Satisfactory

Satisfactory

Ocen: 164
[WALKTHROUGH] A guide to everything Satisfactory.
Autorstwa: Outcast
This is a walkthrough guide with tips and tricks that will cover the complete game.
13
7
11
2
2
2
2
   
Przyznaj nagrodę
Ulubione
Ulubione
Usuń z ulubionych
Introduction
This guide is not meant as a min/max optimized guide, but more of a guide that you can follow from the start to finish of the game, With pointers of what to think about that might not be obvious if you are a new player.

I will add to this guide from time to time, so if it is abit lacking to start, don't worry to much about it.

This guide will start of image heavy, but as you progress the game there will be less screenshots as i assume you will know what your doing by then.

If you find any collectable ingame that you can pick up, feel free to do so, i will cover the collectibles when we need them in this guide, so for now i will skip all collectibles and i will try not to explore to much, there will be a time for that. We will start small and dream big!

Also don't worry if you die, you will drop all your items on the ground as long as you do not fall off the side of the map.
[Show your support!]
Hey! I'm not asking for much but if you find this guide useful, please favorite it and give it a thumbs up!

If you find it lacking in some part, please provide me with feedback, i will gladly consider your suggestions.

If you really like this guide and want to support me further, you can "buy me a cookie", or give me a donation, the cost will be much cheaper then buying any strategy guide out there, but as i said, I am a simple and humble person, if you enjoy the guide, and if i helped you in any way, that is enough for me.

https://www.buymeacoffee.com/Outcast
Selecting a start zone
There are 4 start zones.

As of update 6 i only recommend starting in zone 1 and 2, as zone 3 and 4 might get major terrain remakes in the future that may or may not ruin your future factory.

For ease of this guide, i will play in Zone 1 which is ideal for first time pioneers. If you want to follow this guide i recommend that you do the same.

  • Zone 1 - Grass Fields
    Terrain Flatness Level : High
    Biomass : Medium
    Resource Node Amount : Low
    Resource Node Diversity : Medium

    Lush flat area with some Biomass. Most resource nodes are of Impure quality.

  • Zone 2 - Rocky Desert
    Terrain Flatness Level : High
    Biomass : Low
    Resource Node Amount : Medium
    Resource Node Diversity : Medium

    Barren flat area with few Biomass. Most resource nodes are of Normal quality.

  • Zone 3 - Northern Forest
    Terrain Flatness Level : Low
    Biomass : Low
    Resource Node Amount : Medium
    Resource Node Diversity : Medium

    Lush Forest area with alot of Biomass. Most resource nodes are of Normal quality.

  • Zone 4 - Dune Desert
    Terrain Flatness Level : Medium
    Biomass : Low
    Resource Node Amount : High
    Resource Node Diversity : Medium

    Barren area with few Biomass. Most resource nodes are of Pure quality.
[Tier 0 - HUB Upgrade 1] Welcome to Massage-2(AB)b
Welcome to Satisfactory! You will start your game in a drop pod orbiting Massage-2(AB)b in the binary start system of Akycha . Enjoy the cutscene, i will join you when you make landfall!


What i found interesting is that we are the third person that have made landfall on this planet, might be worth remembering in the future as we approach 1.0 and the story aspect of the game is complete.

ADA (Artificial Directory and Assistant) Will give you instructions and help you through the game, you can continue on your own pace and meet me at Tier 2 section of this guide if you want, but i will cover Tier 1 also.

First thing first is to dismantle your drop pod so you can build your HUB.

Press F and left click on your drop pod to dismantle any buildings in the future. Dismantle your pod.


Press O to open your inbox, from here you can go through any step of the tutorial.


Press TAB to open your inventory. Drag your Xeno-Zapper to your hand slot.


Hold V to open your scan radial. For now you can only search for Iron. But in the future you can select any resource you have encountered or researched.


I recommend that you go towards the closest node you get, you can see where the nodes are on the top of the screen, on your compass. but if you have several nodes bunched together like the screenshot below, you might want to head to that area even if it is slightly further away.

Great tip for moving swiftly
The best early game technique to move swiftly is to run, crouch and then jump directly afterwards. It does not work when running uphill, but it will launch you forward in the air at a faster pace then normal running.


NOTE: Even if you select the same starting area, your drop pod might land somewhere else, Each starting area is a radius, and you can land anywhere in that radius.

SURVIVAL NOTE: Due note that the green gas on the above screenshot is hazardous for your health, avoid it at all cost.


If you come across a plant like this, harvest it. Beryl nuts can be eaten to regain lost health. It will regrow over time. You should harvest health plants whenever you found them.

Another plant to look out for. Paleberry plants give more health than Beryl nuts, and they also regrow!


Finally, we have the Bacon Agaric, it wont regrow so there is, to my knowledge, just a limited amount in the world, they give you the most health of all natural foods, and are hardest to find.


Be careful when approaching resource nodes. Most points of interest such as resource nodes are guarded by hostile fauna. In this example i have a hog. They come in diffrent sizes, the bigger they are, the harder they are to kill.

The hog will try to run around you in a circle, and ram you from afar. A easy way to counter them is to jump as they charge towards you. If you are fast you can run towards them and stun lock them with your Xeno-Zapper.


Survival of the fitest! Lets continue on.


A resource node often start with a solid chunk of rock on it, you can either mine the ground or the rock. But i recommend that you always mine away the rock first, as it will block a future building that you can put on the node. If you need more iron after the rock is removed, you can just mine the node on the ground. Remove the rock!

And yes, you can hear it to. We will, we will, rock you.

And now that's stuck in your head forever too.

Press Q To open your build menu.


Select the HUB.


Build the HUB by right clicking. You can rotate the building with the scroll wheel.


You will have two new stations. The first to the left is the workbench, from there you can use that iron to craft other materials. On the right is the HUB Terminal. From here you will progress in the game.

Open the HUB Terminal.


Here we got the first of four progression trees in Satisfactory. This is the main one, we will cover the other three in the future.

There are 8 Tiers in the game, we start at tier 0. We can progress 2 tiers at the time, after 2 tiers we will need another building to unlock the next 2 tier, and so on. Select HUB Upgrade 1.


Here we can see that in order to progress to the next stage, we need 10 Iron bars. In return we will unlock the Equipment Workshop, Portable Miner and some additional Inventory slots so we can carry more stuff. Select this Milestone.

When the new window opens up, close it down. Do a full 180 and select the Workbench.


Very Important Note:
As this game shares alot of similarities with another factory game called Factorio. We will borrow a rule to live by from that game. This game is all about Automation. With that said, it is okay to use a workbench if you just need a little of something, but if you need alot of something you are better of automating it then use the workbench. I'd say that you are playing the game wrong if you are to depend to much on your workbench..

That covered. We can only create one thing. Irong Ingots. Press on Iron Ingots.

Something alot of newbies do in this game is that they left click and hold on the craft button. Let me ease your finger there, click on it once and then hit space bar and it will auto craft for you. For now you can craft all your ingots, this is because we do not want the raw ore in our inventory.


Once that is done, We can create Iron Plates and Iron Rods. We only need 10 Iron Rods to continue on to the next stage. Create 10 Iron Rods.


Do a 180 and open your HUB Terminal. Shift click your Iron Rods and Upgrade that HUB!
[Tier 0 - HUB Upgrade 2] Portable Miner!
ADA will tell you one thing of importance pretty much. You can use multiply portable miners on the same node.

A good tip is to select the next milestone as soon as your done with your current one, that way you will get information on your HUD on what you need for the next stage.


You will get another item in your hub. The chest, here you can store stuff you have in your inventory.

One thing to note that nothing is ever lost in Satisfactory, If you remove a building you will get a 100% refund on your materials, if you remove a chest, everything in that chest will be deposited in your inventory. If your inventory is full, the item will instead drop in a gray colored chest so you can collect it later.


Open the HUB Terminal, Select Hub Upgrade 2. Same stuff, Diffrent day. You know what you do, you can see what you will unlock and what you need to unlock it. This time we need 20 Iron Rods and 10 Iron plates.


As i removed all the rocks over the nodes i had the material to create everything without doing much work. If this is the same for you, you can actually continue on to the next step directly.

However i will cover the two new unlocks we got.


Under production we got a stand alone Craft Bench and the Equipment Workshop.

These two buildings are vital if you want to expand far away from the hub. The Equipment Workbench makes Equipment, And the Craft Bench can be used to craft materials. So if you want to exapnd make sure to bring Iron Plates and Iron Bars so you can build these 2 buildings.

Lets build the Equipment Workshop.


Step inside and open the Equipment Workbench. For now we want to build 1 Portable Miner. If you do not have the resource to create one, go mine some iron add come back here when you can build a miner.


Open up your inventory (TAB) and drag your miner your hand slot. Then head over to your Iron Node and put that little miner down on that node!


Cute, Hu? The Miner will mine for you without any need for power, and it will mine until it has 100 units of said mineral.

It's a great tool to have when you travel afar, if you find a exotic new mineral you can put one down, and return to it once in a while to collect a batch of 100 minerals.

For now we only use one, But in the future you can use as many as you feel that you can handle. We aren't speed running the game here.

Don't Forget to equip your Xeno-Zapper again.

Collect a batch of 100 Iron, And craft 100 Iron Ingots in the craft bench.

This is boring right? Takes alot of time... if there was a way to automate it... Remember what i said before about depending to much on your workbench?

Craft the needed 10 Iron Plates and 20 Iron Rods to continue to the next stage!
[Tier 0 - HUB Upgrade 3] The first hurdle, The Biomass Burner.
We will now dive into simple power, The Biomass Burner!


Your hub has grown abit, on the outside of the HUB you will have one Biomass Burner, This will give you power.

The Biomass Burner will burn any Biomass such as Flora and Alien Carapace. Depending on the power output you need it will burn at a diffrent rate, so if your factory dosen't need that much power then it will burn your Biomass slowly, so don't worry to much about it.

For now we will leave it alone.


What we want is to build a Smelter, For that we need Copper. We can hover over the Smelter and press the + sign, this will give you information on your HUD on what you need to craft 1 Smelter.


Build another Portable Miner and hold V and scan for Copper.

You can fast scan your last resource by hitting the V key.


Kill of any hostile fauna around the node, remove the big mineral rock and place the Portable Miner. If the copper node is abit away from your HUB, you can consider placing down a craft bench nearby.


Collect 100 Copper Ore, If you, as in my example, have a stack of 18 copper ore over, you can drag it and throw it in the trash to free up a slot in your inventory. You should only do this with materials that are easy to come by. And knowing how to keep a clean inventory in the early game can be a good skill to have.


Return to your HUB/Craft Bench and Craft all the Copper Ingots. Make 5 Iron Bars and 8 Copper Wire. Let's build a Smelter.


As seen on my Screenshot above, i have my Smelter close by the iron field, and very close to the Biomass Burner.

TAKE NOTE of the direction you place your building, note the orange arrows for input and green arrows for output.

We need some cables to connect everything up, go craft some in the Crafting Bench. Cable can be constructed with Copper wire.


Now i haven't said much about the hotbar on the bottom of the screen, we will cover it more in the near future, but for now you have 4 things connected on the hotbar, A Electrical Pole on 1, Cable on 2, Conveyor Belt on 3, and conveyor pole on 4.

With that said we can use it to connect the wire, by pressing 2, click on your smelter when it's highlighted and then on the biomass burner in the HUB. If you have built the smelter close by it shouldn't be any problem, worth knowing is that the wire has a limited range.

Connect the Smelter and the Biomass Burner in the Hub.


It's not optimal compared to what we will use in the future, but start running around your hub and collect leaves from bushes.


With the collected leaves, put them inside your Biomass Burner to produce your first power.


Select your Smelter and select Iron Ingot, and you will be presented with this next screen.


You can probaly guess what this does, go to your iron portable miner, take a stack of 100 iron ore. And put it in the smelter. AUTOMATION! Now you have no excuse to never use the crafting bench to make iron ingots!

Sweet. We should think about automating our copper smelting too, but sadly we can only connect one wire to the biomass burner, We need to advance further in the game to unlock what we need. Use that single smelter to help you smelt Iron, If you need to, you can change the recipe after it has completed smelting your iron, and you can use it to smelt copper too.

If you run out of power, you need to put in more leaves inside your Biomass Burner.

With that said, take everything you learned and craft 20 Iron Plates, 20 Iron Bars, and 20 Copper Wire so we can unlock the next milestone!
[Tier 0 - HUB Upgrade 4] Simple Automation.

Looking Good, you finally have a bed and a toilet on this planet to call your own!


Before we head out, let's check our Biomass Burner. It will slowly burn your fuel even if your smelter is not doing anything. To save some of that fuel for now, hit the standby key. This will temporarily shut down your biomass burner.

First thing first, We need another Portable Miner.


Scan for the new mineral, Limestone. You know what to do, Head over to the closest one, Kill all hostile Fauna. Remove big mineral rock if any, Place down Miner.


Let's get to work, Grab some Limestone, you might not need 100 exactly, But you do you. Head back to your HUB or closest Crafting Bench. And craft some Concrete.


With 3 Copper Wire, 1 Copper Bar and 1 Concrete we can make a power pole, Place one down close to your Biomass Burner. Then press F and aim at the wire that connects the Smelter and Biomass Burner and remove it.


Instead connect your Biomass Burner and Smelter via the Power Pole Mk 1. Each Power Pole Mk 1 can have 4 connections. Just do like i've done on the screenshot above.


Now if you select the wire, press the Power pole and drag it against the ground you can create a new power pole that is already connected to the first one. To make it easier for ourself we need to drag a power line to our copper ore node and limestone node. Do that now.


Remember that the game will tell you when your wire is to long, maximize that wire length. On the screenshot above i have my hub down on the right side, where my iron node is. On the left behind the mountain is my Limestone, and behind me is my copper ore node.

Don't worry if you have to manually create the material to build the wires and poles, we will soon have most of it automated.


Okay, we need one more Smelter, and one constructor, which is a new building. Place the Smelter close to the Copper node, and the Constructor close to the Limestone Node.

The Constructor needs two new resources, Reinforced Iron Plate and Screws. Screws can be made from Iron Bars, And Reinforced Iron Plates are made from Iron Plates and Screws.


A good idea is to plan ahead, i placed my Smelter like this so i can expand towards that direction. Don't forget to set the recipe for both the Smelter...


And the Constructor. And you might have added up 1 + 1 and can see that the constructor can build Iron Plates, Screws et.c. Let's not get ahead of ourself. We will get there.

Remember that hurdle i told you about, Fueling your Biomass Burner?

Yeah, you're gonna have to run inbetween your three types of resource nodes, take out the material in the portable miners and put them in their Smelter/Constructor. A good habit is to collect leaves when you run inbetween your resource nodes so you can keep your Biomass Burner burning.

CHECKPOINT!

You should have 3 portable miners atleast, With 2 Smelters and 1 Constructor.

You should have Iron Ingot and Copper Ingot Smelting automated, And limestone should create concrete in the Constructor.

We need 75 Iron Plates, 20 Cables and 10 Concrete to continue on to the next stage. Collect those material and upgrade to the next milestone!
[Tier 0 - HUB Upgrade 5] More automation, More power problems.

Welcome to your next progression to HUB Upgrade 5.


Before we start we need 2 more smelters and 4 constructors, remember to add them to your list and you will get the total needed supplies to build everything!

You should also build 2 new portable miners.

Do what you do best and collect all the supplies needed with everything you learned so far!

Got everything? Good!


Place another portable miner next to your first one on your iron ore node.


By holding CTRL, you can snap your second smelter in a line next to your first one.


Now do the same with the two constructors, place them after your smelter in line like this.


Just the same way wire works, connect conveyor belts inbetween your smelters and constructors.
This will now transfer your iron ingots directly into the constructors.

Set one constructor to produce iron plates, and the other to produce iron bars. You can now use the two portable miners to fill your two smelters. Power everything up with cables and power poles.


Congratulations! You just automated your iron plates and iron bars!

Now we head over to the copper node and do the exact same thing.


The main diffrence here is that we want both constructors too create copper wire. Also a friendly reminder to create a workbench near your nodes that are further away from your hub, you never know when you need to craft some materials.


Oh no! Not only do we have to collect new Biomass for our biomass burner every once and a while which is a chore, the current Biomass Burner we have can't support our factory.


We will use the standby button on one of the smelters and one of the constructors on our copper node, as we only need one to make the cables for now.

Press E on a power pole and pull that fuse lever down to reset the fuse.


From here we can se how much power we consume, how much capacity we have, how much production of power we have (Currently 12.6 MW, as i said earlier, Biomass Burners will adapt the burn rate to how much power you actually need.) and the Max consumption, which is the amount of power our whole factory would take if every building was running.

Don't worry to much about it, we will go into more details about power management in the near future.

If a fuse keeps blowing out, you need to put more buildings on standby.

There's not much we can do for now, We need to take what we have and do everything we can to advance to the next stage.

We need 72 Iron Bars, 50 Cables that we need to make ourself in the crafting workbench, and 20 concrete.

At this part of the game you should never have any ingots in your inventory, they should all be deposit into a smelter. You should only need to carry the ore to the smelter, and let the smelter do what it does best. Only use ingots if you really need to craft material manually.

With that said, Do everything you can and use everything you learned as of now to upgrade to the next milestone.
[Tier 0 - HUB Upgrade 6] Final Automation!
Welcome to your progression to HUB Upgrade 6.

We got another Biomass Burner to our HUB, so let's connect that up to the power pole closest to your HUB.

This will mean that you need to collect even more Biomass, but in return we get double the power output, so we can finally turn on those buildings we turned off before!

I told you that the biomass burners was a hurdle, didn't i?

You can split a stack with right click, so you can split your biomass stack and put in equal amount in both of your biomass burners.


To start of, we need 2 storage containers, found under organization. And 1 Miner Mk. 1 found under production. The Miner Mk. 1 needs a portable miner, but you don't need to build one, we will use a portable miner we already have.


As you can see, i have two nodes of iron, so i could technically add 2 miners, but we are gonna save some power, as in the near future we will only need one.

Pick up both miners and build your first Miner Mk.1 on one of the nodes.

You do this by opening your portable miner and click pick up miner, this will also pick up any ore it carries.


Once done, it should look like this. The Miner Mk.1 is connected to one of the smelter, the other one we need to hand feed for a little while more. Connect power to your Miner Mk.1.


On the other side of the constructors, We build 2 Storage containers and connect them up to each constructor, so now they will store everything inside this constructors.

GOOD JOB!

In Satisfactory you aim to have all your factory constantly making something, you never want anything to be put on hold, because trust me you will need resources in the future.


We will need 2 more Miner Mk.1 And 1 more Storage Containers. You know what to do!

Same as before, we do not need to build more portable miners.


This is how your limestone node should look like. Miner Mk.1 > Constructor > storage container.

If you are running out of power in the future you could shut down this production line, as concrete is not as important as iron ad copper for now.


For copper, i am still running only one line, this is because in the future the other line will be used to create cables.

Miner Mk.1 Feeds into the first line, and the portable miner is there if we need the second line.

Sweet, Sweet Automations!

Great job pioneer! We have now fully automated all basic materials. You should have Iron Plates, Iron Bars, Copper Wire and Concrete automated.

Which is in line for what we need for the next milestone. 100 Iron Bars, 100 Iron Plates, 100 Copper wire, 50 Concrete.

Remember to keep everything powered. And as everything we need is automated, i will see you in the next phase!
[Tier 0 - Completed] The road ahead...

What's this? a space... drone? And what's all this talk about a space Elevator? What is happening!

Congratulations Pioneer!

You have just completed the tutorial, before i head into the next stage of the game we are going to do 2 things.


First thing's first. We need 2 Biomass Burners. Collect what you need to build them.


I built my two Biomass Burners abit further away from everything, so i can expand if needed.


You're then gonna remove your Biomass from inside your biomass burners in the HUB and move them to these 2 new biomass burners.

The reason behind this is that the stand alone biomass burner can give you 30 MW of power, while the one you use in your HUB can only output 20 MW each. So you can get 20 MW more power this way.


Next we want two more constructors, if you want to save power you can survive with 1 more constructor.


I built these close to my biomass burners. Set one of the construct biomass from leaves and the other for biomass from wood. If you only built one constructor you need to switch recipe as needed, However leaves is by far more common.


Remove almost all Leaves from your biomass burners and take the majority of it with you. Leave about 30 leaves in each burner.


IMPORTANT NOTE:

From now on, you will never burn more leaves or wood inside your biomass burners. Convert everything to biomass and use that as fuel as it is by far more superior as fuel.

You should save up all alien carapace you get, put them inside your storage locker as you can use them in the near future.

Don't mind the space elevator unlock just yet. It needs a insane amount of resources and is not need yet.

Congratulations. You just completed Tier 0 and have a efficient base. See you in the next part of the guide!


My example factory as of this point.

  • LEFT SIDE - Automated iron plates production.
  • LEFT SIDE - Semi-Automated Iron bars production.
  • RIGHT SIDE - Automated concrete production.
  • RIGHT SIDE - Semi-automated biomass and biomass burners.
  • MIDDLE FAR - Automated copper wire production.

I will see you on the next part of the guide!
[Map guide] Learn how to use it.

Update 6 released the map as a starting item, with it you can navigate the lands and mark up locations with ease.

On the bottom you have some icons, or Stamps. They will not show up on your compass but will be shown on your map.

Here is how i use stamps. from left to right.

  • ? Marker - I do not use it at all.
  • Flora Marker - I use it for areas that is lacking alot of flora, it might be a good idea to mark up where large patches of flora is, flora regrows, so you can use these areas and come back to them to fuel future biomass burners.
  • Cave Marker - I use it to mark cave entrances, so i can find them easily in the future.
  • Explosion Marker - I only use these for rocks that can be exploded with the Nobelisk explosive device in the future.
  • Crate Marker - i do not use it at all.
  • Animal Marker - Used early game to mark areas with dangerous fauna, such as large hogs.
  • Water Marker - I only use this to mark water that can be used together with the water extractor that we will unlock in the future.
  • Radiation Marker - I use this mid-game to mark places where uranium ore deposits and other radioactive zones are.
  • Rock Marker - Rarely use it to mark ore nodes.
  • Warning Marker - Used to warn for dangers such as steep hills, poison clouds, out of map areas.
  • Fruit Marker - Used to mark places where alot of fruit/nuts are.
  • Slug Marker - Can be used to mark where slugs that you cannot reach yet are.

The second part is the Map Marker. Click on it and anywhere on the map to add a marker.


You can select any icon you want, what color it is, the size of the icon on the map, And also how near or far away you need to stand before this location shows up on your compass. Super useful.

You can also highlight this marker, that will add a teal circle around it on both the map and the compass.

I use the marker to mainly mark up crashsites, which we will cover at a later date.

You can have a maximal of 250 Markers & Stamps.

That's all about the map, see you in the next part!
[Tier 1 & 2 - Preperations] Power states and node purity.
From now on, we got choices. I will guide you through what i think is the best part.

We will start with Base Building in Tier 1.


For that we need 200 concrete, 100 iron plates, and 100 iron bars.

Lucky for us, that is all automated, so just collect the resources and i will see you once the milestone has been reached.

If you ever feel like you want to go your own path, and choose a diffrent milestone. Due note that if you switch a milestone midway, you will not lose progress on the first milestone. All materials will be saved and you can continue on from where you left off.

Building power states


By now, you might have noticed that every building has a light bar on top. Diffrent colors means diffrent things.

  • White - This machine is overclocked*.
  • Green - This machine is working as expected.
  • Yellow - This machine is powered, but dosen't have the required material to produce.
  • Red - This machine is unpowered.

* More on overclocked machinery in the future.

Node Purity


Another thing i haven't mentioned is node purity. Nodes come in 3 levels of purities.

  • Impure - Ok
  • Normal - Good
  • Pure - Best

Each purity level affects how much your miner can harvest. For example my Iron Miner Mk.1 can harvest 60 iron ore per minute on a normal node.


We will cover this in more detail in the near future.

Okay, that's enough of that. Have you collected everything you need for the milestone? Great! Let's get back to the game.


Whats this? A big shiny red button. Let's hit it!


And away the pod goes! From now on you will get a cool down until the pod returns, don't worry. We wont be that fast in hitting the next milestones. What you can do is select a new milestone while you wait.

We will select Logistics as our next goal.

Logistic needs 150 Iron Plates, 150 Iron Bars, and 300 Copper Wire.

Again, Lucky for us, we have all that automated. Before we head there we are going to use the new buildings we got from base building.
[Tier 1 & 2 - Tier 1: Base Building] Base Building and the hotbar!
Why you want base building first?

Base building will help organize your factory, let you build on a grid instead of free placement.

Sooo... doo you like your factory? Yeah?

Sorry but we are going to tear it all down to prepare for the future. Trust me on this one, you will love the end product.

Hotbar

Time to use that hotbar of ours. We know how to select stuff from it. But there are some hidden features.

First. Satisfactory has 10 hotbars, you can scroll them all by holding alt key and using your mouse wheel.

Second. To add stuff to the hotbar, hover over the item and hit a button. For example Foundation 4m i hit button 5 to put it into slot 5.


Third. Notice that stuff is combined into categories. Foundations and ramps. Lets add ramp 4m to slot 6.


In the above screenshot, i moved conveyor belts to slot 2 and conveyor poles to slot 3.

I can now use the E key to select any object in that category. That's smart.

In the future i wont go through how to use the hotbar more, you will have to fix it in a way that works best for you. Or if you even want to use it all, remember that you can always select stuff from the build menu.

back to....

Base Building


So this is just my preference, You can do as you like. But what i do is that i take a foundation 2 meter and align it to NORTH with the help of the compass.

We also have 3 diffrent modes to place foundations. You can change modes by pressing R, or hold R to get a selection wheel.

Default let you place foundations one by one.


Vertical will let you place many foundations in a vertical line.


Zoop, My favorite, let you place many foundations in a horizontal line.

Note: if the selection is yellow, it means that it intersects another building, but you are still free to place it there anyways..


Here i removed my portable miner and miner mk.1 and placed it on a foundation instead.


Foundations are great as it allows you to build on a grid instead. which is, great, and smart too!


After a couple of minutes (Might take longer if you are a new player, but i believe in you!) this is how my new iron node looks. Alot cleaner, On a grid, and i can clearly see what it does!

Lets continue on...

I'm going to put fondations on my limestone production line...


We do so by zooping the foundation from our iron node to the limestone node!

Why? Why are we doing this? why not just build the foundations over at our limestone node?


Because good luck merging two seperate zones together in the future. Maybe in the future we want to build a bridge inbetween our limestone production and iron production. So we zoop out foundations when we expand, in the future we can easily connect two zones together!


Limestone production line complete! Time to do the same with the copper production line... Just repeat with zooping and vertical foundations until you get there.


By pressing F and holding CTRL you can select multiply objects to remove up to 50 pieces. This can be used to remove your foundations bridging together your zones.


Copper production line complete! and as a added bonus...


We moved our HUB out of the way and put it on foundations!


We put our biomass factory on foundations!


And we put our biomass burners on foundations!

And with that the upgrades are complete. We went from...

BEFORE

AFTER

Everything has the same functions, it just looks more clean and organized! Pat yourself on the shoulder. You have done a great job!

If you wonder why the screenshots got better, it's because i have been using the new lookout tower that we unlocked with the base building milestone.


It can be used to get a overview of your production lines, or to see places from afar. And sometimes you can place them close to cliffsides to get to higher ground!

Now on towards the next stage, Logistics! Your factory should have easily taken care of the requirements if it had power when you renovated everything with foundations.
[Tier 1 & 2 - Tier 1: Logistics] More automation!
Why you should get it?

Logistics unlocks conveyor mergers and conveyers splitters, as well as conveyor lifts. Which are all useful when we expand our factory.

Welcome to logistics. The main part we will use for now is conveyor mergers and conveyor splitters. You can add them to your hotbar if you like!


I started by going to my Iron production line and removed some of the conveyor belts to add a conveyor splitter before the smelters. I can now connect both smelters to the same conveyor line!


And there we go! Looks great! Lets click on one of our smelters... Sadly, It's time to go into some maths.


We can easily see that one smelter takes in 30 iron ore per minute, and converts it into 30 iron ingots per minut. Here on i will write per minute as PPM (Pieces per minute).


By checking our Miner Mk.1 We can see that it outputs 60 Iron ore PPM. Therefor it would be unwise to add a third smelter, as they would not work at 100%, but there is also another limitation.

The conveyor belt Mk.1 can only handle 60 resource PPM. Meaning that the first piece of conveyor belt could not even hanlde a production rate over 60 PPM for now.


Now let's take a look at our Constructor tasked to create Iron Rods. It takes in 15 Iron Ingots PPM and makes 15 Iron Rods PPM. Which means that we can run 2 constructors on 1 Smelter.


A (conveyor) Splitter before the constructor, and a (conveyor) Merger after. and we now have 2 constructors making iron rods to 100% efficiency.

This production line is now making 20 Iron plates PPM and 30 Iron Rods PPM at 100% effciency.

Now belive it or not, this is small scale. Very, very small scale. In the future you might need to calculate 8 smelter going towards god know how many constructors.

For that we have a built in calculator. Hit the N key to get the quick search bar. You can write any item in the game and it will tell you more about it, what recipes* you have unlocked for it and what you need to build it.

But it also works as a calculator, try to write 30*8 and it will tell you 240. Keep this in mind!

*We will go through recipes unlocks in the near future.


Checking on our power we see that we are soon at limit, time to build another biomass burner.


Another biomass burner up and running... i really hate biomass burners and collecting leaves and trees... We will soon make that easier.


I went back to my copper production line, and similar to our iron production line i split the conveyor before the smelter, run a smelter through 2 serial connected constructors. The first one makes copper wire, the second one takes the copper wire and makes cables.

Congratulations. We now automated cables aswell. If you go into the finer details its far from 100% efficient right now. But it's better then nothing.


Back to our Iron production line, after the finished iron rod constructors i put a splitter that connects to yet another constructor, tasked with creating screws from iron rods. Same goes here, its not 100% efficient, but better the nothing.

Congratualtions again! We automated screws somewhat.

We are now heading for our next milestone, and we are taking a shortcut. We are going to make our power problems alot easier, and by that we need to head to Tier 2, Obstacle Clearing.

Obstacle Clearing needs 500 screws, which we now have automated. 100 cables, which we also have automated. And 100 Concrete, which we have automated since a while back. So we should only really need to wait for them screws to come in, or if you want to speed up the process you can handcraft some.

We also unlocked conveyor lifts, we will use them in the future!

See you on the other side.
[Tier 1 & 2 - Tier 2: Obstacle Clearing] Ba-bye Forest!
Why we need it?

Obstacle Clearing will unlock something useful that will help you with power management.

It will also unlock more inventory slots for you!

This will be worth it, for all our hard work we are rewarded with a...


FREAKIN CHAINSAW!

Yeah, it's great, i know it. But first we need to build it.


It needs 5 Reinforced Iron Plates which you need to hand craft. 25 Iron Rods (Automated), 160 Screws (Automated), 15 Cables (Automated).


It also runs on a new type of fuel. Solid Biofuel, which is constructed from biomass.

So lets handcraft some Solid Biofuel.


Get out all your stress relief by cutting down some trees, any trees. The bigger they are the more resources you will get! Cut down everything! Deforestation!


Trees will get a white outline when you are in range, The chainsaw till cut down that tree and any nearby flora.


Now collect the resource to build 3 storage containers and a new constructor.


And expand our biomass factory to look like this. So we have two seperate containers feeding 2 constructors, one that converts leaves to biomass, the other converts trees to biomass.

They then merge and conenct to a third constructor that takes said biomass and makes it into solid biofuel, and deposit it in the container to the left. So i can easily feed my grass and trees into those two containers, just make sure you feed them into the right one. And it converts it into solid biofuel that you can use for your chainsaw!

But what about your biomass burners? Who cares you got a chainsaw! No, jokes aside. We are not using biomass for fuel anymore, it was way more effcient than both leaves and trees. But solid biofuel is the creme of the crop, It can't get any better. It's some grade A quality fuel. The best of the best. So only use this for your biomass burners in the future!

And that's the detour, we are far away from automated power. But atleast i have helped you in making this power hurlde as tiny a problem as possible for you.

Use your chainsaw to collect biomass, convert it into solid biofuel. Do mind where you cut so you don't cut down any berry or nut bushes for your health!

We also unlocked some additional inventory slots, so your inventory space is not as cramped as before!

We are heading back to Tier 1, Field Research. Collect the materials and see me other side!

300 Copper Wire, 300 Screws, 100 Iron Plates. All automated for you.
[Tier 1 & 2 - Tier 1: Field Research P.1] Adventure Time!
Why you need it?

Field Research unlocks the MAM, a powerful building that will unlock new stuff for you!

Welcome to Field Research.


We unlocked some cool new stuff. You can place personal storage boxes much like the one you have on the HUB freely now.

We have beacons that you can place out on points of interest that will help you find it later.

We got the object scanner that can help you locate stuff like berrys and nuts.


We got even more inventory space and a new hand slot so we can carry two inventory items at the same time and just mouse scroll to select them!

And the best part to last, we unlocked the MAM.


The MAM (Molecular Analysis Machine) Is an alternative progression tree in the game. It will unlock alot of stuff that will help you in your travels.

For now we only have two stuff that we know of...


Alien Organisms and Nutrients. We start with Alien Organisms.


If you have any alien carapace on you, or in storage, take them to the MAM. Research as much as you can with what you have on hand. Once researched it will unlock the next stage in the tree. At first it might not give you anything, but later on it will award you with for example, recipes for advance medicine.


I could research two things in the Nutrients tab. Don't worry if you can catch on, you will get there, or you might already be ahead of me.

We can also see some vauge clues on what the other things are.. We are going on a adventure soon to find out!

The last piece to look at, is hard drives. When we get one we can take it to the MAM. It will take 10 minutes to decode a hard drive and it will give you 3 random alternative recipes, some might be more effcient, others might make stuff from new materials. They are rare but also very useful to find!

Adventure Time!

If you want, it will be helpful for you, but you can skip to the next part of the guide if you rather build your base.


Be careful when exploring, you might encounter a new type of enemy called a spitter. They launch fire balls at you from long range and take longer to kill. I don't really have a good strategy for them, i just run in and hit them until they die.

This is called a Mercer Sphere. It speaks to you when near, so if you hear someone speak in a robotic voice and try to tell you to pick it up, it's stuff like this.

I tend to leave them alone as they are Work in Progress and is meant for the final story.

If you encounter anything else marked WIP i would just leave it alone, it serves no use for now. But it's all up to you.


Sometimes you will come across power slugs. They light up in the dark and comes in three diffrent colors and rarities. You can turn this slugs into power shards that can be used to overclock your factory! Pick em up!


Patches of Sulfur Ore can be found rarely across the world. Sulfur can be used to make Explosives and weapons in the future.


Patches of Caterium Ore can be found rarely across the world. It can be used for advance electronics in the future.


Patches of Quartz can be found rarely across the world. It's use in the MAM is to help with exploring and mobility mainly.

Patches of Coal can be found rarely across the world. It's main use is as fuel and for coal power.

Mycelia, a fungi-like material, can be found in damp areas, and in underground caves. It's main use is for medical equipment.


Crashed drop pods can be found all over the world. Be careful as hostile fauna tend to roam around the area. Kill them off and you can collect some rare loot.


Motors, a item that is way above what we can produce right now.


Further more you can click on the drop pod itself.


Inside this door is a hard drive. However i cant open it as i need to connect the drop pod to a power pole that gives it 40 MW of power, which is slightly less then what my whole current factory drains.

The requirement can be something diffrent, sometimes the drop pod wants higher quality items to be able to open.

Not to worry, i built two Biomass burners, connected the two together with a power pole. Put in some fuel, and finally connected the power pole to the drop pod. This gave the pod all the power it needed, and the door opened!


Back at the MAM, this is how the hard drive screen looks like. You just hit scan and it will scan one of your hard drives.


As earlier mentioned, it takes 10 minutes to scan a hard drive. So feel free to do something else, it will remind you when the research is complete on your HUD.


These are the three options i got, they are randomized so you will most certainly get diffrent options, you can search online for suggestions, but i tend to just take what seem most interesting in the moment. There is a clear winner for me? Can you guess which one?

The first lets me make iron bars in the future foundry (Which is unlocked with steel, however we are not quite there yet).

The third one lets me make copper wire from Caterium, a resource which we haven't even found a node for yet.

The second one is the clear winner, it let's me create screws directly from iron bars in a constructor. So i do not have to use 2 constructors to create screws, and can just make them directly.

Now don't worry if you only get stuff you can't use yet, if option 2 was something else, i would have gone for either options, as they are relative close to the "base material", option 1 = just ore, option 2 = Caterium bars.

And you can't "miss" a recipe in the game, there are more hard drives in the world then alternative recipes, so even if you did not unlock that thing before, it will come back at a later
[Tier 1 & 2 - Tier 1: Field Research P.2] Adventure Time!
Before we go i will show you the Object Scanner and the Beacon.


You build it with 4 Reinforced Iron Plates, 3 Beacons (handmade in the Equipment Workshop) and 50 Screws.

With the mouse wheel you can select what to scan, turn around until you get a signal, it will beep more frequent when you get closer to the target. With more MAM Research you will be able to track more stuff.


The Beacon is easy, Just place it like you do with the portable miner.


Select a color and label the beacon with a name.


And there you go.

That is all for the field research tree. It's up to you to explore and you can do it as little or as much as you want. The MAM is, as early said. An alternative, it will help you greatly later in the game, people that tend to rush the MAM can get some great help from it, but you do not need to worry, sooner or later you will unlock everything in the MAM with ease.

I will also remind you of specific research in the MAM at a later date, for example, the smart splitter, a conveyor splitter that can be used to program what part goes where.

Our next goal is Part Assembly. It will take 200 Cables, 200 Iron Rods, 500 Screws, 300 Iron Plates. Everything is automated - thanks to you!
[Tier 1 & 2 - Tier 2: Part Assembly] Finally, The Space Elevator.
Why you need it?

Part Assembly is vital for the upcoming Space Elevator and to progress in the game.


Welcome to Part Assembly, We will start of by building the space elevator. We have everything it needs automated, and your factory should have created a heft sum if not all of the materials we need.

Let's build the space elevator, for now we wont care about putting it onto foundations, we might do so in the future just for the aesthetic reason. The building is the largest building in the game, and it is a bit special as it does not need any power to function.


The only thing i've done for aesthetic reason is to face the computer on the space elevator towards my base.

You will now be awarded with the coolest build animation in the game. Enjoy it.


The Space Elevator is done!


Now the Space Elevator works much like milestones, what it does is that it will unlock the next tier pair in the milestone list, so tier 3 and 4. And after that we need to do this again with a diffrent set of materials to unlock tier 5 and 6, and so on.

The materials the space elevator needs are unique parts only for the space elevator, they need to be manufactured and cannot be handcrafted.

We need 50 Smart Plating to advance to the next two tiers, behind that wall lies our biggest dream, The Coal Power, and full power automation. Let's get to work!


We need to build the new Assembler, but for it we need 4 rotors, something we haven't had automated yet. So we need to handcraft 4 rotors.

Rotors need 5 Iron Bars and 25 Iron Screws. Craft 4 Rotors.


The game is massive, so it can be a good idea to plopp down a building on the grass first to see what it can do.


We can see that this machine can help us automate Reinforced Iron Plates, Modular Frames, Rotors and build the Smart Plating we need.

Both Rotors need Iron Bars, And Reinforced Iron Plates needs Iron Plates, Both need screws.

We could incorporate this into our basic iron production line, but that will create a small mess, and the output is not that great right now.

So what we will do is create a new production line that will focus on just automate the Reinfoced Iron Plates and the Rotors we need for Smart Plating.

I Checked both recipes and this is what we need to produce to be at 100% and having two assemblers, one for Reinforced Iron Plates, The other for the Rotors.

  • 30 iron plates PPM
  • 20 Iron Bar PPM
  • 160 screws PPM

Let's get to work!


I used one of the unused nodes to set up a new miner and built this production line. If you don't have any nodes unused, scan for one and built this as close to you as possible. It works as following.

Miner Mk.1 > Conveyor Splitter > 2 Smelters > Conveyer Merger > Conveyor Splitter > 3 Constructors.

The constructors are set up so that the middle one is making screws, and the split them so that both assemblers get equal amount of screws. The 2 constructors on the side each create either Iron Plates or Iron Bars depending on the Assembler infront of them.


I also have no storage containers connected, as this materials are not in high demand at the moment.


Assemblers take alot of power to run, so i built 2 new biomass burners to handle my factory.

So, we already automated the Reinforced Iron Plates and the Rotors, they aren't running at 100% efficiency, but as said before, it's better then nothing.


We can speed up the process by moving materials from our first iron production line and put them directly into the assemblers.


I built a third assembler, using our newly automated rotors, by the side of the space elevator. This one is set to build the Smart plating we need.


Here you can see it connected straight to the space elevator with a conveyor. I could connect this assembler to the output of the two assemblers making the rotors and plates, but i don't. Reason is that Smart Plating is unique, once i got 50, i do not want to create more, Rotors and Plates can be used on diffrent, more important stuff.

Once we get 50 Space Plating, Load, Seal and Send it!


It's shortcut time, I'll see you on the other side!
[Tier 3 & 4 - Tier 3: Coal Power P.1] The wait is finally over.
Why you need it?

Coal Power will unlock the Coal Generator, along with the Water Extractor and all the tools needed to extract water. It will also update your scanner with coal scanning.

It also unlocks the Fluid Buffer. A Building used to store fluids in.

Coal Power is the first fully automated power system in Satisfactory. Goodbye biomass burners, you will not be missed.

Yupp, We are taking a shortcut directly to Coal Power. It's worth the jump, trust me.

We need 150 Reinforced Iron Plates, 50 Rotors and 300 Cables. We have them all automated so it's just about taking the time to get the required resources.

We are going to prepare for the future ahead of us, i scanned for some copper, as i need a new site, mine was 400+ meters away. So grab some iron plates and concrete and zoop some foundation that way!


Once i got the 50 rotors, i put my rotor machine on standby so that all screws could go to the reinforced iron plates, i will turn it on again when we completed the milestone for coal power.


400 METERS! Yes i am serious, let's go!


Remember to put down a workbench and a equipment workshop when you are this far away from your HUB, you never know when you need it. And it will work like a mini outpost for you!


Miner Mk.1 up on the copper node, on the same grid as the rest of my factory is at.

It has no power for now, but atleast we set up a mini outpost here for preperations for coal power.


Finally done. ADA Says one thing that is important about coal power, we need some power to start it up, but once running it will handle itself.

Head back to our new copper base, this time i will drag the power lines to it.


We need to set up this production line to produce a new copper material we unlocked. The Copper sheets, They are used to create pipes so we can move water from point a to point b. We need water for coal power, because steam.

I have 2 smelters connected to their own constructors making the sheets.


Now for me, my new copper production line is set up on a hill, and my base is 400 meters away down below. I am lazy, and i do not want to walk up this hill everytime i need some sheets, So we will use the conveyor lifts for the first time.


So i used 2 conveyor lifts and now they transport my sheets down to a container that is much, much easier for me to reach.

Great. I'm going to split this up here and continue in the next part.
[Tier 3 & 4 - Tier 3: Coal Power P.2] Water Extraction, We need steam.
Great job on those copper sheets!

We are now going to start with water extraction. Finding water in the Grass field can be hard. Take some copper sheets and gather the resources we need to build 2 water extractors.


Now in your travels you should have discovered this poison filled area. It's in a central location of the Grass Fields, hard to miss.


If you look to your north west, you will see this cliff, you need to get to the top of it by either going around the left or the right side.


Up on that cliff we have some water, looks like paradise! Even have a small cluster of Paleberry that can come in handy. Sadly we are not here on any vacation, we are here to industrialize.


Place your two water extractors, we can also set them up on a grid, but for now we will free place them. I used CTRL to get them side by side atleast.

Important about fluids

These water pump can pump water to a max height of about 10 meters, that is 2x 4m foundations and one 2m foundation on top of eachother, so you can get a slight understanding of how far up they can pump water, if we need to go higher we need to use pumps.

Lucky for us we just need to transport or water downhill. So we don't have to worry about it!


I am going to build a fluid buffer, a new structure that can hold fluids. We just need to handcraft 5 Modular frames.


And this is how it looks now that it is done. We have no power here, but we will focus on it very, very soon.


We are going to have to drag our water pipeline 600 meters to the south, just scan for "coal" and you will see the direction we need to head in.

In the future we will clean this up and build a fancy pipeline that is set on a grid, but for now we free place it. We just want power production as soon as possible so we can get rid of our biomass burners!


I start of from the fluid buffer, raise it two steps so i can walk under it and not need to jump over the pipeline all the time.


Building it almost straight south, the only thing i do not want to do, is to raise the pipeline more then needed, we need to think about that head lift, and just go downhill.


The completed pipeline. We can hold construction after we pass this little clearing with a downhill way leading to a hog and some copper ore deposits.


Because down this hill to the left of that clearing is our coal, on the other side of a deadly ravine, that will kill you if you fall down from it.


Not to worry, we will just zoop a bridge into existance. And place a small outpost with a workbench and equipment workshop on the other side.

Watch out as i had to kill 2 spitters around that coal node.


Freeplacing that miner Mk.1. As said, don't worry we can clean it up later and build it on a grid.

I will see you in part 3!
[Tier 3 & 4 - Tier 3: Coal Power P.3] It's all coming together.
We got water nearby, we got coal nearby. Time to actually build the coal power plants.


So we are going to build 2 power plants, 1 coal power generator needs 20 reinforced iron plates, 10 rotors and 30 cables.

So collect that times 2.


I free placed two coal generators here. I have my water coming in from the pipeline to the north west, and my coal in the distance to the south behind the coal generators.

Lets connect everything with conveyors and the pipeline!


Everything is connected, i have drawn a power line from the coal miner to the new coal generators!

WE ARE SO CLOSE!

Time to drag a powerline from our coal generators to our water pumps that are 600 meters away. Lets Go!


All done? Great!

Head back to our base, we are going to remove all our biomass burners and put our base out of power.


Don't worry. We are going to build a fail safe for our coal power.

Let's head back to our coal generators!


I have put two biomass burners and connected this to the power, they will start the coal miner, both water pumps and both coal generators.

THIS IS YOUR FAILSAFE. See it as a ignition key to a car, you turn this on to turn your main power on.

Now we wait for the water pressure to build up and the coal to come in to the two coal generators.


Coal is on the way...


And we can see that the water pressure has built up in our pipes with the help of this indicator.


COAL POWAAAH!!! Finally! GREAT JOB!

Now put your two biomass burners on standby.


I also built two more power generators, the Coal miner Mk.1 pushes out coal at a rate of 120 PPM.

One coal generator uses 15 coal PPM. So we can easily run 4 with our conveyor mk.1 as they can handle materials at a PPM of 60.

Each Coal Generator uses 50 cubic meter of water. And we are pushing out 240 cubic meter of water, so no worries there. But we can't handle more then 4 generators at the moment.


We now how a power setup for our water, coal and generators.

We will reconnect the power node with the rest of our factory with ONLY ONE power line. It is important that we keep this seperate, as if the factory fails in the future. we will remove this powerline, restart the system, and once we figure out what is wrong we can reconnect it.

If we have alot of powerlines connection, it will be a nightmare to get the system running again in the future. When we have better tools we can design a better system.


Our power looks like this. We are producing a total of 300 MW. The Max Consumption is capped at 211 MW. That means even if our factory is running at 100% power, it will not trip a fuse. GREAT NEWS.

This in turn means that we can expand abit without worries. As i said before, the goal is to have all machine working at the same time, that way the yellow line will be more stable (Consumption).
[Time for a break] You deserve it!
Step back and enjoy.

The factory is running by itself, you do not need to do anything, it will keep manufacturing material until your storage containers are full. As long as we don't add anything more to it, the power will be more then enough.

Breath. Does it feel nice? No more Biomass Burners. No more collective leaves and trees. It's great.

With this said you can easily go AFK and the factory will handle itself.

From here on it's up to you on how you build your factory. Some people want to build a giant factory. I tend to build my factory in sections, with each section specialized in one type of material.

Some people tend to build large "buses" as the people that played factorio tend to know far to well.
Others uses trucks to transport material to far away places. In the future we can even use trains to transport alot of stuff really really fast.

As said, it is all up to you. I hope you enjoyed the game and this guide so far. It's just my start up guide for a good start. It has taken awhile but we got everything in control.

The rest of the guide will help you through all the stages, how you do it is up to you. If you want to follow along, do so.

However the guide will now step up the game, you won't get as much hand holding and instead i just might show of a screenshot of my final product of newly built productions lines. We got the basics covered.

For the next part of the guide we will go back to Tier 2 and unlock everything, even if some stuff is not really needed.
[Tier 1 & 2 - Tier 2: Resource Sink Bonus Program] Recycle, with style.
Updated for Update 6.

Why you need it?

Resource Sink Bonus Program will unlock the AWESOME Sink and Awesome Shop. Two buildings that can be used to customize your factory and add some helpful tools for factory expansion.

It will also upgrade your build gun with the customizer, a tool to customize your factory!

Let's start with the resource sink bonus program. Start of by unlocking it, should be no problem for you pioneer!


The A.W.E.S.O.M.E Sink and shop (Anti-Wate Effort for Stress-Testing of Materials and Exoplanets) is a bonus program and works as an alternative progression tree.


Basic AWESOME Sink connected to a storage container, just put any item you don't want in the storage container and the AWESOME Sink will destroy it and give you points back.

On the bottom you can see the AWESOME Shop.


I have alot of normal Iron Plates. So let's recycle some of them in the AWESOME sink.


The AWESOME Sink will take your item and give you back points, i get 6 points per iron plate i recycle. Once i reached zero, I will get a printable coupon. The first 3 coupons are always 1000 points, after that gets slightly higher for each coupon.

For example:
Coupon 4-6 cost 1.500 each.
Coupon 7-9 cost 3.000 each.
Coupon 13-15 cost 9.000 each.
Coupon 88-90 cost 421.500 each.


A printable coupon!


The AWESOME Shop is our next stop, where we can use our coupons. We have categories on top, and alot of items we can buy. Most items are cosmetic items that serve little to no functions. But there are some items that has great functionality.

None of the items in the AWESOME shop is really needed to complete the game, like the MAM it will help you out abit.

The items to focus on in my opinion is:

Organization
  • Flood Lights - Great to light up your base durning night hours.
  • Signs - Can be used to easily show what storage container is used for what.

Management
  • Conveyor Wall Mount - Great asset so you can wall mount your conveyors.
  • Pipeline Wall Attachments - Same as conveyor wall mount for pipelines.
  • Wall Power Outlets - Nice asset so you can have clean power lines.

Architecture
  • Factory Ladder - Will help you reach new heights..

Customizer
  • Foundations Patterns - Can be used to help you mark up your factory.

FISCIT Specials
  • FISCIT Factory Cart(TM) - Can be used as a early game vehicle. Has almost no grip on natural ground but works well with foundations.
  • The Boombox - This is here because of reasons.

The rest is up to you and what you want. You can even use your coupons to get a stack of parts, i do not recommend it. But you do you!


Me? I spent my coupon on this coffee mug, it does literally nothing. But seeing as we had a break just now i figured why not! :)
[Tier 1 & 2 - Tier 2: Logistic Mk.2] Make everything faster.
Why you need it?

Logistic Mk.2 will unlock faster conveyors for you that can handle more material, which is helpful for future factory expansions!


Let's get back to buisness by unlocking Logistics Mk.2.


With Logistics Mk.2 We get the stackable conveyor pole. Which mean we can optimize part of our factory from the above screenshot to look more like the screenshot below...


This setup has a smaller footprint, which mean we can fit more stuff in a smaller space. And we haven't even started expanding yet, think of building multiply floors and have machines working all the time!


We also unlocked Conveyor Mk.2 which is built with reinforced iron plates instead, you can upgrade older conveyor belts by just placing the new one on top. However we should think of when to use them or not, they are faster yes. But is it really needed on this constructor that is manufacturing concrete at 15PPM when the conveyor can handle up to 120PPM?

The only reason why i would even consider this is if i want to build a very long conveyor and want to transfer stuff really, really fast.
[Tier 1 & 2 - Tier 2: Jump Pads] A fun, but useless way to travel.
Why you need it?

Jump Pads will unlock the Jump Pad and the U-Jelly Landing Pad.

The Jump Pad can launch you up inte air, is slightly useful to launch you over higher cliffs. Mind the Falling damage!

The U-Jelly Landing Pad will make a cushion for you to land in, that neglects falling damage.

This is, in all honestly, not a very worthwhile investment. As you will get better tools in the near future.


Let's do the jump pads, The nich product that is funny to use, but oh so worthless.


Once i clicked where i want the Jump pad, i can use the scroll wheel to adjust the arch i will be launched at. This example is fine, as i won't suffer any falling damage. The jump pad needs power.


Wieee! Now i got up to my old copper sheet factory that i did not want to walk around the hill to get to. How do i get down?


The U-Jelly Landing Pad will neglect all fall damage as long as you land in the green goo. It needs power to function.


This is fine... i think.


Landed inside the green goo!


What's that? For only 3 coupons in the AWESOME Shop you can get some ladders? that takes no power to use? Say whaaaaat?

Let's continue on to the next part of the guide.
[Satisfactory Mascot] Time to meet... it.

Introducing the Lizard doggo, the cute little creature that did not have a name, and then the community made the name up, and now the Devs have decided to stick to it.

Best part, you can tame him! Let me show you how.


Step up to the lizard doggo, and when he sees you he will seem abit afraid of you, naturally. And start backing up, When this happens, open your inventory, and drop a paleberry on the ground by just dragging it outside the inventory box.


The Lizard doggo will now walk towards the paleberry and eat it up, once this happens the lizard doggo is now tamed and will follow you around.


Sometimes, the Lizard doggo will find items for you, you can open up lizard doggos inventory by interacting with the doggo. You can also place items inside his small 1 spot inventory.


And yes, you can pet lizard doggo. you can pet him as many times as you want.

And that's everything you need to know about satisfactory little "mascot". Onto the next part of the guide.
[Preperations] Return of the MAM and overclocking.
Before we start with vehicular transport we should get our modular frames automated for the future.

Let's start by going to the MAM. Research everything you can. But what we are really after is...


Overclocked production. It takes 5 minutes to reserach.


Meanwhile, we can restart our Smart Plating production for the Space Elevator, we can't complete it until we get steel production, but we might as well start somewhere.


Once overclocking is complete we get a new little window in all our machines, the ability to overclock!

We need to find slugs and convert them into power shards that we can put inside our machines. You don't really need to overclock stuff, but it can help. Some machines, like miners are smarter to overclock then say for example a smelter. As you can always just build more smelters.

Overclocked machines will always take up more power then building an additioinal machine, but sometimes you cant build more miners because you have no more nodes closeby, and that is the reason to overclock miners. Another machine that you can overclock if needed is power like the coal generator, just make sure that you can handle the input.


You can also underclock machines. That will make it manufacture less PPM. But it will also drain less power. It can be worth MIN/MAX:ing this as it can save you abit of power.

The above example i take my two water pumps and lower them to 100.8 m3 per minute, as the 4 coal generators uses 200 m3. We went from 20 MW power consumption down to 15.1 MW power consumption. In total we almost save 10 MW of power!

With that power we can run 2 Miner Mk.1 att 100% clock speed!

I wont be overclocking anything right now, so no worries. I just want to give you the option to do so, it will help you in the future.


I free placed Assembler on the grass and hand feed it with Reinforced Iron Plates and Iron Bars to create the Modulare frames we need, which makes this semi-automated but it will work fine for now.

Let's head into Vehicular Transport!
[Tier 3 & 4 - Tier 3: Vehicular Transport] Finally, Some vehicles!
Why you need it?

Vehicular Transport unlocks the Truck Station together with what will probably be your first vehicle, the Tractor.

It can be automated and help you transport material over long distances.

It will also unlock more inventory space for you.


Welcome to Vehicular Transport. We are going to head straight into it by constructing the tractor.

It needs 5 modular frames, 5 beacons that we can make in the equipment workshop and 10 rotors.


Place down the tractor like any other building, when done, head to the backside of it and open the small box.


We need fuel to run it. Lucky for us vehicles can use a wide range of fuels. i will load it up with my solid biofuel for now.

Also note, that all vehicles have a built in craft bench, so you can use them to construct new outposts with ease, and you can even put stuff inside the vehicles inventory.

Vehicles will run over any flora and fauna alike. They can't take any damage as of yet. and you can't be damaged while on a vehicle. The only exception is poison clouds and radiation.

Take it out for a test run!


How was your test drive? All well. Good. It's always a good idea to have more fuel in the vehicle inventory, so if you run out of fuel somewhere far from home you can just refuel your vehicle at location.


We are going to build our first truck station. Truck stations can be used to load and unload cargo. This is useful as you can automate your vehicles so that they can transport cargo for you without any other input. This is done by you recording a path while driving, and the AI will just follow the path you take.

We will not be doing that just yet, we really have no need as all our factories are pretty close by to each other, instead we will use this tractor as our personal car.

Gather the resources for the Truck Station.


We will build our truck station near our coal power. Connect it to to power, it's fine to use the power poles close to the power plant.

In the rear we have 3 inputs and 2 outputs. The stacked inputs and outputs are used for loading and unloading, The last input is used to store fuel. Use a conveyor splitter and drag a coal conveyor into this input.


Just like so! We just created a "gas station" for your car. The plan is that you can drive to this point to refuel your tractor. Time to get your tractor and drive it to the gas station.


It should look like this. Now go to your inventory chest at the rear of your tractor and remove that solid biofuel. it should fill up with coal directly from the "gas station".


In the Truck Station, you can see that it has it's own inventory, so it can work like a storage container. Bottom left you see the fuel, as soon as your tractor has a full load of coal, it will start to stack here. You can take it out manually and put it in the rear of your tractor to have a reserve stack of fuel.

And finally, at the top where it says DockingStation, you can rename it, as you can now see it on your compass. For now we will name this "Gas Station", in the future we might have a truck station to transport Iron plates, and then we can call that station "Iron Plate Factory".

Once you got some reserve fuel, you can use your tractor to explore far and wide. Just make sure you can return home safe again. Better safe then sorry.

And that's where we will leave the vehicular transport part of the guide for now. In the future i will tell you exactly how to automate your vehicles.
[Tier 3 & 4 - Tier 4: Improved Melee Combat] Run, hog, run.
Why you need it?

Improved Melee Combat unlocks one of the best melee weapons in the game, The Xeno-Basher.

You will also unlock more inventory slots and a new hand slot.


We are heading into Tier 4, Improved Melee Combat as a shortcut. The upgraded melee weapon is well worth it, and the milestone isen't that demanding.

This will be a short one, let's go!


This is what we need to craft the Xeno-Basher. Craft one more Xeno-Zapper and unequip the one you've been using. And craft the nex Xeno-Basher.


This weapon is a beast, enjoy it. That's it.


Since that went so fast, we are going to do a slight upgrade to our coal production. Grab some more reinforced iron plates.


Because we added the gas station, sometimes the coal needed for our coal generators gets rerouted to the gas station, this can make your fuse pop. No worries, you should only need to wait a while to reboot the system as we do have coal, not just enough for both power and gas station.

We will fix this by upgrading this conveyor belt to Mk.2. so instead of sending 60 PPM it will send coal at 120 PPM. And the miner can already handle it.


That handled, we now how loads of coal coming in, no problem for now... But we are heading for steel production, and as such we need to prepare abit for it.
[Preperations for Steel Production] Time for a total rework.
It's that time again.

We are greatful for the coal power but i want to put it on foundations, and i rather do it without losing any power to the factory.

First thing first is to zoop some foundation over to our coal generators.


I cleared some land and built foundations, moved the gas station, built ramps on both side so i can drive up to the gas station easily, and added 3 new coal generators, my plan is to build 6 in total, that will take 300 m3 of water, and our pipes can't handle more right now. It will also handle our currect coal output well.


By using the R Key you can switch the mode in which pipes will be connected, this is one of my favorite, you can try it out yourself. :)


After about 15-20 minutes i ended up with this, i have again used the conveyor lifts to have the conveyor going over the "road in" to the gas station.

We are now producing alot of power, can expand without much problem. And it looks alot better then what we started with.


I also added a third water pump, and set two of them back to 100% and the last to 50% clock speed, this gives me a perfect 300 m3 water at all times, same as the limitation of the pipes.

With that, we are heading into Steel production.
UPDATE 6 RELEASE.
Update 6 of satisfactory released at this point of my guide. So from now on i will play under update 6.

I will continue onwards, and if i need to upload anything prio to this point, i will do so. Once done this section will be removed when the guide has been updated to update 6 standards.

UPDATE 6 STANDARD BELOW THIS LINE
[Tier 3 & 4 - Tier 3: Steel Production P.1] Basic Steel Production
Why you need it?

Basic Steel Production unlocks the Foundry, which is used to create Steel. A product that is needed in the Space Elevator to advance to the next stage.


Time to advance to steel production. 50 Modular Frames, 150 rotors, 300 concrete and 1000 copper wires. Let's go!


Welcome to Steel Production. Let's get to work.

We are heading back to our coal node, it is sadly one of few in the grass field. I scanned for iron nodes and found 2 patches nearby. Lets zoop some foundation over there as it is the place we will use to set up our steel production.


We build a foundry, and can see that it needs both iron and coal to make steel. This is why we want to build or steel production so close to the coal.


I drag the conveyor from the steel production line down to the coal line.

Fast maths. My coal generators time 6 takes 15 coal PPM. 6*15 = 90 PPM

The foundry needs 45 coal per minute. 90 + 45 = 135 PPM. But that the moment we can only handle 120 PPM, and then we can't really use the "gas station", we need to throttle the foundry down to 66% for now.

We also only want to focus on Steel Pipes for now.

We are at capacity, and can't risk losing our power. We need to push towards advanced steel productions so we can unlock the Miner Mk.2.
[Tier 3 & 4 - Tier 3: Steel Production P.2] Advanced Steel Production
Why you need it?

Advanced Steel Production unlocks the Miner Mk.2 which can harvest more ore for you. Also unlocks more material needed for the Space Elevator to progress in the game.

Funny, we are in a bit of a pickle, but don't worry. Everything is still working, and we are working towards a solution. Do your best to unlock advanced steel production with the help of the automated steel pipes.


Got there? Good job.

We are going to head into Logistics Mk.3 At the same time, switch over your foundry from steel pipes to steel beams. We should have enough steel pipes (100 pipes) to advance to logistics Mk.3.

We need this cause the Miner Mk.2 Will spit out 240 coal PPM. but we have no conveyor that can handle those speeds!
[Tier 3 & 4 - Tier 4: Steel Production P.3] Logistics Mk.3
Why you need it?

Logistics Mk.3 unlocks even faster conveyor belts that can handle even more material.


Logistic Mk.3 Completed. Head back to our Coal node.


We are going to handcraft our Encased Industrial Beam we need to upgrade to a Mk.2 Miner.

After that we are going to upgrade our conveyors leading up the hill to Mk.3 Conveyors, they only nead steel beams.


Just like the conveyors, we don't actually need to remove the Mk.1 Miner, just build the Mk.2 Miner on top of it, the resources from the Mk.1 Miner will be refunded.


I upgraded our steel production line. We now have 2 foundries, And some of the steel beams are transfered over to a assembler with some concrete to automate encased industrial beams.

The second foundry is focusing on steel pipes.

I also upgraded the inbound coal conveyor up to mk3 conveyor, A conveyor mk2 would have been enough, but i had more steel beams to spare for the moment.


Everything that we can make out of steel is now automated, it might not run att 100% right now, but it is good enough for our needs.

Our power is looking good, we are producing 450 MW, and consuming about 150-200 MW. Which means that we can expand our factory by twice the size, which we will soon do.

First, we will tackle the last milestone, Hypertubes. Mainly just to get it out of the way, then we are gonna sit down and talk. Get a game plan together, and then expand like never before.

Wait a moment for the encased steel beams, or handcraft some. Get the rest of the materials needed for hypertubes. I will see you in the next section!
[Tier 3 & 4 - Tier 4: Hyper Tubes] Travel in style!
Why you need it?

Hyper Tubes unlocks, hyper tubes! A great way to travel long distances.


Hyper tubes are personal transport that are built just like pipes. I am going to build a hypertube inbetween my main factory area and my steel production line. I will also put a hypertube from my factory to my copper sheet factory as it is abit far away at the moment.


Put down a hypertube entrance and power it and away...


we go!


And the second hypertube done. I don't have to run as much!

You can control your character somewhat in a hypertube, by pressing S you can slow down, and turn around and go the other way. Otherwise hyper tubes are fully automatic, you just jump in and you can then go AFK, the hypertube will take you to your destination.

The hypertube needs power to function.

And we are finally done with Tier 4, Halfway to our goal!

Ready for that talk, Pioneer?
[Preperation] The talk...
Real Talk.

We have come a long way from portable miners and semi-automatic smelting. Instead of making 10 or 20 iron plates we are up in the hundreds, for some items, thousands!

And our factories are looking great, and we have done a good job so far. But the thing is, if we keep doing what we have done, then it's all a uphill battle from here, things will just get harder and harder. And to spill the truth, our small factory from the start will not cut it.


Now look at this, it works. It gives us both iron plates, iron bars and screws. Problem is that it just dosen't do it fast enough.

Don't worry, we will not destroy this... not yet anyways. This is still your backbone, and we will use it to get a steady, but slowly stream of items.

What we need is more factories like this, and we can go some diffrent routes.

Either we just expand, and make it bigger, let factories like this do what it has always done, but just bigger.

Or we can go to a new iron node, set up a production line that just focus on one thing. For example screws, and let it churn out screws by the hundreds, Maybe even thousands!

That's one step,

We also need to focus on some of the lesser known, atleast for us, ores. Such as Quartz, Sulfur and Caterium! They will help us advance in ways we can only dream off!

That's another step.

We also need to expand outwards, Coal is not something we come by often in the grass fields. We need to think about our power as we expand.

So again, not that much hand holding, you know how to build a factory by now. I will give you some screenshots of my progression, And tell you about any hurdles i encounter on the way.

Let's get to work fellow pioneer!
[Sulfur Production] Here for the blast.

So i decided to start with Sulfur, made a fast scan and found a node some 800 meters away, it was up on a pillar cliff. As it is so far away from my base i won't care about making it look nice, i just want to start a basic chain so i can get some sulfur.

As we expand our main base further and get closer to the sulfur node, i will remake it, and maybe even automate it some more.


So here it is, is it pretty? maybe, i don't think so atleast. But it does what it needs to do, mine sulfur. And i can store it here for later when i need more of it.

Why sulfur? Well we are getting Satisfactory version of C-4 Explosives. Most of the more uncommon ore are often covered with destructable rocks that can only be destroyed by explosives, some shortcuts are also covered with the same rocks, we even have some slugs hidden inside these rocks.


I took some coal with me, if you don't have any, you can collect sulfur instead and then go to your coal node. Then find your MAM or build a new one.


This is what we are mainly after, but feel free to catch up on any research that you get your hands on easy, if you have the materials, go for it, if you find it to hard, wait until later in the game.


We need some black powder, it's not created in the craft bench, but rather the equipment workshop.


And before long, we got what we come for. The Nobelisk detonator.

It should be regarded as a "tool", but make no mistakes, Nobelisks will stick to alot of wierd stuffs. Hogs, check. Vehicles, check. Buildings, that too. It won't damage your vehicles or buildings, but you can use it as a makeshif weapon and blow stuff up! Fun, almost as fun as when we unlocked the chainsaw!


I unlocked some more stuff in the sulfur tree, but we can't get past this point until we get oil production, which is a tier 5 unlockable. So we will put sulfur on hold for now and continue to the next mineral.
[Caterium Production] Advanced electronics.

Time to scan for some Caterium and head over to our closest node.


So two problems.

First, the caterium is on that small pillar cliff in the middle of nowhere. That is a simple fix, just zoop a bridge over and we are done with that. Be careful not to fall to our deaths.


Second, the caterium ore is covered by these destructable rocks. Funny how i spoke about them in the last part of this guide... It's like i'm psychic... Or maybe, just maybe the reason behind this is that i have played this game before. Nah, I'll go with psychic.

Time to blow it up! Nobelisk away!


Boom!

Problem-oh no more-oh. Why did i write that, that sounds stupid! Time to get to work with our caterium production line.


As materials are not that much of an issue for us i like to build this holy trio of structures whenever i am too far away from my hub. that way i always got crafting options nearby.


Caterium has some sweet toys in the research tree.

First we are after the Zipline. A useful tool in more ways that you can imagine.


Congratulations! Caterium production line complete, i smelt my ore down below, and make it into quickwire up on that hill.

Now we focus on the Caterium research tree!


The zipline! As a tool you can use it to ride on your power lines, if you time your jump right you can jump from power line to power line, this tends to be faster then running, but slower then using a hyper tube, however it does not need any electricity to use.


But the biggest advantage is that with a bit of aiming, you can almost always mount a powerline up on a cliff you might not reach. And then we can use our zipline to get to the top of that hill with ease. You can get to places that might have been to hard for you to reach before!


Cya on the top! Hopefully you understand what power you hold in your hands.

Two new tools in a short amount of time! Awesome!


We should continue down the caterium tree some more, Unlocking power poles mk.2 is useful, they can have 7 connections points instead of the 4 we have with Mk.1 power poles.

But down to the left is a treasure by itself. The Smart Splitter. Study the path down to it and you will see that it's not so hard to get there. This will especially come in handy if you like the AWESOME Sink. Let's go!


Took me about 15-20 minutes but i finally got the smart splitter, Now to show you how it works, place it down on a conveyor belt, extra points if you do it on a line that has staggered due to being to full.


Connect it together with your AWESOME sink, This is just an example, in the future i will show you my prefered design.

Nothing is happening! What?!


Click on the smart splitter and you will see this menu. We need to program it, as i do not plan to have any material go to the right, i will change it from any to none.

The middle one should work as normal, sometimes you need to click any, and select any again to make the machine understand what you want.

For the left one, the one going to your AWESOME sink, we want to set it to overflow.


It's working, but what is it doing, if you haven't understood it by now, here is what it does. It will always fill the conveyor going straight forward, however if it is full, it will take any spill and start dumping it into the AWESOME sink, Giving us TICKETS that we can buy more stuff with.

You might have noticed that you can even go into more detail, say that you have screws, plates and rods on the same conveyor, you can take a smart splitter and make it so that to the left goes the plates, middle goes the rods and to the right goes the screws.

Another useful point is that this will help your factory from staggering, always producing something.

It's a super awesome building to have, and i bet you agree with me.

And here is where we will leave caterium for now. See you in the next part!
[Quartz Production] A long journey.
You might have seen this coming, we are going to start a quartz production!


Problem is that we have a large journey to make. Make sure you have materials to build a craft bench, equipment workshop, and lots of power poles and cables, we want to draw power all the way to our quartz line, and if we need materials we can use the craft bench to make some in worst case scenario.

Don't mind the foundations, we will fix it up once we expand closer. Let's get to it!


We found a cave, it's a great opportunity for us to collect some Mycelia. You can find them in caves, and in some biomes you have these huge mushroom like trees that can be cut down with the chainsaw and give you Mycelia.

But we are most certainly going to meet a new enemy in here, it's a spider like enemy, I wont take any screenshots of it, due to people with Arachnophobia.


You can activate Arachnophobia Mode if you want, it will change the spiders 3d model with a 2d picture of some cats that the devs own in real life, they will meow too! Are super cute, and one thing that makes it better then the spider model is that you can clearly see them.


Mycelia, another tree in the MAM, might as well now that we are here.


This cave is huge, and slightly scary, we might have done a mistake coming here, but nothing ventured, nothing gained.

As you can see i try to place my power poles to the side, so they are not in the way. This way is long and dangerous, and i plan to use an automated truck route to transfer the quartz in the future, something i never did when i first started to play this game. But now, now it's a great idea and i get a chance to teach you how to make automated routes.

Let's carry onwards!


After rain there's sunshine, and all those other clich quotes. We found an exit, let's hope we can find some quartz soon!


It happened. :( I died for the first time in this guide, i put this in to show you that it is okay. We lost all our items but they are in a chest where i died. It was right by the Quartz, but it was guarded by two large monsters. So we are going to collect a stack of all the more common materials, i need to craft another xeno-basher and then i will move out and get our loot back!


Using the zipline will make the travel back alot faster!


Payback is gonna be a b... Yeah, time to get our loot!


And rewarded with that sweet sweet quartz! We already got the power, lets put out some buildings, a MAM can be a good idea, and start some research!


Trust me, we want these as fast as possible! They will increase our running speed and jump height!


I am going to take the inflated pocket dimension and then i will leave the rest for later.

We need to plan our return, and if possible we will make that truck route.


Bad news, i did not have enough materials to build everything, Good news, I found my way home. We are collecting supplies for 3 truck stops and a new tractor.


First truck station is deployed near our base. Smart splitter is programmed so that one conveyor gets silica. The other will take quartz crystals!


Just drive through the poison gas clouds, you will take some damage but it's safe.


We have some coal here, so we are going to use conveyors to get it to a lower level, and then put in a truck station so our truck can refuel. If you want you can drag it all the way to the quartz field and just use one truck station more. But in this case we will use 2 truck stations.


Truck Station 2 is now done. Let continue on to truck station 3.

Don't forget that you can rename truck stations!


Okay, we have our three stations, now we drive all the way back home, because we are going to soon record a route, and we are doing a loop, so once the recording is done, we want to end up back at base.

The last thing we need to do, is change the vehicle settings from load to unload on our first truck station back at base.

Let's continue in the next section!
[Truck Automation] Time to record a route!

Mind my crazy good paint skills, the red line is our planned route, the purple overlay is where we will encounter mayor uphill inclination. So we need to keep the ♥♥♥♥♥ to the metal and not lose any speed.

We plan to stop to refuel, pick up the quartz, return to base and end the loop.

This way the automated truck will always refuel and just keep going forever.

If we encounter poison gas, we drive through it. If we encounter enemies, we drive pass them. The recording will record everything you do in steps. If you stop and pause for 7 seconds and then start moving again, the AI will do so too, so we want to be as efficient as possible so we do not waste any time.

That's why we plan ahead, visualize the route before hand, maybe even do a practice run or two before we actually do the recording.

When you feel that you got everything set, we will start with the recording part.

We will start under the truck stop. The first thing we will do is start the recording, Press F to unload our cargo (we have none) and wait for awhile, like 10-15 seconds, Visualize that we give the AI time to actually unload as much cargo as possible. You can easily see when you waited long enough by the animation of the crane, once the animation is done, you can start driving.

We will then head to the refuel station, stand under the refuel station for just 3-5 seconds so that the truck gets fully refueled.

We will then drive to the quarts truck station. Hit F to load our tractor, and then wait 10-15 seconds before we start to leave, again visualize giving the AI some time to load the cargo.

We will then return to the first station again, and once we hit the end we will end the recording.


At the end of the loop we will see a finish line, just drive through it and the recording will stop.

One more thing, We want to think ahead and try to give some space for the return trip. We can, if we want, have multiply trucks driving on the same line, so it would be wise to have a "2 way road"

Ready? good. Let's start with the recording!


Press Q, and hit start recording, And drive until we see and pass that checkpoint.


Giving lots of space at the fuel station and make a u-turn.


Making our way to the Quartz Loading Station.


Heading back to base! Almost there!


Press R to save your path, give it a name like Quartz Line Grass Fields or something.


If we Press V we can load a path, this is useful if we want to add more trucks to the line, As you can see the line is almost the same as i planned out.


Now press Q, First press the show path nodes to hide the path nodes, otherwise you will always see them, if you like it this way you can keep it on.

Second, Press enable autopilot! then jump out of the vehicle and see it speed away to do our bidding!


See that Tractor go! Go Tractor! Go!


We can see our tractor live on the Map (M key).

AUTOMATION! Congratulations!


The fruits of our labor!

I will see you in the next part!
[Expanding Production P.1] We need more, more, more.

So i drove back to the new gas station i made, where we found some coal nodes.


And we have water nearby... so there really is no excuse for us not to...


place some more coal generators! We are now producing 750 MW!


Okay, back near our first factory i found two iron nodes. And now we are going to go into mass production! Let's get to work.

Draw some foundations, set up two miners, i will be using Mk.2's.


When building this new production line, i tend to think of two things.

First, leaving some extra room, we might want to expand this in the future when we get a Miner Mk.3.

Second. Using conveyor lifts like the screenshot above. This moves the conveyors away from the floor level, and gives you more room to move around your factory. And i also think it looks better.


Let me introduce to you, our new Iron plate factory mk.2. This will only focus on producing iron plates at a solid rate of 80 iron plates PPM. It's not very impressive, compared to what we will create later in the game, but it is a serious upgrade compare to the lousy 20 iron plates PPM.

It also collects all iron plates into one conveyor, and have a smart splitter, it will prioritize filling the industrial storage but if that storage gets full, the overflow will head directly into a AWESOME sink. This way this factory will always be on, always producing, and is running at 100% efficency as i have used maths to calculate how many smelters and constructors i should use.

But it's lacking something, Power. Easy enough, but we are going to start to implement another failsafe.


We need this, the power switch, it's not to hard to unlock. We just handcraft 50 AI Limiters. So let's get to it and unlock the power switch!


We want to do something like this. This will seperate the power grid into two grids, one for the factory, and one for the rest of the power grid.

This is a better failsafe then the one i learned you way back when we first started out with our coal power. We do this for two reasons.

First. If you for some reason want to shut down this production line you can easily do so.

Second. If we experience a fuse blowout, and can't get our power back online, we can simply start shutting down production lines one by one until we can get our power back online.

We do not need to do this to our older productions line just yet, just do it to every new one we build from now on, When we go back to revisit our older, less efficent factories we can bring them up to the same standards.

You can also name each power switch if you want. Time to start up our new Iron Plates Factory!


Power operational! Finally we get a half decent production of iron plates.


Look at this factory! How much faster it produce and pushes out plates. Great job!

Next on the line is to do the same for:

  • Iron Rods
  • Screws
  • Copper Wire
  • Cables
  • Copper Sheets

We will also rework our Caterium porduction line as it is fairly closeby compared to the quartz one.

We will continue the guide in the next part!
[Expanding Production P.2] Even more, more, more.

Iron rods production is complete. As each smelter handles 30 PPM, and each iron rod constructor produce with 15 PPM, i built two floors so the factory has a much smaller footprint.

It has the same Storage/AWESOME Sink setup as the Iron plates factory.


I decided to shut this line down and replace it with my future screws factory. You don't need to do this, you could find a diffrent node and just built a new factory. But in this case i have no use for a factory that makes 3 diffrent types of material, so this will need to go for the future screws production line.

We do this by shutting down the miner, and let the factory produce what it can with the material that is left, i will then "sell" to the AWESOME sink by emptying everything in the storage as fast as possible with conveyor mk.3

While the production line is getting emptied, we can go prepare the next zone.


I removed the first copper wire constructor and started to "sell" out all cables, we are going to have this zone focus on only Copper Wire, and have another new zone focus on Cables.


Nearby our Caterium production, there are two copper nodes, i prepared them with two miners (mk.1 for now but we can easily upgrade them), and put them on foundations, this will be our cable productions, however there is some hilly terrain here, so we are going to pull the resources up the hill to flatter grounds.


After about 30-40 minutes i built the copper cable production line, same standard as everything we built up to now.


A slight sneak peek at the new screws production line. This is 16 constructors running with the alternative cast screw recipe, which will give us a production rate of 800 Screws PPM.

We come a far away from the start where i said we are going to start small and dream big.


And we are done with screws. Down by our old iron plates/rods/screw factory we removed everything and instead we have 2 miners feeding 8 smelters, compared to the 2 smelters we used to have.


And up on the hill we have this monster of a factory, 16 constructors feeding 4 industrial storage containers with screws, if any of the storage containers get full, it will send the overflow to the AWESOME sink.

Why so many screws? Trust me, you'll need em'!


I upgraded our limestone miner to mk.2 and set it at 75% so i can get exactly 45 PPM, that's what our construct needs to run at 100%.


And we are finally done with the copper wire production line, 4 smelters, 8 constructors, all creating copper wires!

And with that all our basic materials have had a much needed upgrade and is now with a new standard, we have the power switch to control each section of our factory, and all sections have a AWESOME sink connected to it, so it will just keep creating.

Now remember with this new standard you should get alot more tickets to spend in the AWESOME shop. Spend your tickets as you feel, just do mind about the functionality of the stuff you buy. As some products are better then others.


Something i spent in the AWESOME shop that i think helps alot is the Display Sign Bundle...


With it you can mark your storage containers, much like i've done here, it's easy to see what it stores, and i can always write in manually the amount pieces per minute (PPM) we create.


You can even mark up your Miners, so you can see from a distance what type of miner it is.

Now on another note, why haven't we automated much of the products that are "after" the first tier of products, such as reinforced iron plates and such? why aren't we upgrading those factories?

We will, We can also if we want, but i do recommend going on an adventure, try to get more harddrives, sometimes you will get alternative recipes that are so good that it would be crazy not to use them, and if we have a "tier 2" factory already set up, we would either need to build a new one, or redesign the whole factory from the ground up.

We done a great job with upgrading our factories. I'll see you in the next part!
[Cleaning up] Heading for the next set of tiers!
So we have put the space elevator on hold for far too long, but for a good reason, we are creating loads more resources, more resources then we will ever need it feels. And we are going to need it cause the game is just going to get harder and harder with the milestones.

If you remember we should have a constructor connected to our space elevator, we may not have automated all parts, but we should have everything atleast semi-automated, so load in materials by hand, so let's start doing that. Use what you have, and just start climbing towards that next milestone. It will take awhile for us to get to it.

Meanwhile, we should use the materials we have and unlock as much research we can in the MAM. Don't be afraid if you need to handcraft some of the material, the more research we can get done, the easier the game will be for us.


We can unlock the rebar gun, it's the first of two ranged weapons in the game, it's a single shot weapon, which is not that great, however getting ammo is really easy as it only needs iron bars to create more ammo.


Any form of medical inhaler is great, they will give you full HP on use, no need to eat 20 berries to get your health up.


You have the parachute which can be a good item, it's easy to research, as soon as we get to the next tiers we can unlock the jetpack, which is loads better.


The explorer is a new vehicle that is loads faster then the tractor. Once researched you should replace your personal tractor with this vehicle instead.


I added another constructor to speed up the construction of smart platings for the space elevators. we need to push forward at a somewhat steady pace to get to the next set of tiers.


I also recommend going out and find crashsites so you can get some more harddrives. above i've marked out 4 of the closest crashsites, there are many more. If you haven't found all yet, now you have the exact location for 4 of them, i will not spoil what they need to open, but most of them are really easy.

If you are not the exploring type, or maybe just want to get all locations and what they need spoiled for you. Then i recommend this for you:

SPOILER ALERT.
https://satisfactory-calculator.com/en/interactive-map


In my travels for more harddrives, i encountered these plants that raise from the ground and spit out poison gas. You can blow them up with Nobelisk explosives.


Returned home because this is the last smart plating we need! Wooohoo!


Hit the next item. Steel beams, no problems. The Modular frames we only have semi-automated and need to hand place materials inside the constructor. It might look like another hard hurdle, but you actually get 2 Versatile Frameworks, so it's more like 250 needed, and not 500.


I built a better looking pipeline for my first coal generators, i did this by running a pipeline next to the old one, i then started to fill the pipeline with water, when the pipes was full of water, i replaced the last part, this way my coal generator have a minimal chance of shutting down due to lack of water.


Something i haven't teached you yet, mainly because it's not really that needed, but it will just take a moment to learn, If you collect flower petals you can use them and convert them into color cartridges. They are used to put patterns on foundations, which you can buy in the AWESOME Shop

.
By going into the build menu (Q Key), The Customizer tab, you can select colors, materials and patterns. You can even put them in the hotbar if you like.


For example, you can make stuff like this small parking spot for your personal vehicles.


Or use colors to paint your base, maybe you have a favorite color, maybe you want to color code your factories.


A really useful thing to do now before we go into oil production is the color code our pipes, like blue for water, Purple for raw oil, Orange for fuels and so on.


Can you remember our old factory? Back there was so much new things to learn, but it was easier, a time where everything was just, more basic.. and straight forward.


And how we have grown, Materials are being built by the hundreds, much of it is totally automated and can run for ages. We do not have to worry about time, this is not a speedrun guide, we will keep going for that milestone, slowly and steady. On our spare time, we research, explore new frontiers, find more harddrives, all this to make the future so much easier for us.


Two down, one to go. Let's push forward!


We need stators for the last part of the space elevator milestone, for now we can just place 1 or 2 assemblers and handfeed them the materials we need. As i have found a harddrive i will use the alternative recipe that will just speed up the process somewhat for me. You will need 100 Stators in total, and lots of cables, which should be no problems as cables are automated, and for me atleast i had a full industrial storage container with cables.


FINALLY! We are set and ready to go! You know the deal!


Load it, Seal it, SEND IT!


I'll see you in the next part, pioneer!
[Tier 5 & 6 - Tier 5: Oil Processing] Black gold!
Why you need it?

Oil Processing unlocks Oil Extractor and the Refinery. Two buildings used to create advance fuel, as well as rubber and plastics.

It also unlocks the scanner update to scan for crude oil.


Who can stop you now? you waited so long for this to happen, so let's go. Oil Processing is not the "first" milestone but it is the first we need to unlock as almost every other milestone is locked behind rubber/plastic.

Nothing serious, the only thing we need to handcraft are some motors, which is built with more stators and rotors. The rotors we have semi-automated, and stators we can just use the setup we used for the space elevator. Get to work and unlock the milestone!


Before we continue onwards. i have to say one thing, before this point we have mostly been in the Grass Fields area, and maybe even the areas closest to it. Now we will need to expand further, well into territory we never been before, other start areas and so on. Make sure you have researched well in the MAM, got some of the special gear and i do recommend the explorer vehicle.

Ready to move on? Great.


We need 1 oil extractor, 2 refineries, 2 truck stations, and bring materials for like 2-3 fluid buffers.

We are also going to need alot, and i mean alot of power poles and cables.

There's also a good idea to have some materials to build some fluid buffers. This should always be true when we handle any liquids in the game.


Here is a more detailed list, Collect the needed materials. Then jump into your explorer/tractor, take it to a gas station, refuel it, and put some extra coal in the storage area of the vehicle.


Time to ping for some oil. It might look like there is not much going on, but the oil is far away from us.


There are 2 spots, i will go for the northern spot, as the terrain and overall way there is alot easier.

Now you have three options, either you start pulling your cables from your main base all the way up to the oil spot, or you build your oil spot and pull the power from there back, or last option, which i do not really recommend, power it with biomass burners... urgh.

I am going to go the first option.


I put a marker down on the map with far/infinite range, this way i can always see it on my compass and don't have to do a scan everytime.


Let's go! Do as you please with the power, do it now or do it later, i will meet you when i get to the oil node with my powerlines!


Found this crashsite on the beach, that's one more harddrive for us!


Okay. we are here. The oil is on that island, but we will start down by the beach, i will start by constructing one truck station stop here, and call it Plastic pickup, set it to load.


Sweet, Sweet, black, gold. Let's go! build a oil extractor on the oil node.


Build two oil refineries nearby. Connect them with pipes from the oil extractor, and set one recipe for plastic and the other for rubber.

You might have noticed that both recipes will create heavy oil residue, this is a byproduct, and in the future we might have a need for it, right now it is an unwanted side product that we rather not have to deal with.

Let's combine the output conveyors into one conveyor with a conveyer merger, and drag that conveyor all the way to the truck stop.


Don't worry about the water, its so shallow that you can easily walk over it and build stuff over it too. And yeah it dosen't look pretty, but as with everything else, first we setup a starting production line, we can always come back later and build it real nice and efficent.


Anyways, we can't do anything just yet when it comes to the byproduct, so i recommend building some fluid buffers, i built three here, and have them fill up with byproduct.

This is a highly temporary solution, as the production line will shut down once the fluid buffers are full, hopefully that will take some time.

Connect this production line with power and let it rip!


We should soon see some plastic and rubber come into the truck station. The blue plastic is important, as we know for sure that we need it for some MAM Research, but we also need plastic and rubber to continue down the milestones.

If you went the other way around and haven't drawn power to your oil node yet, do so and return to the oil node once you are finished.

For the rest of us, we are going to wait until we get 200 plastics minimum, if you can get more then good. But we need 200 plastics for the next milestone.


Time to learn something new, if for some reason you need to do it, or in this example, maybe you have just built one fluid buffer and it got full of byproduct long before we got the 200 plastics, don't panic. just interact with your fluid buffer, and drag the flush lever to flush the buffer. If you want you can select the flush mode "Full Pipe Network" and it will flush the full network. Where does all the content go? Nobody knows. but it will keep your factory online and working.

Once you get 200 plastic, take your vehicle and return back to base for now.


We are heading for alternative fluid transport. This is what we need the 200 Plastic for. The motors we need to handcraft again, which is annoying, we will fix it in the future. Same with the Heavy modular frames. Everything else is easy. Let's get to it and i will meet you in the next part of the guide.
[Tier 5 & 6 - Tier 5: Alternative Fluid Transport] Easier Transport.
Why you need it?

Alternative Fluid Transport unlocks the Packager and the Industrial Fluid Buffer.

The Packager can be used to pack fluids into canister for easier transport.


Finally got everything done, and we have reached the alternative fluid transport.

We are going to take a step back and think abit. What we want is a transport network taking supplies from the oil node, drive it automatically back to nearby our base, and dump plastic, rubber and a new material, packed fuel.

We will need a new tractor to transport our stuff.

In building way we need a total of:

  • 1 oil extractor
  • 4 oil refineries
  • 2-3 fluid buffers
  • 1 AWESOME sink
  • 1 constructor


I added it all to a list, a shopping list if you like. And in any menus like the storage container menu, you can scroll through that list with your mouse wheel. Collect everything we need!

The plastic we don't have to care, we have it over at our oil node.


I built the new tractor and transfered most of the coal to it instead, the explorer still have some 40 coal left, so i can easily drive it to the gas station to get it refueled later.


I prepared the station back at home base. It's a truck station named "plastic dropoff" and it is connected to 1 smart splitter, look below on how i set it up. The splitter then seperates all supplies and go to 3 more splitters. These splitters are just standard any/overflow splitters that then connects to the AWESOME sink in the rear with help of conveyor lifts.


This is my example for my smart splitter. Hop into the tractor and let's drive to the oil node.


This is the road i will pretty much take, this will also be the future recording plan for the tractor to use once we automate it, much like we did with the quartz production line, more on that later.


Back at the oil node, i remove the pipeline from the oil extractor, we gonna rebuild abit.


It looks like a mess, i know, but this is just to get the materials needed in the beginning, we will rework this really soon.

How this works is as following.

Ore extractor extracts oil to 3 refineries, one for fuel, one for rubber, one for plastics. Fuel makes poymer resin, which is feeded into the awesome sink directly.

The plastic and rubber refinery takes the residue oil and feed it to the 4th refinery which makes more fuel, and then feed it back to the buffers.

We get a little bit of plastic, alot of rubber, and alot of fuel from this setup, but it looks ugly and needs a rework pretty soon.


What i have done above is that i seperated the liquid fuel to come down to the second smart switcher, it then loads the liquid fuel first into the refuel slot of the truck station, once the truck station is full, it will redirect any overflow back into the truck stations lower input slot.


This station will both resupply and refuel the truck at the same time.

I will continue the guide in the next section.
[Oil production line problems] The plan...
Welcome back!


Using the map i posted earlier i will now record the route, just like we did with the quartz line. I will run the tractor with coal for the recording, once done. i will fill it up with liquid fuel and activate the autopilot and it will run on liquid fuel from then on.


And we are near homebase, time to dump the cargo. And time to head back again..


And back again, save the route and prep the truck, remove all coal and let it fill with liquid fuel.

Once done, i ride ontop of the tractor to get a lift back home.

But before we do any of that, we are going to do a... shortcut.

And after the shortcut, we will fix the oil production line real good. :)

See you in the next part of this guide!
[Tier 5 & 6 - Tier 6: Jetpack] Fly where the wind will take you.
Why you need it?

Jetpack will unlock Jetpacks, why would you not want a jetpack? It makes it alot easier to travel.

It also gives you more inventory slots.


Haven't done a shortcut in awhile, and this will help you alot in the future, so let's just tick it of our list.

We got rubber, plastic and packaged fuel delivered to our base. All we need is 50 motors. I know we don't have a fully automated line yet, just handcraft them.


Now unlocked, we just need 15 circuit boards, 50 rubber, 50 plastics, and 5 motors. The circuit boards i got was all found around crashsites. But you should be able to build them with plastics and copper sheets.


The jetpack is a back slot item, it will use packaged fuel from your inventory, it will NOT let you fly forever however. Your fuel will drain when you press and hold space bar, when it is empty, you will not be able to boost anymore, always save up a little fuel so you can land safetly without falling damage. Once you are on the ground, the "fuel" will start to replenish back to 100%.

A good metod of moving is to just use your boost from time to time to cover long distances.


Example flight, i used the crouch jump move to get alot of speed, and then burst boost to get as long as i could.


Notice the warning signal on the bottom left side of the screen, it will tell you when you have low fuel. Always burst before you hit the ground so you don't take any falling damage.

Good luck to ever adapt back to walking and running. :D


I also took some extra time, hunting down more crashsites, and researching more stuff in the MAM, i unlocked this "small" building in the quartz tree, the radar tower.

It used to be a bad investment as it did nothing more then remove fog of war on the map, but after update 6 it has been redesigned.


It now shows me all resource nodes in it's range and if i click on a node i can see the purity level of the node, as you can see i have barely taken 50% of the nodes in the grass fields. we can expand loads.

Up to the north we have coal near water, wonder what i will do with that. More coal generators incoming. We can never get enough power.

Make sure you have abit more power then you need, we are going to head into two more milestones and then we will be making some serious progression.

See you in the next part of the guide!
[Tier 5 & 6 - Tier 5: Industrial Manufacturing] Was steel hard for you?
Why you need it?

Industrial Manufacturing unlocks the Manufacturer. A huge building that has four intake ports to manufacture advance material. Needed for the Space Elevator and advance to the next stage in the game.

It also unlocks the Tractors bigger cousin, The Truck.


We are heading into Industrial Manufacturing, i only needed to handcraft some motors as everything else is atleast semi-automated or better.


And before not to long, we got it. In theory, we have everything we need to advance to tier 7 & 8, but we will take our time, make sure our factory is up to the task. We unlocked two new things, the truck, the last wheeled vehicle in the game, and the manufacturer, a advanced type of constructor that has 4 inputs for materials.


All the land vehicles in the game as of update 6.

  • FISCIT Cart (TM) - Unlocked in AWESOME Shop.
  • Tractor - Unlocked by Milestone.
  • Explorer - Unlocked in Quarts Research Tree, MAM.
  • Truck - Unlocked by Milestone.


I will now collect what i need to build one manufacturer, this is so that i can atleast semi-automate so i can create stuff like computers without to much hassel.


After that i will move on to expanded power infrastructure. We will get even faster conveyors that can handle more materials PPM. But also the fuel generator, a new power plant option that will give us 150 MW per plant.

Between the wait for the new milestone i will start draging out foundations all the way to the new oil node so that we can clean up our oil node and make a massive oil plant that also creates alot of power for us!

We got a plan, so let's do this.


When expanding outwards and pulling foundations to our oil node, if i come across any other nodes, such as this iron node, i should connect the foundation to this node too. That way we will save time in the future by not having to connect it then.


Like so. and don't forget to...


Clean up after ourself.


The Jetpack helps alot, and i can finally see our oil node and production in the distance. Let's go!


There's just some kind of wierd satisfaction i'm getting when i put stuff on solid, grid-based foundations. I can't explain it. Feels so, so, so good.

Now i won't clean this zone just yet. I just set it up, i will focus on the manufacturer first, and then the milestone, and then we'll get back to this zone and transform it into something awesome.


The massive manufacturer is up and ready to do our bidding.


And we are on our way to the next milestone!

I will see you in the next part of the guide!
[Tier 5 & 6 - Tier 6: Expanded Power Infrastructure] Yes!
Why you need it?

Expanded Power Infrastructure lets you convert all that oil into sweet, sweet power. Unlocks the Fuel Generator.


You know what, i always trust that you could make it this far. Great job, Pioneer!


Some early game oil power, this simple design gives 300 MW.
[Tier 5 & 6 - Tier 5: Gas Mask] Poison gas, Be gone.
Why you need it?

Gas Mask unlocks the gas mask, a item used to neglect all damage from poison clouds.

It also gives you more inventory slots.

This will be a fast one.


You should have no problem unlocking this milestone, the items needed are super easy to get.


Just craft the gas mask in the equipment workshop and some filters and you are good to go! You should no longer take damage in green poison gas.

See you in the next part!
[Tier 5 & 6 - Tier 6: Monorail Train Technology] Cho-Choo!
Why you need it?

Monorail Train Technology unlocks Trains, that can be used to transport both cargo and fluids over long distances. Cho-Choo!
[Tier 5 & 6 - Tier 6: Pipeline Engineering Mk.2] More Pressure!
Why you need it?

Pipeline Engineering Mk.2 Unlocks Pipelines Mk.2 that can handle twice as much fluid.
[Tier 7 & 8 - Tier 7: Bauxite Refinement] Aluminum... nium?
Work in Progress.
[Tier 7 & 8 - Tier 7: Logistics Mk.5] Zoom Zoom!
Work in Progress.
[Tier 7 & 8 - Tier 7: Aeronautical Engineering] Drones!
Work in Progress.
[Tier 7 & 8 - Tier 7: Hazmat Suit] For all your radioactive needs.
Work in Progress.
[Tier 7 & 8 - Tier 7: Hover Pack] Roads? We don't need em'.
Work in Progress.
[Tier 7 & 8 - Tier 8: Nuclear Power] Moar Powah!
Work in Progress
[Tier 7 & 8 - Tier 8: Advanced Aluminum Production] Al-13
Work in Progress.
[Tier 7 & 8 - Tier 8: Leading-Edge Production] Mine, Mine, Mine.
Work in Progress.
[Tier 7 & 8 - Tier 8: Particle Enrichment] Next Level Stuff.
Work in Progress.
Komentarzy: 16
lucie-heath 31 stycznia o 7:11 
will this ever be completed ?
Doc✪Hollywood 7 maja 2024 o 4:24 
P.S.
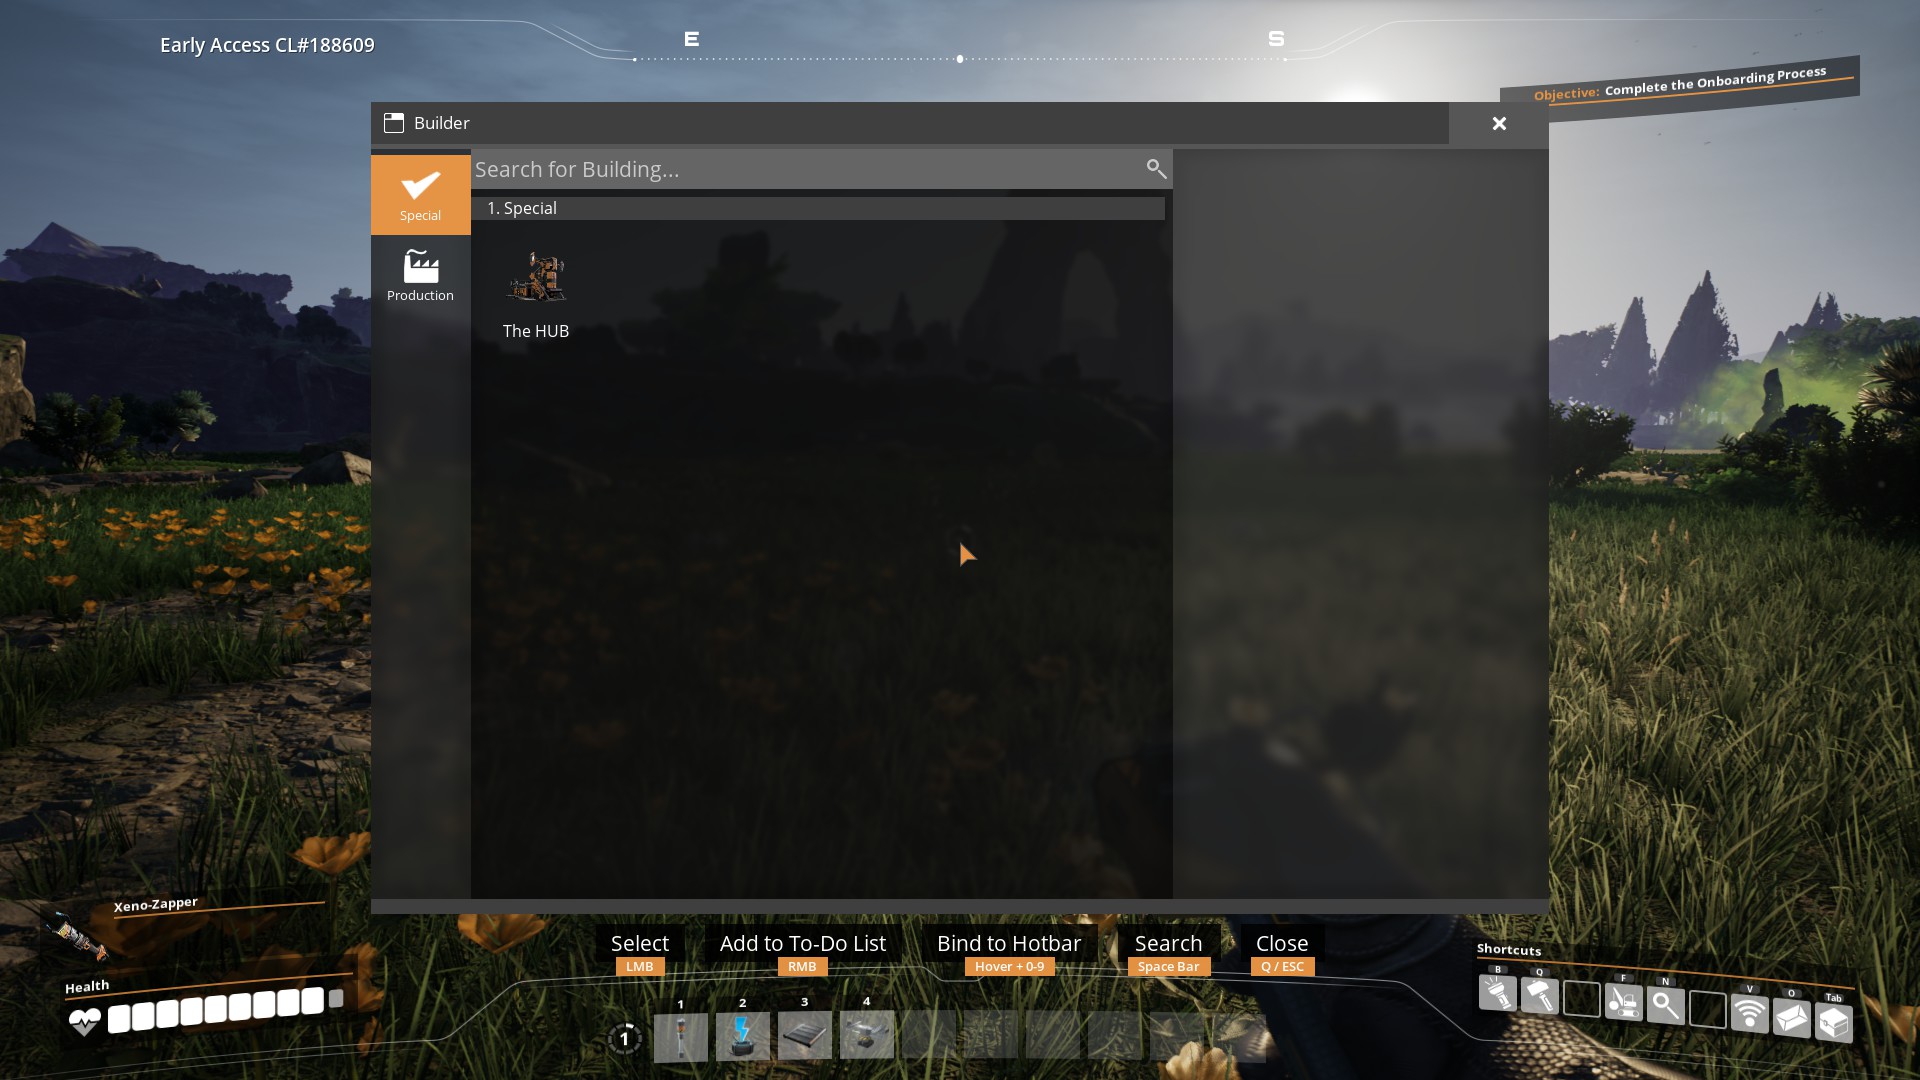
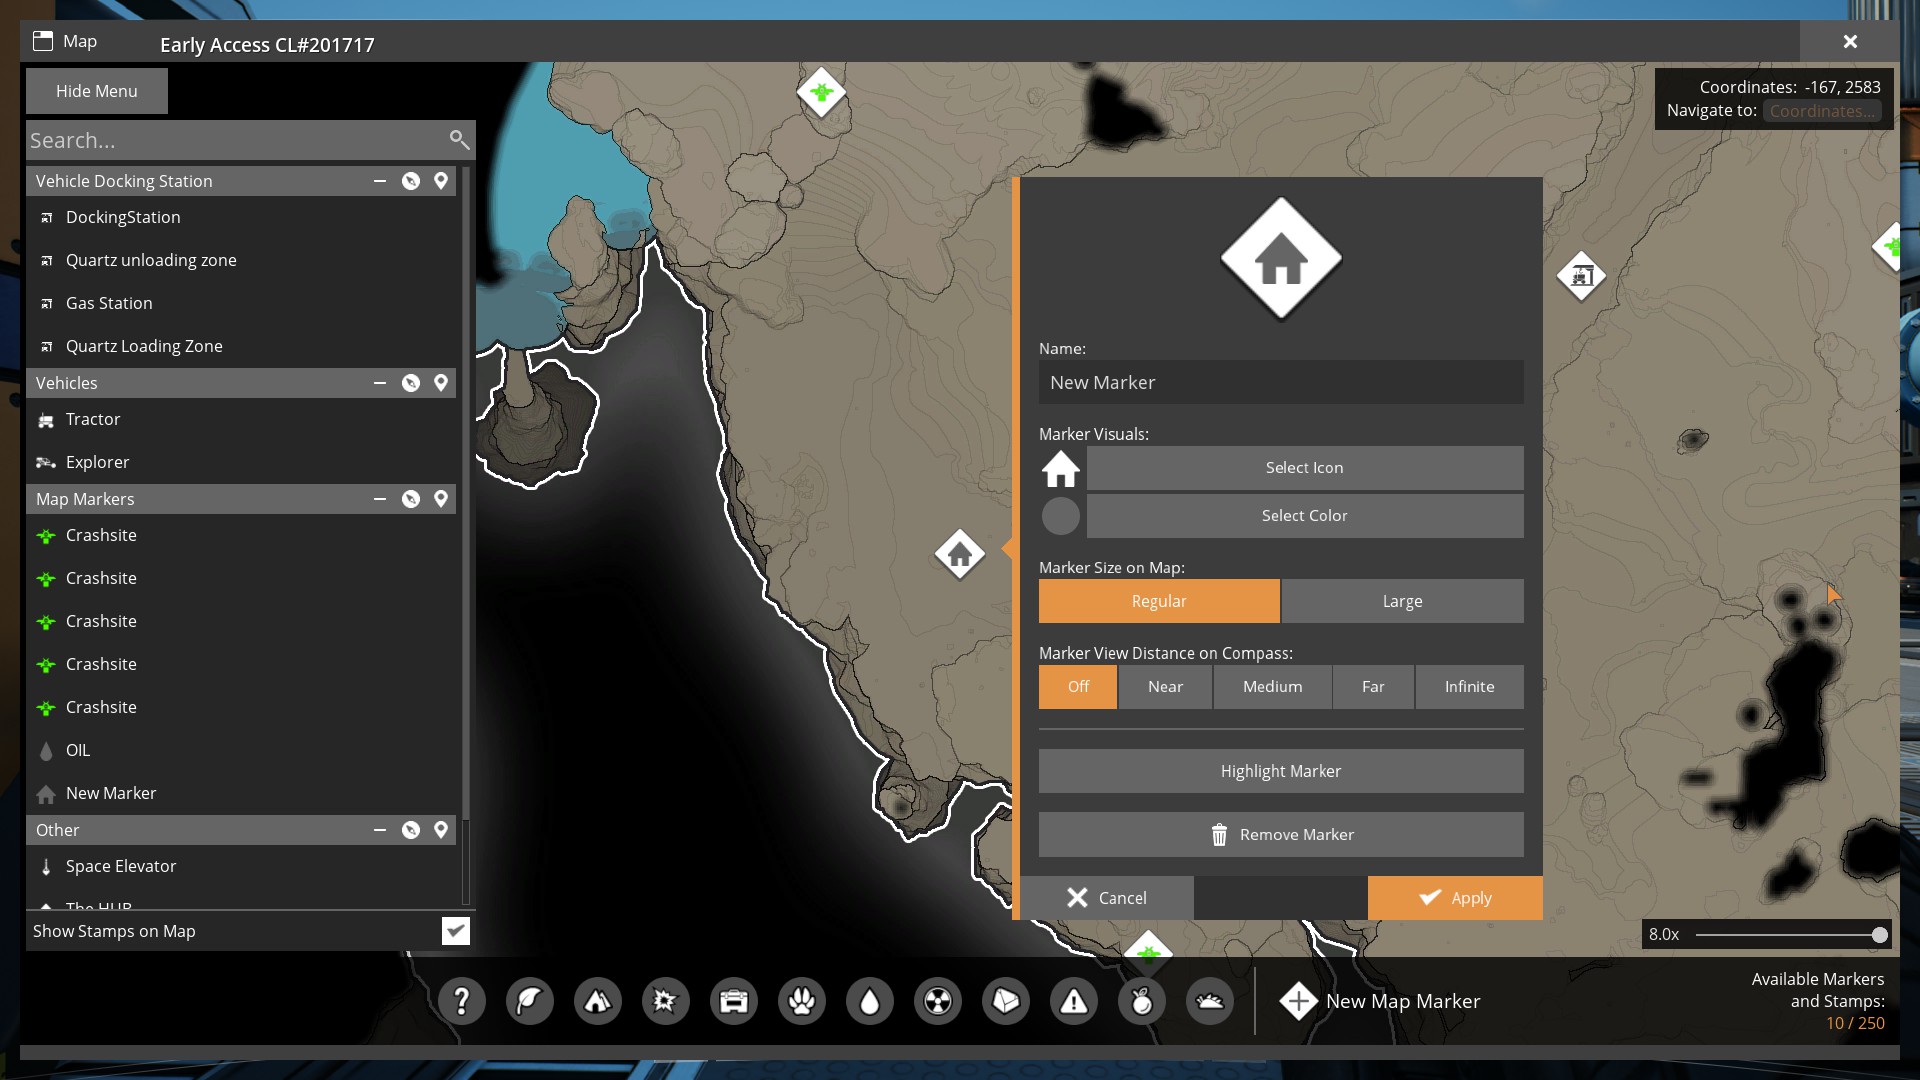
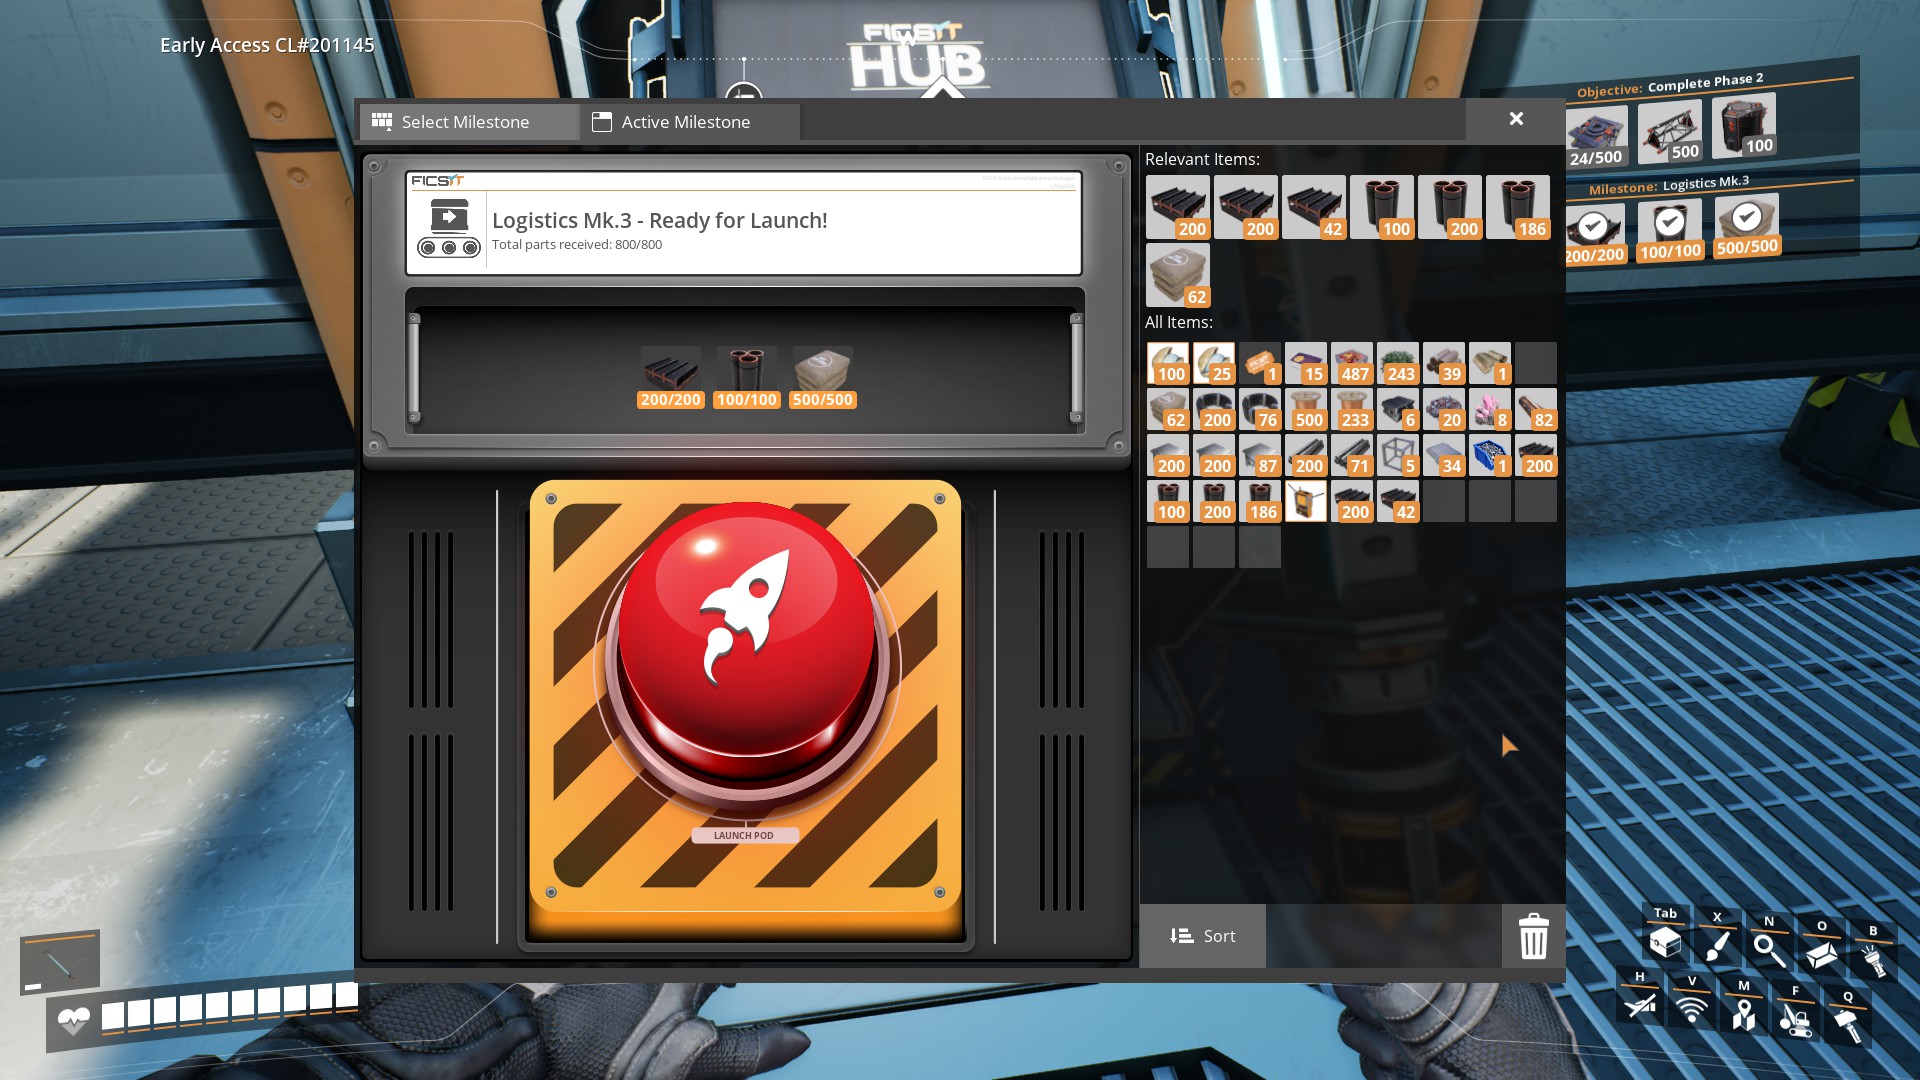
The same in Edge. The menu can not get closed.

https://gyazo.com/3be6a828addd8a9f056bbe8d1814df82
Doc✪Hollywood 7 maja 2024 o 4:22 
Hi. I just saw your guid but can NOT read it.
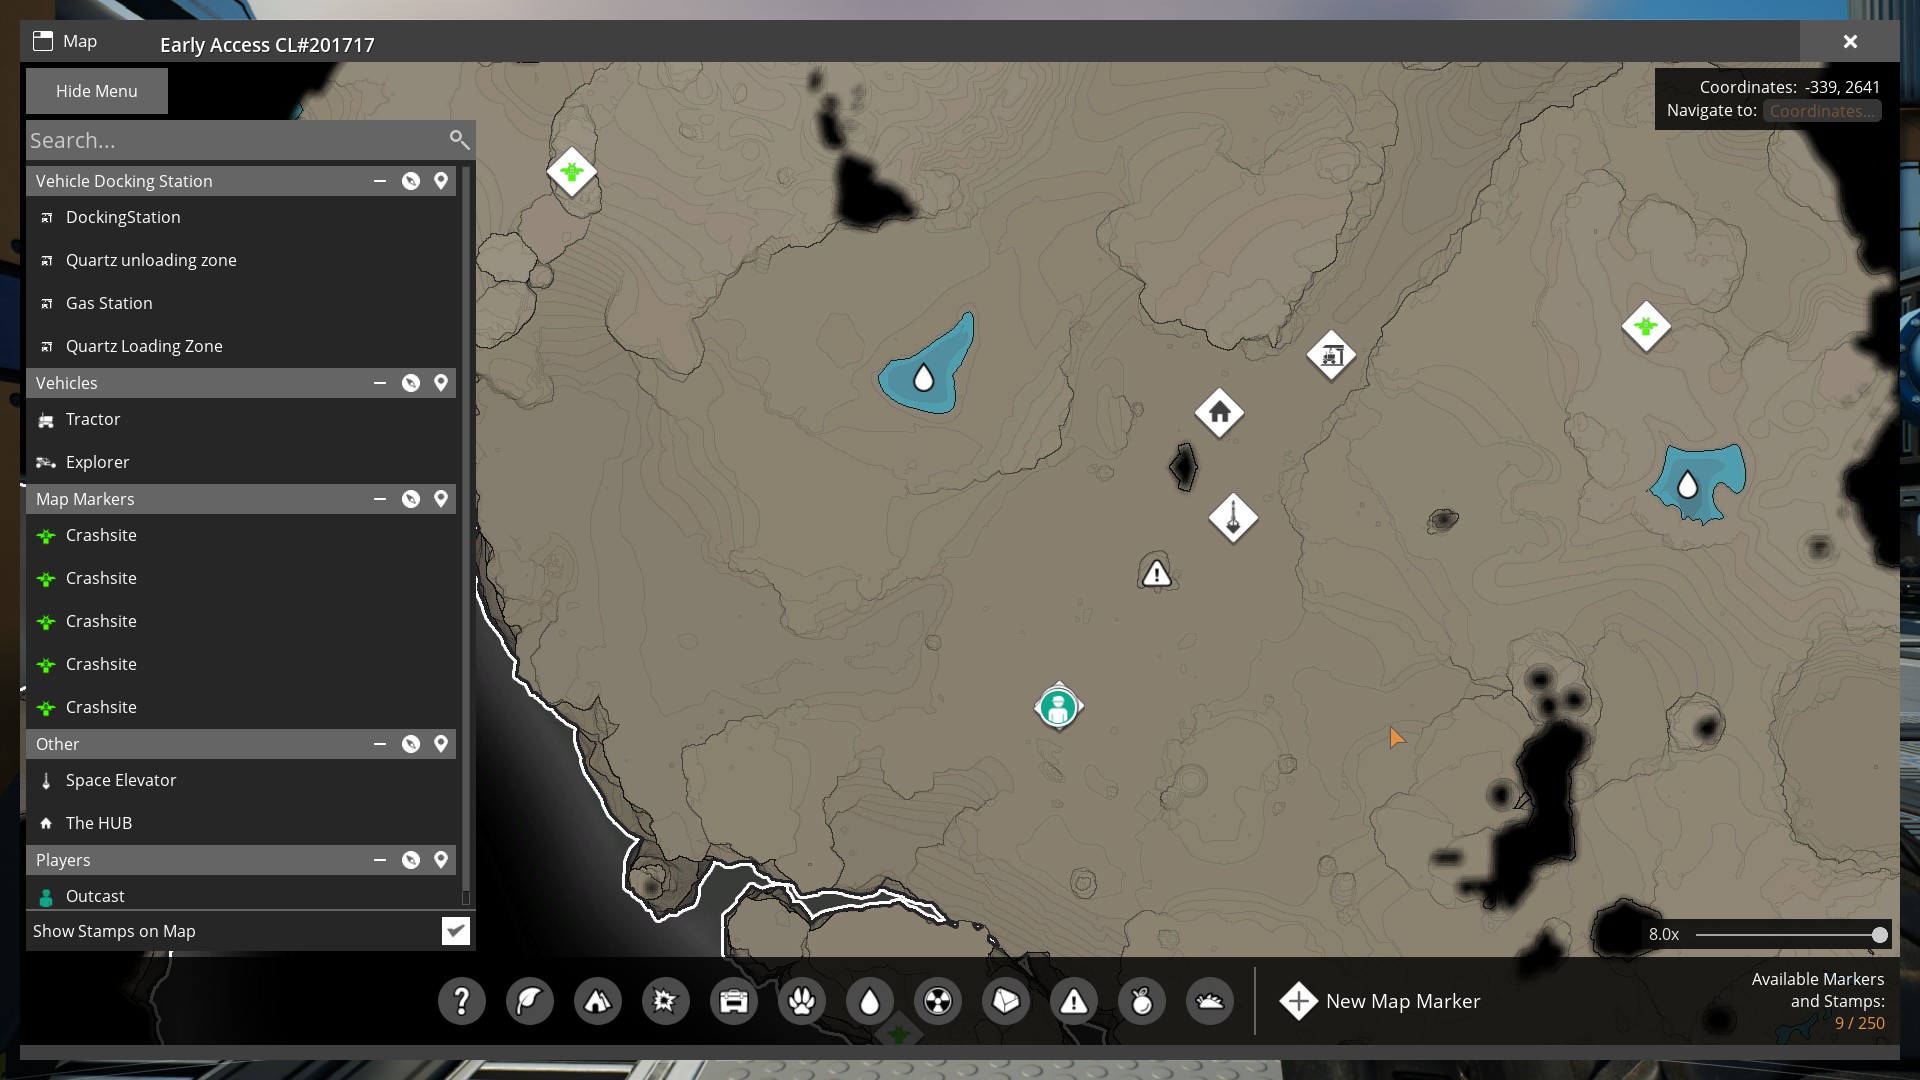
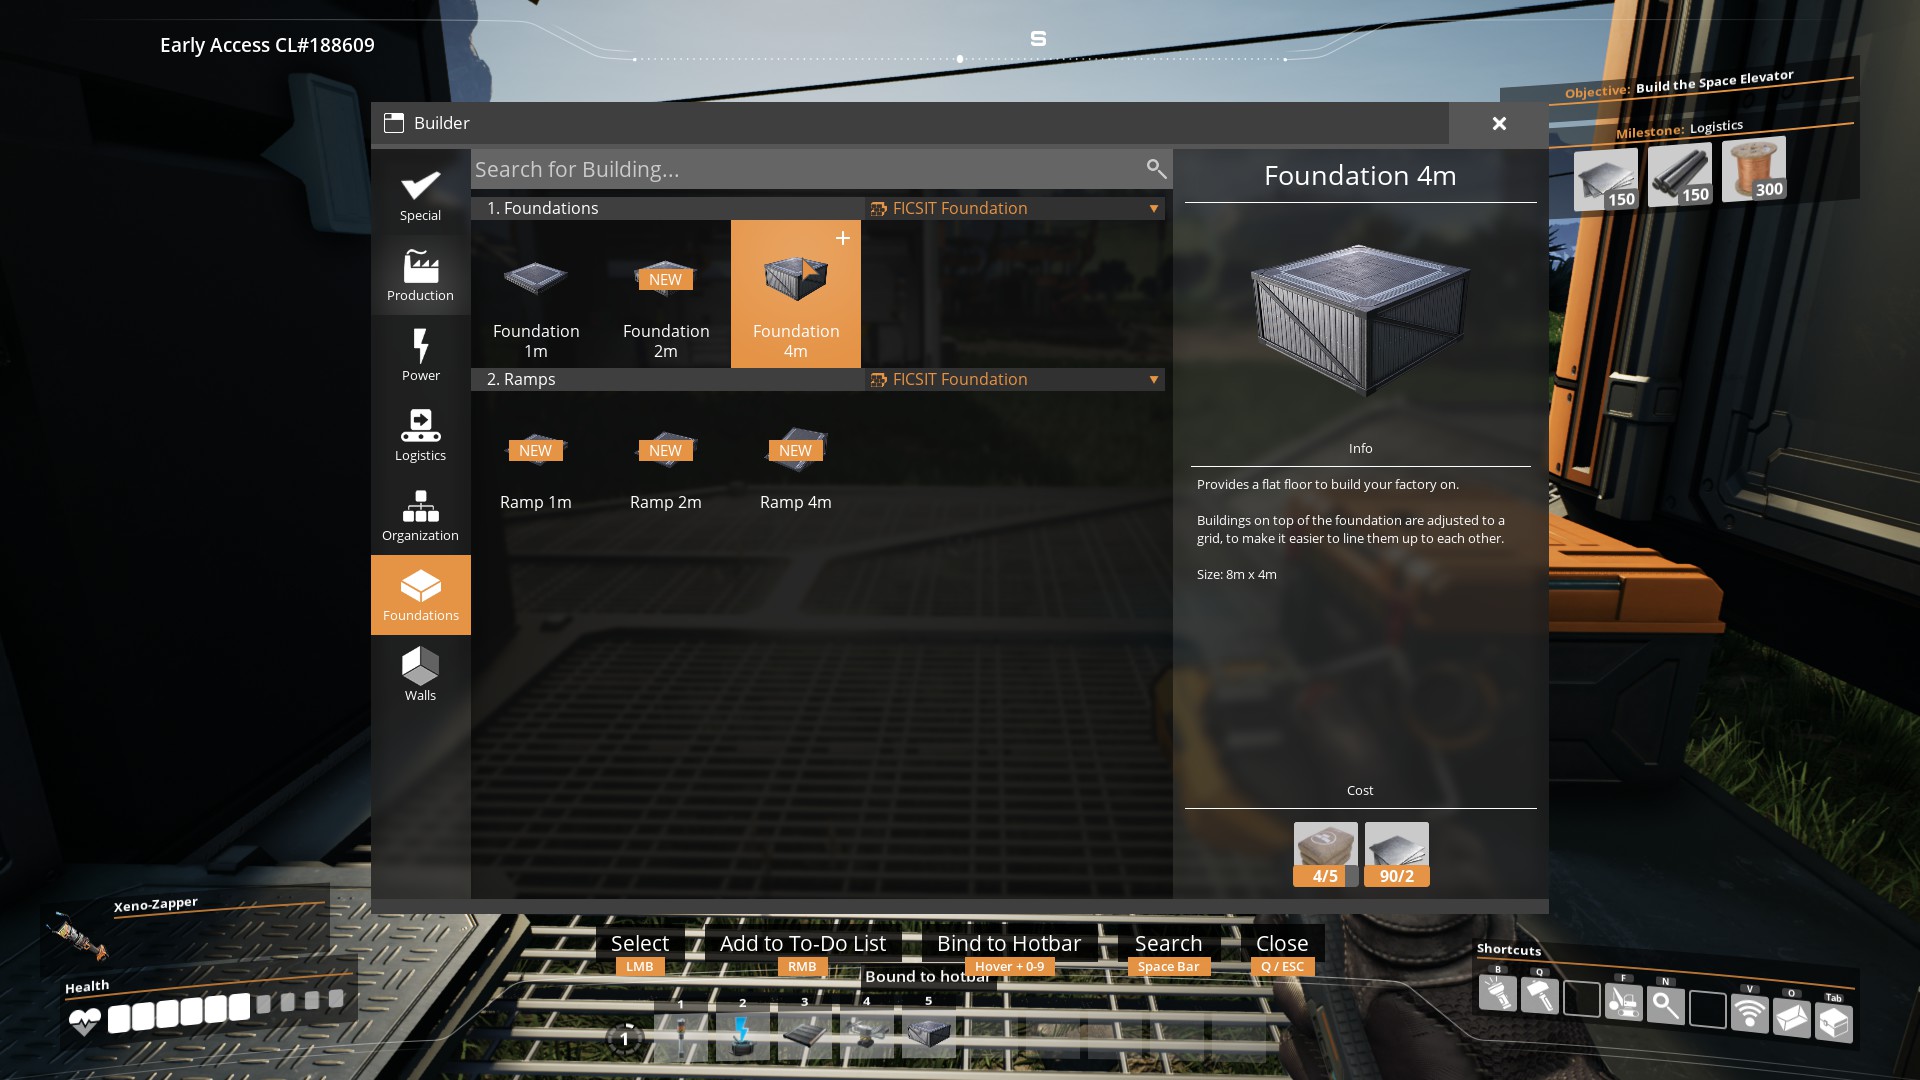
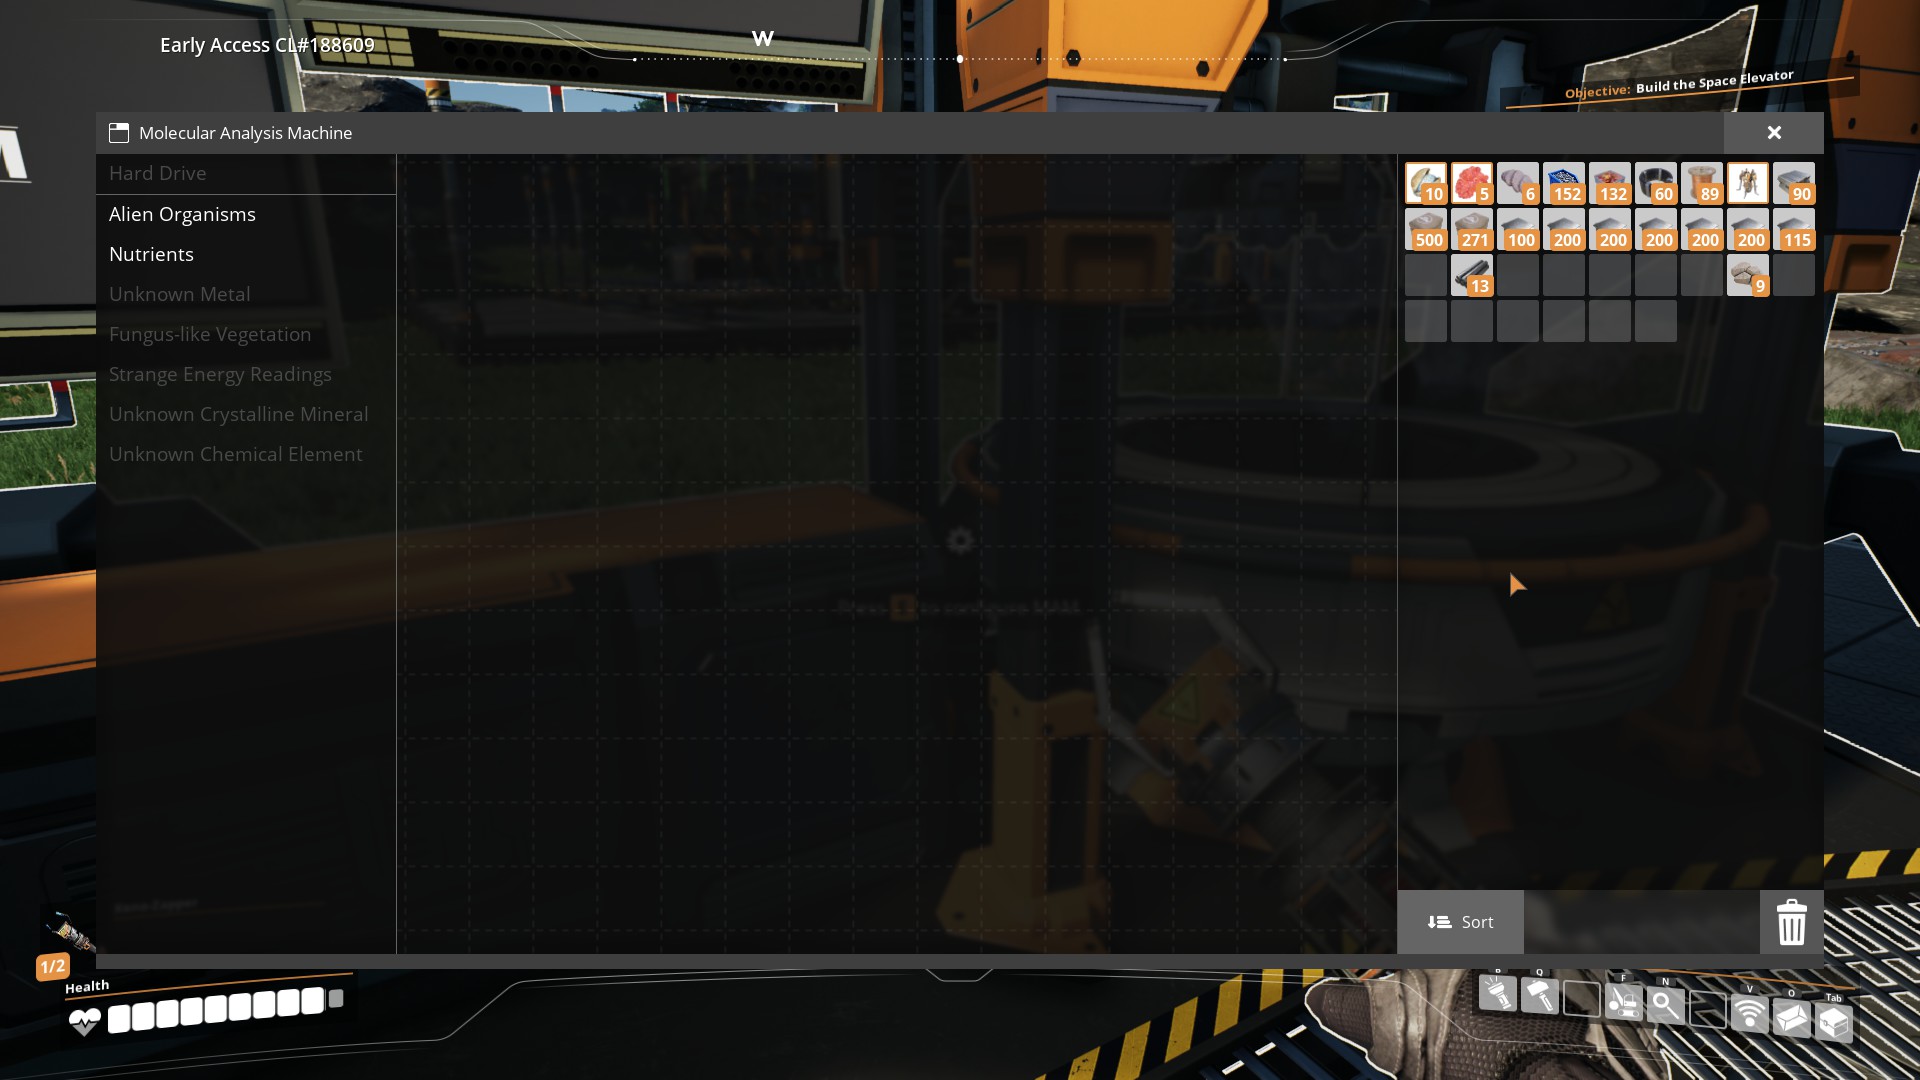
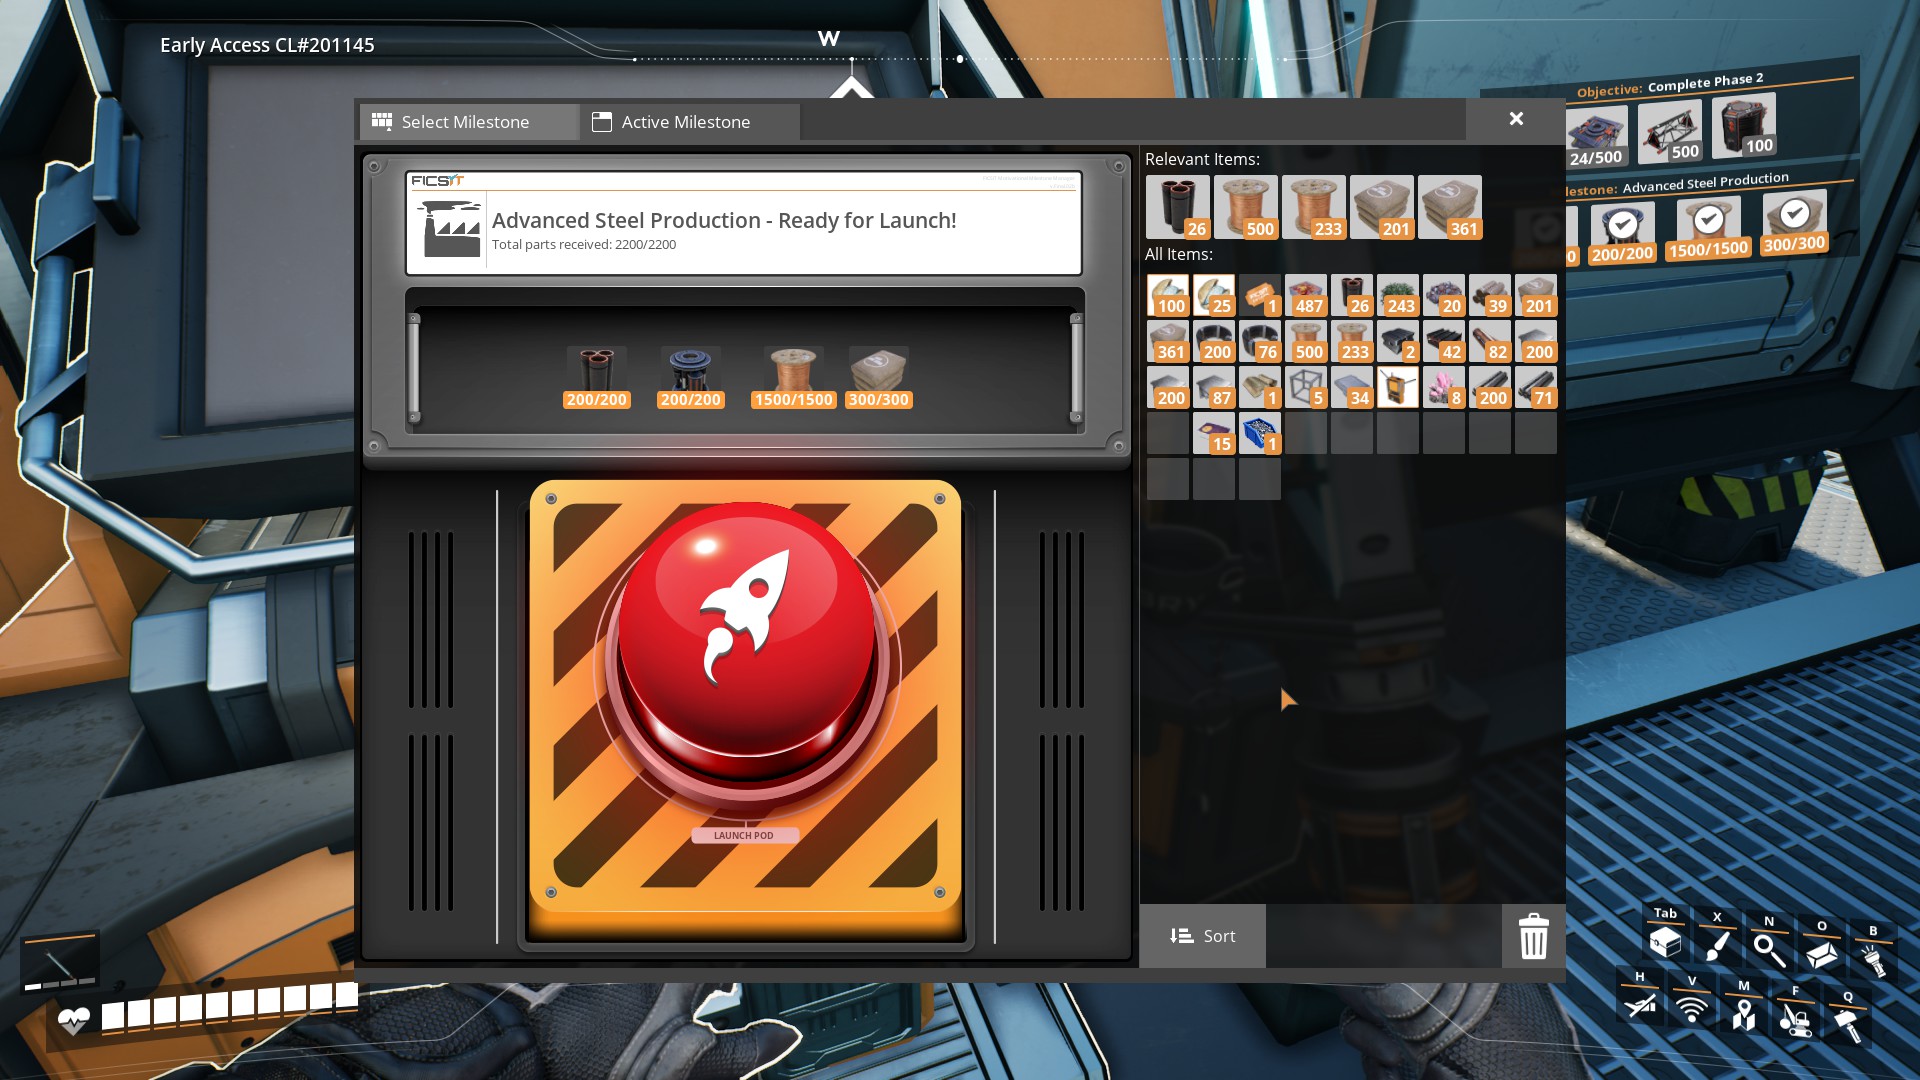
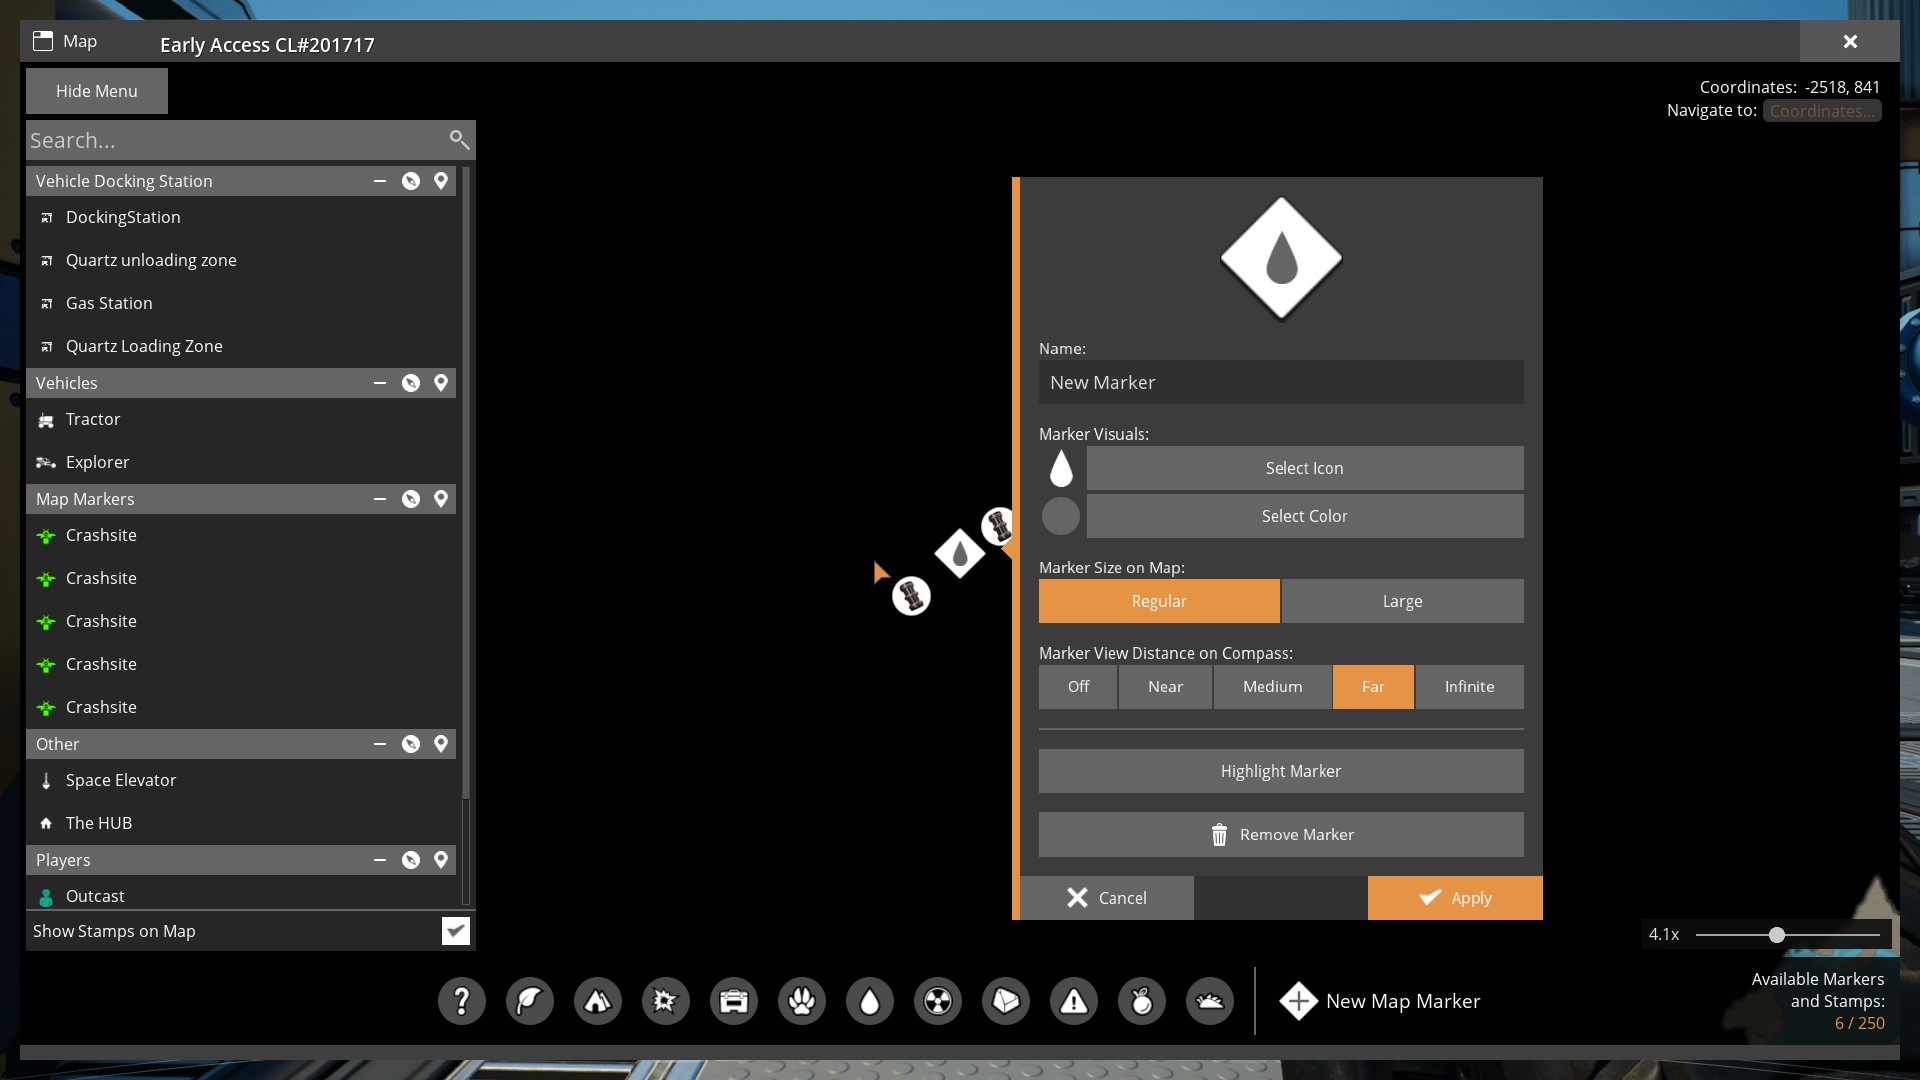
This is how I see your guide, how it looks in Steam browser AND in Firefox:
https://gyazo.com/c046ea7a81e58c0f4c45c055ba6e4925

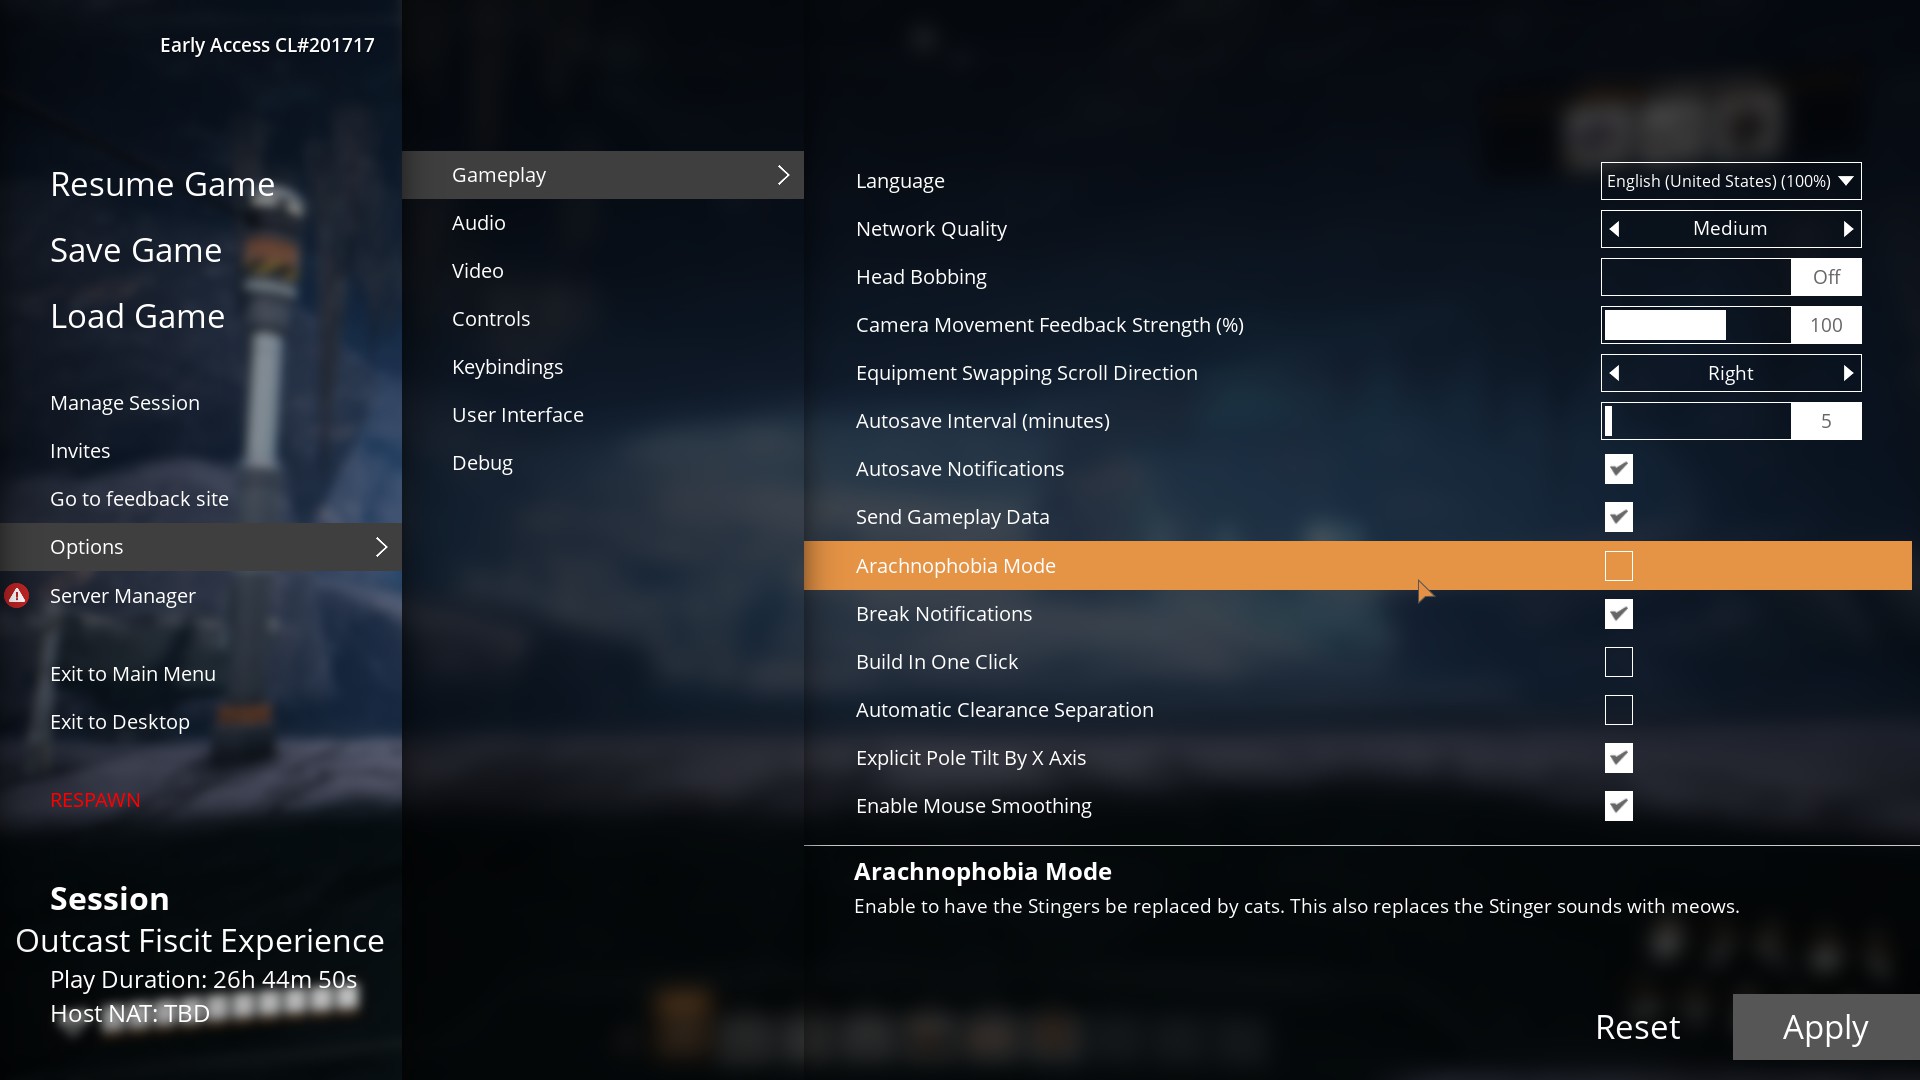
As you see the pulldown menu is all the time open and overlaps with the guide-text :steamsad:
Z3Tor_ 4 maja 2024 o 12:03 
do u have youtube channel?
Hawkeye 22 grudnia 2022 o 5:19 
Hey Outcast,

great work on this guide. :steamthumbsup:

I think theres something to rewrite.

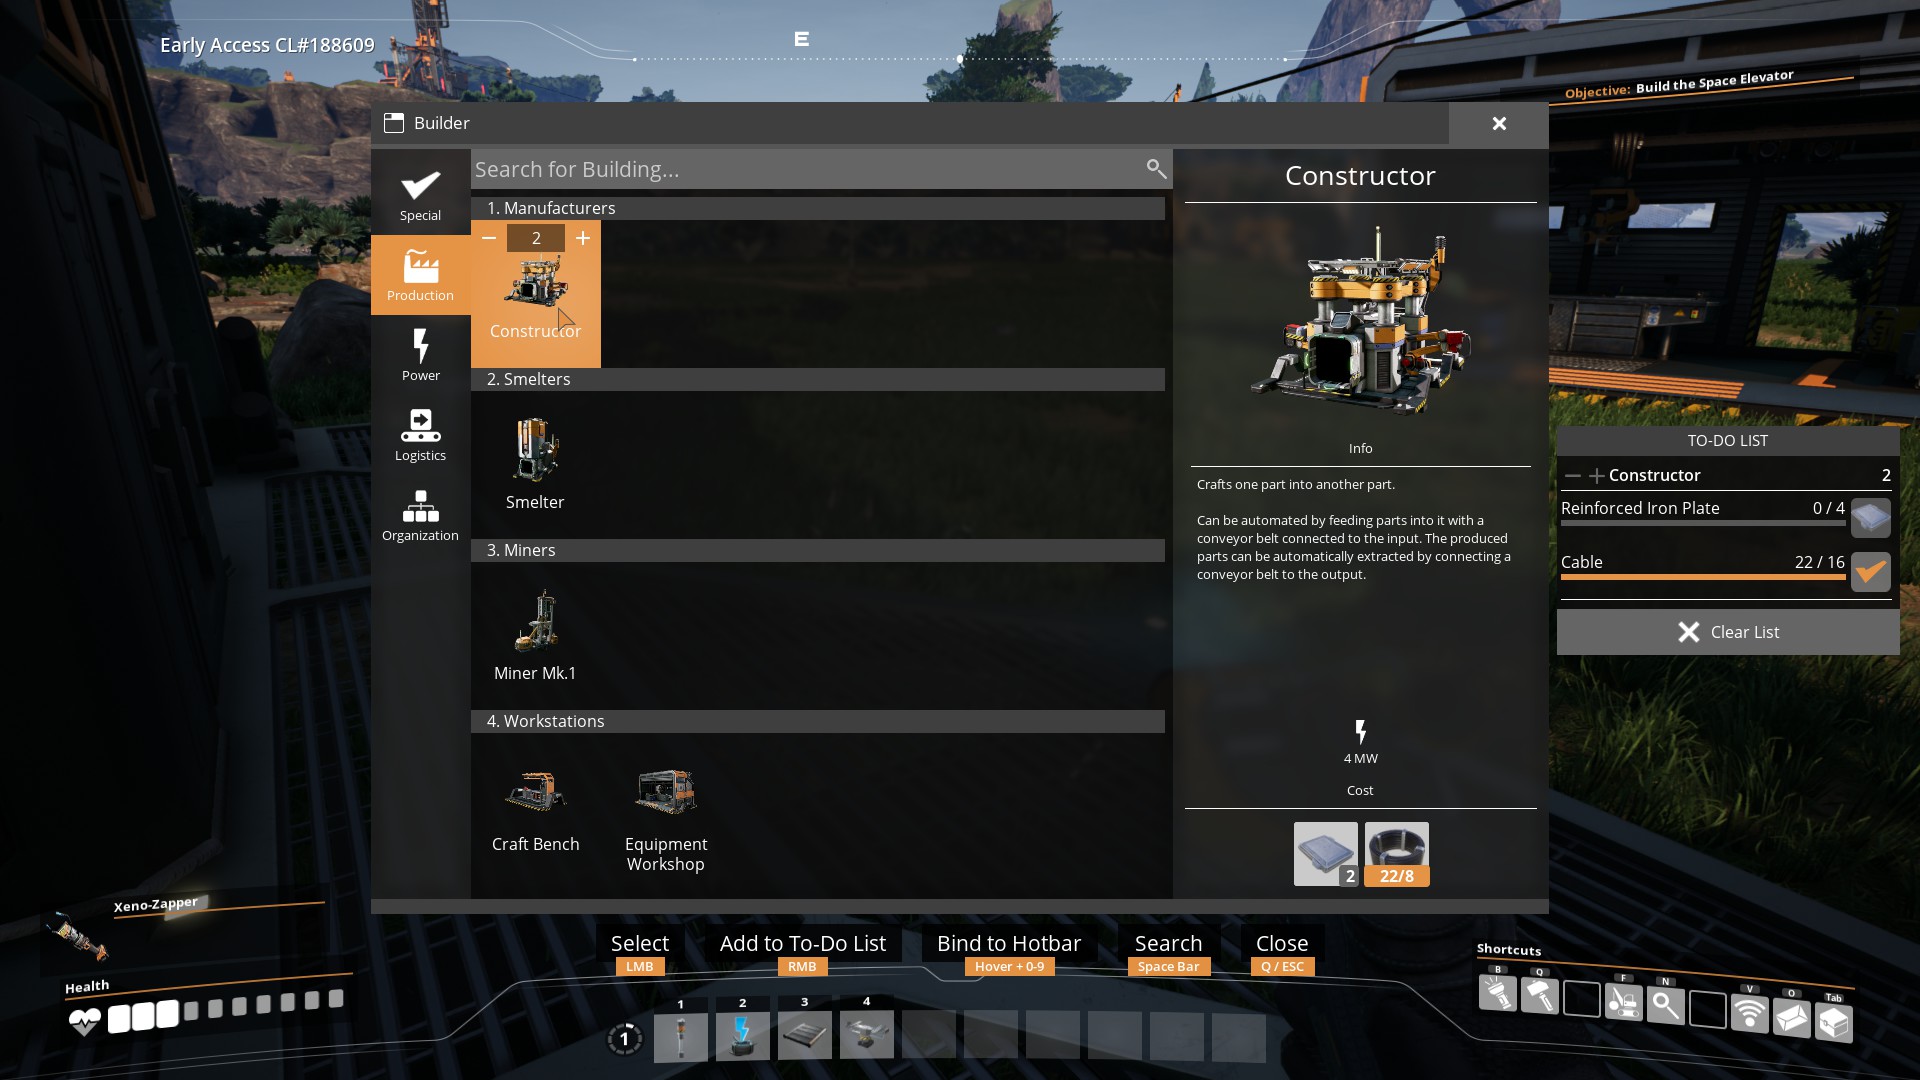
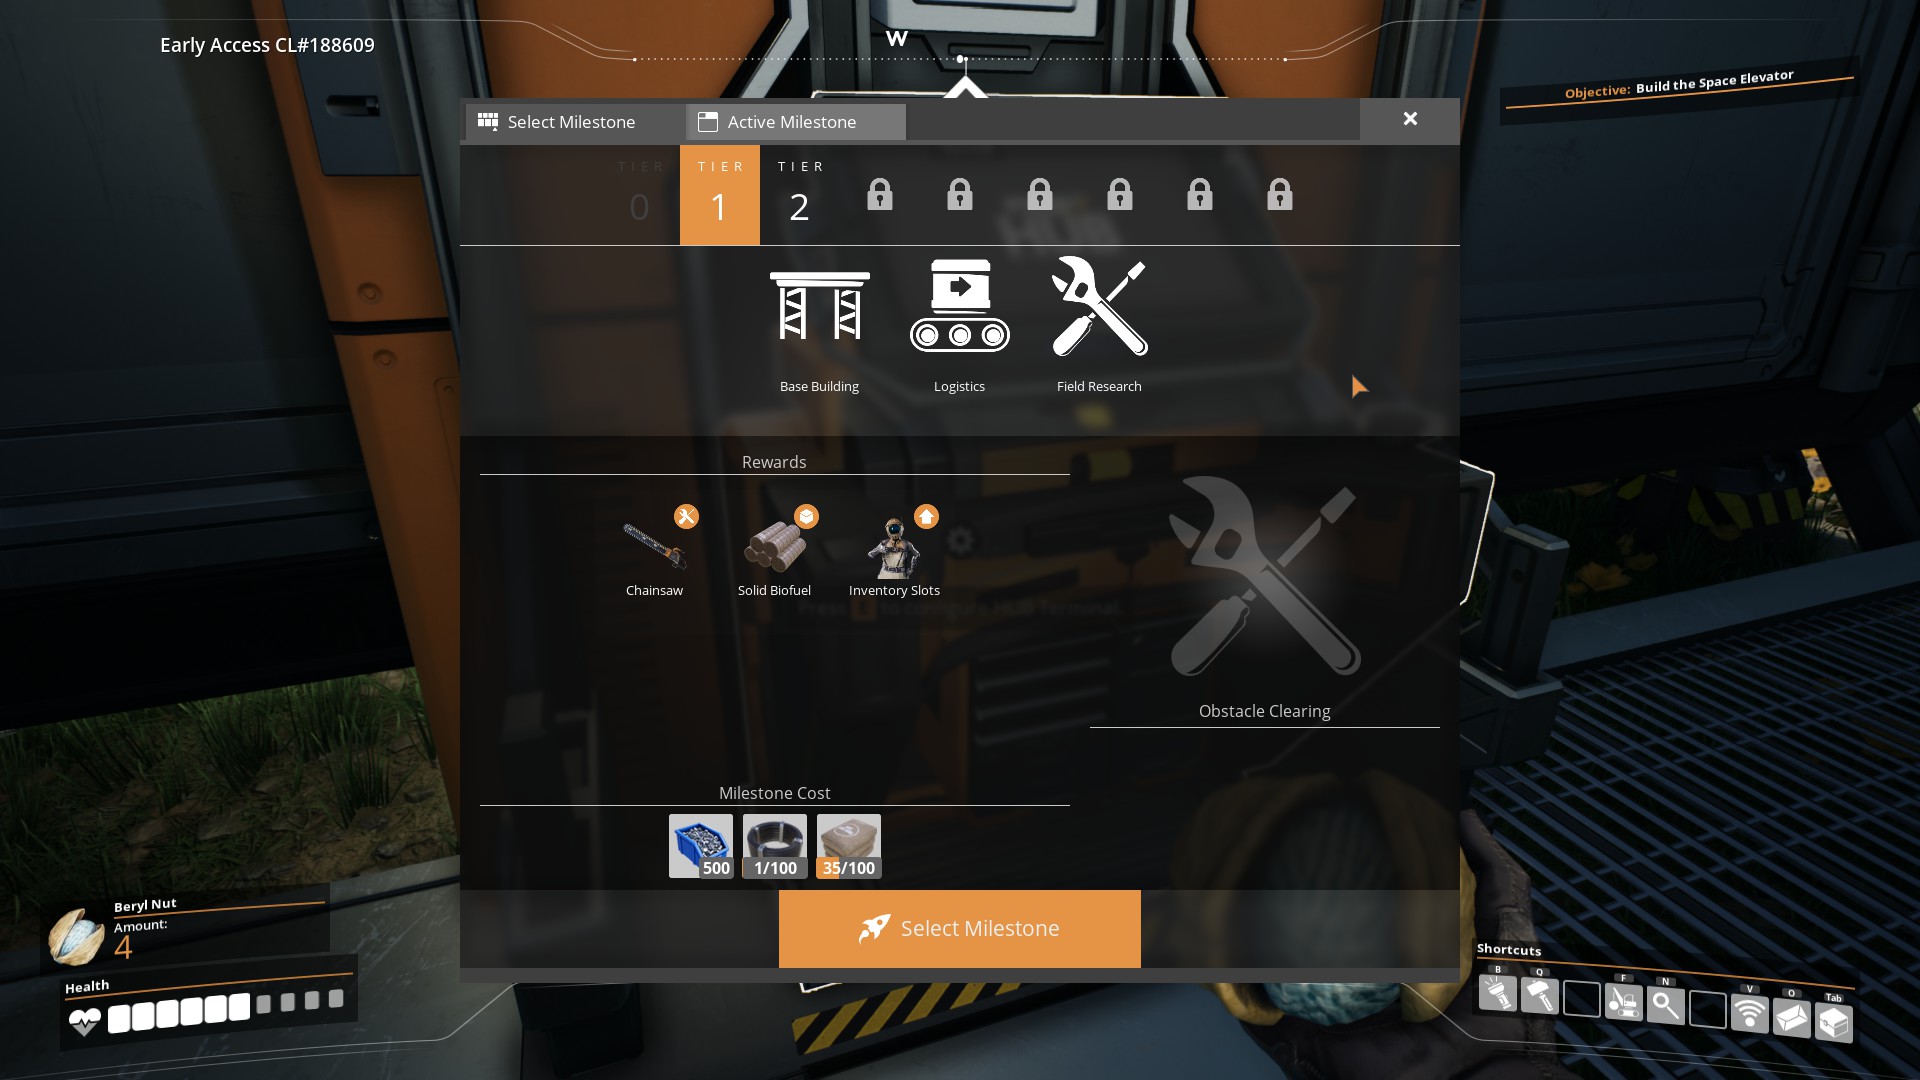
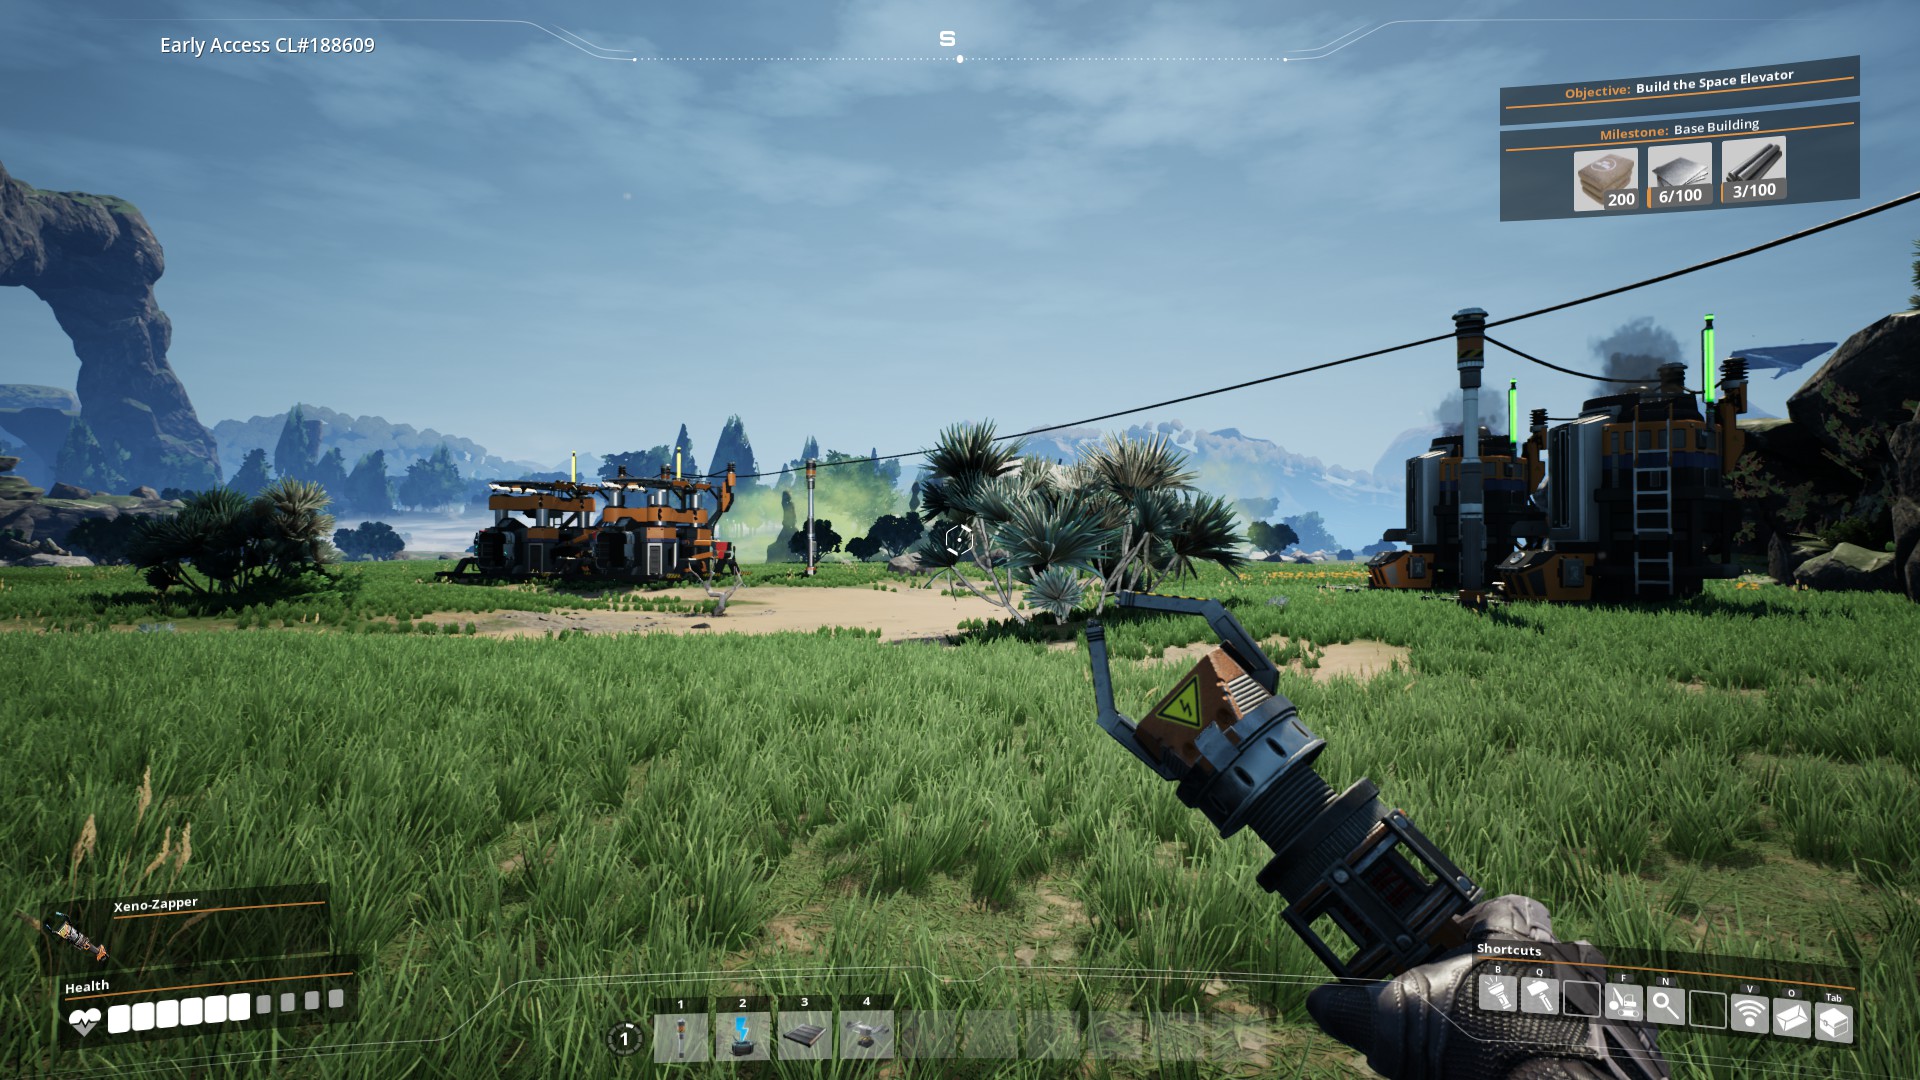
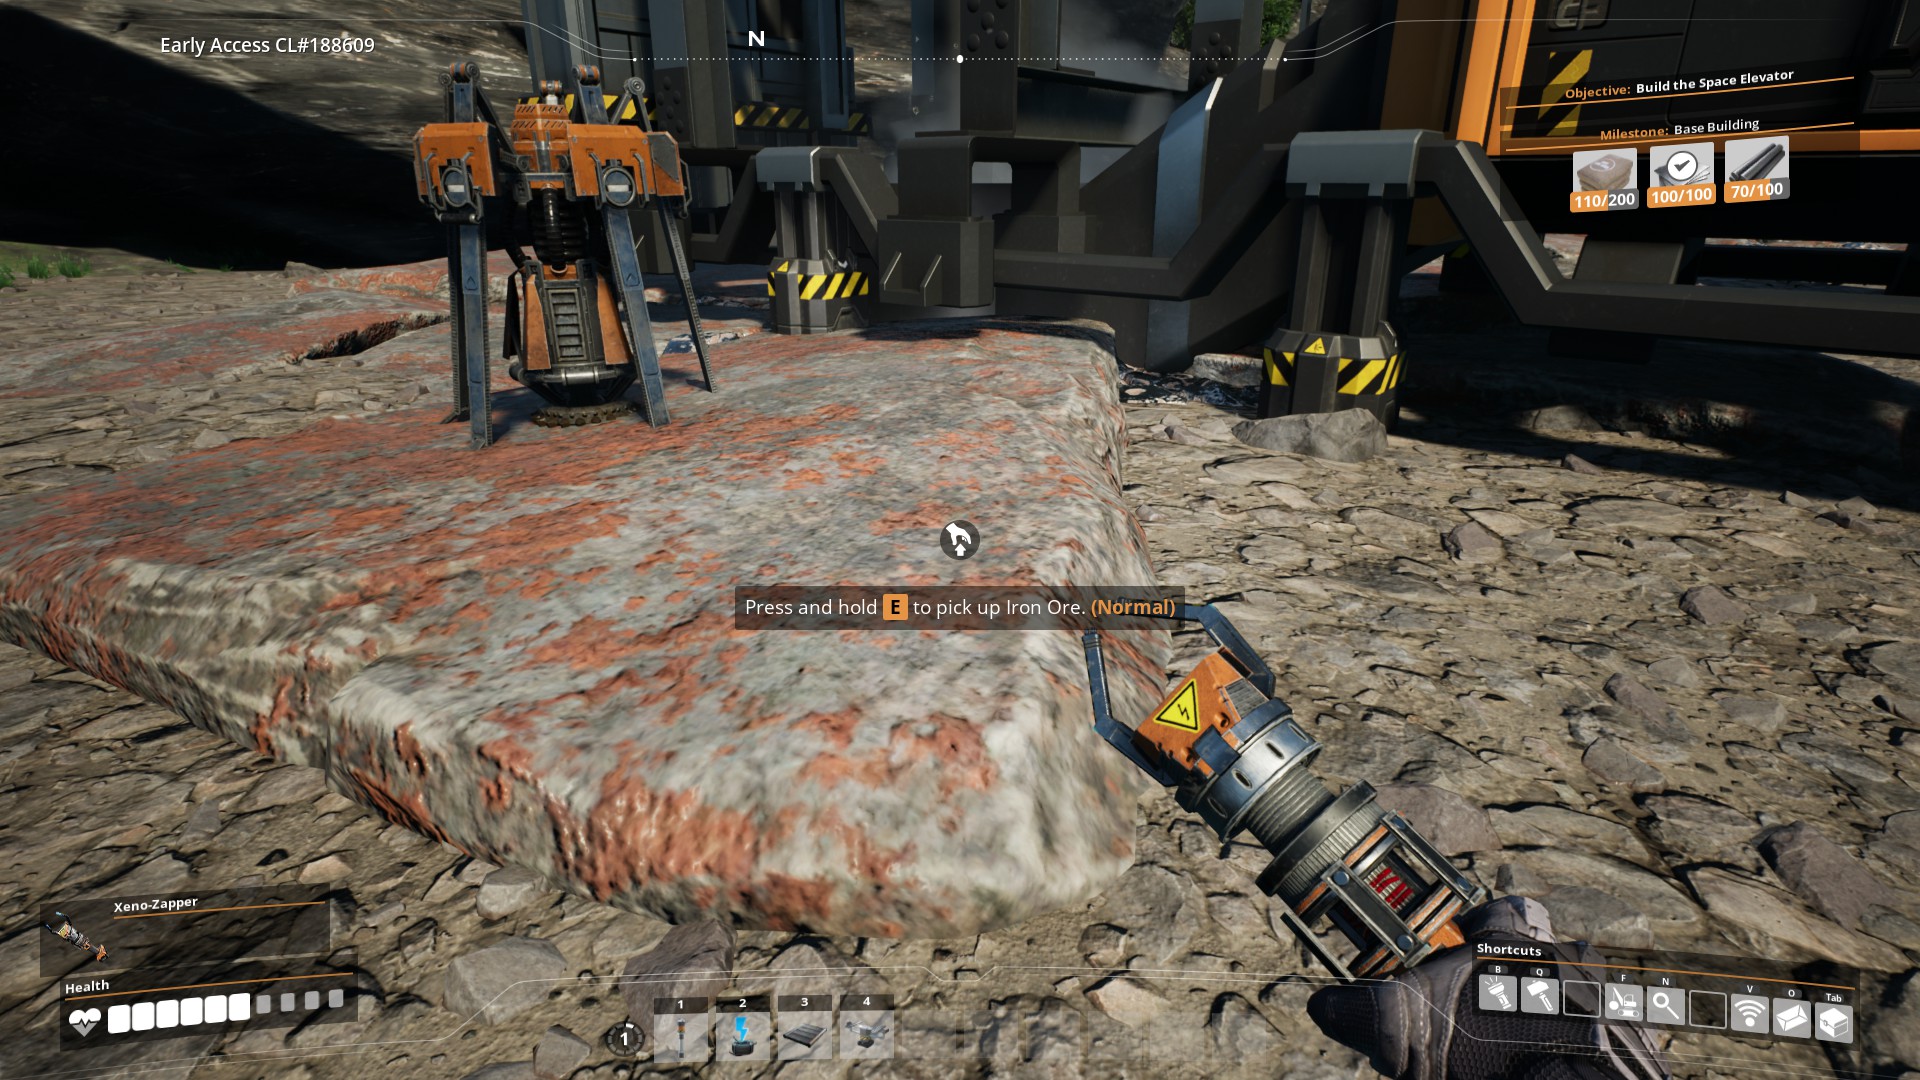
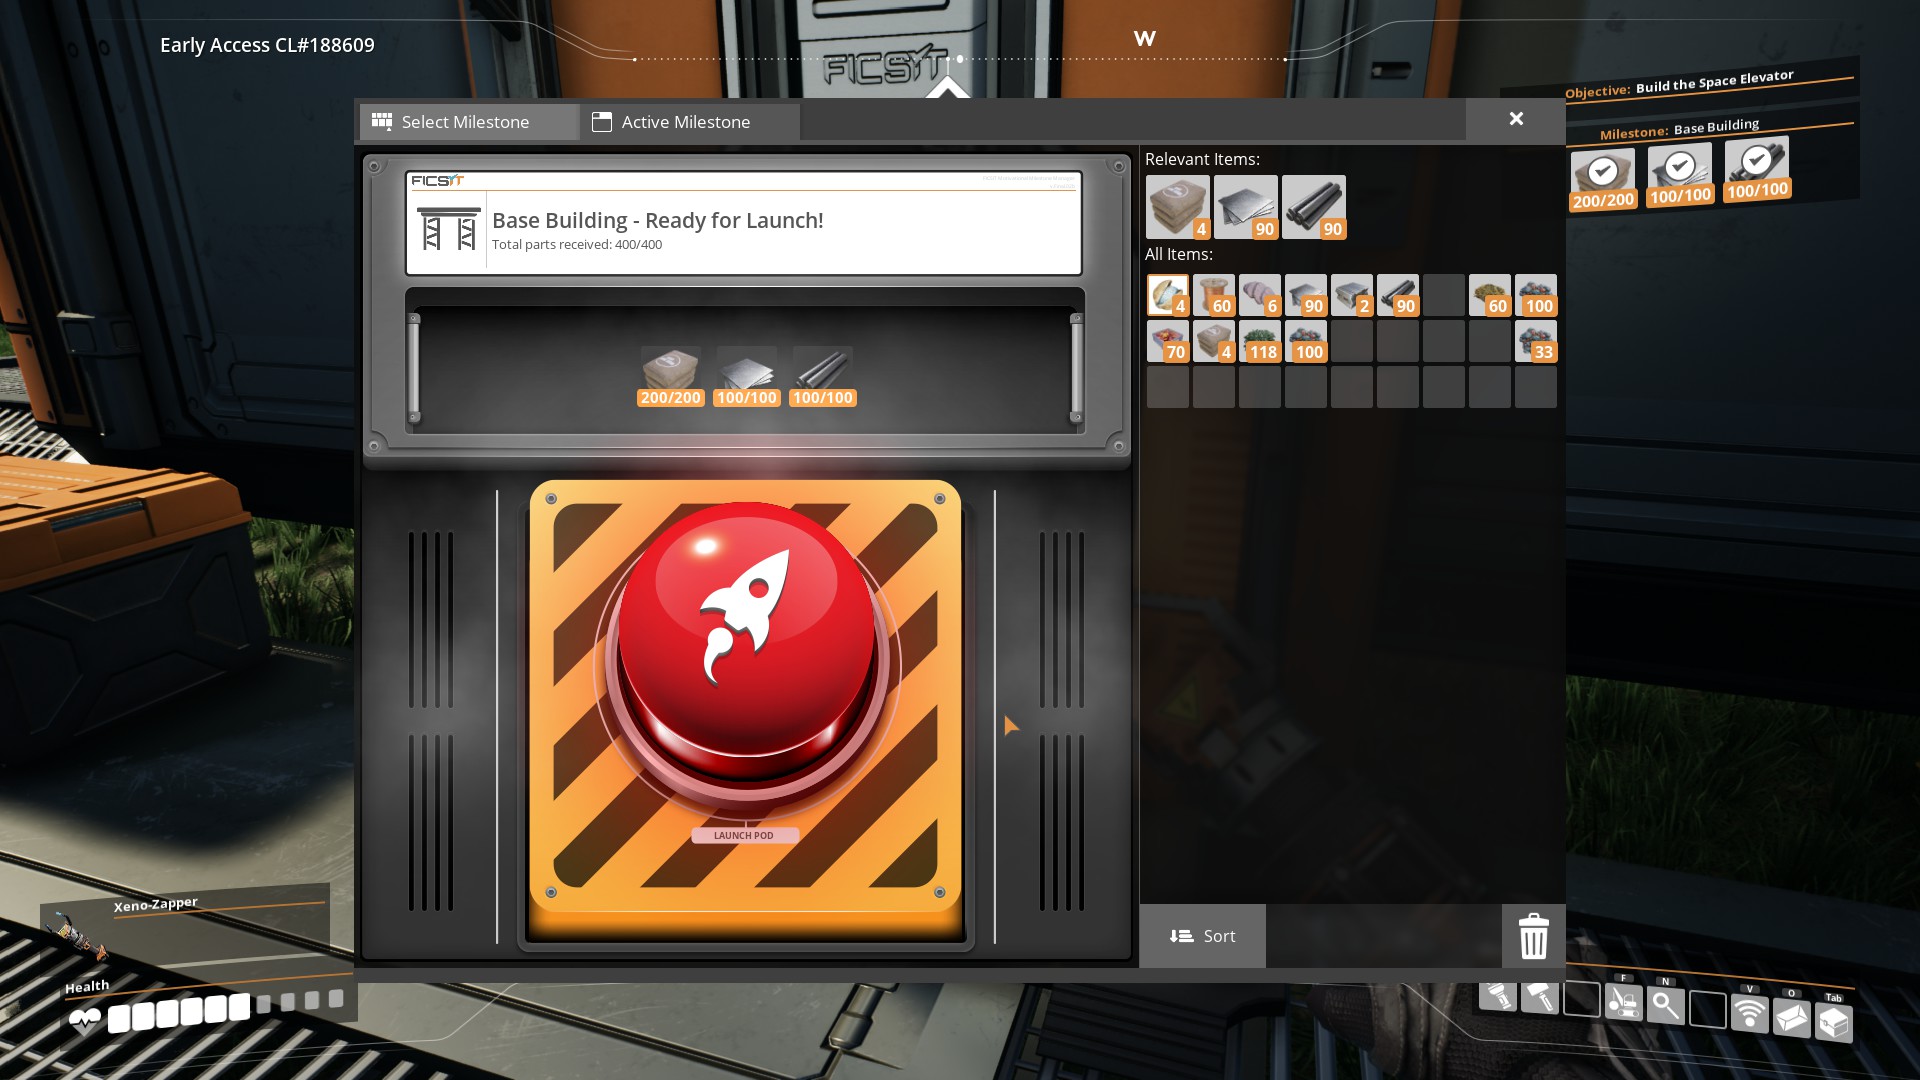
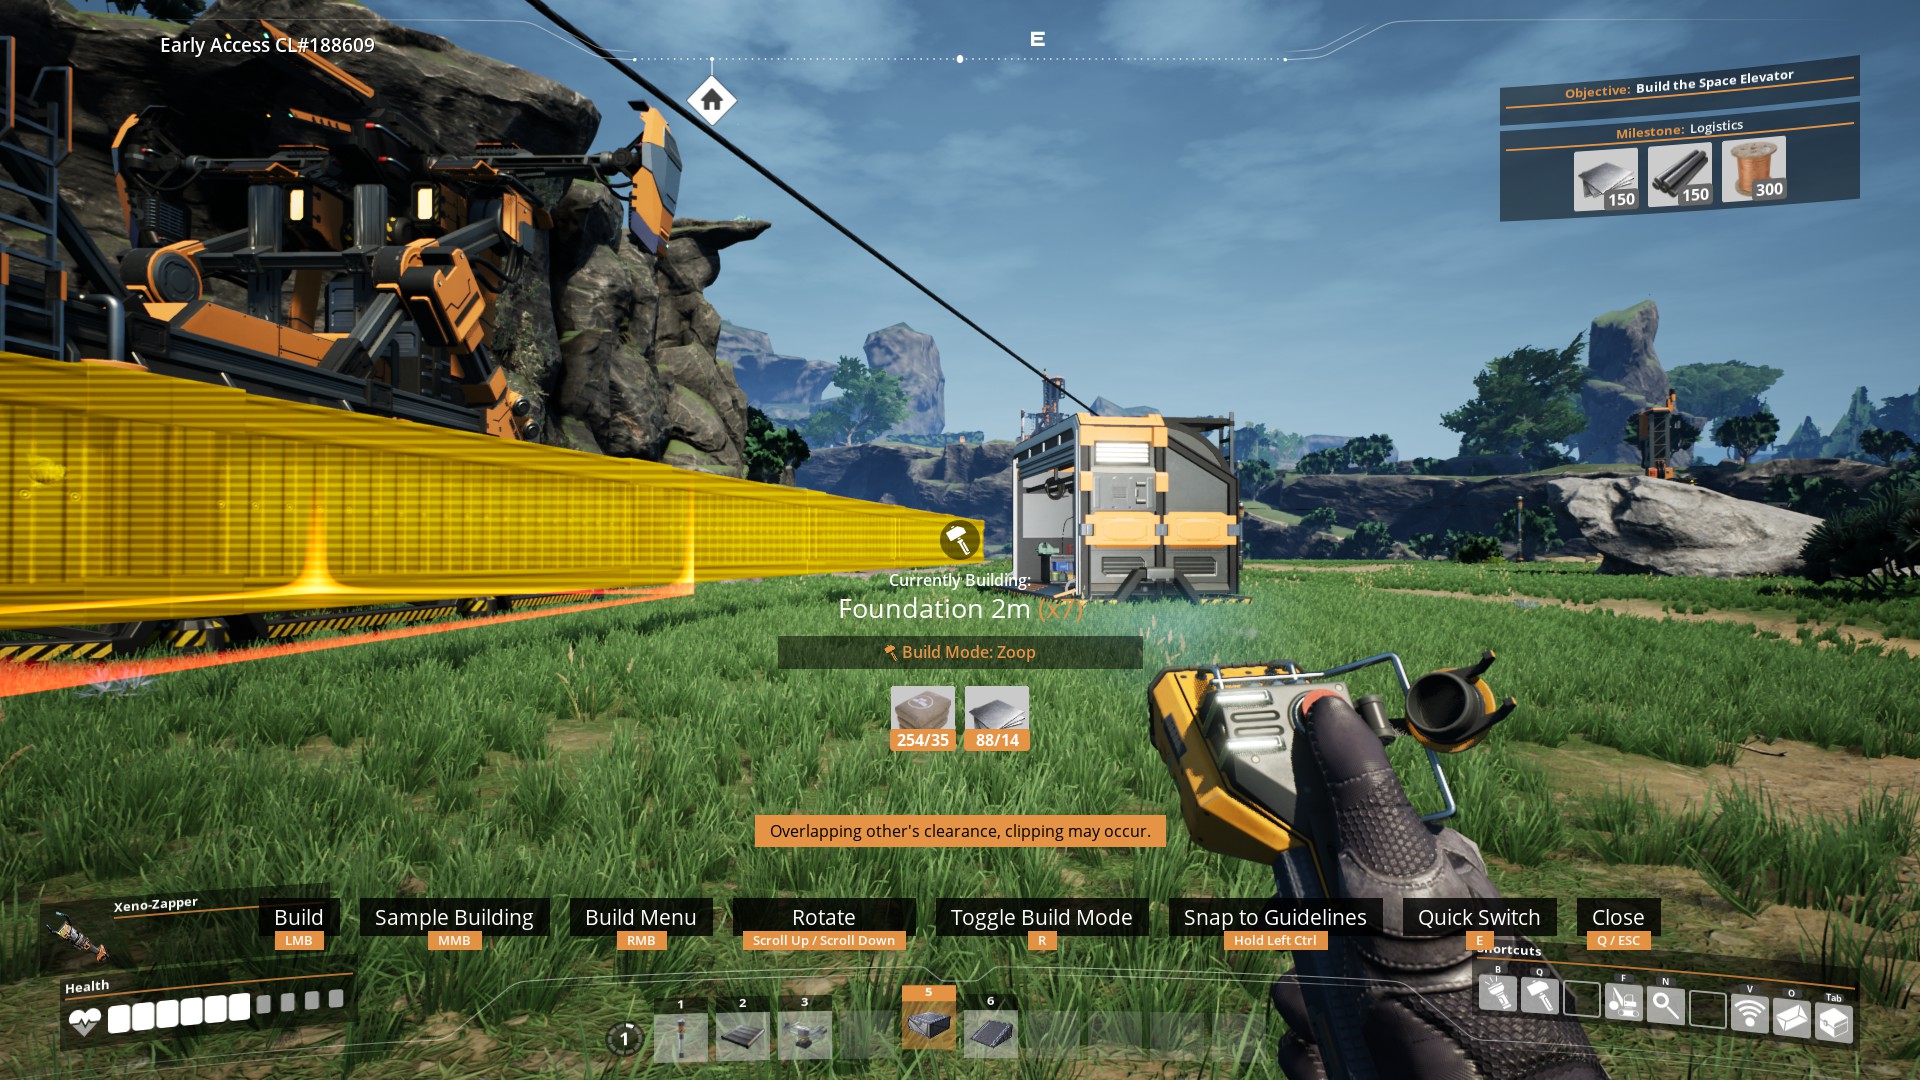
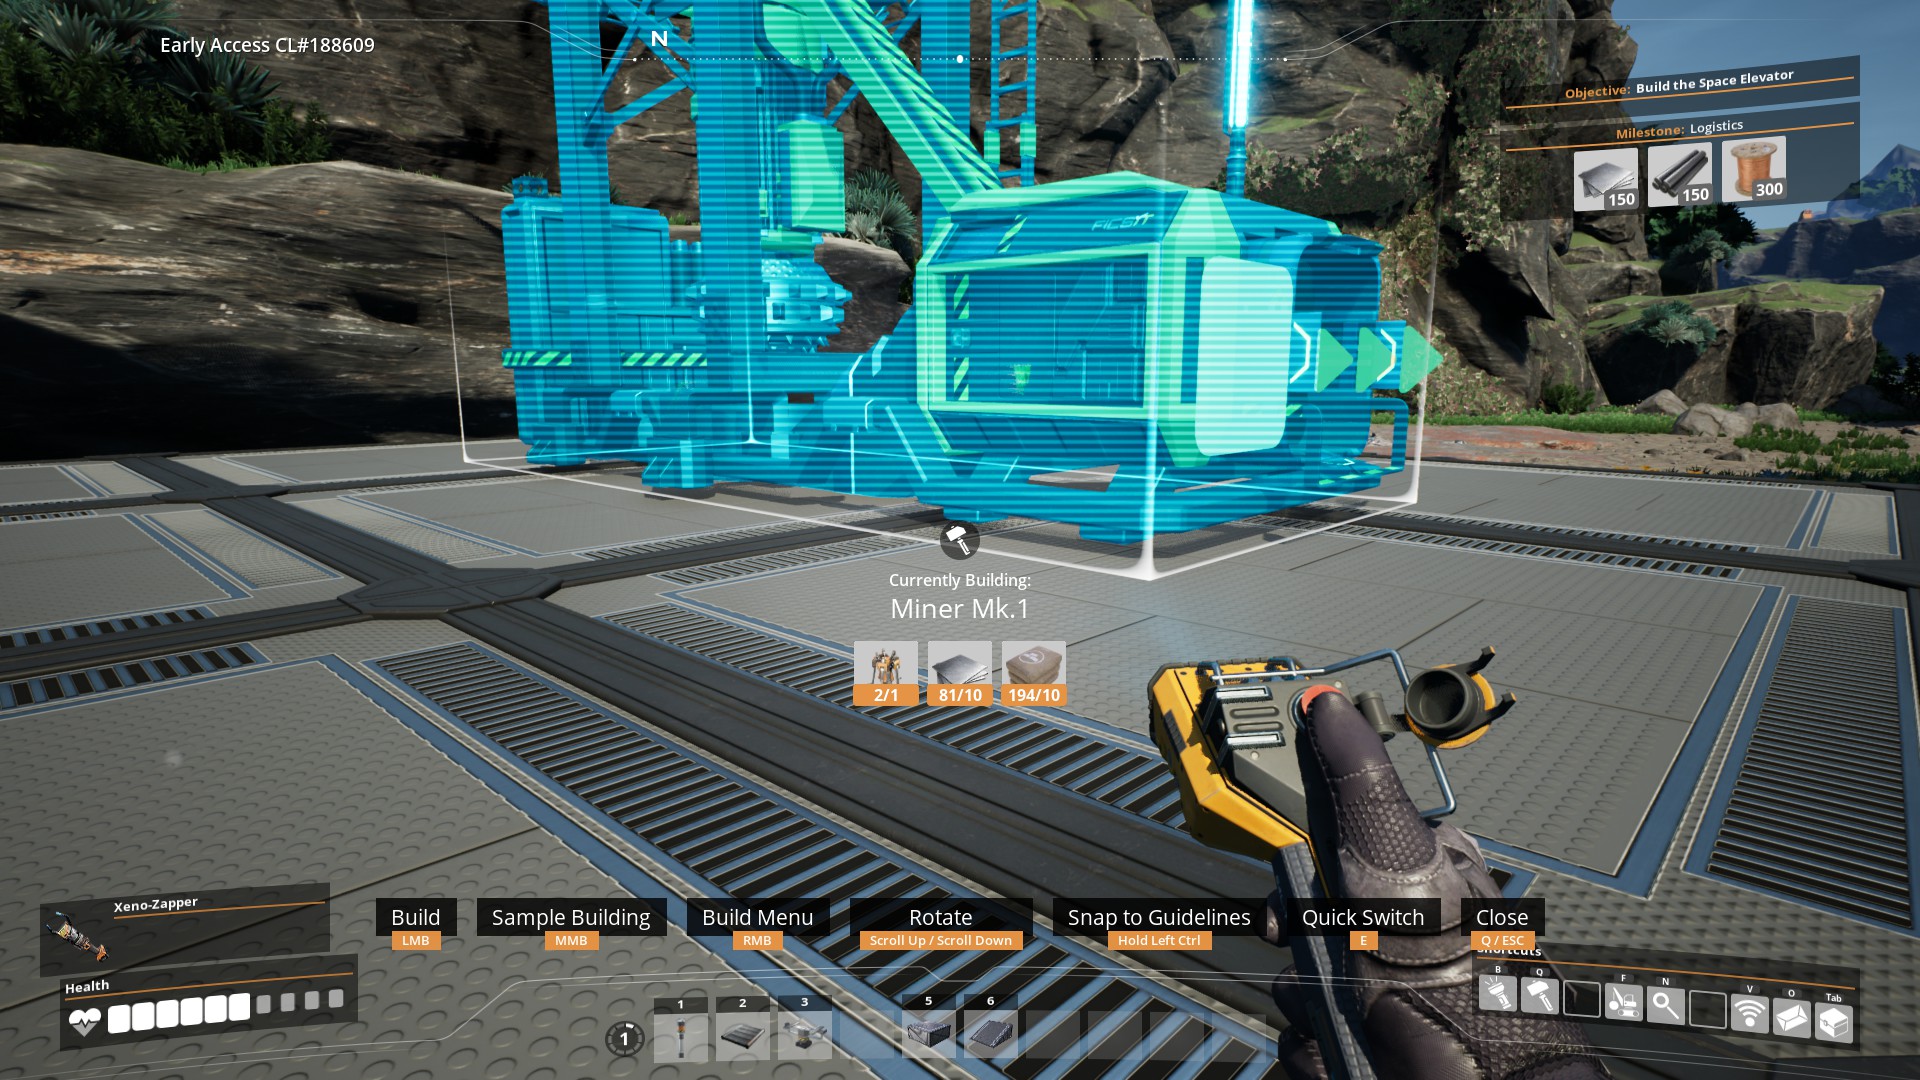
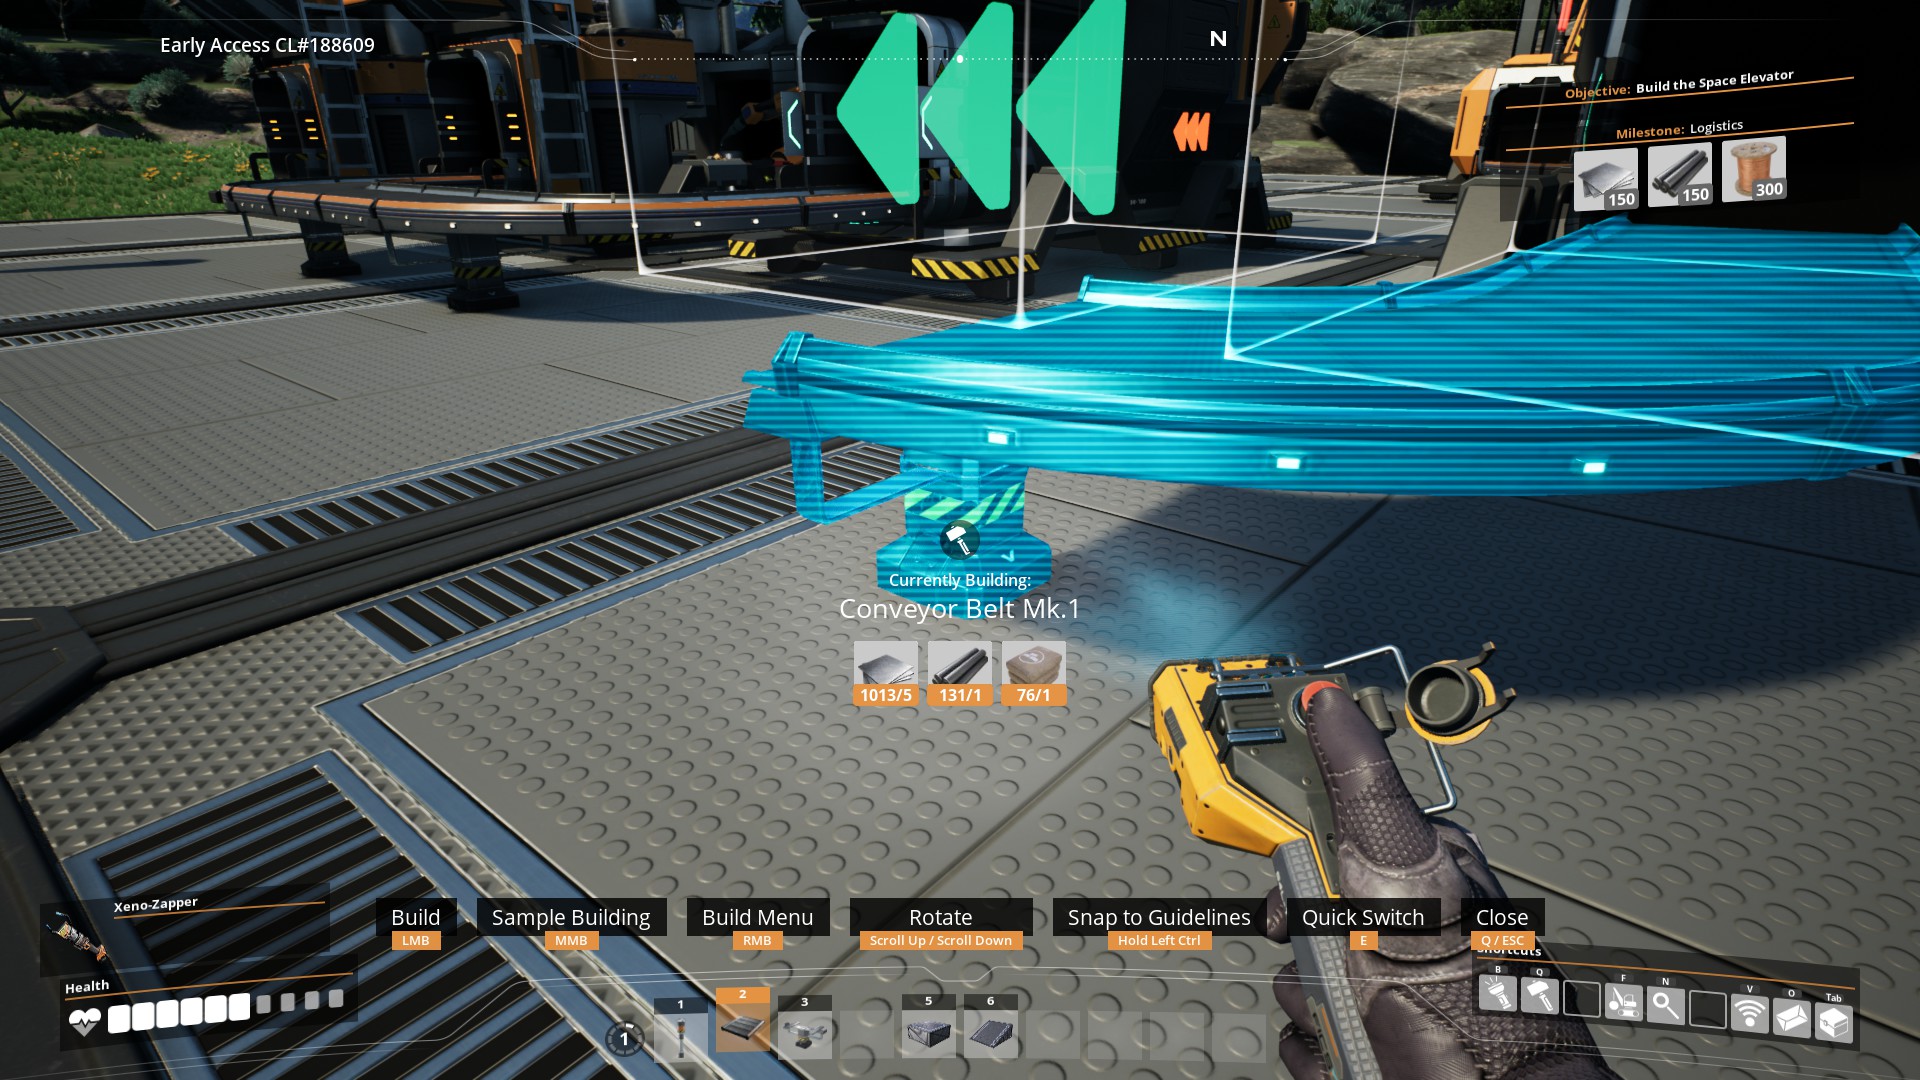
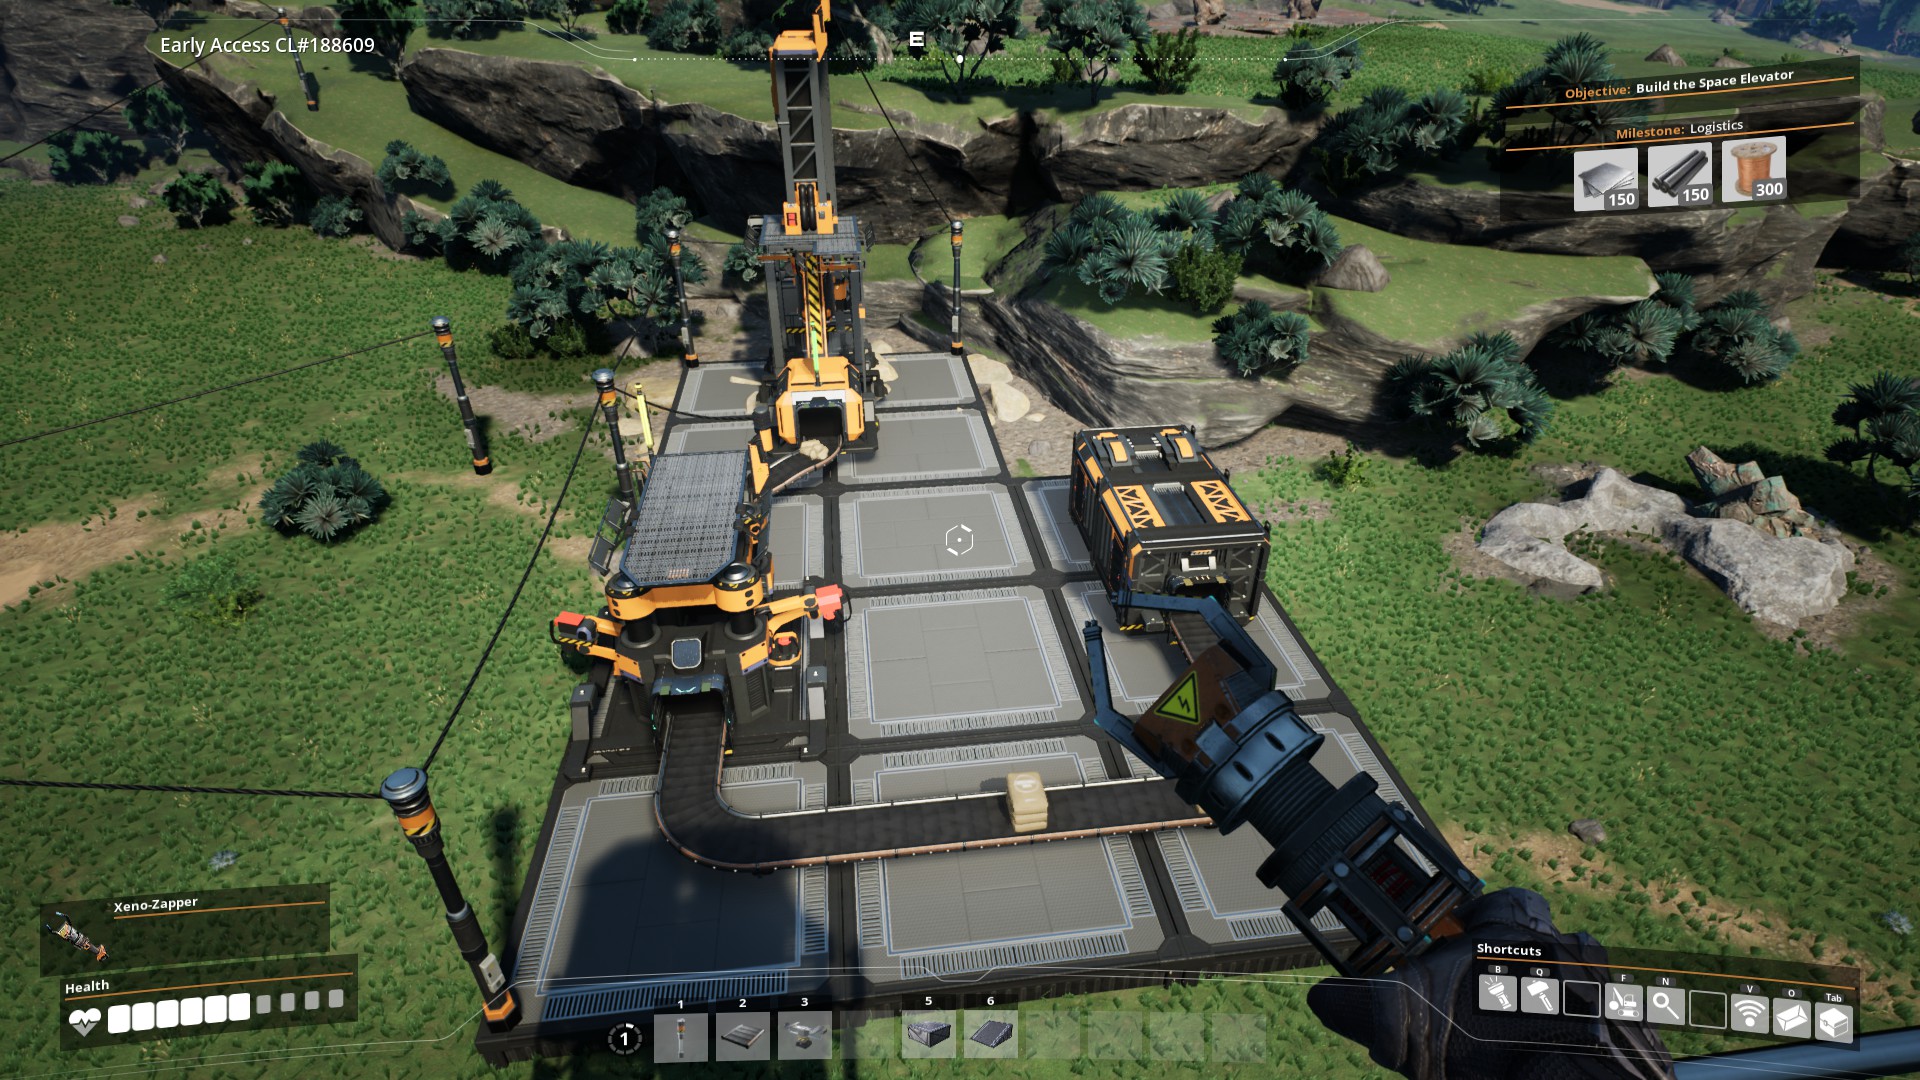
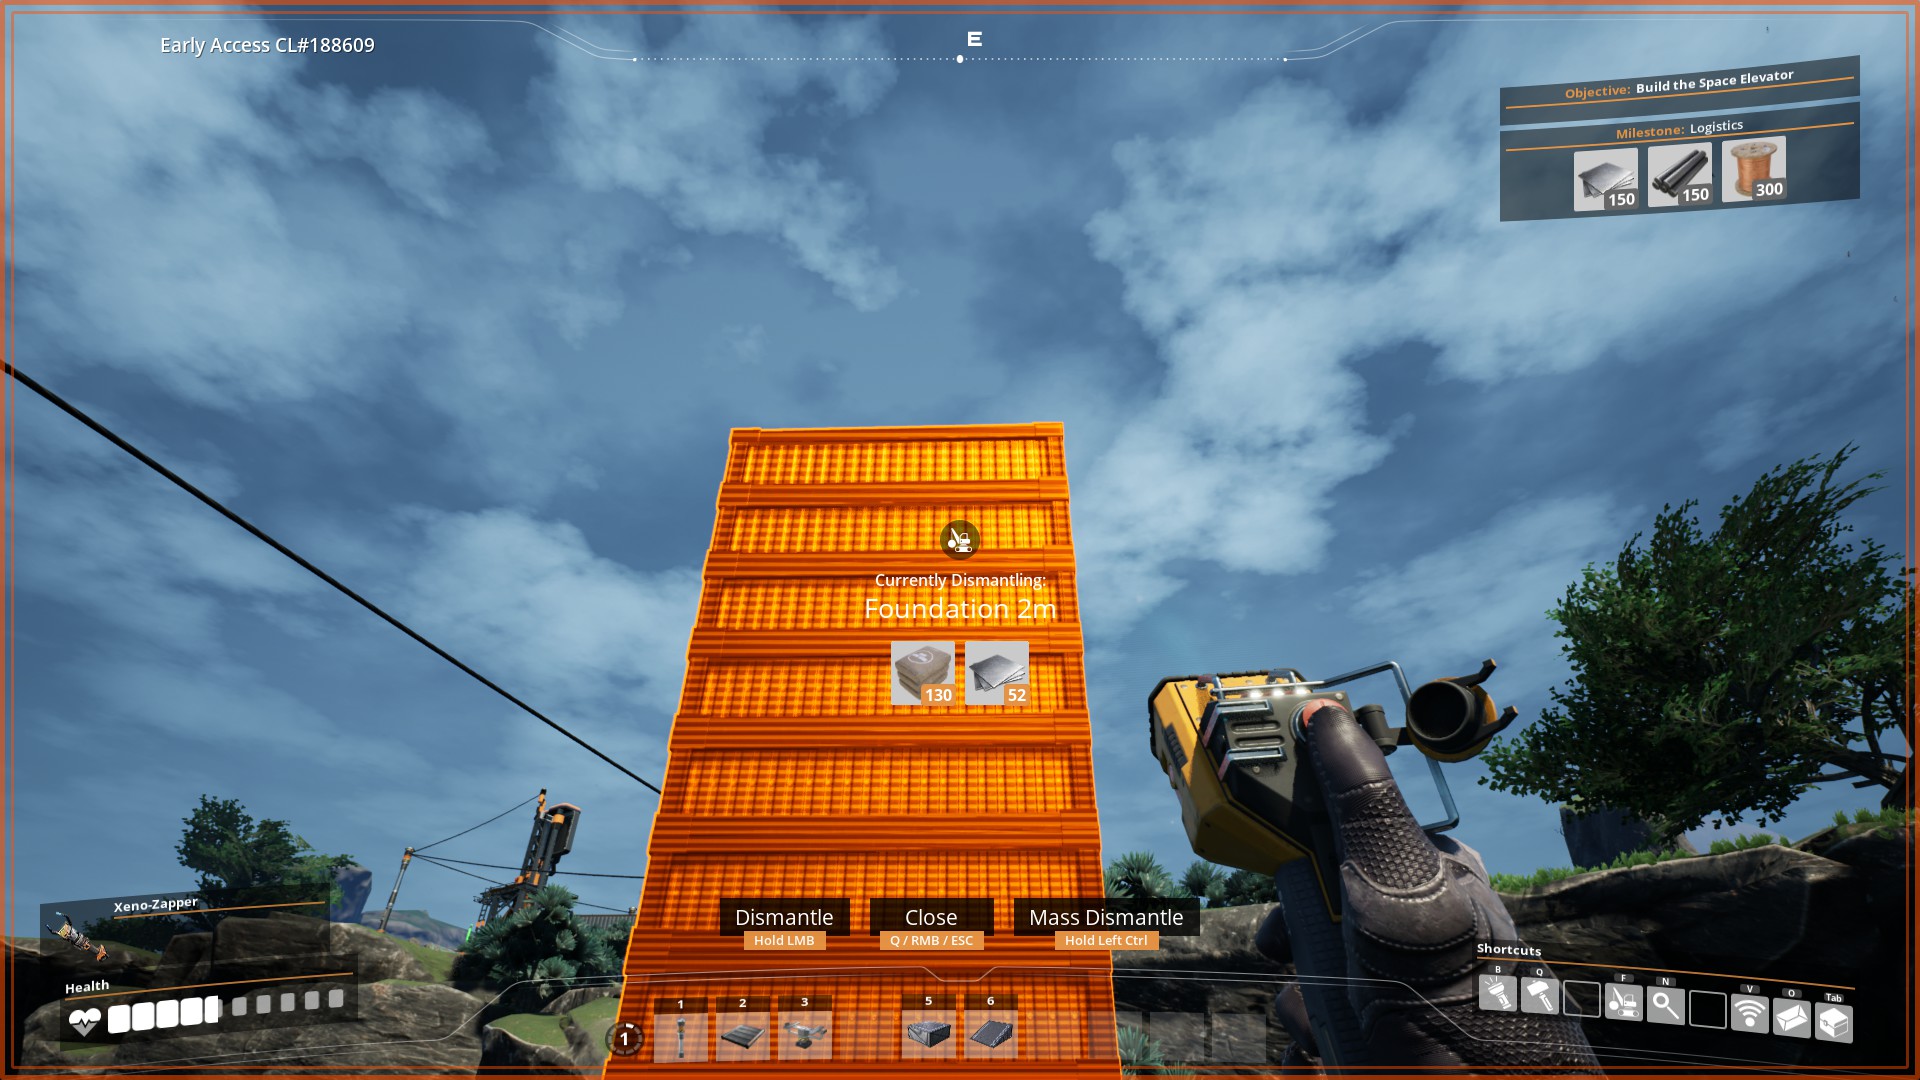
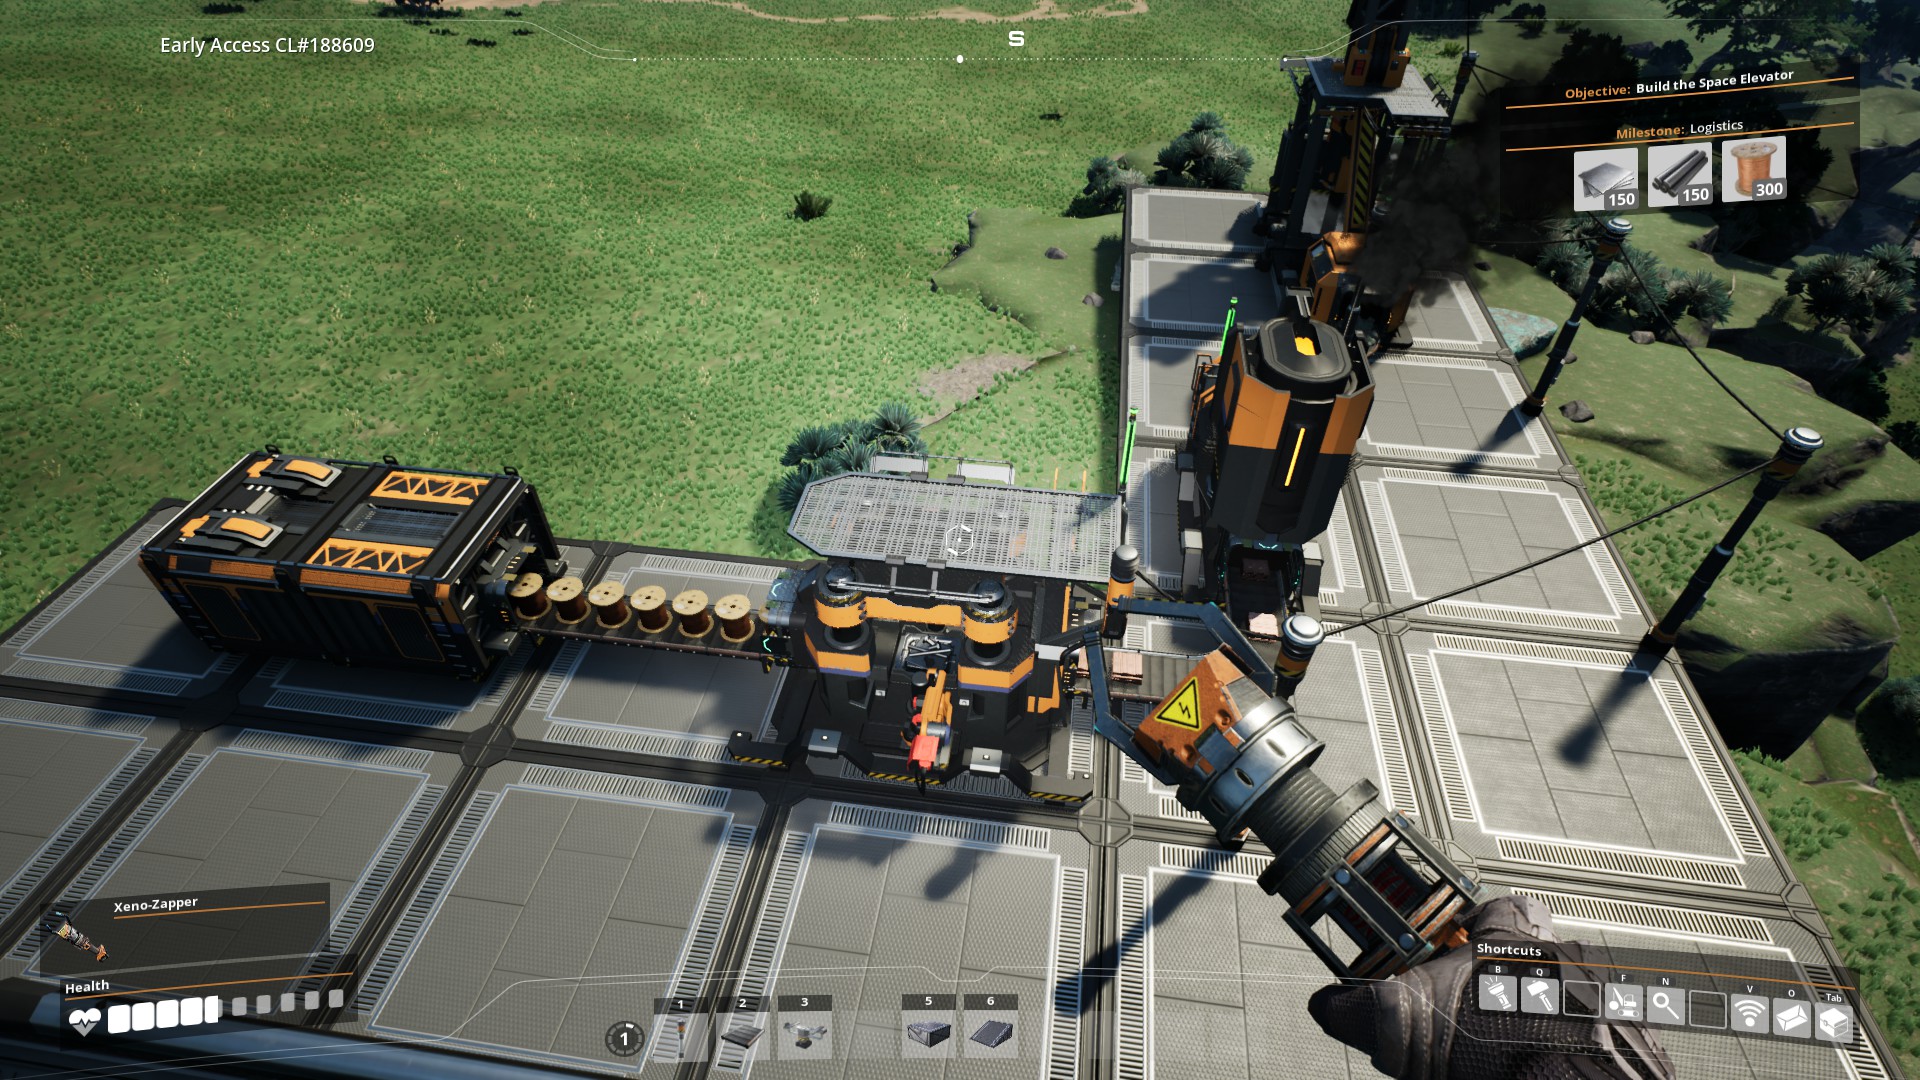
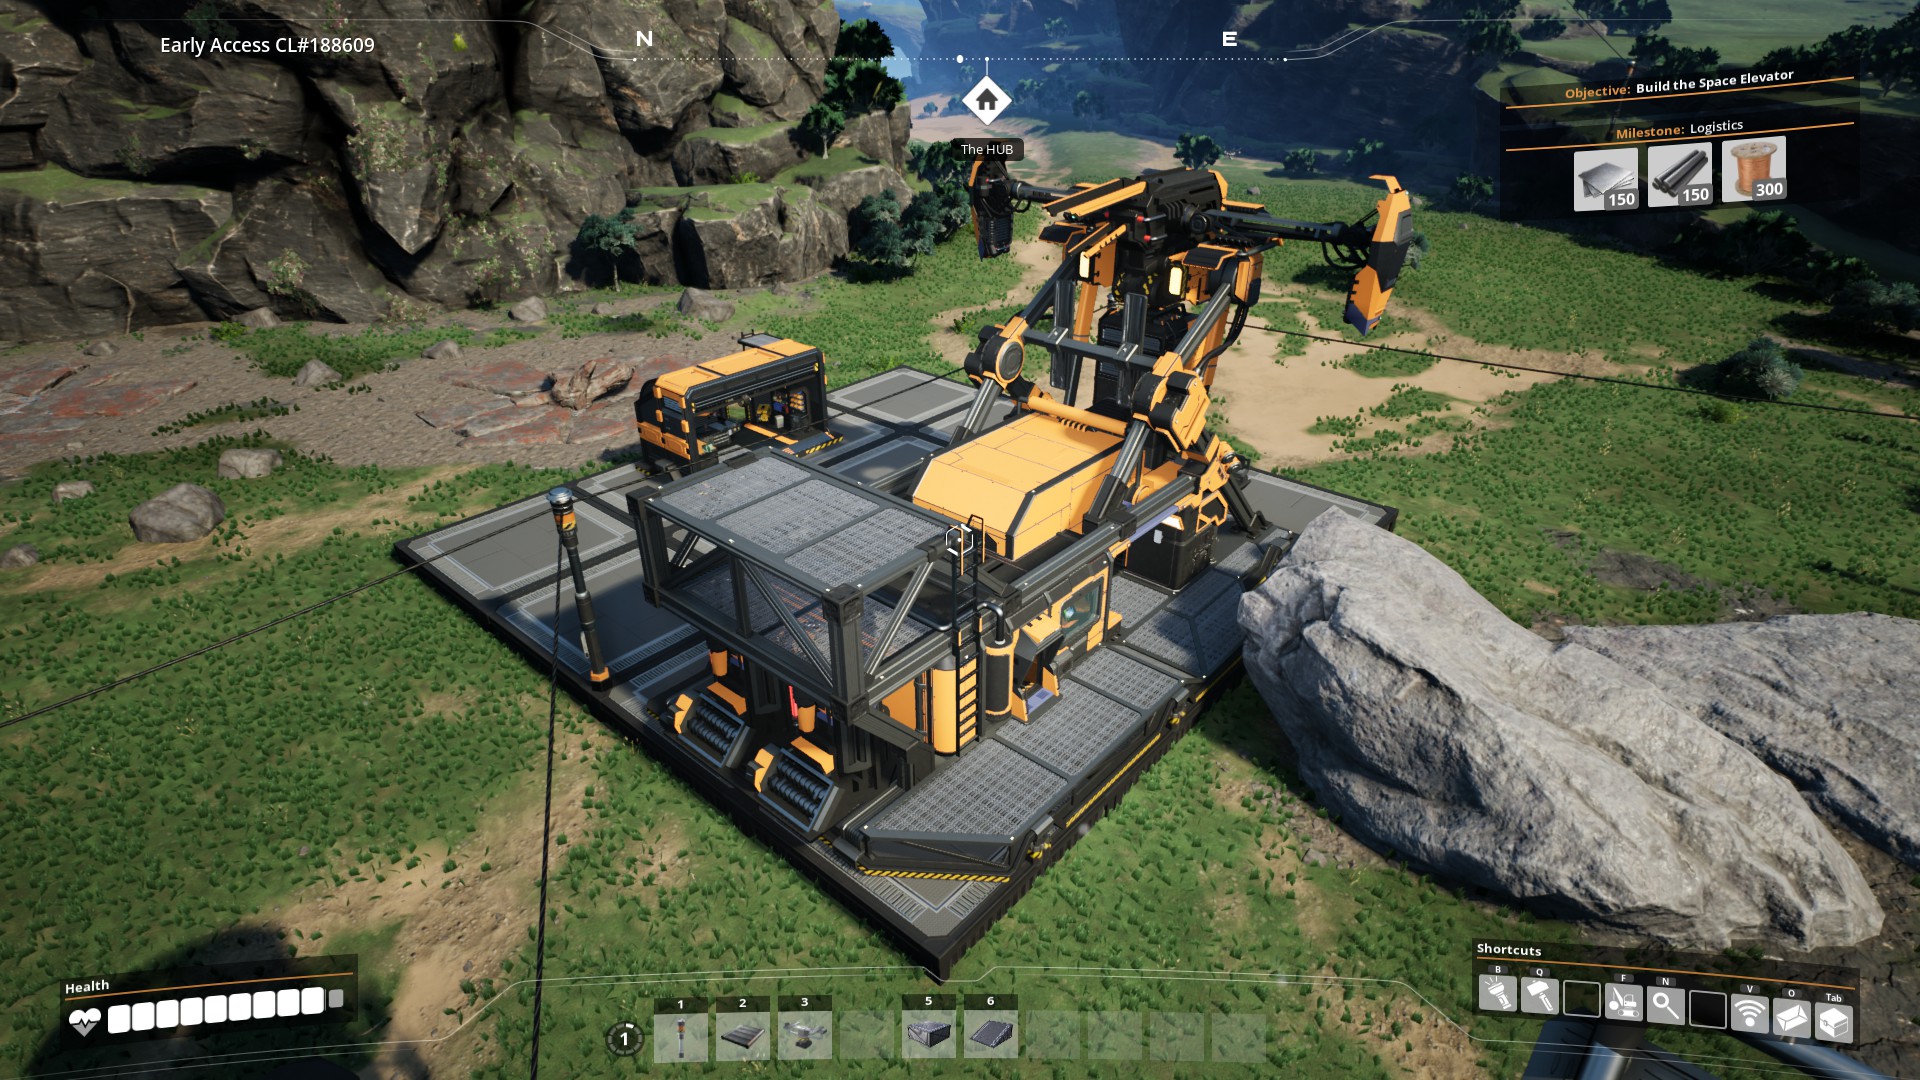
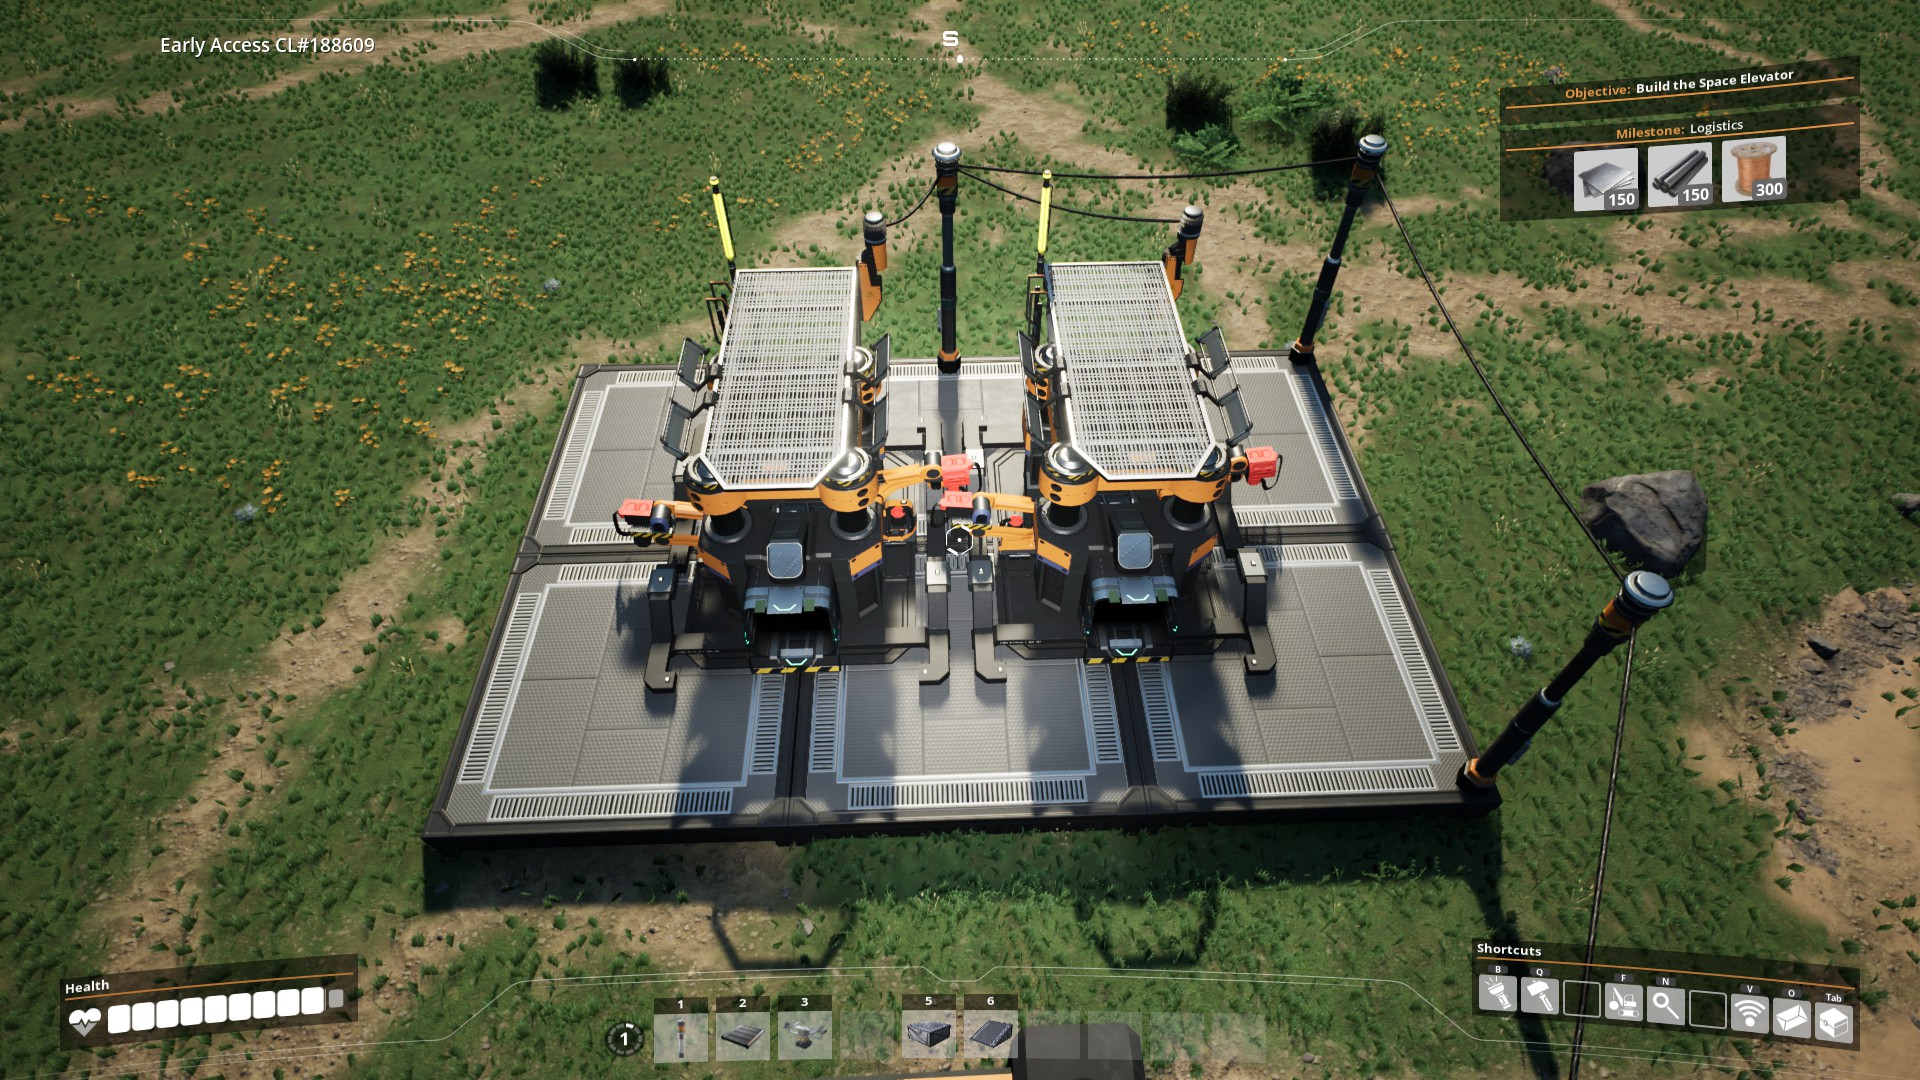
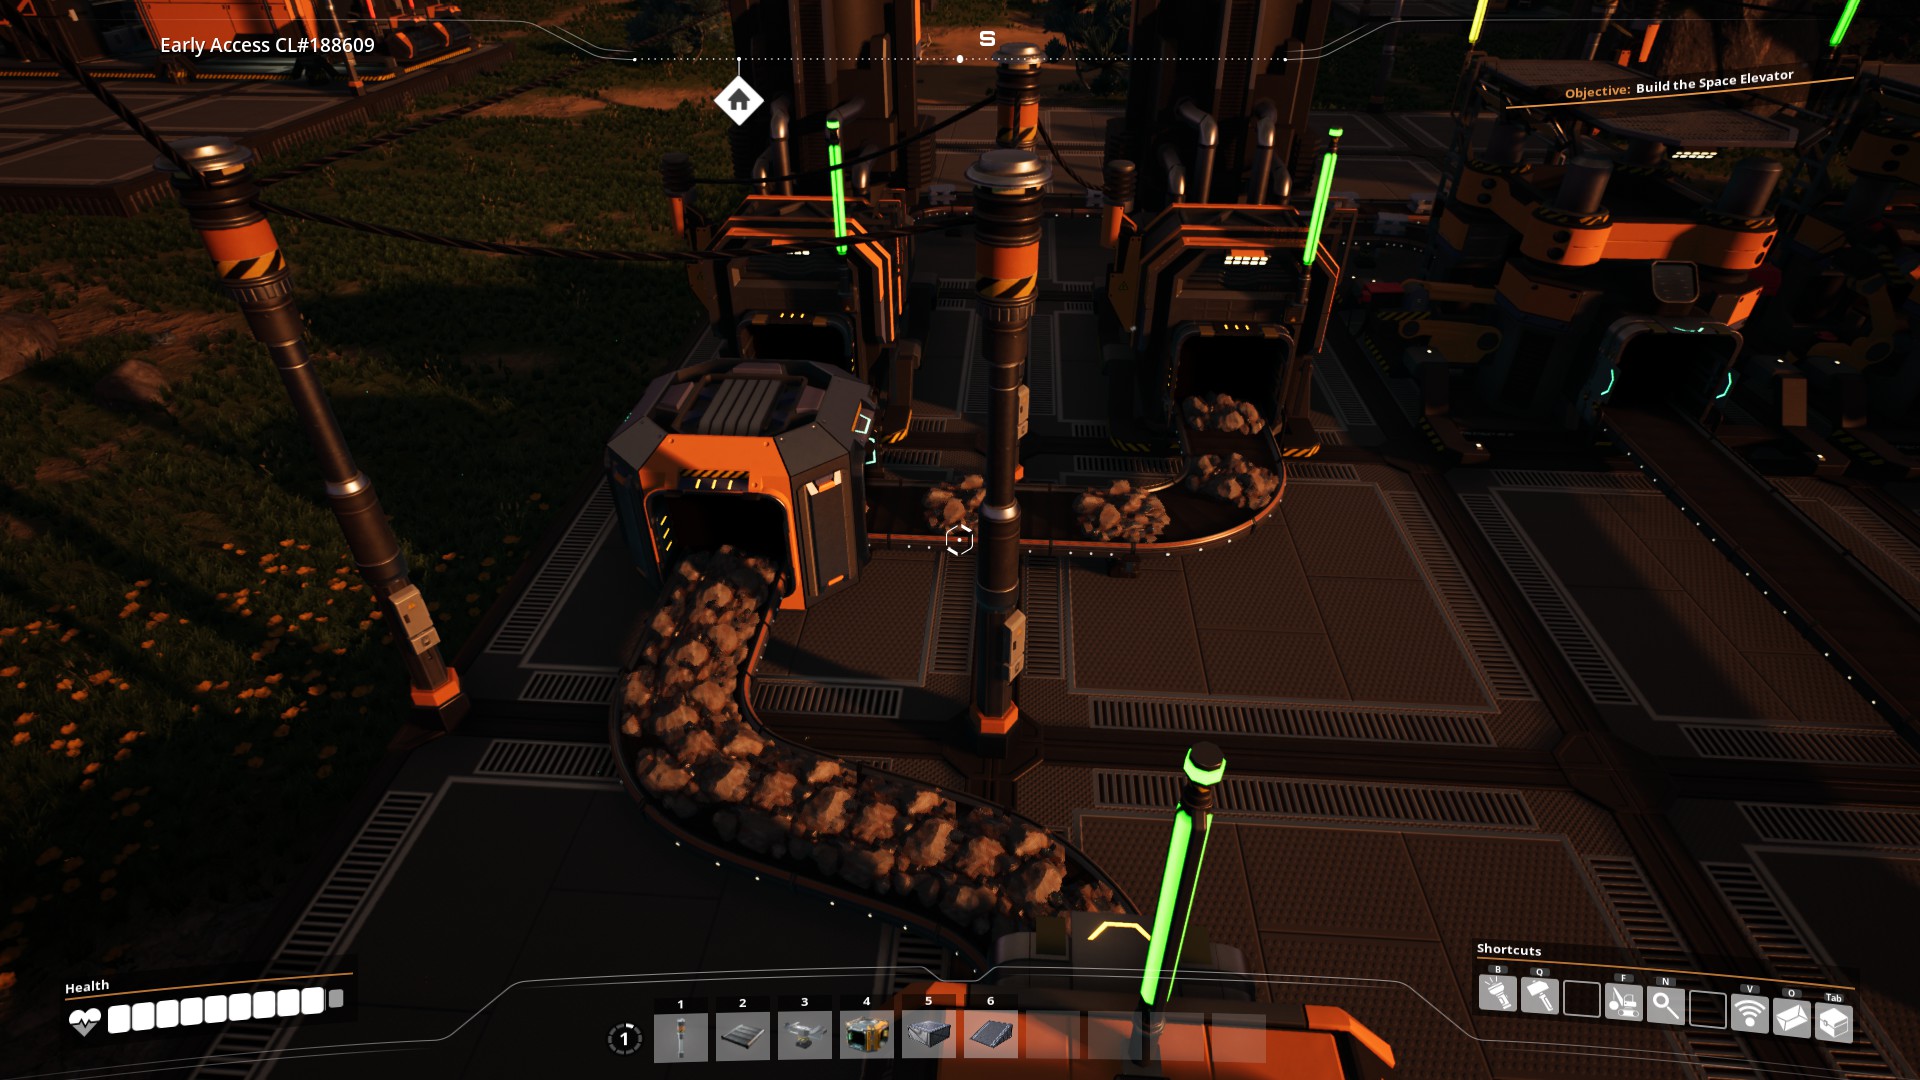
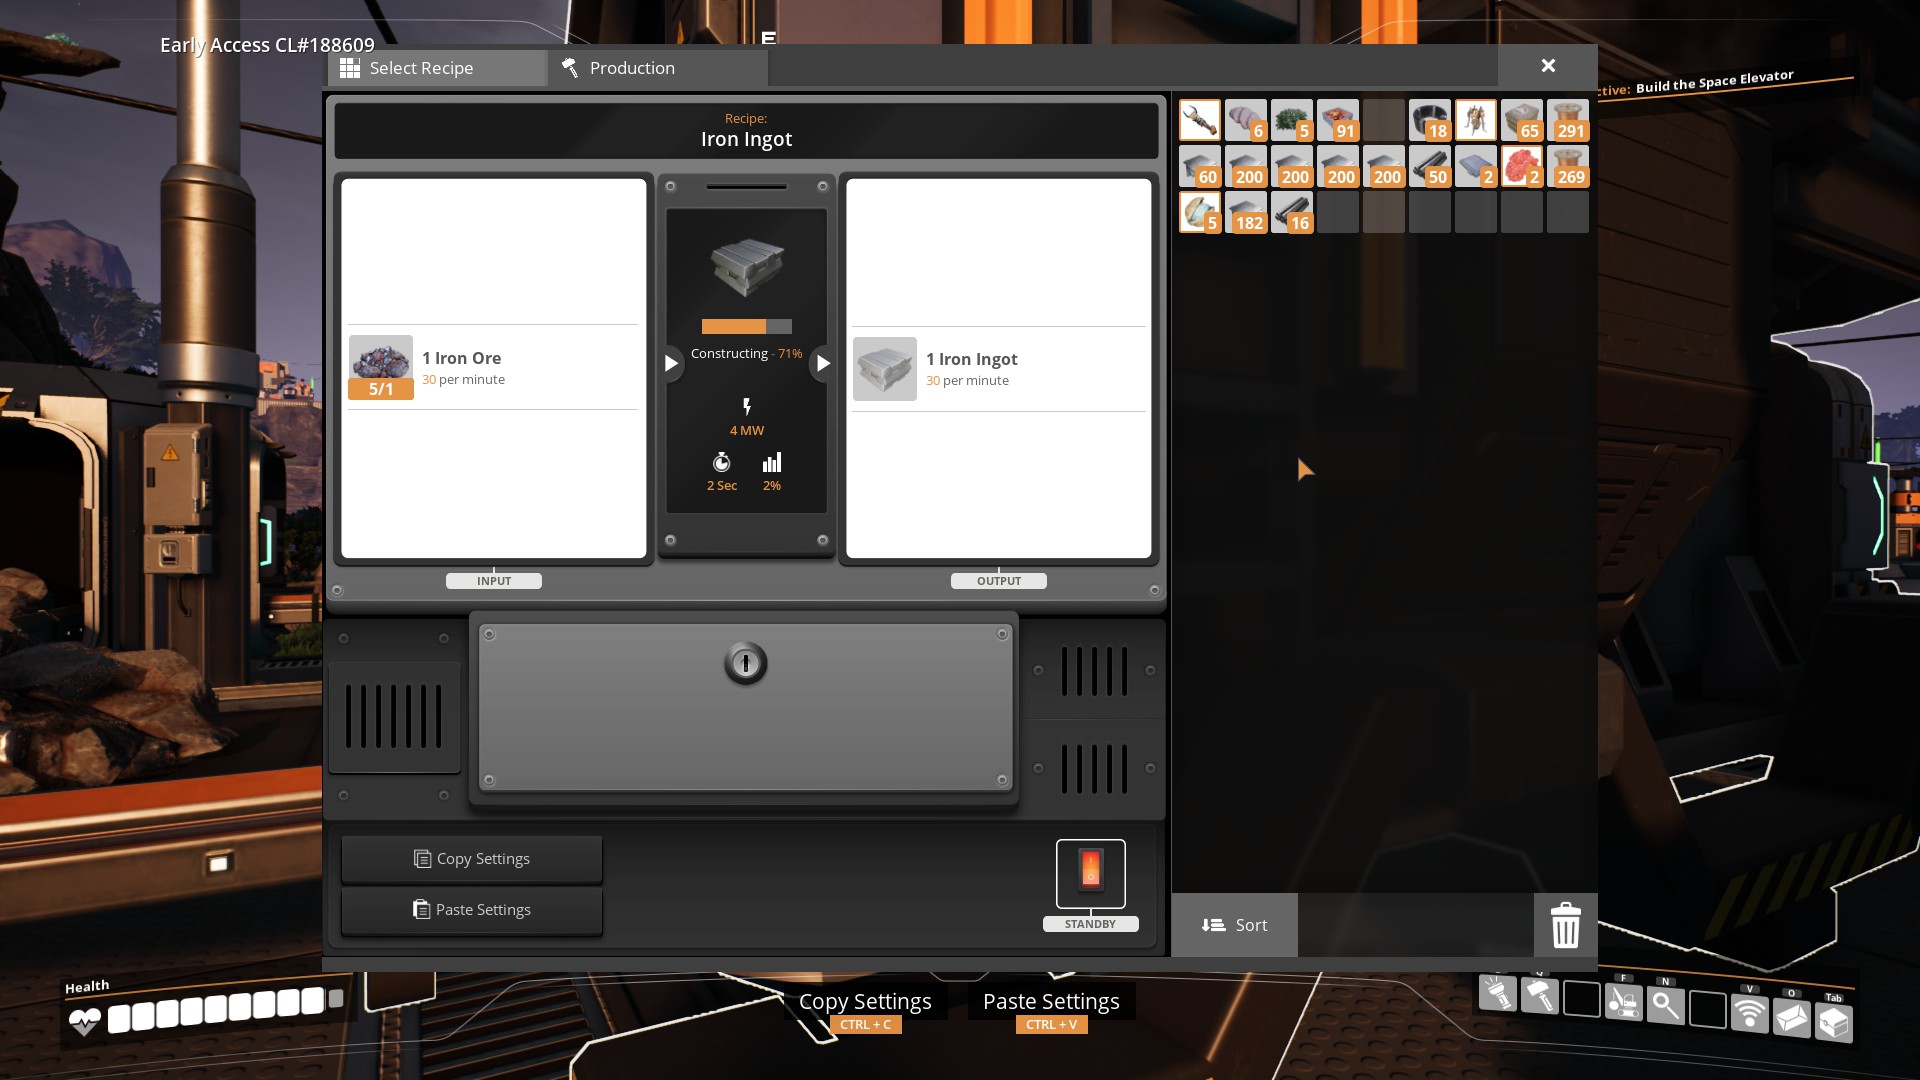
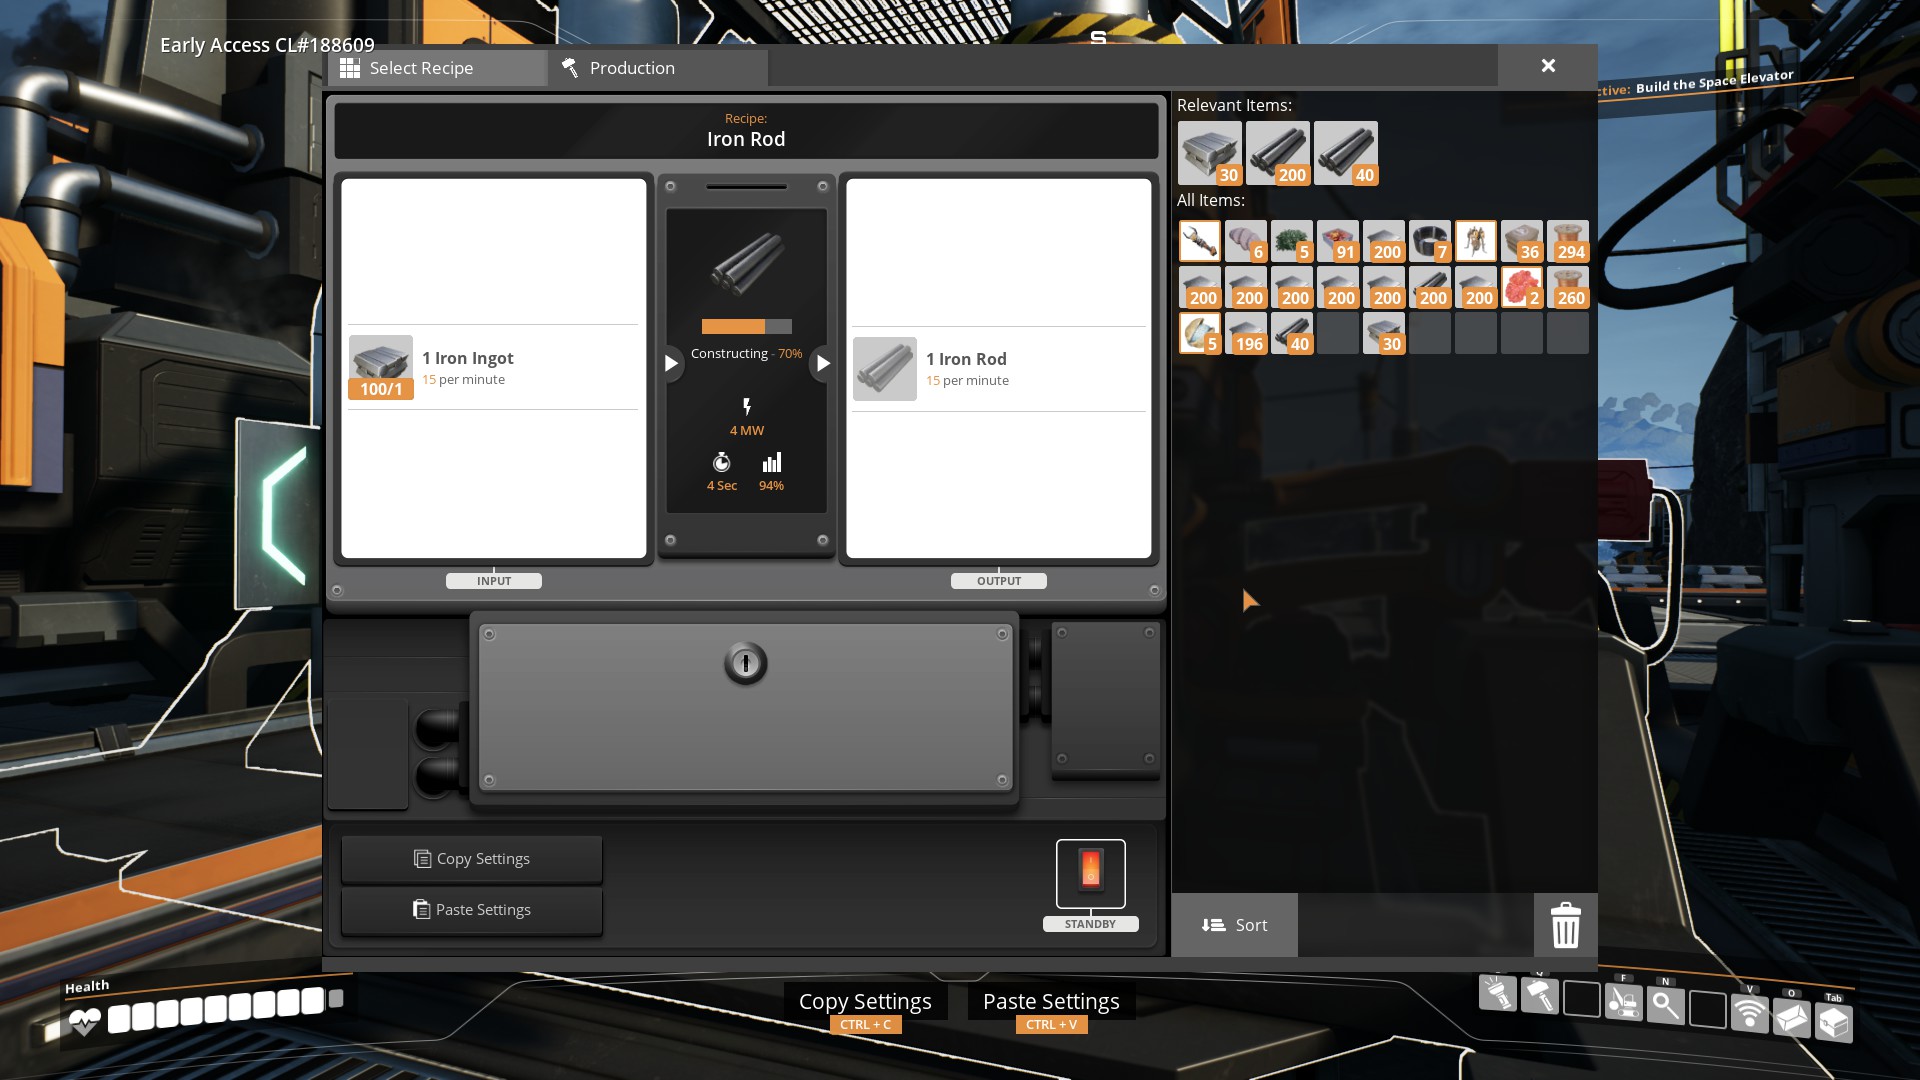
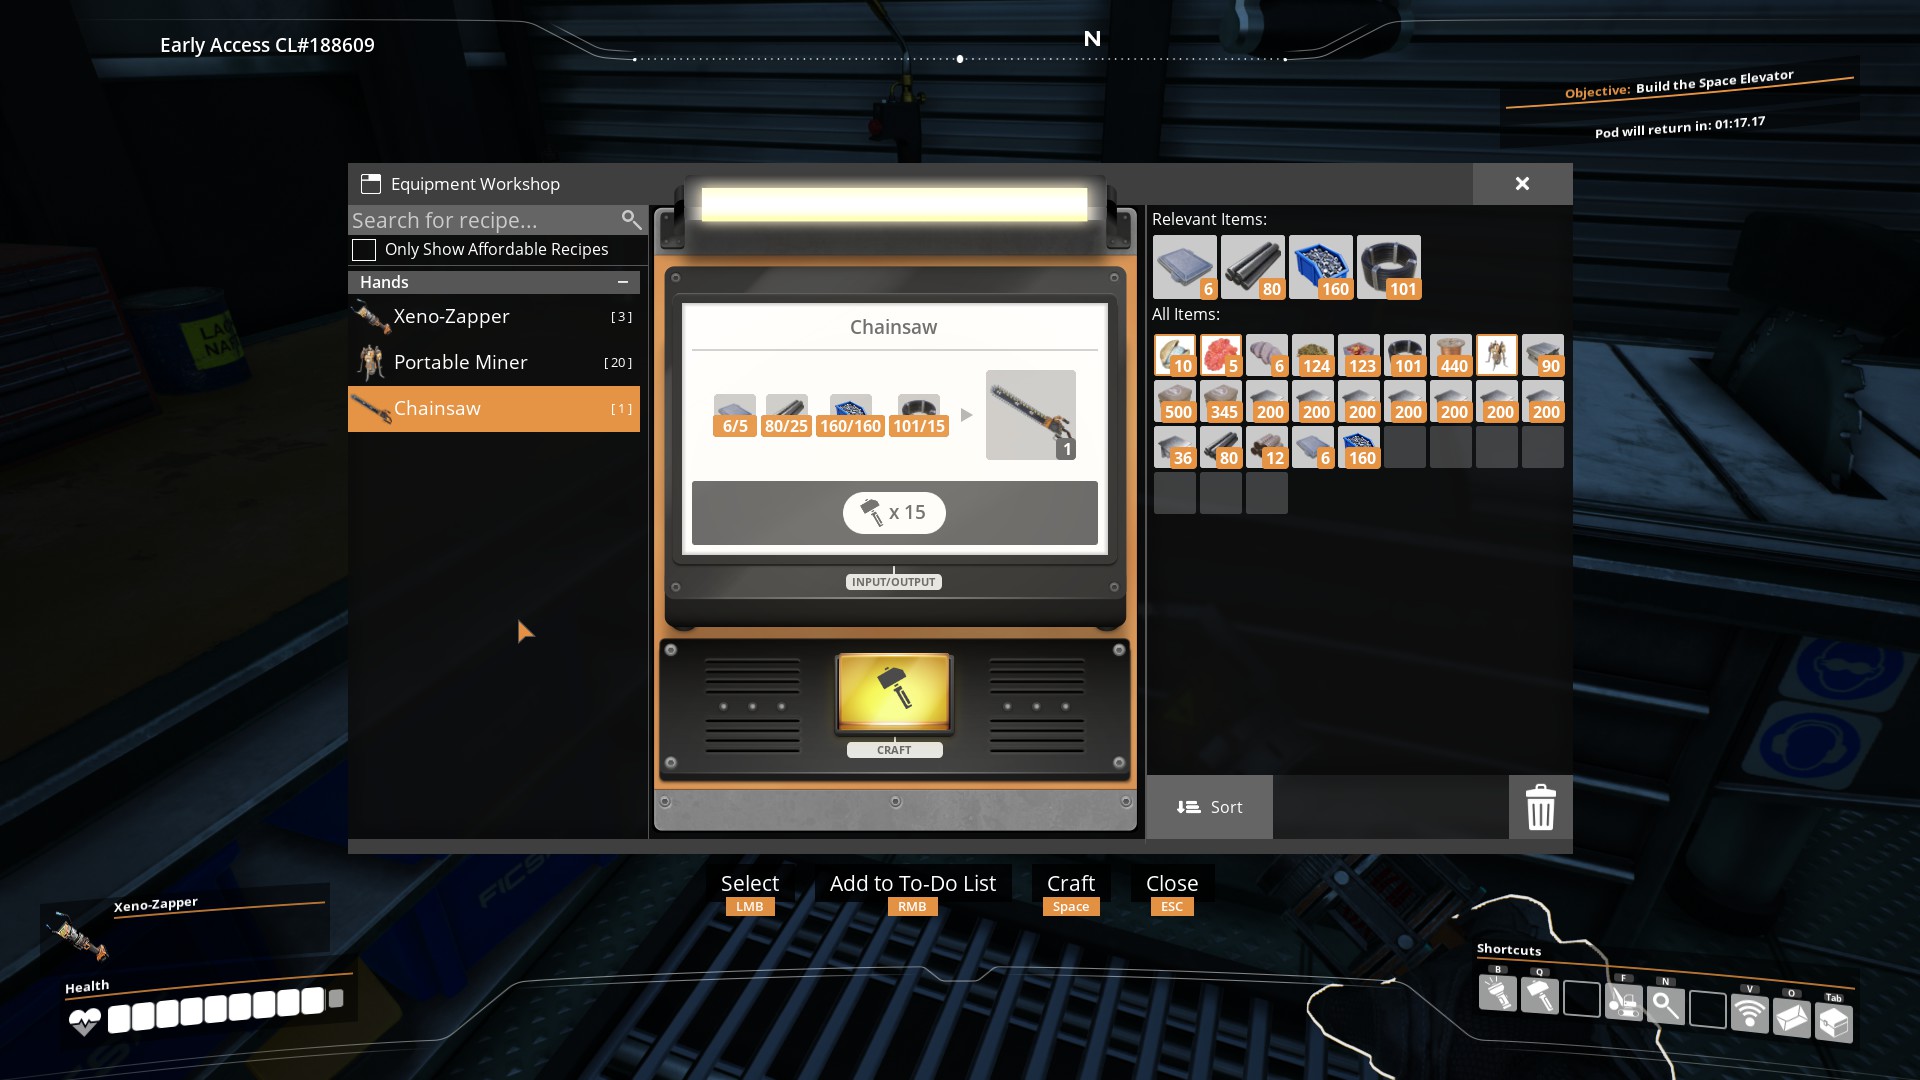
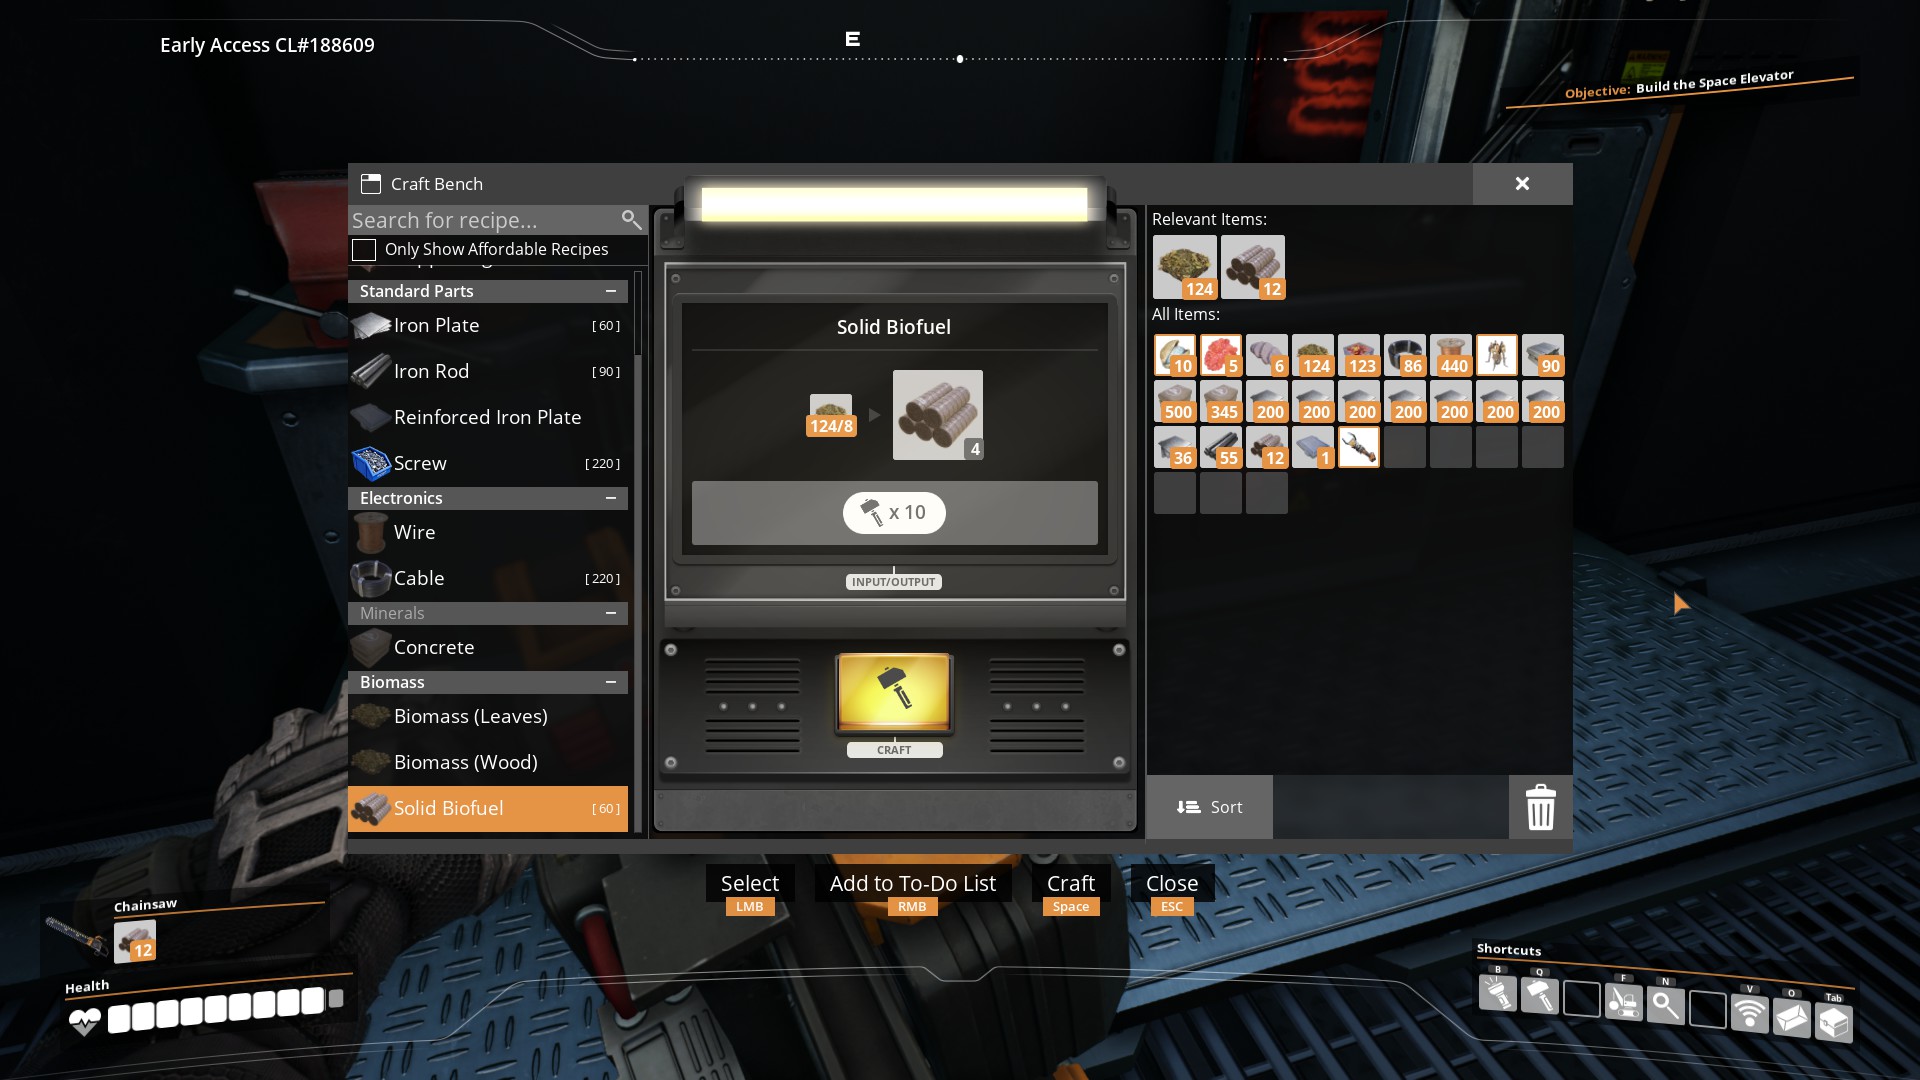
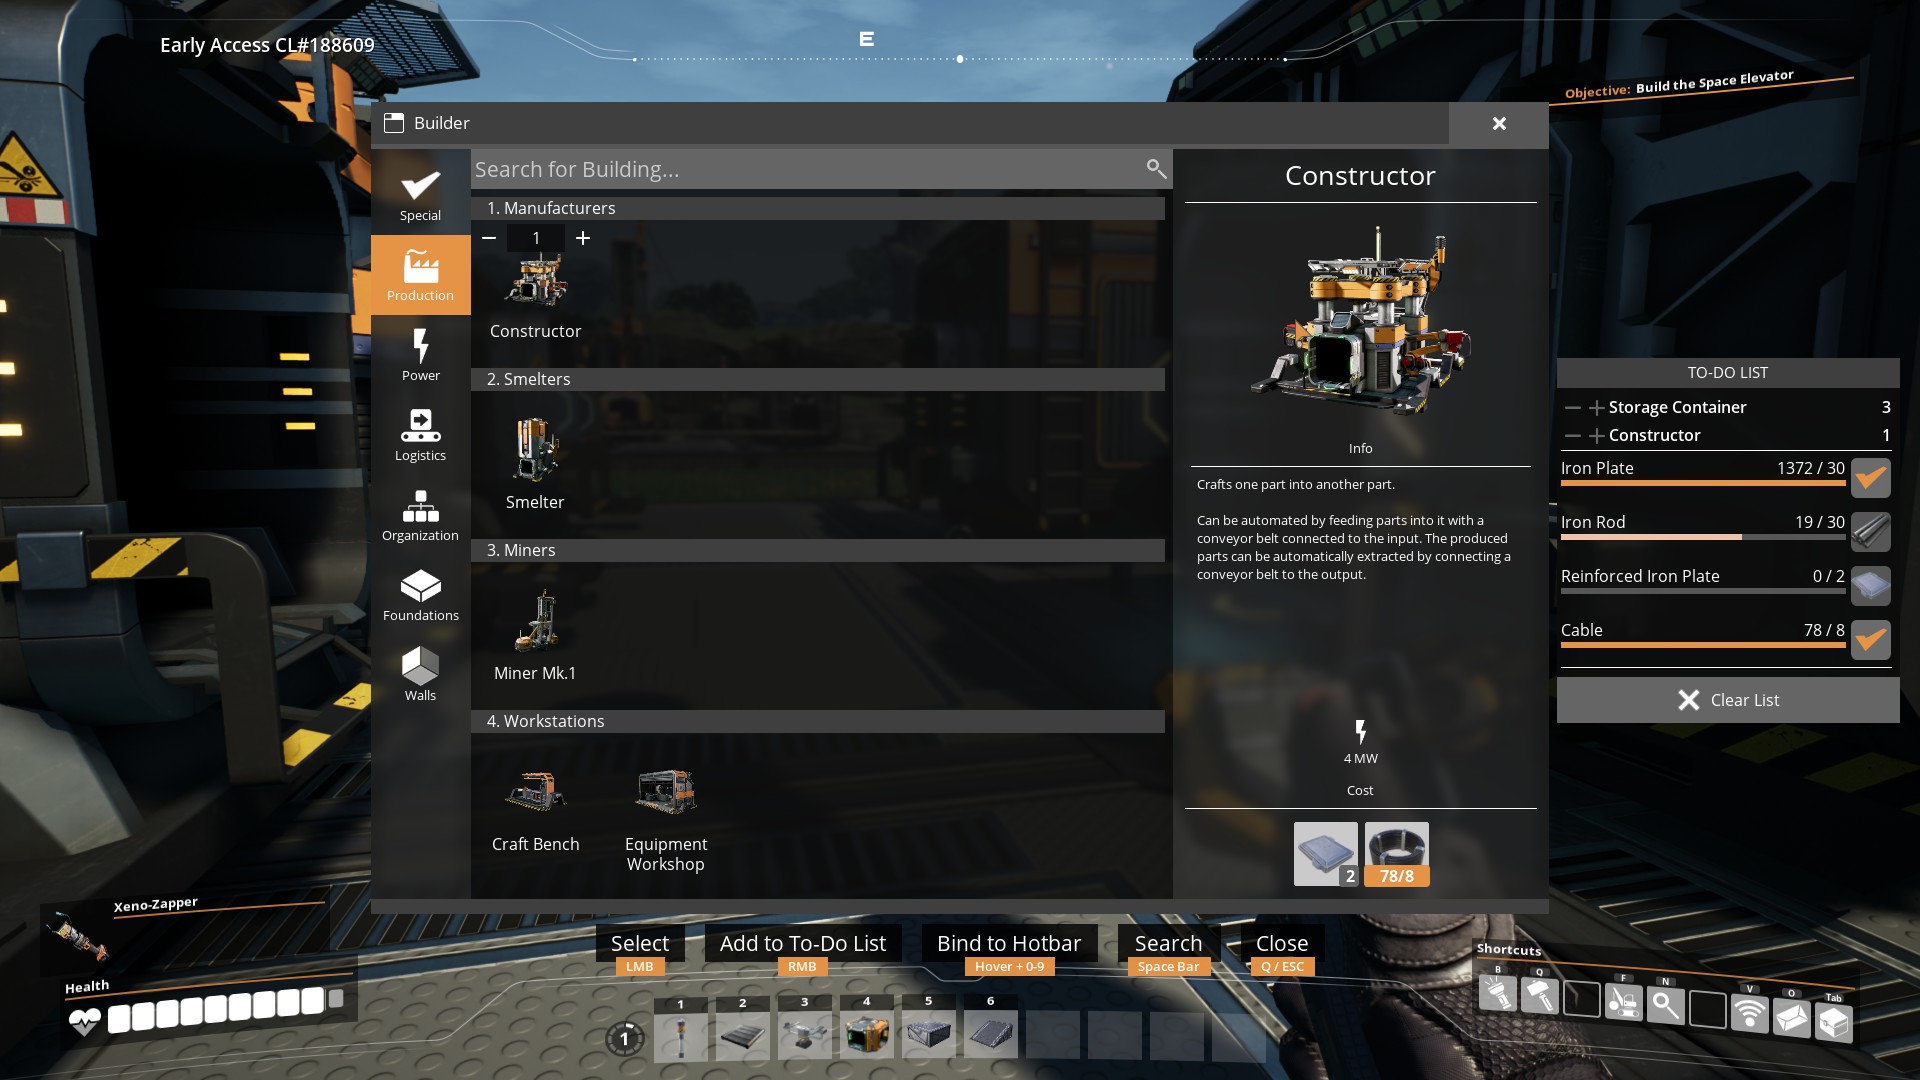
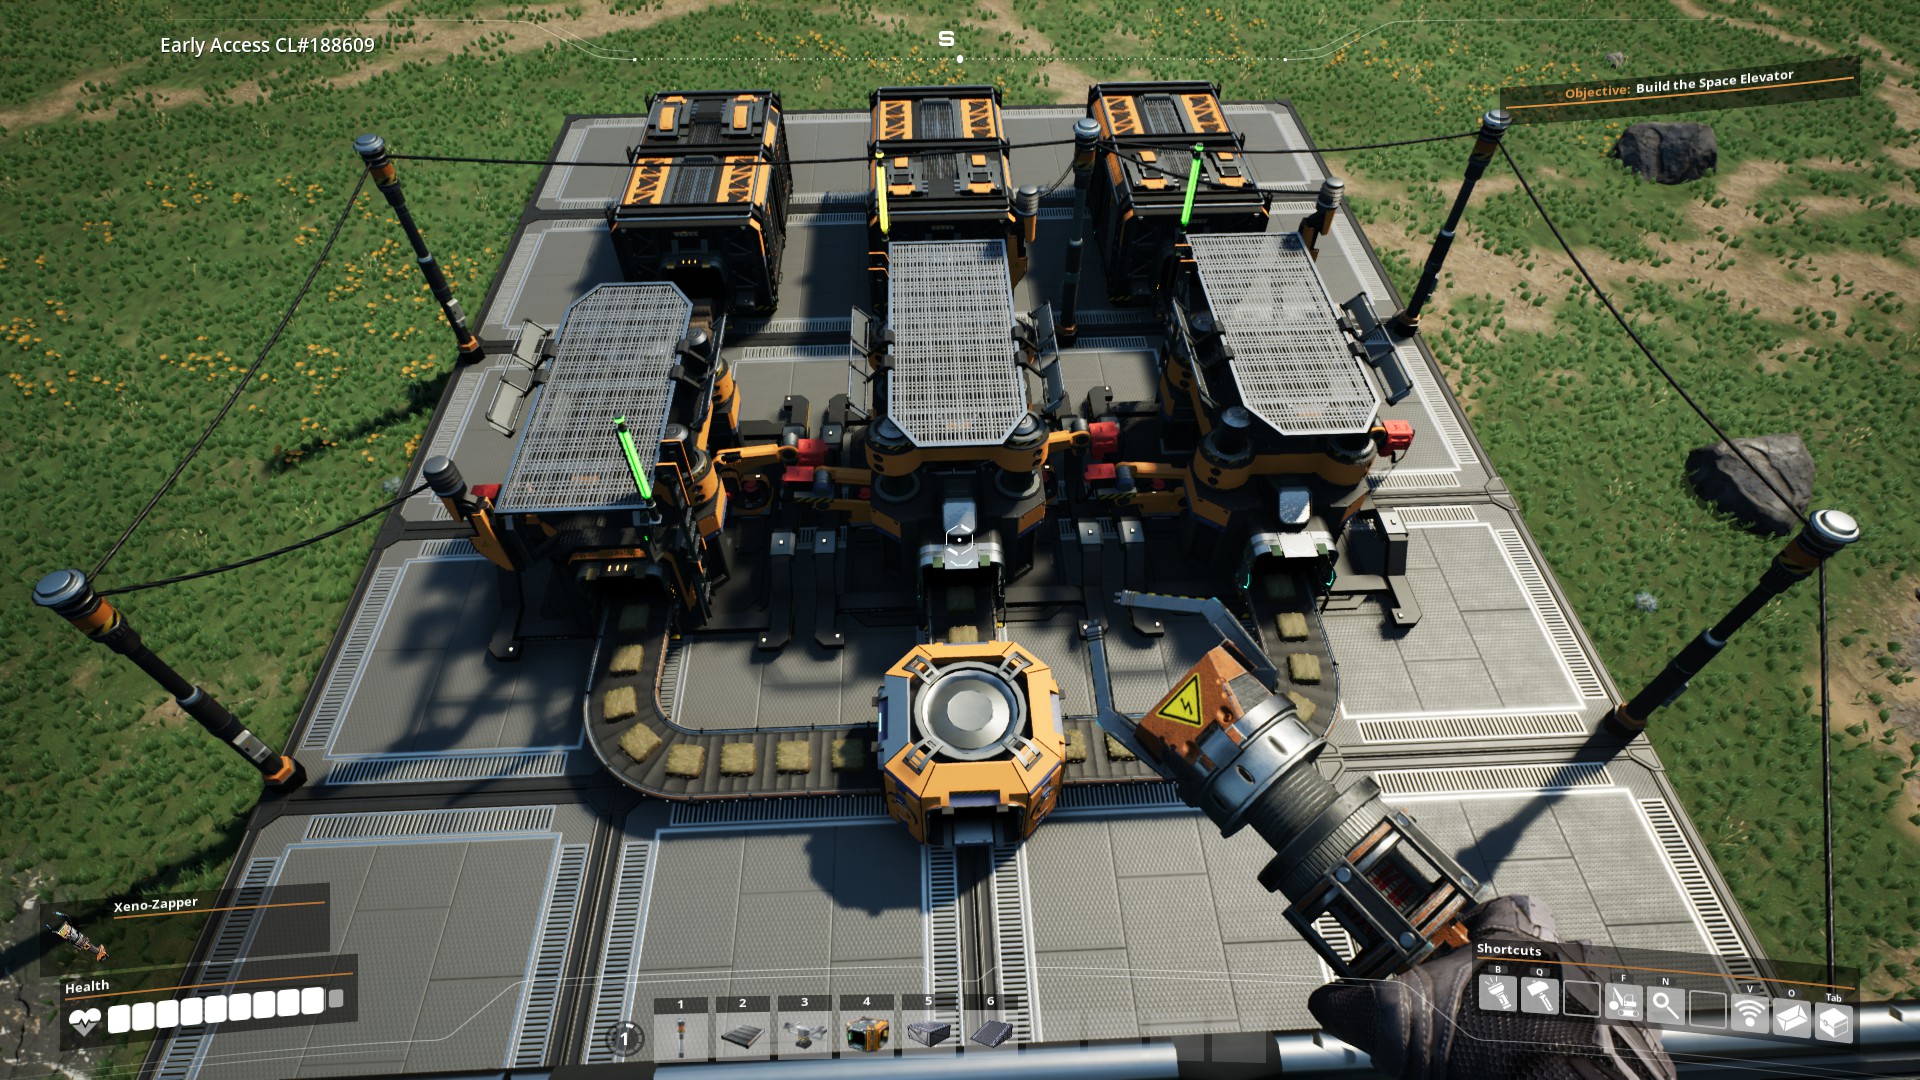
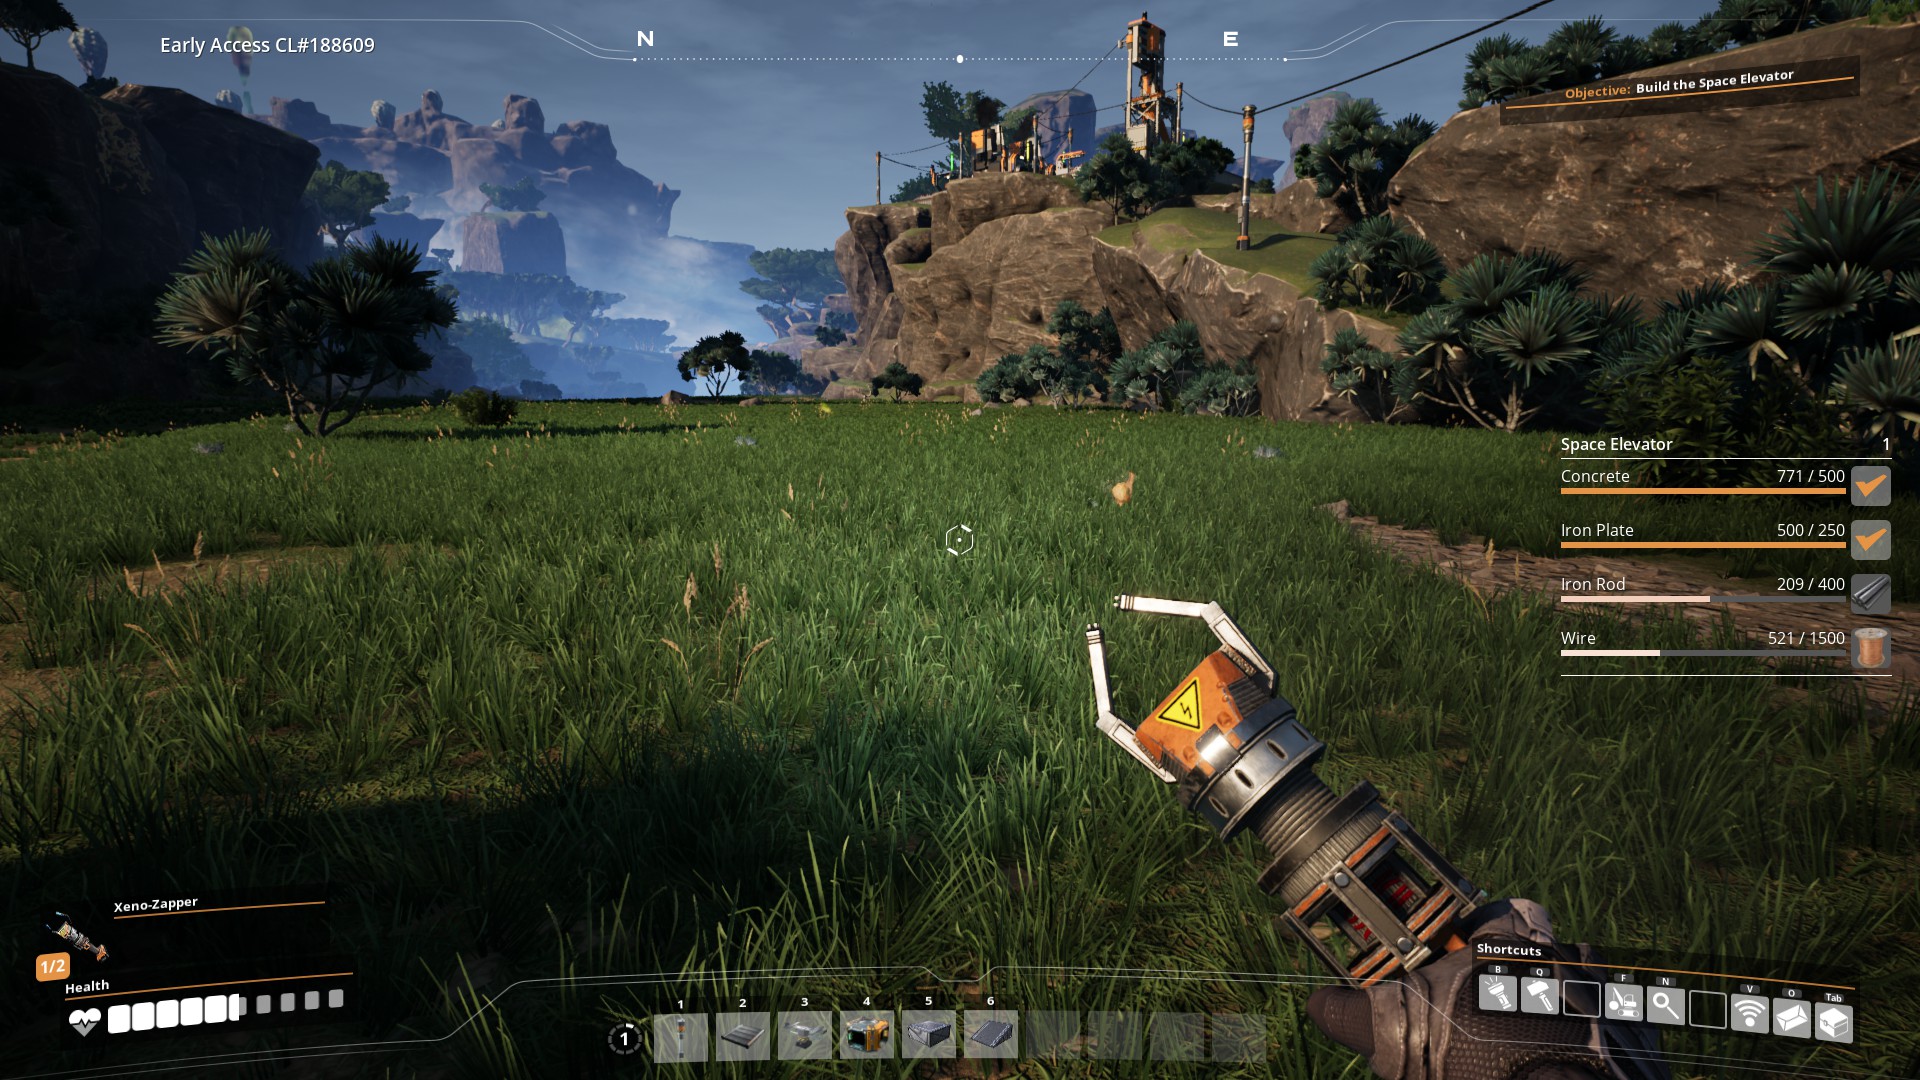
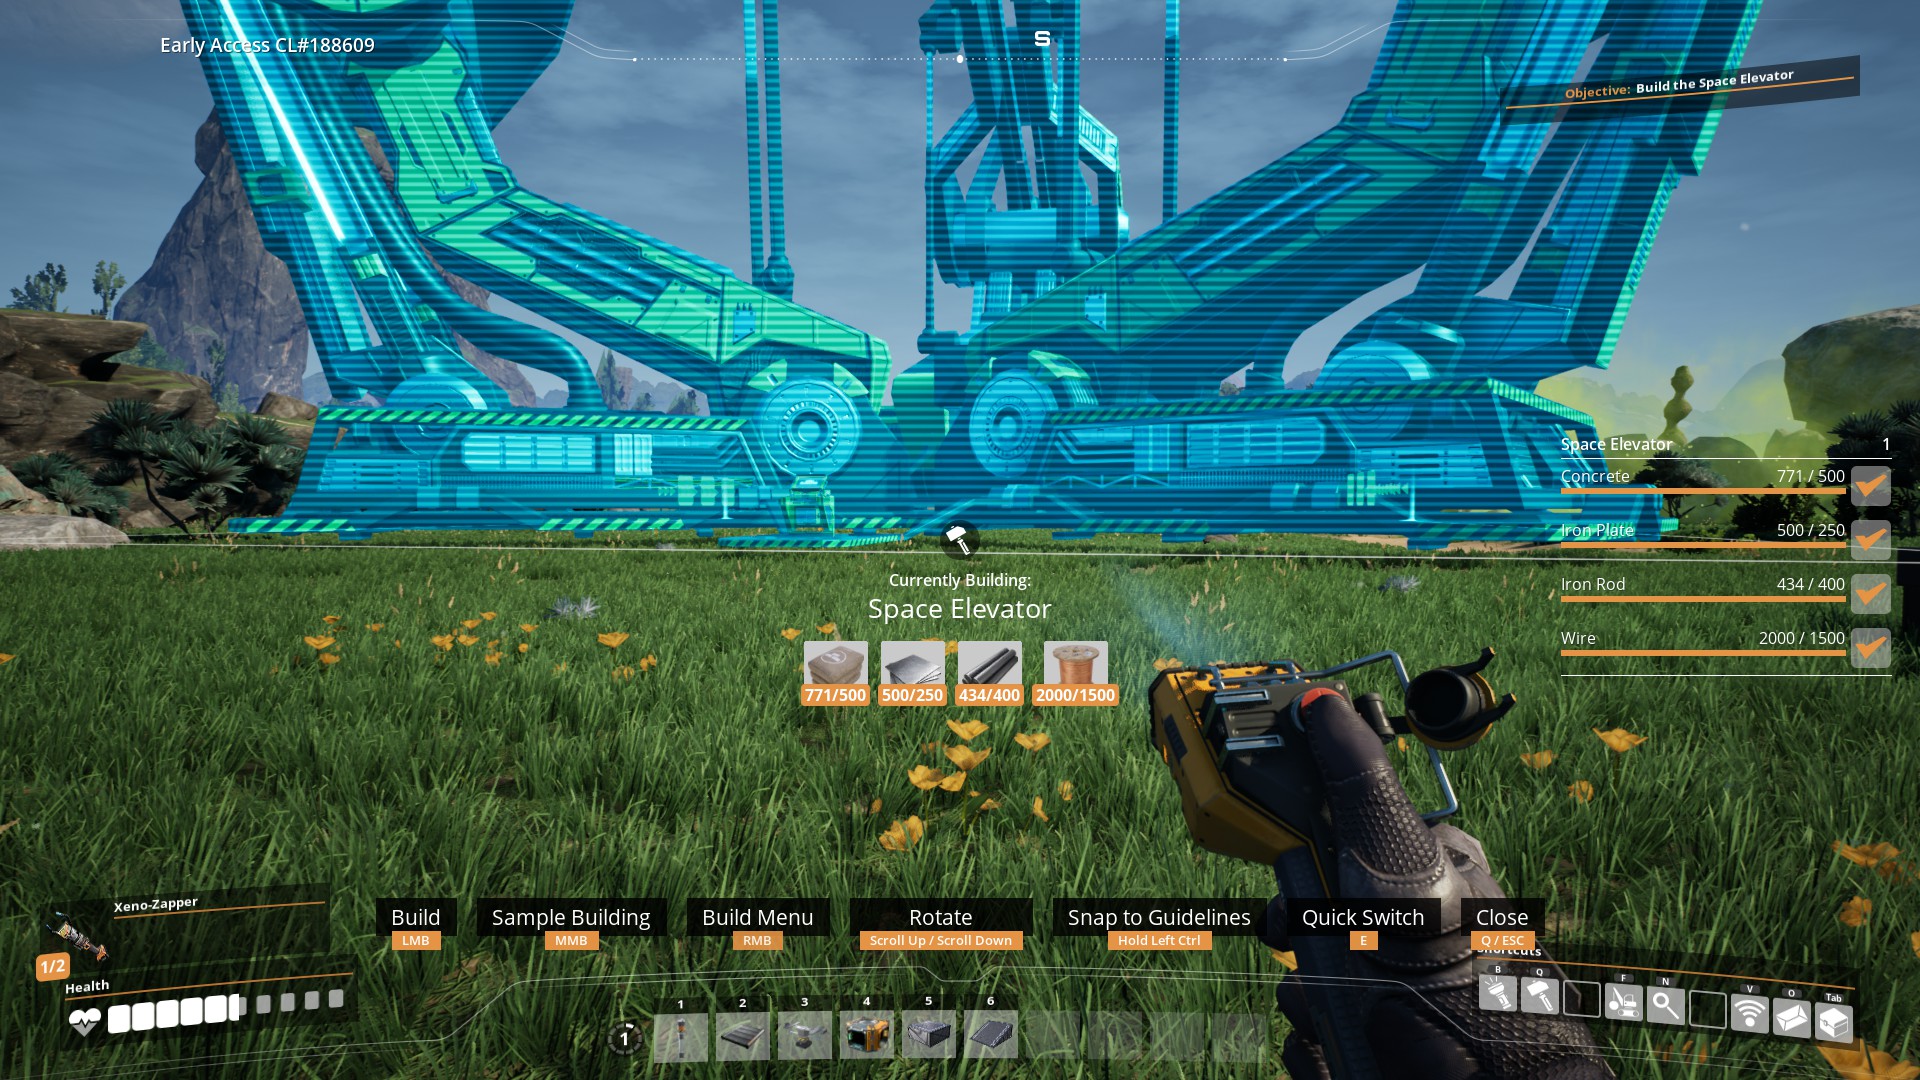
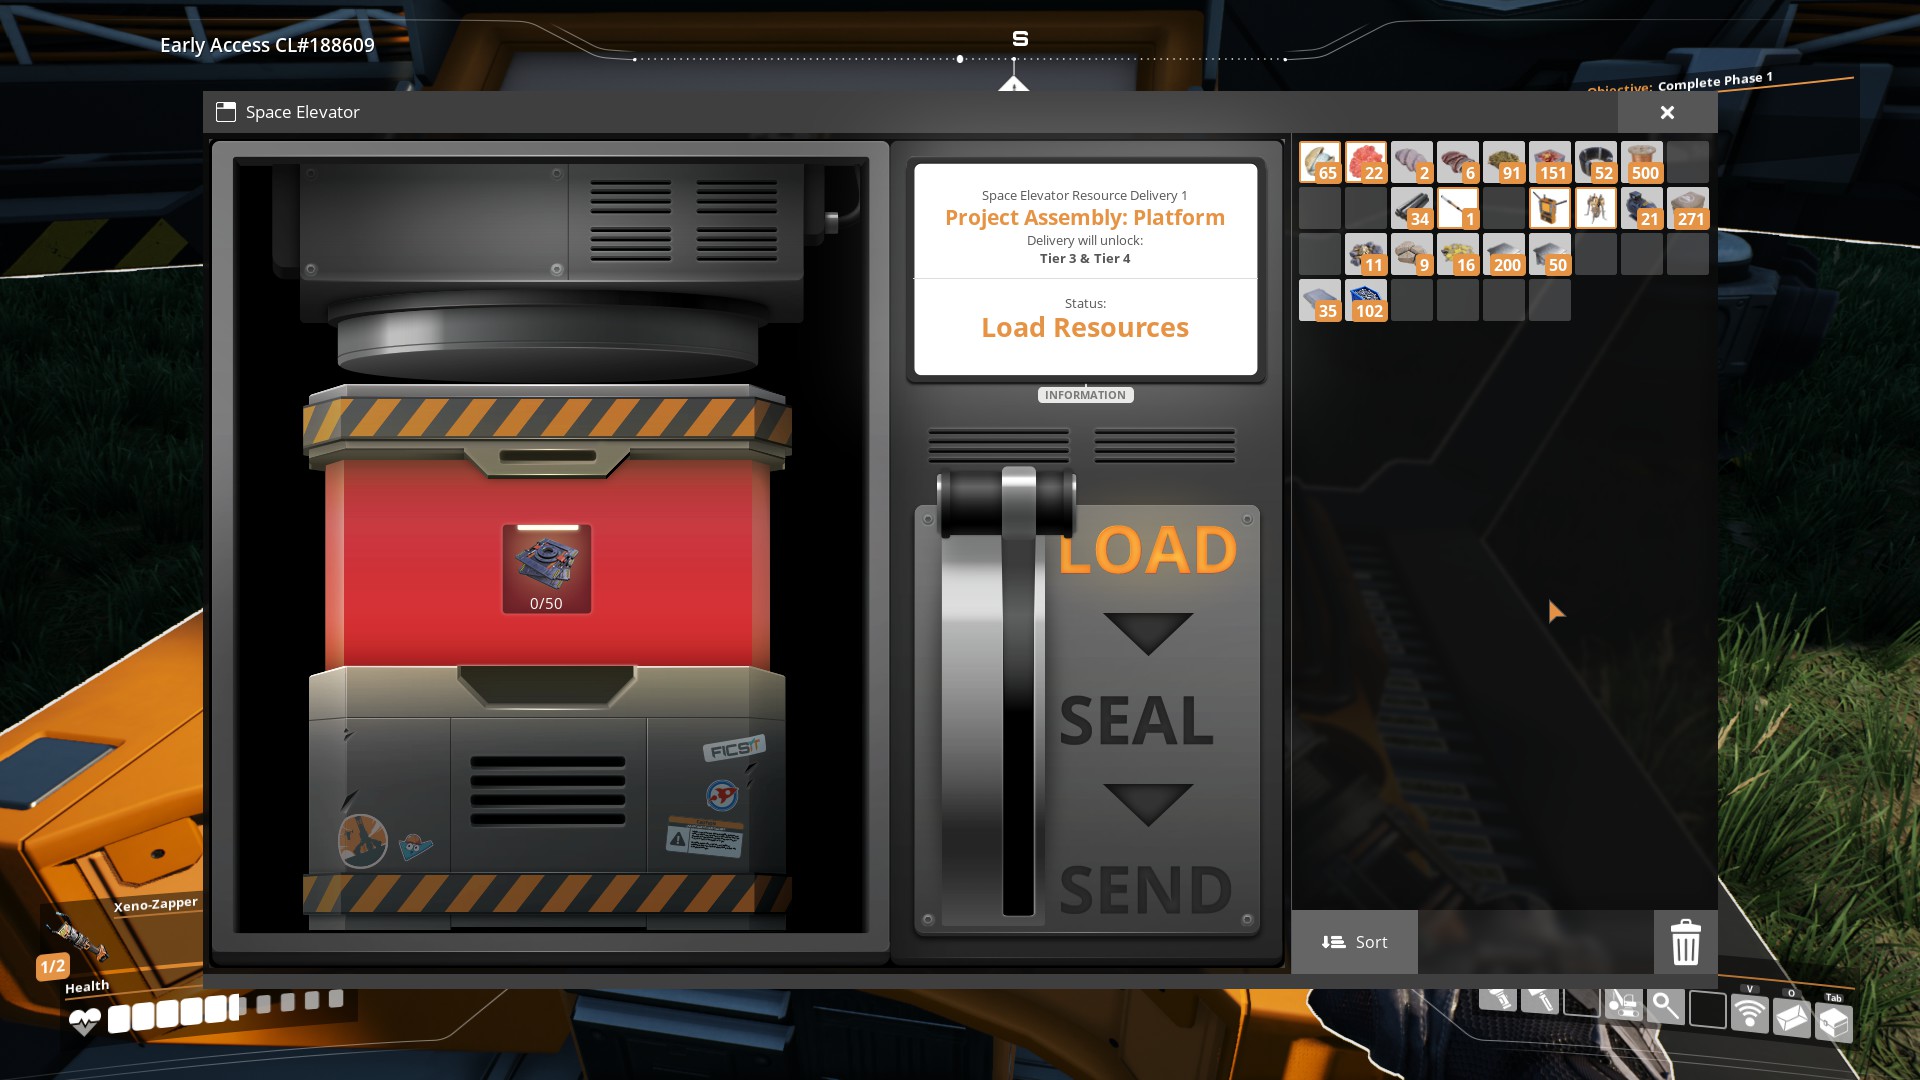
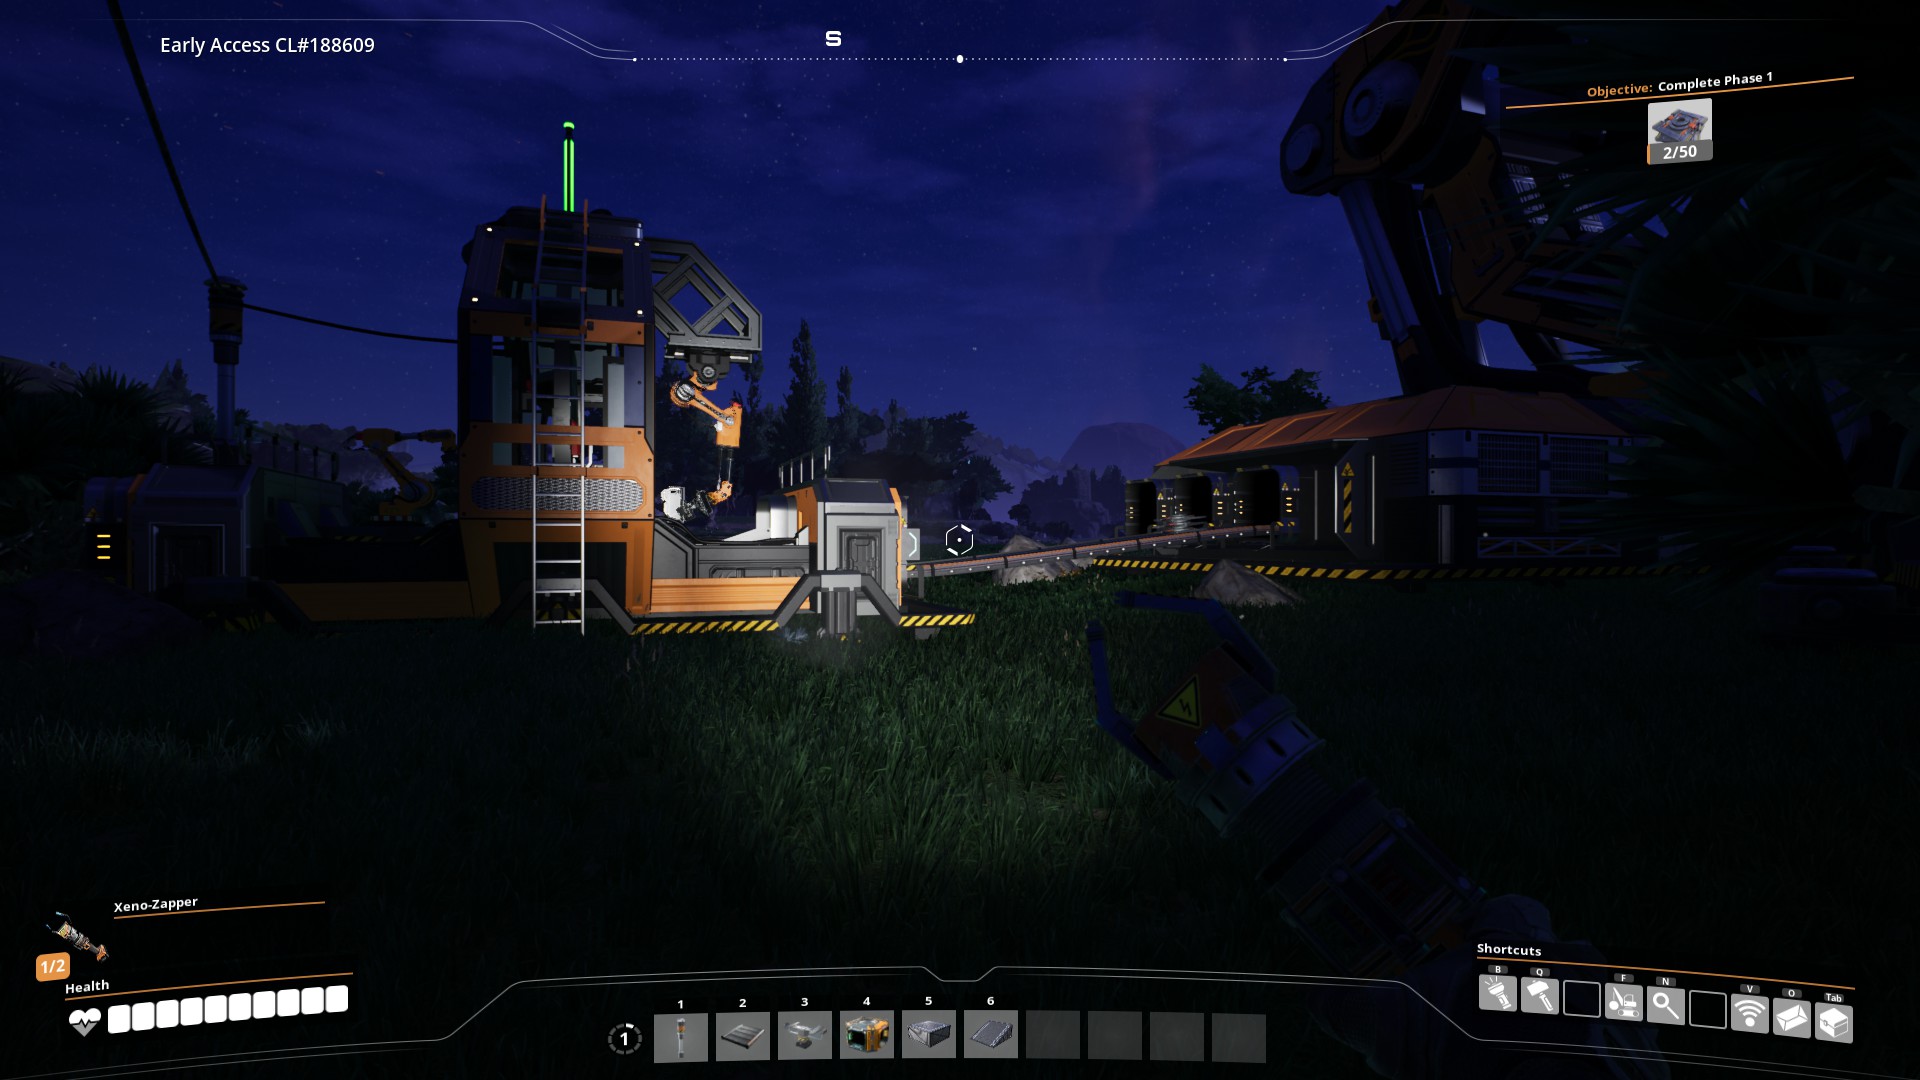
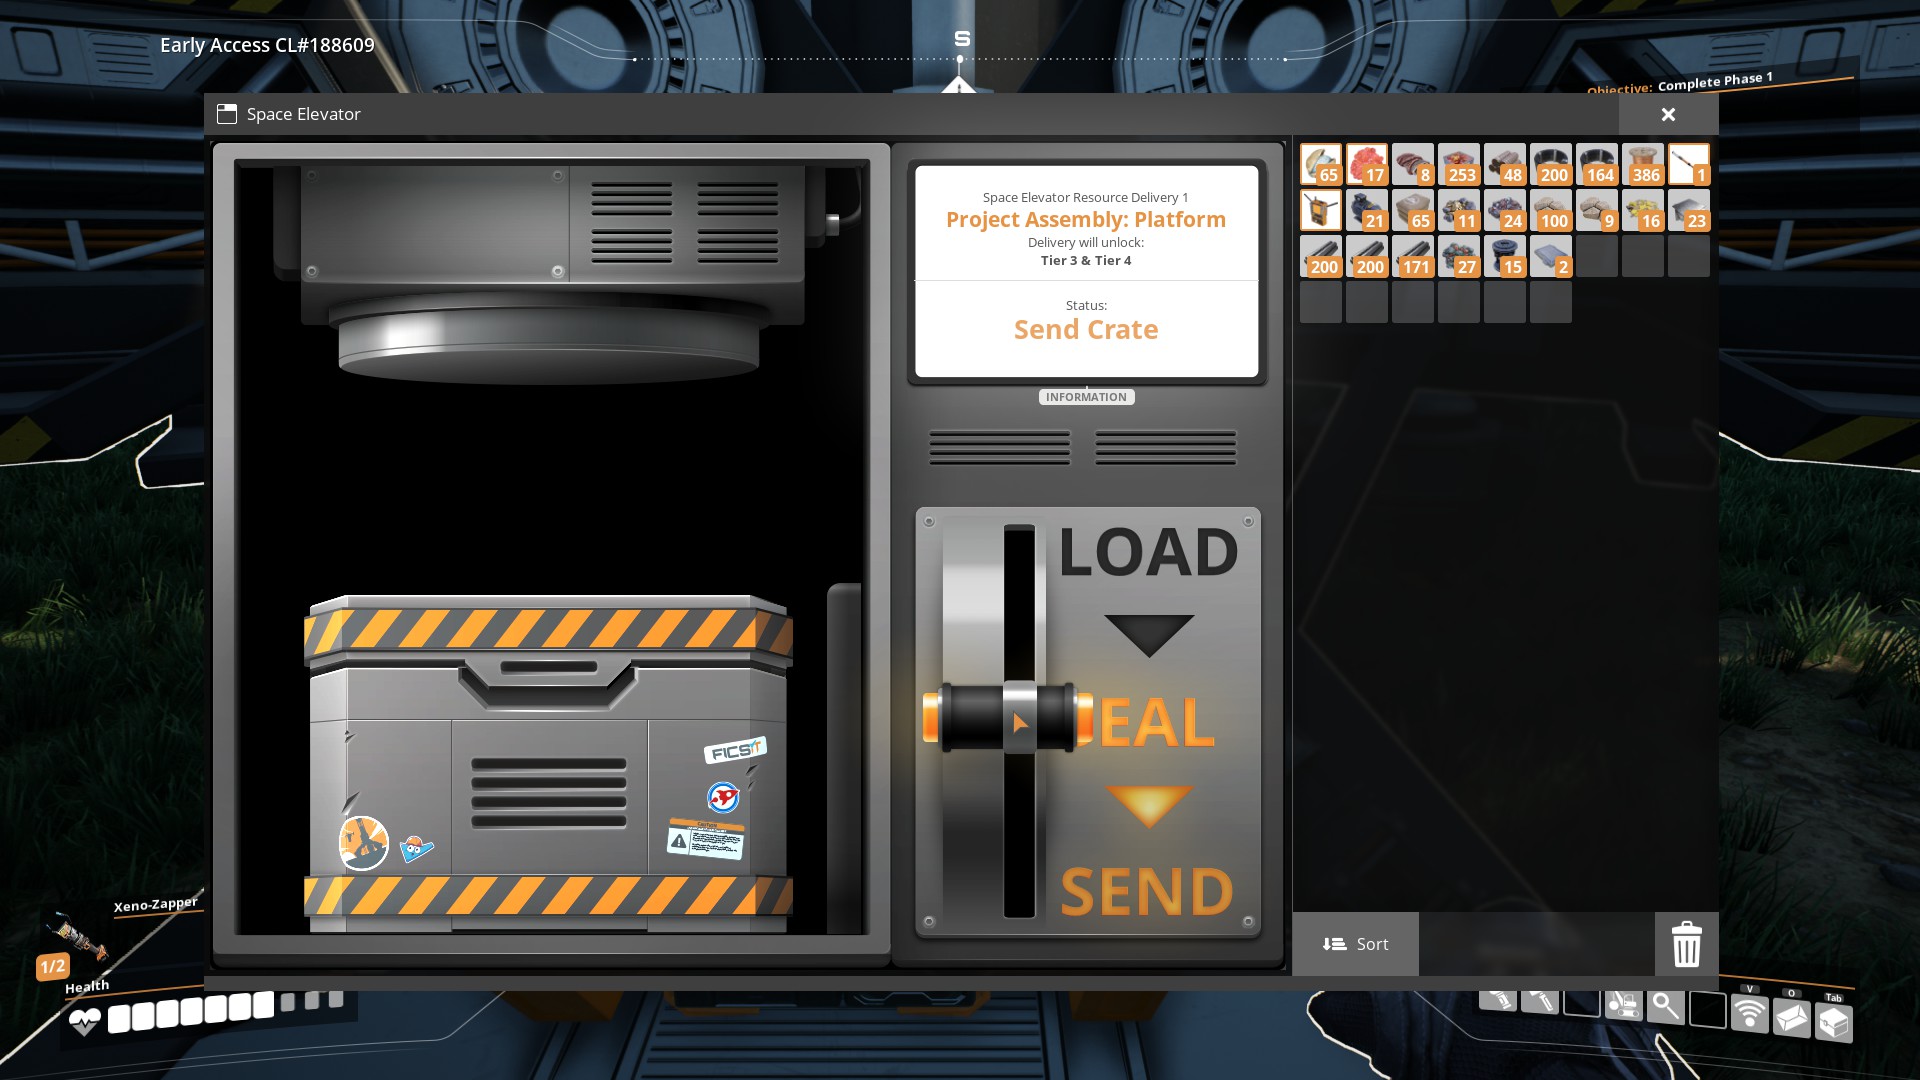
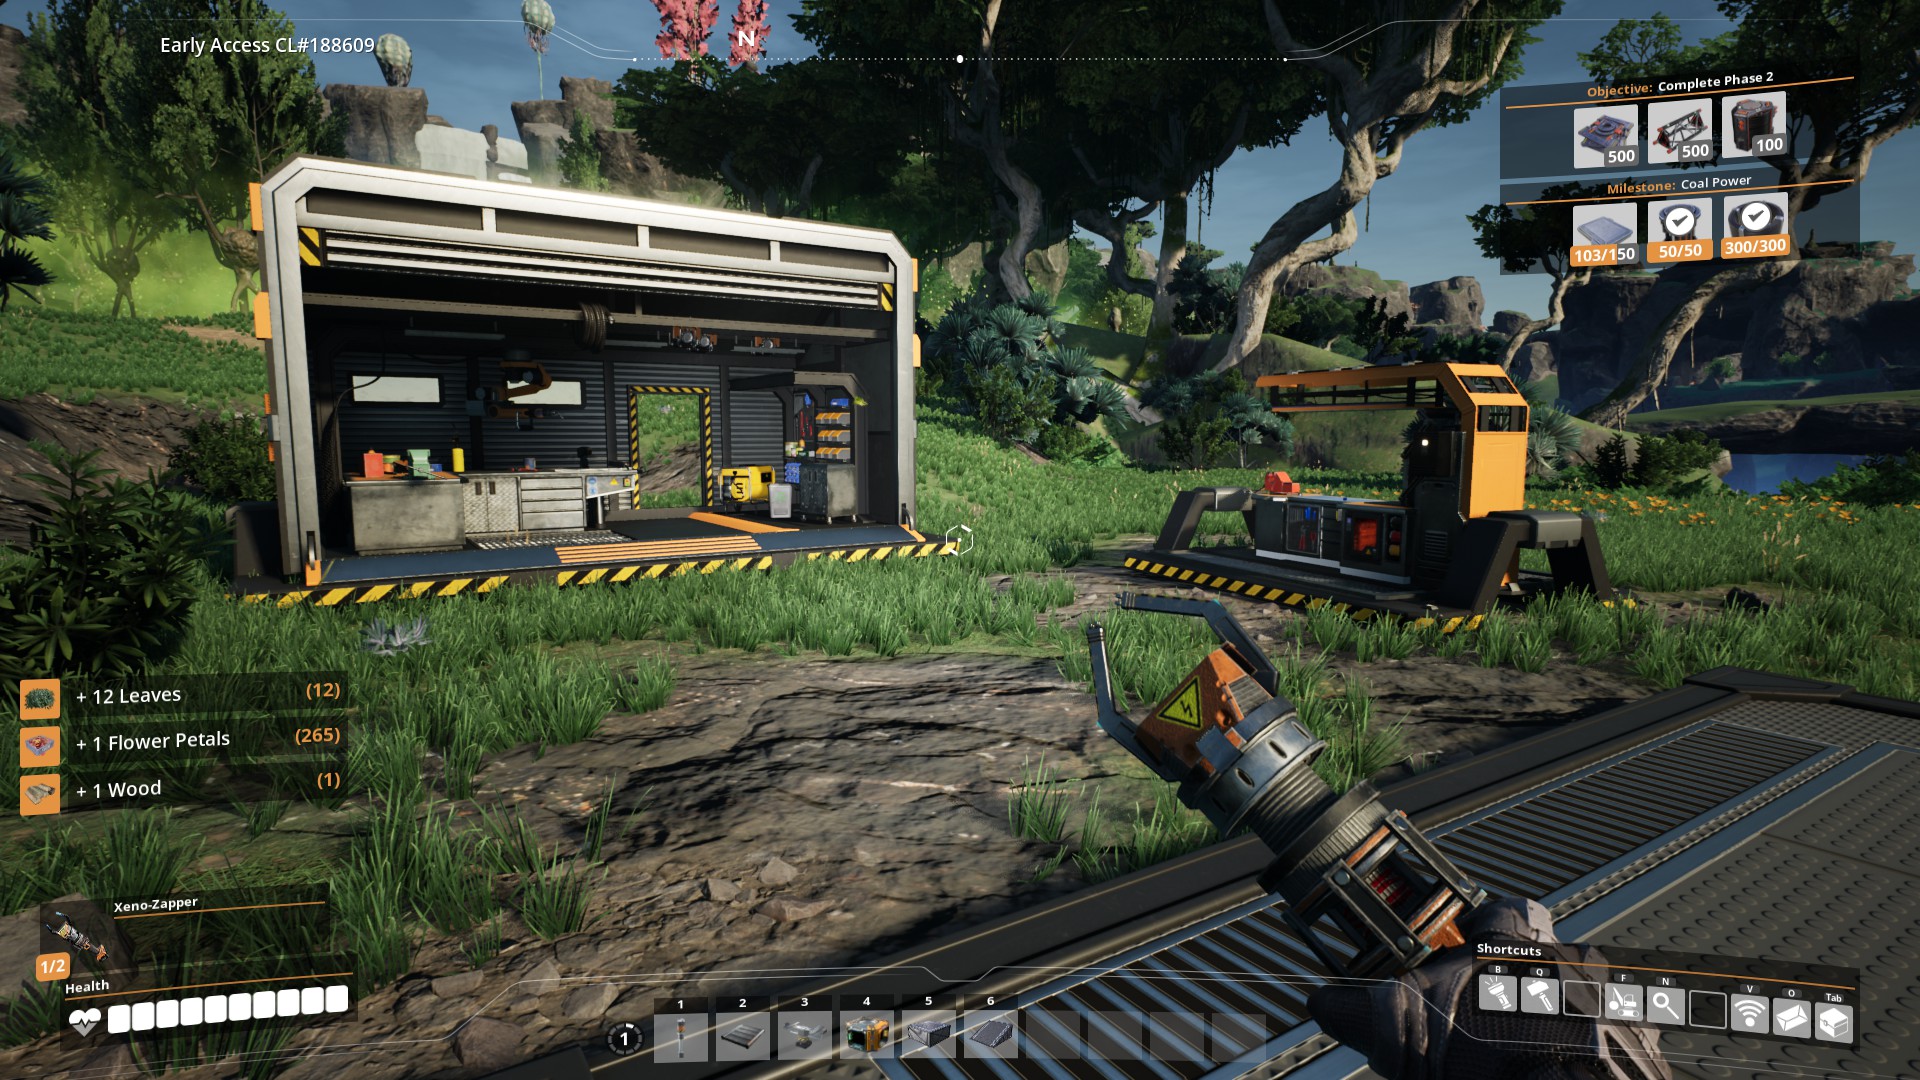
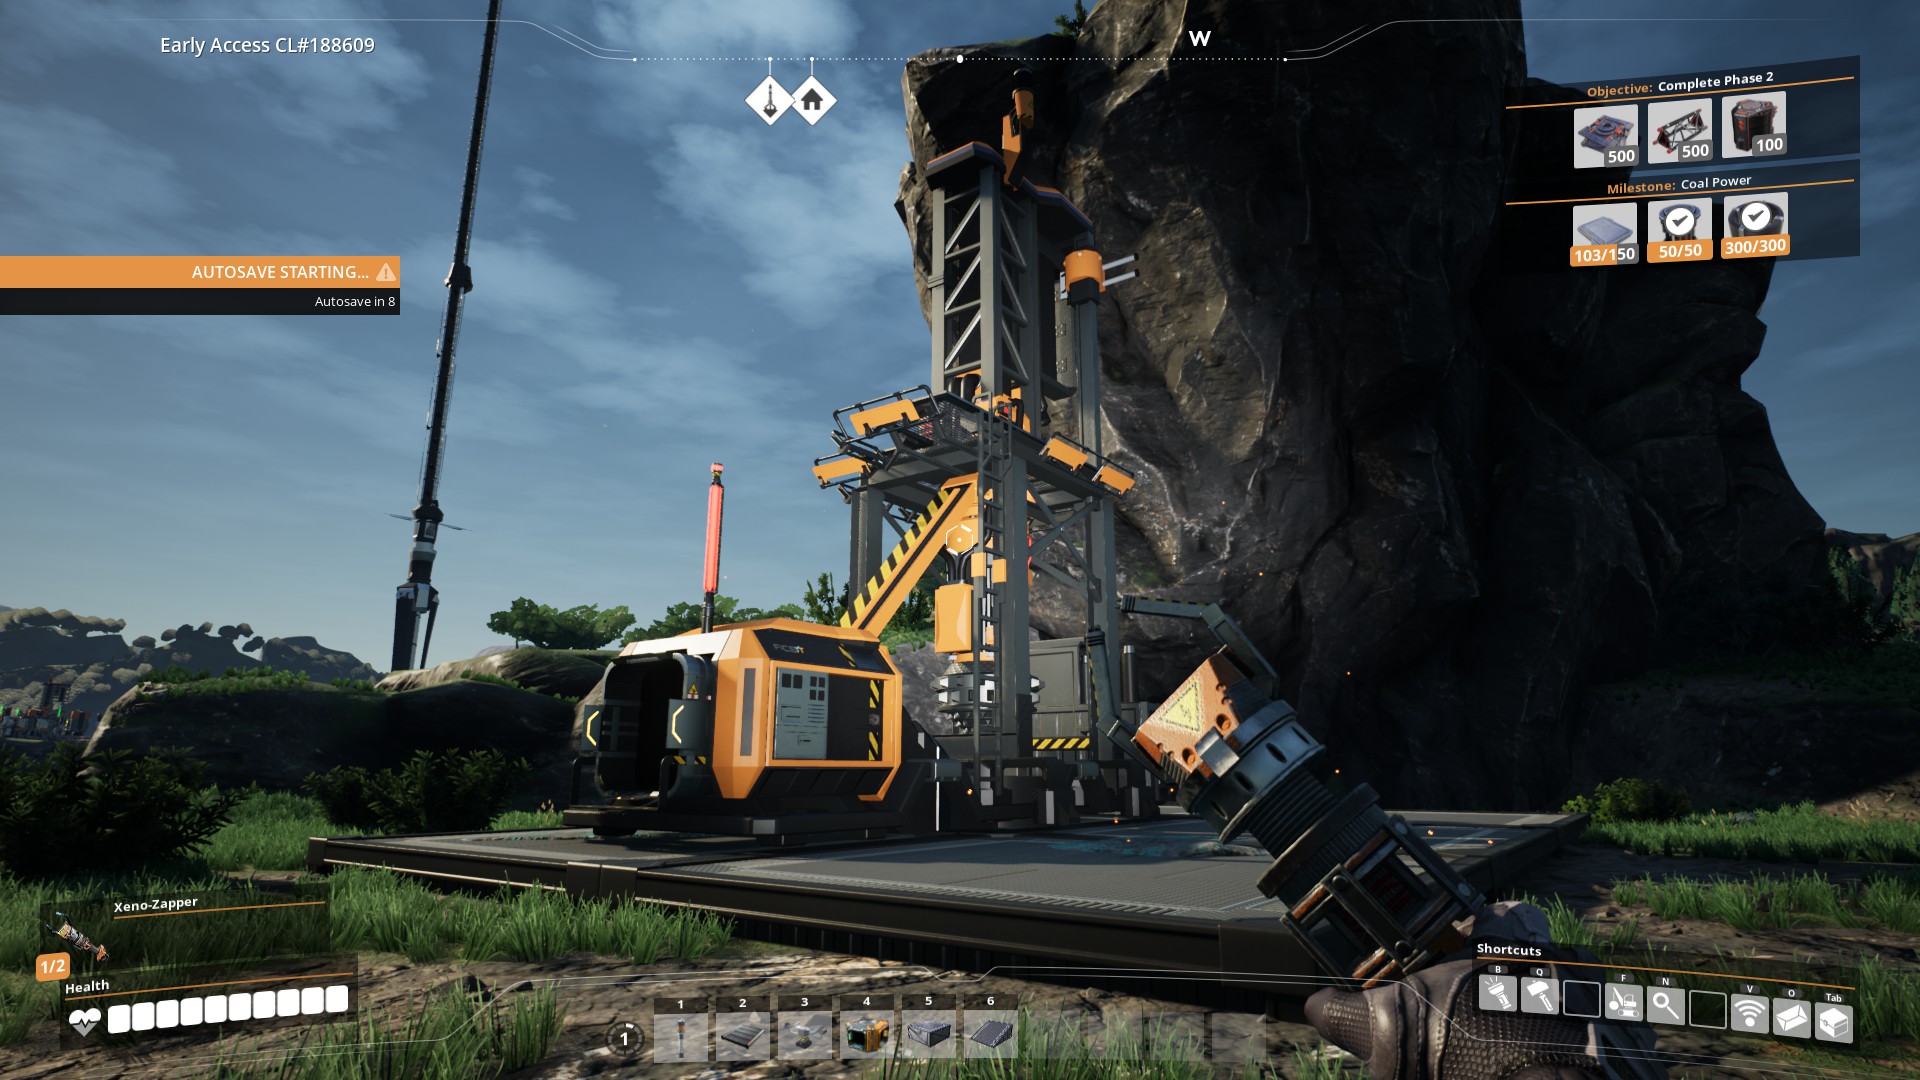
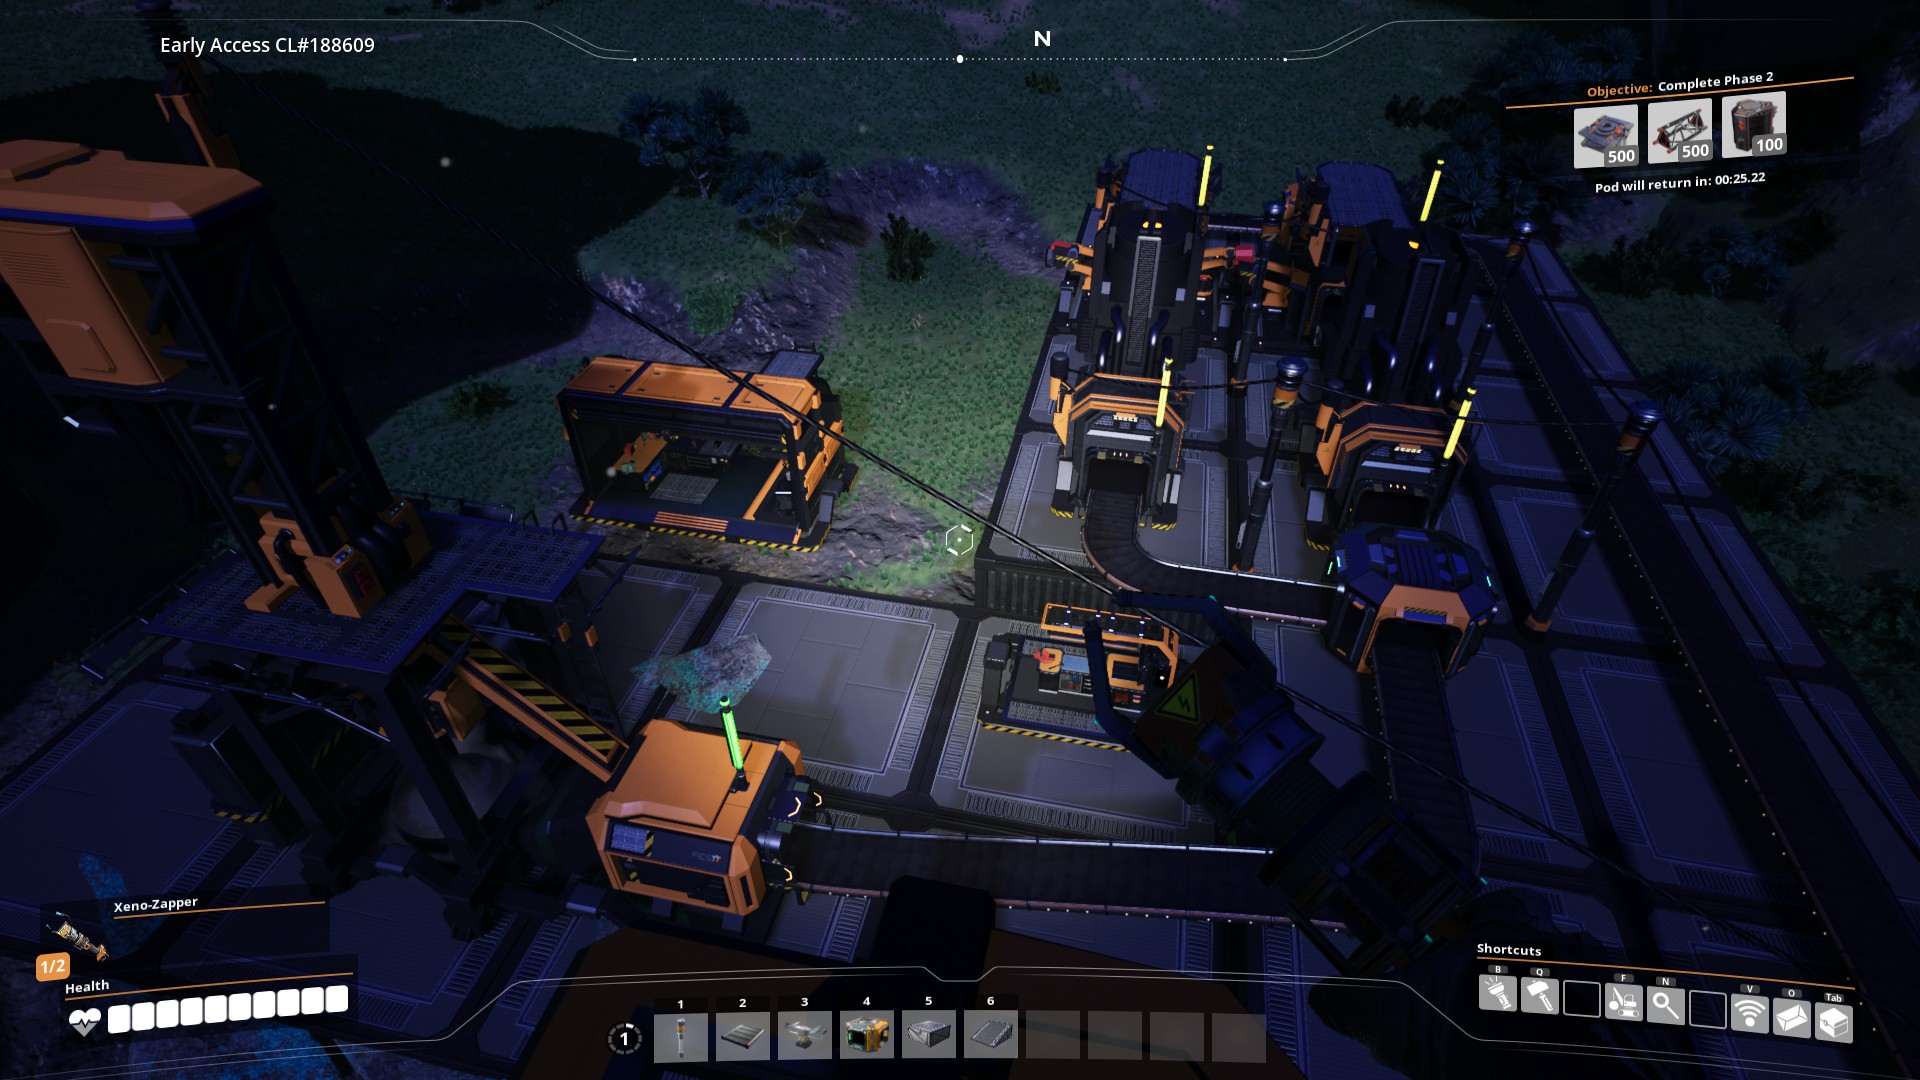
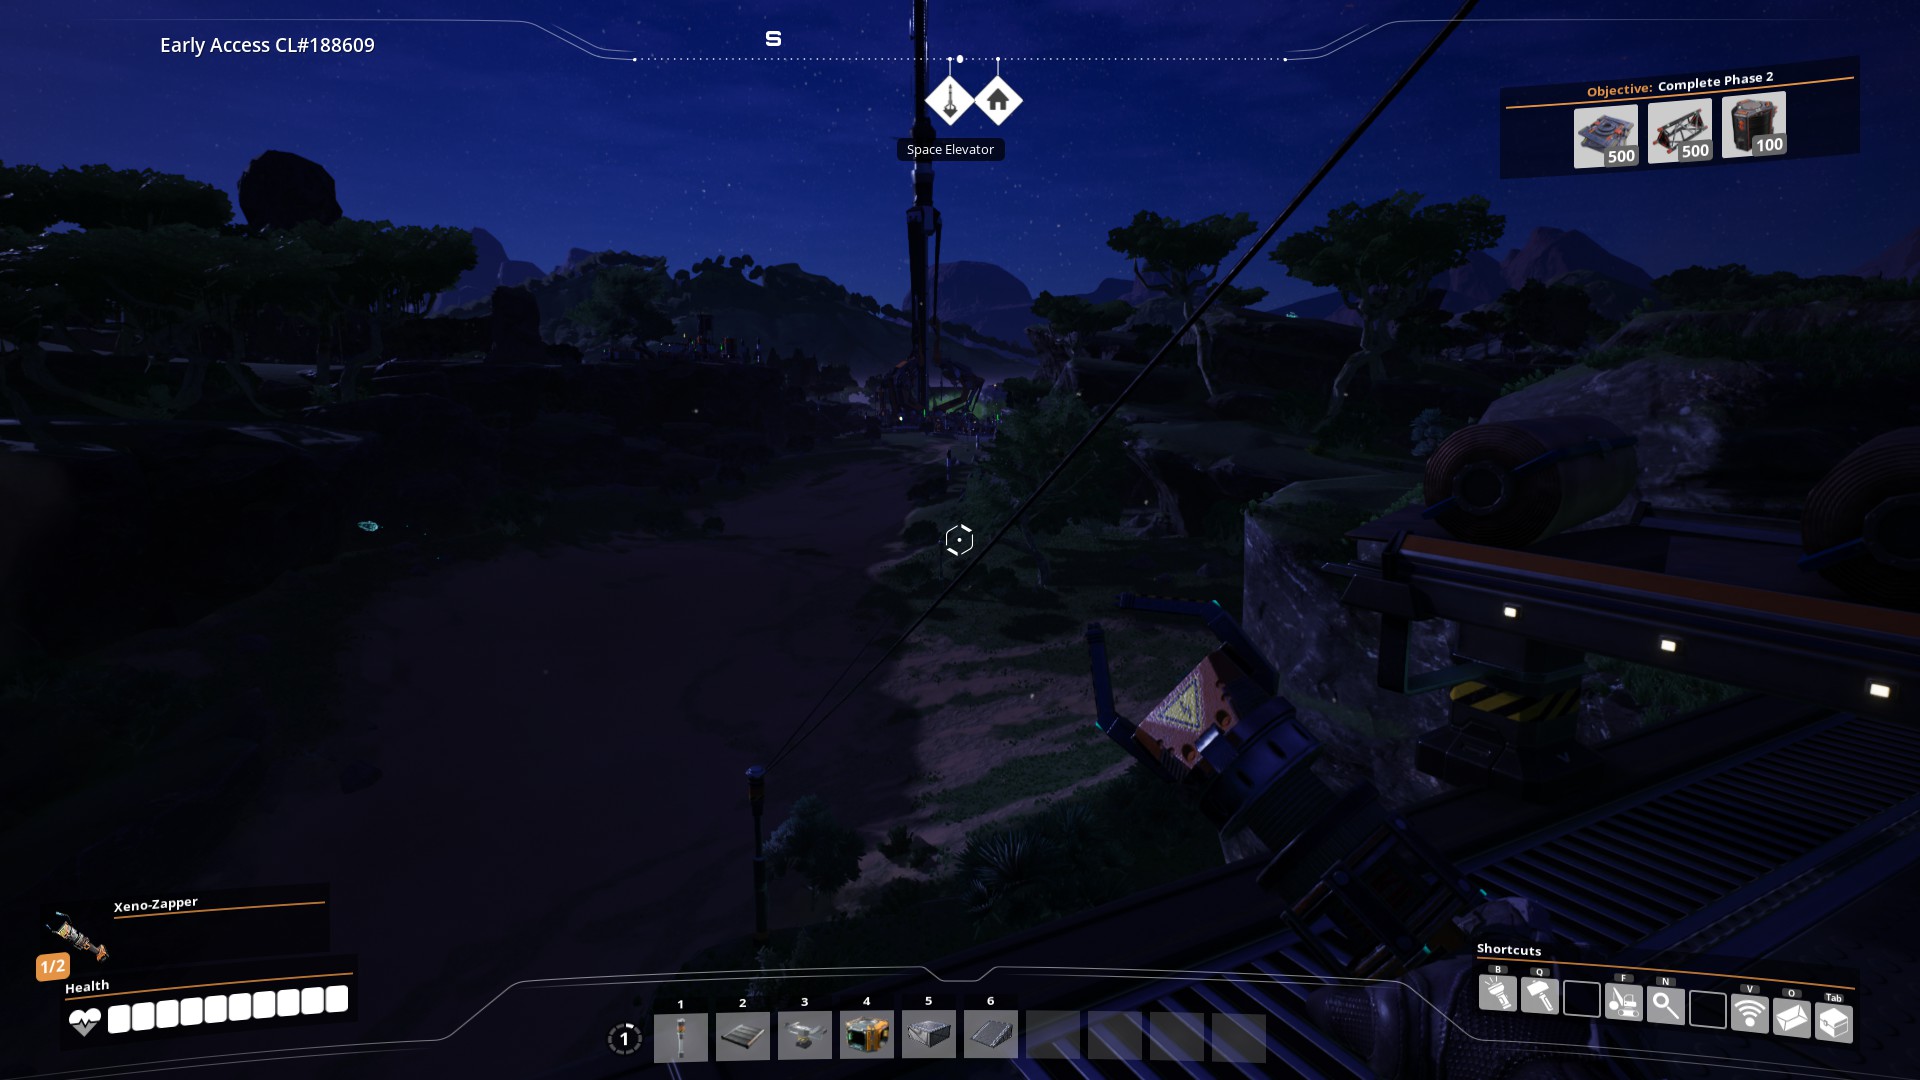
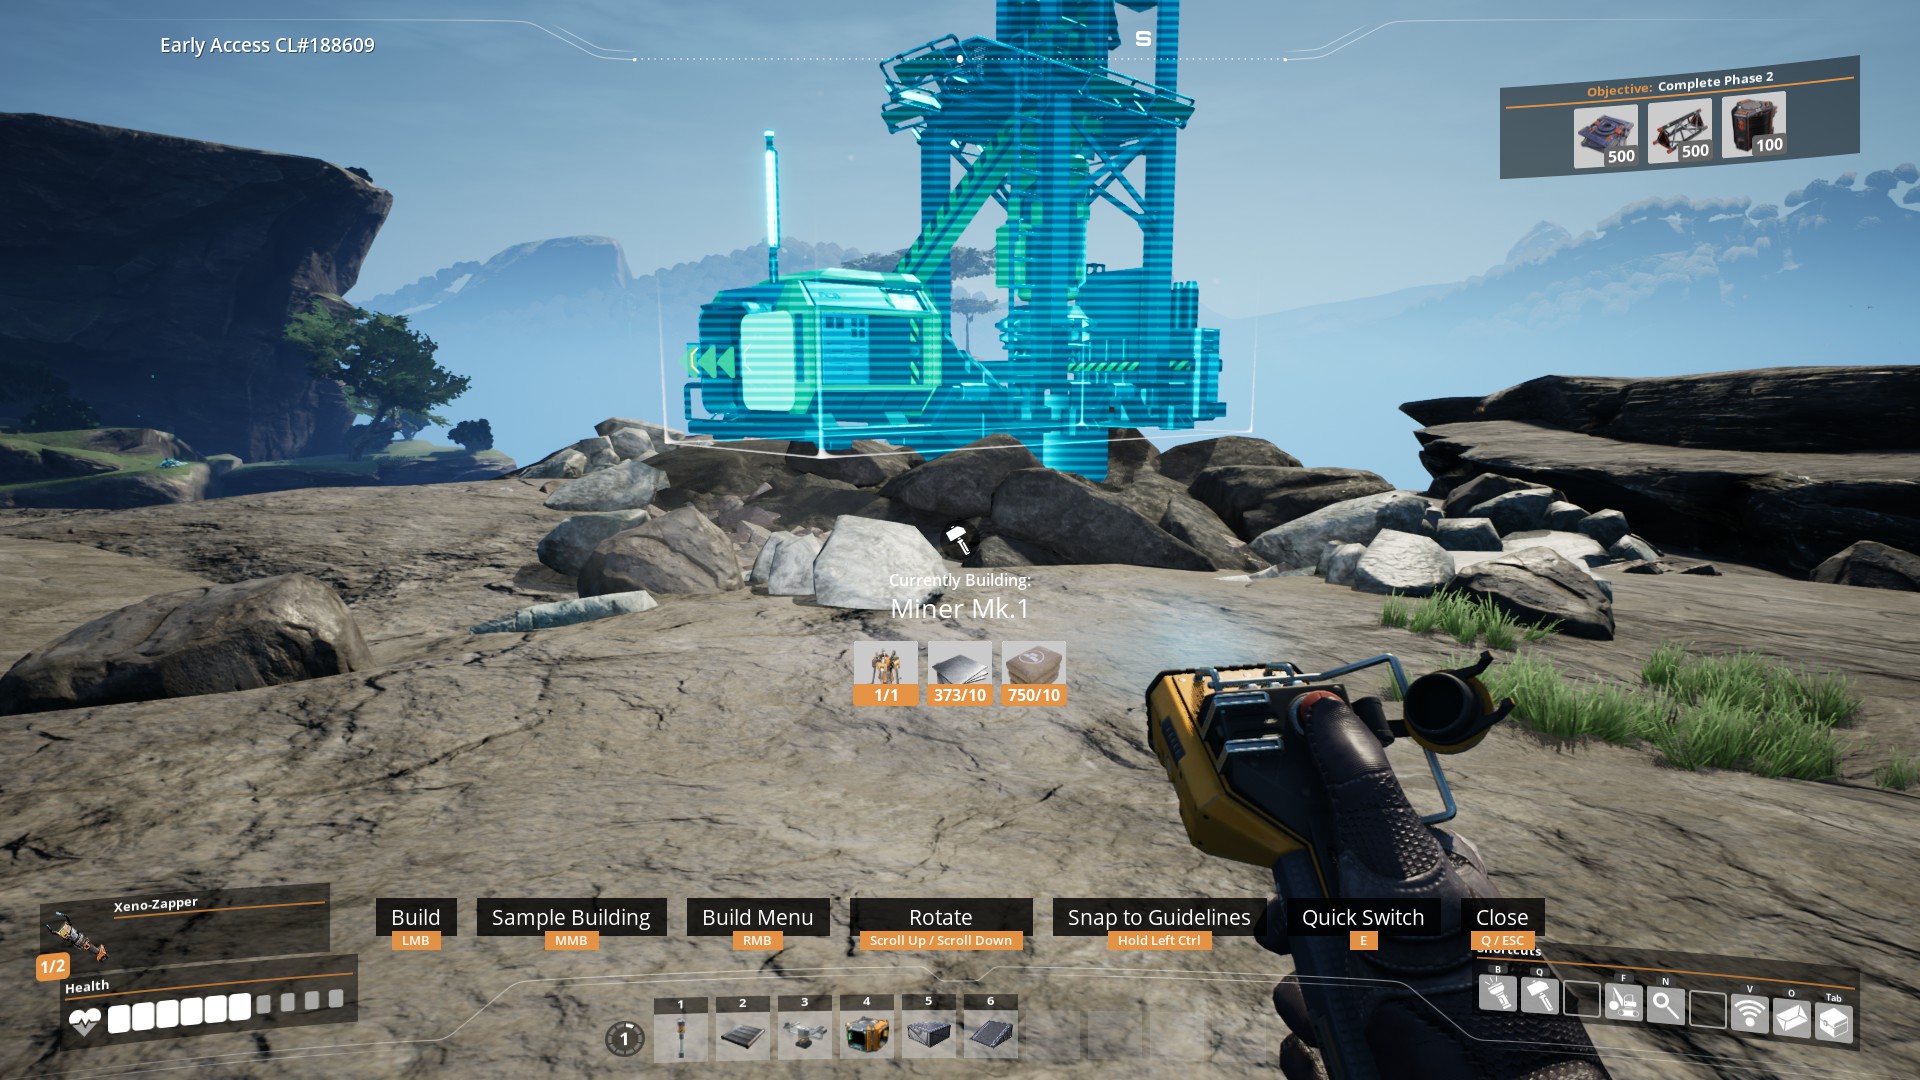
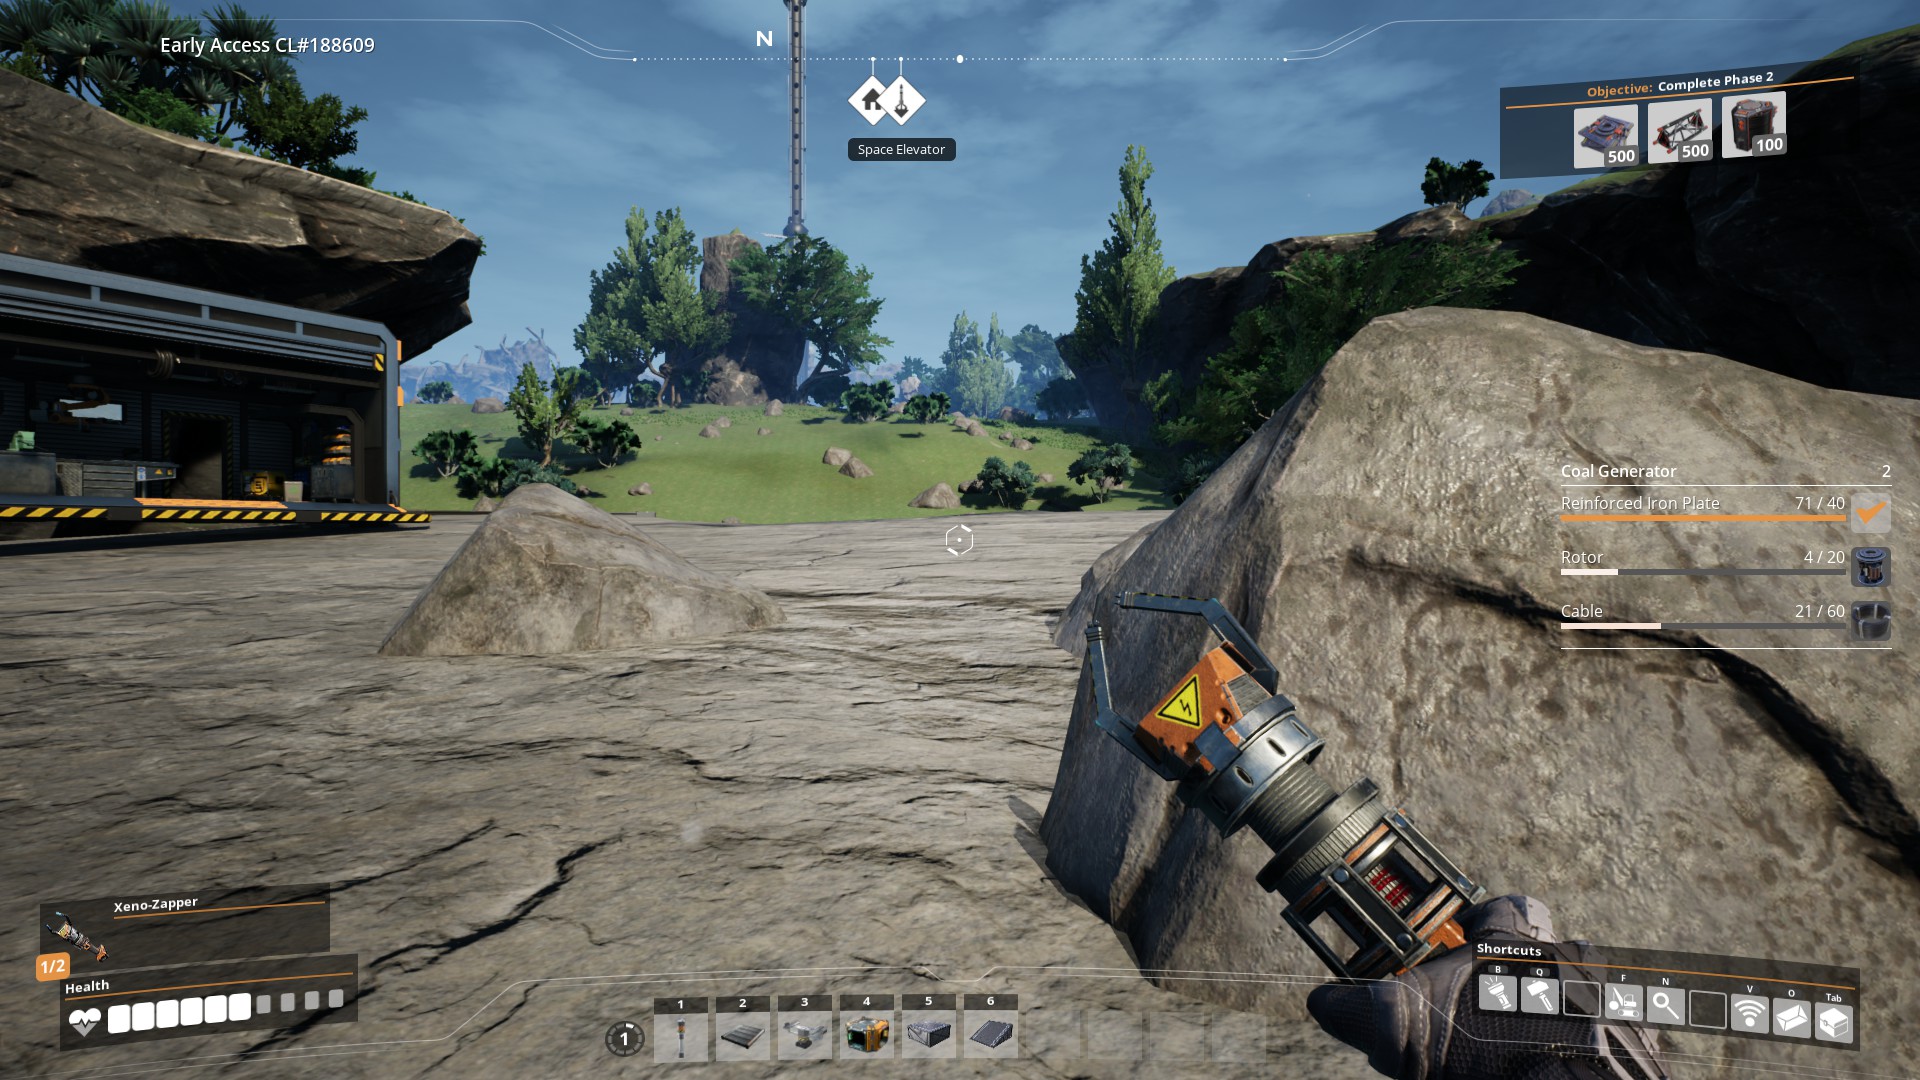
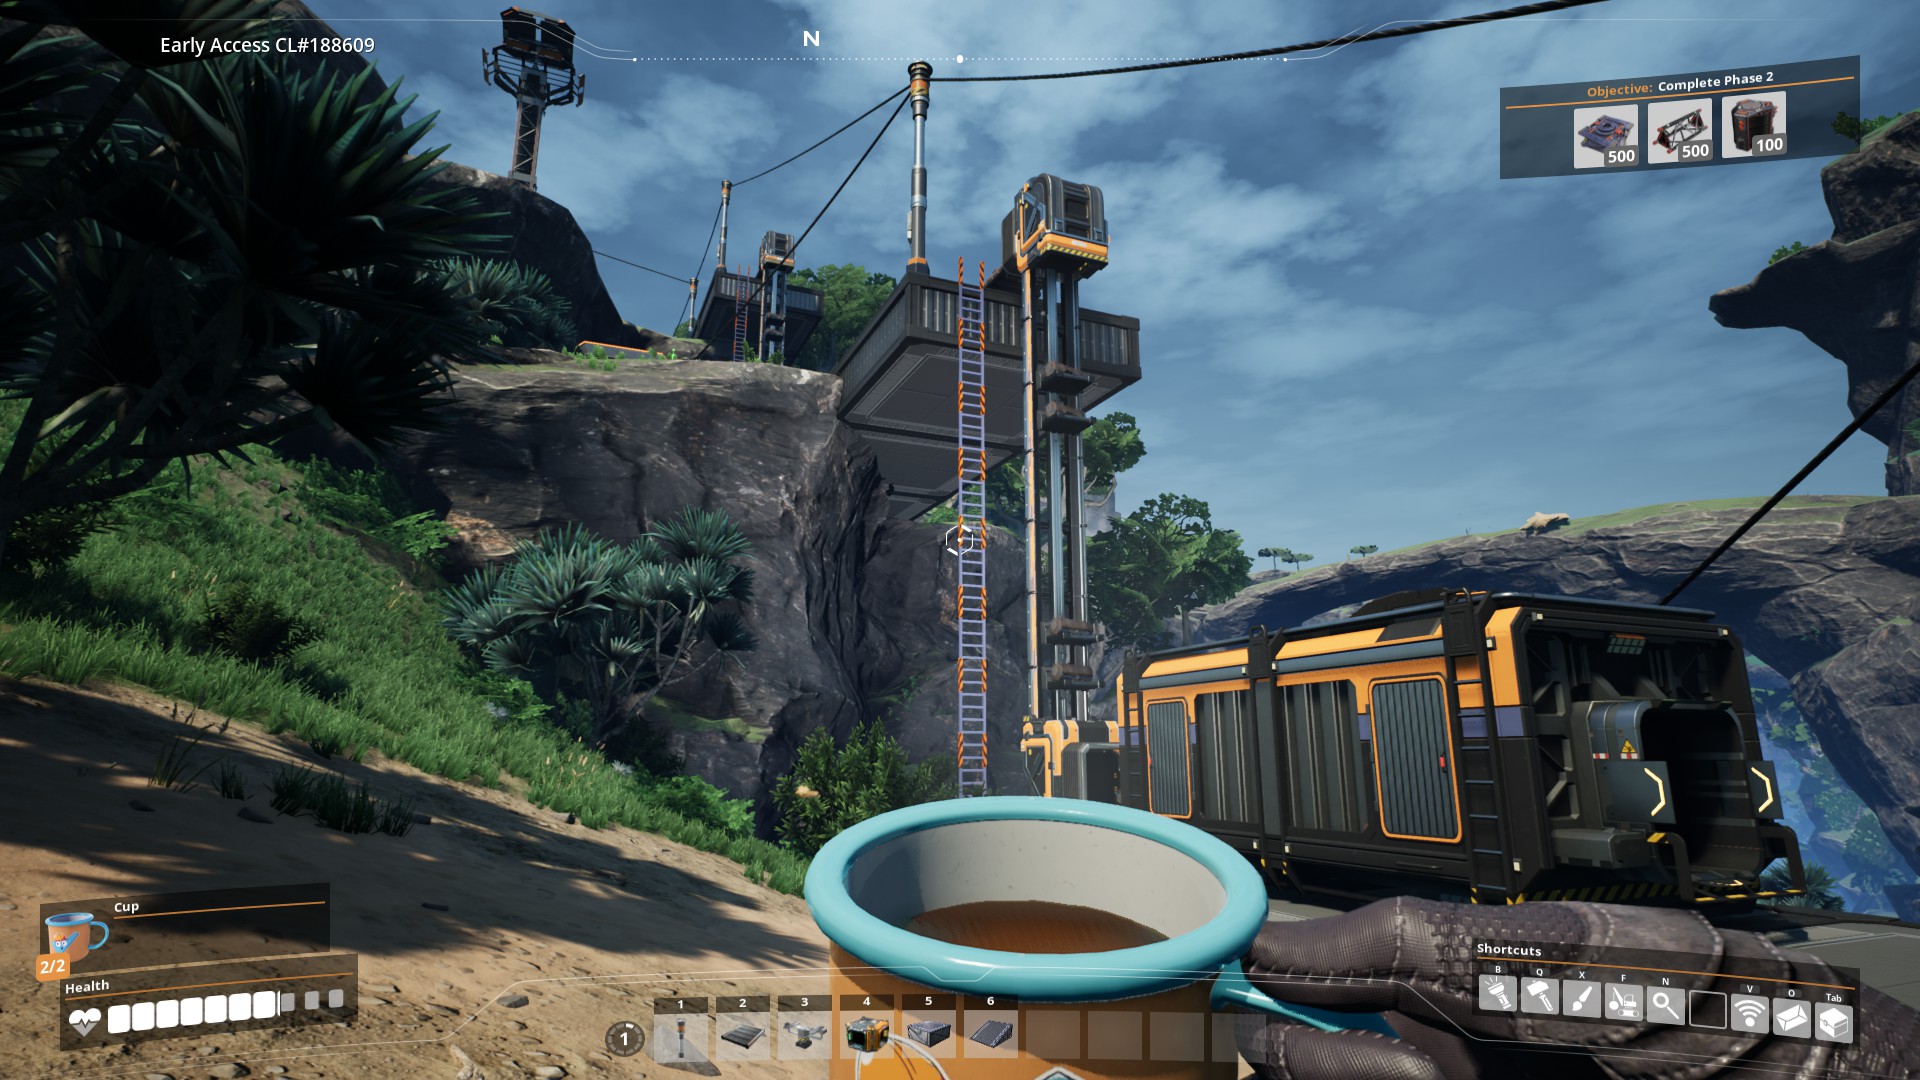
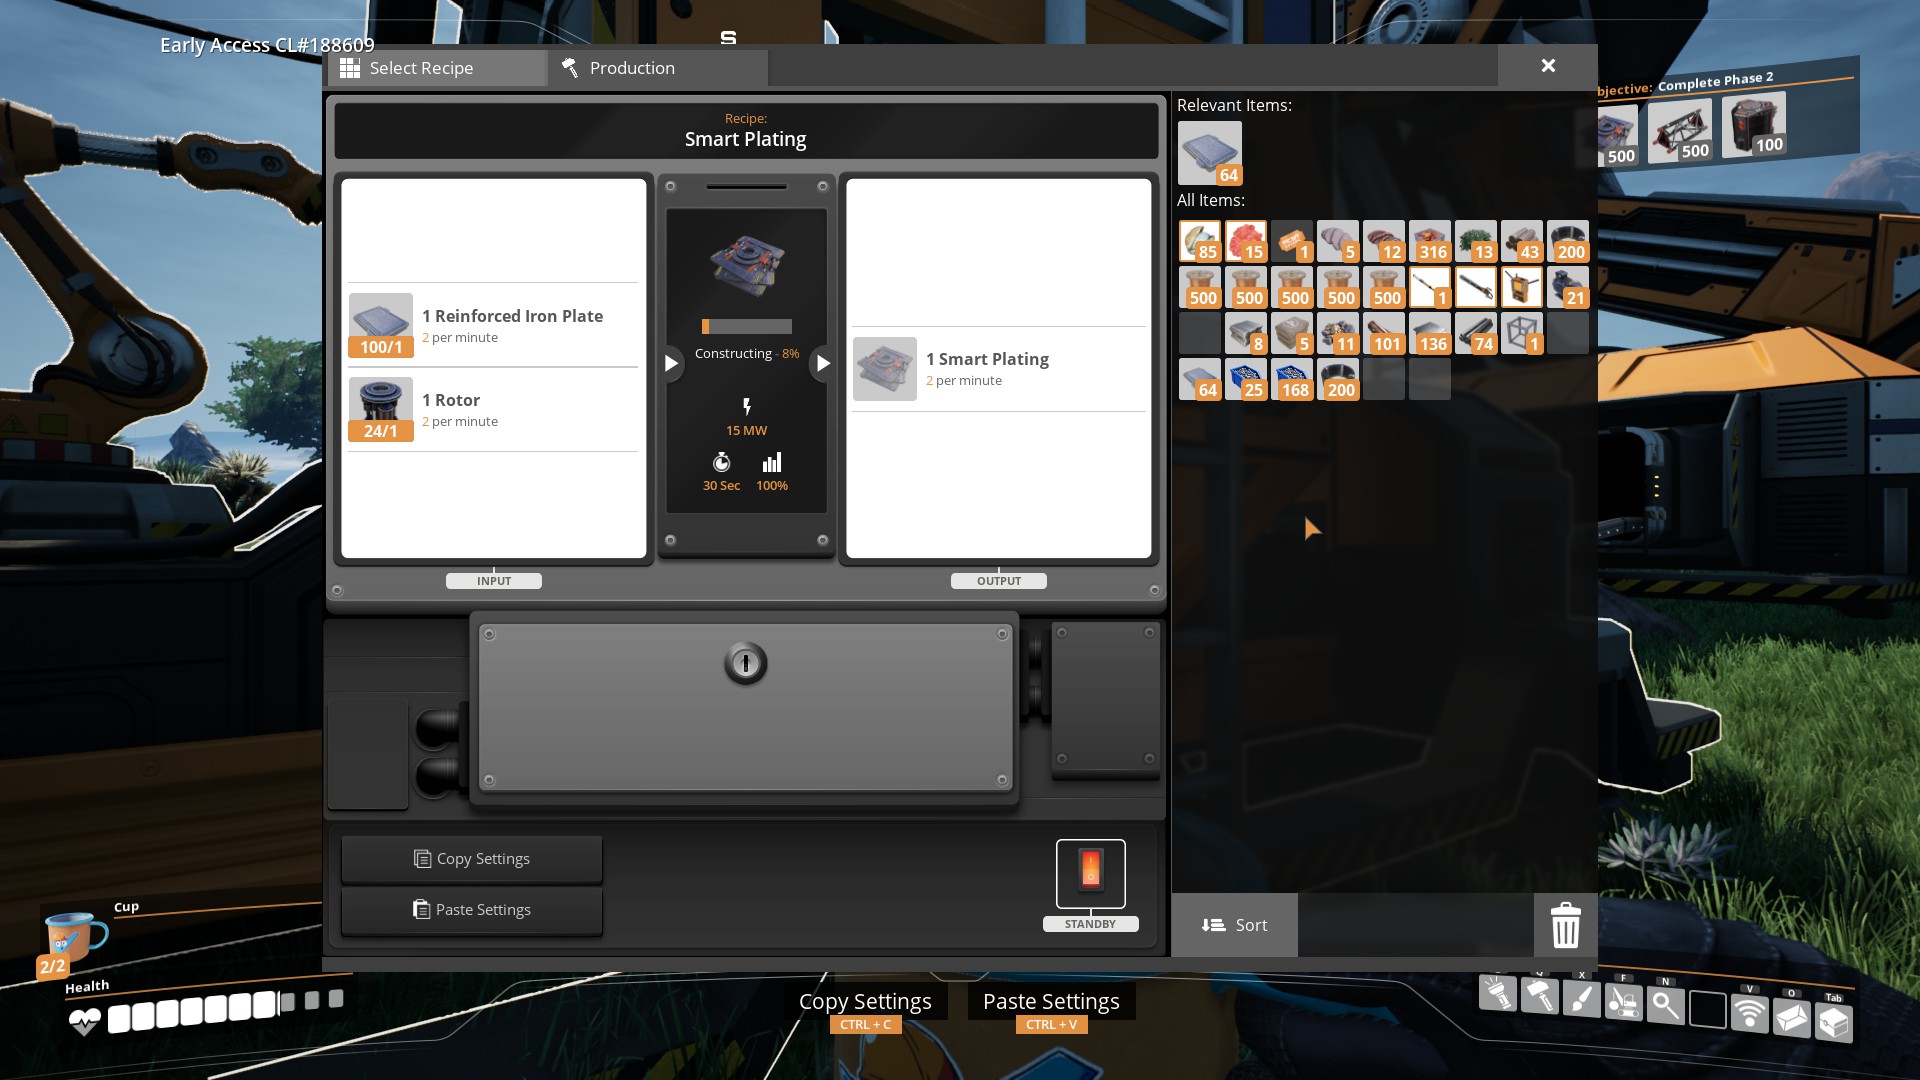
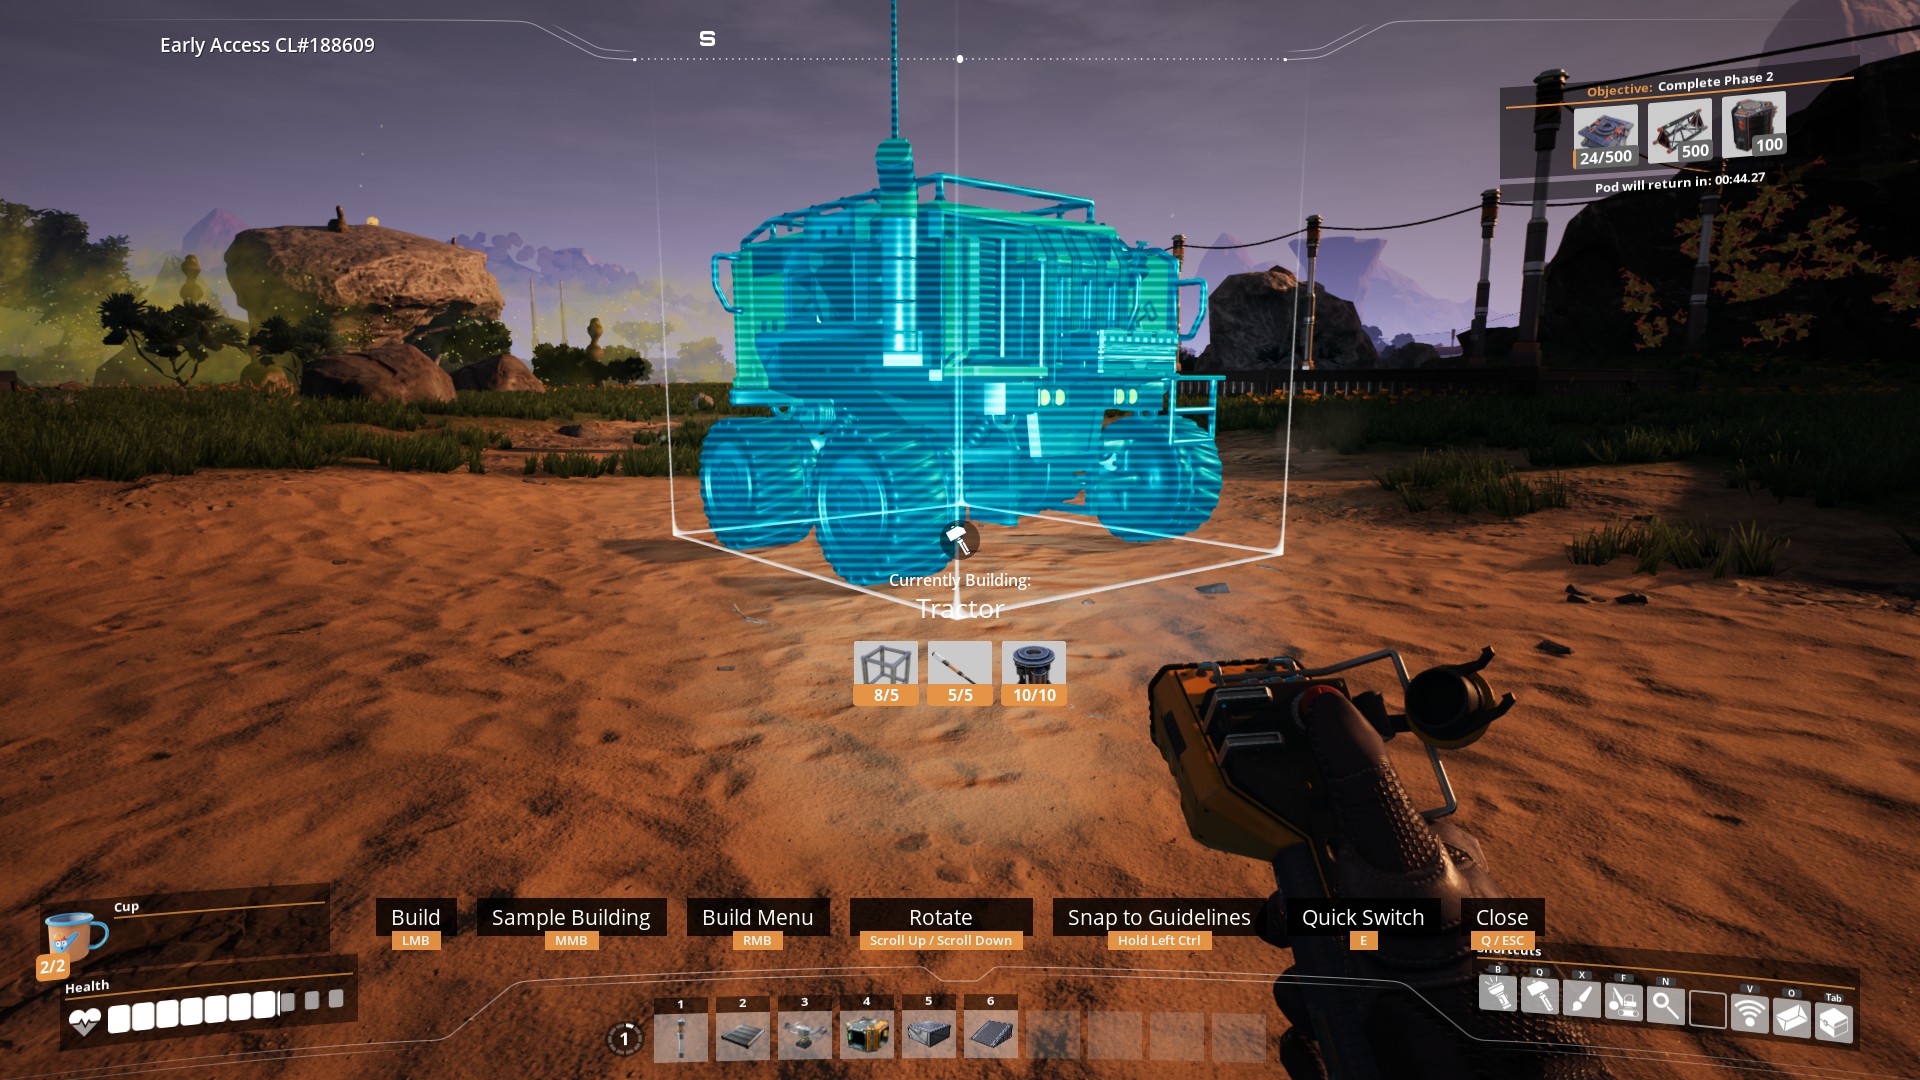
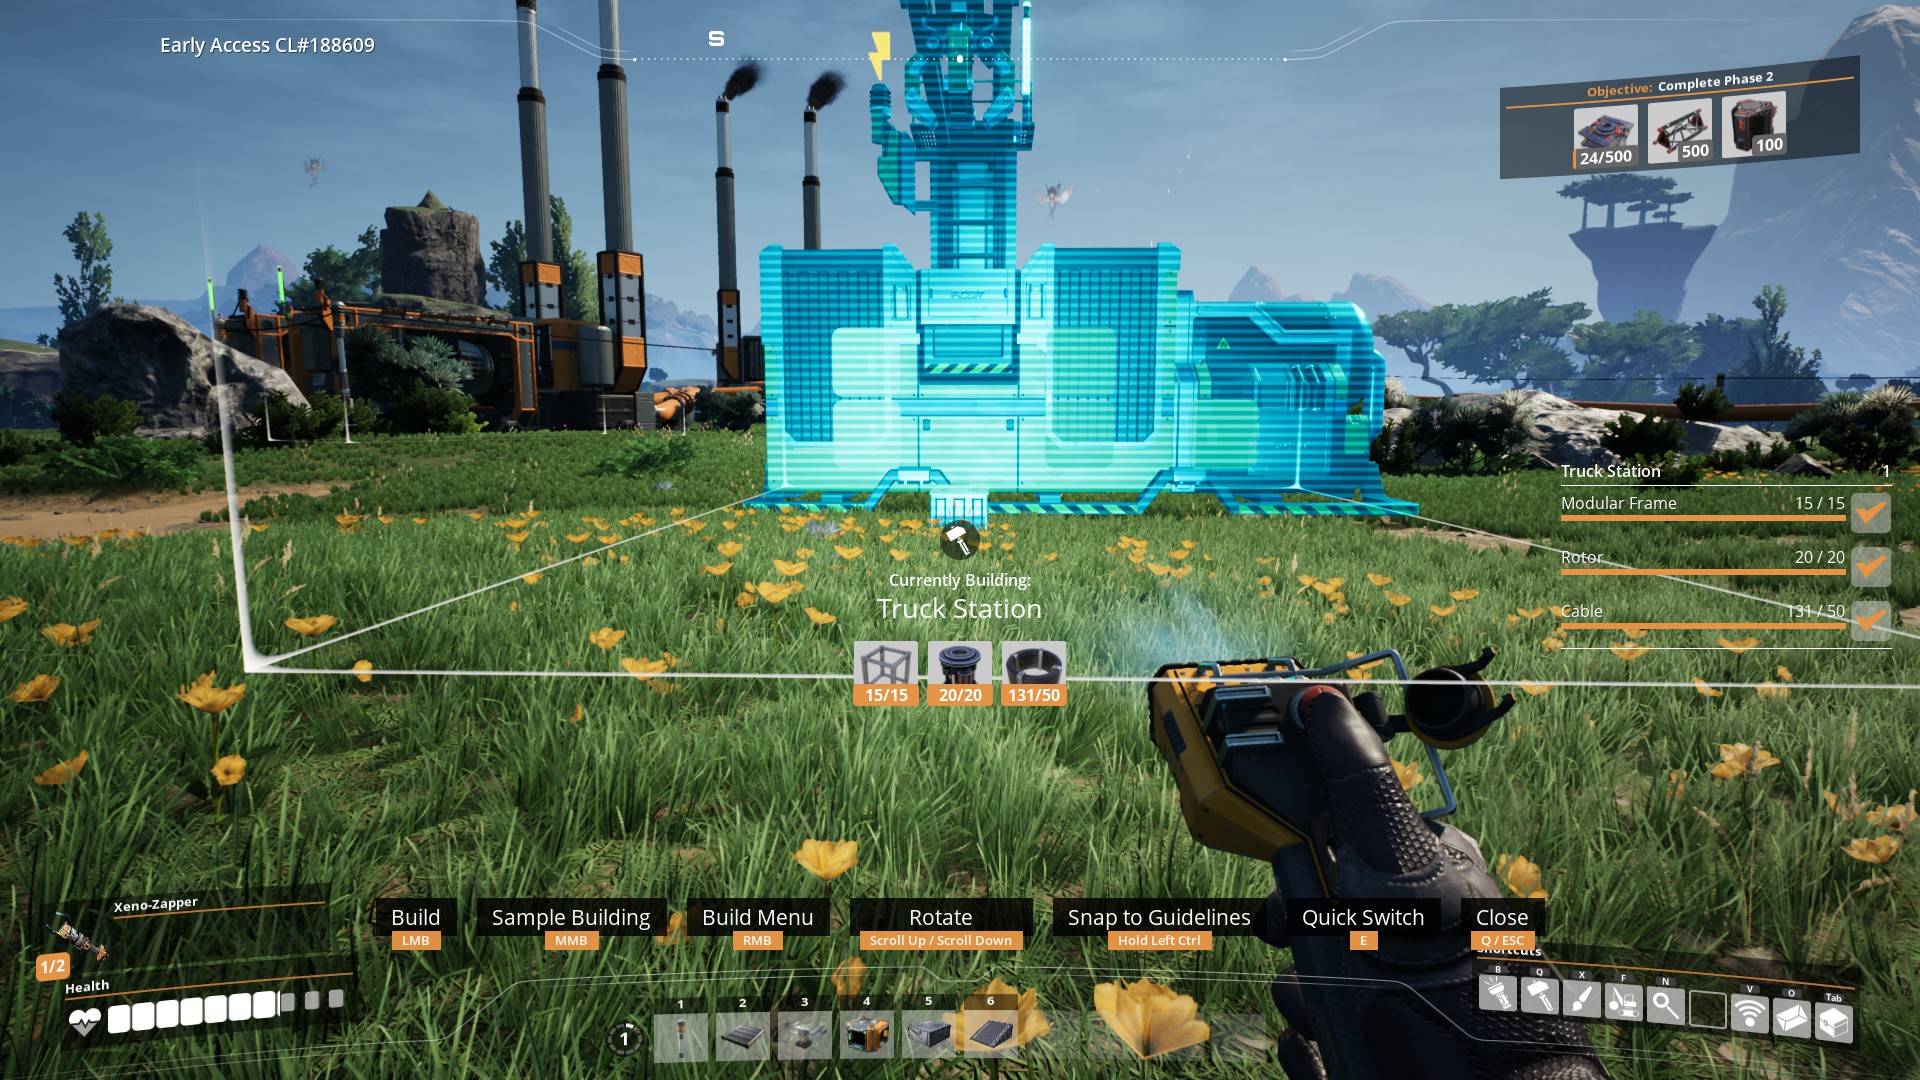
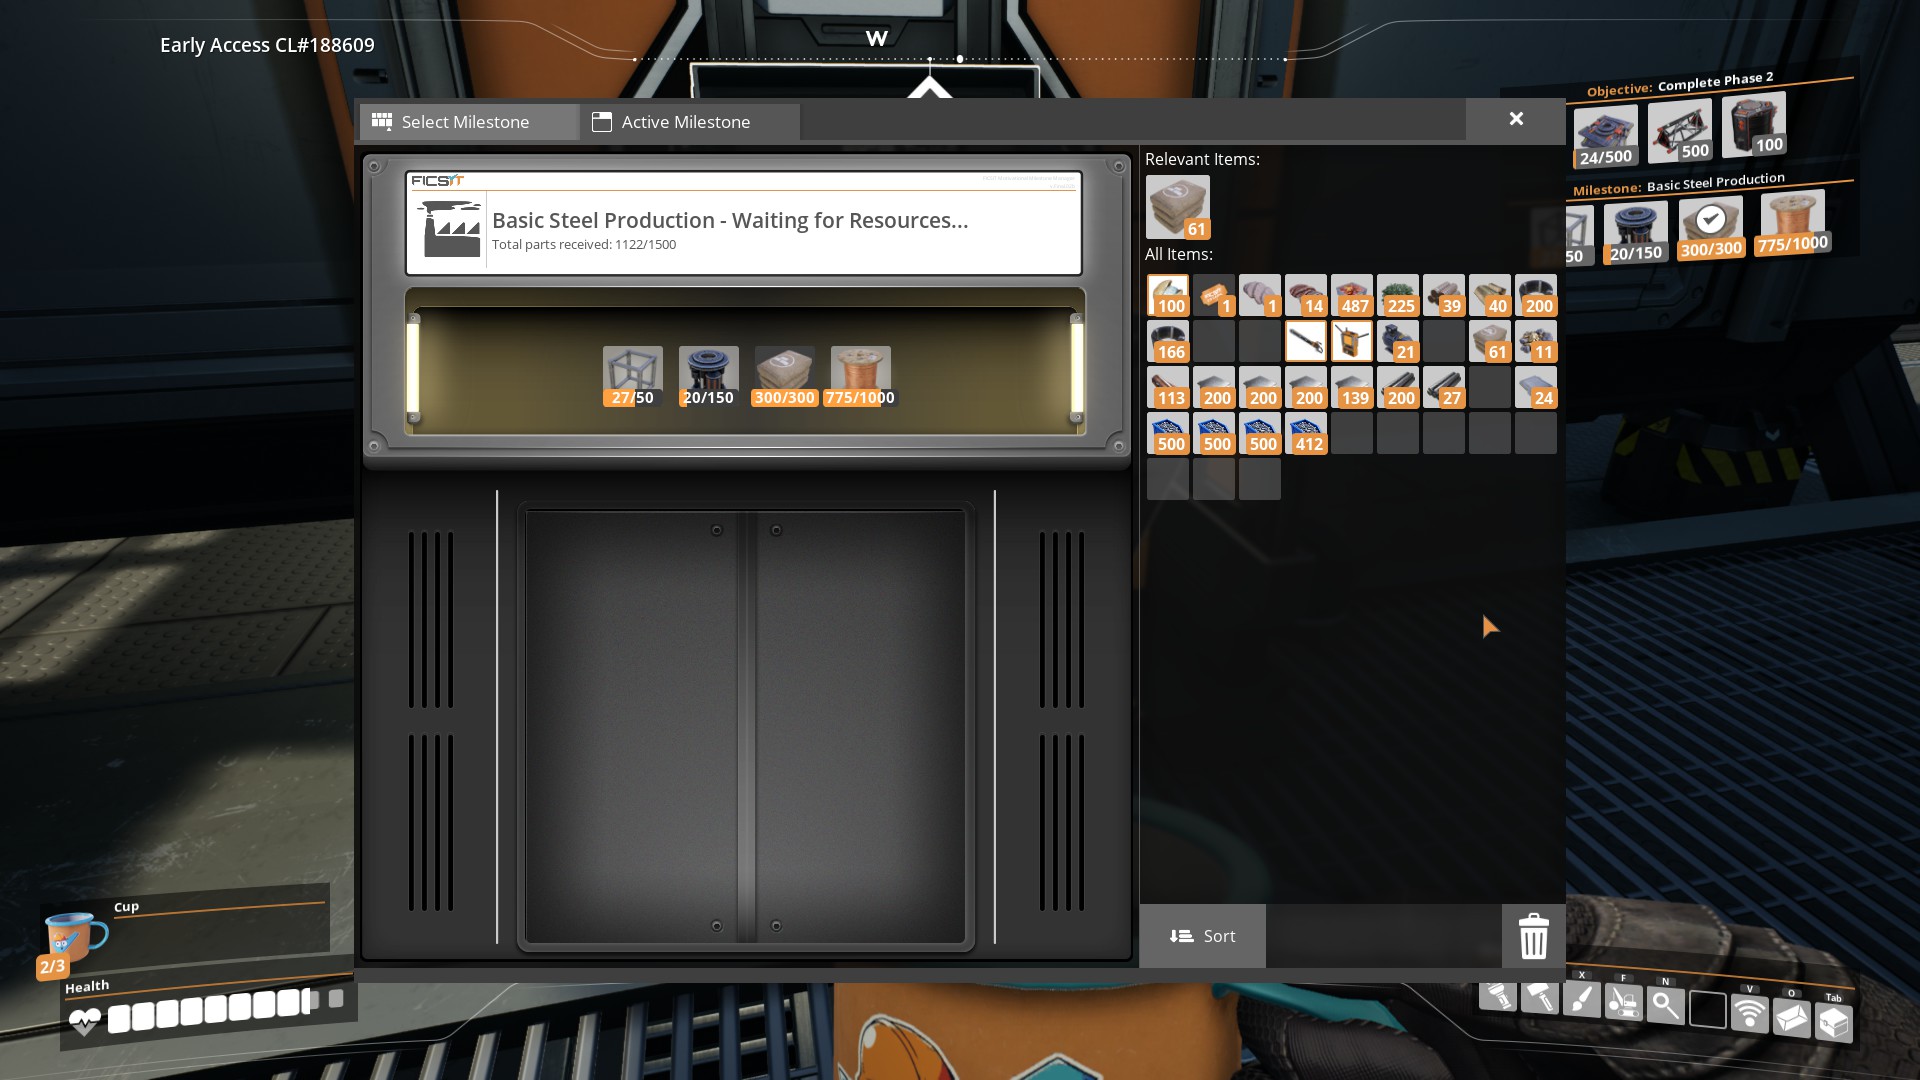
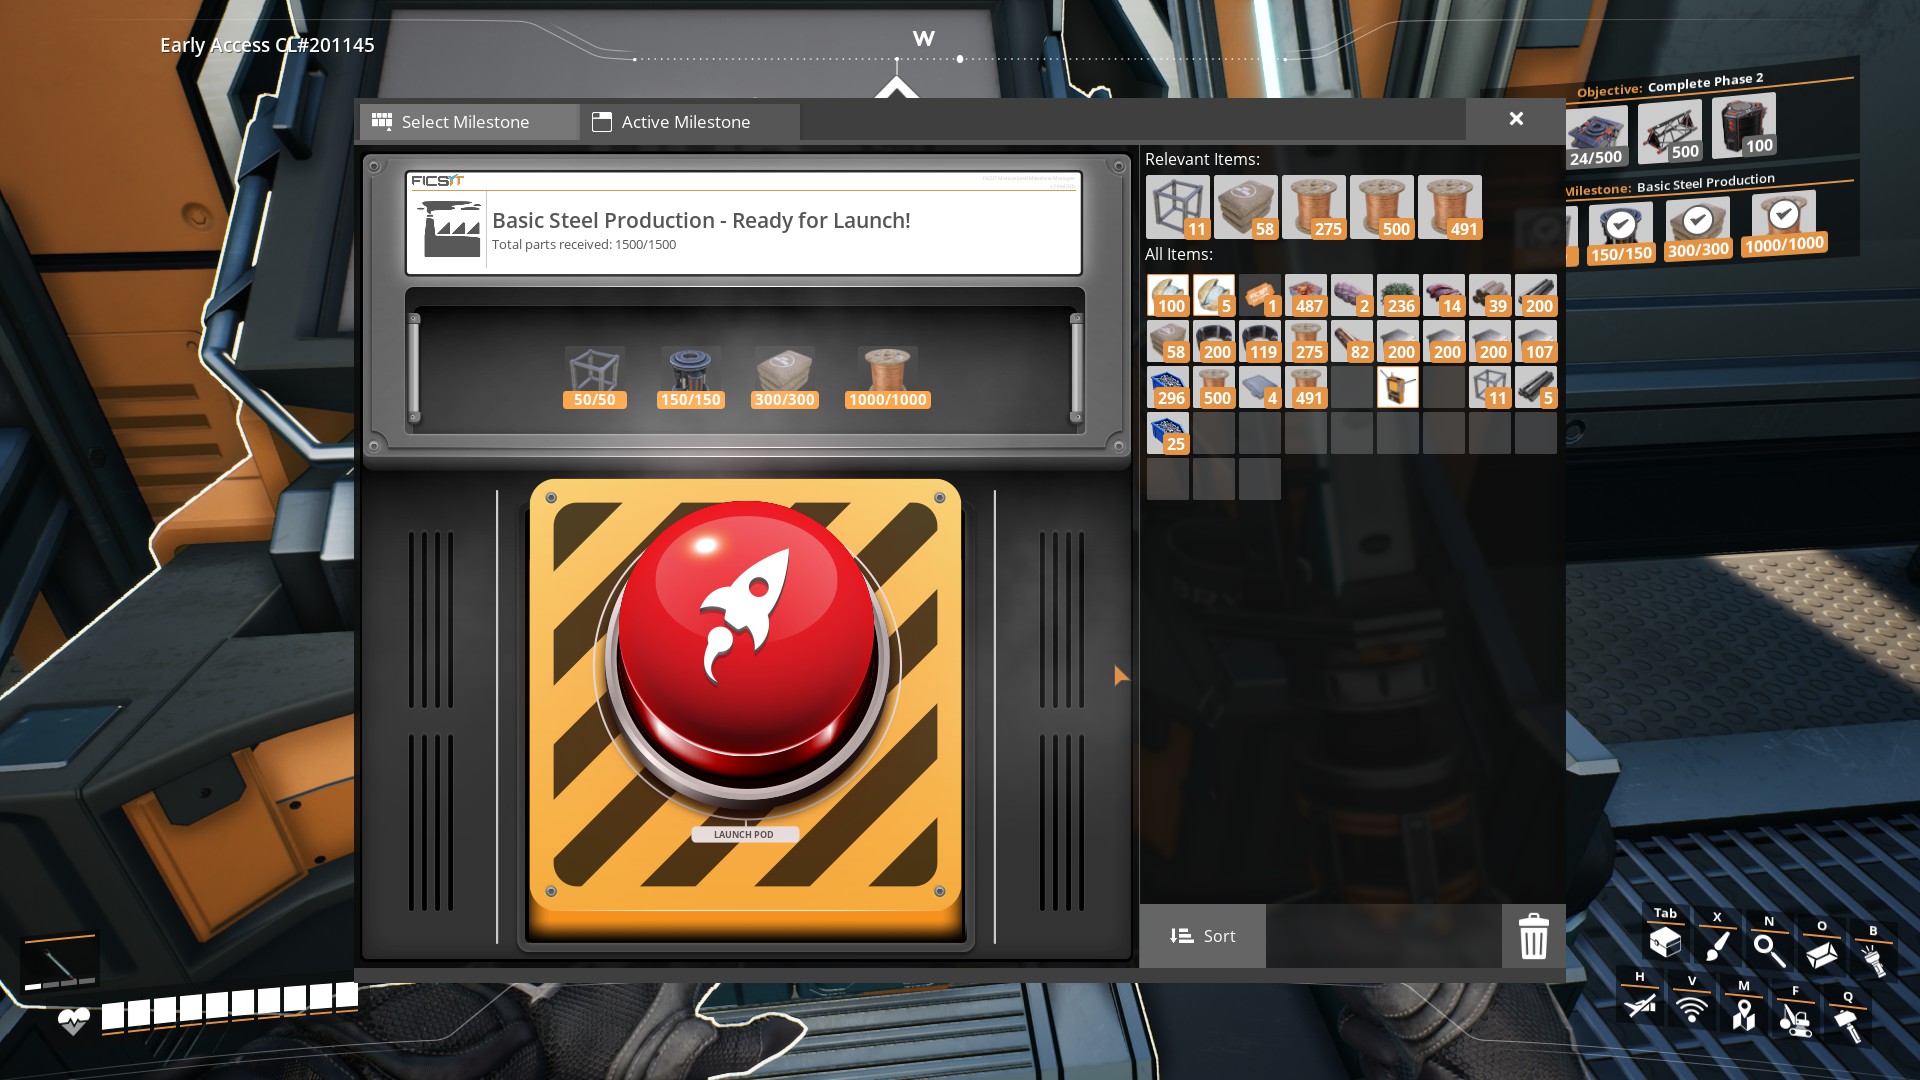
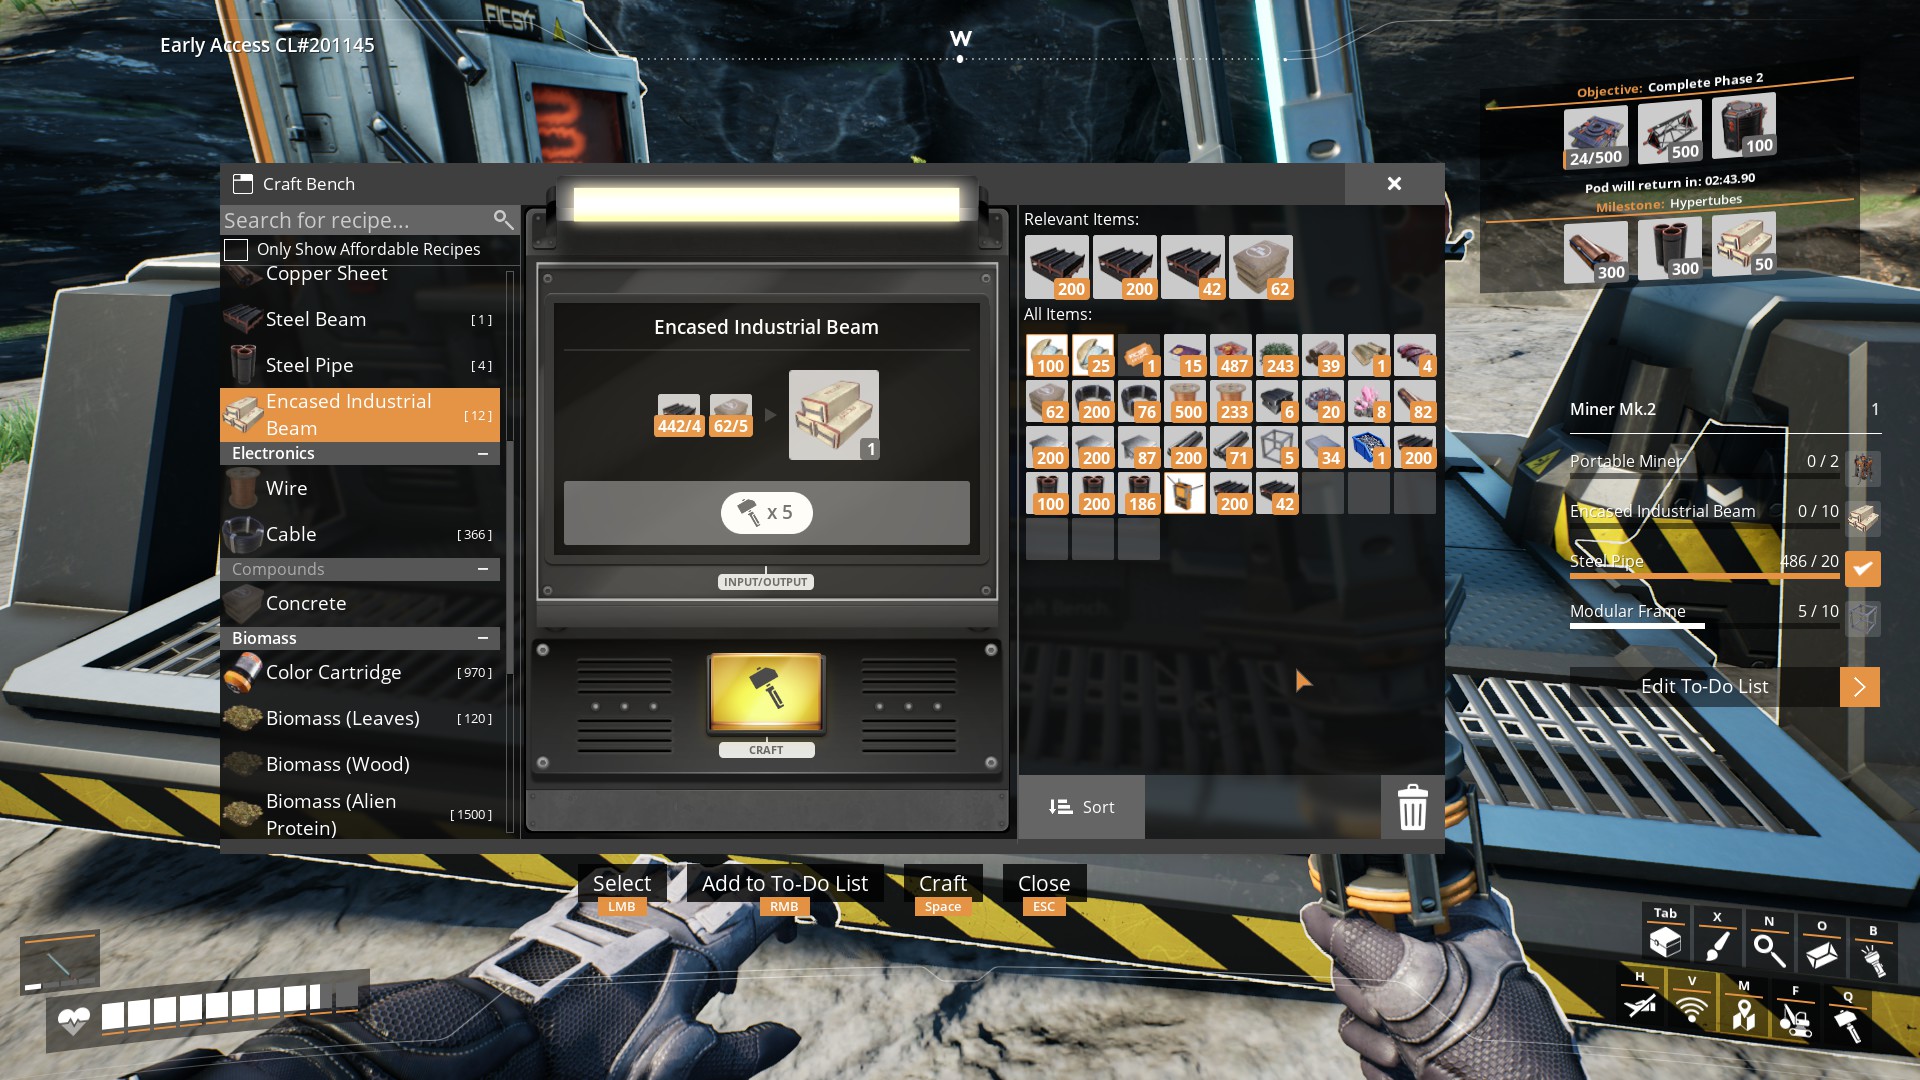
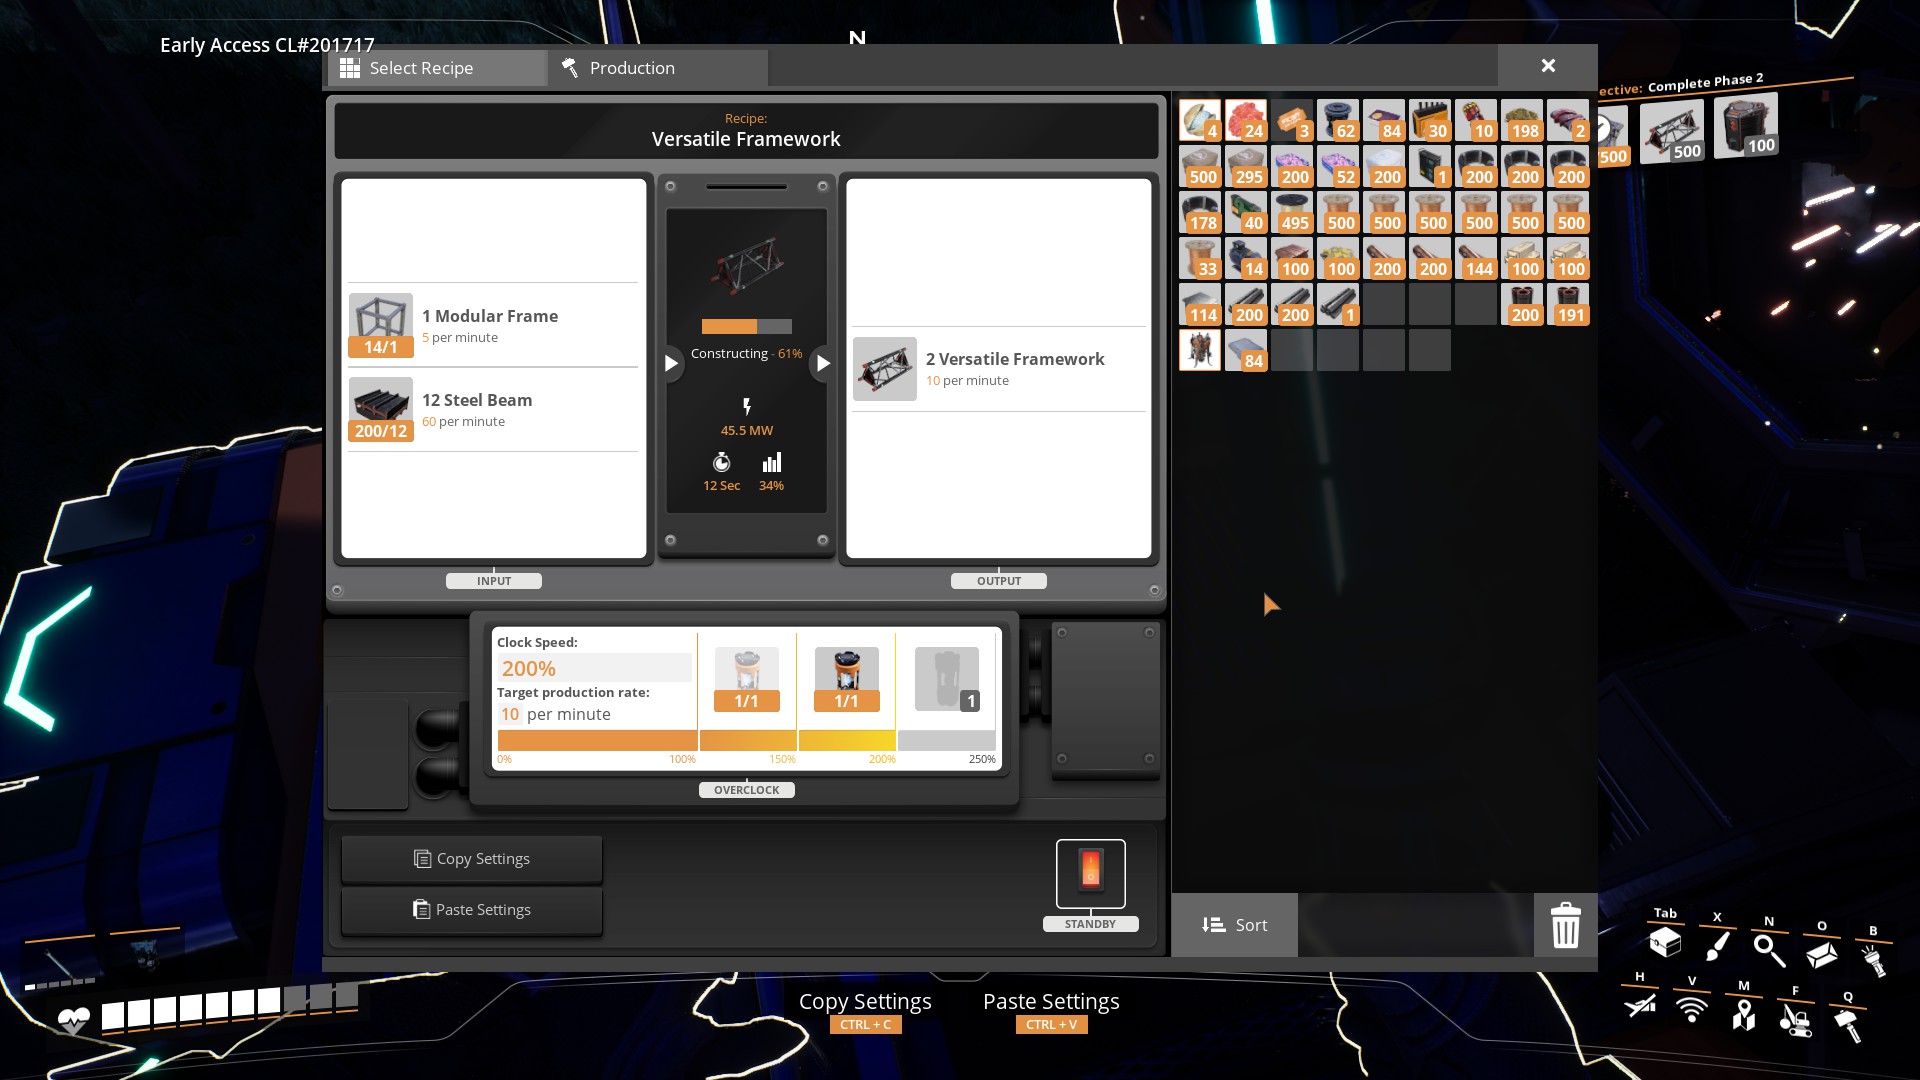
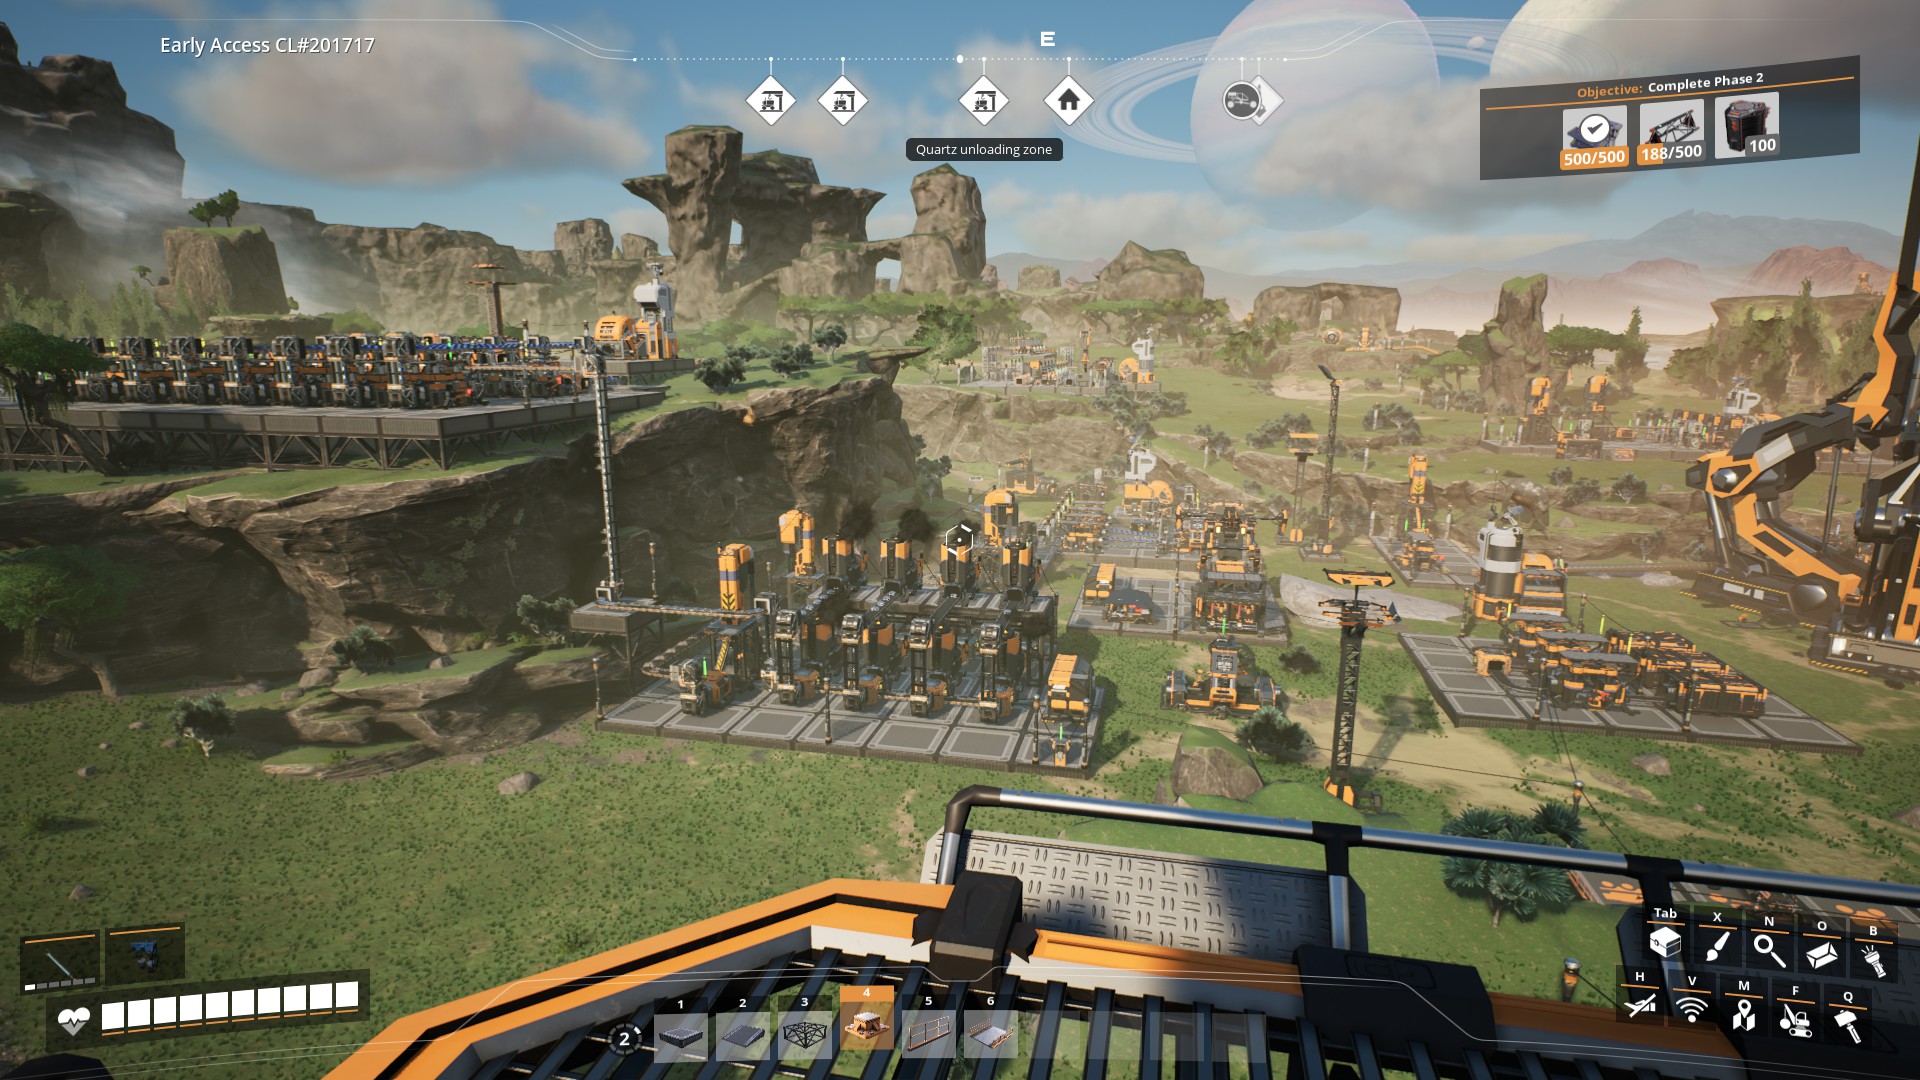
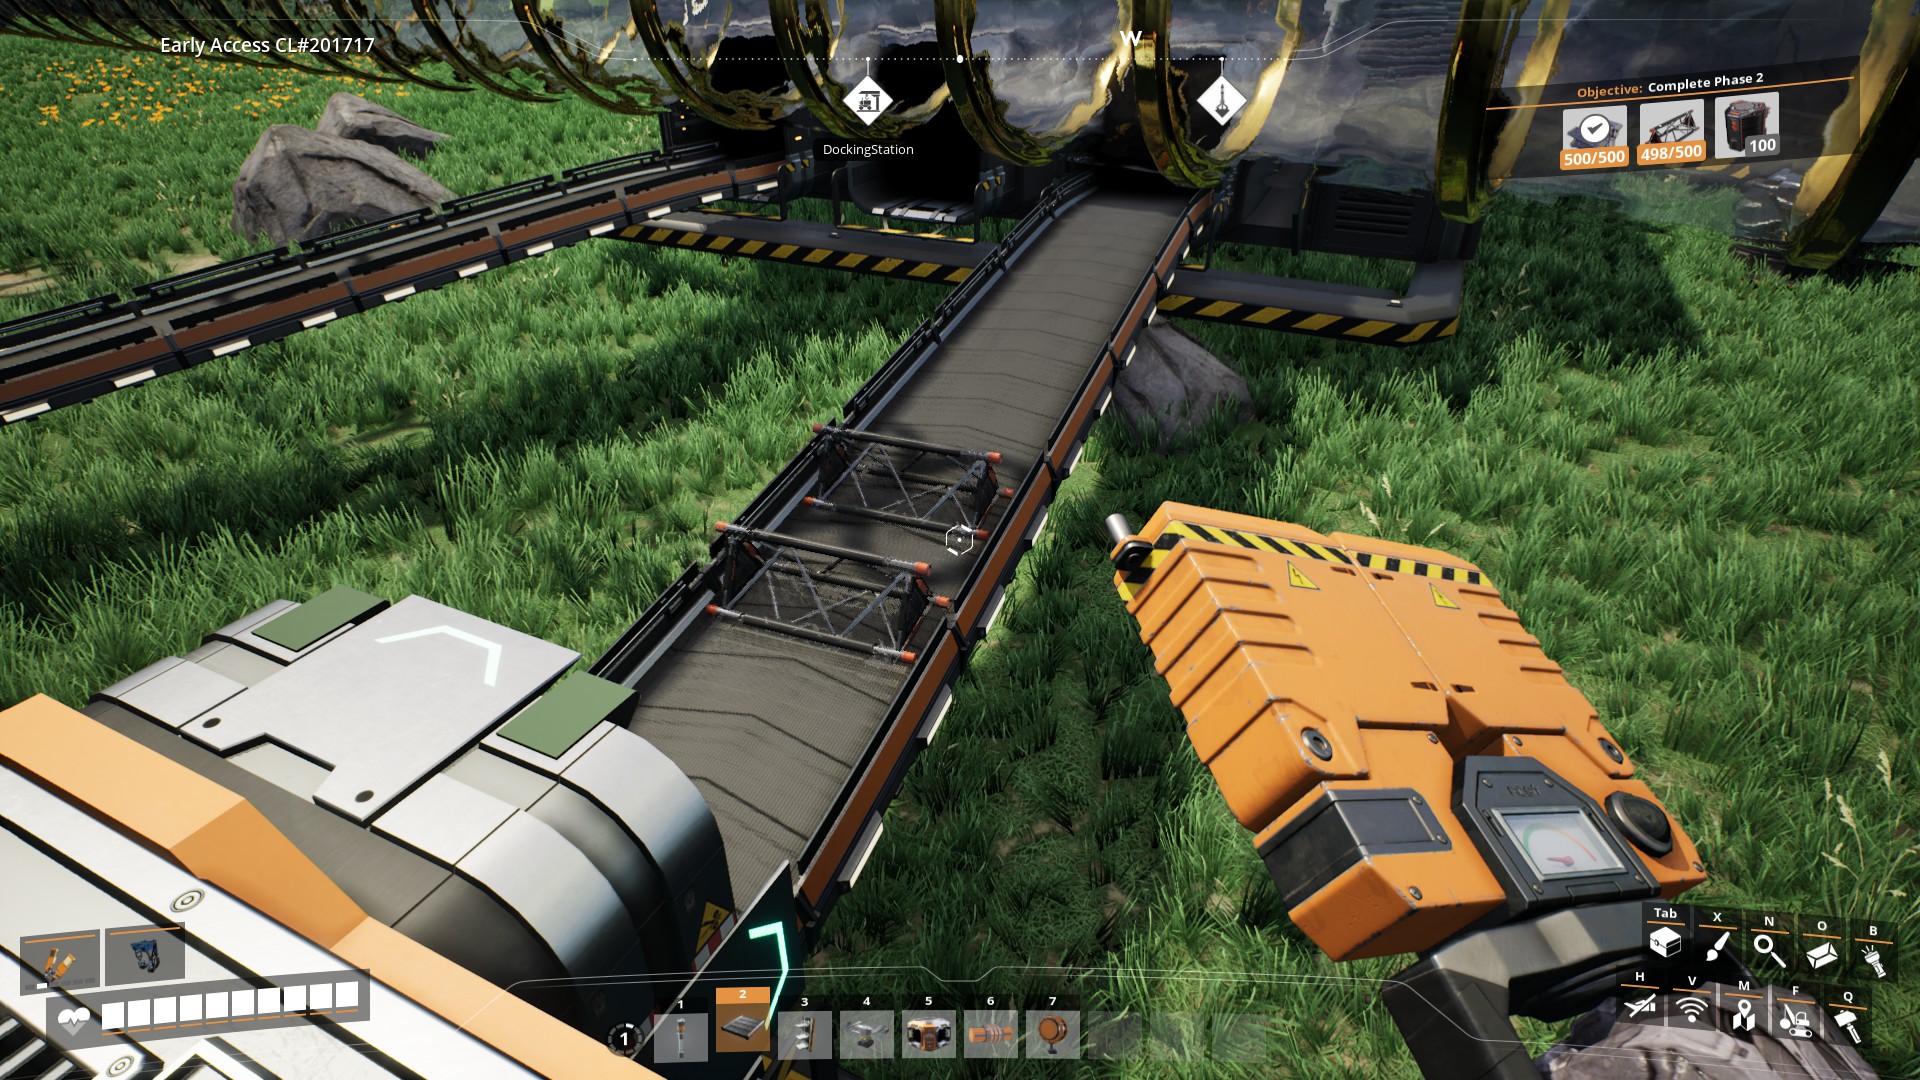
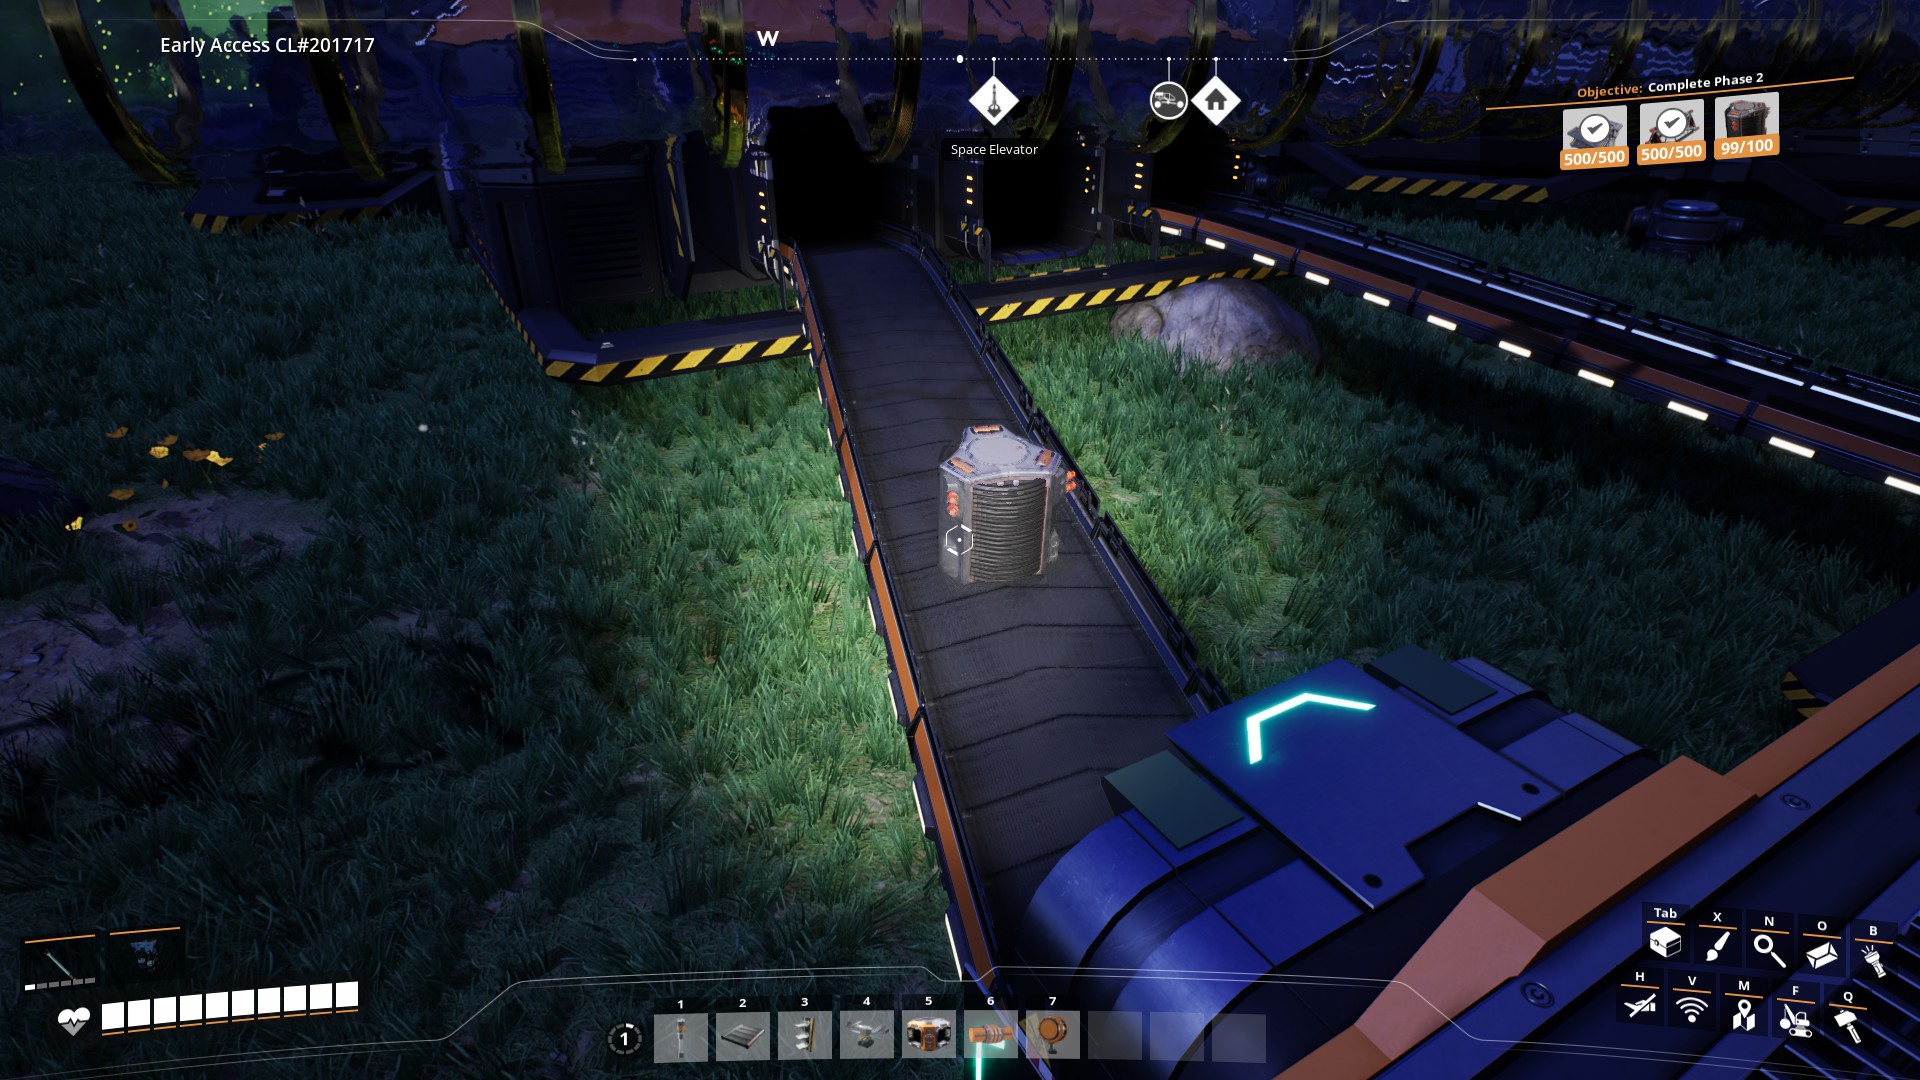
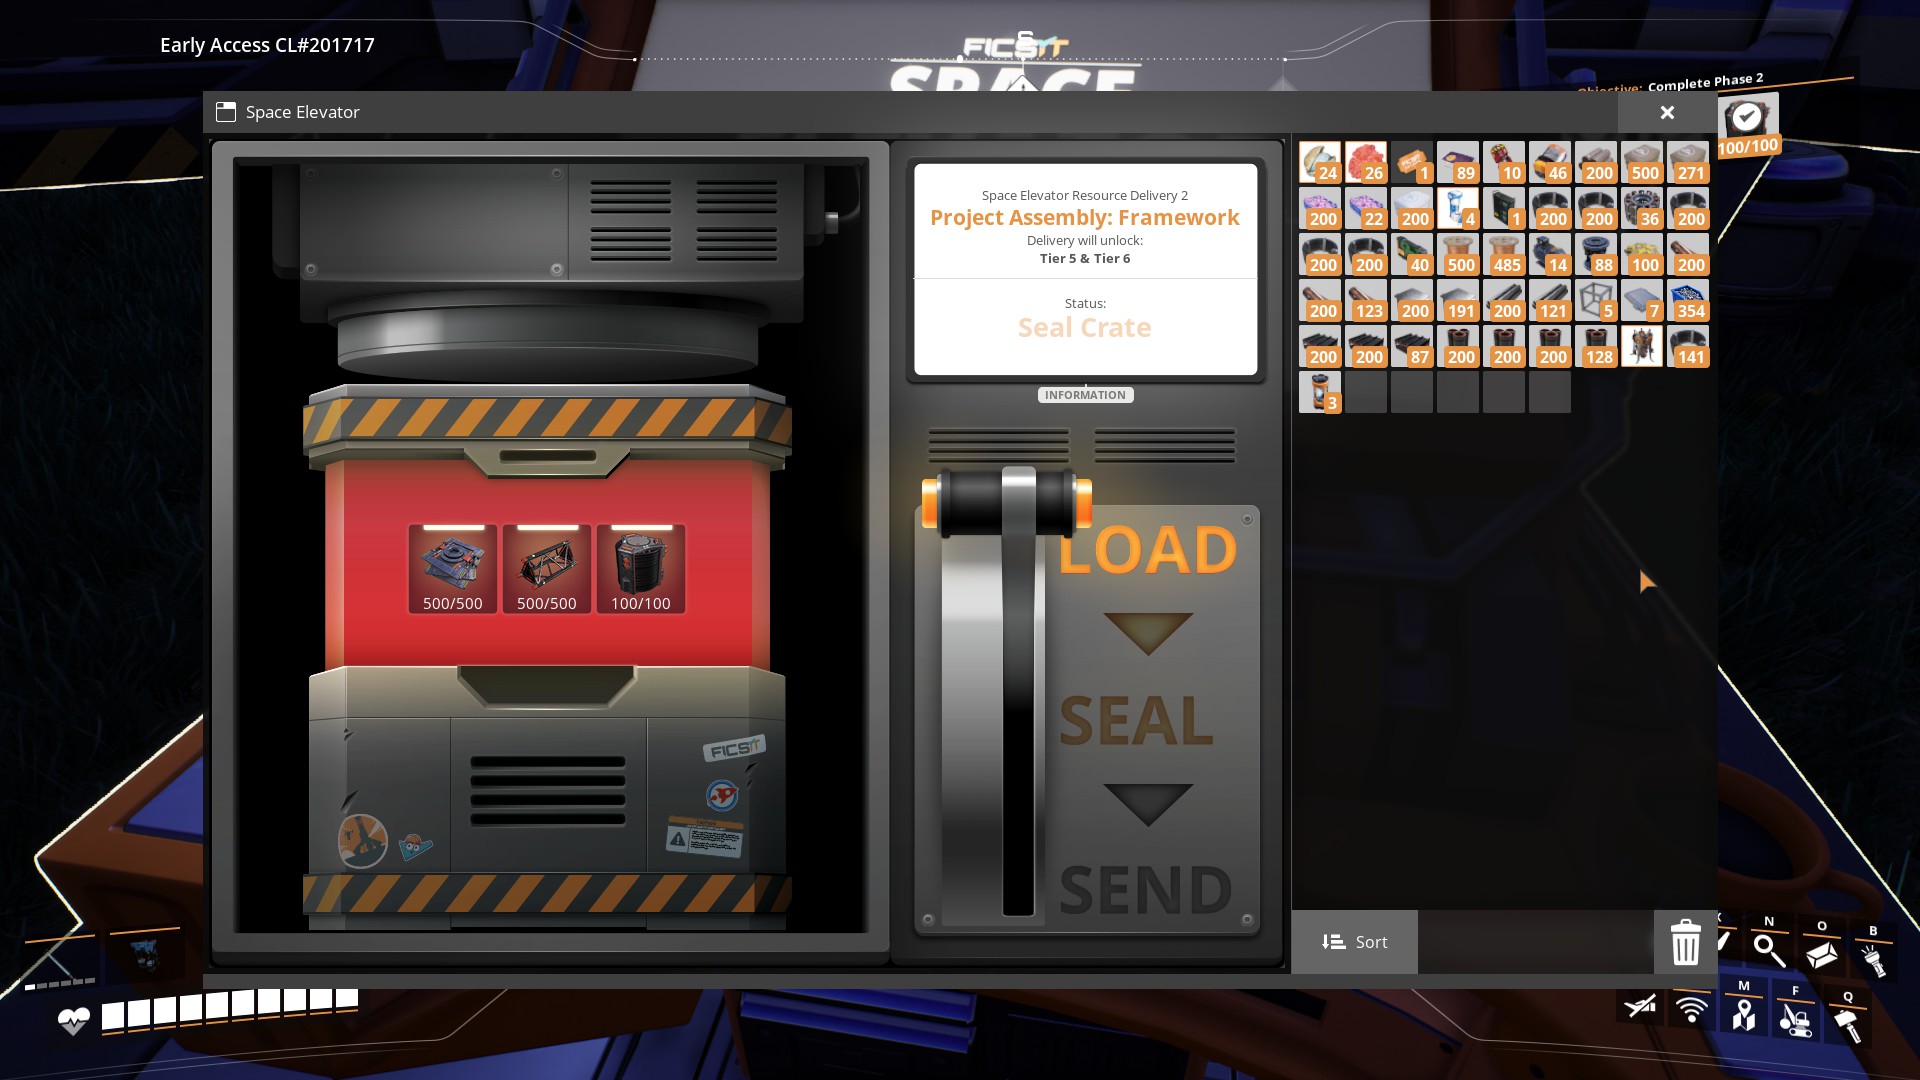
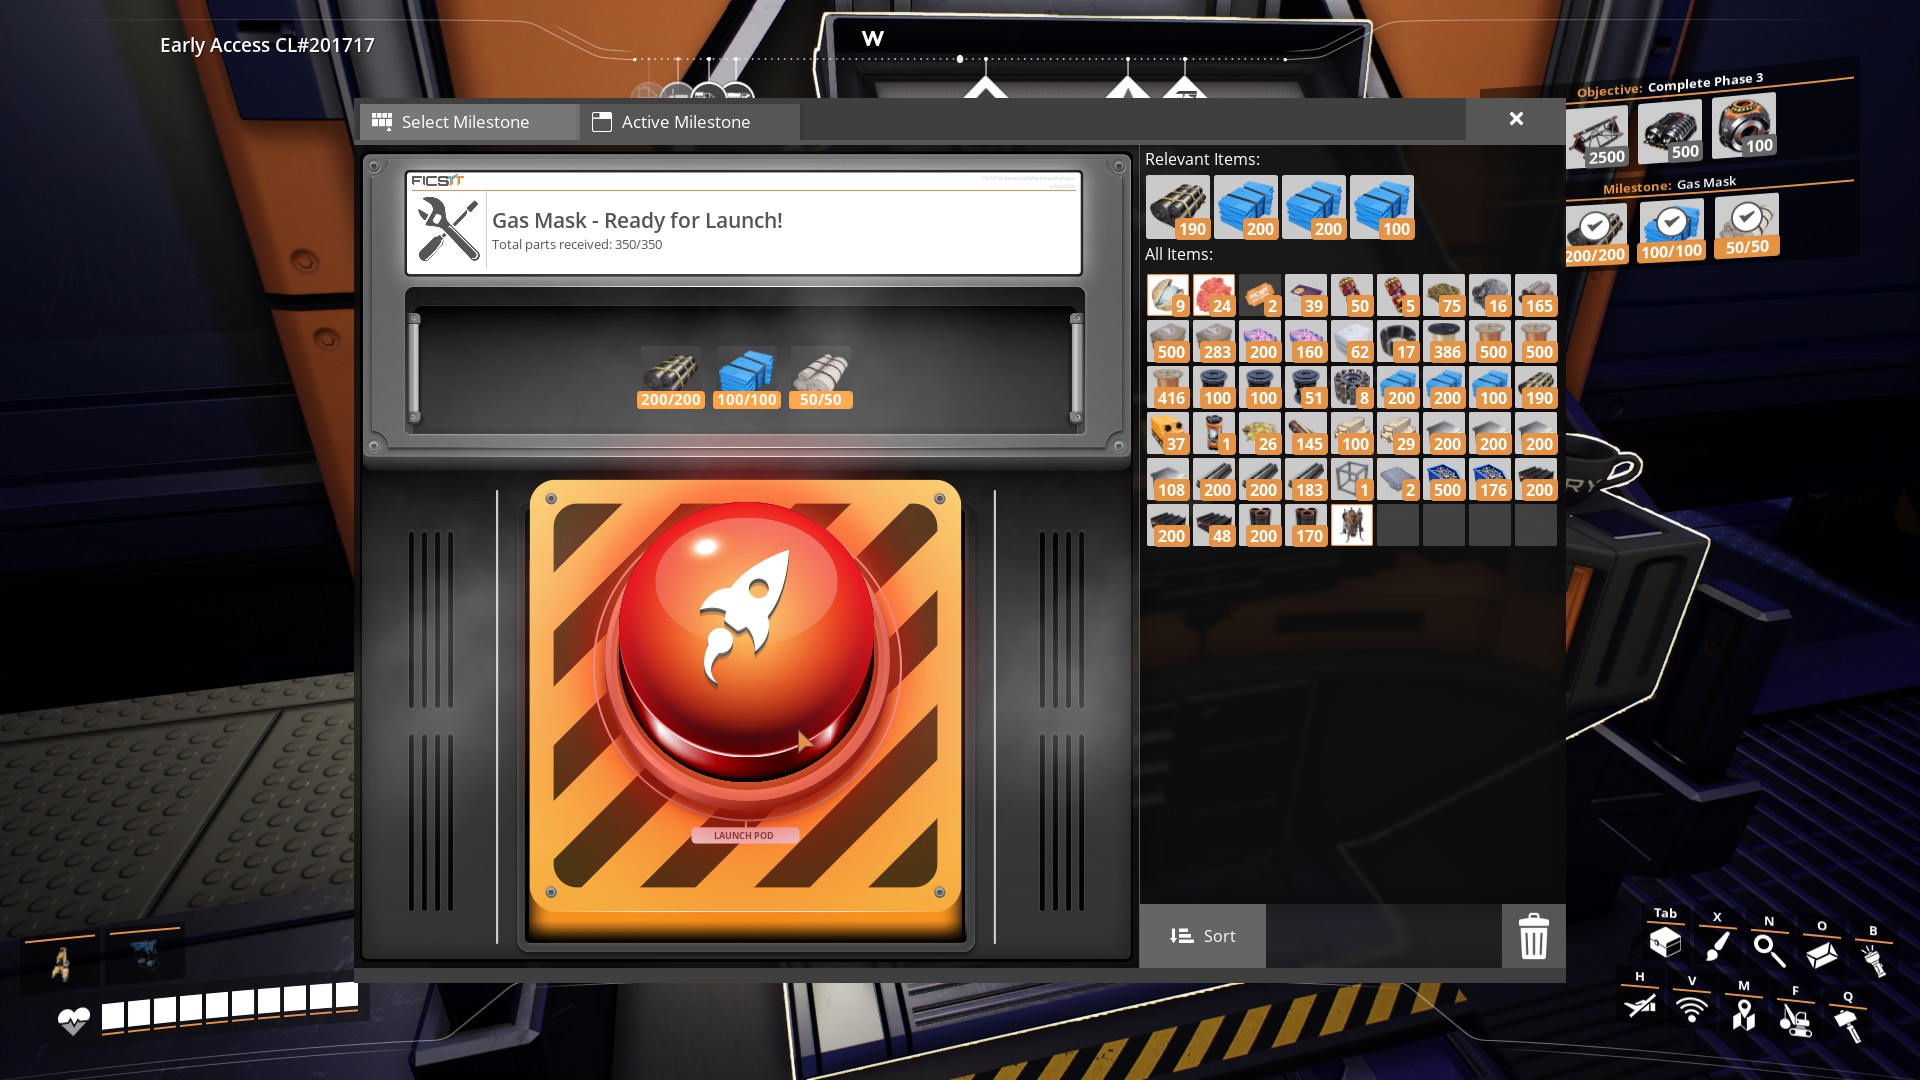
Right now I'm in chapter [Tier 1 & 2 - Tier 2: Part Assembly] Finally, The Space Elevator. And working on the first multiparts-assembles.

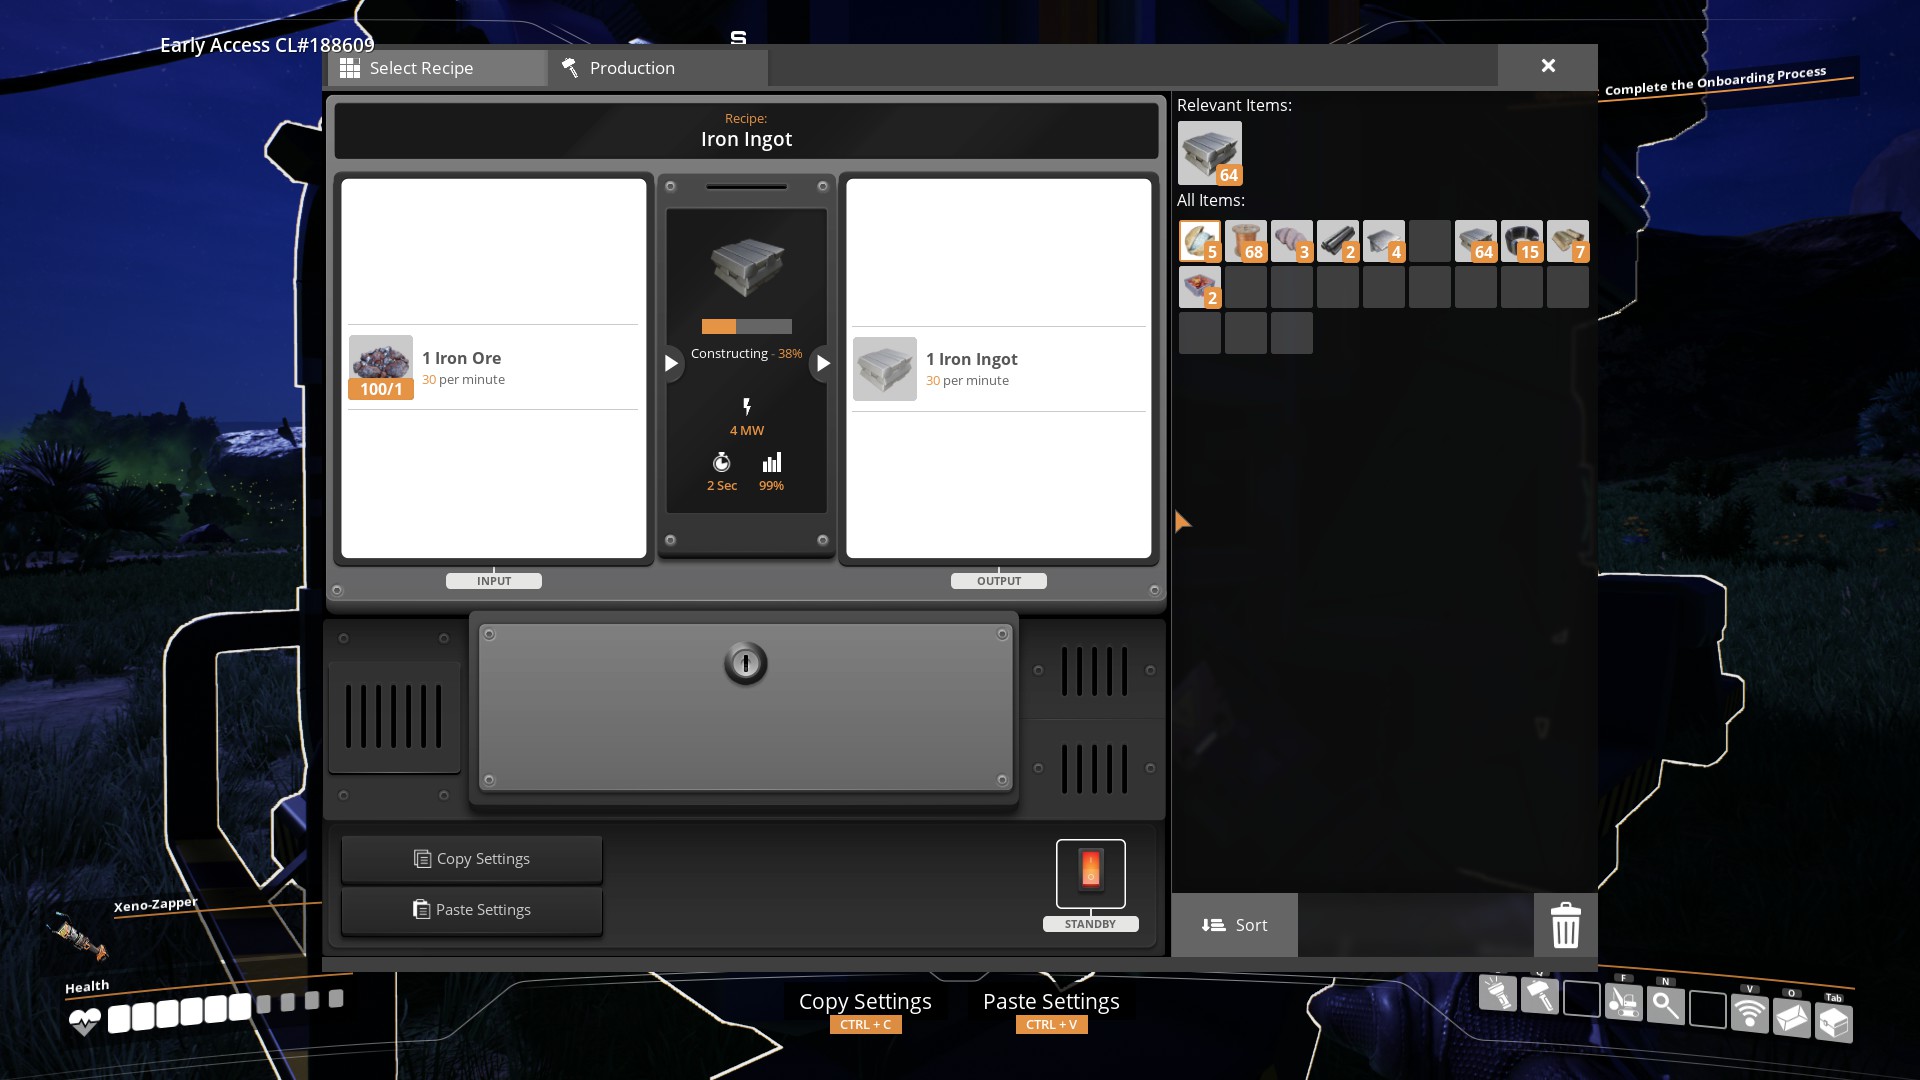
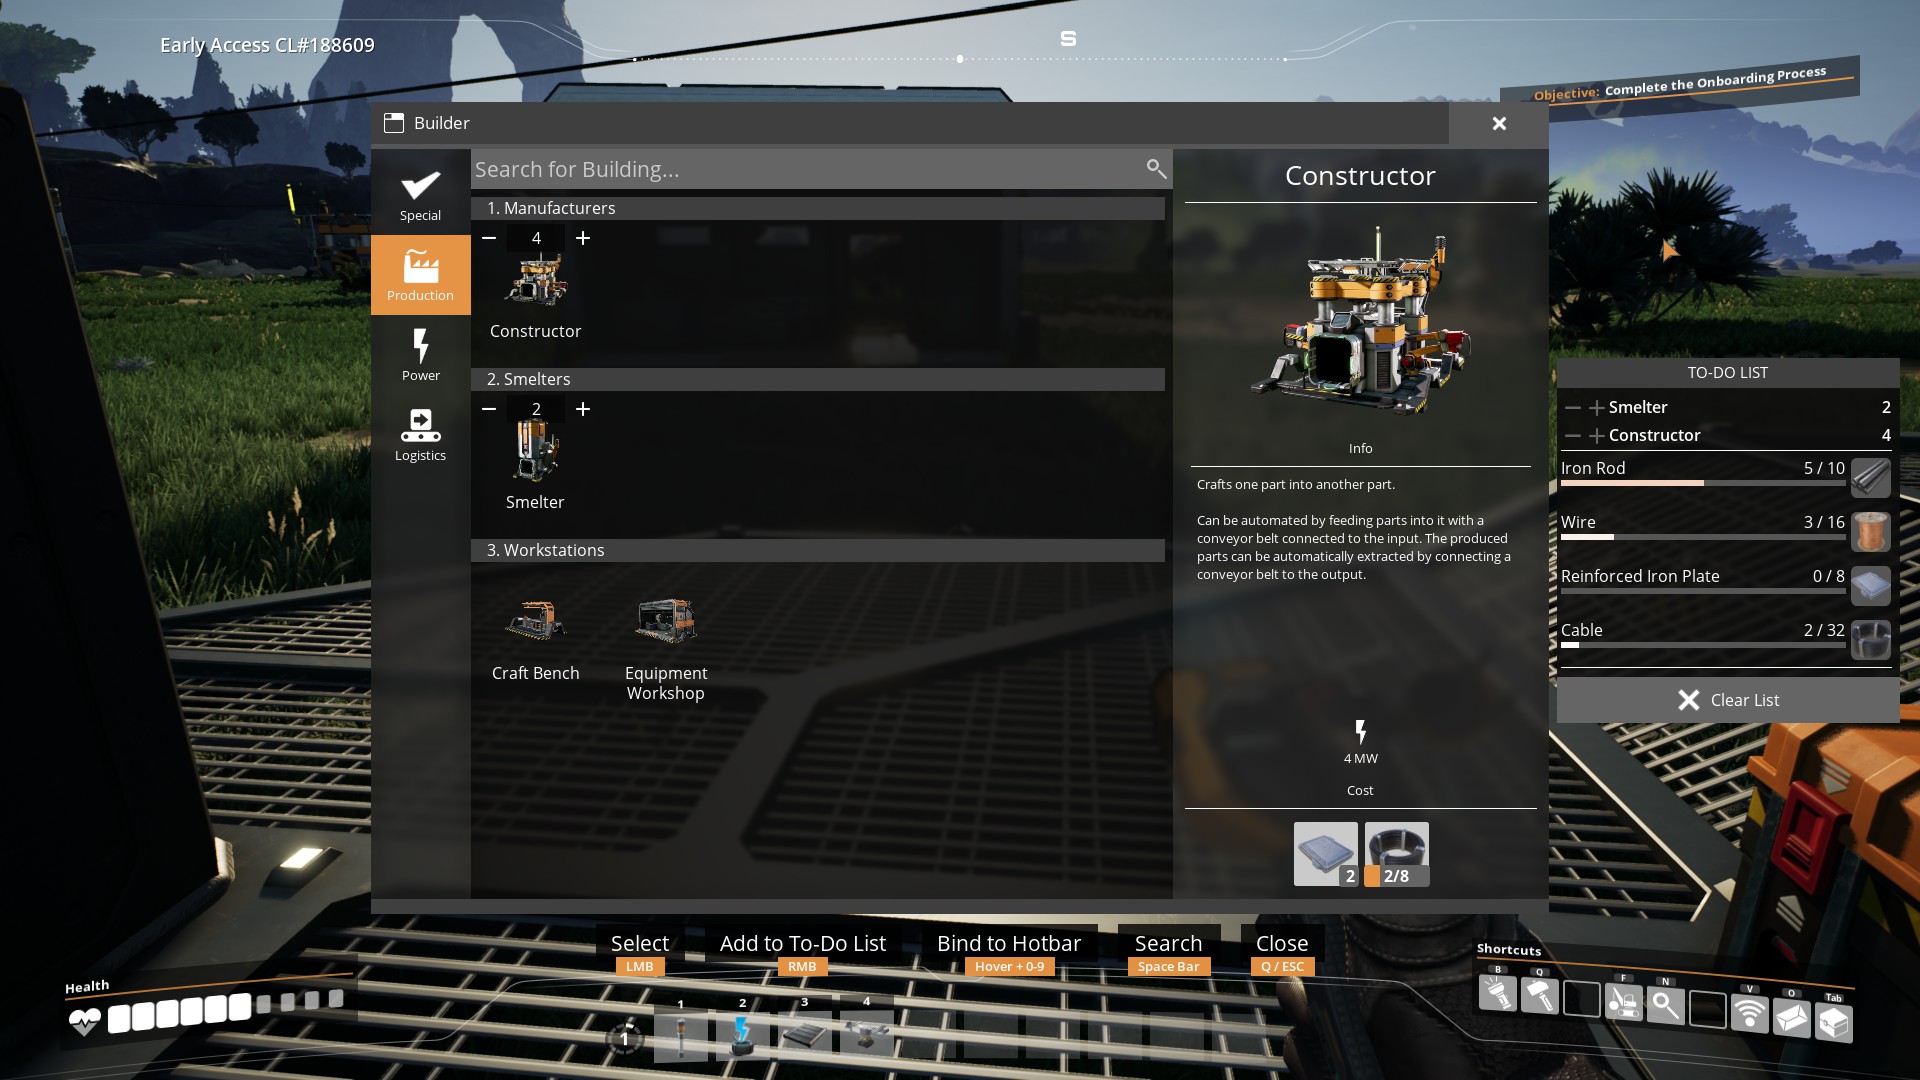
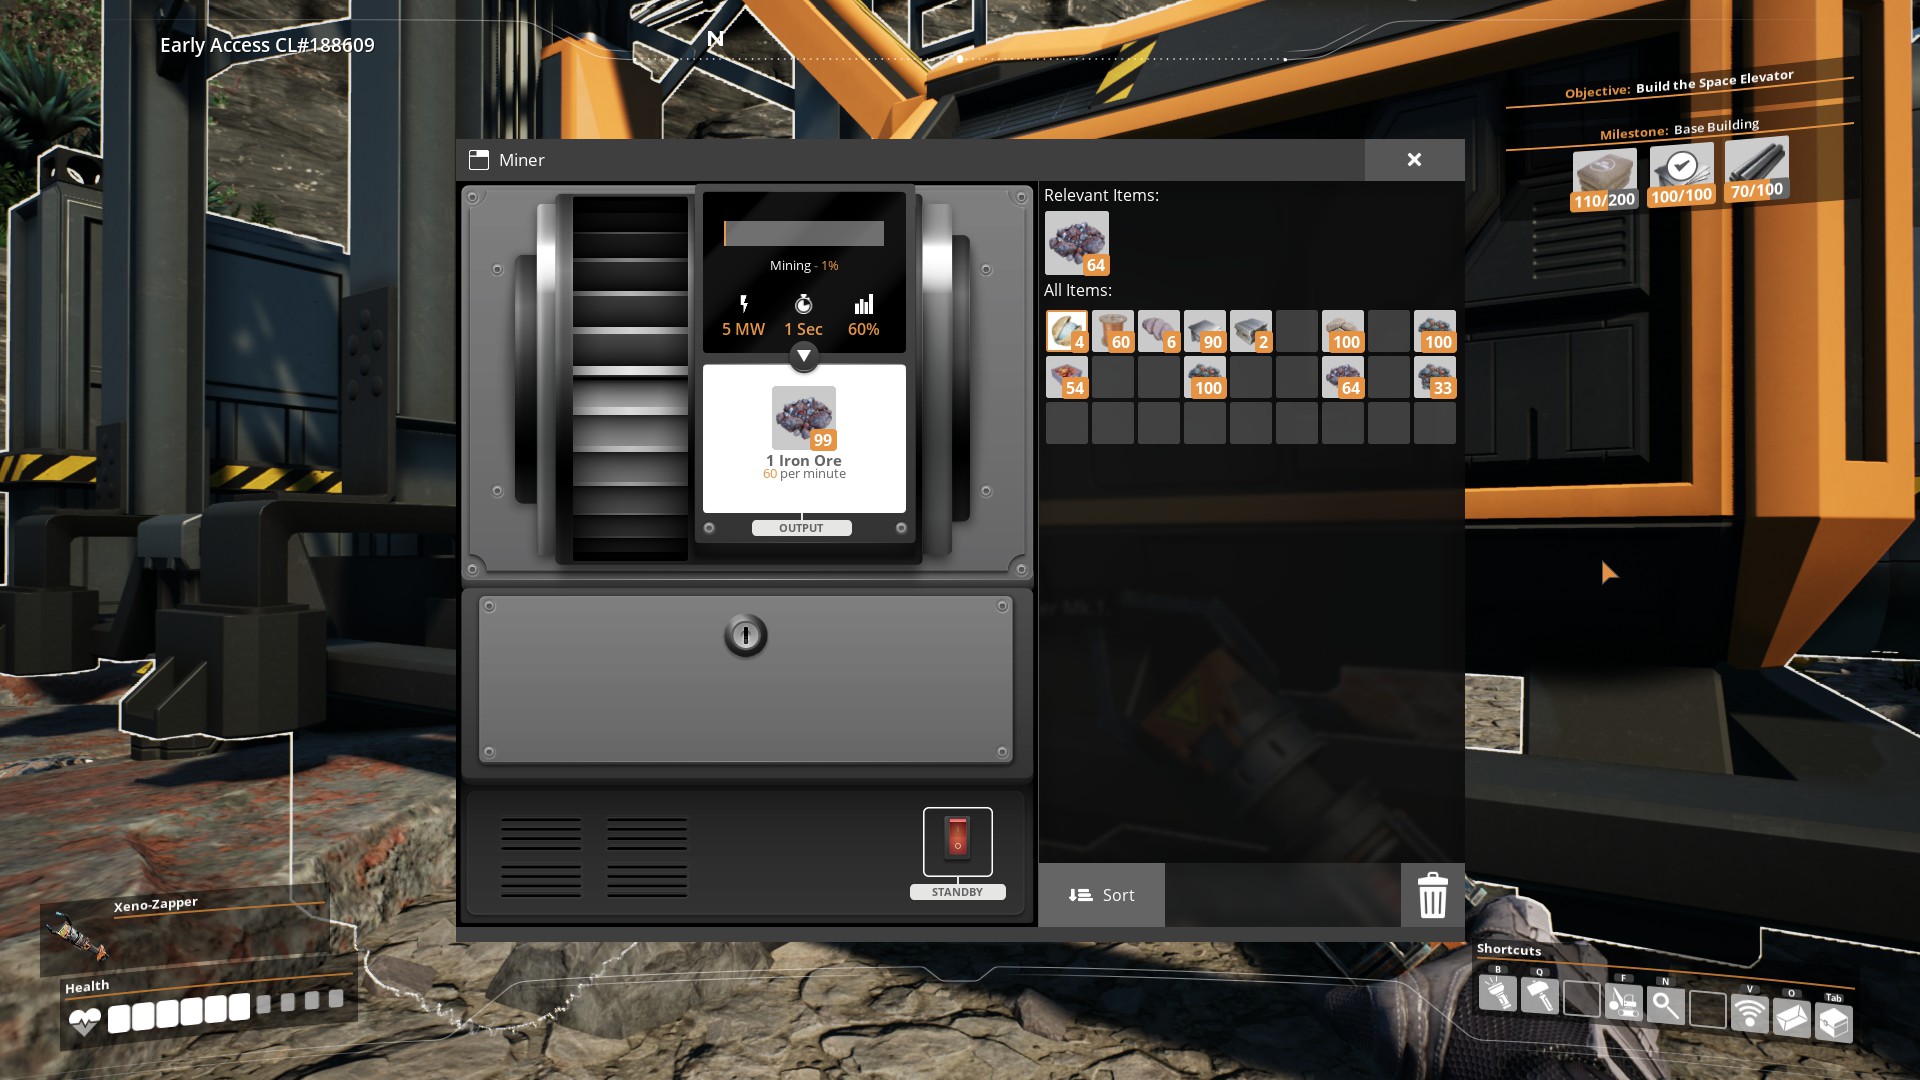
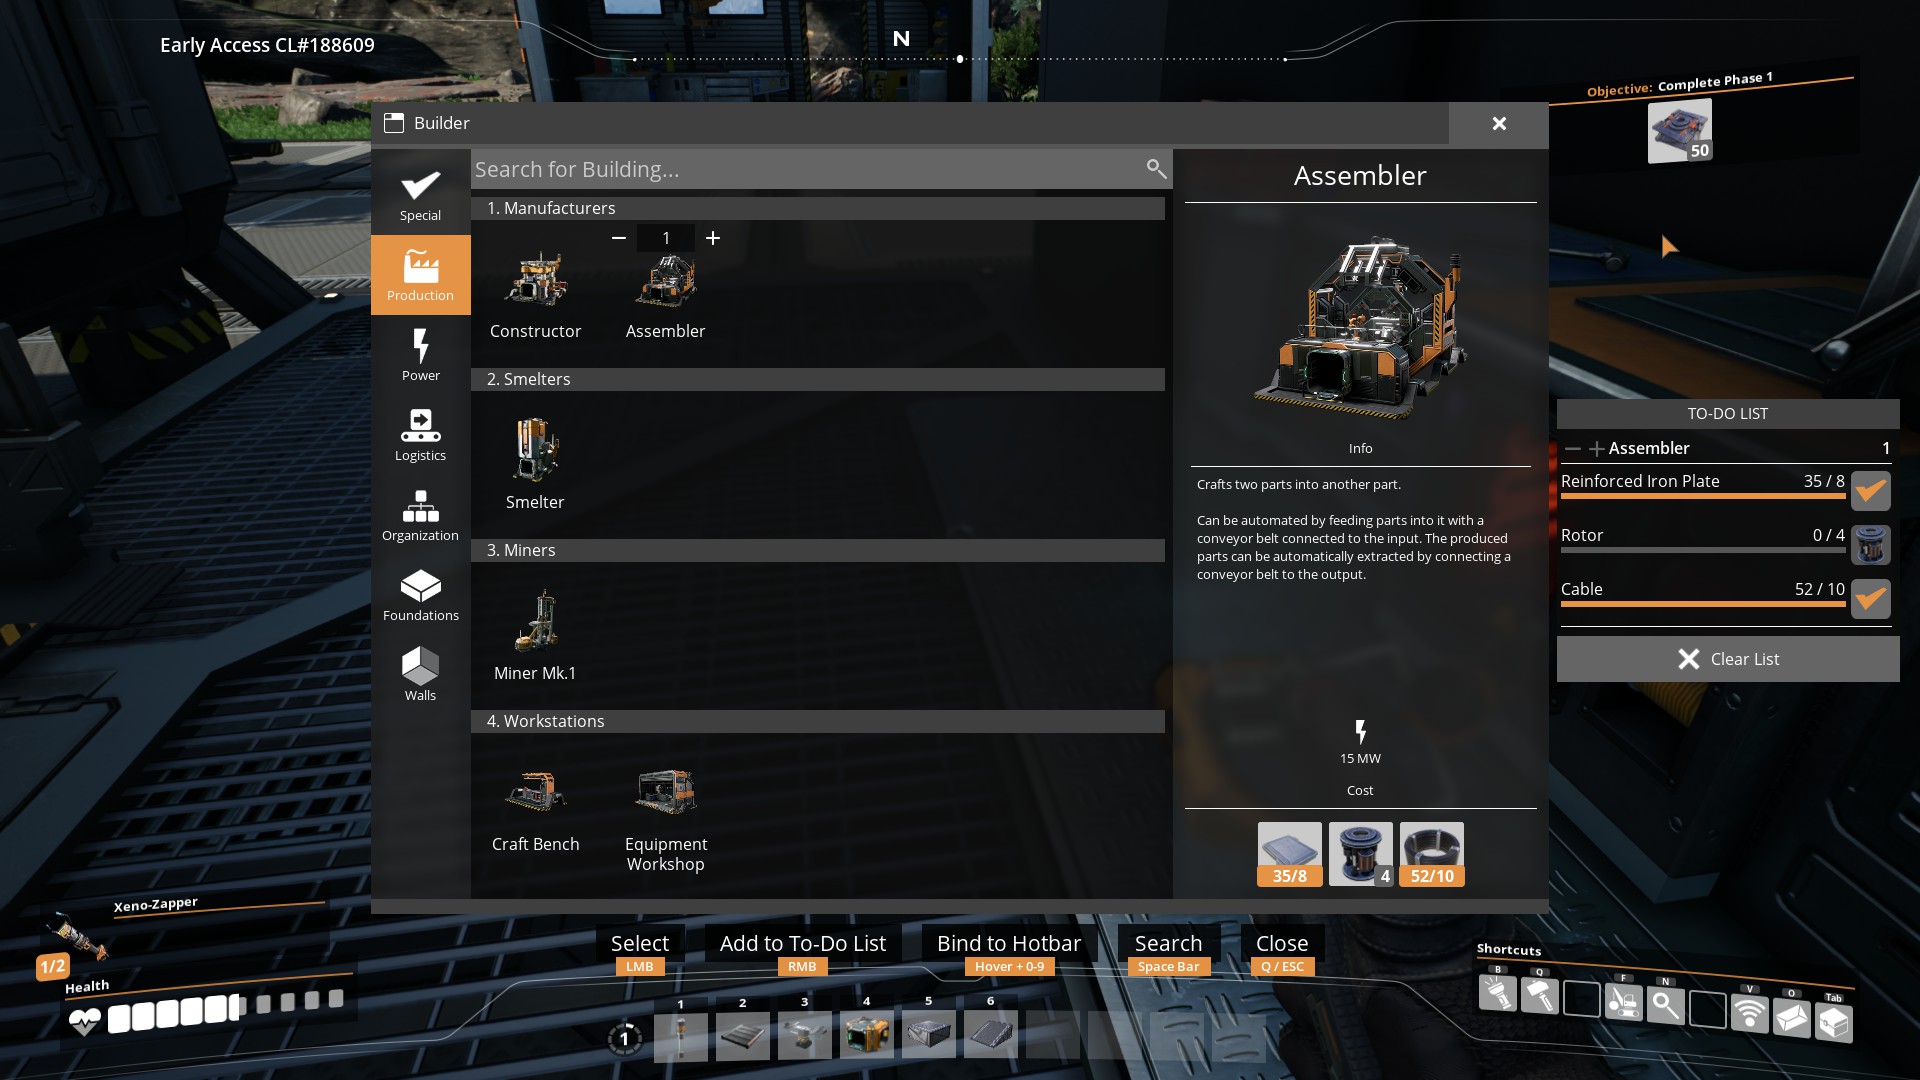
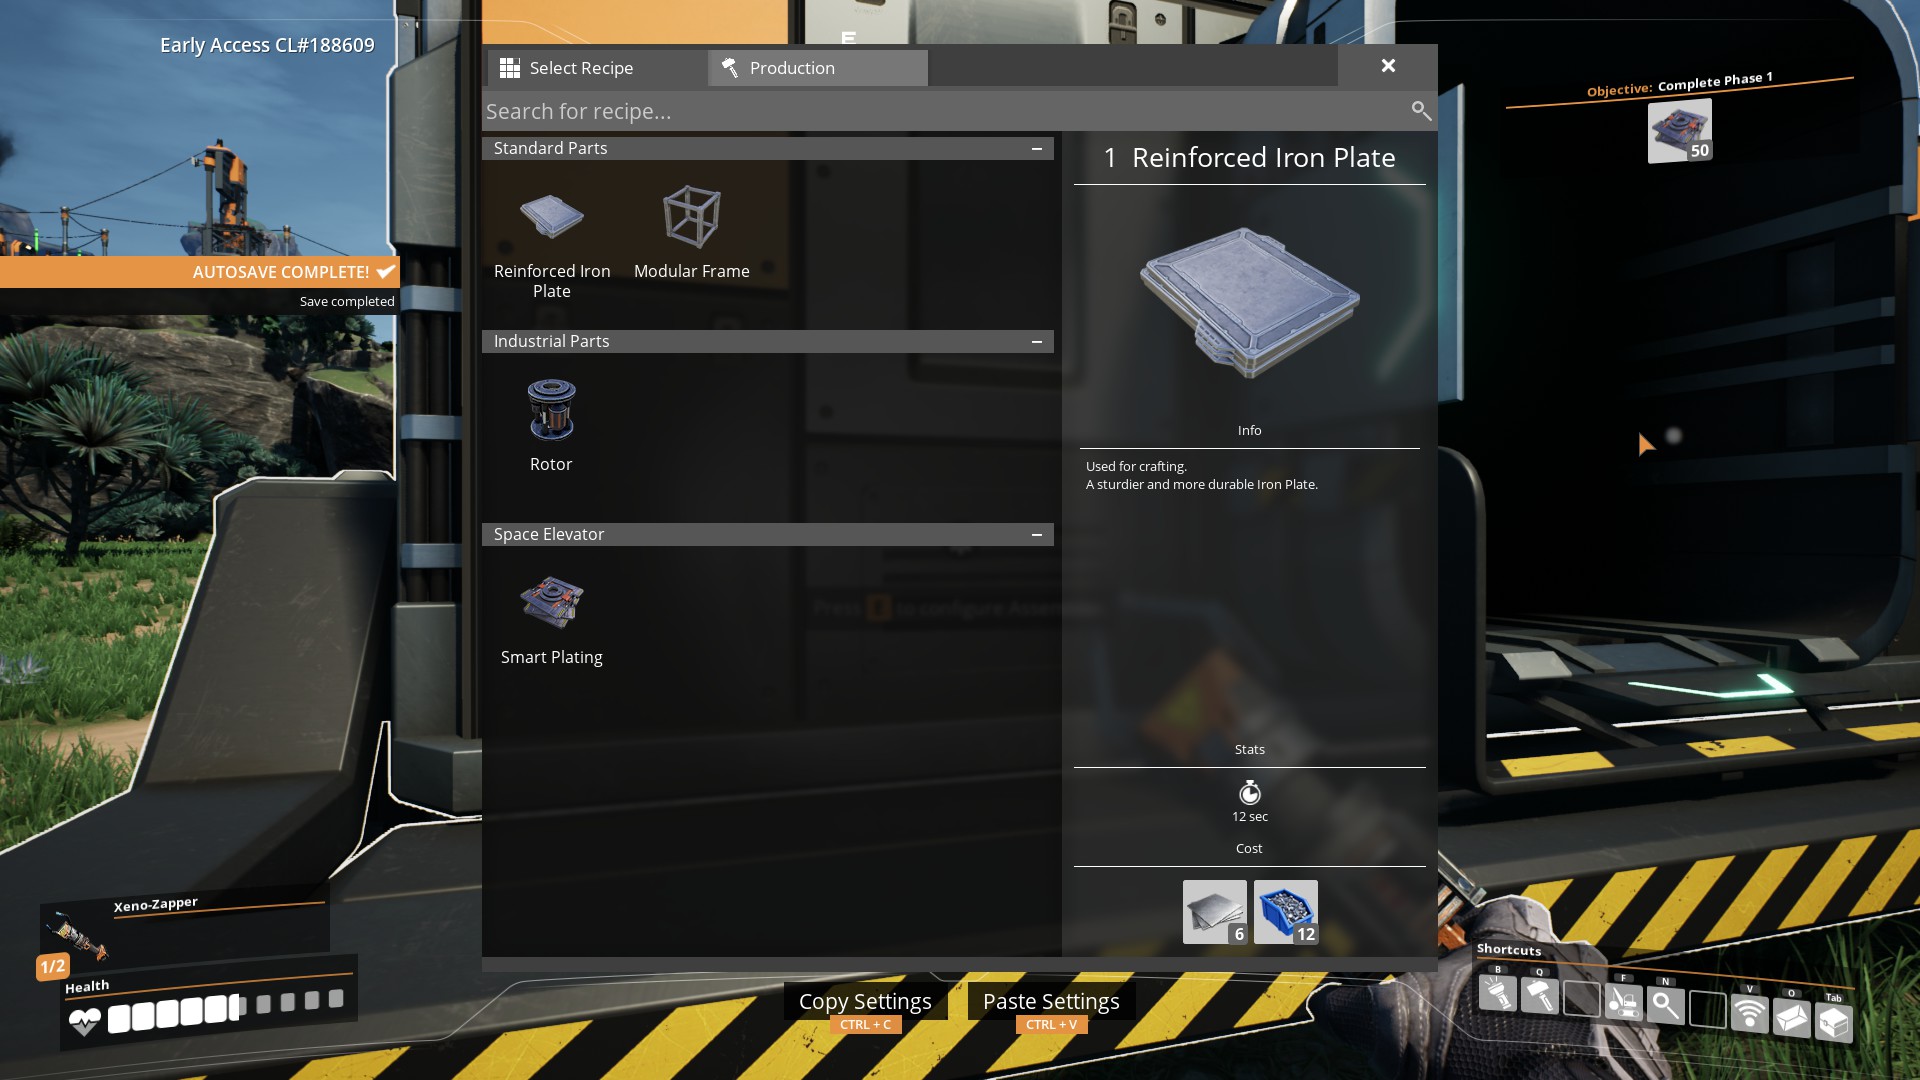
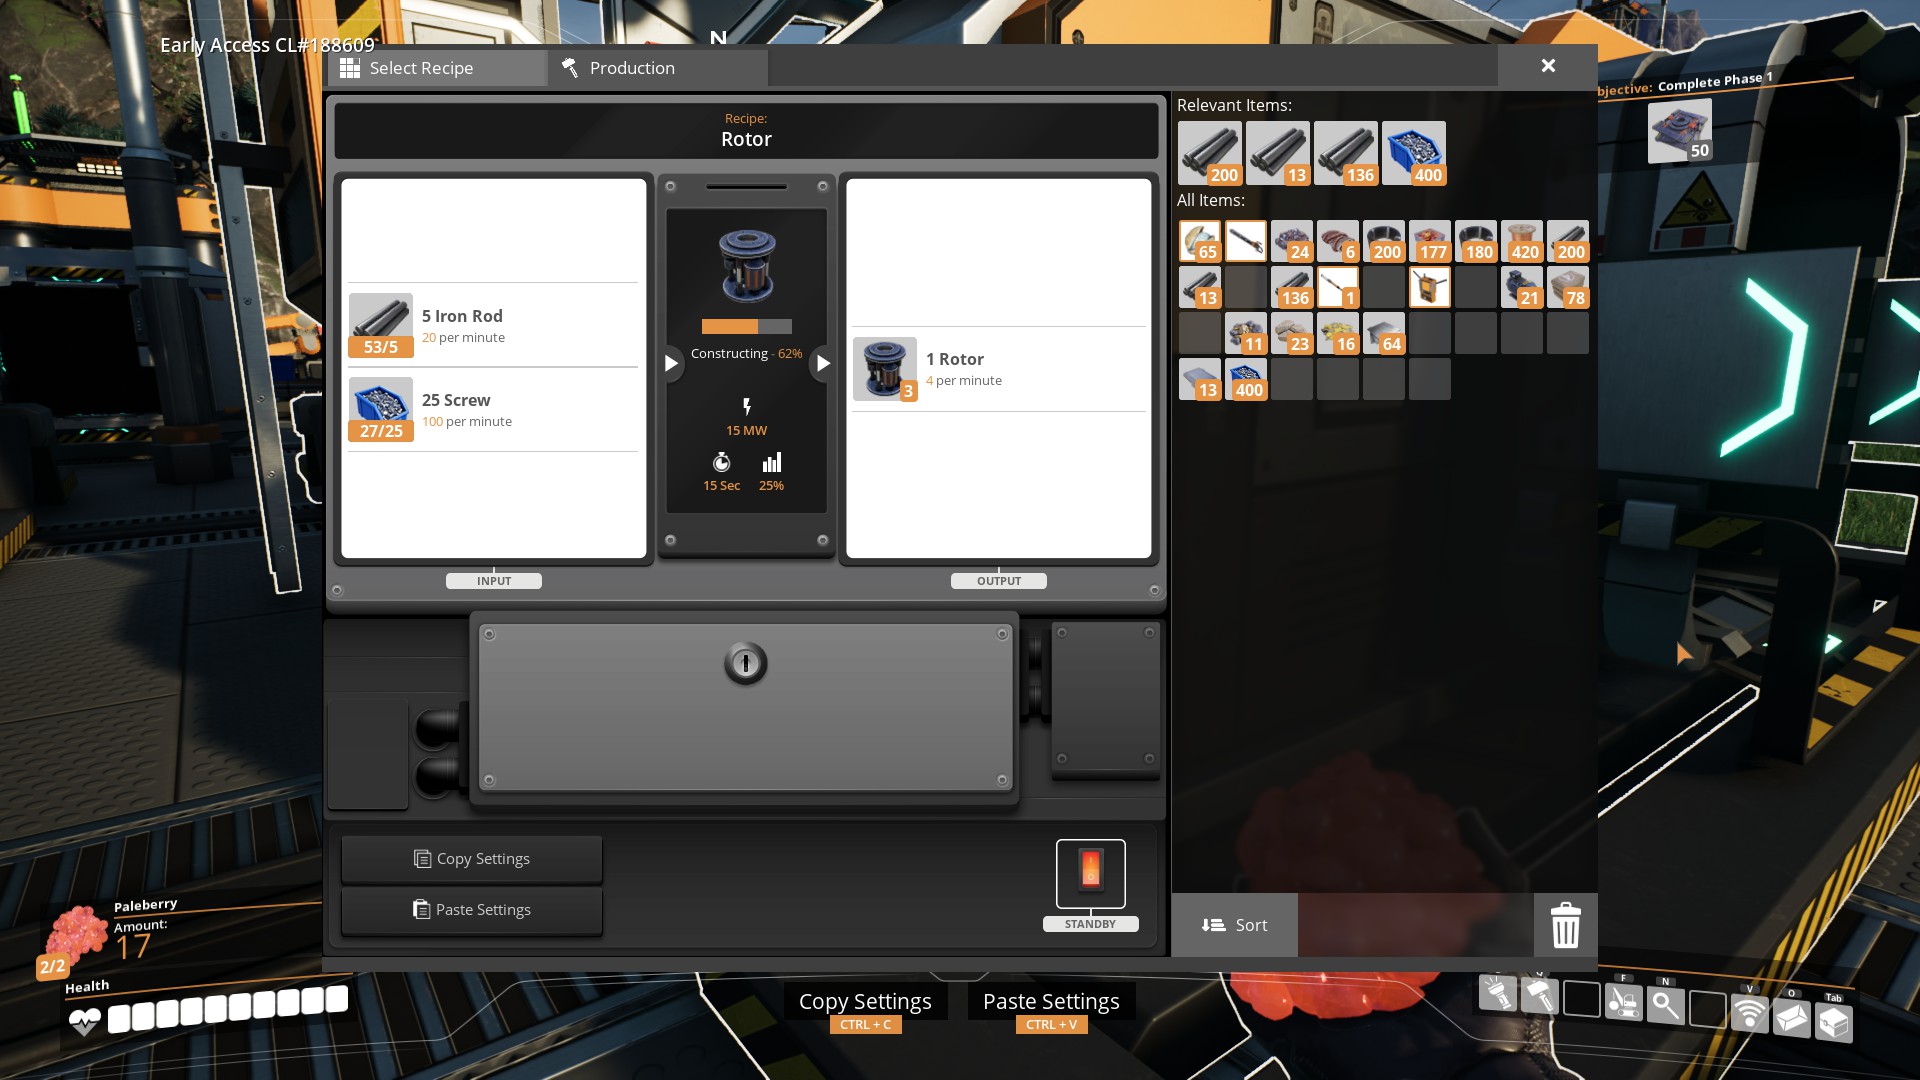
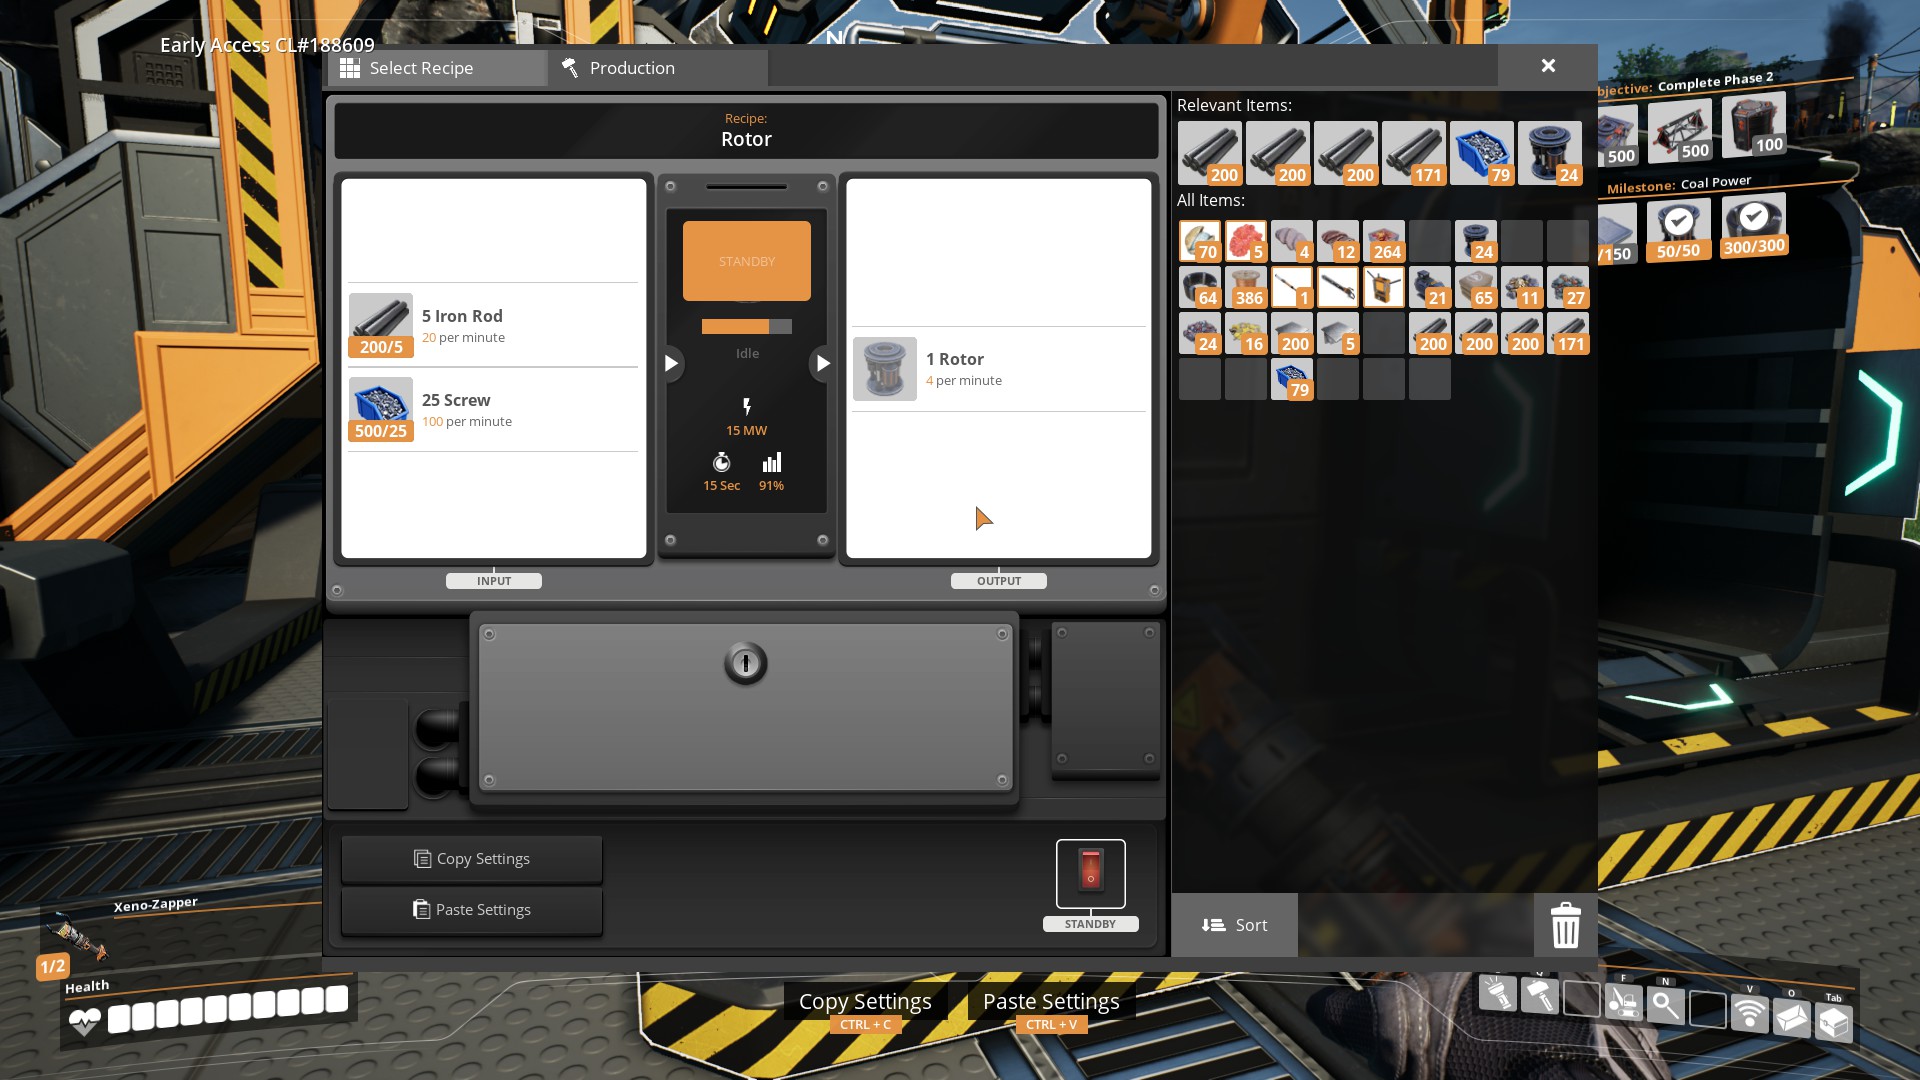
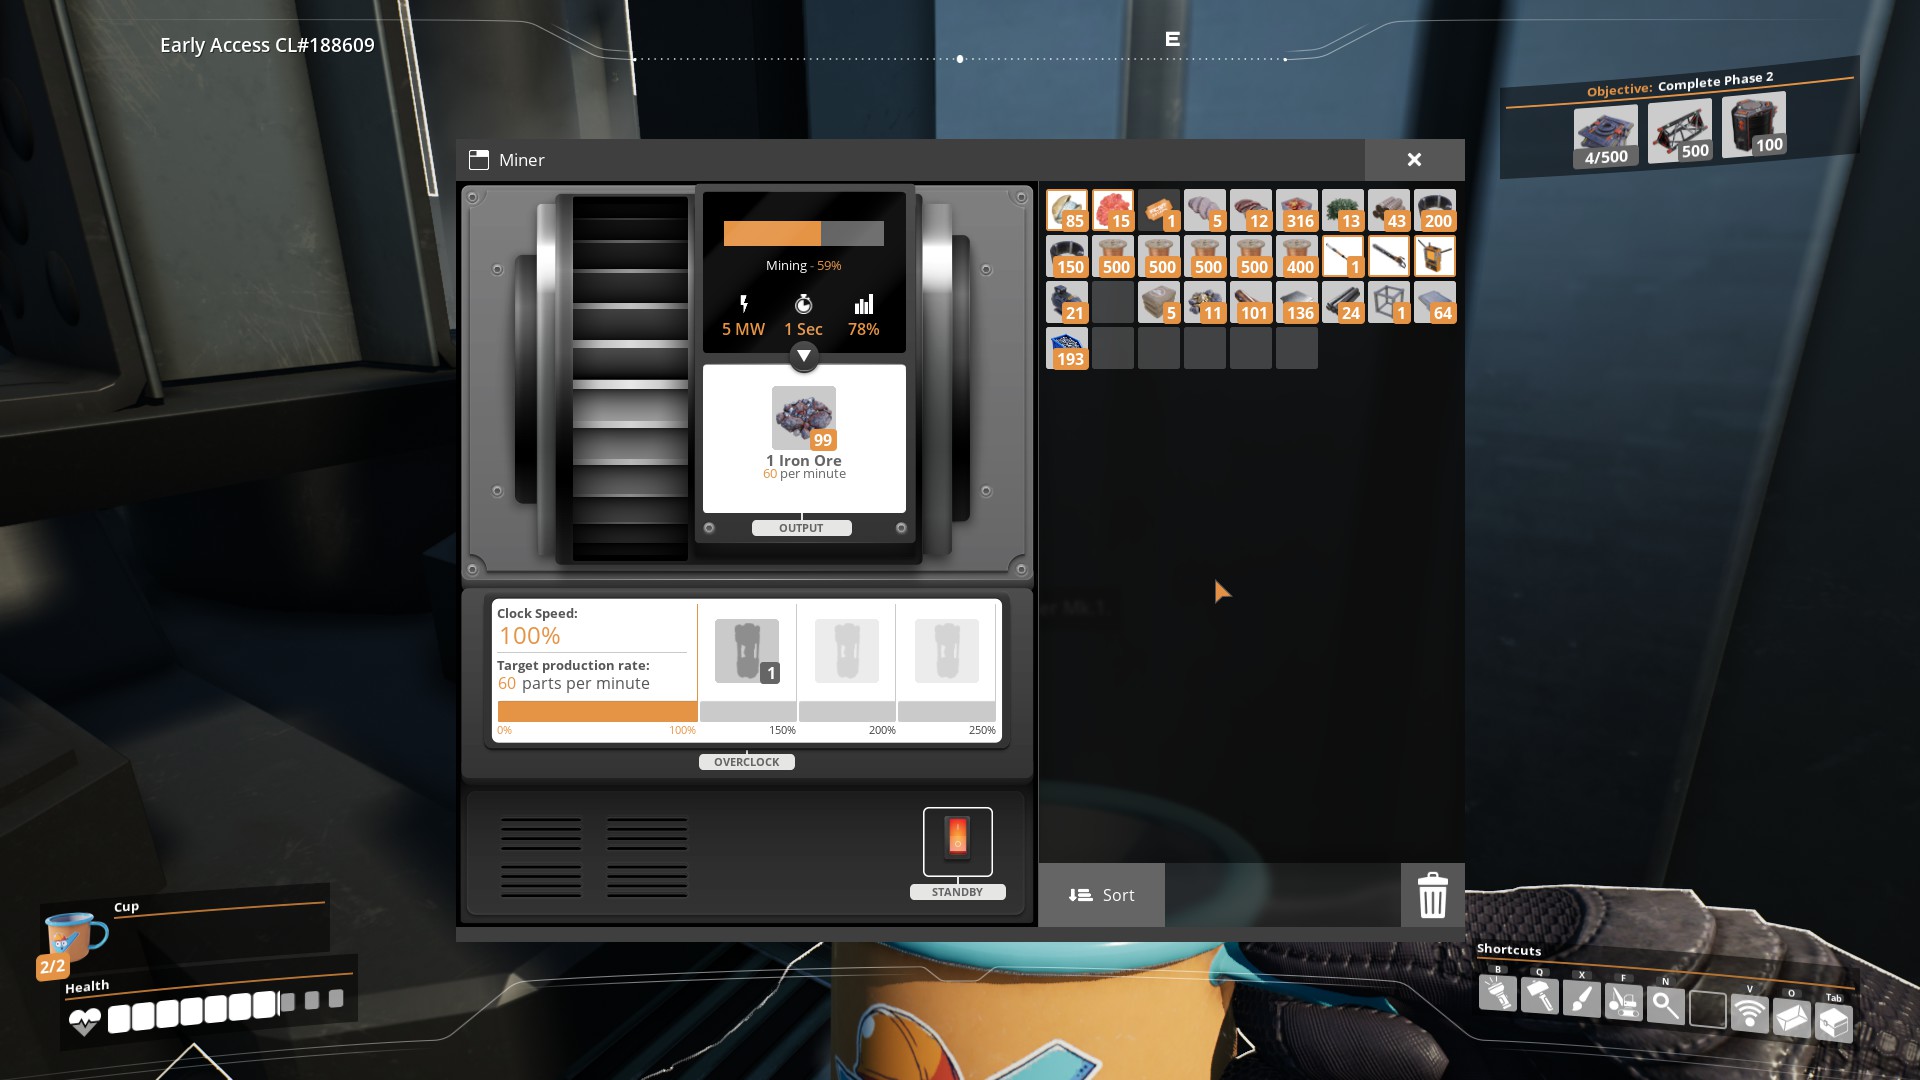
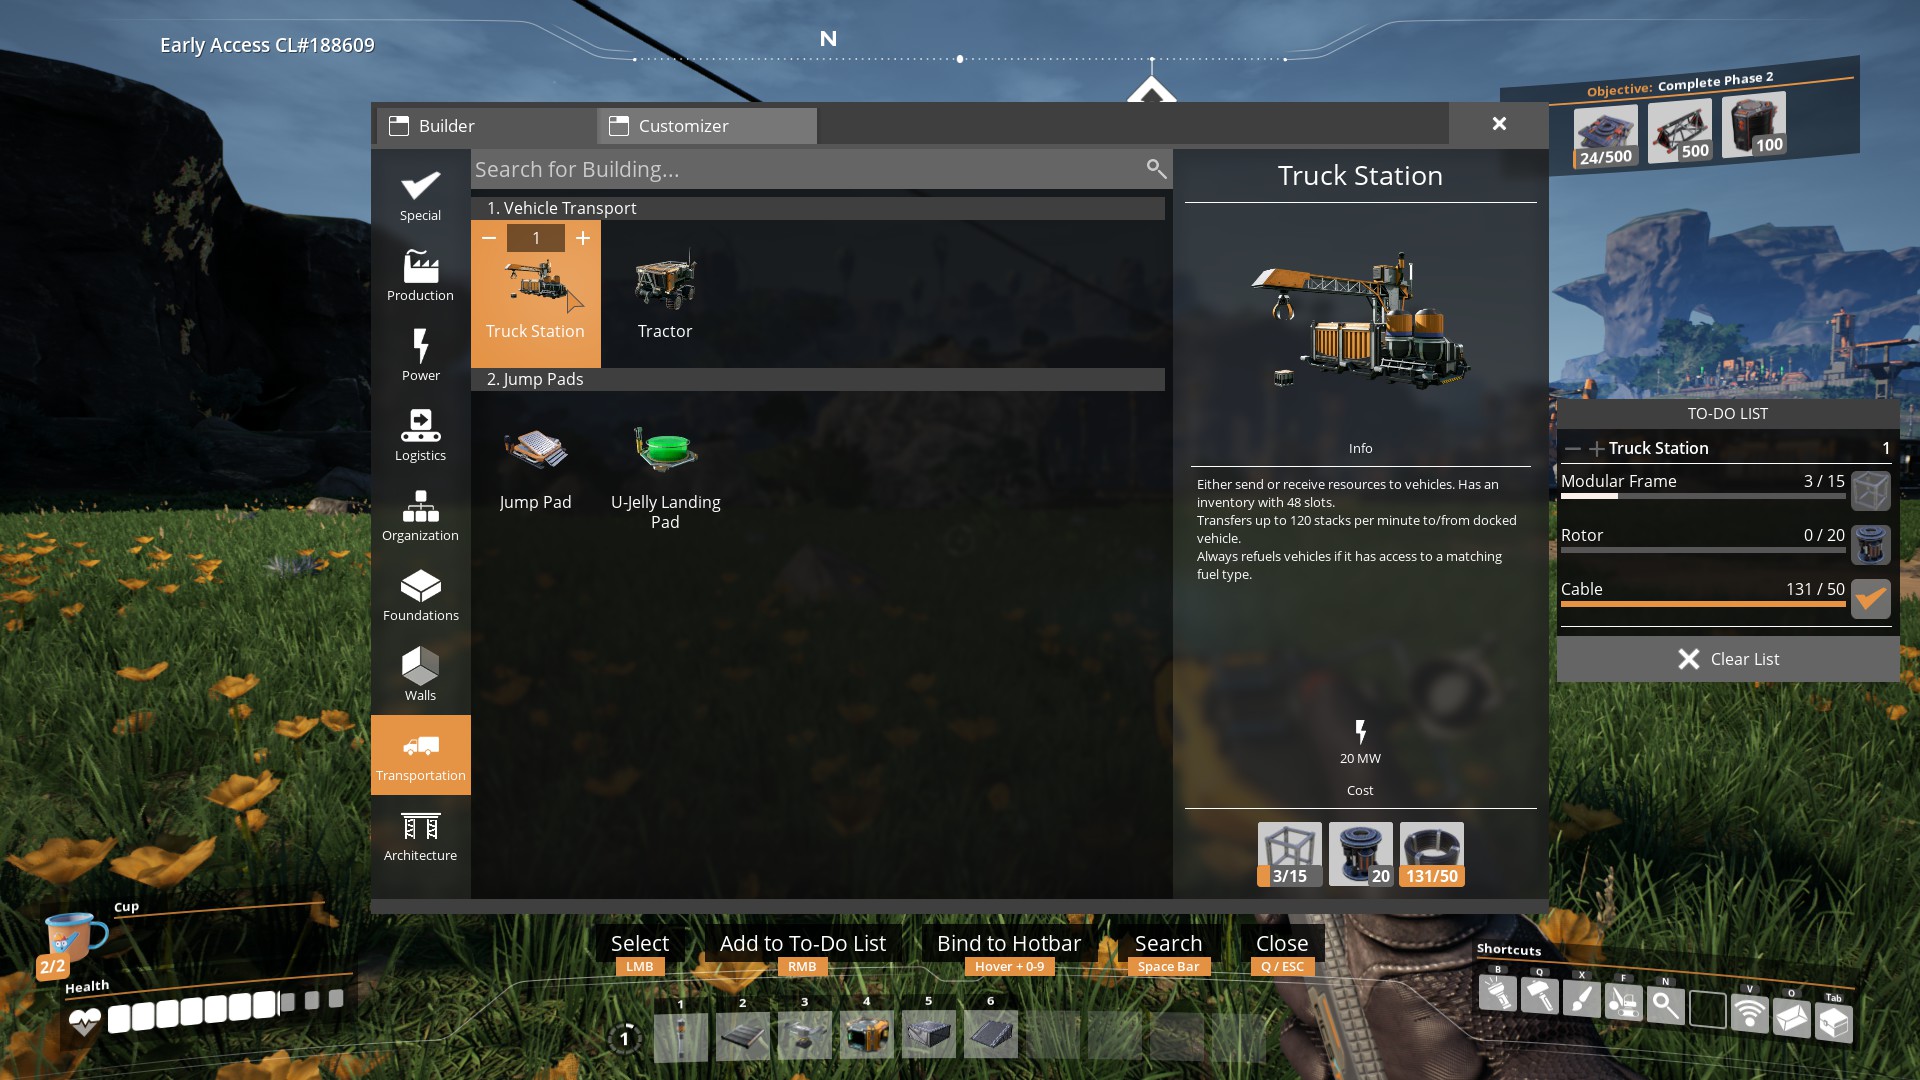
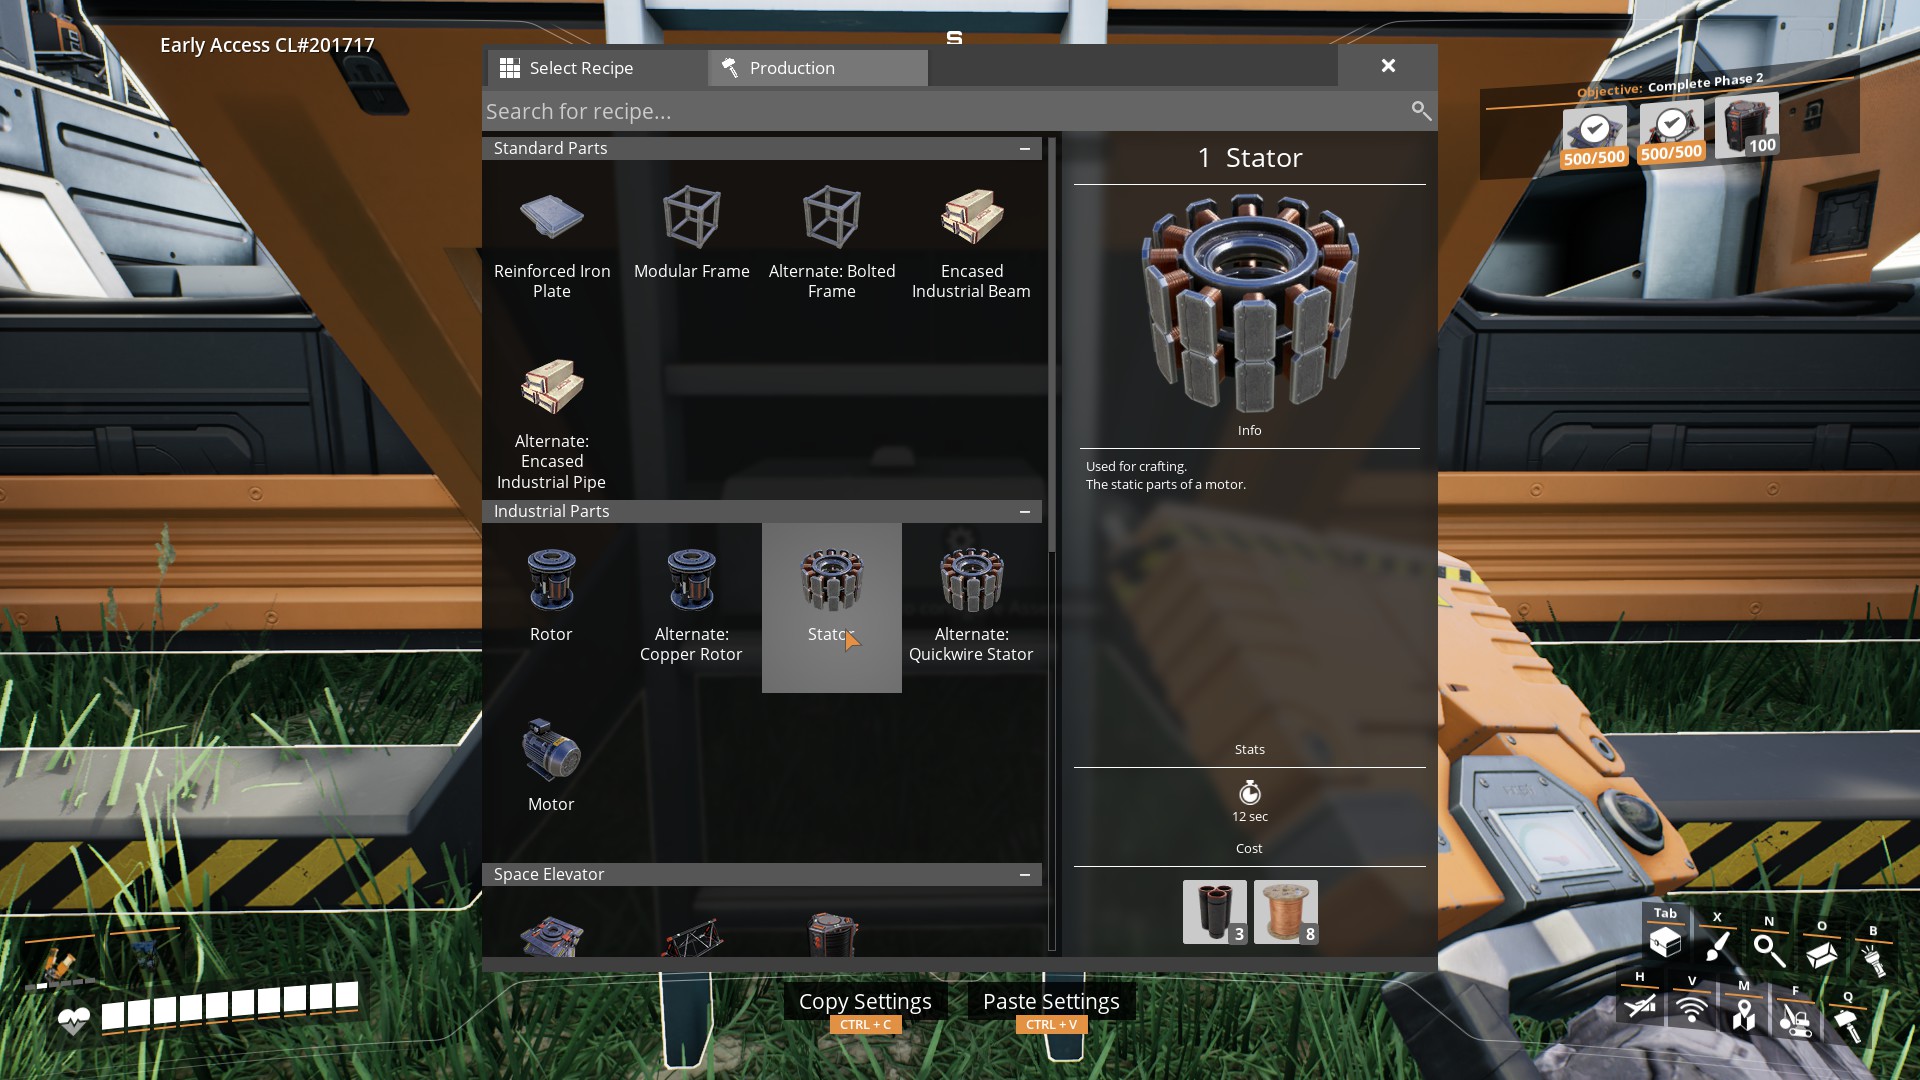
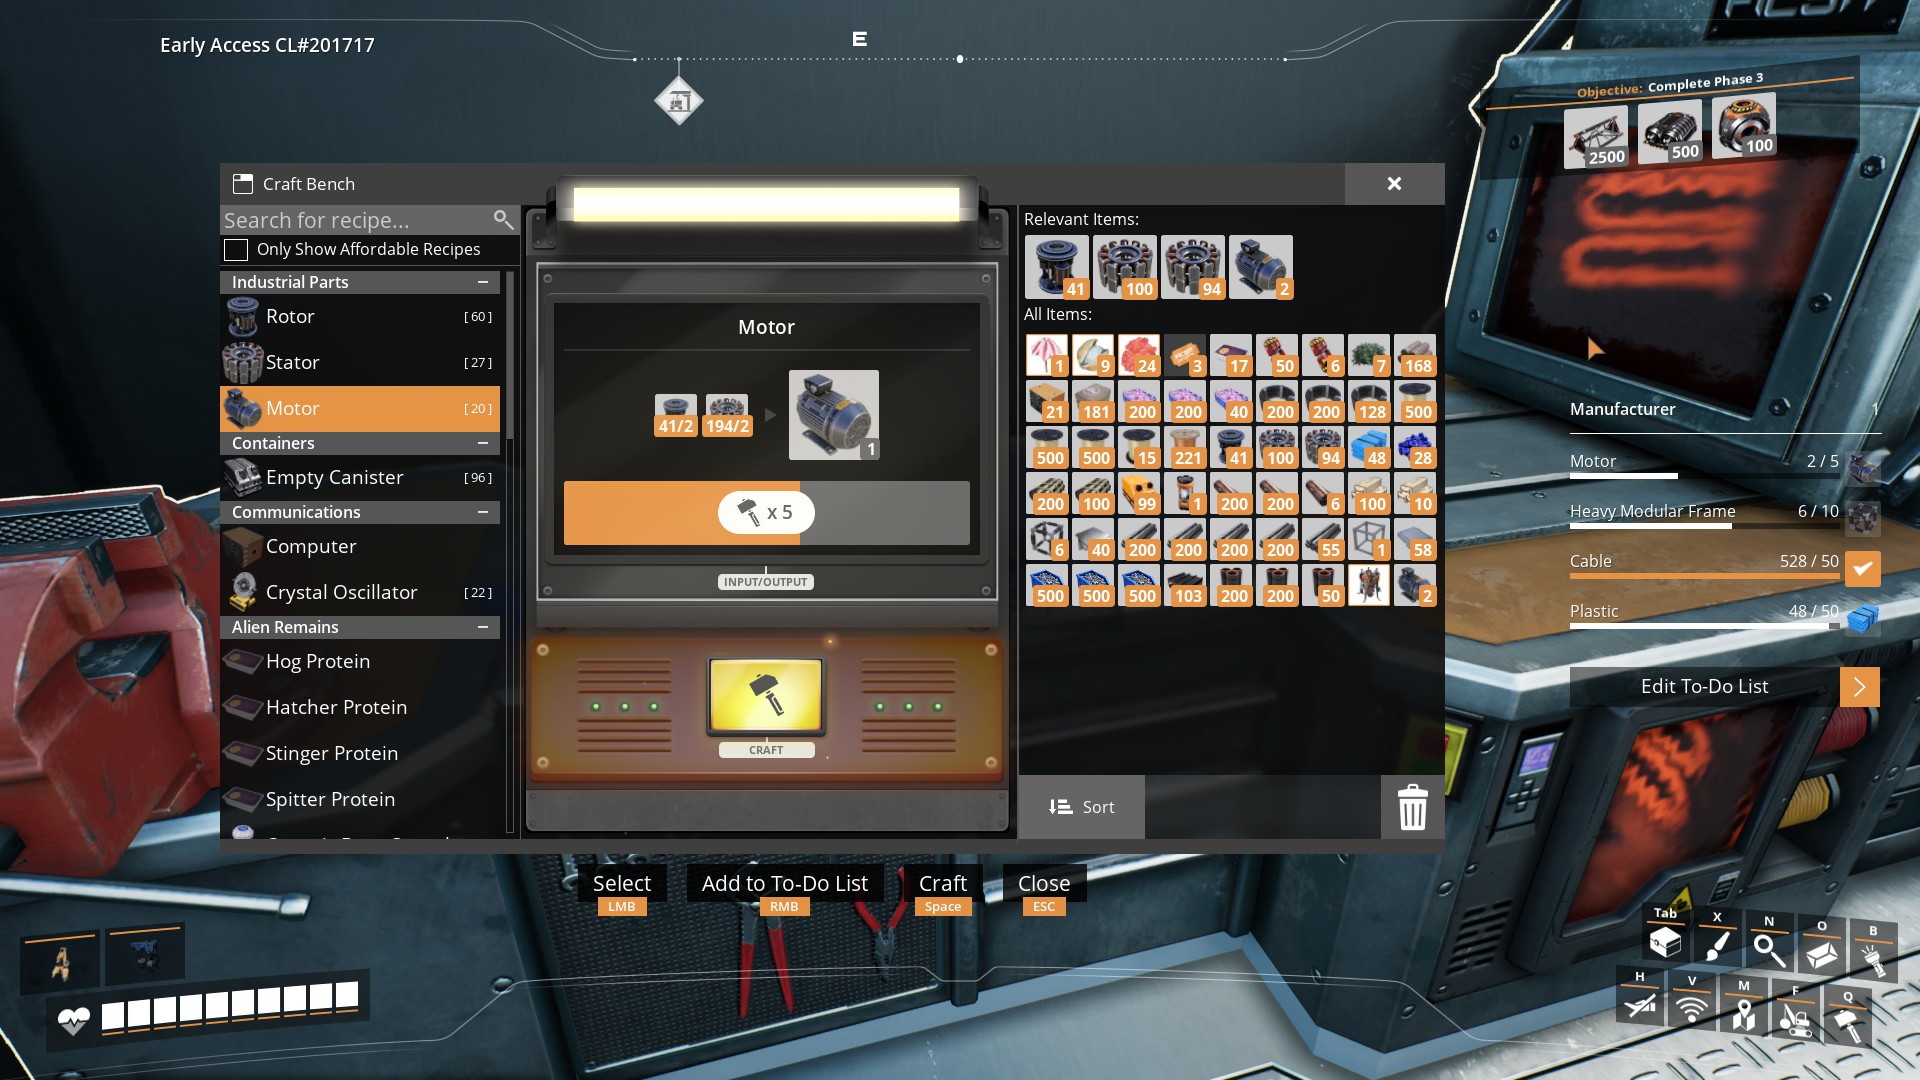
You write there are 3 contructors needed. One for Iron Bars, one for Screws and one for Iron Plates. But the screws need Iron Bars as a resource, so either a Constructor is missing or the whole automation doesnt work like that anymore.
Wirlin 18 grudnia 2022 o 16:37 
I bust out the chainsaw and clear a trail for the record path so that it's easy to remember where I want to travel when recording the path, or make a string of power lines... drive to on one side of them and come back on the other side of em.
Outcast  [autor] 5 października 2022 o 15:21 
A couple of days, got to work out some more on my tutorial factory and then i will continue on with.
Dragonman440 5 października 2022 o 13:53 
I don't even want to know how long it took to write this. Incredible job!
Outcast  [autor] 25 września 2022 o 8:44 
Thanks for the kind words! :)
xjacob 25 września 2022 o 8:36 
so well done