HELLDIVERS™

HELLDIVERS™

27 ratings
Wyvy's Anti-Tank Guide
By Hagon Wyvon
This is my anti-tank guide just to teach what that tutorial robot can't. Robots don't have fun blowing up tanks and armored enemies so they can't teach what they don't understand, so I will do it myself.
   
Award
Favorite
Favorited
Unfavorite
What's anti-tank
Anti-tank weapons are weapons that can deal damage to heavily armored enemies
Some anti-tank weapons are highly explosive so they are good at dealing with hordes of enemies (Rumblers, Demolisher, Obliterator, etc)
When to use ATs
Some anti-tank weapons are designed to only deal with 1 threat at a time (Single target) and some can be used to clear many enemies quickly and easily (Crowd control).
When you want to use ATs:
  • Kill armored enemies.
  • Destroy destroy objectives. (Commando can't destroy them because of its special mechanic)
  • For single target ATs , your job is to kill some enemies that are still alive or posing a threat to your team when your main AT guy in your team is busy.
  • For crowd control ATs, your duty is to kill horde of enemies even if they have heavy armor or not.

Always try to have a clear line of fire to your target when using your ATs because you will have more chance to blow yourself up instead of your target.

Remember to not use your ATs on weaker enemies (when I say "weaker enemies" I mean the medium and light armor enemies because this guide is made mainly to learn how to kill heavy armor enemies) that don't require ATs to take them down, let your primary or your teammates do the job.
How to use ATs
Helldivers provide you and your friends with many deadly ATs, some of them are not simple to use, but they all share the same common trait:
  • Deal damage to heavy armor enemies.
  • Can one-shot helldivers.
Some special AT requires a special way to operate and use like:
  • Commando requires a memory of where a ghost point is on the screen to shoot the homing missile hit its target every time.
  • Demolisher can be affected by the strong arm perk, it can be thrown like a grenade and detonated by reloading. Demolisher on the ground deals more damage than Demolisher flying on top of the targets.
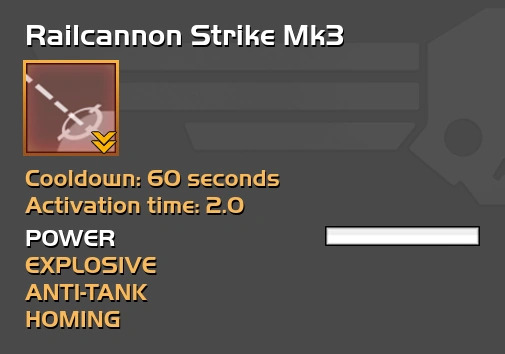
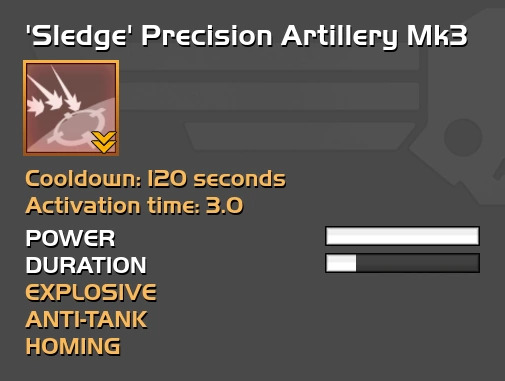
  • Sledge Precision Artillery and Railcannon Strike will home on the biggest enemy in a radius around the beacon (it can switch to a new target if the homed target is dead while the beacon is still on the ground. If the beacon is gone, the target can't be switched and the attack will be initiated on the targeted coordinates). Sledge's homing radius is larger than Railcannon's.
  • Vindicator has the hardest time killing armored enemies because of many factors.
MLS-4X and RL-112
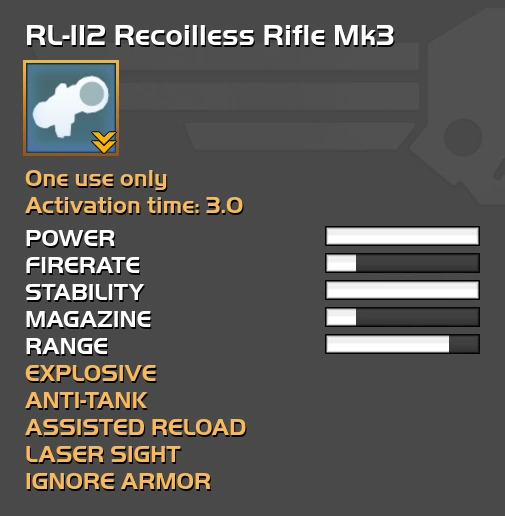
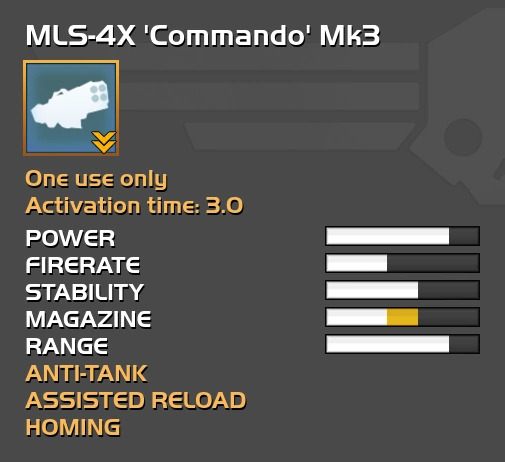
MLS-4X (Commando) and RL112 (Rocket launcher or Recoiless rifle) are the only 2 weapons that can only be reloaded by support kits, so if you lost your support kit, you've lost your ability to reload your gun. Many players like to bring RL-112 when they see other teammates bring Commando and vice versa because they know assist reload will be utilized the most by both players. If it happens, try to cooperate with your teammate, and pay more attention to your teammate's support pack and Commando ammo.
Tip: Self-reload needs 5 seconds to reload but assisted reload needs only 1 second to reload.

RL-112


Description:
  • RL-112 is the weapon that defines the one-shot one-kill in this game, one single good shot and one Behemoth is down. The reload speed is the gun's rate of fire, as soon as the rocket is loaded, you can fire it (back blast damage is not a thing in this game so feel free to take some smoke in your face). Generally, you have to plan how you want to use your rocket because you can only shoot it 7 times before picking up another ammunition bag, use it wisely. To save your ammo, watch your teammates' actions (learn their behavior in combat) or you will waste 1 shot on an enemy that the offensive stratagem or other firearms will kill.
Summary:
  • Good Single Target and Bad Crowd Control against Cyborgs. One-shot everything.

  • Good Single Target and Bad Crowd Control against Bugs. A bad shot to Behemoth will result in it having some small HP left, the rest are one-shot.

  • Normal Single Target and Bad Crowd Control against Illuminate. Over-kill everything, need to disable their shields down first.
Strategy:
  • For Cyborgs missions, you will like to use your shot on IFVs or a single Warlord survived your team's attack. Not recommended to use it on Butcher because they can be taken down easier by any other weapons (unless you have to 1 Butcher in a short time to save an objective but it's risky because of blast damage).

  • For Bugs missions, Behemoths/Tanks is your 1st priority, then Impalers, watch for Stalkers/Shadows jumping in your face.

  • For Illuminates missions, Council Members/Illusionists are your targets, remember to disable their shield first.

MLS-4X


Description:
  • MLS-4X has a steeper learning curve compared to RL-112 because of its homing system. The homing system is made to prioritize weaker enemies instead of heavy enemies, why? Although its MK3 version changes the enemies type this gun can damage but its homing system doesn't change accordingly. Cyborg IFVs need a good shot or two to their back to kill them and need practice and learning. Bugs Behemoths' armor is too thick for 2-3 missiles to punch through it, the RL-112 performs much better in Bugs missions. With other players having a support pack and being ready behind your back, it signals you to hold your fire button and unleash sustained fire on your foes.
Summary:
  • Good Single Target and Normal Crowd Control against Cyborgs. One good missile to kill IFVs, 2-3 missiles to kill Warlords/Hulks.

  • Normal Single Target and Normal Crowd Control against Bugs. Need more than 2-3 shots to kill Behemoths, Impalers and Tanks need fewer shots to the weak point.

  • Normal Single Target and Normal Crowd Control against Illuminates. At least 2 shots to kill an enemy, the blast radius isn't too big.
Strategy:
  • For Cyborgs missions, if you don't know how to kill an IFV with your gun, leave it for other players to handle the threat. If you have good experience with your gun, you can even kill IFVs from even out of the screen. handle a horde of armored enemies, and shut down patrols before they can even sound the alarm.

  • For Bugs missions, if your target is inside a cluster of medium size enemies, it's an excellent choice to not waste any missile because they will prioritize the medium threat. Impalers/Tanks are your 1st priority, single Behemoth is your 2nd priority.

  • For Illuminates missions, 1 missile to kill any Council Members/Illusionists (with disabled shield), your missile can't detect invincible threats and orbs.
EAT-17 and REC-6
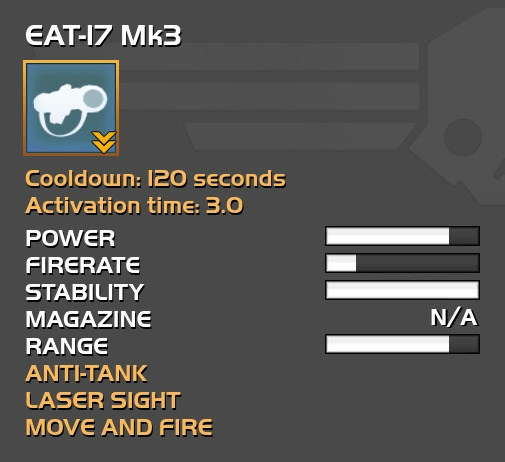
EAT-17 and REC-6 (Demolisher) are 2 of 3 disposable weapons in Helldivers. EAT-17 has 2 minutes or 120 seconds cooldown, and REC-6 has 3 minutes or 180 seconds cooldown. Bringing more than 1 stratagem or Stratagem Priority perk so you can call and use them more often.

EAT-17


Description:
  • EAT-17 comes in 2 per call but deals half the RL-112's damage, you can always think of the EAT-17 as an emergency RL-112 to kill heavy enemies (it's obviously in their name Emergency Anti Tank, it's Expendable AT in the wiki but whatever). You need 2 shots to kill Warlords. You need 1 shot to kill IFVs (a right-angle shot to IFV will kill it), Impalers (to its face while doing the tentacle attack), and a good shot to Behemoth's face will kill it instantly.
Summary:
  • Good Single Target and Bad Crowd Control against Cyborgs. Good shot to one-shot IFVs, Hulks but Warlords need 2 EAT-17 to be taken down.

  • Good Single Target and Bad Crowd Control against Bugs. EAT-17's damage surprised me, you can one-shot pretty much everything (even Behemoths with headshots) by weak point damage.

  • Bad Single Target and Bad Crowd Control against Illuminate. 1 shot to kill everything in Illuminate but need to disable the shield first.
Strategy:
  • For Cyborgs missions, you can immobilize IFVs easier with EAT-17s, any Warlords got hit by it will only have a few hp left and can be easily killed by any other source of damage (1 shot of Railgun, about 6 shots of Gunslinger, etc can be a finisher).

  • For Bugs missions, your hit list should look like this: 1. Orange things (Impalers and Tanks) -> 2. Behemoths' face -> Medium size threats.

  • For Illuminates missions, you can use both of your shots to kill 1 Council Member/Illusionist or disable their shield then shoot the EAT-17.

REC-6


Description:
  • REC-6 (Demolisher) only comes in 1 per call but you will have 3 (5 MK2 upgrades) charges of explosive red glowing thing dealing the same amount of damage as EAT-17 so 5 EAT-17 in 1 call is quite good. You can throw more than 1 charge of explosives and then detonate them all by pressing reload. REC-6 is very hard to use because of its throwing mechanics making the satchel usually miss if the user is not familiar with the game's physic causing using more charge to 1 threat.
Summary:
  • Good Single Target and Good Crowd Control against Cyborg. Good throw to Hulk's right side and IFV's back to kill it with 1 charge, 2 good throws to kill Warlords.

  • Good Single Target and Good Crowd Control against Bugs. 2 good throws to kill Behemoths, and 1 charge to Impaler's weak point will kill it.

  • Good Single Target and Good Crowd Control against Illuminates. 1 charge will kill everything but need to disable the shield first.
Strategy:
  • For Cyborgs missions, you can easily kill IFVs with 1 charge of C4 (sometimes it only immobilize it by bad throws), use Static Field on their horde spawn so your C4s can damage more than 2 enemies in 1 blast, and kill many of them (Hulks' dead explosion can damage Warlords so you can use 1 charge and kill Warlords in that horde too).

  • For Bugs missions, if your teammates with Railgun stun-locking Impalers, your best tactic here is 1. Kill them first. 2. Kindly ask them to stop so u can kill it with 1 C4 to the face (no one ever do this lol). 3. Throw a C4 and detonate it to release it from this torture.

  • For Illuminates missions, you just use it to kill a packed-up horde of Council Members/Illusionists or Tripods/Striders.
M-25 Rumbler
Well well well, isn't this the most OP weapon in the game.

M-25 Rumbler


Description:
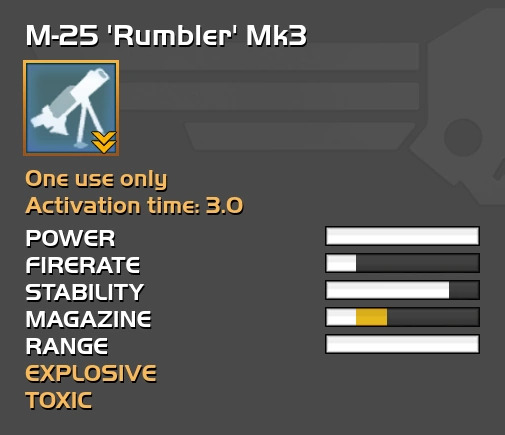
  • Rumbler shoots 3 explosives AT shells in a burst, MK3 upgrade makes this gun even more deadly to other teammates by adding toxin to the explosive shells. This gun has very good crowd control and good damage, but always be careful while operating the gun because sometimes it will explode right in your face instead of heavy enemies for no reason. You will need to hit the Cyborg IFV's back to kill it, and 2 good bursts to kill a Behemoth. (1 burst contains 3 mortar shells)
  • Tips: Try to hold your aim after firing the first shot and change direction after the last shot or second shot in the burst or your last 2 shells in the burst will hurt friendlies.
Summary:
  • Good Single Target and Good Crowd Control against Cyborg. 4 bursts can spawn-kill a horde of Warlords and Hulks (2+ mortar shells to kill Warlords), need to hit the IFV's back to kill it.

  • Good Single Target and Good Crowd Control against Bugs. 2 bursts to kill Behemoths, Tanks, 1 burst to kill Impaler.

  • Good Single Target and Good Crowd Control against Illuminates. Kills almost everything in 1 burst (Obelisks will always survive a burst if not damage the shield first and Council Members will sometimes survive the explosion).
Strategy:
  • For Cyborgs missions, if you have the Toxin upgrade, you can handle Butchers hordes easily and quickly. If you feel hard to kill an IFV and there is other AT in the game, just stay back and let them kill it for you.

  • For Bugs missions, haha mortar shells go brrrrrrrrrrrrrrrrrrrrrr. (Just watch for any obstacle in front of your face like bug corpses, medium size threats, etc).

  • For Illuminates missions, try to have your Rumbler top of with ammo before the next wave of Council Members/Illusionists come.
EXO-51 and EXO-44
Small tip: EXO-51 (Lumberer) and EXO-48 (Obsidian) can crush Cyborg's AA without using their gun by just hugging it, saving your ammo and time.

EXO-51 Lumberer


Description:
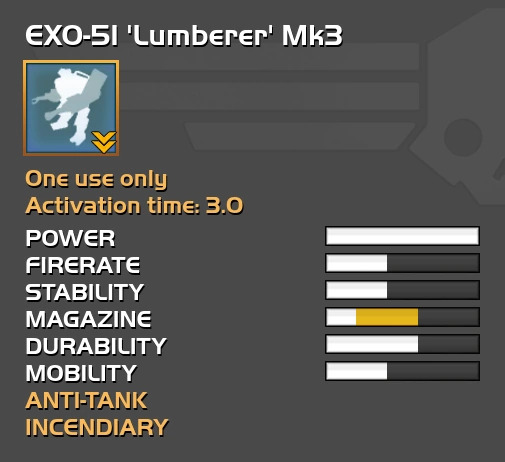
  • EXO-51 (Lumberer) has 2 guns, a flamer and an AT gun. The flamer is just a PDW, the AT cannon has the lowest in all the AT cannon vehicles (only 15 rounds of AT compared to AT-47 and TD-110 Bastion 35 rounds, and M5-32 HAV with 50 rounds). Your mech has a no-no zone and you would like to keep enemies away from that zone when you fire your AT rounds.
Summary:
  • Good Single Target (AT Cannon) and Normal Crowd Control (Flamer) against Cyborgs. One-shot everything with the AT Cannon.

  • Good Single Target (AT Cannon) and Normal Crowd Control (Flamer) against Bugs. Good shot to Behemoth's head will kill it instantly, one-shot Impalers.

  • Normal Single Target and Normal Crowd Control against Illuminates. AT Cannon and one-shot everything but the shied needs to be disabled first. Flamer's short-range forces you to get close to Council Members/Illusionists and it's easier for their orb to hit you while also having a higher chance of taking your shell's blast damage too.
Strategy:
  • For Cyborgs missions, use your Flamer to eliminate medium threats and AT Cannon to kill armored enemies.

  • For Bugs missions, same as Cyborgs but you would like to pay extra attention to Behemoths because they can run and kill you with your mech.

  • For Illuminates missions, maybe just stay far from enemies and let your teammates disable the shield for you instead of trying to do it yourself with your Flamer without REP-80's assistance.


EXO-44 Stomper


Description:
  • EXO-44 (Stomper) has a minigun and 8 (will be AT after upgraded) commando missiles. How to use the minigun is straightforward, aim at weaker enemies then shoot. The way you use your missiles is like how u would like to use Commando if it shoots parallel to the ground. Note that this mech is designed to not be low AT power.
Summary:
  • Normal Single Target (Missiles) and Good Crowd Control (Minigun) against Cyborgs. It's commando missiles but the only difference is the missiles are launched parallel to the ground.

  • Bad Single Target (Missiles) and Good Crowd Control (Minigun) against Bugs. It only has 8 missiles and the Behemoths need about 4 missiles to be taken down.

  • Good Single Target (Minigun) and Good Crowd Control against Illuminates. The Minigun can melt most enemies in a few seconds, Missiles serve as fast Council Members kill option.
Strategy:
  • For Cyborgs missions, aiming Stomper's Missiles is easier than aiming Commando's Missiles, but you will always have to calculate if this missile you are about to shoot is worth it.

  • For Bugs missions, clear the weaker enemies first then shoot the Missiles.

  • For Illuminates missions, you will bully the enemies with the minigun, not your Missiles.
M5-32 and TD-110
M5-32 HAV


Description:
  • M5-32 HAV is the AT-47 on wheels with some more miniguns. You will need at least 2 players to control both the AT cannon and drive the car at the same time. Tip: Magically the M5-32 HAV doesn't take damage from its front, but its rear and back will take it so be careful with your aim if there is no REP-80 user in the mission.
Summary:
  • Good Single Target (AT Cannon) and Normal Crowd Control (Miniguns) against Cyborgs. One-shot everything, Miniguns can take care of Butcher hordes if the position isn't awkward to use it.

  • Good Single Target (AT Cannon) and Good Crowd Control (Miniguns) against Bugs. One-shot everything, Miniguns can take care of weaker enemies if the position isn't awkward to use it.

  • Normal Single Target and Normal Crowd Control against Illuminates. AT Cannon will over-kill everything on the battlefield if their shield is disabled.
Strategy:
  • For Cyborgs missions, having a car to move between long distanced objectives would be nice. You can also use the vehicle as a barricade or shield for defense objectives or just to block the incoming horde of enemies just to buy some time for your downed teammate to get up.

  • For Bugs missions, if you are the type of guy who hates being slowed down by poison, just hop in the car. Miniguns are recommended to deal with Brood Commander hordes and AT cannon for Behemoths/Tanks and Impalers.

  • For Illuminates missions, a horde of Striders/Tripods coming? Boom boom vanished. Outcast horde coming? Minigun goes brrrrrrrrrrrrr.

TD-110


Description:
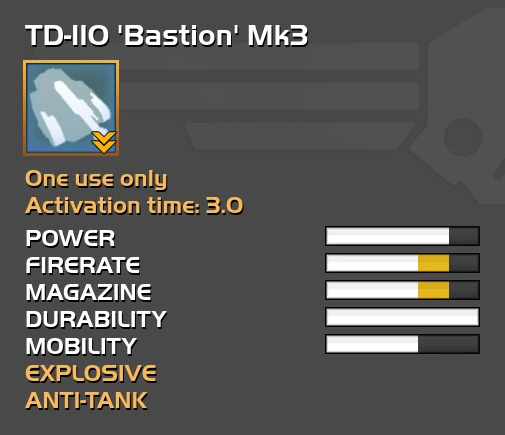
  • TD-110 Bastion is a heavily armored AT-47 on wheels or heavier M5-32 HAV. But Bastion only has 2 seats for gunner and driver, the gunner can shoot both minigun and AT cannon (35 rounds after upgrade), and the driver can change direction without moving the tank forward or backward (Tip: the tank goes faster in a straight line than going forward/backward and steer left/right at the same time). Bastion doesn't have a self-damage reduction on the front like HAV so it will take damage from its cannon.
Operating tips:
  • The gunner has a worse time operating the cannon than other vehicles because the game is wacky when the tank moves forward/backward, it will tilt up/down and lead to many cases of shooting to the ground or shooting higher than the target's head. So to deal with this, as the gunner, you need to tap your minigun first to see if the line of fire is correct and then shoot your AT cannon, if you are the driver, try your best not to move forward/backward while your gunner is shooting (You can ask the gunner to shoot his minigun to indicate when they want to fire the cannon so you can stop moving).
Summary:
  • Good Single Target (AT Cannon) and Good Crowd Control (Minigun) against Cyborgs. One-shot everything, Minigun can take care of Butcher hordes.

  • Good Single Target (AT Cannon) and Good Crowd Control (Minigun) against Bugs. One-shot everything, Minigun can take care of weaker enemies.

  • Good Singler Target and Good Crowd Control against Illuminates. Minigun will melt everything in a few seconds, and AT Cannon serve as fast Council Members kill option.
Strategy:
  • For Cyborgs missions, miniguns are recommended to use against Hulks but you can use AT cannon to instantly delete them. You can use the tank as a better barricade or shield in a defensive position because of their ability to change direction when they are staying still and it would more likely for both you and your gunner to escape any situation that would be fatal if you both are in an HAV.

  • For Bugs missions, less mobility means more danger from Behemoths/Tanks charging towards you and maybe some more danger from Impaler's tentacles.

  • For Illuminates missions, nice tank, it got a nice offense and a good defense against Tripods/Striders, a mix of minigun and AT cannon make Bastion a great Council Members/Illusionists killer.
AT-47 and AT Mines
AT-47 Anti-Tank Emplacement


Description:
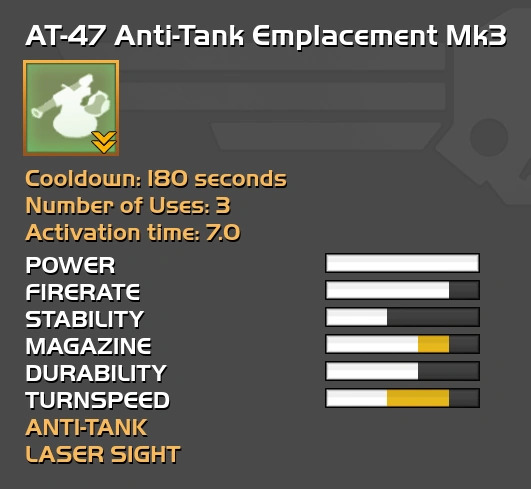
  • AT-47 has the highest total AT ammunition because of math (3*35 = 105 rounds of AT after MK2 Upgrade, MK1 only give you 3*25 = 75 rounds of AT) which beat other AT vehicles. But this gun can't move around like other AT vehicles/mechs so you will love to call this gun in defense positions like RS missions (RS is Retaliation Strike). You would always love REP-80 when you bring this gun in RS mission because why care about self-damage when your heal completely negates it? (also don't do stupid ♥♥♥♥♥ like spam AT-47 while being smacked by 2 or more warlords, the REP-80's heal speed can't handle that, just get out of that gun, very high chance it would explode in seconds).
Placement tips:
  • Try to plant your AT-47 in an open area so your gun can aim and kill whatever is in its sightline, especially keep a small distance from the launch pad and geo tower. If your AT is out of ammo, just leave it there, it can still damage enemies with its death explosion (and the objectives too).

  • This is obvious but I will still write it here, AT-47 can only be called 3 times and 180 (108 with Stratagem Priority Perk) seconds cooldown, AT-47 has a long drop time (7 seconds) and not included the time to prepare the gun and your gaming chair, you should only call AT-47 down when there are no enemies or they can't reach your AT-47 when it's deploying. You should call AT-47 as soon as possible in Launch Pad, Geo Survey, and Extraction objective because you will stay in 1 place and defend there for 1 minute or longer. You can call it down in Capture objectives but since the time to capture is kinda fast and you can just hold enemies far from the point and the bar should go up with the normal speed, AT-47 is not gonna be used as much as the 3 listed objectives.

  • In RS missions, don't be so sad if your new and freshly deployed AT-47 got swarmed by enemies 0.01 seconds after it landed, it happens all the time (Pray for RNGesus to give you a good and peaceful AT-47 spot).
Summary:
  • Good Single Target and Normal Crowd Control against Cyborgs. One-shot everything.

  • Good Single Target and Good Crowd Control against Bugs. One-shot everything, Behemoths can sometimes survive one shot, good shots will kill it in one shot.

  • Normal Single Target and Normal Crowd Control against Illuminates. Over-kill everything, need to disable their shield first.
Strategy:
  • For Cyborgs missions, though it's not recommended to use AT-47 against a horde of Butchers if you don't have any better option than AT-47 then go ahead, blast them to bits. Try not to blast yourself up because some medium size Karen enemies get close and want to take your seat if there is no REP-80 user in your team.

  • For Bugs missions, try to kill Impalers as soon as possible because their tentacles pose a big threat to your gaming chair and sightline.

  • For Illuminates missions, you find blasting those eggs fun, you know that you can't be mind controlled because you are in a VEHICLE.

Airdropped AT Mines


Description:
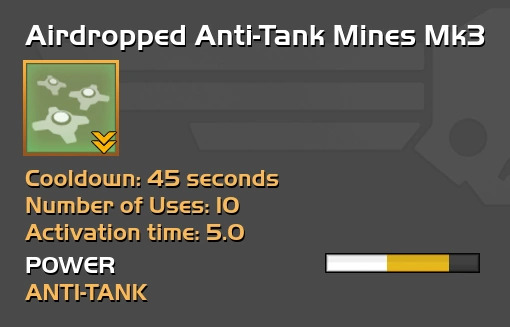
  • AT mines are pretty straightforward, you deploy them, enemies walk on them, explode, job done. The AT mines need to be MK3 to damage armored enemies, their explosion radius is big and they can be used to kill hordes too. Always remember this when using AT mines, never deploy them near objectives because some melee enemies can walk by and eventually fail the objective. Mines also have a hard limit to how many mines can be active at the same time, your 5th mine deployment will remove the 1st minefield (Anti-personnel Barrier is counted as a minefield) you called earlier, it will not remove other helldiver's minefield.
Summary:
  • Good Single Target and Good Crowd Control against Cyborgs. 1 mine exploding in IFV's back will immediately destroy it, or else just immobilize it, 1 mine will kill most other threats.

  • Good Single Target and Good Crowd Control against Bugs. 2 mines are needed to kill a Behemoth (sometimes 1 mine to the head will kill it), and 1 mine is all it takes to kill Impalers and weaker enemies.

  • Normal Single Target and Good Crowd Control against Illuminates. 2 mines detonating at the same time will always guarantee a kill or more, Council Members' orb and Illusionists' orb can detonate mines too.
Strategy:
  • For Cyborgs missions, bringing 2+ AT mines stratagem will guarantee you a better defense position in Capture, Geo Survey, Launch Pad, and Extraction objectives. Calling them on a Hulk/Warlord spawn to let them suffer the emotion that only the Helldivers who have been called in a middle of a minefield can understand.

  • For Bugs missions, just call the mines on a Brood horde. The Behemoths/Tanks and Stalker/Shadows can simply run/jump through your minefield and trigger some on their way.

  • For Illuminates missions, mines are good in Illu missions if you called 2 minefields on top of each other to increase the chance of 2 mines detonating at the same time to kill enemies instantly.
NUX-223 and Shredder
Nux-223 Hellbomb


Desription:
  • Nux-223 Hellbomb is the combination of Distractor and Shredder, Hellbomb can be called down many times in one mission as long as the destroy objective is unfinished. Hellbomb won't destroy Illuminates' beacons if their shields are still on, Cyborg's AI will always focus on downed helldivers then Hellbomb then helldivers that are not in their range.
Summary:
  • Good Single Target and Good Crowd Control against Cyborg. Note that Cyborg units will prioritize the Hellbomb and Warlords/Hulks can survive from half the radius to out.

  • Normal Single Target and Good Crowd Control against Bugs. Behemoths and Tanks can run through the Hellbomb, destroying it, and they can survive the explosion from half the radius to out.

  • Normal Single Target and Normal Crowd Control against Illuminate. Nux-223 Hellbomb doesn't ignore shields like Shredder.
Strategy:
  • For Cyborgs missions, Hellbombs are very good alternative for Distractors but in a smaller proximity. Calling multiple Hellbombs and detonating more than 1 when there are enemies present nearby will increase the chance that at least 1 Hellbomb can successfully detonate and complete the objective.

  • For Bugs missions, a nice screen clearing option but enemies will just not die like Behemoths/Tanks or Impalers that are out of the explosion radius.

  • For Illuminates missions, Hunters can one-shot the Hellbomb so you and your team should secure the area before detonating the Hellbomb.

Shredder


Description:
  • Shredder is the most famous stratagem in the game because it's a Nuclear weapon. Shredder's explosion radius can only be compared to Hellbomb's, its damage will ignore bubble shields (destroy Illuminate's beacons with their shield on). The actual time for Shredder to reach its destination is almost the same as the time it took for a helldiver to get up from his/her hellpod after a reinforcement, so calling nuke first to where you want to call your teammates then throw a reinforcement there would guarantee a higher chance of surviving after going up of your teammates. Shredder's damage from somewhere in the middle of the radius will slowly decrease the more you move from its middle, somewhere from half the radius to the middle point will have a 100% death rate even when you have a shield or are laying, the only way to survive in that area is the jump jet, from that half radius to out, the damage starts decreasing till it reaches 0.
Summary:
  • Good Single Target and Good Crowd Control against Cyborgs. It can immobilize IFVs in the half radius to 3/4 radius, Warlords and Hulks can survive the blast if they are far enough from the beacon.

  • Normal Single Target and Good Crowd Control against Bugs. Heavy enemies will survive from half the radius to out, and Behemoths/Tanks can run out the kill radius so a slowing effect to trap them inside the kill radius is considerable.

  • Good Single Target and Good Crowd Control against Illuminates. Shredder's shield ignores ability and wide radius making it an excellent screen-clearing stratagem for Illuminate missions.
Strategy:
  • For Cyborgs missions, try to call Shredder after they've spawned all in and chasing your team, or if you are confident in your timing skill and game knowledge then try to time the Shredder to strike when Cyborg sends the last of the spawn

  • For Bugs missions, basically just throw them like Hellfire while on the move, on where your team is standing not where your foes are (unless your team has Static), only do this when your team is about to lose the position.

  • For Illuminates missions, when you see the first Council Member spawn, you better call this fat chonky explosion and throw it right on their spawn point (if your back doesn't have enough space for 1 Council Member), or throw it right on your position when you decide to run. Try to call Shredder if you think your team can't defend against the horde.
Railcannon and Sledge Precision Artillery
Railcannon Strike


Description:
  • Railcannon is the best single target AT stratagem in the game, it has a long time call in (2 seconds) when it can only home in a small area around the beacon which will make it most of the time wouldn't home on the right target (Stratagem priority or Precision Call-in is advised to be the best perk to use with the stratagem). When throwing the stratagem's beacon, always think before throwing that will the target move out of range or not, if yes, cancel the stratagem and wait for an opportunity to throw it later since it has a rather short call in code. The stratagem's damage is good and can be compared to RL-112's shot but will need a second shot to kill a Behemoth.
Summary:
  • Good Single Target and Bad Crowd Control against Cyborgs. Railcannon will one-shot everything, if the Warlords and Hulks are stacked on each other when they are spawning, the Strike can kill them all.

  • Good Single Target and Bad Crowd Control against Bugs. Raillcannon will leave Behemoths with low HP after the strike, it will one-shot everything else.

  • Normal Single Target and Bad Crowd Control against Illuminate. Railcannon Strike sadly can't ignore bubble shield like Shredder but it can ignore the Obelisk's white shield and kill it while in its closed state.
Strategy:
  • For Cyborgs missions, throw this thing when you know your target will be held in that spot that your stratagem can aim and hit it.

  • For Bugs missions, throw this to Impalers/Tanks to kill them fast, Behemoths will need a second shot or an additional damage source to be finished off.

  • For Illuminates missions, if your Rail has locked on a target, it will strike the target no matter how far it is teleported (if they ever appear again after the teleport).

Sledge Precision Artillery


Description:
  • Sledge Precision Artillery is the worse version of Railcannon because it has a harder time destroying IFV, and even missing big targets frequently. It's not a good and reliable AT stratagem because of its long cooldown and call-in (120 seconds and 3 seconds), Railcannon strike is better with its lower time. In exchange, it has a significantly wider homing radius.
Summary:
  • Normal Single Target and Normal Crowd Control against Cyborgs. Sledge can "sometimes" miss IFV's back, 1 burst will kill Warlords/Hulks.

  • Normal Single Target and Good Crowd Control against Bugs. Although it's bad locking on running Tanks or Behemoths, it will kill everything if the missiles hit their targets.

  • Good Single Target and Good Crowd Control against Illuminates. Sledge can kill everything though it's hard because many big enemies can teleport around.
Strategy:
  • For Cyborgs missions, Sledge is like a more AoE Railcannon, use them mostly to kill Warlords and Hulks packs, don't try to use it to kill IFVs, Railcannon is better.

  • For Bugs missions, just throw the beacon to somewhere you think the homing radius would lock on the Impaler (need some time to know the distance), you could kill a Behemoth/Tank with it easier than Railcannon.

  • For Illuminates missions, a nice stratagem to have in your hand if you can't have a precise throw.
Offensive AT Stratagems
Heavy Airstrike


Description:
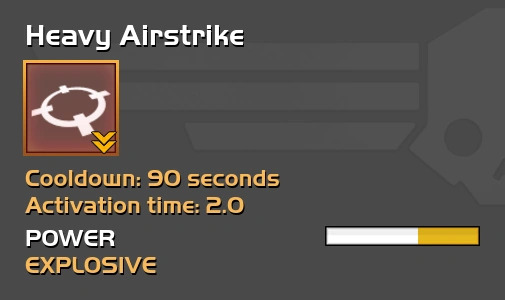
  • Heavy airstrike is a good stratagem, it has good Crowd control damage, AT damage, low call time, and cooldown (2 seconds call and 90 seconds cooldown). This stratagem will deliver a pack of explosives onto the ground guaranteeing 100% fatality to anything standing in its range (even Behemoths can only survive if they only stand on the verge of the explosion).
Summary:
  • Good Single Target and Good Crowd Control against Cyborgs. Bad throw could just immobilize IFVs or scratch Warlords' armor, anyhow it will still cover a large area and would take out a lot of enemies enough for you to focus on things that survived the strike.

  • Good Single Target and Good Crowd Control against Bugs. Sometimes Behemoths can survive but they will be in low health and you can take it out quickly.

  • Good Single Target and Good Crowd Control against Illuminates. Every enemy in this faction is squishy so it could kill anything with 1 blast, but sometimes they could teleport out of your blast zone so be careful with those.

Close Air Support


Description:
  • Close Air Support delivers only a line Strafing gun and 2 (4 if upgraded) homing AT missiles. Although it's a fast call time (0.1 seconds), it's really hard to aim the missile to destroy a moving IFV so most of the time, helldivers call CAS for a small assistance from its missiles and anti-personnel Strafing gun.
Summary:
  • Normal Single Target and Normal Crowd Control against Cyborgs.
  • Normal Single Target and Normal Crowd Control against Bugs. The missiles suffer the same problem EXO-44 Stomper and MLS-4X Commando has, a hard time when killing Behemoths, but they can still kill Impalers in 1 call.
  • Good Single Target and Normal Crowd Control against Illuminates. The minigun will weaken the shield, the missiles will kill the enemies consistently.

Misssile Barrage


Description:
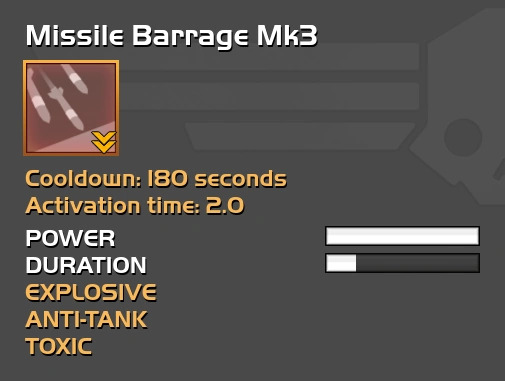
  • Missile barrage has a long cooldown but a fast call time (180 seconds cooldown and 2 seconds call in). MK3 upgrades even give them a toxic effect after the explosion just like rumbler making them a good and reliable AT option and Horde clear option. Its toxin has the same strength as TOX-13's and Rumbler's, you will need to pick your friends up 3 times if they are unlucky enough.
Summary:
  • Good Single Target and Good Crowd Control against Cyborgs. It kills everything.
  • Good Single Target and Good Crowd Control against Bugs. It kills everything.
  • Good Single Target and Good Crowd Control against Illuminates. It kills everything, but the bots are immune to the poison.

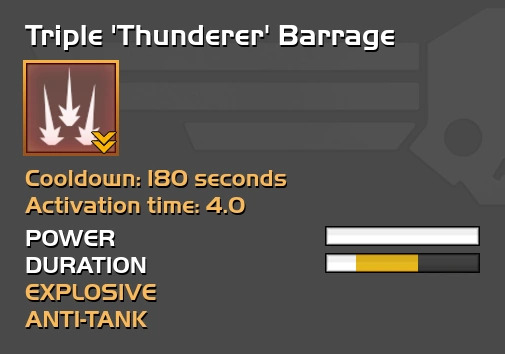
Triple Thunderer Barrage


Description:
  • Thunderer is the best boss speedrunning method in the game, it will rain down 3 AT missiles at the beacon's position 9 times and anything standing near the beacon will have a significant risk of death. It's a slow call in stratagem but it lasts long for nearly 20+ seconds raining down the missiles: a good area denial stratagem and a good horde killing stratagem.
Summary:
  • Good Single Target and Good Crowd Control against Cyborgs. It kills everything.
  • Good Single Target and Good Crowd Control against Bugs. It kills everything.
  • Good Single Target and Good Crowd Control against Illuminates. It kills everything.

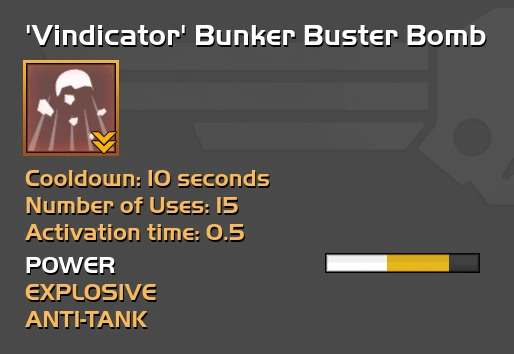
Vindicator Bunker Buster


Description:
  • Vindicator suffers the same issue with Sledge, hard to kill armored enemies. Vindicator only can deal AT damage after the MK3 upgrade, but it only has a small area to deal AT damage and it's in the center of the blast (around the beacon). Although it's terrible performance in Cyborg and Bug missions due to its wacky AT ability, Vindicator does a very good job dealing with Illuminates because it's a singular explosion, it's like a shotgun from the sky, devastating every robot in the area.
Summary:
  • Bad Single Target and Normal Crowd Control against Cyborgs. It's hard to kill heavy enemies because of its small kill radius (a super hard AT stratagem but that dopamine after you land a Vindicator on a Warlord is dope, Warlord will have very little health after a good Vindicator strike) but instant-kill against weaker enemies(not Butchers).
  • Bad Single Target and Normal Crowd Control against Bugs. Behemoths/Tanks move around a lot making Vindicators suffer even worse time killing them, the only prey for Vindicators to hunt are trapped Bugs in Static Field or Impalers doing tentacle attack.
  • Normal Single Target and Good Crowd Control against Illuminates. Just like a shotgun from the sky, it kinda ignores weaker enemies' shields and kills them most of the time, Council Members and Illusionists have higher HP to survive a Vindicator.
Honorable Mention: Weapons
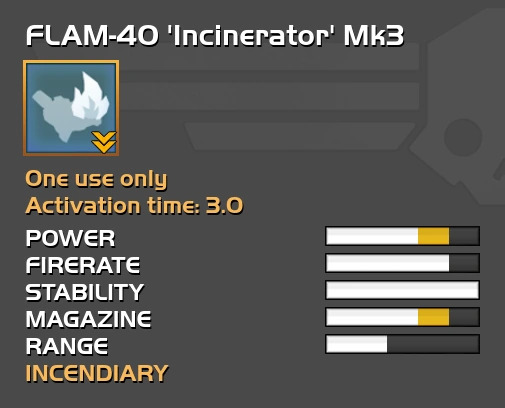
FLAM-40 Incinerator


Description:
  • This Flam-40 can damage Warlords and Behemoths (by fire damage). This gun is also capable of good Crowd control because the enemies will avoid the fire puddles created by the Flam-40, making Incinerator the pocket Hellfire.
Summary:
  • Normal Single Target and Good Crowd Control against Cyborgs. It can damage Warlords overtime but it will take a long time, fire puddles can be used as an area denial against Butcher horde.
  • Normal Single Target and Good Crowd Control against Bugs. It can damage Behemoths by fire damage but it will also take a long time, fire puddles can be used as area denial against horde of weaker enemies, but careful the Stalkers jumping in your face when firing the gun, it would burn you too.
  • Normal Single Target and Good Crowd Control against Illuminates. A decent option against Illuminates, it will not take as long as Bugs or Cyborgs to kill a Council Member, fire puddles also provide area denial against other enemies.

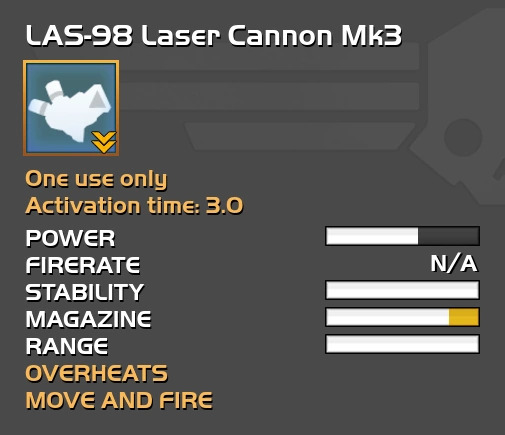
LAS-98 Laser Cannon


Description:
  • LAS-98 is the big LAS-5 (Scythe) with bigger heat mag (more heat required to overheat), faster heat dump, and higher DPS. LAS-98 is capable of dealing damage and killing Warlords but not Behemoths (Warlords take damage from continuous laser beams like LAS-5, LAS-12, LAS-98, Orbital Laser Strike and also take damage from other primary guns like Precision type guns, Arc guns, Gunslinger, and Scorcher).
Summary:
  • Good Single Target and Normal Crowd Control against Cyborgs. A good DPS to Warlords and long fire time to deal with Butcher horde.
  • Normal Single Target and Normal Crowd Control against Bugs. Good DPS to force Impalers to shut their face in seconds, nice DPS to deal with weaker enemies.
  • Good Single Target and Normal Crowd Control against Illuminates. Good DPS to kill weaker enemies in seconds, but it suffer a bad time killing dashing/teleporting enemies because of slow turn speed (can be negated by melee aiming).

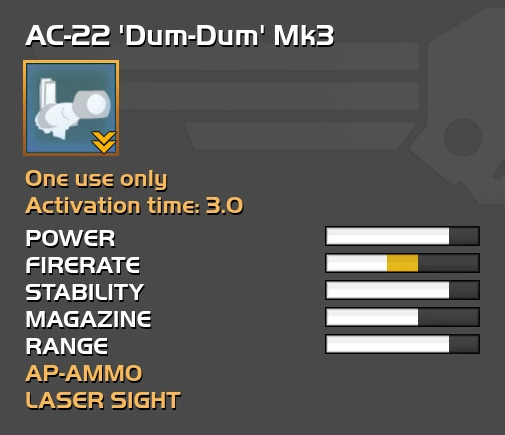
AC-22 Dum Dum


Description:
  • Dum-dum, big gun on your shoulder that can destroy Warlords, Brood commanders, Illuminates in seconds, however it can't pierce through Behemoths' THICC armor.
Summary:
  • Good Single Target and Normal Crowd Control against Cyborgs. Punch Warlords and Hulks right in their faces, they will lay down and cry after a few hits.
  • Good Single Target and Normal Crowd Control against Bugs. Kill horde of weaker enemies easily and quickly.
  • Good Single Target and Good Crowd Control against Illuminates. Spawncamp the robots with 2 shots, punch the Council Members and Illusionists with DEMOCRACY.

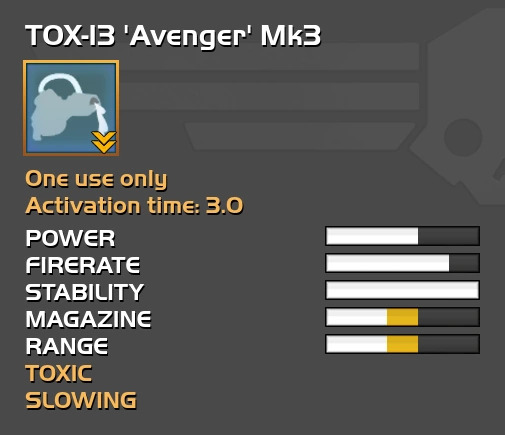
TOX-13 Avenger


Description:
  • Tox-13 (Avenger), the gun that dominates Bugs. This gun applies a slow and poison effect on any organic creature, Behemoths, and Impalers will die within minutes of tap spraying the gun in their face. Warlords and IFVs aren't affected by this gun due to they are not organic, Tox-13 can pass through shields and medium size enemies making it a great crowd control weapon.
Summary:
  • Good Single Target and Good Crowd Control against Cyborgs. Warlords are immune to neurotoxin, TOX-13 is very good against Butcher horde.
  • Good Single Target and Good Crowd Control against Bugs. Totally king of Bugs killing weapon, all Bugs are vulnerable to neurotoxin.
  • Normal Single Target and Bad Crowd Control against Illuminates. Need to disable their shield first, the majority of Illuminates are robots, they are immune to neurotoxin.

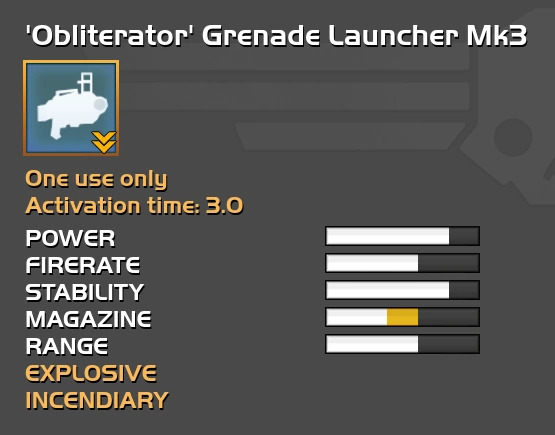
Obliterator Grenade Launcher


Description:
  • The homemade Rumbler for vanilla players, Obliterator, is a grenade launcher launch fire grenades (MK3 upgrade) dealing damage to Warlords (both explosive and fire damage) and kill Brood commanders easily but has a long time dealing fire damage to Behemoths. Great explosion with fire making this weapon a good choice of crowd control.
Summary:
  • Good Single Target and Good Crowd Control against Cyborgs. Explosive and fire damage can kill Warlords, dealing high damage to many Butchers in a horde.
  • Good Single Target and Good Crowd Control against Bugs. Fire damage can kill Behemoths but it will take very long time, really good damage against weaker enemies, if the explosive damage doesn't kill them, the fire will finish them off.
  • Good Single Target and Good Crowd Control against Illuminates. This gun can bully the Illuminates like how Dum Dum would do.
Honorable Mention: Turrets
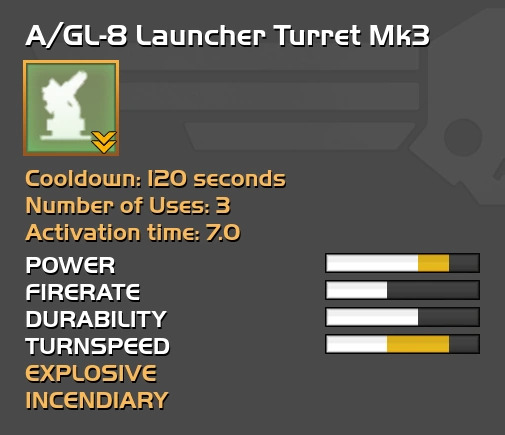
A/GL-8 Launcher Turret


Description:
  • Grenade launcher Turret is the worse launcher than the grenade launcher itself because the firing trajectory is locked and the turret itself is also immobilized in 1 place making it a bad choice of turret. It has the good and bad of Obliterator but you can't move to negate the locked fire angle of the gun.
Summary:
  • Normal Single Target and Normal Crowd Control against Cyborgs. You will need to pay more attention to babysitting this turret than other turrets because it can't fire at enemies damaging it.
  • Bad Single Target and Normal Crowd Control against Bugs. You will need to pay even more attention to babysitting this turret than in Cyborgs because the Bugs are faster.
  • Normal Single Target and Normal Crowd Control against Illuminates. You will need to take care of Outcasts and Hunters trying to damage your turret.

A/RX-34 Railcannon Turret


Description:
  • Railcannon turret is good crowd control and single target damage turret (it doesn't have the stun like rail gun). Warlords and Behemoths will take damage and can be killed by it, IFVs, Hulks, Tanks (Bugs), and Impalers can be damaged and killed as long as the turret hits the weak spot.
Summary:
  • Normal Single Target and Normal Crowd Control against Cyborgs. This turret can be a good bait or a good support fire in defensive positions.
  • Normal Single Target and Normal Crowd Control against Bugs. This turret can be bait and buy your team some time defending a point against a horde of weaker enemies.
  • Normal Single Target and Bad Crowd Control against Illuminates. Its shots can pierce through enemies but their bubble shield can stop it entirely making this turret a bad choice in Illuminates.

A/AC-6 Tesla Tower


Description:
  • Tesla tower, zap zap zap, 3 enemies are down. This tower is capable of killing Behemoths and Warlords but it will take time and someone to heal the tower while it damaging the enemies with REP-80. Can only target 3 enemies in 1 burst, still a good crowd control if it's combined with a Static field. Note: Behemoth, Tanks (Bugs), and IFVs will run through the tower dealing massive damage. Strategy tip: Tesla tower will not target launch pads and geo tower, so you can place tesla tower right next to them for extra protection.
Summary:
  • Normal Single Target and Normal Crowd Control against Cyborgs. If there is a Static Field inside the Tesla Tower's range, the Tower will dominate the entire horde and just need REP-80 user to heal it whenever a Warlord is near.
  • Normal Single Target and Normal Crowd Control against Bugs. If there is a Static Field inside the Tesla Tower's range, the Tower will have more chance of surviving Behemoth/Tank charges and have an easier time zapping enemies inside it.
  • Normal Single Target and Good Crowd Control against Illuminates. The tower only needs 1 zap to kill robots (with their shields down) and Outcasts, it can zap the orbs too.
Honorable Mention: Offensive Stratagems
Heavy Strafing Run


Description:
  • Heavy strafing run calls a fighter jet to rain explosive bullets down on your enemies, these explosive bullets can damage Warlords and kills them in approximately 4 calls in lv15 (I tested with 4 calls directly on a Warlord and it dies). These explosive boollets are super devastating to Illuminates' units.
Summary:
  • Normal Single Target and Normal Crowd Control against Cyborgs. It can kill Warlords with few good throws and is a lot more forgiving with bad throws, unlike Vindicators.
  • Normal Single Target and Good Crowd Control against Bugs. It will eliminate any weaker enemies in its path.
  • Good Single Target and Good Crowd Control against Illuminates. A good throw will deliver devastating damage to Council Members/Illusionists and weaker enemies.

Orbital Laser Strike


Description: [ist]
  • Orbital Laser Strike is also capable of killing Warlords but not Behemoths, it can also damage Tanks (Bugs) and Impalers by their weak points.
Summary:
  • Bad Single Target and Good Crowd Control against Cyborgs. The laser has a rather fast movement speed making it mostly miss the target.
  • Bad Single Target and Good Crowd Control against Bugs. It's a great support stratagem to kill weaker enemies
  • Normal Single Target and Good Crowd Control against Illuminates. Good stratagem for temporary support fire.

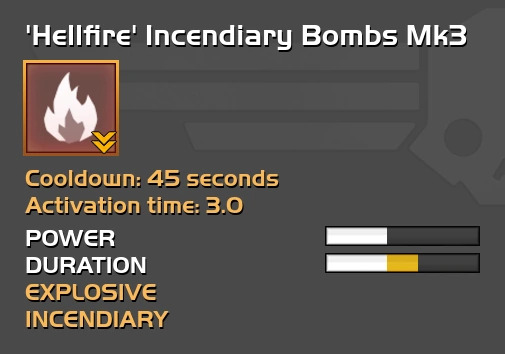
Hellfire Incendiary Bombs


Description:
  • Hellfire, the stratagem that is most hated in every RS mission and will mostly guarantee 100% kick in high lv RS missions. It's capable of killing Warlords (by small explosive damage when deploying the firewall and fire damage from the wall) and Behemoths (by fire damage). Weaker enemies will back up and even can't see through the fire making this stratagem a better Thunderer Smoke.
Summary:
  • Bad Single Target and Good Crowd Control against Cyborgs. Low damage output to Warlords making it a bad choice of damage but a really good choice of area denial for weaker enemies.
  • Bad Single Target and Good Crowd Control against Bugs. Low damage output to Behemoths but a very good choice of area denial stratagem.
  • Normal Single Target and Good Crowd Control against Illuminates. A good throw can keep the team or objective alive for a few more seconds and buy some more time, note that a few types of enemies can teleport through the firewall.
Notes and Feedback
Notes:
  • Warlords, are heavily armored enemies but can be damaged and killed by many non-AT weapons like Continuous Laser weapons (LAS-5 Scythe, LAS-12 Tanto, LAS-98, Orbital Laser Strike), Plasma weapons (PLAS-1 Scorcher, PLAS-3 Singe), Precision weapons (A/RX-34 Railcannon Turret, P-6 Gunslinger, LHO-63 Camper, RX-1 Rail Gun, M2016 Constitution), ARC weapons (A/AC-6 Tesla Tower, AC-3 and AC-5), Fire weapons (FLAM-24 Pyro, FLAM-40 Incinerator, Hellfire Incendiary Bombs).
  • Also, a small funny "function" in the game let you "pierce" enemies with linear fire guns like EAT-17, RL-112, Dum Dum, etc (EXO-44 Stomper's missiles excluded). The "function" works as follows: Because of lag, the wacky game registered you fired 2 shots instead of 1 shot.
Feedback is good
Use the comment section to tell me if I got some information wrong because the Helldivers' wiki is OLD and kind of missing information.

My advice for you new divers out there is, that any gun can be good in any faction if you are good at using that gun.
9 Comments
squeakywheel1 Feb 23 @ 1:55am 
w in the shart
Hagon Wyvon  [author] Jul 25, 2022 @ 12:30am 
added, thanks ya
Friendly Fire Jul 24, 2022 @ 11:16pm 
1 addendum;
Rail Turret can also kill IFVs.
Requires 2 shots to the back, however it usually only gets 1 off, disabling it. Then the IFV sends to spin out of alignment to be hit a second time in it's weak point, making the turret useless until you get rid of the IFV yourself, as it's counted at the turrets priority.
Hagon Wyvon  [author] Jul 15, 2022 @ 10:58am 
All I can serve for this communtiy, thanks. I'm kind of have some idea for new guide but I will do it later
Ztellar💫 Jul 15, 2022 @ 10:09am 
Awesome post. Even tho ive played the game for a while, you added some stuff I didnt know about. Thx for a great summary! :)
Hagon Wyvon  [author] Jul 14, 2022 @ 9:42pm 
Good to hear that :steamhappy:
Lionheart233 Jul 14, 2022 @ 8:30pm 
Great write up with essential info for new players! Also I wondered why I was killing 2 borg scouts with 1 dum-dum shot all the time, now I know why.
Hagon Wyvon  [author] Jul 12, 2022 @ 7:42pm 
:D
Mister X Jul 12, 2022 @ 4:28pm 
:D