Destiny 2
96 lượt đánh giá
Guide to Solo Flawless (Outdated)
Bởi Kotoknow
A detailed guide to help new players or people that have attempted to solo flawless a dungeon and have failed.

I can’t wait for this to be outdated so that I’m forced to rewrite most of it.

D2 is over I can't be bother to update this
10
3
6
3
4
2
3
3
2
   
Giải thưởng
Yêu thích
Đã yêu thích
Bỏ thích
Intro I Guess
Guide to solo flawless
This guide is meant for new players or players that have attempted and have failed the solo flawless.

Disclaimer:
This is not a solo flawless guide for master dungeons as that is a whole different can of worms. I also won’t be talking about seasonal mods as that can or will affect the meta for that particular season. Lastly, the most important disclaimer is that I’m not a god at the game, so you should take my words as suggestion and not as fact. I’m just some dude wanting to help others with my knowledge and if you have any criticism, type a polite comment, please.

General Advice:
Before even getting into any dungeon or most end-game-type activities, you must grind for gear, so please don’t run into prophecy solo with blue gear. Please take your time out of your day to grind some gear. You don’t need to fully kit out GM style either, but you should have most exotics and full legendary gear. Also learn the dungeon before jumping in.

Where to find help
If you need help in finding exotic quest for weapons go to datto.
https://www.youtube.com/@DattoDoesDestiny

If you need help completing activities like raids/quest steps for legendary/exotic weapons the destiny LFG discord is usually nice. Usually, hopefully.
https://discord.com/invite/d2lfg

This is a WIP, so there aren't a lot images or any videos yet.

My Dungeon report
https://dungeon.report/pc/4611686018493569775

Guide Inspired by: https://steamcommunity.com/sharedfiles/filedetails/?id=2269730558
Weapon Mods
Weapons can equip mods to make the weapon stronger from boosted damage on specific enemy types or make a perk stronger. These mods can be bought from Banshee-44. However, there are adapt mods that only can be found in Grandmaster Nightfalls and Master Raids.

Minor spec does 7.7% more damage to red bar ads. (Free)
Major spec does 7.7% more damage to yellow bar ads. (Free)
Boss spec does 7.7% more damage to boss enemies. (Free)
Adapt Big One's spec does 7.7% more damage or yellow bars and boss enemies. This only affects adapted weapons. (Free)
Taken spec does 10% more damage to any taken enemy. can only be found in the Last Wish Raid Paid: (Forsaken Pack)
Crafting
Weapon Crafting
With the latest expansion Witch Queen, you are now able to craft weapons that are on the release of witch queen or after on mars. Mind you other older weapons will be craftable at a later date. To craft weapons, you extract the contents of red border weapons by dismantling them or extract it when inspecting a red border weapon. This will give pattern for that weapon. Some guns need to be extracted multiple times to unlock the recipe. With this, you can choose perks, but not all the perks are unlocked; you must level up one weapon to unlock perks. The levels are gained by killing ads and gaining exp. Unlocks for perks stop at level 16-17. There are also enhanced perks that add a little extra to the perk, so if you can craft these perks onto the gun. However, it's expensive, costing one ascended alloy which you can only buy once a day from Banshee or Master Rahool. You can farm it from master wellspring or campaign missions that rotate each week on legend or above. Each gun will be separate from the level, so if you complete a level 20 weapon don’t throw it away or you're going to have to regrind that weapon again.
Weapon Loadout Advice
Loadouts
This will cover some things you should do and some things you shouldn’t do when making a loadout that feels conformable for you, as everyone has a different play style.

What you should do
Common loadouts are a primary weapon, a special weapon, and a heavy weapon. However, this can change depending on if you need more heavy ammo. If you need more heavy ammo, you can run double special as the game breaks and just gives you more heavy ammo drops for no reason. If you are going to do this, be sure to have a build with strong ability spam and use a trace rifle or wave frame grenade launcher for ads.

What you shouldn't do
DO NOT RUN DOUBLE PRIMARY as this literally does nothing of value to generate more heavy ammo.
Armor Stats
Stats
There are six stats: mobility, resilience, recovery, discipline, intellect, and strength.
Mobility: Increases walking speed and the first jump height, not double jump
Resilience: Gives more health and damage resistance
Recovery: Faster health regen
Discipline: Faster grenade cooldown
Intellect: Faster supercharge time
Strength: Faster melee ability

Important Stats for Each Class
Hunters: Mobility as you get your dodge more often, which can help remove enemy targeting and get your melee ability back or reload your weapon in hand
Titans: Resilience to pop your barricade more often to block damage
Warlocks: Recovery to spam more rifts of damage or healing
Armor Mods
How Mods Work
Every armor piece has a 1-10 energy. The system limits how many mods can be placed on each armor piece and what mods go where. There are 4 to 5 slots depending on if it’s artifice armor or not. The first slot is the stat mod the next 3 are for the armor-specific mods which usually give defense or offense. If you have artifice armor, you will have a slot to place an extra stat mod, but this will always be only a +5 stat increase.


Stat increasing mods: Increase stats.
General purpose: This slot can change depending on armor type. To keep it simple there will always one mod that is a specific element.
Combat Mods: Majority of these mods will be element based and will buff the players performance based off an action.
Raid Mods: Help you in raids and only in raid so this isn't important to this guide

Armor type mods
Helmet mods usually help you get super faster from ability kills, Orb generation mods, or ammo finder mods. There are two mods that help armor charge in a fireteam, but since this a solo guide it, these don’t really matter.

Arm mods usually help you get your abilities back from either a melee or grenade damage, or help you gain grenade or melee abilities faster through armor charge.

Chest mods help you carry more ammo, and increase your damage resistance. Some damage resist mods require armor charge, but are more powerful than the ones that are always active.

Leg mods usually help you pick up more ammo, auto reload slowly when your weapon is holstered, give you a damage buff which requires armor charge, or when picking up an orb of power gives you ability energy.

Class item mods usually help you get super or ability energy from using your class ability, ways to decrease decay for armor charge or help gain armor charge, and finishers that take armor charge to do an effect.

Armor charge
Armor charge mods are mods that are based on consuming orbs of power and using them for an effect. Some use a charge fully or decay. Even if you don’t activate the effects of armor charge, it will decay. By default, armor charge has a 10-second decay per charge.

General Advice
If you are going for a solo flawless, always aim for general mods that improve your resistance to enemies and ways to increase damage for your heavy weapon. Also, look for mods that help you hold more stacks of armor charge and help lessen the effects of decay. If you can fit some extra mods, you can invest in mods that help gain heavy ammo back faster. For stat increases, look back in that stats portion of the guide.
Cover Pt. 1 (IMPORTANT LECTURE PLEASE READ)
What is Cover?
So you are now kitted out for the solo. I want to talk about a basic concept cover. Here me out about this before skipping this section, please. Most people don’t really understand what cover is. Most people think it’s a wall blocking a line of sight from you and your target. This isn't wrong but it's not the only form. In Destiny 2 there are 5 different types of cover blocking damage like a wall, guns/abilities that kill, guns/abilities that immobilize a target, out-healing the incoming fire, and Invis.

Blocking damage
Let’s first talk about blocking damage. This problem is probably one of if not the biggest mistake people do. Most people will run to the closest wall and camp it out. Sure, hugging a wall can protect you from most encounters, but you won’t be able to do objectives. Only use this cover to regain your health and to kite enemies and the boss.


Guns/abilities that kill
Pretty simple, if the target is dead, you don’t have to worry about the meleeing or shooting you back. Use this time to do objectives.


Guns/abilities that immobilize
The diet version of killing the target as you cannot be damaged for a brief period of time. Use that time wisely to either reposition, neutralize the target, or do a fast objective. There are 3 different immobilizing: blinding, Disorienting, suppression, freezing, suspend, and disorienting


Blinding: stops the target from shooting
Suppression: is similar to blinding in that the target can’t shoot their weapon. It also prevents the target from using its abilities
Freezing: They can’t move
Suspend: They can't move
Disorienting: stops the target from shooting

Healing
Oh, healing it’s probably the second biggest problem. Once people stop being attached to the wall, a lot of them gravitate to healing. Healing is good to recover in wall cover faster, but it’s not a full blank of cover. You have a prime chance of dying from standard healing, like rifts and standard healing grenades. Many people crutch off this protection and die because of it. Those forms of healing are to recover faster, so you can reposition or tank minor damage. The stronger healing like sunspots and well are good at protecting you from incoming fire. Just like standard healing, people rely on it too much. Often they will die if they don’t have this protection. To combat this from happening, only use these forms of protection when you are in extreme danger, and remember to have an escape plan once the time runs out.


Invis
Invis, just like healing, is a crutch, however, for good reason, while Invis nothing can target you, mostly. Many people spam invis this can work, but if you slam invis too much, you might not have it up in a dangerous situation. Remember, you still take damage while, invis, so be mindful of when you invis and where you invis. Use invis as a get-out-of-free jail card, to move from cover to cover, and objectives.
Cover Pt. 2
How You should Use Cover
Like I said earlier, you can use cover to do objectives and reposition. However, a good player will combo some of these cover methods depending on the situation. They will also incorporate it with good movement to avoid a lot of incoming fire. Therefore, healing and invis is a crutch and should only be used in dangerous situations.

How you should move
Destiny 2 movement makes for pretty respectable cover since all range attacks from enemies are projectile based. With the right use of movement, you can dodge most of the damage that would have been dealt to you. Try not to move towards your enemy in a straight line or when backing away from the enemy. Always walk at an angle, avoiding an enemy when getting close or away. Also, strafe a lot. That’s about it.
Primary Weapons: Handcannons (Non-Exotic)
Recommended Handcannons
-Fatebringer (Kinetic Adaptive) Loot Source: VoG Raid (Free)
Roll: Perk 1: Explosive Payload Perk 2: Firefly or Frenzy


-Palindrome (Energy: Void Adaptive) Loot Source Nightfall (Free)
(rotates in and out of season)
Roll: Perk 1: Overflow or Outlaw Perk 2: Rampage or One for All Origin trait: Vanguard Vindication


-Nation of Beast (Energy: Arc Adaptive) Loot Source: Last Wish Raid (Paid: Forsaken Pack)
(Craftable)
Curated Roll (unattainable): Perk 1: Outlaw Perk 2: Dragonfly
Roll: Perk 1: Dragonfly Perk 2: Explosive Payload or Volt Shot Orgin Trait: Explosive Pact


-Zaoulis Bane (Energy: Solar Adaptive) Loot Source: King's fall Raid (Free)
(Craftable)
Roll: Perk 1: Explosive Payload Perk 2: Incandescent Orgin Trait: Runneth Over


-Epochal Integration (Energy: Solar Adaptive) Loot Source: Parting the Veil Quest (Paid: Lightfall)
Roll: Perk 1: Stats for All 2: Incandescent Orgin Trait: Harmonic Resonance
Primary Weapons: Auto Rifles (Non-Exotic)
Recommended Auto Rifles
-Chroma rush (Kinetic Rapid fire) Loot Source: Dares of Eternity or Xur (Free)
Roll: Perk 1 Feeding Frenzy Perk 2: Kill Clip


-Gnawing Hunger (Energy: Void Adaptive) Loot Source: Dares of Eternity or Xur (Free)
Curated Roll (unattainable): Perk 1: Overflow Perk 2: Ramage
Roll: Perk 1: Subsistence Perk 2: Rampage


-Rufus's Fury (Kinetic: Strand Rapid fire) Loot Source: Root of Nightmare Raid
(Paid: Lightfall)
(Craftable)
Roll: Perk 1: Demolitionist Perk 2: Hatchling Origin Trait: Harmonic Resonance


-Krait (Kinetic: Stasis Rapid fire) Loot Source: World Loot Pool (Free)
Roll: Perk 1 Overflow or Subsistence Perk 2: Headstone or One for All Origin Trait: Veist Stinger
Primary Weapons: Scout Rifles (Non-Exotic)
Recommended Scout Rifles
-Hungjury (Kinetic Precision) Loot Sources: Nightfall (Free)
(Rotates in and out of the season)
Roll: Perk 1: Rapid hit, Subsistence, or Surplus Perk 2: Explosive Payload or Frenzy


-Night watch (Kinetic Lightweight) Loot Source: Xur Dares of Eternity or Xur (Free)
Curated Roll (Shaw Han new light tutorial): Perk 1: Overflow Perk 2: Explosive Payload
Roll: Perk 1: Rapid hit, Outlaw Perk 2 Explosive Payload


-Vouchsafe (Energy: Void Lightweight) Loot Source: Blind Well (Free)
Roll: Perk 1: Rapid hit, Outlaw, Fourth times the Charm Perk 2: Explosive Payload
Primary Weapons: Pulse Rifles (Non-Exotic)
-BXR-55 (Energy: Solar Legacy PR-55 Frame) Loot Source: Dares of Eternity (Free)
(Craftable)
Roll: Perk 1: Demolitionist Perk 2: Incandescent Origin Trait: Hot Hands


-Insidious (Energy: Arc Aggressive) Loot Source: Vow of the Disciple (Paid: Witch Queen)
(Craftable)
Roll: Perk 1: Dragonfly Perk 2: Rampage Origin Trait: Souldrinker


-Smite of Merain (Kinetic Adaptive) Loot Source: King's fall Raid (Free)
(Craftable)
Roll: Perk 1: Demolitionist Perk 2: Adrenaline Junkie Origin Trait: Runneth Over
Primary Weapons: SMGs (Non-Exotic)
SMG
Recommended SMGs
-Ikelos SMG (Energy: Arc Aggressive) Loot Source: World Loot Pool (Free)
(Craftable)
Roll: Perk 1: Feeding frenzy Perk 2: Voltshot Origin Trait: Rasputin Arsenal


-Extraordinary Rendition (Kinetic Aggressive) Loot Source: Xur (Free)
Roll: Literally any roll works Just don’t get Perk 1: Firmly Planted and Zen Moment Perk 2: don't get Tap the Trigger


-Calus Mini-Tool (Energy: Solar MIDA Synergy) Loot Source: Banshee-44 (Free)
Roll: Perk 1: Threat Detector or Unrelenting Perk 2: Incandescent Origin Trait: To Excess


-Funnelweb (Energy: Void Lightweight) Loot Source: World Loot Pool (Free)
Roll: Perk 1: Subsistence Perk 2: Frenzy or Adrenaline Junkie Origin trait: Veist stinger


-The Immortal (Kinetic: Strand Aggressive) Loot Source: Trials of Osiris (Paid: Lightfall)
Roll: Perk 1: Threat Detector 2: Hatchling or Demolitionist trait: Field-Tested


-Submission (Kinetic Lightweight) Loot Source: Vow of the Disciple (Paid: Witch Queen)
(Craftable)
Roll: Perk 1: Overflow or Subsistence Perk 2: Frenzy Origin Trait: Souldrinker
Primary Weapons: Sidearms (Non-Exotic)
Recommended Sidearms
-Seventh Seraph SI-2 (Energy: Void Lightweight) Loot Source: Xur (Free)
Roll: Perk 1: Demolitionist Perk 2: Dragonfly


-Peacebond (Kinetic: Stasis Adaptive) Loot Source: Iron Banner (Free)
(rotates in and out of the season)
Roll: Perk 1: Subsistence Perk 2: Headstone


-Drang Baroque (Energy: Solar Lightweight) Loot Source: Banshee-44 (Free)
(Craftable)
Roll: Perk 1: Wellspring Perk 2: Incandescent Origin Trait: To Excess
Primary Weapons: Bows (Non-Exotic)
Recommended Bows
-Arsenic Bite-4b (Energy: Arc Lightweight) Loot Source: Dares of Eternity or Xur (Free)
Roll: Perk 1: Explosive Head Perk 2: Rampage


-Accrued Redemption (Kinetic: Precision) Loot Source: GoS Raid (Paid: Shadowkeep)
Roll: Perk 1: Archer’s Tempo Perk 2: Rapid Hit or Explosive Head


-Point and the Stag (Energy: Arc Lightweight) Loot Source: Exotic Archive (Free)
Roll: Perk 1: Archer’s Tempo Perk 2: Vorpal


-Imperial Needle (Energy: Void) Loot Source: Dares of Eternity or Xur (Free)
Roll: Perk 1: Archer’s Tempo Perk 2: Frenzy
Specials Weapons: Shotguns (Non-Exotic)
Recommended Shotguns
-First In, Last Out (Energy: Arc Precision Slug) Loot Source: Dares of Eternity or Xur (Free)
Roll: Perk 1: Autoloading Holster Perk 2: Vorpal


-Heritage (Kinetic: Precision Slug) Loot Source: DSC Raid (Paid Beyond Light)
Perk 1: Reconstruction or Autoloading Perk 2: Focused Fury Origin Trait: Bray Inheritance


-Fortissimo-11 (Kinetic: Precision Slug) Loot Source: Vanguard OPs (Free)
Roll: Perk 1: Fourth times the Charm Perk 2: Vorpal Origin Trait: Vanguard Vindication


-Gunnora's Axe (Energy: Arc Precision Slug) Loot Source: Iron Banner (Free)
(Rotates in and out of the season)
Roll: Perk 1: Autoloading Holster Perk 2: Vorpal Origin Trait: Suros Synergy


-Wastelander M5 (Kinetic: Lightweight) Loot Source: Dares of Eternity (Free)
(Craftable)
Roll: Perk 1: Lead from Gold or Pugilist Perk 2: One Two Punch Origin Trait: Hot Swap
Specials Weapons: Snipers (Non-Exotic)
Recommended Snipers
-Adored (Energy: Arc Adaptive) Loot Sources: Exotic Archive (Free)
Roll Curated: Perk 1: Triple Tap Perk 2: Vorpal


-Ikelos Sniper (Energy: Solar Rapid Fire) Loot Source: Banshee-44 (Free)
(Craftable)
Roll: Perk: 1 Fourth times the charm Perk 2: High impact reserves Origin Trait: Rasputin Arsenal


-Succession (Kinetic Aggressive) Loot Source: DSC Raid (Paid: Beyond Light)
(Craftable)
Roll: Perk 1: Reconstruction Perk 2: Vorpal Origin Trait: Bray Inheritance


-Irukandji (Kinetic: Stasis Rapid Fire) Loot Source: World Loot Pool (Free)
Roll: Perk: 1 Fourth times the charm Perk 2: Focused Fury Trait: Veist Stinger


-The Supremacy (Kinetic Rapid Fire) Loot Source: Last Wish Raid (Paid: Forsaken Pack)
Roll: Perk 1: Rewind Rounds Perk 2: Bait and Switch Origin Trait: Explosive Pack
Specials Weapons: Glaves (Non-Exotic)
Recommended Glaives
Judgment of Kelgorath (Energy: Solar Aggressive) Loot Source: Banshee-44 (Free)
(Craftable)
Roll: Perk 1: Overflow Perk 2: Close to Melee Origin Trait: Ambush
Specials Weapons: Grenade Launchers (Non-Exotic)
Recommended Grenade Launchers
-Empty Vessel (Energy: Solar Lightweight) Loot Source: Vanguard Ops (Free)
Roll: Mag Perk: Disorienting Grenades Perk 1: Autoloading Holster Perk 2: Danger Zone or Vorpal Origin Trait: Vanguard Vindication


-Salvager’s Salvo (Energy: Arc Lightweight) Loot Sources: Exotic Archive (Free)
Curated Roll: Perk 1: Ambitious Assassin Perk 2: Chain Reaction


-Pardon Our Dust (Kinetic Lightweight) Loot Source: Dares of Eternity (Free)
(Craftable)
Roll: Mag Perk: Disorienting Grenades Perk 1: Autoloading Holster Perk 2: Danger Zone or Vorpal Origin Trait: Hot Hands


-Forbearance (Energy: Arc Lightweight) Loot Source: Vow of the Disciple Raid (Paid: Witch Queen)
(Craftable)
Perk 1: Ambitious Assassin Perk 2: Chain Reaction Origin Trait: Souldrinker
Specials Weapons: Trace Rifles (Non-Exotic)
Recommended Trace Rifles
-Path of Least Resistance (Energy: Arc Adaptive) Loot Source: Banshee-44 (Free)
(Craftable)
Roll: Perk 1: Subsistence Perk 2: Voltshot Origin Trait: Ambush


-Retraced Path (Energy: Solar Adaptive) Loot Source: Dares of Eternity (Free)
(Craftable)
Roll: Perk 1: Subsistence Perk or Lead from Gold 2: Incandescent Origin Trait: Hot Hands


-Hollow Denial (Energy: Void Adaptive) Loot Source: Banshee-44 (Free)
(Craftable)
Roll: Perk 1: Subsistence Perk or Lead from Gold 2: Killing Tally Origin Trait: Extrovert
Specials Weapons: Fusion Rifles (Non-Exotic)
Recommended Fusion Rifles
-Null Composure (Energy: Void Rapid fire) Loot Source: Exotic Archive (Free)
Roll Curated: Perk 1: Feeding Frenzy Perk 2: High Impact Reserves


-Cartesian Coordinate (Energy: Solar Rapid fire) Loot Source: Banshee-44 or Xur (Free)
Roll: Perk 1: Lead from Gold Perk 2: Vorpal


-Riptide (Kinetic: Stasis Rapid fire) Loot Source: Crucible (Free)
Roll: Perk 1: Lead from Gold Perk Perk 2: Chill Clip Origin Trait: One Quiet Moment


-Iterative Loop (Energy: Arc Rapid fire) Loot Source: Exploring Neomuna (Free)
(Craftable)
Roll: Perk 1: Compulsive Reloader Perk 2: Voltshot
Heavy Weapons: Swords (Non-Exotic)
Recommended Sword
-Falling Guillotine (Energy: Void Vortex Frame) Loot Source: Banshee-44 (Free)
Roll: Perk 1: Relentless Strikes Perk 2: Whirlwind Blade


-Crown-Splitter (Energy: Void Aggressive Frame) Loot Source: World Loot Pool (Free)
(Titan Only)
Roll: Perk 1: Relentless Strikes Perk 2: Vorpal
Heavy Weapons (Non-Exotic): Rocket Launchers
Recommended Rocket Launchers
-Hothead (Energy: Arc Adaptive) Loot Source: Vanguard legacy Focusing (Free)
(rotates in and out of the season)
Roll: Perk 1: Demolitionist or Field Perp Perk 2: Explosive Light or Clown Cartridge
Origin Trait: Vanguard Vindication


-Palmyra-B (Energy: Stasis Precision) Loot Source: World Loot Pool (Free)
(Craftable)
Roll: Perk 1: Autoloading holster Perk 2: Explosive light Origin Trait: Hakke Breach Armaments


-Hezen Vengeance (Energy: Solar Aggressive) Loot Source: VoG Raid (Free)
Roll: Perk 1: Autoloading holster or Overflow Perk 2: Vorpal or Demolitionist


-Blowout (Energy: Arc Adaptive) Loot Source: Crucible (Free)
Roll: Perk 1: Demolitionist or Field Perp Perk 2: Explosive Light or Frenzy or Vorpal Origin Trait: One Quiet Moment


-Apex Predator (Energy: Solar Adaptive) Loot Source: Last Wish Raid (Paid: Forsaken Pack)
(Craftable)
Roll: Perk 1: Reconstruction Perk 2: Bait and Switch or Explosive Light Origin Trait: Explosive Pact


-Cold Comfort (Energy: Stasis Aggressive) Loot Source: Banshee-44 (Paid: Ghost of the Deep dungeon key)
Roll: Perk 1: Envious assassin Perk 2: Bait and Switch Origin Trait: Restoration Ritual
Heavy Weapons (Non-Exotic): Linear Fusion Rifles
-Cataclysmic (Energy: Solar Precision) Loot Source: Vow of the Disciple Raid (Witch Queen)
(Craftable)
Roll: Perk 1: Fourth times the Charm Perk 2: Bait and Switch Origin trait: Souldrinker


-Taipan-4fr (Energy: Void Precision) Loot Source: World Loot Pool (Free)
(Craftable)
Roll: Perk 1: Triple Tap Perk 2: Focused Fury or Frenzy Origin trait: Veist stinger


-Briars Contempt (Energy: Solar Aggressive) Loot Source: Root of Nightmare Raid
(Paid: Lightfall)
(Craftable)
Roll: Perk 1: Reconstruction Perk Perk 2: Surrounded or Focused Fury Origin Trait: Harmonic Resonance
Heavy Weapons (Non-Exotic): Machine Guns
Recommended Machine Guns
-Corrective Measure (Energy: Void Adaptive) Loot Source: VoG Raid (Free)
Roll: Perk 1: Any perk besides Dynamic sway Reduction Perk 2: Firefly


-Commemoration (Energy: Void Adaptive) Loot Source: DSC Raid (Paid: Beyond Light)
(Craftable)
Roll: Perk 1: Reconstruction Perk 2: Killing Tally Origin Trait: Bray Inheritance


-Retrofit Escapade (Energy: Void Adaptive) Loot Source: World Loot Pool (Free)
(Craftable)
Roll: Perk 1: Fourth times the Charm Perk 2: Target Lock Origin Trait: Ambush


-Circular Logic (Energy: Strand Adaptive) Loot Source: Terminal Overload (Free)
(Craftable)
Roll: Perk 1: Feeding Frenzy 2: Hatchling or Demolitionist Trait: Nanotech Tracer Rockets
Heavy Weapons (Non-Exotic): Grenade Launchers
Recommended Grenade Launchers
-Wendigo GL3 (Energy: Arc Adaptive) Loot Source: Nightfall (Free)
(rotates in and out of season)
Roll: Mag Perk: Spike Grenades Perk 1: Autoloading Holster Perk 2: Cascade Point or Explosive Origin Trait: Vanguard Vindication


-Regnant (Energy: Void Adaptive) Loot Source: Defiant Battlegrounds
(Paid: Season of Defiance) (Craftable)
Roll: Mag Perk: Spike Grenades Perk 1: Autoloading Holster Perk 2: Cascade Point or Explosive Origin Trait: Noble Deeds
Primary Weapons (Exotic)
Exotic Primary Recommendations
-Outbreak Perfected (Kinetic) Loot Source: Exotic Archive (Free)
Weapon type: Pulse rifle (RPM 390)
Exotic Perk: The Corrupted Spread and Parasitism
Catalyst: Has a catalyst (Playlist activities)


-Riskrunner (Energy: Arc) Loot Source: Spark of Hope (Free)
Weapon type: SMG (RPM 900)
Exotic Perk: Arc Conductor and Superconductor
Catalyst: Has a catalyst (Obtained with the Quest)


-Trinity Ghoul (Energy: Arc) Loot Source: Any Exotic Engram (Paid: Forsaken Pack)
Weapon type: Bow (Draw time 720)
Exotic Perk: Spilt Electron and Lightning Rod
Catalyst: Has a catalyst (Playlist Activities)


-Osteo Striga (Kinetic) Loot Source: End of Witch Queen campaign (Paid: Witch Queen)
Weapon type: SMG (RPM 600)
Exotic Perk: Screaming Swarm and Toxic Overload
Catalyst: Has a catalyst (Leveling the gun then reshaping it)


-Final Warning (Kinetic: Strand) Loot Source: The Final Strand (Paid: Lightfall)
Weapon type: Sidearm (RPM 450)
Exotic Perk: All at Once and Pick Your Poison
Catalyst: None


-Final Warning (Kinetic: Strand with catalyst) Loot Source: The Final Strand (Paid: Lightfall)
Weapon type: Auto Rifle (RPM 720)
Exotic Perk: Rocket Tracers and Grenade Chaser
Catalyst: Has a catalyst (Lightfall Campaign)
Special Weapons (Exotic)
Exotic Special Weapons Recommendations
-Witherhoard (Kinetic) Loot Source: Exotic Archive (Free)
Weapon type: Grenade Launcher (RPM 90)
Exotic Perk: Primeval’s Torment and Break the Bank
Catalyst: Has a catalyst (Banshee-44)


-Izanagi’s Burden (Kinetic) Loot Source: Exotic Archive (Free)
Weapon type: Sniper (RPM 90)
Exotic Perk: Honed Edge
Catalyst: Has a catalyst (Playlist Activities)


-Arbalest (Kinetic) Loot Source: Any Exotic Engram (Free)
Weapon type: Linear Fusion (Charge Time: 553)
Exotic Perk: Compounding Force
Catalyst: Has a catalyst (Any Playlist Activities)


-Cloudstrike (Energy: Arc) Loot Source: Empire Hunts (Paid: Beyond Light)
Weapon type: Sniper (RPM 140)
Exotic Perk: Stormbringer and Mortal Polarity
Catalyst: Has a catalyst (Any Playlist Activities)
Heavy Weapons (Exotic)
Exotic Heavy Weapons Recommendations
-Lament (Energy: Solar) Loot Source: Lost Lament Quest (Paid: Beyond Light)
Weapon type: Sword
Exotic Perk: Banshee’s Wail and Revved Consumption
Catalyst: None


-Gjallarhorn (Energy: Solar) Loot Source: And Out Fly the Wolves Quest (Paid: Bungie 30th Anniversary Pack)
Weapon type: Rocket Launcher (RPM 15)
Exotic Perk: Wolfpack Rounds and Pack Hunter
Catalyst: Has a catalyst (All Randal Chest in GoA)


-Sleeper Simulant (Energy: Solar) Loot Source: Exotic Archive (Free)
Weapon type: Linear Fusion Rifle (Charge time 1024)
Exotic Perk: Dornröschen
Catalyst: Has a catalyst (Nightfall)


-Anarchy (Energy: Arc) Loot Source: Exotic Archive (Free)
Weapon type: Grenade Launcher (RPM 150)
Exotic Perk: Arc Traps
Catalyst: None


-Xenophage (Energy: Solar) Loot Source: The Journey and Pathfinder Quest
(Paid: Shadowkeep)
Weapon type: Machine Gun (RPM 120)
Exotic Perk: Pyrotoxin Rounds
Catalyst: None


-Tractor Cannon (Energy: Void) Loot Source: Any Exotic Engram (Free)
Weapon type: Shotgun (RPM 80)
Exotic Perk: Repulsor Force and The Scientific Method
Catalyst: Has a catalyst (Any PVE Enemy)


-Grand Overture (Energy: Arc) Loot Source: Exotic Archive (Free)
Weapon type: Machine Gun (RPM 100)
Exotic Perk: Wrath of the Colossus and Omega Strike
Catalyst: Has a catalyst (Banshee-44)


-Leviathan's Breath (Energy: Void) Loot Source: Exotic Archive (Free)
Weapon type: Bow (Draw Time 1328)
Exotic Perk: Big-Game Hunter and Leviathan's Sigh
Catalyst: Has a catalyst (Any Powerful Combatants)


-Two-Tailed Fox (Energy: Void) Loot Source: Exotic Archive (Paid: Forsaken Pack)
Weapon type: Rocket Launcher (RPM 40)
Exotic Perk: Twintails and Play with Your Prey
Catalyst: Has a catalyst (Any playlist activity)


-Legend of Acrius (Energy: Arc) Loot Source: Exotic Archive (Free)
Weapon type: Shotgun
Exotic Perk: Shock Blast and Long March
Catalyst: Has a catalyst (Nightfall)
Exotic Armor (Hunter)
Hunter Exotic Armor
-Graviton Forfeit Loot Source: Any Exotic Engram (Free)
Armor type: Helmet
Exotic Perk: Vanishing Shadow
The exotic perk increases invisibility duration, health regen while invis, melee charge speed while invis nearby targets, and reload speed. Only should be used with the Void subclass to chain invisibility.


-Assassin’s Cowl Loot Source: Completing Shadowkeep (Paid: Shadowkeep)
Armor type: Helmet
Exotic Perk: Vanishing Execution
The exotic perk is making you invisible and healing you after doing a finisher kill or a charged melee killing stronger targets will increase the invis timer gained. Any subclass is good with this exotic.


-Caliban's Hands Loot Source: Legend Lost Sectors (Paid: Witch Queen)
Armor type: Gauntlets
Exotic Perk: Roast 'Em
Proximity Knifes scorches targets with its explosion, or ignites targets on final blows from the knife scorch or the knife itself. You also gain faster melee energy if you proximity is on a surface until it explodes. Should only be used with a Solar subclass and tripmine knife.


-Liar’s Handshake Loot Source: Any Exotic Engram (Free)
Armor type: Gauntlets
Exotic Perk: Cross Counter
Arc melee abilities and being hit by a melee attack will give more damage on the next melee attack. Only should be used on an arc subclass.


-Gyrfalcon’s Hauberk Loot Source: Legend Lost Sectors (Paid: Witch Queen)
Armor type: Chest Armor
Exotic Perk: See me, Feel me
Gives void weapons volatile rounds after leaving invis. While invis finishers on enemies nearby will give a damage buff and your next dodge will give you an overshield. Only should be used on an Void Subclass


-Star-Eater Scale Loot Source: Legend Lost Sectors (Paid: Beyond Light)
Armor type: Leg
Exotic Perk: Feast of Light
Get extra super energy by pick up orbs and when your super is full you can overcharge your super by picking up more orbs. Caps out at 4 orbs. Can be used on any Subclass


-The Sixth Coyote Loot Source: Any Exotic Engram (Free)
Armor type: Chest
Exotic Perk: Double Dodge
Gives you another dodge that about it. Works on any subclass.


-Renewal Grasps Loot Source: Legend Lost Sectors or Completing Witch Queen on Legend
(Paid: Witch Queen)
Armor type: Gauntlets
Exotic Perk: Depths of Duskfield
Your duskfield is bigger and when you stand in the duskfield you get damage reduction. Only should be used with the Stasis subclass with a duskfield grenade.
Exotic Armor (Titan)
Titan Exotic Armor
-Helm of Saint-14 Loot Source: Any Exotic Engram (Free)
Armor type: Helmet
Exotic Perk: Starless Night
Targets that enter Ward of Dawn super will be blinded and exiting the ward of dawn super will give you an. Only should be used with the Void subclass and the Ward of Dawn super.


-Heart of Inmost Light Loot Source: Any Exotic Engram (Free)
Armor type: Chest Armor
Exotic Perk: Overflow Light
Using one ability will empower the other two abilities can stack up to 2 times increasing recharge speed and empowering your other abilities. Any subclass can use this.


-Loreley Splendor Helm Loot Source: Legend Lost Sectors or Completing Witch Queen on Legend (Paid: Witch Queen)
Armor type: Helmet
Exotic Perk: Cauterizing Flame
Makes a sunspot when at critical health and gives restoration. Only should be used with a solar subclass.


-Cuirass of the Falling Star Loot Source: Legend Lost Sectors (Paid: Beyond Light)
Armor type: Chest Armor
Exotic Perk: Glorious Charge
Thundercrash has more damage and you get an overshield after impact or if the super runs out. The overshield will last longer if your time in the air was longer. Only should be used with Thundercrash


-Synthoceps Loot Source: Any Exotic Engram (Free)
Armor type: Gauntlets
Exotic Perk: Biotic Enhancements
More damage for melee and super when surrounded by enemies. Any subclass can use it, but I high recommend solar titan if you don't have access to loreley.


-Abeyant Leap Legend Lost Sectors or Completing Lightfall on Legend (Paid: Lightfall)
Armor type: Leg
Exotic Perk: Puppeteer's Control
Improves Dengr's Lash tracking and a gives two additional Lashes. If a target gets hit by the lash you gain wovenmail. Only use on should be used with a Strand subclass.


-Strongholds Loot Source: Any Exotic Engram (Free)
Armor type: Gauntlets
Exotic Perk: Clenched Fist
All guard stat on swords are set to 100 and blocking with a sword will not decay the sword charge. Each block hit in a 0.5 second window will grant times 2 restoration for 3 seconds. Can be used on any subclass, but without a sword this exotic is useless.


-Hallowfire-Heart Loot Source: Any Exotic Engram (Free)
Armor type: Chest Armor
Exotic Perk: Sunfire Furnace
Improves ability regeneration for all solar abilities. When you solar super is full it's faster. Only should be used on a solar subclass.


-Actium War Rig Loot Source: Any Exotic Engram (Free)
Armor type: Chest Armor
Exotic Perk: Auto-Loading Link
Steadily reloads a portion of auto rifle and machine gun ammo from reserves. Any subclass can use this, but you should only use this if you are using a machine gun.
Exotic Armor (Warlock)
Warlock Exotic Armor
-The Stag Loot Source: Any Exotic Engram (Free)
Armor type: Helmet
Exotic Perk: Dearly Departed
Provides damage reduction when standing in a rift and when low health, it will give you a chunk of rift energy. Any subclass can use this.


-Phoenix Protocol Loot Source: Any Exotic Engram (Paid: Forsaken Pack)
Armor type: Chest Armor
Exotic Perk: Battle-hearth
Kills in a Well of Radiance super grant’s super energy. Only should be used with a Well of Radiance.


-Nezarec's Sin Loot Source: Any Exotic Engram (Free)
Armor type: Helmet
Exotic Perk: Abyssal Extractors
Void kills grant ability regen. This can work on any subclass but is best used with the void subclass to chain abilities.


-Starfire Protocol Loot Source: Any Exotic Engram (Free)
Armor type: Chest Armor
Exotic Perk: Fusion Harness
You get two charges of fusion grenades and when you’re in an empowering rift or well of radiance damage with your gun will recharge 2.5% grenade energy back. If it a weapon kill it will recharge 20%. Kills with fusion will help charge back your empowering rift. Only should be used with a Solar subclass and with fusion grenades.


-Osmiomancy Gloves Loot Source: Legend Lost Sectors or Completing Witch Queen on Legend (Paid: Witch Queen)
Armor type: Gauntlets
Exotic Perk: Fervid Coldsnap
You get two coldsnap grenades that recharge faster when the coldsnaps freeze a target. The seekers also go further. Should only be used with a stasis subclass with coldsnap grenades.


-Verity's Brow Loot Source: Any Exotic Engram (Free)
Armor type: Helmet
Exotic Perk: The Fourth Magic
Weapon kills with the same damage type as your subclass recharges your grenade faster and it will cause grenades to do more damage. This can work on any subclass.


-Swarmers Loot Source: Legend Lost Sectors or Completing Lightfall on Legend (Paid: Lightfall)
Armor type: Boots
Exotic Perk: Swarmers
Destorying tangles will release a threadling and threadlings now unravel targets. Only should be used with a Strand subclass.


-Sunbracers Loot Source: Any Exotic Engram (Free)
Armor type: Gauntlets
Exotic Perk: Helium Spirals
Solar grenades will linger longer and solar melee kills will grant unlimited grenade energy for a short period of time. Only should be used on a solar subclass and highly recommended to use solar grenades.


-Contraverse Hold Loot Source: Any Exotic Engram (Free)
Armor type: Gauntlets
Exotic Perk: Chaotic Exchanger
You gain damage resist while charging your void grenade and charged void grenade hits will refund grenade energy. Only should be used on a void subclass with chaos accelerant.


-Cenotaph Mask Loot Source: Legend Lost Sectors (Paid: Lightfall)
Armor type: Helmet
Exotic Perk: High Priority
Steadily reloads a portion trace rifle ammo from reserves. Damaging vehicle, boss, or champion with a trace rifle marks them. Defeating marked enemy will drop special and heavy ammo for yourself. This can work on any subclass, but you should only use this with a trace rifle.


-Geomag Stabilizers Loot Source: Any Exotic Engram (Free)
Armor type: Legs
Exotic Perk: Close Enough
Damaging enemies with Chaos Reach extents the super's duration. Only should be used on a arc subclass with Chaos Reach.
Subclasses (Hunter)
Recommended Hunter Subclasses/Subclass builds
Nightstalker: Void (Free)
Abilities: Gambler’s Dodge, Triple Jump, Snare Bomb, Vortex Grenade
Super: Shadowshot: Moebius Quiver or Shadowshot: Deadshot
Aspects: Tapper’s Ambush, Vanishing Step
Fragments: Echo of Obscurity or Echo of Harvest, Echo of Undermining, Echo of Persistence


Gunslinger: Solar (Free)
Abilities: Acrobat’s Dodge or Gambler’s Dodge, Triple Jump, Knife Trick or Tripmine Knife, Solar Grenade or Healing Grenade
Super: Blade Barrage
Aspects: Knock ‘Em Down, Gunpowder Gamble
Fragments: Ember of searing, Ember of Mercy, Ember of Beams, Ember of Torches


Arcstrider: Arc (Free)
Abilities: Gambler’s Dodge, Triple Jump, Combination Blow, Pulse Grenade
Super: Gathering Storm
Aspects: Flow State, Lethal Current
Fragments: Spark of Shock, Spark of Resistance, Spark of Magnitude, Spark of Feedback


Revenant: Stasis (Paid: Beyond Light)
Abilities: Gambler’s Dodge, Triple Jump, Withering Blade, Duskfield Grenade
Super: Silence and Squall
Aspects: Grim Harvest, Touch of Winter
Fragments: Whispers of Bonds, Whisper of Torment, Whisper of Chains, Whisper of Conduction, Whisper of Rime


Threadrunner: Strand (Paid: Lightfall)
Abilities: Gambler’s Dodge, Triple Jump, Thread Spike, Shackle Grenade
Super: Silkstrike
Aspects: Widow's Silk, Ensnaring Slam
Fragments: Thread of Continuity, Thread of Binding, Thread of Mind, Thread of Generation
Subclasses (Titan)
Recommended Titan Subclasses/Subclass builds
Sentinel: Void (Free)
Abilities: Towering Barricade or Rally Barricade, Strafe Lift, Shield Throw or Shield Bash, Vortex Grenade
Super: Ward of Dawn
Aspects: Bastion, Offensive Bulwark
Fragments: Echo of Remnants, Echo of Undermining, Echo of Obscurity, Echo of Leeching


Sunbreaker: Solar (Free)
Abilities: Towering Barricade or Rally Barricade, Strafe Lift, Throwing Hammer, Solar Grenade, or Healing Grenade
Super: Hammer of Sol
Aspects Sol Invictus, Roaring Flames
Fragments: Ember of beams, Ember of Wonder, Ember of Torches, Ember of Combustion


Striker: Arc (Free)
Abilities: Towering Barricade, Rally Barricade or Thruster, Strafe Lift, Thunderclap or Seismic Strike, Pulse Grenade
Super: Thundercrash
Aspects: Touch of thunder, Knockout
Fragments: Spark of Shock, Spark of Resistance, Spark of Magnitude, Spark of Ions


Behemoth: Stasis (Paid: Beyond Light)
Abilities: Towering Barricade or Rally Barricade, Strafe Lift, Shiver Strike, Glacier Grenade
Super: Glacial Quake
Aspects: Howl of the Storm, Tectonic Harvest
Fragments: Whisper of Torment, Whisper of Chains, Whisper of Conduction, Whisper of Rime


Berserker: Strand (Paid: Lightfall)
Abilities: Towering Barricade or Rally Barricade, Strafe Lift, Frenzied Blade, Shackle Grenades
Super: Bladefury
Aspects: Into the Fray, Drengr's Dash
Fragments: Thread of Mind, Thread of Fury or Thread of Continuity, Thread Binding, Thread of Generation
Subclasses (Warlock)
Recommended Warlock Subclasses/Subclass builds
Voidwalker: Void (Free)
Abilities: Healing Rift, Burst Glide, Pocket Singularity, Vortex Grenade
Super: Nova Bomb: Vortex or Nova Bomb Catacylsm
Aspects: Feed the Void, Child of the Old Gods or Chaos Accelerant
Fragments: Echo of Remnants, Echo of Undermining, Echo of Persistence, Echo of Expulsion or Echo of Instability (Only run if using void Weapons)


Dawnblade: Solar (Free)
Abilities: Healing Rift, Empowering Rift or Phoenix Dive, Burst Glide, Incinerator Snap, Solar Grenade, Healing Grenade, or Fusion Grenade
Super: Well of Radiance
Aspects: Heat Rises or Icarus Dash, Touch of Flame
Fragments: Ember of Mercy, Ember of Torches, Ember of Searing, Ember of Resolve


Stormcaller: Arc (Free)
Abilities: Healing Rift, Burst Glide, Ball lightning, Pulse Grenade
Super: Chaos Reach
Aspects: Electrostatic Mind, Arc Soul
Fragments: Spark of Ions, Spark of Magnitude, Spark of Shock, Spark of Resistance


Shadebinder: Stasis (Paid: Beyond Light)
Abilities: Healing Rift, Burst Glide, Penumbral Blast, Coldsnap, or Duskfield Grenade
Super: Winter Wrath
Aspect: Iceflare Bolts, Bleak Watcher
Fragments: Whisper of Durance, Whisper of Hedrons, Whisper of Chains, Whisper of Torment


Broodweaver: Strand (Paid: Lightfall)
Abilities: Healing Rift, Burst Glide, Arcane Needle, Shackle Grenades or Threadling Grenade
Super: Needlestorm
Aspects: Weaver's Call, Mindspun
Fragments: Thread of Evolution, Thread of Generation, Thread of Binding, Thread of Rebirth
Dungeon: Shattered Throne
Shattered Throne (Difficulty: Very Easy) Paid: (Forsaken Pack)
The first dungeon that was made, so it's a bit dated in terms of boss hp and mechanics. It still can be a rough time as you won’t be able to place rally banners at the start of an encounter.

Encounters
Encounter 1: Erebus
Encounter 2: Vorgeth, The Boundless Hunger
Encounter 3: Dûl Incaru, The Eternal Return

Erebus
Loadout:
-Bring one long weapon preferably a sniper
-Good ad clear weapons.
The reason that long-range weapons are good here is that hobgoblins spawn basically everywhere in high-up positions and since you're alone, you will be taking all the aggro.

How this encounter works
This Encounter is killing a miniboss and a symbol. Go-to tower with the symbol and kill that miniboss you must kill 8 to move on. The last miniboss is always at the center of the entrance.

Tips:
-Clear the left and right entrance
-Kill the hobogoblins
-Use Supers often to kill ads or Minibosses


Credit: https://www.reddit.com/r/DestinyTheGame/comments/9pxz5x/shattered_throne_1st_encounter_map/

Vorgeth, The Boundless Hunger
Loadout:
-A mix of mid-range and close-range
-High DPS Burst Heavy Weapon
-Swords are good
-Izanagi hot-swapping is good for damage

How this encounter works
In this encounter you have to kill 4 wizards and pick up orbs and dunk them in one of 4 bowls. This may seem simple, but once you pick up an orb you have 40 seconds to pick up another orb before you die. Picking up the other orb will extend the time. This part makes most people panic here if you can beat this you can finish the dungeon.

Tips:
-There is no time limit if you haven't picked up the orb so take your time killing the first wizard
-Once you kill the first wizard you need to start rushing to the other wizard
-Once you reach the damage phase the orge will shoot out multiple tracking orbs at you so shoot them if you don’t have a strong source of healing
Favorite strat: Use lament as the sword block has a lot of damage resistance. Not only that you can outright tank the tracking orbs from the boss as dealing damage heals you. This sword can also help kill wizards fast if your about to die from the debuff.

Dûl Incaru, The Eternal Return
Loadout:
-Should use close-range good ad clear weapons
-High DPS Burst Heavy Weapon
-Witherhoard is great
-Izanagi hot-swapping is good for damage

How this encounter works
In this encounter you will see 3 knights you must Kill the knights pick up the same wizard orbs from the Vorgeth encounter then you can do DPS when the timer for the buff hits zero you die. To cleanse go to the middle glowing pillar to cleanse. There will be a crystal that will spawn on a timer. If this crystal spawns you can’t deal damage to the knights or the boss so you must break it. Once broken ads will spawn.

Tips:
-Kill all the ads left and right.
-Try to kill all the knights at the same time.
-Keep moving these knights can one-shot you if too close and their knockback can push you off the tower into the void.
Dungeon: Pit of Heresy
Pit of Hearsay (Difficulty: Easy) Paid: (Shadowkeep)
It might have one boss, but the combat difficulty was way higher than Shatter Throne.

Encounter
Encounter 1: Necropolis
Encounter 2: Tunnels of Despair
Encounter 3: Chamber of Suffering
Encounter 4: Harrow
Encounter 5: Cradle of Damnation

Necropolis
Loadout:
-Good ad clear weapons with some mid-range and close range

How this encounter works
This encounter is about looking for the right 3 rune symbols on each tower. To find which runes are the ones you need to go to the highest elevate of the tower. There will be a knight guarding the inside of the tower to kill it. This knight will drop a sword which is required to advance. When you enter the right symbol room there will either be a wizard, knight, or, a shrieker.

Tips:
-Each room has ads for the knight its knights for the wizard it is wizards, and the shrieker is other shriekers
-For the wizard and knight, the room tries to kill the ads first before targeting the mini-bosses.
-The shrieker you can just stand outside and block
-The next tip is when going down to the lower floors you can just jump down if you know there is a platform below if you hold a block with the sword you will take no damage
-Kill the boomer knights and orges they have high damage and huge splash damage with a big radius

Tunnels of Despair
Loadouts:
-Literally, any that you’re comfortable with that is good for end-game content

How this encounter works
In this encounter, you are running from two orges that are immune from all damage. You can hide in the tunnels, but there will be ads that spawn, so kill them. The goal is to kill a knight who drops a void orb and dunks it at the entrance of the next encounter. You must do this three times at all three different entrances.

Tips:
-If on a hunter use invis as the orges can’t see you
-For everyone else use your radar to determine where the orges are at


Credit: https://www.reddit.com/r/DestinyTheGame/comments/dpml1e/tunnels_of_despair_map_pit_of_heresy/

Chamber of Suffering
Loadout:
-One long-range weapon, preferably a sniper
-Close-range or mid-range weapon with insane ad clear potential
-Recommend exotic primaries here and machine guns

How this encounter works
In this encounter, you will kill knights to get the same void orb from the last encounter and dunk it into the same triangle thing. This will get rid of one of the six locks. Do this six times. There will be a debuff called the curse of suffering if this stacks up to 10 times you die. The only way to reset the debuff is to dunk the orb, but this will spawn ads. There will be a plate you can stand on to make this timer go slower.

Tips:
-Clear all the ads before dunking
-Kill the center ads as fast as possible every time you dunk, then kill right or left ads depending on how you feel
-Kill the boomer knights that spawn up top
-If the plate is overrun by ads, it is ok to go run off the plate to get a better position to kill the ads.
-DON’T STOP MOVING OR YOU WILL DIE TO DIRECT DAMAGE FROM THE BOOMER KNIGHTS
-Use Subclasses that can heal you and give you temporary cover

Harrow
Loadout:
Literally anything for endgame content

Tips:
-Wear movement exotics like Stomp-ee5 (Hunter), Dunemarchers (Titan), Lion rampants (Titan), and Transverse steps (Warlock)
-Maybe bring a sword if you're struggling to jump
-Use movement-based subclasses Dawnblade aspect: Icarus Dash (Warlock), Striker Super: Thundercrash (Titan), and Revenant aspect: Shatterdive (Hunter)
-Follow your radar if lost


Credit: https://www.reddit.com/r/DestinyTheGame/comments/dpkc4c/here_is_a_map_i_made_of_the_the_harrow_encounter/

Cradle of Damnation
Loadout:
-Should use close-range good ad clear weapons
-High DPS Sustain Heavy Weapon
-Witherhoard is great
-Izanagi hot-swapping is good for damage
-Anarchy is great

How this encounter works
This encounter is picking up a sword from one of the hive knights and killing the same knight, wizard, and shrieker from the first encounter. Each of these enemies will drop and void orb to grab and dunk in the middle near the boss. When you go fight these minibosses there will be ads guarding them. Every time you dunk ads spawn majority of the ads are cursed thrall. When you dunk DPS starts to stand on the middle plate and shoot. The boss will fight back, so you will have to kite. Also, ads will spawn make sure to kill them. When the boss knees down get off the plate or you will die instantly if are still on the plate. Rinse and repeat. If the void orb is lost don’t worry they will all spawn back if you dunk the other two or lose the other two.

Tips:
-Every time you dunk ads spawn majority of the ads are cursed thrall remember to kill them before your next dunk
-If you using anarchy or witherhoard you don’t have to fully focus on the boss giving you leeway to shoot the ads that will spawn
-Try to dunk opposite of the knights or bait them away
-Invis when dunking this mostly applies to hunter
-Don't stop when damaging the boss
Dungeon: Prophecy
Prophecy (Difficulty: Normal) Free
This Dungeon is all about repositioning there is truly no camp spot in this dungeon.

Encounters
Encounter 1: Phalanx Echo
Encounter 2: Wasteland
Encounter 3: The Hexahedron
Encounter 4: Deadsea
Encounter 5: Kell Echo

Phalanx Echo
Loadout:
-Close to mid-range weapons
-High DPS Sustain Heavy Weapon
-Swords are good
-Lament can one phase

How this encounter works
This encounter is dunking the same two different types of motes light or dark. Each time you cleanse a plate you will spawn ads. Once you cleanse all the plates then it’s DPS. In DPS eventually, hobgoblins will spawn and shield the boss make sure to target all the hobgoblins when they spawn unless you're in a well of radiance. This will let you attack shielded or not. If you don’t kill him in one phase he will go immune and the motes need to deposit will change.

Tips:
-Kill all ads when they spawn after a dunk of the motes
-If it’s not safe to pick up the motes don’t pick them up
-Try not to get booped off by the boss
-Abuse invis (Mostly a hunter tip)
-If you get booped off try to recover with your sword back onto the arena
-If you get booped too far trying to get joining allies
-You can hit the right side of the boss as he has a shield (Unless you're in a well)

Wasteland
Loadout:
-Long-range weapons
-Trinity Ghoul is good here
-Machine guns are good here

How this encounter works
Follow a Toland, which is the white orb. It will bring you two blights to kill all 3 and then follow to the next spot 2 more times. There will be an invisible mini-boss minotaur following you. You can use your sparrow here.

Tips:
-Kill all three hobgoblins
-Clear all ads before destroying the blights
-When you're near a blight zone the minotaurs majority of the time won’t shoot you.


Credit: https://www.reddit.com/r/DestinyTheGame/comments/dpkc4c/here_is_a_map_i_made_of_the_the_harrow_encounter/

The Hexahedron
Loadout:
-Long-range weapons
-Trinity Ghoul is good here
-Sword is good here for the final room

How this encounter works
Basically, follow the same taken orb from the last encounter. There are 5 places it can be north, east, west, south, and up. If it is in any direction other than up, you will get the motes correlating to the beam of what you need to dunk. If the orb is on the top, then you can dunk any mote. However, you won’t make any progress. To get the knights to spawn, and kill hobgoblins. In the last room, there will be two Centurion Echoes to kill.

Tips:
-Kill all the ads before taking down the hobgoblins and knights
-The Ad spawns are on a timer be fast
-Use invis whenever trying to pick up 5 motes (Many a hunter Tip)
-Use barricades and rifts often as cover (Titan and Warlock tip)
-Burn the final two mini-bosses
-Each time you dunk in one of four directions it will send you to a room specific in the direction you want to go

Kell Echo
Loadout:
-Should use close-range good ad clear weapons
-One long-range weapon
-High DPS Sustain Heavy Weapon
-Witherhoard is great
-Anarchy is great
-Sleeper is good here

How this encounter works
This encounter is killing the knight's dunk the correct 3 motes that go to damage. Every time you dunk a mote, the kell shooting at you will despawn and spawn an ogre, so kill it. Once you go to the middle, you will be transported to an arena. The boss will throw out taken magic that can bring you back to the beginning of the arena. This may sound like an inconvenience, but the boss runs plate from the plate over time and if you're not close, you build a stack of dark entropy. Get 10 stacks of you dead. He will go back to the other arena after a while, so if you can’t kill him in one phase it’s Rinse and repeat for the last part in a new room.

Tips:
-Once you dunk the first set of motes and kill the orge use that place as cover
-Kill all the ads before killing the knights
-You don’t need to kill the third orge if you are entering to the DPS arena
-Use your super on the first or last platform in the arena against the boss
-Kill the hobgoblins before damaging the boss

Dungeon: Grasp of Avarice
Grasp of Avarice (Difficulty: Easy) Paid: Bungie 30th Anniversary Pack
Easy a lot of places to camp and low ad density makes this a very good beginner dungeon.

Encounters
Encounter 1: Phry'zhia the Insatiable
Encounter 2: The Sparrow run
Encounter 3: Fallen Shield
Encounter 4: Captain Avarokk The Covetous

Phry'zhia the Insatiable
Loadout:
-Should be close-range good ad clear weapons
-High DPS Sustain Heavy Weapon
-Izanagi hot-swapping is good for damage
-Sleeper is good here
-Lament

How this encounter works
This encounter makes you fight an ogre. To get engrams you just open one of the rooms to collect engrams. To open the room you need a scorch cannon from a fallen. Then you have shot a charge shot on a fallen generator. The charge must be held for 2 beeps. Open it kill the hive in the room dunk the crystal. However you need 25 engrams to get to DPS, so they go to the second room. DPS Rinse and repeat.

Tips:
-Use the scorch cannon to kill some of the ads in the room
-Once DPS is overkill the ads before going into a room
-When doing DPS if you don’t have a well hidden near the right side by the bottom of the stairs (unless you're using the lament)
-You can spam your super as picking up 10 engrams will fill up your super meter

The Sparrow runs
Loadout:
Literally ANYTHING

How this encounter works
The Sparrow runs. Just follow the path to each bomb. There are mines you can tap to extend the time. You don’t have to tap all the mines if you have good pathing. You don’t need always on time Datto has done it with a 140-speed sparrow.

Tips:
-If your sparrow is about to explode replace it
-For the final jump to the last mine replace your sparrow if it has taken any damage
-Practice that's about it

Fallen Shield
Loadout:
-Should use close-range good ad clear weapons
-Trinity Ghoul is good here
-Sword is good here
-Witherhaoard is good

How this encounter works
Kill ads dunk 20 engrams into the crystal and kill the servitor. Push the servitor to the cannon. Then Launch was the servitor on a cannon and fire. Remember to check if the cannon is shooting the right way. If you lose the servitor ball, don’t worry, as a new one will spawn on a different platform.

Tips:
-Take it slow
-Don't chase the Servitor's dead body if it's going near a cliff

Captain Avarokk The Covetous
Loadout:
-Should be close-range good ad clear weapons
-High DPS Sustain Heavy Weapon
-Sleeper is good here

How this encounter works
Captain Avarokk The Covetous. Get the cannon to shoot at the same object in the first encounter. It will drop engrams in the middle, left, and right. Dunk at the crystal. However, there will be a shank and marauder. So, kill them first. When you kill the marauder it will drop 10 engrams to proceed, you need 60 engrams. Then DPS Rinse and repeat.

Tips:
-Use the scorch cannon to kill the shank and marauder
-Take it slow
-DPS from the back of the middle arena or the platform on the left.
-Kill all the ads before releasing the engrams
-You can do a max run of picking up 20 engrams per run
Dungeon: Duality
Duality (Difficulty: Very Hard) Paid: Duality Dungeon key
This dungeon is a bit buggy and a pain to finish. The ad density is jack to the max and the bosses have extreme health thankfully they have long DPS phases.

Encounters
Encounter 1: The Nightmare of Gahlran, Sorrow Bearer
Encounter 2: Unlock the Vault
Encounter 3: The Depths

The Nightmare of Gahlran
Loadout:
-Should be close-range good ad clear weapons
-High DPS Sustain Heavy Weapon
-Lament is probably the best weapon here

How this encounter works
You will teleport into a nightmare realm with limited time if that time goes to 0 before you die. Kill a Pison, then pick up their standards and dunk them in the right corresponding symbol. To exit the realm, you need to kill the Incinerator cabal to shoot the bell when you are in the bell's ring. The symbols are dog, chalice, sun, and axe. Once you dunk one symbol, the room will open. Kill the ads inside them. Room, shoot the bell. These bells are like the bells in the other realm. Kill both to shoot the bell. Once you enter the other realm, kill the fake Gahlrans. Once you kill all 8, you go out and kill the Incinerator cabal, then shoot the bell. Do the other standard. Then DPS starts. Once you exit the realm, DPS is over and you repeat until he is dead.

Tips:
-If you leave the standard behind, you can pick it up again the next time you go into the nightmare realm. Also, another Pison will appear don’t kill it. When you're killing the fake Ghaglran, the Pison will still be there. Kill it to extend your time in the nightmare realm.
-Kill all the ads before leaving the nightmare realm to have fewer ads for the DPS phase
-Don’t stand next too close to a wall Ghaglran will try to physics kill you

Unlock the Vault
Loadout:
-Should be close-range good ad clear weapons
-High DPS Burst Heavy Weapon or Special
-Eager edge sword can be good if you are afraid you will run out of time in the nightmare realm

How this encounter works
Once you have opened the door, you will enter a big room. Each side has the same symbols from the first encounter. There will be two bells and both will be unlocked after killing the Incinerator cabal. There will be two symbols on the ground go their side and shoot the bell. Once you at that side kill all the ads, then a bearer of the stand will spawn. Kill it, then kills the Incinerator cabal again to shoot the bell and leave. You only have enough time to get one. Unless you are insanely time efficient. Once you dunk all 2, you can damage the mini-boss. Then another will spawn and do the same thing again until you have killed all 3 mini-bosses.

Tips:
-Kill all the ads before you leave for the nightmare realm
-In the nightmare realm do everything as fast as possible and ignore the middle ads unless they are in your way.
-Kill all the ads before killing the mini-boss.
-Don’t stand next too close to a wall for both the nightmare and the normal realm you will be physics. Same will ledges.


Credit: https://www.reddit.com/r/raidsecrets/comments/v0h2j2/has_anyone_got_a_decent_map_of_the_vault_room_for/

The Depths
Loadout:
-Should be close-range good ad clear weapons
-High DPS Sustain Heavy Weapon

How this encounter works
The last encounter does the same thing as the vault encounter. There will be two symbols you need to get, But instead of 2, there are 3 to kill the cabal guarding it. Teleport into the room and pick up the standards that kill the cabal blocking the bell from working. Do it again. Once you have all 4 symbols you have the shoot 1 of 4 chains to enter the nightmare realm to start the damage phase. Once you enter Caiatl will go to 1 of 3 bells and kill the cabal guarding it. Then shoot the bell to stun Caiatl for DPS you have 10 seconds. Then you do it for all 3 bells. Then repeat until she is dead.

Tips:
-You don’t have to go after all 3 bells if you can’t for DPS
-Kill all the ads when dunk you stand or go invis
-If you don't kill the bell keepers with a precision kill from their backpack they have a chance to drop their backpack on the ground which can kill you in DPS if Caital stomps near the packs. Break them
-Once the chain is shot you can shoot the bell to go in early to kill the cabal guarding the bells early.


Credit: https://www.reddit.com/r/DestinyTheGame/comments/v0y2h5/made_a_map_for_duality_encounters_1_2/
Dungeon: Spire of the Watcher
Spire of the Watcher (Difficulty: Normal) Paid: Spire of the Watcher Dungeon Key
This dungeon is known for having a boss with tons of health with short windows of DPS. Be ready to bring burst DPS Heavy weapons. For some odd reason all the warlock mains I know hate this dungeon

Encounters
Opening Encounter
Encounter 1: Ascend the Spire
Encounter 2: Silence the Spire
Encounter 3: Persys, Primordial Ruin

Opening Encounter
Loadout:
Long to close range that is good for ad clear

How this encounter works
There are 4 starting wire points and 4 ending wire points. None of the 4 starting points and endpoints will be connected. Shoot every wire in order. To shoot the wires, you need a buff called Arctrician, which is from Minotaurs.

Tips:
-Be fast
-Shoot ads if they are in your way
-Memorizes the wire placements
-Stay inside for the most part
-Only run out to do objectives after you cleared most of the ads in front of you
-If you are outside keep moving and shooting
-Shoot the end wire once you have all 4 wires at the end to avoid the supplicant spawns.

Ascend the Spire
Loadout:
Mid to close range that is good for ad clear

How this encounter works
Same as the last encounter, but this time you have only shot 2 wires from start to finish. Once the end wires are done, you will go up an elevator to a higher part of the tower. You need to do this 3 times. In 3 different rooms in the tower.

Tips:
-Be fast
-Shot ads if they are in your way
-Memorizes the wire placements

Silence the Spire
Loadout:
-Mid to close range that is good for ad clear
-Use sustain DPS weapons
-Special weapons should be Arbalest or Witherhoard
-Sleeper is good here

How this encounter works
There will be 4 rods you need to charge with the same wire system. Your goal is to connect the wires to all 4 rods. Once you have connected all 4 rods, the boss will get the last charged rod area. Shoot all his eyes to start DPS. When in the DPS, the boss will walk backward to the middle. Once in the middle, he will end DPS depending on how long you took to break the eyes. The faster you break the eyes, the longer DPS will be. Once DPS ends, he will launch an enormous shock wave of the arc that pushes you back.

Tips:
-Every time you lock down a Rod Harpies spawn on all the uncharged rods
-Kill the Harpies on the way to charging the rods
-Kill all the Harpies before DPS so they don't flinch you
-Focus on one eye at a time don't spray everywhere
-The faster you break the eyes on the boss the longer the DPS phase
-Use an SMG or Auto for the eyes
-On a solar subclass that isn't warlock use your melee ability to get radiant.

Persys, Primordial Ruin
Loadout:
-Mid to close range that is good for ad clear
-Use Xenophage or Grand Overture
-If you don't have access to Xeno or Grand Overture use rockets
-Use witherhoard if using rockets

How this encounter works
For this boss, there will be hydras that spawn and kill them to spawn the Minotaurs. There will be both red and yellow wire. Red wires can be shot in any order as long as you do before their timer runs out. When it does, it will reset. There will be 5 red wires, two on both pliers and one on top of the door. This will let you shoot the yellow wires. There will be 2 starting and ending. Once all wires have been shot, the boss will enter the room. Shoot the 5 wires to close the door to start DPS.

Tips:
-Keep your distance from the supplicants
-Kite the boss when doing the wires
-After DPS you can use the wire room for cover as no ads spawn there
-KEEP MOVING DON'T STOP
-You can use Icarus dash to bait out the supplicants
-If your a Titan Burning Maul on the boss is not a bad option if you have full stacks of Roaring Flames
-If your a Strand hunter use star eater super and tractor to burn the boss
Dungeon: Ghost of the Deep
Ghost of the Deep (Difficulty: Hard) Paid: Ghost of the Deep Dungeon Key
This dungeon is the most recent dungeon to be released and is known for having bosses with tons health and that move a lot. Every encounter is jam packed with ads. I believe this is the hardest dungeon as it stands.

Encounters
Opening Encounter
Encounter 1: Hive ritual Disrupted
Encounter 2: Defeat Ecthar, the Shield of Savathun
Encounter 3: Defeat Simmumah ur-Nokru

Hive Ritual Disrupted
Loadout:
Mid to close range that is good for ad clear

How this encounter works
There will be an ogre that spawns in one of four paths. Kill it to reveal where to go next. A green hive like glow indicates this. This should direct you to the general location of a rune. Remember this rune it will be necessary. When you head over to the rune, ads will spawn. When you kill all the ads, the rune will disappear and reveal the next area with the same glow as when you killed the ogre. You will do this 2 more times. The last spawn group will spawn a lucent brood hive. Kill it to obtain a buff called vestige of light. You must dunk back into the middle area before the time runs out of time. If it does, you will die. To dunk you need to kill a mini-boss wizard to reveal a deepsight. When using the deepsight, multiple runes will show up dunk to the rune that matches your rune. Dunk the incorrect rune, you will die. You will have to repeat the process from the beginning of the explanation to the end 3 more times. Then you are done.

Tips:
-Take it slow and memorize what symbol you have
-You only need to rush once you have to obtain the vestige of light
-You can go back to the last location of the symbol if you forgot what the symbol was
-Use deepsight when you have cleared all the ads

Defeat Ecthar, the Shield of Savathun
Loadout:
-close range that is good for ad clear
-Lament or Legend of Acrius for DPS
-Throwing Hammer and Combination blow is very good for DPS with tractor cannon and a one two punch shotgun
-Arbalest and Linears (Warlocks only)

How this encounter works
There will be 3 mini-boss knights. Once all knights are dead, an ogre will spawn. Killing this ogre will lower the boss into the water and will spawn a deepsight. When using the deepsight you will see runes on the left wall and right walls. Once you know all 3, you will head underwater to activate these runes. You don’t have to activate it all at once, so if you forgot, don’t panic, just go back to the surface. When you are in the water the boss will chase you and when hit you will lose a lot of pressure. There are air bubbles around to refill this. When you have claimed a rune, a lucent wizard will spawn. Kill it to get the vestige of light and dunk it at any of the 3 dunk locations which are up in the middle, left, and right of the arena. If you claim 2 runes, 2 wizards will spawn, and if you claim 3 runes, 3 wizards will spawn. Once all 3 vestiges of light are dunk, the boss will spawn in the middle as well as a knight. Kill this knight to spawn a pool of hive energy. While standing in, you can take down the boss's shield. Once the shield is removed the boss can take damage and won’t be in, it’s super. Do the entire process until he is dead. Once killed, you will need to kill his ghost like a Lucent Brood. If you don’t, he will respawn with a good chunk of health and you will have to do the process all over again.

Tips:
-Since this boss has some much HP double special is not a bad idea as you will generate more heavy ammo this way
-If you have a hard time remembering symbols you can claim the runes one at a time
-Never dunk the last rune to dps from the middle
-Before dps kill the boomer knights near where the boss spawns
-Before dps kill the boomer knights that spawn at where you are dunking
-Use your super and grenade to break the boss’s shield. This doesn’t always break the shield fully, so remember to use some heavy ammo if needed
-If you are overrun by ads during dps, it’s ok to go over to kill them
-Keep moving and never stop moving
-Use deepsight when you have cleared all the ads

Defeat Simmumah ur-Nokru
Loadout:
-Mid to close range that is good for ad clear
-Xenophage or Leviathan's Breath
-Arbalest and Rockets with tracking or Linears

How this encounter works
There will be a deepsight that spawns in a random location. When used, you will see a triangle. Each edge of the triangle will have a ring that will appear if you stand at the spot. You will need to stand in the ring while killing the mini-boss knight to spawn the taken king symbol and a ring. Line up from the ring and the taken king symbol to spawn a rune. You must go into the water walls which are up at the head of Oryx, near where you jump down from, and the opposite side of where you came in from. There are no bubbles to refill the pressure, so you will need to go out of the water to refill the pressure. When in the water, you will need to go into the room with the ads, this can be tracked with your radar the majority of the time. If the room has the wrong symbol, you will have to go to a different room. When the right room is found, you must kill a Lucent Brood to get a buff similar to a vestige of light. Don’t worry about the name change, it won’t really matter. Once you have the buff, you will need to use a deepsight to be able to dunk. Kill the knight 2 more times at the other edges to start DPS. When the last buff is dunked, you will stand in a green hive pool again. This is the same as the first fight. Break the shield while standing in the pool and deal damage. Do the entire process until she is dead. Once killed, you will need to kill his ghost like a Lucent Brood. If you don’t, she will respawn with a good chunk of health and you will have to do the process all over again.

Tips:
-Since this boss has some much HP double special is not a bad idea as you will generate more heavy ammo this way
-The 3 most optimal last dunks before dps is at oryx's head, his hand near spawn and rock near oryx's chest.
-Use your super and grenade to break the boss’s shield. This doesn’t always break the shield fully, so remember to use some heavy ammo if needed
-If you are overrun by ads during dps, it’s ok to go over to kill them
-Strafe when shooting the boss
-Keep moving and never stop moving
-Use deepsight when you have cleared all the ads
-If you forgot what symbol you need to dunk for second or third dunk. You can tell which ones you did dunk by seeing the orb to dunk during deepsight under the ones you already did without using the deepsight.
19 bình luận
RyonTMM 20 Thg02, 2023 @ 2:21pm 
+rep 10/10 guide will share to literally every player who needs to get started
FalterXV TTV 20 Thg02, 2023 @ 2:20pm 
+rep is a me
Lars Fillmore 17 Thg02, 2023 @ 2:09am 
Just one note I think is useful for Solar titans on Spire, you can uncharged melee supplicants with Roaring Flames and it will knock them out of the explosion wind up animation. It's a bit scary but it works in a pinch
Boofy* 9 Thg02, 2023 @ 11:48am 
to all haters out there with their 5 cent opinions about this guide,

First of all thank you for doing service to the community (no one asked)
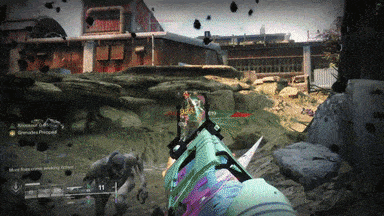
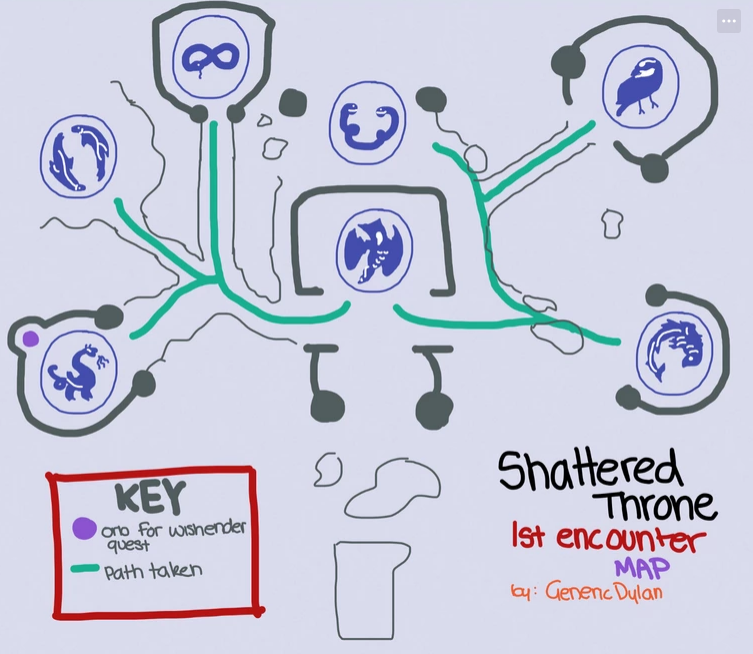
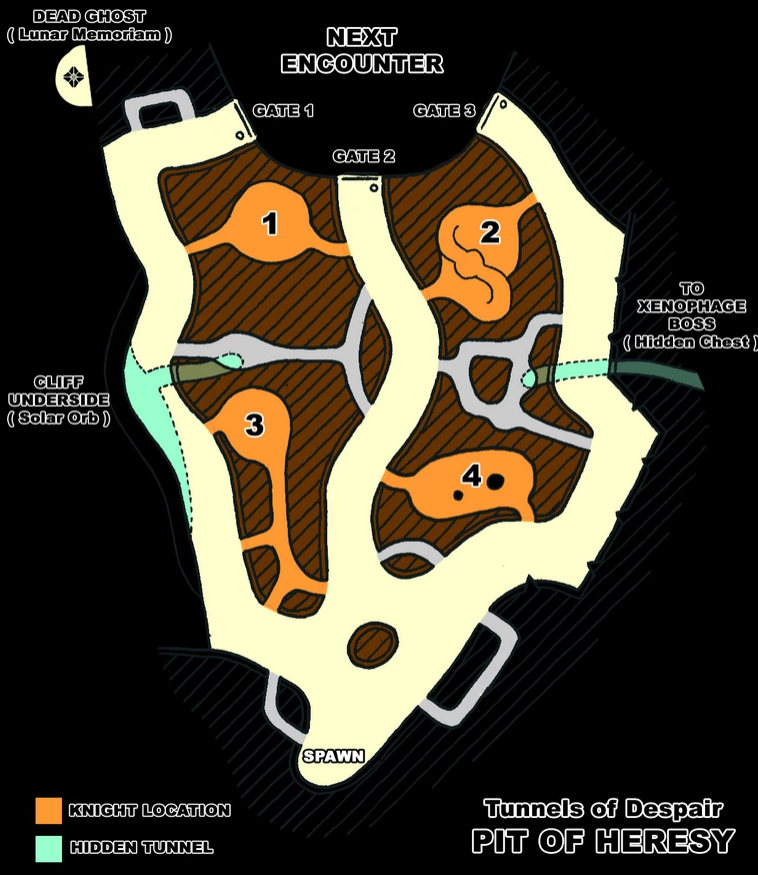
This guide is not 100% but it gives u'all an idea what u shud be focused on, also revealing lots of variety to newbies and expets alike especially to D1 players like me'self,

since i am veteran of Destiny 2 and i can confirm everything this guy said is 95% accurate for things to do and to get what and to who.

If you got problem with "where and how" GOOOGLE AND YOUTUBE
even pros using youtube to save time and hustle!

since there are twitch nolifers and youtube no lifers that 24/7 sitting duck this game so u can leech their no life existance!

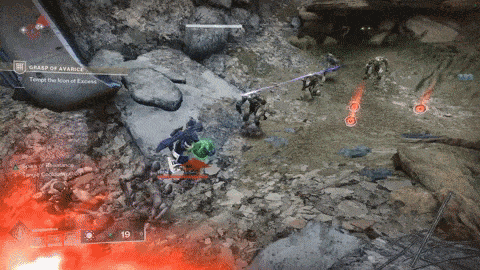
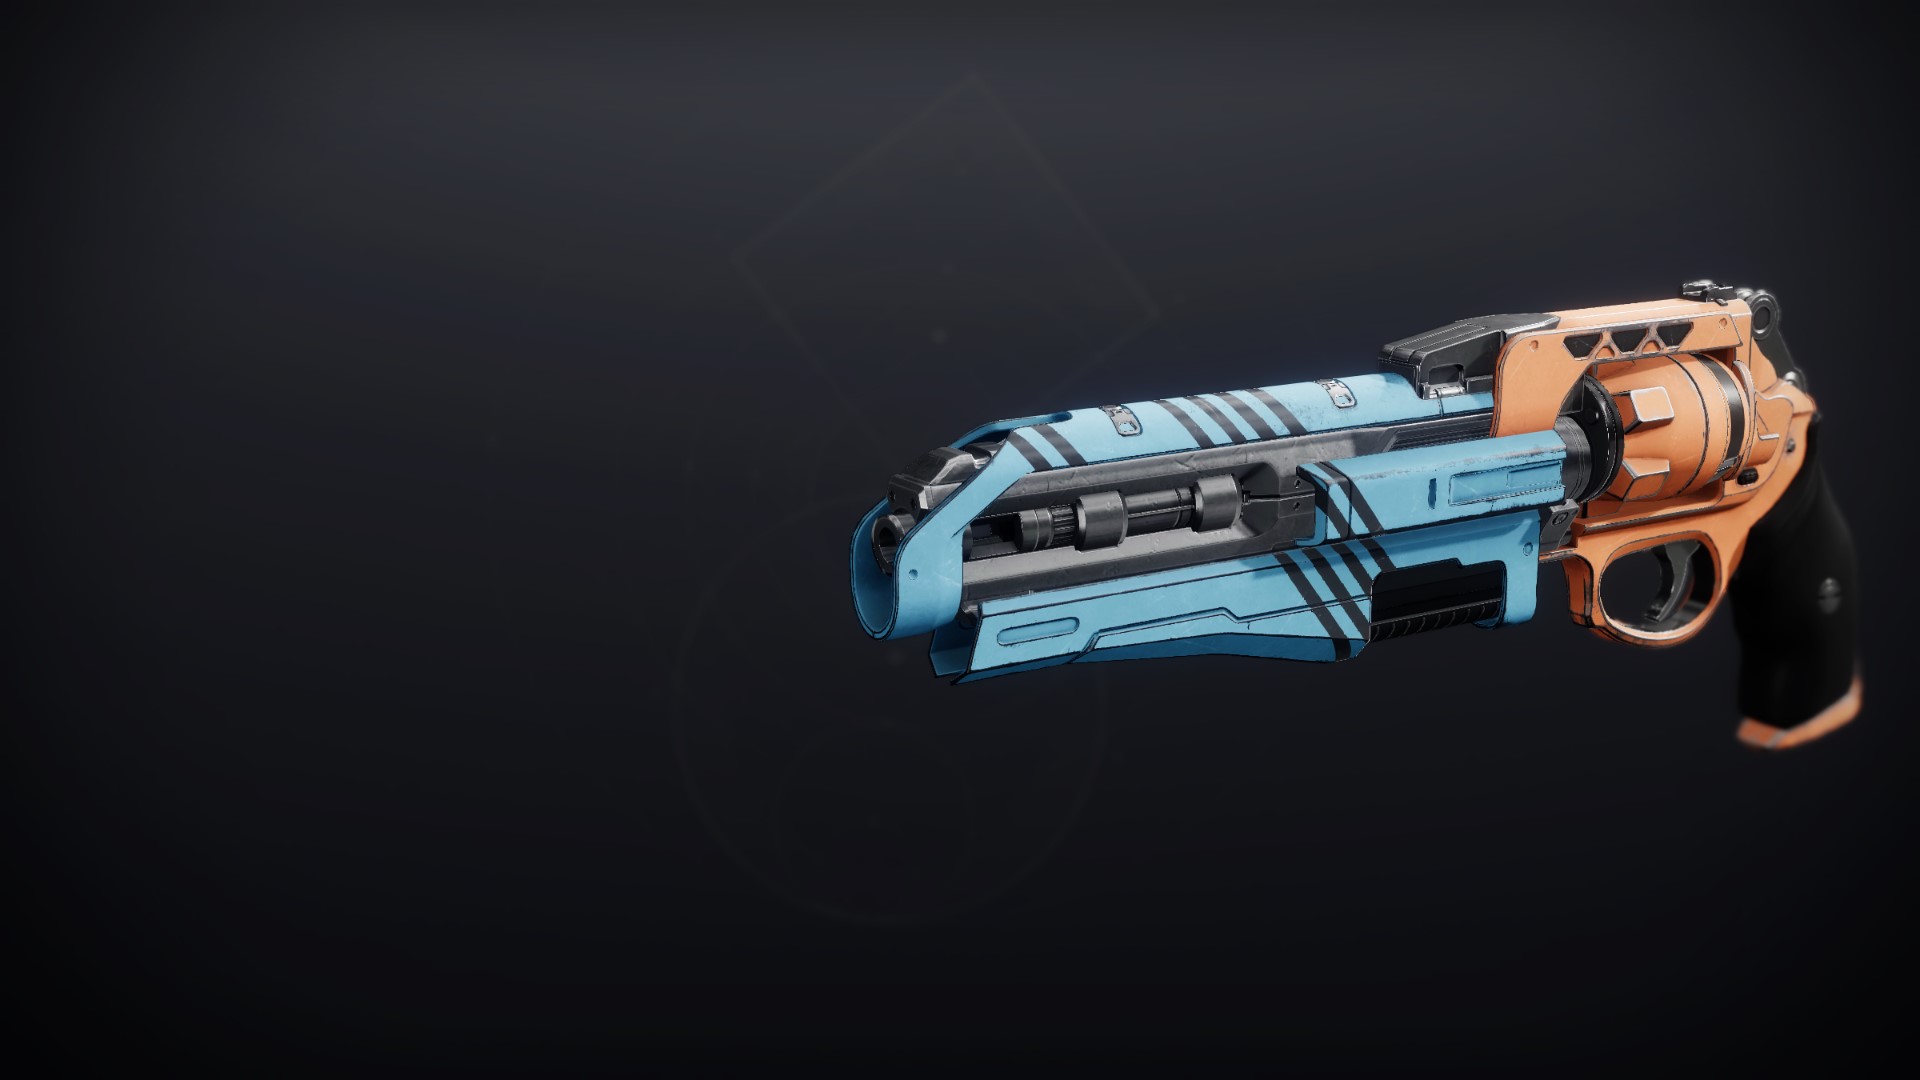
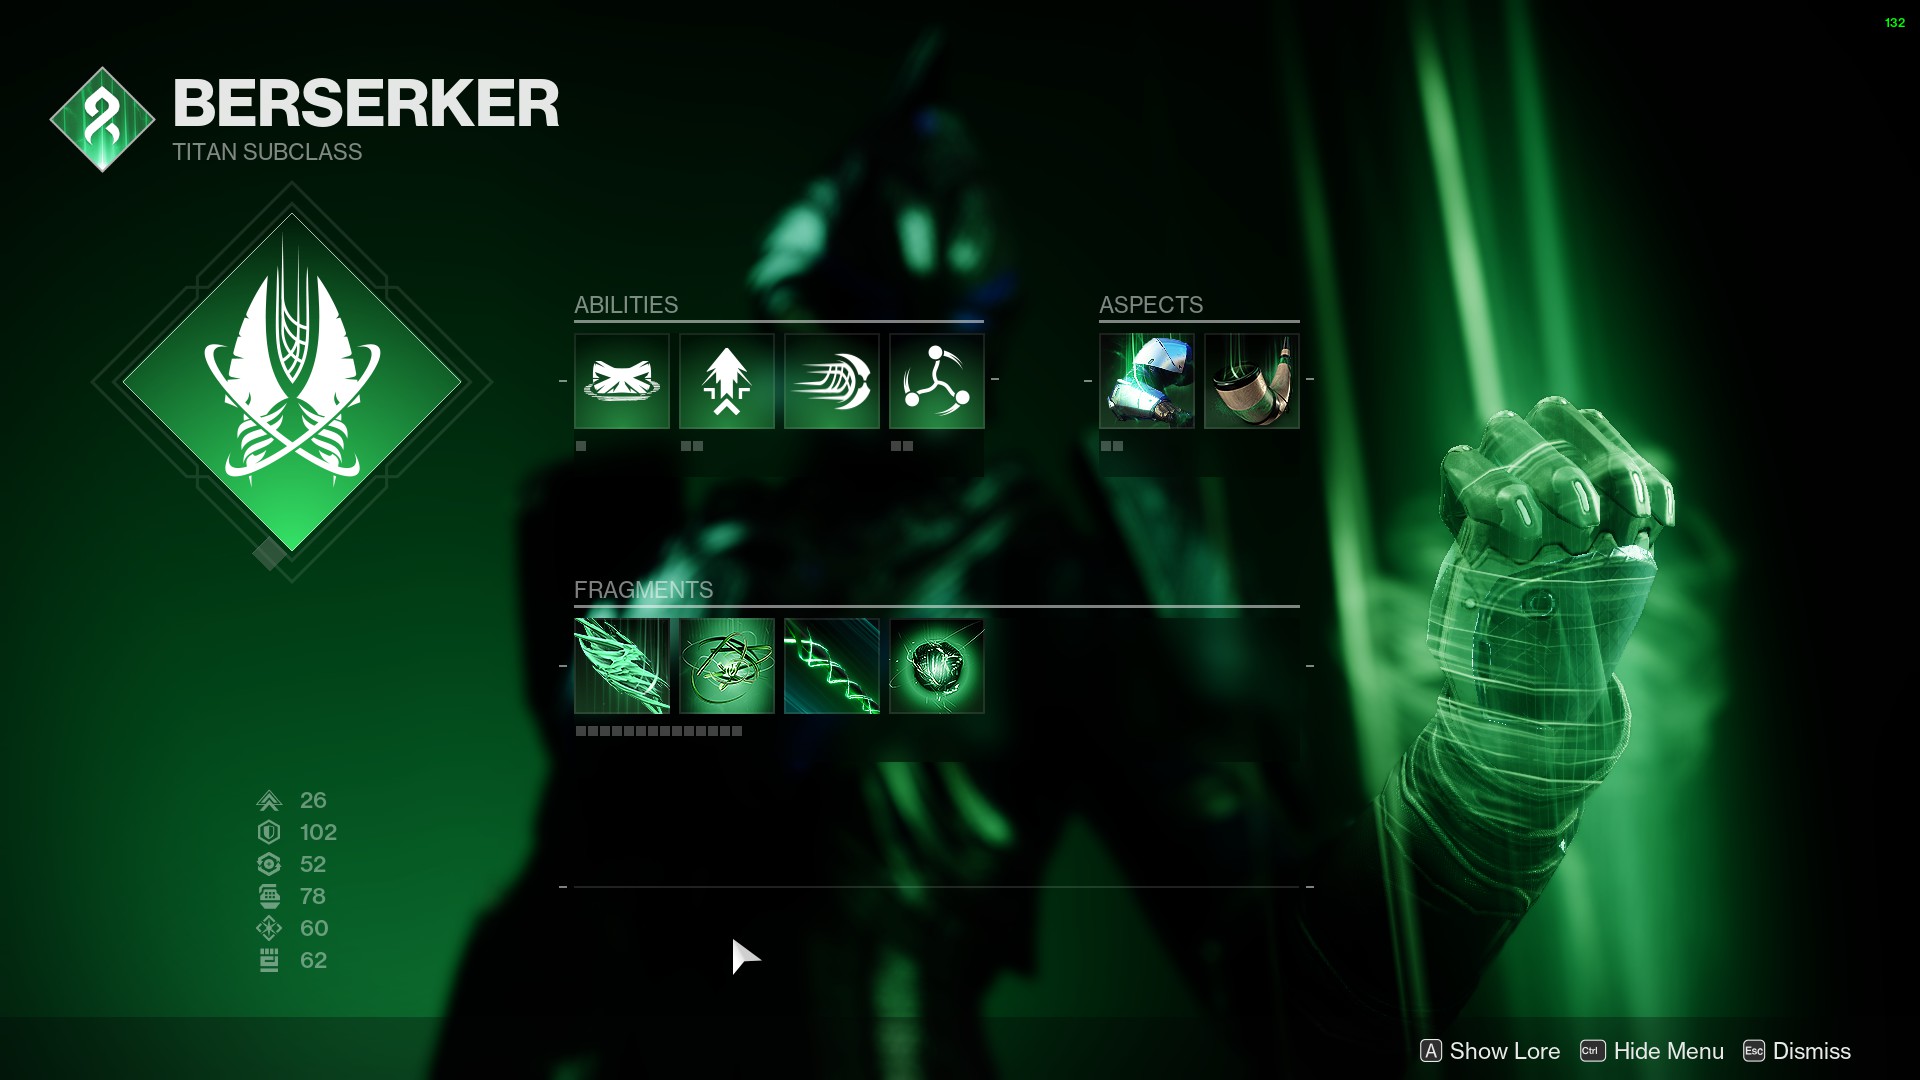
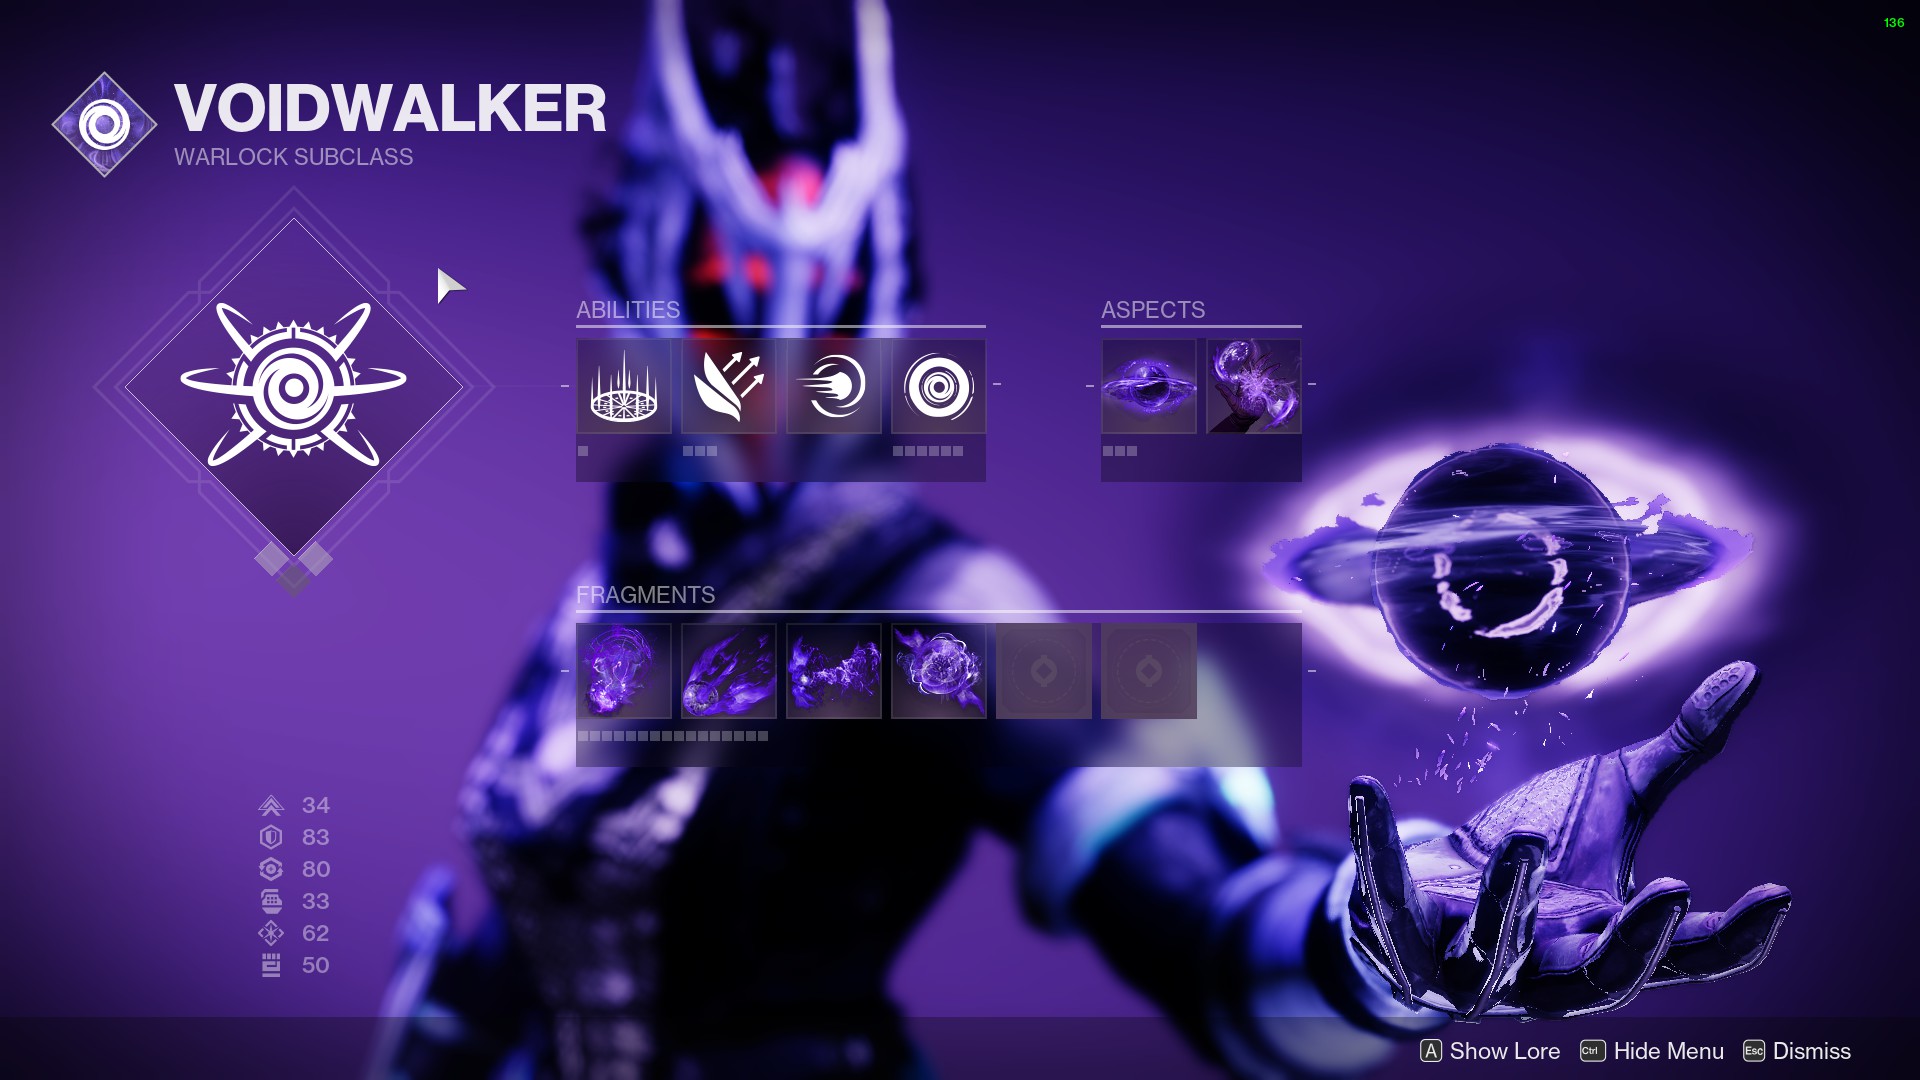
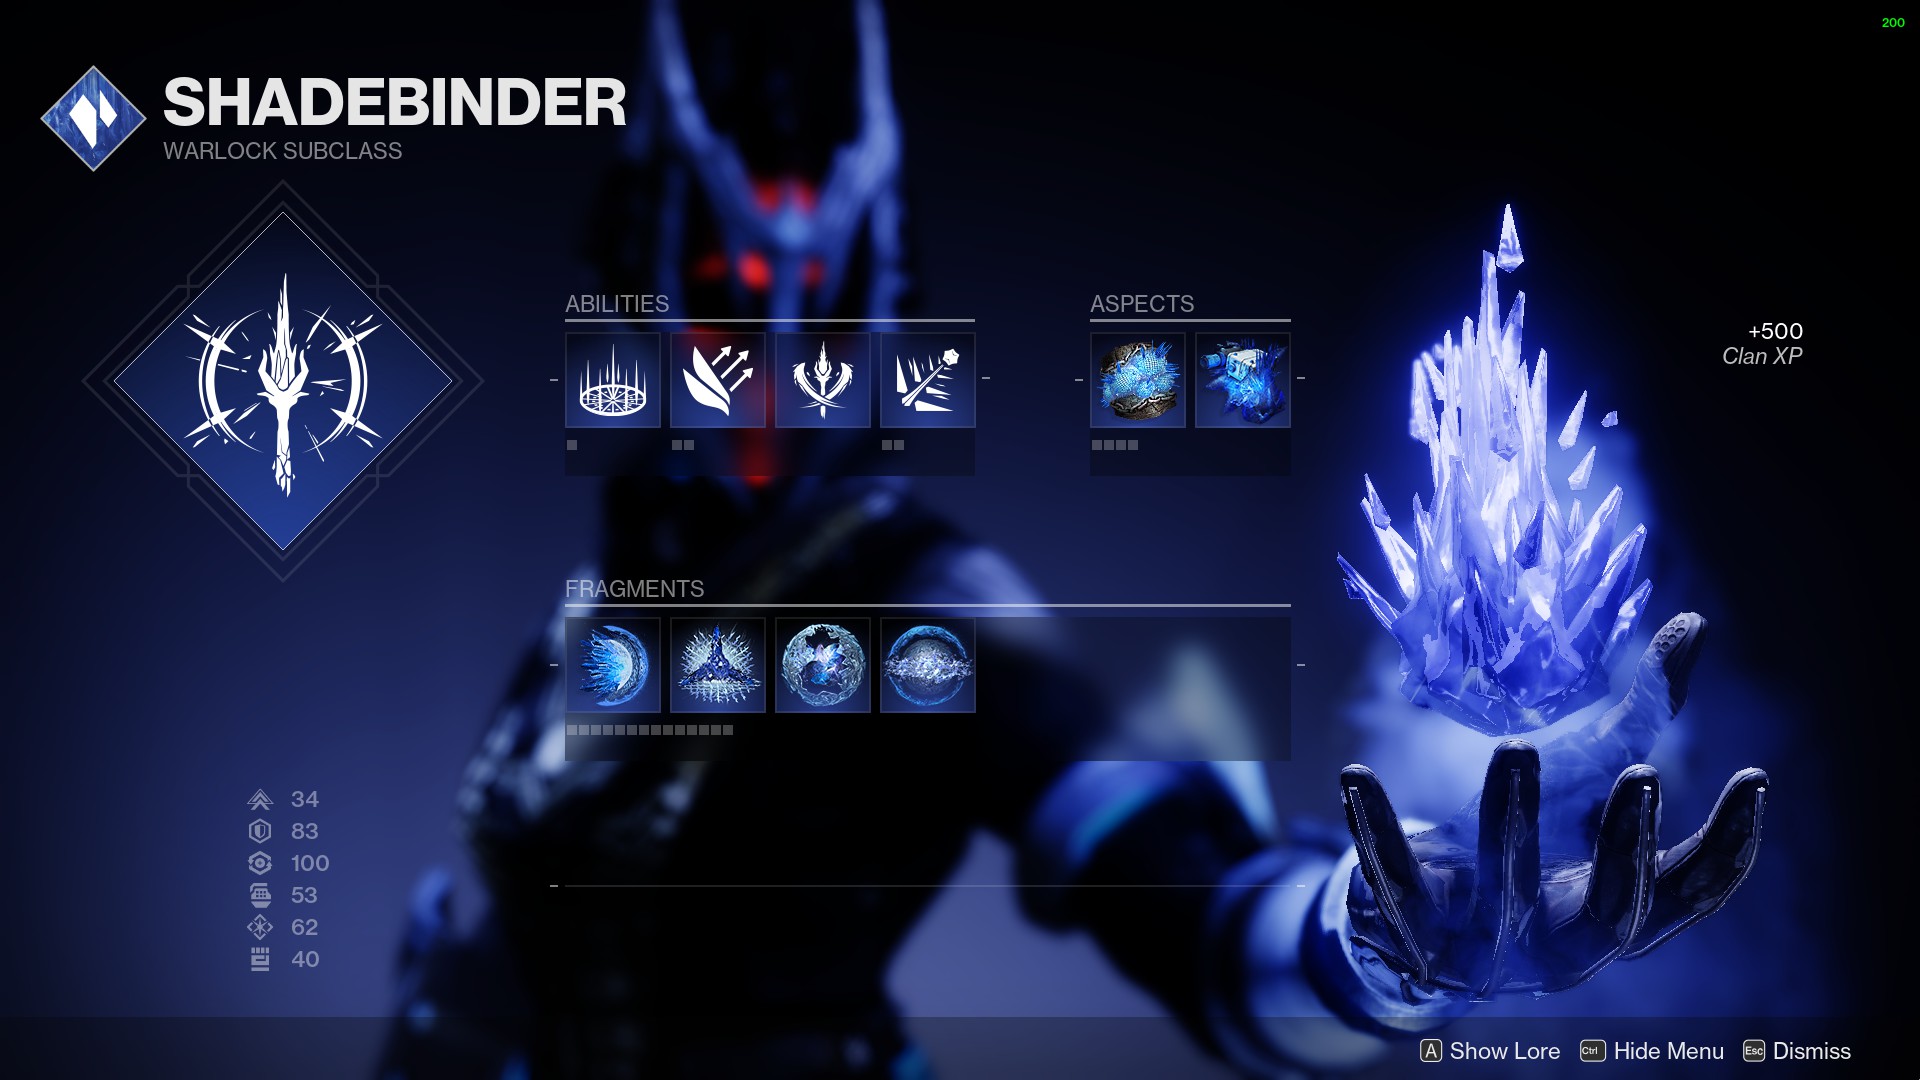
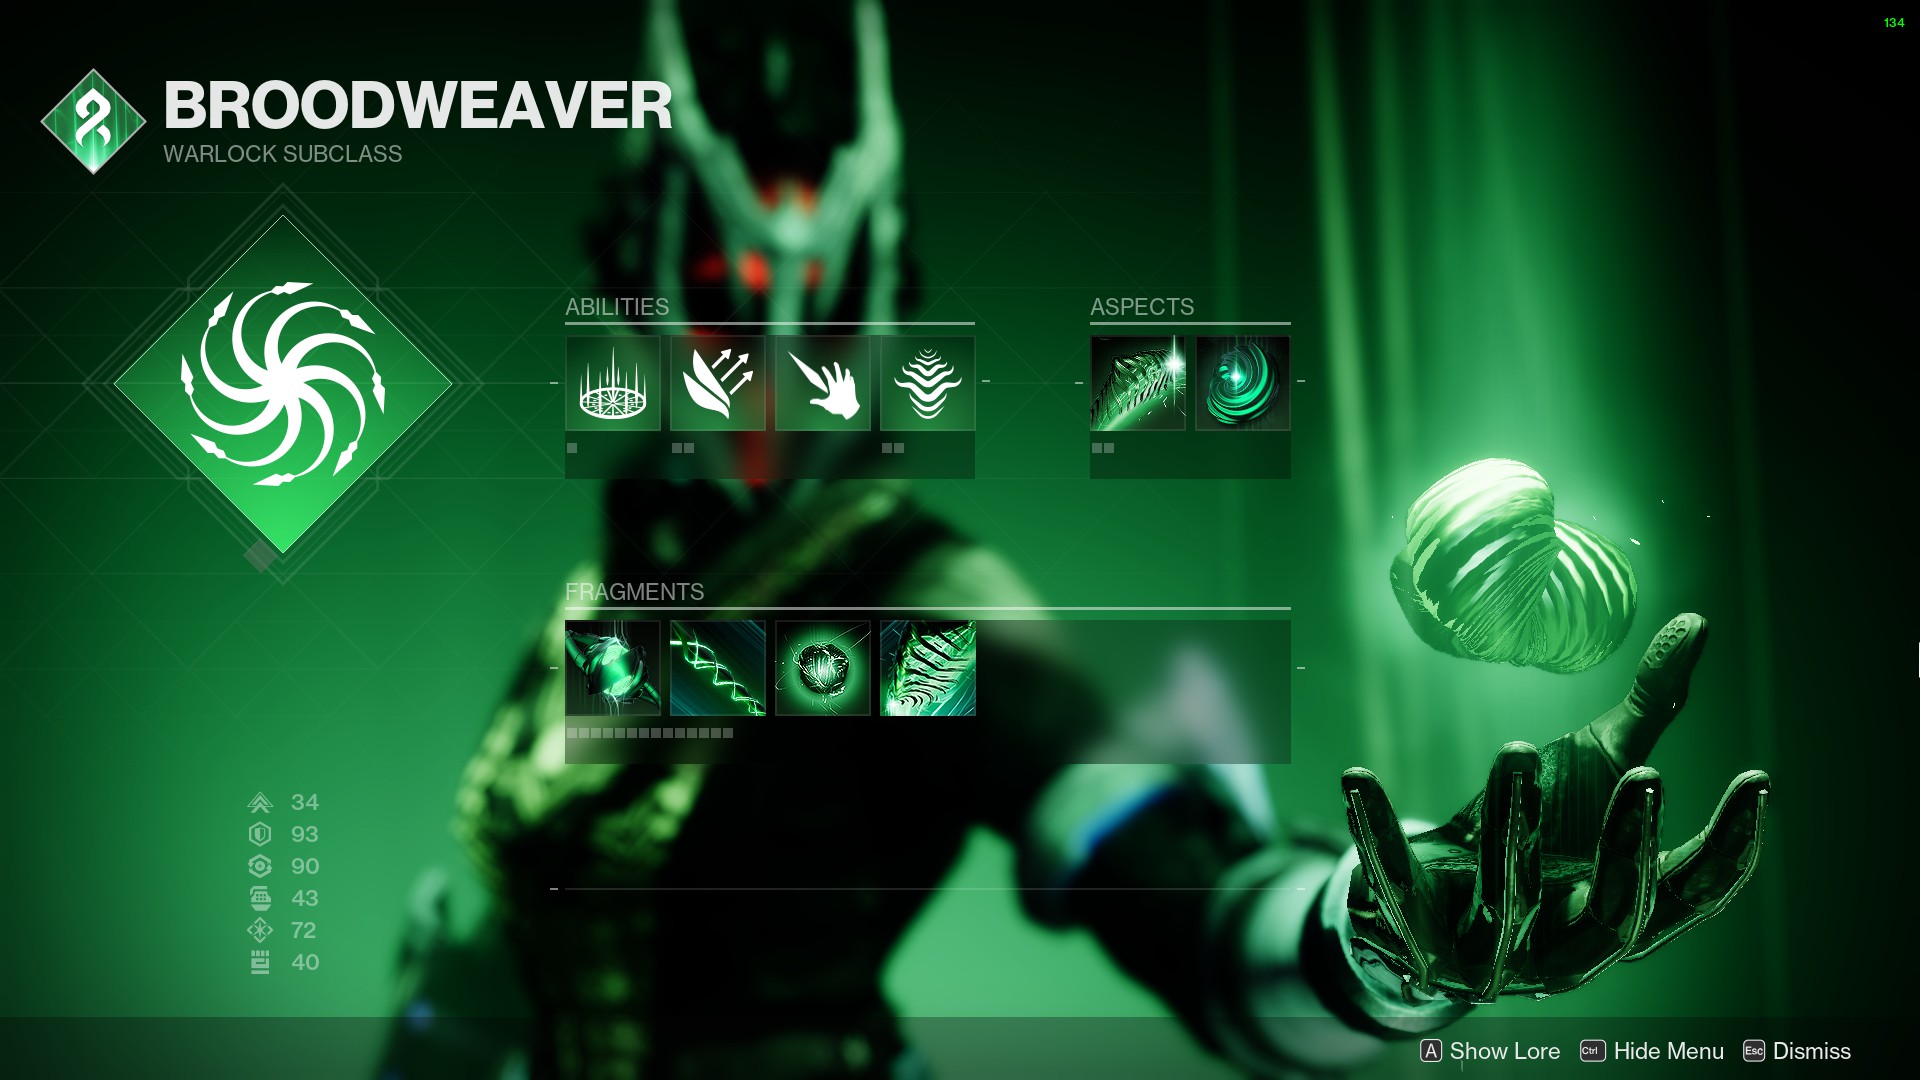
personally using Warlock void devour with almost no cool downs and having immortal being status, with Striga and shotgun with god roll sword also 3rd person :)

did witch queen solo legendary since 1350 campaign alone, used whitherhoard + smg/shotgun-Gnawing hunger god roll + MG/Sword.
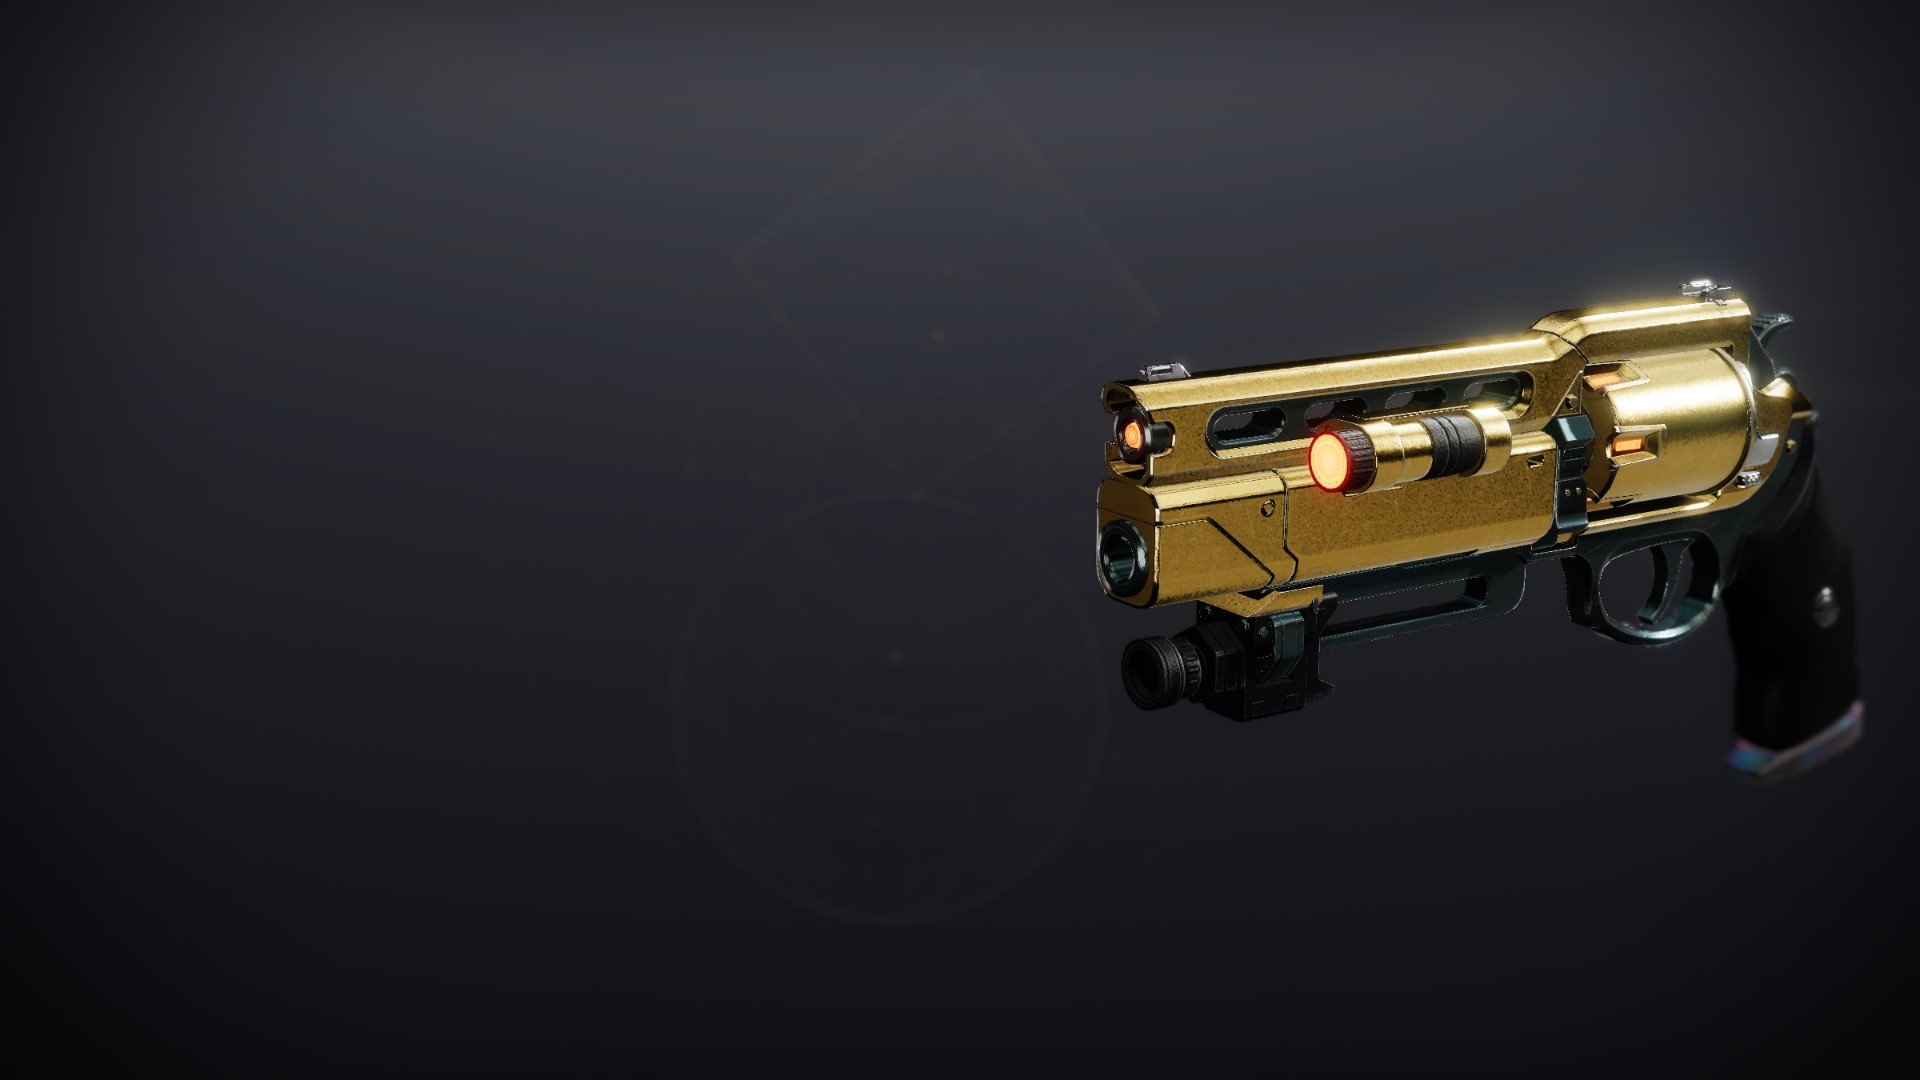
Now using Striga
7 Thg02, 2023 @ 2:14pm 
just be better lol
big guy 6 Thg02, 2023 @ 5:52pm 
pit of heresy is spelled wrong
Kotoknow  [tác giả] 5 Thg02, 2023 @ 10:05pm 
got it
Traitor 5 Thg02, 2023 @ 10:03pm 
please add osteo striga to the exotics, its one of the most viable ad-clear weapons rn
Kotoknow  [tác giả] 5 Thg02, 2023 @ 6:37pm 
It's not negativity it's criticism which I need to learn from, but thank you.
Ren 5 Thg02, 2023 @ 3:18am 
good guide,ive solo flawlessed every dungeon, if you want to check my tag is Levi#0480
dont let the negativity get to you man! keep doing what you love! :praisesun: