State of Decay: Year-One

State of Decay: Year-One

195 ratings
SoD:YOSE 100% Achievement Guide
By Jedo
Welcome to my 100% achievement guide for State of Decay: Year-One Survival Edition! This is a labour of love that took several hours to piece together so I hope you enjoy reading it as much as I enjoyed writing it. Good luck on your trophy collection endeavors! Feedback is always welcome.
4
3
4
2
   
Award
Favorite
Favorited
Unfavorite
Welcome!
This guide is divided into 3 categories (Vanilla = Base Game, Breakdown, and Lifeline) and further separated into sub-categories depending on the activity (battle/community/etc).

Under each section I noted how many achievements are in each corresponding category to make it easier for the reader to keep track of their progress.

Finally, if you liked this guide please consider showing some love!
Vanilla - Storyline Achievements (7)
These first 3 achievements are part of the story and cannot be missed.

Cannibal Family Picnic
Get to the Mt. Tanner Ranger Station.


Holy Rolling
Escape Mt. Tanner and find the survivors at the church.


Survivor
Escape Trumbull County.


These next missions are for sidequests/other storylines in the base game. You can get them all in the same playthrough, but for the sake of minimizing complications I suggest you don't overlap storylines since the game is known to be buggy and some missions can conflict with others.

Arrested Developments
See things through at the courthouse.


This achievement is from the final mission in the Courthouse storyline. Try to complete this mission ASAP as the quest can expire (and render you unable to obtain the achievement in that same playthrough). The Military storyline mentioned below can potentially conflict with the final Courthouse mission.


It Was Just a Police Action
Find out what the Army was up to.


This achievement is related to the military storyline (after meeting Sgt. Erik Tan). The side quests are gated behind in-game days. If it's not triggering for you despite having played enough days, just restart your game and continue from your save.


Home on the Grange
Play matchmaker for Quentin and Becca.


This achievement is from the final mission of The Grange storyline. Quentin will ask you to look into Becca's history. Once you get the desired information, you will have the option to either tell Quentin about it or tell him to let the past go.

If you say YES, it will a few extra steps to get the achievement. You'll need to rescue Quentin later before it can unlock. This increases the possibility of missing the achievement if someone dies.

If you say NO, the quest chain ends and you will immediately get the achievement.


Gun Thugs
Help the Wilkersons resolve their differences.


This achievement is obtained on the final Wilkerson mission. A member of their group will come uninvited to your base and ask for your assistance as a neutral observer in an arms deal. Just follow everything they ask and leave once Job asks you to. We all know what happens to the survivors you escorted there.

Vanilla - Battle Achievements (12)
Pest Control
Destroy 5 infestations in one day.


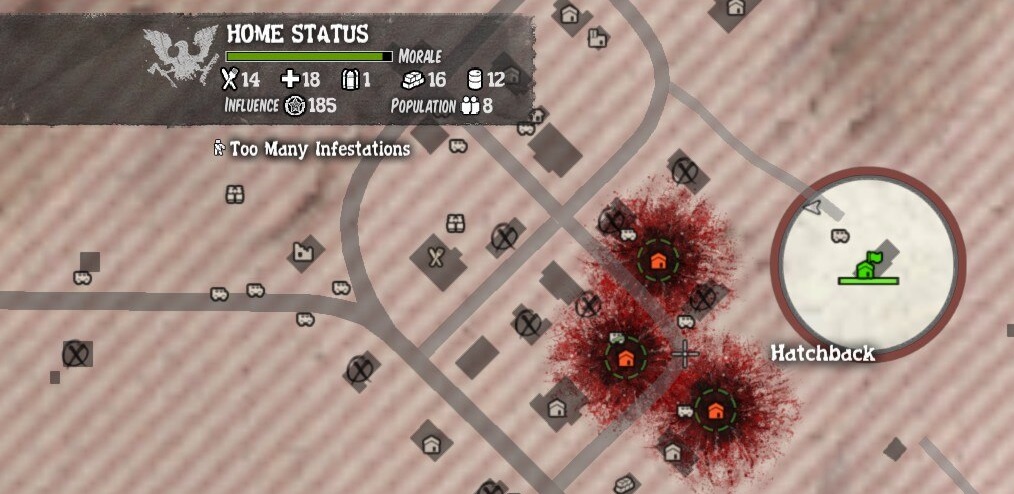
Let zombie herds roam freely for a while. Infestations happen naturally in undefended areas so having outposts will be counterproductive to getting this achievement. I suggest fully looting a good-sized area such as the Church vicinity and then leaving it as an area without an outpost (at least until you have the achievement) so you can build up a few infestations close to each other.


Watch the Birdie!
Distract zombies to complete an objective.


You are first introduced to diversions when you go to save Lily's brother. Use the firecrackers to unlock the achievement.

Throughout the game you will randomly be given these types of missions. Alternatively, you can use a car horn instead of firecrackers as an alternative way of getting the achievement. Can be combined with The Bruce achievement.

The Bruce
Kill 3 zombies with an exploding propane tank.


You will need:
  • A propane tank
  • Any gun with ammuntion
  • Distraction item (firecrackers, kitchen timers, etc.)
Propane tanks are all around the area and they are usually found beside structures.

Once you've found one that has at least 3 zombies in the area, throw the distraction item as close to the tank as you can. The zombies will then ignore you as the item goes off and you are free to shoot out the tank for a quick and easy achievement.

Horde Hoard
Destroy 10 hordes in one day.


Zombie Hordes spawn frequently so just go on a joyride for an hour or so and you should get this provided you don't let the hordes turn into infestations. It's recommended that you don't do this at the same time as Pest Control since they "compete for resources". It also helps if you have less outposts since they kill hordes that pass through.

Torn Apart
Get killed by zombies.


Don't resist when you go down.

Ya Always Were An A-Hole Gorman
Sacrifice your life in a blaze of glory.


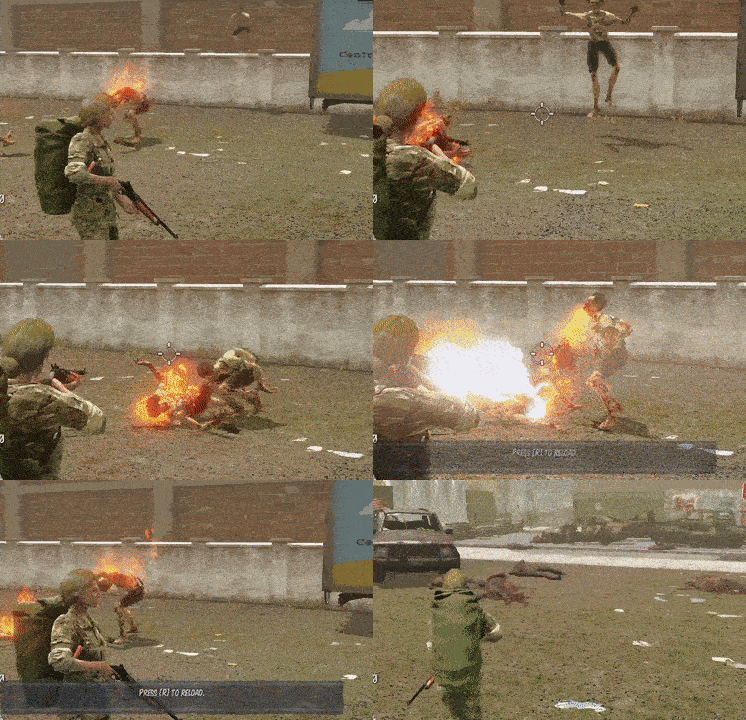
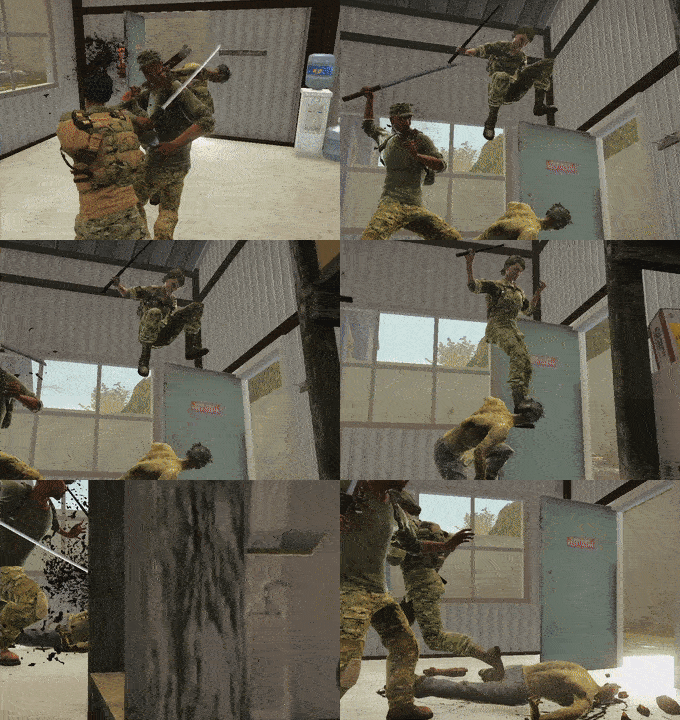
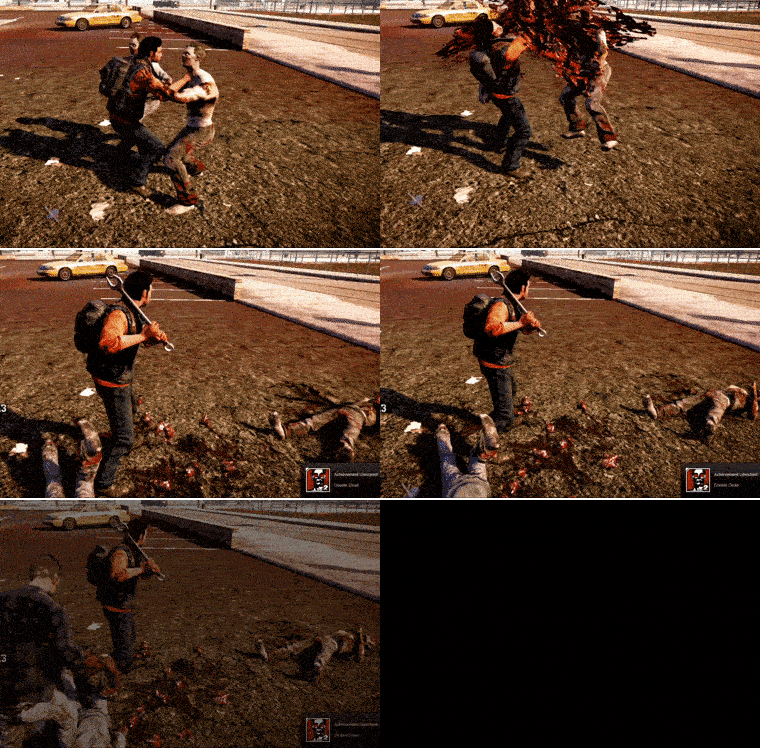
Same as above. Don't resist when you go down. HOWEVER, make sure you have an explosive type item in your inventory (grenade/firebomb/petrol bomb). Equip it before go down, keep pressing the corresponding use key to ensure that the explosive goes off. See the GIF below for clarification.


Get Yo' Freak On
Kill one of each freak zombie type.


This is straightforward but just for your information:
  • Bullets work on all freaks except SWAT/Army zeds
  • Every freak dies to 1 grenade/explosion except the Juggernaut which dies in 2 explosions
  • Same thing applies to fire projectiles. I believe the Juggernaut will still have some HP left after 2 fire projectiles but it should be near death.
Get Outta My Dreams
Kill one of each freak zombie type with your car.


  • SWAT & Screamer - Simply just run 'em over.
  • Bloater - Use meds to heal as soon as you run one over because the poison lingers after.
  • Feral - if it latches on to your driver-side door, knock it around a few times by trying to open the door and ram the side if your door against any solid wall (like trying to scrape off a booger). Otherwise, lure one into a tight space and just swerve around while going half of your max speed.
  • Juggernaut - Ram your pickup truck in reverse to start. The back tires will get blown off but it's better than the ramming from the front in fulle force (it damages the engine) since the car will explode and instantly kill you. You can use multiple pickup trucks for this. Ram one in reverse and then ram the other one full speed ahead but get out of the car while its speeding to cause a massive explosion on collision.


Gotta Enjoy the Little Things
Use a car door to kill a zombie.


Visualize yourself jousting. Just accelerate and open the door to perform a clothesline move on the unassuming zombie.


Vehicular Zombicide
Run over 250 zombies.


Tip: Run over hordes in reverse (with your door open when applicable) because the back is sturdier than the front. Whenever you ram into hordes at high speed using the front, the engine takes damage as well. You can get a lot more done with all that junk in your trunk.

Double Dead
Perform a hand to hand double kill special attack.


Marcus and any other Powerhouse specialist can buy the double kill skill after maxing out the Powerhouse trait. Once you have it, HOLD Left CTRL+C (xbox: LB+B) to counter 2 zombies for a double kill.


Watch the World Burn
Kill 25 zombies with incendiary shotguns.


You will need:
  • A shotgun that can chamber incendiary rounds
  • Incendiary Shotgun Shells
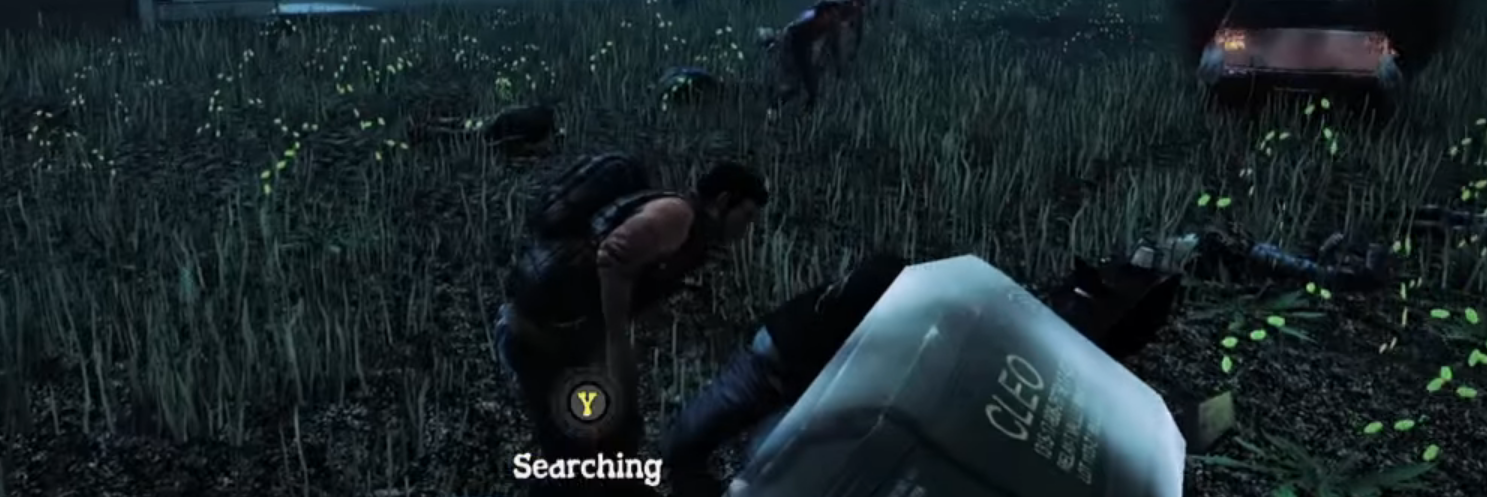
Incendiary Shotgun shells can be looted from relevant caches (CLEO & gun shop's caged area) or crafted through the Munitions Shop after completing the Library research (cost: 4 fuel and 10 fame)

Please check JohnnyInterfnk's post on where to find a shotgun that works.[www.trueachievements.com]

Vanilla - Community Achievements (16)
Land Usage
Build one of every type of facility.


You will need decent supply of construction materials. Just build every type of facility. You do not need them all built at the same base so I try relocating to the bigger available home sites so you have more building space. The achievement will unlock once you build everything at least once in the same run. Click here for a list of facilities (DLC facilities not required).[stateofdecay.fandom.com]

Home Improvement
Build a facility.


Manifest Destiny
Build 8 outposts.


Home Improvement and Manifest Destiny are easier and cheaper to complete. All you need are influence, a minimal amount of resources, and time (cooldown). Just keep in mind that you have to fully search a building AND clear it of zombies before you can turn it into an outpost.

Please note that only the Snyder Depot and County Fairgrounds can accommodate 8 outposts.


I'll Be There For You
Earn 500 Fame.


3 ways to get Fame:
  • Complete missions - largest source of Fame
  • Level survivor skills (Cardio, Wits, Fighting, etc.)
  • Build facilities
Come and Knock On Our Door
Convince another enclave to join your community.


As you play, you will have the option of asking other groups of survivors to join your community. You don't need to build trust with a group to get the option, but interacting with them positively (trading, completing tasks) will increase the chances of making it available.

Everywhere You Look
Get 15 people in your community


On top of recruiting enclaves, you can also get more survivors for your community by progressing the side stories mentioned under the Storyline category.

Movin' On Up!
Relocate your home base.


As you progress the story, you'll be asked to scout a new home site. Once you've confirmed a site, radio in as if you were establishing an outpost and there will be an option to relocate your home base. You will need 50 construction materials to make the move.

Rule #1
Max out a community member's Cardio skill.


The safest and fastest way to do this is to use a character without any negative traits that affect Cardio. Craft and use a bunch of snacks to sprint endlessly within the confines of your home base.

Rule #2
Max out a community member's Shooting skill.


First off, make sure you have the Shooting Platform (upgraded from Watch Tower) so that you can activate a shooting buff. I suggest driving around long stretches of road and looking for clumps of zombies/hordes. Silencers are optional because you'll be far from your home base anyway so you can run away via car when you attract too much heat. Headshot streaks further speed this process up.

Rule #18
Max out a community member's Fighting skill.


You'll unlock this without even trying as long as you don't avoid all your fights. It's beneficial to fight as much as you can prior to max Fighting anyway since it increases your max HP.

Rule #31
Max out a community member's Wits skill.


Straightforward achievement. Avoid characters with negative traits that decrease scavenging exp (Total Lush, Absent Minded, etc.). Having a researcher and a Library will increase your scavenging exp further to max out Wits more efficiently.

Apples and Beans
Fix delicious snacks 5 times.


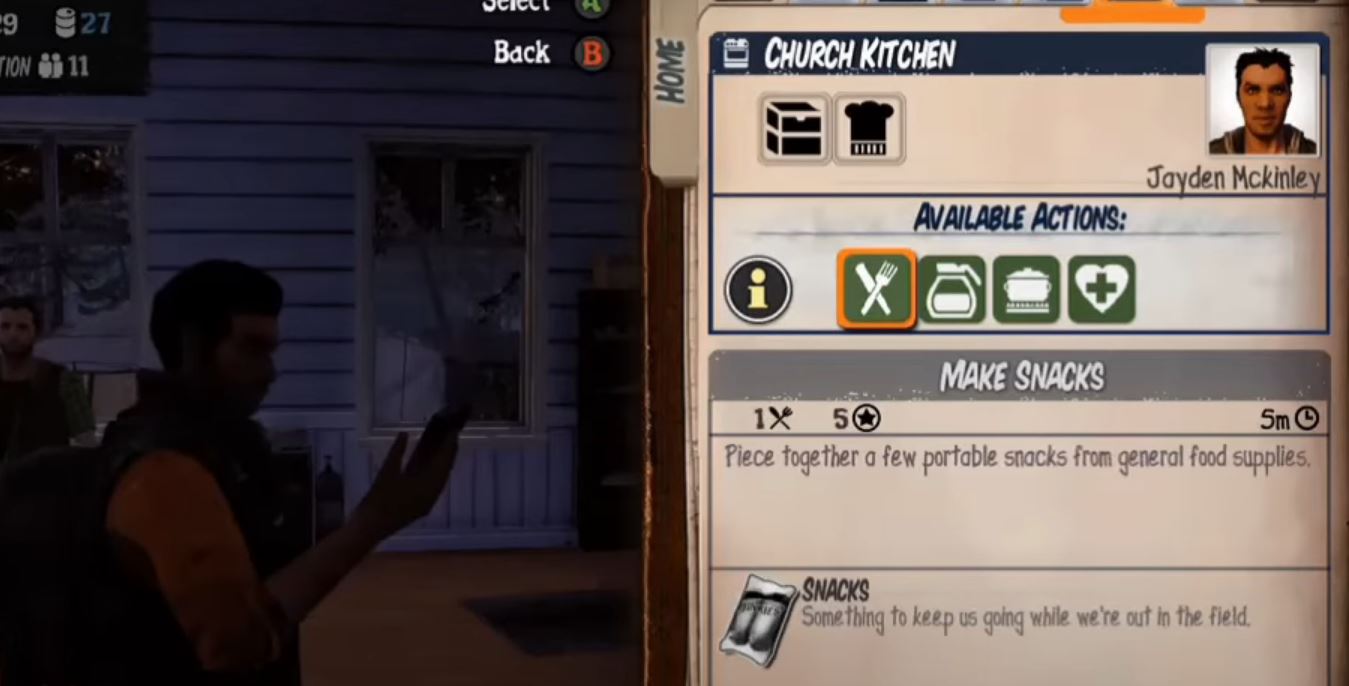
Craft these in your Kitchen 5x.


Powder and Primer
Craft ammunition 5 times.


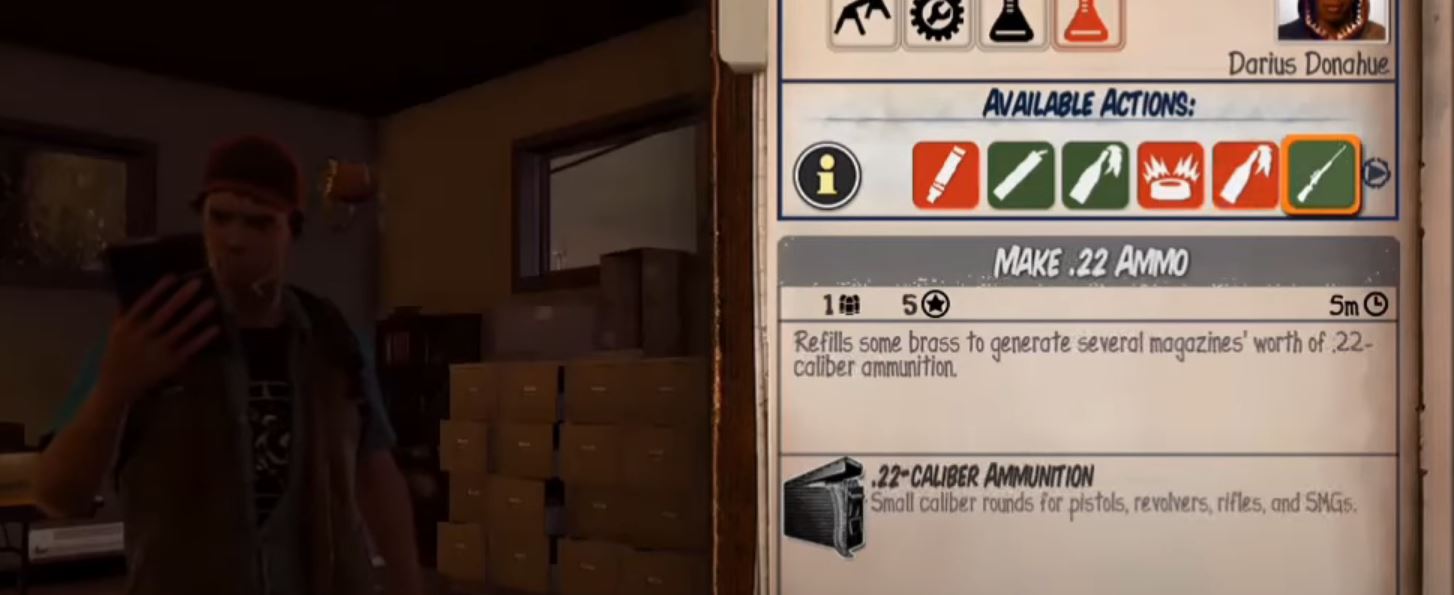
Same as above. Craft these in the Munitions Shop 5x.


Trust Me, I'm an Expert
Earn a skill specialization for one of your community members.


Once you hit level 4 on a character skill (Cardio, Wits, Shooting, Fighting), you will unlock skill specializations. Example: At level 4 Fighting you can choose a melee specialization(Edged, Blunt, or Heavy)

For these next 2 achievements, you just need to ask a community member to watch your back. Rinse and repeat. Sometimes the option to have them follow you is unavailable if they are:
  • On a mission
  • Sick, injured, or tired
Get Over Here
Invite a community member to follow you.


Serial Monogamist
Invite a community member to follow you 10 times.
Vanilla - Other Achievements (5)
I Can See My House From Here
Complete a survey activity.


Early into the game you will be asked to survey the area using a water tower. Completing this activity nets you the achievement. I don't think you can miss this achievement.


Mercy Shot
Kill a member of your community to prevent them from turning.


Sometime during the middle of the game one of your community members will get sick (story-driven). As a result they will want you to end their life so that they don't turn. Make sure to use a gun when you do this.


If you don't get it through this method, you can replicate the conditions required for a mercy kill by getting a member gravely ill and ensuring they don't recover by gimping your facilities and resources. This is a lot of extra work though.

These next 2 achievements are for successfully scavenging the CLEO supply drops. At some point Lily will alert you of a mysterious signal. Simply investigate, scavenge, and leave. Rinse and repeat 5 times. The loot from these drops are usually very good.

Order at DZ
Intercept a mysterious supply drop.


Letters from Cleo
Intercept 5 mysterious supply drops.


Badass
Complete 50 missions or activities with the same character.


You'll get this with Marcus or your most used character over time (provided they don't die).

The following missions/activities count:
  • main/side quests
  • missing survivors
  • trade scenarios
  • backup/freak hunting tasks
  • base sieges
  • etc.
Breakdown - Progression (6)
These achievements are just progression checks each time you move up a tier in Breakdown. Each time you raise the level, your progress is reset and the difficulty ramps up. Outside of doing the other Breakdown-related achievements, I suggest that you use heroes that fit your style of play. There's this old but still relevant guide that I linked in my older guide written by Axiom which has useful Breakdown survival tips which are still relevant going from SoD vanilla to SoD YOSE.
https://steamcommunity.com/sharedfiles/filedetails/?id=203472028
The Friend
Reach Breakdown Level 2.


The Convict
Reach Breakdown Level 3.


The Gunner
Reach Breakdown Level 4.


The Veteran
Reach Breakdown Level 5.


The Scientist
Reach Breakdown Level 6.


The Rescuer
Unlock All Heroes.


There's already an excellent guide for unlocking all heroes and I don't think I can write a better one so please refer to this post instead.[www.trueachievements.com]
Breakdown Lv1 or higher (2)
The Sacrifice
Go out in a Blaze of Glory at Breakdown Level 1 or Higher.


Same technique applies as in Ya Always Were An A-Hole Gorman achievement. Royell "The Joker" Vincent can also be unlocked as a usable Hero in Breakdown by crafting 5 snacks. He comes equipped with a grenade which enables you to complete this achievement within minutes of spawning with him.[www.trueachievements.com]

Credit: Hirsute Dave of the True Achievements community


The Scholar
Complete All Research Projects (Breakdown Level 1 or Higher).


All the research must be completed in the same level because your progress resets when you move to a higher Breakdown level. I recommend completing all research projects at the Savini Residence.

Research list:
  • Pipe Bomb
  • Steel Pipe Bomb
  • Box Mine
  • Whistling Box Mine
  • Chemical Incendiaries
  • Greenhouse Gardening
  • Biodiesel
  • Potent Homemade Stims
Snippet from my old guide:
Originally posted by Jedo:
The Scholar - This can be problematic due to a bug preventing the research of chemical incendiaries related to a medical lab and a munitions shop while at the Snyder Trucking Warehouse. I got past this by doing my research on the next breakdown level while residing in the Savini Residence.
Breakdown Lv2 or higher (2)
The Dead Man
Destroy 5 Bloaters (Breakdown Level 2 or Higher).


Straightforward achievement. I suggest using guns since approaching Bloaters in melee range is never a good time.

The Phoenix
Burn 100 Zombies with Fire (Breakdown Level 2 or Higher).


Instead you can abuse zombie clumps, hordes, and infestations with:
  • petrol bombs
  • firebombs
  • thermite
  • incendiary shotgun shells
  • chemical incendiaries
Snippet from my old guide:
Originally posted by Jedo:
I've read posts from a few months ago mentioning that outposts worked towards this challenge but I tested it recently and found that they didn't count. Just do it the regular way with chemical incendiaries. EDIT: I've been told that outposts work now!
Breakdown Lv3 or higher (2)
The Fighter
Destroy 5 Ferals (Breakdown Level 3 or Higher).


Find or raise up a survivor's Shooting to max ASAP to unlock Focus Aim. Proceed to abuse them with headshots during "bullet time". Use rounds that deal higher damage so that it's a 1-shot skill. Using weaker rounds will normally take an extra shot to the head to secure the kill.

The Judge
Perform 50 Zombie Executions at Breakdown Level 3 or Higher.


Staggered (kneeling or on the floor) zombies can be executed. Take your time and don't try to execute a lot of zombies when you are heavily outnumbered. You can still take damage during the execution animation. To execute: Shift+E on Keyboard and LB+Y on xbox controller.

Bonus funny GIF from this glitchy game:
Breakdown Lv4 or higher (2)
The Sniper
Earn 25 Headshot Streaks (Breakdown Level 4 or Higher).


  • Headshot Streak = 5 headshots in a row
  • Raise a hero's Shooting skill to max to unlock Focus Aim. Military heroes start with high Shooting.
  • Use non-penetrating ammo + gun combo so that you don't end up killing more than 1 zed/shot.
  • Roam the open road to look for hordes and then get your shooting streak done 25x over.

The Survivor
Collect 150 Resources at Breakdown Level 4 or Higher.


Scav like you're playing Tarkov with a huge backpack! Straightforward objective.
Breakdown Lv5 or higher (2)
The Mercenary
Destroy 5 Juggernauts at Breakdown Level 5 or Higher.


Various methods to kill a Juggernaut:
  • 2 grenades
  • Sacrificing vehicles (ram one in reverse and then ram another one full speed while hitting the eject button for a car bomb)
  • Let the Juggernaut charge into a wall so that it gets staggered to give you openings to attack.
  • Fire-related projectiles and then finish it off with a few shots.
  • Box mines, propane tanks, air strikes.

The Ninja
Execute 50 Stealth Kills at Breakdown Level 5 or Higher.


Snippet from my old guide:
Originally posted by Jedo:
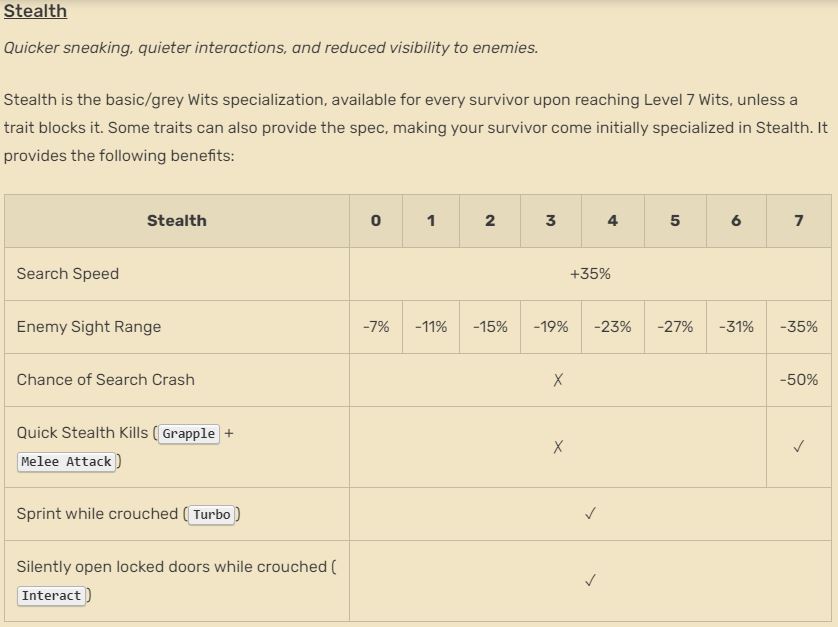
Stealth kills are performed by sneaking up on zombies by crouching and using brush to conceal yourself. You have to be out of their line of sight for this to work. The Ninja specialization helps a ton when trying for stealth kills.

Source: Wiki[state-of-decay-2.fandom.com]


The "Ninja" specialization is Stealth. It lets you sneak around more easily to assist in performing stealth skills. It's very easy to perform and it's the same button combination as as execute (LB+Y or Shift+E). The only difference is that it has to be done behind a zombie. You can actually do it without sneaking as long as you catch the correct timing to perform the stealth kill (see samfisher's YT video).

Lifeline - HVA Main Story (7)
High Value Asset (HVA) missions are given by Doghouse and Highroad via radio comms. As far as the High Value Assets go, I don't have a full list of which HVA missions can be failed through death or expiration so I'm only speaking from my experience based on who has died or which missions expired. As a rule of thumb, don't go in without fire projectiles or guns (preferably with focus aim). It's better if you have both. Failing even one of these achievements can be very annoying. You can try to Alt+F4 before it auto-saves, but if you're like me and you're using a controller, sometimes you just don't react fast enough to dodge the unfortunate event.

The Doctor
Brought Thomas Horn to the Landing Zone, at least.


This is the first HVA that you are tasked with rescuing as part of the main missions in Lifeline. Multiple people have confirmed that there's no time limit before you approach his location. This means you can loot the whole map except the area he's in (unless you pre-loot it before visiting the base).

The Surgeon
Successfully extract Julene Horn.

2nd HVA. She will take you to her house to look for notes. You just have to defend her. From here on out I believe there's some randomness in the order of which HVA you're tasked to rescue next.

The Protégée
Successfully extract Madison Grant.


The Bureaucrat
Successfully extract Michele Martin.


This mission actually expired on me on my first full run of Lifeline. When Highroad tasks you with something related to the Human Future Fund (HFF), you'll be paying Michele Martin a visit. Make sure not slack on this and any other HVA mission once you see it. Pre-loot the map so you can focus on objectives and not have any mission expire. This mission will only require you to defend her while she looks for notes in an office.

The Examiner
Successfully extract Timothy Hall.


The Scion
Successfully extract Hadley Westen.


Hadley Westen is the Governor's son. You'll be rescuing him at some kind of restaurant and it's surrounded by zombies. Bring a petrol bomb/fire bomb in case you and the asset get surrounded. He won't take friendly fire damage.

The Colleague
Successfully extract Dan Bogatz.


This is a 2-part mission. Try to set up an outpost near him (northeast corner of the map) before you encounter his HVA mission. It'll make the first part much easier since you'll have cleared that area somewhat via the outpost protection area. Either way you should bring a fire projectile in case he's being ripped apart on the ground as you approach him.


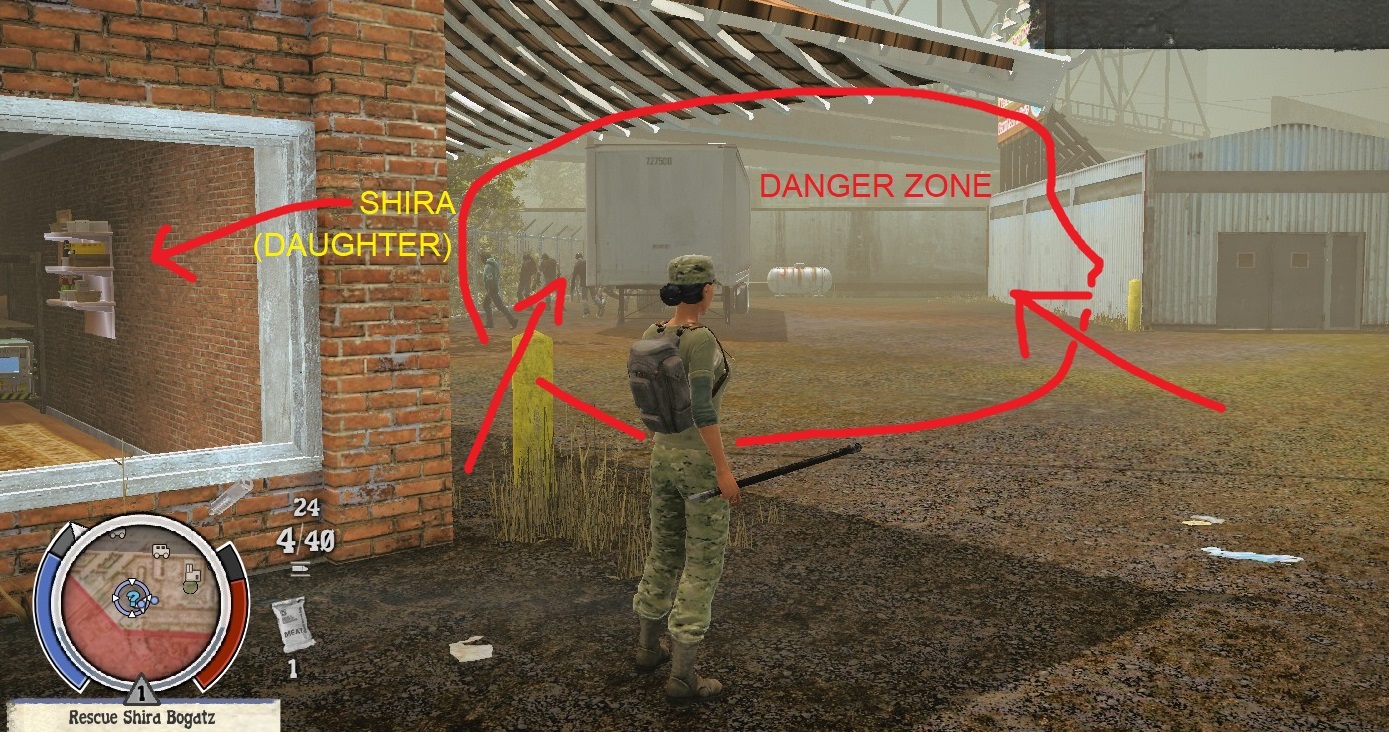
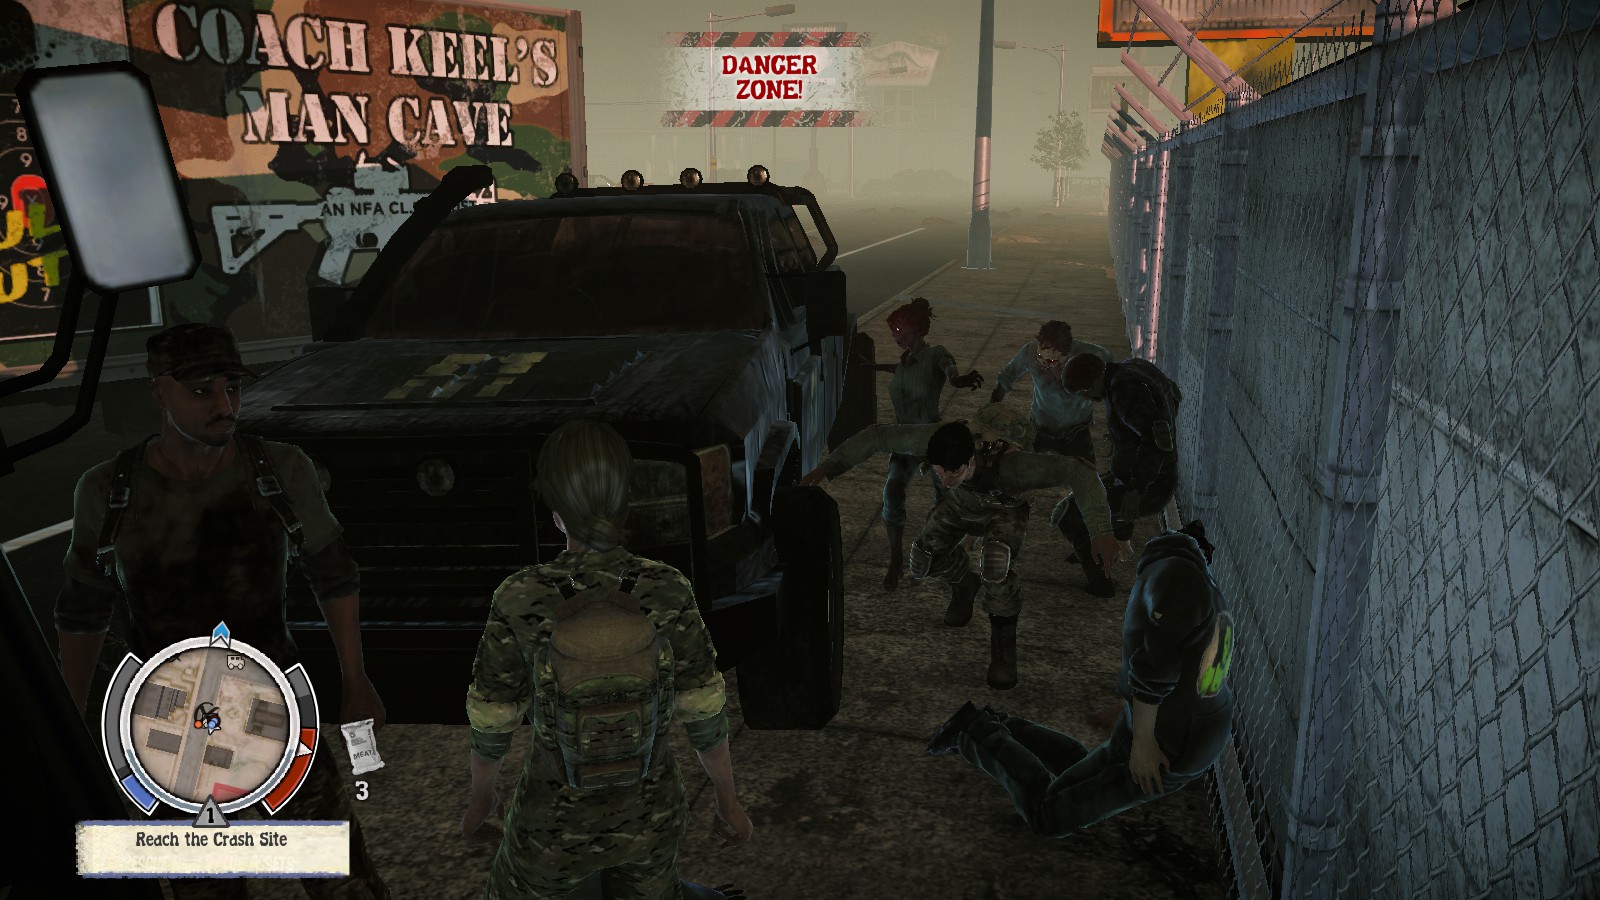
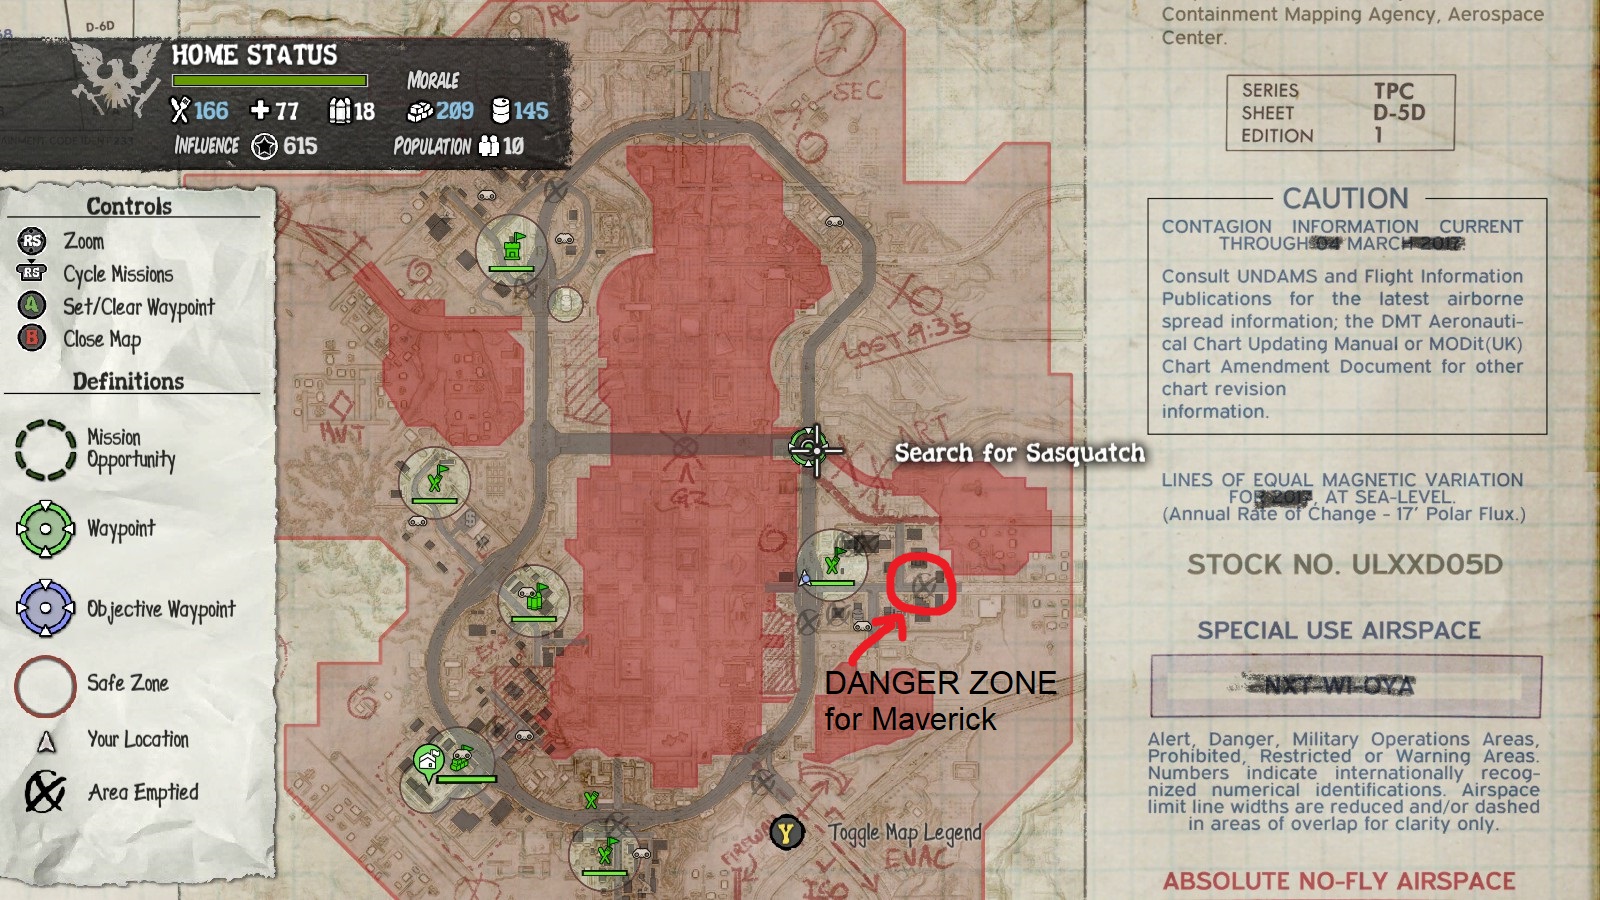
After you save him, you'll notice that he's very injured. Don't talk to him yet and clear the buildings further down the street because Dan Bogatz will limp towards the next part of his mission. He wants you to save his daughter, Shira Bogatz, so pre-clearing the next area before talking to him will help a ton. DO NOT step in the danger zone (screenshot below) or it will spawn more enemies. I made this mistake and spawned a Juggernaut which killed Dan during my first try.

Lifeline - Battle (3)
Maverick
Survive 2 minutes within a Danger Zone.


Drive your car into this spot. Enemies will still spawn but it's the smallest Danger Zone in Lifeline and it's easy to back out in case things get dicey. I suggest you do this before saving Thomas Horn because your companions are immortal during this time.


Wired for War
Kill 100 zombies with Drone Strikes.


Before losing contact with Doghouse, you will have access to Drone Strikes. Using this command costs influence and will subsequently give you something that looks like a grenade. Throwing it marks the area for a drone strike. It acts in the same way as a distraction item (firecracker, kitchen timer, etc.).

You can get this achievement done with the least amount of influence if you only throw it in the underground area where you can find Sasquatch and/or at hordes/infestations. You'll have to run in deeper the 2nd/3rd time you throw the drone strike marker so eat an MRE so you can be in and out.


Under Siege
Survive 10 sieges on your base in a single playthrough.


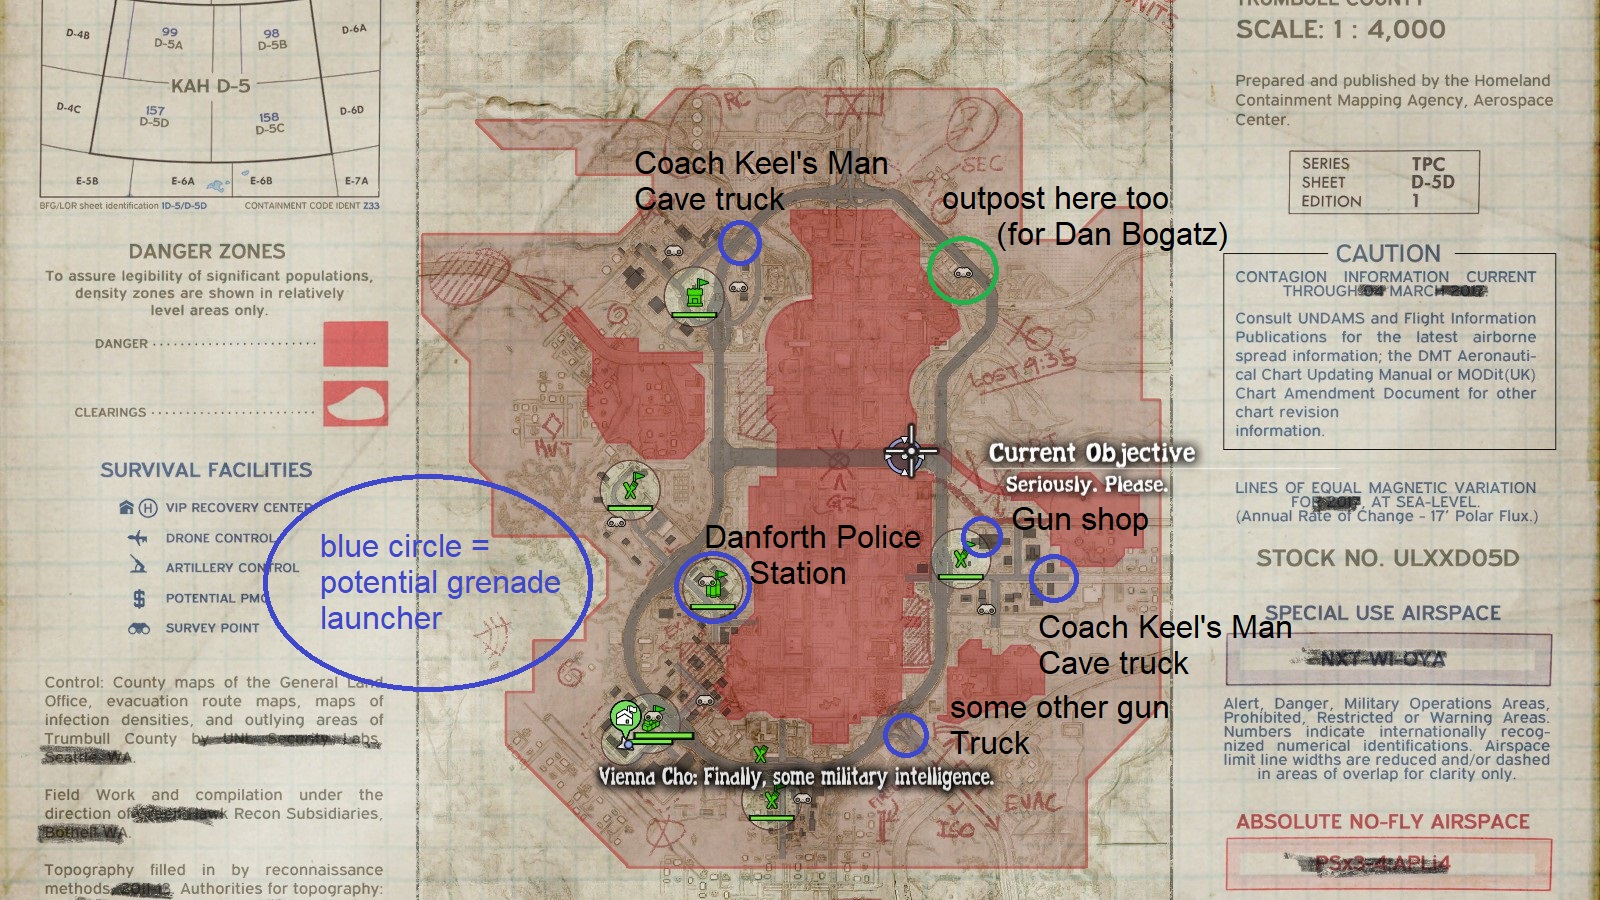
Each subsequent siege gets harder and harder so preparation is key. The most useful thing you can do to prepare for 10 sieges is to equip as many community members as you can with grenade launchers (see image below for outpost suggestions and grenade launcher potential locations). The most I've found was 6 in one game (not including prepper's pack). Pre-loot the entire map or loot it as much as you need to secure enough of each resource. You'll primarily need (1) materials, (2) ammo, and (3) medicine in that particular order. The less you have to loot in between sieges, the less likely you are to miss an important mission (and achievement) AND you can be home in time for sieges without worrying about resources.

(NOTE: You can't save the game until you save Dr. Horn.)
  • materials - used to upgrade facilities and create silencers
  • ammo - used to create grenade launcher ammo
  • medicine - used for good painkillers (crafting stims not necessary at this point since fatigue is only an issue when you're initially pre-looting and can't save the game - just use coffee & guarana)


The suggested outposts are just there so that you can manage the zombie population in the suggested areas before going into any HVA mission in between sieges. Less enemies for you to worry about so you're not wasting resources killing more zombies than you have to. Additionally, you can deposit valuable loose loot (grenades, petrol bombs, firebombs, etc.) straight into the outposts. Whenever you find any throwable projectiles.

Once you've pre-looted enough, just use your influence as needed to fill the gaps in resources. The less you have to use this, the better. It's better to use the Long-range supply drop that is accessible later (for 300 influence) because it gives you grenades which are useful for defending your base and acts as a great substitute for a grenade launcher on your active character.

You should also turn on the "thin the herd" command in the ops center even if it increases the time it takes for a siege to happen. This is useful since it'll give you breathing room to complete other achievements in between sieges.

Siege timers are somewhere around 30-40 minutes depending on the RNG of your ops center command success rate. After that timer is up, the threat level will go up to level 2. Around 5 minutes later, the threat level will once again go up to 3 and the siege will begin shortly. If you've done everything mentioned, defending your base will require minimal effort from your active character.

I know that was very lengthy, but here's a final checklist of what you need:
  • enough resources for daily consumption, crafts, and upgrades
  • grenade launchers (equip your non-active community members since they have infinite ammo)
  • loot and stash throwable projectiles (grenades, firebombs, etc.) especially from CLEO drops
  • set up outposts with traps so to manage zombie population
Bonus:
  • Radio in for the Bonus Survivor (Gurubani Kaur) - she comes with a perpetually silenced rifle.
  • Radio in for the Prepper's Pack. It delivers a good weapon, the SKS Survivor, into your stash. It is a Super lightweight Rifle AND a Grenade Launcher combined (Shift+Space or LT+A to switch firing modes).

Lifeline - Other (2)
Flugtag
Send an energy drink flying.


(image broke - just ram your vehicle into the slanted trucks with a can on top scattered along the highway)
Full speed ahead! Send that can flying with a vehicle.


Rucks in Trucks
In Lifeline, deliver 6 rucksacks to your base in the back of a single vehicle.


4 types of vehicles can hold 6 rucksacks:
  • Pickup Truck
  • Army Pickup Truck
  • SUV
  • Police Cruiser
Just fill up any of these vehicles' trunks with 6 resource (material, ammunition, medicine, food etc.) rucksacks. Just remember that you can only have 10 (looted/spawned) rucksacks in the world at any given time. Either in the trunk(s), on your character, or on the ground. If you pick up any more they get despawned and go to waste.
Lifeline - Alternate Endings (4)
The Operator
Brought Eldridge to Black Friday, but he won't leave.


Sasquatch is technically a HVA but his story missions lead to the alternate ending choices. He will butt into your radio comms as you progress your main storyline. Reinforce his ass to get the achievement.

Freak Hunt
Complete all hunting missions with Sasquatch.


For this achievement you need to complete the 4 Freak Hunt missions that Sasquatch will propose
  • Bloater - kill with headshot
  • Feral - kill with edged weapon
  • Screamer - kill with fire
  • Juggernaut - kill with melee
An easy way to kill the Juggernaut is to use a grenade on it to stagger it and cut its HP in half. After it's staggered just keep smacking it with melee hits. If Sasquatch kills it, you'll have to find another Juggernaut and repeat the process. Be careful since Sasquatch probably has the weakest and dumbest AI from my experience.

These last 2 achievements are the 2 alternate endings to State of Decay Lifeline. it goes without saying that they are mutually exclusive. I understand that there's a save manager and that it's possible to manually back up your save to just before the choice is made. Unfortunately, I couldn't get it to work despite reading the guides and I ended up wiping my file so I will not be talking about it here. If anyone can provide a detailed explanation on how to do this, I would be happy to add it to the guide.

War Never Changes
Survive detonating a nuclear device in Danforth.


Sometime after you progress the HVA missions and Freak Hunts (whether you skipped it or not), Sasquatch will go missing. He'll turn up in that underground area with an armed nuke. After this you'll have the option of triggering the nuke by talking to him in the base. Once you choose this option, just complete the final extraction(and siege) with Sasquatch alive and the cutscene will trigger along with the achievement.

Last Voice of Danforth
Escape Danforth with Vienna Cho in your community.


I personally believe that this is the true ending to Lifeline. All you have to do to get Vienna Cho to join your community is successfully save all of the stranded callers. The number of callers you have to save is random but she will call for her own extraction sometime after you rescue the last HVA. After you extract her, avoid getting any of your community members killed at all costs! If someone dies, she will flee the community because she does not feel safe.

If you also have Sasquatch in your community, you will have the option of defusing the armed nuke with the help of this electrical engineering dropout. After successfully defusing the nuke, simply complete the final extraction (and siege) with her still alive and a lengthy and hopeful dialogue will play. I love this ending!

Outro
Thanks for reading up to here! I learned quite a bit after playing this game a second time so I decided to write the achievement guide with more detail based on what I know now. I hope you enjoyed hunting for this trophy and I hope you found my guide useful! I can confidently say that it's better than the older guide I wrote for this game. If you want an extra reference while reading this guide, feel free to check out my older guide (and maybe my other guides as well).
https://steamcommunity.com/sharedfiles/filedetails/?id=183861585
20 Comments
FALL1N1 Mar 28 @ 5:27am 
Is it hard to get all of the achievements for this game?
Dezerae Jan 9 @ 4:47am 
danke, will be using soon
Godzilly ^~^ Dec 11, 2023 @ 4:25pm 
ok so i solved it, well sort of, it wasnt a glitch, its just that you need to go into camp menu thing and press the radio place and select start extraction or whatever which basically makes you get out of there, the nuke thing just immediately extracted you next siege, the vienna cho extraction didnt, so you needed to extract yourself manually. what you can do is, after you get cho, just immediately do the manual extraction when you feel you done what you want, then after do the upcoming siege and well done. you can get sasquatch and disarm before manually extracting.
Godzilly ^~^ Dec 11, 2023 @ 2:19pm 
weird, i had her in community, no one died and i disarmed the nuke, and did the extraction and siege and no one died, she was still in the community and nothing happend, i think there was a dialogue but nothing happend and didnt get the achievments
Godzilly ^~^ Dec 10, 2023 @ 6:54pm 
Lifeline - for the alternative ending vienna chos, your not REQUIRED to get every single civilian thats called in, i accidentally missed a few thinking i had more time. but i still got her in my crew, you probably need to save a few people in a row a few times.
GGLoner Oct 8, 2023 @ 2:17am 
For everyone trying to get The Killer / Mercy Shot, a possibly quicker alternative is the George Romero Mod on NexusMods.
You can extract the 'Sick World' mod which lets you start with 5 survivors (including Lily) and they all have Black Plague.
Jedo  [author] Sep 18, 2023 @ 12:20pm 
Glad I could help!! :D:
FroZeNpeOn- Sep 18, 2023 @ 11:44am 
great guide man! I love you for this!
zachjd Jul 16, 2023 @ 2:47am 
Great guide.
Zichile Jan 18, 2023 @ 4:31pm 
Home on Grange achievement wasn't acquired when I declined his request :(