
Install Steam
login
|
language
简体中文 (Simplified Chinese)
繁體中文 (Traditional Chinese)
日本語 (Japanese)
한국어 (Korean)
ไทย (Thai)
Български (Bulgarian)
Čeština (Czech)
Dansk (Danish)
Deutsch (German)
Español - España (Spanish - Spain)
Español - Latinoamérica (Spanish - Latin America)
Ελληνικά (Greek)
Français (French)
Italiano (Italian)
Bahasa Indonesia (Indonesian)
Magyar (Hungarian)
Nederlands (Dutch)
Norsk (Norwegian)
Polski (Polish)
Português (Portuguese - Portugal)
Português - Brasil (Portuguese - Brazil)
Română (Romanian)
Русский (Russian)
Suomi (Finnish)
Svenska (Swedish)
Türkçe (Turkish)
Tiếng Việt (Vietnamese)
Українська (Ukrainian)
Report a translation problem


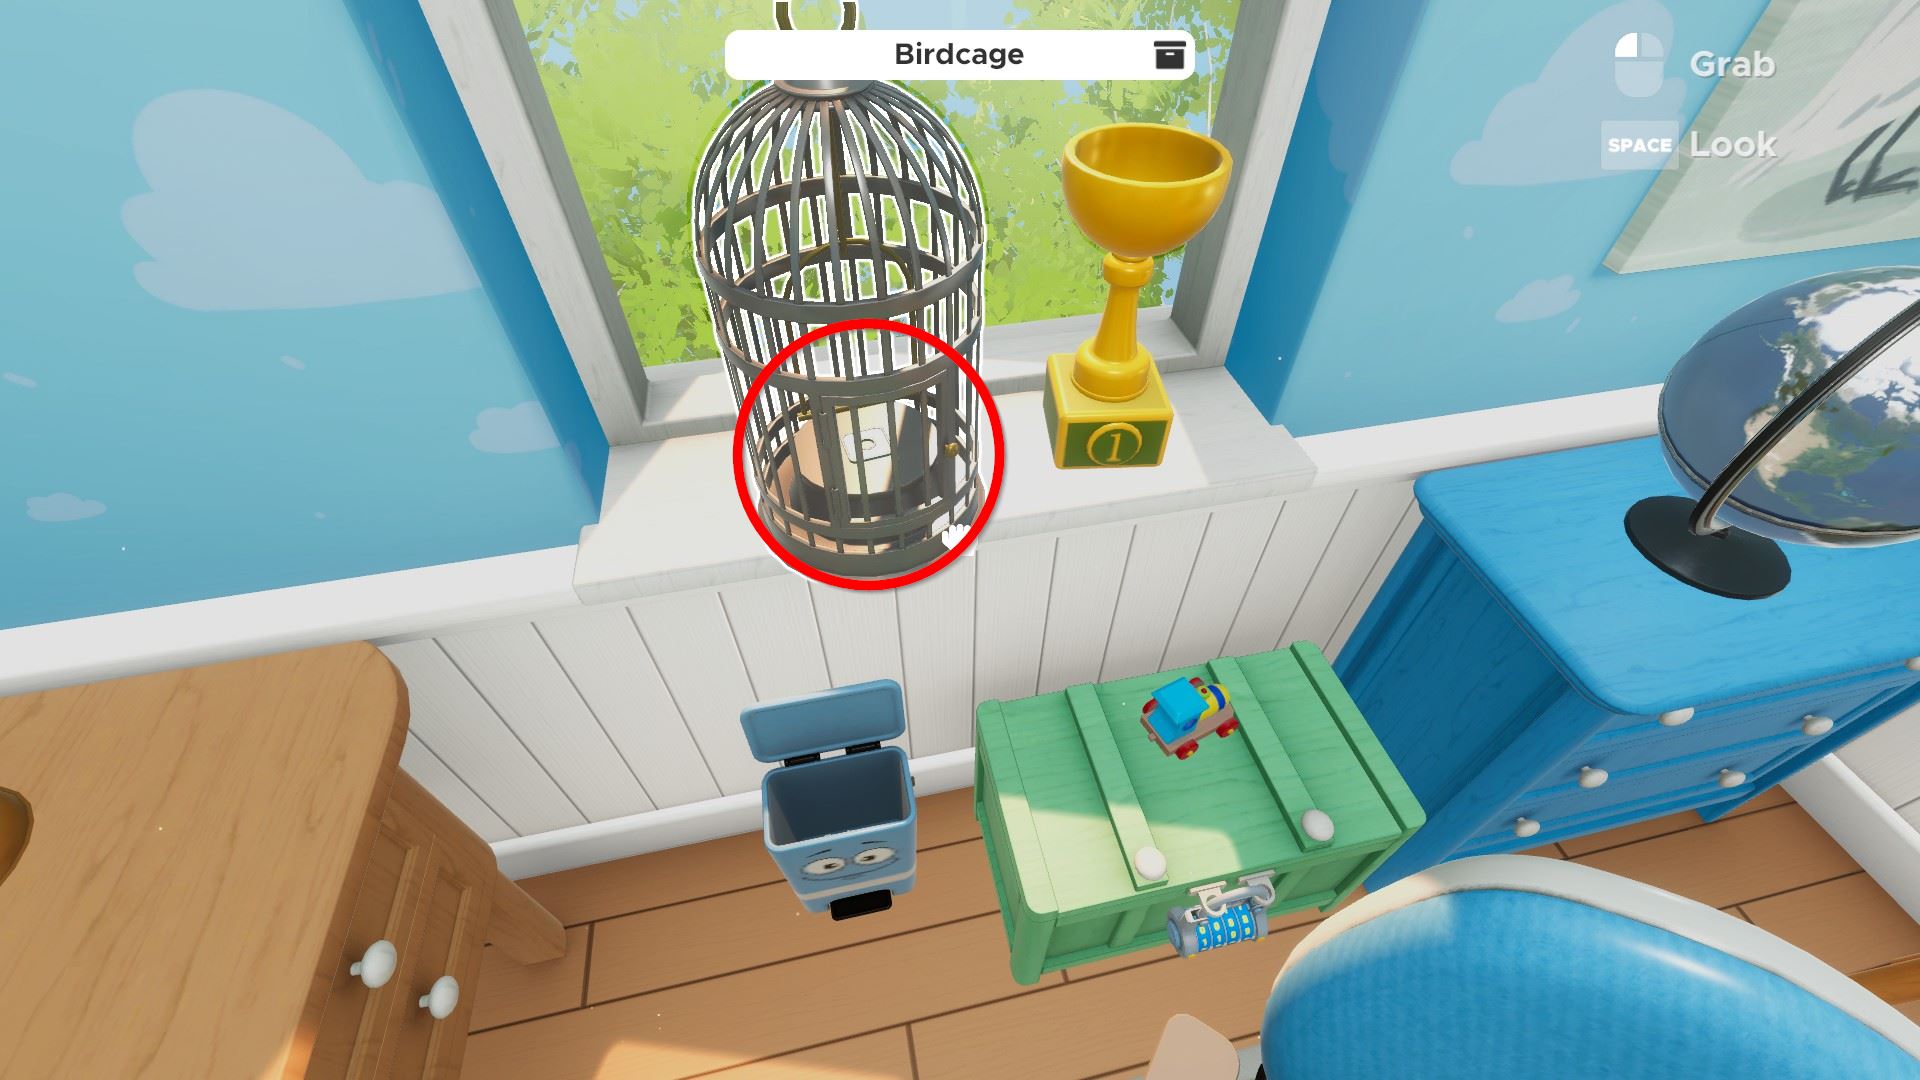

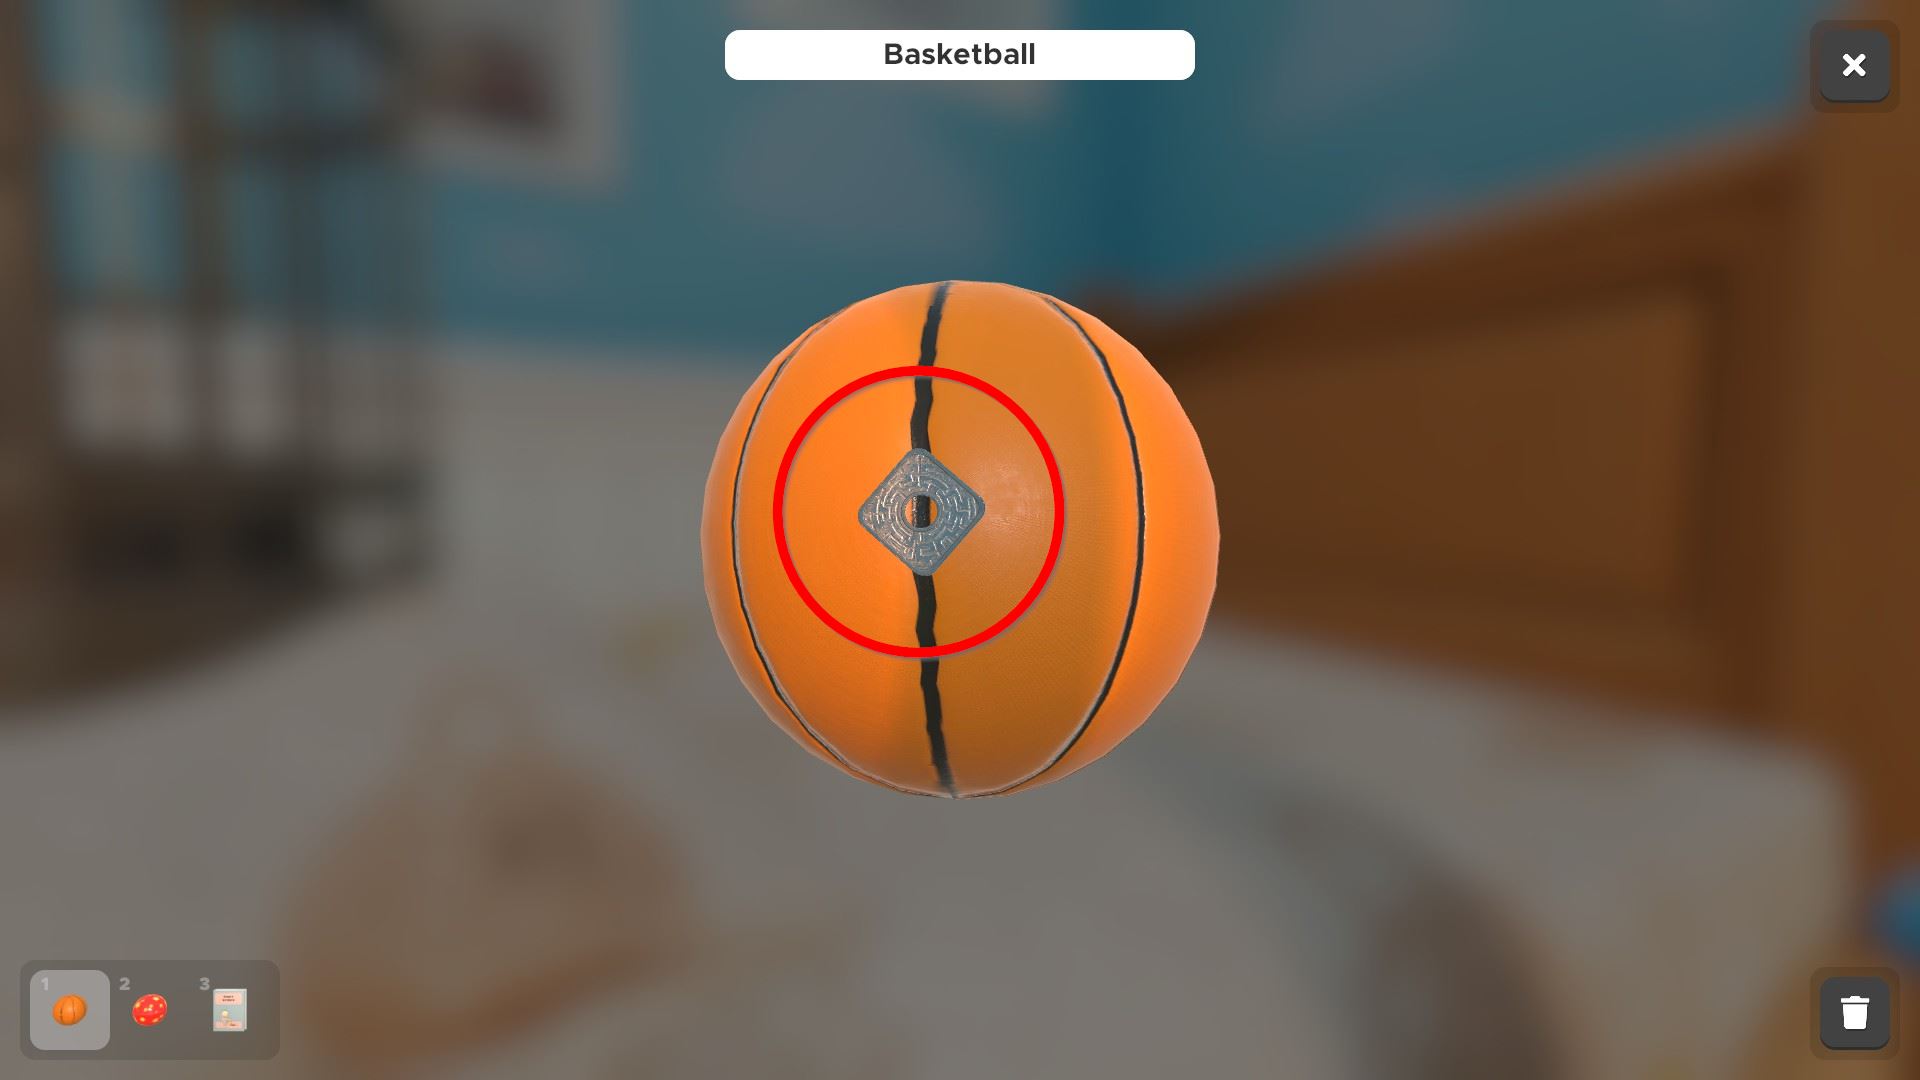


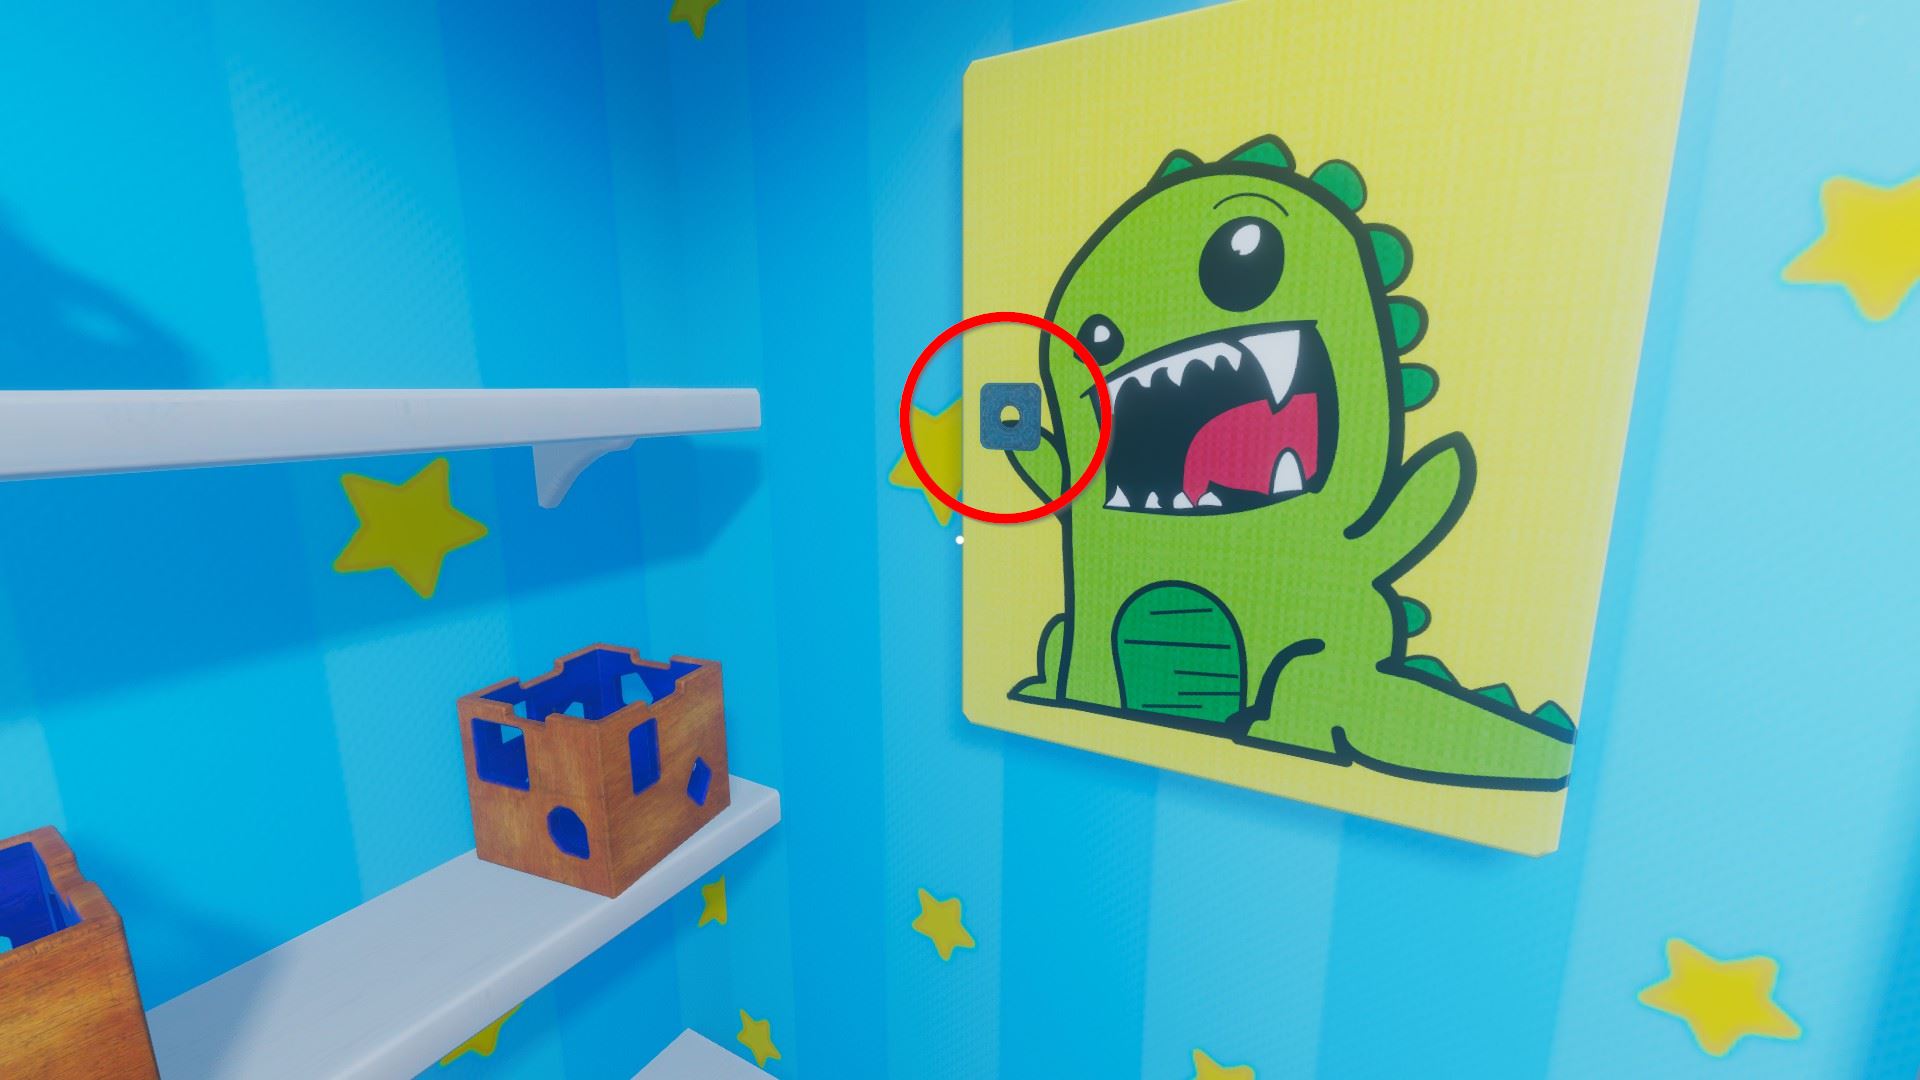

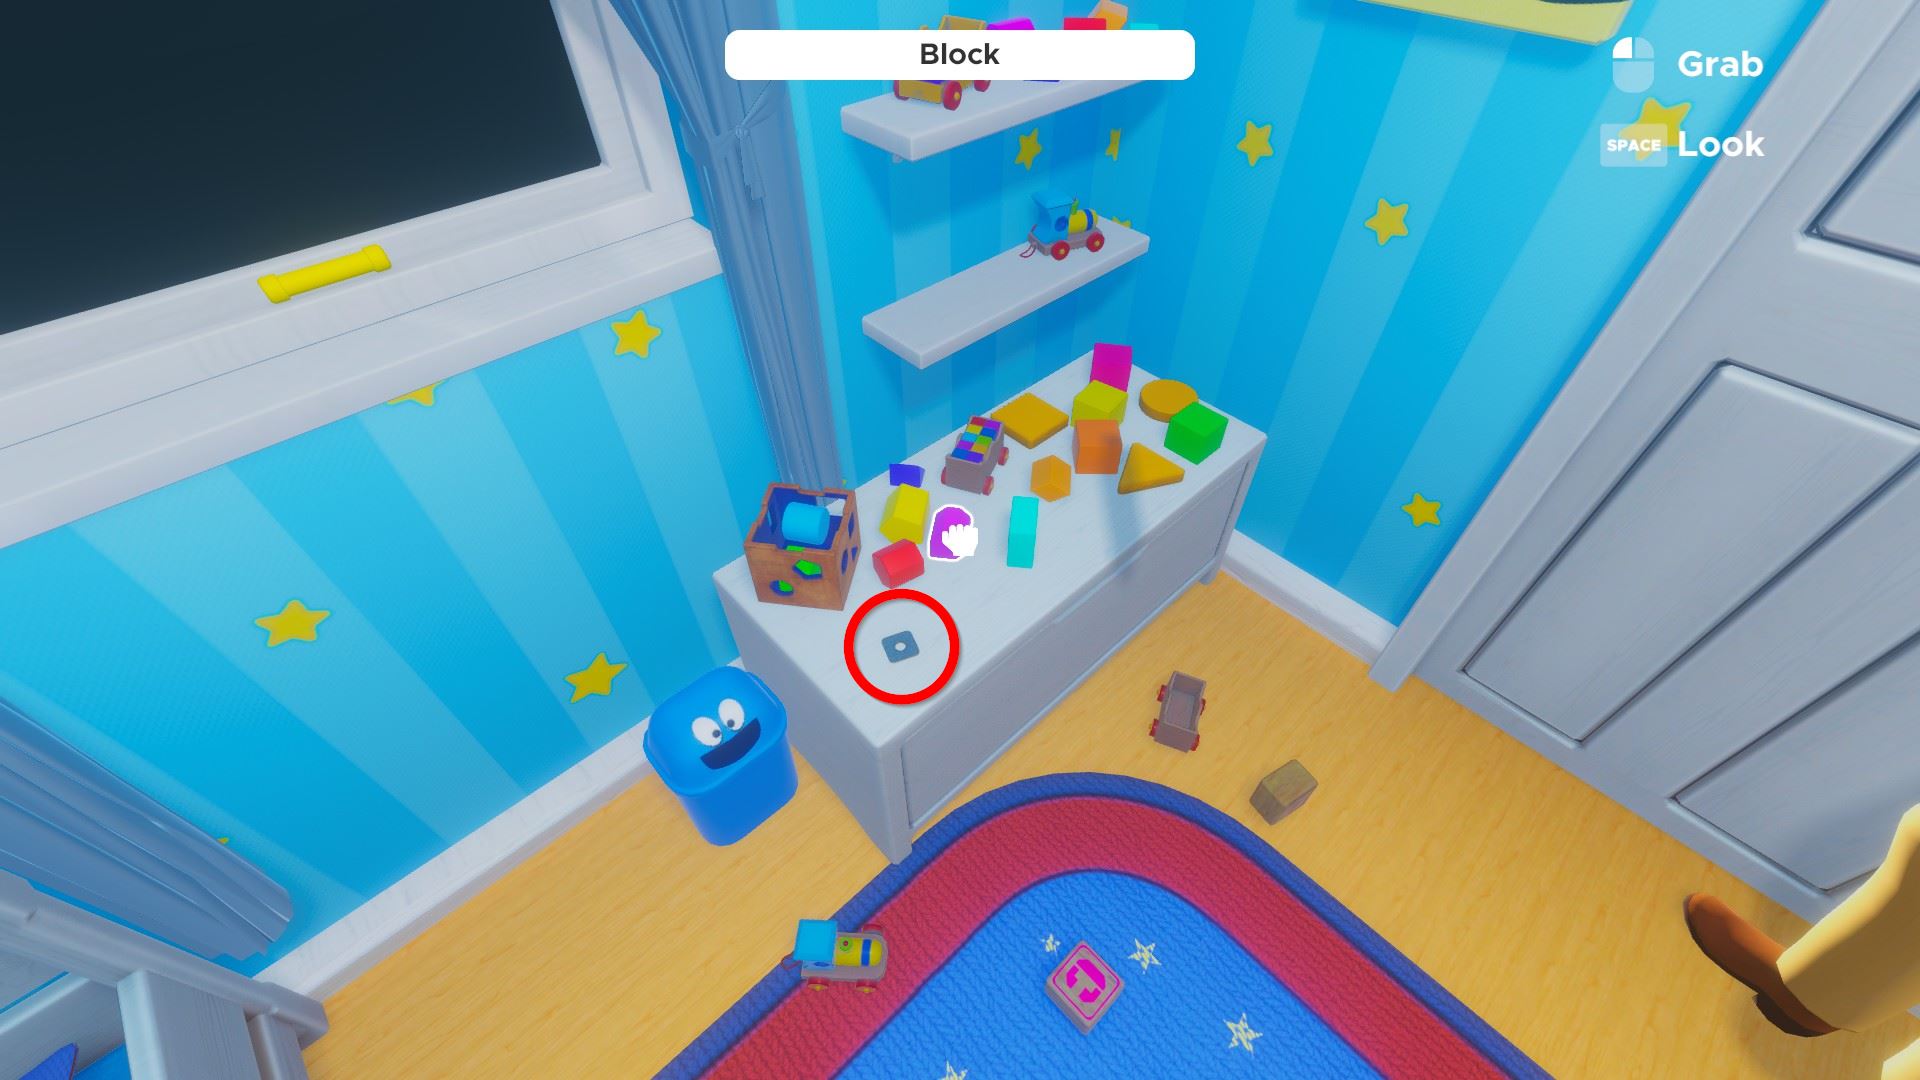
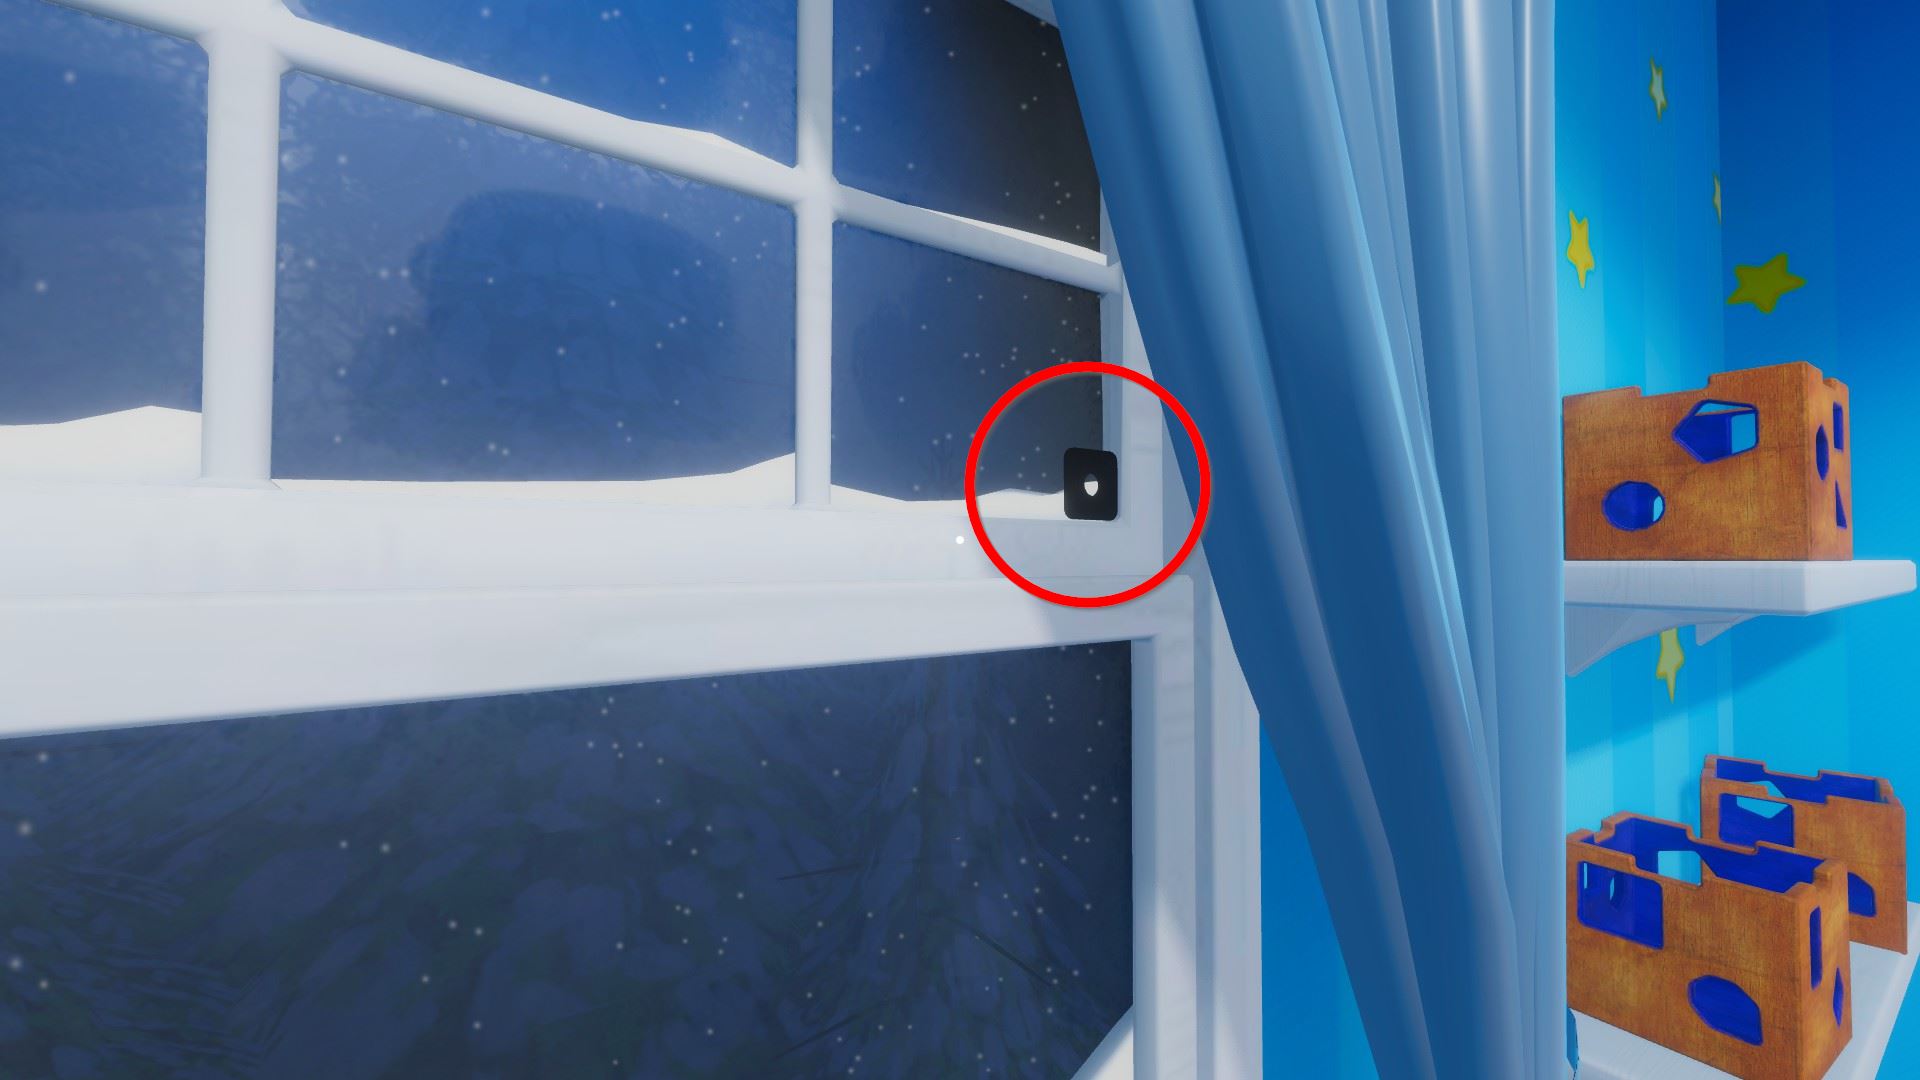


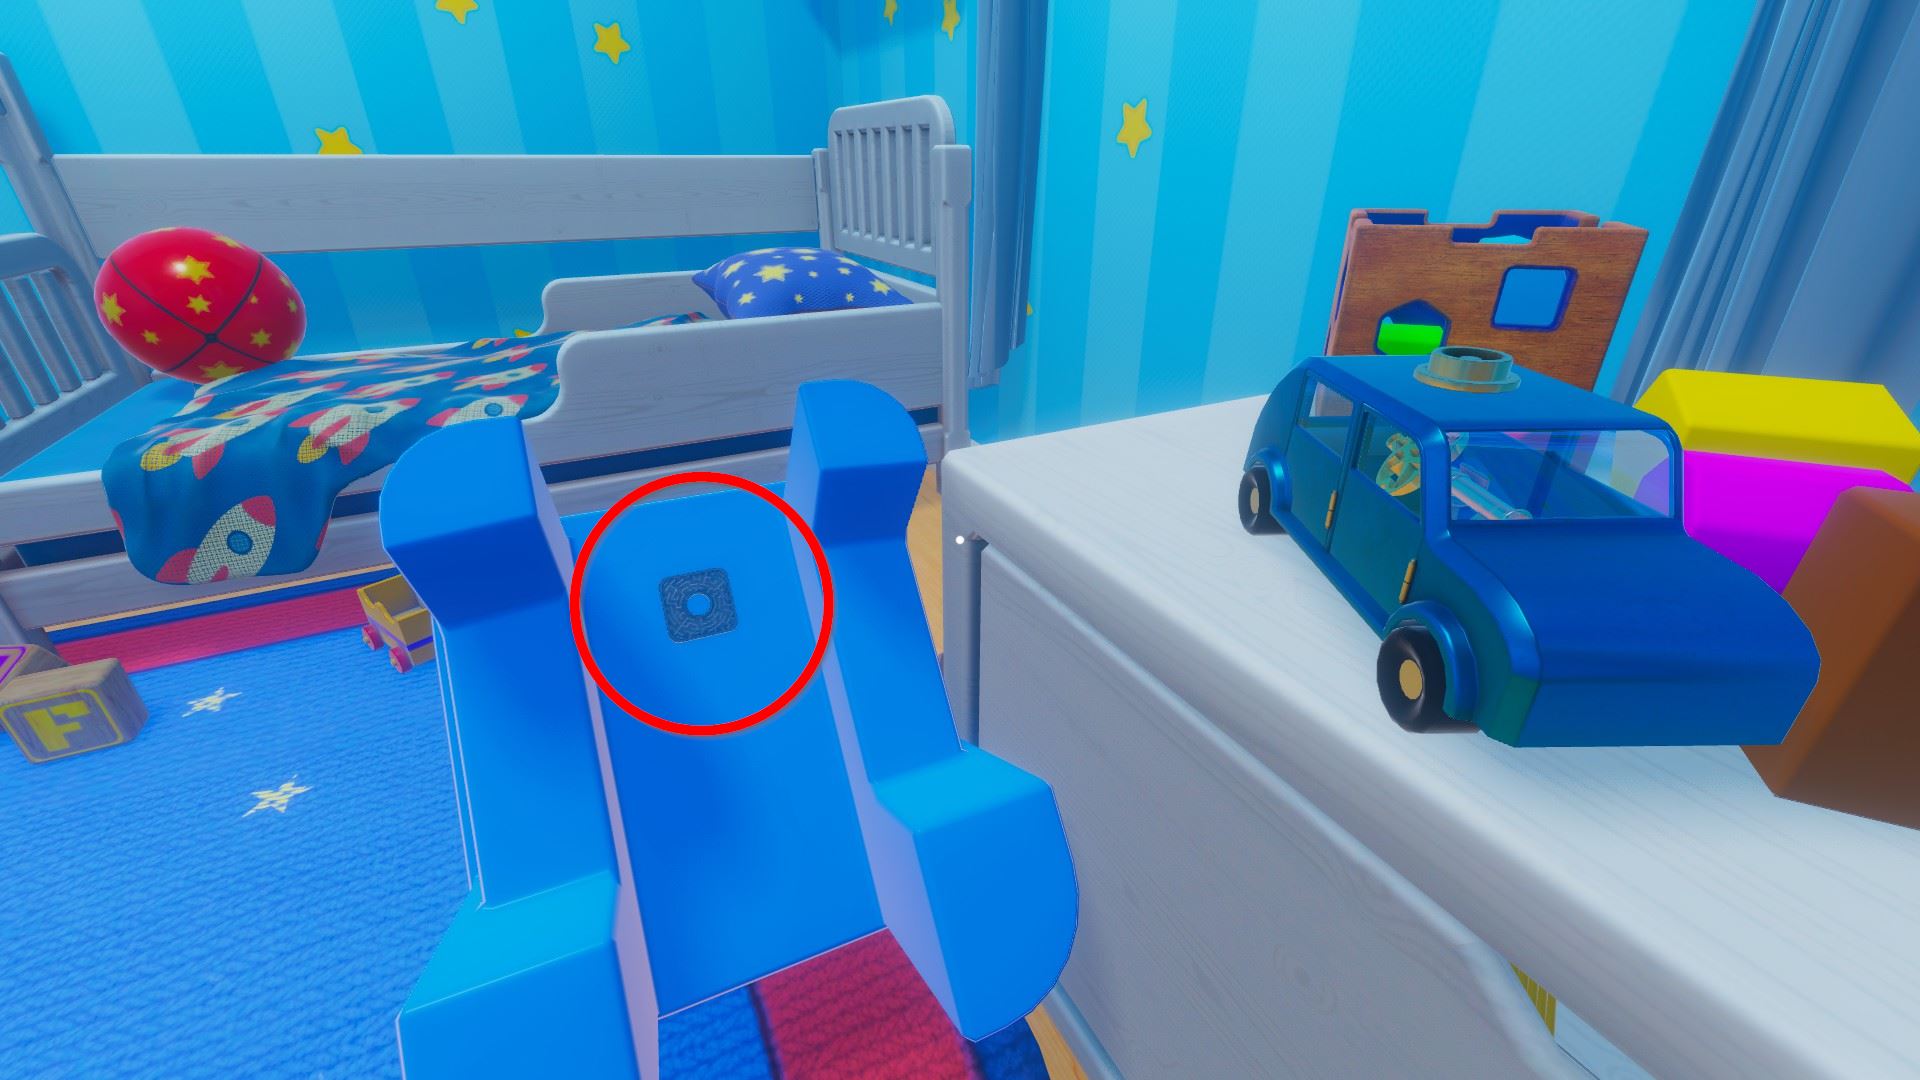
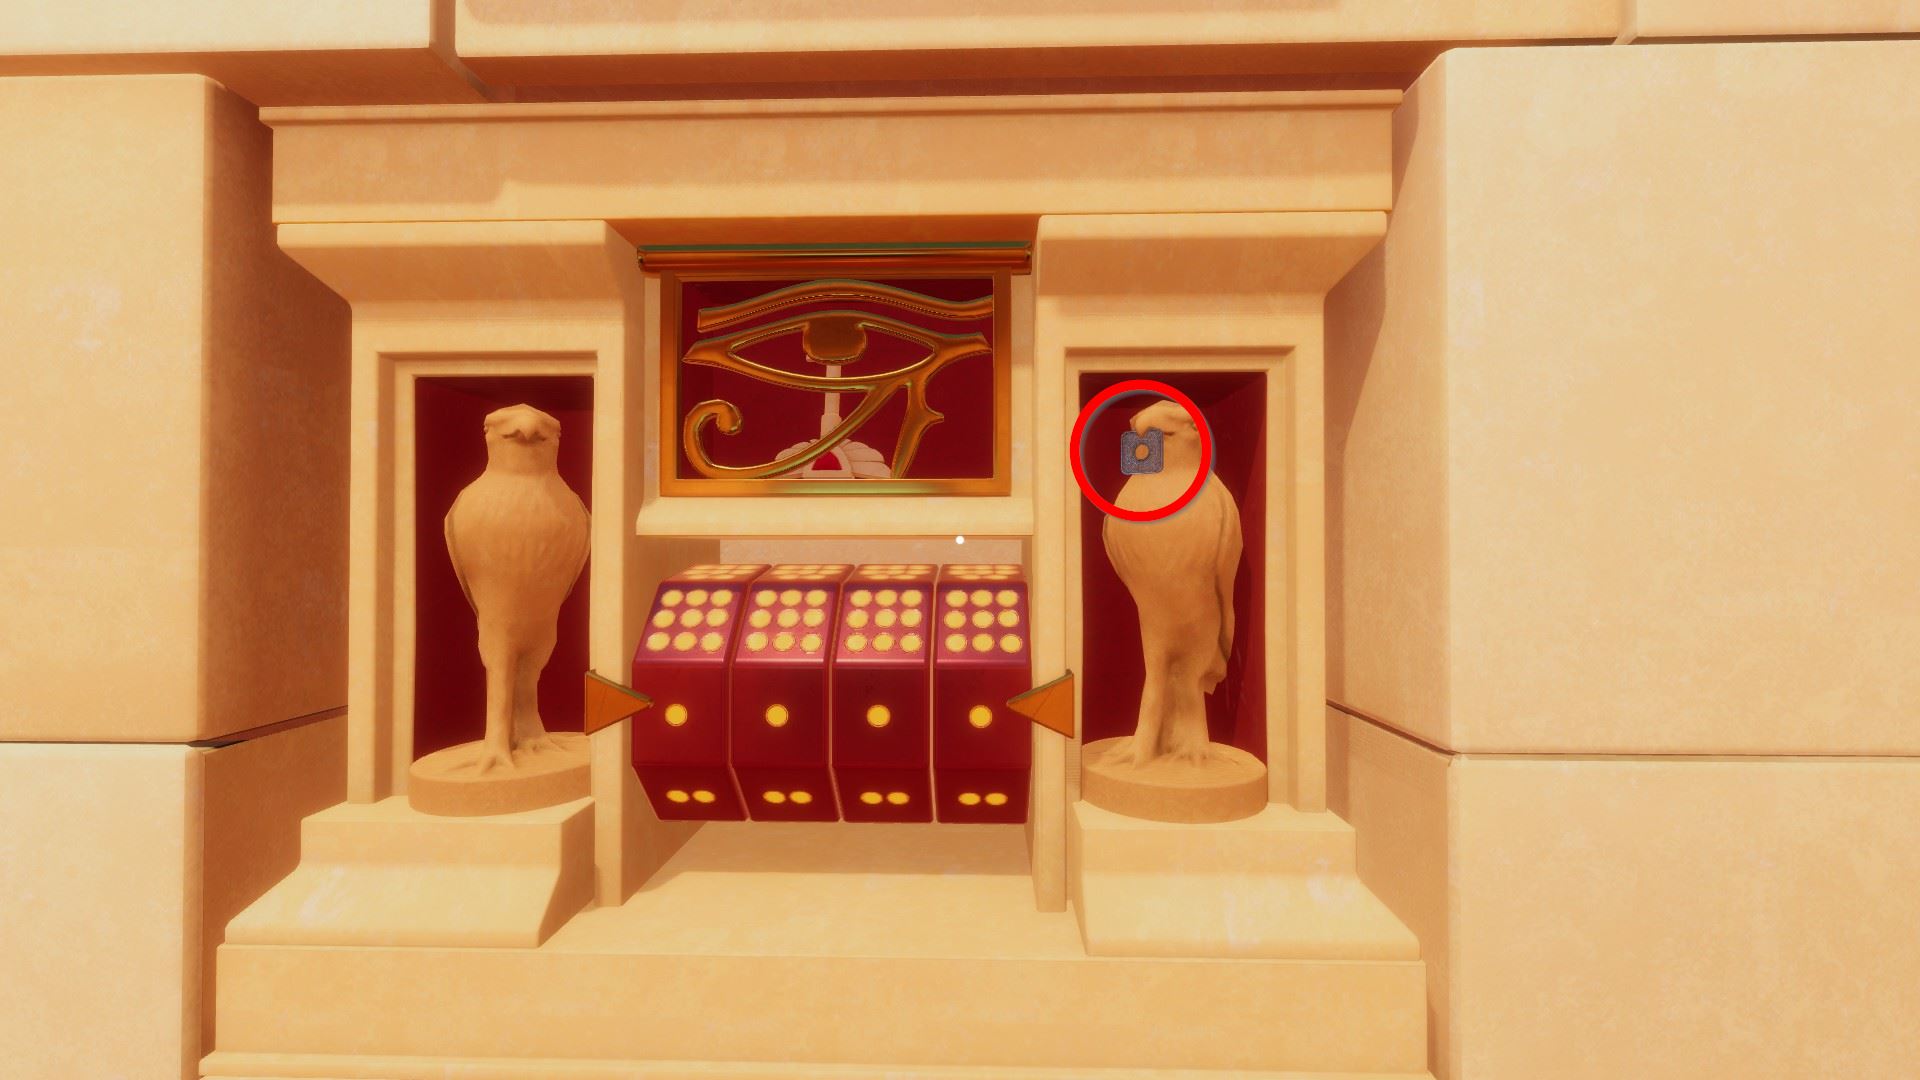
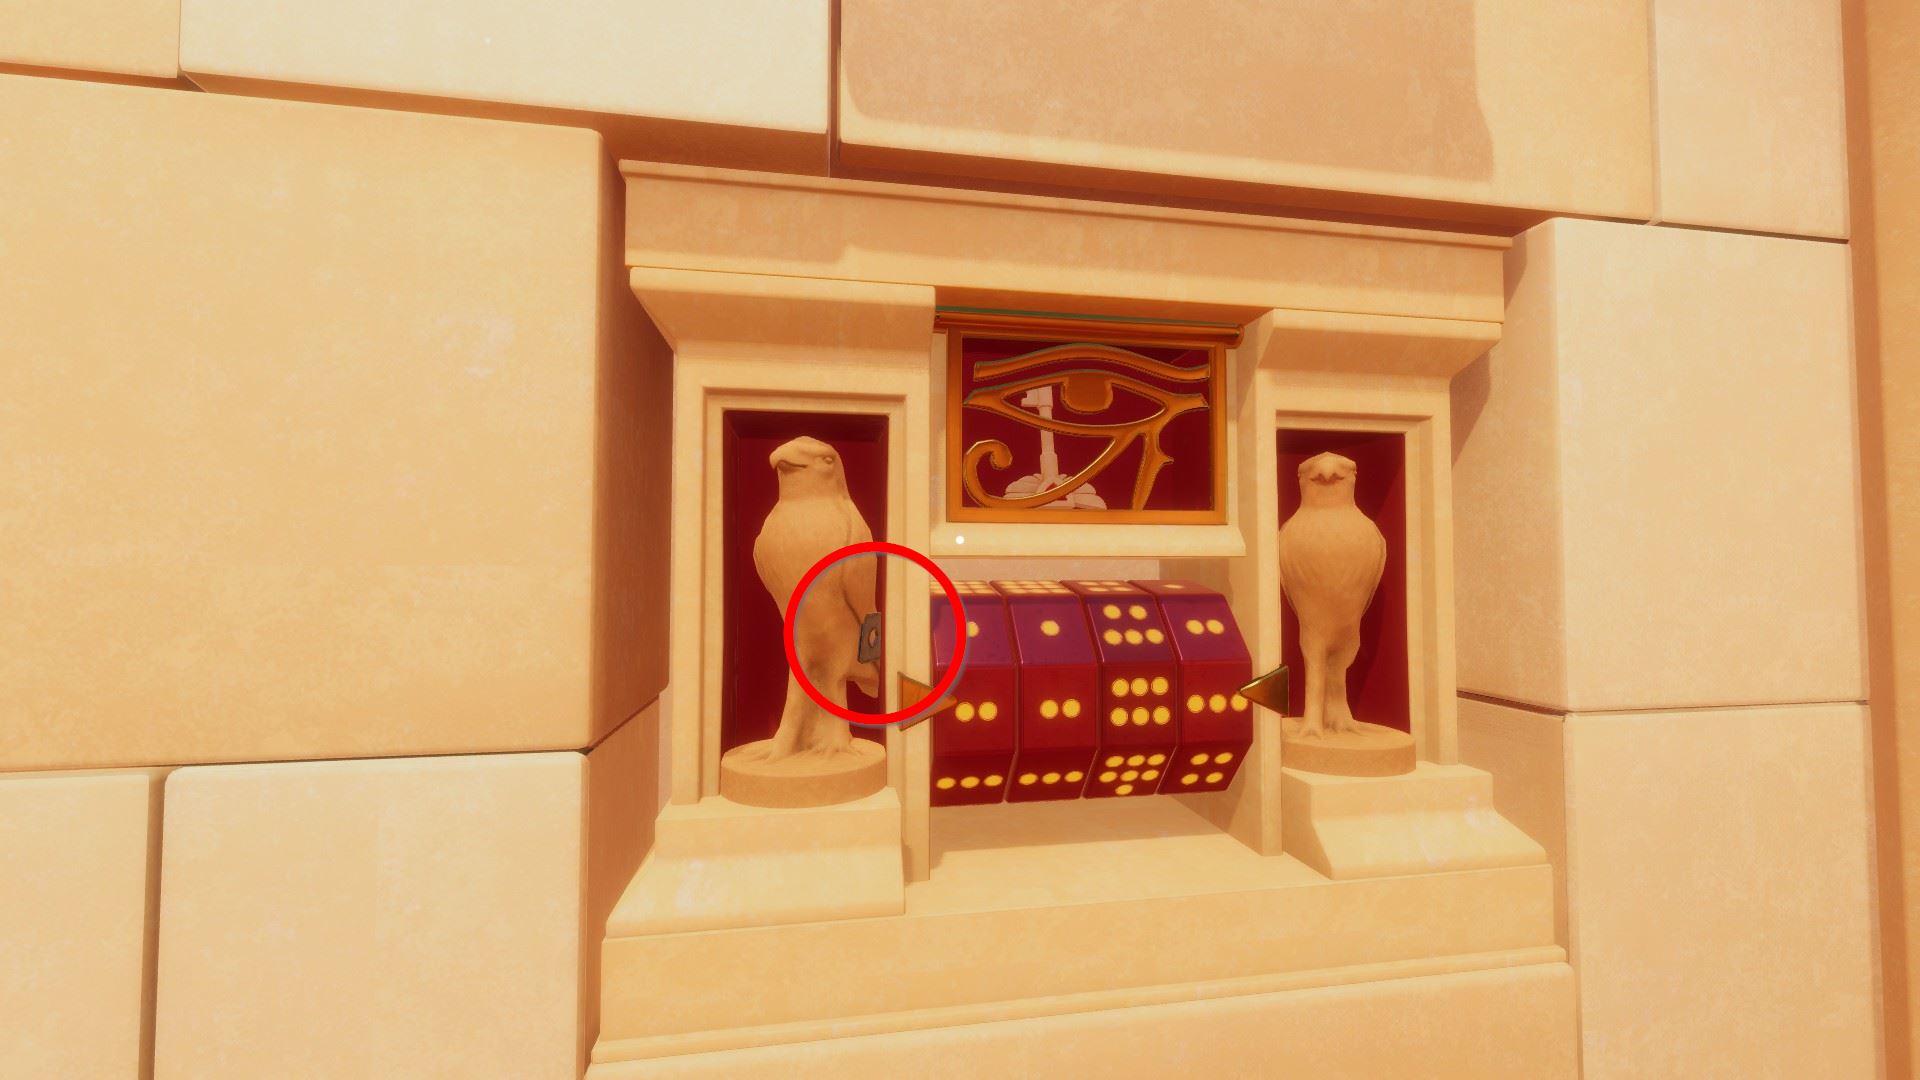

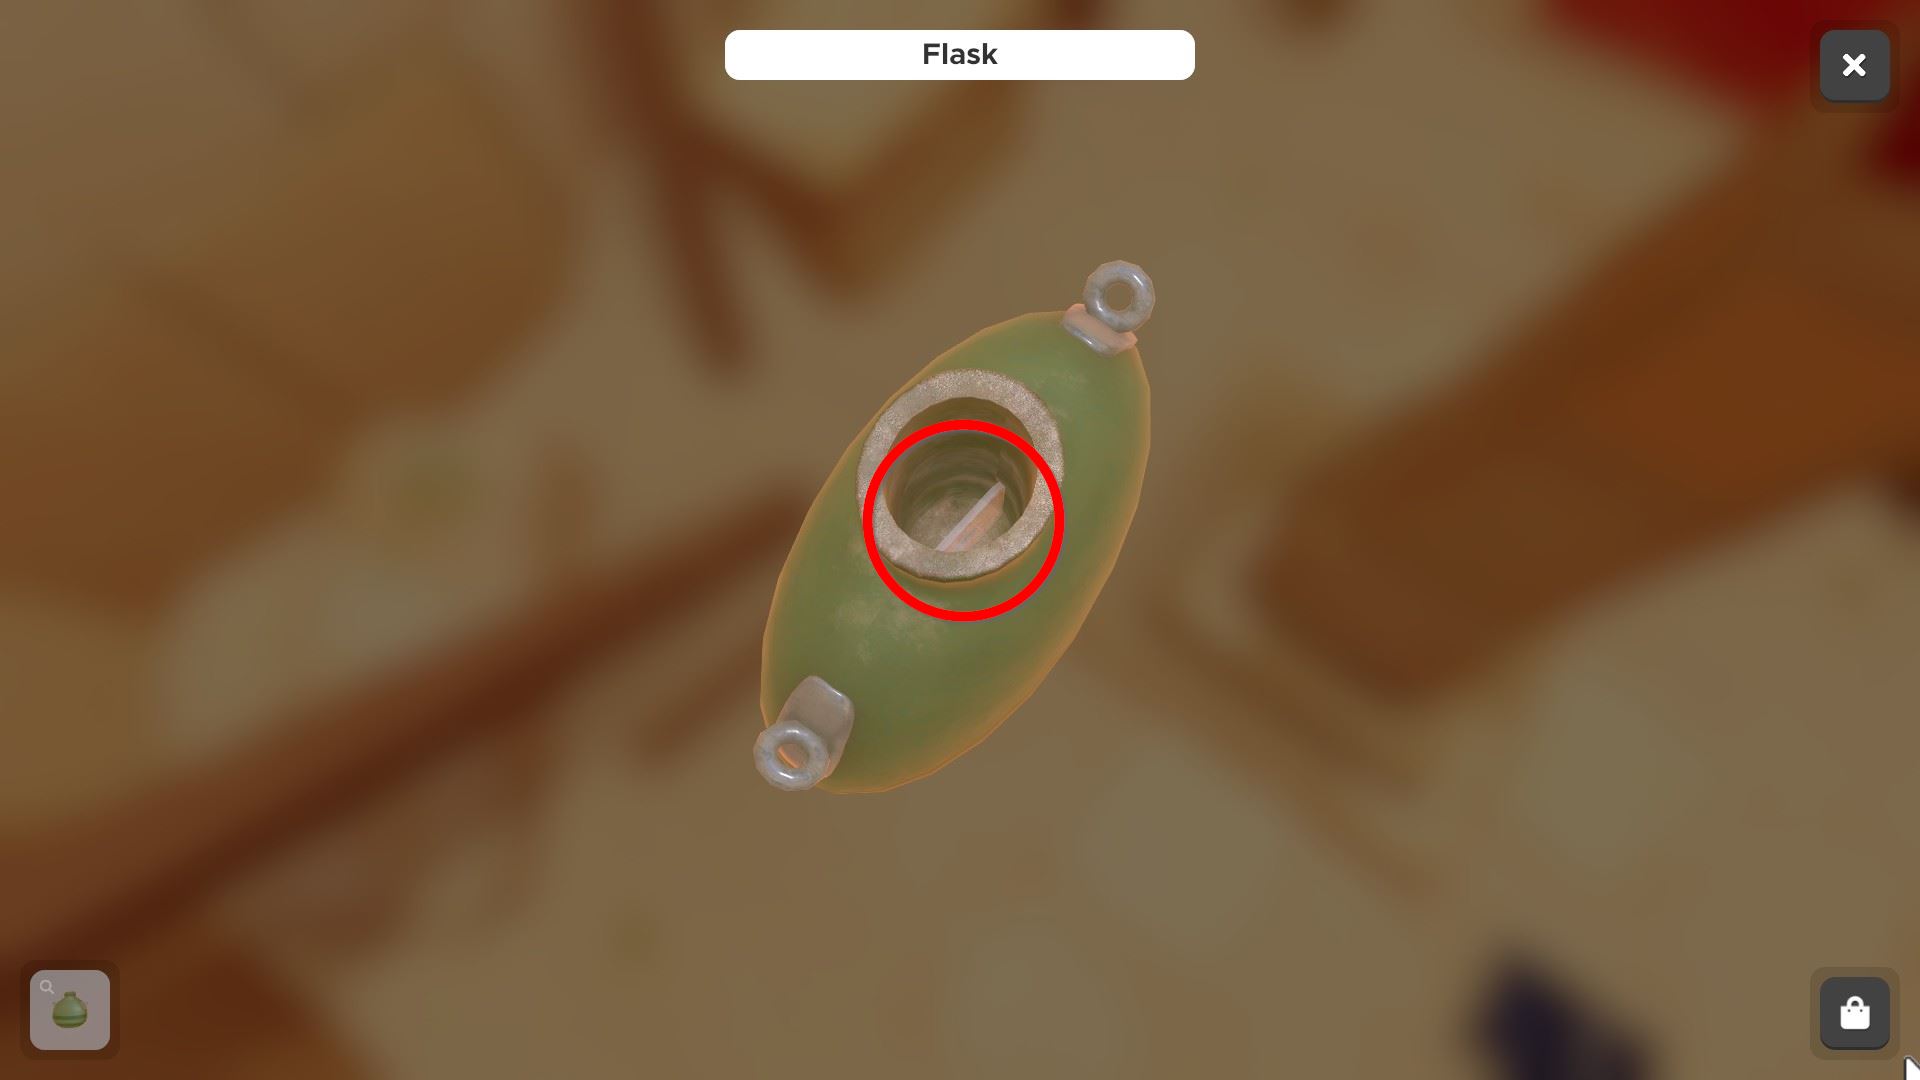
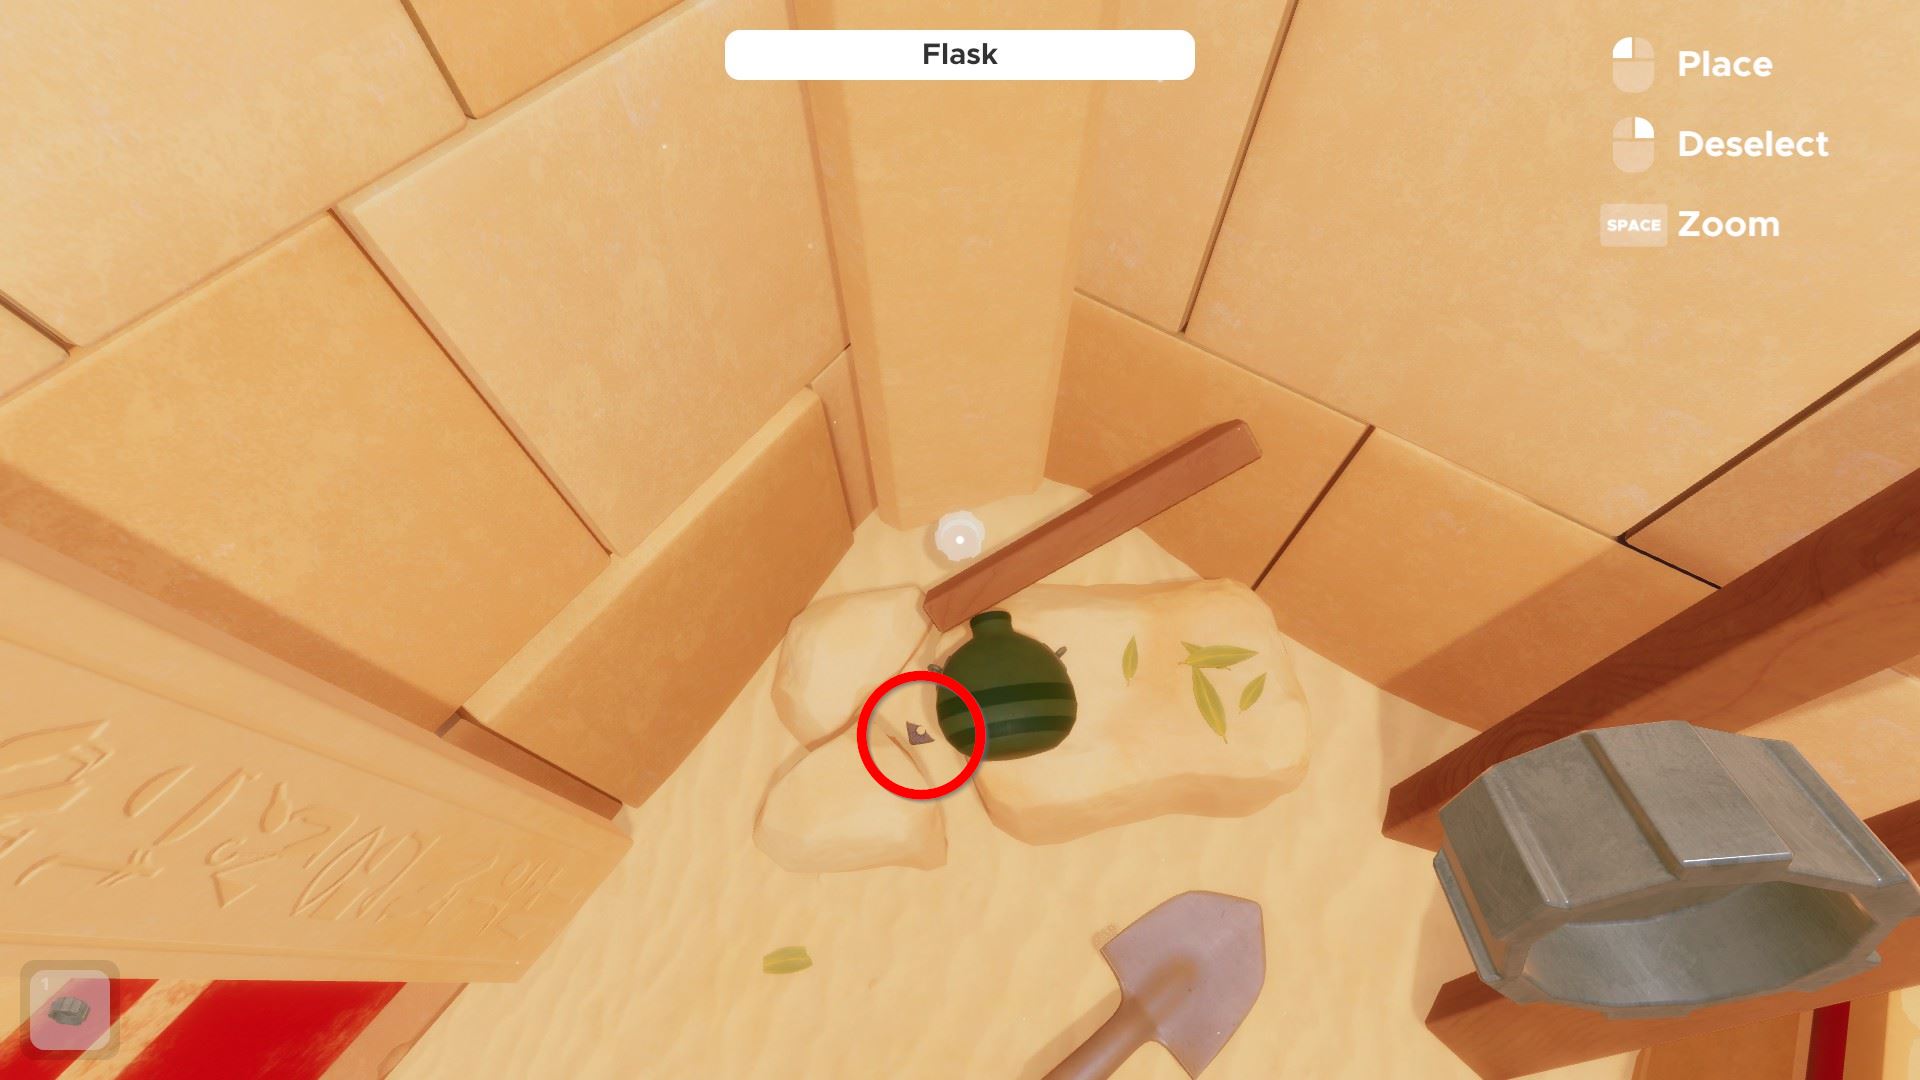
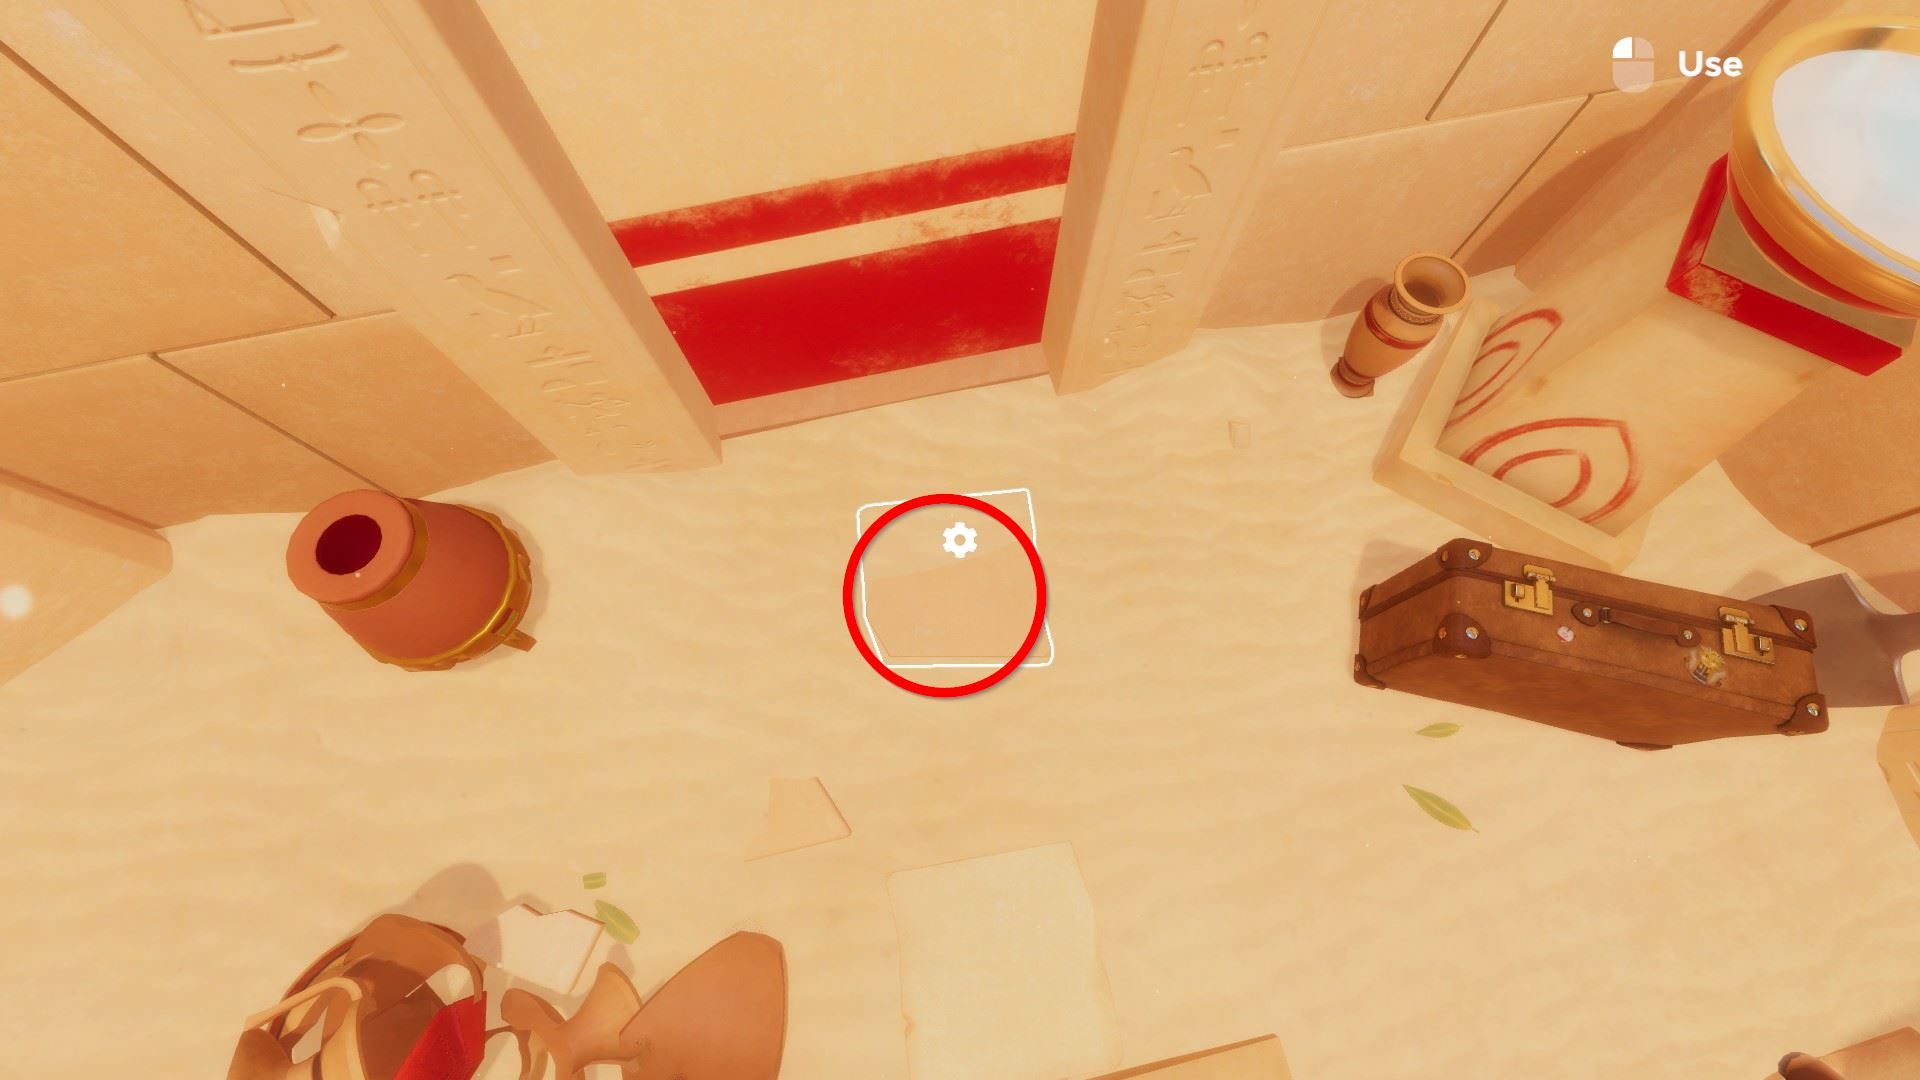
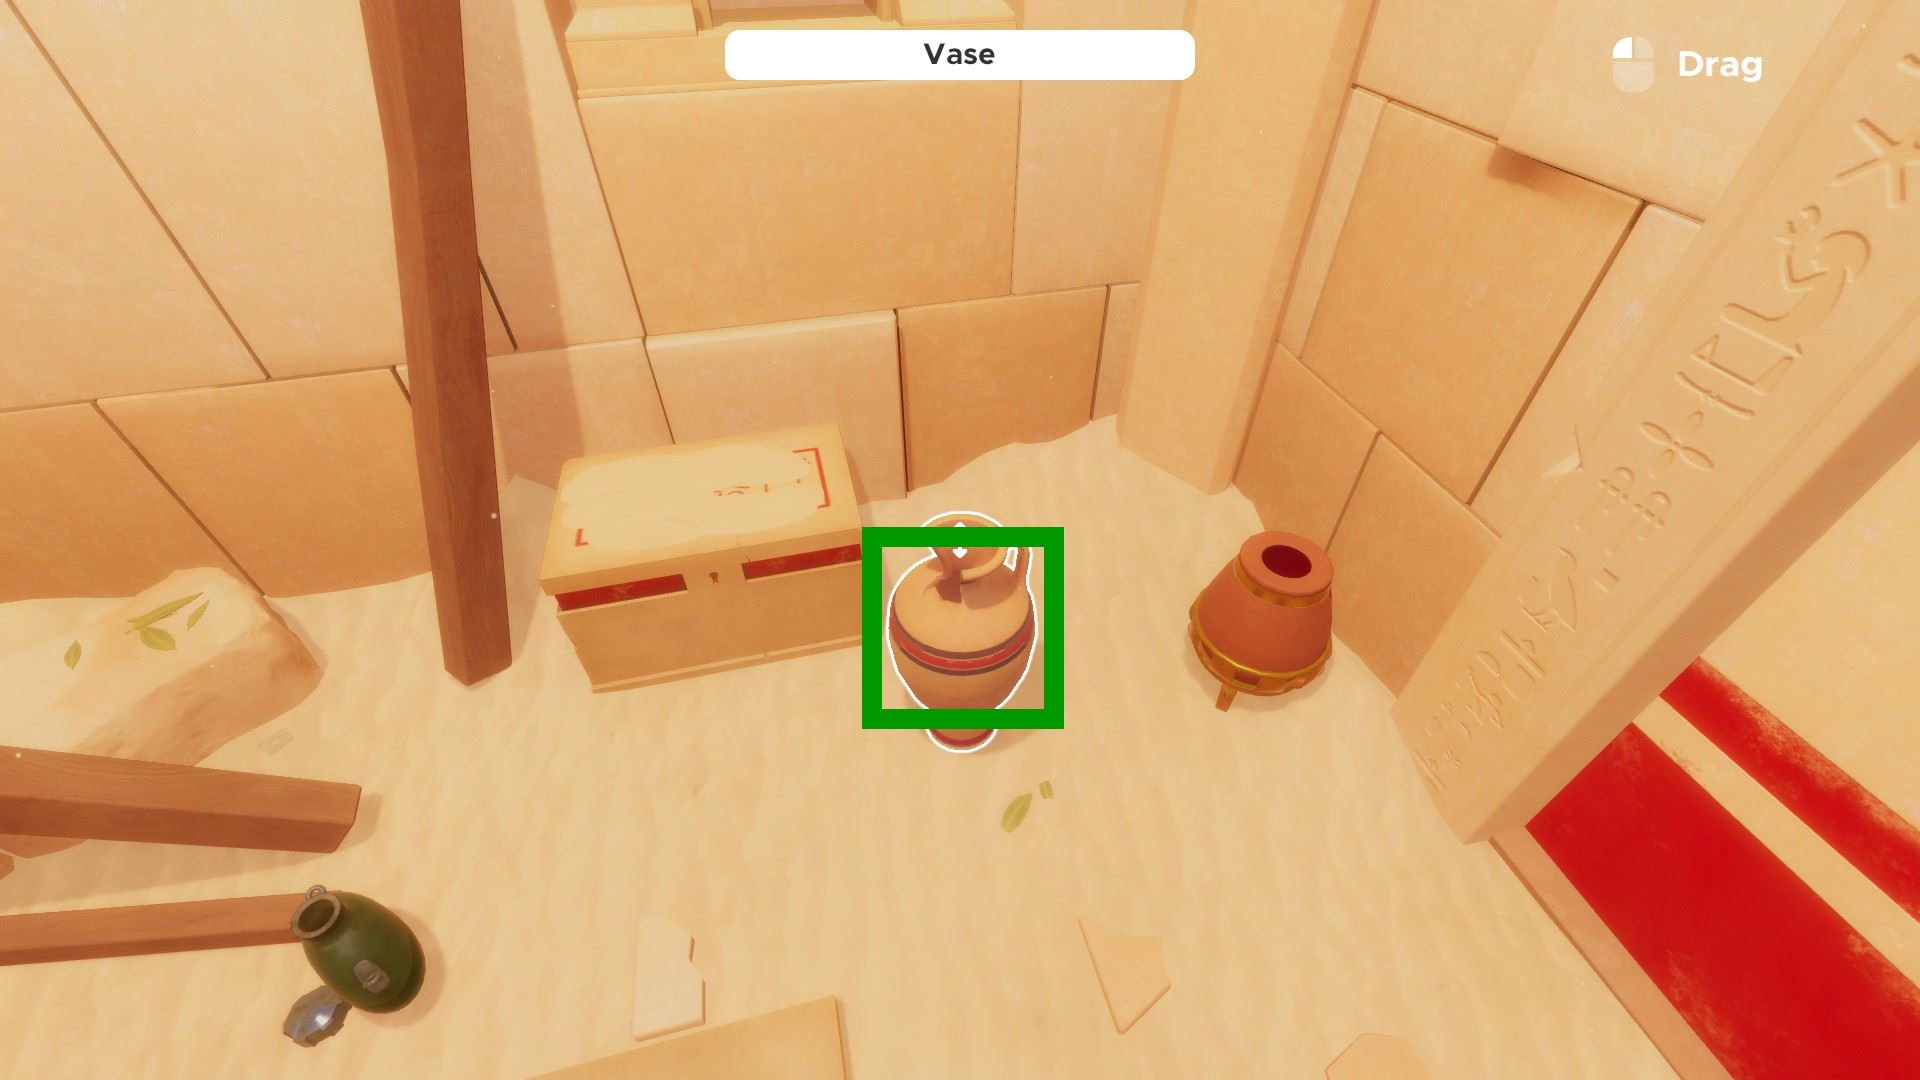
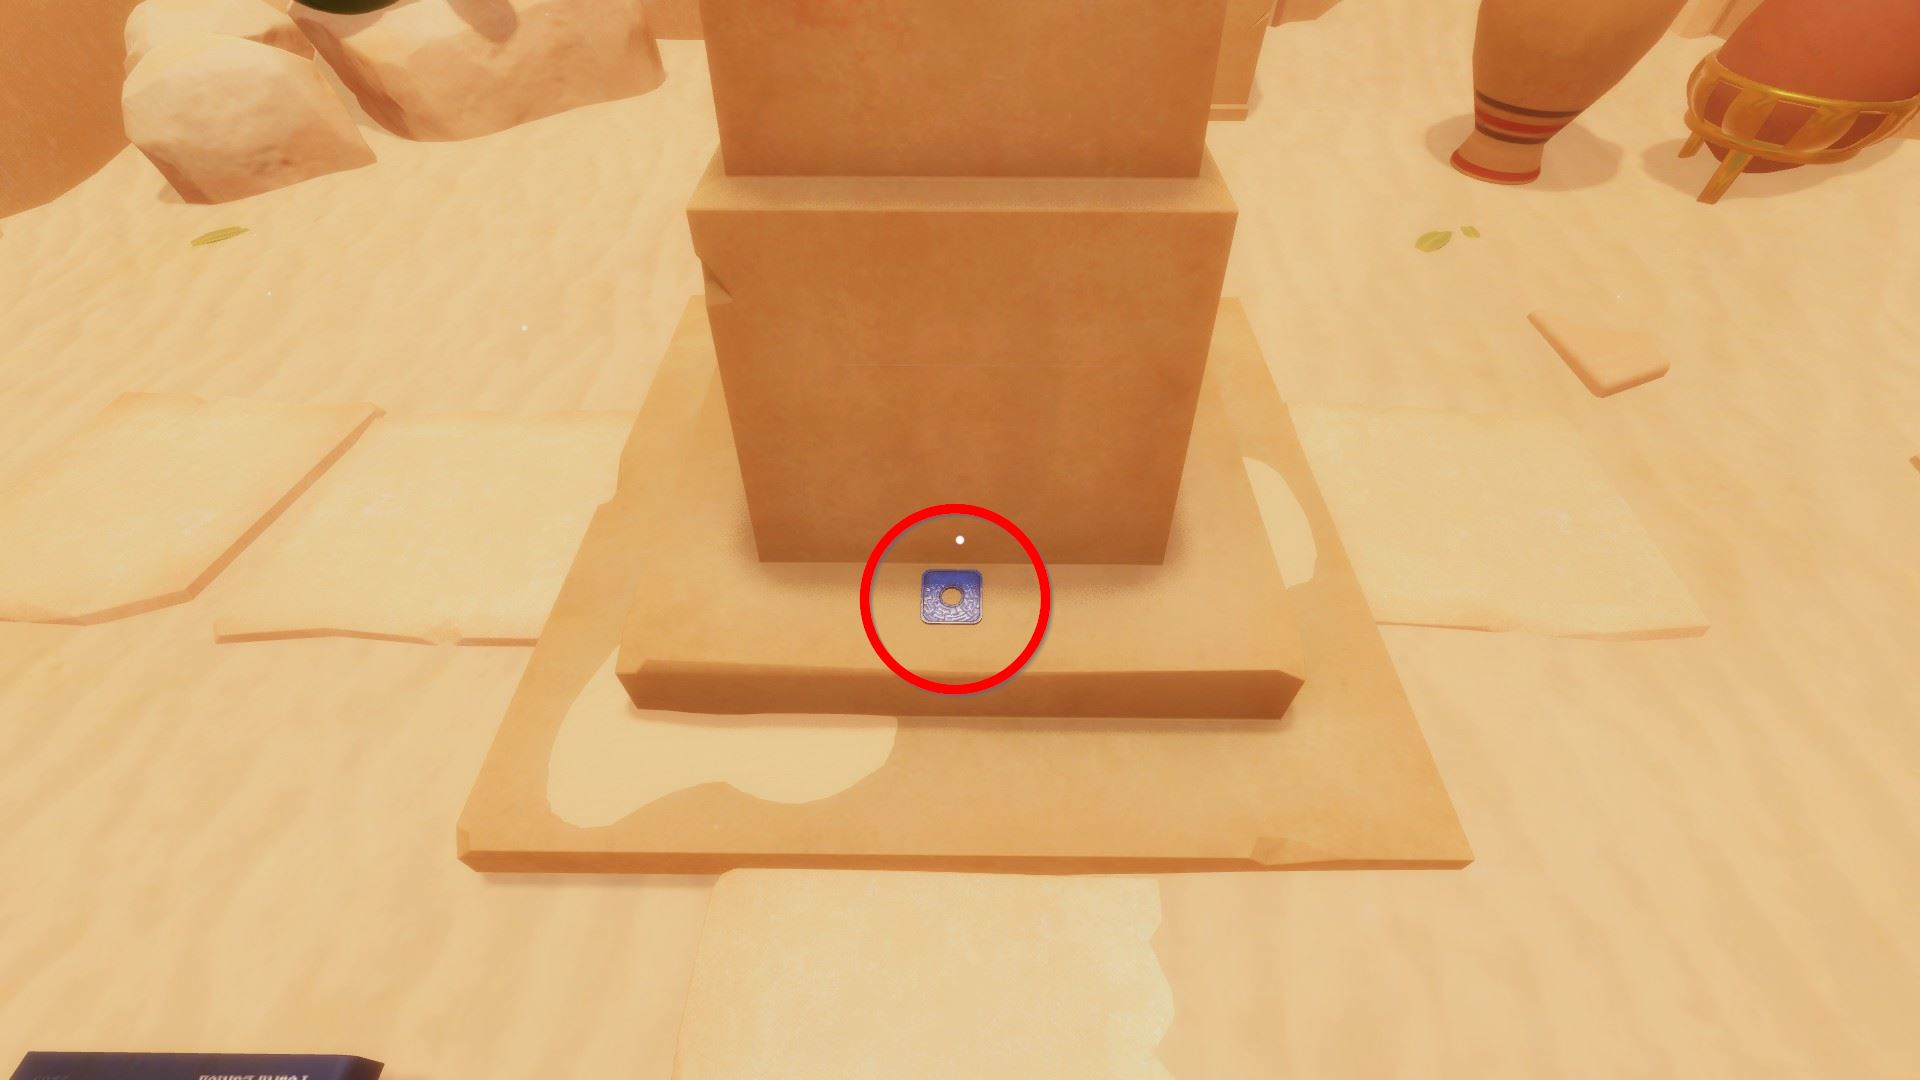
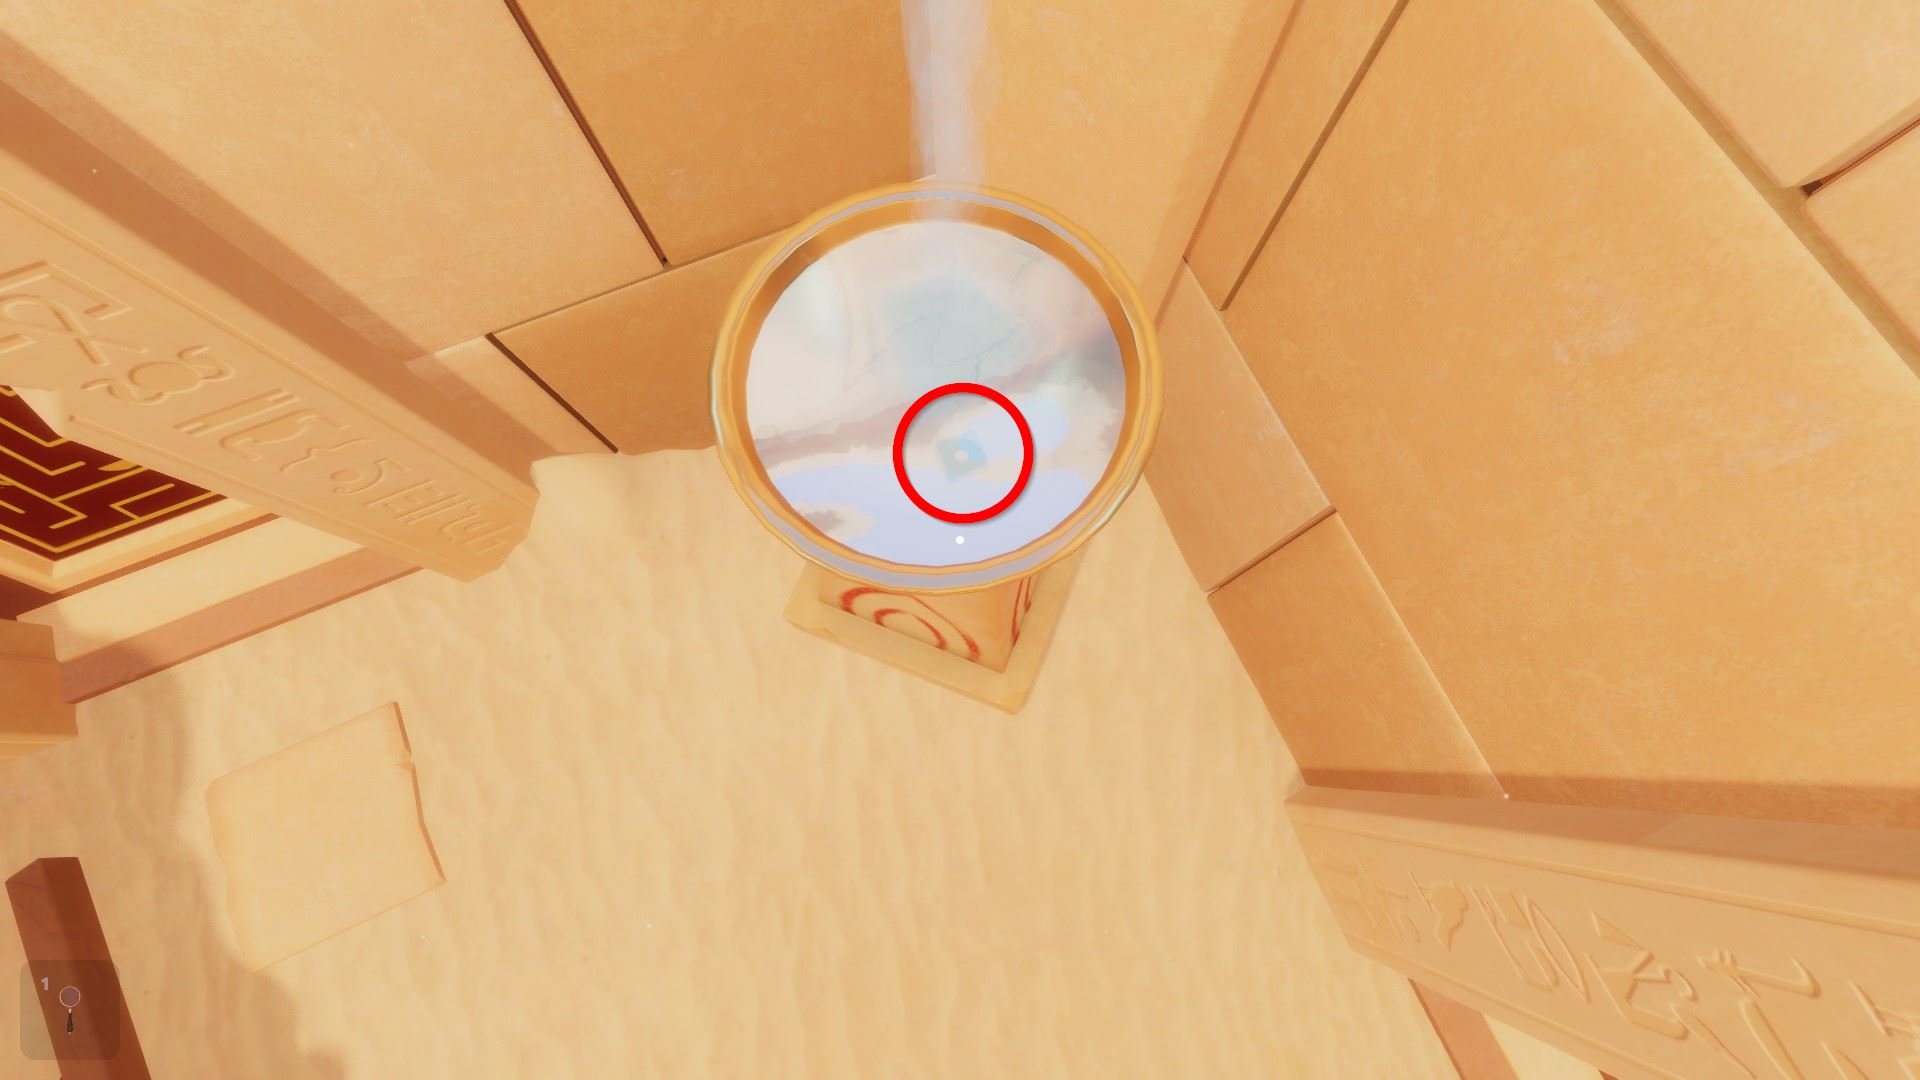
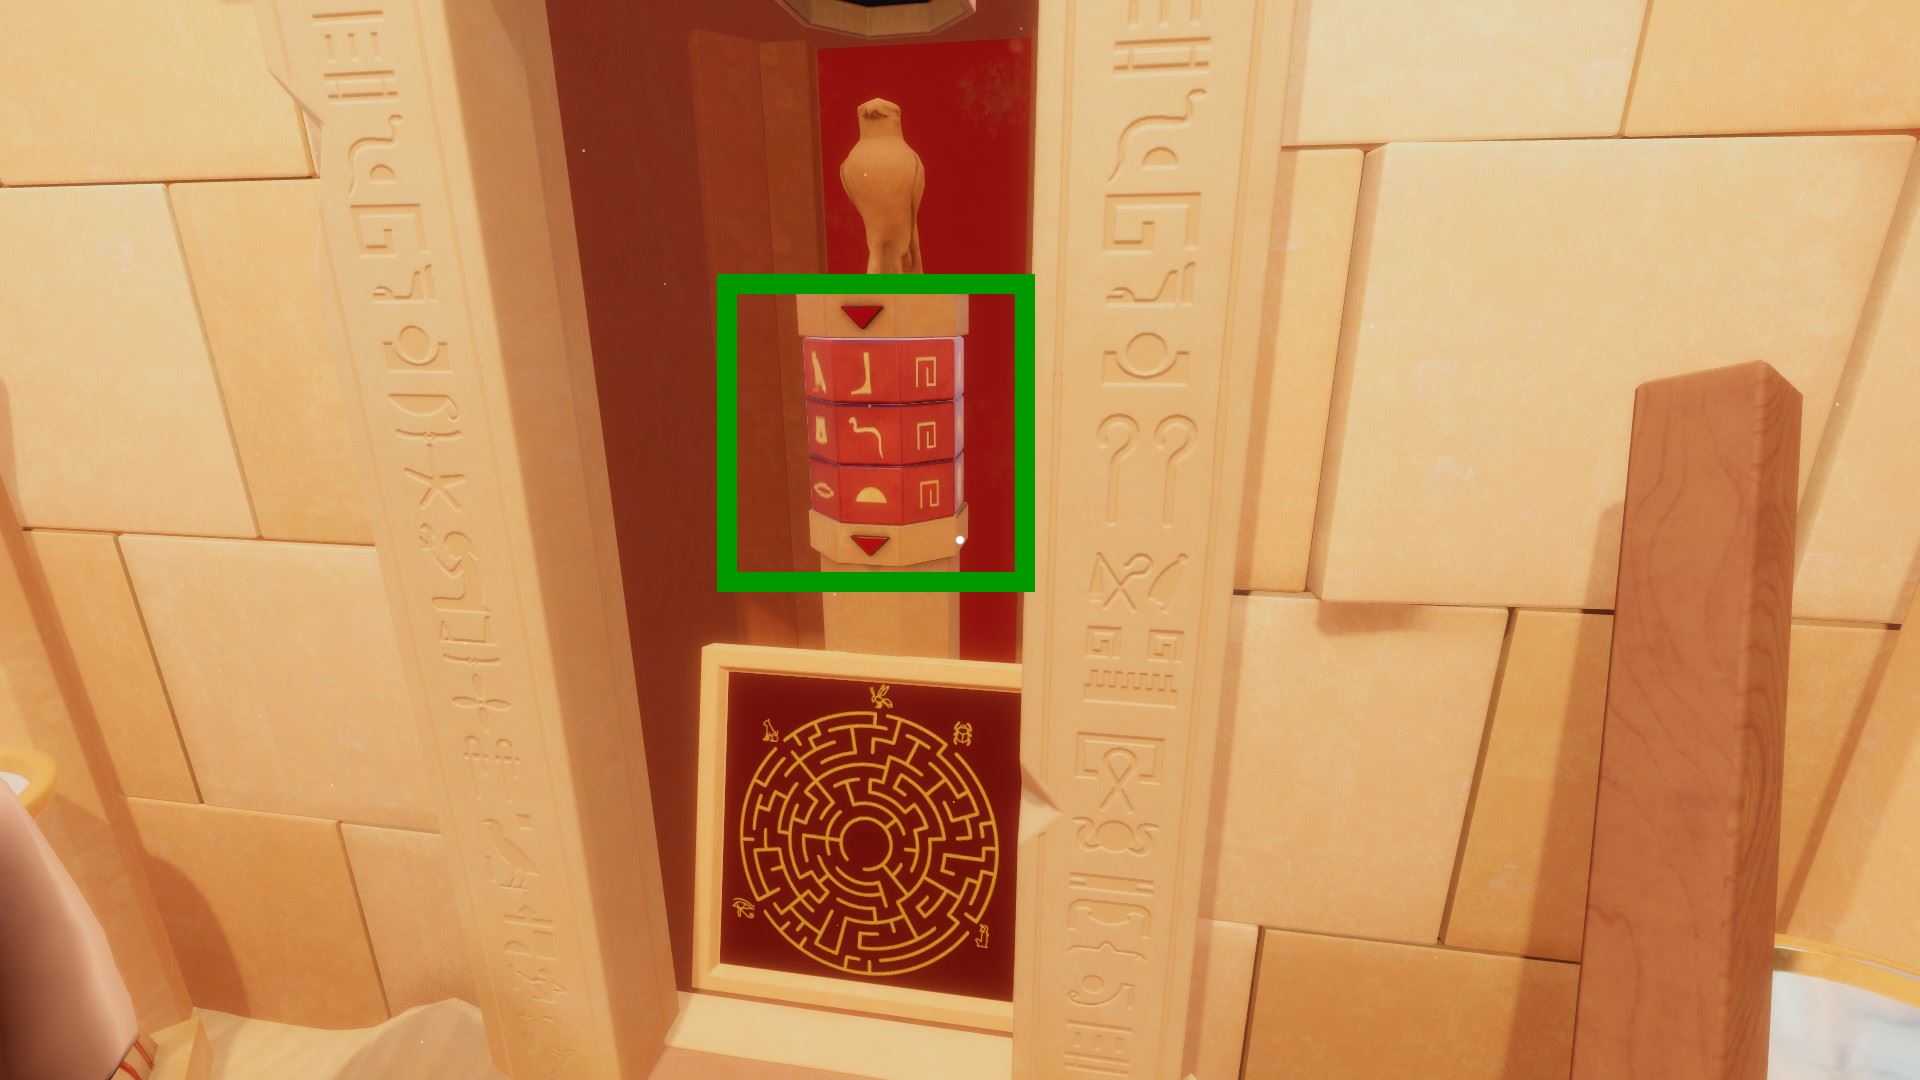


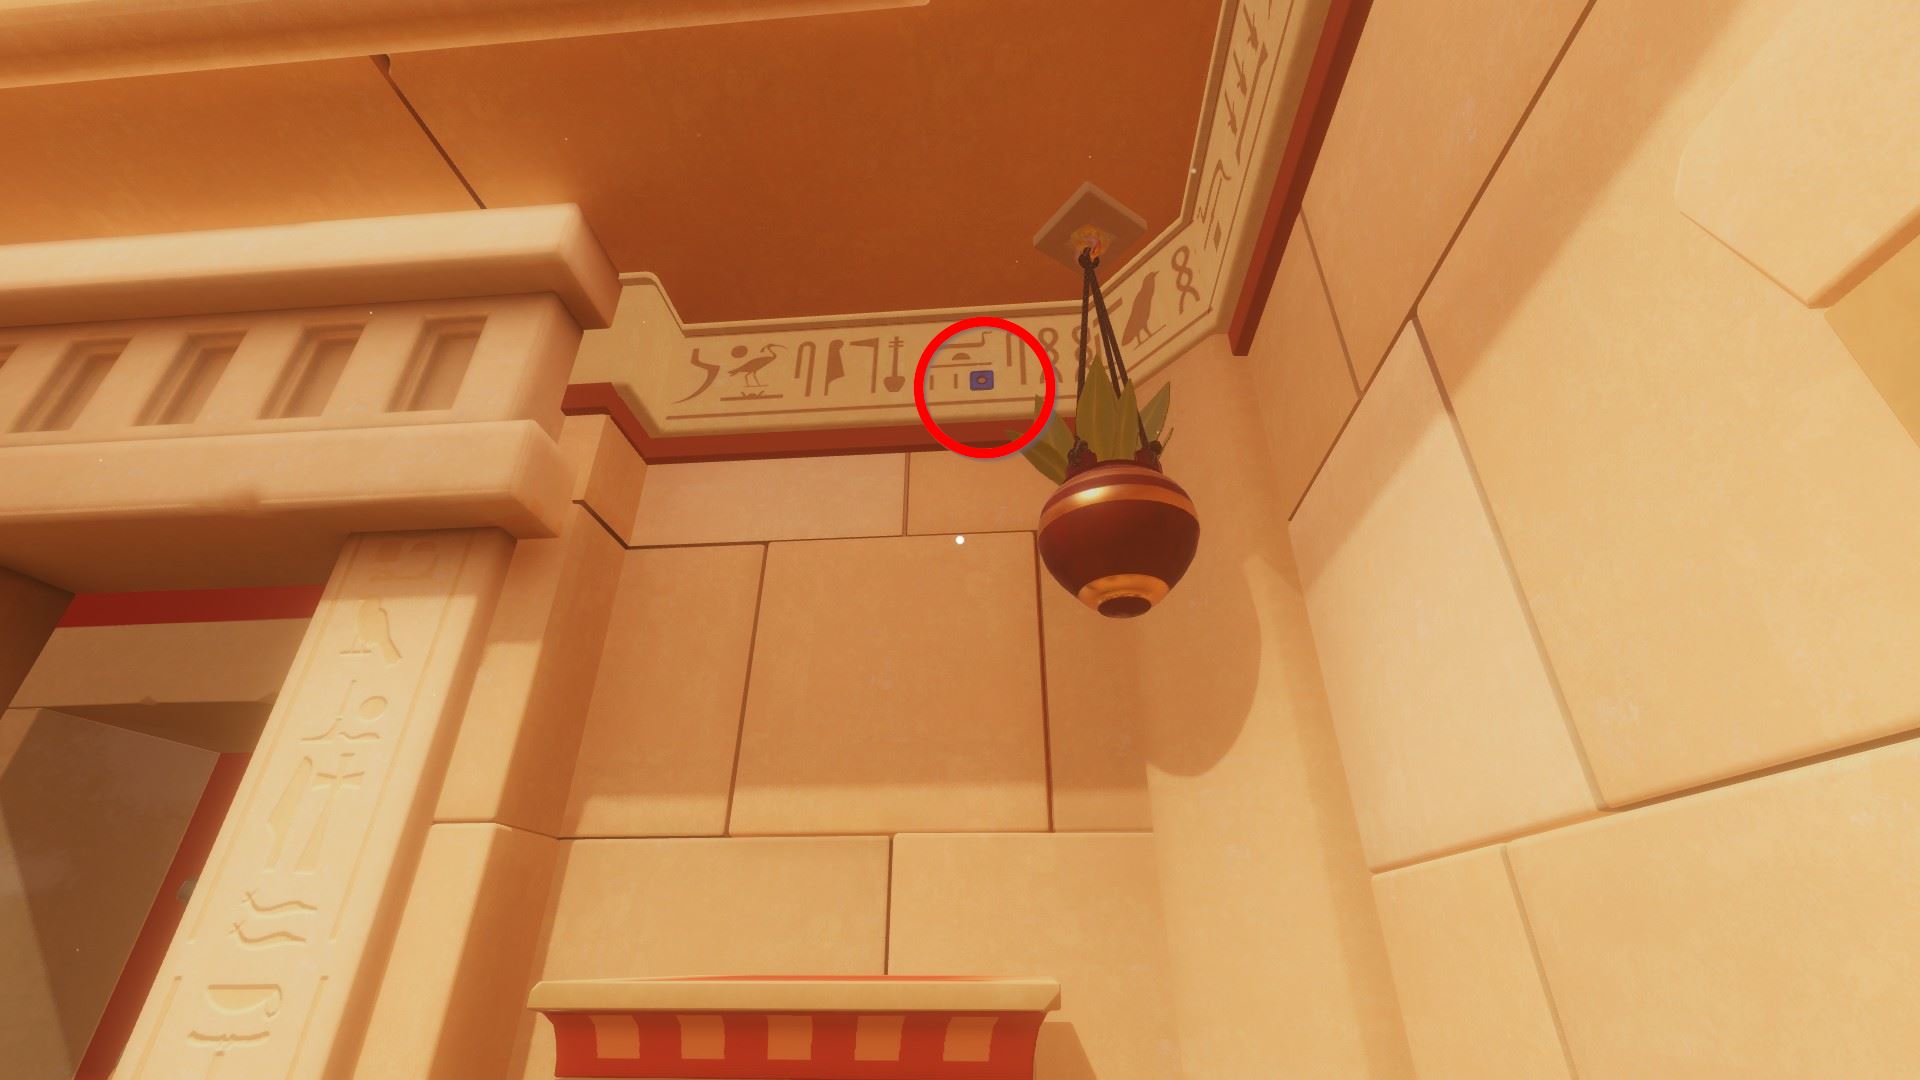

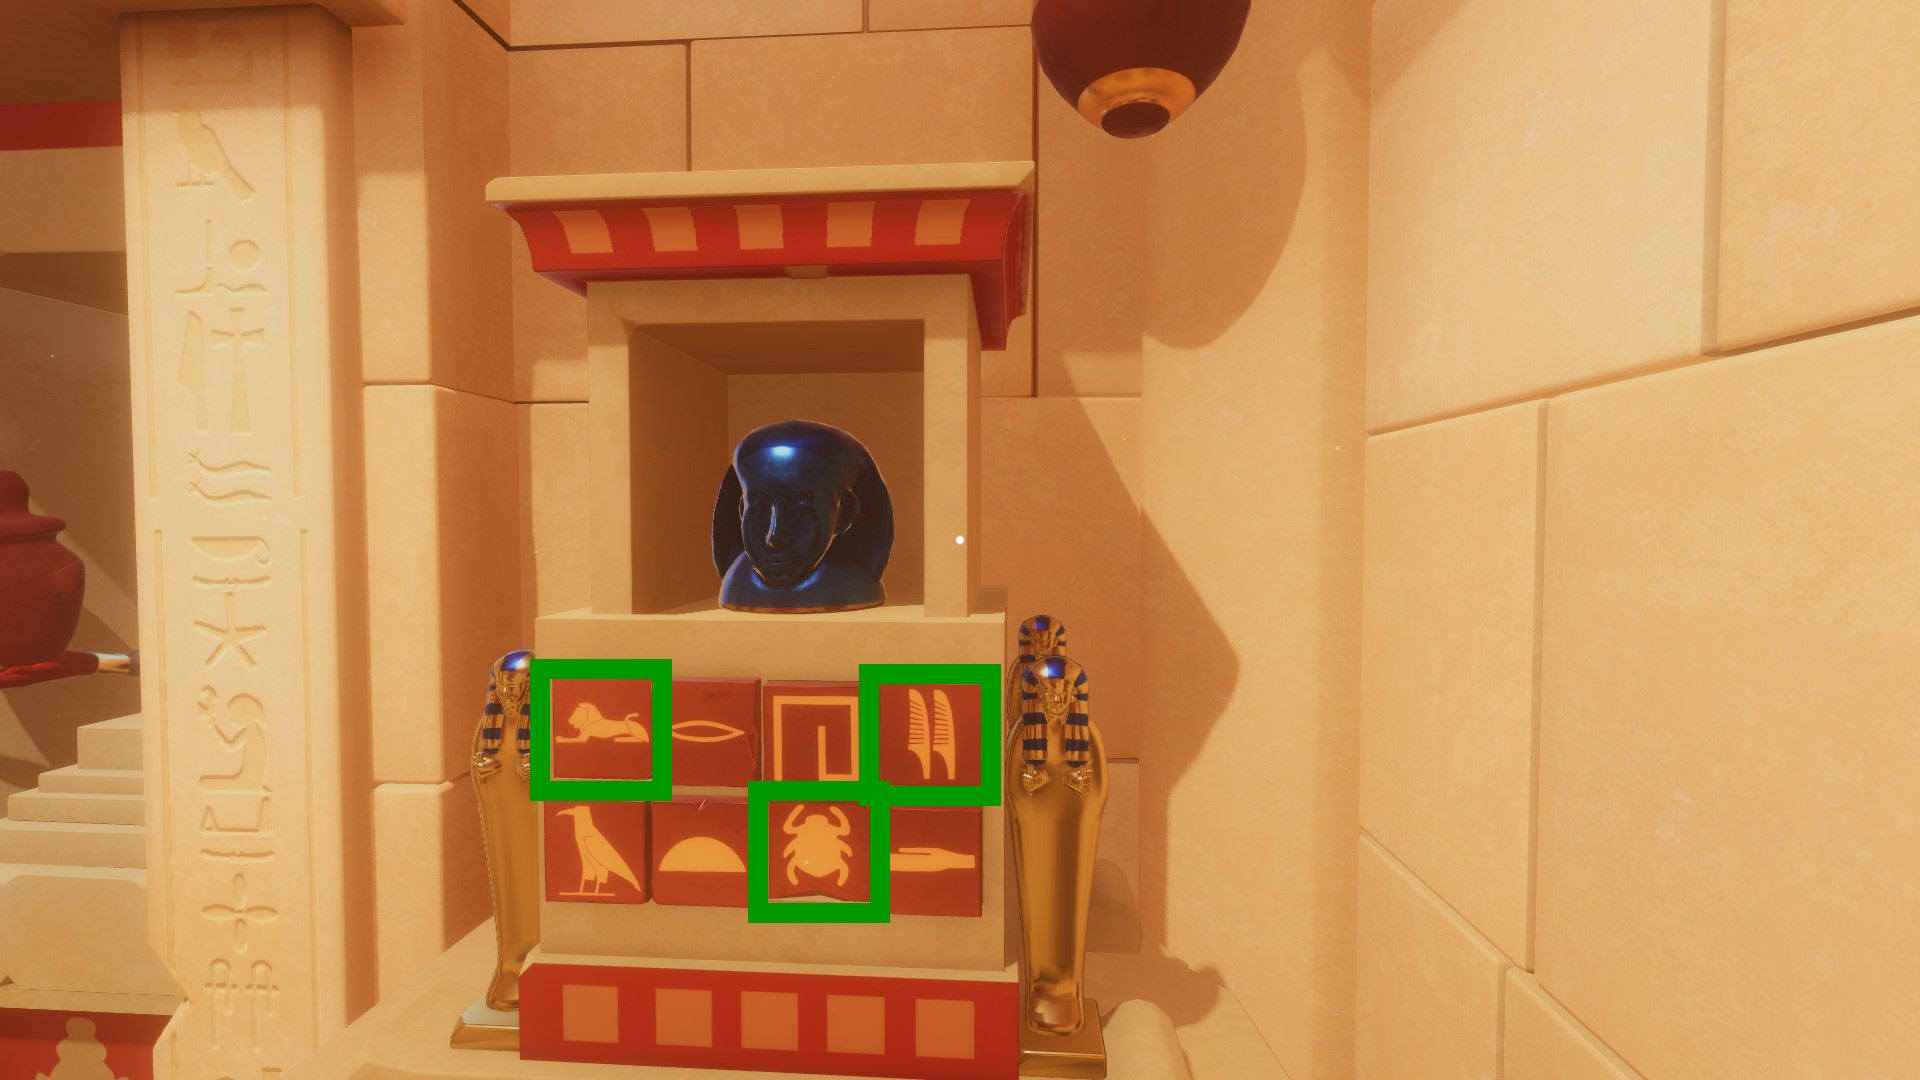
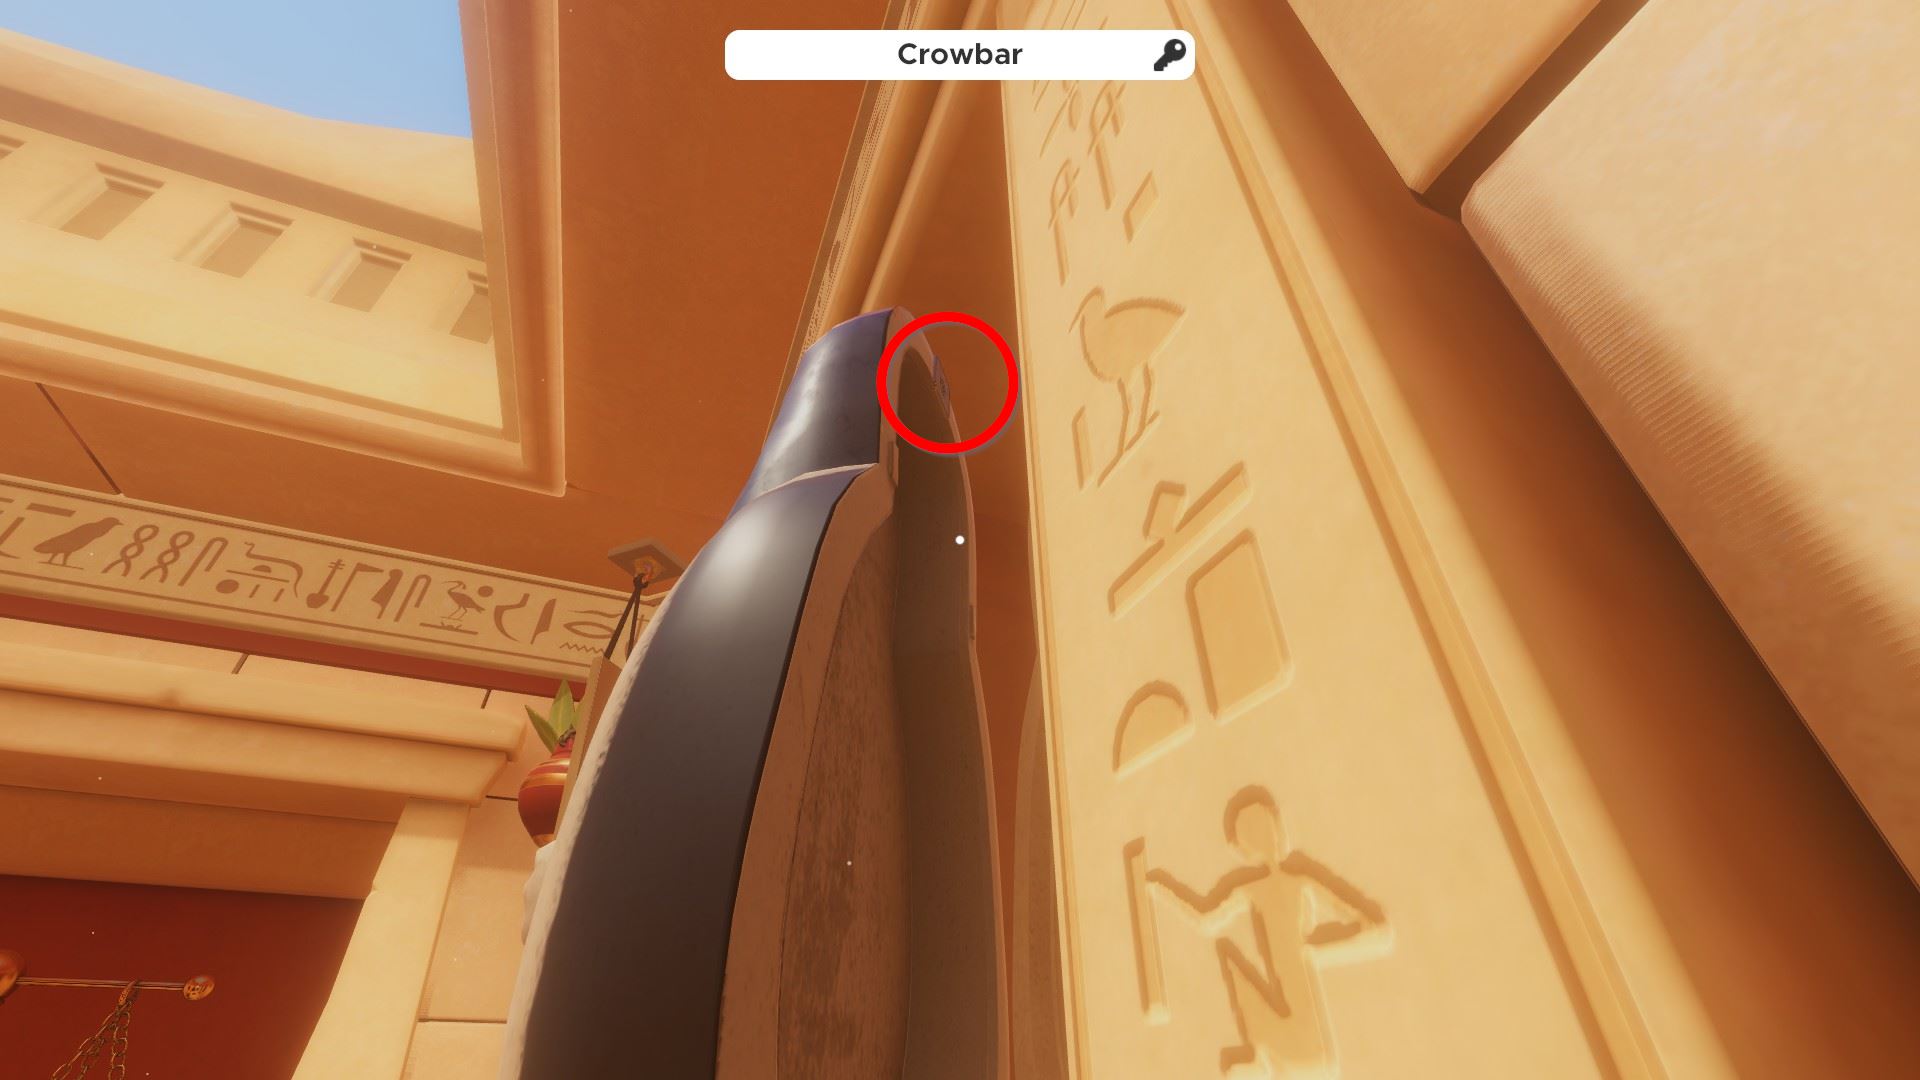

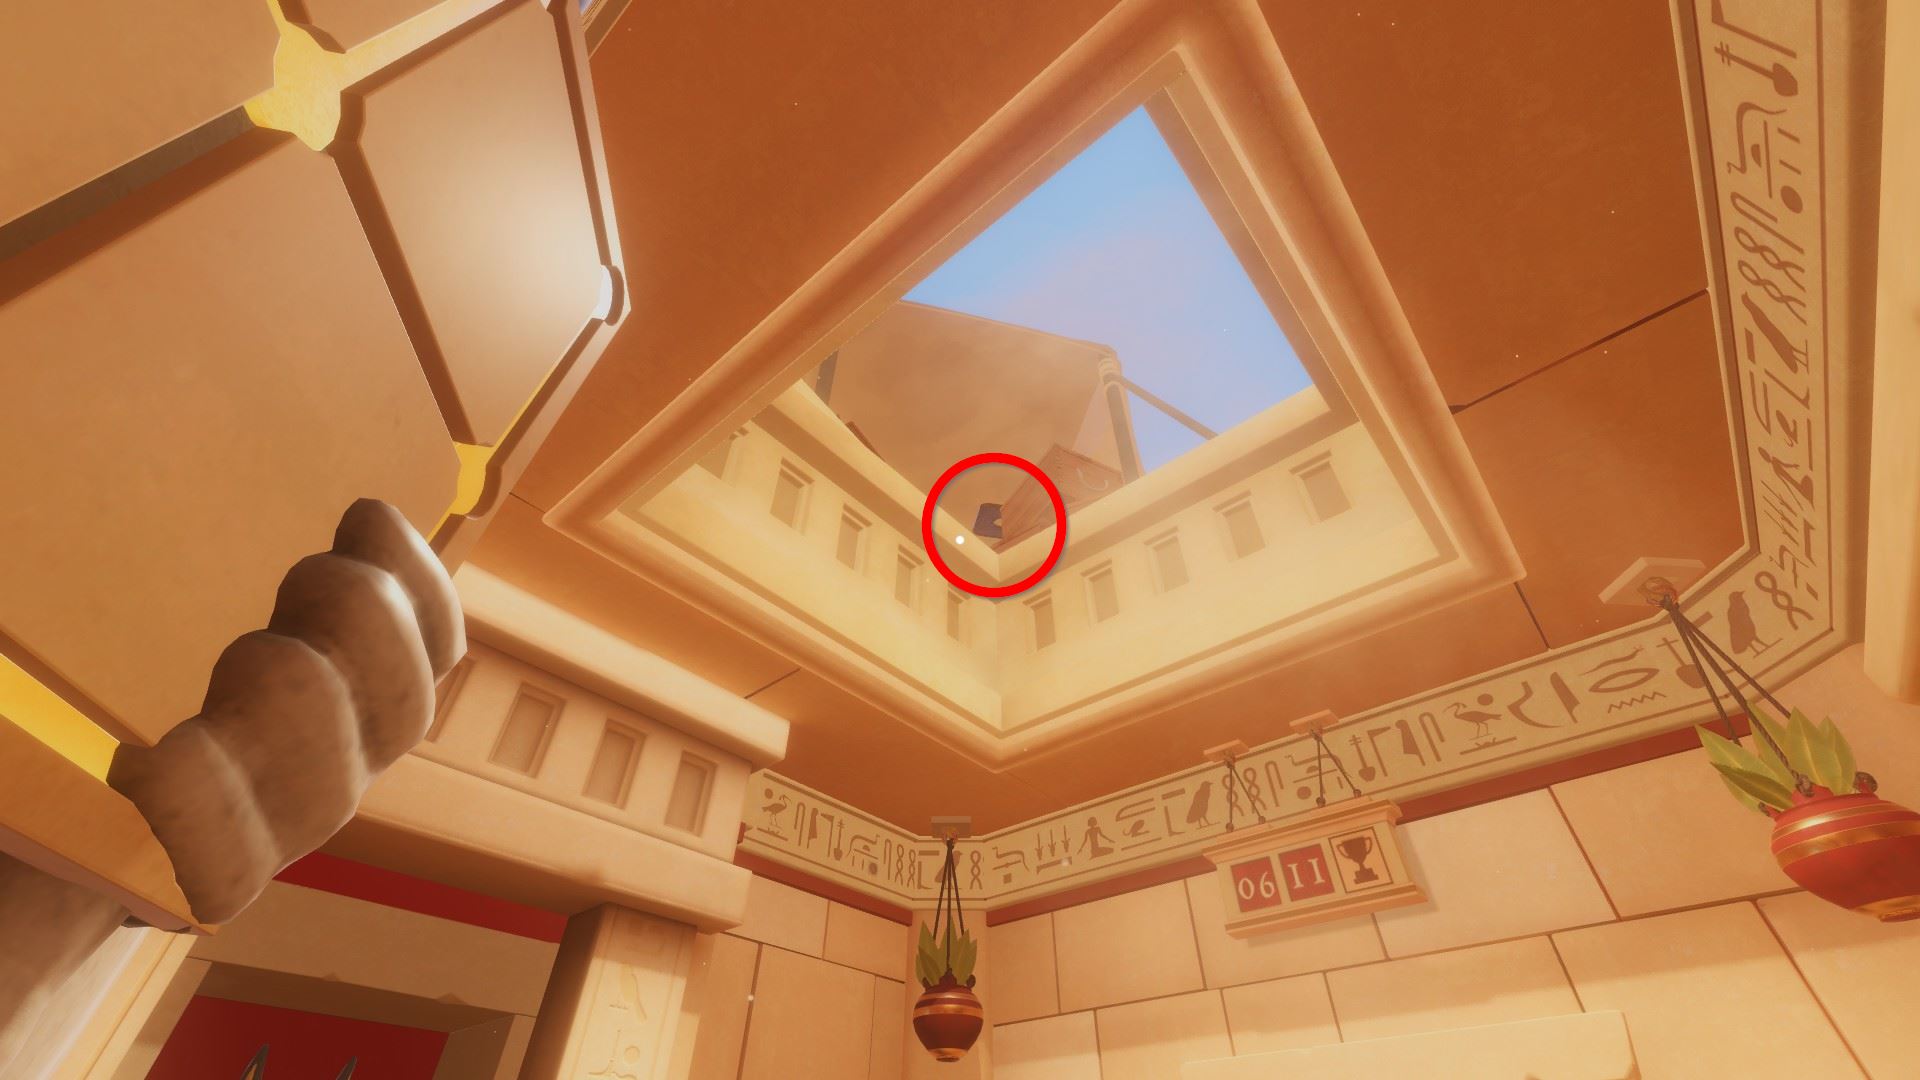
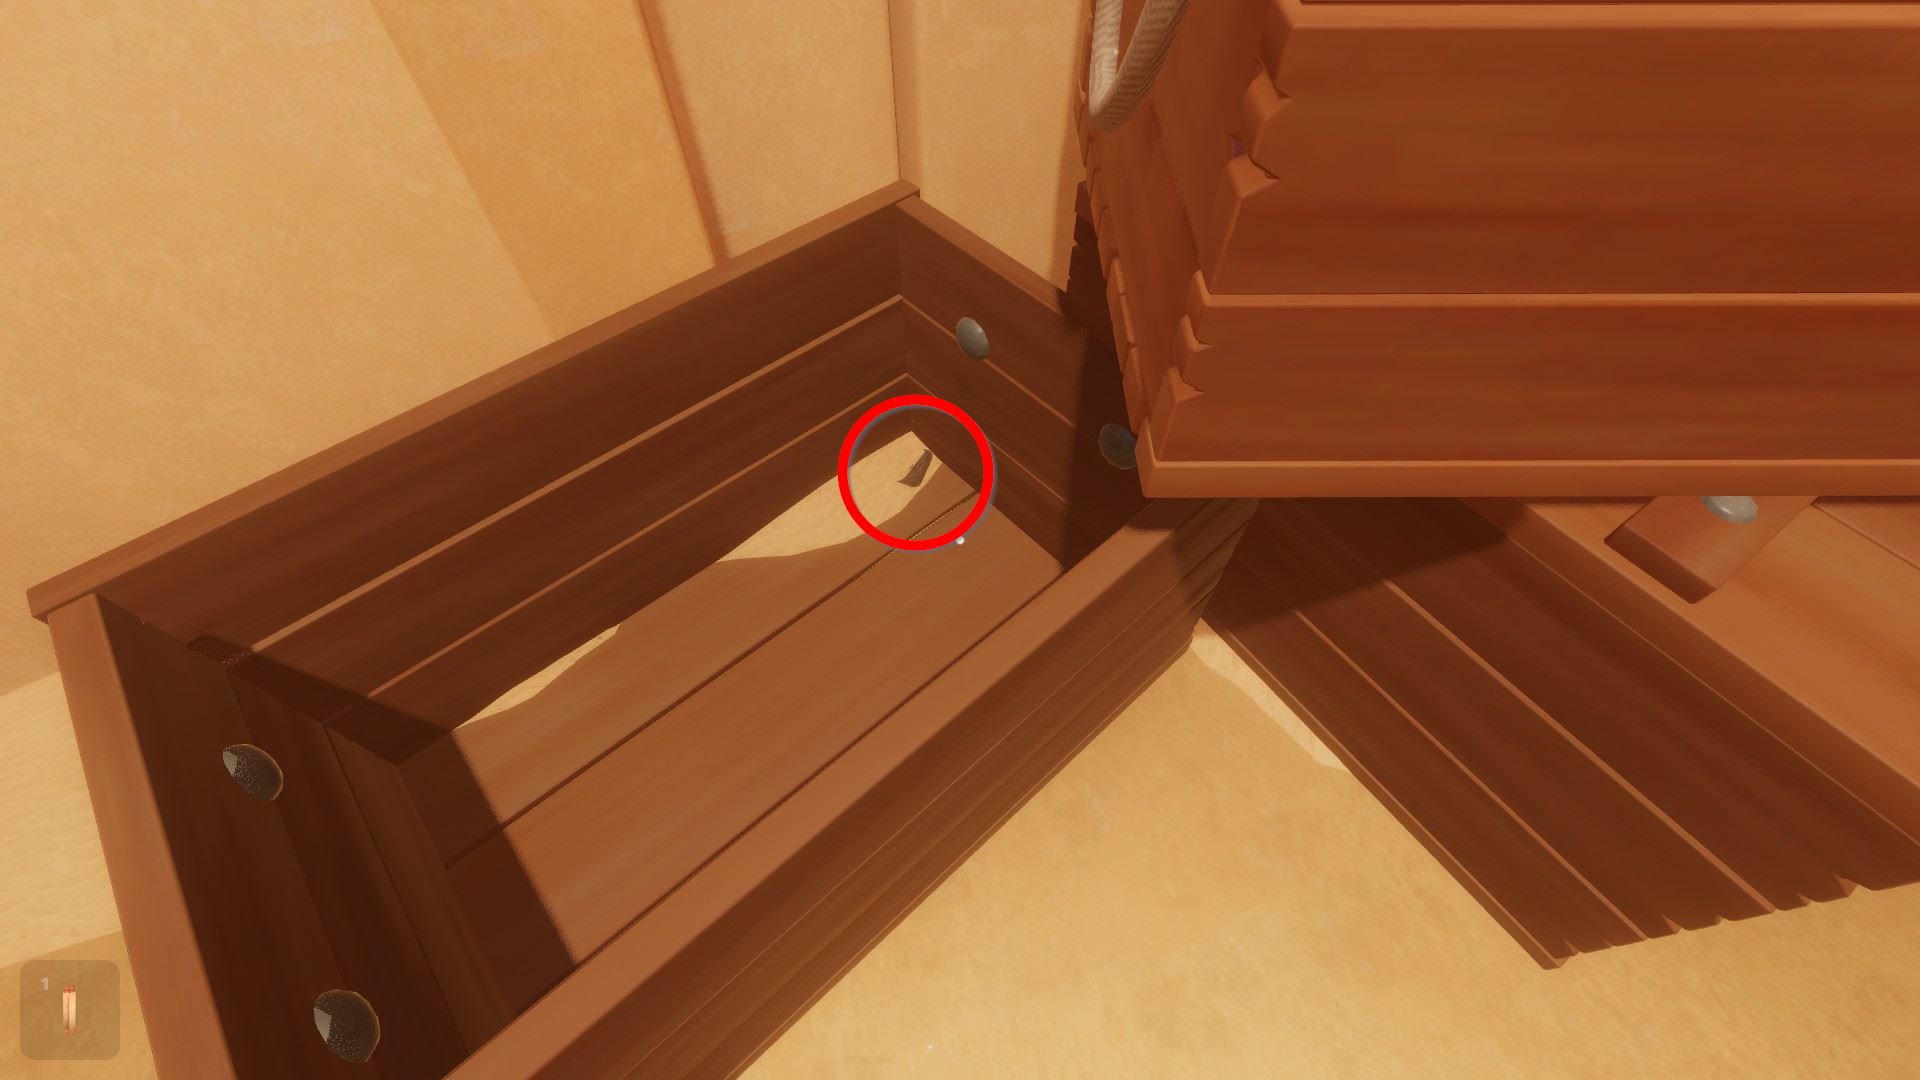
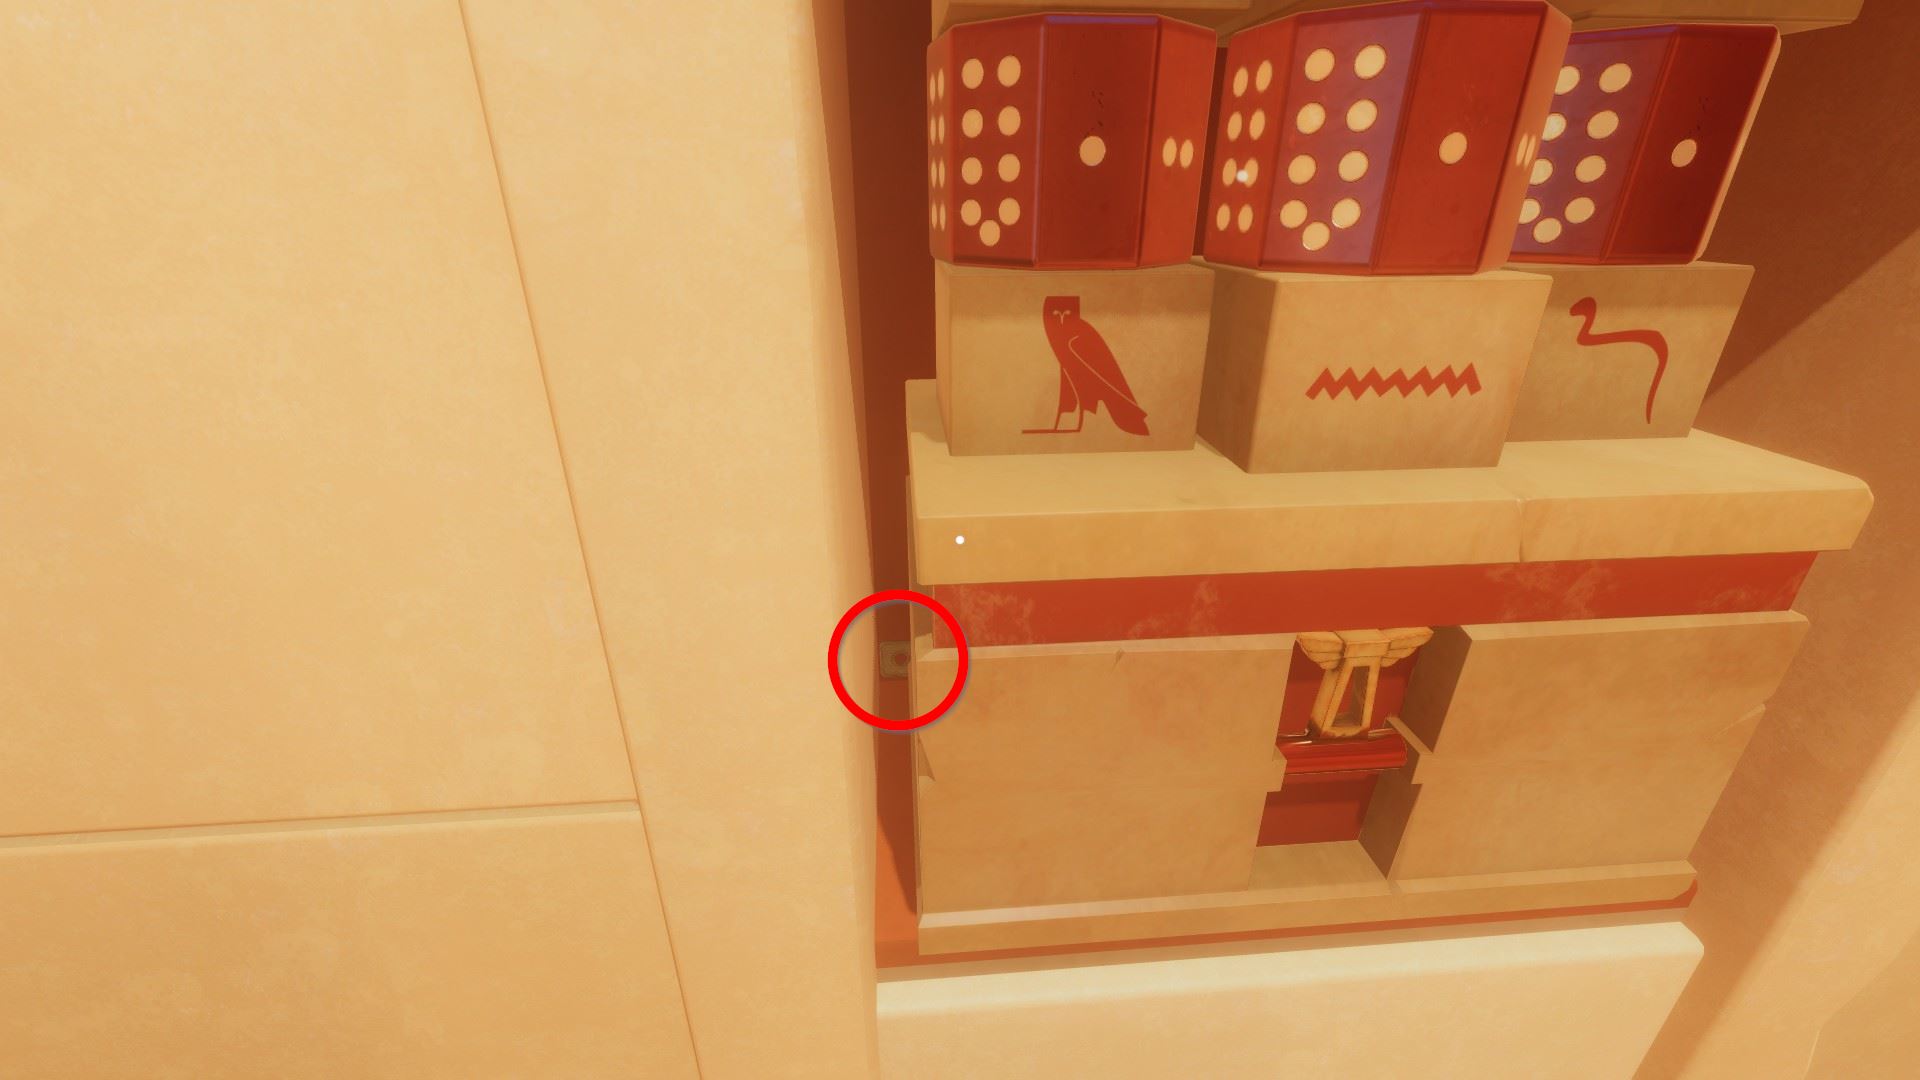
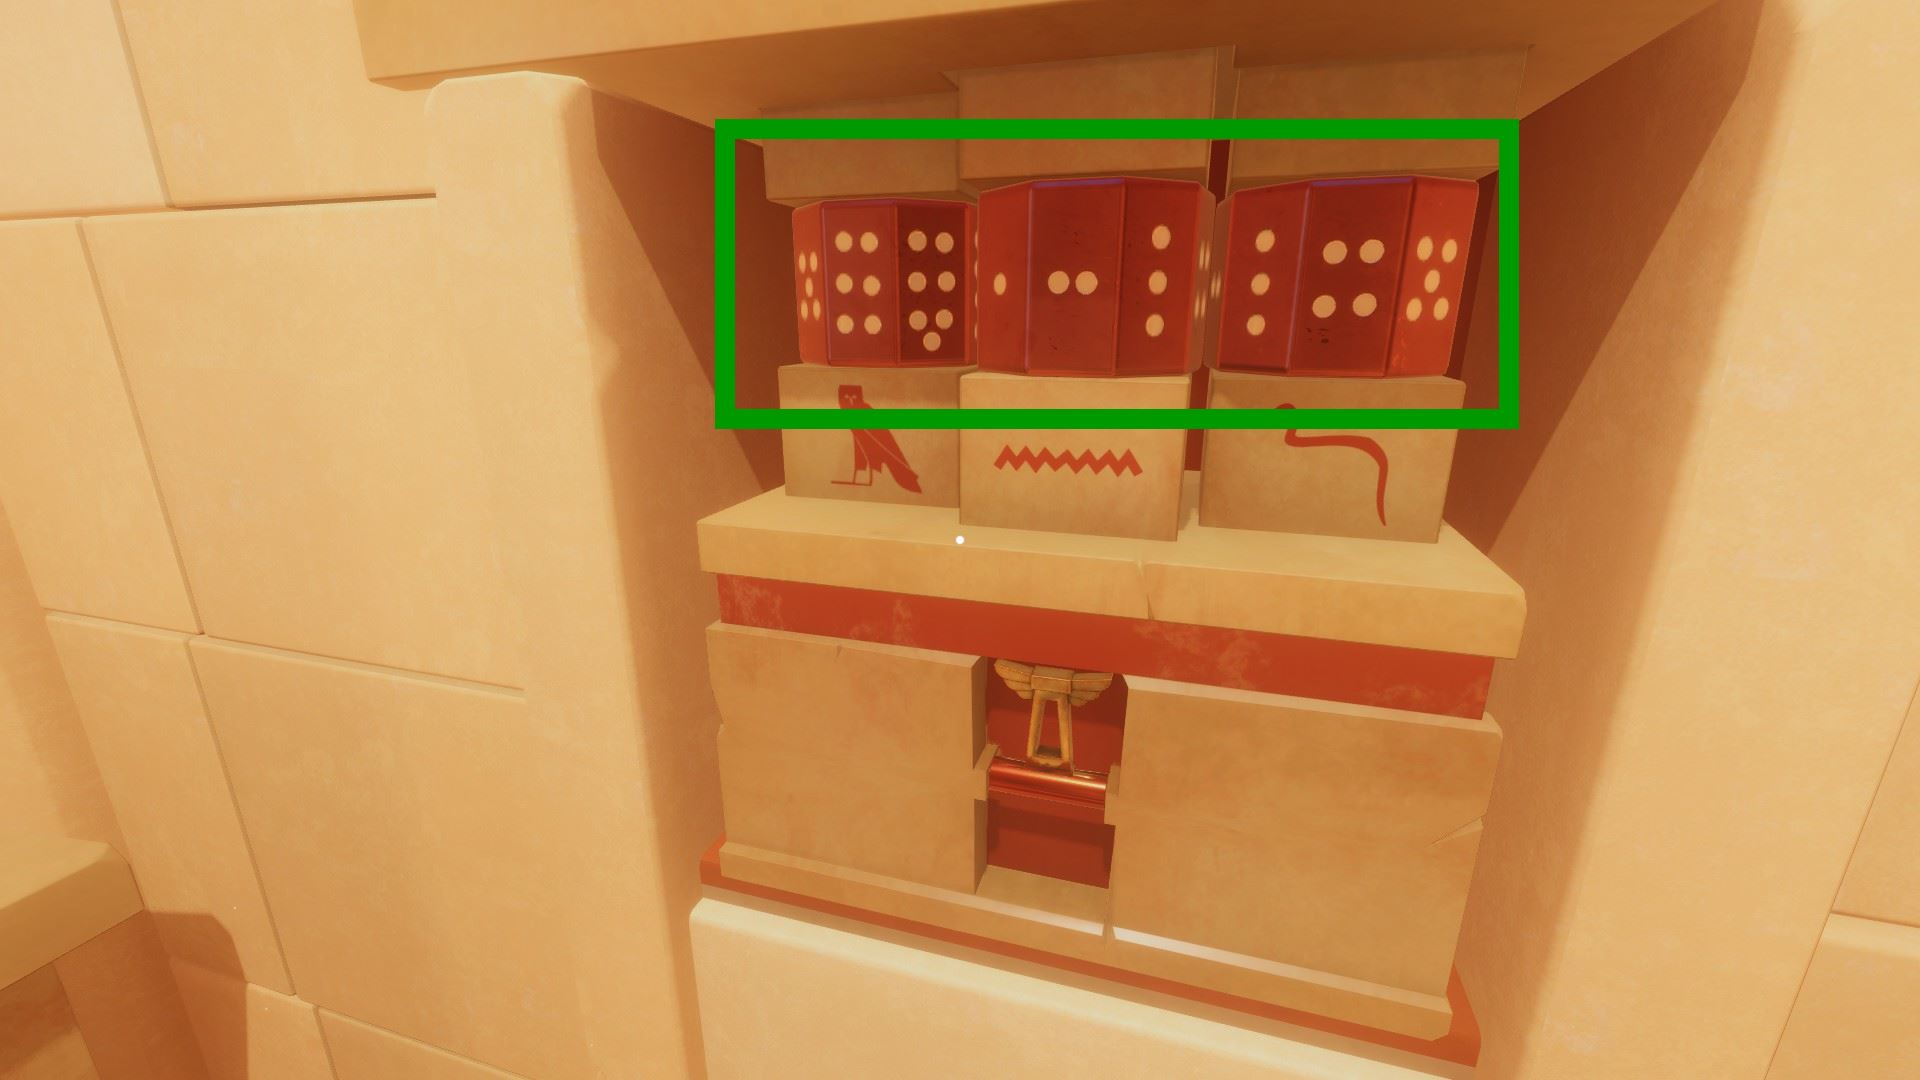
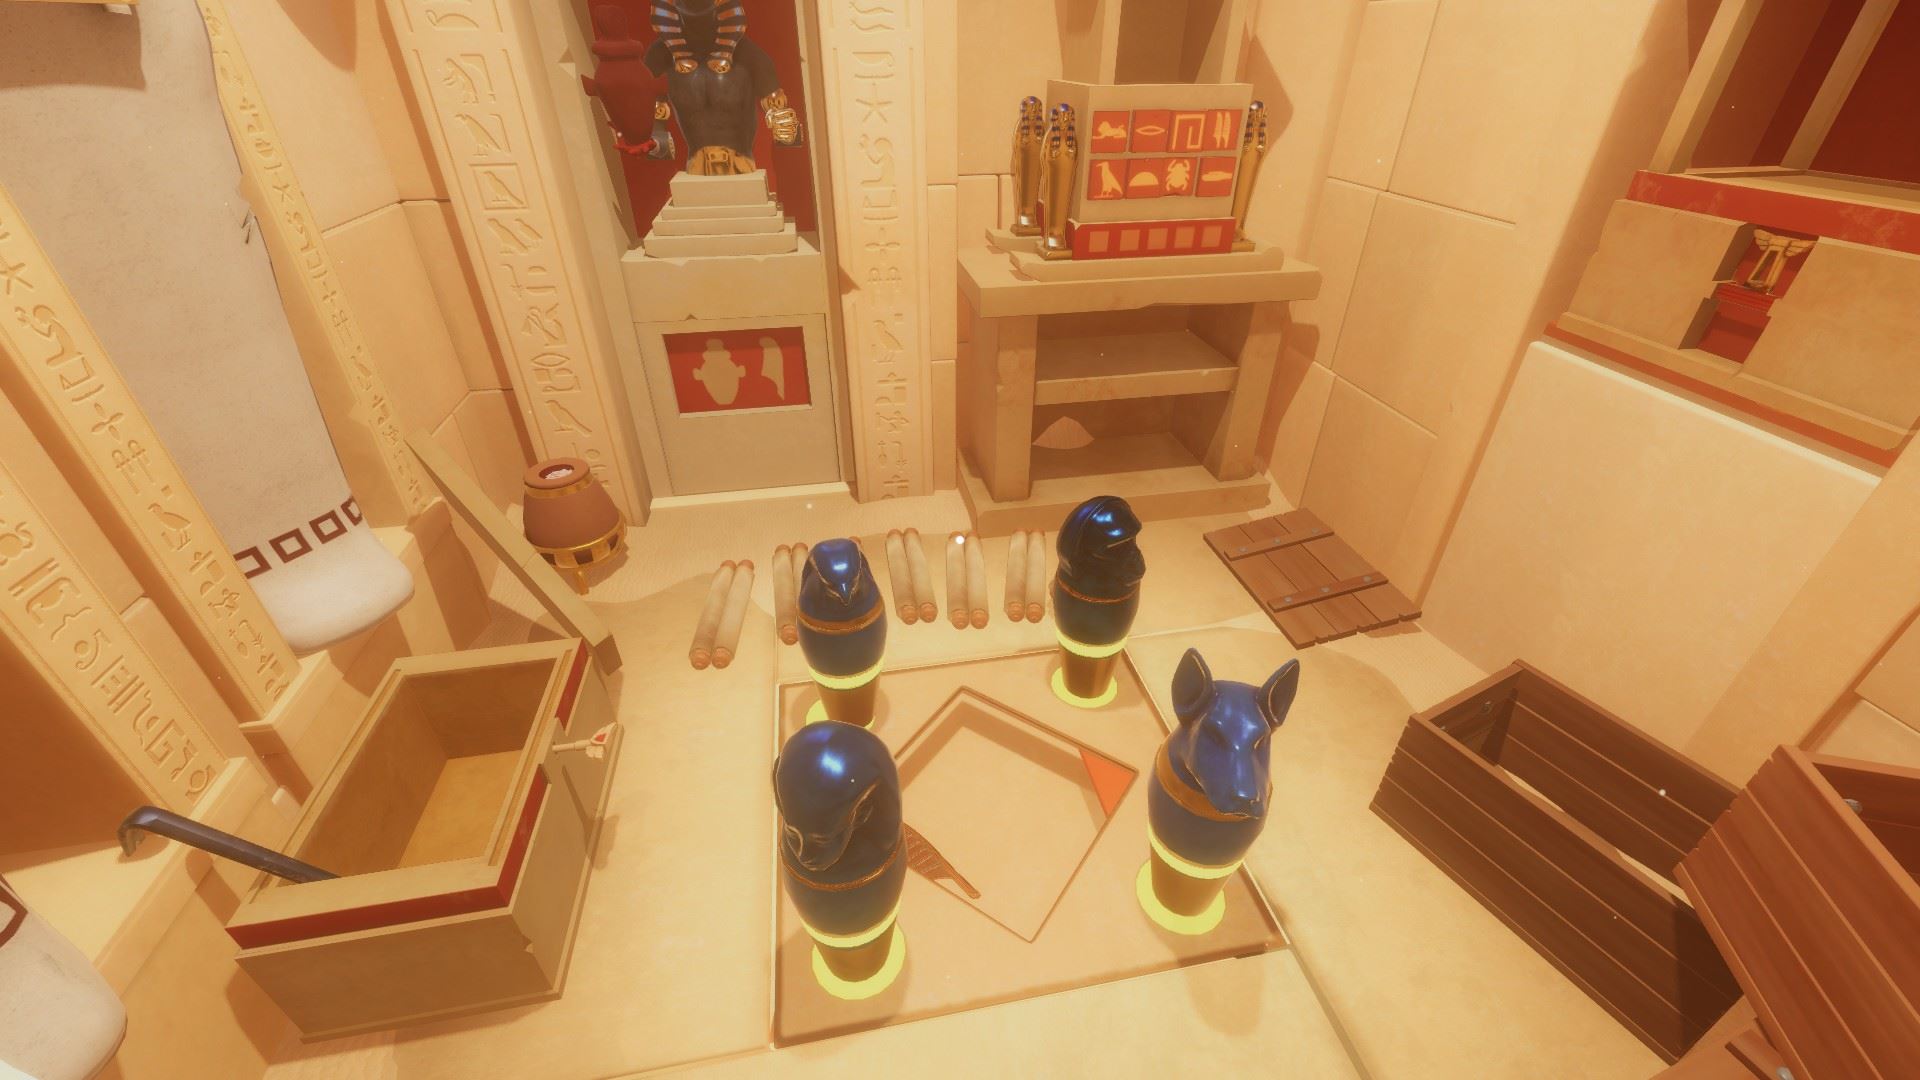
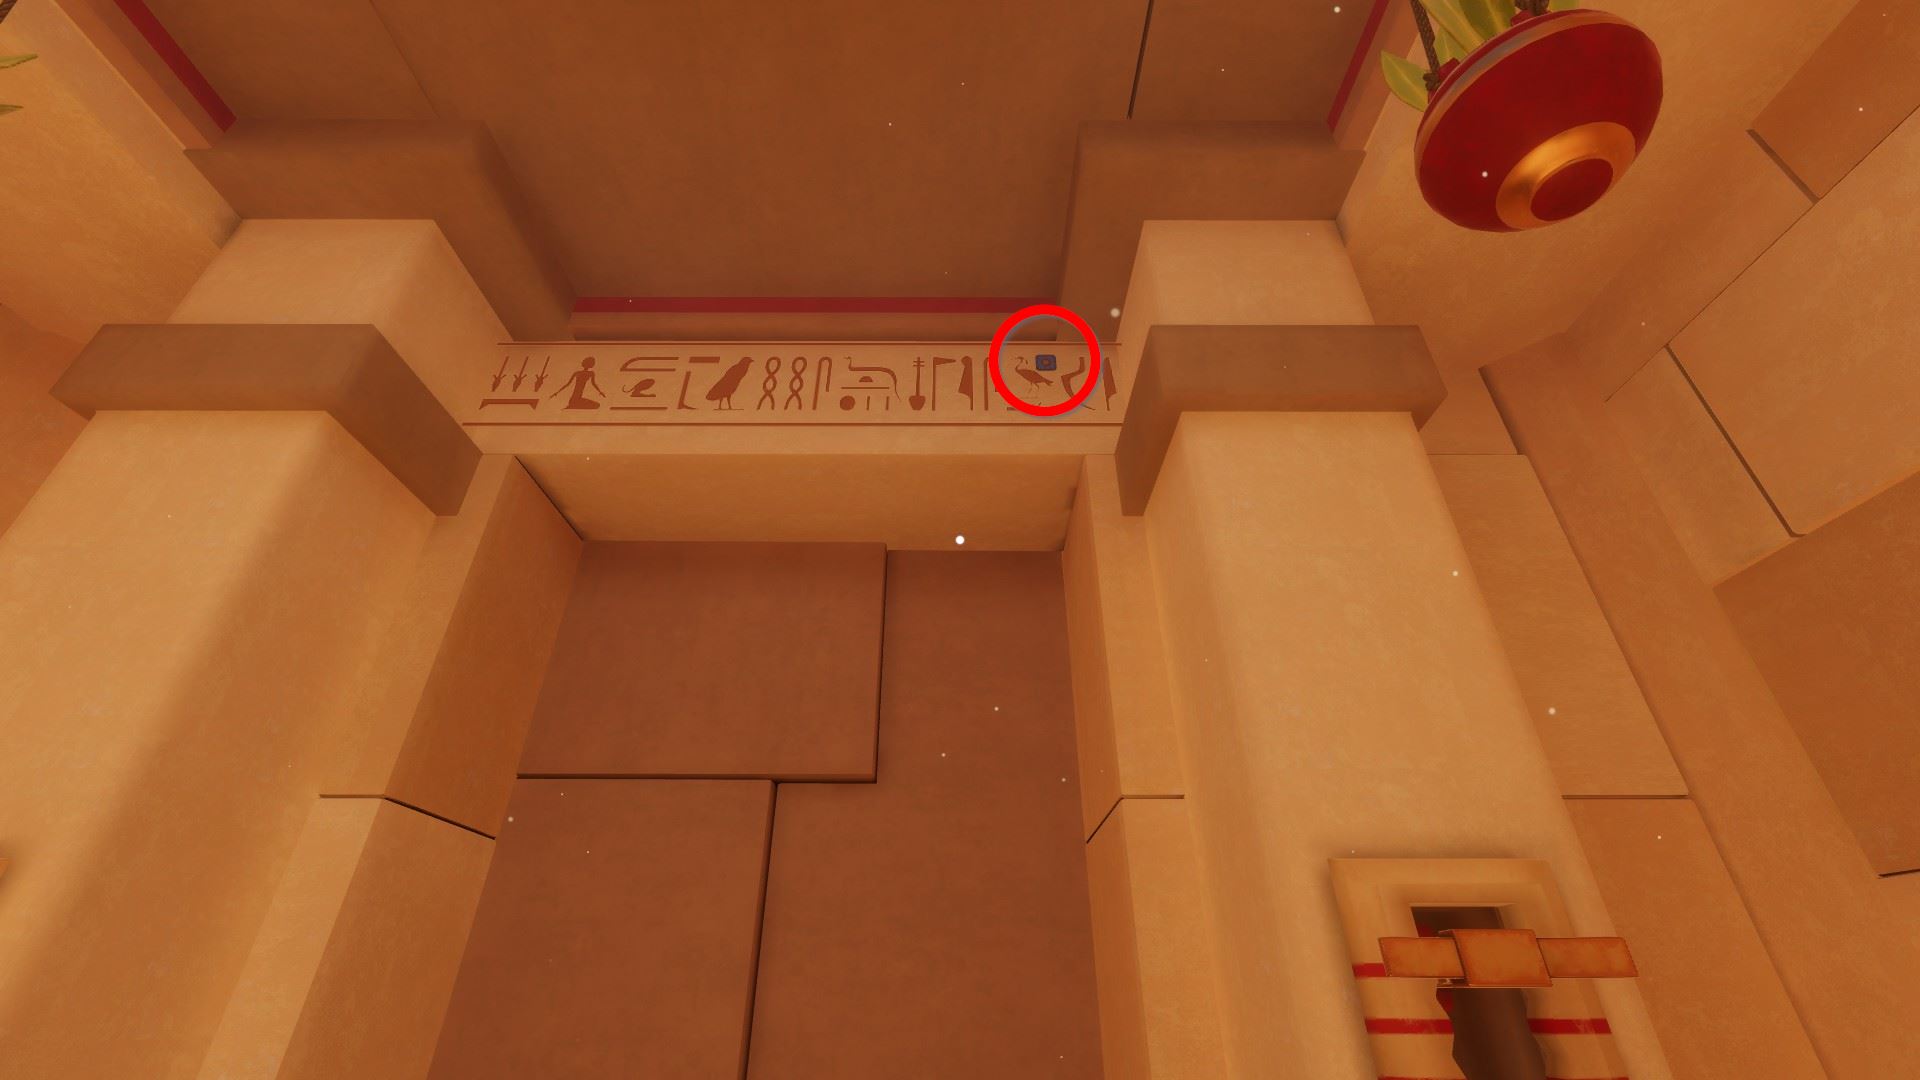


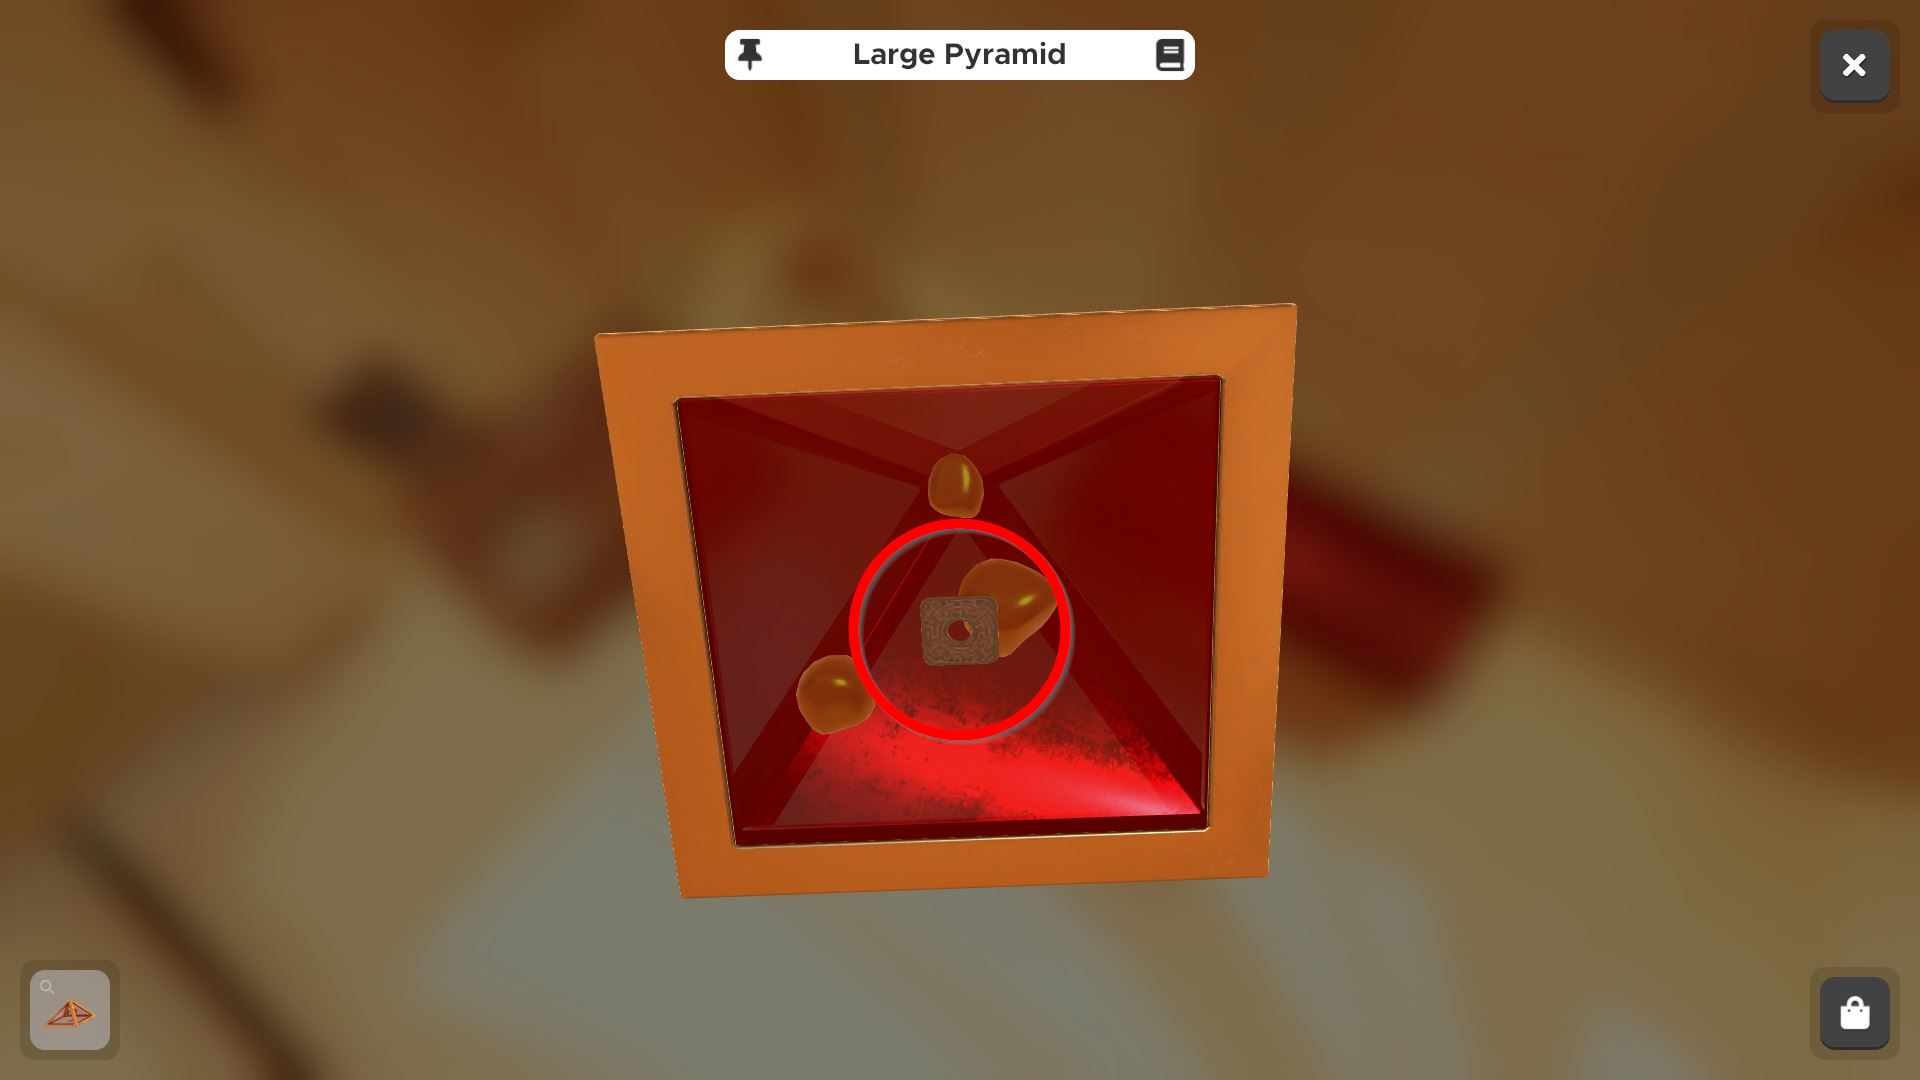

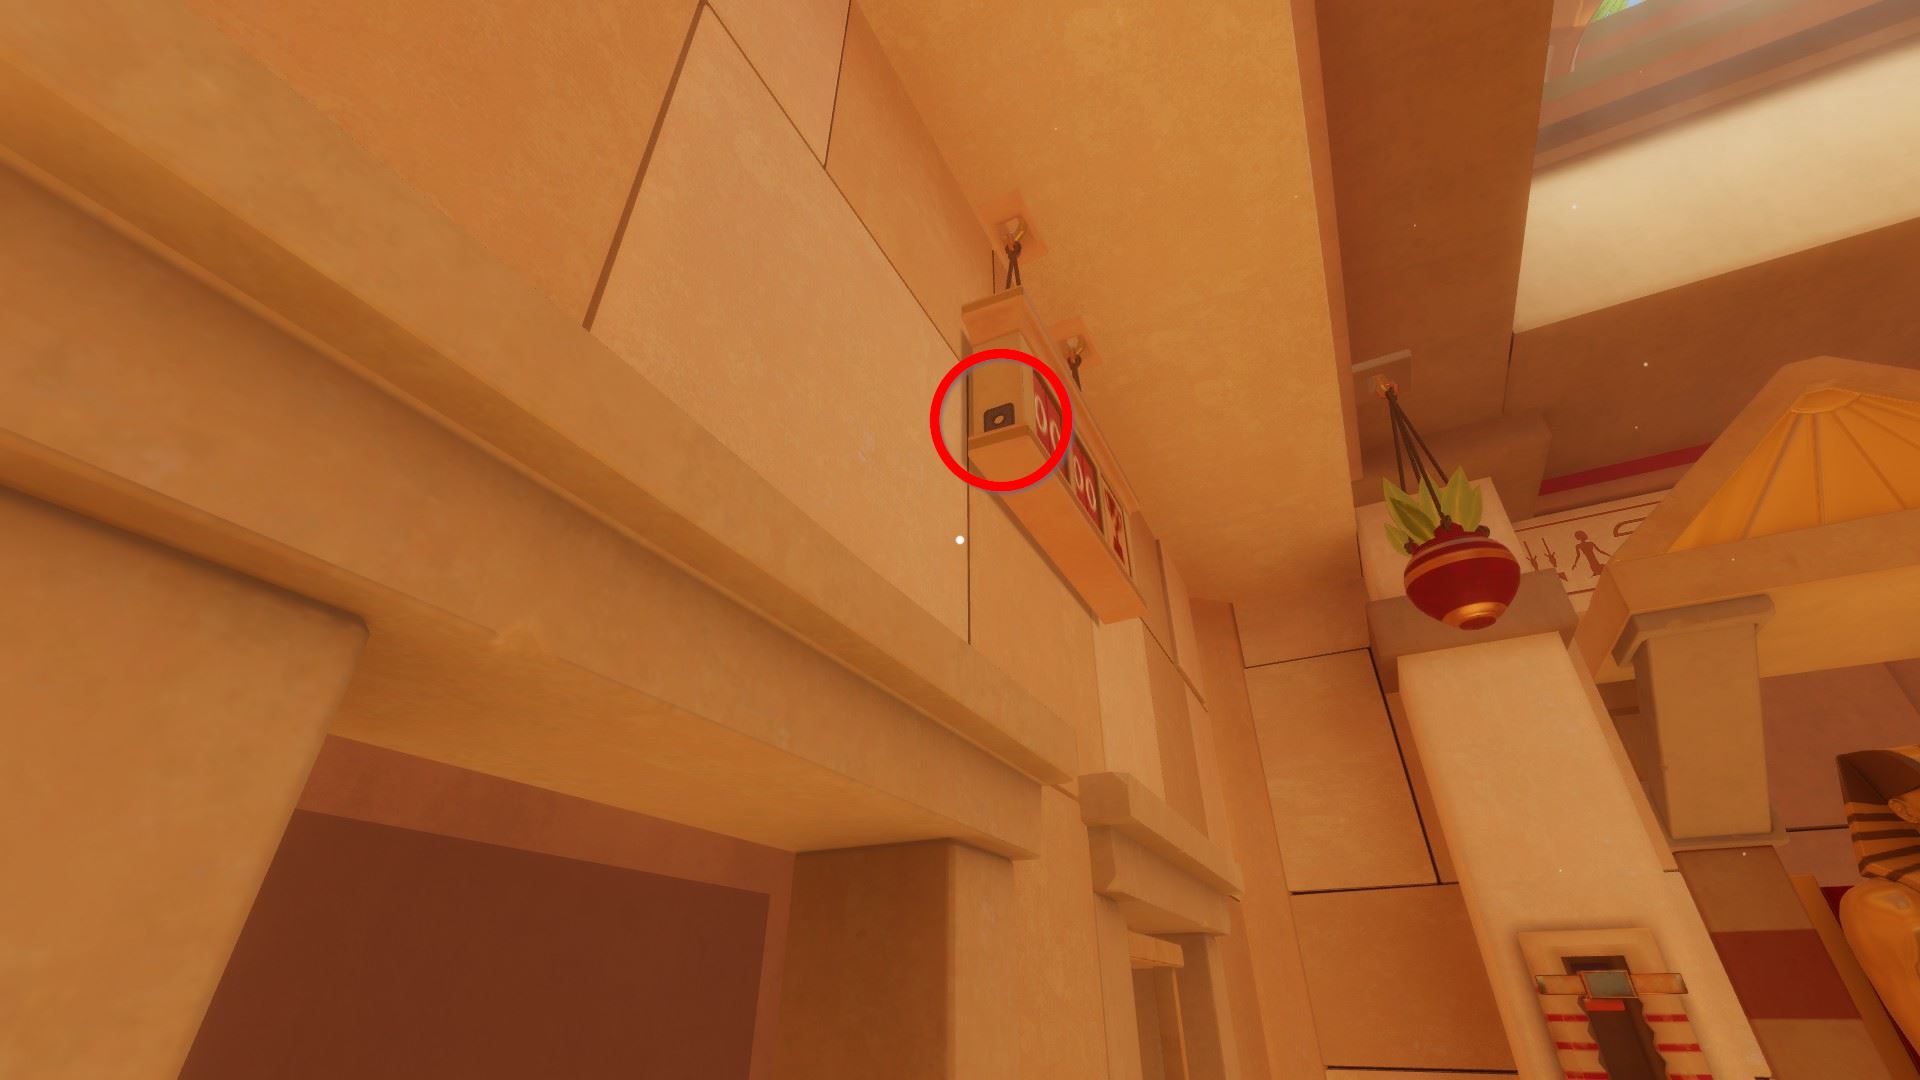
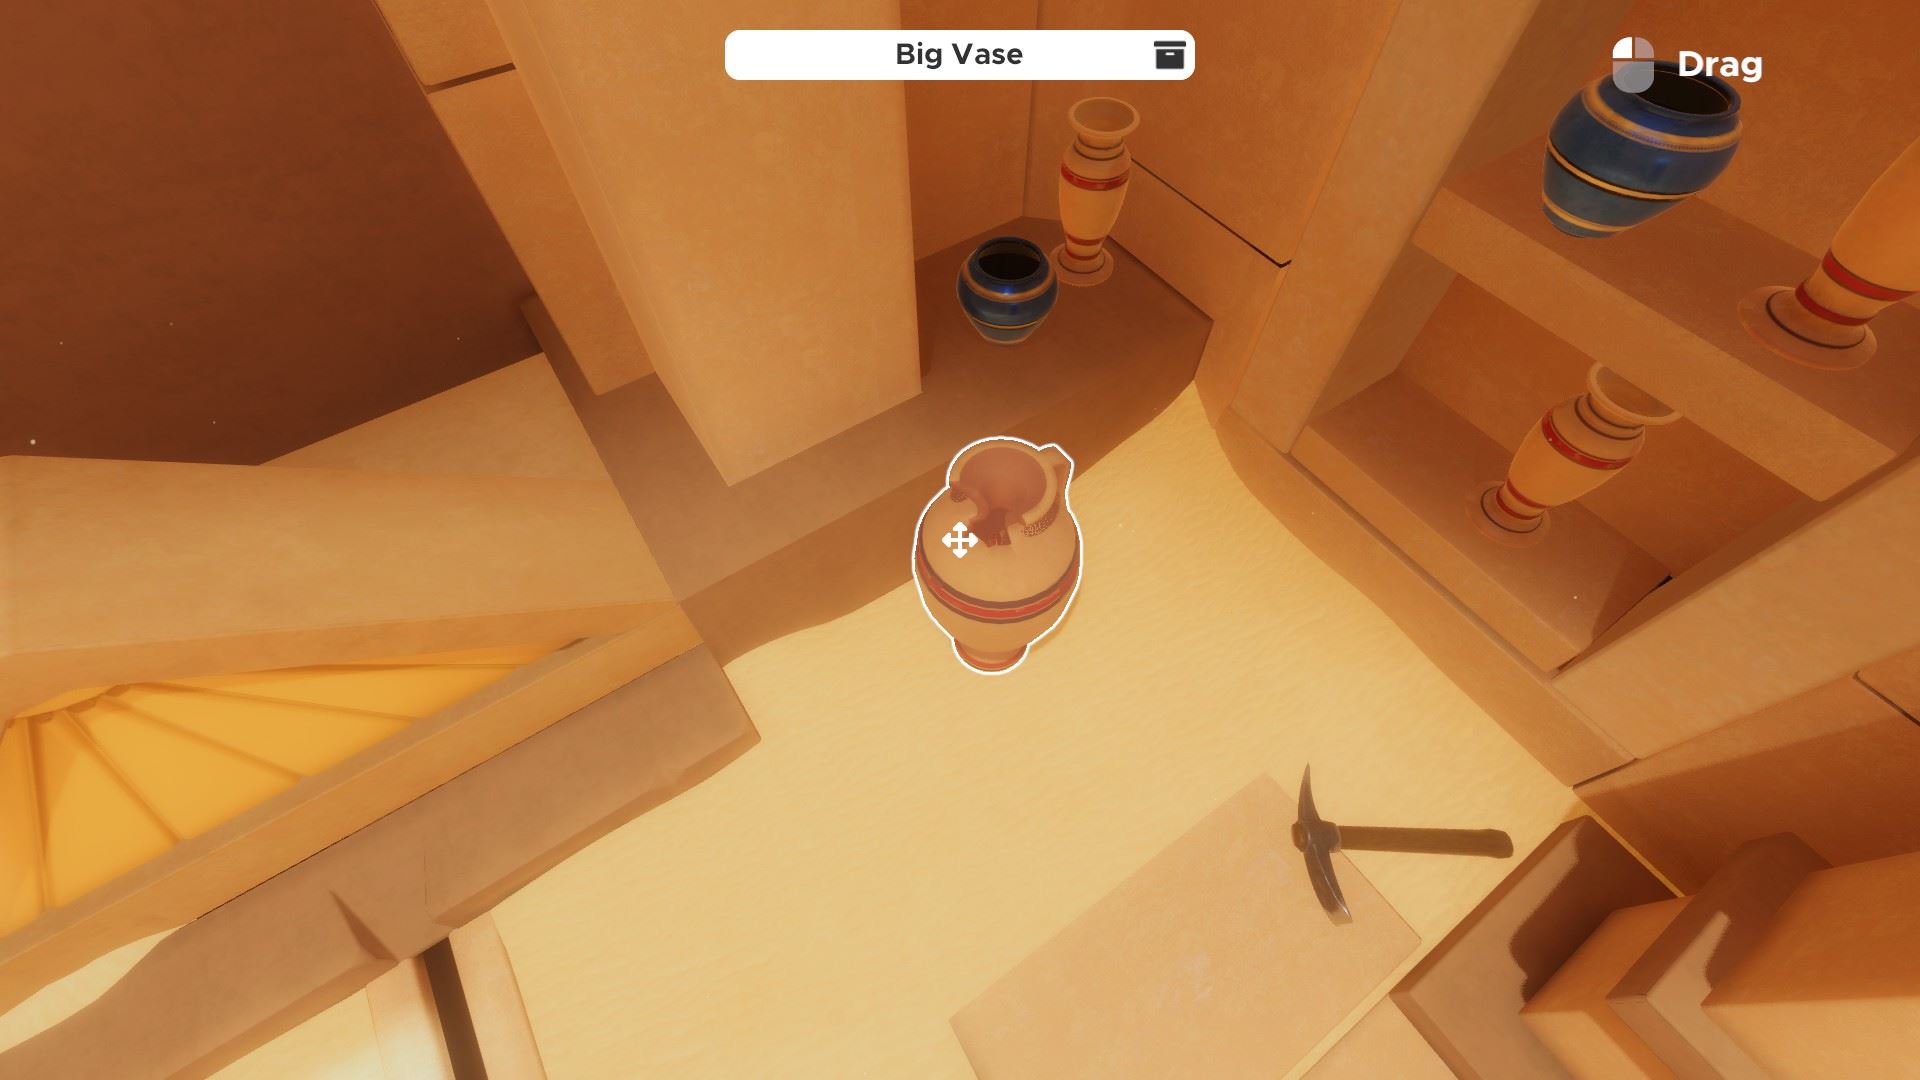

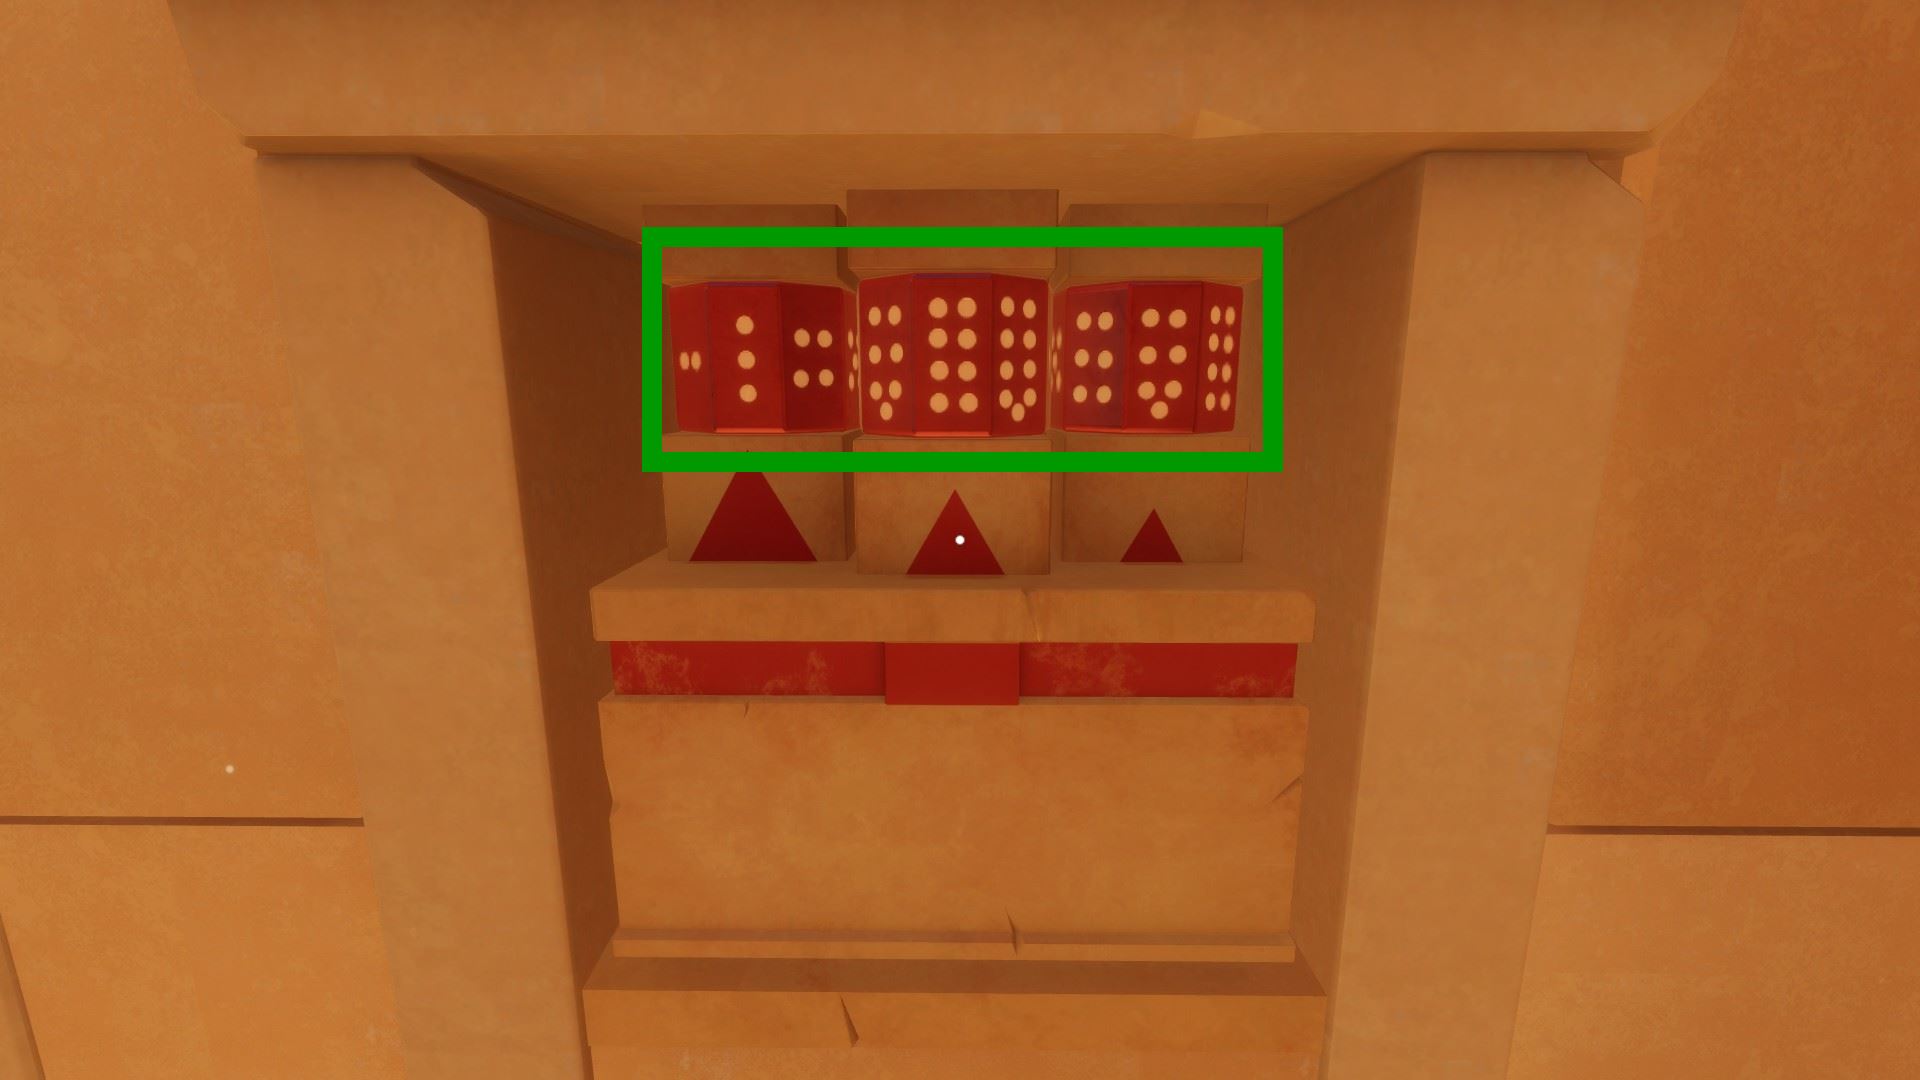

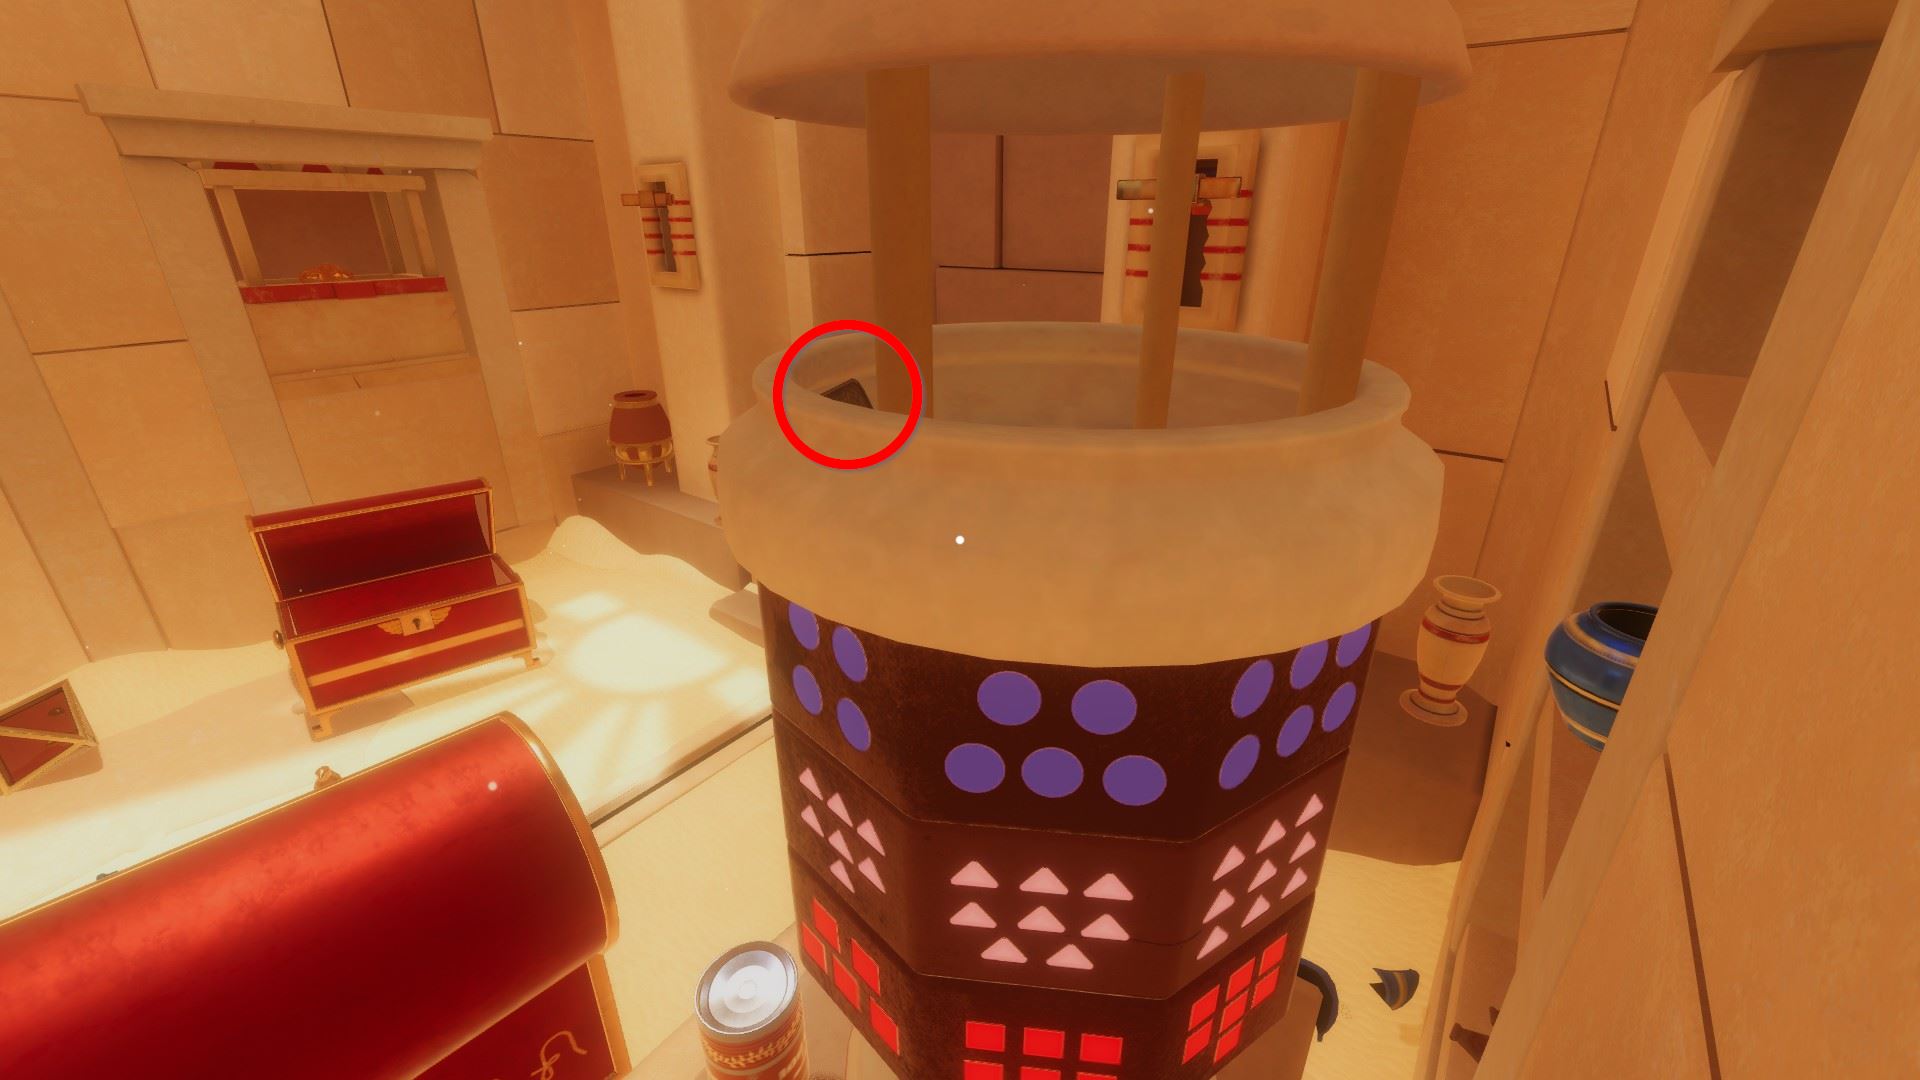

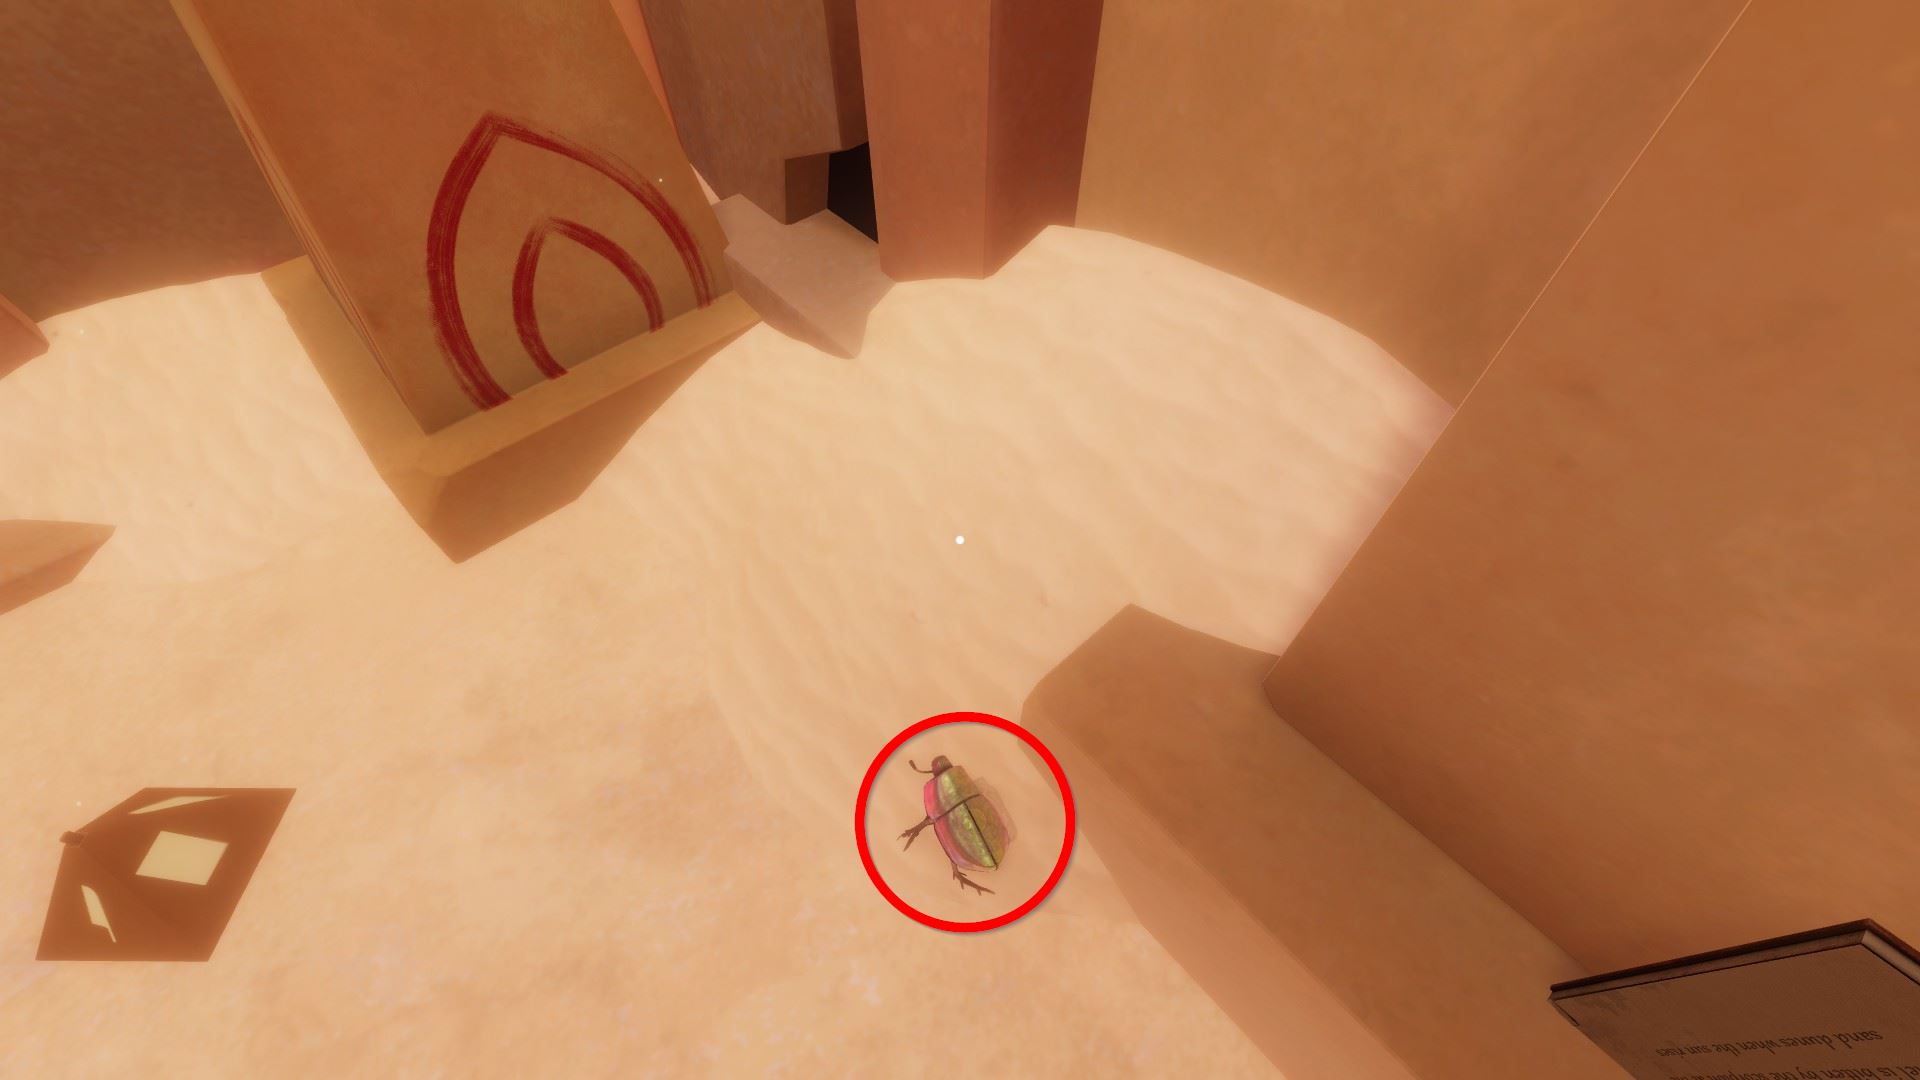
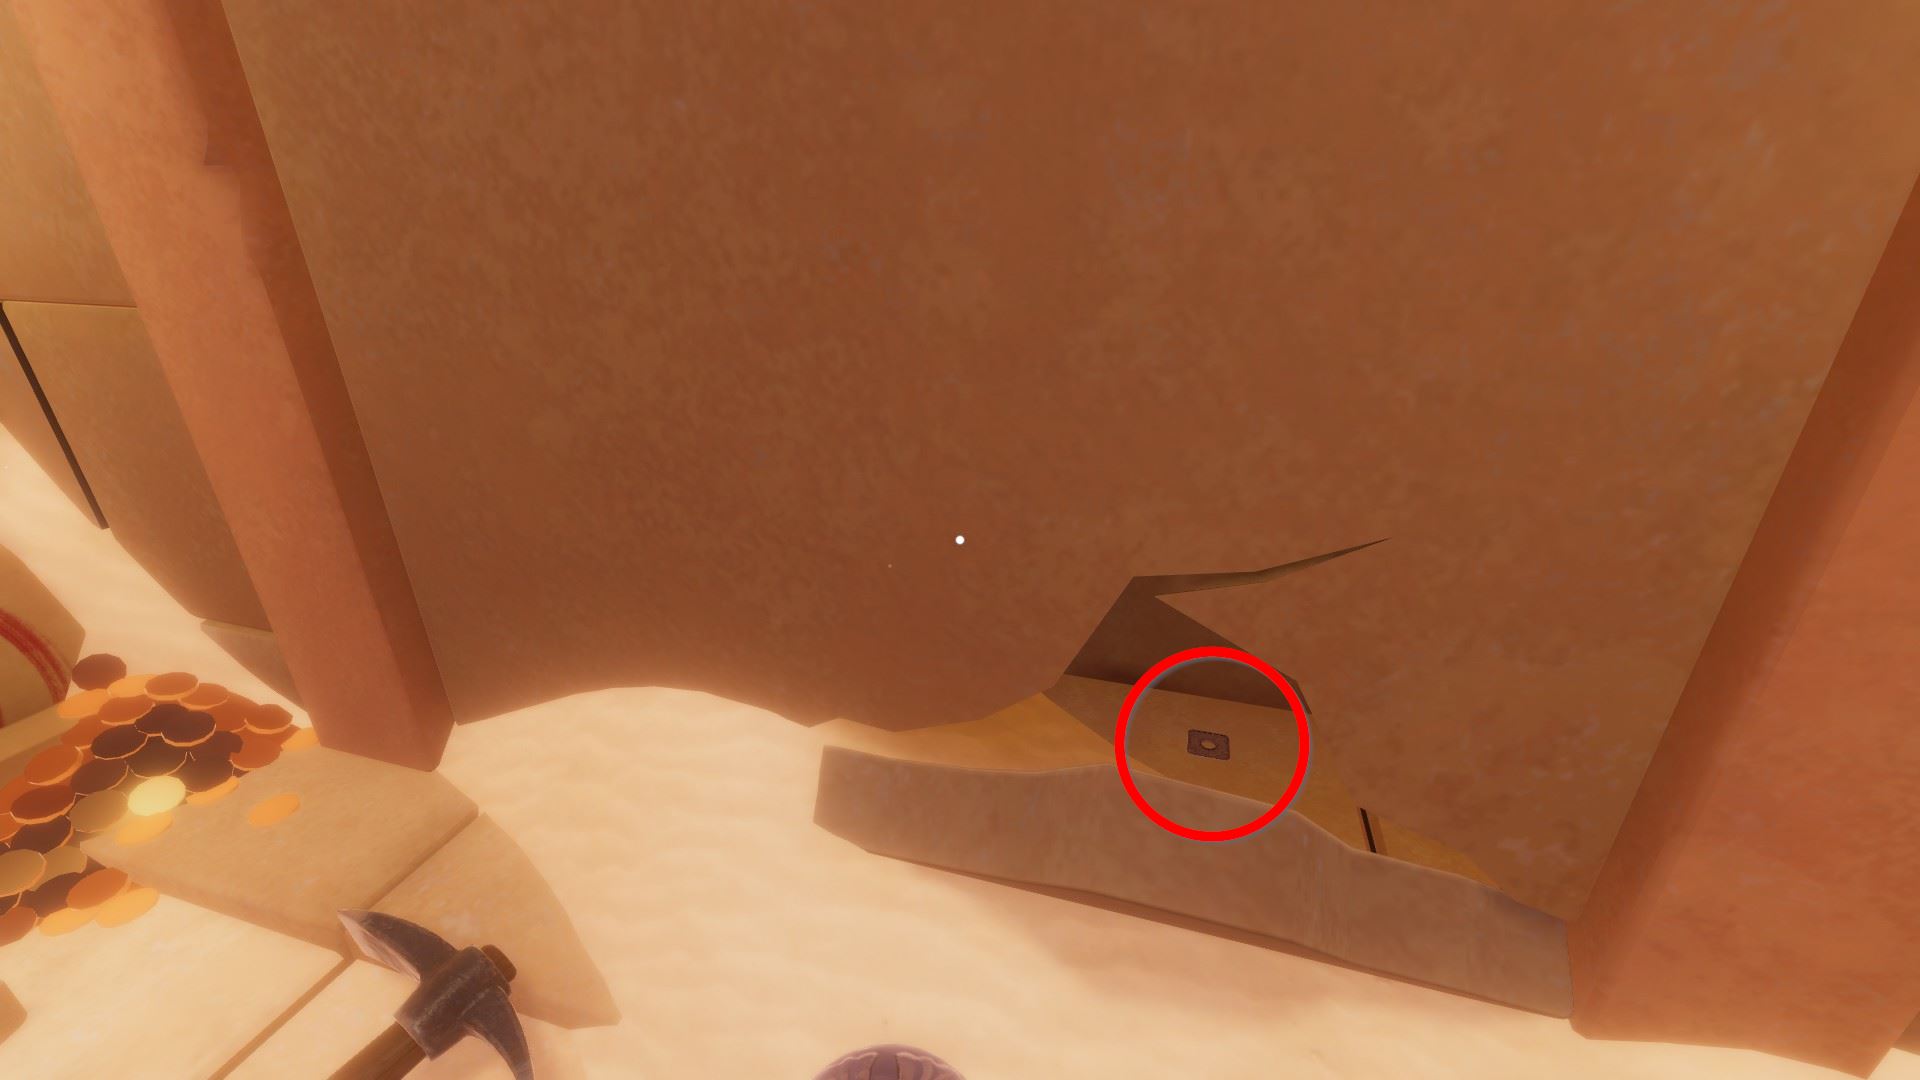
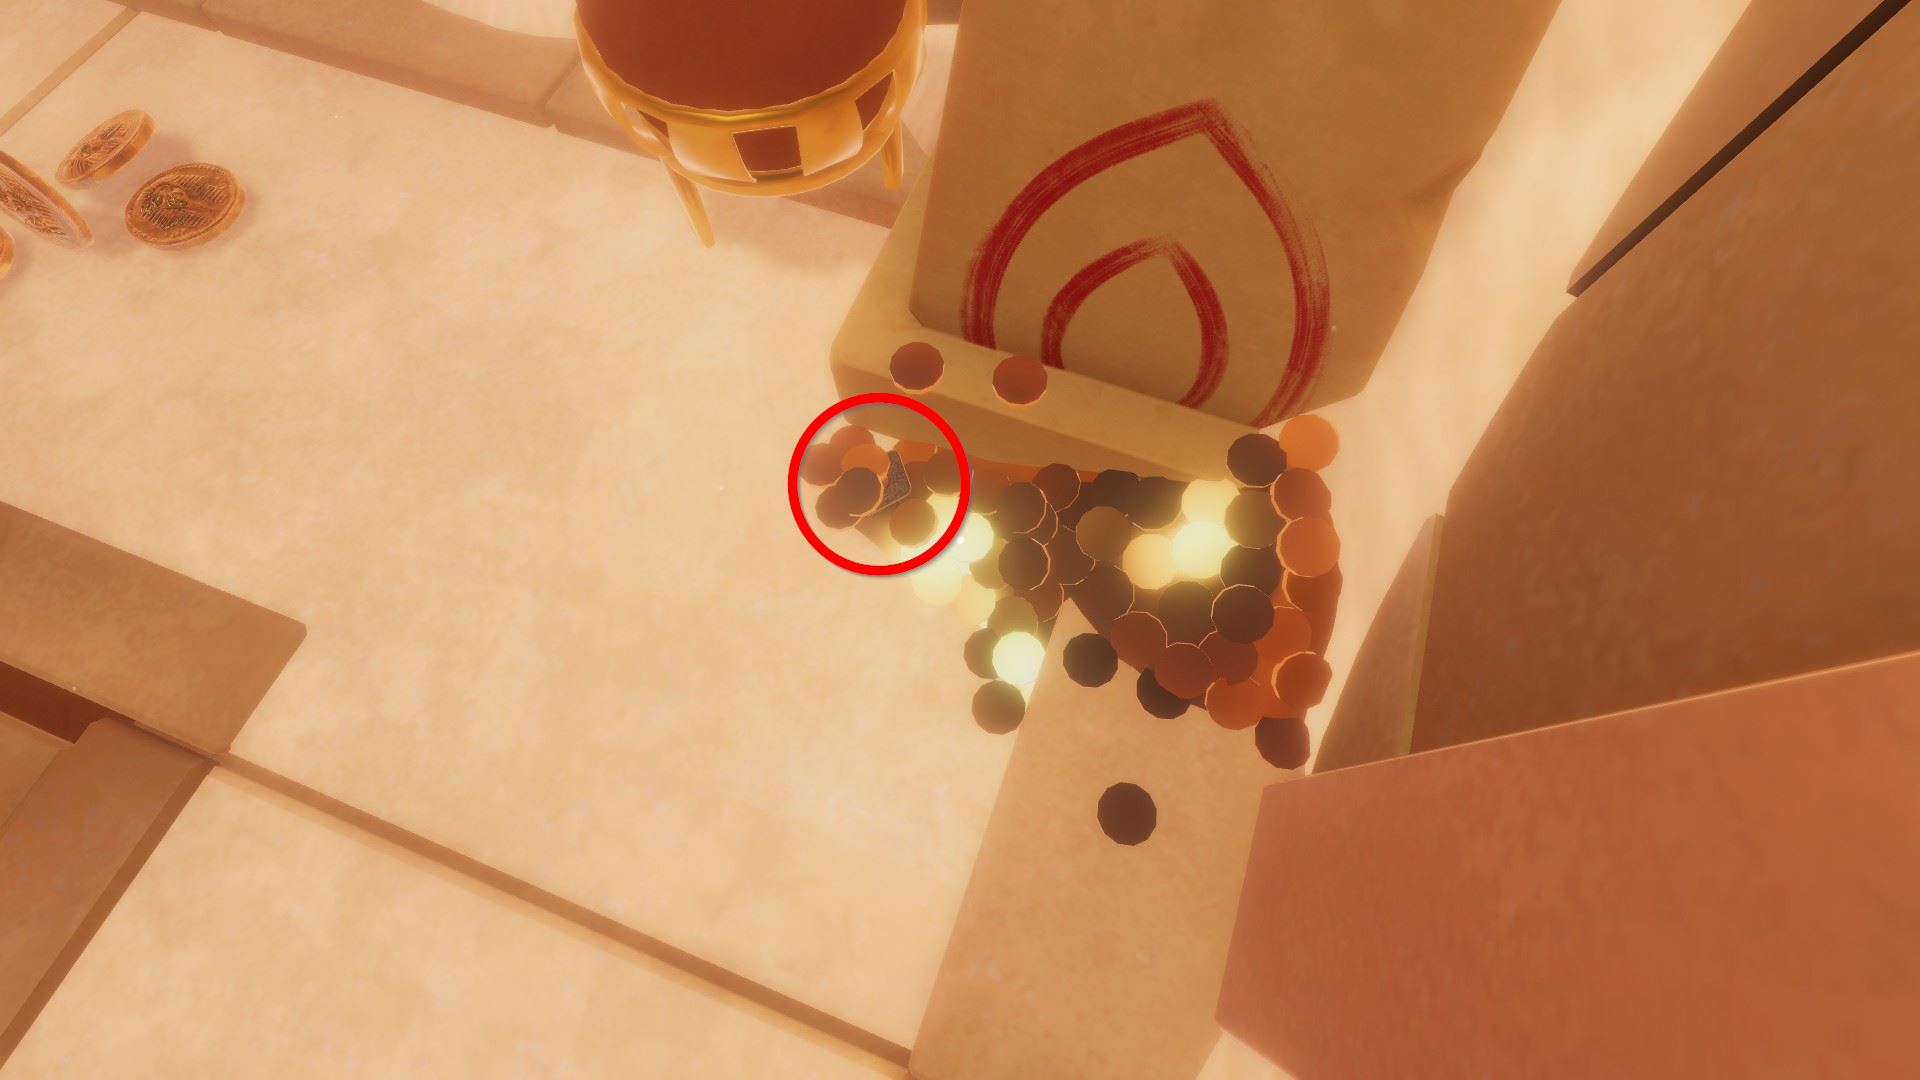
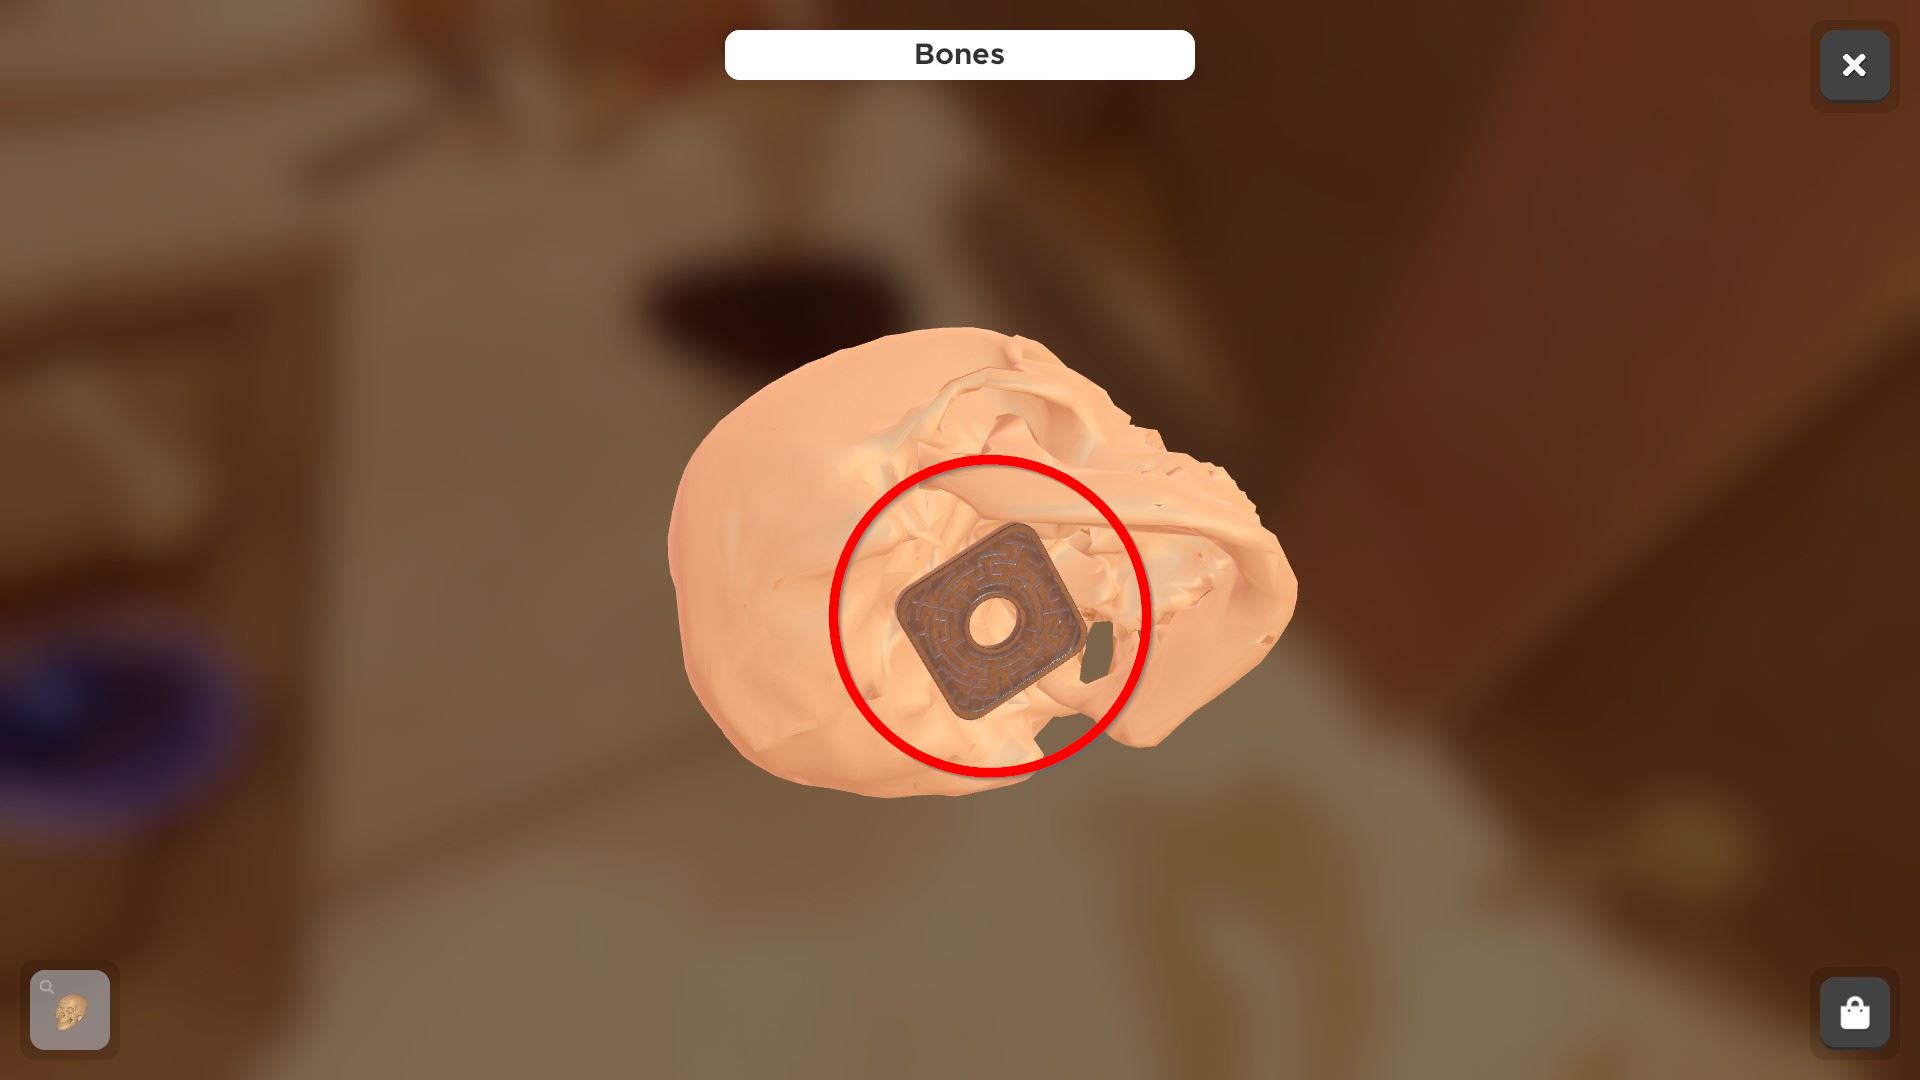
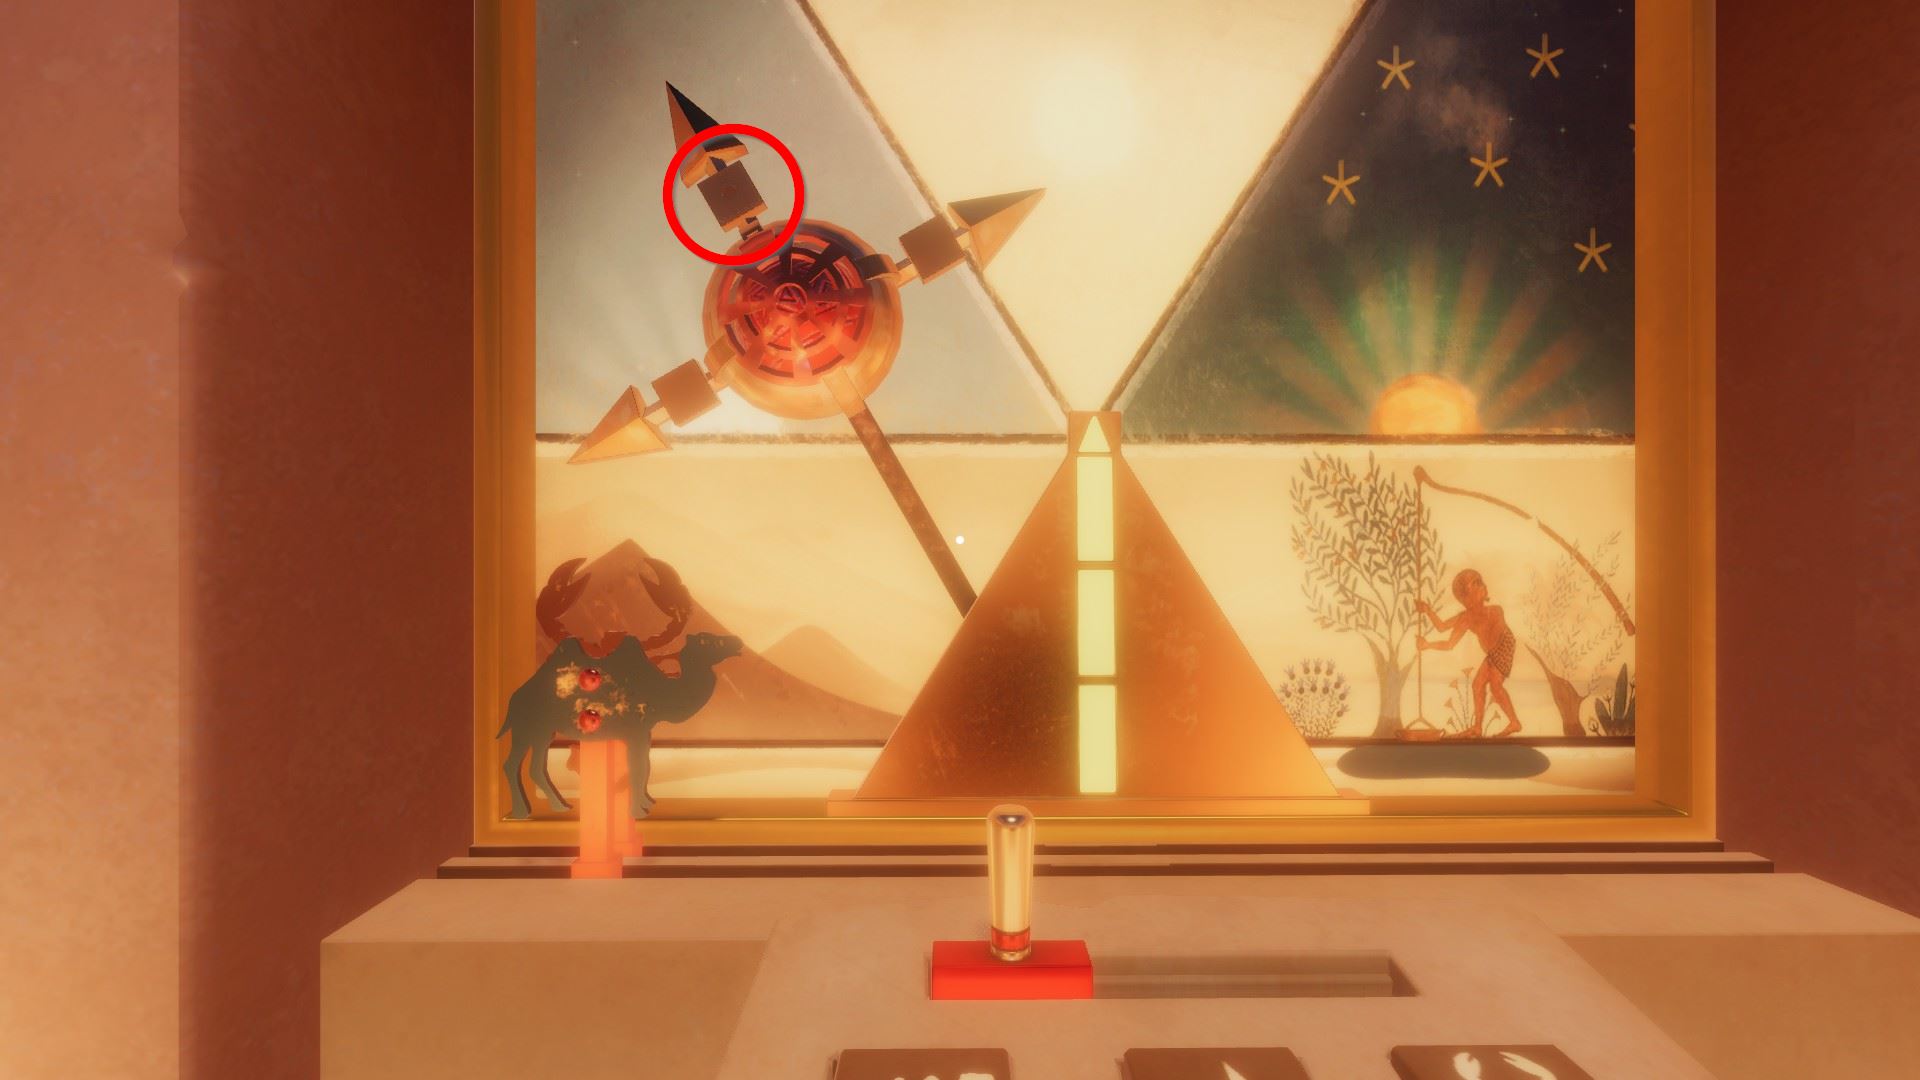
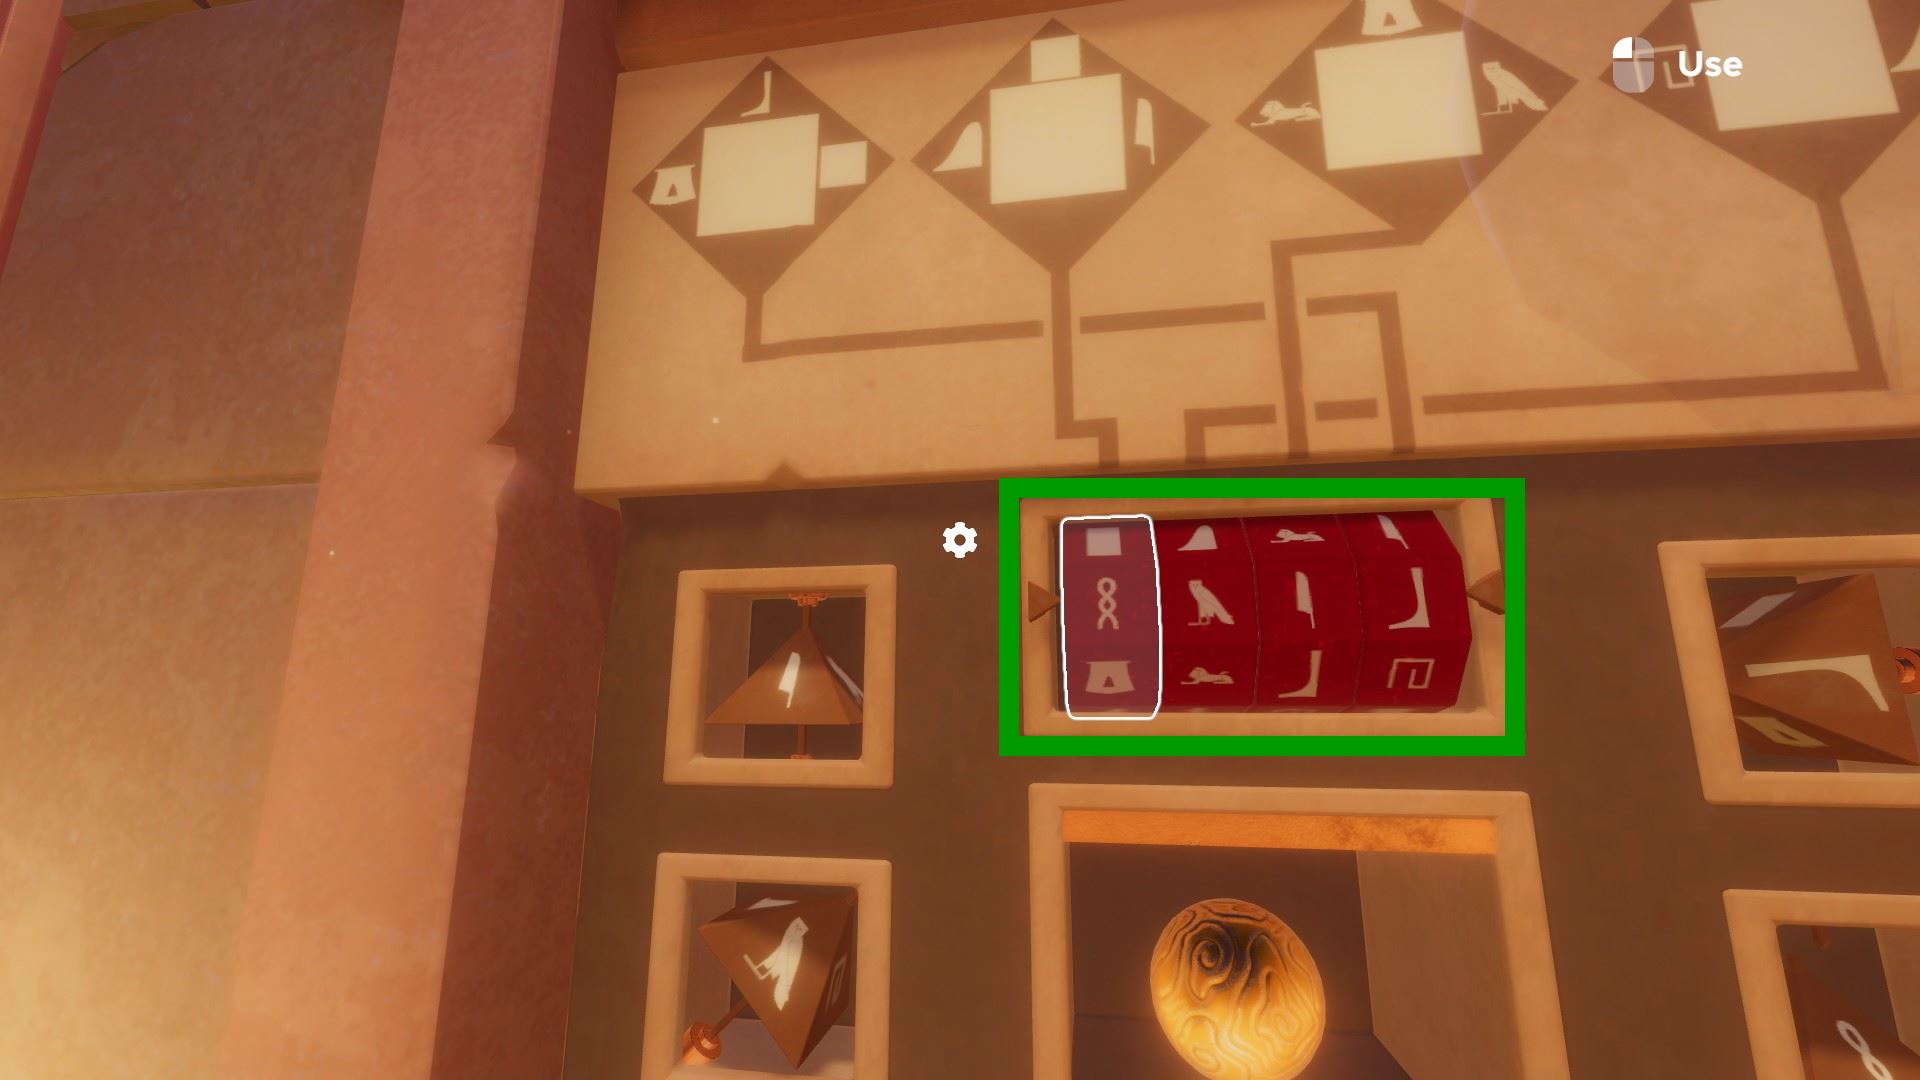
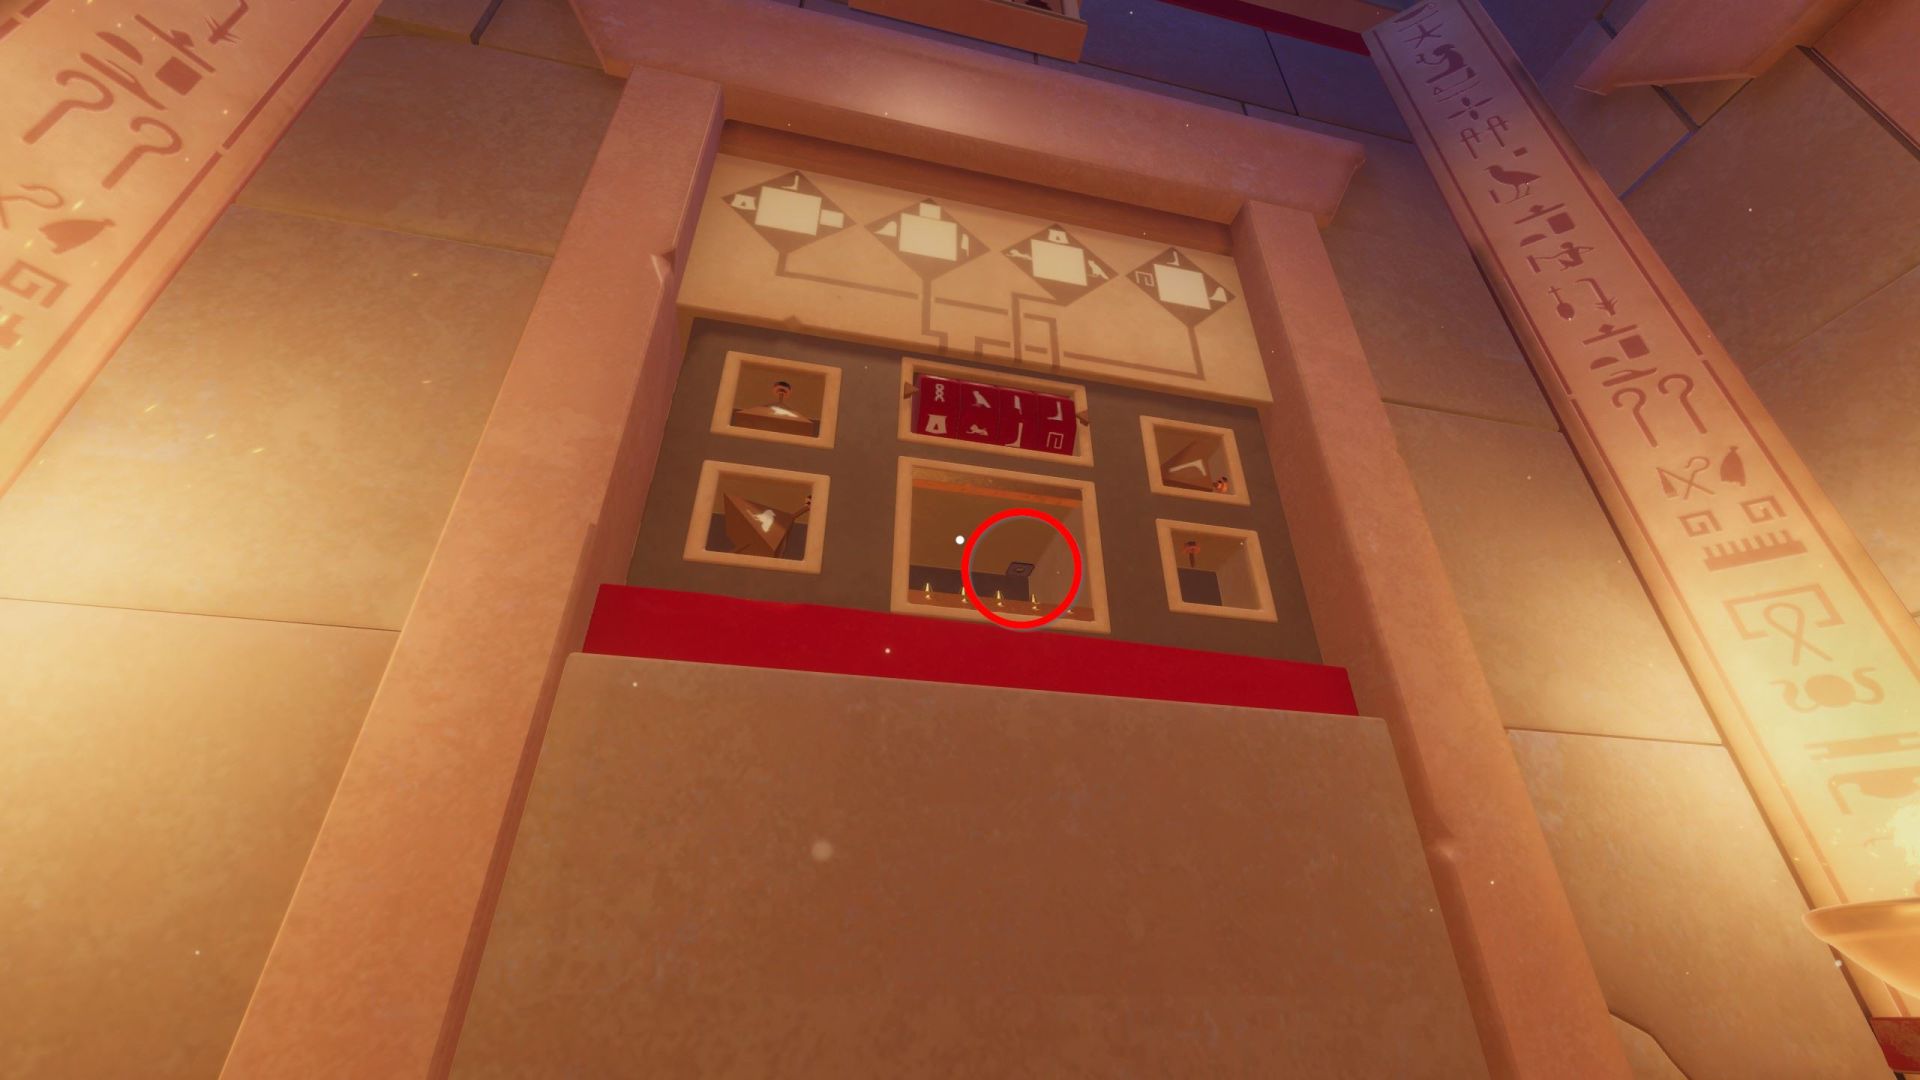
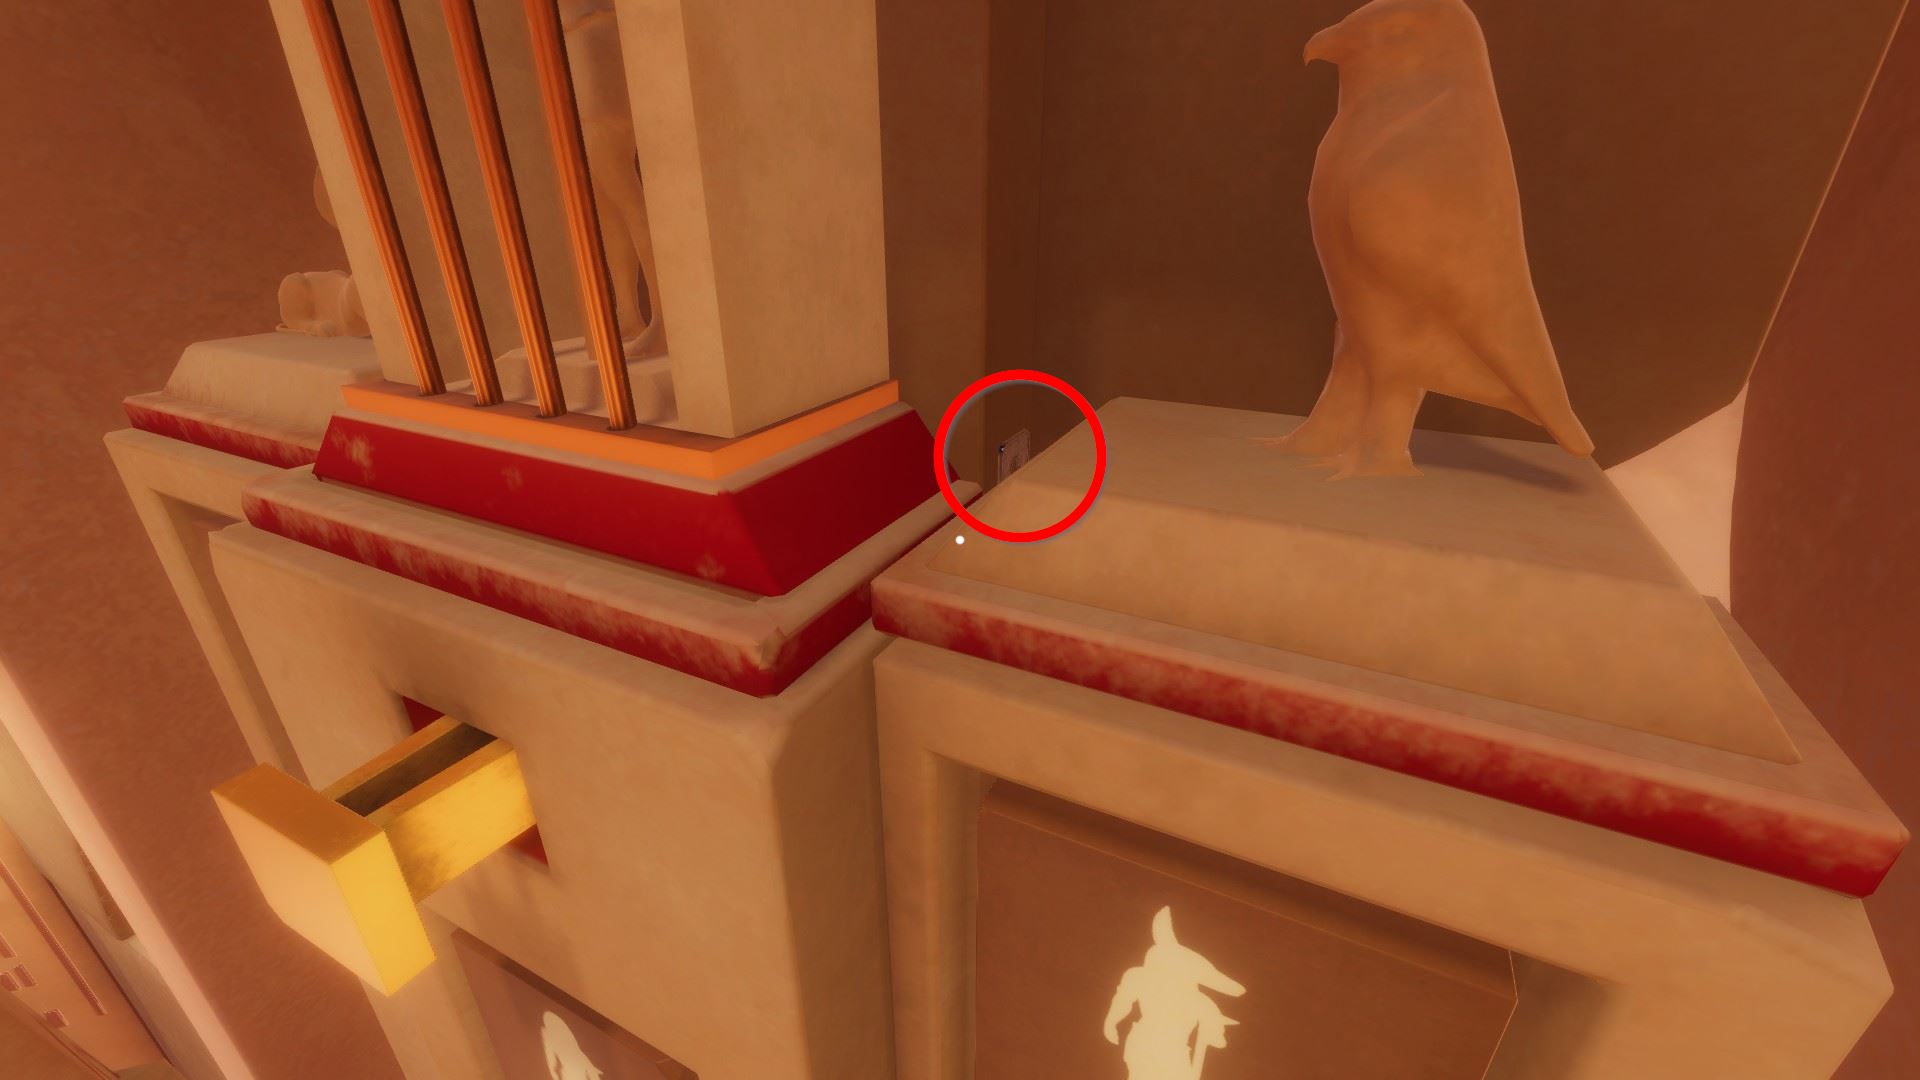
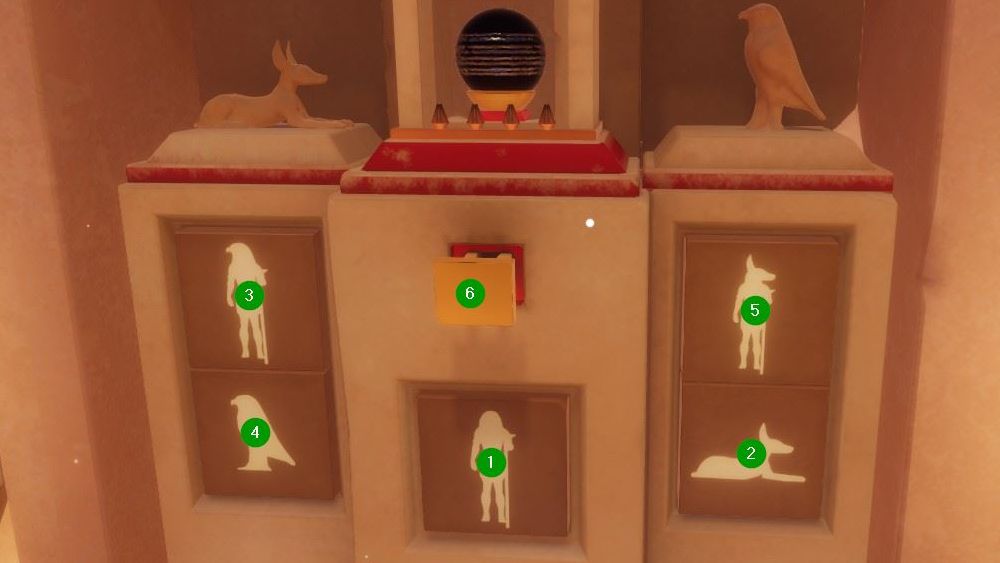


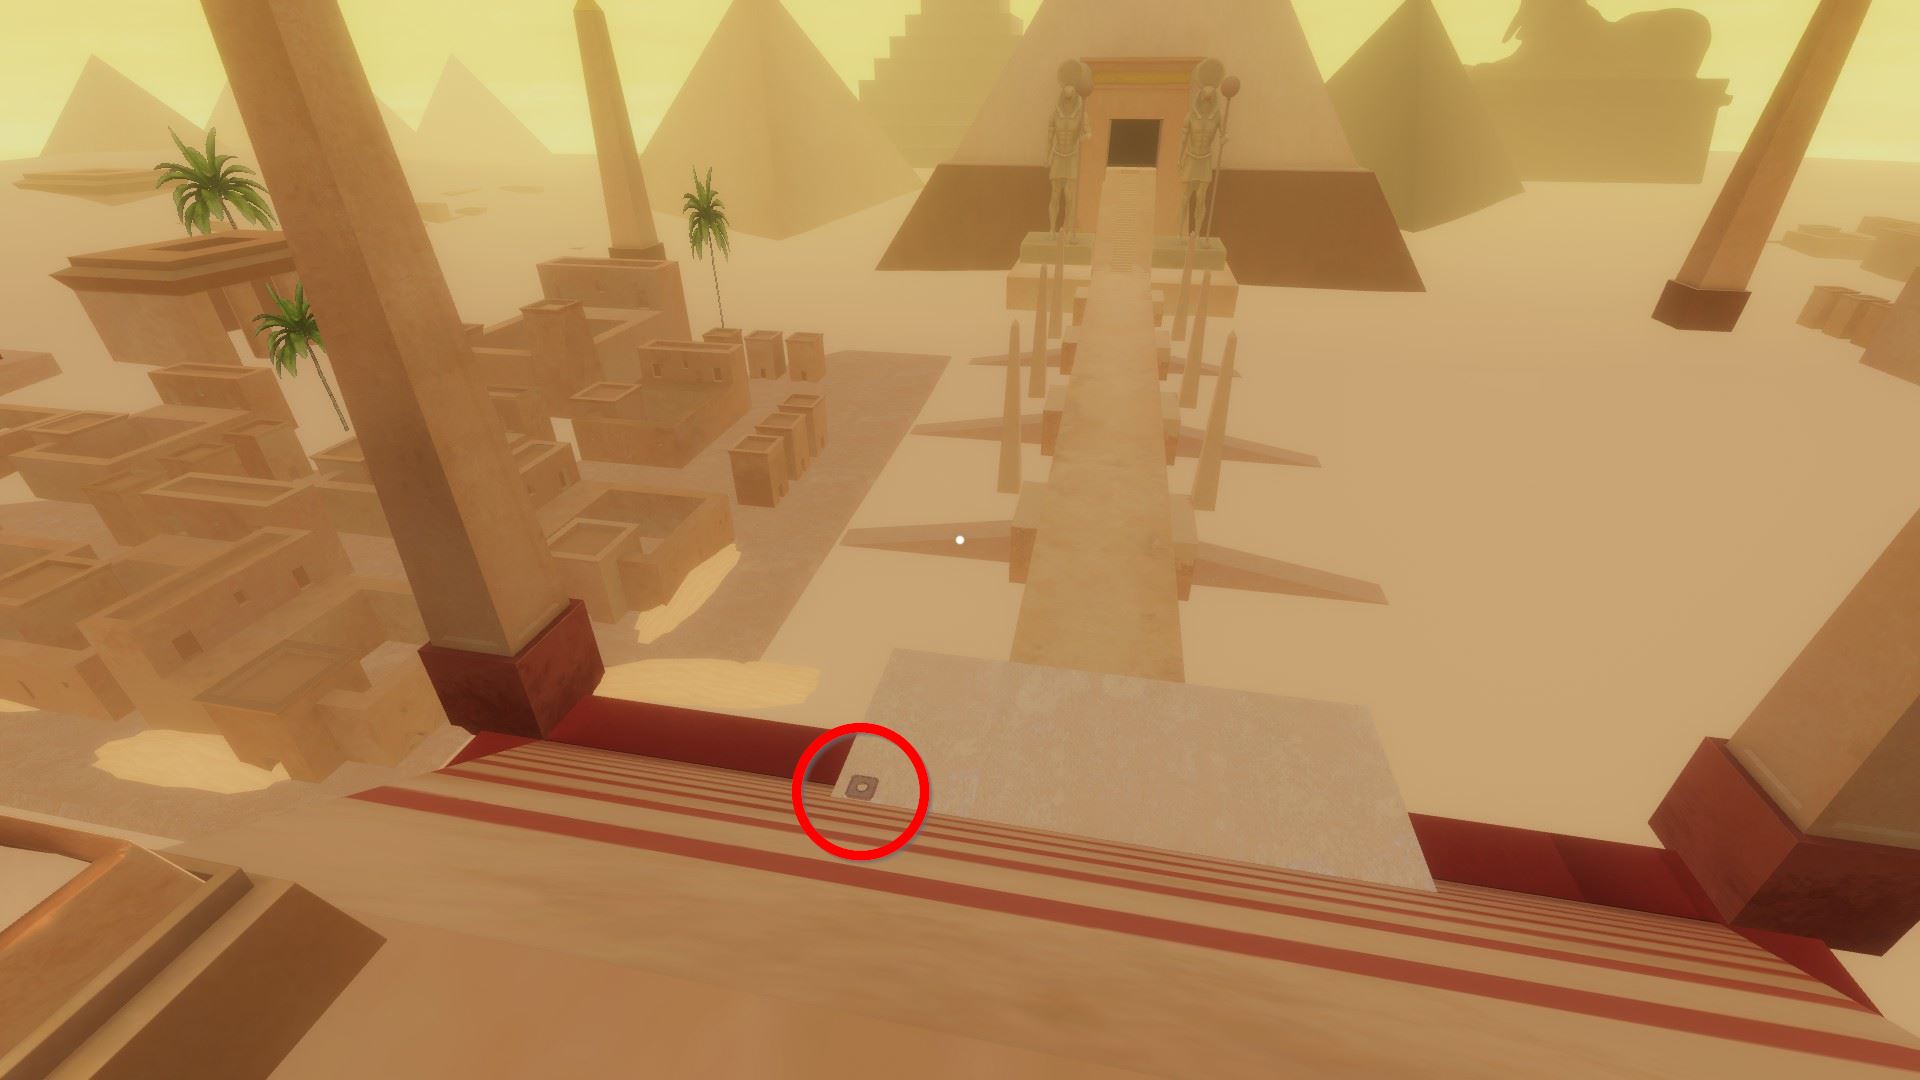
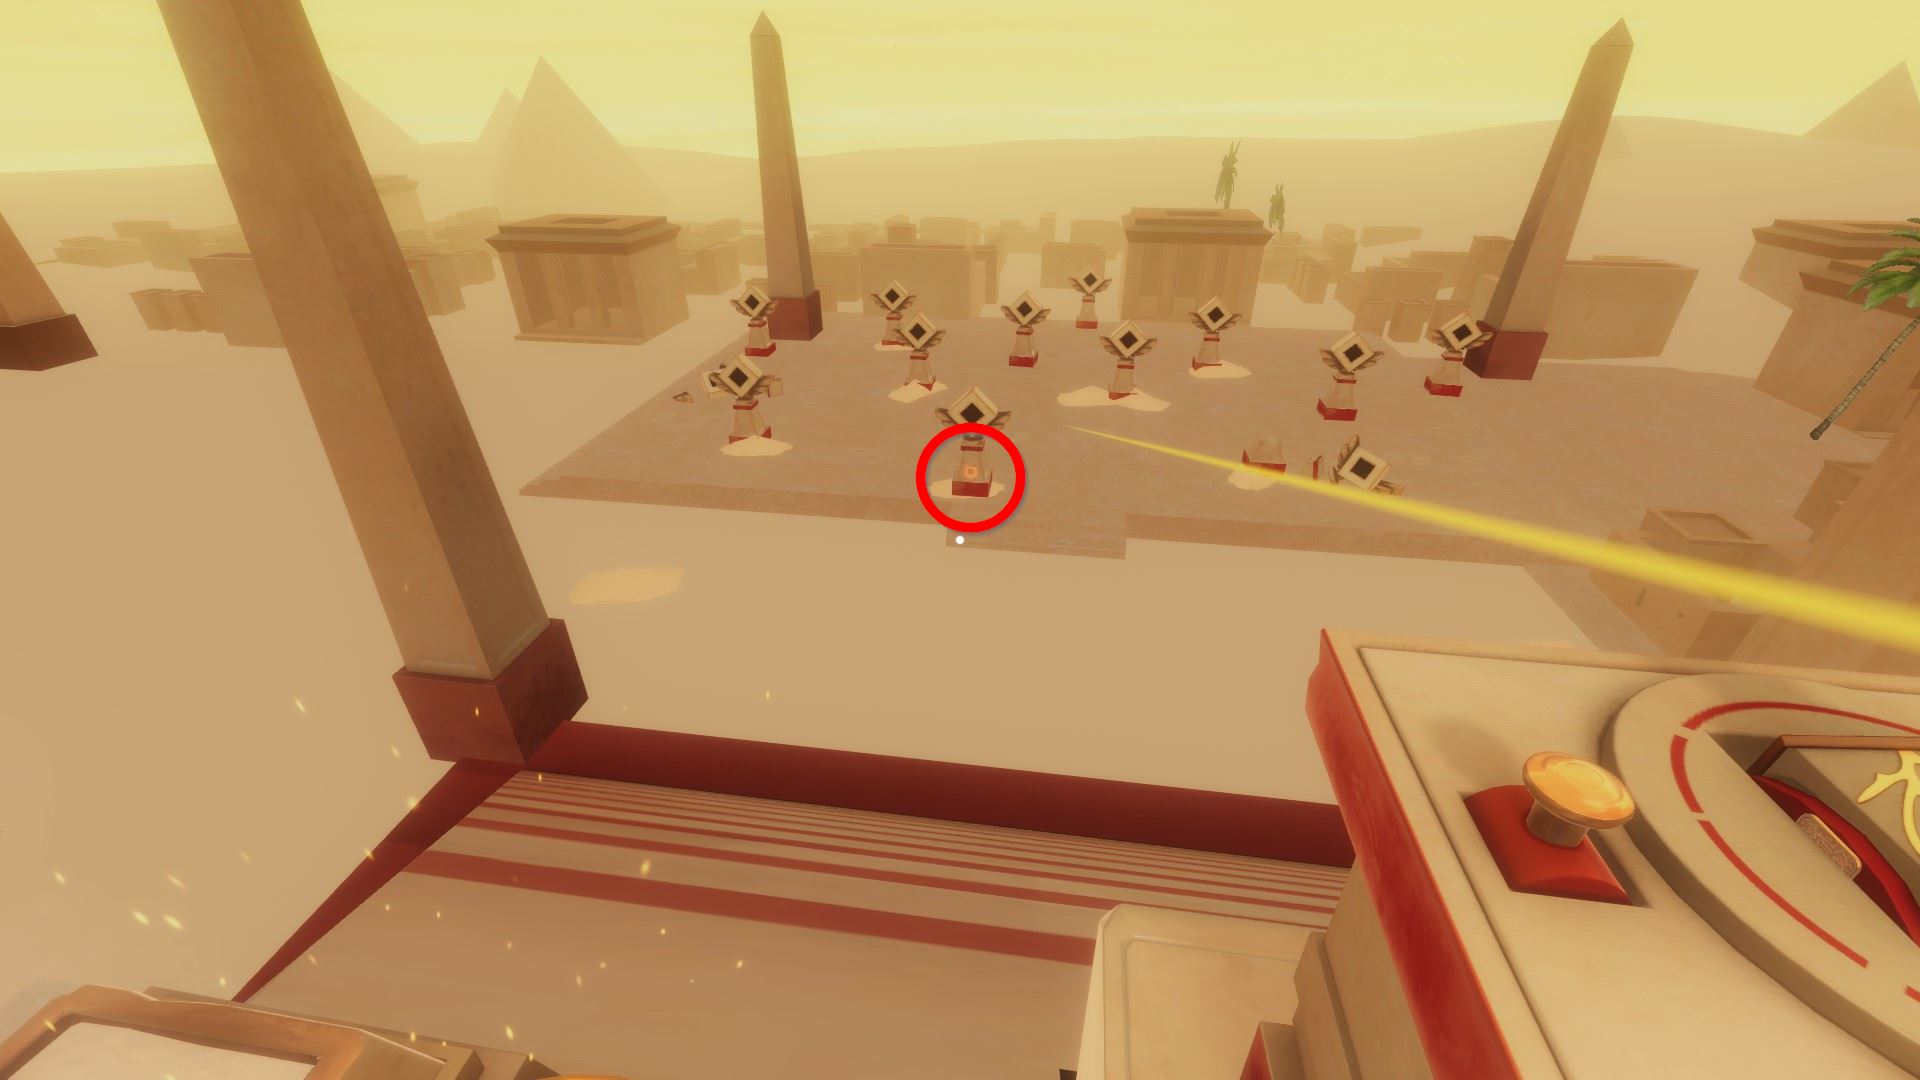
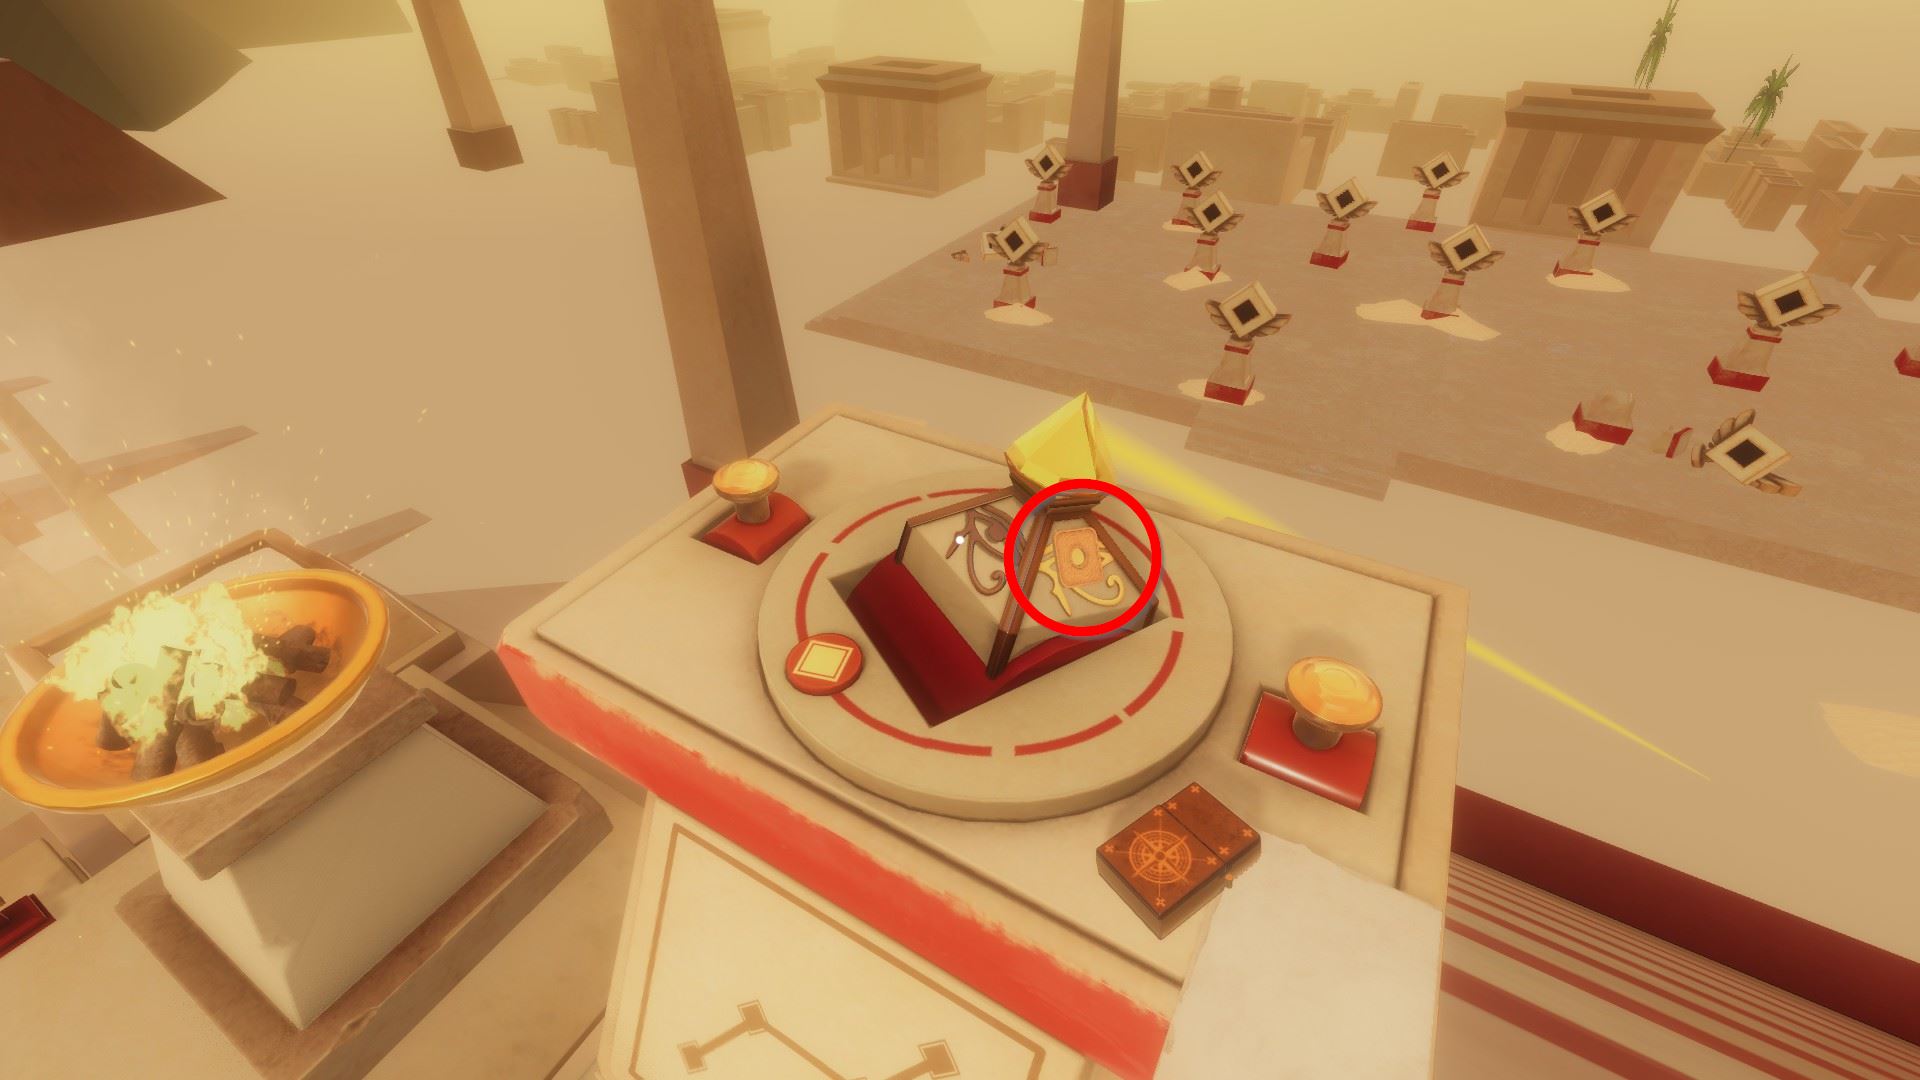
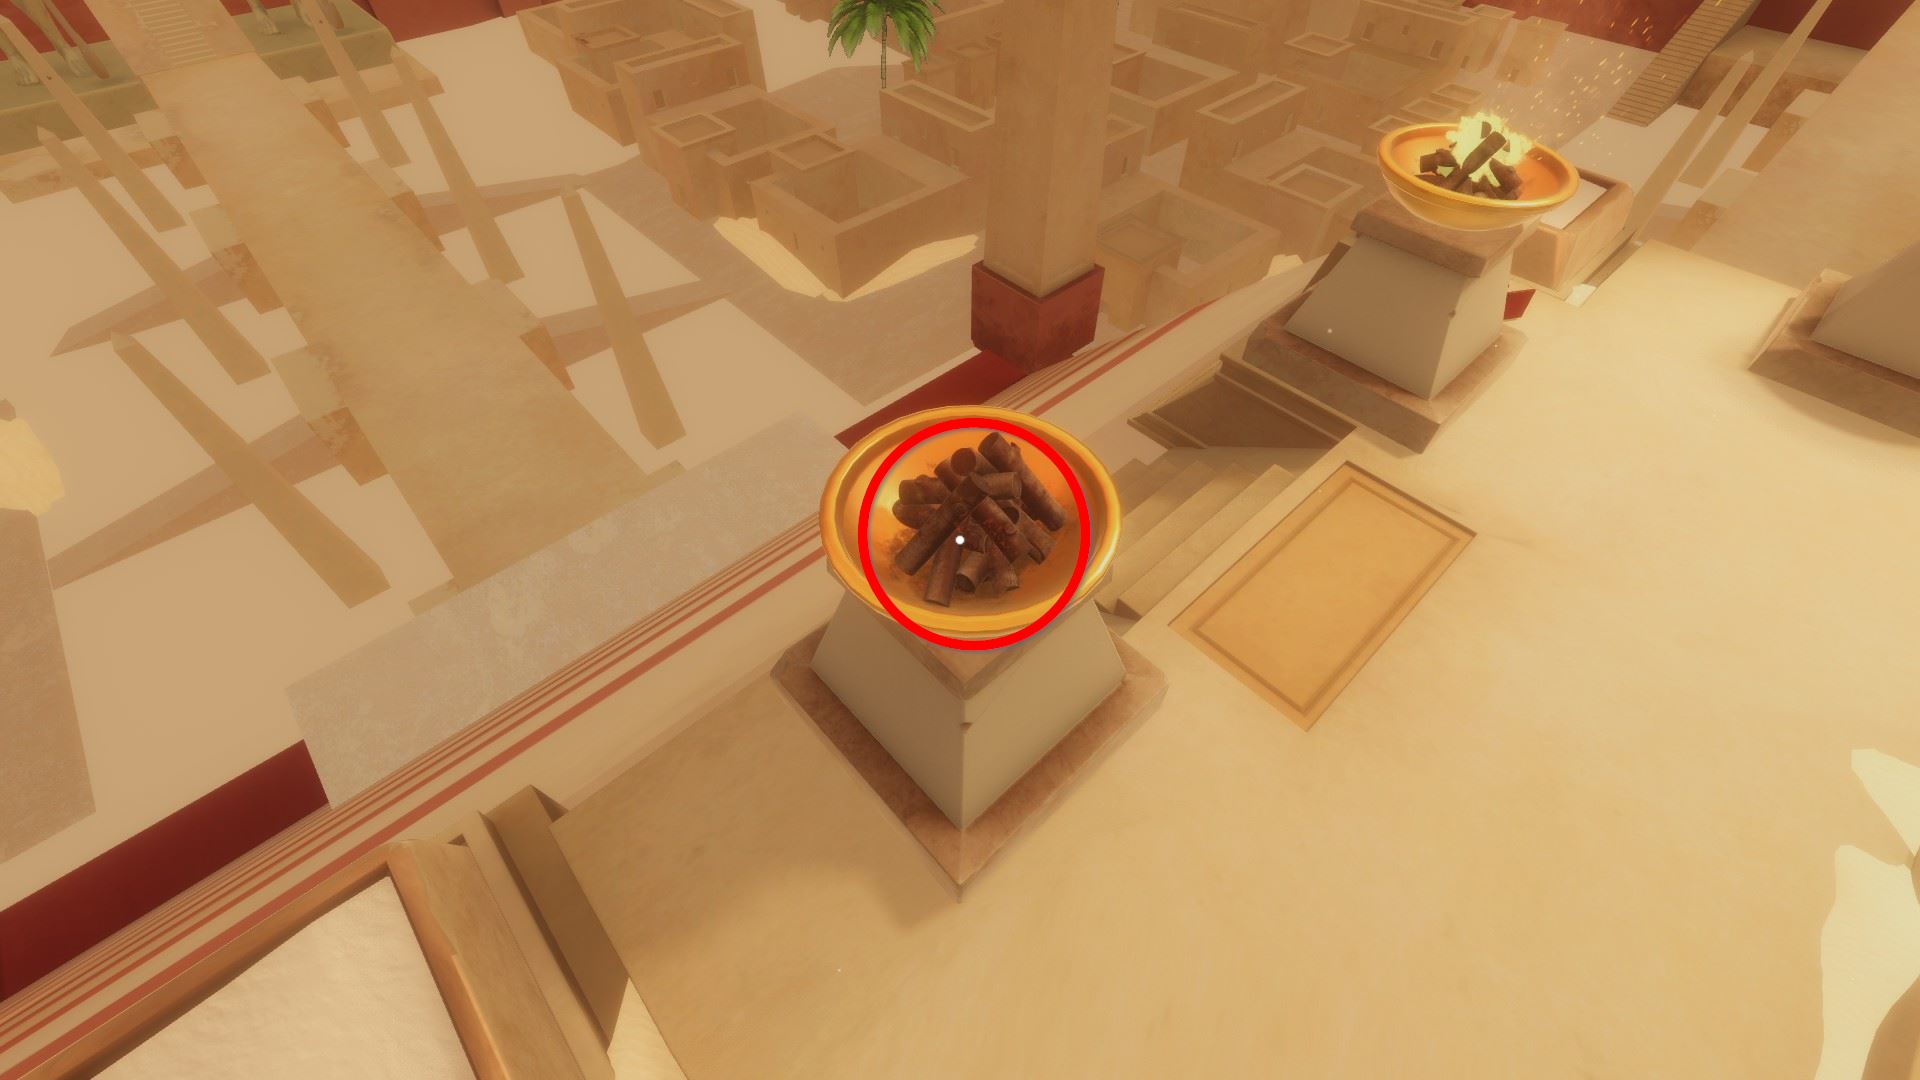


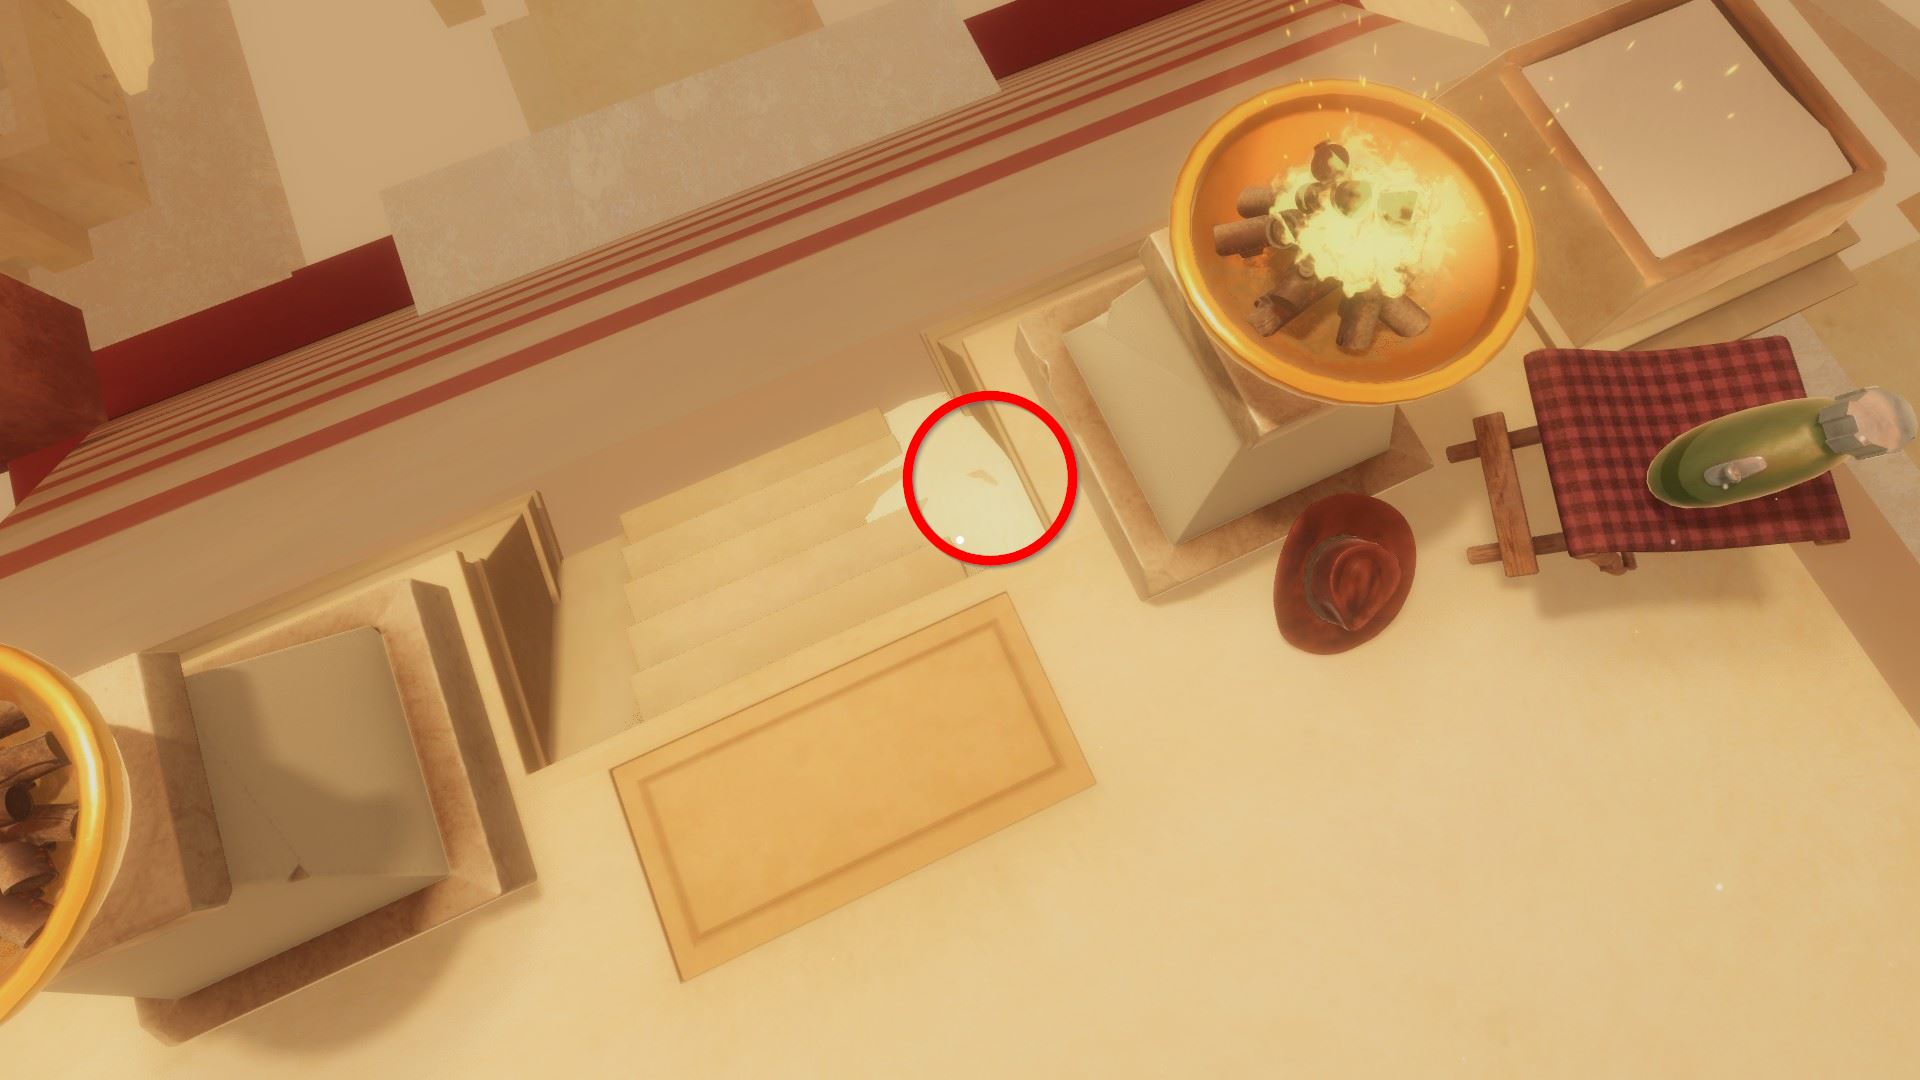
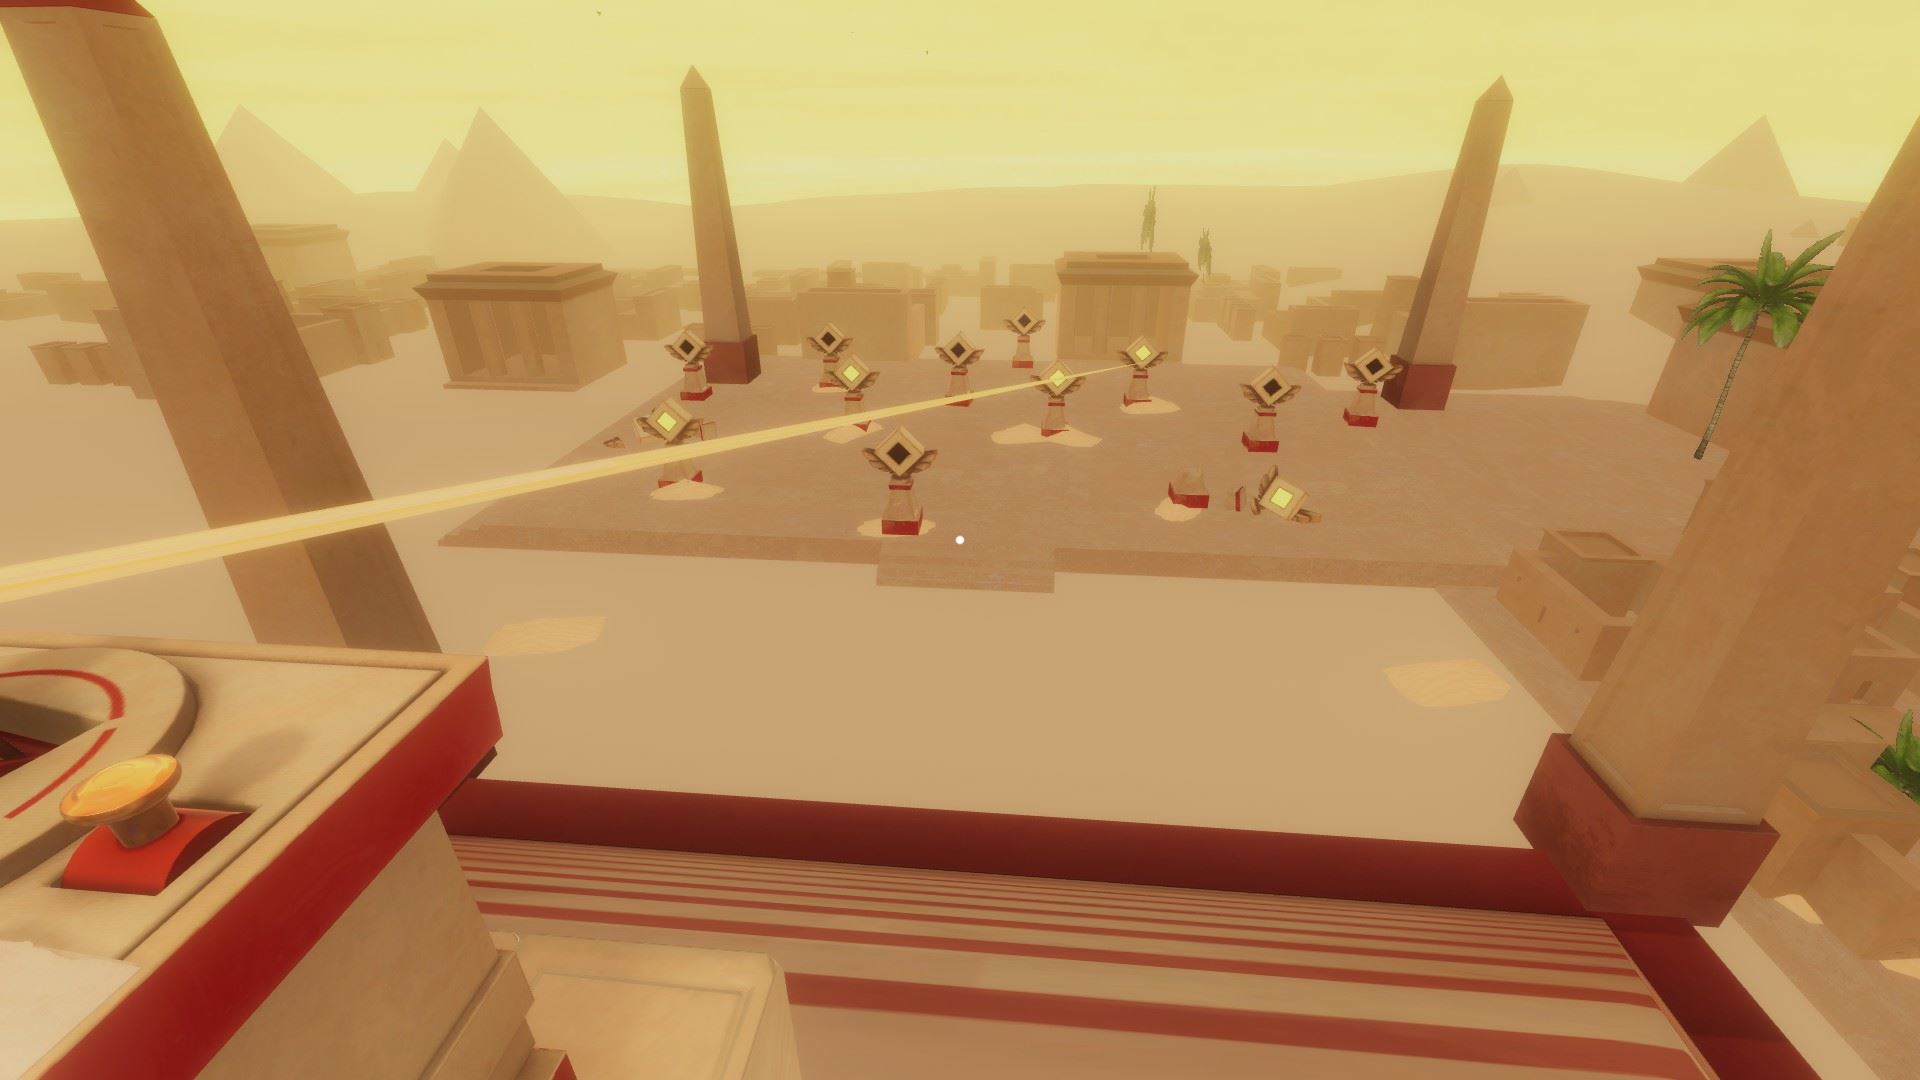
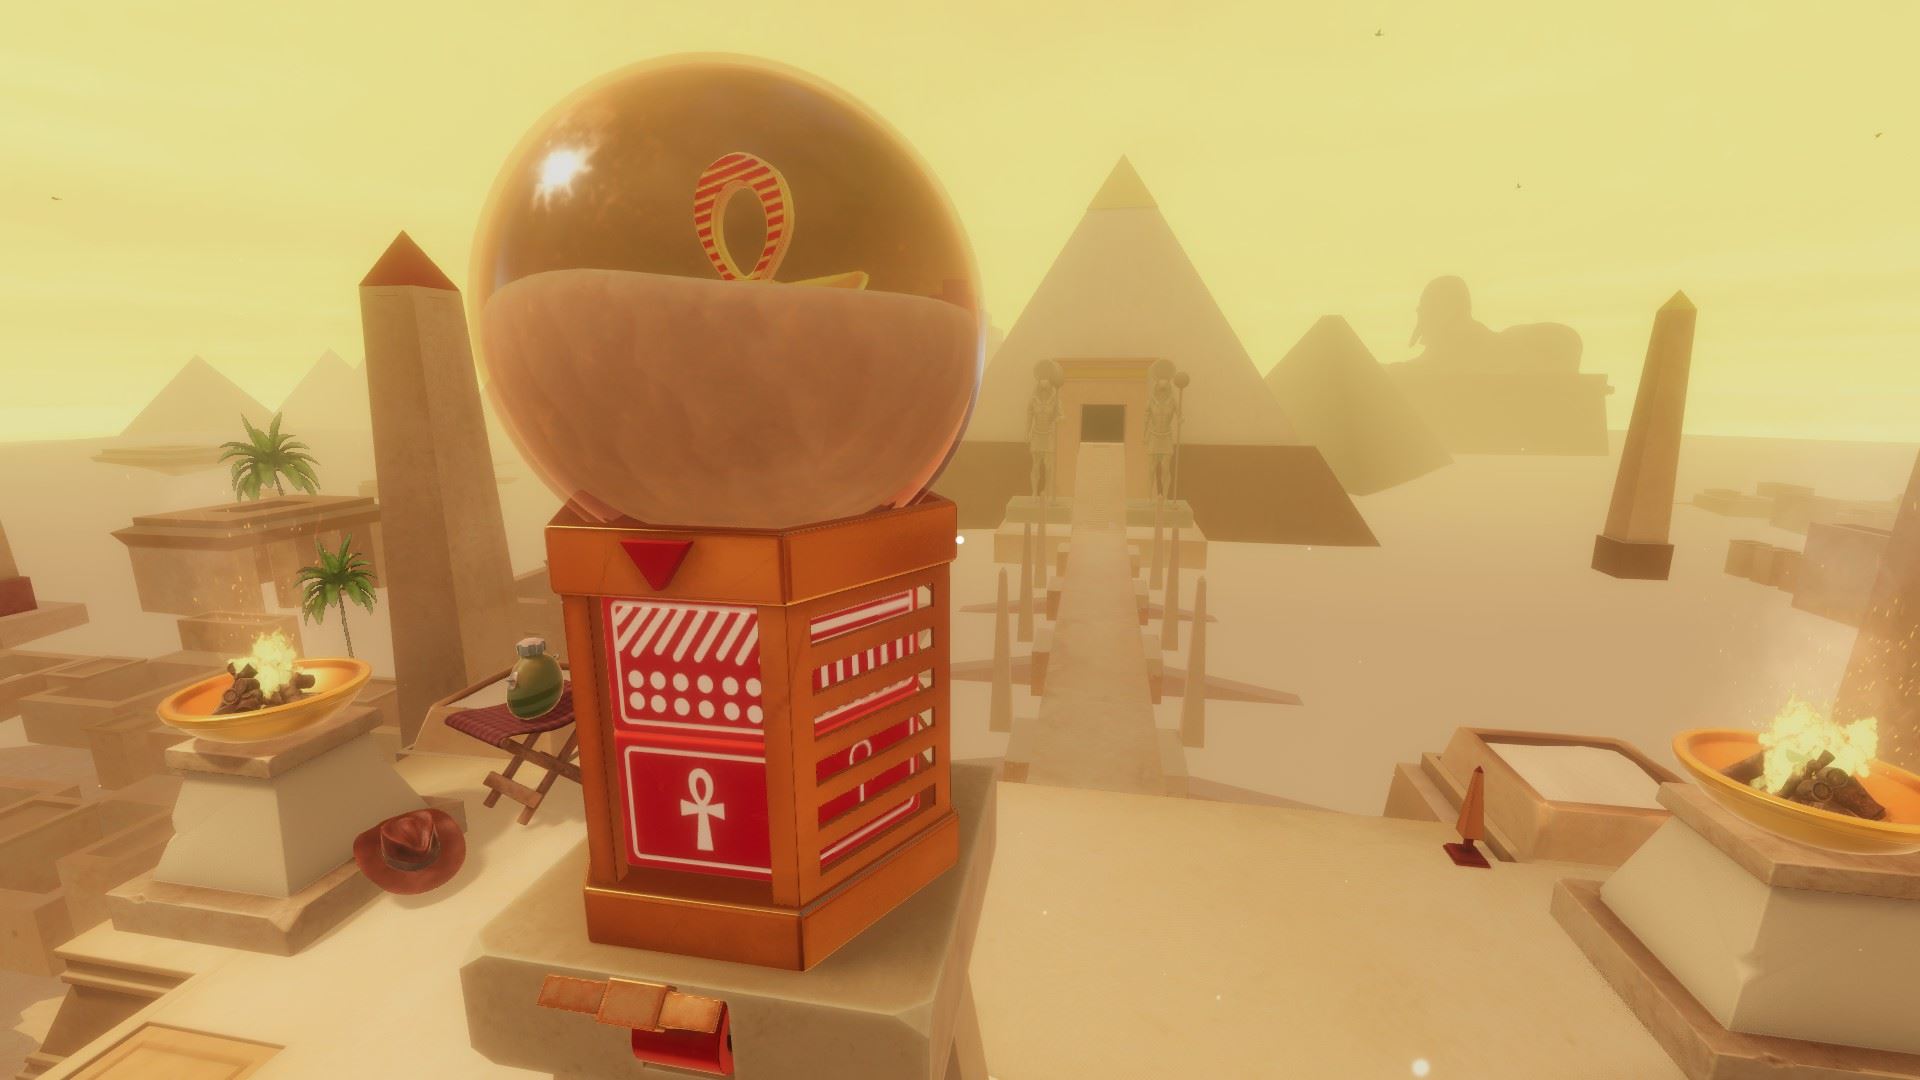
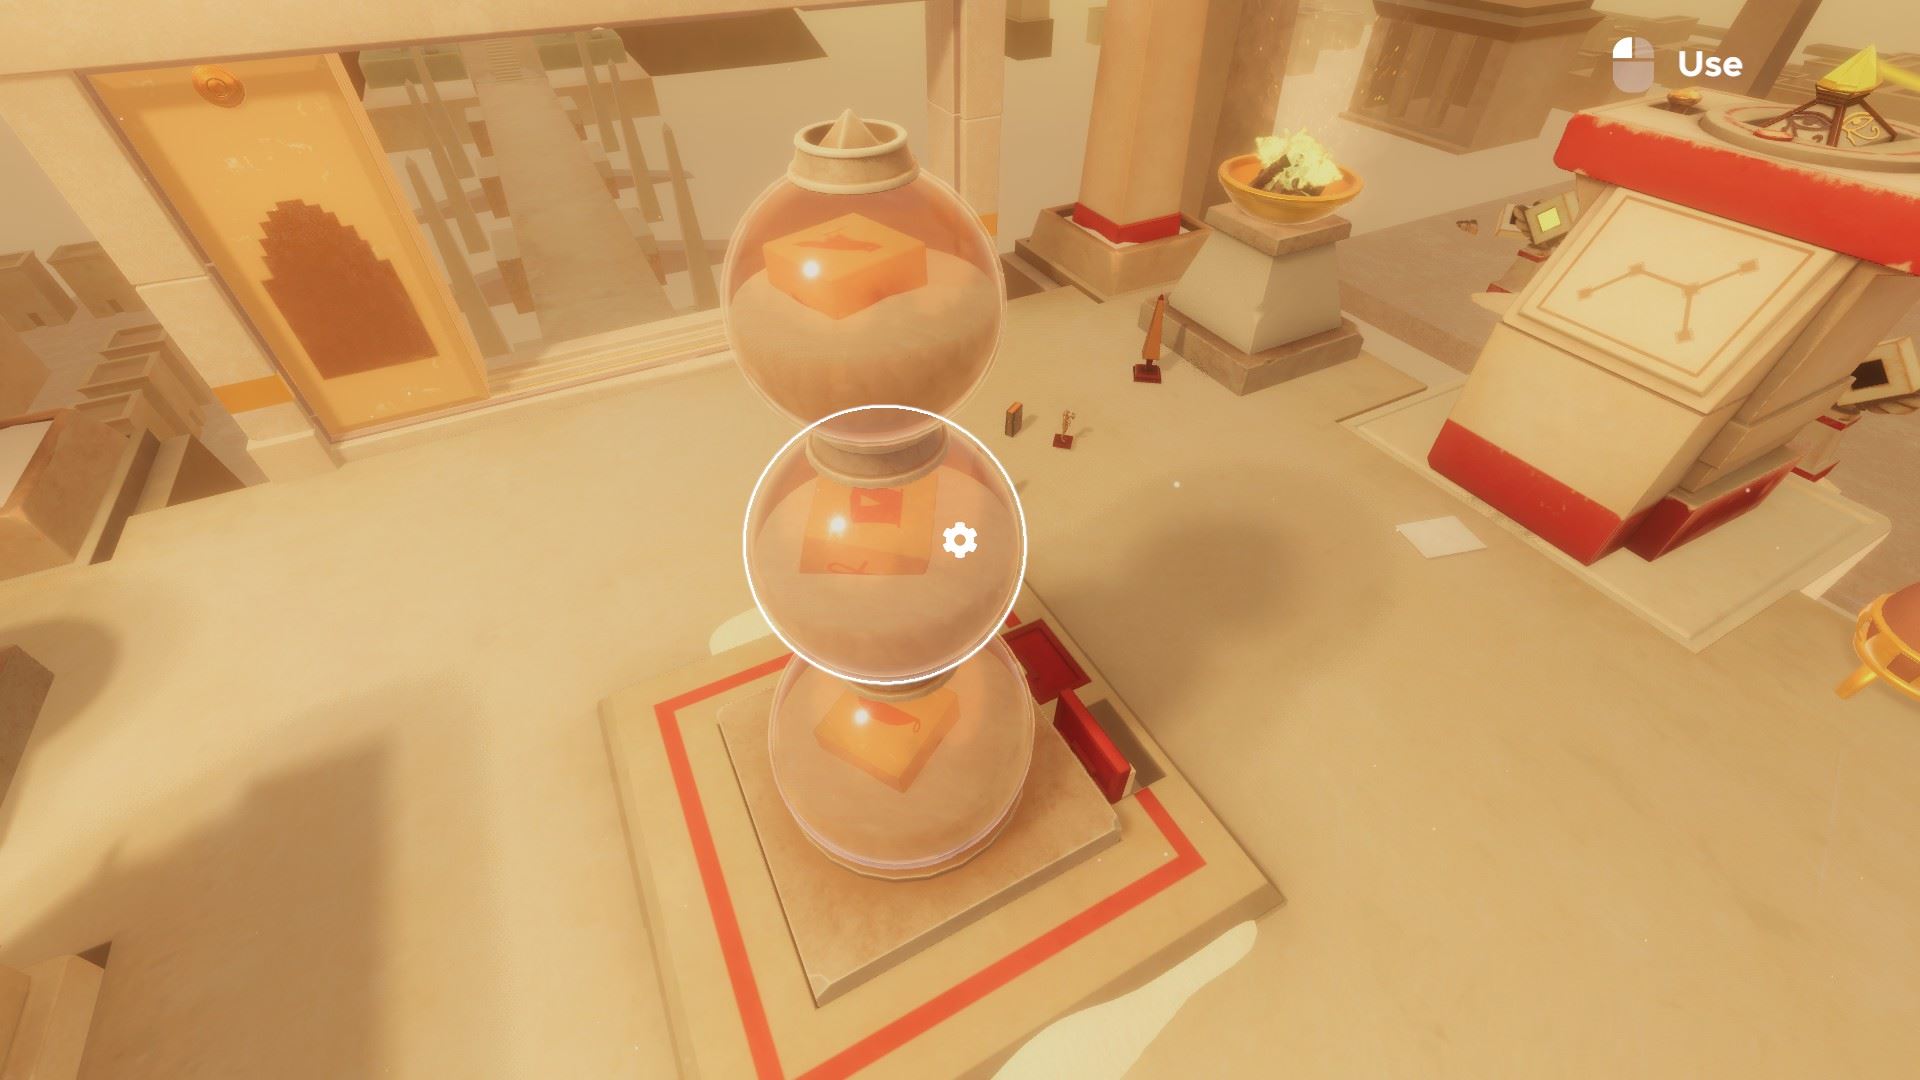

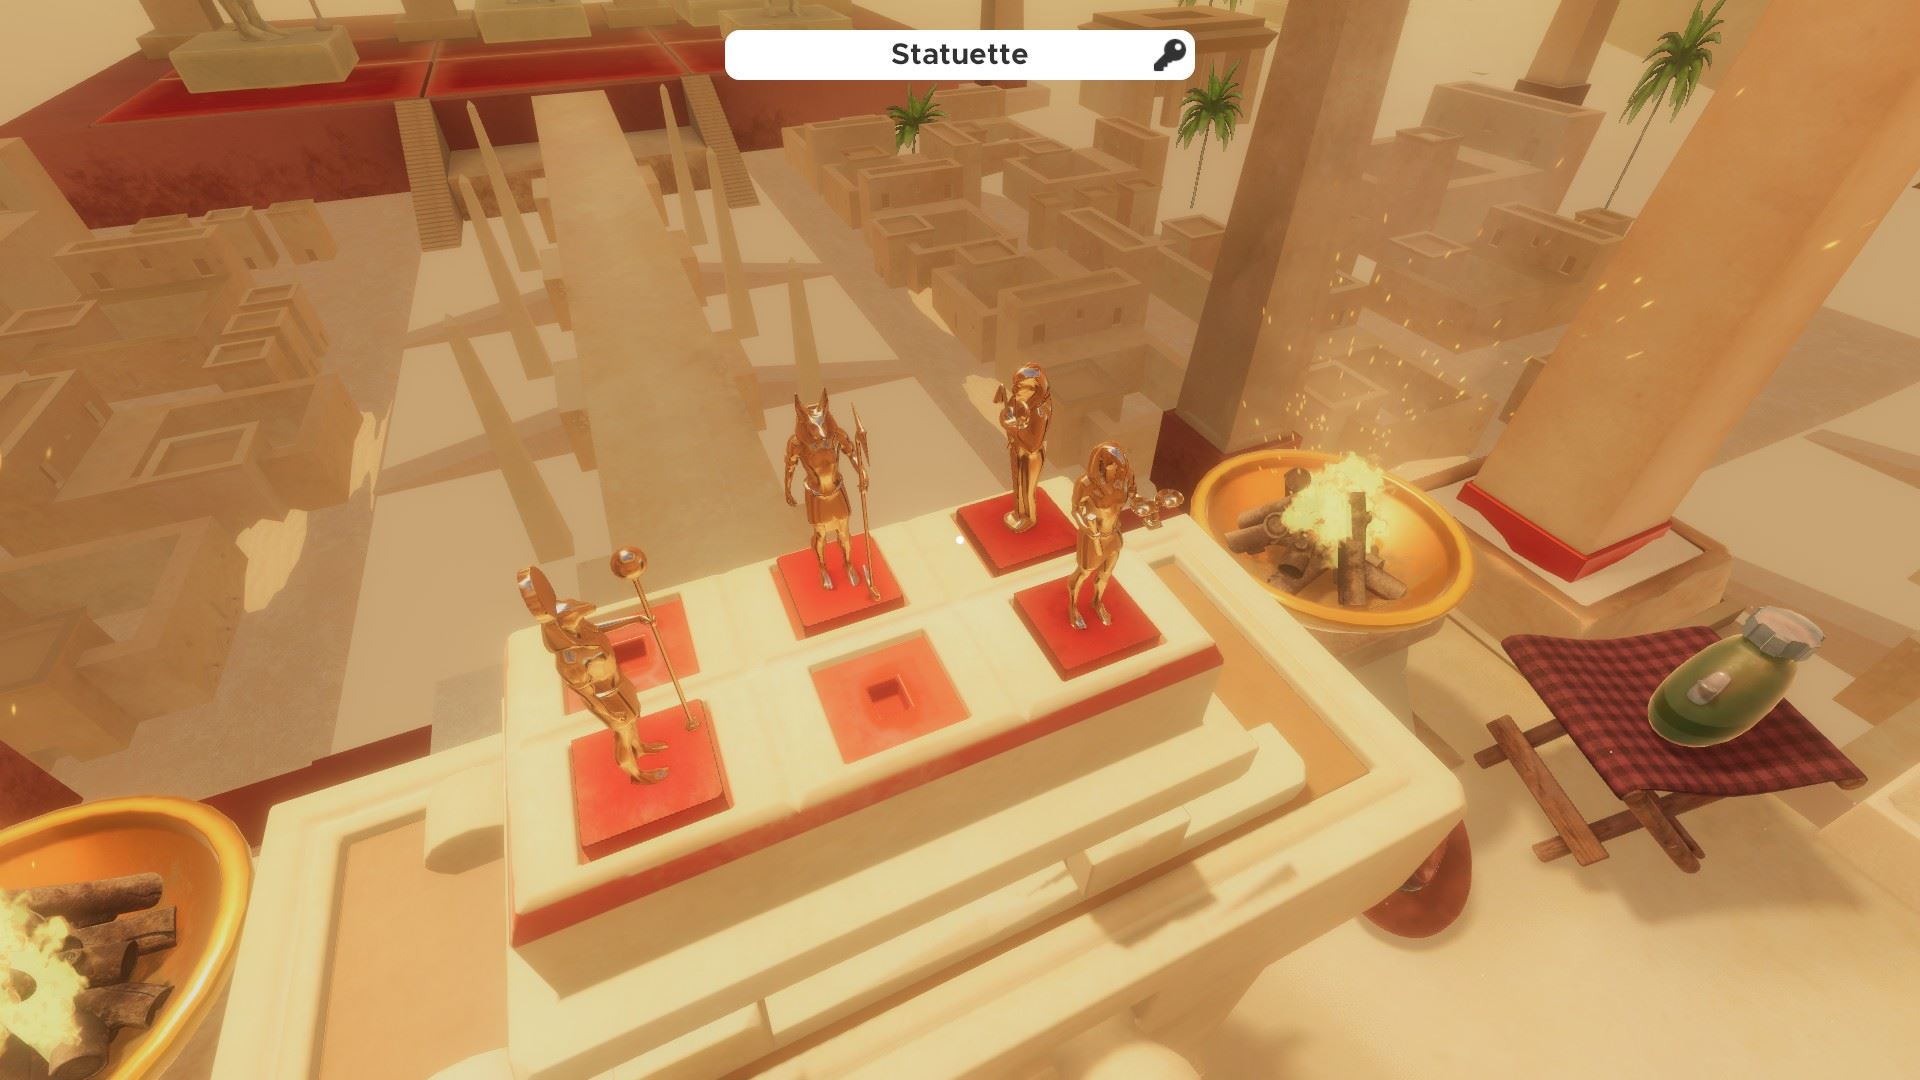
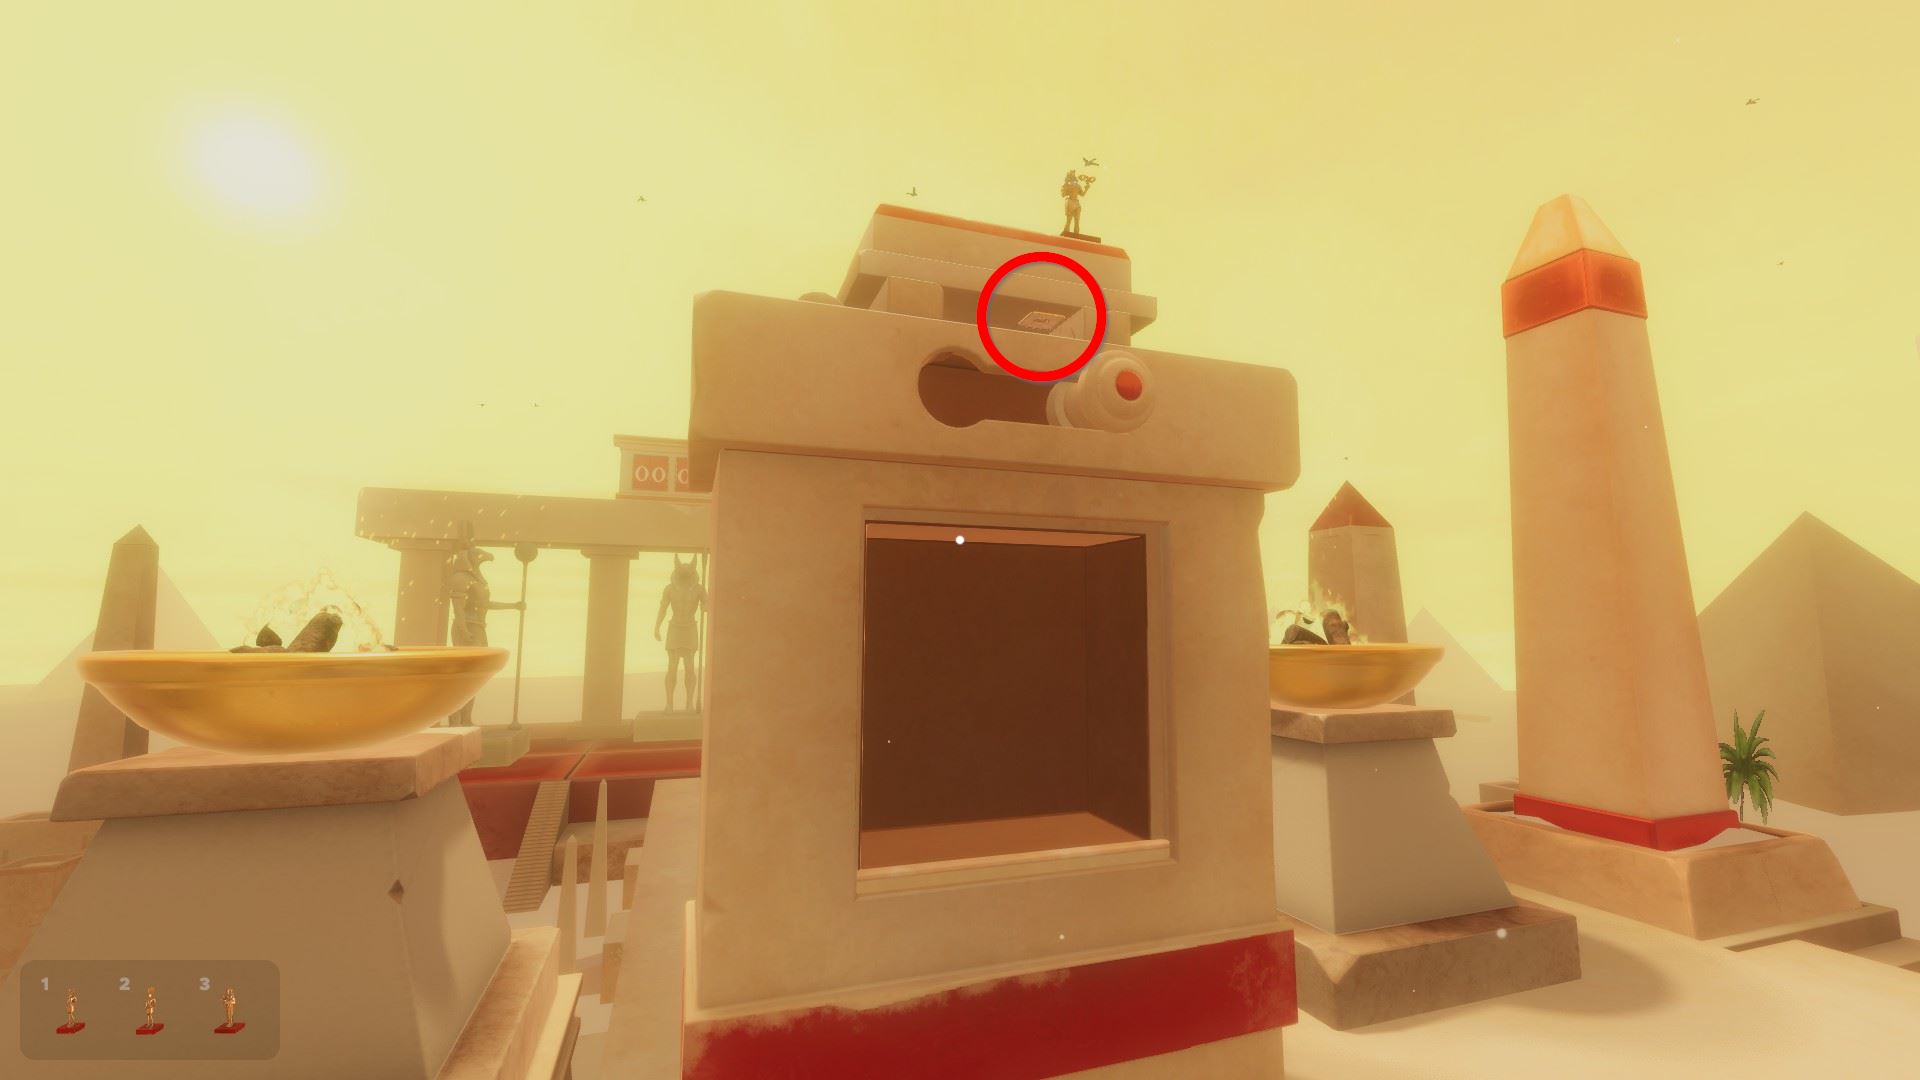


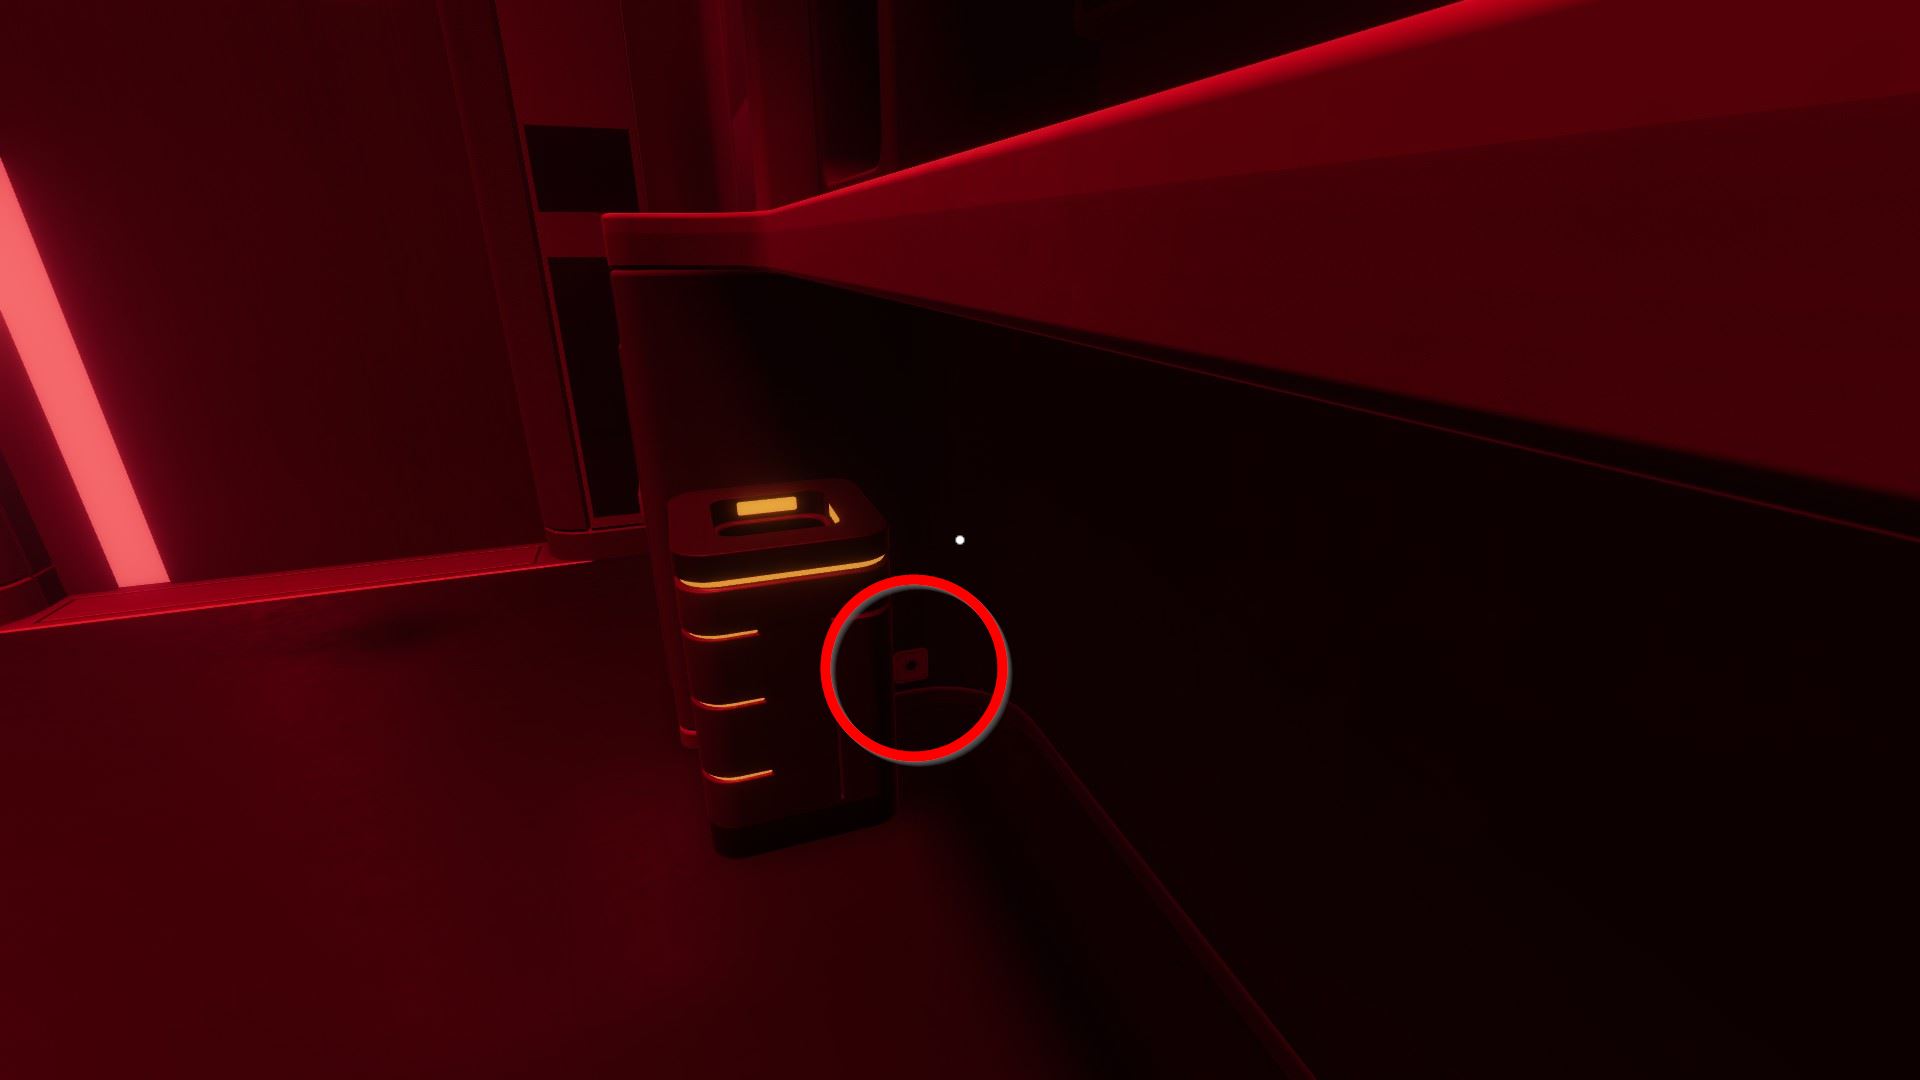
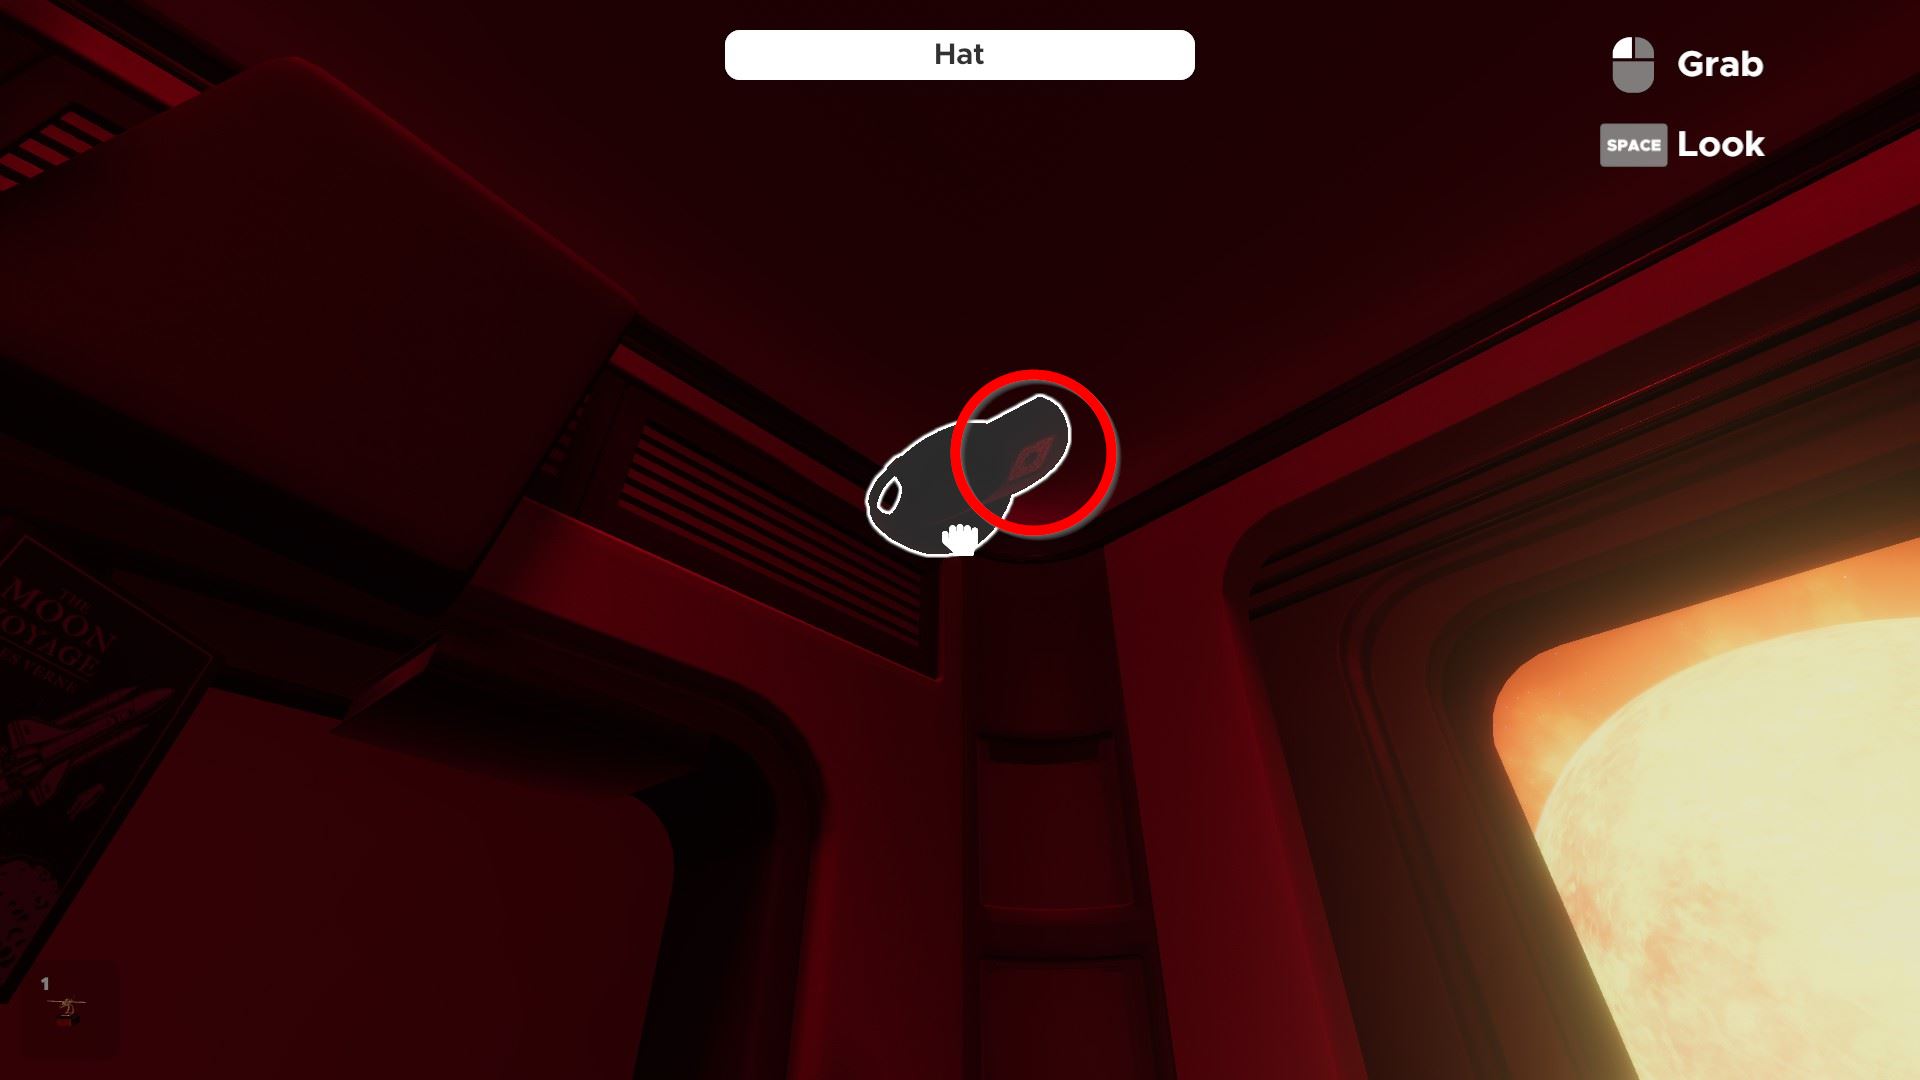

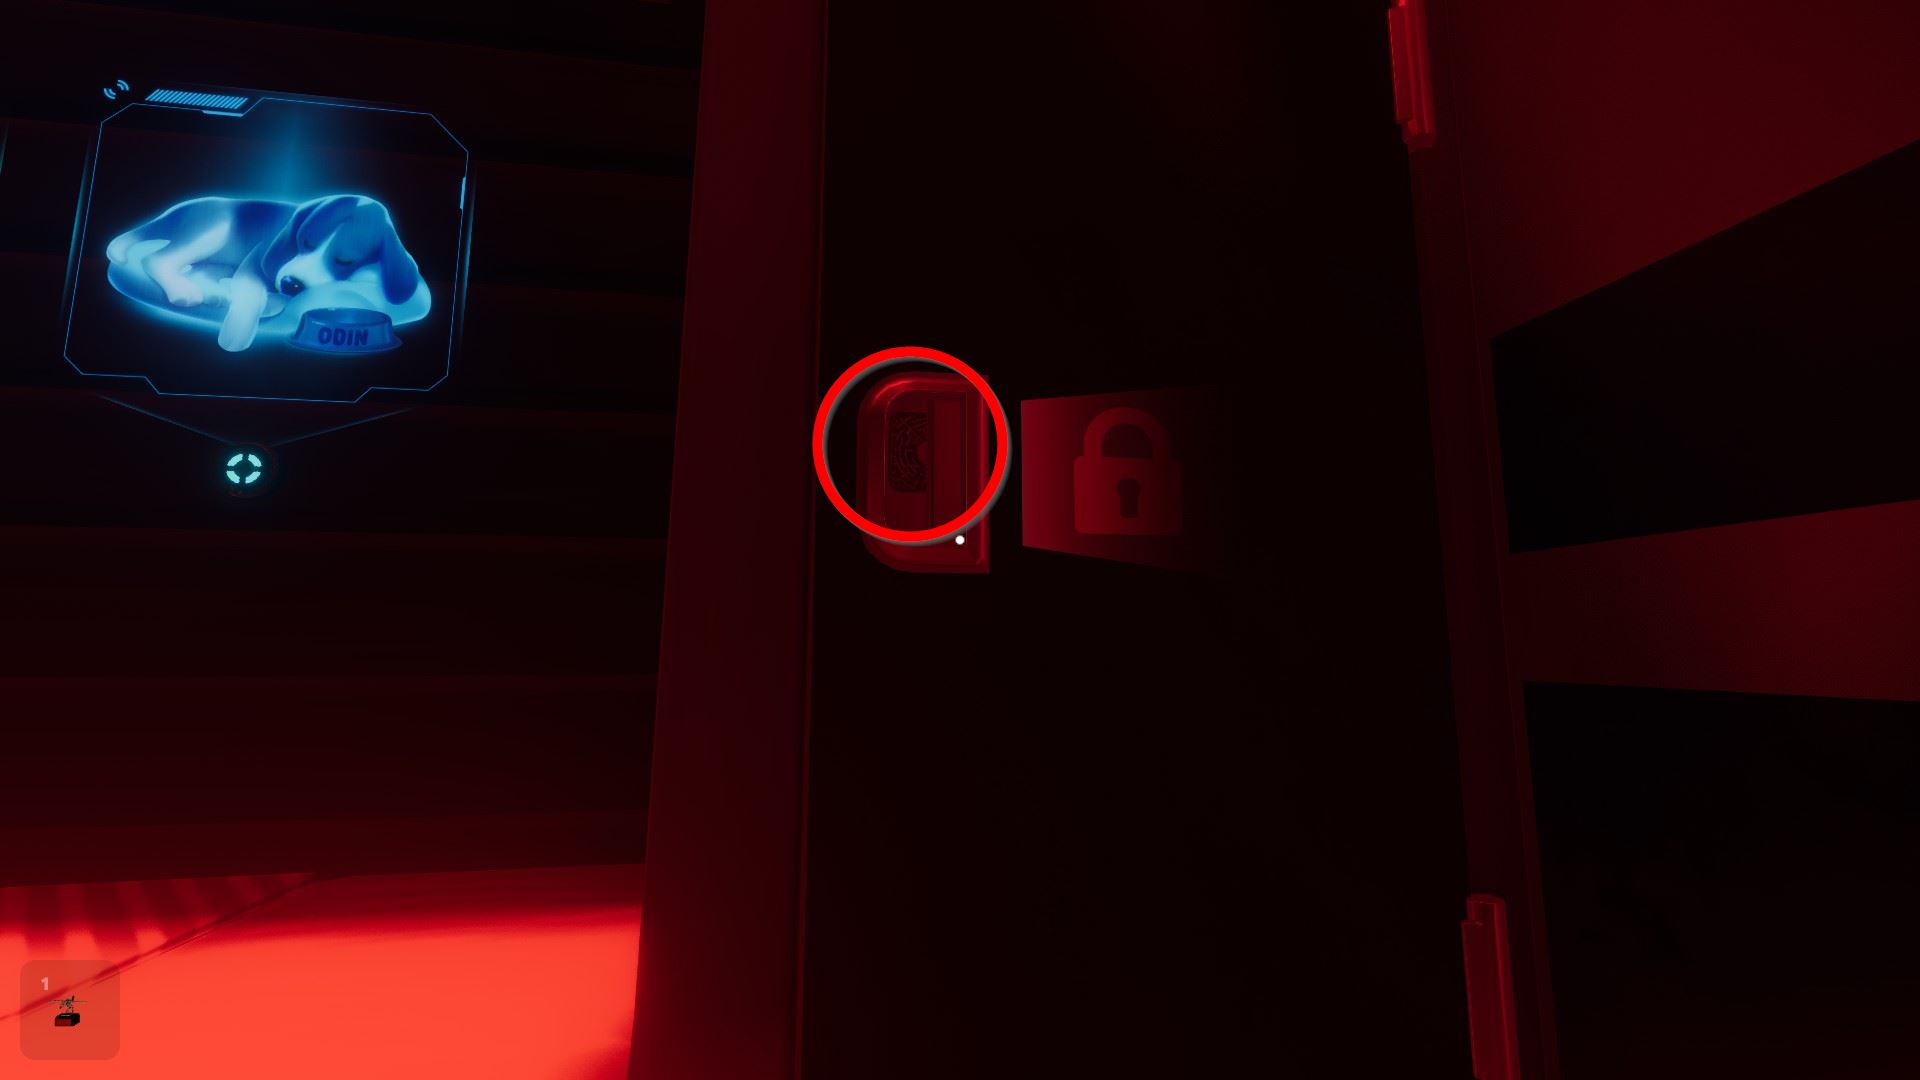
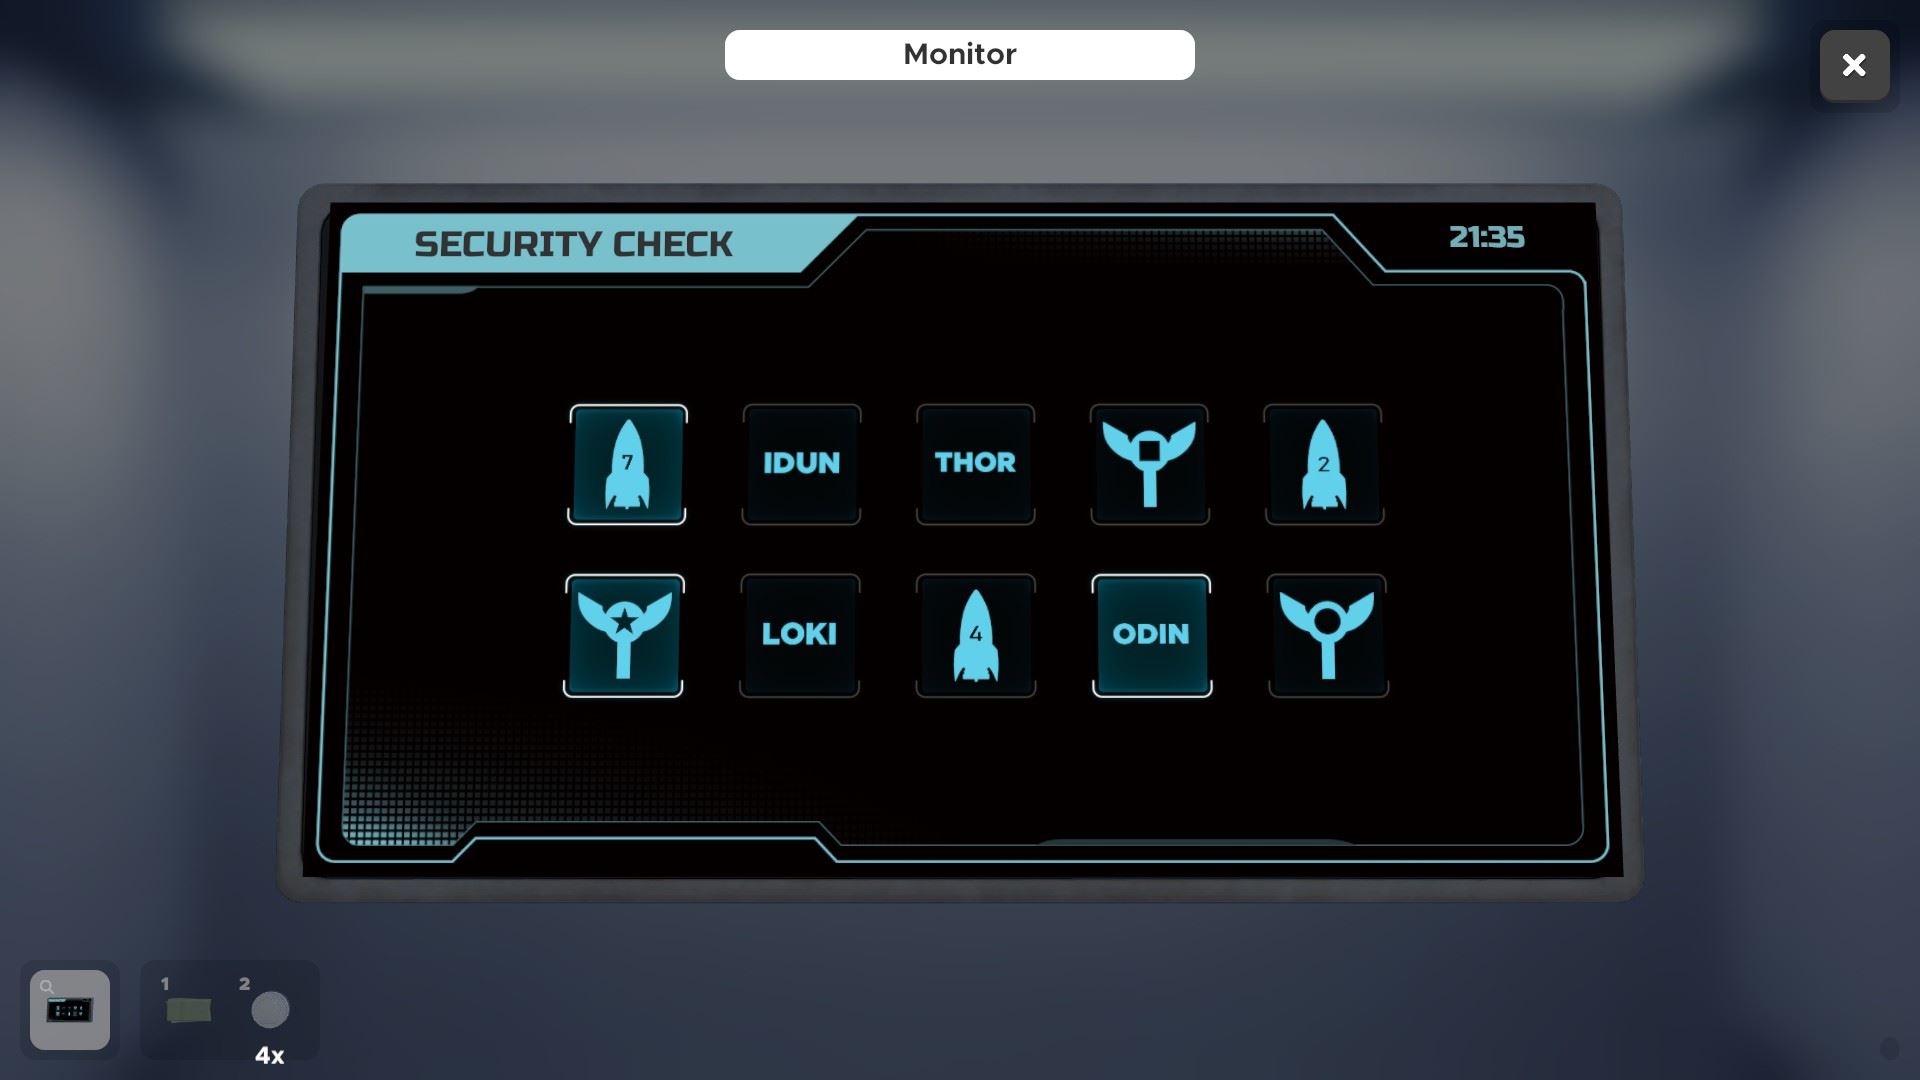
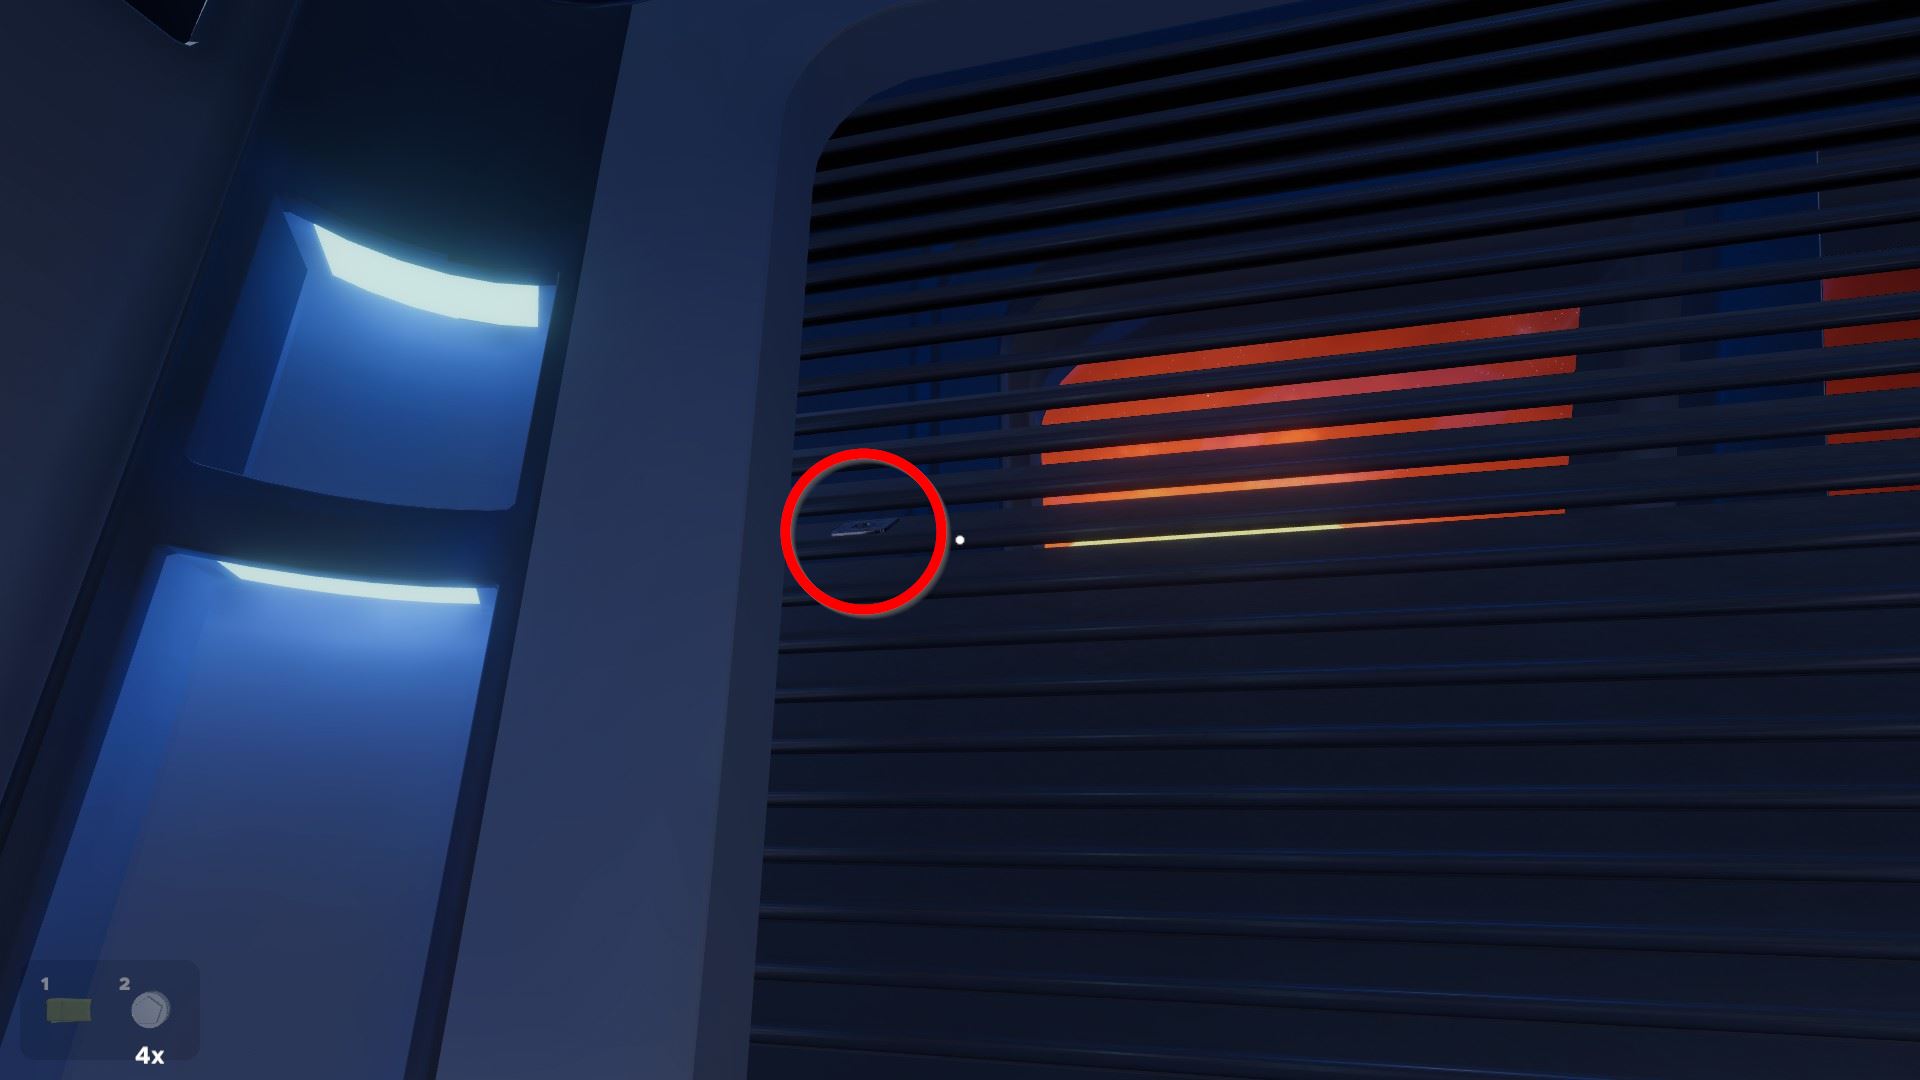

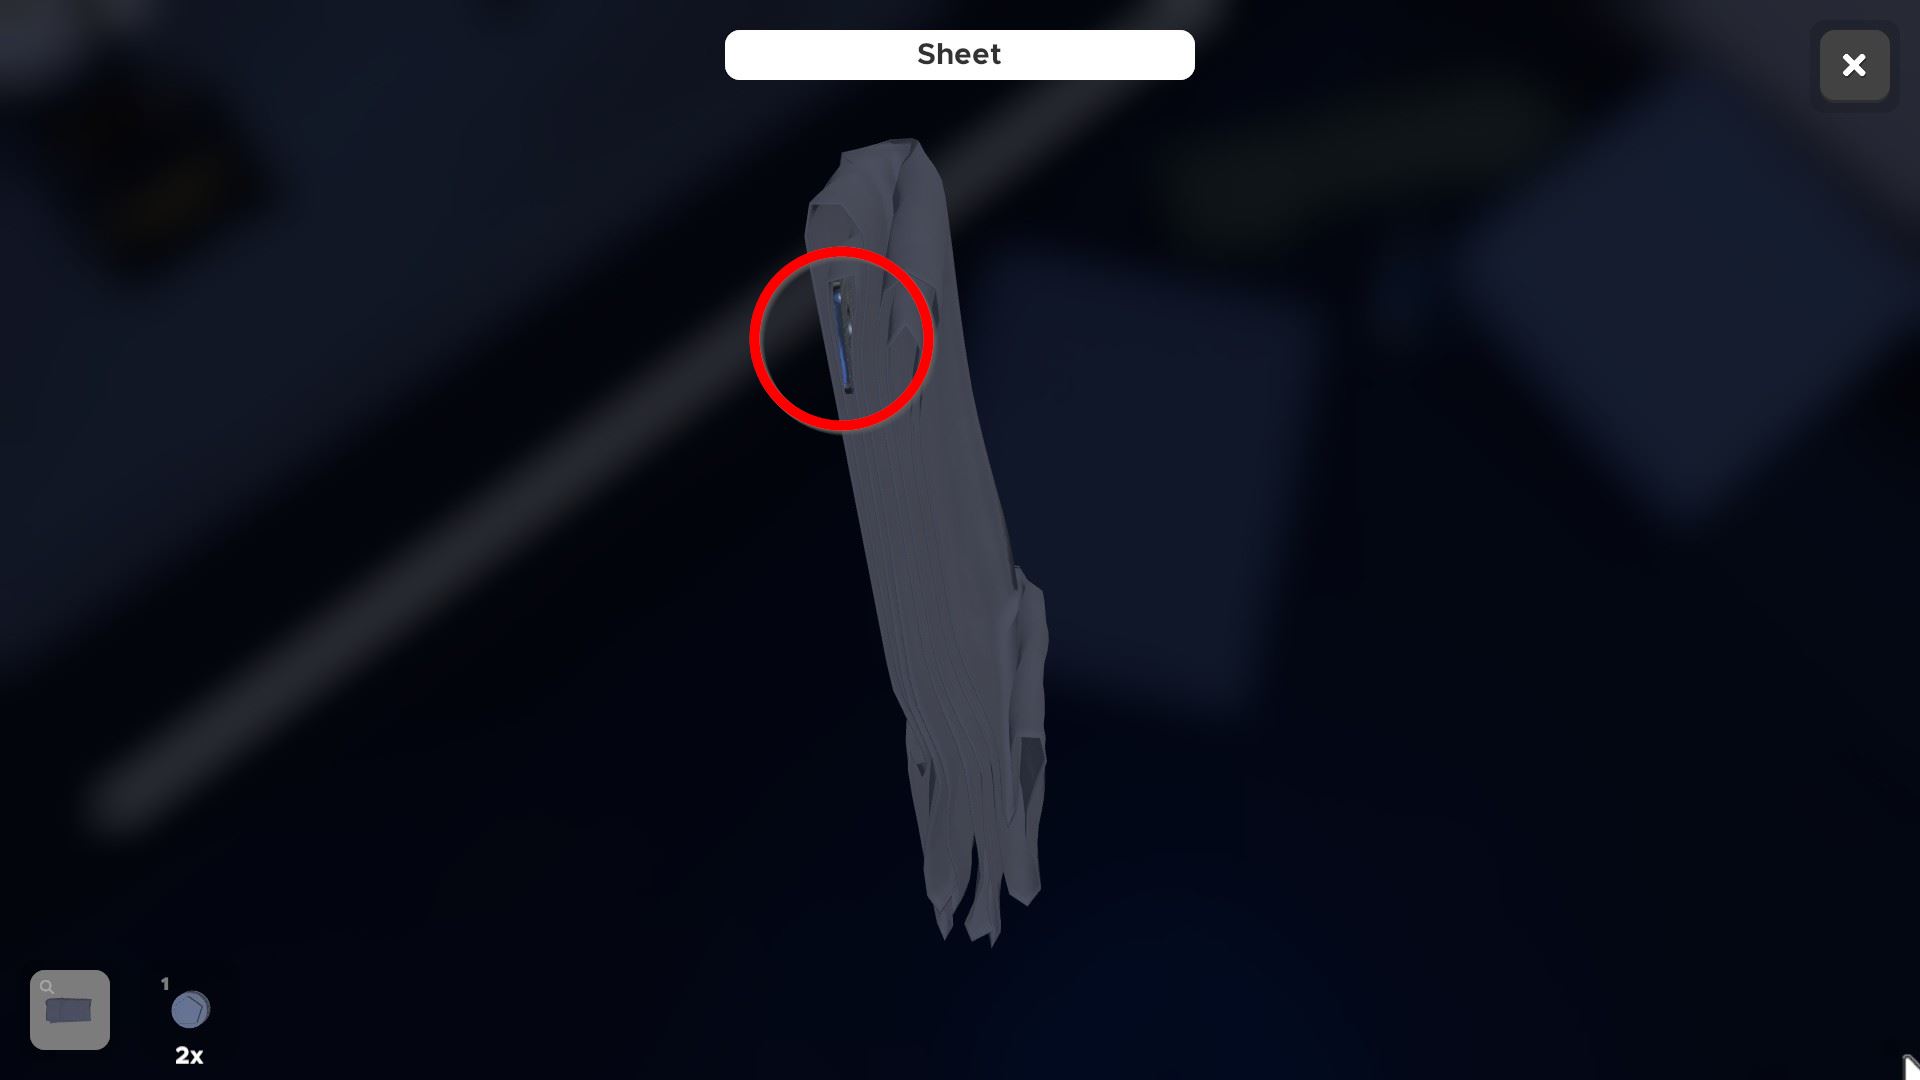
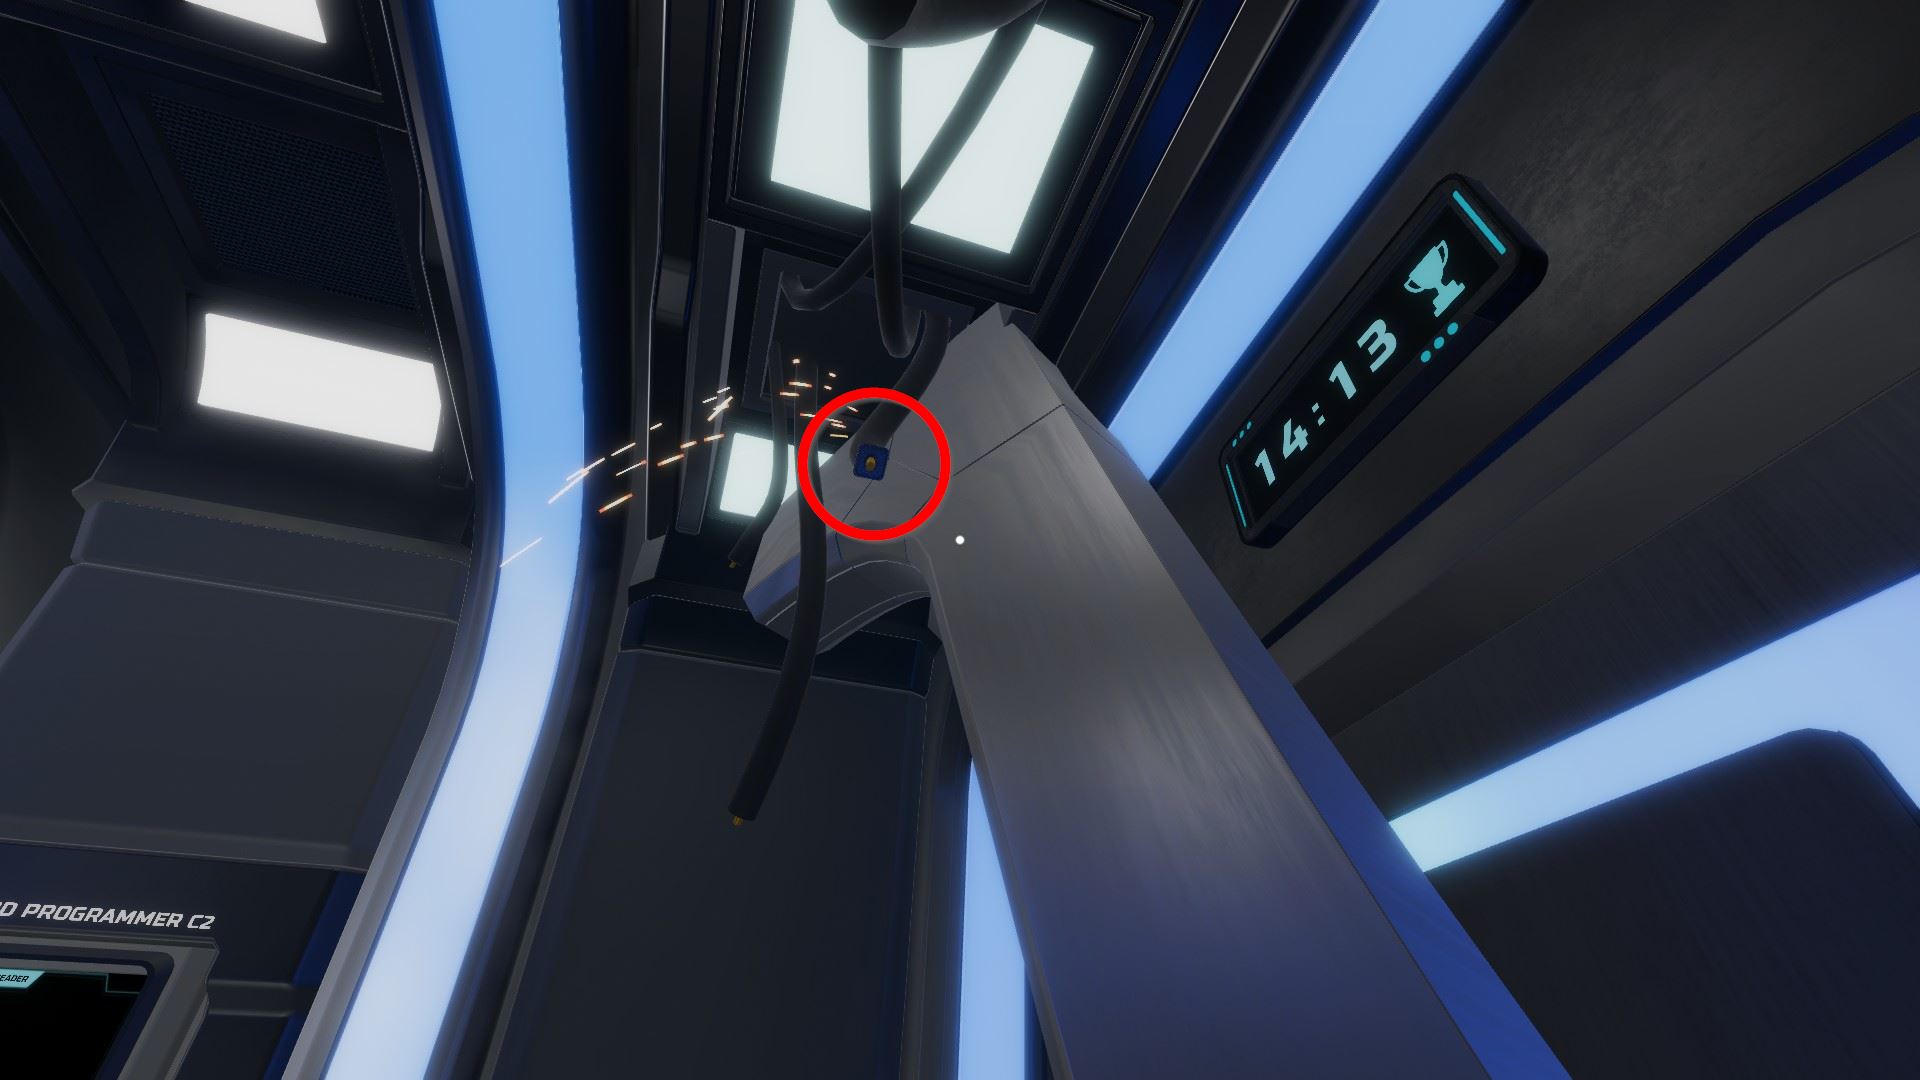
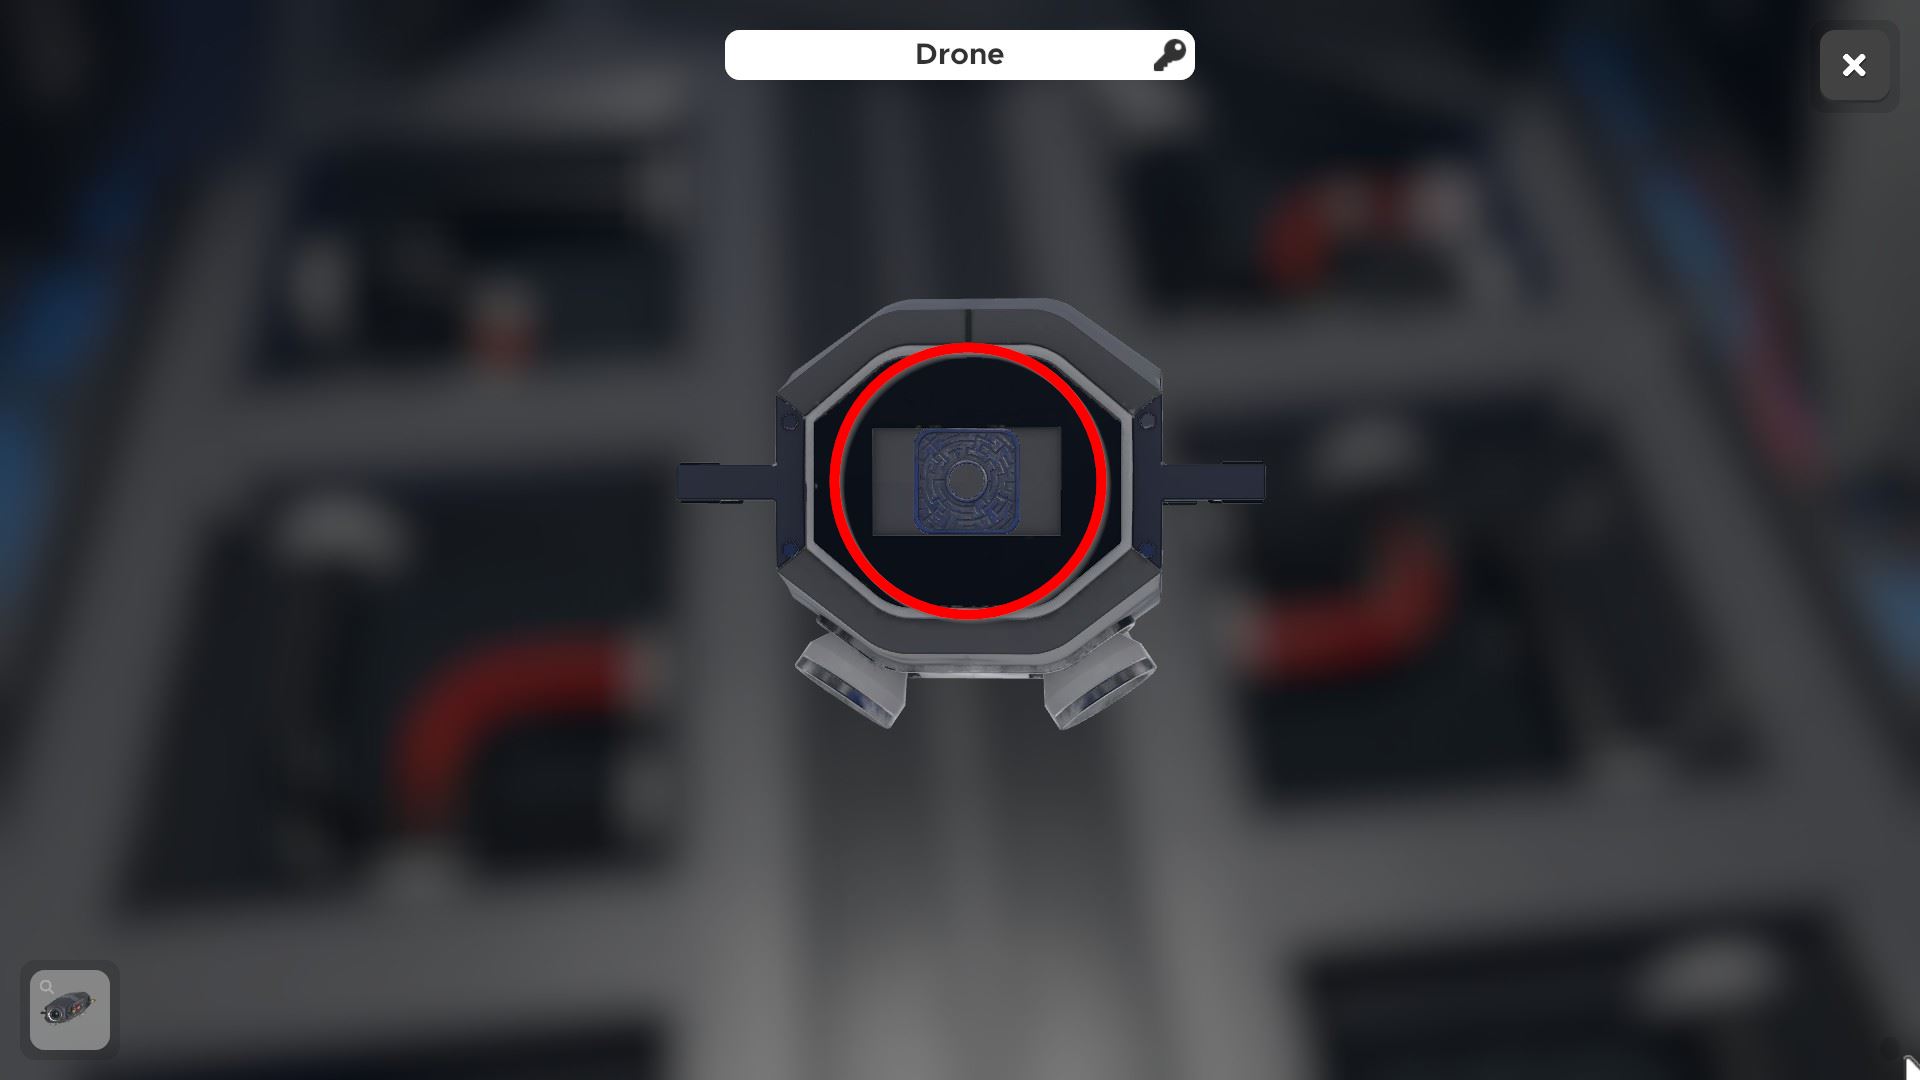
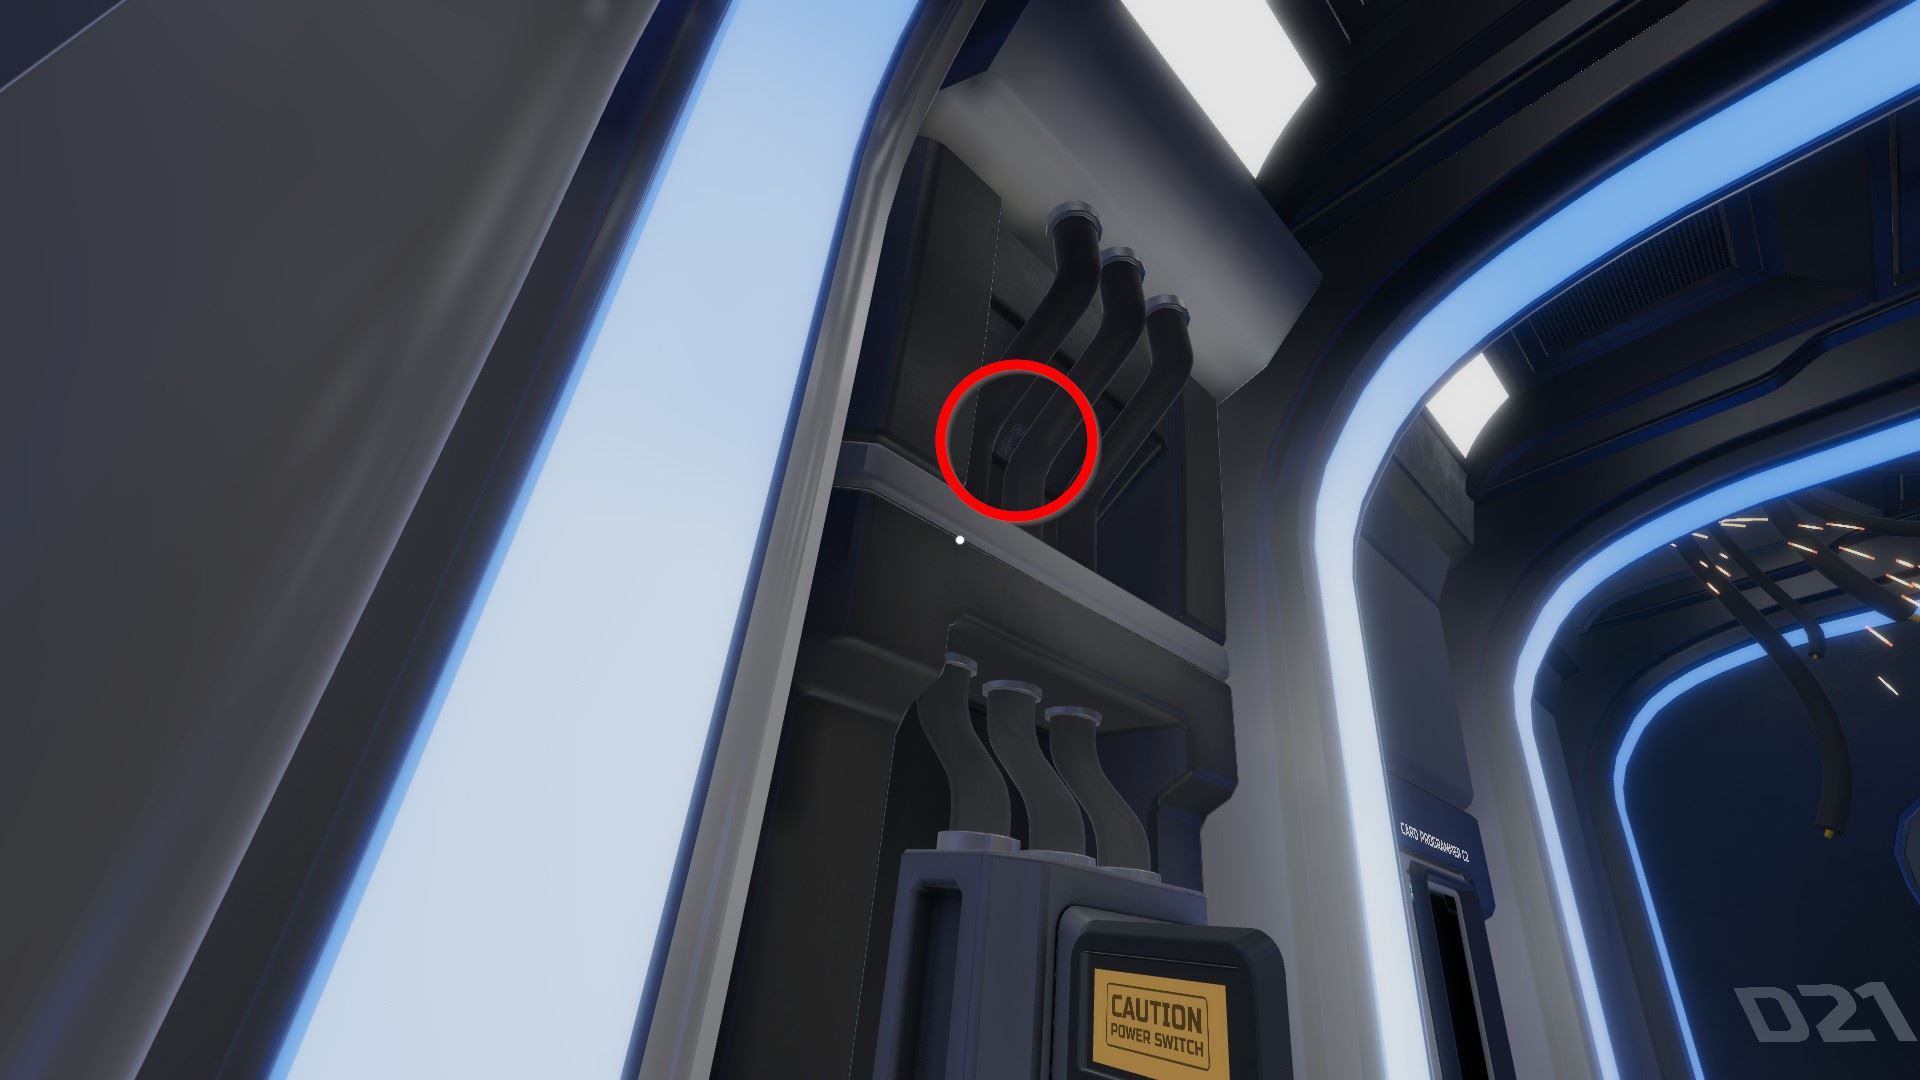
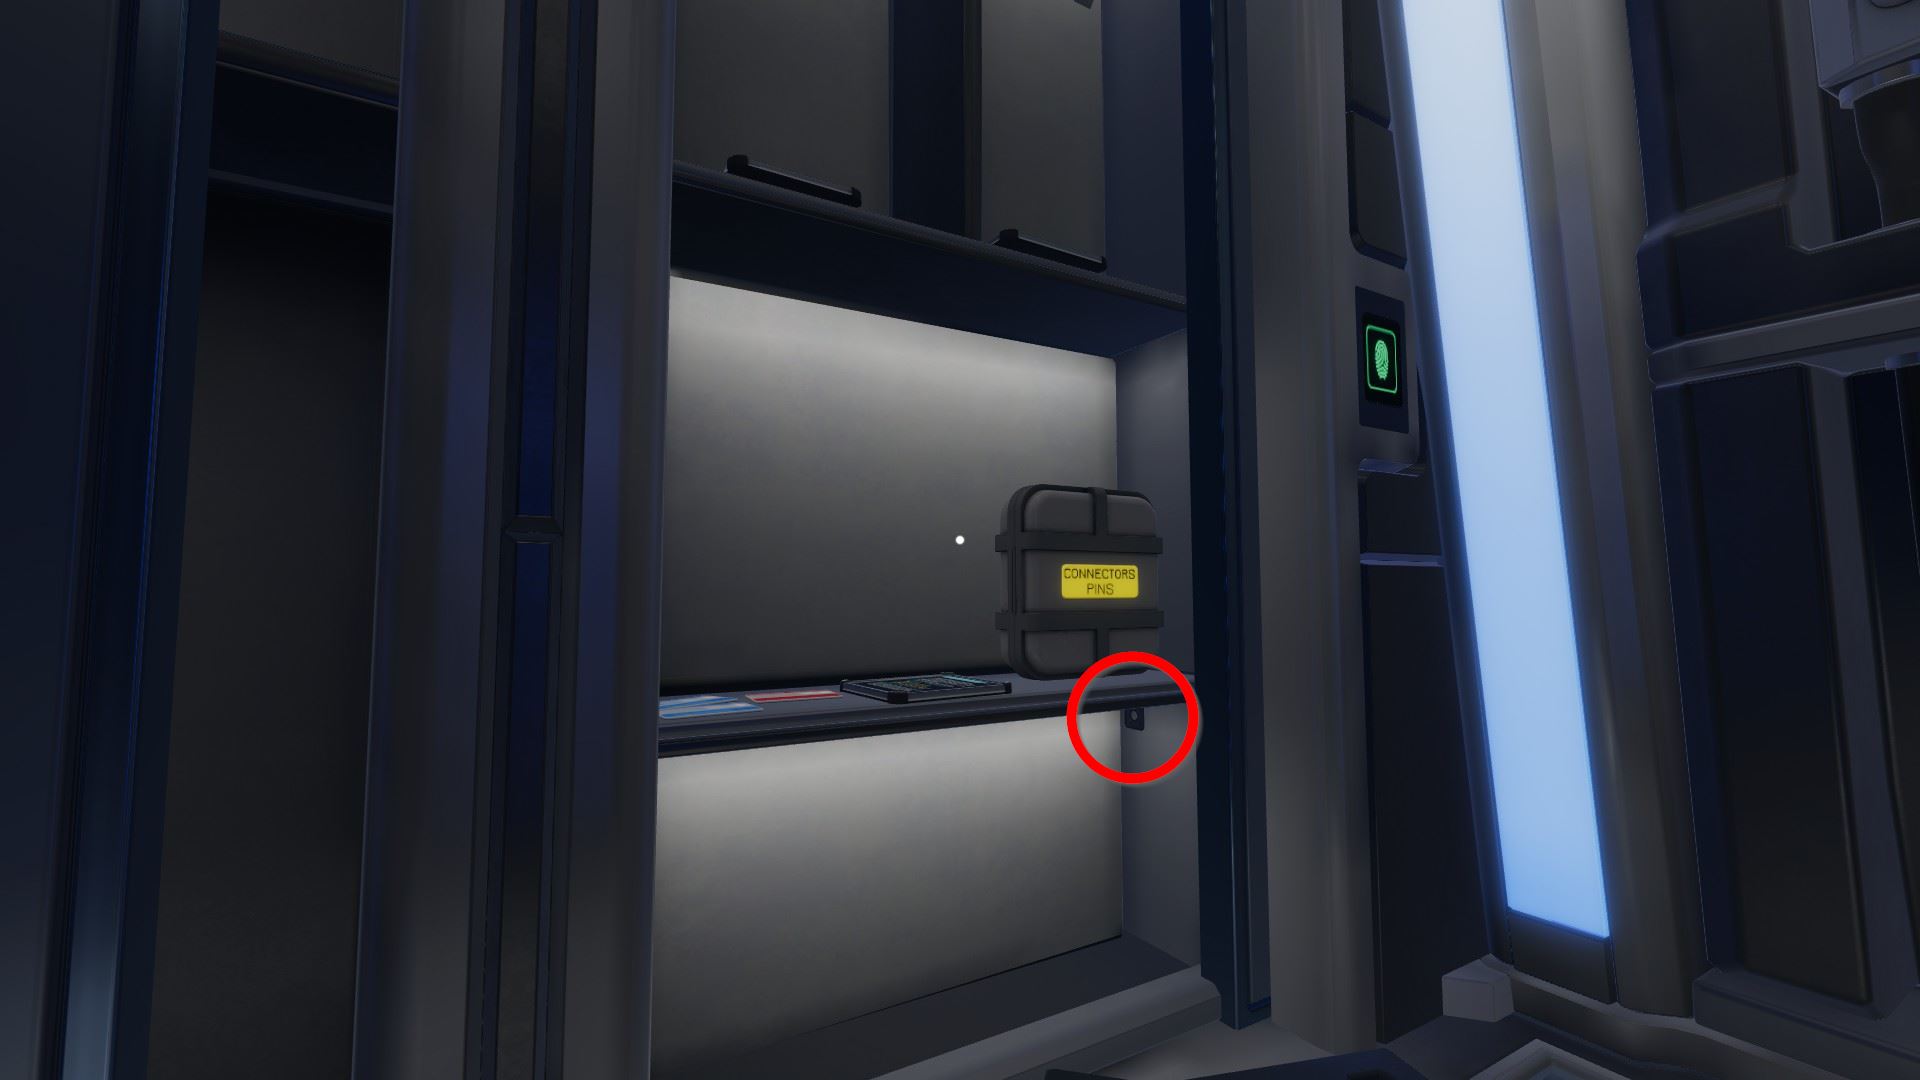
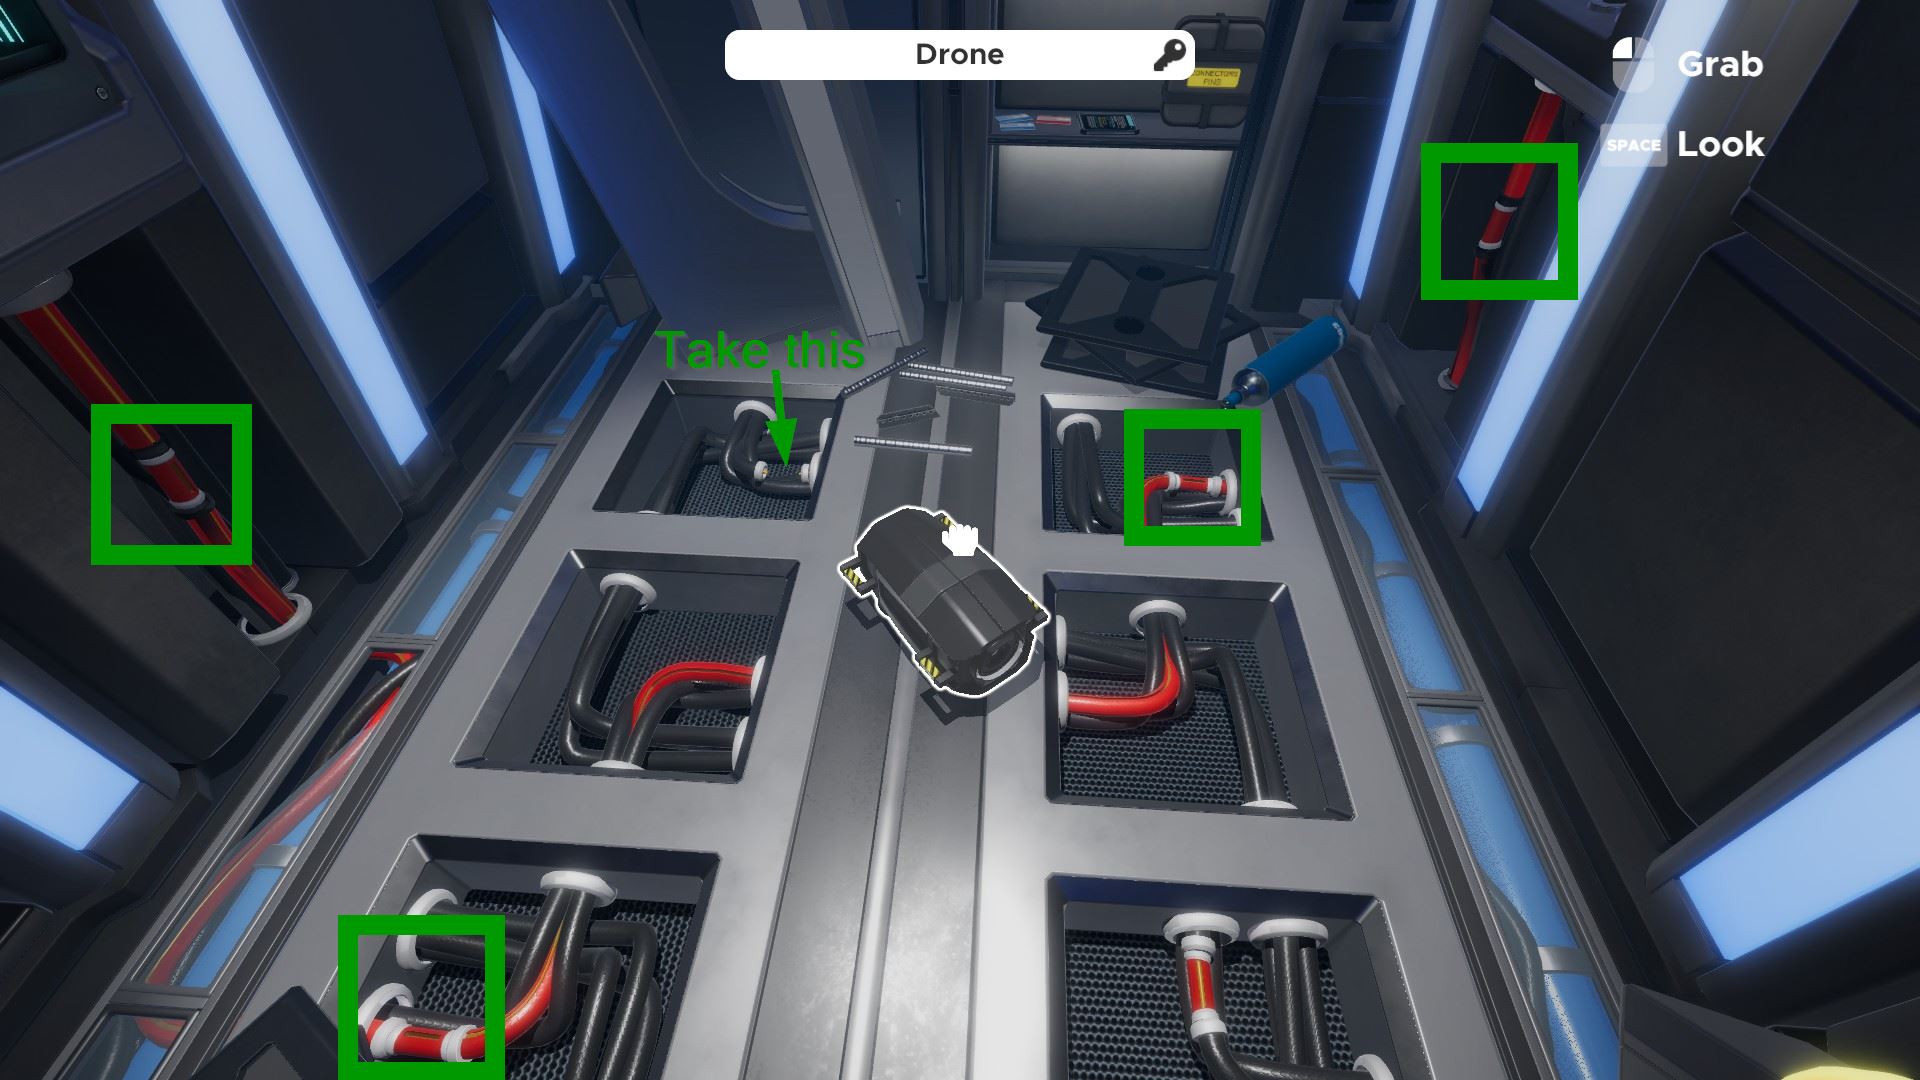
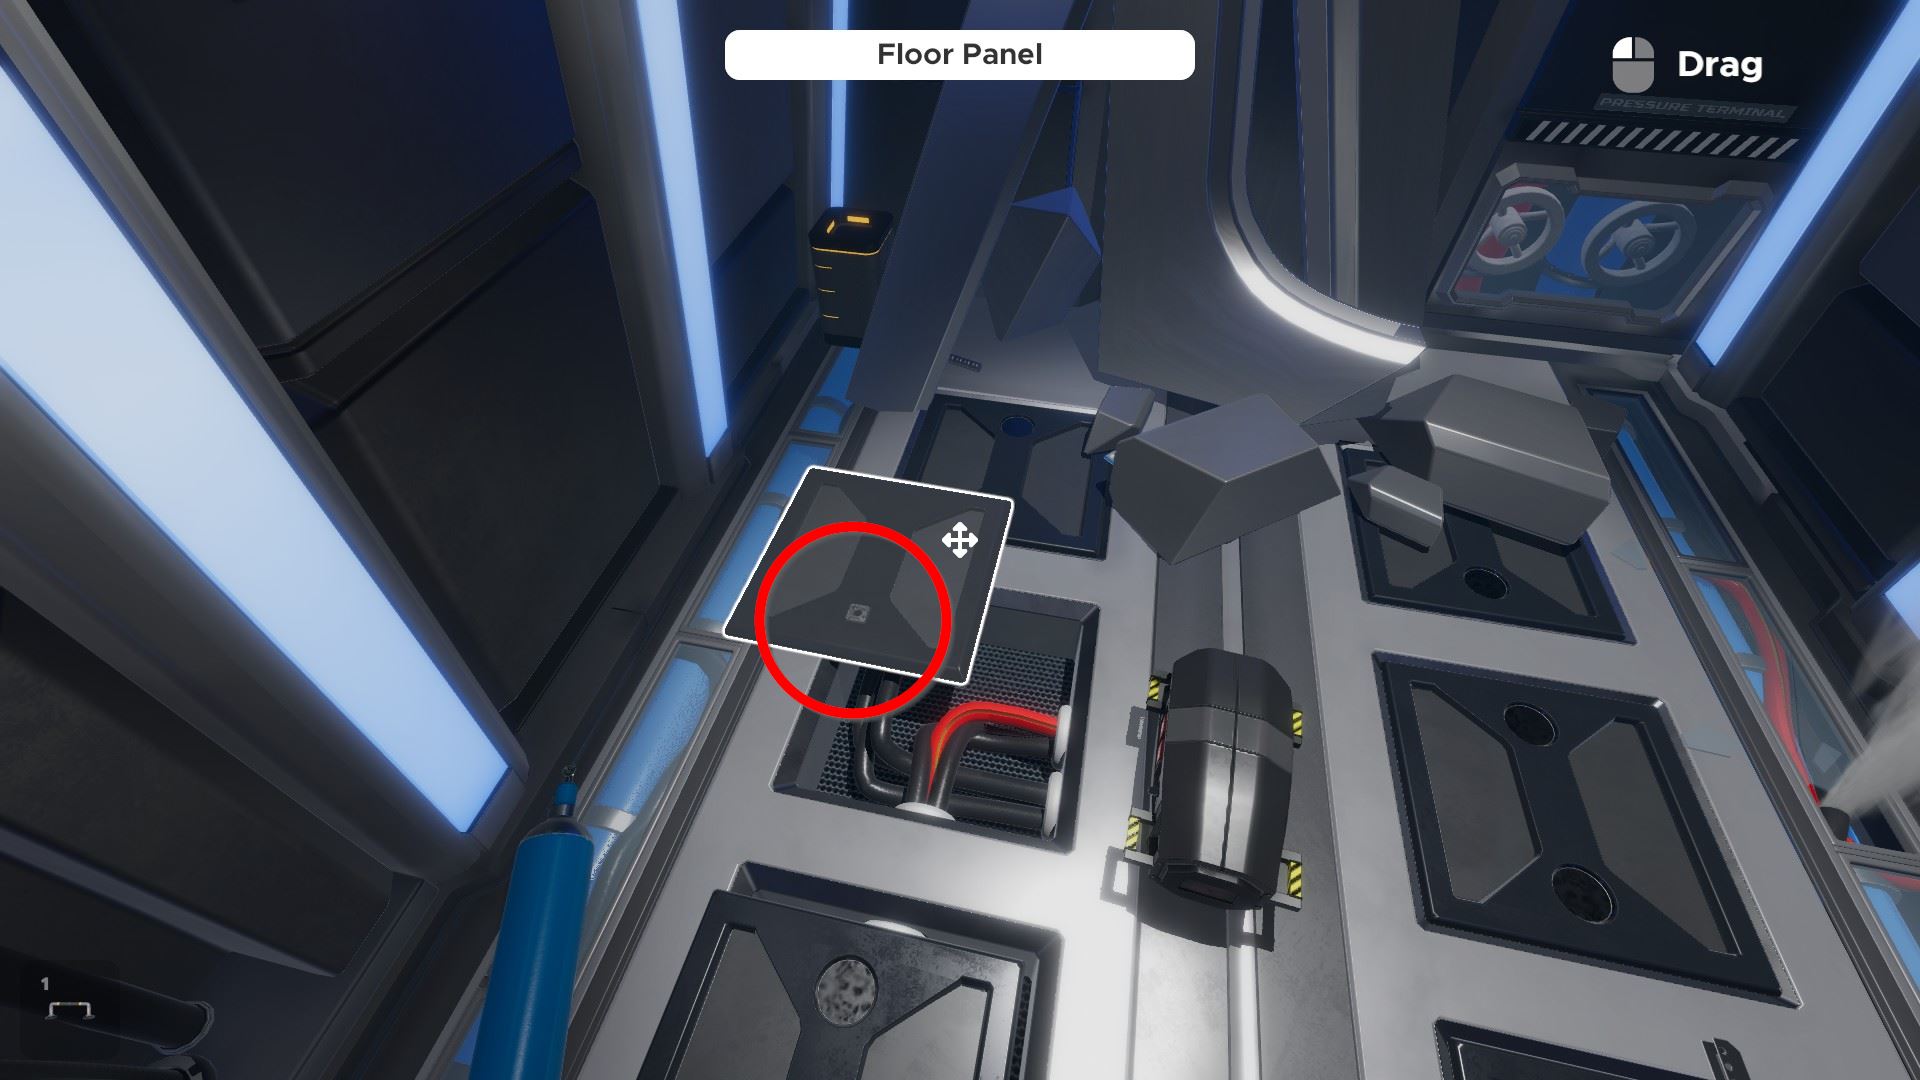

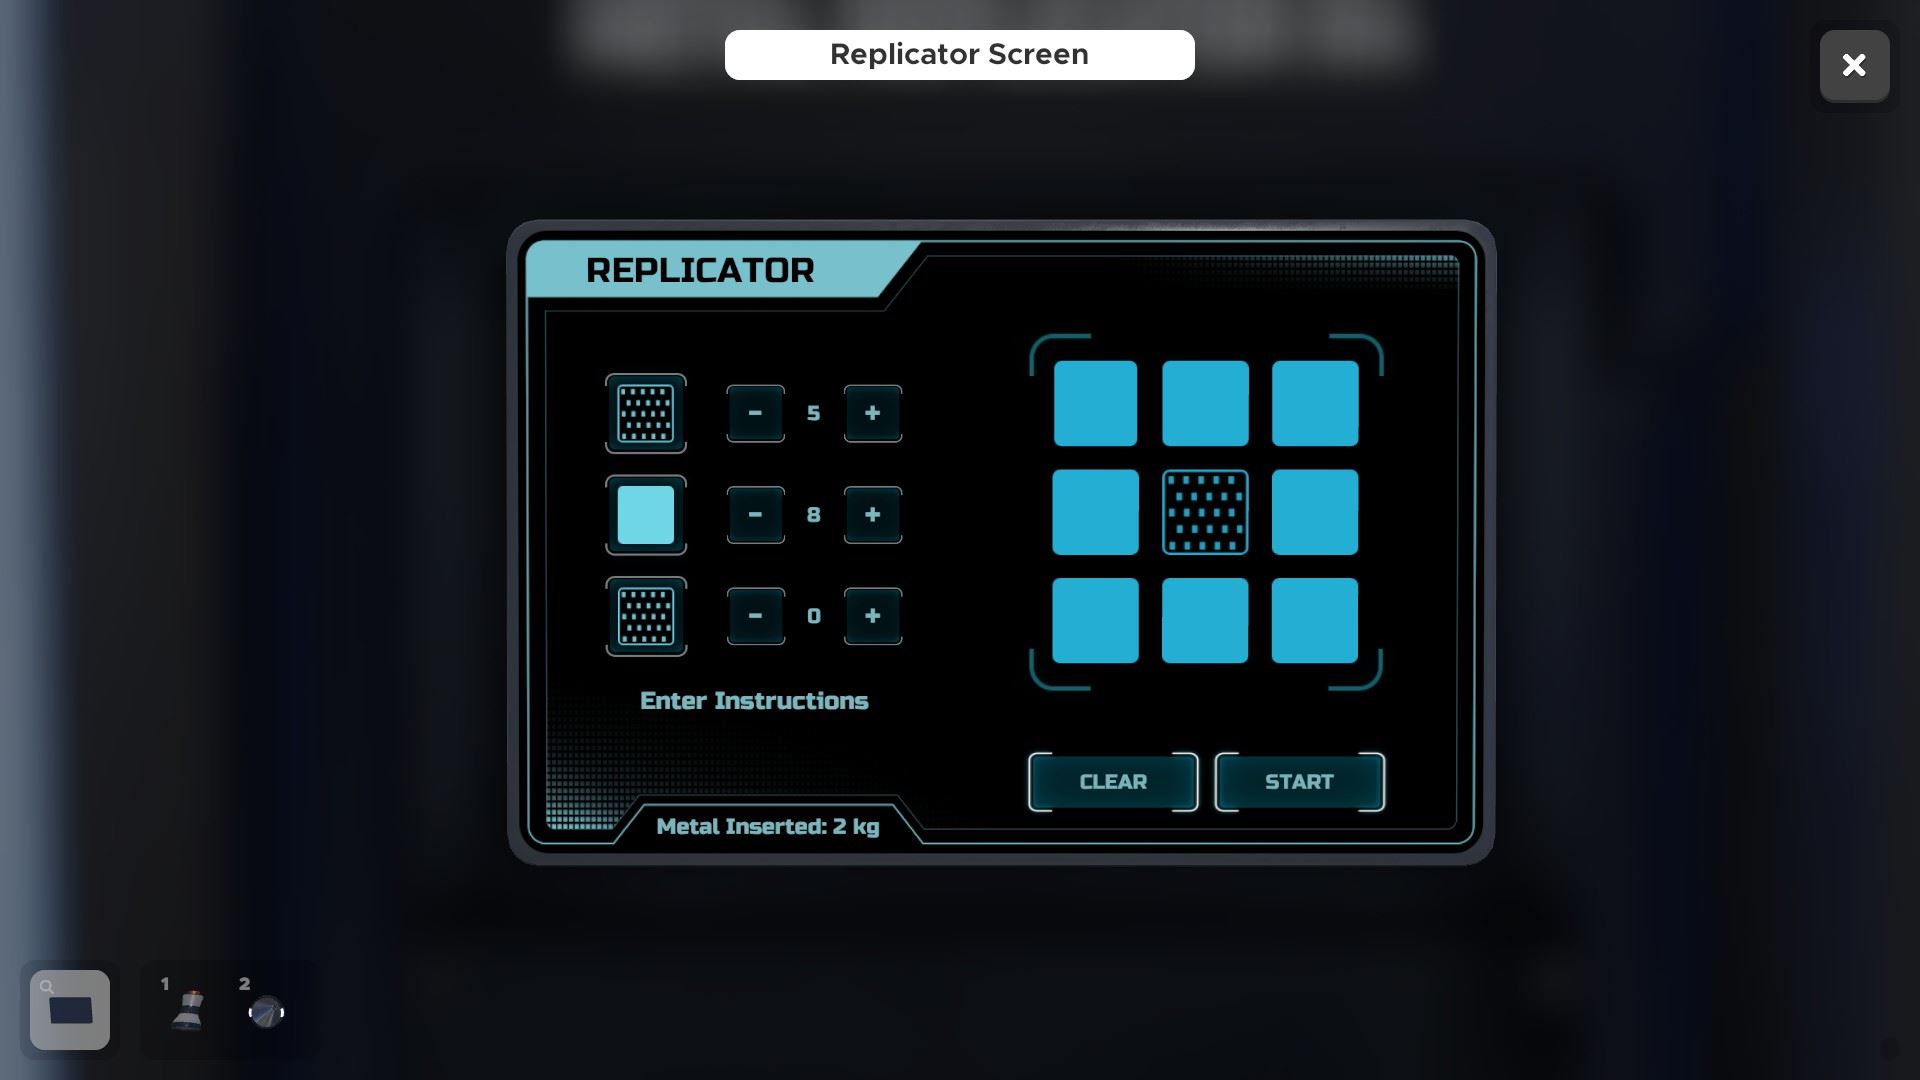


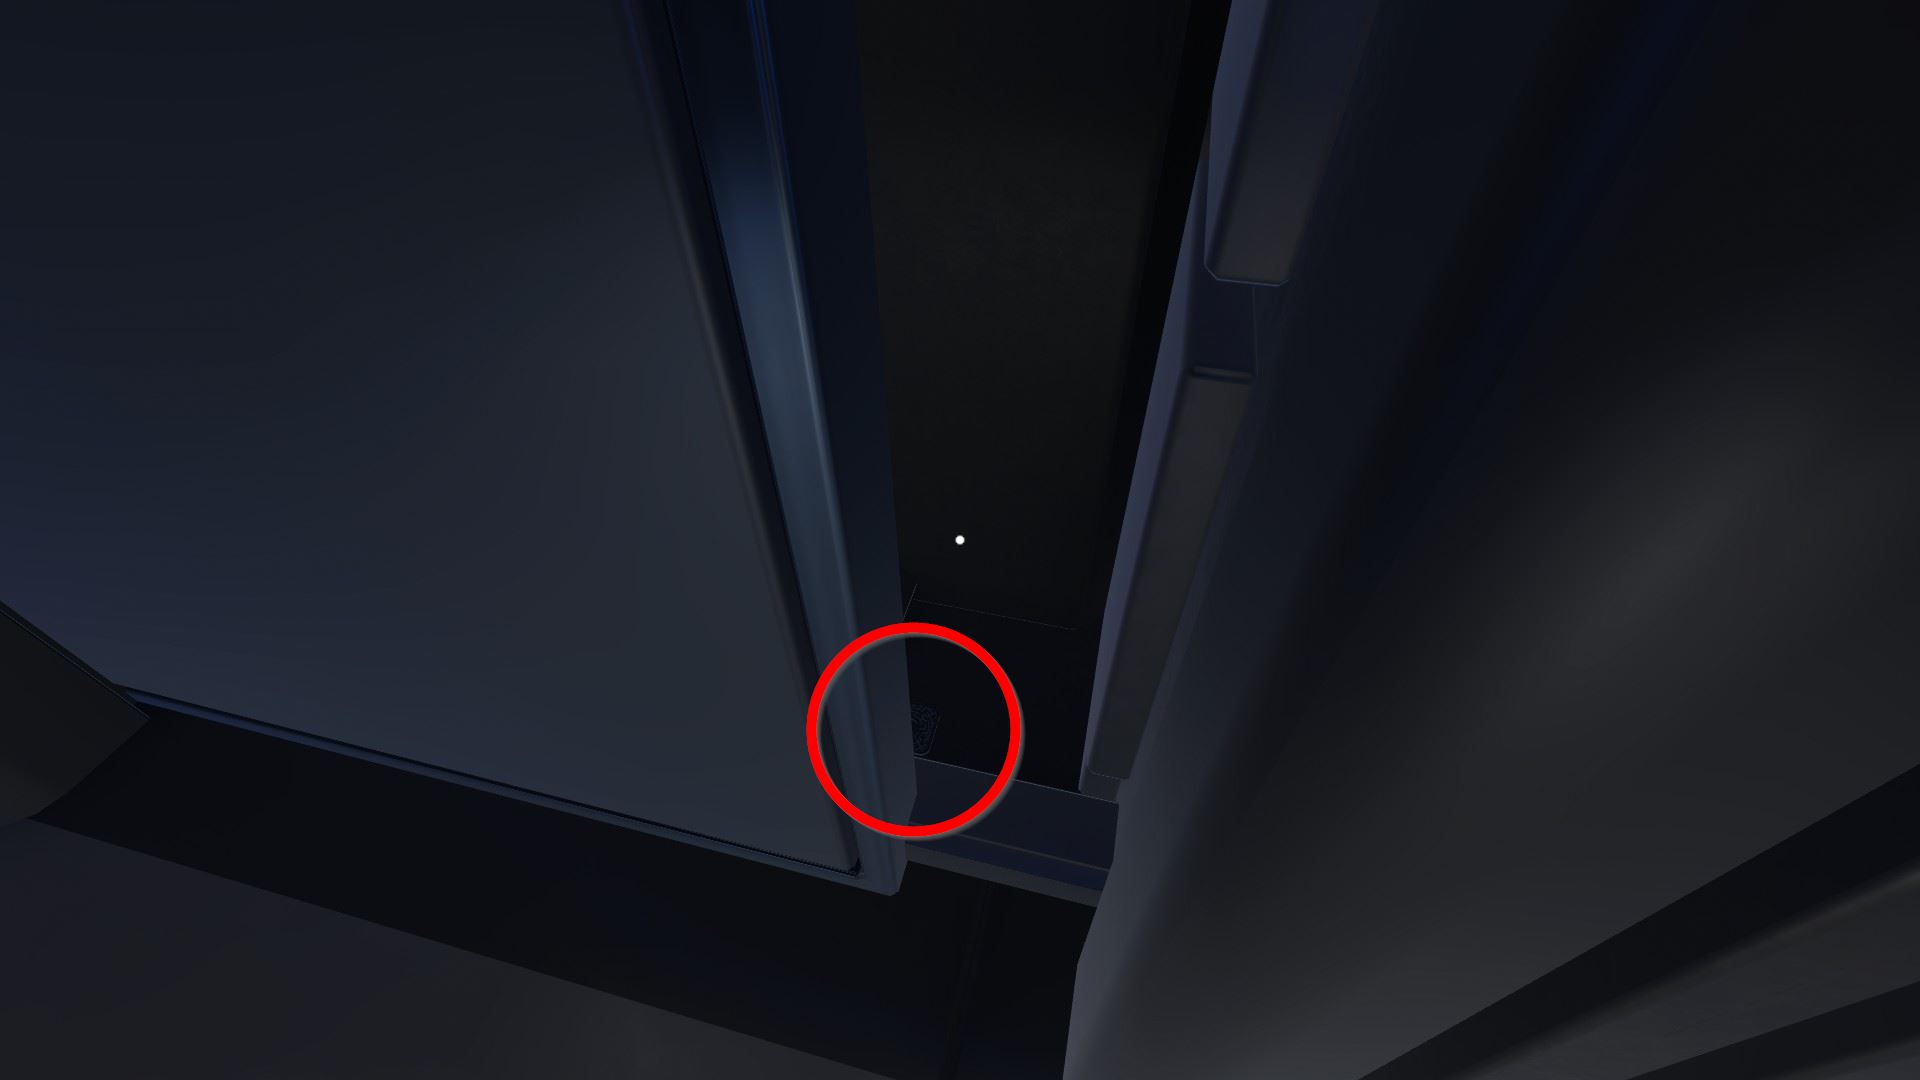
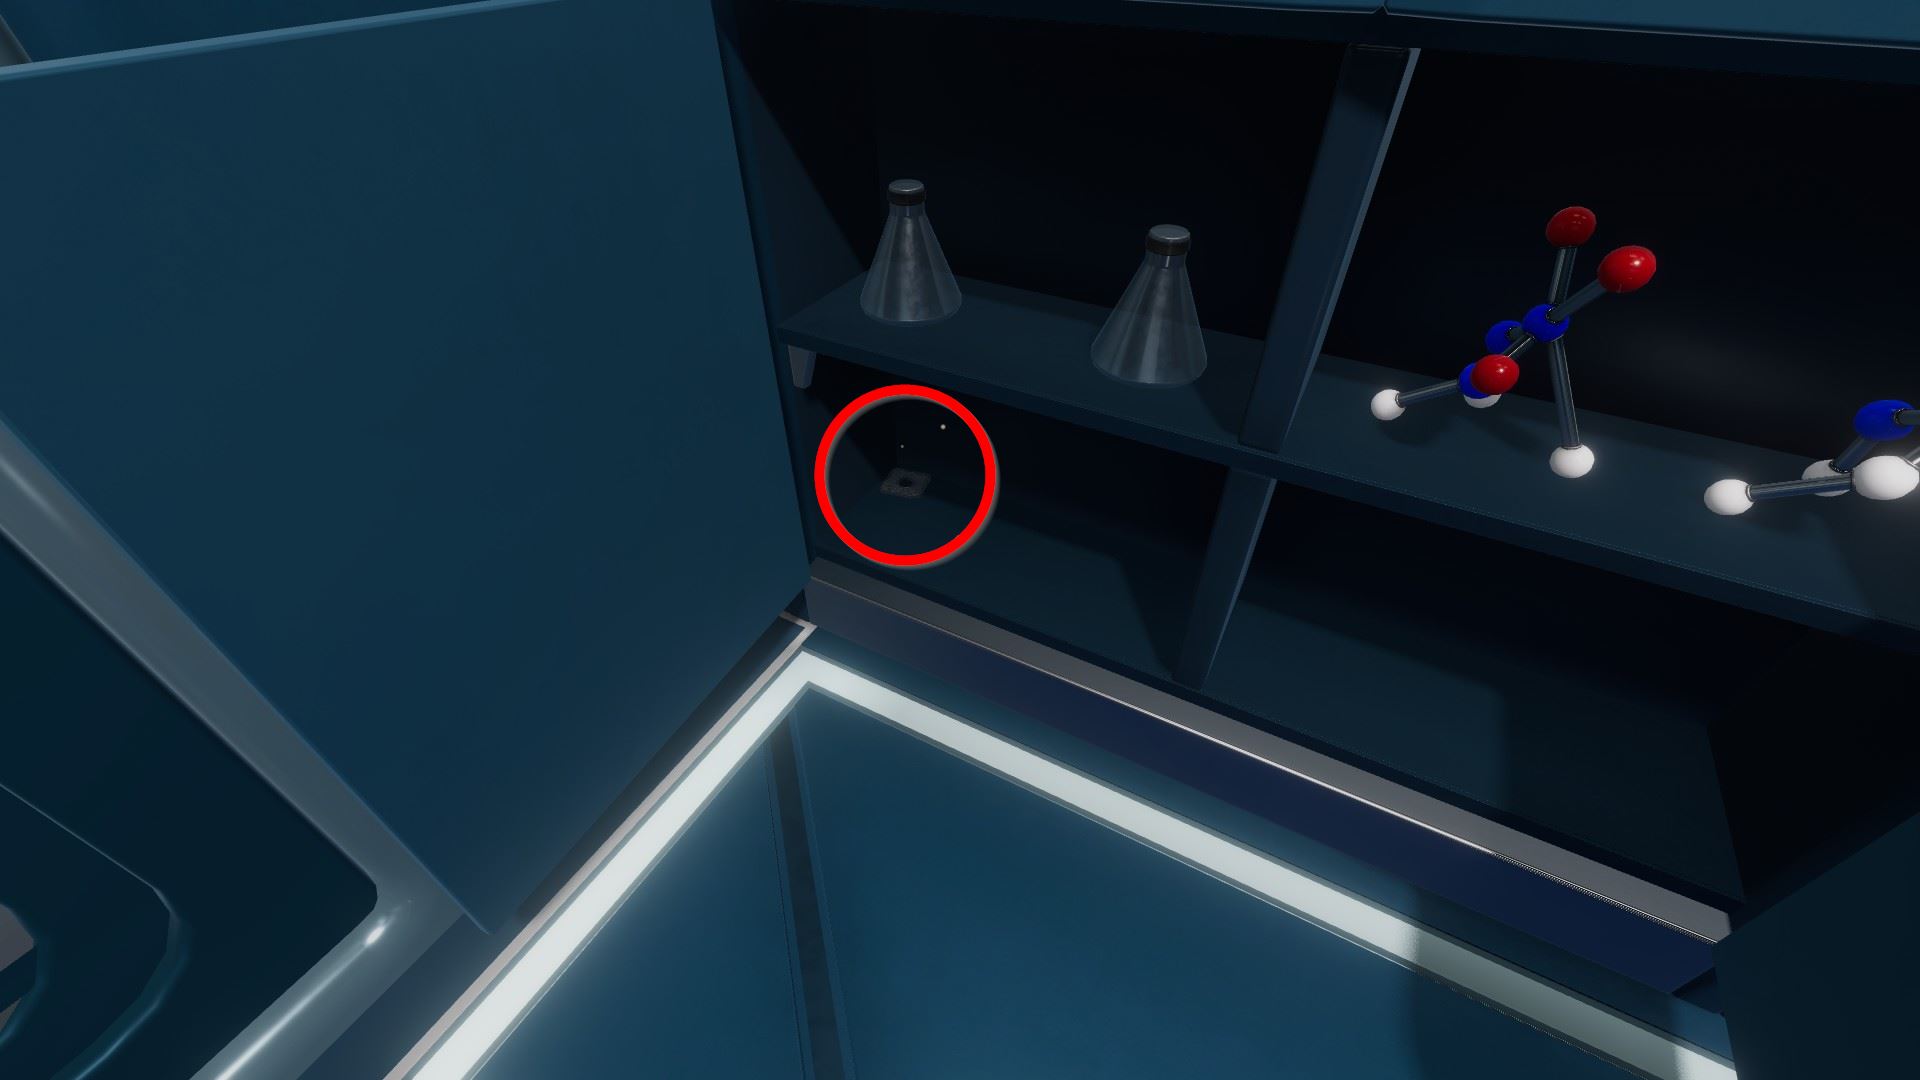
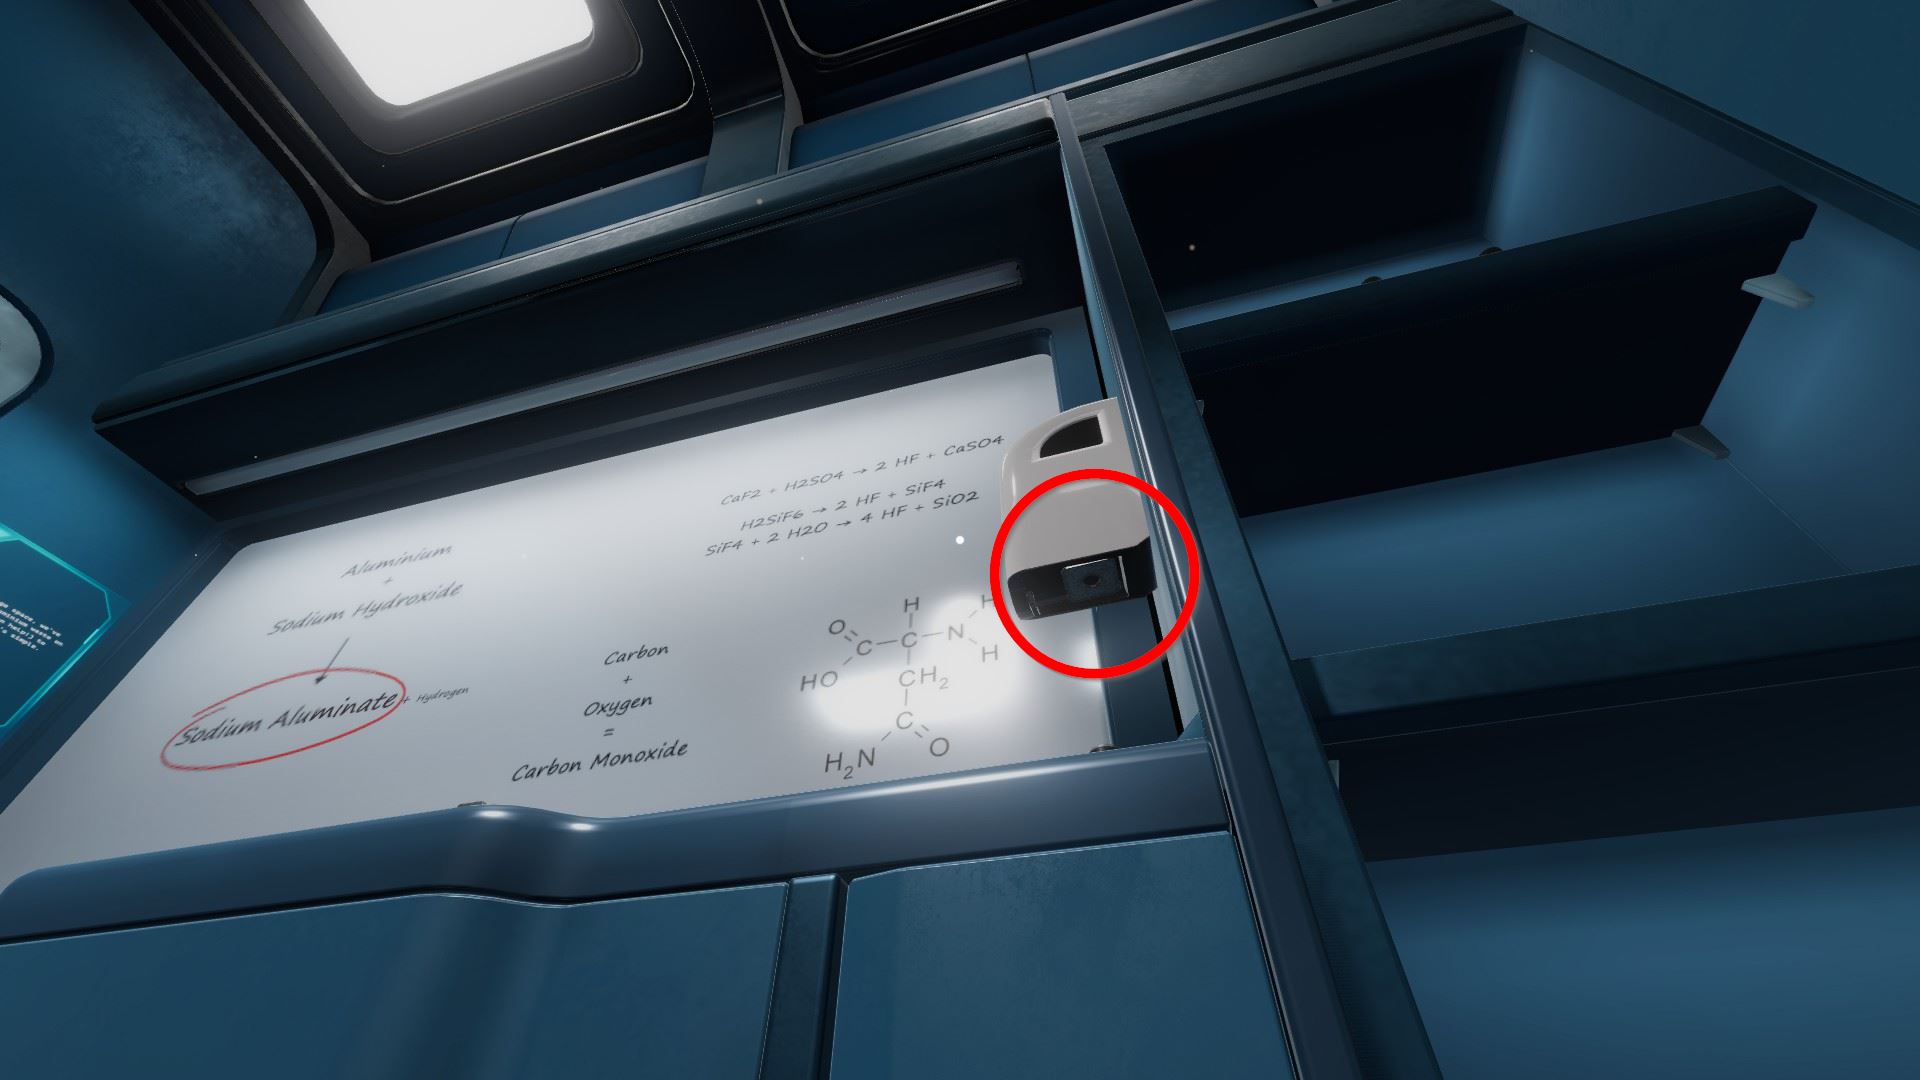


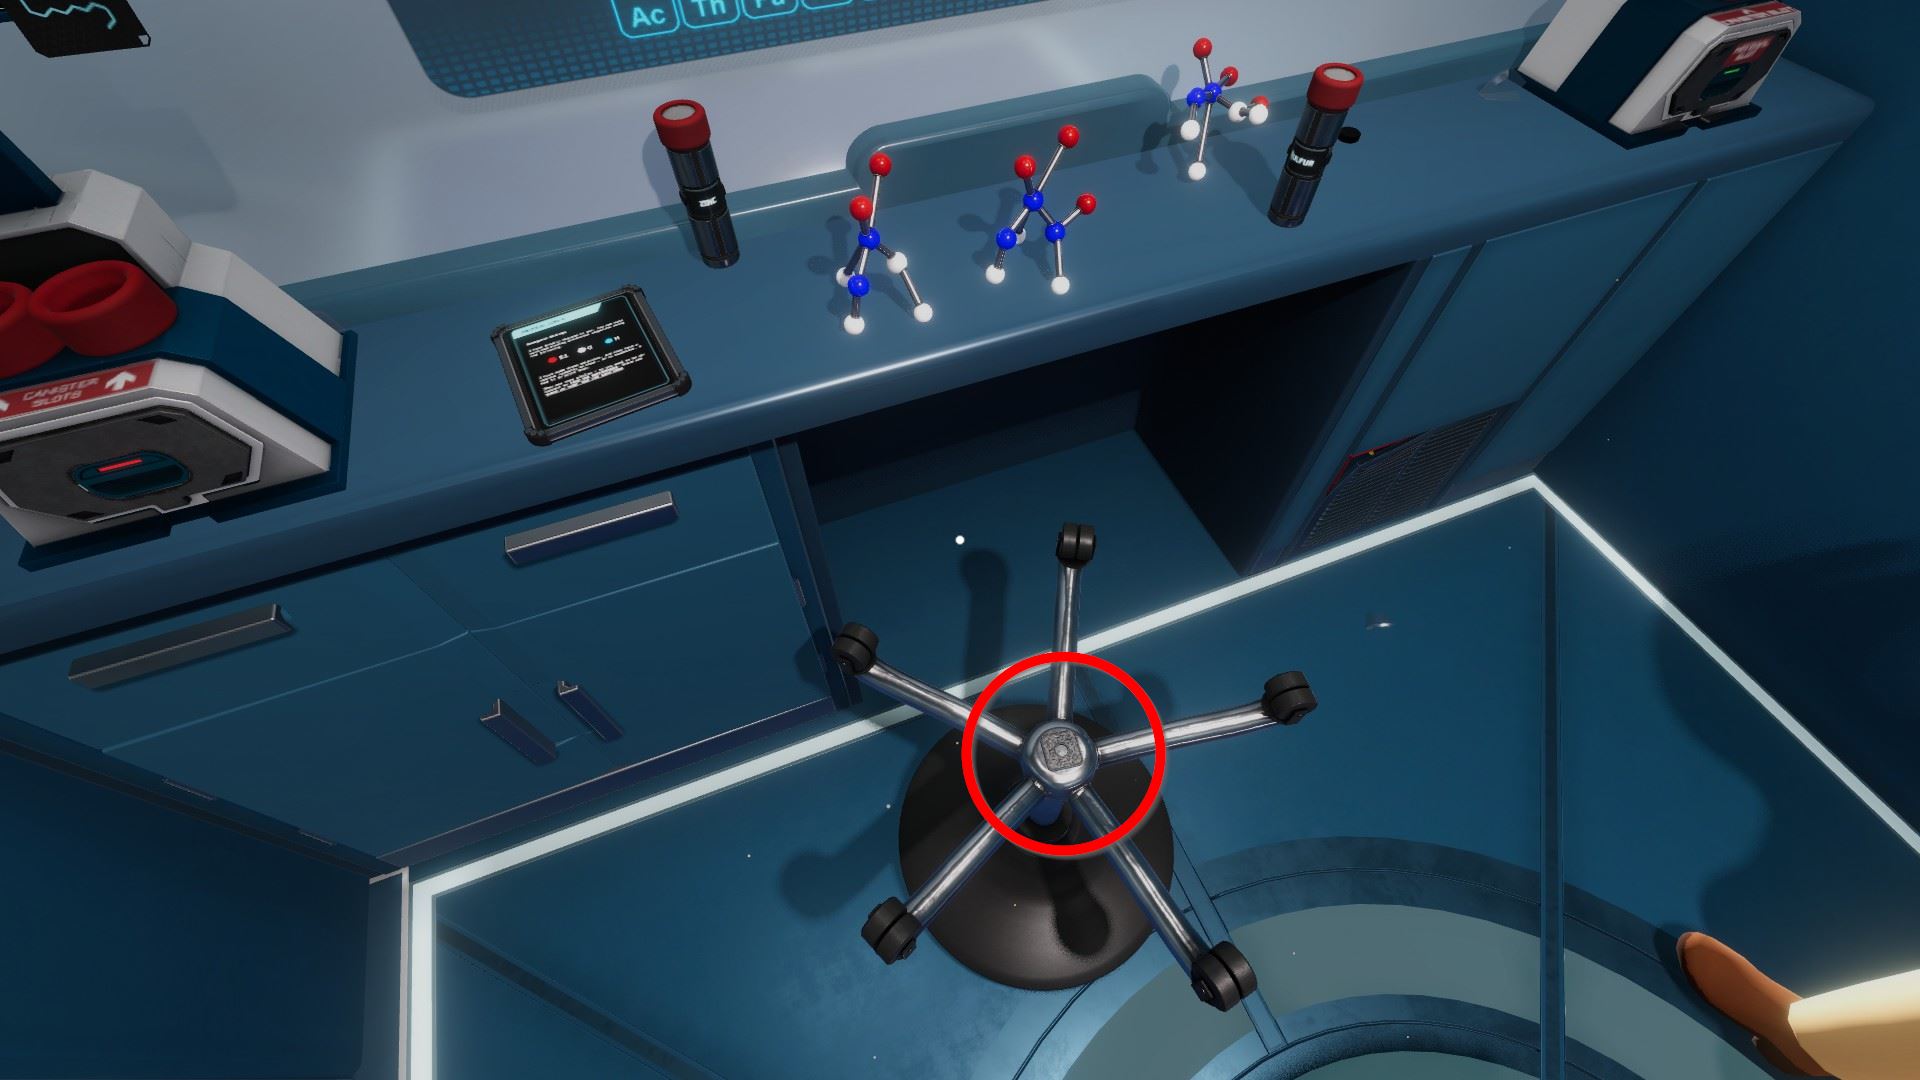
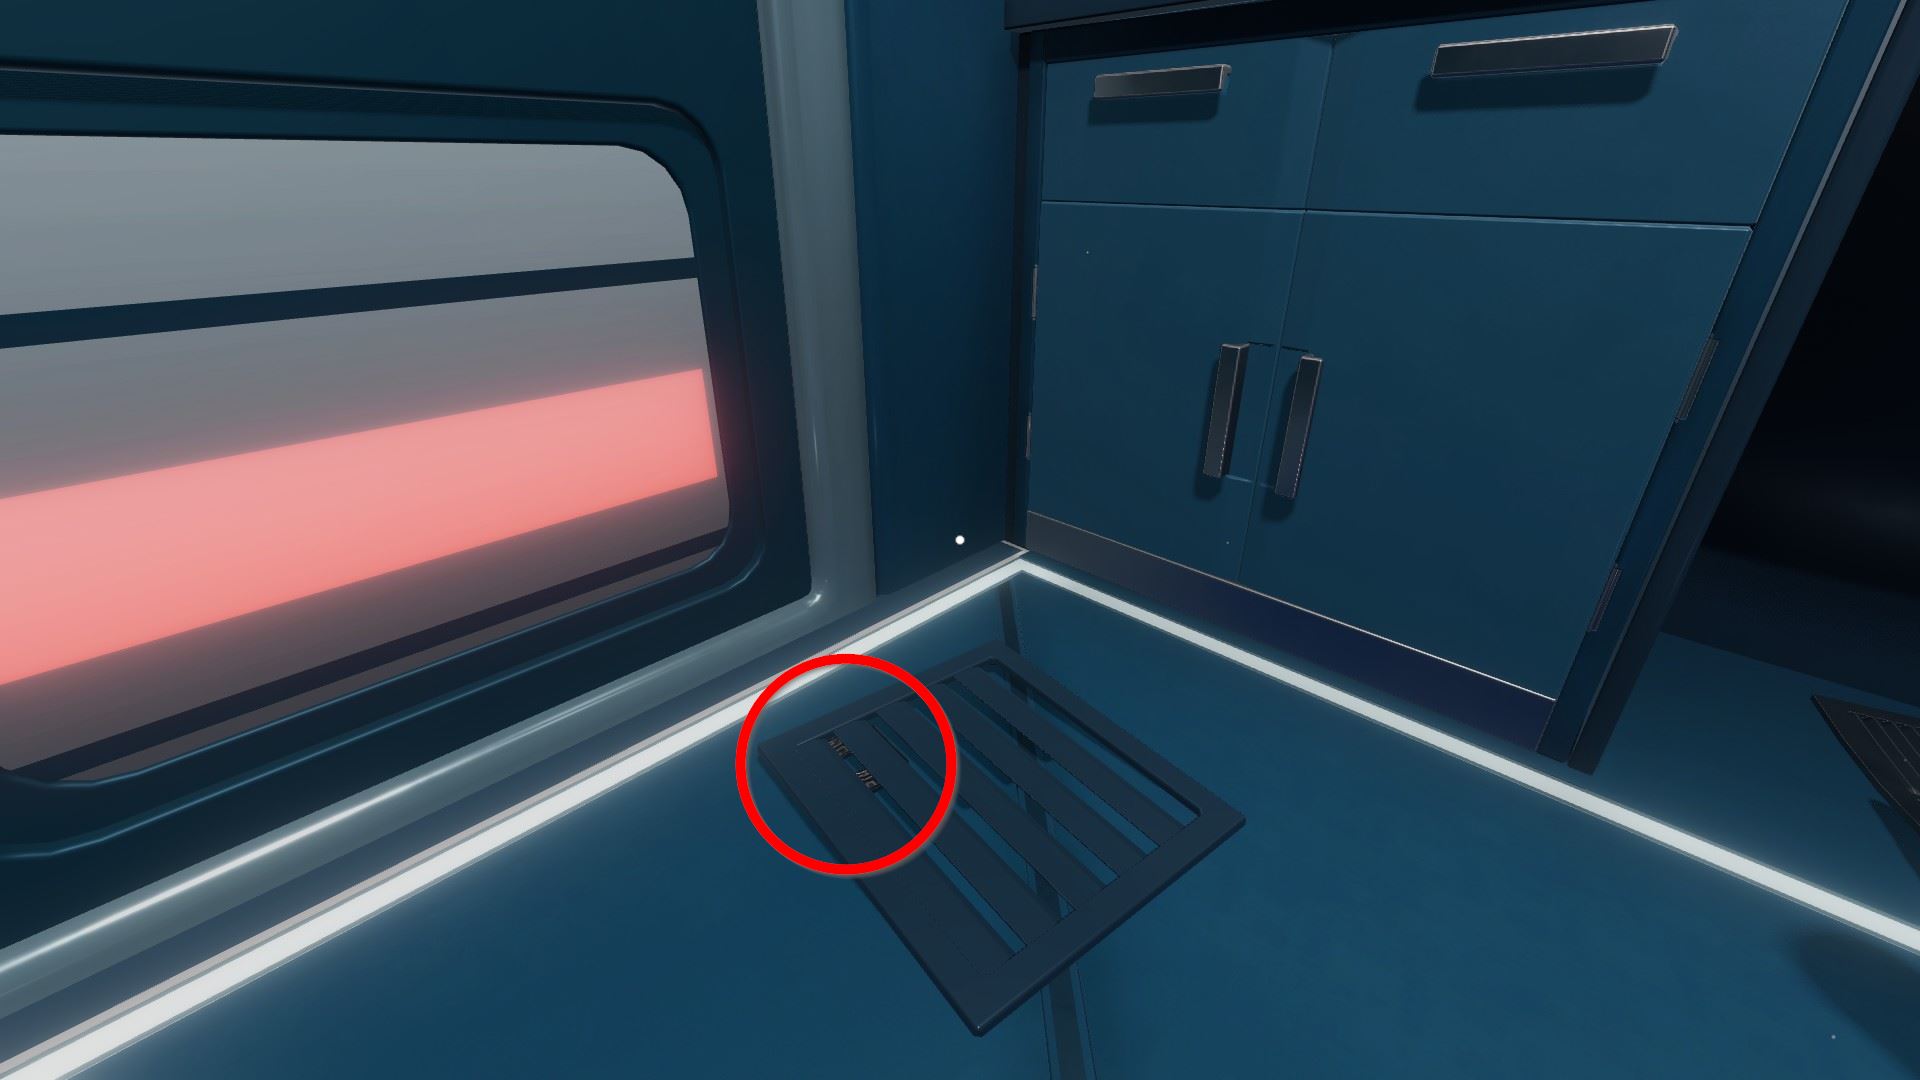
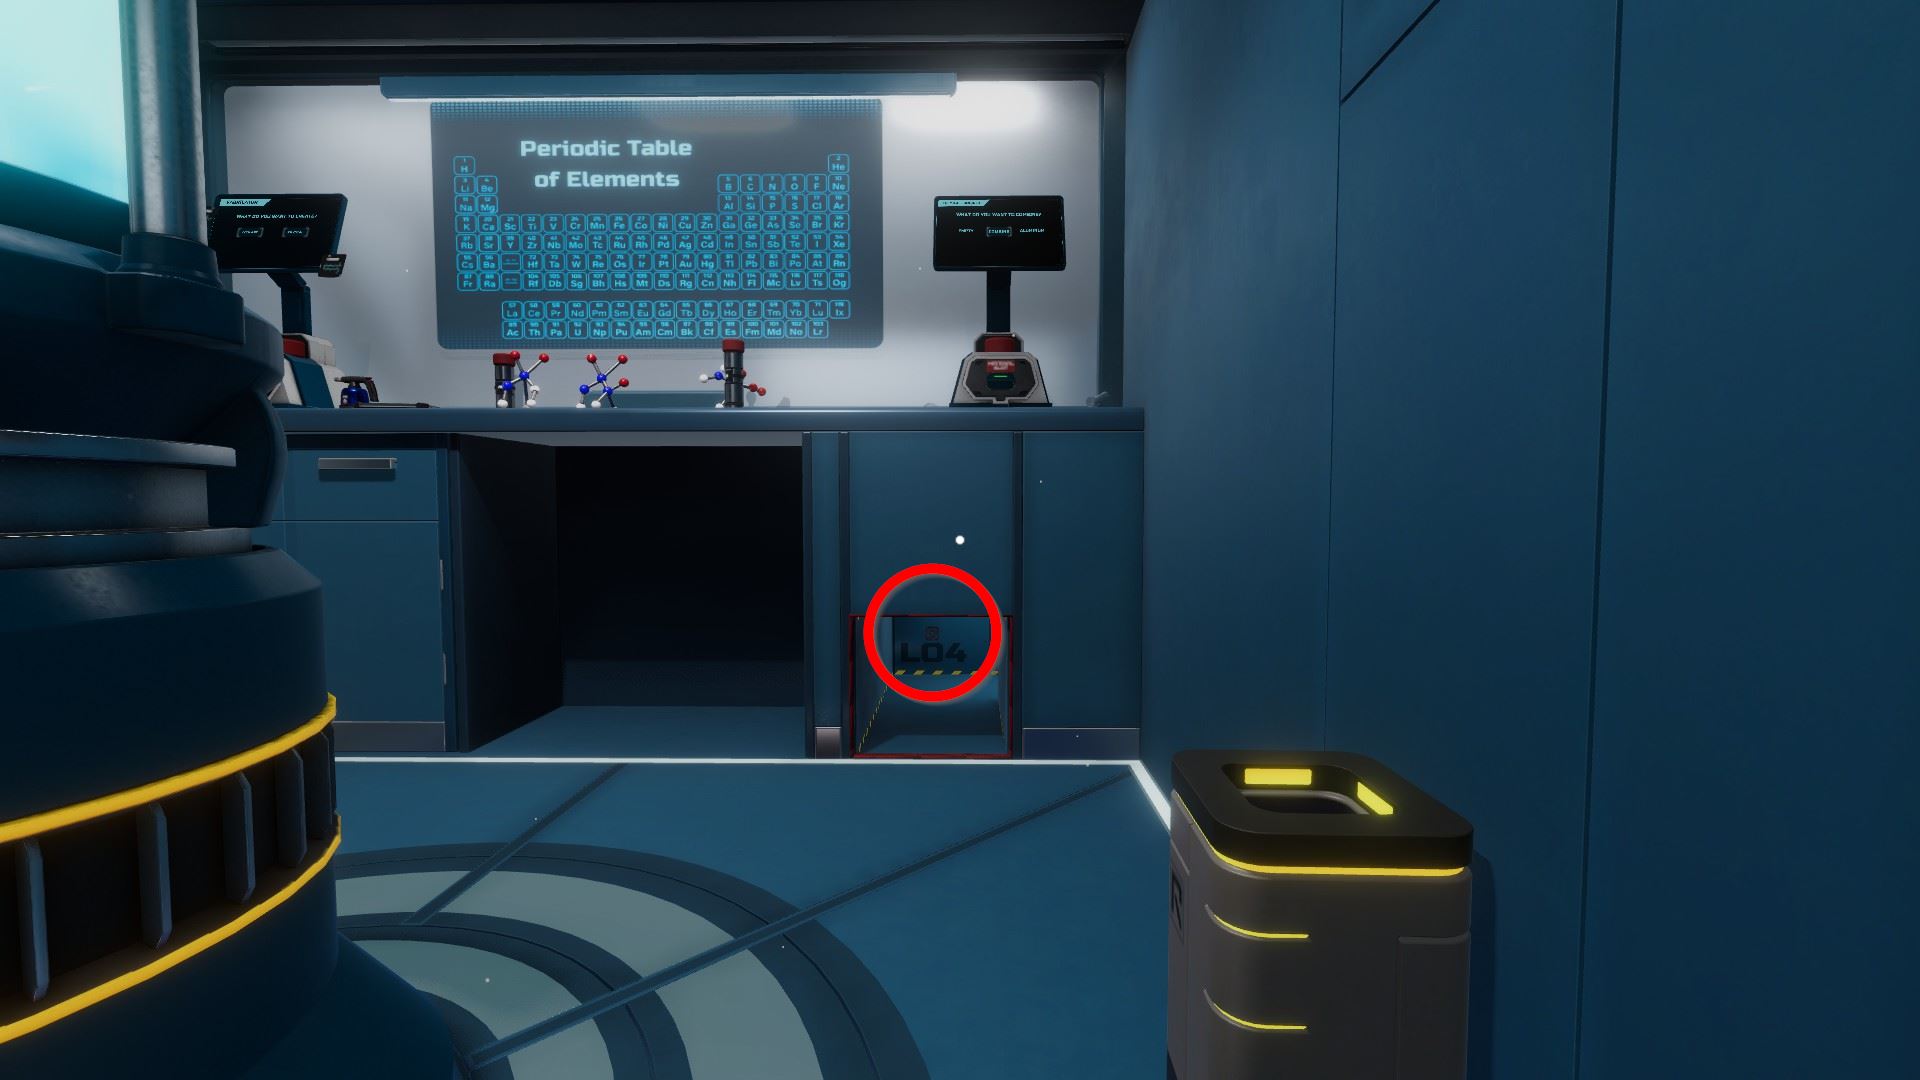
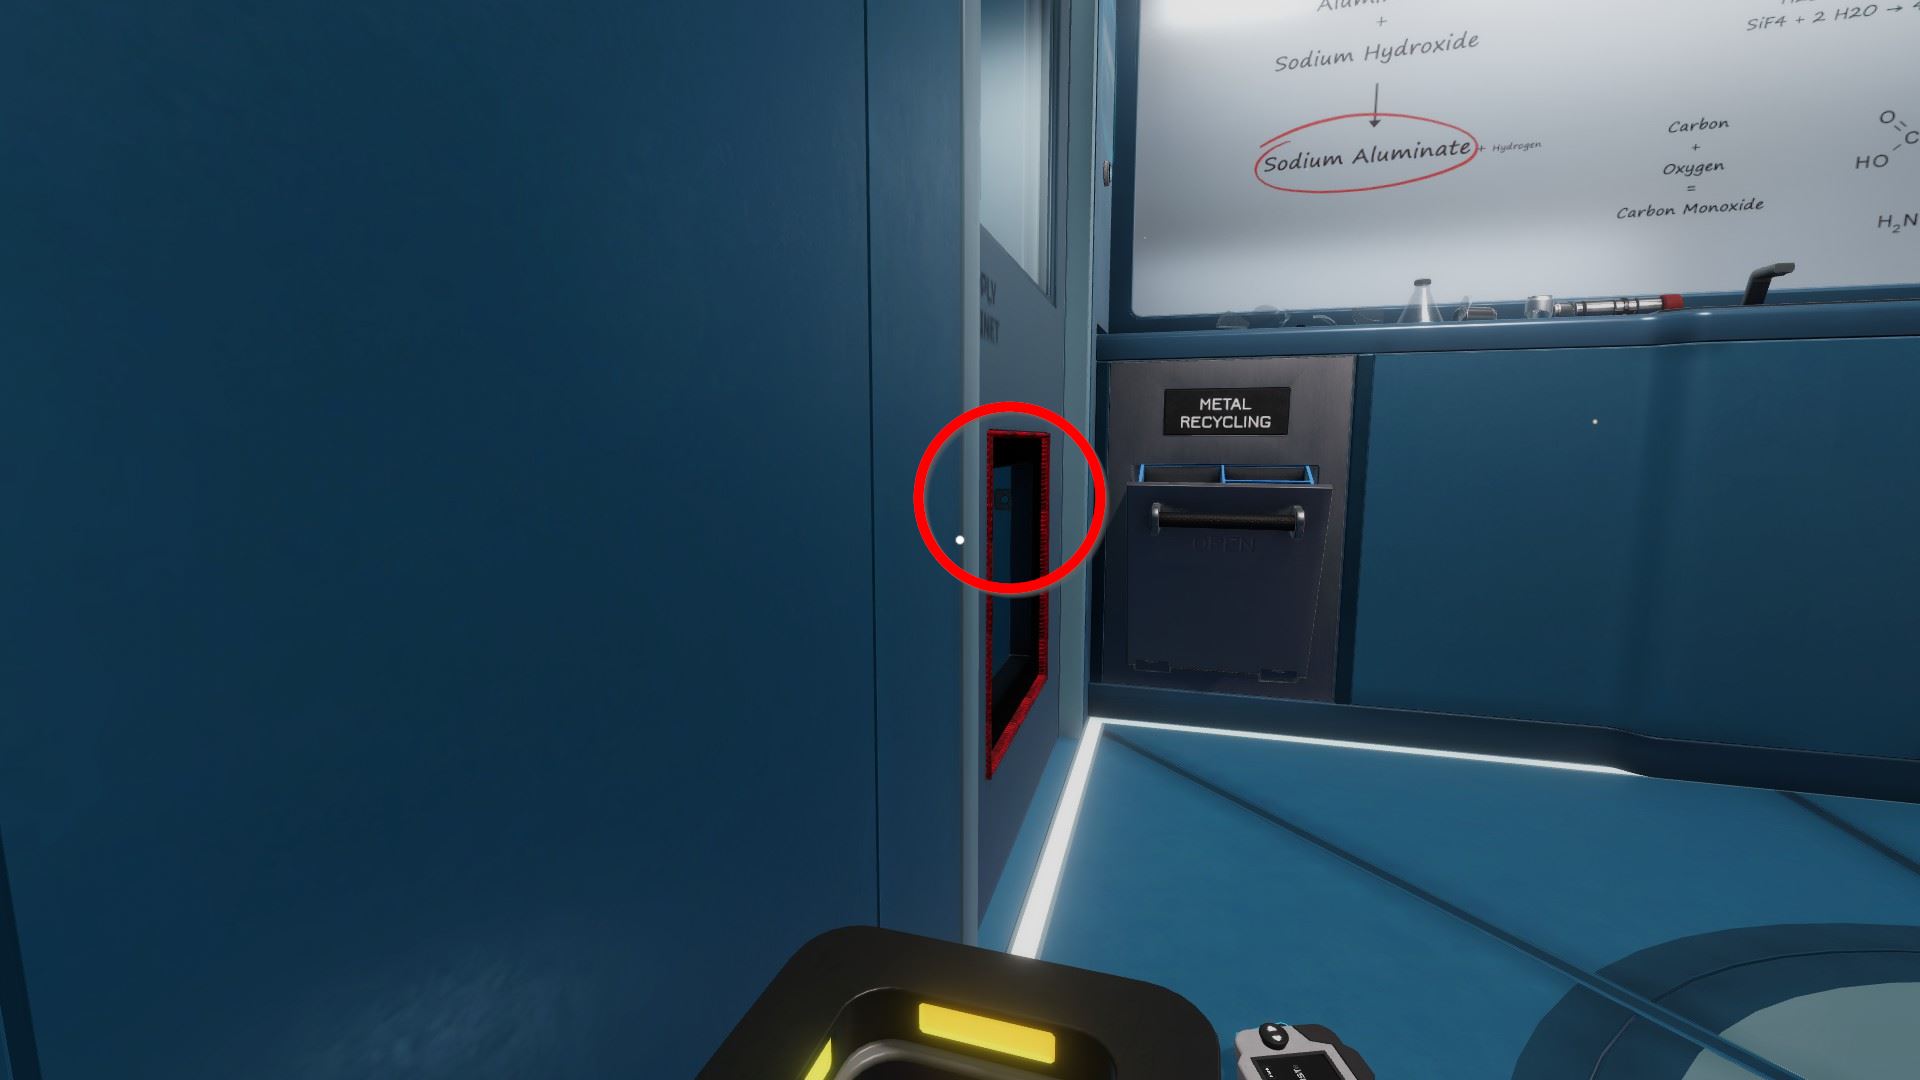
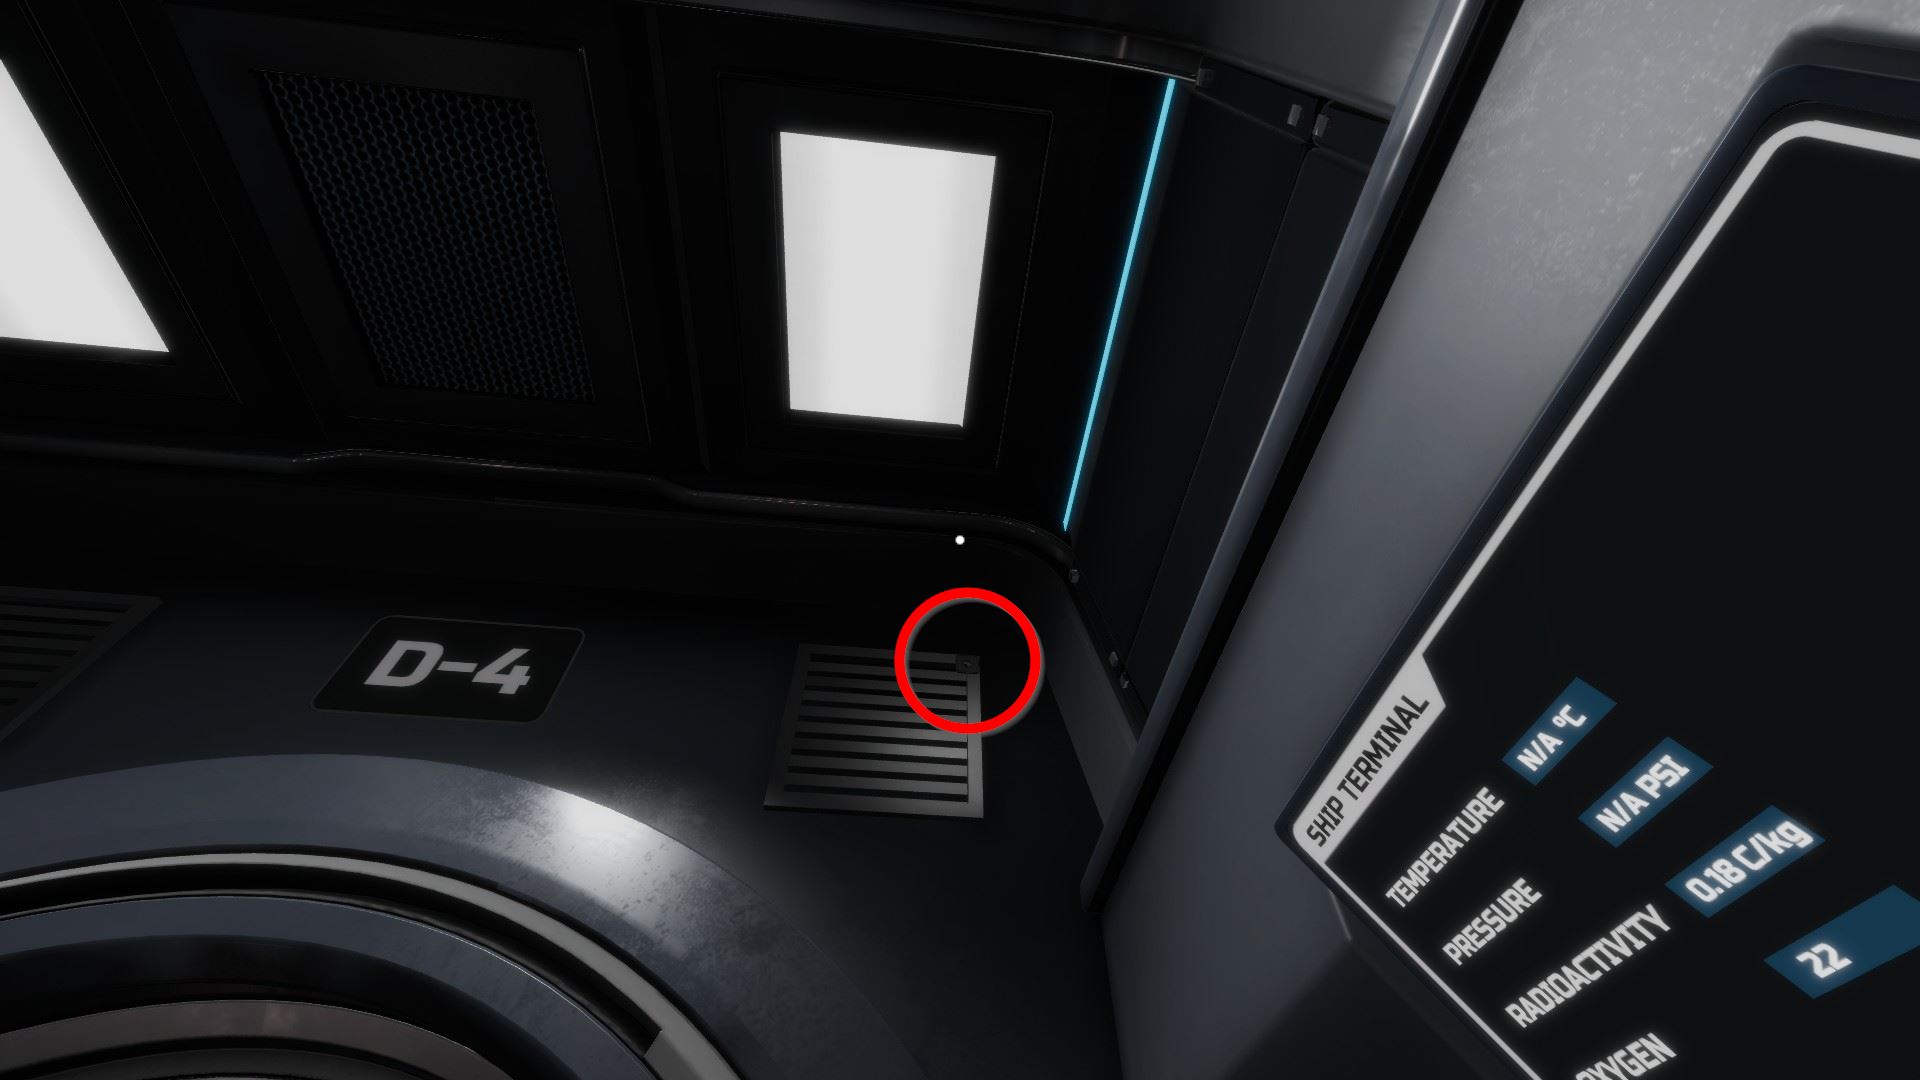
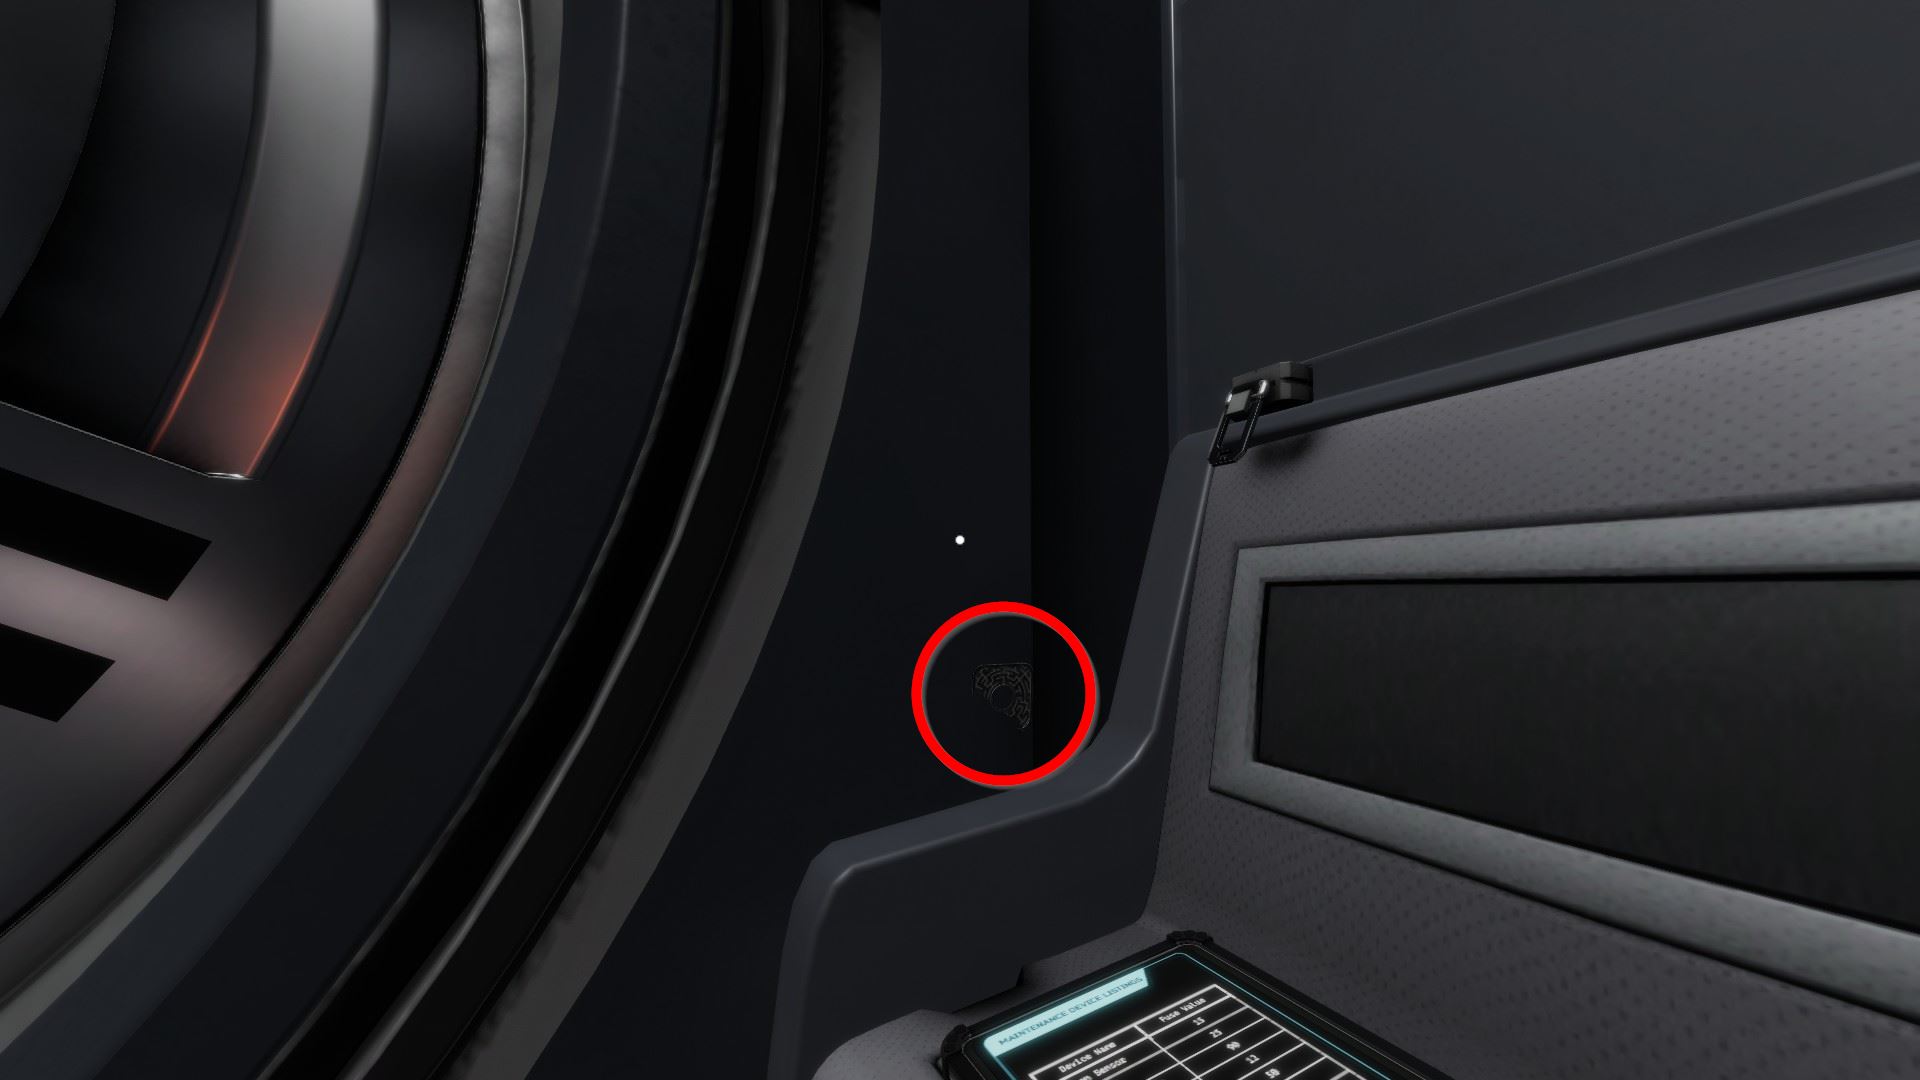
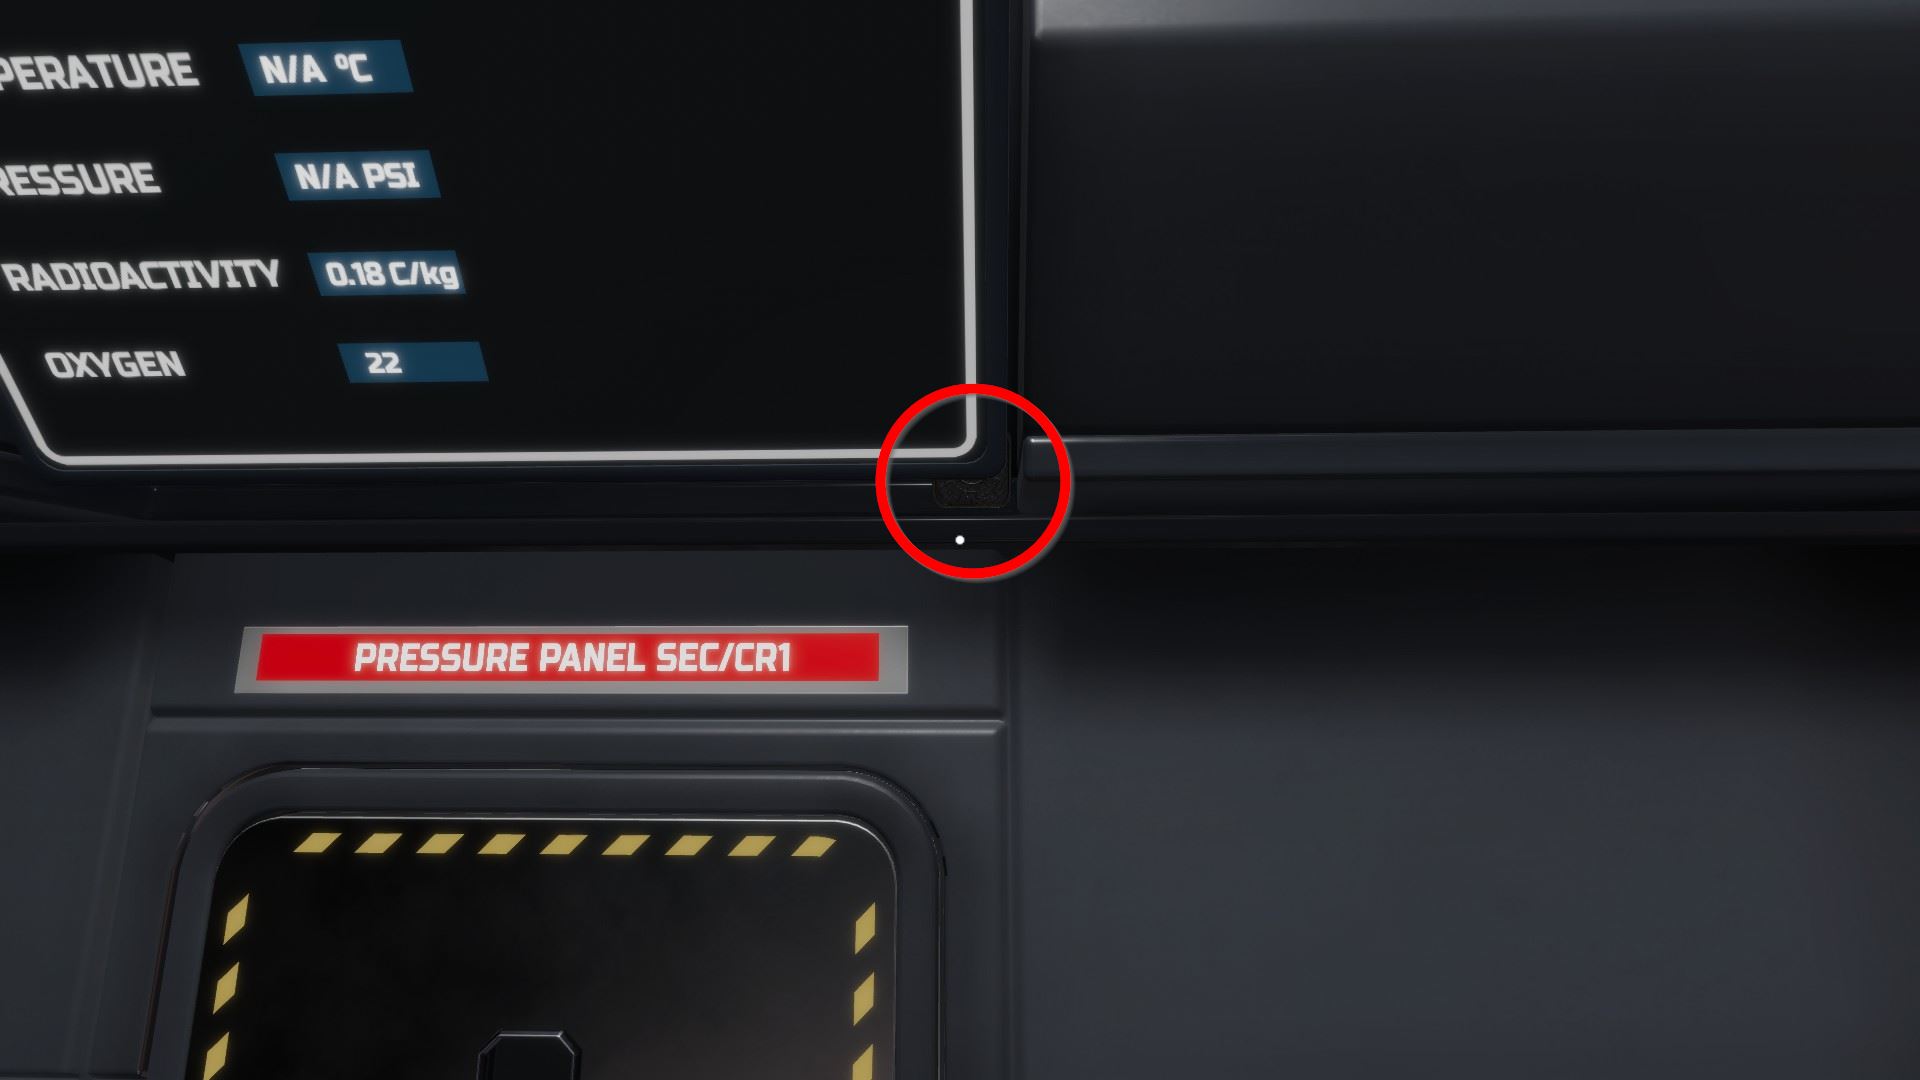
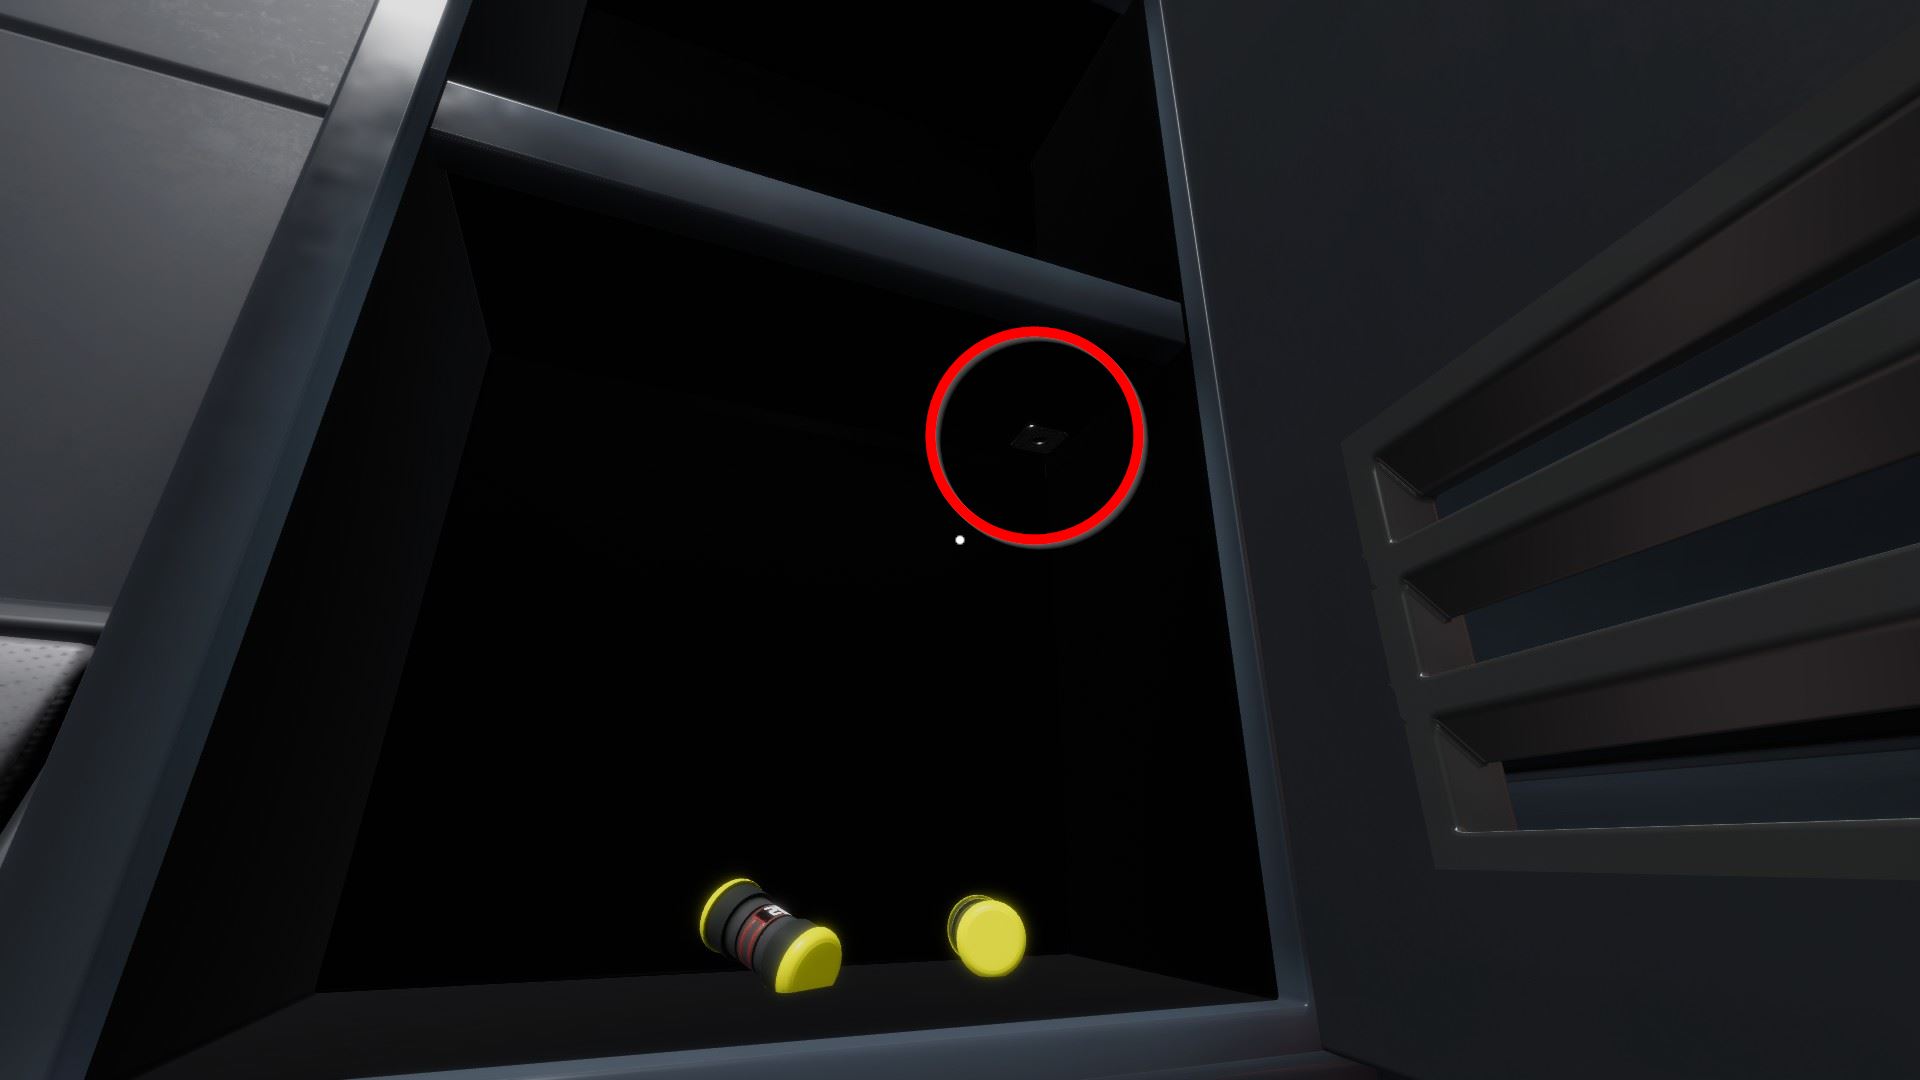
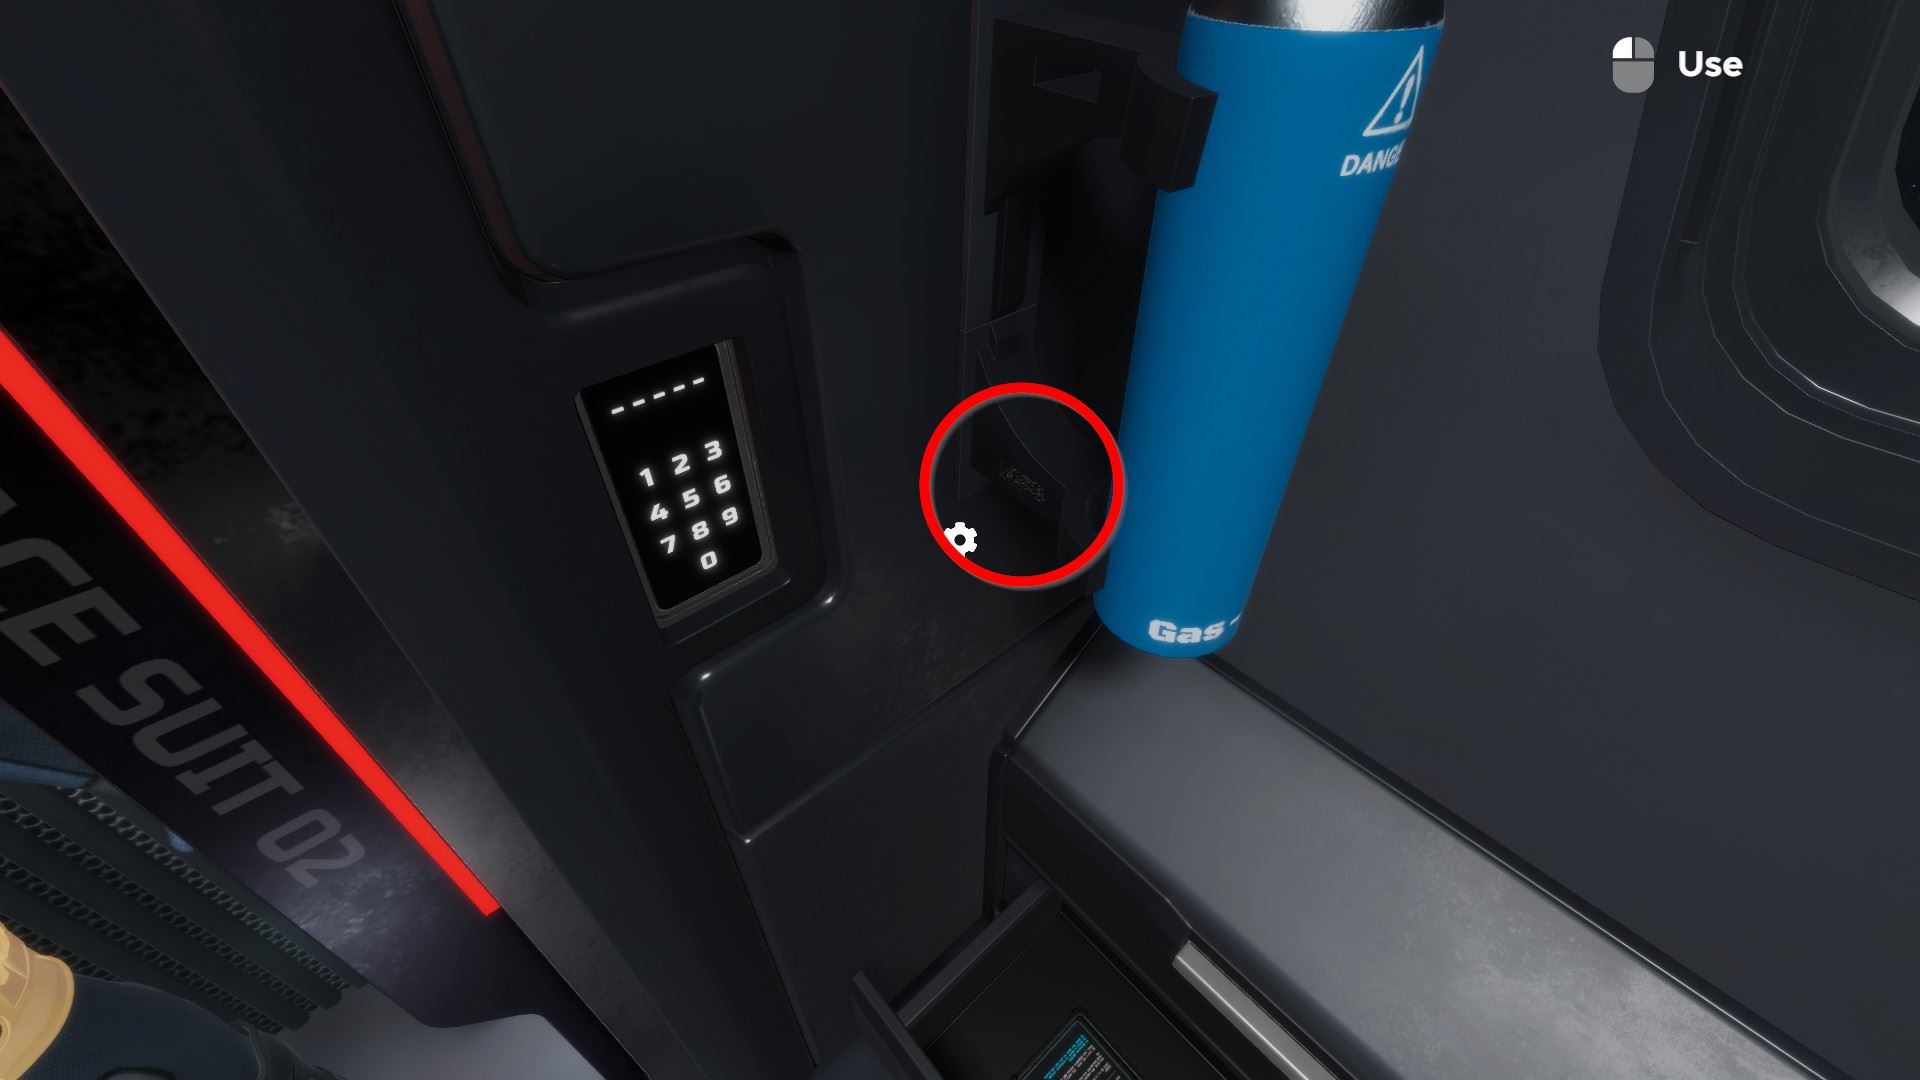
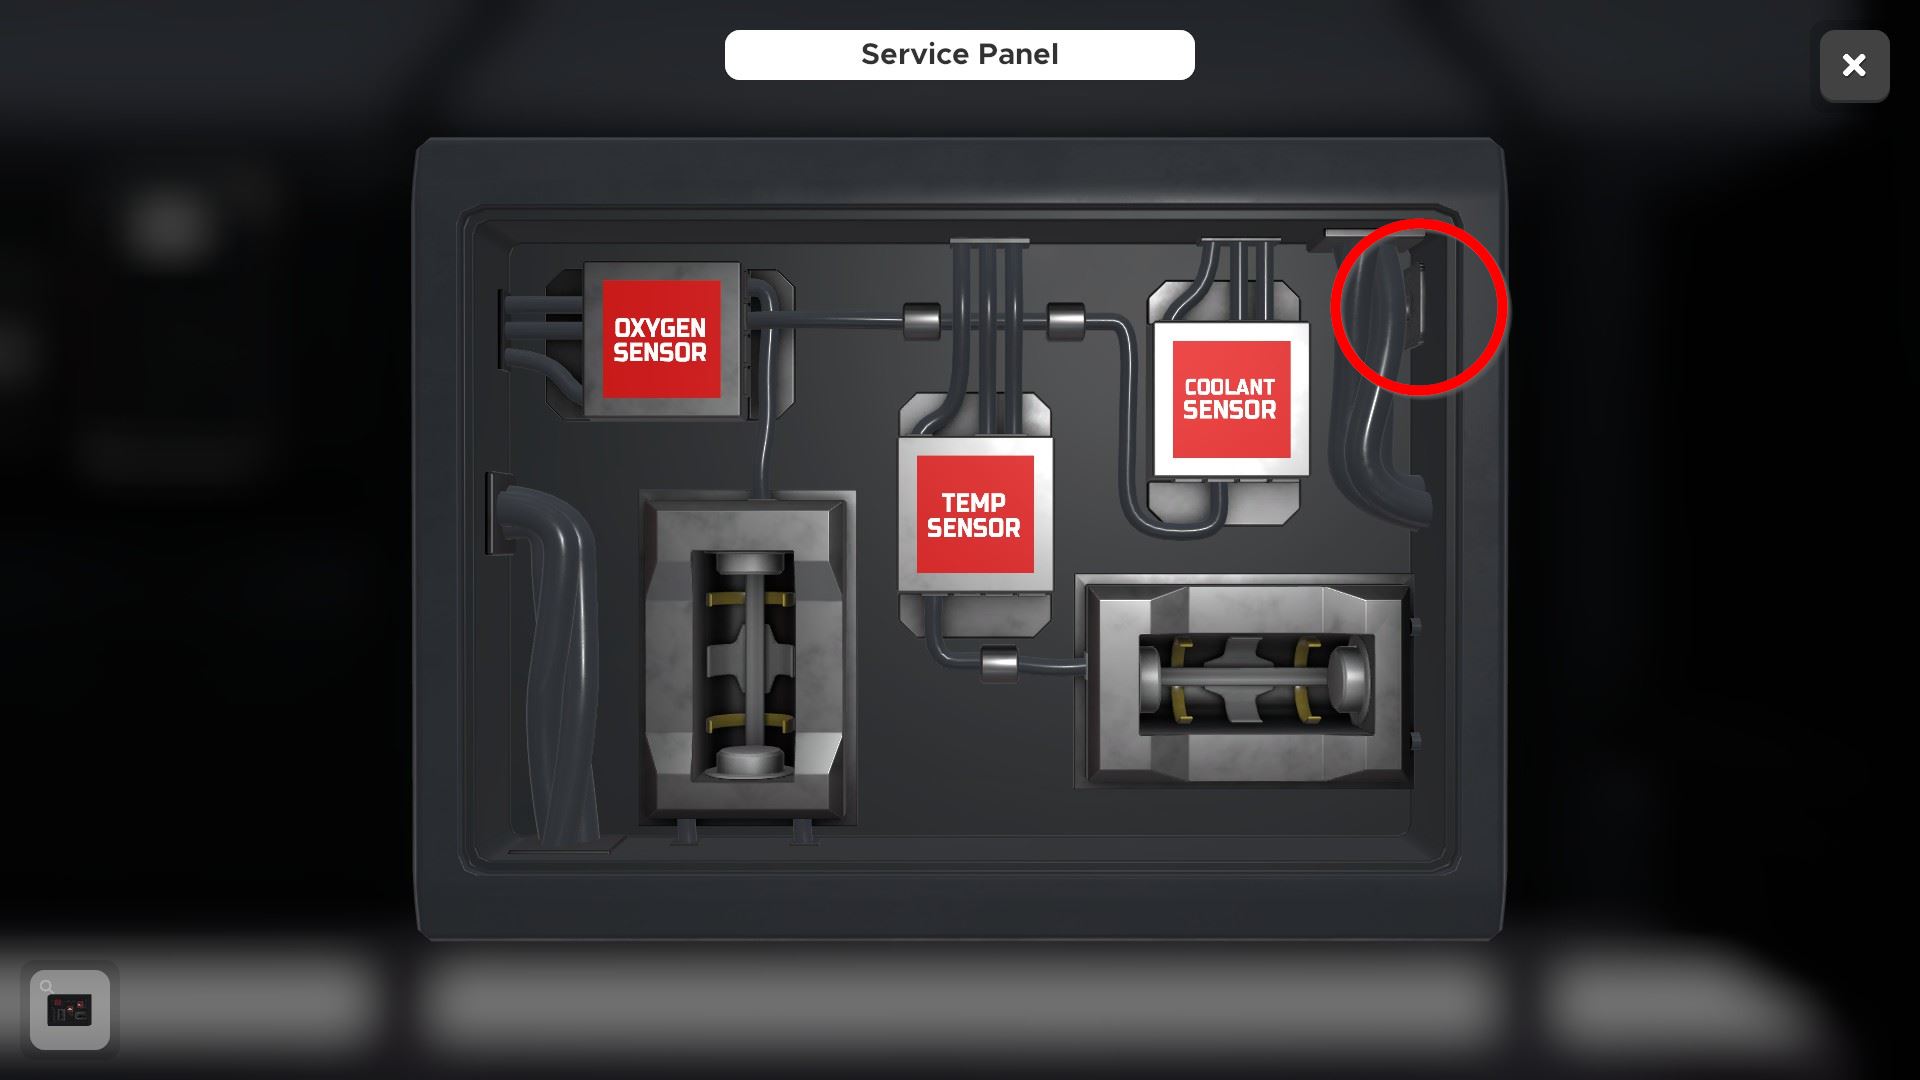
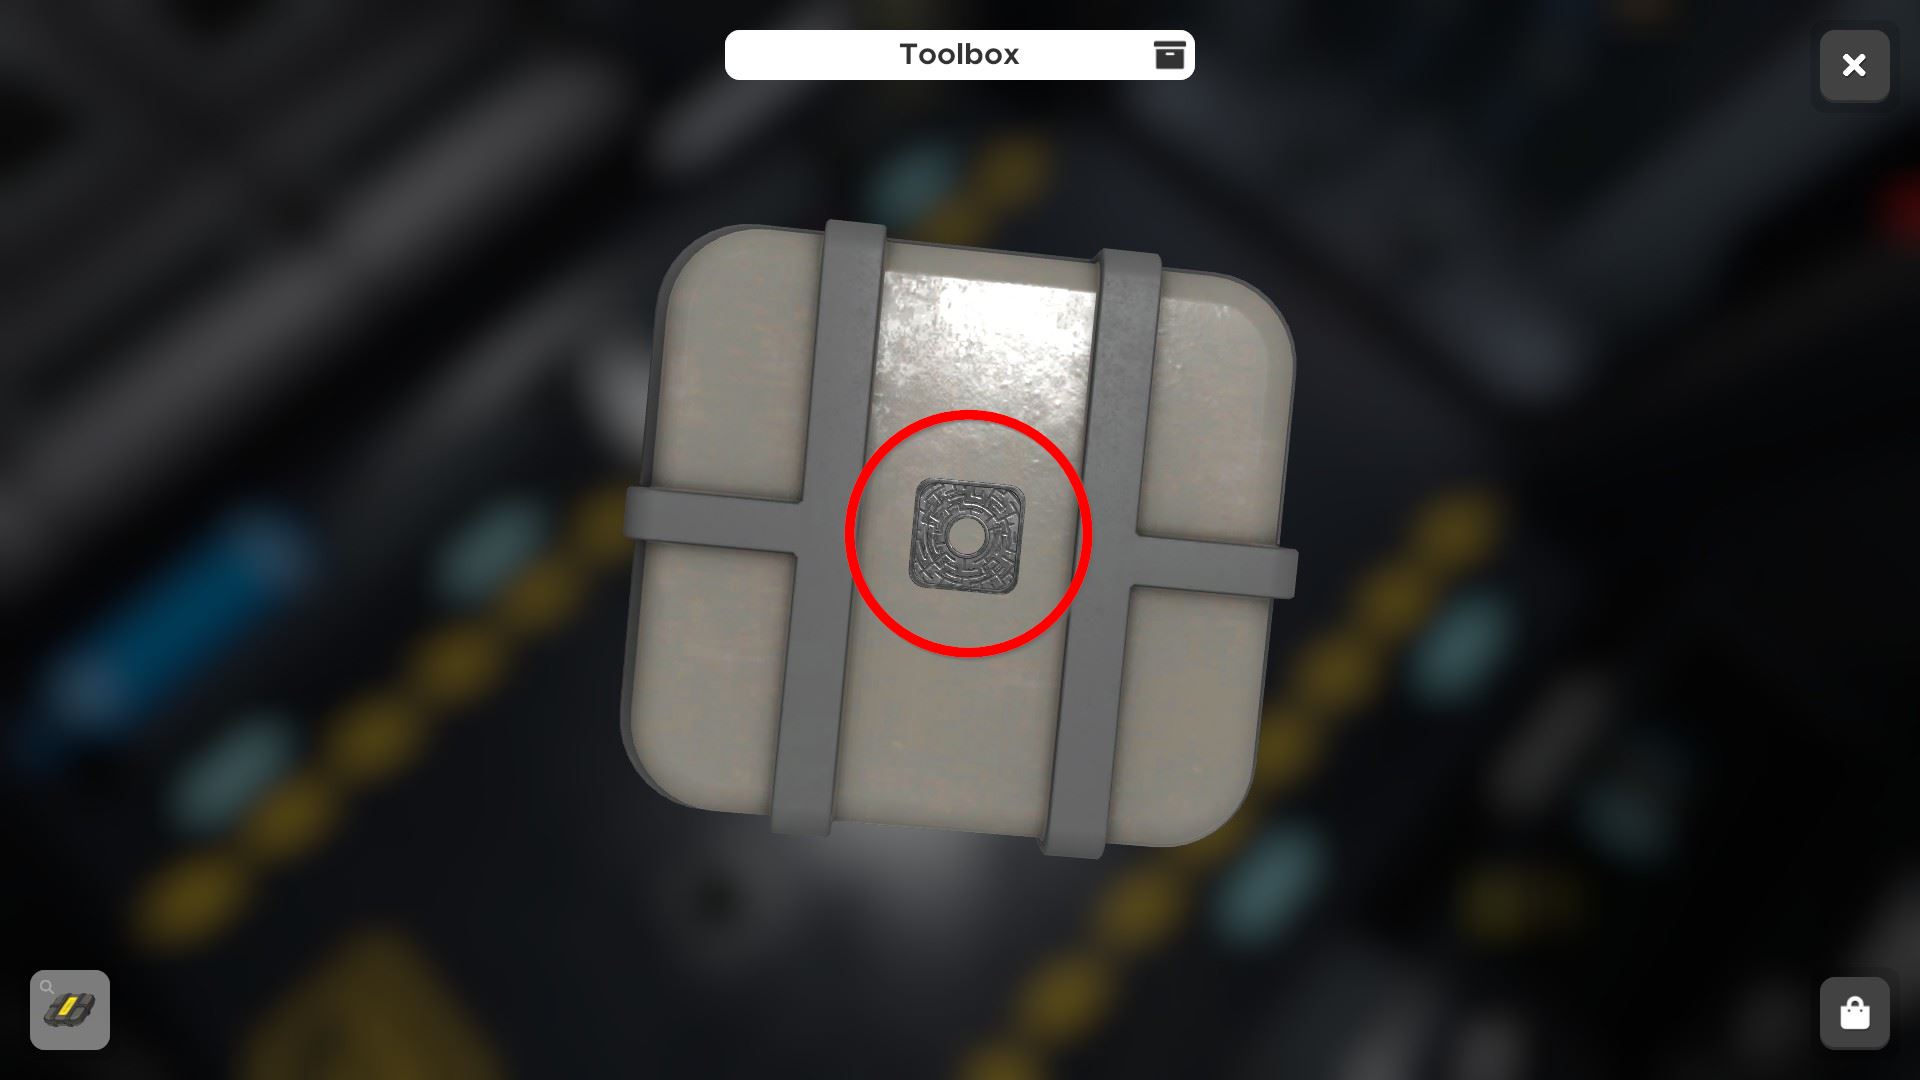
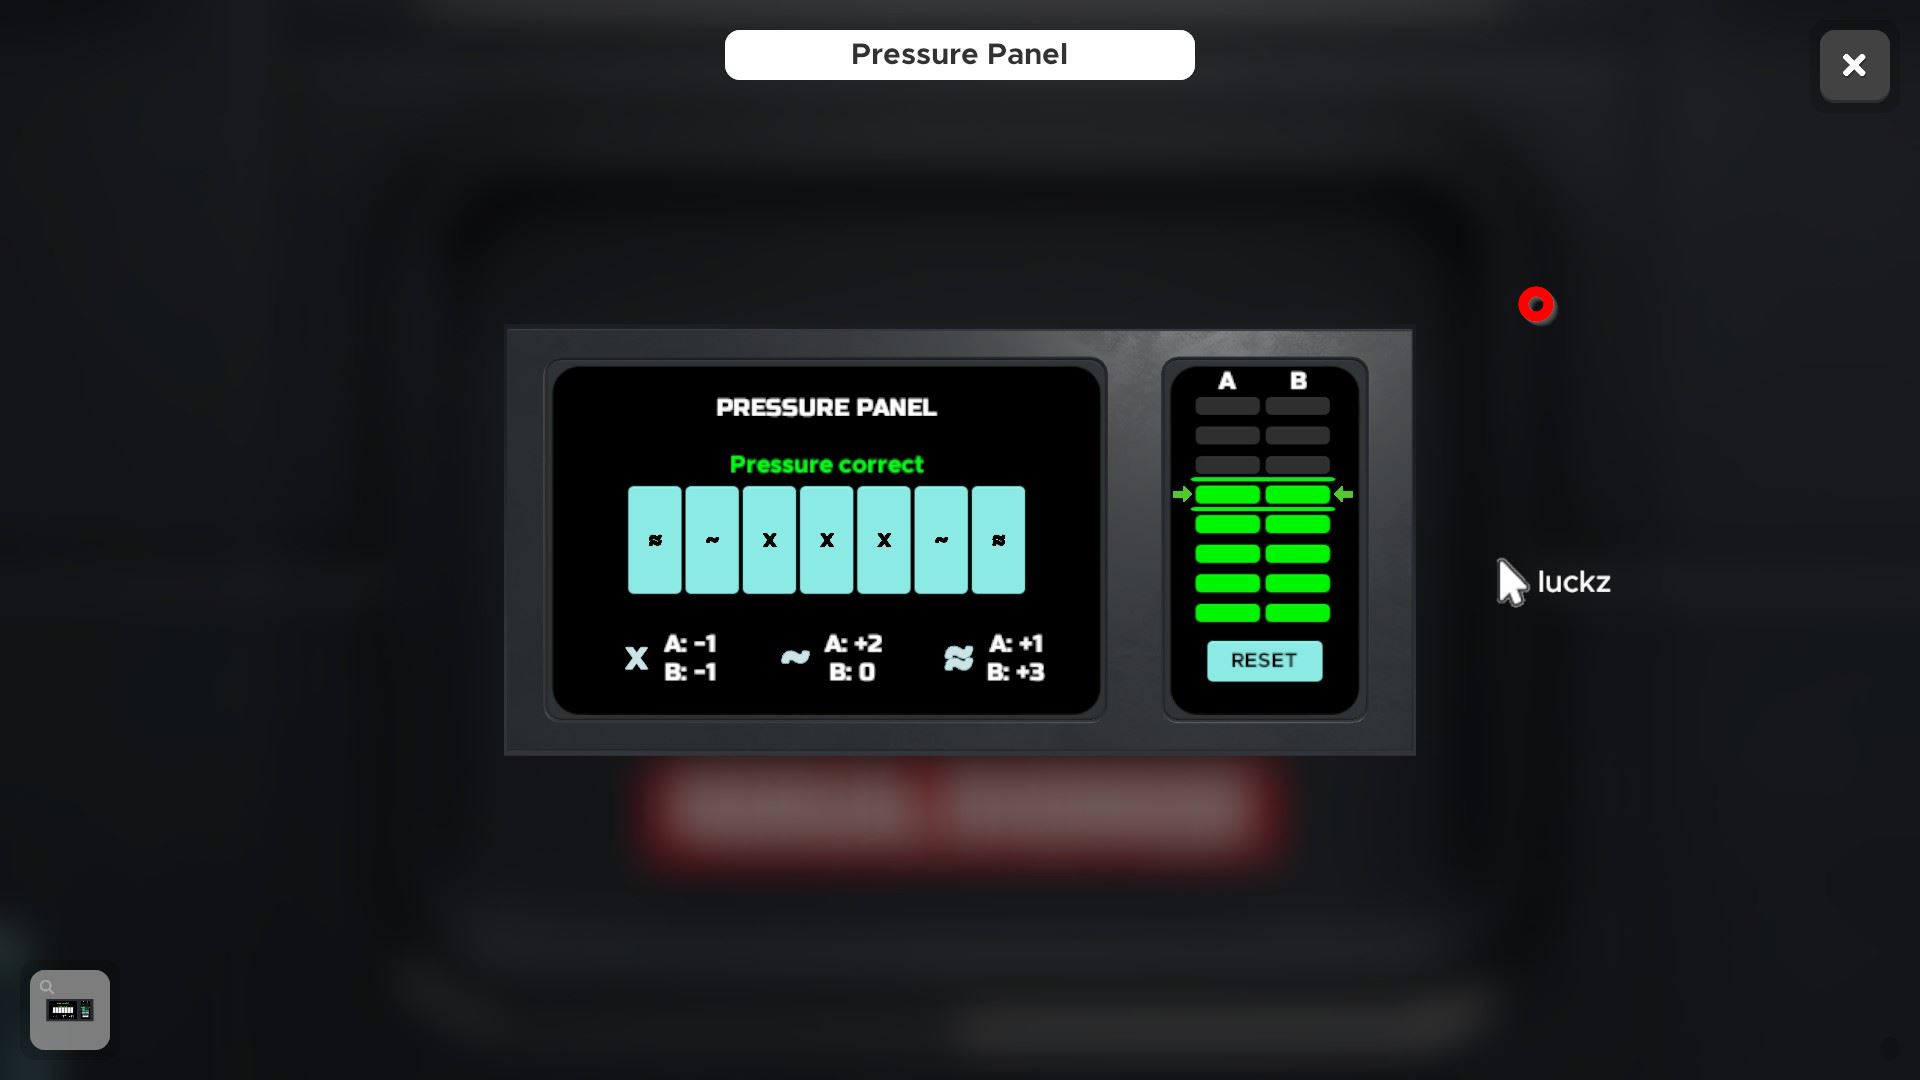
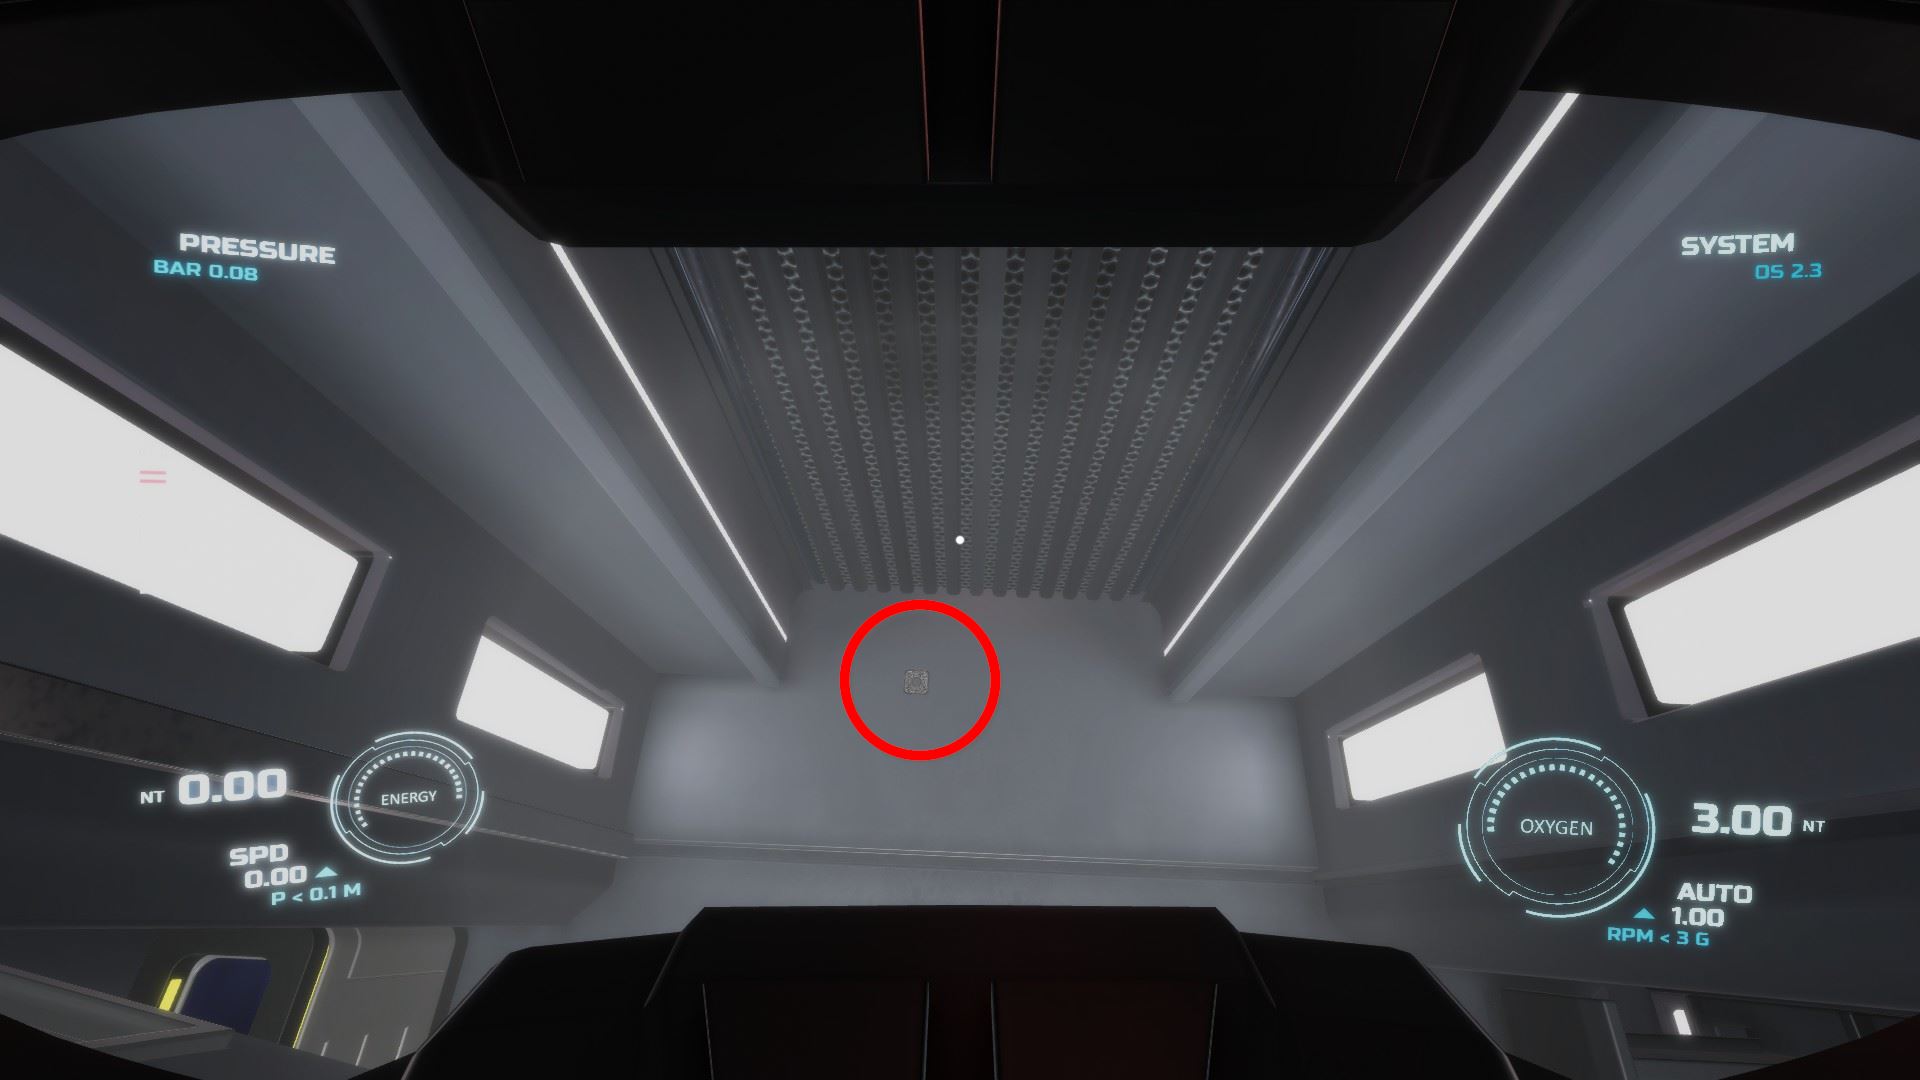
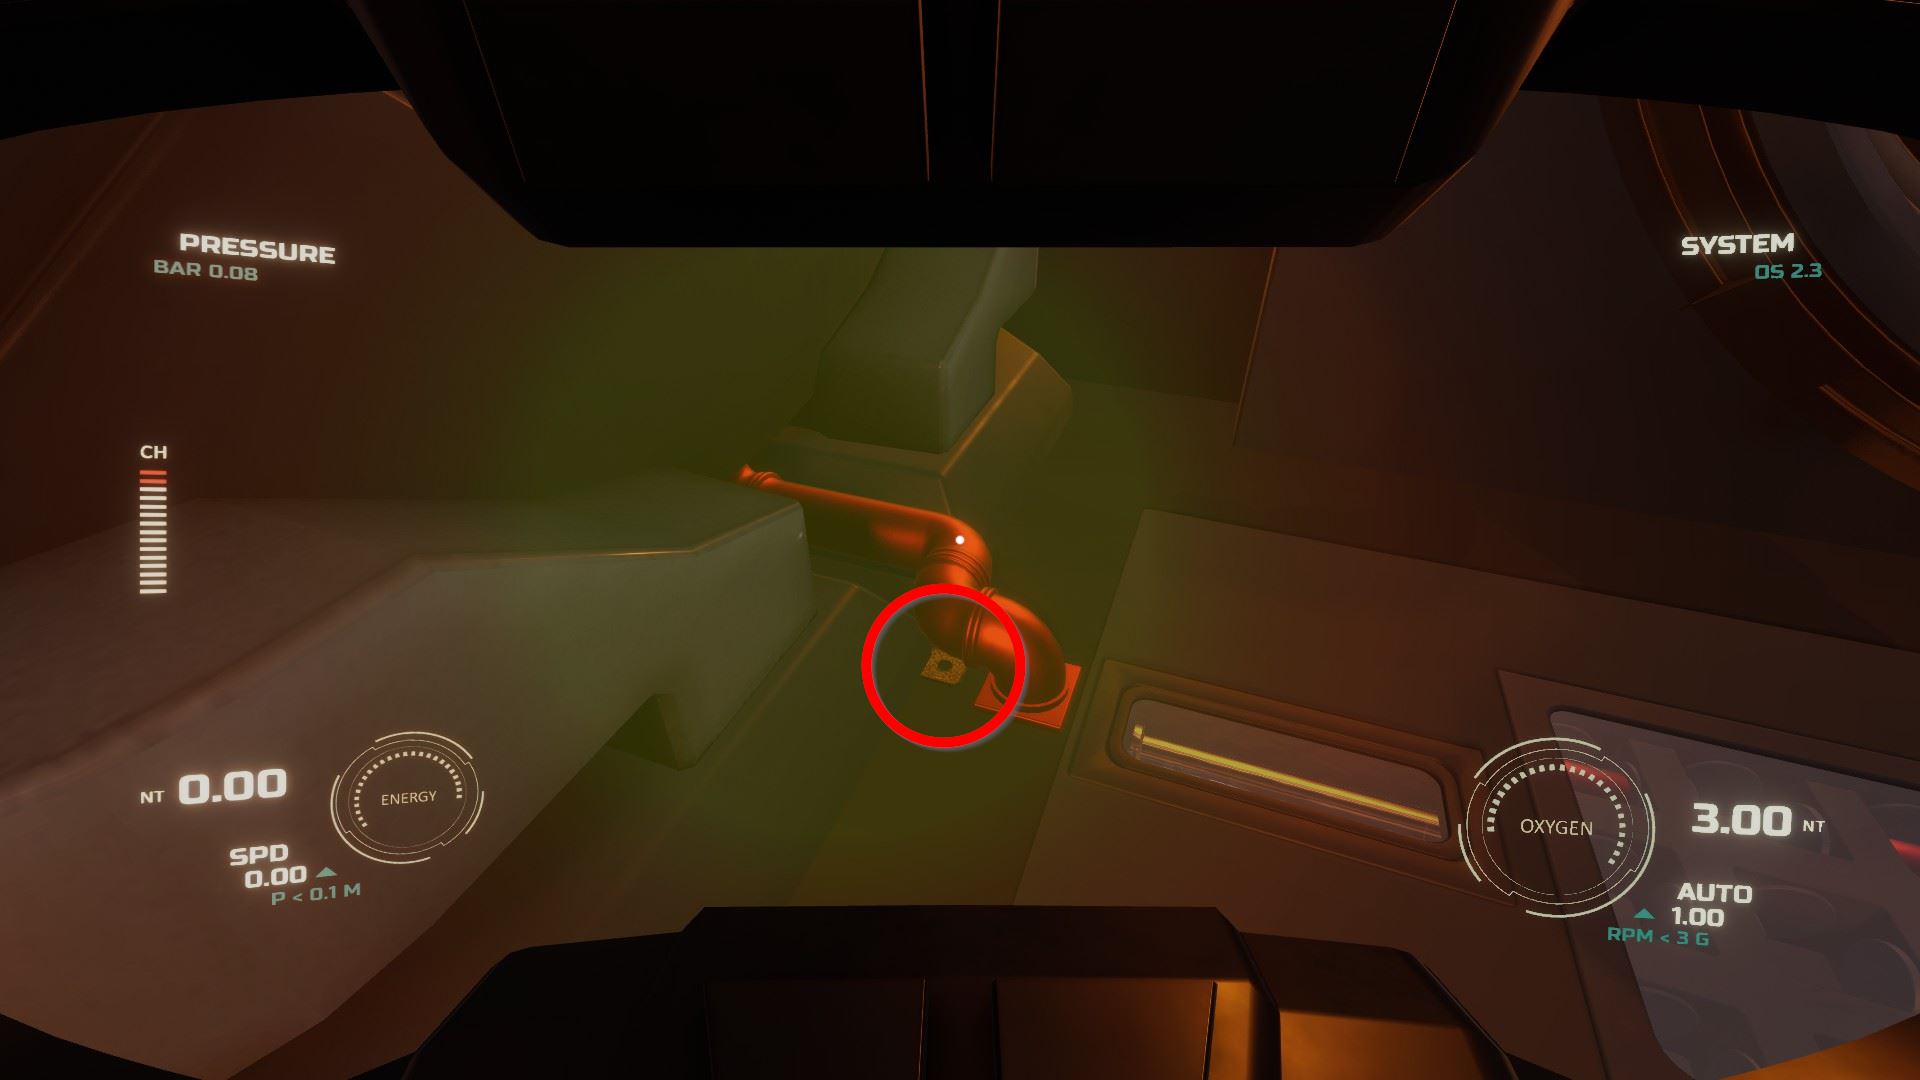

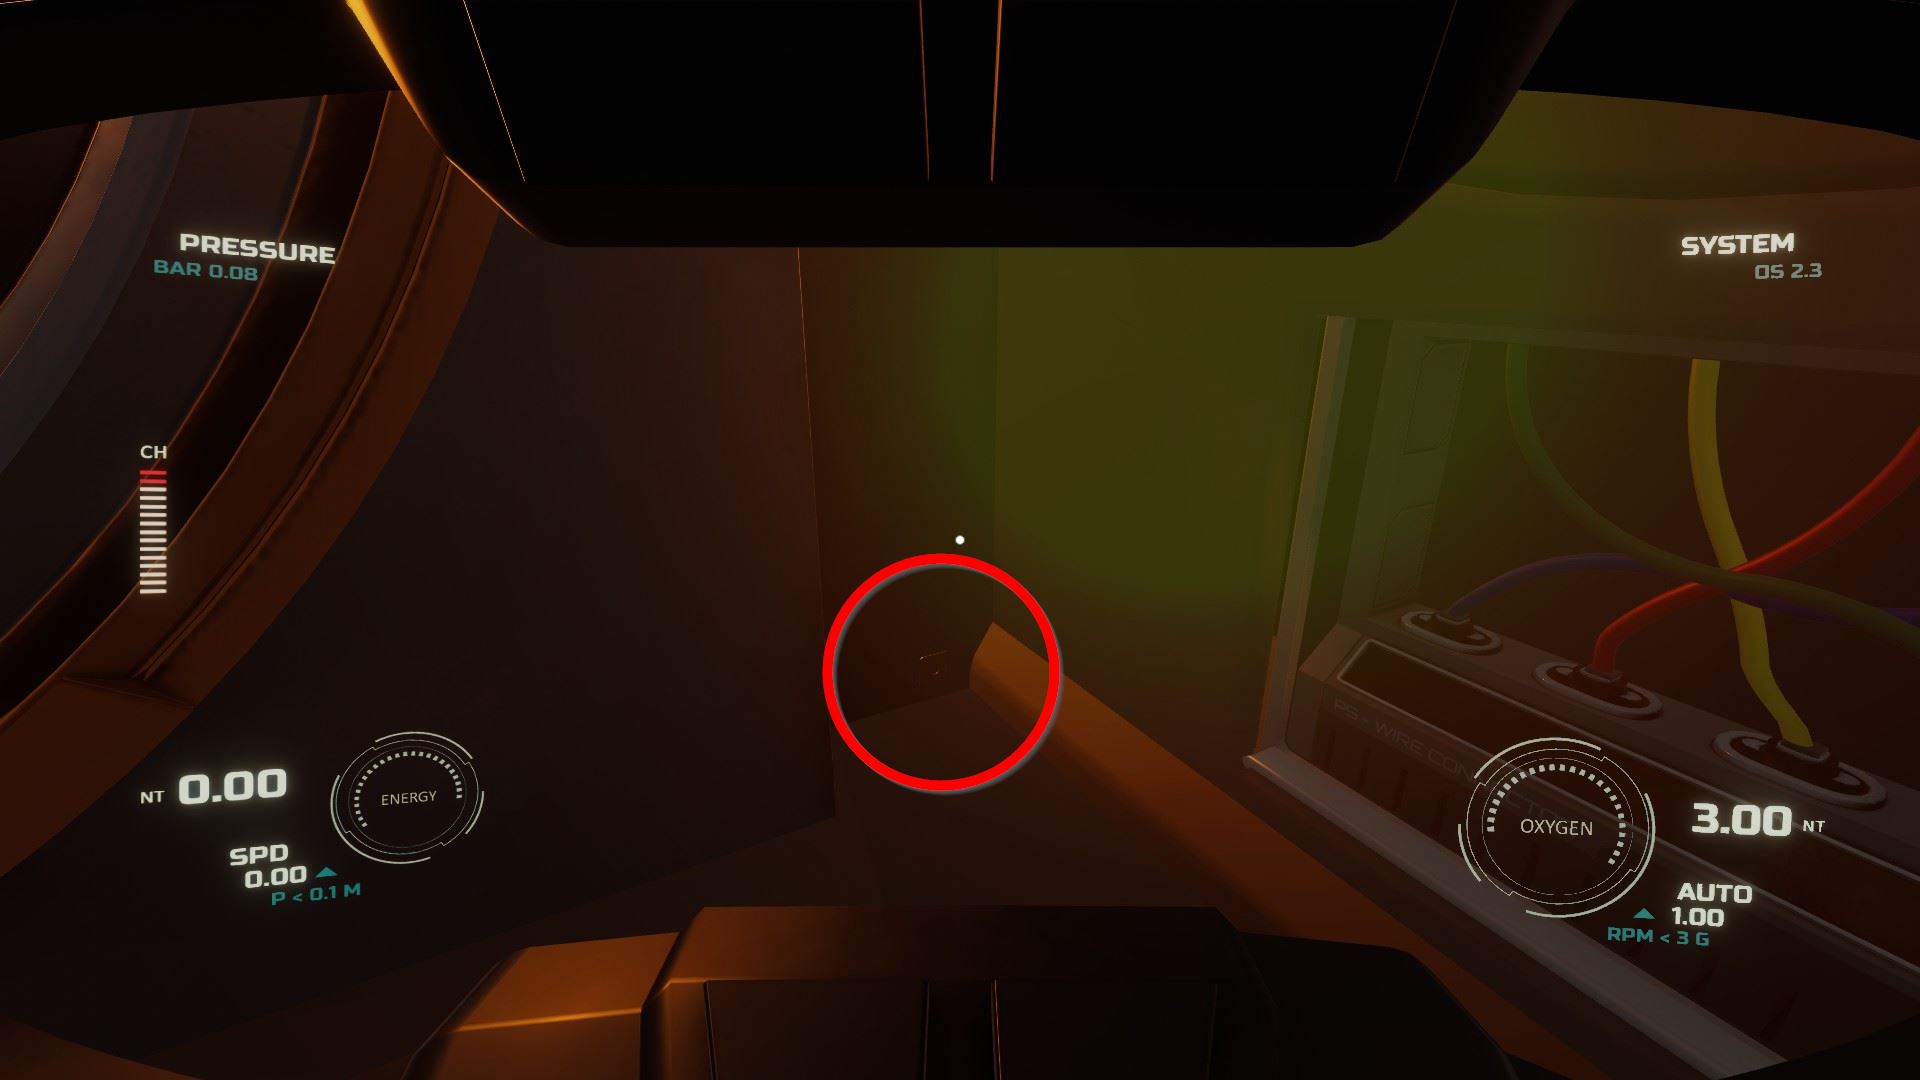
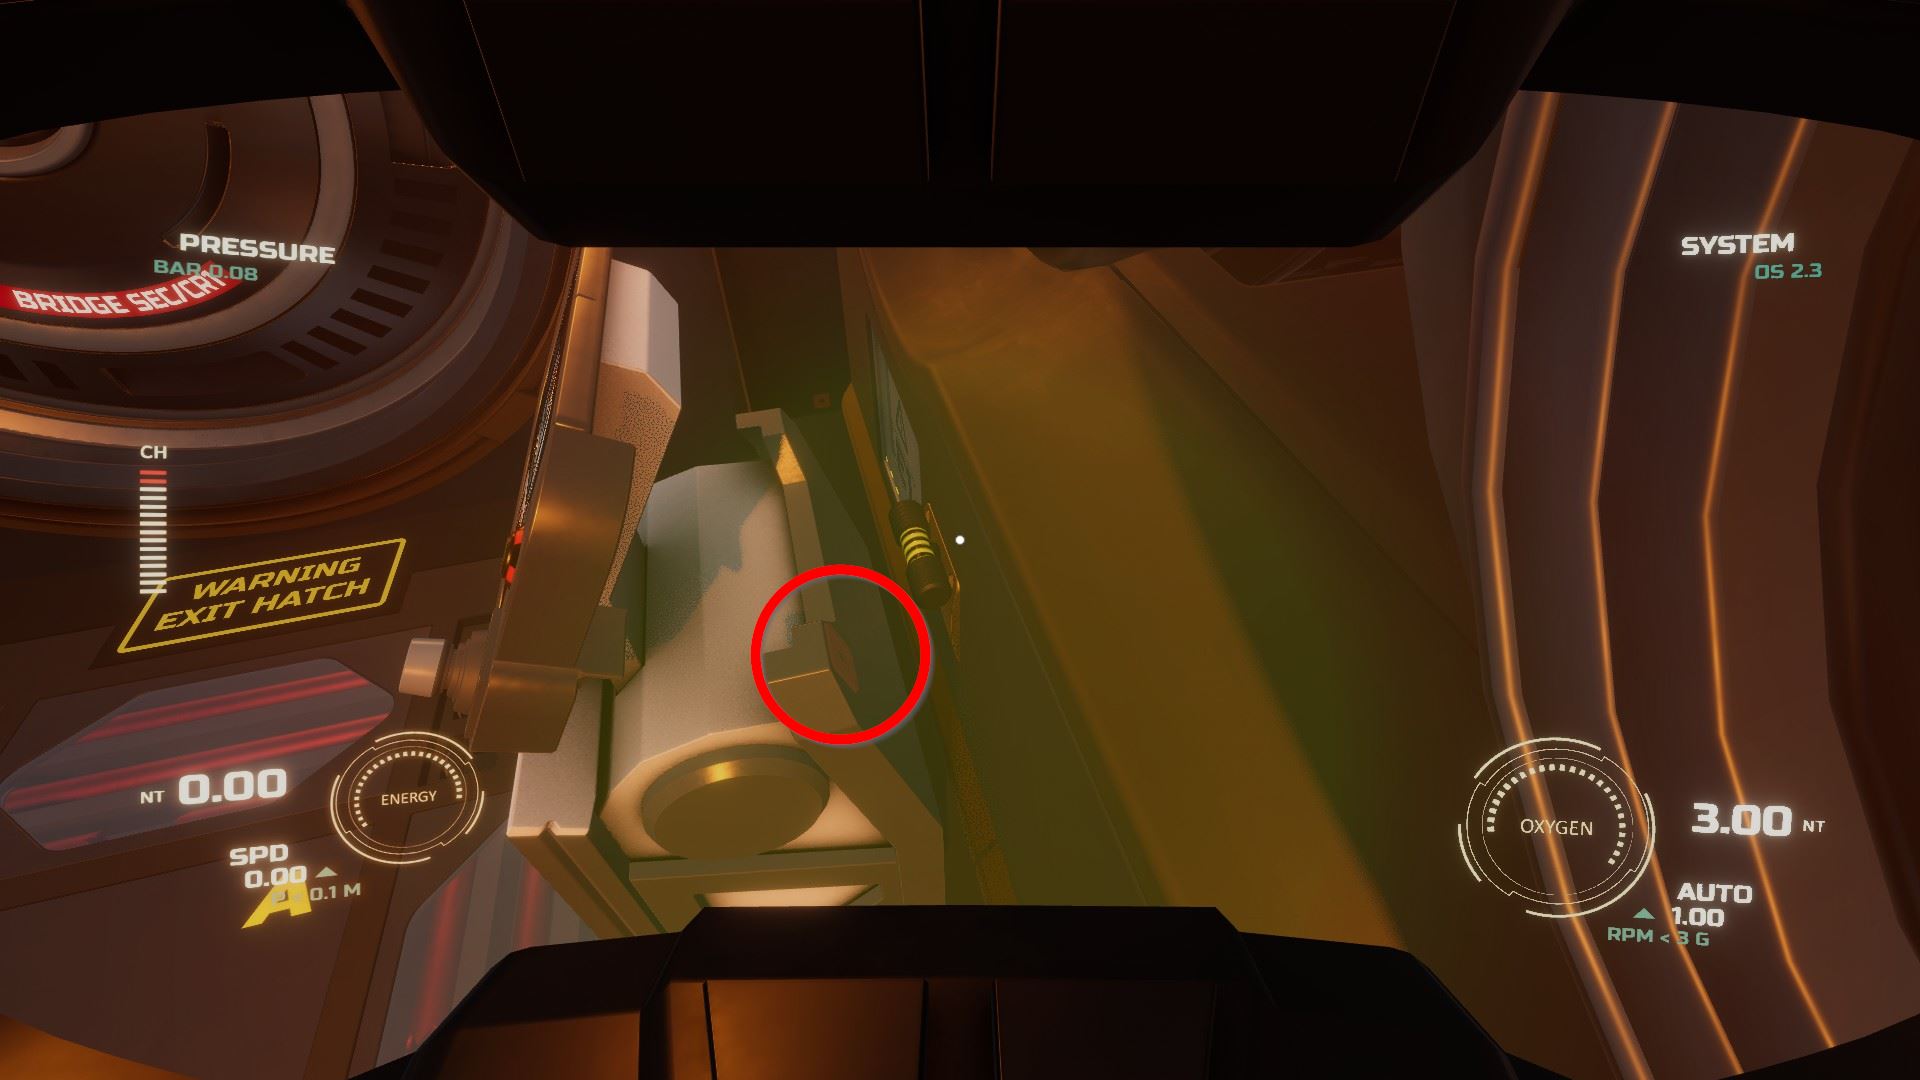
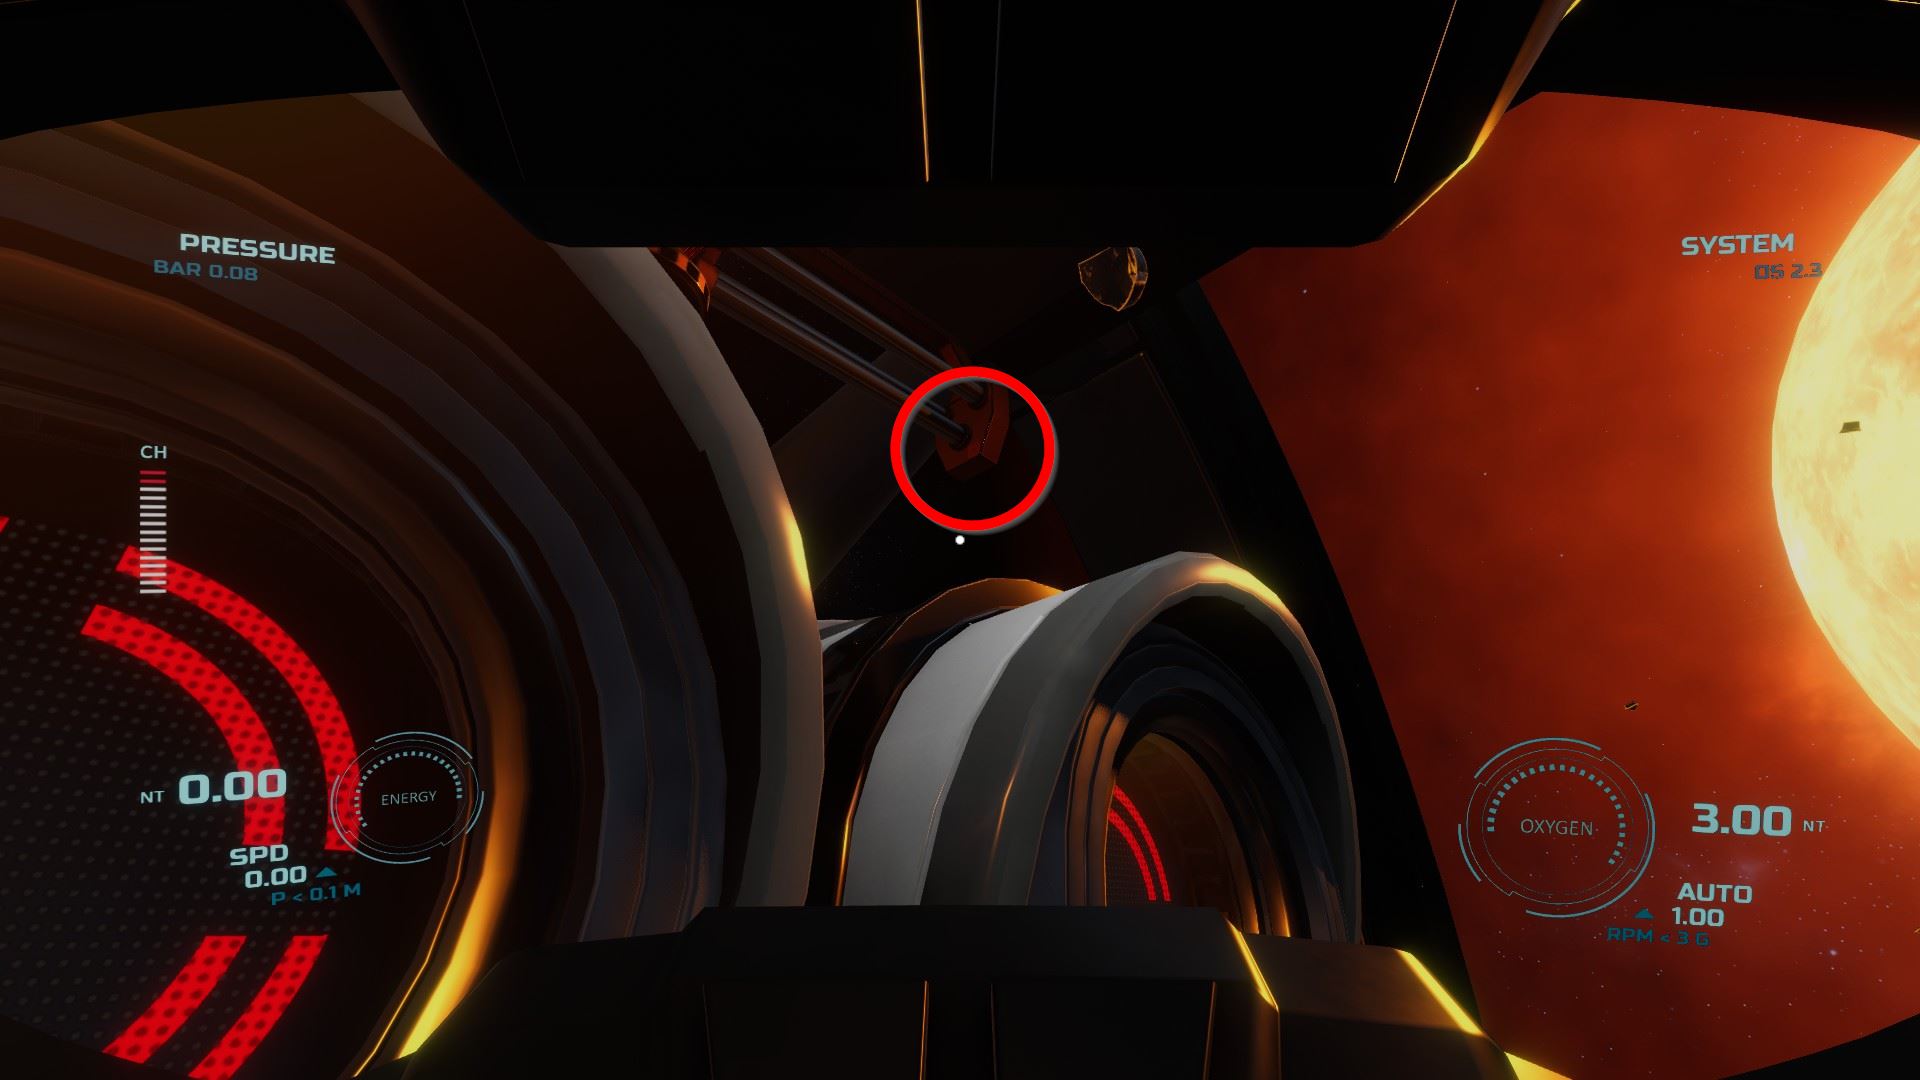
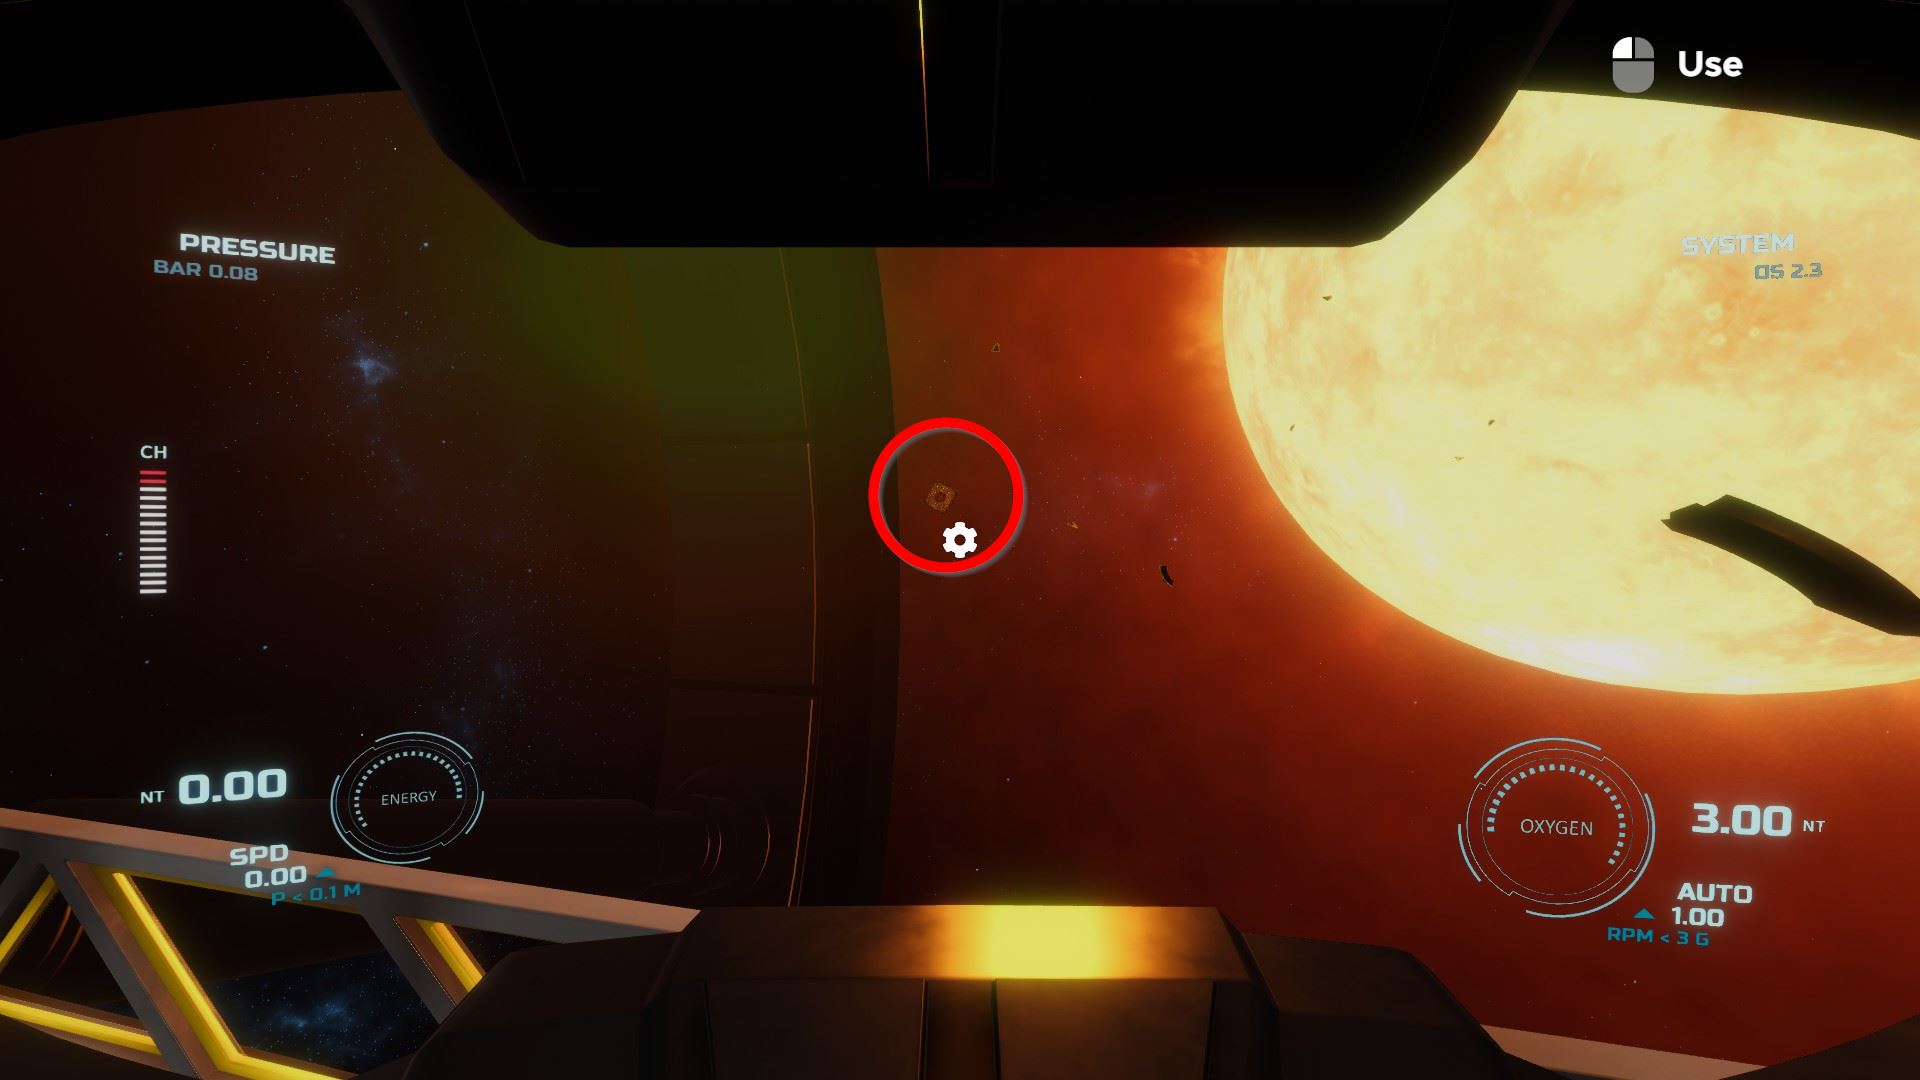
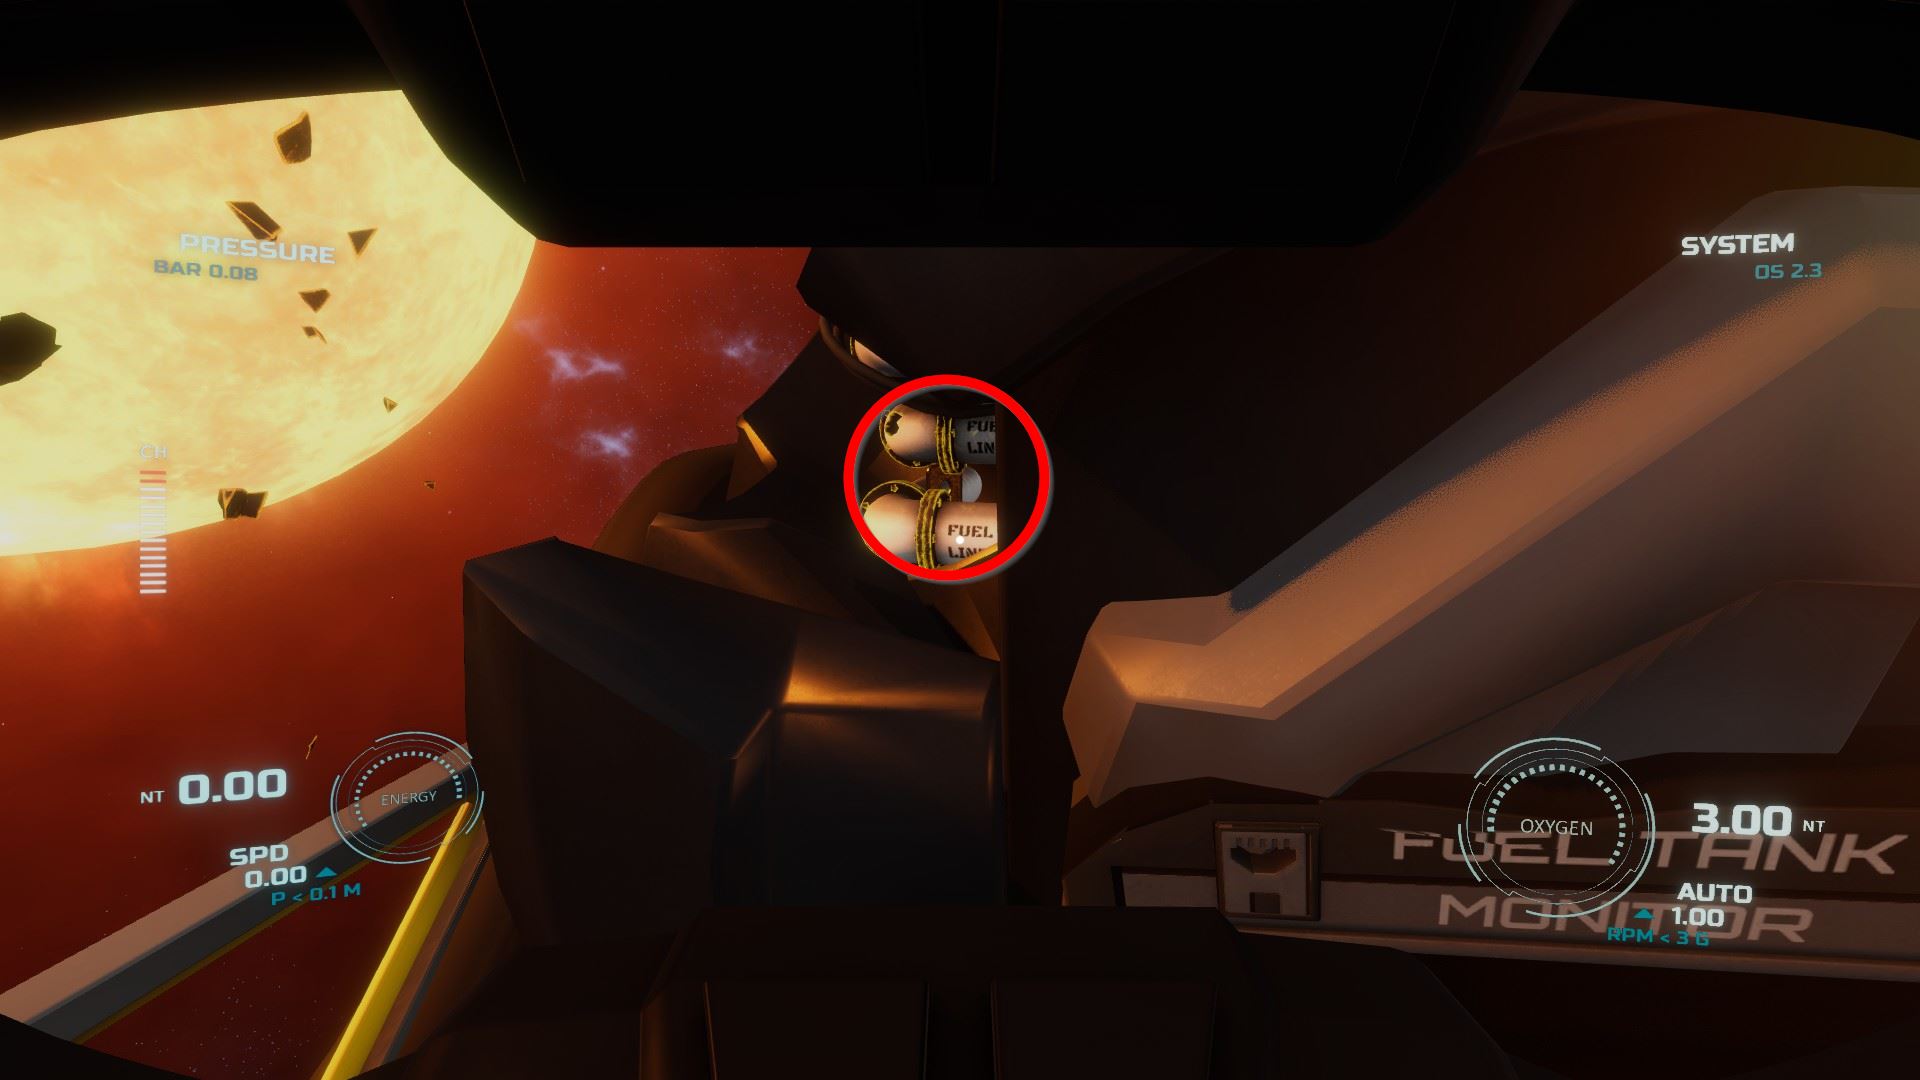

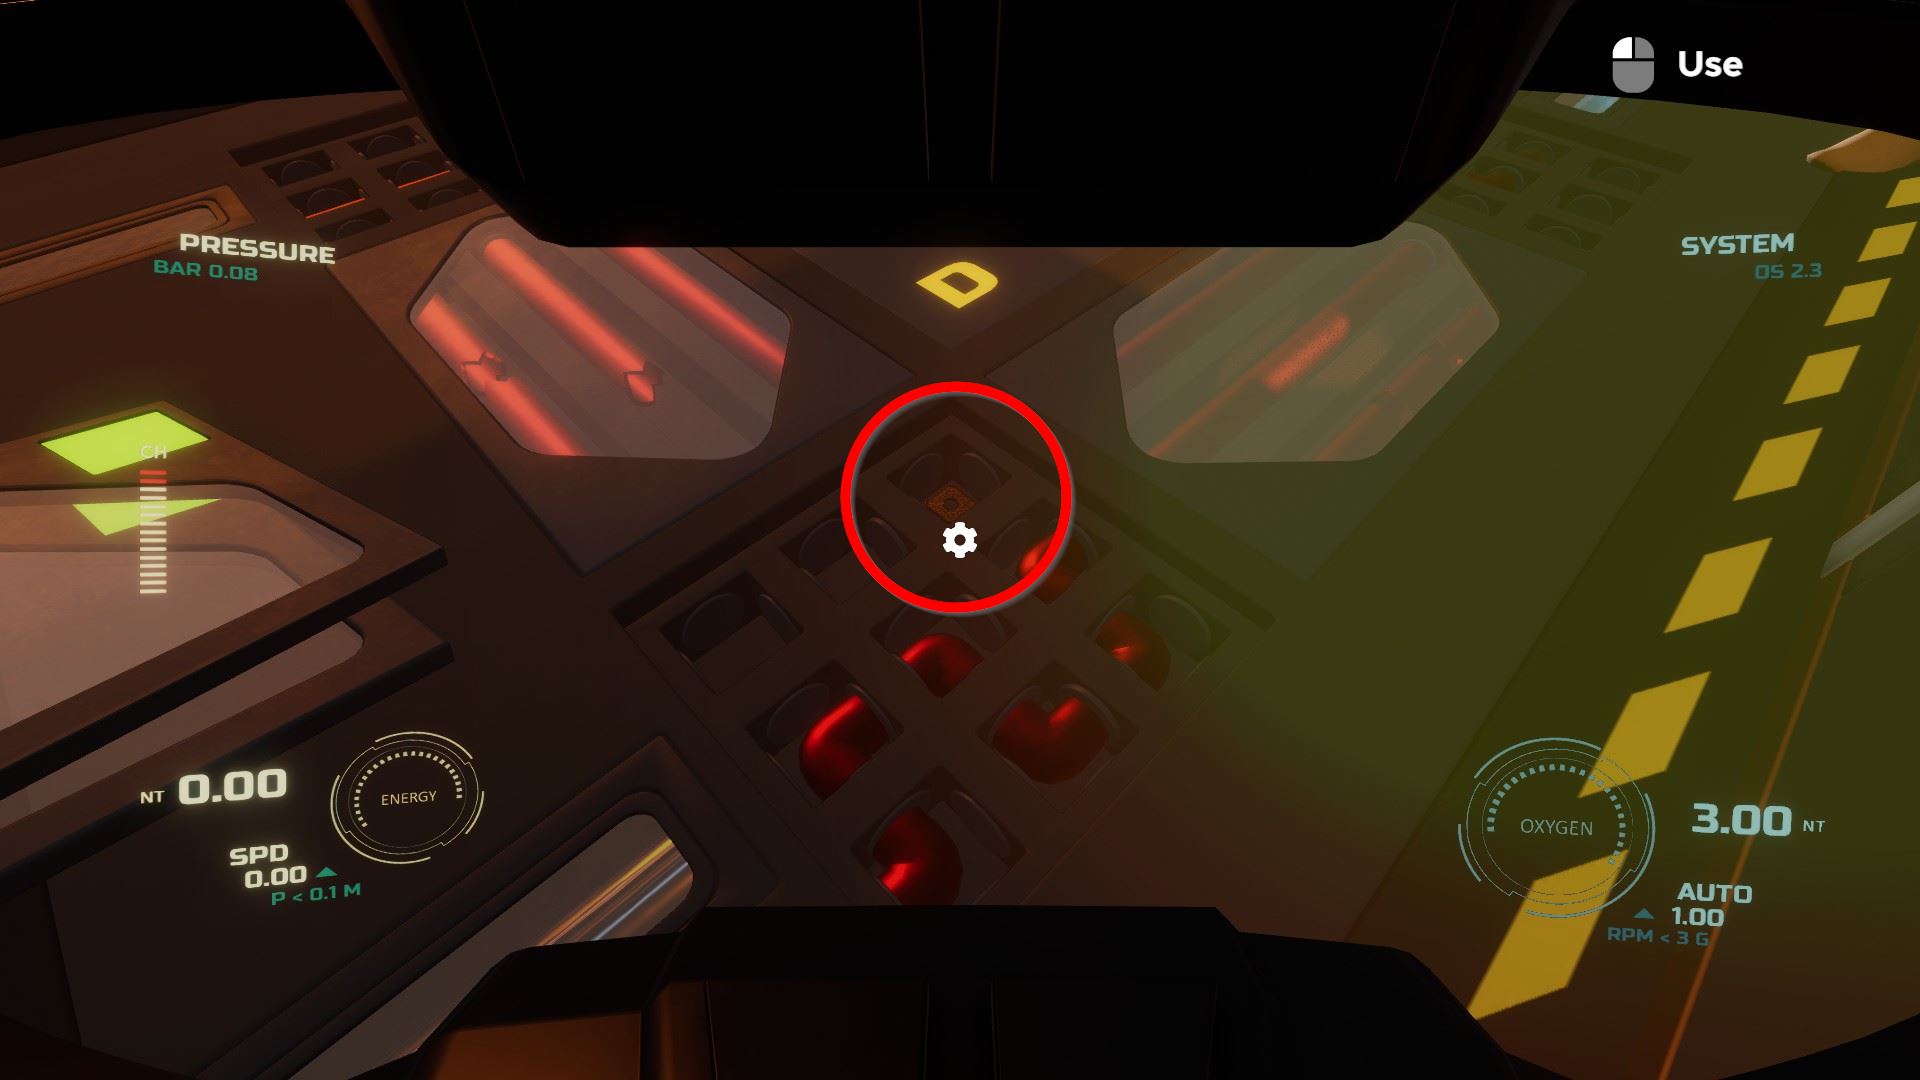
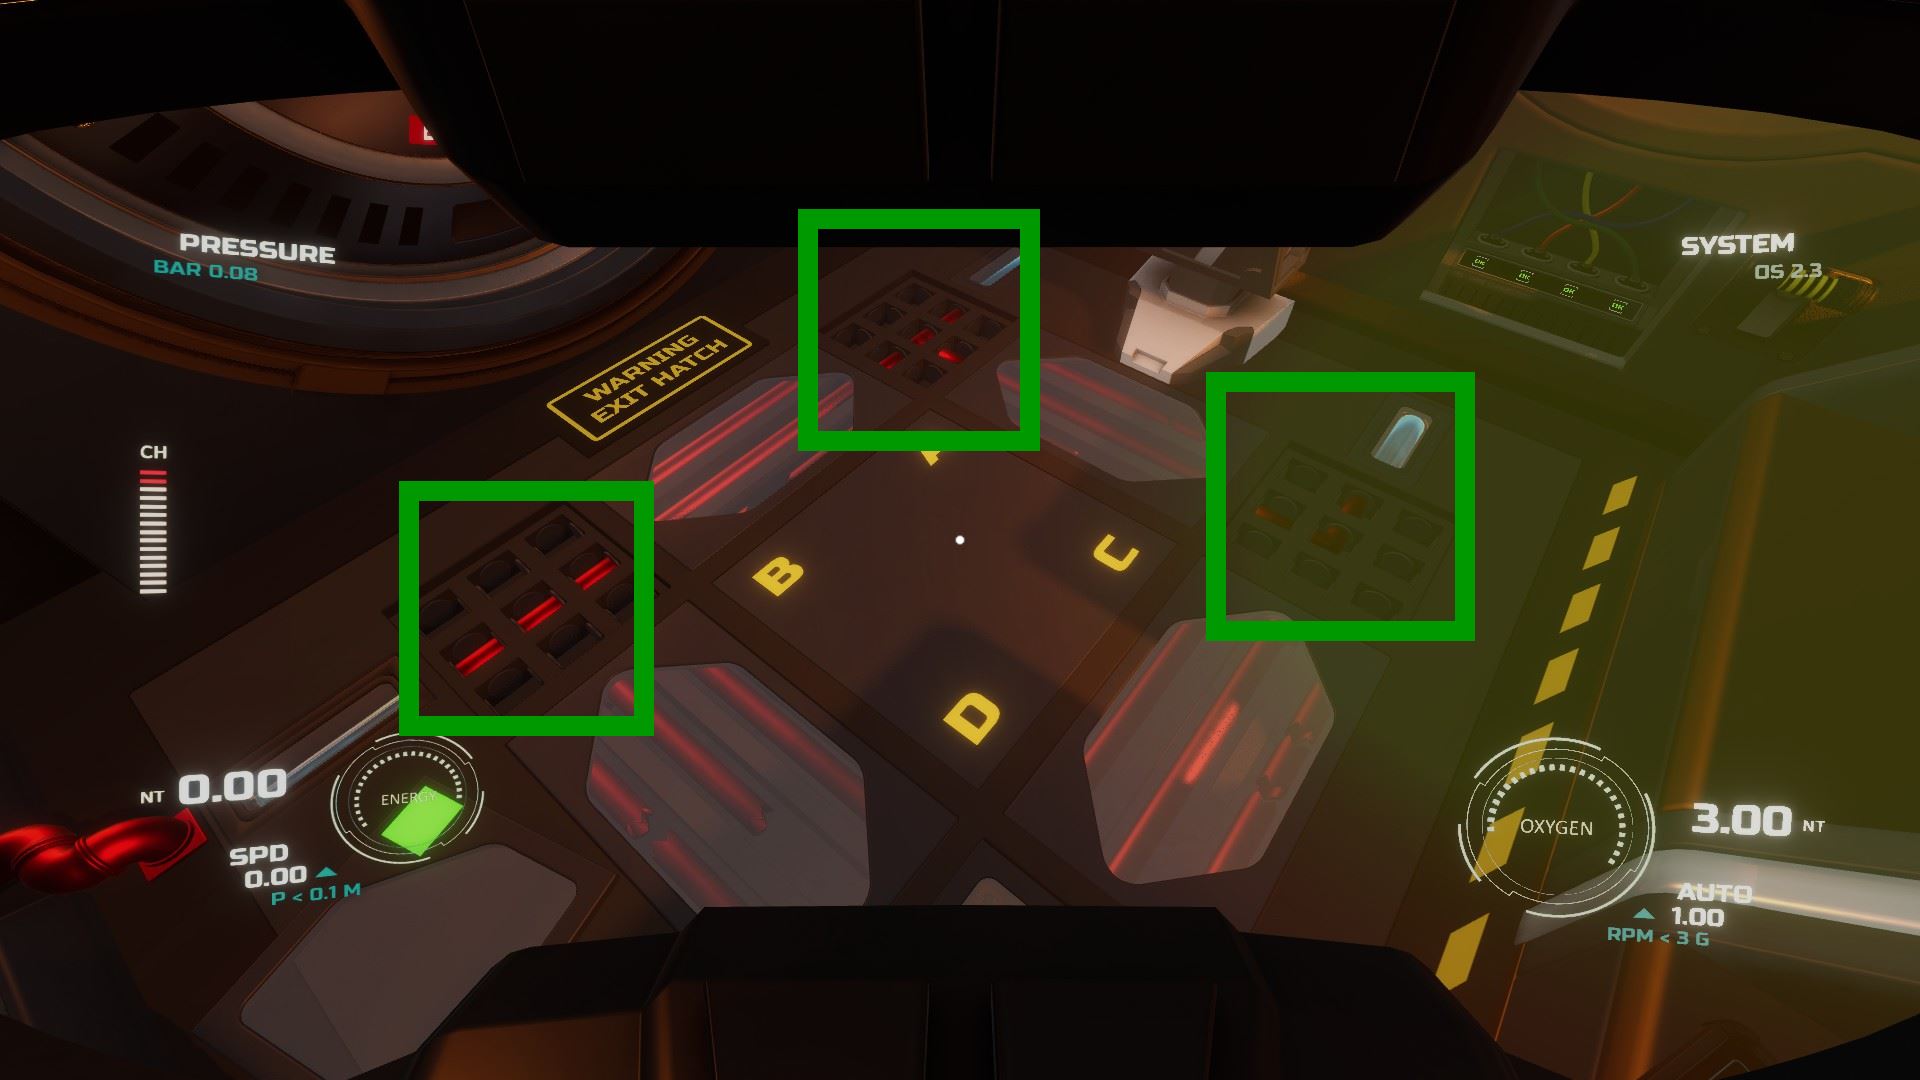
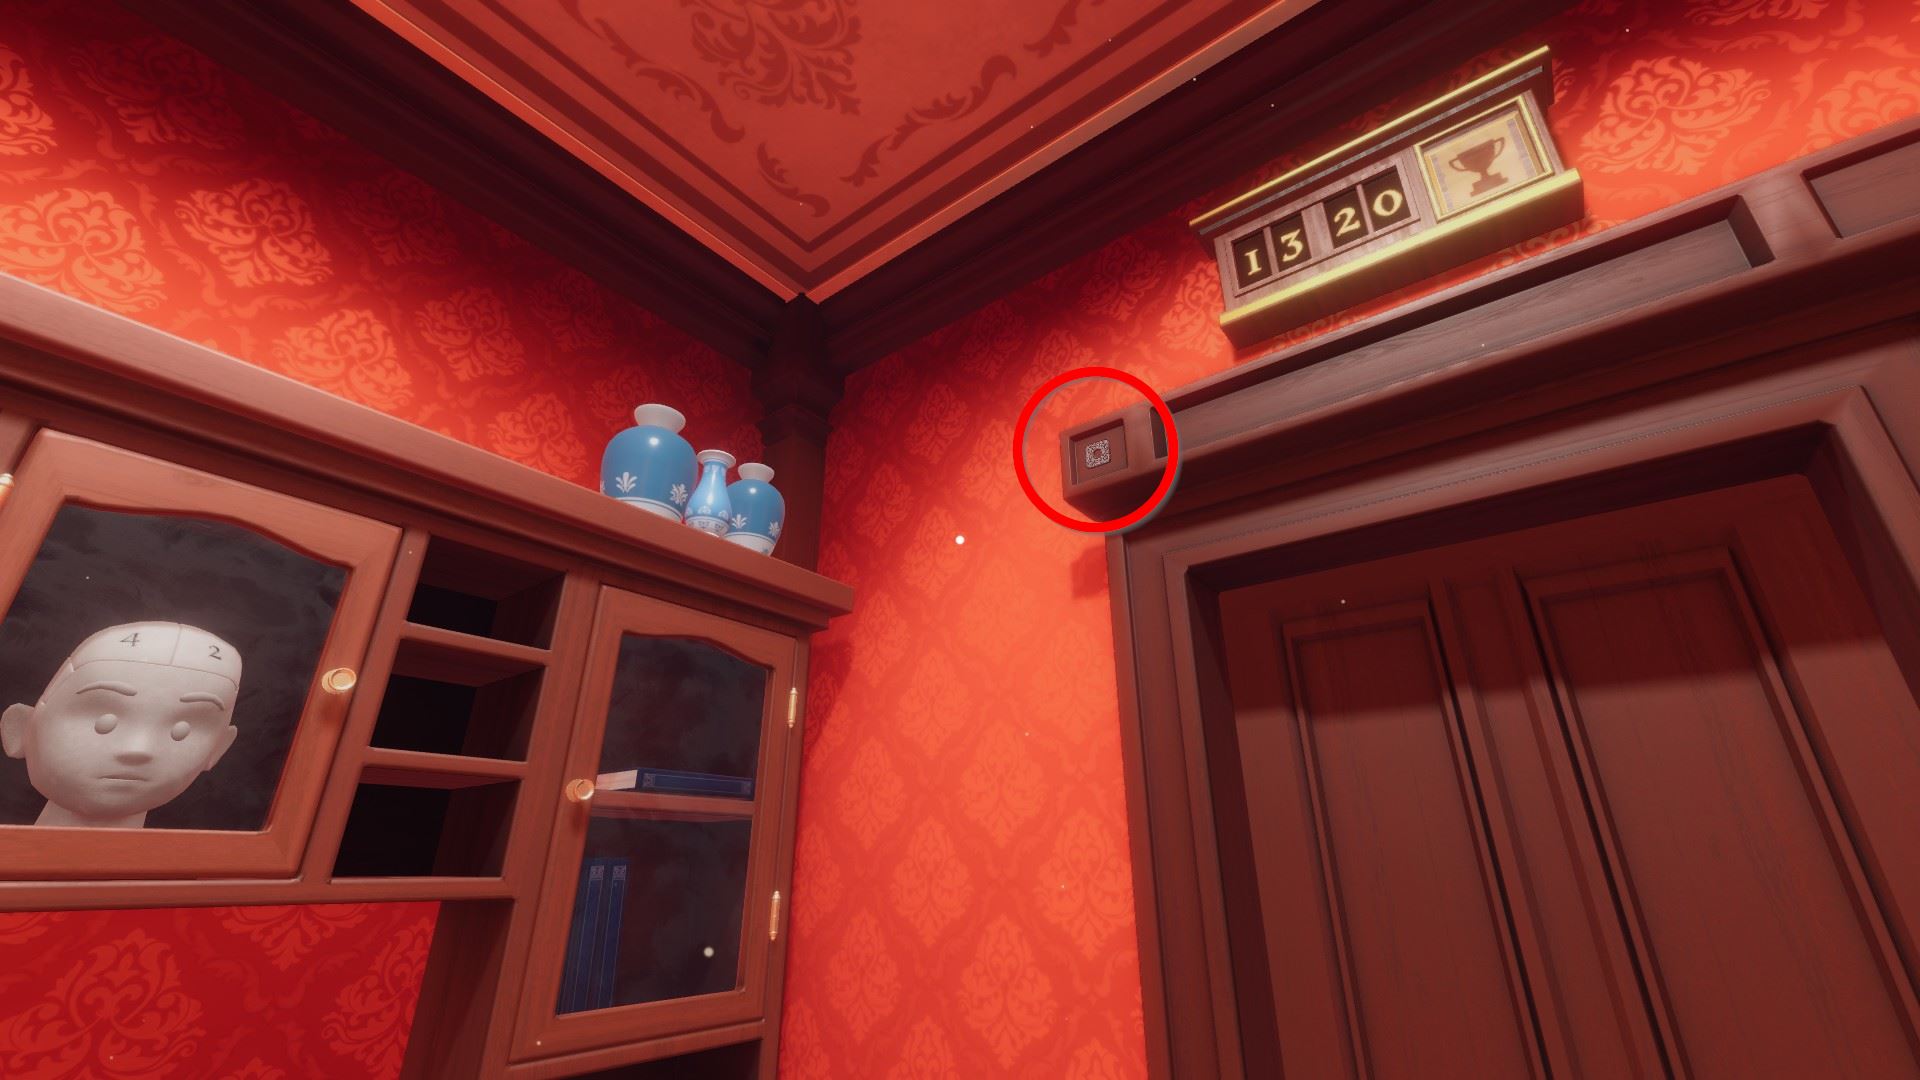
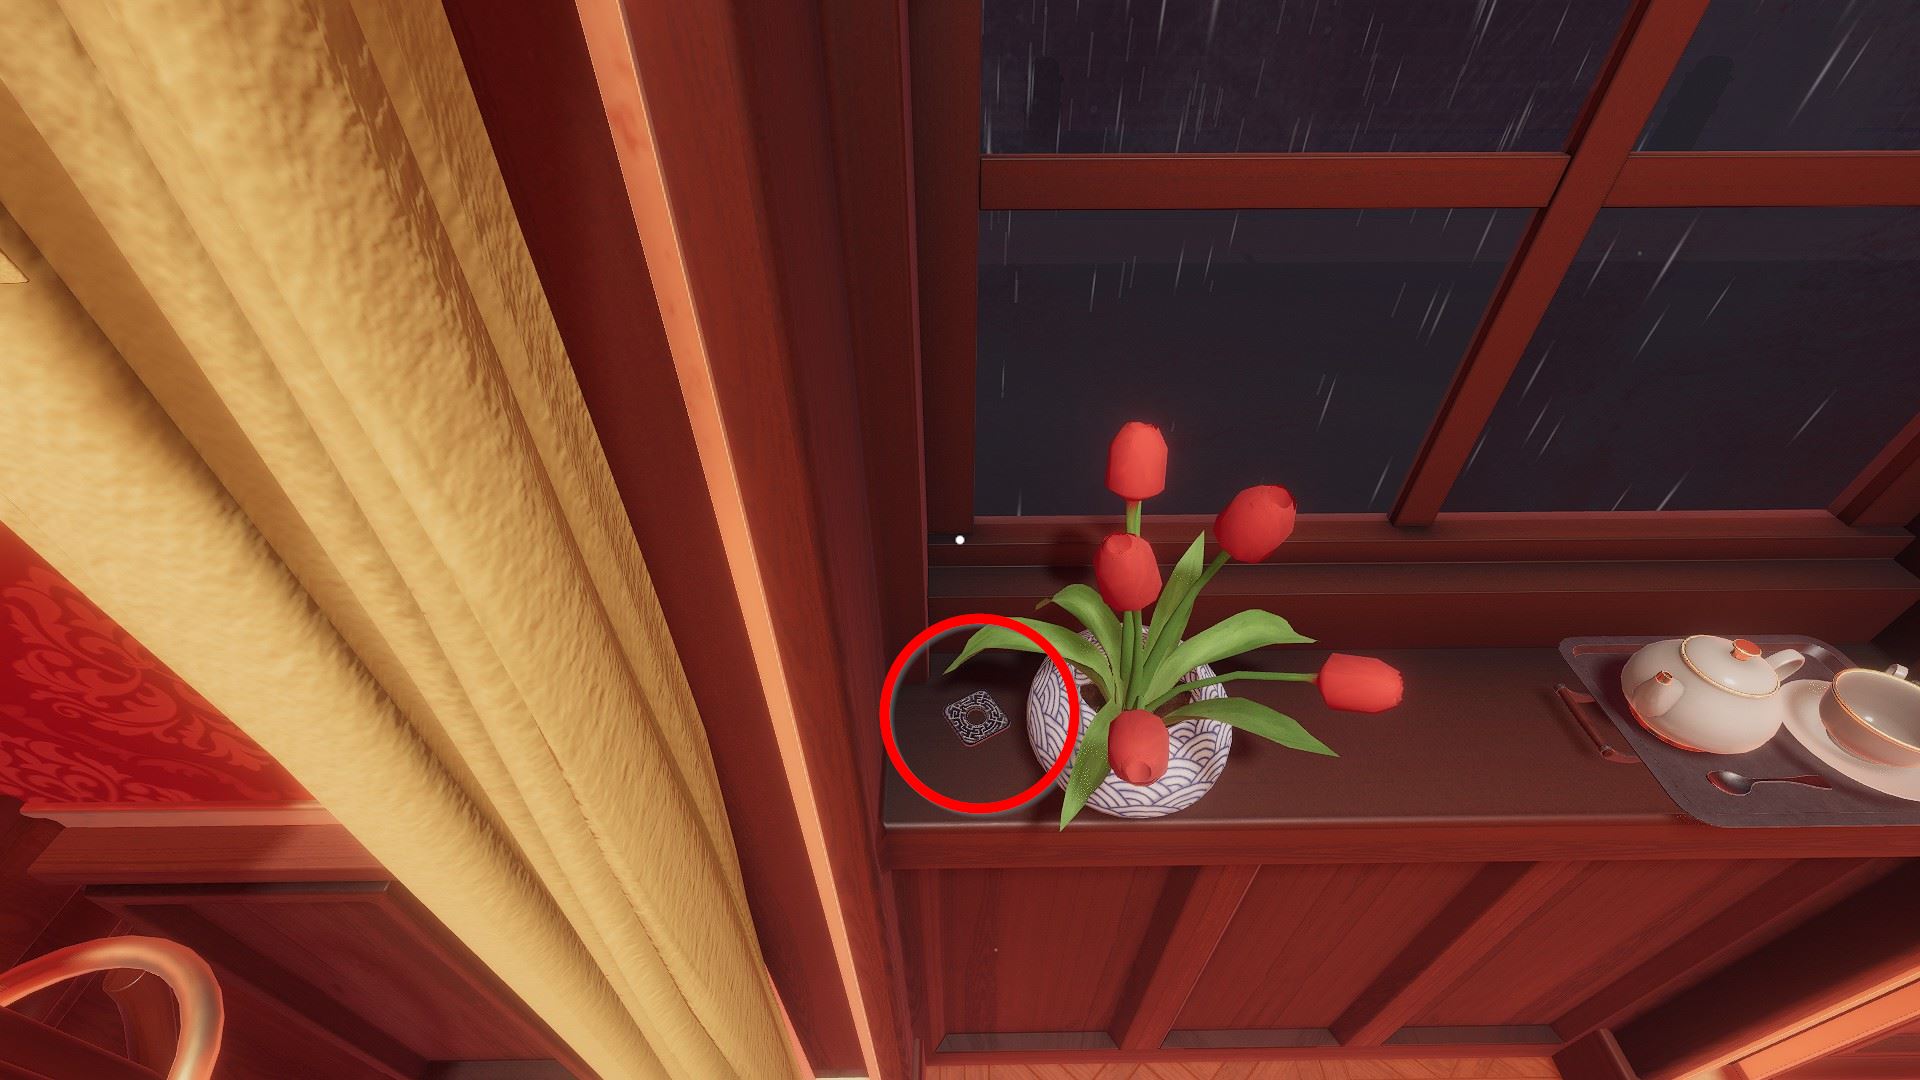
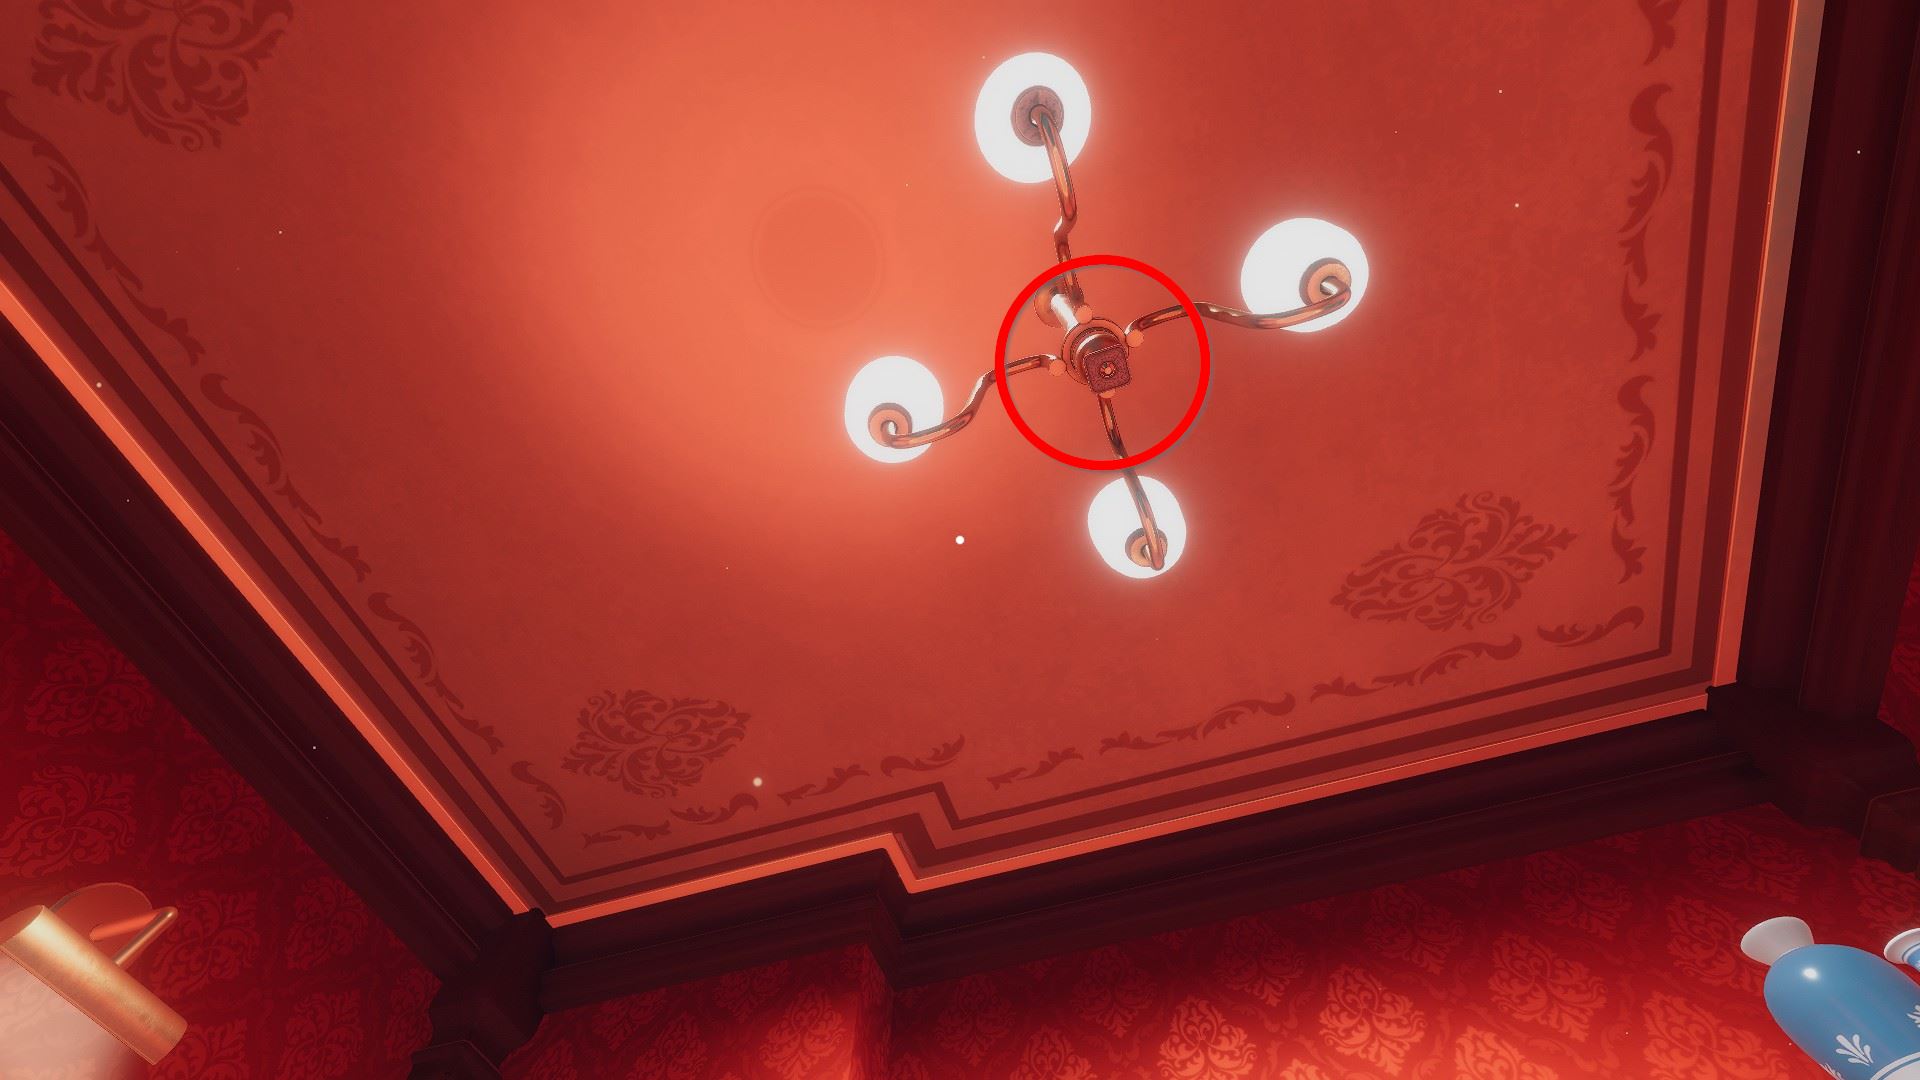


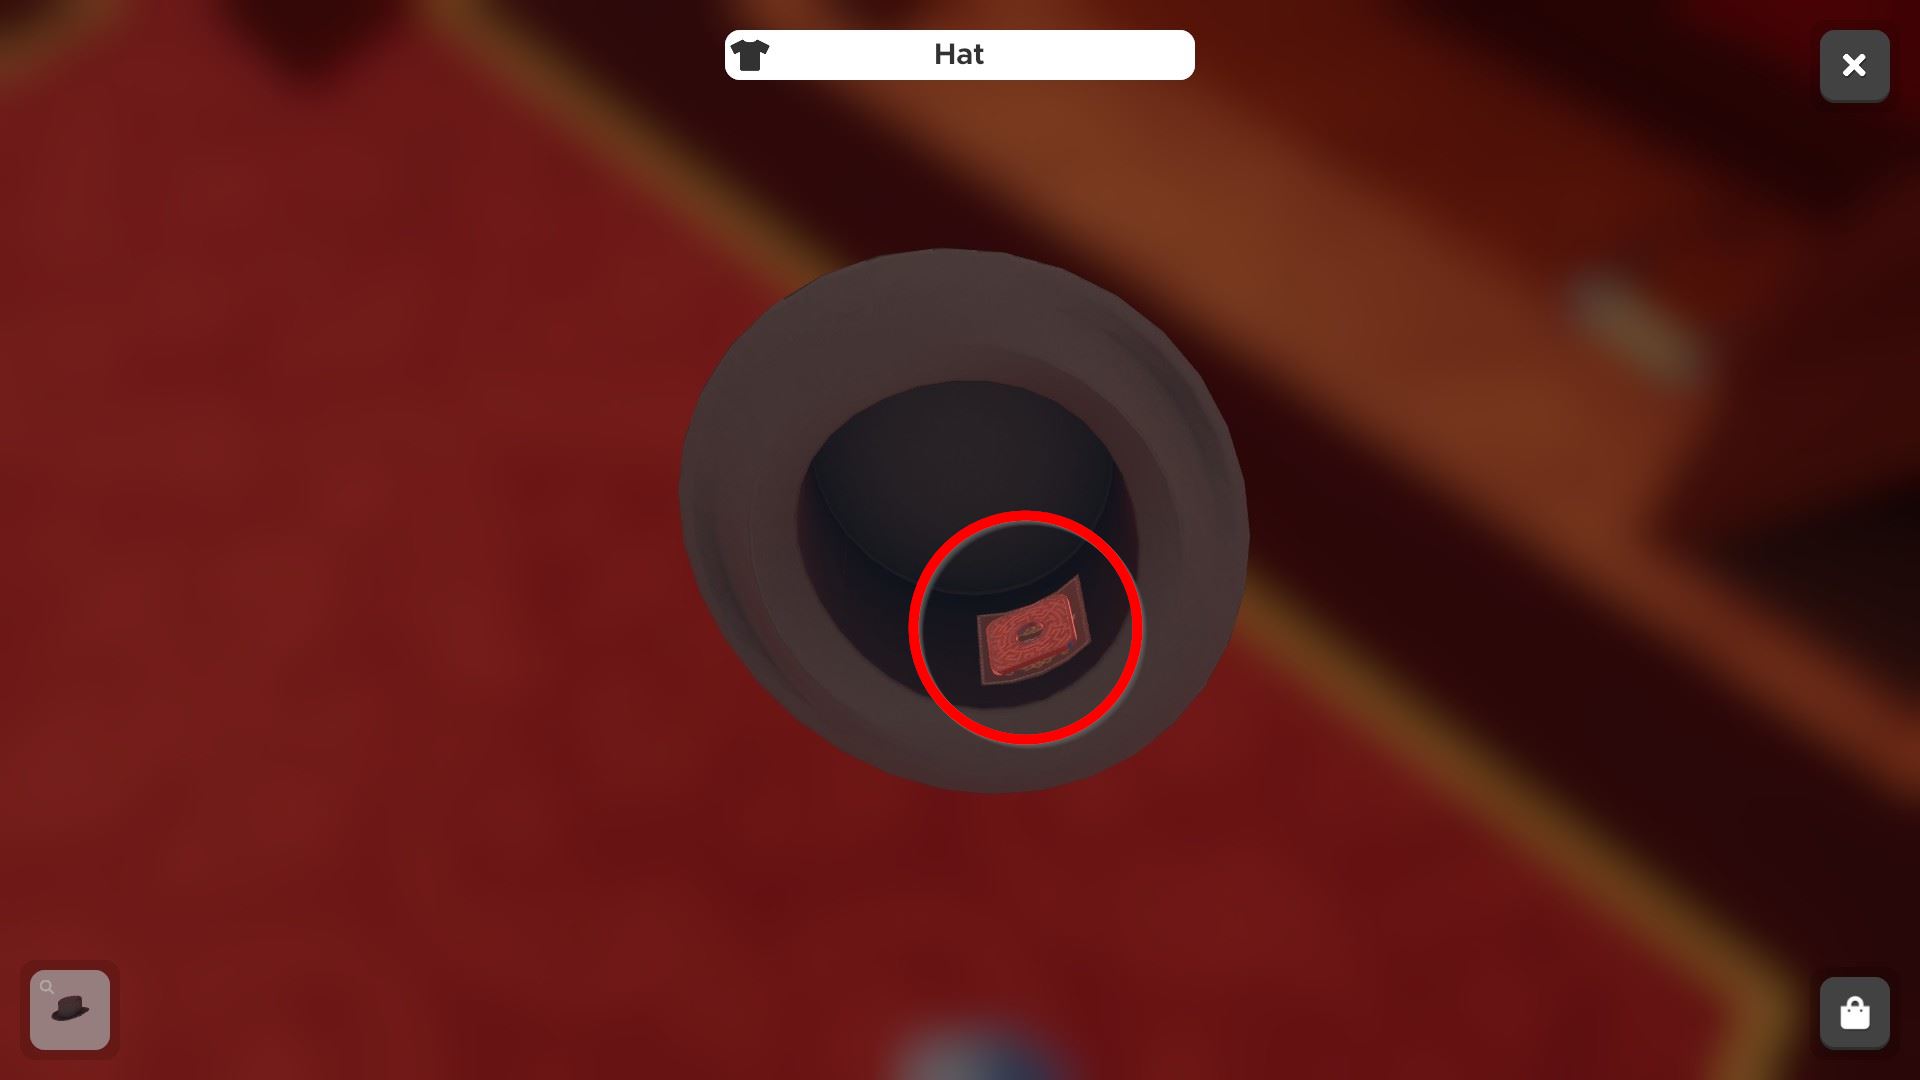
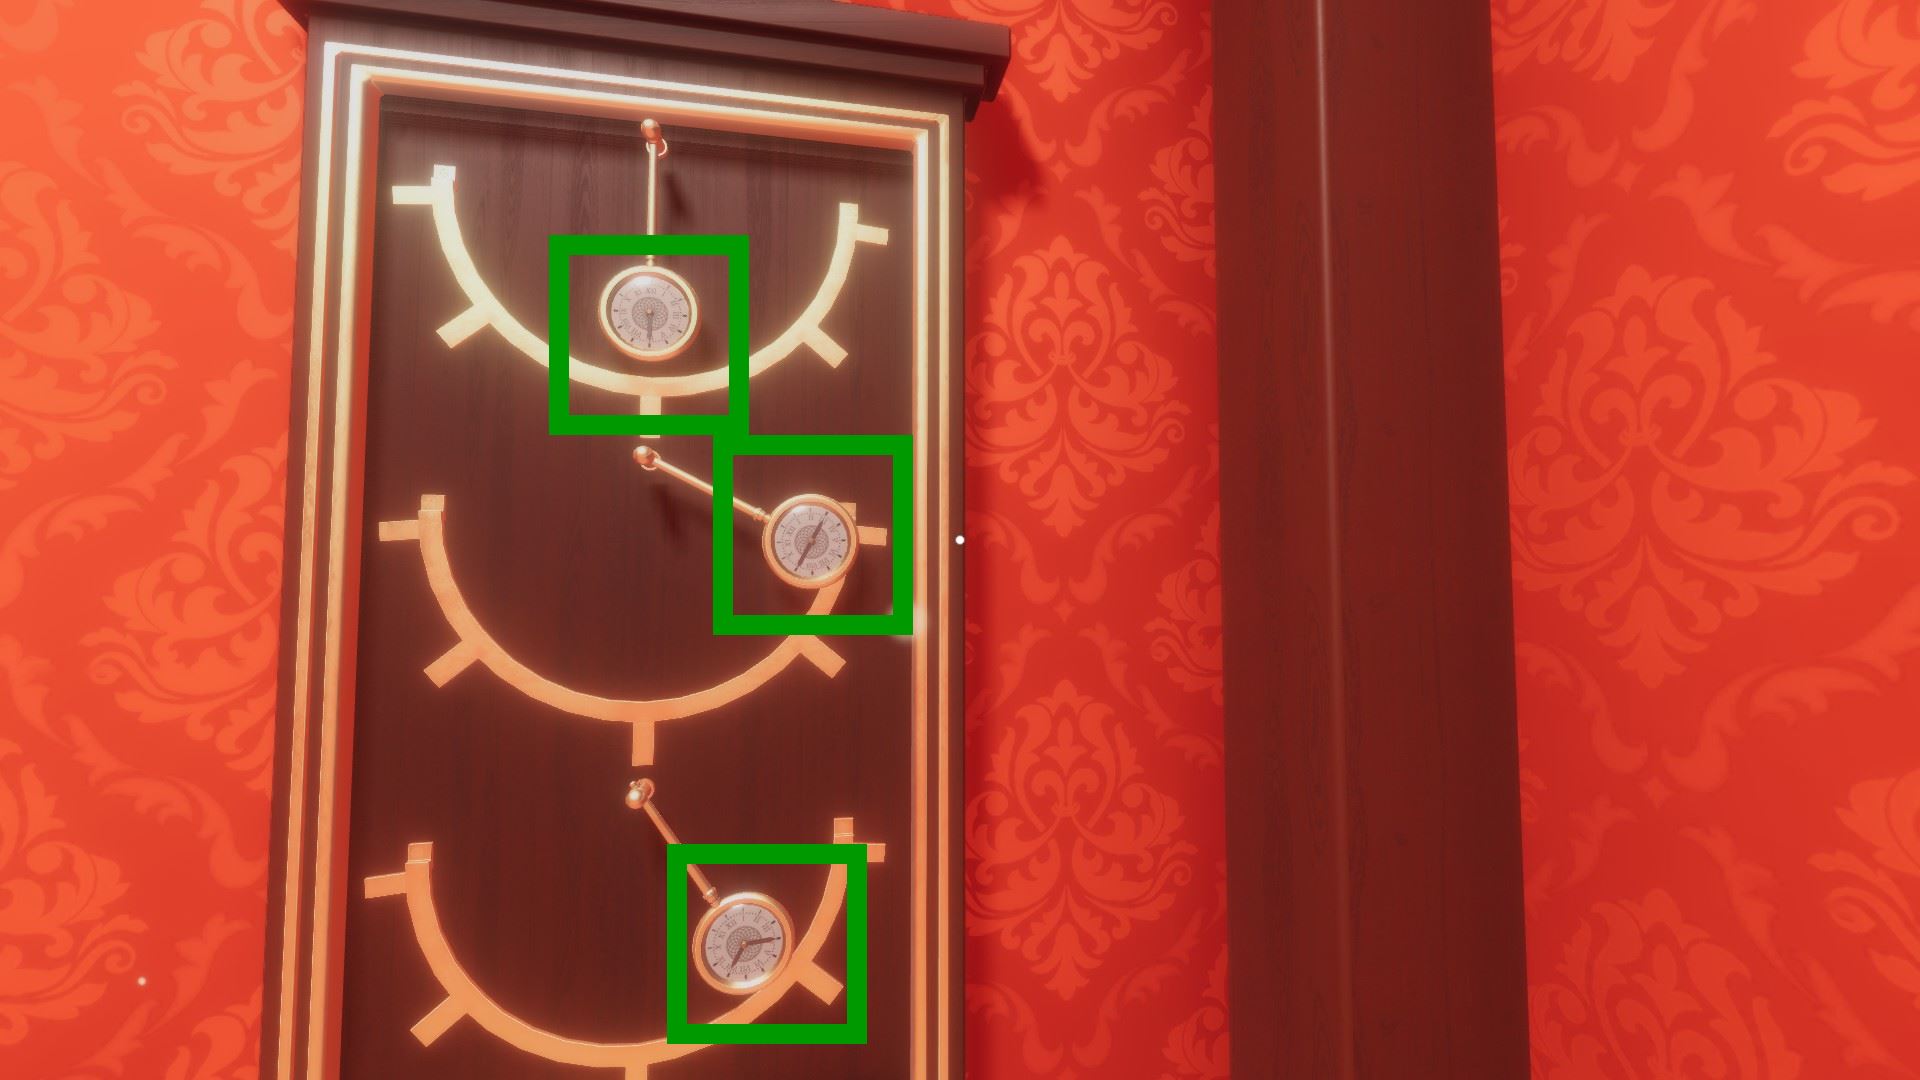
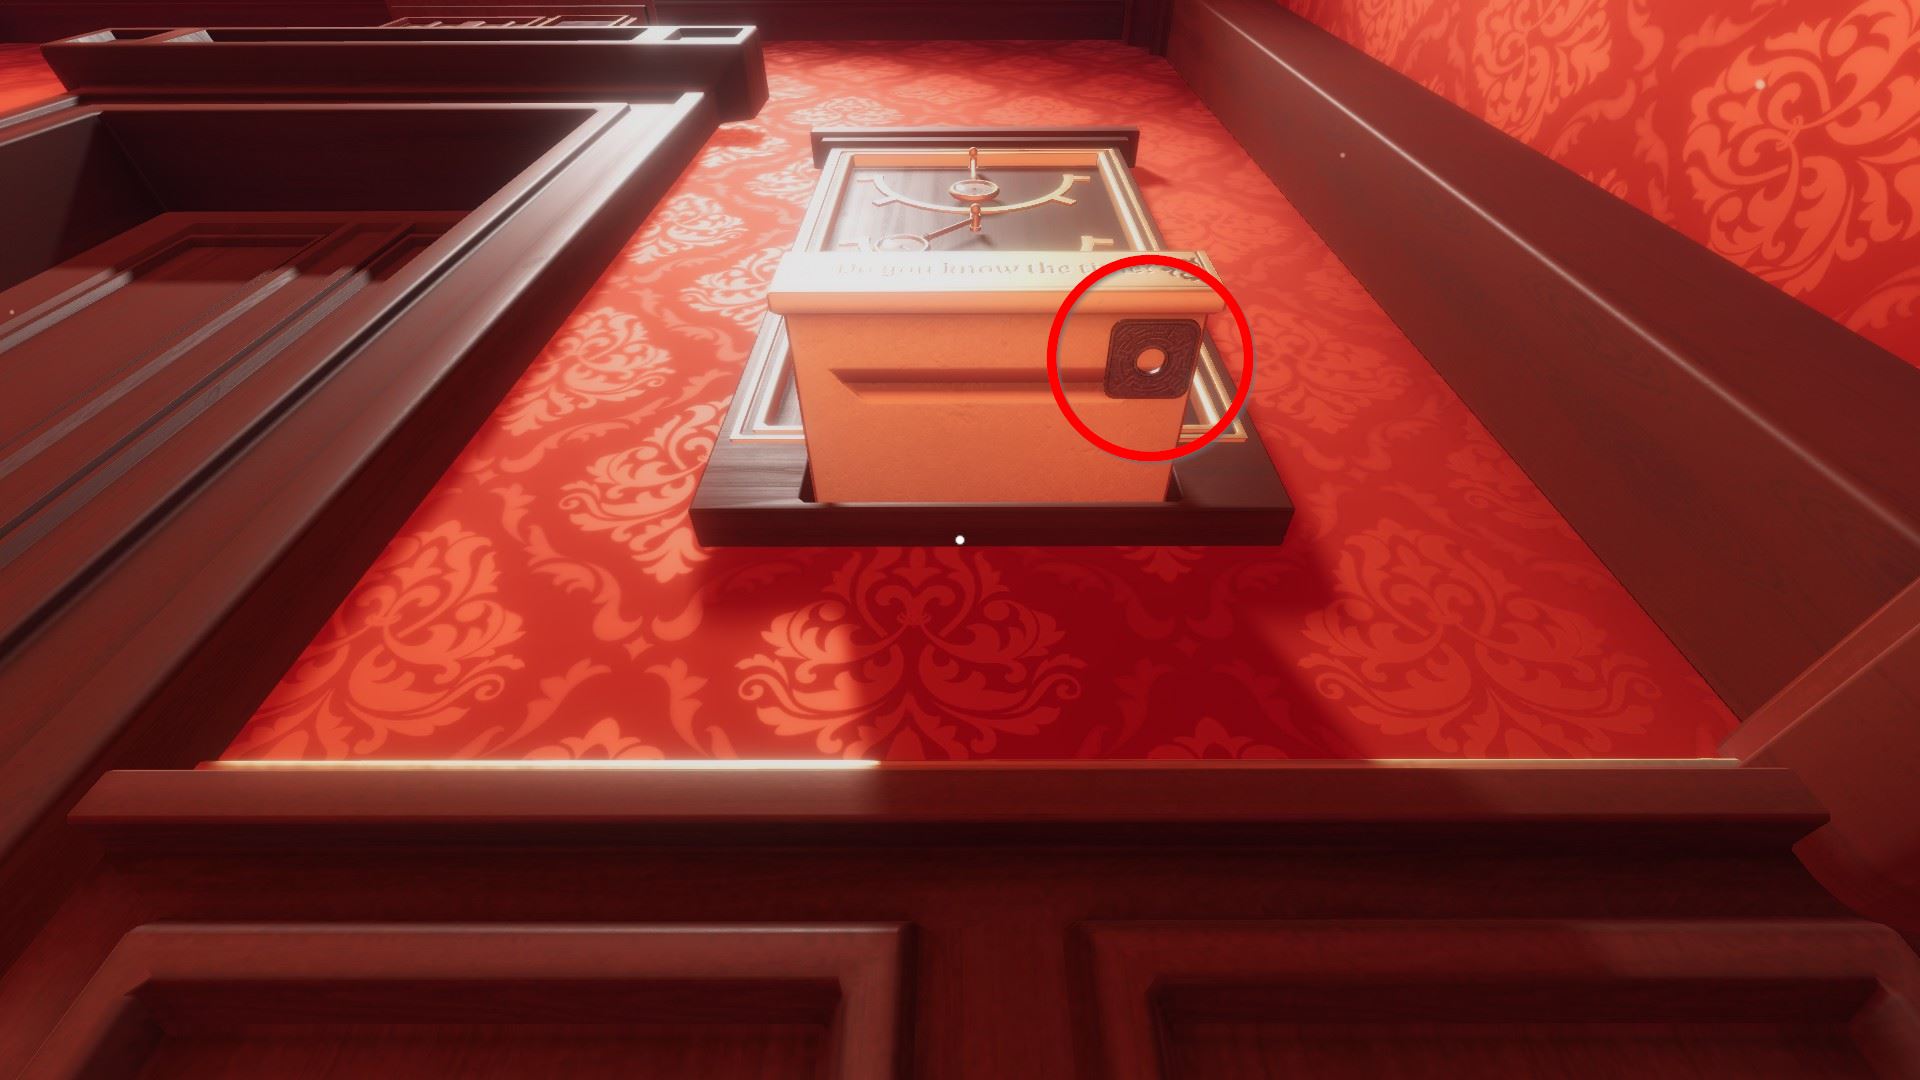

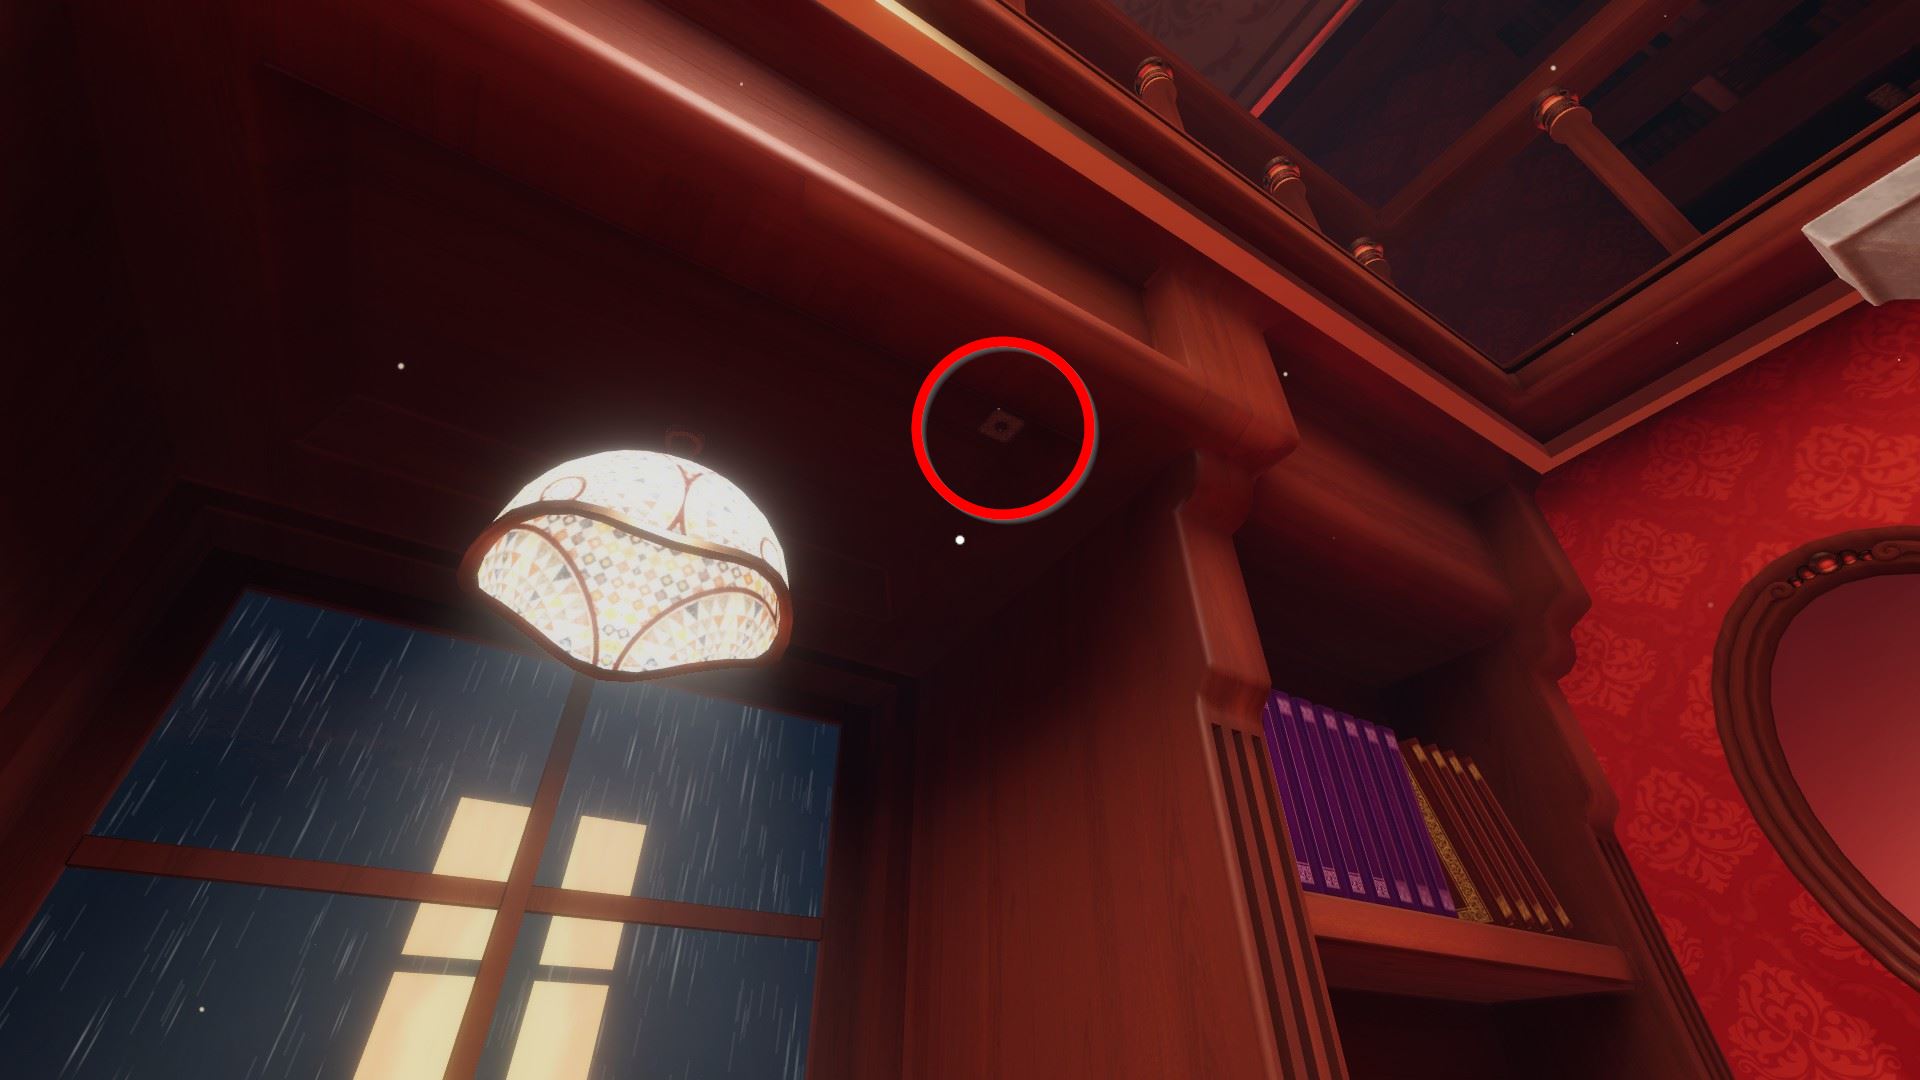
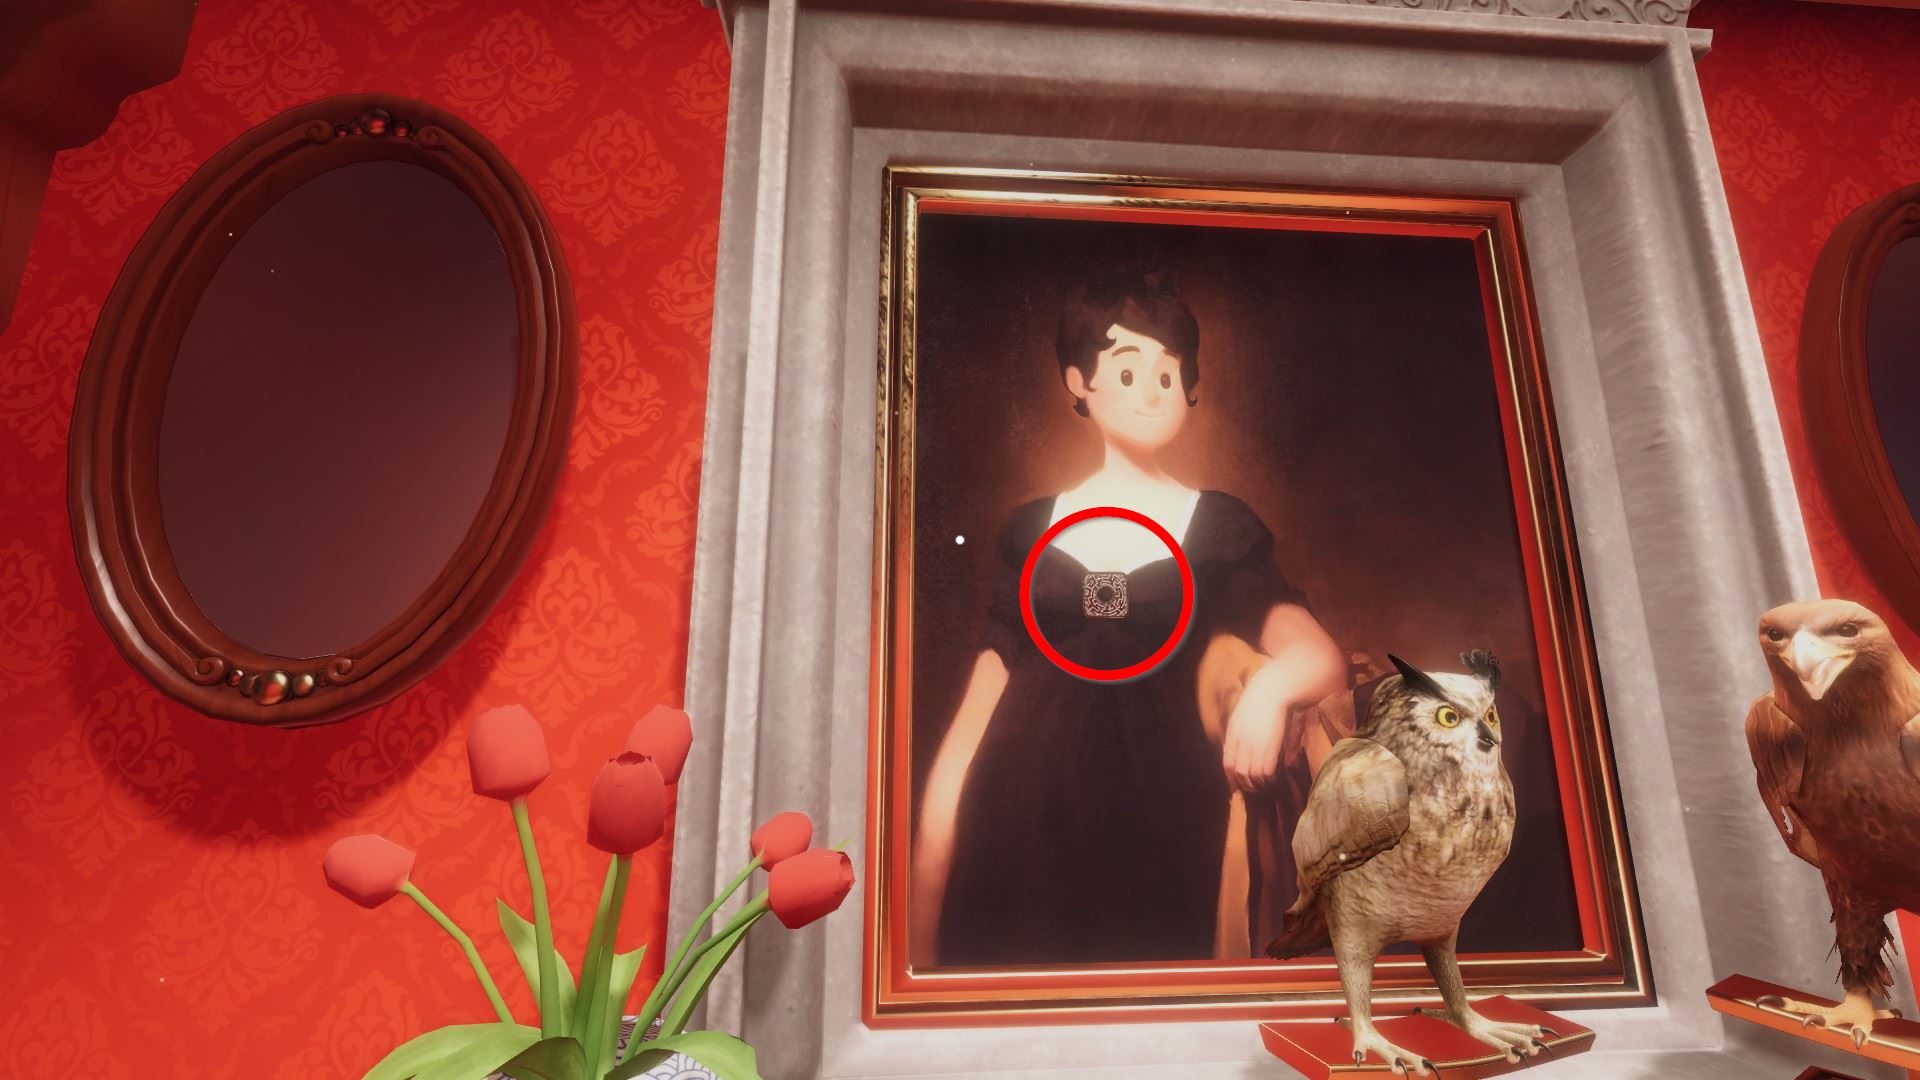
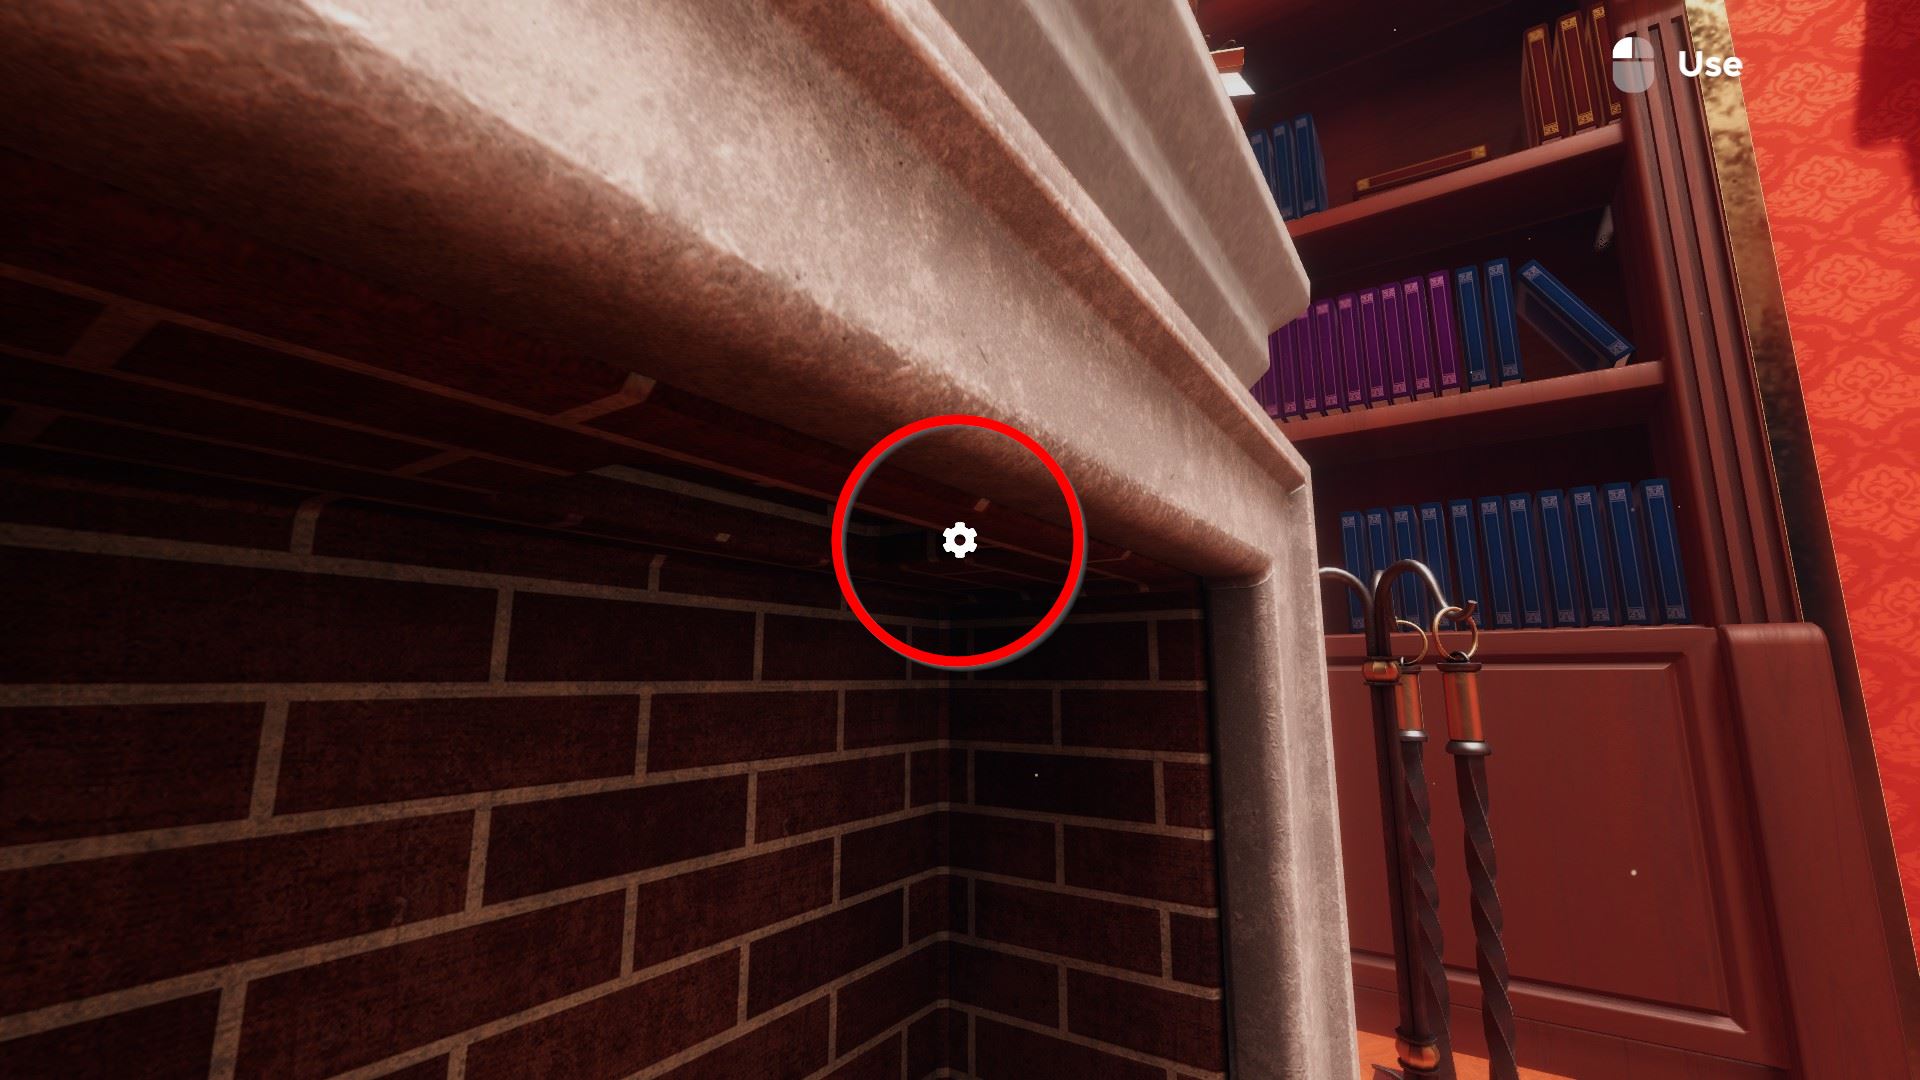
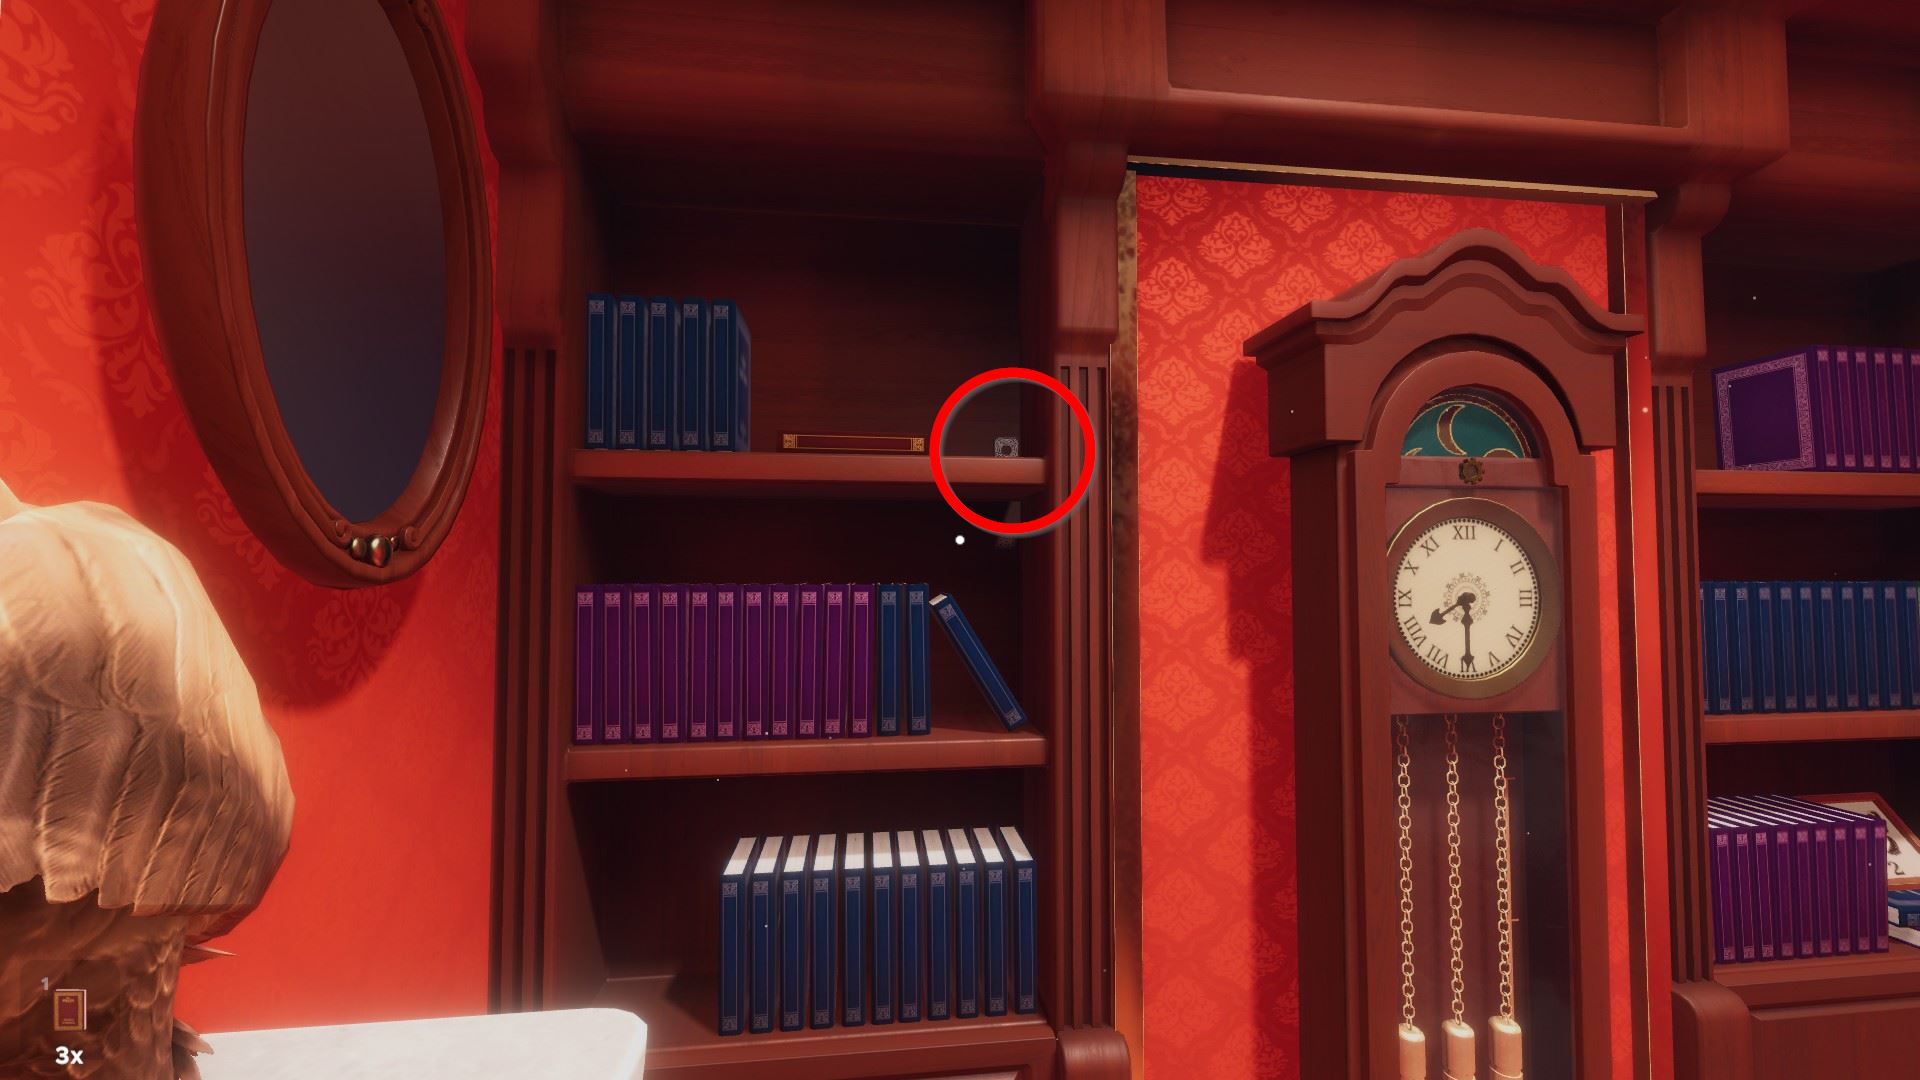
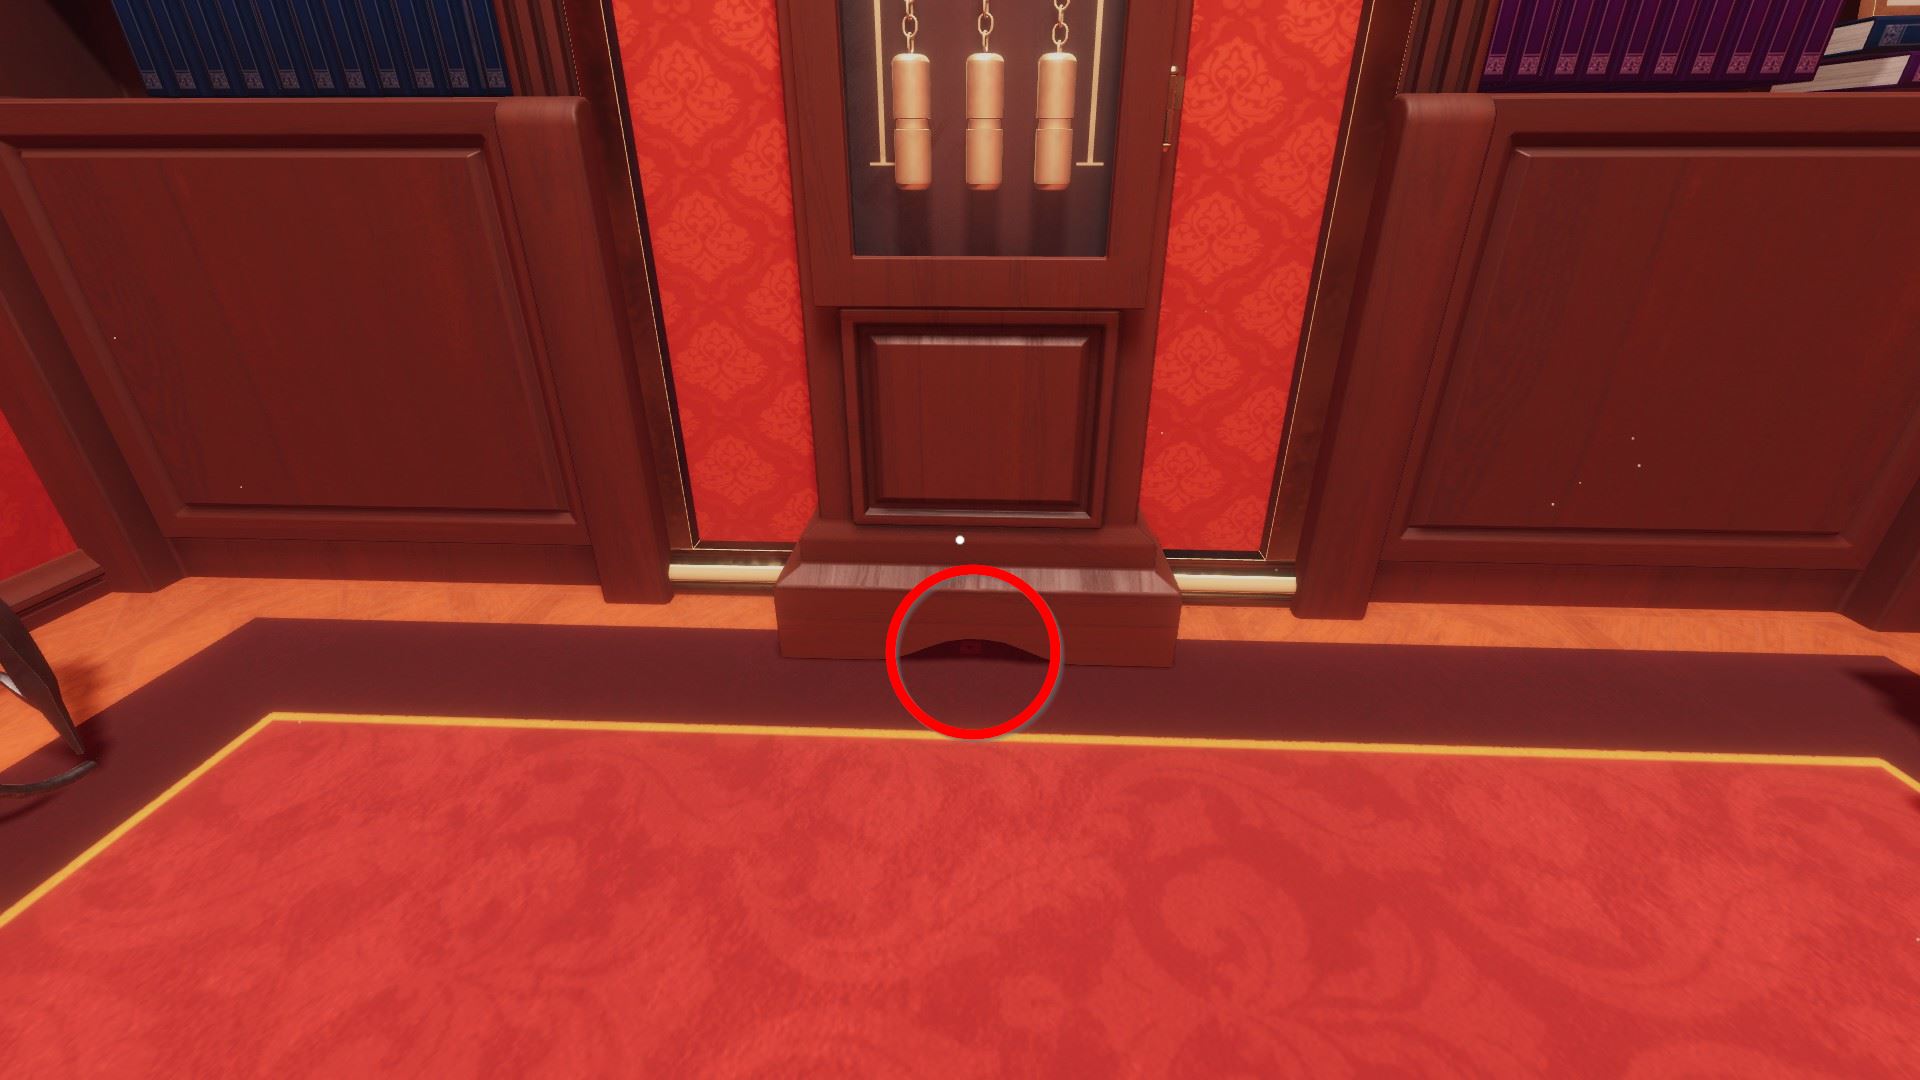

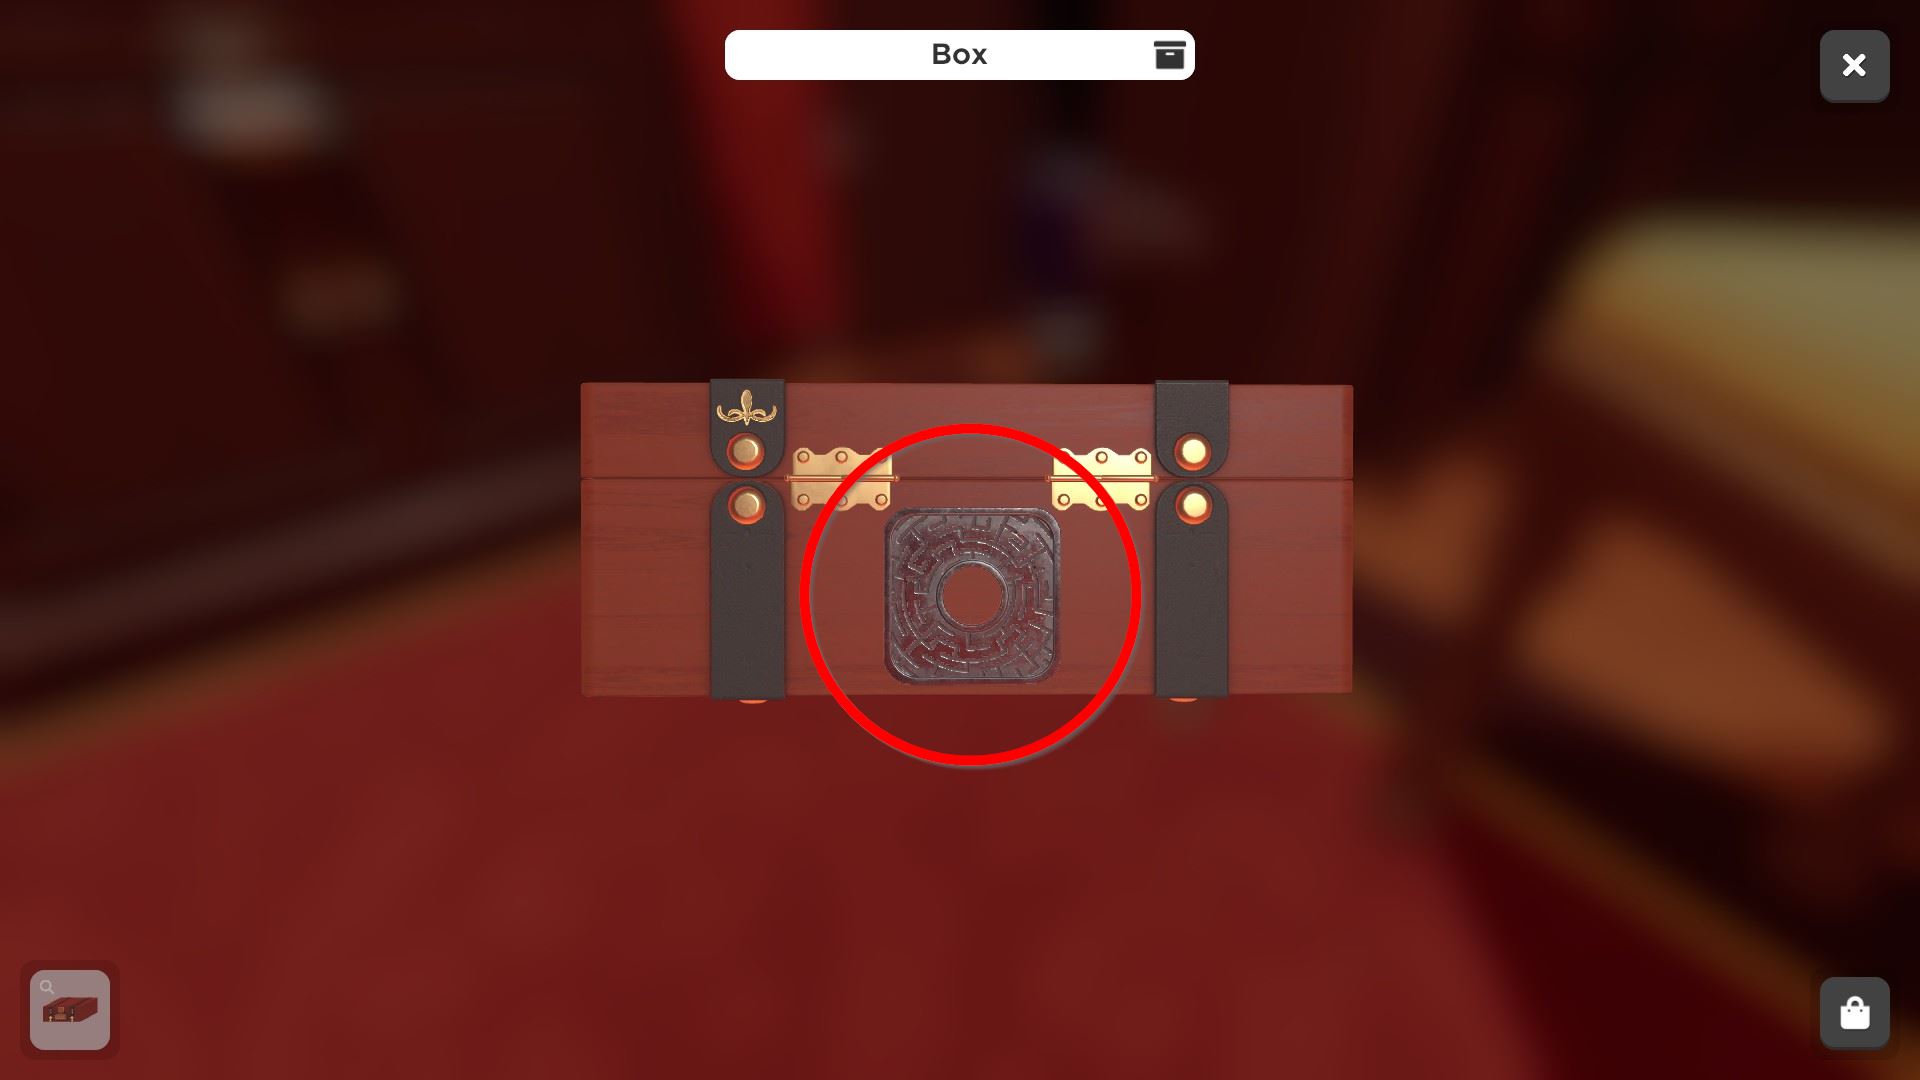
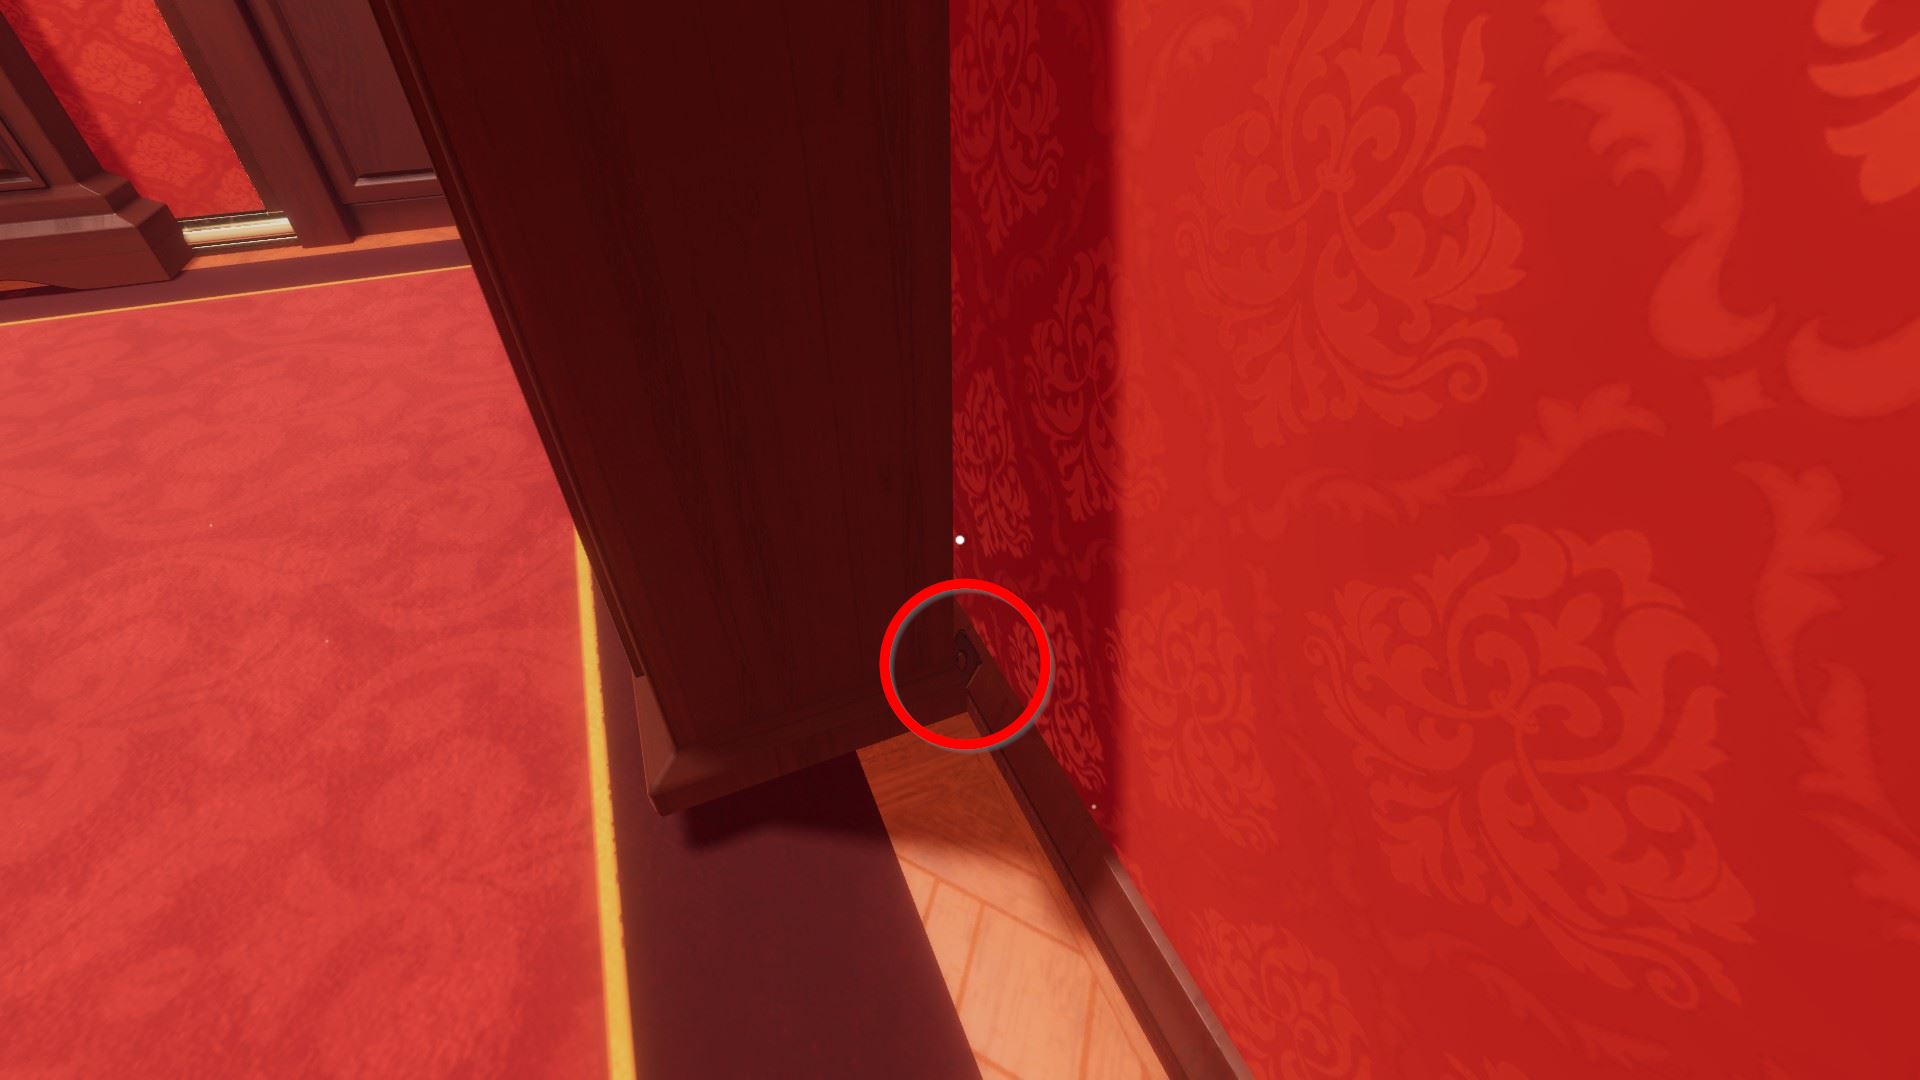
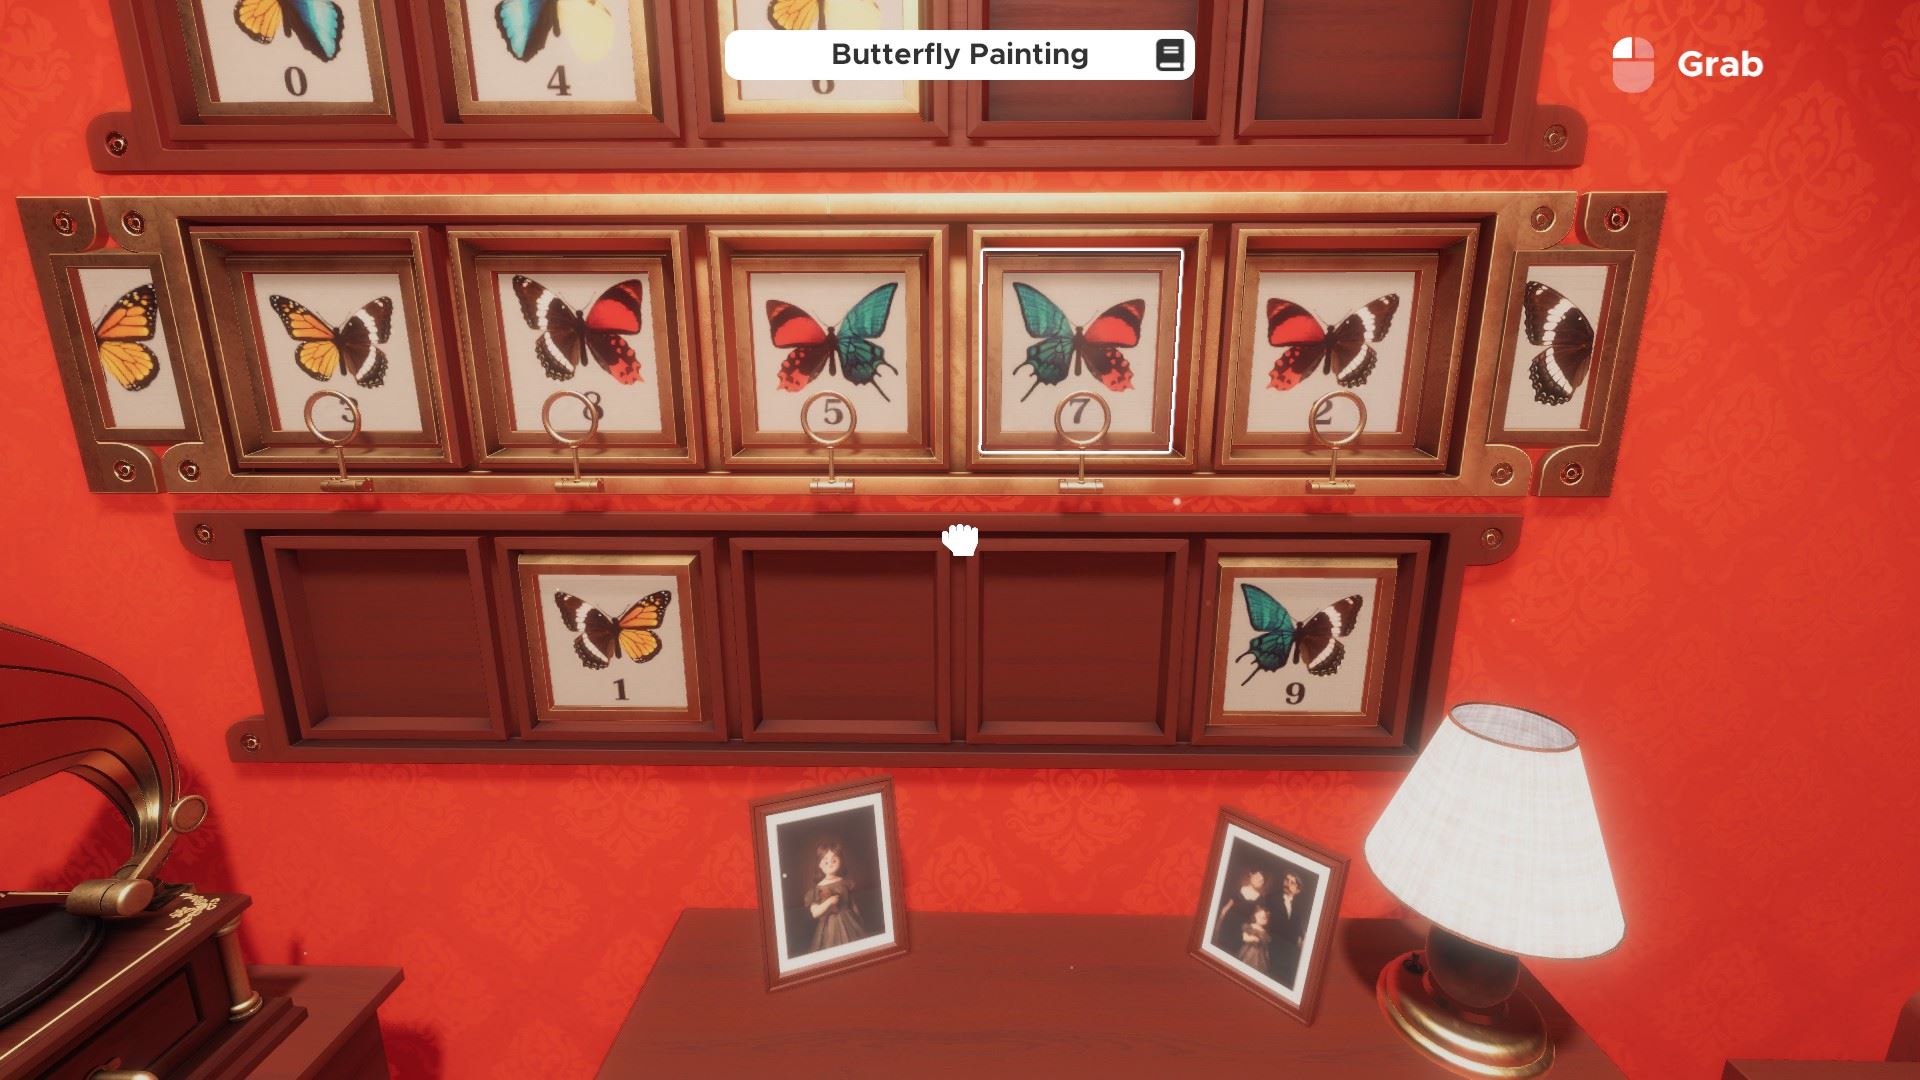
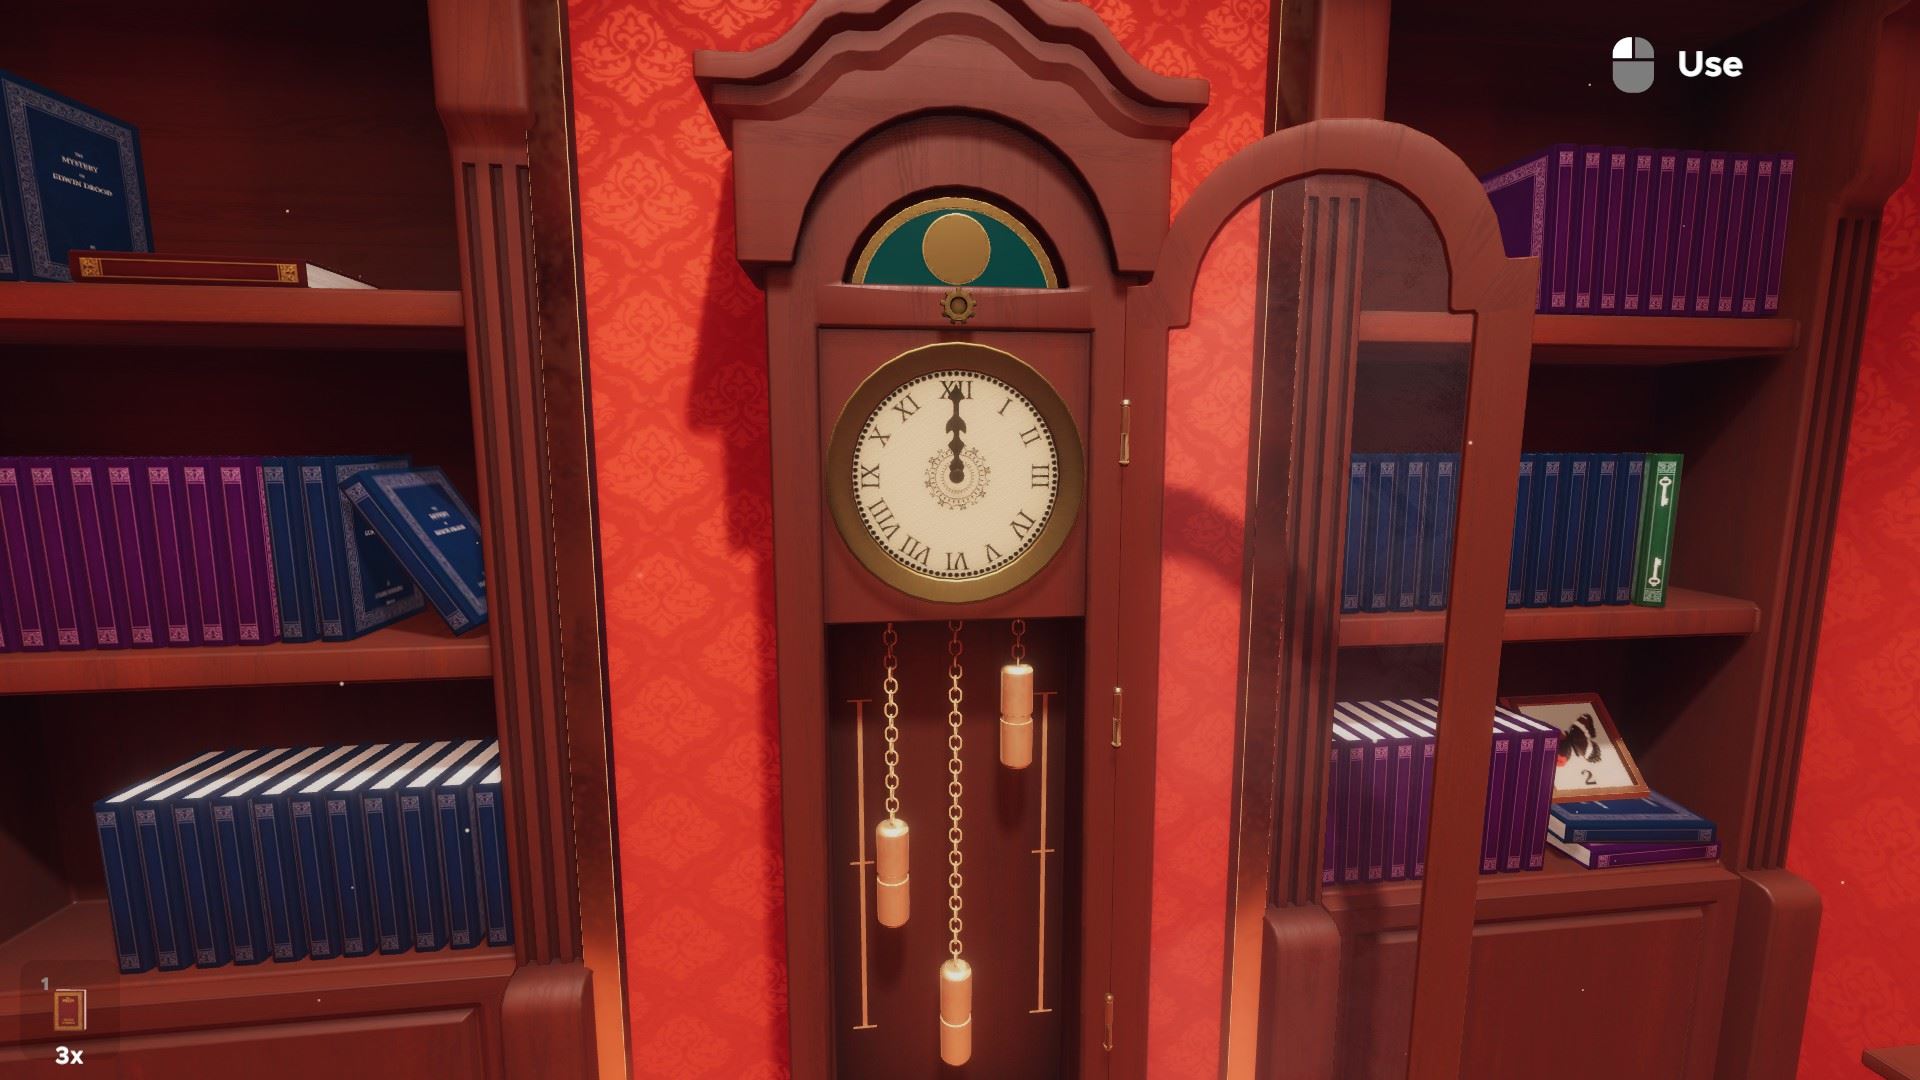

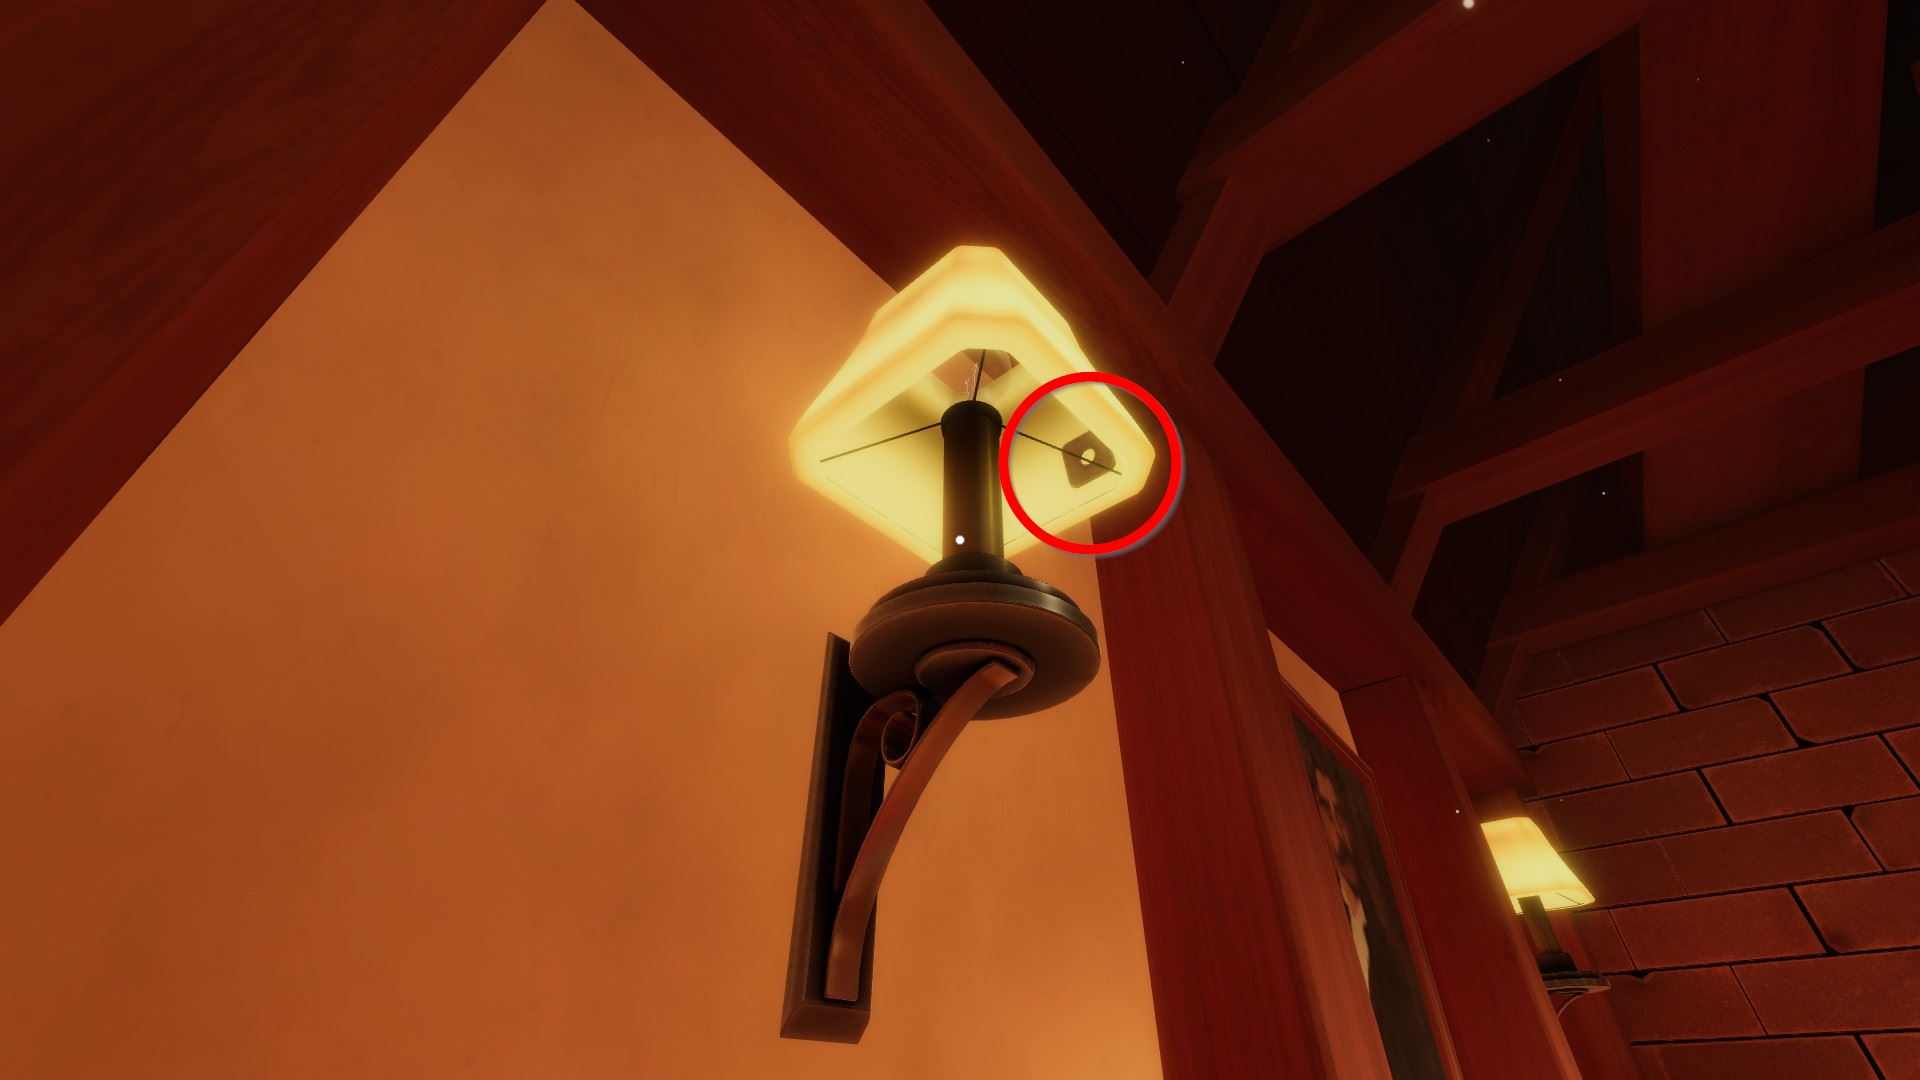
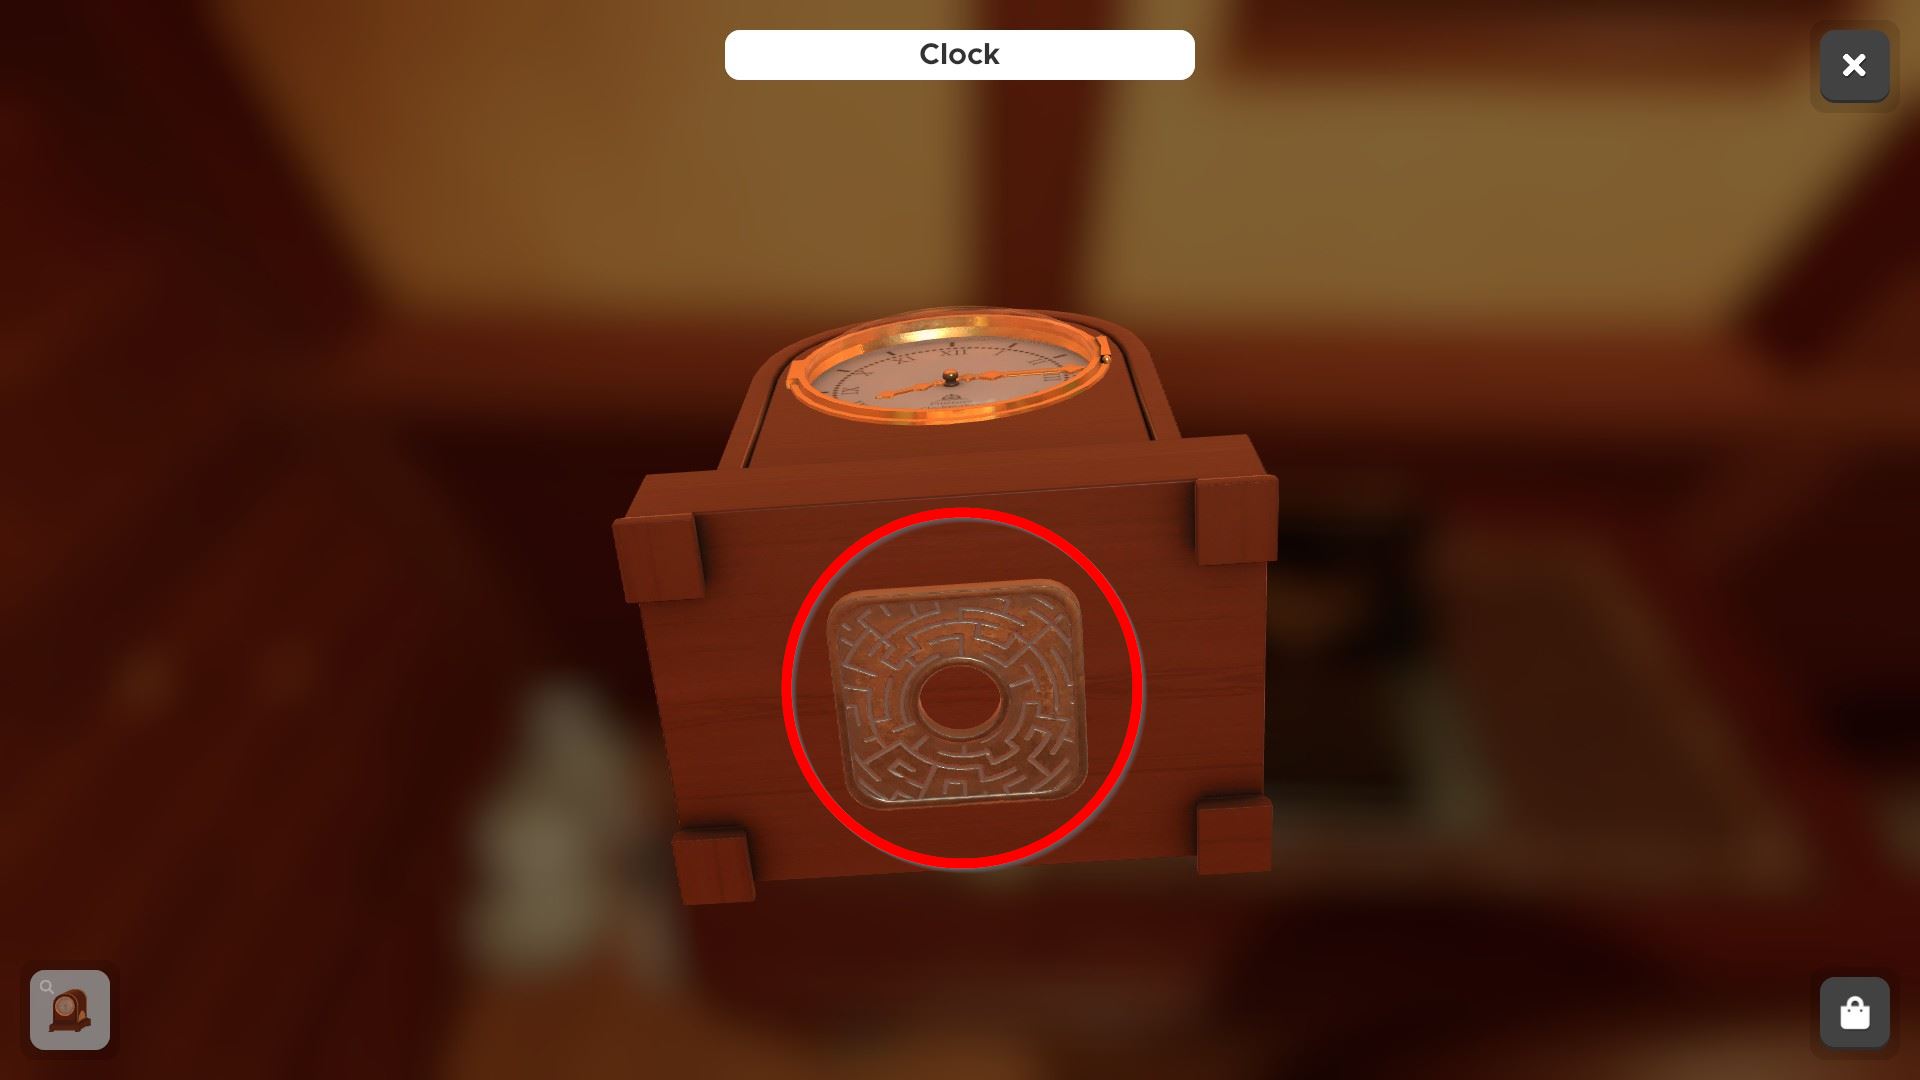
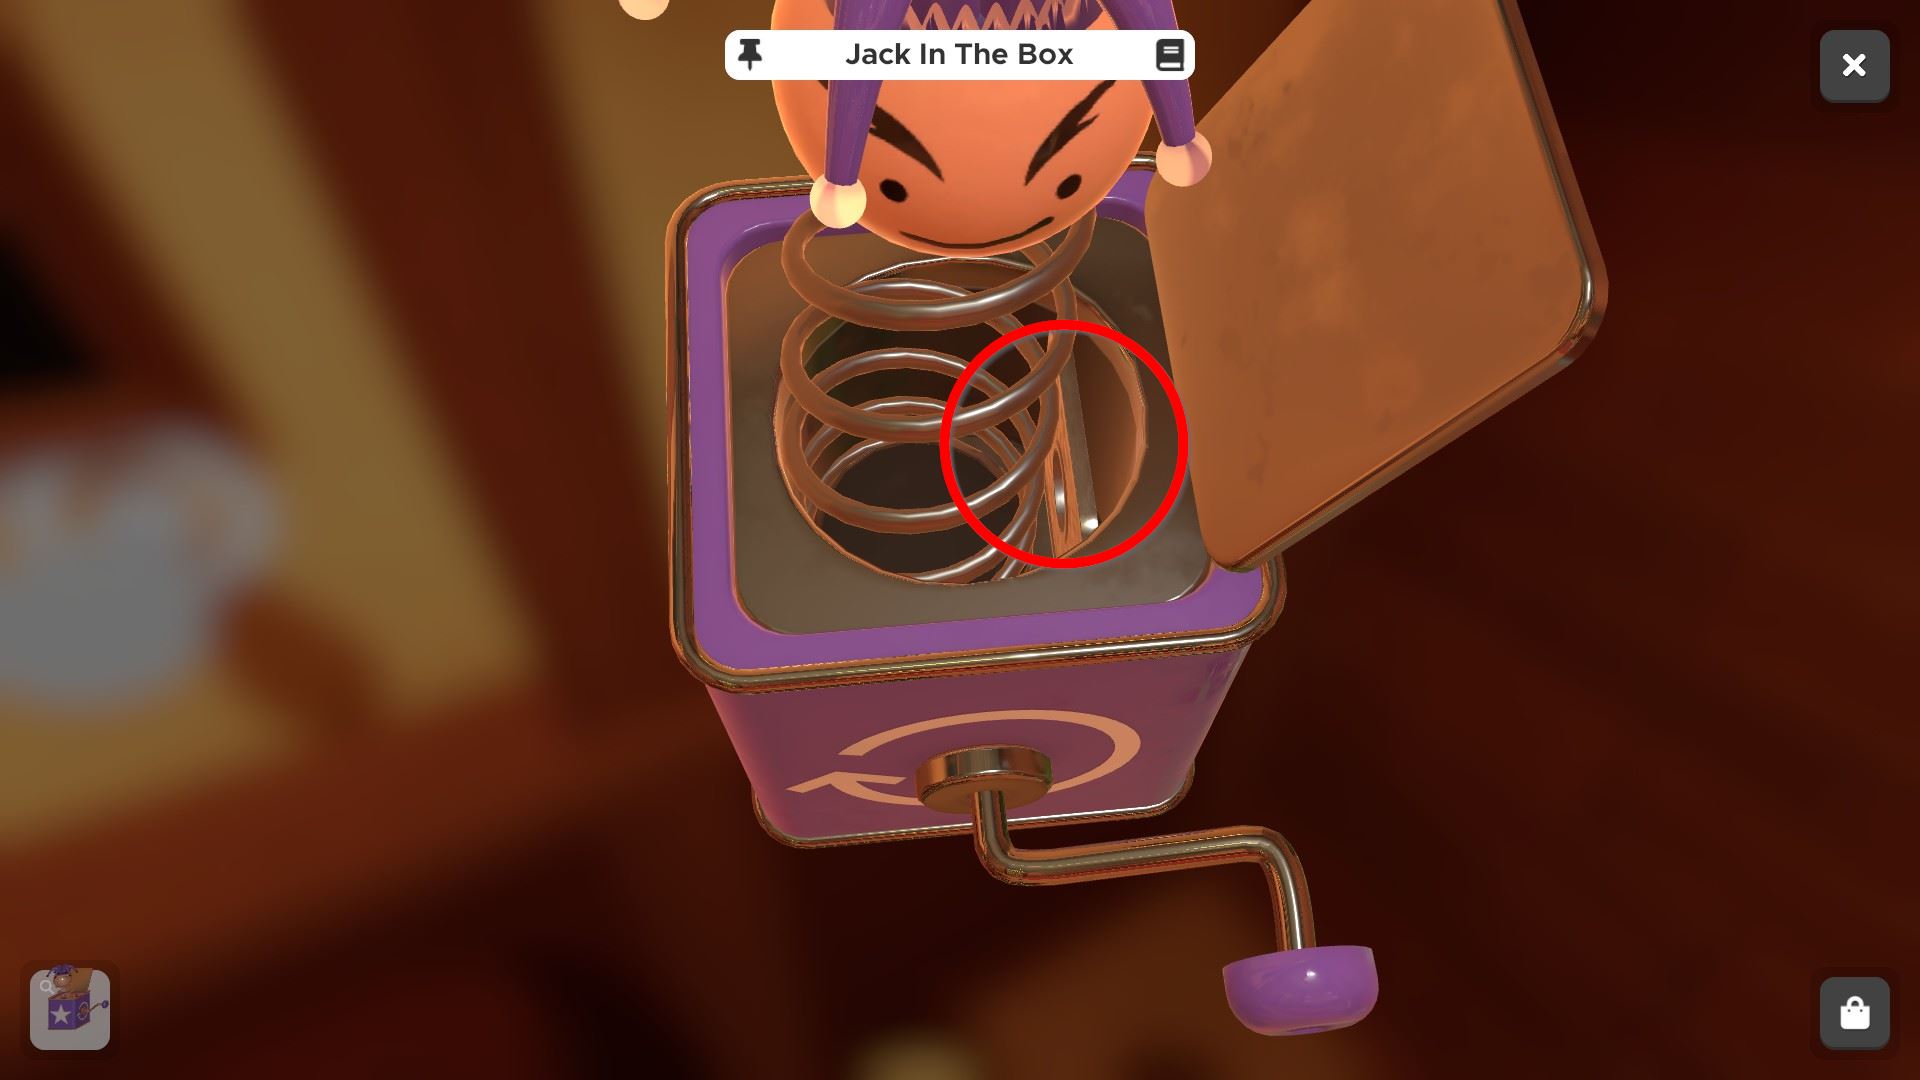

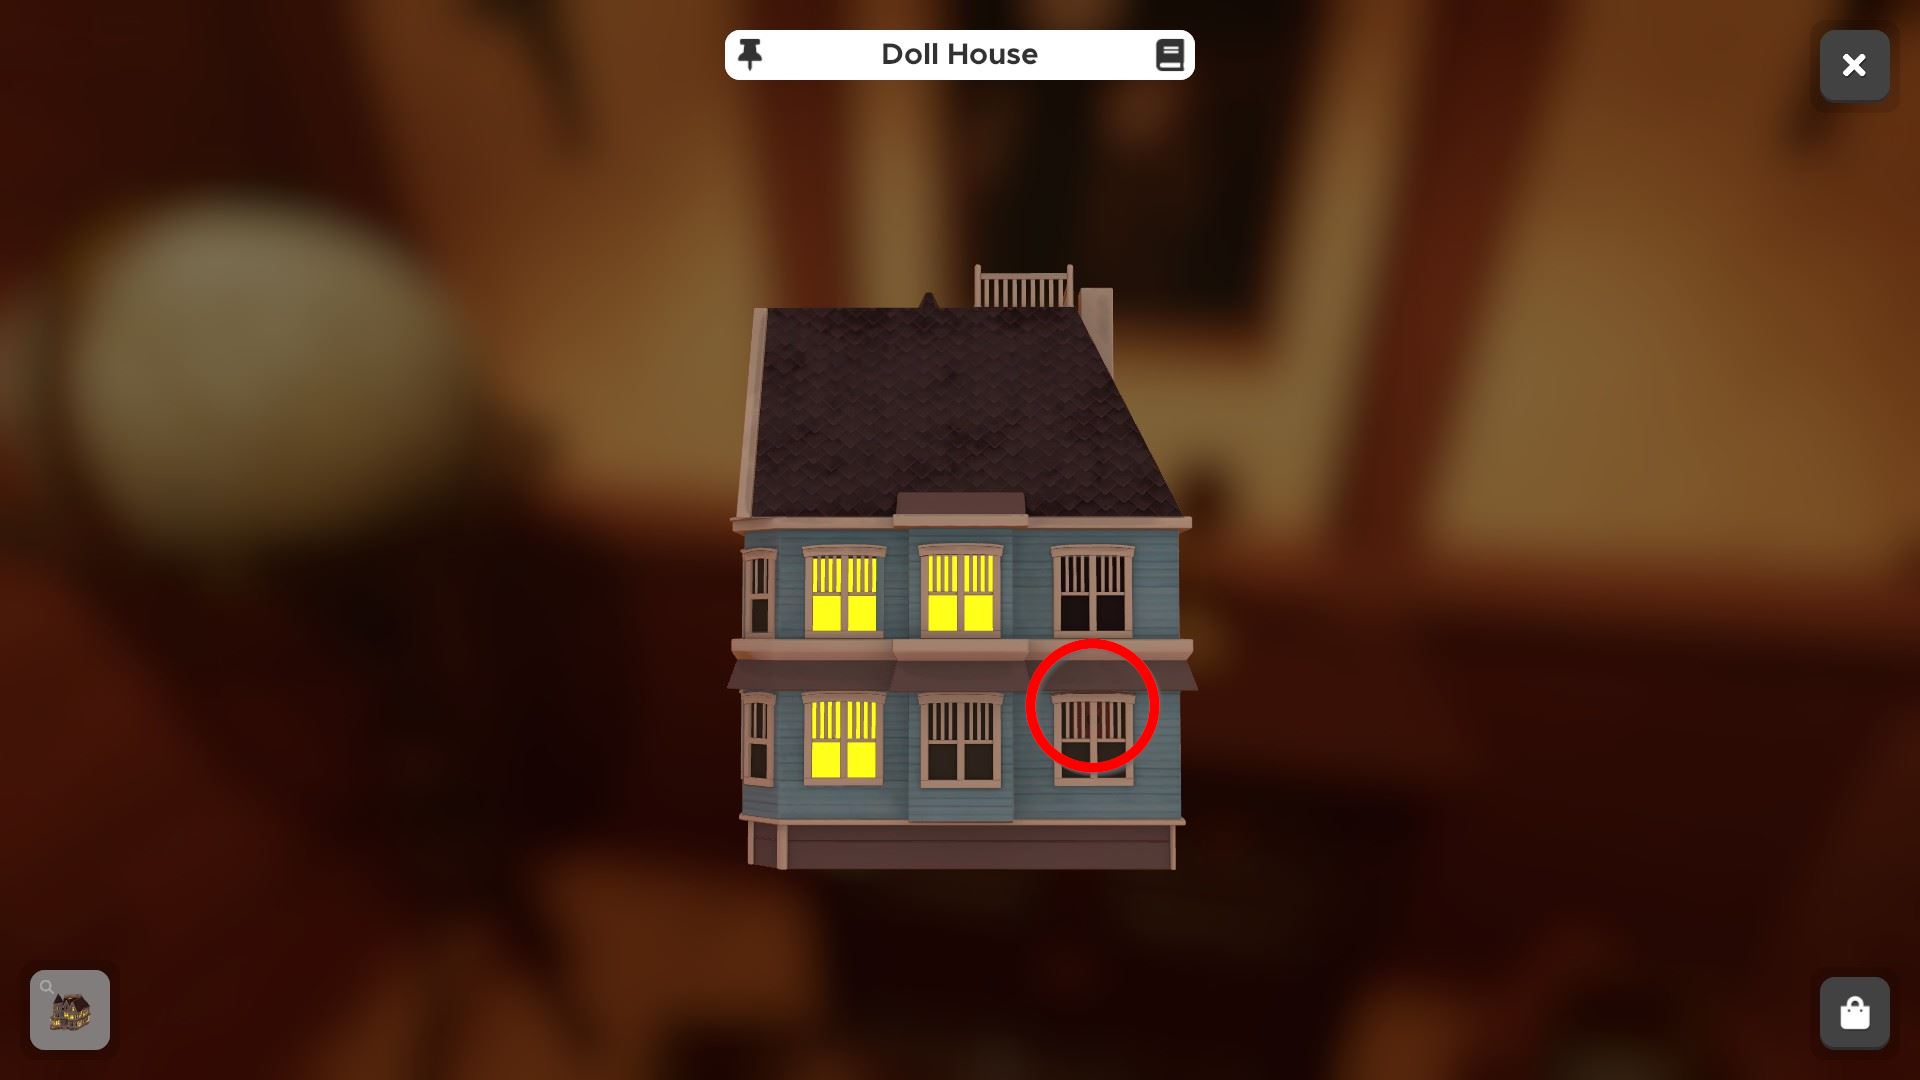
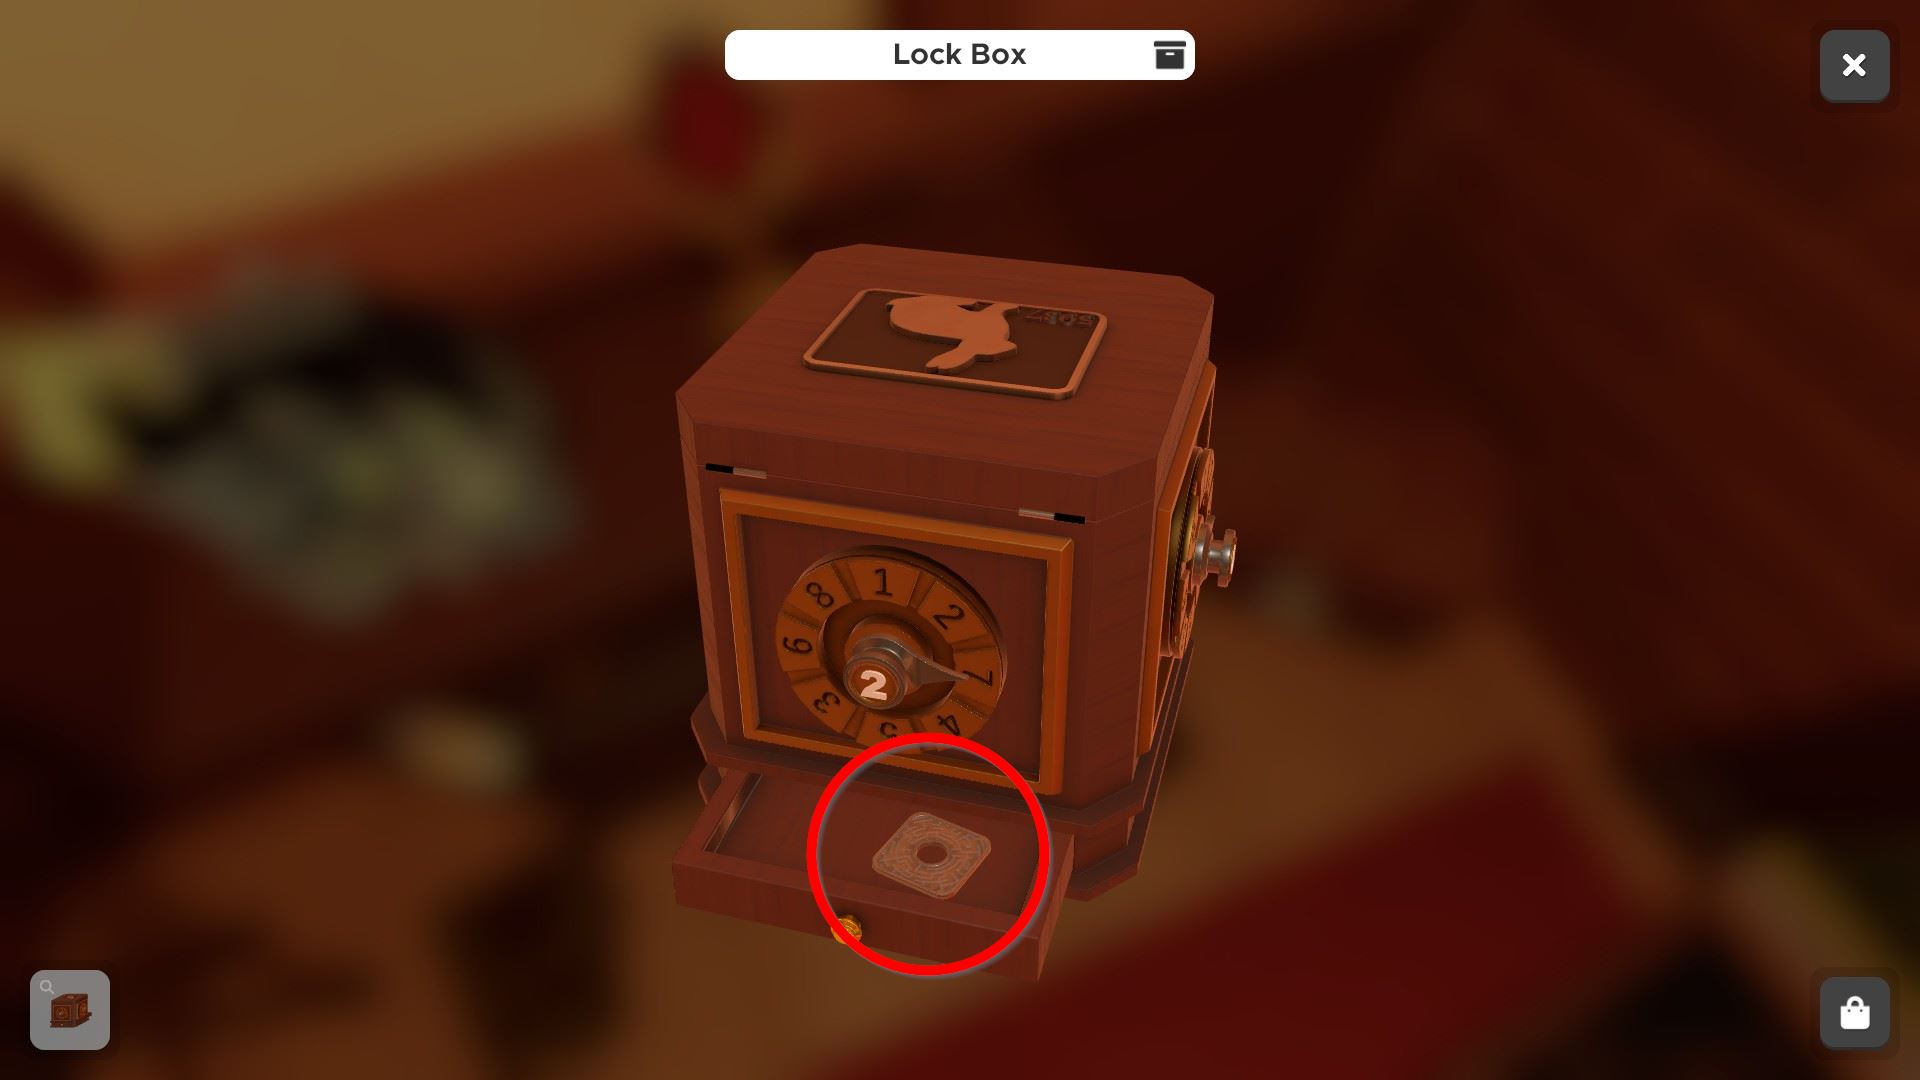
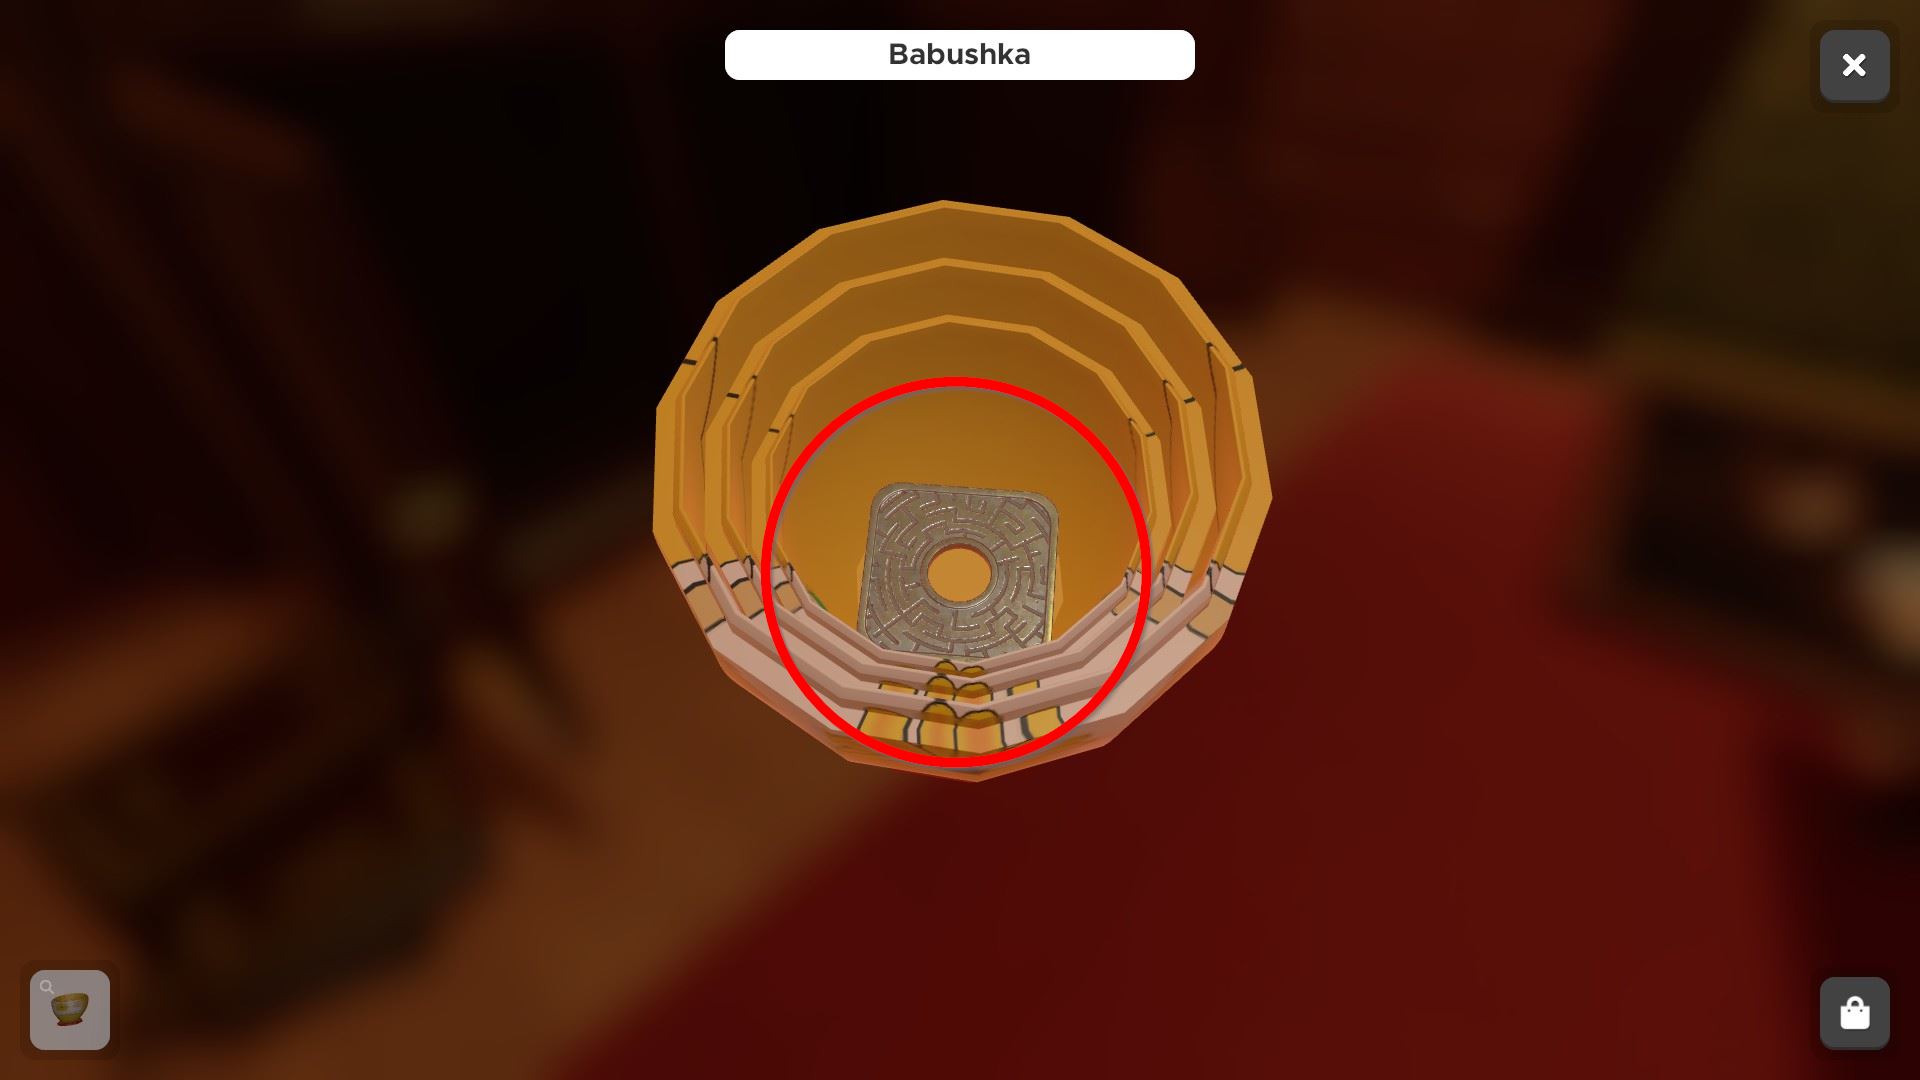
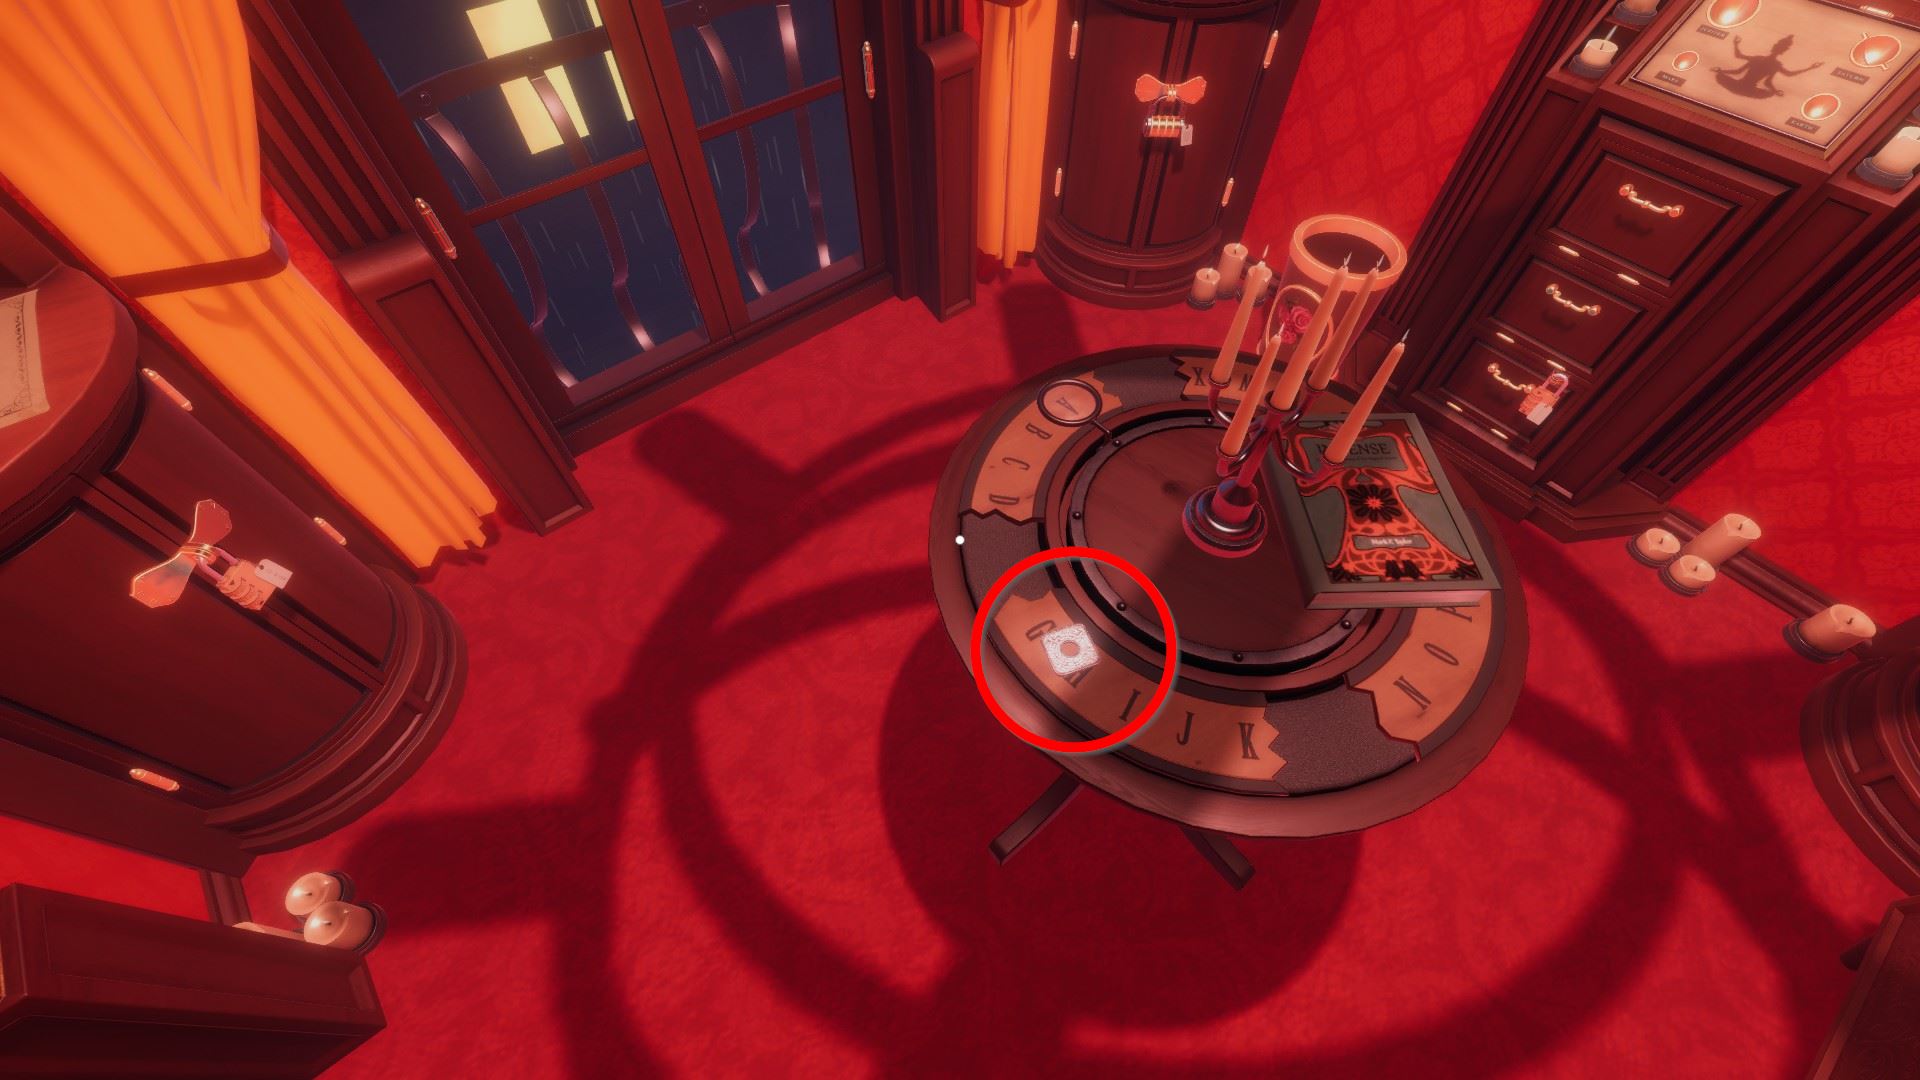
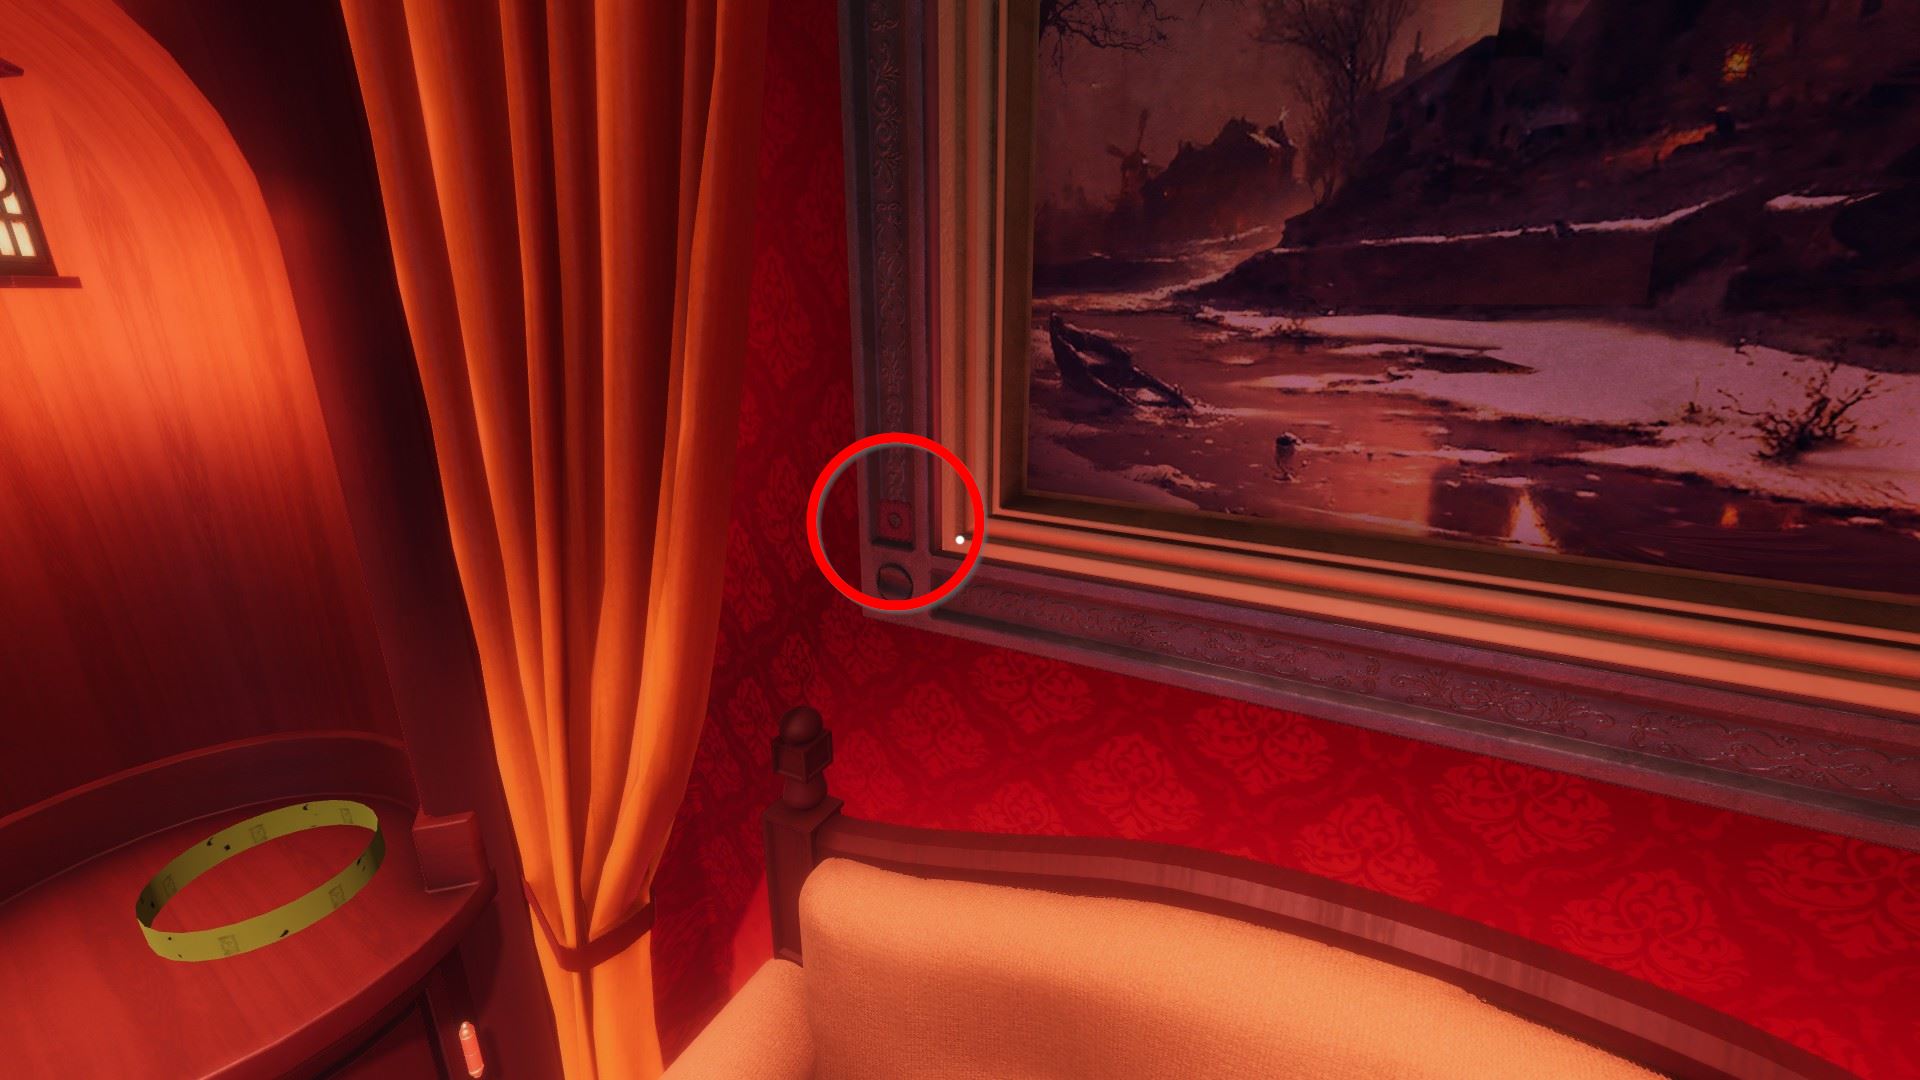
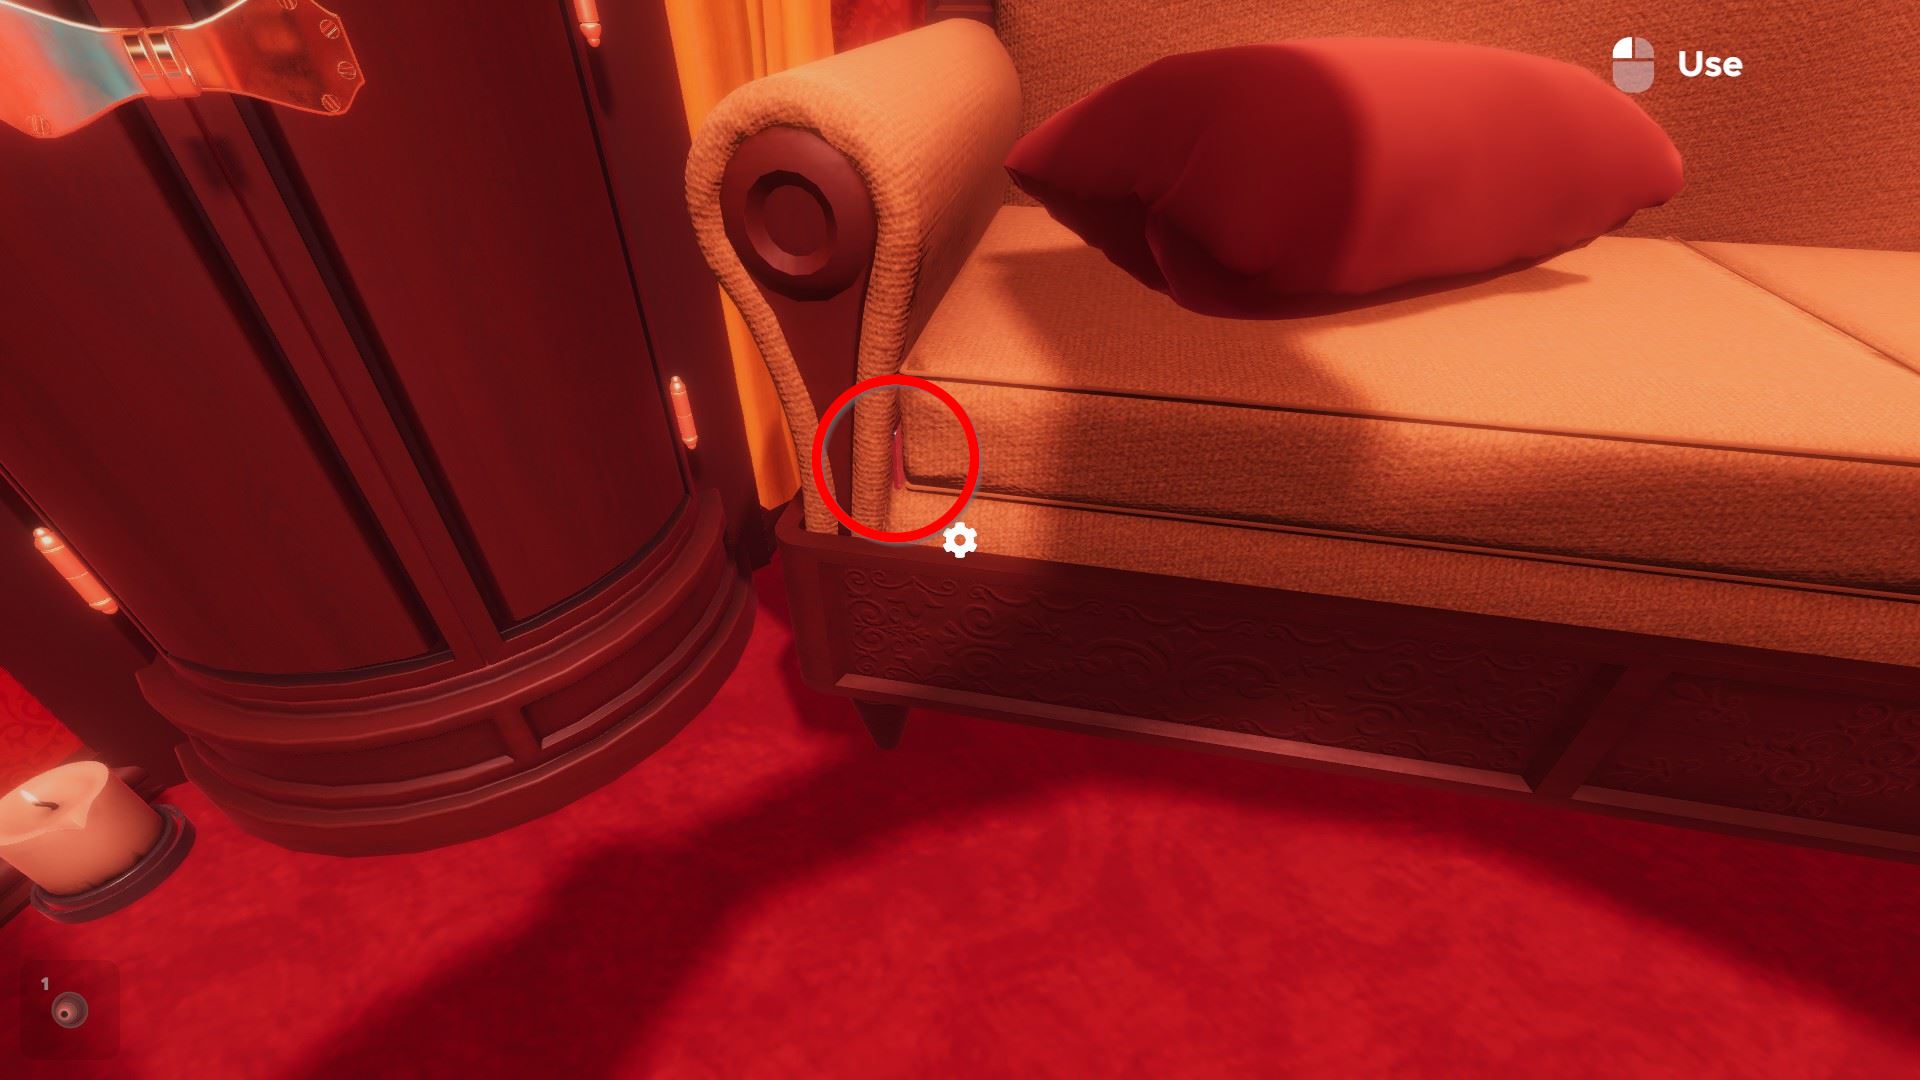
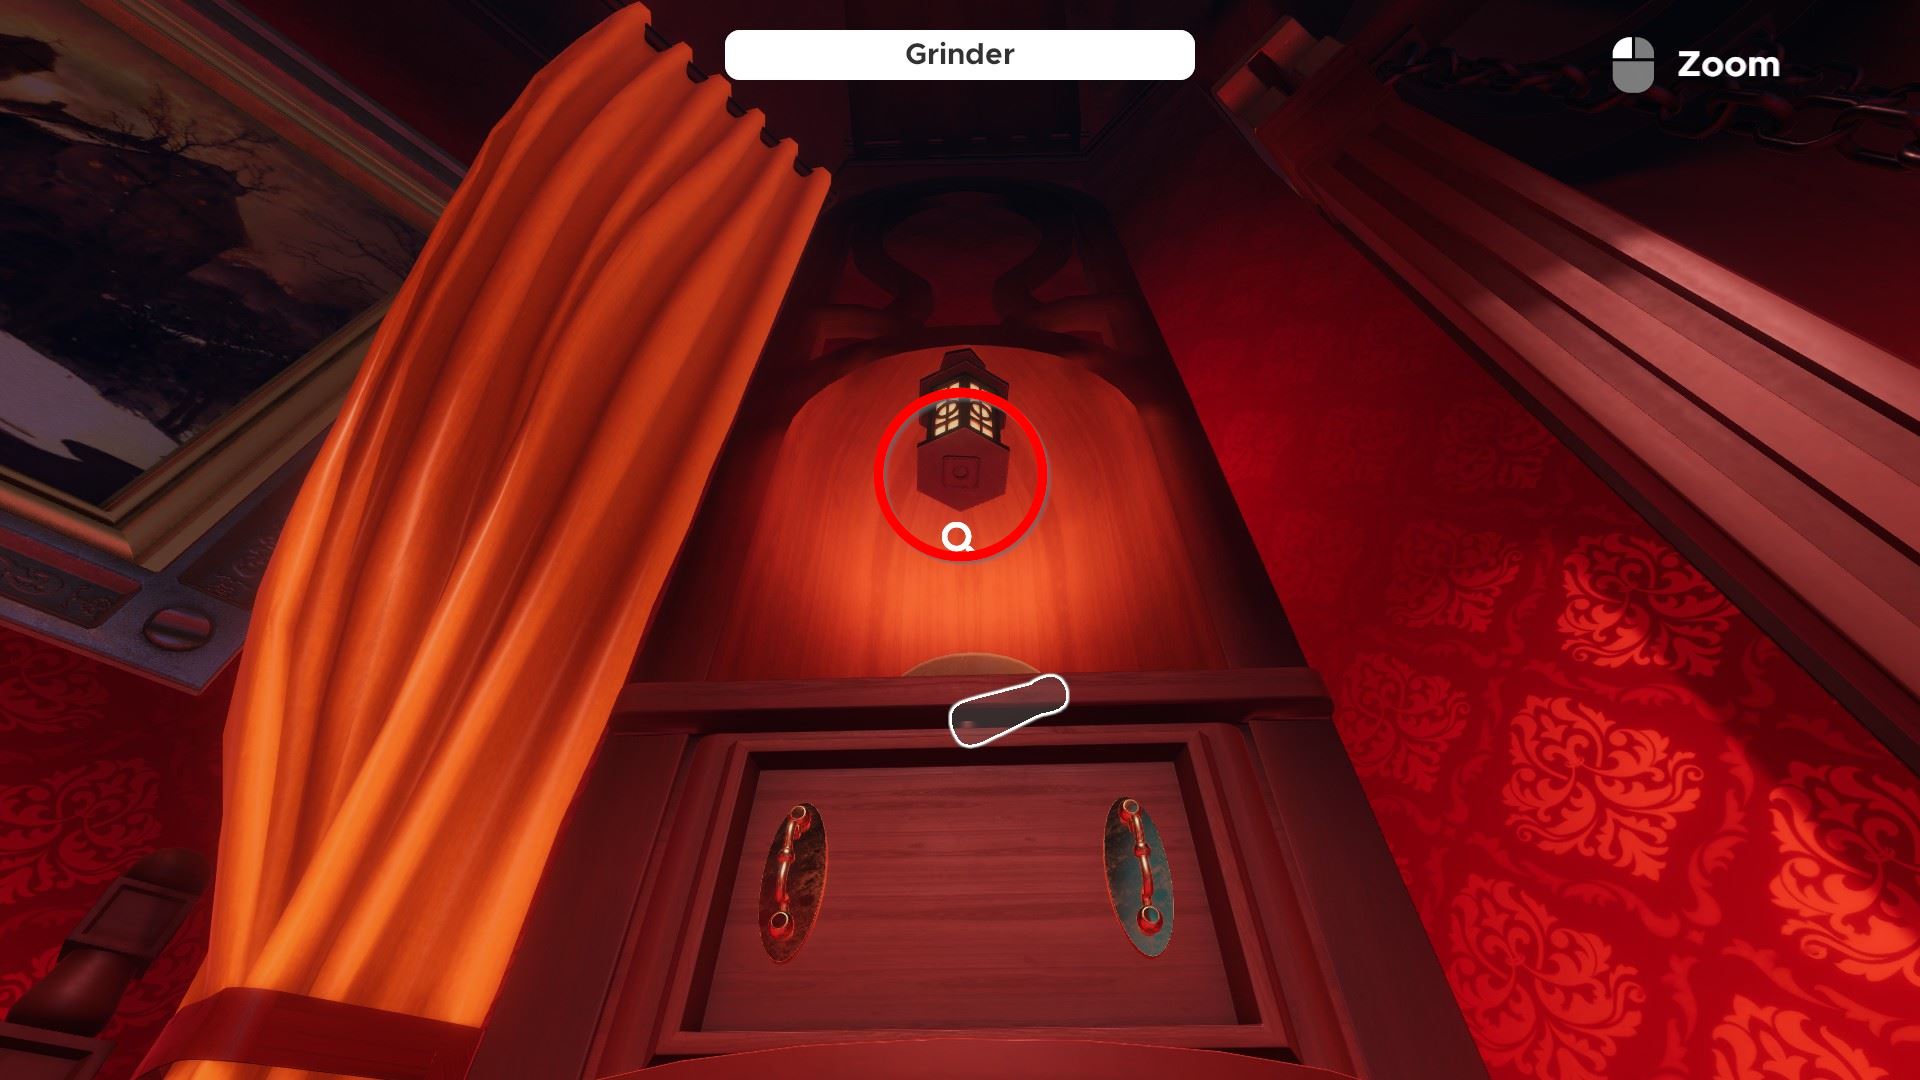

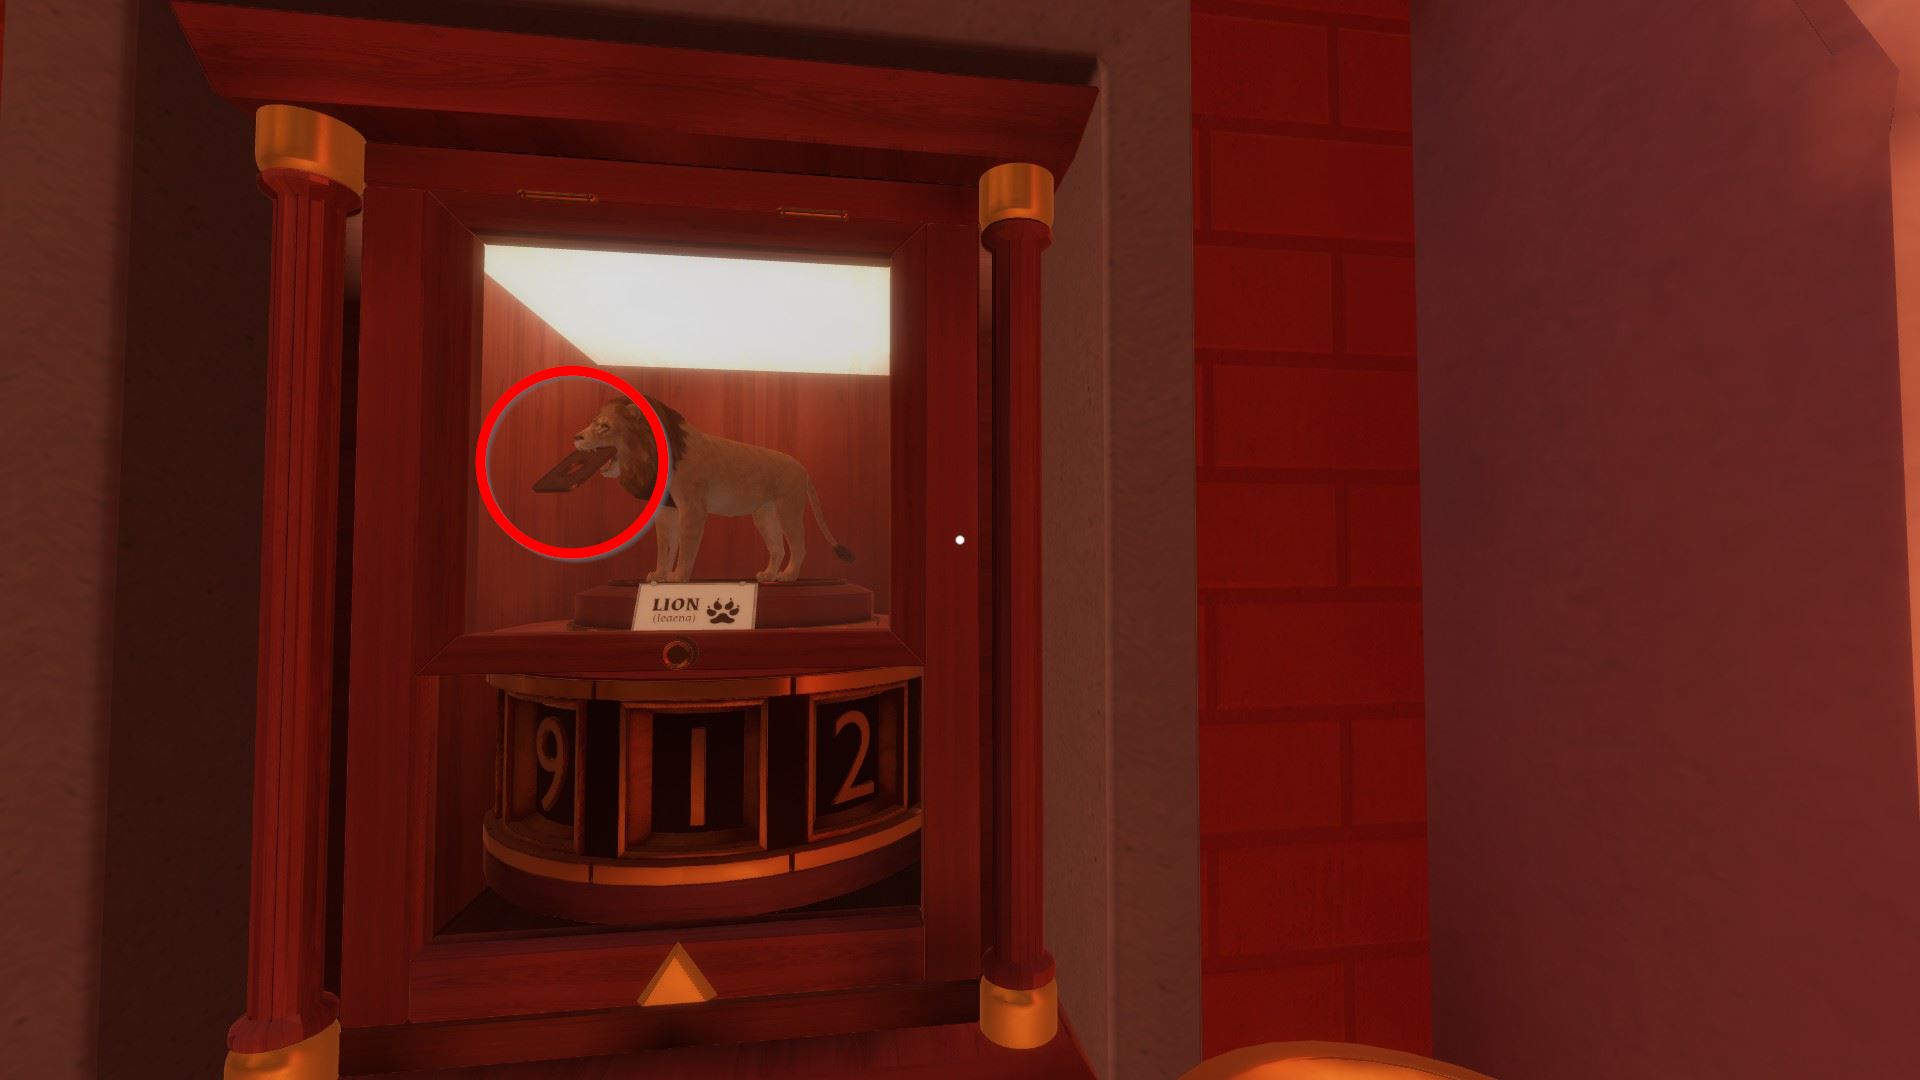
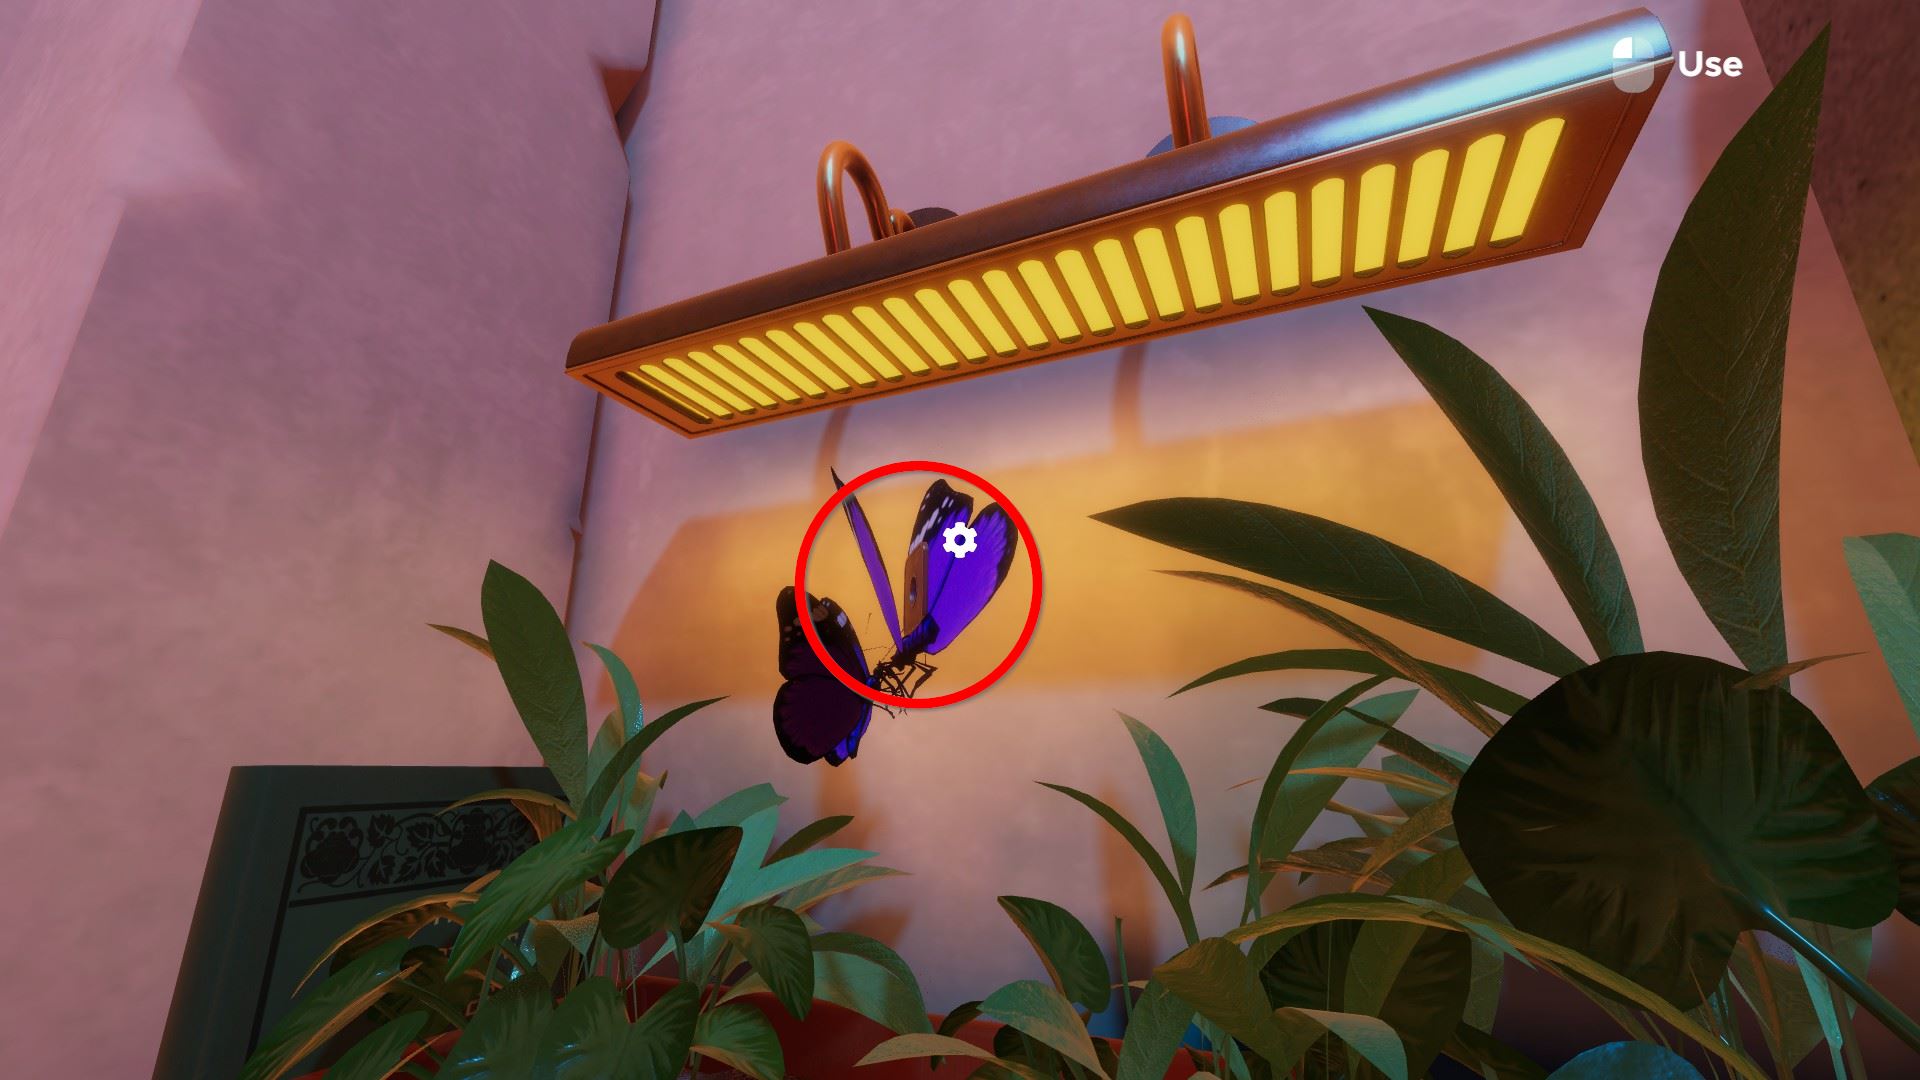

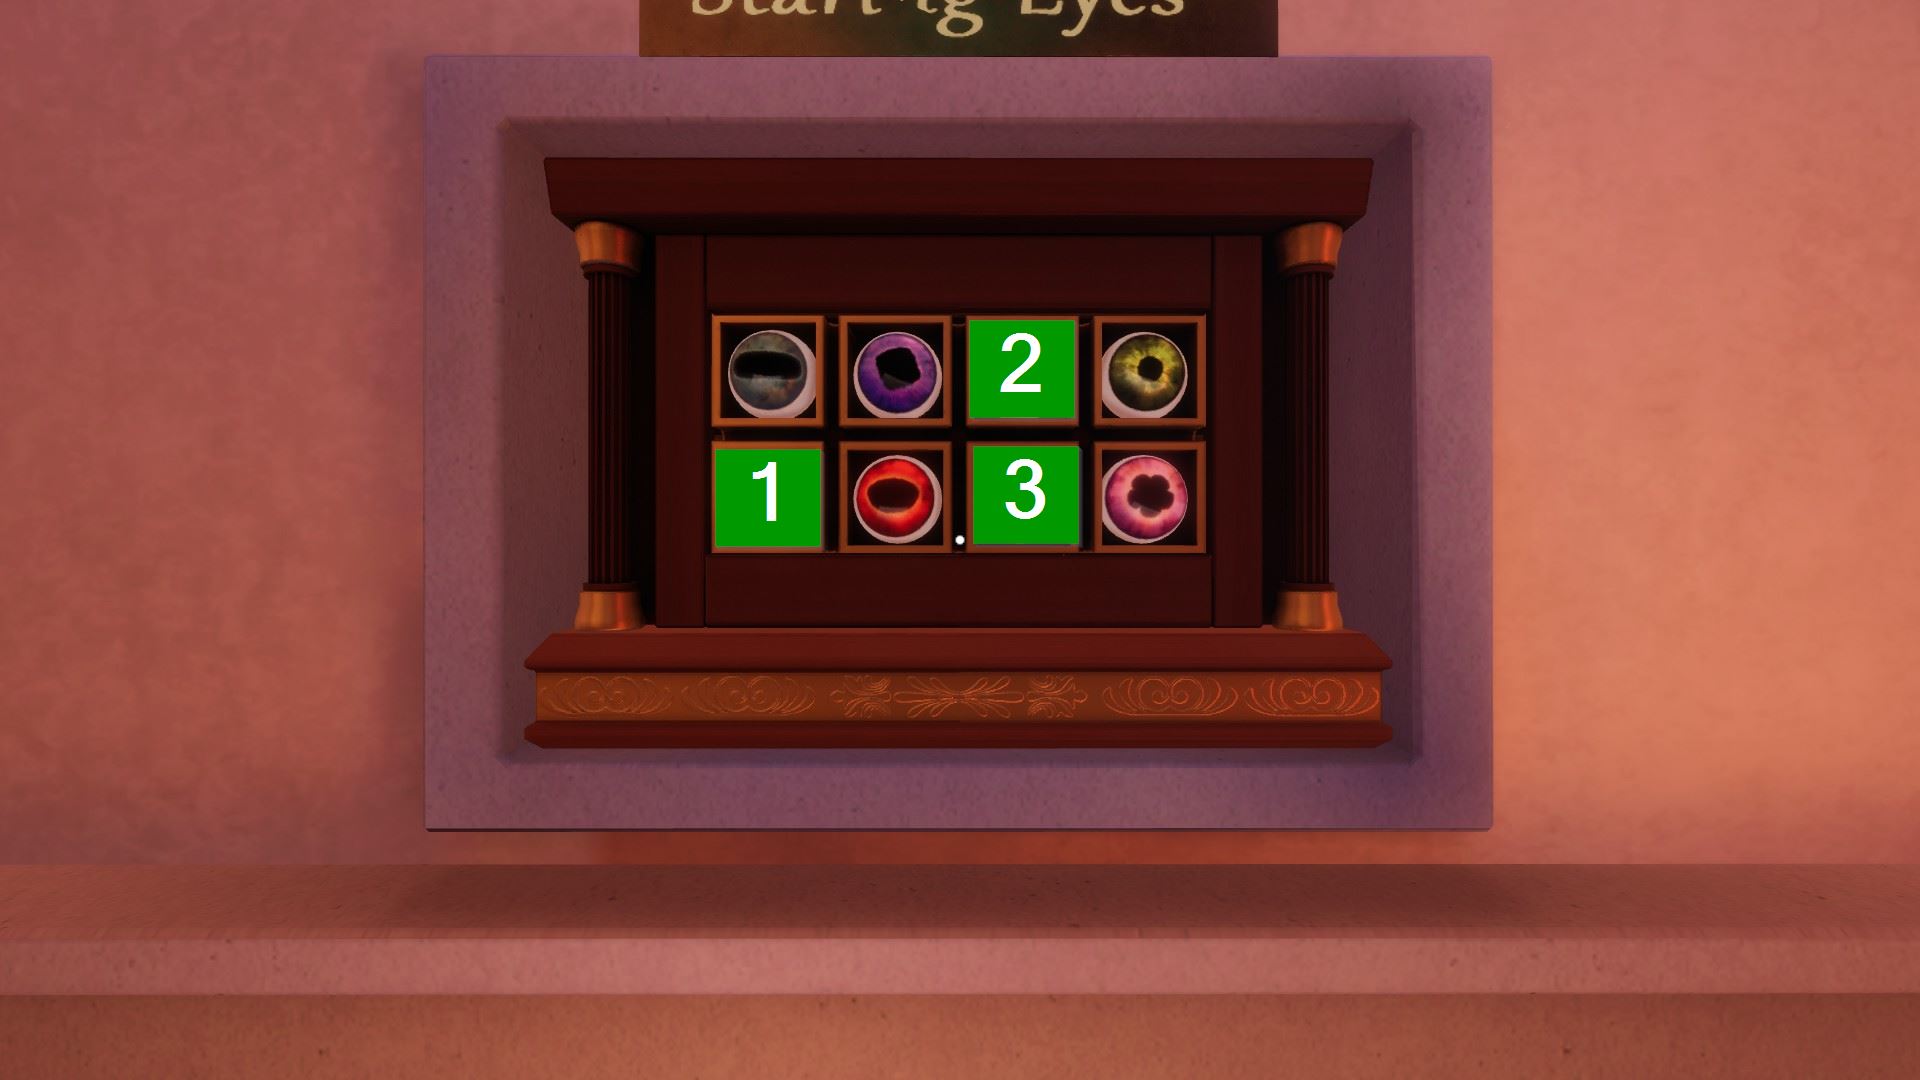
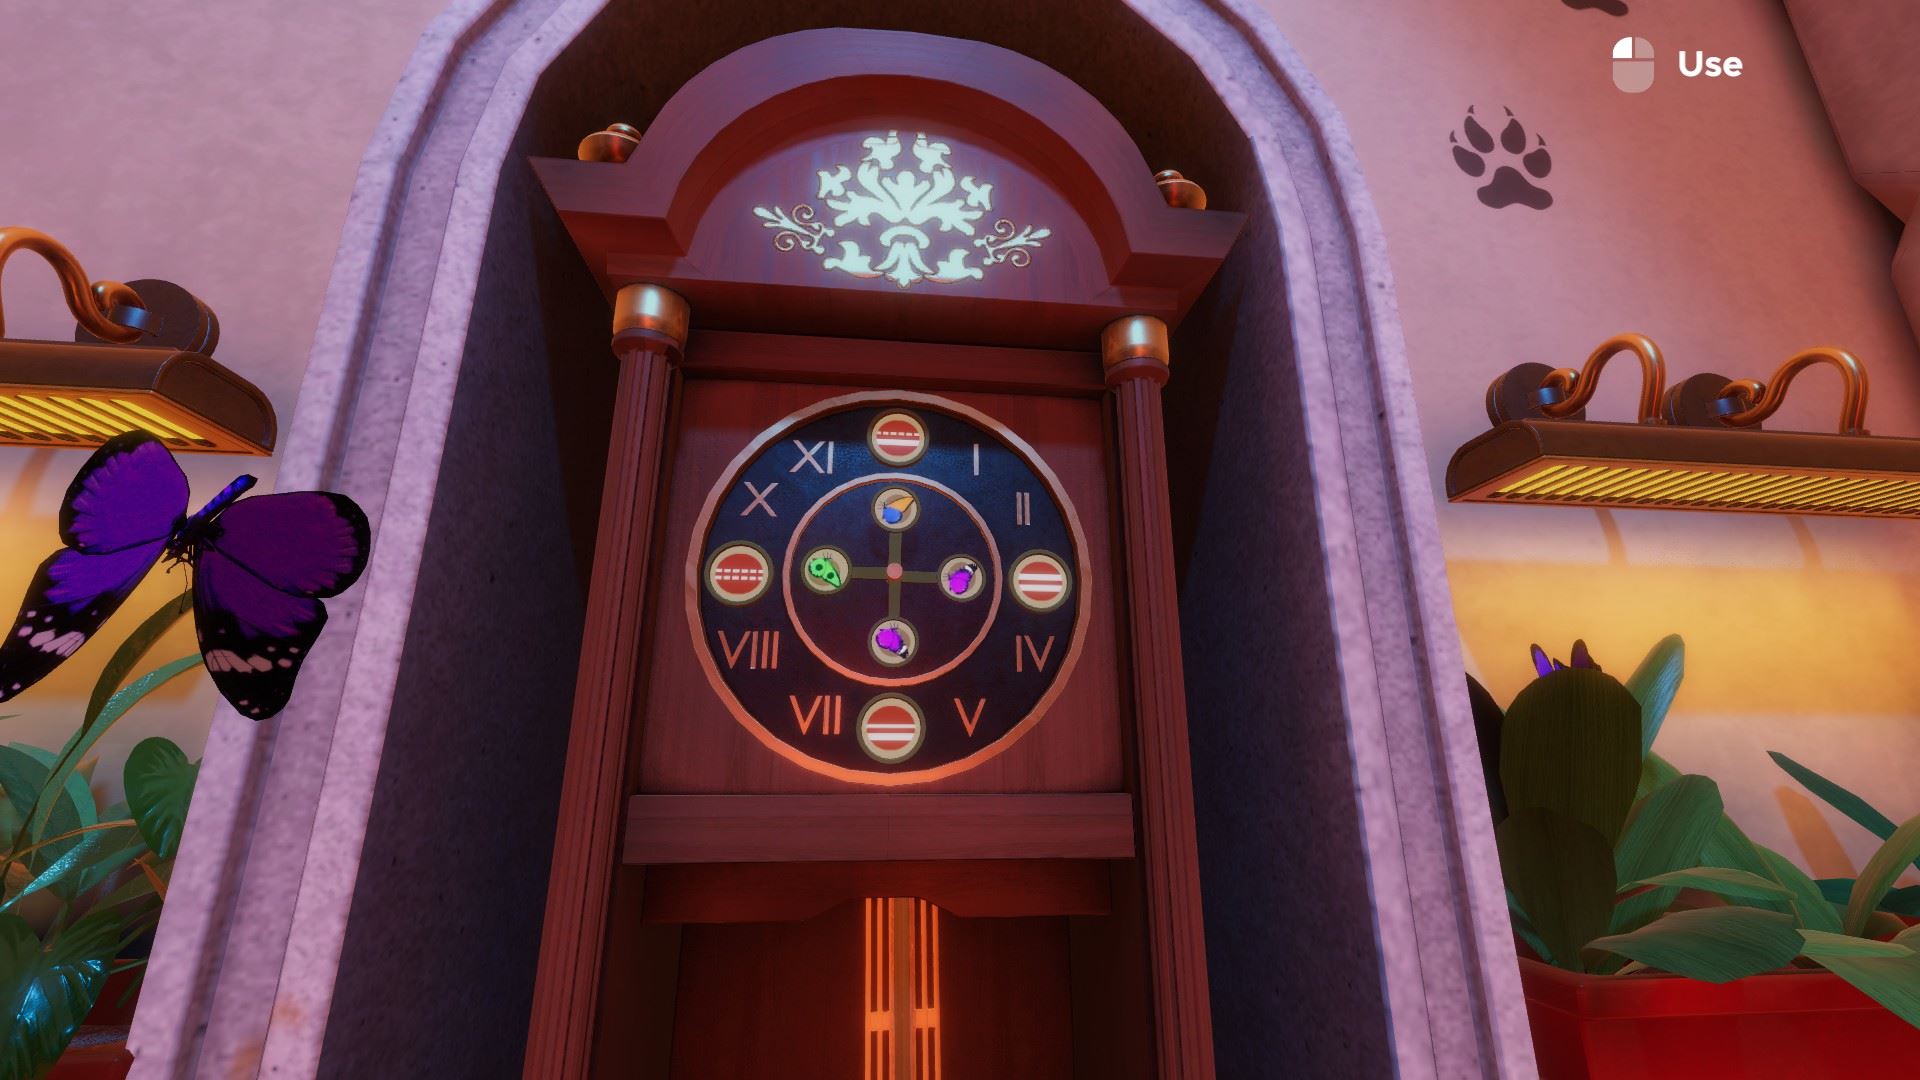


Keep in mind that during the first weeks after release, the location of some tokens might change. We would appreciate it if you let us know when this happens, so we can update this walkthrough accordingly.
thanks
Sadly the throwing out thing doesn't work for me :c