DARK SOULS™ III

DARK SOULS™ III

718 beoordelingen
Dark Souls 3 NPC Questlines in Order
Door GoldSAW
This is a linear area-by-area guide for the major NPC questlines in Dark Souls 3
45
18
6
33
14
6
11
4
4
6
5
6
5
4
4
4
4
2
3
2
2
2
2
   
Prijs
Toevoegen aan favorieten
Toegevoegd aan favorieten
Verwijderen uit favorieten
Part I


Note(s):
● You cannot progress all quest-lines in Dark Souls 3 without being hollowed, it will severely alter your characters appearance!

● This guide also notes Gestures, Estus Shards, and Bone Shards. These are not tied nor necessary to the completion of NPC questlines. You can ignore them if you wish.


Firelink Shrine

Firekeeper: Exhaust the Fire Keeper's dialogue.

Shrine Handmaiden: Exhaust Shrine Handmaiden's dialogue.

[G] Hawkwood: Exhaust Hawkwood's dialogue. (Receive Collapse Gesture!)

[G] Blacksmith Andre: Exhaust Blacksmith Andre's dialogue. (Receive Hurrah Gesture!)


High Wall of Lothric

Blacksmith Andre: Obtain the Estus Shard on the altar in the large indoor room with the explosive barrels.

Greirat: Obtain the Cell Key in the small downstairs-landing within the same room.

Greirat: Backtrack to free Greirat from his cell on the lowest floor of the Tower on the Wall using the Cell Key, which is found at the lowest floor of the structure just past the same bonfire. Exhaust his dialogue and agree to give the Blue Tearstone Ring to Loretta. He will return to Firelink Shrine.

Note: Do not drop down into the courtyard as it will prolong the backtracking. Take the same path you used before, or warp back to the Tower on the Wall bonfire.

Talk to Emma who is located in the opposing large chapel to Vordt, she will gift the Way of Blue Covenant and the Small Lothric Banner (which allows you to access the Undead Settlement.)

Leonhard: After Vordt is dead, return to Firelink Shrine and speak with Leonhard. He'll be standing next to the throne in the center on the upper level. Exhaust his dialogue.


Undead Settlement

Note: Do not progress Yoel/Yuria's questline if you don't want your character to be hollowed, or obtain the Usurpation of Fire ending.

Yoel & Yuria: Find Yoel below the Foot of the High Wall bonfire amongst the other dead Pilgrims. Exhaust his dialogue and he’ll head to Firelink Shrine.

[G] Yoel & Yuria: Proceed to Firelink Shrine and exhaust Yoel's dialogue (Receive Beckon Gesture).

Yoel & Yuria: Accept Yoel’s offer to Draw Out True Strength. If you don't do this before reaching the Catacombs of Carthus you will void the questline.

[G] Yoel & Yuria: Obtain 5 Dark Sigils and refresh, Yoel will have perished and Yuria will be nearby. Speak to her (Receive Dignified Bow Gesture) and buy the Londor Braille Divine Tome. You can give it to Irina or Karla, if you gift it to Irina and purchase any of the items it will progress to her bad ending.

Greirat: Spawn at the Undead Settlement bonfire and proceed to the first large house on your left. Walk onto the balcony and you’ll see a hanging body you can cut down, which contains Loretta’s Bone. Return to Firelink Shrine and give Greirat the item and he’ll let you keep the Blue Tearstone Ring.

Blacksmith Andre: Pick up the Estus Shard by the large burning tree with worshiping crowd of undead. This is to the left of the Undead Settlement Bonfire, just past the house.

You can find the Warriors of Sunlight covenant in a hidden room in the building after the worshiping undead congregation. In the next house, there will be a hole in the floor that you can drop into, this room also has an Estus Soup.

You can find the Mound-Makers covenant by climbing into the cage of the saw-wielding enemy with an empty cage on his back, from the undead congregation, cross the bridge and over proceed right. You can only do this before the Curse-rotted Greatwood has been defeated. If you have already defeated the Curse-rotted Greatwood, you can acquire the covenant later through Sirris’ quest-line.

Cornyx: Find Cornyx in the Undead Settlement just above the Cliff Underside bonfire, which can be progressed by dropping onto the ledge below a bridge that is right in front of the building that has 3 firebomb-throwing undead on top of it. From the bonfire, ascend to the top of the building. You’ll find a cage on the balcony that contains Cornyx. Exhaust his dialogue and he'll proceed to Firelink Shrine.

Return to Firelink Shrine and talk with Cornyx (Receiving the Welcome Gesture and a Pyromancy Flame). Also interact with Greirat, who should be taking the news of Loretta’s death not so well. (Receive Curl Up Gesture!) You can only only obtain the gesture if he's performing it.

Eygon & Irina: You'll find Eygon and Irina near the large tower (progression), but you’ll be able to reach Irina using the key from the Shrine Handmaid by giving her the the Mortician's Ashes. Speak to Irina to recieve a gesture. (Receive Prayer Gesture!)

Shrine Handmaid: Grab the Mortician’s Ashes at the graveyard with the falling spears, near the Dilapidated Bridge bonfire. You can also ascend the tower to befriend the giant. You may need to use a white tree branch.

Firelink Shrine Bonfire: On the platform to the right of the large white tree you'll find an Undead Bone Shard.

Return to Firelink Shrine and purchase the Grave Key, which opens the locked door in the sewer area next to the Dilapidated Bridge bonfire at Undead Settlement. Progressing through this area will eventually lead to Irina, who has been locked away by Eygon. Upon talking to Irina, she’ll teleport to Firelink Shrine if you allow her.

[G] Return to Firelink Shrine and talk to Irina.

[G x2] Find Siegward, who is inside the large Tower near Irina and Eygon. He’ll be riding the elevator to question its mechanics. There are actually two lifts on-top of one another, solve the riddle of the elevator and slay the Outrider Knight on the lower floor (or you can die also.) Take the lift up to the actual top of the Tower. Roll off at the halfway point to land on a wooden platform. Proceed outside and exhaust Siegward's dialogue. Begin fighting the Fire Demon, Siegward will come to aid you. After killing the Fire Demon exhaust Siegward's dialogue. (Receive Siegbrau, Toast Gesture, and Rest Gesture!)

Kill the Curse-rotted Greenwood to get the Transposing Kiln, which you can give to Ludleth of Courtland back at Firelink Shrine to turn boss souls into special weapons and items.

Leonhard: Leonhard should be at Firelink Shrine. If he isn’t, continue until you get a Pale Tongue and he'll appear. He’ll give you a Lift-Chamber Key that you can use on a locked door within the Tower on the Wall of High Wall of Lothric. It’ll lead to a Darkwraith that upon death will drop a Red Eye Orb.

Leonhard: Return to Firelink Shrine and exhaust Leonhard's dialogue. (Receive Applause Gesture!)

Hawkwood: Talk to Hawkwood after killing the Curse-rotted Greatwood. He will gift you a Heavy Gem.


Part II


Road of Sacrifices

Note: You need at least 10 INT to converse with Orbeck.

Greirat: You can now send Greirat to pillage. He won't reappear in Firelink until the next area boss is defeated.

Eygon & Irina: You can find the Braille Divine Tome of Carim below the bridge right before the Halfway Fortress bonfire. Give it to her at Firelink Shrine and buy all the spells it offers if you want her good ending.

Anri & Horace: Talk to Anri and Horace at the Halfway Fortress bonfire. Horace will offer you to join the Blue Sentinels covenant when spoken to. Exhaust Anri's dialogue.

Cornyx: In the swamp area with the two giant crabs, the Great Swamp Pyromancy Tome will be in a deeper area of the swamp that slows your progress.

Kill Yellowfinger Heysel, who will invade your world in the center of the swamp.

Blacksmith Andre: At the Halfway Fortress bonfire in Road of Sacrifices, drop down from the ledge on the right side, keep going straight along the right wall and enter a doorway at the far end. Turn left and you will see a Black Knight guarding several bodies, the body at the far end holds the Farron Coal (which grants you Heavy, Sharp & Poison Infusions.)

Blacksmith Andre: Grab the Estus Shard on the side of the ruins near the Crucifixion Woods bonfire. Two lycanthropes will be near a fire.

Orbeck: Enter the ruins near the Crucifixion Woods bonfire, head up the stairs, cross the bridge, and you’ll notice an area to the left that contains Orbeck. Exhaust his dialogue. He will only speak to you if you have 10 INT. You must give him a scroll before defeating the Abyss Watchers or else he will leave Firelink Shrine, effectively voiding his questline.

Yoel & Yuria: Yuria at Firelink Shrine wants you to kill Orbeck. You’ll get the Morion Blade if you do. Only recommended if you don't plan on using sorceries.


Cathedral of the Deep

Sirris: Talk to Sirris at Firelink Shrine to begin her quest line.

Shrine Handmaid: Near the first bonfire is where the Paladin’s Ashes lay.

Blacksmith Andre: Grab the Estus Shard right outside the Cleansing Chapel bonfire.

Karla: The Deep Braille Divine Tome can be found on a mimic chest.

Firelink Shrine Bonfire: Grab the Undead Bone Shard near a white tree that the Giant throws spears around, on the roof area of the Cathedral after navigating the graveyard and crossing a bridge.

[G] Patches: Proceed through the Cathedral of the Deep until you have made it to the fog door before the Deacons of the Deep area-boss. Proceed to the nearby lift on the left to open the large blue double doors that lead out to the initial entrance. Turn around and look far out to your lower-right. You'll note a new bridge has been activated and Patches is standing near it wearing Siegward's armor. Exhaust his dialogue and proceed across the bridge. After the cut-scene, return to the lift-shortcut just outside the Cleansing Chapel Bonfire, use the external ladder entrance to navigate back towards the rafters of the Cathedral, eventually you'll be able to drop down on the other side of the bridge Patches activated.Tell Patches “You know who I am.” (Receive Prostration Gesture!) Then purchase Siegward’s Armor Set from him. Do not sell or dispose of this armor!

Leonhard: In the rafters of the Cathedral, on the opposing side, you'll find a spot to drop down just outside Rosaria’s Chamber bonfire. Exhaust Rosaria's dialogue and she'll allow you to join the Rosaria's Fingers Covenant. Do not gift Rosaria any Pale Tongues and don’t equip the Rosaria’s Fingers covenant item or it will void Sirris' quest-line. We will continue this later on.

Patches: If Patches didn’t spawn at the Cathedral, return to Firelink Shrine and purchase the Tower Key if you haven’t already and head into the Tower behind Firelink Shrine. As you ascend the lift to the top, you’ll hear a door shut. Grab the Fire Keeper’s Soul at the top and then come back down to encounter Patches. Proceed down the makeshift ensemble of coffins to escape.

Blacksmith Andre: Proceed to the Tower and cross the bridge that overlooks Firelink Shrine. Drop down onto the roof and proceed around the edge until you find an open archway you can go through. An Estus Shard will be on the adjoining rafters.

[G] While on the roof, you can speak with Snuggly the Crow. Trading him three items will gift you a gesture. (Receive Rejoice Gesture!)

Fire Keeper: With the Fire Keeper’s Soul, you can completely get rid of your Hollowing Level. If you are following Yoel/Yuria’s quest-line, however, don’t do this until the post-game or you’ll end up voiding Yoel/Yuria's quest-line.

[G] Patches: Refresh Firelink Shrine and head to the upper right to find Patches now located there. He’ll ask for forgiveness, refuse (Receive Prostration Gesture and Rusted Gold Coin). Leaving Firelink Shrine and returning will sometimes allow Patches to be in his squatting position. Interact with him. (Receive Patches Squat Gesture!)

Siegward of Catarina: Return Siegward's armor set to him in the well just outside the Cleansing Chapel (via the Cleansing Chapel bonfire), if you cannot purchase the armor yet, exhaust Siegward's dialogue first. (Receive Rejoice Gesture!)


Farron Keep

Blacksmith Andre: In Farron Keep, near the first bonfire, proceed on the left side of the area until you reach a small structure near a darkwraith. Inside that structure you'' find The Sage's Coal, which grants you Crystal, Blessed & Deep Infusions.

Blacksmith Andre: Grab the Estus Shard as you proceed from Road of Sacrifices, on the left-side wall you'll note it.

Orbeck: From the Keep Ruins bonfire proceed towards the wolf-gate and turn left. Follow the nearby wall and you’ll eventually find the Sage’s Scroll.

Orbeck: From the initial bonfire, head out and go along the right area until you begin to encounter basilisks. There will be a cave in this area that will contain a chest with the Golden Scroll inside. Give these scrolls to Orbeck before beating the Abyss Watchers or the quest-line will void.

Firelink Shrine Bonfire: Grab the Undead Bone Shard on the bottom of the tower to the right of the wolf-gate with the three flames that you have lit. It is surrounded by a cornucopia of slugs.

Anri & Horace: Return to Firelink Shrine to find Anri and Horace. Exhaust their dialogue.

Shrine Handmaid: On the largest tower, proceed up the exterior stairs to find an illusionary wall on the left for the Dreamchaser’s Ashes.

[G] Sirris: Return to Firelink Shrine, gift the Dreamchaser’s Ashes to the Shrine Handmaid. Sirris will appear at Firelink Shrine after a refresh. Exhaust her dialogue. (Receive Darkmoon Loyalty Gesture!)

[G] Yellowfinger Heysel: You can summon her in Farron Keep for the Abyss Watchers fight if you killed her in Road of Sacrifices, but you’ll need to have given a Pale Tongue to Rosaria, which will void Sirris’ quest line, so I recommend saving this part for NG+1. Once the area-boss is defeated you'll automatically obtain a gesture. (Receive Proper Bow Gesture!)

[G] Black Hand Gotthard can be summoned for the Abyss Watchers fight and will grant you a gesture upon summon. (Receive By My Sword!)

[G] Yuria: If you are doing the Yoel/Yuria side quest, you’ll also be able to summon the Londor Pale Shade for the Abyss Watchers fight and gain a gesture upon completion. (Receive Proper Bow Gesture!)


Part III


Catacombs of Carthus

Hawkwood: Return to Firelink Shrine and exhaust his dialogue for the Farron Ring. Hawkwood may be outside Firelink near a grave if he isn't indoors.

Hawkwood: Refresh and head outside to the grave once more and Hawkwood’s Shield may be resting on the same grave. If this doesn’t happen, try again later.

Cornyx: Halfway across the initial bridge into Catacombs of Carthus, drop down onto a lower platform along the side. You’ll find the Carthus Pyromancy Tome in that area.

Anri & Horace: Before heading down the largest center staircase, proceed along the left hallway instead and you’ll eventually run into Anri. Exhaust her dialogue.

Firelink Shrine Bonfire: Once arriving at the bottom of the largest center staircase, you’ll notice a skeleton with a hat. Slay it and the next time the skeleton-ball hits the gate, it’ll explode and reveal an Undead Bone Shard.

Shrine Handmaid: From the Catacombs of Carthus bonfire, proceed down the stairs that the second skeleton ball is rolling around, head up some adjoining stairs across the way. Once you’re at the top of this new area, head to the left and you’ll fine the Grave Warden’s Ashes.

Anri & Horace: Once you make it to the wooden bridge, you’ll see Anri to the upper-right. She’ll once again ask if you have found Horace. You haven’t yet. Proceed across the rope-bridge and slash it. But do not defeat Wolnir until you've completed Anri/Horace's next step(s) in Smouldering Lake, as defeating Wolnir will make Anri move on. Descend the fallen bridge into Smoldering Lake.


Smoldering Lake

Firelink Shrine Bonfire: Near the Old Demon King fog-door you'll encounter the giant Carthus Sandworm, use the giant ballista firing at you to your advantage to kill it. Hide behind the worm near a mound of exposed ground to target the Sandworm instead. Upon slaying it you’ll gain an Undead Bone Shard.

Cornyx: Before fighting the Old Demon King you can summon the Great Swamp Cuculus. After slaying the Old Demon King with this NPC thriving, proceed back to the initial cage you found Cornyx in to receive Cornyx’s Armor Set and Spotted Whip.

Proceed to the Demon Ruins Bonfire.

Firelink Shrine Bonfire: The first initial enemies you'll encounter in the Demon Ruins are a herd of Demon Clerics. On the top floor note a set of stairs nearby. Head down those stairs and then move towards the left where there will be another herd of Demon Clerics. Behind this group is an Undead Bone Shard.

Blacksmith Andre: Once you've located the Old King’s Antechamber bonfire in this area, utilize the illusion wall in the same room. Proceed down the hallway that has a bunch of Writhing Rotten Flesh enemies on the ceiling and grab the Estus Shard on a body at the far end.

Cornyx: In a room after the Old King’s Antechamber, you’ll find the Izalith Pyromancy Tome on the ground.

Karla: From the Old King’s Antechamber bonfire, hit the illusory wall in the room and head back out to the larger room with the herd of Demon Clerics. There is a nearby corridor out of this room where you’ll see the tome, but there will be a large hole that leads to a giant rat. Head down the hole, kill the rat, head straight, take a left, take another left, and in this room there will be another illusory wall that leads to the Quelana Pyromancy Tome.

Further into the Demon Ruins, you’ll come to a point where there are several basilisks and you’ll see some stairs. Instead of going up the stairs, take a left when you get to them and you’ll encounter Knight Slayer Tsorig. Defeating him will gain you a gesture. (Receive My Thanks! Gesture!)

Anri & Horace: Along the right side near the entrance of the Smoldering Lake, you'll find a cave passage that eventually leads to Horace who is now hostile. Kill him and he’ll drop the Llewellyn Shield. The Shrine Handmaid will also now sell Horace’s Armor Set.

Anri & Horace: Proceed back to Anri and inform her of Horace. She’ll gift you the Ring of the Evil Eye.

Karla: After slaying Wolnir you’ll obtain the Grave Warden Pyromancy Tome. Cornyx cannot read this Pyromancy Tome, only Karla has the ability. You don't encounter Karla until much later.


Irithyll of the Boreal Valley

Sirris: In Irthyll, you’ll slay one of Sulyvahn’s Beasts and then proceed through a force field to the Central Irithyll bonfire. Rest at the bonfire and return to the middle of the bridge and Sirris’ summon sign will be there if you’ve been progressing her quest-line. Upon victory, the next time you meet her at Firelink Shrine she'll gift you a Blessed Mail Breaker and the Silvercat Ring.

Anri & Horace: Anri’s story has a major divide here. If you want to follow her quest-line to its conclusion, follow Anri A. If you want the Usurpation of Fire ending, follow Anri B.

[G] Anri Ending A: Anri will be at the Church of Yorshka bonfire. Exhaust her dialogue.(Receive Quiet Resolve Gestures) Smash the statues in the corner of the room until you plug the Chameleon-spell using pilgrim sent by Yuria. He’ll drop the Chameleon sorcery.

Anri Ending B: or ignore the pilgrim.

Firelink Shrine: Starting at the Church of Yorshka bonfire, go down the tunneled hallway stairs, and go right along the cliff-side. An Undead Bone Shard will be found behind the large tombstone at the end of the external-path. If you helped Sirris, Creighton will invade you here if you’re embered. Slaying him will gain you the Dragonslayer’s Axe and the Creighton’s Armor Set if you return to the bridge where you initially were summoned for Sirris.

Shrine Handmaid: While walking around the sewer area, in the corner opposite some stairs are the Excrement-covered Ashes. Yummy.

Siegward: Just after the sewer area you'll find Siegward hanging out by the fire in a nice kitchen. Exhaust his dialogue and you’ll receive the Emit Force Miracle.

Greirat: Return to Firelink Shrine and exhaust Greirat's dialogue. He’ll ask to pillage Irithyll. Only do this after meeting Siegward in Irthyll or if Patches is at Firelink Shrine. If you have neither, Greirat will perish and his ashes can be found in the sewer area.

Patches: Rest at Firelink Shrine after sending Greirat out and Patches will ask you where he went. Tell him and Patches will head out to protect Greirat.

Anri Ending B: After defeating Pontiff and exhaust Yuria's dialogue in Firelink Shrine.

After the Giant courtyard, there will be an illusory wall on the left side of a stone structure that leads up to the ramparts that reveals a long ladder down. Proceed down the ladder to discover Archdeacon McDonnell to gain the Aldrich Faithful Covenant.

Shrine Handmaid: As you ascend the ramparts you can find the Easterner’s Ashes on a lower rooftop/rampart.

Anri Ending B: Near the large circular lift to Anor Londo, you'll find an illusionary wall just before the lift. Enter it and you'll find another one of Yuria's pilgrim that will give you the Sword of Avowal and tell you Anri is waiting ahead. Head down to altar to find Anri’s body. Interact with it to obtain Anri’s Straight Sword and 3 Dark Sigils.


Part IV


Anor Londo

Blacksmith Andre: At the Anor Londo main entrance, proceed left and you’ll find the long-dead Giant Blacksmith with the Giant’s Coal (grants you Lightning, Simple & Chaos Infusions.)

Blacksmith Andre: Once inside Anor Londo castle, there will be an area with Writhing Rotten Flesh enemies. Next to them will be a chest with a Estus Shard within it.

Anri A: Inside Anor Londo Castle, interact with Anri's summon sign to fight her version of Aldrich. After defeating him, return to Firelink Shrine and exhaust Ludleth's dialogue and he’ll give you Anri’s Straight Sword, stating that she left it for you now that her mission was complete.

Anri A: If you informed Anri of the Smouldering Lake, she will be where Horace was. If you didn't inform her of Smouldering Lake, she will instead be near the entrance of the Cathedral of the Deep. Defeating Anri allows you to purchase her Elite Knight Armor Set from the Shrine Handmaid.

Sirris: After defeating Aldrich, proceed to the room prior to the Curse-rotted Greatwood fight. You will find Sirris’ summon sign just before the giant hole that leads to the Pit of Hollows. You’ll be summoned to fight Holy Knight Hodrick. Defeating him grants you the Sunset Armor Set. You can then also find the Sunset Shield on his grave, which is located outside Firelink Shrine.

Sirris: Rest at Firelink Shrine and Sirris will appear, exhaust her dialogue. Allow her to be your knight and she’ll be able to be summoned for the final three main-area boss fights of the game. Refuse and you’ll find her Hollow in the Pit of Hollows and have to kill her.


Irithyll Dungeon

Blacksmith Andre: In the Irithyll Dungeon, you’ll eventually discover a room that as a Mimic chest. Kill the mimic and it’ll drop an Estus Shard.

Siegward: In the room with the Giant, you'll find Siegward nearby who is trapped in a cell. The key to get to him is the Old Cell Key, which is found in the room you're standing in next to a Crystal Lizard.

Blacksmith Andre: A little further from the previous room, you'll come to an area with several Jailers. In one of the cells you'll find the Profaned Coal (which grants Dark, Blood & Hollow Infusions.)

Shrine Handmaid: In the same room you can also find the Xanthous Ashes.

Karla: One of the cells in the Jailer-room contains Karla, but it’s locked. You’ll find the key in the following area and backtrack here.


Profaned Capital

Firelink Shrine Bonfire: The first bonfire you find will have poor Laddersmith Gilligan’s dead corpse near it. You’ll receive a gesture and an Undead Bone Shard from examining it. (Receive Stretch Out Gesture!)

Descend down the smaller ladder and drop into the lower area using the hole in the wall. Follow this path and you’ll find yourself at a toxic swamp with a herd of Sewer Centipedes.

Orbeck: In the lower-swamp area, ascend to the roof of the building via the ladder and kill the sorcerer NPC to retrieve Logan’s Scroll.

Karla: There will be a stairway on the rooftop that you can proceed into that will eventually lead to a location you couldn’t previous access. You’ll find the Jailer’s Key Ring here, which is what is needed to free Karla.

Siegward: On the roof where the sorcerer-NPC was slain, you can run from the roof and jump through an open window. This leads to the cell that Siegward is locked in. Open it and exhaust his dialogue, he’ll give you a Titanite Slab for saving him.

Siegward: As you head into the Yhorm fight a special cutscene will play with Siegward. Upon defeating Yhorm, come back to the Yhorm boss room later to find Siegward’s Catarina Armor Set, the Pierce Shield, and another Storm Ruler.

SIEGWARD'S QUESTLINE IS NOW COMPLETE.

Karla: Return to where Karla’s cell was and you can now free her and send her to Firelink Shrine. Give her the two Pyromancy Tomes and with some effort, you can also give her the Londor Braille Divine Tome and Deep Braille Divine Tome.

KARLA'S QUESTLINE IS NOW COMPLETE.

Shrine Handmaid: With the Jailer’s Key Ring you've obtained, you can also open a cell that contains the Prison Chief’s Ashes.


Part V


Consumed King’s Garden

Blacksmith Andre: After Dancer of the Boreal Valley head up the ladder and take the first left to reach a lift. Halfway down, jump off to a platform and then head down the stairs to find a Estus Shard.

Hawkwood: Summon Hawkwood for Oceiros, the Consumed King.

[G] After defeating Oceiros, continue on down and you’ll find a gesture on a corpse. (Receive Path of the Dragon Gesture.)


Untended Graves

Fire Keeper: When you reach the alternate version of Firelink Shrine, activate the illusory wall to where Irina typically is and you’ll find the Eyes of a Fire Keeper. These can be given to the Fire Keeper to trigger the End of Fire ending.

Shrine Handmaid: There is another Shrine Handmaid here that sells the Wolf Knight Armor Set, the Priestess Ring, and other merchandise.


Archdragon Peak

Hawkwood: Beat the Ancient Wyvern boss and you’ll receive the Dragon Head Stone.

Hawkwood: You can summon Hawkwood outside the Great Belfry bonfire and he’ll assist you with loads of enemies in the path. Use the Path of the Dragon gesture at the altar at the very top of the mountain and you’ll get the Twinkling Dragon Torso Stone.

Shrine Handmaid: On the way to get the Twinkling Dragon Torso Stone, you can find the Dragon Chaser’s Ashes off to the side.

SHRINE HANDMAID'S QUESTLINE IS NOW COMPLETE.

Hawkwood: Exhaust Andre's dialogue at Firelink. He’ll give you a message from Hawkwood asking you to come to the Abyss Watchers bonfire, proceed there and slay Hawkwood. If you win, you gain the Twinkling Dragon Head Stone. If you lose, Hawkwood takes your Twinkling Dragon Torso Stone. You can battle him as many times as you need.


Lothric Castle

Greirat: From this point on, if Greirat offers to pillage Lothric Castle, refuse. No matter what happens, he will die on this trip. However (if you should permit him to go), on the rooftops of Lothric Castle you can find Greirat's corpse that contains Greirat's Ashes. Give these ashes to the Shrine Handmaiden and she'll now sell all of Greirat's stock.

Firelink Shrine Bonfire: At the bridge with the two fire-breathing dragons, drop off the side of the bridge near the end. An Undead Bone Shard is underneath the bridge.

[G] In the Lothric Castle pray to the Sunlight altar to receive a gesture. (Receive Praise the Sun Gesture!)

Eygon & Irina: If to this point, you have not purchased any Dark Miracles from Irina or not even given her the Londor and Deep Tomes, Eygon can be summoned for the Dragonslayer Armour fight. His body can be found in Irina’s original cell in the Undead Settlement after this fight. You can then purchase Morne’s Armor Set from the Shrine Handmaid.

Eygon & Irina: After defeating Dragonslayer Armour, turn around and you’ll find the Braille Divine Tome of Lothric down a set of stairs.

Eygon & Irina: There are two endings to Irina’s quest: Giving her all 4 Tomes, but not buying any Dark Miracles, you can make Irina a Fire Keeper. She’ll move to the bottom of the tower to the left of Firelink Shrine after you refresh the world and now act as a Fire Keeper, or she will be taken from Firelink Shrine by Eygon and he'll become hostile near Gundyr's area.


Grand Archives

Orbeck: Once inside the Grand Archives, you’ll notice a Crystal Sage. Killing her will give you the Crystal Scroll.

[G] Orbeck: You’ll now be able to summon him for the Twin Princes fight. (Receive Silent Ally Gesture!)

Firelink Shrine Bonfire: In the area of the rooftops where you fight some Gargoyles, there will be a broken window that you have to enter. The Undead Bone Shard will be on this balcony on a dead body in a chair.

Andre: On the very top of the Grand Archives while looking at the stairs to the Twin Princes fight, turn around and go up another roof where the three Gertrude’s Knights are. You’ll find a Estus Shard on the very back of this roof.

Orbeck: After beating the Twin Princes, you can find his body in the Grand Archives.

ORBECK'S QUESTLINE IS NOW COMPLETE.

Sirris: Return to her grandfather’s grave after the Twin Princes fight and you’ll find her body with the Sunless Talisman on it. You can also now purchase the Sirris’ Sunless Armor Set from the Shrine Handmaid.

SIRRIS' QUESTLINE IS NOW COMPLETE.

Leonhard: Head to the Rosaria’s Bed Chamber bonfire and either give her a Pale Tongue or equip the Rosaria’s Fingers covenant item. Refresh the world and Leonhard will now be in this room. Exhaust his dialogue. Refresh the world again and Rosaria will now be dead with a Black Eye Orb on her body.

Leonhard: Proceed to the Princess' Chamber in Anor Londo, The Black Eye Orb will react to this room. Use it and you’ll invade Leonhard’s world. Kill him for Rosaria’s Soul, Crescent Moon Sword, and the Silver Mask. You can also now buy Leonhard’s Armor Set from the Shrine Handmaid. You can either return Rosaria’s Soul to her body or give it to Ludleth for the Bountiful Sunlight Miracle.

LEONHARD'S QUESTLINE IS NOW COMPLETE.


Kiln of the First Flame

Yuria: You can summon Yuria for the Soul of Cinder fight. After the fight, go to Firelink Shrine and where Yuria normally is will now be her Black Armor Set and Darkdrift.

YOEL & YURIA'S QUESTLINE IS NOW COMPLETE.

Quest-line Related Endings:

Ending 1: Simply interacting with the First Flame results in the To Link the First Flameending. This is the standard ending.

Ending 2: If you obtained the Eyes of a Fire Keeper from the Untended Graves area and gave them to the Fire Keeper you can use a summon sign next to the bonfire to trigger the The End of Fire ending.

Ending 3: If you followed the steps to Ending #2, during the final scene you have a short window where you regain control of your character. You can attack the Fire Keeper after the cutscene for a different version of the The End of Fire ending.

Ending 4: If you followed the Yoel/Yuria quest line to this point and “married” Anri, you can usurp the flame by wrestling the flame from its mantle triggering the Usurpation of Fire ending. To progress this option, you must have 8 total Dark Sigils. The 5 from Yoel’s Draw Out True Strengths and the 3 from “marrying” Anri. Simply interact with the First Flame at this point and it’ll activate.


But What do They Look Like?
I know, I know, what's the point of having a 'NPC Questlines in Order' guide if you need to Google what a certain NPC looks like every 10 seconds. That's what this section is for!


1. Fire Keeper - Firelink Shrine, primary source for player leveling.
2. Shrine Handmaiden - Firelink Shrine, primary merchant.
3. Hawkwood the Deserter - Firelink Shrine, exposition machine/side questline.
4. Blacksmith Andre - Firelink Shrine, primary blacksmith and enchanter.
5. Greirat of the Undead Settlement - Firelink Shrine, merchant/side questline.


6. High Priestess Emma - High Wall of Lothric, exposition machine/Way of Blue leader.
7. Ringfinger Leonhard - Firelink Shrine, professional sleuth/side-quest line.
8. Yoel of Londor - Undead Settlement, merchant/multi-step questline.
9. Yuria of Londor - Firelink Shrine, merchant/multi-step questline.
10.Cornyx of the Great Swamp - Undead Settlement, primary pyromancy merchant.


11.Irina of Carim - Undead Settlement, primary miracle merchant.
12.Eygon of Carim - Undead Settlement, multi-step questline.
13.Siegward of Catarina - Undead Settlement, multi-step questline.
14.Anri of Astora - Road of Sacrifices, multi-step questline.
15.Horace the Hushed - Road of Sacrifices, multi-step questline.


16.Orbeck of Vinheim - Road of Sacrifices, primary sorcery merchant/fetch questline.
17.Unbreakable Patches - Cathedral of the Deep, humble merchant.
18.Sirris of the Sunless Realms - Irithyll of the Boreal Valley, multi-step questline.
19.Company Captain Yorshka - Anor Londo, leader of the Blades of the Darkmoon.
20.Karla - Irithyll Dungeon, primary Hex merchant/small questline.


21.Ludleth of Courland - Firelink Shrine, boss weapon/magic merchant.
22.Picklepum the Crow - Firelink Shrine, runs the local swap-meet.
23.Rosaria, Mother of Rebirth - Rosaria's Fingers covenant leader.
24.Holy Knight Hodrick - Undead Settlement, Mound-Makers covenant leader.
25.Old Wolf of Farron - Farron Keep, Watchdogs of Farron covenant leader.


Conclusion


I hope this aided you in your pilgrimage, ashen one!

I've written multiple un-posted guides on my tenure of obtaining 13 FromSoft 100% completions thus far, 6 of which are Dark Souls platinum trophies on PS3/PS4. After much consideration I've begun compiling my knowledge into a series of Dark Souls guides.

It's somewhat tasking attempting to accumulate this information into an simplistic, easy-to-understand guide — but I try. ;)

If you found this guide useful please rate and give it an award! Thank you for your patronage!


You can also check out my other guides on Steam!


22 opmerkingen
Relat 25 apr om 14:06 
Sorry for being a bit late to this, but you get "Chameleon" if you complete the marriage, in the corpse of the guy who gives you the "Sword of Avowal" (he dies automatically)
Owl 15 apr om 0:20 
I love how even Heysel questline is included
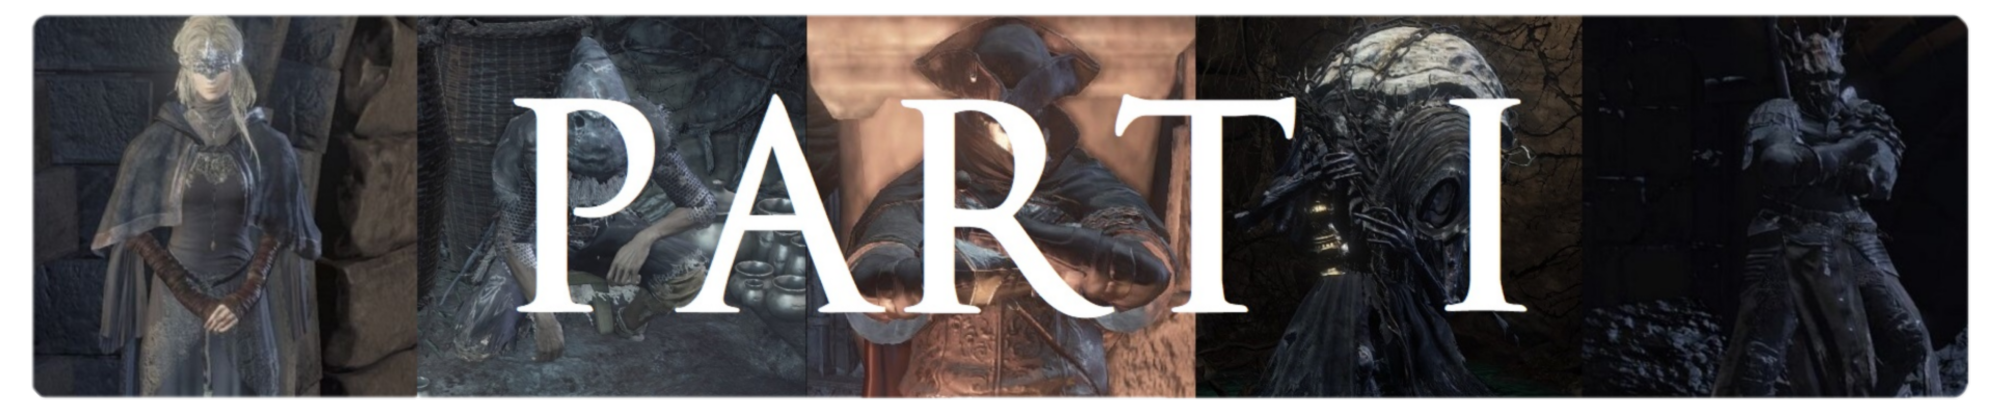
everybody seems to forget about her
L0RKH4N 5 dec 2024 om 7:41 
"Greirat: Return to Firelink Shrine and exhaust Greirat's dialogue. He’ll ask to pillage Irithyll. Only do this after meeting Siegward in Irthyll or if Patches is at Firelink Shrine. If you have neither, Greirat will perish and his ashes can be found in the sewer area.

Patches: Rest at Firelink Shrine after sending Greirat out and Patches will ask you where he went. Tell him and Patches will head out to protect Greirat."

The parts about Patches are not correct. I just found out the hard way by losing Greirat.

My situatoin: Patches sat in Firelink but he didn't ask me, where Greirat went. I read somewhere, that you cannot send Patches, even if he is in Firelink, when you bought Siegwards armour from him. Greirat will die. So even if Patches sits in Firelink, this alone is no indication for the quest to succeed.
FoolishSamurai 27 okt 2024 om 5:07 
dude this is amazing. thanks! :praisesun:
JizzGenerator69 26 jul 2024 om 12:27 
thanks bro
Nixeni 11 apr 2024 om 5:07 
Very nice guide.
I just did my ng+1 following this one to do the quests and get the usurpation of fire ending.
Corpse 6 apr 2024 om 15:21 
Amazing, thank you.
Billy•Pilgrim 16 feb 2024 om 21:05 
Excellent guide, thank you! Was very helpful for me!
Panopticon 7 jul 2023 om 21:35 
Noticed two things missing:
- You get the "Duel Bow" from Pale Shade, not the "Proper Bow"
- Before defeating the Soul of Cinder, you can give Orbeck's ashes to Yuria after the end of his questline to receive the Morion Blade, instead of killing him.
$∃@ℕ 7 jul 2023 om 2:42 
iam just gonna favorite this guide just incase i cant do 100% quests