Terraria

Terraria

Not enough ratings
Terraria Boss Ideas 11 [61-80]
By Okami Tomato
Not really sure how these went from 3 month gaps to like 10 days? University maybe?

For the few of you that don't know what these are Boss Ideas is a series of boss designs, as the title suggests. They are themed around mods instead of vanilla since it gives a lot more freedom in what I can make.

As usual this is not a guide and is simply a place to put ideas in a clear and concise way, and also the theming is now moreso mod-themed than something for vanilla Terraria

Anyways, onto the bosses :)
   
Award
Favorite
Favorited
Unfavorite
[Prior Notes]
So, with the last page having a lot of large bosses, I've had to step back a little and do a few smaller ones. Don't worry, though; the fights will still have the same scale as the larger ones did, and the sprites will still be detailed, just a little smaller. Of course there are still a few bigger bosses here, just not as many as before.

Also fixed the small palette issue that happened in the last page. Admittedly tried cutting corners and it made some sprites look a bit... plastic-y? But that should be gone now :)

Oh! We also got a few fan bosses again for the first time in a while, so I hope you look forward to seeing those later-on in the page

Anyways, onto the bosses
[Debuffs]
The debuff list, back again

Suppressing Slime
Effect: Wing flight time and acceleration reduced by around 25%
Tootip: Your wings are all slimy and gross
Sources: Slimera (Summon)

Golden Flames
Effect: Deals 25 damage per second and reduces damage by 10%
Tooltip: Magical golden flames scorch you
Sources: Skye, Reverence

Greed's Curse
Effect: Reduces movement speed by 10% and wing flight time by 20%. Additionally deals 20 damage per second. If the player is hit by another attack that would inflict this debuff while still under its effects, the player will be inflicted with Greed's Curse II for 2 seconds
Tooltip: Greed's curse haunts you
Sources: Greed King

Greed's Curse II
Effect: Player is turned into a gold statue and left immobile until the effect expires
Tooltip: You have been turned to gold by Greed's curse!
Sources: Greed King*

Chaos Ember
Effect: Deals 30 damage per second to the player, and increases their damage vulnerability by 10%
Tooltip: Unnatural flames scorch you...
Sources: Levialous - Half-Complete, Oblivion, Levialous - Broken, Scavenger

Unstable Magic
Effect: Deals 20 damage per second
Tooltip: You are surrounded by pure magic
Sources: Amazon (Rematch), Eudeus, Stardust Magus, Geresso, Solar Scourge, Eharas, Nazar

Purifying Flame
Effect: Deals DPS based on the player's current health compared to their max health
Tooltip: Purified by the flames...
Sources: Reverence

Heavy Gravity
Effect: Reduces flight speed by 33% and max flight time by roughly 60%
Tooltip: Your wings feel heavy
Sources: Arachking (Summon), Taboo (Summon), Crimtaminator (Summon)

Blinding Light
Effect: Deals 16 damage per second. While in effect the player radiates light akin to a shine potion, and the player's screen has a white hue that makes it a little harder to see.
Tooltip: Blinded by the light
Sources: Solar Flare Wyrm, Eharas, Rift
61 - Creep

Appearance: A large skull with two arms protruding from the mouth. The arms are long and slender for their size; acting as Creep's legs.

Summon: Use the Infested Skull in Pre-Hardmode. It will be in a dormant state until attacked. Once the world is in Hardmode it has a rare chance of appearing in the underground/caverns at night, or in a spider den at any time, but can no longer be spawned with the Infested Skull.

Fought: Pre-Hardmode
Specification: Pre-Boss
Special: No Summon Needed (Hardmode Only)
Progression: No

Stats:
Health:
-1,650 (2,800) (3,570) (Creep)
-5 (8) (11) (Spiderling)
Attack:
-40 (80) (Melee)
-25 (50) (Oozeball, Spiderling Melee)
Defence: 5

Attacks:
Creep mainly just slowly walks towards the player, stopping frequently to use its attacks. It has a cooldown after attacking before it can begin walking again. It can be blocked by solid objects such as walls and doors.
-It may leap towards the player. This leap can pass through blocks. Unlike other leap attacks it does not become more common if the player is far away.
-It may launch a stream of 3 balls of ooze at the player from its mouth
-It may release 1-3 small spiders, called Spiderlings, from its mouth. These simply act like Wall Creepers but are smaller, faster, and have significantly less HP.

Defeat: Explodes into gibs. Spiderlings remain aggressive even after Creep is slain. (Also drops 4-7 Spiderlings when killed.)

Drops:
Creep has a chance to drop a sword or a bow, but will otherwise only drop coins. This feature remains the case even when encountered naturally in Hardmode.
In Expert Mode it can drop the Spider Charm that reduces the spawnrate of enemies in spider dens and reduces the amount of speed lost when passing through cobwebs.

Lore:
A spider-like monster that uses a giant skull to protect its body. Unfortunately, it has still lost most of its legs due to the skull's inability to protect its legs in the same ways it can defend its body.

Hints:
-Simply keeping a distance from Creep makes the fight immensely easy. It has very few means of keeping up with players, or especially reaching players on high-up platforms.
-Fast firing but low-damage weapons, such as the Minishark, can make quick work of Creep's Spiderlings and render them a nonissue
-Creep actually deals a heavy amount of damage for a boss fought even before the Eye of Cthulhu, so prioritise dodging over damage. Its health is fortunately low enough to end fights quickly as well
--Its stats do not increase when encountered in Hardmode, making encountering the boss a nice means of earning some extra cash.

Extra Info:
-Despite Creep having only 2 legs, it is still a spider as evidenced by its spider minions, lore entry, and its primary spawning locations when able to be spawned naturally in Hardmode.
-Despite Creep having unique spawning mechanics in Hardmode, it does not receive any buffs when encountered in its Hardmode form.
[Added: 12/5/21]
62 - Sunny
Inspired by an event in the (former) Technological Terror Discord

Appearance: A yellow-haired girl with mildly tanned skin and mostly green and brown clothing. Her appearance seems human.

Summon: Plant and destroy a Sparkling Sunflower. Sparkling Sunflowers have a rare chance to replace regular sunflowers for a single day cycle or be planted as-such. Sparkling Sunflowers return to normal at night, and Sunny will also despawn once it becomes nighttime.

Fought: Pre-Hardmode
Specification: Post-EoC
Special: Special Summon
Progression: No

Stats:
Health:
-2,450 (3,750) (4,781) (Sunny)
-20 (35) (50) (Vivid Sunflower)
Attack:
-30 (48) (Melee)
-19 (35) (Seeds)
-26 (43) (Seed Ball)
Defence:
-7
--+5 (per Vivid Sunflower active)

Attacks:
Sunny will constantly be running and jumping around onto nearby platforms that she can reach, only ever stopping to launch an attack at the player
-She may throw down a few seeds that, after a short delay, grow into 'Vivid Sunflowers'. These deal no damage to the player, but buff Sunny's defence by 5 each while active. Up to 4 may be alive at a time before Sunny stops summoning them.
-She may jump into the air and rapidly throw 5 seed projectiles at the player
-She may summon a ball of seeds in her hands that she throws at the player. The ball is affected by gravity and explodes into a random burst of seeds on impact with a solid object (the ball also releases seeds randomly as it travels in Expert Mode).
-She may throw an inaccurate and random clutter of seeds upward that are affected by gravity.

Defeat: Sent tumbling away, rolling in the opposite direction of the player.
After her defeat she will move in as a town NPC. She sells a variety of plant-themed items, mainly weapons and armour, and can buff the Dryad's Nature's Blessing if in range.

Drops:
Primarily just drops a selection of random items that her NPC counterpart sells.
In Expert Mode she will also drop the Sunny Seed which makes it so the Happy! buff caused by Sunflowers also grants very mild buffs to damage and damage resistance.

Lore:
Sunny is a half-dryad, hence her otherwise human appearance but still distinct connection to plants. She didn't really know her parents as she was simply raised by a family of dryads before the war against the Moon Lord, which she was too young to remember. Her favourite plant is the Sunflower.

Hints:
-The Sunflowers Sunny spawns are easily the most dangerous aspect of the fight. Their defence buffs can stack up easily; bringing Sunny's defence up to a maximum of 27 which can be hard for many early-game weapons to penetrate.
--AoE and Piercing, or anything that provides ample damage to destroy the Sunflowers fast, is recommended to limit the number of active Sunflowers at any given time.
-This is one of few fights best kept more 'contained' in a smaller arena. Having a lengthy arena can cause the player to lose track of the Sunflowers, making the fight needlessly harder.

Extra Info:
-Unlike most bosses that have NPC counterparts, the NPC version does not disappear when the boss variant is summoned. Instead she will look panicked and have a drastic change in dialogue.
-Sunny's physical design is based on that of a sunflower. Her yellow hair, brown top and green shorts mimic the main three sunflower colours. Not to mention Sunny's name also basically being based on 'sunflower' as well.
[Added: 12/5/21]
63 - Obelisk

Appearance: A giant... obelisk? It has a total of 4 shards broken away from its body that look like smaller versions of the boss itself.

Summon: Use the Desecrated Obelisk. The item requires an Obelisk to craft, thus requiring the player to likely die multiple times in order to get the correct tombstone, or to kill various town NPCs in Hardcore

Fought: Pre-Hardmode
Specification: Post-EoW
Special: Pesudo-Joke Boss
Progression: No

Stats:
Health: 3,865 (6,000) (7,650)
Attack:
-44 (67) (Melee)
-25 (42) (Shard Melee)
Defence: 15

Attacks:
Obelisk will float after the player, usually trying to stay directly above them. It will often attack either with its own body or using its 4 smaller, broken shards as projectiles. The shards will return to Obelisk after being used as projectiles.
-It may launch all of its shards at the player rapidly. They spin in-place once after being thrown before returning to Obelisk
-It may fly above the player and drop out of the sky, trying to crush the player beneath it
-It may throw itself at the player, with its shards at its sides forming a 'v' shape. If it hits a solid object like a block during the charge the 4 shards are launched away from it in either the cardinal or ordinal directions
-It may launch its 4 shards in a narrow arc towards the player. They return to Obelisk faster than normal at the end of this attack

Defeat: Shatters into gibs. The Shards that spawn with it will simply drop out of the sky, acting as gibs themselves.
Defeating the Obelisk allows for Golden Obelisks to be dropped when a player or Hardcore NPC dies. The conditions are the same as for all other gold tombstone variants.

Drops:
Primarily weapons themed around a shiny, black marble; the same marble the Obelisk itself seems to be made of. Primarily these include a throwing knife, a sword, a bow and a summoner staff that summons shards that charge at enemies.
In Expert Mode it also drops the Marble Slab which will block the first damage taken during a boss fight before breaking; regenerating only when no bosses are currently active. It cannot be un-equipped in its broken state.

Lore:
A large tombstone seemingly possessed by the restless soul buried beside it. Angered by years of neglect and disturbed from its slumber by careless behaviour, it seeks to bury others 6 feet under as well with its heavy body.

Hints:
-Obelisk's projectiles will return to it once launched, so do not assume dodging the initial attack will keep you safe.
-Obelisk can only attack when its shards return to it; giving clear visual indications to when it is incapable of attacking the player and is left open and vulnerable
-Because the boss cannot be circled due to it staying above the player, a long arena with a few rows of platforms is best for optimal dodging room.

Extra Info:
-The Obelisk was primarily based on the joke of the tombstones actively trying to kill the player, which eventually became the Obelisk because it was my 2nd favourite tombstone design
--Conveniently, it just so happened that Golden Obelisks do not currently exist in the game, allowing me to add an extra silly detail once the boss is defeated
-There was once a plan to make Obelisk's Expert drop the Golden Tombstone instead of a bonus upon its defeat and instead of the Marble Slab. This plan was scrapped because, despite being a joke boss in concept, its fight is still mostly serious
[Added: 12/5/21]
64 - The Descendant
A concept suggested by Slayer via Discord


Appearance: A monster consisting of purely hands and a head. It seems to be made out of the same material as the meteor and its accompanying Meteor Heads; though a lot smoother. It has cracks in its body displaying visible, flowing lava.

Summon: Use the Meteor Chunk at the surface. The player does not need to be near a meteor to use the item, though it is crafted using raw pieces of Meteorite and thus requires one to be partially mined to summon it.

Fought: Pre-Hardmode
Specification: Post-EoW
Special: Fan Idea
Progression: No

Stats:
Health: 3,650 (5,750) (7,331)
Attack:
-36 (70) (Melee) (Inflicts On Fire! - 33 (50)%)
-27 (45) (Fireball) (Inflicts On Fire! - 20 (33)%)
Defence: 10

Attacks:
Descendant will try to float near to the player when possible, occasionally trying to ram them to deal contact damage if it ever gets close enough to possibly do so.
-It may use one of its disembodied fists to 'punch' towards the player. Once the hand retracts back to him he slams it into the ground if near enough to it
-It near to the ground he may move near to the player quickly and slam his head into the ground. This launches fireballs from the ground over a range of 5 blocks to the left and right of where the head lands.
-He may spit out a cluster of fireballs towards the player. These act like Flower of Fire projectiles; being affected by gravity and bouncing as they travel
-He may charge at the player over a long distance, shrouded in fire. He has a short cooldown after this attack (except in Expert Mode).
Once below 50% health there is a chance that he will 'double-up' on attacks; using the same attack twice in rapid succession. This does not include the charge attack (except in Expert Mode due to the lack of cooldown).

Defeat: The hands shatter as the face looks shocked. The back of the Descendant's head cracks; creating a stream of fire that launches the Descendant skyward at a rapid pace.

Drops:
A few meteorite pieces, and some Meteor Bars as well. Can drop a melee weapon that launches fiery fists at enemies, a space gun-type weapon that turns regular bullets into meteor bullets, and a summoner staff that summons fiery fists similar to the Descendant's own.
In Expert Mode he also drops the Astronaut Badge. This makes Meteor Heads friendly and reduces the low gravity effect in space.

Lore:
A meteor monster forcibly brought down to the planet after being stuck by and getting stuck to a meteor as it began entering the atmosphere. Justifiably ticked-off by his experience.

Hints:
-Yes, he still deals contact damage during the defeat animation. It may be best to wait a short while before grabbing the loot to avoid embarrassing, unnecessary damage
-Dashes or other forms of fast horizontal movement are very helpful for dodging the head slam attack's fireballs
-Having the fight mainly take place on a series of platforms far away from solid blocks can severely limit the effectiveness of his fireball split attack. Note, however, that the Descendant can use semi-solids freely for the fist and head slams; passing through or hitting them as he deems necessary.

Extra Info:
-The concept for the Descendant was provided by Slayer, who referred to the Descendant as "A monstrous creature that descended from a meteor". The design was made by me and approved by Slayer shortly thereafter
-Aspects of the Descendant's design were inspired by a boss from the original Rayman game, hence the free-floating limbs
[Added: 12/5/21]
65 - The Leech

Appearance: A large, scaly worm-like monster. It lacks almost any significant features aside from a large mouth filled with teeth.

Summon: Use the Rotten Chunk anywhere in the world. Most of the ingredients are Pre-Hardmode, aside from a small amount of Ichor or Cursed Flames. There are no spawn requirements for the Leech despite the summon materials, however.

Fought: Hardmode
Specification: Post-WoF
Special: No
Progression: No

Stats:
Health:
-16,500 (23,450) (29,899) (Leech)
-40 (65) (80) (Mini-Leeches)
Attack:
-60 (110) (Leech Melee) (Inflicts Bleeding - 100%, Poisoned - 50 (100)%)
-32 (56) (Mini-Leech Melee) (Inflicts Bleeding - 33 (50)%)
-36 (62) (Debris)
Defence: 15

Attacks:
The Leech mainly chases the player. It accelerates and decelerates slowly, making its turns appear clumsy and 'slippery'
-It may accelerate rapidly over a short distance. During this time it cannot turn. This usually only happens for around half a second before returning to normal speed and is always aimed directly at the player
-It may burrow into some nearby ground. Once the player gets close to any sort of ground, semi-solid or otherwise, a dust cloud will erupt from it promptly followed by the Leech
-It may fly up and off-screen. After a short delay it will drop from the sky above the player. If it hits a solid block as it falls it will also launch chunks of debris in random directions
-It may spew out several Mini-Leeches from its mouth. These look like smaller versions of the Leech and chase the player in a very similar manner.

Defeat: Explodes into gibs. Any live Mini-Leeches continue attacking the player even after the Leech itself is killed.

Drops:
A range of items based on meat and bones, including a magic item that spews defence-lowing ichor in the form of bubbles. Can also drop most ingredients towards its summon and a variety of random items otherwise often found in gold and surface chests as additional loot such as potions, ammo, cans of worms and plants.
In Expert Mode it also drops the Leech's Gullet that charges up based on the amount of enemies slain recently. The bag grants buffs to damage and defence but lowers speed when full and, as it slowly empties by moving and taking damage, grants more speed in exchange for reduced damage and defence.

Lore:
A massive leech-like beast that can typically be found scavenging off of downed monsters; draining them rapidly of any remaining blood and vitality. It is unknown just how much food it has to consume in order to retain its size, but it always seems bloated and full.

Hints:
-Due to the 'slippery' nature of its flight, the Leech can be circled quite easily. Teleports and dashess, or any other forms of 'burst movement', can also throw off its chase.
-Infinite flight methods like certain mounts can stall time during its burrow attack. This isn't permanent, however, as the radius needed for it to emerge will increase after a few seconds and continues to do so until the player is in reach.
--The extra time is still helpful for potion cooldowns and regen, however.
-Piercing and AoE weapons can shred through the Mini-Leeches as they are spawned, making them a nonissue

Extra Info:
-The speed of the Leech's squirming is determined by its velocity. Faster movement means more squirming.
-Despite the name the Leech is, in fact, not a leech. This is made apparent mainly by its scaly body, but other aspects such as size, lack of link to water, and tooth layout can also be analysed.
[Added: 12/5/21]
66 - Mr. Spindles
(Prior warning to arachnophobes with active imaginations: you might want to skip the 'Attacks' heading)


Appearance: A massive spider. Its body is a mixture of a dark grey and a bright greenish yellow. It has 6 visible eyes on its face that are scattered asymmetrically.

Summon: Use the Infested Skull in Hardmode. The item will only work inside of a spider nest, even though Mr. Spindles can be lured out after being summoned.

Fought: Hardmode
Specification: Post-WoF
Special: Returning Enemy
Progression: No

Stats:
Health:
-14,200 (21,000) (26,775) (Mr. Spindles)
-20 (35) (50) (Paraspiders)
Attack:
-54 (108) (Melee) (Inflicts Venom - 33 (100)%)
-44 (82) (Paraspider Melee)
-40 (75) (Fangs) (Inflicts Venom - 20 (33)%)
Defence: 10

Attacks:
Mr. Spindles will be almost always chasing the player. Like other spiders it can climb on walls to reach players who would otherwise be out of its reach, and can even create temporary walls of webbing if there aren't any suitable walls nearby already.
-It may launch a large cluster of fang-like projectiles from its mouth. After a second of travelling they become affected by gravity
-It may accelerate and charge at the player up to 3 times in succession
-It may back away from the player a little ways. Then it fires an arc of 3 fang projectiles, followed by a stream of fangs for roughly a second, and finished up with another arc of 4 fangs.
-Its abdomen may swell and several small yellow spiders named 'Paraspiders' can be seen burrowing out from beneath its skin. These spiders will chase the player continuously at a quick pace
Once below 40% health Paraspiders will automatically begin crawling out from its abdomen slowly, even during other attacks. The amount is increased even further at 20% (and again at 10%).

Defeat: Mostly explodes into gibs, though drops its abdomen as a 'Spider Sack' that can be attacked and destroyed. Any Paraspiders will continue attacking the player even after Mr. Spindles' death.
Attacking the Spider Sack causes it to burst open; releasing massive swarms of Paraspiders. There is no reason to do this as destroying the Sack gives no actual benefits to the player.

Drops:
Spider-themed items. It can drop a bow, a sword and a magic tome that all primarily specialise around inflicting Venom onto enemies. Mr. Spindles can also drop Spider Legs in large quantities when killed
In Expert Mode it drops the Spider Sack that spawns clusters of spiders when the player takes damage. These spiders are all launched at nearby enemies and the quantity is based on the damage the player receives.

Lore:
A colossal spider, able to achieve its size despite the females of the species often being the large ones. Its large size has, unfortunately, attracted unwanted attention from parasites. It does not seem pained by the pests that have taken refuge in its abdomen, and has instead formed an almost symbiotic relationship with them.

Hints:
-Mr. Spindles can drop a large quantity of Spider Legs for early Hardmode summoners. This can be a lot faster than slowly farming Black Recluses if the player saved a few Infested Skulls from Pre-Hardmode.
-Mr. Spindles' web walls do not count as cobwebs and will not slow the player. Additionally, they disappear after around 15 seconds of not being used.
-AoE and piercing weapons are highly valuable for dealing with the large amounts of Paraspiders that can build up without proper maintenance

Extra Info:
-I am so sorry to anyone who doesn't like spiders having to read about its 'summon' attacks.
-Mr. Spindles was first actually seen as a regular enemy during the Army of Arachnids event from Boss Ideas 1; the same place that both the Arachking and Charlotte originated from
-Mr. Spindles uniquely shares its summoning item with Creep, despite the lack of an obvious connection
-Despite the title 'Mr.' suggesting the boss is male, it is still capable of 'hatching' smaller spiders
--However, their name of 'Paraspider' may instead suggest a more parasitic relationship; with the Paraspiders simply being pests that have infected Mr. Spindles
[Added: 12/5/21]
67 - Lil' Planet

Appearance: A small planet surrounded by clouds. It has 3 mountain-like formations on its back and a hole at the front for an 'eye'. The planet almost looks like Earth.

Summon: Use the Globe at the surface or in space. The boss can be taken anywhere once summoned, however.

Fought: Hardmode
Specification: Post-Mechanicals
Special: No
Progression: No

Stats:
Health:
-28,000 (40,000) (51,000) (Lil' Planet)
-40 (80) (120) (Drones)
Attack:
-48 (85) (Melee)
-46 (82) (Fireball, Flame Trail) (Inflicts On Fire! - 50 (100)%)
-54 (94) (Drone Explosion) (Inflicts On Fire! - 0 (33)%)
-42 (76) (Leaves)
Defence: 16

Attacks:
Phase 1:
Lil' Planet flies near to, but never intentionally into, the player when not attacking. Despite its blue and green exterior most of its attacks are fire-themed; being launched from its exposed core.
-It may launch up to 3 fireballs at the player in succession that decelerate as they travel until they stop. Lil' Planet then charges at the player before sucking all 3 fireballs back into its core.
-It may charge at the player 3 times in succession
-It may launch several drones from its surface. These drones are small, rocket-shaped enemies that fly after the player and explode on contact with the player, a solid block, or upon running out of health
-It may spin around and launch a cluster of leaves at the player. These gradually slow down before despawning
Once reduced to 30% health it will enter its 2nd phase
Phase 2:
Lil' Planet becomes panicked and begins charging at the player constantly. These charges all leave short-lived trails of fire. Lil' Planet keeps charging at the player until it is destroyed.

Defeat: Explodes into gibs, complete with a fiery explosion from its core

Drops:
Core Fragments, which are primarily just used for crafting armour and a set of weapons themed around nature. They are often upgrades to existing weapons, as well, using the element of the weapon used as a material
In Expert Mode it also drops the Pocket Ops; a tiny building that can be equipped as an accessory that sometimes launches homing drones at enemies like the ones Lil' Planet itself summons

Lore:
An entity masquerading as a planet so convincingly that life has begun to grow and develop on its surface.

Hints:
-The boss itself is very small, making it hard to hit. Homing weapons are highly useful for the fight, however, due to their consistency
--Piercing and AoE weapons can also be useful if it summons a lot of drones over a short space of time
---And thus melee-oriented summons, due to having both of these features, are very, very useful for this fight

Extra Info:
-The clouds that follow Lil' Planet seem to be coming from its surface as opposed to simply floating around it as clouds would normally do
-The eye/core is the only part of Lil' Planet's actual form that can be seen; the water and greenery are all just part of a disguise
--This does, however, beg the question as to how Lil' Planet's gravity works, as the water does not simply flow off of its surface
[Added: 13/5/21]
68 - Water Spirit
Phanta has since made her a theme so go check it out: https://soundcloud.com/spectral-apparition/enchanting-waves

Appearance: A remake of the Water Spirit. As with before her entire body is composed of water, though now she's wearing a sailor suit and has a fully-formed body as opposed to her legs only being partially-formed like they used to be

Summon: Use the Dew Necklace. The item can be equipped as a vanity accessory, but does not spawn the Water Spirit. There are no spawn conditions for the fight.

Fought: Hardmode
Specification: Post-Mechanicals
Special: Returning Boss
Progression: No

Stats:
Health: 30,000 (43,500) (55,463)
Attack:
-40 (80) (Melee)
-52 (90) (Water Bolts, Water Stream)
-64 (107) (Water Ball)
Defence: 12

Attacks:
The Water Spirit will fly around above the player, not sticking to any particular route or movement pattern.
-She may shoot an arc of 8 water bolt projectiles. Instead of firing them all at the same time she fires them in rapid succession starting from either end and working across to the other
-She may throw a large but slow-moving ball of water towards the player. When damaged this water ball will launch a smaller, faster ball of water at the player. (In Expert Mode the large water ball can also delete projectile that hit it)
-She may launch an inaccurate cluster of water bolts at the player at random speeds and angles.
-She may form into a ball of water and then charge at the player, reforming back into herself at the end of the charge
-She may launch several balls of water randomly around herself that eventually stop. After a short delay they all burst into random streams of water, like those of the Aqua Sceptre.

Defeat: Forms back into a ball of water and drops downward, passing through blocks.

Drops:
Water-themed items, as you may have guessed. Includes a bow, two magic tomes, and a summoner staff that summons mini Water Spirits to attack enemies.
In Expert Mode she also drops the Enchanted Dew Necklace that transforms the player into a small version of the Water Siren. This grants a large mobility bonus in water and a mild damage reduction

Lore:
A magical entity made entirely of water, it seems. After finding a missing shipment of books she decided to embrace 'human culture' and 'found' a sailor outfit and a skirt, which she now wears constantly in an attempt to fit in.

Hints:
-The main hint is simply to fight her in an open area. Her water bolt projectiles can bounce off of walls, so the less walls the better.
-Homing shots will not intentionally target her water ball attack, and thus can move around it. Though it is probably still easier to just reposition yourself once it is thrown at the player

Extra Info:
-The Water Spirit initially appeared in Boss Ideas 5, though managed to weirdly become popular again with the last few weeks, thus was redesigned
-The 'missing shipment of books' is probably manga, considering the outfit the Water Spirit deemed to be a generalisation of 'human culture'
[Added: 13/5/21]
69 - Cinder

Appearance: A lady made seemingly entirely of ichor, wearing a black dress. Cinder's hair is significantly larger than she is, over double her size, forcing her to keep floating.

Summon: Use the Ichor Strand. Due to the more limited ways of getting Ichor in a Corrupt world, it is generally a lot easier to get the summon in a Crimson world. The item can be used anywhere, however.

Fought: Hardmode
Specification: Post-Plantera
Special: Returning Boss
Progression: No

Stats:
Health: 47,500 (69,000) (87,975)
Attack:
-44 (72) (Melee)
-35 (62) (Ichor Sphere)
-38 (67) (Ichor Stream)
-52 (78) (Ichor Typhoon)
Defence: 20

[All of Cinder's attacks inflict Ichor - 100%]

Attacks:
Cinder will generally try to float close to the player, sometimes trying to align horizontally with the player and other times simply trying to stay within range of the player.
-She may launch a stream of ichor spheres at the player. After around 1.5 seconds they will each split into 3
-She may summon several ichor spheres beneath the player that, after a short delay, begin rapidly accelerating upwards
-She may summon a large ichor sphere in her hands which she throws at the player. After a few seconds of travelling or upon hitting a solid object it bursts into random streams of ichor
-She may summon 2-3 projectiles that look and act like golden Razorblade Typhoons; chasing the player rapidly until they despawn
-She may summon a large ichor sphere beneath her, hops up, and land on it. When she lands on the sphere it explodes into a burst of 12 ichor sphere projectiles

Defeat: Flinches, and falls out of the sky. Ignores blocks as she falls; simply falling off-screen.

Drops:
A range of Ichor-themed weapons. Throwing knives, a gun-esque ranged weapon, a magic staff and a summoner that summons a sentry that looks like Cinder that launches ichor spheres at enemies
In Expert Mode she also drops the Ichor Reactor; an item that gradually consumes any Cursed Flames, Pixie Dust or Ichor in the player's inventory over time while granting a range of stat buffs, though debuffs the player once the resources are exhausted for a few minutes.

Lore:
The only remaining entity created from the Ichorian Spark after the others were systematically destroyed. Cinder's unique species and unmistakable appearance has made her somewhat of a celebrity in certain circles.

Hints:
-All of Cinder's attacks inflict Ichor, so it is recommended to play more defensively for a while after being hit to allow for the debuff to expire, thus weakening Cinder's next attack
-Trying to keep moving away from Cinder is not recommended due to the 'ichor sphere stream' attack being generally more dangerous when the player is away from Cinder

Extra Info:
-Cinder had originally appeared in Boss Ideas 5 among the Netherrise Armies; a series of monsters made of hellstone and the 'Ichorian Spark'; a material made using elements of the hallow, corruption and crimson fused together
--Cinder is said to be the 'only surviving member', thus stating this fight would canonically take place after the Boss Ideas 5 Netherrise Army bosses
--However, with Ichorian Spark returning, it may mean someone else is returning as well...
[Added: 13/5/21]
70 - Temple Guardian

Appearance: A construct made of the temple's bricks and a glowing orange, slightly transparent material. Its main body is small and spherical and has a large eye at the front, and it has 4 large wings attached to its body

Summon: Mine the Lihzahrd Altar inside the jungle Temple. Breaking the Altar with actuators or mining it after it is placed outside the temple will not spawn the Guardian. Breaking the Altar multiple times in the temple can summon multiple Temple Guardians.
If spawned while Golem is active it grants the Golem additional movement and attack speed. It also grants Golem's head and body 10% Damage Resistance and 20% for its fists. These buffs remain even after the Guardian is destroyed

Fought: Hardmode
Specification: Post-Golem
Special: Unusual Summon
Progression: No

Stats:
Health: 48,500 (70,000) (89,250)
Attack:
-80 (130) (Melee)
-65 (102) (Laser)
-50 (86) (Fireball) (Inflicts On Fire! - 67 (100)%)
-100 (145) (Deathray)
Defence: 40

Attacks:
The Temple Guardian will fly to a point ordinal to the player with every attack. It does not move to the side opposite where it currently is; instead moving to another adjacent corner.
-It may throw a large fireball towards the player. The large fireball explodes into 4 smaller fireballs launched out randomly after a few seconds, with the smaller fireballs acting like Golem's.
-It may charge at the player 3 times in succession, creating after-images as it charges
-It may fire a stream of lasers towards the player
-It may charge up and fire a deathray ordinally in the direction of the player. While firing the deathray the Guardian is pushed backwards, away from the player
As the Temple Guardian loses health its attack speed gradually increases. (In Expert Mode it will also summon stationary 'Guardian Visions' every 30% health lost that stay in-place and fire lasers at the player infrequently, speeding up as the Guardian loses health)

Defeat: Explodes into gibs. (Any Guardian Visions active will disappear into golden particles if active when the Guardian is defeated)

Drops:
Mainly drops Solar Tablet Fragments and Lihzahrd Stone Plating; with the latter material being used to upgrade a vast array of other earlier Hardmode weapons.
If killed alongside the Golem it will additionally drop the Golem Power Cell which summons a mini Golem head when equipped that shoots lasers at nearby enemies.
In Expert Mode it drops the Guardian Core which summons a mini Guardian that dashes and shoots at enemies. If spawned alongside the Golem Power Cell's Golem head both it and the head attack faster and deal more damage.

Lore:
A defence drone created initially to defend the Temple long ago when its entrance saw the light of day. As the Temple became buried and the number of threats to their civilisation dwindled the Guardians were deactivated to preserve energy.

Hints:
-Despite the Guardian's fast movement speed homing weapons aren't a necessity, since it stays at predetermined locations compared to the player.
-It is recommended to take the Guardian out of the temple when fighting it, as the temple's limited space makes dodging a lot harder if it hasn't been properly excavated in advance.
-The player could choose to weaken the Golem in advance before summoning the Guardian if trying to obtain the Golem Power Cell.

Extra Info:
-The main inspiration for this boss was the idea of a 'Temple Guardian' that was intended to exist within the same vein as the Dungeon Guardian. Eventually it was moved to being a boss instead of a hazard and gained an entry
-The Guardian's design is similar to the Soulkeeper of Flight; being a small, spherical creature with 4 large wings that make up most of its size
[Added: 13/5/21]
71 - Geostorm

Appearance: A large worm-like boss coated in massive plates of Granite. Geostorm's actual body is mostly light blue and glowing, similar to the Granite biome's enemies.

Summon: The Radiant Geode must be used in a Granite biome to summon Geostorm. He can be taken anywhere underground, but will enrage if taken to the surface; gaining increased speed and 33% increased damage resistance, as well as an aura around all of its segments that inflict Electrified

Fought: Hardmode
Specification: Post-Golem
Special: Returning Boss
Progression: No

Stats:
Health:
-80,000 (145,000) (Geostorm)
-2,000 (4,000) (Plating)
Attack:
-100 (160) (Head Melee) (Inflicts Electrified - 100%)
-70 (120) (Body Melee, Lightning Orb, Geostream) (Inflicts Electrified - 100%)
-58 (105) (Vortex Lightning)
-55 (100) (Laser, Lightning Bolt)
-0 (0) (Electrified Aura) (Inflicts Electrified - 100%)
Defence:
-42 (Geostorm)
--50 +20% Damage Resistance (Plating)

Attacks:
Geostorm, like most worms, will burrow after the player at high speeds; attempting to ram into them.
Geostorm's body segments are each individually coated in large plates of Granite that need to be broken before Geostorm himself can actually be damaged. Breaking a plate makes that segment vulnerable, but also gives the segment an aura that debuffs the player with Electrified if they get too close, as well as a slight movement speed buff
-Geostorm may release a lightning orb from its head that looks and acts like LC's
-Geostorm may launch lasers at the player from all of its segments. Segments with broken plating also fire a 2nd laser in a random direction
-Geostorm may surround its whole body temporarily with the 'Electrified aura' and accelerate, trying to charge at the player. After a few seconds he reverts back to normal
-Geostorm may launch small lightning bolt-like projectiles at the player from its head. Each of these, when hitting a solid object within range of the player, split into 4 smaller lightning bolt projectiles that are launched in either the cardinal or ordinal directions
-He may charge a lot of electricity in his head for a few seconds. Once fully-charged he will attempt to launch a stream of lightning between himself and the player, called the Geostream. It can only be evaded by getting far enough away from Geostorm's head once it is fully-charged, as the Geostream is effectively a 'hitscan' attack

Defeat: Explodes into gibs. Any plating left on its segments also shatters into its own set of gibs

Drops:
Granite and electric-themed weapons. A sword, summoner whip, gun, rocket launcher, bow, and a magic tome are possible drops.
In Expert Mode it also drops the Geocore which, when equipped, launches streams of electricity towards nearby enemies; rapidly dealing damage

Lore:
The eventual victor of a lengthy quarrel between two cavernous biomes. After its victory it returned to a dormant state for a long time, waiting for another challenger to disrupt its home.

Hints:
-The Geostream is Geostorm's most generally-dangerous attack, so when the player sees sparks coming from its head it is a signal to keep away. The timing between being fully-charged and launching the Geostream is roughly a second, but getting out of range at any time during that will disrupt and cancel the attack
--Teleportation is, by far, the easiest way to do this. Simply teleporting out of its effective range once it is charged is an effective means of dodging the attack
-Keeping away from Geostorm as much as possible is recommended, especially later-on in the fight, due to both the Geostream attack and the aura its segments gain when their armour is broken
-Piercing weapons work against Geostorm and its armour and is thus recommended.
-Sadly, trying to make a large open area to trap Geostorm at the bottom of an arena will not work, as it can gain flight for a while if it deems the player 'unreachable'

Extra Info:
-Geostorm appeared initially in Boss Ideas 4. It was called the 'Granite Burrower' in its regular state and had a rivalry with the Marble Burrower, as mentioned in its lore.
--It is also stated that the Granite Burrower/Geostorm was victorious over the Marble Burrower, perhaps explaining its absence
[Added: 13/5/21]
72 - Dominance
A concept suggested by Slayer via Discord

Appearance: A golden robot with a pill-shaped body. Its head is rounded with a tear drop-shaped visor with 3 eye holes. Its chest has some diamond-shaped protrusions. It has 6 legs protruding from its base, each with pointed 'feet' on the ends.

Summon: Use the Cosmic Steel Chunk. The item is actually dropped by a series of Post-Moon Lord enemies instead of being crafted. It can be used anywhere and at any time to summon Dominance.
Dominance will actually speak during the fight, both using text boxes and also audio. His voice is high-pitched and robotic, most easily compared to Castle Crasher's Painter boss
"Required material located, preparing forceful retrieval protocol."

Fought: Post-Moon Lord
Specification: Post-Moon Lord
Special: Uncraftable Summon, Fan Idea
Progression: No

Stats:
Health:
-145,000 (245,000) (Dominance)
-150 (250) (Drones)
-15,000 (30,000) (Barrier)
Attack:
-165 (292) (Dominance Melee, Drone Melee, Barrier)
-140 (242) (Rockets, Vortex Lightning, Lasers)
-180 (310) (Lightning Orb, Pillar of Fire)
Defence:
-50
--+80 (100)% Damage Resistance (Dominance, Barrier Active)

Attacks:
Dominance will not move when not trying to attack, instead staying still while brushing his pincer-like legs against each other. However, when attacking, he gains the ability to move rapidly and fairly freely.
-He may fly diagonally to the player and deploy a series of rockets from his base. These rockets drop down before they activate; where they fly towards the player in a straight line while rapidly accelerating
-He may fly overhead and build a drone with his legs. These drones act very similar to the Destroyer's Probes; chasing the player while periodically firing lasers at them
-He may summon an electrical barrier around himself. This barrier grants Dominance 80 (100)% damage resistance when active. Once the barrier is below 25% health Dominance has a chance of 'throwing' it at the player as a projectile, prematurely lowering the shield. This becomes more common the less health the shield has remaining.
-He may fly close to the player and drop a lightning orb from his base, catching it with his legs. This acts like LC's lightning orb until it begins to expire. At this point Dominance crushes the orb; sending 12 lasers outward in a burst
-He may dash towards the player and, at the end of the dash, fire 3 simultaneous streams of lasers from his eye sockets.
-He may fly above the player and dash horizontally, dropping several bombs from his base. These bombs, upon expiring or hitting a solid block, erupt into short-lived flame pillars. He may perform this attack up to 3 times in succession
As Dominance loses health he will gradually gain attack speed and movement speed during the attacks, which is most prominent when charging.
Dominance will say further dialogue as he loses health as well:
"Attempts to stop me are... futile." (<85% Health)
"This planet, as are you, are destined for destruction." (<70% Health)
"Wait for me, my machines. I have someone to reconstruct into a corpse first." (<55% Health)
"Your efforts are commendable, but futile nonetheless." (<30% Health)
"Perhaps I have... miscalculated." (<15% Health)
"Abort. Abort. I cannot believe it!" (<5% Health)

Defeat: Dominance will shudder for a while before exploding into gibs. All his drones and missiles will immediately deactivate when Dominance runs out of health; falling out of the sky and exploding shortly after

Drops:
Mostly hi-tech weapons, all with golden sheens. Magic guns, bows, rocket launchers, non-magic guns, swords and a sentry that deploys drones and missiles. Can also drop Refined Cosmic Steel; used for a variety of crafting recipes.
In Expert Mode he drops the Dubious Reactor, which when equipped causes a meter to begin rising during boss fights that buffs stats when full for a few seconds, but explodes if the player takes damage; causing the player to take increased damage and emptying the bar again. He may also rarely the Voice Modulator Chip, which makes it so the player can say a variety of random sentences when attacking and makes all voice clips robotic-sounding.

Lore:
A malicious AI bent on world-domination using an army of mindless, self-built drones. It deems itself the most important machine in the universe, a product of its own artificial ego. Its creator is unknown, but it seems whoever it was has abandoned Dominance and left him to roam freely.

Hints:
-Since Dominance only moves when attacking, the player can study his movements in order to predict which attack he plans to use next
-Teleportation is recommended for this fight through use of items like the Rod of Discord, primarily due to the 'flame pillar' attack's timing potentially being too tight for consistent dodging. This is particularly the case if Dominance manages to trap the player between flame pillars.

Extra Info:
-Several of Dominance's voice lines are references to other games and shows.
--'Abort', and Dominance's voice as a whole, is a reference to Castle Crasher's Painter boss
--'I cannot believe it' is mainly a reference to Dynamite Headdy
---Both these lines also occur in their respective games when the respective bosses are either low on health or actively playing their death animations, hence why Dominance references them for his final low-health quote
--The 'reconstruct you into a corpse' is a more vague reference to one of Bill Cypher's quotes
-Slayer's original concept for Dominance was a "Gigantic construct made of pure gold, aided Scourge in his takeover". While its size was reduced a little and it lost its direct ties to Scourge, it retained its golden appearance and planet-conquering nature from the original concept
[Added: 14/5/21]
73 - Solar Flare Wyrm

Appearance: A colossal golden worm. Its segments have large golden rims around the sides of its segments, which all have zig-zagged surfaces as opposed to being smooth like the original. Each of its segments has a blue core, aside from the head which has 3 cores connected to each other. The head is a larger version of the body segments, mostly the same in terms of design but with the rims splitting into 3 and a small spike of the rim's more golden material on the back of the head. Sheens of light continuously move across its body, giving it a weird reflection on its surface.

Summon: Use the Cosmic Steel Beacon

Fought: Post-Moon Lord
Specification: Post-Moon Lord
Special: Returning Boss
Progression: No

Stats:
Health: 376,500 (550,000)
Attack:
-250 (444) (Head Melee)
-200 (350) (Body Melee)
-150 (255) (Lasers, Homing Orb)
-170 (313) (Bombs, Flame Pillars)
Defence:
-60
--+25% Damage Resistance (Per segment pierced)

[All of this boss' attacks inflict Blinding Light - 50%]

Attacks:
The Solar Flare Wyrm rarely ever tries to deal contact damage, instead mostly trying to fly a little ways overhead. Often this flight pattern forms a figure-of-eight, given the player doesn't move too far.
The Solar Flare Wyrm will constantly be charging an ability called 'Flash of Light'. When all his cores turn from blue to white he will create a flash of light that obscures the player's vision by covering the screen with a light yellow hue. This effect can also stack with its debuff, making it very difficult to see until the effect wares off. After a few seconds the flash fades and the cycle repeats.
-It may fire lasers at the player from all its segments, starting from the head and working its way down to the tail. (The head specifically launches an arc of 5 shots instead of 1, however.)
-It may glow yellow and attempt to ram the player by moving downward in a curved motion, reaching the player at the lowest point of the curve, before flying back up again
-It may launch a large electrified orb that homes-in on the player and chases them at a moderate pace. This orb will alternate between firing streams of lasers at the player and launching bursts of lasers in the cardinal directions. After a while the orb fades
-It may drop bombs downward that explode into pillars of flame after a short time. The bombs can be dropped from any segment
-It may launch lasers from its segments, starting from the head and stopping halfway along its body. Unlike the other laser attack all of these lasers have a mild homing effect; curving towards the player as they travel
The Solar Flare Wyrm generally attacks faster at lower health (and also has the cooldown on its 'Flash of Light' ability reduce gradually as it loses health as well)

Defeat: Explodes into gibs

Drops:
A group of golden weapons, including throwing knives, a spear, a bow, a magic tome and a summoning staff that summons a mini Solar Flare Wyrm that flies around the player firing lasers at enemies, gaining additional shot speed and damage per segment added. Also drops Refined Cosmic Steel, as with Dominance.
In Expert Mode it drops the Solar Crown, which grants a series of damage buffs during the daytime while also granting a permanent Shine Potion effect while equipped

Lore:
The reconstructed remnant of the original Solar Flare Wyrm. Not much could be salvaged from the original model, but what was saved was implemented and installed into this new, stronger body. The person who rebuilt it is unknown.

Hints:
-As with Dominance, having some means of escaping sticky situations such as the homing orb getting too close or being pinned between flame pillars is recommended
-Piercing weapons are useful for this fight, despite the damage resistance it gains against piercing projectiles

Extra Info:
-The Solar Flare Wyrm's 'Blinding Light' debuff is a reference to the Weeknd song of a similar name. The same goes for it tooltip.
-The Solar Flare Wyrm last appeared in Boss Ideas 7, with a similar design.
--Despite also being a golden sun-themed worm boss it is unknown if it has any connections to the Solar Scourge
[Added: 14/5/21]
74 - Maiden of Steel
A concept suggested by Slayer via Discord, with an extra addition inspired by OmegaFerretMusic


Appearance: A grey-clad, silver-haired swordswoman. She has a scar visible from beneath her hair, which also obscures her left eye. She has a set of mechanical wings seemingly made out of various pieces of sharpened, almost blade-like metal

Summon: Use the Iron-Branded Flag. Titania will appear and warn the player that their actions are foolish, before unfolding her metal wings and beginning the fight

Fought: Post-Moon Lord
Specification: Post-Moon Lord
Special: Fan Idea
Progression: Later Bosses

Stats:
Health: 165,000 (280,000)
Attack:
-200 (332) (Melee, Rapid-Slash)
-150 (252) (Swords)
-175 (288) (Chain Blade)
Defence: 45

Attacks:
Titania will usually float close to the player, staying mostly still when not attacking unless the player tries to distance themselves from her too far. However, due to how often she attacks, it is hard to notice her lack of mobility in her downtime.
Phase 1:
-She may move to a point horizontal to the player and release several metallic sword-like spikes from her wings by spreading them out wide. She launches arcs of 12 swords each to both her left and right
-She may release an arc of lighter-grey swords towards the player. After a while all of these projectiles will suddenly re-adjust their angles to face the player and begin rapidly accelerating
-She may dash at the player a few times in succession. Each dash releases 10 sword projectiles; 5 either side of her as she dashes that are evenly-spaced throughout the dash.
-She may release 4 bursts in succession, each containing 14 swords. The subsequent bursts have varying angles of offset and thus aren't launched in the same directions as the prior bursts.
At 40 (55)% health Titania will become visibly frustrated and enter Phase 2
Phase 2:
Titania becomes faster, attacks faster, and will often dash toward the player before performing an attack.
-She retains all of her Phase 1 attacks
-She may summon a chain knife-like weapon and swing it towards the player. The range of the chain knife swing is deceptively large, and both the chain and knife deal damage on contact
-She may draw the sword at her waist and swing it towards the player, creating a massive and densely-packed arc of sword projectiles.
-She may draw the sword at her waist and point it upward. Several silver lines will begin appearing near the player at random angles. After a few seconds Titania disappears and 'slashes' across all of the lines with her sword at blinding speed, damaging the player if they overlapped the line at the time she attacked.

Defeat: Titania is disarmed and parts of her wings show visible cracks. She commends the player's strength before flying upwards, dropping loot as she does so.

Drops:
Mostly sword-themed items, including a tome that launches swords, a sword, obviously, a bow and some throwing knives. She has a rare chance to also drop a version of her 'Blade Wings'.
In Expert Mode she will drop the Premium Whetstone, which grants a major increase in armour piercing and crit chance for all melee weapons when equipped.

Lore:
Titania, more commonly known as the Maiden of War or the Maiden of Steel, has spent much of her life training for battle and is considered powerful enough to single-handedly turn the tide of battle. Despite her status, however, she is said to have a softer side that she keeps hidden from her allies.

Hints:
-Due to how mobile she is, it is recommended to bring homing attacks in order to hit her more consistently
-Mobility options are always recommended, especially with faster-paced fights such as this. Dashing to get you out of range of her own dashes, and teleports can allow the player to avoid attacks they otherwise might not have been able to

Extra Info:
-According to some more unused lore, Titania actually has a pet Ferret called Sabre
--This was Ferret's main contribution, but I thought it sounded interesting to give the battle-hardened character a softer side because of it, so it counts as a contribution :P

-"A knight with sword wings, has powerful control over metal" was the description Slayer gave for Titania, as well as the title 'Maiden of War'. A few other name concepts were looked at, but Maiden of Steel had the best mix of 'sounding cool but not overly mean'
[Added: 14/5/21]
75 - Red

Appearance: Red, from the Older of Slime, with a remade design. His mechanical body is larger and more refined, and now comes complete with a small Order of Slime insignia on the chest. His cape is also much larger than it originally was as well. Red's sword is larger but retains the vague star shape of the original, though has additional markings on the hilt and guard.

Summon: Place down the Order of Slime's banner. Red has a chance of appearing near it every day and can be interacted with, either for conversation or to be challenged. Selecting challenge will prompt Red to ask if the player is sure about that decision and, if challenge is selected again, Red will summon large red wings from under his cape, fly upward a short distance, and begin the fight.

Fought: Post-Moon Lord
Specification: Post-Blacklight
Special: Returning Boss
Progression: No

Stats:
Health: 800,000 (1,150,000)
Attack:
-318 (455) (Melee, Sword Throw)
-335 (473) (Energy Pillars, Deathray)
-310 (442) (Red Discs, Disc Fragments)
-280 (400) (Red Swords)
Defence: 100

Attacks:
Red always tries to remain a specific distance from the player when not attacking, moving away from players getting too close or approaching those moving away from him.
-He may slam his sword down into the ground, prompting several red pillars of energy to erupt from the ground nearby. These pillars are evenly-spaced out and give only a short window of warning through faint red lights before they erupt
-He may swing his sword 3 times, launching 3 arcs of red sword-like projectiles towards the player. The arcs consist of 9, 10 & 11 projectiles, respectively.
-He may dash at the player 4 times. The first 3 are regular dashes chained in rapid succession, though there is a very brief gap between the 3rd and 4th charges. The 4th charge will instead be aimed based on where the player is moving towards as opposed to being aimed directly at the player.
-He may spin his sword around himself in a broad slash, creating 3 large red discs of energy. These discs chase after the player rapidly, but have 'slippery' movement due to their slow turns
-He may spin his sword around himself again to create a energy disc, but slashes the disc after a very short time. The result has the energy disc shattering into a burst of 8-12 fragments that disperse at extreme speed.
-He may perform a horizontal dash towards the player after aligning himself with them. During the charge he releases sword projectiles both above and beneath him
-He may launch a large red deathray from his chest. The deathray sweeps towards the player as they dodge, only fading away after 3 seconds or after sweeping up to a maximum of 180 degrees
-He may throw his sword towards the player. The sword creates two streams of sword projectiles as it flies, both launched 90 degrees of the sword's thrown angle.
As Red loses health he will begin to attack gradually faster and faster. Furthermore, at <50% health he will begin gaining a faint red glow that only intensifies as he loses health.

Defeat: Flinches and disperses his red aura, causing his cape to fly upward for a moment and his wings to vanish into clouds of red particles. He can be interacted with again at this point, where he comments on the player's strength in comparison to their size, apologises, and drops some items before leaving.

Drops:
Will drop Aetherium Bars, a material used for multiple crafting recipes, as well as the Order's Insignia which makes slimes friendly and grants mild buffs to mobility, regeneration and jump height. Red may also rarely drop replicas of his outfit, including a vanity cape accessory and a red slime mask.
In Expert Mode he will additionally drop a replica of his sword, which in itself can launch both arcs of homing sword projectiles and also sometimes spawn the red energy discs that can hit multiple enemies before disappearing

Lore:
The appointed leader of the Order of Slime, having earned the role due to his loyalty and strength. Due to the amount of monsters, disasters, and general dangers he has pushed himself beyond his former limits; quite an achievement for someone with such humble beginnings.

Hints:
-Once again, mobility is recommended, especially later-on in the fight where Red's attack speed increases considerably
--Burst speed, especially, can be useful for dodging attacks such as his 4th charge, and allows the player to more easily distance themselves from his deathray attack
-Homing attacks are recommended here as well. Red become increasingly mobile throughout the fight so despite his fairly large hitbox he can become tough to hit once he loses a fair amount of health.

Extra Info:
-Red was last seen in Boss Ideas 5 and has retained the same role and a very similar design here. The only real difference is the sleeker mech suit and the insignia added onto his chest.
--In fact, the Order of Slime didn't have an insignia in Boss Ideas 5, for that matter
[Added: 14/5/21]
76 - Eharas
A concept suggested by Slayer via Discord


Appearance: A large, hallowed worm. Its entire body is coated in gold, pink and blue plating and its body segments have additional diamond-shaped gold plates in the middle. The head has almost mandible-like gold plates either side of its mouth, which is lined with pink teeth.

Summon: Break 5 Jewel of Lights. Jewel of Lights are Post-Blacklight Hallow enemies that look like large crystals. They are passive until provoked, though once attacked fire lasers at the player and teleport around. Each one grants a warning when broken and, shortly after the 5th one is broken, Eharas spawns. It will pursue the player wherever they go to and is unaffected by time of day or biome.

Fought: Post-Moon Lord
Specification: Post-Blacklight
Special: Fan Idea
Progression: No

Stats:
Health: 600,000 (735,000)
Attack:
-333 (452) (Head Melee) (Inflicts Blinding Light - 100%)
-300 (430) (Body Melee, Portal, Deathray)
-280 (400) (Hallow Spear, Mines)
Defence: 65

[All of Eharas' attacks can inflict Blinding Light - 20 (40)%]
[All of Eharas' attacks can inflict Unstable Magic - 50 (100)%]

Attacks:
Eharas flies around the player for most of the fight, acting on one of two states; passive or aggressive. It alternates between these states roughly every 20 seconds initially.
-Passive means Eharas will circle the player from a distance, generally avoiding contact
-Aggressive means Eharas will rush the player constantly, in a manner most similar to a Wyvern
Furthermore, only Eharas' head is vulnerable. All of its body segments, while able to deal damage, cannot be damaged by the player. Hitting a body segment will cause projectiles to deflect away from it, though they remain as 'friendly' projectile if they do so.
-Eharas can split into 3 worms; one blue, one yellow, and one pink, briefly. When split the blue and pink worms are always passive and aggressive, respectively, while the yellow worm alternates between both states. All 3 worm are smaller and a little slower than the fully-formed Eharas. Only the yellow one can use Eharas' attacks and yellow is the only one vulnerable to damage. After a while they reform.
-Eharas may launch a long stream of hallow spear projectiles from its head towards the player over a few seconds
-Eharas may launch a stream of hallow spear projectiles from its head towards the player. After a while they decelerate to a stop for a moment, before suddenly dashing towards the player at high speed.
-Eharas may release a portal from its mouth. After a short delay it will launch a deathray at the player, and once that deathray fades away it will fire a 2nd one. After the 2nd deathray the portal disappears.
-Eharas may drop mines from all of its segments simultaneously. These mines simply stay in-place, lingering for a long time, dealing contact damage
As Eharas loses health it will begin to move faster. Additionally, it will begin switching between passive and aggressive mode more often: down to a minimum of 10 (8) seconds before switching.

Defeat: Explodes into gibs and pink, yellow and blue particles.

Drops:
Hallow-themed weapons. Drops a spear, sword, bow, rocket launcher, flamethrower, magic tome and a summoner staff that summons minions that look like small Eharas heads that charge at enemies. Also drops large quantities of Hallowed Gemstones; an otherwise-rare material used in a few high-tier item materials.
In Expert Mode Eharas will additionally drop the Safekeeping Stone. This item summons a small wisp of light, roughly 2/3rd the size of the player, that follows the player. The player's body will be invulnerable and will even be able to mildly repel certain incoming projectile types, usually smaller or slower ones, though if the wisp of light is hit the player will take damage. It also gives the player increased damage vulnerability in exchange for the effectively reduced hitbox size.

Lore:
A massive crystal serpent, formerly sealed beneath the Hallow to halt its violent streak against the biome. Its body is near-impervious, made of some sort of hardened diamond-like material, and reinforced further by a magical barrier.

Hints:
-Unfortunately this is one of few worm bosses that piercing weapons are not particularly helpful against. Not only can they only damage its head, but the piercing effect doesn't help much as the projectile will merely deflect off of Eharas' body even if it pierces directly through the head segment
-Homing projectiles are helpful for this fight. Not only will they solely target Eharas' head, but they can even re-adjust their movement paths if they deflect off of Eharas' body, thus making it even easier to deal damage
-A large, wide-open arena and lots of mobility is recommended. Eharas is surprisingly mobile and becomes an even larger threat while split in 3, which it can do at any point in the fight

Extra Info:
-Eharas has had easily the most drastic design changes throughout the planning cycle, now at a point where he would be unrecognisable compared to his original self.
--The original idea put forward was a Crimson & Corruption boss, which then more specifically became an Ichor & Cursed Flame boss, and then almost a Chaotic Entity before becoming a Hallow worm boss
[Added: 14/5/21]
77 - Nazar

Appearance: Nazar is a blue, vaguely humanoid creature with large blue wings. Its body is gooey in appearance but retains consistency in its general shape. Its head only has a large and only partially-open mouth on it, with its eye instead being on its stomach.

Summon: The player will need to infiltrate a large structure beneath the ocean at the jungle side of the world. The key for entry is craftable only after Skye is defeated, but it can be accessed early via hoiks and teleportation. The structure looks similar to the dungeon and several excessively strong enemies can be found inside, all until the last room. The final room is very large but entirely empty and inflicts Cursed on the player when inside. There is a stand in the middle of the room with hooks protruding from it.
The player needs to bring a Nazar, one of the Dungeon items, and place it onto the stand via right-click. The Cursed debuff disappears, all enemies within the structure despawn immediately, and the placed Nazar begins to melt and shift into a humanoid form before sprouting wings and beginning the fight
While it is possible to theoretically summon him even back in Pre-Hardmode with hoiks and a Nazar, it is very strongly recommended the player doesn't
Nazar, the boss, can be taken out of the structure without issue, though exiting may be difficult due to the structure's twisting corridoors so it may be best to simply convert the large room it spawns in into an arena

Fought: Post-Moon Lord (Technically Pre-Hardmode)
Specification: Post-Skye
Special: Unique Summon Method
Progression: Later Boss

Stats:
Health: 1,500,000 (2,100,000)
Attack:
-420 (635) (Melee)
-300 (452) (Shade Orb)
-360 (548) (Deathray)
Defence: 100

[All of Nazar's attacks inflict Unstable Magic - 33 (50)%]
[All of Nazar's attacks inflict Cursed - 100%]

Attacks:
Nazar will chase after the player when not attacking, only ever stopping when planning to use one of its various attacks. Each attack actually has 2 variations, with the 'alternate' version starting out as rare and becoming roughly as common as the 'regular' version as Nazar loses health
-It may align itself with the player and launch a horizontal stream of shade orbs towards them
--The alternate variant has it alternate between streams of shade orbs and arcs of 3 pseudo-homing shade orbs that curve towards the player
-It may release multiple bursts of 8 shade orbs in succession that rotate clockwise as they disperse
--The alternate variant has Nazar also launch arcs of 5 shade orbs at the player in-between bursts
-It may release multiple bursts of 10 shade orbs that rotate as they disperse. The rotation of each subsequent burst alternates between clockwise and anti-clockwise
--The alternate variant makes each burst consist of 12 shade orbs and makes the rotation random between each burst instead of alternating
-It may release several arcs of shots at the same time and perform this action several times in succession. It alternates between launching 4 arcs of 5 shade orbs each in the cardinal directions, and then afterwards in the ordinal directions
--The alternate variant launches 8 shade orbs per arc, but only launches 2 sets, one cardinally and one ordinally, before ending the attack.
-Launches 3 bursts of 20 pseudo-homing shade orbs in succession
--The alternate variant has Nazar charge at the player in-between each burst, but the time between each burst is increased
-It may screech, launching deathray-like lasers in random directions. The directions are indicated in advance by several thin, blue lines that appear before the deathrays are launched
--The alternate variant has Nazar launch 8 deathrays cardinally and ordinally instead, with 8 more deathrays connecting them together roughly 30 blocks away in all directions
-It may launch rapidly accelerating shade orbs in all directions for a few seconds. The orbs released are done so in random directions, though the quantity generally means at least one will be launched in virtually every angle before the attack ends
--The alternate variant makes the acceleration and number of shade orbs slower, but Nazar will periodically launch tightly-packed arcs of 5 shade orbs directly at the player
-It may charge at the player 3 times in rapid succession
--The alternate variant has Nazar charge only once, but during the charge shade orbs rise from the ground along the covered horizontal distance of the charge
As Nazar loses health its attack speed increases slightly, as does the chance to use the 'alternate' variants of its attacks. Initially the alternate attacks have only a 10% chance, though this generally rises to 50% once below 25 (40)% health.

Defeat: Shrieks, then begins slowly melting away until nothing is left.
Enemies stop spawning in the structure Nazar was summoned in, and the stand the nazar was put on to summon the boss will crack.

Drops:
Cursed Matter, used to craft a variety of weapons, accessories and an armour set. Nazar doesn't drop any items directly due to the fact he can be summoned and thus technically defeated at any point after Skeletron is defeated, or even before using hoiks very slowly.
In Expert Mode it drops the Cursed Eye; an accessory that doesn't do anything by itself but can be combined with other accessories to amplify their effects at a cost, depending on the accessory it was combined with.

Lore:
A manifestation of souls and curses, forced into a vessel due to its placement upon the stronghold's podium. There are documents of such creatures being constructed before, each with varying results based on what the body has to inhabit, and what chooses to do so.

Hints:
-Staying close to Nazar is recommended, as trying to run away will make it hard to judge Nazar's attacks and made it harder and harder to dodge the shade orbs it releases, due to them accelerating constantly.
-Dashes and teleports are, as ever, strongly recommended.
-It is recommended to only fight Nazar when you are intended to: once Skye is defeated. Trying to fight it sooner puts the player at a massive disadvantage, and even beating it prematurely doesn't give the player any advantages as the crafting station needed to use its drops are also strictly Post-Skye
-Having a Nazar (the accessory) or any of its upgrades equipped is recommended, since Nazar (the boss) inflicts Cursed with all of its attacks

Extra Info:
-Many of the boss' features, mainly its curse-oriented lore and debuff, are fairly ironic considering the role of a nazar is meant to actually protect people from evil.
-Nazar's body, despite appearing shiny and somewhat liquid-like from his appearance, is said to actually be fairly solid until he is defeated
-Nazar's colour palette was primarily inspired and based off of the colours used for the accessory; being almost the exact same for most colours and shades
[Added: 15/5/21]
78 - Scavenger
A concept suggested by Slayer via Discord


Appearance: A Chaotic Entity shaped like a bird. It has a ragged body with a vaguely hook-shaped head with a red ring stuck in the back, connected through a fairly thick neck to a rounded body. Its wings have eye-like markings and red spikes and its feet are long and end on clawed toes. It has a surprisingly scrawny tail with another ring lodged within it, but most surprisingly the Scavenger has a single, humanoid arm on the right side of its body separate from its wings

Summon: Use the Chaos Remnant anywhere in the world. The sky darkens and gains a mild red tint throughout the fight.

Fought: Post-Behemoth
Specification: Post-Behemoth
Special: Tier 1 Superboss, Fan Idea
Progression: No

Stats:
Health:
-4,500,000 (7,565,000) (Scavenger)
-225,000 (378,250) (Scavenger Clone)
Attack:
-650 (900) (Melee, Clone Melee) (Inflicts Chaos Ember - 50 (100)%)
-600 (850) (Chaos Feather, Chaos Spark) (Inflicts Chaos Ember - 20 (30)%)
-620 (872) (Crimson Eye) (Inflicts Chaos Ember - 33 (67)%)
Defence: 88

Attacks:
The Scavenger will pursue the player continuously at a decent pace, only stopping briefly to perform its projectile-oriented attacks
-Scavenger may sacrifice some of its own health to create a clone of itself. Using roughly 2 (1)% of its health Scavenger can create a smaller, weaker clone of itself that acts like Scavenger, but attacks less frequently and uses less projectiles in its attacks. Only 1 (2) clone(s) can be active at any time, and they cannot be summoned under 5% health.
-Scavenger may fire 5 arcs of 5 chaos feathers at the player in rapid succession. These feathers move surprisingly fast and can also gradually accelerate after a few seconds
-Scavenger may create 3 rings of 12 feathers each that orbit it. Scavenger will throw these at the player one at a time, dashing through them shortly after throwing them to cause the feathers to disperse rapidly
-Scavenger may summon a crimson red, eye-like orb in its hand before charging at the player several times in rapid succession. At the end of the final charge it crushes the orb, creating a flower-like pattern of 'chaos sparks' that disperse rapidly
-Charges at the player up to 3 times in succession. It will swipe and grab at the player with its claws and hand during these charges, making it generally harder to avoid
-It may fly overhead, throwing crimson eye-like projectiles at the player that will explode after a short time. These eyes, upon breaking, also spawn vaguely flower-like patterns of chaos sparks, though with far fewer sparks each than with the charge-themed version of this attack
As the Scavenger loses health it will gradually gain movement and attack speed. Furthermore, from 50%-5% health, the Scavenger will always attempt to have (at least) one clone active to attack alongside it.

Defeat: Any active clones die instantly, and the Scavenger itself shrieks and begins visibly cracking and melting before flying upwards and off-screen. The sky returns to normal once it is out of sight.

Drops:
A throwing knife, flail, magic staff and a gun. As with other superbosses these items are on-par with other Behemoth-tier items, but are not directly stronger than them.
In Expert Mode Scavenger drops the Morphing Mass which is an infinite-use consumable insstead of an accessory. When equipped it creates a low-health clone of the player that attacks enemies at the cost of some of the player's max health. When the clone dies the health is not returned, instead only being returned to the player when a boss is defeated while no other bosses are active.

Lore:
A construct of Chaos Energy, once thought to be some sort of harbinger of the end. It feasts on wounded and fallen Chaotic Entities, with no mercy or remorse for its brethren and kin.

Hints:
-Piercing weapons are actually quite helpful for this fight, especially in Expert Mode, due to the Scavenger's ability to summon minions
-Having at least decent mobility is strongly advised, since Scavenger pursues the player throughout most of the fight and also because of the speed of many of Scavenger's projectiles
-Teleportation is, as with most later bosses, also recommended. This is especially the case here since the clones can attack independently of Scavenger but retain his attacks, albeit weaker. This has the possibility of making attacks nearly unavoidable if the clones attack just as Scavenger does, making formerly-planned evasion paths and movements unusable

Extra Info:
-Scavenger is actually a combination of two of Slayer's concepts; Extinction and the Soul of Levialous
--The design is a modified version of the Soul of Levialous' old design, made more bird-like due to the belief that Levialous has, for all intensive purposes, been destroyed now.
--"A construct made of the darkest souls, thought to bring the end times" was Extinction's description and the one that much of Scavenger's design and fight was built upon
[Added: 14/5/21]
79 - Jest

Appearance: A strangely buff, monochromatic clown-like monster. While it is mostly human its face is cracked and distorted, lacking proper facial features. A tag is tied around one of its ankles, with a grey balloon in turn tied to the tag.

Summon: Place and pop the Grey Balloon by attacking it. The sky turn grey throughout the fight. Jest has no other spawn requirements and thus can be fought anywhere and at any time, given there is at least a 1x3 space to place the balloon.

Fought: Post-Behemoth
Specification: Post-Behemoth
Special: Tier 2 Superboss, Unusual Summon
Progression: No

Stats:
Health: 9,250,000 (13,975,000)
Attack:
-950 (1200) (Melee)
-900 (1115) (Circus Ball, Jesting Faces)
-920 (1145) (Energy Sphere)
Defence: 175

Attacks:
Jest teleports around, attacking the player roughly every 3 or 4 teleports. Faint laughing can be heard after certain teleports, even though Jest's face doesn't change
-He may kick a ball of energy towards the player that looks like a beach/circus ball. The ball explodes after a while, creating 3 overlapping bursts of 10 energy spheres each: one burst simply disperses outward, while the other two rotate clockwise and anti-clockwise respectively.
-He may spew out a cluster of energy spheres skyward. These begin raining down from the sky in 'clumps' a few seconds later. These sphere 'clumps' explode into random bursts at random intervals while falling or upon hitting solid blocks
-He may release several 'bursts' of energy spheres in succession. These all rotate anti-clockwise and accelerate as they disperse. Each subsequent burst has more spheres than the last; starting at 6 and increasing by 2 each burst up to a maximum of 16
-He may spew a stream of energy spheres at the player. These spheres rapidly accelerate and move in a zigzag pattern as opposed to a straight line
-He may teleport around rapidly, summoning several stationary energy spheres. After a random amount of time he will stop and shriek, causing all of the projectiles he summoned to rapidly accelerate towards the player
-He may laugh, causing several 'projectiles' to begin appearing randomly nearby that all also appear to laugh. These are stationary when summoned and disappear after a few seconds, simply dealing contact damage. More of these appear in larger numbers when Jest's health gets lower
At 40 (50)% health Jest enters a 2nd phase
Phase 2:
Jest begins creating after-images around himself, often with different expressions or poses than Jest himself has. These are purely visual and cannot be damaged or hurt the player, however.
Jest will create a clone of himself in this phase. The clone is invulnerable and will move and act like Jest; even attacking at the same time Jest does.
While Jest retains all of his Phase 1 attacks in Phase 2, his attack speed will now begin gradually increasing as he loses health.

Defeat: Shudders, laughs, and crumbles into what seems to be dust. The sky then returns to normal.

Drops:
A variety of different-coloured balloons which can simply be placed; acting purely as furniture items. May also drop a monochrome version of the beach ball, a clown wig, and rarely a Grey Heart which de-saturates the player and makes them and their items and accessories monochrome.
In Expert Mode it will drop Vigour Mortis: an item that allows the player to survive on what appears to be 0 health after taking a fatal blow. Once activated, the player will be given 10 grey hearts which slowly drain over time or will also be removed by taking damage. They cannot be restored through any means and, once fully-drained, the player will then die.

Lore:
Some sort of strange, hollow vessel that leaves many question to be answered. Why the clown aesthetic? Why was its entire form monochromatic? And most important what was inhabiting the vessel, exactly?

Hints:
-The player could spend some additional time in Phase 1 trying to learn backup methods of avoiding some of Jest's attacks, due primarily to the 2nd phase adding what is effectively a 2nd Jest to the fight
-Homing weapons are highly effective in this fight. This is twofold both because of Jest's constant teleporting and high mobility, but also because homing projectiles will only target the real, vulnerable, Jest in Phase 2.

Extra Info:
-Considering the tag on Jest's ankle and the greyscale colour scheme, it could be theorised that Jest was some sort of zombie; explaining the tag to be the same sort as are put around the toes and ankles at a morgue
--It would also have explained the supernatural abilities, if it weren't for Terraria already having various supernatural elements available to other bosses, NPCs, and the player themselves
-Jest is one of few bosses to not drop any combat-related items in his Normal-Mode form.
--However, in Expert Mode, he drops an accessory so it does not apply for the Expert Mode fight
[Added: 15/5/21]
80 - Rift

Appearance: A humanoid entity seemingly made of something like TV static. It wears a brown cloak to conceal some of its body.

Summon: Go to the structure that Nazar was summoned in after defeating Nazar. The player must bring an item called the Radio and place it in the room where the stand that summoned Nazar is. The player then has to tune the Radio via right-click, and doing this enough will cause it to begin emitting noise and static to begin appearing. The Radio will eventually break and teleport the player back to their spawn.
Everything, upon returning to spawn, will be entirely monochromatic; with all the colour absent from anything that isn't the player. Rift will gradually form near the player before beginning the fight. Rift is also exempt from the monochrome effect, though it makes little difference.
Rift can be summoned at any time and can be taken anywhere. If the player get too far away Rift will teleport to the player, no matter how far they get.

Fought: Post-Behemoth
Specification: Post-Behemoth, Post-Nazar
Special: Unusual Summon, Secret Boss, Tier 2 Superboss
Progression: No

Stats:
Health: 12,000,000 (17,750,000)
Attack:
-1000 (1285) (Melee, Deathray, Static Tear)
-920 (1145) (Static Sphere)
Defence: 165

[All of Rift's attacks can inflict Blinding Light - 50 (100)%]

Attacks:
Rift flies and teleports around at high speed. It never attempt to directly ram into the player while doing this. It is rarely stationary, but this is mainly just due to it deciding to attack
-It may launch an arc of 5 deathrays at the player. All of Rift's deathrays, and attacks in-general for that matter, have a similar 'TV static' appearance to Rift itself.
-It may swipe an arm towards the player. This opens a large 'tear' after a short delay that lingers in-place for a very long time. There is a short delay before it opens for the player to avoid it, which also in-turn reveals in which direction the 'tear' will be longest via a faint, white line appearing momentarily before the tear opens.
-It may release several bursts of static spheres in succession. Each subsequent burst doubles the number of shots; starting from 4 and doubling all the way up to 64 for the final burst. Each burst can also rotate in a random direction at a range of random speeds.
-It may launch 3 arcs of static spheres at the player, with the arcs consisting of 3, 4, and 3 spheres respectively. These spheres have a faint white 'aura' around them that, while the player is enveloped by it, causes the sphere to launch smaller spheres at the player. The smaller spheres produced do not have their own auras.
-It may launch a stream of static spheres at the player. When these reach the player they split into 4. The 4 spheres produced are launched either cardinally or ordinally, alternating with each sphere.
-If may raise its hands, causing static spheres to begin appearing randomly from roughly 50-60 blocks away from Rift that move towards it, as well as a solid ring of spheres 60 blocks away that the player cannot safely pass through. The attack ends after a few seconds or prematurely if the player escapes the outer ring somehow, with the outer ring of spheres dispersing rapidly
Once down to 50% health Rift will enter Phase 2, spouting a large set of wings

Phase 2:
Rift becomes more aggressive in this phase, attacking faster and generally moving faster and teleporting more frequently as well.
Rift retains all of its Phase 1 attacks, but also gains a series of new attacks:
-It may twitch before teleporting. After teleporting it will emerge with its face formed like a mouth before rapidly charging at the player. At the end of the charge it teleports again, its face returned to normal.
-It may perform the 'multiplying burst' attack from Phase 1 again, but stops before launching the 64-shot burst. It will let out some sort of shriek that instantly halts all its projectiles for a moment, before causing them all to begin moving in random directions. Rift does not fire the 64-shot burst in this attack.
-It may launch 4 deathrays in the cardinal directions. Alongside the other 4 a 5th deathray is launched based on the direction of the player from Rift. This 5th deathray is initially launched cardinally, like the others, but then rotates 60-70 degrees towards the player before the attack ends.
-Rift may disappear. Deathrays will begin erupting from the ground randomly, indicated by thin white lines appearing where the deathrays will appear. The intensity and number of these deathrays rapidly increases until a final, larger deathray is launched from beneath the player. Rift rises up from this final, larger deathray.
Rift's attack speed and the frequency of its teleports increase as it loses health in this phase.

Defeat: Rift shrieks before its wings suddenly shatter into pieces and begin fading away. Rift will teleport rapidly but stays within the same general 5-block area with each teleport, with its face shifting to a different form with each teleport. After a while Rift itself will also shatter and fade away.
Afterward a flash of light will occur, similar to when the Moon Lord is defeated, and once the flash fades colour will be returned to the world and Rift will be absent; only leaving behind some loot.

Drops:
In Normal Mode it will drop the Tuned Radio, which has the ability to play various different songs both exclusive and not, which can be switched through by right-clicking it. It may also rarely drop 'Static Wings', which look like smaller versions of Rift's Phase 2 wings
In Expert Mode it will additionally drop the Rift-Walker's Cloak; a vanity accessory, and the Rift's Call, which makes the player's body appear like static as well.

Lore:
Something from beyond this world, having travelled through a rift in time and space to reach new worlds. Something seems to have gone wrong, however, leaving only a husk of what the traveller once was.

Hints:
-Dashes, teleports, and other forms of mobility are once again recommended for this fight
-Nazar needs to be defeated before this boss can be summoned, regardless of whether or not the player obtains the Radio in advance.
-Spending a bit of time getting used to the Phase 1 attacks may be recommended, as it will quickly become more aggressive once Phase 2 is triggered
-The 'multiplying burst' attack is actually more threatening in Phase 2 as part-way through the attack it may turn out to be a different variant. The player should remain actively vigilant of this; watching for if the 64-sphere attack is launched or if there is delay instead, as this will determine which one is used.

Extra Info:
-The term Rift-Walker in the cloak's name and the Lore actually provide a faint link to the Riftwalker bosses from Boss Ideas 7. Similarly, those were also a series of powerful cloaked bosses from another dimension
--Aside from this, however, the links aren't particularly clear between the two groups
-Rift shares a few similarities to TBoI's Dogma; being a boss with an appearance akin to TV static that gains wings in its 2nd phase
[Added: 15/5/21]
[Final Notes]
And that was the next part of Boss Ideas 11

Admittedly a few 'smaller' bosses than in previous pictures, but that's partly due to the amount of larger bosses last time, so you can probably expect to see more random giant monsters again soon if you want them

I also see Boss Ideas 11 has quite a lot of bosses present now. I'm going to avoid doing what I did for Boss Ideas 5 and try to keep bosses consistently well-sprited and interesting, even it if means later parts may be a bit slower coming out. Idk when Boss Ideas 12 will be a thing, as it will either require me to improve my sprites again or tell another side-story like Boss Ideas 6 and 8 did, but if I do I will try to let some peeps know what the plans are :)


Feel free to check out some of the other Boss Ideas parts. These are time-consuming, but ultimately very fun to make so I'd appreciate it if you had a look at some other pages if you liked this one:
https://steamcommunity.com/sharedfiles/filedetails/?id=2399643812
https://steamcommunity.com/sharedfiles/filedetails/?id=2271455483
https://steamcommunity.com/sharedfiles/filedetails/?id=2443717129
Also, here's a link to Boss Ideas 10's Tomato Event. Not part of number 11 but still fun to make:
https://steamcommunity.com/sharedfiles/filedetails/?id=2220451686


Special thanks primarily to Slayer, who gave a bunch of ideas and concepts for this page via Discord which helped speed up production, as well as generally just being cool to see people giving concepts to these for the first time in a while.

Additional thanks to OmegaFerretMusic for some extra ideas (unintentionally) for Titania,
and a thanks to you for coming to have a look at the page and putting up with my mini-essays :P


Anyways, hope to see you next time, whenever that will be :)
5 Comments
っLunauticalっ Jun 30, 2021 @ 3:08am 
* I had to divide it into 4 so I could post it and since I did it wrong you kinda have to read the posts backwards * :torielsad:
っLunauticalっ Jun 30, 2021 @ 3:08am 
Void Shard: summons a mini void prince to fight for your, it does 150 summoner dmg. like the stardust dragon and the desert tiger it gets stronger every single summon. after 3 summons it gets bigger and does 300 summoner dmg. after 6 summons it teleports behind enemies like the bosses attack and does 400 dmg. at 9 summons it gets a bit bigger and also dashes through enemies as well. the dash does 500 dmg. the teleport attack does 650 and the regular attack does 450 dmg. At 11 summons the dmg just gets increased by 100 for each attack
Inky Backstabber: (accessorie) periodically shoot daggers at enemies for 150 dmg
っLunauticalっ Jun 30, 2021 @ 3:07am 
DROPS:
Shadow Sword: shoots a crescent projectile, the projectile slows down over time and goes about 50 blocks, when it fully stops it stays for 10 seconds dealing.
Shadow sword deals melee 200 dmg
Set of Shadow Daggers: like shadowflame knife, however does 150 ranged dmg and when the dagger thrown hits anything it explodes into a dark cloud like the boss's attack
Realm Scar: shoots a fast piercing projectile for 45 mana and does 250 magic dmg
Shadow whip: is summoner whip and deals 250 dmg. causes minions to go in a frenzy and attack 2x faster and target the first enemy hit with the whip
っLunauticalっ Jun 30, 2021 @ 3:07am 
4: Shapeshift_Tendril. The Void Prince shape shifts it's body, making a spear like tendril, it thrusts the tendril into the direction of the player deals. 100 dmg
5: Shapeshift_Whip. The Void Prince shape shifts it's body, making a thin tendril. it then slashes with the tendril like a player whip would 3 times. Deals 50 Dmg.
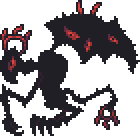
6: Royal Call. The Void Prince summons voidlings to come to it's aid. Each voidling has 100 hp and on contact do 150 dmg,
STATS:
Max Hp: 45,000
Defense: 50
Attack 100 (contact dmg)


っLunauticalっ Jun 30, 2021 @ 3:07am 
Void Prince

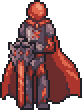
Humanoid entity, made from shadows, wears a purple cloak has long spindly limbs like twigs
It holds two daggers, pitch black
Summon: The summon item Darkest Shadow is made from 10 coalesced shadows. 1 coalesced shadow is made from 5 souls of night and 5 souls of fright
Other behavior:
Ignores ALL defense
In expert mode the stats are multiplied by 1.5
In master mode the stats are multiplied by 3
In for the worthy the stats are multiplied by 4.5 and the attacks become a lot faster. it's speed is also doubled as well
Attacks:
1: Teleports behind player and slashes. slash does 75 dmg, however it causes blindness
2: Throws shadow daggers. whenever a shadow dagger hits a block or enemy it creates a dark cloud which slows and poison. the shadow daggers do 50 dmg
3: Cutting Dash. Cutting Dash is like expert EoC charge, however it leaves a trail that deals 75 dmg