Control Ultimate Edition
Оцінок: 475
Control Ultimate Edition 100% Achievement Video Guide
Автор: Mesjaf
Here you will find everything to get that 100% on Control Ultimate Edition.
This guide contains puzzle solutions, all collectibles, boss fights, walkthroughs, tips, tricks and more.

If you like this guide check out my other work here on Steam and consider subscribing to my Youtube channel.
Even if you don't want to subscribe please leave a like under the video that helped you.
This helps me a lot and in making high quality video guides for Steam community and other players out there.

My Steam guides: https://steamcommunity.com/profiles/76561198022897265/myworkshopfiles/?section=guides&p=1
Youtube: https://www.youtube.com/user/TurboAchiever
9
4
19
5
4
4
2
2
   
Нагородити
До улюбленого
В улюблених
Прибрати
Introduction
By following this guide you should be able to get 100% achievements in Control Ultimate Edition.

This guide is quite big and can be hard to navigate. You can use search option in any browser (including Steam client) by simply pressing combination CTRL+F.


First of all, enjoy the game. There are no missable achievements and you can get what you missed after you finish the game.

As upgrades go I recommend that you upgrade your Launch ability and Energy capacity first adding a bit of Health upgrades here and there.

Launch is powerfull ability and will be your main weapon agains enemies.

To get all achievements you will need to play through all Story Missions (10 in total) and all Side Missions (18 in total).

Side missions will grant you Ability Points for upgrades and some will unlock new abilities.
I highly reccomend playing those missions as soona s they are available:

A Good Defense - Shield Ability (check out Insular Telekinesis Achievement)
A Merry Chase - Evade Ability (check out Shifting Positions Achievement)
A Captive Audience - Seize Ability (check out Psychic Occupation)

Collectibles
There are 250 collectibles in the main game. To get all related achievements you only need 120.
There will be no video here because you should be able to get that 120 with ease. Some collectibles you get automatically by defeating enemies, some by entering an area and the rest lays all around. Every time you see a dot indicate interaction that's probably a collectible.


Strange Collection - Collect 40 Collectibles


Record Keeper - Collect 80 Collectibles


Bureau Archivist - Collect 120 Collectibles
Story Related Achievements
Those will be unlocked automatically as you progress through the story


Choose to be Chosen - Obtain the Service Weapon


Welcome to the Oldest House - Complete Mission 1


Unknown Caller - Complete Mission 2


Directorial Override - Complete Mission 3


Old Boys' Club - Complete Mission 4


Threshold - Complete Mission 5


My Brother's Keeper - Complete Mission 6


The Face of the Enemy - Complete Mission 7


Finnish Tango - Complete Mission 8


Polaris - Complete Mission 9


Take Control - Complete Mission 10


Paranatural Powerhouse - Obtain the Launch Ability


Rising Thought - Obtain the Levitate Ability
Misc Achievements
Astral Construction

Astral Construction - Construct a Weapon Form or Mod


You will probably unlock this achievement before reading this guide :) To construct something interact with cleansed Control Point and acces Astral Constructs menu. You will need Source, witch you get by killing enemies, and materials, witch drop from those enemies or can be found around the game in boxes. Mods are buffs for weapons and Jesse. You can equip them in Loadout screen. Weapon Forms are new weapons and you can have 2 equipped at a time but it is possible to pause and change loadout mid combat.
Non-Standard Issue

Non-Standard Issue - Upgrade any Weapon Form to Level 3


Simply upgrade one of your weapons to level 3. You will need a lot of SOurce and some rear materials but you should be able to get this achievement naturally by just playing the game.
Career Development

Career Development - Unlock all 3 Personal Mod slots


Another automatic achievement that you will unlock on your way. Simply upgrade abilities and at the bottom of ability screen you will notice a progresion bar toward next slot. You need 25 upgrades to get 3rd slot.
Master Parautilitarian

Master Parautilitarian - Spend 100 Ability Points


To get 100 ability points you will have to finish all main missions, all side missions, find all 19 hidden location and get Gold Suit outfit.
Only Launch, Shield, Seize and Levitate are abilities eso upgrading health, energy or melee will not count toward the achivement. But don't wory, play as you like and at the end siply pay 30 000 source to respec.

Hidden Locations: Central Research

Hidden Locations: Containment

Hidden Locations: Executive

Hidden Locations: Maintenance

Outfit - Golden Suit
Proper Handling Procedures

Proper Handling Procedures - Use Launch to throw a grenade or rocket


For this you will need Launch Explosives upgrade for Launch Ability. Find HIss Granadier, ther's plenty of them all around and when he throw a granade at you or fire rocket gram it with Lauch.
Altered Manifestations May Occur

Altered Manifestations May Occur - Defeat esseJ


For details and boss fight check out Self-Reflection Side Mission.
Aggressive Growth

Aggressive Growth - Defeat Mold-1


For details and boss fight check out Old Growth Side Mission.
Head of Communications

Head of Communications - Defeat Mr. Tomassi


For details and boss fight check out Mr. Tommasi Side Mission.
Living Archetypes

Living Archetypes - Defeat the Anchor


For details and boss fight check out The Enemy Within Side Mission
Astral Phenomena

Astral Phenomena - Defeat Former


For details and boss fight check out Fridge Duty Side Mission
Insular Telekinesis

Insular Telekinesis - Obtain the Shield Ability


For details and boss fight check out A Good Defense Side Mission.
Shifting Positions

Shifting Positions - Obtain the Evade Ability


For details and boss fight check out A Merry Chase Side Mission.
Psychic Occupation

Psychic Occupation - Obtain the Seize Ability


For details and boss fight check out A Captive Audience Side Mission.
Paranatural Collection

Paranatural Collection - Collect more than 100,000 Source


You get Source for killing enemies. This achievement should unlock through natural gameplay but if you somehow didn't get 100 000 Source before unlocking all achievements than just go farm some in areas with enemies. Expeditions should provide plenty.
Interdimensional Defender

Interdimensional Defender - Killed 1000 Hiss


Just as Paranatural Collection this one also should unlock by just playing a game and killing enemies.
Discerning the Pattern

Discerning the Pattern - Cleanse 25 Control Points


There are 29 Control Points in main game and since you're going for 100% completion you will find 25 of them without an effor as you will have to do all side missions anyway.
Crisis Management


Crisis Management - Complete 5 Bureau Alerts


Bureau Alerts are special missions that will be randomly popping up. All have 20 minutes time limit.
If oyu die during Bureau Alert it will fail automaticaly even if you'r in a different section of buerau.
There are just few types of those missions

Major Targets - you must kill special, named, enemies.
Hiss Nodes - look for glowing Hiss nodes in the area (red cubes) and shoot them.
Personel Protection - you have to protect few soldiers, mission will fail if last of them dies
Astral Tactician

Astral Tactician -Complete 25 Board Countermeasures


Board Countermeasures are special tasks you can pick up at control points. They reward mods, materials or Junkbox Coins. You can have 3 active at a time but you can drop unwanted ones without penalty and as soon as you do new one will be generated.
Side Missions

The Importance of Synergy - Complete 5 Side Missions


Inter-Departmental Cooperation - Complete 10 Side Missions


FBC Crisis Solution Task Force - Complete 15 Side Missions


You only need to complete 15 out of 18 Side Missions to get all those achievements but you will need to complete all 18 Side Missions for Master Parautilitarian.
A Merry Chase

Shifting Positions - Obtain the Evade Ability


During Mission 3 “Directorial Override” on your way to the Janitor’s Office in Maintenance go in opposite direction than to the Janitor’s Office.

A Good Defense

Insular Telekinesis - Obtain the Shield Ability


To start this mission you need to find Home Safe Tests collectible. It's in the Black Rock Processing lab in Central Maintenance, in a room with a control panel, south of entrance.

From NSC Power Plant go to Central Maintenance, There's a Field Training section on your right. Clear some Hiss Nodes and go in. Finish target practice in under 45s to get through garage doors to the safe. After finishing the tutorial on your new ability achievement will unlock.


A Captive Audience

Psychic Occupation - Obtain the Seize Ability


Near the Control Point in Parapsychology on a furniture bear the white board there is a file Astralnauts Information needed to start this mission.

In Hypnosis Lab you will find an X-Ray Lightbox object of power to cleanse.

Fridge Duty

Astral Phenomena - Defeat Former


While on a mission "My Brother’s Keeper" you will run into gent Phillip staring at Refrigerator. He's on the fourth floor of the Panopticon in the Containment sector. He'll ask for your help but you must finish your mission first. After you find Dylan's cell go back to Phillip and talk to him. Than go talk to
Langston, Panopticon Supervisor. He'll open door to Refrigerator.
While clensing it you will meet FORMER in the Astral Plane.

Aim at his glowing eye. He will throw some black energy balls at you that you can catch and Launch back at him. He will also try to hit you with his arms. This attack is easy to avoid but it will most likely destroy the floor and it's super easy to fall in that hole. SO start your evasion at one side of the arena and always evade in the same direction.


A Matter of Time

In Logistics sector you will find soldier named Horowitz. He will ask you to find his friend.
Go through the Oceanview Motel to new area and help his friend.
In motel you have to set clocks in rooms to the same time as clock in reception.
Langston’s Runaways Pt. 1
Unlocks after completing “Fridge Duty”.
You have to cleanse 4 Altered Items.


Japanese Paper Lantern


First you have to play through the “A Matter of Time” Side Mission to get acces to this area.
Lantern is among clocks in one of the rooms.


Traffic Light


It's on 4th floor of the Panopticon. Move when the light is green, stop and don't move on yelow and red.


Hand Chair


In the Medical Wing (Containment sector) there is a room full of Mold. Chair is there on the ceiling, attack it to get in downit and cleanse it.


Moving Letters


In Dead Letters in Executive sector. Use my video to get their locations.
Langston’s Runaways Pt. 2
After part 1 you will get another set of items to cleans


Flamingo


Use Levitate and Evade to fly through the holes. While cleansing it you will be taken to Astral Realm to face FORMER for the second time. Strategy is the same as before.


Mannequin


It's located in Prime Candidate Program. After interacting with it you will have to find it in this area now covered in bunch of mannequins. My video shows location of the one you seek.


Rubber Duck


There's a secret passage that will get you to the Rubber Duck. It will vanish and you'll have to find it. It quacks rather loudly so it shouldn't be a problem. Chase it around using evade.
What a Mess: Burn the Trash
Speakg with Ahti in his office as part of Mission 3 “Directorial Override”. He will give you a series of Side Missions as you progress through the game. You can find them on coarkboard.

What a Mess: Talk to the Plants
This mission will be availble later in the game. Check the coarckboard regullary.
In this mission you must find and talk to 6 plants in Central Research.

What a Mess: Clear the Clog
Very simple mission.
Go to the Water Pumps and to a small side room.
Solve power puzzle and shoot some tentacles.

What a Mess: Clear the Mold
This mission will be availble later in the game.
Go to the Medical Wing in Containment sector and shoot 6 Mold growths.

What a Mess: Even More Mold
This mission will be availble after compleating Clear the Mold Side Mission.
Go to the NSC Coolant Pumps in Maintnance and shoot anothe 6 Mold growths.

What a Mess: Take a Break
Just sit down and relax, you'll get the Janitor's Assistant outfit.

Self-Reflection

Altered Manifestations May Occur - Defeat esseJ


To start this Side Mission you need Mirror Supplement file that can be found on your way to Prime Candidate Program in a guard station.

To get to the Mirror you must open some shutters on both sides of the corridor. Camera feed will tell you which one should be opened (or watch my video).
In mirror dimension you will have to fight esseJ, your mirror self.
I hid behind the wall on the left side of the room and shoot her from there.
Old Friend
After mission 6 "A Brother’s Keeper" go talk to Emily in the Board Room, then go talk to Arish. He'll ask you to find his friends.
Old Growth

You can find this mission in abandoned elevator shaft in Central Research. It's that big hole with mold all around it. You will need Clearance Level 4 to get there to Dr. Underhill but you will need Levitate for boss fight.
Finishing this mission will grant you modl immunity.
Mold Removal

You get this mission after completing Old Growth side mission.
You will be asked to kill some Mold Hosts around the Research Department.
Mr. Tommasi

Head of Communications - Defeat Mr. Tomassi


After you finish Mission 7 “The Face of the Enemy” talk with Emily Pope.
This is your second and final fight with Mr. Tommasi. This time you will fight in a big arena with little cover. I found that fighting him Obi-Wan Kenobi styl (having higer ground) works best.
At top level you can find some cover and you should be safe from soldiers at the bottom. They will find their way up though so be carefull.
Max out your Launch ability to make this fight easier.
The Enemy Within

Living Archetypes - Defeat the Anchor


To unlock this side mission you neet to compleate A Matter of Time side mission first.

To get to the anchor you need Levitate ability so you will probably need to progres a bit in the main story if you don't have it yet.

Fight itself is not very hard.
Anchor is shielded all around but it will open iot shield spit clocks. This is a great opportunity to deal a lot of damage and cancel it's attack. Charge with some blast radius upgrades also works when fired from the side in to it's "mouth".
After you deal some damage additional enemies will start to spawn so clear them quickly as they can easily distract you and Anchor will surprise you with it's attac dealing massive damage or even killing you.
Put A Record On
After mission 6 take Jukebox Token lying on the table near Central Executive Control Point and talk to Arish. Then complete Tier 1 expedition.
Check out my strategy in Expedition Gear Outfit down below.
Boss Fights
Tommasi Boss Fight (Unknown Caller Mission)

This is the first fight with Me. Tomassi.
Hide behind the pillar to get a cover from his attacks and shoot him down while launching stuff at soldiers helping him.
Mr. Tommasi Boss Fight (Mr. Tommasi Side Mission)

After you finish Mission 7 “The Face of the Enemy” talk with Emily Pope.
This is your second and final fight with Mr. Tommasi. This time you will fight in a big arena with little cover. I found that fighting him Obi-Wan Kenobi styl (having higer ground) works best.
At top level you can find some cover and you should be safe from soldiers at the bottom. They will find their way up though so be carefull.
Max out your Launch ability to make this fight easier.
Astral Spike Boss Fight (Old Boys' Club Mission)

You will run in to this enemy first time during Old Boys' Club Mission. You can't kill him so you have to trap him. Get inside that big hangar and seal the exit. When Astral SPike gets close to you shoot him to stun him and quickly seal him inside.
Black Rock Prism Boss Fight (Threshold Mission)

You will run in to this enemy first time during Threshold mission.
He will disappear and attack from hiding.
Grab some stuff with Launch ability and just as it attacks launch items at him at him and at the same time avoid his attack if case you fail to be quick enough. If hit monster will stop his attack and dissapear again.
esseJ Boss Fight (Self-Reflection Side Mission)

Hide behind some cover and use your gun and Launch ability do tefeat her.
If she fires a rocket you can grab her with Launch if you have upgrade for grabbing grenades and rockets.
Anchor (The Enemy Within Side Mission)

Anchor is shielded all around but it will open iot shield spit clocks. This is a great opportunity to deal a lot of damage and cancel it's attack. Charge with some blast radius upgrades also works when fired from the side in to it's "mouth".
After you deal some damage additional enemies will start to spawn so clear them quickly as they can easily distract you and Anchor will surprise you with it's attac dealing massive damage or even killing you.
Mold-1 Boss Fight (Old Growth Side Mission)

Levitate to avoid it's attacks and keep Launching explosive rocks at him.
If you run out of energy shoot it with your gun but mainly use Launch ability.
I highly recommend upgrading it to the max level as soon as possible.
Salvador Boss Fight (My Brother's Keeper Mission)

You will run into Salvador during My Brother's Keeper Main Mission.
He will protect himself with a shield and throw stuff at you.
Attacking him with Launch will destroy his shield and leave him open for attacks for a short time.
Take Control Mission - Reach Dylan (Red Level)

Not really a boss fight but somehow it fits in this section.

In red level avoid touching the ground. Standing in shadow should be fine.
In phase two you must fight your way through a bunch of enemies.
Outfits
Expedition Gear
To get this outfit you have to compleate Expedition Tier 3.

Expeditions are special timed missions avaible in Jukebox. You will need special Jukebox Tokens to activate them, tier 1 costs 1 token, tier 2 costs 2 tokens and tier 3 costs 5 tokens.
After mission 6 you will find one token on the table near Central Executive Control Point. Pick it up and talk with Arish.
Additional tokens drop from enemies and can be crafted. Also succeeding on expedition will refund your tokens.

No mather what tier you play area and tasks you have to do will always be the same so my strategies below aplay to all tiers.

Each time you activate expedition there will be some kind of modifier in play. If you have a lot of tokens you can abandon the expedition at Jukebox to randomly generate a new set of modifiers.

If you die on expeditionyou will respawn at the start of Formation (area of expeditions). This can be used to your adventage. If you die AFTER comleating all objectives in given area you can save some time.

There are 4 areas that must be compleated. Going from the right as you start

Area 1 - cleanse 3 satellite dishes, avoid enemies and run straight for satelite dishes, defend there. You cleans them by standing on them for a short time.

Area 2 - fight 3 waves of enemies. I like to hide on a left side of this small arena launching stuff at enemies.

Area 3 - recover biometric logs - you must recover biometric logs from 3 dead soldiers. Look for beeping and blinking bodies. One is always straigh from where you came.I recommend that you locate all bodies before interacting with them. As soon as you try to grab a log enemies start spawning. It's not necessary to fight them but you can kill few to get some healing if needed. After you take third log fall down from the edge, this will teleport you to the begining of this area.

Area 4 - burn hiss nodes. Enemies will start spawning after you gram a node or after few seconds in this area so you can use this time to locate nodes - that red, glowing cubes. Grab them and launch at the furnace. Don't waste your time on enemies as they will continue to spawn endlessly.

Boss Fight

After compleating all 4 areas return to the starting location. Now you have to face the boss of Formation - Distorted Tourist.
I found an easy way to defeat this boss. Jump on the tower remains and then levitate on one of the lamps. He won't be able to his you there. Use Charge with some blast upgrades to damage him and force him to drop his invisibility. Use that opening for Launch attacks.
Asynchronous Suit

Available after you defeat esseJ in Self-Reflection side mission.
Candidate P7

Easy to get as it's on your way while on "The Face of the Enemy" mission.
Golden Suit

This one is important one a sit gives you 2 ability point needed for Master Parautilitarian achievement.

To get this outfit you need clearance level 5 to get to thew roulette room in Luck and Probability department.

Once here you need to score 7 on roulette wheel and to do this follow those steps:


1 - turn on 4 lamps
2 - make sure balls are not moving
3 - horseshoe must be faceing upwards
4 - Cat must be waving
5 - transfer clover to the roulette room
6 - move gold fish to the red carpet
7 - spin the weel and step out of the carpet
Janitor's Assistant

You'll get this as a reward for completing side mission What a Mess: Take a Break
Office Assistant
Rewarded for completing main story.
Director's Suit
Rewarded for completing main story.
Extradimensional Suit
This outfit is available in AEW DLC.
To unlock it you have to play and win every Arcade Game.
Arcade machines are located where the big elevator is, where you first fought Hartman.
Just left as you enter from Operations Center.

There are two Games - SHÜM and SHÜM 2.
Finish every game and you will unlock it, it does not award any achievement though.

Misc Videos
Secret stash under the Turntable
Altered World Events DLC
All Collectibles

In-depth Investigations - Find 80% of the Collectibles in the Investigations Sector


As in main game you only need 80% of all collectibles so it shouldn't be a problem. Some are preatty well hidden but in obviouse places. There are 5 or more in the last area so if you miss 5 or so for achievement before final boss battle don't worry.
All Hidden Location and Clock Puzzle
Side Missions
Another Fine Mess Cork Board Location


If you missed it, here's the location of Coark Board with all Another Fine Mess side missions.
Another Fine Mess - Nourish The Plants
Another Fine Mess - Clear The Mold
Another Fine Mess - Burn The Dark
Return to Sender

Quick walkthrough for Return to Sender Side Mission that you can unlock by picking up a letter from the tubes near AWC Loading Bay Control Point. First copy it 3 times, then sent those copies out and find and cleans Altered Item to finish this mission.
Gerbil Took The Top Head

This mission will unlock automatically after your encounter with Hartman in Fra Mauro AWE.
I'm not sure if you have to give him those two items found near the prison cell so you can skip that part and go straight for the helmet. It's at the start of the level protected by some named enemy.
Dead in its Tracks

This mission will unlock automaticaly as you finish encounter with Hartman in Eagle Limited AWE
Get inside the train and interact with items in this order:

Briefcase
Driver's hat
Violin
Meal
Hammer
Scrap
Achievements
Multiple Applications

Multiple Applications - Use Multi-Launch to hit 3 targets


You need final Launch Ability upgrade for this. Grab 3 items (use right mouse button on PC to grab additional items), find 3 or more enemies and wait until Launch locks on to 3 enemies, than launch those items for the achievement.
Surge of Power

Surge of Power - Upgrade Surge to the maximum level


Surge is a new weapon form you'll get access to shortly after starting this DLC. It's a sticky grenade launcher that can be quite useful.
Workplace Recreation

Workplace Recreation - Play a single game in Arcade Mode


Arcade Machines (SHUM and SHUM 2) are located near the elevator in Active Investigations (where you first meet Hartman)
Elevated Mind

Elevated Mind - Kill 25 Airborne Rangers


Airborne Rangers are new type of enemies. Kill 25 for this achievement.
Vending Spree

Vending Spree - Destroy 80% of the Altered Vending Machine instances


Every vending machine in Investigations has a chance to turn alive. It will turn red wen damaged and will start running away from you. You have kill 4 of those.
It can be a bit annoying as it's a random event but turns out you can farm those machines.
Simply find few good spots with 2-3 machines nearby and teleport from one spot to another. If machines stop respawning simply quit to menu, load, and start your run again.

Farming Guide
Boss Fights
First Hartman Encounter

Familiar Methodologies - Fight off Hartman


Put Power Cores in sockets.
Note that while in darkness your energy will be slowly depleting.
Hartman Boss Fight - Fra Mauro AWE

There are some buttons on the left side, fortunately in those lighted areas.
Use those buttons to move the light mounted on the crane. You must burn the darkness covering two power cores and place those power cores in sockets. Placing one in the lower socket will activate another light that will burn the darknes from the upper one.
Hartman Eagle Boss Fight - Limited AWE

Move train wagon across the hall. Use cranes light to move safely between platforms.
Hartman Boss Fight - AWE Transit Bay

Your goal here is to put 4 Power Cores in Sockets. Power Cores are protected by some Hiss Nodes and few enemies. You will loose energy on darkness so move fast from light to light. Also, every time you remove a Power Core a light will go out making things slightly harder.
After you get all four Cores push the button and the fight is over.
Hartman Final Boss Fight - Bright Falls AWE

This is your final battle with Hartman.
Phase I - First phase is easy, just put all power cells in sockets and turn on the lights.
Phase II - In phase two you have to fight Hartman. He has a powerful melee attack that heals him if he hits you. He also teleports all around so stay away from him. He also has two ranged attacks that he telegraphs by glowing red. One is a short range blast and second is a long range missile attack.
Phase III - After you bring down his health bas he will knock out two power cells from random sockets so you have to put them back. He will be shielded from your attacks so don't bother.
Phase IV - it's the same as Phase II.
Puzzles
Transit Terminal Puzzle
Utility Corridor Power Cores Puzzle
DLC: The Foundation
All Collectibles

Subterranean Research - Collect all Collectibles in the Foundation


WARNING - This achivement is buggy.
It is highly probable that after collecting all collectibles from my video and all automatic unlocks you will be missing one - Hotline record called Out of Options. Luckily there is a workaround.
First make sure this is in fact the collectible you are missing. There's a checklist for your convenience below.
To be safe finish all other achievements for the entire game before trying this.
Backup your save files. Contro's Steam saves are stored in \Steam\userdata<whatever_big_number>\870780\remote.
From menu go to mission select and start from End Game mission.
Go to Foundation and through the first cave. Achievement should unlock after first Marshal communication through the Hotline.
Now go to Main Menu, DO NOT EXIT GAME, switch back your backed up saves and hit continue. You should be where you finish your playthrough (still missing that one Hotline collectible though).
If you're not where you finished, turn of your connection to the internet, exit game, wait for Steam cloud synch to fail and turn internet back on. Delete your save files from Steam folder, start the game and it should load saves from the cloud.

Now, for the collectibles.
This video contains all collectibles that must be picked up. There are automatic unlocs and you will have to finish all side missions to get those.

You will be asked to pick one new ability Shape or Fracture. I picked Shape, another ability you will receive after performing second ritual. I recommend to take Shape if you want to easily follow my video, otherwise order in witch you will be picking up collectibles may be different.
But don't worry, none are missable and you can get them after you finish this DLC.

CHECKLIST

Hiss Research:
Hiss Sharpened (automatic unlock)

Astral Research:
Astral Copy (automatic unlock)
Astral Mimic (automatic unlock)
Astral Spike (automatic unlock)

Reports:
America Overnight Fatality
Power Cores
Talented Janitor

Research:
Cave Paintings
Foundation Etchings
Foundation Pillar
History of the Oldest House
Leylines
Pyramidic Geometry

CASE FILES

Altered World Events:
Kyiv Summary
Kyiv Supplement
Meteor Hill Summary
Meteor Hill Supplement

Altered Items:
Maneki-Neko Procedures
Movie Camera Procedures (automatic unlock)
Movie Camera Supplement
VHS Tape Procedures (automatic unlock)
VHS Tape Supplement

CORRESPONDENCE

Official:
Ash: Request Denied
Foundation Accident
Northmoor: Final Warning
Northmoor: Medical Results
Unacceptable Behavior Memo

Non-Official:
Adventure Accepted
Relocation Order
Shift Account Pt. 1
Shift Account Pt. 2
Shift Account Pt. 3

Dead Letters:
Computer Program
Green
New Language
Were-Everything

MULTIMEDIA

Altered Items:
Brian's Movie Den Ep. 3

FBC Recordings:
FBC Reminder: Windows

America Overnight:
America Overnight Ep. 367
America Overnight Ep. 382

Threshold Kids:
Rejected Episode

Ash Tapes:
Log 1: Discovery
Log 2: Foundation
Log 3: Work
Log 4: The ID
Log 5: Pyramids
Log 6: Departure
Log 7: Changes
Log 8: Purpose
All Hidden Locations

Niche Position - Find all hidden locations in the Foundation


All Maneki-nekos Cats

One of Us - Gather all the Maneki-nekos


After finding all Cats you will get acces to the cat vault. Upon entering you will receive this achievement. Inside you will find can ears that you can equip and wear but they will disappear upon leaving Foundation area.
Final Boss Fight

She's like upgraded Sharpened.
At distance she will throw grenades at you, first a couple and whole bunch later. You can use them as your ammunition for launch.
At close she will be attacking you in melee just like Sharpened.
She will teleport when shoot at or to get closer to you.
She will also summon His to her aid. Take control of them to help you with this fight.
Look out for snipers as they can deal massive damage if you're not careful.
Side Missions
Pope's Collection


Pope will get down to The Nail after you finish your first ritual. After talking with her you will receive this side mission. She will give you a Skeleton Key that allow to open all doors in this level.
Collect 4 ID cards around Warehouse and go to the back of the elevator for the 5th ID card. Then place them on the right stations.
This will activate the elevator and unlock basement level of the Warehouse with a boss to fight. After the fight pick up documents from the desk and talk to Pope again to finish the mission.
Jesse Faden Starring in Swift Platform

Star Performance - Complete the Side Mission: "Jesse Faden starring in 'Swift Platform'"


This mission will be available after you lower Camera Altered Item.
After interacting with it you will be thrown into a train platform chase. Your goal here is to jump from platform to platform to avoid obstacles and killing enemies. There is a flying boss at the end of the level.
Found Footage
Achivements
Supportive Staff

Supportive Staff - Have a Deployed Ranger kill 5 enemies


There are few places with radios allowing you to call in a ranges to help.
Problem is that those rangers are useless. You will have to damage few enemies and wait for rangers to kill them, it will take some time.
Hostile Work Environment

Hostile Work Environment - Kill 50 Hiss Sharpened


Sharpened are new type of enemies in Foundation. They move fast and teleport short distance to avoid your ranged attacks and to get close to you. They hit hard so keep your distance.
< Make/Unmake >

< Make/Unmake > - Use Shape and Fracture a combined total of 100 times


Shape and Fracture are two new abilities you will get playing through Foundation. One allow you to grow crystals and other to destroy them.
Astral Plumbing
Puzzles and misc videos
How to activate Warehouse Elevator
Collapsed Department Power Problem Solution
How to get to Cave Bridge Control Point
Astral Plane Pillars
Коментарів: 66
Mesjaf  [автор] 16 верес. 2024 о 9:53 
Good to hear that :)
Ninja Eule 15 верес. 2024 о 21:14 
Never mind, I thought I had already gotten to the one in the warehouse but I mistook the window. It popped when collecting Northmoor: Medical Results, also located there, for the Subterranean Research achievement. :squirtyay:
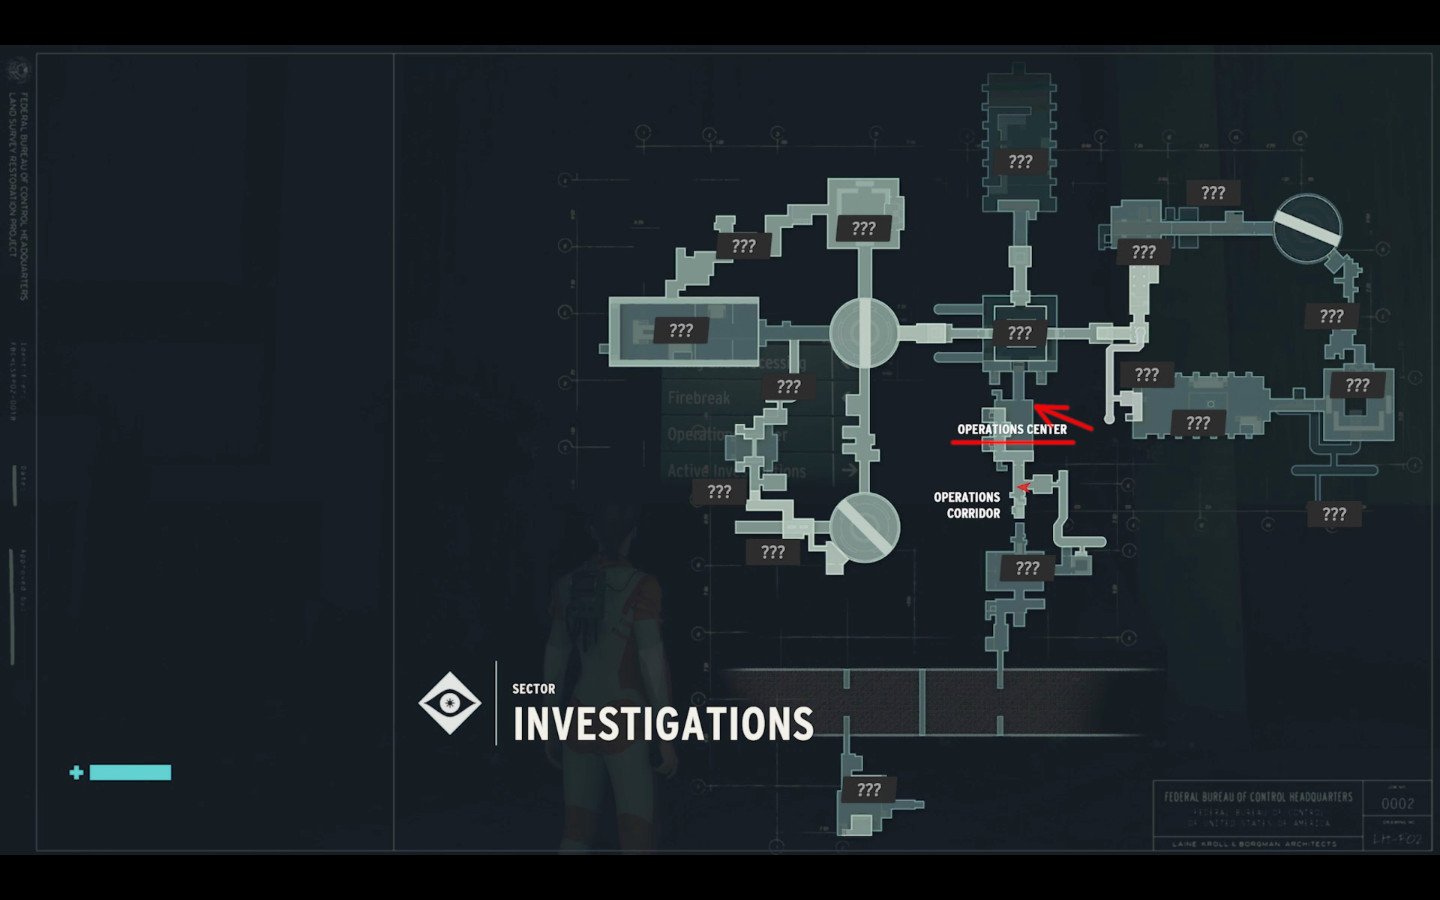
Since there is no way to miss things I only look at the guide after playing through the sections normally. That way I don't spoil the fun of trying to find things on my own until I don't know how to progress anymore. Unfortunately this time it led me to believe that I had gotten to that Hiden room when I hadn't.
The Nothing Man 15 верес. 2024 о 11:19 
hate to ask
was one on a tuesday?
steam can really bork cheevs
one game point and click required 12hrs real time to wait on a screen to get hard worker achievement
just be careful on tuesdays
Ninja Eule 15 верес. 2024 о 11:19 
I did run through all of them again but the achievement still didn't pop. :goobert:
Should I just start a new game from End Game mission and collect them again?
Mesjaf  [автор] 15 верес. 2024 о 10:47 
Run through them again. Maybe game didn't count one.
The Nothing Man 15 верес. 2024 о 9:58 
hmm odd
Ninja Eule 14 верес. 2024 о 19:00 
I got to all the hidden locations in the Foundation, yet my Niche Position achievement is still stuck at 9/10. Any workaround?
The Nothing Man 10 серп. 2024 о 12:11 
this has never been an issue
its not a valve game you can cheat all you want in any game
Doctor Long 92 10 серп. 2024 о 8:37 
Yes We can use ingame cheat without breaking the achivements :cs1_susan:
tranz2deep 10 квіт. 2024 о 19:16 
For the battle with FORMER, I like to get on the pillars. The attacks don't destroy them anywhere near as easily and if the attacks do manage it, they don't take out the floor beneath.