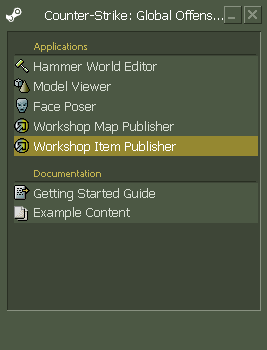
Counter-Strike 2
Оценок: 342
Complete guide to creating Stickers for CS:GO
От Pumkin
This guide should go over everything you need to know to be able to create and upload stickers to the CS:GO workshop.
2
   
Наградить
В избранное
В избранном
Удалить
Requirements
In this guide I'll be using Photoshop but you can use any other free alternatives if you want as the process is mostly the same.

What you need is:
Photoshop[www.adobe.com] - You can get a free trial or obtain it by questionable means, it doesn't matter.
VTFedit[nemesis.thewavelength.net] - Lets you create VTF textures
Nvidia texture tools photoshop plugin[developer.nvidia.com] - For creating normal maps
CS:GO sdk - For testing stickers and submitting to the workshop. Find it in the tools section of your steam library.

Optional:
VTF photoshop plugin[nemesis.thewavelength.net] - Makes it easier to make quick changes to textures
Getting started
Now that you have all required software and plugins installed we may begin.

For the first bit I'll use this sticker I made as an example:
http://steamcommunity.com/sharedfiles/filedetails/?id=231865039
Start photoshop and create a new square image.
The resolution has to be a power of 2 so you can set it to:
  • 128x128
  • 256x256
  • 512x512
  • 1024x1024
Ideally you should use a higher resolution because you can always just scale it down if necessary.

I'll use 512x512.

Set the background color to black and create a new layer on top of it for your sticker.

If you don't want to follow the process of creating the bandaid then skip the next section and move directly to Finishing up the sticker
Creating the sticker
We can't just rip an image off google and sell it off as our own so we'll need to create it ourselves.
Before we do that we need one as reference so let's grab that off google.

I got this bandaid picture:


The shape is pretty simple and can be recreated using one of the default tools:


I'll use the color picker to get the color of the bandaid from my reference picture and fill my shape with that.


Doesn't look quite right so I'll make some changes to the anchor points


Looks more like a bandaid now
Let's add another rounded rectangle for the center bit. Stroke it with a slightly darker shade of the same color.


Let's double click the layer to bring up the layer styles menu and add the emboss style.


Looks somewhat believable but consdering it's a small sticker it should be fine.

Now let's add the white dots.


Let's group all the bandaid layers together and hide it.
I'll make a copy of the group and merge it into one layer.


Next let's duplicate it and rotate it. I'll use puppet warp to slightly bend one bandaid to the side.


Now that I've got the shape right I need to add some dirt and shadows to make it look less like a terrible clip art.


You may have noticed that the image is smaller and looks completely different. It's because it is.
I couldn't be bothered to repeat the whole process and just grabbed the finished bandaid I had in another psd file.
For some unknown reason I decided to use 256x256 on that one but you shouldn't.

Anyway, now I'll save the image and move on to the next step - Finishing up your sticker.
Finishing up the sticker
Now that we have the sticker image ready it's time to turn it into a texture.

But before we do that we must create an alpha channel to indicate where the sticker texture should be transparent.

Go to your channels tab and create a new channel. This will be your alpha channel.
The alpha channel is a black and white image that indicates transparency.
Black means invisible and white visible while grays are in between, transparent.

By default your layer will be plain black which means your sticker is invisible.
Flatten your image if you haven't and select the black area outside of your sticker. Invert the selection and fill it with white.

You should end up with something like this:

If you click the eyeball of the RGB channel to make it visible you should should see the black area turn red.
The red bit is what will not be visible.
Inspect the edges and see if there is any overlap.
If there isn't - good, if there is you might want to paint around a bit either in the alpha channel or your actual image.


Even though the whole texture is tan the alpha channel gives it the right shape ingame as you can see here:


Before we save our image ensure that the image was flattened and that there is only 1 layer - the background.
Creating the .VTF and .VMT
VTF or Valve Texture File is valve's default texture format, duh.

If you downloaded the photoshop VTF plugin then the next step would be to just go to File > Save as and select .VTF.
Save it with the following settings:


Alternatively if you didn't install the photoshop vtf plugin save it as a .tga. We'll use VTFedit to create the vtf instead.
Open up VTF edit, go to File > Import and import your texture with the default settings.

After that tick the same options on the left as in the image above. Save your changes.
Each VTF needs to have a VMT (Valve Material File) to function properly.

A VMT is a text file that holds a script with parameters for the VTF.
You can use a text editor to create a VMT but I'll just use VTFedit.

Go to File > New and paste in a script depending on the style of sticker you want to create.
Here's the script for the glossy version of my bandaid sticker.
WeaponDecal
{
$DECALSTYLE 0 // glossy sticker style
$basetexture "//./C:/users/user/desktop/New folder/bandaid/bandaid"
$unwearstrength 0.16
$envmap "env_cubemap"
$envmaptint "[ .07 .07 .07 ]"
$phong 1
$phongexponent 2
$phongfresnelranges "[ .2 .5 1 ]"
$phongalbedotint 1.0
$phongboost 1.0
$phongalbedoboost 10.0
}
Make sure to correctly indicate the filepath or your sticker won't work.
Use //./ for an absolute filepath. If you don't it will default to the materials folder in your counterstrike folder somewhere.
Enclose the filepath in quotes just to make sure it works right with spaces.

Also make sure there is no extension for your texture in the filepath.


It's also a good idea to stay organized and name your folders properly, unlike me.
Previewing your sticker
If you've done everything correctly your sticker should work.
Let's go test it out.

Open up your csgo sdk and select the model viewer


Go to File > Load model, scroll all the way down and select sticker_preview.mdl
You should see this default sticker:


We're going to temporarily replace it's texture.
Go to the materials tab, select sticker_prewiew_wip and click the Replace VMT button on the right.
Select your texture.


If you see your sticker then you did everything correctly, if not then either:
  • Your alpha channel is missing or is incorrect
  • You didn't flatten your image
  • Your filepath is wrong in the VMT

If everything works you might want to see how your sticker looks on weapons. Getting it to work ingame would require you to replace existing textures, which would require some more effort to get working.

But that isn't necessary since valve was kind enough to provide us with weapon models with stickers already applied to them, all you need to do is replace the default sticker with your VMT.

Go to File > Load model and this time scroll down and find the sticker_preview folder, inside you can see weapon models.
Follow the same process to replace default sticker VMTs. Tick Affect all loaded materials to replace all stickers at once.

You can also temporarily change certain parameters by selecting them from the list in the middle and changing their variable.

These changes are only for previews and aren't stored in the texture, but if you do want to add any of these options to the final texture you'll need to copy them over to the VMT.

Your simple glossy sticker is done.
Now let's move onto fancier foil stickers.
$DecalStyle and $UnWearStrength
$DecalStyle
The $DecalStyle VMT parameter controls which of the style presets the sticker uses ingame.

More about each particular style in the next sections.

$UnWearStrength
Автор сообщения: Valve
By default, stickers wear evenly across their surface. However because some parts of the sticker are more visually important they need to remain recognizable after heavy wear and tear.
Well said, Valve.

To define important areas on your stickers use brush strokes with color values over 30 (out of 255).
As you can see with $Unwearstrength 0 the whole surface is randomly scratched.


While with $Unwearstrength 0.32 it sticks to saving gray areas in the alpha channel from being scratched as much.
Sticker styles - Glossy and Paper Backed
The glossy style is the simplest one, it requires only a texture with an alpha channel.
It is set by setting the $DecalStyle parameter to 0 in the VMT.

Here's the glossy VMT again.
WeaponDecal
{
$DECALSTYLE 0 // glossy sticker style
$basetexture "//./C:/users/user/desktop/New folder (2)/bandaid/bandaid"
$unwearstrength 0.16
$envmap "env_cubemap"
$envmaptint "[ .07 .07 .07 ]"
$phong 1
$phongexponent 2
$phongfresnelranges "[ .2 .5 1 ]"
$phongalbedotint 1.0
$phongboost 1.0
$phongalbedoboost 10.0
}


The paperbacked style is the same as the glossy one but it has a paper backing. It keeps it's original shape when it's wears out.

To make a standard glossy paperbacked sticker, set $DecalStyle to 1.

WeaponDecal
{
$DECALSTYLE 1 //Paper-backed glossy sticker style
$basetexture "//./C:/users/user/desktop/New folder (2)/bandaid/bandaid"
$unwearstrength 0.1
$envmap "env_cubemap"
$envmaptint "[ .07 .07 .07 ]"
$phong 1
$phongexponent 2
$phongfresnelranges "[ .2 .5 1 ]"
$phongalbedotint 1.0
$phongboost 1.0
$phongalbedoboost 10.0 }
Sticker styles - Embossed foil
Embossed foil stickers that create the illusion of a 3D relief on the sticker using a normal map.
Embossed stickers are made by setting $DecalStyle to 4.

Here's the VMT for an embossed sticker:
WeaponDecal
{
$DECALSTYLE 4 // embossed foil
$basetexture "//./C:/users/user/desktop/New Folder (2)/redstar/redstar_foil"
$normalmap "//./C:/users/user/desktop/New Folder (2)/redstar/redstar_normal"
$unwearstrength 0.08
$envmap "env_cubemap"
$envmaptint "[ 25 25 25 ]"
$phong 1
$phongexponent 0.1
$phongfresnelranges "[ 1 1 1 ]"
$phongalbedotint 1.0
$phongboost 40.0
$phongalbedoboost 2.0
}


You don't have a normal map? Well, that's not a problem as normal maps are easily created in photoshop with the Nvidia texture tools plugin.
Once you install it it should appear in your Filters menu.


Once open these settings should work just fine.


When saving you can use the same settings but this time also tick normal map.

The only things you may want to change are the scale and maybe invert the light.
Play around with it, see what works best for your sticker.

When automatically generating some areas might appear rough when you might want them to be smooth. If that's the case just brush over the areas with the background color.


When saving you can use the same settings but this time also tick normal map.


When using this style your sticker might appear really bright. If so you'll need to darken the base texture.
Sticker styles - Holographic
Holographic stickers are paperbacked stickers that use two additional textures to create a holographic light warp effect.
The textures we need are the sticker and the holomask, the spectrum texture can be left as default.

Holographic textures are made by setting $DecalStyle to 3.
The VMT for a holographic sticker is:
WeaponDecal
{
$DECALSTYLE 3 // holographic
$basetexture "//./C:\Users\User\Desktop\Stickers\Smoke\smoke"
$holomask "//./C:\Users\User\Desktop\Stickers\Smoke\smoke_holomask"
$holospectrum models\weapons\customization\stickers\default\holowarp_default
$unwearstrength 0.1
$envmap "env_cubemap"
$envmaptint "[ .07 .07 .07 ]"
$phong 1
$phongexponent 2
$phongfresnelranges "[ .2 .5 1 ]"
$phongalbedotint 1.0
$phongboost 1.0
$phongalbedoboost 10.0
}
To get this working right we need to create the holomask texture.
For that we need to create a new texture and split the channels in photoshop.

Copy your sticker to the clipboard and head over the the channels tab. Delete the RGB channel.
(You won't be able to delete the RGB channel if you don't have any other channels apart from Red Green Blue you need to create an alpha channel if you didn't)
This will leave only your Alpha channel. It will also set your image mode to multichannel.
Create 3 new channels and paste in your sticker onto each.

Rename each channel so you have:
  • A red channel
  • A green channel
  • A blue channel
  • An alpha channel

    If you make all your channels visible you should end up with weird colors but that's fine.
    As the channels aren't linked together we can edit each one of them individually.


    The $holomask Red channel masks what areas of the basetexture have holographic effects applied.
    Areas not included in this channel (plain black) will use the basetexture color, as if they were on a normal paper backed sticker.


    The $holomask Green channel defines a pattern for light to warp around, based on the spectrum texture.


    The $holomask Blue channel defines the vertical offset read from the spectrum texture.
    White values in this channel mean the bottom of the spectrum texture while black values mean the top.


    The default spectrum texture:


    Note how the bottom of the spectrum has gray colors.

    Once you're done with all 3 of your channels go to Image > Mode and set it to RGB. This will link all the channels and give the holomask the funky colors that the game can understand.


    This holomask gives us the following effect:

Sticker styles - Color-replace
Color replace stickers are stickers that use a mask texture to paint a sticker with up to 4 colors.
The mask texture uses it's channels as layers for separating paintable areas.


The VMT for color-replace stickers is:
WeaponDecal
{
$DECALSTYLE 2 //color-replace sticker style
$basetexture "//./C:\Users\User\Desktop\Stickers\Tsticker\Tsticker"
$colortint "[ 0 0 0 ]"
$colortint2 "[ 141 27 30 ]"
$colortint3 "[ 181 168 168 ]"
$colortint4 "[ 255 255 255 ]"
$unwearstrength 0.2
$envmap "env_cubemap"
$envmaptint "[ .07 .07 .07 ]"
$phong 1
$phongexponent 2
$phongfresnelranges "[ .2 .5 1 ]"
$phongalbedotint 1.0
$phongboost 1.0
$phongalbedoboost 10.0
}

To create the mask texture we need to edit it's channels separately.
Go to your channels tab and delete the RGB channel, this will set your image into multichannel mode.
Create 3 new channels. Name them Red, Green and Blue then paste in your new channel images. All your channels have to be monochromatic.

I recommend creating the 3 layers necessary in a different file then copying them over.


Once you're done with that go to Image > Mode and choose RGB.
This should give your image weird colors but ignore them as the final colors are set later using RGB values indicated in the VMT.


To easier pick color directly in the model viewer you can use the integrated color picker.


You can download the sticker from this example here[mega.nz].
You can't upload it to the workshop though.
Publishing to the Workshop
Now that you're done with your sticker and are satisfied with the results it's time to publish the sticker to the workshop.

Publishing is easy, you just start the sdk and select the Workshop Item publisher.
The publisher has moved. To publish you need to start csgo and type workshop_publish into the console. The rest is the same.


Pick sticker and click Add.
Next just fill in everything and you're good to go.


(Note: Your publisher will look a bit different, the "changes this update" box will be missing because you're adding a new submission while I just brought up the Edit submission menu.)

Because stickers have different qualities Valve insists on you submitting at least 2 sticker styles. It is recommended to submit one of styles 0-2 and one of styles 3-4.

That's it
Thanks for reading my guide.
I hope you found it useful and that it answered most if not all your questions.

Got a question? Post in the comments.
Got a suggestion? Post in the comments.
Want to point out a mistake? Post in the comments.
Want to point out anything else? Post in the comments.
Want to share a random fact? Post in the comments.

I'd also appreciate if you leave a rating, whether you liked it or not and check out some of my other workshop submissions:

http://steamcommunity.com/sharedfiles/filedetails/?id=256653819
http://steamcommunity.com/sharedfiles/filedetails/?id=188935661
http://steamcommunity.com/sharedfiles/filedetails/?id=231865039
http://steamcommunity.com/sharedfiles/filedetails/?id=232085402
http://steamcommunity.com/sharedfiles/filedetails/?id=233540849
Комментариев: 155
Pumkin  [создатель] 7 окт. 2023 г. в 21:43 
No clue. I'm assuming there's new tools and workflows for this
Mario Sesenta y Cuatro 7 окт. 2023 г. в 16:47 
The SDK for Counter Strike GO doesn´t work right now. How do i preview the sticker and upload them now?
ᴷᵘʸᵃ Tristan 18 авг. 2022 г. в 15:20 
Hey there, I'm getting the error

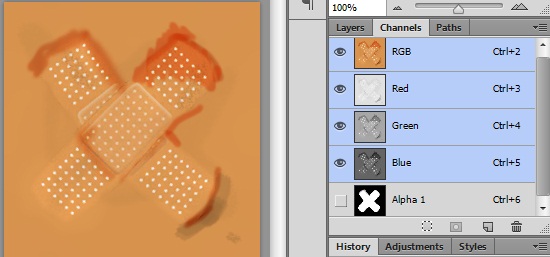
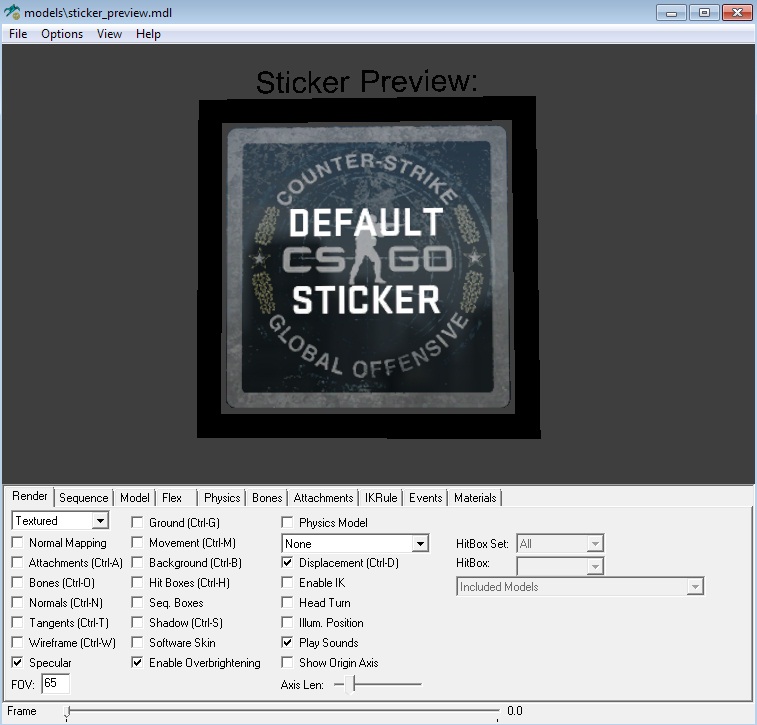
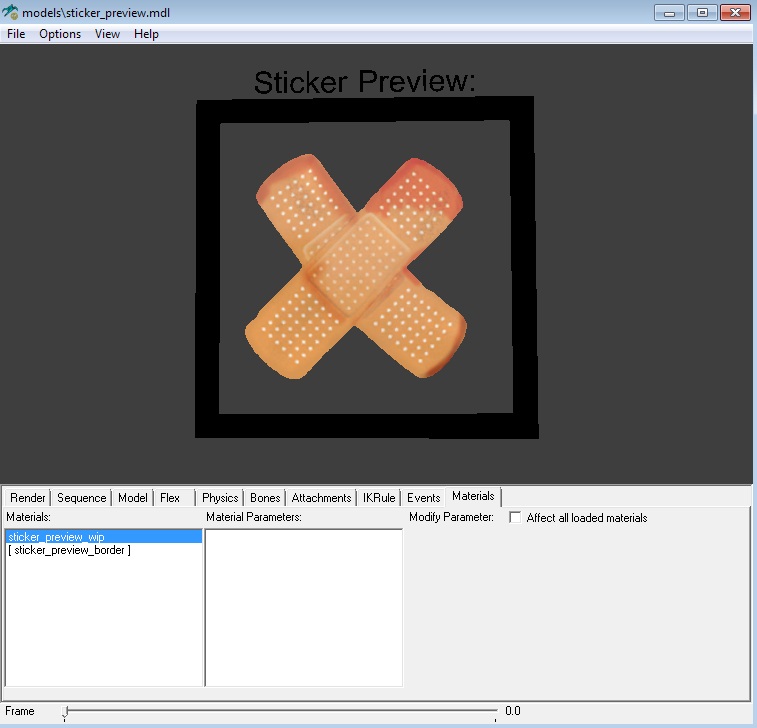
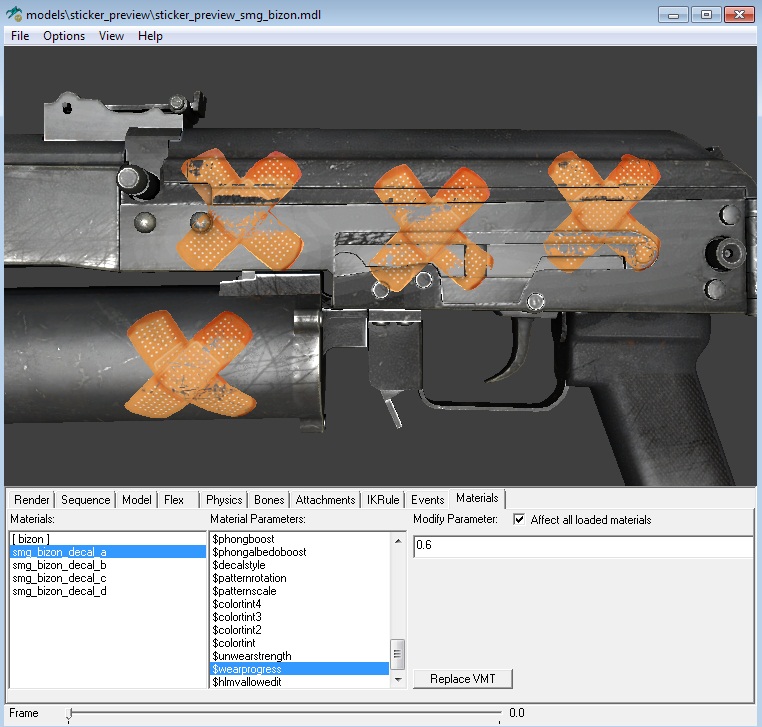
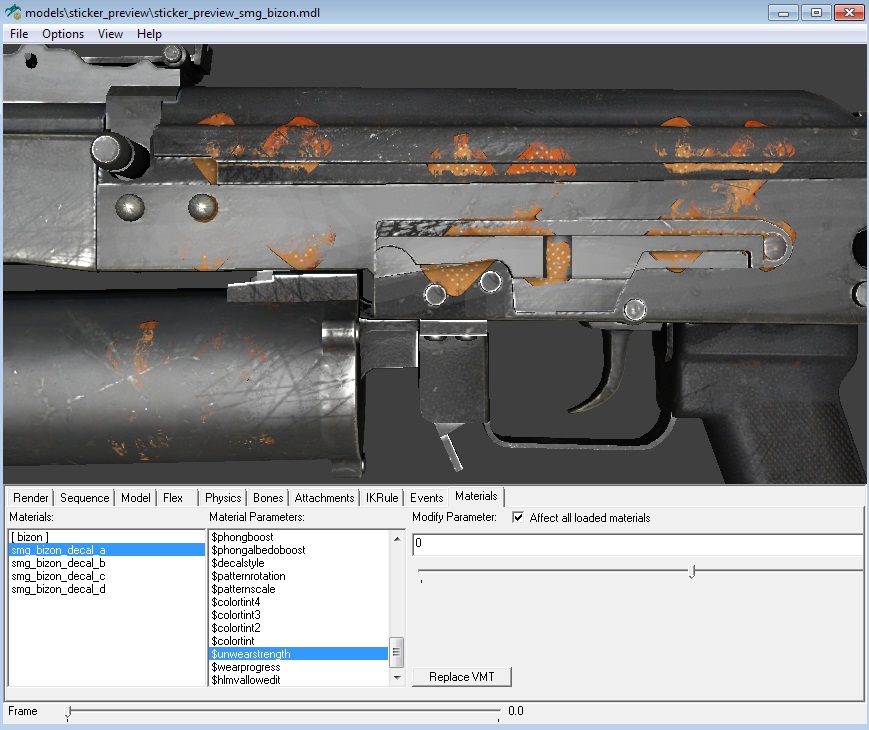
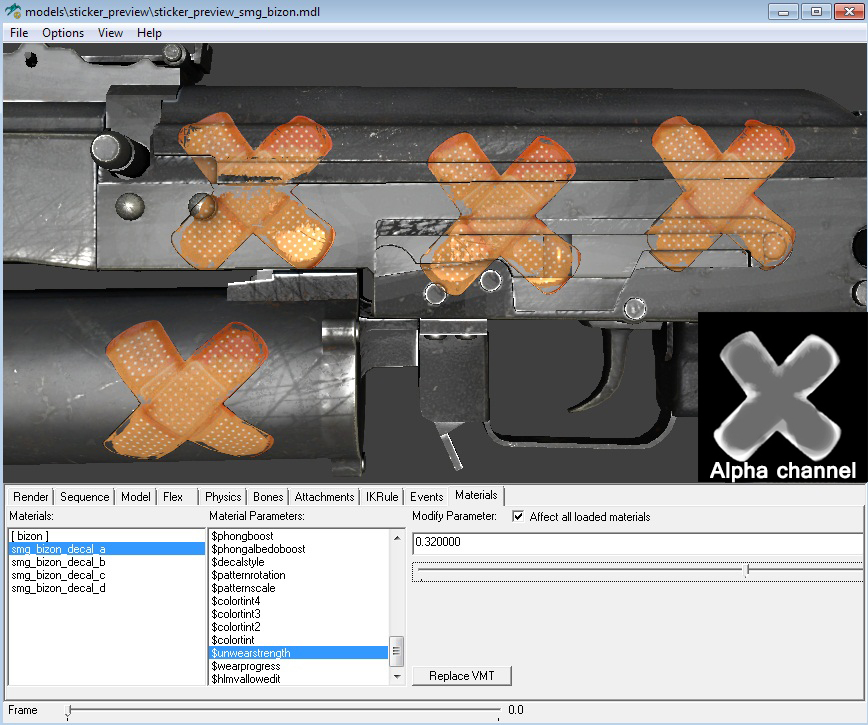
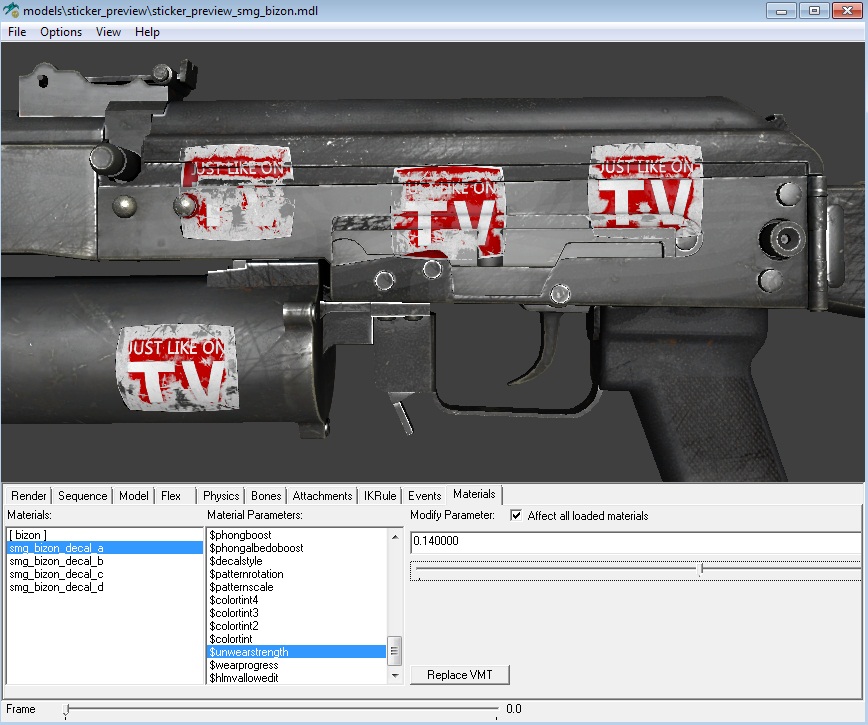
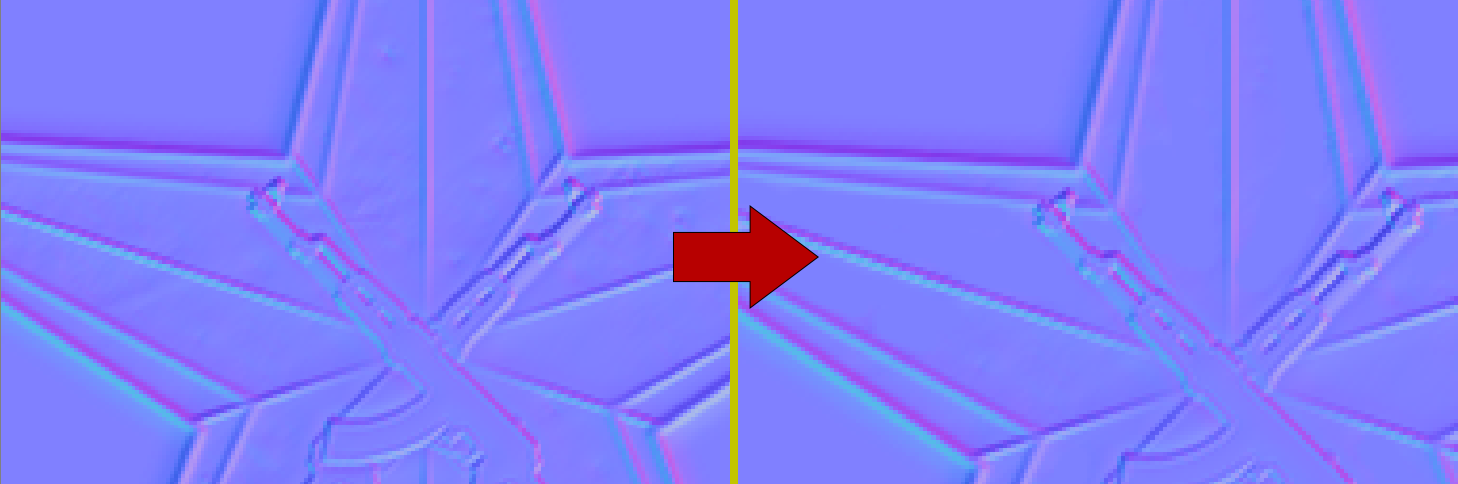
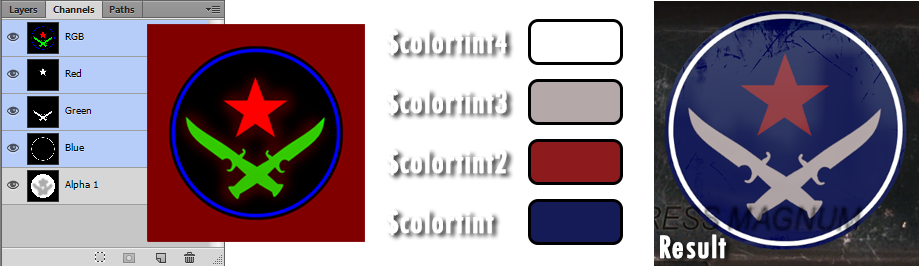
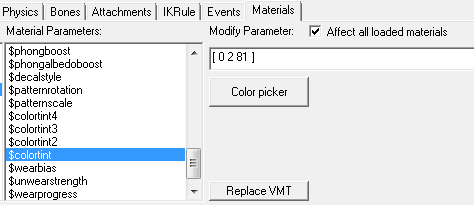
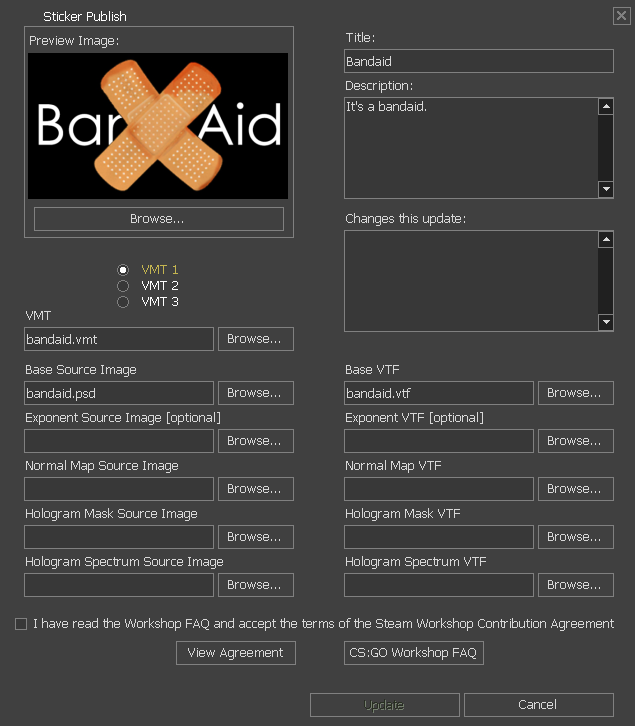
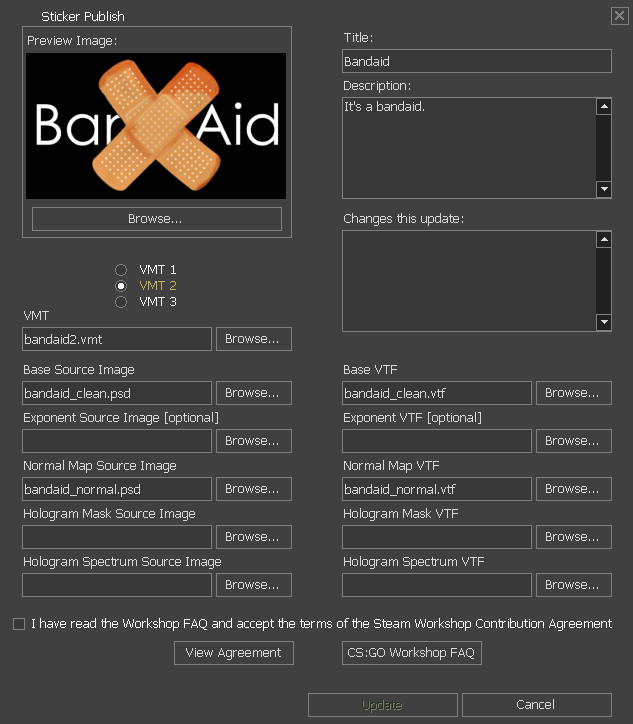
" has $decalstyle 3, but has bad or missing holospectrum source image!"

Any suggestions on how to fix this? Much appreciated.
Pumkin  [создатель] 18 авг. 2022 г. в 12:50 
You just upload to the workshop. It's entirely their decision what they choose
57 18 авг. 2022 г. в 9:44 
Does anyone know how valve chooses wich skin goes to the game? How do you apply for it?
Pumkin  [создатель] 6 мар. 2021 г. в 15:18 
That's something you gotta ask steam support I guess, I dunno how it works.
But from what I heard you get a small cut from every sale.
If you're in a sticker capsule, the cut gets split between every person in that capsule for capsule sales.

But don't quote me on that
Chris Angel 6 мар. 2021 г. в 14:25 
I can't seem to find anywhere if you do get a cut off the stickers or how does it work?
[UA/SK] Divine Lotus 1 июл. 2019 г. в 10:07 
I meant to say GIMP 2.8.0
[UA/SK] Divine Lotus 1 июл. 2019 г. в 5:52 
For anyone that use GIMP (pasting my info to relative guides):

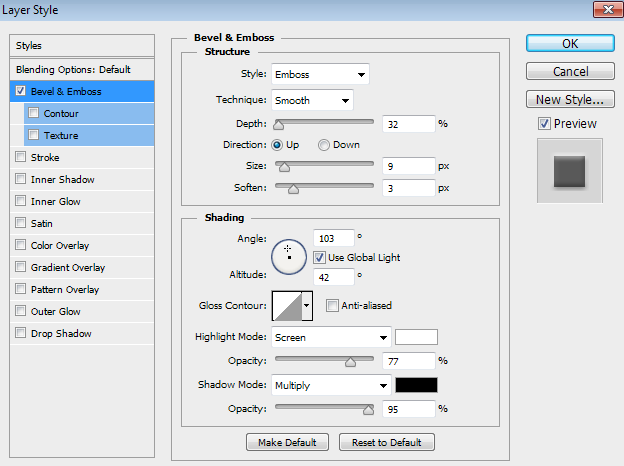
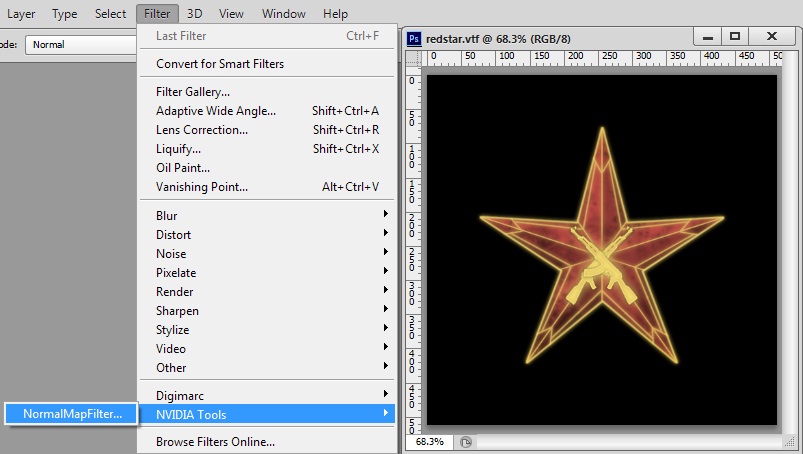
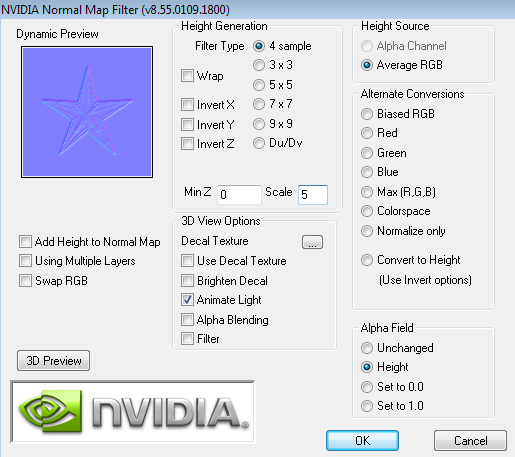
I recommend looking into the official Valve SDK Documentation for insight on how materials work in CSGO's Source engine, linked below:
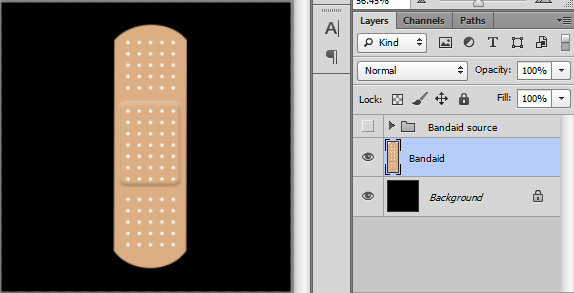
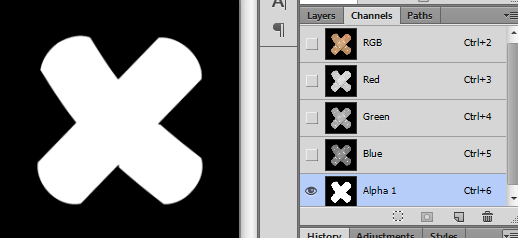
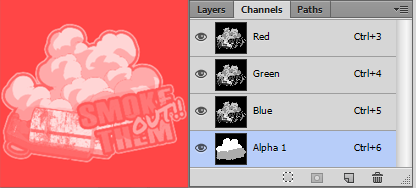
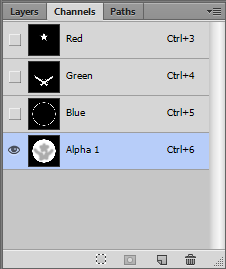
GIMP alpha channel
https://developer.valvesoftware.com/wiki/GIMP

GIMP Alpha channel: https://m.youtube.com/watch?v=LQCziSTNJgQ
https://www.youtube.com/watch?v=A9aZdPqs17M

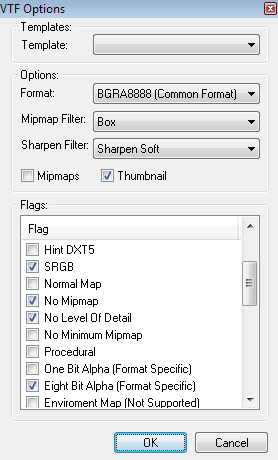
Using GIMP VTF plugin?
Be sure you're using GIMP 2.80

Not using plugin? Follow this: https://developer.valvesoftware.com/wiki/Creating_a_Material

I have a wiki that relates to the process of making skins / modding: https://steamcommunity.com/sharedfiles/filedetails/?id=1501754039&searchtext=Wiki

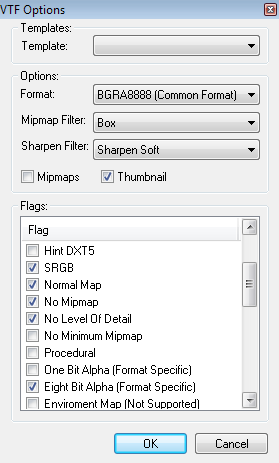
Use .tga or .tiff image types instead of .jpg or .PNG since they're lossless and supports alpha. More info in the Valve Source SDK Doc
pv 6 фев. 2019 г. в 4:39 
right, i found a download for it on nvidia's webpage, thank you!