Sonic Adventure DX

Sonic Adventure DX

47 ratings
Sonic Mission A Guide
By UnseatingKDawg
While this guide isn't a full walkthrough, it provides info on how to finish all 10 of Sonic's Action Stages with Rank A - that is, under the time limits provided. Unlike some other Sonic games, you'll have to take some pretty unorthodox shortcuts and abuse some physics if you want to finish in the time limits provided for each stage.
   
Award
Favorite
Favorited
Unfavorite
Prerequisites
Before you start speeding through the stages, you'll need a few things first:

1. Complete Sonic's story in Adventure Mode - this will unlock all 10 Action Stages for play.
2. Complete Mission B in each stage - Mission B needs you to finish the level with 50 Rings in hand. Once you complete Mission B for a stage, you can then start tackling Mission A.
3. Get all of Sonic's Level-Up Items. There's three total - you'll get the Lightspeed Shoes and Ancient Light through the course of his story, while the Crystal Ring can be found above the service desk in the hotel. Make sure you grab that Crystal Ring, because it cuts your Lightspeed Dash charge time in half.
4. While it's optional, it's a very good idea to play through the stages in Adventure Mode since you can build up a nice stockpile of lives. If you happen to not do something right, you can restart at the last checkpoint you passed. Some stages may require you to retry several times.
5. Learn to love Sonic's Spin-Dash. If you aren't running up a wall, make it a point to spam that Action Button because multiple spin-dashes will carry you far.
6. Use a control method that works for you. For instance, I prefer to use an Xbox 360 controller.
Notes
1. Since this is the post-story setup, Tails will follow you in every stage (much like Sonic the Hedgehog 2 or Sonic 3 & Knuckles). He can be a double-edged sword. While he can help you grab Rings and Item Boxes, he can also get in your way otherwise - such as grabbing a Shield item you don't need (like a Magnet one or downgrading you to a green one) or grabbing a rocket before you do, making you wait until it reloads. You can knock Tails around by jumping into him if needed.
2. If you need to, restart from a Checkpoint by pausing and selecting "Restart". In a couple videos I've put in, I had to restart at some points. Don't be afraid of blunders either - if you lose a life, continue from the Checkpoint. You don't need points - you just need to finish in time.
3. I have encountered a couple of glitches in my playthroughs, as seen in my video's below:

A. When running down the building in Speed Highway, it is possible to get hit by helicopter blades. While you should avoid hitting them (they slow you down and you lose Rings), I had an instance where Sonic turned invisible (most likely stuck in his Mercy Invincibility). While invisible, Sonic couldn't get slowed down by obstacles, but he couldn't grab Rings or Item Boxes, either. The glitch ended when he crashed through the windows at the bottom of the building.
B. When going on the path that leads to the mirror room in Lost World, it is possible to glitch and run through the right side of the first rising door. I don't know if I was just going fast enough or what really happened there.

I don't condone you to trying to use these glitches, as they most likely have a low probability of happening. I am just merely explaining what happened in those situations.

4. As said, I do have videos. I have a video playthrough of the stage at the end of its section. You can give them a watch to see how I've gone through each stage.
Versions
1/22/2014 - 1.0: Guide is completed, with details and screenshots.
2/11/2014 - 1.1: Guide is updated with the folllowing:

1. A new Notes Section is added with additional info.
2. A new Versions Section is added with Version info (what you're reading now).
3. A gameplay video of each level is added at the end of each section.

12/8/2014 - 1.2: Guide is updated with the following:

1. Listed an alternate method of the bridge shortcut in Twinkle Park, courtesty of user Kon22.
Emerald Coast in 2:00
Emerald Coast can be a bit of a challenge, despite being the first stage.

Some general tips:

-Avoid water if possible.
-Avoid enemies if possible - nothing hurts more than taking a smack from an enemy which costs you time.

1st Section:

Abuse that Spin-Dash and avoid the monkey on the boardwalk. When you get across, try not to get bounced by the railing on the boardwalk. Run along and go through the loop at the end of the route, and then cross the Checkpoint.

2nd Section:

Again, spam the Spin-Dash. Go up the beach and on the ramp and launch yourself into the next Checkpoint.

3rd Section:

Go through the tunnel, this time WITHOUT the Spin-Dash. Go up the ramp, and watch the gate. If it's up/moving up, use a Spin-Dash to roll underneath it. If it's going down, jump over it and continue onward. You can Spin-Dash across the bridge, but be careful - if you dash while the bridge is being disrupted by the orca, you may stop dead in the air. Keep moving towards the next checkpoint.

4th Section:

Kinda self-explanatory, just hold the direction that Sonic's facing, and you should be able to escape the orca and get to the next Checkpoint.

5th Section:

Watch the gate's position and act accordingly, then go up the hill and use the Springs to go upward. Don't try for the extra life - just keep going upward. Use a couple short hops to cross the gaps, and then go around the top of the lighthouse and into the next section.

6th Section:

Make it a point to run up the side of the wall, and grab those Power Sneakers while you're at it. DON'T try to Spin-Dash, as you'll just fall. Run along the wall, and enter the cave entrance at the top, because that's a lot quicker than the lower path. Use the speed pads and Springs to launch into the next section.

7th Section:

Now, I know I said to avoid water if at all possible. But, there's an exception. Look at the screenshot below:
Now, I'm standing in the water, but as you can see, there's a corkscrew to the right, and some grass on the left. Since it's MUCH quicker, go towards the grass and jump over it. Use the ramp to cross the water and then come up to this next ramp:
When you go up this ramp, hang a hard right, like so:
By doing that, you can touch down to the beach below and save a whole lot of time. Go towards the cliff in the back and you'll find a Spring which will launch you up above. When you're on the top part, watch for the gates and monkey, and make your way towards the ramp. On the final stretch, Spin-Dash to the Capsule.

Windy Valley in 3:00
Windy Valley isn't that bad when it comes to finishing in 3:00. Just remember to keep using that Spin-Dash.

1st Section:

Not too far off from where you start, you'll find this small cliff. Take the high road and use Homing Attacks on the fans to continue to the Checkpoint.

2nd Section:

Run down from the Checkpoint marker and... just keep running. Sonic will run along a path of wind. Try to land on the trampoline, as shown below:
It only takes a few bounces to reach the isle above. Jump from there to the next one below, and then head towards the tornado.

3rd Section:

This is pretty self-explanatory. Just use the Springs to make your way up the tornado, and don't dally. There's a Checkpoint halfway up, but that's trivial - just pass through it and continue until you're out of the tornado.

4th Section:

Head down and follow the path, spamming that Spin-Dash. Just be sure to stop spamming once you get close to a loop - using a Spin-Dash during a loop may cause you to fall out of it, which ain't good.

When you get to this fork, don't bother with the Lightspeed Dash path - chances are you may have a Magnet Shield (which attracts Rings), and charging up the dash takes a few seconds. It's much quicker to just use the rocket.


5th Section:

That rocket drops you off at a Checkpoint. Pass through it and Spin-Dash downhill. Remember to stop Spin-Dashing and just run when you come to the loop. Keep on running - Sonic will run along another wind path, and then to here:
Make sure you hold down your jump button when you hit that Spring - if you do, you'll bounce to the top of the mound, which saves a lot of time. If you don't do it immediately, that's OK - just hold the jump button while you fall and hit the Spring again. The center of the mound has a fan, which will send you to a Spring, which will send you to the next Checkpoint.

6th Section:

Just run down the path, using the Spin-Dash as needed. When you get to the vertical wall, just run down the path, along a wind path, and then break for the capsule when you touch down.

Casinopolis in 5:00
This one can be a toughie. Just be sure to haul your blue butt as fast as you can through the sewers.

It's a common misconception that you need to grab 400 Rings in a game of pinball. That is not true.

1st Section:


OK, these two screens here depict your starting point, and where you need to go (just ignore the Collect 50 Rings thing - that's Mission B). From the start, head to the left and enter the Sonic pinball machine. While inside the machine, just lose the game (let Sonic fall down the drain 3 times) with less than 100 Rings in your possession. If you do that, you'll be in the sewers.

2nd Section:

Here's the sewer start. Head forward, and charge up a Lightspeed Dash. Use it on the line of Rings, and watch the steel balls at the top - you definitely want to make a point of NOT getting hit while you're down here, because you can snag close to 400 Rings, which is your target.
This is the first fan room. Head straight forward, grabbing the capsule and Rings, and fly through the vent. When RUNNING down the vent (RUNNING, not Spin-Dashing), be ready to jump to hit more Ring Capsules. Also avoid the speed pads, because they'll send you running too fast.
This is the next fan room. Now, this sounds like it's time-consuming, but it's for your own good. Head straight forward to the line of Ring Capsules, grabbing as many as you can on the way up. If you enter the vent, jump back out. Then, when the wind dies down, float down to the bottom (the fan can't hurt you) and grab the rest of the Ring Capsules. Then quickly head to the left line of Ring Capsules, hitting them on the way up to the vent at the top. Enter that vent, and then run down the path, grabbing Ring Capsules and avoiding steel balls. When you touch down to the platform below, you'll find a six-pointed star made of Rings. Grab all of them, and charge up a Lightspeed Dash - then jump in the air and use it on the line of Rings to bypass the steel balls and collect a Shield and Invincibility. Climb the ladder to the shower room.

3rd Section:

If you grabbed as many Ring Capsules as you could, you should have 400 Rings, if not, close to it. Go through the shower room, grabbing Rings if you need them, and head out to the casino floor.

4th Section:

Now, if you only need about 10-15 Rings, then just head to your left and bash the slot machines to grab Rings.

Next, head towards the golden colored room as shown in the screenshot - that's the vault. Step on the switch in there, and desposit your Rings. If you have 400, jump up the pile and hit the capsule; you're done. If you still need a decent number of Rings - like between 100 and 150 - jump back in the pinball machine and try to get what you need quickly. If you need a lot of Rings - like 200 or more - you may need to restart the stage from scratch.

Ice Cap in 4:00
Ice Cap ain't the easiest stage, but it ain't quite the hardest either. Just avoid icy enemies, and don't fall when you're climbing.

1st Section:

Run past that enemy and outside.

When you get out here, head south to find a Ring and a Jump Pad. Charge up a Lightspeed Dash, and if you want, turn the camera so you can see the whole line of Rings. Use the Lightspeed Dash on the line of Rings to reach another Jump Pad. Use the Jump Pad chain to reach the cave which will take you to the next section - which also has you bypass another cave, which saves a lot of time.

2nd Section:

Hit the Checkpoint and drop down to the ground below. Find the start of the climbing section (not too far from where you dropped) and get moving.
You'll be crossing icicles like this on the way up. Make sure Sonic's back is to the next icicle you want to go to before you jump.

Take Tikal's advice here - you don't want to fall off this ice bridge, because that will cost you a lot of time. Don't Spin-Dash here - just jump on and run across.

3rd Section:

There's a Checkpoint at the end of that ice bridge. Pass through it and continue upward through a loop, and then use a Jump Pad chain to reach the top. Don't mash that jump button though - you'll run the risk of jumping off before the huge icicle crashes down. Once the icicle hits the center of the cave, run across it and the bridge to the last section.

4th Section:

This section will probably cost you the most time, but if you finished the previous section in around 1:30, you'll be fine. Just hold the direction Sonic's facing, and try not to hit trees or rocks that can slow you down. There are also checkerboard ramps - jump off of them to gain some speed and distance. In the final stretch, try to hit those ramps - they'll launch you to the end more quickly than dropping down to the ground below.

Twinkle Park in 3:00
Hoo boy... this is where the going starts getting tough. From this point onward, you'll be facing some pretty long and time consuming level design.

1st Section:

This section is quite the famous one. You have to drive a cart across a race course. When you start, you'll find six of them piloted by robots. A quick homing attack will do them in. Try to kill all six in one shot, and then jump into a cart. Now, keep the following in mind:

- Grab as many Rings as you can - the more you have, the better your acceleration and the faster you'll go.
- Try to hit as many Speed Pads as you can - they'll only help you.
- Try not to grind along a wall - that severly slows you down.
- Try not to hit any enemies. They stop you dead and take all your Rings.

If you follow those points, you'll be able to finish in about 1:30-1:35 on average. Yeah, that track takes that long to complete even if you're going full-speed ahead.

2nd Section:

You don't have much choice in the matter here - you'll take a roller coaster automatically, which will take about another 10 seconds off your time. This gives you just over 1 minute to actually finish the dang level. Go through the Checkpoint quickly, avoiding the monkeys and barrels. When you enter the bowling ball launcher, use the jump button to roll down the lane. Try to hit at least one pin so the door in the back opens, and Spin-Dash underneath as it's opening. When you get to the water, just keep jumping - don't try a Jump Dash or Homing Attack, as that will cost time.

3rd Section:

Go through the Checkpoint and the next bowling ball lane. When you go up the steps, either using quick Homing Attacks or dodge the monkeys. When on the carosel, just be weary of the steel balls as you make your way to the pool area.

4th Section:

Go through the next Checkpoint and keep going to this Spring here:

While these next two methods are not required to beat the level in time, they can really help out, so I sugest you take a look.

Now, this is where you need to do some game physics abuse. Use a Homing Attack on this Spring, but HOLD DOWN the jump button. If you play your cards right, you'll be able to bounce to the catwalk above, like so:

Try your hardest to land on here. There's some good news and bad news. While this is a great shortcut, the camera tends to stay down below. So, you'll have to do a little maneuvering until the camera goes back to your location.

As an alternative way of doing this, you can also run into the left side of the Spring and press and hold the jump button EXACTLY when you touch the Spring. This still launches you up to the bridge, and it actually gets you a little bit closer so you don't have to hang too hard of a left to land on the catwalk.

In any case, choosing a method is a "6 of one, 1/2 a dozen of the other" kind of deal - both are somewhat tricky to pull off - the Homing Attack method requires you to hang more of a left at the highest point of your jump, while the Hold the Jump Button method requires precise timing when you hit the spring and the button at the same time. Either way, you can practice as much as you want, and when you're ready, pause and restart at the checkpoint nearby.

When you get inside this tower, the camera should snap to this location. Continue onward to the next Checkpoint.

5th Section:

Now, instead of going all the way around this tower, we're gonna take another shortcut.

You see this fence here? If you try to jump over it, you'll find an invisible wall blocking your progress. So, what's a hedgehog to do? Use the hang time from Sonic's jump (hold the button down) and jump around the left side of the fence. It's kinda hard, but you need to jump around the left side and land behind the fence. From there, either take the Spring nearby or Spin-Dash up the roof so you can get to the Capsule.

Speed Highway in 2:30
They don't call this level "Speed Highway" for nothin'! The fastest paced stage in the game, with plenty of routes to choose from and plenty of Power Sneakers to collect.

Here's some pointers before you begin:

- When attacking the purple Spinner enemies, make sure you're jumping high enough before using a Homing Attack - you don't want to hit the blades and get stun-locked until you hit the ground (or bottomless pit).
- As per usual in Sonic games, you definitely want to take the high road. This level emphasises that rule.
- Use the Power Sneakers! While you can use the Spin-Dash method, buildings are kinda small, so just use Power Sneakers to move faster.
- There's going to be some cop enemies in cars - be careful when touching down on buildings, because they can rush and surround you.
- Watch out for actual cars late in the stage - they hit hard, and you'll lose precious time when you're trying to get back up.

1st Section:

From the start, get Spin-Dashing and roll down the road.


When you get to this lift, if you feel daring, jump onto and run up the track it's on - it can shave a couple seconds off your time. Get through the Checkpoint.

2nd Section:

That speed pad will send you running up the side of a building.


You see that Item Capsule there? Those are Power Sneakers. Try to snag them, and keep heading upward to the path near the top of the building. Follow the path, just using the speed pads - don't Spin-Dash here. Run to the bucket elevator and keep moving!


Take those four Rings and jump up to the road above. Grab the Power Sneakers, and try to jump past the entire elevator - if you can't, just try to land on the platform that's moving upward. Keep running on the road and enter the next bucket elevator to go to the next section.

3rd Section:

Jump onto the foot of the helicopter (be careful to not touch the blades!) to fly to the next building and a Checkpoint. Grab the Power Sneakers and run past the enemies to the rocket. Take the rocket to the next road, and keep running. Don't Spin-Dash on this corkscrew - just run to the end of the path.


When you fly off the road, try to land on that square platform. From there, use Homing Attacks on the Spinners to get to the building below. Try to hit the Bomb Item on the way down so you don't get rushed by the cop cars below. Take the rocket to the next section.

4th Section:

The famous building run. As you run down this skyscraper, don't jump or roll. Just keep moving, and try to avoid the orange barriers. More importantly, avoid the helicopter blades. Unlike the barriers, which just slow you down, the helicopter blades hurt you AND slow you down. Avoid the pillars too. Once you reach the bottom of the building, exit to the final section.

5th Section:

Now, on average, you're probably going to only have about 30 seconds to get to that Capsule. So, start Spin-Dashing on the ground - follow the path, and when you get to an intersection, make a left. Keep going, staying on the right-hand side of the road.


When you come across this Spring, USE IT! It will launch you to a building above, where you can follow a path to another Spring, which will take you to the final area of this level. Jump into the fountain to launch yourself upward, and go towards the bell (the camera should pan to show you). Behind that bell is the Capsule.

Red Mountain in 3:00
Oh good Lord... whoever decided to put 3:00 on the clock for this level was downright sadistic. Good thing there's only two areas in the level. Here's some general tips:

- Use the "hold the jump button" technique on Springs in the first area. You can bounce higher and save some time that way.
- Watch out for fire - there's plenty of it in this level. It hurts and slows you down.
- Be even more wary of lava. While you can survive if you have at least one Ring, any Rings you have sink into the lava.
- On average, it's going to take about 1:30 to finish the first area, even if you take shortcuts. That leaves you with 1:30 to finish the rest of the level.

1st Section:

From the start, run past the monkeys and take the rocket.

When you drop from the rocket, make a right and try to land on the upmost platform. Run across the bridge and through the Checkpoint.

2nd Section:

You need to either run underneath or jump around the steel ball to hit the switch that activates the rocket. Go back to the rocket and take it upward.

If you can, try to land on the Spring that's partially obscured by the steam in this screenshot. If you can't, jump on the gray boxes and take the Springs on the right. Either way, you need to get to the highest platform, pass through the Checkpoint, and take the bridge across.

3rd Section:

Watch the steam coming from the ground - if you run over those spots, Sonic will get sent flying (possibly into one of those steel balls). Keep going to the extra life at the end of the path and take the Spring to the next platform. When touching down, try not to hit the fire from enemy below. Take the zipline behind him to the next Checkpoint.

4th Section:

Keep to the right-hand platforms and avoid the streams of fire. Hit the Spring at the end to be launched upward, and then go across the bridge as quickly as you can, as it crumbles pretty quickly.


At the end of the bridge, you'll see this, as in the screenshot. Use Homing Attacks on the Spinners and extra life, and then take the Jump Pads to the next spot. From there, use Homing Attacks on the Spinners, and then climb the tilting platforms. Once you get to the top, pass through the Checkpoint, across the bridge, avoid the Spinner and fire, and run down the path. At the end of the path, you'll find a hammer hitting a switch. Wait for it to go upward, then hit the switch to activate the rocket.

5th Section:


Once you touch down here, pass through the Checkpoint, and then charge up a Spin-Dash. Don't fully charge it though - charge it for a couple seconds and then release, jumping before the edge. The momentum should carry you across the lake of lava, allowing you to continue. Take the zipline here, and you'll enter the doors that will lead to the second half of the level.

6th Section:

Pass through that Checkpoint, and start spamming that Spin-Dash. Chances are you'll be starting this section with 1:30-1:45 already on the clock, so you don't have a lot of time to waste. At the end of the tunnel, you'll end up in a chamber that has rising lava (don't worry, it only rises at key points). Keep going, grabbing a Shield and defeating Spinners. Keep going along the path, Spin-Dashing until you reach the Checkpoint.

7th Section:

Hit the Spring to continue onward. Either use Homing Attacks or outright jump past the Spinners, and keep Spin-Dashing on the pathway. Be careful when you jump to the next island - two fire enemies are there, and it can be hard to avoid getting hit. Run past the cells and hit the Spring, and then wait for the lava to rise. Use the Spinners to continue.


Here, you'll have a choice - a collapsing bridge, or a line of Rings. Charge up a Lightspeed Dash and take those Rings - they'll send you to a Spring which will launch you further. Spin-Dash past the monkeys and through the last Checkpoint.

8th Section:

Now it's just a stretch from here to the rocket which will launch you to the Capsule. Spin-Dash your way through while trying to avoid fire, Spinners, and hammers. When you hit the rocket at the end, try to land right on the Capsule.

In all, this level will probably take you a few tries - 3:00 is hard to beat, and you have to do it dang near flawlessly.

Sky Deck in 5:00
Don't let the time limit fool you. Each section is complex enough that you'll probably finish by the skin of your teeth.

Some pointers:

- When climbing ladders, just climb. Don't try to jump up a ladder - it'll cost more time than just climbing.
- You'll be under a LOT of fire during the stage. Your best bet is to just jump above the bullets, or if the cannons are in your way, smash them with a Homing Attack or Spin-Dash.
- When you're manuvering on pillars (Sonic will press his side against them), try jumping while moving around it.

1st Section:

When you get launched out of the cannon, you'll end up on a pillar. Jump as you move around it, because you'll move a little faster than just walking. Go through the Checkpoint, collecting Rings and jumping over barriers. At the end of the catwalk, climb the ladder and use the Spring to go to a set of rotating pillars. Jump from pillar to pillar, using a Homing Attack on an extra life on another catwalk. Use the speed pad to run through and get to the next Checkpoint.

2nd Section:

Pass through the Checkpoint and head straight to be launched to another pillar. Jump around the right side, grabbing a Magnet Shield in the process. When you hit the catwalk, just run. If you get stuck (this section is kinda glitchy), just keep rotating your movement controls slowly - Sonic running here is more of a scripted event instead of you directly controlling him. When you hit the Spring at the end of the path, use a Homing Attack on the Magnet Shield and another Spring to fly across. You'll hit Power Sneakers in the process, allowing you to run faster through the tunnel.


When you get here, don't run down the catwalk - it's glitchy here too, and there are steel balls that can slow you down. Instead, jump and land on the catwalk below, and run to the ladder.

3rd Section:

Pass through the Checkpoint, and climb the ladder. But be careful - you'll have to wait for an opening between the steel balls. When you get to the top, you can jump to a horizontal ladder. Now, for this ladder, jump and try to go as far as you can before landing on the ladder again. This will save some time. Climb across the rest of the ladder, and jump up to the catwalk. Run across the catwalk, avoiding the moving Spinners and using Homing Attacks on the stationary Spinners. Watch out for the enemy on the end - it usually launches spiked balls at you - and jump to the next pillar.


From this point onward, Spin-Dash across the catwalk, and try to stay on the top catwalk. That cannon in the middle will keep firing at you and destroying chunks of the catwalk in the process. But, if you keep Spin-Dashing, you'll stay ahead of it. You'll also have to go around 3 more pillars before getting to the rocket at the end of the catwalk.

4th Section:

Ah, the wing section. Pass through the Checkpoint, using Spin-Dashes to keep going. If the wind gets high enough, either hang on to something or just try to fight it.


When you get here, go left. You'll come across 3 cannons. Either destroy them or go past them on the right, and keep going to the wall, either destroying cannons or passing them. Go up the ramp on the wall, and grab the horizontal ladder. Jump from the ladder to the next section.

5th Section:


From here, take the Checkpoint, and then Spin-Dash like a bat outta hell. If one of the platforms is collapsing (which they will), jump to another one and keep going! At the end of the path you'll come across a time consuming area.


This cannon... THIS cannon. You need to launch a rocket into the barrel, while avoiding fire from smaller cannons. Now, you can either get lucky and get a rocket in from the get-go, or just destroy some smaller cannons while you wait for it to stop on the rocket you need it to go to. In any case, once the central cannon is destroyed, you'll go to the next section.

6th Section:

Pass the Checkpoint and go to the elevator in the top-left corner. At the top of the elevator, jump past the Spinners, and take the speed pads to a ladder. Climb said ladder and deal with the enemies up there as you cross the walkway.


You see the yellow dot in the middle of the white circle behind Tails in the screenshot? Stand there, and jump when the crane hook passes overhead. Ride it across, jump down, and pass through the Checkpoint.

7th Section:

From the Checkpoint, run up the ramp on the left side. Wait for the ship to tilt, and then jump across the moving blocks to the escalator.


Now, from where Sonic's standing, charge up a Spin-Dash and use the momentum to leap as far as you can. As the ship is tilting, try to grab on the nearest ladder. If you can make it to the furthest one, you'll save a load of time. Follow the arrows to the Checkpoint.

If you're really good, you can leap to the catwalk above the ladder and follow that to the exit.

8th Section:


Now, this is the catwalk I was talking about. The Checkpoint in the corner of the screenshot is the one you pass from the ladder, and the Spring launches you up to this catwalk. BUT, if you got to the catwalk in a leap (like I did), you can just follow the catwalk's arrows.


When you get to these catwalks, jump down to the central platform with the switch below. That saves time. Hit that switch (it's kinda glitchy, so you may have to run over it a couple times), and follow the path to the Capsule.

Lost World in 4:30
Are you ready? Out of all the levels in the game, this one is the hardest to finish in its time limit. You need to be fast, you need to be ready to react, and you need to take a few huge shortcuts.

Some points:

- The Spin-Dash is your friend from the moment you enter the tunnels after the water fountain. You'll also need to use Spin-Dashes as you go down the long circular tunnel.
- The water room with the giant stone snake will cost you the most time, mainly because that snake moves at its own pace.
- When you get to the mirror room, DO NOT try to mess with the mirrors. Just jump past them. Unlike the original Dreamcast version, there's enough light that you should be able to see where you're going.
- While it may seem faster, don't Spin-Dash during the boulder run. Indy didn't have to in Raiders, and you don't have to now.
- In the final chamber, you'll have a pretty big shortcut you can take. It's borderline required to finish in time.

1st Section:

From the start, run and jump through the water, then go up the steps and to the tunnel. When you're at the tunnel, start spamming the Spin-Dash. You'll end up in a circular tunnel with rising flaming stone slabs. Keep Spin-Dashing through here, and try to avoid the slabs as you go down. If you end up running on the ceiling (which is possible), jump down and keep going. You'll end up at another tunnel. Keep Spin-Dashing, and if your momentum is good, you'll propel yourself right to, if not right past, the Checkpoint.

2nd Section:

The water room... get ready to move. From the entrance, make a left and climb up, hitting the blue circular switch (this raises the water). Jump on the stone snake when it comes to you (ignore the Magnet Shield), and ride it until you reach here:


Jump up to this platform and hit the square switch - this is the first of three which will open the door to the exit. Climb upward, hitting the next water switch. Jump back on the stone snake when it comes back. Ride it to this platform:


Hit the next square switch, and then climb upward, avoiding the spiky platform. Hit the next water switch here:


You see that platform in the corner of the screenshot? That's the third switch. This is the only spot where you can save some kind of time in this room, so charge up a Spin-Dash and leap to that switch. Hit the switch, and jump on the stone snake which should (hopefully) be passing you. Ride the snake to the platform with the door, and pass through to the next section.

3rd Section:

Now, even if you rushed, you probably already have 1:50-2:00 on the clock, and there's plenty of level left to go. Follow the path, Spin-Dashing along. When you come to the enclose area, stop Spin-Dashing so you don't hit the doors that rise up - if you Spin-Dash into one, Sonic falls on his butt, costing you a couple seconds as he gets up. When you enter the mirror room, follow the path, avoiding the fire enemies and the mirrors. There should be enough light for you to see. At the end of the path, you'll find a line of Rings. Charge up a Lightspeed Dash and fly through the Rings.

4th Section:

Pass through the Checkpoint and go down the water slide. Once you fall down the waterfall, take the Springs to the next tunnel. Avoid the flaming stone slabs as you run through here. Once the door opens, you'll find another Checkpoint. Pass through it, and then run from the boulder. Don't use your Spin-Dash here - running will do just fine. I say this because there are breaks in the path, and if you hit the Action Button while over a gap, you'll just drop to your death. At the end of the path, enter the tunnel to a room with water and sand. Enter the tunnel on the left, and you'll be in the final chamber.

5th Section:


When you enter this room (as shown), head right to the back. Jump on that switch 3 times so the path lights up on the wall, and then start running along the path, following the Rings. At the end of the path, jump up to the platform, and hit the switch to change the path on the wall. Run up the path, use a Homing Attack on the Ring Capsule, and jump on the next path to a Checkpoint.

6th Section:

From here, go into the tunnel in the back corner, avoiding the flaming blocks. Jump on the switch and run across the wall path.


Now... this is the hard part. There's a room (you can see it in the lower-left corner of the screenshot) that has a switch. Said switch activates a line of Rings which you need to Lightspeed Dash across to get to the exit. You can jump from where Sonic's standing here - the hard part is curving underneath the ledge and using a Jump Dash to land in that room. This might take more than a few tries. When you get down there, activate the switch and use a Lightspeed Dash to get to the Capsule.

This level, as stated, is the hardest in Sonic's set. It may take more than a few tries to finish in 4:30.

Final Egg in 4:30
Wouldn't be a Sonic game without an industrial-themed level at its end. So, here we go!

1st Section:

From the start, head to the right, avoiding robots and lasers. Go down the path, avoiding more lasers, robots, and cranes.


When you get to this room, use Homing Attacks to reach the Spring and hit a Checkpoint to start the next section.

2nd Section:

Keep to the high road here, jumping on conveyor belts and avoiding spikes. You'll find a tunnel. Go down the tunnel and along the path, running and jumping (this is so you don't end up running along the ceiling, which will cost you time).

3rd Section:

This room has you drop down by platforms and tunnels. Just don't drop in the middle of the room - that will cost you a life. Just follow the path, and you'll be fine. When you hit the switch on the floor, it will open up and take you on a new path. From there, you need to avoid swinging hammers while jumping on platforms. Sonic has enough hang time in his jump that you should be able to pass through with proper timing. Keep along the path, and you'll end up in an elevator.


At the bottom of this elevator, head towards the path that has the steel balls and Spinners. Head down the platforms to another elevator, and enter it.

4th Section:


When you get out of the elevator, you enter this room. Grab the three Item Capsules as shown, and then head into the tunnel. You'll end up in the first crab room. These enemies are time-wasters - just jump past them and go to the back-right corner of the room. You'll find four Rings and a ladder. Climb the ladder and run along the ledge into a Checkpoint.

5th Section:

From the Checkpoint, go across the fans - get used to this because it will happen frequently - and head into a room with a cross made of Rings. Head left across more fans and into another room. Go right, following the arrow of Rings, and across more fans. Go through a small room, across more fans, and into the second crab room. Like the first, head to the back-right corner and find a speed pad which will help you out of the room. Go through a tunnel, dropping down into another one with a Checkpoint.

6th Section:

From here, go through the Checkpoint and drop into a shaft.


When you're dropping down the shaft, position yourself where Sonic is in this screenshot. By doing that, you'll drop on a platform that's higher up than the one that is dead-center. From the higher-up platform, jump to some more fans and into another tunnel, which will drop you off in the final crab room. From your position, make your way to the right of the room, where doors will open up. In this room, rush past the three Spinners and the grabber-robot into another room.

7th Section:


From here, you can either go past the robots on the right, or charge a Spin-Dash and leap across to the path on the left - from there, just Spin-Dash up the wall. In any case, you'll end up at the end of the room with one more Checkpoint. Follow the path from there, and quickly defeat the grabber-robots. Charge up a Lightspeed Dash and fly along the line of Rings to the Capsule.

Epilogue
Well, that's all there is to it. I hope you found this guide to be useful! If you have any questions, just put it in the comments and I'll see if I can answer them.
27 Comments
Bro Videogaming Jan 14 @ 6:04am 
A little tip for those people A ranking in 2025
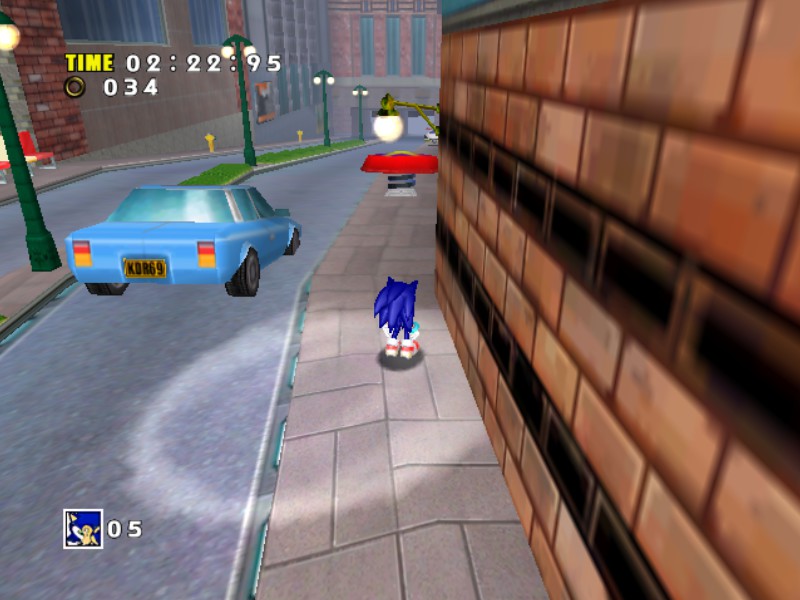
When you use "spam-dash", instead of only spamming x, spam both x and b and alternate. You'll get way more speed if you spam fast enough.
I usually use my index and middle for the spindash inputs, as you don't really need to move the camera much thankfully.
Moth Master Mar 7, 2021 @ 4:16pm 
I'm not through Sonic's trials yet, but this guide and the comments made it a lot easier and I know I'm going to 100% it.
Sailor Foxhound Apr 23, 2020 @ 5:18pm 
The Spin Dash spam trick worked WONDERS for Emerald Coast! I can't thank you enough.
UnseatingKDawg  [author] Oct 2, 2017 @ 4:48pm 
@JoeMD: Happy to be of service!

As for everyone else commenting, I do appreciate the suggestions and alternate methods of getting these levels done in time. I won't be adding them to my guide, but please don't hesitate to put in your own experience. It's nice to see some kind of positivity after seeing all the crap the world's going through lately.
JoeMD Oct 2, 2017 @ 2:04pm 
Just 100%ed Sonic's trials. Ths guide was a HUGE help! Thanks!
JoeMD Oct 2, 2017 @ 12:30pm 
I finally managed to do it. @SurDno's suggestion really helps. When you are crossing the wooden bridge just before the long path that least to the hammer and rocket that takes you to the zipline into the mountain, you can jump down the side of the mountain to the rocket as SurDno said. You just need to jump over the railing on the left after crossing the brige and you should land near the hammer/button.

http://steamcommunity.com/sharedfiles/filedetails/?id=1155787419
http://steamcommunity.com/sharedfiles/filedetails/?id=1155787778

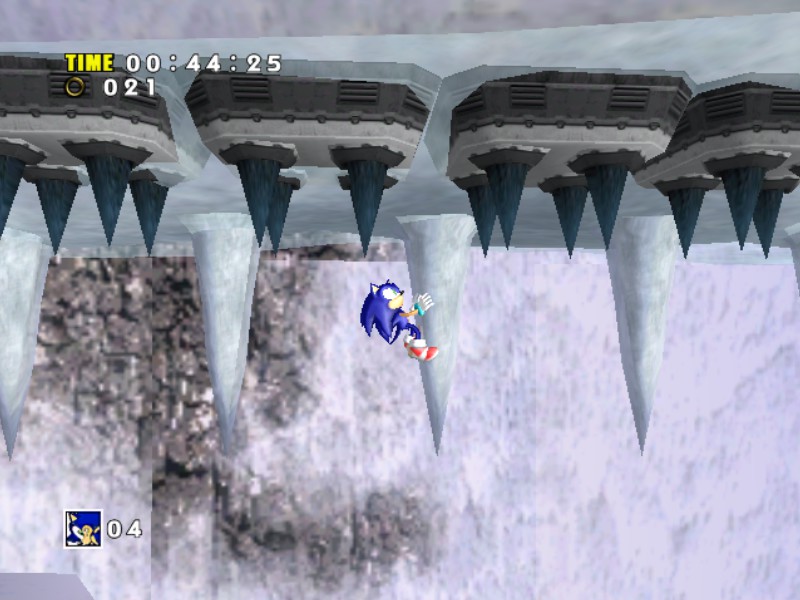
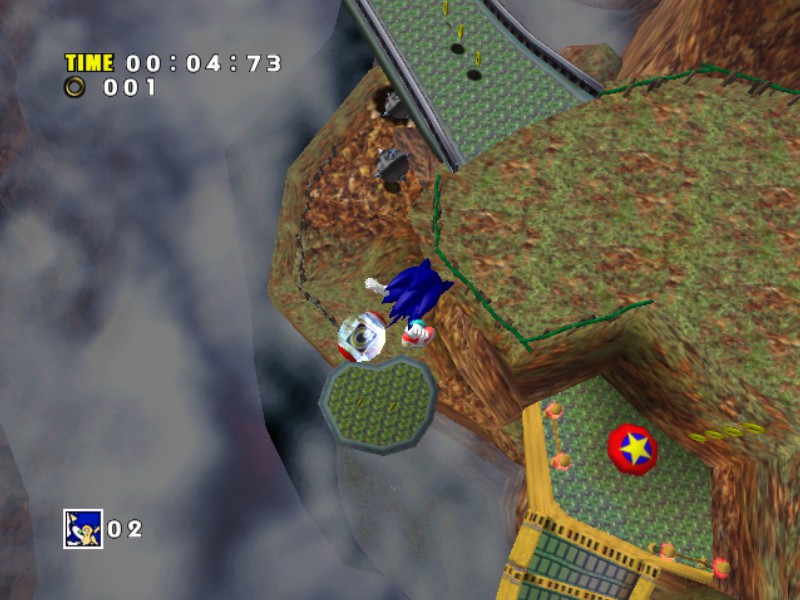
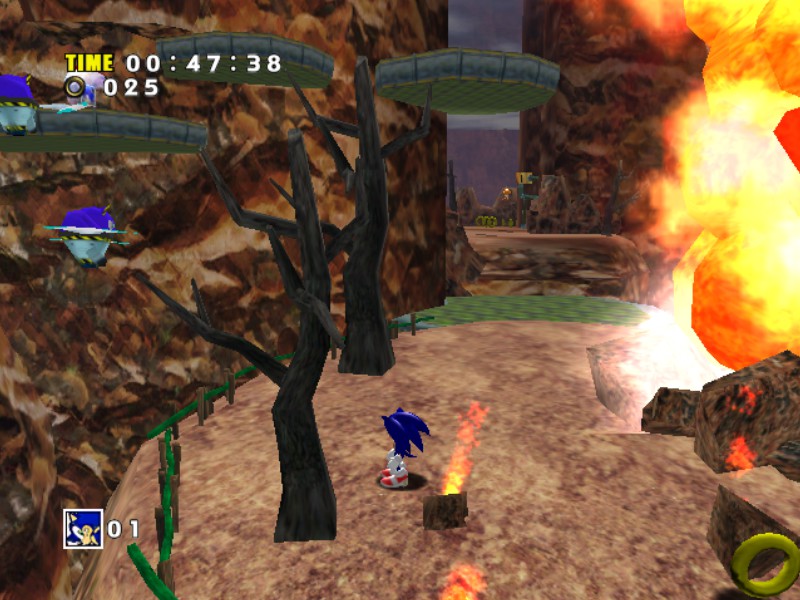
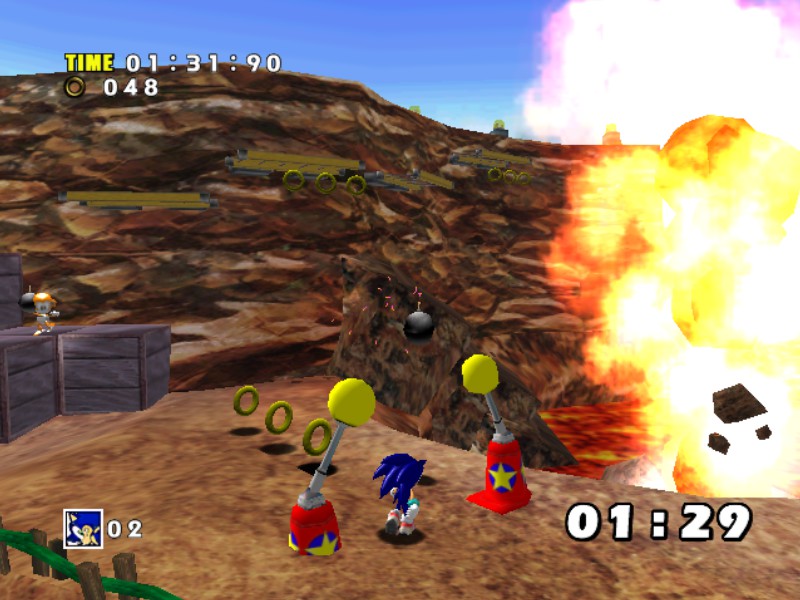
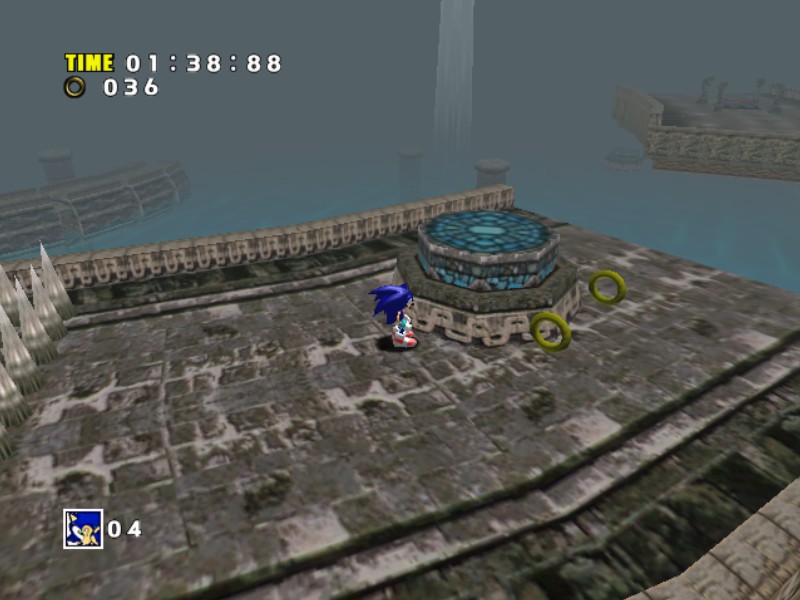
I also found that sometimes if you stick to the left of the rocky section where the spiked balls drop and the ground shoots out lava and steam vents, if you're lucky a steam vent will hit you and propell you all the way to the first platform section, totally skipping the spring.

http://steamcommunity.com/sharedfiles/filedetails/?id=1155788089

Cheers.
JoeMD Oct 1, 2017 @ 11:25pm 
Thanks @SurDno. Do you mean the long path just before you go INSIDE the mountain? If you have a screenshot that would be great.
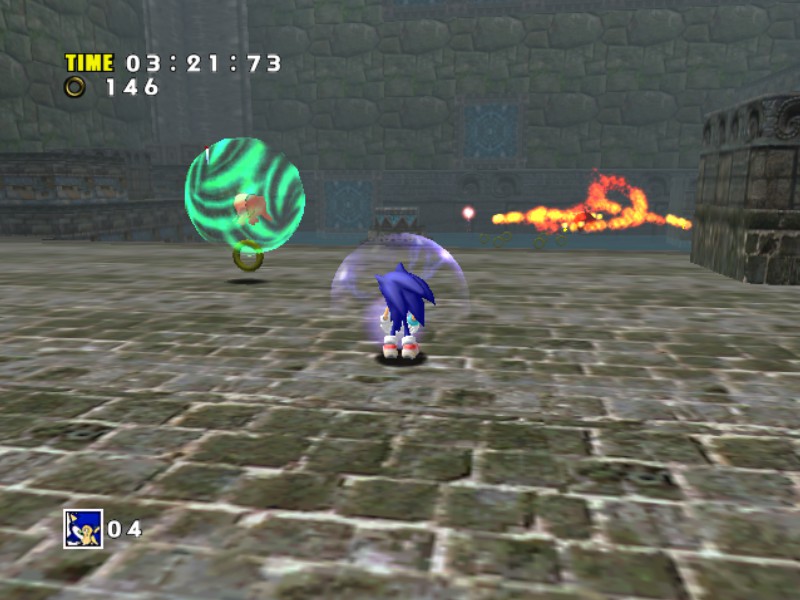
@UnseatingKDawg: yeah, it's nuts. So many things can go wrong seemingly just based on luck.
SurDno Oct 1, 2017 @ 4:16am 
@JoeMD
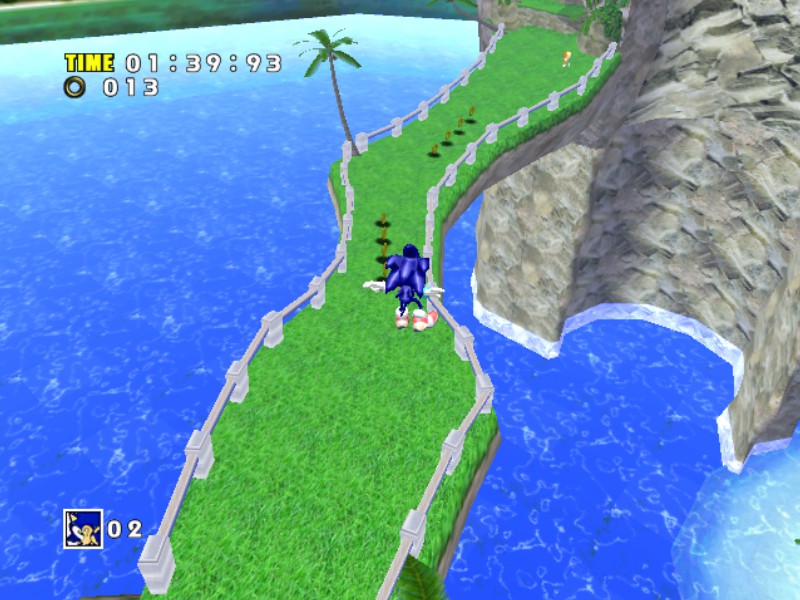
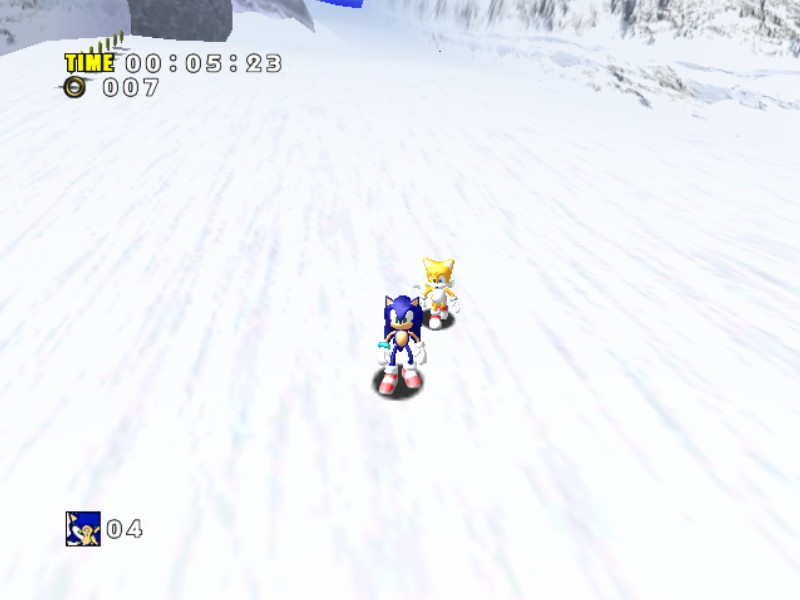
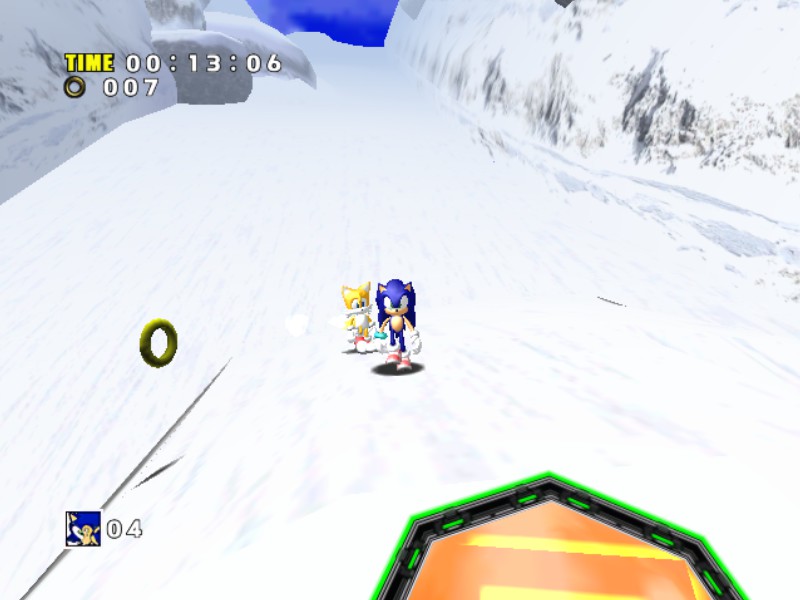
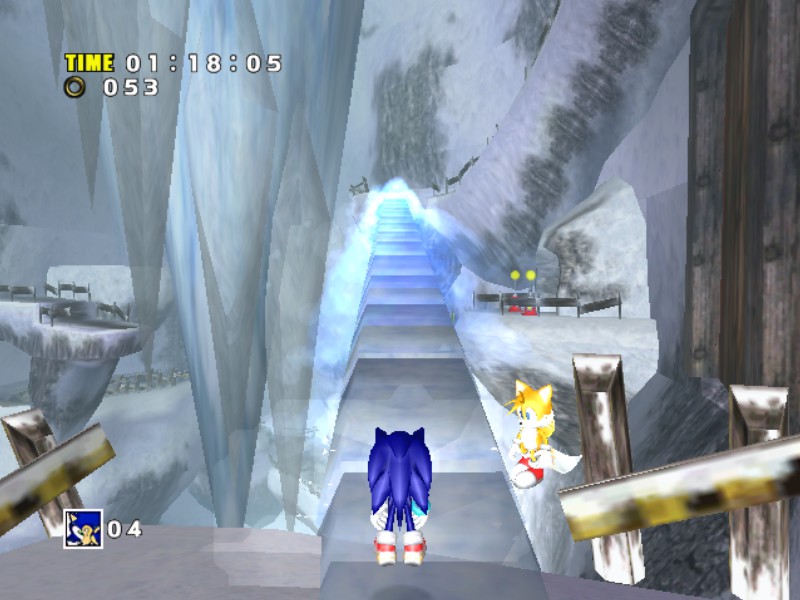
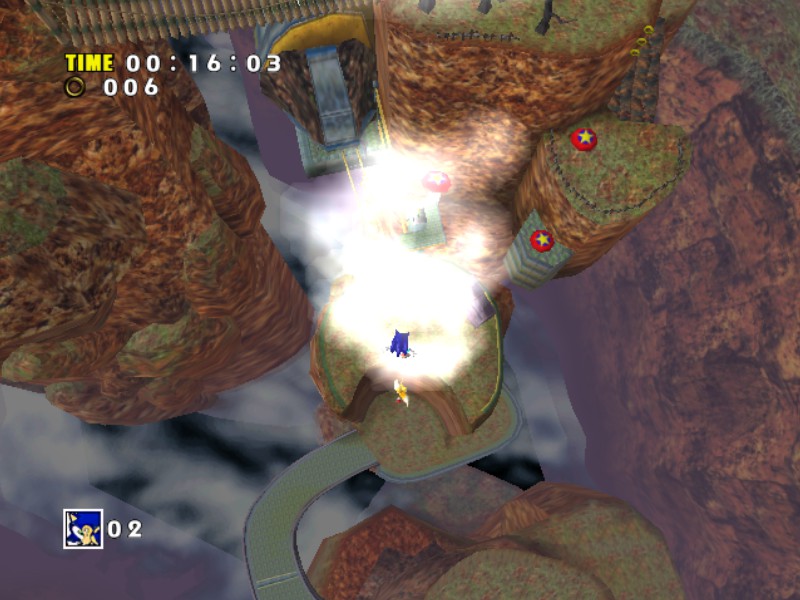
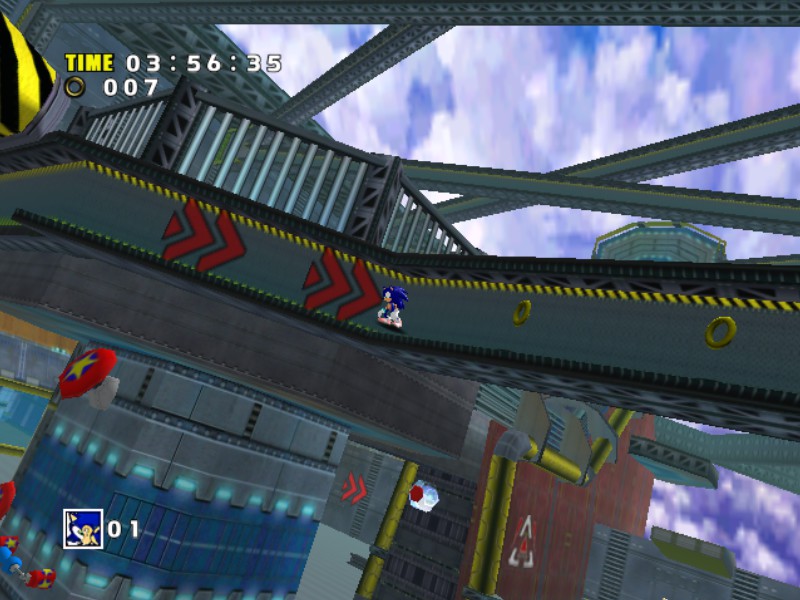
When you cross a bridge just before a long path round the mountain, try to jump down from it where the first parallel line of rings is located. It can help you to save around 20 seconds, but needs some practice.
UnseatingKDawg  [author] Sep 30, 2017 @ 3:38pm 
@JoeMD: Keep at it! It takes a lot of practice to get through that hellhole quickly, let alone one piece.
JoeMD Sep 30, 2017 @ 2:52am 
Man, I am having a hell of a time with Red Mountain. Best I can do is 3:05 :steamfacepalm: