Counter-Strike 2

Counter-Strike 2

122 rating
[Skinmaking] How to Remove Default Ambient Occlusion/Text and Logos from your Skin
Oleh Kai
This guide will show you a simple, but effective method on how to get rid of the weapon's default ambient occlusion, that oftentimes includes text and logos.


This guide requires:
  • Photoshop (or Gimp, although it might not work as well as PS)
  • VTFEdit
  • Basic knowledge on how to make a skin in CS:GO and, at best, already one you are making / have made, because I am not going to go too much into detail on that.
    However, if you haven't made any CS:GO skins yet, I highly recommend you to watch this video series by Hollandje first.

The way we are going to solve this problem is by simply making the desired areas on the texture brighter, so the effects cancel each other out!

DISCLAIMER:
For some weapons, like the Nova it seems impossible to completely remove the text, as it is completely black in the ao map.
In that case, even making the area fully white won't really work unfortunately...


Let's get started!
7
   
Penghargaan
Favorit
Difavoritkan
Batalkan favorit
Setup

Open your skin file in Photoshop.
If you are using a different software to create your skins, for example Substance Painter, just import your texture file.


Locating and Exporting the Ambient Occlusion File

First, we need to find the ambient occlusion file of our weapon.

The path for that is
C:\Program Files (x86)\Steam\steamapps\common\Counter-Strike Global Offensive\csgo\materials\models\weapons\customization.

(It may vary depending on the location of your Steam/CS:GO folder)

If you can't find the files there, there is a different way to get them:

Go to C:\Program Files (x86)\Steam\steamapps\common\Counter-Strike Global Offensive\csgo, and open the file "pak01_dir.vpk" using the Software GCFScape
(https://developer.valvesoftware.com/wiki/GCFScape)
From there, just go to the corresponding folder to the one I have mentioned.
Then simply right-click on the file and choose "Extract".


Next, click on the folder of your weapon.
Inside, there are different files.
The one we need is the file for the ambient occlusion, which has the ending _ao.


Open it in VTFEdit.


Then export it by clicking on File > Export or simply use the shortcut Ctrl+E.


Export it to the same location as your skin files.
This is not crucial, but convenient to keep things organized.


Importing the File to Photoshop

To import the ambient occlusion file to photoshop, you can go to File > Place Embedded or simply drag+drop it from the file explorer.

You do not need to use Place Linked, as the file will never be changed.
If you are draggin+dropping, make sure you are zoomed out, so that the image is placed exactly in the center.


Scale the image up to match your texture size, as it is only 1024x1024px large.


Now your texture should look something like this:


Editing the Layer

Next, open your layer's Layer Style window by double-clicking on it.

Because the Green channel contains the Ambient Occlusion information, only set this one to active.


Apply the layer style and close the window by clicking OK.


Then, convert the layer into a Smart Object (even if it might already be one), so that the look of the layer is applied.
This is very important, because otherwise it would just make the layer with all its future modifications based on the Red and Blue values as well, which we don't want.


Because we want to work with grayscale, we need to make the image black and white.
To do this, go to Adjustments > Black & White or press Ctrl+Alt+Shift+B.


Make sure the value for the Greens is set to 100%.


In case you are wondering "Why don't we just keep the layer with its RGB values and simply set everything in the Black & White settings to 0%, except for the green channel?", it doesn't work properly then.
I assume it's because the Black & White Dialogue includes more colors than just RGB, namely magenta, cyan and yellow, so that will create an "overlap" in the colors that are being affected, because those last ones are obviously a mixture of red, green and blue.

And even if you might get it to work properly this way, I think it's just faster to eliminate the red and blue channels right away, so you don't even have to care about the black and white values for all the colors except green.


Now for the important step!

The way CS:GO applies the AO is by using the Multiply blend mode.
This means that the darker a part on the AO texture is, the more visible it gets.

Like mentioned before, our goal is to invert this effect.
So naturally, the blend mode we want is the Divide blend mode.


After applying it, your texture should look something like this:


As you can see, there are some larger white areas.
You actually don't need to worry about those, as they are areas that will are covered by other mesh parts, meaning they won't be visible on the skin.


In theory, you are now already finished.
After saving exporting your result to your VTF file, your skin will look something like this:


Though if you are only interested in getting rid of the text and logos, you can follow the next steps.


Focusing only on certain parts of the AO

First, use your selection tools of choice, and very roughly select the areas you would like to keep.
You don't have to be precise.
Usually the most important elements are text and logos.


Then apply a feather effect to the selection, so that it doesn't cut off hardly.
The reason for that is that even on "empty" areas, there might still be some AO, so by doing this, you can make the transition less noticable.


Now your selection should look something like this:


Finally, create a layer mask of that selection.


Again, if a bit of the white areas is visble, it doesn't really matter, but at least now there are much less of them, so texturing can become easier.
Nonetheless, while texturing, you can of course keep the layer disabled.


Now your skin will look something like this:


Final Words

Thank you for viewing my guide!
I hope it has helped you overcome this problem, which many of you might have faced when making skins!

As always, if you have any questions or suggestions, feel free to write them in the comments and I will be happy to answer them or improve my guide!

🔫 Happy Skinmaking! 🔫


47 Komentar
Skins by: Narcos 20 Sep 2024 @ 5:54am 
thnx 4 tutorial
Greger 5 Sep 2023 @ 9:54am 
Hey bro! Saw your awsome paintjob on your zues skin. I'm atm making my own first skin for the zues also, but when i apply it to CS2 the trigger doesn't get ant color. Could you help me out
friend, everything worked out, but when I reveal the level of skin float, the removed details return. this is fine?
Kuze 21 Mei 2023 @ 10:22am 
do you have any youtube totorials?
Kai  [pembuat] 21 Mei 2023 @ 10:03am 
Ah, sorry, my bad, I forgot that for the tec9, unfortunately you can't seem to fix it.
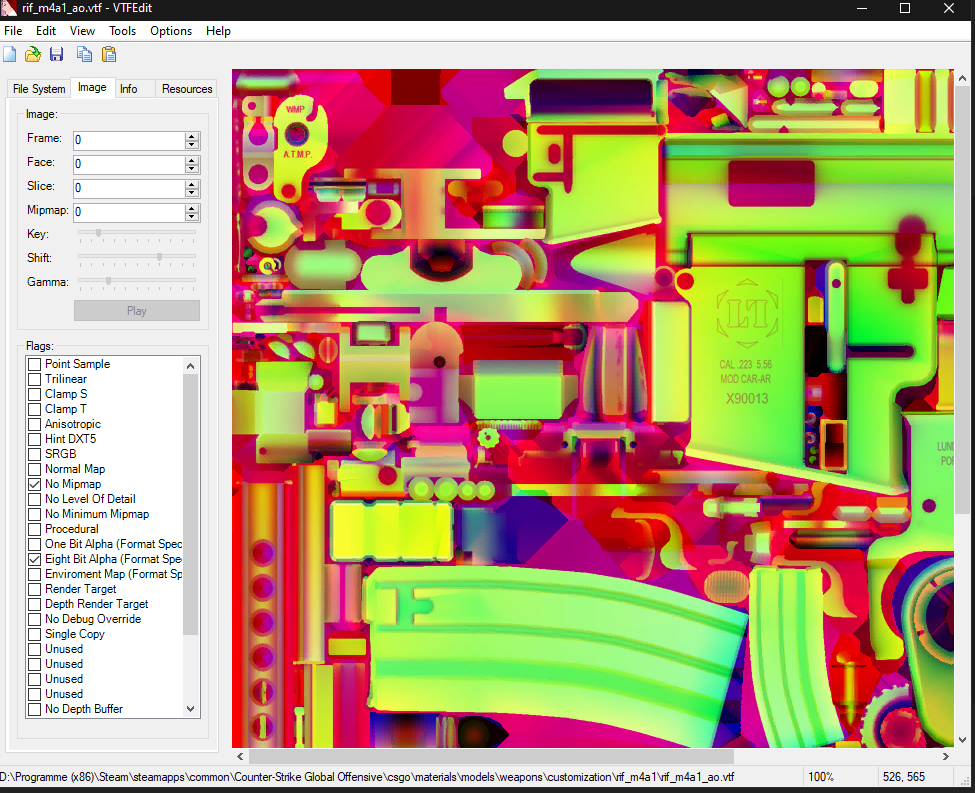
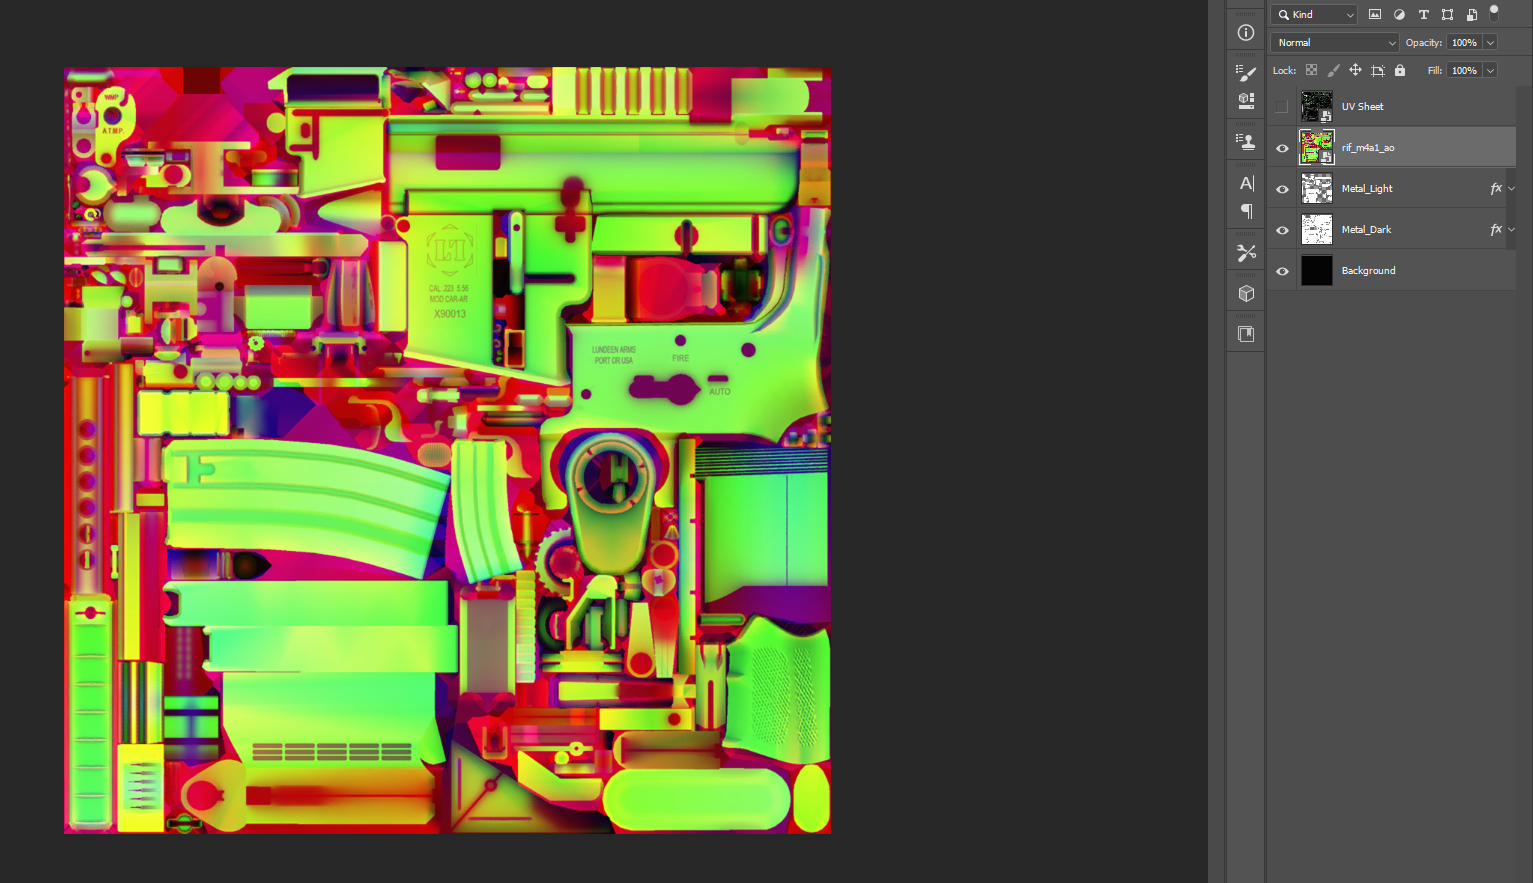
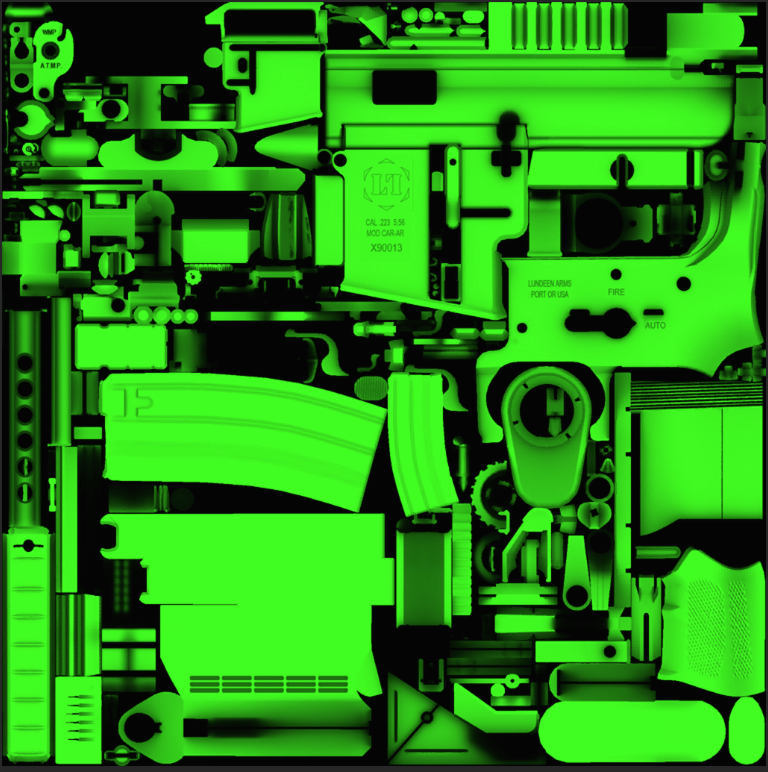
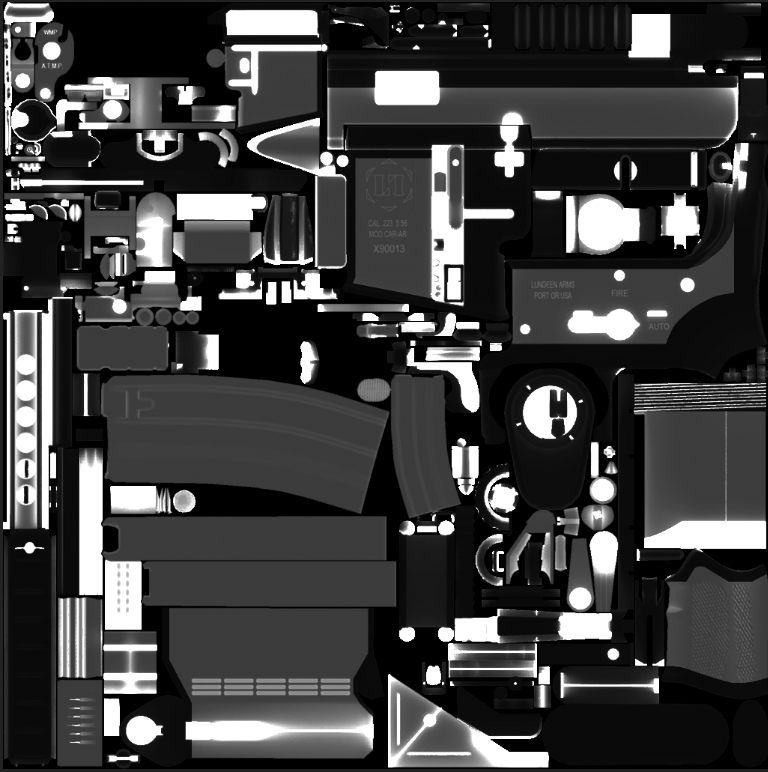
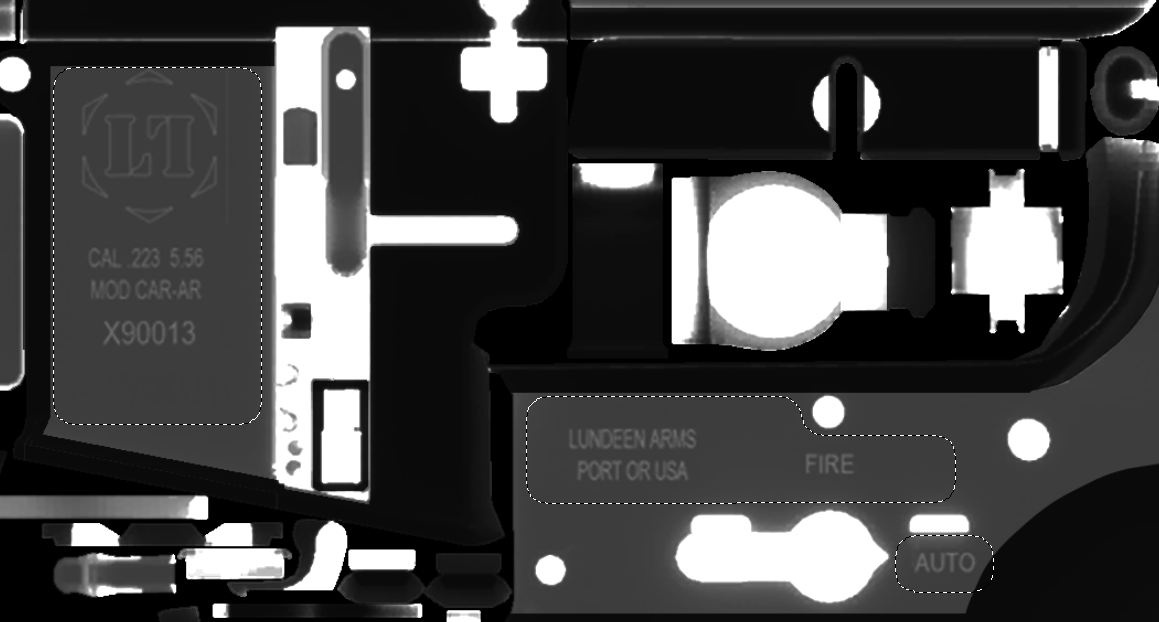
The reason is that the ao in that area is completely black, so no matter what you would do, you won't be able to compensate for it...

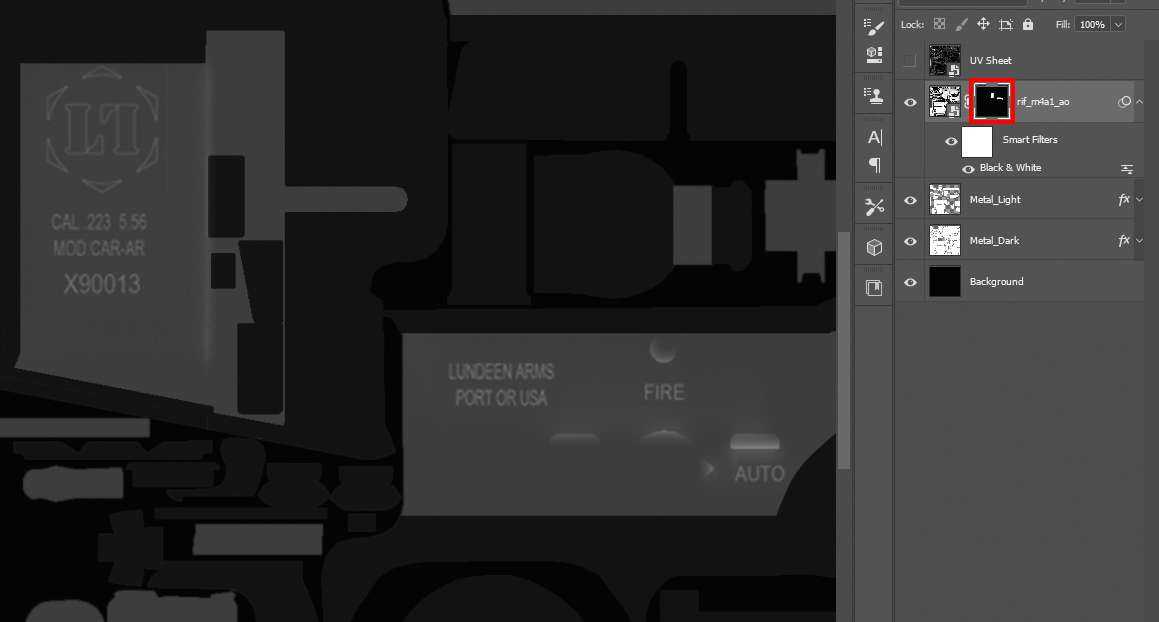
So I'd suggest if you're just starting out, to just wait until we'll get all the CS2 models and shaders, because I assume then you won't have to worry about stuff like this anymore.
Kuze 21 Mei 2023 @ 10:00am 
I did it in gimp, and, still, in cs go, on tec 9 the muzzle has black baked lights on it...
Kai  [pembuat] 21 Mei 2023 @ 9:24am 
@Kuze Almost :)
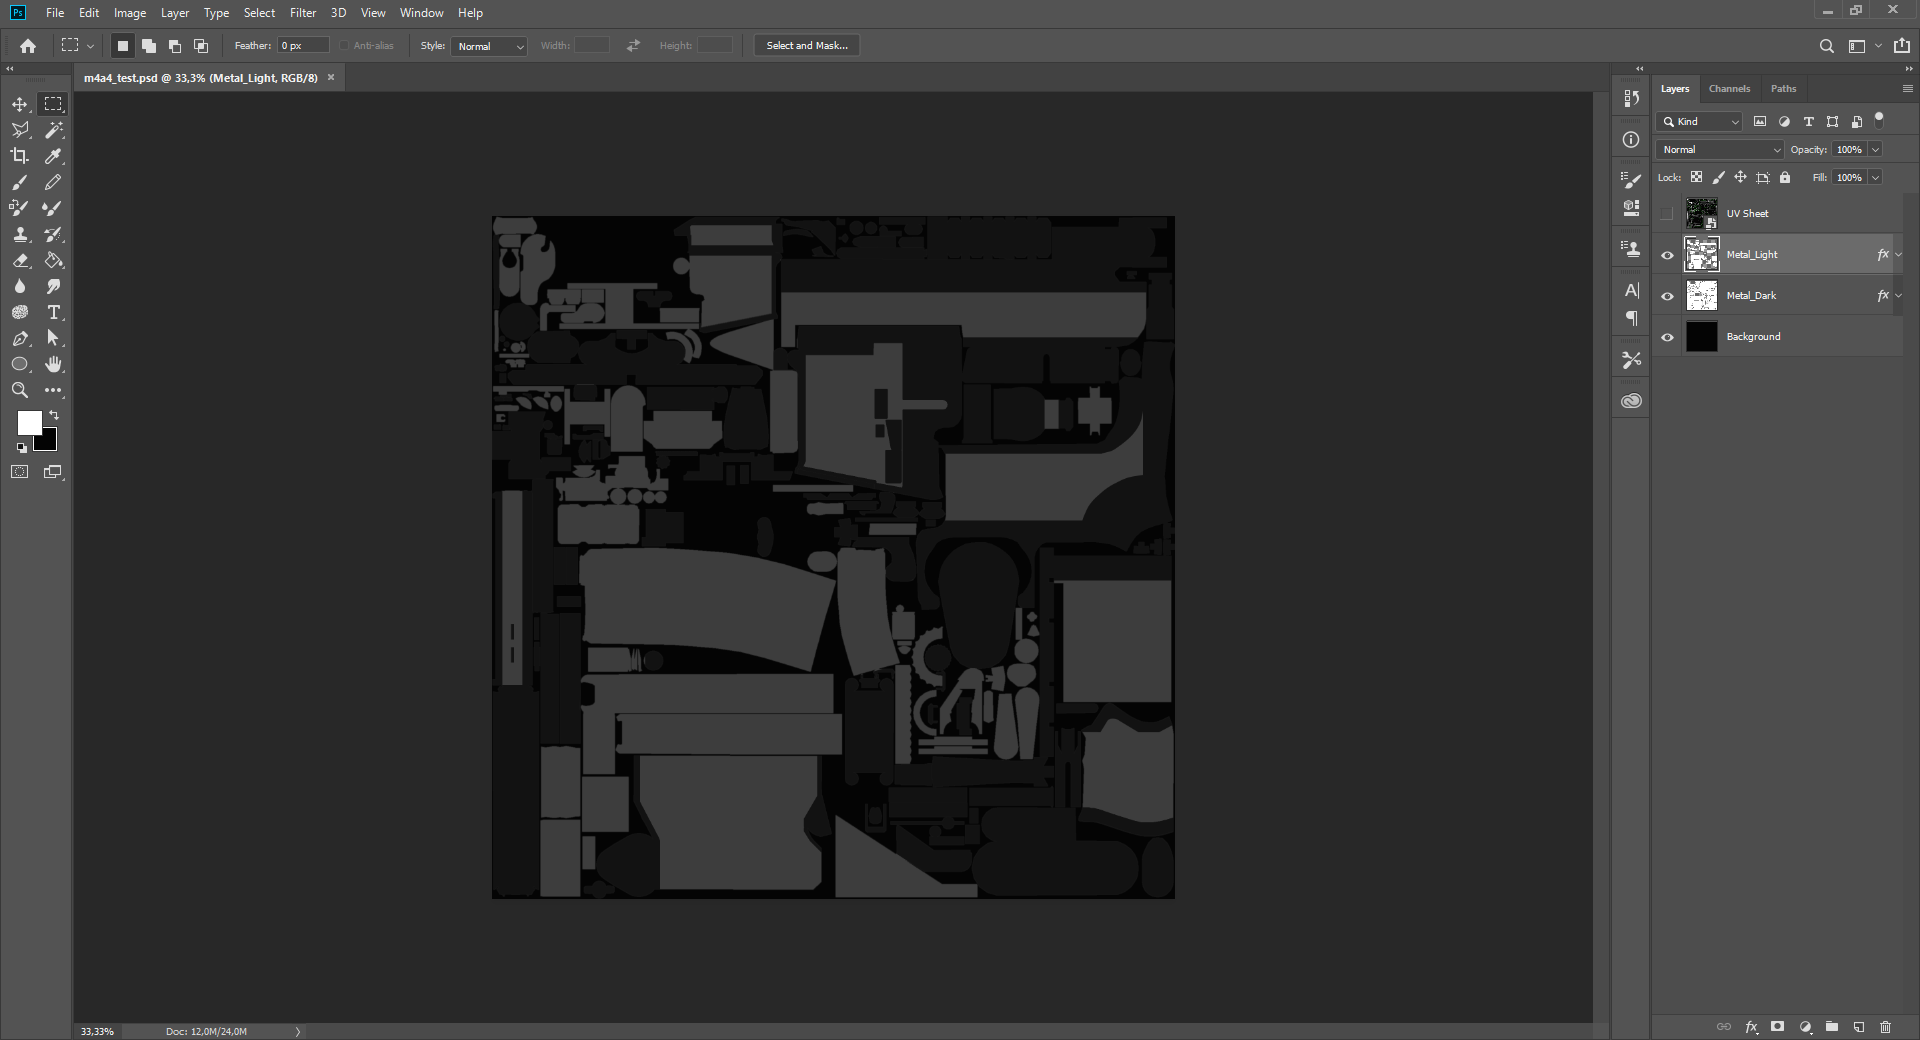
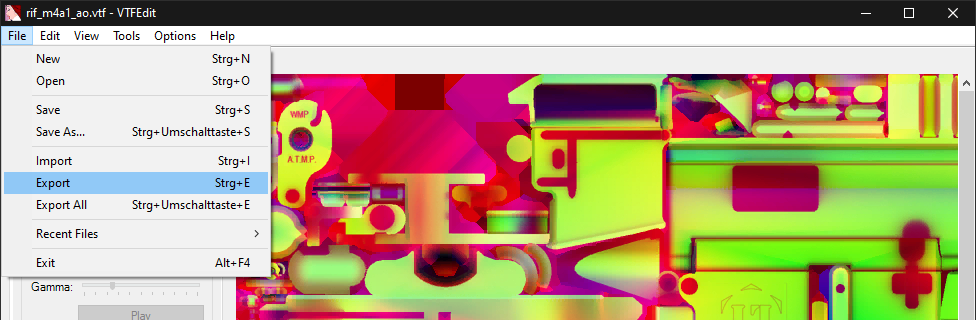
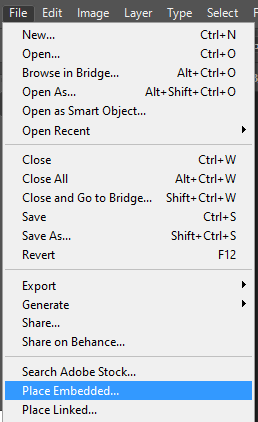
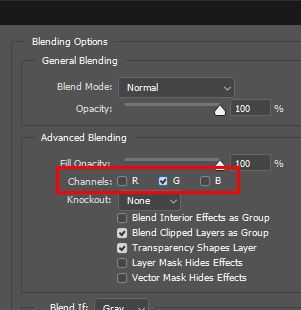
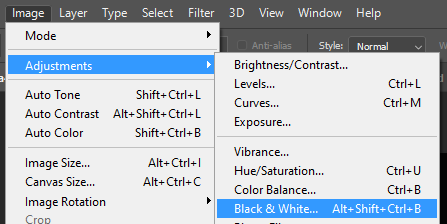
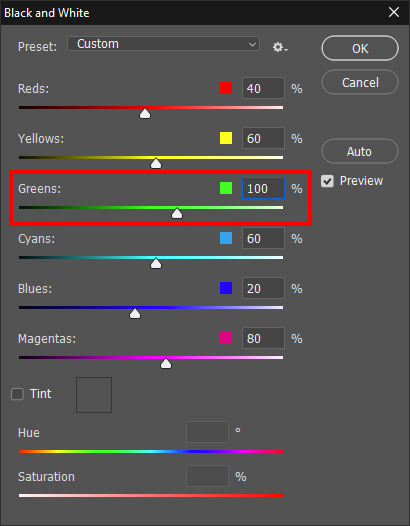
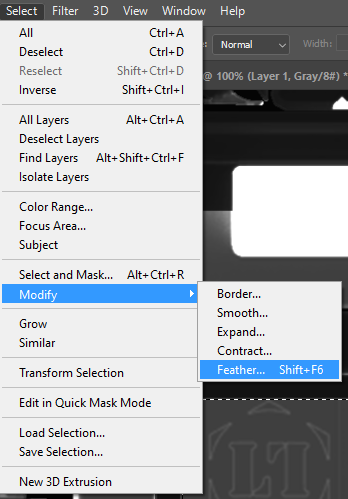
You first need to isolate the green channel, convert that to a smart object, and then add the black&white filter.
Kuze 21 Mei 2023 @ 8:37am 
same for m4
Kuze 21 Mei 2023 @ 8:33am 
https://imgur.com/a/1pQxI2L so...? tec 9 AO
Bellator 20 Mei 2023 @ 10:11am 
Ahhh okay, I'll have another look at it in a bit. But it's just weird because in gimp the AO layer looks perfectly aligned with my textures that I made in blender. It's only when I apply the finalised texture to the gun that the text appears slightly above where the text should be and not aligned.