Team Fortress 2

Team Fortress 2

83 ratings
Pyro, Sniper, and Spy: The Unused MvM Classes
By Captain Daddy
The Pyro, Sniper, and Spy are useful classes in MvM. This guide outlines how the classes can be useful to any MvM game, despite how underused they are.
   
Award
Favorite
Favorited
Unfavorite
Introduction: The MvM Metagame
The Pyro, Sniper, and Spy are largely ignored in Mann Vs. Machine. Despite what other players may insist, the three classes can be very useful (though different) in MvM. These classes are ignored mainly for two reasons: (1) they are considered more difficult to play, and (2) they break the MvM Metagame.

This guide aims to explain what the MvM metagame is, as well as how to break it, so that Pyro, Sniper, and Spy can be accepted, as well as properly used in MvM.
What is a Metagame?
This commentary outlines quite nicely what a metagame is:


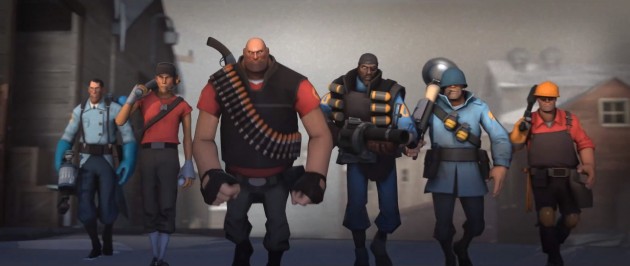
To sum up the video: Metagames can be defined as doing what needs to be done in order to win a game easily, in this case MvM. Take a quick look at the following image:


What was originally the promo teaser for MvM back when it was still in development, has now become the Metagame for all MvM matches. Everybody knows that as of the Two Cities update, the winning team formula for any MvM match is as follows: Medic, Scout, Heavy, Demoman, Soldier, and Engineer. Anybody gearing up to play Mann Up mode better be damned well ready to choose one of these classes to compile the team pictured above, or else they're playing the wrong game mode.
How is a Metagame Good?
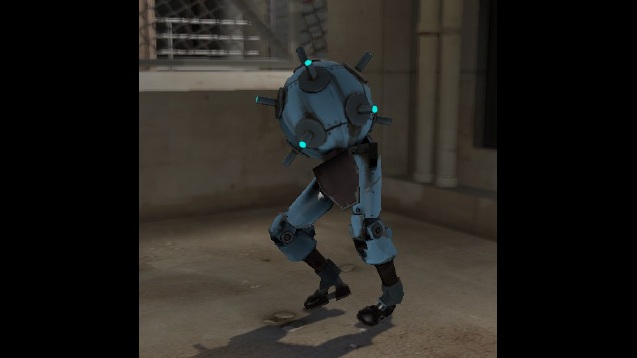
Metagames are not completely terrible. As anybody who has played team based strategy games, including TF2 can tell you, some classes are necessary at times to win matches. In MvM for example, the Engineer is so useful that Valve made a robot specifically built to mess with him.

Yes, the Sentry Buster, built specifically to force any Engineer on the Red team pick up and stop his/her sentry from firing for a few moments, simply because the sentry gun is a living hell for just about every robot. This, coupled with the fact that the Engineer's dispenser distributes both health and ammo, as well as the fact that his teleporter helps mobility, and it's understandable why in just about any MvM match, you'd want an Engineer on your side.
How is a Metagame Bad?
Anybody who has heard the following phrase will understand why a metagame can ruin the entire MvM experience:

Switch classes or we'll kick you.

The three classes that were not shown in the MvM teasers -- Pyro, Sniper, and Spy -- easily hear this phrase the most.

While there are some open minded people who will respect players using these classes, generally this is not the case. People assume that at worst, these classes are absolutely useless, and that at best, there are still better options.

The goal of this guide is to outline the three ignored classes, how they can be useful, what they can be useful for, and most important of all, when it may be time to stop innovating.
Difference Between Alternate Strategies and Bad Strategies
Before I go any further in this guide, I want to outline something very important: Just because it is an alternate strategy does not mean it will be a good strategy.

Throughout the guide, I will suggest several weapons that are not worth using. Note, however, that any time I suggest not using them, it will not be because it is different from the conventional MvM strategy, and therefore, bad. Any time I suggest not using them, it is because as of writing this guide, they have not proven to be useful in MvM, and therefore, are just plain bad. There is a fine line between the two.

For example: Some stock weapons for some classes are worth using. Some are not. Take the Fire Axe for the pyro: It is a simple stock weapon, yet it is never worth using, even if a player finds that they do not like the Axtinguisher, the Powerjack, and the Backscratcher.

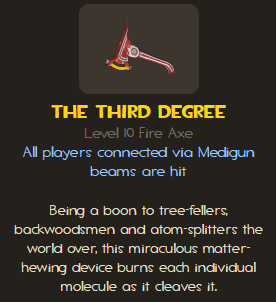
Why though? Because of the weapon on the right.

The Third Degree has the exact same stats as the Fire Axe, except it also does damage to all players connected via medibeam. A player could hate every other Pyro weapon that was and ever will be, but the fact of the matter is, as long as the Third Degree exists, there is no reason that the Fire Axe should be used.

Telling the player to use the Third Degree over the Fire Axe would not be using a conventional strategy -- It would be using a logical strategy. There is a small, yet distinct difference.

Now that we've cleared that up, let's dive more into the three ignored classes, and how they can be useful.

The Pyro: The Basics

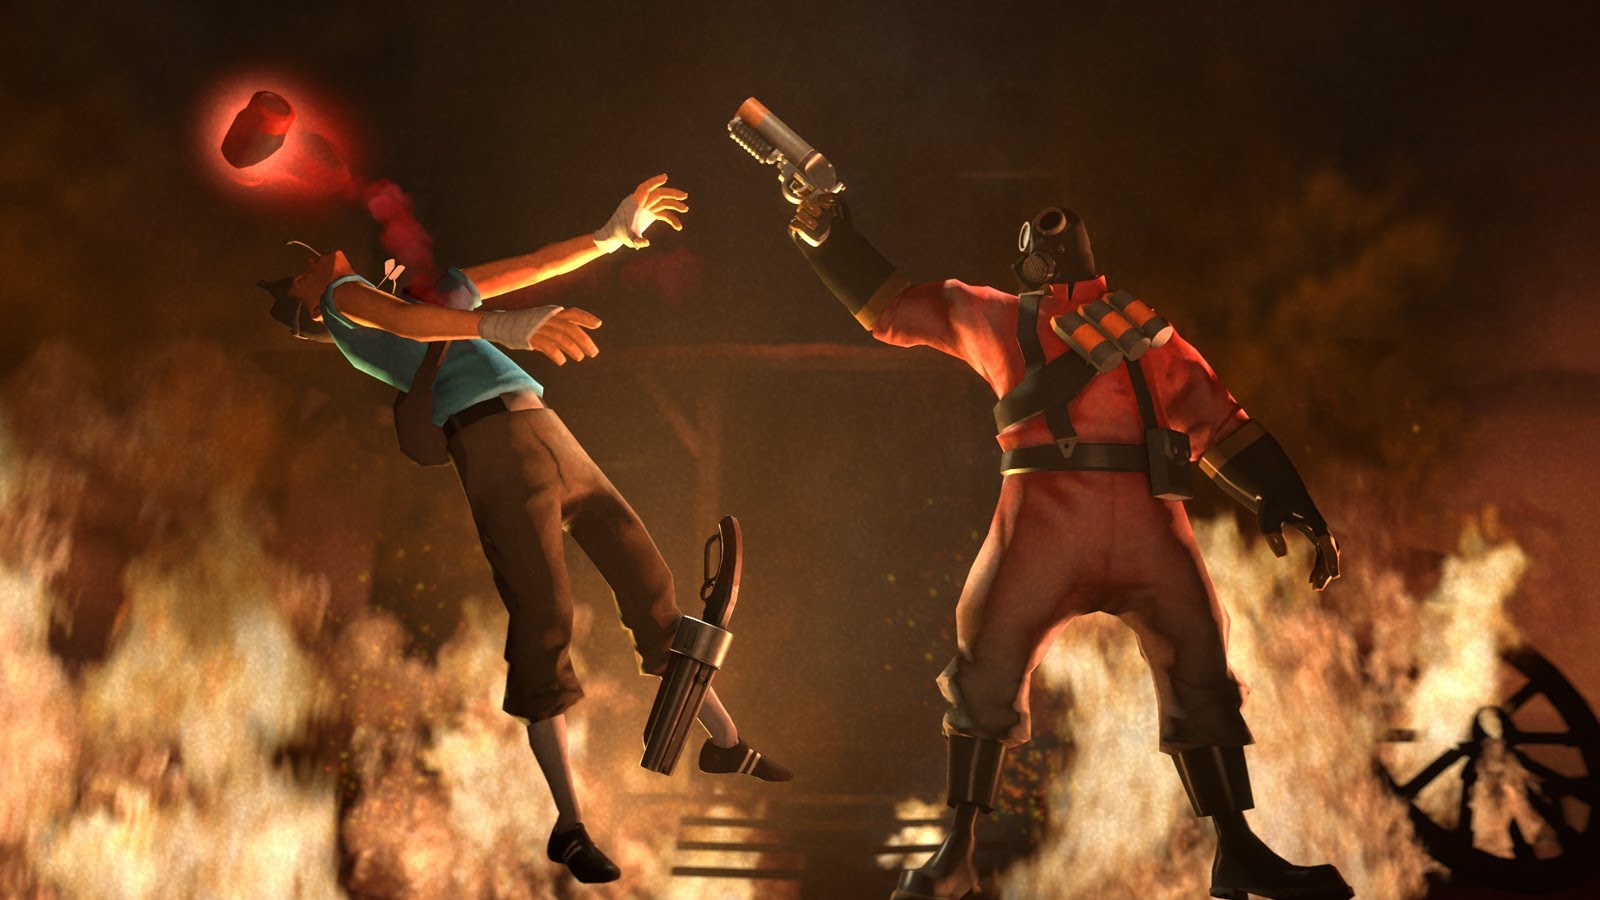
The Pyro: He (She?) is easily one of the most obnoxious classes in online versus. Why can't the Pyro be just as obnoxious against robots too? Here are some strategies for playing as the class:

Main Jobs as Pyro:
-Flank and ambush enemies
-Be the main Tank buster in the group
-Spy check
-Airblast enemies and projectiles (If airblast is equipped)
-Collect cash when the Scout is not available or not being used


Upgrades to Buy:
-+25% Damage for Flamethrower
-+25% Burn Damage for Flamethrower
-+25% Burn Duration for Flamethrower
-+25 Health on Kill for Flamethrower
-+50% Ammo Capacity for Flamethrower
-+25% Airblast Force (If not using the Phlog)
-+10% Movement Speed
-Ubercharge Canteens or Critical Canteens
-Resistances based on upcoming wave

Can Replace:

Scout
Pyro specializes in dealing mass damage, but only up close, and as such, will be on the frontlines more than most classes. He may not be healed by cash or magnetize it, but upgrade weapons to +25 health on kill, and maybe buff movement speed, and the Pyro can serve as a more damage oriented replacement to the Scout. A bold strategy, as the Scout is arguably the hardest class to replace. This strategy is not recommended on much larger maps such as Manhattan, but on more clustered maps such as Rottenburg or Decoy, can be considered.

Soldier
Generally, the Soldier deals explosive damage at medium speeds, before breaking out the Buff Banner to boost his teammate's damage with minicrits, or (rarely seen) offering extra protection using the Battalion's Backup or the Concheror. The Pyro can dole out mass damage over time simply by lighting his enemy's on fire and letting them burn, and can even protect his teammate's from incoming projectiles using airblast. All airblasted projectiles are automatic mini-crits. Fire damage and afterburn damage can both be upgraded, as well as airblast strength and ammo capacity. For those situations where ammo does run out, Ammo Refill canteens are only 25 credits a piece.

Heavy
Heavies can dole out massive amounts of concentrated damage, and later on, destroy projectiles and knockback enemies. The Pyro can dole out massive amounts of widespread damage, reflect projectiles, and airblast enemies -- both away from teammates or into pits to push back the bomb. Again, airblast strength and ammo capacity can both be upgraded. Additionally, the Pyro would be responsible for replacing the Heavy's big job -- Taking out Tanks.

Demoman
Generally, the Demoman is mainly used to kill Medics using sticky traps, and to take out large groups of robots. If a Pyro waits for the right moment (e.g. Uses Phlog crits or Backburner crits on enemy Medics), the Pyro can have the same effect on enemy Medics as any good Demoman. As for large groups, the Pyro can do either of the following: (1) Sneak up behind the group and use Phlog or Backburner crits, similar to the strategy used on enemy Medics, or (2) on projectile groups, reflect projectiles and score mini-crits, all while redirecting the projectiles away from teammates.

Note that any strategy involving airblast can NOT be done with the Phlog, as the Phlog has no airblast.

To properly enact such strategies, it is important to understand what each weapon does. The next few sections will cover that.
The Pyro: Primary Weapon Choices
As a Pyro, odds are you'll be using your Primary weapon more than any other weapon in your loadout, simply due to the fact that this is how to be the most effective Pyro possible. This section outlines what each primary weapon does, as well as how they can be useful.

Stock Flamethrower
Recommended? Yes!
Airblast costs a reasonable amount and the flames do a decent amount of damage. Easiest to toy around with when it comes to airblasting, though if you're looking for direct damage rather than airblast, it may not be the best option.

The Degreaser
Recommended? No.
A favorite in online versus, offering faster weapon switch, in exchange for less afterburn damage. Generally used to perform combos (e.g. Light on fire with Degreaser, follow up by hitting with Flare Gun or Axtinguisher for insta-kill), while it may be a favorite in online versus, it may not be the best primary option as a Pyro. It is a great way to win against small groups of people online, but when encountering a large amount of bots, it may be more useful to burn a large group of them, rather than light each on fire, and individually shoot/smack them to death.

The Backburner
Recommended? Yes!
Yes, yes, we all hate the backburner, but you know who will hate it even more? The robots. Generally, as a Pyro, you will try and sneak behind the enemy. As such, the Backburner can only help by rewarding you with crits for doing so. The extra cost for airblast (-50 ammo on airblast) may deter some players, but as rounds go on, ammo capacity can be upgraded, and much easier than damage can be. It costs 400 credits to upgrade damage by 25%, but only 250 credits to upgrade ammo capacity by 50%. If you use the Backburner right, you won't even need to upgrade damage until later rounds, as the back crits will be powerful enough. Definitely an option to consider.

The Phlog
Recommended? Yes!
While some players find that they would prefer extra damage, or may just not use airblast often, other players straight up opt out of using airblast. The Phlog "Mmmph!" meter can be filled by doing fire damage of any kind. A Pyro can fill the meter by lighting up enemies with the Phlog, with the Flare Gun, or even with the Sharpened Volcano Fragment!*** Mmmph can be used by pressing alt-fire with the Phlog equipped, which will heal the user and grant crits for a short amount of time. Crit flames devestate robots, and especially devestate tanks. Some player may prefer working towards a few seconds of crits, as opposed to getting them randomly, or getting them when sneaking behind a player. Choose based on your playstyle, though be conscious that you will be without airblast when using the Phlog.

***I can't in good conscience recommend the Sharpened Volcano Fragment to any player. Please do not use this weapon.

Even if you buy extra ammo capacity, as a Pyro, you are guaranteed to chew threw a lot of ammo. Take note of ammo packs and where your Engineer places his dispenser, and be sure to visit such locations during the calm moments within each wave.
The Pyro: Secondary Weapon Choices
The Pyro's secondary will most likely not be used as often as his primary weapon. There will be situations where they will be put to use though, and when that time comes, it is best to understand what the weapons are, as well as how they can be used best.

Stock Shotgun
Recommended? No.
The shotgun is simple -- deal massive, immediate damage up close. In online versus, it is great for taking out other Pyros. In MvM though, your teammates will likely be able to take out the other Pyros. Plus, the slower firing rate than the flamethrower make this weapon less useful when playing Pyro. Not the best option for MvM.

The Reserve Shooter
Recommended? No.
Similar attributes to the Shotgun, though with a few minor changes. The weapon switch speed is 15% faster, the clip size is reduced by 50%, and the Reserve Shooter will minicrit all airborne enemies for 3 seconds after switching to it. The Reserve Shooter though, has the same shortcomings as the Shotgun, and similar to the Degreaser, relies more on combos for damage output, which becomes difficult in larger groups. Not the best option for MvM.

The Flare Gun
Recommended? Situational.
Lights a single enemy on fire from a distance. If you hit an enemy who is already on fire, the Flare Gun will score an instant crit. Useful on giants, not so useful on larger groups. This one is a tough call, so each player should decide for themselves on whether or not to use the Flare Gun.

The Detonator
Recommended? Yes!
Similar to the Flare Gun, except makes a whistling noise, and can be detonated. The Detonator can also light large groups of enemies on fire when detonated accordingly, though unlike the Flare Gun, this will not score critical hits if the enemy is already on fire. The Detonator can do damage to the user, though most players use this to actually perform little Detonator jumps. Useful for extra mobility, and definitely useful on larger groups. A good option for MvM.

The Scorch Shot
Recommended? Yes!
Similar to the Detonator, the Scorch Shot is capable of setting large groups of enemies on fire, and even knocks them back. This is in exchange for a 50% damage penalty, though when it comes to secondary Pyro weapons, it is not the impact that is destructive, but the flames. The Scorch Shot also allows the user to perform jumps when used properly, though some players find the Detonator easier to use when performing these jumps. Not so different from the Detonator, a player will likely find themselves deciding between the two.

The Mannmelter
Recommended? Situational.
The Mannmelter's main use is that it can extinguish burning teammates, and grant a critical flare for each teammate extinguished using the flare. It is particularly handy when using the Phlog, as the Phlog's lack of airblast makes it impossible to extinguish teammates. The Mannmelter's only ideal use though, is when there are Pyros on the robot side. Pay attention to what you will be dealing with the next wave, and make your decision then if you would like to use this weapon. One thing to keep in mind though -- Will you actually get the chance to use these extra crits? If using the backburner, there would rarely be a point. If using the Phlog though, the crits can be used to safely build your Mmmph! meter from a distance. A good, but very situational option.
The Pyro: Melee Weapon Choices
Melee weapons are used very little by most classes in MvM with a few exceptions (e.g., Engineer using the Wrench, Scout using the Fan O'War, Demoman using the Eyelander to boost damage). The Pyro, though, definitely has some useful options for melee, both in terms of doling out damage, and in terms of supporting his team.

Upon finishing this section, I realized that all weapons were written as "Situational" or "No" for their respective Recommended sections. As such, all weapons that were previously recommended as situational are all recommended for use. Be aware, however, of when it is appropriate and not appropriate to use them!

The Fire Axe
Recommended? No.
See the section on the difference between alternate strategies and bad strategies.

The Axtinguisher / Postal Pummeler
Recommended? Yes!
While on large groups you likely won't use the 100% crits, this can be a good strategy on giants, especially giant Medics. Use based on what will be attacking during the wave.

The Third Degree
Recommended? No.
While it can do damage to all enemies connected via medibeam, very rarely will you need or use the extra damage. On the giant bots who are being healed, it is better to concentrate all damage on the medics before anybody else, and for doing so, the Pyro will likely use his primary or secondary weapon. If you're looking to do damage to larger groups, stick to the flamethrower.

The Homewrecker
Recommended? Yes!
Let's break down the stats on this one:
+100% Damage Vs. Buildings
Damage Removes Sappers
-25% Damage Vs. Players
Engineers will be grateful for the remove sappers feature when they cannot reach their buildings for whatever reason. One swing of the Homewrecker will remove Sappers from any friendly Engineer building. As such, the Homewrecker is only truly useful if you are generally close to your Engineer and his buildings.

The Neon Annihilator
Recommended? Yes!
Again, let's break down the stats:
Damage Removes Sappers
100% Critical Hit Chance Vs. Wet Players
No Random Critical Hits
-20% Damage Penalty
The Neon Annihilator also offers a remove sappers feature, though it takes two hits with the Neon Annihilator to remove a Sapper. On the plus side, the Neon Annihilator comes with a lesser damage penalty, as well as 100% critical hit chance against wet players. Wet players may include robots covered in Milk or Jarate, and as such, you will likely encounter them often. Keep in mind though, the Axtinguisher does the same to burning players, and does not suffer from a damage penalty. As such, if you are concerned about situational crits, the Axtinguisher is simply better. If you are more concerned about removing sappers, choose between this or the Homewrecker.

The Powerjack
Recommended? Yes!
The Powerjack offers +15% faster move speed, and +75 health on kill, but while active, the Pyro is 20% more vulnerable to ALL incoming damage. Useful when you see a straggler, but against a larger group, not reccomended, especially since the primary weapons offer higher damage output and can be upgraded to offer +25 health on kill for 200 credits a point.

The Back Scratcher
Recommended? Yes!
The Back Scratcher offers +25 damage bonus, though it's main strategy lies in it's passive attributes. The weapon grants +50% health from packs on the wearer, though -75% health from healers on wearer. While it may sound like a downside, this negative attribute can actually help Medics build ubercharge quicker, since it takes larger to heal a Pyro with this weapon equipped, though survivability may become an issue. Take note of health packs around you if you use this weapon, as you may need them!

Sharpened Volcano Fragment
Recommended? No.
Great weapon for Pyros who do not realize that they have a Flamethrower in their primary slot.
The Sniper: The Basics
The Sniper: Great for picking off enemies easily at a distance using headshots. A good Sniper can be incredibly useful in MvM.

One important thing to note as Sniper: two skills you should invest in immediately in any MvM game are explosive headshots (Rifle) and slow on hit (Jarate). Without these, it will be very hard for you to serve your team well.

Sniper's Main Jobs:
-Take out large groups at a distance using explosive headshots. All cash dropped by robots killed from headshots will be automatically collected
-Take out Medics before they can use their ubers
-Use Jarate to slow enemies and maximize team damage output
-Keep enemies from getting close

What to Upgrade:
-Explosive Headshots for Rifle
-Slow on Target for Jarate
-+25% Damage for Rifle
-Projectile Penetration for Rifle
-+25 Health on Kill for Rifle
-+20% Recharge Rate for Jarate
-+20% Reload Speed for Sniper (Best when used on the Hitman's Heatmaker or the Huntsman)
-+25% Bullet Resistance (For protection from other Snipers -- one of your biggest threats)

Can Replace:

Demoman
As covered before, the Demoman's main job is to take down Medics, and take out large groups. The Sniper can accomplish both of these: One well placed explosive headshot can take out an entire group of Medics, especially when fully upgraded. The same holds true for groups. Also, what some players may not realize, headshotting a giant who is surrounded by regular bots will trigger explosive headshot damage on the surrounding bots. Use this to easily take out larger groups.

Soldier
Deals out explosive damage at large rates, and Buff Banner offers the team mini-crits. The Sniper's explosive headshots operate similarly, and in some cases, better than the Soldier's rockets. Additionally, Jarate not only offers mini-crits and can charge at the same rate as the Buff Banner in some cases, but also slows enemies affected. The Sniper can be just as -- and in some cases -- more effective than a Soldier on a MvM team, especially considering explosive headshots can insta-kill most robots.

Now onto the weapons!

The Sniper: Primary Weapon Choices
As a Sniper MvM, there will lonly be three instances in which you will temporarily stop using your sniper rifle: You're throwing Jarate, you're fighting a Spy, or you're dead. As such, it is important to choose the Sniper rifle which will help you the most, and also benefit your team the most.

Stock Sniper Rifle
Recommended? No.
Whlie it may be the simplest rifle, it is certainly not the best for MvM. Other rifles have better rewards for doing the same thing you would be doing anyway with the stock rifle.

The Huntsman
Recommended? Situational.
I have seen people help win MvM using the Huntsman, though it is generally frowned upon and not used in MvM, and as such, hard to form an opinion on. It is the easiest to upgrade in terms of firing speed, and has a base charge rate of one second, allowing for fast and powerful damage output. The lack of scope though, can make it difficult to be accurate. Considering how many teams are against Snipers as is, it may be even more difficult to convince a team to let you play Sniper and use the Huntsman. If anybody has significant input on the Huntsman, please chime in below in the comments section!
Update: Several people have chimed in saying the Huntsman is useful, but I have yet to be given specific details on it. Its main strength is its faster base firing rate, as well as the fact that bodyshots (and shots on Tanks) will still do significant damage. As I await more input on the subject, the Huntsman will currently go down as situational.

The Machina
Recommended? Situational.
On full charge, the Machina does 15% more damage than other fully charged rifles, and the rounds will penetrate enemies. The Machina can only fire while scoped though. While it does do more damage at max charge and can penetrate players, every other Sniper rifle can be upgraded to do the same in MvM, and some have better benefits. Additionally, some players may find the inability to fire out of scope irritating. Use at your own discretion.

The Sydney Sleeper
Recommended? No.
The Sydney Sleeper has a 25% faster charge rate, and covers enemies in Jarate for 8 seconds on hit. This weapon has one major downfall as Sniper though -- it cannot perform headshots. The explosive headshots upgrade will still apply if purchased (i.e., if an enemy is shot in the head, other nearby enemies will receive damage), though the headshots will not be critical. Additionally, the Sydney Sleeper's Jarate does not benefit from the "slow on hit" upgrade that can be bought for Jarate. As such, the Sydney Sleeper is not recommended.

The Bazaar Bargain
Recommended? Yes!
The Bazaar Bargain begins with a 20% lower base charge rate than the Sniper Rifle, but with each headshot (fatal or non-fatal), the charge rate will increase by 7.5%, capping off at 6 heads (1.8 second charge rate). For every scoped non-headshot, base charge rate will reduce by 7.5%, capping off at the 20% lower rate. After 3 headshots, the charge rate of the Bazaar bargain is actually faster than all other rifles, and as a Sniper, you better be getting headshots. This is my weapon of choice for when I play Sniper in MvM. The Bazaar Bargain is an underrated rifle in MvM, and by using it, you can avoid having to upgrade charge rate.

The Hitman's Heatmaker
Recommended? Yes!
This sniper rifle comes with a unique feature -- Every kill and assist will work towards filling your "Focus" meter. Once the meter is filled, Focus can be activated by firing while scoped. When in Focus, the charge rate is 25% faster and the user cannot unscope. The only downside of the rifle is a 20% reduction in damage on body shots. A favorite among MvM snipers, and very useful when Focus is activated at the right time. The Hitman's Heatmaker is worth using.
The Sniper: Secondary Weapon Choices
As I said earlier, one of the most important things for a MvM sniper to invest in is slow on hit for Jarate. In the spirit of this guide though, I will outline each weapon option, and breakdown why it is best to use Jarate.

Stock SMG
Recommended? No.
The SMG, on average, assuming every bullet hits, can do about 12 damage per shot at point blank range. The Sniper's primary, when upgraded with explosive headshots, can do 100s of damage to several enemies with a single shot at any distance. It would be illogical to switch to from using your rifle to using your SMG to deal with enemies.

Razorback
Recommended? No.
Blocks a single backstab attempt. After that, it's useless unless you make your way back to resupply. Not a logical choice.

Darwin's Danger Sheild
Recommended? No.
Offers 25 extra health to the wearer. Some people find it helpful in online versus, but in MvM, the extra health won't be as useful, and it won't benefit your team either.

The Cozy Camper
Recommended? No.
The Cozy Camper passively gives +1 health per second on wearer, keeps the user from flinching while aiming, and reduces knockback from damage by 20% while scoped. This is in exchange for a 20% damage vulnerability on the wearer. In MvM, any player can buy +2 health per second for 200 credits, or even +25 health on kill for 200 credits. Buying one of these is much more logical, as neither of these will make you more vulnerable to damage.

The Cleaner's Carbine
Recommended? No.
Upon getting a kill with the Cleaner's Carbine, the user will get 3 seconds of 100% critical hit chance on any of his/her weapons. This is in exchange for 20% smaller clip size, 35% firing speed, and no random critical hits -- All of which make it more difficult to get a kill with this weapon. While it is fun to use, it is not practical in terms of damage output in MvM.

Jarate
Recommended? Yes.
Let's compare Jarate to some of the other secondary weapons to illustrate why it is the better option:
The Razorback - Stops a single backstab attempt, revealing a Spy to you. Jarate can cover several Spies at once, keep them from cloaking, slow them down, and make them more vulnerable to damage. If you're concerned about Spies, this is the weapon you want to use.
Darwin's Danger Shield - Makes it harder for robots to kill you. You know what makes it even harder for robots to kill you? When they're already dead. Jarate will slow bots down, and help your teammates kill them before they can even reach you. This, combined with if there's a Medic on the team (a very high possibility), and you won't have to worry about survivability.
The Cleaner's Carbine - Grants 3 seconds of crit on kill, if you manage to get a kill with this weapon. Jarate, on the other hand, guarantees mini-crits on any enemies covered with it, and it is easier to hit enemies with Jarate than it is with the cleaner's carbine. Plus, your whole team benefits from the mini-crits, not just you, so damage output is vastly improved.

As we can see, Jarate offers a combination of benefits, the only downfall being that you can't equip a different secondary weapon. As was stated earlier, there is a difference between an alternate strategy and a bad strategy. Using any secondary other than Jarate in MvM would simply be a bad strategy.
The Sniper: Melee Weapon Choices
As was stated earlier, it is very rare that you will not be shooting your rifle. For when that situation arises though, be conscious of your melee weapon, and how its attributes will affect you in these situations.

The Kukri
Recommended? Yes!
Performs like any stock weapon, and unlike the Pyro's fire axe, has no options that are directly better than it.

The Shahanshah
Recommended? Situational.
+25% damage when at <50% health, and -25% damage when at >50% health. Good weapon if you're caught against Spies and have taken some damage, though if you've been Sniping for a while and been gaining +25 health per kill, it may seem pointless. Use at your own discretion.

The Tribalman's Shiv
Recommended? Yes!
Causes enemies to bleed for 6 seconds, though does 50% less damage. Good against Spies if you've already thrown your Jarate and are waiting for it to recharge.

The Bushwacka
Recommended? Situational.
If you find yourself using Jarate against Spies often, this can be a helpful weapon. Be conscious of the extra 20% fire damage vulnerability though.

More than likely, your melee weapon will be used against Spies, and nothing else. Pick your melee weapon based on how you deal with the Spies best in MvM.
The Spy: The Basics

The Spy: Whether against Red, Blu, or even Gray apparently, the Spy is a master of disguise, and is great for sneaky strategics.

Main Jobs:
-Sap large groups, Medics, and giants to stop or slow them down
-Backstab unsuspecting enemies
-Collecting cash that the Scout does not grab
-Serving as a distraction, as well as general pain for the robots
-Disguising: Disguise out of view of any bots, as if one sees you, they will call out "Spy!" causing their whole team to be on you
-Sapping, stabbing, and surviving. Robot will detect Spy presence in the following situations: If a robot nearby is sapped (Giants will still move upon sap, and as such, will detect you and fire upon you), if a robot nearby is backstabbed, if the Spy is on fire, and finally, if you're undisguised.

Upgrades to Buy:
-+30% Critical Damage Resistance
-Sapper Power (Increase radius and duration)
-+25% Armor Penetration for knife
-+10% Firing Speed for knife
-+25% Health on Kill for knife
-+10% Movement Speed
-Resistances based on upcoming wave

Can Replace:

Scout
Similar to the Pyro replacing the Scout, this would be a bold strategy, and not recommended on big maps such as Manhattan. The Spy can use his sapper to halt or slow incoming groups, and backstab them. Given the fact that a good spy will be right behind the robots a majority of the time, cash collection can be easier for him compared to other, more stationary classes. Use the Dead Ringer and upgrade +25 health on kill for your knife, and you essentially have a sneaky, damaging, near invincible cash collector.

Demoman
We have covered several times that the Demoman's biggest goal in MvM is taking out the Medics. A properly upgraded Sapper can sap and stop several bots at once. A regular sized bot, once sapped, will cease firing and halt in his tracks, and several robots around him (depending on how much the sapper has been upgraded) will do the same. This tactic can be used to stop and then backstab large groups easily, including Medics building up ubers. A giant, once sapped, will be slowed down, but not halted, by the sapper. The Spy can upgrade armor penetration (+25% armor penetration for 400 credits) in order to be able to backstab giants, and can upgrade attack speed (+10% attack speed for 200 credits) to be able to backstab multiple enemies without having to wait for cooldown time. The sapper and knife make the Spy just as deadly to a group as a Demoman waiting with a crit sticky trap.
The Spy: Revolver Choices
As a Spy, you're more than likely only going to use your pistol against tanks, or the few occasions that you're at a distance. Some pistols will be useful in their passive effects, while others will be good on the few occasions you'll have to use them.

Stock Revolver
Recommended? No.
In MvM, it does not make sense to use the Stock Revolver, as other pistol options better suit the Spy's use in the game mode.

The Ambassador
Recommended? No.
Does 15% less damage, fires 20% slower, and has no random critical hits, though crits automatically on a headshot. While some players may be good with the Ambassador, the Diamondback offers situational crits, and is far better suited for this game mode. We'll cover that when we discuss the Diamondback.

The Enforcer
Recommended? No.
Does 20% more damage while undisguised, though fires slower and has no random critical hits. While it packs a punch and has become notorious as an overly easy weapon to use as Spy, there are better options in terms of both damage and survivability.

L'Etranger
Recommended? Yes!
Any Spy equipped with the L'Etranger has gains an additional 40% cloak time. Additionally, every hit adds 15% charge to cloak, though each hit does 20% less damage. This is the best weapon in terms of survivability as a Spy, especially with the Dead Ringer equipped. The minimal damage will not matter, as most of the time as Spy, you will be using your knife. Definitely recommended for MvM.

The Diamondback
Recommended? Yes!
The Diamondback has recently been updated to be a more useful weapon. Now, with every building destroyed via sapper, or with every enemy killed via backstab, the Spy gains a critical shot for the Diamondback. Critical hits stored cap out at 35. This is all at the expense of a 15% damage penalty and no random critical hits. This is where the Diamondback comes in as more useful than the Ambassador, as it is easier to gain critical hits for the Diamondback, and it does not suffer from a slower firing speed. Additionally, crits from the Diamondback can be used on tanks, whereas the Ambassador cannot headshot tanks. Neither of the Diamondback's downsides will matter so long as you are getting backstabs, and if you are playing as Spy in MvM, you better be getting backstabs.
The Spy: Sapper Choices
It hardly matters which sapper you choose (Stock Sapper vs. Red Tape Recorder), as both have the same effect on robots, and both can be upgraded similarly. The only difference is that when facing Engineers in MvM, the Sapper will destroy buildings faster than the Red-Tape Recorder.* In these situations, it is better to use the stock Sapper.

Sap every group that you have the chance to. Different situations to sap in:
-When you want to perform backstabs. The Sapper will stop small bots, and will slow giants. Small bots that are sapped can be backstabbed from any side.
-Medics, especially Uber Medics. This will halt them from building their Ubers, and give your team the chance to safely dispose of them.
-Giants. While they will never be halted completely by your Sapper, they will be slowed, and sometimes, this can be crucial to a team staying alive, or even to a team winning the match. Also, I have been told that if you Sap a Giant before he begins shooting, your Sapper will halt him from shooting altogether. (If more people can confirm this, that would great!)
-Groups your team can't focus on immediately. If your team has to deal with two groups and appears to be more focused on one, sap the one which they are distracted from. This will allow for your team to safely deal with both groups.
-Groups which place survivability at risk. Sometimes, a group of robots may actually pose a significant and immediate threat to team members, whether those robots are being focused on or not. Sap these when possible. If your team is already focusing on that group, the robots being sapped will make it easier for your team to destroy them. If your team was not focusing on that group, then it will give you a chance to warn them, and it will save your team the trouble of having to be revived or having to buy in.

*Due to a glitch, Engineer bots currently do not remove the Red-Tape Recorder. This glitch will likely be fixed soon though.
The Spy: Knife Choices
As a Spy, your Knife will be put to use often. As such, it is important for both you and your team that you choose the right one.

Stock Knife
Recommended? Yes!
This is the knife for those who feel most comfortable with the basic abilities of the Spy. A player does not have to deal with the bells and whistles that come with the other knives, and as such, it is simplest to use. It does not restore health or gain cloak on kill, though +25 health on kill can be bought. As for gaining cloak, cloak can be gained through picking up an ammo box, stopping by a dispenser, or using the L'Etranger if equipped.

Your Eternal Reward
Recommended? No.
With YER equipped, a Spy cannot disguise using the disguise kit, though disguises discreetly as his victim upon a successful backstab. Theoretically, this would be the best Spy knife for MvM, as robots do not shoot disguised Spies. However, the difficulty in gaining that first backstab against bots, paired with the fact that the disguise takes longer to take effect in MvM than it does online, makes the weapon a poor choice for Spy. Any Spy using YER will find themselves swiftly killed by robots.

Conniver's Kunai
Recommended? Situational.
Any Spy equipped with the Conniver's Kunai starts with 60 health. On backstab though, the Spy absorbs the health of his victim, up until 300% overheal (around 185 health). While after the first backstab, overheal negates the lower base health, all Spy knives can be upgraded to grant +25 health on kill, and some have more useful effects, though at the same time, using the Kunai can save 200+ credits for use on other abilities and still increase survivability. As such, the Kunai is a situational weapon, mainly based off the player's preference.

The Spy-Cicle
Recommended? No.
The Spy-Cicle's backstab silently turns the victim to ice, and on hit by fire, will grant 2 seconds of fireproof the the wearer. On hit by fire though, the Spy-Cicle will be rendered unusable for 15 seconds. Since robots detect all nearby backstabs, the silent backstab effect is rendered useless. Additionally, while the fireproof effect may prove useful (all robots instantly target Spies taht are on fire), using the Dead Ringer to feign death will extinguish any fire, and when used with other knives, will not render the weapon useless. Any positive effects granted by the Spy-Cicle are either surpassed by other weapons, or negated by the robots' AI.

The Big Earner
Recommended? Yes!
Any Spy using the Big Earner will gain 30% cloak on successful backstab. In exchange, the user spawns with 100 base health. When used against a large group of robots along with the Dead Ringer, the Spy can easily cloak in dangerous situations and safely escape. This, along with the fact that the Big Earner can be upgraded to grant +25 health on kill, and the Spy becomes near unstoppable.
The Spy: Cloak Choices
Once again, I hate to state that one option is simply the best for MvM, but in the case of the Spy's cloak, the Dead Ringer proves to be the best. Robots do not Spy check on disguised enemies unless they sap or backstab. In these situations, it will be difficult to get away when robots see you cloak, especially if you are on fire. It is for these reasons I recommend the Dead Ringer over all other options.

How to use the Dead Ringer:
-Some players like to play it safe and not attack bots until their Dead Ringer cloak is totally filled. To best do this, take note of ammo boxes around the map, as well as where your Engineer places his dispenser. Every time you feign your death, stop by one of these locations to refill your cloak, or use the L'Etranger if you have it equipped.
-Some players prefer the riskier play style, and in some situations go in while their cloak is still recharging. This is more recommended for players using the Big Earner, as a single backstab will recharge about a third of cloak. Either way, always be conscious of how much cloak you have, as well as how quickly it recharges -- Otherwise, you may wind up dying for real.
-Use it to get out, grab health, and disguise again. Even if you have upgraded your knife to gain health on kill, sometimes you will take too much damage to risk going back up against the robot horde right away. In these situations, play it safe, and grab the extra health, or call for your medic.
-Use it for any situation where bots have spotted you and you cannot perform a backstab. In these situations, unless your team can save you, or you have the Diamondback equipped, you cannot win. Even with the Diamondback equipped, it would be better to save the stored crits, or feign death and fire them from a distance.
-Against giants following them noticing you. Sometimes, you can endlessly backstab a giant, and they will not turn around. This is not always the case though. When they do turn around, do yourself a favor and use the Dead Ringer. Against the giants up close, you'll be torn to bits, but if you use the Dead Ringer, you can safely escape.
Conclusion: Keep an Open Mind
The MvM Metagame is making playing MvM boring, turning the game mode into nothing more than a grind-fest to get Australium weapons. What was supposed to be a fun and new game mode, has now been turned into a class restrictive game mode where innovation is frowned upon. This is not done by Valve -- This is done by the community that plays the game, particularly in Mann Up mode.

Could Valve do what they did for the Medic and make adjustments to the Pyro, Sniper, and Spy that makes them more useful? Theoretically, yes. This though, does not change the fact that they are useful, fun to play classes now, and there are players who not only enjoy playing them, but are good at playing them.

While this guide was written for players newer to TF2 and MvM, that crowd was not my main target. My main target with this guide were players who threaten to kick immediately upon seeing one of these three classes on their team roster. Yes, you did pay to play on Mann Up mode -- so did everyone else, including the player you may be threatening to kick.

This guide aimed to illustrate how the classes can be just as useful to a team as any of the classes they replace. When you see these players, keep an open mind and give them a chance -- You never know how they may do.
Is There a Time to Stop Innovating?
This part of the conclusion mainly targets the players who are new to TF2 or MvM. The answer to this question? Of course there is.

We covered earlier in the guide the difference between an alternate strategy and a bad strategy. Keep that in mind when you attempt to innovate. If you cannot tell if your strategy is working, here is what you should ask yourself:

Is the strategy working because of my team, or is it working because of me?

If the only reason your strategy is working is because your team is carrying you, then the strategy may not be working. Carefully observe who is doing what on the battlefield, and ask yourself this question during each round, especially if things seem more difficult.

Your team should be open to new ideas. They should not have to suffer for them. Generally, most teams that I've been on agree to something I call The First Round Rule. At the start of a MvM match, select the class or loadout you want to play. If your team argues with you, tell them that you'll try your loadout for one round, and if it doesn't work, you'll switch to a working class or leave. Generally, people are reasonable and will agree to this. Just keep in mind, if your strategy doesn't work and gives no indication that it could work, then it may be time to switch classes.

Innovation is a two way street: Your team has to be open to you innovating, and you have to be willing to switch loadouts should your strategy not work. If both parties agree to do so, this allows for MvM to be much less restrictive, as well as creates a better environment for online matches. Be open minded to new strategies, but also be aware of when strategies aren't working. This way, everyone can attempt to innovate, have fun, and still work together to win the MvM match.


I admit to not being the most experienced player in any of these classes, though I have written this guide based on experience and observations from MvM matches. If there is anything I was wrong about, or anything I missed out on mentioning that you feel is important, please feel free to mention it in the comments.

And hey, if you enjoyed this guide or found it helpful, why not share it with friends, or check out my other guides?
http://steamcommunity.com/sharedfiles/filedetails/?id=214391198#
http://steamcommunity.com/sharedfiles/filedetails/?id=217382855#
Thanks all!

-Patches Petunias

Update: Thanks everybody!
Wow, 2,000+ views and 50+ favorites?! Given that this is my third guide posted to the steam community (as well as my most popular), this means a lot to me! Thanks so much to every single one of you who took the time to view, rate, favorite, comment, and share! :)
87 Comments
ABF579X Jan 13, 2021 @ 10:21am 
I feel like The Pyro, Sniper and Spy should've been in the MVM Trailer.
Mandalore Jan 3, 2016 @ 7:34am 
Pt 5
"Could Valve do what they did for the Medic and make adjustments to the Pyro, Sniper, and Spy that makes them more useful?"

All of those classes are op as they are in mvm. they do not need any changes. However, you need skilled players.

Overall, if this is how your teaching people how to play spy, your doing it wrong, because this isn't an effective way to build spy, if all your doing is sapping. You won't get that much damage out, and any experience demoman will do more than you. A demoman cannot deal with giants as fast as you, nor can he collect money, which are the spys main role.
Mandalore Jan 3, 2016 @ 7:34am 
Pt 4

"Giants. While they will never be halted completely by your Sapper, they will be slowed, and sometimes, this can be crucial to a team staying alive, or even to a team winning the match. Also, I have been told that if you Sap a Giant before he begins shooting, your Sapper will halt him from shooting altogether. (If more people can confirm this, that would great!)"

Thats false. You never sap giants. In fact, sapping until the late game is pretty much useless. Any good demoman or soldier should be able to crowd control.

Mandalore Jan 3, 2016 @ 7:33am 
Pt 3
"The Spy can use his sapper to halt or slow incoming groups, and backstab them"

Again, thats not the point of spy. The point of spy is to take down giants. Sapping bots is only in the late game, not the early game.

"A giant, once sapped, will be slowed down, but not halted, by the sapper."

You shouldn't be sapping giants, except for giant scouts. You should be backstabbing them.

"The only difference is that when facing Engineers in MvM, the Sapper will destroy buildings faster than the Red-Tape Recorder."

Nope, theres another difference. Robot engineers won't remove sappers from teleports if the sapper is the RTR.
Mandalore Jan 3, 2016 @ 7:33am 
Pt 2
Thats pretty much wrong. You don't get sapper power at all, because spy isn't meant for crowd control. If you wanted to crowd control effectively, then go demoman or soldier. Your job is to take out giants. Therefore, wasting 1050 credits, is going to set you back a while.

Typically the upgrade path for spy is: max out: armor penetration, knife attack speed, run speed, resistances (crit, blast, bullet, maybe fire), sapper, everything else).

"Similar to the Pyro replacing the Scout, this would be a bold strategy, and not recommended on big maps such as Manhattan."

Whenever time you play spy, you should be cash collecting. It doesn't matter the map. Its part of your job.

Mandalore Jan 3, 2016 @ 7:33am 
Pt 1
"Giants will still move upon sap, and as such, will detect you and fire upon you)"

Only giants you should sap are giant scouts.

And you forgot to mention as spy, you should backstabbing giants.

"Upgrades to Buy:
-+30% Critical Damage Resistance
-Sapper Power (Increase radius and duration)
-+25% Armor Penetration for knife
-+10% Firing Speed for knife
-+25% Health on Kill for knife
-+10% Movement Speed
-Resistances based on upcoming wave"


bandit.o.s. Inc ⚧ Feb 8, 2015 @ 3:02pm 
I've played on server about week ago with a spy that demolished a whole wave of scouts giving the medic and pyro(Me) enough time to wipe out the crowd and giving our soldier and heavy enough time to prep for the giants. If you wanna play Mann up most are accepted depending on the mission just friend me :D
Scorn on the Cob Dec 9, 2014 @ 2:15am 
I don't know if it's been said before, but the bushwacka is especially useful against tanks when paired with soldiers, as the buff banner will grant you straight 195 damage hits every few seconds.
Hope Nov 4, 2014 @ 9:51am 
...They don't even give us a chance. I trust in our skills since we've completed most maps on bootcamp with great results, but we just cannot get a tour done on Mann Up since nobody accepts us.
On their order I've played some matches as other classes, but it's not as fun for me and I feel like I'm less of a credit to team... Sometimes I've even felt like we lost because there was nobody to halt that group of scouts as a spy or to airblast them off their tracks to send them backwards.

tl;dr: Thanks for this!
Sincerely, a discriminated MvM spy.
Hope Nov 4, 2014 @ 9:51am 
I really appreciate this. I usually play with a friend who is a great pyro in both versus and mvm modes with some great airblast skills which come in handy during MvM. I personally normally play soldier, but I've found out that I handle best as a spy in MvM.
I usually upgrade the sapper right off the bat and always go for survivability with DR and Big Earner, changing between L'Etranger and Diamondback, depending on whether I need crits or more survivability. I play as a team player, stopping medics and slowing giants to help the rest of the team to take them down, as well as dealing with those pesky snipers to save lives.
We've both learned well and have often been credit to team on bootcamps, but the moment we enter Mann Up mode...

"Oh, great, a troll team. Kicke the BoSF group, they're just trolls. Just look at their class choices."