The Long Dark

The Long Dark

36 avaliações
The Long Dark - Interloper
Por xanax
Guide for Interloper
   
Premiar
Adic. a Favoritos
Nos Favoritos
Desfavoritar
What is Interloper?
Interloper, one of the 4 survival modes in this game, is the hardest of them. This experience is best suited for expert players looking for the ultimate survival challenge.
Some information about Interloper.
• Very few items. Matches and other ignition items are rare, a hunting rifle, revolver, hatchets, and hunting knives will never spawn on this difficulty. You have to make a knife and hatchet.

• You have to make a bow to hunt.

• You can't start the region you want. The chances of starting in the Forlorn Muskeg and Hushed River Valley regions are higher than others. After these two, the chance of starting on Timberwolf mountain are high compared to others.

• When game starts , there are no matches and sleeping bag in your inventory. You start with a few bad clothes and just a recycled can. You have to make good clothes yourself.

• Your condition will rise more slowly.

• Some containers on Timberwolf mountain do not spawn.

• Houses in some areas may have been destroyed. For example, there are a maximum of 3-4 houses around the garage on Coastal Highway. Others have been destroyed.

• When the game starts you will not be hungry , thirsty and tired.

• When you start there is usually a strong wind.

• Possible to spawn at night, and you can't spawn in a house. You will spawn outside.

• Fewer dangerous animals, but they are stronger.

Weather
• The most important thing that makes Interloper difficult is cold weather. Generally, it is a foggy or windy weather. We should not forget the blizzards that started in minutes. That's why map information is so important. If you feel that the storm will begin and you are far from a closed area, do not leave the main road. When there is a blizzard ,the temperature usually ranges from -50 to -70. As the days progress, the world becomes colder than before. These temperature values ​​may chance.

• Pleasant Valley has the worst weather , is known with blizzards.

• When there is a blizzard, there are no animals around.

• In the Interloper mode, the weather can change very quickly.

• The temperature is between -18 and -42 with a high probability. If you are lucky (with good clothes on you) you may see a temperature between -5 and -12, but rarely. This air temperature is very suitable for break branches like pine and cedar.

• Even if the weather is clear and sunny, the temperature can be -40.

• Some things that announce the coming of the storm. Imagine that the weather was clear, then slowly falling snow began. If the wind suddenly came out and if snowfall started to accelerate slowly,
You have 1 minute left.


• A photo from my own game(2nd photo)

Region : Pleasant Valley - Near the entrance of Mount Timberwolf.
With best clothes tempreture was -76 , I wondered what would happen after removing all the clothes and that's the result. That's why Pleasant Valley is known with blizzards.

Information about World Map (Map Spoiler)
Transitions between regions.


Name
Difficulty
Size
Mystery Lake
Normal
Medium-Large
Pleasant Valley
Hard
Huge
Ravine
Easy
Small
Desolation Point
Normal
Medium
Broken Railroad
Normal-Hard
Small-Medium
Hushed River Valley
Hard
Medium-Large
Coastal Highway
Normal-Hard
Large
Mountain Town
Normal
Large
Forlorn Muskeg
Normal-Hard
Large
Winding River
Normal
Small
Timberwolf Mountain
Hard
Large
Crumbling Highway
Normal
Small
Bleak Inlet
For Legends
Medium-Large


Feature
Region
Info
Easiest
Ravine
There are no animals that can attack you, only 1 deer and 3-5 rabbits.
Hardest
Bleak Inlet
There are 4-5 timberwolf spawn points.They are in groups of 4-5 wolves. I wouldn't want to imagine your end if you can't use arrows like Legolas, Green arrow or Hawkeye.There are northern lights almost every night. In the daytime, there are strong winds during the day.
Smallest
Crumbling Highway
Just a small area
Largest
Pleasant Valley
It is a very large region and a lot of places to visit.
All regions
Broken Railroad


Forlorn Muskeg


Hushed River Valley to


Mountain Town


Mystery Lake


Winding River


Pleasant Valley


Timberwolf Mountain


Desolation Point


Crumbling Highway


Coastal Highway


Bleak Inlet


Base in each region
Set a base in each region. Bring all the loot you find in that region.

Note : Lets say you went to Mystery Lake then to Camp office or wherever you want. For example you went to camp office. Now you can explore Mystery Lake , you wanted to go to Trappers Homestead. Take what you want from there and go to back to camp office. If you want you can stay there all day to loot everything or 10,20 days , I don't know, that is your decision. One more thing , do not try to bring fresh guts back to your base if you have killed an animal.


The most suitable base locations for each region (If you want, you can stay somewhere else) :


Mystery Lake : Camp office


Coastal Higheay : Quonset Garage or Fishing Camp


Mountain Town : Gray Mother's House


Desolation Point : Lonely Lighthouse


Pleasant Valley : Signal Hill


Bleak Inlet : Cannery Workers Residence


Broken Railroad : Meintenance Yard


Forlorn Muskeg : Old Spence Family Homestead


Timberwolf Mountain : Mountaineer's Hut


Hushed River Valley : Wherever you want


Long Journeys
Things to do when going from one region to another :

• Since you are likely to come back again, put water and 4-5 cat tail stalks(if you have) and some things you want.

• For example, if you have 35 kg inventory capacity, fill this up max 40 kg. To be able to run and move faster.

• Take coffee with you before you go.

• If you get too cold on the way, light a fire and drink a hot tea.

• Make your journeys in the morning, after you rested.

• Do not deal with animals on the road.

• Plan, which road to which area and which building to go.


Dangerous Regions & Areas
Dangerous Regions

• Broken railroad : A narrow passage, and the wolf at the end of the passage. It is difficult to pass the wolf.

• Timberwolf Mountain : The absence of a good house makes it difficult to live in this region.

• Hushed River Valley : Caves are the only place you can stay in this untouched region. It makes living difficult with its complex and difficult to understand region.

• Forlorn Muskeg : As in the Timberwolf mountain, there is no good house . As you walk around, the ice you press on may break. It is very difficult to protect from the wind.

• Pleasant Valley : Blizzards in this region are very strong. Very fast changing air can leave you in a difficult situation. Since this region has 5-6 bear spawn points, it can make it difficult to walk around.

• Bleak Inlet : Strong winds and northern lights that come almost every night are factors that make this area difficult. Of course, these are almost nothing next to the TIMBERWOLVES. It is almost impossible to live here with a bow in your hand, Timberwolves travel in groups , they are usually 4-5.


Dangerous Areas

Quonset Garage : The wolves, bear and moose around the garage make it difficult to walk around. Sometimes you can't even find a single animal.

Barn : 3-4 wolves next to the barn make entrance and exit difficult.

Meintenance Yard : There are 3-4 wolves around and they are making entry and exit difficult.

Last Resort Cannery : There is only one entrance, as soon as you approach that entrance, the timberwolf group will come towards you. If you are not legolas or don't have a marine flare , you're dead. Stay away from this area.

The Cannery Workshop : Let's say you pass the wolf group at the entrance. The northern lights came, you got the code and you're ready to go inside. You entered and what is it? There's a wolf inside and it's coming towards you. That wolf or you will die.

First days
Region that you started

• If you start in the Hushed River Valley area, go directly to the Mountain Town. Hushed River Valley is untouched by human hands, you will die from thirst and cold on the first day.

• If you start in Forlorn Muskeg, going to the Mystery Lake is the best option.

• Bleak Inlet region is very difficult to survive. If you start there, your job will be very difficult. Dealing with Timberwolves is really hard. If you started there, stay away from the factory. It's like a wolf's lair. It has only one entrance and be ready to fight the timberwolves as soon as you enter.

• When you start at Timberwolf mountain, you have to go to the Pleasant Valley. Because there is only one house in this area, but it is cold inside, you should always light a fire inside. That's why it's almost impossible to stay in this area without good clothes.

• If you start in other regions it would be better to stay in that region.

• When you first start, you will have time to research the surroundings because you are not hungry, thirsty and tired. It would be better if the places you go to first are important locations in that region. Each region has important locations. For example, important locations in the Mystery lake: Trapper's homestead, Camp office, Carter Hydro Dam and Forestry Lookout. You don't have to force yourself to go to such areas. It makes more sense to go to nearest home , where you started.

Items in your Inventory

• You will start with bad clothes on you and a recycled can in your bag. It is almost impossible to spend the first night without matches. You need to drink water. If there is a house with a toilet near you, you can get the water from there. If not, your first goal is to find matches. There is no sleeping bag in your inventory , you need to find a house with a bed where you can sleep at night. You can't stay in a place without a bed until you find a bedroll.

Loot

• I would recommend you to go to important places in your area. Because these places are better than the other places, and have more and good quality loot (for example : Quonset Garage , Camp Office , Signal Hill). Always may not meet your expectations (especially Carter Hydro Dam). The game may sometimes surprise you. For example, items you find in a small house may be better than what you find in a large house.

Food & Water

• Do not eat the foods you find in the first days. Eat your food just before going to sleep. Even if you're hungry during the day, you won't lose too much condition. If you eat your foods before going to bed at night, you will gain the condition you lost during the day by sleeping. This is the best way to increase your condition. If you are hungry at night while sleeping, your condition will not increase, on the contrary, it will decrease. While sleeping you will get 3 condition per hour, if you are hungry your condition will not increase. So keep your food night.

• You have visited the houses around, as we all know, the food you find from those houses is not enough for you. So collect cat tail stalks if you have them around. These are one of the most important things in the Interloper mode. You can find them next to the lakes and rivers. They are found in almost every region. These things gives you a lot of calories and their condition does not decrease. So eat them last, when you can't find food.

• Another option to find food in the early days is to hunt rabbits with stones. Take the stone in your hand, aim, wait for the rabbit to be right above your thumb and throw the stone. If there is a closed area nearby, take the rabbit there. If don't have house , light fire (near a rock), make sure you get warm. Gather the meat, skin and guts. Cook and eat the meat directly there.

• Another type of food finding is deer carcasses on the road. Follow the crows, when you find the deer carcass, put a fire next to it and take your meat and cook it. Then collect skin and guts, then run to the nearest house.

• And fishing. I think fishing while playing Interloper is a waste of time. Because you have to burn a fire in order not to cold there, you need water to drink and when you fish, there is a lot of calories that you spend and there is not a lot of calories in the fish you hunt. If you're not lucky, you're wasting your time in the first days.

• Eat your foods in the following order: First meals then foods you found in houses then cat tail stalks.

• These days when you don't have too many matches, make a fire and make as much water as possible. Don't spend too much matches. Make tea using the mushrooms and rose hips you collect with the water you made.
Negative Afflictions
I only wrote the ones that you will see often.


Cause : • Eating spoiled food


Effect : • Condition cannot be restored
• Condition is reduced by 85% over the course of 12 - 24 hours

Treatment : 2 x Antibiotics / 1 x Reishi tea

Recovery time :
• 10 hours (treated)
• 12 - 24 hours (untreated)


Cause : • Having a bodypart exposed or in contact with frozen clothing


Effect : Maximum condition reduced by 10%

Treatment : Cold bite has no solution.

Recovery time : It stays forever

Tip : At the beginning of the game, you will see often the risk of frostbite. As soon as you see the frostibe risk post, go to warming up.

How can you protect yourself in first days?

• Craft Improvised head wrap and Improvised hand wraps

• Two pieces of cloth and a sewing kit or fishing tackle are required to craft the head wrap; crafting takes approximately 30 minutes.

• Crafting the hand wraps takes about 37 minutes and requires 4 pieces of cloth and a sewing kit or fishing tackle.


Cause : Spending the majority of 6 days indoors


Effect : • You can't rest indoors for 24 hours

Duration : 24 hours + you will get cabin fever risk. Around 30 hours.

Tip : Collect woods to light a fire for 24 hours . Go to fishing hut ( if you can find hut with door you will be safe). Hunt fish in day and rest in night.

When you get cabin fever risk , don't go to a house. Stay outside. You will get cabin fever if you go to house.


Cause : Freezing for an extended period of time


Effect : • All condition loss from freezing is doubled.
• Fatigue is lost at twice the normal rate.

How to protect from Hypotermia?


Every time it gets cold, there will be a risk of hypothermia. When this risk of hypothermia is 100%, you will be hypothermia. Try not to increase the risk of hypothermia above 50%. Warm-up is necessary to get rid of the risk of hypothermia.


Cause : Consuming bear or wolf meat


Effect : • Condition is reduced by 2% per day
• Maximum fatigue is reduced by 2% per day

Treatment : 2 x Antibiotics or 1 x Reishi tea

Recovery time : 20 days on Interloper

How to protect ?

Don't eat so much bear and wolf meats. Eat 2 or 3 meal. After level 5 cooking skill , you will not see this.

Netural resources
Collect all the plants you find on the way.

You can make tea with rose hip , reishi mushroom and birch bark.


Rose hip


Reishi Mushroom


Birch Bark


Cat tail stalks

It is one of the most valuable things in the game. It is one of the most valuable calorie sources because you can find them in almost every region.


Old man's beard lichen

It can be used instead of antiseptic. Since it is much lighter than an antiseptic, it makes more sense to carry it instead of an antiseptic.


Condition
How to increase your condition?

• Your needs should not be red color. When a need meter has emptied, its icon turns red.

• Your needs is : Warmth , Fatigue , Hunger and Thirst

• The fastest ones who decrease your condition are in order (when they are empty).
1- Warmth
2- Thirst
3- Fatigue
4- Hunger


Fastest ways to increase condition :

Herbal tea :
Duration : 6 Hours


Birch bark tea :
Duration : 2 Hours


Tip : Drink these two teas before sleep. Don't go to bed without drinking water and hungry. Don't sleep more than 10 hours, because after 10 hours you will be thirsty. This will cause your condition to not increase.


• Don't starve for 72 Hours to get +%5 condition capasity
• Duration : Until starving
The Ravine & Flare gun
• It is the safest region in the game.
• It is very easy to live there.
• It is the only region where there are no dangerous animals.
• Although it is a small region, it is the place where you can find nice loot and good food.
• You're likely to find Jerry can, and it's also one of two areas where you can find flare gun.
• You can find emergency stim beside the flare gun
• You have to find a rope to take the flare gun
• You can find a lot of birch barks

Flare gun

Flare gun can be found in two regions

• Timberwolf Mountain - Tail Section
• The Ravine
Tools
Some tools you will need and possible spawn points.


Hacksaw

You can use the hacksaw to get metal, pick up saplings, pick up carcasses and break the big tree limbs on the ground before making hatchet . Also , it's required to open cargo containers at the region Timberwolf Mountain.


Possible Spawn Points :

Mystery Lake : Trapper's homestead - Camp office - Carter Hydro Dam - Forestry Lookout.

Coastal Highway : Quonset Garage - Abandoned Lookout - Cinder Hills Coal Mine

Mountain Town : Orca Gas Station - Paradise Meadows Farm - Gray Mother's House(Behind)

Desolation Point : The Riken - Hibernia Processing - Lonely Lighthouse

Pleasant Valley : Signal Hill - Barn - Pleasant Valley Farmstead

Bleak Inlet : Last Resort Cannery - Echo one Radio Tower

Broken Railroad : Hunting Lodge - Meintenance Yard

Forlorn Muskeg : Old Spence Family Homestead

Timberwolf Mountain : Mountaineer's Hut - Tail Section


Heavy Hammer


It is used to break things like boxes, tables, chairs, and crafting hatchet , knife or arrowhead.


Mystery Lake : Trapper's homestead - Camp office - Carter Hydro Dam - Forestry Lookout.

Coastal Highway : Quonset Garage - Abandoned Lookout - Cinder Hills Coal Mine

Mountain Town : Orca Gas Station - Paradise Meadows Farm

Desolation Point : Hibernia Processing

Pleasant Valley : Signal Hill - Barn - Pleasant Valley Farmstead

Bleak Inlet : Last Resort Cannery - Echo ond Radio Tower - Pensive Lookout

Broken Railroad : Hunting Lodge - Meintenance Yard

Forlorn Muskeg : Old Spence Family Homestead

Timberwolf Mountain : Mountaineer's Hut - Tail Section


Jerry Can


Is used as an accelerator when starting a fire and as a fuel to storm lantern and crafting torch.


Mystery Lake : Trapper's homestead - Camp office - Carter Hydro Dam

Coastal Highway : Quonset Garage - Cinder Hills Coal Mine

Mountain Town : Orca Gas Station - Paradise Meadows Farm - Mackenzie's Crashed Plane ( in cave)

Desolation Point : Hibernia Processing - Lonely Lighthouse

Pleasant Valley : Signal Hill - Barn - Pleasant Valley Farmstead

Bleak Inlet : Last Resort Cannery

Broken Railroad : Hunting Lodge - Meintenance Yard

Forlorn Muskeg : Old Spence Family Homestead

Timberwolf Mountain : Tail Section

The Ravine : In the train(red)


Bedroll

It is necessary to sleep wherever you want.


Mystery Lake : Trapper's homestead - Camp office - Carter Hydro Dam - Mystery Lake Fishing Huts

Coastal Highway : Quonset Garage

Mountain Town : Orca Gas Station - Paradise Meadows Farm

Desolation Point : Hibernia Processing - Lonely Lighthouse - Stone Church - The Riken

Pleasant Valley : Signal Hill - Barn - Pleasant Valley Farmstead

Bleak Inlet : Last Resort Cannery

Broken Railroad : Hunting Lodge - Meintenance Yard

Forlorn Muskeg : Old Spence Family Homestead

Timberwolf Mountain : Secluded Shelf
Knife & Hatchet
In this game mode, you can't find knife / hatchet , you have to craft them. You have to find a forge to craft. There are 3 forges in world map.
1. Desolation Point - The Riken
2. Broken Railroad - Meintenance Yard
3. Forlorn Muskeg : Old Spence Family Homestead

Hatchet


Requirements
Workplace
Forge
Tool
Heavy Hammer
Time
4 Hours
Material
Scrap Metal(5) & Cloth(1)


Knife


Requirements
Workplace
Forge
Tool
Heavy Hammer
Time
3 Hours
Material
Scrap Metal(3) & Cloth(1)


Clothes
When you start, you have clothes that can't protect you from cold. Unfortunately, many of the awesome clothes you can find in other mods are not available in this mod. If you want to get the best clothes, you have to craft them yourself. You will need animal skin and guts.

• Make rabbit skin gloves and hats with the skins you get from the rabbits you hit.

• Collect deer carcasses on the road, make deerskin pants and shoes with the leather you get.

• Make a moose-hide cloak. The other coat you make is up to you. If you want, you can make bear skin coat or wolf skin coat. Bear skin coat is better, but wolf skin coat is 2 Kg lighter.

• Craft the clothes with a knife and sewing kit. It will be faster.

• It takes too long to craft clothes, you may get cabin fever. So craft 1 day and go outside the other day. If you say I will craft without stopping, make sure you have enough food and water with you. You are likely to get cabin fever so be careful.

The clothes you need to craft :

Rabbitskin hat

Name
Info
Workplace
Work bench
Tool
Sewing kit / fishing tackle
Time
3,5 Hours / 5.6 hours
Material
Rabbit skin(3) & gut(1)


Rabbitskin Mitts

Name
Info
Workplace
Work bench
Tool
Sewing kit / fishing tackle
Time
5 Hours / 8 hours
Material
Rabbit skin(4) & gut(2)


Bearskin coat

Name
Info
Workplace
Work bench
Tool
Knife / hatchet
Time
39 Hours / 54 Hours
Material
Bear skin(2) & gut(4)

Wearing the bearskin coat also intimidates wolves. They are slightly less likely to attack and, rarely, may even run away from player.


Wolfskin coat

Name
Info
Workplace
Work bench
Tool
Knife / hatchet
Time
32.48 Hours / 45 Hours
Material
Wolf skin(4) & gut(4)

The wolfskin coat has a small chance to scare away wolves when worn


Moose-Hide Cloak

Name
Info
Workplace
Work bench
Tool
Knife / hatchet
Time
21.67 Hours / 30 Hours
Material
Moose Hide(1) & gut(4)


Deerskin Pants

Name
Info
Workplace
Work bench
Tool
Sewing kit / Fishing tackle
Time
12.5 Hours / 20 Hours
Material
Deer skin(3) & gut(4)


Deerskin Boots

Name
Info
Workplace
Work bench
Tool
Knife / hatchet
Time
12.5 Hours / 20 Hours
Material
Deer skin(2) & gut(4)


Name
Warmth
Windproof
Waterproof
Protection
Mobility
Weight
Rabbitskin Hat
2.0 °C
1.5 °C
30%
4%
0%
0.35 kg
Rabbitskin mitts
2.0 °C
2.0 °C
50%
5%
5%
1.0 kg
Bearskin coat
6.0 °C
5.0 °C
80%
18%
20%
5.0 kg
Wolfskin coat
4.0 °C
4.0 °C
60%
15%
15%
3.0 kg
Moose-Hide Cloak
3.5 °C
4.0 °C
90%
25%
10%
4.0 kg
Deerskin pants
2.0 °C
2.0 °C
60%
10%
5%
2.0 kg
Deerskin boots
2.5 °C
2.0 °C
50%
7%
5%
2.0 kg


These are the best clothes you can craft and find:


NOTE : Except for wool toque, balaclava is slightly better than it. But I don't use much, you can use it. Also, bear skin coat is better but heavier than wolf skin coat. All skin and guts should be cured to craft clothes.
Skills
• You should improve your skills at any time. You can start by reading books that you find to develop skills. For example, you can improve your archery ability by using bow, and your fire starting ability by burning fire.

• One of the best things you can do is hunting. Because , you can improve your archery, fire burning, carcass harvesting and cooking skills at the same time.

• Let's take a look at all of them and see what are the tips.

Carcass Harvesting


Level
Skills
1
•Basic carcass harvesting
2
• 10% reduction in meat harvesting times
3
• 25% reduction in meat harvesting times
• Can harvest 50% frozen carcasses by hand
• 10% reduction in hide or gut harvesting times
4
• 30% reduction in meat harvesting times
• Can harvest 75% frozen carcasses by hand
• 20% reduction in hide or gut harvesting times
5
• 50% reduction in meat harvesting times
• Can harvest 100% frozen carcasses by hand
• 30% reduction in hide or gut harvesting times

How to level up quickly?

•Read books.
• Shoot the rabbits and collect everything.
• Collect everything in the deer carcasses you find on the way.
• Hunt animals and collect everything.
• It is much better to hunt bear and moose, because they have a lot of meat.

Cooking


Level
Skills
1
•Basic cooking skills
2
• 10% calories from any cooked food item
3
• 15% calories from any cooked food item
• No calorie loss when smashing open cans
• Cooking times reduced by 10%
4
• 20% calories from any cooked food item
• No calorie loss when smashing open cans
• Cooking times reduced by 20%
• Ready times increased by 20%
5
• 25% calories from any cooked food item
• No calorie loss when smashing open cans
• Cooking times reduced by 30%
• Ready times increased by 20%
• Never get Parasites or Food poisoning from cooked food.
Retroactive, meaning Carivore meat cooked before level 5
will also carry no risk of Parasites or Food poisoning

• There are two important skills here. One opens at level 3
and the other at level 5.
1- No calorie loss when smashing calorie loss
2- Never get Parasites or Food poisoning from cooked food.
Retroactive, meaning Carivore meat cooked before level 5
will also carry no risk of Parasites or Food poisoning.
• Especially the latter is very important. The risk of parasites
really makes you bother and you can't eat meat as you like.
That's why it's important to be level 5 quickly.

• How to level up quickly?

• Read Books
• Cook canned food.
• Make plenty of tea.
• Cook the meat in the deer carcasses you see on the way.
• Hunt rabbits and cook.
• If you can, shoot the bear and moose and cook all the meat.


Fire Starting
Level
Skills
1
• 40% chance to start fires
2
• 55% chance to start fires
• Fires last 10% longer
3
• 65% chance to start fires
• Fires last 10% longer
• Can start fires without tinder
4
• 75% chance to start fires
• Fires last 25% longer
• Can start fires without tinder
5
• 90% chance to start fires
• Fires last 50% longer
• Can start fires without tinder.
• Fires start 50% faster

• Try to be level 3 quickly. You will no longer need any kind of tinder,
you will lose some weight and you don't have to look for tinder.

How to level up quickly?

• Read books
• Start fires but dont waste matches to level up at fire starting.

Ice Fishing
Level
Skills
1
• Basic ice fishing skill
2
• Fishing time reduced by 5%
• 8% chance of line break on catch
3
• Fishing time reduced by 10%
• 5% chance of line break on catch
4
• 10% to average fish weight
• Fishing time reduced by 20%
• 3% chance of line break on catch
5
• 25% to average fish weight
• Fishing time reduced by 30%
• 1% chance of line break on catch

How to level up quickly?

Leveling up on Ice Fishing is really difficult. Fishing is not as easy as you think.

• Read Books
• Go fishing ( :D)

Archery
Level
Skills
1
•Basic archery skills
2
• Bow sway reduced by 25%
• Arrow damage increased by 10%
3
• Bow sway reduced by 50%
• Arrow damage increased by 10%
• Critical Hit chance increased by 15%
4
• Bow sway reduced by 75%
• Arrow damage increased by 10%
• Critical Hit chance increased by 25%
• Bleed Out time reduced by 25%
• Per-use condition loss reduced by 50%
5
• Bow sway reduced by 75%
• Arrow damage increased by 25%
• Critical Hit chance increased by 50%
• Bleed Out time reduced by 50%
• Per-use condition loss reduced by 50%
• Can fire Survival bow when crouched

• One of the most important skill in the game. Shooting arrows while crouching.

How to level up quickly?

• Read Books
• Hunt animals
• Hit the rabbits to level up faster. But don't lose all your arrows while trying to hunt rabbits.

Mending
Level
Skills
1
• Basic mending skill
• 50% chance of successful repair
2
• 65% chance of successful repair
• Repair time decreased by 10%
3
• 75% chance of successful repair
• Repair time decreased by 15%
• 10% greater item condition increase
4
• 85% chance of successful repair
• Repair time decreased by 25%
• 15% greater item condition increase
• 25% reduction of Sewing kit wear
5
• 100% chance of successful repair
• Repair time decreased by 40%
• 25% greater item condition increase
• 35% reduction of Sewing kit wear

How to level up quickly?

• Craft new clothes.
• Repair your clothes often.
• Gather unnecessary clothes in a house. Collect all the fabrics from other houses. This will be much easier if you are in the mountain town area. Repair all the clothes you are not wearing. Do not try to do this in the first days.


Other Skills

• Other skills, you don't need to improve them. You can burn all the books you find about them or keep them as decorations.

• Skills that don't need to improve are :
Rifle Firearm
Revolver Firearm
Gunsmithing
Crafting Bow & Arrow
• Hunting is one of the most important things. However, it is also risky. The risk increases even more when you have a bow in your hand. Bow and arrow are your only chance to hunt. You need maple saplings and guts to make bow. For arrow you need arrow heads, arrow shaft and crow feathers to make arrows.

Bow

• The survival bow is a craftable, aimable tool used to launch simple arrows at targets. Arrows have a chance to kill animals instantly with a critical hit, but more commonly cause massive bleeding wounds that will drain the animal's health quickly. The bow's condition will degrade about 2-3% per shot and unlike the rifle, cannot be repaired


Requirements
Workplace
Work bench
Tool
Knife/hatchet
Time
5-6 hours(with knife)
Material
Maple Sapling & 2 Guts


Arrow


Arrowhead :

Requirements
Workplace
Forge
Tool
Heavy hammer
Time
1 hour
Material
Scrap Metal

• 1 scrap metal = 2 arrowhead.


Arrow Shaft :

Requirements
Workplace
Work bench
Tool
knife/hatchet
Time
30 min
Material
Birch sapling

• 1 birch sapling = 3 arrow shaft.


Crow feathers : To find the crow feathers, just listen, listen the crows. You can find at least 3-4 feathers alongside dead man and animal carcasses.

Crafting Arrow
Requirements
Workplace
Work bench
Tool
none
Time
90 min
Material
Arrowhead(1) , arrow shaft(1) , crow feather(3)

NOTE :You don't need any tools to make arrow. But you can use tools to decrease the arrow making time.

Tool
Time
None
90 min
Simple tools(blue)
67 min
Quality tools(red)
45 min


• If the arrows you shoot hits the animal, it stays on the animal you hit.
• If the arrow you shoot hits ice or stone, its condition will drop or break.
Animals & Hunting
Hunting Guide

Rabbits

• Rabbits dies with a single arrow or you can shot them with a stone. Then kill them. They are found in groups. Rabbits in a rabbit group are between 2 and 4. You can set up traps and wait for them to be caught.


Snare


Requirements
Workplace
Workbench
Tool
None
Time
30 minutes
Materials
Reclaimed wood & gut


Deer

• If you want to hunt deer, approach it quietly, don't go too close, it can run away. What you need to do is aim at throat or head. It dies with a single arrow. If you hit the trunk like a leg, it will not die and it will run away. It will die from blood loss, but away.

• When you pull the arrow , you need to take a quick shot. You took the bow, pulled the arrow, and I guess you have a maximum of 2 seconds to shot the deer. As soon as you take the arrow, the deer hears the sound and starts to run away in seconds.

• The deer is best hunted like this. Approach the deer and wait for it to stop. When he bends it's head to the ground, take a quick shot and shoot the deer through his throat.


Wolf

• The animals you see most often in the game. They are found in every region except Bleak Inlet and Ravine. Wolves follow you for a long time, but it's easy to escape or scare them. You can escape them by walking or running, all you have to do is not approach them. When they approach you, they start running towards you. Do not stop while escaping from them, enter the nearest house, you can go outside after waiting a bit inside. They will probably gone, but it is good to be careful. It may be nearby.

• It is a little difficult to hunt them, I will tell you how to hunt them. But be careful, if you miss the shot, it can be deadly for you. Before approaching the wolf, first make sure that there are no other wolves around. Go towards the wolf, walk on it until it sees you. It will start coming towards you. Bow must be in your hands at all times, even before approaching to wolf. When the wolf coming towards you, pull the arrow and wait for it to run. It will approach you quickly by cross-running. When it comes to your bottom, shot it in the head. It is very likely to die with a single arrow. But if you shot the arrow on it leg or something else, the wolf can kill you.


Bear

• As we all know, bears are powerful animals. If you see a bear, you have little chance of escaping. Because they run very fast. If you shoot the bear with the bow , it will start running towards you. Do not get too close to the bears, they will come to you as soon as they see you.

• Although it seems difficult to hunt them, it is not so much. All you need is a place around where a few cars or bears cannot reach you (rock, hill or destroyed tree).

• As an example, I will tell you how to hunt bear around Quonset Garage. You saw the bear around the garage, go near a car (get close to the bear) to see you, but don't go near it, it will come towards you. Hit at the head, he will get angry and will quickly start running towards you. Get in the car directly, wait for the bear to come to the car and then move far enough away. Get out of the car and do it again until the bear dies.

• Another way to hunt the bear and any animal is, for example, if you saw the bear in front of your house, get a little closer and make it see you. Slowly go to the front of the house, hit the bear with the arrow on the head while the bear is coming towards you and enter the house before attacks to you. After 2-3 hours (in-game) go out and look for the carcass of the bear. The bear's carcass is either around your area or in front of the bear's own cave. If you want to know where the bear caves are, continue reading the guide.


Moose

• Moose is a very strong animal. If you want to hunt moose, you definitely have to shoot the arrows towards it's head. The arrows you throw on the body will not give you much damage and you will need to shoot many arrows. You can find them by looking at the trees. Peeled trees are a sign that there is or will be a moose.

• Hunting moose is like hunting bear, the thing (not the 2nd) I told for bear are effective on moose. The accurate arrows you will shoot on Moose can scare it.


Timberwolf

• The most troubling animals in the game are timberwolves. They are located in a single region (Bleak Inlet). This is the only thing that makes this region difficult. Do not even imagine hunting these groups of animals, what can you do against 5 wolves with a bow?

• What did you say , I couldn't hear? Did you say you want to hunt them? You must be crazy. Well I will tell you how to hunt them.

• Be sure to use bow like Legolas.

• Go out to a high place where wolves can't attack you. Do not hurry, they will run around. Wait for the right time and hunt it with a single arrow on their head. Unfortunately, you have to do this at least 2-3 times and there are 4-5 of these wolf groups, I told you , don't go to this region at all.
Meal
The amount of meat in the animals :

Rabbit : 0,7 - 1,5 Kg 1 Kg meal = 450 calories

Deer : 8 - 10 Kg 1 Kg meal = 800 calories

Deer Carcasses : 0,8 - 2,1 Kg 1 Kg meal = 800 calories

Wolf- Timberwolf ; 3-6 Kg 1 Kg meal = 700 calories

Bear : 26 - 38 Kg 1 Kg meal = 900 calories

Moose : 32 - 45 Kg 1 Kg meal = 900 calories


If you are not 5 level at cooking , don't eat too much wolf and bear meal. You will get parasite risk.

1. Meal -> %1 parasite risk

2. Meal -> %4 parasite risk

3. Meal -> %9 parasite risk

Do not increase the risk of interference above 9%. At 9%, the risk of being intestinal parasite probably lost. When you go up from %9 this, the probability of being intestinal parasite risk is too much.
Inventory Capasity
When you start the game, your inventory capacity is 30 Kg. It is possible to increase this by 10 Kg.


• Moose-Hide satchel : A bag that you can make from the moose hides. This will give you an extra 5 Kg.


Requirements
Workplace
Work bench
Tool
Sewing kit / fishing tackle
Time
10 Hours
Material
Moose-Hide(1) - gut(2)


• Well Fed : You can earn this bonus if you are not being hungry for 72 hours. It is a little difficult in Interloper mode. I can't play without this bonus. Even if it is interloper. I take care to not lose this bonus at all. You don't need this early in the game. After 50-55 days, you will not be hungry anyway. If you know how to use a bow. This will give you an extra 5 Kg.
Fishing
Fishing in this mode is a real waste of time (BEFORE DAY 30!!). The calories you take are less than you spend. You also need wood for fire. It may be good if you fish while you are hungry. But how good would it be to return home with 300 calories after spending your whole day there? Do not think that you will fish and fill your stomach. In the first days, I would not recommend you to deal with fishing. There is a good thing about fishing , when you get cabin fever and can't sleep inside, go to fishing hut. If you're lucky, you can catch some fıshes. After being level 3 or higher at ice fishing and level 3 or higher at cooking , fishing will be so good. Spend your time doing something else at the very beginning of the game. I'm not trying to say fishing is worst thing. Actually, fishing is my favorite thing in this game, It is so much fun and is very good for a little relaxation. I'm just trying to say, at the beginning of the game dont go fishing If you are level 1 at fishing and cooking cause you cant get enough calories. Whatever , if you want to go you can. My advice is if you want to go, go while you are hungry. Because you will catch what you have already eaten and you will get hungry again. Go while you are hungry and eat your fish before you go to bed at night or before you leave the fishing hut. After you improved your skills you wont have any problem.

How to craft fishing tackle? Here is the answer.

Hook(3)


Requirements
Workplace
Work bench
Tool
None
Time
20 Minutes
Material
Scrap Metal(1)


Line(2)


Requirements
Workplace
Work bench
Tool
None
Time
15 Minutes
Material
Gut(1)


Fishing Tackle


Requirements
Workplace
Work bench
Tool
None
Time
10 Minutes
Material
Hook(1) & Line(1)


Big boy

Raw = 1300 calories
Cooked = 1700 calories

Bad memories I had with Timberwolves
• You don't need to read , but you can read to learn something about Bleak Inlet and Timberwolves.


• In this paragraph, I will explain the memories I had with timberwolf in the Bleak Inlet region in Interloper mode. I was around 140-150 days , in those days the Bleak Inlet region had just arrived. After learning where the entrances and exits were, I decided to explore it. I knew I was crazy. I met Timberwolf in story mode. I went to Ravine and then to Bleak Inlet. I walked a little and guess what I saw, 5 timberwolf was coming towards me. I started running towards the Pensive Lookout. It was a difficult start, but I arrived at the Pensive Lookout. Of course, if I do not count that I was bitten 2-3 times on the road. My condition was around 40%, I knew the wolves could not reach the top of the stairs. Many hours passed, but the wolves weren't going, they were waiting me down. I was angry, took my bow and went out the door. There was a sound, as if someone was running on the stairs, I thought the wolf was coming up. I quickly got inside. The wolf did not come, I came out slowly, there was sound, but there was nothing around, I started to go down. I came to the middle of the stairs and I saw the wolf, it was running but can't going anywhere. He had entered Bug or the game would not allow him to go up. I hunted him with a single arrow. This continued 2-3 times like this. That's how I shot 3 wolves. The other two are gone. I was relieved. I decided to go down with the rope. It was calm for 1-2 days. Then I went to the factory like crazy. I knew very well that there was only one entrance and there were 5 wolves at the entrance. I ran towards the rope and climbed to the upper area of ​​the factory. It was impossible for the wolves to come here. I took the bow and started to shoot them one by one from above. 4 of them died and the other gone. I was hungry, I took the meat and went up again when the area was empty. I spent the night . It's morning. A group of wolves came to eat me. I didn't want to deal with 5 timberwolves again. 3-4 days passed by collecting condition at the Factory. I had already made up my mind and would return to Ravine again. I went to the sea. I started moving without seeing the wolves. There was a strong wind and it was very difficult to advance. I was going to the rope where I went down and I hearded a voice. I was about to go crazy. I was tired of these wolves. I started running towards the rope. The wolves stood for 1-2 days at the place where the rope. Their voices were coming up to Pensive lookout. I knew I had to get out of the scholarship immediately. When it was morning, I would run directly to the Ravine. I went outside and went towards the rope. The wolves were still waiting for me below. I started moving towards the exit and met a wolf group on the way again. Fortunately they couldn't catch me. I shot nearly 10 timberwolves in 10 days. I have to say , 6 of 10 days are spent inside the house.


Info
• Sorry for the word mistakes I made. If there is something you don't understand, you can write it in the comments section. Be sure I'll answer you.

• There may be missing or wrong things in the guide (I'm sure there is nothing wrong), we are all human and we can make mistakes. So don't afraid to say if there's anything wrong in the guide.

• After 180 days (still continues) , I shared my experiences with you. I hope you can find something useful for you.

• One last thing, don't bother with TIMBERWOLVES :D

• Thanks everyone for reading that guide.

22/4/2020

• If anyone interested about my Interloper stats :


19 comentários
Seriously Unserious 17 dez. 2022 às 2:50 
@jowjack - tend to agree. Fishing is also the only way to replace your lamp oil and the lamps are the only way to have a renewable light source that does not waste your precious few matches like torches would, and flares are too rare in Loper to waste on light, when a lantern would do (if you bothered to fish and build up the lamp oil to keep your lanterns lit.
Jowjack 17 dez. 2022 às 2:22 
Fishing is absolutely not a waste of time in interloper mode. I find it very useful when I've developed cabin fever from having spent too much time inside crafting bows or clothing. I just remember to stop by the fishing hut to drop off some twigs every so often and make sure there's a nice stockpile of wood there, then when I develop cabin fever I can chill in the fishing hut reading books, fishing or sleeping with a bedroll and since I've got a fire lit that's going to be lit for a long time I make sure to make some water while I'm at it. On interloper you really just have to squish your brain to make things as efficient as possible.
Seriously Unserious 19 mar. 2022 às 23:46 
The weather is a a bit warmer then Timberwolf Mountain, and not as stormy as Pleasant Valley or Bleak Inlet, but is still pretty unstable, though not as unstable as Ash Canyon or Broken Railroad. The main hazard are the mix of normal wolves and Timberwolves (who's distant howls sound just like normal wolves). The Timberwolves may even stay out hunting in blizzards so beware if your caught out on one. The majority of the Timberwolves tend to hang out up the mountain though some also hang out down in the valley near the river and along the road between the prison and the dam.

The dam is in much better repair then Carter though also much smaller, as it was in active use, up until the events of Storey Mode shut it down.
Seriously Unserious 19 mar. 2022 às 23:46 
Other good bases are a power relay station which is near the Keeper's Pass entrance, a trailer part way up the main mountain - Blackrock Mountain - and a doorless hut of the same model as Mountaineer's hut but minus the door located on a lake more then half way up the mountain. There's also a hydro dam across the river from the main part of the map that can work well as a waypoint base for exploring that part of the map, but it's rather out of the way for a main base, though it is connected to the prison via tunnels.
Seriously Unserious 19 mar. 2022 às 23:46 
Blackrock

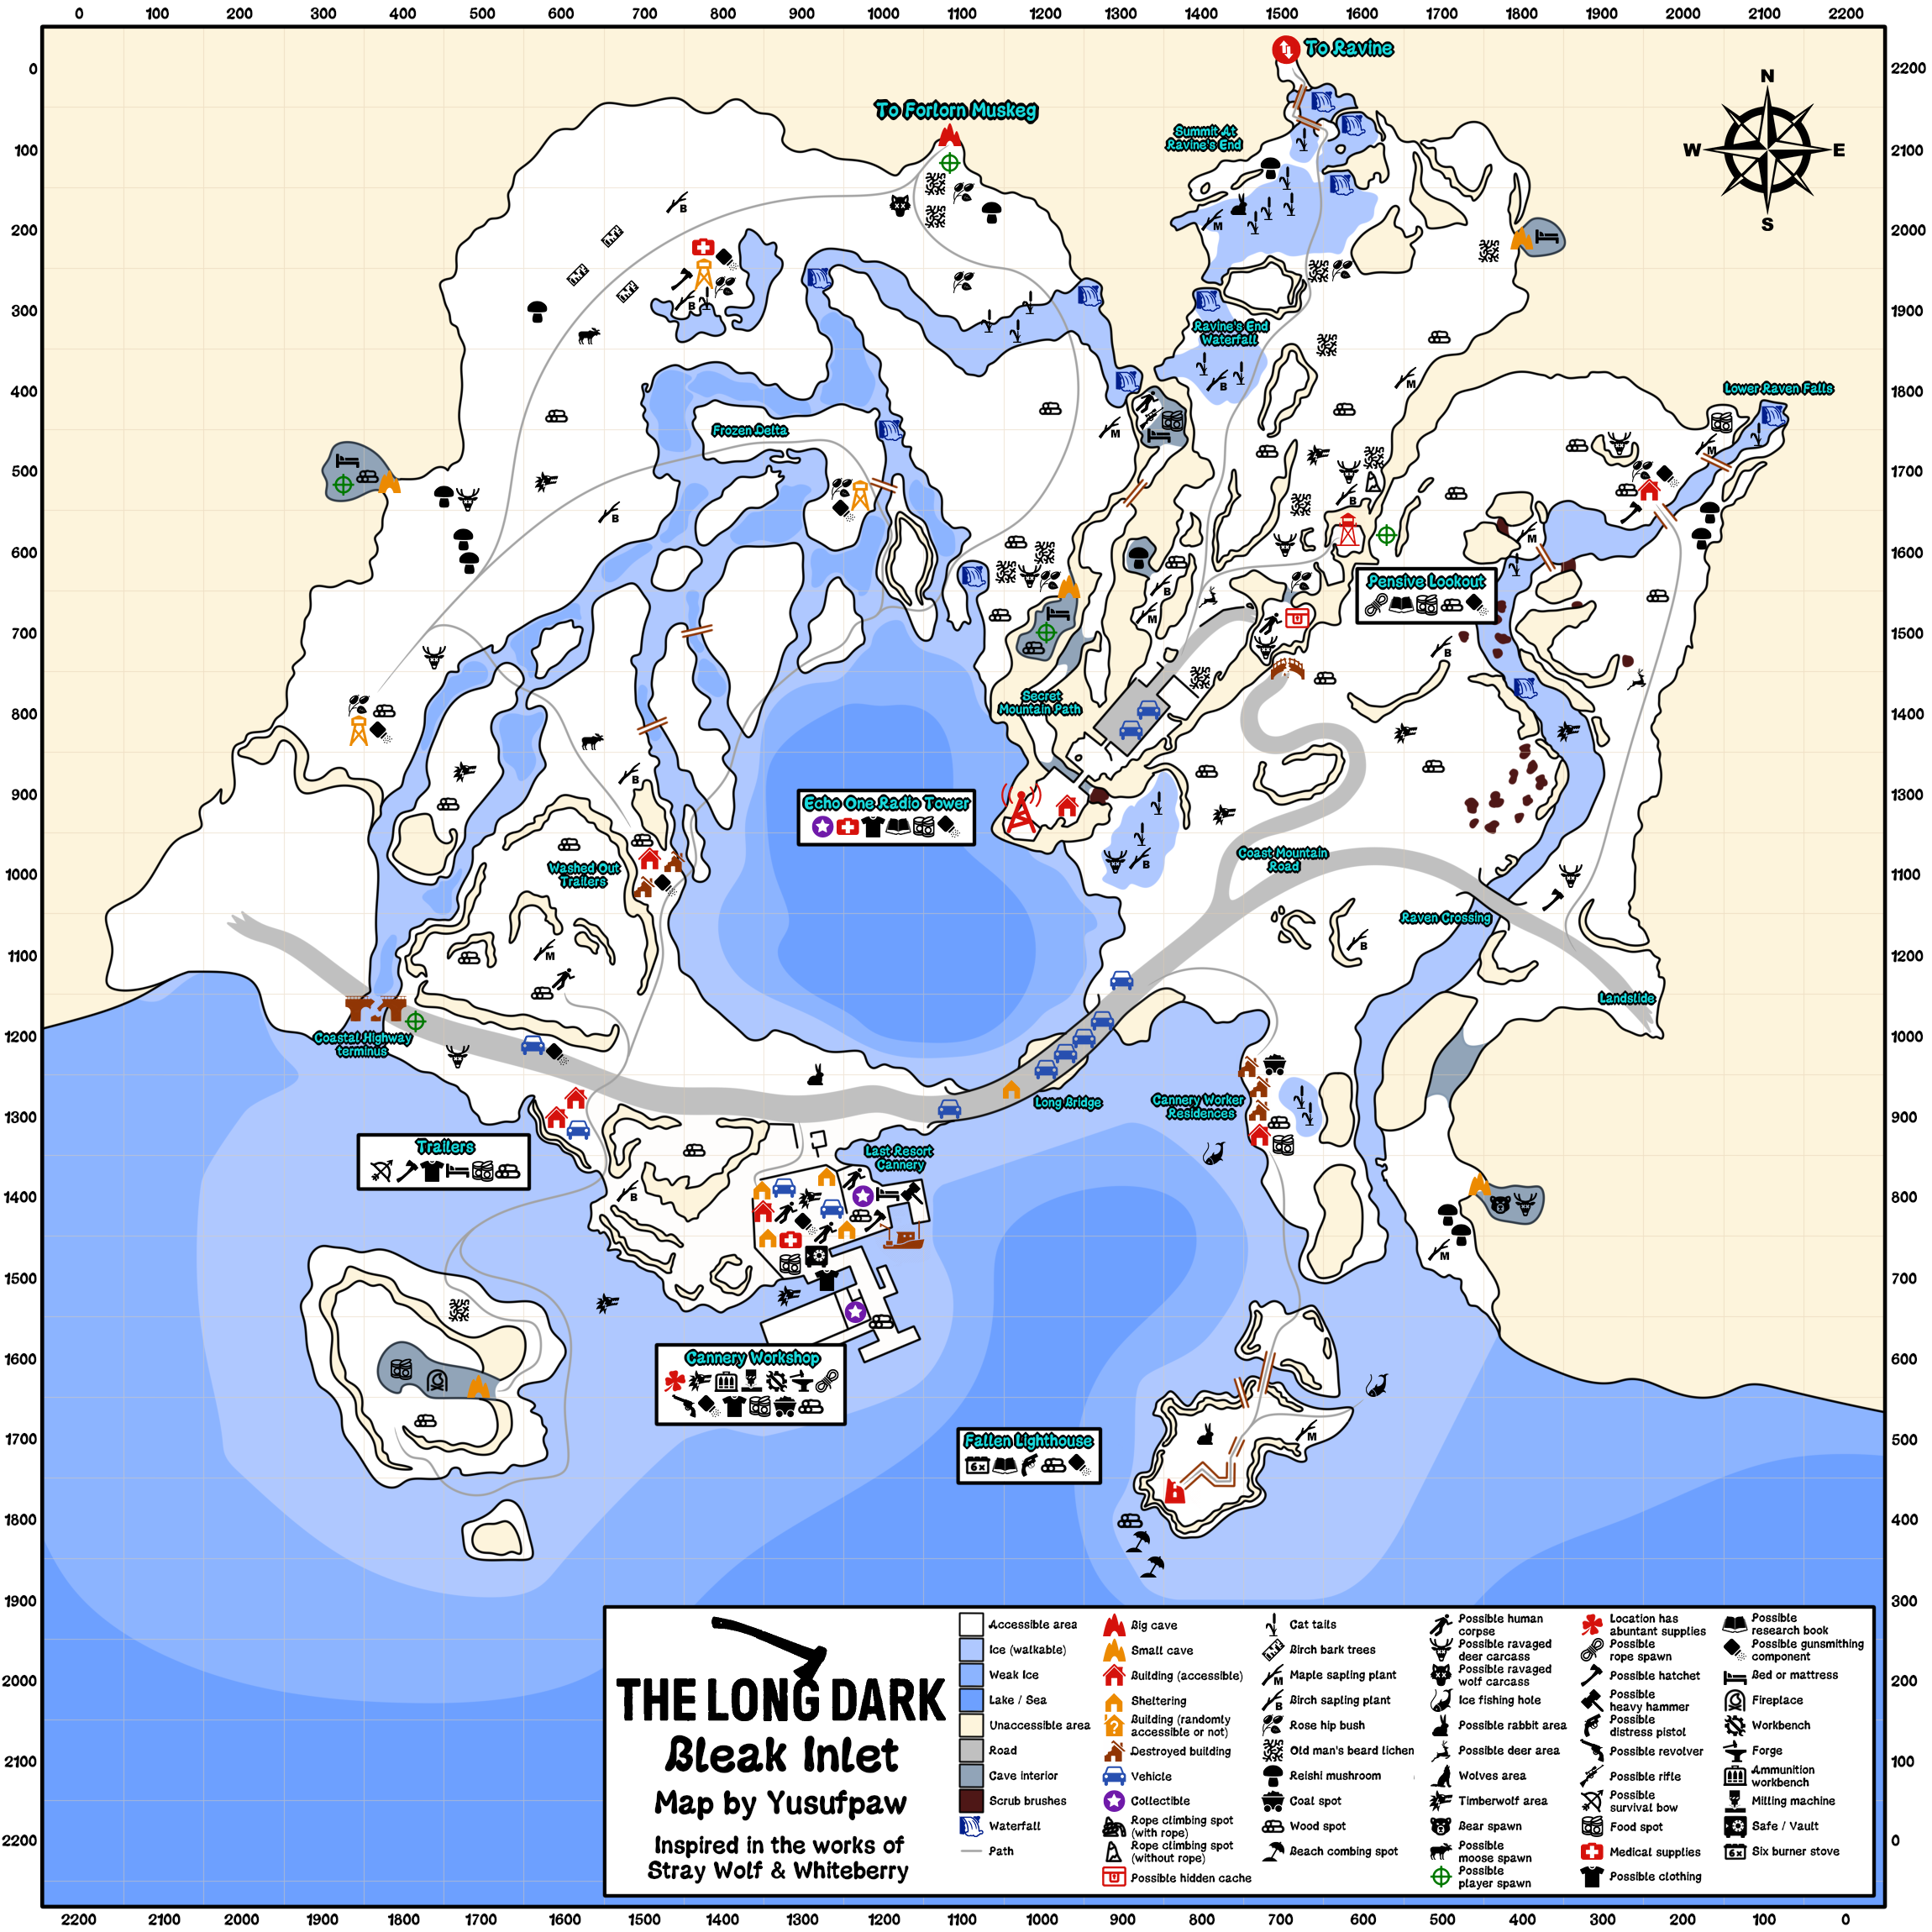
The main feature of this region is both the mountain and the maximum security prison the region gets its name from. Since the prison's cleared out of its inmates, it can make a good shelter as it's fearly well situated in the region, has access to a machine shop and ammo bench (which is even useful in Interloper as you can use it to make gunpowder and noisemakers, once you find your first of them in the region.

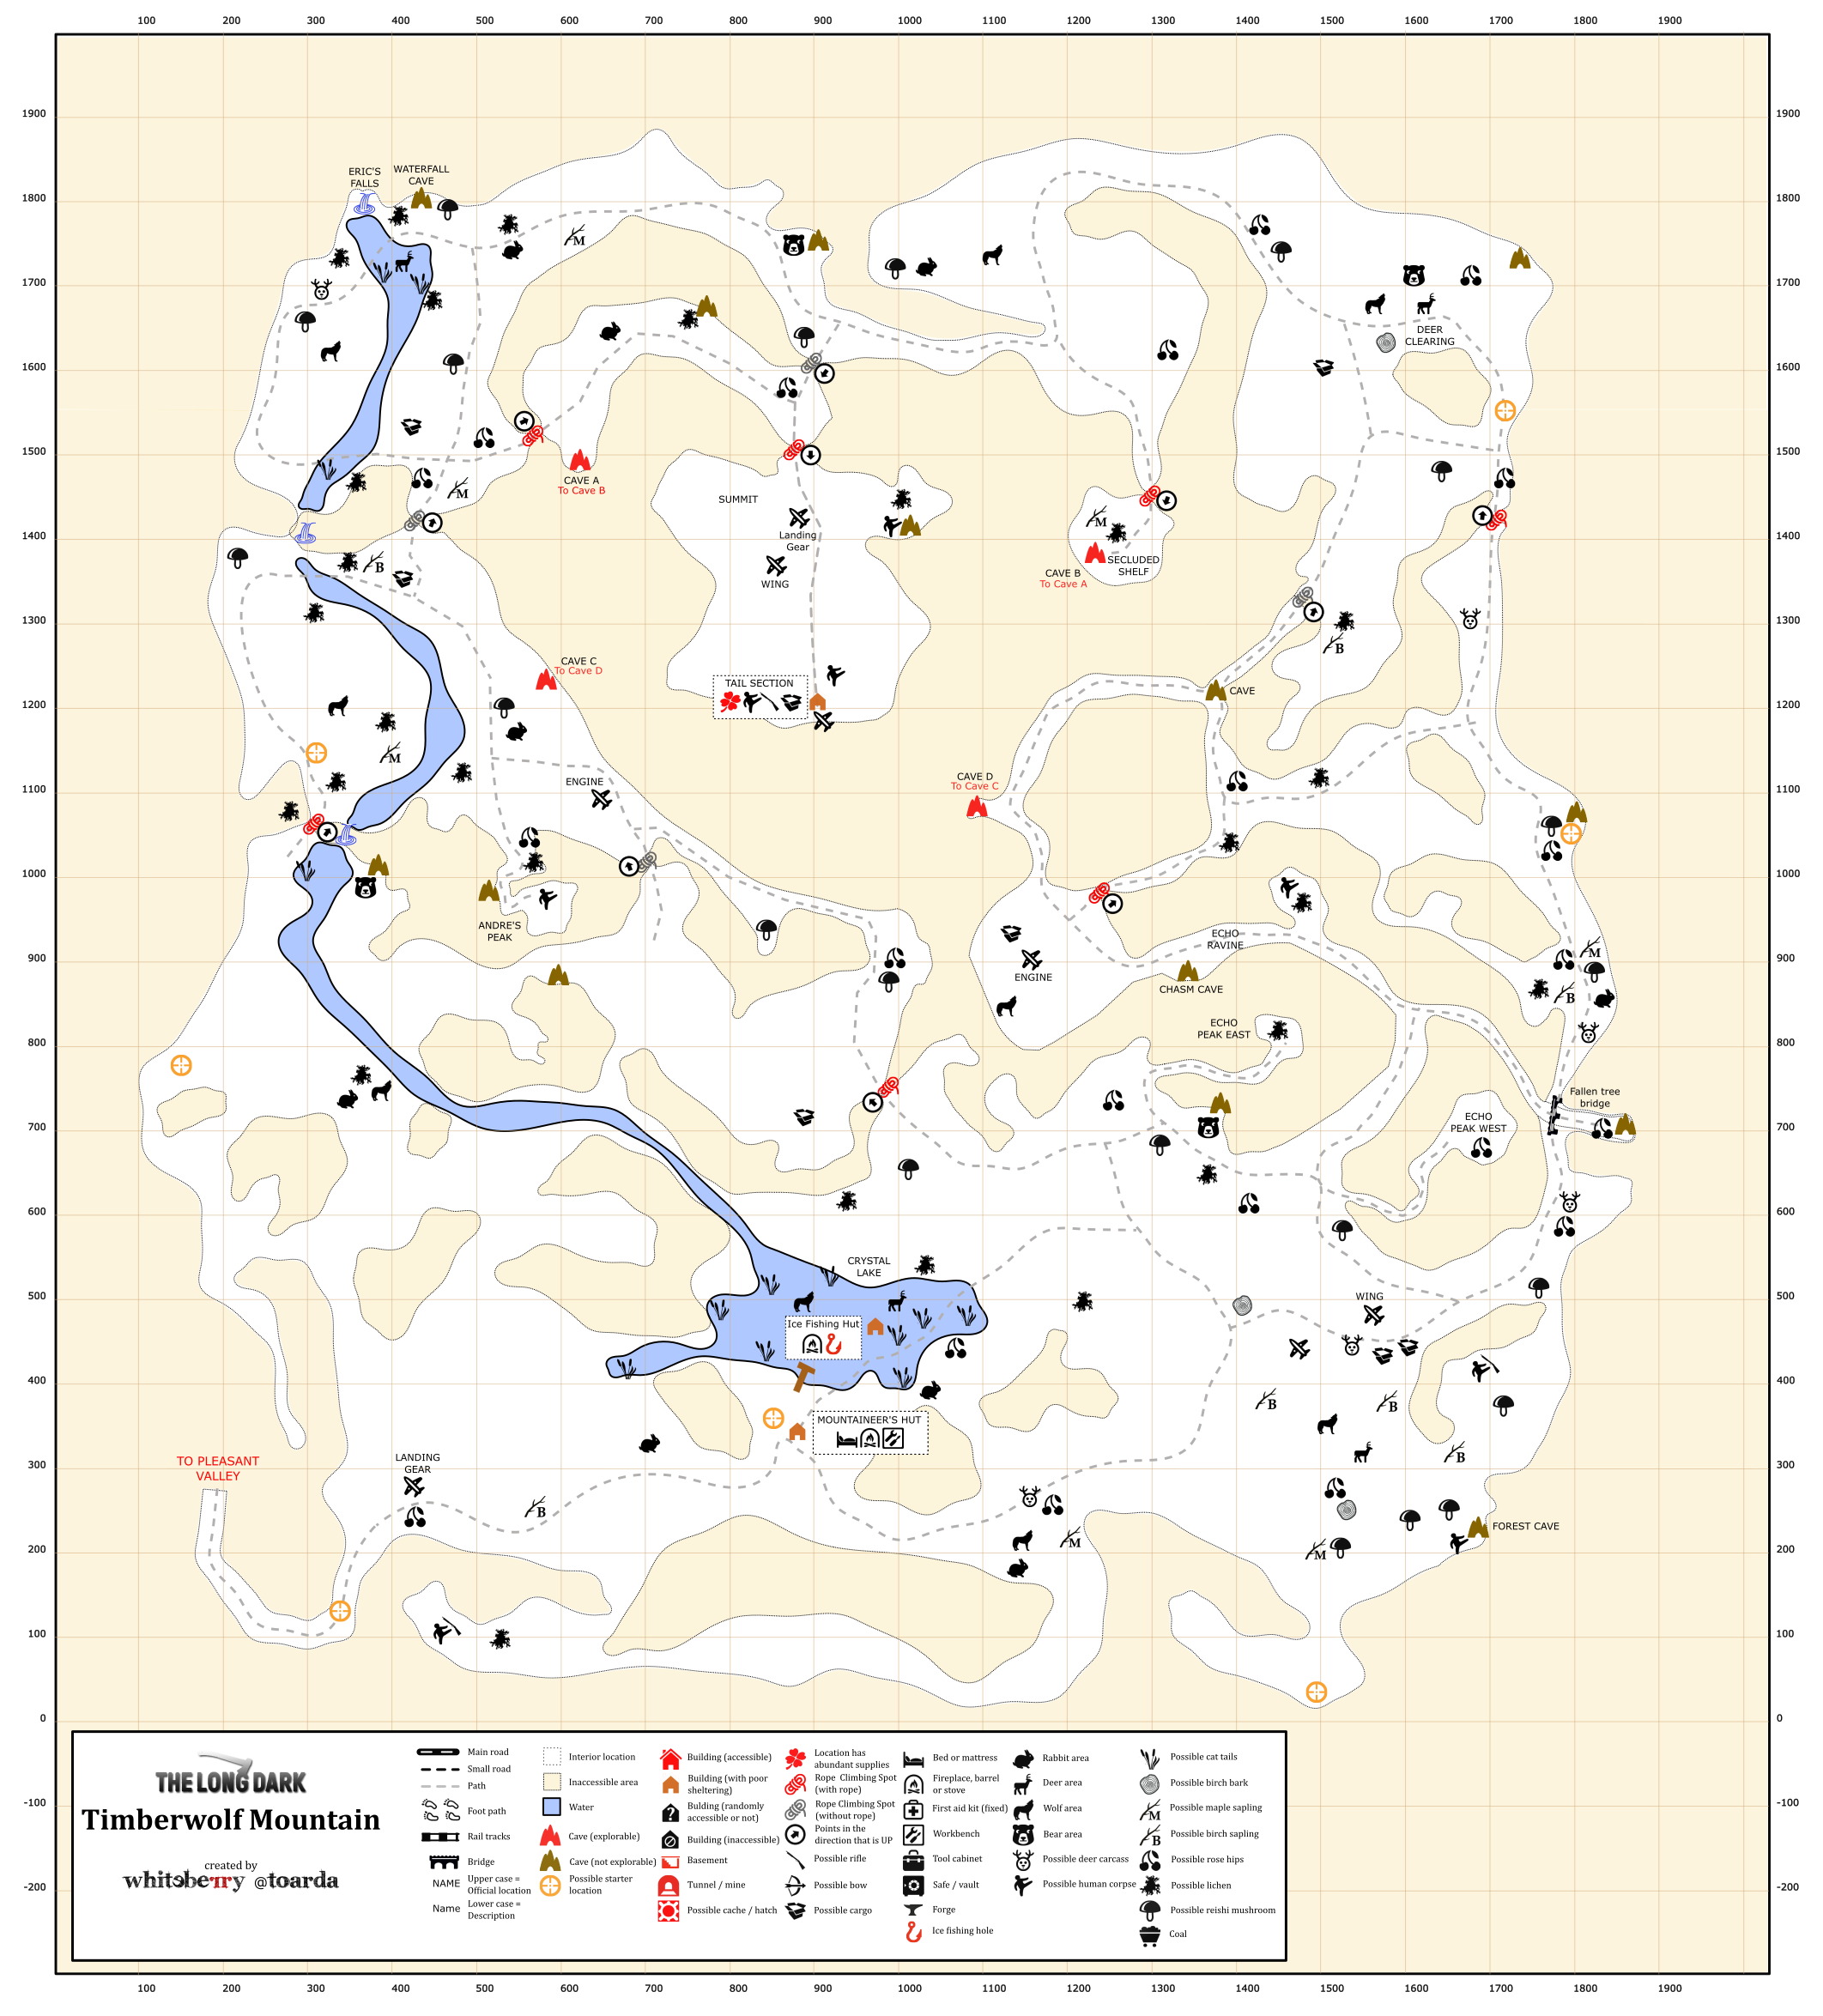
This region has a lot of verticality and some of the longest rope climbs in the game, so bring your coffee and crampons!
Seriously Unserious 19 mar. 2022 às 23:46 
Weather's about the same as the south side of the pass, but with no good shelters after the cave, it's a touch region and best to move through as there's no good renewable food sources in there, just the few rabbits to supplement your food on the way through.
Seriously Unserious 19 mar. 2022 às 23:45 
Keeper's Pass North

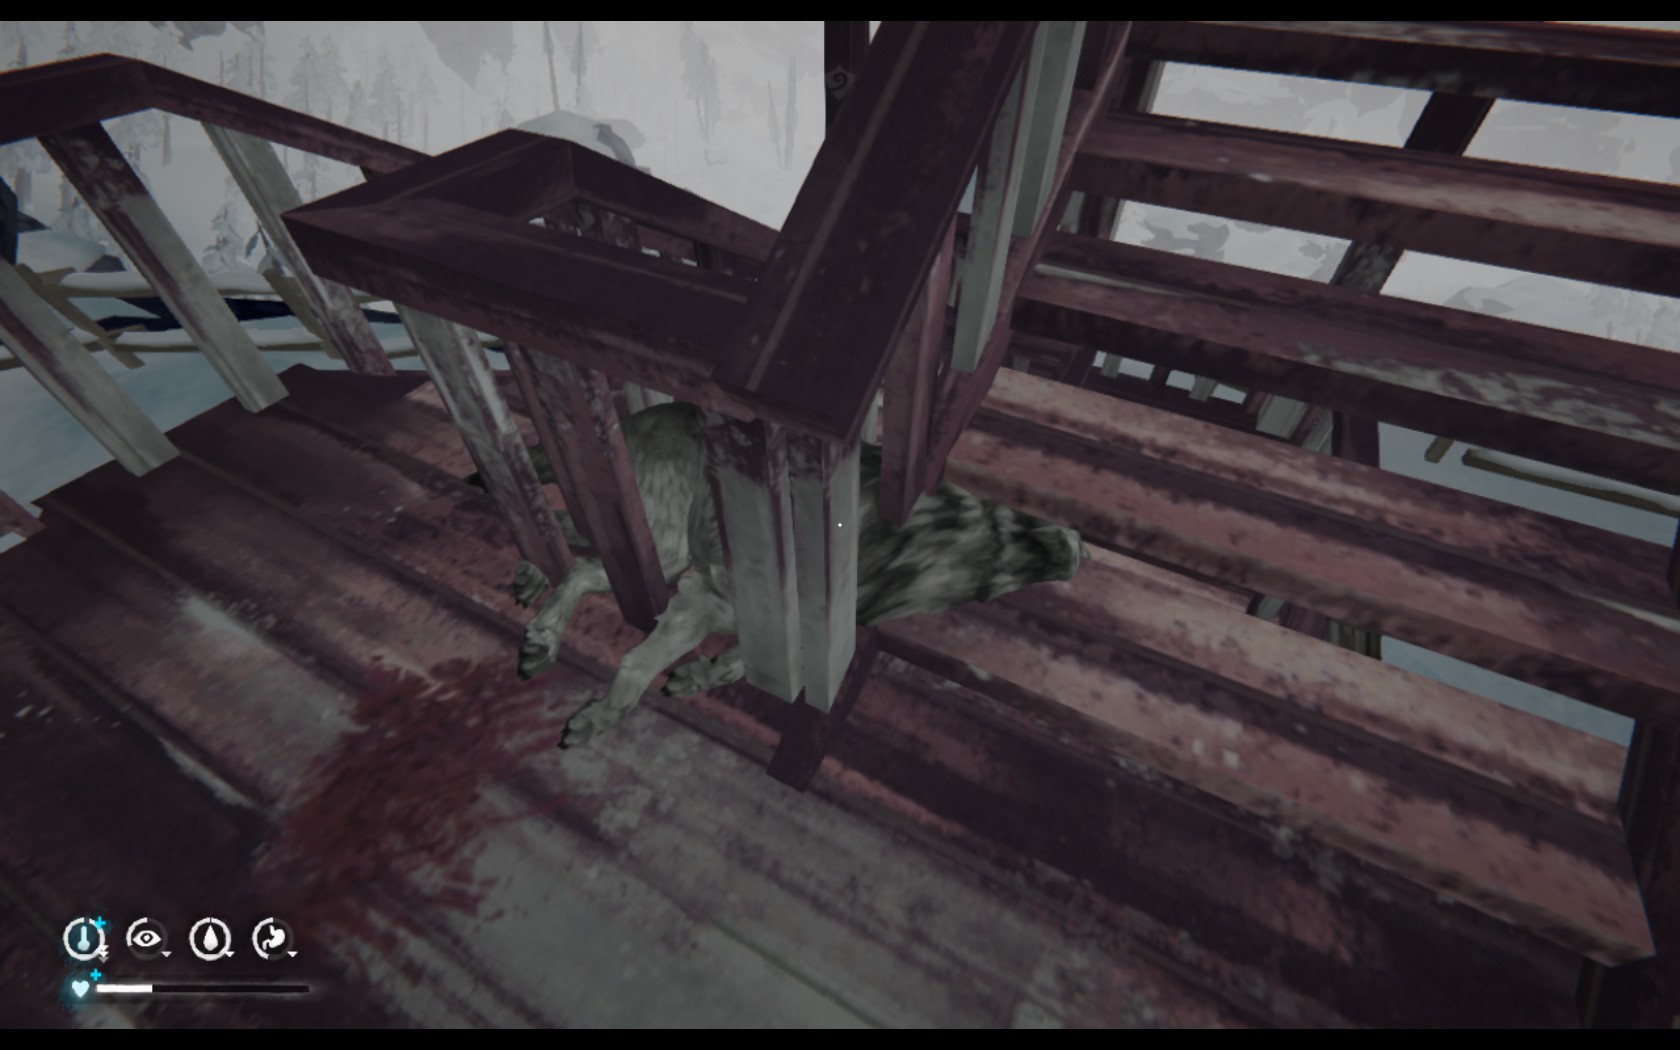
This region connects to Blackrock and the south end of Keeper's Pass. There's a long, narrow slot canyon you'll spend most of your time in here, with a few rabbit groves, no deer and no wolves for most of the way. There is a wolf area near the Blackrock exit however, and it's quite narrow, so if you want to get by that wolf, you'll most likely have to kill it. You don't need to deal with that wolf however, as it guards an optional path for some more possible gear.

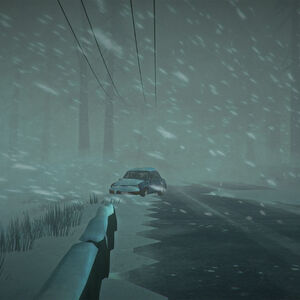
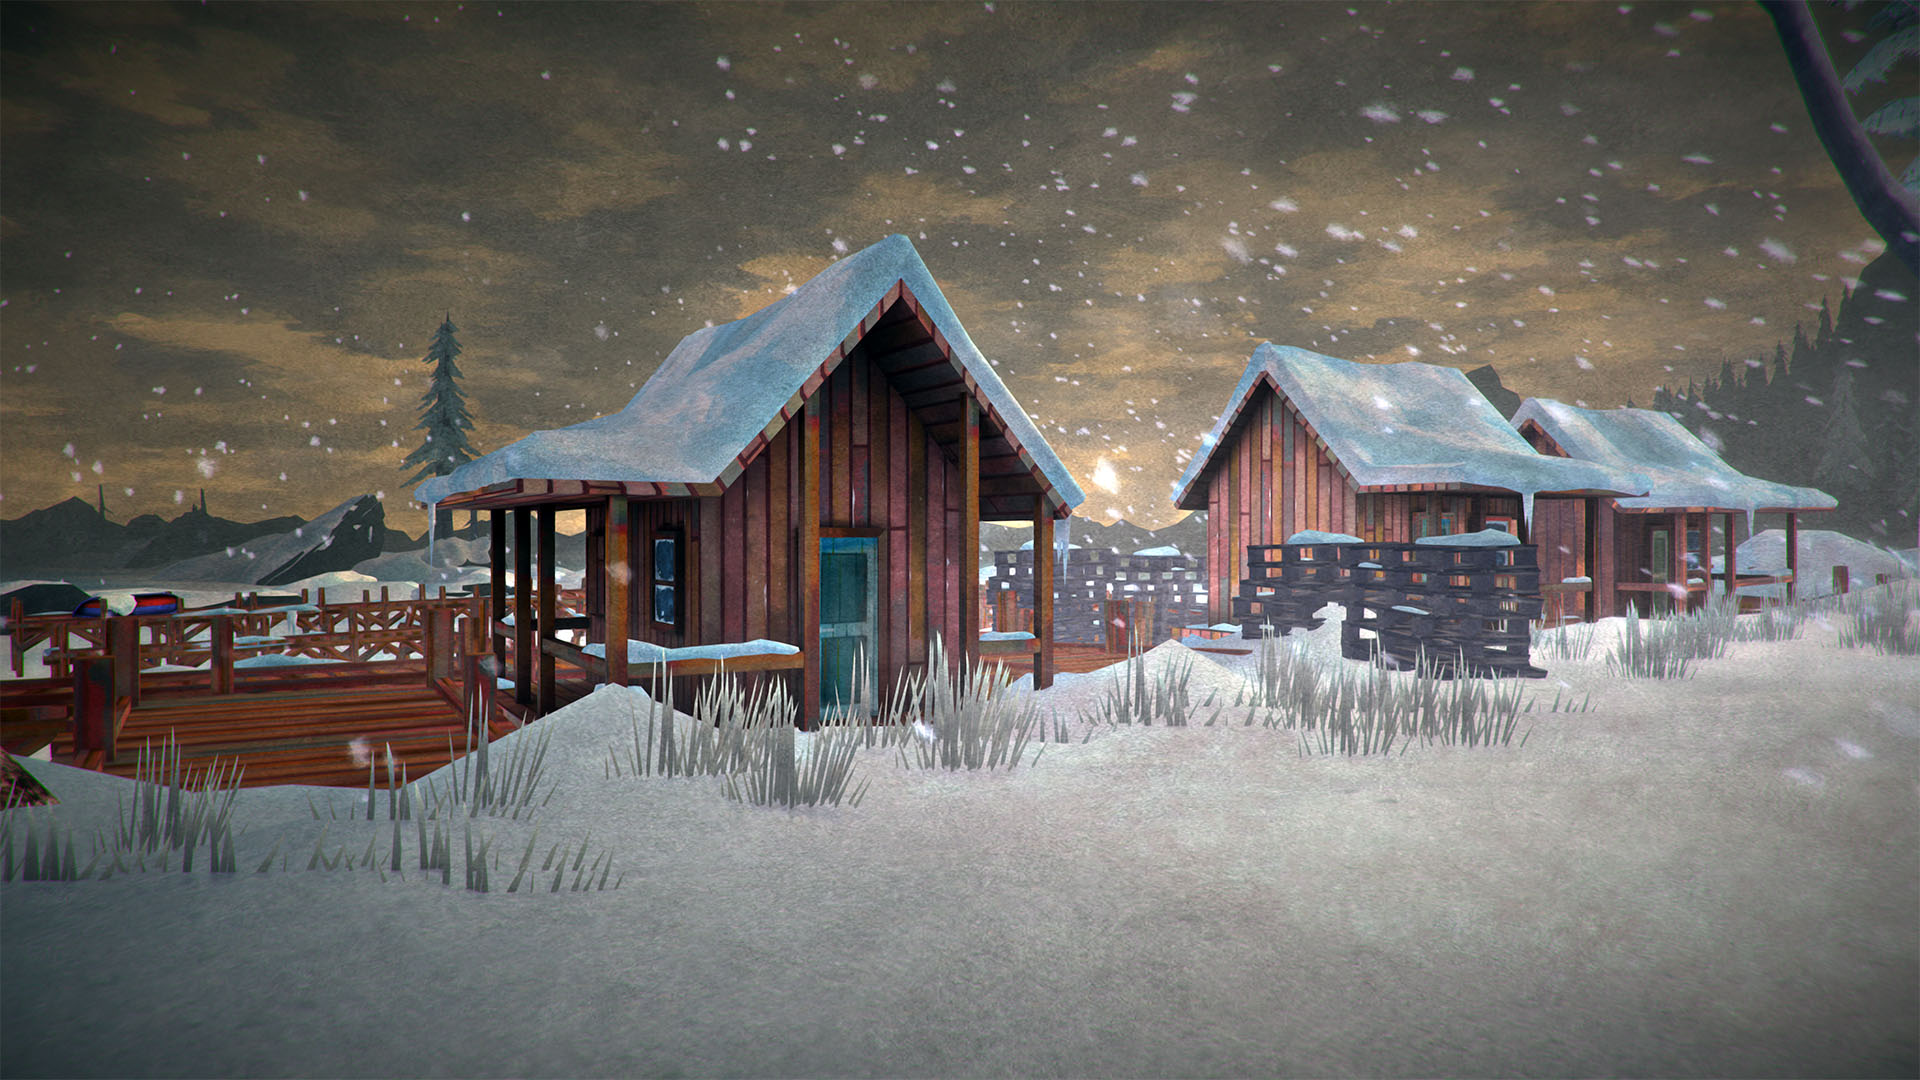
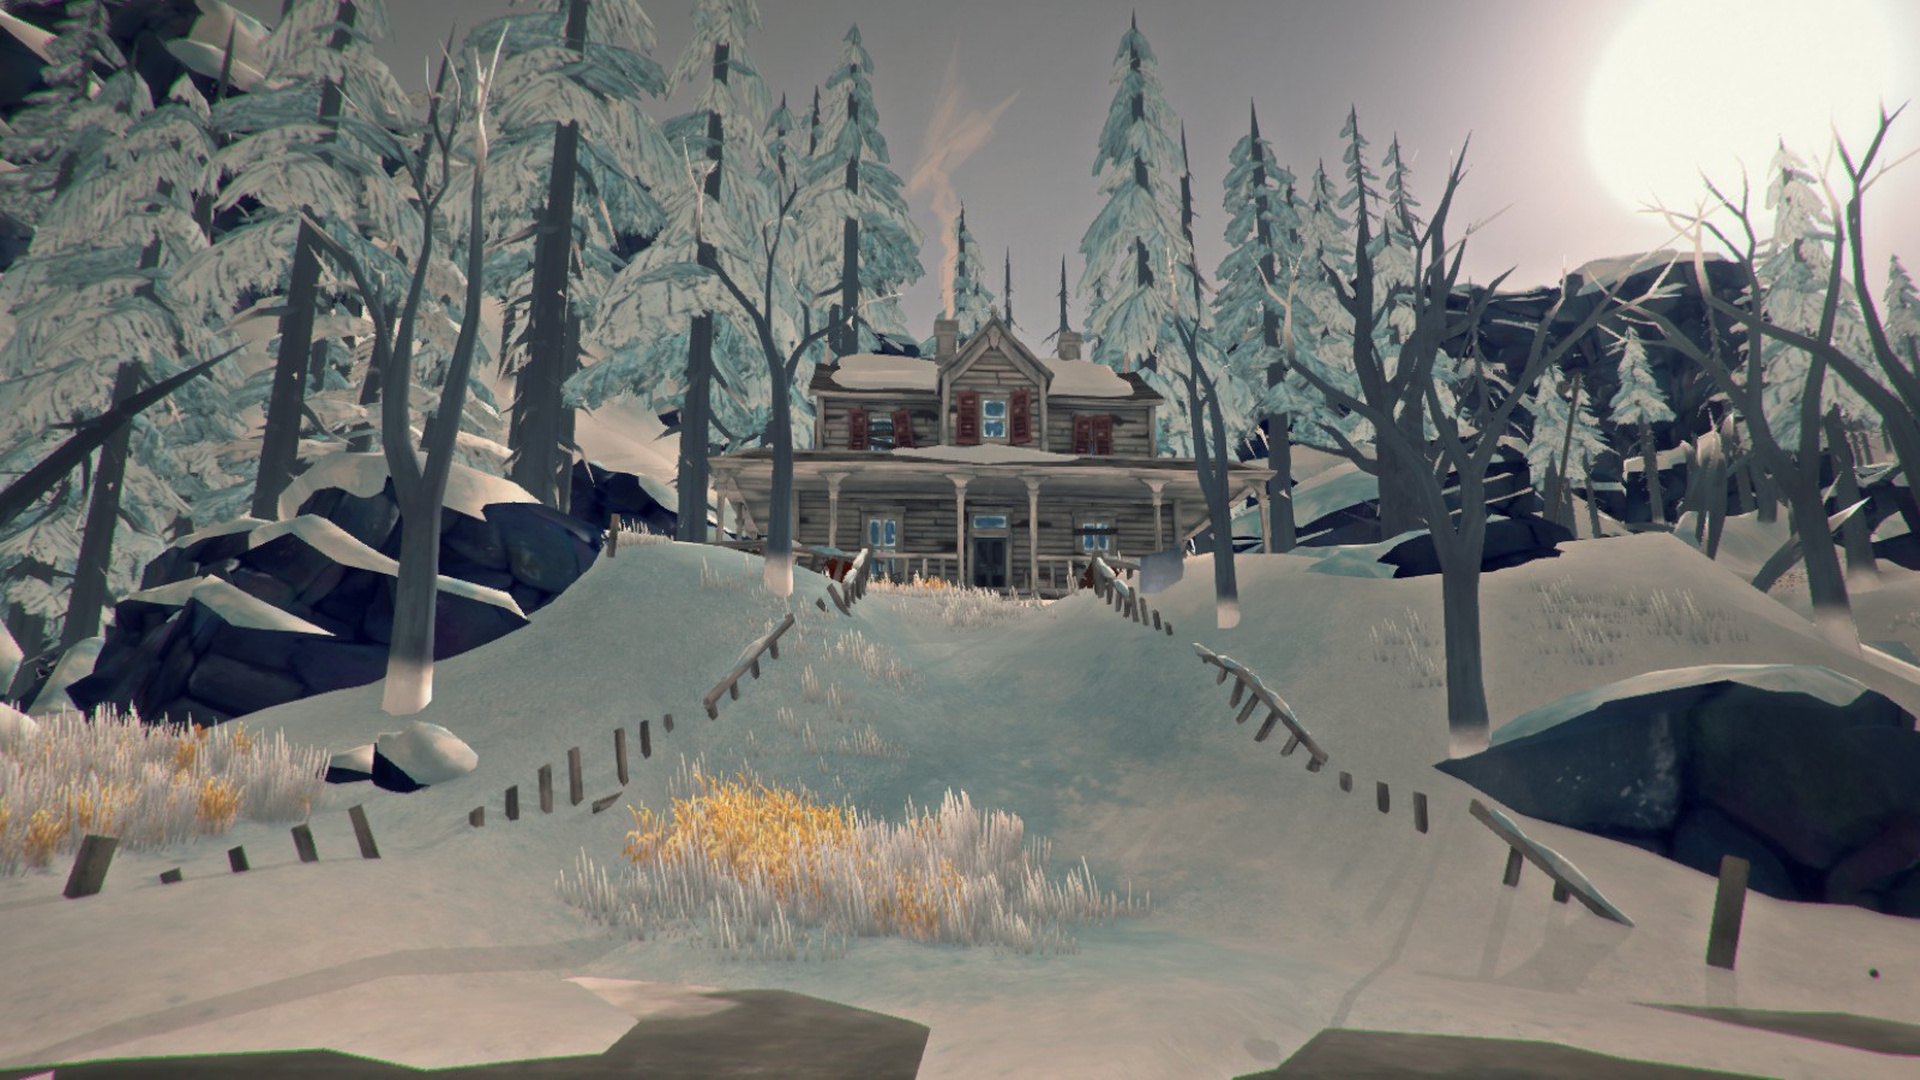
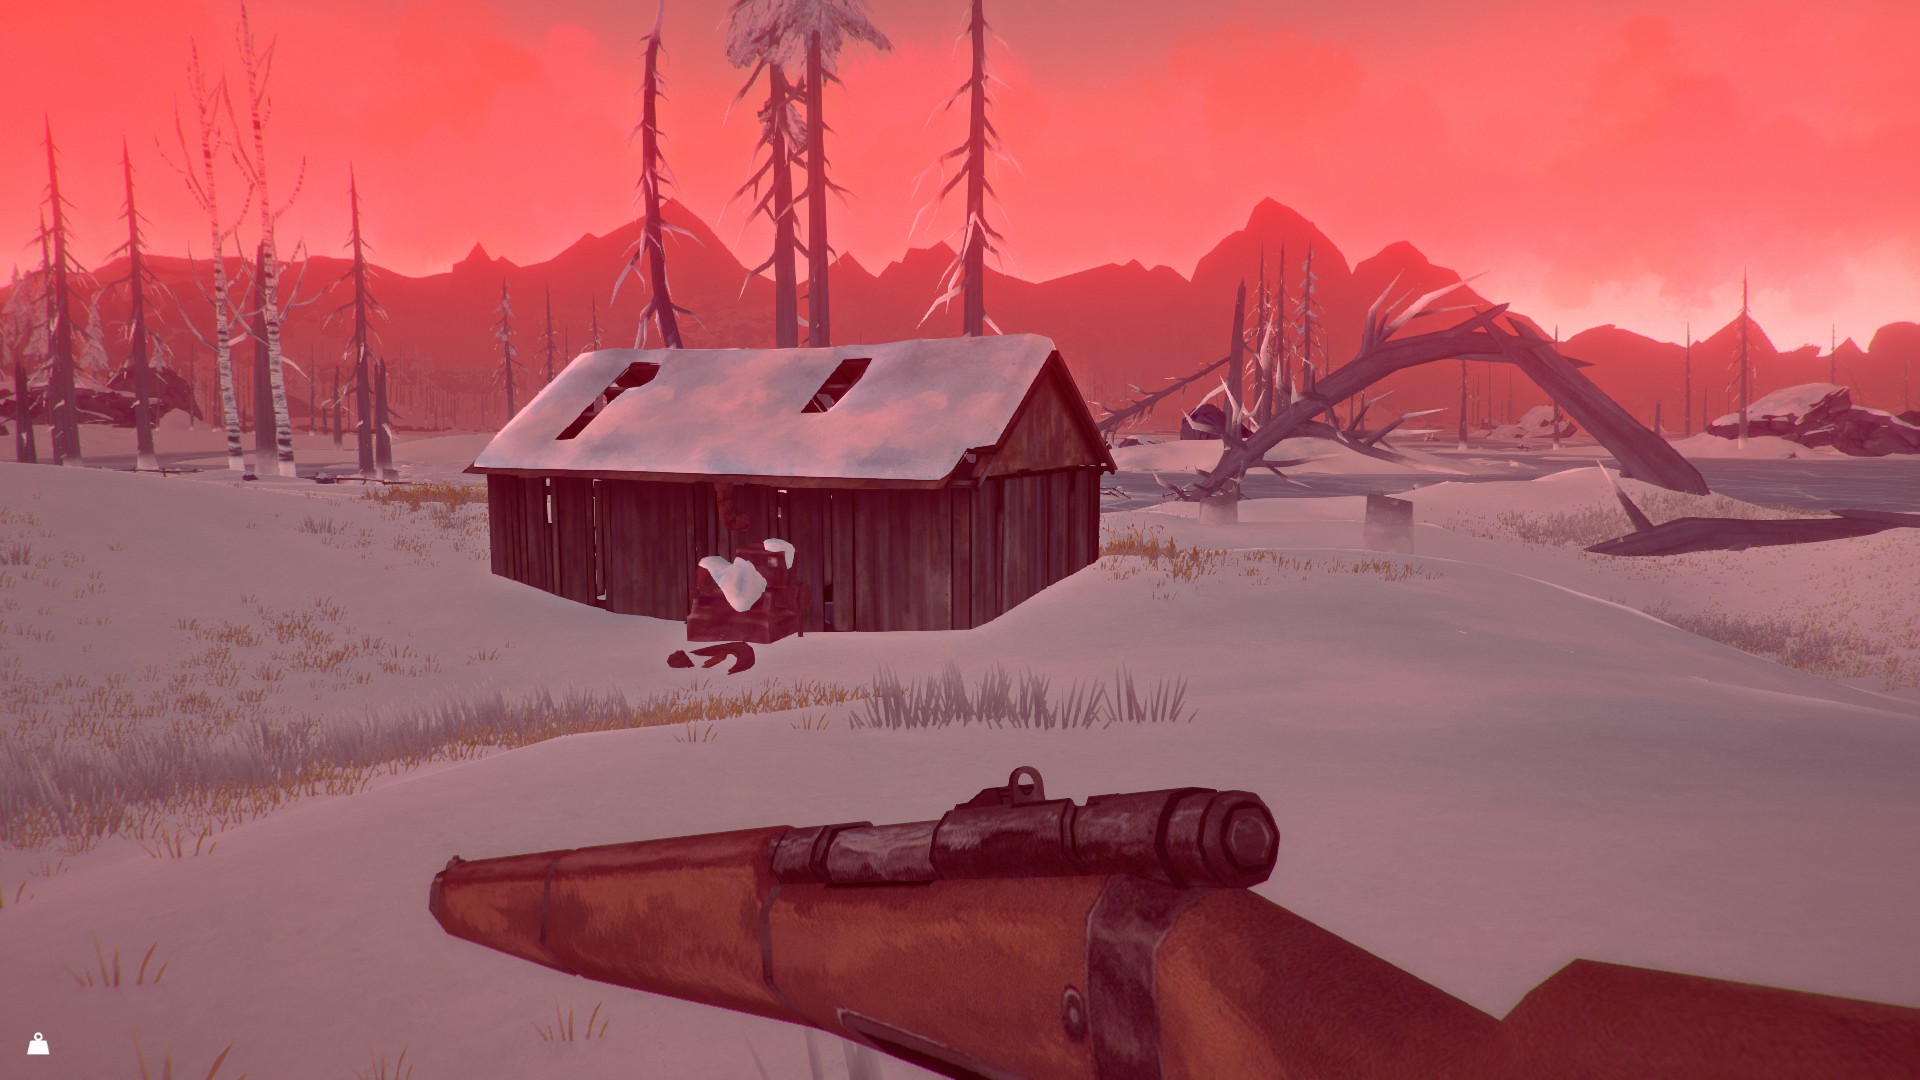
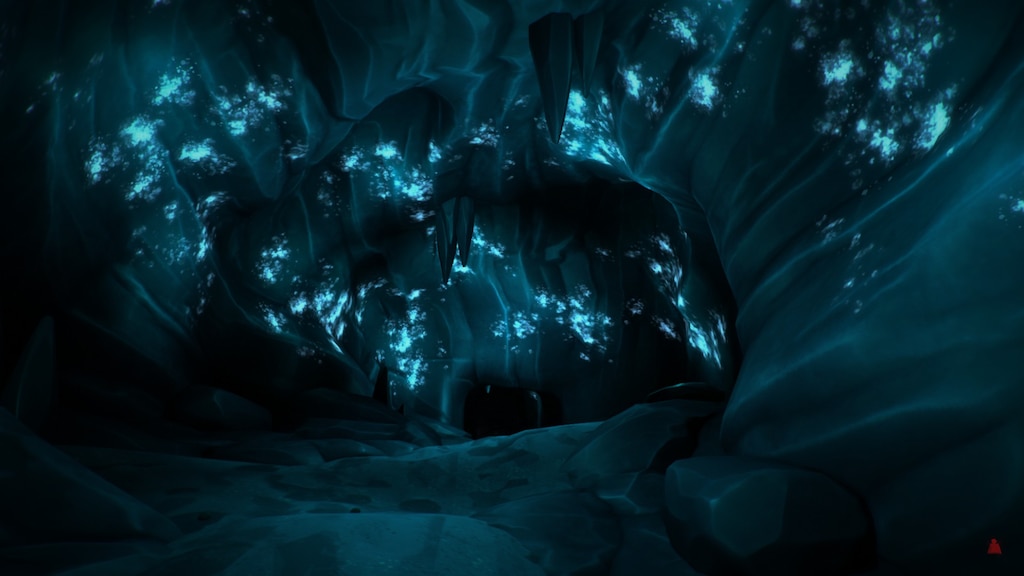
There's not much in the way of shelters here, you've got the transitional Ice Cave between the north and south halves of the pass, a ruined cabin with a 2 burner stove and built in bed in it, and a pick up truck - and a cold cave down a rope climb (guarded by the wolf I mentioned earlier).
Seriously Unserious 19 mar. 2022 às 23:45 
The weather can be worse then Pleasant Valley, and many a player has come to refer to Keeper's Pass (both north and sough sides) as "Blizzard Alley" as blizzards can go for days on end. My first visit, I got held up for over a week at the trailer waiting out daily blizzards.I was fortunate to have plenty of meat from the wolves I'd killed in the area.

Temperature wise, it's pretty similar to Pleasant Valley. Colder then average but not the coldest region around.

This region features some minor elevation changes and is mostly narrow paths, so dealing with the wolves can be a problem as there's not much room to skirt them if you don't want to go in guns blazing (or have to make like Legolas at Helm's Deep if you're on Loper and don't have guns to blaze).
Seriously Unserious 19 mar. 2022 às 23:45 
Keeper's Pass (Split into 2 transition regions Keeper's Pass North and Keeper's Pass South)

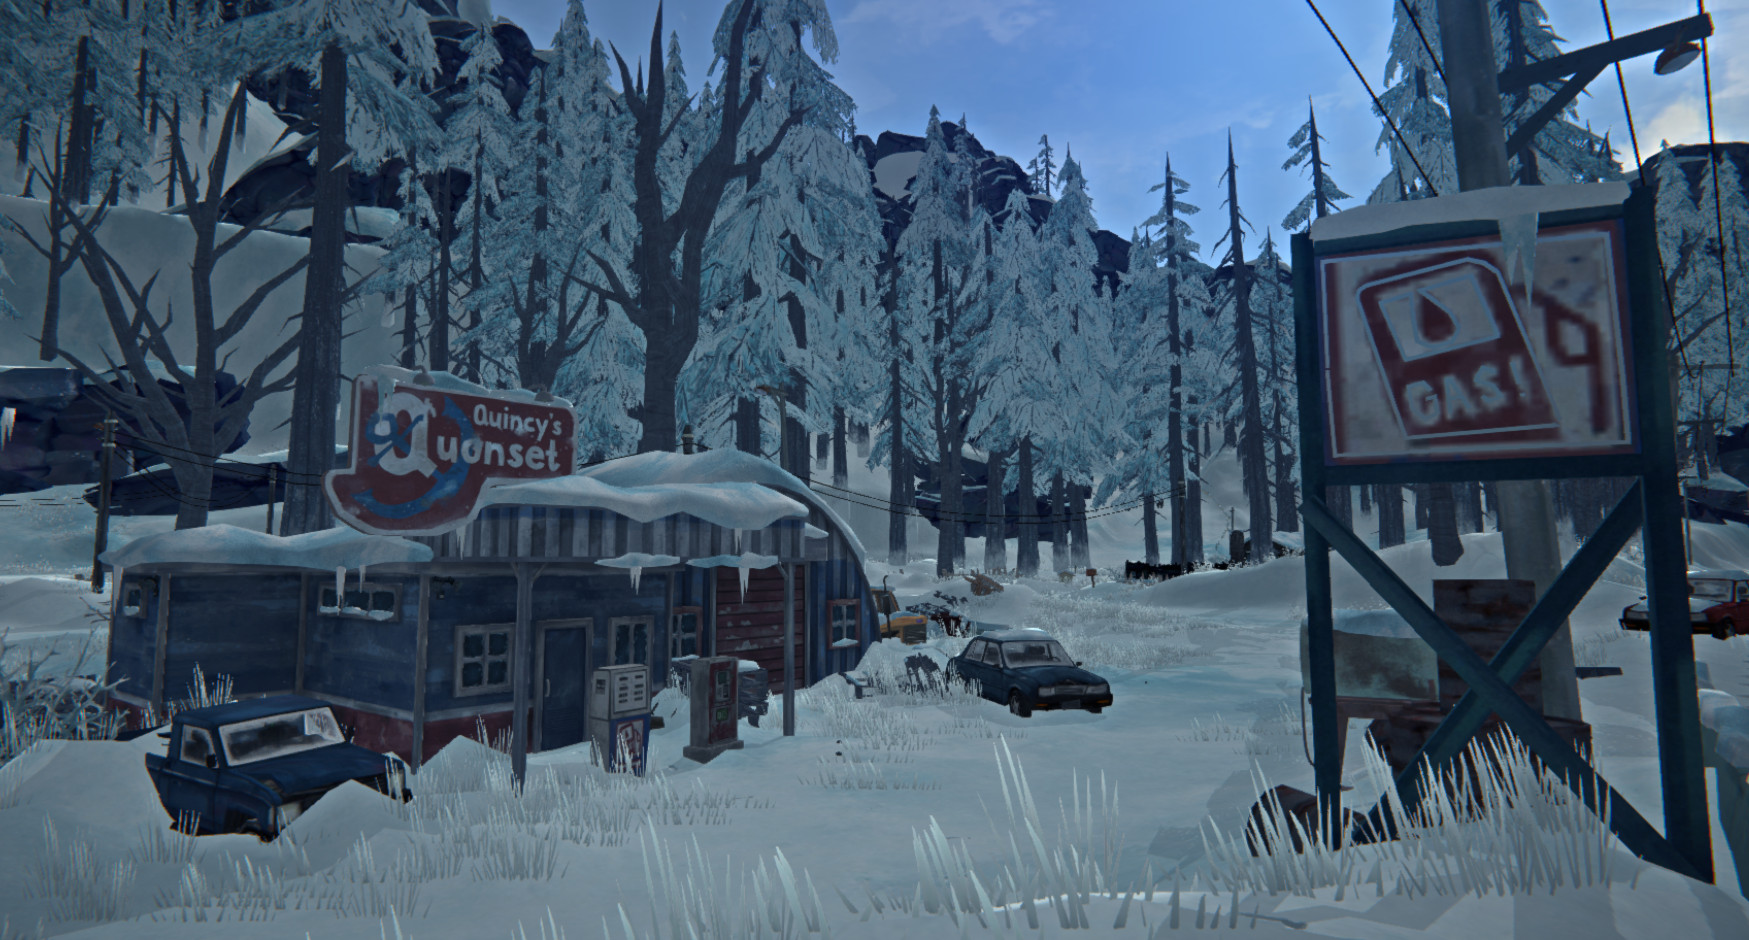
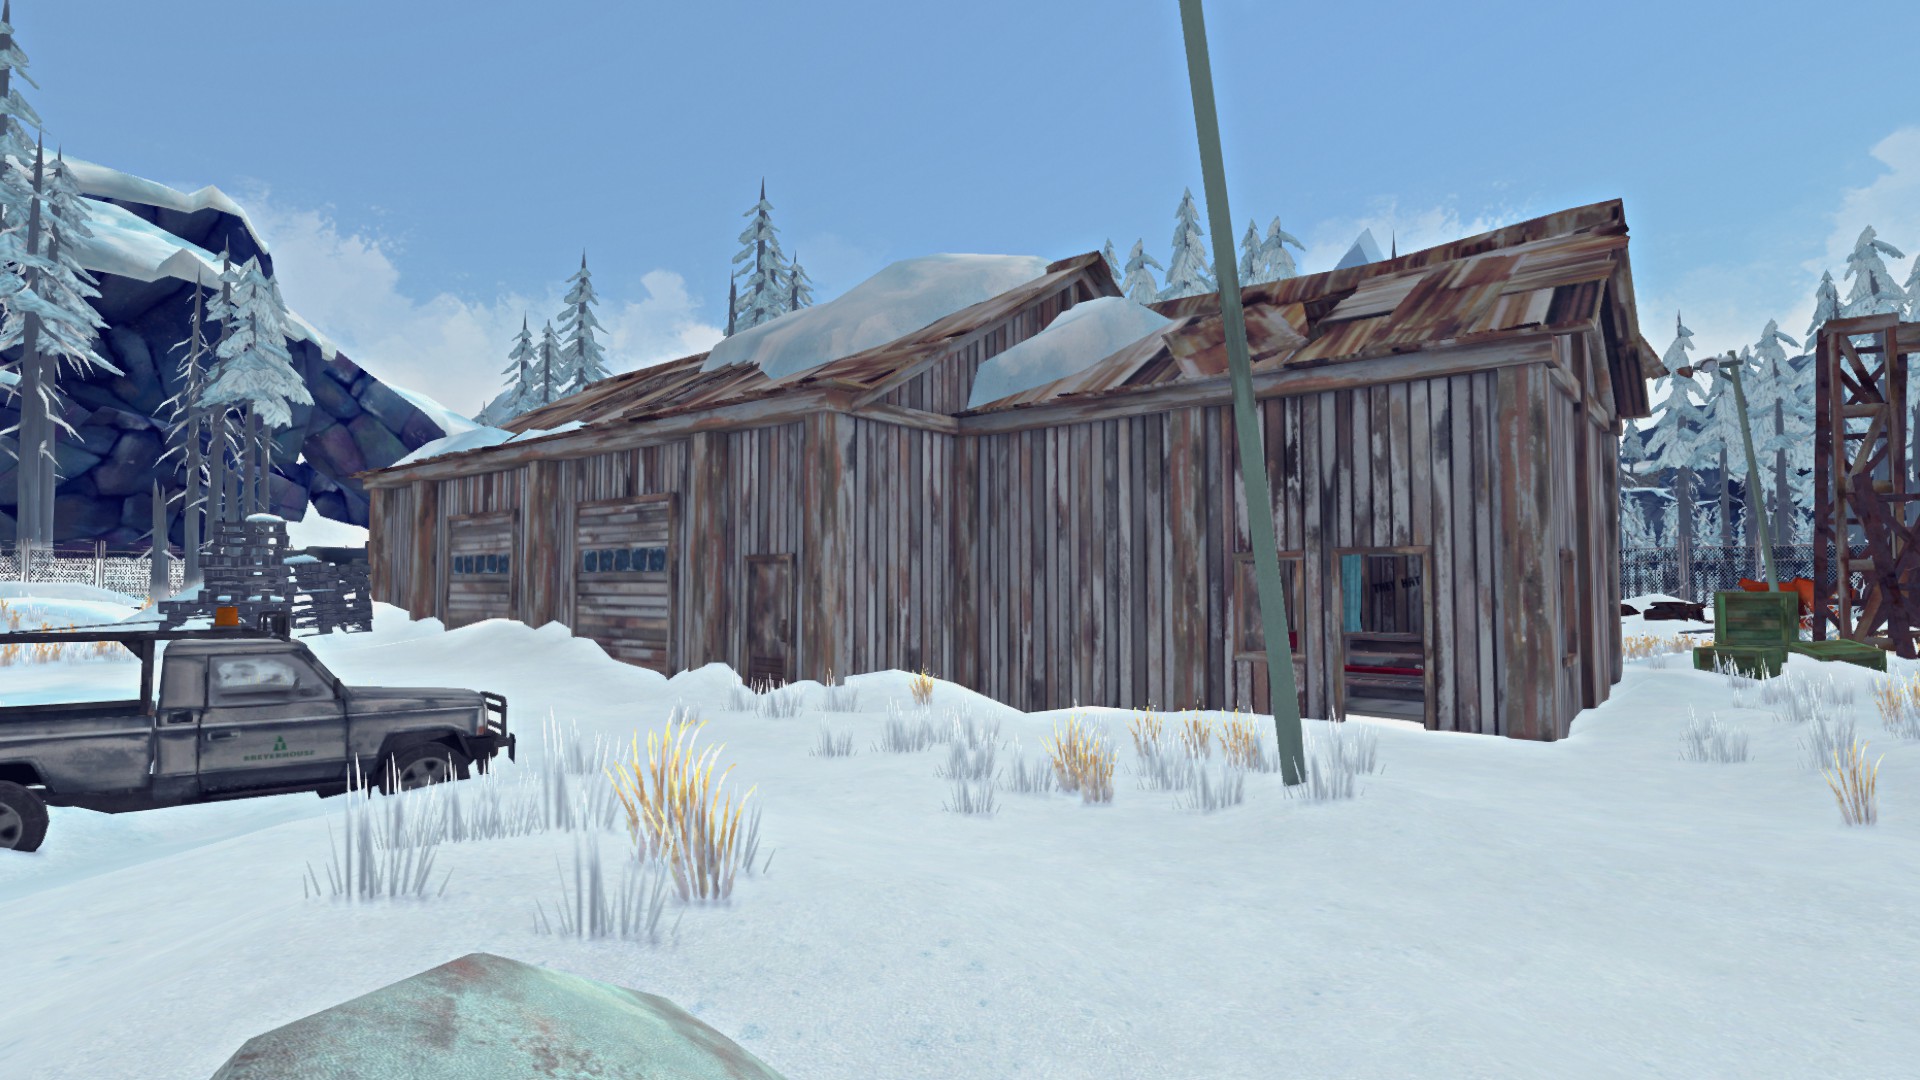
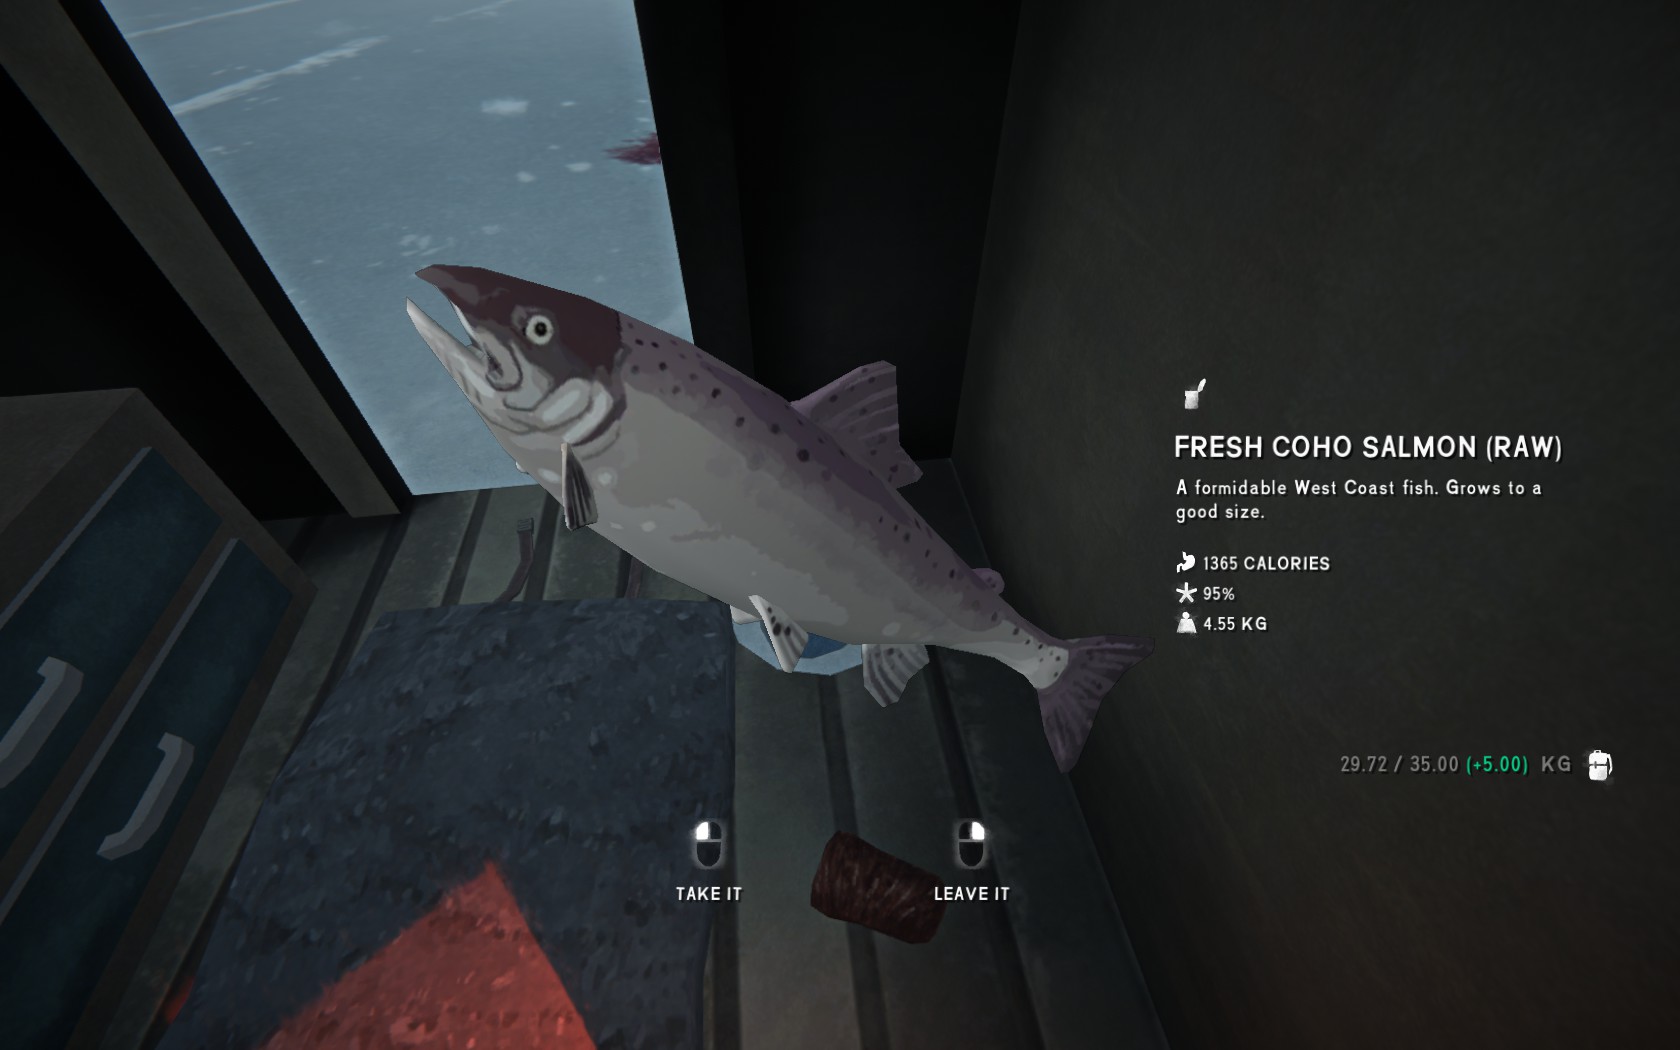
You can enter Keeper's Pass South via Pleasant Valley. The best shelter here is a trailer at the intersection where the roads to Miltion, Pleasant Valley and Blackrock converge at a 3 way intersection. The road to Miltion is blocked by a cave-in in the tunnel however, so you can only pass between Pleasant Valley and Keeper's Pass North from here. The trailer is often guarded by a normal wolf or 2 and has a rabbit grove right outside of it. There's a fishing hut down on the frozen over river the trailer overlooks which can be a reliable source of food. Other then a few rabbits and the wolves, there's not much to hunt in Keeper's Pass South, so if you plan on staying here for any length of time, be prepared to rely on fishing as your main food source.

This is a small transitional region so not much here other then what I mentioned.
Seriously Unserious 19 mar. 2022 às 23:44 
Really good guide overall. However, it's missing the newest region, Blackrock, and the connector regions of Keeper's Pass North and South.

I'll give some general tips of my own for Keeper's Pass and Blackrock here that can help TLD players until the guide's author can add in more Interloper specific info:

(I'll break it up into several comments due to the character limit)