Dungeon Defenders

Dungeon Defenders

25 ratings
Dungeon Defenders for Dummies 2021
By Frezmo
This is a guide for absolute beginners to Dungeon Defenders, with little to no knowledge and or experience with the game.
This guide contains the following contents:
-How to host a game
-How to invite or join a friends game
-How to search for an online game
-Picking a class
-How to play your selected class
-Mana
-Items
-Managing your Tavern
-Survival Mode

This guide does not include any content that requires a DLC to play.
   
Award
Favorite
Favorited
Unfavorite
What to do when opening the game for the first time
Upon first entering the game you'll be asked to either play Online or Locally. You'll want to pick play online. Once you have selected this you'll be given two options titled "Ranked" and "Open". You should come across a page that looks like this:


You will want to select "Ranked" to play your games, this is because the games content and management are on these servers, whilst "Open" is for workshop related game-play, which is essentially player made content.
Selecting a character
Once you've selected "Ranked" you'll be given the option to pick one of the four following classes. "Apprentice", "Squire", "Huntress" and "Monk".


What class does what
There are two main categories of class which are DPS (Damage Per Second) and Builders. Both of which are essential to the game. When playing with a friend or a group of friends you'll want a mix of both builders and DPS classes. As this game is a tower defence game you'll need builders in order to build effective towers in order to protect the Eternia crystal, yet you'll also need some DPS classes in order to fight the bosses which are at the end of certain maps.

Although, if you're playing alone you'll want to play a builder over a DPS character, this is because a builders towers can hold multiple pathways the mobs can take at once whilst a DPS character can only hold one pathway therefore your Eternia crystal will be less protected and it more likely to be destroyed.

The Apprentice
Type: Builder
Difficulty: Easy
Attack type: Ranged

Do you enjoy shooting foes with a staff by spamming left click or holding right click to commit "you shall not pass Gandolf style? The Apprentice is for you. You use your staff to shoot magical bolts and enemies using left click and using right click will cause the Apprentice to slam his staff into the ground creating an AOE (Area of Effect) knock back. However, The Apprentice specialises in building magic towers to defend the Eternia crystal from the enemies.

Apprentice Towers
The Apprentice has many different towers to protect your Eternia crystal from the enemies. They do different elemental damages which some enemies may be immune to. This class has the following defences:

Magic Missile Tower
Level Unlocked: 0
Mana Cost: 40
Defence Units: 3
Attack Distance: Ranged
Damage Type: Generic

This tower has a low mana cost, low defence units and deals generic damage meaning that nothing is resistant to it's damage. Despite guaranteeing damage on any enemies in the range of the tower, it has quite a low damage per hit, yet it's attack speed is quite fast compared to some of the other types of towers.


Magic Blockade
Level Unlocked: 3
Mana Cost: 20
Defence Units: 1
Attack Distance: N/A
Damage Type: N/A
Special Effect: Enemies which hit the barrier will lose their elemental resistance if they have any.

This defence is a barrier which enemies must destroy in order to proceed on their path towards the Eternia crystal. This defence has no damage yet it has quite a high amount of base health. This means you can use it to protect your towers by placing it in front of them allowing your towers to be able to attack the enemies for longer before being destroyed.


Fireball Tower
Level Unlocked: 7
Mana Cost: 80
Defence Units: 5
Attack Distance: Ranged
Damage Type: Fire

This tower has a higher damage than the magic missile tower and has a slight are of effect mechanic when hitting enemies. Despite having a higher damage than the magic missile tower, it has a slightly lower attack rate but this is barely noticeable. The main drawback to this tower is that fire resistant enemies will not take any damage from this tower.


Lightning Tower
Level Unlocked: 11
Mana Cost: 120
Defence Units: 7
Attack Distance: Ranged
Damage Type: Lightning

This tower does chain damage. This means that it will shoot a bolt of lightning that bounces from enemy to enemy dealing damage to all of them at once. This feature can be extremely useful as it can attack a chain of enemies from the tower all the way back to their spawn point dealing a high amount of total damage. It will fire these lightning chains in intervals. Yet, the lightning tower does lightning damage, therefore enemies who are lightning will be unaffected by this tower.


Deadly Striker Tower
Level Unlocked: 15
Mana Cost: 150
Defence Units: 9
Attack Distance: Ranged
Damage Type: Generic

This tower does extreme amounts of damage per hit, yet the towers attack rate is far slower compared to every other tower. This tower is mostly good for using against bosses or high health enemies such as ogres. The tower also deals generic damage meaning that no enemies are resistant to it, meaning it will always do damage on a hit.


Class Abilities
The apprentice has two class abilities it can use during combat to aid in defending the Eternia crystal.

Overcharge
Level Unlocked: 5
Mana Cost: 8 per second

This ability allows the Apprentice to summon, repair and upgrade towers quicker than he would otherwise be able to do. The ability typically knocks off a second on the time it would usually take to do these actions.


Mana Bomb
Level Unlocked: 20
Mana Cost: 200

This ability throws your character in the air with purple magic emitting from the character as a huge area of effect spell is cast which does large amounts of damage in all surrounding enemies. This is could for damaging many enemies at once in an ugly and desperate situation.

The Squire
Type: Builder
Difficulty: Medium
Attack type: Melee

Do you enjoy getting up close and personal to enemies while you show them who's boss? Then the Squire may be for you. The Squire uses his sword to strike down foes by holding left click. The Squire can also defend himself by holding right click to block incoming damage. The Squire is a builder class despite his damage potential against enemies. He builds martial defences that all deal generic damage in order to protect the Eternia crystal, mostly specialising in blockades preventing enemies from taking their path to destroy the Eternia crystal.

Squire Defences
The Squire has martial defences which all deal generic damage against the enemies defending the Eternia crystal mostly by blocking enemies off from pathways to the crystal, however he has some other building potential. This class has the following defences:

Spike Blockade
Level Unlocked: 0
Mana Cost: 30
Defence Units: 3
Attack Distance: Melee
Damage Type: Generic

This blockade has a low mana cost as well as a low defence unit cost. It's also quite broad so can cover quite a distance in order to block off the enemies. The enemies take damage upon walking into the spike blockade. As this defence deals generic damage no enemies are resistant to its damage.


Bouncer Blockade
Level Unlocked: 3
Mana Cost: 40
Defence Units: 4
Attack Distance: Melee
Damage Type: Generic

This blockade has a slightly higher mana cost and defence unit cost but there is not a huge difference between the Bounce Blockade and Spike Blockade in terms of cost. The Bouncer Blockade spins and extends its spikes in a circular motion to damage enemies and knock them back. The knock back on this blockade is very useful and can cause enemies to fall off the map if positioned right. As this defence deals generic damage no enemies are resistant to its damage.


Harpoon Turret
Level Unlocked: 7
Mana Cost: 80
Defence Units: 6
Attack Distance: Ranged
Damage Type: Generic

This turret fires arrows at enemies as they try to story your defences. The arrows on this defence can travel through enemies in order to hit multiple enemies with one arrow assuming they're in a line. This turret is most effective if placed behind a blockade so that it doesn't take damage and go down. As this defence deals generic damage no enemy is resistant to its damage when hit.


Bowling Ball Turret
Level Unlocked: 11
Mana Cost: 100
Defence Units: 7
Attack Distance: Ranged
Damage Type: Generic

This turret fires metal balls on the enemies. The balls can bounce off walls and enemies upon hitting them in order to then go on and hit more enemies as the balls bounce around. Eventually after a certain amount of bounces the balls will disappear. This tower, like the Harpoon Turret, is also best placed behind a blockade. This defence also deals generic damage therefore no enemy hit by one of the turrets bouncing balls is resistant to the damage.


Slice N Dice Blockade
Level Unlocked: 15
Mana Cost: 140
Defence Units: 8
Attack Distance: Melee
Damage Type: Generic

This blockade is covered with swords which hand all around the sides of the circular blockade. When enemies get close to the blockade it'll start to spin and it will gain in speed the longer enemies are in its range. Each time one of the many swords hits an enemy whilst spinning at super fast speeds the enemy will take damage. This tower is very good for high damage over longer periods of time. As this defence deals generic damage no enemies are resistant to its damage.


Class Abilities
The Squire has two class abilities it can use during combat to aid in defending the Eternia crystal.

Circular Slice
Level Unlocked: 5
Mana Cost: 60

This ability causes your character to spin in a stationary position dealing a fairly high amount of damage to all of the surrounding enemies. The enemies have to be pretty close to the Squire in order to take damage though.


Blood Rage
Level Unlocked: 20
Mana Cost: 30 per second

This ability causes the Squire to glow a blood red colour as the Squires damage is increased for the duration of the ability depending on how long you keep it up for. This ability is best to be used for dire situation or whilst against bosses due to its high mana cost.

The Huntress
Type: DPS
Difficulty: Hard
Attack type: Ranged

Do you enjoy fighting mobs from afar? Holding the back lines and avoiding getting hit? The the huntress may be for you. The Huntress uses a crossbow to shoot bolts at enemies by holding the left mouse button and reloads her weapon by pressing the right mouse button. The Huntress is a DPS class meaning that she is here to deal damage to the enemies as a hero. This means that this class is best for taking down bosses and enemies with large amounts of hit points such as ogres. Despite being a DPS class, the huntress does still have traps she can place in aid of defending the Eternia crystal.

Huntress Traps
The Huntress can lay down different traps that are triggered upon an enemy stepping onto them. They have a certain amount of charges before disappearing which is represented by a number in the middle of the trap and enemies can not attack them to destroy them. They all get destroyed when they run out of charges. Much like the Apprentice, the Huntresses Traps can deal elemental damage meaning that certain enemies may be resistant to them. This class has the following traps:

Proximity Mine Trap
Level Unlocked: 0
Mana Cost: 40
Defence Units: 3
Attack Distance: On Contact
Damage Type: Generic

This trap has a relatively low mana and defence unit cost therefore you can place multiple without using up your resources. The trap itself doesn't a lot of damage yet it does deal generic damage, this means that enemies aren't resistant to the traps damage.


Gas Trap
Level Unlocked: 3
Mana Cost: 30
Defence Units: 3
Attack Distance: On Contact
Damage Type: Poison

The gas trap doesn't deal any damage to enemies, instead it stuns them causing enemies to stand in place and cough frantically. This gives you the opportunity to kill them whilst they're doing so without running the risk of getting hit. The trap does deal poison damage so enemies who are resistant to poison will be able to walk over the trap whilst reaming unaffected.


Inferno Trap
Level Unlocked: 7
Mana Cost: 60
Defence Units: 4
Attack Distance: On Contact
Damage Type: Fire

This trap upon being triggered the Inferno Trap will cause the ground to ignite which will deal fire damage over time to enemies who step over the trap. This trap will not deal any damage to an enemy with fire resistance.


Darkness Trap
Level Unlocked: 11
Mana Cost: 70
Defence Units: 3
Attack Distance: On Contact
Damage Type: Debuff

This trap removes any resistances enemies may have against certain defences. As well as this it will cause the enemies to change focus, this means that if an enemy is trying to hit you and it walks over a Darkness Trap, the enemy will change it's focus to something else, either a different player or one of the defences you may have.


Ethereal Spike Trap
Level Unlocked: 15
Mana Cost: 80
Defence Units: 3
Attack Distance: On Contact
Damage Type: Generic

This trap does extreme damage upon an enemy stepping onto the trap. This trap is really good for dealing chunky of damage to bosses or high hit point enemies such as ogres. As well as this, the trap deals generic damage. This means that enemies will always take the damage upon triggering the trap regardless of their elemental resistance.


Class Abilities
The Huntress has two class abilities it can use during combat to aid in defending the Eternia crystal.

Invisibility
Level Unlocked: 5
Mana Cost: 15 per second

This causes the Huntress to turn a black colour and become invisible to enemies, which means that the enemies won't be able to see your character. Therefore, she can move through them to re-position without running the risk of being hit.


Piercing Shot
Level Unlocked: 20
Mana Cost: 40

The Huntress shoots a huge purple bird from her crossbow which deals a lot of damage as well as travelling through enemies. This means that it can hit multiple enemies with one shot, assuming that the enemies are all stood in a linear fashion. This is good for clearing lines of enemies or at least taking a good chunk out of all of their hit points.

The Monk
Type: DPS
Difficulty: Very Hard
Attack type: Melee/Ranged

Do you enjoy being versatile when attacking enemies, the monk may be for you considering he has the ability to both stab enemies with his spear by holding left click as well as throwing magic bolts at the enemy by holding right click. The Monk is a DPS class, meaning that it specialises in dealing damage to enemies and is useful for taking out bosses or enemies with a lot of hit points such as an ogre. Although being a DPS class, the Monk has the ability to place down auras to help defend the Eternia crystals from enemies.

Monk Auras
The monk can summon different auras which effect enemies in different ways (depending on the aura) as they step into them. They drain over time before disappearing which is shown has a health bar as if any other regular tower. However, enemies can not damage these to reduce it's health, the health will just steadily go down over time with use. Like the Apprentice and the Huntress, the Monks damage aura is elemental damage not generic, meaning some enemies you fight may walk through them without taking damage, however there is a way to stack auras to nullify these enemy resistances which will be spoken about in more detail below. This class has the following auras:

Ensnare Aura
Level Unlocked: 0
Mana Cost: 30
Defence Units: 3
Attack Distance: On Contact
Aura Effect: Slows down enemies

This aura has a low mana cost and defence unit cost, this means that you can place quite a few of them armour the map for a small amount of cost to your resources. This trap does not do any damage at all however it debuffs the enemies by reducing their movement speed significantly. This can give you more time to damage them as they make their way to the Eternia crystal you're defending.


Electric Aura
Level Unlocked: 3
Mana Cost: 50
Defence Units: 5
Attack Distance: On Contact
Aura Effect: Damages enemies

This Aura is a bit more costly than the other, however it does lightning damage to any enemies that walk through it. This aura can be combines with the slow aura by stacking them on top of one an other to slow down the enemies as they walk through both auras to ensure that the electric aura does more damage to them as they're in it for a longer period of time. Keep in mind that some enemies may be resistant and therefore immune to the damage in inflicts.


Healing Aura
Level Unlocked: 7
Mana Cost: 40
Defence Units: 4
Attack Distance: On Contact
Aura Effects: Heals Hero

This Aura is fairly cheap for the resources it costs to build, despite this it is not wise to build more that a couple of these auras, and on the earlier maps you only really need one. This Auras heals your hero and any other players who are standing within its range. The Healing Aura is best used placed near to the Eternia Crystal(s) that you and your fellow players are defending to keep your heros alive for longer. This means that your heros are likely to live longer allowing more effective tower repairing and upgrading, as well as DPS.


Strength Drain Aura
Level Unlocked: 11
Mana Cost: 60
Defence Units: 5
Attack Distance: On Contact
Aura Effects: Reduces damage of the enemies within it as well as removing any elemental
resistances they have temporarily whilst they're within the aura

This Aura us on the more expensive side, however it is also one of the more useful auras you can use as a monk. A good way to use this aura is to stack it a long with the Electric and Ensnare Aruas explained above. By combining the effects of all three auras you can optimise the DPS of your auras as a monk. This tactic reduces the enemy movement speed as well as removing any elemental resistances which optimises the Electric Auras damage.


Enrage Aura
Level Unlocked: 15
Mana Cost: 100
Defence Units: 5
Attack Damage: On Contact
Aura Effects: Causes enemies to attack each other within the aura

Out of all the auras this is the most costly and also the most fun to use. It is very entertaining to watch the enemies smack each other whilst you kick back or deal with other things which need attention else where. However, despite the amusement, this aura isn't worth the cost to make, your best bet is just ignoring this aura all together and just using the other four. In the long run, it really isn't that useful at all.


Class Abilities
The Monk has two abilities it can use during combat to aid in defending the Eternia Crystal.

Defence Boost
Level Unlocked: 5
Mana Cost: 15 per second

This causes the Monk to emit a wavy aura of his own which increased all stats of defences within its range whilst this ability is active. As well as this, it also heals the towers as well. This is good and should be used by the monk whilst they're in a dense area of defences.


Hero Boost
Level Unlocked: 20
Mana Cost: 15 per second

This causes the Monk to emit a wavy aura of his own like the above, however, this one increases all stats of heros within range including the monk himself rather than defences. As well as this, it also heals heros over time whilst they're in range. This can be combined with the defence boost for maximum tower and hero buff effectiveness. This boost is very useful to use when fighting a boss, however you only need one as if you have two monks using hero boost, only the boost with the highest stats will take effect and the other will have no effects other than wasting mana, this is the same for the tower boost too.

Creating a Game
Once you've selected the hero you would like to play and customised the heros appearance as well as given it a name, you'll come across a menu which looks like the following the image. Below will explain what each one does.
Quick Game
Clicking this will allow you to view all online and public games which are open for you to join. When you first start playing with your first level 0 character, this will most likely be empty as people often host games with a minimum level requirement as this is what it does by default and not many people manually change it. I wouldn't recommend this when first starting to play.

Custom Match
Clicking this will send you to your own personal tavern, by hosting a custom game you allow all players from the internet to join your game as well as view it on the quick match section. If you want to find people online and make new friends this is the one you'll want to select. Just keep in mind that this game has been out of a long time and there a lot of players with crazy good items in the game, this means that you may get people who join and one shot everything effectively making you useless and unable to do anything as you watch idly by watching them do everything so fast you can't do anything. This is known as carrying, if you do not want this to happen to you, do not create a custom game.

Private Match
Clicking this will also send you to your own personal tavern, however this time the game is not public so random people won't be able to join. It's important to note however that this does not make an offline game, you are still able to invite specific people you want to play with. So if you and a couple friends want to play together without interruption or you just want to kick it solo, this is what I would recommend you pick to start out with.
Setting up a game
Once you have spawned into your tavern, to get into a game press "g" and it'll open up this menu.

This is where you can customise your game experience. When you first start out you won't have all the maps unlocked nor will you have the nightmare difficulty as the nightmare difficulty is a DLC which requires purchase.

On the left hand side you can pick what map you would like to do and over on the right hand side you can choose what difficulty you'd like to play. I would recommend starting on either medium or hard. Easy is too easy to be fun and insane is too hard to be fun. Also it is worth noting that the harder the difficulty that you do, the more xp you'll get and better loot will drop.

In the bottom right you can select to play survival if you wish to or pure strategy. Survival is what it sounds like, you keep getting waves until you either eventually fail to protect the Eternia Crystal or until wave 35 which is the last wave. Pure strategy is the same as this however your characters can't do any damage, only towers that you build can, however pure strategy has easier enemies on it compared to survival.

When you're ready, just click "Go!"
Managing your Tavern
Each person will have their own personal tavern which will become decorated over time with trophies as you earn achievements in the game. When you first spawn into your tavern you will find to boxes on the ground, you can attack them by using left click and it will give you four pets which are TF2 themed. These are worth keeping a hold of in your inventory whilst you level your character up to the level you need it to be in order to use the pet.

Swapping a public game to a private game and vice versa
If you are playing in a public lobby and wish to turn it into a private one, you can do this by pressing "esc" then clicking on hide match which is found all the way over to the right of the screen, if you want to change it back press show match which is the same button.

Adjusting minimum level requirements for player to join
When hosting an online public match for people to join, you may want to adjust the minimum level requirement so that everyone can join regardless of level or the other way so that people that are only at a higher level can join. This is done in the tavern by pressing "g" and going to the top right corner where it'll say Minimum Join Level, there you can click the up and down arrows to adjust this accordingly.

Your Tavern Hero Shop
You are able to make your own market place for players who join your tavern by talking to the tavern keeper near the spawn point of the tavern. Please read the mana section first if you are unsure of what mana is and how it is used as a currency.
A hero shop allows players to buy your items for a price you set, the mana is then instantly transferred into your banked mana.

To get into your hero shop to set it up, you'll need to talk to the tavern keeper near the spawn and click on "Hero Shop of (username)".

Once you have opened your hero shop, you can then play around with it and it will probably end up looking a little something like this.
You can add folders onto your shop to help your customers navigate your items that you have for sale. In order to add a folder, edit a folder and delete a folder you'll need to press the books on the side, green is add, yellow is edit and red is delete.
In order to move items into folders just click and drag them, and to move them out of a folder you click and drag them to the blue book in the top left corner above the folder create, edit and delete buttons.

In order to add an item you have found to your shop, just find it in your inventory and click on it so it is highlighted, from there just press move to shop.
Once you have moved an item into the shop, it will have a price set at 0 automatically, but don't worry, the item will be unable to purchased by players until you have edited the price so you are at no risk of having your items sniped whilst moving them into your shop.

To set up an item prince, click and highlight the item and press set item cost on the right, I would recommend not setting the prices too high otherwise they won't sell but over time you will get to grasp what items are worth.
Mana
Mana is the main currency of this game, in order to do anything in this game you will need mana. However there are two different types of mana: mana, and banked mana. It is important to know the difference.

What is mana?
Mana is the resource used in order to build defences, you can find them in chests or by killing enemies which will drop it upon death. With this mana you can not only build defences, but also repair and upgrade them.

What is banked mana?
Banked mana is mana stored across all of the game sessions you play including your tavern. This is what you can use to upgrade items you have, you tavern services such as renaming your hero and buying stuff from both other peoples hero shops or the tavern keepers shop. Although, I wouldn't recommend upgrading things too much early game nor buying from hero or tavern shops as in the early game you find upgrades and better items that drop in game regularly, so you would be wasting your banked mana by upgrading items just to swap it out later in the near future.
Using mana in game
Whilst in game, you will want to use the mana to upgrade and or repair your defences in order to properly protect your Eternia crystal.

In order to open up your wheel of doing things as I like to call it, press down on your middles mouse button and you will get a selection appear (you can also use the keys it tells you to use in the bottom left whatever you find easier).


When this wheel comes up you can either go into your hero stats and look at your heros gear as well as their stats. However, the other four are options you can do in game to help you make your defences and to defend your dungeon.

Upgrading Defences
When upgrading towers you'll have a mana cost, each time you upgrade a tower the higher the manna cost becomes. You can upgrade a total of 5 times per defence.
Upgrade 1 = 100 mana (requires level 4)
Upgrade 2 = 200 mana (requires level 9)
Upgrade 3 = 400 mana (requires level 19)
Upgrade 4 = 700 mana (requires level 34)
Upgrade 5 = 1220 mana (requires level 60)


Repairing Defences
You can repair defences in game, when doing so you can hover over the defence that you would like to repair and it will tell you how much mana it is going to cost you to repair it. Repairing is a lot quicker in the building phase rather than the combat phase, this is the same for upgrading towers as well.


Selling Towers
You can sell towers in game and when you hover over them it'll tell you how much mana you'll get for it. The more used a tower has been the less it'll sell for however if you build a tower in the wrong place and want to sell and rebuild it all in the same build phase. You will get all of the mana refunded back to you.


Players can sell each others towers, however you can change this so players can only sell their own towers in the game settings. Hit "esc" and clock on the circle that says "Other Players Towers Sellable". When this dot is red you can sell other players towers and when it is black you and other players can only sell their own towers.
Using Banked Mana
Banked mana is used for buying, upgrading, adjusting stats and renaming. It is the games currency.

How do I get banked mana?
Banked mana will be put into your inventory just from playing the game, this is an automatic process. Picking up items off the floor to sell them doesn't increase the amount of banked mana you will have, at the end of each wave the game sells all of the dropped items and splits the mana equally to all players automatically so you don't need to panic or spend time hording items that are dropped in game.

You can also get banked mana by converting mana you have in game straight into your banked mana, this is done by going to the forge, and pressing the arrow at the top of the menu to convert it over. However this isn't very useful and doesn't give you a lot of mana due to your mana carrying capacity. You'll be better off just holding your mana to use it in game for upgrade, repairs, etc.


Tavern Services
You can use your banked mana and take it to the taverns item shop. The item shop will have three pieces of armour, three pets and three weapons for you to buy after each game that are randomly generated, it is very rare that you will get a good deal though, most of the time the items in this shop are terribly over priced and not worth buying. However you can use your mana in the tavern services section.

The Tavern has four services, all with different costs that you can see from the screen shot.
You can buy an xp bonus for your character for 70,000 mana, again I'd say that this is not worth buying, xp is pretty easy to gain and although it may be tempting to buy it later on in the game when leveling becomes slower, it doesn't give you enough xp for it to be worth it.

You can also respec your hero for 100,000 mana which can be good if you've made a series of mistakes when putting level up stats into your character, however the price for this is pretty steep so wait until your further into the game and have the mana to throw into this.

Same with renaming your hero for 50,000 mana, it is pretty expensive and this doesn't effect the game at all. So don't buy this unless you have the mana to spend.


Lastly, you can generate a mana token for free, what this does is put the amount of mana you set into a gem stone which can then be kept in storage. It will take it out of your banked mana but when you want to get the mana back you can just sell it to the tavern keeper and all of the mana you put into it for storage will go back into your banked mana.
This useful so that you don't hit the capacity for banked mana, which is 1 trillion mana so good luck getting there first. This can also be used if you want to restart on the same account without having a mana advantage.


Upgrading your items
You can use your banked mana for upgrading your items, make sure that you upgrade it well though as once you have upgraded an item, you can change what stats you put the upgrades into. To upgrade an item just go into your hero information (if the gear is equip) or find it in your inventory and select upgrade item in the bottom right. Once you have filled up the bar with all the mana required for an upgrade, you then put in a stat. Once you have upgraded an item to its maximum amount of upgrades (shown in the bottom right corner) you can spend mana in order to rename that item to whatever you want.
Items
Items in this game are dropped from chests that you can find around the map as well as from the enemies the selves. The harder the map and the difficulty the better the item drops typically are.
Items have twenty different levels of quality all with different level requirements as well as five different types.

When putting armour onto your character it is important that you have you helmet, gloves, chest piece and shoes be the same type. (example, having all leather armour). This is because when you get a full set of armour your stats gets boosted, the better the quality the higher the boost. If you're unsure if you have a full set or not, look at your hero page and your armour piece should have a blue highlight around them.


Armour Types
You can get leather, Mail, Chain, Plate and Pristine armour. It is important to note that the armour type does not effect the armours stats. Leather armour can have stats which are just as good or even better than plate armour for example.

Armour Quality
Armour has twenty different qualities that it can be. Each with a different level requirement and stat boost percentage. The table below will show you the level required for each quality and the stat boost it provides when you have a full set of the same type of armour (i.e. leather).

Quality
Level Requirement
Stat boost
Cursed
0
25%
Torn
0
25%
Worn
3
25%
Stocky
6
25%
Solid
8
25%
Sturdy
10
25%
Polished
12
25%
Shining
14
25%
Powerful
20
25%
Amazing
27
25%
Epic
34
25%
Legendary
45
25%
Godly
60
25%
Mythical
74
30%
Transcendent
78
33%
Supreme
83
36%
Ultimate
90
40%
Ultimate93
93
40%
Ultimate+
100
40%
Ultimate++
100
40%

Armour Resistance
Armour resistance caps out at 90%, once you have hit 90% there is no need to put more upgrades into resistance for armour as it won't get any better regardless.
Different armour resistances are good for different enemies. The different resistances do the following:

General Resistance = Reduces physical damage from all enemies (good against Ogres and Dark
Elf Warriors)
Fire Resistance = Reduces all fire damage from all enemies (good against Wyverns, Dark Elf
Mages, Kobolds and The Ancient Dragon)
Lightning Resistance = Reduces all lightning damage from enemies (generally good)
Poison Resistance = Reduces all poison damage from enemies (good against ogres poison ball)


Weapons
Weapons also have the same quality level restrictions however you can't get stat boosts from weapons based on the quality like you can for armour. Weapons are generally better the higher the quality due to having more available upgrades.
Big Thanks for checking out my guide
Hey guys, thanks for looking over my guide and I hope you found it helpful. This is my first time writing a guide and it took me around 15 hours to do so, including going into game and getting all of the screen shots I needed. I had a few times were I wrote a bunch and didn't save it so had to re-write it which was really frustrating.

However, not to say that I didn't enjoy writing this guide, I found it very fun and for filling. I apologise if there are any spelling or grammatical errors in there, I haven't proof read it. Maybe in the future I will and make some edits, however, hopefully this guide won't ever go out of date. I tried to keep all of the content to the very basics to the best of my ability.

If you would like to see more guides from me, feel free to suggest below what my next guide should be on. Can be this game or a different game, just make sure that if it's a different game it's a game I have a lot of hours in, in order to have the knowledge to write a guide if good quality.

Again, thanks a lot for reading my guide, and feel free to comment below if I've gotten something wrong or missed anything out which you think should be added. Also, I have written this all in British English (the real and original), sorry Americans!

Created by - Frezmo
11 Comments
ᴬᴺᵀᴵHEADSHOT Jan 19, 2021 @ 2:58am 
Buying exp is verry much worth it > Lvl 70. For 70,000 Mana (which should be nothing at his Point) you get > 1M Exp which is noticable.
spliff Jan 17, 2021 @ 9:54am 
just started again with redux after a 10 yea hiatus, thanks for this simple refresher - especially for the gear level names table. i seem to have stopped with mythical gear, so i know what to look for now. :-)
Frezmo  [author] Jan 3, 2021 @ 9:00pm 
Thanks for the information, I shall get that misinformation corrected when I can :)
ForeverMaster Jan 2, 2021 @ 12:51am 
Now for some corrections and worthy info to implement into your guide:

* The Ethereal Spike Trap does lightning damage , NOT Generic. However, it is the only trap that detects flying enemies, such as wyverns. Upon detonation, the trap hits whichever enemy is closest to its center.
* In your section on the Gas Trap, you correctly note that it does not inflict damage. However, you later contradict yourself stating that it does "poison damage."
* The Deadly Striker Tower (DST) can shoot through walls .
* All hero abilities that drain mana overtime to upkeep (Overcharge, Invisibility, Tower and Hero Boost, etc) consume mana at an exponential rate ; it is not linear.
* The Huntress's Invisibility does not hide her from Dark Elf Warriors and bosses.
ForeverMaster Jan 2, 2021 @ 12:47am 
One important game concept I think should be made clear here is Elemental Affinities/Alignments. -- There are three elements in DD1: Fire, Lightning and Poison.

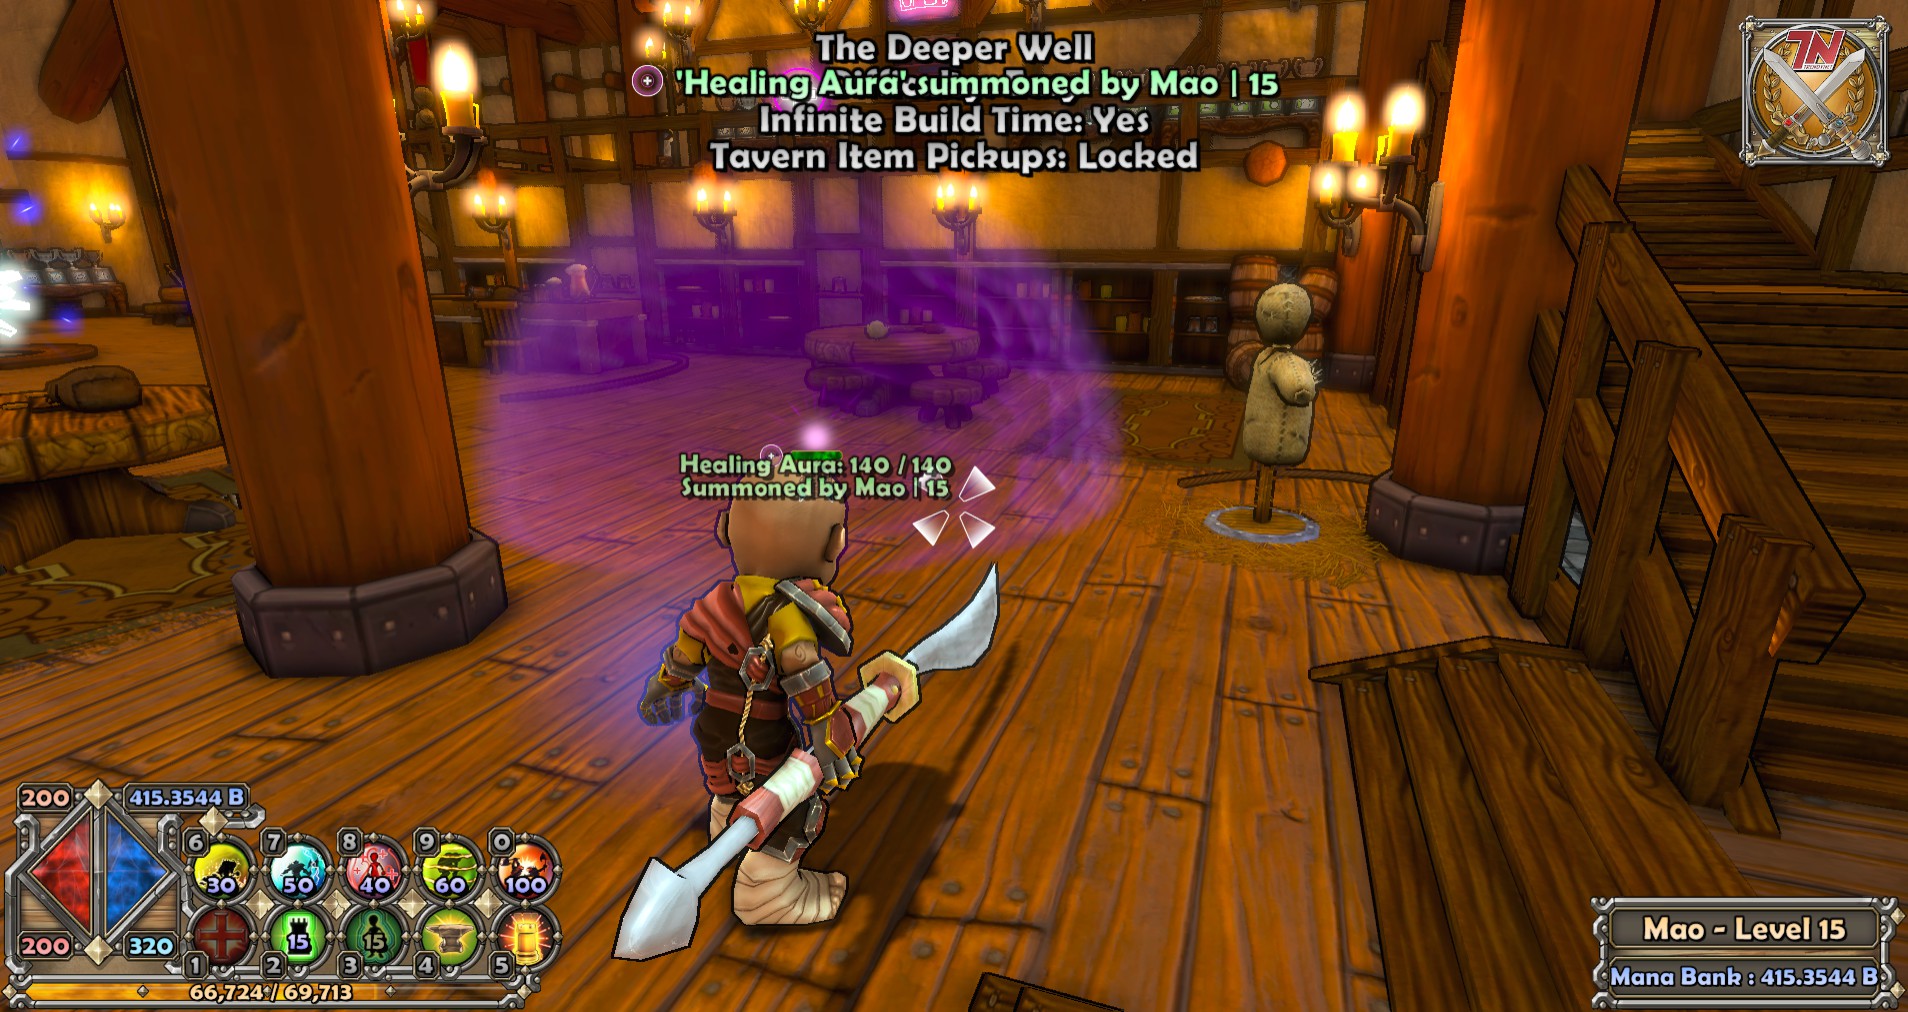
An enemy may have one of these elements of which they emit and are immune to. Some hero defenses also possess an element. These defenses are ineffective against enemies that share their element; this is NOT exclusive to damage-dealing towers like the Fireball Tower. -- Both the Gas Trap and Ensnare Aura are poison-based; they do not stun/slow down enemies immune to poison.
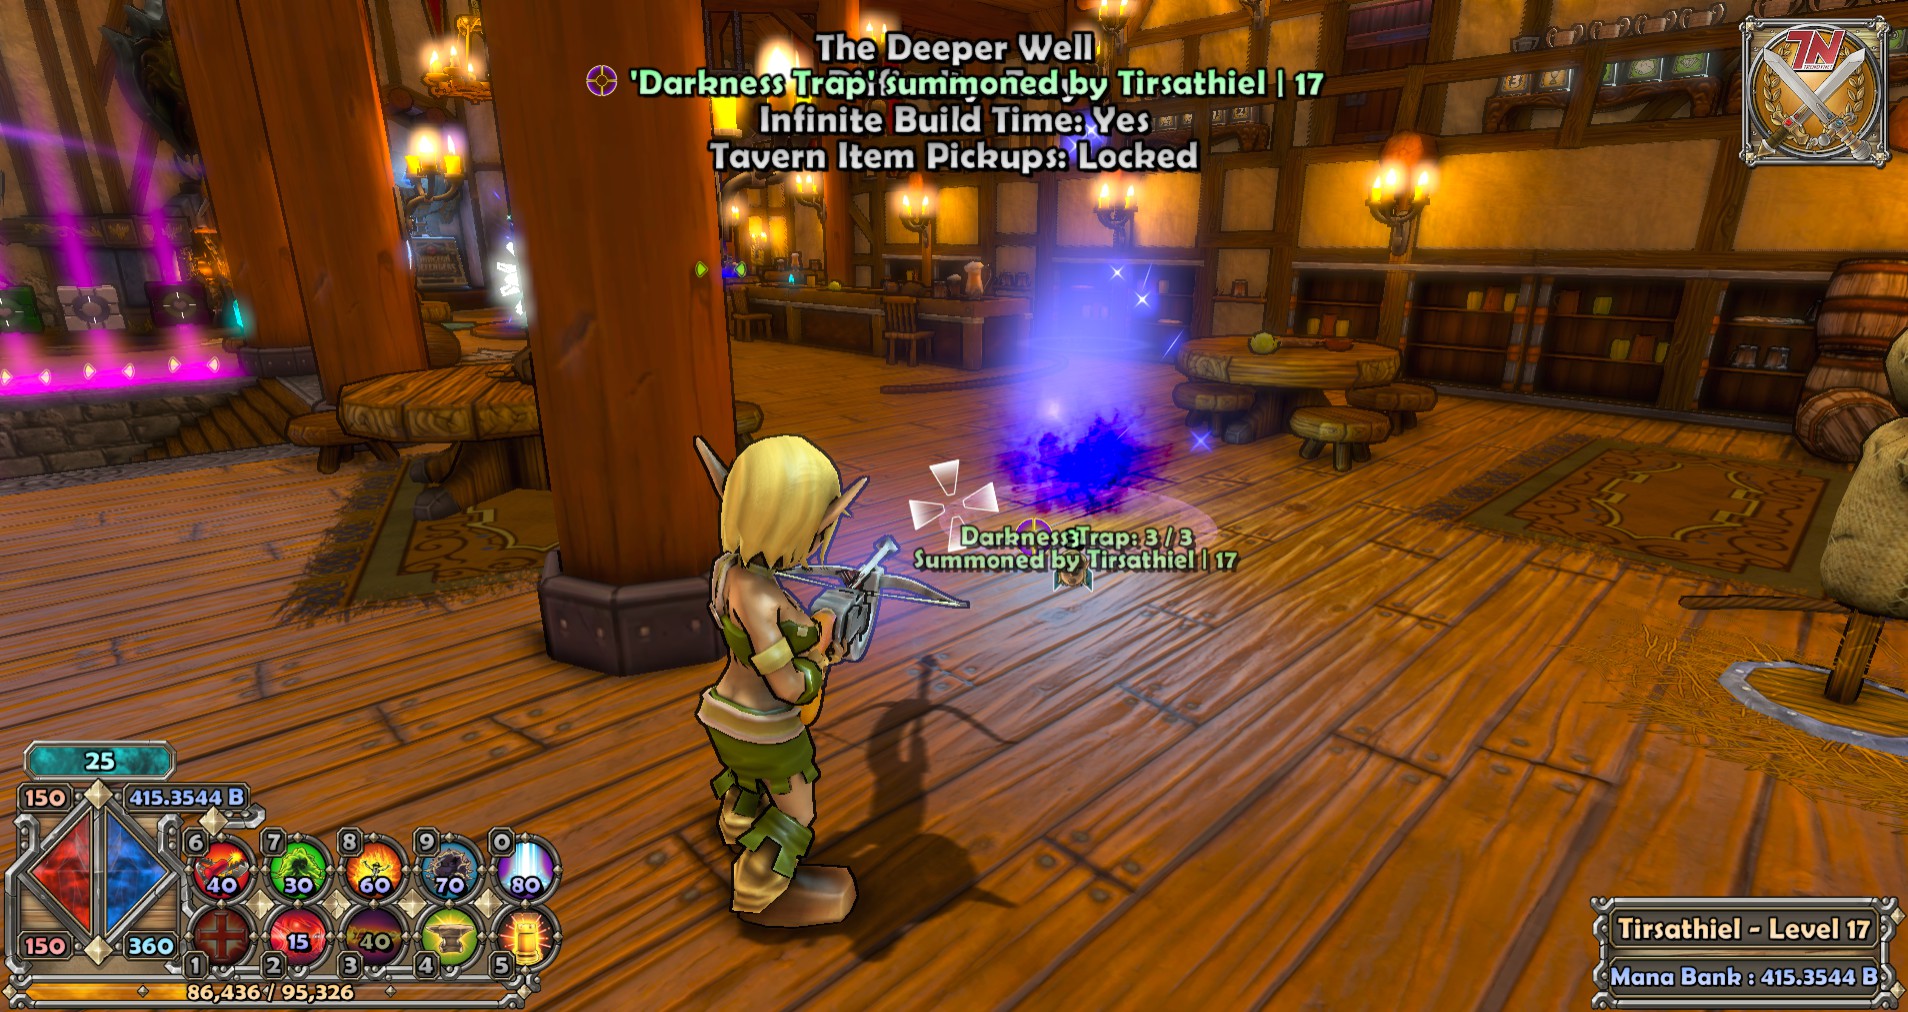
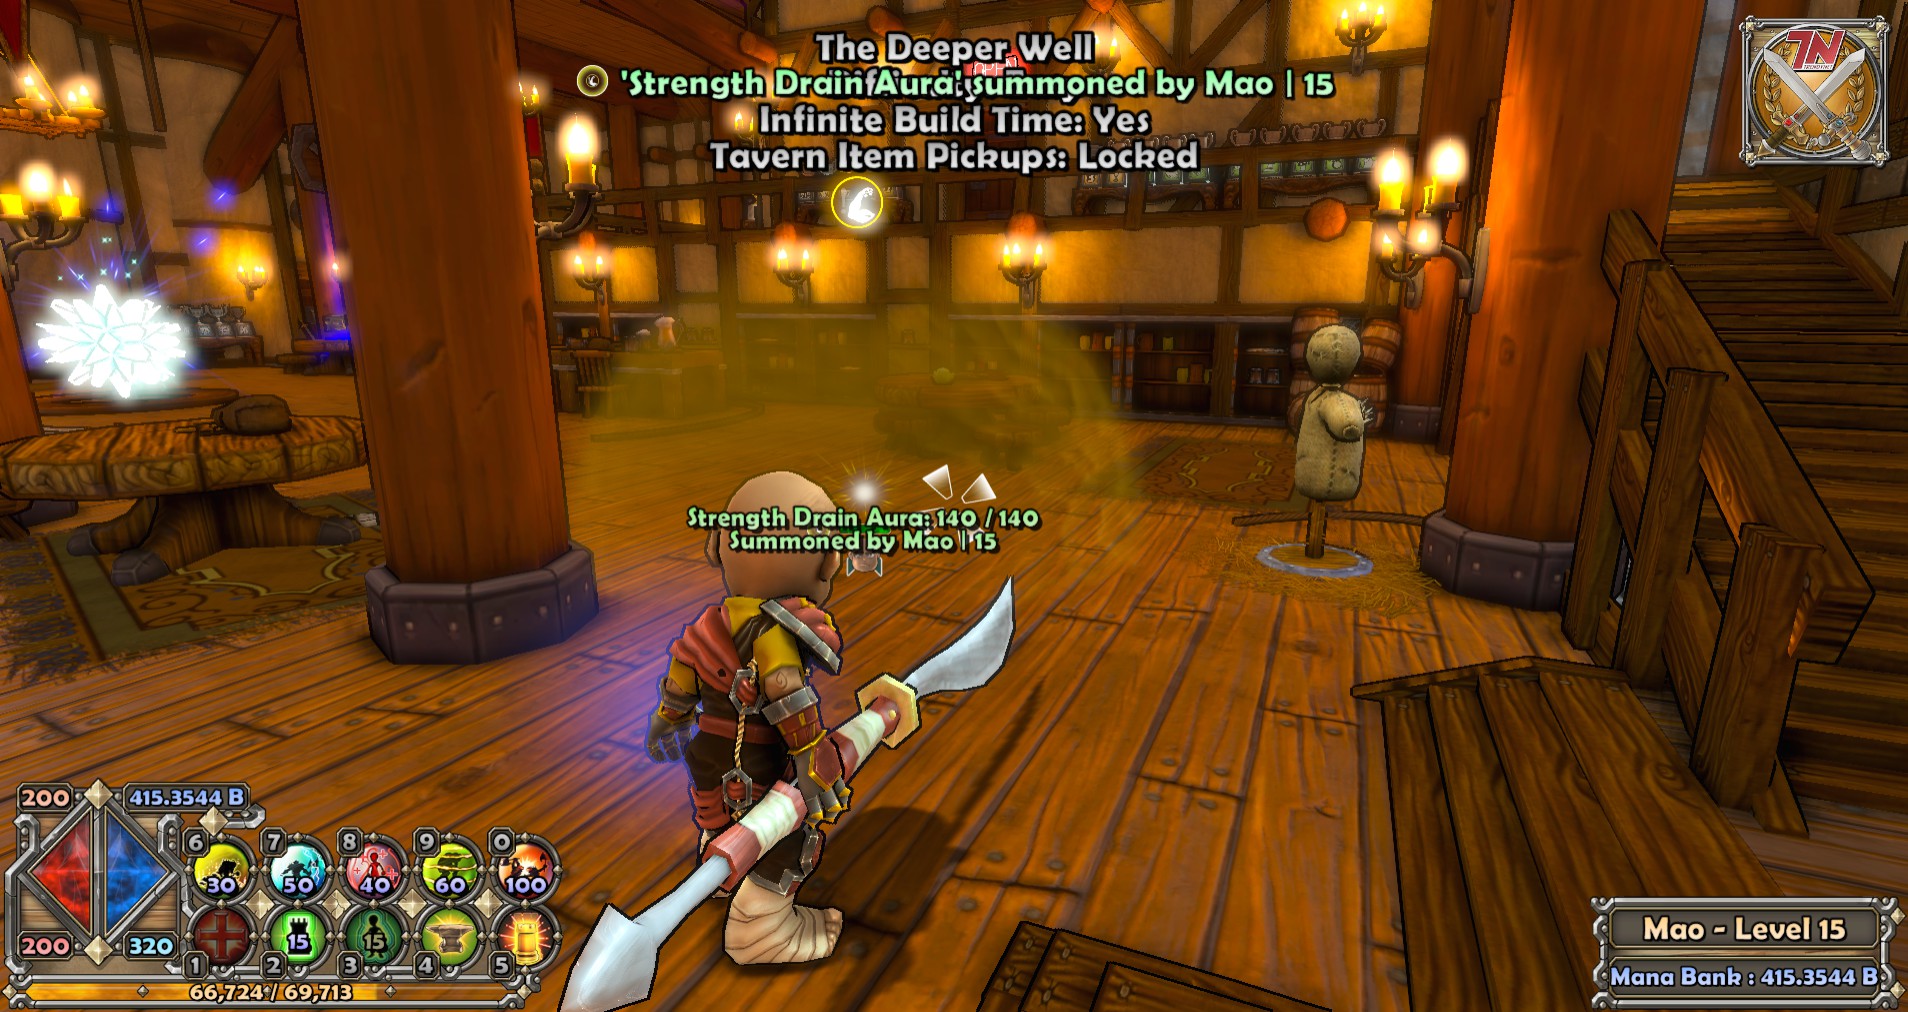
The elemental affinities on monsters can be nullified with either a Magic Blockade, Darkness Trap or Strength Drain Aura. The Apprentice barrier and Huntress utility trap can remove the enemy's element permanently, while the aura only disables it while the foe is inside the Strength Drain.
Catbug Jan 1, 2021 @ 6:59pm 
This guide was super helpful thanks! I know now how to play the hit game Dungeon Defenders
The Grand Mugwump Jan 1, 2021 @ 1:23pm 
The apprentice does not need to spam left click to attack. You should include that an apprentice can auto fire by holding both the left and right mouse buttons down. It's a major quality of life tip.
Spudzor Dec 31, 2020 @ 11:12pm 
Thanks dude, had this game in my library for 8 years and just now getting into it. This will help :D
Frezmo  [author] Dec 31, 2020 @ 4:50pm 
Cheers guys for the comments, glad it helped you out!!!!
Tolga Dec 31, 2020 @ 4:37pm 
Great job! You have just helped me progress in Dungeon Defenders!