
Installer Steam
connexion
|
langue
简体中文 (chinois simplifié)
繁體中文 (chinois traditionnel)
日本語 (japonais)
한국어 (coréen)
ไทย (thaï)
Български (bulgare)
Čeština (tchèque)
Dansk (danois)
Deutsch (allemand)
English (anglais)
Español - España (espagnol castillan)
Español - Latinoamérica (espagnol d'Amérique latine)
Ελληνικά (grec)
Italiano (italien)
Bahasa Indonesia (indonésien)
Magyar (hongrois)
Nederlands (néerlandais)
Norsk (norvégien)
Polski (polonais)
Português (portugais du Portugal)
Português - Brasil (portugais du Brésil)
Română (roumain)
Русский (russe)
Suomi (finnois)
Svenska (suédois)
Türkçe (turc)
Tiếng Việt (vietnamien)
Українська (ukrainien)
Signaler un problème de traduction


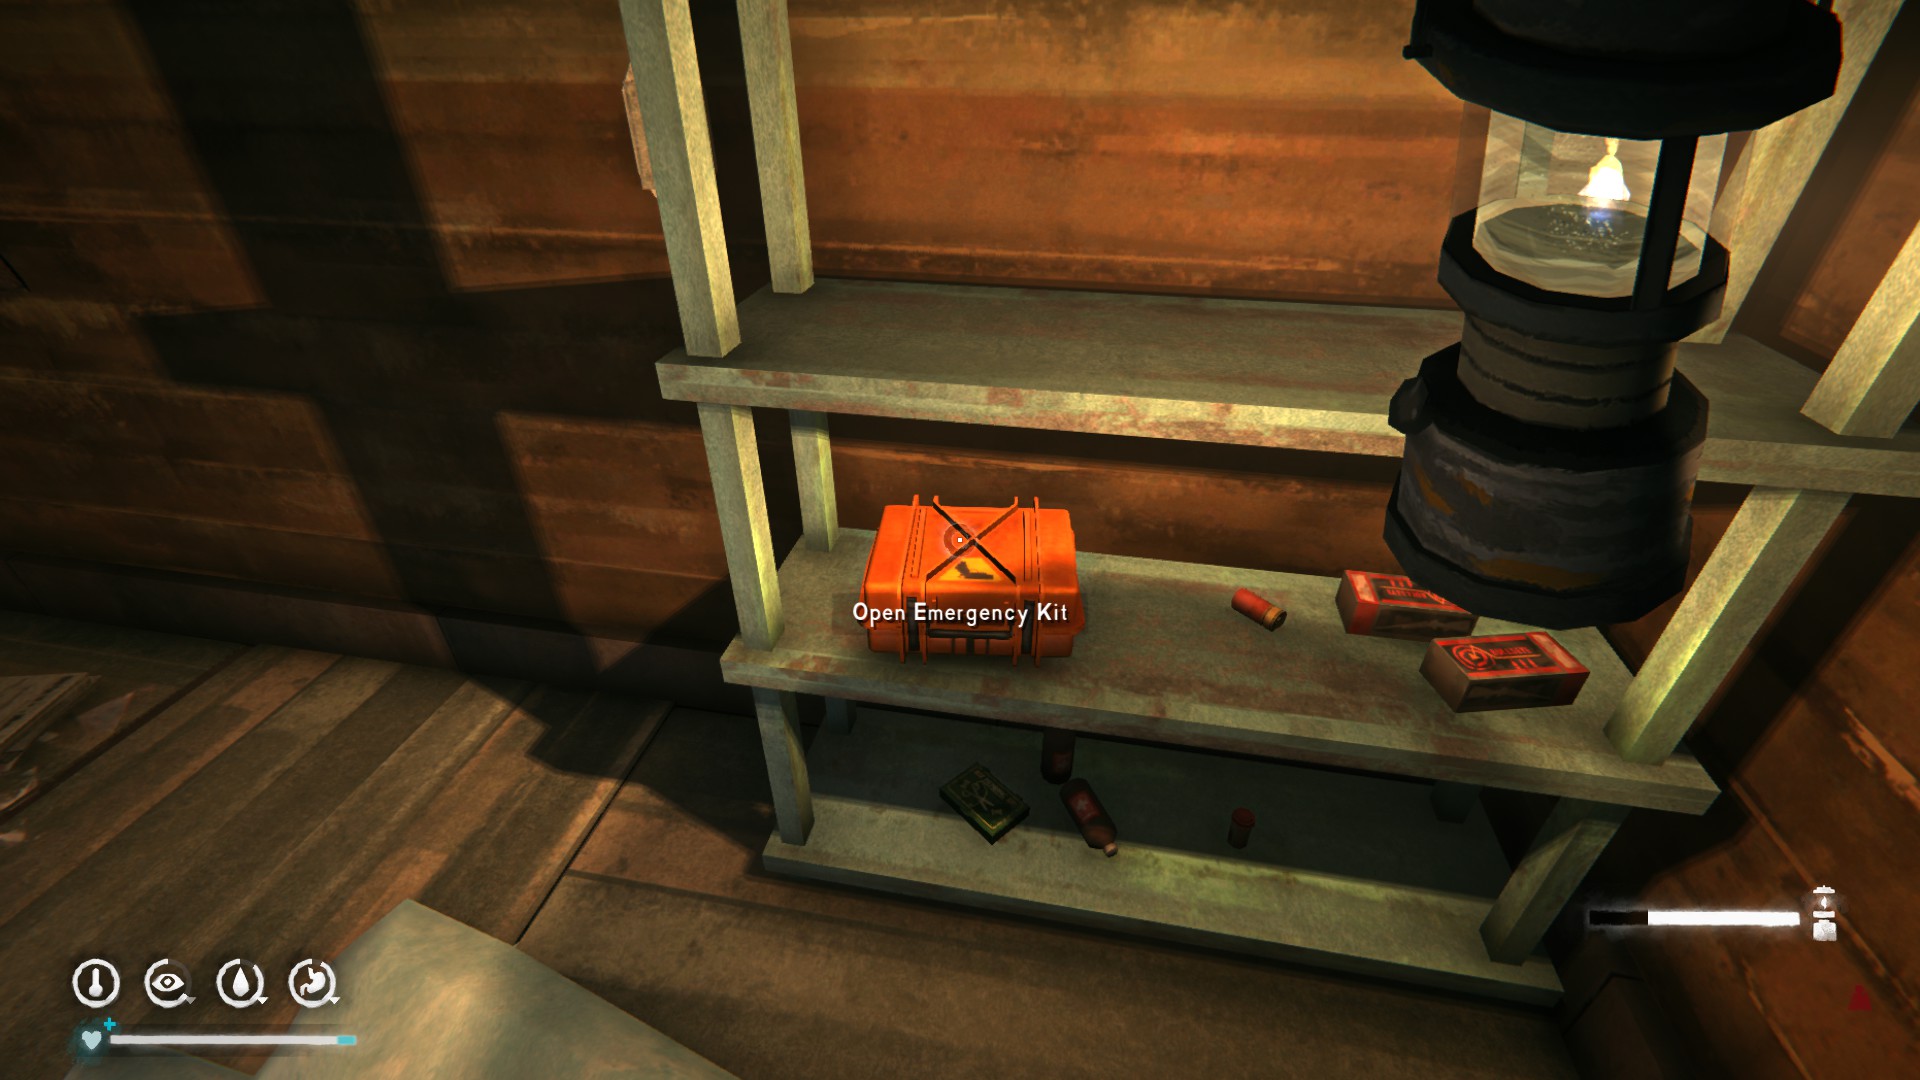


8 Antiseptic Bottles / Old Man’s Beard Dressings
16,000 calories' worth of food
48 hours’ worth of fire fuel
10 Bandages
0.528 gallons of kerosene (idk what this is in liters)
8 Antibiotic Pills / Prepared Reishi Mushrooms
1 Distress Pistol
4 Distress Pistol shells.
I can't seem to find the "Forest Talker Bunker Memo" in the local shop (It's thomson's market in front of the community, right ?) There's no corpse nor backpack
Maybe I need to go further the main quest...