Super Animal Royale
Оценок: 131
Guide to Weapons in Super Animal Royale
От Kohchu
Ever wonder how the guns in Super Animal Royale function? The advantages and disadvantages to each? Why or when you should consider using them? Well, this guide aims to at least help give you a general idea on the strengths, weaknesses, advantages and disadvantages of each; helping you both fight and use each weapon to give a general idea of how to approach each foe in Super Animal Royale.
9
2
   
Наградить
В избранное
В избранном
Удалить
Introduction
Welcome, and thank you for clicking on this guide. Hopefully, with it's help, you will be able to understand how one should think when both fighting and using each weapon in Super Animal Royale.

It's important to note, that just because this guide says "X is good for Y scenario" doesn't mean you can't use a weapon in whatever way you want too. Playing how you wish is part of the fun of a game like this. The point of this guide is to help players who are new get a general idea on the basic use and advantages each weapon has to offer. This way they can jump into the fray eager to fight like all of us do.

With that said, let's begin.

IMPORTANT: As of 25/07/2020, I am going to halt updating this guide. So this information might be slightly outdated.
Basics of Super Animal Royale
Alright, let's get started with the basics of Super Animal Royale before we step into the weapons themselves.

Health, avoiding damage, and Restoring Health

Health is an important aspect of surviving in Super Animal Royale. At the start of a match, you will have a maximum health amount of 100 HP by default. As you take damage, or shoot enemies, their max health total will go down; and once your health hits 0, you die (Naturally).

But how do you avoid dying? Well, for starters, a good tactic is to utilise the Super Jump Roll. With a simple tap of the Spacebar, one can perform a roll dodge which is useful for avoiding gunfire.

But that's not all, if you tap the Spacebar to Super Jump Roll instantly after landing another jump roll, you can gain extra speed and a trail of gold sparkles which let you move faster and farther. Super useful for fleeing or avoiding attacks.

However, even if you roll constantly, this doesn't make you invincible. So let's say you accidentally get hit with a few stray bullets and you are now on low health. That's it, game over; right? Time to wave the white flag and surrender? Nope. It's time to hit Q to take a swig of our Health Juice.


Whenever you have some stored, you can hit Q to heal HP. As you drink, your health will be restored at a 4.75 HP ratio per 0.5 second. Since your Animal has 100 health by default, this means it takes about 10.5 seconds to restore from 1 hp to 100 hp. It is important to note that while drinking your Health Juice, you are very vulnerable to being attacked. Because of this, it's best to hide somewhere out of the warzone before you attempt to heal. Your Health Juice canteen can carry up to 200 HP worth of health; and upon death, you drop that canteen for other players to pick up. But this also means when you kill players, you can loot theirs as well.

To fill the canteen naturally, you have to pick up Health Juice canisters. Health Juice is found all over the map, and can be found in 3 different sizes: Small (worth 10 HP), Medium (worth 20 HP) and Large (worth 40 hp). It's best to loot as much as you can while you have down time.


There are two other sources of healing that will be majorly useful to your Animal. The first one are the Campfires. These are found throughout the map, if your animal is damaged, and stands near them; they will light and begin to heal your animal back some of their health.

These Campfires while lit, will heal 4HP per second as long as animals remain near them, and they remain activate for 15 seconds before fizzling out. It is important to note however that the Campfire will heal any animal who stands within' range, so enemies can take advantage of that healing too if they get in range. While lit, the campfire also can alert enemies to your presence as a lit flame tells players that someone is near; so watch out for grenades flying in to ruin the party. Also, standing near a Campfire and drinking health juice will stack and heal you much faster, so if you desperately need health; you can find a Campfire and drink health juice.

Standing near a Campfire while riding an Emu will also heal your Emu at the same rate. You can't see the Emu's health bar, however; you can still see their state revert from it's injured frames if you continue healing.

The final method to restore HP is to eat Coconuts which can be found around the palm trees. These can be found all over the island, and heal you for 5 HP when eaten. It's not much, but it can help you survive in those desperate moments so don't ignore them if you need a bit of health. It's instant, unlike the other methods which take time. Emu's can also eat Coconuts to heal.

Restoring health and rolling is fine and all, but wouldn't it be great if there was a way to tank even more damage, luckily there is with Armor . Like Health, Body Armor comes in 3 different levels. While wearing armor, you get a bar of Armor Health, with each level giving you an additional one (Level 3, gives you 3 bars, 2 gives you 2, etc)


While wearing armor, it will tank a blow that normally would have dealt full damage to your Animal. The only exceptions to this rule are the Deagle (knocks off 2 Armor levels instead of 1), the Sniper (knocks off all Armor levels instead of 1), and the Poison Dart Gun (ignores armor). All the other weapons will damage the armor based on tracers hit. This means that rapid fire guns and Shotguns are really good at breaking armor fast. Emus deal 15 damage and break 1 bar.

The advantage of armor, is that those are shots that aren't damaging your health pool and instead just breaking your armor, giving you time to react or retaliate against your attacker. Like Health Juice, Armor can be looted from all around the battlefield.

But, let's say your armor is broken; what do you do then? Well, that's when you hit C to use your Super Tape! The Super Tape will repair one damaged block of your armor, making it a super handy tool; and like Armor and Health Juice, can be looted from around the map. You can carry up to 5. However, Tape takes a few seconds to repair, and in the heat of the moment, one must decide if it's a better idea to repair, or just pick up another set of armor. In some circumstances, that is a smarter choice (Ergo: If you have a damaged level 3 set, and there is a fresh one; just pick up the fresh one instead of fixing the damaged one. This conserves resources and is much faster).
General Gameplay Tips
The Best Defense is a good Offense

There are a lot of weapons in Super Animal Royale, and now that you know the basics of health and armor, it's time to talk about the aspect of your main source of damage. Your weapons which come in 3 categories (Melee, Guns, Throwables) and qualities, which effect damage output and so on.

When you first arrive, you'll be riding on the Delivery Eagle. Your landing site, among other things, can greatly change how you should first plan your moves. If you land in a labelled area (such as the Emu Farm or the city), expect it to be high traffic, Other players are also likely to arrive. In the wilderness, you are less likely to bump into players. It's a better idea for you to try to find spots where nobody else is setting down so you have time to get resources without fighting. You win by being the last one standing, NOT the one with the most kills.

While floating down, you can hit the E button to close your umbrella and enter Freefall. This will give you less control as of where you land, but let you land faster. Be sure your umbrella is out before you land though, you won't take damage, but you'll be stunned for several seconds, long enough for someone to kill you if you aren't careful. You can glide much further away using the Umbrella, so use it to get somewhere away from other players if possible.

Weapon Qualities and Ammo types

There are 5 different weapon Qualities in Super Animal Royale, each one slightly influences the damage output of the gun. The difference is usually minor, with better quality having a small damage increase over the other, but it is still something to take into account. The qualities are Common (white), Uncommon (green), Rare (blue), Epic (purple) and Legendary (gold).

Common, Uncommon, Rare and Epic quality can be found all over the map; however, Legendary quality items can only be obtained from the Delivery Mole. He pops up twice per game as the Circle of Life shrinks, and gives a special Mole Crate which upon opening, will contain Legendary, and Epic quality weapons, Grenades, Armor, and other goodies.

This makes the Delivery Mole a good character to find; but it also means lots of players will fight to get their hands on the goodies that he drops off. The Mole is the only way to get the Minigun and Legendary Quality Weapons, so it can be well worth the struggle to secure the goods offloaded by him; if going after it though, be prepared for a potentially rough and dangerous encounter.

With all this explained, we can finally move on to the weapons themselves.

Firearm Knowledge

Some things to keep in mind; is that guns in Super Animal Royale suffer from Bullet Spread. If you hold down the attack button or spam it; bullets will go flying in a deviated degrees and sometimes miss the target completely. However, if you click and wait half a second, bullets will generally be more accurate. This can make aiming feel much more consistent and better then praying and spraying. Melee Weapons don't suffer from this downside.

Bullets also have travel time in SAR; meaning it's important to lead your shots. Instead of shooting directly at the Animal, is usually more beneficial to aim where he is going. Try your hardest to predict the enemies movements; and if fighting someone, move in unpredictable ways to throw off their aim. Again, Melee doesn't suffer from this downside.

When a gun is fired, on your screen; it makes noise and also emits a muzzle flash. This may seem minor on your screen, but enemies who do not have a line of sight with you, can hear and see these. If you are in the fog of war, and fire a gun; the muzzle flash will light on the other players screens, giving your position away. The Silenced Pistol is the one gun in the game who's muzzle flash will not give your position away. Melee will make a feint noise, but otherwise doesn't reveal you.

Another important thing to keep in mind, is the type of bullets each weapon uses, ammo types include, Little Bullets (Pistol, Silenced Pistol, SMG, Minigun, Thomas Gun), Big Bullets (AK, M16, Magnum, Deagle), Shells (Shotgun, Jag-7), Sniper Rounds (Sniper Rifle), and Poison Darts (Poison Dart Gun). The maximum carrying capacity is as follows:

  • Small Bullets - 120
  • Big Bullets - 90
  • Shells - 30
  • Sniper Rounds/Poison Darts - 25

The last thing to mention about weapons in Super Animal Royale, is they suffer from Damage Falloff. Weapons deal max damage at close range, but the further away they get, the less damage you will deal. Due to this, zoning is generally not as viable. The damage totals of this guide will be referring to the base damage if the gun is fired at Point blank, but keep in mind that the further away the target gets, the less damage you deal.

Super Powerups

These items can give you bonus abilities just for picking them up, making them a valuable addition to the lineup. Go for them if you can, but take note of what they can do.

  • Claw Boots: As long as you are wearing these, walking through grass will result in it automatically being cut without the use of your Melee. Great on paper for getting resources, but does reveal your location to enemies in the Fog of War. If trying to stay unnoticed, don't use these.

  • Banana Forker: A unique item; if you have and use Bananas, this item can save your life, letting you sacrifice some of them for 25 health. However, avoid the Skunk Gas, as it will make your Bananas inedible.

    26/06/2020 - Buff: Banana Forker now heals 25 health on use, instead of 15.
    26/06/2020 - Buff: Banana Forker range increased.

  • Ninja Booties: Wearing these boots will quiet your movement speed by 50%, and increase your Creeping speed by 12%. Ideal for people who like to avoid conflict, or engage in battles sparingly.

  • Skunk Gas Vial: This vial of toxic gas will add an extra punch to your Melee weapon, dishing out an addition 30 poison damage to your melee hits, making the previously weak Melee hits actually decently strong. The Skunk Gas Vial will also make you immune to poison from other Melees and the Poison Dart Gun, but not Skunk Gas or Bombs.

    26/06/2020 - Buff: Skunk Gas Vial now offers poison immunity from other Melees/Dart Gun.

  • Cupgrade: Possessing this upgrade will allow you to heal at a 25% faster rate. Useful for outlasting enemies.
The Weapons of Super Animal Royale Part 1: Melee, and Rides
Melee Weapons and Rides are a bit less viable then other weapon types, as they require you to be at point blank to attack. However, these options allow for faster movement options. Because of this, these options are generally better for Defense and moving quickly, rather then offense.

Melee Weapon

Unlike the other weapon types, your Melee weapon is always equipped. The default one is a Katana, but the Melee weapon has many skins; some droppable, some from special events, so don't worry too much if you see someone wielding a Lightsaber or a Backscratcher, they function the same way.


Base Damage: 33 per hit + 30 Poison damage (if the Skunk Gas Vial has been collected).
Clip Size: N/A
Reload Speed: N/A
Rate of Fire: Medium
Range: Point Blank

The Melee weapon can be pulled out by pushing 3 on your keyboard. While equipped, the Melee weapon makes you run much faster then if you had any gun out. Making it useful for fleeing, or moving quickly, especially if Rolling.

During combat, it can kill anyone without armor in 4 hits, however; it will only damage Armor by 1 bar per hit, meaning if the enemy has Level 3 armor, you'll need to hit them 3 times, just to start actually dealing damage. This makes Melee only really useful early on in the round before enemies have time to secure armor and gear.

If the user collects the Skunk Gas Vial, all Melee hits will have an addition 30 Poison damage, buffing the poor 33 damage to a whopping 63 damage.

The Melee weapon is also useful for cutting grass found on the map, and breaking crates; all of which have a decent chance of dropping collectables, such as grenades, health juice; so if you're really hurting for supplies, a little yard work can go a long way.

There is a special achievement for winning the round with only a Melee weapon.

21/05/2020: Buff: Added Skunk Gas Vial which adds a 30+ Poison Damage to Melee.


Hamster Ball


Base Damage: Instant Kill
Ride Health: 3 Hits (any Tracer)
Rate of Fire: Has to be moving fast
Range: Point Blank

While in the Hamster Ball, your Animal will roll around in it, to move faster then he could on foot. If the Hamster Ball is up to speed, and collides with another animal, you will instantly kill the animal in a single blow (this does not damage their armor, but will still kill them). Also, the Hamster ball, regardless of if you are in it or not; will take oncoming bullets, so if fleeing, you can hide behind one to use it as a sort of "faux armor" so to speak.

However, the Hamster Ball has it's own downsides. While rolling, you cannot pick up supplies on the ground, and cannot use your weapons, but the most obvious, is that it has a massive hitbox, like lvl 3 Armor, the Hamster Ball can only take 3 bullets (Each bullet deals 1 HP to the Hamster ball, except the Sniper which deals 2 instead). Upon shattering, your animal will be released from the Hamster Ball, vulnerable to attacks. USE CAUTION IN AN ATTEMPT TO ROLL OVER ANIMALS WITH A SHOTGUN OR JAG, the Shotgun/JAG can and will tear the Hamster Ball apart in a single shot. Only one person can ride in a Hamster Ball.

Giant Emu


Base Damage: 35 per peck (G, C, SE), 45 per peck (BE) + 1 Armor hit
Ride Health: 140 (GE), 190 (CE), 110 (SE), 150 (BE)
Rate of Fire: Slow
Range: Point Blank

The Giant Emu is a newly added Ride found primarily in Super Saharaland, mostly near the Giant Emu Ranch, but they do wander freely, so you may find them all over. They can be used as a mount. When riding, they take damage instead of the rider, and can use their peck attack to damage enemies. They also run faster then an animal on foot. Unlike the Hamster Ball, a second animal can also ride; making them an ideal mount for Duos. While the second animal is riding, they can increase the movement speed to make the Emu run faster then the Hamster Ball.

When a Giant Emu pecks a target, it will deal 35 damage against an animal without armor. However, if the Animal is wearing armor, the Emu will deal 1 block of armor, and 15 damage instead of the full 35. This makes armor more viable for surviving against the Emu. The Battle Emu deals 45 damage instead.

However, Giant Emus have massive hitboxs, making them easy for enemies to focus fire and slowly damage and ware down. The Emu's will show their damage over time. Also, Grenades and Skunk Bombs will still damage the rider, so be cautious of that. When dismounting from the Emu, your animal will not be able to instantly fire their weapon, so be cautious when leaving your ride.

Unlike the Hamster Ball, Giant Emus can be healed. To do this, while riding an Emu, stand near a Campfire; and the Emu will slowly begin to heal at the same rate an animal would. The Emu's sprites will revert from injured to healthy, but it can take multiple campfires to fully heal the Emu. The Emu's health can be clearly viewed via the bar on the saddle.

Giant Emus now come in 4 Breeds:

  • Giant Emu: The Average All Around. Blue in colour.

  • Chonk Emu: More Health, but less speed. Brown in colour and large body. 85% Speed.

  • Speedy Emu: Faster movement speed, less health. Purple in colour and smaller body. 115% Speed.

  • Battle Emu: Better Everything, but rare to find. Black in colour and their saddle has a knife. 110% Speed.

    13/03/2020: Giant Emus added to game.
    31/03/2020: Buff - Giant Emus can now eat Coconuts to heal.
    31/03/2020: Rework - Giant Emus now have a visible Health Bar on the saddle, and show healing particles while healing.
    31/03/2020: Rework - Movement now has more acceleration and deceleration.
    31/03/2020: Rework - When dismounting from an Emu, there is now a delay before the rider can fire.
    31/03/2020: Rework - Giant Emus now deal 15 damage and one bar of armor against an armored opponent.
    31/03/2020: Nerf - Repeatedly mounting and dismounting an Emu will result in a temporary block from being able to mount.
    31/03/2020: Nerf - Giant Emus can now be poisoned.
    21/05/2020: Rework: Giant Emus now come in 4 Breeds. As a result stats and abilities have been reworked.
    26/06/2020: Buff: Chonk Emu health changed from 170 -> 190
The Weapons of Super Animal Royale Part 2: Small Bullet Guns
Small Bullet Guns

Firearms, pieces, lead hurlers, whatever you wanna call them; guns offer you a decent amount of range, and damage output. However, unlike your Melee weapon, guns have limited ammo, so you'll need to be careful about running out of bullets.

Small arms have a hefty ammo pool, and generally great reload speed and fire rates; though this tends to come at the cost of range and damage output. They are a great cover for other weapon types.

Pistol

Base Damage: 34 (C), 36 (U), 38 (R), 40 (E) per bullet
Qualities: Common, Uncommon, Rare, Epic
Clip Size: 10
Reload Speed: Fast
Rate of Fire: Slow-Medium
Range: 110 (C), 120 (URE) Super Animal Units (SAU)

One of the most common weapons in the game, using Little Bullets; the Pistol is more useful early in the round, and is likely to be grabbed as a safety net until something better is found. The Pistol is Semi-Automatic, meaning it's fire rate is based on how quickly you click. This makes it a decent weapon for up close and personal self defense, or an emergency last minute damage tool.

The biggest weakness of this gun, is damage falloff hits it hard; at the longest range of 120 SAU, this gun will only deal 5.71 damage, so zoning makes this weapon basically useless.

13/03/2020: Buff - Pistol's Clip size was increased from 8 -> 10

Silenced Pistol

Base Damage: 38 (E), 40 (L)
Qualities: Epic, Legendary
Clip Size: 12
Reload Speed: Fast
Rate of Fire: Slow-Medium
Range: 120 (EL) SAU

A great sidearm who is often overlooked due to how weak the standard pistol is; up close, the SIlenced Pistol can actually contest the AK in DPS if used well, thanks to being Semi-Automatic like it's non-silenced counterpart. Its lack of a bright muzzle flash, and low sound emitted on shot also makes it great for players who don't want to draw too much attention to themselves.

However, this gun suffers from 2 major drawbacks, the first is the same as it's non-silenced counterpart; damage falloff hits this gun hard. At the longest range, you'll be dealing just shy of 10 damage; but the other downside is more impactful; it's a rare gun to find on the battlefield. The Legendary Quality can only be un-boxed from a mole crate, and the Epic quality likely won't pop up too often.

Sub Machine Gun (SMG)

Base Damage: 31 (C), 33 (U), 35 (R)
Qualities: Common, Uncommon, Rare
Clip Size: 25
Reload Speed: Fast
Rate of Fire: Fast
Range: 120 (CURE) SAU

One of the best early game weapons for shredding armor; the SMG comes in as a fast firing, and dangerous weapon to behold at closer ranges, due to it's rate of fire. It can shred through even Level 3 armor really fast, and dish out good damage up close and personal; plus with a fast reload speed and decent clip, it seems like it has no downsides...

However, the SMG suffers from the same flaw as the Pistol and Silenced Pistol; in that Damage Falloff hits this gun like a sledgehammer, causing it to go from respectable damage up close, to just shy of 5 damage (C) to 13 (E) at longer ranges; making it super important to close the distance to make use of this beast to it's max potential. The other downside, is it's bullets tend to suffer from more spread then other guns at longer ranges, making it much harder to aim, but due to the falloff, it's not good to use at long range anyway. Great sidearm to cover the weaknesses of other guns.

21/05/2020: Nerf - The SMG has more start spread and recoil per shot.

Thomas Gun (Tommy Gun)

Base Damage: 37 (E), 39 (L)
Qualities: Epic, Legendary
Clip Size: 40
Reload Speed: Medium
Rate of Fire: Fast
Range: 183 (E), 197 (L) SAU

The poster boy of the 1920's and old time Gangsters, it's not a wonder why. The Tommygun has great range (in fact, it has the longest range in the entire game currently) and damage output, is amazing at shredding armor, and a decent reload speed. Plus, with 40 bullets in the chamber, it's almost impossible to not hit the target with some of them. While falloff applies to all guns, it's not nearly as harmful for the Tommy Gun, thanks to it's sheer ammo pool.

However, that clip is both a blessing, and a curse. Sure, it's great to have 40 shots to spam at enemies, but knowing you only have 120 bullets in reserve, you can run out of ammo really fast if not being smart about how to use this gun, it's reload speed is also only average at best; so you can easily be overtaken while reloading. Like the SMG, it also suffers from bullet spread, so don't expect to be sniping too effectively with this beast. It's better to fire off only a couple of bullets at a time, then to hold the trigger most of the time.

23/01/2020: Buff - The Thomas Gun's reload speed was buffed slightly from 1.75 seconds to 1.50 seconds.
23/01/2020: Nerf - The Thomas Gun's Clip size was nerfed from 50 -> 40.
21/05/2020: Nerf - The Thomas Gun has more starting spread and recoil for shot.

Minigun

Base Damage: 33 (E), 35 (L)
Qualities: Epic, Legendary
Clip Size: 100
Reload Speed: Slowest
Rate of Fire: Fastest
Range: 120 (EL) SAU

It costs over 400,000$ to fire this weapon, for twelve seconds; but the Minigun is a death dealing, massive hunk of pain and misery staring right at the enemies face. Anyone caught at the receiving end of this big beast is going to receive a ludicrous amount of damage, regardless of range, as the falloff on this gun isn't as damaging as other weapons, and since it fires so fast; it can majorly mow down enemies like crazy. Sounds unstoppable, right?

Well, the biggest downside to the Minigun, is that it majorly reduces your movement speed while walking, rolling, and especially while attacking. It also takes a second to rev up, making you a sitting duck for Grenades, Snipers, and even just concentrated focus fire. Due to these obvious weaknesses, the Minigun shines brightest if playing in Duos or Squads, where you can have your teammates bait enemies into you and mow them down; or let them draw attention before you charge in; but in Solo, while it may look big and strong, it can easily be put down if not careful. Best to carry along with a fast emergency weapon for backup. Given it's large clip, it also chews through ammo really fast, but hopefully by then, everything around you is a wasteland.
The Weapons of Super Animal Royale Part 3: Large Bullet Guns
Bigger is Better

Big Bullet guns carry higher damage, and more potential all around power output, but their ammo is a little less common; making them a little more special. These weapons are generally all around great; and ideal for covering good ground that other weapons lack; though their reload speed can sometimes leave them vulnerable.

Magnum

Base Damage: 51 (C), 54 (U), 57 (R)
Qualities: Common, Uncommon, Rare
Clip Size: 7
Reload Speed: Medium
Rate of Fire: Medium
Range: 120 (CUR) SAU

The Magnum is big, the Magnum is shiny, and the Magnum hits like a truck against un-armored targets. Early on in the round, the Magnum can 2 tap any Animal not brandishing body armor; meaning you might want to reach for one of these upon your first touch down landing. The damage falloff on this gun is also almost non-existent only going down by about 7 points of damage from the base at longest range.

However, late game, the Magnum begins to show it's weakness. It's average rate of fire, and reload makes it ineffective against armored foes; especially L2 and L3 armor. Even then, it can still pack a powerful punch, especially if paired with a gun that can decimate armor.

13/03/2020: Buff - Magnum Bullet Speed increased.

Desert Eagle (Deagle)

Base Damage: 60 (E), 63 (L)
Qualities: Epic, Legendary
Clip Size: 7
Reload Speed: Medium
Rate of Fire: Fast
Range: 120 (EL) SAU

The Deagle (get it? Cause it has an Eagle's beak?) is basically a super Magnum. Not only does it do more damage on hit, but it also fires faster, reloads faster; and has the added benefit of dealing 2 bars of armor damage instead of just 1; making it a great armor buster. Like the Magnum, it doesn't suffer from falloff much either; losing 12 damage at the furthest distance.

The biggest downside to the Deagle, is that it is LOUD. The Deagle has a unique audio cue per shot of an Eagle screeching; and also leaves behind Eagle feathers on shot. While a nice touch, these audio and visual features make it very obvious when someone is using the Deagle; and promotes caution if one is using it well. The other downside, is that it is a relatively rare gun, given it's higher quality; it is a great all-around sidearm to carry with you.

13/03/2020: Buff - Deagle Bullet Speed increased.

AK

Base Damage: 35 (C), 37 (U), 39 (R)
Qualities: Common, Uncommon, Rare
Clip Size: 30
Reload Speed: Medium
Rate of Fire: Medium
Range: 120 (CUR) SAU

The AK is the most well rounded weapon in SAR, making it an ideal choice for almost any situation. There's not really any downsides or upsides; making it the safest pick of all guns to use. Close Range, Long Range, it does well at all; though it is beaten at close range by Shotguns, and is beaten at Long Range by Snipers. It is probably the best sidearm for whatever choice you take as your primary.

13/03/2020: Nerf - Damage Falloff on the AK was increased to make it less effective at longer ranges.
13/03/2020: Rework - Recoil per-shot has been decreased, however maximum recoil has been increased.
13/03/2020: Rework - Bullet speed of the AK's shots were slightly reduced, to make them slower then Sniper bullets.
21/05/2020: Rework - Moving while shooting will not slow you, but increase spread instead.

M16

Base Damage: 38 (E), 40 (L)
Qualities: Epic, Legendary
Clip Size: 30
Reload Speed: Medium
Rate of Fire: Medium
Range: 120 (EL)

Think of the M16 as a better version of the AK, it's got pretty much the same exact stats, but it's stronger; with the only downside being it is a super rare gun. The most recent update made it so if you are super lucky; you might find an Epic quality one on the Overworld while exploring, but the safest way to get this gun is still via the Mole Crate.

23/01/2020: Buff - Epic Quality M16 added to random Overworld drops.
13/03/2020: Nerf - Damage Falloff on the M16 was increased to make it less effective at longer ranges.
13/03/2020: Rework: Recoil per-shot has been decreased, however maximum recoil has been increased.
13/03/2020: Rework - Bullet speed of the M16's shots were slightly reduced, to make them slower then Sniper bullets.
31/03/2020: Rework - Epic quality no longer spawns from Mole Crates, Legendary Quality spawns more frequently to compensate.
21/05/2020: Rework - Moving while shooting will not slow you, but increase spread instead.
The Weapons of Super Animal Royale Part 4: Shotguns and Snipers
Close and Long Shots

Shotguns and Snipers are the polar opposites when it comes to dealing damage. With Shotguns, you wanna get as close as possible before you pull the trigger; while with Snipers, is generally wise to keep your distance. Regardless of the method, they prove to be quite deadly if used properly.

Shotgun

Base Damage: 29 (C), 31 (U), 33 (R) per pellet
Qualities: Common, Uncommon, Rare
Clip Size: 5
Reload Speed: Fast
Rate of Fire: Medium
Range: 70 (C), 74 (U), 78 (R) SAU

When fired, a Shotgun launches 5 pellets in a wide spread; each one having the potential to do max damage for quite a hefty chunk of change. If you get right up and meatshot someone, even wearing full L3 Armor, you will rip their armor apart and dish out up to 66 damage at the same time, assuming all the pellets hit. That's a lot of damage. This weapon can also tear the Hamster Ball apart in a single shot.

But of course, with high damage; the downside shines bright, the Shotgun is useless at longer ranges, where the falloff makes each pellet deal just short of 8 damage. Because of this, the Shotgun is best used to punish players up close and ensure a decisive victory.

JAG-7

Base Damage: 25 (E), 27 (L) per pellet
Qualities: Epic, Legendary
Clip Size: 5
Reload Speed: Fast
Rate of Fire: Medium
Range: 74 (E), 78 (L) SAU

Though on first glance; one may think the JAG looks weaker then the standard Shotgun; that is because it fires more pellets then it's counterpart. While the standard Shotgun fires 5 pellets; the JAG fires 7; allowing it to not only break L3 armor in one shot; but even give a full health Animal a trip to Mr. Reaper. Because of this, players must use caution around the JAG. Like the Shotgun, the JAG can rip the Hamster ball to shreds in one shot.

Also like the standard Shotty though, the JAG suffers from extreme falloff making it's respectable damage go down to a slap on the wrist at longer ranges. Be wary of chasing players, if they have the JAG, you might be dead before you even have time to react.

Hunting Rifle

Base Damage: 80 (C), 85 (U), 90 (R)
Qualities: Common, Uncommon, Rare
Clip Size: 1
Reload Speed: Slow
Rate of Fire: Slow
Range: 120 (CUR) SAU

The Hunting Rifle is more or less; a weaker but still effective version of the Sniper Rifle. A single shot from a Hunting Rifle will completely wreck any armor, even a L3 will be instantly destroyed. The falloff on the Hunter is also fairly good, only dropping by 10 at the longest range, and it also hits Hamster balls for 2 HP instead of only 1. This makes it a good gun to grab early if you have the chance to grab it. The true beauty of this gun, is that it's one shot will always be 100% accurate; as long as you aim well, it will hit it's target.

However, the downside to the hunting Rifle is clear as day; that 1 shot. This means you have to make it count, as if you miss; you'll have to deal with a slow reload speed EVERY, SINGLE, TIME. The Hunting Rifle is a weaker alternative to the Sniper, more common to find, but less effective overall. But, not a bad weapon to grab early on for armor breaking, or pressuring if you are confident in your aim.

13/03/2020: Hunting Rifle added to the game.
31/03/2020: Buff - Movement speed while using the hunting rifle increased.

Sniper Rifle

Base Damage: 95 (E), 100 (L)
Qualities: Epic, Legendary
Clip Size: 5
Reload Speed: Slow
Rate of Fire: Slow
Range: 120 (EL) SAU

What would a game with guns be without a Sniper Rifle? To be honest though, the Sniper in SAR lacks the range one might expect; but it makes up for that with devastating damage. Like the Hunting Rifle, one single shot will completely wreck any armor. The falloff on the Sniper is also fairly good, only dropping by 10 at the longest range, and it also hits Hamster balls for 2 HP instead of only 1.

However, the downsides to the Sniper begin to pop up around now. It reloads slow, it fires slow (although rolling can help circumvent the slow fire rate); and it's loud as hell. It's also the heaviest gun in the game, slowing your movement speed a considerable amount while it's drawn and reducing your roll distance (yes, heavier then even the Minigun), so consider brandishing another weapon if you wish to move around faster. It's also a rare find on the Battlefield, so if the option presents itself, consider arming up.

13/03/2020: Nerf - Rare Quality removed. Snipers can now only be found in Epic and Legendary Quality.
31/03/2020: Buff - Legendary Quality more likely to spawn in Mole Crates.
31/03/2020: Rework - Sniper Rifle Recoil resets faster when not moving.

Poison Dart Gun

Base Damage: 11 (U), 13 (R) + 40 (P)
Qualities: Uncommon, Rare
Clip Size: 5
Reload Speed: Slow
Rate of Fire: Slow
Range: 120 (UR) SAU

The Poison Dart gun, on first glance, may seem like a useless weapon. However, this weapon can be one of the most powerful. The Poison Dart Gun ignores Armor completely, and inflicts Poison damage on the target hit (40 damage, over 5 ticks over half a second), amounting to a total of about 51-53 damage on hit. Since the Poison is fixed damage, this also means range isn't an issue; as long as the dart hits, they are taking the poison damage.

However, it's low DPS makes it more viable for slowly wearing enemies down, or pressuring them. It can easily be overpowered by a gun of higher DPS; and it's slow reload speed means missing a shot can put you in a bad spot. Still, it's potential is high, so be cautious of that. Animals who possess a Skunk Poison Vial of their own will not take the Poison Damage ticks as well.

13/03/2020: Buff - Poison damage increased from 9 to 10, making each shot deal 40 poison damage max.
31/03/2020: Rework - Poison now ticks 5 times, but damage remains 40.
31/03/2020: Buff - Giant Emus can now be poisoned.
26/06/2020: Nerf - Skunk Gas Vial now grants immunity to Dart gun poison.
The Weapons of Super Animal Royale Part 5: Throwables
Lobbing a Present

Somebody on the run? Camping out in a hard to reach area? Hiding near a Campfire and hogging it for themselves? Surely you want in on that action, but oh dear... your health is low, your resources dwindling, and you don't want to expose yourself directly to them, less you get shot and die... however can we work around this issue?

Why, Throwables of course. Lobbing weapons around the corner makes for an extremely powerful tool, as it can be hard to react if you turn a corner and see a grenade about to go off. This gives Throwables a great value as a pressure tool to make the situation more stressful for enemies.

In Duos and Squad mode; throwables do not contain friendly fire; so if one of your teammates throws a grenade, you won't take damage from it. HOWEVER; the person who threw the grenade is subject to splash damage. Be cautious when lobbing explosives, or you could easily kill yourself by accident.

Grenade

Base Damage: 150
Max Carried: 5
Range: 31 SAU

Good old Pineapples; the Military class Hand Grenade is a staple of most war related games. And Super Animal Royale is no exception. Upon throwing a grenade, it will detonate a few seconds later; shedding a loud explosion, dealing massive damage to anyone too close to the blast. A direct hit will kill the target, regardless of armor and health level.

With 5 carried at any time; you can throw them around where you think enemies maybe hiding, or drop them to try to punish people pursuing you.

Skunk Bomb

Base Damage: 0, 16 per 0.6 Seconds (P) for 8.4 seconds.
Max Carried: 5
Range: 30 SAU

The Skunk Bomb may not do any damage on it's throw; but what it does is extremely deadly. Upon exploding, the Skunk Bomb releases toxic gas in a wide radius. Any Animal that enters that space will be subjected to 32 Poison damage for every second they are in that gas. If caught in a Skunk Bomb explosion, it's best to run, or roll out of it. Be cautious of areas with only one entrance; a well placed Skunk Bomb could seal your fate.

Be cautious however, as you yourself will take damage from your own Poison; so avoid throwing them and trapping yourself, or you might kill yourself in a very humiliating way.

13/03/2020: Buff - Poison damage increased from 13 -> 16.
13/03/2020: Buff - Duration increased from 5.4 seconds to 8.4 seconds.

Banana (Praise Banan)

Base Damage: 0
Max Carried: 10
Range: 16 SAU

On immediate glance, many people probably think of the Banana Peel as a joke weapon. Given it does no damage; it's extremely situational, and doesn't seem to have as much practicality as the other options.

These people are what we like to call, Heretics. One must Praise the Banan, as it offers one of the strongest advantages any player could have. If a player is dumb enough to walk over the peel, or mistimes a roll and lands on it; they will be temporarily incapacitated for 2 seconds; more then enough time for a player to empty a clip into them.

You can also use the Banana Forker to heal yourself.

Praise Banan.

21/05/2020: Buff - Using the Banana Forker, you can now eat your Bananas for 15 HP, however: Skunk Gas will make your Bananas inedible.
Strong and Fun Combinations
Tools of the Trade

Certain Weapon combinations pair exceedingly well; and knowing which ones work well together can help give you an advantage. These combinations can aid with covering weaknesses, and taking down other players.

Safety Animal
Weapons: AK/Shotgun or M4/JAG, Any Explosive

The purpose of this loadout is to allow comfort in your approach towards the target. The AK/M4 is generally the most well rounded gun in the game, allowing for comfort at any range, and the Shotgun/JAG allows you to punish enemies for crowding you to close; or can be used to kill enemies pursuing you heavily.

The Juggernaut
Weapons: M4/Minigun, Grenades

A Loadout that would make most enemies flee in terror. The M4 covers all around combat; while the Minigun is for moments where you need to threaten, or scare enemies away. Using the M4 to move, Grenades to pressure, and the Minigun to punish; this loadout may not be the best in the book; but if you have the chance; load up, and take to the streets.

Deadly Combination
Weapons: JAG/Sniper Rifle, Any Explosives

Long and Close Range domination; but you lack an alternative in the event you miss. This makes it a high risk/high reward loadout. If you feel confident in your ability to hit those shots; you can truly punish anybody who comes strolling around. But if you fear your aim being imprecise; the Deagle can make a good alternative to the Sniper.

Virus Spreading
Weapons: Thomas Gun/Poison Dart Gun, Skunk Bombs

This loadout can be evil to fight. The general gist is to use the Poison Dart Gun to apply pressure and force the enemy to attempt to rush you down, then bust out the Tommygun and clean house when they do. The SMG can be a good alternative if you don't find a Tommy; and Skunk Bombs are great for forcing some distance in case you are caught off guard.

The Agent
Weapons: Silenced Pistol/Sniper Rifle, Any Explosive

For the Player who wants to be a bit more tactical about their moves; the Sniper Rifle deals hefty damage and destroys armor, which can then be followed up with the Silenced Pistol to quickly output damage up close and personal to quickly dish out some pain.

Trap Master
Weapons: Any Guns, Bananas

The Trap Master prefers to follow targets around, and wait for them to enter a room with only one entrance, then they get to work. With a few well placed bananas, escape is impossible. Once the target has tripped; they are at the complete mercy of the Animal who set the trap.

The Pacifist
Weapons: Melee Only, Bananas

Running a Pacifist Loadout can get you a Flyswatter Melee unlock for you; but earning a Pacifist victory is quite hard, since you can't deal any damage yourself, but you have to be the final one standing. Your best friend for this one is to Praise Banan, stay hidden, avoid confrontation whenever possible; and let the Circle of Life slowly get smaller. Once it's down to the final 2, lob your Bananas like mad; pray your enemy slips on one and get engulfed in the Super Skunk Gas, and drink your Health Juice trying hard to outlast them.

Experiment and have Fun

This guide is by no means telling you "You should only use these because they work best." If anything, many of these loadouts are probably not very effective, but can be fun. It's best to try all kinds of things to find what Playstyle works best for you. With that, I hope to see you on the battlefield, of Super Animal Royale.
Closing Credits
A thanks to All involved

Thank you to Pixile Studios for making this amazing and fun game.

Thank you to the Super Animal Royale Wiki (source of the pictures), I recommend heading there if you want more details on individual weapons, skins or other such things about the game.

Link to the Super Animal Royale Wiki; https://animalroyale.gamepedia.com/Super_Animal_Royale_Wiki

A Special thanks to all the players, who helped me learn what most of these weapons do through experimentation and practice.

And a special thank you for reading this guide. I hope it has at least helped out some.
Комментариев: 23
Kohchu  [создатель] 28 дек. 2023 г. в 21:20 
This was likely before the Mushrooms were added.
FoxxyDoe 28 дек. 2023 г. в 18:17 
you mention campfire, coconuts, and drinks, but don't forget to give love to the 3 mushroom types, Green health, Blue speed, Black poison/gas *if hit melee*
Kohchu  [создатель] 14 апр. 2023 г. в 20:20 
That would be much appreciated. And thanks for the interest in keeping this guide going even after I stopped. I'll drop a link in my guide to yours as well to redirect some of the traffic to your updated version as well.
Vahlok 14 апр. 2023 г. в 8:41 
Of course, I wouldn't be asking you if I didn't plan to give credit now would I? :WhiteWolfInterset:
If you'd like I could even let you know once it's finished
Kohchu  [создатель] 14 апр. 2023 г. в 8:38 
I mean, that's entirely up to you. I'd appreciate credit and link to the original if possible, but since I don't really play much, someone else wanting to use this info to keep it up to date is fine by me.
Vahlok 14 апр. 2023 г. в 8:11 
I see, would you mind if I redid the guide and updated it to try and keep it up to date?
Kohchu  [создатель] 10 апр. 2023 г. в 18:59 
I appreciate listening some missing mechanics Vahlok. To be truthful, part of the reason, is I don't really play SAR that much anymore. As a result, my guide is kinda outdated. But clearly lots of people do, so I hope this guide helps out some, even if it is somewhat old.
Vahlok 10 апр. 2023 г. в 15:11 
I do wonder if this will get updated, if not then that's no bother, but it'd be nice for the newer players that read through these.
Missing additions:
Mushrooms (work same as coconuts but spawn in forrests, also can spawn as speedshrooms; blue, or poisonshrooms; black)

Dartflygun (a dartgun that chains to targets, letting you heal several people at once, or deal with multiple enemies more effectively, also scopes when you creep)

Egg launcher (A grenade launcher that works similarly to the bow minus the tracking, where you need to charge it up, careful! Bounces and can deal self damage)

Lucky/cat mines (Mines that look like a chineese statue of a cat with a red eye that lights up while armed)

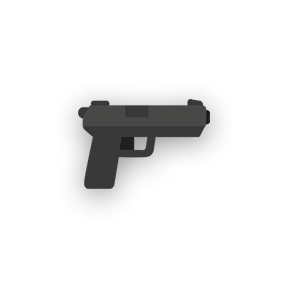
Dual pistols (Picking up a second pistol will create dual pistols that are automatically set to the quality of the higher of the two, increases ammo and coolness)

Sparrow launcher (A bow that doesn't need to be pulled back but has a magazine instead)
Beefcake 29 окт. 2021 г. в 19:19 
░░░░█▐▓▓░████▄▄▄█▀▄▓▓▓▌█Help
░░░░░▄█▌▀▄▓▓▄▄▄▄▀▀▀▄▓▓▓▓▓▌█ Doge
░░░▄█▀▀▄▓█▓▓▓▓▓▓▓▓▓▓▓▓▀░▓▌█ Take
░░█▀▄▓▓▓███▓▓▓███▓▓▓▄░░▄▓▐█▌ Over
░█▌▓▓▓▀▀▓▓▓▓███▓▓▓▓▓▓▓▄▀▓▓▐█ Steam
▐█▐██▐░▄▓▓▓▓▓▀▄░▀▓▓▓▓▓▓▓▓▓▌█▌ Copy
█▌███▓▓▓▓▓▓▓▓▐░░▄▓▓███▓▓▓▄▀▐█ And
█▐█▓▀░░▀▓▓▓▓▓▓▓▓▓██████▓▓▓▓▐█ Paste
▌▓▄▌▀░▀░▐▀█▄▓▓██████████▓▓▓▌█▌
▌▓▓▓▄▄▀▀▓▓▓▀▓▓▓▓▓▓▓▓█▓█▓█▓▓▌█▌ DO IT.
█▐▓▓▓▓▓▓▄▄▄▓▓▓▓▓▓█▓█▓█▓█▓▓▓
greed block tales 5 сен. 2021 г. в 10:54 
i call it chaos