Counter-Strike 2

Counter-Strike 2

643 ratings
[Workshop / Skinmaking] How to Remove Default Text/Logos from your Skin
By Kai
I have made a better version of this guide, which is both easier and faster!
Please use it instead:
https://steamcommunity.com/sharedfiles/filedetails/?id=2173693040


This guide will show you a simple, but effective method on how to get rid of the Text and/or Logos that you might see when viewing your skin.

Note:
This will NOT work for skins from the game, but is rather a technique you can use when making your own.


This guide requires:
  • Photoshop (or Gimp, although I am not entirely sure whether it works as well as in PS)
  • VTFEdit
  • Basic knowledge on how to make a skin in CS:GO and, at best, already one you are making / have made, because I am not going to go too much into detail on that.
    However, if you haven't made any CS:GO skins yet, I highly recommend you to watch this video series by Hollandje first.

The way we are going to solve this problem is by simply making the desired areas on the texture brighter, so the effects cancel each other out!
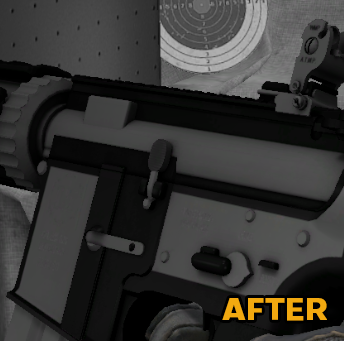
This principle also works for the reduction of baked AO on the skin (Ambient Occlusion/Shadows stored in a texture instead of being calculated in real-time).

Let's get started!
   
Award
Favorite
Favorited
Unfavorite
Preparation

Open your skin texture.
  • If you make your skins directly in Photoshop, you can obviously just open the .psd file.
  • If not, you can just create a new .psd file with dimensions of 2048x2048 and then import your skin texure.

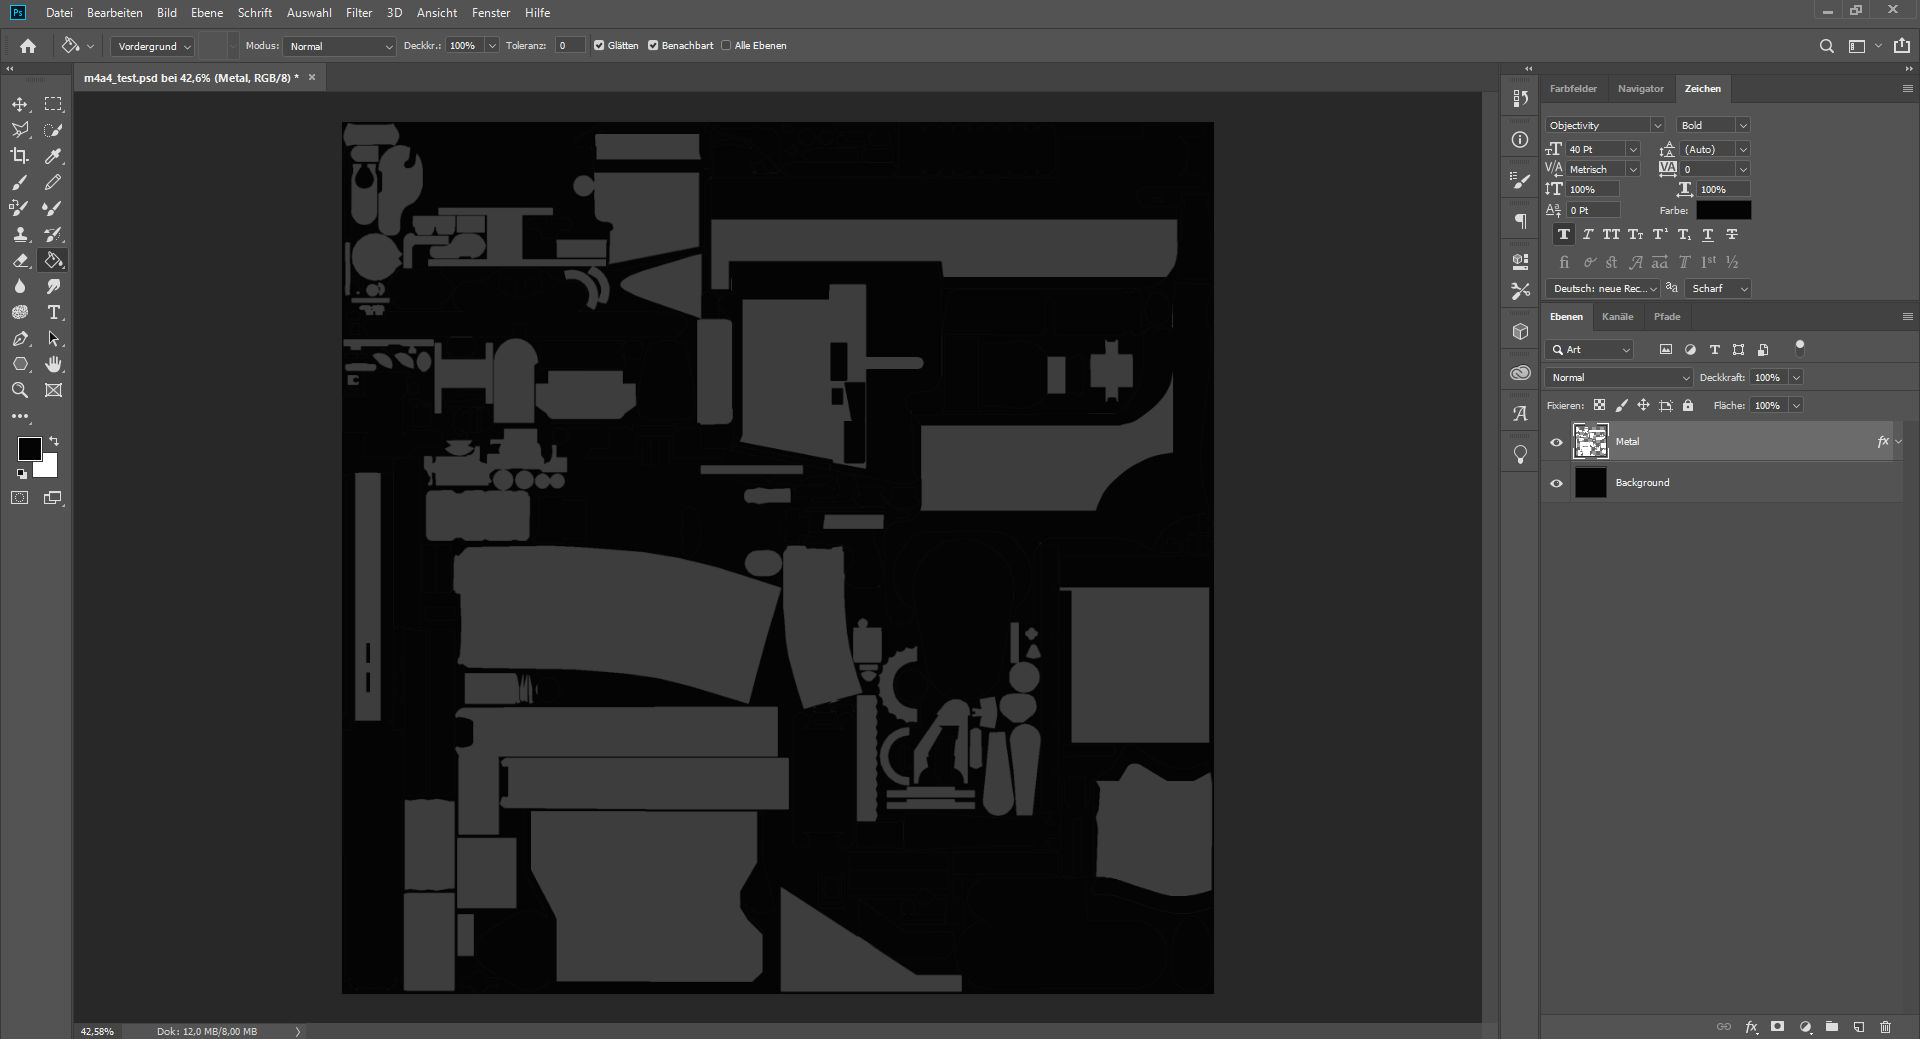
I have created a really basic skin to simplify things:


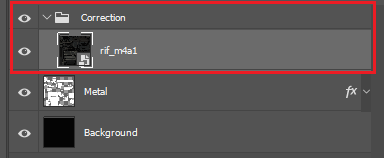
Create a new Layer Group on top of all layers.
Name it something like "Correction".


Getting the Default Weapon Texture

Because the default texture contains all the text and logos we want to remove, we need to locate it and save it in a usable format.

To do that, go to
C:\Program Files (x86)\Steam\steamapps\common\Counter-Strike Global Offensive\csgo\materials\models\weapons\v_models
(you might have a different drive letter)
and open the folder with your weapon name.

In my case, the folder is named rif_m4a1, for the M4A4.


Then, open the .vtf file with the same name as your folder using VTFEdit (in my case rif_m4a1.vtf).


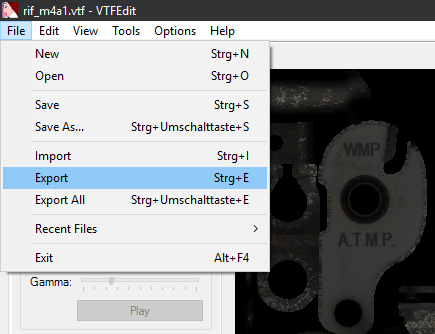
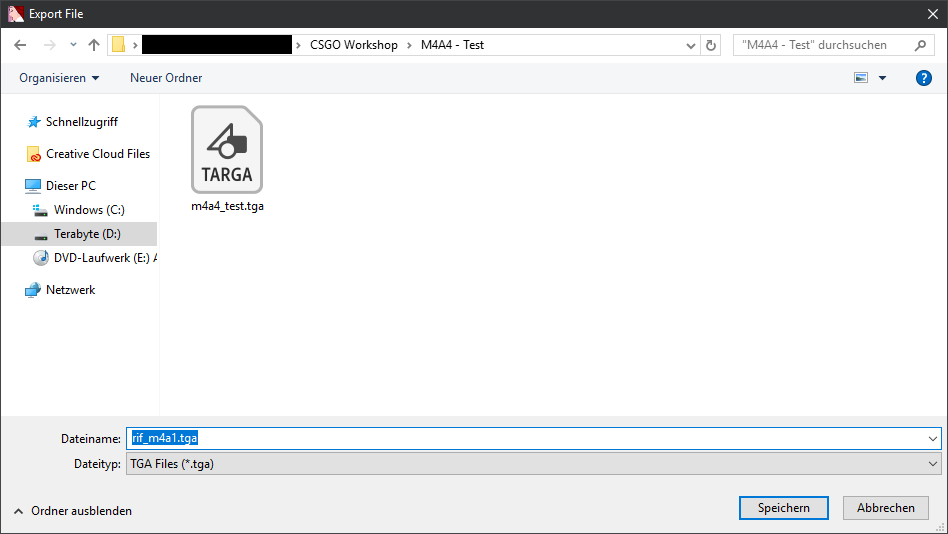
In VTFEdit, go to File -> Export (You can also use [Ctrl + E]) and save the .tga file to your skin folder.


You can now close VTFEdit.


Importing the Default Texture into Photoshop

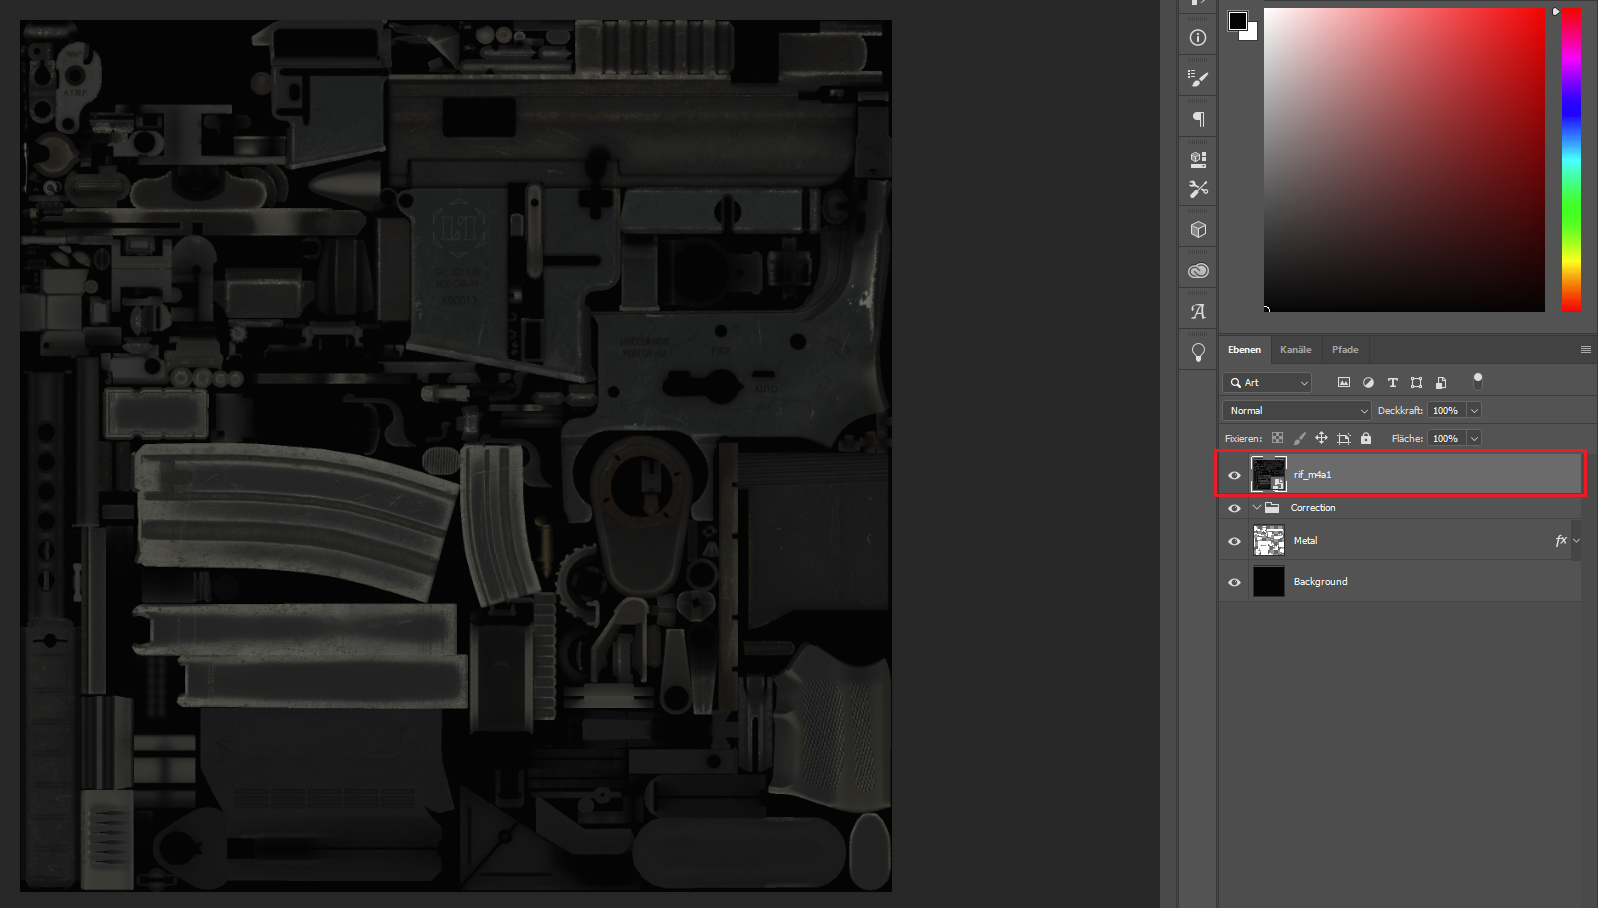
Go to your skin folder and drag+drop the .tga file into Photoshop.
Then press [Enter] to confirm the selection.


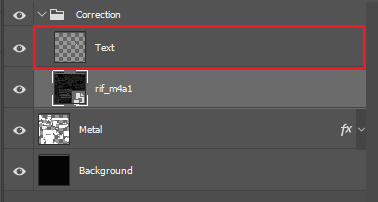
Now move the new layer with the texture into the "Correction" layer group we have created before.


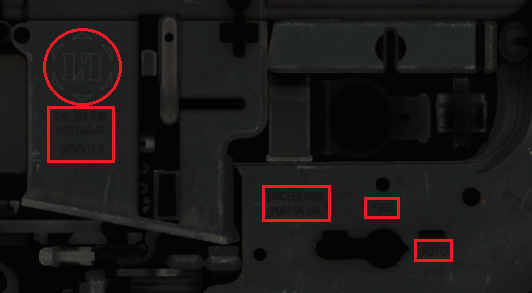
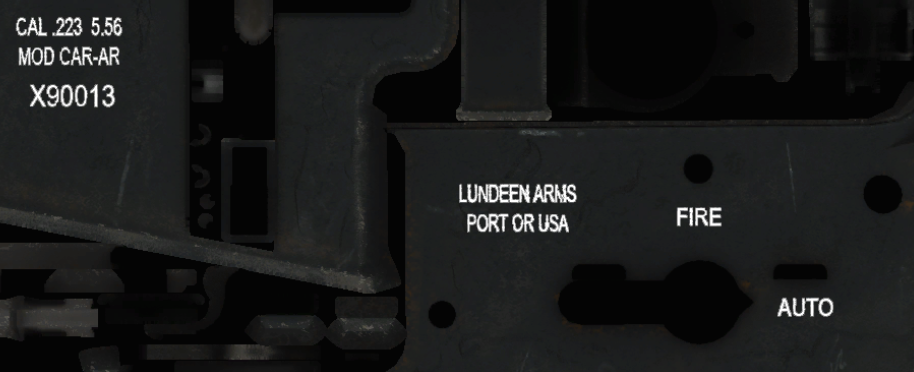
As you can see, the default texture contains the text and logo(s) we want to remove from the final skin.


Selecting the Text from the Original Texture

First, we will only focus on the text.

Press [W] to get the Magic Wand Tool.
This will allow you to select similarly colored regions like our letters, which will give us the best results the fastest.

Make sure the Tolerance is set to 0.


This value might differ depending on the thickness of your letters!


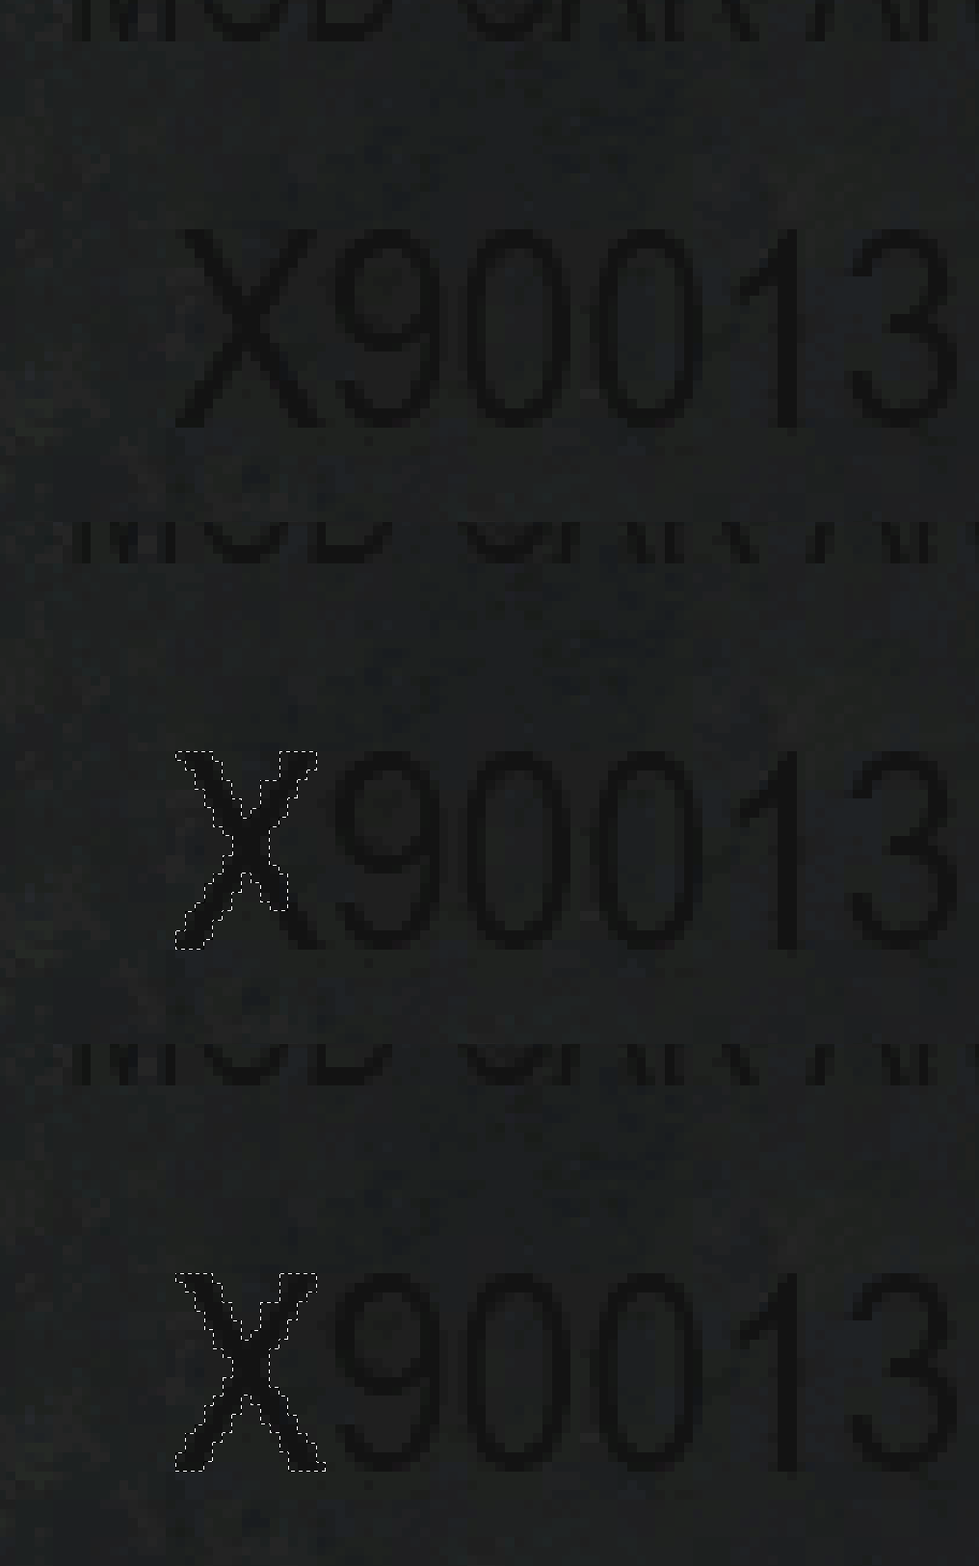
Then select all the letters you want to be affected.

To do this, simply click on the unselected parts of a letter, while holding [Shift] until it is fully selected.
Holding the [Shift] Key will add the new selection to the current selection, as you can see by the little "+"-Icon next to the cursor (not visible in the image below).


While keeping the [Shift] Key pressed, repeat the whole process for each letter you want to be removed!
Also, you don't need to be completely accurate, so it won't matter much if the selection might be a bit outside of the letter!

After that, your selection should look something like this:


With that selection still active, create a new Layer inside the layer group and name it something like "Text".


Then, press [G] to get your Paintbucket Tool.
Make sure your current color is set to white and simply click anywhere to fill the selected area.
Now you can press [M] to get the Rectangular Marquee Tool and click anywhere again to deselect.
As you can see, your text is now white!


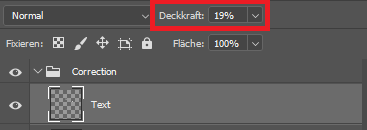
The next thing to do is to reduce the Opacity of the Text layer to still allow your skin texture to be visible under it.
For this skin, a value of 19% worked the best, but it may vary depending on your texture.
The only real way to find out the best value is by checking your skin in the Workshop Workbench, but more on that later...


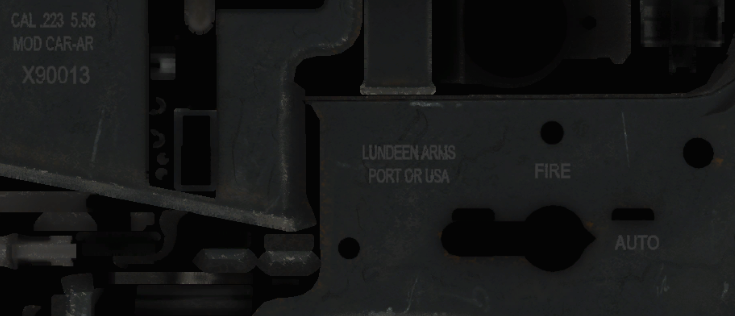
It now should look something like this:


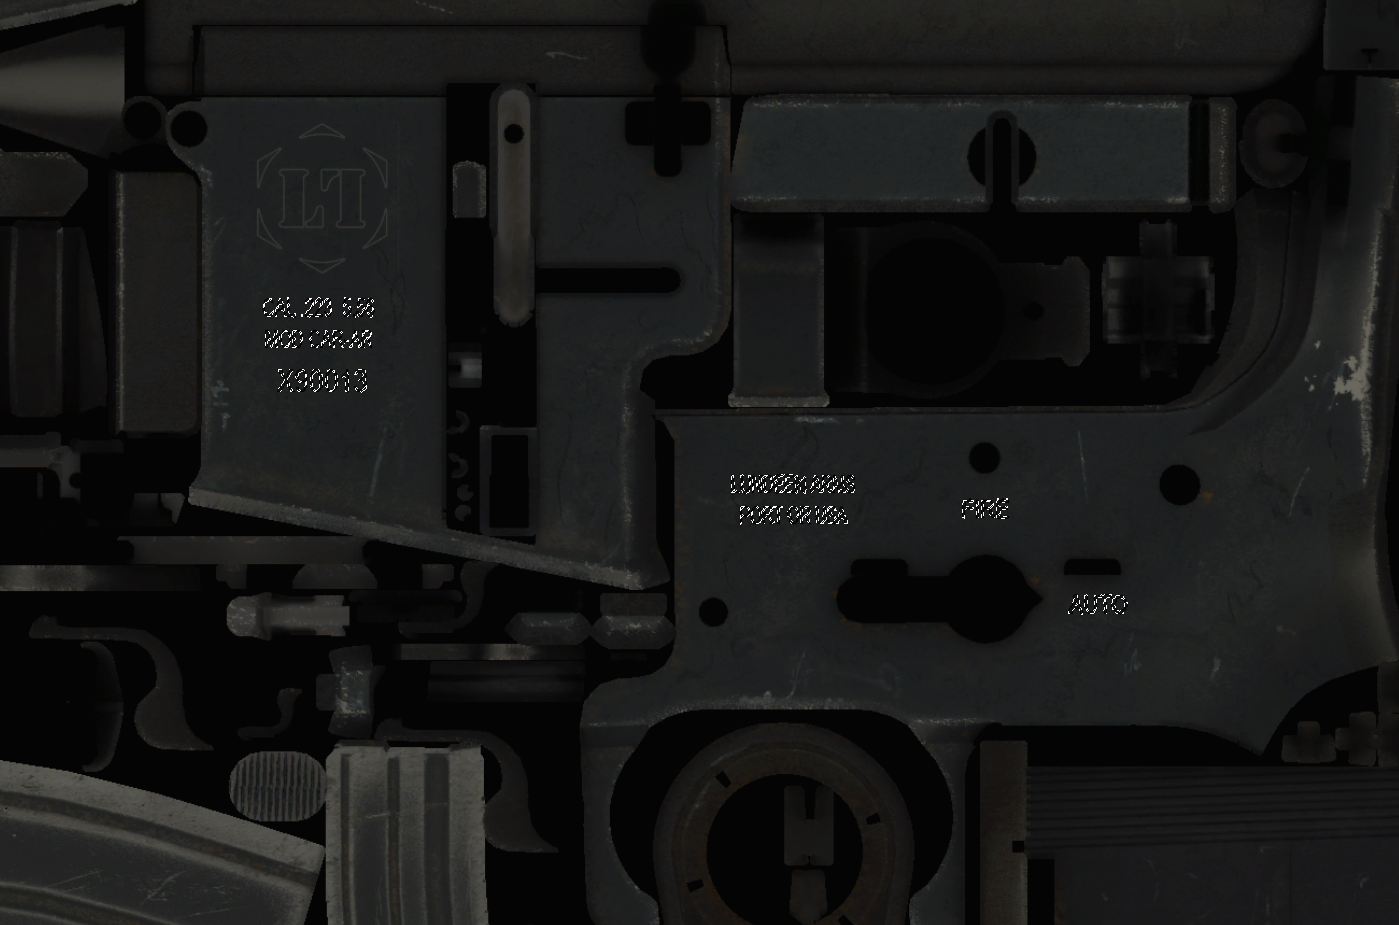
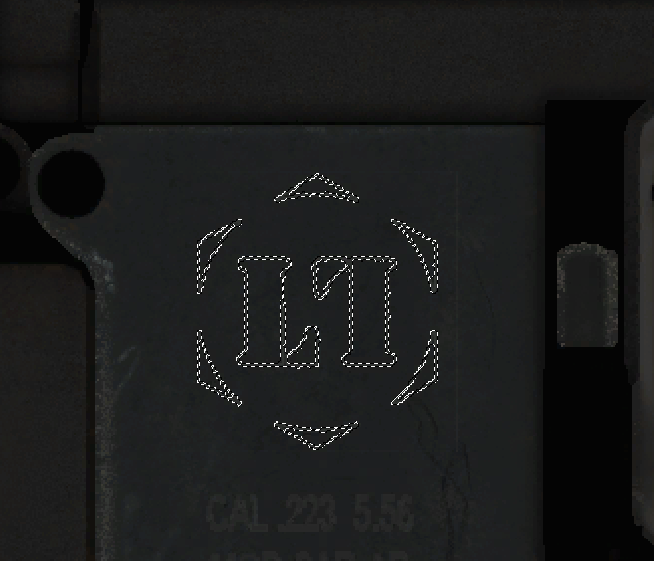
Selecting the Logo(s) from the Original Texture

For the next step, we will focus on the logo(s).

Just select them the same way you did for the letters!
After having finished that, your selection should look something like this:


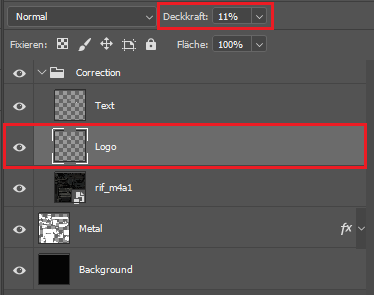
Now, create another layer inside the group and name it something like "Logo".
Then, fill it with your selection and set the layer Opacity to something like 11% (again, this value may vary).


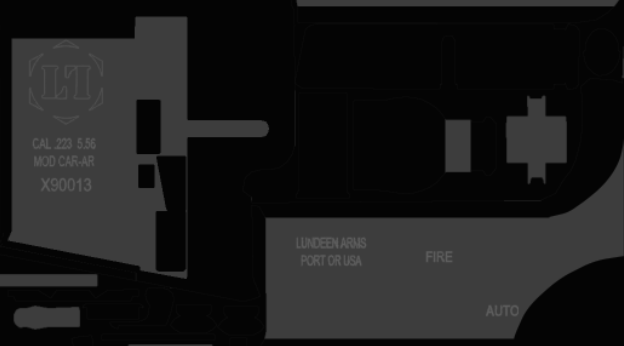
And finally, you can disable (or remove) the layer with the original texture!
Now, your texture should look something like this (your skin texture, with the text and logos):


Testing your Skin!

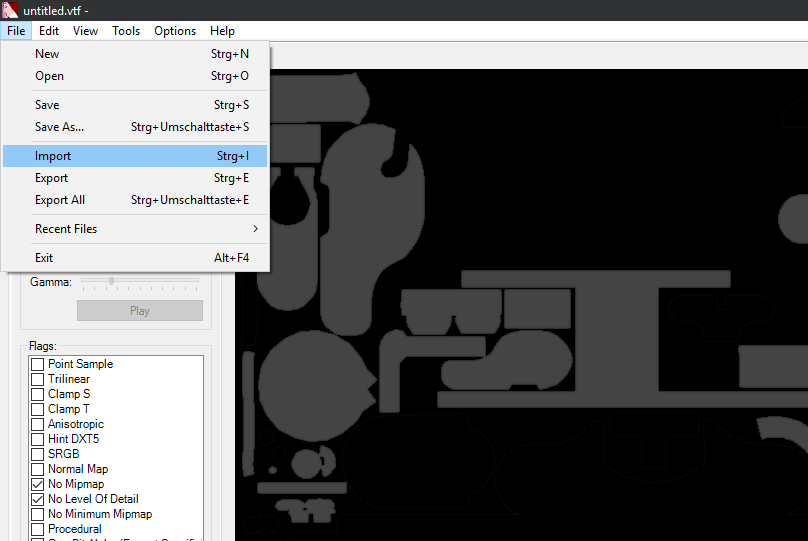
Go to your skin folder and open your .vtf file with VTFEdit.

Go to File -> Import (Or simply press [Ctrl + I]) and then select your texture file.


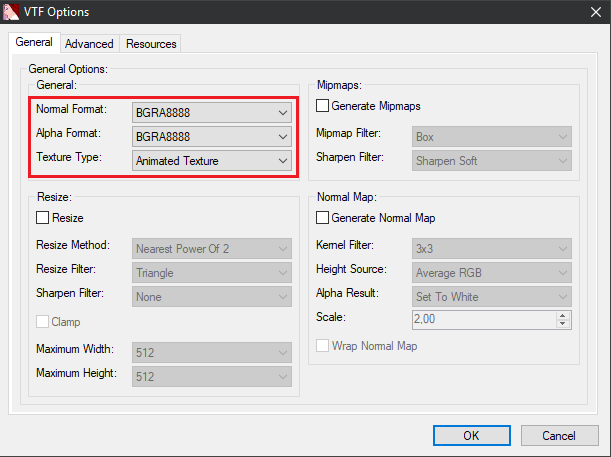
In the VTF Options Dialogue, make sure you have your Normal and Alpha Format set to a non-compressed one, like BGRA8888.
Compressed ones, like DTX1/DTX5 may lead to artifacts around the text/logos which we want to avoid.
At https://developer.valvesoftware.com/wiki/Valve_Texture_Format#Image_data_formats you can find a comprehensive list of all available formats for VTFEdit and their properties.

Although Hollandje told me that Valve would prefer the DTX1/5 format due to memory restrictions, my accepted skins were still in the BGRA8888 format.
I am not sure whether Valve was okay with it, because computers have gotten better now, or whether they simply didn't know about it, so please keep that in mind.


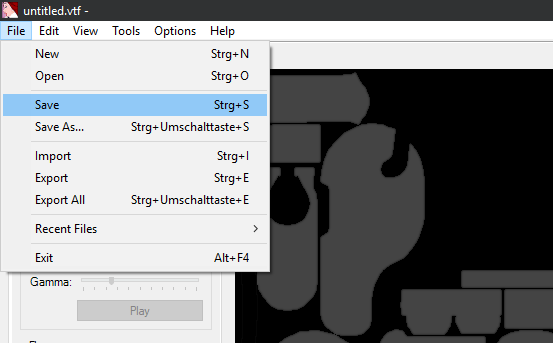
Go to File -> Save (Or Press [Ctrl + S]) to save your .vtf file.


Then, start CS:GO and open the Workbench.

Now load your .txt file with the skin data, or simply click on Refresh if you had it already open.

The text and logos should be gone!
You might need to adjust the opacity values of the correction layers though


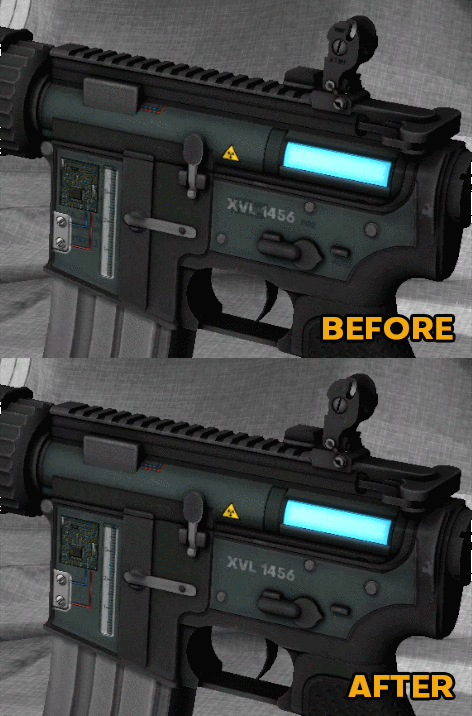
Here you can see this method working on my M4A4 - Tau!


If you want to reduce Baked AO (Ambient Occlusion/Shadows), you can use the same principle:
Simply increase the brightness and/or saturation in areas that are darker!
Of course, if an area of the AO is completely black, you can't do anything about it...

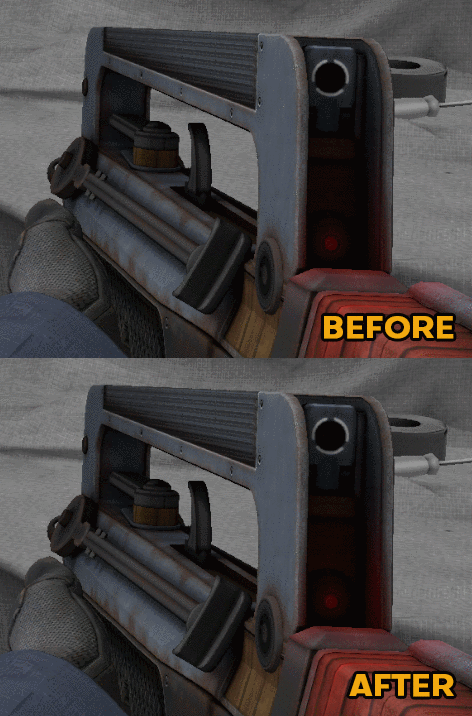
I have used this method for my FAMAS - Decommissioned!

Even though it is a bit hard to see in the Workbench, this effect actually makes a big difference in-game!


I hope this guide was helpful!
If you have any questions, just comment below and I will be happy to answer!


🔫 Happy Skinmaking! 🔫


42 Comments
Kai  [author] Jul 25, 2023 @ 10:45am 
Thank you Bob, although I admit, some things could have been done easier, because I wasn't quite experienced with some of the Photoshop tricks yet.
I did update the guide some time ago though, so this should work better:
https://steamcommunity.com/sharedfiles/filedetails/?id=2173693040

I am also thinking about updating it for CS2, but I first have to check more weapons and get a general feel for the new shaders.
Bob. Jul 25, 2023 @ 9:48am 
ironic that it was downvotted by people who essentially profit from what you do
Kai  [author] Nov 9, 2021 @ 2:38am 
You're welcome :)
LuhhVi Nov 9, 2021 @ 2:06am 
ok, thanks for responding so fast
Kai  [author] Nov 9, 2021 @ 1:54am 
Ah I see what you mean :)
Like I said, check out the updated guide, it should be easier and more convenient, so you don't even need that file you are looking for.
https://steamcommunity.com/sharedfiles/filedetails/?id=2173693040
Hope this helps!
LuhhVi Nov 9, 2021 @ 1:39am 
on the instruction, im instructed to C:\Program Files (x86)\Steam\steamapps\common\Counter-Strike Global Offensive\csgo\materials\models\weapons\v_models
Kai  [author] Nov 8, 2021 @ 12:20am 
Hmm, I am not sure what you would need the v_models for, but maybe take a look at my updated version of the guide:
https://steamcommunity.com/sharedfiles/filedetails/?id=2173693040
LuhhVi Nov 7, 2021 @ 11:00pm 
hey, is it just me bcuz i cant fine the v_models. any idea?
Kai  [author] Oct 16, 2021 @ 11:16am 
Ah well, then I'm glad you found a solution :)
Chasm Oct 16, 2021 @ 10:07am 
Well, no, actually since the problem is a photoshop problem, nothing to do with the steps, but I eventually found a fix. But I still appreciate the help!