Oxygen Not Included

Oxygen Not Included

512 évaluations
ONI - Surviving the Late-Game
De Jahws
This ONI guide is designed to teach you the tricks necessary to make near-full use of the resources available to your colony and make it self-sustaining. Also, space!

Note that this guide is based on the original Release version of ONI and is a continuation of my early-game and mid-game guides.
4
19
2
2
3
2
2
2
   
Récompenser
Ajouter aux favoris
Favoris
Retirer des favoris
Intro
This guide assumes that you're already familiar with handling the following issues that plague what I term a "mid-game" base:
  • Oxygen production from Electrolyzers + cooling
  • Heat elimination with Steam Turbines
  • Sustainable (even if slow) production of Steel
  • Plastic from Glossy Dreckos
  • Successful taming + utilization of Cool Steam Vents and Natural Gas Geysers
While there are many other topics I typically cover in the mid-game, these are, by far, the most important points to already have covered within your colony. If any of these are a sticking point for you, please consider visiting my mid-game guide first before proceeding:

https://steamcommunity.com/sharedfiles/filedetails/?id=1362621368
I'll generally be skipping over those topics within this guide, handling them in the background so that we can focus on more interesting things here.

If you'd rather use the same world-gen seed as I'm basing everything on but wish to otherwise ignore the early-game guide, I'm using the world-gen seed 2500 on Terra. These strategies are not specific to a particular seed, but I recognize its usefulness when following a guide for learning purposes.

In general, I will be avoiding strategies that rely upon the randomly-generated "hidden geysers", as not all seeds will contain specific geyser types. I will also be ignoring "bonus items" from the Printing Pod, since those are also quite random.

A few notes:
  • If you're looking for how to handle and utilize Oil, that's mostly covered in the first two "base planning" arcs.
    • I only present the most basic Oil-handling machinery, though - use of Volcanoes is nice, but not necessary for this guide's goals, and it doesn't fit with the "flow" and ordering of the in-game concepts this guide takes.
    • I might eventually add something with Volcanoes in the not-yet-implemented "fourth arc" section, but that's yet to be determined.
  • Handling Space starts with the third "base planning" arc, so feel free to skip to it if you're already comfortable with everything else. Jet Suits aren't necessary, but they do make things easier.
Late-Game's Start
Let's start off by examining the state of a base that's just leaving the mid-game. For those who have been following my other guides, this will be following the same playthrough as before. Note that the playthrough is meant to serve as an example; you should be fine as long as your colony has similar areas to these.


Geysers

Of course, when a colony has been running for 200 cycles, there's a lot to cover. First, let's focus on tamed geysers:


The three blue circles indicate the presence of Cool Steam Vents, while the orange circle marks the site of a Natural Gas Geyser and the light purple marks a Salt Water Geyser. All of them have been properly enclosed in a manner that will allow the colony to continuously utilize their resources.

Industry


The colony also has a significant amount of industry up and running. The yellow ovals mark the locations of existing Power generation areas - Coal, Natural Gas, and Manual Generator sites. While these areas aren't yet being directly cooled by Steam Turbine, there's a little time before a Turbine is strongly needed here. Meanwhile, the blue circle marks the site of the colony's Oxygen generation plant.

At present, the black circle's site is small, but there's a lot of empty room nearby - this is quite intentional. I'll be referring to this as the "industrial zone."

Our "industrial zone" currently doesn't house very much - it's just the site of a Metal Refinery that's linked to a Steam Turbine cooling setup. That said, there's plenty of room to add new industry to the same cooling loop as the Refinery. A lot of the new designs we'll be building can generate a lot of heat, so it's a very good idea to have an area like this base in your colony before proceeding far.

Cooling

Finally, let's examine the temperature overlay:


As might be expected, the sites of all the geysers are running pretty hot. That said, you'll note that the sites closer to the base aren't "bleeding" much heat outside of their enclosures; that's due to the "taming" process done in the mid-game. The current worst offender in terms of heat is the power zone, which is to be expected if there's no cooling on-site yet. (It doesn't help that the old Metal Refinery setup was in the same area.)

Note the temperature at the industrial zone's site - it's actually gotten pretty cold there! Steam Turbine cooling is quite powerful and has started reversing a lot of the heat that the nearby Cool Water Vent bled into the environment during earlier stages of the game. The strongest spots of blue in that area mark the sites of exposed Radiant Pipe that are being actively maintained by the coolant tank beneath the Refinery and by the Steam Turbine setup to its right.

At the top of the view, there's another Steam Turbine setup to the left of the paired Cool Steam Vents. There's no coolant loop paired with the Turbine yet, as it's pretty new and is focused solely on cooling the Vents. That said, I'll eventually want to add to this area; since I have an industrial site already, I'm thinking this will make a great "farming" zone whenever I decide to move away from the mid-game's Mushroom farm.

Infrastructure Planning

One last thing worth examining - the colony's main corridors.


The horizontal corridor is 6 tiles high, while the vertical one is 6 tiles wide. This gives plenty of room to route important wires and pipes. For a decent example, let's look at the core of my current base:


Note how the left half of the corridor gives enough space to add small Power Transformers and to place Gas Valves for distributing Oxygen from the main supply line. (Horizontal corridors easily house the larger variant, as both types of Transformers are two tiles tall.) The right half is focused instead on Dupe mobility, which is rather important for vertical corridors. A sharp eye might notice some Insulated Gas Pipe behind the Fire Pole - that's a Natural Gas line. There's even room to add another Gas Pipe line and some extra Liquid Pipe through the corridors, and that's by design.

While it's not strictly necessary to heavily pre-plan where Pipe and Wire infrastructure will go, it's extremely helpful if you want to avoid having a massive mess later in the game. I use these corridors to do the core, central routing necessary, adding branches where needed to supply structures. I typically try to avoid too much criss-crossing across the corridors, but it's doable in small amounts when necessary.

Other Notes

At this stage, if you haven't already done so, I advise discontinuing the Smooth Hatch ranch. There's no need to directly kill them; just don't let their eggs hatch.

As a replacement, note that you probably have an incredible amount of Raw Mineral stored up - breeding more Stone Hatches as a replacement is probably a good idea.

You may have occasionally seen Arbor Acorns appear as offerings from the Printing Pod. If you're on a map type where these aren't naturally obtainable, try to grab a few prints of this special item; we'll examine some uses of it later on this guide.
-- Base Planning (Round 1) --
If you implemented the long-term Oxygen solution (the SPOM) from the mid-game guide, your colony should be producing enough cooled Oxygen for up to 16 Duplicants. That milestone was reached somewhat late in the guide, so at this stage, I'd say that your colony should probably have somewhere between 8 to 16 Duplicants. For every 8 normal (no Diver's Lungs) Dupes, that Oxygen solution will need to consume 1 kg/s Water, so your colony's permanent Water consumption should be under 2 kg/s at this point.

If you followed the advice to "explore" and find extra geysers from the end of the previous guide, your base should have a supply well above 2 kg/s. For my colony, I'm getting 4 kg/s Water from Cool Steam Vents plus an extra 3 kg/s Water from the Salt Water geyser - well above the 2 kg/s threshold. Our colony won't be hurting for Water anytime soon.

A larger concern for our colony at this stage is likely Power. Keep in mind that our current Steam Turbine setups all cost Power to run. Since we've "solved" the Oxygen problem by linking its production to Water, the next big problem we must solve is heat. We've done this in the most critical locations, but our Power grid may not be able to handle too many Thermo Aquatuners running simultaneously.

The Plan

Now that we're in the late-game and have lots of resources at our disposal, we're in a safe place to consider the many uses of Oil. One of these uses is the Petroleum Generator - running just one of these produces 2 KW of Power, which becomes 3 KW after a Tune-Up buff! This will easily help improve the colony's Power capacity.

All of that said, we do have a bit of time before the Power situation becomes too critical, especially if we have cooperative Natural Gas Geysers. Actively using Oil takes quite a bit of work as well; as a result, the first arc of this guide is all about boosting our industry to prepare for the future. We'll start to use Oil as part of this, too.
Corridor Extension - Oil Biome link
Since we're talking about Oil, it's worth investing some time to properly link our corridor infrastructure to the Oil biome. We could delay this a while longer if we want, but a very common late-game problem arises once we start to lay a lot of pipe infrastructure across the game world.

Keep in mind that until now, we've only run a pipe or two from the Oil biome when building a few projects that needed a limited supply of Oil. In the very near future, we're going to commit to continuous, long-term use of Oil. You've probably noticed that moving long stretches of pipe can be long, tedious, and boring work, especially when the pipe is being actively used for resources. Since we're not actually using Oil yet, now's the time to lay a well-planned Oil pipeline that won't get in the way of other things in the future.


On all Terra maps - and in most maps for other world types - the Oil Biome is reliably situated toward the bottom of the map. Now's a great time to extend the central corridor and connect it more directly to the Oil biome. This will give us the space we need to lay a well-planned line of Liquid Pipe for continuous shipment of Crude Oil.

In my case, this means crossing a Frozen biome. Since doing so involves expanding the path from a single Tile of atmosphere exposure to 5 or 6 tiles of exposure, this means a lot more of the "cold" will easily be lost unless I take steps to prevent it - and losing too much "cold" means that the biome's ice will melt, potentially flooding the Oil biome and making a mess.

For now, here's what my corridor extension looks like:


Note that I've added Insulated Tile to the corridor's exterior, leaving just a few points of entry into the Frozen biome. Honestly, I should probably seal up a few more of the points than this, but it's enough to get the idea.

Note that at this stage, I'm now able to properly extend the Heavi-Watt wire and Oxygen supply lines down to the Oil biome's entrance. This will help to simplify how their respective resources were previously routed here - we can now decommission the old supply lines and clean up any related tangled infrastructure.

Of course, I should also show off the goal of this operation - the Oil pipeline.


Note that there's plenty of space to add more pipes on either side. This space will absolutely be utilized in the near future, so try to keep the area clean!

Carbon Dioxide Management

Until now, the base's Carbon Dioxide has been managed by use of Carbon Skimmers. This converts some of our Water supply into Polluted Water, but it's served us quite well for keeping a clean in-base environment for our Dupes. However, now that we're connecting to the Oil biome, there's a possibly better way to handle things - Slicksters!


If only these little marvels were a real-world creature... alas. At any rate, they'll directly convert Carbon Dioxide (CO2) into more of that sweet, sweet Crude Oil. The issue is that they love their hot home down in the Oil Biome; we should leave them there for now. That said, now that we've got space to run extra pipes, there's nothing stopping us from sending our unwanted CO2 to them.

Also, if you get offered Slicksters or their eggs from the Printing Pod, that's a pretty great option to take. You'll need to spend Plastic on a Critter Trap to catch them for transport to meet the others, but it's worth it.

After a bit more work and cleanup, here's my Ventilation overlay:


There's not that much Carbon Dioxide on a regular basis, but it'll help feed the Slicksters down there until we have a more steady supply. I've replaced my old Carbon Skimmer with a Gas Pump, following similar Automation logic to what I'd used before for the Skimmer - it's a pretty simple and direct replacement.

Other Notes

If you're following along my playthrough on the same seed, you might like to know that I did a little exploring during this section and found the second guaranteed Natural Gas Geyser - just dig directly beneath the Metal Refinery and you'll find it soon enough.
Oil Refinement
Now that we're ready to continuously ship Crude Oil out of the Oil Biome, it's time to start work on an actual Refinery. This structure will convert Crude Oil into Petroleum at a 2:1 ratio. Later in the game, we can do better than this, but this will easily meet our needs for now.

Petroleum has a few interesting uses worth talking about at this stage of the game:
  • It's slightly better than Crude Oil for high-heat conductive applications and has a superior range of temperature before changing state.
  • It can be used to manufacture Plastic.
  • It fuels Jet Suits, which will be very useful when we start exploring Space.
  • It's also very useful for Power generation.
For now, the key is setting up an Oil Refinery. If you left space in your old industrial site, now's the time to start adding onto it! Here's my site; I've cleared out some new space since the old "Sustainable Refinery" section in the mid-game guide, but its otherwise mostly unchanged:


The ladder to the left of the coolant tank was always meant for eventual demolition; now's a good time to tear down the area and start putting in some new structures. Since I do plan to upgrade the industrial site's cooling capacity in the future, I'll be leaving extra space for that eventual work.

Required Researches
  • Transit Tubes (Tier 5)
Construction: Step 1
If you've inspected the stats on the Oil Refinery, you've probably noticed an interesting detail - it produces 90 g/s Natural Gas when operated. This is quite useful to pass along to our Natural Gas Power Plant, so it'd be wise to capture everything the Oil Refinery puts out. Accordingly, I like to start with the following design for my Refinery:


The goal of this design is to seal off the Oil Refinery entirely from the outside, allowing us to start with a perfect vacuum inside so that we can perfectly control its atmosphere. Once operational, the Refinery room will have a lot of Natural Gas - this is one of the most conductive in-game gasses, meaning that workers in there will need protection from the environment unless the temperature is ideal. Since the Refinery will emit Natural Gas at 75 C or higher... the temperature will likely not be ideal.

To allow us to seal the room completely... and because I hate Water-locks with a passion... I advise implementing your base's first Transit Tubes. In my case, this has the extra benefit of allowing me to reuse the nearby Atmo Suit Docks - this is actually rather important, as the temperatures we'll be working with nearby aren't safe for long-term Dupe exposure when not suited up. It's also worth noting that Water-locks don't block temperatures as well as Insulated Tiles, in case that's a concern.

Note that the minimum temperature for the Refinery's outputs is 75 C - the usual threshold for overheating. This gets worse if your source Crude Oil is hotter. If you can keep your inputs below 75 C, a single Wheezewort actually does just enough to keep heat under control - I've left room on the left that allows inserting one.

Of course, not all maps have those available - but we also have our cooling loop nearby. Exposing a bit of it can allow us to extract heat from the room without overcooling the area, and we can always use extra Radiant Pipe if needed for stronger cooling. I'll be using the cooling loop in my implementation so that the example is useful to players without Wheezeworts and so that I don't have to worry about the Crude Oil input temperature.


Honestly, that's probably a bit too much Radiant Pipe in the area; I'll probably reduce it to three tiles of Radiant Pipe instead of five. Feel free to experiment and find what works for you. Note that I've also included yet another Liquid Bridge in the extension; I have plans for another industry build in the near future above the room, and this will help when connecting the next structure.

Now that I've gotten my cooling loop extension ready to connect and have built everything inside of both rooms, it's time to seal off the Oil Refinery's site, connect the loop, and then start pumping out the inner atmosphere. In the meantime, I'll continue preparing the Petroleum Reservoir beneath the Refinery setup.

Construction: Step 2

The end goal is to build something like this:


This provides our colony with its first proper Petroleum Storage unit. Since Jet Suit synthesis requires Pitcher Pump delivery of Petroleum, we include a Pitcher Pump (Ceramic) as part of the tank.


I've left out the Power overlay and the Ventilation overlay, as they're relatively simple at this point. You'll need a few separate Conductive Wire lines, but that's it.

As you can see, I've already got a Dupe actively refining Crude Oil into Petroleum! The reservoir setup below is set up kind of like the Advanced Gas Storage from late in the mid-game guide. The system first prioritizes filling up the lone Liquid Reservoir - any Petroleum inside will be automatically forwarded to the first consumer. After that, any excess will be dumped into the main pool. Finally, if the Petroleum line into the Reservoir isn't full and there is free Petroleum in the tank, the Liquid Pump will refill the Reservoir.

For the Hydro Sensors:
  • Top - Above 720 kg, preventing overflow. (The top tile of a Petroleum lake has a maximum pressure of 740 kg.)
  • Middle - Below 500 kg, re-enables the Refinery. (We don't want the Refinery to toggle on and off rapidly when near-full. This value's very customizable.)
  • Bottom - Above 50 kg, ensuring the Liquid Pump operates with maximum efficiency.

In regard to the Atmo Sensor in the Refinery chamber, I advise setting it to "Above 1 kg." That leaves enough atmosphere to provide a decent cooling buffer for whatever cooling solution you decide to use.

If you decide to rework the layout of everything in the Petroleum tank, note that Petroleum is a very strong conductor and it will be quite hot. It might be wise to add an extra Transit Tube access and enclose the tank area - I've left space four-tiles high above the tank to ensure this will be possible, after which you can lock the area in Insulation Tiles in a manner similar to the Refinery.

Other Notes
Technically, we can supercool the room to the same temperature as the coolant - it will mean extra cooling work, but it won't be enough to overwhelm the Steam Turbine setup. 90 g/s Natural Gas at 75 C will cool to 0 C with about 14.8 kDTU/s cooling, making this Refinery setup cost a total of just under 25 kDTU/s heat per second when in use.

Compare that to the 575 kDTU/s that the (Polluted Water) Thermo Aquatuner can feed to the Steam Turbine, which has an even higher capacity. It won't overwhelm the system; it'll just mean spending a bit of extra Power for cooling - about 31 W extra when active.

For the curious, fertilized Wheezeworts in at least 1 kg/tile of pure Natural Gas generate nearly 11 kDTU/s cooling.
Glass Synthesis
Now that we're able to start producing Petroleum, it's a good time to start working on yet another new resource - Glass. Glass is quite expensive to make in mass and generates a ton of heat, but it's critical for a few things we'll want to make when we reach space. There's only one way to make it, so now's as good a time as any to get started.

As this is yet another 'industrial' function for our colony, I'll be implementing this near the industrial site. I've chosen to start construction just above the Steam Turbine setup:


While not the focus of this section, I will also be relocating my colony's Rock Crusher next to the upcoming new Glass Forge. We never talked about it in the past, but the Rock Crusher generates a fair bit of heat itself - 16 kDTU/s. It'd be wise to move it away from our base's core now if it hasn't already been done.

Researches Required
  • Solid Transport (Tier 5)
  • Superheated Forging (Tier 5)
Construction: Step 1

To begin, I advise constructing the new parts you see below compared to the previous image:


Note that we can still get inside the lower area to finish anything that might remain. We'll eventually add a second Insulated Tile wall to the left-hand side matching the one on the right. We are not ready to handle Glass yet, so hold off on actually using the Forge.

Now, for some overlays:


The entire setup can fit on a single Conductive Wire, so Power's not at all tricky here.

For the Plumbing overlay, note that the Insulated Pipes connect directly to the Liquid Vent outlet from the Glass Forge. You want this pathway to be simple, short, and direct if at all possible - Molten Glass is extremely hot and must be handled with care. I've also modified the old cooling loop to accommodate the new build.

Note the new Conveyor overlay! This will make more sense once we finish construction, but the short of it is that we've implemented a "cooling" track for the Glass we will produce. Since Molten Glass is extremely hot, we're going to drop it into a pool of Petroleum - that's the plan for the lower tank. Petroleum's high overheat temperature will easily allow enough range to cool any incoming Molten Glass as soon as it arrives to the pool. That said, it usually solidifies at very high temperatures - this conveyor will "force" the hot Glass to stay in the Petroleum pool long enough to cool down reasonably.

Once everything is connected, built, and swept free of any desired debris, add an Insulated Tile to the left-hand wall and start delivering Petroleum to the pool. You can connect a temporary line to the Glass Forge's outlet via Liquid Bridge to deliver it. An important note - while delivering Petroleum, you're likely to have a significant spike in your colony's Power demands. It's at least 75 C because of the Oil Refinery's minimum output temperature, and your coolant loop will be working hard to catch up for a while.

Construction: Step 2
After a while, you should reach the following point:


The Petroleum tank is now about halfway full, so if you'd like to play around with the Glass Forge a bit, you should be safe to do so. Of course, continue pumping more Petroleum in for now.

You'll also notice that I've added a couple of Weight Plates to the area. As odd as it is, the one under the Rock Crusher actually is correct - which unfortunately means any significant output from the Rock Crusher will trigger the Plate, so feel free to ignore that one. It's generally worth illuminating the area when a Dupe is working - spending 10 W to speed up a Dupe's work by 15% will save tons of Power on Glass Forge use and should even yield savings with the Rock Crusher. The small output heat is trivial to handle since the cooling loop is already right there.

Once the pool is completely full, even when not fully cooled by the coolant loop, you should see a remarkable drop in your output Glass's temperature due to the conveyor loop - with a 41 C tank, my Glass comes out around 115 C instead of the 600+ C that would result without the conveyor cooling setup! Of course, that means our coolant loop must absorb a lot of heat, but that's exactly why we've got this focused industrial area - to facilitate handling high-heat applications like these.

One more important detail - you should set the Conveyor Receptacle to "Allow Manual Use" so that your Dupes can retrieve any output Glass directly.
Plastic Manufacturing
After getting the Glass Forge done, you might be interested in synthesizing Plastic directly from Petroleum. We now have the tools to handle this; let's take a look.

Required Researches
  • Plastic Manufacturing (Tier 4)
The biggest concern when using Polymer Presses is the extreme amount of heat that they produce - 32.5 kDTU when active. It's easily the biggest heat producer we've seen so far. That said, cooling loops are extremely potent; we can add it to our industrial site.

Remember that spot I reserved over the Refinery's site?


I've made this Polymer Press out of Wolframite. It's specific heat is low, to be sure, but the thermal conductivity is so high that this allows all of that 32.5 kDTU to be transferred without needing Tempshift Plates, which are kind of expensive. (My Polymer Press is stabilizing around 33 C in this image, while the local coolant is around 5 C due to the Glass Forge's Petroleum at the moment.) If Wolframite isn't available to you, Steel will easily do the job while also giving you much higher margins for error with overheating. 400 kg isn't too expensive.

If you remember the Liquid Bridge I left in the loop for a future extension...


A small rework later, and the Polymer Press is on the loop. While it does produce small quantities of Water like this (hence the Liquid Pump), it will be a long while before I need to pump the bottom area dry. I can always connect the Pump's output at a later point.

Other Notes
You'll note that the room is designed to accept a second Polymer Press. I've also left enough room to add Conveyors and an Auto-Sweeper if desired. An automated setup delivering to a Smart Storage Bin can be useful - use the Bin's Automation signal to disable the Presses once the Bin is full.

That said, your base's demand for Plastic probably isn't very high right now. It would be nice to replace our core Ladders with their Plastic Ladder variant, but we can still rely on our Glossy Drecko ranch for Plastic if desired. The choice is yours on whether to rush that or not... and even on whether or not to actually build this Plastic manufacturing site at all.

On the other hand, this does allow us to turn Plastic from a limited, rare resource into an easily-available commodity, which is a nice reward for making it to this point in the game. Comfy Beds can be useful for shortening your Dupes' needed sleep time, Plastic Tiles can increase Dupe run speed, and Plastic Ladders can increase Dupes' climbing speed. All three of those properties can be useful for making your base run even more efficiently than it already is.
Petroleum Power
Now that we've added a few high-Power consumption machines to the colony, it's probably wise to add another Power Plant. This time, we'll be adding a Petroleum-based one.

Petroleum Generators have a lot of benefits over Coal and Natural Gas use, though we do need to prepare well to use them properly. They generate less Heat per Watt and produce more output resources - Polluted Water and Carbon Dioxide. In fact, their Carbon Dioxide output is so strong that they can fully utilize a Gas Pump!

Of particular note is that like the other Generators, their output temperature varies depending upon the Generator's temperature. We want to maximize our gains from this.
  • All output Polluted Water will be at least 40 C (or hotter if the machine is hotter)
  • All Carbon Dioxide output will be at least 110 C (again, hotter if the machine is hotter)
Where there are benefits to getting hot Carbon Dioxide, those benefits are significantly lower than the benefits we get from 40 C Polluted Water, which has a very high heat capacity compared to most other materials. We'll want to keep the Power Plant under 40 C if at all possible. Likewise for the others - we just didn't bother before because their resource output rates are comparatively quite low.


Here's a "before" picture around the site I'll be constructing the Petroleum Power Plant. I'll also be adding in a Steam Turbine setup at this time nearby, which will be dedicated to the colony's Power Plants. I technically could reuse the existing cooling loop from the industry area, but I advise against it for the following reasons:
  • I advise that learners use more but smaller cooling loops. If something goes wrong, it's easier to fix this way... and it results in less cross-map Pipe clutter. Working around severe pipe clutter is no fun and can be quite demotivating; we want the game to stay fun.
  • We recently added a lot of high-heat producing machines to the cooling loop. In particular, running the Metal Refinery and Glass Forge at the same time will considerably warm the cooling loop, possibly past what the Thermo Aquatuner can handle in the long-term. (Short bursts are fine, though.)
    • A 0 Tinkering Dupe refining Steel dumps over 2339 kTDU/s into the Refinery's coolant during operation.
    • Assuming the run time is the same, a Glass Forge will require about 600 kDTU/s of cooling on its output.
  • We don't want to "waste" cooling on the Generators beyond what's needed; this lets us run the new loop at its own temperature setting.
  • Two Petroleum Generators will max out a single line of Gas Pipes, leaving no room for Carbon Dioxide from other sources to be shipped unless an extra pipeline is built.
Since I covered Steam Turbine cooling already in the mid-game guide, please refer back to it as necessary if you also need to make a new cooling loop. You should probably pause other industry tasks and focus on refining more metal (like Gold) as needed.

https://steamcommunity.com/sharedfiles/filedetails/?id=1362621368
A significant amount of time later, since Steam Turbines and cooling loops do take a while to make...


Since Petrol Plants with the Tune-Up buff generate 3 kW, each one will need its own Large Power Transformer. A dual chamber would be possible - just make it double-wide, mirrored around the Power Control Station (aside from the Liquid Pump).

That said, I advise only using one Petroleum Generator for now, anyway. For starters, we don't yet have an Oil Well, which is necessary if we want a continuous stream of Oil. We'll also want some Petroleum for other uses, especially later once we get to space. Let's not burn all the Crude Oil we can get our hands on... and we can always add an extra copy of this room later if needed.

Not seen here: a Tempshift Plate behind the Petroleum Generator, dead-center at the Generator's bottom. Carbon Dioxide's a terrible Heat conductor, so we need a little help to facilitate efficient heat transfer.


The basics of each overlay shouldn't be troublesome for you to work out at this point, though of course I should probably discuss the Automation settings a bit.
  • Atmo Sensor: Above 2000 g, which maintains enough pressure to keep new Oxygen out of the room and to prevent the Polluted Water output from off-gassing.
  • Aqua Sensor: Above 50 kg (or similar) - ensures that the Liquid Pump always has a full load when operating.
Power Plant Cooling Loop
Now for a bigger-picture look at the new builds:


I'm honestly a bit surprised at how close the new Turbine ended up to the old one. That said, the new site will have a much easier time reaching the Power Plant, as it's not tangled up with the Cool Steam Vent nearby or the tangled piping that manages the temperature of the industrial site's coolant. Of course, this will be much clearer with a look at the Plumbing overlay.


Note how the Polluted Water line moves across each Power Plant in sequence, then back to the Steam Turbine before re-entering the coolant tank. I've left a few Liquid Bridges in place at a few locations to facilitate loop extension for extra Power Plants in the future.

I advise setting this cooling loop's Liquid Pipe Thermo Sensor to send coolant to its Thermo Aquatuner once coolant is "above 28 C". This is around the point where the loop will be able to keep the Petroleum Generator at or below 40 C when running full-time. Of course, experiment to find what setting works best for you and your colony.
-- Base Planning (Round 2) --
After all that work, we're finally starting to truly utilize Crude Oil and Petroleum; it's been a long time coming. There is still more work to do in this regard, but now's a good time to stop for a moment and review our progress.

Here's a before and after since the last "Base Planning" round for my example playthrough:


Note the significant expansion in the lower-left parts of the image; now we have a real industry area.

As the base grows, it can become tricky to route important resources everywhere. That's part of why I like to focus on the central corridor design for the most important ones. Here's a good example of how that's working in the current colony:


The design's benefits will be most prominent in the horizontal version and to the part of the vertical corridor leading down to the Oil Biome. The most key gaseous elements to route are Oxygen, Carbon Dioxide, and Natural Gas; we'll want to ship the first two down to the Oil Biome. In the next arc of this guide, we'll be shipping up Natural Gas from the Oil Biome, so the routing pattern will stick pretty well.


On the other hand, the Plumbing overlay shows that we aren't using the central corridor for liquids very much. This is no accident on my part - the next arc of this guide will see this change dramatically. Note how we've kept the various loops largely outside of the main corridors; outside of a few stray Liquid Pipes in the vertical section from the early game, we have plenty of room to make bridges to cross any cross-sectional lines. (Those lines can be safely deconstructed; I've just been lazy about that.)

Since we've avoided making a tangled mess until this point, we can now start doing some serious liquid transportation work without much issue.

General Notes
You may note that I've played a few extra cycles since the end of the last section. Now that my Power Plants have cooling, I've linked in the second Natural Gas Geyser to the system. Those generators had been running a bit too hot for my tastes before, but now I won't have to worry about excess heat from running them more frequently.

Also, depending on the pace you've been keeping, you may want to check your Hydrogen storage. My tanks are around 15 kg/tile at this point, so I took some time to add a Hydrogen Generator to the grid. It'll run only when the storage area reaches over 19 kg/tile, preventing the storage from fully backing up.

One more thing, about Power Plants - the Tinker operation that applies the Tune-Up buff has errand priority 5, and there's no way to change that. I strongly suggest setting all non-critical Operate tasks at a priority below 5 whenever you wish to utilize this buff.

The Goal
Now that we're able to produce even more types of resources than before and have started working with Petroleum, we should take some time to stabilize the base - Crude Oil won't be free forever. Most of our work will be in the Oil Biome for this arc of the guide, and we'll be sending a lot of resources down that direction.

One of our big tasks will be to "tame" at least one Oil Well. For the cost of 1 kg/s of Water, we'll get 3.333 kg/s of Crude Oil - nearly enough to run a Petroleum Generator full-time. Unlike the real world, these never run out of Oil, giving us a renewable supply. Each world has at least three of these, meaning you can always reach a supply rate of 10 kg/s for the cost of 3 kg/s Water.

This is why I highly advised taming renewable sources of Water before starting the guide - we're about to start consuming a lot more than our colony did before. That said, Petroleum Generators do give a good return on Polluted Water, and that's something we can make use of.

While the Oil Biome is hot, even that is something we can make use of; there are certain plant types that love a little heat. We'll be adding support for some new ranches and farms that work well here.

In short, this arc is all about digging deep and giving our colony even more long-term staying power than it already has. After that, with considerable work we can stretch to even greater heights than before - literally.

The Plan
Before proceeding, it's probably wise to examine the layout of your Oil Biome. Find all of the Oil Reservoirs you can within the area that will be most convenient to work within.


I've marked the site of all three of my world's Oil Reservoirs with small black circles. As you can see, the Oil Reservoirs are a bit scattered here, with the middle one being probably the most accessible. It's relatively close to the one on the left, so focusing work in that area may be best. Of course, I do have a lot of partially pre-mined space at the current entry to the biome, and that space is out of the way of the Oil Reservoirs - that's not a bad place to start building ranches.

The magenta rectangles, as usual, mark my existing plans for future corridor extension. Well, my original plans. Turns out that I have a few "features" that are non-deconstructable in the way in both directions if I build far enough. Oh well, we'll cross that bridge when we come to it.

With the ranches on the right and the first two planned Oil Reservoirs on the left, our Oil Biome cooling solution would best be placed somewhere in between. For my playthrough, I'll mostly be working in the nearby, upper half of the Oil Biome and the part of the Tide Pool Biome between its peaks.

Ranches will require considerable open space that we'll want to keep relatively close to an upcoming cooling loop within the Oil Biome, so keep that in mind as you think ahead for your layout in the coming sections.

Other Notes
Partway through the next section, I took some time to extend my industrial cooling tank. This is just a short bit not worthy of its own space, and it fits thematically with what came before:


Since the cooling loop is became much busier after we added more cooling tasks, the Metal Refinery's output will often be blocked. This modification provides space to add an extra Liquid Pump dedicated to the Metal Refinery. Of course, that means the coolant may become significantly warmer when performing a lot of refining tasks, but we can address that a little further down the line. If you do this, just keep an eye on the tank's heat levels.

While I could show the Plumbing overlay here, this area is a real mess - remember that this is the core of the industrial area, so there's tons of piping running around the area. Just make a simple and clean line for the Metal Refinery's new output path - the input is the same, just connected to a different source Pump.

This should improve our industrial abilities quite a bit, though we should exercise a bit of restraint, just in case. It will take a while to fill the tank completely, so forgive me for skipping that picture. A full tank means no offgassing coolant, which is always a plus.
Sporechid Handling
Unfortunately, very close to my Oil Biome entry there's been this annoying Sporechid spewing Zombie Spore germs. The associated disease is no joke - it provides a -10 debuff to most of a Dupe's stats!

Simply removing the plant isn't enough - the germs will remain in Carbon Dioxide and Crude Oil with no loss, easily infecting Dupes that aren't wearing protection. While we do have an Atmo Suit access point at the biome's entry, can we be sure the germs won't spread past that point?


With germ counts that high, the germs are very likely to spread through the atmosphere. It would be best to not let them spread. Fortunately, there is a solution that can help prevent them from spreading - Slicksters love eating Carbon Dioxide, which will convert the germy CO2 into Crude Oil. Since Dupes don't breathe Oil, this shouldn't be an issue - especially since the germs don't appear to transfer to the Oil anyway.

Note how I've set up a lockable chamber with a Critter Drop-Off (Gold, for the overheat bonus). By placing a Slickster here, mining the tile underneath the Sporechid, and running away very quickly, the germs will have no time to spread outside the chamber.

Now, a problem with that - Critter Traps overheat at 75 C, and temperatures in the Oil Biome are usually far above that. However, it does take a bit of time before trap overheats - if you place it, catch a Slickster, and relocate it quickly enough, the overheat bonus won't be a problem. Note that Traps cost 200 Plastic and break after one use; fortunately, we can easily make more.


As you might guess from this image, the game has been extremely friendly to me with Slicksters and their Eggs. I placed them all together here, so I captured one in no time at all. That said, I can watch the temperature ramp up quite quickly on the default speed - probably about 1 C every two seconds. Feel free to abuse the Yellow Alert priority here if things start getting too close for comfort. It was 40 C by the time my Dupe got to the sprung trap!


As soon as I mined out the tlie beneath the Sporechid, I had the Dupe run for the hills and disabled access permissions to the area. It's now up to our little buddy to clean out the Carbon Dioxide and make the area safe. Domesticated Slicksters will eat 20 kg CO2 per cycle, as seen by the critter tooltips, but wild critters usually eat only 1/5 that amount, meaning we can expect 4 kg/cycle. Fortunately, it's a pretty small pocket down there - it should be safe in around four cycles. (There's about 15 kg CO2 total in the pocket.)

A little while later:


The germ count will rapidly fall as the pressure nears zero. From this point, it takes about one more cycle for the Slickster to make a complete vacuum. If you're dealing with a larger pocket, don't worry - a couple thousand germs per tile will probably be safe, especially if the pocket's deep in the Oil Biome. Unlike Slimelung, these germs don't multiply in their preferred gasses, so there's no cause for alarm if low amounts are left in the open - it's the high count we saw before that's dangerous.

Other Notes
Just in case you've had a Printing Pod give you Pips, make absolutely sure to store any Sporechid Seeds you get somewhere that they cannot reach. Pips will plant them randomly otherwise, and while the germs die off in Oxygen, they do so quite slowly. Don't give Pips the chance.
Oil Biome - Enhanced Access
We're going to be building a lot of things in the Oil Biome that work best when significantly temperature-controlled, atmosphere-controlled, or both:
  • Oil Wells will need atmosphere control and specialized cooling.
  • Slickster breeding is best done with lots of hot Carbon Dioxide.
  • Ranching normal Dreckos is most efficiently done with a stable and warm Chlorine atmosphere.
Making use of Transit Tube Accesses to get around will help maintain the ideal condition for each area we'll be making down here. Since we haven't really built anything within the Oil Biome until now, we've got a clean slate to start really playing with this advanced transportation system - so let's make it really convenient for our Dupes to use.

Also worth noting - this is one of the far edges of the game world, so Dupes will often face high travel times when entering downtime. Transit Tubes, if planned well, should help them return a little bit more quickly from here than otherwise. Make sure to place it close by your Atmo Suit Dock.


We'll be using a lot of Plastic in the near future, so keep on top of production for these resources! Fortunately, Transit Tube Accesses don't overheat, so we can make them from Lead for now with little issue. Plastic melts way earlier than Lead, so there's little reason at this stage to not use Lead.

Now, a little something important about Transit Tubes - there's a limitation on how they turn. Compare the following two pictures:

-

Transit Tubes require one straight tile before turning when coming out of a Transit Tube Crossing, which functions as a wall. You also can't do a full 180 without having straightening the path for a tile after a 90 degree bend, so plan accordingly. Finally, you must have at least two Tubes in a line above the Transit Tube Access for it to connect properly. Fortunately, the second tile above can turn as seen here without issue.

Examine the right-hand image again. Note how I have a three tile wide corridor, with a Tube beside the Ladder in the corridor's central tile. This gives it the turning radius needed to enter rooms on either side. Also note that I've removed the Ladder where the Transit Tube crosses - Tubes don't share spaces with buildings.

Expanded Atmo Suit Docks
Note how I've also started expanding the corridor's end point near the Oil Biome's entry - since we'll be starting to build here in the near future, investing in infrastructure here is a good idea. I've been particularly wanting to build Power Transformers down here, and this gives me the space to do so.


Finally, since there's going to be a lot of work down here soon, it's probably a good idea to upgrade our Atmo Suit entry point:

-

The layout of the Gas Pipes shows a way to ensure each of the six Atmo Suit Docks receive Oxygen at the same rate.

Other Notes
Of course, to build the pipes there, I had to mine out the last layer of Abyssalite from the Frozen Biome's barrier. Be careful when doing this, as the hot air from below can cause Ice to start melting! That's the source of the Water seen below:


Note how I've used raised Tiles to 'catch' the melting Water and prevent it from dropping into the biome and its Crude Oil. It's a simple trick, and it saves us the trouble of having to use a Liquid Filter down below later.

I'm also starting to clear out the Tide Pool Biome nearby, which will make it easier to access the upper-most Oil Reservoir and clear out space we'll want in the near future. (I'm dumping the Water in the flooded area near my exposed Salt Water Geyser; I won't be getting through there in a long time as it is.) I've already cleared out space to the right; that's where we'll we working next.
Slickster Ranching
Whenever we use that shiny new Petroleum Generator, it generates a lot of Carbon Dioxide. We can handle this with Carbon Skimmers as before, but there are some serious benefits to handling it with Slicksters instead. We've also advanced quite far in the game compared to the last ranches we built, so this is a great chance to see how we can upgrade our colony's ranches.

Here's where I decided to build a pair of Slickster ranches:


I advise building everything in this room that can overheat out of Steel. That includes the Critter Drop-offs, Auto-Sweepers, Conveyor Loaders, etc. Even Pneumatic Doors can overheat - consider replacing them with the Manual variant if you want to save on Steel. Later on, we'll be heating up the CO2 we send here. While we could keep things within 125 C, it's helpful to the Molten Slickster breeding process if we can run at higher temps. We can approach 160 C instead this way, the melting point of Plastic.

Both main rooms have 74 tiles, allowing them to hold 6 active Slicksters each. As surprising at it may sound, though... that's actually not quite enough to handle a full-time Petroleum Generator! As a result, once we really start utilizing the lone Petroleum Generator that we've built, it will easily be able to supply this ranch with all the Carbon Dioxide it needs. In fact, use of the High Pressure Gas Vents allows 20 kg/tile CO2 storage, so we can build up quite a buffer before the room overpressurizes.

Don't be distracted by the Gas Pump in the image above - I'm just doing my usual vacuuming routine before I route the CO2 in.

If you're curious about the math, it goes like this:
  • Petroleum Generators produce 500 g/s CO2. That's 300 kg/cycle.
  • Slicksters eat 20 kg/cycle CO2 when domesticated.
  • Therefore, a Petroleum Generator at 100% uptime can feed 15 domesticated Slicksters.
For comparison, two Carbon Skimmers would run with 83% uptime and a Water Sieve dedicated solely to the two Skimmers would require 33% uptime. That's a lot of looping Water and a significant constant Power draw. We don't yet have near-infinite Power, so we save a lot of Power on CO2 processing when we use Slicksters instead.

Now, back to the build. The room's design is motivated mostly by a wonderful tool we have - the Auto-Sweeper.


No matter where a Slickster may go within this room, the Auto-Sweeper will be able to pick up its Eggs and deliver them to the dedicated hatchery toward the right. (If the rooms were any larger, an extra Auto-Sweeper would be required in each chamber, which is inefficient.) While not yet built in this image, we can use Automation logic to control when the Incubator operates and resupply it with more eggs to hatch.

I advise against the "Allow Manual Use" option on the Conveyor Receptacle, as it's largely unnecessary - any eggs left within for over 10 cycles will automatically break, as if used in an Egg Cracker. This will automatically produce the Egg Shell and Raw Egg products that usually result, automatically dropping them from the Receptacle.


For those interested in a little Decor boost, I've left three spots where Ceiling Lights may be added. Light will reach the primary work locations from each relevant position. It won't speed up the grooming process, but a +15 Decor from light is a nice buff in itself. Speaking of Decor, if you change the Mesh Tile into Window Tile on the upper floor, you can build artworks that will affect the work floor, giving your Ranchers a great Decor boost that should positively affect their Morale.

With a few more buildings in place, the Power grid will look like this:


Once a Liquid Pump is placed on the circuit, it will show a maximum demand of over 2 kW. To handle this, we can use a little Automation Logic to ensure this is never an issue.


Set the lower Critter Sensors to 6 critters and the Critter Drop-Offs to 6 critters. This way, we'll only reach 7 critters when a critter lays an egg. At this stage, we need the Auto-Sweepers in the room with the Slicksters to remove the egg as quickly as possible, maximizing their egg-laying uptime. (We want to remove "Cramped" as quickly as possible.) When there are no eggs in the chamber, it's safe to activate the hatchery's Auto-Sweeper instead. So, at any one time, we'll only be using 1920 W at most, which is within the circuit's limit.

There's another set of Critter Sensors here worth talking about. Set the upper Critter Sensors to 5 critters. With the connected Not Gate, this will trigger the Incubator to activate when either room is missing a critter - that is, when a Slickster has died. (Aside from when we're starting the ranch.) Auto-Sweepers will automatically place an egg in a Incubator deactivated by Automation, but it will still slowly incubate. We'll only want to rush incubation when we're short on Slicksters.

You can drop the bottom Critter Sensors if you put the Transit Tube Access on its own circuit; I'd advise that, as the automation can have some trouble and it makes things simpler in the structure overall.


If you've noticed the Slicksters in the lower chamber... they managed to get themselves trapped in there. They're wild, so I don't mind whatever happens to them down there - I'll just pull their eggs out at some later time.

Other Notes
With a small alteration, we can get even better food out of this setup. Barbeque is superior to Omelettes, so if you don't mind a little animal cruelty, we can modify our hatchery just a bit like this:


By using a Conveyor Chute submerged in Crude Oil, we can deliver eggs into a "drowning tank." The Auto-Sweeper can reach through the Pneumatic Door to retrieve eggs when needed, but otherwise critters will hatch in the tank, unable to escape through the door. With sufficient liquid pressure, any freshly hatched Slickster Larvae will drown in the Crude Oil, turning into Meat. You'll want at least 200 kg in that bottom-right tile for this; even 180 kg Crude Oil in the tile will not drown the critters.

Baby critters and their adult variants drop the same amount of Meat when they die; you'll get 2 kg of Meat per Slickster killed this way, which cooks to 4000 kCal.
Multi-Tiered Cooling
Before we tackle Oil Wells, we need to tackle Oil Biome cooling. While Oil Wells only generate 2 kDTU/s as their base heat, they generate their output Crude Oil at 90 C, which honestly isn't too bad to deal with. The crazier part, which the game doesn't warn you about, is that they also produce significant super-hot Natural Gas that are released in bursts - something we can use if we approach it right.

The Natural Gas is generated at 20 kg/cycle (or 33.3 g/s) at 243 C and must be released at least once every 4 cycles. Fortunately, it's released somewhat slowly - a Polluted Water coolant loop will be effective enough to keep the temperatures sane, even when starting with a relatively low atmospheric pressure.

As you might guess, we're going to establish yet another cooling loop, this time in the Oil Biome. However, we're going to add a few new "features" to this one compared to those from before. Since the Oil Biome's already hot, we can start preparing to utilize that heat for more than just raw Power from the Steam Turbine. For example, raising Slicksters in temperatures over 100 C tends to yield Molten Slicksters, a superior strain that auto-refines Carbon Dioxide straight to Petroleum instead of Crude Oil!


Having mined out the bottom of the nearby Tide Pool Biome, I've built three separate structures for use with cooling and heating in the area. You likely already recognize the top-left and bottom-right structures, but what's going on with the top right?

Note that the top-right structure is especially close to the Slickster ranches we just built and is near to the Carbon Dioxide line. By sending heat to this tank, we can transfer that heat to incoming Carbon Dioxide before it reaches the Slicksters.


Of course, it will take a while for enough heat to build up, but we can wait a while on that. Be sure to use a highly-conductive metal like Wolframite or Aluminum for Radiant Gas Pipes within the tank. Note that the tank also has a Thermo Sensor inside:


We can use this Thermo Sensor to automate which Thermo Aquatuner is used to maintain coolant. As mentioned in the last section, we'd like to heat incoming Carbon Dioxide to around 150 C - any hotter and we risk ruining our Plastic-based Transit Tubes. Set the Thermo Sensor accordingly. Also note that we can get away with a Gold Amalgam-based Thermo Aquatuner here, as its base overheat temperature is 125 C, not the usual 75 C.

I ended up reworking the automation logic here a little bit over time, hence the different cycle number on this screenshot. Note that there's now an extra Liquid Shutoff right before the branching path to the two Thermo Aquatuners. The Hydro Sensor can trigger coolant to leave the tank, but only the Liquid Pipe Thermo Sensor will allow the coolant to reach the Thermotuners; we accomplish this by using an Or Gate.

Along with the Hydro Sensor in the coolant tank, along with two Liquid Vents instead of one. It will take us a while to fully prepare to use these features, but we're going to actively utilize some of our spent coolant and resupply this chamber. Remember the Natural Gas and Petroleum Power Plants? They've been producing excess Polluted Water around 40 C. If we can find useful ways to spend heated Polluted Water, we can then resupply with that 40 C water and reduce the net heat within the coolant tank. More on that later.

Automation Settings:
  • Thermo Sensor - above 150 C
  • Hydro Sensor - above 750 kg
  • Liquid Pipe Thermo Sensor - above 60 C (or possibly 70 C)
Now, let's examine the cooling loops:


At this stage, I've just gotten the core buildings up and the tanks mostly filled. The initial Polluted Water supply is only around 53 C, so it's happily cycling on the main cooling loop in the image above. (In case it helps, the coolant travels clockwise.) Presently, the coolant maintenance lines are empty. Note how the pipe out of the coolant tank leads straight to two Liquid Shutoffs, one disconnected and the other between Pipes leading to the two different Aquatuners.

The first (bottom) Liquid Shutoff is controlled by the Hydro Sensor and can be used to eject coolant from the system. We don't yet have a destination for ejected coolant, which is why I've left the Shutoff disconnected. Our first uses will be to supply a Water Sieve for Oil Well use and to develop our first Pincha Pepper farm in upcoming sections.

The second Liquid Shutoff is tied to the upper-right tank's Thermo Sensor. By default, heated coolant will be cooled by the upper-right tank, but if its temperature rises above 150 C, the Thermo Sensor will redirect coolant to the Steam Turbine setup instead. The return paths merge into a single Pipe, which is fine because only one of the two Thermo Aquatuners should ever run at a time anyway. You should also add a third Liquid Shutoff just below this to ensure that only the Liquid Pipe Thermo Sensor can send liquid through it.

So, in essence, we're managing two separate heat levels:
  • Polluted Water coolant between 40 C to 70 C
    • This range is ideal for farming Pincha Peppers and Balm Lily Flowers.
    • It's also distinctly lower than the superheated Natural Gas that an Oil Well will periodically release.
  • A Crude Oil "heat buffer" (eventually) around 150 C
    • This is fantastic for heating up the Carbon Dioxide that we feed to Slicksters, which will help us obtain the superior Molten Slickster variant.
While we aren't presently cooling very much with this coolant loop, having everything in place now will allow us to proceed with our next Oil Biome goals. In particular, it's time to start work on an Oil Well, which will be the primary 'heat source' for this cooling loop. This was actually a significant motivating factor in the placement of these structures:


The three white circles correspond to this world's Oil Reservoir sites. Note how I've built the new structures very close to one Oil Reservoir and am well positioned between the other two. This is why the coolant loop exits to the right of the coolant tank - I'll eventually want to supply a line out to the bottom-right Oil Reservoir. I've made sure to leave a Liquid Bridge in place to facilitate that extension in due time and have also been making good progress on approaching the upper-left Oil Reservoir, which we'll also want to integrate into the loop.

Other Notes
Note how you can see a new resource line supplying the Oil Biome in this image - I've got an active Polluted Water line. While it's technically a "temporary" supply at the moment to initialize the coolant tank, it will be a permanent line - this will be our coolant "resupply" that I alluded to earlier. We're now up to two liquid lines and two gas lines in the central corridor, and we'll soon be adding the third of each.

It would be wise to add yet another Liquid Shutoff, this one to our "resupply" line. When the coolant tank is sufficiently full, we should stop taking on extra coolant for a while to leave space for returning coolant in the tank, using a Not Gate to automate together with the Hydro Sensor's output.

You may notice a few relatively empty open spaces nearby - one below the Slickster ranch and another to the left of the nearest Oil Reservoir. These will make great places to add some new buildings, like the Pincha Pepper farm I've been alluding to. We're now ready to start spending that excess Polluted Water we've been generating!
Oil Wells
Now that a nearby cooling solution is ready, it's time to address two problems at the same time:
  • We have a significant amount of excess Polluted Water from our Power Plants.
  • We've been running off of pre-existing Crude Oil lakes, which will eventually run out.
In classic ONI fashion, we're going to solve the second problem with the first "problem." The key - Oil Wells consume Water to renewably generate significant amounts of Crude Oil!

Each Oil Well that you build consumes 1 kg/s Water in order to produce 3.33 kg/s Crude Oil. With 3 of them, you'll have exactly 10 kg/s, enough to run one Oil Refinery full-time. Of course, before we get to 3 Oil Wells, we should probably focus on one first:


Unlike the Geysers and Vents of the ONI world, Oil Wells will always produce a consistent and constant output. This allows us to get away with a far smaller chamber for Oil Wells than we used for the Cool Steam Vent and the Salt Water Geyser.

Note that I'm running Radiant Liquid Pipes behind the Oil Well. A line of four such Pipes should be enough to reasonably blunt the raw heat that will be emitted during a "backpressure release" phase like the one seen in the image above.

You see, 20 kg/cycle of 243+ C Natural Gas will build up within the Oil Well. Its internal Natural Gas storage fills completely within 4 cycles, at which point the Oil Well will stop. Give it a high priority and set the "backpressure release threshold" to around 75% to ensure continuous operation; that way, your Dupes will have a 1 cycle window to temporarily "operate" the Oil Well and release its pressurized contents at a rate of 800 g/s.

Fortunately, 800 g/s of Natural Gas has significantly less heat capacity than our circulating Polluted Water loop; even at 60 C, it will easily absorb enough heat from the hot released gasses to prevent melting the Transit Tube entry to the chamber. Note that I've linked the new Transit Tube Access to the same 'grid' as the other nearby Accesses.


You might note that I've done the suggested modifications from the last section; the coolant tank has filled sufficiently, allowing excess coolant to 'fuel' the Oil Well after passing through the Water Sieve below. The supply?


Many cycles have passed since the Petroleum and Natural Gas Power Plants went online, allowing a significant amount of Polluted Water to build up. Now that we have somewhere to utilize it, I've started sending it down to the coolant tank. The line at the lower right is also exporting the last of the my original, pre-cooling Metal Refinery's heated waste 'coolant.'

Since the Oil Well produces Natural Gas, it's wise to build a new line of Gas Pipes to add the output to our existing Natural Gas tanks. This marks the third gas resource that we'll be routing between our colony's core and the Oil Biome.

[Principles] The Advantages of Slicksters
As previously mentioned, each Slickster converts 20 kg/cycle of Carbon Dioxide directly into Crude Oil at a 2:1 ratio. If we can ranch a full set of 15 Slicksters per Petroleum Generator, we can get a return of 250 g/s Crude Oil. Not a lot in the grand scheme, but Crude Oil's more useful for us than Carbon Dioxide.

Of course, you might be asking yourself "is it worth the trouble?" That's a fairly good question, and the answer may well depend on your world seed. In this section, I'm going to focus on the math of Slicksters and how they can fit into your resource flow.

Oil Pumps - the true Water cost
Let us first consider how much net Water we lose from Oil Wells. Obviously, we pay 1 kg/s Water to run each Oil Well... but we do get back 750 g/s Polluted Water from Petroleum Generators via our Water reclamation system. If we assume that the only use of Crude Oil in our base is for Petroleum Generators, what's the actual net cost in Water?

One Oil Well outputs 3.33 kg/s Crude Oil, which an Oil Refinery converts into 1.67 kg/s Petroleum. This is 83.3% of what a Petroleum Generator requires to run, meaning that one Oil Well's output corresponds to .625 kg/s Polluted Water, for a net loss of .375 kg/s Water. That is, before we consider the Carbon Dioxide output.

As soon as we established a Petroleum Generator, we also made efforts to construct a considerable Slickster ranch. If ranches worth 15 Slicksters are perfectly maintained and groomed on time, those Slicksters are just enough to convert one Petroleum Generator's output into Crude Oil. The real key here is their conversion ratio - 500 g/s Carbon Dioxide (from a fully-supplied Petroleum Generator) will be converted into 250 g/s Crude Oil. That can be converted into 125 g/s Petroleum, which is 1/16th the amount needed to run a Petroleum Generator. Alternatively, once we upgrade to Molten Slicksters, we'll have double the resulting Petroleum - 1/8th of a Generator's needed supply.

Rather than spell out the rest of the math in a guide, here are the results:
  • Normal Slicksters can stretch 1.67 kg/s Petroleum into an effective 1.78 kg/s Petroleum. This provides 8/9ths of a Petroleum Generator's needed supply, returning .667 kg/s Polluted Water for a net loss of .333 kg/s.
  • Molten Slicksters stretch the same original amount into an effective 1.905 kg/s Petroleum. This returns 5/7ths of the original supply in Polluted Water, for a net loss of 2/7ths - or .286 kg/s.
Note that even with normal Slicksters, proper ranching allows for three Oil Wells to be run for just 1 kg/s Water.

Other Benefits
It's worth remembering that Slicksters produce more than just extra Petroleum. Since they're critters, they also produce lovely eggs that have extra benefits for a burgeoning base. Every six cycles, one Slickster will produce 2 kg Meat that can be converted into one Barbeque worth 4000 kCal. Using Molten Slickster numbers, one Oil Well can sustain 14.286 of them - 100/7. The math comes out surprisingly clean - .286 kg/s Water divided by 14.286 Slicksters gives us a Water consumption rate of 20 g/s per Slickster... or 12 kg/cycle. If the ranch is perfectly maintained, that loss turns into 9,523.8 kCal/cycle, or 55.556 kCal/kg Water. It's still impressive if you do Omelettes - just multiply by .7.

For comparison, note the following:
  • Bristle Blossoms convert 20 kg Water/cycle into 2000 kCal every 6 cycles when grilled. That's 16.667 kCal/kg Water.
  • Sleet Wheat converts 20 kg Water/cycle and 5 kg Fertilizer/cycle into 400 kCal/cycle if making Frost Buns. (Pepper Bread requires an extra Pincha Pepper for no kCal improvement.) This gives us 20 kCal/kg Water, disregarding the Dirt cost.
  • Dusk Caps convert 4 kg Slime/cycle into 2800 kCal every 7.5 cycles when grilled. While Slime to Water isn't a perfect conversion, note that this results in 373.333 kCal/cycle, or 93.33 kCal/kg Slime.
  • Lettuce isn't far behind Dusk Caps at a mere 5 kg/cycle of Salt Water for 400 kCal/cycle, or 80 kCal/kg. However, there is the small detail that your world may not have a Chlorine Geyser, making Bleach Stone use ultimately limited without end-game rocket resupply.
  • While these rates can be 'doubled' with Fertilizer and the Farm Station, note that this also adds an extra 2 kg/cycle Water cost - each Farm Station use costs 5 kg, and the buff must be reapplied per cycle.
While supplies last, Mushrooms and Lettuce are king. That said, Slickster ranching is more Water-efficient for food than any other crop. On top of that, it yields +8 Morale food instead of the Grilled Mushroom's +4.

They also produce Lime from their Egg Shells, yielding even more benefits. At one egg every 6 days per Slickster, we get 2.5 kg/cycle (15 x 1 kg/shell divided by 6 cycles) of Lime out of this deal, too. That's Lime for one extra batch of Steel every 4 cycles.

So, are they worth it?
As noted by the math above, if you ever find yourself on a low-Water world, Slicksters are phenomenal for gaining the benefits of Petroleum use as Water-efficiently as possible. They're also a fantastic sustainable food source, allowing them to fulfill two critical niches for your colony.

On the other hand, if your game world has tons of Water available, maybe the Water conservation thing isn't so important. Often times, when Water is abundant, you may find yourself more limited by Polluted Water. While Water is critical for survival, Polluted Water has its own wonderful array of benefits worth considering:
  • Pincha Peppernuts are very useful for increasing Dupe Morale, both as a food ingredient and as an Expresso ingredient for recreation.
  • Sustainable Dirt production near-requires use of Polluted Water, usually with Polluted Dirt as part of the process.
    • Water Sieves output Polluted Dirt as part of their operation - 200 g/s with perfect uptime (5 kg/s Polluted Water)
    • Lumber from Arbor Trees (consumes some Dirt + Polluted Water) can be used with the Ethanol Distiller to make tons of Polluted Dirt and some excess Carbon Dioxide. The resulting Ethanol can be used in Petroleum Generators, too.
Keep in mind that Dirt is very useful for making Fertilizer, which can effectively halve the cost of raising domesticated plants outside the cost of the Fertilizer itself.

When you're not in a Water-starved world, it's probably worth conserving some of your Carbon Dioxide for use with Carbon Skimmers, at least eventually. We'll revisit that once Polluted Water supplies start to become more of an issue.

For now, we're producing excess Polluted Water from our Power Plants, and we've only just started to utilize it. We'll be producing more of it as we consume more Power, too - there's no need to pursue Polluted Water at this time. With that in mind, Slicksters give us better Power efficiency than before and help to increase our Lime supply so that we can make even more Steel - two things that will serve us well at this stage of the game. While Fossil is relatively plentiful in the Oil Biome, it is ultimately limited; we'll want more than the world provides us for free.

Final notes
While beyond the planned scope of this guide, it is often possible in the end-game to 'boil' Crude Oil into equal amounts Petroleum, doubling all effects above. It also doubles the Polluted Water output, turning the net Water loss into a Water gain!

If you want to start on this early, you'll want to look for Volcanoes to facilitate this. This guide's worldgen seed provides a Volcano in the Frozen Biome to the right of the colony's core, for example. Many veterans have developed builds for this that don't rely on space materials, so feel free to look those up if you want to start early.

Of course, such a "boiler" will lose the bonus Natural Gas produced from the Oil Well and from the refining process. That said, I didn't include either benefit in the math above.
More Morale
While we've started 'burning' our excess Polluted Water to utilize Oil Wells, there are other, better uses we should consider given the current state of our base. We've got tons of hot Water at our disposal, so we don't need to recycle Polluted Water into Crude Oil. Why not use Polluted Water in other ways instead?

One particularly useful application of Polluted Water available to nearly every world type is the Pincha Pepperplant. This wonderful plant produces a cooking ingredient useful for cooking advanced foods (which increase Morale) and for raising Dupe morale more directly through the Espresso Machine. It also likes temperatures in the 35-85 C range - something we can easily enforce with our Oil Biome cooling loop.


Feel free to ignore the left-hand room beside the Pincha Pepperplants; I started a bit more construction than was needed here.

Like the Slickster ranch, this room is designed around the Auto-Sweeper, which is able to deliver Phosphorite to all 12 of the plants inside the room. Each plant uses just 1 kg/Phosphorite per cycle; the bigger demand is the 35 kg/cycle Polluted Water. At 12 plants, this works out to 420 kg/cycle, or 0.7 kg/s. When the Petroleum Power Plant is in constant use, we'll be getting enough output to slightly more than cover this farm's needs completely.


Of course, there's also the Oil Well, which requires 1 kg/s Water upkeep. Our Power Plants won't be generating nearly that much Polluted Water, so while we have a large supply available now, we should plan ahead and prepare a backup system. Note that I've modified the Pipe-work around the Sieve:
  • By default, all Polluted Water that can be sent to the Pincha Pepper farm will go there first.
  • Any leftovers will go to the Water Sieve and will be sent to the Oil Well.
  • If there isn't enough Water coming out of the Sieve, incoming heated Water from other areas will be used as a substitute.
When I implement Oil Wells on the other two Oil Reservoirs, their supply lines will attach to the left side of the Water line below the current Oil Well; that way, we only have to implement the "piping logic" once. Past that, note that I've extended the "cooling loop" into a "stabilization loop" around the Pinchas. I probably went overkill on the Radiant Pipes here, but this structure communicates the idea well enough.

Advanced Cooking
There are a few advanced food types (Stuffed Berry, Pepper Bread, and Spicy Tofu) that use Pincha Peppers as an ingredient, but all of them use a new station called the Gas Range:


This is a rather expensive device to operate - 100 g/s Natural Gas while cooking and an extra 240 W draw. Keep in mind that 90 g/s Natural Gas is 800 W (or 1200 W buffed with Tune-Up)! That said, if we find ourselves with an abundance of Natural Gas, it's better than outright wasting the excess.

There are some strong benefits to operating a Gas Range that you may find to be worth the cost. For starters, the "worst" foods made at this station are worth +12 Morale! They also allow us to create very kCal-dense food. For example, consider the Surf'n'Turf, which requires 1 kg Barbeque and 1 kg Cooked Fish worth a total of 5600 kCal. One batch of Surf'n'Turf yields 1 kg of food worth 6000 kCal! This means that storing high amounts of reserve food will be easier than before.

Now, to supply that Natural Gas...


Note how I've taken the hot supply from the main Natural Gas storage and sent it through a small Radiant Pipe loop in the Power Plant coolant tank. This will rapidly remove the excess heat and make it safe to send through the base. In fact, depending on your temperature setting for the coolant, this can allow the Natural Gas supply to help cool the base as it passes through.

Advanced Recreation
If you've been following my guides, you've probably noticed that it's been a long time since I've talked much about Dupe Morale. Now that we've gotten a good handle on the Oil Biome and are getting ready to approach the surface, it's a good time to enrich our Dupes' lives so that they can learn even more skills. The Gas Range will certainly help with this, but it's not the only thing.


On the left, you can see my new Expresso Machines. These machines requires the Tier 5 research "Advanced Caffeination" and consumes 1 Pincha Peppernut with each use. While it takes Dupes a while to use the machine, this gives them a bonus of +4 Morale - not to mention keeping them in one spot, the optimal situation to create a focused high-Decor environment to further boost Morale. It requires fairly high upkeep, though - it must be used every cycle to maintain the +4 Morale boost!

On the right, you see the Arcade Cabinet, a station that two Dupes can share at a time for a +2 Morale boost. It costs a lot of Power to operate, so definitely give it lighting to speed up the task and save on Power in the long run - note the nearby automation Sensors. Its Morale buff will usually last a few cycles, just like the Jukebot.

Since the Dupes now have significantly more Morale equipment to utilize, it may be worthwhile to give them an extra slot of "downtime" now. While this does mean less time per cycle actually working, we can afford it at this point. I often struggle to prevent my nemesis, the "Idle (2)" notification, from appearing - especially during complex builds - so I personally find the increased downtime to be a bit helpful. Gotta manage my stress while managing their Stress too, I guess.

If you find yourself short on Pincha Peppernuts, there's a reason I put the Expresso Machines further inside than the Arcade Cabinet. Feel free to restrict their use to your most valuable Dupes.

Other Notes
For those curious, I've decided to use all the excess Salt Water from the nearby Tide Pool Biome for the backup Water supply to the Oil Well:


While it does cost Power to run the Desalinator, this area has long been extremely flooded due to its Salt Water Geyser. This will help to slowly clear out the area so that I can more easily explore there. (And yes, I'm really lazy with the Desalinator's placement here.) Also note that I've deliberately left the non-filtered output slot on the Liquid Filter disconnected - it will immediately backup and stop once a different liquid attempts to enter. That won't happen for a long, long time due to the extreme amount of liquid, though.
Drecko Ranching
Pincha Pepperplants aren't the only farmable item that loves 40 - 70 C temperatures - the Balm Lily works great in this range too. Balm Lilies have the wonderful distinction of requiring literally zero upkeep outside of a lone requirement - a perfect Chlorine atmosphere. They're also quite useful for feeding basic Dreckos.

Dreckos are useful for three things:
  • When in Hydrogen, they slowly grow Reed Fiber wool.
  • They produce Phosphorite.
  • They produce eggs, even if slower than any other critter.
Even if their reproduction is slow, standard Drecko maintenance is practically free once you get the setup in place, and they're far better for Reed Fiber than Thimble Reeds due to the latter's extreme upkeep costs. While we're in the midst of doing other things in the Oil Biome, we may as well wrap up this arc by building one last ranch down here before we turn our attention elsewhere.

We're going to aim for something like this:


Due to the atmosphere requirements of Dreckos, it can take a while to properly vacuum the room out. Consider digging toward the top of the map to find space if you haven't already during this time. My cycle count has certainly increased since the last section due to this.

By fully vacuuming the place before adding gasses, we can ensure that only Hydrogen and Chlorine will remain inside the room. Carefully controlling the amounts we add, it's possible to get a near-perfect balance between the gasses as seen above. Here, I used Gas Bottlers to deliver exactly 20 kg of Chlorine before dumping in the Hydrogen. As a result, there's just enough Chlorine to grow the Balm Lily Flowers, while nearly anywhere else is filled with Hydrogen to grow their wool.

Aside from that, the setup is really similar to the Slickster ranch. We've got a similar egg storage and hatchery automation established, the Auto-Sweeper can immediately remove any Drecklet eggs that are produced, etc. Also note that if we wanted to, we could have added a second copy of the right-hand room on the left-hand side with little issue. Of course, right now my base is nearly swimming in eggs, so I'm not in a rush to set up the other part just yet.

While we already have very high amounts of Phosphorite from mining out natural tiles, this will give us a steady, controlled stream of renewable Phosphorite for use with our colony's Wheezeworts and the new Pincha Pepper farm. It's also quite useful should we ever want to manufacture our own Fertilizer... something which can double the production of farms. Finally, since these Dreckos will produce Reed Fiber, there's little reason to worry about farming Thimble Reeds, allowing us to spend Polluted Water on more interesting things.
-- Base Planning (Round 3) --
Now that sustainable Crude Oil is under our belt and we've practically colonized the Oil Biome, it's time to turn our attention to the stars - we're about ready to venture to the surface and space! We'll have all sorts of wonderful new challenges to deal with; make sure to have tons of Iron and Lime (or pre-made Steel) saved up! You should have tons of useful Fossil for this from your recent Oil Biome trips.

Before we get too excited, though, let's review what we've done since the previous "Base Planning" round. Since the vast majority of our work was performed in the Oil Biome, that's where we'll look:


It's often interesting to see a before and after; taking things one step at a time, large amounts of work can get done! The most "fun" overlay to examine here for review is the plumbing overlay:


Yeah, it's a bit of a mess, but the primary lines into and out of the Oil Biome are still pretty clear and comparatively untangled.

The Plan
Now that we've tamed the Oil Biome, it's time to move onto the next challenge - we're going to set our eyes on the Space Biome. If you haven't done so already, start mining toward the top of the map until you see something like this:


Note the revealed area toward the top-right - we can see starts in the background and some new natural tile types. If you hover your mouse in the area, you'll also see a "Space Exposure" warning. That's the sort of place we want to go.

Once there, we'll want to focus on making it a safe place to work, utilizing Bunker Doors to protect the base as appropriate. Once that's locked down, we'll then start building some "space industry" and prepare ourselves for Steam-based Rockets! As it turns out, our beloved Steam Turbine setup makes a wonderful Steam boiler when half-constructed. (We can always complete the Turbine setup later, once we've moved on to better rockets.)

Of course, one of the first steps toward this is to extend our corridor toward the edge of space for our initial entry. There's one little problem for me, though...


Unfortunately, I've got a major roadblock in the way of extending the vertical corridor all the way. Since I can't deconstruct Neural Vacillators, I'm going to make an early horizontal corridor below the ruins instead. It's not that big of a problem.

In fact, this has its benefits. As you probably noticed in the Oil Biome, the edges of the map tend to have the biomes zigzag in and out, like how I originally entered near one of my Oil Biome's peaks. Whlie we don't necessarily want to enter space directly at a valley, those valleys make a great place to build rockets - and we'll want to keep the corridor a little bit below the rocket's launchpad, anyway.

This arc will run pretty long - Space takes a lot of work. Feel free to work on some other side projects in the meantime - I'm likely to establish an enhanced Hatch ranch or two in the background. Just take a look at the two recent ranches we implemented for ideas in that regard if you need them. For me, the big thing is that manually dealing with the eggs from the old version gets tiring after a while and lowers my personal morale. It's really relieving to get automatic ranches established instead.

At this stage, all the big, immediate dangers have already been handled. The final two "dangers" were if we didn't handle the Petroleum Generator's CO2 output and if we ran out of Oil, which could cause significant Power issues. That said, handling our excess Polluted Water output proactively, rather than just dumping it somewhere and perpetuating the problem, is also quite useful. All in all, there's no longer any need to race, so take whatever time you need to make the rest of the game run more smoothly for you. It is a game, so make sure it stays fun!

Other Notes
If you haven't already done so, now's a great time to replace your main vertical corridor's Ladders with Plastic Ladders. The additional boost to climbing speed will be extremely helpful, given how large and spread out the colony is becoming. If you don't yet have enough Plastic - and admittedly, we did spend a lot down in the Oil Biome - just fire up the Polymer Presses for a while.
Steam Turbine Cooling Extension
Before making the big push to space, I like to do just a bit more positioning to facilitate all the work we'll be doing once we get there. We're going to be using a LOT of Steel out there, and making Steel makes a lot of heat. All that Fossil we found down in the Oil Biome? That's for making Steel - and it still won't be enough for everything. (Rockets cost an awful lot.)

Since it will take a while for us to build a proper, safe tunnel through to space, why not prepare to take a bit more advantage of that time? At this point, there's one last upgrade I like to do to facilitate the big push - I'm going to upgrade my original Steam Turbine setup, the one at the core of the industry zone. This is one of the huge advantages of the Atmo Suit access design - without it, extending this structure would be far more difficult.

We should start by remembering that the chambers of the Steam Turbine require a vacuum setup for optimal use. Also, if you've not yet done so, you may want to extend your coolant tank to match mine, giving you the room for an extra Liquid Pump. (I mentioned doing this in the background in an earlier section.) Since we're extending an operational building, it's better to cordon off the new areas and vacuum them first:


Once both chambers are vacuum-pumped, disable the Gas Pumps (through automation or cutting their Power lines) and break down the wall to extend the old chambers, like so:


At this point, we've successfully expanded the general structure of the Steam Turbine setup, but we haven't really increased its cooling capacity. We're going to add an extra Thermo Aquatuner in the new space along with an extra Steam Turbine up top. This will double the structure's heat deletion and cooling power, allowing our industrial cooling loop to keep up with the heat from Steel refining more easily than before. We'll also want an extra Liquid Pump in the coolant tank to drive it:


Since the piping here has long been complex, here's a before-and-after on the plumbing overlay:

-

All this time, I've been planning ahead to leave enough room to add the new Pipes for this. While I was at it, I decided to make part of the return route Radiant - this way, we can cool off the underside of the industrial zone a bit too, countering the heat of all those Large Power Transformers whenever the second Thermo Aquatuner kicks in.


In case you're worried about Automation, here's that overlay. I've set the Thermo Sensor that drives the new Liquid Pump to "above -2 C" - I've recently been running the coolant loop at that temperature as well, largely because of the recent coolant tank extension. I'm about to have both Natural Gas Geysers go active - that'll be a better time to spend extra Power to bring the temperature back down to the original -5 C.

Other Notes
By this point, you should have long ended the old Smooth Hatch ranch. With the Petroleum Generator and cooling loop operational, we've already got a better solution in place for refining Iron. It's more costly to operate, to be sure, but use of the Metal Refinery gives 100% refined mass instead of only 75%. While it's not critical to save that 25%, you'd probably prefer to not be waiting around for extra Iron to trickle in once you've mined out all the metal.

As a result, I might have been saving up a lot of material to refine...


Between all the Oil Biome's Fossil and all the Egg Shell from the ranches, I'm practically swimming in Lime. I had to put some of the metal refinement tasks on pause while doing the coolant tank extension while the new coolant's temperature was lowered, but now that everything's ready, I can refine to my heart's content!

While you could get by without ever extending the industrial cooling loop here like I have, there may come points where you'll need to wait for things to cool down. If you're comfortable doing that, be my guest. However, I find the game more fun when I have less things I have to track - and improving the power of the cooling loop means I'll need to micromanage this area considerably less than before; that's a win for me.
Space Biome Exploration
Phase 1 - Breaching the Surface
Naturally, the first step in exploring space is to simply dig up.


You'll want to block the path with an Airlock of some type so that any nearby atmosphere we've been maintaining doesn't disappear into the void. While not completely necessary, I advise using Steel for the Airlock... more on that in a bit. Be sure to set permissions so that only your best explorers can venture forth for now.


As it turns out, I'm probably digging up from one of the lowest points on the surface - I've got a lot of distance to dig to reach the top. Note how I'm occasionally shifting the Ladders from side to side - this is to avoid issues from dropping Regolith, much like Sand can be an issue in other biomes. Since Space has no Oxygen, it's important to ensure a quick pathway back to air for your explorers.

Note how I've selected a new critter found in the Space Biome - the Shove Vole. These critters have crazy appetites and specialize in helping to keep the surface safe for our colony before we actually reach it. That said, they're all too happy to venture below the surface if you give them a path; that Steel Airlock won't let them pass, while one made of Raw Metal would be of no issue to them. They also don't like Abyssalite or Obsidian due to their hardness.

At this point, the current subgoal is to find the actual surface. Every world has a 'surface ruin' at some point on the map, and not everything within is destructible. As a result, we'd like to avoid building our primary pathway to space through it if possible. That said, if you're entering space near one of the closest points to the surface, it will offer you great protection from meteor strikes, which are a thing we'll address later.


In my case, the pathway to the edge of space is clear. I've decided to plan a main vertical corridor through the area with the maroon rectangle, as it can just squeeze between the non-destructible ruins down in the Frozen Biome. I could do it to the right of the Neural Vacillator, but I'd rather leave potential space for a rocket silo on that side. All of this said, there's still a fair bit of work to do before we can fully extend a corridor into space.

Phase 2 - Jet Suit Infrastructure
Now that we've scouted enough to make plans for space, it's time to build the infrastructure that will let us build and explore efficiently. You may notice that to this point, I still haven't built any Atmo Suit Docks to help my explorers. That's because we're going to make Jet Suits instead, and also because I hate making very temporary infrastructure. I'd much rather do things correctly the first time. Note - the research "Jetpacks" (Tier 6) will be required.

You might also notice, though it's faint, that I'm building some Drywall at the space-exposed points in the Frozen Biome. This will end the space exposure and allow us to build/conserve an atmosphere here, making it more easily usable for checkpoints into space.

A significant amount of time later, I've extended the central corridor up to the desired point and built my colony's first Jet Suit Checkpoint:


Note how one of the Dupes is flying! Doing this within the asteroid will result in Carbon Dioxide exhaust, but in space the exhaust will quickly disappear.

Due to the relatively cramped area, I've decided to make a two rows of Jet Suit Docks - this will allow a total of six Dupes to venture into space once the second row is completed. Since Dupes can fly with Jet Suits, make sure that there's no way for them to return without dropping them off at the checkpoint - otherwise, you may have to chase the renegades down later.

Now that we have Jet Suits, we can explore the surface much more easily. Since I already dug most of the way to the surface, it only takes a small bit of extra digging to break through and go for a spacewalk:


Note the marked zone at the top of the map - this marks the edge of space. We can't build anything within that area or beyond it. To view all of this for your playthrough, be sure to use the "Move To" command on a Dupe's info view - Jet Suits give Dupes plenty of freedom to go wherever you tell them. I used the opportunity to find the space ruins - note the buried structure on the right-hand side.

Phase 3 - Building our "Space elevator"
At this point, everything's ready to a corridor to the edge of space - something of a "space elevator", if you will. At the very least, we'll want to extend Power lines and Oxygen to the surface, with the potential for more lines later.

Of course, digging all of this out means that a lot of material is about to fall to the floor near the Jet Suits... within a Frozen Biome. Great. This especially matters for the materials found at the edge of the surface; due to meteor strikes, they're generally hotter than the tiles beneath them.

Speaking of meteor strikes, one of our first priorities will be to prevent any strikes from entering our eventual elevator. They deal damage to nearly everything your Dupes can build, and the repair costs can eat away at valuable resources. Fortunately, there are a few things that are impervious to Meteor strikes - Bunker Tiles and Bunker Doors, both of which are made from Steel.

I'll discuss the overall strategy for handling meteors in the future, but for now, try to build the following aligned over your elevator shaft:


Ignore the zigzagged blocks - those are a visual aide to indicate that your Bunker wall-off should have five buildable spaces above it. For the horizontal alignment, and to start digging away at the hot resources I don't want in my shaft, I've marked the future elevator shaft with a maroon rectangle as usual. Those are real Dig commands, too - I want to clear away the hot resources before I fully open the shaft up.

You may also want to add an extra pair of Bunker Doors on the sides of the two in the build commands above, but even the structure seen above should be able to prevent any meteor strikes from dealing damage within or to the shaft. That said, we'll be adding more Doors than that in the near future, so there's little reason to not add a bit more safety now.

I've also set up some Sweep-only Storage Bins to take Mafic Rock, Regolith, and Granite that has been dug out, giving us some place to place the hot surface resources before fully connecting it to the shaft's base below.


At this point, I'm most of the way done making the shaft. Once the final sweep commands there are handled, I plan to mine out the rest; it's cold enough already that it won't be a problem if it falls into the Frozen Biome.

Of course, you might be noticing a little visitor to one of the side shafts I used to reach the surface originally. Even a single-tile width shaft can let meteors through to deal damage; this is why Bunker Tiles and Bunker Doors matter.


At this point, the main access to the surface is now ready and we have space to run Power and pipes without worry. We can tidy up the walls and such at a later point.

Other Notes
If you haven't yet visited the inside of your surface ruins, make sure to do so! There's some good lore in there.
Space Protection (Bunker Doors + Scanners)
Before we can build anything substantial in the Space Biome, we first need to make it safe for work. By this point, you should have seen at least one meteor storm and the effects that said storms have on the surface. We'd rather not have those storms break our surface buildings when we make them.

The first step in making things safe is to build Bunker Tiles and Bunker Doors. These are unbreakable - whenever the Doors are closed, no meteor can get through them; only around. However, keeping them closed makes space remarkably less useful. We'd like to work here safely, and with the Bunker Doors open when possible.

Researches Required
  • Celestial Detection (Tier 6)
This pattern for the "great space wall" was primarly inspired by this post on Reddit - many thanks to the original designer. If you want to check out the original design, it's the third image in the first linked album there.


Start off by constructing a set of four Bunker Doors on each side of the elevator shaft's protective barrier. Beneath that, place one Space Scanner as seen directly beneath the center of each set of Doors, leaving three tiles of space. Combined with the distance of the Bunker wall from the edge of space, this gets the Space Scanners as close to the edge as absolutely possible. Any closer to the edge and we'd lose scanning quality.

Note that the Space Scanners are setting on Mechanized Airlocks, beneath which are rotated Robo-Miners. Since many meteors drop large quantities of Regolith, we'll want Robo-Miners to auto-mine what drops and preserve vision of space; this way, you the player won't have to constantly re-mine the place.

Beneath all of that, we have Mesh Tiles. Oddly enough, while Mesh Tiles do block Decor, they do not block vision of space. In fact, they let more light through than Window Tiles! There's also the major benefit that when Mesh Tiles break, should the worst happen, they won't let anything drop through to any buildings below. We'll be placing more buildings underneath that, but first focus on getting this basic structure in place.

Materials list
  • If it's on or directly touching a Bunker Tile or Door, make it from Steel.
  • If Regolith can drop from above onto it, make it from Steel - dropping Regolith can deal damage!
    • You can get by with some of the other Refined Metals, but absolutely do not use Lead. It will break rapidly and often.
  • Robo-Miners must be made from Steel. They'll eventually overheat, so disable their Auto-Repair. (Deconstruct and rebuild to reset the temperature.)
  • For now, we'll be fine using Raw Metal (like Gold Amalgam or Aluminum Ore) for the Mesh Tiles. Breaking is possible, but it's better than spending a ton of extra Steel unnecessarily.
I highly advise setting a few Storage Bins in space near your work area so that your Storage Dupes can reduce the amount of back-and-forth your workers will need to do for materials. Make sure to do this for whatever Raw Metal you use for the Mesh Tiles - otherwise, Dupes may go running around grabbing small trace amounts from the surface in a very inefficient manner. Also, note that climbing Ladders is actually faster than flying with Jet Suits; don't be afraid to build a Ladder up the shaft to the work area, as it'll save time in the long run.

Once that's built, we're ready to start preparing the Bunker automation:


Note: the automation logic goes completely counter-clockwise here. I've numbered each gate, in sequence, so that each can be clearly explained below.
  • Space Scanners send a Green signal when they detect a meteor. However, we need a Red signal to close the Bunker Doors. That's why the first gate in the sequence (Gate 1's input) is a Not Gate.
  • Gate 1 - a Buffer Gate (incorrect in image above) - allows us to control the delay for closing the Bunker Doors. As we add more Space Scanners, we'll be able to keep them open for longer after receiving an "incoming" meteor signal. This connects straight through to the Bunker doors. Subtract 45 seconds from the minimum the Scanners tell you.
So, opening the Bunker Doors is pretty simple. The hard part is what comes next - opening the Mechanized Airlocks at the exact moments we want them open and at no other time.
  • Gate 2 - another Filter Gate (43 seconds) + its neighboring XOR. We only want to open the Mechanized Airlocks immediately after reopening the Bunker Doors - that is, after a meteor strike. This combination will signal Green from the XOR for 43 seconds once a meteor strike ends. It will be Red at any other time.
    • In essence, the XOR Gate says "the main doors are opening."
  • Gate 3 - yet another Filter Gate (42 seconds). Opening a Bunker Door takes 45 seconds when powered - that's quite a long time! We only need to open the Mechanized Airlocks when debris will be falling - and that's two seconds before the Bunker Doors fully open - Mechanized Airlocks have a small, 2 sec opening delay.
    • Because this is a Filter Gate based on the XOR, it will only signal Green for a single second, creating a pulse saying "the doors just opened", and will be Red at any other time.
  • Gate 4 - a Buffer Gate (5 seconds). To ensure that debris has enough time to fall, we keep the Mechanized Airlocks open for a short interval, then close them again so that the Robo-Miners and Space Scanner can resume operation.
    • If you want, you can remove Gate 4 by increasing Gate 2's timing to 50 seconds; Gate 3 will then give a 5 second Green pulse. (I added #4 to make the overall logic a bit clearer, with each Gate serving only a single purpose.)
Once the core automation and Power lines are built and fully connected except to the Bunker Doors, then and only then complete the connection to the Bunker Doors.

The result? (1 minute clip)

Space Construction and Infrastructure
Solar Power + Space Analysis
Let's start things off by noting a new resource available to us that we should consider using:


Light far stronger than what our buildings produce comes raining in through the Mesh Tiles. Since we have a Glass Forge, we can create Solar Panels to gain literally free energy from such strong light. Glass may cost a lot of Power to make, but it's an investment that pays off in dividends. We'll protect the Solar Panels by placing them under the Mesh Tiles.


A pretty simple rule of thumb for the spacing - build your first Telescope underneath the Mesh Tiles. Build your Solar Panels at the same level and you're good. Building the Telescope will also give you access to a new screen - the Starmap:


This building requires a piped Oxygen source, so be sure to provide that. From here, set a researcher to analyze nearby asteroids for interesting targets for space travel in your colony's future.

Notice - it's been nearly 350 cycles (in my case), but now's the first time I've been able to open this map meaningfully. In case you didn't feel this way before... seriously, welcome to the late-game!

Space Construction
One of the more difficult parts about working in the Space Biome is the complete lack of atmosphere. You see, heat - and cold - spread primarily though interactions with gasses in the atmosphere; without that, buildings that generate heat will often rapidly overheat. If you haven't seen that yet with a Robo-Miner, just give it time.

Basically, we need to carefully build many of the structures we need in such a way that we can maintain enough atmosphere to do heat transfers when and where they matter. The trickiest part of this? Power Transformers generate heat constantly... and we'll want them in numbers for our Bunker Door circuitry since Steel's too expensive to use for that at this point. So far, I've just been running up a couple of Conductive Wire lines from below, but that won't be enough to extend everywhere.

If you're not interested in mining out the full surface just yet, you might want to start constructing a pressurized corridor underneath the Solar Panels. (Note that at this point, I've decided against making a rocket tube close by at the right, but I'm leaving space for some on the left.)


Remember all that work we did down in the Oil Biome with pressurized structures? We can use similar techniques for space construction. The big difference is that we'll need to make drywall that can hold an atmosphere. I've opted for a 4-tile high corridor for two simple reasons - we need that height to add a Transit Tube Access, and I'd rather not build it in a notch.

Fortunately for us, Transit Tube Accesses don't actually generate heat. They're safe to use before we pressurize the room, so feel free to connect the Tubes before the room is ready for pressurization. (Note the Access near the Jet Suit Checkpoints.)

A few other pointers:
  • Make sure to build doors, not walls, at endpoints of pressurized sites if you'll want to extend corridors from them in the future. Deconstructing Tiles or Doors will temporarily cause space exposure, losing atmospheres. It's nothing too critical, but a little planning now can reduce frustration later.
  • We'll want a Hydrogen (Gas) supply line to the surface; we'll use it for corridor pressurization for now, but we'll add more uses later. (This makes two Gas lines to the surface.)
  • If you want to start from a pure vacuum in the new corridor, make sure that Dupes don't need to fly when building anything. Remember, Jet Suits emit Carbon Dioxide when flying.
After a few more cycles:


As long as we keep the pressure in the new chamber above 1 kg/tile, the Wheezewort will eliminate 12 kDTU/s - that's enough for 12 Power Transformers, giving us plenty of room to build something far more substantial at the surface. If you're on a map type without Wheezeworts, consider pre-cooling the Hydrogen you send here and using an Ice-E Fan to maintain the temperature afterward. Either technique should last us for quite a while and is sufficient for our upcoming plans.

For an alternate design, consider this:


It may take a bit of extra work, but this taller design gives you two layers for building Power Transformers instead of just one - a very handy feature. It can be tricky to remove any stray bits of Carbon Dioxide from the bottom, though.
Convertible Steam Boiler
Now that we've got our first infrastructure line solidly implemented within Space, it's time to start working on a more robust, long-term cooling solution. That said, we're not exactly in a rush to actually build heavy industry here - we can last a while with the limited cooling we just implemented.

On the other hand, there's a different huge reason to start work on a Steam Turbine setup right now - the same cooling structure we used in the industry zone can be tweaked to create a Steam boiler that will let us operate our first Rockets! (Of course, these setups require Power sources - we made the cooled chamber so that use of Large Power Transformers here will be safe.)

Here's the start of the Steam Boiler setup, which should look fairly familiar from the mid-game guide:


You've probably noticed a major difference - there's a new building there called the Liquid Tepidizer. When submerged in liquid under 90 C, it will very rapidly heat the surrounding liquid. Of course, this is a terrible thing to use in a coolant tank - but right now, we don't need a cooling tank. What we need is an infinite heat source that can boil Water into Steam. The device shuts off automatically when its surrounding liquid reaches 90 C, but that's okay - we'll move its output heat into the lower chamber (this time, Petroleum) above by using the Thermo Aquatuner to bypass that limitation. In essence, we'll be deliberately overheating coolant so that we can make Steam on demand!

The nice thing about this setup - once we upgrade to Petroleum rocketry and thus no longer need a Steam boiler, we can tear down the Tepidizer and convert it straight into a standard Steam Turbine cooling setup, one that will last us a long time on the surface. It'll be very simple to swap the contents out due to the airlock access built into the structure.

Since the future plan is to turn the boiler into a Steam Turbine setup eventually, note the odd difference of the Manual Airlocks on the right-hand side. Remember, space is a vacuum - despite the metal walls provided by the doors, we'll have perfect insulation. The reason for the doors? Doors block vacuum exposure, which is incredibly important if we ever want to extend the chamber in the future. If we used standard tiles here, the contents of the two chambers would be lost during the extension process due to vacuum exposure. The doors will be inside the chambers once extended, and in the worst case, we can simply add insulation on their right-hand side and call it a day.


Of course, we'll need to have supply lines routed to the area to provide the initial Water and Petroleum necessary to run the structure. There's little other use for Polluted Water out here, so it's simpler to just use Water for the lower chamber. Once we're far enough in Space tech, we'll want to replace the "coolant" with a new material we currently can't access; something reasonable but temporary is fine for now. There's also the pleasant detail that I'm using very hot Water from a Cool Steam Vent - it'll have loads of heat available immediately, rather than requiring use of the Tepidizer from the start.

Once you've reached this point, it's time to prime the "coolant" tank with hot Water and the tank with the Thermo Aquatuner with Petroleum. Both will take a while to fill up; either start building the rest of the internals by reading ahead or start preparing a build area for your first Steam Rocket. (If you haven't already, make sure to start researching the Tier 7 tech "Introductory Rocketry" - being able to place the components will help give you an idea of the size and scale you'll need.

You only need to fill them up to the levels seen below:


Unlike Polluted Water, normal Water doesn't offgas; as a result, there's no rush to completely fill the tank. The more Water we add, the more time and effort will be required to empty it later. As for the Petroleum chamber, note that Petroleum's preferred max pressure is 740 kg. Cut it off just short of that, if possible.


Here's the "boiler"-mode Automation logic:
  • The Liquid Tepidizer is set to run if the Water's temperature drops below 20 C. As long as we use the Thermo Aquatuner on Water over 14 C, we get the same returns on heat; why not keep the Water relatively cool?
  • If there is more than 2 kg/tile of Steam in the boiler chamber AND the Steam's temperature is above 115 C, pump the Steam out - it's rocket-ready. (Make sure it can't cool off on the way to a Rocket, but everything's fine once the Steam's inside safely.)
  • If there is less than 2 kg/tile of Steam in the boiler chamber, add more Water. Remember, there's a stretch of pipe between the Liquid Shutoff and the Steam chamber - lots of Water will be delivered after the Shutoff cuts off.
Since the Petroleum isn't yet hot enough to create Steam, I haven't connected the "add more Water" logic to its Liquid Shutoff yet. Be sure to wait until the Petroleum is at least 115 C to be safe - Water has a higher heat capacity, so we'll want a safety margin on the initial Steam. (Save first, just in case.) It'll take a while to ramp up the Petroleum's heat, but once there, we'll be ready for rockets!
Steam Rockets
Now that we have a Steam Boiler in the readying stage, it's time to actually build a Rocket. Get ready, 'cause these things are huge and require quite a bit of Steel. Our first rocket - by itself - will need 3.2 tons of it, and having far more than that on hand will prove quite useful.

To start off, let's talk about our first mission - a simple research trip to one of our nearest destinations:


Each unique destination has five separate "interstellar research" categories that can be analyzed during a Rocket mission. Each Research Module your Rocket has can recover data for only one of the five categories. As a result, why not aim for a simple Steam Rocket that can cover all 5?

To do this, you'll want to prepare a significant amount of space:


That's right - you'll want at least 35 tiles of space beneath a set of Bunker Doors. Also, note the Mesh Tiles on the underside - rocket exhaust is a thing here, and it is hot. Steel Mesh Tiles for the center three tiles beneath the Engine is enough, as that's where the exhaust comes from. Be sure to leave nine tiles of space below the Mesh Tiles, as hot Steam will fill that area upon launching.

Finally, make sure to prepare some fuel storage and a Gas Pipe path that can fuel your Rocket:


Make sure to use Insulated Gas Pipes - the material will likely start out cold, which could cause the Steam to cool to the point of breaking your Pipes with the other Pipe types. Also, avoid use of Granite or other relatively-low melting point materials near the Rocket - use Mafic or better. Finally, set your Rocket's Steam Engine to 695 kg of Steam.

If you're curious where that number came from, check out this resource for rocket planning: https://oni-assistant.com/tools/rocketcalculator


You may have noted a bit of Automation logic near the rocket; this helps to control the Bunker Doors in a rocket-friendly manner. Or rather, in a Bunker-friendly manner - the one thing capable of destroying your Bunker Doors is a Rocket! The logic:
  • If the launch checklist is complete and there are no incoming meteors, retract the Gantry and open the Bunker Doors.
  • If the rocket is returning, open the Bunker Doors regardless. Note that the left-most Space Scanner has been set to signal when this Rocket returns.


Once enough fuel is added, assign your first Astronaut Dupe to the Rocket and press the launch button! As you might note in the images above, my rocket's ready to go.


It's now time to click that "Launch Mission" button - enjoy the show!

The Return
In about three cycles, the Rocket silo should reopen and welcome the Rocket for its return. After it lands, you should see this at its base:


If you've been wondering about the third research point bar on the highest-tier researches, these "Data Banks" are a requirement for gaining them. Spending them at the Virtual Planetarium will give 1 Interstellar Research point per Data Bank. You should have at least 250 of them from this trip - 50 x 5 from the Research Modules. (Somehow I got an extra here.) Future trips to the same location will only return 10 Data Banks instead of 50 per module, but that's useful for pushing past Steam Rocketry to more advanced types.

That's not the only thing we gained, either:


We've uncovered details about two new resource types available at this destination - and one of them is brand-new! There are three different materials that are only obtainable in space, and all have powerful uses. For example, Fullerene is used to make Supercoolant, the hands-down the best liquid for cooling uses in the game for normal temperature ranges. (Note: this requires a supply of Gold too, so hoard all you can if your world type doesn't give you large deposits of it.)

This discovery is particularly exciting - Supercoolant has double the thermal capacity of Water, making Thermo Aquatuner cooling far more efficient than before. It'll be a while before we can make enough of it, but it's something to look forward to. Of course, we'll need the ability to actually retrieve it from Space missions - we'll need Petroleum Rocketry and Cargo researches for that.

Also, that bit in a previous section about upgrading the spaceborne "coolant" tank? Yeah, we'll want Supercoolant in there, not Water.
-- Base Planning (Round 4) --
Now that we've achieved Steam-based Rocket usage, the game starts to open up in some interesting new ways. We'll need a few trips before we have enough "interstellar research points" to advance our rocket tech significantly, but new resource types will become available as we continue space exploration.

Of course, we're not in a rush; we've got time to optimize our base while we wait on more space missions. If you want to sit and pause for hundreds of cycles, that's actually perfectly viable - space is there, ready and waiting for you whenever you want to explore more. But first, what can we do to improve our base at this stage?

Before continuing on, a little before-and-after comparison:


For starters, we've got a large Space Biome to exploit - there's a ton of potential for Solar Power out here! You can see that I've started extending my space infrastructure accordingly, and that's significantly eaten into my Steel supplies.

At this phase, we could go two different directions:
  • Pursue base self-sufficiency
  • Pursue more advanced Rocketry
Since the last section was pretty much a huge push into Space, this arc will start by focusing on the former. At the very least, a Solar Farm greatly enhances our colony's capabilities when operational and allows us to preserve critical resources.

It's also been quite a while since we built the Slickster ranch. At this point, there's a fair chance that our efforts have started paying off:


The last two normal Slicksters in there will be dying off within the next 5 cycles - I've nearly got a full Slickster ranch now! The Crude Oil tank for warming Carbon Dioxide has slowly warming up, but it is warming, and it's enough to keep the Molten Slicksters within their livable range.

If you've been scrutinizing my screenshots, you've probably noticed that my calorie count has skyrocketed recently. That's our ranching efforts paying off! Well, that and Meat from the Shove Voles on the surface - each one drops 10 kg of Meat when it dies! At this point, I could easily decommission the old Mushroom farm without issue.

Given all of this... notice how close we are to total self-sufficiency now:
  • Cool Steam Vents and our Salt Water Geyser (at minimum) provide plentiful renewable Water.
    • Rule of thumb: 1 kg/s Water per 8 Dupes + 1 kg/s extra for Crude Oil production (with Slickster use) or + 2 kg/s without Slickster use.
  • We can use that Water to supply all our Oxygen needs.
  • Using Water for Oil Wells gives us significant Polluted Water supplies.
  • Ranching provides nearly all of our food needs; we can use Water to cover any gaps.
    • By using Water in Oil Wells, we can sustain Slickster ranches.
    • By utilizing Balm Lily plants, we can sustain Drecko ranches.
  • Ranching provides Lime while space meteors provide Iron, giving us more Steel slowly but steadily in addition to traces of Metal Ore from meteor drops.
    • For now, Coal from Hatches is very plentiful but eventually limited - unless we use Sage Hatches to eat excess food. The returns aren't great for that, but at least it exists as an infinitely sustainable option.
  • Meteors provide plentiful Regolith for use in Sieves, even if it comes down hot.
  • Since Solar, Oil, and Natural Gas are all renewable in-game, we have enough power sources to sustain our industries and cooling systems so long as we act responsibly.
If you've been sticking to this guide, note that your colony is already doing all of this. Well, except for the Sage Hatch bit, but we've got plentiful supplies for regular or Stone Hatches for now - close enough.

Assuming you have gotten or are able to get a few Arbor Acorns from the Printing Pod, we should be able to make our colony completely self-sufficient. If you can't find any Arbor Acorns yet, Petrol Rockets should eventually help you solve that particular problem.

Towards Self-Sufficiency
To reach complete self-sufficiency:
  • Provided we do extra work, maintaining Coal from Sage Hatches can be made easier - optimally, we'd like to renewably produce Fertilizer.
    • Fertilizer is made from Dirt, Polluted Water, and Phosphorite and produces small amounts of Natural Gas as a byproduct.
    • We're already making renewable Phosphorite, and Polluted Water's not hard if we make an extra Petroleum Generator setup. Dirt's the trick.
  • With Arbor Acorns, an initial supply of Polluted Water allows us to set up Arbor Tree farms.
    • Lumber (from Arbor Trees) is very useful for renewably producing Polluted Dirt / Dirt and can near self-sustain Polluted Water... all in addition to producing Ethanol (useful for Power generation) and significant excess Carbon Dioxide (for use with Sieves or Slicksters to eventually make more Polluted Water).
    • If we feed the Carbon Dioxide to Molten Slicksters, the net setup can recover its spent Polluted Water!
    • Or, we can just let Pips plant Arbor Acorns "wild" in a managed ranch; they'll produce small amounts of Dirt for free this way.
  • Producing lots of Polluted Dirt allows us to sustain a few Pokeshells, giving renewable Sand for Glass manufacture.
  • We've been operating off of a single Petroleum Generator and Oil Well so far. Once we have 3 operational, we can sustainably run two of them full-time and have 1 kg/s Petroleum left over... before any returns from the Molten Slicksters are counted in.
  • There are still plenty of Geysers, Vents, and Volcanoes to exploit.
  • We could add a more 'active' form of in-base air conditioning to completely stabilize the core's heat levels - or by linking to a convenient, pre-existing one.
Past that, it's just a balancing act to make sure our base's expenses don't outpace its production - the colony is finally moving from "surviving" to "thriving." We've been continuously exploring a lot of new things - now's a great time to "settle down" and invest more deeply into some of the techniques we've already examined.

Note that since we've now long been able to directly synthesize Plastic, we can decommission the old Glossy Drecko ranch. Mealwood consumes Dirt, which is typically more limited than Water in the long-term. While we could convert to feeding them Bristle Blossoms, it's actually less efficient than directly synthesizing Plastic.

Background Tasks
  • Increasing the size of the Solar Panel 'farm'
  • Adding an extra copy of the Natural Gas Power Plant - I've discovered a third geyser, and the current one can't keep up when all of them are emitting Natural Gas.
There's also a good chance of doing these, too:
  • Taming the other two Oil Reservoirs
  • Adding an extra Oil Refinery and Petroleum Generator - these within the Oil Biome.
    • It's a bit rough to ship extra Carbon Dioxide down there, so why not make it within the Oil Biome instead?
    • This will give me plenty of Polluted Water, enough to explore a few extra uses. Especially if I use a bit of that Carbon Dioxide with a Carbon Skimmer.
  • Adding on some extra Operator-type Dupes to handle the extra Refinery and Power Plant upkeep.
  • Adding another Slickster Ranch. (As if I didn't already have enough Meat...)
  • Extending the core SPOM.
That's obviously a lot of work, but it's also work we've already seen how to do.

Of course, continuing with Space exploration will give us even more tools to increase the colony's capacity - we'll want to continue to pursue Petroleum Rocketry at our leisure.
Arbor Trees
The most profitable way to ensure our colony has a sustainable Dirt supply is to invest in Arbor Trees once they're available. When their Lumber output is used to produce Ethanol, a Power-positive and Dirt-positive loop can be created for very little maintenance cost.

Optimizing it can be a bit tricky, though. Arbor Trees like the 15 - 40 C range, making them great to grow in or near the base. However, refining them into Ethanol produces tons of hot Polluted Dirt and Carbon Dioxide, and burning that Ethanol in a Petroleum Generator produces even more hot Carbon Dioxide - in total, more than we can pump through a single pipeline! As it turns out, all the industrial stuff is much better suited for an Oil Biome site.

Arbor Tree Nursery
First, I'll start things off by creating the farm (or "nursery", because trees) that will generate the Lumber we'll need for the system. A few good reasons to start with this:
  • Without Lumber, there's nothing for the later half to process.
  • If you're on a world that doesn't normally get Arbor Trees, this gives us time to multiply the seeds so that we can fill the room eventually.
  • We could use somewhere to 'process' some of the naturally-occurring Polluted Water lakes as we expand our colony.
The end goal of this half is to get a room looking like this:


It's fairly tricky to set up, though. The only way to get Arbor Trees planted that close is to start them all from seeds at the same time; if you remove a tree and try to replant it once branches have sprouted, it'll be blocked! If you don't have 6 seeds, plant what you can until you reach 6 seeds, then reset the room and replant.

That's not the only issue either - each tree needs to sprout 5 branches. For each set of three, the outer Trees need to have 3 pointing to the 'outside', 1 going 'up', and only one to their left. This leaves just enough room for the center Tree of each set to sprout its 5 branches. You'll need to visually inspect the Trees and constantly prune the branches until they sprout the direction you want - work on the outer trees first. (It can take a while before you get the results you want.)

The result is nice, though - we can grow 6 Arbor Trees fully covered by just two Auto-Sweepers and a single Conveyor Loader! This will be enough to attain 83.3% uptime on the loop we'll be creating in this section, which is easily enough to allow our colony to produce tons of Dirt.

Note that as of the time of writing, Arbor Tree branches are not affected by fertilization - but just in case Klei decides to change that, those Storage Bins may be swapped for a Farm Station.


Arbor Trees like a temperature range of 15 - 40 C, so I've set them up on a new cooling loop near two of my Cool Steam Vents. This loop's configured to target coolant temperatures between 15 C to 29 C, which is a different range than my colony's other loops. (This is pretty useful for farming Bristle Berries if desired, and careful construction of the loop can be used to facilitate Sleet Wheat farming - but my base is overflowing with food, so I'm not bothering with those initiatives right now.)

While I've added a Conveyor Loader for now, there's one small issue... this room is very far away from the eventual Lumber processing station:


To build a Conveyor Rail line long enough to make the journey would take me over 14 tons of Raw Metal! Green = Arbor Tree nursery, Blue = eventual Ethanol plant - the second half.

However, note how I've set things up - there's a vertical corridor just left of the nursery, and with a little effort, I can 'drop' Lumber from a well-placed Conveyor Chute all the way down to the Oil Biome, next to the eventual Ethanol site! The current problem: There's a Frozen Biome right above the Oil Biome, and it's got a lot of meltage already. I'll handle that in the background, though.

Ethanol Plant
Now that our colony is producing Lumber, we've got a lot more reason to start work on Ethanol infrastructure. The Ethanol Distiller requires 1 kg/s of Lumber (a bit less than 2 domesticated Arbor Trees output) to output .5 kg/s Ethanol, .333 kg/s Polluted Dirt (3.33 times what a single Compost can handle!), and .167 kg/s Carbon Dioxide. That's a lot of byproducts we'll need to handle!

Keep in mind that our goal is then to supply that Ethanol directly to a Petroleum Generator to produce Power and more resources - .5 kg/s Carbon Dioxide and .75 kg/s Polluted Water. Once any Lumber reserves run out, our 6 Arbor Trees will result in 83.3% sustainable uptime. For those who want the cold, hard numbers on what we'll be dealing with:
  • 4 kg/s Lumber requires 7.2 Arbor Trees.
  • While 4 kg/s Lumber is available, the outputs of the Ethanol Distiller and the Petroleum Generator combine to the following totals:
    • 1.167 kg/s Carbon Dioxide (more than two Gas Pumps can handle!)
    • 1.333 kg/s Polluted Dirt (requiring 14 Composts... or critters that can eat some of it)
    • .75 kg/s Polluted Water
    • 2 kW Power (or 3 kW with Tune-Up buff)... before any machinery is added in.
  • 7.2 Arbor Trees would require the following upkeep, noting that no practical fertilization is currently possible:
    • .84 kg/s Polluted Water
    • .12 kg/s Dirt
  • So, for a net cost of 0.09 kg/s Polluted Water, we can produce a net of over 1.2 kg/s Dirt and 1.167 kg/s Carbon Dioxide when we have 100% uptime.
  • Dropping this down to 83.3% uptime, we get .972 kg/s Carbon Dioxide - just shy of what two Gas Pumps can handle - while still producing just over 1 kg/s Dirt.
    • As a note, 1 kg/s Carbon Dioxide requires 3.33 Carbon Skimmers to handle and 66.7% uptime on a dedicated Water Sieve - which means another .133 kg/s Polluted Dirt!
    • Alternatively, 1 kg/s is enough to feed 30 (Molten or regular) Slicksters. You know, if you weren't already swimming in Meat.
As you can see, there's a lot to handle here, but we'll be swimming in Dirt once we do handle it. So let's start working on that!
The Ethanol Loop
So, now for part two of the Arbor Tree -> Dirt process: an Ethanol-based Power Plant.

Construction: Step 1


So, remember that bit about dropping the Lumber down to the other area? Note that nook toward the top-left - that's where the Lumber ends up. Beats having to use literal tons of Raw Metal for the same job - we might need the material later for other things.

Now, about the chambers here - there are two main areas. On the left-hand side, we have the Ethanol Distillers and Petrol Generator - basically, everything that makes Carbon Dioxide. There's also the nook down below with the Carbon Skimmers. Since we're going to be making a lot of Carbon Dioxide, this will also include our long-term Carbon Skimmer station.

You've probably noticed that Carbon Dioxide supplies to our Slickster ranch can be somewhat volatile - at times, too much Carbon Dioxide comes in, while at other times not enough comes in. At this stage of the game, your ranch has probably near-filled with Carbon Dioxide, so we'll need somewhere else to dump excess. Of course, nearly the full capacity will be needed by the Ethanol loop we're constructing, so don't go overboard with it.

On the right hand side, we have a colossal array of Composts. Feel free to reduce the number if you have other uses for Polluted Dirt, but we do need a lot of them for the Polluted Dirt -> Dirt conversion process. The Water Sieve also produces Polluted Dirt, so it fits in nicely here. Note that I've sealed this room as well - Polluted Dirt off-gasses to Polluted Oxygen, and this will help us to provide a pure stream of it once everything is operational.


The processes of Ethanol production and use does generate a fair bit of heat, so I've extended my Oil Biome cooling loops to link with the left-hand chamber. Of course, it does run a bit hot - the original range set for it was from 40 C - 60 C. It's not the end of the world if the Polluted Water comes out a bit hot because we don't fully cool the Petroleum Generator, but feel free to reduce that maximum if you like - it will mean less difficulty with cooling for the Arbor Tree nursery.

Not yet pictured - a Liquid Pump and Insulated Pipe-line that sends the output Polluted Water back to the nursery area. That's a link we'll want to make eventually, but there's nothing wrong with using it for other purposes if you'd rather let the Nursery drain existing lakes for now.


As you may have guessed from the last image, this set of pictures has been taken from a mid-build state. Neither Polluted Water nor Polluted Dirt will off-gas at pressures over 1800 g/tile, so we'd like to pre-pressurize the room and ensure that no off-gassing can occur in our Carbon Dioxide chambers. Of course, we don't want to do that without vacuuming out anything that isn't Carbon Dioxide first. I've already vacuumed out the left-hand chamber, so I'm now starting to pump in Carbon Dioxide using the Carbon Skimmer's High Pressure Gas Vent.

The Skimmer chamber is designed to take on extra pressure past what the Petroleum Generator and Ethanol Distillers will tolerate - this is the purpose behind the Mechanized Airlock (currently open). Closing it will help keep things running when the Skimmers can't fully keep up, giving you some time to make a bypass. This also allows you to send the Carbon Dioxide to other things first, like extra Slickster ranches should you decide to make them.

The right-hand side is less critical - there are no buildings that require pure Polluted Oxygen inputs, after all. If you want the line to be pure, you'll probably need to wait a while, or you could just use a Gas Element Sensor / Gas Shutoff setup to clean it and move on. There's no need to pre-pressurize here unless you want to outright prevent off-gassing, so setup here is less complex.

Once you have the chambers set appropriately, it will be time to properly start the loop. Make sure to have at least 2 kg/tile of Carbon Dioxide around the Ethanol Distillers before proceeding. Note that I've deliberately left the Petroleum Generator's input pipes disconnected, as otherwise off-gassing materials would be steadily produced.

Construction: Step 2
Once everything is properly pressurized and running, your plant should look something like this:


The Power is pretty straightforward - Transit Tube Accesses are on their own circuit (or on Heavi-Watt), and each side is on its own circuit. The left might be slightly overloaded, but we don't plan to open the Mechanical Airlocks, so it's no big deal.

The Automation is fairly simple too, with each sensor controlling things within its own area:
  • Carbon Dioxide Gas Pumps - over 2500 g/tile (includes buffer to help prevent off-gassing)
  • Carbon Skimmers - over 8000 g/tile (enough Atmosphere to passively cool the Skimmers)
  • Liquid Pump - the standard "above 50 kg" for efficient Power use
  • Polluted Oxygen Gas Pump(s) - over 750 g for efficient Power use
Feel free to deconstruct one of the Gas Pumps; you probably won't need both.

I've built the Skimmers and the Water Sieve with Gold Amalgam for its +50 C overheat bonus, allowing them to be passively cooled. As an alternative for Skimmer cooling, consider replacing the cooling loop Pipes above with Radiant Pipe. This will result in more heat going to the cooling loop, but makes Skimmer management much less tricky, especially if you also install Metal Tiles over the new Radiant Pipes.

Now for a more interesting overlay:


I realize the right-hand side might be a bit tangled, so here's a key - Polluted Dirt never crosses a Conveyor Bridge here. It follows a straight line to the right, only branching as necessary to deliver supply to the Conveyor Receptacles within the room. The other Conveyor Rail lines all retrieve Dirt produced by the Composts and dump it beside the Transit Tube Access, just out of range of the nearest Auto-Sweeper. The secondary line may not be necessary, but it's helpful to give Dupes a single point for Dirt pickups instead of collecting from over ten different debris piles.

With all the pieces in place, your colony will be actively producing large quantities of Dirt, giving you the key that unlocks the last few important paths to renewing critical resources.

Uses for renewable Dirt
What can we do with our newfound Dirt / Polluted Dirt?
  • Run some Fertilizer Synthesizers
    • This produces extra Natural Gas; great for helping during dormancy periods.
    • This also 'stretches' the Dirt we're producing, allowing the Dirt to feed more Sage Hatches than before.
  • Feed some Pokeshells (they eat just shy of .25 kg/s Polluted Dirt) for Sand production
  • Feed some Sage Hatches for Coal production
  • Let it off-gas into Polluted Oxygen (useful for raising Pufts if desired)
    • As more of the Composts start filling up, you'll note that the right-hand side is already somewhat designed to do this passively, though in small amounts.
Other Notes
While the two rooms' circuits total at over 3.6 kW peak Power consumption and some of the Pumps are on the Heavi-Watt line, note that a large amount of the Conductive Wire circuit load is from Auto-Sweepers and Conveyor buildings. These won't be constantly running, so we're Power-positive after a Tune-Up.
Oxidizer Production
There are a few different ways to prepare "oxidizer" (either Liquid Oxygen or Oxylite) for use with Petroleum Rockets. As we'll be wanting to use those soon, it's worth investigating our options.

The Oxylite Refinery
This is probably the simplest approach you can take. While it does require refined Gold to operate, the cost is a mere 3 g/s of (refined) Gold to run, or 1.8 kg/cycle. You should get at least that much from meteor drops, making this viable even for worlds without naturally-occurring Gold Amalgam.

It's not even that tricky to set up; while the Oxylite Refinery generates significant heat, it doesn't actually have an overheat threshold. The main key is to prevent the Oxylite from rapidly converting back into Oxygen.

-

It's simple enough to place it over nearly any kind of liquid pool you might have in your industry zone. I opted to place it with my Petroleum tank, as it's just short enough to pair wonderfully with an Auto-Sweeper. The Auto-Sweeper will auto-deliver all output Oxylite straight to the Smart Storage Bin below, preventing off-gassing into Oxygen by immediately submerging it.

Use of the Smart Storage Bin in the manner depicted above will produce Oxylite until the Bin's set "Automated Storage Capacity" is met; at that point, the signals will invert and automatically disable the Refinery. When Oxylite is removed for use elsewhere, production will then automatically restart and refill the Bin, making management of the structure very simple and easy.

Puft Ranching
Whie there is the option of Puft ranching, it's quite complex to manage. The goal is to breed Dense Pufts, which consume Oxygen and convert it at 95% efficiency to Oxylite. Each Dense Puft, when domesticated, will produce about 79.2 g/s of Oxylite - less than a seventh of the speed of the Oxylite Refinery.

The issue is how Puft breeds work:
  • All Pufts but the Prince strain will tend to lay Prince eggs if not penned with a Prince.
  • Any other Puft penned with a Prince will tend to lay Squeaky and/or Dense Puft eggs.
  • Puft Princes will lay Puft eggs.
Standard Pufts and Puft Princes are simple enough to maintain - keep one of each in its own ranch and it will lay eggs for the other type. The problem is maintaining the variant strains - optimally, you'll want to have a single Prince penned with one or more Dense Pufts, and the game doesn't give you the tools to easily automate mixed-critter ranches to this level of detail.

The simplest way I know of to maintain the right Puft types is to create specially-managed ranches that focus on producing the Eggs you want... and the automation involved is a doozy. Please note that what I'm presenting here is a sandboxed test build that may need refining:


The left Drop-off accepts 1 Puftlet Prince while the right Drop-off accepts 1 Dense Puftlet. Both rooms' Critter Sensors are set to "above 0." The core idea - we want to synchronize when Pufts may enter the main room (at the top). Top-most Sensor - "above 1", right-hand Sensor - "above 0."

Stage 1 - no Pufts:


Once all Pufts have died in the main chamber, logic will automatically open the Drop-off zone. This is the only time we want to accept new Pufts below.

Stage 2 - Puftlets readied:


Once the Puftlets are in place and the delivery Dupes are clear, all Drop-off access is locked. The doors to the main chamber then open, allowing the new Puftlets to enter it. The doors will remain open until both Puftlets leave the Drop-off zone.

Stage 3 - Puftlets in place


Once both Puftlets have left the Drop-off zones, the doors lock behind them. Note how the access door remains locked; it will only reopen once both have died, ensuring that any newly-hatched Pufts (from this pair's eggs) are delivered elsewhere.

This basic setup will allow you to reliably produce Puft Eggs (from the Prince) and Dense Puftlet Eggs (from the Dense Puft), giving you a way to produce extra Eggs to maintain your primary Dense Puft ranch elsewhere. You'll also need a standard Puft ranch to make Prince Eggs... so we're talking a total of at least three separate ranches to make this approach somewhat reasonable.

In general, the left-hand logic maintains the Puft control, while the right-hand maintains the access control. Apologies that the room isn't more refined; as you can see, the logic is complex enough as-is. You'll likely need to move things around to add Auto-Sweepers, Gas Vents, and a Grooming Station as it is.

Liquid Oxygen
In the long-term, our goal will be to create Liquid Oxygen (LOX) through use of Supercoolant cooling; right now, what we need is a stop-gap to help us actually obtain Supercoolant. So... don't feel a need to heavily invest in any of the options listed above.

If your world doesn't have a natural source of Gold and there's no planet within the 10000 km range or so that has Gold as a resource you might get from cargo missions, you may want to consider extreme measures and jump straight to Liquid Oxygen production, even without Supercoolant. You'll need to run a lot of extra space missions - about 32 - to afford the CryoFuel (Tier 10) tech, but it's a possibility.

You'll want to pair up gaseous Hydrogen with the Thermo Regulator to create very cold Hydrogen Gas and use that to condense Oxygen. This strategy works pretty well in conjunction with Anti-Entropy Thermo Nullifiers, which will allow you to either pre-chill the Oxygen close to the point of condensing or as a heat dump for the Thermo Regulators. It will be more costly in terms of Power, but this strategy will allow you to conserve every gram of Gold you obtain so that you can devote it all to Supercoolant production.

Note that Anti-Entropy Thermo Nullifiers only spawn in Frozen Biomes, while Gold Amalgam only spawns in Swamp Biomes. None of the base game's map types are missing both, so you should have a few AETNs available if you're jumping to this due to lack of Gold - make good use of them!

I'm not going to construct an actual build at this time, especially since the example playthrough is on a Terra seed, but here's the general idea:
  • Construct a Hydrogen-gas based cooling loop within a well-insulated, pre-vacuumed chamber. Use several horizontal coils of Radiant Pipe, and send the Hydrogen in cold from the bottom. (This will make the heat exchange more efficient.)
  • Pre-chill gaseous Oxygen and send it in from a vent at the top, above the top-most cooling coil. Leave a bit of space so you don't accidentally break your pipes.
    • You may need a Gas Valve or Shutoff so that you don't overwhelm or outpace the cooling loop.
  • As the Oxygen expands downward, it will be progressively cooled by increasingly cool Hydrogen and eventually condense, dropping to a pool at the bottom.
The rate will be slower than a Supercoolant-based LOX cooler, but that's okay - if you're resorting to this measure, you probably didn't have any better options. It's basically performing the same techniques we'd perform with Supercoolant, just with a weaker cooling agent.
Petroleum Rockets
Now that we have some sort of solution for Oxidizer production in place, we can turn our attention back to Rocketry. Petroleum Engines have a much better range than Steam Engines, so we'll be able to perform missions to many more places and rack in those sweet, sweet Interstellar Research points.

To start off, we should probably retrofit our Steam Rocket to use Petroleum instead. Deconstruct the old Engine and its flooring, moving the floor down by a total of ten tiles. We can safely attach new modules to the bottom by building our new Petroleum Engine, followed by a Liquid Fuel Tank, then by a Solid Oxidizer Tank (unless you skipped straight to Liquid Oxidizer). As long as the parts line up correctly, the rocket will reconnect. You can use this trick to add extra modules and/or fuel tanks in the future, too.

Here's an in-progress pic of my retrofit:


Since we only ever explored the 10 km mission targets, we should restart our space program by visiting anything at 20 km, then 30 km and so forth. Of course, different distances require different amounts of fuel and oxidizer. A site like https://oni-assistant.com/tools/rocketcalculator can be very handy for getting the numbers right:


So, after completing the infrastructure and properly fueling the rocket:


As reported by the rocket calculator resource, we've given the rocket the perfect amount of fuel - time for launch!


Note that Petroleum Engines generate extremely hot Carbon Dioxide - be careful not to accidentally roast any nearby Dupes! They'll probably be fine as long as they're inside either Atmo Suits or Jet Suits, though - even when extremely hot, Carbon Dioxide isn't very conductive.

Now that we have a new target for our 5x Research Module rocket, we'll be having at least 250 new Interstellar Research points coming to our base once the first Petroleum-based mission completes. The target:


Unlocking Solid Cargo will let us start using Rockets for more than Research - we can finally start harvesting "space materials" to start making the end-game supermaterials!

In the meantime, I'd advise starting construction of a new rocket - you'll want to continue sending out Research missions for a while, and there's no reason to continue sending Research missions to our cargo rocket destinations. We can burn less fuel by keeping specialized rockets - one for Cargo and one for Research. Of course, there is the small matter of having enough Dupes to keep the research going at home while sending out multiple astronauts... though there's also little harm in just waiting a while if you find that easier to manage.

Your first cargo rocket can actually be pretty short and light:


The two tanks are set for 332 kg, just enough fuel and Oxylite to reach the 10000 km target(s). You can actually use the same exact rocket to reach 30000 km targets; after that, you'll need to add an extra Liquid Fuel Tank to gain additional range. There's no need for Research Modules - this Rocket will only be visiting pre-researched targets, and bringing them means a heavier rocket that burns more fuel.

Note that since I'm only actively running a single Rocket at a time for now, I've swapped my silo-linked Space Scanner to look out for the cargo rocket now. I may give each rocket its own Scanner eventually, but this will work fine for now.

Since I've researched Solid Cargo and have found a target with Isoresin, it's a good time to start researching CryoFuel Combustion - the other cargo types are easily less critical.
The Molecular Forge
As we'll soon be returning cargo from space missions, it's time to start preparing to synthesize the new materials offered by the Molecular Forge. Considering its high heat output, it's a pretty good fit for your industrial area. Here's where I placed mine:


As you can see, this machine will give us access to special Manufactured Materials - the absolute strongest materials in the game for their respective tasks:
  • Fullerene (+ Gold) -> Supercoolant - the strongest general-use coolant, making Thermo Aquatuner use efficient.
    • This greatly facilitates Liquid Hydrogen and Liquid Oxygen production, as Supercoolant is the one liquid material that can tolerate the extremely low temperatures required while also being liquid near room temperature.
    • Note that this material requires Petroleum as an ingredient - placing the Molecular Forge near your Petroleum tank is a good idea because of this!
    • This material is the key to utilizing Hydrogen Engines and Liquid Oxidizer Tanks - these allow for the most efficient space travel possible in-game.
  • Niobium (+ Wolframite) -> Thermium, a dual-use Metal like Steel with the strongest overheat bonus in the game: +900 C!
    • This allows us to build extremely high-heat structures with ease!
    • While it's possible to utilize high-heat features like the Volcano as high-temp heat sources, Thermium in particular allows structures to directly control high levels of heat if desired.
    • Thermium is also the most highly-conductive Refined Metal (aside from Aluminum).
  • Isoresin (+ Reed Fiber) -> Insulation, the strongest insulating material in the game.
    • It's still pretty hard to get, so I advise saving its use for things that don't have "Insulated" variants, like Pipe Bridges.
    • It also pairs very nicely with high-temperature structures, allowing you to provide the best insulation possible to any liquids involved.
  • Isoresin -> Visco-Gel, which is great for people who like "water lock" setups.
Once we have a significant amount of these materials, we've effectively reached the end of the ONI tech tree and completed what I'd call the late-game. Of course, individual rocket trips don't exactly return a lot of the critical materials for this, so you may want to find a good Dupe to devote solely to gathering them from space. For example, check out the returns from my first cargo trip:


That's not even enough Fullerene to make two batches of Supercoolant. That said, it's better than nothing and does allow us to start synthesizing it in the new Molecular Forge. Of course, the Starmap did say "Trace" levels of Fullerene - it may be worth exploring other mission targets to find higher-yield sites. That said, we did get this much Fullerene from a 10000 km target - we can expect to retrieve about this much one every three cycles with little issue now if we prefer.

At any rate, we're now at the transition to the end-game.

Of course, there will still be a lot of cool new structures you can try your hand at while you finish the tech tree and work your way to the ultimate imperative - "The Great Escape." There are also a few remaining tasks we can address to help our base become a bit more sustainable, so I'll take some time to expand on these next.
Fertilizer Manufacturing
Even if you have to wait a while to get enough Arbor Trees for true sustainability, your colony probably has large reserves of Dirt already available. Why not start putting them to use?

A Fertilizer plant is the final piece toward achieving full sustainability. By synthesizing Fertilizer from our excess Phosphorite, Dirt, and Polluted Water, we can create small amounts of Natural Gas - quite a useful feature for times when our standard supply is dormant! This also produces Fertilizer, which is fantastic to feed to Sage Hatches. This helps us to more sustainably produce Coal, rounding out the sustainability push. While Dirt works well enough on its own, we get 120g Fertilizer to every 65g Dirt we put in, nearly doubling the amount of mass that we can feed our Sage Hatches long term.

I've opted to place this within the upper-half of the Tide Pool Biome just above the Oil Biome.


As you may notice from the Cycle count, I've been taking care of a lot of other things in the background, like playing with Supercoolant-based Liquid Oxygen production. (That's one of the first "end-game" tasks you may wish to tackle; I consider it beyond the scope of this guide.) There's no rush whatsoever to get this thing built; it's just a nice thing to have, as it helps to increase a colony's stability.

The trickiest part about building a facility like this is getting all the logistical parts just right:


Note that the far edges of the Fertilizer Synthesizer are unreachable by the Auto-Sweeper. That said, all the important parts - the delivery and drop-off points - are in range and thus deliveries can be fully automated.

At the room's top-center are two Conveyor Receptacles. One of them receives Dirt from outside; in my case, from the Ethanol plant to the bottom-left. The other one receives Phosphorite; in my case, from the old Drecko ranch to the bottom-right. Finally, at the bottom is a Loader that receives all output Fertilizer and delivers it outside the central chamber, dumping it directly beside the Transit Tube Access. This allows the room to be fully lockable during regular use; otherwise, Dupes have a nasty habit of 'stealing' deliveries from the Auto-Sweeper during near-idle times.

Of course, Fertilizer Synthesizers do produce a lot of heat - 3 kDTU when operational. With four of them in place, that's 12 kDTU with full uptime, so a bit of cooling might be needed - this can overwhelm a single Wheezewort. However, this room can usually be passively cooled.


The Polluted Water pipeline into the room is drawing from the same source as the Pincha Pepperplant farm - from the Oil Biome's coolant overflow. This will usually be somewhere around 40 to 60 C, depending on your preferred settings. If you run the loop on the cooler side, it will easily be cold enough to passively cool the room if you use non-insulated Pipes. Of course, you can always link the cooling loop to it instead.

General Use
Unlike most of the other structures in this guide until now, this is a room I usually prefer to not run constantly. I instead find it to be very useful for solving an interesting problem late-game bases start running into - utilizing 'overflow' Power.

When a lot of Solar Panels are in place and many renewable resources are available to the colony, sometimes there's simply a bit too much Power available. Consider all the Steam Turbines we've built; they've been set to run near-immediately once they can eliminate heat at full efficiency. Sometimes that's not when our colony actually needs that Power, though. In the case of my playthrough's seed, there's also the problem of having too much Natural Gas at times. Remember that the Oil Refinery and Oil Well both produce it, and they can overpressurize. It's important to have a way to eliminate excesses.


Note how I've linked the Fertilizer Plant to the grid - the Synthesizers will only run when the Smart Battery is not requesting a recharge. In other words, they'll deactivate when the energy levels drop significantly. I like to run this room when the Smart Battery stays over 80% - at that point, none of my resource-consuming Generators are running except for the Ethanol plant. (Well, and the Natural Gas Generators if Natural Gas storage is nearly full. That's okay - this room is power-negative, producing less Natural Gas than needed to operate it.)

Since this facility is designed to run only part-time, it's generally a good idea to expand it over time. Solar energy runs strong for only part of the cycle, so your colony will often have a heavy surplus at certain times of the "cycle." It takes less than two Solar Panels (at 100%) to run this facility as shown here, so once you have a strong "solar farm" in place, it's not unreasonable to double, if not quadruple, this chamber.

Resource Math
  • Assuming your base can sustain about 1 kg/s Dirt (like from a 83% uptime Ethanol plant), that's enough Dirt to run over 15 Fertilizer Synthesizers full-time.
  • If you built a copy of the Drecko ranch from earlier in this guide, a full 6 Dreckos will produce 60 kg/cycle of Phosphorite - 100 g/s.
    • That's enough to run nearly 4 Fertilizer Synthesizers full-time.
    • Note that the produced Phosphorite is practically free - no resources are consumed in the process. A bit of Power is used for access and automation, but that's it. The "worst" cost is the space requirement for adding ranches.
    • This and Wheezeworts are the only real uses of Phosphorite; you can go a long, long time until we need full sustainability here.
  • 750 g/s of Polluted Water (one Petroleum Generator's output at 100% uptime) can run over 19 Fertilizer Synthesizers full-time.
As you can see from the numbers, it's remarkably reasonable to run a lot of these at once; it's just a matter of building the necessary structure and machines. Note that 15 Fertilizer Synthesizers at 100% uptime produce enough Natural Gas for 1.67 Generators at full uptime; that's stronger than the average Natural Gas Geyser! If you can run them solely off of Solar Power and other excesses, this can really help improve your Power grid's stability when the geysers are dormant!

Of course, you don't want to run this when consuming resources you wouldn't otherwise want to burn. There's little reason to waste Coal to run these, and you should only consider using Natural Gas if you're running too high on it. That said, it's reasonable to run this from Petroleum Generator power in many cases, since they also have a high output of Polluted Water and Carbon Dioxide - either of which you might want for various uses. Consider your base's needs and adjust your Power grid settings appropriately.

Also worth noting: 15 full-time Fertilizer Synthesizers produce enough Fertilizer to feed over 7 Sage Hatches full-time, yielding plenty of Coal for reserve Power if desired. On the other hand, it may be worth running less Synthesizers if you want to feed a Pokeshell or two from Polluted Dirt instead.
-- Under Construction --


This is a new guide currently under development, so apologies for the lack of material after this section. Check back every once in a while for new content! I've gone ahead and made headings for the approximate planned order in which I'll be developing the guide, but it takes a while to make each section - especially now that there's a lot of less-interesting background work to do.
Basic Volcano Taming
While Space materials are very helpful for managing the heat of Volcanoes and the like, it's actually possible to tame some of these features without the top-tier resources they provide.
65 commentaires
✔️ DemKy Nigerian Prince 26 déc. 2024 à 22h58 
what is the gate used at Oil refinement - Construction: Step 2 ? Memory toggle ?
Jahws  [créateur] 18 sept. 2024 à 7h51 
I'm worry for lack of updates and such. Steam keeps dropping images periodically, and I just got _really_ tired of having to refresh them. It'd also take time to dig up the originals, assuming I still have 'em around somewhere.
Buster 8 sept. 2024 à 8h15 
Please update these series of guides) They are really great!
Mighty 26 juin 2022 à 6h18 
Nevermind, I managed this by fully over complicating it as always.
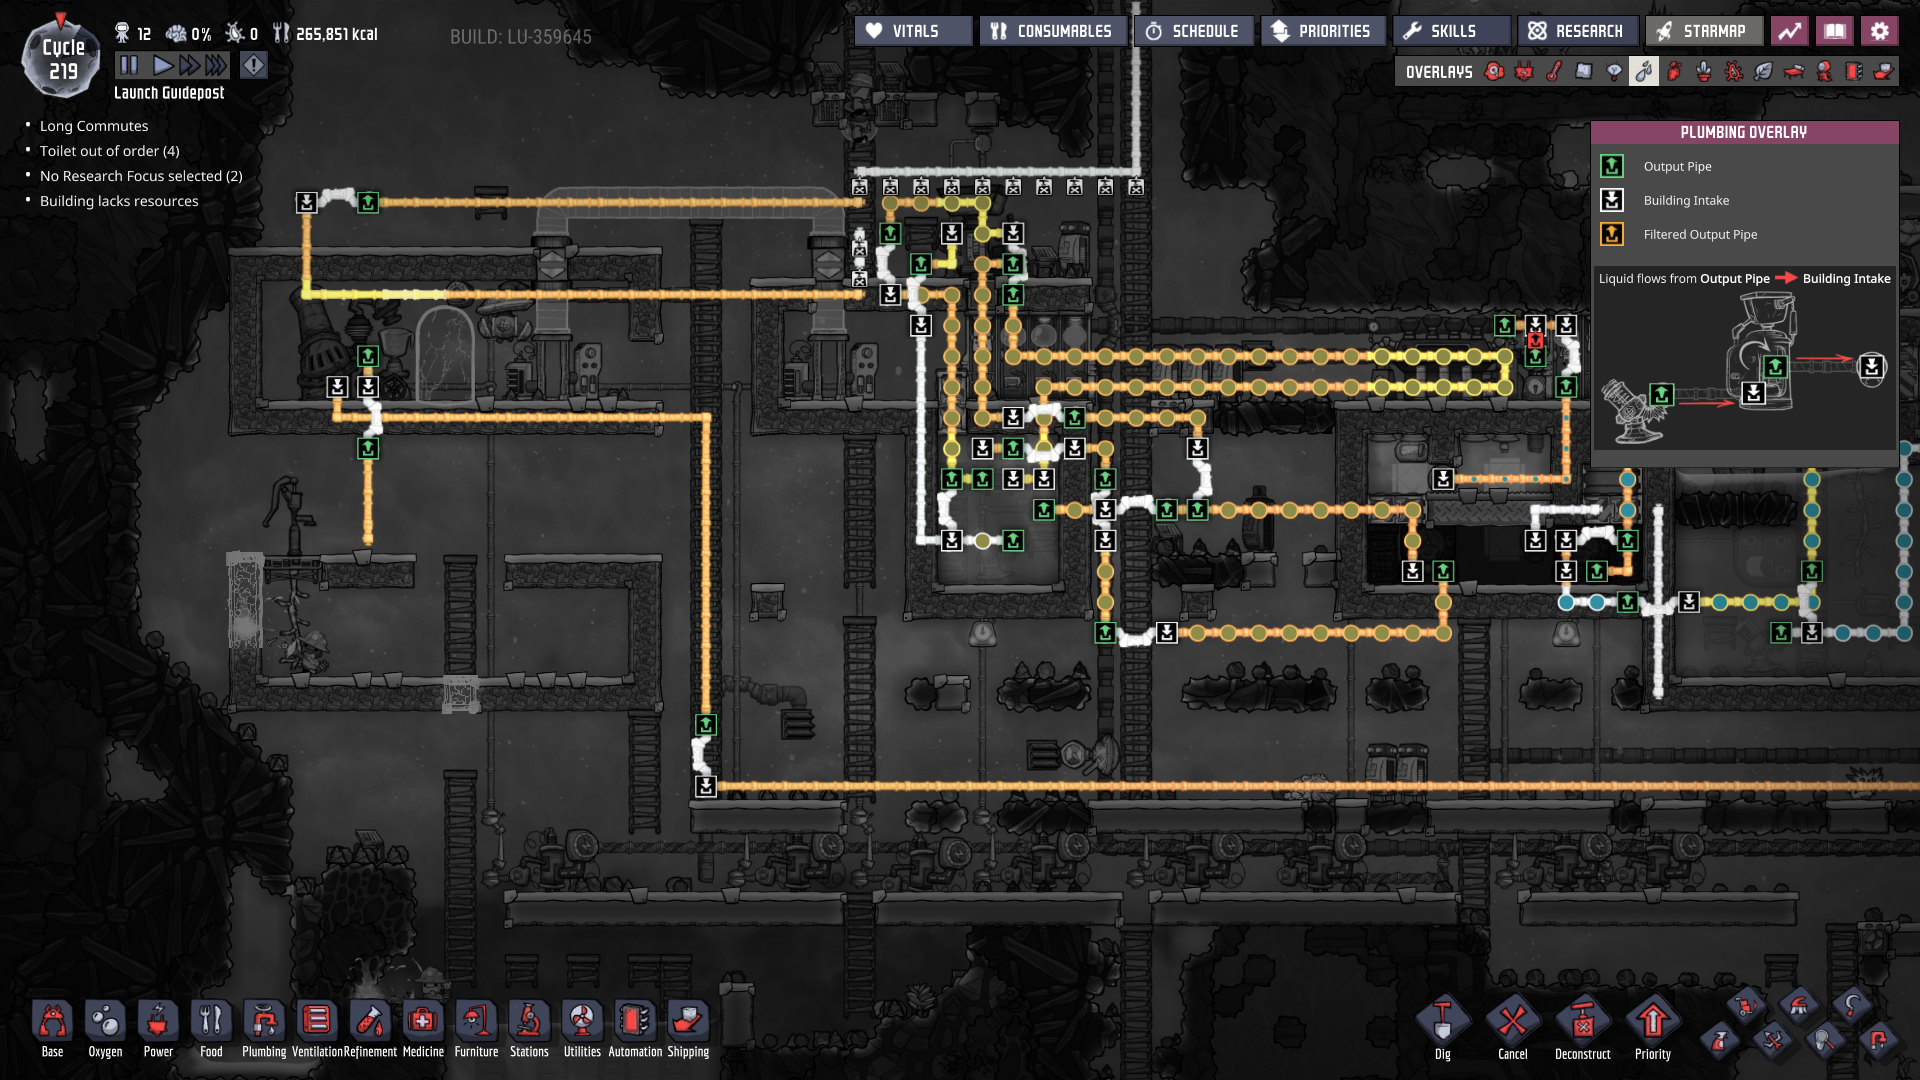
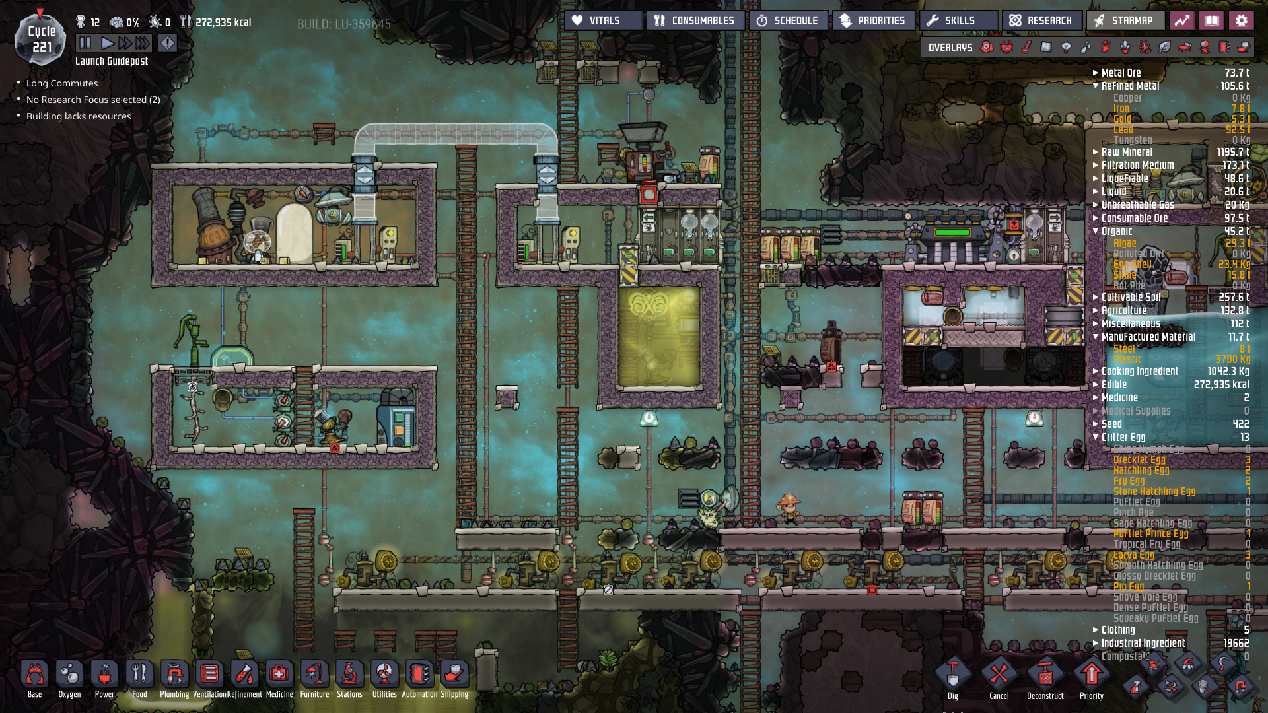
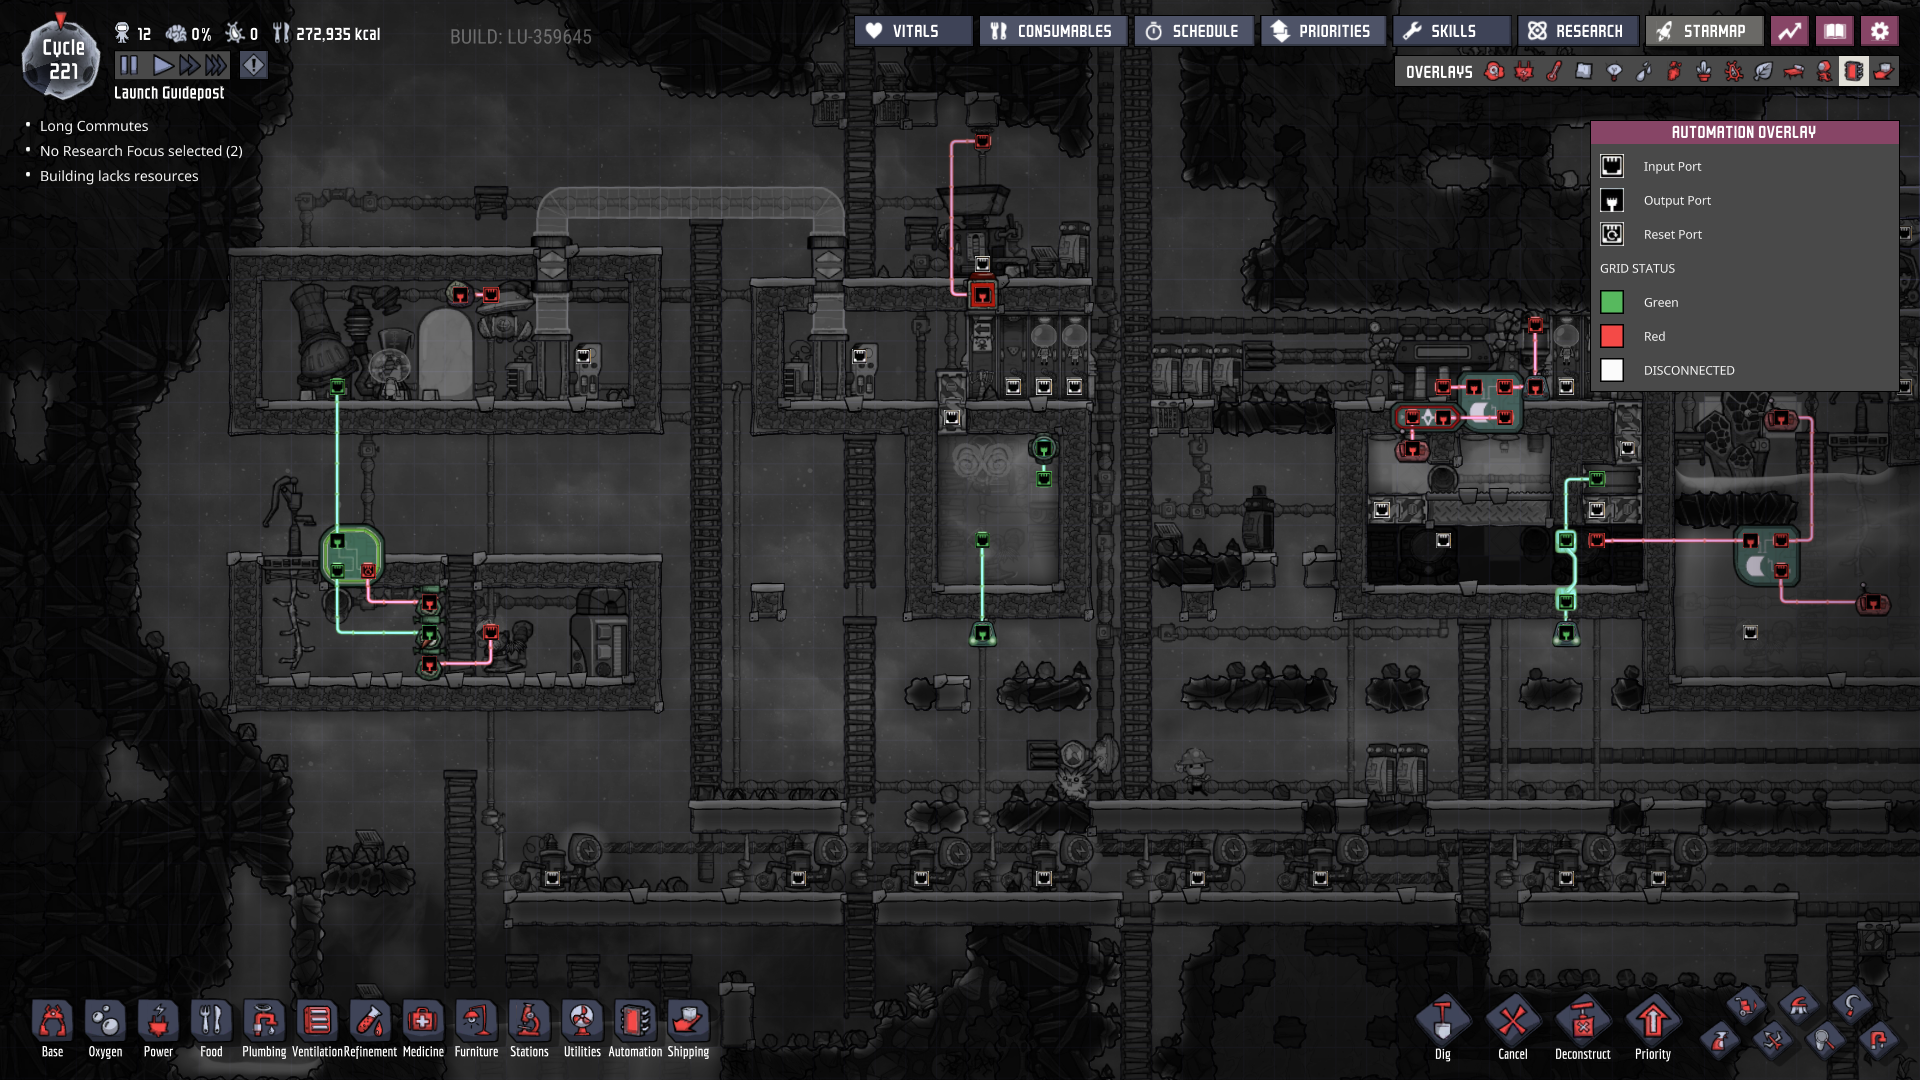
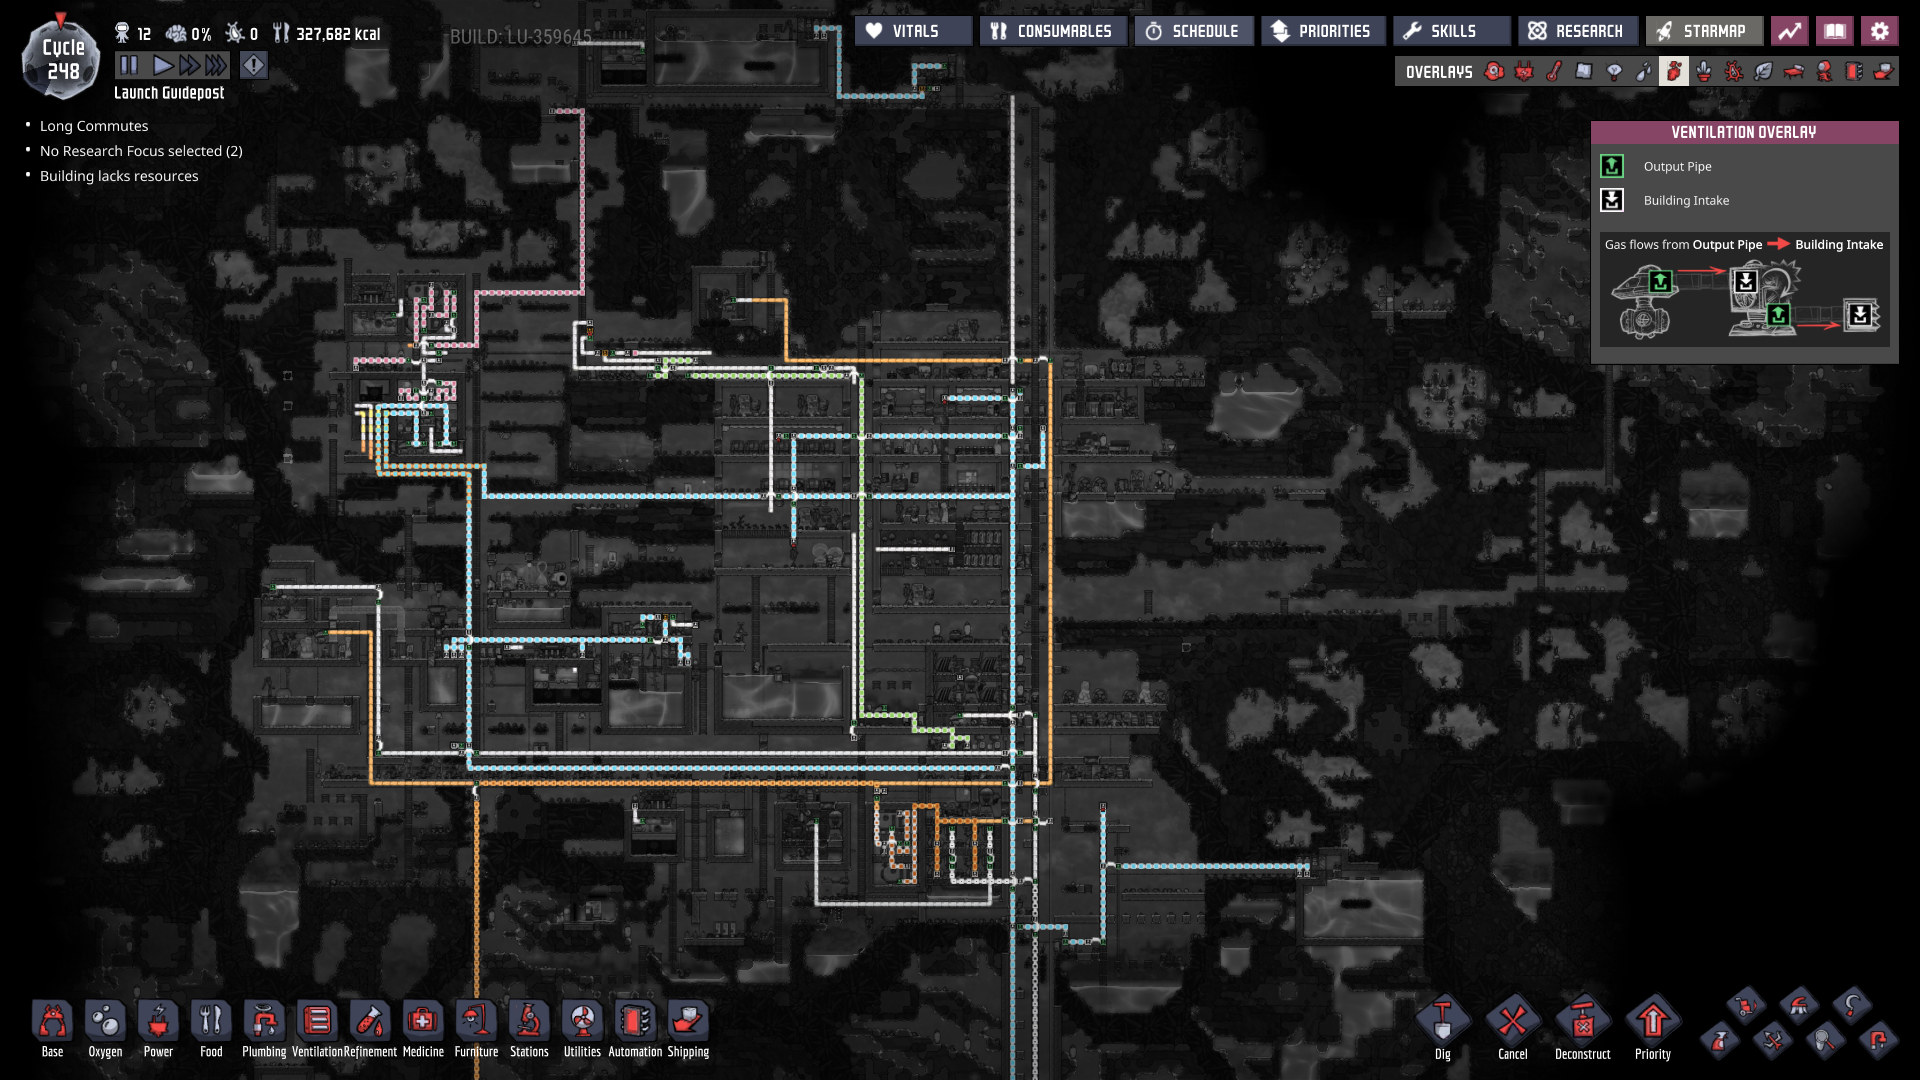
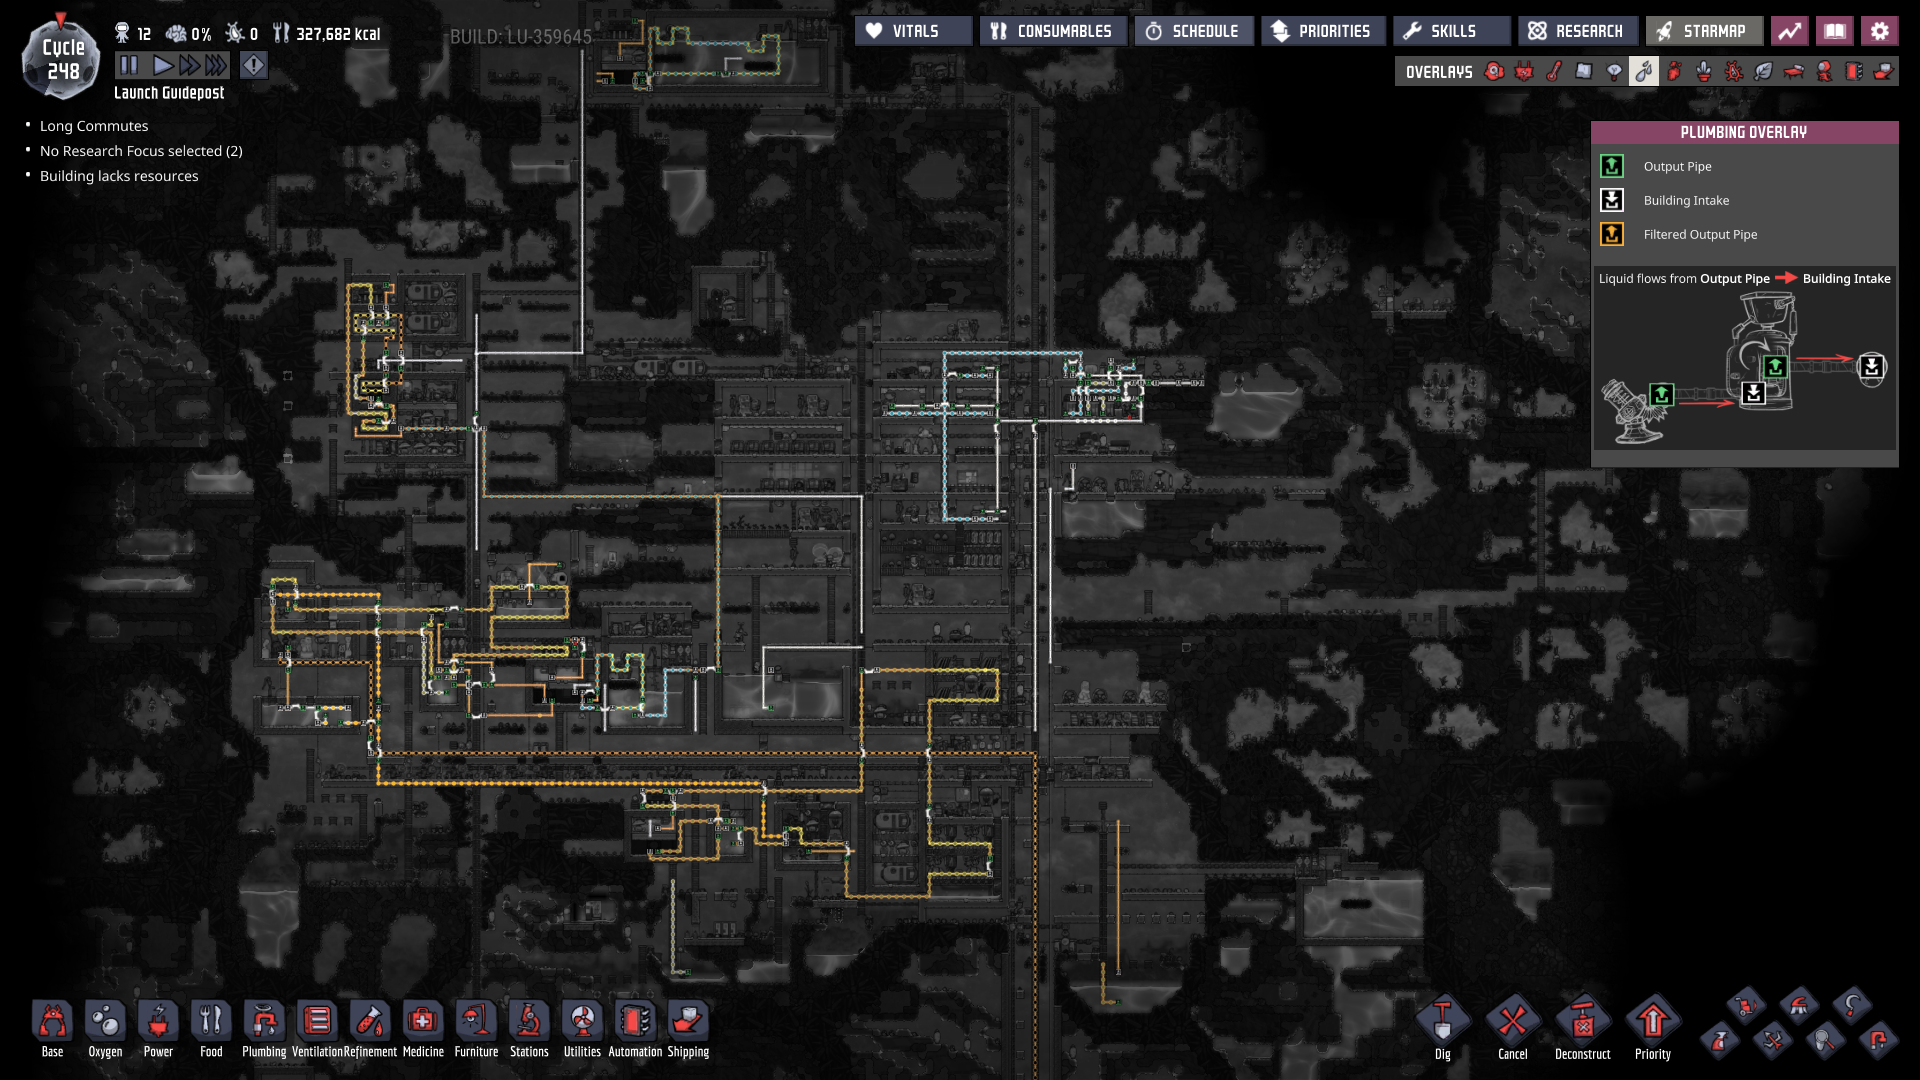
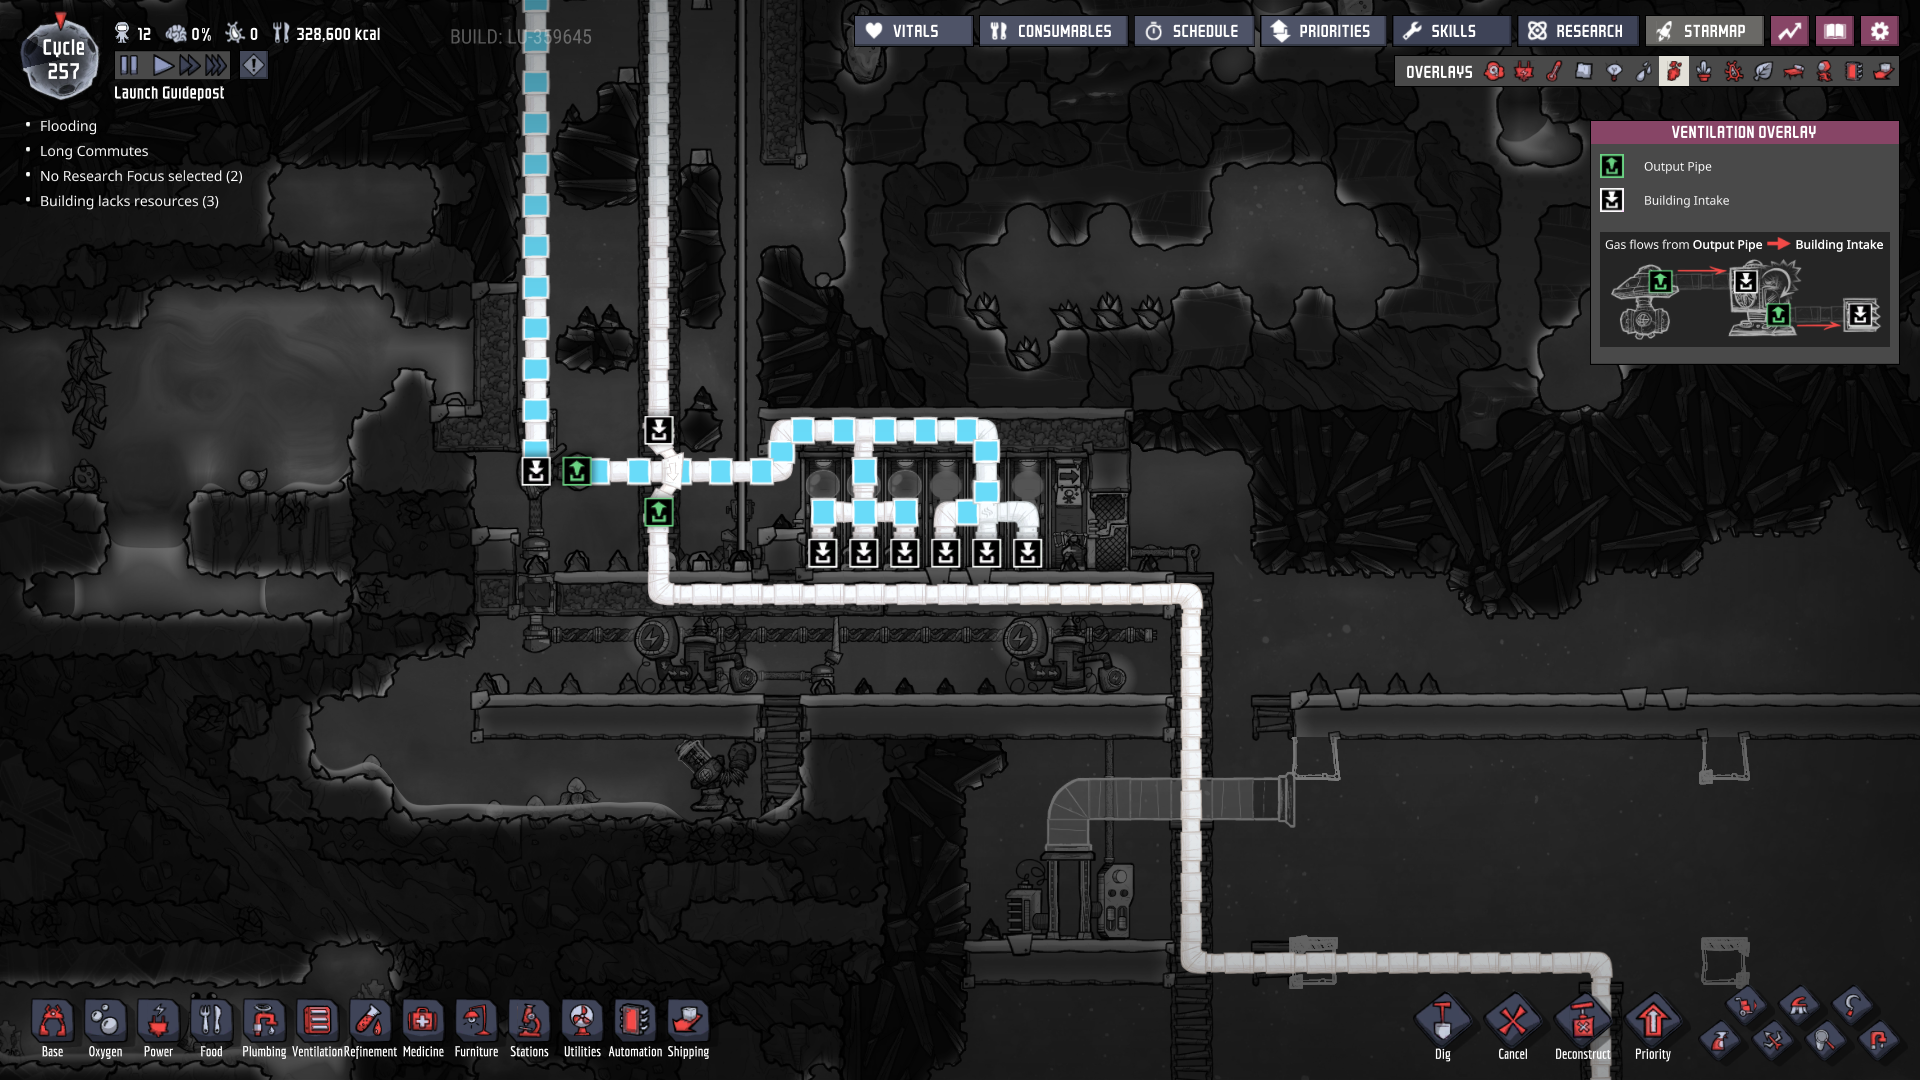
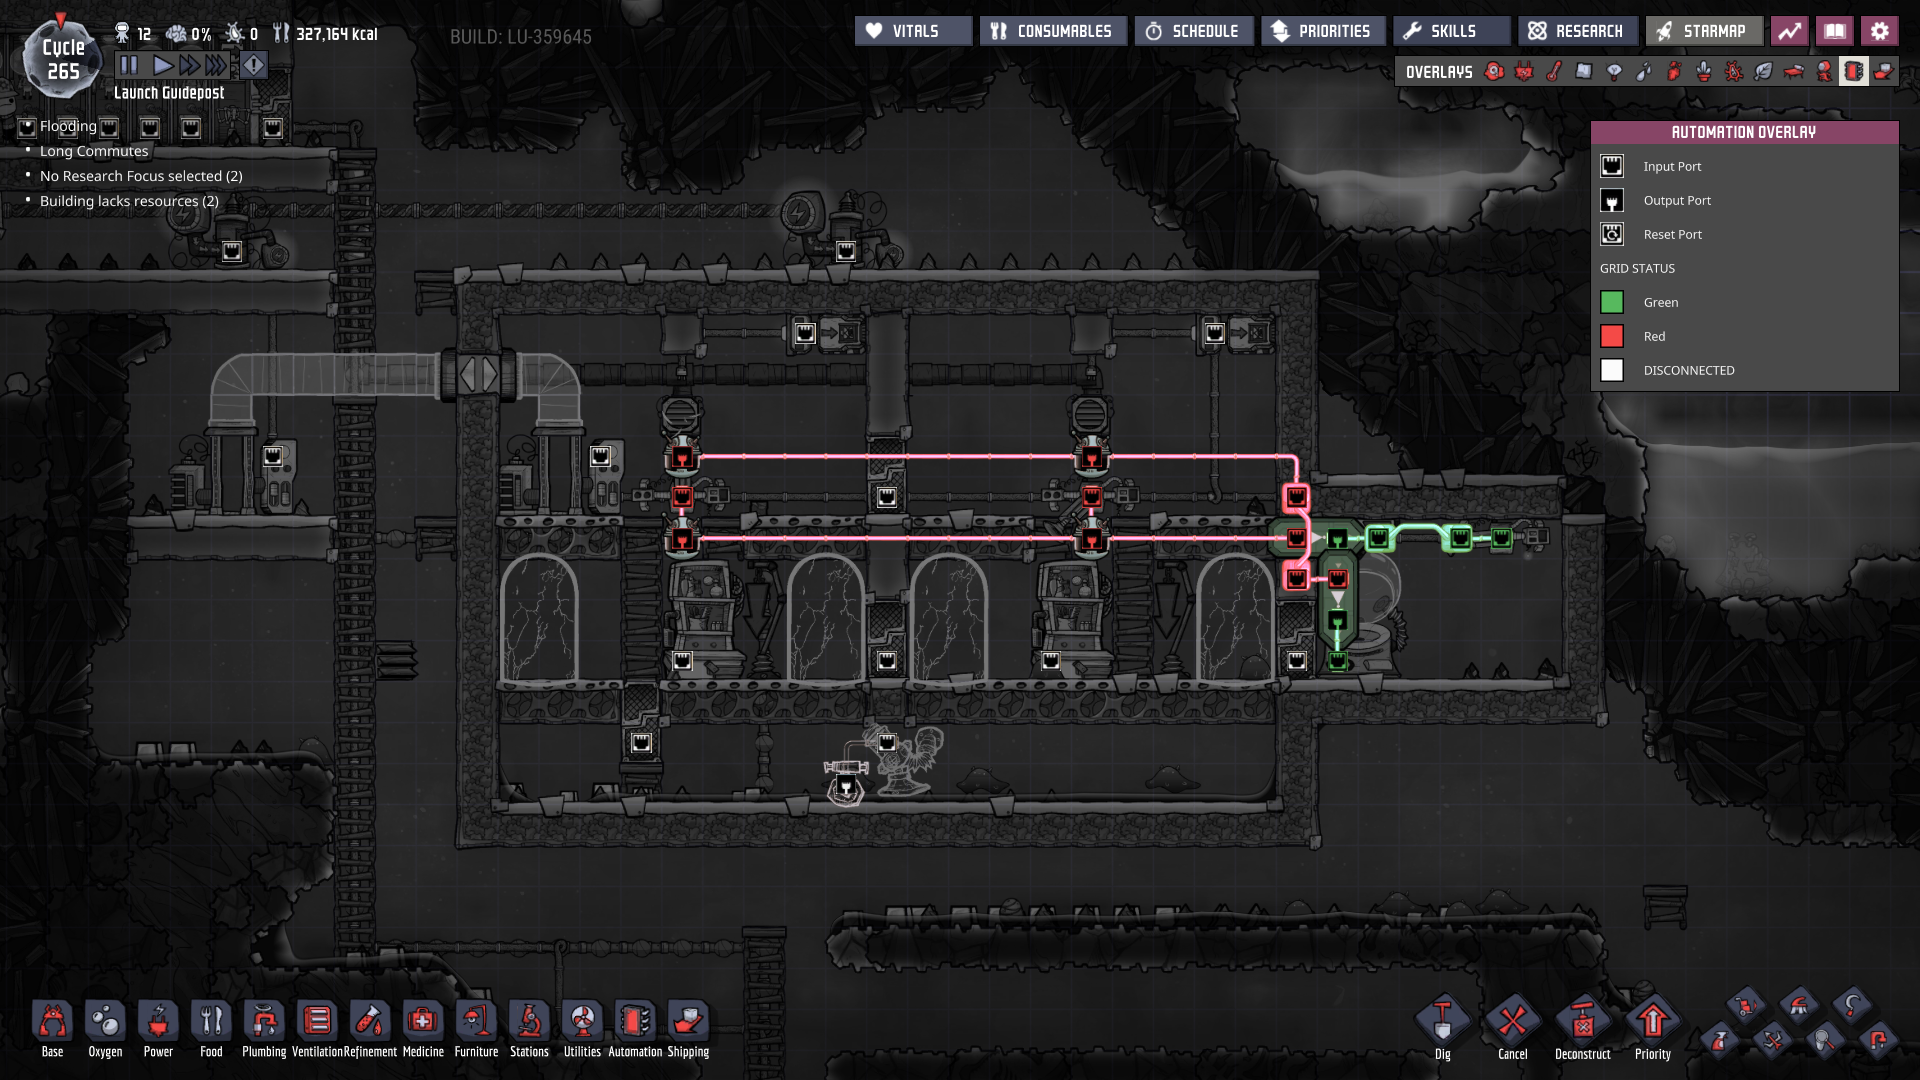
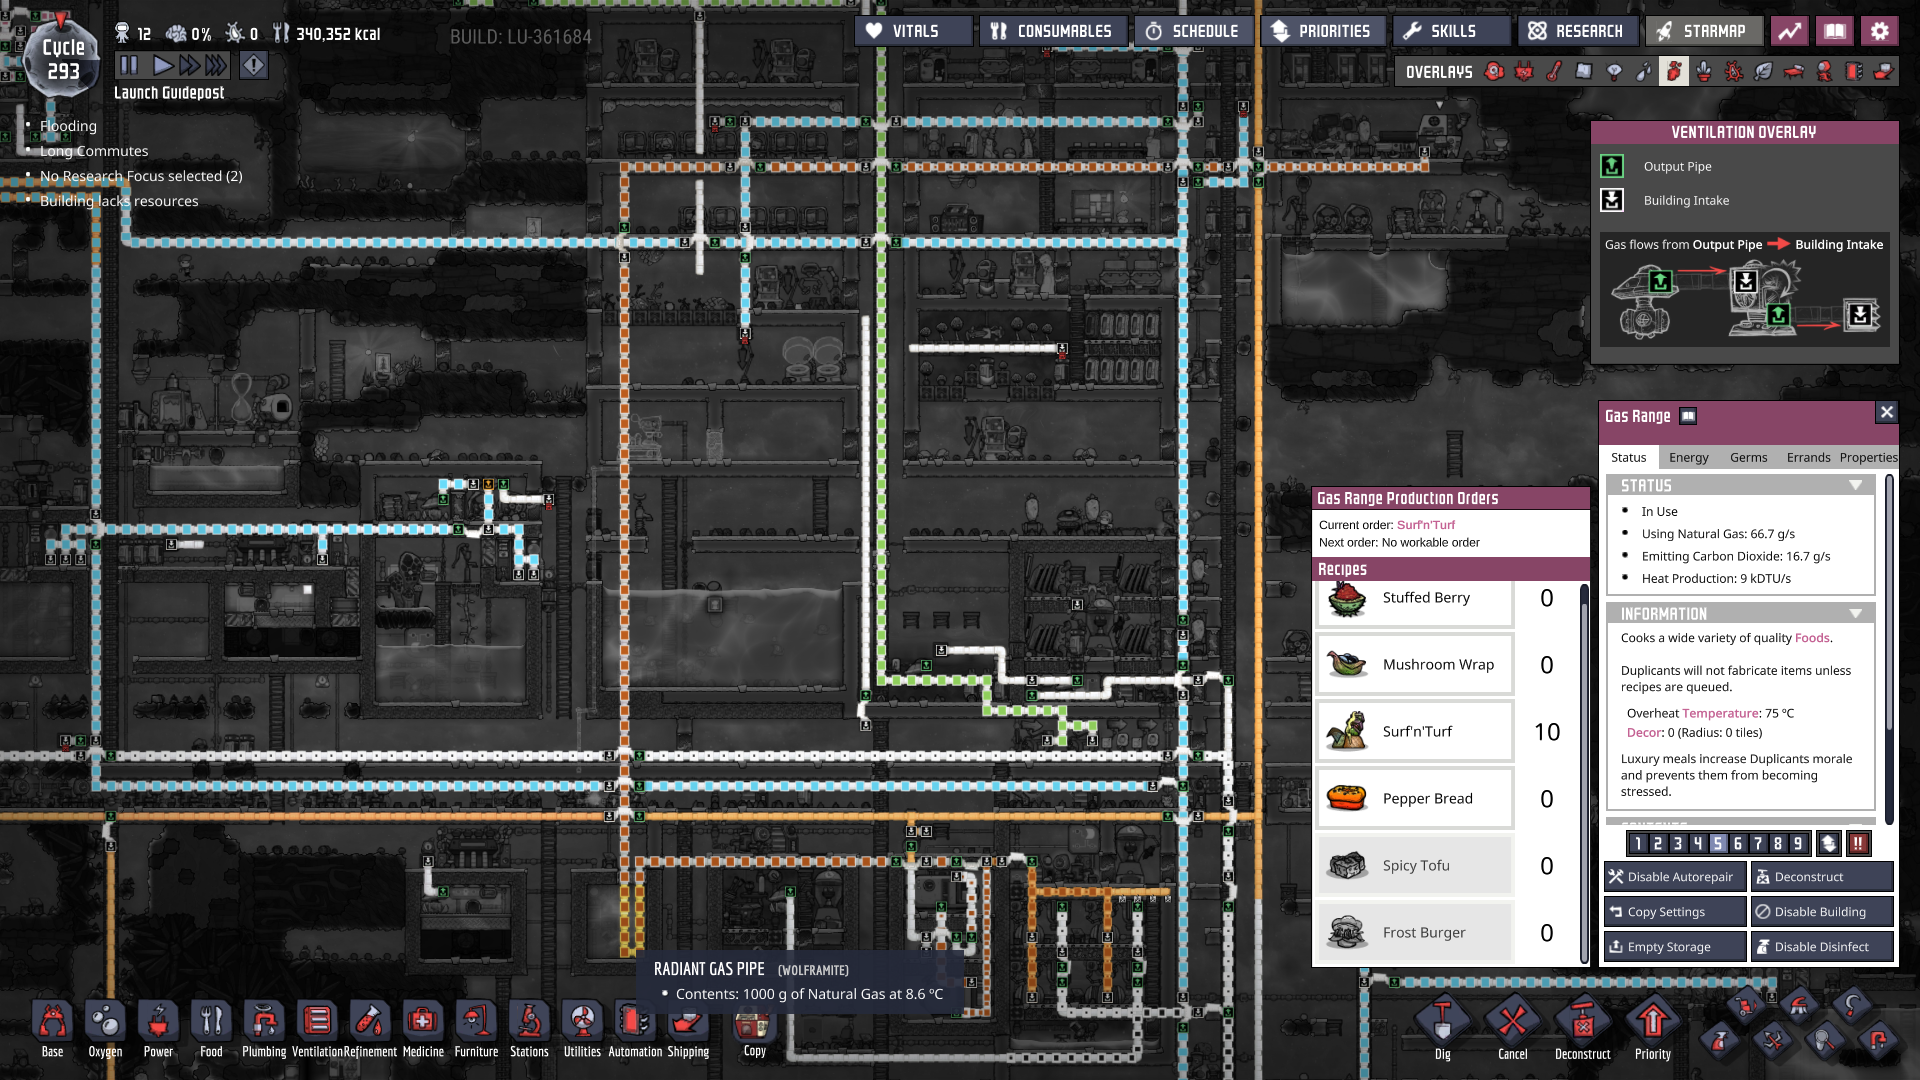
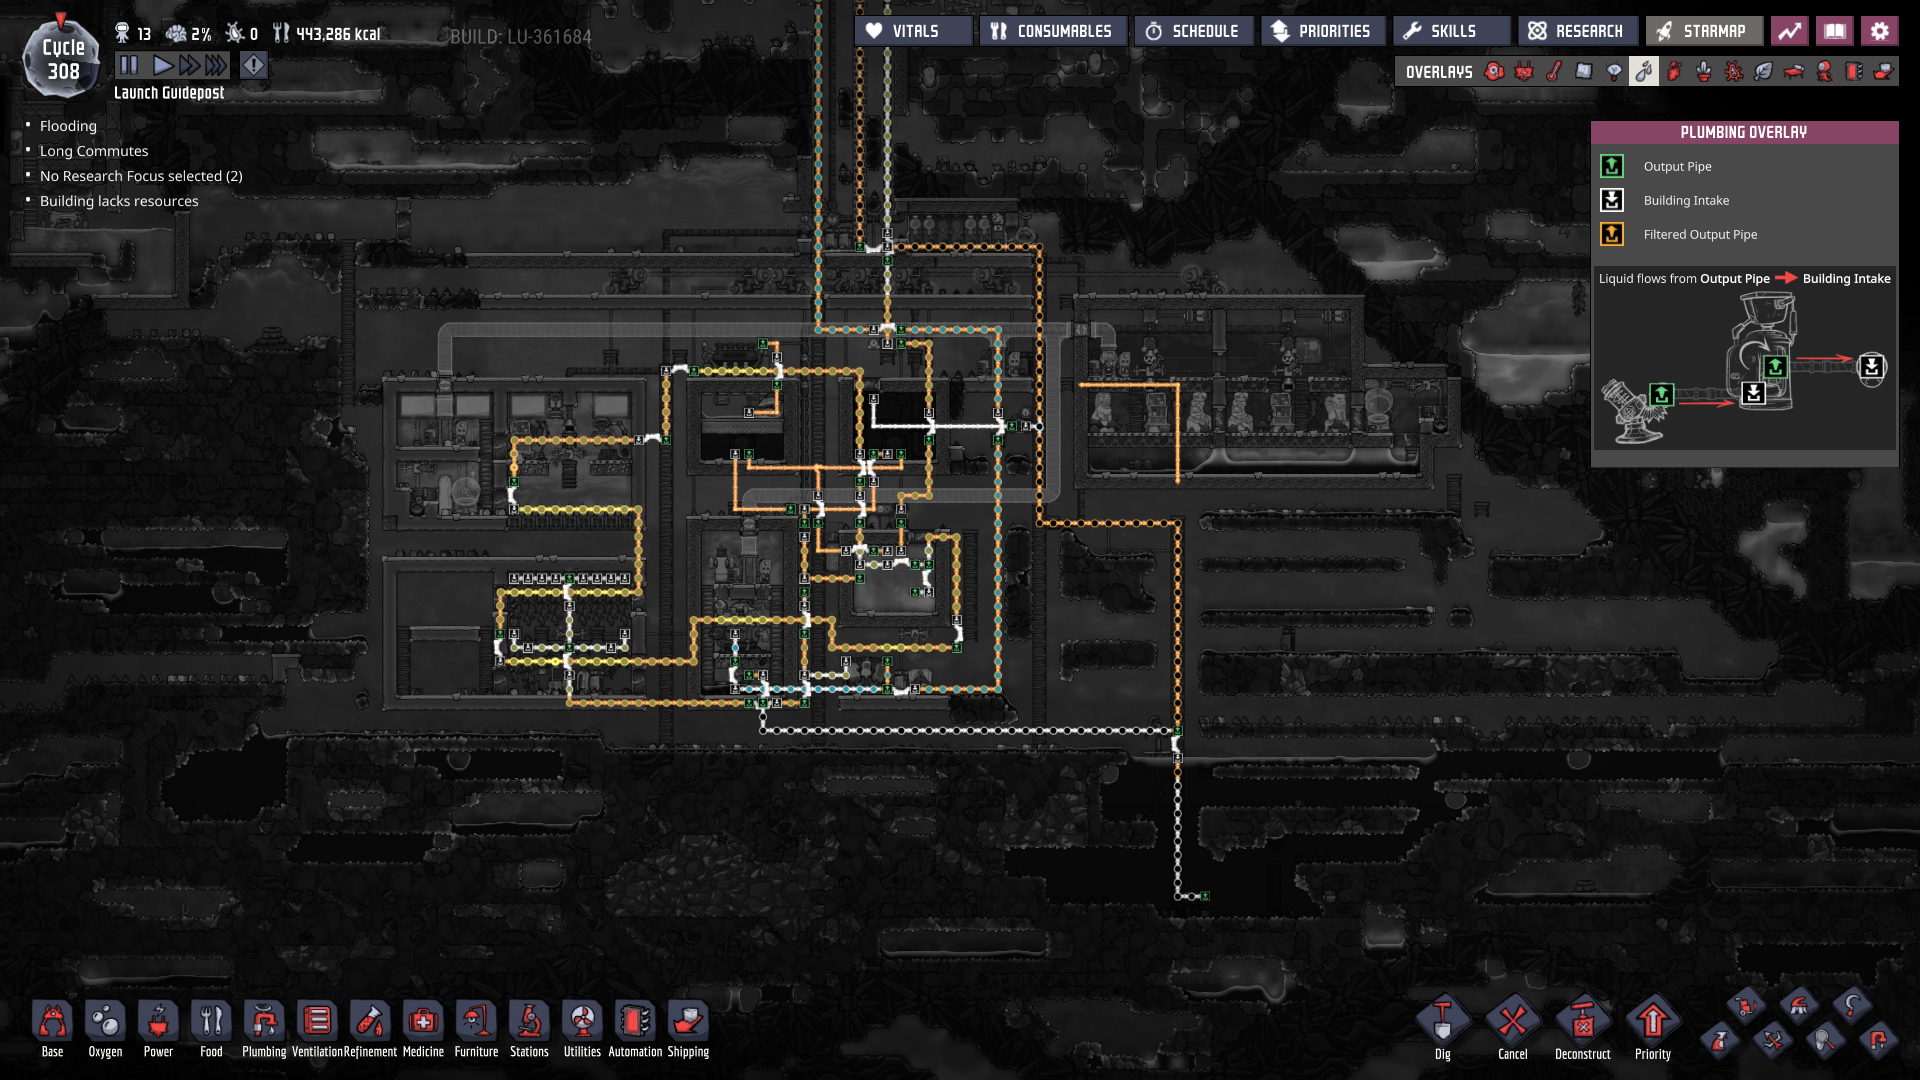
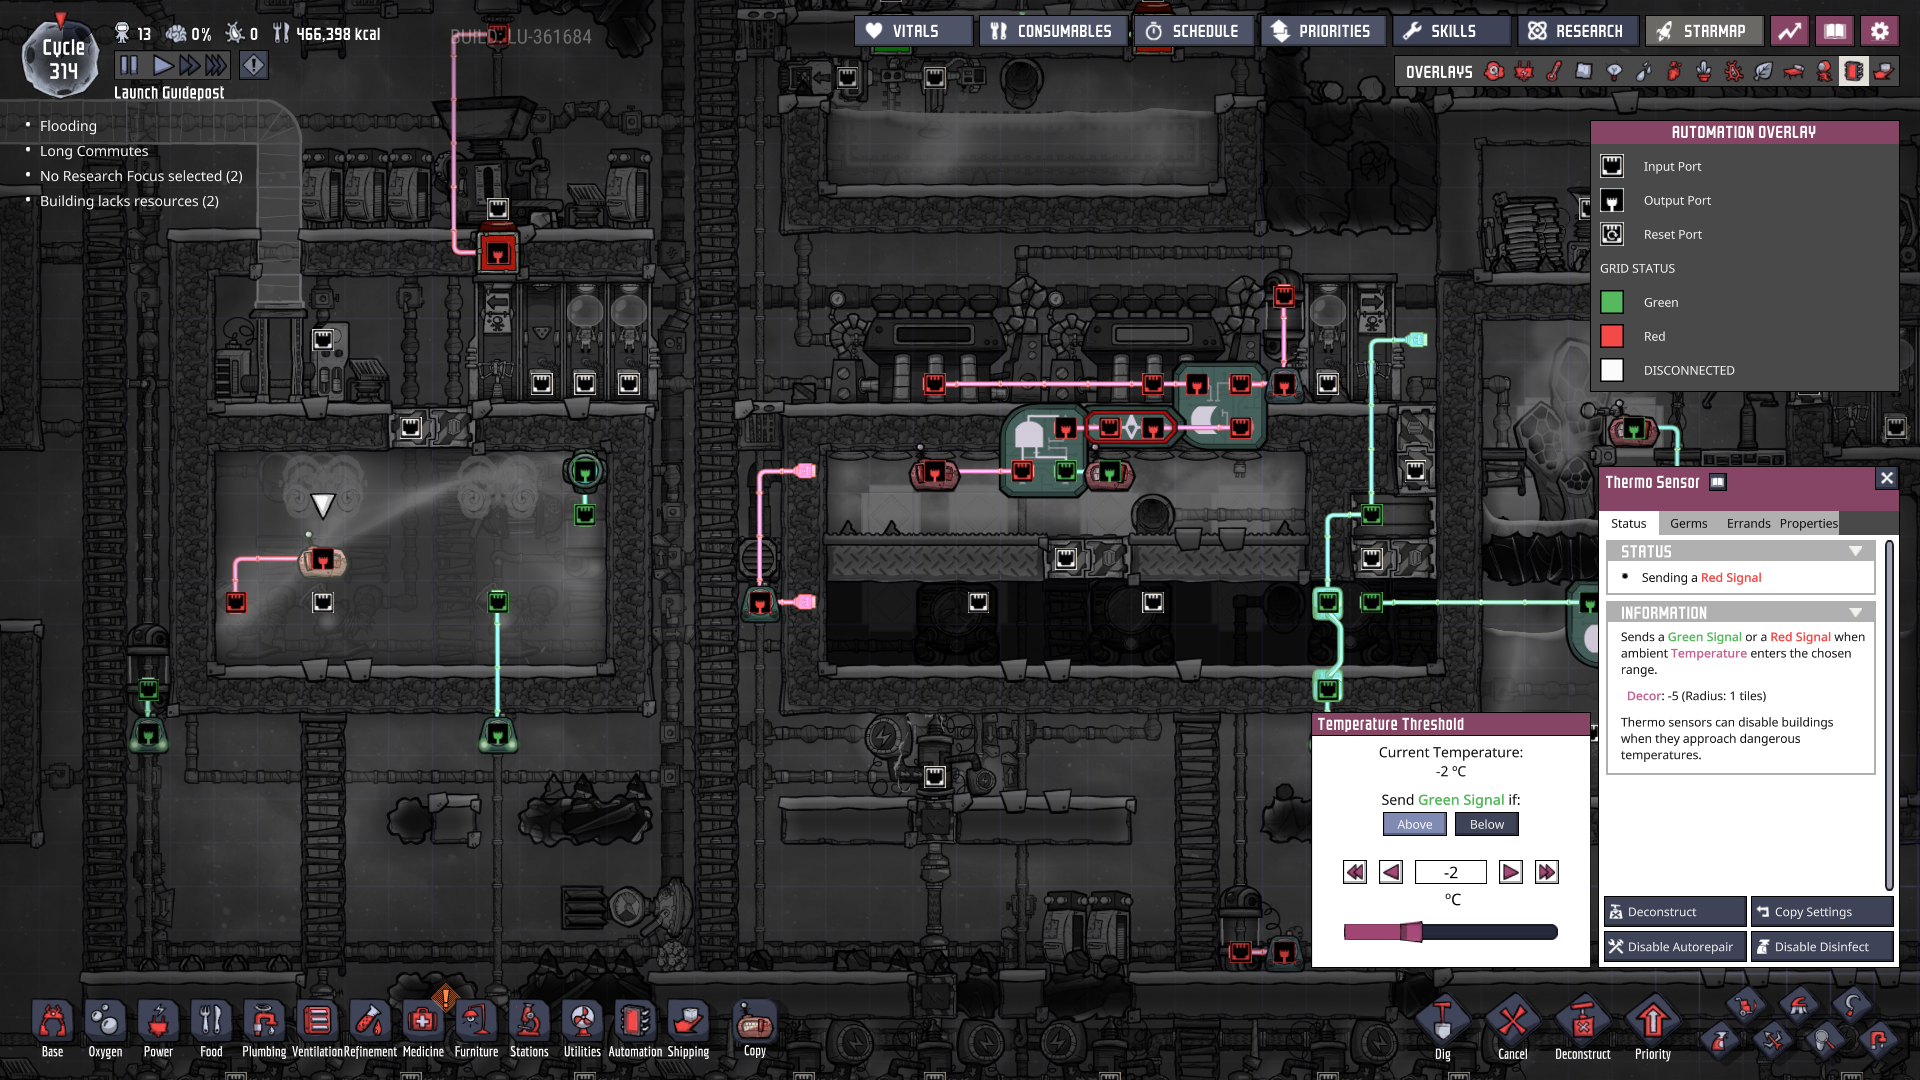
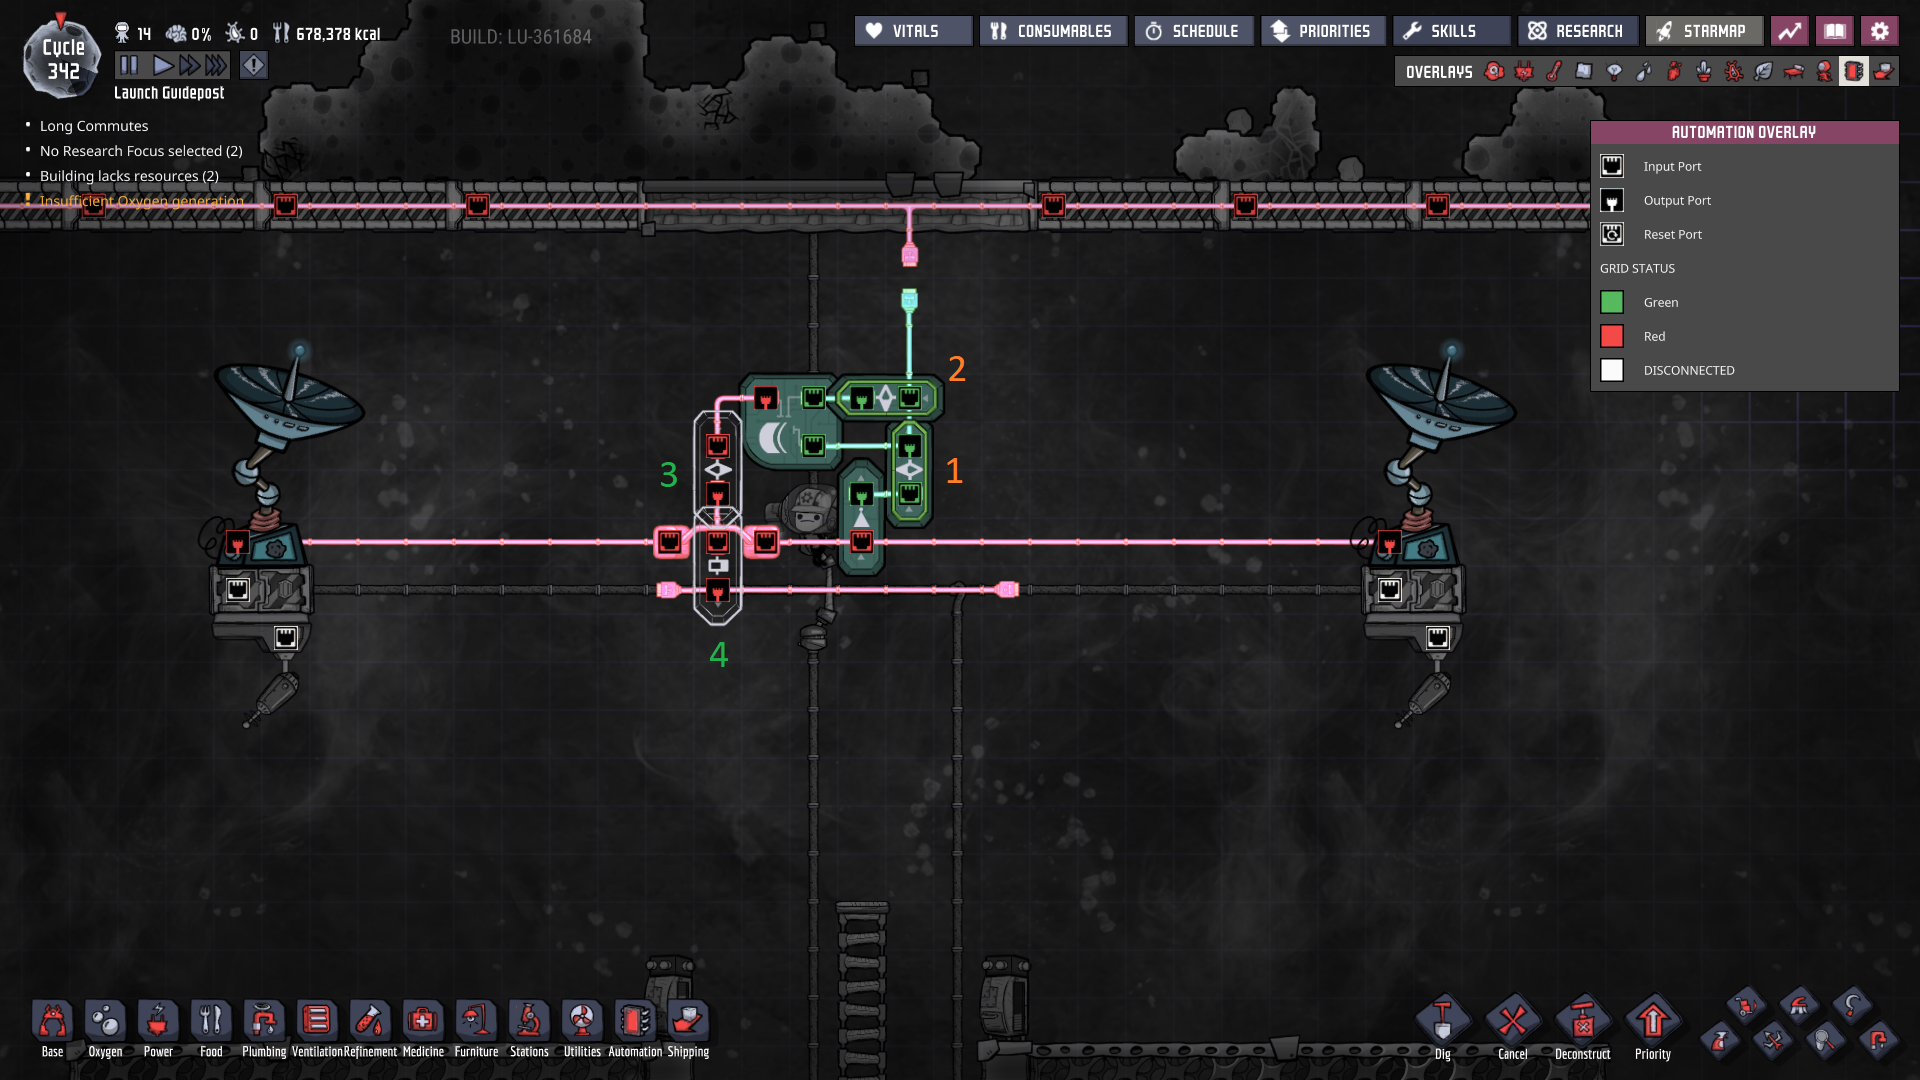
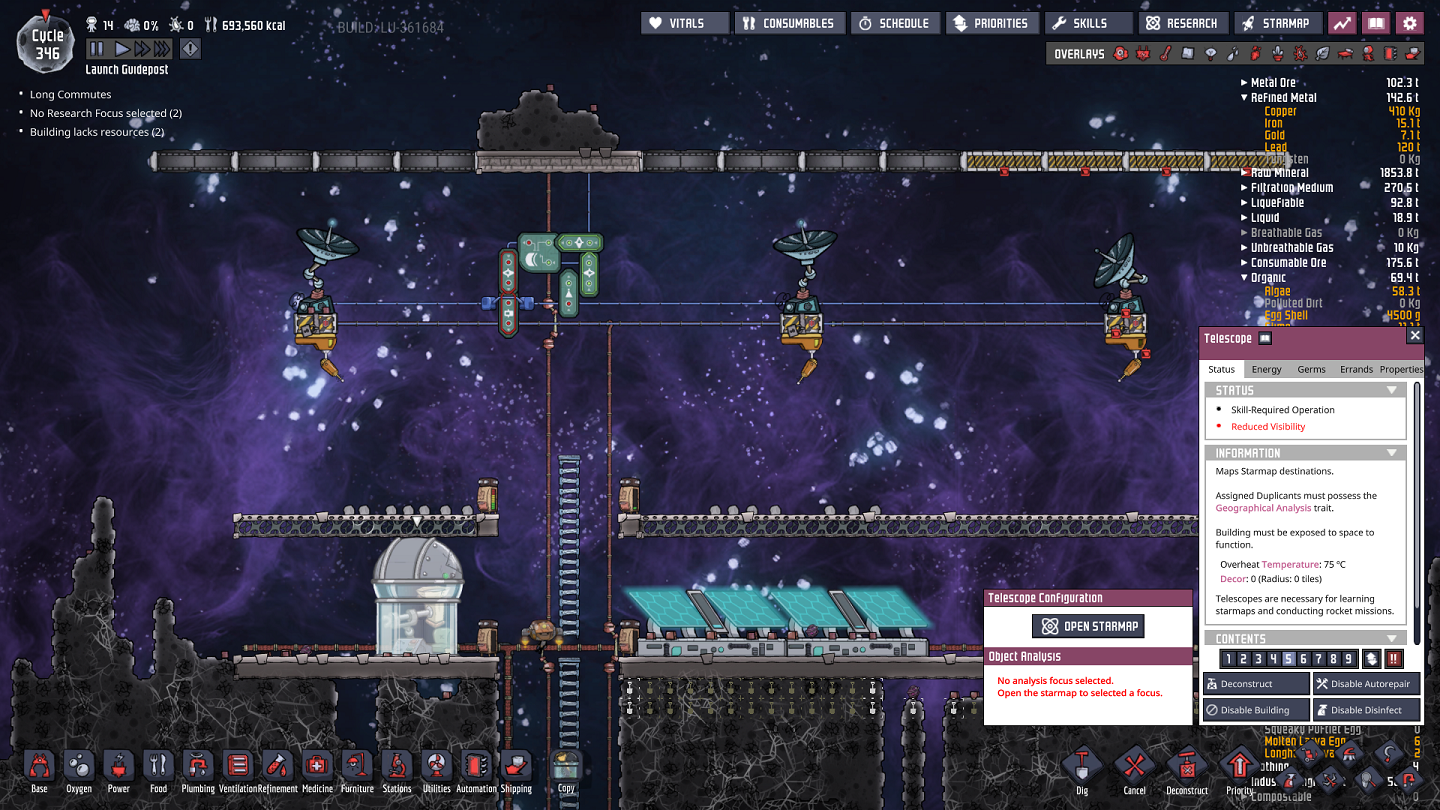
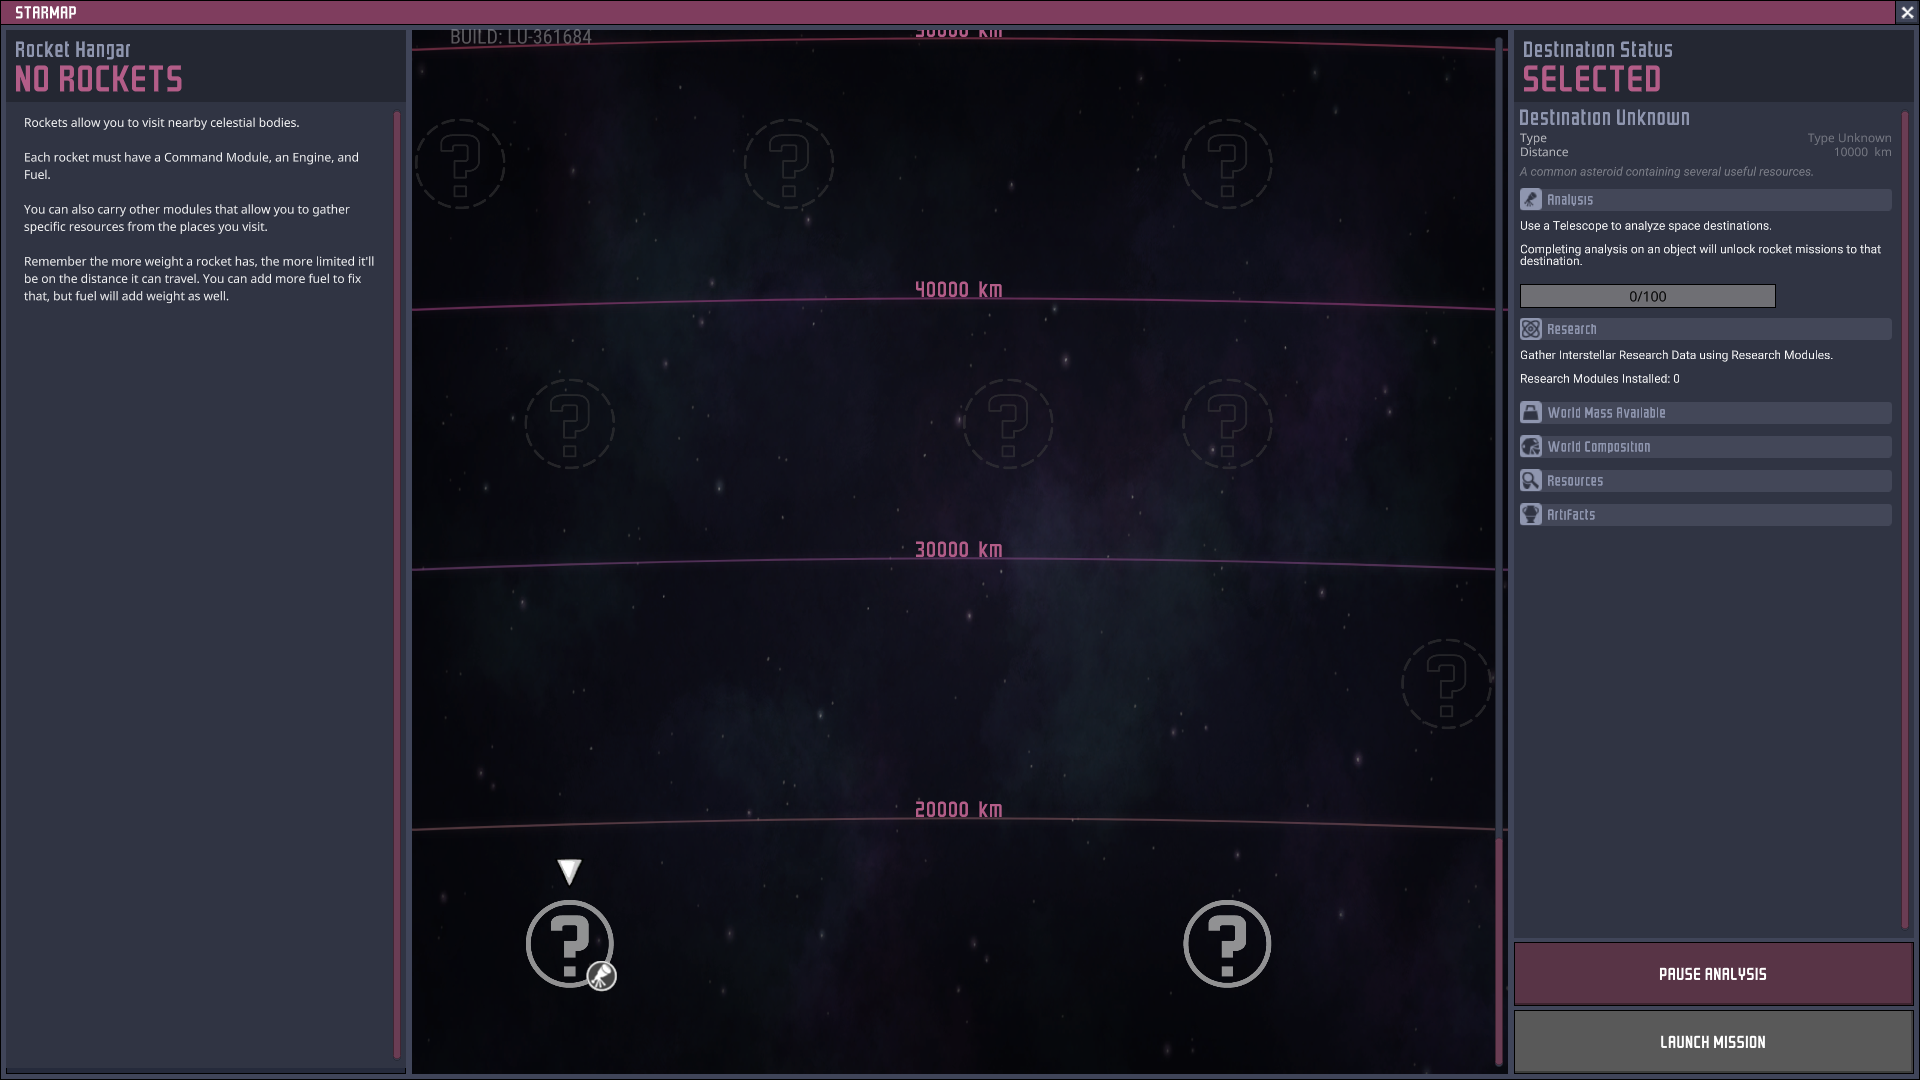
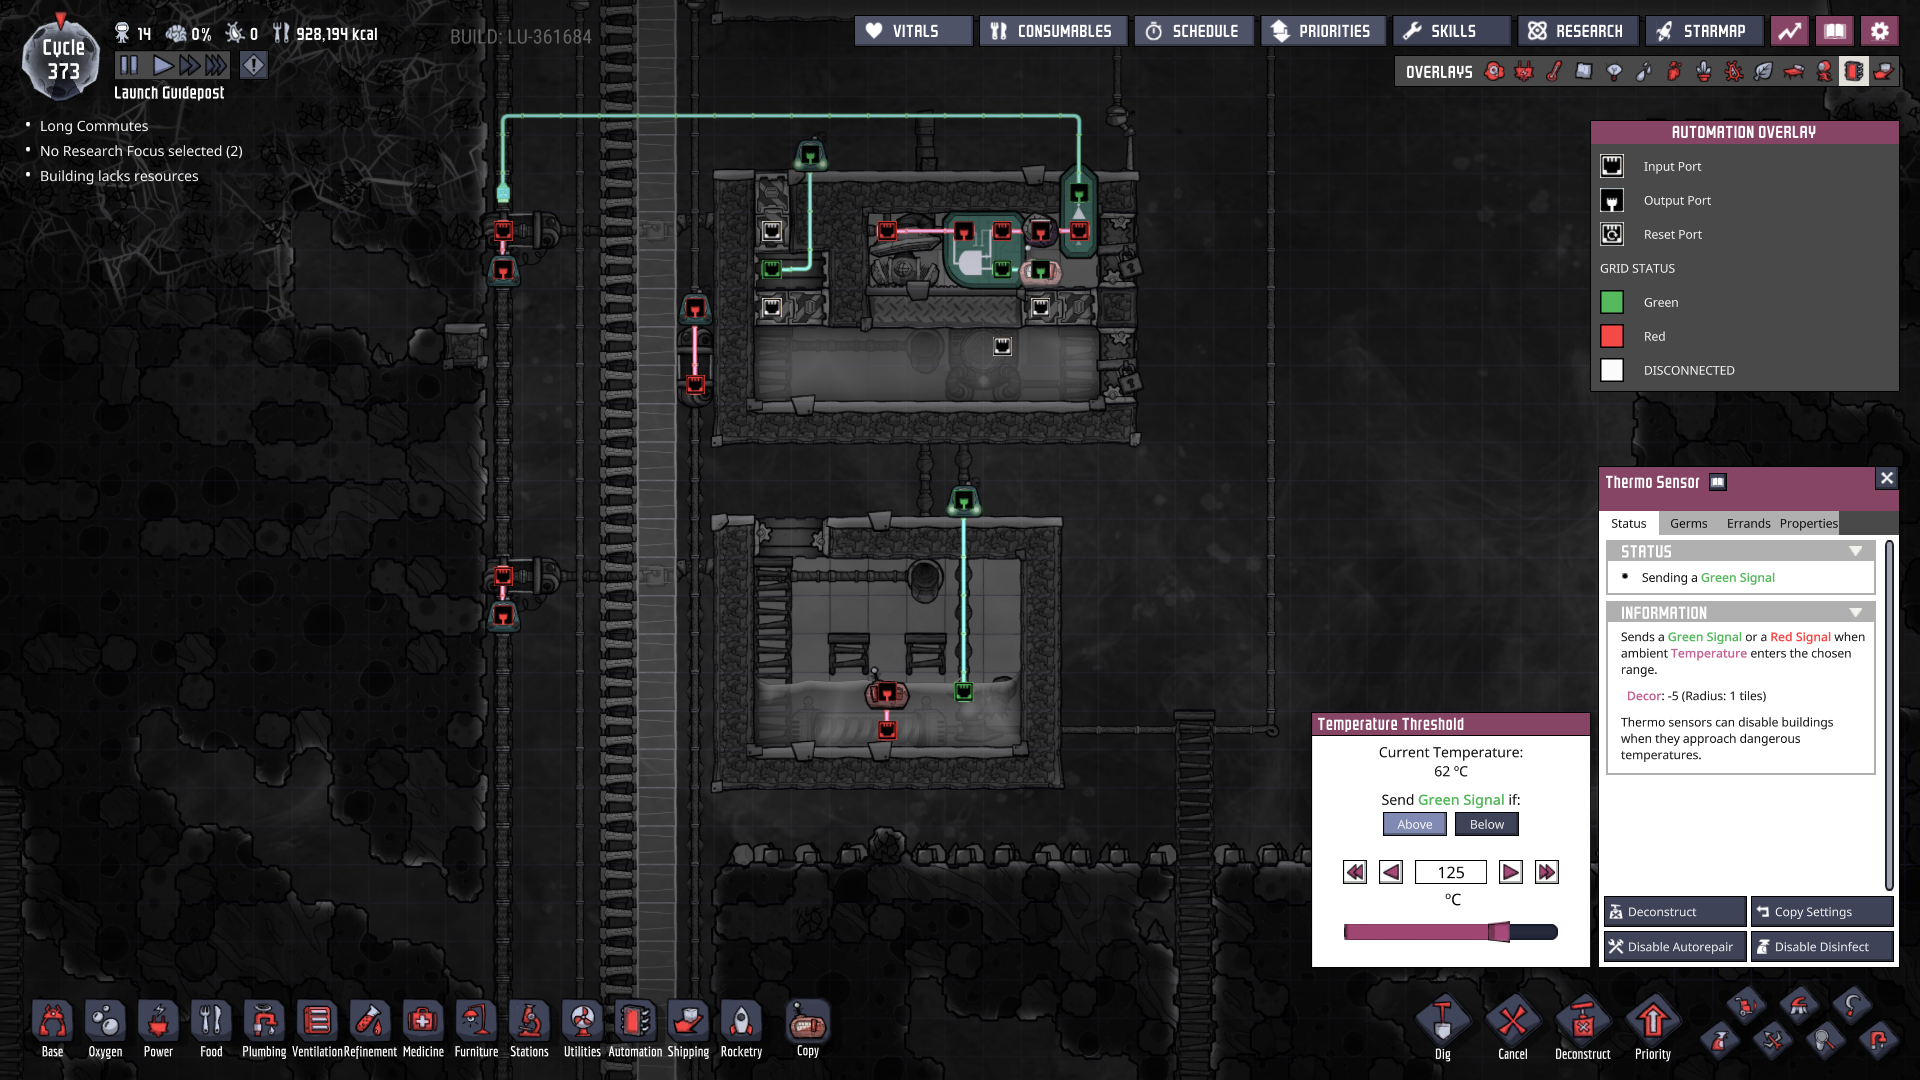
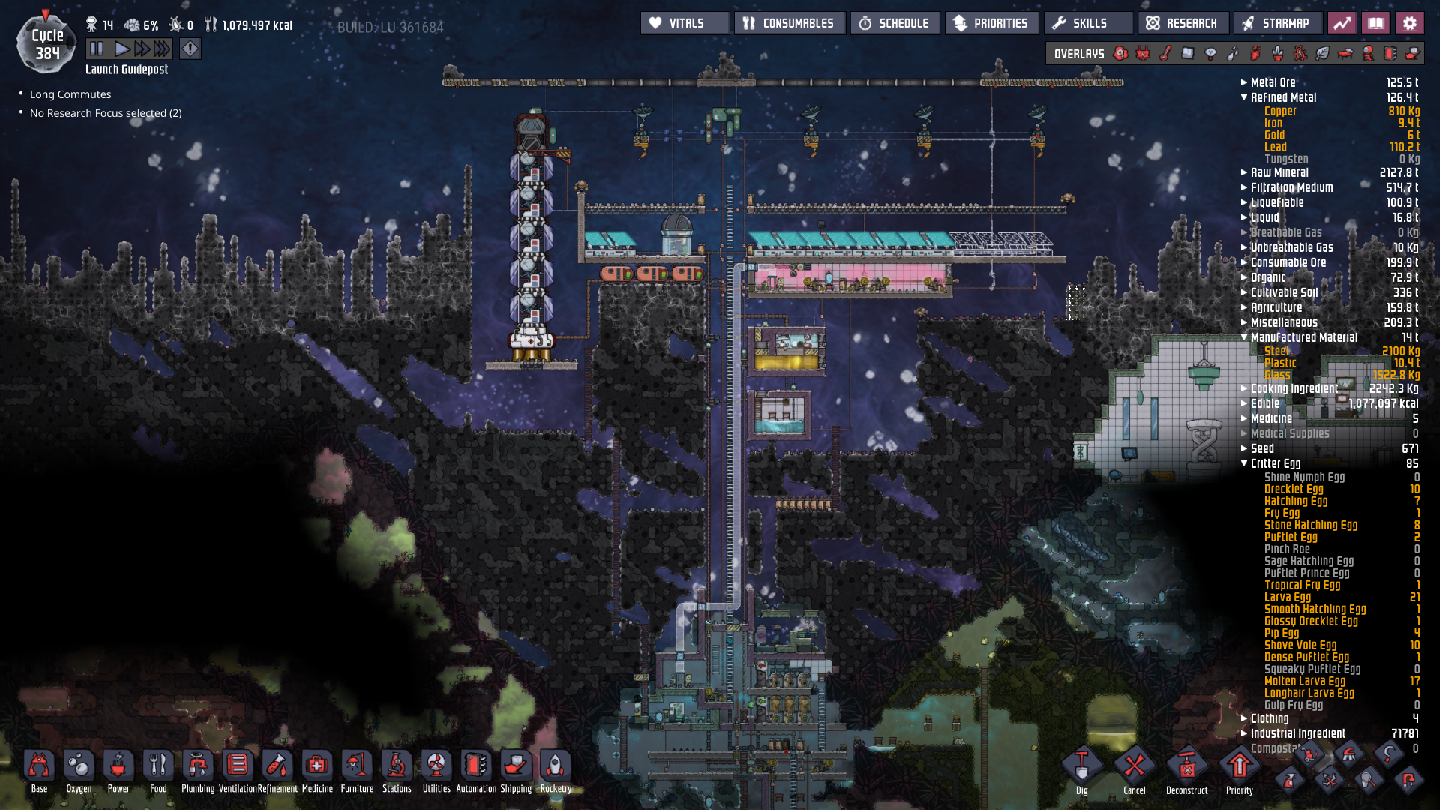
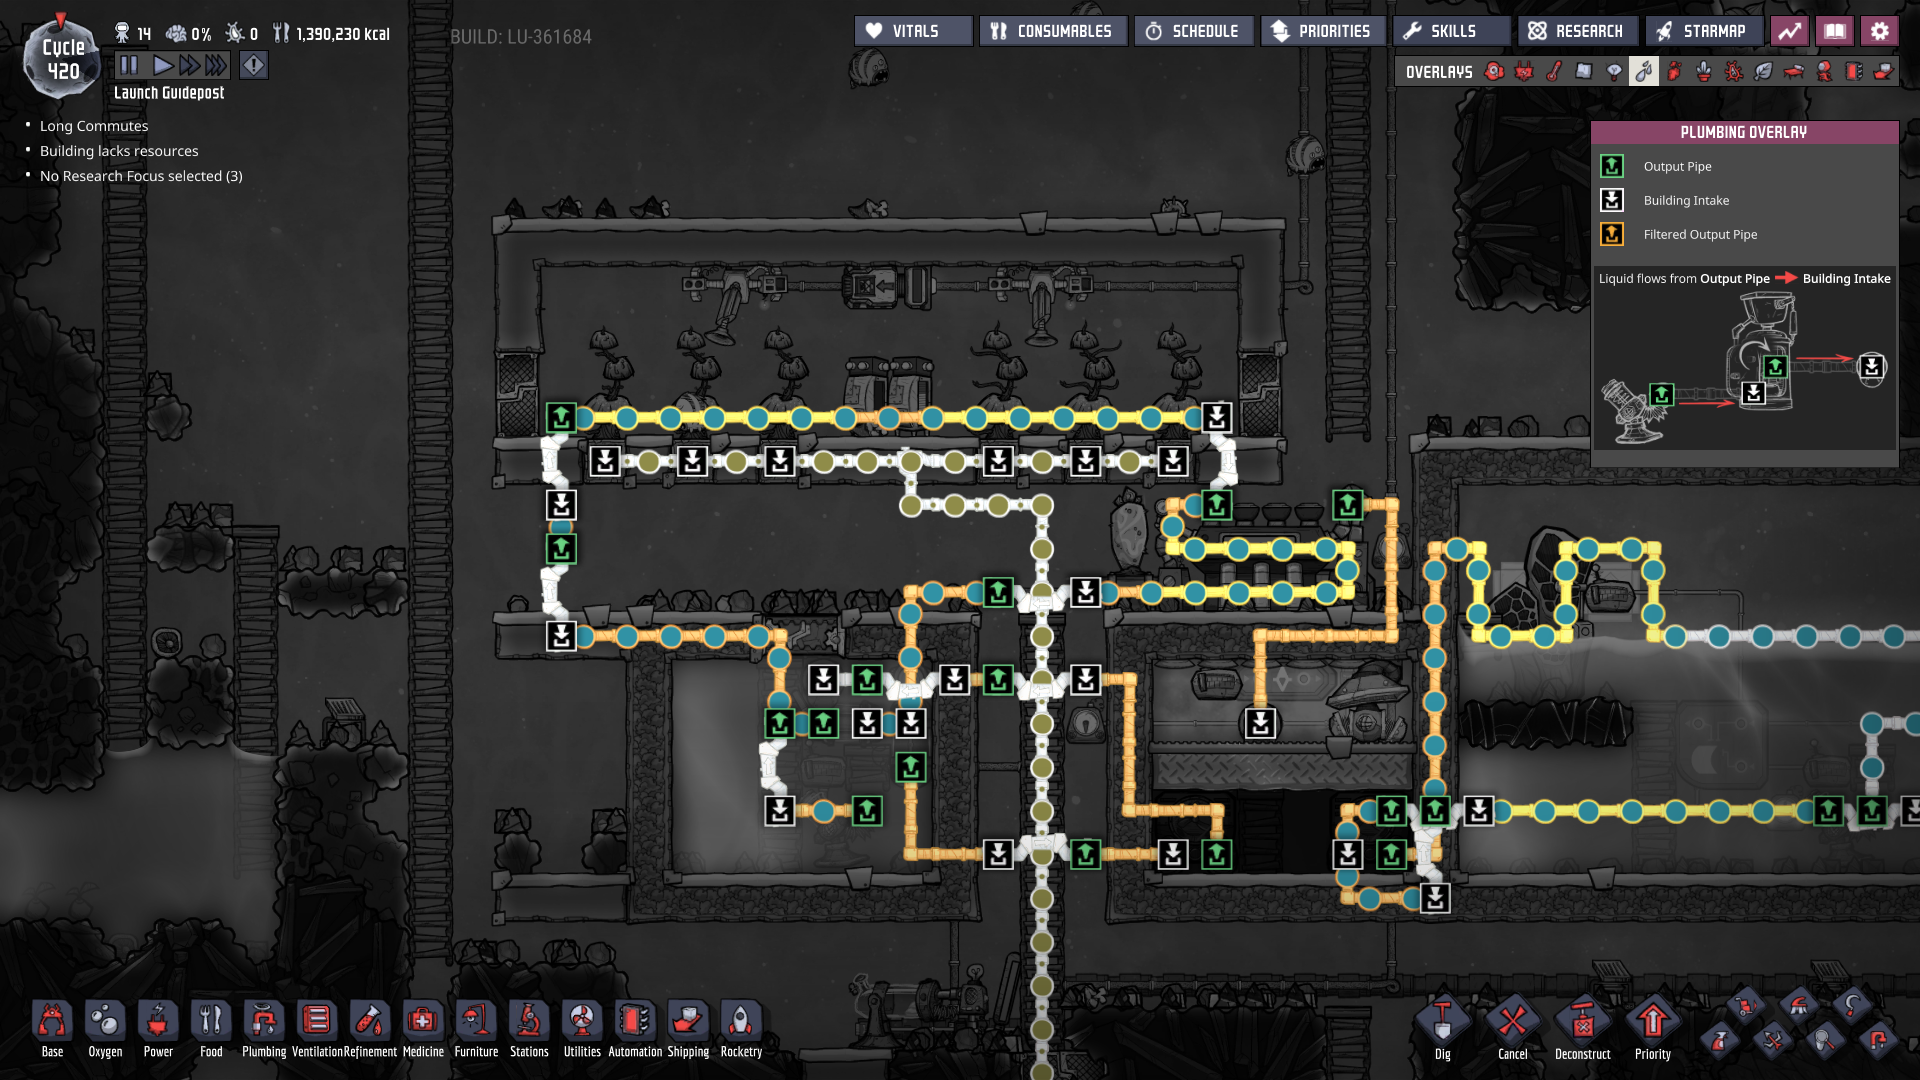
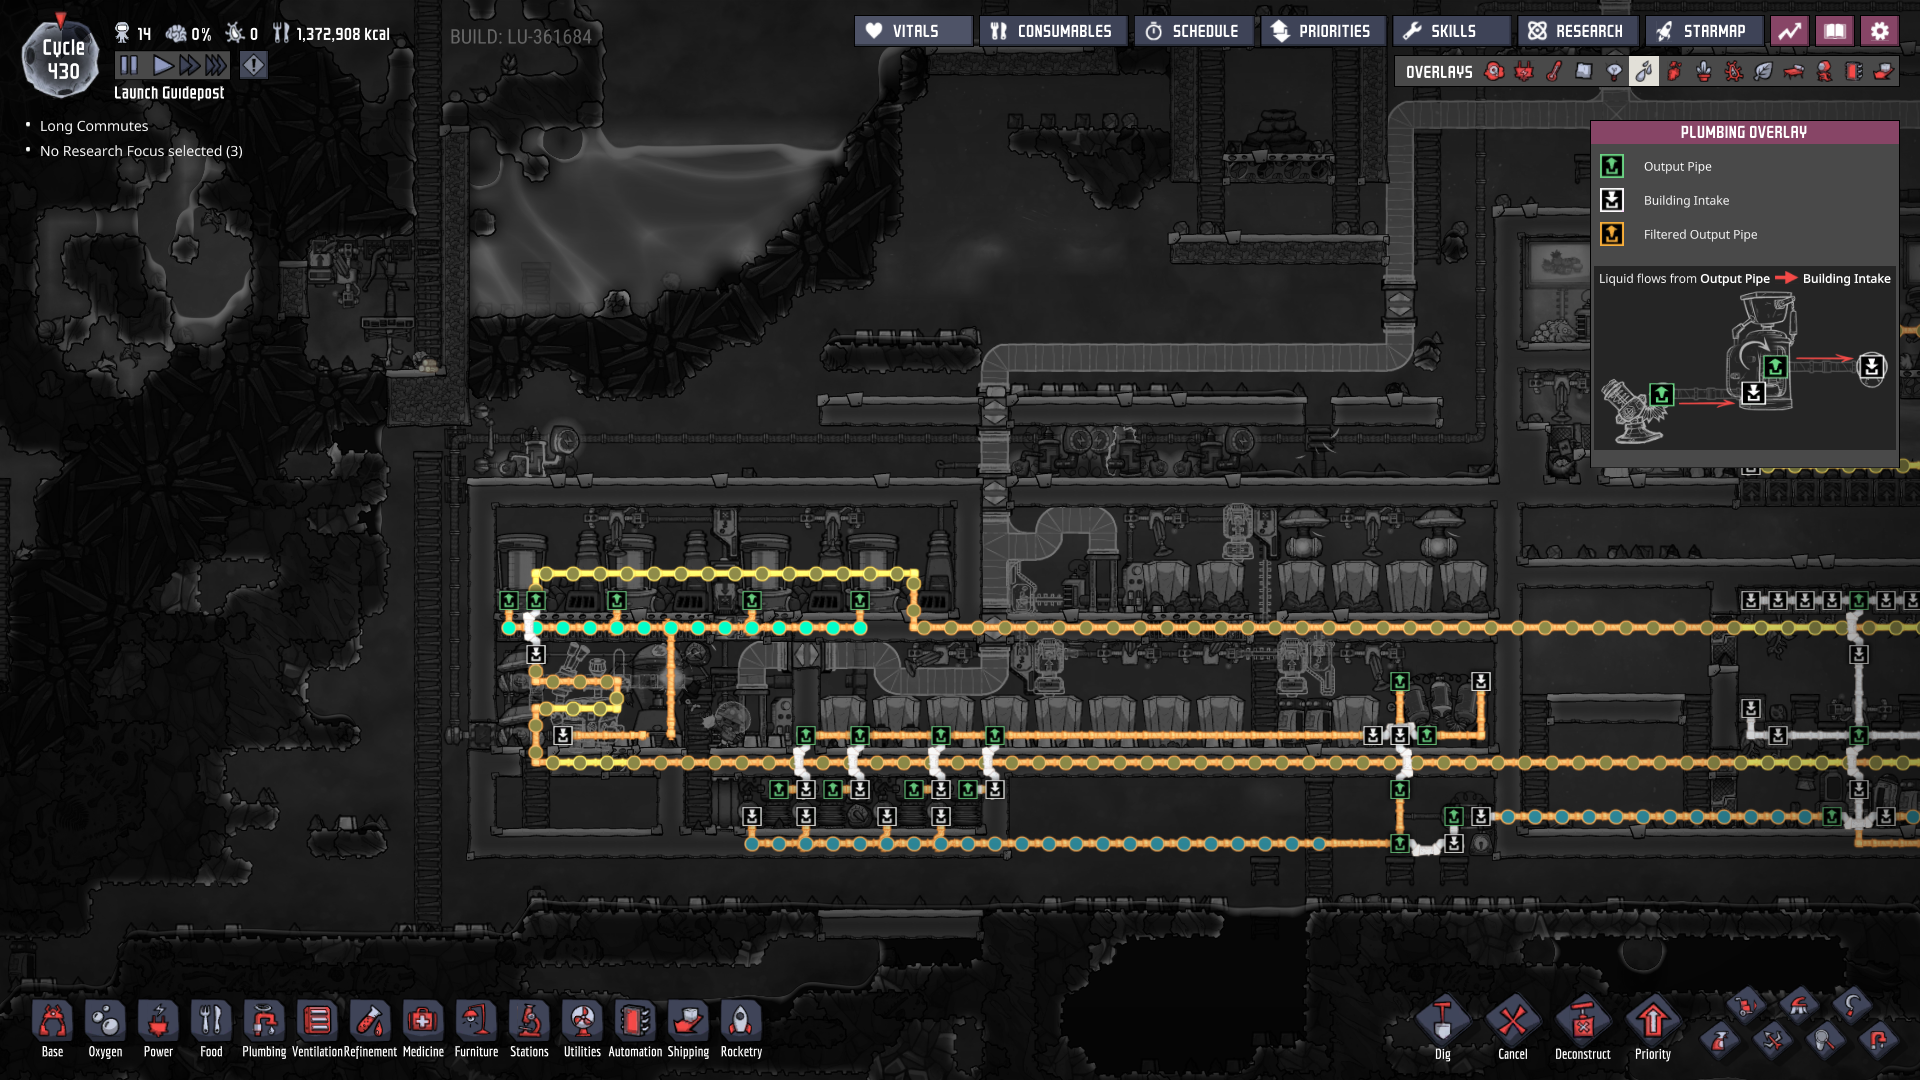
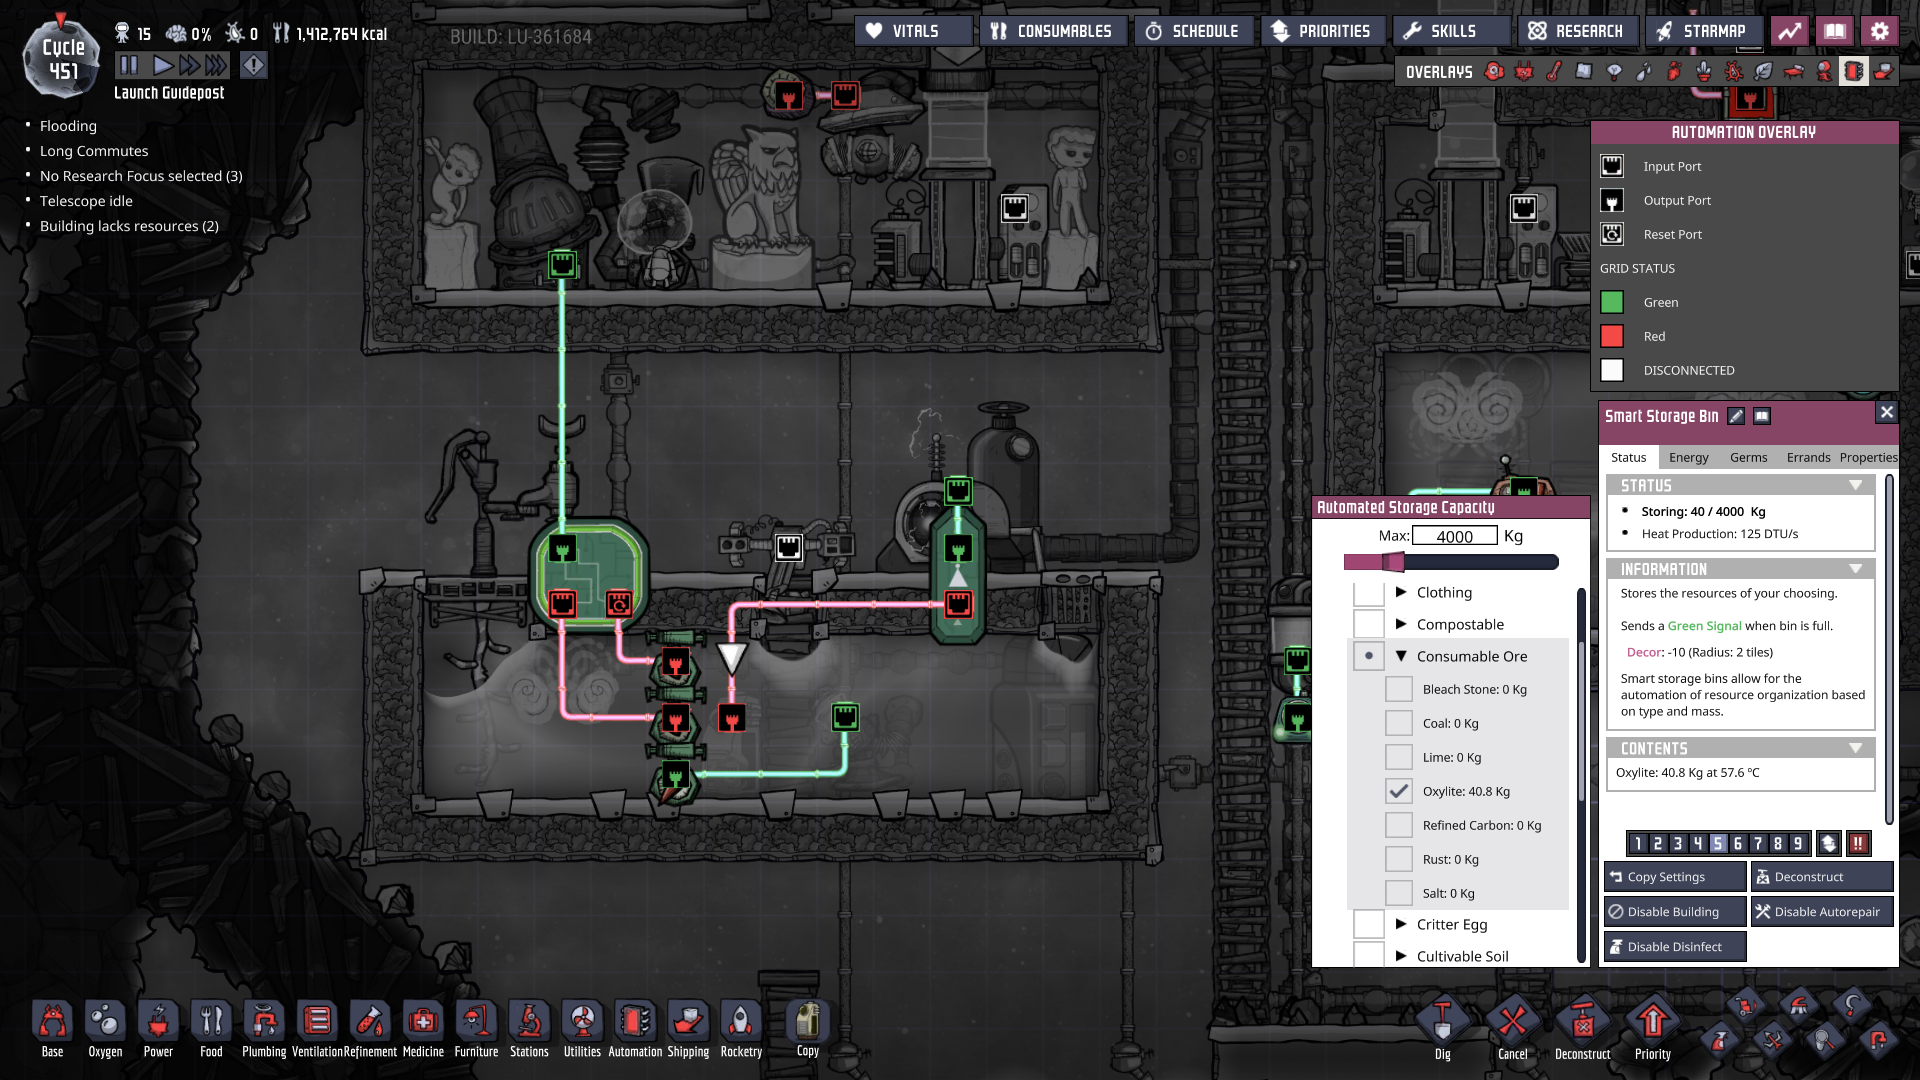
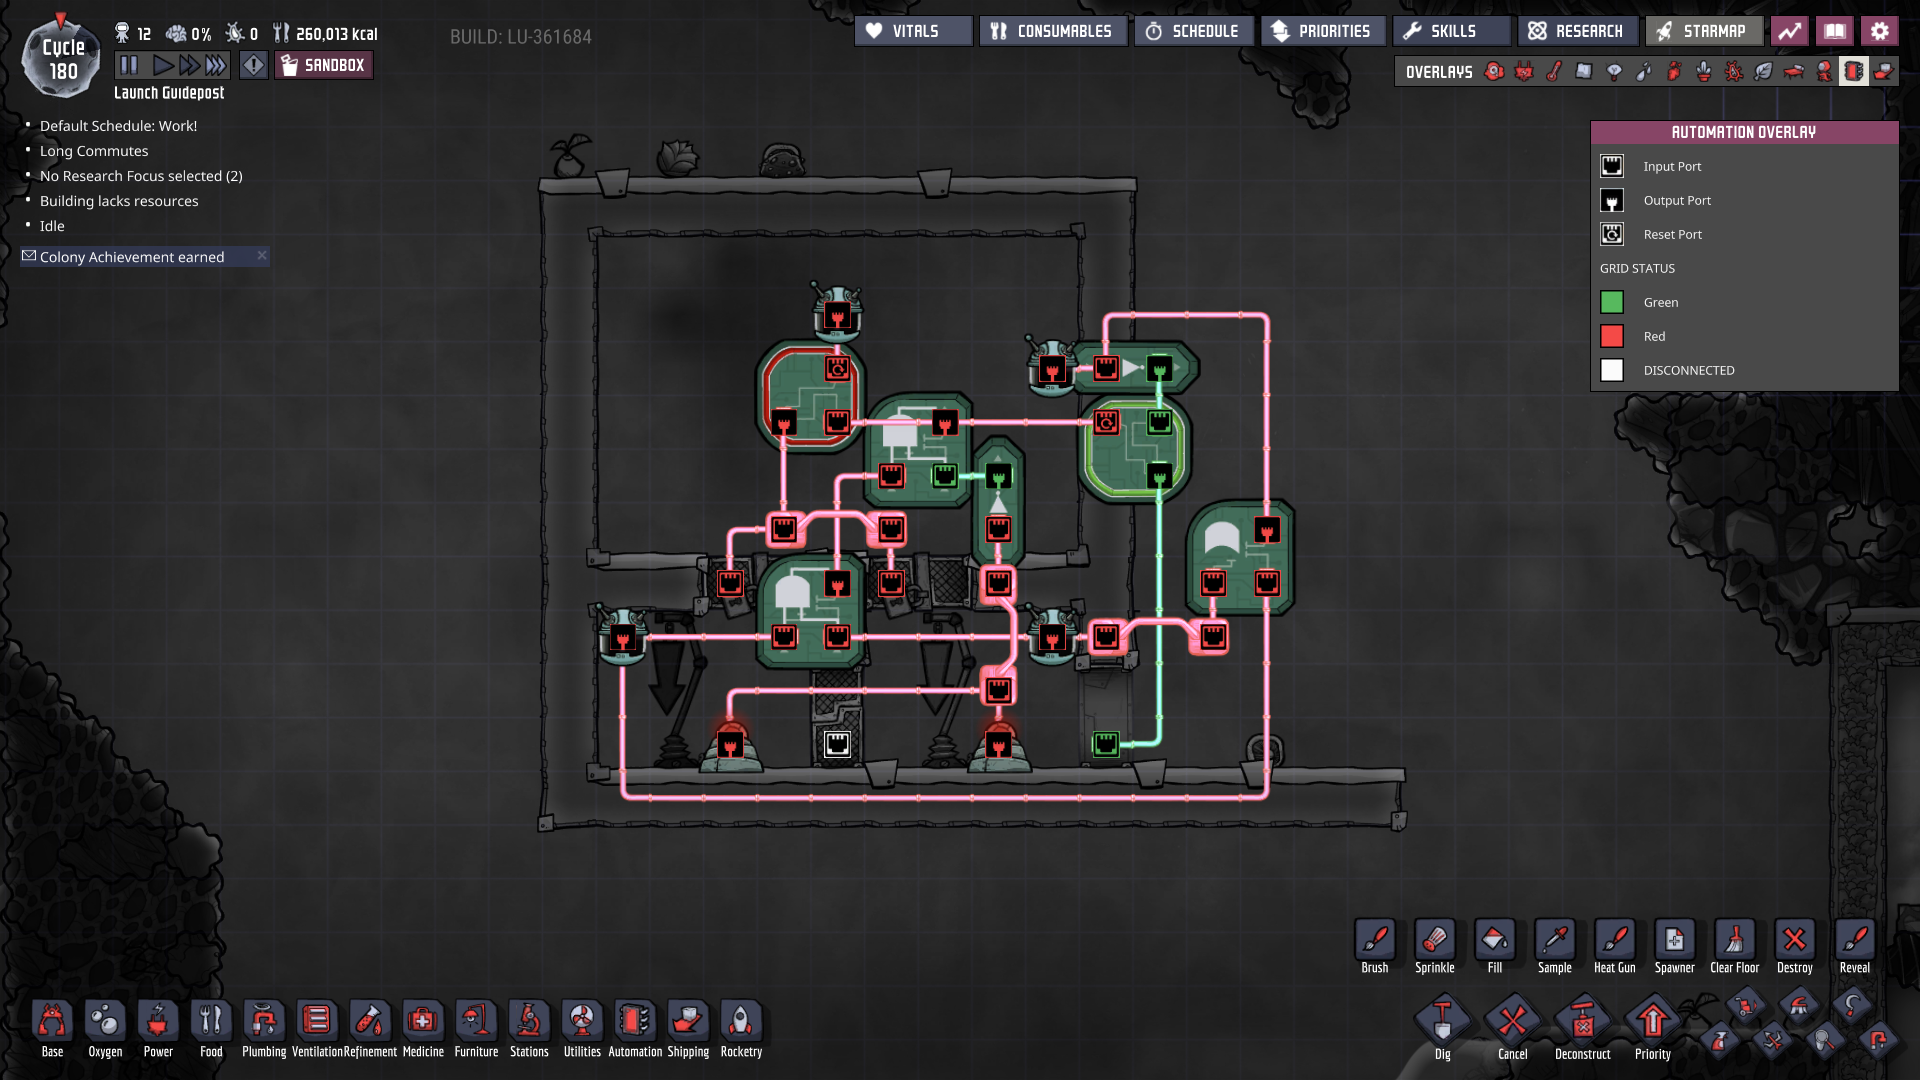
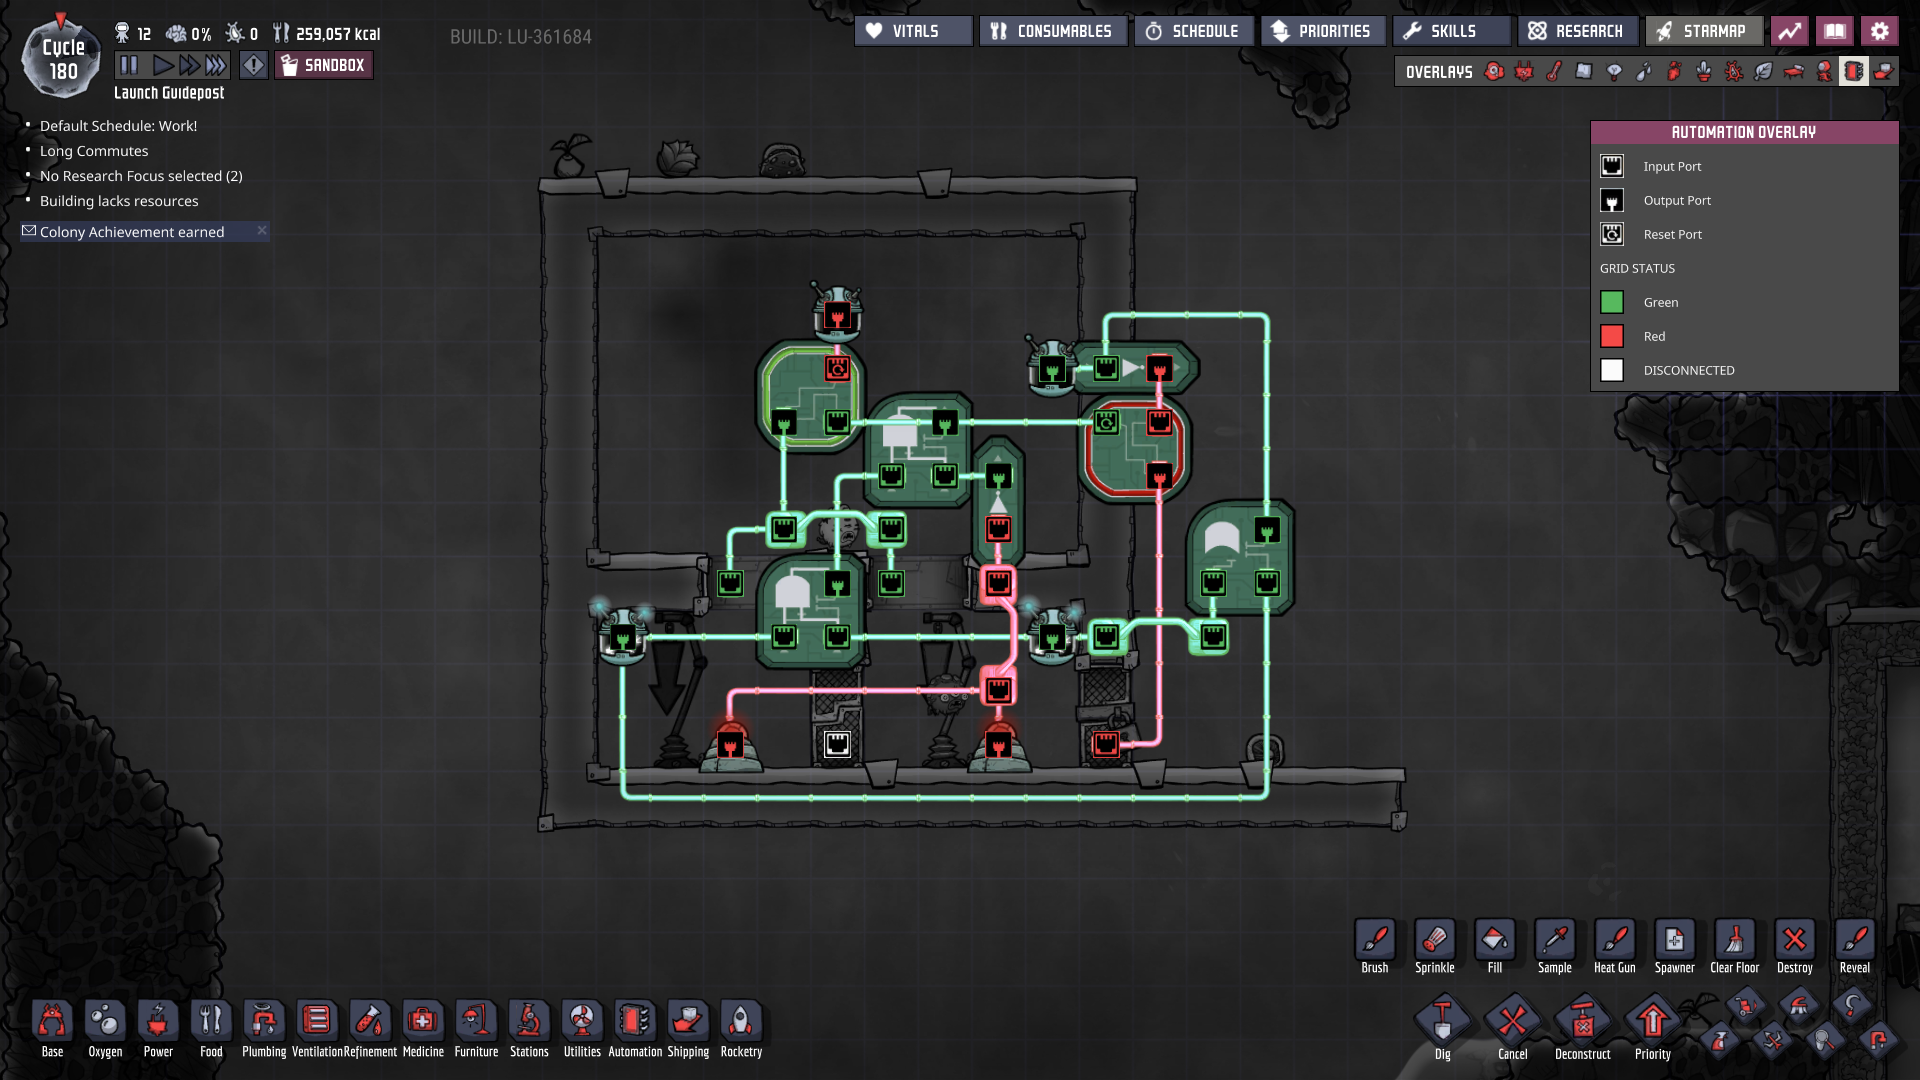
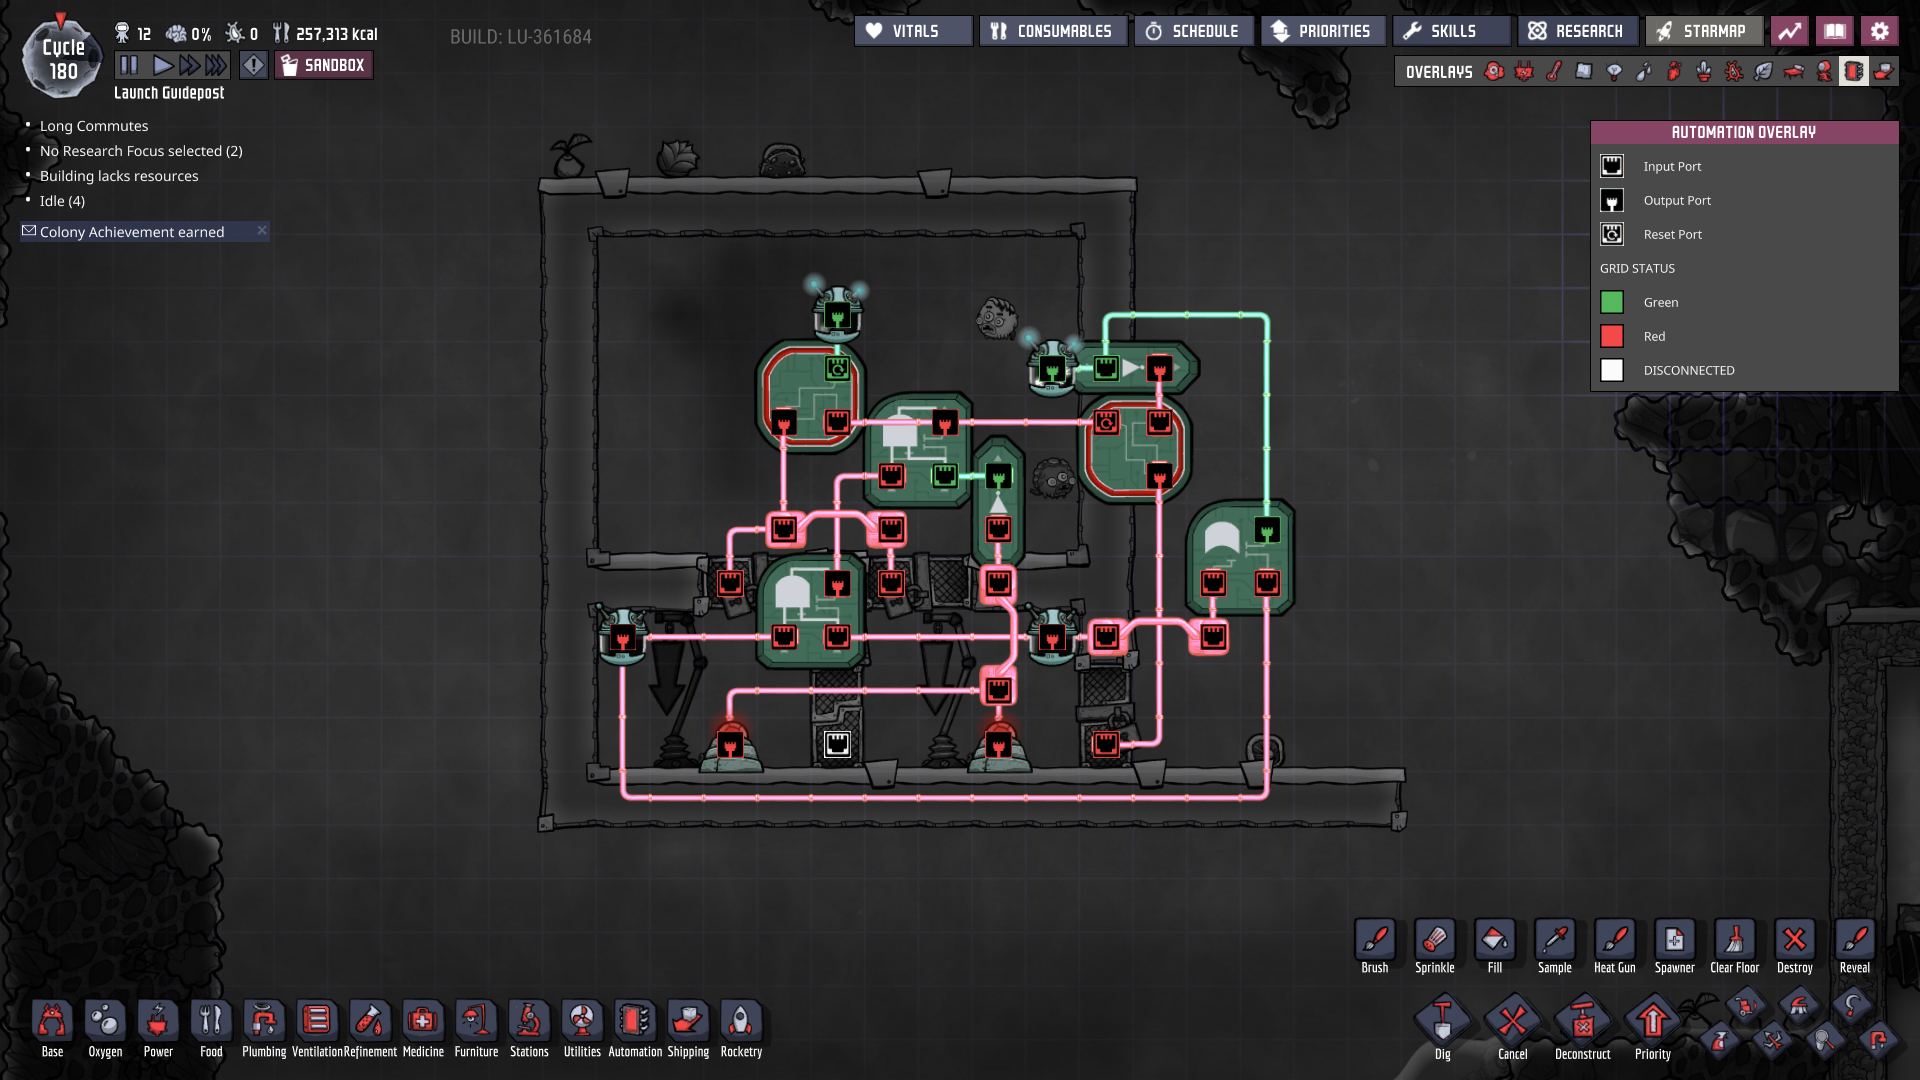
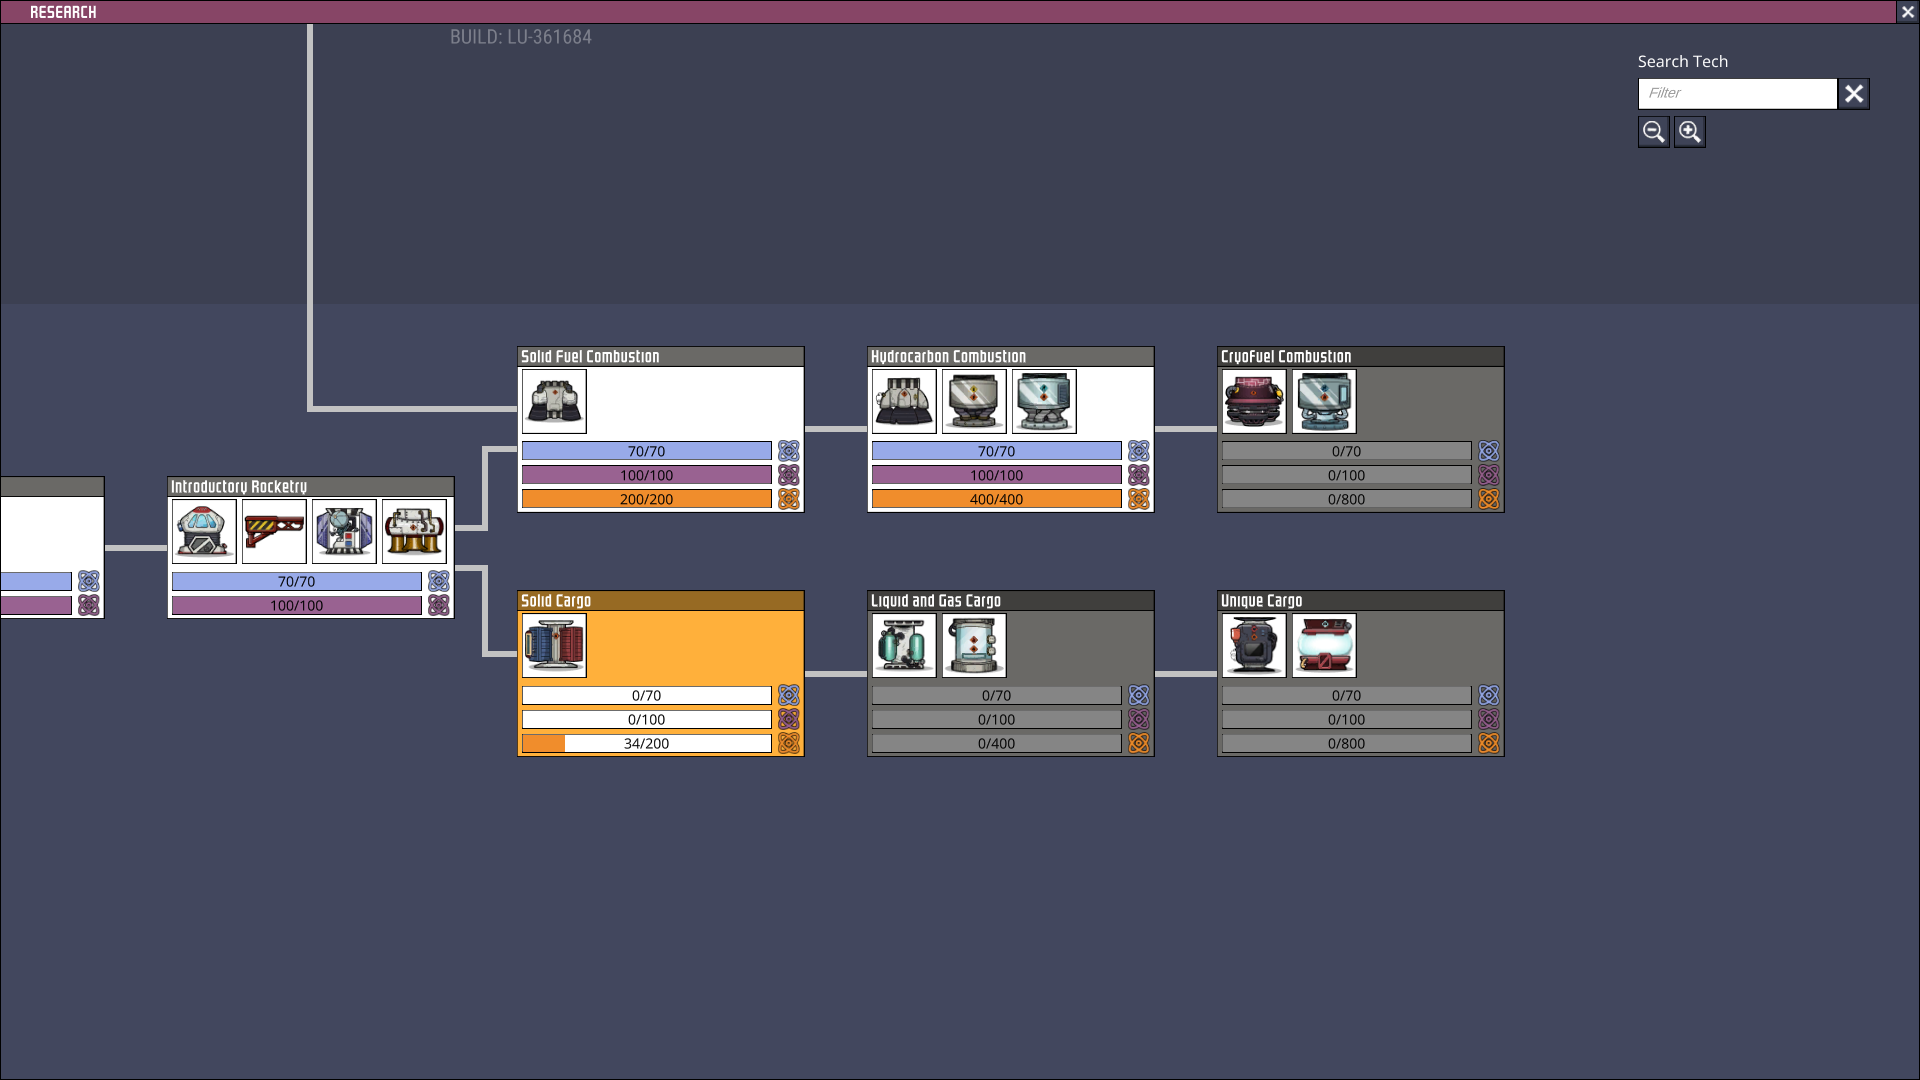
And Gate for the launch sequence checklist good + no meteor shower into Or gate for return allows them to open even if there is a shower. Not gate to the gantry and a couple of filter gates to give doors time to open before allowing launch.
Mighty 26 juin 2022 à 4h40 
Does anyone have an overlay on how to get the bunker doors to operate but still open for the rocket to launch and return safely, I have had non stop accidents all day :D

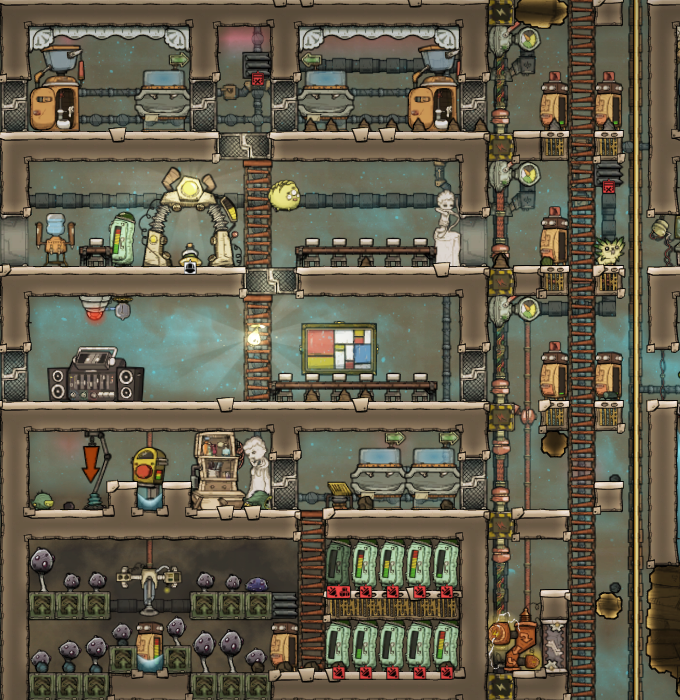
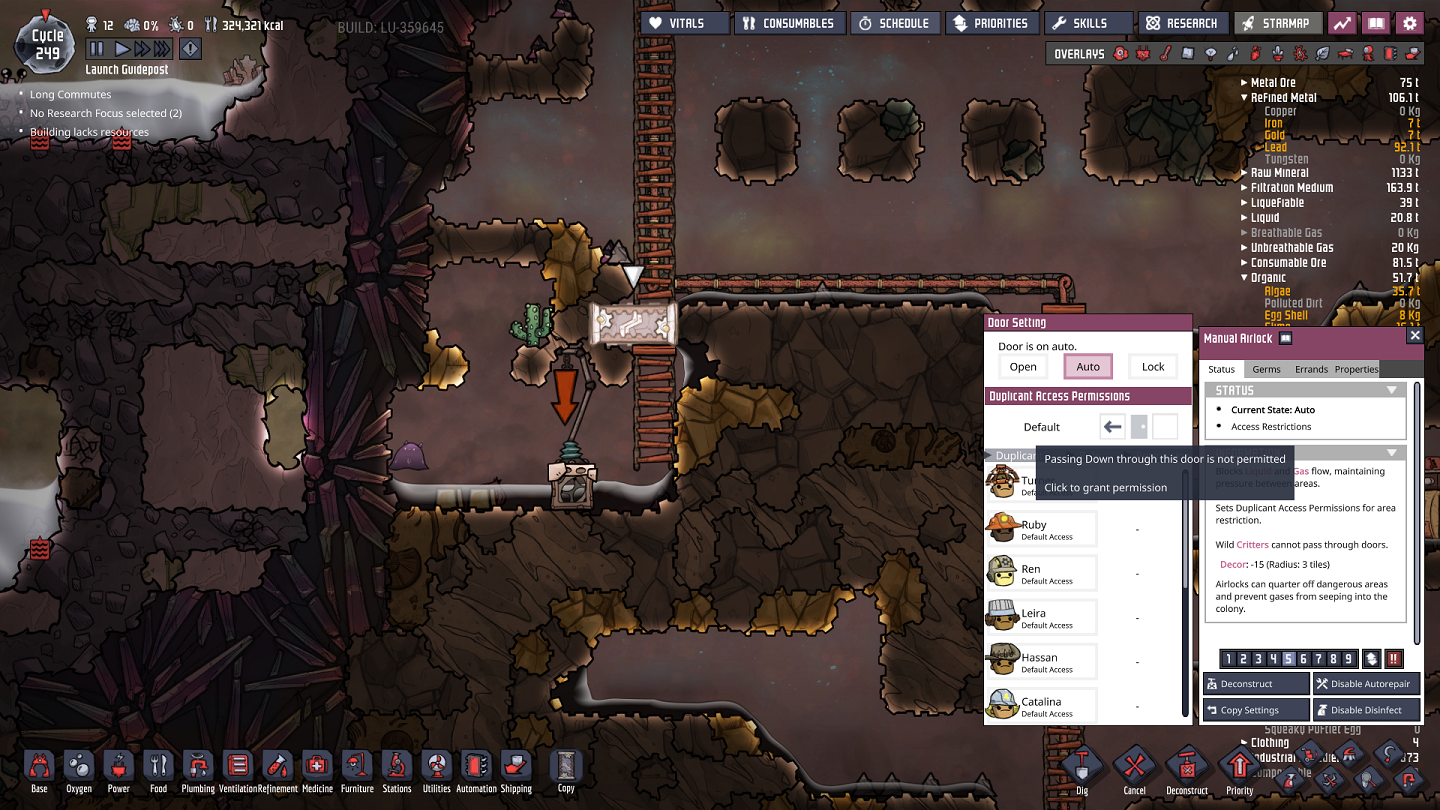
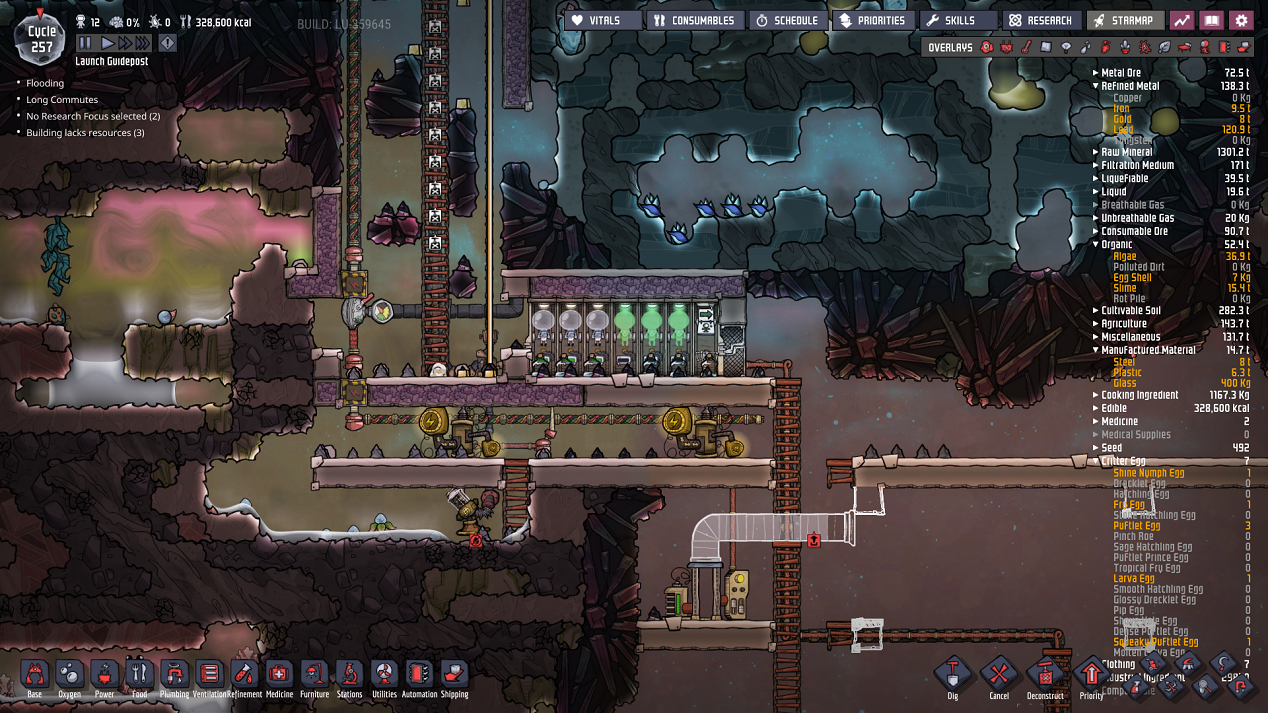
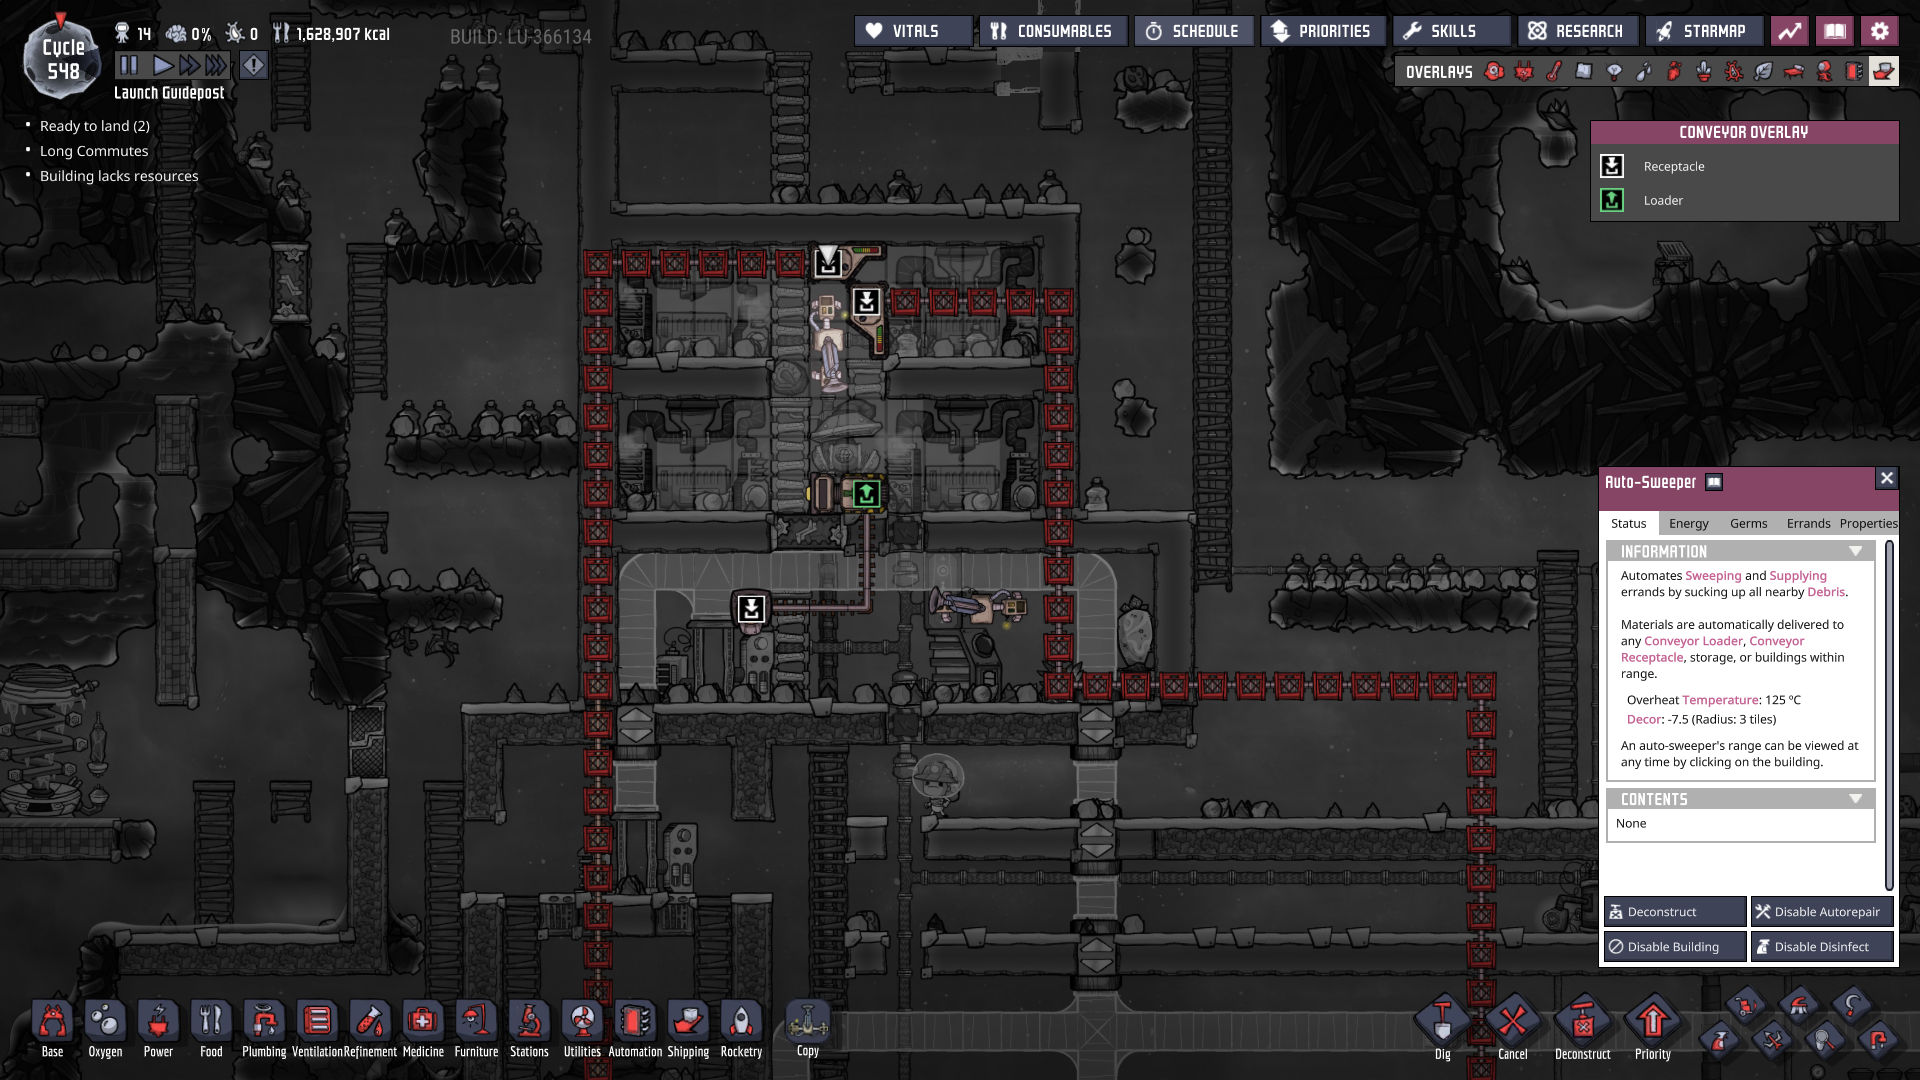
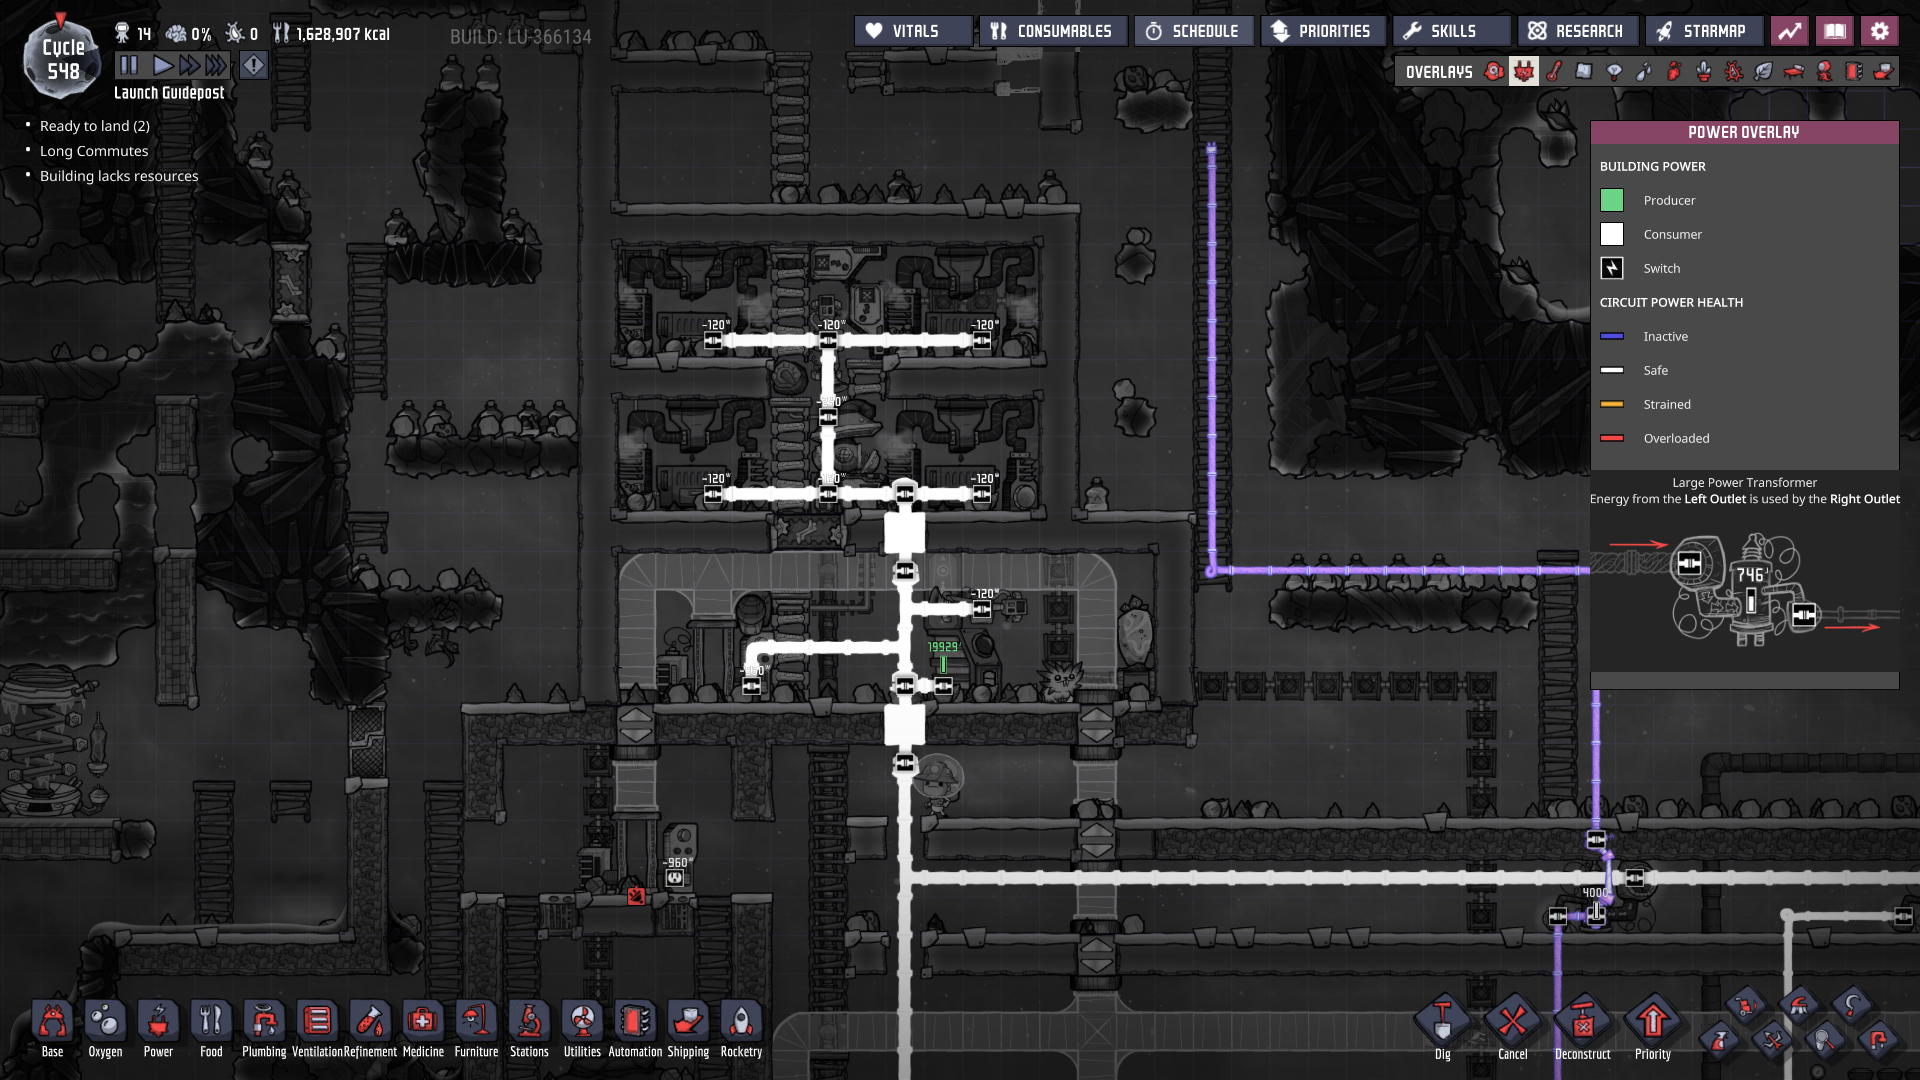
I have seperated 4 bunker doors from the rest of the system and have manged to get it to half work, but it is still doing strange things
Oxygen Not Included 22 nov. 2021 à 20h31 
This is an old guide. Lots of things have changed. I would recommend Nathan's Sandbox and Francis John on Youtube. Nathan's is very good at explaining.
Deadarchimode 21 nov. 2021 à 10h09 
My brain... My poor brain ... sparks started to come out from my head.... Smoke is included as well
Ekimmak 7 nov. 2021 à 16h59 
@Wolfymistake

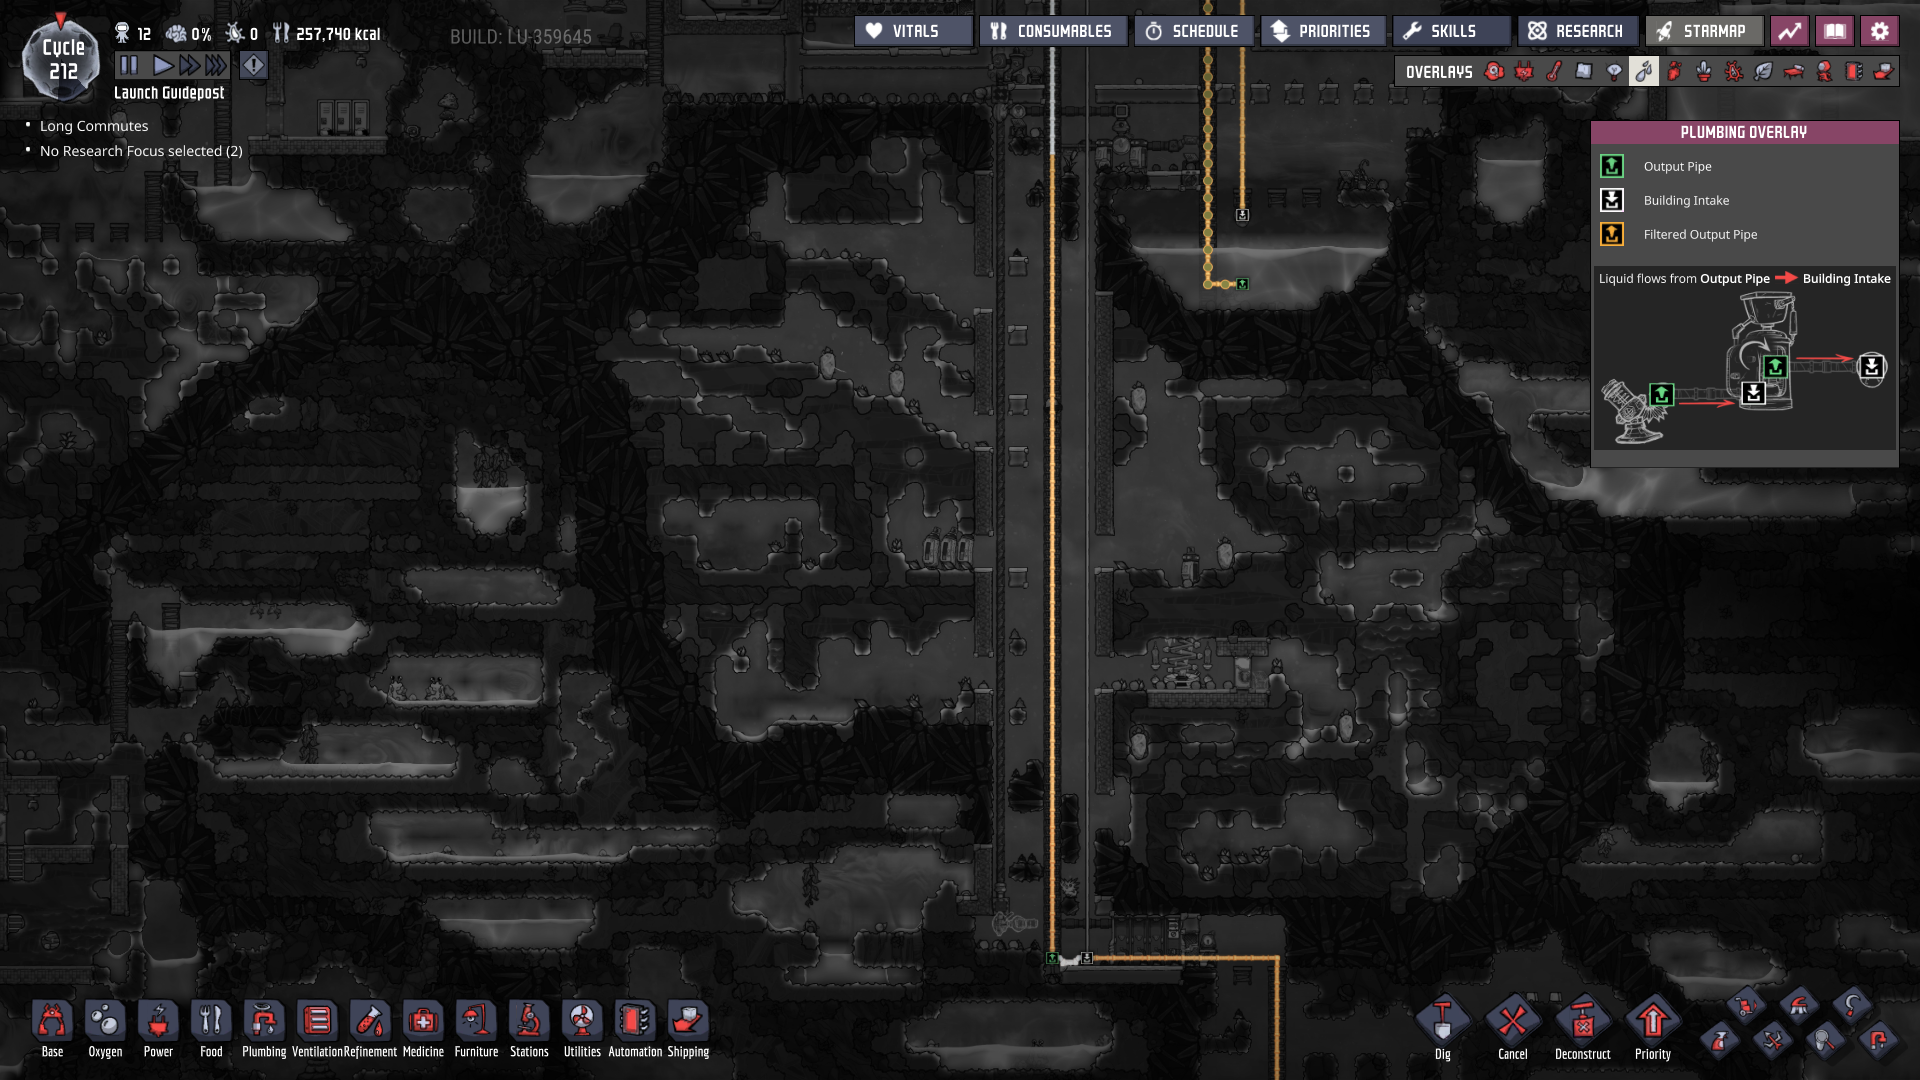
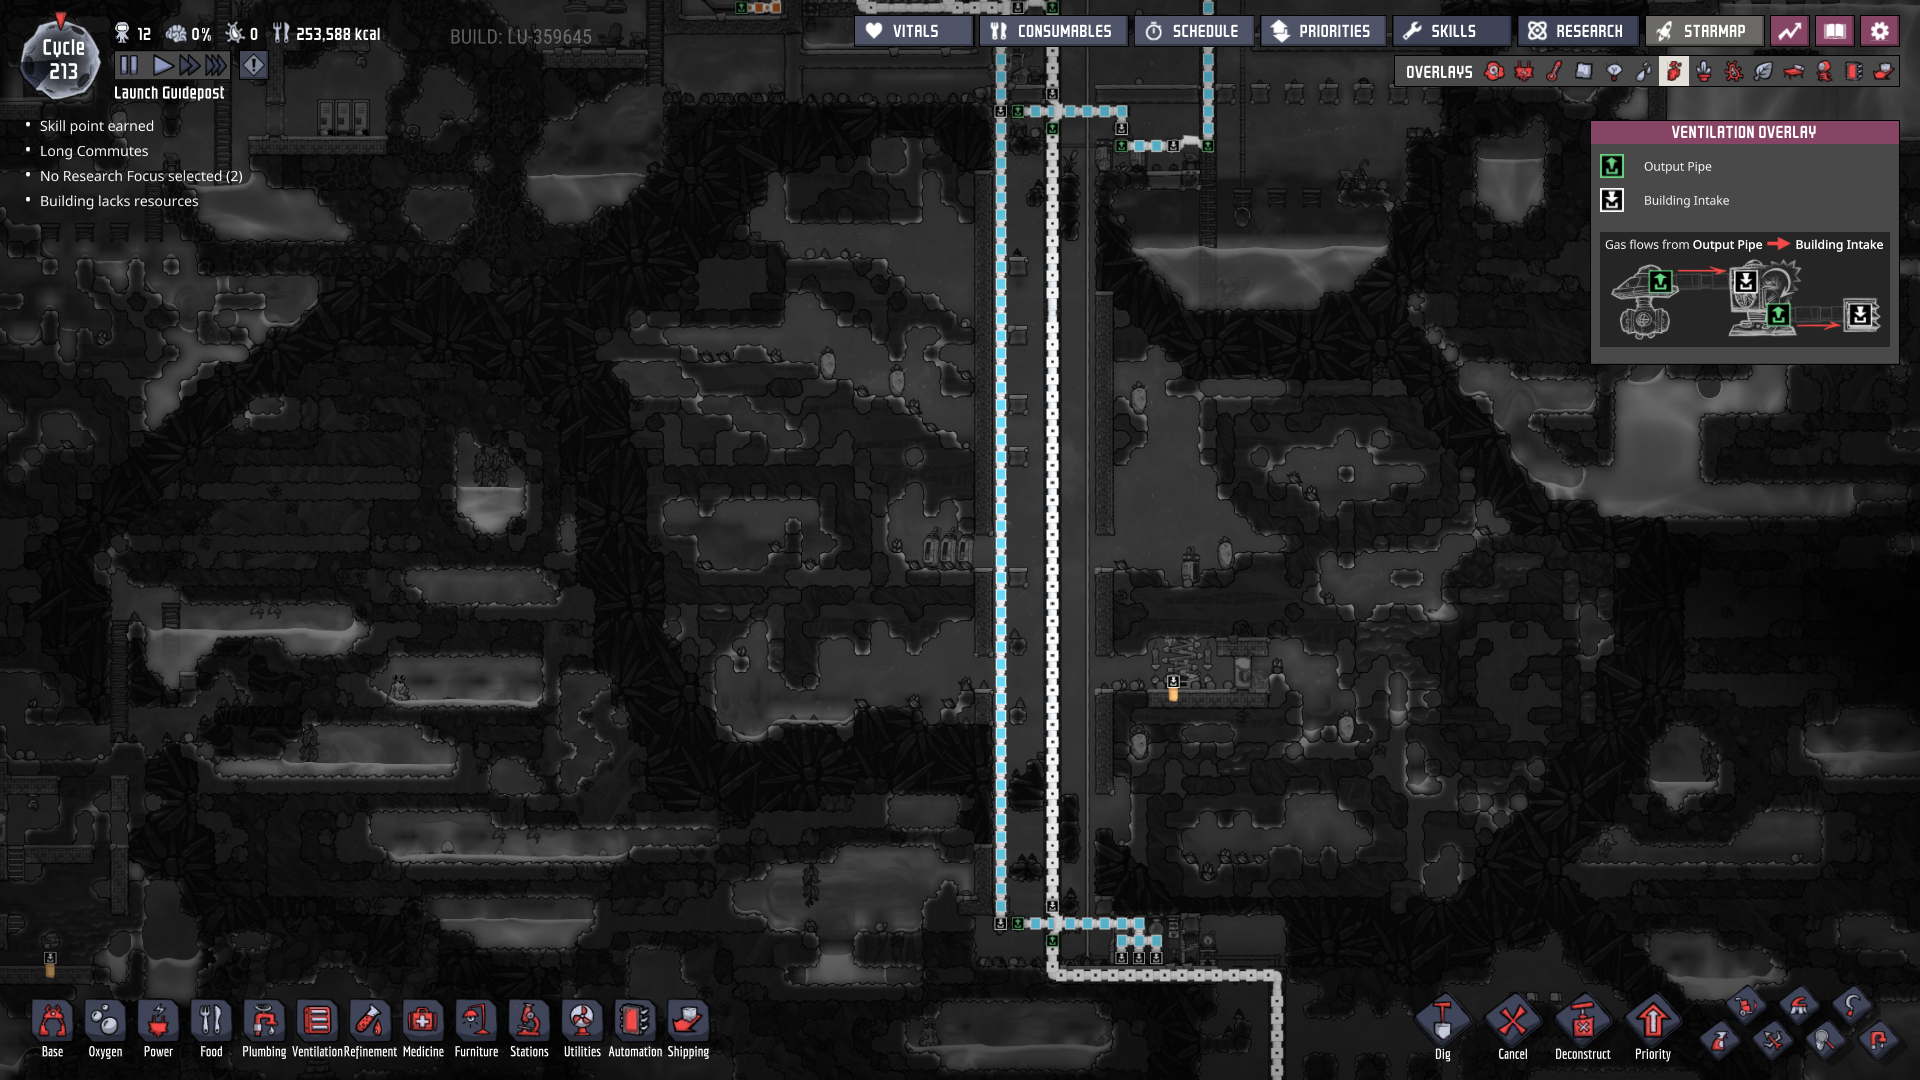
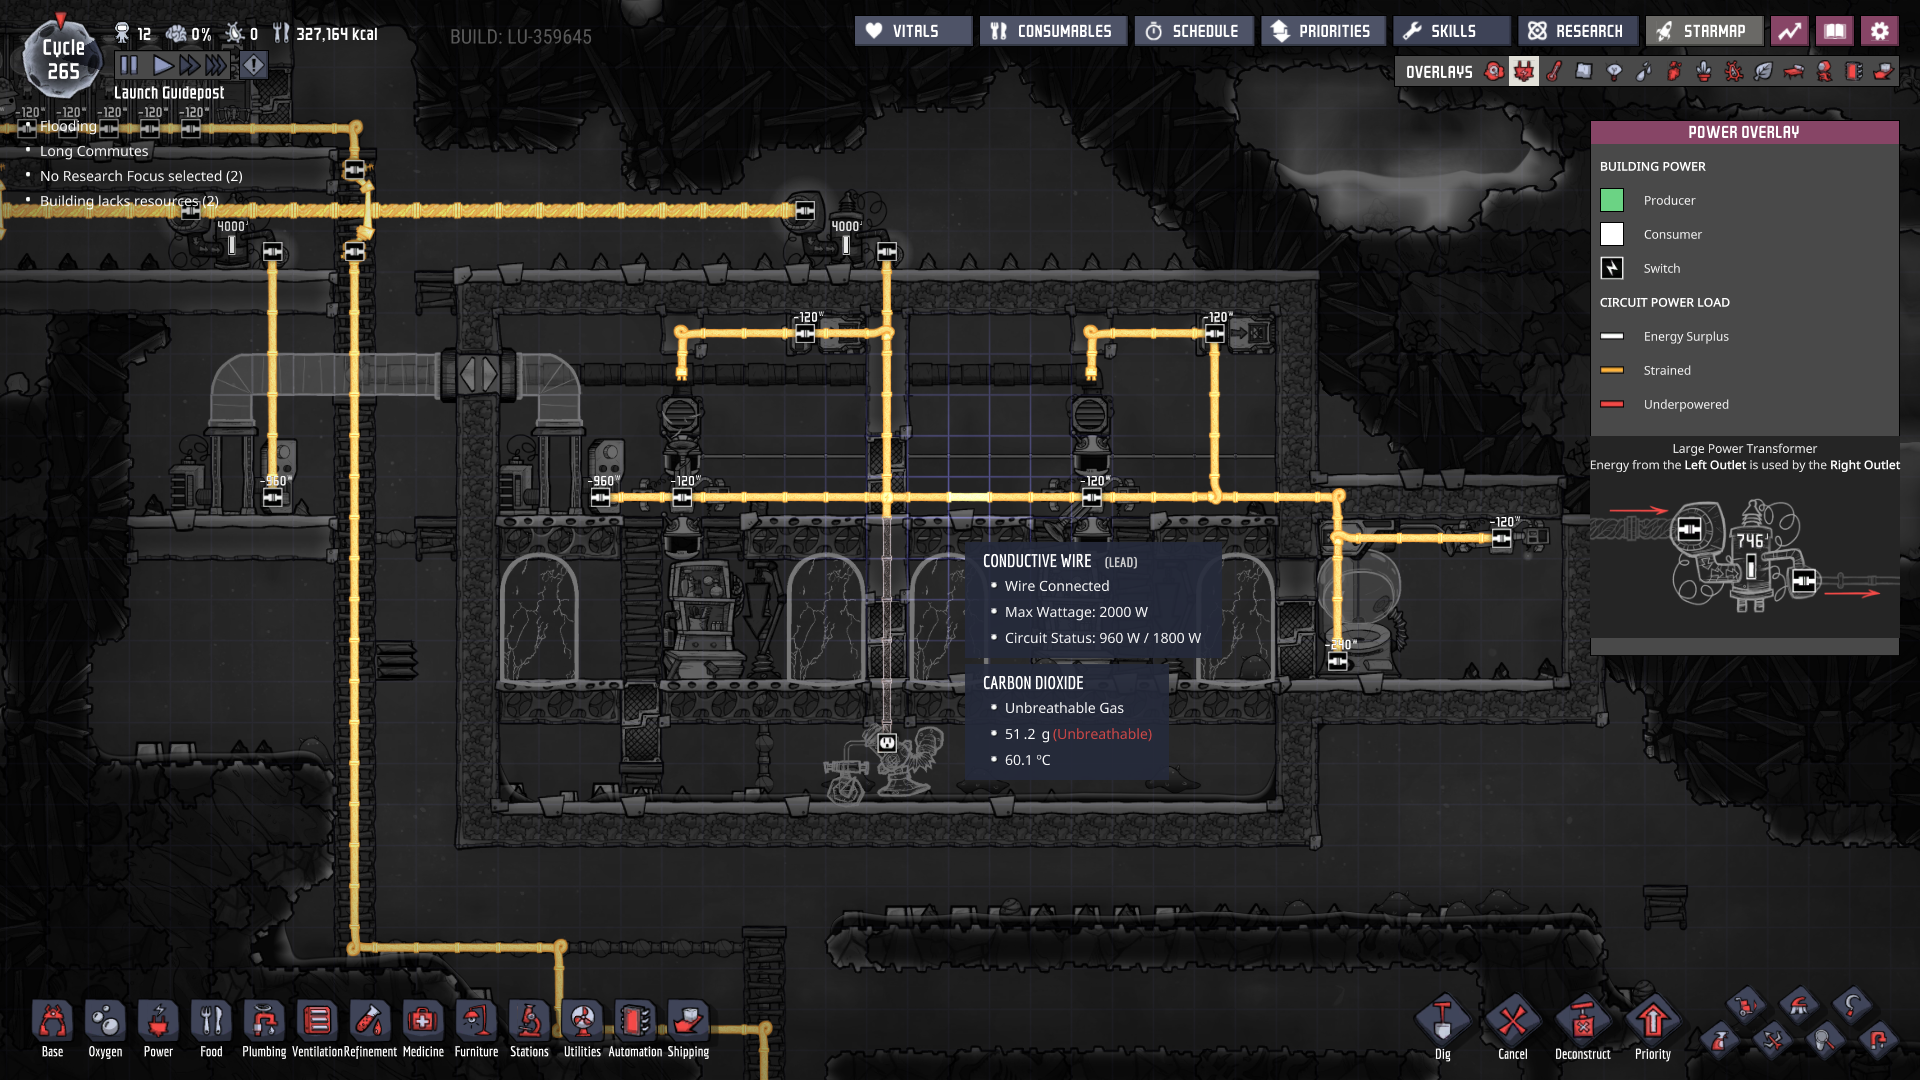
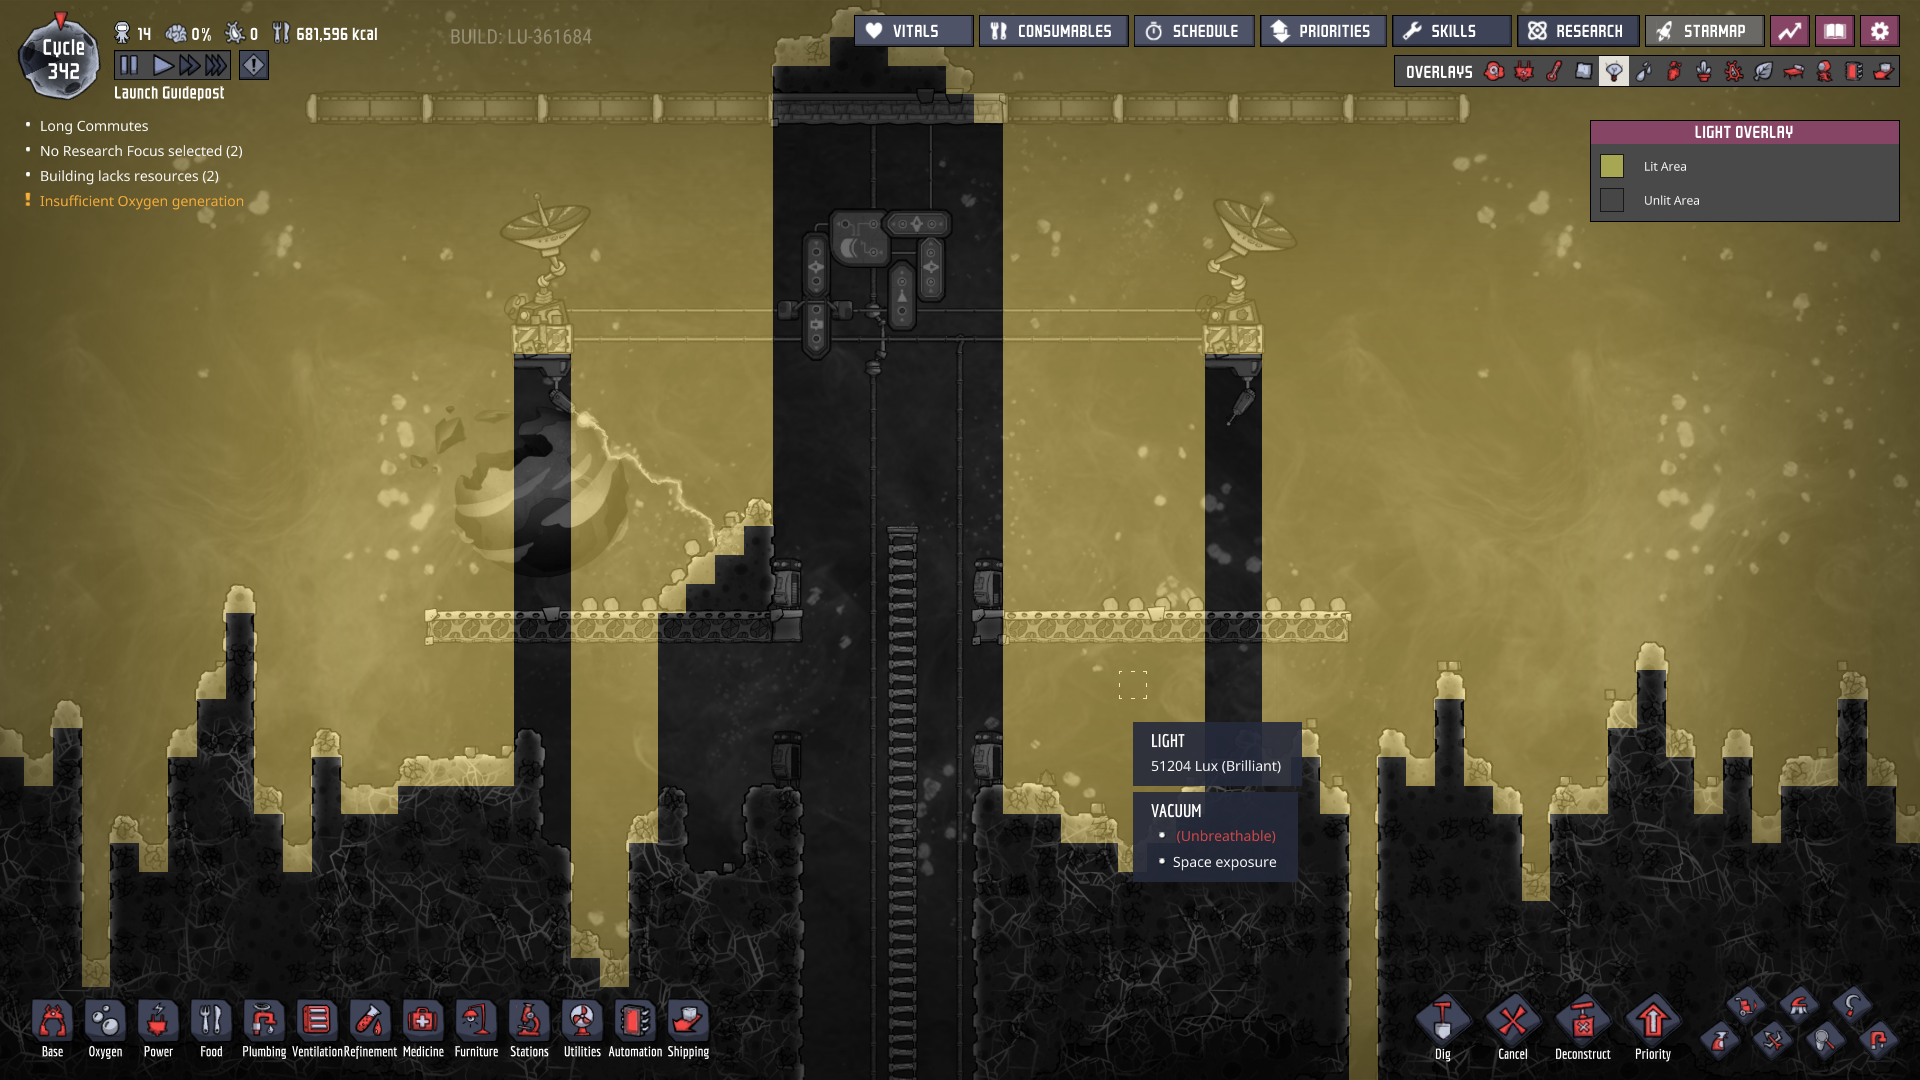
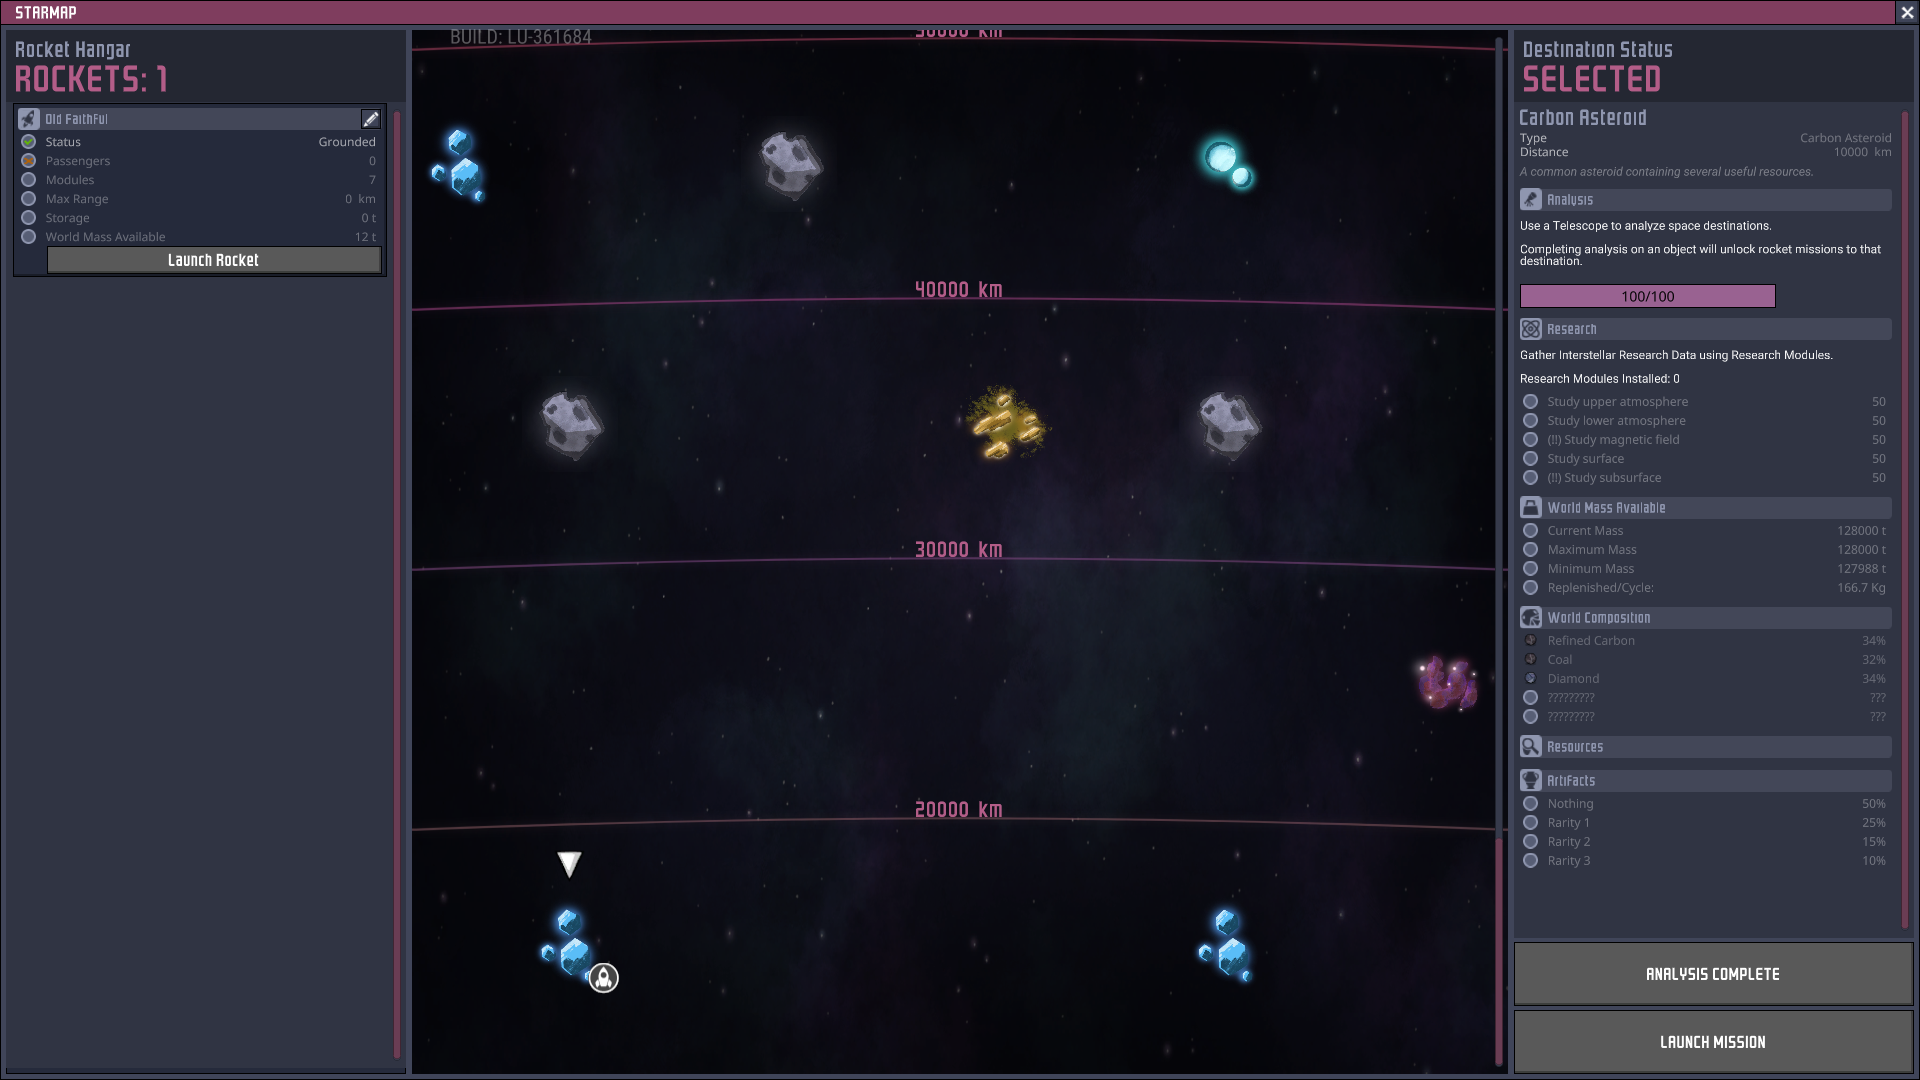
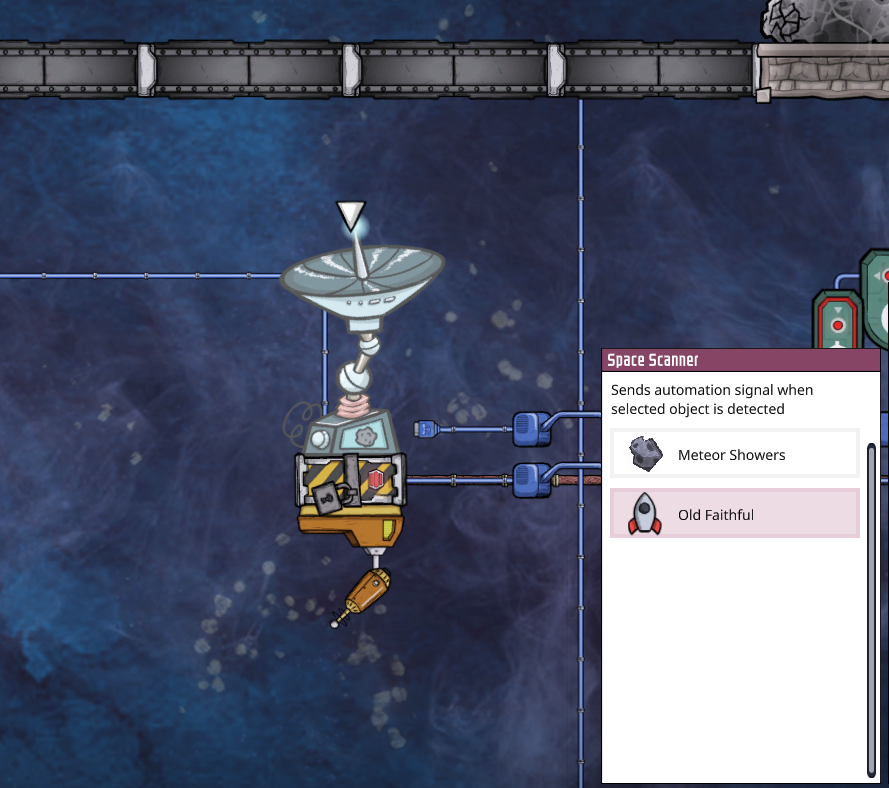
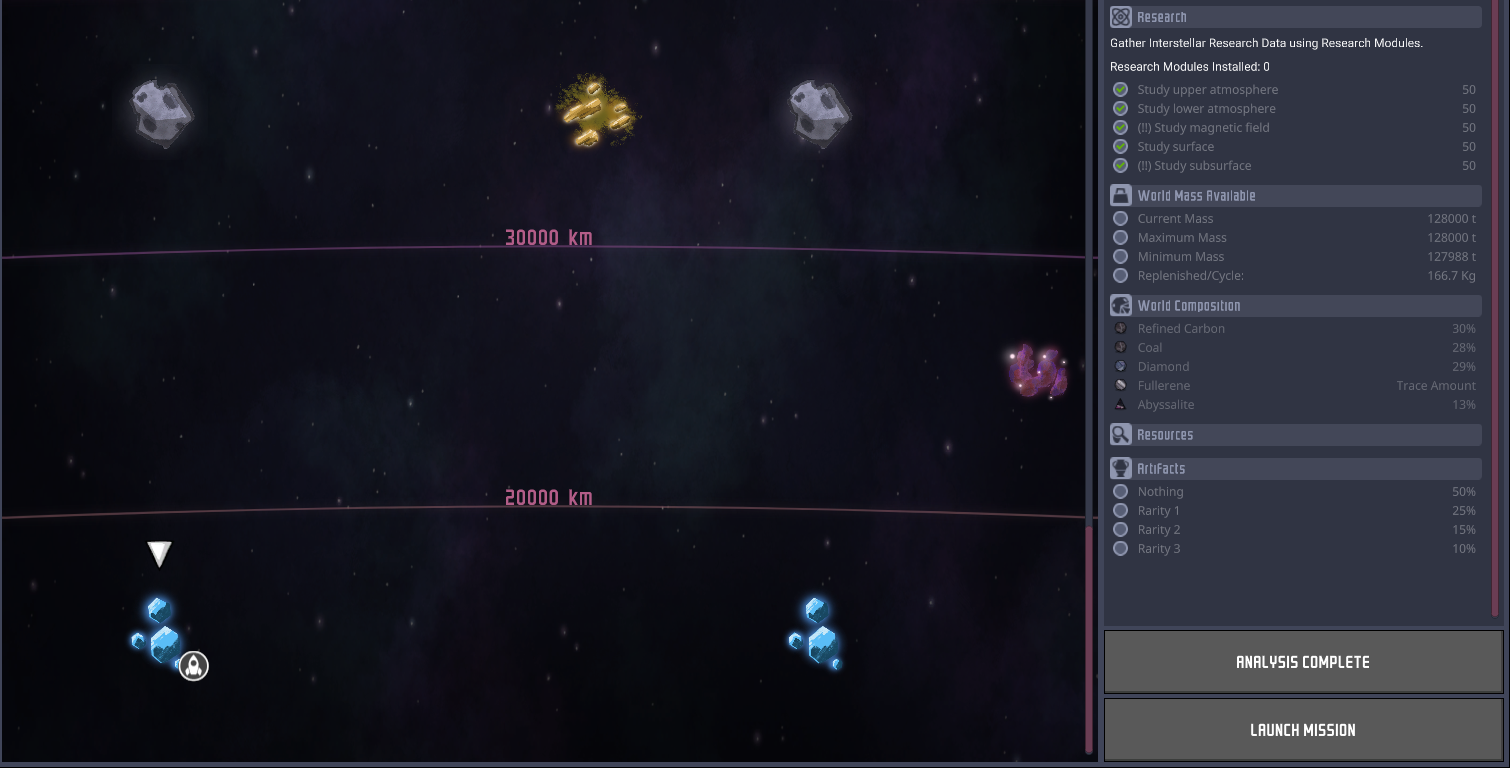
Not gate connected from radar
Buffer Gate connected from Not gate
Filter Gate connected from Buffer gate
Buffer and Filter connect to different inputs for a XOR gate

space doors connect to buffer gate

After XOR gate is a 2nd filter gate
After 2nd filter gate is a 2nd buffer gate
all manual airlocks connect from 2nd buffer gate output
Wolfymistake 10 avr. 2021 à 10h51 
does anyone have the automation overlay for steam rocket bunker doors ?
CrazyGuy82 21 févr. 2021 à 10h25 
Re: Petroleum Power
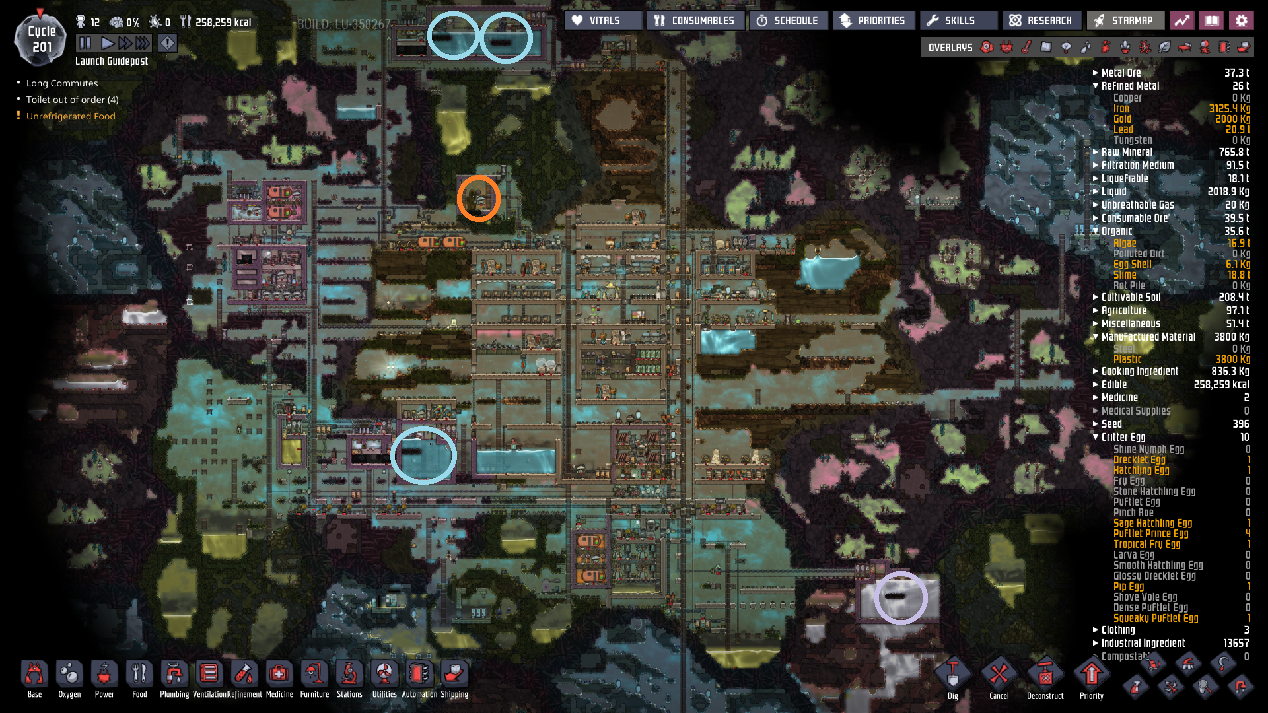
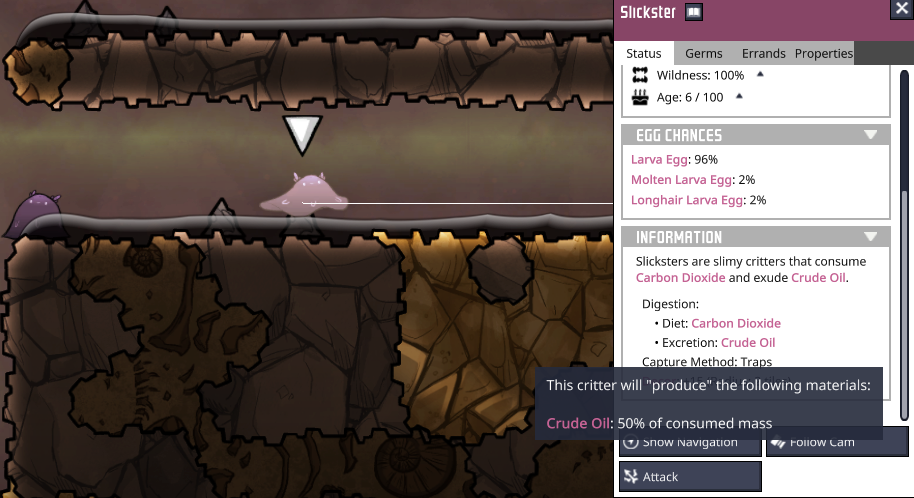
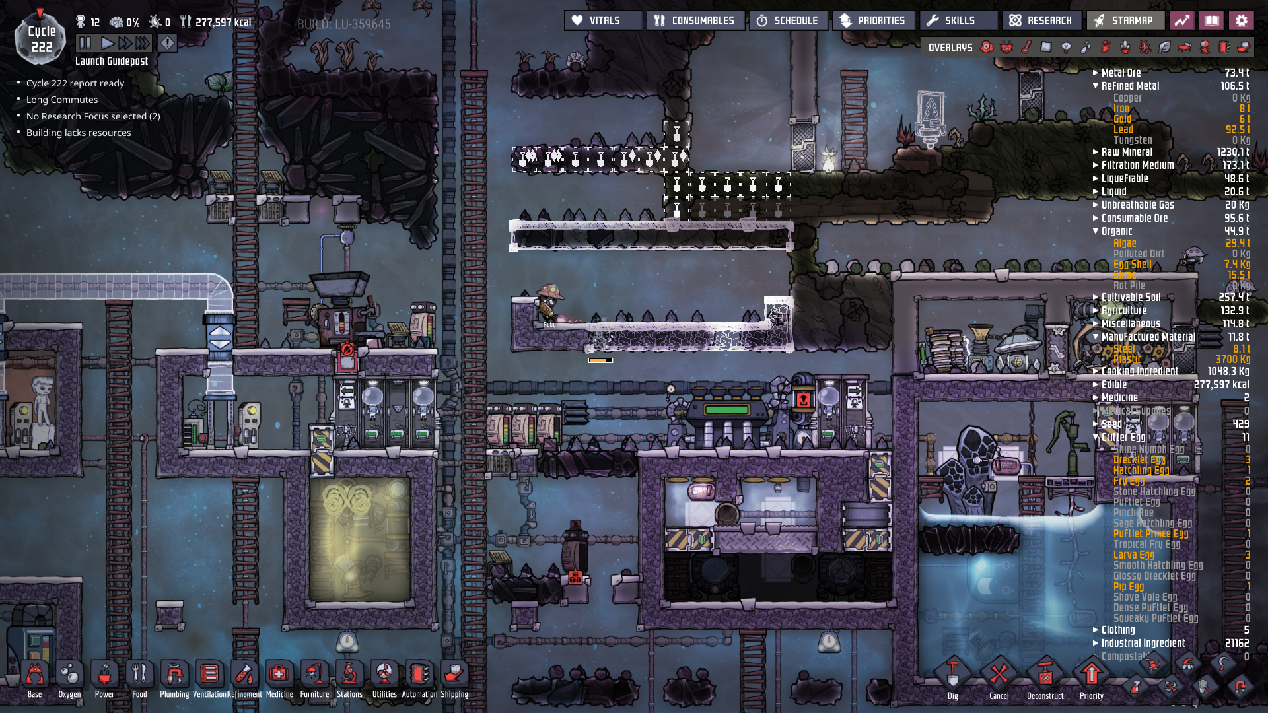
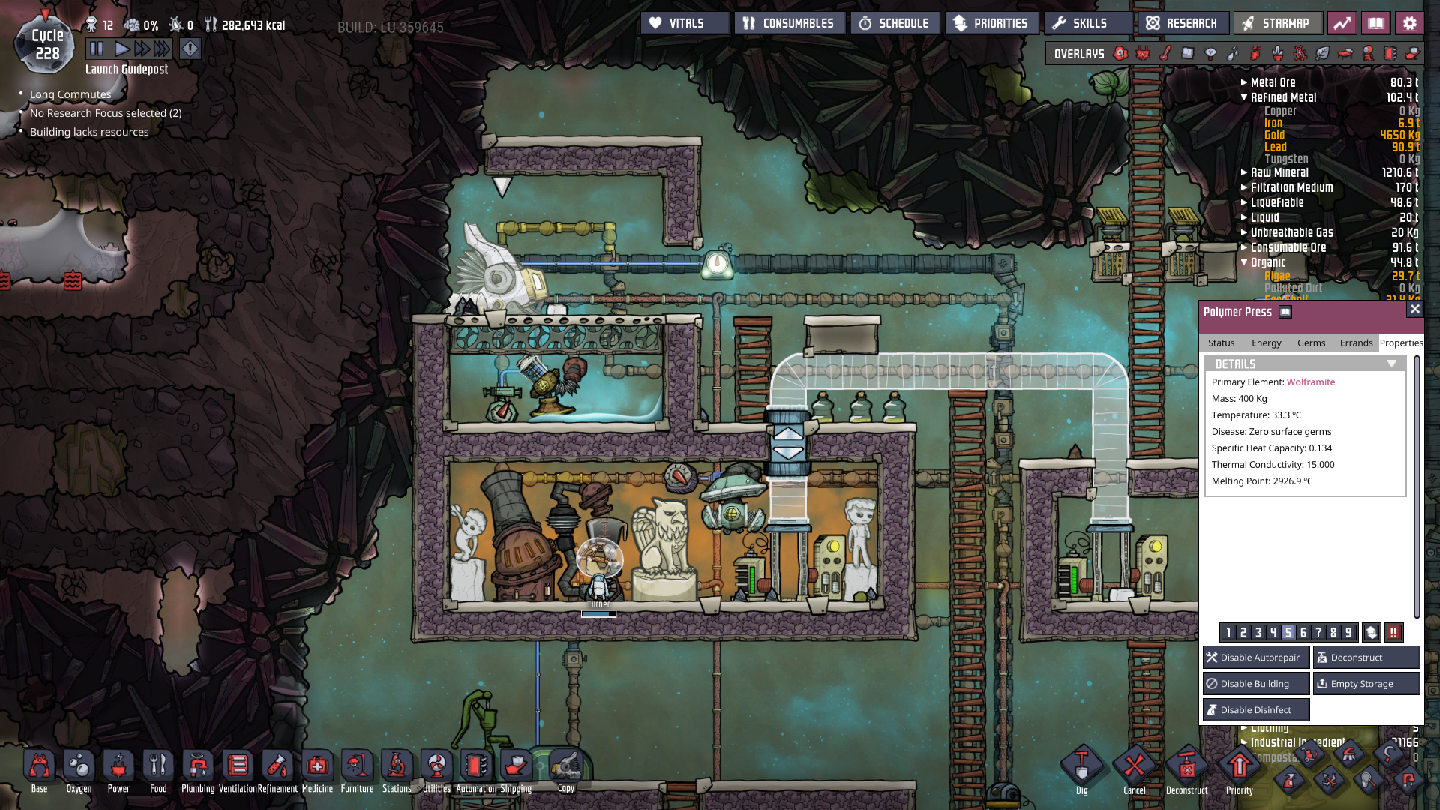
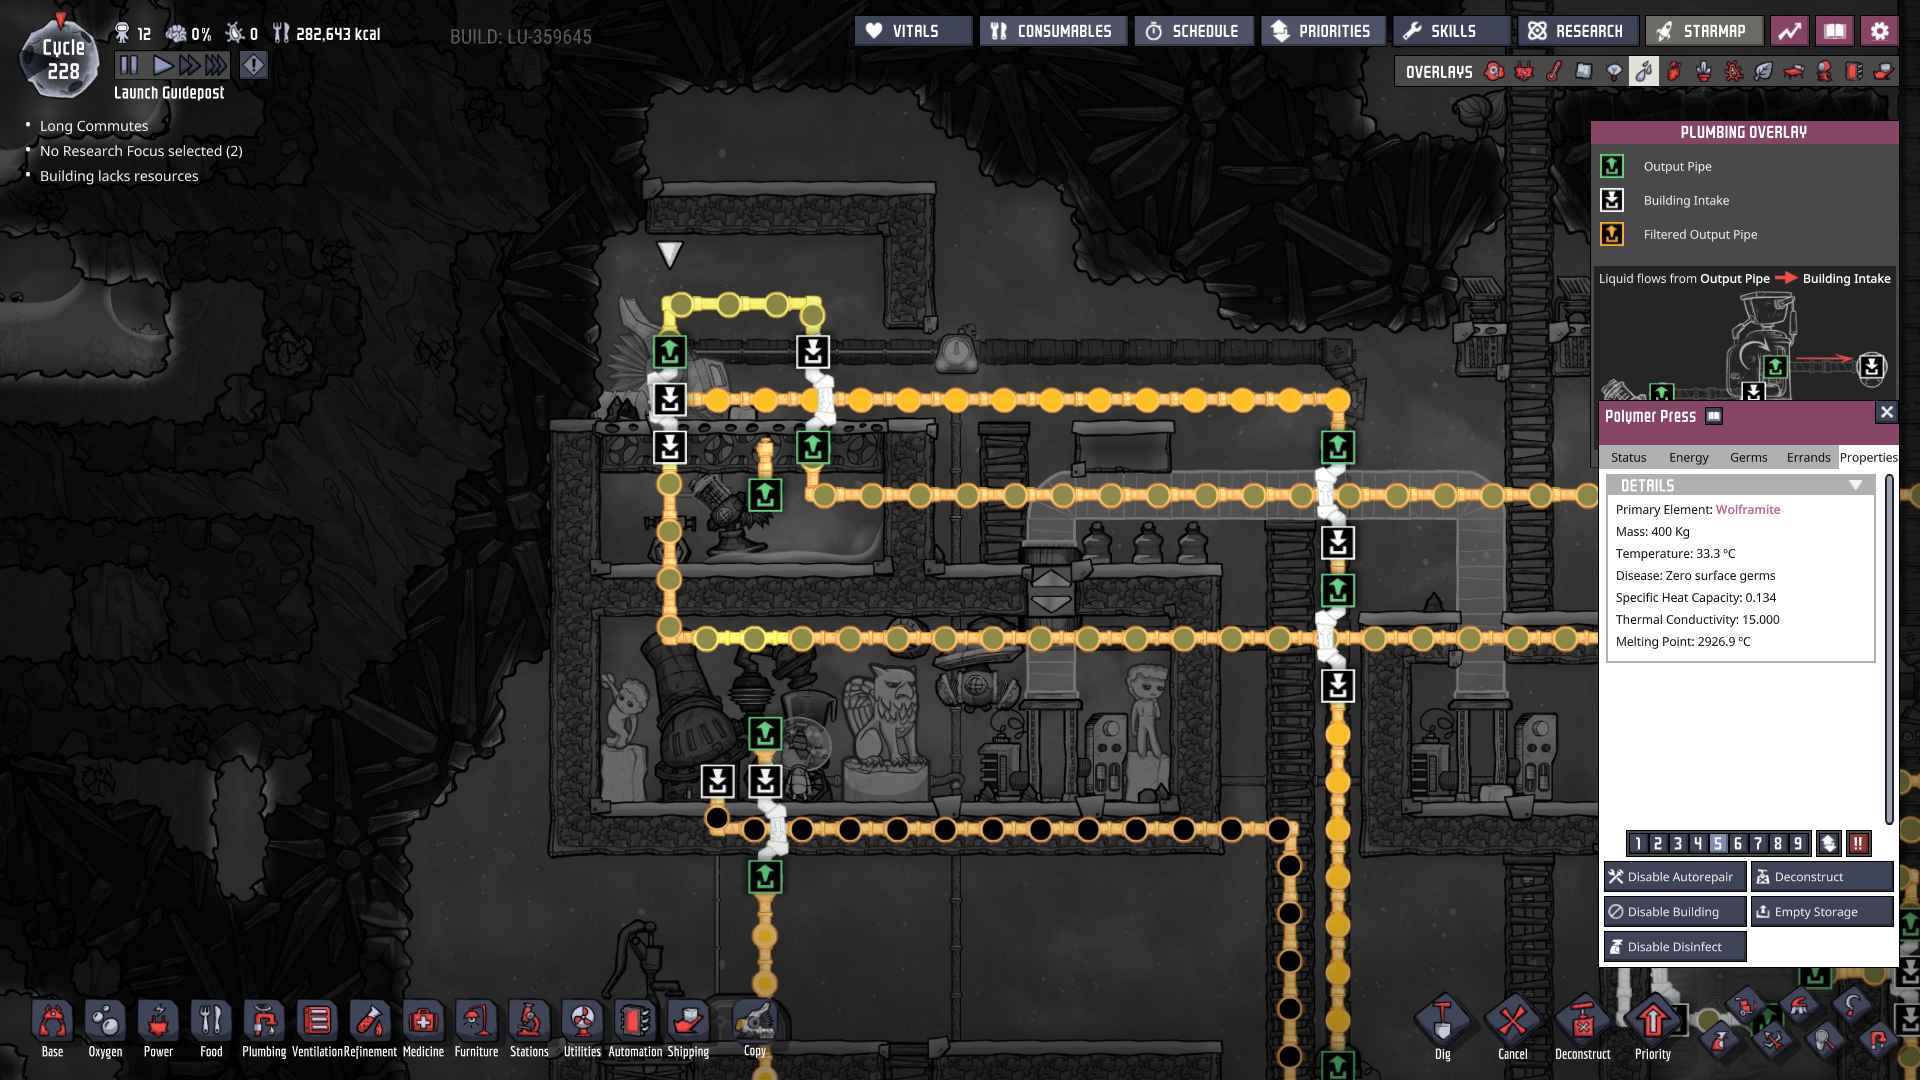
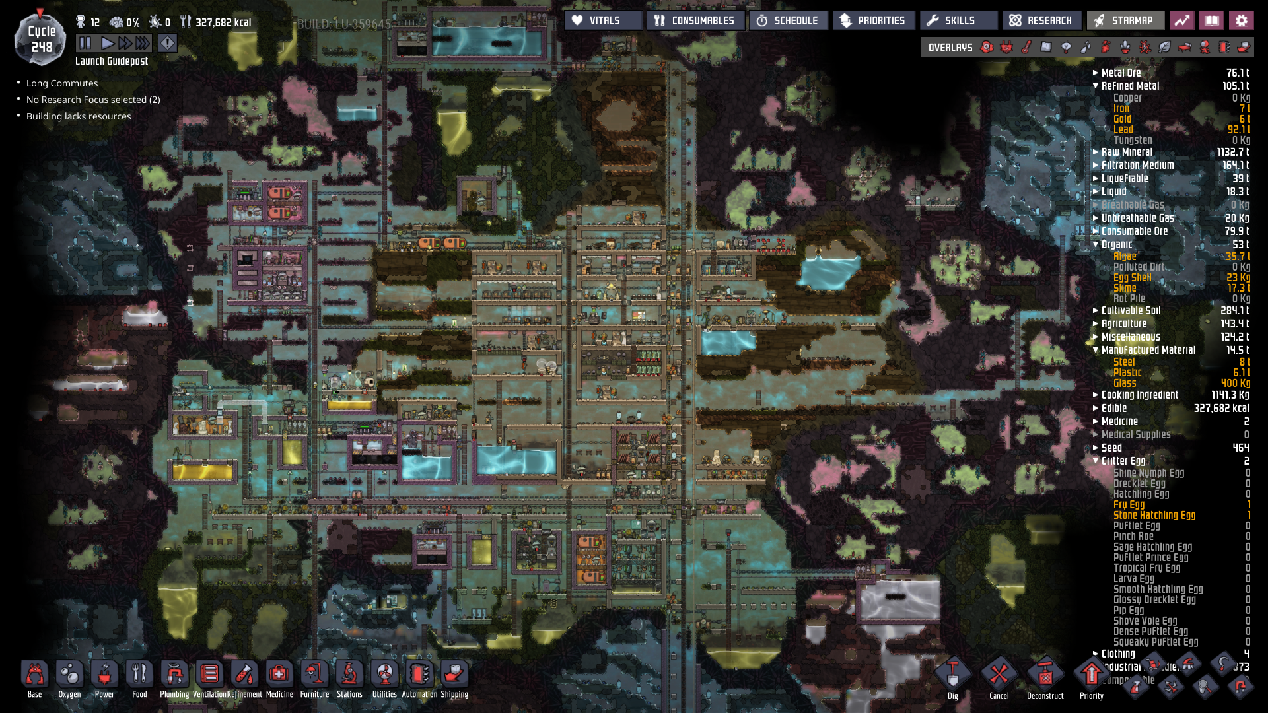
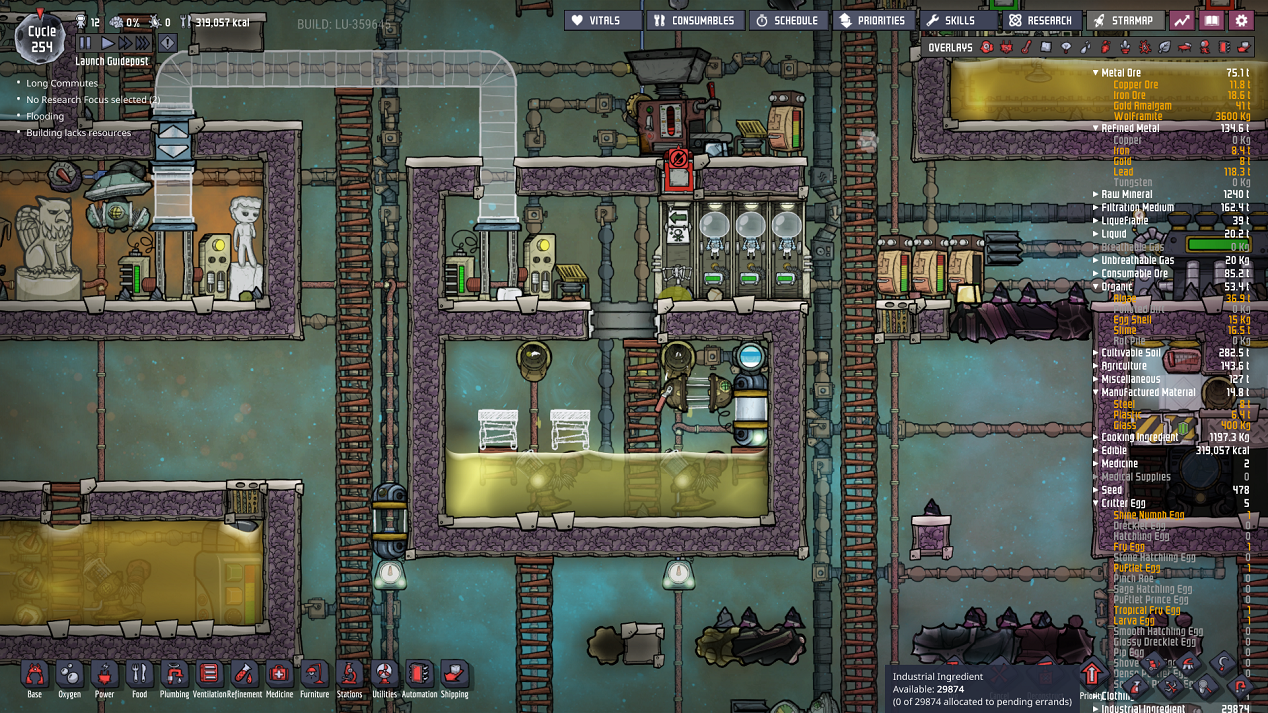
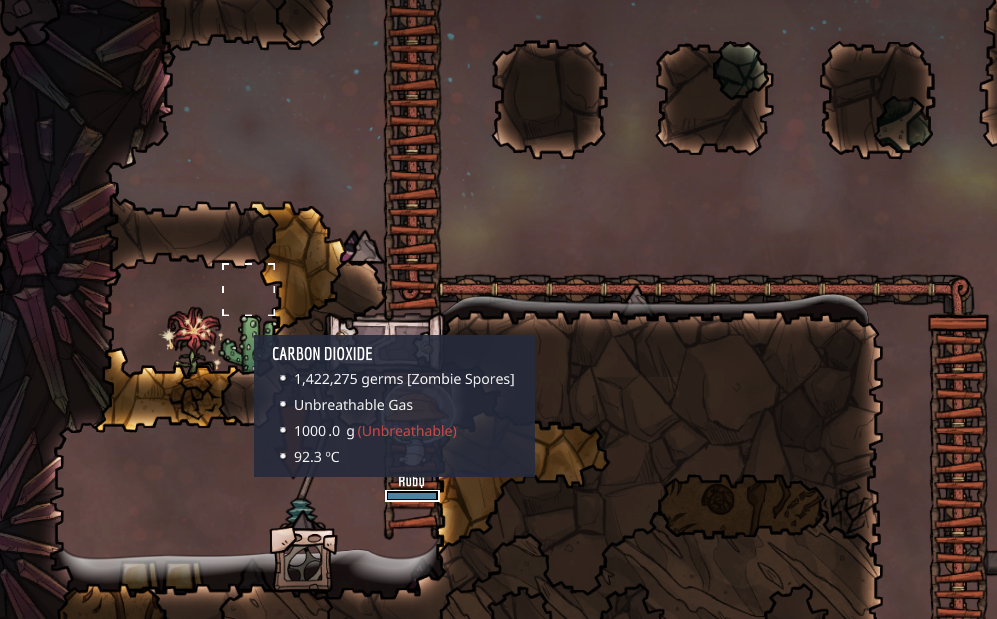
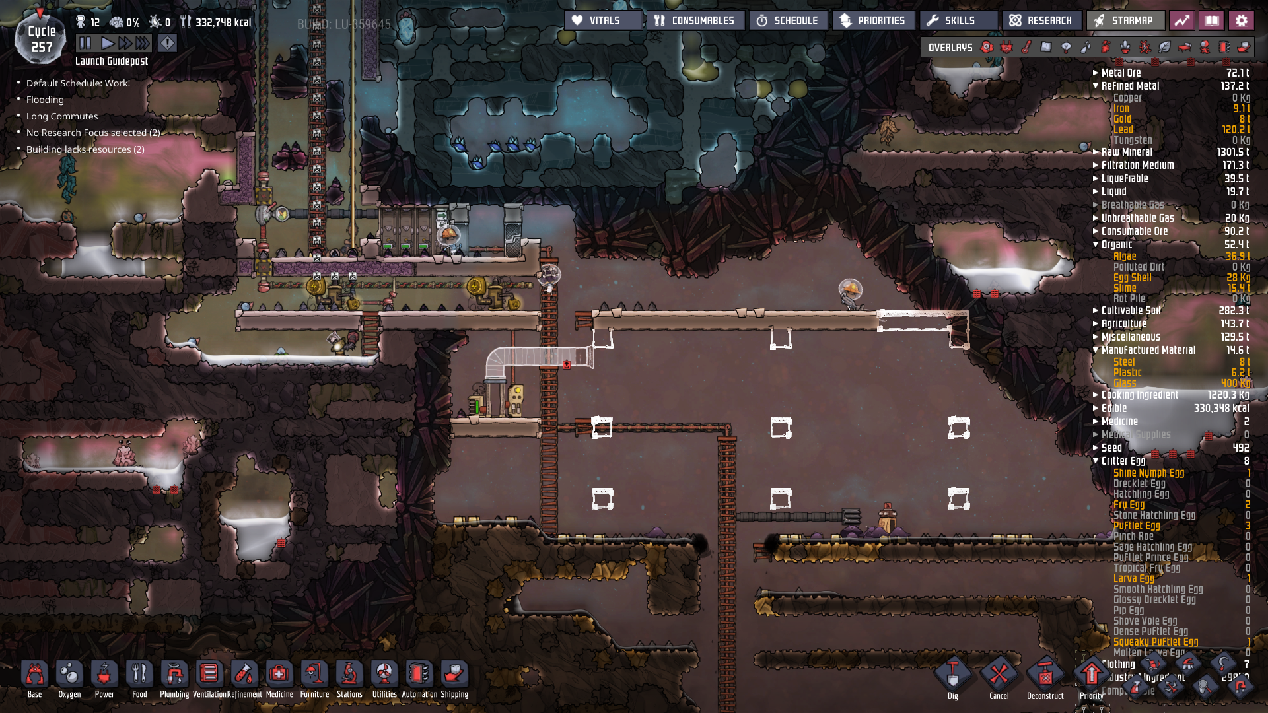
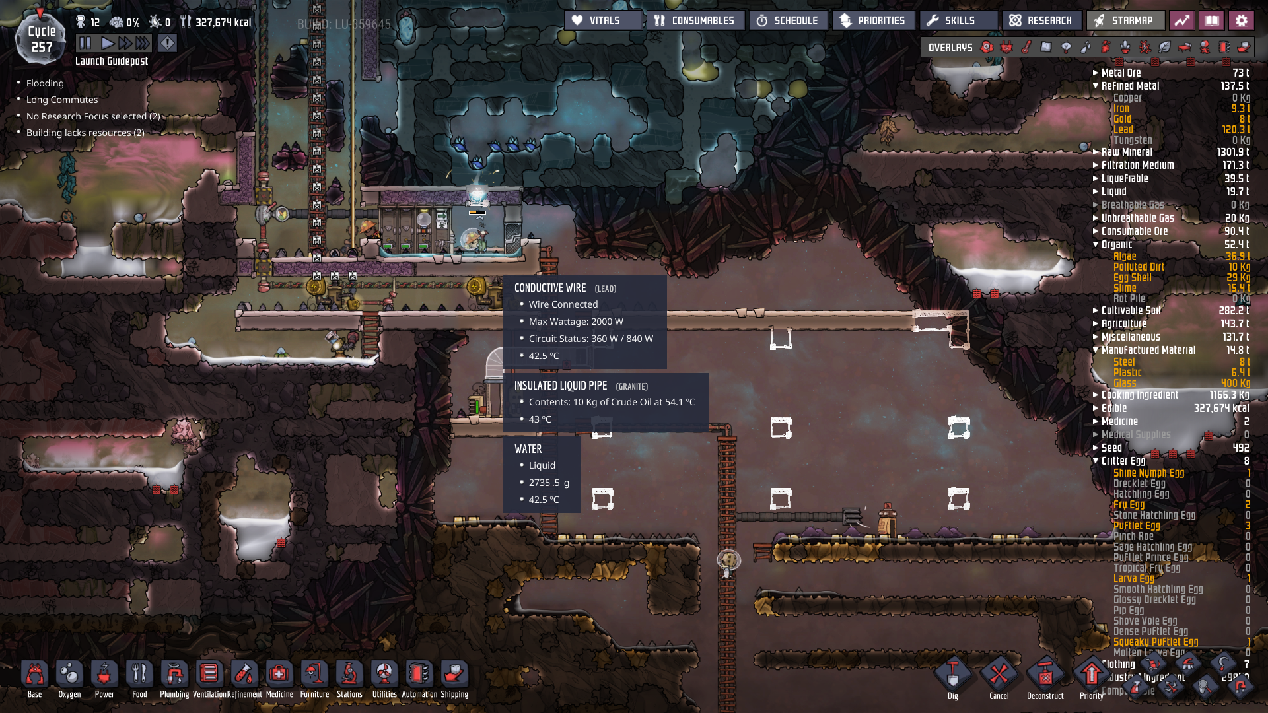
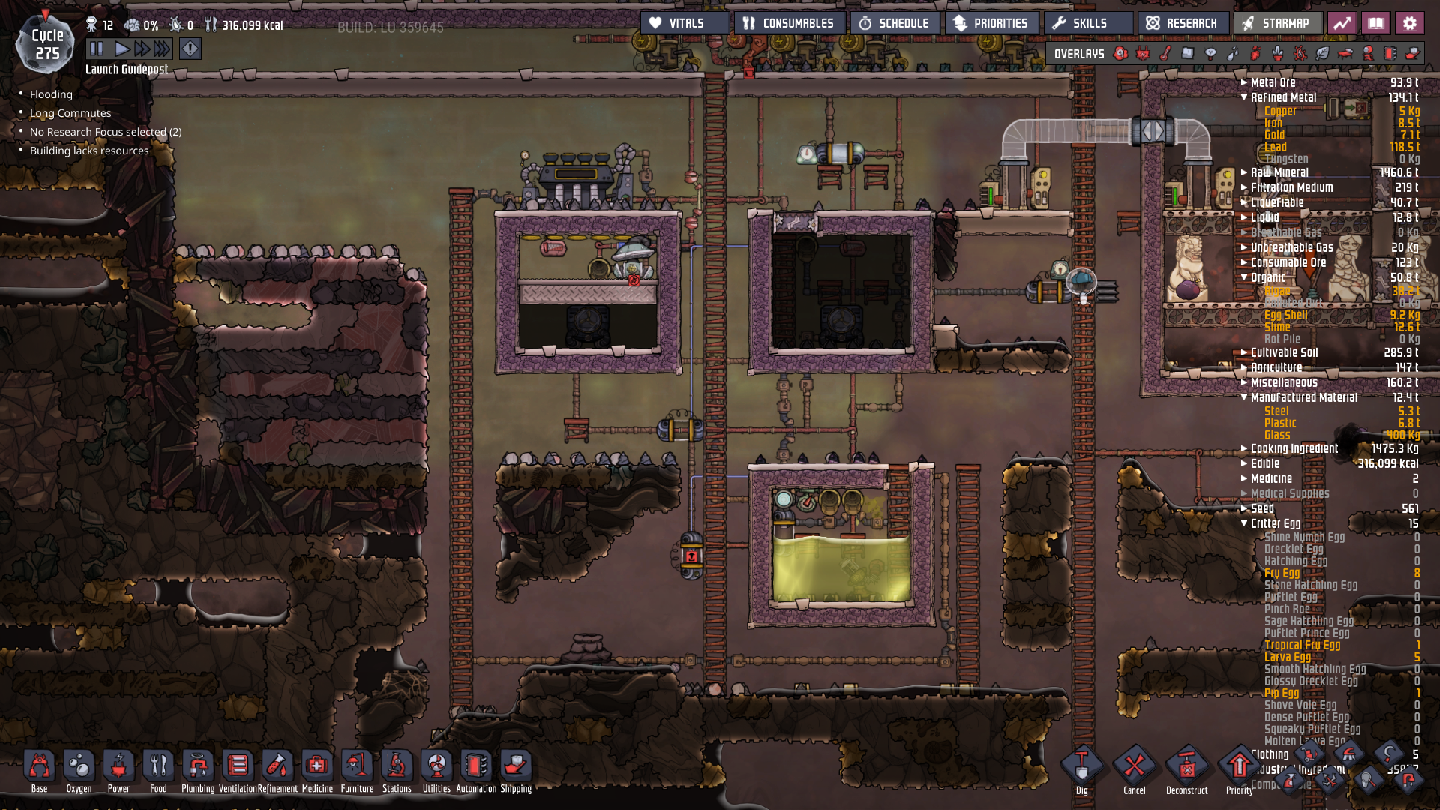
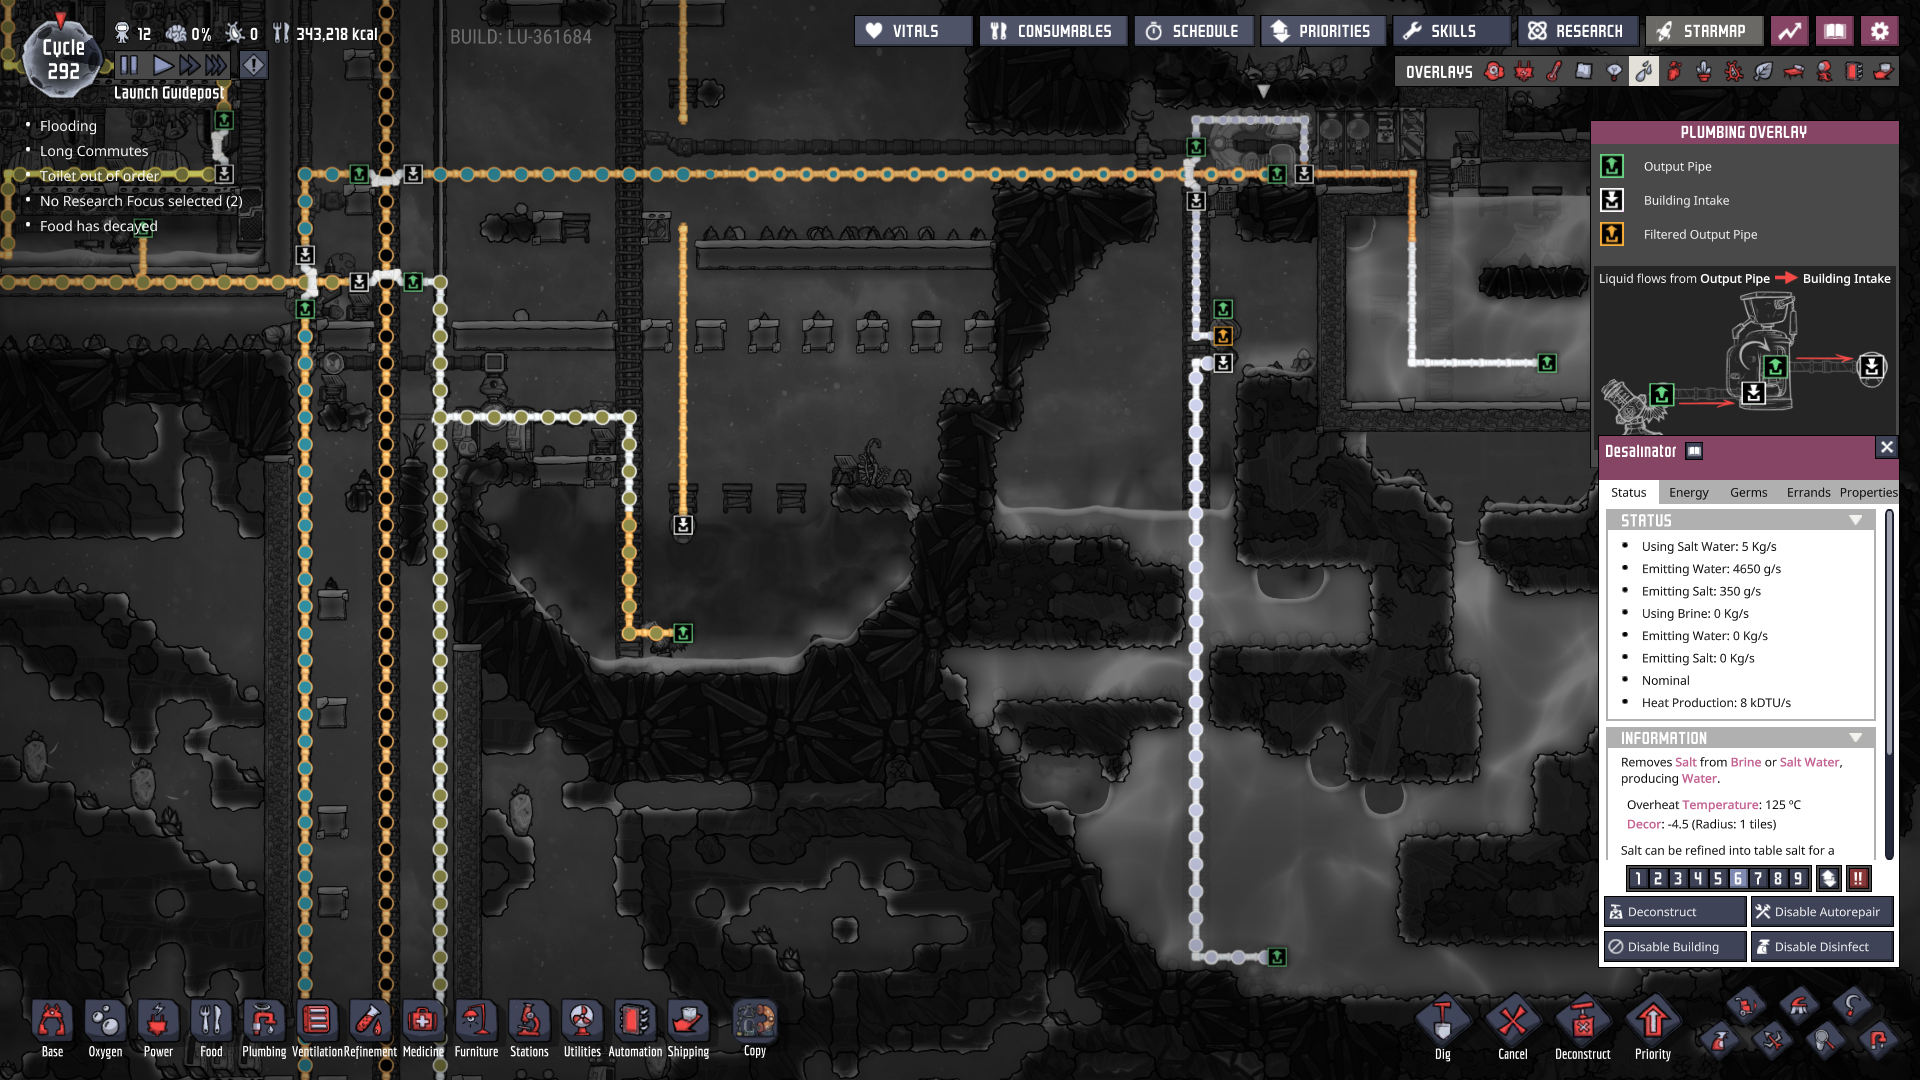
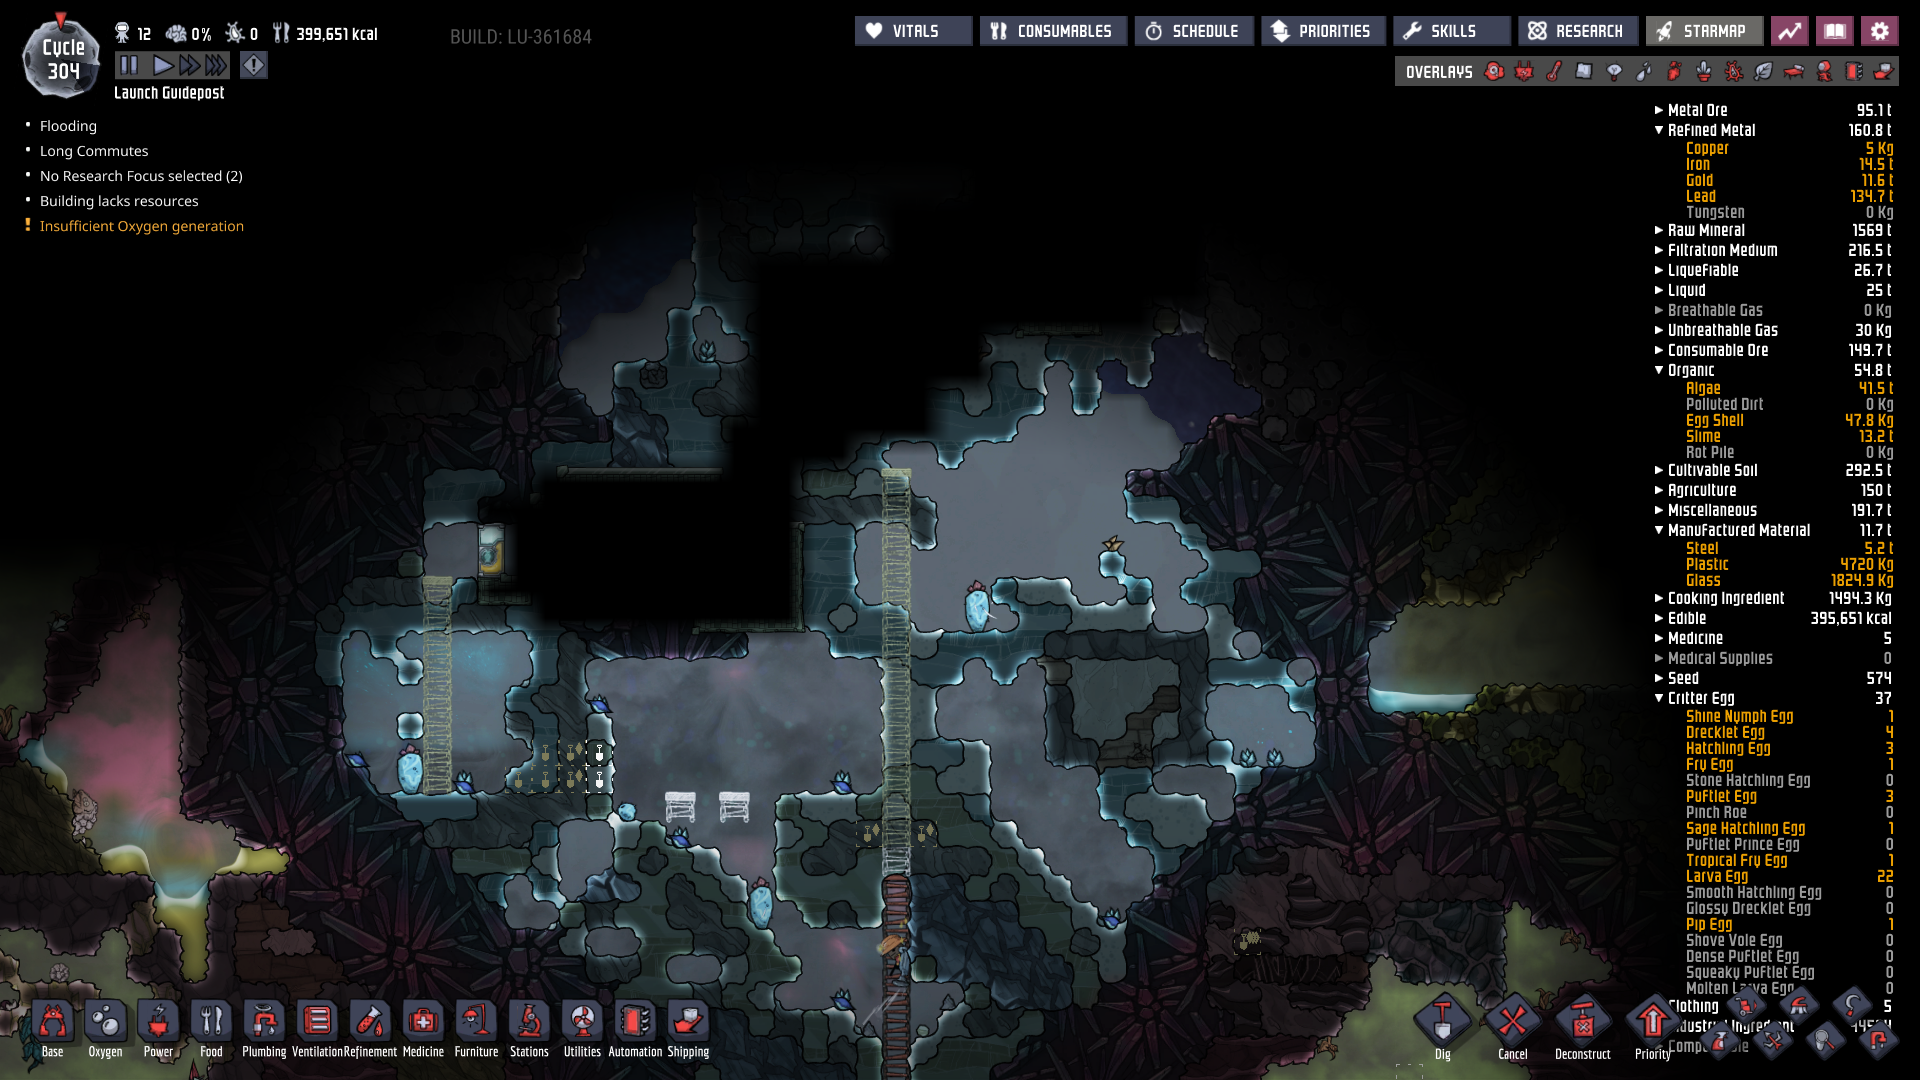
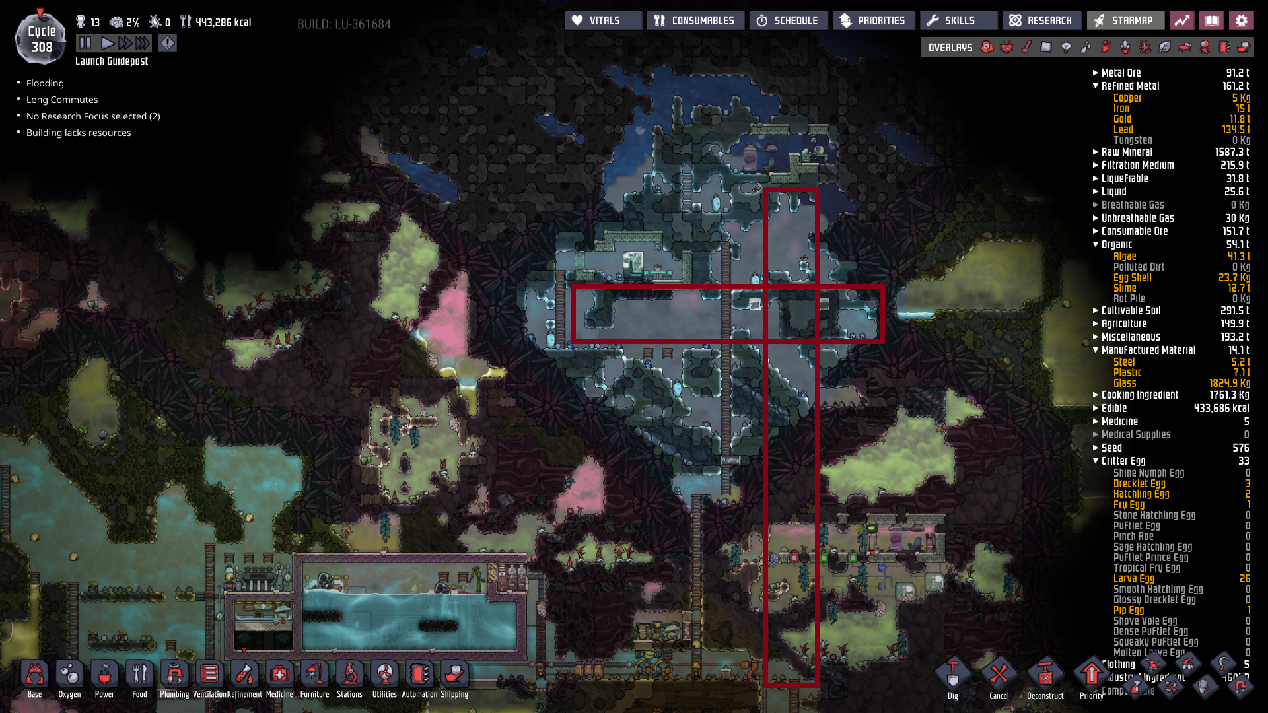
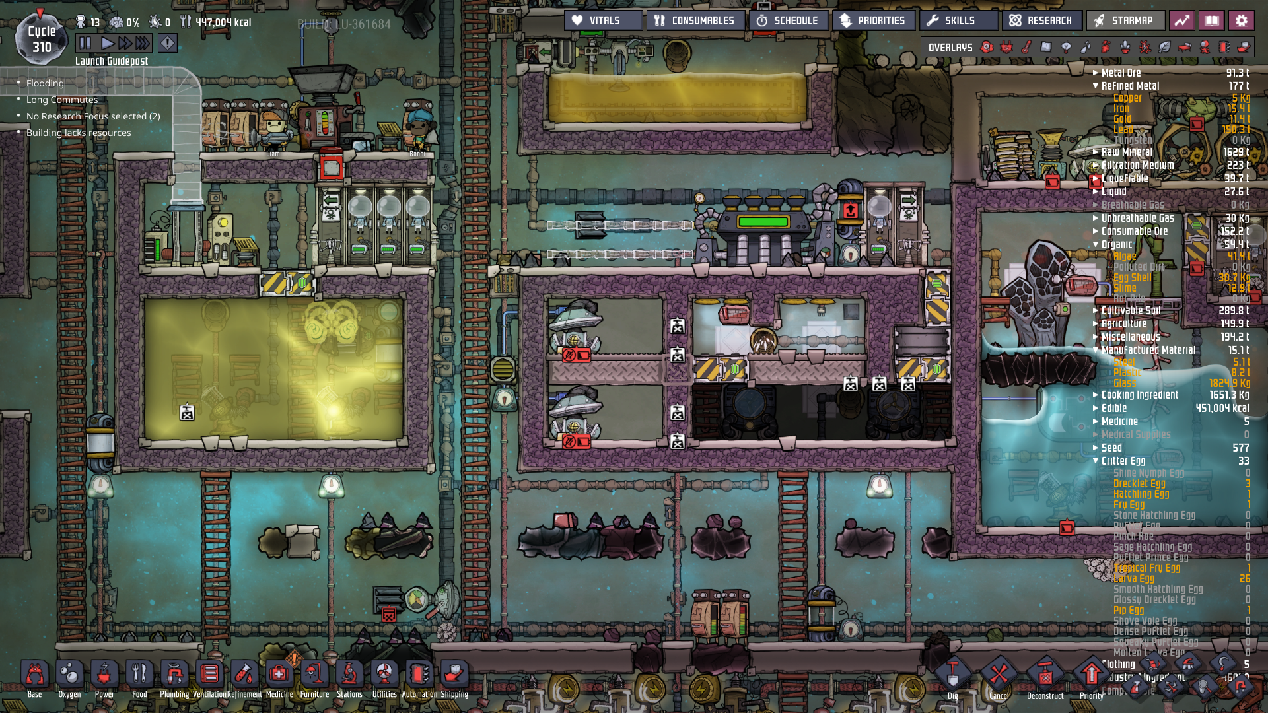
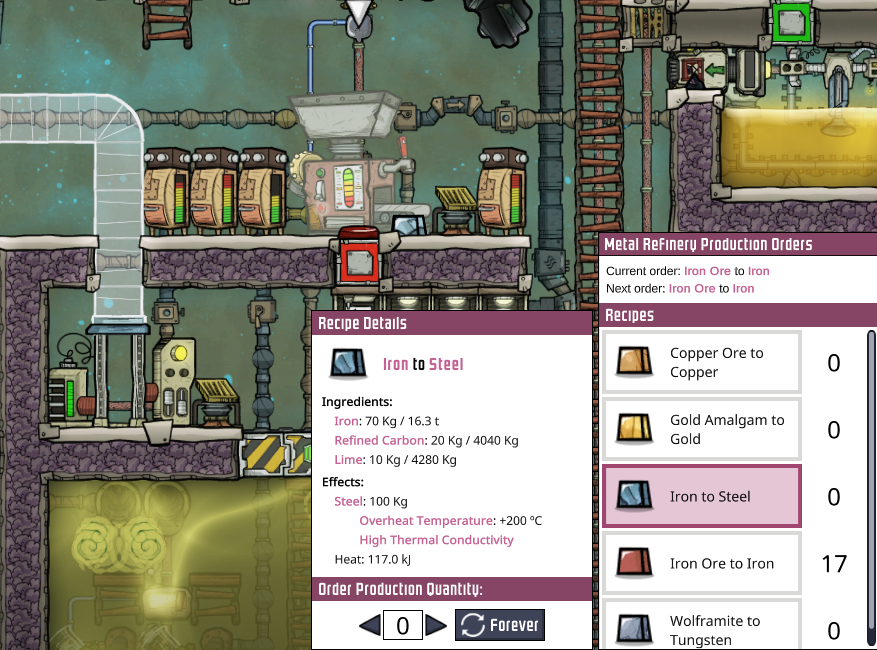
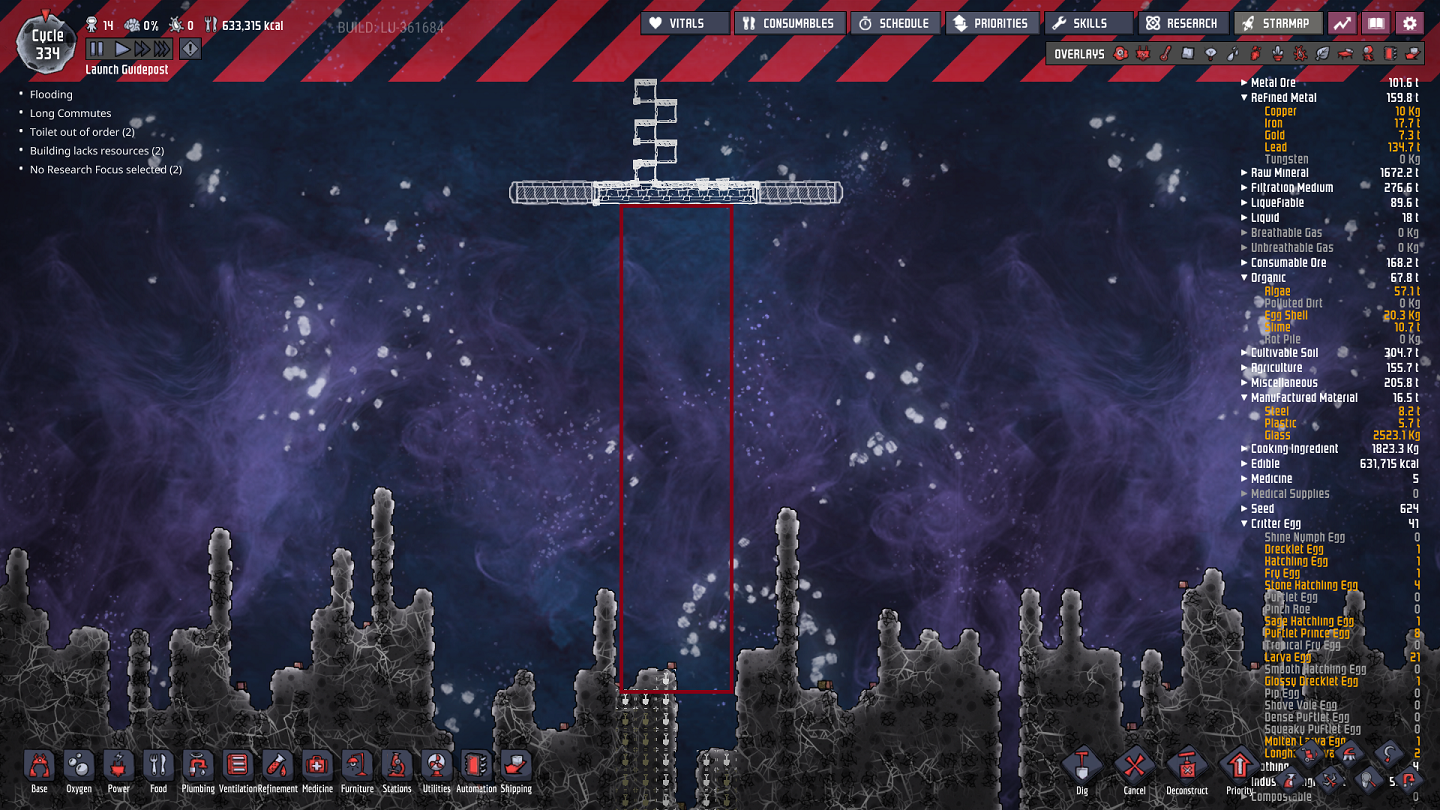
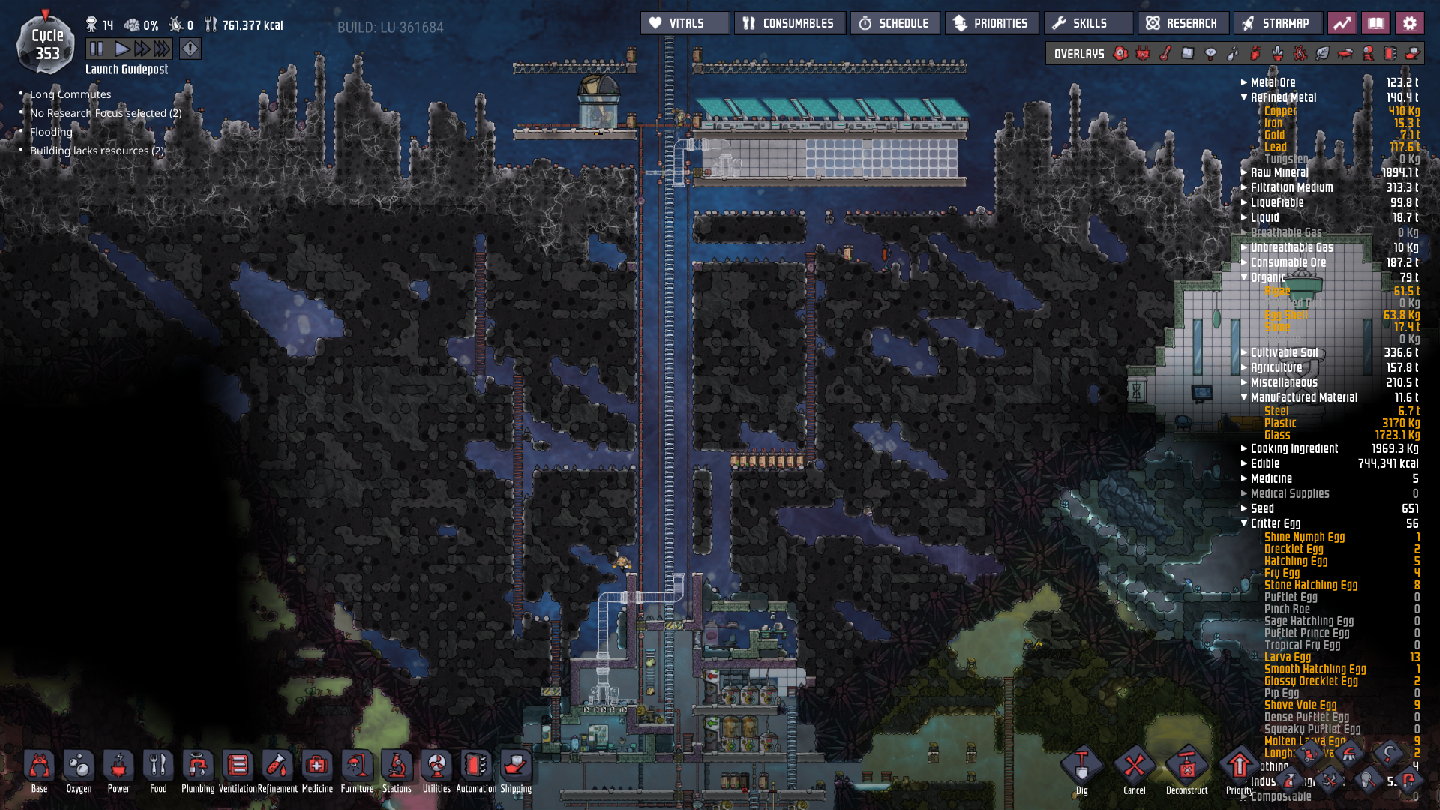
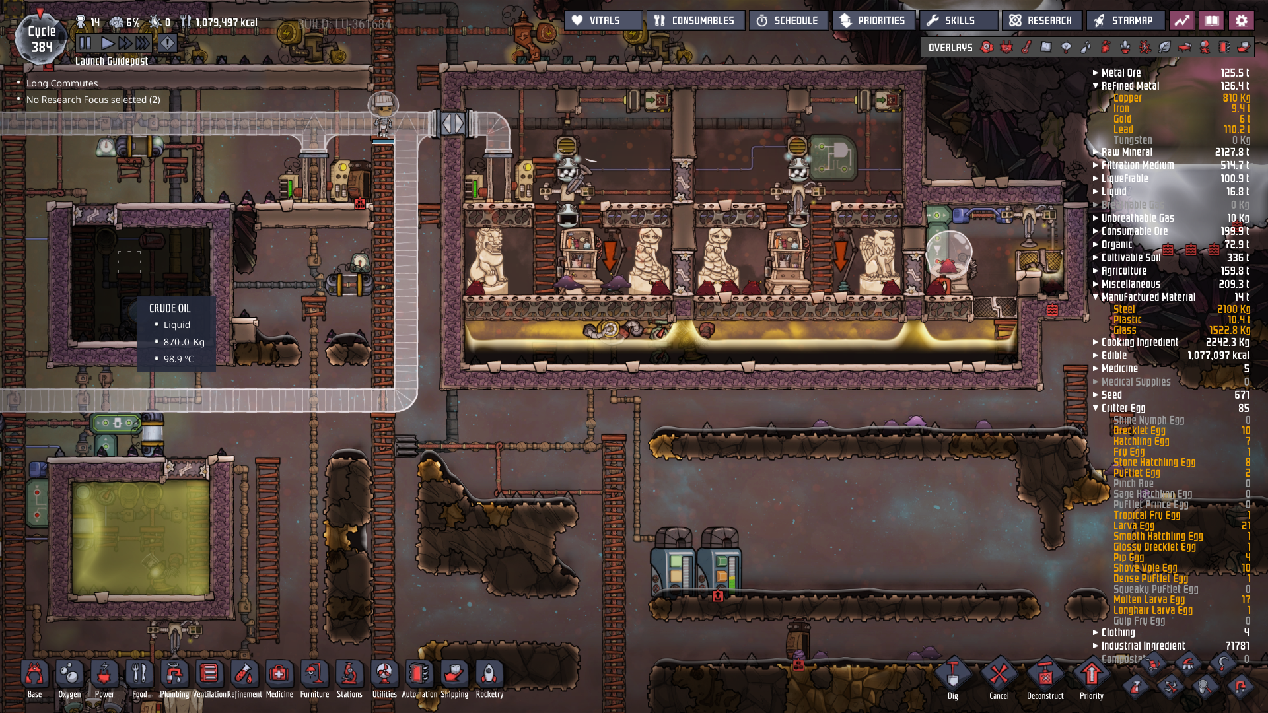
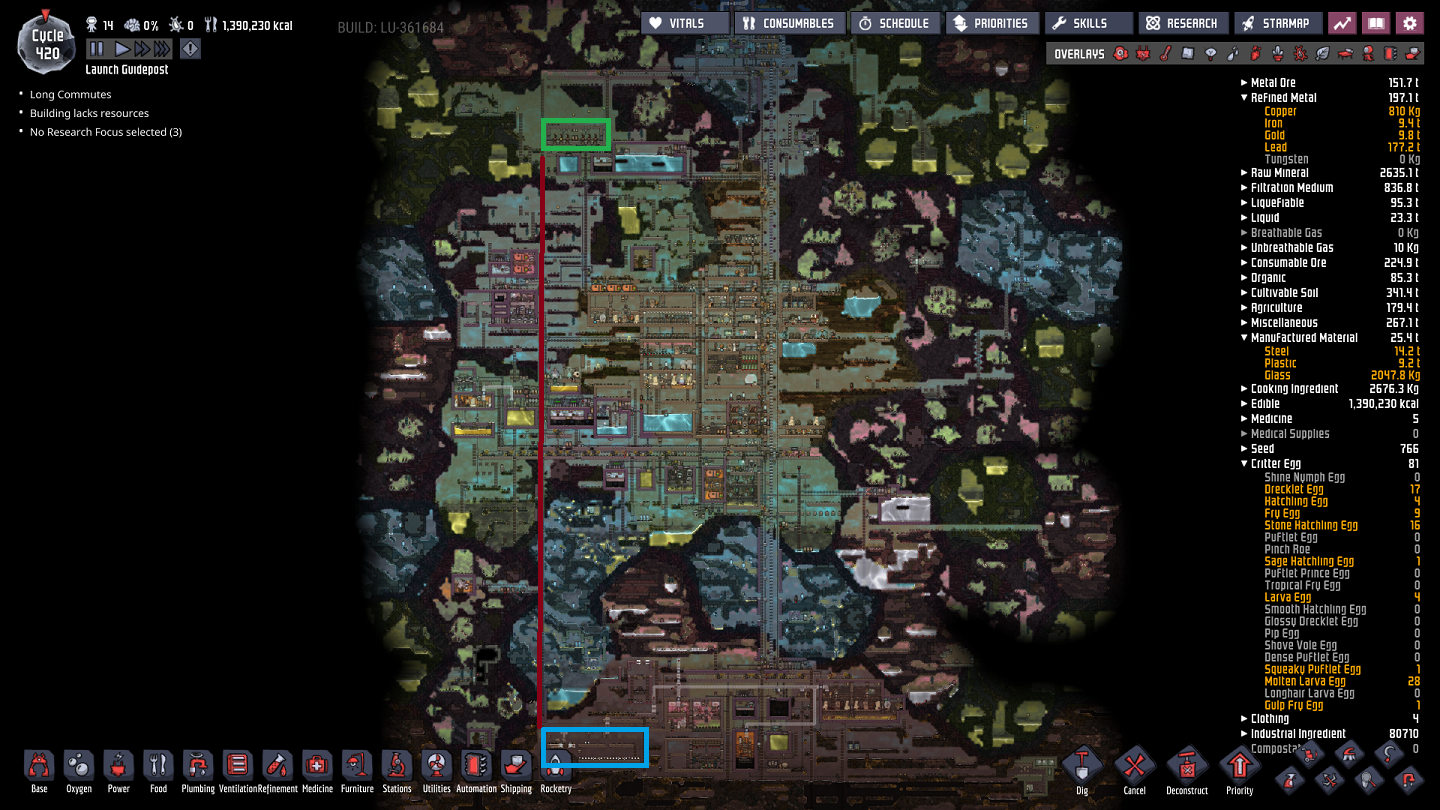
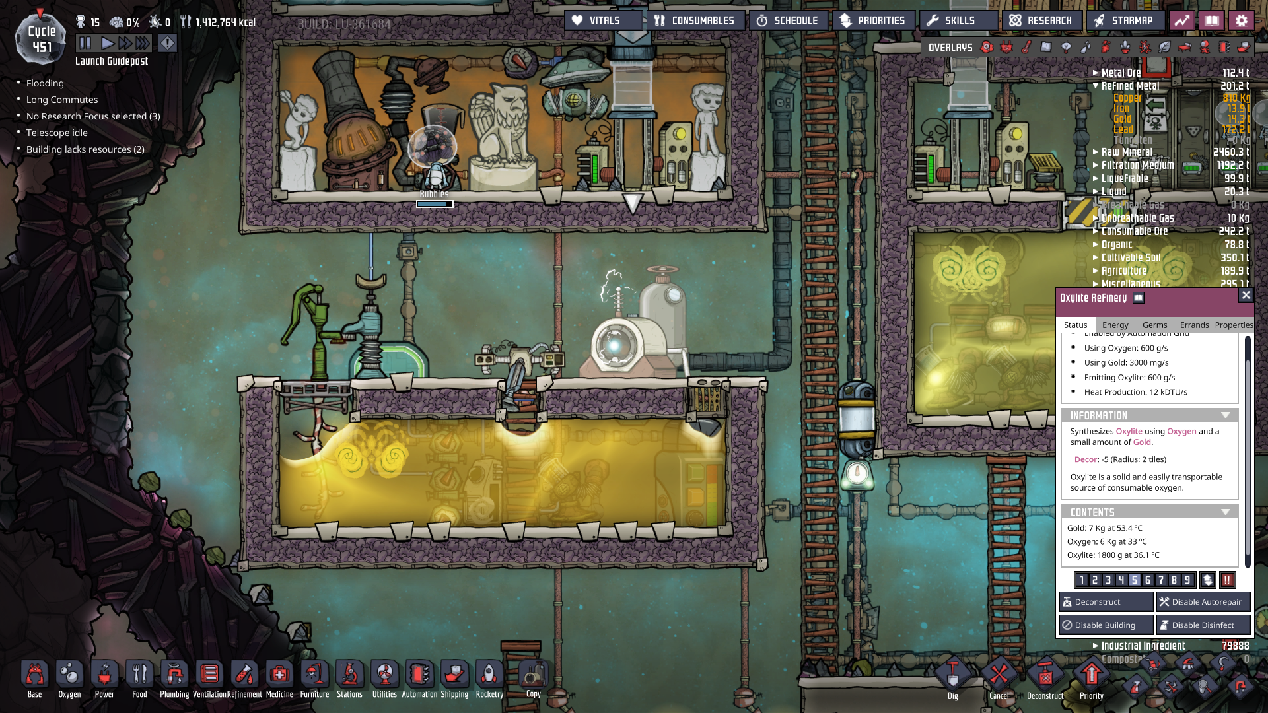
I think they can be made out of gold or tungsten