Blitzkrieg 2 Anthology

Blitzkrieg 2 Anthology

25 ratings
German Campaign Walkthrough
By ★ Spaceflash ★
Hi guys. Chances are you already read my other two campaign guides, if not then welcome to the guide triology that goes through the entire campaign of a faction, explaining what to do in optional and main missions. Stuck on a main mission? Can´t figure out how to finish this one damm optional mission? Or want to become a better leader with a better ratio of killed enemies vs own casualties? Then this guide should help you most of the time. I want to stress that I didn´t do all the optional missions in the final chapter, since the reinforcement budget is just too tight. Since the rewards of these missions aren´t that great anyways you won´t miss out on anything mayor. With that out of the way - let´s get into it!
   
Award
Favorite
Favorited
Unfavorite
The First Chapter: Revenge on Marne
The first chapter of the germans is laughable easy except for it´s main mission. It´s an interesting way to play WW2, since most (strategy) games don´t allow you to be on the side of the axis powers. The Blitzkrieg series does and it´s a fun change to be commanding the enemy from the other 2 factions. In this first chapter your most important army branch will be your medium tanks and bombers. Main infantry has a less important role, but is used a lot in the final optional mission and the actual main mission. The chapter map:
Mission 1: In Talon's Reach
Definitly the fastest and most easy mission of the germans, which doesn´t require much tactical finesse. Quitting to the chapter map to assign a commander for your light tanks before doing this first mission is recommended, but not crucial.
To reduce your losses to a minimum you should call in a group of light tanks as reinforcements and have your whole tank group move to the small camp to your south - easy pickings. After clearing out all enemy soldiers you need to hold positions for your bombers to make their run over the enemy city - several french tanks are parked there that would tear your weak Pz. II's apart. Quickly charge into the town as soon as the bombs have been dropped to intercept any surviving tanks with your tank hunter.
Once you captured the enemy town move your tanks down the road to the south and intercept some trucks that are towing some AT-guns. What we see here is the successful use of the german "Blitzkrieg" tactic: the french still think they are controlling the town and the camp infront of it and are sending in these cannons to fortify the city you already took in a suprise attack. Anyways, move your army to the small village to your north-west and clear out the scout tanks and french infantry inside. At this point in the mission I suggest sending one of your tanks to the north-west corner of the map near a small warehouse on the edge of the map - this will give you a HUGE reward: 2 free promotions on the chapter map!
Once you dealt with everything on the right side of the river cross the bridge and storm the weak defended enemy HQ. They still don´t know that we - the germans - have already overrun their defences on the east and defend their commanding officers just with a single AT-gun and a couple machine guns. Dealing with that should pose no problem at all - I even managed to pull this first mission off without any casulties (that´s how easy it is).
Mission 2: Dangerous Steps
Another pretty easy mission and the last mission you will make real use of light tanks in this chapter. You start the mission in the north-east corner of the map and are ordered to clear the main road in this sector from enemies. This will be an easy task as you can overwhelm each enemy position with sheer force (since there isn´t any room to maneuver I can´t really give much in tactical advice). In any event, fight your way south and then back into the north, following the path of the road. The third and last roadblock of the french is the toughest one since they positioned a proper light tank there - leave that to your tank hunters.
Once you captured the nearby warehouse your next objective will be the city in the south-west. In order to reach it you first must clear a small town on the road towards the objective - kill the AT soldiers first, then order your tanks to destroy the buildings the infantry hides in - that way your own infantry (if you bother with it) will have less casualties. After capturing this small village ditch the infantry and do the rest of the mission with the tanks. Follow the advice of your commanders and use the dirt path to your right to sneak past the enemy defences (they have several AT guns so a frontal assault will cost you a great deal). March into the city center and eliminate all enemy soldiers near the city hall and a side road to the left. Another easy win for the germans.
Mission 3: A Gentleman´s Wager
This mission is very fast paced and requires perfect coordination between your infantry and tanks in order to be furfilled without severe losses. The time limit will be the most severe issue in this mission, as your bet with the allied commander forces you to hurry and ♥♥♥♥♥♥ the safety of your soldiers. Call in more medium tanks first and move them close enough to the enemy trenches so they can open fire and get the attention of the french infantry. Try to time your attack so that your own infantry comes into range of the trenches just after your tanks moved in - sounds hard, but gets easier the more practise you have in the game. After punching through the first line of defence and eliminating all the enemies move your army to the second defence line in the south - take care of that mortar before it devastates your infantry squads!
During your attack you should pay close attention on the progress of your allied commander - if he is close in breaking the enemy defences you need to hurry up and ditch the infantry, else try to keep both infantry and tanks close together to avoid excessive losses. After dealing with the left side of the 2nd enemy defense line move into the actual town and clear the warehouse and the nearby crossroads from enemies - as soon as one of your units reaches the now unoccupied crossroads you won the bet, therefore the mission.
Mission 4: Forced Eviction
Finally a proper mission! For the first time you have to actually fight through a proper enemy defence line and need to use a good tactic to avoid unnecessary losses. The french will launch some fighter planes soon after the mission starts (at least on hard), denying you the vision range of the scout plane. Call in some medium tanks and use a similar tactic we used in the last mission on the small defence line to your left. Instead of suiciding your scout tanks I recommend moving them to the north-east corner of the map (make sure they take the path near the northern edge of the map). They will come across a weak defended enemy depot and upon clearing out the french soldiers and moving a unit on the mortars you will furfill a secret mission objective.
Proceed by moving your main army along the western edge of the map, to the southern reinforcement point. Capturing it will prevent the enemy from calling in more reinforcements (including more fighter planes), which will allow you to call in another group of medium tanks and use remaining reinforcement points on bombarding the enemy city (as soon as the enemy fighter planes from the start are gone). Be efficient with your bombardments and try to take out the enemy AT guns at the northern edge of the town. Make sure to order a bombing run near the center of the town as well, on top of a medium tank. Use the free scout plane to identify your targets and as soon as you start the ground attack you should use it to give your ground units a sightline on the enemy. If you want some bonus experience you should take care of the enemy defense line (it´s MUCH easier to take from the west than it is from the north), afterwards/else move your army to the big house in the east part of the town - after clearing out all enemies there you won the mission.
Main Mission 1: Swift Justice
I really like the 1st main mission of the germans, since it offers a lot of tactical options while still being pretty challenging and fun to play. You start the mission at the east side of the map and are tasked to cross any bridge leading to the other side of the river. I strongly advice you to take the central bridge, which offers a quick and unproblematic access for your reinforcements. The town on your side of the river is extremly strong defended - something we are going to change thanks to our bombers.
Right at the start of the mission you should call in a bombing run right on top of the town center - there is a crap ton of french infrantry that will give the bombers a massive experience boost. Launch more bombers to take out key groups of enemy defenders, especially the bridge and southern defenders should be weakend before commencing the attack.
If you did everything fast enough you can have up to three bombing runs until the enemy launchers fighters that shoot down any additional bombers you call in. Instead, you should now call in 2 or 3 groups of medium tanks and at least 1 group of main infantry. Focus your effort on one part of the defenses, I recommend just going for the one on the eastern side of the town. Work your way to the bridge itself and clear out any remaining enemies in the area - you will have to ward off a weak counterattack a few mintues after you attack.
After dealing with the defenders in the town you should wait until the enemy fighters RTB and call in more bombers to weaken the defences on the other side of the bridge and at the depot to the north-west. Send in your tanks afterwards and secure a bridgehead on the other side of the river. Dig some of your tanks in to ward off the occaisional scout tank and send the rest to the west to deal with another defense line. Once that has been dealt with as well you can finally launch your attack on the northern depot, capture it and get some free tanks as reward.

At some point the french might launch more fighters, in which case you must hold off your bomber attacks and call in some more tanks and infantry. While waiting for the enemy fighters to RTB you should position your tanks and infantry for your final attack on the southern enemy city, which will be your final mission objective. Once your bombers are available again start bombing the crap out of the defenses. You want to take out as many AT guns, tanks and fortified houses as possible before launching your attack. For a nice experience boost I also recommend bombing the train waiting at the train station. Commence the ground attack and overrun any remaining defenders. For additional experience you should support your allies that attack from the east - if they ever got so far (they didn´t in my hard mode playthrough). Make sure that both tanks and infantry attack at the same time to avoid unnecessary losses while still getting quick results. After dealing with most enemies in the town you won the mission and completed the first german chapter.
The Second Chapter: The Rats of Tobruk
The second chapter of the german campaign offers just a slight increase in difficulty. While the british troops are usually better equipped than the french troops from the 1st chapter, your own tanks become MUCH better in this chapter, especially your light tanks. You also get access to GAPs (Ground Attack Planes) in this chapter, which will be of great importance in the main mission and one of the optional missions. Most important army branches will be your GAPs, light tanks and medium tanks (depending on preference, I usually go with a mix of both tank variants). Chapter Map:
Mission 5: Desert Barracuda (Priotizized)
I recommend doing this mission first, as the upgrade for your light tanks is pretty important and the access to GAPs makes your live much easier in the next missions. This mission will be a special ops mission - get into the right mindset for it! First thing you want to do with your elite infantry is to turn them into stealth mode (make sure there is a yellow box around the icon) and move them across the road ito the south. If there is an enemy partol you may choose to take them all out or to wait until they pass by. Hug the left edge of the map until you stumble across a light AA gun with some british soldiers nearby. Change the fighting mode of your infantry to prone and sneak up to the soldiers - once in range (check with alt+r) order your men to open fire. Turn your men into stealth mode again and repeat the same thing with a couple guards inside a building to your right (near a campfire). After clearing out all of them the captured tank crew of a nearby parked Pz. II will come out and get to their tank. If the event isn´t bugged (like in my playthrough) you receive mentioned tank and with that a way to easily complete the rest of the mission.
Next up is the actual mission objective, the nearby communications facility. Make sure your elite infantry is in stealth mode and attack the complex - else just storm the place with your tank and stay outside the range of the enemy´s grenades. Ignore the trucks fleeing the scene - there is no penalty for letting them get away. Instead focus your efforts on a nearby prison and free some german infantry squads trapped inside - not that you really need them since you got your elite infantry.
Make your way north, to a small house with a german sniper hold prisioner inside. Like with the tank crew and infantry squads you should clear all british soldiers nearby and free the sniper, who then can be used to take out key targets from a distance or to give your other units a good line of sight. You can both brute-force your way into the enemy depot or be fancy with your elite infantry to minimize your own losses - it doesn´t really matter regarding the laughable weak defenses the depot has. If you don´t have the tank (anymore) you can use the mortars you received when freeing the infantry squads - just order them to attack the warehouses and they start bombarding it with grenades. After all 3 ware-houses have been destroyed you won the mission.
Mission 6: Waste Not Want Not
Back to the intended order of missions. This one is incredible easy thanks to the GAPs you unlocked in the mission "Desert Barracuda". Start by calling in some GAPs and send them out on the intended path for your ground troops (near the village to your north) - the british have almost nothing in terms of AA. GAPs tend to get bugged after a while and fly around ignoring enemies. To avoid this you need to spam Mouse2 on the enemy you want the GAP to target. After a while you will hear the sound of the plane commencing the attack.
Focus down the enemy AT guns and crusader tanks you find in the area - that greatly reduces your losses later. After your GAPs run out of fuel you should call in another group of them and have them attack the enemy reinforcement point to the west. Focus down the lonely enemy AA tank, the parked Matilda tank and any Valentine tanks you come across. After that has been dealt with use the remaining fuel of your planes to destory remaining AT guns and as many Crusader tanks as possible.
The order in which you attack the enemy is of no significance. I recommend calling in some tanks as reinforcements and go for the warehouse to the west - if you did a good job with the GAPs that will be a very easy target. Storm it, capture the reinforcement point and receive a couple Pz. IV Ausf. F as reward. Mop up any remaining enemies on the left side of the map and reach the allied AA battery. Some transports will spawn in to move the cannons to safety. Before touching your transports you should clear out any remaining enemies near the village I mentioned earlier. Use your remaining tanks for this task (which - again - should be easy if you did a good job with the GAPs). After you made sure the path is clear simply order your transports to hook up the AA guns and move them to your starting position - mission complete!
Mission 7: Precious Prelude
This is a quick and pretty easy mission in the second chapter - if you know how to make use of your GAPs. Mission objective is to make your way to the enemy town in the center of the map and destroy the enemy presence there. You have three roads leading to the objective: One in the north, one in the center and one in the south of the map. I recommend to call in one group of light tanks and to take the southern road that leads to the reinforcement point. Not only is this road very weak defended but taking the reinforcement point also allows your reinforcements to arrive much quicker.
After clearing the road and capturing the enemy warehouse you should commence several air raids on the enemy positions. Goal should be to take out all enemy AT guns and long-range artillery you can find. While the AT guns are scattered throughout the town, the long-range artillery consists of two batteries in the north-east corner of the map, across a bridge. In order to furfill a secret mission objective you have to order your GAPs to take out several supply trucks near a warehouse in the northern part of the town.
Time to send in the tanks to clear out any remaining enemies - if you took out most AT guns and long-range artillery your losses shouldn´t be too high. In order to gain some extra experience you may want to take care of the west part of the town as well, which isn´t required to complete the mission. Be aware that the mission ends automatically once you move your tanks to the bridge - if you dealt with the artillery already. That´s an easy mission completed.
Mission 8: Smokeout
Definitly the hardest optional mission in this chapter, although the start is pretty easy. First mission objective is to clear a roadblock of the british troops ahead. Call in a group of light tanks as reinforcements and attack the roadblock with everything you have. Focus down enemy AT guns and tanks first, but make sure to have one of your light tanks pursue the fleeing enemy infantry. After securing the roadblock you should get ready to attack the enemy city in the north - attacking the canyon is suicide from this angle.


While there is a weaker defended part of the town to the north I recommend just brute-forcing your way through the town´s main defences in the south. Again, you need to focus down AT-guns first, then enemy tanks and infantry - make sure to attack with your tanks first, as your infantry would get slaugthered if you haven´t dealt with the tanks first. Call in more light tanks if you had casualties, else/then move to the north and deal with another much weaker defence line that shouldn´t give you much trouble. Move one of your tanks to the small dirt road to the west - destroy a small car there and an enemy officer that is currently in the city can´t escape. If you succeeded the enemy will launch some bombers that drop their payload on their OWN troops (we are repeating the tactic the germans were using in the dodgeball mission in the final chapter of the soviet campaign) .
After clearing the enemy town of enemy troops it´s time to launch our offensive on the canyon - it´s important to launch this attack from the small dirt road I mentioned earlier, as the front defences of this enemy outpost is WAY too strong for you to destroy head-on with acceptable losses. Instead, we attack the enemy in his weak-defended back and work our way towards the main defences from there. Attacking in this order neutralizes the enemies terrain advantage for the most part and allows us to target seperate parts of the defences one at a time. After clearing out most of the enemies you won the mission.
Mission 9: Helping Hand
This mission is a LOT easier than the last one and shouldn´t give you that much trouble if you know how to make use of tank hunters and heavy AA guns. Start the mission by assigning one heavy AA gun to each main side of the defences: the left part, the top-right part and the right part of the town. Call in another heavy AA gun to accomplish this. One important thing to do right at the start of the mission is to take care of the british long-range artillery in a small village to the north (with your tank hunters). The british commanders didn´t anticipate such a bold counter attack on their positon and didn´t place ANY defences for their artillery.

Don´t overextend with your tank hunters and retreat them as soon as you took care of the two enemy artillery guns. Call in 2-3 more groups of tank hunters and spread them evenly across the three main defence lines I mentioned earlier. After a couple weak and disorganized attacks of the british you receive the order to clear the way for an advancing convoi of artillery reinforcements. Use 4-5 tank hunters for this task and move them (grouped tightly) to the village to the north-east. Obliterate the parked Crusader tanks and the two AT guns inside the actual village and leave the infantry to the allied tanks spawing in on the road. Move your tank hunters to the left flank of the arriving convoi - a group of Crusader tanks will launch an attack there soon after the convoi arrives. After dealing with this larger group of enemy tanks retreat back to your defence lines and await the arrival of the last transport.
After the final transport finally arrives you get control of the ENTIRE convoi, including the tanks that spawned in first. Use the tanks to fortify your defenses and spread the AA guns across the town - the light AA is pretty much useles, while that heavy AA can come in handy if you lost one of your AA guns earlier in the game. If you happen to just loose the crew of such a gun keep in mind that there are some spare gunners at the depot in the southern part of the town. The enemy will launch his first (and last) proper attack on your positions, that from multiple directions. They will field some US medium tanks (the one you receive in the 2nd US chapter as reinforcements). Since the german heavy AA guns are still stupidly overpowered (why they didn´t fix this after the first BK seems dumb) these tanks shouldn´t prove much of a challenge to you - unlike the high command claims. The town after the mission was almost over:
Main Mission 2: Homecoming
This mission can be a real challenge on hard difficulty due to the sheer amount of enemy troops there are. Start the mission by calling in some GAPs and have them deal with the most dangerous defenders first. Target following units (in that order): light AA gun, 2 assault guns, Matilda + Valentine tank, any AT guns you find. You most likley have to call in a second group of GAPs to accomplish this. Once dealing with the defense line you may want to call in bombers to deal severe damage to the enemy fortress a bit to the north, since you won´t be able to launch more planes for a while due to british fighter planes (Do NOT send in your own fighters, they are severly inferior to the british fighters).
Launch your ground attack and deal with any remaining defenders. You will most likely loose a LOT of your starting tanks, as they are incredible bad. If your losses become too severe call in more light tanks as reinforcements. After dealing with the defense line you need to move your forces to the south-west and capture the small village with the reinforcement point - this will become your staging ground for your attack on the enemy fortress just a bit to the north. Call in more tanks (both medium and light) and launch several bombing runs on the enemy fortifications - once the enemy fighter planes RTB. Commence the ground attack and clear any remaining enemy units.
After taking care of the enemy fortress the british will launch a counterattack with almost a dozen US medium tanks (the same model you fought in the "big brother" mission). Defeating them shouldn´t be too hard if you got enough medium tanks left, else call in more as reinforcements. Before attacking the city of Tobruk itself I recommend to take care of the small fortress to your east, the one you send in bombers to earlier in the game (if you have listened to me that is). Shouldn´t be too hard if your bombers (and GAPs) did a good job. Call in reinforcements as needed and attack Tobruk from the road near the west fortress (where the enemy started his counterattack). Use GAPs to take care of dangerous AT guns and tanks, then move in with your ground forces. Capture the reinforcement point in the north-west corner of the map.
The final objective of the mission is to deal with the remaining defenders in the city of Tobruk - incredible easy if you still got reinforcement points left for bombers and GAPs. Let them soften up or even annihilate the enemy defenders, then move in with your ground forces. Of course you should call in some tank reinforcements if you had a lot of casualties - that happens pretty quick with german tanks, as their armor isn´t very good. At some point in the mission you should move a single tank or infantry squad to a small destroyed convoi just to the south of the north-west control point - you will find some long-range artillery and furfill a secret mission objective. Along with mentioned convoi, some points of interest in the city of Tobruk for your airforce:
The Third Chapter: Controlling Stalingrad
This is an odd chapter if you ask me. The first three optional missions we are going to talk about in this chapter are ridiculously easy, while the main mission of this chapter is pretty challenging if you don´t play it smart. The most important army branches are light and medium tanks, while we are going to make use of a lot of GAPs in the actual main mission. A picture of the chapter map, which should look familiar to those that already played the third soviet chapter:
Mission 10: Big Brother (Priotizized)
It´s pretty important to do this mission first, since the upgrade for your light tanks is absolutly crucial to avoid heavy losses in the next two missions. Thankfully, this mission is incredible easy if you know how to position tanks and heavy AA guns (which are still overpowered af). Place one heavy AA gun near each defensive position: One facing the north-west, one facing the south-west, one facing the south-east and the final one facing the east entrance to the village. Then it´s just a matter of calling in some medium tanks and have them dig in infront of the AA guns, to draw the fire of incoming tanks and infantry. And that´s pretty much it - defeat a couple of weak enemy attacks coming from all directions until the mission objective has been achieved. To furfill a secret mission objective find some soviet AA guns near a destroyed building on the far east side of the map, near the train tracks. My defense lines, including a picture of the abandoned soviet AA guns:
Mission 11: Precious Cargo
This mission is pretty difficult if you haven´t unlocked the upgrade for your light tanks - if you did it´s incredible easy. Start the mission by calling in two groups of light tanks (have 1 or 2 of them stay at the reinforcement building as it will come under attack later). Unload your infantry and move your forces up the road leading to the north. You will come across a small enemy roadblock and a weak defence force on the train tracks - easy pickings for your tanks, which armor is finally strong enough to withstand enemy AT guns and light tanks.

After clearing the way have your army assemble on the rails and assault the train station to your east, which is guarded by some light tanks, infantry, a couple weak AT guns and a single T34. Overrun the enemy positions - have your tanks take point to get the attention of the enemy tanks and AT guns (reduces infantry losses a lot). You don´t really have to use much tactics during the attack, just make sure not to get too close to the southern defence line of the soviets - we can ignore that.
Once you cleared the train station you get control of the train - but don´t move it to your starting position yet - a hostile armored train arrived to the west which blocks the train rails. Have some (but not all) of your remaining tank force deal with that train to the west, while a couple of your Pz. IIIs should secure the rear of the train, which will come under attack by yet another single T34. After destroying the enemy train to the west and any tank that enters the area you can move the train to your starting location, which should have come under attack by yet ANOTHER lonley T34 - what are the soviets thinking? After moving the train next to your reinforcement building it despawns and you won the mission.
Mission 12: Angry Nursemaid
This mission shouldn´t give you any trouble, as long as you don´t foolishly rush the soviet attackers inside the village next to your starting locations (that KV1 makes mincemeat out of your tanks). Instead, you need to take the long route around the now hostile village. Call in two groups of light tanks: One will be your attacking force, which should consists of 6 or 7 tanks, while the rest of them makes the rearguard for your convoi. Move your attack group to the crossroads infront of the allied village and clear it from enemy soldiers, then proceed to the reinforcement point to the south-west. Meanwhile your convoi should make it´s way to the allied southern village, on your side of the river. Have your rearguard take position near the corssroads, as it will come under attack by some soviet infantry squads. After dealing with this bad organized ambush you should move your attack group across the southern bridge and deal with any defenders you find near the road, leading to the north-east bridge in this sector. Make sure to have one of your tanks move to the small bunkers on a hill nearby, as this will complete a secret mission objective and grants you two squads of assault infantry.
At this point in the mission it makes sense to combine the rear guard and attack group into one big stack and have them attack the north-east bridge alongside your infantry. Have your tanks take point, as they will get the attention of the enemy infantry making them easy pickings for your own footsoldiers. Time to cross your newly conquered bridge and defeat a small enemy defense line on the other side of the river. After that has been dealt with move in with the convoi and order them to drive to the allied village in the south-east corner of the map - once they arrive you won the mission. Be aware that some soviet infantry squads spawn in from the east road (near the soviet defence line you just destroyed) - so keep your troops there to deal with them.
Mission 13: Easy Moves
The title of this mission is pretty ironic, since this is actually the first challenging mission in this chapter. Especially the beginning of this mission can be annoying, since all you have for an army is a single sniper who has to make his way through several soviet patrols. I screwed up this part several times in my playthrough of the campaign - make sure you are VERY careful with your sniper and take care of the enemy patrols from afar. Another very important thing to remember is to ALWAYS cloak your sniper after each attack (make sure the icon has a yellow box around it). Fight your way to a small campfire further along the raod where you have to take out a soviet sniper. Important: Do NOT kill the enemy officer first, as the soviet sniper will see your soldier and kill him instantly. Cloak your own sniper again and move him a little bit to the north until all the enemy cannons come into sight - wait for their destruction (don´t risk your sniper by killing the crew of the artillery with him).
Next up is yet another mission for the sniper. He has to capture the warehouse on the right side all by himself. It´s guarded only by a light AA gun and three enemy soldiers - make sure to be out of their line of sight before opening fire. After capturing the warehouse it´s time for building up an army consisting of medium tanks and assault infantry. Just make sure to keep one reinforcement point as you´ll need some fighter planes later. Your ground army should look like something like this (right picture):
The actual attack on the enemy village is pretty rough, as you cannot loose too many of your tanks (which are pretty squishy unlike your light tanks). Make sure to focus down the enemy heavy AA, several mortars and a couple weaker tanks. After receiving losses and capturing the reinforcement point the enemy will launch two GAPs - now it´s time to send in your fighters. Your next objective will be to help your allies defeating the enemy defense lines. Before attacking the main defense line you really should wait for your allies to distract the enemies - else YOU might be the one ending up loosing all your tanks to the enemy. After clearing out all defenders you won the mission.
Mission 14: Armored City
Urgh this mission is just annoying. Main goal is to capture a fuel depot to the north-west. That by itself isn´t too difficult, but you need to avoid excessive collateral damage inside the actual depot or you´ll fail the mission. Have the two Pz. IVs you get at the start hold position and let them deal with a small enemy attack. Meanwhile, you should order your troop transport to drive to the depot and unload your infantry. Call in one group of medium tanks and two groups of tank hunters as reinforcements - while I usually HATE wasting reinforcement points you need such an overwhelming force since you have to deal with an armored train on the rails just before the depot. That thing blows your medium tanks to bits (which you need against the enemy infantry), hence the tank hunter reinforcements.
Before attacking the actual depot you should call in a bombing run on a small village to the east of the depot - the soviets have a rocket launcher parked there that would tear apart your advancing tanks. Another reinforcement point goes to a group of medium tanks, that will clear a crossroads near the south-east corner of the map. Let them face towards the eastern road and dig them in - that will help you later in the mission. Commence your attack on the enemy fuel depot - make sure to let your infantry deal with the enemy infantry inside the depot (use your tanks only against the enemy AA guns and tanks). After defeating all the defenders including the armored train you need to capture the reinforcement point. Next mission objective will be to defend the depot against an enemy counterattack - very easy, since the tanks we dug in a bit earlier will destroy the enemy tanks as soon as they spawn. After a short while you receive a new mission objective: To kill a retreating soviet general in a badly damaged KV-1 tank. Use your tanks in the south-east corner of the map for this task, since you just need to reposition them a bit so they face the south instead the east. After the general is dead you completed the mission.
Main Mission 3: Volga Factories
The third main mission of the germans may seem huge and difficult, but it really isn´t if you know how to make optimal use of your air superiority. You start the mission in the bottom part of the map and receive free reinforcement units to defeat the soviet defences in the immediate area. Your main force (left picture) will arrive from the west, while smaller task forces arrive from the north-west and south-west (right picture). The two smaller task groups shouldn´t really do anything other than to secure their spawn point, while your main force has to capture a reinforcement point near their position - that´s absoltuly crucial since you need the support of the airforce to complete this mission.
Dig in at the warehouse and commence several air raids with your GAPs and bombers. This next part plays out somewhat similar to the final soviet mission, where you finish off most dangerous enemies with your airforce and leave the rest for your mop-up ground crew. There are many enemy artillery batteries (including rocket launchers) deep insdie enemy territotry, which should be taken care of right away before proceeding with your ground force. In the pictures below you will find several artillery batteries (including a ship and some dangerous AT guns) which you should target with your air strikes.
Of course there are several other dangerous AT gun emplacements scattered around the map, though I recommend that you focus on those that are located in the southern part of the city first. Have some GAPs destroy the heavy AA gun, the flame thrower tank and any AT guns you can find near the munitions factory (in the south). Commence your ground assault and capture the factory, which shouldn´t be too hard after you soften it up with several air raids. Be aware that there is a strong AT gun emplacement just to the east of that factory - take care of that with bombers or GAPs. Similar to the first depot you took you should ALWAYS leave a small garrison behind to guard your reinforcement points, as the soviets will launch counter attacks on you. I recommend 1 heavy tank, 2 infantry squads and 2 heavy AA guns - that should shred any attackers. Call in reinforcements as needed, then proceed to take care of the soviet HQ (the lonley building complex near the coast, which was protected with many artillery batteries including that ship). You technically aren´t supposed to complete this mission objective yet, but do so regardless since the soviet HQ makes for a perfect staging ground to attack the soviet tank factory, your last mission objective. Similar to the munitions factory in the south, you should launch several air raids with your GAPs and bombers - when the defenses are weak go in with your ground forces. Once all enemy units near the reinforcement point have been taken care off you successfully completed the mission.
Final Chapter: Angry Water
This chapter will be a break from tradition of my guide series. Reason being that this chapter has such a tight budget of reinforcement points that it is unadvisable to do all the optional missions, instead I will only talk about the missions you SHOULD play in this chapter. These missions will be rather easy and shouldn´t cost you many reinforcement points, which you can spent on the final mission instead. Important: The final chapter supports a maximum of 35 reinforcement points, so should you have a lot more than that left after finishing the 3rd optional mission go ahead and do a 4th one - most of the optional missions I left out are much harder and don´t give a good reward. The most important army branches will be your medium and heavy tanks, followed by assault infantry. Bombers and V2 rockets will be very important in the main mission. The last chapter map of the german campaign:
Mission 15: Hunted Tiger (1st of 3 optional missions)
This is a rather easy mission, since your heavy tanks are just SO good and the americans just have no real counter against them. Before you actually proceed with your tanks have them turn around and dig in: A small group of US tanks will spawn in shortly, which will get obliterated by your superior tanks. The enemy will start launching GAPs, which should be intercepted by your fighter planes without much issues. Move your tank group towards the enemy town, but instead of attacking it we avoid it by climbing up the mountain. Be advised that there may be a couple Sherman tanks coming from the south - be ready to deal with them.
Drive along the northern road, under the enemy bunker (you are too close to the bunker for it to open fire on you). You will come across some infantry, among them some AT soldiers which should be focused down immediatly. Continue making your way to the allied village to the north-east. Just before reaching the bridge you will get jumped by a couple Sherman tanks and a bit of infantry, which
shouldn´t pose too much trouble - what will cause trouble are two Slugger tank hunters guarding the bridge (these things are OP af). Use your Tiger IIs against these things, as they are the only tank that has enough armor to withstand a couple hits of the Slugger while having a cannon strong enough to crack it´s front armor.
The worst part of the mission is definitly the defense of the allied village, once you reach it with your tanks. Call in some medium tanks as reinforcements and have them take position infront of your heavy tanks - usually that is a stupid thing to do, but in this case you aren´t left with much of a choice. Reason being that if both of your Tiger IIs get destroyed you lost the mission, while your Pz.IVs are expandable. Of course you still need to use your Tiger tanks against these Sluggers, as the Pz.IV can´t penetrate it´s front armor. After defeating most enemy attackers you won the mission.
Mission 16: Street Sweeper (2nd of the 3 optional missions)
God this mission used to be such a nightmare for me until I realized that it could be completed so ridiculously easy that I couldn´t stop laughing when I originally discovered it. Instead of playing the mission like you are supposed to we - instead - are going to exploit the low accuarcy of the heavy US AA guns. Yep that´s right - send in a transport plane to the spot shown in the left picture (not further to the north, as the plane cannot survive two AA guns at the same time) and save yourself a LOT of stress and time. As soon as the elite infantry touches the ground have them change their stance to prone IMMEADIATLY and have them take out the AA gun and nearby US infantry. Then it´s just a matter of moving them north (while they come under fire, that´s why they have to be prone), taking out the second AA gun and have them storm the reinforcement building, capturing it immeadiatly. Aaaannndddd that´s it! A very difficult mission completed in under 3 minutes.
Mission 17: Gatekeeper (3rd of the 3 optional missions)
Urgh this mission is disgusting, I failed it multiple times in my playthrough. But the reward (slight upgrade for your assault infantry) is definatly worth it, as we will need infantry in the main mission. The very first thing you should do after the mission starts is to move one heavy tank destroyer to each bridge and have them take point of the defense (that way enemy tanks and infantry try to charge in to get another, less armored angle on the tank). I would recommend moving the defense tanks infront of your AT guns as well, so that enemy infantry won´t be an issue for them. Also worth taking notice is the badly damaged Elefant tank hunter currently inside the factory - repair it and move it to the southern bridge. In order to get some infantry you should have them leave the buidlings inside the factroy and have them dig trenches near the bridges instead. Move two of the four infantry squads to the southern bridge. The three bridges, along with the tank hunter I mentioned:
An important thing to keep in mind is that the main focus on this mission is defense - to keep control over the factory, which is fulfilled the most easy by stopping the enemy at the bridges. So feel free to call in as many tank hunters as you need AFTER you got yourself one group of assault guns. We need these to bombard the area infront of the enemy warehouse, which we are supposed to capture. The best time to strike is when the US-troops launch a troop transport, which should be after several waves of enemy tanks.


Order your tanks and infantry at the southern bridge to cross the river, have your Elefant tank take point (it´s important to keep that thing alive until this point). Use it to destroy a Slugger tank hunter on the other side of the river, then proceed to the warehouse and capture it. This has to be done rather quickly, as I am sure the enemy gets reinforcements just a couple minutes after the transport plane drops it´s paratroopers.
Final Mission: Heavy Hand
This mission is next to impossible to complete if you didn´t save up enough reinforcement points - which is why I skipped all these other optional missions. If you did save up enough reinforcements, this mission is actually pretty easy compared to the past main missions of the germans - if you know how and when to use the right reinforcement type. At any point in the mission you have to know when you need more tanks to complete your objective - I went with a small group of high quality tanks that shred any hostile tank they came across. Before proceeding with the actual mission objective I like to spent a couple points on heavy AA guns to secure each of the bridges leading to enemy territory - that makes for a total of 3 reinforcement points, but they are well invested as the OP german AA will wreck any US/british tank that tries to cross. For additional security add some Pz.IVs you received at the start of the mission. While doing this you should keep in mind that you still need to secure the northern bridge.
Unfortunatly the GAPs of the germans in the final chapter utterly suck, so use some bombers instead to weaken the enemy defences at the depot. Once you feel save enough you can cross the bridge (use Tiger IIs against any Slugger tanks you come across) and assault the enemy depot - make sure to bring your assault infantry as well, as you will need their help to clear out the US infantry in the trenches (these AT soldiers are more dangerous than you might think). After capturing the depot build up some defences (heavy AA guns and 1-2 squads of infantry), then proceed across the bridge to your north and defeat any enemy holding that city. Although you shouldn´t have any problems dealing with the weak US garrison left in that city, you might want to send in another group of bombers first to deal with some of the entrenched infantry.
Now comes a rather annoying part of the mission: To defeat the enemy artillery battery on a hill to your west. Best way to deal with that is to send in 2 V2 rockets, so you don´t have to suffer many casualties with your ground army. Since the recharge rate for your next reinforcement is incredible long after the use of a V2 you should try to shoot a rocket into the artillery battery early in the game, when you don´t require any reinforcements at the moment. Same goes for the castle in the center of the map which has some long-range artillery as well.
Next up should be two bombing runs on top of the enemy defense lines guarding the enemy depot. After that´s been done proceed with your tanks and infantry and deal with the entrenched infantry. Capturing the fuel depot shouldn´t pose any challenge to you now. The final part of this mission is very easy: Just have some Panthers and your assault infantry storm the british hold city - except for their AT infantry, they have NO MEANS against your strong tanks. Capture the reinforcement point and you successfully completed the mission - with that the german campaign. Congratulations!
My statistics
I will list the final stats of my walkthrough of the german campaign here. I think I was rather successful in my playthrough, but I just wasn´t able to quite make it to the highest rank possible due to the missions I skipped in the last chapter.

Enemies killed: 5966 kills
Own units lost: 933 casualties
Army rank: Generaloberst (second highest rank possible)
Favorite army branches: Light tanks, heavy tanks, assault infantry, bombers, GAPs.

To be entirely honest: I really dislike the german campaign, though I still hope that this guide helped you with the more difficult missions this campaign has to offer. And like I already mentioned you shouldn´t really bother with half of the optional missions of the final chapter - they are just not worth it. Why do I dislike this campaign? Well, it seems the most unbalanced one in the entire game. Especially in the first chapter almost all your tanks are freaking worthless, while they get ridiculously overpowered in the final mission. Same goes for the overpowered german heavy AA, which I complained about several times now. It´s just a bit frustrating to be pumped to control the most advanced tanks of WW2 and then you end up being able to only use them in like what: 1 mission? 2 missions?! Anyways that´s enough personal opinion from my side - I hope you guys did enjoy my guide triology. Have a nice day!
20 Comments
beholder Oct 28, 2023 @ 5:17am 
About mission not in a guide: Steady grip
You NEED to upgrade heavy AA and light AA before this mission.
Randomness is in the enemy fighter jet accuracy. If they target your AA its bad, if they target allied machine gun crew its good. You can call your planes to fight these guys, but its about resourcefulness.
My best result on a hard is a 3 supplies. First you call Heavy AA in the north and set them up on the left road near map border get them in a group 1, at the same time move starting AA on road and set them up near light projectors and these are your group 2. Use alt+R to see your guns range they all should connect and overlap. If you did it correctly enemy bombers would not destroy fuel supply, but maybe 1 or 2 fly over and bomb some buildings.
beholder Oct 28, 2023 @ 5:17am 
Second call light AA and put one near your heavy AA to defend them and other go in the middle of the map and kill sniper on a hill. There are 3 snipers but the middle one is crucial.
Third call infantry and dig trenches around central hill and use binoculars to look at the center, because US going to send their paratroopers at the end in this hill. To reliably destroying their planes you need to move northern heavy AA (1st group )down on the road near your other group (2nd). Don't be afraid to save ~3 minutes after every enemy raid with different saves. If you lose people on a AA guns replenish with infantry, if you lose any gun, reload.
You need to focus fire enemy planes with infantry, because 1-2 planes can pass, its not a big deal, your light AA and trenched infantry can deal with them. But 4 planes is a reload situation.
At the end all survived paratroopers are going to attack 3 towns at the same time. Depending on a previous work this is a cake walk or a nightmare.
beholder Oct 28, 2023 @ 4:36am 
My 2 cents to a Mission 16: Street Sweeper on a hard difficulty
If you can't capture point even if you killed squad in a nearby building and AA guns, i suggest to kill squad in a building down in a south.
You can move your firetank from the base to this building with a little bit of luck. To do so: On the shortest route you encounter 1 gun and 1 tank that can't penetrate front armor, but you can't stop near the buildings, because grenades can kill tank very easy.
There are 3 problems with firetank strategy:
1) heavy AA near capture point will kill it, thats what your paratroopers should deal with as guide and watermelon suggests
beholder Oct 28, 2023 @ 4:36am 
2) your tanks could be killed by rocket artillery fire, before paratroopers kill AA guns, so I suggest to move all vehicles up on the hill on the south-west and use them to kill enemy infantry squad, also separete your starting infantry in 2 groups and put them in the nearest buildings to attract artillary fire, + you can spend one of your firetanks to kill nearby (center west) US rocket artillary (1 tank and 2 artillary)
3) US infantry can grenade your tank and they spawn just at the end of the road and march to you, but the range and delay of their grenades allow you to just run them over
watermelon Apr 20, 2023 @ 2:21pm 
Then you can send the paratroopers to go down past the house with the 1 infantryman left and attack the house to the left. I managed to clear that house then finally take out takeout the final infantryman. The cap can now be captured.
Now, just as I finished capturing the paratroopers got shot at by artillery. So I'm not sure if there is a time limit. This is why I think the infantry at spawn needs to survive so that they can continue to distract the enemy. I tested this on normal ( yes I struggled on normal) so I'm not sure if this works on hard or very hard.
Sorry for the long post.
watermelon Apr 20, 2023 @ 2:20pm 
Afterwards, go to the top right of the reinforcement point but not too far then camouflage. Walk left, above the road so you don't get spotted by the house below until you get in range of the heavy AA and the machine gun. Attack the machine gun first since it turns the fastest then the heavy AA then the building which can now be cleared. I found that I needed to do this as not using camouflage and attacking the building first is fine until 1 infantryman is left. That infantryman occupies the bottom left of the building so the submachinegun paratroopers will go towards the building only to be minced by the machine gunners and the heavy AA.
Afterwards, go back to the reinforcement point and wait if the US assault squads ( I think ) haven't already passed. They'll be heading towards the German spawn.
watermelon Apr 20, 2023 @ 2:20pm 
After the paratroopers land have two squads go prone and take out the heavy AA. Once the heavy AA is gone ( take care not to click on the heavy AA after it is vacant ), attack the house left of it till only 1 infantryman is left then retreat. This house is preventing the cap from being taken but the last infantryman cannot be taken out without getting too close to the other enemy houses nor can the house be left alone otherwise the paratroopers take too much damage going north.
While the two squads of paratroopers are busy, send the squad furthest to the right to walk to the heavy AA up north then attack it when they are in range. This heavy AA will be too busy attacking the two squads further south so you can walk there ( though I only tested this twice so I'm not sure how reliable this is ).
watermelon Apr 20, 2023 @ 2:19pm 
In Mission 14: Armored City, just before the fuel depot on the most western side. You can put infantry in the house and the factory shaped building just before the rails. The armoured train will proceed to shoot at these buildings which can help cover for the tanks. Out of the 5 medium tanks and 6 stugs I sent to attack the train, I only lost 1 medium tank. Only the further most right cart only shot once ( irrc ) at my tanks.

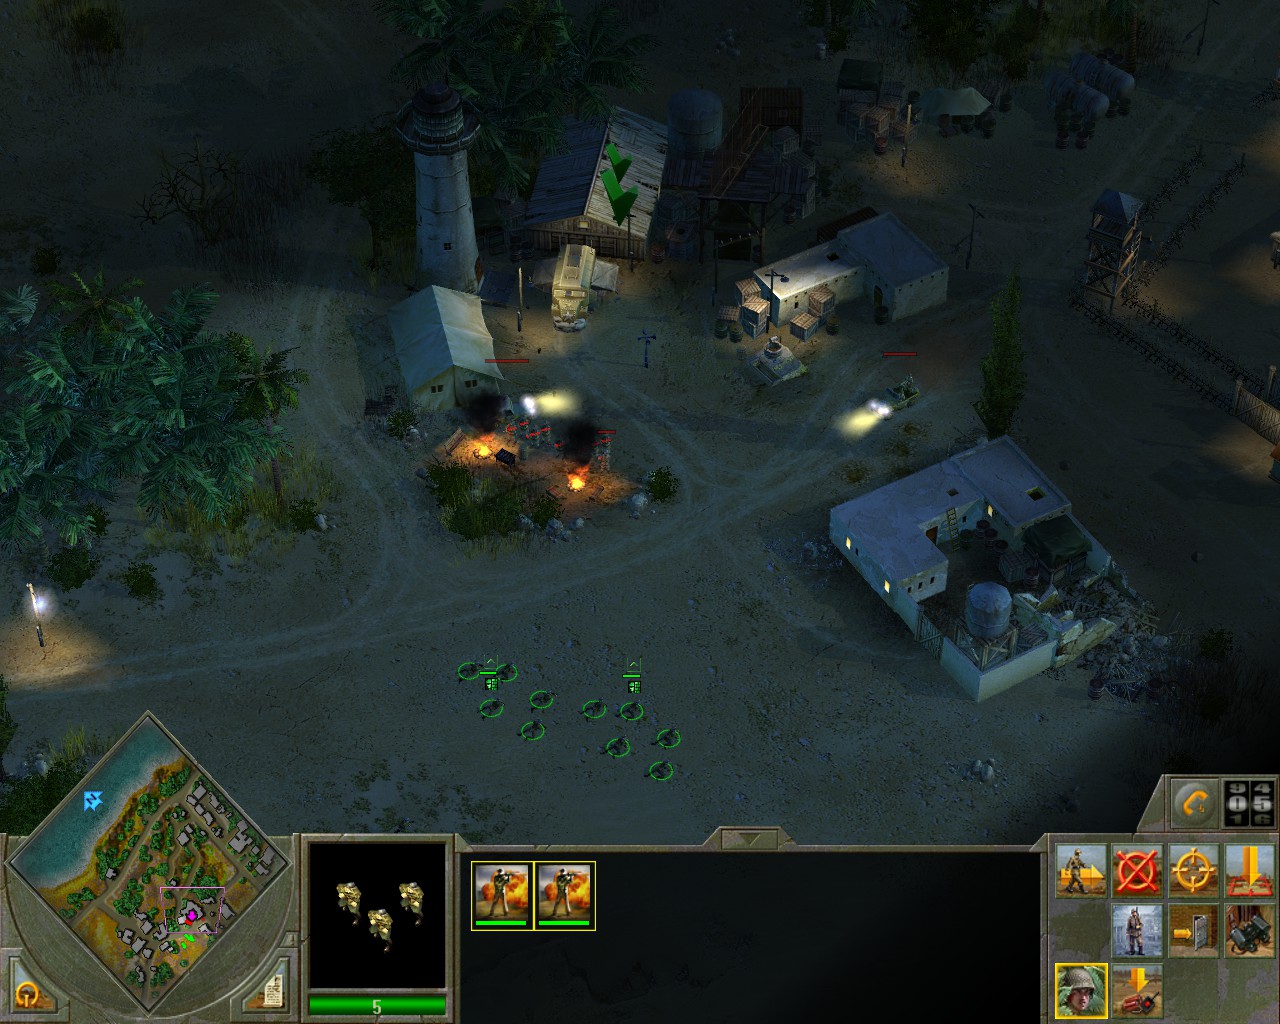
I found Mission 16: Street Sweeper to be harder than the guide states though this could be me misreading the guide and being bad at the game. Tested on normal. You land the paratroopers in the same place as the guide though don't call the troops too far to the right otherwise one squad will not drop out. Meanwhile move the infantry at spawn to the warehouse ( can only store 1 infantry squad + AT ) and to the houses at the right. This will give the infantry some protection from artillery fire.
watermelon Apr 20, 2023 @ 2:19pm 
For Mission 8: Smokeout, there is a alternative passage to the right that allows you to go behind the roadblock which you can attack from behind. This route may be more costly due to attacking behind means first contact with the tank and infantry meaning it takes longer to attack the AT guns ( though they do have to turn ).

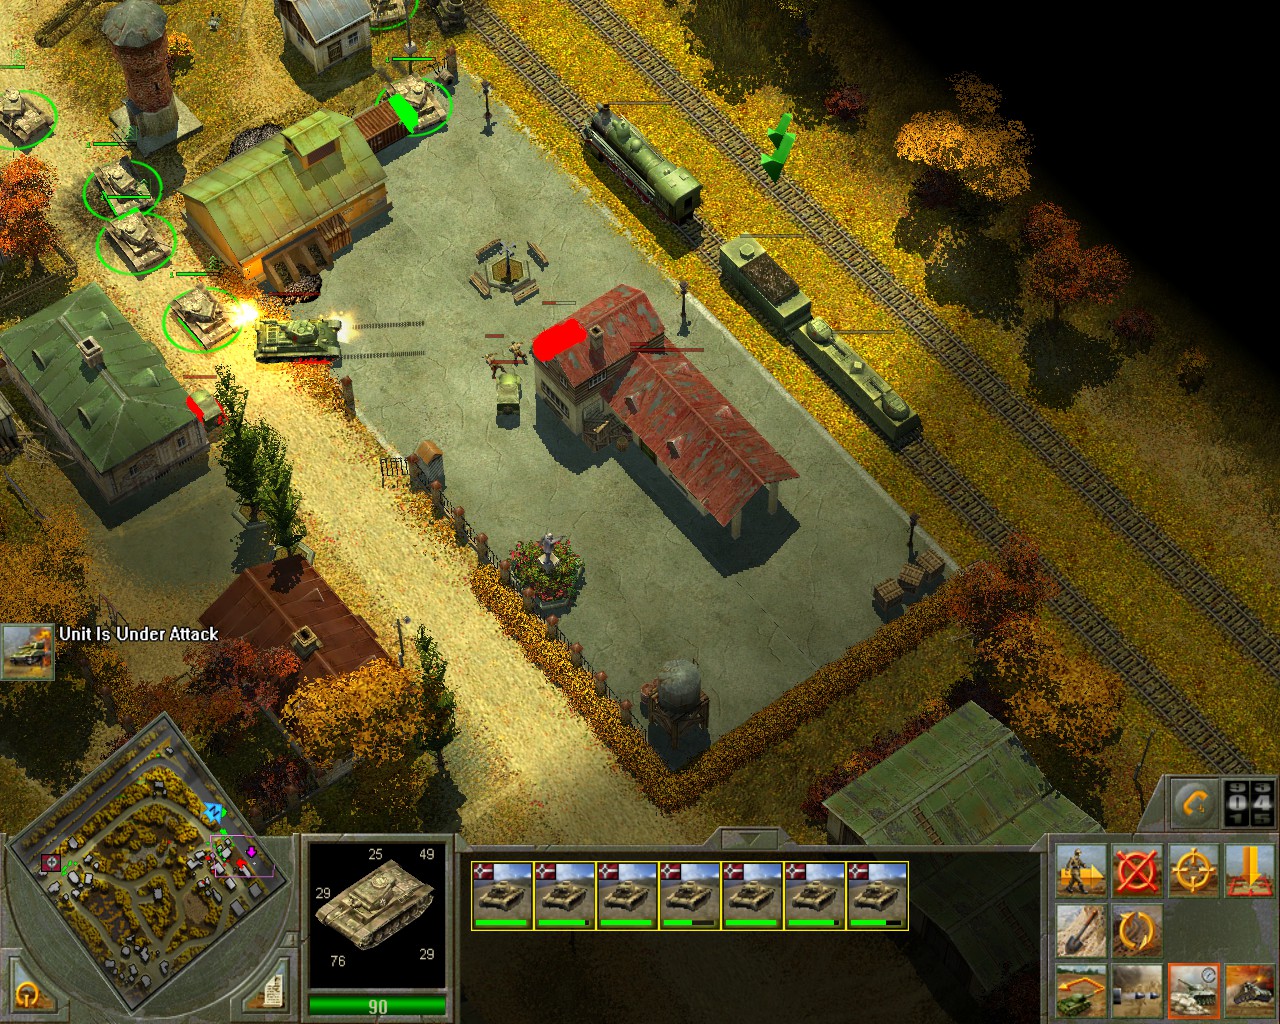
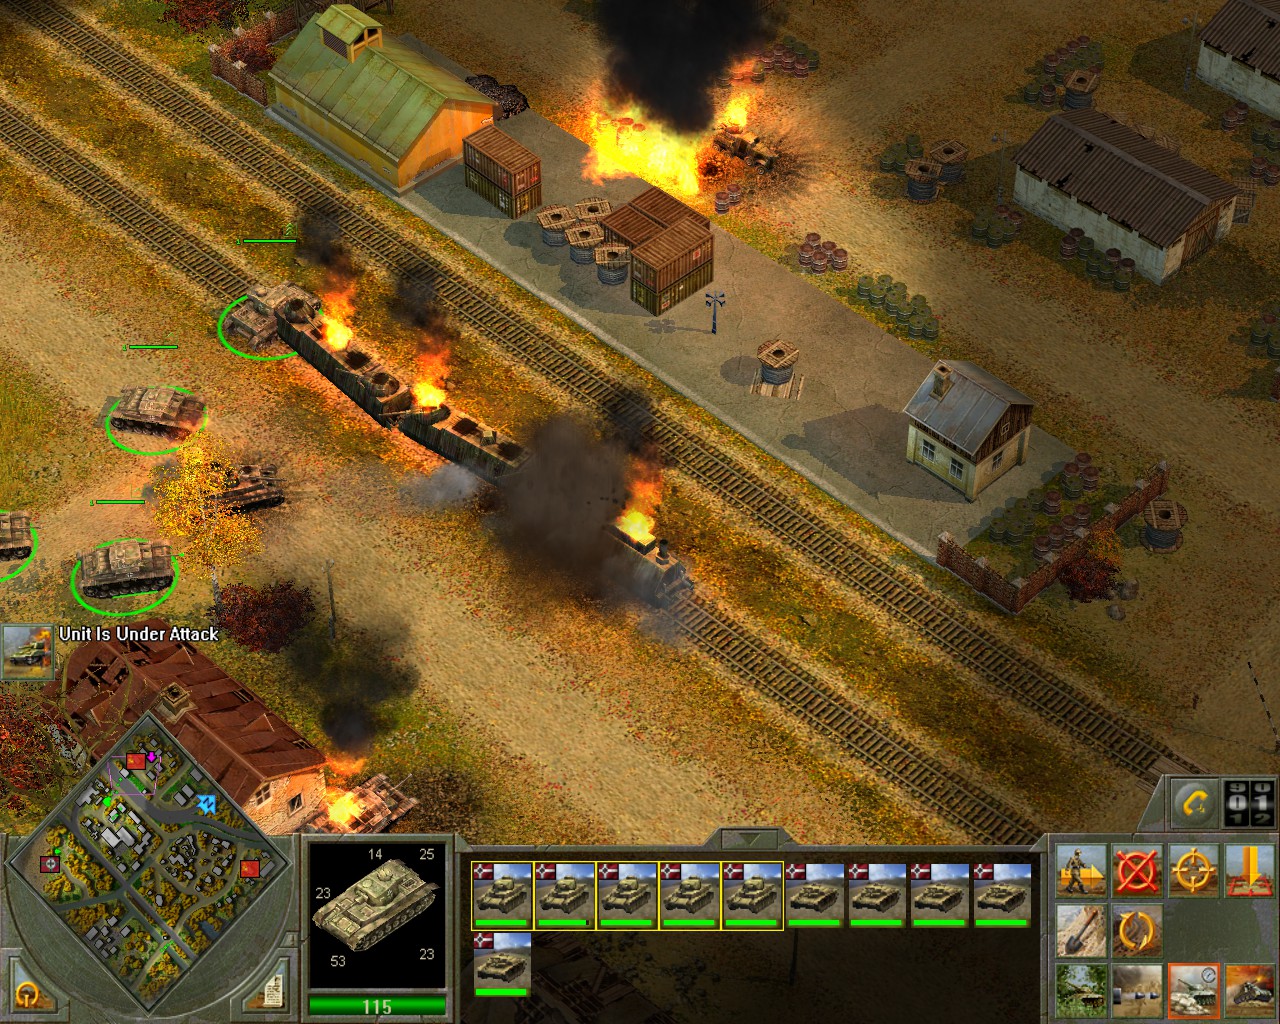
For Mission 11: Precious Cargo, the new soviet train's spawn point can be mined by engineers. I concentrated more mines further away from the edge of the map as I thought destroying the locomotive when the train just spawned would bug the mission / crash. But the train took damage as if it teleported there then got damaged by mines. So I'm not sure if there was a risk that the train could bug out due to possible no hitbox / collision when it spawns
~TAB~ NinjaWJ ★ Nov 16, 2021 @ 9:09pm 
Fall of the Recih guide now!