Blitzkrieg 2 Anthology

Blitzkrieg 2 Anthology

Not enough ratings
Soviet Campaign Walkthrough
By ★ Spaceflash ★
Hello everyone. As requested in my US guide, I am now covering the other campaigns as well. This guide is intended for new players that are struggling with the single player campaigns. Stuck on a main mission, just can´t beat that one optional mission or want to be the most efficient with your armies? Then this guide might help you. Keep in mind that I am playing this game on hard difficulty, so some of the enemies I mention might not spawn if you play on normal difficulty and events might trigger slightly different. The soviet campaign is known to be tough right from chapter one, which is a big difference compared to the laughable easy 1st US chapter. You will face some of the longest and toughest battles in this campaign, some of which contain dozens of ways to fail at them. With that said, enjoy the guide :)
   
Award
Favorite
Favorited
Unfavorite
The First Chapter: Defense of Moscow
Unlike the other two campaigns that start pretty easy, the soviet campaign throws you in the cold water, so-to-speak. While the main mission and the very first optional mission play on the offense, you will mainly have to play defensive missions in this chapter: That means they are pretty long (for 1st chapter missions), require you to position your troops correctly and might be a little bit boring to those of us that have a lot of experience in this game. Almost your whole strategy will revolve around the use of medium tanks and main infantry. Here is the map of the 1st soviet chapter:
1st Mission: Rescue Mission
Like all the campaigns, you should exit to chapter map first before you do anything. That allows you to assign a commander for your main infrantry - I wouldn´t bother assigning someone to light tanks, since you will hardly use them after unlocking your medium tanks.

Now restart the "rescue mission" - you can farm some experience for your main infantry
(if you are careful enough). You start the mission on the east side of the map, near a small shack. Shortly after the start of the mission some german motorcycles appear - the WORST fighting unit in the entire game. After taking care of these you should split up your armies in two groups: one that follows the intended path to the south, the other one moves to the north and flanks the village defenders from the back (call in at least one more tank group first). Move the south group into the village and take out the weak defenders inside.

After that´s been dealt with cross the bridge and take out any remaining infantry you come across. There is a small roadblock ahead, which shouldn´t give you too much trouble though. A nice strategy is to move in with your tanks first and let them get the attention of the enemy infantry. While they try to rush towards the tanks hold your ground or move them back a little and let your own infantry deal with them. Your own tanks should focus down the enemy Pz. II in the meantime - since it´s such a crappy tank you shouldn´t have any problems with that.

After defeating the remaining enemies in the south move into the friendly village and have one of your units go to the rocket artillery. As soon as it becomes active the enemy launches a massive attack in the south: You will now be demonstrated the devastating effectiveness of the soviet rocket launchers. The initial volley of rockets will tear apart most if not all the attackers, the rest can be handled by your ground toops. Meanwhile some german bombers spawn - don´t worry just yet, they just destroy the bridge you crossed on earlier. That means you have to fight your way through the enemy village to the north - very easy if you followed my advice at the start of the mission.

Move your main force to the north, out of the village. You will come across a group of tanks that need to be destroyed before the convoy can move up, which it does automatically once the way is cleared. Take out the tanks and move to the small crossroads ahead where you need to destroy a small squad of enemy soldiers - easy pickings. If you want some extra experience you can also attack the small enemy outpost at the bottom left of the map before moving to the north. Now it is time to swift your attention to the small group of units you left behind the back of the enemy.

You can do this at any point of the mission, but if you are new to the game I would wait until you finished clearing out the enemy on the left side of the river. Move the small task force out of the forest to the small field nearby: You will be able to ambush the small german group of infantry and one Pz. II without much issue. After that´s been dealt with move to the actual village and flank the enemy defenders in the back: There are a total of 3 Pz. II and a decent amount of enemy infantry - that´s why it is such a good idea to bring in some infantry of your own. After everything has been cleared the rocket launchers will drive to the end of the road and you won the mission.
2nd Mission: Factory Evacuation
The first of many defense missions you will play in the soviet campaign, although this one is one of the more enjoyable ones since it´s set during the night. Your objective is plain and simple: To protect the train that is getting loaded with important war assets from enemy attacks (located in the center of the map). You start off with a small garrison army with a couple tanks and a decent amount of infantry. I recommend pausing the game (spacebar) in order to have the luxury of time while deciding where to dig in your units.


The best place to dig in is actually the outer defence line currently being held by a couple of allied soldiers. Order your infantry squads to get into the unoccupied trenches and call in some more infantry as reinforcements - you´ll need them soon. Meanwhile you should position your tanks evenly at both defense lines and ward off the early german attacks of weak tanks and a bit of infantry. Make use of the binoculars of the infantry squads - they give you slightly more vision range and allow your units to open fire sooner. After a short fight you will notice how the allied soldiers panick and run out of the trenches into safety. Fortunatly, this allows your reinforcement soldiers (and squads you might have leftover from the start) to take position in the trenches previously occupied by your allies. I would spend my next two reinforcement points on calling in medium tanks who are kind of overpowered in these optional missions. Fortify both of your defense lines with them and ward off any remaining german attacks, who will become increasingly more powerful. After the train has been loaded to the brim with goods (the grey train cars will turn blue) the train will set off and you won the mission, as soon as it leaves the area.
3rd Mission: The Roads to Moscow
Another defense mission, this time during the day. Before starting this mission make sure to assign a commander to the "anti tank artillery", since they can earn some serious experience in this mission.

You start the mission on the right side of the map and are ordered to defend this position from an upcoming infantry attack. Call in some light tanks
(2 groups are optimal) as support and use the binoculars of the infantry squads to give you some more vision range. Use that heavy tank as an artillery unit and bombard the two large groups of german infantry that just got inside the vision range of your infantry. You might want to hotkey the heavy tank for easier and quicker access (for example
ctrl + 1). After two small waves of enemies you are ordered to support your comrades on the other side of the map.
Call in some anti tank guns as reinforcements and start building up another defense line on the left side of the map, in front of that of your allies. In the meantime you should take your tanks from the right side of the map and move them to the left side. Make sure to take out all the stray german tanks, that would otherwise wreak havoc on your units passing by. After these have been taken care off call in some infantry backup to fortify your new line of defense on the left side of the map. By now your main infantry should have leveled up at least once: make use of their new ability and dig some trenches in front of the anti tank cannons that you should have gotten into position by now. Place any surviving tanks in front of the trenches, so that incoming enemy infantry will try to destroy your tanks with grenades instead of shooting at your entrenched infantry. After your defense line is set up you just need to wait for several waves of enemies that suicide run into your blockade. What we see here are the germans trying to use their "Blitzkrieg" tactic on a well fortified position - not a very good idea. After all waves are destroyed you won the mission. Have your artillery fire onto the hill on the north side of the map at some point of the mission: Near the edge of the map hides a german officer whose death will furfill a secret mission objective.
4th Mission: Organized Defense
Yup - it´s yet another defense mission, this time it´s in a larger scale than the last two missions. Just like your commanding general told you, your troops are incredible disorganized and have set up position in front of the actual defense line.
Pause the game and move your infantry squads one-by-one into the trenches of the 2nd line of defense - don´t bother with the first line it´s almost impossible to hold with reasonable losses. Call in two groups of anti tank guns and distribute them evenly behind the trenches of the second defense line. Meanwhile you should move the tanks you received at the start of the mission to the left side of the map, onto the rails. Group them together and have them move down the rails until you come across several infantry squads and pioneers - take out the pioneers and you furfilled yet another secret mission objective.
At this point, the first wave of attackers should have appeared where your troops where standing idle just a minute ago. While the first line of defense buys you some time, you should finish positioning your infantry and cannons, move any surviving tanks from the left side to the 2nd line of defense and call in more medium tanks as reinforcements. Two groups usually do the trick, but feel free to call in a third if you are unsure. The enemy will mindlessly charge wave after wave of infantry and tanks who should get obliterated by your strong defense line. This time the germans will actually call in some GAPs (Ground Attack Planes) - fortunatly they are too weak to deal real damage to your medium tanks. Take a look at my defense line at the end of the mission if you don´t know how to position your units exactly:
Main Mission 1: The Klin Ledge
I REALLY don´t like this mission. While it thankfully ends the row of defense missions, you are left with almost NO strategical options and you have to brute-force your way through almost everything with your medium tanks.

You start the mission on the right edge of the map and are ordered to repell a strong enemy attack coming from the left. Right at the start of the mission I recommend that you call in some medium tanks as support - they might make it in time to do some difference (unlike heavy tanks). Shortly after the enemy commences his attack you will get massive allied support in form of rocket launchers, who will obliterate anything in front of the trenches - keep that in mind when calling in your medium tanks.


After the attack has been repelled allied bombers will launch and punch a hole into the enemy defense line further to the north. The german defense line consists of many anti-tank cannons and light bunkers, who both should take severe damage by the airstrike. Call in more medium tanks and overrun the enemy defense line at the bottom, then work your way up and destroy any remaining enemies there. After most enemies are eliminated the remaining german soldiers panick and retreat into the villages to the north and west.
Recommend to pursue the fleeing soldiers by splitting up your tank force into two groups, with one group securing the light defended bridge access on this side of the river, while the other group storms the village to the north and captures the reinforcement point there. While most german tanks don´t pose a threat to your medium tanks (like I said, they seem overpowered to me) the enemy does have a Pz. IV F2, which has a cannon strong enough to penetrate the armor of your tanks - focus it down first, its near the south entrance of the village. Call in more tanks as you see fit, you will need an overwhelming force to capture Klin. Some heavy tanks can´t hurt either for taking the 2nd bridge inside the actual town.

After that has been dealt with the worst part of the mission commences: The actual capture of the city of Klin. Due to the terrain you will have to funnel your tanks through two bridges inside the town - impossible to do without casulties. The first bridge to the south of the village you took is lightly defended with 2 anti-tank cannons which have to be focused down first. The entrenched infantry and scout tanks don´t pose a threat if you don´t bother using infantry. Make your way through the city where your tanks will obliterate anything the germans can throw at you - which isn´t much to be honest.

You should split up your tank army into three groups: Two smaller ones, of which one secures the south part of the city and the other one that captures both villages to the east of Klin. The third group should be a lot bigger and has the job of capturing the rest of Klin on the left side of the map. The germans make good strategic use of the bridge and have positioned tank hunters (hard difficulty) to the north and south of their side of the river. This is where I would use the heavy tanks, as they can survive more shots from the enemy tanks as your medium tanks open fire on any defender that comes into the line of sight of your advancing heavy tank.

After sustaining casulties you should be able to eventually overpower the germans who become very disorganized once you break through their defences. The stray german tanks and infantry groups will be easy pickings for your remaining tanks who can easily overrun the remaining two reinforcement points on that side of the river. Meanwhile your east group should have captured both villages without much issues, be aware that there is a anti-tank cannon inside the central village (if you capture the abandoned soviet long-range guns near the eastern village you fulfill a secret mission objective). Now you just need to call in more reinforcements, and split them up into two groups, who attack the factory from different directions. You should have no problems what-so-ever taking the factory if you didn´t have ridiculous high casulties while securing Klin (which can happen at that damm bridge, don´t feel bad about it). After destroying most defenders inside the factory you won the mission.
The Second Chapter: Defense of Sebastopol
The second chapter of the soviet campaign finally introduces missions that require much more tactical knowledge to be furfilled without many casulties. Each mission in this chapter is somewhat unique, which is a welcoming change from the rather boring first chapter of the soviet campaingn. You will unlock most of the army branches in this chapter as well, which requires you to carefully choose which branch you want to give a commander. Your main infantry, heavy tanks, fighter planes and rocket launchers will play an important role in most missions. The chapter map:
Mission 5: Cover of Darkness (Priotizized)
If you read my US-campaign guide you will know that I sometimes ignore the intended order of missions and priotizize some missions for their great rewards. Like in this case where your bulky medium tanks from the first chapter get replaced by the legendary T34, which is superior to almost any german tank in this chapter. Your fighter planes also get an important upgrade.

Objective for this mission is to ambush an enemy convoi of artillery transports and to take out an already deployed artillery battery further down the road, near the coast. You start the mission on the far north-east of the map. You got no time to waste: As soon as your assault infantry leaves the boat you have to select them, change their fighting stance to charge and move them to the road quickly. Reason being is that the convoi (don´t know if this is a bug) immeadiatly departures as soon as your troops land and don´t give you any time to set up a proper ambush like the mission briefing suggests. As soon as the two enemy transports come into sight order your men to open fire before they have a chance to get away. As soon as they are dealt with take out the german motorcycles and wait until the german scout tanks retreat (they do NOT trigger an alarm once reaching the enemy base, which seems like yet another bug). Take out the german machinegun and capture the reinforcement point.

The rest of the mission is thankfully less bugged and requires the use of stealth. That´s what you got the elite infantry and sniper for, who landed in the other boat. Important: Do NOT use these special forces to take out the convoi - you´ll need them alive for later! Anyways, order your men to use stealth (make sure the icon has a yellow box around it) and move one squad of elite infantry and your sniper to the west, out of the small forest. Use the superior sight radius and range of the sniper to take out the enemy soldiers near the beach and some more german motorcycles on the road.

Cloak your sniper again and move along the edge of the cliff to your left. Along the way you will come across two lone snipers which are easy pickings for your own sniper, who can snipe them before the germans can react. After both snipers have been taken care off it´s time for the elite infantry to show their worth. Make sure they are cloaked and move the squad of soldiers to the forest on the far west side of the map and hug the edge of the map towards the coast. Then make your way down the coastline until you reach the lighthouse. Just in front if it you will find the completly unguarded artillery battery along with two german transport vehicles. Take all of them out and you won the mission.
Mission 6: Battery Defense
Don´t let the name spook you - it´s not another dumb defense mission like in the first chapter. Your objective is to hold an important coastal artillery battery to the south, but that quickly changes into destroying the enemy field HQ in the small village to the north-east. First you should call in fighter planes to take out bombers that spawn pretty soon, then two groups of medium tanks (shiny new T34s) to reinforce the allied defences. Split them up evenly and dig them in infront of the trenches, to get the attention of german infantry. Your defences should look something like this:

Meanwhile you should move your whole starting force (including the 4 tanks) to the far north-west corner of the map, near a group of buildings. Not only does this complete a secret mission objective (and grant you access to some trucks) but it also offers a perfect spot to position your rocket artillery in. Move your army into the forest and order the rocket launchers to shoot several barrages into the enemy base. After weakening or destroying the enemy defenses move in with your tanks and infantry to mop up any survivors and capture the reinforcement building. Since the germans will launch more planes after their first attack fails you should call in one or two more squadrons of fighter planes. If you time it unlucky, the enemy might get reinforcements JUST when you attack the base with your ground forces. In that case retreat to a safe distance and barrage them with your rocket artillery.
Mission 7: Chaperone
Urgh this mission is just a huge mess. Don´t get me wrong - I love unique missions that play a lot different than most other operations. This time, however, the mission design is so weird and bad executed that I honestly don´t get fancy with strategies.

The mission starts on the left side of the sea, where you have a small base and several coastal artillery units. These will be cruicial for the successful completion of the mission, which is why you have to protect them against a significant german air assault. Your main line of defense should be your fighter planes, which you should call in immeadiatly after the first wave of enemy GAPs spawn on the right side of the map. Take note of the light AA guns and light tanks that are positioned further south on your island.


The AA cannons are honestly almost worthless but the tanks will get important really soon. Reason being that the germans use paratroopers to take care of your artillery. That´s why the mission design is so freaking horrible: the AI of both the AA guns AND the soviet fighter planes is SO bad, that they cannot even shoot down some german transport planes - trust me, I tried it on hard and these damm planes just wouldn´t go down in time, even with 4 fighters focusing on one. At least the enemy GAPs get shot down rather quickly. Be aware that you will come under fire of the german fleet, who is blockading the passage to the harbor.
Once you survived the intial attack on your artillery you are ordered to protect the incoming transports from enemy ships and GAPs. Launch more fighters to take care of these german planes, while your artillery takes care of the enemy boats (use your scout planes or your GAPs to locate them). Aaaannnnndddd thats it... no fancy use of allied boats or another enemy assault - after 3 boats make it to the harbor you won the mission. At least the reward is decent enough to make it worth playing this mission, especially for the GAPs.
Mission 8: Sapun Mountain
Unfortunatly yet another defense mission - at least it is an easy one. You are tasked with the defense of the mountain of Sapun, which is of great strategic value for the soviet defense force holding Sebastopol. The germans send in several hordes of scout tanks and light tank hunters which get supported by two artillery batteries nearby. Once the mission starts that will be our first target: Call in some GAPs and deal with the artillery. GAPs tend to get bugged and start to ignore enemies after a little while. To prevent this you just need rapidly spam mouse2 on the enemy unit you want to be targeted by the GAP - eventually you will hear the sound of the plane commencing an attack. The locations of the german artillery, who isn´t even protected by AA guns:

After you dealt with the artillery you should tend to your actual defense lines. I strongly recommend to call in more heavy tanks as reinforcements and have them take position infront of the trenches - do the same with the heavy tanks you already got when the mission started. One thing you might want to (but don´t have to) do before sending in the GAPs is to retreat the first line of defense - these poor soldiers would just get slaugthered and can help reinforcing the 2nd defense line instead. Especially the anti-tank cannons come in very handy if you can retreat at least some of them behind your 2nd line of defense. Continue to reinforce your defenses by calling in 1 or 2 more group(s) of heavy tanks and build up defenses that will hold off the enemy waves of weak tanks - without artillery support they don´t have much of a chance to drive you out of your entrenched positions. If you want some artillery of your own you can find two abandoned cannons near the reinforcement point, to the right of it. That´s how my defenses looked like plus the location of the mentioned artillery:
Main Mission 2: Sebastopol Defense
This mission ... THIS mission is why I don´t like the soviet campaign that much. You liked all these lovely and creative defense missions? Well congratulations! Now you can have fun defending three defense lines at the same time, that for almost half an hour. Adding to that the germans have learned from their grave mistake in the battle of Sapun mountain and have secured their numerous heavy artillery cannons with many heavy AA guns - at least on hard they shred anything you send there, except fighters who can dodge the projectiles for a little while.

You start the mission with the order to secure the right flank of your allies and to protect the coastal artillery (which unfortunatly can´t target anything behind them). You have almost nothing of a starting force and have to start building up a defense line from scratch. I would start calling in some rocket artillery, then medium/heavy tanks, anti-tank cannons and finally some infantry. The first enemy attack is commencing almost right after the mission starts so be quick about calling in these reinforcements. You should prepare for some heavy bombardement from the enemy artillery - thats why it´s best to call in the infantry and anti-tank cannons last. Use the breaks the enemy artillery takes and position cannons, rocket artillery and infantry in strategic important locations. Just don´t be suprised if you loose an entire reinforcement group to a well placed shot of the enemy artillery - it´s kind of luck based. Make use of the rocket artillery you called in and bombard groups of enemy tanks and enemy infantry as soon as they come into sight. I can recommend using the binoculars of the infantry and to hotkey the rocket launchers for quick access. To make things easier on you feel free to pause the game every now and then. That´s my right flank after a couple waves of enemies:

Sh** is about to get real once you get the order to defend the left flank as well, as you have virtually no preparation time at ALL if you play this blind. If you can spare ANY reinforcements from your right flank I would prepare the left flank with anti-tank guns and rocket artillery, so you can react to the enemy much quicker than you´d otherwise could. Either way you must act quickly as soon as the order to hold the left flank comes. Fortify your positions with rocket launchers, anti-tank guns, infantry and heavy tanks. If you can feel free to fire a volley of rockets onto a nearby anti-tank gun near the road (just outside your vision range). Another volley of rockets should go to the small field to the left of the enemy reinforcement building. The germans have deployed a super heavy mortar there which destruction will furfill a secret mission objective. This is by far the most difficult defense line to hold, as the enemy tries to overrun you with several waves of tank hunters and uses his artillery to soften up your defenses (gotta hand it to the AI, it´s doing a pretty good job with their artillery in this mission). Here is a pic of the northern defense line near the end of the mission:

Finally, you even have to protect the central defense line, although that will be a pretty easy task thanks to the numerous allies that are in that area. I recommend to build up a small defense line behind the 1st line of defense of the allies, shown on the picture below. If the allied rocket artillery is still intact you should send in some supply trucks into that direction to keep it stocked with ammo (like with your own rocket launchers, use the trucks you receive for calling in anti-tank guns). Be aware that the germans might send in some parachuters behind your lines to take out the allied artillery battery - station some light tanks or infantry there to prevent that. After a small eternity the last group of allied soldiers boards the transport ship and once it leaves the area the martyrdom is finally over. The central defense line:
The Third Chapter: Operation Uranium
The soviet campaign is finally getting a lot better with this chapter, that allows you to make strategic use of your different army branches. There is a healthy mix of attack and defense missions and even the covert ops mission is pretty decent. Difficulty-wise you have yet another up from the last chapter, but that can be negleted with the right strategy and the use of your rocket launchers. Without doubt, your most important units will be your heavy tanks and rocket artillery - you will need them in almost all the optional missions and in the main mission. As always, the chapter map:
Mission 9: Bottle Stopper (Priotizized)
You should do this mission before the rest for the cruicial upgrade of your heavy tanks, as they will be your most important frontline fighting unit in the entire chapter. This mission should be a breeze if you know how to properly use anti-tank guns, infantry and to a lesser extend fighter planes. Your objective is to support your allies on both side of the river, neither side is allowed to fall. First call in one group of anti-tank guns and main infantry for each side and have them dig in at strategic important locations. Between calling in these ground reinforcements you should call in fighter planes to shoot down the german scout plane along with the GAPs. That´s cruicial to deny the enemy artillery a line of sight on your defenses (for some reason the AI is too stupid in this mission to blind-fire on your positions). The left defense line about halfway through the mission, make sure to use your trucks to supply the allied rocket launcher:
Once you are done with the left side (which I would reinforce first) turn your attention to the right side and organize your defenses here. Important advice for both sides: Do NOT move your units anywhere near the 1st line of defense - it gets obliterated by german rocket launchers (again, the germans are being stupid and don´t move the rocket artillery forward). You also shouldn´t use tank hunters if you don´t absolutly have to - on the defence, they are inferior to anti-tank guns. use your last reinforcement point to call in more fighters instead to take off the heat from the GAPs, at least for a while. After the enemy throws several suicide waves onto your defenses they give up and you won. Make sure to recapture your cannons if the gunners die and use the binoculars to get more vision range. The right side near the end of the mission:
Mission 10: Steel Avalanche
This mission is virtually impossible to furfill without high losses if you don´t know how to make use of rocket launchers. Doing this mission in the right order and taking one objective at a time is very important as well. I would ALWAYS start by rushing your northern group towards their village objective and dig them in asap - the enemy will arrive just a few seconds after you do. Make sure to get your rocket launchers into position and fire one barrage into the attacking german tank group. After calling in a group of heavy tanks as reinforcements I would dig in the point and fire a couple of rocket barrages into the central town (use the sight line your allies give you to pinpoit enemy locations). After a while you will get the order to assist your allies in taking the central city, which will be incredible easy if you did a good job with your rocket launchers.
Now that both objectives in the north have been completed its time to swift you attention to the south. Up until this point I would recommend to completly ignore this side of the map, since the intel is wrong and the germans actually already dug in the city with anti-tank cannons and a horde of medium tanks. Before attacking the actual city I can recommend to secure the bridge first, to allow reinforcements from the other side of the river to assist you (you have to repair both bridges with pioneer trucks, which will also grant you an armored train). After taking control of the bridges you should start shooting at least half a dozen barrages of rockets into the enemy village, targeting several areas and destroying some of the buildings to give you better sightlines. Once you feel confident enough launch a massive tank attack and use your rocket launchers to destroy groups of entrenched german tanks that survived the initial attack. Just make sure to keep your tanks in a tight group and away from your own artillery strikes. Capture the reinforcement point and you won the mission.
Mission 11: Covert Mission
This mission is a lot easier than it first seems, if you aren´t a total screw-up with elite infantry (no offense, they suck). It´s not cruicial to finish this mission, but the access to assault guns and upgrade for medium tanks may come in handy in the main mission of the chapter. Start the mission by cloaking your elite infantry and move them to the west (be sure that the icon has a yellow box around it). Carefully position your soldiers close to the road and ambush the enemy patrol along with a squad of soldiers defending an officer. If you screwed up and let enemies escape the garrison in the nearby village is alerted to your presence.

Regardless of that happening or not you need to cloak your soldiers asap and move them to the north,away from the road. If you are quick enough you can actually avoid the enemy soldiers that rush to the now allied german officer, if you alerted them to your presence. The enemy general will be in the top right house of the village - order a elite squad to open fire on the house, killing the general inside. Cloak your units and move them to a barn in the north: You will see some soviet elite soldiers that are about to get executed. Intervene! Rush in and kill the german soldiers and save the lost squad of allied soldiers.

Move one of your own squads near them to free them and include them into your strike team. I recommend to move away from the barn before you attract the attention of a nearby anti-tank gun and the entire garrison inside the village. Sneak past the enemy village and kill a squad of enemy soldiers patrolling in the area (this may not occur). Make sure your soldiers are cloaked and move near a small german camp behind the town: Kill all soldiers there and make sure no one can get away to warn the village garrision. And now... move a squad near the german Elefant tank - you get control of it!!!
Yep, thats right - no sneaking up on the enemy base, you can just use the tank to drive there and shoot the place up. Make sure not to alert the enemy too soon and try to avoid accidently running over german infantry. Once you are at the depot, you should open fire on the light AA gun, which should start a chain reaction (else shoot other things in the base and wait for the chain reaction).


Mission 12: Romanian Push
This is propably the hardest mission in this chapter, including the main mission. You can do a LOT wrong in this mission due to the lack of air support, the numerous enemy defenses and a strong german artillery battery. On the other hand, you can save a lot of reinforcement points if you do this mission right just like with the "steel avalanche" mission. It´s actually done in a similar manner - bombarding the enemy with rocket launchers (and assault guns in this case). Right at the start of the mission you should move all your assault guns to the left side of the map (left picture) and start bombarding the german artillery battery (right picture) - once its destroyed you will get a notification, since it´s an actual mission objective.

After that has been done the next important part of your plan begins - the assault on the enemy defense line. I strongly recommend attacking the left side, since it gives you access to the two enemy reinforcement points. First you should form a small defense-line with your tanks, since the germans like to suicide run a couple Pz. IVs into your position every now and then. Get your rocket launchers and ammo trucks into position and start to bombard the enemy defense line, similar to the southern village in the "steel avalanche" mission. After bombing the crap out of the enemy charge in with both your tanks and the infantry at the same time (if necessary you should wait for your infantry to catch up). The infantry makes short work of the entrenched german infantry, especially the enemy AT soldiers can be a huge pain if you attack just with your tanks. After breaching the enemy defenses be ready for a german counter attack in form of two Tiger tanks, which is best countered with your artillery or assault infantry (which has very powerful hand grenades). Now assault the two reinforcement points of the enemy while avoiding the enemy HQ and right defense line. The former artillery battery is heavily defended, which is why you might want to use assault guns or rocket launchers first.


Now it´s time to attack the enemy HQ on the right hill. Just like with the main defense line you want to soften up the HQs defenses with rocket launchers and assault guns. After that´s done charge in with your remaining tanks (call in more if you lost most of them) and any infantry leftovers. After capping the HQ you won the mission.
Main Mission 3: War in the Steppes
This has got to be the most easy soviet main mission there is, reason being the ridiculous amount of reinforcements you can call in if you didn´t screw up in the optional missions. Only the start of the mission can be a bit hairy as you need to cap a reinforcement point with only a few tanks at your disposal. First thing you should do with your tanks is hug the right cliff side right at the starting location, as the germans try to sneak some anti-tank guns in your flank. Take them out and charge into the enemy village. Take out the german anti-tank guns that aren´t in position yet first and mop up any remaining resistance, including an already deployed AT-gun at the north side of the village. Build up a defense line (like in the picture) and call in tank reinforcements (a group of assault guns can´t hurt either). You won´t be needing any infantry reinforcements for your tank group, as the germans make use of tanks and artillery most of the time. Anyways, overrun the village to your west and capture the reinforcement point.

Now it´s time to take the small city to your north. Call in some GAPs and take out crucial targets in the village like the heavy german AA and anti tank guns. If you are good with multitasking order your assault guns to target entrenched tanks and buildings with german infantry inside in the meantime. Charge in with your tanks and take out any remaining enemies. Before proceeding to the east you should call in more GAPs and take out several points of interest on the map: AA guns and german artillery (bottom left picture and next to the bridge on the far right of the map), who would cause severe casulties otherwise. As soon as the GAPs and assault guns take out the most dangerous enemies charge in with your tanks and take out any survivors. Once you arrive at the german AA battery (bottom right picture) you should pause and call in more tanks as you should make a defensive hold at the bridge crossing the river (the german will occaisionally attack with Pz. IVs).

Now comes the final part of the mission: Taking out the east village and the city in the center of the map. Just like before, call in GAPs to take out valuable enemy units and to give a line-of-sight for your assault guns. Then charge in with your tanks. Beware of a hidden Tiger tank at a barn to the south, just infront of the actual village. Once you captured the village call in tank reinforcements as needed, then proceed with several GAP strikes against the enemy city. Target heavy AA guns first, then AT-guns and tanks that are not entrenched. Use your assault guns against entrenched tanks and against infantry in strong buildings. You might want to call in bomber strikes as well, if you want to take out a heavy bunker or a big group of enemies at once. Before crossing the bridge I recommend taking out the defenders with GAPs and artillery - then you should cross the bridge and charge the enemy city. If you haven´t already, you should definitly take out the nearby german artillery battery, which is just next to the river to the west. After capping the german reinforcement point in the center of the map you won the mission.
Final chapter: Battle for Berlin
There it is: The final chapter of the soviet campaign. After beating the previous chapters full of though missions you can guess that the germans won´t make this one easy on you. You will face the most elite german tanks and that in almost all the missions in this chapter. By far the most important army branch are the medium tanks, as the T34-85 is a powerhouse in the late years of the war and you even get 5 of them for one reinforcement point. The final version of the soviet GAP is almost as great as the US Thunderbolt and is unlocked in the most easy mission of the chapter. Heavy tanks and rocket launchers will be of importance too, just to a lesser degree. Meanwhile your infantry will loose dramatically in importance, as this chapter is all about the right use of tanks, artillery and GAPs. Chapter map, as usual:
Mission 13: Pigeon Shot (Priotizized)
Let me just get it out of the way now: There is literally no reason NOT to play this mission first in the chapter. The light tank upgrade you get during this chapter actually makes this army branch worse and doing this mission early grants you a crucial upgrade for your heavy tanks and GAPs. Objective for this whole mission is to destroy several waves of german troops that flee the frontline in panic. They are disorganized, have few tanks and no functioning artillery except for some heavy AA guns that are scattered around the map - easy prey for your field artillery. Only two of them are really dangerous: One inside the southern town and one between the northern and southern road. You might want to take out the one near the church to the north as well, if you build your defense line further down the road.

I would start the mission by calling in some light tanks and use both them and the main infantry near the starting point to block the southern road inside or to the right of the small town. That way you guarantee that no enemies can slip by and get away from your artillery. Your second reinforcement point should go into rocket launchers, after that call in light tanks as you see fit. I tend to only use the rocket launchers if there either is a proper german tank or a ton of enemy infantry approaching. After two waves have been dealt with the germans change their evacuation route to the north - make sure to move at least your tanks up there in time to occupy the retreating forces, so remaining infantry and rocket launchers can reposition themselves. Two more waves of germans have to be stopped to complete the mission which shouldn´t give you any trouble if you make good use of your artillery. Calling in more than two groups of light tanks can be considered a waste of reinforcement points, since you might need them in the main mission of this chapter. The southern (left picture) and northern (right picture) defense line.
Mission 14: The strongest Link (Priotizized)
Although a though mission I can´t stress the importance of completing this mission enough. Reason being that it is this mission´s reward that upgrades the old T34 into the T34-85 - an upgrade you just have to get if you want to complete the rest of the campaign with reasonable losses. Getting off to a good start is crucial in this mission as it makes the difference between crushing defeat and glorious victory. First and foremost call in rocket launchers and move two of them to the southern defense line hold by your allies (left picture) - if it falls you lost the mission! Drive one of them to the left of the 1st defence line and barrage the area infront of the farm with the walls - that´s where the german rocket launchers hide (right picture).
Meanwhile you should position your starting forces, dig them in and repell an enemy tank assault - thanks to your heavy AT-guns that shouldn´t be too hard. Use the remaining rocket launcher on the right side to bombard the enemy trenches, who are just infront of the small forest and the small village. While moving in with your tanks and infantry (at the same time, that´s very important!) you should use the ammo truck to resupply your rocket launcher as you will need it again soon. Defeat a german counter attack coming from the road to the north in form of heavy tanks, which you should meet with your tank hunters and your own heavy tanks. After dealing with that move up your rocket launcher and barrage the area just outside of the forest, leading to the enemy HQ. Move in with your remaining forces (call in tank backup if needed) and overwhelm the two Tiger II tanks the germans have dug in. Use rocket artillery or the soviet super weapon (a heavy train artillery behind your lines shoots several super heavy rounds onto the target location) if you feel unsure about engaging a Tiger II in a straight-up fight. After capturing the reinforcement point you won the mission, if your defences hold out in the meantime (that´s what the second rocket launcher is for, use it to help out your allies).
Mission 15: Factory Rescue
Definitly the hardest mission in this chapter, maybe even the entire game. Reason being is that the germans have a significant presence in this sector with a lot of artillery and heavy AA, that you don´t have access to air support (which is kinda stupid from the soviet command) and that the factory, your main defense objective, is likely to fall if you waste too much time. In order to successfully complete this mission you have to be both quick and efficient with your tanks and assault guns - much easier said than done.

Start the mission by calling in some medium tanks, after that a strike on top of the heavy bunker (guarding the bridge) from your super weapon. Quickly move in with your tanks and defeat any resistance you meet near the actual bridge. Keep in mind that the germans have a light presence on your side of the river as well. Use the first two or three tanks that cross the bridge and rush them to the south - near the crossroad you will find an enemy rocket launcher that will cause havoc if it isn´t taken care off soon. After taking care of the rocket launcher and capturing the reinforcement point to the north you should turn your attention to the allied factory, ignoring the enemy HQ for the meantime. Rush to their help, defeat any leftover attackers and make your way south towards the control point.
Since the depot is heavily guarded by an Elefant tank hunter and several heavy AA guns I recommend calling in another strike from your super weapon. Aim it just a little bit infront of the actual depot, near the road. With a bit of luck (or lack of bad luck, I guess) you destroy all the heavy german defenders and can use your tanks and some leftover infantry from the factory to clear out remaining enemies. Just make sure not to leave the factory completly unguarded, as the germans can still send in troops from their HQ. To finish this mission make your way to mentioned HQ, just make sure to call in another strike from the train artillery (covering both the heavy bunker and some heavy AA behind it) and more ground troops, if needed. Try to deny the enemy any sightline on your units, as he would use his artillery to inflict severe damage to your units. Afterwards send in your tanks and remaining infantry to clear out remaining german soldiers. Capture the church and you won the mission, if the factory hasn´t been captured in the meantime. I advice you NOT to attack the german artillery battery at any point in the game, since it´s defended very good and consumes some of your valuable time (time is the most crucial part in the mission).
Mission 16: Spring Cleaning
This mission is pretty relaxing compared to the mess the last mission was. The soviet high command finally realized their past mistake and now grants you air support. Call in some GAPs right at the start of the mission and take care of the enemy assault guns stationed on the small hill between your two northern control points. Start targeting other valuable targets like german AA cannons, AT-guns and tanks. Once you cleared the northern enemy bastion of most or all cannnons send in your ground troops and take over the control point. Make sure to attack with infantry and tanks at the same time, as your footsoldiers need to take care of the enemy AT soldiers.

Dig in your units in the north and turn your attention to the south. Call in another group of GAPs and deal with the heavy defenders on the left side. Then it´s just a matter of attacking the enemy trenches with tanks and infantry at the same time. Since they are of great importance in this mission, you might even want to call in more infantry for your southern group. After that has been dealt with use the remaining fuel of your GAPs to take care of the heavy defenders on the right side as well, else call in another wing. Use your super weapon to destroy the heavy bunker facing the west and overrun the enemy position with tanks and infantry (infantry and tanks at the same time, it´s VERY important to avoid heavy lossees on either army branch). You shouldn´t have any trouble dealing with the remaining enemies, just make sure to call in some tanks if you lost too many during your attack on the western village.
Mission 17: Dodgeball
Time to take care of the final crappy mission in the soviet campaign - which has quite a few of them. This mission has got even me mad a couple times, since you don´t have air support AGAIN. To be fair, the allies are sending in bombers as air support - but as you cannot fully control the timing of their bombing runs you risk loosing your troops to friendly fire. Start the mission by calling in assault guns and move your entire army (except 2-3 tanks to defend your reinforcement point) on the road leading to the town in the west. Consider calling in more tanks before lanching your attack - just make sure that the allies finished their bombardment. Use the assault guns to take care of enemy rocket launchers at the west exit of the town. Move in with your army and seize control of the town. Make sure to move your infantry and some tanks to the small camp on the hill nearby - taking out the germans reveals that they used captured US officers to call in bombers on your troops.
Now comes the trickiest and most annoying part of the mission: Capturing the train depot along with the city to the north. Map knowledge is key for this part - if you know where the enemy core units are you can bombard them with your assault guns. Use your artillery to weaken the enemy defense line and rush towards the train depot with your tanks, ignoring some stray german soldiers along the way. Be aware that the allied bombardment may fail and leave the enemy rocket launchers near the town hall operational. If that´s the case (like in my playthrough) use the fresh arrived rocket launcher near the train depot to fire a barrage infront of the town hall (else use assault guns).
Call in reinforcements as you see fit and take care of remaining enemies inside the city - don´t move your troops too far to the south, as the remaining defense line might open fire on your units. Move your surviving troops into a forest infront of the field the german defenses are in. Wait for the allies to finish their bombing runs on the city and use the sightline the bombers give you to direct your assault guns (important targets are a rocket launcher, heavy german AA, tanks and buildings with AT infantry inside). Eliminate remaining german resistance inside the town and capture the reinforcement building.
Final Mission: The Berlin Prize
We are finally here: The final mission of the soviet campaign. It has been a long jorney from the boring first chapter of this campaign and now it is our turn to attack the germans at their very own captial: Berlin. Just like in real history this mission will pose a huge challenge to unexperienced players - on the other hand, those that know the map and know how to use their GAPs right this mission is the easiest final mission in the entire game. And that´s exactly what we are going to do first: Calling in at least half a dozen groups of GAPs to cleanse the map of enemy heavy AA and artillery of any kind. Below you find a collection of all serious german artillery batteries, the first rocket launcher shown on the first left picture should be taken care of right at the start of the mission, as it is in range of your starting position (it´s in the smoke cloud).
Thats a lot to do with GAPs at the start of the mission, but it pays off a LOT the more your ground troops advance, as your casualties will be significant lower if the artillery has been taken care off. During this entire mission I used my ground units more as secondary units which I send in to mop up remaining enemies and did almost all the work with my GAPs - trust me they are SO GOOD if you know how to use them (remember, spam Mouse2 on the enemy you want them to target).
Now, regarding ground combat, your best bet is to collect your army and have them stick to the north of Berlin. Like already mentioned I kept calling in GAPs and used them to take down german AT-guns and heavy AA guns that can threaten my tanks. Move them along the northern part of the map until you stumble across the HQ that is marked on your map. If your GAPs did their work right the place should be just waiting to get overrun by your medium tanks, which should be the only armored unit you should be using in this mission (the T34-85 is incredible versatile and can crack most german tanks, use GAPs for the heaviest tanks the enemy has on the map).
After dealing with the enemy HQ you are tasked to cross the river on one of the three remaining bridges in the area. I strongly recommend to take the southern bridge, as it is the closest to a reinforcement point and offers a great way to attack the defenders of the Reichstag in the back. Make sure to deal with the defenders on both sides of the river with GAPs - especially that Elefant tank hunter will cause havoc if you don´t destroy it with your airforce. After crossing the river you (like I hinted) have to capture the german Reichstag building, which is extremly well defended - at least if you didn´t weaken it with your GAPs already like I did. There, in fact, wasn´t a whole lot my tanks and assault infantry had left to do apart from mopping up some leftover Pz. IVs and infantry that my GAPs and my bomber attack (on the Tiger II) left.
After securing the Reichstag you should leave behind a significant ground force there to defend it against counter attacks and call in more medium tanks for a ground assault on the last german stronghold in the area. Like always, start the attack with a GAP attack that deals with the biggest threats (heavy tank hunters, AT-guns and heavy AA) and send in your "mop-up crew" to finish what your airforce started. Finally, after capturing the reinforcement point you won the mission - with that you completed the campaign of the soviet union, congratulations!
Some of my statistics
Similar to my US-guide, I present you the most important statistics of my soviet career in Blitzkrieg 2. Don´t feel too bad if you are far worse in the score, I am a pretty experienced player ;). Here you go:

My army rank: General Armii (highest rank possible)
Total army kills: 7292 kills
Total army losses: 1205 casualties
Favorite Army Branches: GAPs, medium tanks, heavy tanks, rocket launchers, assault guns

Hope the guide helped you with the more difficult missions in the soviet campaign and offered you insight into some more advanced strategies in the game. Make sure to check out my other guides if you got trouble with the other campaigns as well.
Have a nice day!
35 Comments
~TAB~ NinjaWJ ★ Mar 26, 2020 @ 8:13am 
Thanks this is awesome. Game is fun but can be difficult without cheats :)
★ Spaceflash ★  [author] Jun 21, 2019 @ 1:17am 
Regarding your 2nd comment,you gotta see what kind of unit branches you got available in a mission. Artillery is often limited to chapter missions, while you have frequent air support at least in the US and soviet campaign. If you are effective enough with them, you can take out enough entrenched troops with them, making it worth their reinforcement point. In the campaigns, I really only use artillery if the enemy position is just WAY too strong for GAPs to do any real damage, which is pretty rare tbh. Finally again about this rocket vs bomb discussion: a straight rocket into an artillery battery is a certain death for the crew, usually also for the gun itself. Rockets are also more effective against tanks. Bombs have a tad bit larger blast radius, but if you go the full mile with bombs anyway, you might be better off just calling in a wing of bombers.
★ Spaceflash ★  [author] Jun 21, 2019 @ 1:17am 
Totally agree on that the AI of GAPs is godawful, this doesnt change the fact though that (rocket) GAPs get incredible amazing if you micro them. Its still micro and tactics, micro since you have to basically hold their hands the whole time and tactics since GAPs are incredible hard to shoot down without a massive AA position or fighter planes (at least in BK2). This saves your ground forces some incredible losses, like in the final mission of the US campaign - I once easily finished that one with more than 20 reinforcement points left.
Lord Commander Militant Jun 21, 2019 @ 12:46am 
As a further opinion, because GAPs aren't good in the macro sense, being terribly resource-inefficient, you should only call them to strike things that need to be struck fast, usually artillery units [either because of the CB risk or because they move]. Static units, like entrenched tanks and guns that have no blind-fire capability [AT guns, AA guns], are generally best left to artillery, since there's no time pressure to kill them.

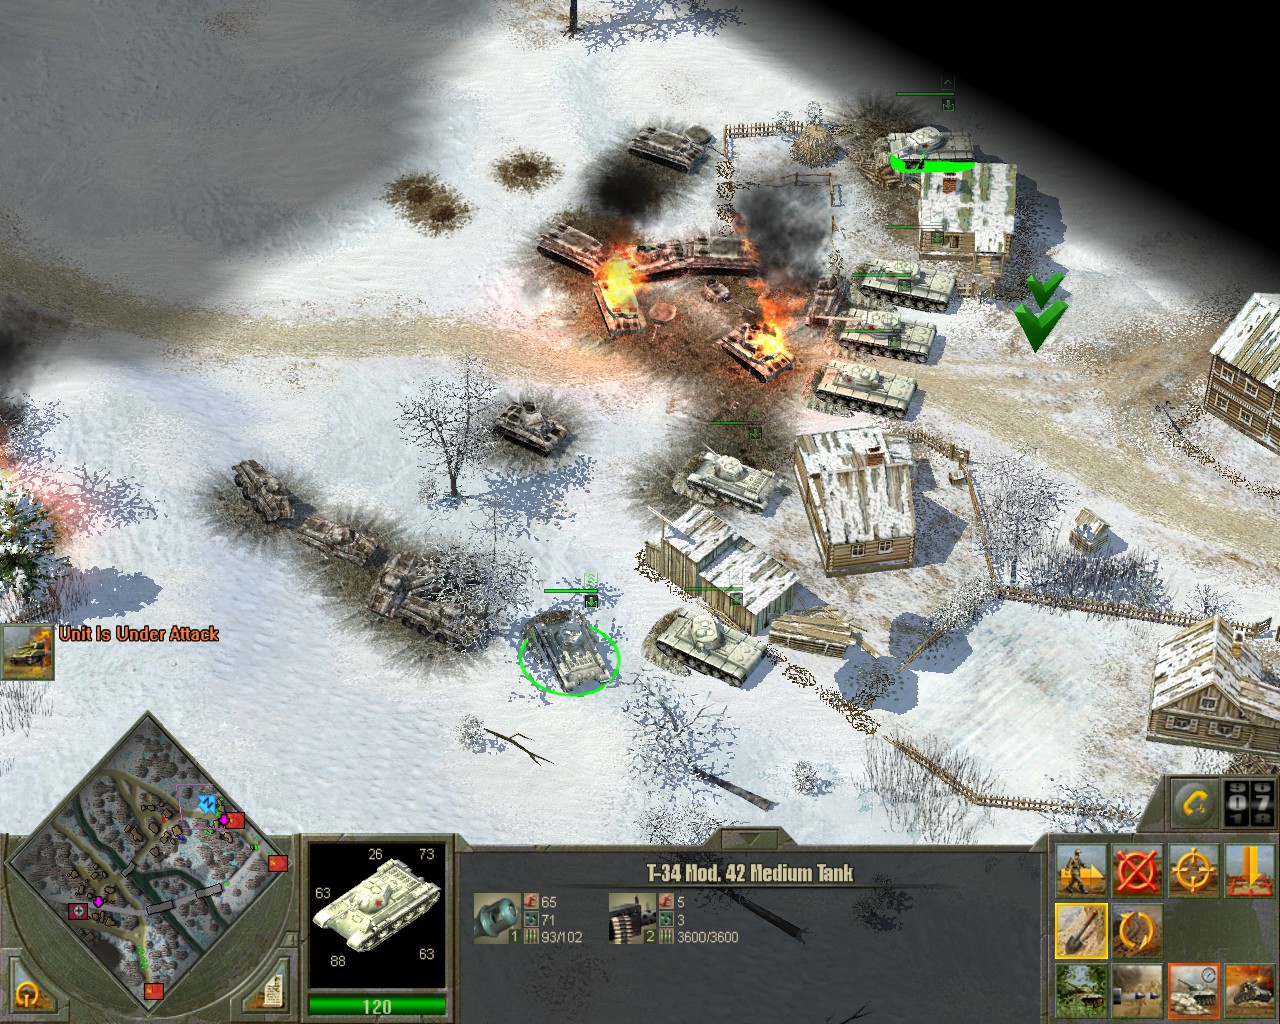
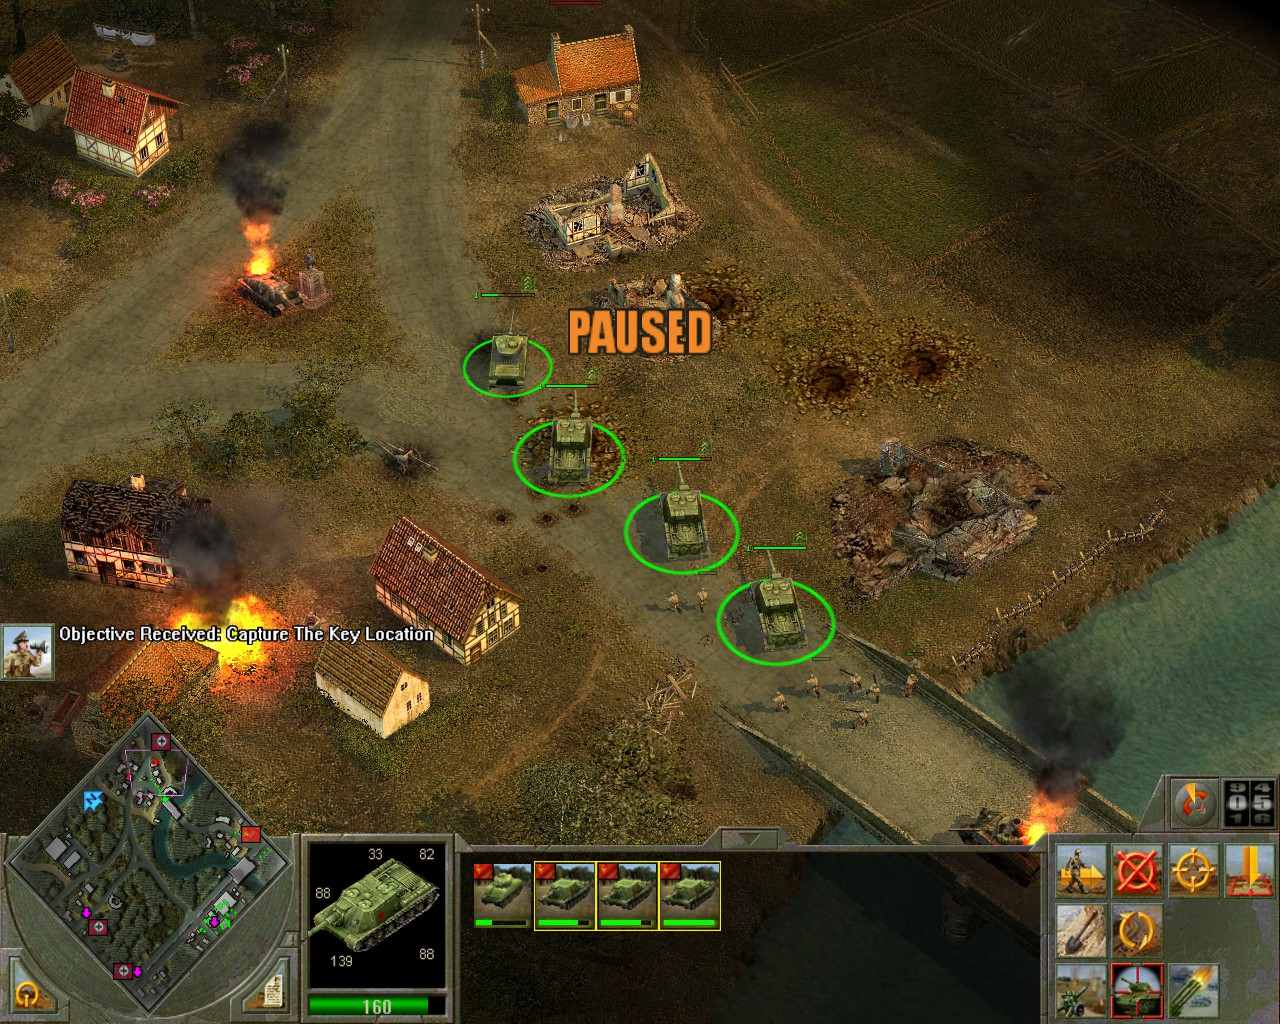
For this, the larger blast effect radius of bombs is also an advantage, since mostly you're going to be bombing artillery guns or soft targets, and the larger bomb blast radius is beneficial to getting more out of your pass.
Lord Commander Militant Jun 21, 2019 @ 12:41am 
I prefer bombs; they can be microed very precisely, while rocket planes just do their own thing.

Clicking a ton of times like it's Brood War isn't good micro or tactics, it's recompense for the planes' godawful AI that causes them to fly around and lose their target and just wander off.

The biggest difference is that the player has control over the bomb drop by using the "z" order, which doesn't do anything for rocket planes [the button is there, but doesn't do anything]. This is huge; and just a massive advantage that rocket planes can't compete with.
★ Spaceflash ★  [author] Jun 20, 2019 @ 11:39pm 
You are looking a bit too much on the stats. THe penetration of rockets vs bombs just doesnt matter, since no rank has enough roof armor to fully withstand a rocket - if it can penetrate a Tiger 2 tank roof armor, it can penetrate basically anything. The pure stopping power is stronger on paper, but since bombs are more inprecise and more likley to bounce off from armor the rockets are more powerful in reality, since they are far more precise when you use GAPs right (rockets cant ricochet from armor, they always explode on hit, making it incredible strogn against infantry as well).
Lord Commander Militant Jun 20, 2019 @ 11:27am 
There are good uses for the level bombing attack, because it's very predictable and easy to set up. The first bomb lands near the target point, and the other about 5-6 map-grid-units later. This means that it's excellent for targeting lines of enemy guns, like the guns on Sapun Mountain, where a well laid strike can destroy nearly the whole battery.

Also, the bombs are much more powerful than the rockets: they have 170 damage with 50 penetration to the rockets' 80 damage with 60 penetration. However, there are only 6 bombs or so, while rocket planes have 12 or more rockets. The rockets are more precise than the level bombing attack but about as or slightly less precise than the dive bombing attack.
★ Spaceflash ★  [author] Jun 20, 2019 @ 12:40am 
yeah i noticed these different attacks patterns as well, and you are right! the one is pretty inaccruate, while the other one is an almost guaranteed hit. Yeah the M262 isnt that bad as I said at first, I just prefer my GAPs as an independant troop barnch, which isnt possible with the german late war GAP. The superior speed is pretty good, especially since the M262 is so hard to shoot down even by fighter planes.
Regarding bombs vs dumb rockets (dumb means unguided). Bombs allow for blind bombing but rockets have MUCH more firepower and are actually more precise as well. Thing is the way the GAPs fly in auto-mode they dont make good use of rockets, while they can use bombs to some effect.
Lord Commander Militant Jun 19, 2019 @ 3:24pm 
The other major type is a diving attack, which I've noticed tends to be executed when the planes are near or recently overflew the target area. This attack is very accurate, as the plane will fly straight up, then roll over and dive, releasing the bombs as it pulls out. The bombs land close together and generally very close to the target area, making it good for sniping that one thing that needs to die. However, I have not had a whole lot of success getting them to perform this attack deliberately, it's almost certainly based off their position, orientation, and the turning stats of the plane itself, which is impossible to finely control.
Lord Commander Militant Jun 19, 2019 @ 3:20pm 
There are two major types of attack patterns I've noticed:
Level bombing, in which they fly overhead or make a shallow dive, releasing their bombs as they fly over. They make this attack when given the order to attack targets far away from they are. It has a generally terrible accuracy, and is prone to overshooting the target. The bombs tend to land in a line along the flight path. This attack is easy to deliberately provoke, and easy to guide, and because the bombs tend to fall a fair distance apart in a line, can be useful for destroying the batteries on Sapun Mountain in a single lucky pass if lined up right.