Warframe
Оценок: 132
An In Depth Beginner's Guide to Eidolon Hunting
От Myers и соавторов
This guide covers the details and basics of eidolon/tridolon hunting especially for beginners who have little to no experience.
(post Sacrifice update)
   
Наградить
В избранное
В избранном
Удалить
Author's Message
Before you start reading this guide, keep in mind that this is only meant for beginners who have little to no experience with the eidolons. The walkthrough mechanics and builds will be slightly different in comparison with advanced hunts. In other words, dont take this guide as the "holy bible" to all eidolon hunting.
  • Some items are also based on my personal "comfort zone", so it may vary from person to person. But dont worry, the main idea is still there! (OP also recommends checking out builds from other guides)

  • Do point out potential mistakes if you found one, i might have missed them while checking.

  • This guide is still constantly updating (check last updated date) and is also open to suggestions for improvements.


Introduction
Spoiler Alert!
If you have not completed The War Within, look away unless you want to get spoiled.


The Eidolons are gigantic "endgame bosses" of what used to be a sentient. They only appear at night and retreat into bodies of water at dawn. The 3 known Eidolons are the Teralyst, Gantulyst and Hydrolyst. They all look similar, but differ in colour, size, and attack styles.

This guide will cover:
  • A quick walkthrough and what you need to do
  • Preparing your arsenal (builds for warframes/Amps/weapon (sniper only)/Archwing
  • 3 main Focus Schools - Zenurik/Madurai/Unairu
  • Collecting Lures
  • Recognizing deadly eidolon attacks
  • Common bugs/problems

You can skip to the tl;dr section for a general overview of what's in here


Basic Walkthrough
To begin hunts, you will need:
  • The War Within complete
  • Amp (operator weapons)
  • A suitable warframe
  • A suitable weapon(s)
  • At least a charged eidolon lure


Phase 1: The Eidolon’s shields

When you are trying to take down the eidolons, you must take down its shields first. This is where your amps comes in handy because the shields are only destructible with void damage (operator attacks).

It is advisable for everyone to partake in taking down the shields as this is the main factor that consumes time.


Phase 2 : The eidolon synovias (weak points / limbs)

After taking down the eidolon’s shields, you will need to destroy one of its weak points. This is where you use your warframe weapons.


After destroying the weak point, the eidolon will fall to its knees and let out a scream (energy spike). This scream deals high magnetic that depletes all your energy while also capable of killing everyone.

Energy spike

To avoid any damage taken during energy spike, you will have to enter your operator’s void mode (holding ctrl by default). The magnetic damage will still deplete your warframe energy.
Using K-drive will render you immune to damage and status types. (1 maxed set of arcane nullifier+ 1 unranked one will give you 100% immunity to the magnetic proc as well.)


After energy spike is over, the eidolon will stand and regenerate its shields again and you will have to repeat steps in phase 1 and phase 2 until all the weak points are destroyed.

*The eidolon Gantulyst and Hydrolyst has 2 extra synovias on the armpit (or shoulder blades as shown below).


Phase 3 (final phase)

After destroying the last synovia, the eidolon will collapse and cry for help. Whithin this 30seconds, vomvalysts are summoned to heal the eidolon. You can choose to eliminate as many vomvalysts to prevent the eidolon from healing too much. This is also the phase where you have the opportunity to charge up your lures for the next eidolon.

After 30 seconds, the eidolon will stand up once more, and you can attack any part of the eidolon to finish it off. Aim for the head for bonus damage.


Anchoring the Eidolon

Anchoring the eidolon means preventing the eidolons from teleporting and regaining full shields after destroying a synovia. To anchor an eidolon, you will need at least one charged lure.

To charge a lure, you will have to destroy three vomvalysts’ physical form and let the lure absorb its energy. When the lure is charged, the yellow lure indicator will turn blue as shown below:


In case if you dont know what a vomvalyst looks like:


In order to keep the eidolon anchored, you will need the charged lures to stay within 40m from the eidolon. When the lures are tethered to the eidolon, you will see a small beam of light (as shown below) tied to the eidolon’s destroyed synovia. (sometimes only the host is capable of seeing those tethered lines.)


tethered lures


Capturing the Eidolon

To advance with stronger eidolons, you will need to capture the eidolons instead of killing them. It is important to capture the eidolons because they yield rarer arcane drops by doing so.
*Capturing the eidolon causes lures to self destruct after taking them down.

  • Eidolon Teralysts : 2 charged lures required
  • Eidolon Gantulyst and Hydrolyst : 3 charged lures required
A total of 8 charged lures are required to capture all 3 eidolons.

in order to summon the next two eidolons, each players are required to sacrifice one Brilliant/Radiant Eidolon Shard at the shrine located at the center of Gara Toht Lake.


Gara Toht Lake


The shrine


========================================================================

Quick Summary : General eidolon capture steps

1) Obtain a lure > charge it up > obtain more lures
2) Take down shields
3) Destroy synovia (but first, make sure charged lure is in range)
4) Hide in void mode or k-drive during energy spike
5) Repeat step 2~4 until all synovias are destroyed.
6) charge remaining lures in healing phase
7) take down the eidolon.

You will follow the same steps for the Eidolon Gantulyst and Hydrolyst.

========================================================================


Quick Charge and Collecting Lures
to make things less complicated, this does not include the tactic that requires players to stay within the cetus door boundary


DPS/ shield DPS roles:
This applies primarily to Chroma/Rhino (DPS), and sometimes Volt/Harrow etc. (shield DPS).

Quick charging means taking only one lure and charge it up with 3 Vomvalysts. The DPS or shield DPS should first fly to Twin Horns (see map below) and take that lure to quickly charge it.

Normally, Vomvalysts will spawn at the area around the right side of Cetus door near Gara Toht Lake. If you see 3 Vomvalysts, you're lucky' If there's only 2 of them, partially charge the lure and bring it to the eidolon to charge it there.


Trinity/Support roles:
This applies primarily to Trinity and/or Oberon.

This role is responsible of collecting all 7 remaining lures as quickly as possible. before the the Teralyst reaches its healing phase

Alternatively, if you couldn't collect 7 lures in time, you can first collect 2 and give it to the DPS/Shield DPS so they can capture the Teralyst and also have a charged lure to anchor the Gantulyst. You should be able to collect 5 lures before getting the Gantulyst.


Lures can be found in these location:
image source: Warframe Wiki[warframe.wikia.com]

  • The area highlighted in green is the most effective area to obtain lures.
  • Yellow areas are not as effective, but it also depends on where the eidolon spawns.
  • The main idea is to get familiar with lure locations and collect them in a sequence as fast as possible.
  • Refuel Camp / North Dig Camp / Deployment Camp are also considered great spots to collect lures.
  • Sometimes, lures won't spawn in some areas. go to the next area immediately.


Why won't the DPS take all the lures?
The reason behind this is because the lures will move infront of you while you are trying to take down the eidolons, blocking your view and taking your bullets. Since the developers have not introduced lure transparency (yet), there's nothing much can be done.


Lure blocking.


The Eidolon’s Health and Armor
The eidolons possess alloy armor and robotic health. Since the armor scales with level, the eidolons will have an approximately 80% damage reduction from your weapons. The damage reduction can be reduced by stripping most of the eidolons’ armor.

Radiation elemental damage is very effective against alloy armor with 75% damage bonus. Radiation elemental damage is not to be confused with radiation status procs. Since the eidolons are immune to status procs, status chance is irrelevant.


Stripping armor

Note: It is important to not strip all of the eidolons’ armor since that will completely remove its alloy armor, leaving only its robotic health (less effective with radiation, thus losing the 75% damage bonus). You can tell if the armor is entirely stripped when the eidolon’s health is red instead of yellow

Corrosive Projection
The most easy and effective method to strip armor. A max ranked Corrosive Projection removes 30% of the eidolons' armor. With 3 corrosive projections, you will remove 90% of the eidolons' armor. If 2 person uses coaction drift, you will remove 99% of the eidolons' armor.

Shield Disruption does not work on the Eidolon


Sarpa
Use Shattering impact + attack speed mod.
While using your primary/secondary, hold down E and shoot the eidolon. it will work even with the shields up.


Here's how it works:

Shattering Impact, when maxed reduces 6 base armour per hit with impact damage (Not impact proc, so you dont have to proc impact to activate it).

The Eidolon Teralyst/Gantulyst/Hydrolyst has 200 base armour and it takes 6 sarpa shots (5 pallets per shot) to remove 180 base armour, leaving only 20 base armour (10% remaining). shooting the seventh time will remove all alloy armour.

This strat is only recommended when hunting solo, unless you're certain your team does not have another sarpa user.


Amps and Weapons
Amps:

*Will add details on the new tier 4 amps and change the existing amp part stats when there is more information about it.


Here are the list of amp parts:

Tier 1 (T1) : Raplak Prism // Pencha Scaffold // Clapkra Brace

Tier 2 (T2) : Shwaak Prism // Shraksun Scaffold // Juttni Brace

Tier 3 (T3) : Granmu Prism // Klebrik Scaffold // Lohrin Brace

Tier 4 (T4) : Rahn Prism // Phahd Scaffold // Anspatha Brace

**Tier 7: Certus Brace

When you first talk to Quil Onkko, you will be given a mote amp (aka starter amp). However, using this against the eidolons is not recommended since they do very little damage compared to the T1 amp parts. Therefore i’d advice to have at least a T1 amp before starting tridolon hunts. Mote amp is still sufficient for teralyst hunts, but it will take a lot of time to remove its shields.

As for T7 amp brace (Certus brace), it is an upgraded version of the T3 Lohrin Brace. Can be obtained from little duck in Fortuna at the second last rank of Vox Solaris.


Amp part details:

" * " denotes lack of info, still requires update.


Prisms
Raplak Prism (T1) - Long ranged hitscan lightning bolt simmilar to a sniper. 3000 damage

Shwaak Prism (T2) - Mid range "shotgun" that has punch through. 3500 damage with guaranteed impact proc

Granmu Prism (T3) - Fires 3 long ranged projectiles that arcs with gravity and splashes on impact. 2400 x 3 damage (1400 radial damage, 1000 direct impact damage, if all shots are direct hits.)

Rahn Prism (T4) - SMG styled, rapid fire accurate hitscan. 1000 damage/hit


Scaffolds
Pencha Scaffold (T1) - 41m charged "Opticor" beam with 2 meter punch through. 9000 damage.

Shraksun Scaffold (T2) - 10m grenade launcher with 7-8m splash range. 7500 damage with guaranteed impact proc.

*Klebrik Scaffold (T3) - A 25m beam that effectively latches onto target. 3500 damage.

*Phahd Scaffold (T4) - A glaive Projectile that ricochets off after hitting a target and explodes after. 6100 damage


Brace
Clapkra Brace (T1) - Increases Amp max energy from 100 to 140.

Juttni Brace (T2) - Reduces recharge delay from 2s to 1s.

Lohrin Brace (T3) - Increases critical chance and status chance by 12%.

*Anspatha Brace (T4) - Reduces amp energy regeneration delay and regeneration time.


Additional Info
  • The meta amp parts are any prism + T2 scaffold + T3 brace (also known as x23).

  • x27 (Certus Brace) outperforms x23 due to its increased critical chance of 32% to 40%

  • The most used meta amp build is 223 (old) and 243 (new) T2 prism is used because it is good at clearing vomvalysts.

  • Damage output on T1 and T4 Prism aren't high, but they can easily proc Virtuos Shadow (+critical chance on headshot). However, the arcane can also be proced by dashing through the eidolons' head, thus saving up void strike charges.


Weapons
(will go a little in depth for snipers)


Generally, you will need to have a crit based weapon with radiation elementals. Snipers are the current meta but other weapons works fine too. Most common non-snipers are the Opticor, Arca Plasmor, Buzlok, Euphona Prime and Pandero. Non-metas/snipers are usually used with a riven mod.

In this guide, i will only be covering sniper builds since they are the most effective in eidolons.

The current weapon meta against eidolons are snipers, which are:
  • *Lanka
  • *Rubico/Prime
  • Vectis Prime
  • Vulkar Wraith
  • Snipetron Vandal
Snipers with ' * ' indicates the most viable option

Below is the standard sniper build for Eidolons.


Alternatively,

  • Heavy Caliber is not needed for snipers since -accuracy makes your multishot fly elsewhere. But hey, you can try putting it on too.
  • Primed Cryo Rounds will be great to subsitude fire rate/reload speed mods if you have arcane momentum/acceleration
  • Speed Trigger can be substituted by any other utility mods (use a riven mod if you have it).
  • Argon scope can also be used. To proc argon scope, you will need to shoot the eidolon's head (0 damage will still proc argon scope). Personally, i'd substitude Vigilante Armanents with argon scope. However, i prefer using VA over Argon scope since having to proc it can be annoying.


Shot Combo Counter:
This works similar to melee combos, the more shots you hit with your sniper, the higher the combo counter, the higher the base damage multiplier and stat bonus. You can farm combos during the eidolons' last phase while it's healing itself. Stat bonuses differs depending on which sniper you use.


Stat Bonuses:
Lanka: additional flat 20/30/50% critical chance when zoomed in
Rubico: additional 35/50% critical damage at 3.5/ 6x zoom.
Vectis Prime: additional 35/55% headshot damage at 3.5/ 6x zoom.
Vulkar Wraith: additional 35/55/70% headshot damage at 2.5/ 4/ 8x zoom.
Snipetron Vandal: additional 25/50% headshot damage at 2.5/ 6x zoom.


Damage Multiplier:
All snipers starts at 1.5x --> 2.0x --> 2.5x --> 3.0x and so on.
normally, you will achieve 2.5~3.5x depending on the sniper you use.


Additional Tips:
  • If you don't own any riven for a good weapon, you can use the Lanka since this sniper busts the Eidolon even with no riven mods.
  • Snipers with headshot damage multiplier as a combo stat bonus is only useful during the last phase.


Bonus: Budget Arcanes
Arcane Nullifier: Protect yourself from magnetic proc when there’s no harrow/oberon/limbo. Alternatively, you can just hop into a k-drive to completely negelect damage and status procs.
Arcane Acceleration: Increase rifle fire rate
Arcane Momentum: Increase sniper rifle reload speed.
Arcane Arachne: 100% bonus damage for 20s after wall latching for 2s.
*most arcane proc chance can be stacked with 2 arcanes. However, some arcanes can have their effects stacked too.*


Bonus: Riven Mods
I wont be explaining about riven mods. If you want to know what's the best riven stats for your weapon, you can check it using Folrunhow's discord bot[forums.warframe.com] or "WarTrade - Black Market[discord.gg]"


Recommended Warframes And Their Roles
Trinity/Prime

Trinity is considered a must have in an eidolon team or else lures will hardly survive through gantulyst and hydrolyst.

As a trinity, your main purpose is to babysit both the lures and your team by keeping blessing up as much as possible. you will also be collecting lures before the fight.

Build:

Focus on : 150% Power strength, duration and efficiency.


  • Since your first 3 abilities will be useless for the entire fight, you will only have to build for your fourth ability, Blesssing.
  • 150% power strength is required to reach a max 75% damage reduction on blessing.
  • Range is not needed since bless uses affinity range.
  • Natural talent for faster casting speed


Volt/Prime

As a volt, your main purpose is to buff both operator amps and weapon damage by using your electric shield. You are also capable of being the main DPS of the team.

Shooting through each volt shield provides a 50% bonus base electric damage and it is stackable. Since volt can only summon 6 shields at max, a total of 300% bonus electric damage will be stacked. (some projectiles dont seem to travel through too many shields)

Shooting through a volt shield also provides additional 200% critical damage. However, this effect is not stackable.

Side note:
stacking volt shield does not provide additional bonuses to amps, but it can provide additional status damage bonus to weapons.


Build:

Focus on: Efficiency and Duration


  • You will be using electric shields most of the time. All you need is Efficiency and some duration. Range and strength is not needed.
  • You can swap primed continuity with narrow minded more extra duration.
  • Deadeye is better off swapped with corrosive projection.
  • Natural talent for faster shield casting speed (helps a a lot!)
  • Handspring is used to quickly recover from eidolon knockback shockwaves


Harrow

As a harrow, your main purpose is to protect your team from energy spike's energy depletion by using covenant. You are also in charged of buffing the team at the final phase with critical chance and headshot damage to finish off the eidolons.

It won't be as easy for first timers since timing can be a little problem, but it's pretty easy to get used to it!

Harrow’s penance can also buff yourself with reload speed and fire rate while healing allies and lures. However, it is not as effective as trinity's blessing since there's no 75% damage reduction.

*Using Penance is optional

Build:

Focus on: a fixed duration of 95%~110%, Efficiency, some Strength

  • High duration means more room for error, BUT you risk messing up if the team takes down shields and limbs quickly. The common sweet spot for most people is 95~105%
  • Again, range is not needed since covenant and penance relies on affinity range.
  • Strength for a better chance to have maximum covenant buff with little damage soaked (for the final stages)
  • Hunter Adrenaline can be swapped with other mods


Rhino/Prime

As a Rhino, you are the main DPS in the team. Your Roar is useful to both for yourself and other potential DPS if there's any. Ironskin's invulnerability can be very helpful to prevent annoying knockbacks and staggering or also saving you from gantulyst's light pillars and hydrolyst's burst energy spike.

Build:
Generally, you would want as much power strength as possible for roar buff (enough to easily take down limbs), efficiency, and duration. Duration does not have to be too high. 20-30s roar duration can be sufficient. Range is completely ignored.

Author's note: I will have to leave out rhino's build since I have not invested forma on him to have a decent built.


Chroma/Prime

Despite being the main and most powerful DPS for the limbs and final phase, Chroma can be a little sophisticated for starters since you have to keep your buff and energy up. Though, it will be relatively easy and better compared to rhino once you get used to it.

Chroma's 2nd ability, Elemental Ward increases Reload/Holster speed when using Toxic Energy. Using this ability is optional unless you're using the Vectis prime/Rubico.
Some people will also use different elemental energy for different effects. You can check out the details here[warframe.wikia.com]

Chroma's 3rd Ability, Vex Armor increases weapon damage (Fury) when health is damaged and Armor (Scorn) when shields are damaged. This ability can be recasted to reset the timer (stats are not affected) so you won't have to do self damage again.

To charge up Vex Armor, you will need a self damage secondary/melee. Usually, this will be the Glaive Prime or Cerata. Personally, i use a Hikou Prime with concealed explosive so i dont hit myself too hard.

Build:

Focus on: Ability strength, duration + max ranked vitality.
Range is ignored.


  • If you have arcane energize, or if you are willing to use alot energy pads, you can swap the efficiency mods for more strength/duration.

  • you can also switch one of the eficiency mods for Hunter Adrenaline/Rage.

Important !
When using chroma, your weapon builds will also be altered a little since you do not need +raw damage mods such as serration/horned strike. Instead, substitute raw damage mods with elementals such as Primed cryo rounds / Thermite rounds / High voltage etc.

Here's an example:

Speed trigger can be replaced with a riven mod/any other utility mods

Non-mandatory Geeky Calculations Below:
The reason why we dont include raw damage mod (Serration/Heavy Caliber etc) is because of how multiplicative damage works in warframe. Lets take an example below:

  • Serration: 165% or 1.65
  • Elemental mods: 90% + 90% = 180% or 1.8
  • Primed Cryo Rounds: 165% or 1.65
  • Chroma damage buff%: 852% or 8.52

with the damage equation:
(base damage) x (1+damage mods) x (1+ elemental damage) x (crit) x (multi),
and to simplify things, we only take (1+damage mods) x (1+ elemental damage mods) into account.

Normal Build: (1+1.65) x (1+1.8) =7.42
Vex Armour with Serration: (1+1.65+8.52) x (1+1.8) = 31.28
Vex Armour without Serration, but with Primed Cryo: (1+8.52) x (1+1.8+1.65) = 42.36


Other warframes


Oberon/Prime
Hallowed ground prevents energy depletion from energy spikes while Renewal heals allies and lures and also providing additional armor when paired with hallowed ground. However, Oberon's rate of healing will be insufficient when it comes to Gantulyst or Hydrolyst's damage output.

Limbo/Prime
Almost similar to Harrow, Limbo's Cataclysm provides protection from energy spike and eidolon attacks during its shield phase, staying in the rift also provides energy regeneration. However, Hydrolyst's attacks seems to bypass banish. Though, I wouldn't recommend trying this unless you're with a very coordinative team with voice chats.


(Optional) Archwing


Itzal

Reason:
  • Fastest known archwing
  • Can teleport & travel long distances quickly (1st ability, Blink)
  • Can turn invisible, making lure collecting easy (2nd ability, Penumbra)
  • Eidolon drop and sentient core vacuum since sentinels cannot pick them up (3rd ability, Cosmic Crush)
  • Facilitates in collecting lures quickly

Build:
  • Energy Amplifier (range)
  • Hyperion Thrusters (flight speed)
  • System Reroute (Efficiency)
  • Efficient Transferral (Duration)
  • Auxiliary Power (Max Energy, optional).


Amesha

While Amesha is rarely to almost never used, for now, it can be a good candidate to keep lures alive as a last resort if there is no healers around by using Benevolent Decoy and Watchful Swarm.

  • Watchful Swarm provides damaged immunity to a certain amount of hits (depending of ability strength)

  • Benevolent Decoy provides damage to healing conversion by soaking damage in a fixed area.

  • Vengeful Rush is a toggle ability providing you and allies full status immunity from energy spike while also capable of slowing down incoming vomvalysts in the healing phase (similar to nova's molecular prime). However, it does not slow the eidolon.

  • Warding grace provides all damage received to energy conversion, making you immune to all incoming damage including energy spike as long as your energy pool isn't full (use with vengeful rush


build:
  • Energy Amplifier (Range)
  • Auxiliary Power (Max Energy)
  • Primed/Morphic Transformer (Strength)
  • Efficient Transferal (Duration)
  • System Reroute (Efficiency)

  • Hyperion Thrusters (Flight speed, optional)
  • Enhanced Durability (Max Health, optional)
  • Argon plating (Armour, optional)


(Optional) Focus School
In Eidolon hunts, using a specific focus school can give you a boost to certain aspects. The 3 main schools eidolon hunters use are Zenurik, Madurai and Unairu.


Zenurik
great for public runs if you don't want to waste energy restores


The reason Zenurik comes first is because Energizing Dash provides an energy regeneration buff of up to 5 energy per second for 30s depending on energizing dash level (this is the node players should max it out first before going to other nodes/focus tree). Energy Pulse might also be beneficial since it provides additional energy after picking up an energy orb.


Madurai
great for both public, excellent for team runs


Assuming you have maxed the necessary nodes, Madurai is great for taking down the shields really quick and have some slight extra damage boost on weapons. They are also known as the "shield busters".

The main operator DPS node is Void Strike. by staying in void mode, you stack void strike that increases damage multiplier. This method is capable of shredding the Gantulyst/Hydrolyst initial shields in seconds and save up lots of time. You can also charge void strike to about 1.7x during energy spikes and up to 8x or more during the final phase + waiting for your team to insert shards.

Other useful nodes are Inner Gaze and Eternal Gaze that increases Amp max energy and energy regeneration rate. Phoenix Talons and Phoenix Spirit provides 25% physical and elemental damage boost that works on your weapons (not on operator's amps)


Important note: do not invest additional focus points on void radiance.


Unairu
great for advanced team hunts


Unairu Wisp provides 100% additional operator damage for 12s when you/someone else picks up the unairu wisp. Basilisk Scales and stone skin adds survivability to yourself whereas Basilisk Gaze increases void blast radius (beneficial for creating wisps). Void Shadow and Void Chrysalis provides invisibility and 80% Damage reduction to lures/teammates in range.


In an advanced, coordinated team, the limb DPS will be using this focus school. They will spawn wisps before/end of energy spikes for the shield busters, then fall back to a good position to shoot the limbs. In this case, there will be only one limb DPS and the remaining players will be using Madurai.
*The Unairu user will also collect the first lure to quick charge it.


Unairu is most useful when the non-dps can take down the shields quickly and the limb DPS is able to take down limbs within 3 seconds.


Which role uses which focus schools?
Assuming you have the necessary nodes unlocked.

Zenurik - Energizing Dash for energy regeneration
Used in public runs, anyone is free to use this school.

Madurai - Shield busting with void strike (non-DPS)
Volt, Harrow, Trinity, Limbo and Oberon
*DPS can use this while in a public run.

Unairu - Madurai Buffer (DPS)
Chroma, Rhino, or other DPS roles
*Only great in a coordinated team


Waybounds

Each focus school has 2 waybound nodes. Waybounds are nodes that can be used outside of its specific school once it's maxed and "unbinded". Unbinding requires 1 million focus points + a brilliant eidolon shard.

Eg:
I am able to use Zenurik's Void Siphon while Madurai is set to my active school. The same goes for every other waybounds nodes.


Useful waybounds (in order)


Zenurik
> Void Siphon - increases operator energy regeneration rate
> Void Flow - increases operator max energy


Naramon
> Mind Sprint - increases void dash range


Vazarin
> Enduring Tides - increases operator max health


Unairu
> Basilisk Scale - Increases operator's armour


Madurai
> Inner Gaze - increases amp max energy
> Eternal Gaze - increases amp energy regeneration rate


Other waybounds that are not mentioned
:

Naramon's mind step:
Increases operator sprint speed
I find the speed increase in void mode insignificant, therefore this is ignored.

Vazarin's Rejuvenating Tides:
Health regeneration is great. But in eidolons, this rate is too low to keep you up.

Unairu's basilisk gaze:
Only beneficial for creating wisps, but you can always go closer, no harm there.


Recognizing The Eidolons' Abilities
Common notable abilities for all 3 eidolons:

Ground stomp:
The eidolon stomps on the ground, sending out a shockwave that knocks back players.

Ground smash:
The eidolon smashed the ground with their arms, sending out a homing seismic shockwave that staggers and deal damage to players.

Starfall:
the eidolon shoots in the sky and rains explosive projectiles down (the Gantulysts spawns a disco rave beams of light instead)

Shield regeneration:
The eidolon screams and summons vomvalysts to regenerate its shields. The eidolons’ shields are invulnerable until all tethered vomvalysts are destroyed.

Notice these vomvalysts tethered to the eidolon


Things to look out for !


Eidolon Gantulyst:

Light Pillars
After the eidolon ground stomps, it summons beams of light from the ground, dealing massive amount of damage to players and lures. This can be avoided by moving away from spotlights that are on the ground after a ground stomp. This ability is the main reason lures are obliterated destroyed.

It is advisable for trinity to use bless right after every ground stomp to have a 75% damage reduction during this attack.

Avoid these spotlights:


Eidolon Gantulyst light pillars:


Knockback pulse spam
When the Gantulysts’ puts their gigantic shield up, it will send out multiple knockback pulses after a ground stomp. Can be avoided by jumping.

Similar to frost's snow globe, operators cannot dash through the shield. However, you can dash to the top of the shield and fall back into battle.


Giant Gantulyst shield


Eidolon Hydrolyst:

Acid rain:
The Hydrolyst occasionally summon clouds that causes an AoE acid rain, causing the ground below to be drenched in acid. Walking in this area deals high amount of damage over time. But you can escape by using the operator’s void mode.
Be careful not to fly your archwing into the area too!


Energy spike orbs:
Not alot of people seem to know this, but the Hydrolyst spawns huge bubbles that later explodes after reaching a maximum height and having its "pillars" disappear, capable of wiping out the team and depleting energy, similar to energy spikes.

The image below shows the bubbles reaching a maximum height. When the green pillars below disappear, hide in void mode or your k-drive immediately.


TL;DR - Summary
Warning : Super wordy content ahead.


Basic Walkthrough
  • Eidolon Phase 1 - take down shields with your amps.
  • Eidolon Phase 2 - Make sure you have at least a charged lure to anchor the eidolon, destroy synovia, and hide in operator's void mode/k-drive.
  • Eidolon Phase 3 - Eidolon heals itself, you can either kill the vomvalysts or use them to charge up remaining lures.
  • To capture the eidolon, you need 2 lures for the Teralyst, 3 for both Gantulyst and Hydrolyst.
  • Use 3 Corrosive Projections to strip 90% of the eidolons' armor. +2 Coaction drift to strip 99% of the eidolons' armor
  • Sarpa with shattering impact and speed mods can strip the armor, but it's only recommended when you're in solo mode.


Quick Summary : General eidolon capture steps
1) Obtain a lure > charge it up > obtain more lures
2) Take down shields
3) Destroy synovia (but first, make sure charged lure is in range)
4) Hide in void mode or k-drive during energy spike
5) Repeat step 2~4 until all synovias are destroyed.
6) charge remaining lures in healing phase
7) take down the eidolon.


Collecting Lures

  • A player other than trinity takes a lure and quickly charge it up, then brings it into battle. The general idea is to quickly charge a lure to save up time. In public missions, you'll have to do everything because you can't expect much from pub teams
  • At the start of the hunt, Trinity collects as many lures as possible in a short time. (at least 2~3, at most 7)


Amps and Weapons

Amps:
  • Mote Amp is sufficient for the Teralyst.
  • Have at least T1 Amp before starting tridolons.
  • x27 is the current amp meta build, followed by x23

Weapons:
  • Use crit based, radiation weapons.
  • Snipers seems to be the best option (also a meta weapon).
  • Non-meta weapon works too as long as it deals heavy radiation damage.
  • Riven mods are recommended, but not mandatory.
  • Sniper combos increases damage multiplier.
  • Sniper combos also increases critical chance/critical damage/headshot damage. Depends on what sniper you use.
  • Top 3 Snipers (from strongest to weakest) are Lanka/Rubico Prime > Rubico > Vectis Prime.


Recommended Warframes For Starters
(go to main section to search for builds and details)
  • Trinity to babysit lures and your team. Keep blessing up as much as possible.
  • Volt uses electric shield to buff you and your team with weapon damage and operator amp damage.
  • Harrow to protect your team from energy spike and provide critical chance and headshot damage at the final phase.
  • Rhino and Chroma as the main DPS

Other warframes:
  • Oberon and Limbo protects your team from energy spike. Oberon can also heal/provide armor while Limbo provides energy regeneration and protection in Eidolon Phase 1.


    Archwing (Optional)
    • Itzal
      • Generally helps alot in collecting lures and travelling long distances
      • mod for range, flight speed, efficiency, duration.
      • max energy on the Itzal is optional
      .
    • Amesha
      • Useful in case if there is no healers to keep the lures alive.
      • Mod for range, strength, duration, max energy, max health, (possibly efficiency)


    Focus Schools (Optional)

    Zenurik:
    • Provides energy regeneration.
    • Good is public teams.
    • Not efficient in advanced hunts.

    Madurai:
    • Great for taking down shields
    • Void strike stacking increases damage multiplier.
    • Provides some damage boost to weapons.
    • used by any roles in public teams.
    • used by all non-DPS in advanced teams.

    Unairu:
    • Great for advanced, coordinated teams
    • Wisps provides 100% damage increase to operator amps, especially for Madurai users
    • only used by the one and only one DPS of the team (Rhino/Chroma).


    Recognizing The Eidolons' Abilities

    Common Eidolon Abilities:
    • Ground stomp - The eidolon stomps the ground, pushing players away.
    • Ground smash - The eidolon smashes the ground, sending out a homing seismic wave, staggering everyone in its path.
    • Starfall - The eidolon shoots in the sky, causing explosive projectiles to rain. Gantulyst shoots rotating beams of laser down instead.
    • Shield regeneration - The eidolon cries for help, summoning vomvalysts to replenish its shields. Kill the tethered vomvalyst first, or the shields cannot be taken down.


    Attacks you should avoid:
    • Eidolon Gantulyst light pillars (they do hella lot of damage!)
    • Eidolon Gantulyst knockback pulse spam - only occurs when he ground stomps with the shields up.
    • Eidolon Hydrolyst acid rain - It affects the ground too, dealing high damage over time in the affected area.
    • Eidolon Hydrolyst energy spike bubble - hide in operator void mode or k-drive before they explode. they can kill you easily.


Tips
  • Shoot the limbs in a specific order. Go for the Arms first, then armpits/shoulder blades and lastly the knees. This is to reduce any inconvenience caused by the eidolons' movement and flashy visual disturbances. (some would prefer the armpits first)

  • Make every second count, 50 minutes of cetus night cycle can end quickly. Use a time trackers such as this warframe tracker (PC)[deathsnacks.com]

  • Bring energy & ammo restores

  • Using ciphers to hack lures can save up time. Pro Tip - Press "Y" to instant use ciphers.

  • Disable screen shake, colour correction, bloom, and other magnificent graphic configurations so you dont go insane/blind or most likely both.

  • If you're running out of time and have not captured the eidolon, lure the eidolon away from the large lake. This will spare you some time to capture even though the mission will be considered a failure.(however it won't , you'll still get your rare arcanes if you manage to capture the eidolon.)


Bugs / Technical problems commonly faced


Eidolon teleports away mid fight when tethered.
When the eidolon gets stuck / in a funny position, it will teleport away. Get your archwing and get to the new spawn area. It's not a bug, it's a feature.

This used to cause the eidolon to regenerate to full shields, thankfully, it doesn't do that anymore and you are able to continue where you stopped.


Unable to use skills (Transference/warframe skills)
Solution 1: Jump into the water to reset yourself
Solution 2: Suicide (im not joking). Tell your teammates to not revive because you're bugged.


Unable to reload weapons
This normally happens when you use the vectis/rubico.
Solution 1: Switch to your melee/pistol and switch back to your primary.
Solution 2: Use transference and go back.


Cannot sacrifice eidolon shards at the shrine
Solution: check if you picked up the shard, it's likely that you missed it.
if it does not work, it is a rare bug that only can be fixed when the affected person leaves. Otherwise, restart the hunt and start all over again.


Underground vomvalyst when the Eidolon is regenerating shields
This bug rarely happens at steep hills/inclined areas. There's no way to kill the vomvalyst unless you lure the eidolons downhill to get the vomvalyst out. Otherwise, you will have to wait for the shield to fully regenerate. Use this time to charge up void strike / sniper combo.


Eidolon lures did not spawn drops
This is not a bug. Instead, this is caused by a player (the lure holders) transporting the tethered lures right after the eidolon is taken down. You should be able to find loots at the shrine / cetus door.


(Additional) Performance Optimization
Resolution Scale

If you happen to have low frames in the plains, this will help a lot.

Reducing your resolution scale is pretty simmilar to playing a youtube video at 360p in fullscreen instead of 1080p in fullscreen, therefore it greatly sacrifices graphics quality for perfomance.


To lower your resolution scale, you first have to navigate to:

options > display > dynamic resolution.

set your dynamic resolution to 'user' and reduce it to your liking. the lowest i could go is 60, anything lower and i will have some trouble finding for the synovias.


Converting your warframe Steam version to a hybrid Steam/stand-alone version

So far i've never encountered any problem using this but I'm unsure if this can corrupt your files. Do it at your own risk. I'd also recommend having a backup copy of your warframe.

Since steam itself takes up your computer resources, running warframe without Steam can improve your perfomance to a certain degree. here's how you do it:

1) Locate your Steam Warframe directory. usually it's at :
C:\Program Files (x86)\Steam\steamapps\common\Warframe\Tools

2) Create a shortcut to Launcher.exe and move it to desktop.

3) Right click the shortcut, select properties and look for " Target: "

4) replace the target with:
"Your directory\Steam\steamapps\common\Warframe\Tools\Launcher.exe" -cluster:public-registry:Steam

in my case, it will be:
"C:\Program Files (x86)\Steam\steamapps\common\Warframe\Tools\Launcher.exe" -cluster:public -registry:Steam


You can now launch warframe with steam closed. You can also launch warframe in steam if you need access to tennogen items


Changelog
Guide updated to as of late January 2019


Guide Changes:

  • 15 Aug 2018 - Updated info on Volt's shield not affecting operator amp damage, but only increases critical damage.

  • 17 Aug 2018
    • Added Amesha on the Archwing section. (may require more testing)
    • Updated new info on existing amp parts, including T4 amps.

  • 18 Aug 2018
    • Edited info for Amesha Archwing and Additional info for amps in Amps and Weapons.
    • Changed Additional info for Phahd Scaffold (T4) to reflect the recent hotfixes that fixed its unintentional boost to overall damage output.
    • Also updated on the current amp meta. RIP x43, had a short yet great time together.

  • 19 Aug 2018
    • Changed and edited the section about collecting lures

    • 28 Sep 2018 - Bump!
      • Not much, but some small updates on rubico/chroma prime are on the way, also possibly updates on focus schools (soon, if I have the time!)
        23 Jan 2019: whoops, seems like i was too busy for this.

    • 28 Jan 2019
      • Updated some parts the guide to suit the current state of the game (including the usage of k-drives)
      • Included t7 Brace, Certus Brace. Other parts are not included because it is not necessary.
      • Included alternate sniper build
      • Updated Chroma build and elaboration on why serration on weapons is not needed for Chroma.
      • Removed some redundant contents

  • 1st February 2019
    • Removed Mesa from the warframes section since shooting gallery no longer affects operator amps.


Комментариев: 25
kostermw 6 июл. 2024 г. в 7:36 
Why do these hunts have to be so complicated.
KNIESS 18 фев. 2022 г. в 19:22 
ty
Gregarius 9 мар. 2021 г. в 18:48 
You mentioned Twin Horns was on the map in your Quick Charge section, but it's not.
LoneWalker 31 мар. 2019 г. в 2:04 
You can also juggle the eidolons if you want to
Myers  [создатель] 4 фев. 2019 г. в 5:26 
thanks, corrected it.
Frank 3 фев. 2019 г. в 17:20 
minor mistake: Arcane Momentum increases sniper reload speed, not fire rate
Myers  [создатель] 20 авг. 2018 г. в 7:18 
I wouldn't say vazarin is mandatory even for trin (they're just an added QoL). It's fine for casual hunts since it helps a little as long as there isn't a need to do do multiple hunts. But if one goes for advanced hunts, it's best to use madurai for the void strike buff to burst down shields, otherwise, zenurik's energizing dash is better for keeping energy up without wasting restores.

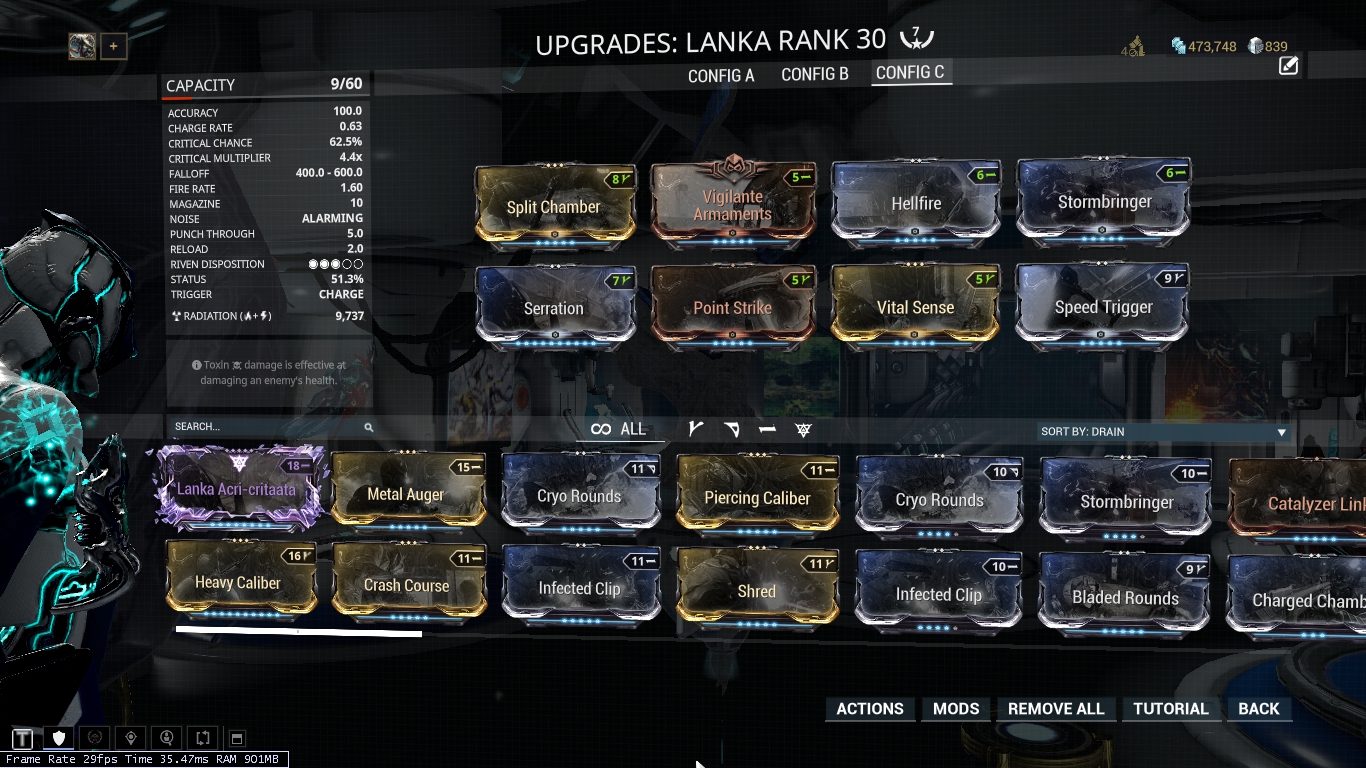
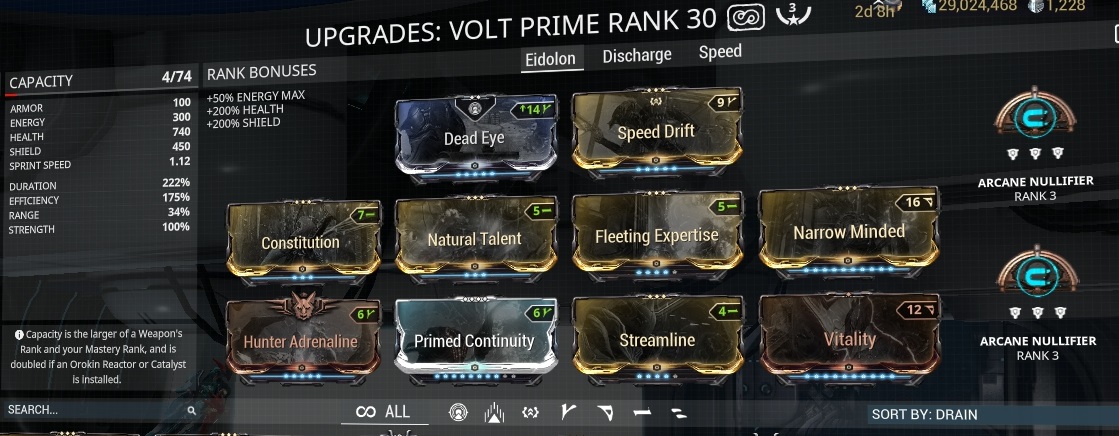
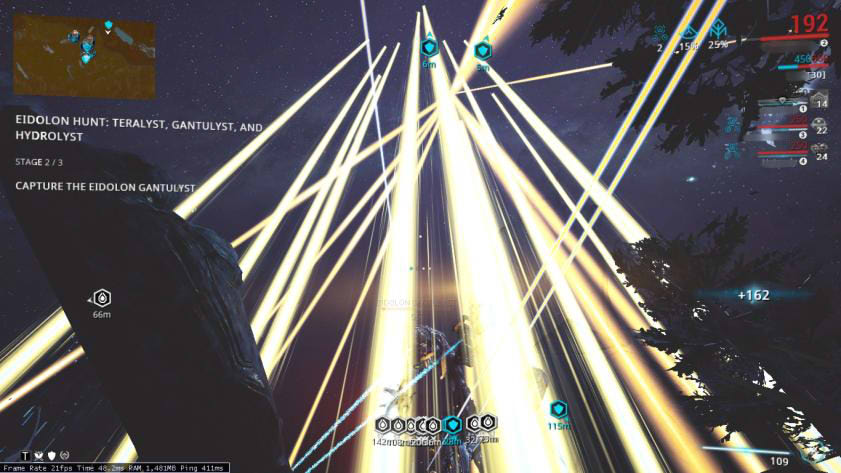
Though the extra affinity radius seems like a nice boost, it's not really needed since the base radius of 50 meters is already enough.
Lady Amber Of Mossflower 19 авг. 2018 г. в 14:59 
varzin is manditory for trinity imho,though im new to it her ult is increased by the affiniy range mending unity provides as well as the instintanious revives incase somone screws up.just my 2 cents though from a semi experianced terry hunter
Myers  [создатель] 19 авг. 2018 г. в 2:43 
Thanks for the info, will add them later. Regarding the breaking limbs, is it actually valid other than personal experiences? Never heard of that before :/
Mano 18 авг. 2018 г. в 6:53 
2 Additional points
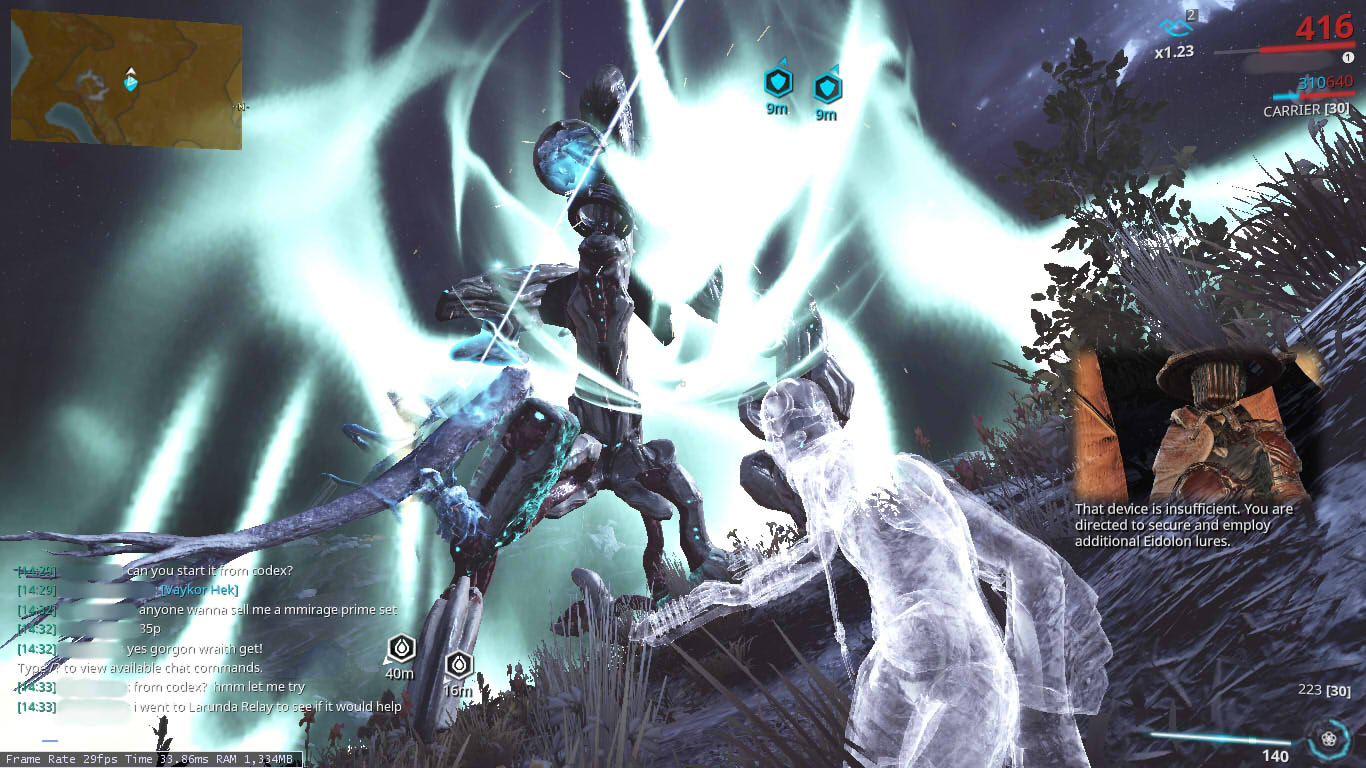
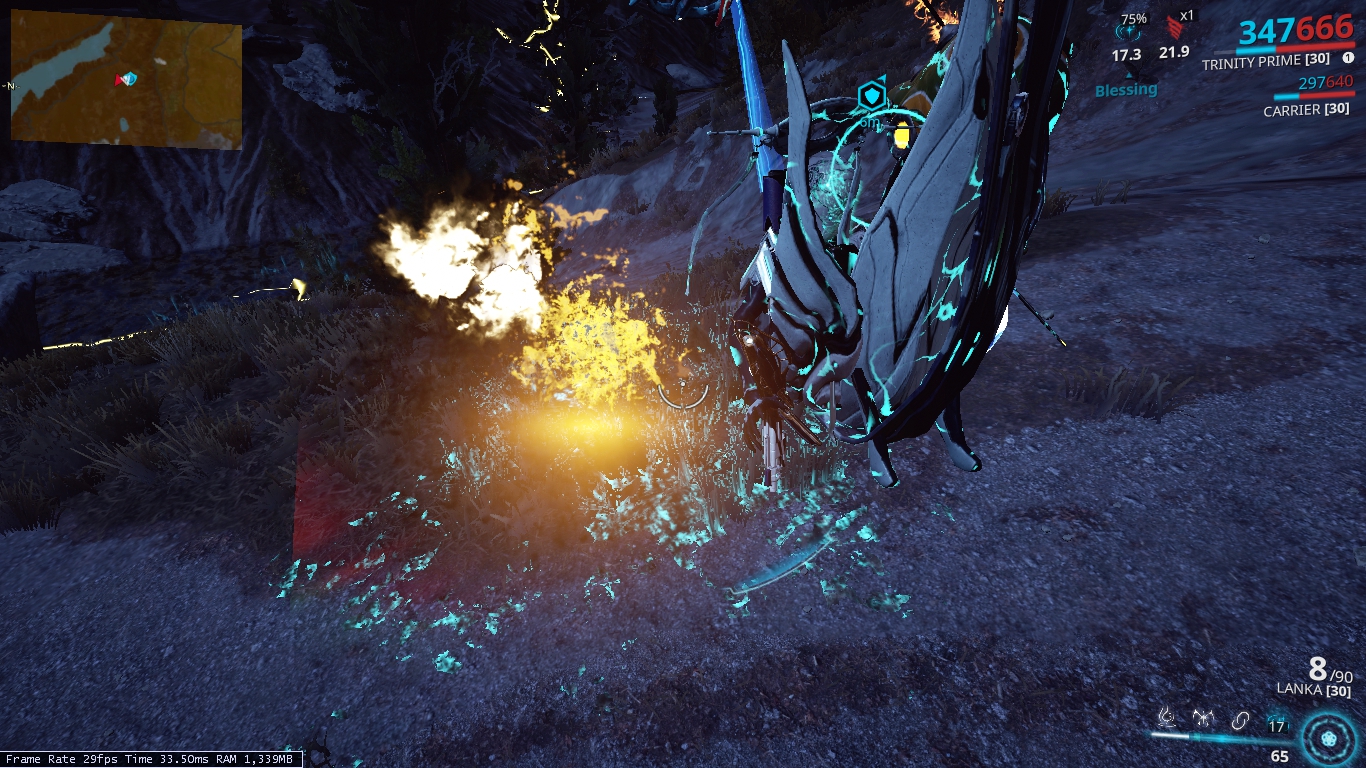
- When you quick charge lures. Get the Trinity to bring you two more and tell him to go away and and collect the remaining, now whoever was quick charging willl have 3 lures. The reason for this is after Terry is defeated you'll have 1 lure left charged, and instead of trying to charge 8 lures, you are only charging 3. When you move onto Terry you can give the lure back to the Trin so the Eidolon won't TP away. After capping Terry you should have most of the lures charged already.
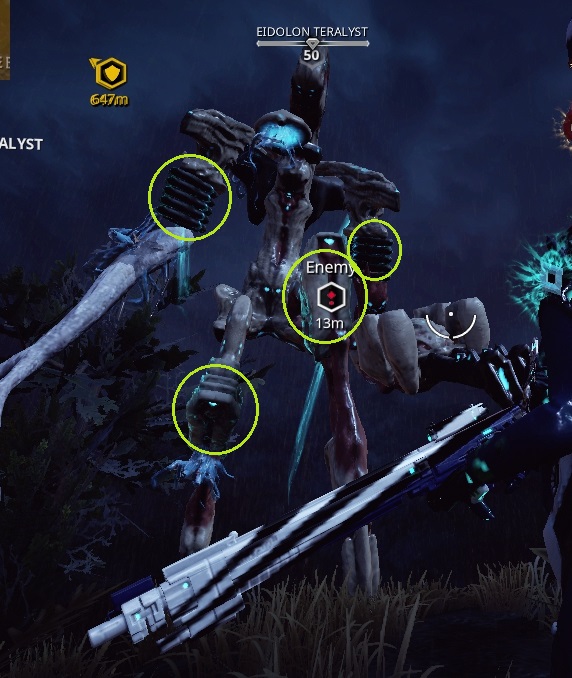
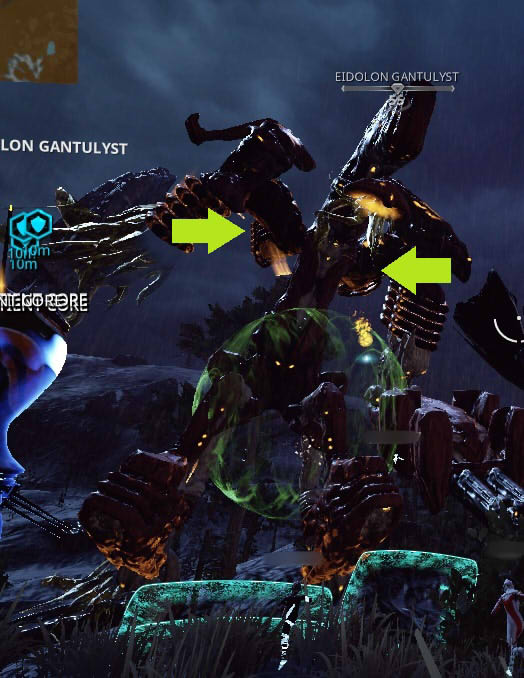
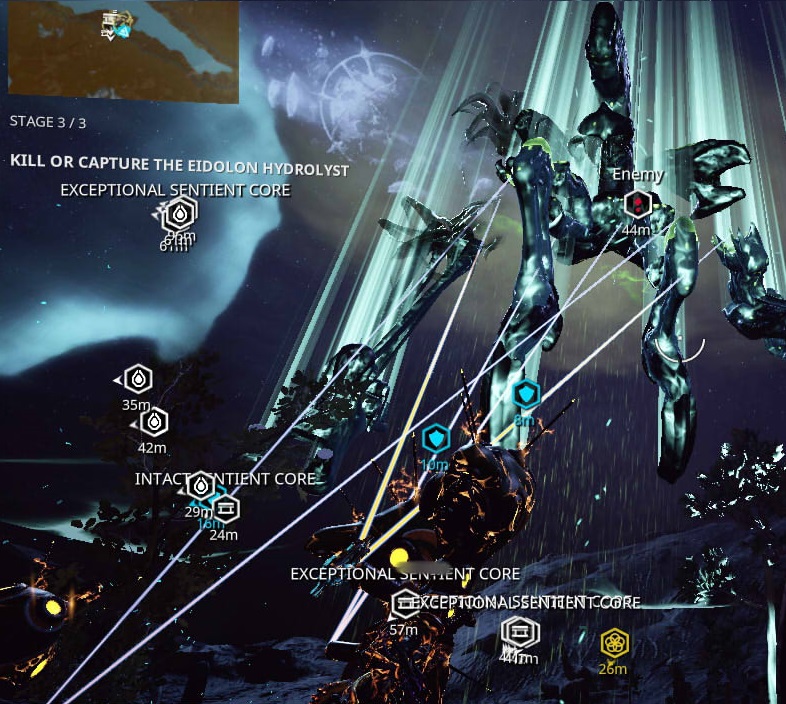
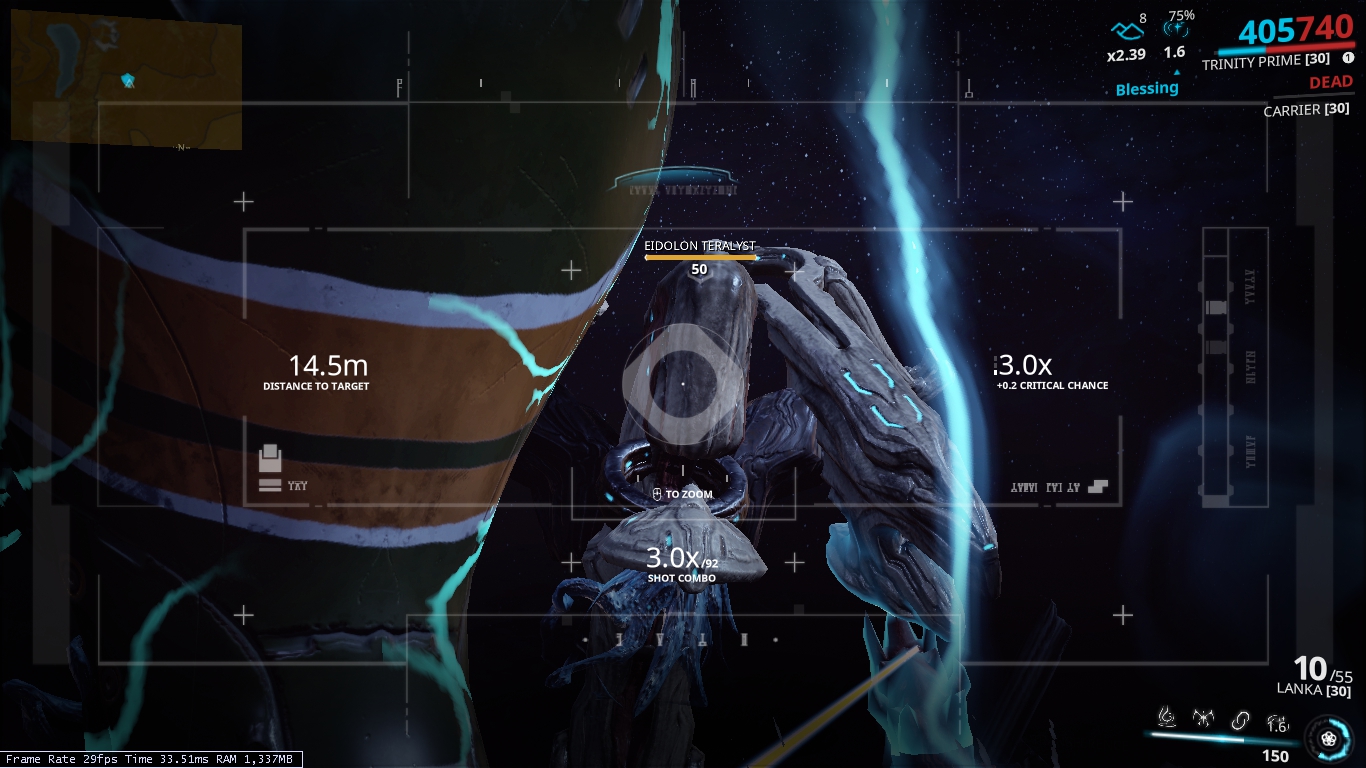
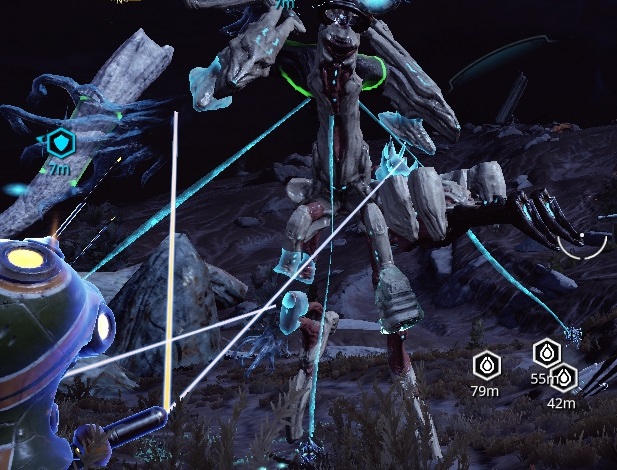
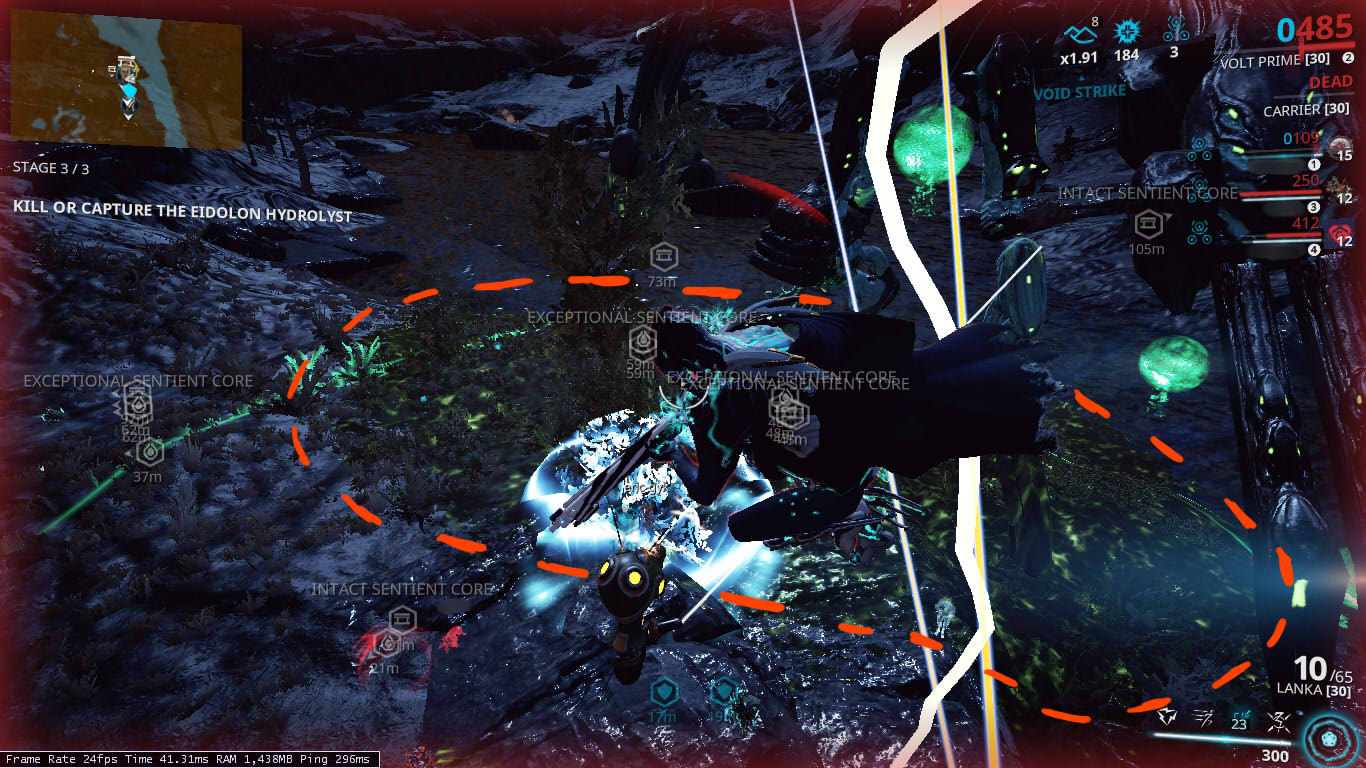
- The most common reason why Eidolons TP is because when you break limbs you break them in the order of Left/Right side first.
To prevent this once you break a limb, more onto the adjescent one instead.