TIS-100

TIS-100

168 ratings
TIS - 100: The Manual for Absolute Beginners
By QuasiSnipr1048
This guide attempts to explain the manual to players who are lacking in the programming department. It covers all the core sections of the manual and explains the terminology in simpler terms without the programming jargon.
7
2
2
   
Award
Favorite
Favorited
Unfavorite
Introduction
Welcome.

If you are here, you probably don't have much of a programming background and think the game doesn't make a lick of sense. The manual probably hasn't helped a whole lot either. Or, maybe everything does make sense and there's just that one thing you just haven't been able to fully grasp and you need it explained another way.

You've come to the right place.

I'll try to explain everything as basic as possible and try to relate some topics a bit more familiar (no, that wasn't a binary pun). In this guide, I'll cover nodes and how they work, the system architecture (how the computer in the game stores data), the instruction set (how you tell the computer to do things), and some additional info that should help you out a bit more as you go through the game.

Let's get started.
Nodes and How They Work


Nodes are fairly basic in their operation. I'll be brief so we can get to the good stuff you are probably more interested in learning.

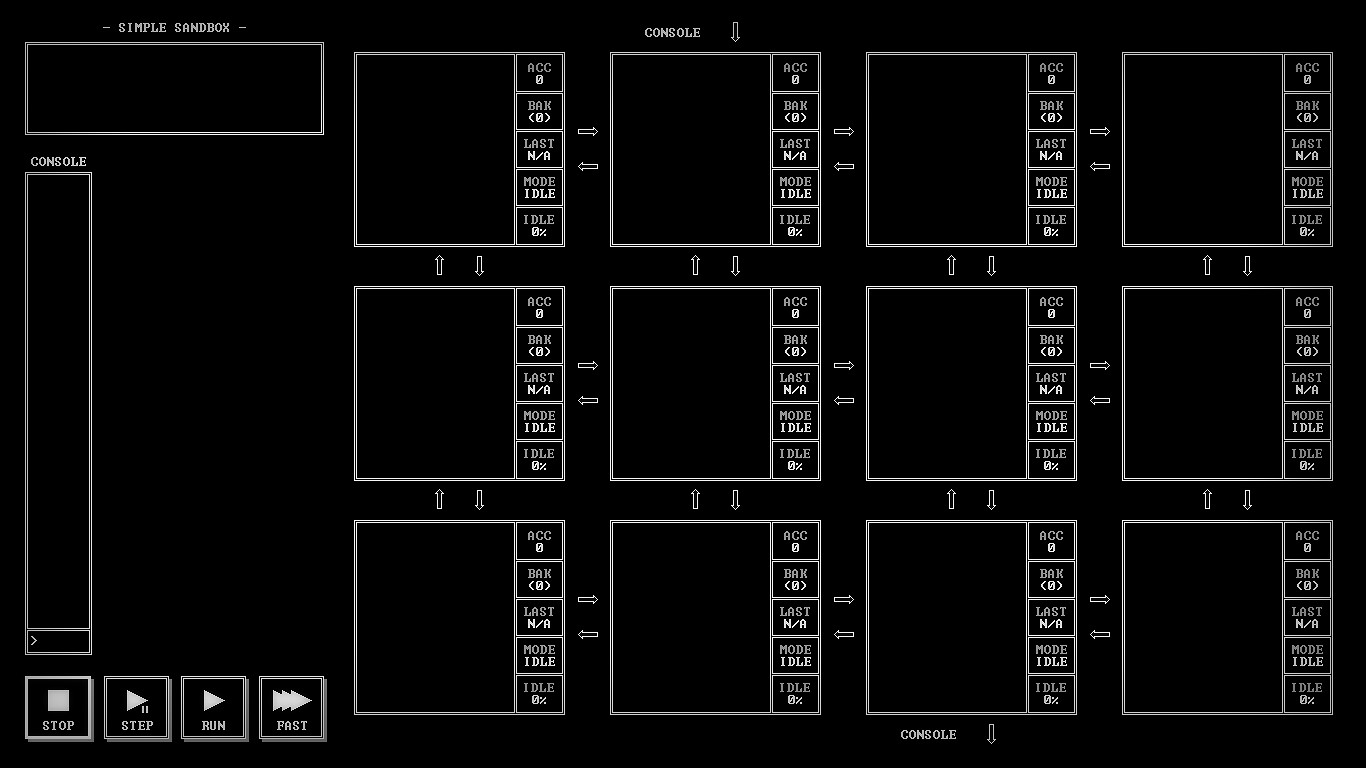
Inside the nodes is where your code will go. The arrows show the paths the data can travel on to go into the nodes. Notice that the nodes have arrows going back and forth to each other, indicating that data can be sent both ways. There is also at the top of the screen an input path pointing to a node. This is where the data will start flowing when you run your program. The goal is to modify it as needed and channel it to the output path at the bottom at the bottom of the screen.

That's about all there is to cover with nodes. There are some things you should avoid when using the nodes, but we'll cover that in the last section. Let's get more into the inner workings of the nodes.
System Architecture


Inside and outside each node are a set of memory locations (registers) where you can store your data. The data that is passed through the program is numerical, any number from -999 to 999, and these memory loactions are used to either store the data, change the data, or move the data around. I'll go through these one by one and try to explain them as best as I can.

ACC
Think of ACC as "the" memory location. Every program you write is going to use it in some way, shape, or form, and most of the commands (opcodes) I'll talk about in the next section use it or change it as well.

The best analogy I can give you for ACC is your wallet. You can put money (data) into it, take money out, and generally do what you want with it. If you are going to change the data somehow, use ACC.

BAK
BAK is kind of a funny guy. You would expect him to work a bit like ACC, which he does in the way he stores data, but he doesn't have the full functionality the ACC does.

BAK is sort of like your bank, but don't take that analogy literally as BAK doesn't act like a real bank. Only two commands work on him, which I'll cover in the next section. Just know that from ACC you can either move data to BAK, the equivalent of taking money from your wallet and putting it in the bank, or copy data to BAK, the equivalent of telling your bank you have this much money in your wallet and them doing some illegal stuff to mirror that amount in your account.

NIL
NIL has no explicit purpose in terms of the game, but it is used for less obvious reasons that will be important later when I start explaining the commands (opcodes). For now, know that it means zero.

LEFT, RIGHT, UP, DOWN
These are not memory locations, per se, but techically they do hold data temporarily before moving the data to different nodes. Their names indicate which direction they are moving, shown by the arrows around the nodes. Pretty self-explanatory.

ANY
ANY is also pretty self-explanatory. Rather than just look at one direction, it looks at all of them and takes data from the first direction it comes from or moves data in any direction. If you use ANY, make sure there are at least two (2) adjacent nodes that are using it.

LAST
LAST is like ANY, except that it takes into account where the data came from. If data came from LEFT, and you want the data to be set back without specifying a direction, use LAST.

NOTE: ANY and LAST can be used in combination with each other to create some interesting data flows.


Thats about all for this section. Now, let's get to the commands, otherwise known as opcodes.
Instruction Set
This is where I think many people get confused when it comes to TIS-100, and that isn't without reason.

If you do have some experience programming, especially in high-level (English-like) languages like C, Java, Python, etc., it probably takes some time to adjust to a low-level (computer-like) language like assembly which the game is based on. You are, in essence, talking to the machine rather than letting a compiler do it for you.

If you have no experience with programming at all, it is sort of a double-edged sword when it comes to these commands. On one hand, you are new to programming so you can learn much easier as you have no pre-conceived notions about how code is written. On the other hand, assembly language is less user-friendly (waaaay less) and, in my opinion, teaching it to new programmers is the equivalent of dropping them out of an airplane without a parachute and expecting them to create another plane to survive the fall.

Anyway, enough of that. I'll go through each instruction (also known as opcodes, as I have said) and explain each one.

Comments and Titles
Comments might seem pretty useless, but if you really need to remember something about your code, you should use them. Use them sparingly, though, as they take up valuable space that can be used for other more useful instructions. To create a comment, type '#' before it.

Titles are similar, but you have to type '##' instead. You can't name a program directly, so you have to use this instead.

Labels
Labels are sort of like comments, but unlike comments they play a role in how the code runs. Labels show where sections of code start and, when used with the jump (JMP) opcode, can be used to control which sections of code run.

An example of how a label can be used is shown below. The section of code is called 'LOOP:' (that colon is important). The jump (JMP) opcode is used to go back to 'LOOP:' (JMP will be explained here in a bit).

LOOP: <INSERT CODE HERE> JMP LOOP

NOP
No-operation (no-op), or NOP, is another one of those things that might seem pretty useless. However, NOP actually can be pretty useful if you want to control the pace at which your code works. It's exactly as it sounds: it does nothing....sort of.

What it does when it runs is it adds in extra work the computer has to do on nothing. In the manual, it says it's equivalent is 'ADD NIL', which is basically saying 'add zero'. When the computer adds zero, it adds extra time for the code to run. You may not use it in the first couple of challenges in the game, but when the timing of the code is critical, NOP can be your friend.

MOV
This opcode is crucial to moving data around in the program. Expect to use this opcode A LOT.

You may have noticed that a lot of these names are pretty well-defined. MOV is no different. It allows you to move data around your program, in particular between two nodes. It requires two things: a starting point where the data already is and a destination where you want the data to go. The destination will always be a memory loaction like ACC, DOWN, ANY, etc. The starting point doesn't always have to be a memory location. In fact, your starting point can actually be a number if you wanted. Some examples below show this opcode in action.

MOV UP, ACC #Data from the upper node is moved into the current node's ACC register MOV 8, DOWN #'8' is moved down to the node below

SWP
Remember how I said BAK was kind of a funny guy. These next two opcodes will show you how to use him.

Swap (SWP) tells the computer to move any data in ACC into BAK, and any data in BAK gets moved into ACC. Remember the wallet/bank analogy. The is the equivalent of making a deposit from your wallet (ACC) into your bank (BAK) and withdrawing whatever is in BAK.

SAV
Save (SAV) tells the computer to copy any data in ACC into BAK. Your bank just did some illegal stuff to mirror the amount of money in your wallet (ACC) to your bank account (BAK), though don't think it's illegal to use this opcode.

NOTE: SWP and SAV are the only opcodes that can change the data in BAK. Using any other opcodes besides these two to change BAK will result in errors.

ADD
This opcode adds a value or data in a memory location to the ACC register. Think of this as getting birthday money and putting it in your wallet (ACC).

SUB
This opcode subtracts a value or data in a memory location to the ACC register. Think of this as spending that birthday money you got (probably on something you really didn't need in the first place).

NEG
Negate or negative (NEG) might be confused with SUB by first-time programmers. NEG doesn't do anything else except make a positive value negative or a negative value positive. It only changes data in ACC.

JMP
Jump (JMP) is the first of several opcodes mentioned here that control how the code runs. I described it's operation like this to someone in the forums: Imagine you are building a chair you bought from a store and it tells you that in order to attach the legs, you have to go to section 3 and follow those instructions.

And that's basically it. In the code, JMP tells the computer to go to a section designated by a label and run those instructions there. Look at the example under the 'Labels' section. It should make a lot more sense now!

JEZ
These last several opcodes are all jump instructions, but require something in the ACC register to be true.

JEZ is an acronym for "Jump Equal Zero". This means that it will only jump to another section of code if the value in ACC is exactly 0. Like JMP, you must specify a label to jump to.

JNZ
"Jump Not Zero". If the value in ACC is any number but 0, jump to the designated label.

JGZ
"Jump Greater Zero". If the value in ACC is greater than 0 (meaning it's a positive number), jump to the designated label.

JLZ
"Jump Less Zero". If the value in ACC is less than 0 (meaning it's a negative number), jump to the designated label.

JRO
JRO, like BAK, is also kind of a funny guy. As you use him very early on in the game, I'll try to explain in a bit more detail.

"Jump Relative Offset" does not need a label to jump to. It can take a value or it can be dependent on the value in ACC. Based on the number it is given, it will either skip forward that many instructions or jump back that many instructions. Hypothetically speaking, it can jump back as far as 999 instructions or jump forward as much as 999 instructions, but because you can only write so many instructions in a node you will only ever need to go back or forward a maximum of 10 instructions. Some examples are shown below.

NOTE: Do not give JRO a value of 0. This will will cause JRO to jump to itself, causing your program to freeze.

JRO -2 #Jump back two instructions JRO 3 #Jump forward three instructions JRO ACC #Jump back or forward based on the value in ACC
Additional Information
(Work-in-progress. Sections to be included are: Node communication, Stacks, and Keyboard shortcuts.

Additional sections and subsections can be added if requested.)
Closing Remarks
And that is the manual explained. I hope you found this information useful in some way and that you left this guide slightly less confused that you were before. I firmly believe that programming isn't something everyone can easily understand, so don't feel bad if you are still struggling with it. If there are parts of this guide that could be made more clear, or if you have a question that isn't pertaining to anything spoiler related, feel free to leave a comment. I am more than willing to help, and I'll be sure to quickly update the guide so that it is easier to understand.

GG and Good Hunting.
18 Comments
Falcorian Sep 22, 2022 @ 5:11am 
Helpful as a kind of refresher/intro to an old coder who has forgotten more than he remembers :P Wish you had managed to finish it up but what's there was helpful :) Thanks!
chainerfries Sep 3, 2022 @ 3:25pm 
as in the ones that dont need coding
chainerfries Sep 3, 2022 @ 3:24pm 
i think i should stick to other Zacktronic games like SpaceChem, Opus Magnum, and Infinifactory
Nova☆ Apr 20, 2022 @ 8:59pm 
Dan, if you're still struggling (or anyone who reads this later with the same question), try putting in "JGZ A." Then, elsewhere in that node, Put "A: MOV ACC DOWN" (or whatever).

the JGZ command will jump to wherever the "A:" is.
DAN-di-WARhol Oct 22, 2021 @ 12:32am 
I'm struggling to input a "designated label" for JGZ. I've tried "JGZ 2" (wanting it to jump forward two commands if acc is greater than 0), but I get an error.
DAN-di-WARhol Oct 21, 2021 @ 11:44pm 
It has been very helpful. I am still 50:50 about whether to continue with this one though. As having no programming experience, the game is very opaque compared to other Zach titles.
QuasiSnipr1048  [author] Oct 21, 2021 @ 9:17pm 
I always forget about this guide and then I get a comment that reminds me that it exists lol.

Code examples are on the to-do list, I just haven't got around to doing it yet. Appreciate the feedback, hope it was helpful!
DAN-di-WARhol Oct 21, 2021 @ 1:20am 
I'd have liked to see examples of the code's usage.
NewbeToAll Aug 14, 2021 @ 7:55am 
Nice Guide! Never knew how JRO worked until now
Eye of Newt May 26, 2021 @ 7:23pm 
If you look at the corresponding ADD instruction you can see that the order is always ADD the value TO ACC. So SUB would be to SUBTRACT the value FROM ACC, or ACC - X.