JYDGE

JYDGE

160 Bewertungen
Collectibles (& Secrets) Locations.
Von superjwren329
Exactly what it says on the tin, really. With all of the Secret Areas and ALL of the collectibles. Spoils some of the game by telling you where they are, so if you want to save the surprise...yeah.
5
   
Preis verleihen
Favorisieren
Favorisiert
Entfernen
Introduction
Welcome to Jydge. If you're here, there's likely at least one of these collectibles holding you back from getting that certain achievement. Some of the hints you're given are vague, others are more obvious if you think about it and look at the map it might be referring to, either by the name of the mission or what's on present.

There's 15 Collectibles in all. I'll be listing them out in order of how they're listed row by row, from left to right rather than Map Order as some require certain Cyberware, Difficulty level or other factors.

All of their names and effects will be spoiler-tagged in case you'd prefer to keep it as a surprise until you find them for yourself. While I don't have many screenshots on hand (or at least ones with the collectibles on screen as they stop appearing after you pick them up, hopefully the description and what images there are will get the point across.

And I'll try to avoid making the obvioys letter replacement throyghoyt this gyide.

...Well, after that. Ahem.
Collectibles 1 to 5.
#1 - Odd Rock.
Hint: "Poor little fellow in the hardcore nightclub dumpster."
Effect: Show friends and foes in minimap.
Map? 10, Ash Bay Nightclub. Hardcore Difficulty. Thanks to Flameheart for pointing out the difficulty DOES matter with this one.

For the first on our list is one of the easier hints, although it may not seem that way at first. Half of the hint here makes it obvious as to what map and where the Collectible is while the other half however is a bit ambigious as how to actually make it spawn.

Make sure you have the Shrinkify cyberware equipped and an explosion Special Weapon, Heavy Ryckets or C-4K to blow the dumpsters up so you can reach the collectible before you enter the map. That's the only other thing you'll need.


As marked on the map, you want to make your way to the top left corner of the map. Feel free to take out the boss if you wish or simply blow the dumpsters away and grab the Collectible hiding in the corner.


---
#2 & 3 - Pixelated Glasses, Space Ship Model
Hints: "Metro can be a deadly place.", "What's this doing in a garden shed?!"
Effect: Pixelated Vision and Increasing your fire-rate by 5% respectively.
Map: 11, Neighborhood Watch. Normal Difficulty is fine.


...And now we go to one that was very ambigious and the last one I stumbled across. Or at least Collectible #2 was. The only indication of there being a Secret Area leading to the collectible is the Grim Reaper poster down by the underground rail box near your starting position. Thankfully, it's easy enough to access. In either case, bring your handy dandy C-4K along.


Simply walk into range of one of the sweeping turrets either to the left or straight up from where you start, destroy it and make sure it sets off the alarm. Turn back around and wait by the box, four thugs with blue mohawks will spawn and walk out of the box. Kill 'em off and enter it and volia, off you go to the Secret Area 1!


Although it's not in the screenshot, the game will pan over the item you're after to the top right of the lone enemy present. Just deal with him, grab it and get out. And yes, that pistol is something you can pick up...but only while you're here, unfortunately.

...As for the third collectible, you'll want to head to the top left corner of the map nearby where one of the Gang Lord and civilian are. The door is locked, so simply blow it away by planting the C4 right up against it and voila, you're in.


---
#4 - Grim Reaper Poster.
Hints: "Behind a crimson red door at dawn."
Effect: Extra Blood & Gore.
Map: Well, the name of the map is in the hint. It's 'The Dawn of Jydgement.'

Just bring your handy-dandy C-4K or in a pinch, a Heavy Rycket. This'll be over quick. Skip past the opening dialogue and simply follow the road/go to the top left corner of the building where the red door is located.

Simply blow it open with that handy explosive (two Ryckets hitting the door should also work) and you're in. You don't need to, but turn the in-game music down before you walk into the room. It's certainly a welcome call-back, isn't it?

#5 - Cog of War.
Hints: "X Marks The Spot."
Effect: Increases reload speed by 5%.
Map: 5. The Cobra Gang Hideout. Any difficulty works.

It looks a little obvious on the map, doesn't it?


Anyway, bring the C4-K along or again, a decently powered Heavy Rycket. C-4K is pretty much a staple, being a key for nearly everything, really. Head up and go take out the spider bot. After you've dealt with it, simply place the C4 at the doorway the laser-sight's pointing at and blow it open, revealing the room behind it and an elevator to the Secret Area 5, where you'll find the Collectible.


It's a fairly small room, with the collectible in the top of the room. Just break through the glass to reach it and leave through the other elevator.
Collectibles 6 to 10.
#6 - Seashell.
Hint: "Be Patient, the other elevator seems to be out of order. Normally there should also be a button."
Effect: Shows the ghost (a sphere of light) of your previous run/death.
Map? 7, Hostile Hospitality. The difficulty DOES matter, but only slightly.

Thankfully, this is an easy Secret Area to reach. You still will want to bring some C4 with you. In Normal difficulty, you'll need to blow open the Red Door to get to the upper half of the map where the button is waiting, on other difficulties, you don't need to. After that, as the hint implies, you must simply be patient and wait for the elevator but that won't trigger/become active until a short time. It's a bit inconsistent, sometimes taking up until 1:54.

Either way, step inside to Secret Area 2.


From your starting position, it should be easy to get to the 'Do Not Feed' room in the screenshot.
Directly south of it is a small room labelled with a 'Start Test' switch. Pressing it will cause the purple door to the right to open, leading to the maze you'll see below.


Each switch opens one of the three doors in the far right while closing others in the maze. If you're quick on the button and have the Fast Legs cyberware or the explosive key that'll get you through any door, you can get into a different room before the doors close. However, if you want to do it properly...

Middle, Bottom, Middle, Top, Middle, in that order. That's the order of the switches to push. The red and blue keys should be easy enough to get and leave through the red gate.
---
#7 - Old Key.
Hint: "A dead night watchman's locker holds the key ...to the key."
Effect: Well...you need it for the next collectible on the list.
Map? 13, Industrial Boom. Any difficulty works. Bring Shrinkify and Hacking Tool.


First off, head to the bottom left corner of the map. It might be best to defuse the bomb to remove the 'time limit'. When you reach the small 'room' with a corpse/pool of blood (and therefore a Hackable Chest), open it and grab the blue key.


Then head up directly north to the wire mesh fence with people huddling around the barrel-fire.

As you can see, with Shrinkify, there's a small enough gap to get through and being able to unlock the Blue Door and walk into the building with the collectible.
---
#8 - Sin Eraser.
Hint: "Such a dangerous item can only be sold under the counter."
Effect: Using this Collectible brings up a prompt giving you two options. To erase half of your 'sins', in other words, Civilian Deaths by paying 66,666 credits or ALL of them at the cost of wiping your Mission and Medal progress back to the start of the game. Think of it at New Game+, I suppose. You DO keep any Cyberware and Weapons you've PURCHASED, if you've only unlocked them, they WON'T carry over. The first option is repeatable if somehow you've got that many credits on hand and thanks to recent patches, even if you have finished Mission 18, if your total civilian casuality count is brought under 20, you'll get the Good Ending/Achievement when you replay Mission 18.
Map? 12, Circuit Market. The difficulty doesn't matter. There's no real need for a map as you'll see the item directly to your left when you start the map.

Simply unlock the door in the alleyway and pick up the Collectible. You need the previous Collectible to get this one.
---
#9 - Tentacle Statue.
Hint: "It seemed like just a normal night at the park..."
Effect: See things in their 'true' form. ...Well, not really. The models get...eerie and a really annoying grain film filter is constantly in effect.
Map? 14, Artificial Park Rescue. Normal Difficulty.


Simply walk to the top left corner of the map, following the path until you arrive at the corner and the picture below.

Just walk right through the gaps to a small room like you saw on the map, with the Collectible in the middle of a bloody pentagram.
---
#10 - Time Recoil Comic.
Hint: "This comic gave nightmares to the kid next door."
Effect: Slows down time. In reality, it slows down movement and projectiles, both yours and the enemies.
Map? 1, House Arrest. The difficulty doesn't matter. Bring Shrinkify.


This is another short map where you likely saw the Collectible on your first playthough. With Shrinkify, walk through the gap between the hedgewall and barricade near your car...


...and voila, you're 'next door' and able to pick up the Comic that's located a bit further south.
Collectibles 11 to 15.
#11 - Peculiar Gem.
Hint: "Only found on a grim day in the safe room."
Effect: Unlocks the ability to play Gembine, what seems to be a recurring 10tons mini-game when you click on it in the Collectibles menu. Necessary to access Secret Area 10.
Map? 18, Cobra Manor Takedown. Take a guess on what difficulty's required. Okay, it's Grim.


As the camera pans over the main target you're after for the level, that's where you want to go. Blow through the blue door and take him and everyone out to save a hassle. As you can probably see depending on your camera view, there's a 'explosive' generator in the top room and a room with purple doors below.


Simply blow up the Generator and the doors will open. Go and get the collectible!
--
#12 - C.A.T.S.
Hint: "There's been rumours about a vault under the bank..."
Effect: Increased accuracy by 25%. I'm not exactly sure how effective/much of a change this actually entails, however.
Map? 2, Bank Robbery. Hardcore or above. Bring Hacking Tool.

Many people have seen the yellow door taunting them, not being able to get through. Even your trusted companion C4-K can't break through, but it can help you get the key. Where is? Directly to the right at the barricade where the citizens are hiding behind.

To get the key...well, you have to do the opposite of your job. After a bit of recent replaying, the best way I've found is move up right up against the indent in the baricade and charge up a melee attack to kill the top-most civilian.


Again, making it clear that you need to be on Hardcore difficulty or above. Head back to the golden door and head on down to the secret area, number 6, this time. You'll need the Hacking Tool to unlock the doors and away you go, the collectible is at the end of the 'gauntlet.'

It may be best to save this one until after you've finished the game as the 'Citizens Died' tally is there for a reason. Or if you want to use the Sin Eraser.
--
#13 - Book of Secrets.
Hint: "Sometimes science requires sacrifice. Luckily these people are frozen so they won't mind."
Effect: Shows you the Secret Areas you've discovered. Yep.
Map? 6, Shift From Hell. Any difficulty is fine. Explosives will come in handy as you'll see, or Wall Breaker, which will make things a lot easier.


For those who've played this map, you might have already seen while scrambling to survive on the map.


Simply destroy those stasis pods and the door at the bottom of the room will open, leading you to Secret Area 3. A rather pleasant stroll with the Collectible easy enough to get.
--
#14 - Friendly Fire.
Hint: "Private elevator, beware of mines though or he's gone."
Effect: Name kinda says it all. Watch your fire if you're playing with a friend.
Map? 3, Office Retaliation. Hardcore and above. Friend of Mine is recommended, but not needed if you're confident enough.


Thankfully, exploring through the level will bring you to the switch you're looking for, which until it's patched/adjusted, will work only on difficulties Hardcore or higher despite appearing on Normal difficulty. Head to the northern-west corner of the map to find it.


As you can see, the switch and the elevator is in the same screenshot and it will turn grey, signalling it's active. Step inside and get whisked off to Secret Area 7.


Have fun. The collectible is at the bottom of the room near the computer. Keep the hint in mind when you're trying to reach it as Explosion Immunity will save you, but not the collectible.
--
#15 - The Orb.
Hint: "Follow the rescued shoppers."
Effect: Round and polished. Seemingly does nothing. ...To be honest, I'm not sure what it does.
Map? 17, Corruption for Sale. Grim Difficulty.

The last Collectible and a self-explainatory hint telling you all you need to do. As the goal is clear, there isn't much to say beyond rescuing the Civilians and following them to the elevator they escape on and away to Secret Area 4 you go, with the Collectible easy to reach.
Secret Areas 8, 9 and 10 - Closing.
Thanks to Flameheart pointing out how to unlock Secret Area 10 and it being confirmed by the BETA/Patch Notes, all of the secret areas have only found. I was hoping to stumble across it like Areas 8 & 9 and figuring out how it ticked (and not waste 7 hours of searching), but on the plus side, you learn a LOT about map layout and figure out what doors/walls could open to a potential secret area.

But there isn't any real in-game hints leading to them, compared to the Hints for Collectibles and the Grim Reaper poster to indicate there was a secret nearby.

And because I suppose it defeats the purpose of the Guide if I'm ambigious, I'll be more specific with the hints.

Secret Area 8.
Map 15, Raid on their Parade. There's something you need to do before you access the terminal...

To be more specific, BEFORE you activate the terminal that is your mission objective, destroy the two explosive drums behind the Yellow Door.


Which will cause three dummies to spawn around the map


Take 'em out and then activate the Terminal. The database will explode and an elevator will appear nearby.


Secret Area 9.
Map 4, Riots on the Street. There's something in the level that there's more of than anything else. Destory 'em and that 'sign'.

Destory ALL of the computers on the desks in the level and the sign on near the bottom right corner on the map. If the door behind it is still shut, you've missed a computer. Blow 'em all up!


Secret Area 10
This is probably the hardest area to reach since you don't exactly get to it like the others. If you want to reach it, you'll need to score 55000 points or above in Gembine. It's a bit of a tall order to accomplish and I can't exactly give much advice on it.
---
...Other minor Easter Eggs.
Click on the Jydge's mechanical arm or visor several times. If you're using a 360 controller, mash the X and Y keys to get similar results. Again, it's minor, but it's still some source of amusment, I suppose. And playing Map 1 on Nightmare will have some...unexpected creature lurking in the top right corner of the map. You can't reach it, but it's still a little unsettling.
----
Closing

If it hasn't exactly been apparent, this has been my first attempt at writing a Guide of any sort and hopefully it's been clear enough to help find any Collectibles or Secret Areas that have you stumped.

Feel free to criticize what I've written up, whether there's spelling mistakes, information that's a bit unclear and I should clarify in greater detail. I can probably get the mini-maps of the Secret Areas if people would prefer.

Is there anything else you want me to add? I can expand on the guide and make it cover everything in the game that'd be unlockable with Medals, like Cyberware, Weapon Mods and Modes, that sort of thing, perhaps? I'm open to suggestions so if there's anything you want me to add, let me know.

But for now, there's no more Secret Areas left to find, so until more content gets added and therefore more Secret Levels, I'm more than happy to give credit if you stumble across any before I get to them.

Speaking of which, I owe a lot of thanks thanks to Flameheart for pointing out that Collectible 1 DOES require playing the Ash Bay Nightclub/Map 10 on Hardcore Difficulty, along with suggesting to make the hints for the Secret Areas 8 & 9 more clearer and pointing out Secret Area 10 likely (and DID) turn out to be hidden behind the Gembine wall.

Thanks a bunch to 10tons for making this game. Again, I'm sorry if I'm spoiling the secrets you had in store, but there's times some of us need a hand, so...that's why I'm here.

And I guess a gruding sigh at the Gameplay.Tips webpage, which I'm sure they'll be copy-pasting the edits and final 'W.I.P' here onto their website soon enough.
39 Kommentare
Riff 17. Sep. 2022 um 5:27 
Alright nvm, it only spawns on grim (probably nightmare too) difficulty
Riff 16. Sep. 2022 um 14:47 
Hey I don't know if you're still responding, but in Level 18 Cobra Manor Takedown I don't see a peculiar gem. It just doesn't spawn for me there. Do you know what I can do to fix this or something?
Redyrts 30. Juni 2022 um 20:12 
If you do the [#13 - Book of Secrets], on Map 6 [Shift From Hell], and blow up all of the stasis pods, you'll go to secret area with a man in the bottom right area of the house.
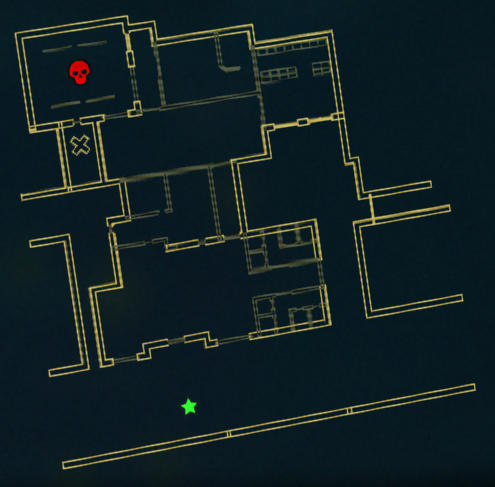
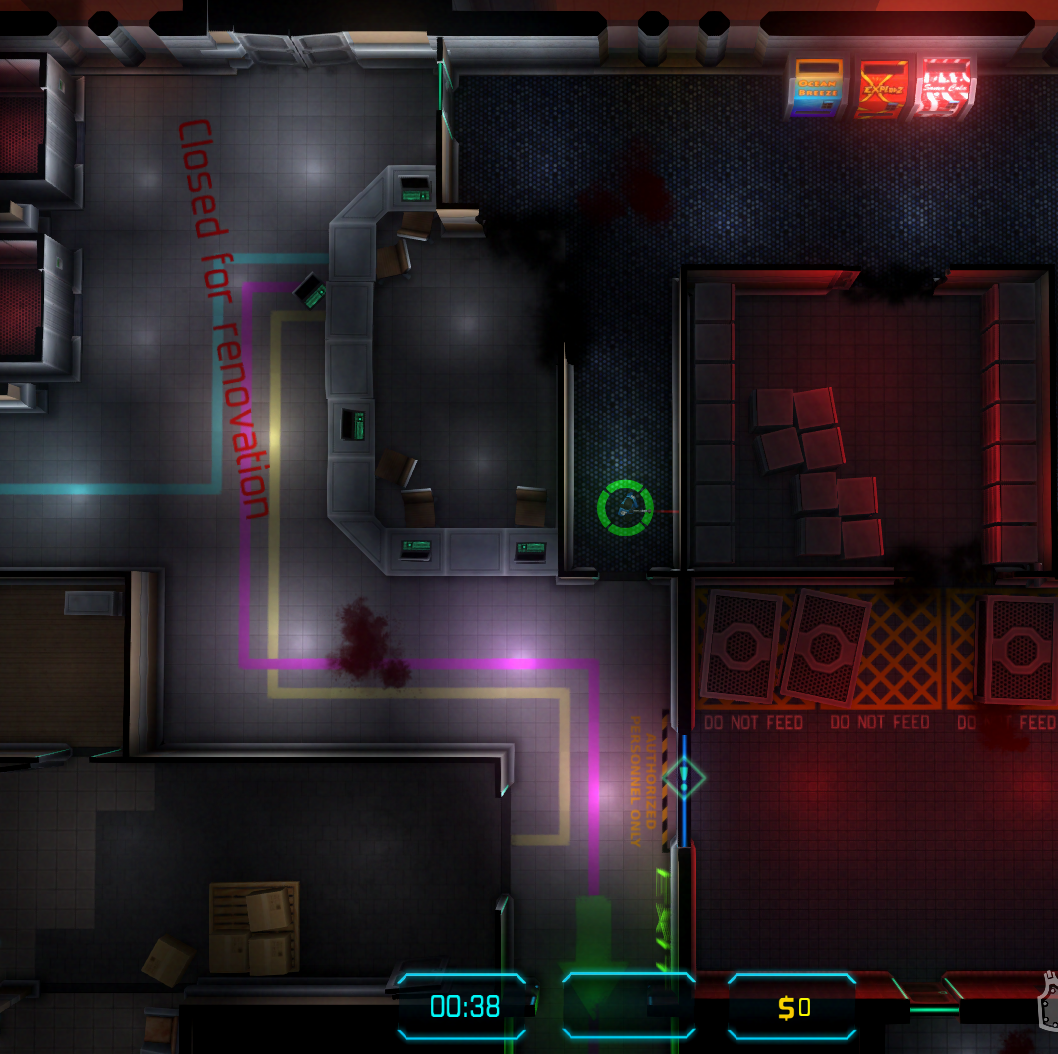
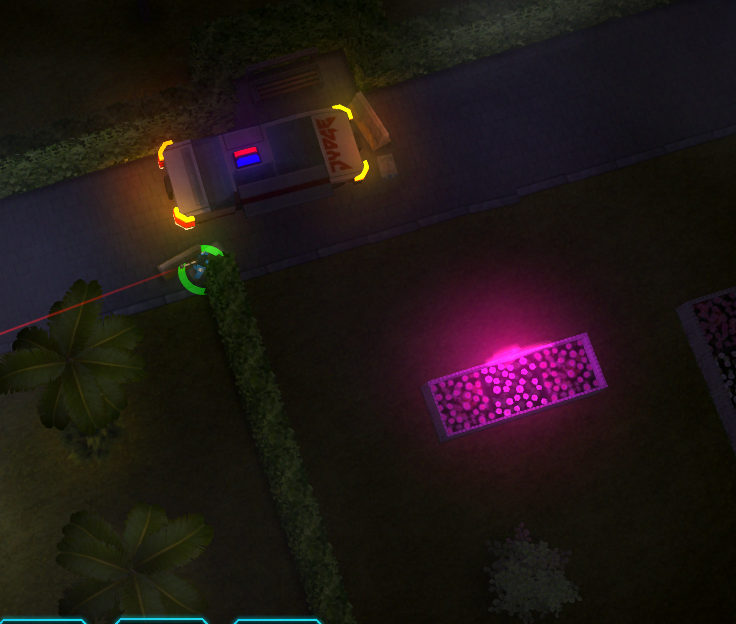
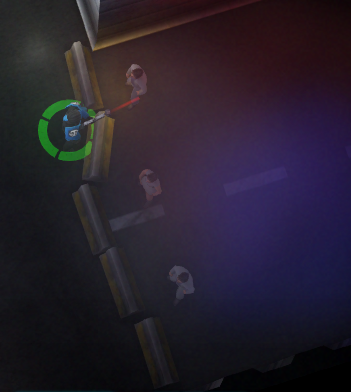
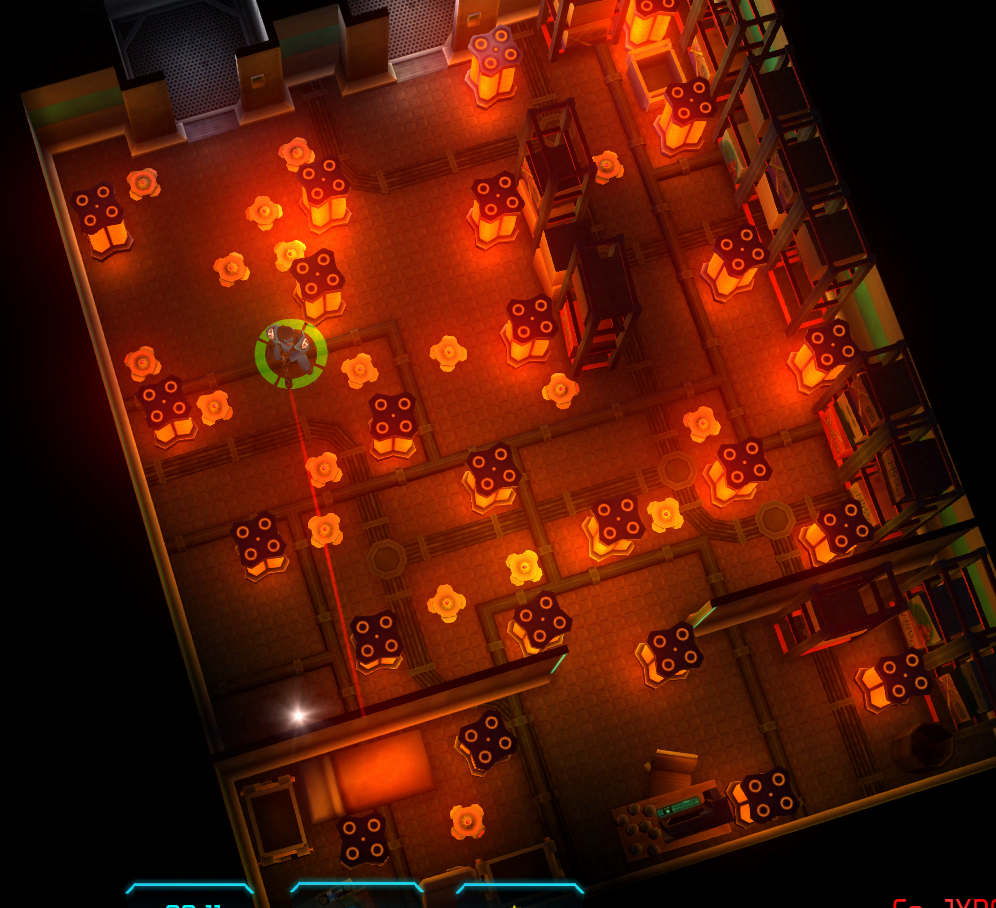
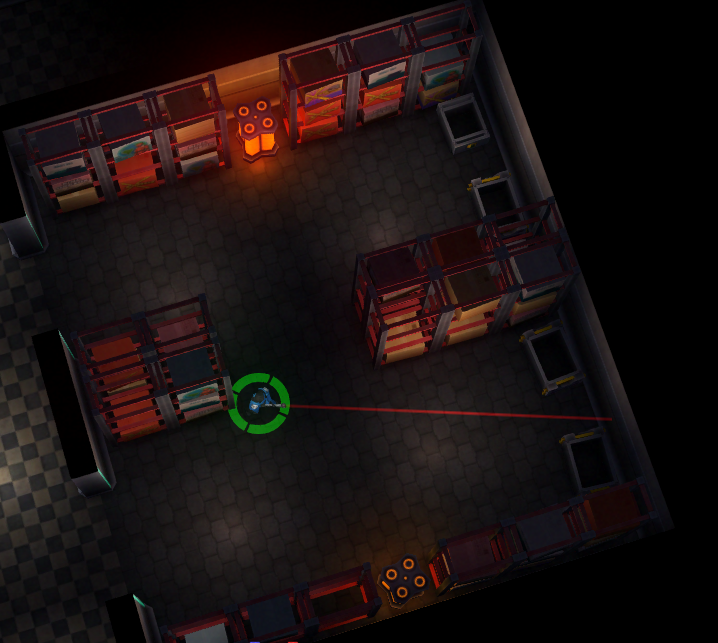
As Zattmann, commented, if he dies, the house will blow up, room by room. Then a large number on mechanical spiders will appear and chase you.One tough armored Chaingunner (also used in Neon Chrome) will also appear an hunt you.
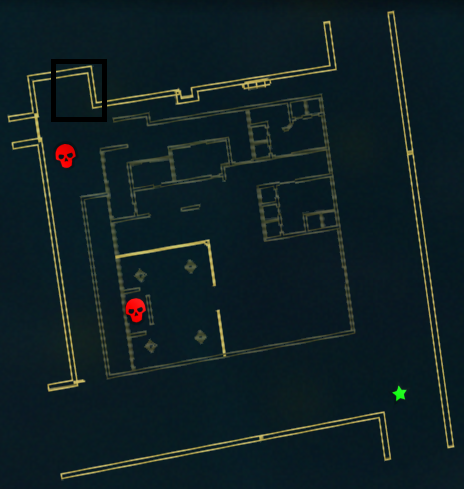
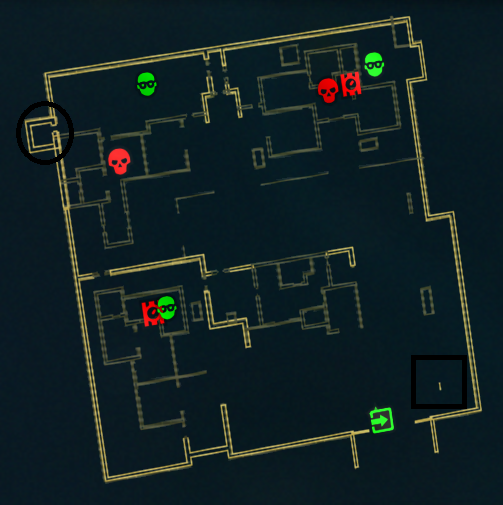
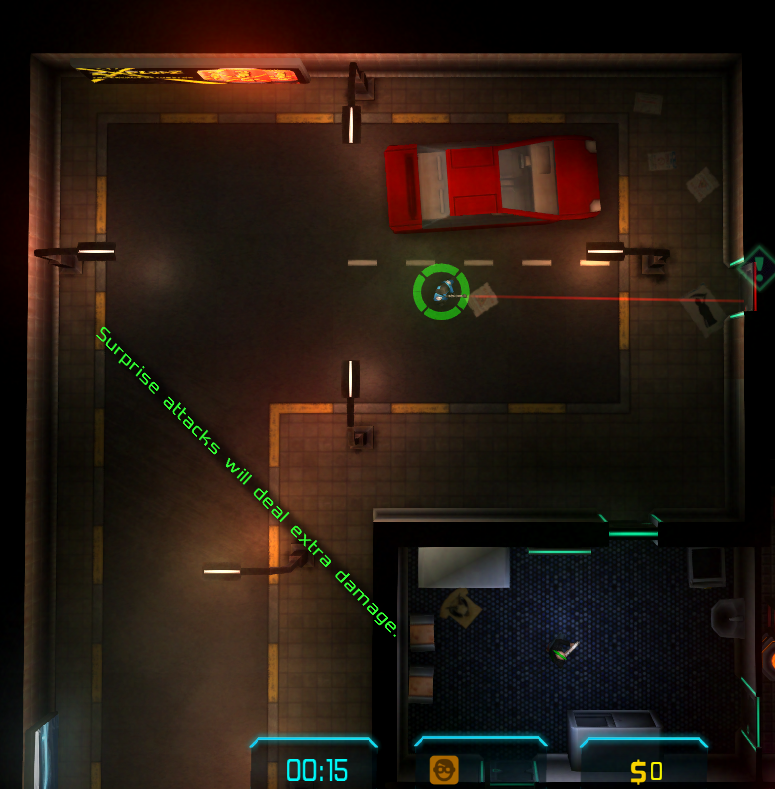
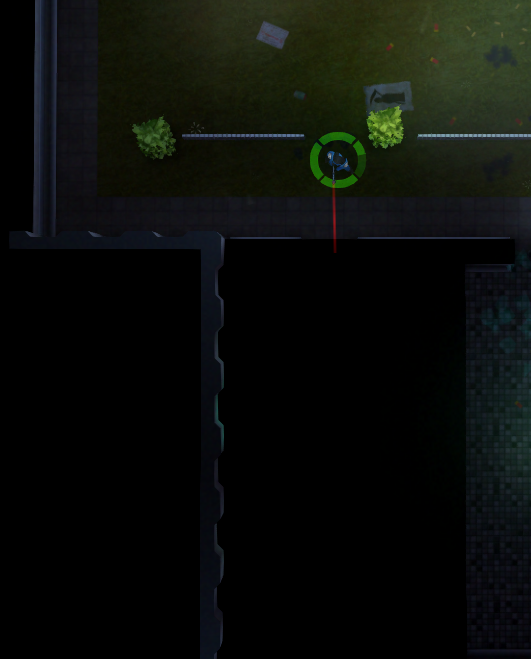
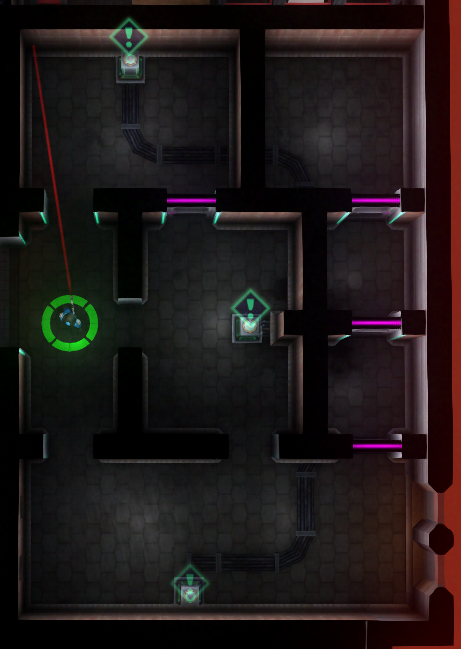
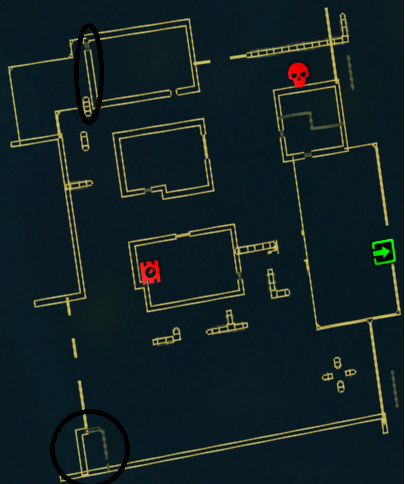
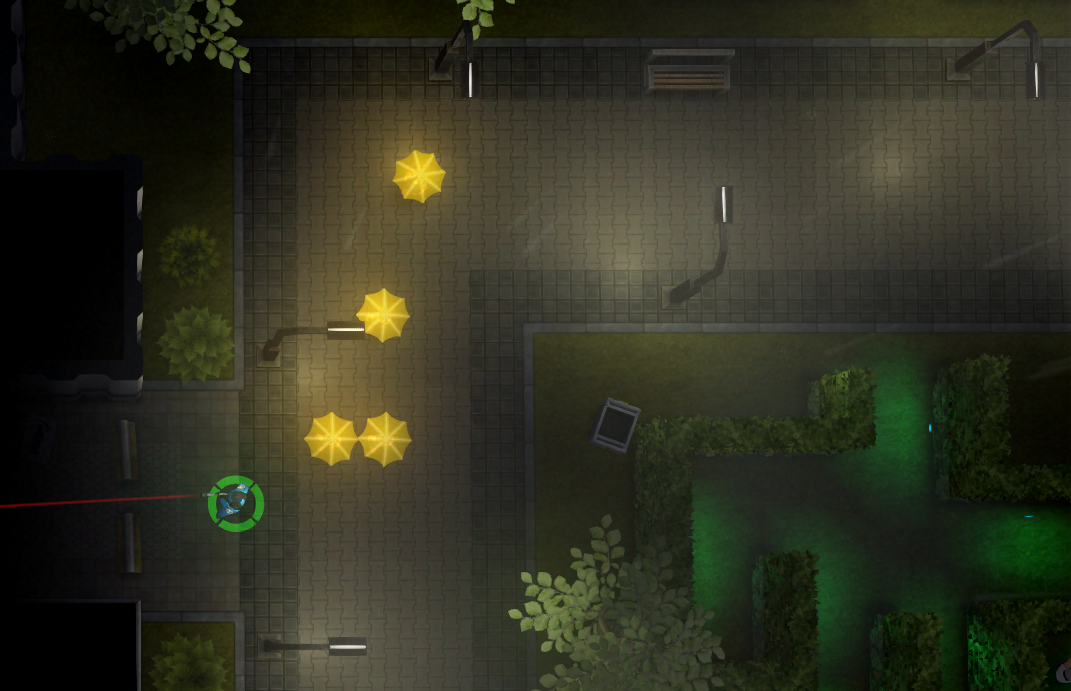
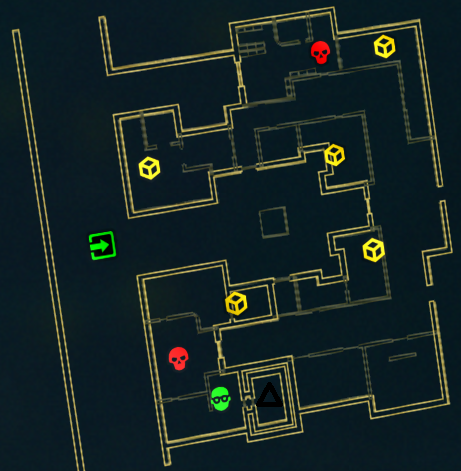
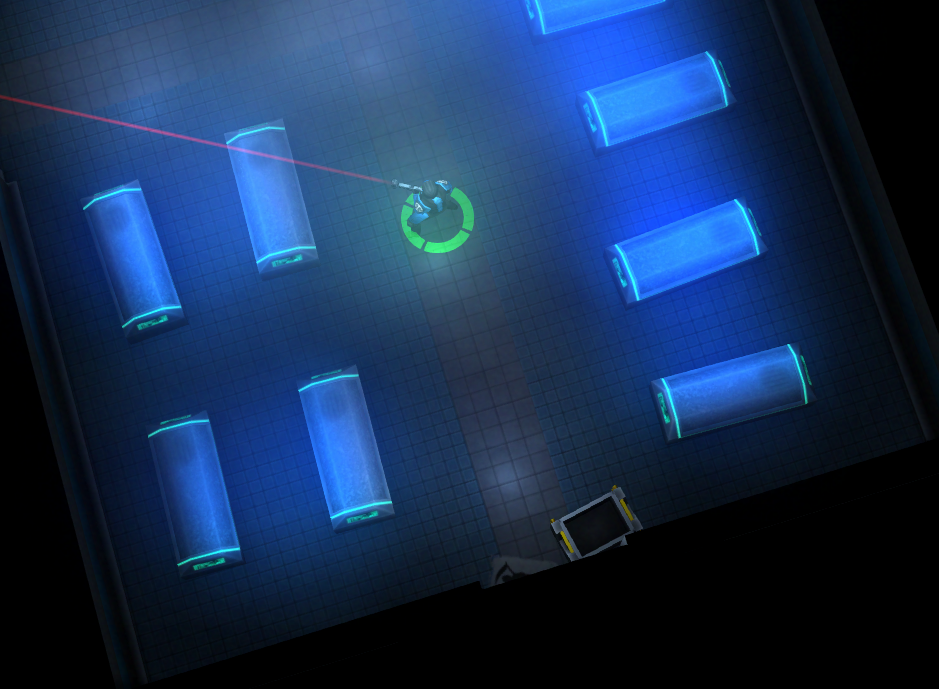
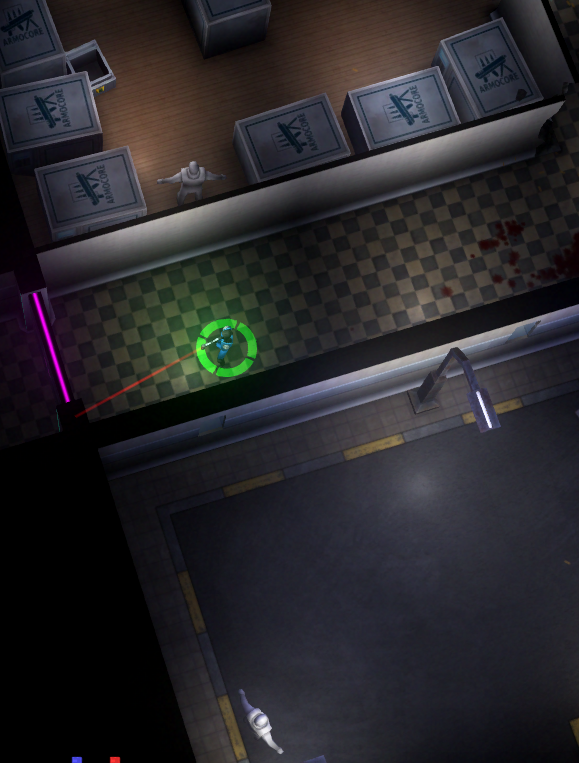
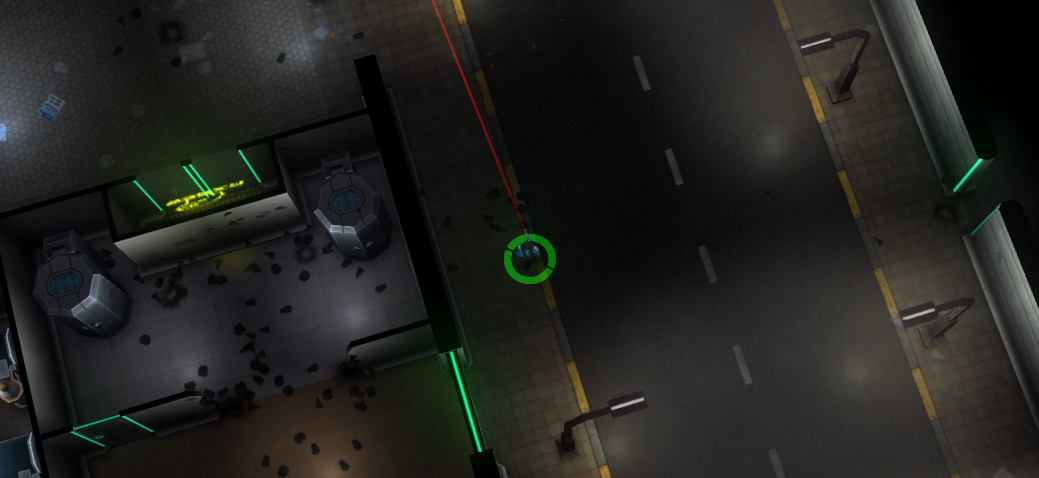
The left most path that leads upwards, you can now go off of the black background of the map until you get to an orange background.
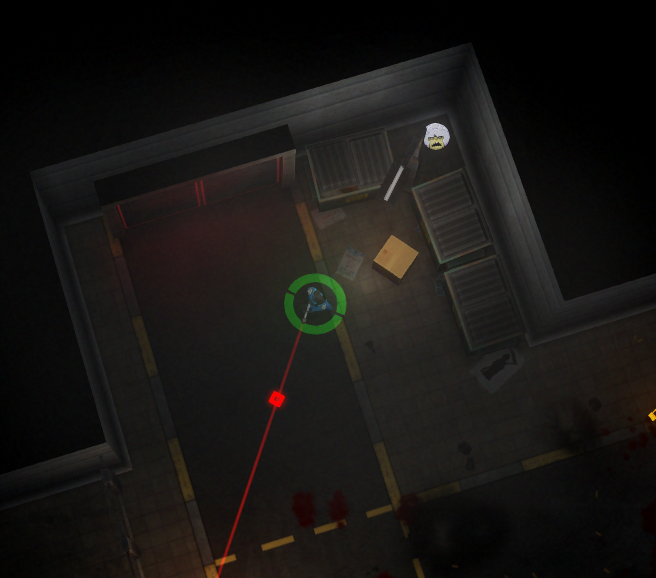
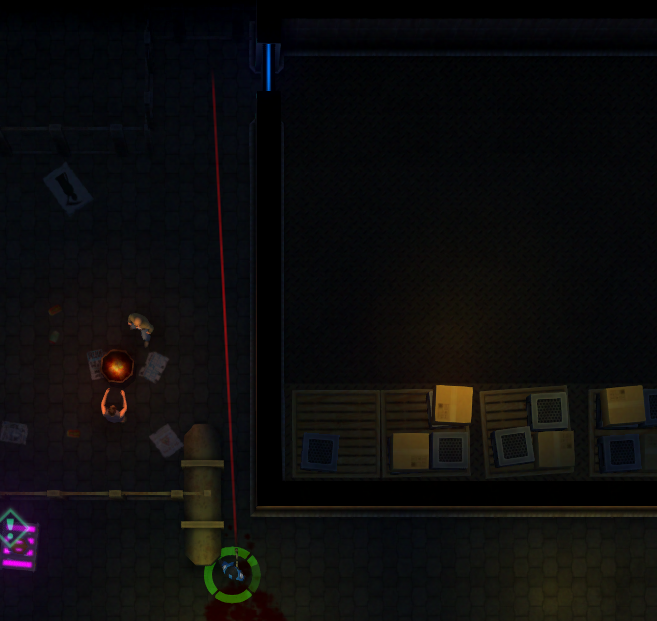
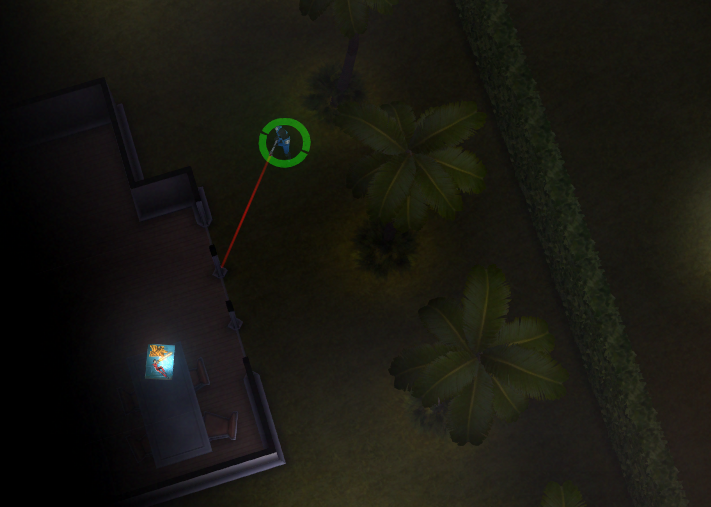
I use the aiming laser as a LADAR (stops when it hits an object) to see if there were any walls or objects hidden in the black are off of the map. I could not find anything.
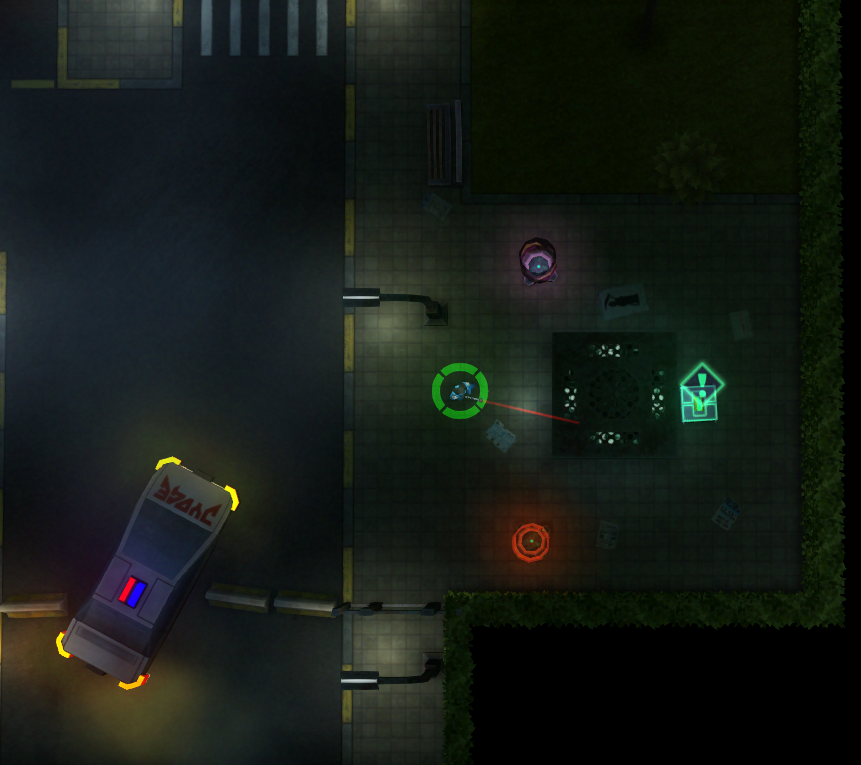
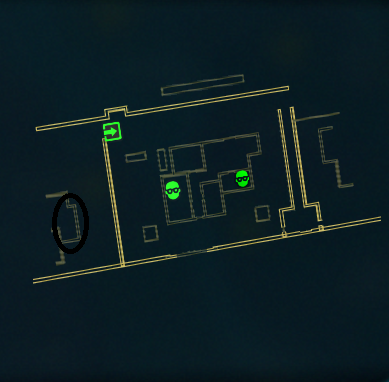
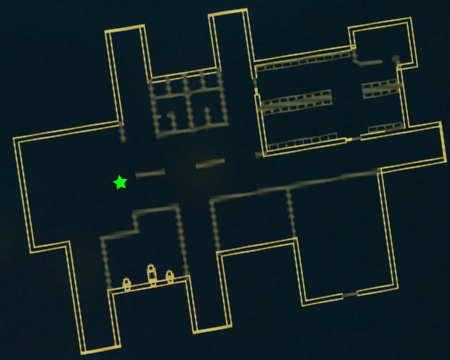
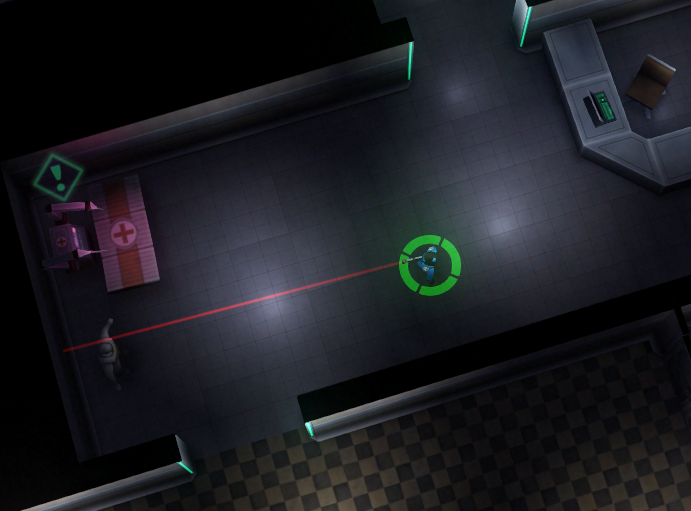
I tried 5 orange screens in every direction. After 45 minutes of searching, I gave up.
I'd like to believe that there is a reward for beating the chaingunner, but I haven't see anything.
I think that the access to the black background and then the orange area may be a bug.
Rushin 17. März 2022 um 8:40 
I second the question about the Secret 10's final room. Since I'm stripped off of weapons, abilities, and decent running speed I can neither blow up the doors nor survive the generator explosion if I melee it. Is it possible to get into that room?
Raptor 28. Jan. 2022 um 13:01 
Thanks for the comprehensive guide but the spoiler tags should be removed, makes it more difficult than it should have to be.
ovni.demon 9. Sep. 2021 um 19:50 
One precision to add: if you reset with the apple, unlocked doors stay open. (I think it's the only thing in stages that is kept)
HajiFreeman 20. Juni 2020 um 12:52 
MerC :squirtyay:
Zattmann 19. Mai 2020 um 19:48 
Just figured out. Its an armored guy with a machine gun and grenades that takes several charges of C4K and a fully upgraded shotgun with the deadly lead weapon mod... The good news is he's slow.
Zattmann 19. Mai 2020 um 19:40 
If the man in Secret Area 13 dies. The house blows up and then spiders start crawling out of the remaining walls... I don't know if anything else happens if you destroy them... I did not stay to find out. >D
Napkino 10. Feb. 2020 um 15:27 
this, is, amazing! once i started getting my hands on these, the levels were so much easier! thanks man!:steamhappy: