Arma 3
54 ratings
Pilgrimage SP Mission Guide (ver 1.95)
By Alky Lee
Unlock some of the hidden features within the Pilgrimage mission to set the mission up to suit your playstyle.
   
Award
Favorite
Favorited
Unfavorite
Introduction
Pilgrimage is a highly customisable singleplayer mission that covers the whole of the island of Altis with dynamic and randomly placed enemies, intel and loot.

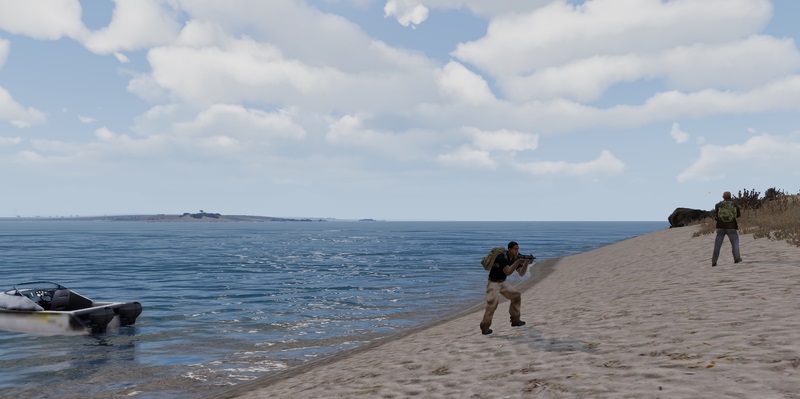
You play as Alexander Laskaris, who is a PMC explosives expert who has rushed to Altis straight from his last contract with no time to prepare, so he is travelling light. He arrives by boat with the intention to find his brother's body, in order to take it home for burial. His father had been working on a secret project which had gone wrong. His brother had gone to the island to stop the invention, but had been killed by it. All Alex knows is that the body is at or very near to a chapel and he will have to check each one until he finds it. He will also need to find a vehicle to transport the body back to the boat. Once the body is in the boat, the mission is completed. Intel found along the way will identify areas to check as well as cross off some of the chapels for him.

The island has been gripped by war. Local warlords have set up Strongholds, roadblocks and garrisons as well as groups of armed men moving around the countryside. The level of enemy activity can be customised before the mission starts to suit your style of play.

Alex is only lightly armed and will need to find better equipment in order to deal with various challenges along the way and to be able to defend himself against any threat. This can be made easier or more difficult by customising the difficulty settings before the mission starts.

It is unlikely that this mission will be completed in one sitting, so consideration needs to be given to saving your progress. The mission will autosave at certain points, and there is an option to autosave every 20 mins. The best option, in my opinion, is to turn on unlimited saves and save manually as and when you feel like it. An average mission length is between 5 to 10 hours in length. I have had a couple, where I was taking on the enemy, extend to over 20 hours.

The mission has been ported to other maps by Rydygier. At the time of writing it has been ported to Chernarus, Bornholm and Lingor.

He also encourages players to create their own ports of the mission. There are unofficial ports available for Tanoa, Altis, Chernarus and Stratis. Some are still work in progress and trying to introduce things such as boat patrols in Tanoa or the complete replacement of vanilla units with RHS Escalation. These unofficial versions may change aspects of the mission which this guide will not address. The main mission was designed for Altis. If using a port to a smaller map, consider reducing the number of checkpoints and hidden camps to avoid over population of the map with such things.
Getting Started
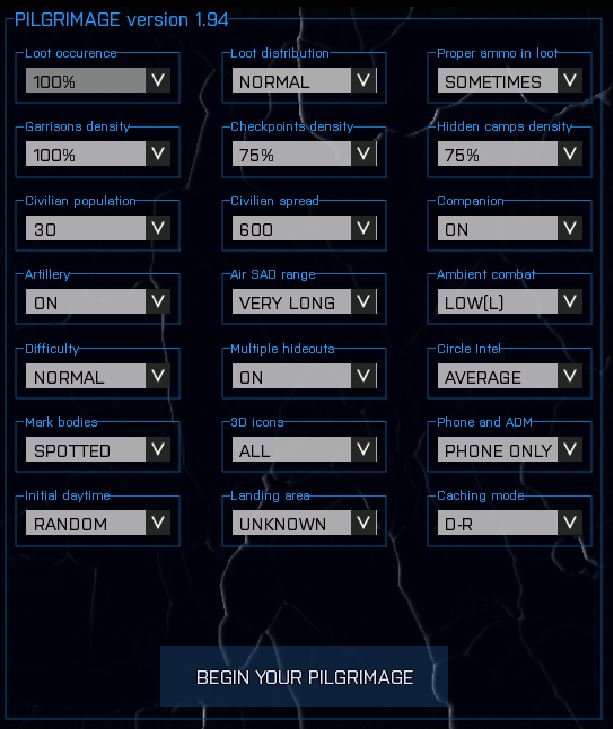
Before you get into the mission proper, there is a screen with several customisable options that set the frequency and type of loot, type and level of enemy activity, presence of 3D help markers, difficulty level, starting gear and starting location.

These settings cannot be altered once the mission has started, so choose carefully as they can dramatically affect your experience in the mission. Even starting in the same place will not guarantee an identical mission. I have played several missions, and none have been the same as each other. Because of the random approach to the AI, you may see things in one mission that you never see again. On the other hand you may see things in your current mission that you have never seen before. This means that the mission is always able to surprise you with something new, no matter how many times you have played it through.

If you intend to play with mods, think carefully about which mods you use as some will interfere with the mission scripts and cause errors and features to stop working. As a rule of thumb, the bigger a mod, the more likely it is to cause problems.

Whilst some mods will reinitialise when you resume a saved mission the next day, other mods won't. You can use a mod called Moduload by Outlawled which can be used after resuming the mission to get mods working again. Moduload must be installed before you start the mission in order for it to work.

Rydygier recommends the following mods:
- Bigger Trunk addon;
- INCOGNITO addon;
- TPW MODS;
- unlocked uniforms;
- any preferred low level AI enhancers;
- any preferred sound and graphical FX enhancers.
Settings Menu

The settings menu can be used to customise the difficulty, ambient combat and other settings before the mission starts. The settings can't be changed after the mission has started.

These initial settings are saved in the player's profile and will be restored automatically each time a new mission is started. Default values can be entered by pressing the ESC button.

The settings selected can be viewed after the mission has started in the Setting Review Log in the diary.

"RANDOM" options are available for each initial setting.

There are currently 21 different options to customise your mission

1. LOOT DISTRIBUTION
– Normal - Can be found in any building but only civilian items in houses
- Abundant - Weapons can be found in houses
- Realistic - Weapons can only be found on bodies or at hidden camps, roadblocks, strongholds, miltary or research installations

2. LOOT OCCURRENCE
- Increase or reduce the number of locations where loot can be found.
- Default is 50%

3. CHECKPOINT DENSITY
- On maximum setting = approximately 70 across the island
- On maximum setting = 1 checkpoint every 4 suitable crossroads

4. GARRISON DENSITY
- Chance of a hostile garrison group in each town or village
- a garrison may be an infantry or mechanised/armour group that is static or on patrol in the area.
- A mechanised group may investigate a position where the player was last spotted.
- A Recon group may try to hunt you down if they come across your trail

5. HIDDEN CAMP DENSITY (HIDEOUTS)
- There are up to 24 hidden camps across the island in remote areas
- They are not evenly distributed and there can sometimes be several in a small area, so I would recommend reducing the setting slightly to try and avoid two camps right next to each other.

6. PHONE & ADM (REQUIRES RADIO)
- Phone calls are mainly background and require no action by the player
- One phone call provides possible stronghold co-ordinates
- ADM (Anonymous Data Market) gives offers of vehicle locations or enemy presence
- Disabling ADM does not affect the ability to sell loot (No radio req)

7. LANDING AREA
- Let's you specify a region where to land otherwise a random location will be given.

8. MULTIPLE HIDEOUTS
- Can restrict to just one hideout at a time, or as many as you find.

9. COMPANION
- You may select to start with an AI medic on your team who occasionally provides you with his pearls of wisdom
- You can switch to your team mate using Team Switch (U)

10. DIFFICULTY
The amount of armoured vehicles on the map will depend on the difficulty setting.

- EASY - Provides better equipment at the start (Rifle, NVGs, binoculars)

- NORMAL- Start with just SMG, 3 Mags, FAK, compass, map, radio & watch

- HARD - no map markers
- no hitch hiking
- no shift+click waypoints
- no artillery mission markers
- no boat marker
- reduced efficiency of vehicle inspections

- VERY HARD - As HARD but no map, radio, compass or watch. Only armed with a handgun at the start. Toolbox is required to repair vehicles.

- INSANE - No clothes or gear at all. (Start in underwear and can't carry any ammo, first aid kits or other loot)

11. MARK BODIES
- Can provide map markers (+) for the position of bodies that the player spots
- Can be set for just player kills or include ambient combat kills too.

12. 3D ICONS
- These are used to identify buildings with loot, civilians who may have intel, surrendered enemies, HVT targets in assassination missions and abandoned vehicles.
- can be disabled not to identify buildings with loot or completely disable all markers

13. CACHING MODE
- D+R (Despawn + Respawn) provides better performance
- H+S (Hide + Show) can be used but will reduce performance by 10 FPS
- B does not remove bodies but gear will be removed (Ambient Combat bodies will be removed)
- Normally units are cached if they exceed a certain distance from the player which is 2km for infantry & 4km for motorized/mechanized/armored groups. Choppers, mortars and the mad Stomper are not cached at all.

14. ARTILLERY
- Enemies can call in artillery if you are spotted
- Artillery are enemy mortars in fixed positions with 32 rounds
- Artillery ammunition can be multiplied by this setting
- Mobile artillery units may join in if they are in the area
- Map markers let you identify the source of the artillery fire as well as the target area (on EASY and NORMAL difficulty settings only.)

15. AIR SAD RANGE
- Two of the airfields on the map are occupied and have a helicopter each
- Groups allied with the chopper have one chance to call in a helicopter on a Seek and Destroy (SAD) mission on the players position.
- Choppers can be shot down, either by the player or ambient combat, and will not respawn
- Their range can be restricted by this setting or disabled
- The choppers are deadly against vehicles and in my experience can also be deadly against infantry. Past experience is no guarantee against future performance in this respect as it depends on default AI behaviour which may be changed by BIS in game updates.

16. AMBIENT COMBAT
- This can make or break your mission experience
- makes CSAT & AAF hostile to each other as well as the player
- spawns extra enemy groups which may bump into each other and start fighting
- sometimes they may find the player first
- ambient combat may occur on the players position
- recommended setting is LOW(L) which limits the amount of groups in an area and allows the player to completely clear an area or at least significantly reduce enemy presence.
- can provide bodies for the player to loot but is dangerous
- MEDIUM setting doubles the number of groups spawned on the LOW setting. HIGH setting doubles the number of groups spawned on the MEDIUM setting.

17. PROPER AMMO IN LOOT
- When a weapon is found, will provide some correct ammo for it

18. INITIAL DAYTIME
- Default is 5am, but you can specify a time or have a random start time given to you

19. CIVILIAN POPULATION
- Specifies the number of civilians to be spawned in the vicinity
- If using a CIV mod such as TPW, intel can still be gained if this is disabled

20. CIVILIAN SPREAD
- radius of how widely spread the civilian population above will be

21. CIRCLE INTEL
- This setting controls your chances of getting circle intel
- circle intel is the most valued intel
- it provides a circle inside which the body may be found
- with more than one circle it will limit the area to where the circles intersect
- circle intel is gained from officers at strongholds/airfields as well as from carrying out assassination side missions for civilians and there is a very small chance of getting it from any source
- excluding civilians will disable assassination side missions
- circle intel from warlords is guaranteed unless completely disabled
MISSION OBJECTIVES
PRIMARY OBJECTIVE
Find the body and a vehicle to carry it back to the boat

SECONDARY OBJECTIVE (OPTIONAL)
Check the strongholds and release his brother's men who are being held captive

THIRD OBJECTIVE (OPTIONAL)
Destroy his father's invention.
If a suitable terminal can be found, try to disable or reprogram the machine. This requires a strong signal which means getting within 100m of it. (Requires a BLUFOR UAV Terminal which may only rarely be found in loot boxes)

FINDING THE BODY
As each chapel is checked, a red cross marker is placed on the map and the games autosaves.

When the body is found, a green cross marker is placed on the chapel instead and the player gets a message to load the body into his vehicle and drive back to his boat. A white 3D icon marks the position of the body.

To load the body into the vehicle, drive the vehicle to within 10m of the body, get out and, while looking at the body, use the action menu to scroll down to the action that loads the body onto the vehicle. If you change vehicles, the body can be transferred to your new vehicle if you are

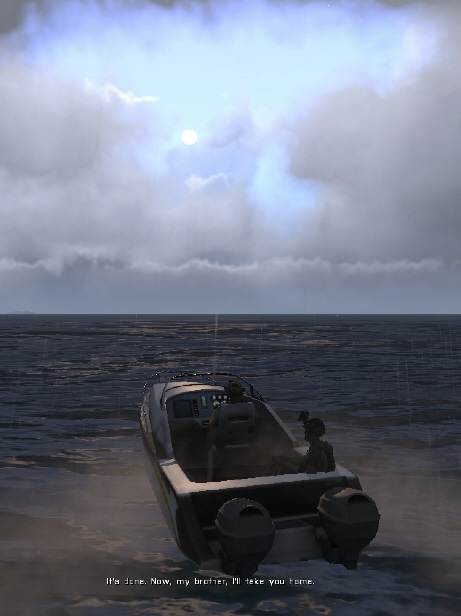
On arrival at the boat, drive the vehicle to within 30m of the boat, use the action menu to load the body into the boat and the mission completes. You can get into the boat and set off for a nice picturesque ending to the mission.

If the body is close to the shoreline, it can be loaded directly into the boat, if it is within 200m of the boat. This provides an option of bringing the boat to the body, especially if you have no other vehicle.


Armed boats can very rarely be found
Known Issues
- When the mission starts there is a massive amount of initialisation to be done which can lead the mission to stop responding and/or lose some sounds. Selecting a high level of enemy presence increases this even more. If you experience this, be patient as normally things settle down after this initial period. This method of initialisation is used, so that higher performance is achieved after the mission has started. If problems persist after a couple of minutes, try saving the game, exiting and then resuming. This can help to achieve better performance and resolve problems. If this does not resolve the problem, it may be necessary to restart the mission.

- some mods may cause problems at the initiation stage, often with on-screen config errors or no sound. It is recommended to try and identify the troublemaking mod and disable it before restarting the mission without it.

- when using fast travel such as hitch hiking, occasionally AI may become uncached in view of the player if they are near to the target position.
Tips and advice
- If you check a chapel and get a green mark on the map and a message about finding the body, it is within 50m of you and you have had a clear line of sight towards the body position. If spotting the body is difficult, you may temporarily set Terrain Details in video settings to "LOW" to remove grass etc.

- To load the body bring your vehicle within 10m of the body and use load action at body. Then guard this vehicle well until you reach the boat.

- If a boat is within 200m of the body position, you should have an option to load the body directly into the boat

- to enable unlimited saves: ESC -> CONFIGURE -> GAME -> DIFFICULTY and enable "unlimited saves";

- If you come across any recon soldiers or see them watching you, try to make sure you kill all of them. It will make your life a bit easier. Also they normally carry rangefinders which are useful if you don't have any binoculars.
VEHICLES
These are spread randomly across the map, in general near roads, but not in towns. There are about 50 empty vehicles, both soft and armored, to find. These are taken from all land military & civilian vehicles in the config. There are more soft vehicles (30-49), than armoured (only 2-3) although the chances are random. Difficulty setting can affect the chances of a vehicle being armed Civilian vehicles were added specifically for use with the INCOGNITO mod.

The best chance to find one of these is in the areas with many roads, but not highly urbanized. As soon as Alex spots such a vehicle, it will be marked by a blue circle in 3D.

Approximate positions of abandoned vehicles can be bought on the ADM market. The approximate position will be provided in form of square "car" marker on the map. It points to an area where one of these vehicles is located nearby.

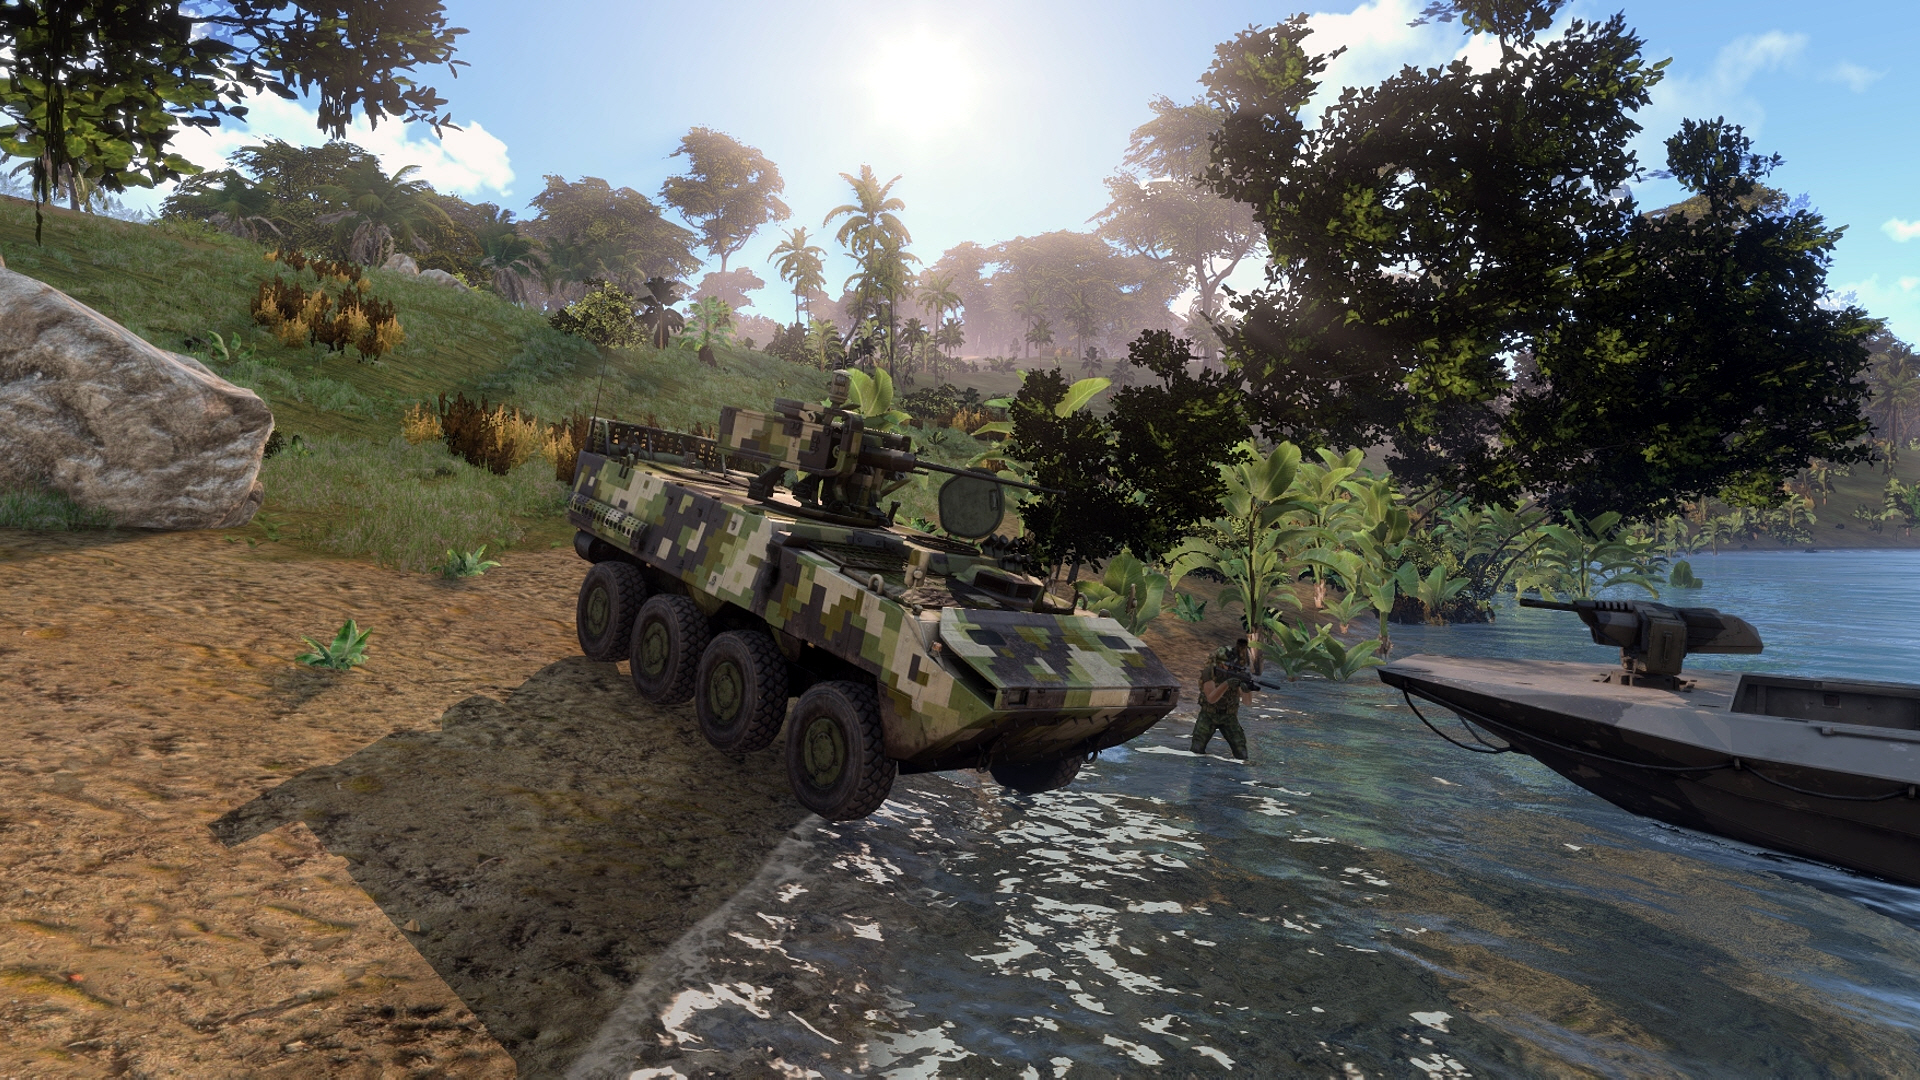
There are also 12 boats randomly spawned at suitable locations around the island, such as piers, jetties, etc. There is a 1% chance that these boats will be of the armed variety rather than civilian. These boats can be used to load the body and end the mission. If all boats are destroyed, including the boat arrived in, the mission will fail. The easiest way to find another boat is by buying the information about abandoned vehicles and looking for a marker on the coast. It can save a long journey back to the original boat at the end of the mission.

If you encounter an enemy vehicle and force the crew to abandon it, you will then be able to repair (inspect) it and use that. You will not be able to inspect the vehicle if it has been destroyed or if you do not have sufficient ff or if you are in combat/danger. A toolkit will normally improve the repair and is required on VERY HARD and INSANE difficulty settings. Beware, that if you have not killed all the crew of the vehicle, they may reclaim it after you've repaired it and leave it unattended.

If the player is using an armed vehicle, there is an action that allows them to check nearby abandoned vehicles for ammunition and transfer the ammunition into the currently used vehicle. They can also be re-armed at hidden camps and checkpoints.

Inspecting vehicles option (Costs 1000 ff)

1. The vehicle must be in your possesion;
2. There must be something to do (i.e. fuel below 90%, damage above 10%, immobilized or destroyed main gun);
3. Player must be within 6m of the vehicle;
4. Player must have enough ff (>1000);
5. You are not aware of any enemy at the time (assumed as combat/danger).
6. A toolkit is required if using the VERY HARD or INSANE difficulty settings.

Vehicles can be used to store loot and weapons in them. In standard vehicles, this space is very limited and will force you to choose what you take with you. The space available can be extended using the Bigger Trunk addon produced by Rydygier in the recommended addons section. The addon does not apply to your boat or the gunship as space in those vehicles is limited.
STRONGHOLDS & AIRFIELDS
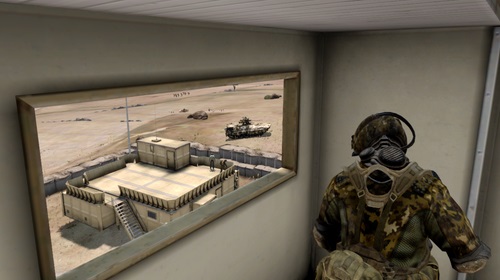
There are two airfields and two strongholds on the map in each mission. Their locations randomly chosen from 10 military and industrial areas and all airfields (but not in towns). At each base there is a really bad ass warlord (maxed skills officer unit). At his body you can find good intel. In general you can expect there to be both foot and armored defenders at strongholds and airfields, as well as static weaponry and minefields nearby. (you can use Alex's demo expert abilities - toolbox and mine detector are useful for identifying and disarming mines).

There are two AIs available to hire, held as captives, one per "stronghold", but not at airfields. If they survive your assault, they may be hired in the action menu for 10000 ff. They will be either a medic or an engineer.

From the officer you can get the locations of the remaining airfields and strongholds, as well as circle intel. If you are lucky enough to have them surrender, you can interrogate them for a circle intel, then kill and search them for another, so it is possible to get 2 circle intel from each officer. (Only one if they are dead)

Officers and potential teammates are situated in a “building” within a 300m circle around the airfield/stronghold. For instance, the officer for the SE airfield, was once found across the road in a metal shack by the gas station. Once a teammate was in a house with 2 CSAT. Once he was on top of one of those tall metal military "towers". Unfortunately, after being hired and told to follow, he fell through the stairs to his death. In such situations use the Team Switch feature to get them safely on the ground and get some weapons, gear, etc.


In addition to the two strongholds, 2 out of the 6 airfields on the island are randomly chosen to have a strong garrison with an officer and an attack helicopter. Circle intel can also be obtained from these officers the same as with the strongholds. Code looks for buildings in 300 meters radius around central point (for airfields - where chopper is landing).

Strongholds:
https://www.youtube.com/playlist?list=PLmLW2nnlKFZ2UidnOsug7dzdF9OsbYa71

Airfields:
https://www.youtube.com/playlist?list=PLmLW2nnlKFZ22QvaMqW5Fmno07eEndgvG
THE MAD STOMPER
Getting a BLUFOR terminal is possible only via loot boxes, which means it is very rare. It also reveals the position of the Mad Stomper so it is a way to find the body fast. In version 1.81 a "hacking" feature was introduced that allows you to do three things.

1. Reprogram targeting algorithms (within 100m of the Stomper);
2. Disable AI control; or
3. Force self-destruction

AI is spawned in the vicinity of the Stomper if controlled by the player. This may lead to too many uncached enemy groups at once which will have a noticeable impact on performance (probably a loss of more than 10 FPS). If this is unplayable then the best option is to destroy the Stomper and sell the UAV terminal as it is of no more use.

LOOT
The first piece of loot you find will probably be in a box contained witin a building. These buildings are marked by a 3D marker if you are close enough. If you are unable to find a loot box in the building or outside on a balcony, there is a chance that the building contains possible intel on a laptop, camera, mobile phone or other document. These may be hard to find and when you do find them, you have to look directly at them to have the “check the intel” option appear in your action menu.

Once you have found loot, you can take it to use or store in your vehicle/at a hideout, leave it there as a temporary cache (mark it on the map) or sell the contents using your action menu. Often the contents are less than useful. On NORMAL setting, civilian loot will be spawned inside houses. On ABUNDANT setting there is a better chance of weapons and ammunition. On REALISTIC setting you can only find loot at military installations, hidden camps or checkpoints

The next way you are likely to find loot is from a soldier's body that you have killed or who was killed in ambient combat. Please note that a killed unit's equipment is "decimated" by a script to limit amount of loot from bodies. Don't assume, when you take a weapon, that you will have any spare ammo to go with it, otherwise you will get a nasty shock when you try to reload in the middle of a gunfight. Anything that you don't want can be sold direct from the body using the action menu while looking directly at the body. All items including uniform, vest & backpack will be sold so beware.

As well as selling from the loot boxes you also have an option in your action menu to create an empty box. This will not spawn inside a building, so you may lose the position of the box. If this happens, you have an option in your action menu to remove the box (N.B. any contents will be lost). You can then go outside and create the box where you can see it spawn. Fill it with what you want to sell, sell the contents and then you are free to create another empty box. You can only create one such box at a time.

The third option for selling loot is from the hideout. The smaller one of the hideout boxes can be used for selling or storage, the larger one just for storage.

There is a 30% chance that when you complete an assassination mission for a civilian, instead of circle intel, they will reveal the location of a “hidden stash”. It is a loot box filled in the same way, as those in military buildings and is marked on the map with a black triangle, with decent accuracy.

On rare occasions you may be (un)lucky enough to come across a "treasure chest" (helicopter crash site) containing goodies that have been manually picked by Rydygier. E.G. everything, considered as most useful. Sniper rifles, launchers, few other rifles/MG, fancy optics, mines, explosives, most popular magazines + magazines for possible weaponry, UAV terminals, etc. All this may also be found in the regular loot boxes, but not in this quantity. This will only be present in 10% of gameplays and very hard to find. The location may be revealed as a reward for an assassination mission.

As for loot statistics, here is how it works for the normal distribution:

1. Stuff is divided by three categories: weapons, ammo, items.
2. Each element is equally probable, but only within own category. Adding more weaponry from addons will not increase chance for any weapon in the box even a bit, although addons like African Conflict, with many weapons with attachments, will increase the chance of something useful. But, at the same time, if that weapon does not use vanilla magazines, the chance for a proper magazine being found separately from that weapon is lower.
3. Each time loot box is filled, code "rolls a dice" for random number from 0 to 100 and chooses one of possible variants:

If a box of better loot, above 30 - box will contain: 1-3 weapon(s) of same kind, 1-24 magazines proper to randomized weapon and 0-1 random item. Above 90 there will be one weapon and 1-12 proper magazines.
In a normal box, over 25 it will contain a random item + an additional 25% chance for 1-6 magazines. Over 55 – will contain 1-12 magazines of same, random kind. Otherwise it will contain a single weapon.
INTEL
When looking for loot, you need to search houses carefully, as apart from the boxes there is a small chance for "intel holder objects", that are much smaller, such as mobile phones, camcorders, etc.

Intel can also be obtained from civilians (blue 3D marker above them - average 10%). Look at the civilian (within 6m) and use the action menu to ask about your brother. This can be tricky if the civilian is moving leading to unwanted actions being performed from the action menu. Paying a civilian for intel can "motivate" the given person. This way the chance for anything useful increases from 50% to 85% and the risk of misleading direction is halved. Getting close to a civilian and staying there for a while may cause civilian to watch you. That also increases a chance for a comment. Civilians may report your location to the authorities and a local patrol be sent to investigate. Shooting will make most of near civilians panic and run for cover.

Interacting with civilians can provide:

1. Nothing useful;
2. A direction in which the body may be found. (Not always accurate and sometimes deliberately misleading)
3. Information re recent enemy presence (red hatched circle on the map);
4. Cross off some of the local churches for you and autosave;
5. Occasionally completing an assassination mission for them , will give valuable intel via e-mail (action menu) and some ff;
6. The location of a warlords big base (stronghold or airfield). For EASY and NORMAL difficulty settings, the location of the POW will be shown on the map.
7. Killing civilians will seriously damage your reputation.
8. Killing bad guys and a few other things will increase your reputation amongst the locals


Interactions with surrendered/dead soldiers can provide intel and/or ff.
1. From[/previewimg] officers at strongholds/airfields/checkpoints using the action menu
2. From surrendered soldiers who can be interrogated using the action menu.
3. From the bodies of officers/squad leaders/team leaders using the action menu.

If you take out both strongholds and both airfields, you can acquire many circles hopefully leading to a small intersecting area significantly narrowing your search.

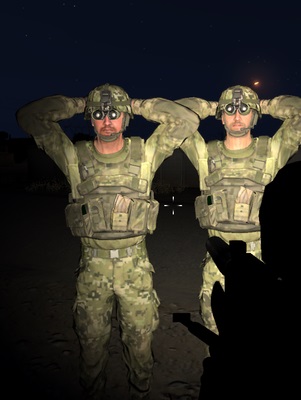
There is a chance that enemy groups, that sustain at least 50% losses may surrender, if the player is not further than 300m from them. Such units will place their weaponry, mags and backpacks on the ground, and will stand with their hands on their head. Captives may be interrogated for intel. They will be deleted, if the player goes more than 2km away from them.

If the enemy surrenders, you can take all their gear, and:
1. Interrogate about your brother(action menu);
2. Release the Captive (action menu - removes from mission, never to return)
3. Kill ... or
4. Nothing.

With Team Leaders and above, sometimes when you kill them if they die after you've interrogated them, you can find further intel on their bodies. What he wants to say to you is one thing, what you can find by searching his body is another.
SIDE MISSIONS
Assassination side missions are sometimes offered by civilians. They will place a red cross on your map with the targets name and role. If you want to maximize the payment, try to eliminate your target by surprise from a distance. Payment is calculated based on distance in metres between player and the prey, and may be multiplied if target was eliminated by surprise. Any kill performed by player will receive intel either circle intel or the location of a hidden stash. If the target is killed before the player completes the task, the offer is cancelled. Target will be marked by a red 3D icon. Mark is visible from long distance (1500 meters), but is very small and semi-transparent. Enough to confirm, that this is the target, when observed, but shouldn't make finding the target too easy.

Missions are dependent on Circle Intel setting. It is always 0% if circle intel is disabled/"warlords only" mode. Otherwise - 2% for "rare", 5% for "average" and 10% for "frequent". Reputation also has an influence on this, if basic chance is above 0%. While negative reputation can reduce chance for the mission seriously (up to 75% probablity, so code will exit before test for actual chance, and up to -1.5% for basic chance), positive values may raise chance for the mission, but only up to 1.5%. So, in total, range is 0-11.5%.
REPUTATION SYSTEM
A good reputation can improve your chances of obtaining intel from civilians. If your reputation becomes extremely good or bad, you may find armed civilians who may be friendly or hostile depending on your reputation. After taking an airfield or stronghold, a good reputation can result in FIA groups spawning as part of Ambient Combat.

If the player is being tracked, more groups may be allocated depending on the player's reputation.

Civilians may report the player's position or trail to the hostile factions depending on reputation.

Reputation is demonstrated graphically using the comments from civilians. Green is a good reputation and red is a bad reputation. Blue is neutral.

If the player gets within 30m of a civilian with clear LOS and in front of him, that civilian passes a test, which decides if should he report that meeting. Each civilian is tested only once - and may report only once. Here the chance varies between 5% and 60%, depending on reputation, with 20% chance for reputation 0. Also all hostile armed civilians will report player on sight. Civilians may report a footstep that the player left in a 600m radius, reflecting rumours about his recent passing by. Because of that, in fact, each time player closes to a town (where many civilians will be spawned) this test is performed for the whole settlement as series of individual tests, if he recently left a footstep in the radius (last 10 minutes).

1. Each time the player does something that should influence his reputation, an entry is added to the single, global array containing value of influence, location and time. Actions influencing reputation are: kill (influence dependent on side and kind of group of killed unit, counts only kills performed by the player or his current vehicle, so if AI companion will kill some civilian eg when driving second vehicle, this will not influence player's reputation, but same for killed enemies), releasing POWs (surrendered hostiles and the two captives), paying civilians for intel;

2. As for reputation dynamics, cyclically, influence of each event is calculated for each unit reacting on player's reputation one by one and all are summed giving the single number. The farther event is, the lesser influence it has, but as rumours are spread in time, older events will have bigger influence. On the other hand, old enough events will gradually be "forgotten" and their influence reduced again, so nothing is permanent (skipping the daytime by resting or waiting however will not speed up forgetting process, it is calculated basing on real gameplay time). There is also a random factor.

3. Reputation influences noticeably, bot not critically, amount of civilians ready to talk about the brother, as well as chance for something useful to hear and risk of pointing false directions. It also influences the chances for useful intel from interrogated POWs, but as in this case conversation is based on the fear, also civilian kills, as making the player more fearsome person, will improve the chance for some intel.

4. Apart from that depending on reputation there is a chance for 3D commentary text, one per civilian. The farther calculated for given civilian reputation value is from the 0, the bigger chance for some sentence. What exactly person will say, depends on reputation value (sentences are randomized from several arrays, each per reputation level). Apart from that, if reputation is high enough, civilian may stop to watch the player. If reputation is low enough, there is a chance, so civilians will flee from the player toward their houses.
TRADERS (Stuff Sellers)
Some civilians may have stuff, such as weapons and attachments, ammunition, vests and other miscellaneous stuff, for you to buy. There are indicated with a blue icon which looks like a little house to me, but are probably a small arrow pointing upwards.


Like mechanics and medics, they will only offer stuff for sale if you are unaware of any enemies and there are no enemies nearby. Any stuff you buy will be in an ammo box nearby (within a few feet). Be careful on stairs, I have been killed by the spawning box on occasions.

If you leave stuff in the box and leave the area, the box may not be there when you get back, so don't buy too much stuff at once unless you have a vehicle nearby to load the stuff into.
GETTING AROUND THE MAP
Hitch hiking is enabled by standing on a road and using the action menu to select the option. It costs 1 ff per metre, so 3000 ff at the start could take you 3km which should get you close to a nearby town. You can hitch hike with a vehicle and your AI companion.

Personally I tend not to hitch hike, as I am frightened I may miss something on the way. There is also a possibility that enemies may be present when you arrive leading to your early demise.

It is also possible to fast travel to a hideout, if you have located a hidden camp and established a hideout there.

Fast travel is disabled if you are in combat, there are enemies nearby or if you have already found the brother's body and the body has been loaded into your vehicle.

HIDEOUTS/HIDDEN CAMPS
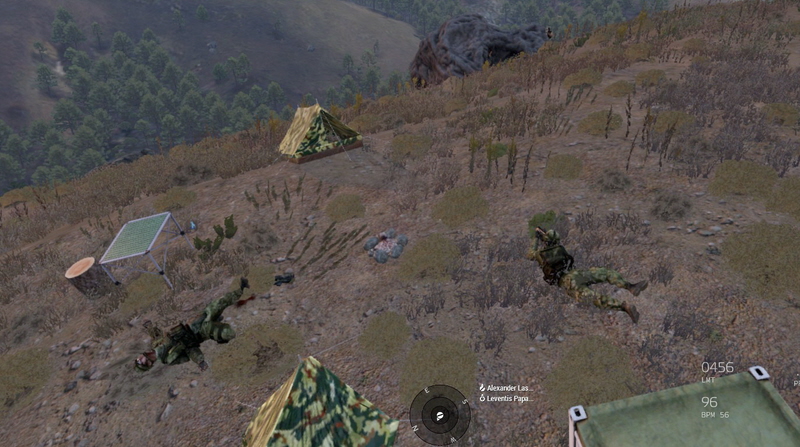
As you usually start in a remote location you can often find a hideout shortly after starting. It is announced to the player as “You smell smoke from X direction” and may be accompanied by “You see a trail. Possibly 1-3 men.”The camp consists of a campfire, some tents, two storage boxes and normally three or less soldiers. A single GP round can quickly take care of them. otherwise if you still only have an SMG, you may need to get closer.

Camps are always AAF but, if ambient combat is not enabled, be careful that they don't call out the gunship on you.

Once you have cleared the camp, approach the fire, look at it and select “establish a hideout” from the action menu. Once established you can fast travel to the hideout at any time (as long as you are not in combat). If you have established more than one hideout you can select the right one by clicking on a map. Fast travel to the hideout does cost time, so if you do it too often, you can find yourself in the dark before the end of the mission. Your vehicle will travel with you provided it is within 250m of your position. Fast travel is disabled if you are in combat, there are enemies nearby or you have found the body and loaded it into your vehicle.

You also have the option to fully heal at the camp fire which takes 6 hours and uses one first aid kit if you don't have a medikit.

If you have an assigned vehicle close enough (within 50m) from an established hideout, you can use an action at the fireplace to pack the hideout into that vehicle, and unpack the hideout at a new location (if there is sufficient space nearby). Loot stored in the boxes should stay intact. Limitation - there may be only one packed camp in game at a time.

On REALISTIC loot settings weapons can be found in the small ammo box.
GARRISONING
One possible AI group stance is "garrisoning". That means, most group members, except the Team Leader will be relocated into random house positions, where they should stay as a nasty surprise. TL meanwhile will patrol many building positions in loop. If you arrive in town on foot, you may suddenly find an AI in a building behind a closed door.
GUNSHIP SEEK AND DESTROY PATROLS (SAD)
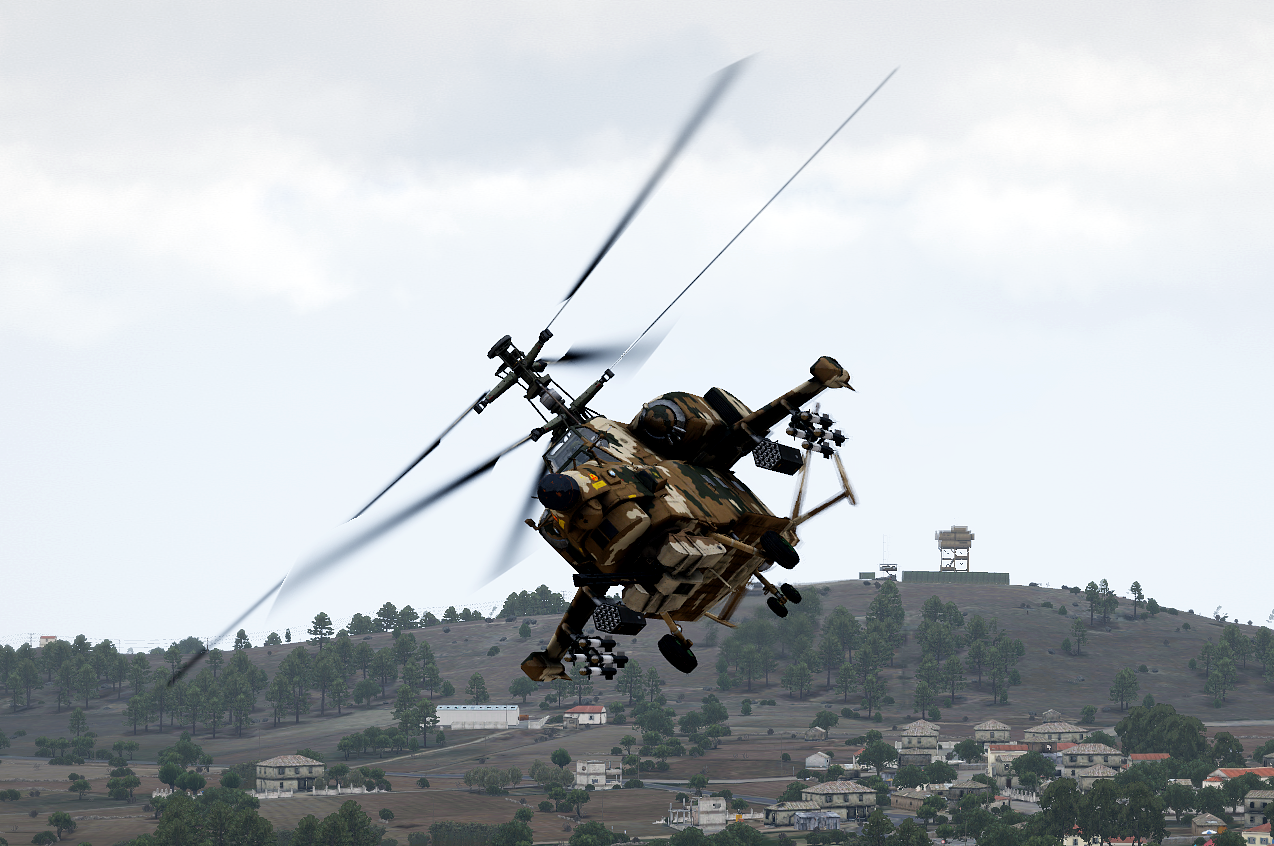
There are two Kajman gunships on the map, each based at an airfield, and if you manage to capture one by damaging it or sniping the pilots inside, it should be repairable for use as your vehicle.

Chopper patrols are straight forward - Seek And Destroy waypoint somewhere near the position where the player was spotted. When done it will RTB and land at the airfield.

It is not too hard to avoid detection by a chopper. Just take cover in a building or a bush. If you are in a vehicle you may be dead before you know the gunship is there. If the reporting unit still has line of sight on your vehicle, the gunship will attack it even though you may have got out of it. The air SAD patrol over an area lasts at most for a few minutes.

Any group, that detects you, have a single chance to call air support. The closer to an airfield with a gunship, the bigger that chance is. If called and free (and no more than one mission per 10 minutes, unless in self defence), gunship will arrive, do a SAD sweep (few minutes) and will go back. Watching the diection of the helicopter as it leaves gives a good indication of the airfield that it is based at. If there are other enemies in the vicinity, the gunship may continue to attack them and stay a bit longer.

If the SAD setting is set to VERY LONG, you may have two gunships around at the same time, or the second one arriving as the first one leaves depending how far they are based from the player. If the gunship is out on a tracking mission, it may respond to the call for assistance. As a result it can arrive quicker and from an unexpected direction.

The helicopters can be destroyed and will not respawn. They can also be engaged by ambient combat/enemy groups who can also destroy/disable the helicopters. If disabled the crew will abandon it once on the ground. A disabled gunship can be repaired and used as the players vehicle, however obtaining fuel may be a problem.

The gunships may also respond to assist when units are tracking you by going to the predicted area. Be careful that it doesn't fly over you on its way there or back.
ARTILLERY
Artillery consists of 2-4 mortars in fixed positions with a limited amount of ammo (32 rounds). Masochistic players may multiply the ammunition by 4 by using the settings screen at the start of the mission.

Sochors on patrol may also join in if they are nearby. They can be very bad news if you don't have AT.

Captured mortars can be disassembled and carried in a vehicle for later use against airfields, strongholds or other mortars

Each time, you are targeted, a temporary set of specialist arty markers are visible on the map (not in VERY HARD or INSANE difficulty settings) showing source of the incoming fire, point of targeting, and final impact point for the salvo, after applying targeting errors due to several factors. Also TOF and ETA. So you know where (not) to run and where to go to silence those damn tubes early enough. Each shell of the salvo has also individual spread. Each fire mission, if possible, includes two parts: adjust fire and fire for effect. So even, if first shell was a surprise, you still can wait for the main salvo markers. Using these markers you can easily find mortar's position, go there and take your revenge. Mortars are not cached with the rest of the AI.

AMBIENT COMBAT (AC)
Ambient combat can be disabled in the initial settings at the start of the mission or set at a level to suit your taste. By setting intensity player sets chances for something to happen, not certainty. There is also a "gravedigger" function to delete empty groups, bodies & wrecks. AC starts to work with hardcoded 10 minutes delay.

If disabled, CSAT & AAF are allies against you. Otherwise they are enemies and will fight each other and provide bodies for you to loot. If enabled, CSAT minefields are dangerous for AAF units.

Side effects - only opfor group can call air support (as choppers are opfor), and calling artillery depends, if mortar is on the same side, as an AI group.

Intensity controls how many groups of both sides will be present at the same time around player and also how close they may be spawned (but not in direct vicinity). Groups are removed permanently if player goes farther away than 2.5 km, and replaced by new if player returns to that area.

WARNING; The higher the setting, the more aggressive the Gravedigger Script works. Bodies may despawn before you get to reach them along with their loot.

AC does two things: makes east and resistance enemies to each other and spawns a few groups of both sides at a reasonable distance from the player (how many and how close depends on intensity, on lowest it is between 600 and 2000 meters). Each spawn there is 75% chance for infantry group, 15% for motorised, 8% for mechanised and 2% for armoured group. Each such group performs random SAD patrol with few looped waypoints placed in the similar radius, but may be closer, than 600. If not eliminated in combat, groups are deleted if farther away from player than 2.5km.

There are three intensity levels of AC in "Limited" mode. In this mode, before AC begins to spawn AI groups, it is determined, how many AC spawns occurred previously in the 2600 meters radius around current player position. If too many - no more spawns will be performed for that area. Each spawn's position is saved for checking in the future. So, basically, if player stays long enough in given area fighting with AC groups or just watching fights between AC groups, after some time AC combat on that area will burn out permanently, so that area may be then considered as cleared, unless some group comes there from elsewhere.

The limit is 10 groups for LOW, 20 for MEDIUM and 40 for HIGH - it is rough estimation, so if player relocates, the radius will change to also cover a piece of not yet "burned out" area. This limitation also affects city battles.

AC intensity is also altered by local population/urbanization density.

Before AC spawns anything, it checks how many towns are present in 3000 meters radius around the player. Depending on that number and average distance between player and these towns, chance for spawn is modified (if this time code should spawn at all, how long wait before next check, how many of maximal allowed by intensity level groups to spawn). From the user's side that means:

- average AC density now seems to be lower, except in the vicinity of towns;
- approaching towns and entering highly urbanized areas are now more risky;
- far from "civilization" the player is relatively safe, chances for AC spawn there are very low, even on higher intensity settings;
- however, because of above, in limited mode it takes more time before AC in wilder areas will burn out, because of much lower spawning frequency

Far from the cities frequency of spawns is seriously lowered, so new groups appear much slower in time, thus takes much more time till this limit of spawns in limited mode is reached there.

Example: We are playing with AC set on LOW (Limited). For LOW limit is about 10 groups per area. If eg close to the urbanized area new spawn may be done each 3 minutes or so, it will take roughly not less than 10x3 = 30 minutes before reaching the limit of 10. It is pure theoretical of course, as new group may be spawned only, when current amount of present groups is below the intensity level, which is 1 for LOW. So spawned previously group must be eliminated/deleted first before next may be spawned.

In the most remote areas new spawn is possible roughly, let's say, once per 20 minutes for same setting, So reaching the limit of 10 groups theoretically will take no less than 10x20 minutes, that means above 3 hours of player's presence there. x6 slower, in theory, as said.

After clearing a stronghold or airfield, and the player has a good reputation, AC groups may include friendly FIA units. Killing these units will count as friendly fire.
GRAVEDIGGER SCRIPT
Gravedigger works on a number of variables. It first checks the age of the body. If it is above 10 minutes, it checks the amount of bodies and their distance from the player. If there is <30 AC bodies currently on the map, that distance is 1200. As long there is >30 and <40, the distance is 600. Between 40 and 50: 300 meters. 50-60: 100 meters. If there are >60 bodies on the map, gravedigger will delete AC bodies older than 10 minutes at any distance from the player.
TRACKING OF PLAYER
1. Player will leave behind "footsteps" cyclically, if went far enough from latest of them.
2. Footsteps will be removed, if old enough (average one hour) or due to rain (some chance to erase for each footstep).
3. Footsteps will be not left, if player is moving on a road or concrete surface. Also, they are not left at night, as it is assumed to be too dark for tracking.
4. Some enemy groups will be marked as "trackers". This applies to all groups, whose leaders have a config camouflage value < 1 (that basically means recon, snipers and spotters).
5. Each cycle, any of the "trackers" groups have a chance based on the distance and skill to spot closest footstep, if it is within 100m.
6. Spotted footstep will tell the tracker four things: player was here, direction of player's movement, speed of player's movement, how old this footstep is.
7. Based on this, the tracker will try to predict, where the player may be going by calculating: predicted current player position, predicted position of the player at the time, when tracker should reach current player position, and predicted nearest location, where player may be going by finding nearest location around the latter of calculated earlier positions.
8. Having such information a tracker will:

- try to call some nearby allied armoured group, if close enough, towards predicted location;
- try to call, if within response range and allied, a chopper on the predicted location;
- move on SAD patrol between the location and the latter of predicted positions.

Called groups will do a normal SAD patrol and will return to normal activities when completed, while tracker group will continue to patrol the identified area.

Statistically there are few recon or sniper groups, so chance for such an event is relatively low. These skills are also limited and fallible. The chase often goes in the wrong direction, so no worries about some inhuman restless hunters following the player all the time.

TIP: If you come across any recon soldiers or see them watching you, try to make sure you kill all of them. It will make your life a bit easier. Also they normally carry rangefinders which are useful if you don't have any binoculars.

MISCELLANEOUS INFORMATION
The player character is based on a FIA explosives specialist.

As you move around the map you may see messages about nearby enemy presence. Numbers of enemy are not accuarately reported. One man can turn out to be a whole squad, or three men might be in an armed vehicle. Treat such messages with caution.

TELEPHONE CALLS

Exist to provide background information and ambience, although one phone call from Tyrone provides approximate co-ordinates for the 10 possible stronghold locations.

RADIO MENU (0,0,x)

A radio is needed to execute radio commands although most commands have now been moved to the supports menu.

SUPPORTS MENU (0,8,x)

Provides options to wait one hour, wait six hours, run the gravedigger script or set the option for periodic saves every 20 minutes. Fatigue can also be toggled on/off.

WEATHER

The mission starts with overcast set on 60, dropping in time to 51 (minimal chance for short raining from time to time). Also fog is set to 1% (+ fading ground fog at init). No other alterations, rest is up to Arma engine or weather mods, if any used (like TPW's FOG component).

FF DECOY

Provides the ability to attract nearby foot mobile enemy groups by sacrificing FF and broadcasting the coordinates. The more ff used - the bigger the range and chance. There is a risk that it will bring the chase after Alex instead. Groups equipped with any vehicle or static weaponry should not be affected; The message will only reaches units of sides whose radio frequency the player has obtained.

RADIO FREQUENCIES

The player can obtain the enemy frequency for that side by either searching the killed TL's body for intel or by interrogating prisoners. Player will be informed, that the frequency has been obtained. If so - player with assigned radio item may hear from time to time reports of units of that side about spotted enemies (including player), support requests, "nothing is going on" reports and reports for recon units, that found player's trail. Range is 1500 meters. There are two frequencies to obtain, one for CSAT and one for AAF. At the start of the mission, you have neither frequency so will not hear any radio messages.

The radio messages are signalled by a radio squelch and text in the notification area of the screen.

If the player is being hunted, radio ranges are enhanced for some radios so that the player can gain knowledge that patrols or certain units are on their way. The ranges are 15km for the choppers, 10km for artillery and 4.5km for motorized patrols.
USING MODS
A lot of mods are of no use when playing this mission. Rather than have problems starting the mission, it is advisable to disable unnecessary mods before starting. If you encounter problems when starting, it is likely to be a mod that is the culprit. An error message may identify the mod concerned, otherwise try disabling them one by one until the right one is identified.

Mods come in all shapes and sizes and one that causes problems now, may not in the future and vice versa. In addition to this, the game is constantly being updated by the developers and each update is awaited with bated breath to see what problems it will cause with existing content, both mods and missions.

Some mods such as TPW Mods can be configured to work in this mission without problems. The mod is regularly updated and has been improved to work in Pilgrimage.

I use TPW mods but have turned off any modules that I thought may conflict such as TPW Skirmish & EBS. You may also want to turn off Bleedout, in case you get injured and bleedout before you can get a first aid kit. TPW brings the island to life and I wouldn't play without it.

The D+R caching system should be used with Bcombat for better performance.

ASR AI works very well ... BUT ... be aware of a couple of points first. The enemy AI share knowledge about you. This means the gunship will not go away while ground units are aware of your presence. This can mean being stuck for hours while you take out the nearby units. Secondly, enemy AI will use unattended vehicles and static weapons to fight you. This includes YOUR own vehicle.
FAQ
Q) Will my vehicle despawn with all my gear?
A) It depends on the car.
1) Cars spawned by the scenario itself, the ones with the blue 3D markers, will not despawn.
2) Vehicles captured from enemies will not despawn
3) Ambient combat vehicles that are captured (with a normal inventory) are unlikely to despawn, but may do if you go far away and the gravedigger script runs in the meantime.
4) The cars from TPW_MODS (TPW_CARS), that you commandeer, are unlikely to despawn but may do so if damaged and abandoned by the AI before it is commandeered.
5) The cars from TPW_MODS (TPW_PARK) that spawn near houses to mimic ambient life: these despawn when you are a few hundred meters away, together with the whole inventory contained in them, even if your AI companion is still in the vehicle.
6) Vehicles from other mods may despawn but you will have to learn from experience.

Q) What is the red circle in the map with ETA time???
A) Run! Artillery is shooting at you. It shows you where mortar is firing from, roughly where the shell will impact the ground, how much time you have etc. It also reveals the approximate location of the firing mortar.

Q) Will this mission become CO-OP or MP?
A) Although Rydygier does not write MP missions, some players are trying to port the mission to CO-OP although this is still WIP at the time of writing

Q) Why should I attack a stronghold?
A) A stronghold will have a captive that you can release and hire for 10,000 ff. It will also have an officer from whom you can obtain circle intel. (x2 if he surrenders). Also a possibility you can capture an armoured vehicle if it is immobilised.

Q) Why should I attack an airfield?
A) It will have an officer from whom you can obtain circle intel. (x2 if he surrenders). Also a possibility you can capture an armoured vehicle if it is immobilised. It is also an opportunity to destroy the chopper on the ground if you do not have any AA capability.
21 Comments
Alky Lee  [author] Apr 2, 2022 @ 1:30pm 
incognito mod can be downloaded from the Pilgrimage BI Forum page under recommended addons. https://forums.bohemia.net/forums/topic/163307-sp-pilgrimage/
Chariothe Apr 2, 2022 @ 12:56pm 
Incognito mod such as? I can’t really find one i found the incognito mode in ASR ai mod but it’s AI mod so i don’t want to use.
State Farm Jake Sep 24, 2020 @ 8:59pm 
Thanks for the info
Alky Lee  [author] Sep 24, 2020 @ 5:40pm 
State Farm Jake The ADM messages are basically two types, ones that offer information such as abandoned vehicles and enemy presence which you can purchase from an option in the scroll menu, and others that are purely informative such as when you are selling stuff
State Farm Jake Sep 24, 2020 @ 3:53pm 
So im giving this another shot, how do you actually use the ADM? like i had a message pop up but there wasnt anything i could do.
Alky Lee  [author] Apr 17, 2020 @ 1:48pm 
That is the Arma 3 version of unlimited saves, but you only have a limited number of slots. To be honest, you don't normally want to go back to the older saves anyway, so it;s OK to overwrite the oldest one each time. I use a quicksave mod anyway, which is all OK provided that you don't save just at the wrong time and then get dead straight away. It's always useful to have an earlier save just in case.
Valen Apr 17, 2020 @ 1:32pm 
"- to enable unlimited saves: ESC -> CONFIGURE -> GAME -> DIFFICULTY and enable "unlimited saves";"

Is this a left-over of a previous Arma 3 version? As I cannot seem to make more than 6 or so savegames. My difficulty/misc options only show "multiple saves", not unlimited. After 6 or so I have to overwrite older ones. (last pre Old Man version. 1.96 something)
drastikk Aug 9, 2019 @ 8:56pm 
@Alky Lee - Thanks for such a quick response!
Alky Lee  [author] Aug 9, 2019 @ 9:47am 
Killing surrendered enemies will affect reputation but not as much as killing a civilian. You will only get intel from squad/team leaders so killing a machine gunner or an AT Soldier etc is just a waste of a bullet and can draw attention to yourself.
drastikk Aug 8, 2019 @ 7:52pm 
Are there any downsides to shooting surrendering enemies? I know you said in the guide that you can retrieve intel from them when they are alive and possibly get more intel if you kill them. There doesn't seem to be any reason *not* to kill them. Just seems like no reason to keep them alive. Does it affect reputation to kill surrendering enemies?