XCOM 2
326 ratings
Capnbubs' Hat Modding Guide
By Mothvie
This guide will cover the basic steps of getting a new hat prop in to XCOM 2.

I'll explain how to import it in to the XCOM Editor and set up the materials and archetypes. Then I'll explain what lines you need to add to the configs in the Firaxis Modbuddy.
   
Award
Favorite
Favorited
Unfavorite
Setting up the XCOM ModBuddy.
When you first run the XCOM ModBuddy you'll have to set up the game directories first.

In the ModBuddy, go to the TOOLS menu and select Options. Then enter the paths to your XCOM and SDK directories as shown:

ModBuddy Options Dialog

Now you are ready to start!
Exporting your mesh. (Blender only)
Before you can import your model in to Unreal you'll need to export it from your preferred modelling package! I'm only going to cover Blender, since that's what I use, but some of this may be applicable to other applications.

Once you have your rigged mesh ready to export make sure you hold shift and select the root (this is the armature) and the mesh in the hierarchy view.

Blender Hierarchy View

Next choose to export it as an .fbx file and tick the Selected Objects tickbox under Main, then the Tangent Space tickbox under Geometries. (Exporting the mesh tangents should make sure that your normal maps appear correctly once the model is imported)

FBX Export Properties
.png].png]

Your mesh is now correctly exported, with it's armature, and ready to import in to the XCOM 2 Editor!
Importing your mesh in to the Editor.
Once you have opened your XCOM ModBuddy, go to the TOOLS menu and open the XCOM 2 Editor. In the editor you press the Import button in the Content Browser.

The content browser should already be open but, just in case it isn't, the button for the Content Browser looks like this: (alternatively press Ctrl+Shift+F)

Content Browser

Once you choose your mesh to import you should be presented with this import dialogue.

Import Dialogue

If this is the first thing you are importing you will have to type a name for the unreal package in the dialogue marked Package. If there is no package with the name you chose then it will create that package now, otherwise it will place the imported mesh in the package with that name.

Grouping does nothing but organise the assets in your package, it's a good idea to write the type of file in here to make it easier to find your files as your mod gets more complicated.

Under name I suggest you use the same naming convention as the default assets. I inserted my mod name in to the filename to make sure it was unique, just to avoid any possible conflicts with other mods.

Once the mesh is imported you are ready to get the materials and archetype set up.
Setting up your Material.
Once you have your Hat mesh imported in to the Editor you are ready to create a material.

Before you create your material you should get your textures imported. The first part of the import dialog is the same as for importing a mesh so the same advice applies. The second dialog allows you to choose the import settings for the texture such as the LOD group and the compression type. The information for these is in the documentation included with the SDK, if you can't find it the pdf file is located here:

Steam\steamapps\common\XCOM 2 SDK\
Documentation\Content\XCOM2Mods_CharacterShaders.pdf

After importing your Diffuse, Normal map and MultiMask textures you're ready to create and set up your material. In the content browser you need to right click and choose New MaterialInstanceConstant as shown.

Content Browser Right Click Menu

I suggest setting the group to Materials and naming as per the developers naming conventions. Double click your new material to open the editing window. The first thing you have to do is set the parent material, the material you will probably want is the standard material used for all armour and props.

To find the correct base material you should type SoldierArmorCustomizable_TC in to the search bar in the Content Browser, you may also have to click the All Assets button. Once you have the SoldierArmorCustomizable_TC material selected click the small green arrow next to the Parent option in your material settings.

Material Settings

Next you should open the Parameter Groups and Textures dropdowns in your material. Add your textures the same way you set up the parent material, by pressing the small green arrow while they are selected in the Content Browser.

Material Settings Textures Dropdown

Now you can mess with the other options in the material settings until you are happy with it! If you want to see the material on your prop you can select your mesh in the Content Browser and press the large green arrow at the top of the material window. Bare in mind that the environment reflection is not rendered in the preview so you may have to test the prop in game to really know how it is going to look, metal parts in particular tend to have low diffuse and high reflective values so they will look much darker in the editor than they will in the game.
Setting up your Archetype.
The best way to create the archetype for your prop is to find one of the standard included ones and duplicate it in to your package. I suggest typing ARC_Hat in to the Content Browser search box and then right click one of the built in hat archetypes and choose Create a Copy...

Archetype Right Click Menu

If you are making a hat, make sure that you copy an archetype that covers the head in the same way as your hat prop, this will save you time later as you won't have to try different hair fallback settings to see which one works. Once again enter the name of your package and I suggest using Archetypes as your grouping.

Now you have your own archetype ready you can double click it to open the settings dialog. All you should have to change here is the Skeletal Mesh setting. Select your mesh in the Content Browser and then click the green arrow beside the skeletal mesh setting in your archetype.

Archetype Settings

Your archetype is now ready and you can save your package. I saved mine in the packages folder, I'm not sure if there is a better location for it but it seems to work fine. Once the package is saved you can close the Editor move on to getting everything set up in the XCOM ModBuddy!
Creating your mod files.
If you haven't already created a mod project in the XCOM ModBuddy you will have to do that first. Open the ModBuddy and click on the New Mod... button. Choose the DefaultMod template, name it whatever you want but do not use any punctuation as it can cause errors later.

Now you have your mod project ready you should import your Unreal package. Right click on the Content folder in the Solution Explorer and choose Add/Existing Item...

XCOM ModBuddy

Once your package is imported you are ready to set up the .ini files to have your prop appear in the game!

First, open the XComContent.ini from the Solution Explorer by double clicking on it. You will have to enter a line in here that tells the game to load your archetype and add it to the appropriate prop list.

Here is an example from my own accessories mod:

+BodyPartTemplateConfig=(PartType="Helmets", TemplateName="Hat_Capnbubs_Beret_M", ArchetypeName="CapnbubsAccessories.ARC_Hat_Capnbubs_Beret_M", Gender=eGender_Male, bCanUseOnCivilian=false, bVeteran=false)

You'll need to enter this line in it's entirety and change the TemplateName, ArchetypeName and Gender to whatever is appropriate for your prop. Every prop will need both male and female versions as the meshes are significantly different.

The ArchetypeName includes the name of the package on the start, so it should be named as follows: "Package.Archetype"

The bVeteran option allows you to specify that your prop can only be equipped by veteran soldiers.

You can use ; to denote a comment in this file, this is very useful for keeping the file organised and easier for you to find things later on as the mod becomes more complicated. You can see me using this in the image above to organise my props.

Your mod will now appear in the game! All that is left to do is tell the game what your mod is called. In the Solution Explorer open the XComGame.int located in the Localization folder. This file simply lists all the props you have added and tells the game what they are called when it shows them in the menus. Here is an example:

[Hat_Capnbubs_Beret_M X2BodyPartTemplate]
DisplayName="Field Beret"

Simple use the template name you used in the XComContent.ini entry for your prop. Once again you'll have to do this for both male and female versions even if they have the same name.

Now you can press F5 to test your prop ingame and if everything is working fine you are ready to publish!
Congratulations on Making a Mod!
I hope you found this guide useful and easy to follow!

Thanks for working to support one of my favourite games and I can't wait to see your mods on the workshop!
189 Comments
Stealth211 Mar 13, 2019 @ 8:28pm 
Any idea what might cause the mesh to import sideways into the game. All i did was a helmet but its rotated 90 degrees on both the X and Y axis and clips through characters heads. I've done everything right up until i hit this error. I'm not sure what the problem is because in the editor it imports in the same direction and scale as all the existing models.
ben.thomason1 Feb 3, 2018 @ 3:46pm 
wtf? why is this so complicated to install and long war so easy?
Corvus Dec 30, 2017 @ 9:40pm 
@Capnbubs Thanks for the Tutorial. But i dont really get the implementation of the 3d object into EU. When i create an object in e.g. Blender and import it into the editor, to set it up as my own arc, i cant "refere/setup" the Xcom template to my created object as shown in the picture. Could you elaborate on that?
(I am a pretty noob when it comes to modding, but i wanted to give it a try.)
Israflux Sep 25, 2017 @ 2:52am 
You're welcome, glad I could help :)
RainingMetal Sep 24, 2017 @ 3:49pm 
Looks like your advice worked perfectly. Now I just need to inform the original author how to pull it off.
Israflux Sep 24, 2017 @ 11:34am 
I'm relatively sure you can't add a file without recompiling,
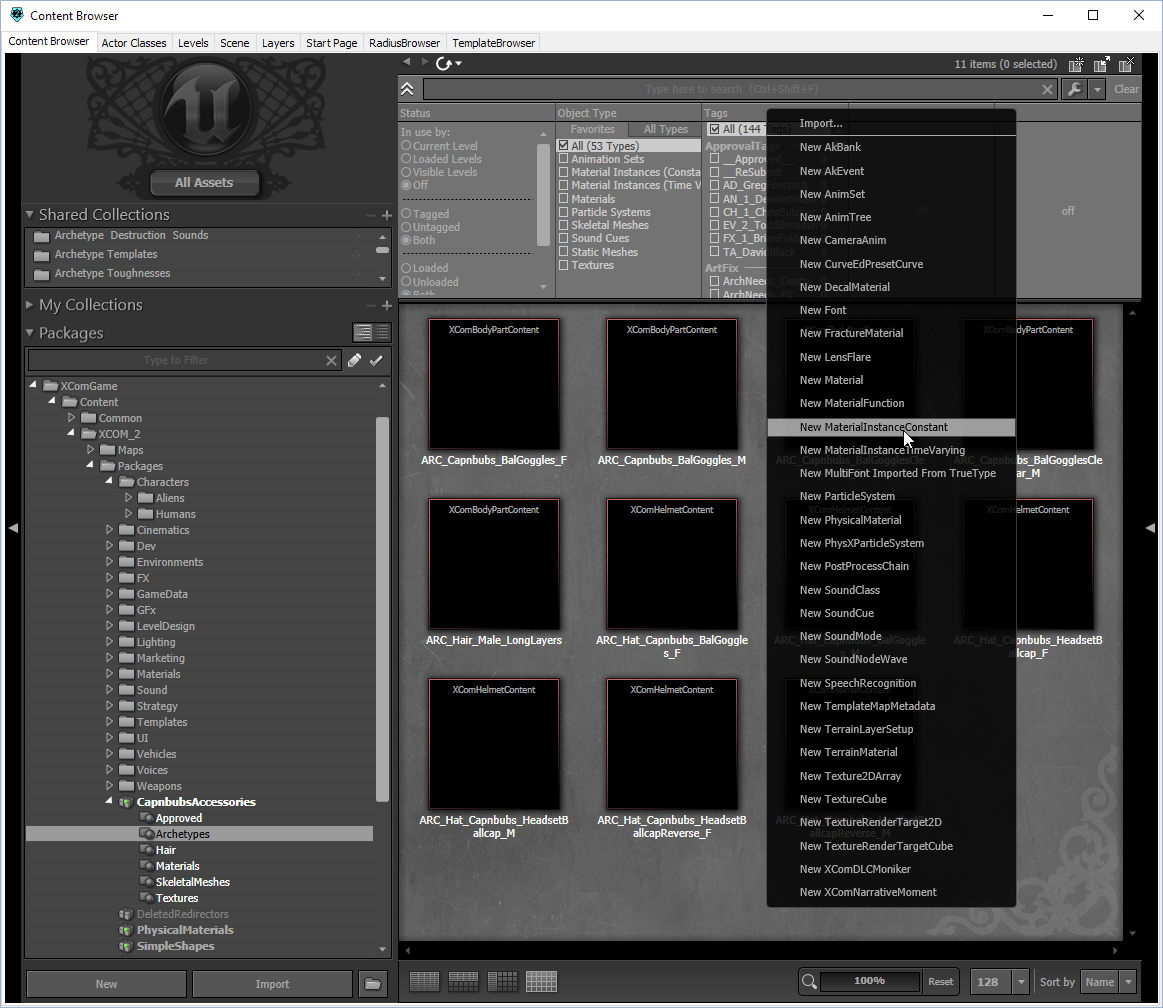
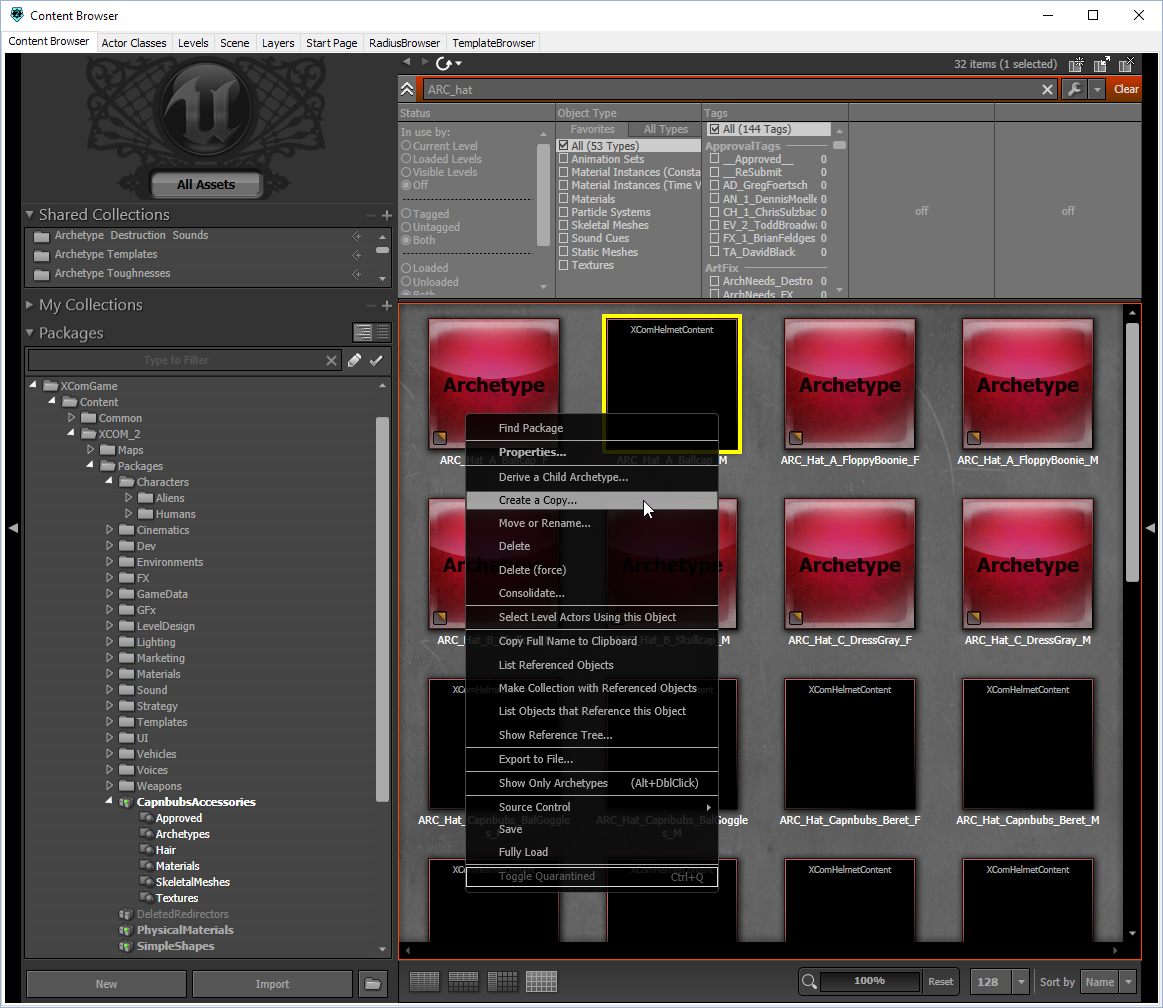
but you could make a new empty mod in modbuddy
and add the same files that you have from the 'old' mod.
I did this with some voicepack mods were i didnt want all the voices.
RainingMetal Sep 24, 2017 @ 11:16am 
@Israflux I assume you need to build the mod with modbuddy in order to apply this new line of code? I'm currently trying to get this to work on someone else's mod that doesn't have the slider yet.
Israflux Sep 24, 2017 @ 2:35am 
@RainingMetal
here you go:
https://www.reddit.com/r/xcom2mods/comments/5g9c5x/how_are_sliders_for_mods_in_the_optionsgameplay/
what worked for me was:
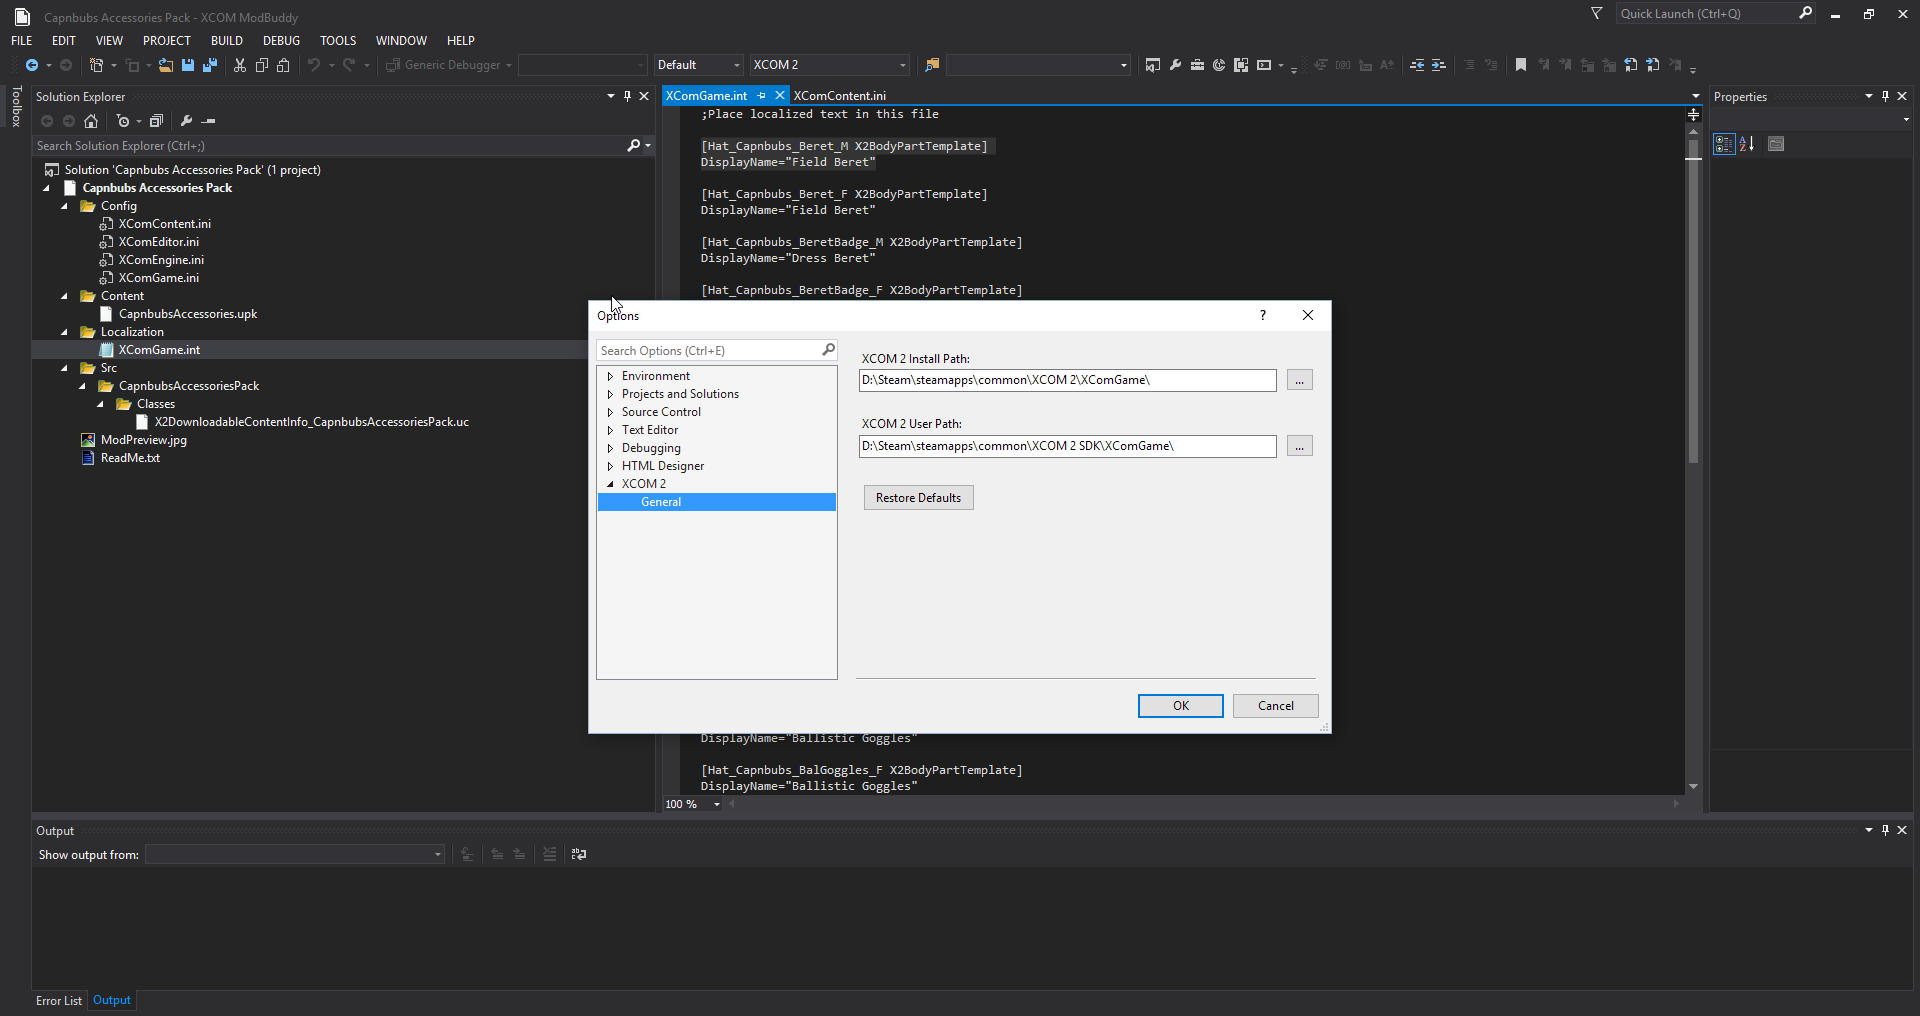
Creat a file under Localization named *WhateveryourDLCName*.int
than add the following to it:
[X2DownloadableContentInfo_*WhateveryourDLCName*]
PartContentLabel="What ever you want to call the Slider"
PartContentSummary="Adjust the likelyhood that new soldiers will appear with Your Mod customization options"

DLCNames have to be set for every part of your mod in the XcomContent.ini for it to work.
RainingMetal Sep 23, 2017 @ 5:06pm 
What do you do to add the slider in the options menu that determines how often the mod's gear appears on new recruits?
Lancer 667 Sep 4, 2017 @ 9:21am 
Capnbubs this is a great tutorial.