Sid Meier's Civilization V

Sid Meier's Civilization V

260 ratings
Modding Basics
By ceej12
The basics of modding covers XML creation, ModBuddy, and shows how to add one of the easiest things to make: a building.
   
Award
Favorite
Favorited
Unfavorite
Introduction
Hello! In this guide, I will cover the very basics of modding to the addition of a new building, and everything in between including icon creation with GIMP and XML formating. I aim for everything to be pretty easy to understand.
ModBuddy
Download and Installation

BodBuddy is a requirement for modding. It is 100% free, after buying Civilization 5. After purchase, you will find the Civilization V SDK under your tools tab on Steam. Simply download and install, and you should be good to go. Start the SDK and a menu should appear asking what exactly you want to do: ModBuddy, WorldBuilder, Nexus, and FireTuner. Click on ModBuddy. If it is your first time starting ModBuddy, you may need to download an extra thing. If you don't download it, ModBuddy won't start. Download the application when prompted. Once that download is completed, you can start ModBuddy.

Starting a New Project

Once you start ModBuddy, you should see a screen similar to this:
Click on New Mod.... A new window should pop up. For what this guide will show you, click on Empty Mod, and then at the bottom of the window, name your file. For this guide, I'll name it "City Zoo". Once you name it, click "OK".
A new window will appear, asking for the name of the mod, author, special thanks, and description.
Enter in the information. The name is what will be displayed when/if you release it on the Workshop. You most likely will want to enter your Steam ID into the "Author" slot. If someone directly did something to develop the mod, but their ID in the "Author" slot also. The "Special Thanks" slot is not required, but be sure to put in the IDs of people if they helped you by providing ideas, icons, etc. The description describes your mod to the public, so you most likely want to say what the mod contains. You are now ready to actually make the mod.

Organization, Folders, and Files

Your screen should now look like this (or roughly so):
It should at least have a box titled "Solution Explorer" and "Output". Now right click on the title of your mod in the "Solution Explorer" (in this guide's case, "City Zoo"). Hover your mouse over "Add", and then click "Folder". The new folder should appear under your title. Do this twice, and name one "Art" and the other "XML". It is not required for you to have these folders, but it will help in organization, which is very important if working on a mod that adds lots of things. Now, right click on your new "XML" folder, hover your mouse over "Add", and select "New Item...". When the window pops up, click on "Game Rules (XML)" and then name the file. For this guide, I'll simply name it "Zoo.xml". The file should now open in the ModBuddy window, and you can then edit it. Proceed to the next part of the guide for information on XML.
XML
The Template

Now for the fun part of modding: editing an XML. I always begin with an XML from elsewhere and edit it entirely. That way I know what is required to work. If you would like to use a template, copy the below code into the XML file. Completely replace everything in the file after creation.
<GameData> <BuildingClasses> <Row> <Type>BUILDINGCLASS_[INSERT]</Type> <DefaultBuilding>BUILDING_[INSERT]</DefaultBuilding> <Description>[INSERT]</Description> <MaxGlobalInstances>[INSERT]</MaxGlobalInstances> </Row> </BuildingClasses> <Buildings> <Row> <Type>BUILDING_[INSERT]</Type> <BuildingClass>BUILDINGCLASS_[INSERT]</BuildingClass> <Cost>[INSERT]</Cost> <PrereqTech>TECH_[INSERT]</PrereqTech> <Help>[INSERT]</Help> <Description>[INSERT]</Description> <Civilopedia>[INSERT]</Civilopedia> <Quote>[INSERT]</Quote> <ArtDefineTag>[INSERT]</ArtDefineTag> <MaxStartEra>[INSERT]</MaxStartEra> <NukeImmune>true</NukeImmune> <HurryCostModifier>-1</HurryCostModifier> <MinAreaSize>-1</MinAreaSize> <ConquestProb>100</ConquestProb> <DisplayPosition>2</DisplayPosition> <IconAtlas>[INSERT]</IconAtlas> <PortraitIndex>0</PortraitIndex> <WonderSplashImage>[INSERT]</WonderSplashImage> <WonderSplashAnchor>[INSERT]</WonderSplashAnchor> </Row> </Buildings> <Building_Flavors> <Row> <BuildingType>BUILDING_[INSERT]</BuildingType> <FlavorType>FLAVOR_WONDER</FlavorType> <Flavor>[INSERT]</Flavor> </Row> <Row> <BuildingType>BUILDING_[INSERT]</BuildingType> <FlavorType>FLAVOR_GOLD</FlavorType> <Flavor>[INSERT]</Flavor> </Row> <Row> <BuildingType>BUILDING_[INSERT]</BuildingType> <FlavorType>FLAVOR_SCIENCE</FlavorType> <Flavor>[INSERT]</Flavor> </Row> </Building_Flavors> <Civilization_BuildingClassOverrides> <Row> <CivilizationType>CIVILIZATION_BARBARIAN</CivilizationType> <BuildingClassType>BUILDINGCLASS_[INSERT]</BuildingClassType> <BuildingType/> </Row> </Civilization_BuildingClassOverrides> <Building_YieldChanges> <Row> <BuildingType>BUILDING_[INSERT]</BuildingType> <YieldType>YIELD_[INSERT]</YieldType> <Yield>[INSERT]</Yield> </Row> <Row> <BuildingType>BUILDING_[INSERT]</BuildingType> <YieldType>YIELD_[INSERT]</YieldType> <Yield>[INSERT]</Yield> </Row> </Building_YieldChanges> </GameData>
Basically, replace all the "[INSERT]"s with the required information, and you're good to go. Now for the individual XML lines. The following will only cover the lines with [INSERT].

BUILDINGCLASS_...
Wherever you see "BUILDINGCLASS_[INSERT]", replace the [INSERT] with a title in all CAPS. In this case, I will replace it with "CITYZOO". Just be sure that wherever it is "BUILDINGCLASS_", replace the [INSERT] with the same thing. Note that "BUILDINGCLASS_..." is different than "BUILDING_..." So, this line of code for this guide is "BUILDINGCLASS_CITYZOO".

BUILDING_...
Wherever you see "BUILDING_[INSERT]", replace the [INSERT] with a title in all CAPS. It should be different than the previous "BUILDINGCLASS_...", so I'll just name this "ZOO". Just be sure that wherever it is "BUILDING_", replace the [INSERT] with the same thing. So, this line of code for this guide is "BUILDING_ZOO".

Description
Wherever you see "<Description>[INSERT]</Description>", replace the [INSERT] with a title. This is what will appear in game in the Production Menu and in the Research Tree. Therefore, this should be grammatically correct. So I will replace the [INSERT] with "City Zoo". Replace the [INSERT] with the same text for all lines that say "<Description>[INSERT]</Description>".

MaxGlobalInstances/MaxPlayerInstances/None
This next line is completely optional. "MaxGlobalInstances" means that the building would be a World Wonder, only being able to be built once in the entire game. If you would prefer that it can only be built once per civilization, making it a National Wonder, than replace "MaxGlobalInstances" with "MaxPlayerInstances". Lastly, if you would prefere that it would be a normal building and be able to be built once per city, than just delete the line and skip to the next header. However, if you have either "MaxGlobalInstances" or "MaxPlayerInstances", then replace the [INSERT] with a number. Usually, you would want the number to be "1", but you can set it to what ever you want it to be. For this guide, I will just delete the line, for I want it to be able to be built once per city.

Cost
This line involves how much Production it costs. The number is general though, as if you set it to 1000, then the cost will be slightly less than that. For this guide, I'll put it as "1200".

PrereqTech
This is the technology requirement to build your building. You can find the names of all the Techs in the file "CIV5Technology". For people that have Gods & Kings, you can find the file in "C:\Program Files (x86)\Steam\steamapps\common\Sid Meier's Civilization V\Assets\DLC\Expansion\Gameplay\XML\Technologies". If you don't have G&Ks, then look in "C:\Program Files (x86)\Steam\steamapps\common\Sid Meier's Civilization V\Assets\Gameplay\XML\Technologies". The line from these files you want is the words in <Type>. I want the building to be unlocked with the Ecology Tech, so I will replace the "<PrereqTech>TECH_[INSERT]</PrereqTech>" with "<PrereqTech>TECH_ECOLOGY</PrereqTech>".

Help
What you type here is what appears when you hover your mouse over the icon. For this, I'll replace the [INSERT] with "The City Zoo grants you gold and science."

Civilopedia
This is the text that will appear on the Civilopedia page for your building. For this guide, I'll just use the same text as the help, but replace the [INSERT] with what ever you want.

Quote
This is the quote that appears on the Civilopedia page and on the Wonder Spash Screen that appears if you make the Wonder Splash Screen, but more on that later.

MaxStartEra
This is the max era you can build the wonder in. You can find the name of the eras (some have different file names than the name that appears in game...) in "C:\Program Files (x86)\Steam\steamapps\common\Sid Meier's Civilization V\Assets\Gameplay\XML\GameInfo" if you have Vanilla, and "C:\Program Files (x86)\Steam\steamapps\common\Sid Meier's Civilization V\Assets\DLC\Expansion\Gameplay\XML\GameInfo" if you have G&Ks. If you don't want there to be a max era, so you can build it throughout the entire game, you can just delete this line.

IconAtlas
This line refers to the icon atlas that you will later use to link the icons with the XML. Choose a short name (in this guide's case, I'll use "Zoo"). More on icons and the icon atlas later.

WonderSplashImage
This line refers to the Wonder Spash Screen Image that appears. You can set one to appear regardless of if the build is a wonder. More on splash screen creation later. If you don't want a splash screen, then you can delete this line.

WonderSplashAnchor
This line refers to how the spash screen image pans. More on that later. If you deleted "WonderSplashImage", delete this line as well.

Flavors
There are various flavors that you can use. Only thing is: I have no idea what they do. So just replace the [INSERT]'s with a number between 1-20, and you should be okay.

Yields
There are different types of yield for all the types of resources. For this guide, I will replace one "YIELD_[INSERT]" with "YIELD_SCIENCE", and the other "YIELD_[INSERT]" with "YIELD_GOLD". For the other [INSERT]'s (in the "<Yield>[INSERT]</Yield>" lines), I will replace the first with "1" and the other with "1". The "<Yield>[INSERT]</Yield>" lines refere to how much of the yield you get.

Finished!
Go to next section.
Icons
Stuff You Need
Now for the art work. I personally use GIMP instead of Photoshop for the notable fact that GIMP is free. Below is a list of things you need to download if you are using GIMP. If you have Photoshop and would prefer to use that, you can look up a icon creation tutorial for that and skip ahead to the header below titled "Icon Atlas".

  • Gimp[www.gimp.org]
  • Gimp DDS Plugin[gimp-dds.googlecode.com] (To install into Gimp, run the "dds.application" and extract the files to "C:\Program Files\GIMP-2.0\lib\gimp\2.0\plug-ins".)
  • {LINK REMOVED} (Made by Civilization Fanatics forum member SamBC.)

And that's everything you need.

Making Icons
Now open the zip file downloaded from the "Templates" link above. Make sure that you have all ready installed GIMP. Open the file "IconAtlas256" with GIMP. You should see this appear:
The circles are what represents the icons. You will need to find an image, and overlap it on the top-left circle. You may need to play around with GIMP a bit before doing this, but the way I do it is:
  • Paste the image you want to use as an icon into a new layer.
  • Use the "Elipse Select Tool" (hot key "E") and highlight the top-right circle. Zoom in on the circle and adjust the selected area to fit the the circle.
  • Once it is adjusted, move the "selected area" over the image you pasted in. Do "Ctrl + C" to copy the circle into the clipboard, and then paste into a new layer.
  • Move the new layer over the top-left circle. Adjust the size if needed. You can delete the first layer you made (the one with the image you pasted in first).

    And there you go. It doesn't matter if you do it this way, but the end result should be about the same. This is my result:
    You may want to save it in the special GIMP format, but make sure to do "Save As..." with a different name, so you keep the original template to make future mods. Before you export it, make sure you merge the layers. On the right of the screen should be the "Layers - Brushes" toolbar. If you made the icon the way I did above, then there should only be two layers: one titled "main surface" and the other "Clipboard". Right click on the layer "Clipboard" and select "Merge Down".
    Once you are happy with your icon and you have merged the layers, click on "File" and then "Export" (or do Ctrl + Shift +E). A new window should appear. Name your file
    "[WhateverYouWant].dds" in the "Name" slot. Make sure the extension is ".dds". Once you have done so, you can click "Export". When another small window appears showing various things like "compression", just click "OK".
    To make a building, you need an icon of all the following sizes:
  • 256x256
  • 128x128
  • 64x64
  • 45x45
    Becasue the templates have an 8x8 grid of these sized icons, multiply each size by eight to get the total dimension of the file. Click on "Image" (on the top of the GIMP screen) and then on "Scale Image...". You should see a window similar to the image below appear.
    Becasue you allready made the 256x256 icon, you now need to make the 128x128 icon. Simply replace the numbers "2048" with "1024" and press "Scale". The window should disappear and your image will shrink to the next size. Go back to "Export" and export the file with a different name. I always put the icon size in the file name, so where the 256x256 icon was named "Zoo256.dds", this file is "Zoo128.dds". Export and click "OK" when the window with "Compression" appears. Repeat the steps to scale and export for the 64x64 and 45x45 icons. In the scale window, replace the "1024" with "512", scale, and export the same way as before, but with a different name. Then do scale, replace "512" with "360", scale, and export. Got it? If so, continue on, back to ModBuddy.

    Icon Atlas
    Right click on your "Art" folder (back in ModBuddy), hover over "Add...", and click on "Add New Item". Create a new XML file and name it "IconAtlas.xml". Copy the following text into the new XML file.
    <GameData> <IconTextureAtlases> <Row> <Atlas>[INSERT]</Atlas> <IconSize>256</IconSize> <Filename>[INSERT]</Filename> <IconsPerRow>8</IconsPerRow> <IconsPerColumn>8</IconsPerColumn> </Row> <Row> <Atlas>[INSERT]</Atlas> <IconSize>128</IconSize> <Filename>[INSERT]</Filename> <IconsPerRow>8</IconsPerRow> <IconsPerColumn>8</IconsPerColumn> </Row> <Row> <Atlas>[INSERT]</Atlas> <IconSize>64</IconSize> <Filename>[INSERT]</Filename> <IconsPerRow>8</IconsPerRow> <IconsPerColumn>8</IconsPerColumn> </Row> <Row> <Atlas>[INSERT]</Atlas> <IconSize>45</IconSize> <Filename>[INSERT]</Filename> <IconsPerRow>8</IconsPerRow> <IconsPerColumn>8</IconsPerColumn> </Row> </IconTextureAtlases> </GameData>
    The following line info only applies to lines with [INSERT]'s in them.

    Atlas
    Remember back to your XML file for the actual building? Hopefully. Find the line
    "<IconAtlas>[INSERT]</IconAtlas>" and replace the [INSERT with what ever you want. I put "Zoo". Now in your "IconAtlas.xml", replace all the "<Atlas>[INSERT]</Atlas>"s with
    "<Atlas>[Whatever you put previously]</Atlas>".

    Filename
    Right click on your "Art" folder, hover over "Add...", and then click "Existing Item". Navigate to where you exported your icons to, select the files, and click "Add". Your icons should now appear in your Art folder. This is why it is a good idea to put the icon size in your file names. Replace each "<Filename>[INSERT]</Filename>" with each file. Pay attention to what the
    "<IconSize>[256/128/64/45]</IconSize>" is, as if I have a file named "Zoo256", I need to put it in the <Filename>[INSERT]</Filename> respective to the icon size. Get it? Well, my final code is:
    <GameData> <IconTextureAtlases> <Row> <Atlas>Zoo</Atlas> <IconSize>256</IconSize> <Filename>Zoo256.dds</Filename> <IconsPerRow>8</IconsPerRow> <IconsPerColumn>8</IconsPerColumn> </Row> <Row> <Atlas>Zoo</Atlas> <IconSize>128</IconSize> <Filename>Zoo128.dds</Filename> <IconsPerRow>8</IconsPerRow> <IconsPerColumn>8</IconsPerColumn> </Row> <Row> <Atlas>Zoo</Atlas> <IconSize>64</IconSize> <Filename>Zoo64.dds</Filename> <IconsPerRow>8</IconsPerRow> <IconsPerColumn>8</IconsPerColumn> </Row> <Row> <Atlas>Zoo</Atlas> <IconSize>45</IconSize> <Filename>Zoo45.dds</Filename> <IconsPerRow>8</IconsPerRow> <IconsPerColumn>8</IconsPerColumn> </Row> </IconTextureAtlases> </GameData>
    Hopefully you understand it now, if you didn't all ready. However, before icons would appear in-game, you need to right click on each icon file in ModBuddy and click on properties. A small window on the side should appear. On the window should be boxes, and one box should say "Import into VFS" and next to that, "False". Change the "False to "True" for all the image files. If you don't do this step, images won't work, and this goes for ALL image files, whether they are spash screens or icons.

    That's all for icons. You're almost done with making your mod! If you want to learn about making Spash Screens, go to the section titled "Extras".
Testing & Publishing
You are almost ready to test your building in-game! First, however, you need to tell the mod what it needs to load. On the left of the ModBuddy screen, above your folders, is the title of your mod, in my case, "City Zoo". Right click on the title and click on "Properties". You should see a new tab appear:
This tab shows everything that the mod says or does. You can replace the version and stabibility as you see fit. What really matters is the "Teaser" and "Description". The teaser should be a very short version of the description. That's all you really need. Now, on that same tab, click on "Actions". This should appear:
On the right of the tab, click on "Add...". A small window should appear with three pull-down-tabs. For "Events", select "OnModActivated". For "Action", select "UpdateDatabase". And for "File", select one of your XML files. Repeat this process to add both XML files. Once they are added, they should appear on the tab. If they do, you are ready to test! Be sure you do "Ctrl + S" first.

Testing!
On the top bar, click on "Build" and then "Build Solution". An "Output" windows should appear, and it will show when the "building" is complete. It should say:
========== Build: 1 succeeded or up-to-date, 0 failed, 0 skipped ==========
Now, you can start the game. You don't need to close the SDK, as it will be a pain to re-open it should you need to change something or when it's time to publish you mod. Once you start the game, go to mods and you should see the title of your mod in the list. Put a 'check' to enable it, and you most likely should disable any other mods you have.
Once you enable your mod, click "next" and set-up a new game. Do Advanced Settings to change the start era. Start the game and wait for it to load. If something went wrong with one of your icons, a pop-up window will appear saying the game couldn't load the icons, and you most likely will have to do Ctrl+Alt+Delete to exit the game. If the game loads and you can start playing, then the icons should be working. The first thing you should do is found your city, open the research menu, and open the technology tree. Look for the tech you set the building to unlock with. If you see it, it works!
You should then check the production menu to make sure it is there, if you have reseached it all ready.
If you see it, congrats! Your mod is working! If you don't see it in the production menu or the technology tree, go back to ModBuddy and do some troubleshooting. Maybe you mis-typed something in the XML, or you left out an important line. What ever it is, keep trying until you get it to work.

Publishing
Well, hopefully your mod is working. If it isn't don't even both reading the following, as it is about publishing your mod onto the Steam Workshop. In ModBuddy, click on "Tools" (at the top of your screen) and then click on "Publish to Steam Workshop". A new tab should appear that has the "Steam Workshop" logo on it and a big button that says "Begin". The tab will change and there will be an empty list (it could have stuff in it, but if you have already uploaded mods, then you probemly aren't reading this guide) with a button at the top that says "Upload New Mod...". Click that button. The upload terms will appear, read them and press "Accept". The tab will change and you should see a single bar with a button next to it that just says "...". Click that small button and navigate to the mod package. You should find the package in
"Documents\Firaxis ModBuddy\[You Mod's File Name]\Packages"
Once you find your mod's package, select it and click open. A series of small bars that shows the upload process should appear, and once they are complete, you can click the "Next" button. You can now modify the mod's title, description, icon, visibility, and tags. The icon needs to be of ".jpeg" format and should be 512x512 size. Check all the tags that describe your mod so people can find your mod more easily. Change the visibility to what you want, and once you are happy with everything, you can click "Upload". A status bar will appear and a series of text with a button at the bottom that says "Next". If the progress has not finished, the "Next" button will be un-clickable. Once you click next, it will go back to the list you saw before. Press the "Refresh" button at the top of the list, and you should see you're newly uploaded mod in the list. Congrats! Your mod has now been published! You can go into the Steam client and go to your workshop, and you will find your mod there. And that's that.

Thank you for using my guide, and I hope you understood it all, as I realize my explaining skills may have not been perfect. If you want to see a few other things, such as making buildings resource dependent or the wonder splash screens, go to the section titled "Extras".

Thanks for reading!
Extras
This section discusses a few extra things you can do to your mod.

Wonder Splash Screens
Wonder Splash Screens add to the effect of wonders by making them seem more unique, and they are easy to make. Make sure you have read the section on icons first however, so that you know some of the basics of GIMP. I make my Wonder Splash Screens to the size of 1024x768, but I believe the no matter the size, it is auto-sized to fit the splash screen. So make your image, and when you're done, make sure that it is all a single layer, and export it as a ".dds" file. Then add it to your "Art" folder in modbuddy and change the "Import into VFS" property to true. Then add the following lines to your building's XML:
<Row> <Type>BUILDING_[What Ever You Put Here]</Type> <BuildingClass>BUILDINGCLASS_[What Ever You Put Here]</BuildingClass> <Cost>[What Ever You Put Here]</Cost> <PrereqTech>[What Ever You Put Here]</PrereqTech> <Help>[What Ever You Put Here]</Help> <Description>[What Ever You Put Here]</Description> <Civilopedia>[What Ever You Put Here]</Civilopedia> <Quote>[What Ever You Put Here]</Quote> <NukeImmune>true</NukeImmune> <HurryCostModifier>-1</HurryCostModifier> <MinAreaSize>-1</MinAreaSize> <ConquestProb>100</ConquestProb> <DisplayPosition>2</DisplayPosition> <IconAtlas>[What Ever You Put Here]</IconAtlas> <PortraitIndex>0</PortraitIndex> <WonderSplashImage>[Name of Your Splash Screen].dds</WonderSplashImage>
<WonderSplashAnchor>C,T</WonderSplashAnchor>
</Row>
The bold lines are what you need to add. Everything that isn't bold is just there so you can see where to add the bold lines. The line
"<WonderSplashImage>[Name of Your Splash Screen].dds</WonderSplashImage>"
should have the name of your splash screen. The second line you added,
"<WonderSplashAnchor>C,T</WonderSplashAnchor>" affects how the image pans.

These letters are the first letter before the comma:
C = Center R = Right L = Left

These letters are the letter after the comma:
C = Center T = Top B = Bottom

And that's all you need for the splash screen. Build your mod again and try it out in-game. It should work.

Resource Dependence
There are multiple ways to make a building resource dependent, by either making it require the resource in that city or just requiring a resource throughout your civilization. First, this is how to make your building require a resource in the city:

Add the following code in your building's XML file. You can put it anywhere, as long as it is between the <GameData>'s and not in between something else (I recommend putting it right before the last <GameData>).
<Building_LocalResourceOrs> <Row> <BuildingType>BUILDING_[INSERT]</BuildingType> <ResourceType>RESOURCE_[INSERT]</ResourceType> </Row> </Building_LocalResourceOrs>
The first insert refers to the name of the resource. You can find the names in the file "CIV5Resources", located in "C:\Program Files (x86)\Steam\steamapps\common\Sid Meier's Civilization V\Assets\Gameplay\XML\Terrain" if you have Vanilla, or "C:\Program Files (x86)\Steam\steamapps\common\Sid Meier's Civilization V\Assets\DLC\Expansion\Gameplay\XML\Terrain" if you have G&Ks. And that's all you need. Do note however, that if you want the building to require more than one resource in the city, copy and paste everything from <Row> to <Row>, and then replace the [INSERT]s with what you want.

Now to make your building require a resource availiable throughout your empire.
<Building_ResourceQuantityRequirements> <Row> <BuildingType>BUILDING_[INSERT]</BuildingType> <ResourceType>RESOURCE_[INSERT]</ResourceType> <Cost>[INSERT]</Cost> </Row> </Building_ResourceQuantityRequirements>
Do the same as the previous for the first two [INSERT]s and put a number for the <Cost>. Note that the cost is how much of that resource it requires, so you most likely would want a small number, such as 1 or 2. And that's it.
182 Comments
Ricky Aug 17, 2021 @ 2:11am 
Attempting to use those links to Microsoft Visual studio, so I can use modbuddy and whatever other related programs, I am confronted with an error during installation.

"KB2736182 does not apply, or is blocked by another condition on your computer. Please see http://go.microsoft.com/fwlink/?LinkId=225649 for more details."

The support link goes to a 404, due to how old this program is.

Anyone got a fix?
kevinruggles Feb 26, 2020 @ 9:20pm 
I am trying modbuddy and the 'something else' to install is VB 2010 SP 1.
your links are out of date. Here is link to the download.
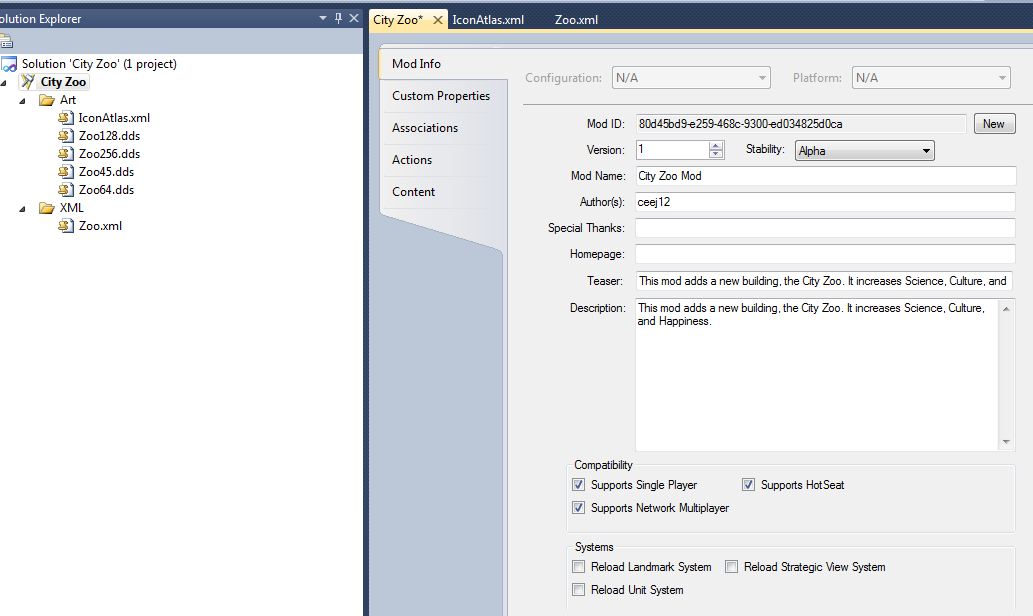
thanks for the guide.
https://www.microsoft.com/en-us/download/confirmation.aspx?id=34677
cilasliag Aug 21, 2019 @ 4:57am 
You had me until the art work part. And then it was like trying to learn Latin Klingon. It all went to hell. Trying to download some file and then extract it into GIMP was impossible. It kept saying that I couldn't extract it there. So I gave up. As with every Civ mod guide, they go off road and you're fucked. I don't know how all manged to write these mods. The amount of code and files to get just perfect is staggering. You all must have programming degrees.
ShaquilleOatmeal Nov 15, 2018 @ 3:19pm 
Hey there! I am trying to make a mod that replaces the Fort tile Improvement and was wondering how you would do that. I've read through your guide and it seems like it is focused on city buildings. Thank you!
Fire10116 Aug 30, 2018 @ 12:09pm 
I don't seem to be able to find the 2010 version of Visual Studio, do newer versions work as well?
Marihan. Jun 17, 2018 @ 4:15am 
Where do i find the xml template for ressources like marmor or iron?
Dr. Memeulous Apr 7, 2018 @ 1:31pm 
https://drive.google.com/file/d/13e-7i7yXkAoYwThnsEa0Uh6JF0Dd3Etb/view?usp=sharing
Is the VS10 shell if you want, Directly taken from Visual studios partner site
ArtfulBadger Mar 13, 2018 @ 1:37pm 
Not quite the same mod, but I attempted to make a mod to add a civilization. I used a similar icon method (one 256 by 256 image rather than a grid), but all of the icons appear too big ingame. Do you know what the cause of this might be? The icons appear normally otherwise.
Squeezy Feb 17, 2018 @ 3:04pm