
Quake
290 ratings
Dawn of the Machine Secrets
By Xazuki
A visual guide to finding all the secrets, secret levels and upgrades in the Quake expansion pack: Dawn of the Machine.
31
16
10
7
5
5
3
3
3
   
Award
Favorite
Favorited
Unfavorite
Useful Information


Quake Secrets Guides

Introduction
'It's no use. She won't let us escape.'Dawn of the Machine has a unique approach to how you progress through the episode. After advancing through the main set of levels you will return to them again later to access more secrets. This guide divides the episode into three parts as certain secrets in a level will only become available during a later part.
  • Part 1 consists of the first ten levels plus two optional secret levels. At the end of this you will acquire the Rune of Sacrifice, unlock the hub level and move on to Part 2.

  • Part 2 is based around the hub level: The Runic Nexus. You will return to previous levels and use runes to reveal additional shortcuts, rune secrets and secret levels. After collecting all the runes you will defeat the final boss and complete the episode.

  • Part 3 is an optional New Game+ mode that consists of a full playthrough of the entire episode again but this time locked to Bloody Nightmare Difficulty. It is unlocked by completing Part 2 after acquiring the Bloody Knight's Head. There are new weapon upgrades to find and it ends with a secret alternate final boss.
In this guide each screenshot is colour-coded. For example during Part 1 you can only find the brown secrets. When you reach Part 2 you can also access the purple secrets and if you decide to do Part 3 then you can finally discover the red secrets.

Upgrades
Permanent upgrades that increase your maximum health and ammo capacities are a new addition for this episode. The vast majority of these are found within secrets but a few are found normally in the levels. All 68 upgrades are included in the guide so you can find a complete set as you progress. There are also 3 permanent weapon upgrades to discover.

Upgrade Type
Number of Upgrades
Initial Capacity
Max Capacity
Health
15
50
200
Shells
15
50
200
Nails
15
100
250
Rockets
13
20
150
Cells
10
100
200


‎‏‏‎START: The Thirtieth Passing
Extra Secret 1
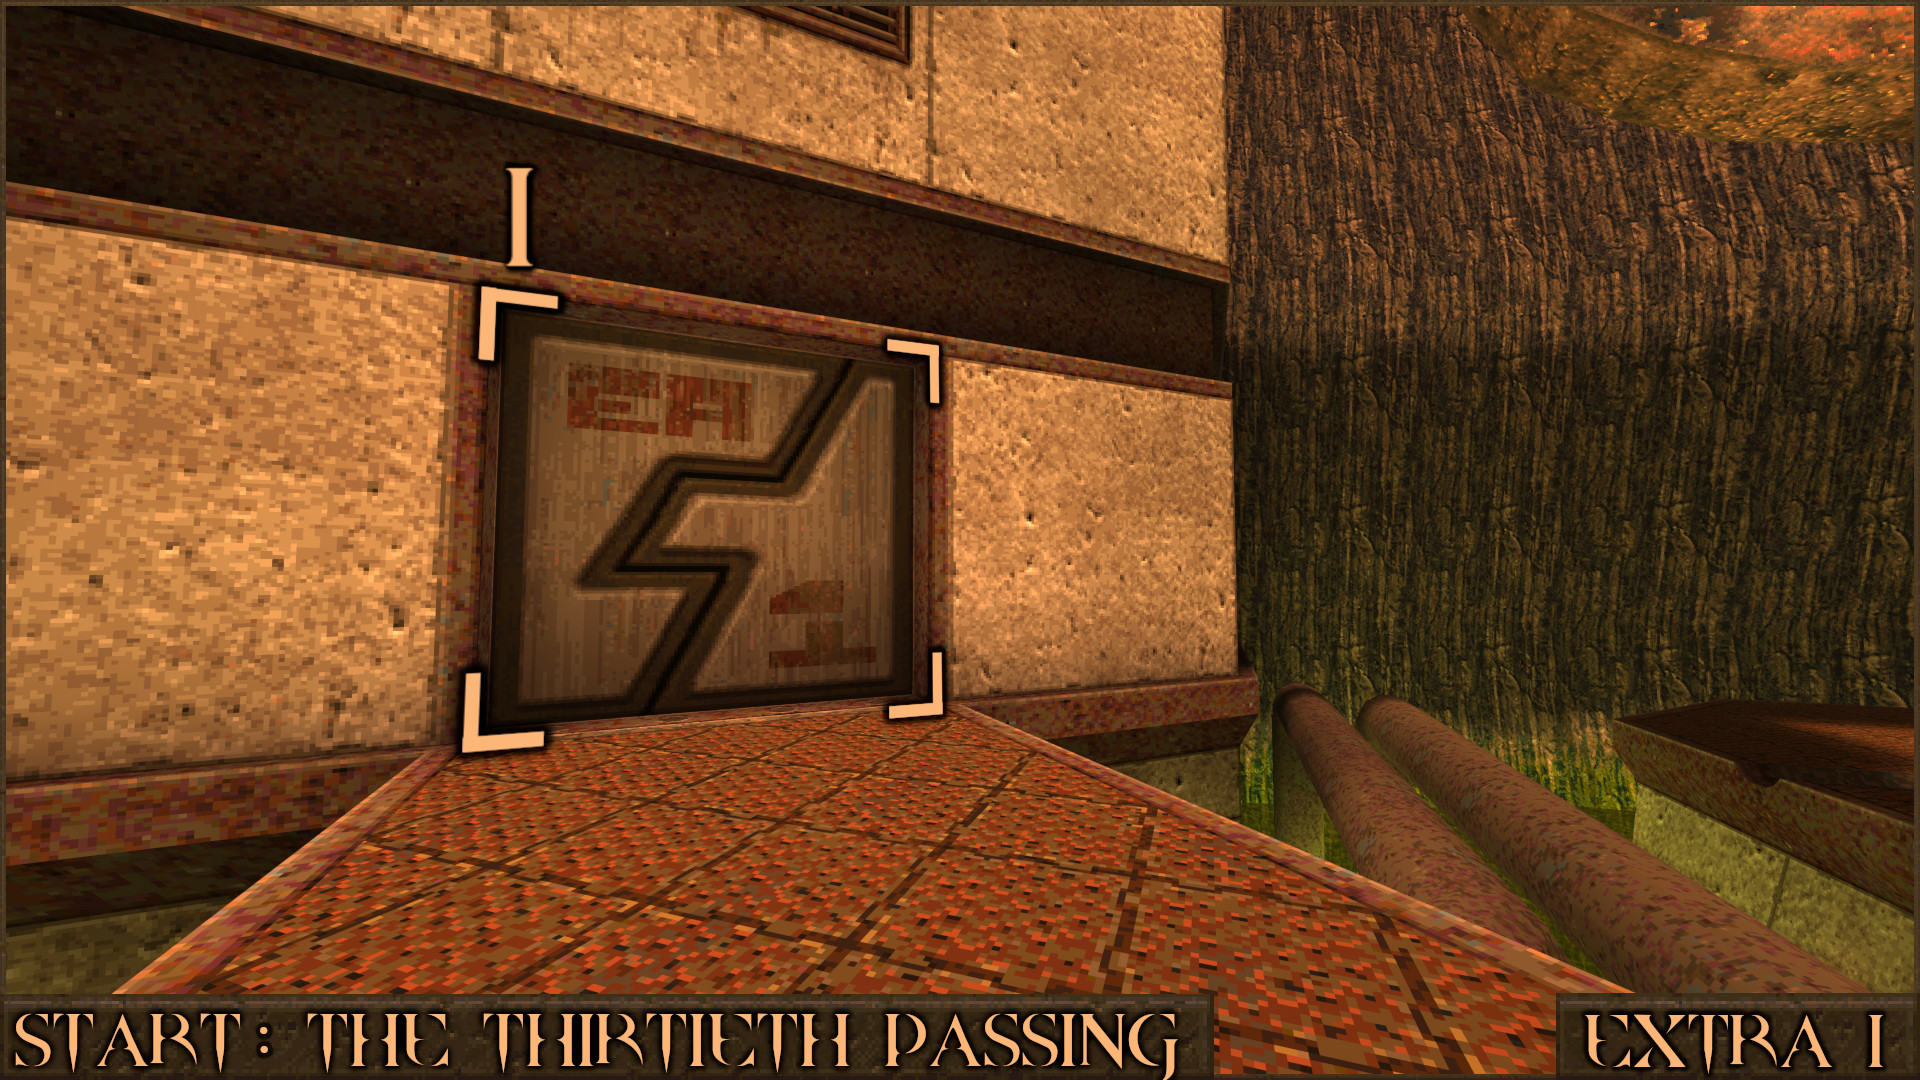
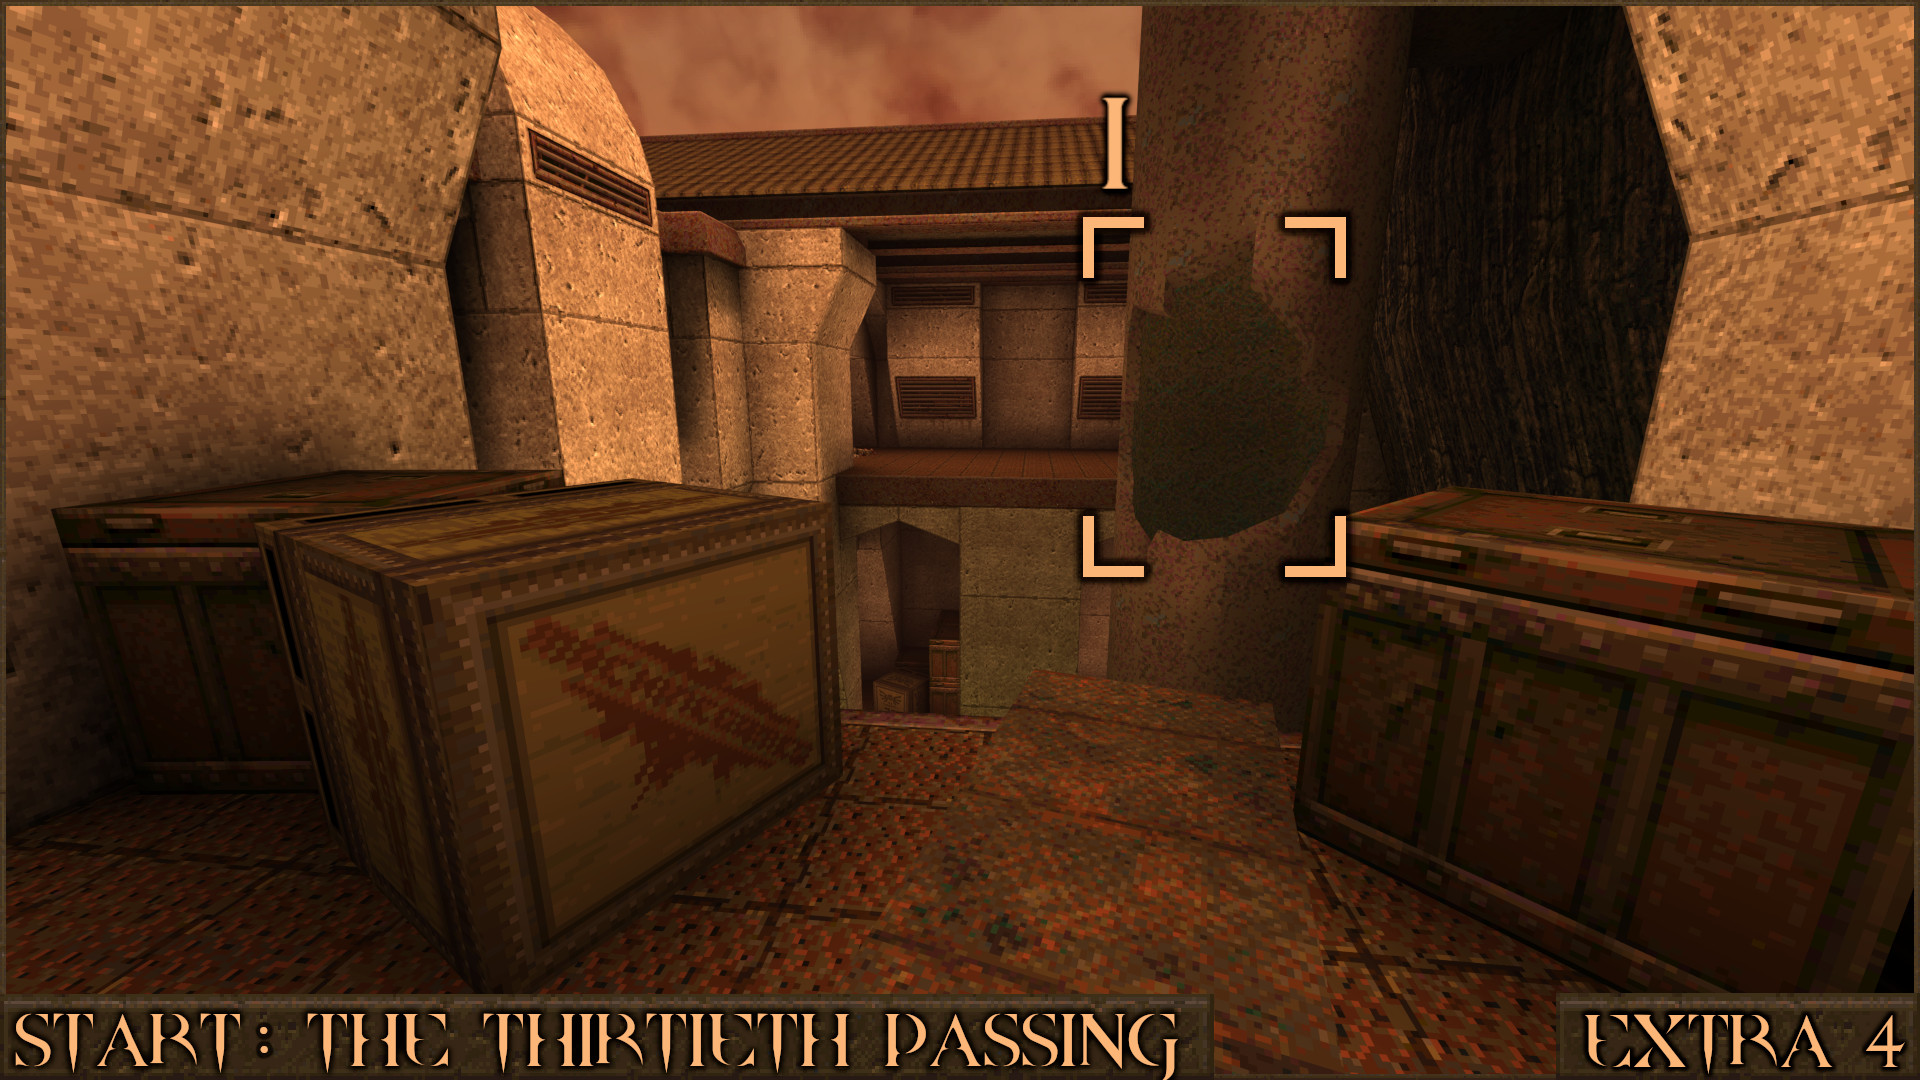
The starting level doesn't have any official secrets however there are a few hidden items to find here so they are referred to as Extra Secrets. Go to the bridge and look for the "EA" door () which leads to Easy Difficulty and go through it.

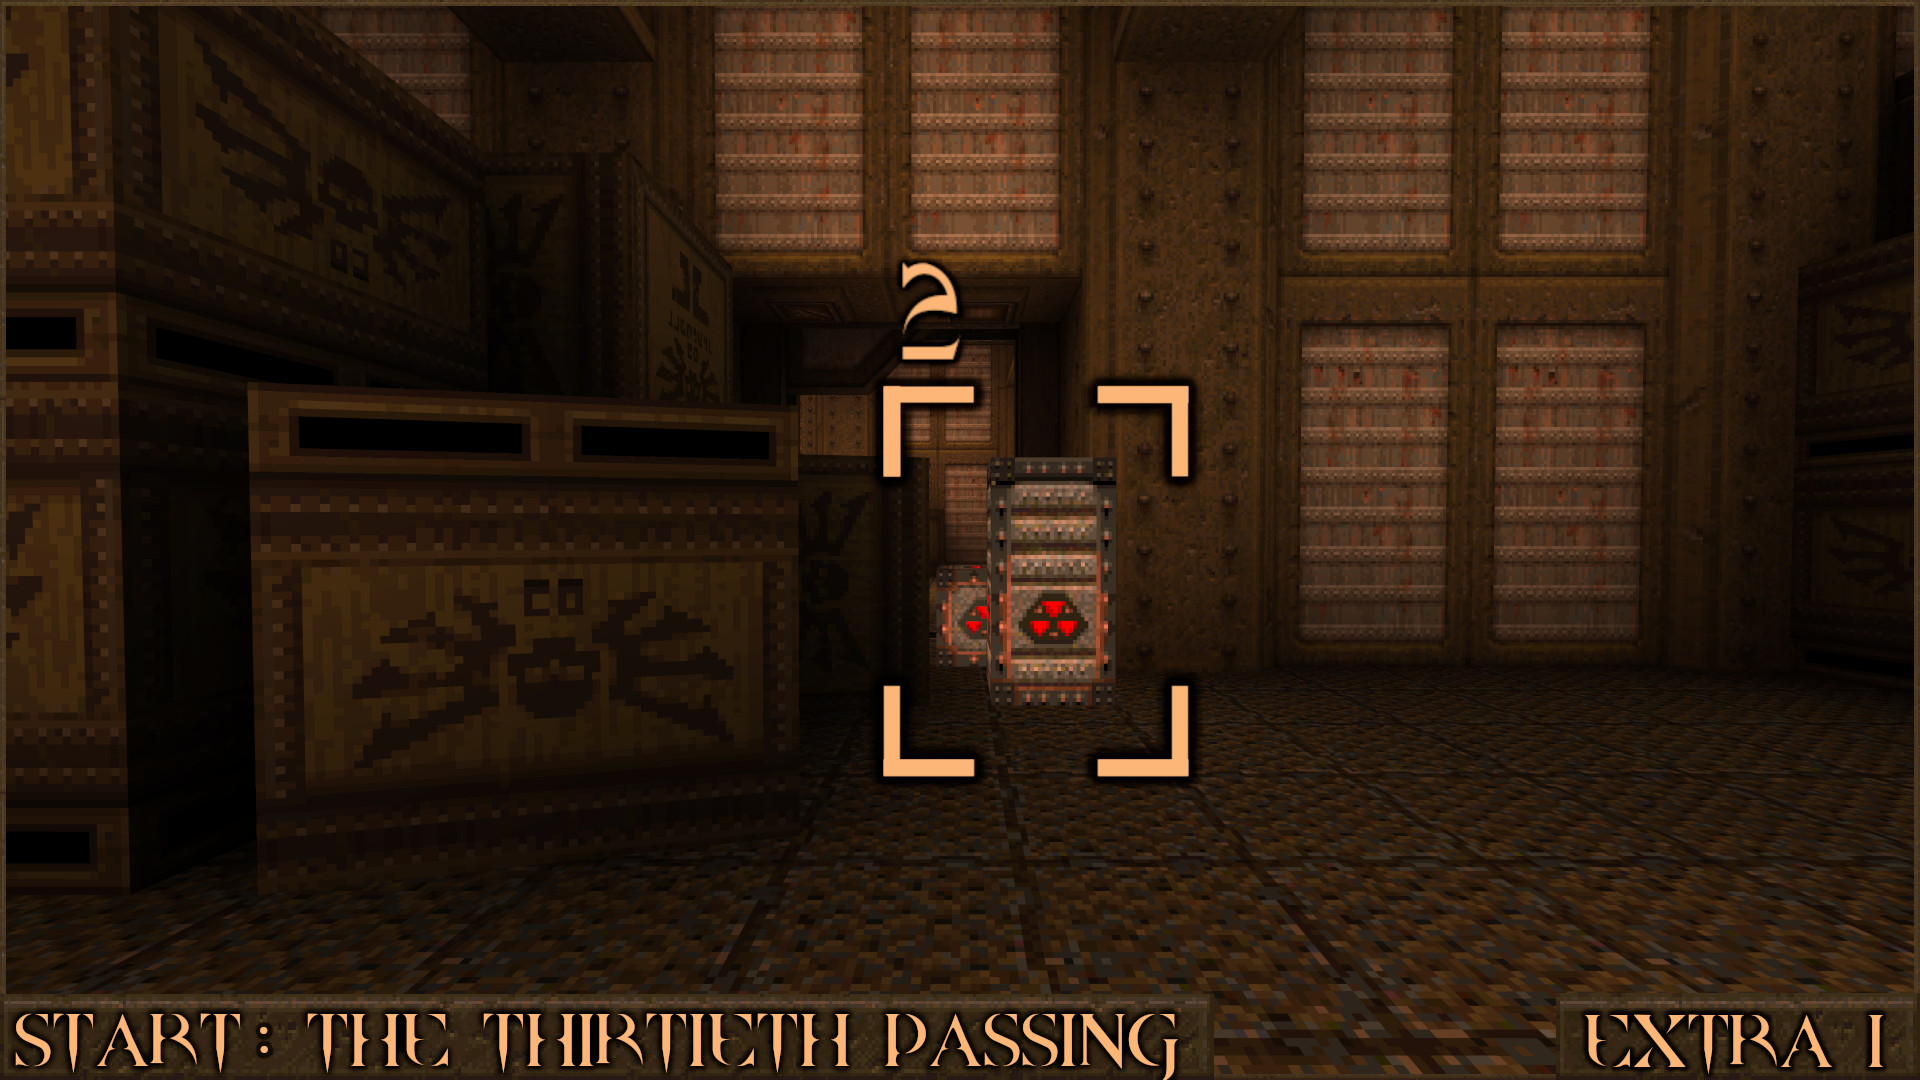
On your left shoot some explosive crates () to allow access to a room containing some ammo.

Reward: Small Shells ×2

Extra Secret 2
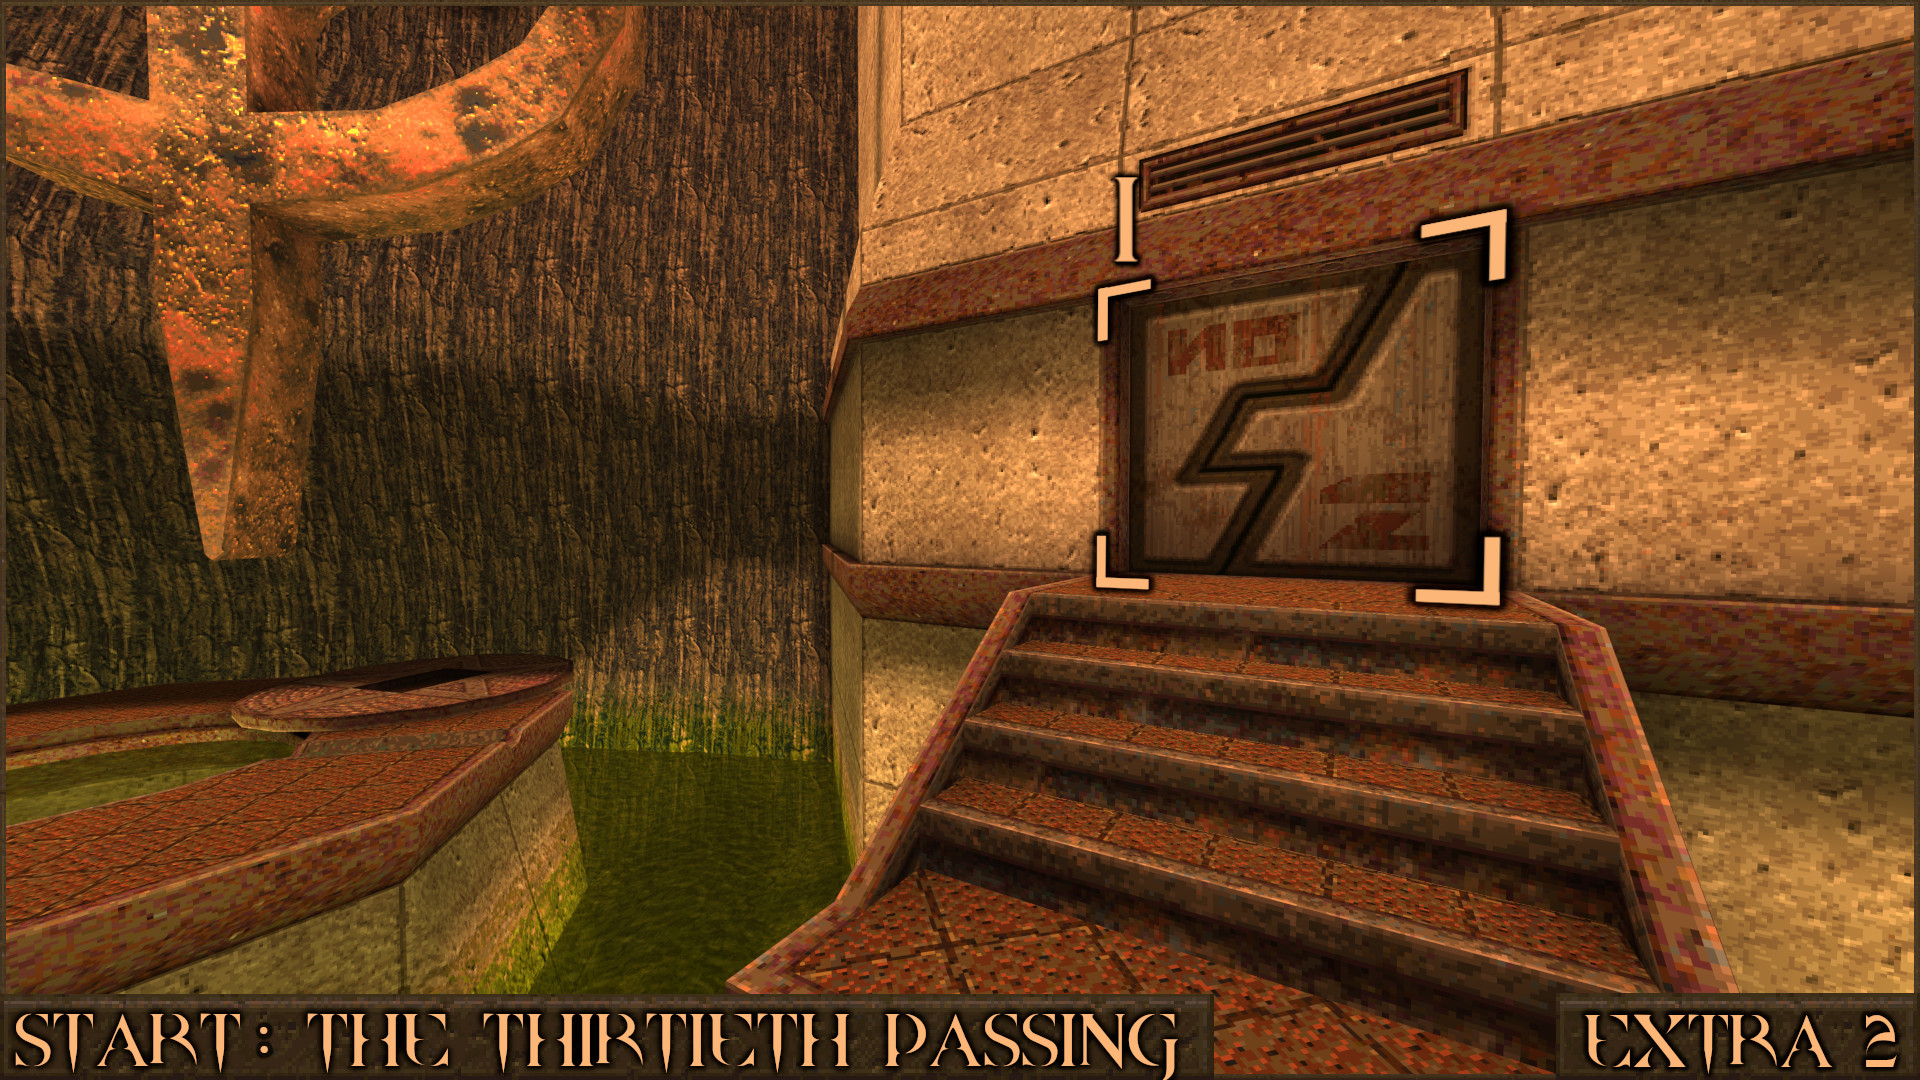
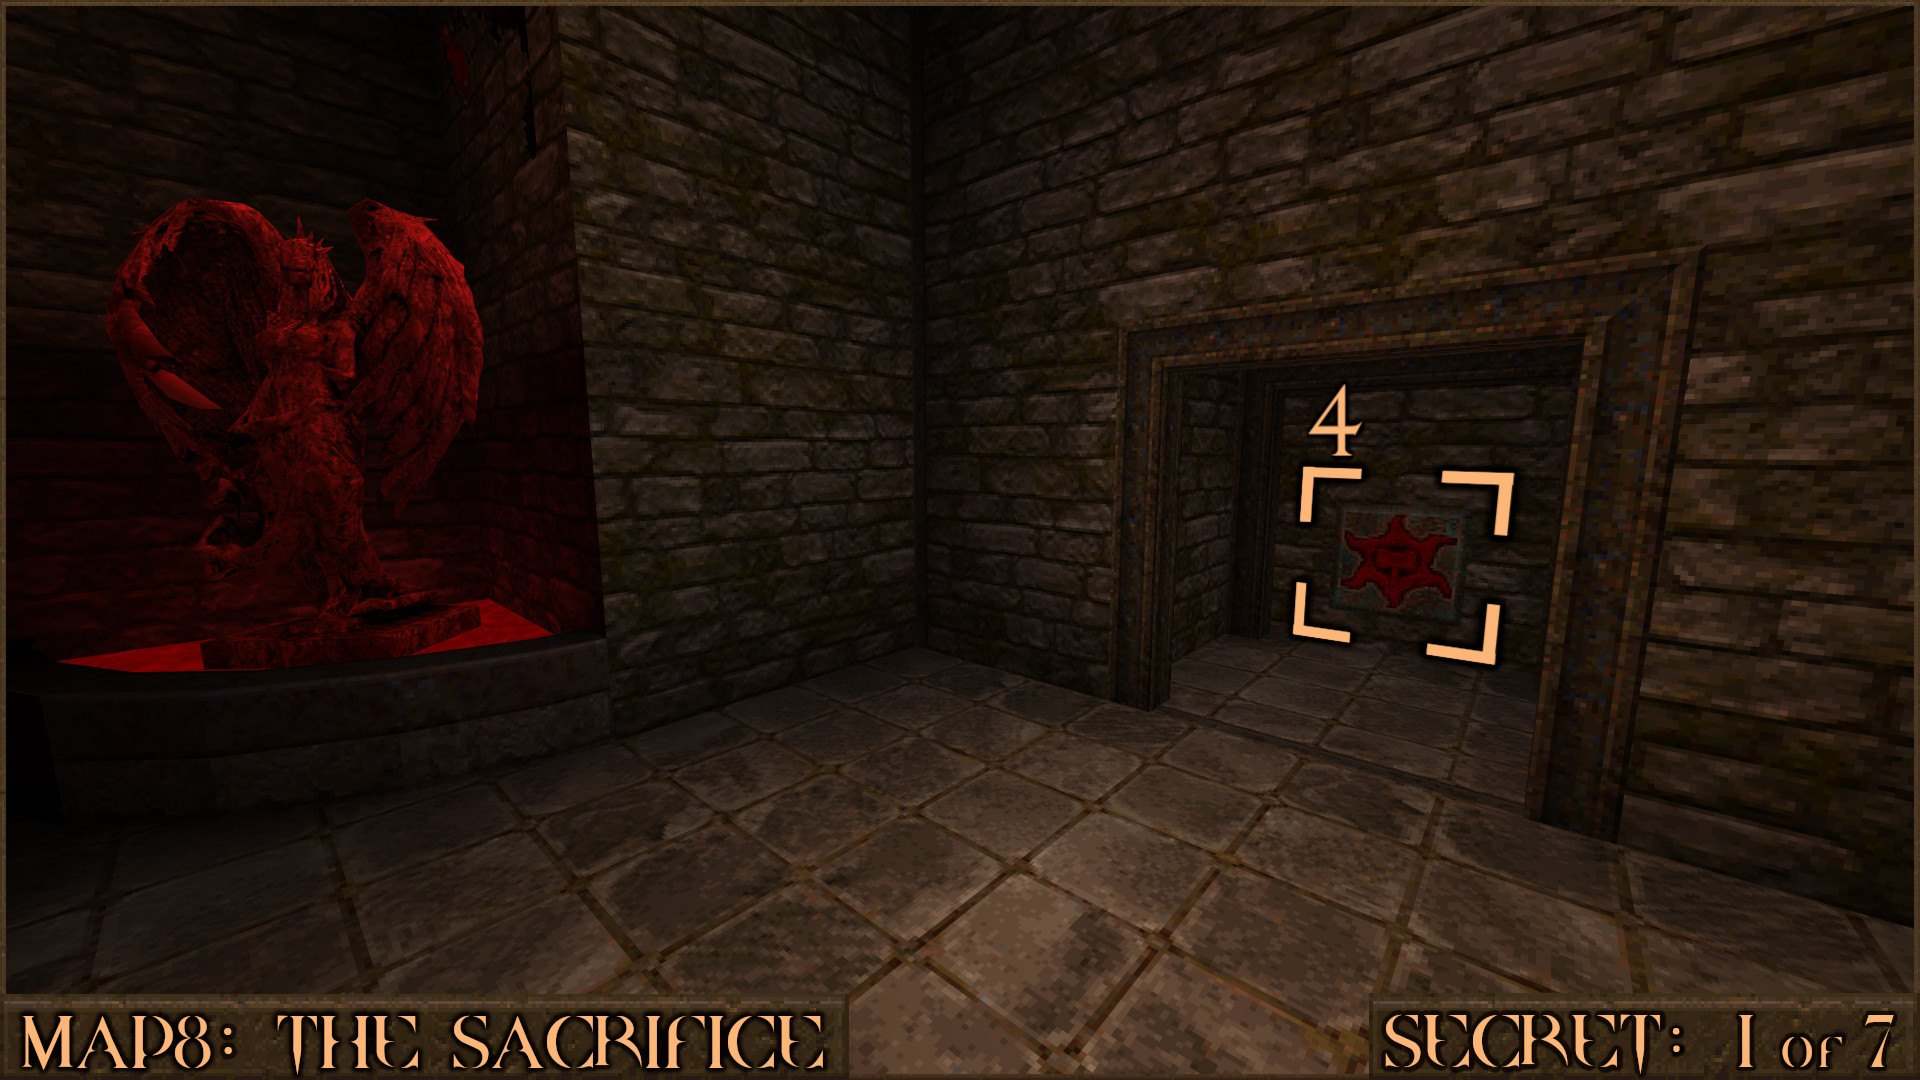
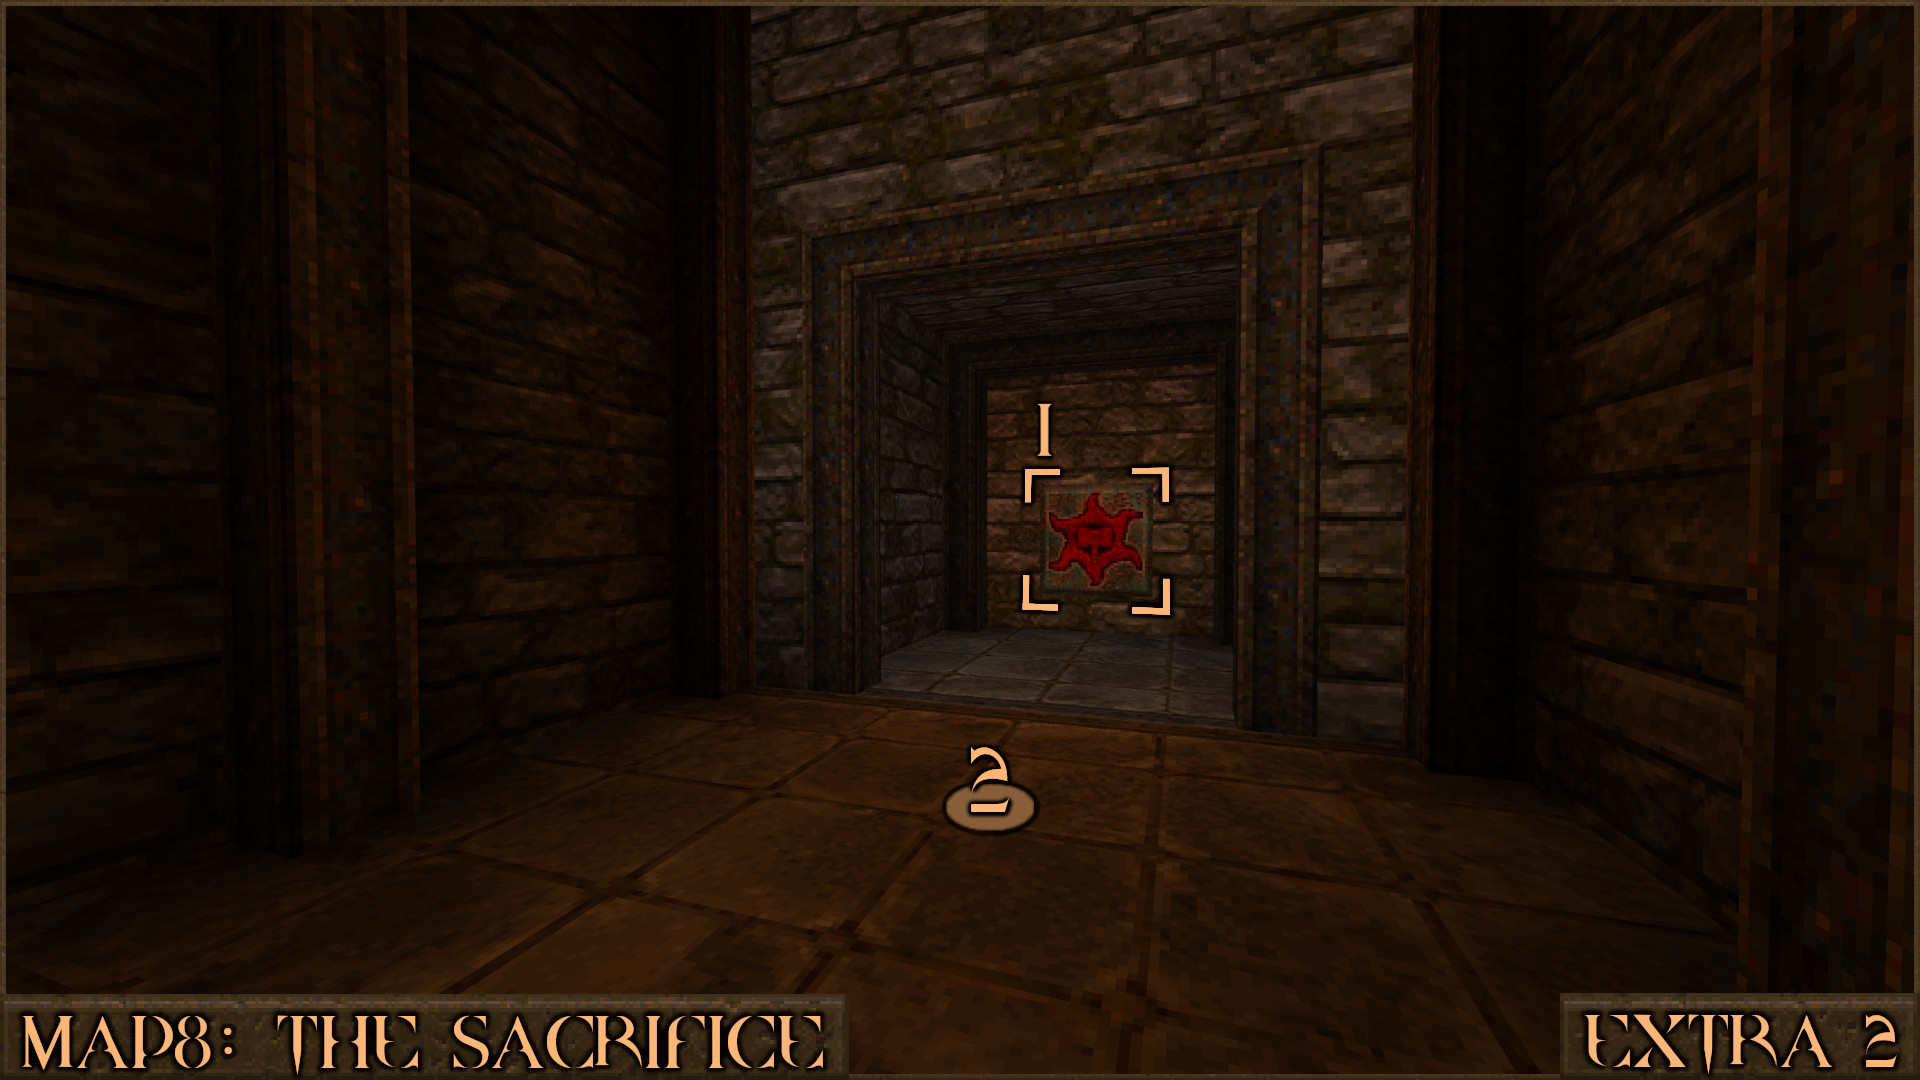
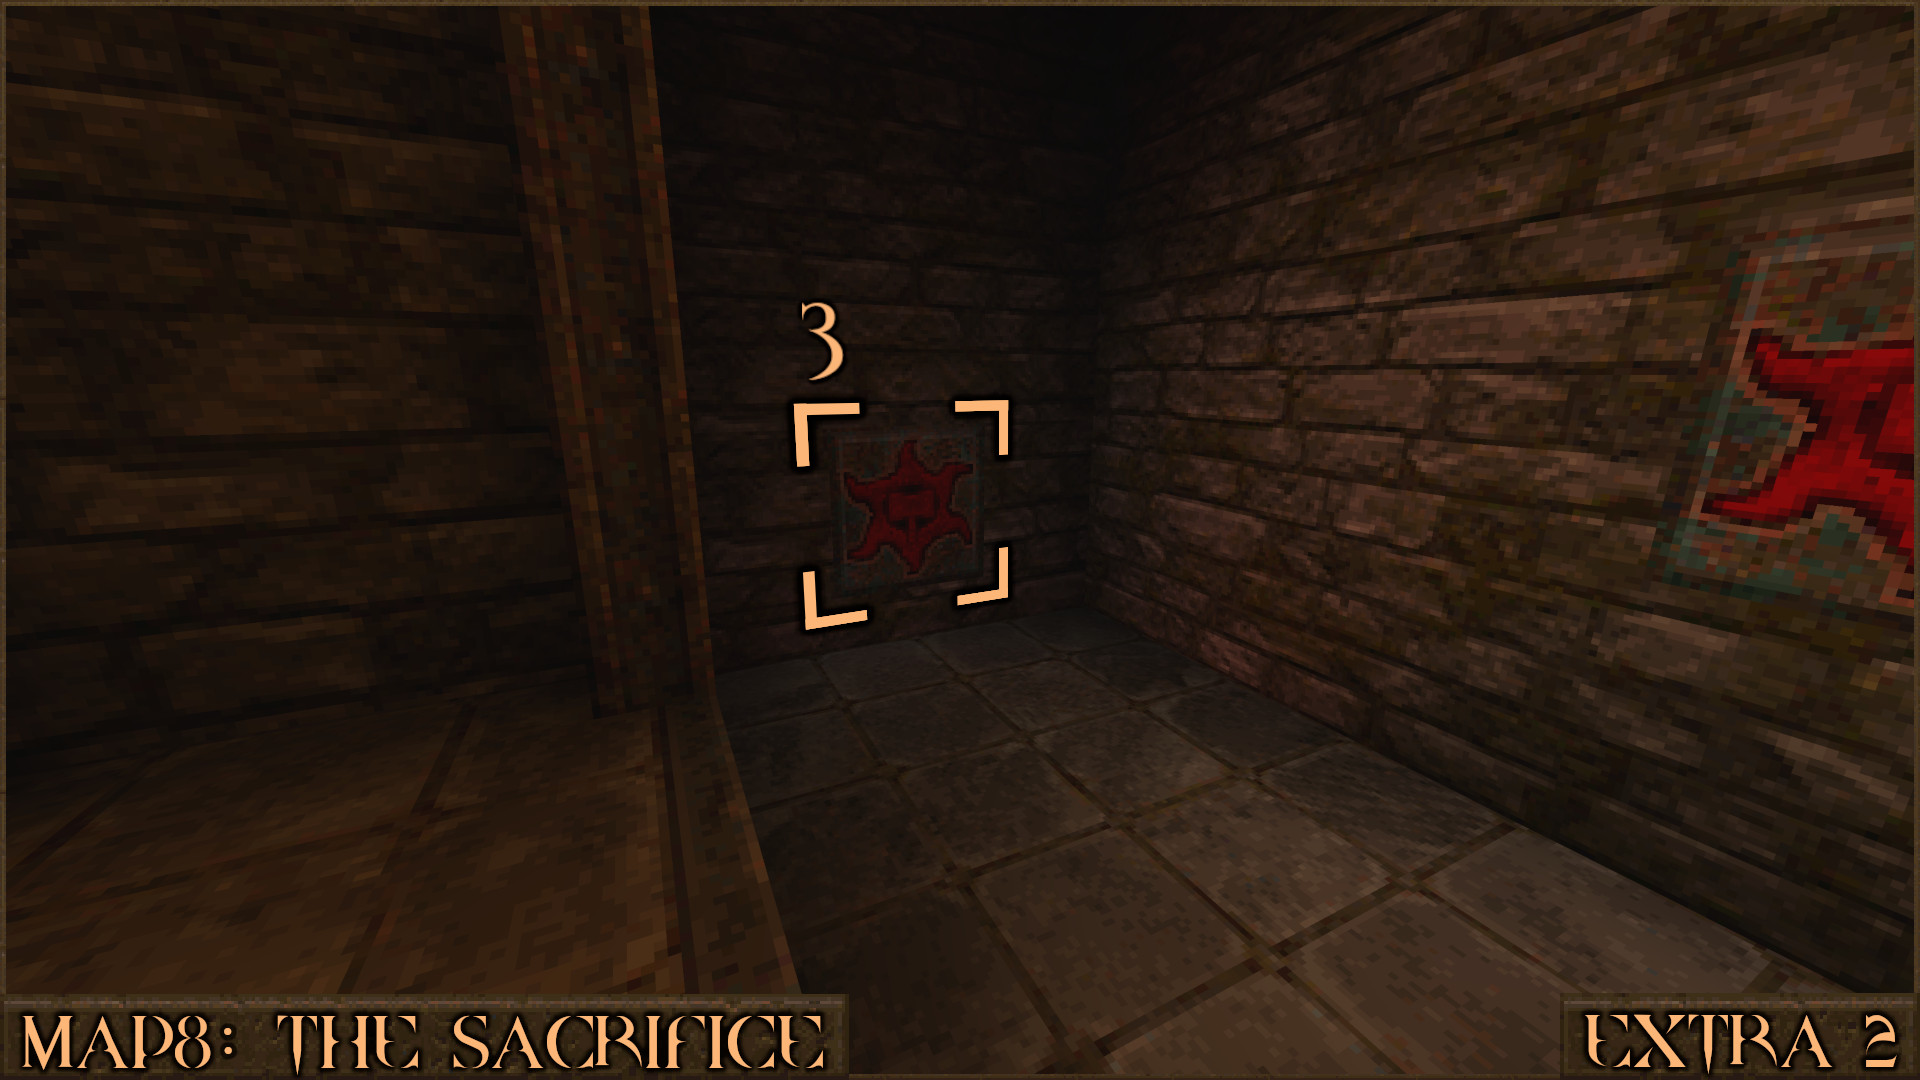
Return to the bridge and this time go through the "NO" door () that leads to Normal Difficulty.

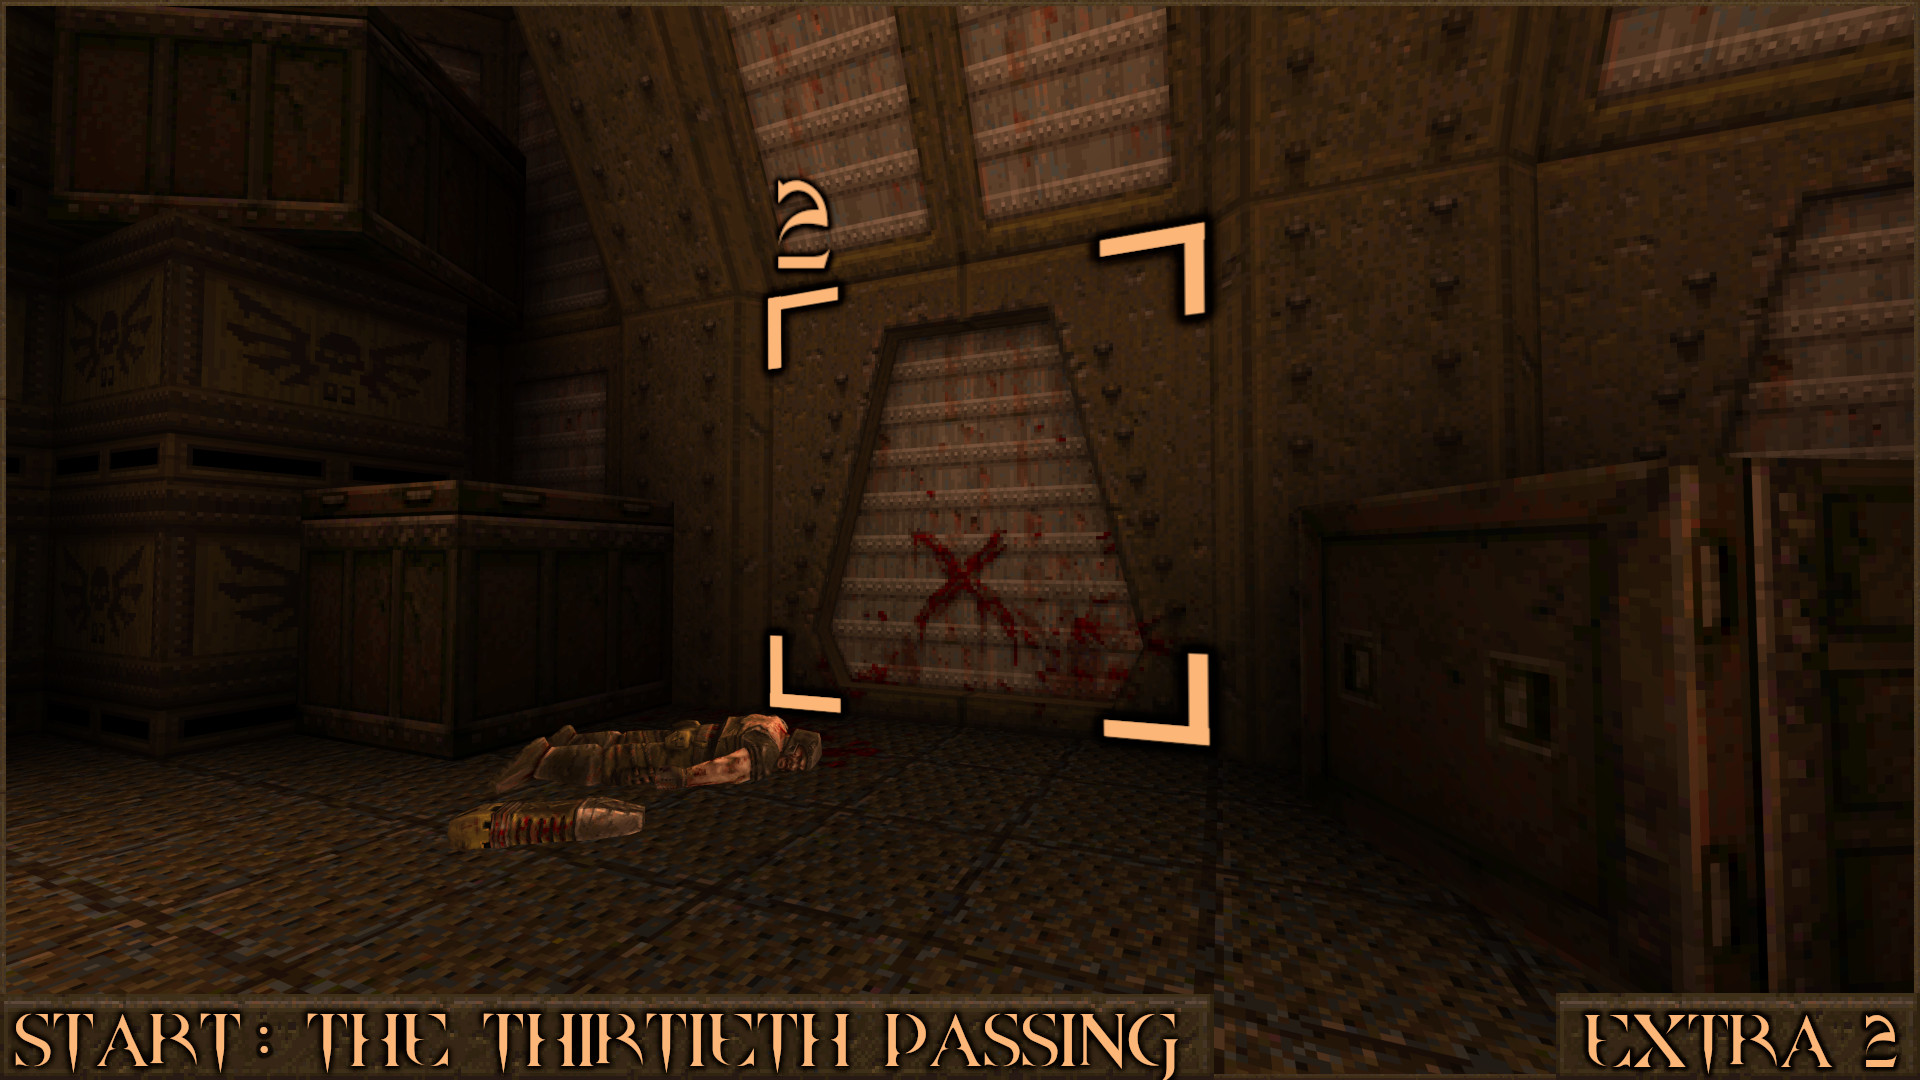
On your right you will see a red X on the wall (). Shoot it to reveal a secret.

Reward: Green Armor

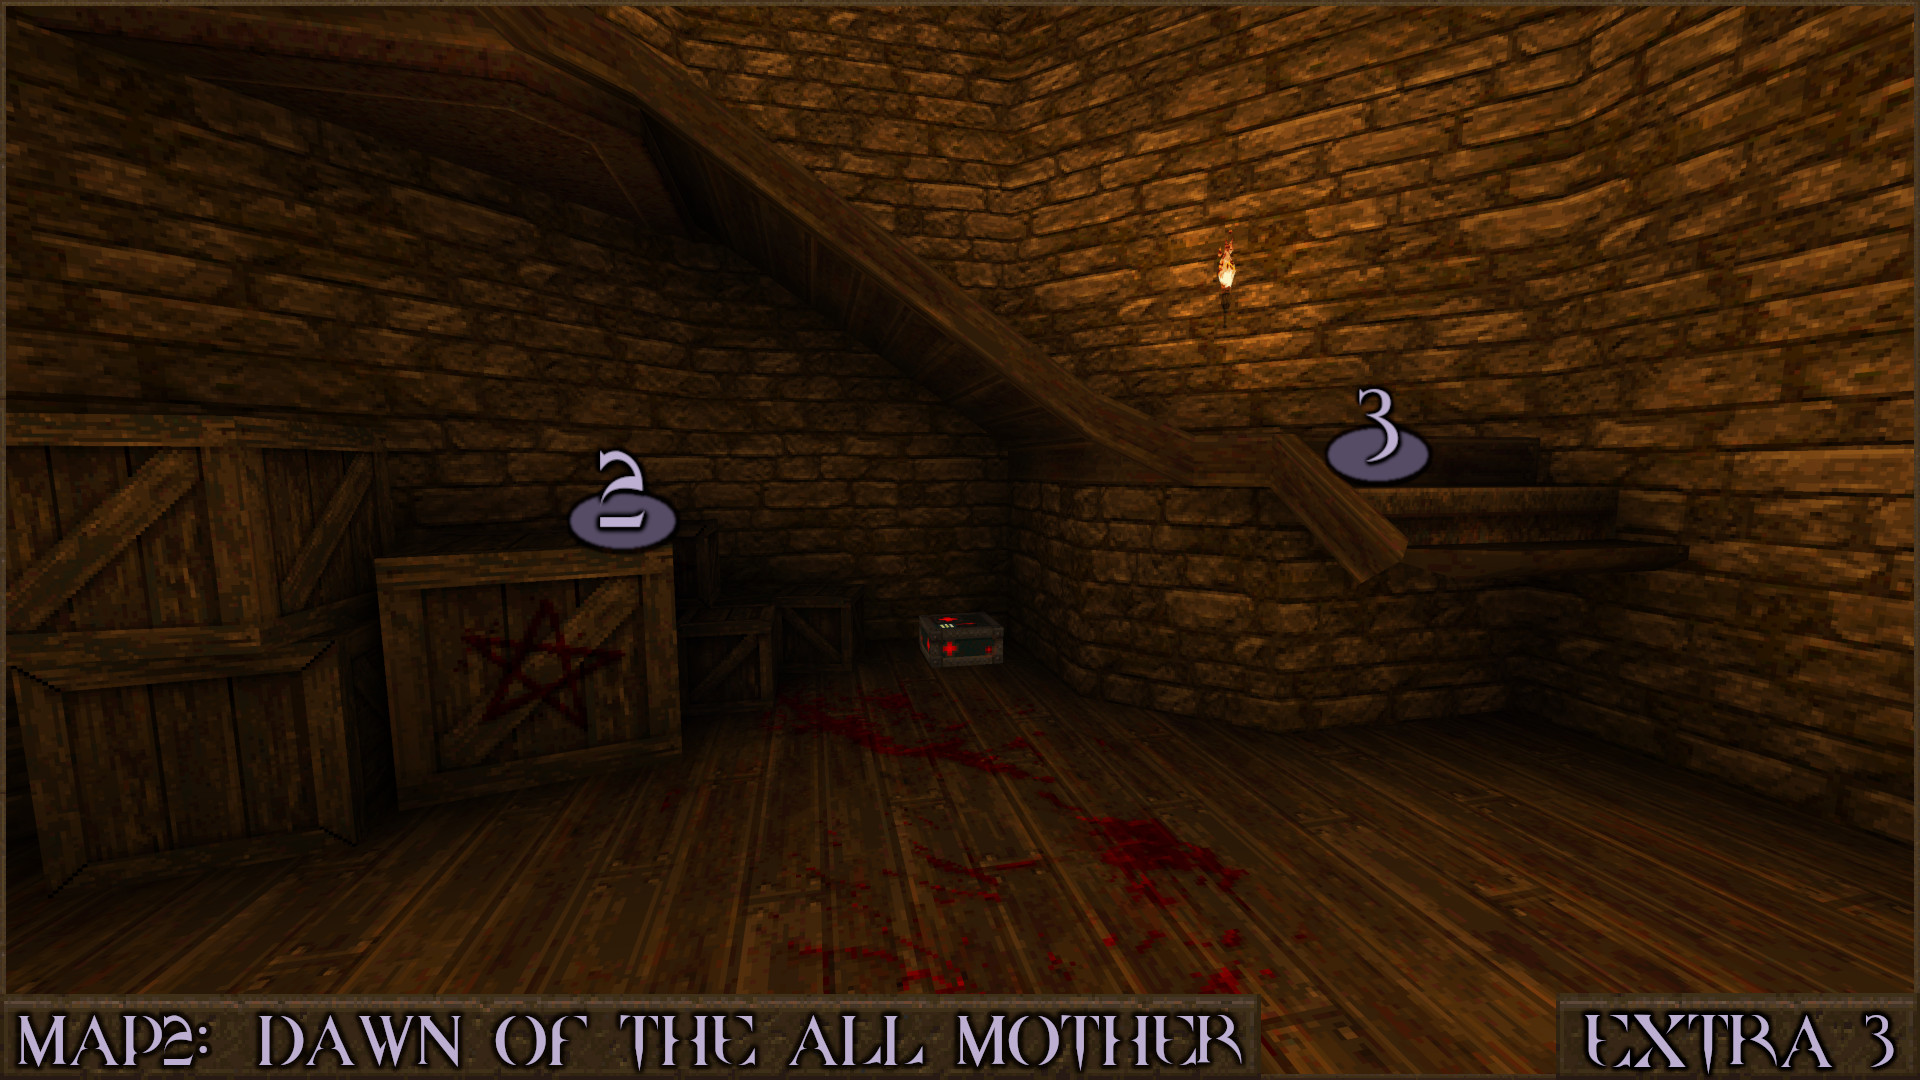
Extra Secret 3
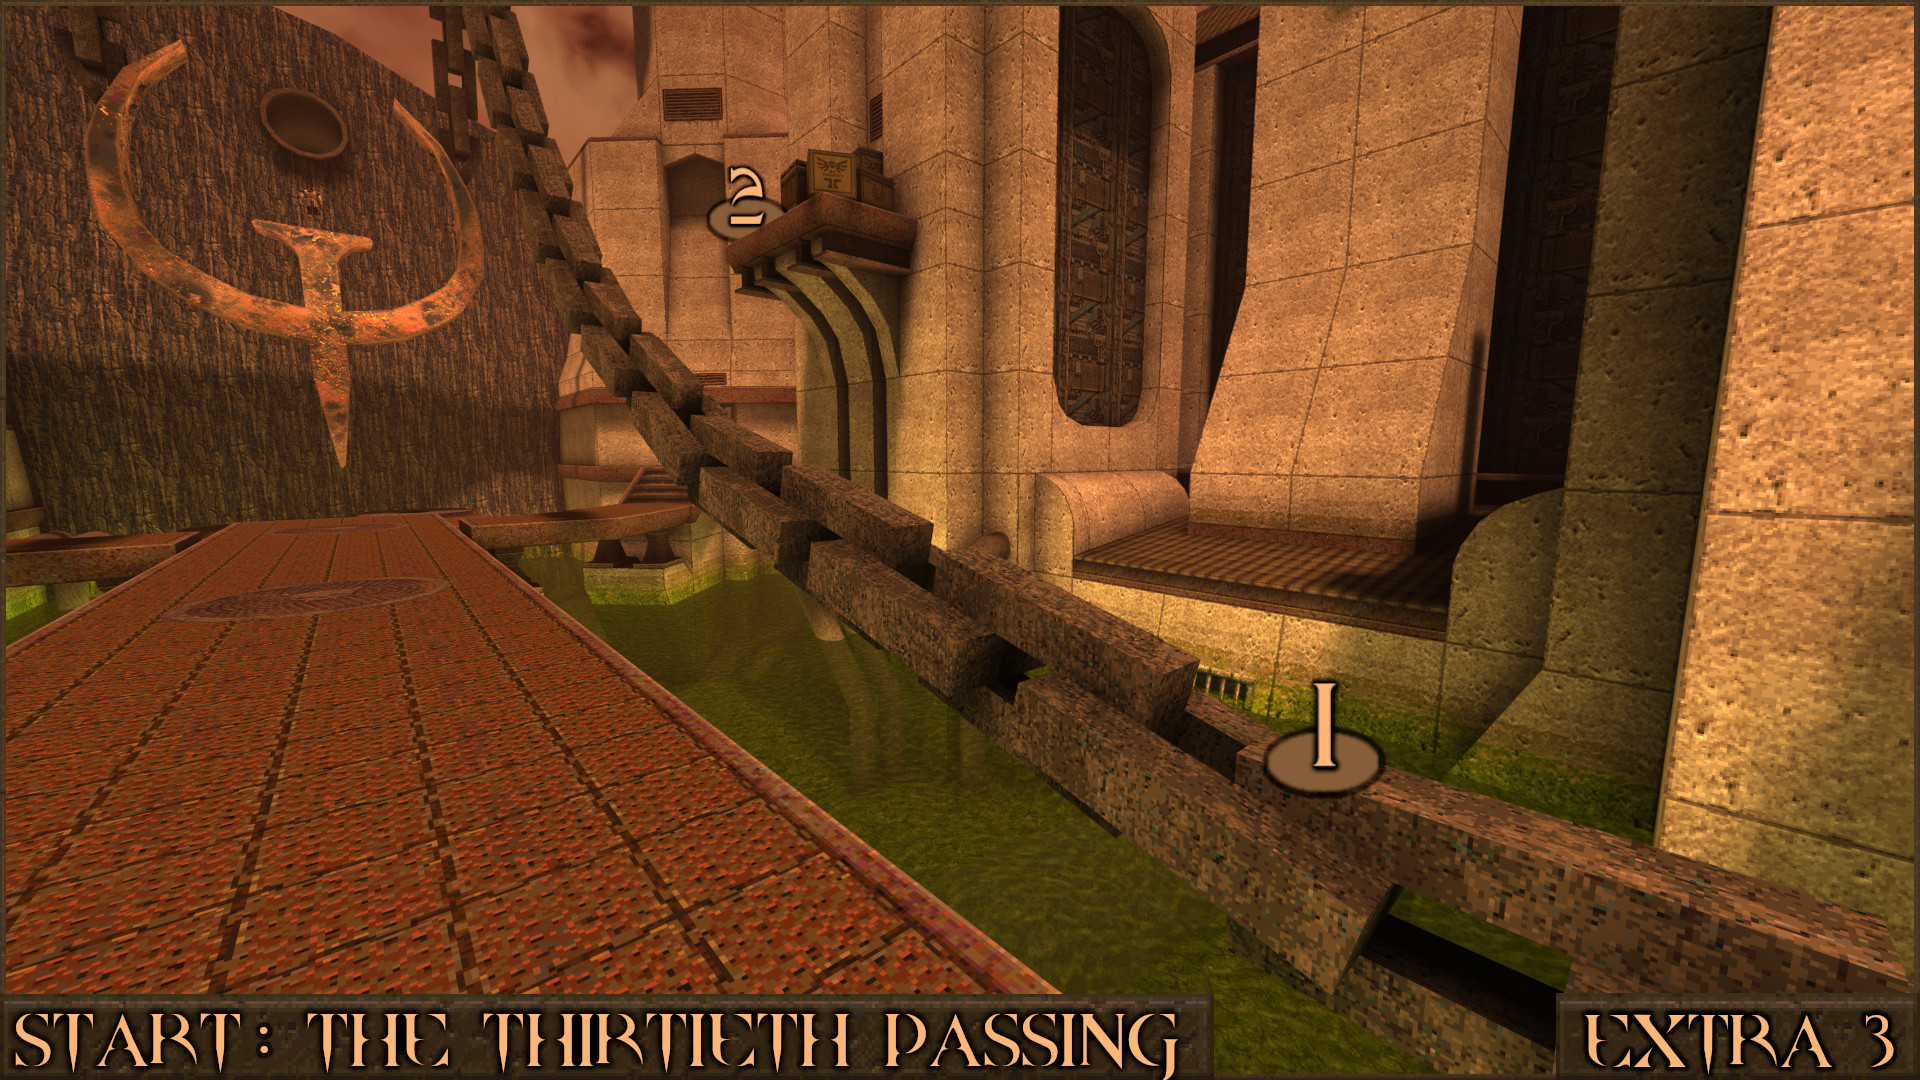
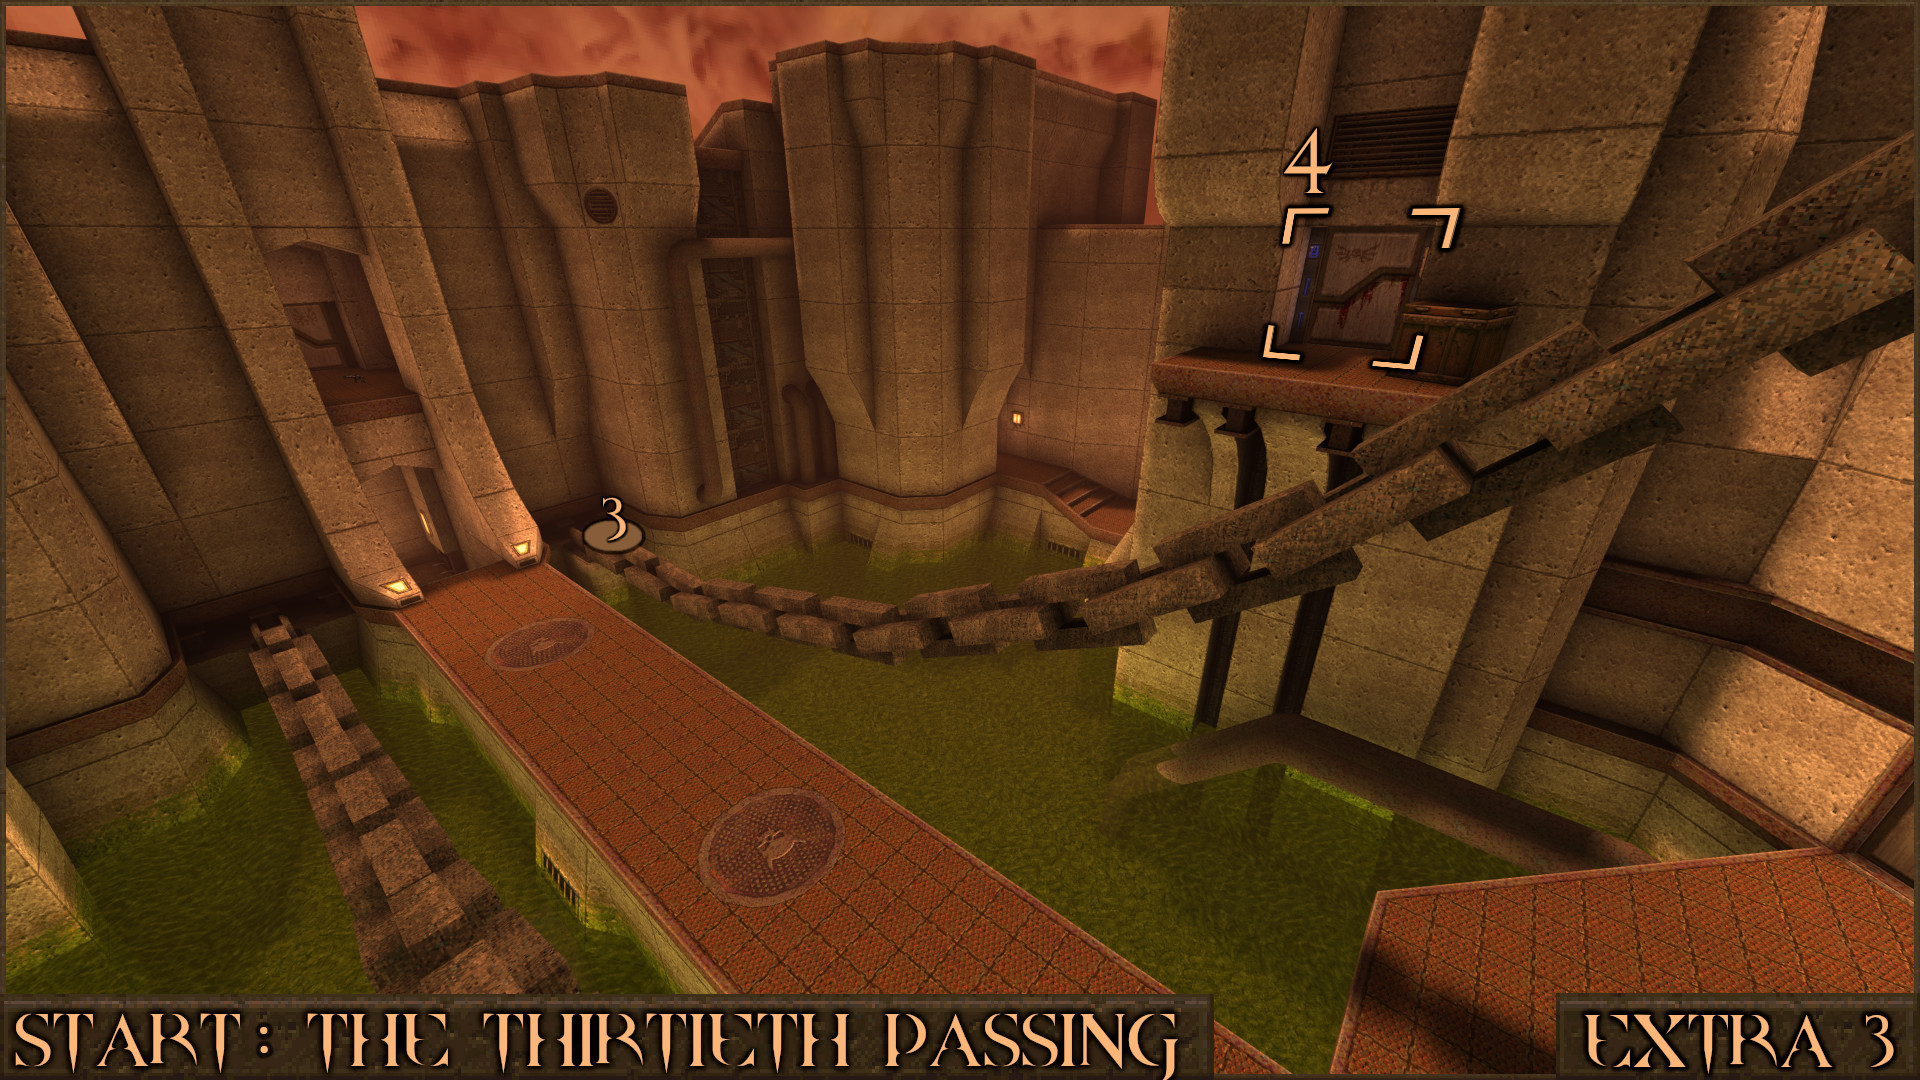
Return to the entrance by the bridge and this time jump over to the chain on the right of the bridge (). Run up it to reach a platform () containing the Silver Keycard.

Go back down the chain and jump over to the other chain () and go to the top. Jump over to the nearby platform and go through the Silver Keycard Door ().

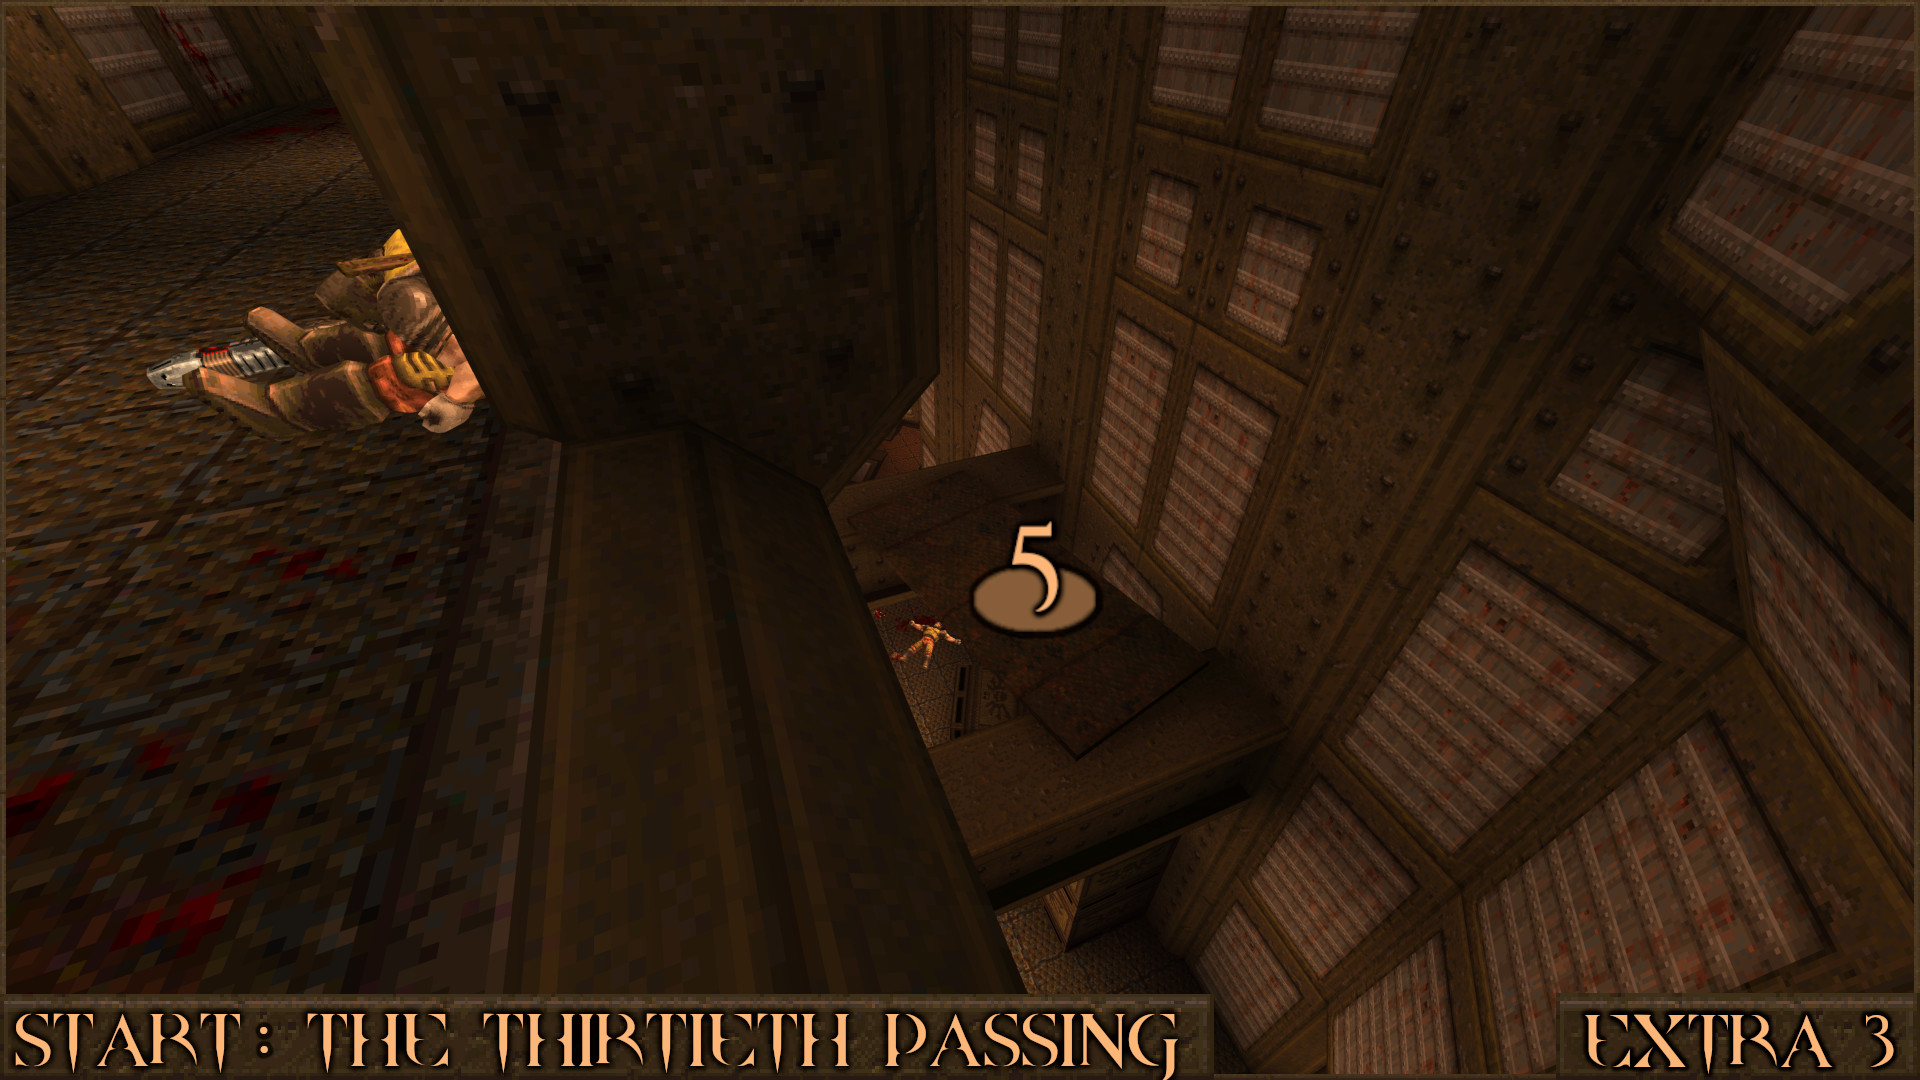
Go through the first "HA" door and when you see a dead Ranger body look over the edge. Drop down to the metal platform below ().

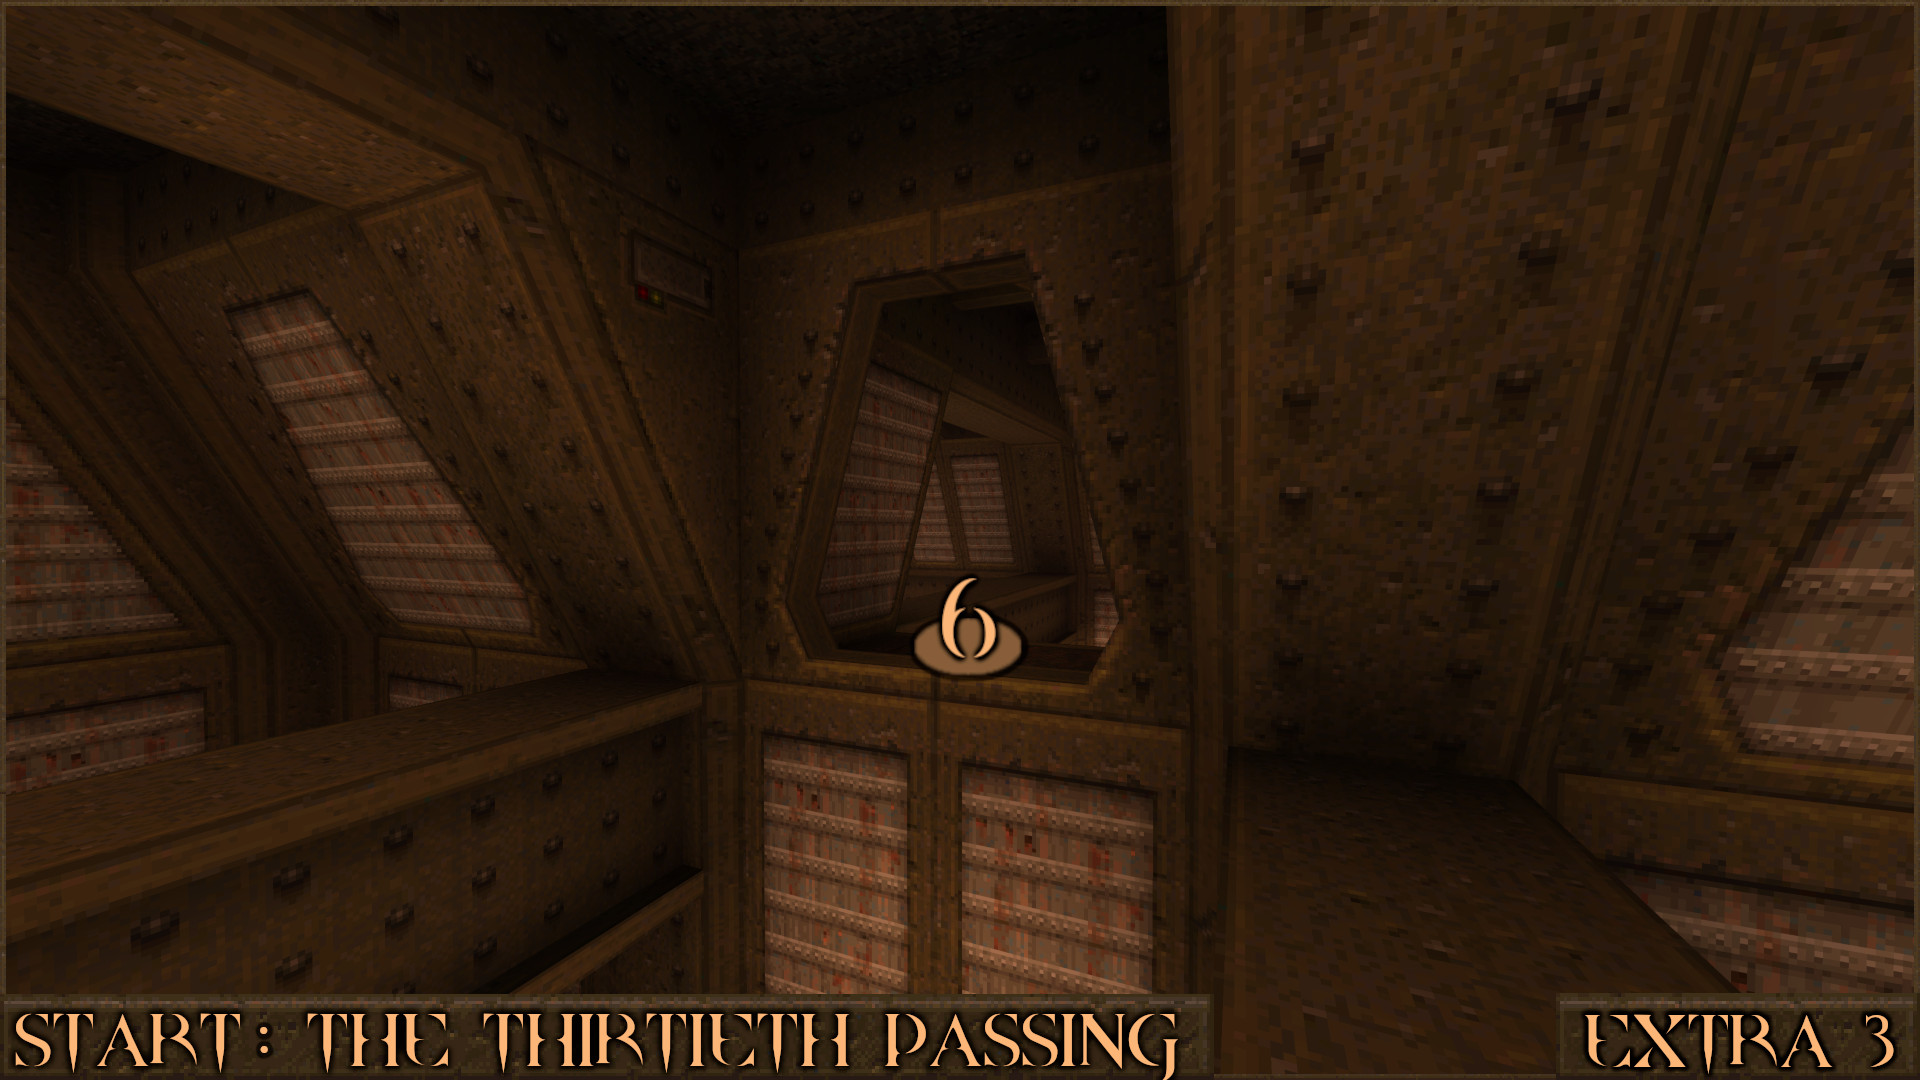
Nearby is a hole through the wall () that leads to some beams above a room. Jump between the beams until you reach another hole in the wall that leads outside.

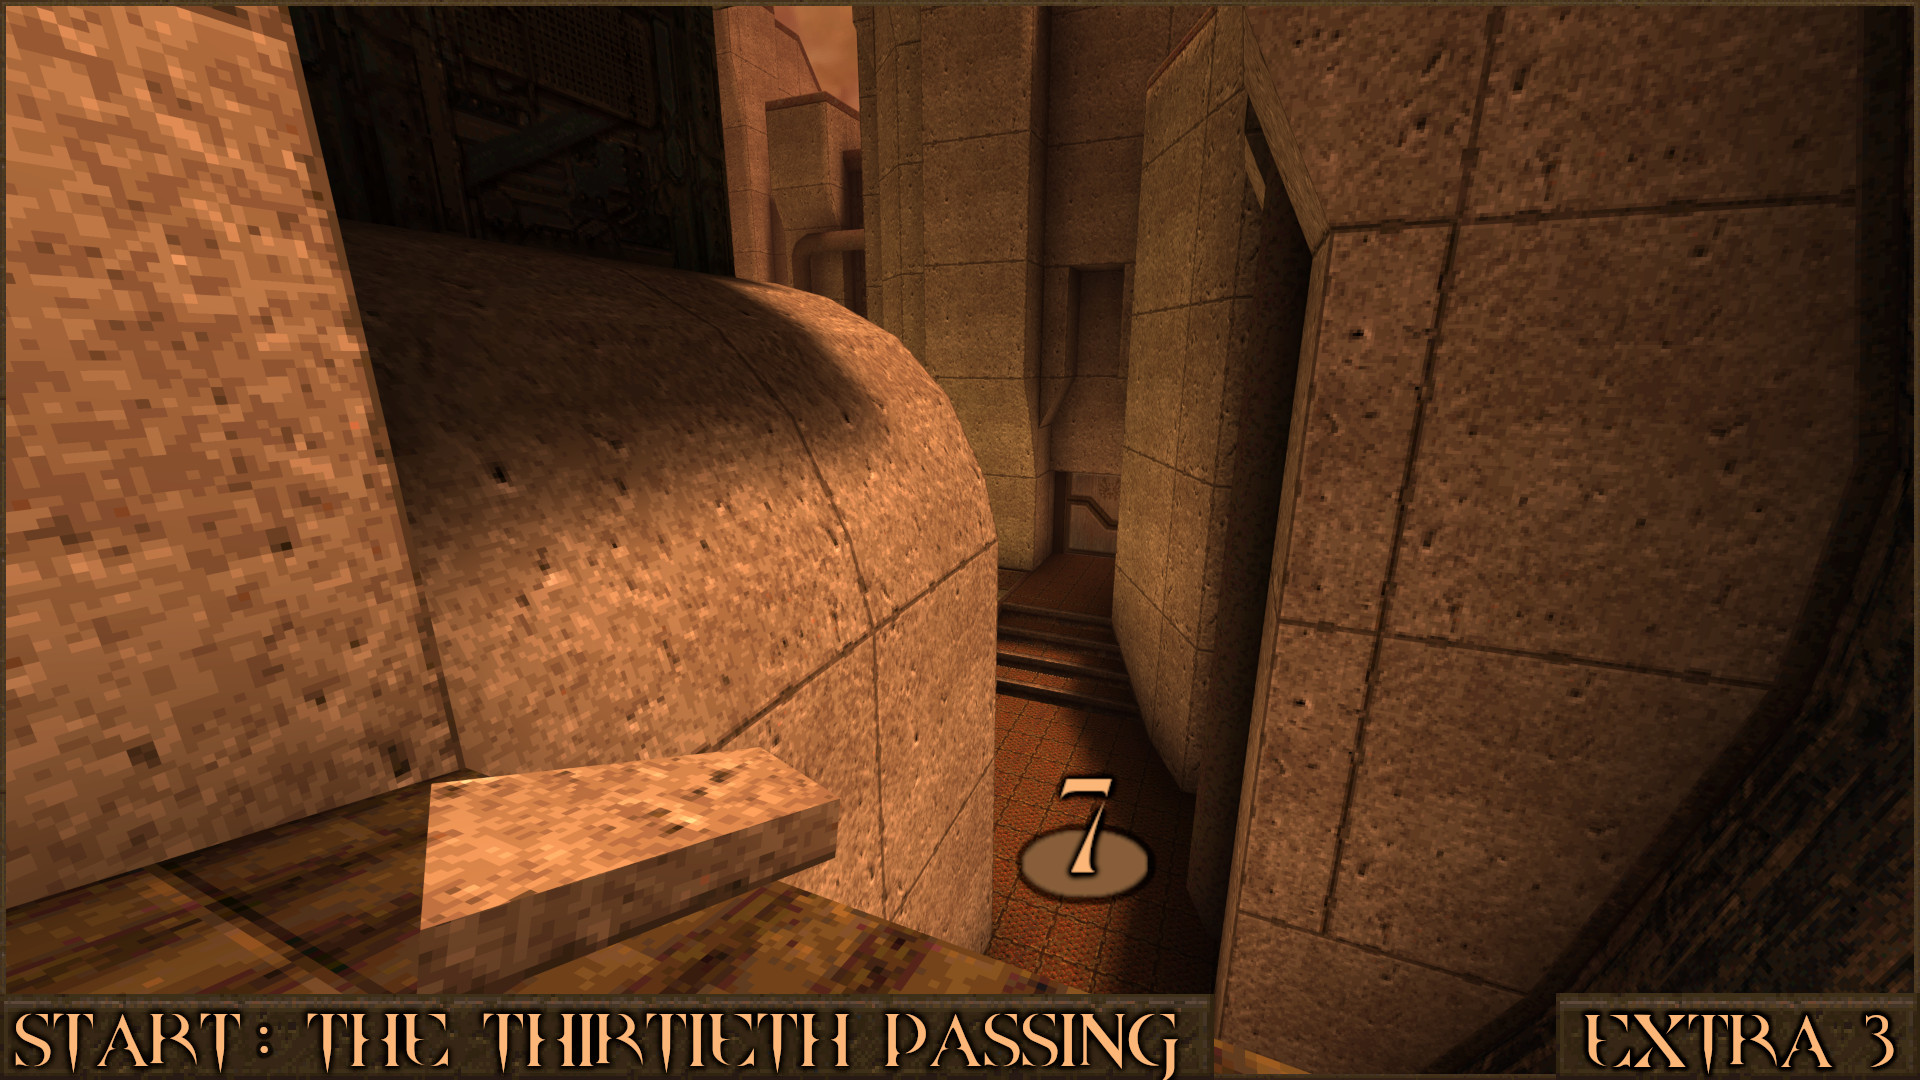
From here drop down to the floor outside () and go through a nearby door. In there you will find some ammo and past another door is a Nailgun.

Reward: Nailgun Small Nails ×2

Extra Secret 4
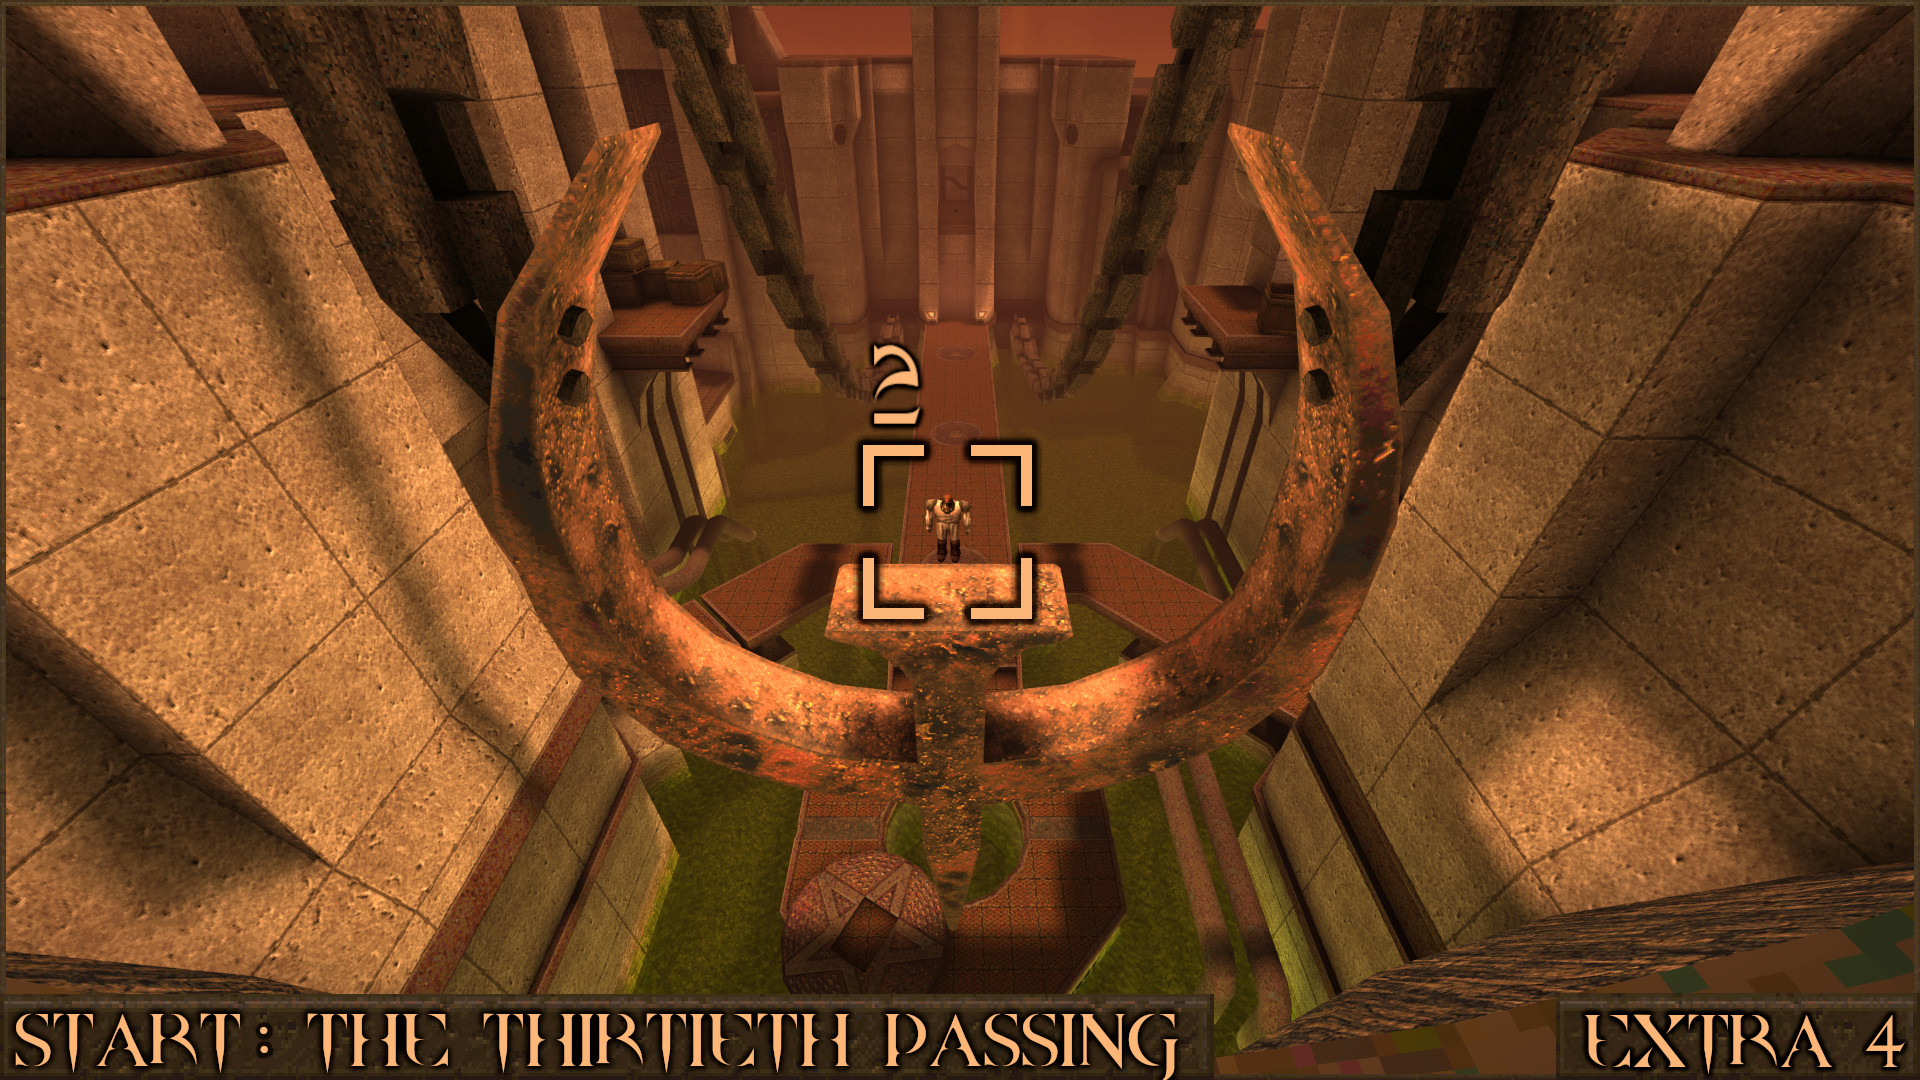
The final secret leads to the Nightmare Difficulty door. Continuing on from Extra Secret 3 you need to go back up the left chain by the bridge and back through the Silver Keycard Door. Go through the first "HA" door again but stop before going through the second "HA" door (that leads to Hard Difficulty) and instead look to your right to see a broken pipe (). Jump into it to be blown up to a ledge.

Run off the ledge to land on the giant Quake symbol and pick up the Biosuit ().

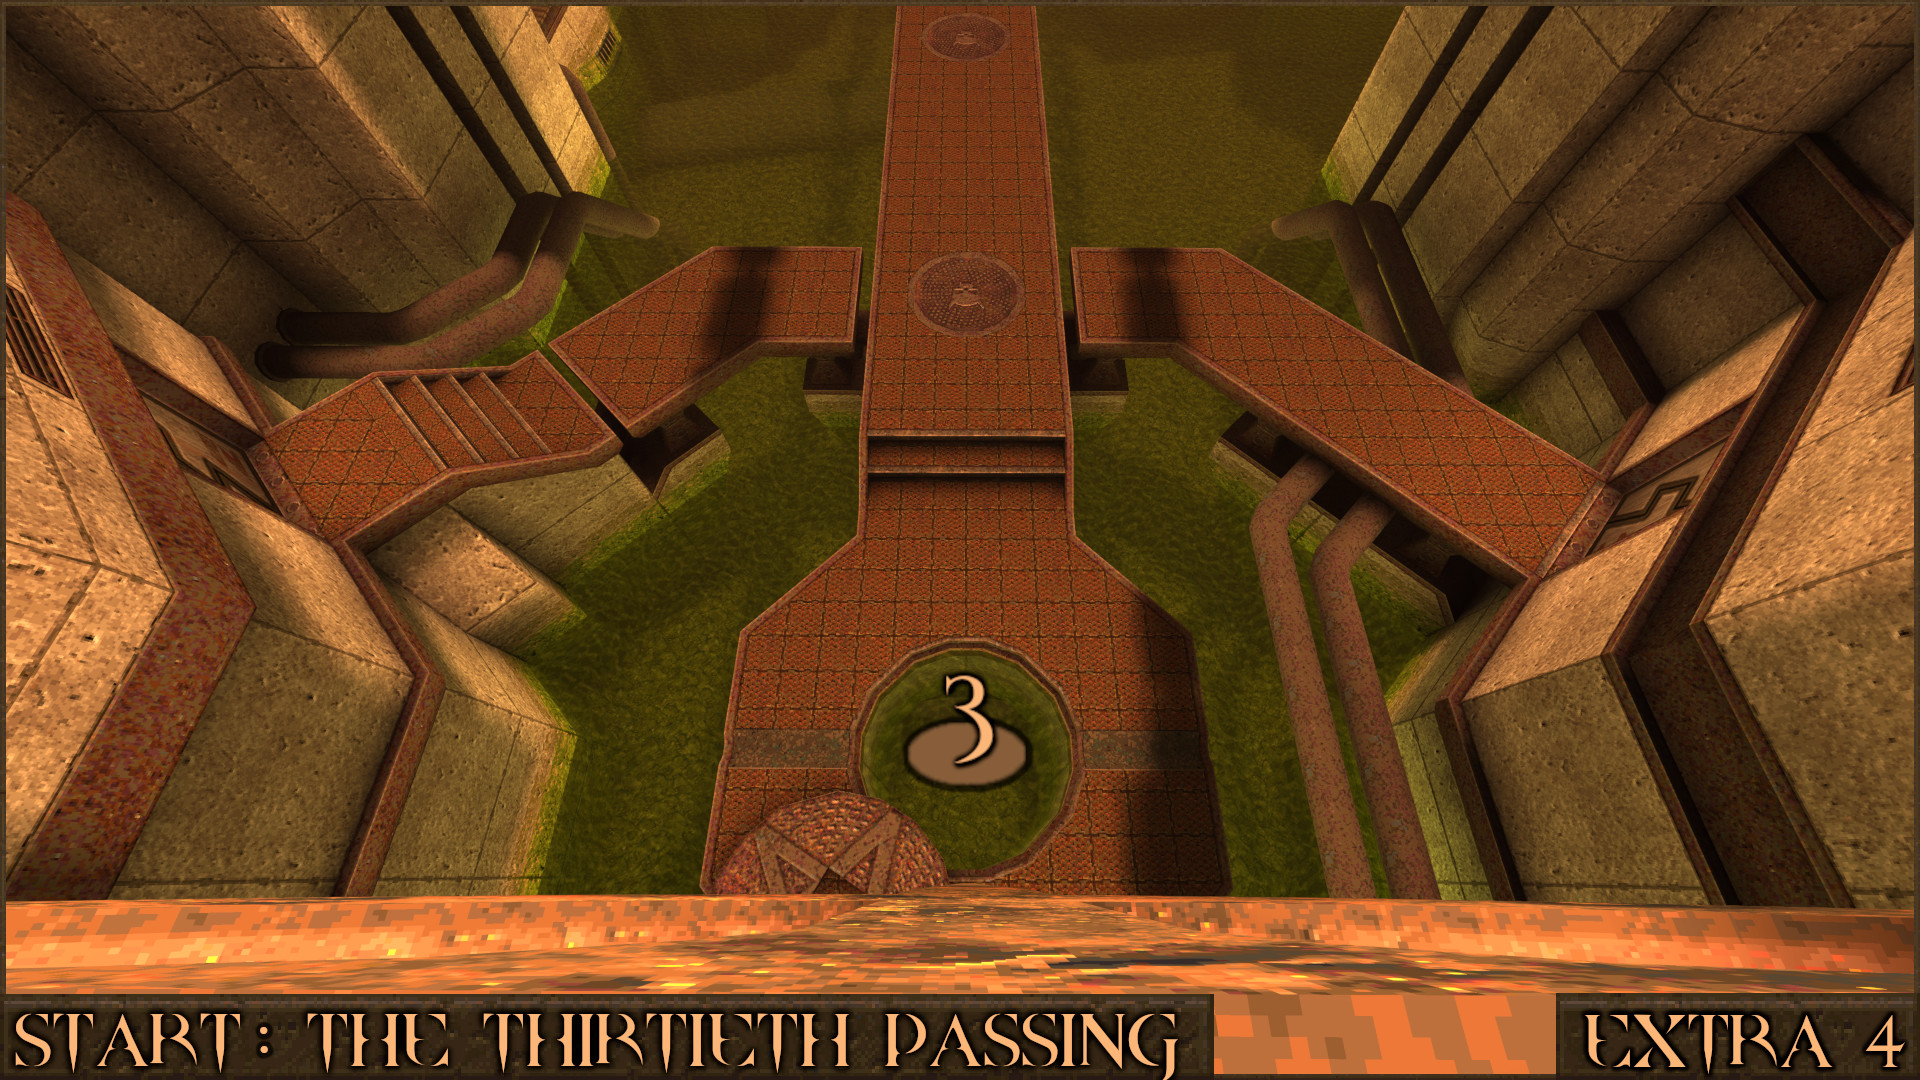
Look below you to see a circular pool of slime (). Drop down into it and swim through the tunnel. Eventually you will surface by an elevator that you can ride up.

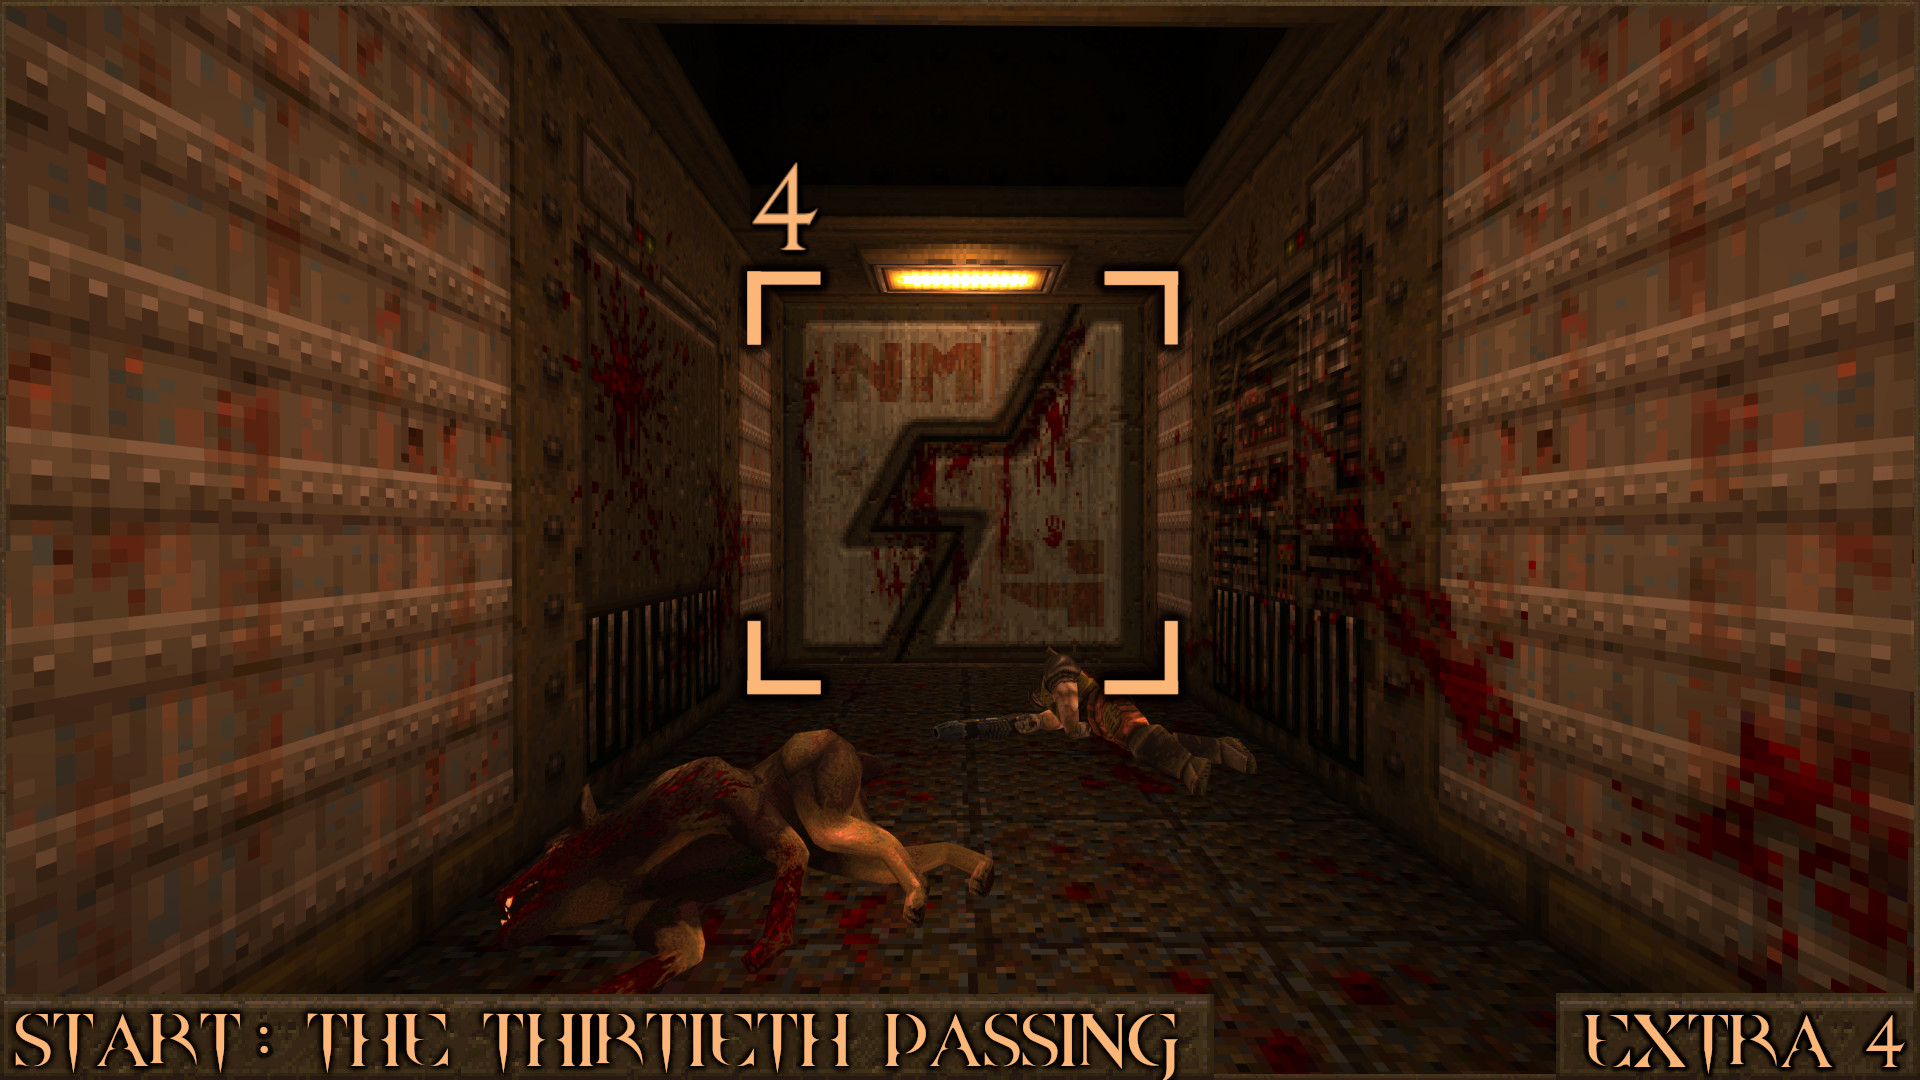
Carry on and go through the "NM" door () which enables Nightmare Difficulty and then head to the level exit.

Reward: [Nightmare Difficulty]
‎‏‏‎MAP1: Through the First Arch
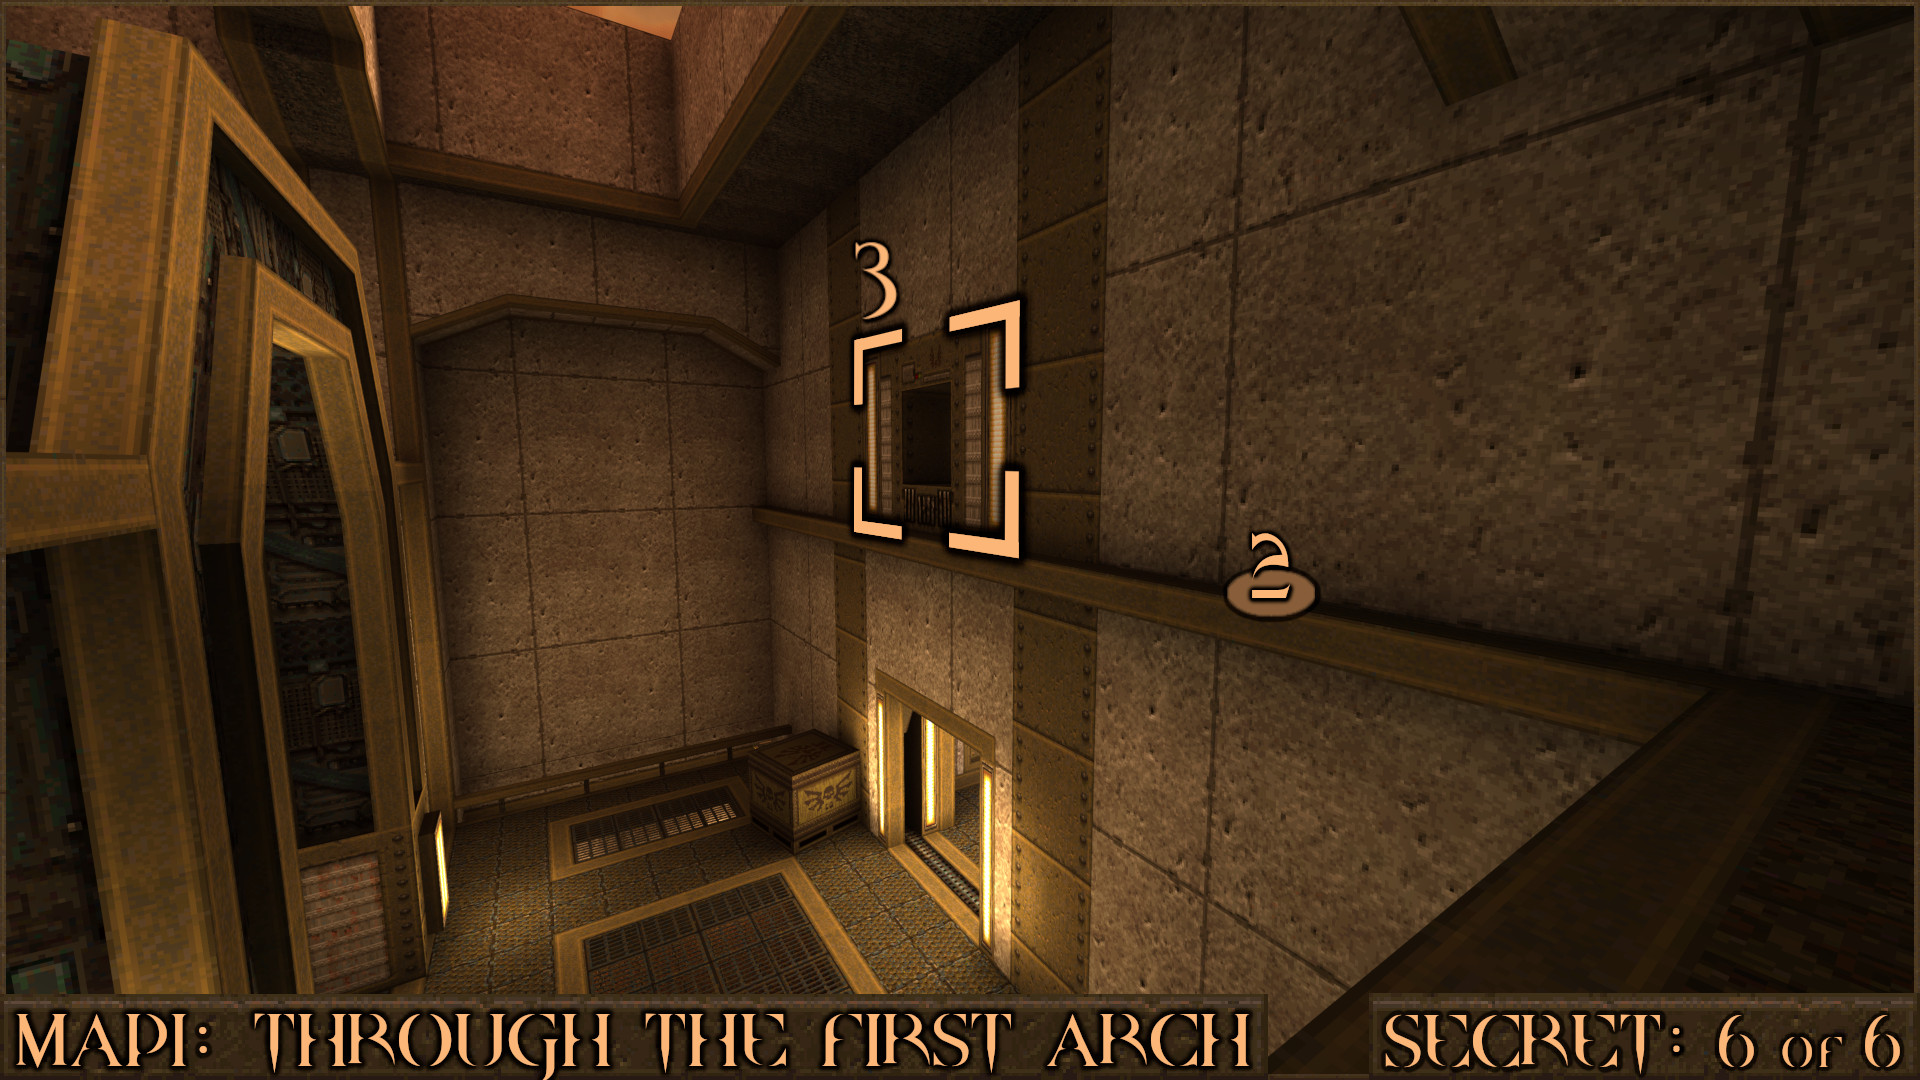
Secret 1 of 6
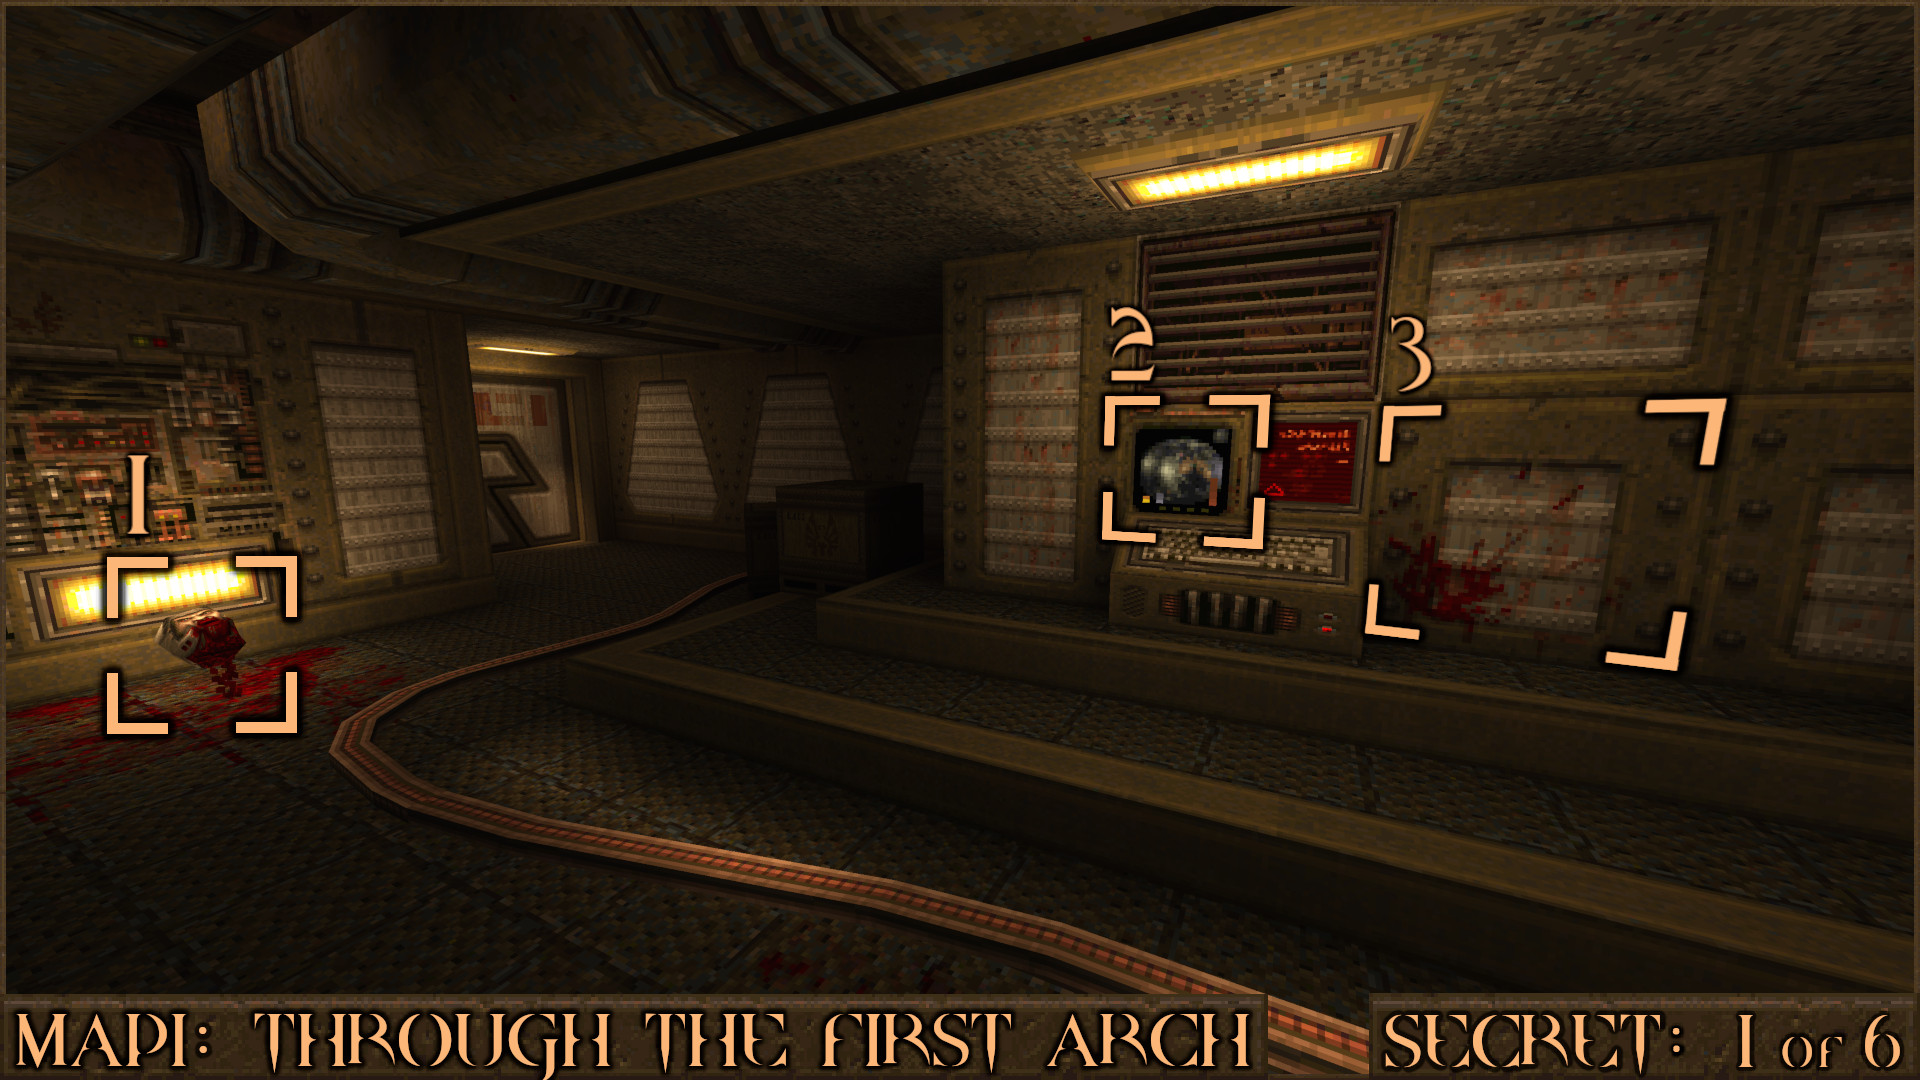
In the first room make sure to pick up the Health Capacity Upgrade () which permanently increases your maximum health. To find the actual secret shoot the nearby computer monitor () to shift a nearby wall () and reveal some ammo.

Reward: Large Shells [Health Capacity Upgrade]

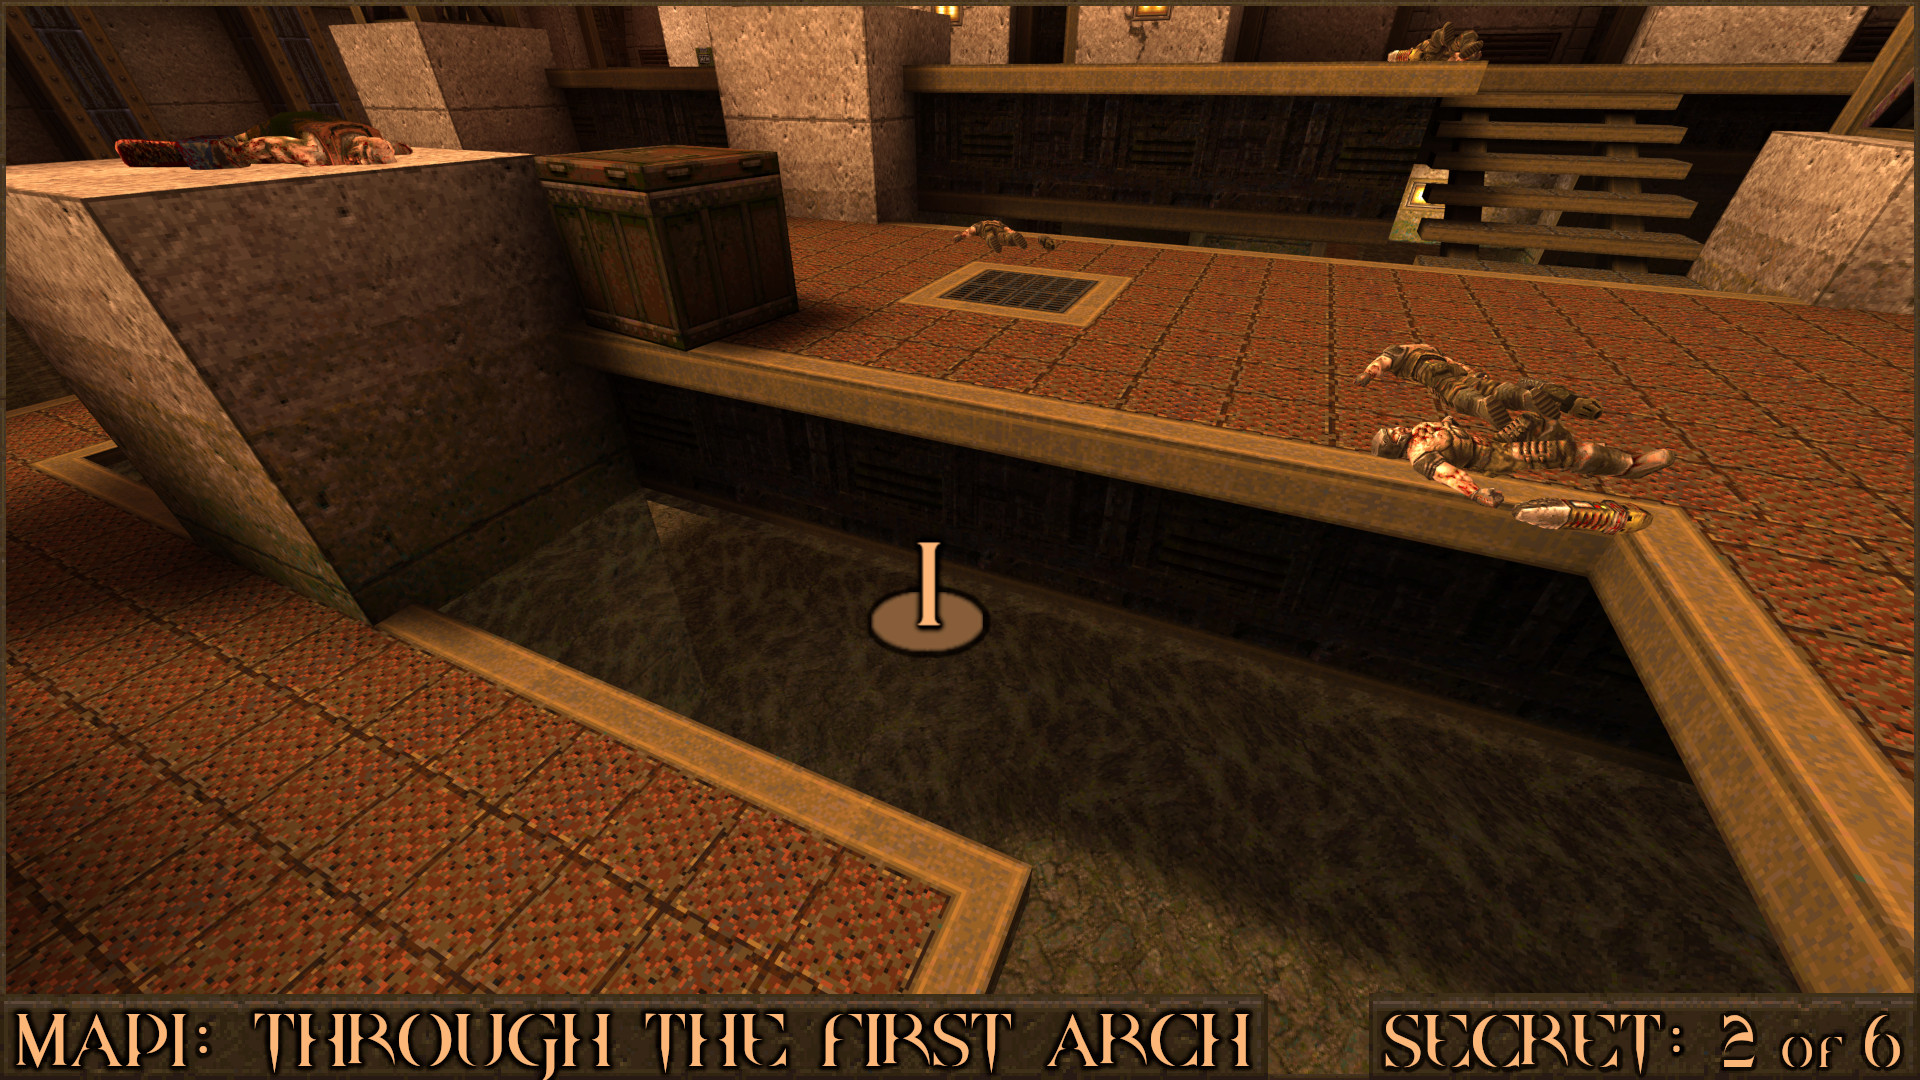
Secret 2 of 6
When you reach the outside area that has large metal platforms jump into the water below ().

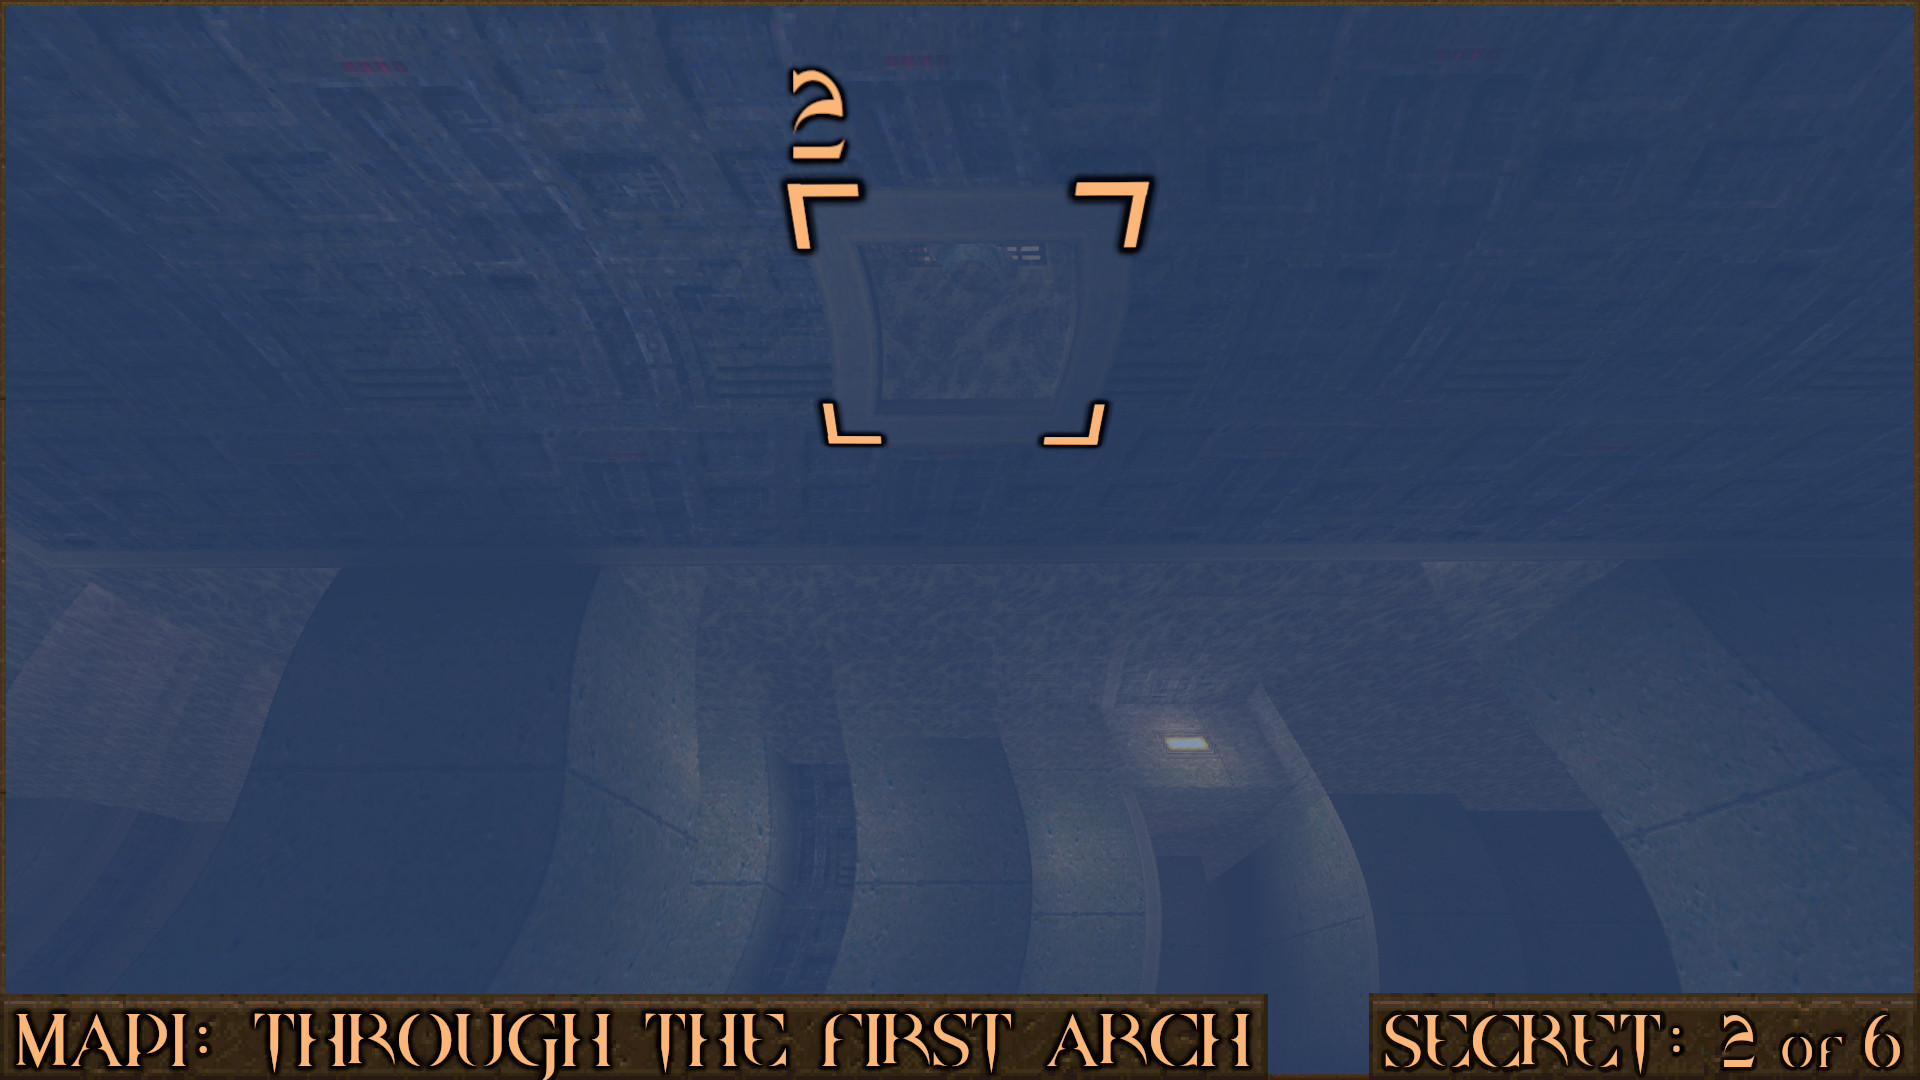
Swim under the centre of the metal platform and you'll see a square hole () above you containing the secret.

Reward: Green Armor

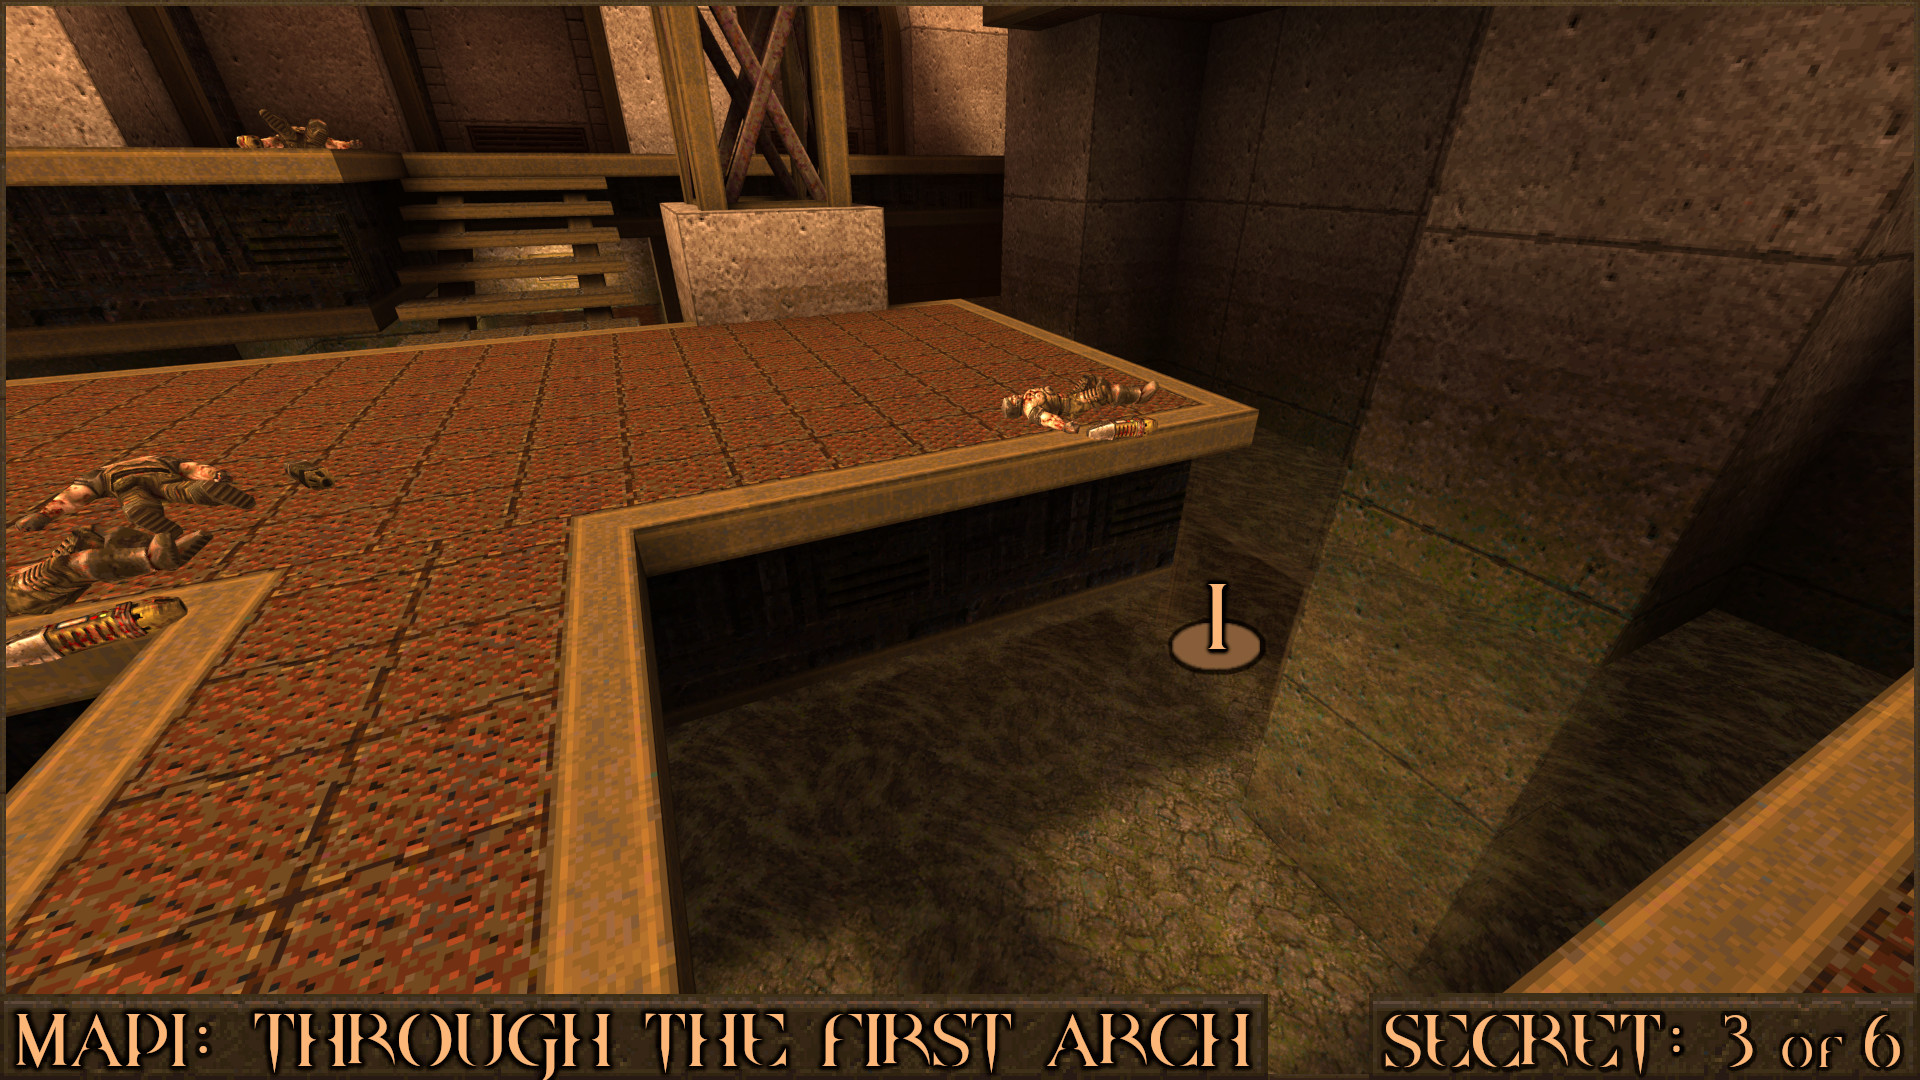
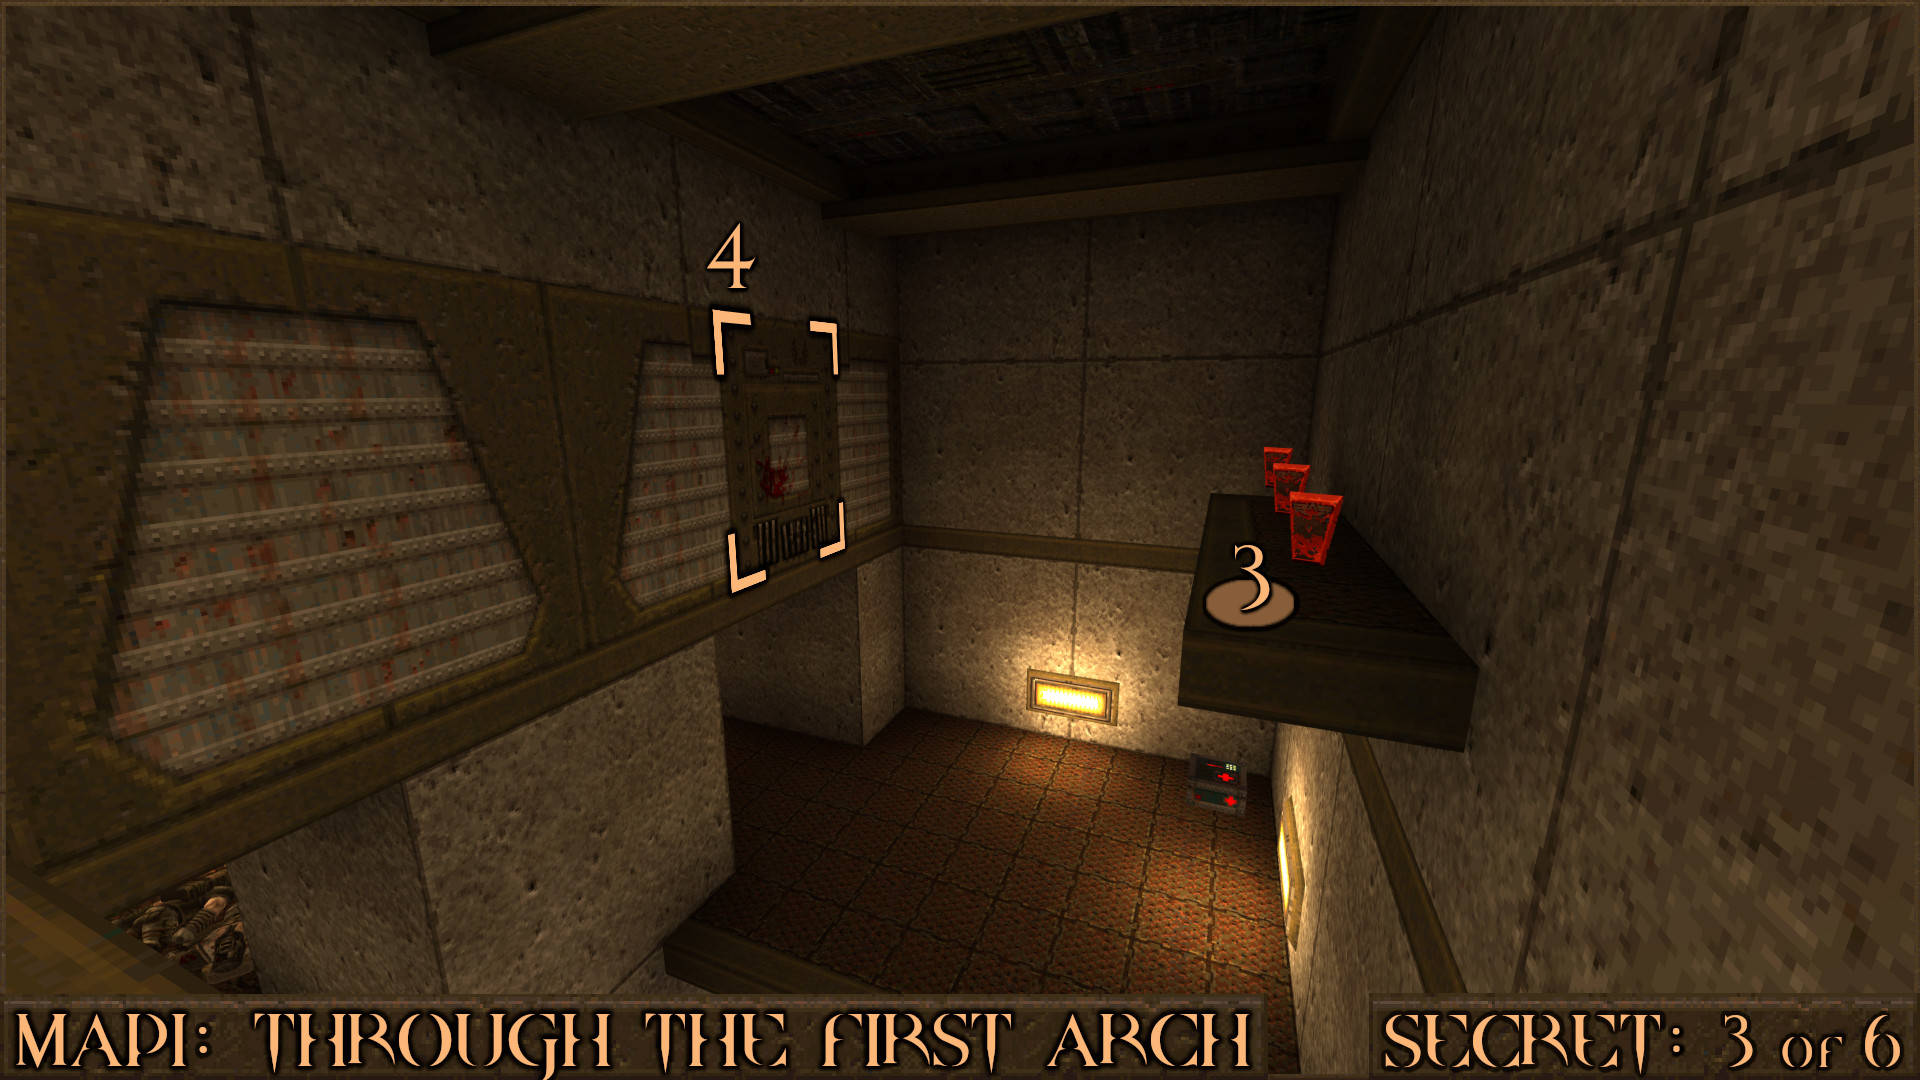
Secret 3 of 6
In the same outside area swim through an underwater hole nearby ().

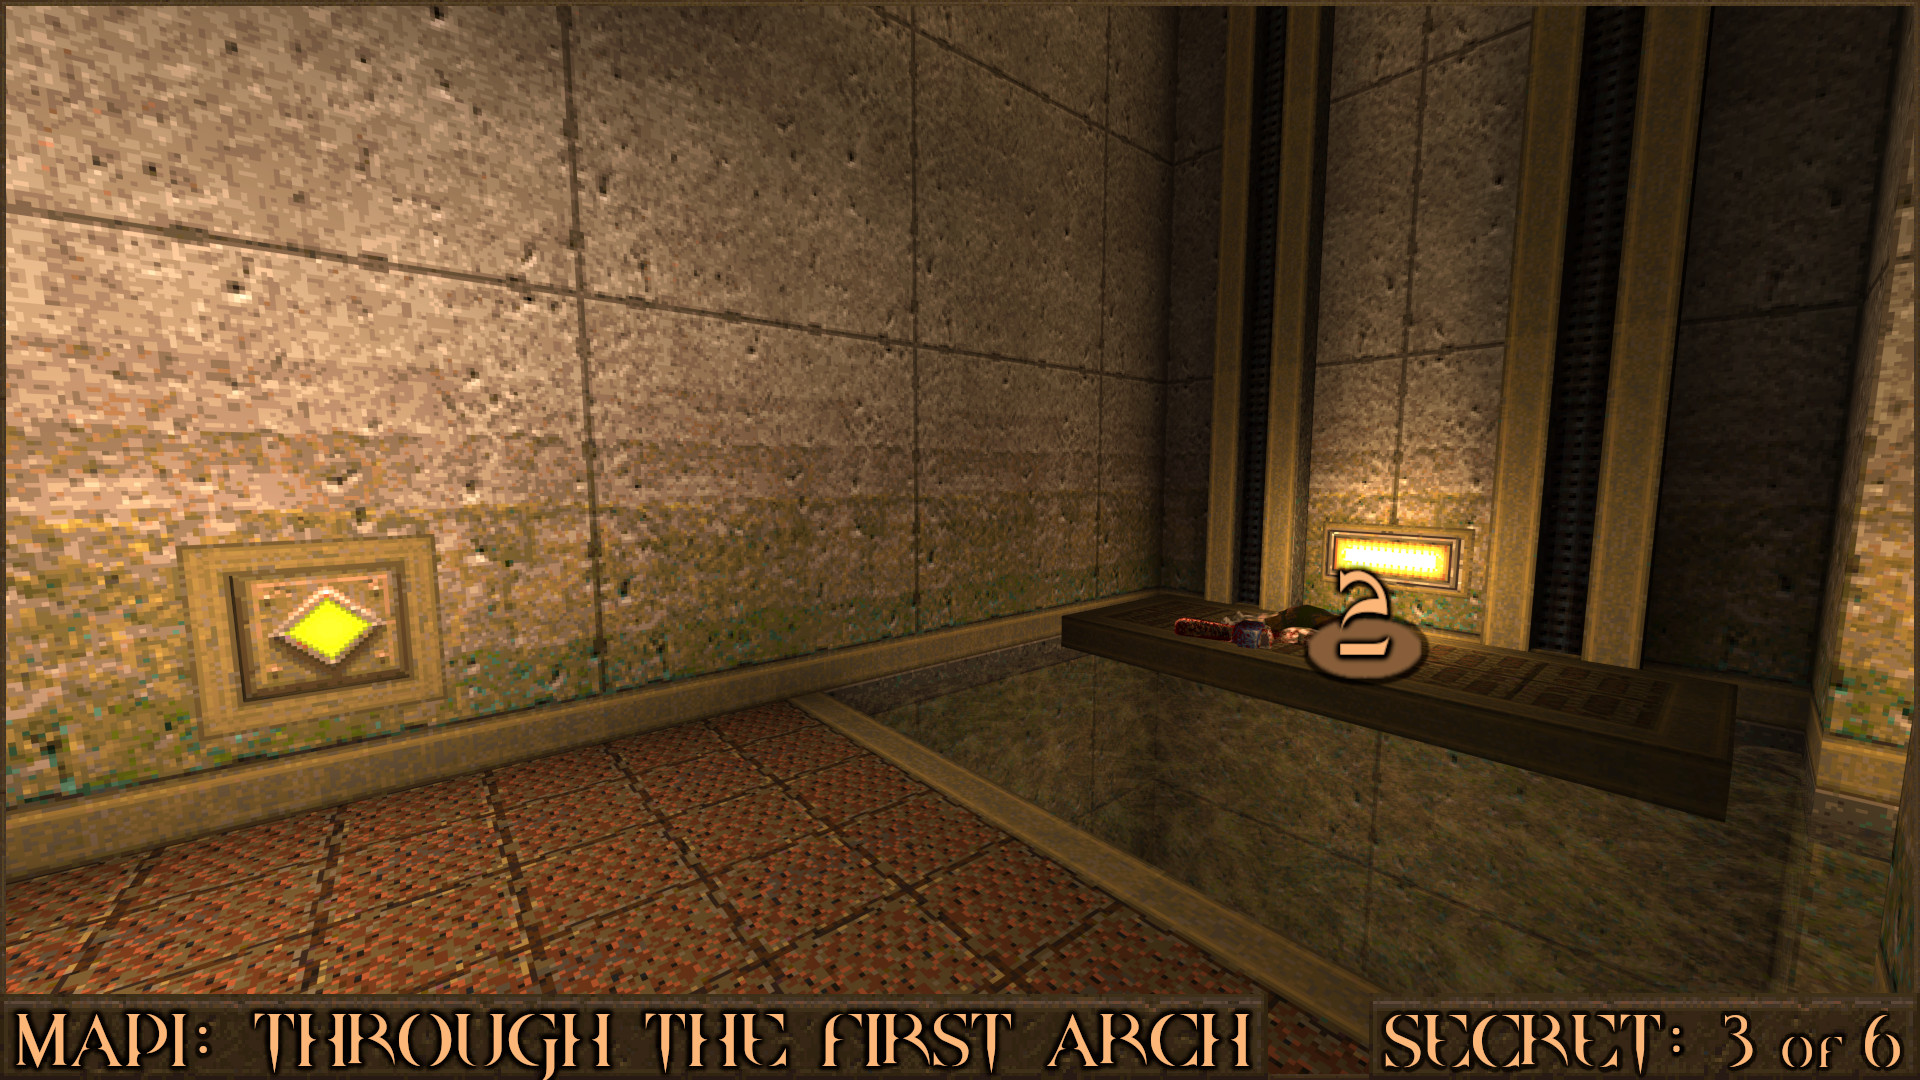
Press a diamond button to lower a nearby elevator. Jump on the elevator () to ride it to the upper level.

Once at the top jump over to a nearby ledge () containing several Armor Shards. Shoot a nearby bloody wall panel () to access the secret. Afterwards, carefully drop down onto a nearby crate to reach a fourth Armor Shard.

Reward: Megahealth Armor Shard×4

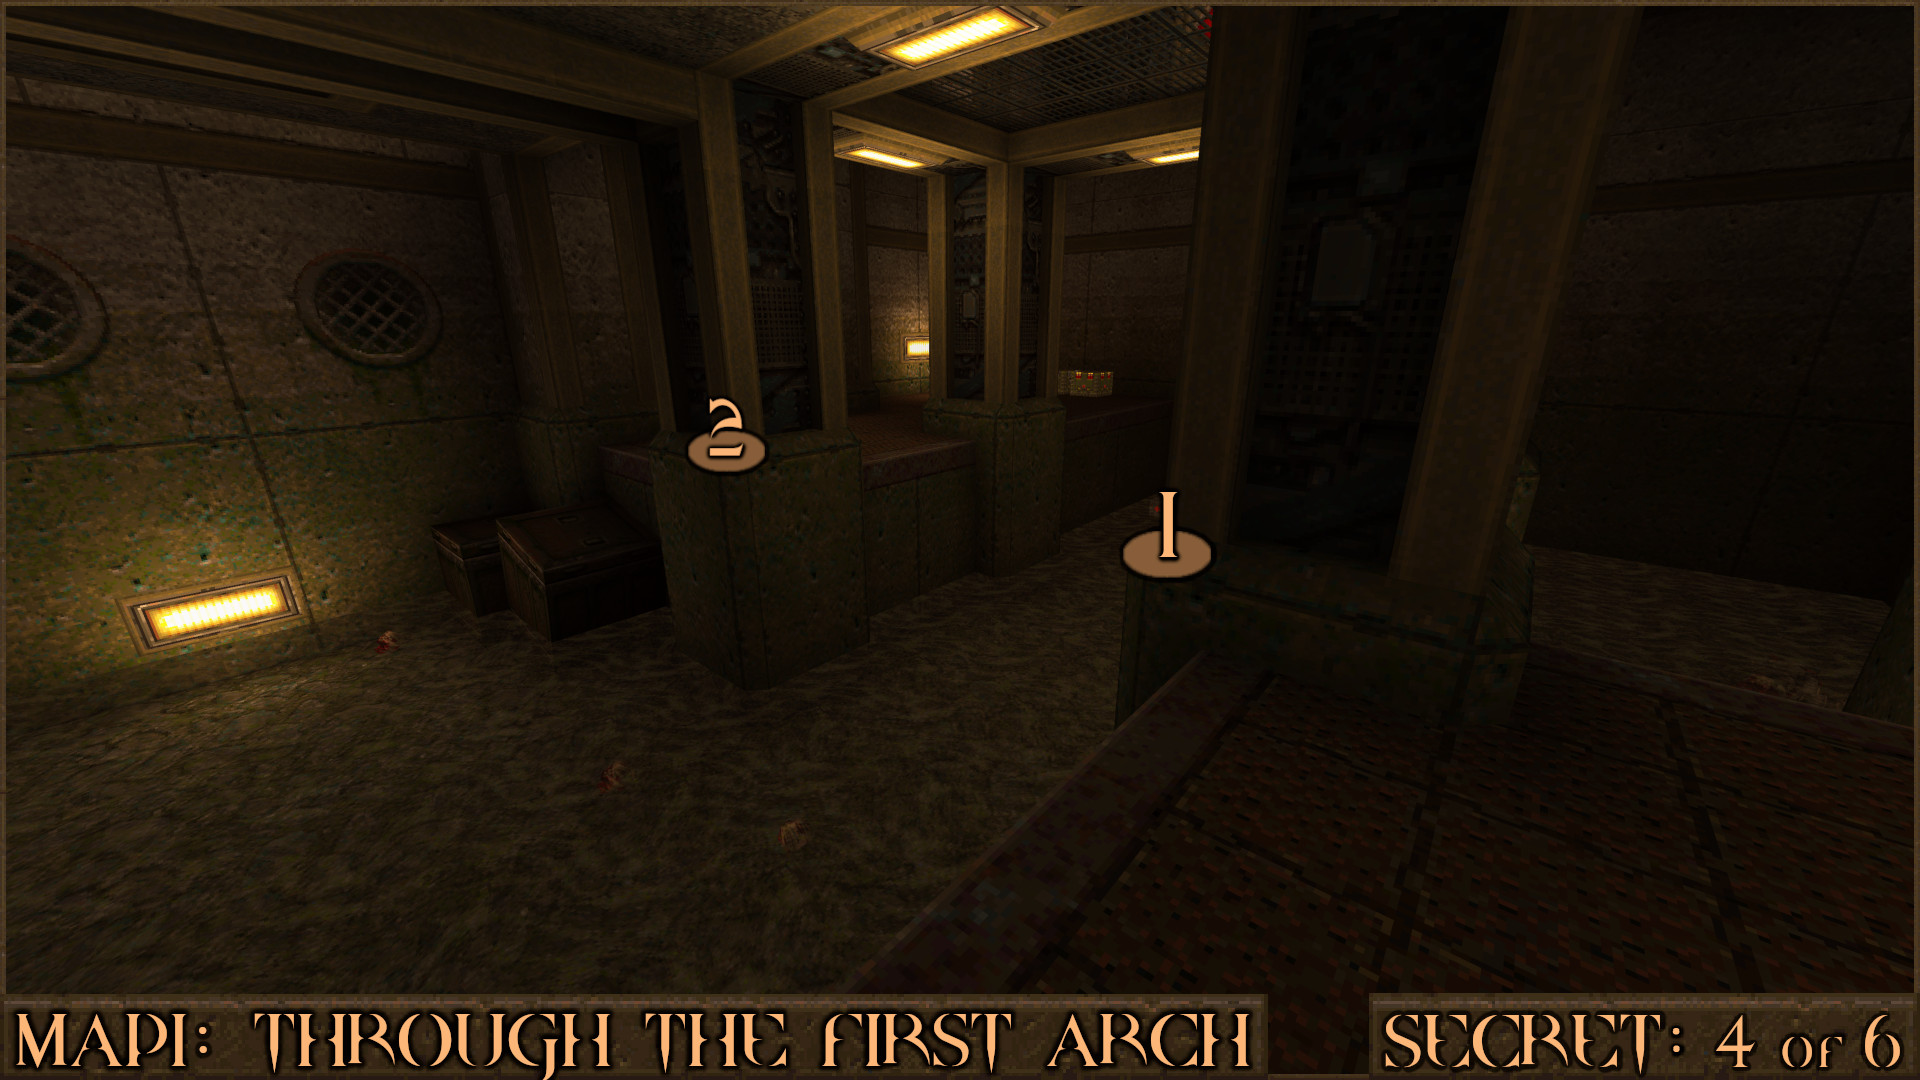
Secret 4 of 6
After passing by a Rune of Sacrifice Door you'll be in the upper part of a room with shallow water below you. Jump onto the edge of a pillar () and jump over the water to the next pillar () and you'll be able to reach the secret on the ledge.

Reward: Large Shells Large Nails Large Health

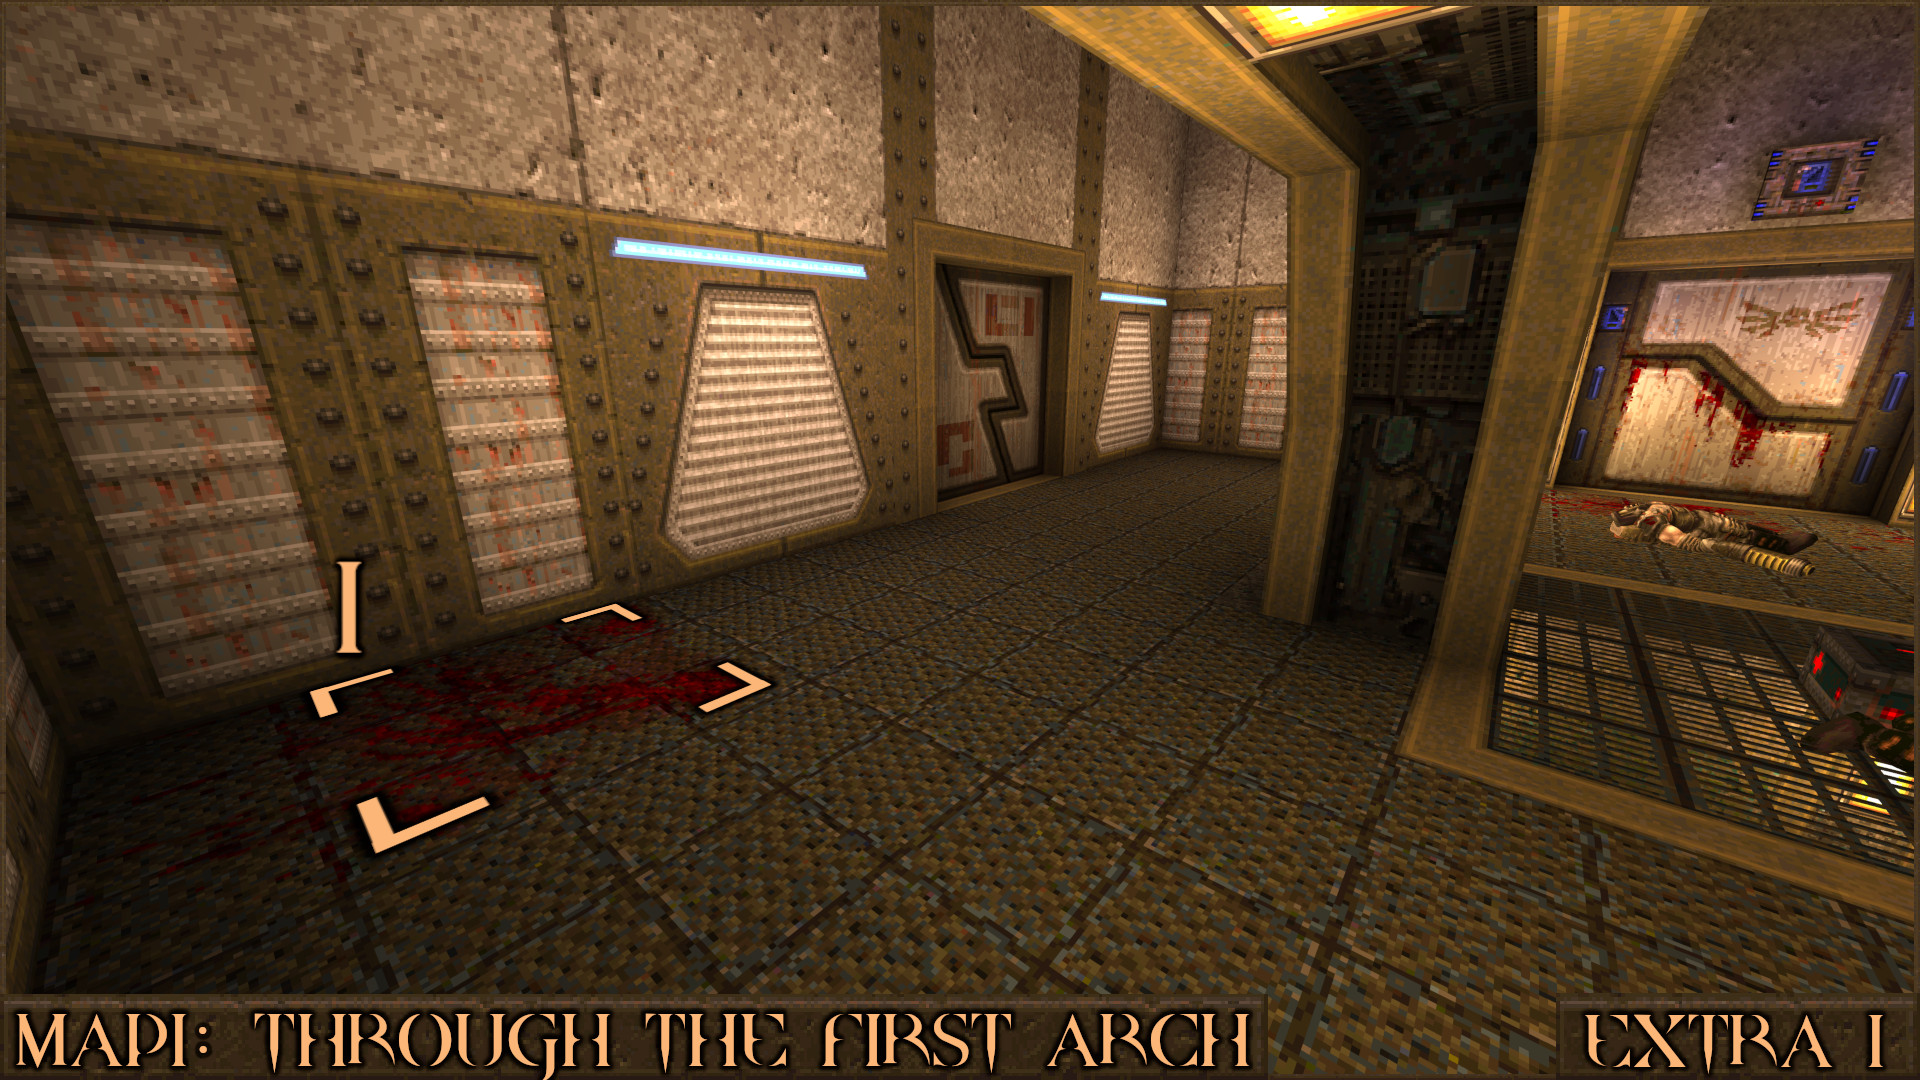
Extra Secret 1
In the room that contains the Silver Keycard Door look in the corner for a large blood stain () on the floor. Shoot it to reveal a hole to a lower level containing an upgrade.

Reward: [Shell Capacity Upgrade]

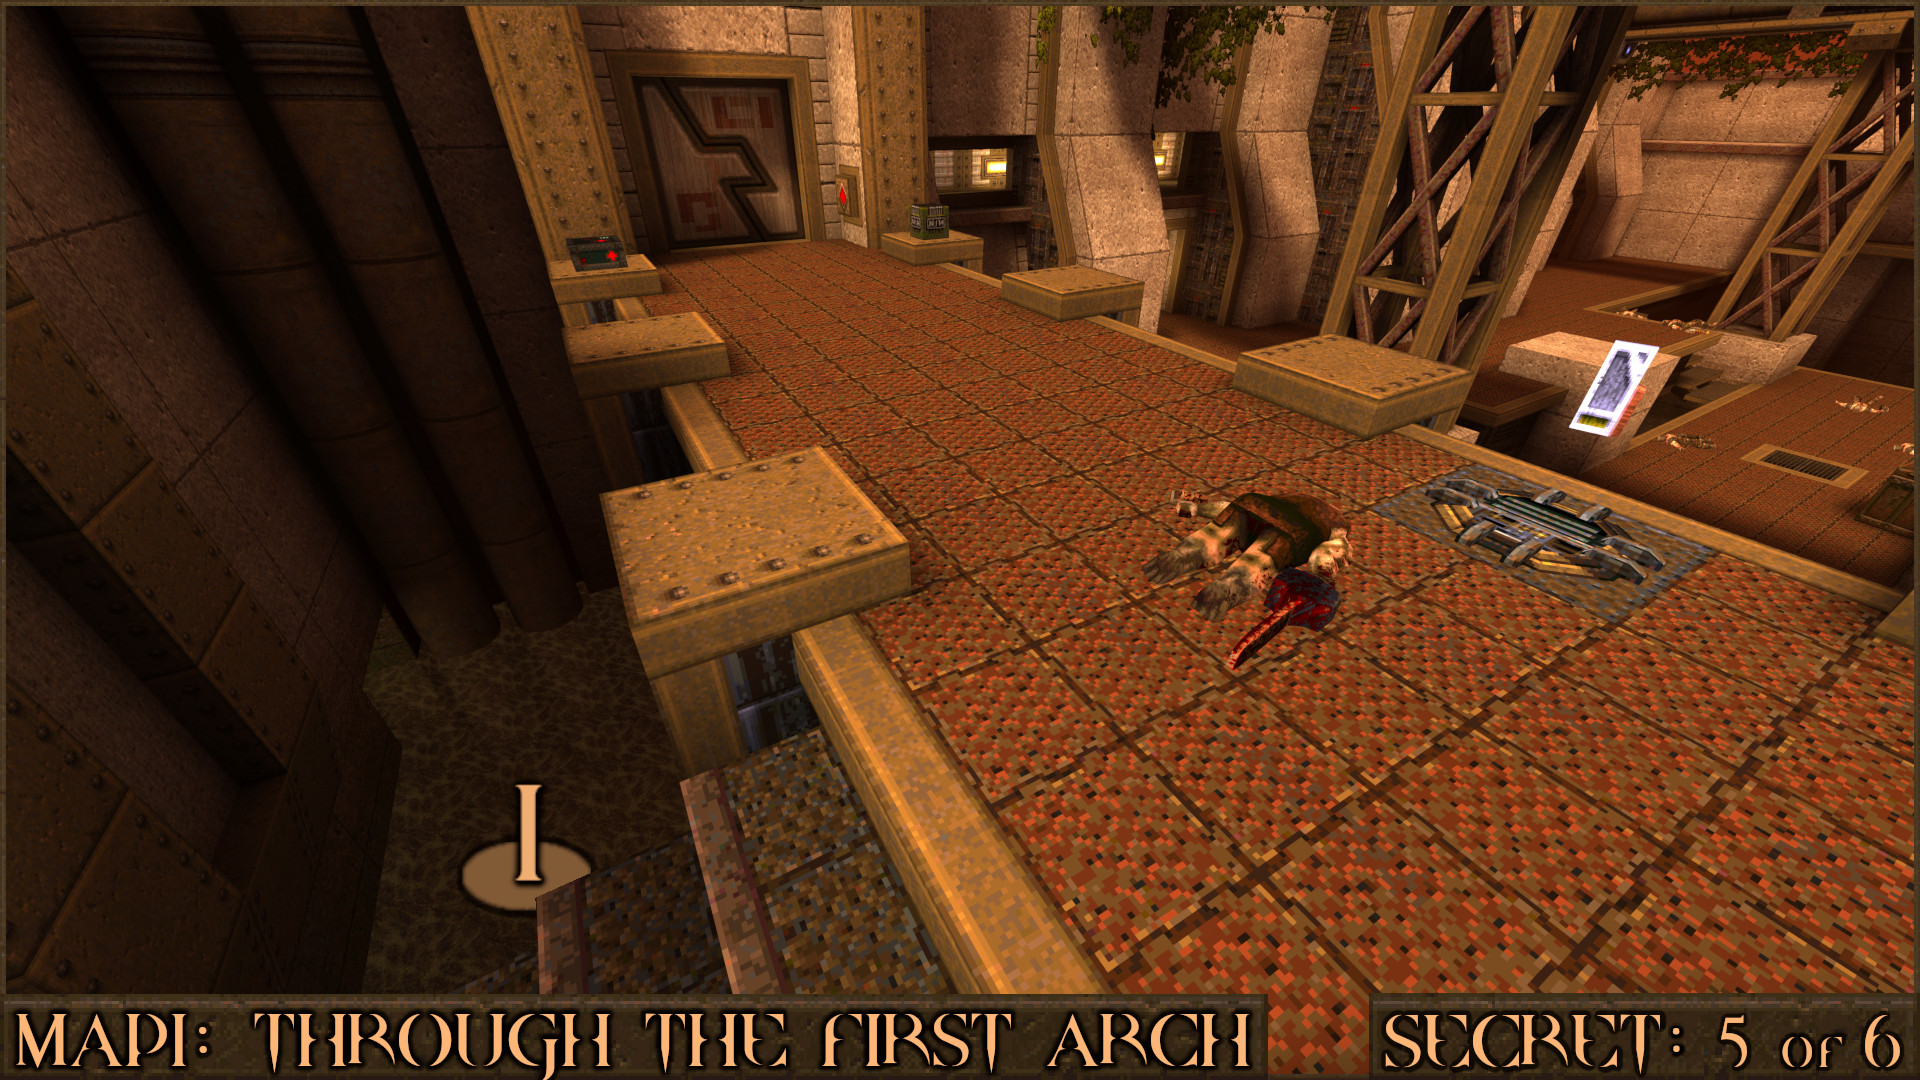
Secret 5 of 6
After picking up the Silver Keycard on top of the large dam drop down into the water on the left side of the wall ().

Look for some pipes in one corner and swim behind them () to find a secret.

Reward: Yellow Armor

Extra Secret 2
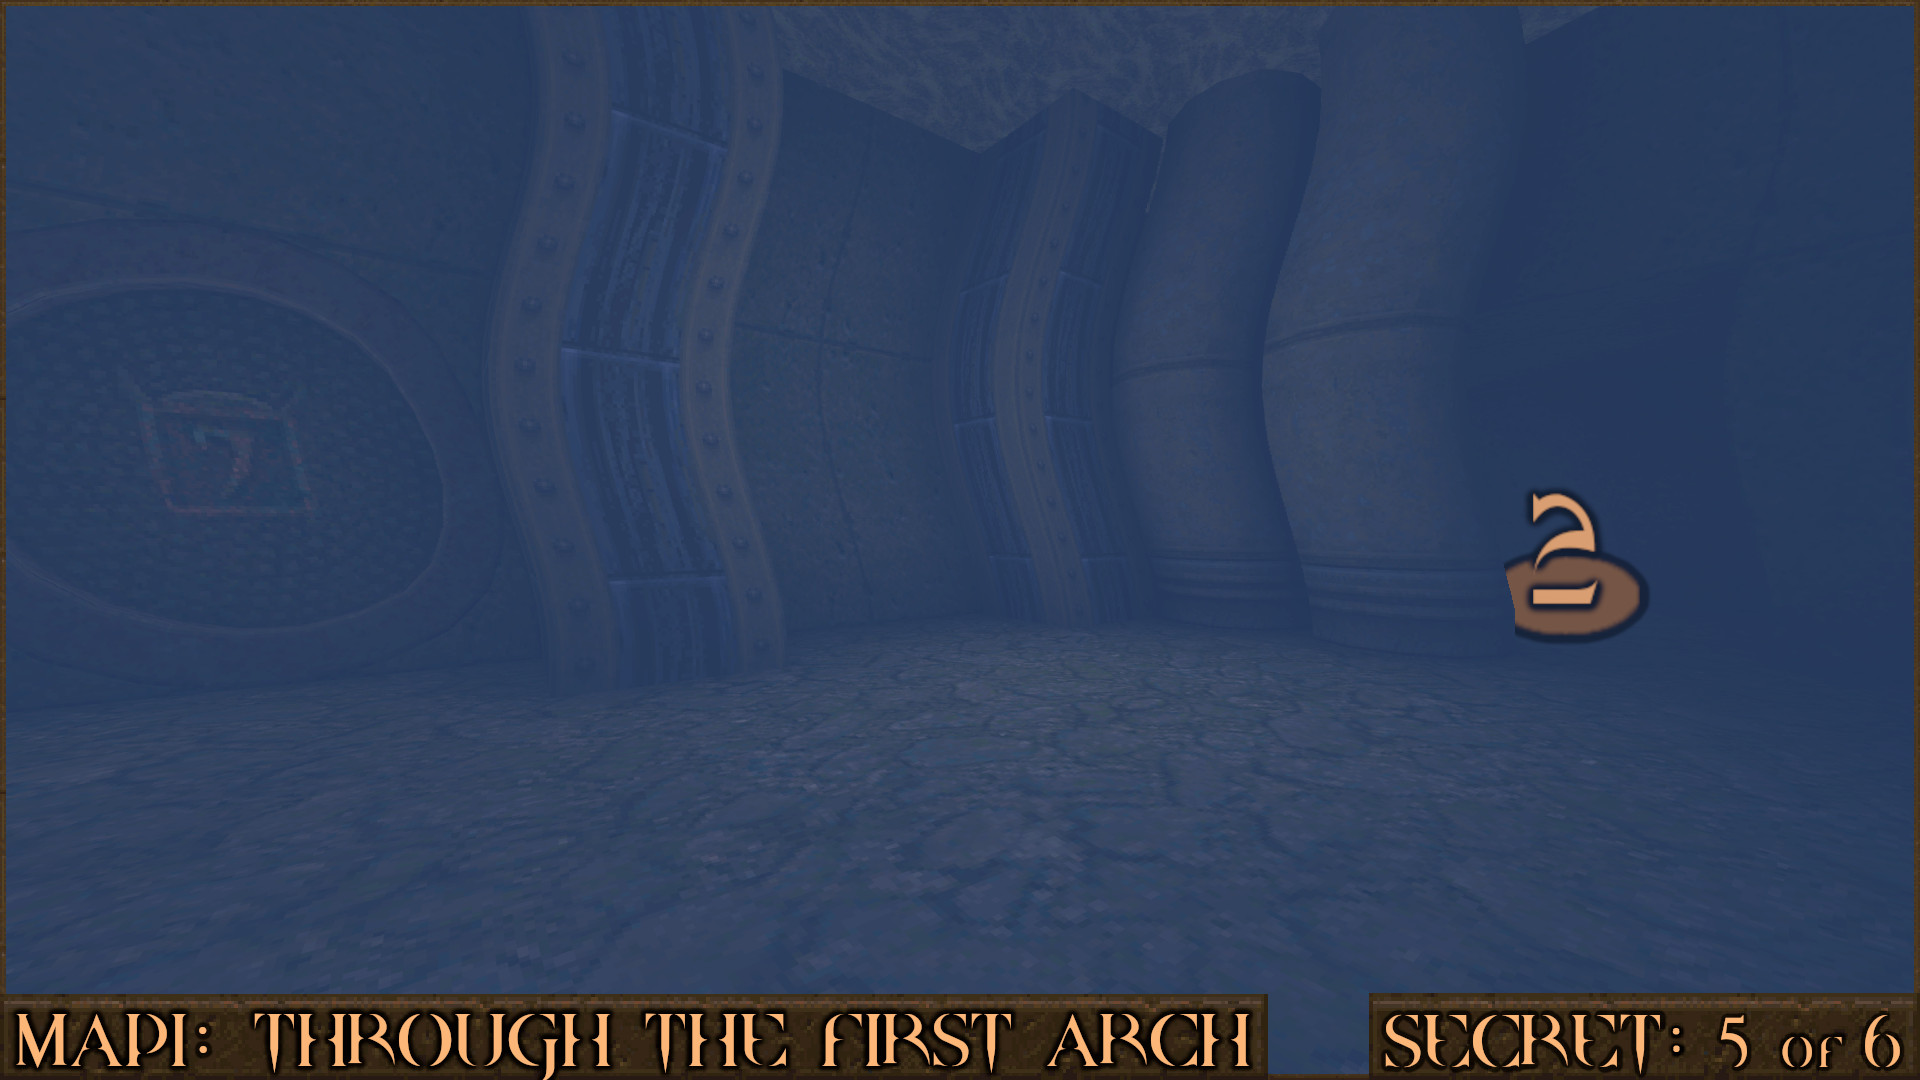
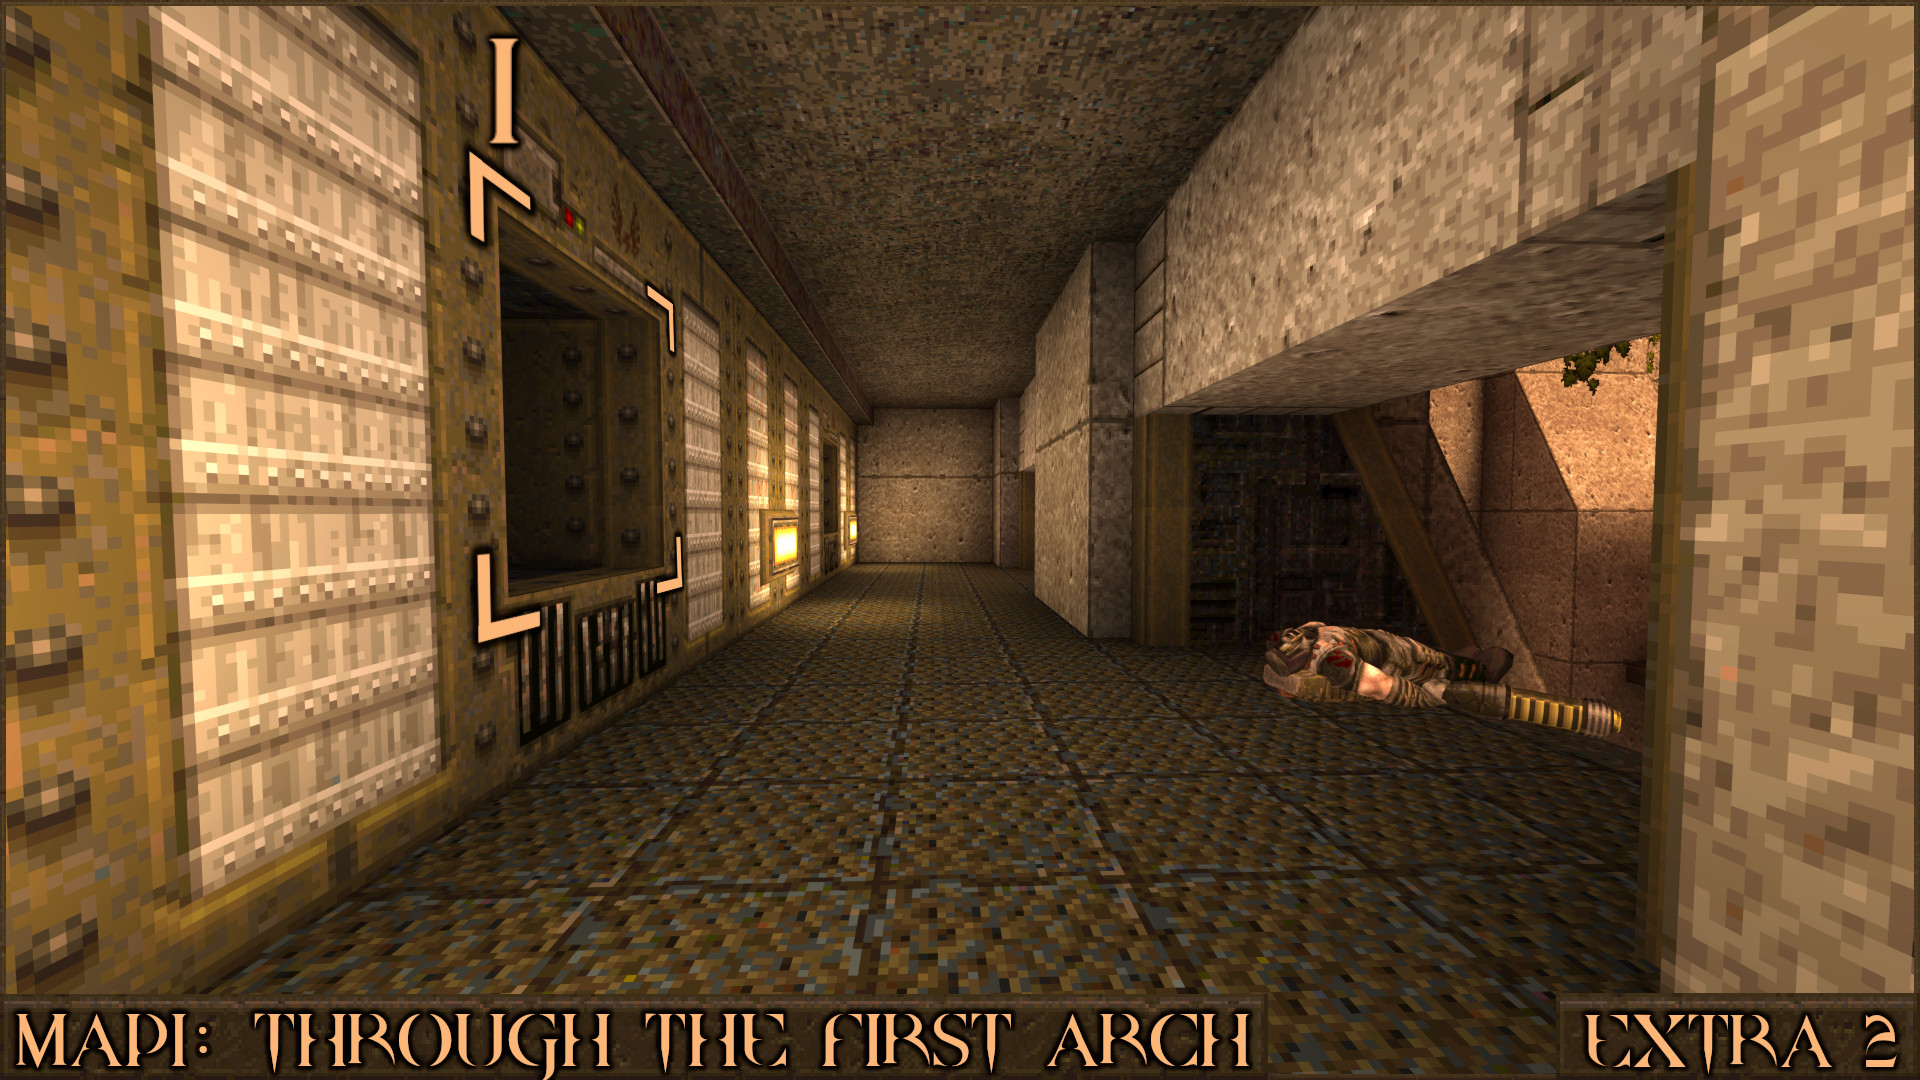
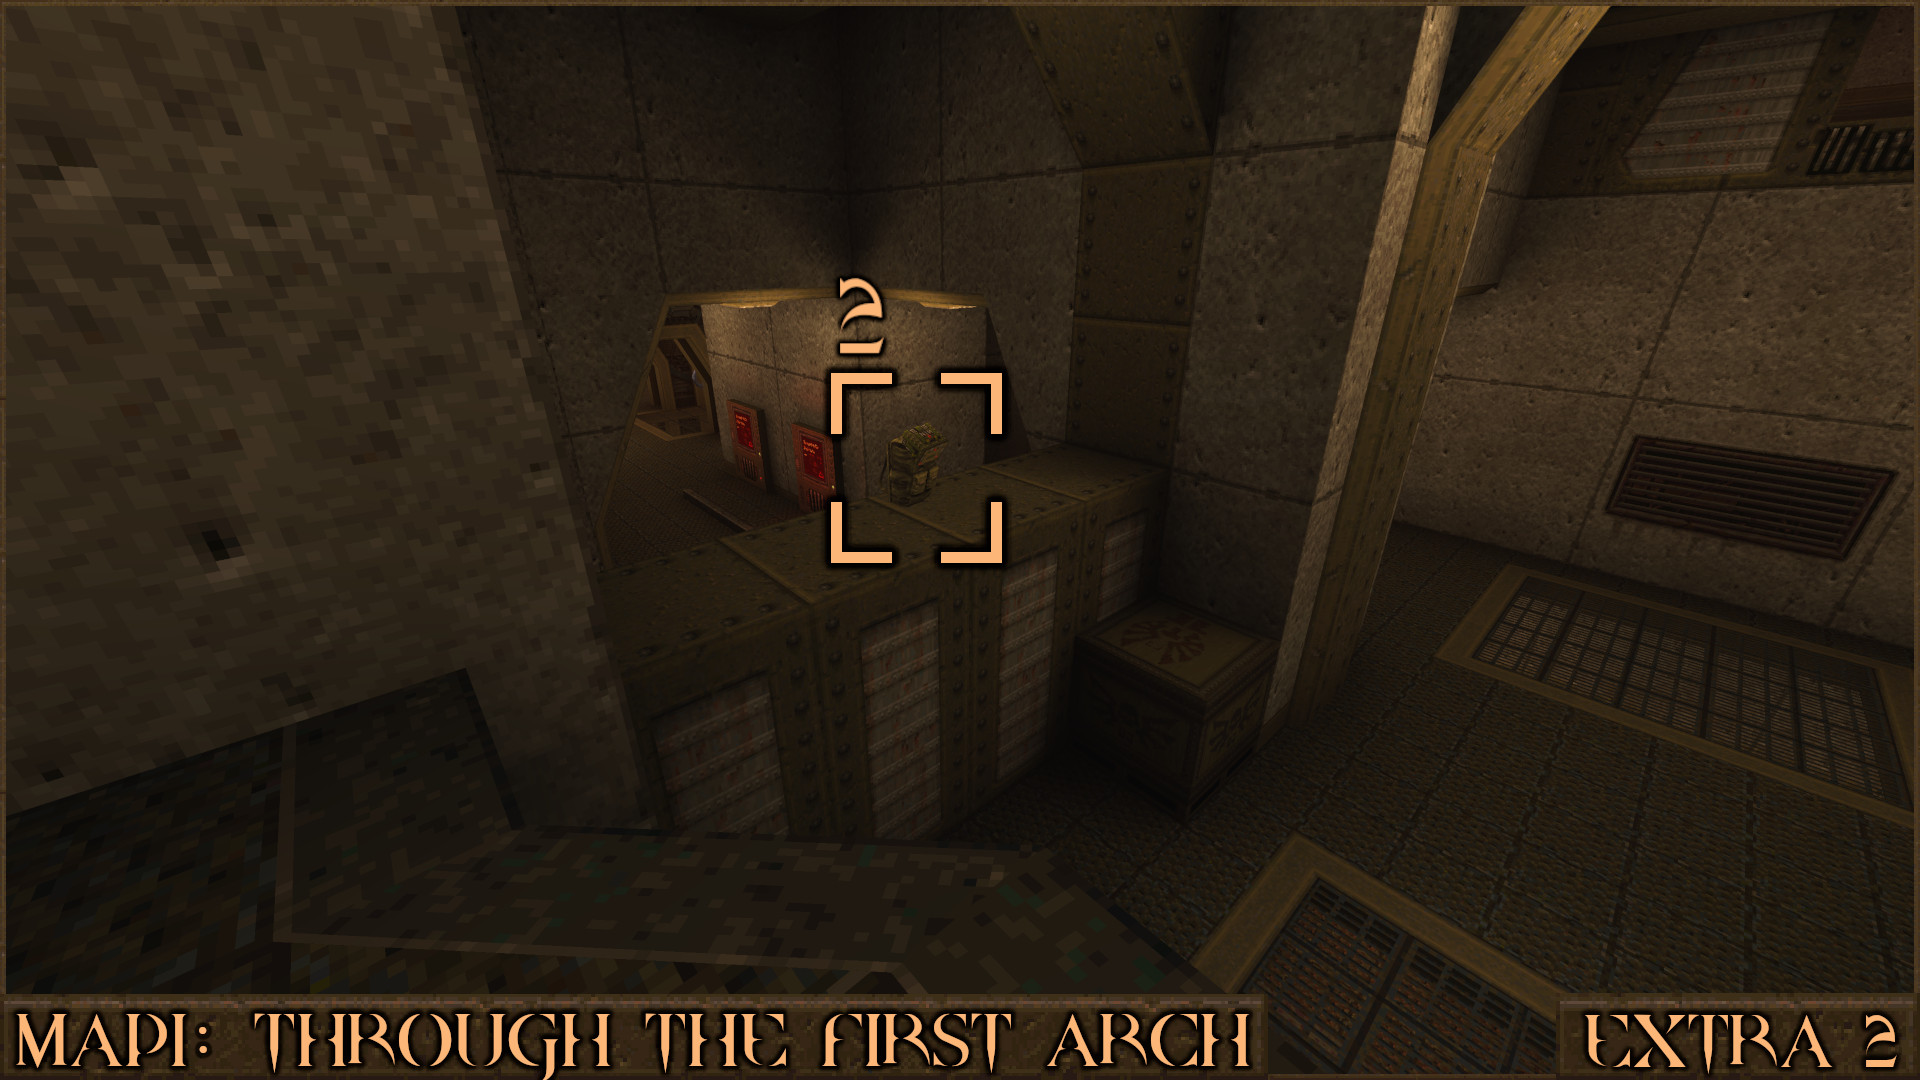
Return to the top of the large dam and go through the door and turn right. Look for a square hole in the left side of the wall () that you can enter.

You'll drop down into the upper part of a previous area and will be able to reach an upgrade () you may have noticed earlier.

Reward: [Nail Capacity Upgrade]

Secret 6 of 6
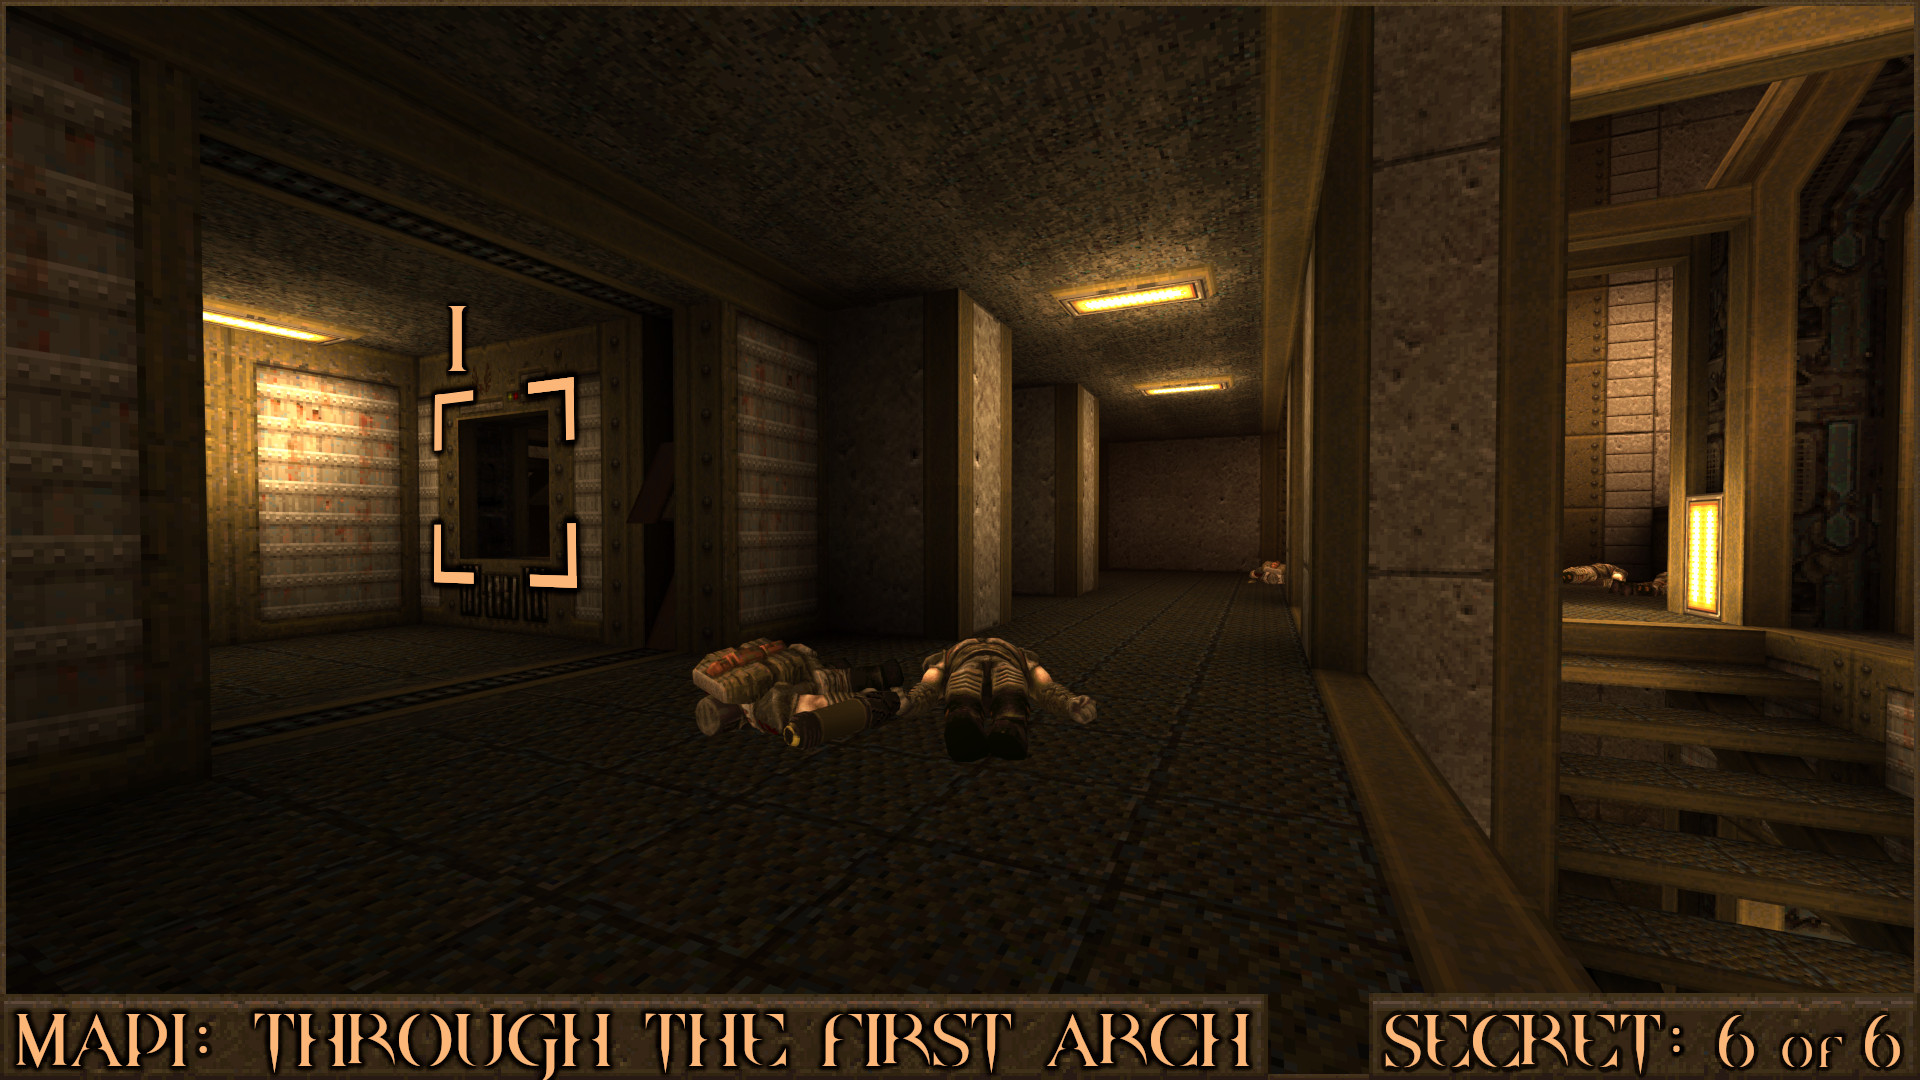
Near the level exit is a large ambush of enemies. In the far left room from which some of them emerged look for a square hole in the wall () and go through it.

In the next room look for a thin ledge at the edge of the wall () that leads to another square hole (). Once through that hole you'll find another ledge containing the secret.

Reward: Yellow Armor
‎‏‏‎ ‎‏‏‎ + Rune Secrets
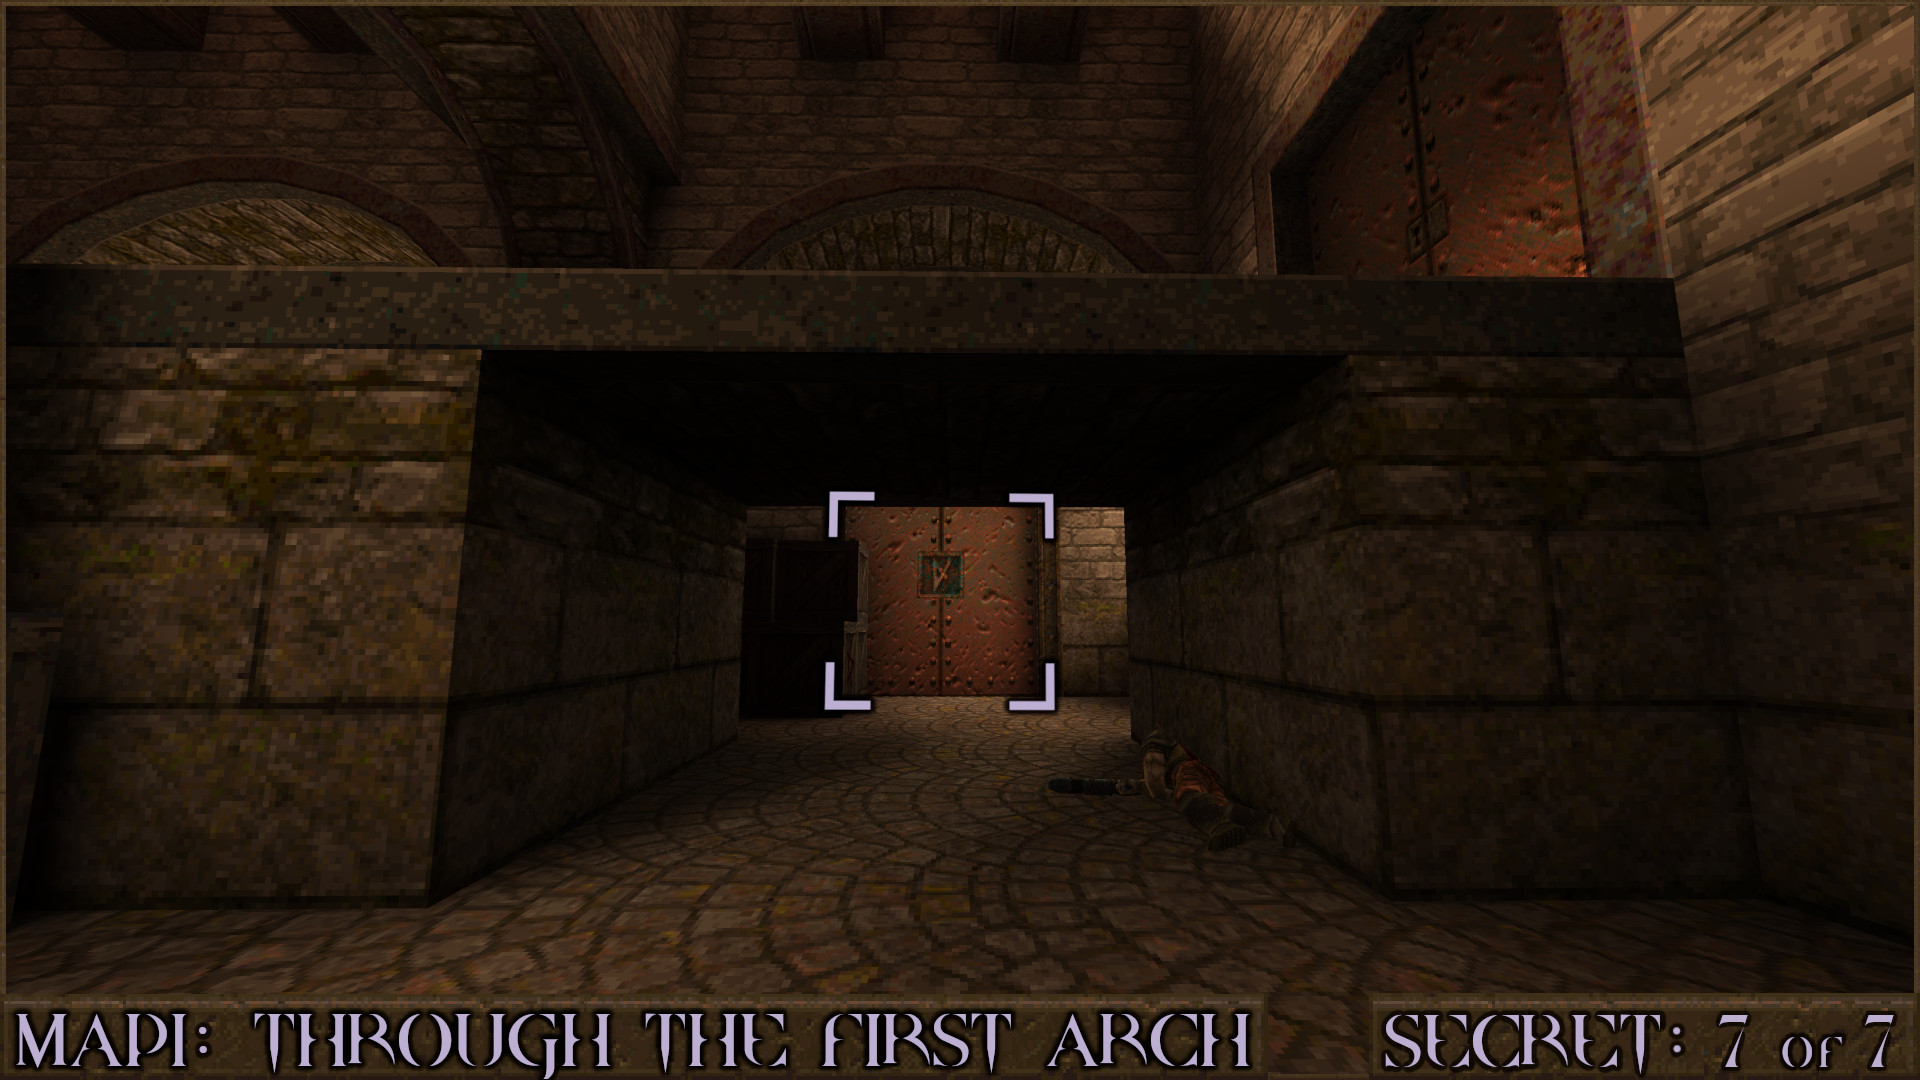
NOTE: During Part 2 a new secret exit is accessible. The secret count for this level increases from 6 to 7.

Secret 7 of 7
Requires Rune of Sacrifice
In the 2nd room of the level straight ahead is a Rune of Sacrifice Door you couldn't open before. Head inside to shift to the future where you'll find some items.

Reward: Grenade Launcher Large Rockets Megahealth

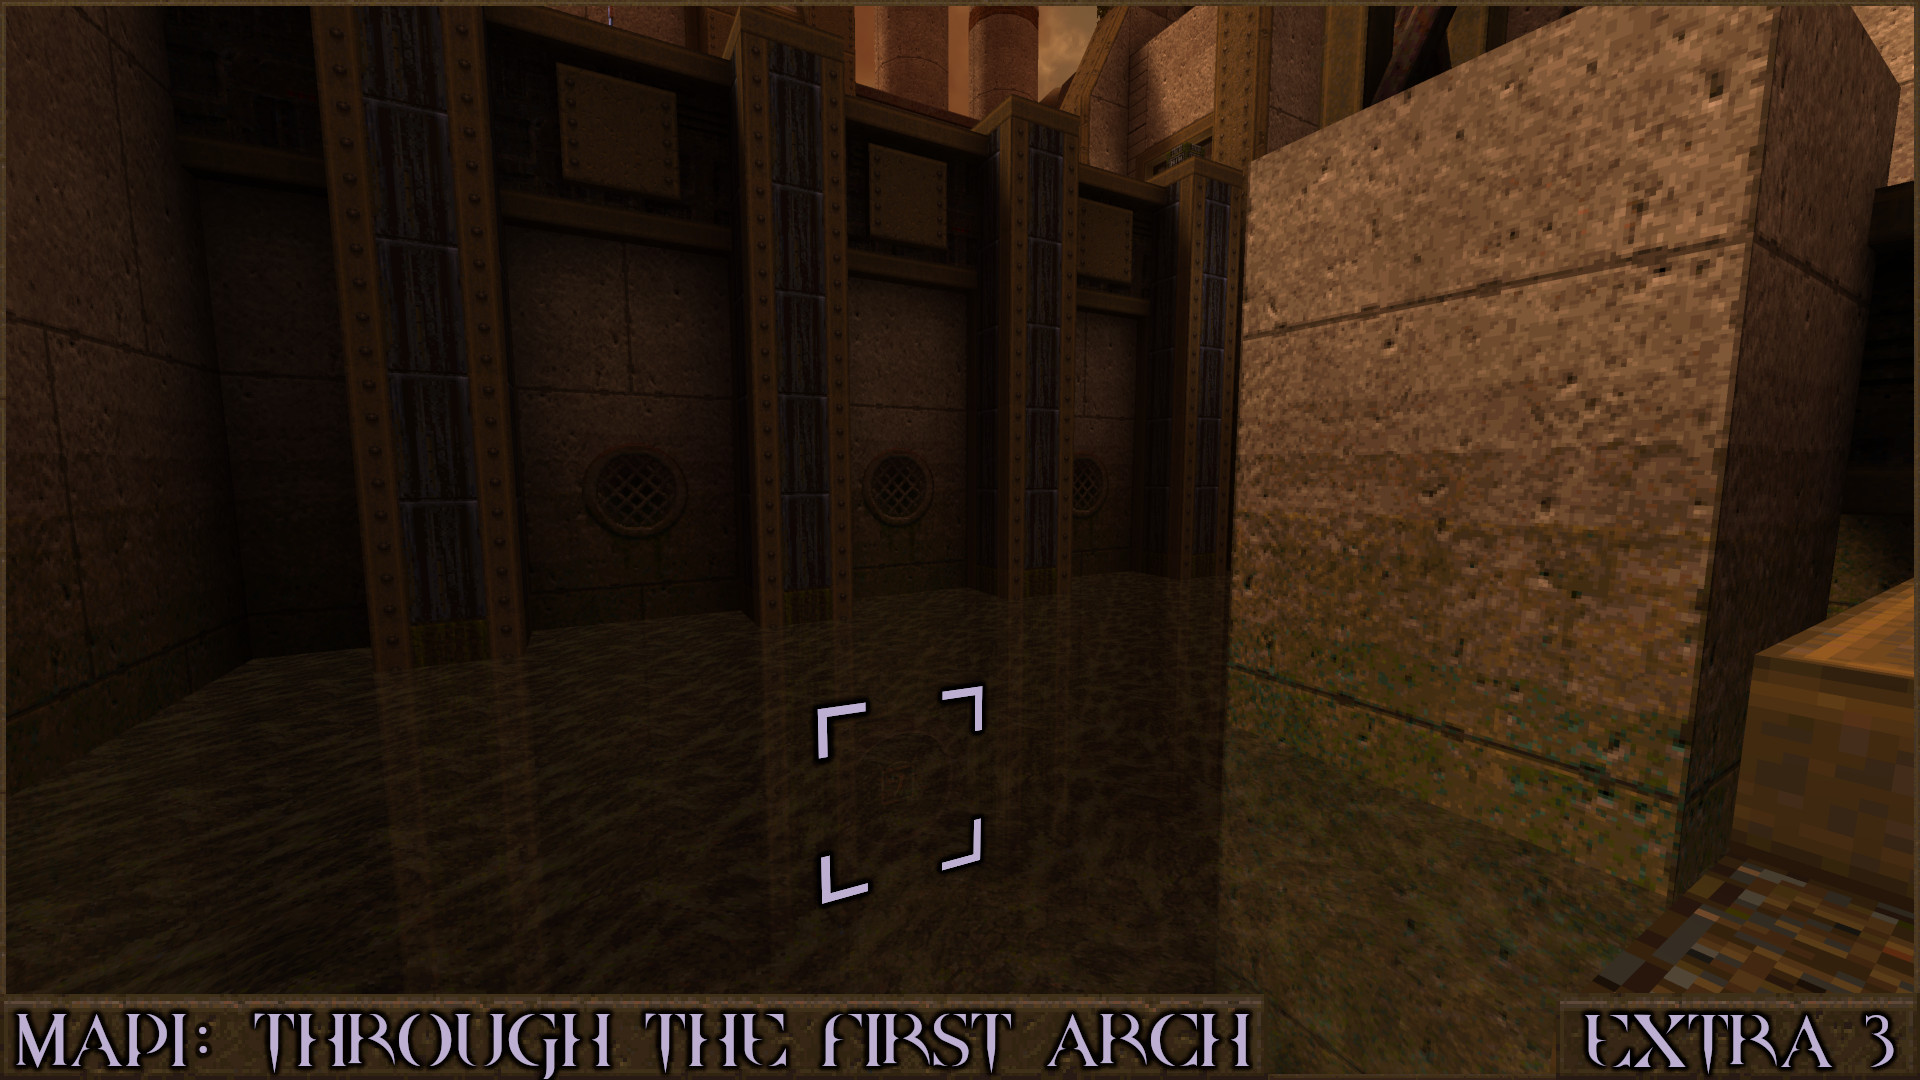
Extra Secret 3
Requires Rune of Chaos
Head to the large water area from Secret 2 and look underwater for a Rune of Chaos Door in the side of the dam. Opening it reveals a Quad Damage and a shortcut to a later part of the level.

Reward: Quad Damage

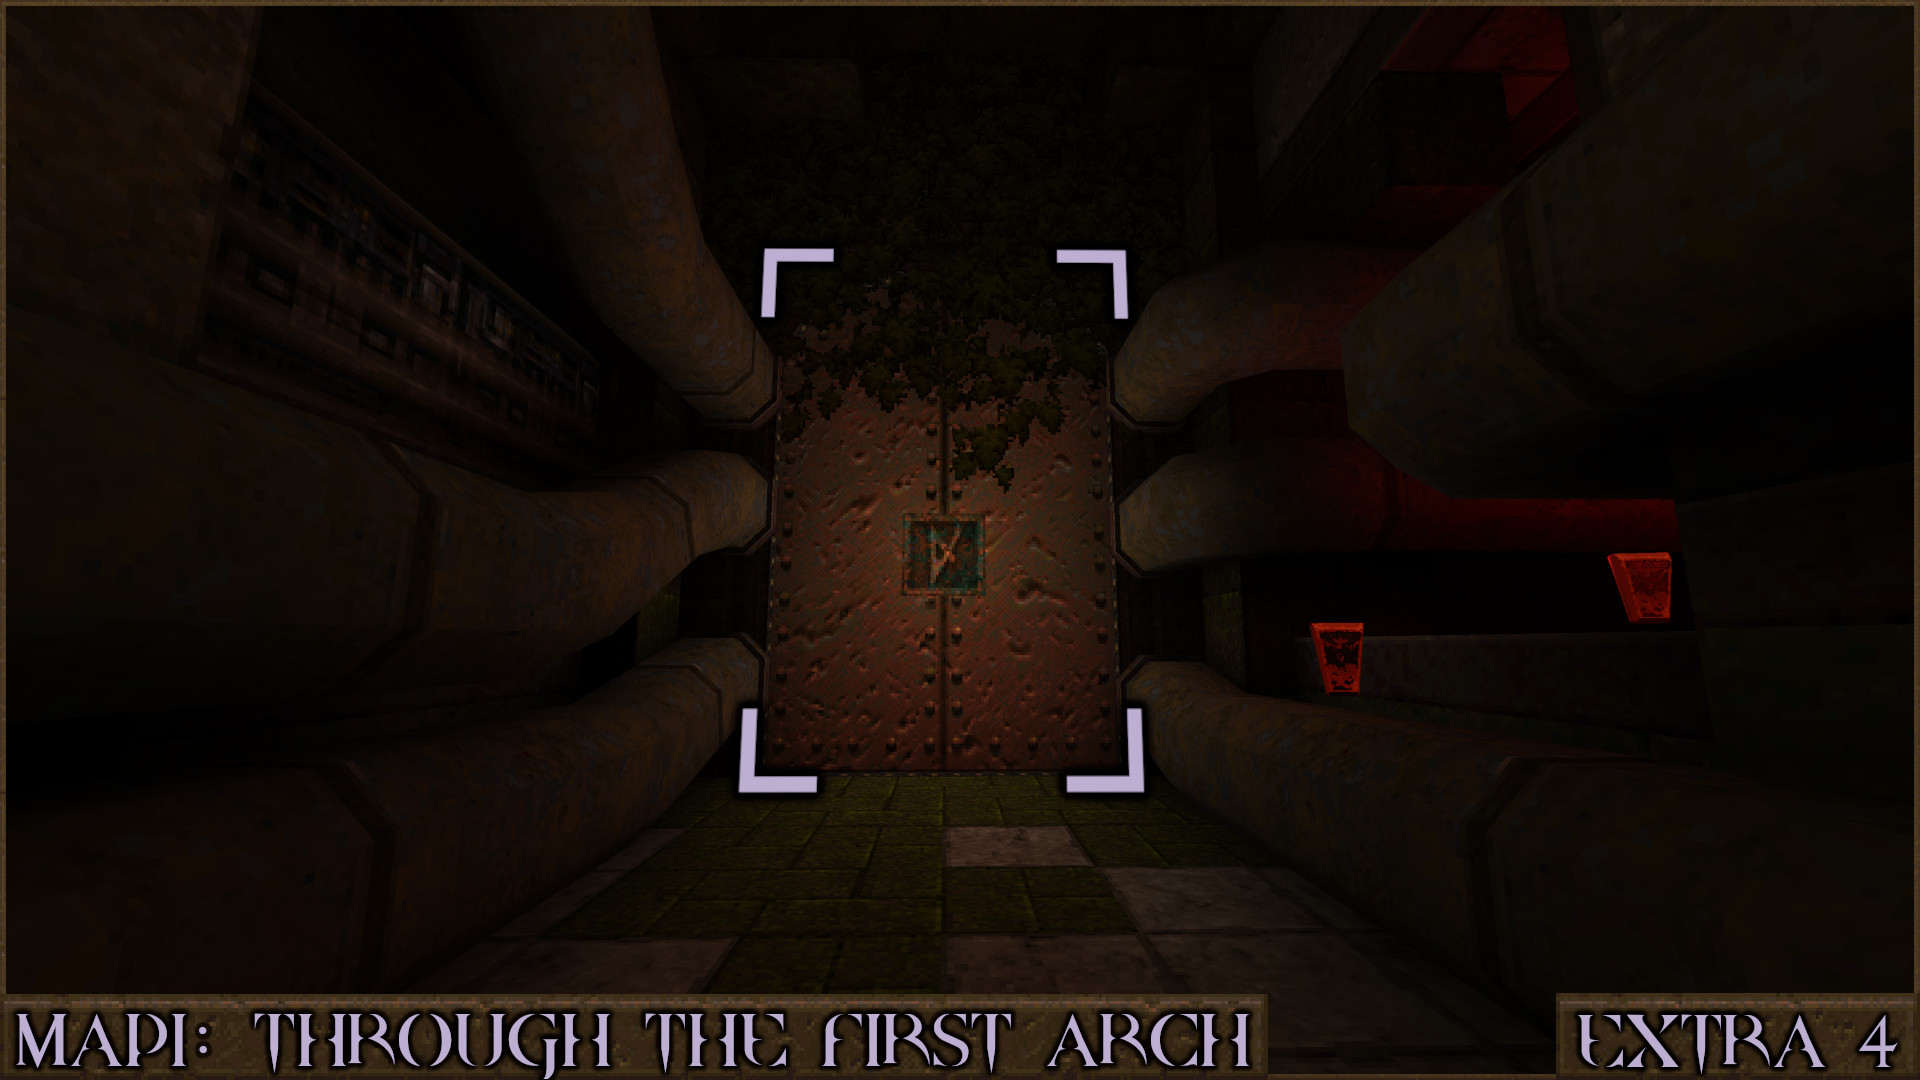
Extra Secret 4
Requires Rune of Sacrifice
Continue with the level and shortly after working your way through the shallow water you'll see another Rune of Sacrifice Door by some pipes. Head inside to find the secret exit to the level: SECRET1: The Sundered Column.

Reward: [Secret Level]
‎‏‏‎ ‎‏‏‎ + Bloody Nightmare NG+ Secrets
NOTE: During Part 3 a new weapon upgrade is available here.

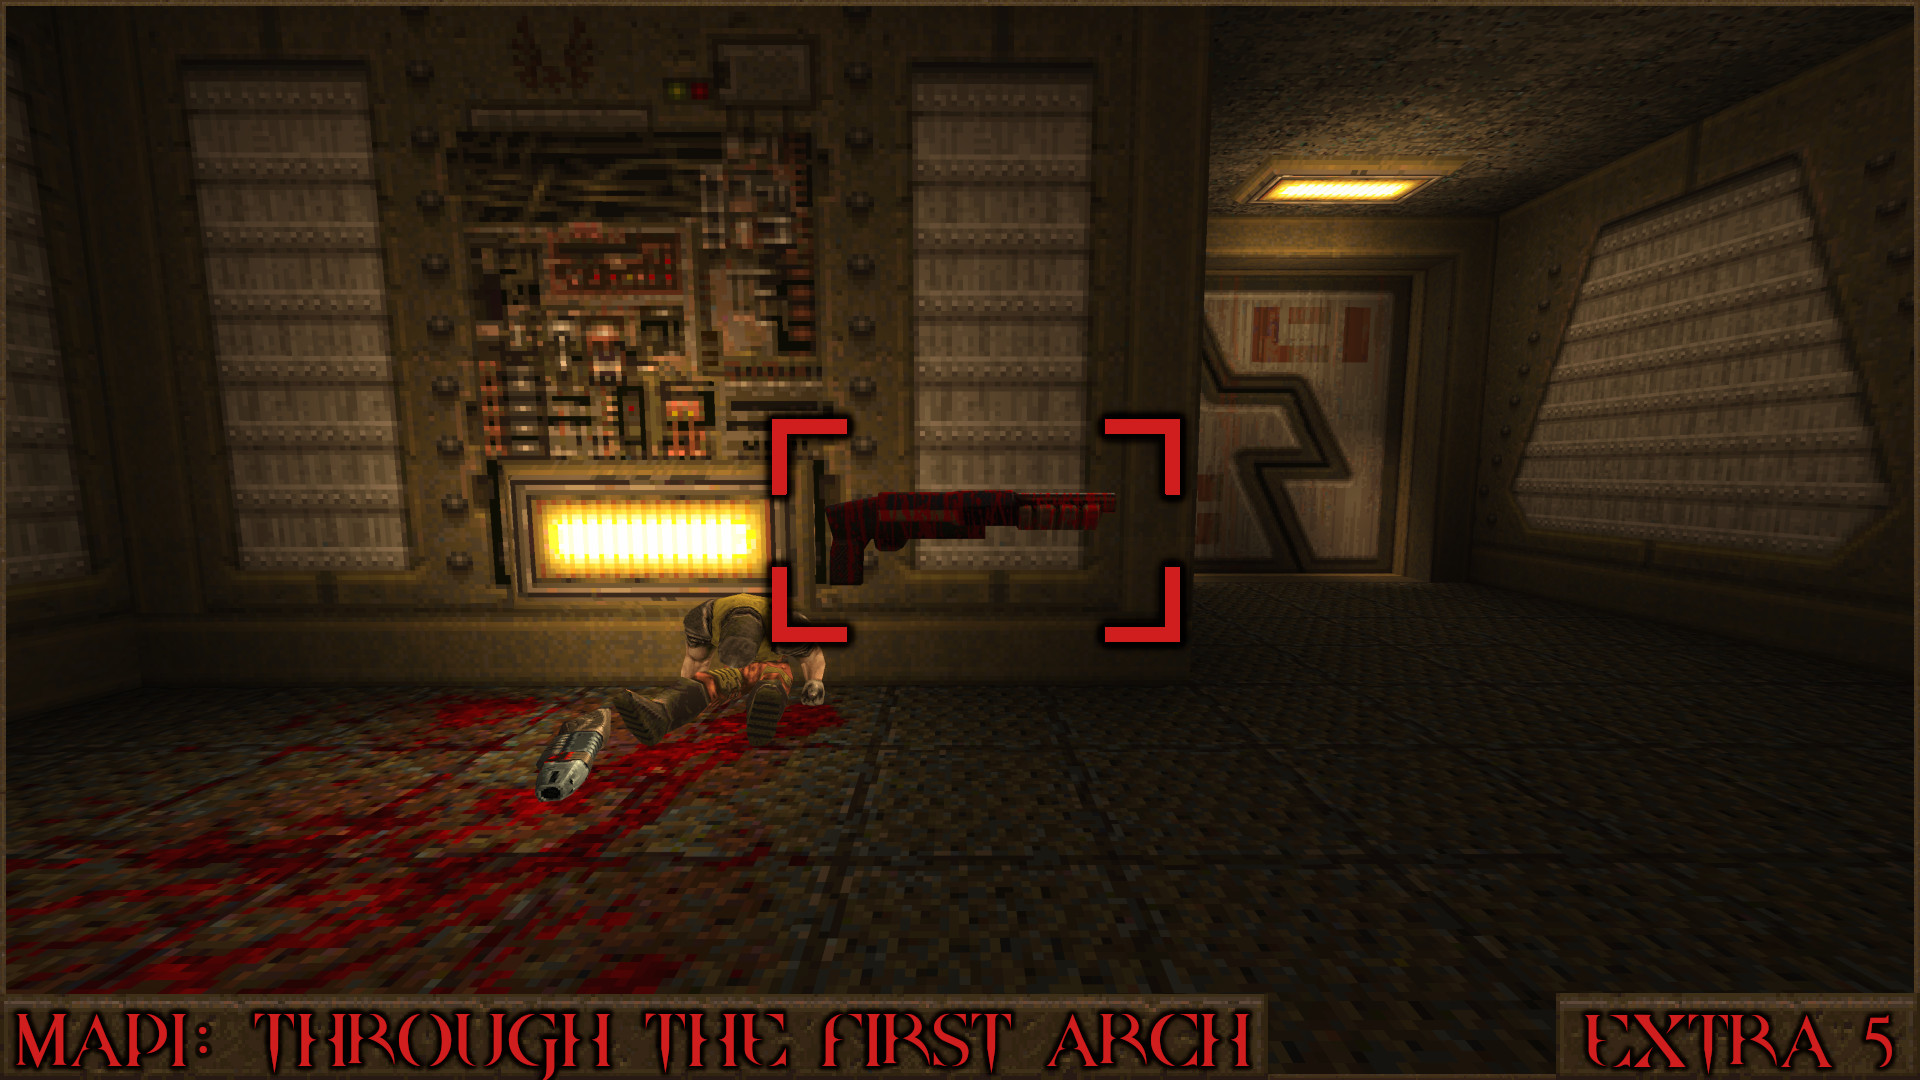
Extra Secret 5
Requires Bloody Nightmare New Game+
You will find the Bloody Shotgun upgrade at the start of this level. This permanent upgrade massively increases the fire rate of the regular Shotgun making it very effective at unleashing a lot of shells at mid-range.
This upgrade will not appear merely by picking up the Bloody Knight's Head and returning to this level during Part 2. It will only appear during Part 3.

Reward: [Bloody Shotgun]

NOTE: You may have noticed the Health Capacity Upgrade that is normally nearby is missing during Part 3. It has replaced the Yellow Armor in Secret 6 near the end of the level.
‎‏‏‎SECRET1: The Sundered Column [Secret Level]
NOTE: During Part 2 this secret level can be accessed from a rune secret in MAP1: Through the First Arch. The Rune of Chaos can be found here.

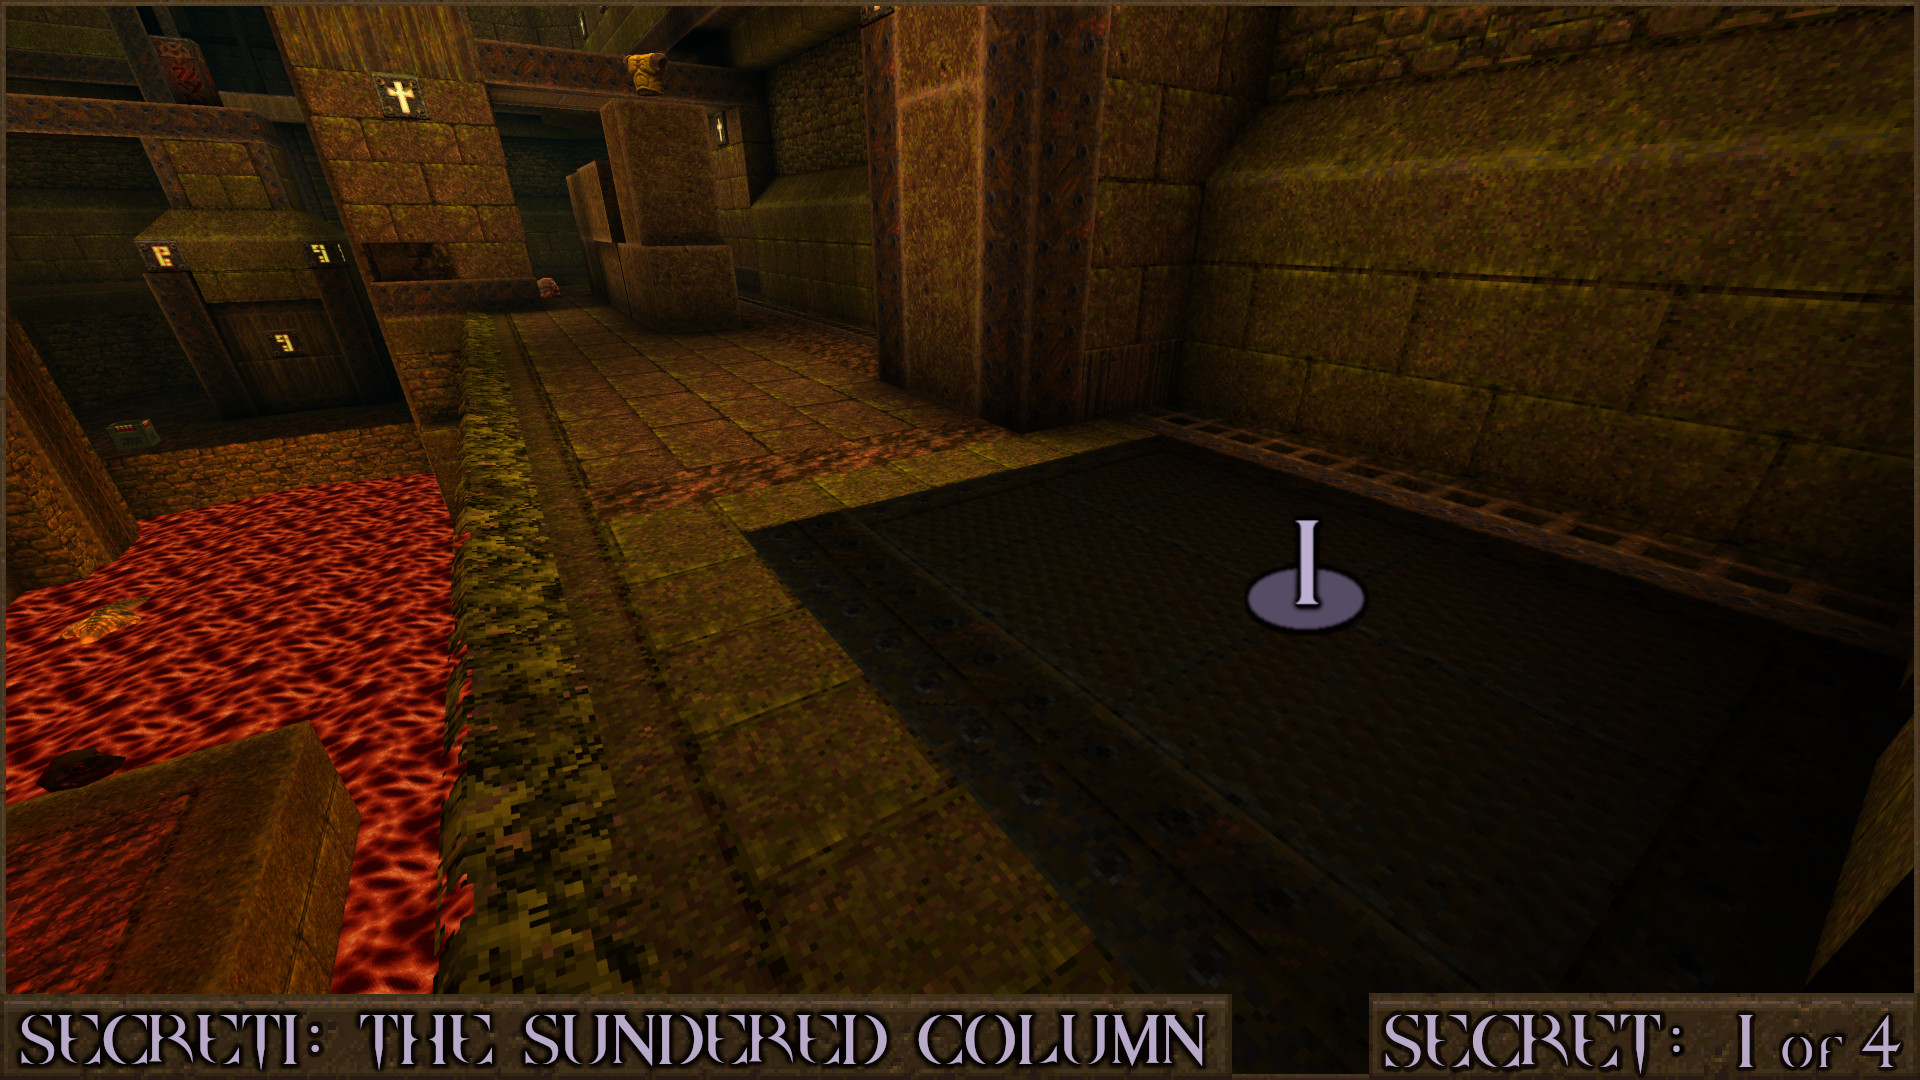
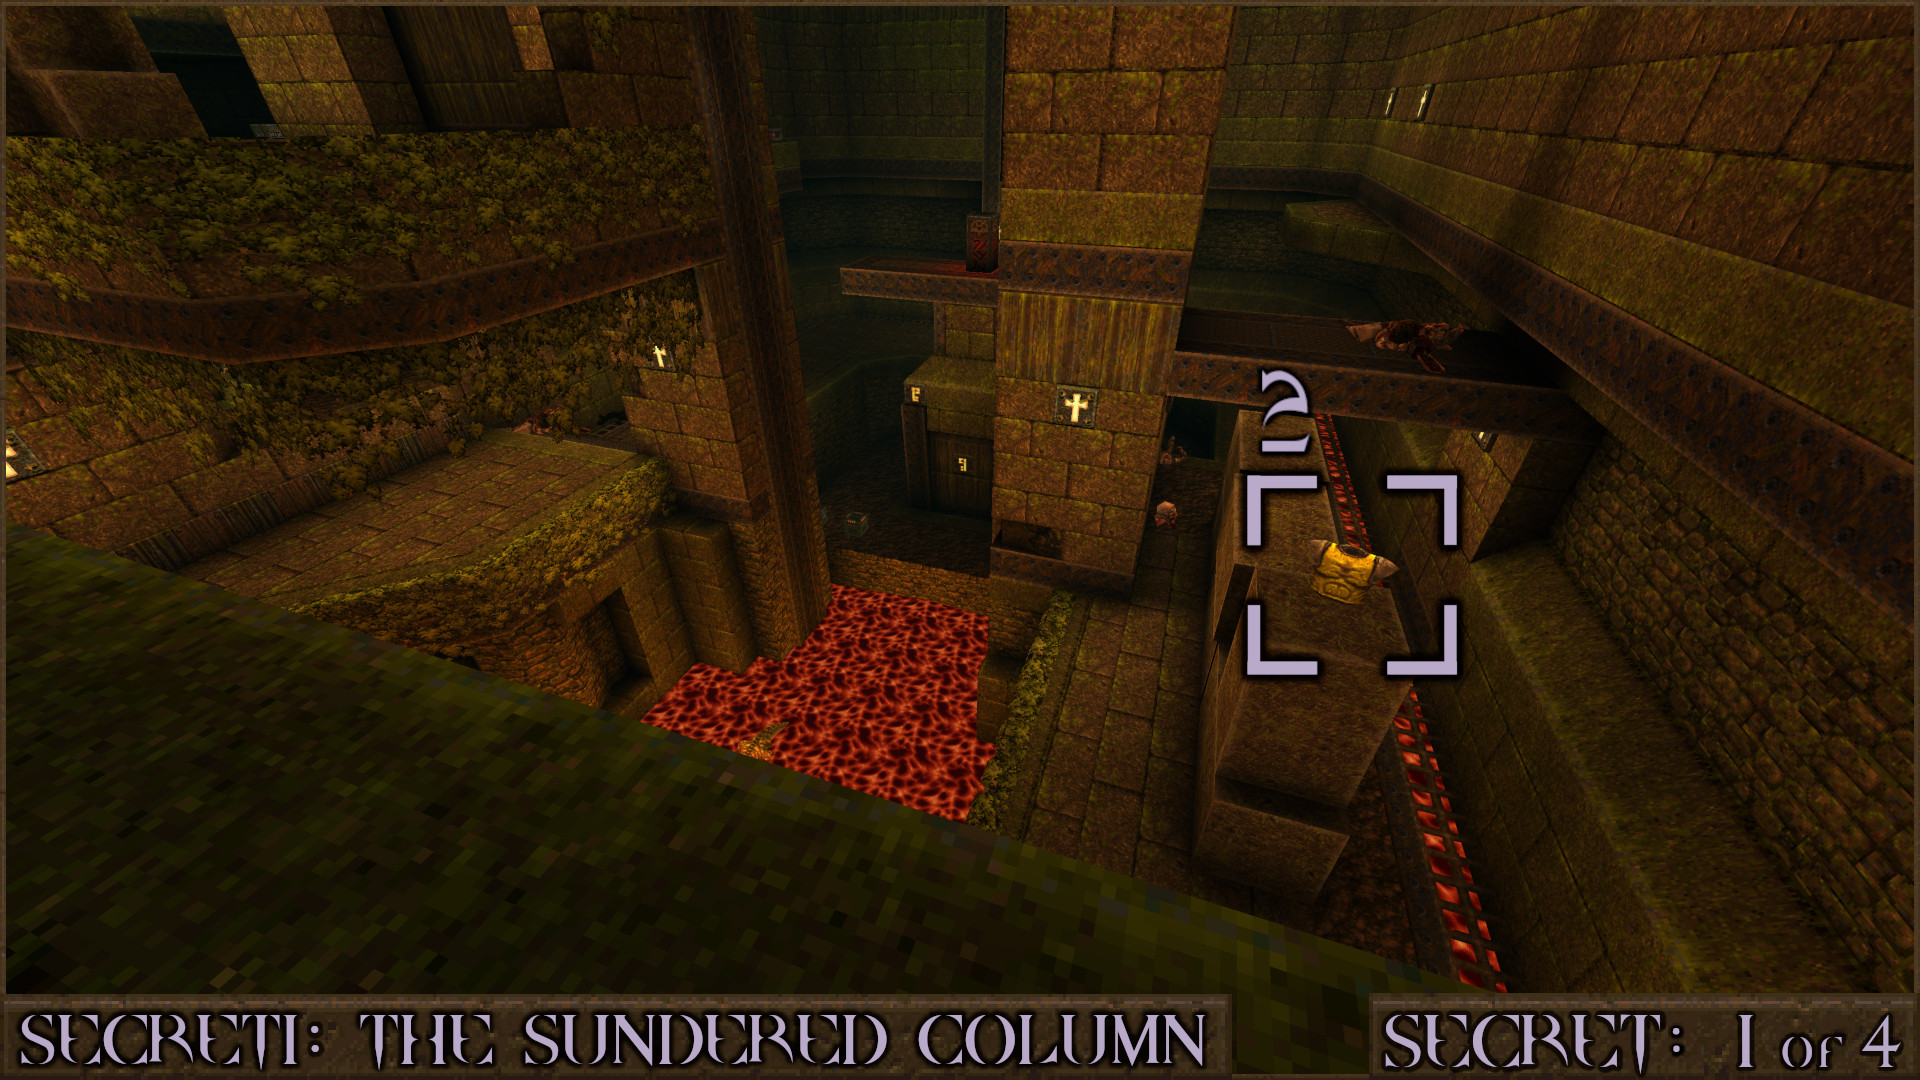
Secret 1 of 4
In the large room that contains the Gold Key Door, head over to a far corner to find a metal elevator () and ride it up.

From up here look over the edge and jump over to a brick wall below to find a secret Yellow Armor ().

Reward: Yellow Armor

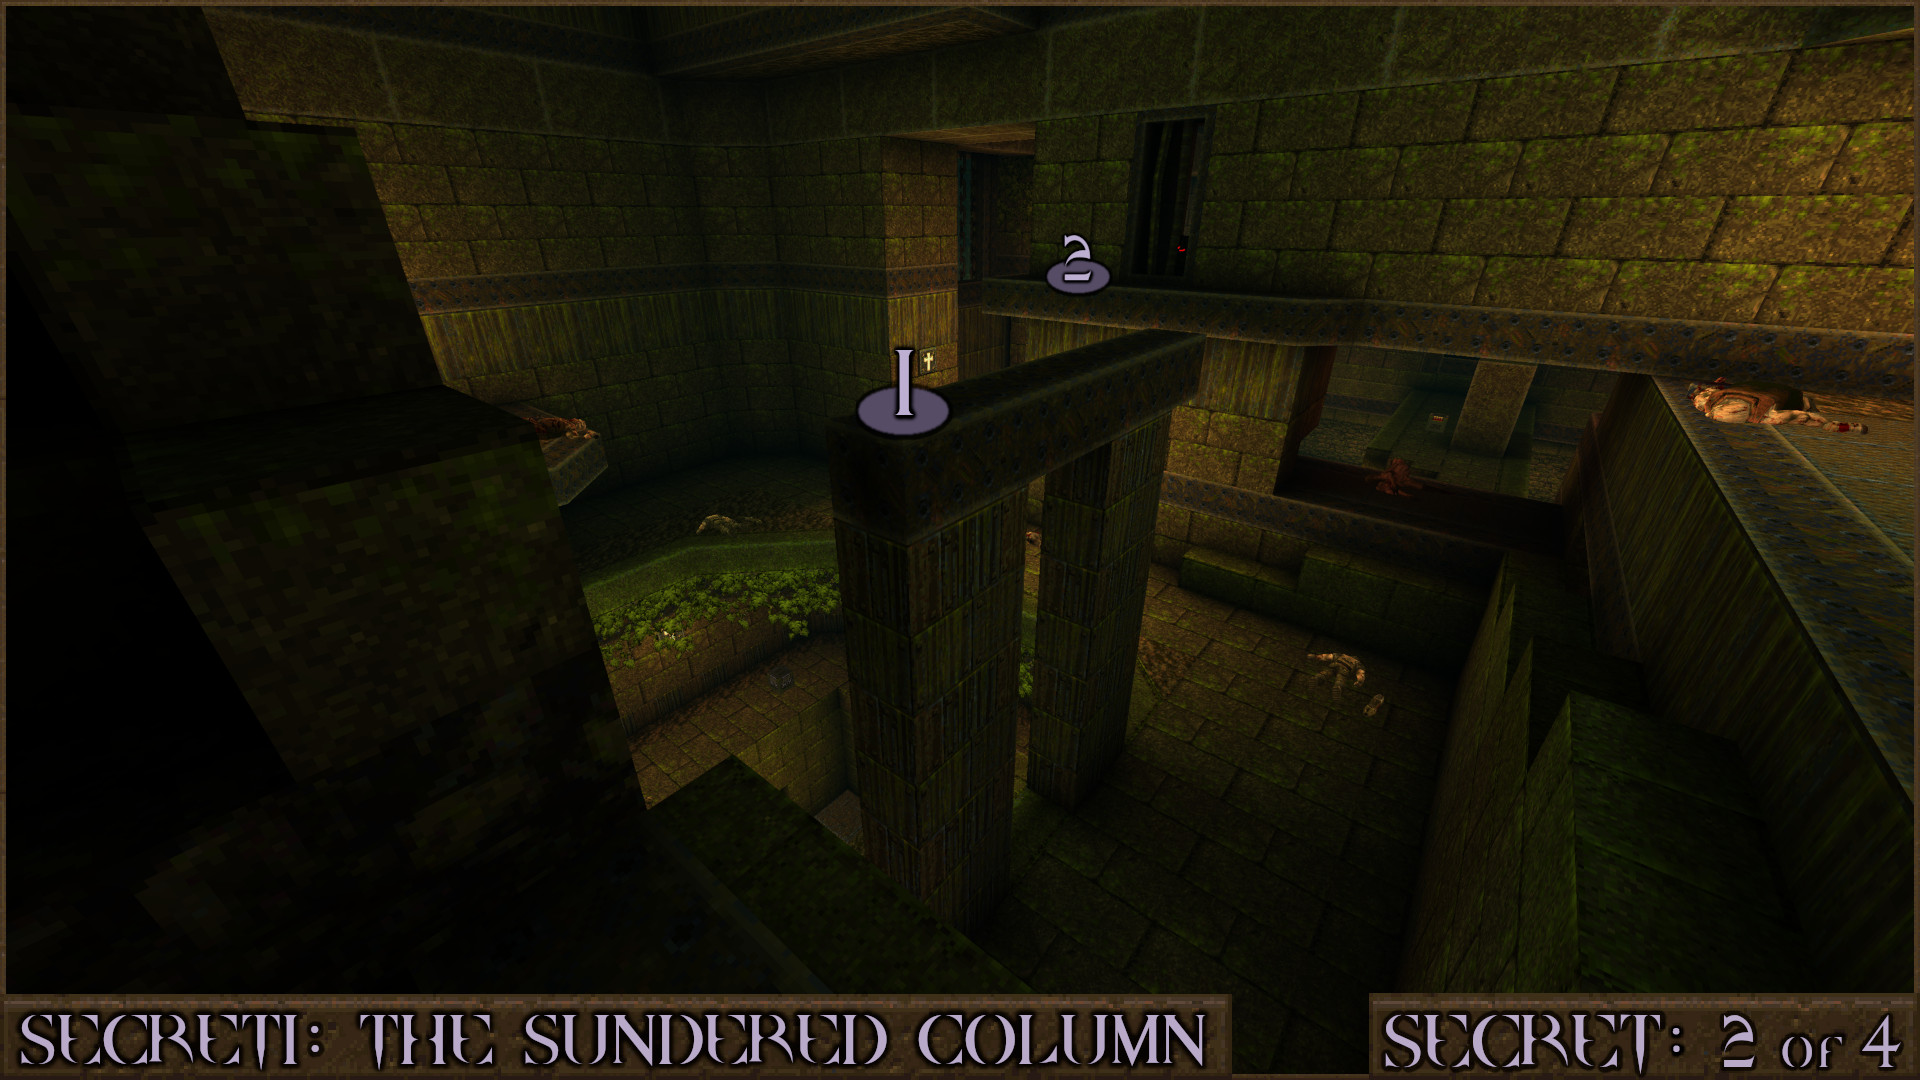
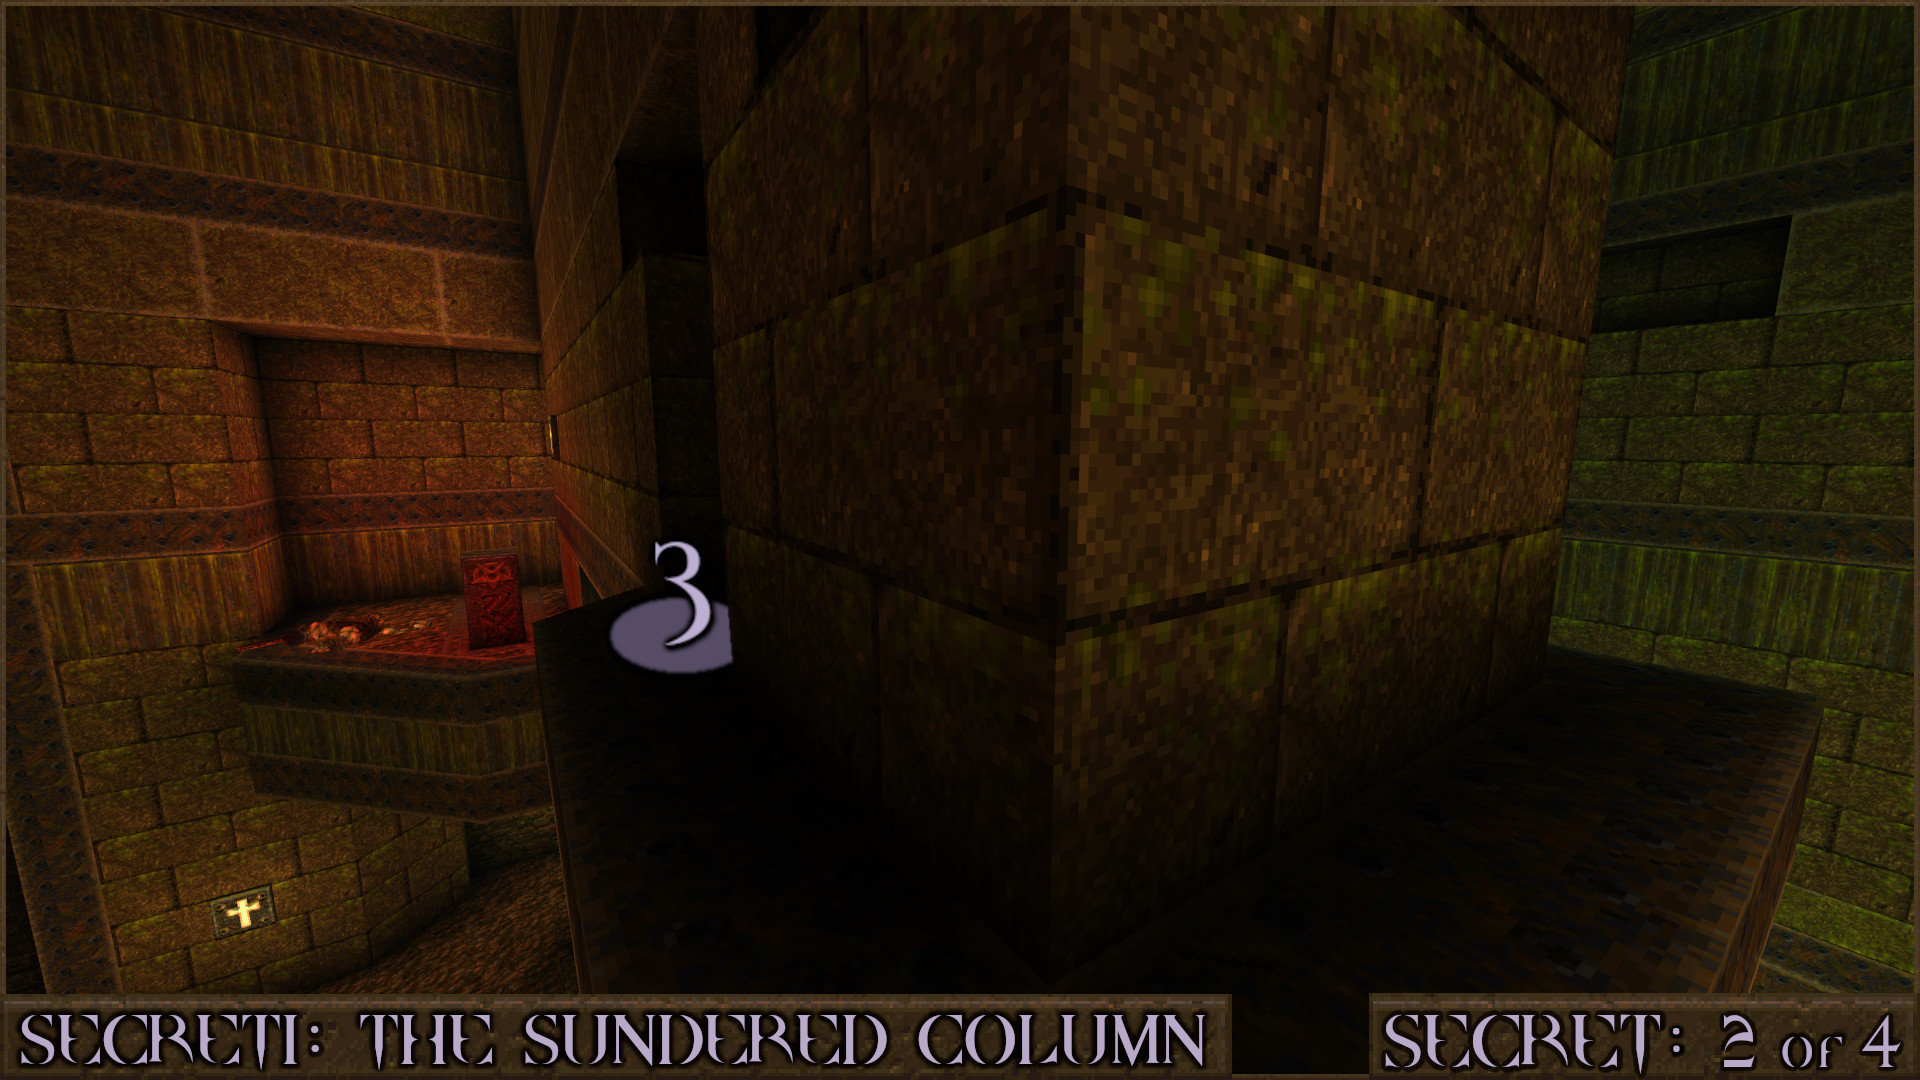
Secret 2 of 4
After jumping up the side of a broken wall turn around to see a metal beam. Jump onto it () and then over to the nearby wall ().

Follow the thin ledge around the wall and head into a dark alcove () to find the secret.

Reward: [Rocket Capacity Upgrade]

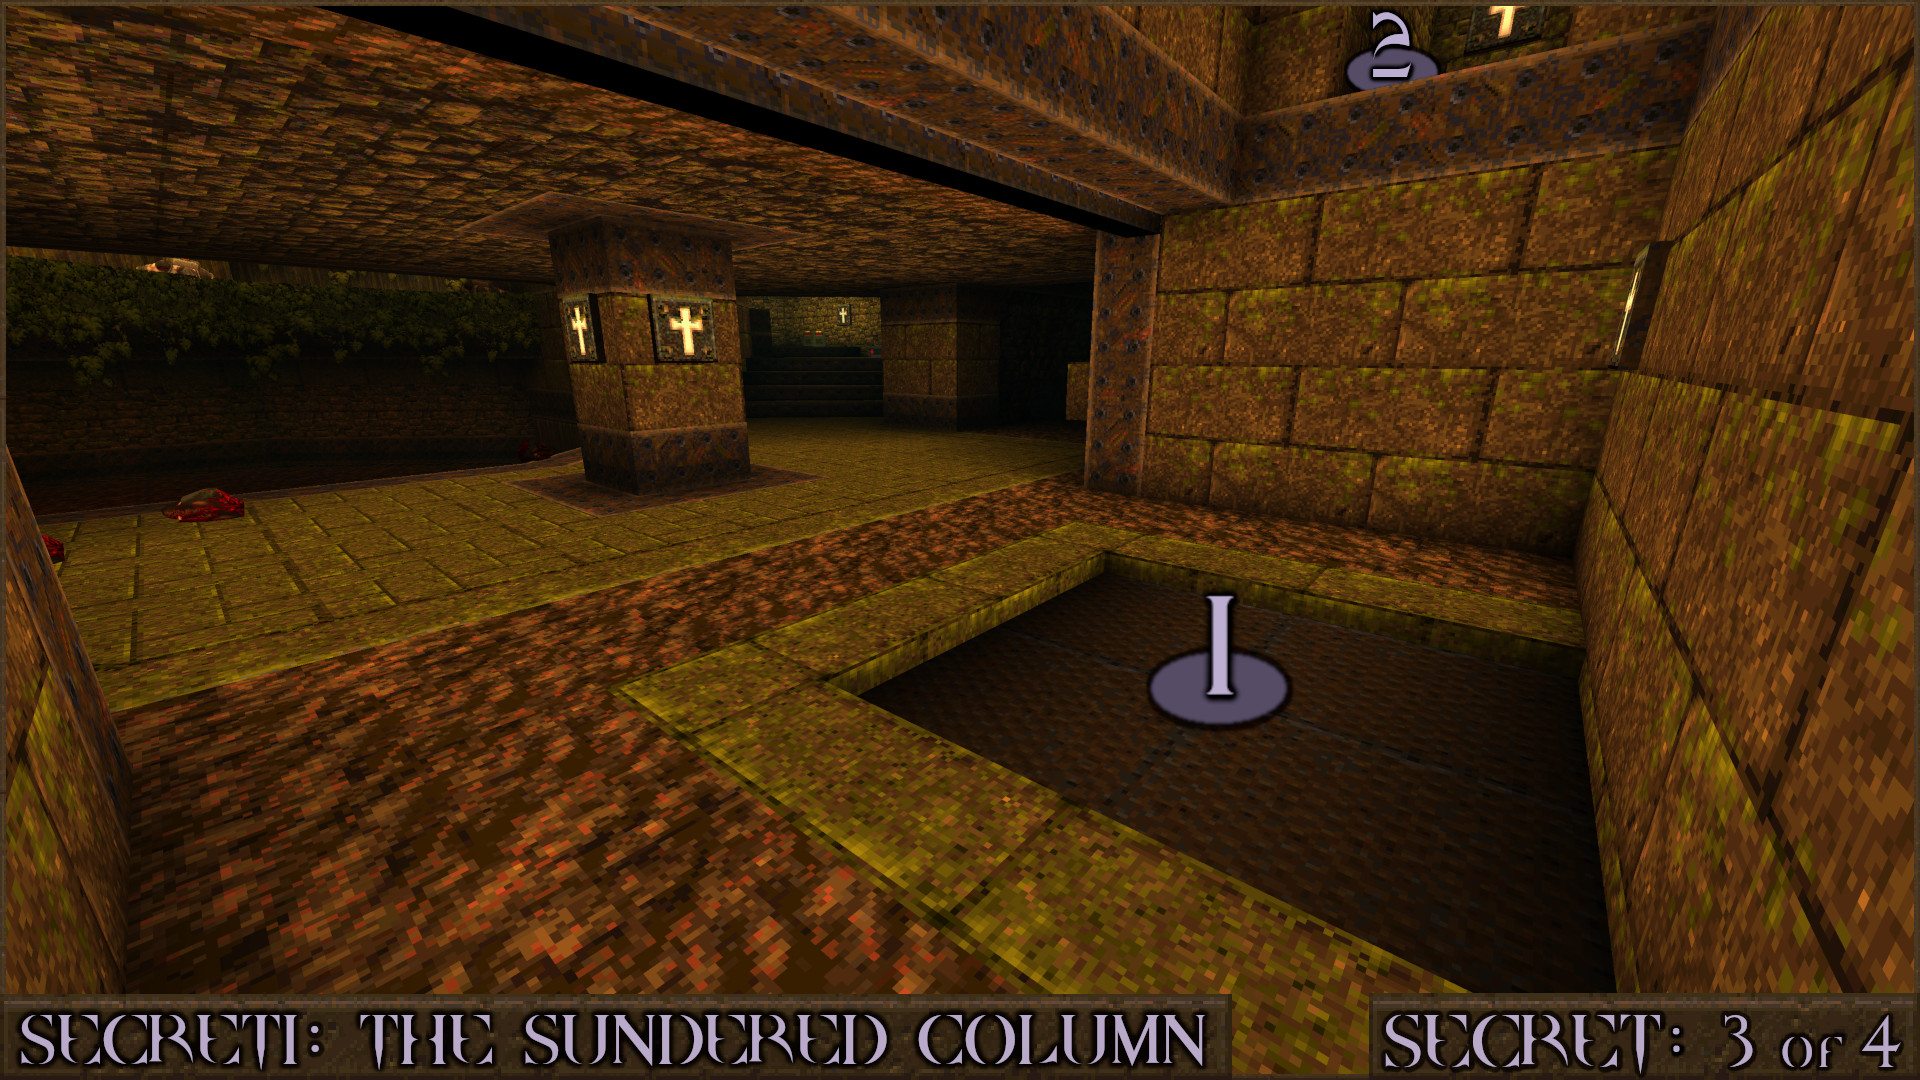
Secret 3 of 4
After activating a runic block an ambush featuring Demo Dogs will occur and an elevator will drop off a Shambler to attack you as well. After dealing with the enemies go stand on the elevator () and ride it up to a small secret on a ledge ().

Reward: Small Cells

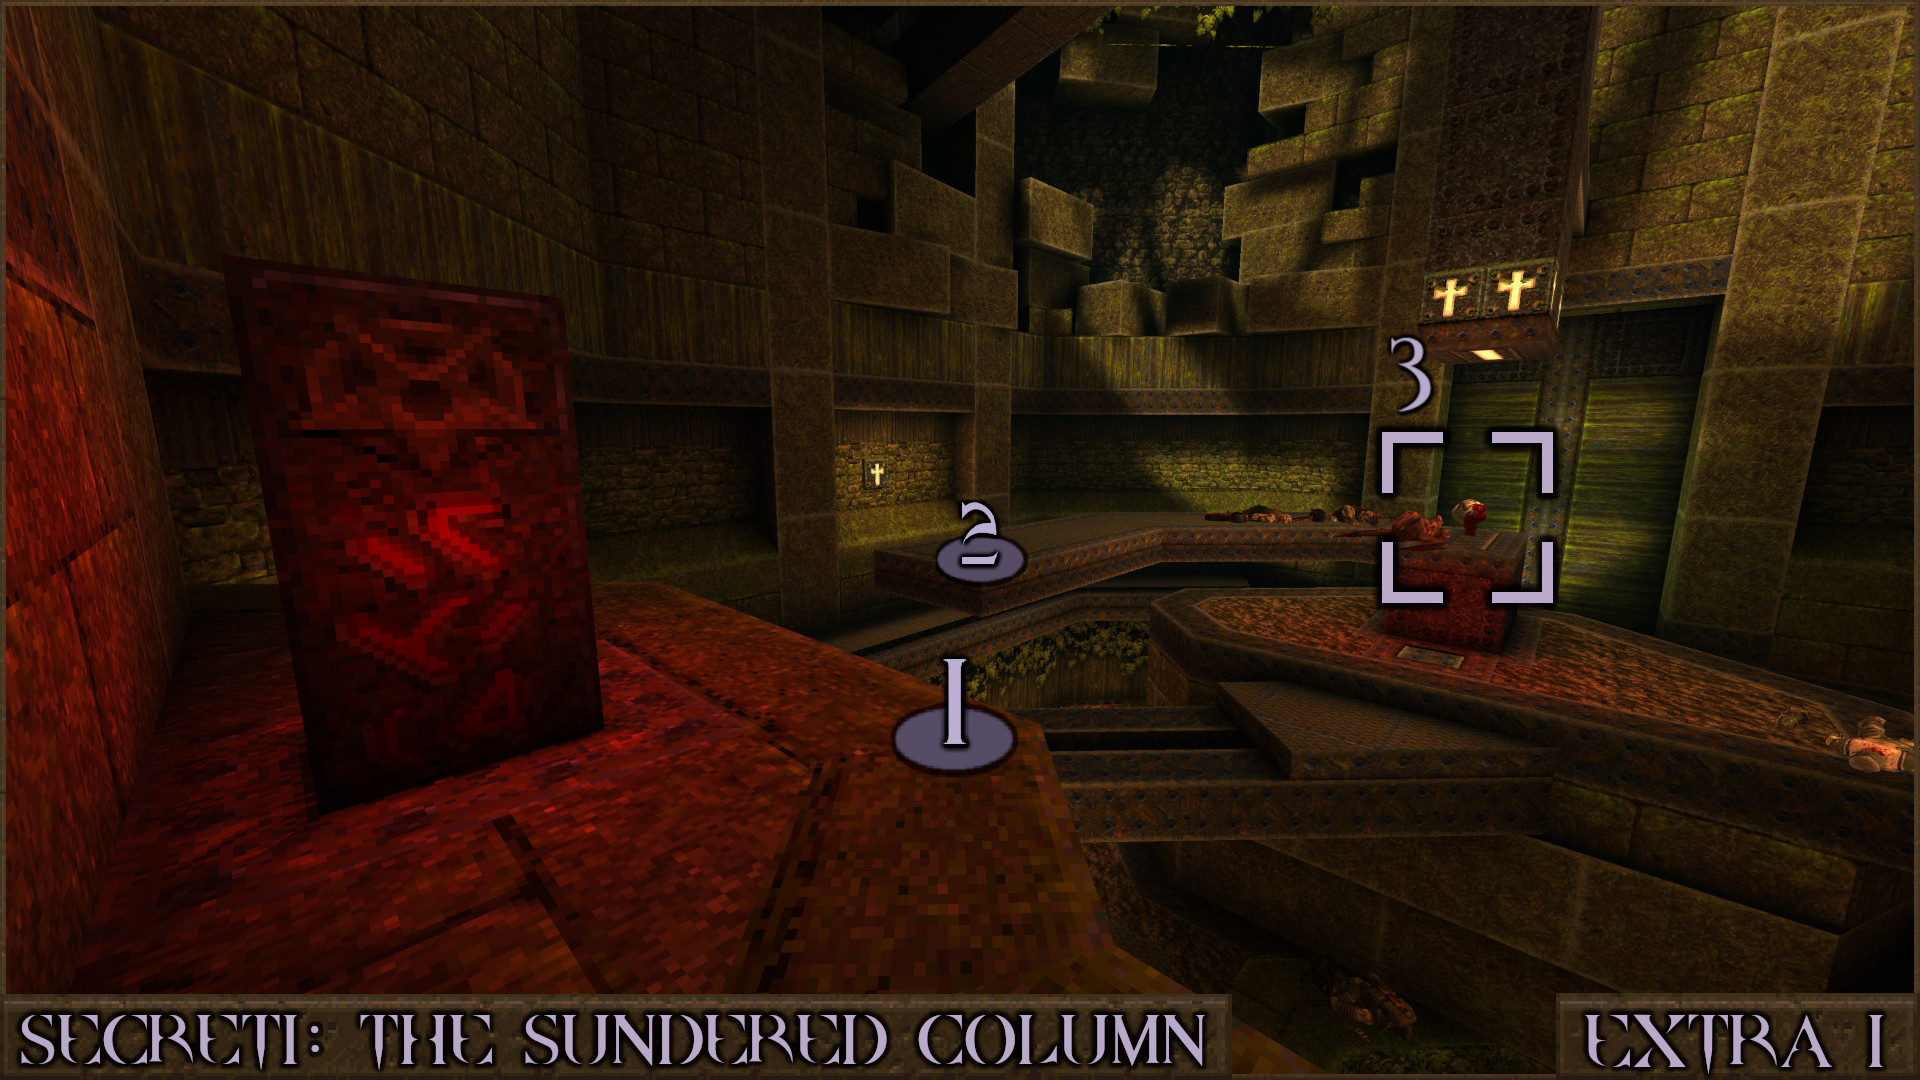
Extra Secret 1
In a large room there will be an altar in the centre and a floating metal platform. Jump up to the upper ledge in the room to find another runic block and stand near it (). Leap over to the floating metal platform when it is at its lowest point () and then simply jump over to the altar and grab the Health Capacity Upgrade ().

Reward: [Health Capacity Upgrade]

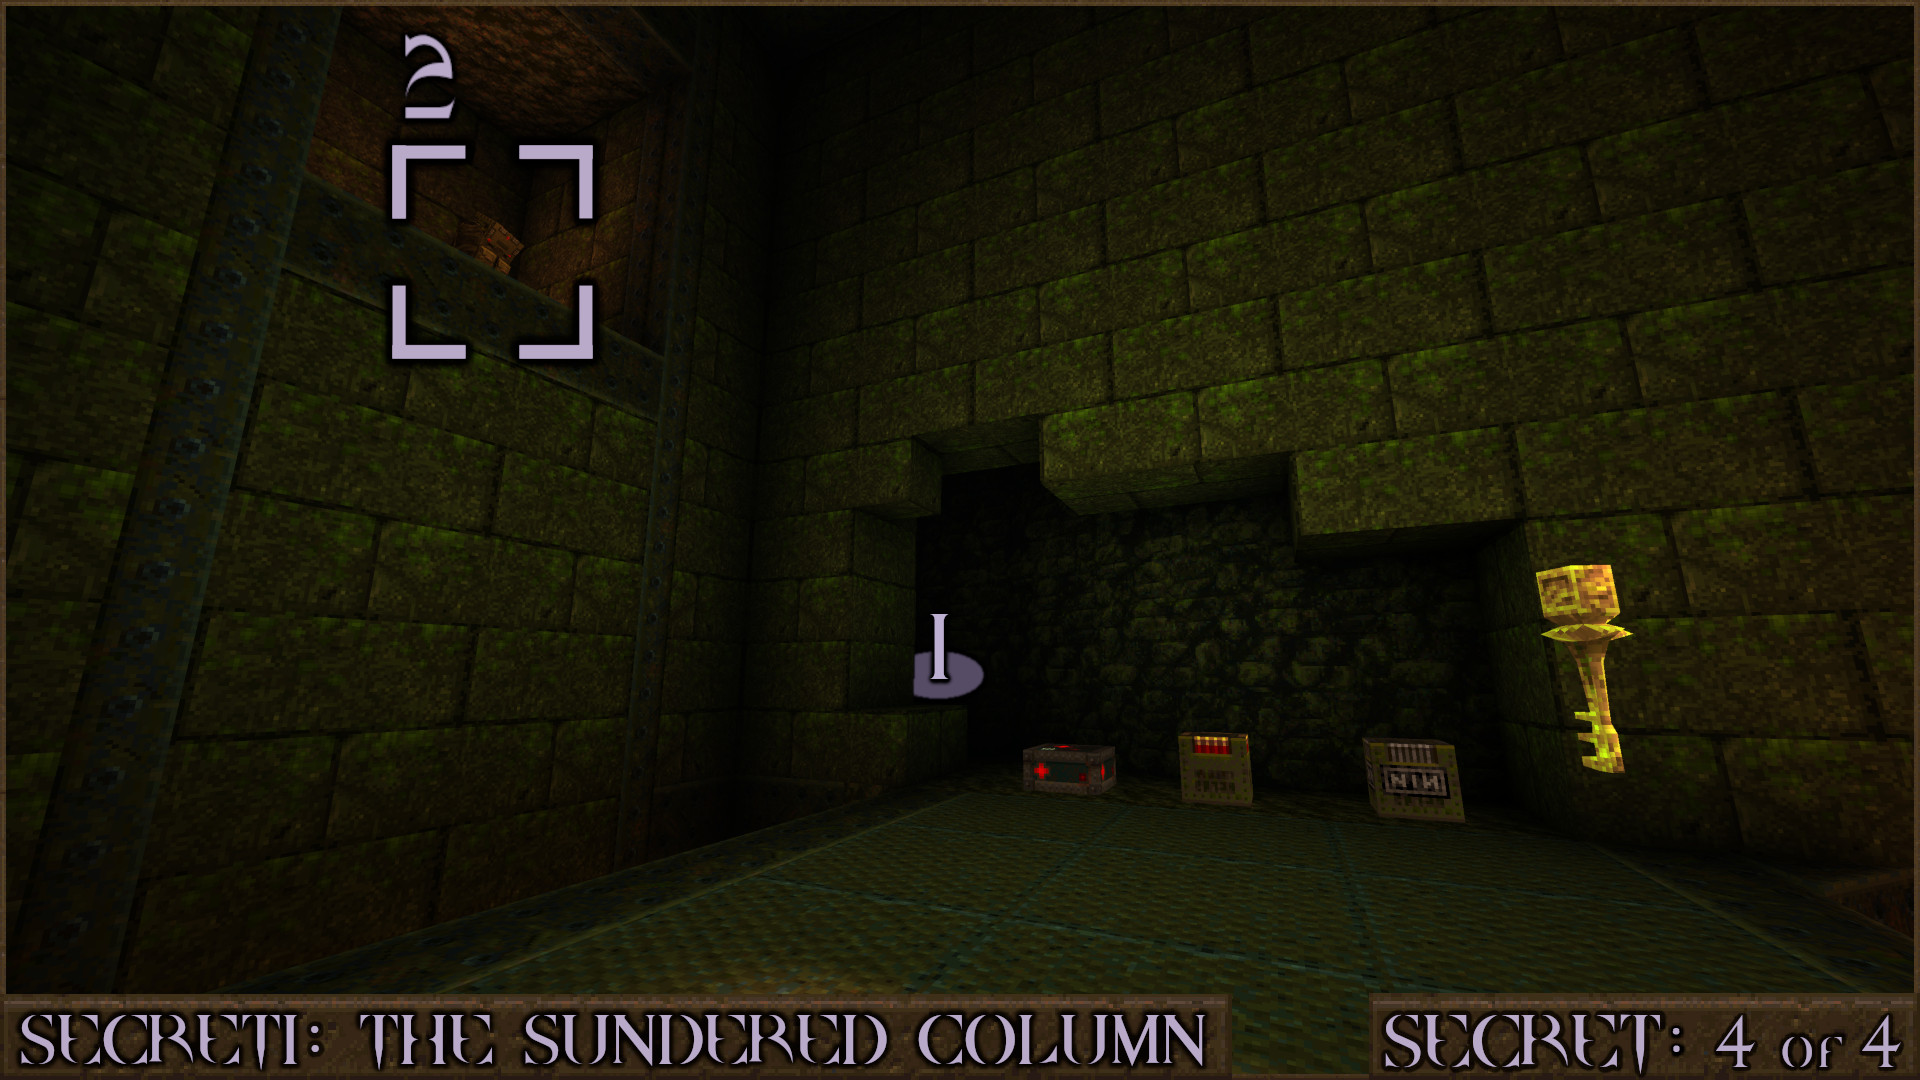
Secret 4 of 4
Shortly after Extra Secret 1 is a small metal bridge leading to a broken wall. Head around the back of the wall () and go up to find a hidden Nail Capacity Upgrade ().

Reward: [Nail Capacity Upgrade]

Extra Secret 2
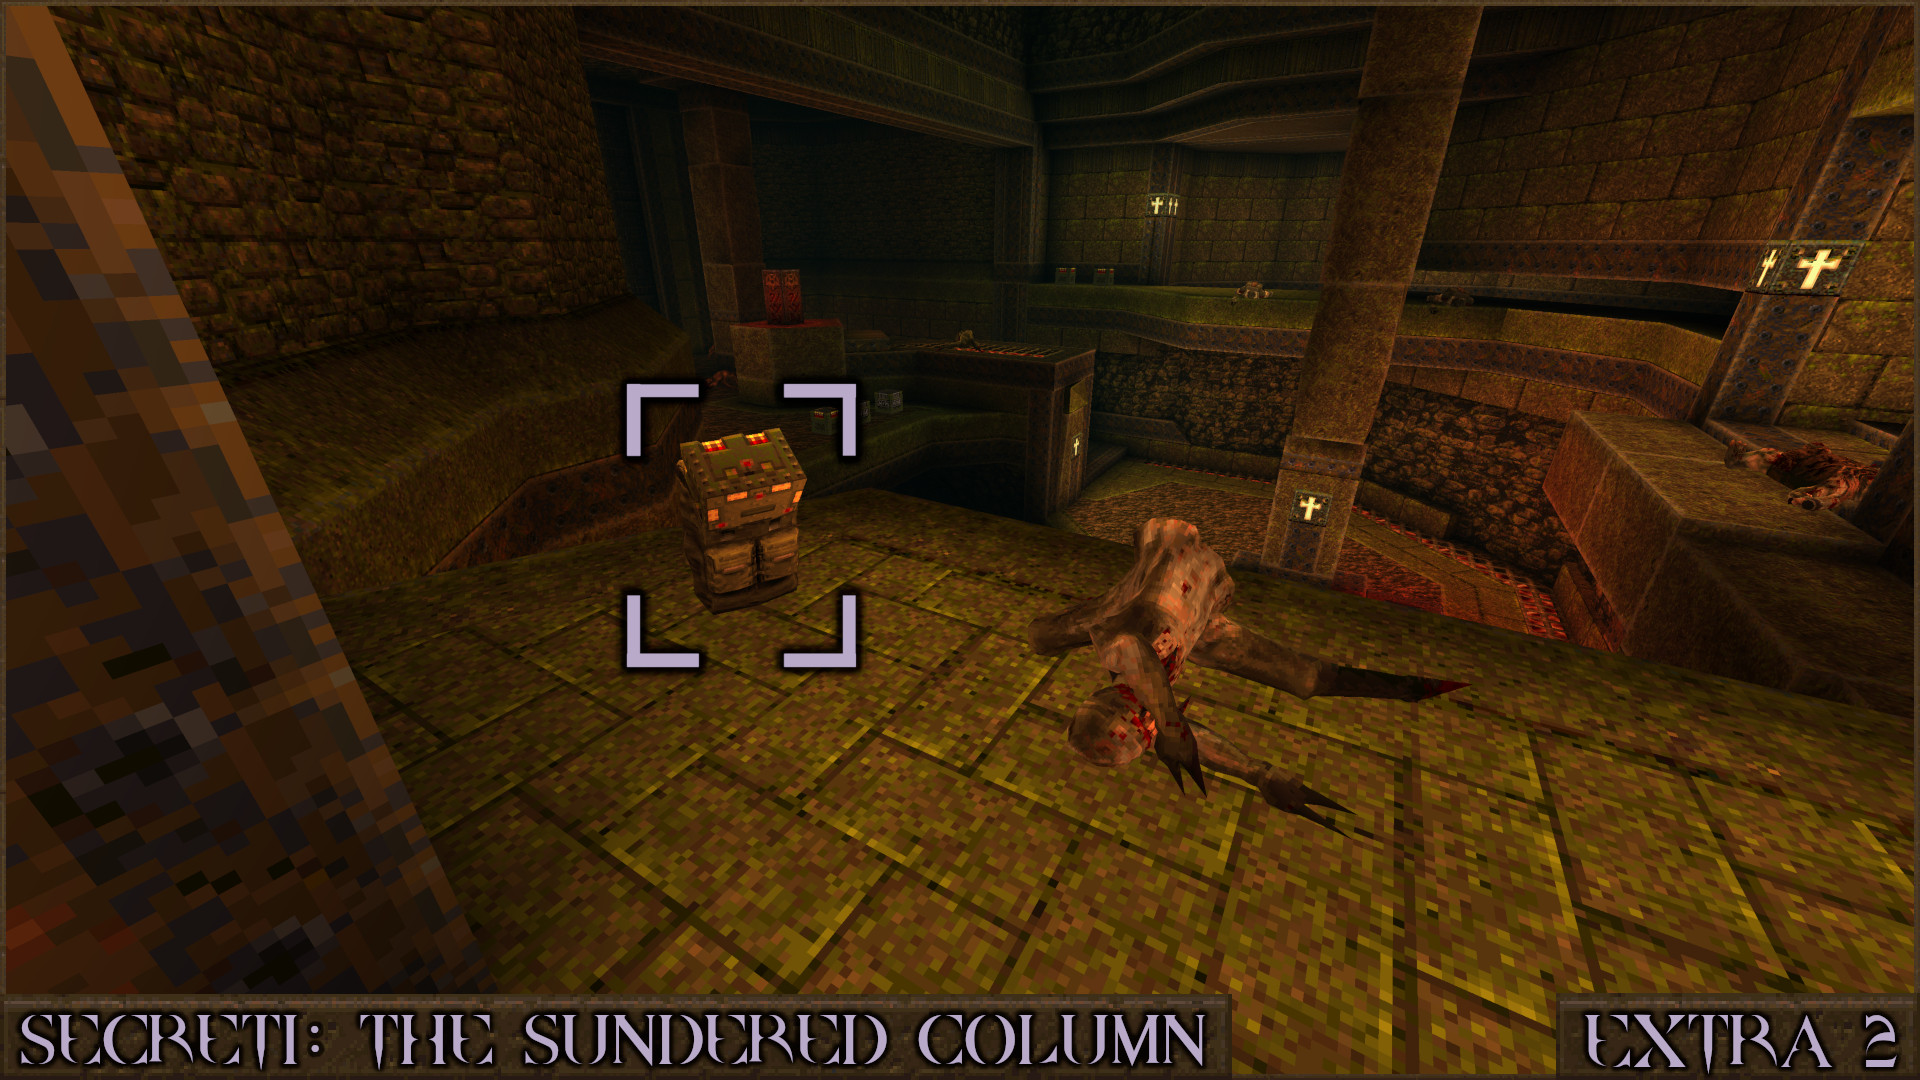
Continue on through the level and you'll reach a ledge in a large room. A Shell Capacity Upgrade will be in plain sight on the ledge.

Reward: [Shell Capacity Upgrade]

Extra Secret 3
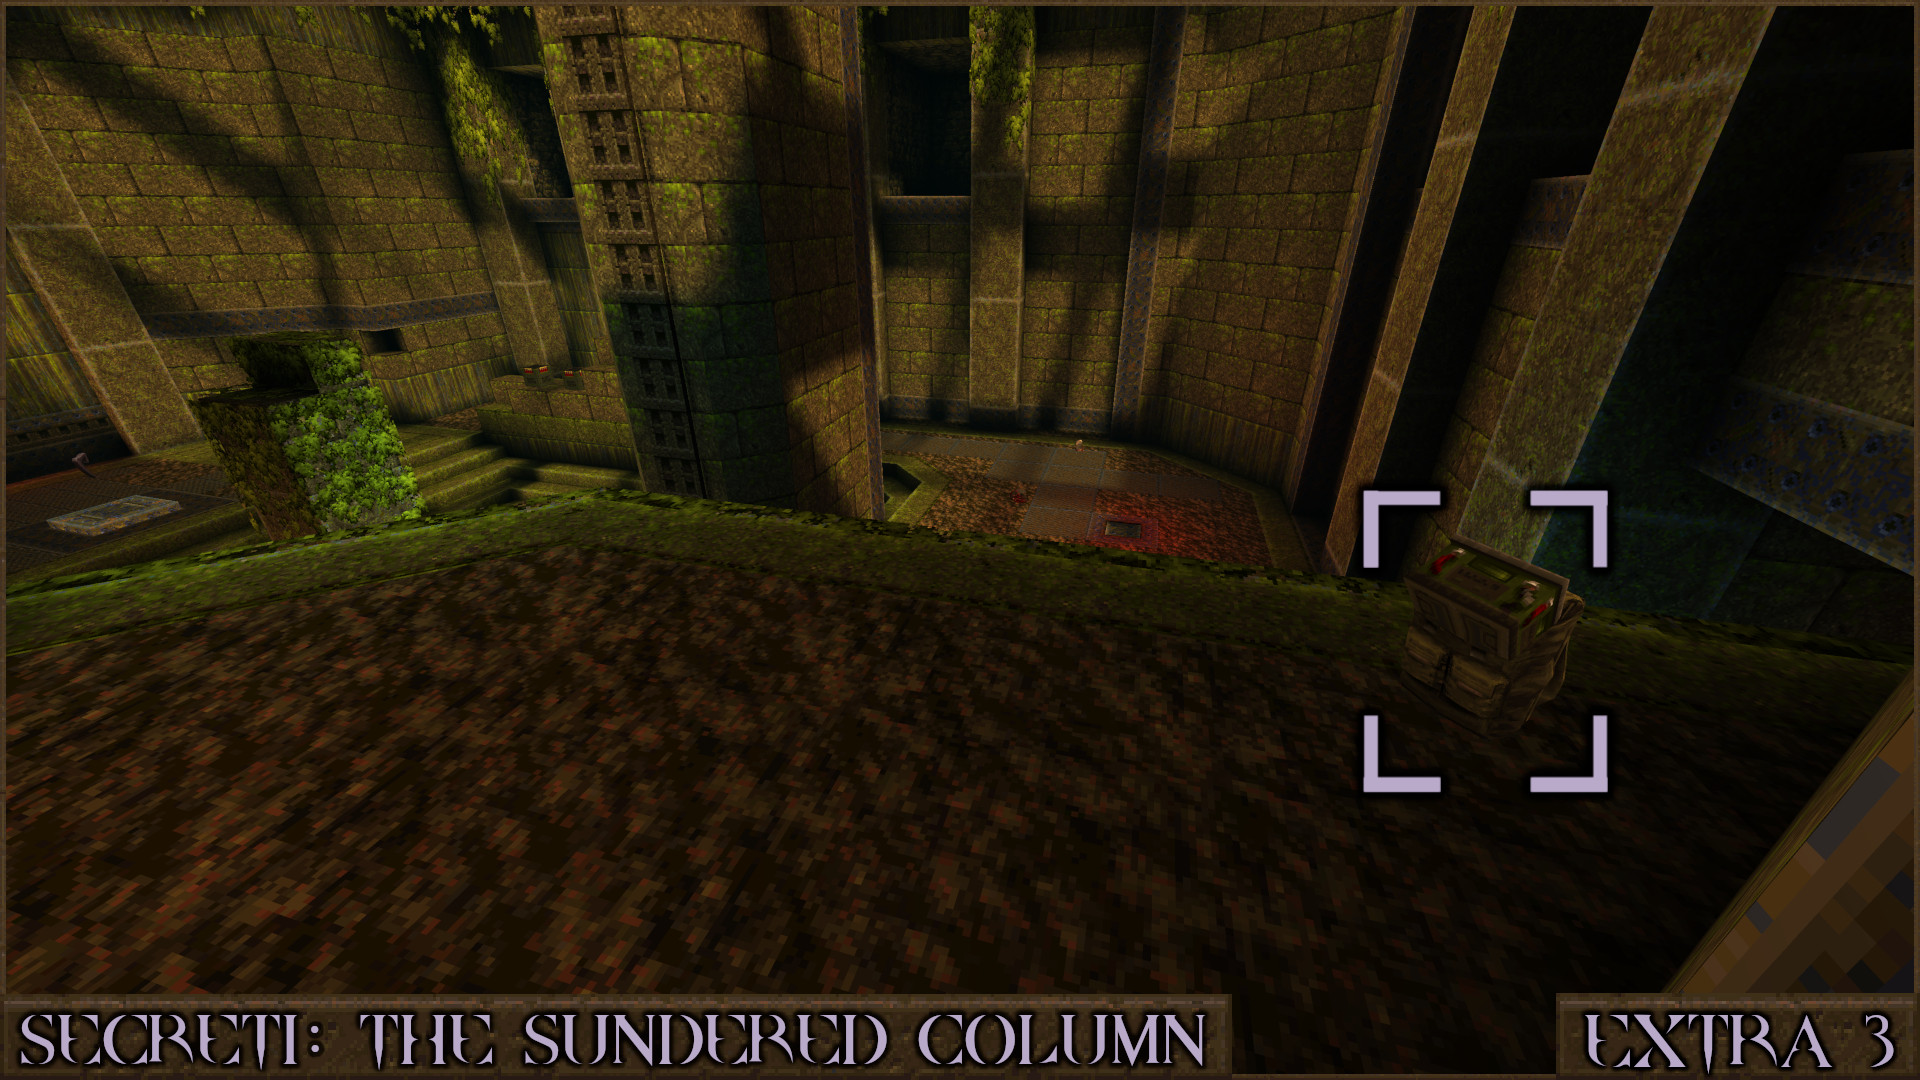
Near the end of the level you will reach a ledge overlooking the starting area and you'll also see the Rune of Chaos in the distance. Look to the right on the ledge and pick up the Cell Capacity Upgrade before you drop down.

Reward: [Cell Capacity Upgrade]
The Rune of Chaos!
At the end of this level you will acquire another rune, the Rune of Chaos! The level exit will take you directly back to the The Runic Nexus hub.
‎‏‏‎MAP2: Dawn of the All Mother
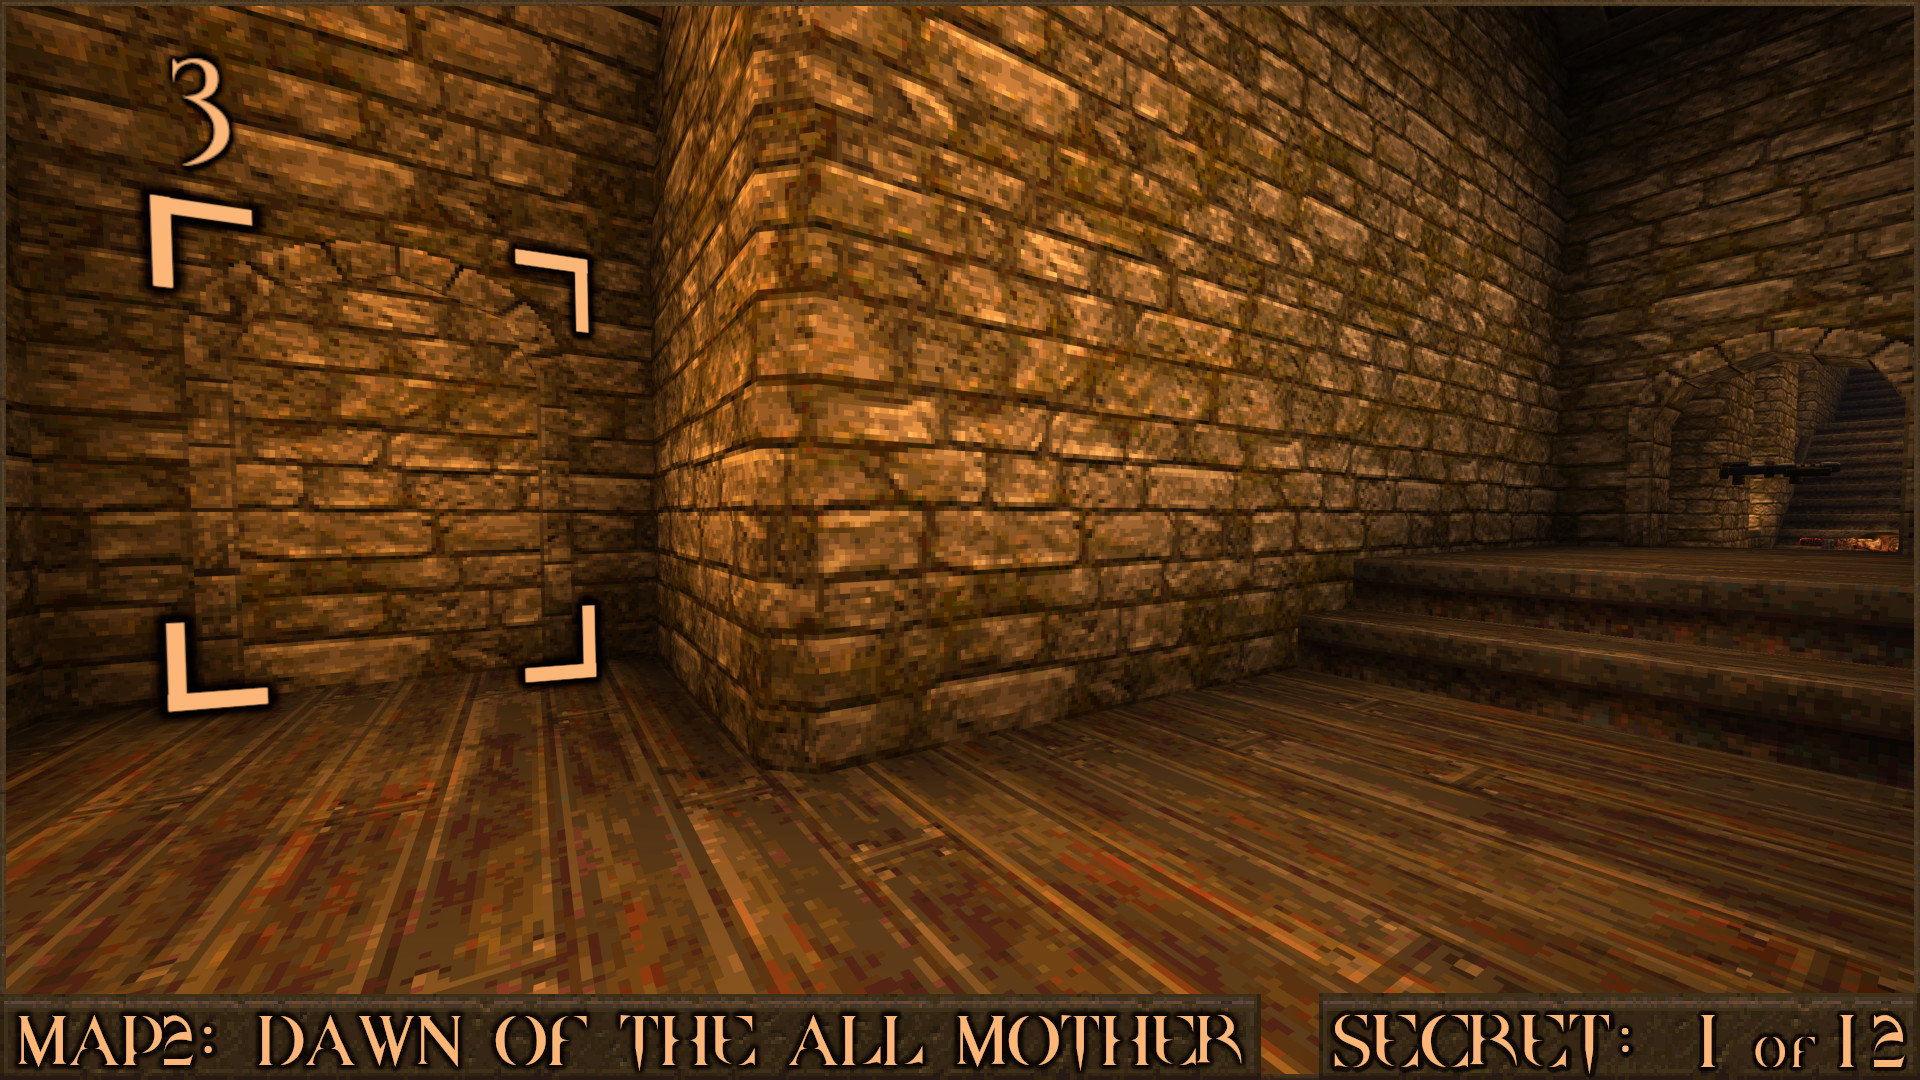
Secret 1 of 12
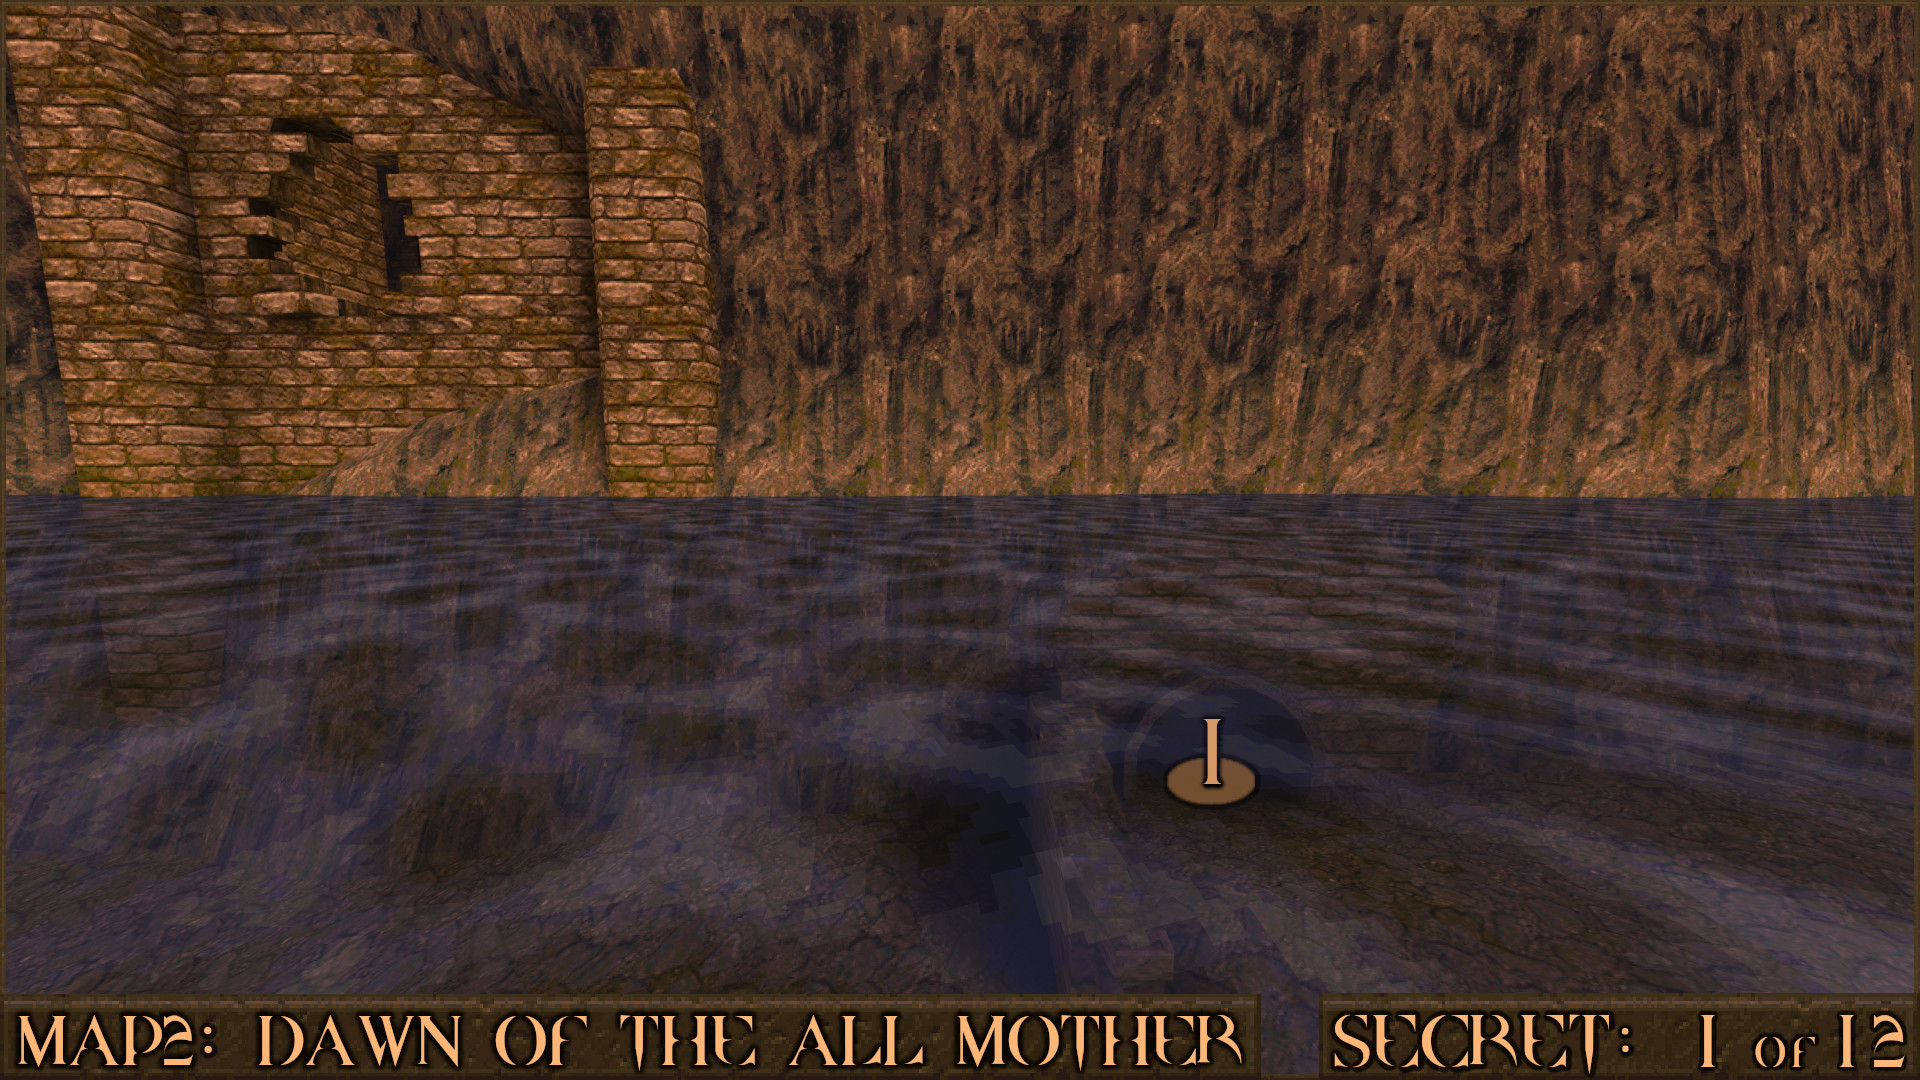
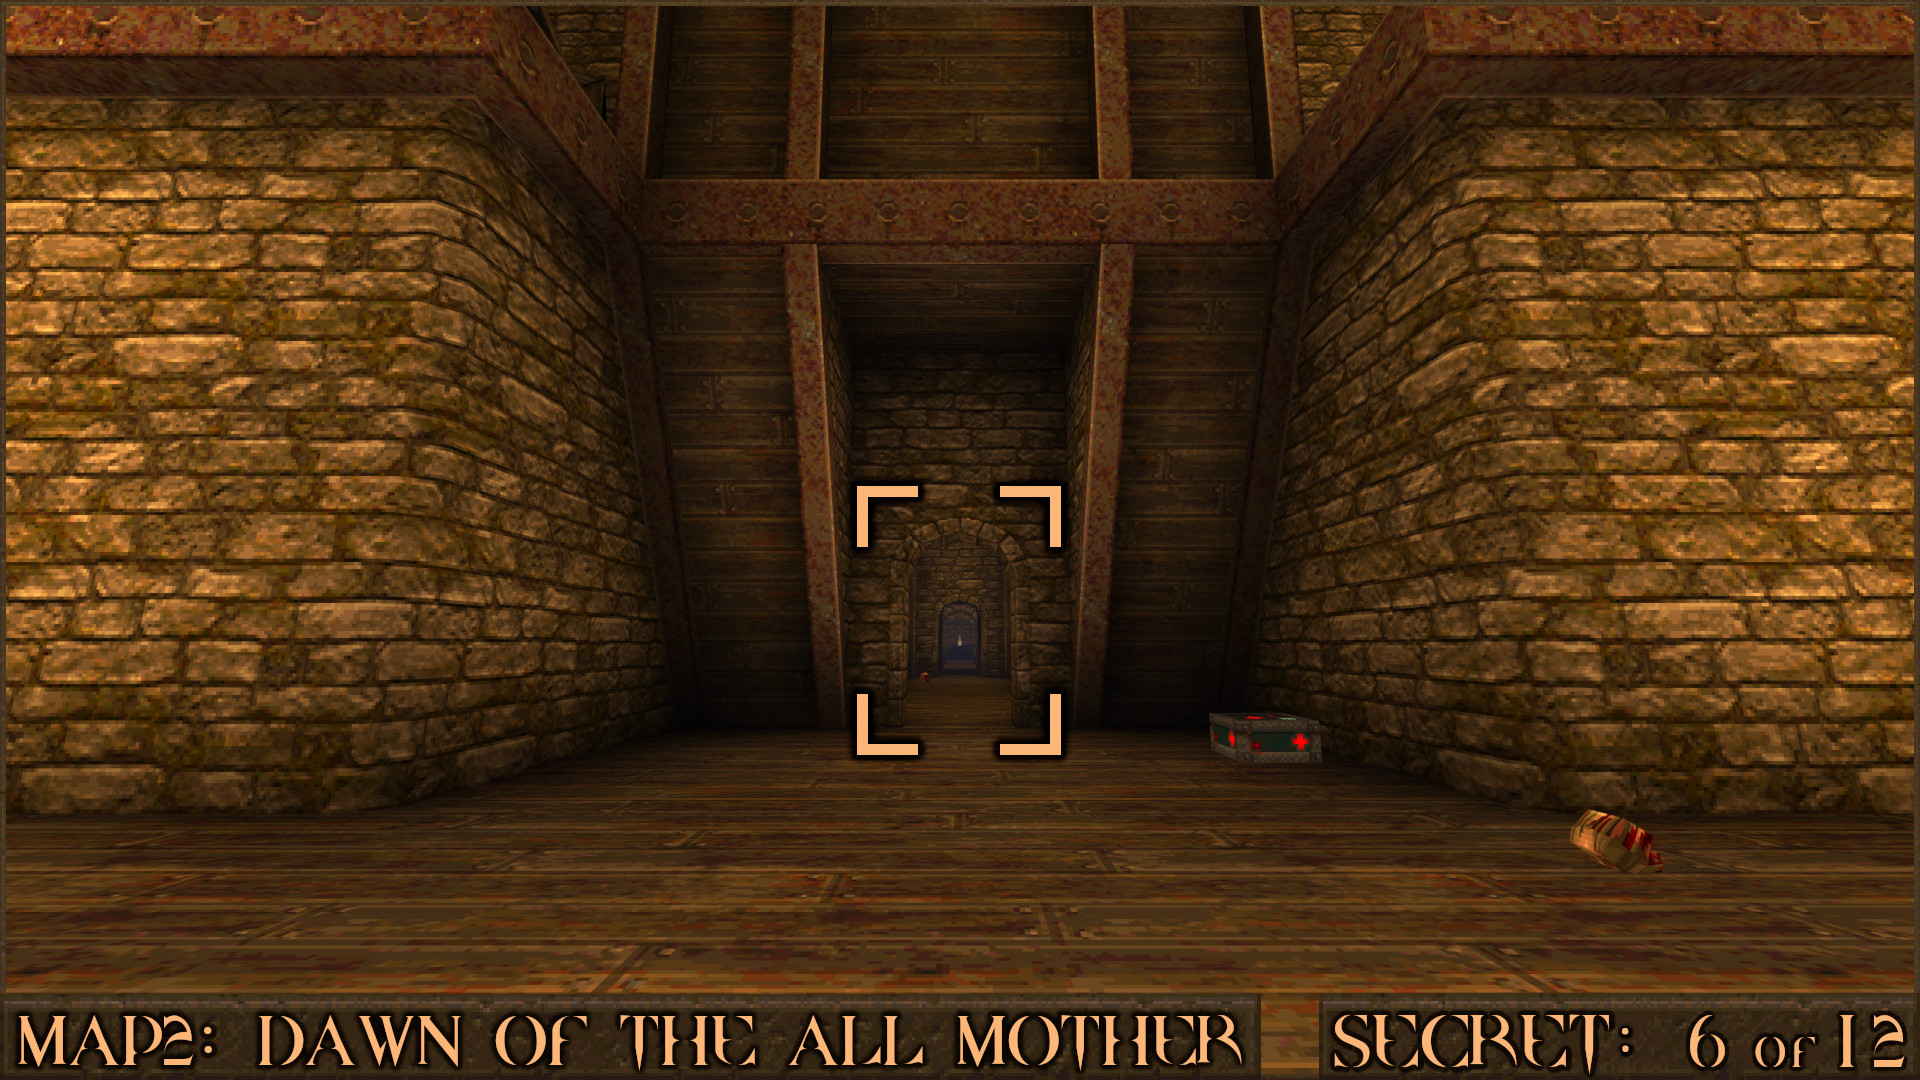
After jumping out of the window into the ocean, swim to your left near the wall to find an underwater pipe ().

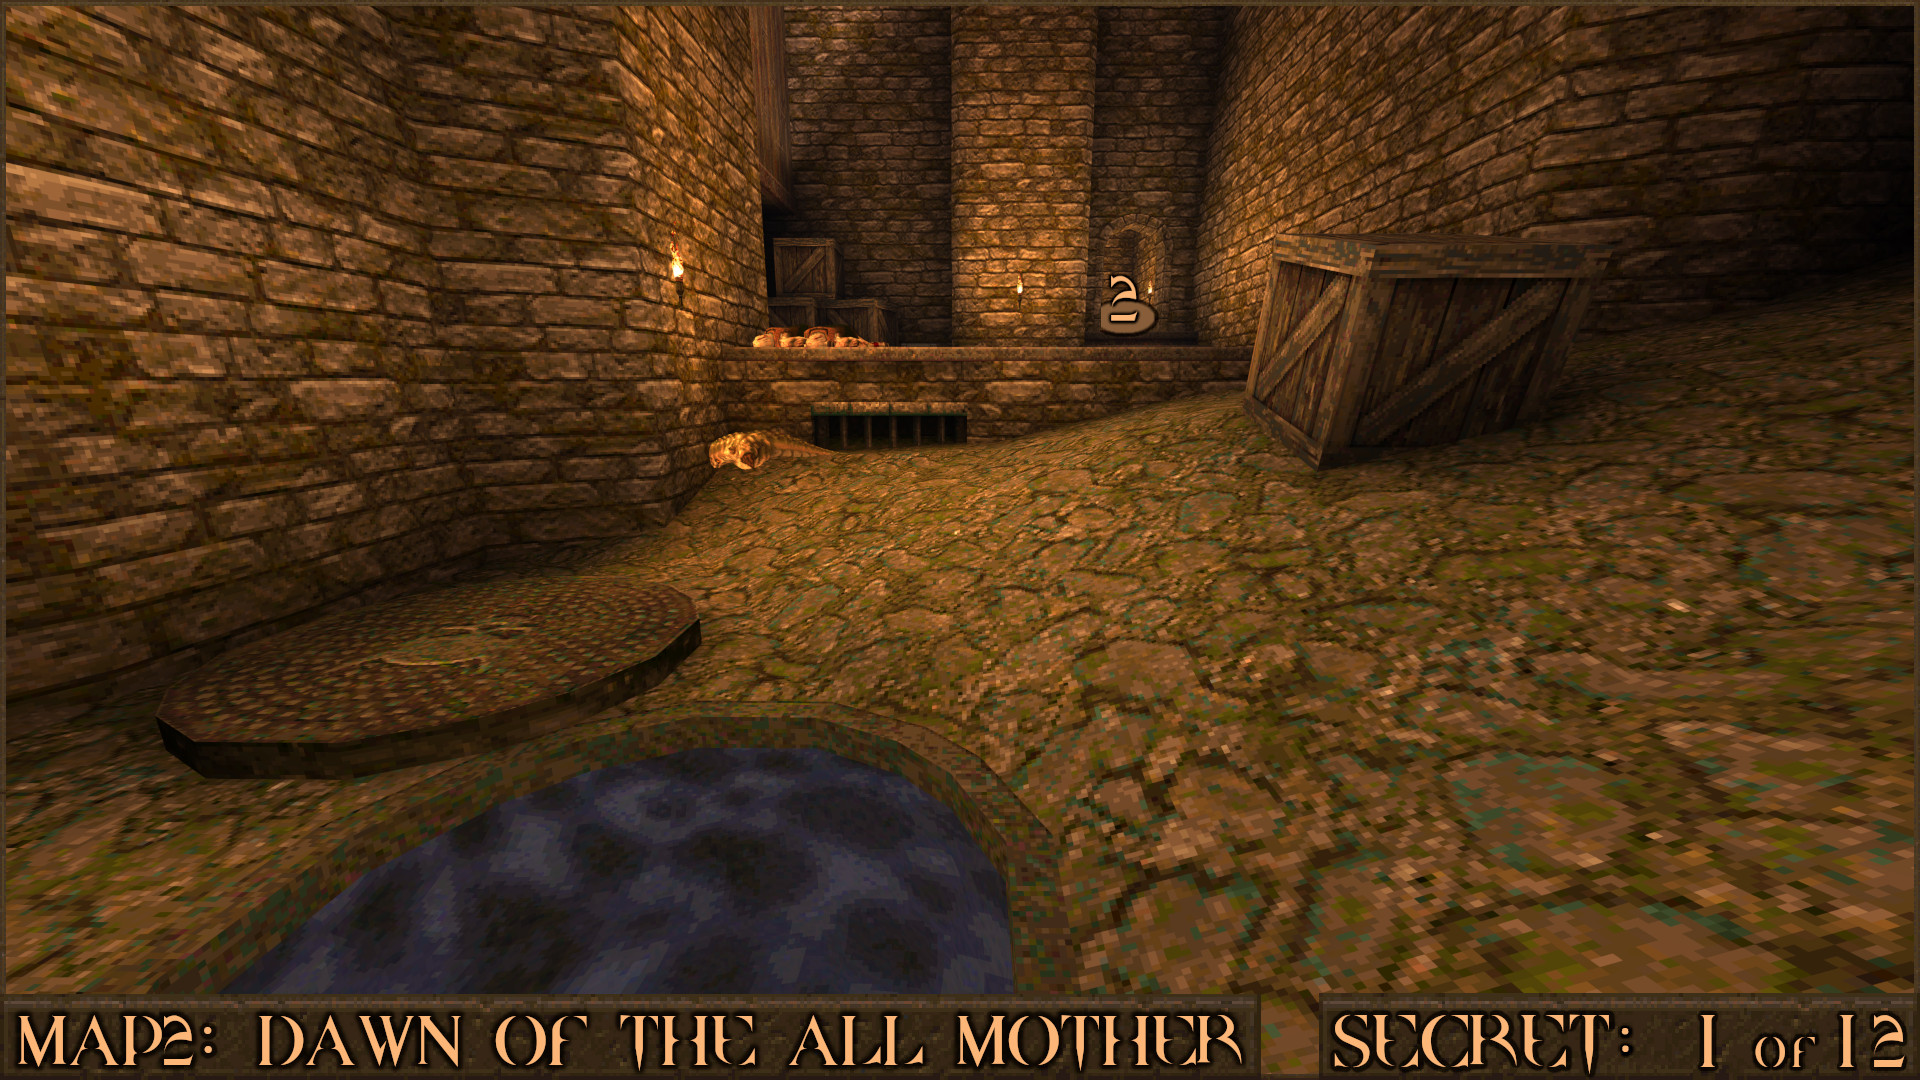
It will eventually lead you back into the castle where enemies are waiting to ambush you. Proceed through the nearby entryway () and up the stairs.

You'll see a Grenade Launcher but just to the left of this is a blocked alcove () that can be shot to reveal the actual secret.

Reward: Small Health [Shell Capacity Upgrade]

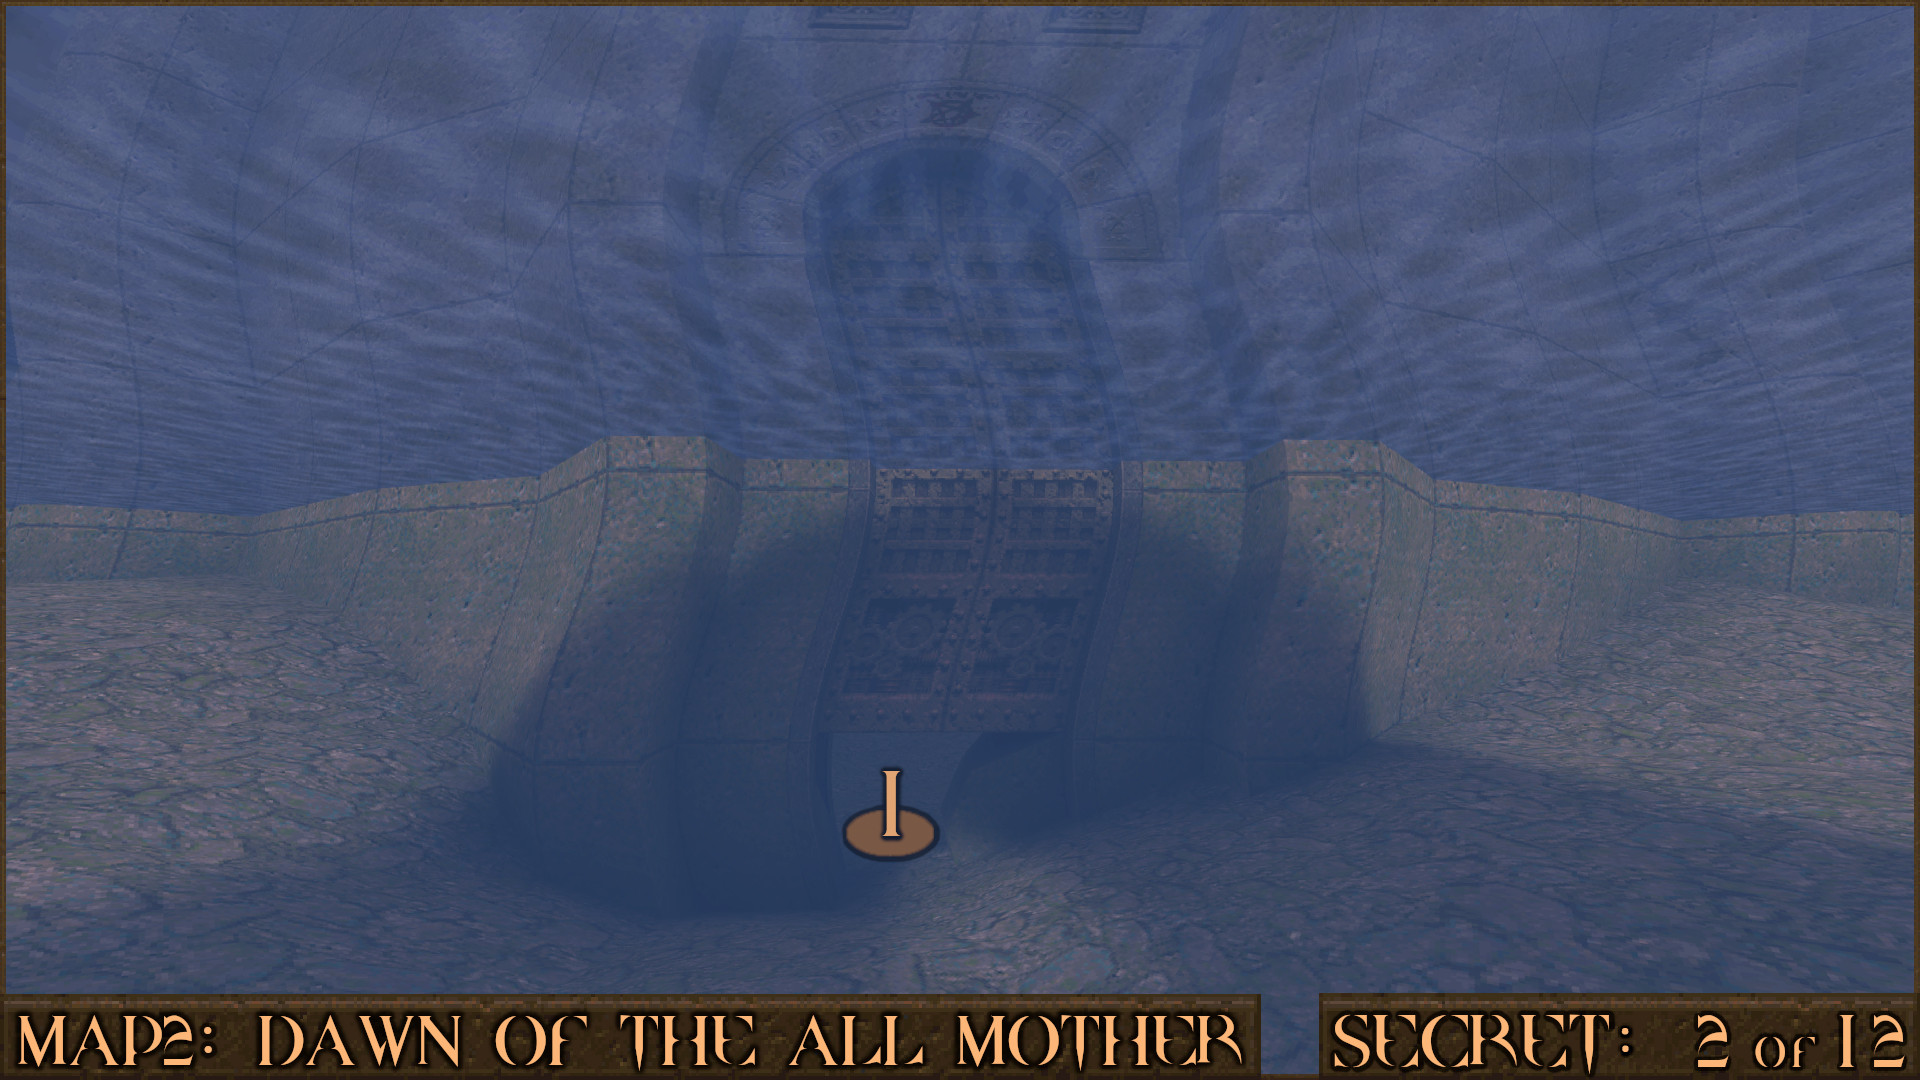
Secret 2 of 12
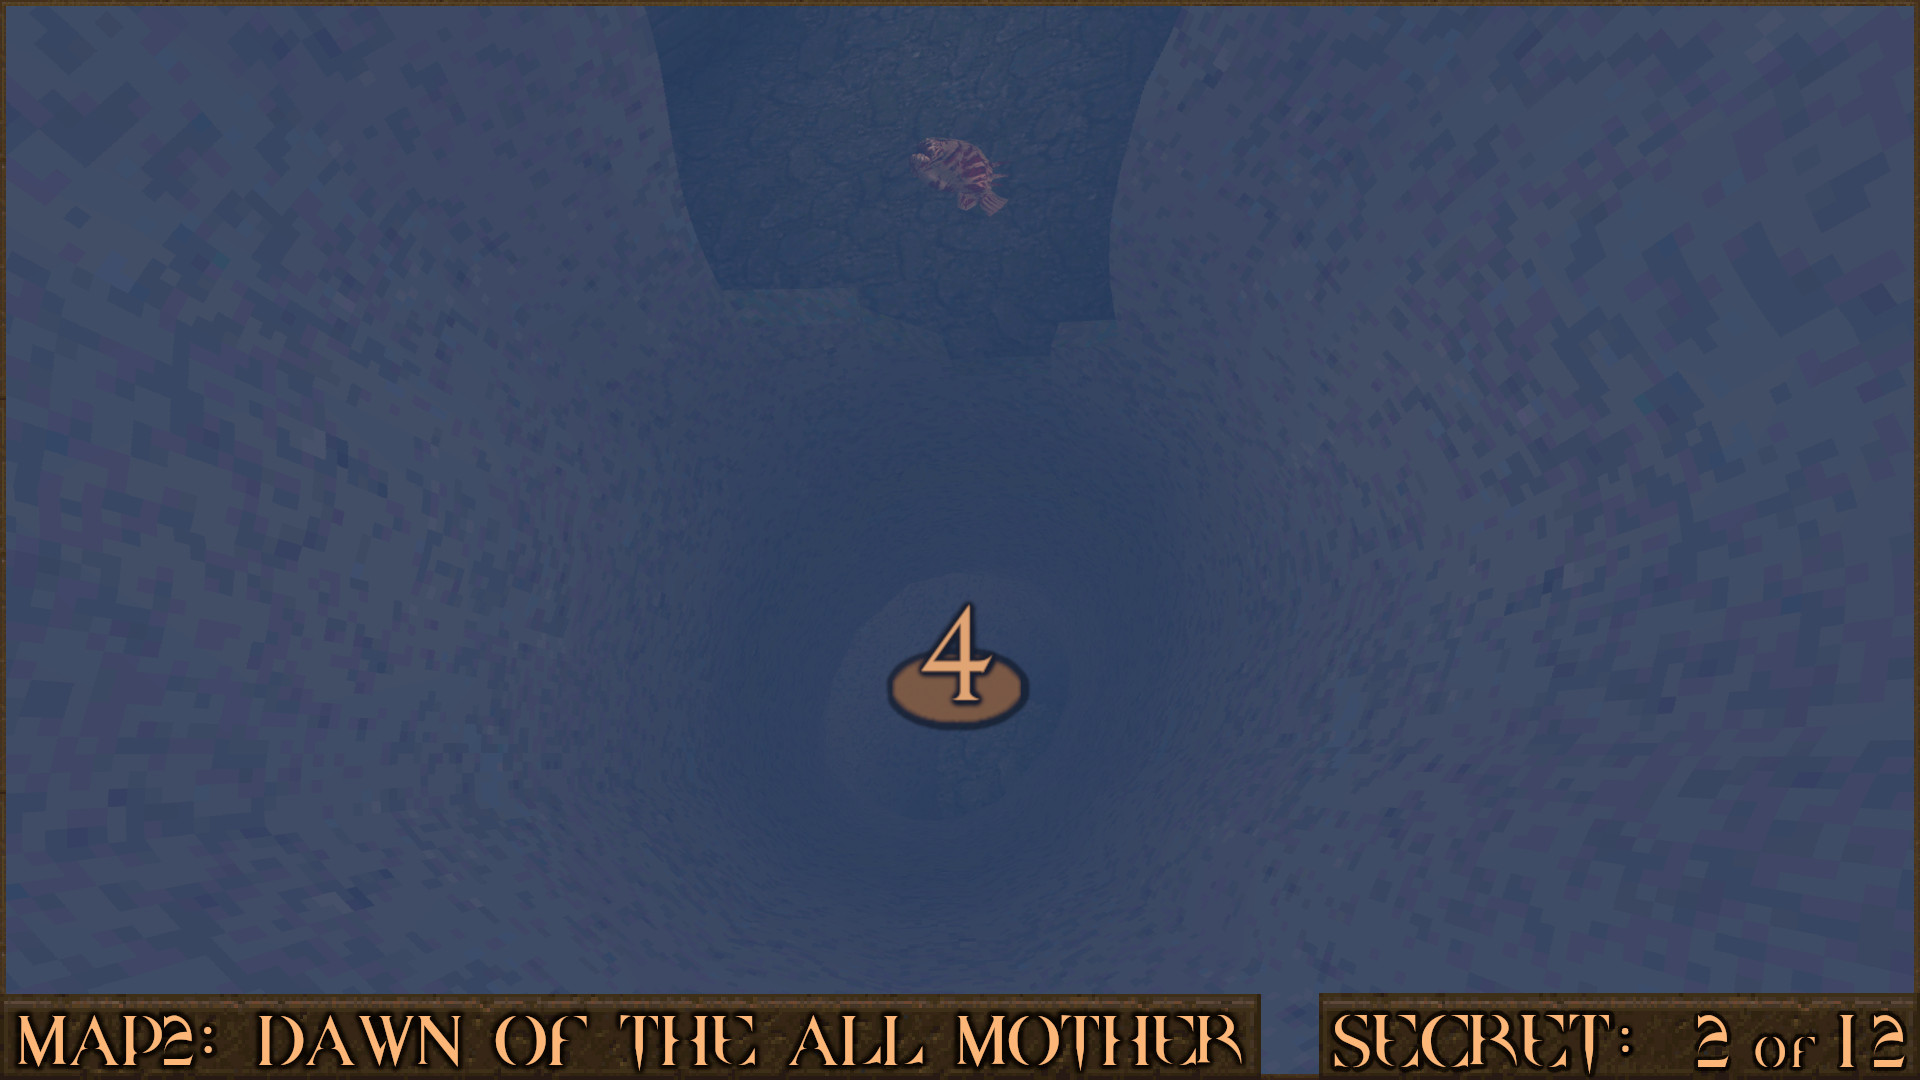
After returning to the ocean area you'll come across the castle entrance that you have to swim under ().

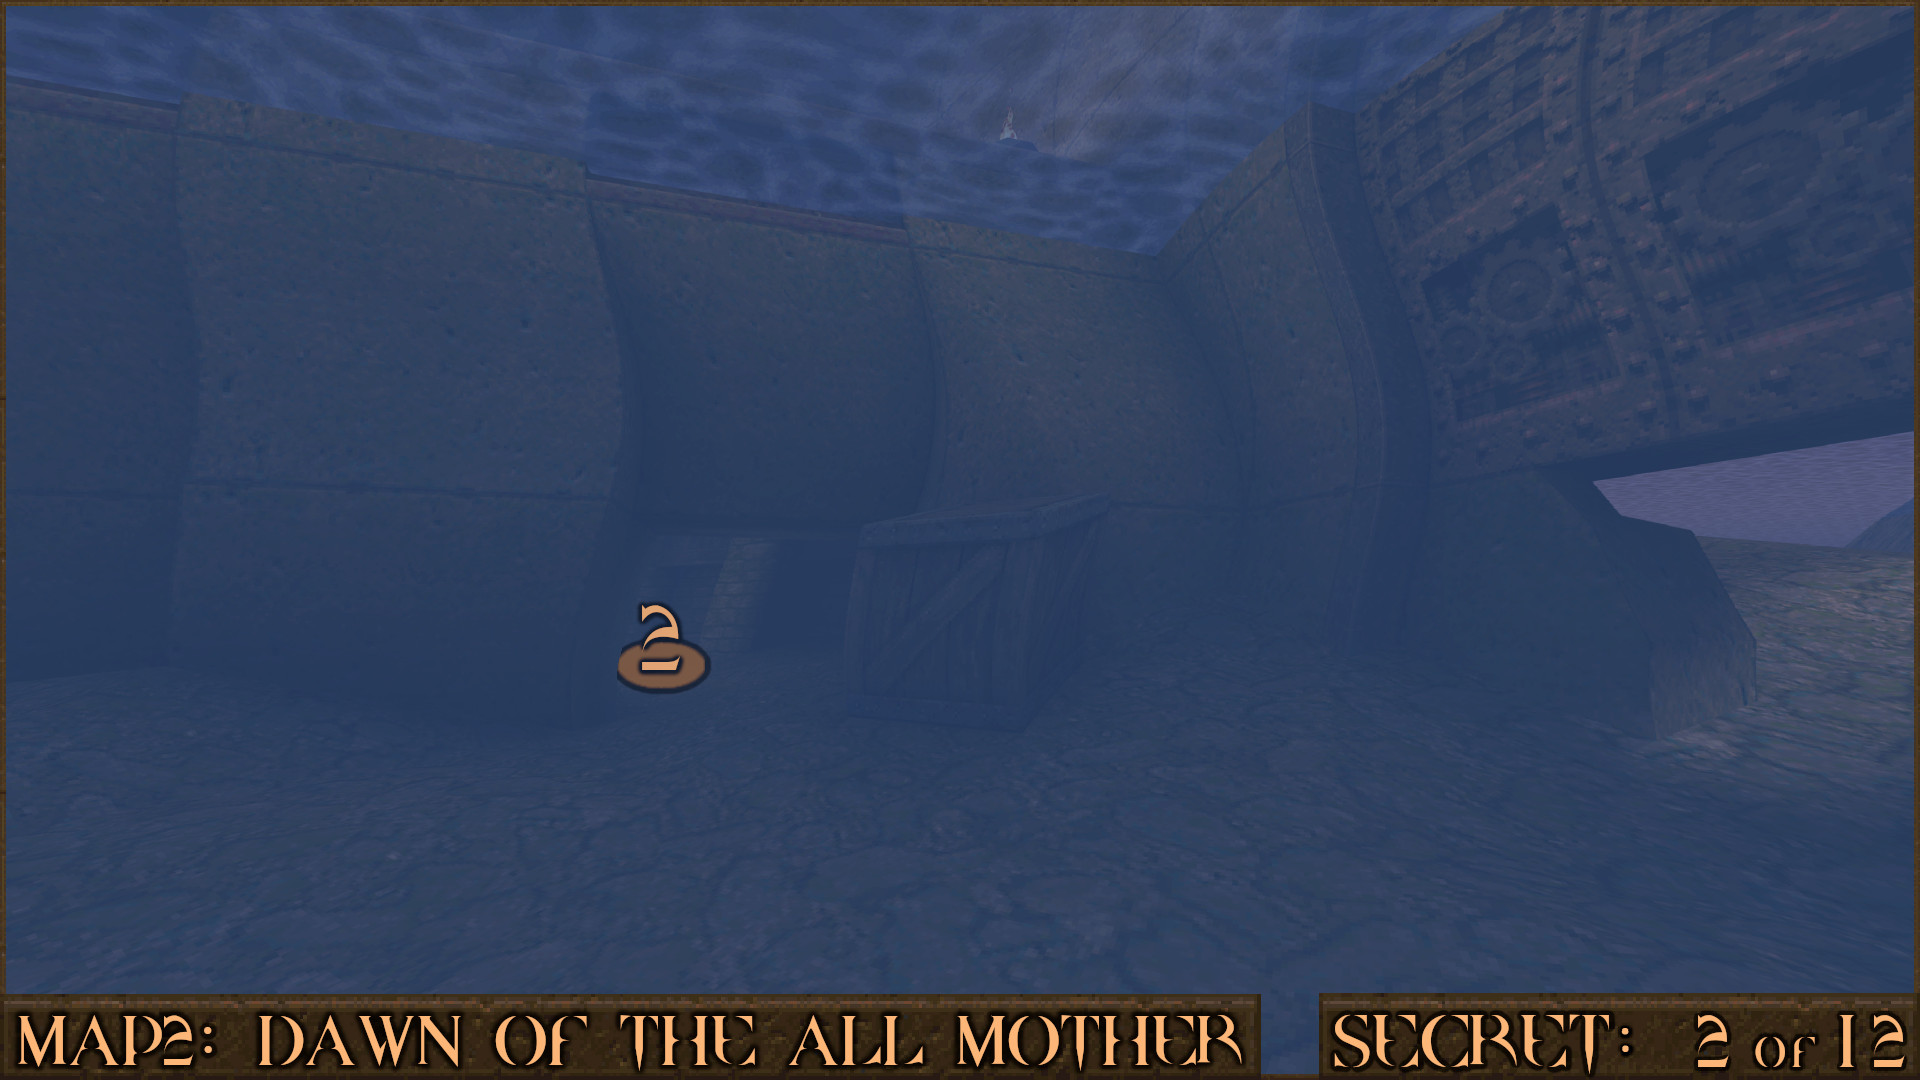
Immediately to your right is a small hole () that leads to a large pipe.

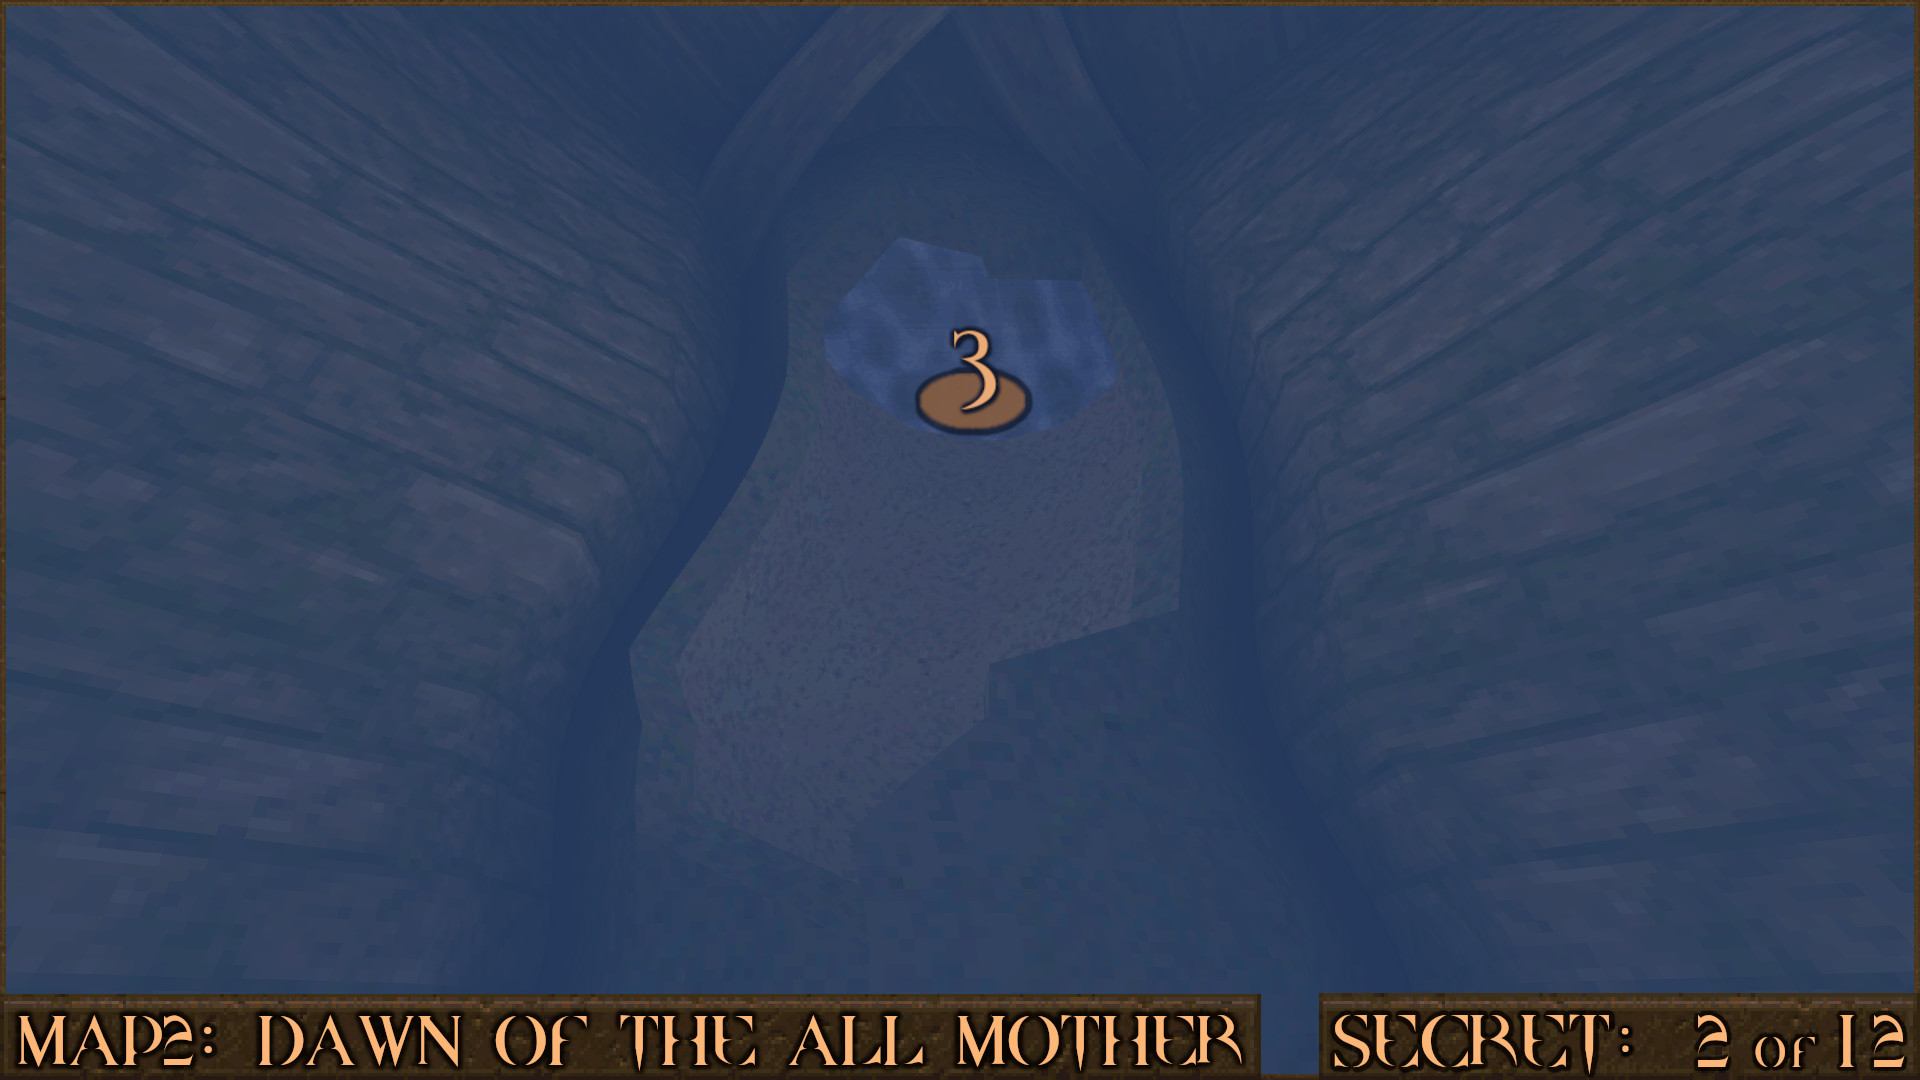
Swim up the pipe to surface into a small room () containing a Biosuit which will help you reach the next section.

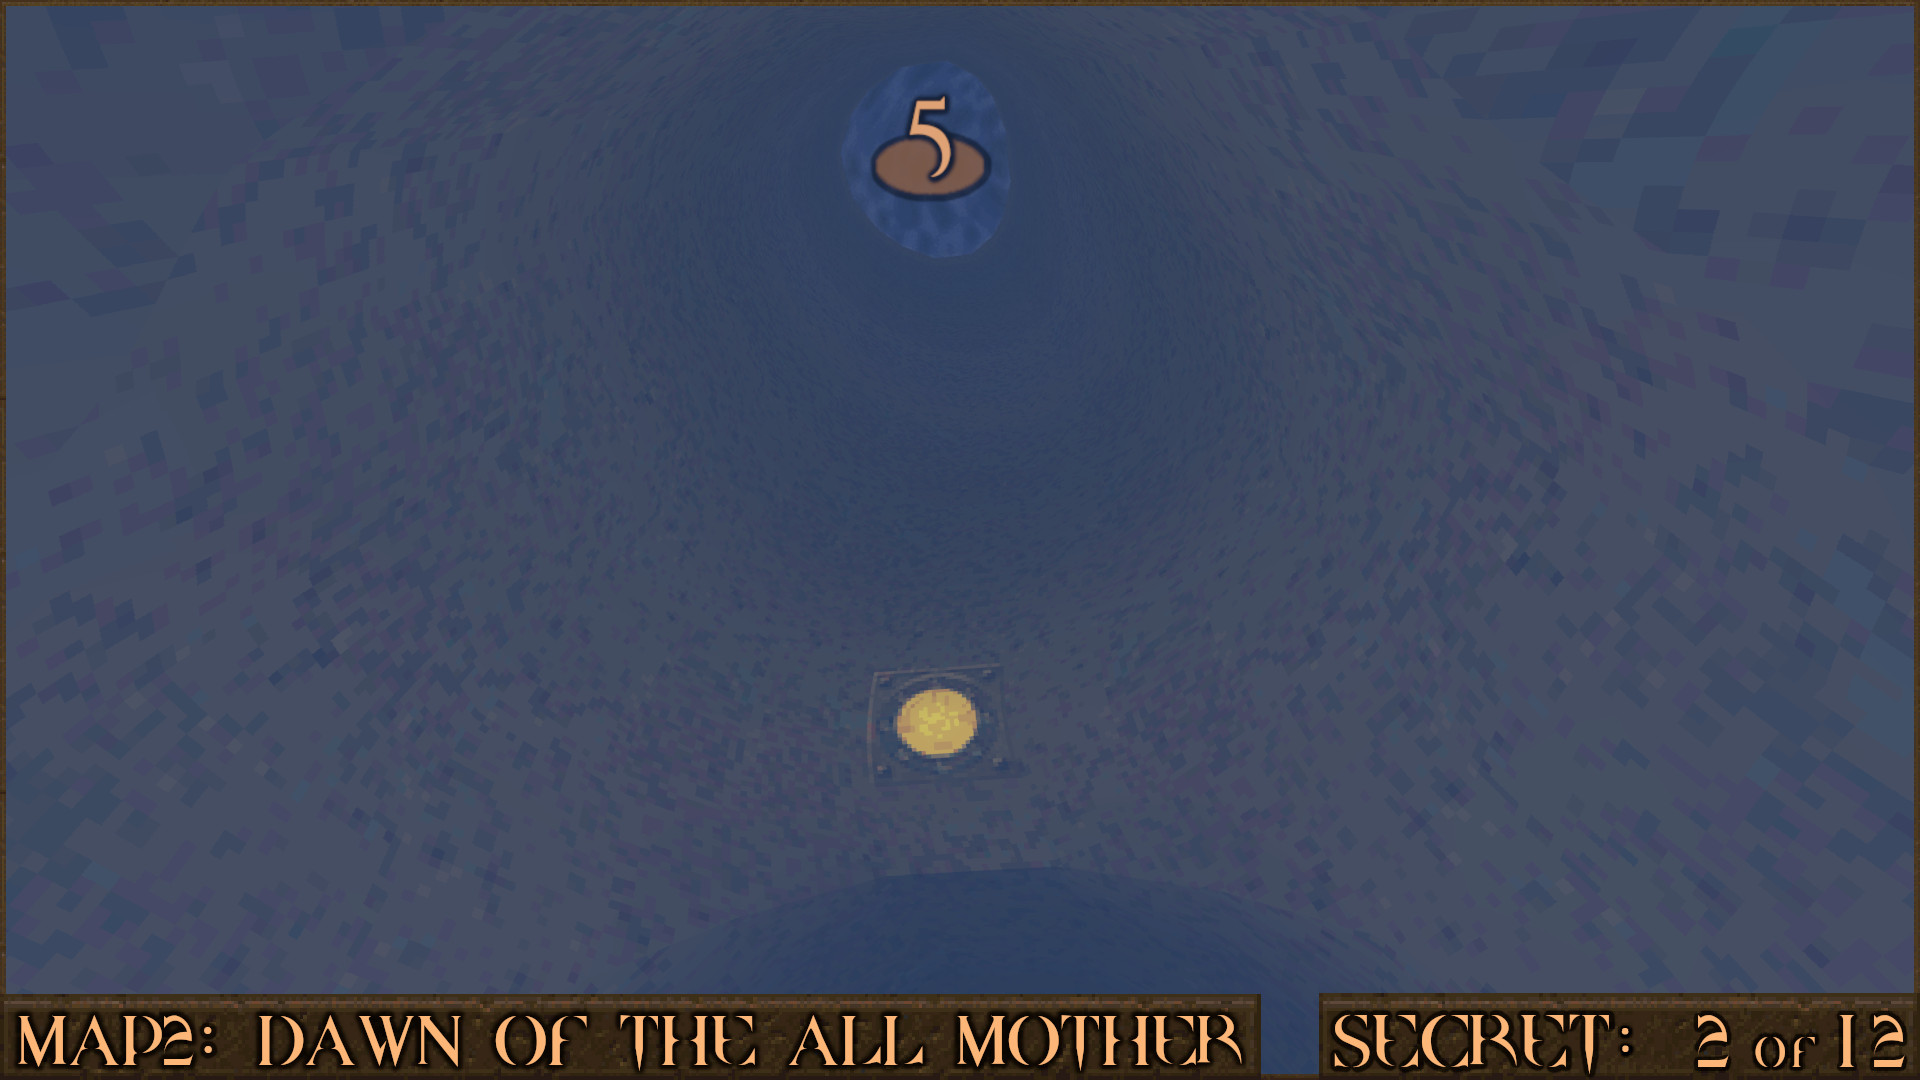
Return to the pipe and this time swim to the very bottom of it ().

Continue following the pipe while looking above you for an exit () that lets you surface into the secret. If you come across the 4 Rune Door you have gone too far.

Reward: Small Rockets Large Health×2 [Nail Capacity Upgrade]

Secret 3 of 12
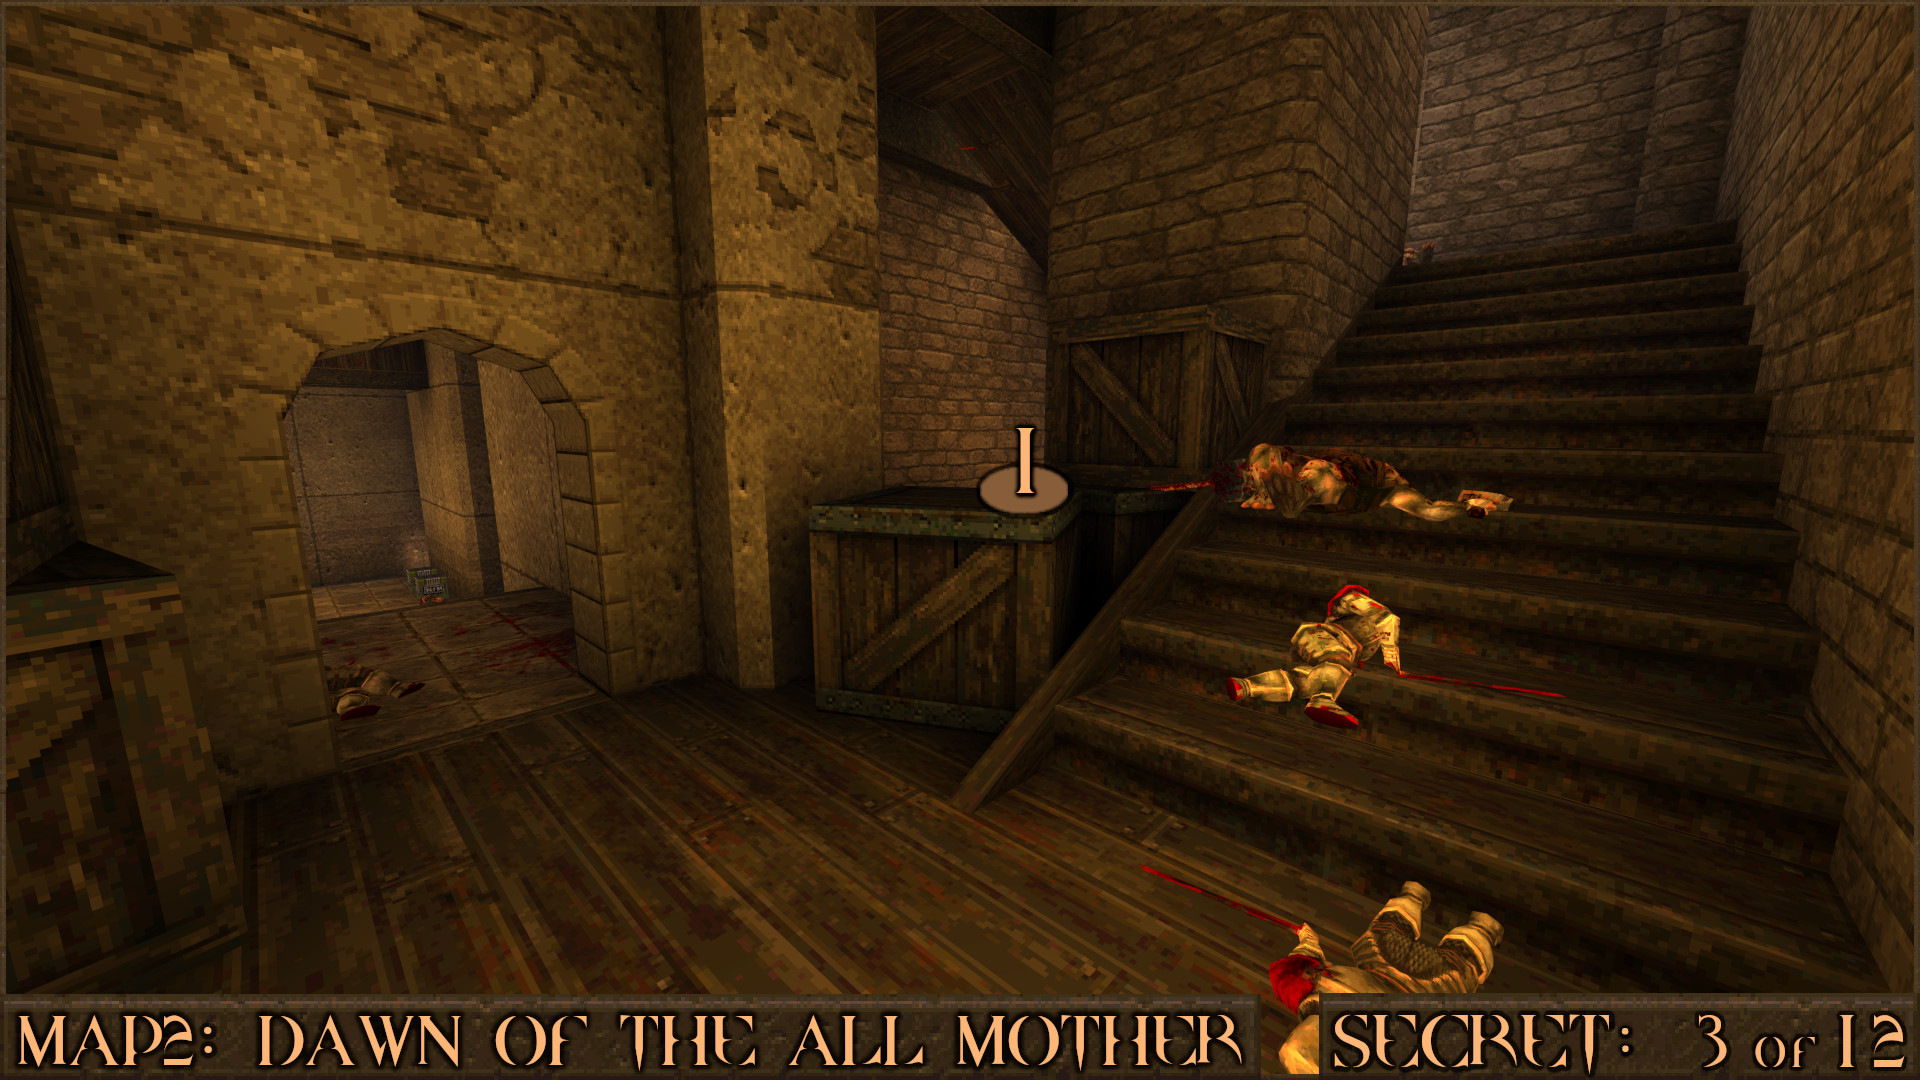
Once again you'll return to the ocean area and swim over to another part of the castle. While ascending the stairs of this section (they lead to the Silver Key) you'll notice a pile of crates on your left. Jump onto them () to access behind the stairs for the secret.

Reward: Small Rockets Green Armor

Secret 4 of 12
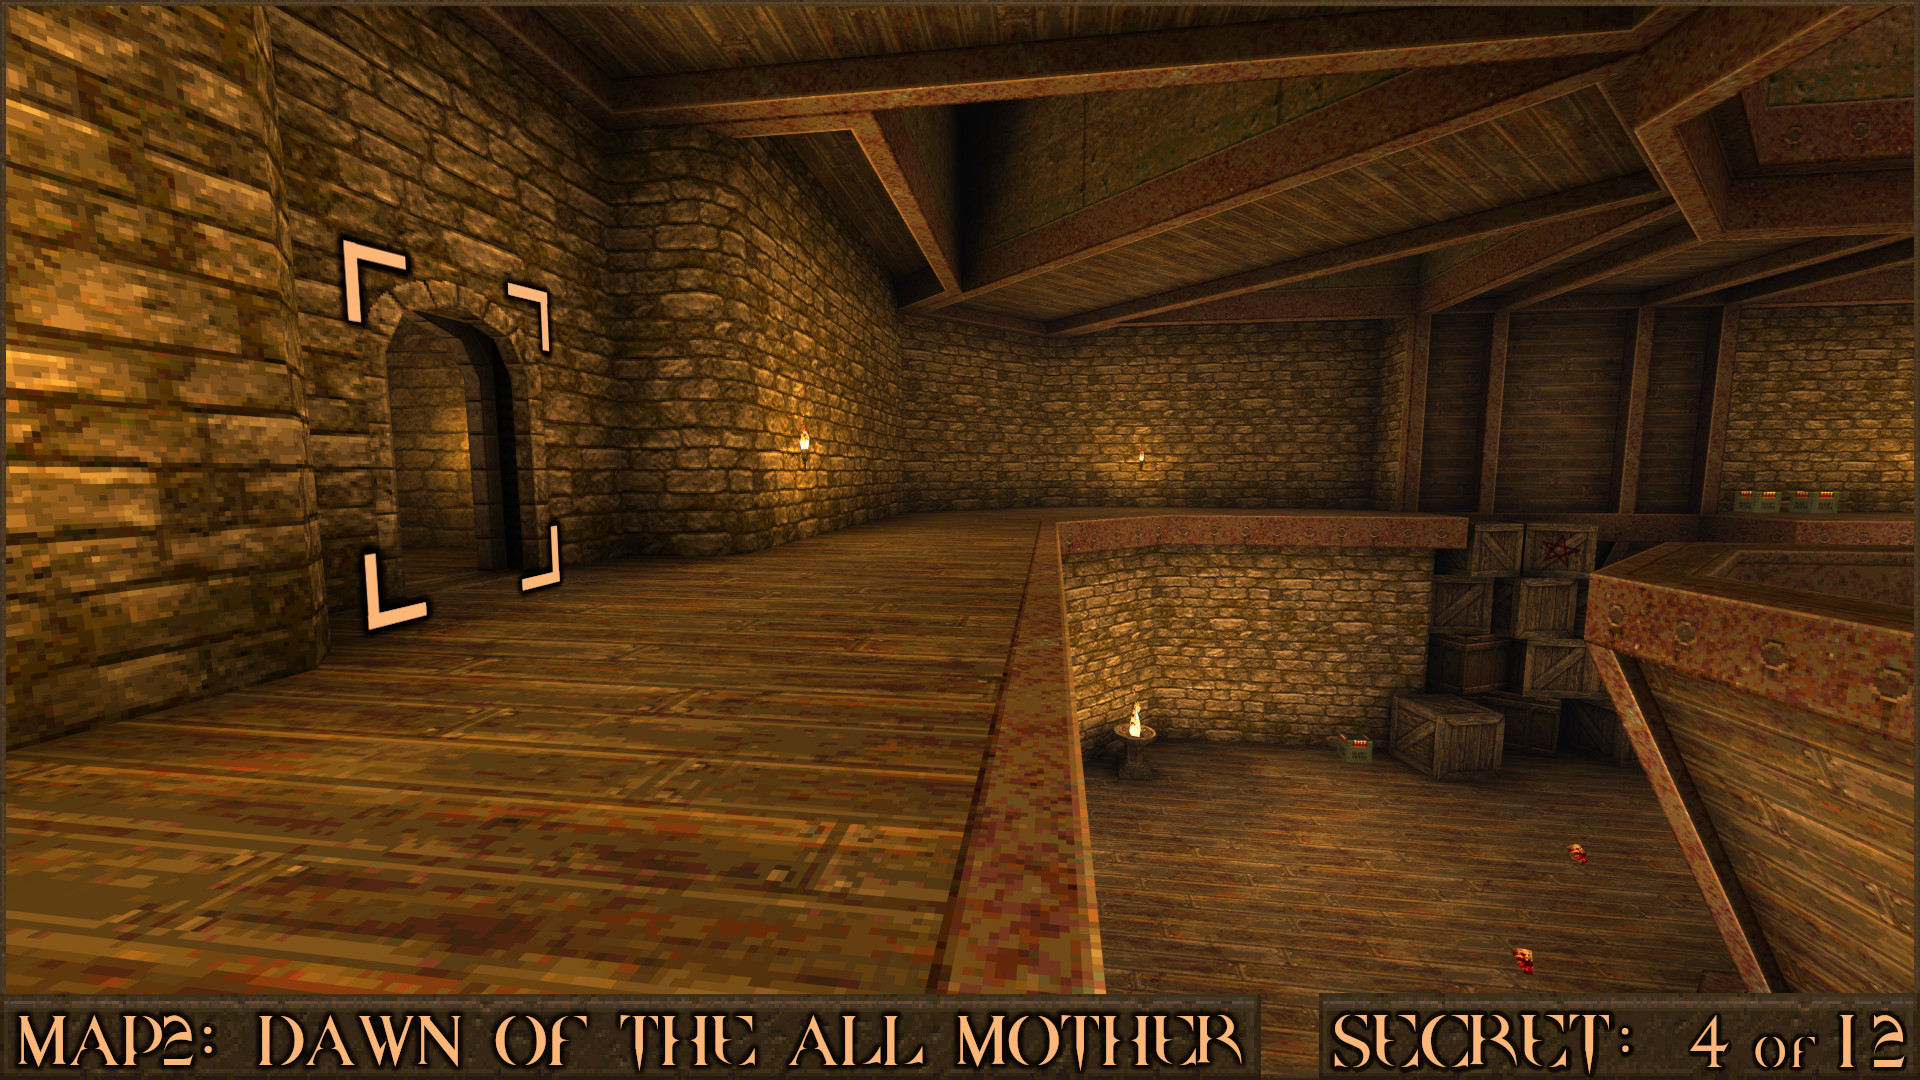
After picking up the Gold Key and fighting an arena battle you'll enter the upper part of a large room with a huge funnel in the centre. Enter the first door on your left and go up the stairs to find a secret.

Reward: Green Armor Large Health

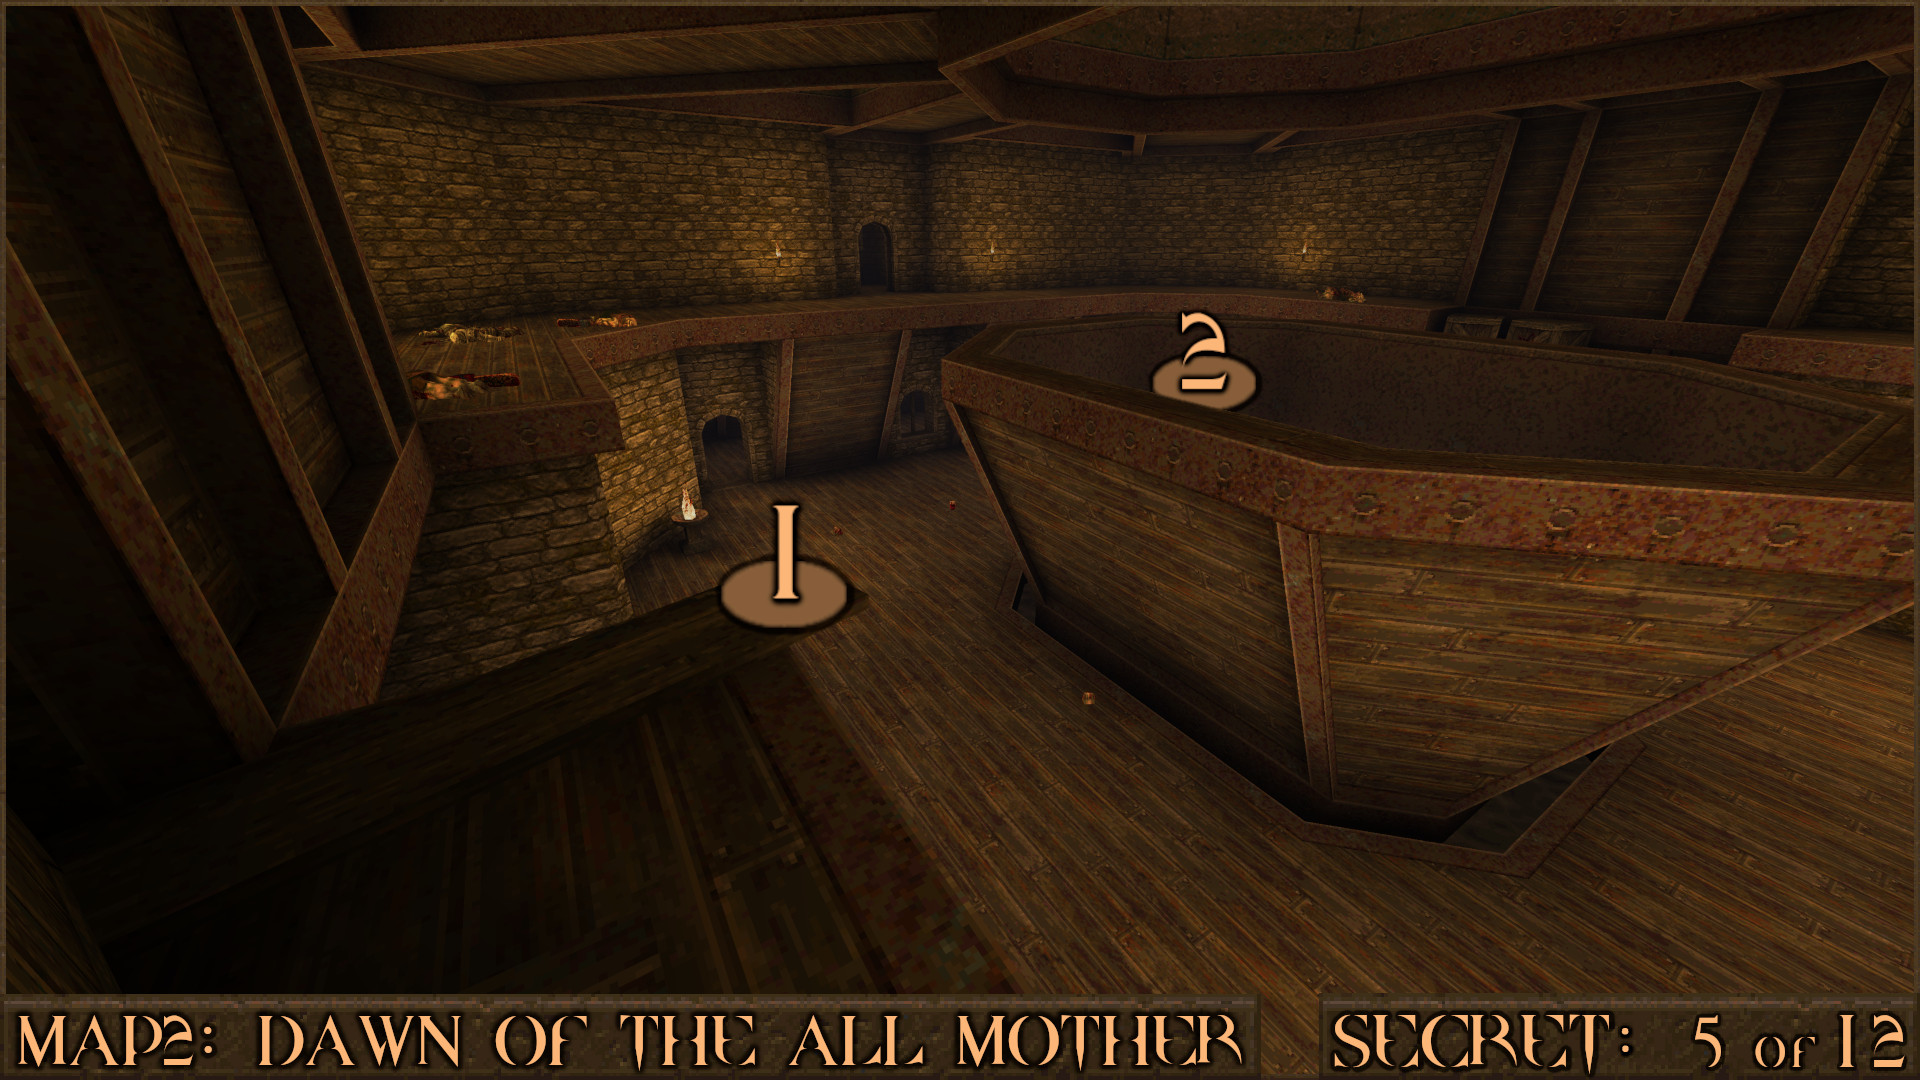
Secret 5 of 12
After returning to the large funnel room this time look for a plank of wood () and use it to jump into the funnel itself (). There is a small underwater tunnel that takes you to the secret.

Reward: Yellow Armor Large Health

Secret 6 of 12
After exiting Secret 5 return to the room with the funnel. Go through the corridor that leads to the elevator where you picked up the Gold Key. You'll notice that the elevator has been replaced with a small corridor that leads to a new secret area instead.

Reward: Small Rockets×3 Large Nails Yellow Armor Large Health×2

Secret 7 of 12
After opening the Gold Key Door you'll go down into a flooded area with lots of Zombies. A Green Armor is visible behind a metal bar. Simply go around the side and into the water ().

Around the corner of this structure you'll find the back entrance into that room ().

Reward: Green Armor

Secret 8 of 12
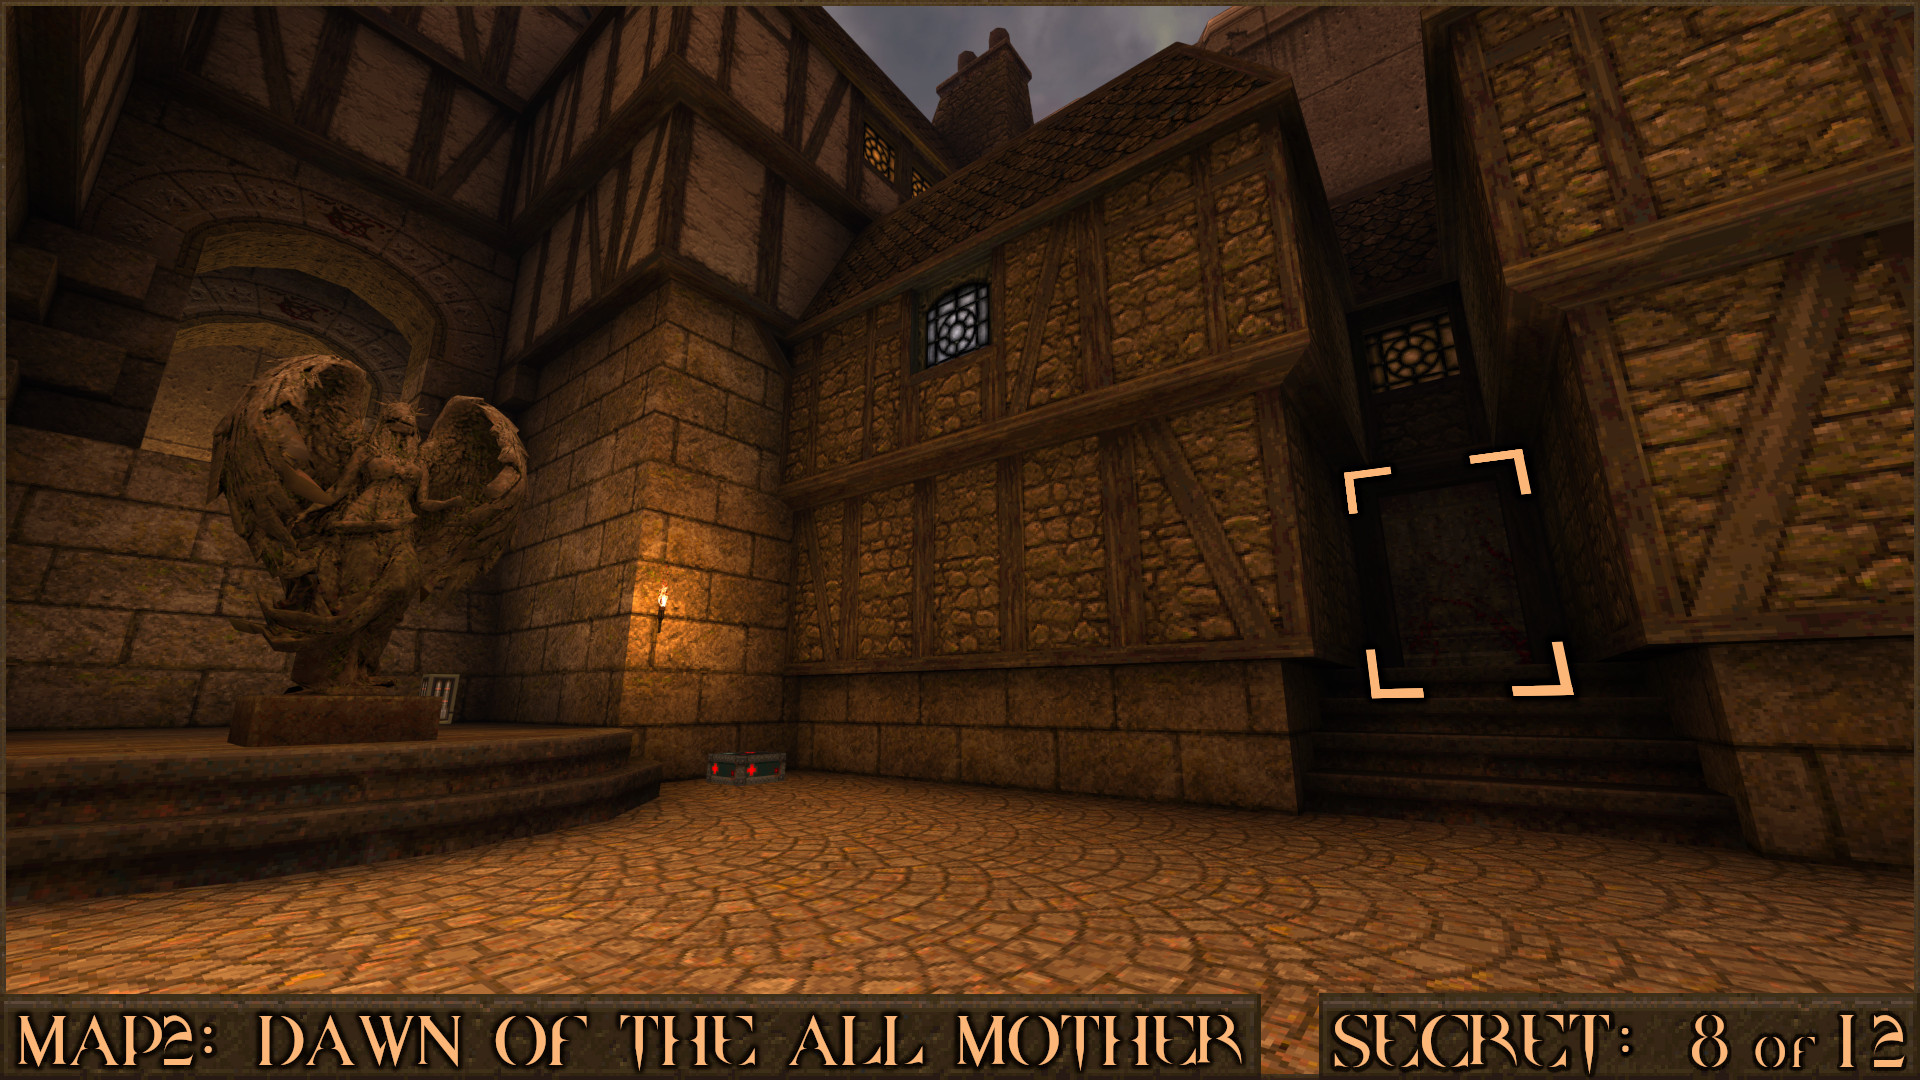
You'll come to large outside village area with a stone angel statue. Look to the right of this to see a door with red bloody marks on it. Shoot it to access the secret room behind it.

Reward: Quad Damage

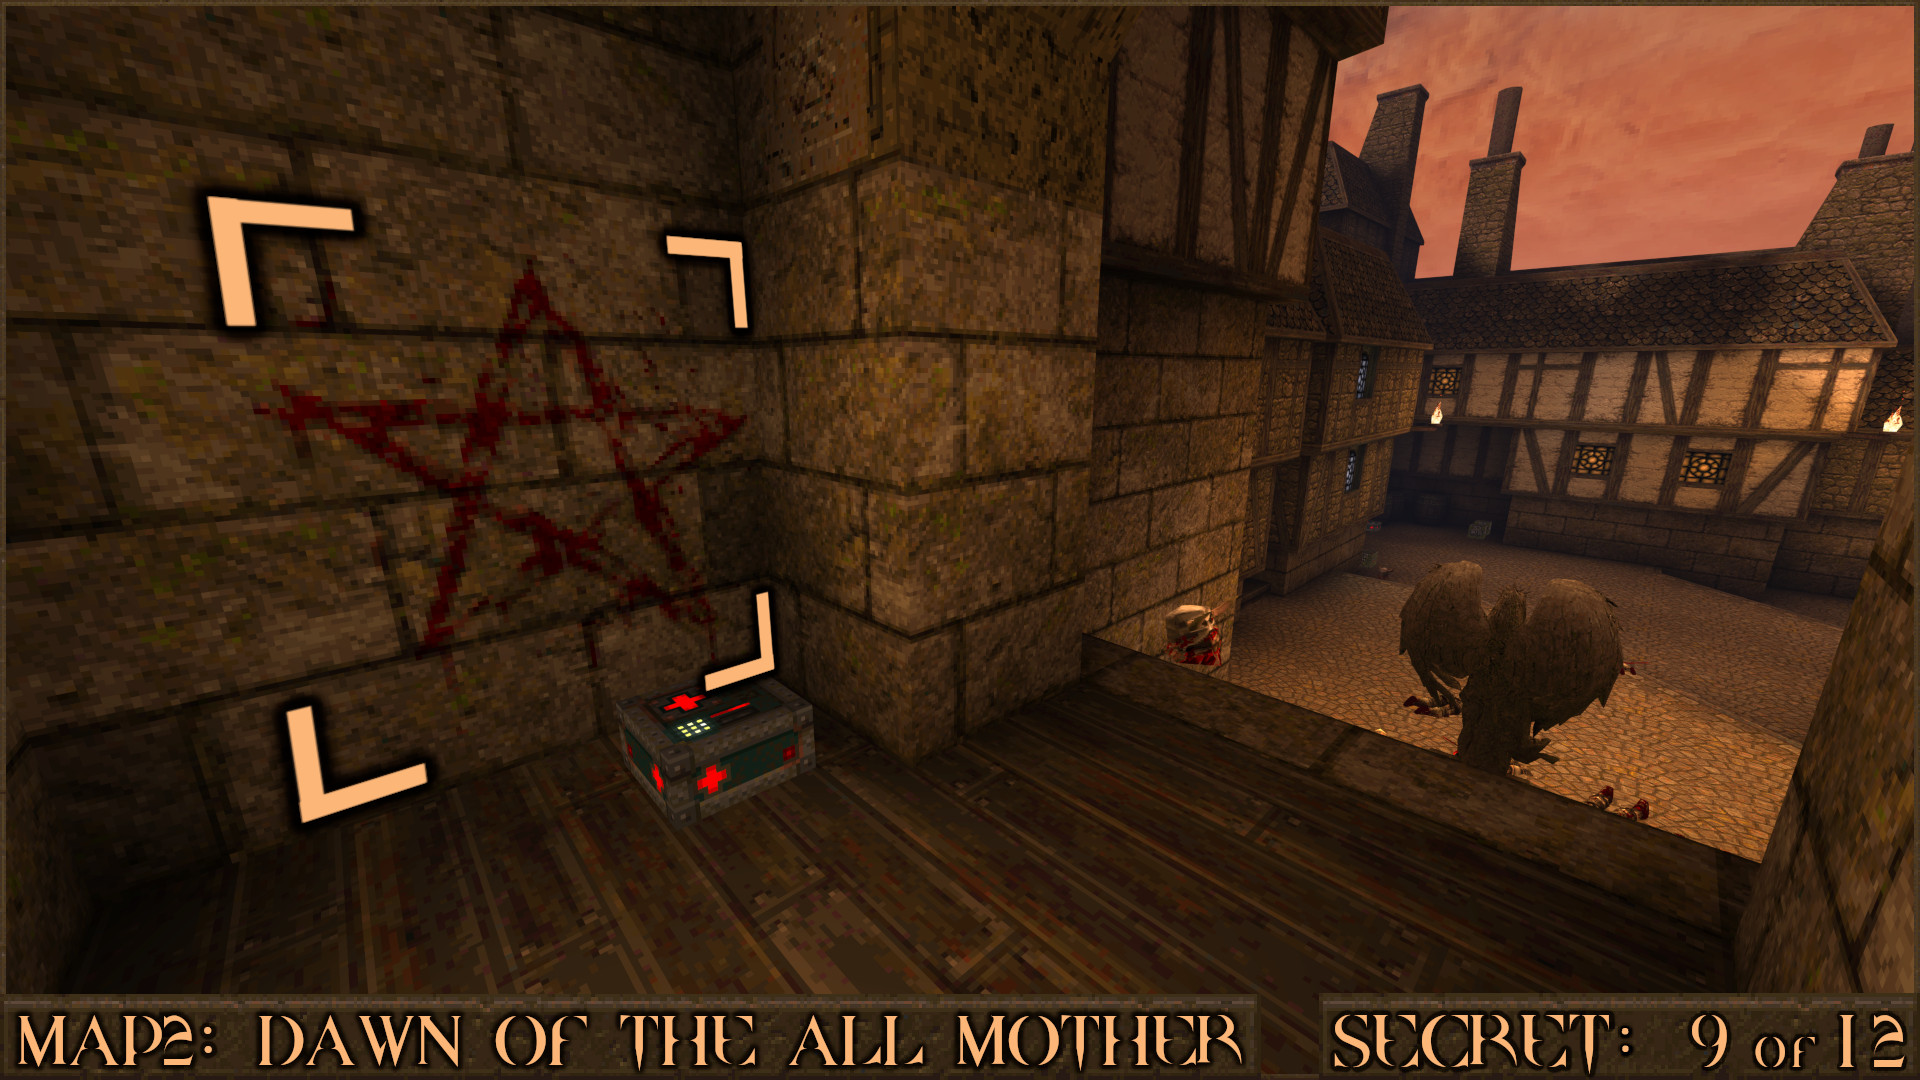
Secret 9 of 12
After going up some stairs you'll be on a platform behind the stone angel statue. On the wall to your left is a red pentagram symbol. Shoot it to access a hidden outside ledge.

Reward: Armor Shard×5 Ring of Shadows

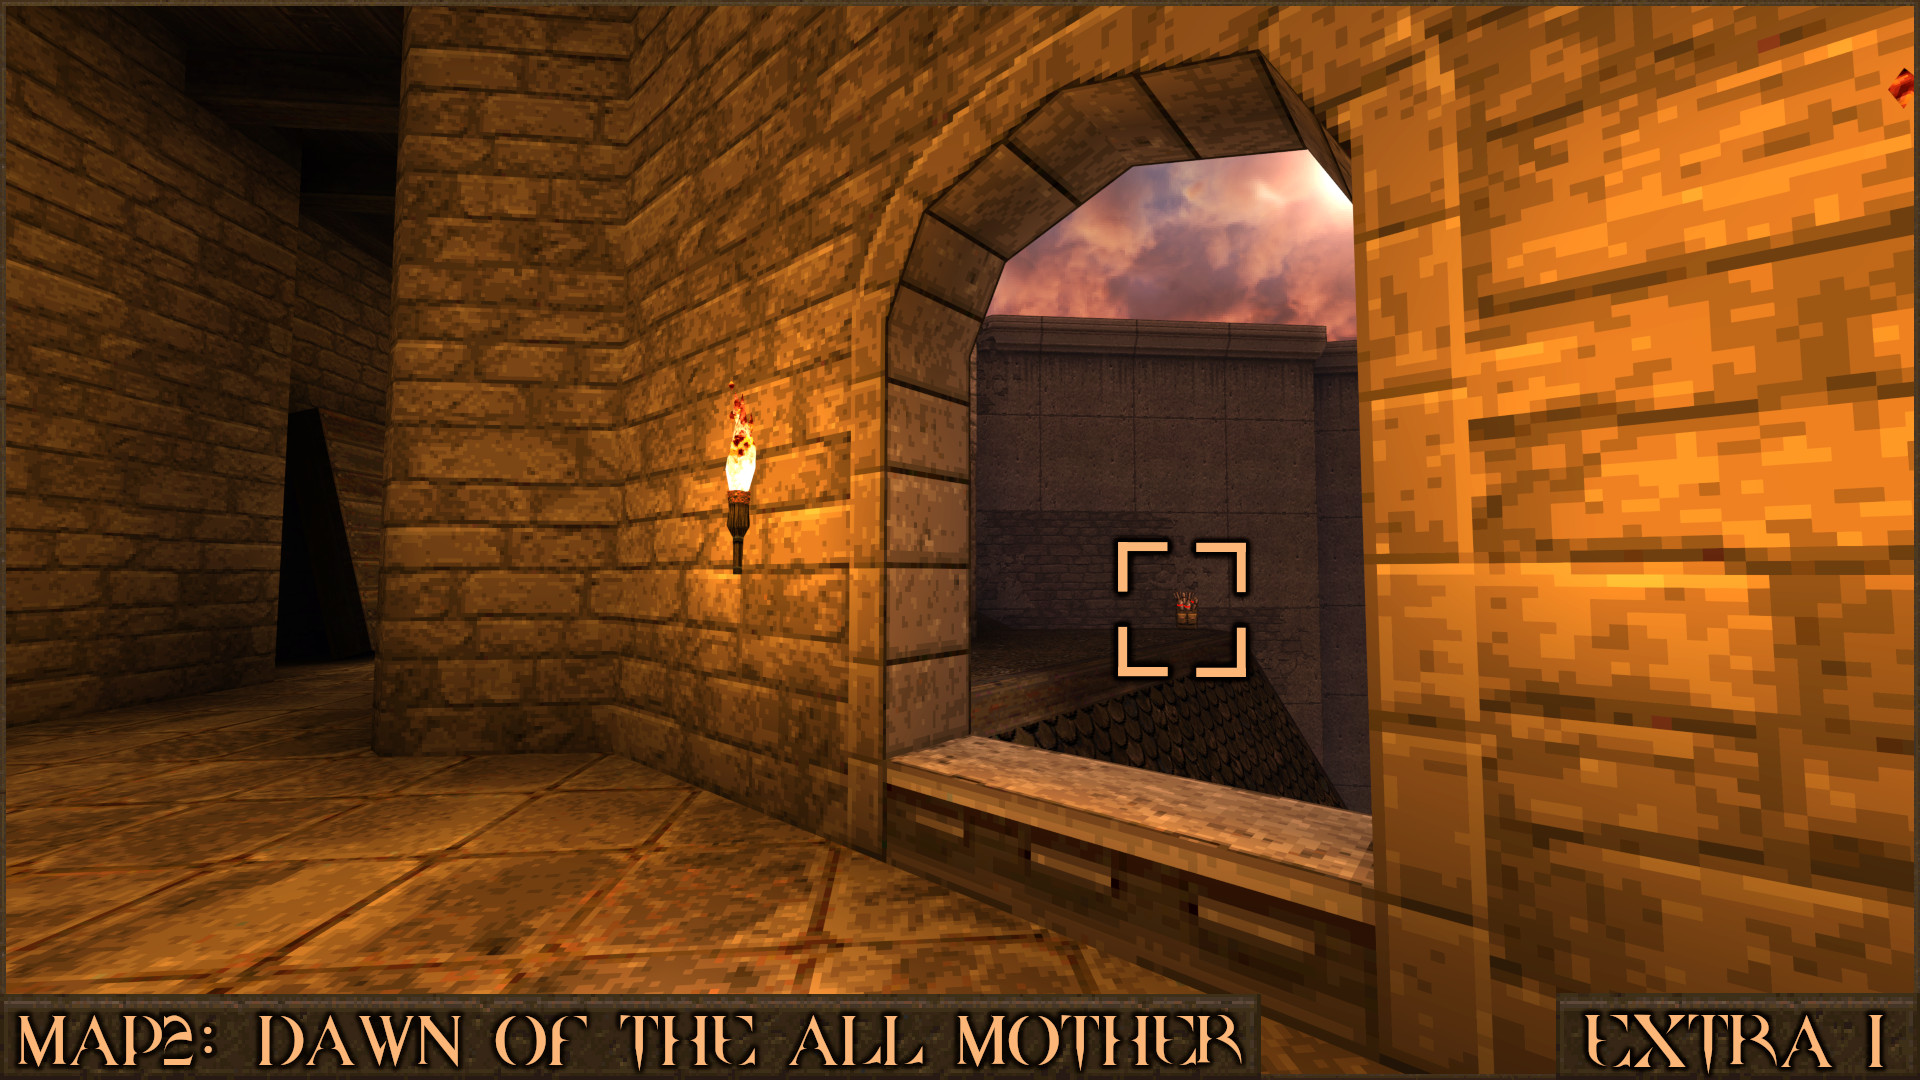
Extra Secret 1
While passing by several windows you'll notice a Rocket Capacity Upgrade on a roof outside. Make a slightly tricky jump out of the window and onto the roof to claim it.

Reward: [Rocket Capacity Upgrade]

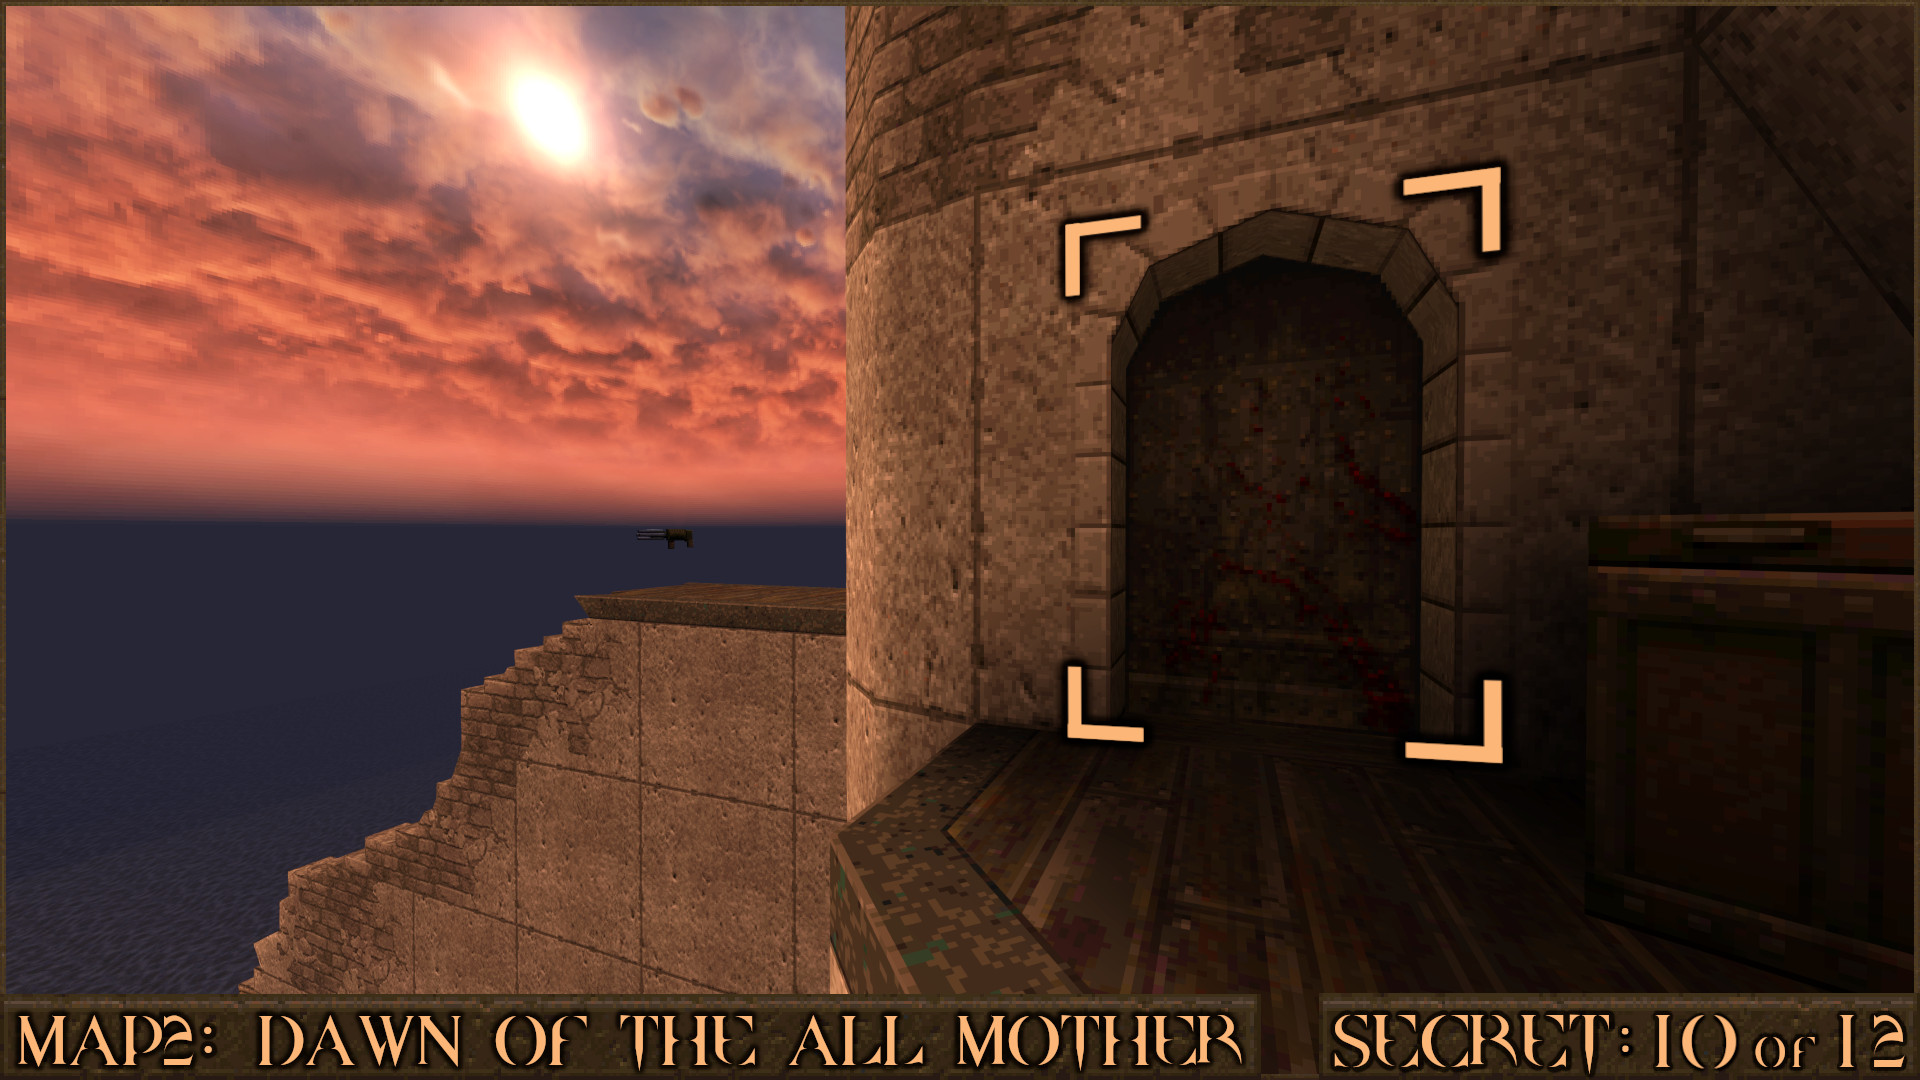
Secret 10 of 12
Once you reach the outer battlements of the castle you'll see a Super Nailgun on a crumbling wall. Shoot the nearby bloody door to reach it.

Reward: Super Nailgun

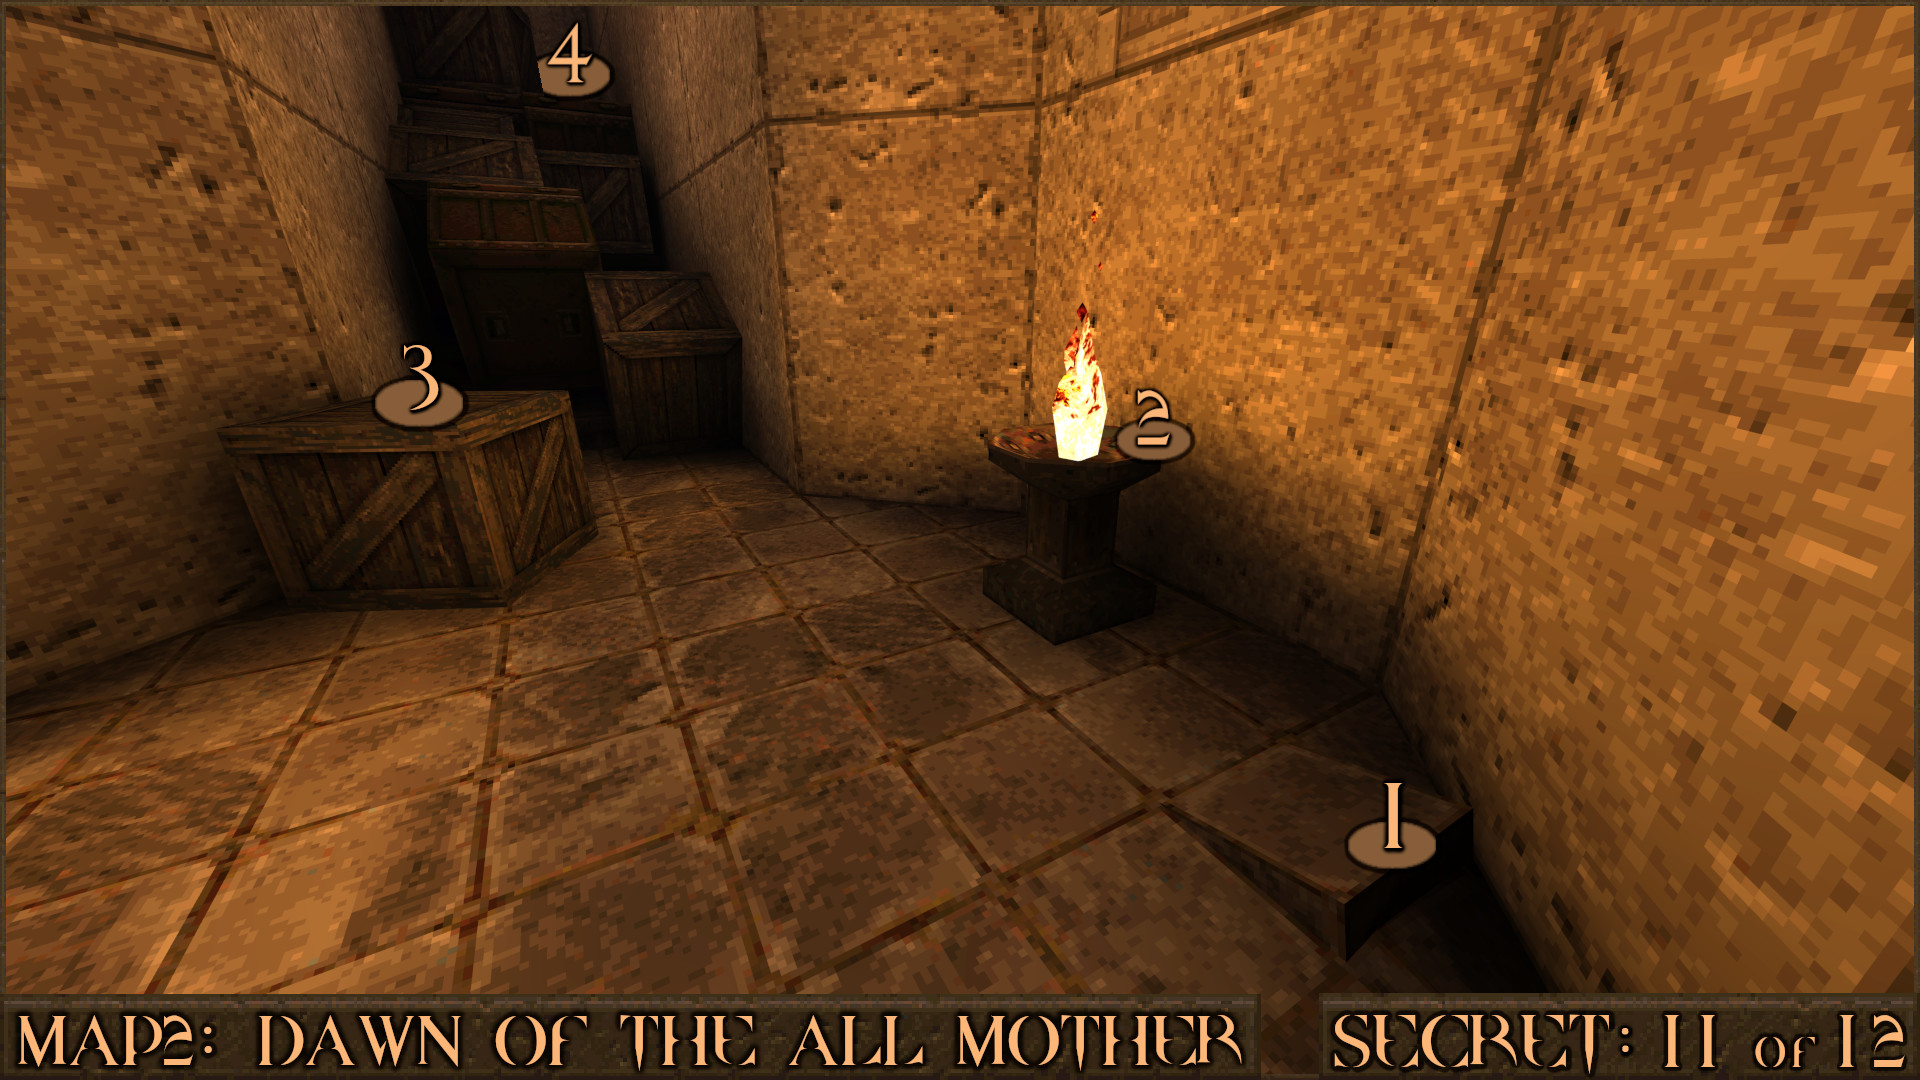
Secret 11 of 12
You'll come across a large pile of crates strewn over some stairs. Use a nearby crooked floor slab () to jump onto the nearby brazier () and then to the nearest crate (). Jump over to the crates on the stairs and reach the top () to find the secret.

Reward: Yellow Armor

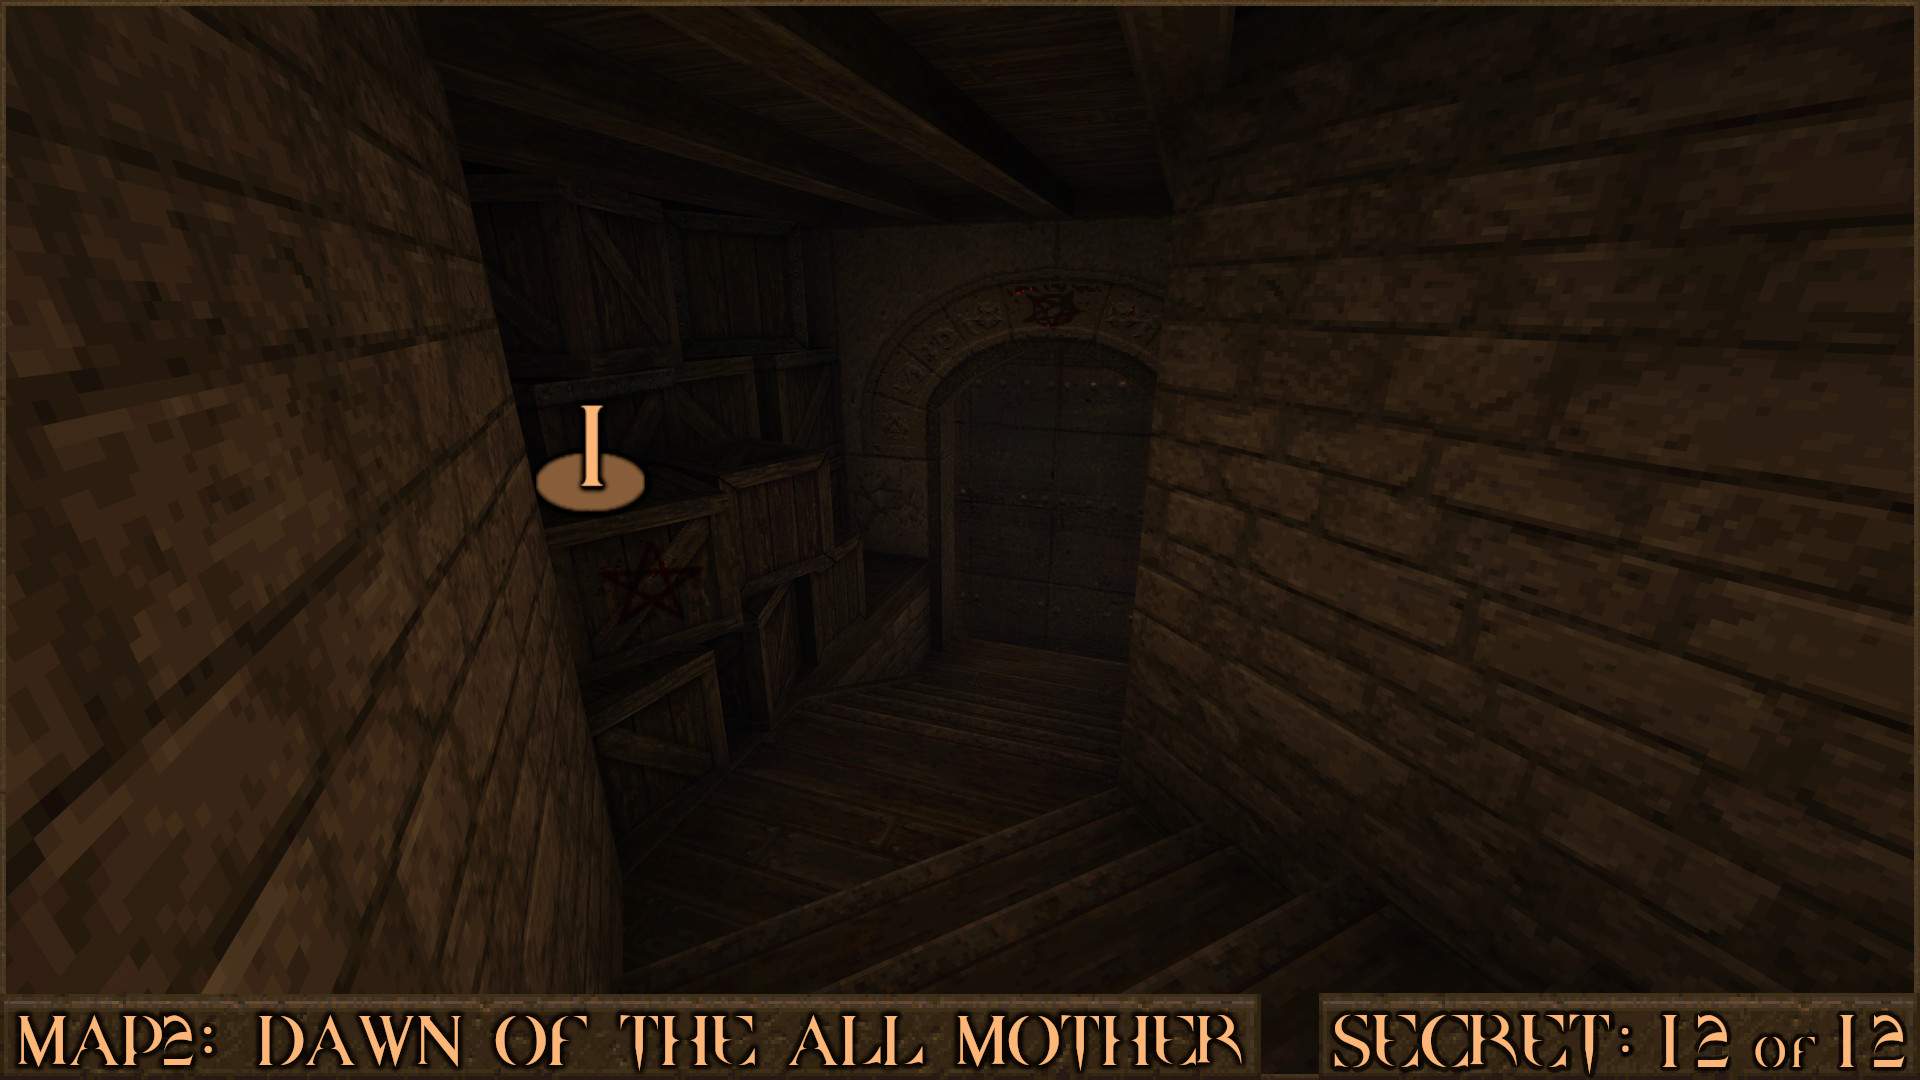
Secret 12 of 12
Near the end of the level don't drop down into the large arena of dead bodies yet. Look around for a stack of crates next to a closed double door. From the top of the stairs run and jump to the crates () and then go through some windows to find a secret ledge outside.

Reward: Small Nails×2 Quad Damage
‎‏‏‎ ‎‏‏‎ + Rune Secrets
NOTE: During Part 2 you can find a unique weapon upgrade for the Axe. The secret count for this level increases from 12 to 14.

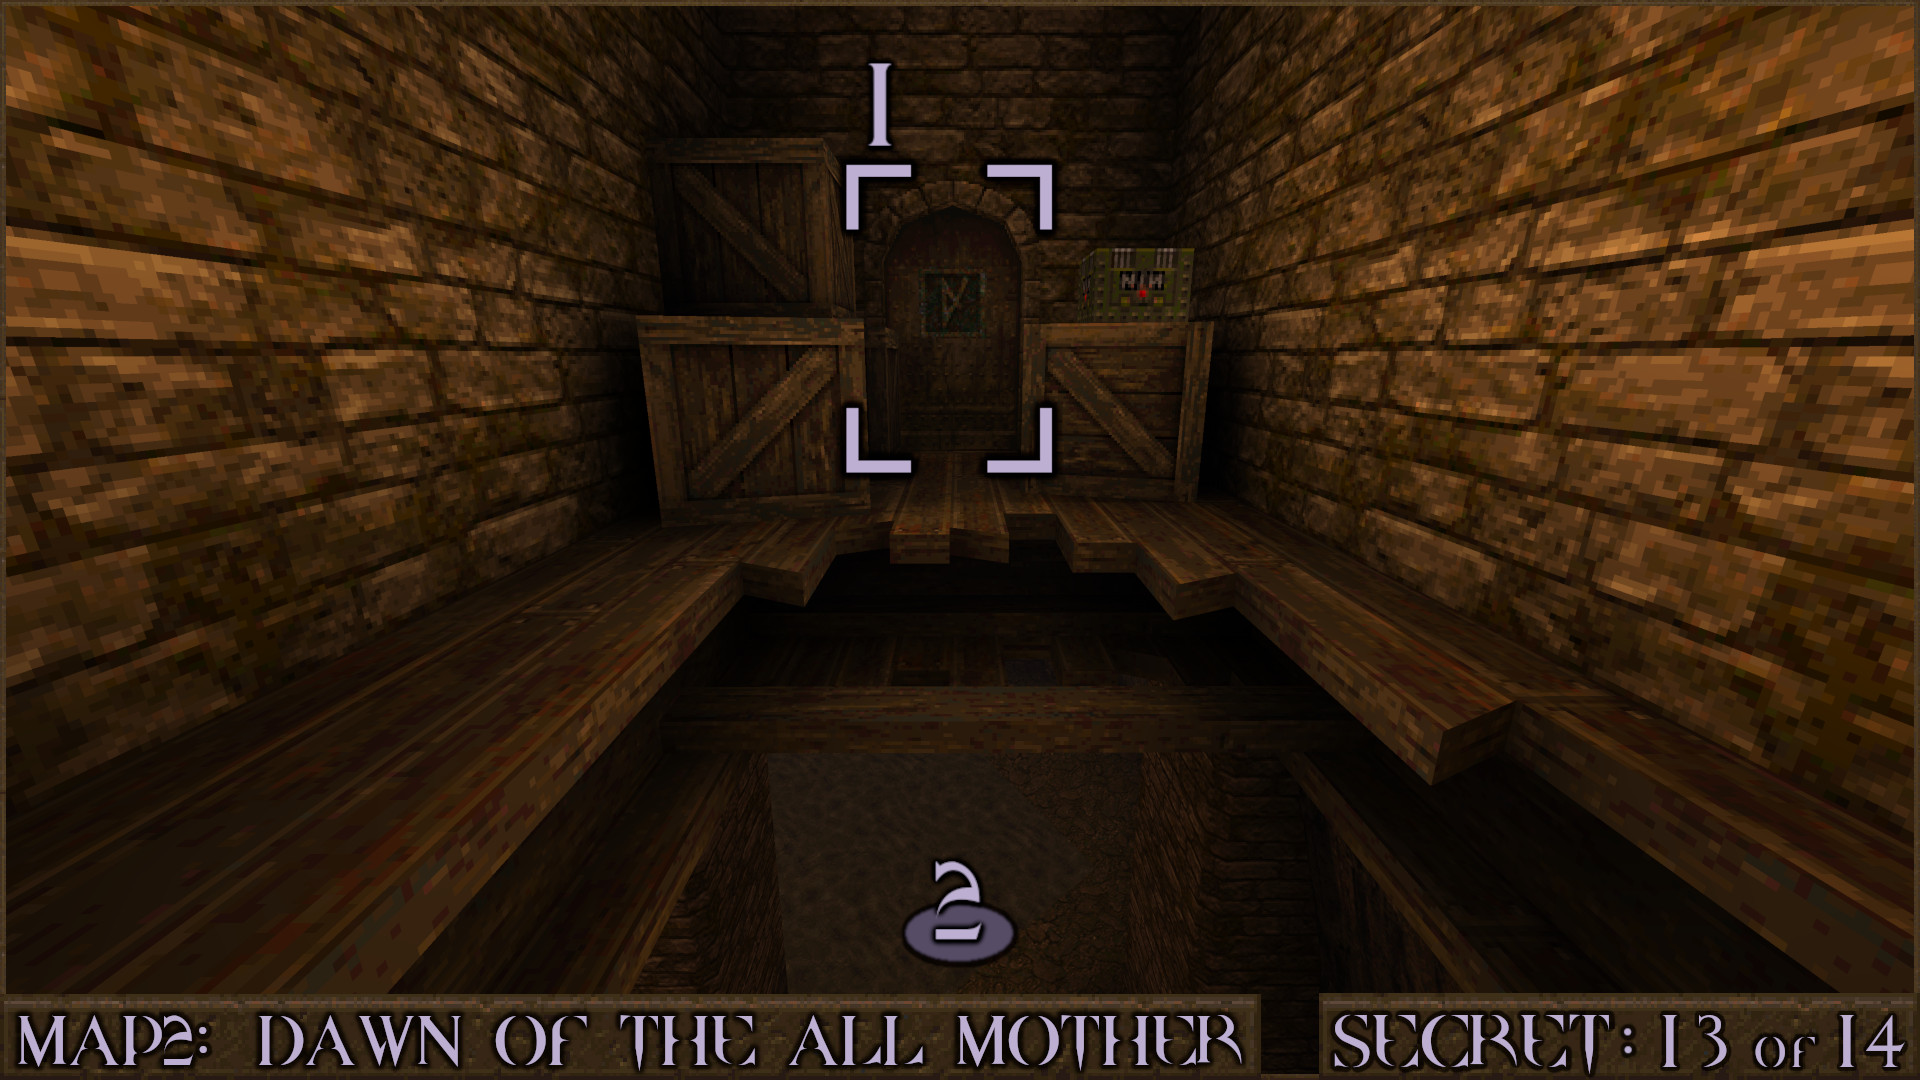
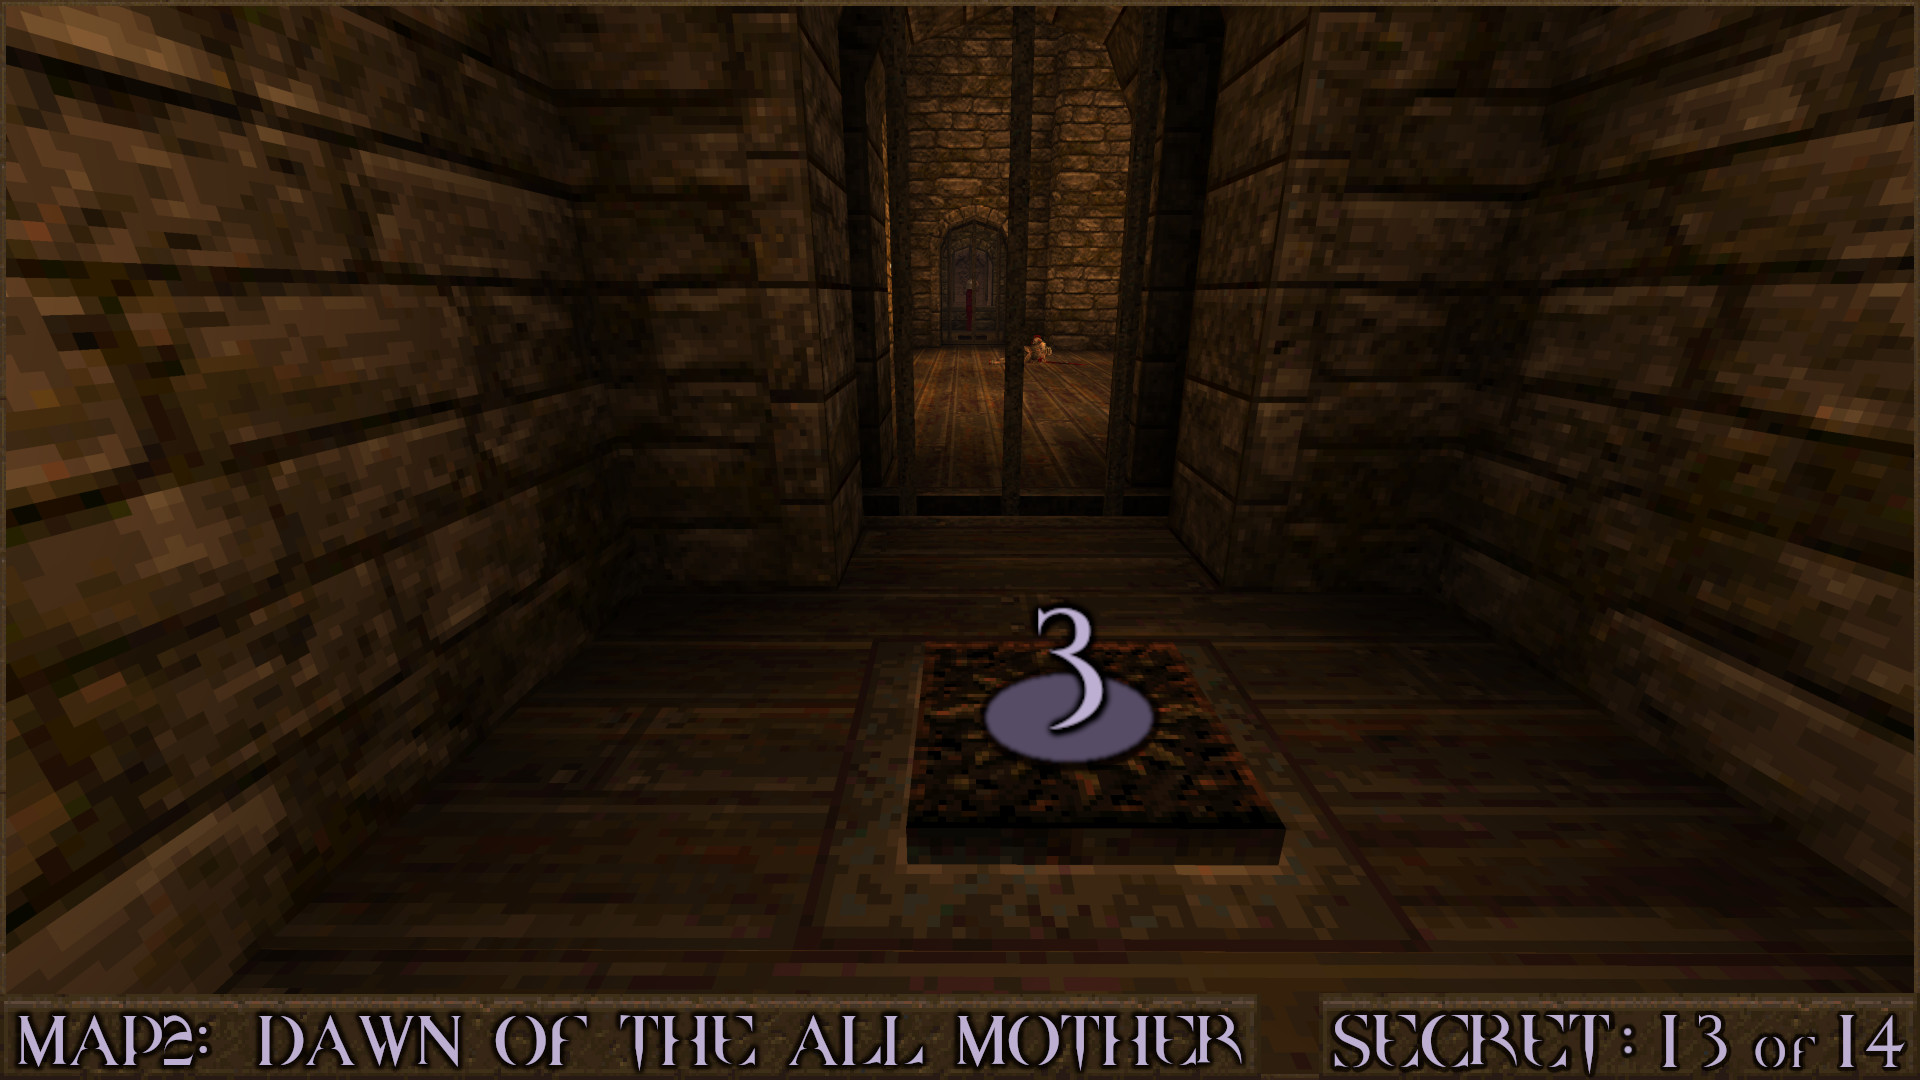
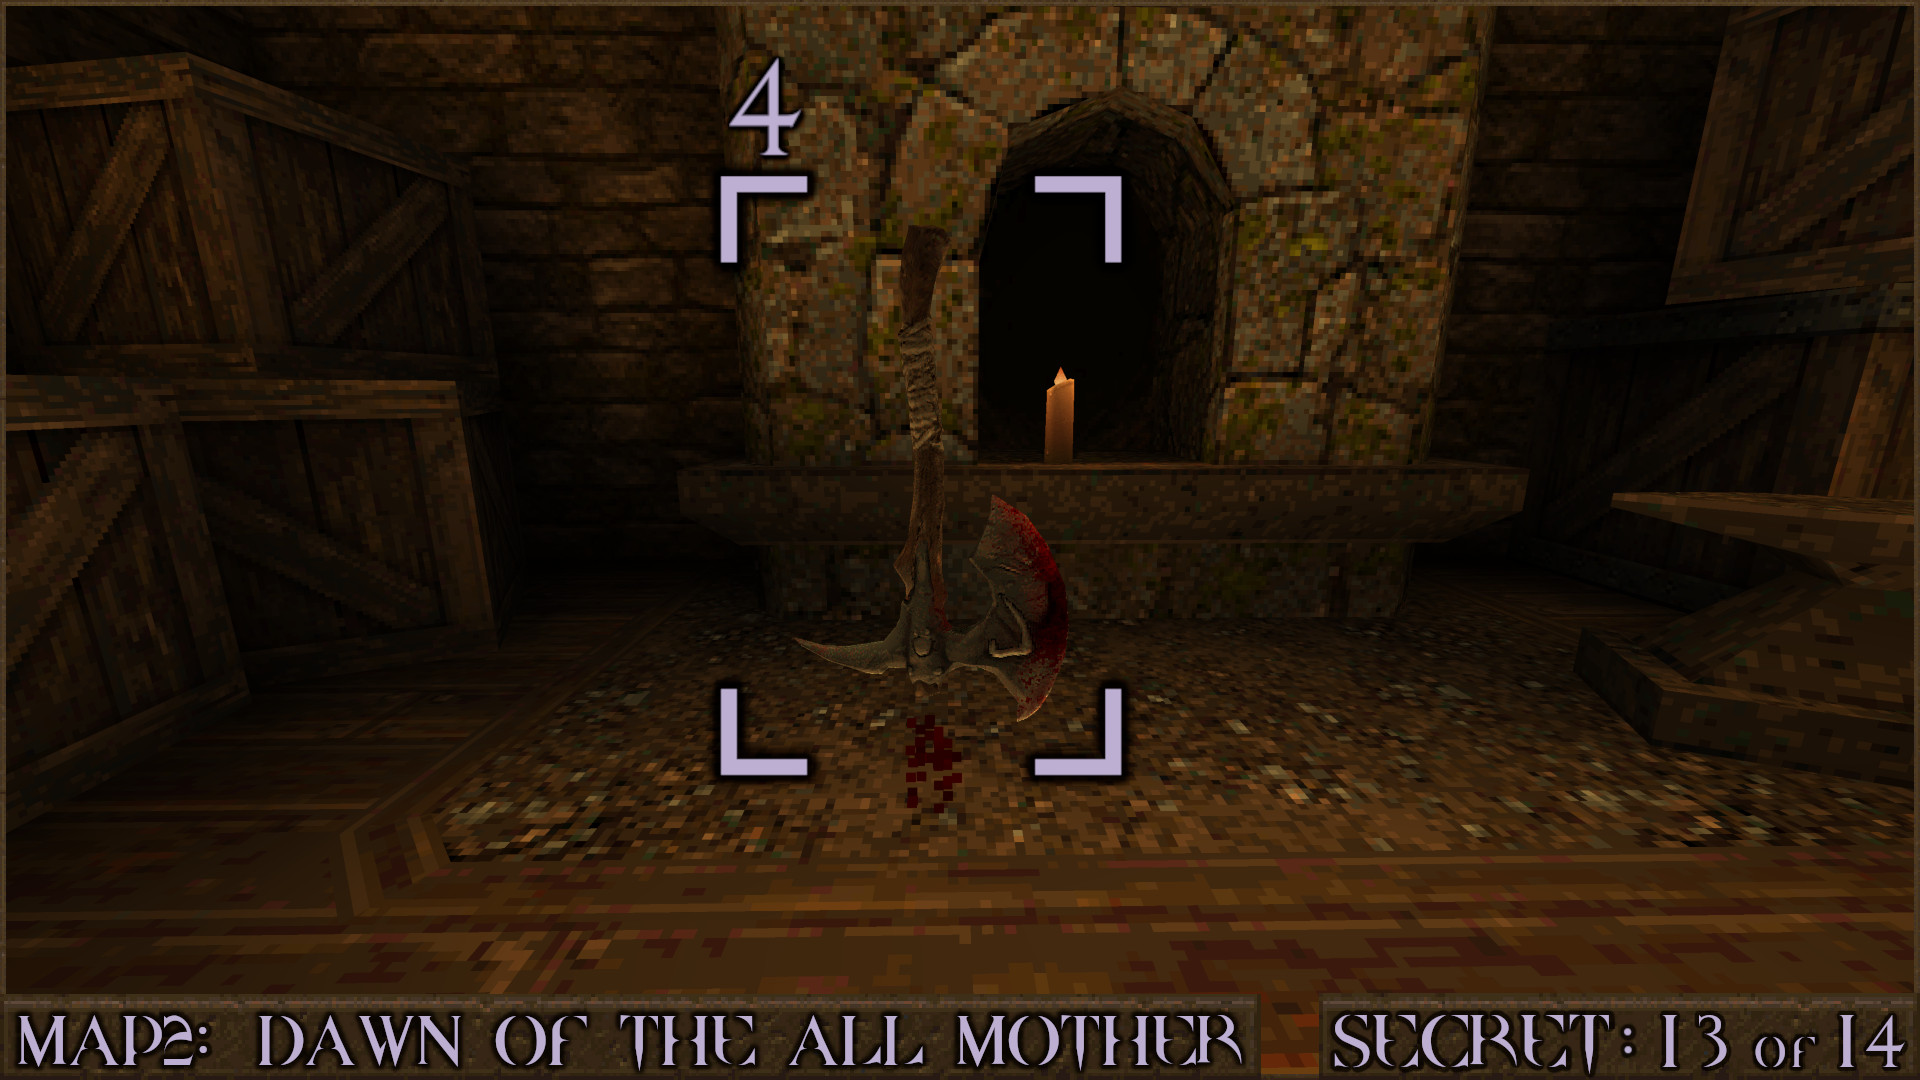
Secret 13 of 14
Requires Rune of Sacrifice
From the start of the level head down the stairs and you will see a Rune of Sacrifice Door () near a hole in the floor. You can go inside but the way forward is blocked by metal bars for now. Instead drop down to the hole below () and after dealing with the enemies head up the nearby stairs.
You'll eventually reach a floor switch () that shifts some metal bars ahead of you but it also shifts the metal bars behind the Rune of Sacrifice Door too. Head back down to the rune door and head inside.

You'll find a secret weapon upgrade: the Super Axe (). This weapon is very effective at killing Zombies and if you strike an enemy twice in a row it will use 15 Cells to unleash a special lightning attack.

Reward: [Super Axe] Small Rockets×2 Small Cells×2 Green Armor Large Health

Extra Secret 2
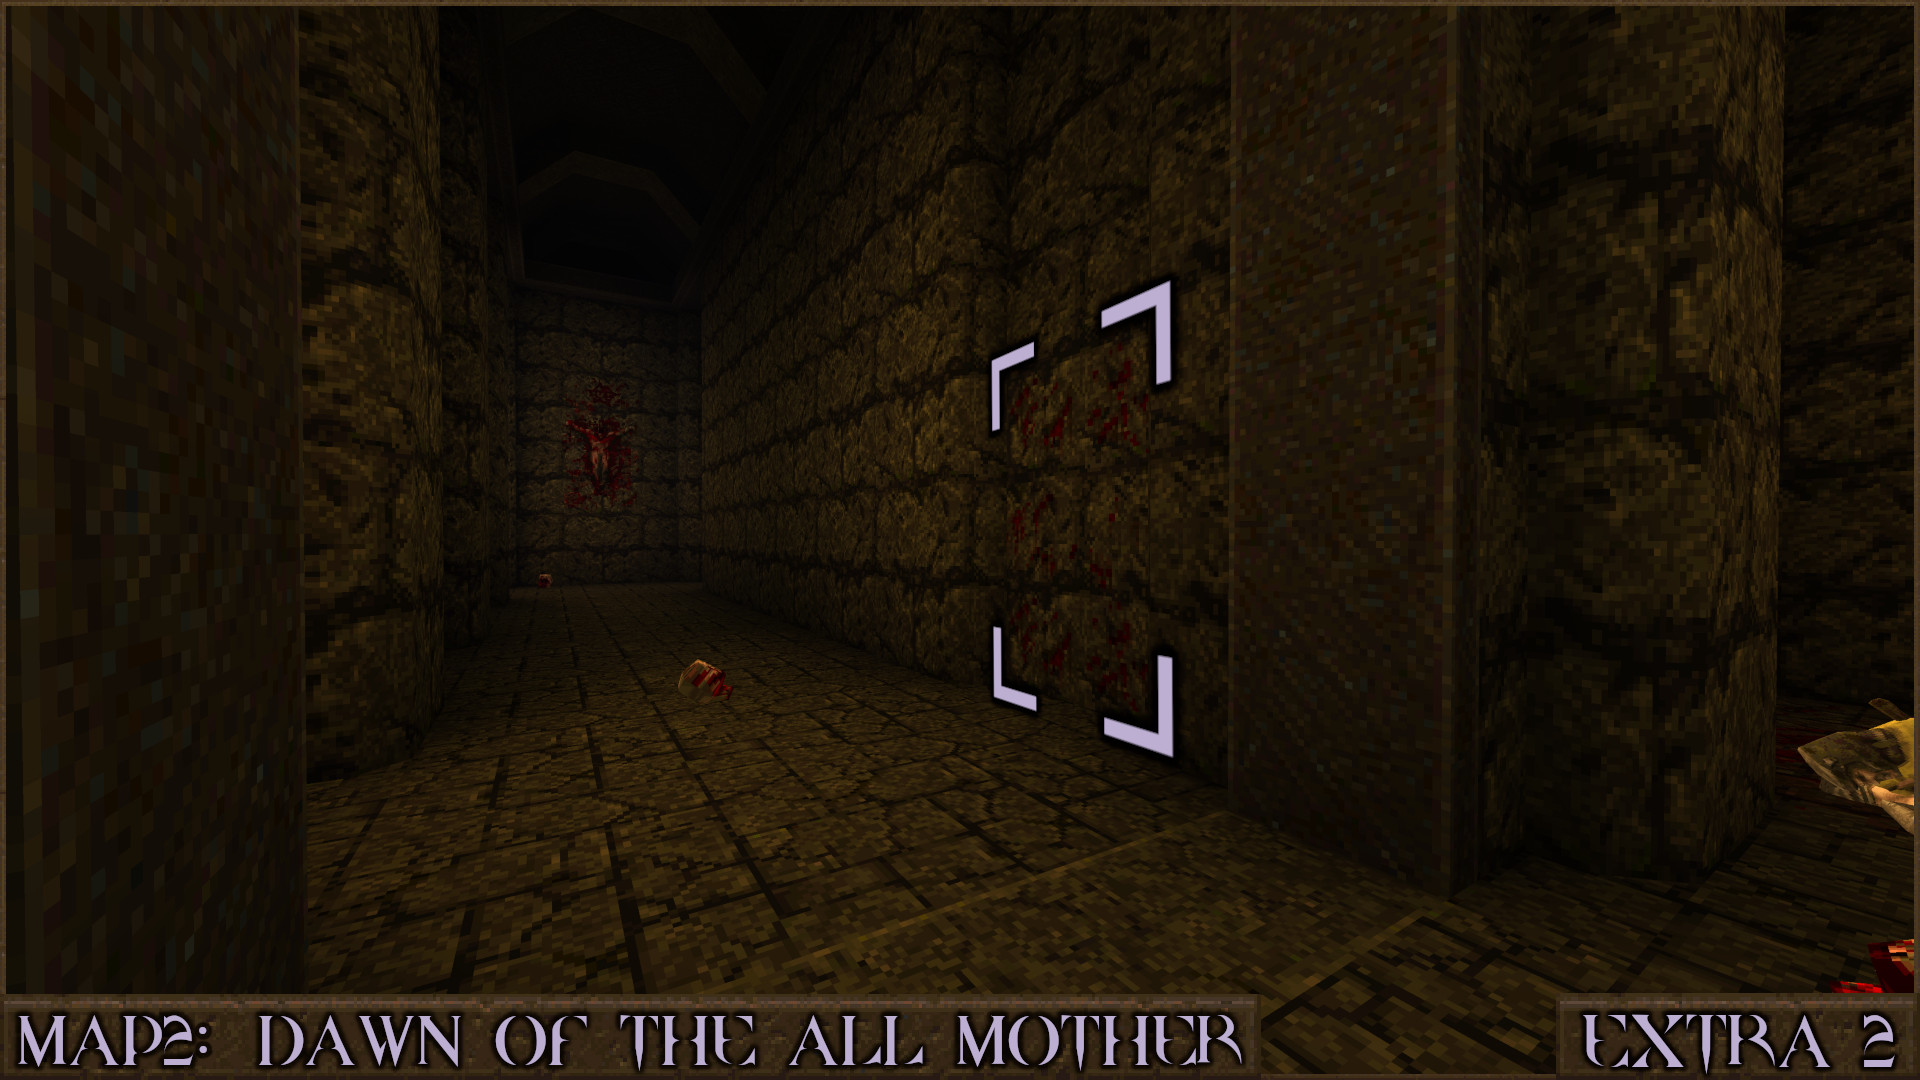
After picking up the Super Axe in Secret 13 proceed through the next area. You may recognise this section as an altered version of the original Quake deathmatch level: DM1: Place of Two Deaths. Eventually you'll see a Megahealth on a distant ledge but to reach it you must retrace your steps to the corridor nearby and shoot a wall covered in bloody scratches. It will shift the wall and let you reach the item.

Reward: Megahealth

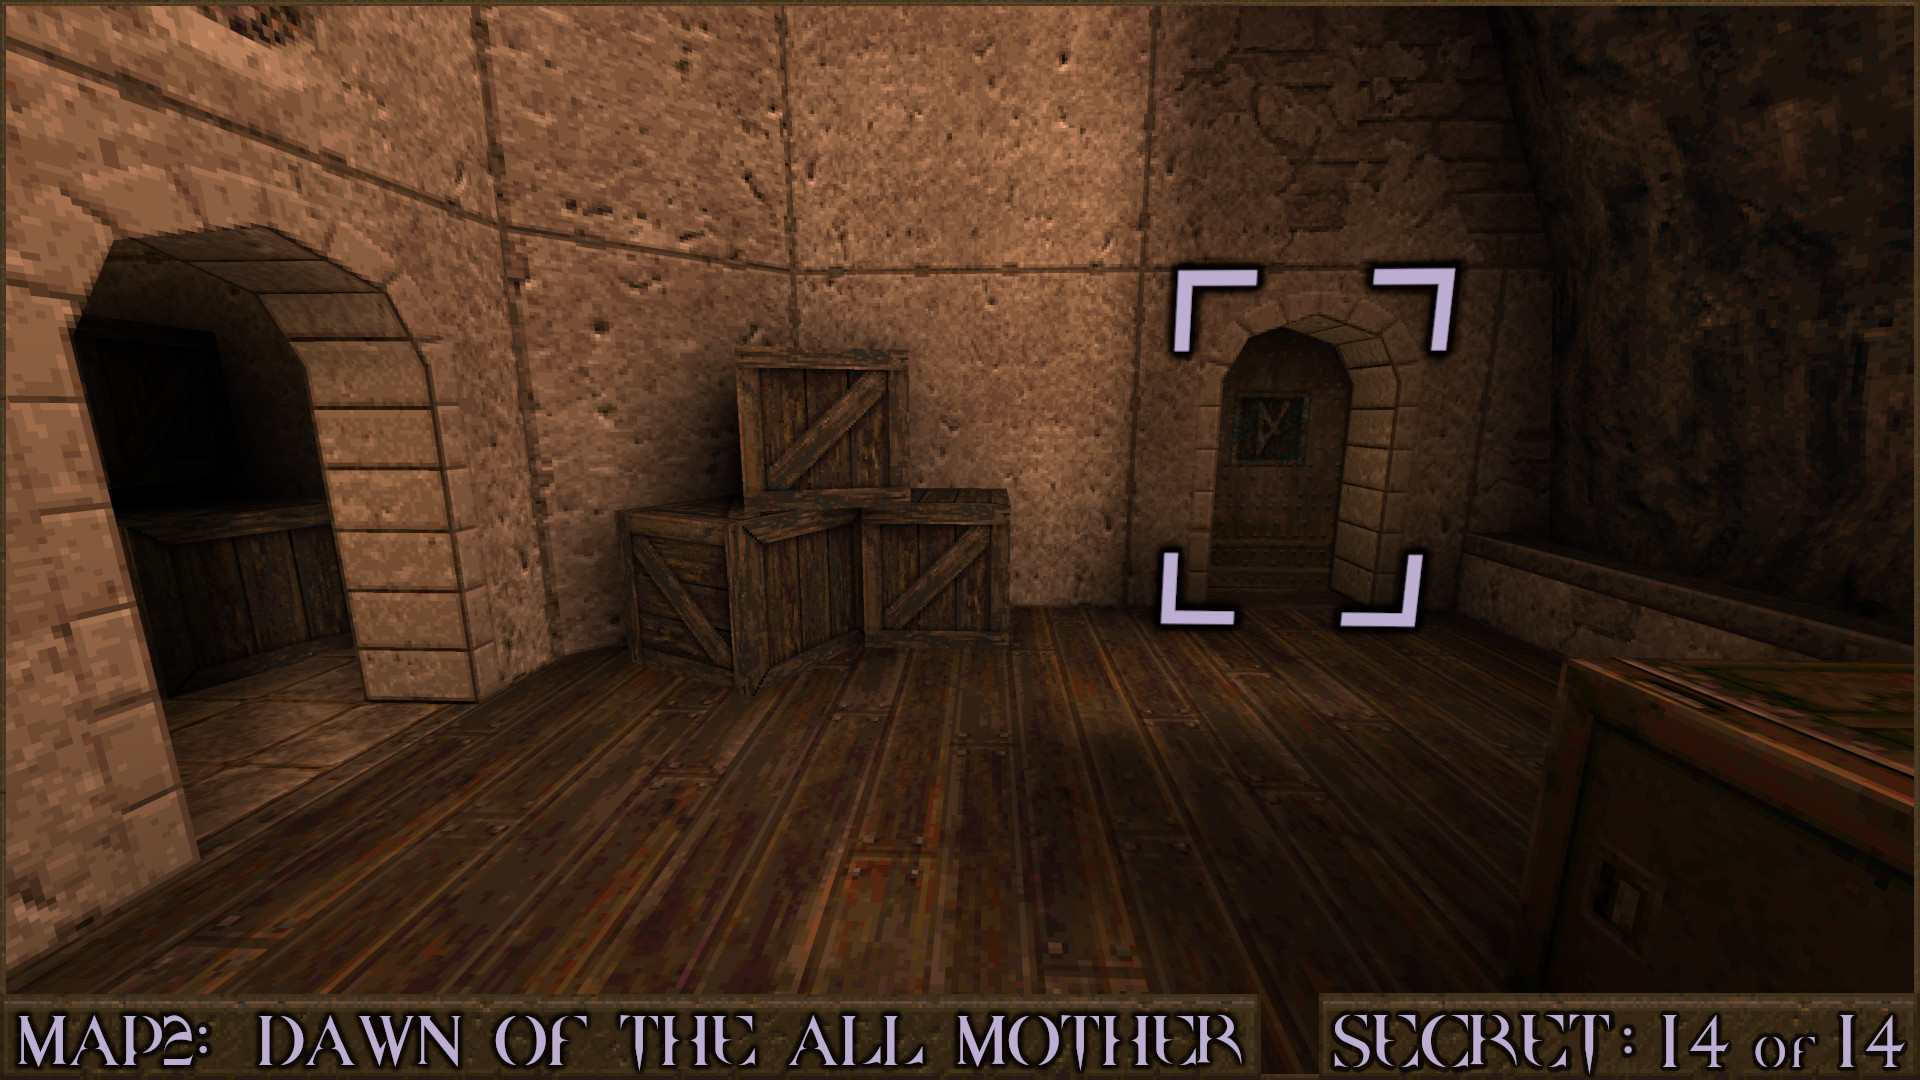
Secret 14 of 14
Requires Rune of Sacrifice
After exiting Secret 13 you will be teleported quite far into the level. Keep progressing through the level until you reach the upper battlements and come across the crates strewn up some stairs from Secret 11. Instead of going in that room turn right to go out onto the balcony where another Rune of Sacrifice Door is located. Inside you'll find a Health Capacity Upgrade and a shortcut back to the beginning of the level.

Reward: [Health Capacity Upgrade]

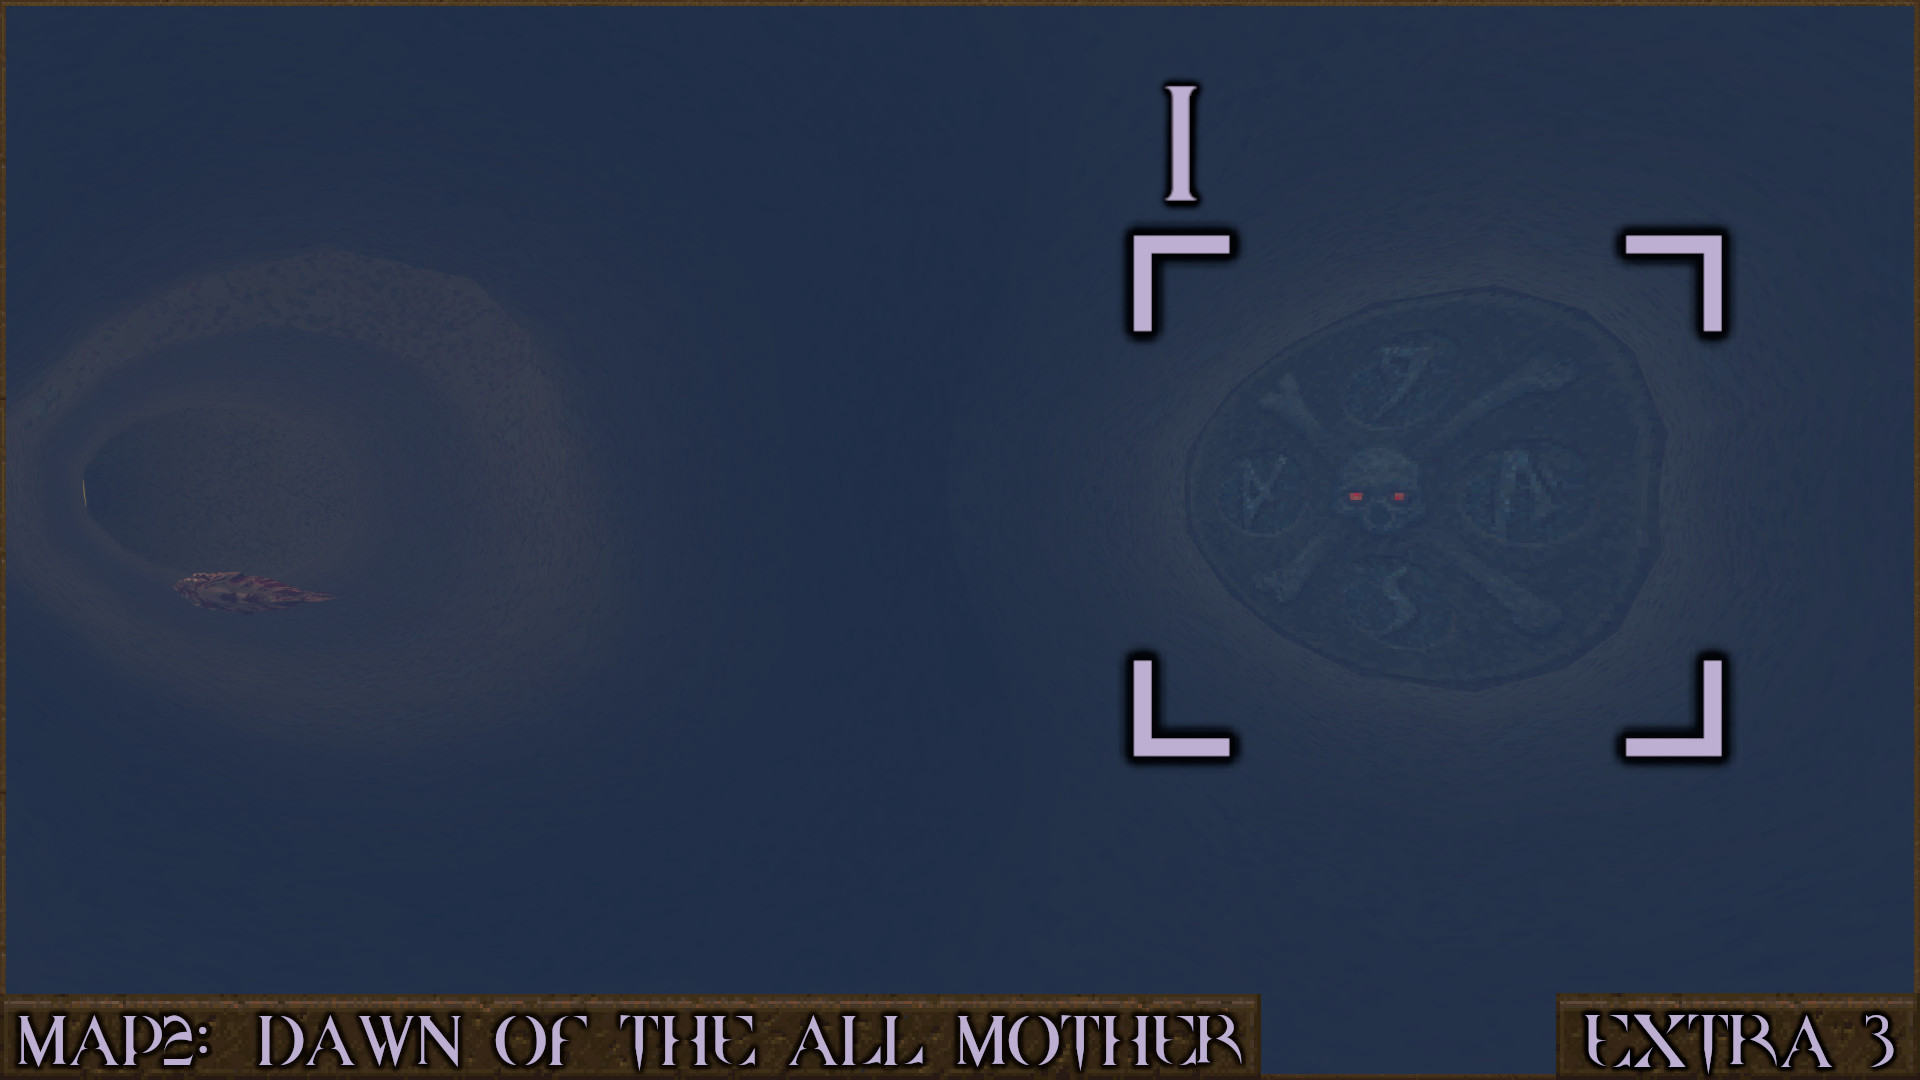
Extra Secret 3
Requires 4 Runes
Work your way back to Secret 2 which involved swimming under the castle entrance, through a pipe and grabbing a Biosuit. Dive down to the bottom of the pipe like before but instead of swimming up to surface this time keep swimming forward to the end of the pipe to find a 4 Rune Door ().
Past the rune door you'll find an area featuring lots of enemies and items. After that you'll climb up a tower but the stairs are broken. Use the nearby crates () to reach the broken staircase () and continue up to find a nice cosy secret.

Reward: Large Shells×2 Large Nails×2 Large Rockets×2 Large Cells×2 Yellow Armor Red Armor Large Health×4
‎‏‏‎MAP2B: Into the Abyss of Time
Secret 1 of 13
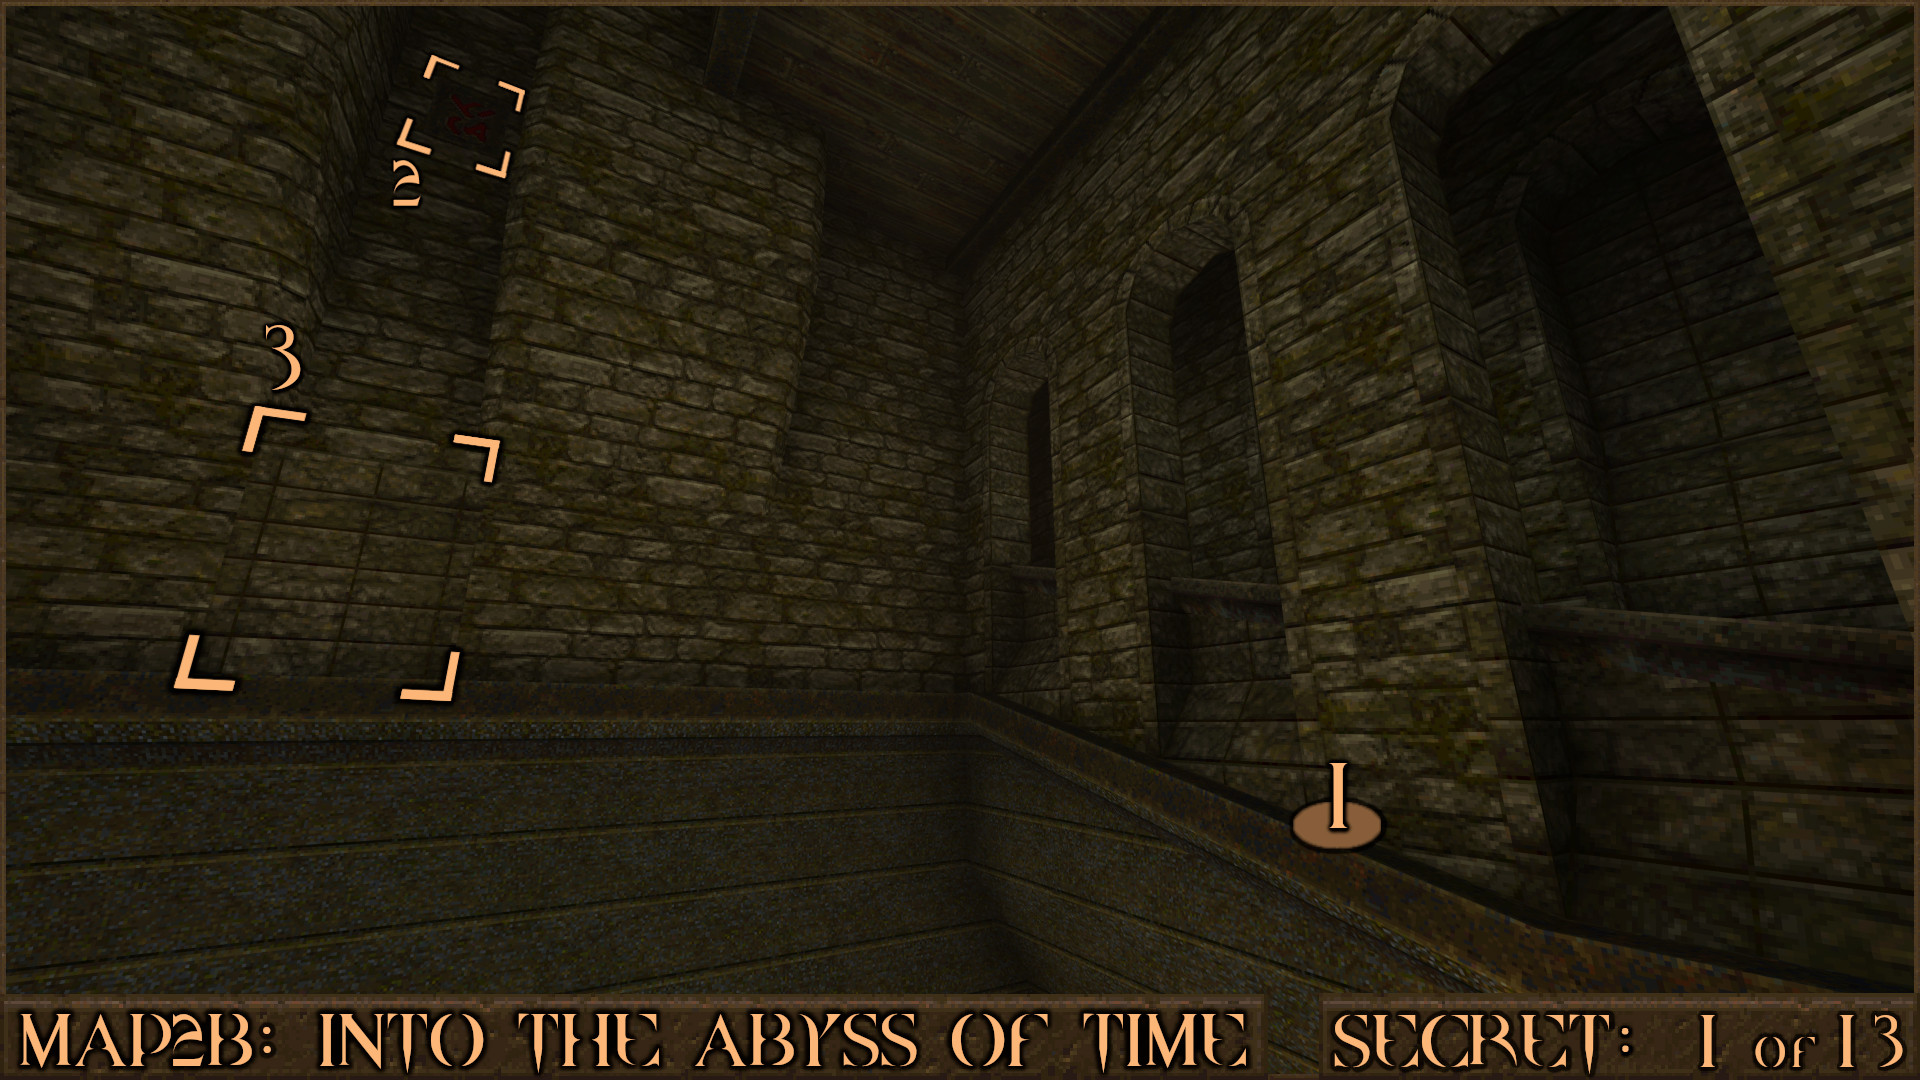
Before using the orange button in the elevator look at the side of the nearby wall to see a thin platform around the edge (). Shoot the faint red switch on the wall () and quickly run across the thin platform through the opened doorway () before it closes.

Reward: Large Shells Small Nails Large Rockets Yellow Armor Large Health

Secret 2 of 13
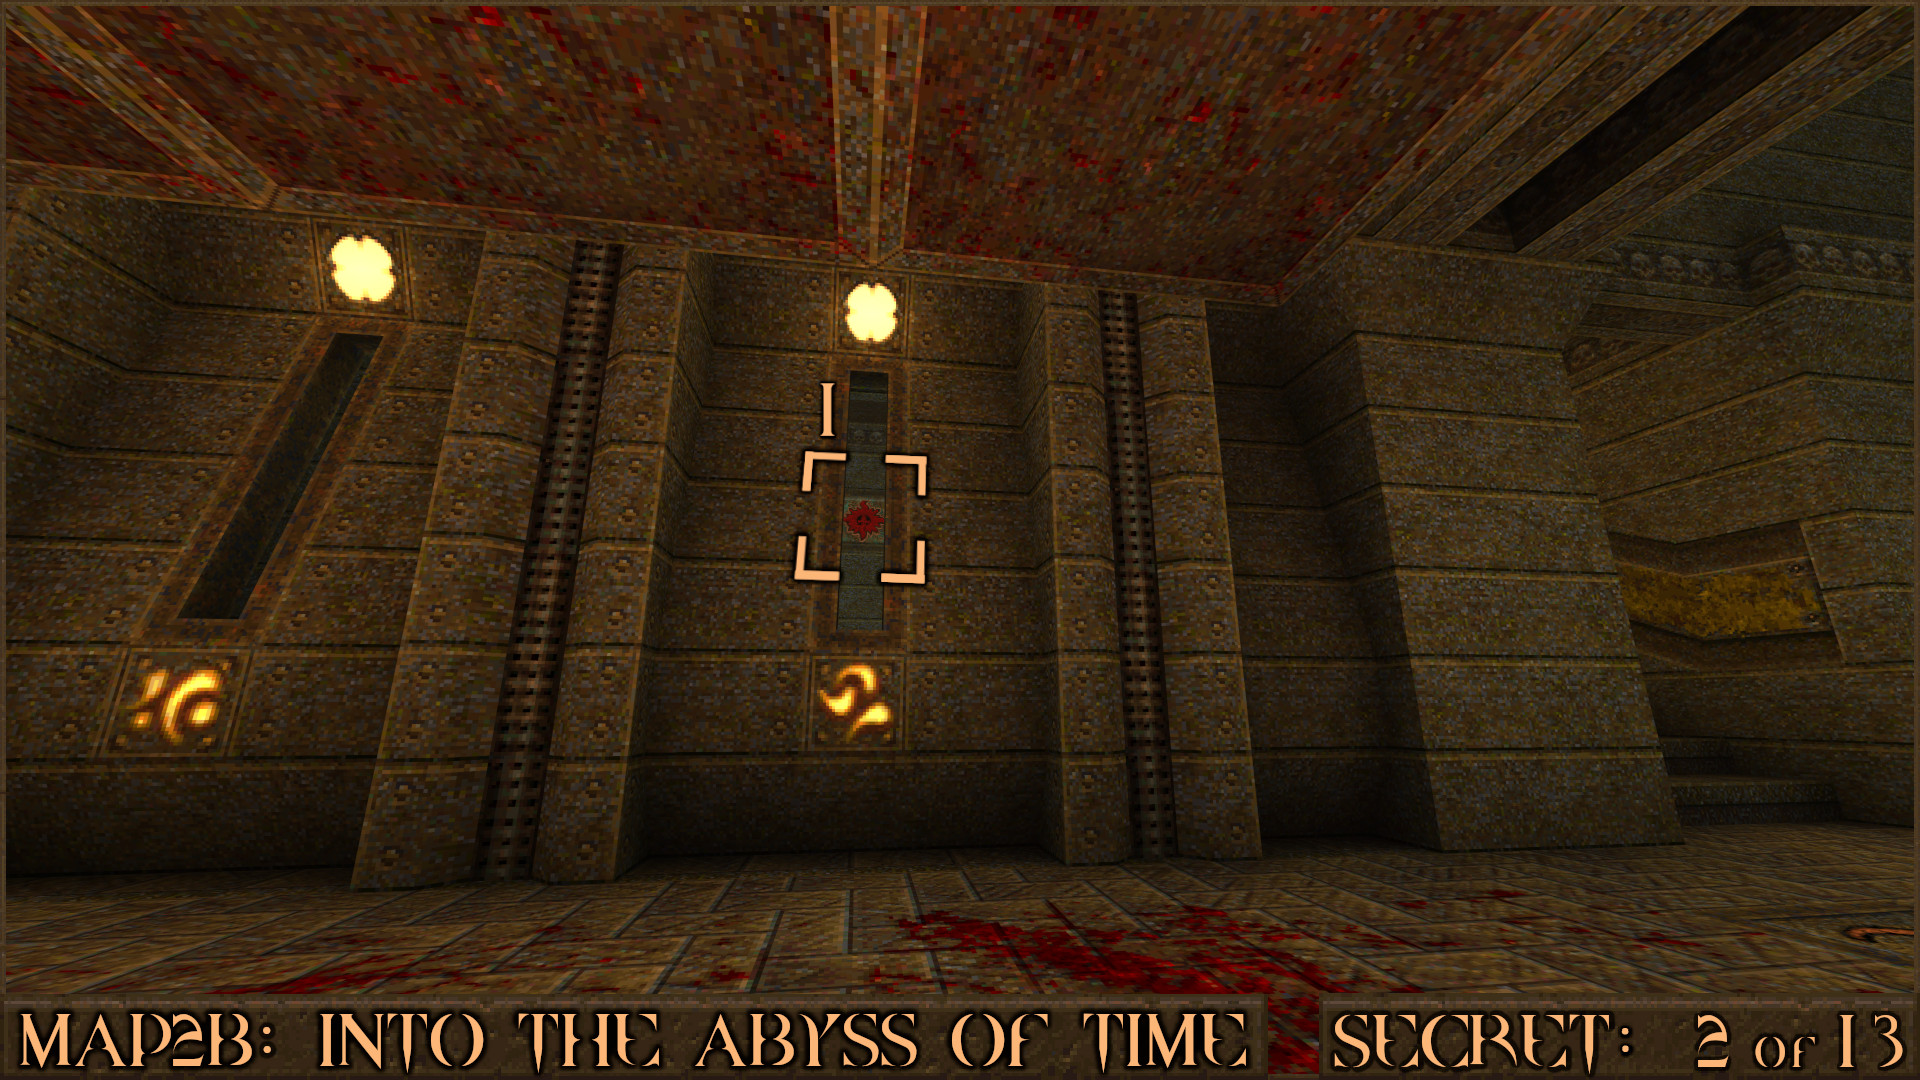
Look for the large overhead crusher trap. On the right side of the wall here are two thin windows that each have a red shootable button () behind them. Trigger the crusher, then pull back and when it is rising back up run under it and quickly shoot one of the targets.

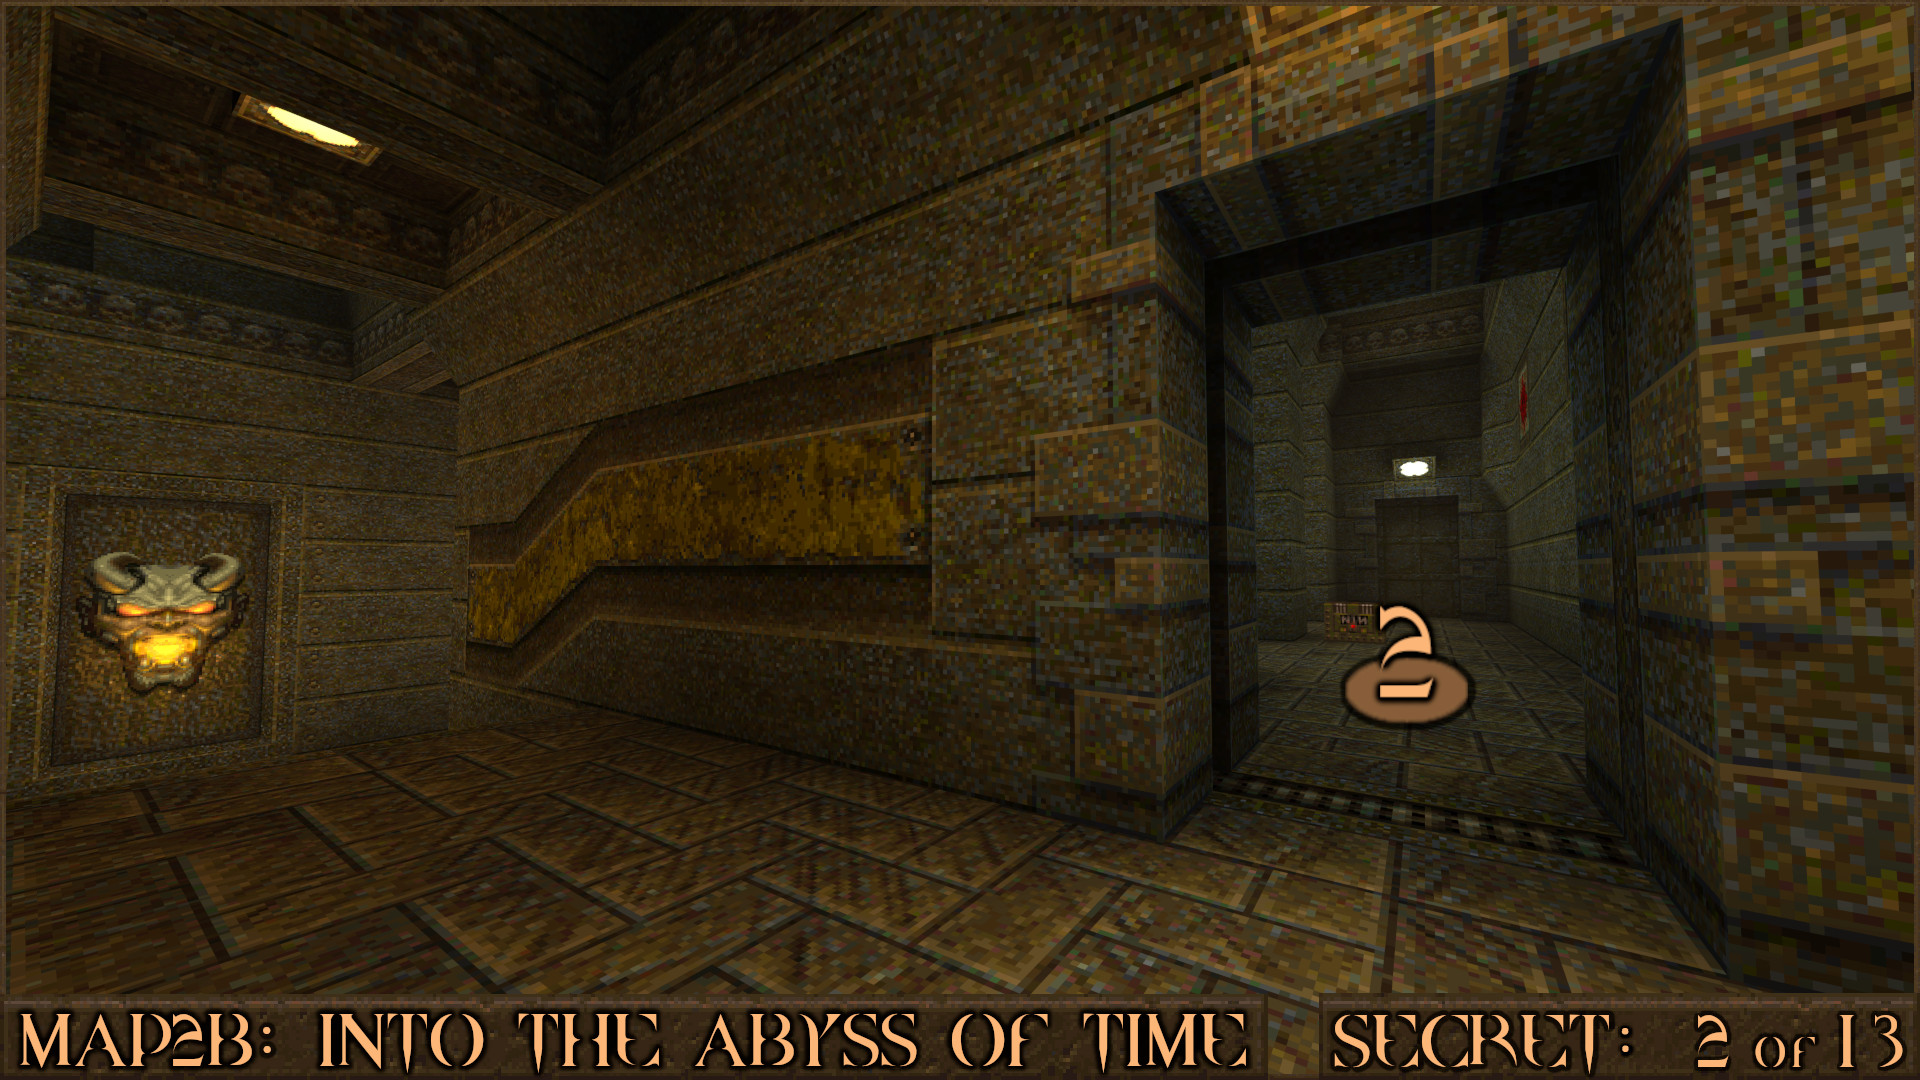
Go around the corner and a door will have opened allowing you into the back room (). Killing the enemies here will disable the crusher trap.

Reward: Large Nails

Secret 3 of 13
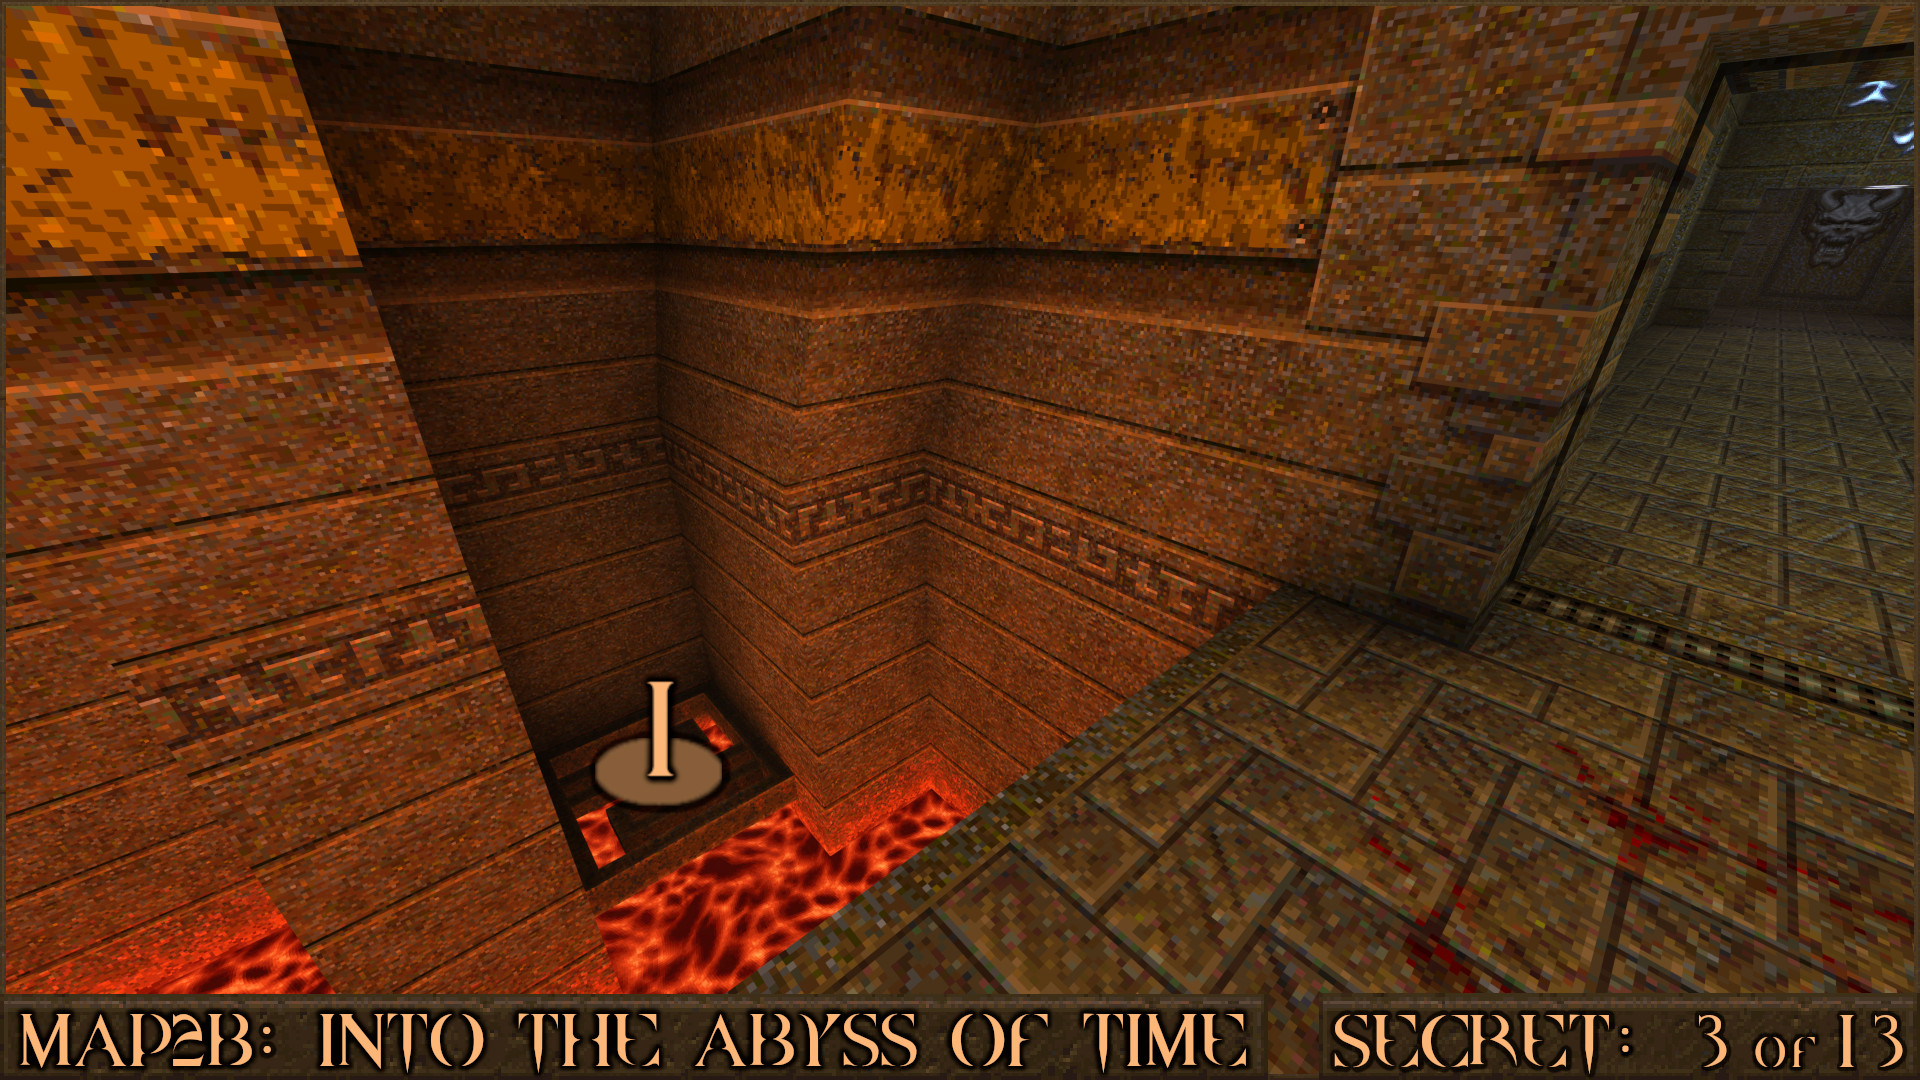
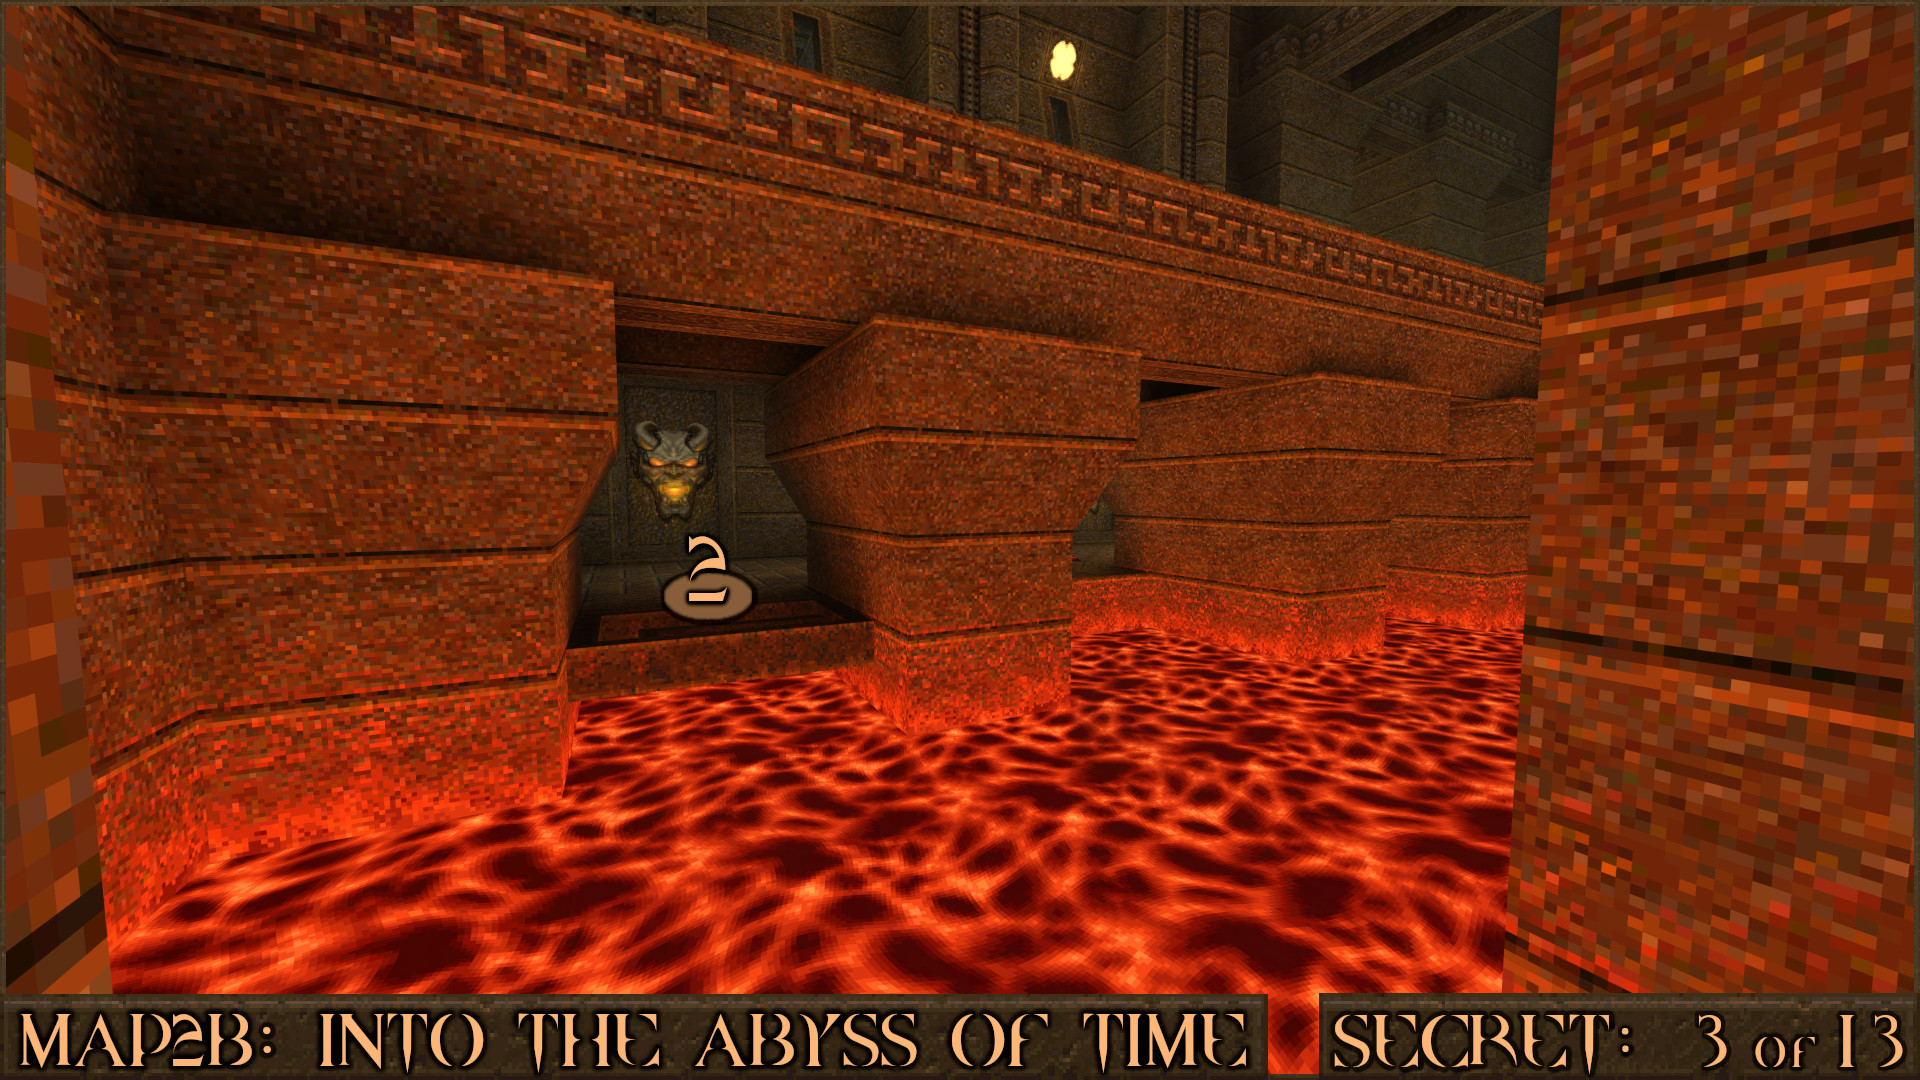
Stand beneath the inactive crusher trap and carefully look over the side for a metal platform below ().

After dropping down to the platform jump over to the other metal platform () to find a secret area.

Reward: Armor Shard×4 Megahealth

Secret 4 of 13
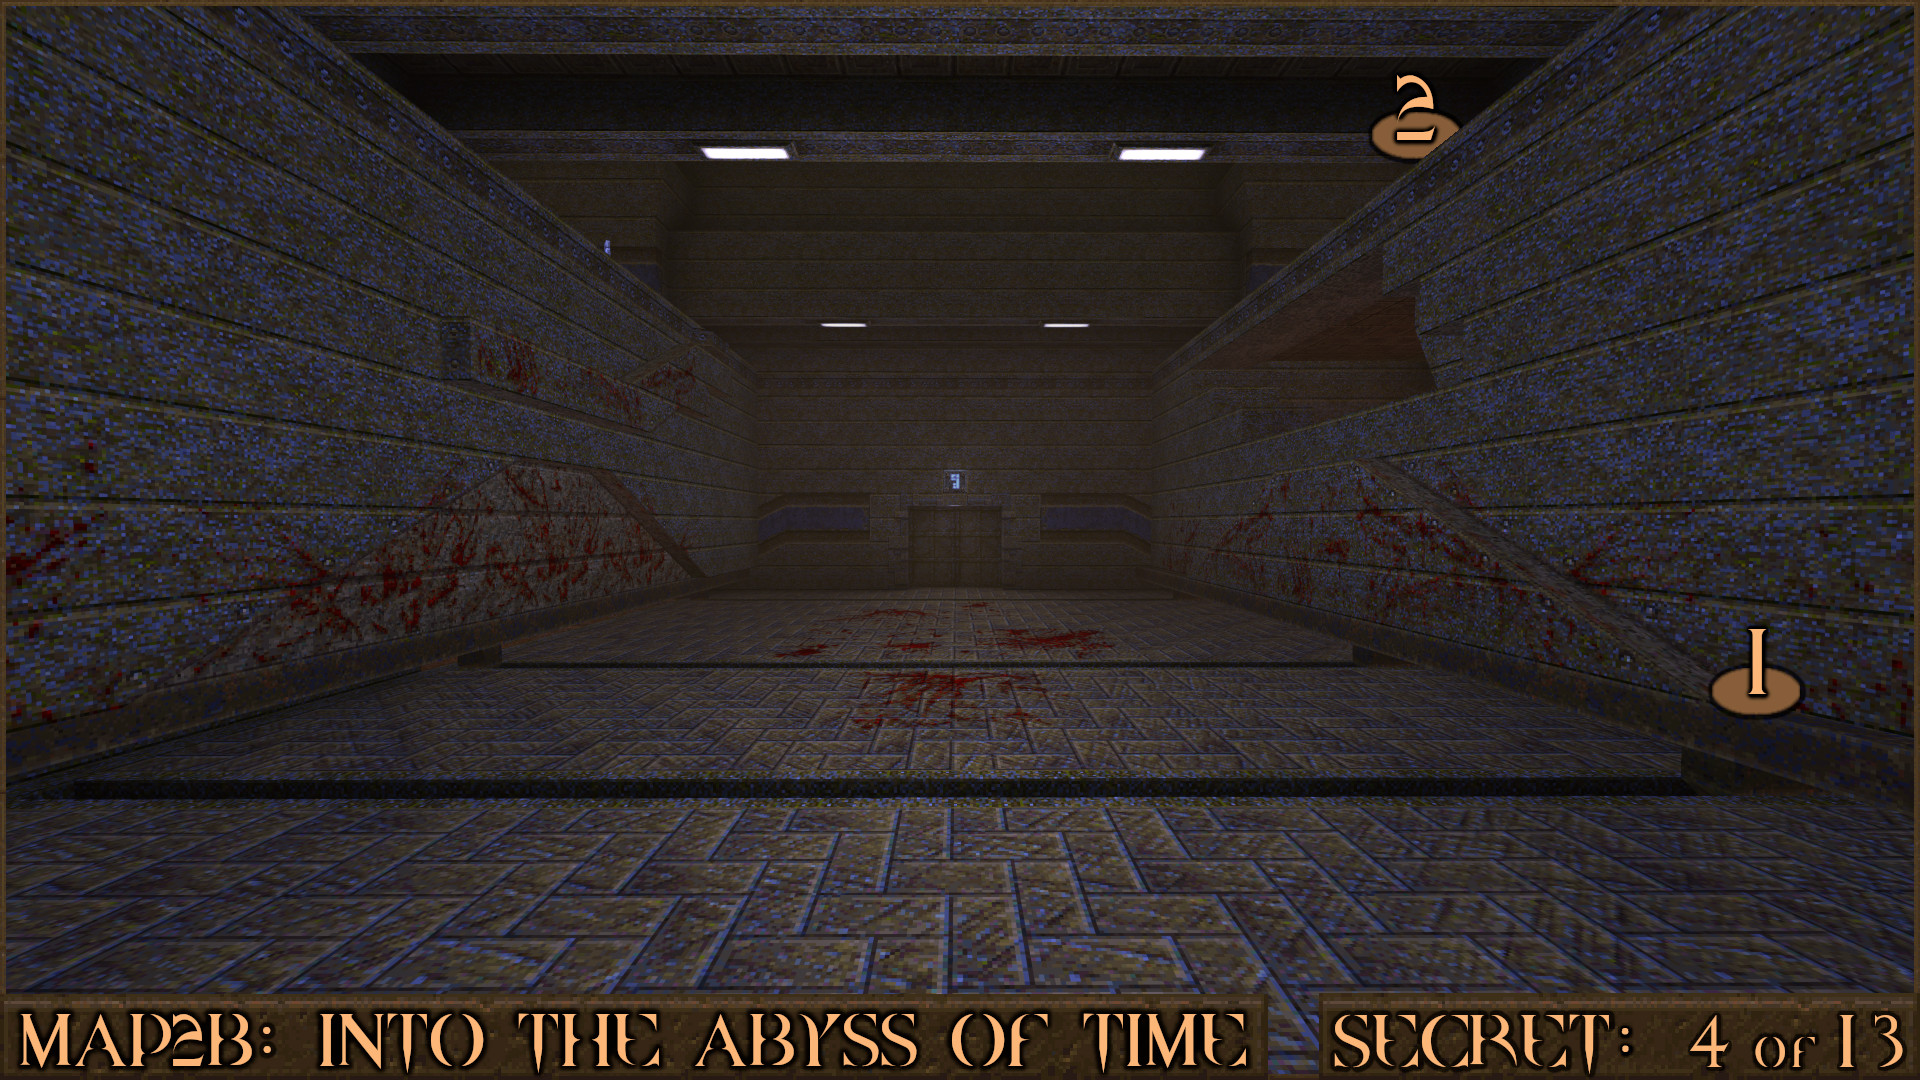
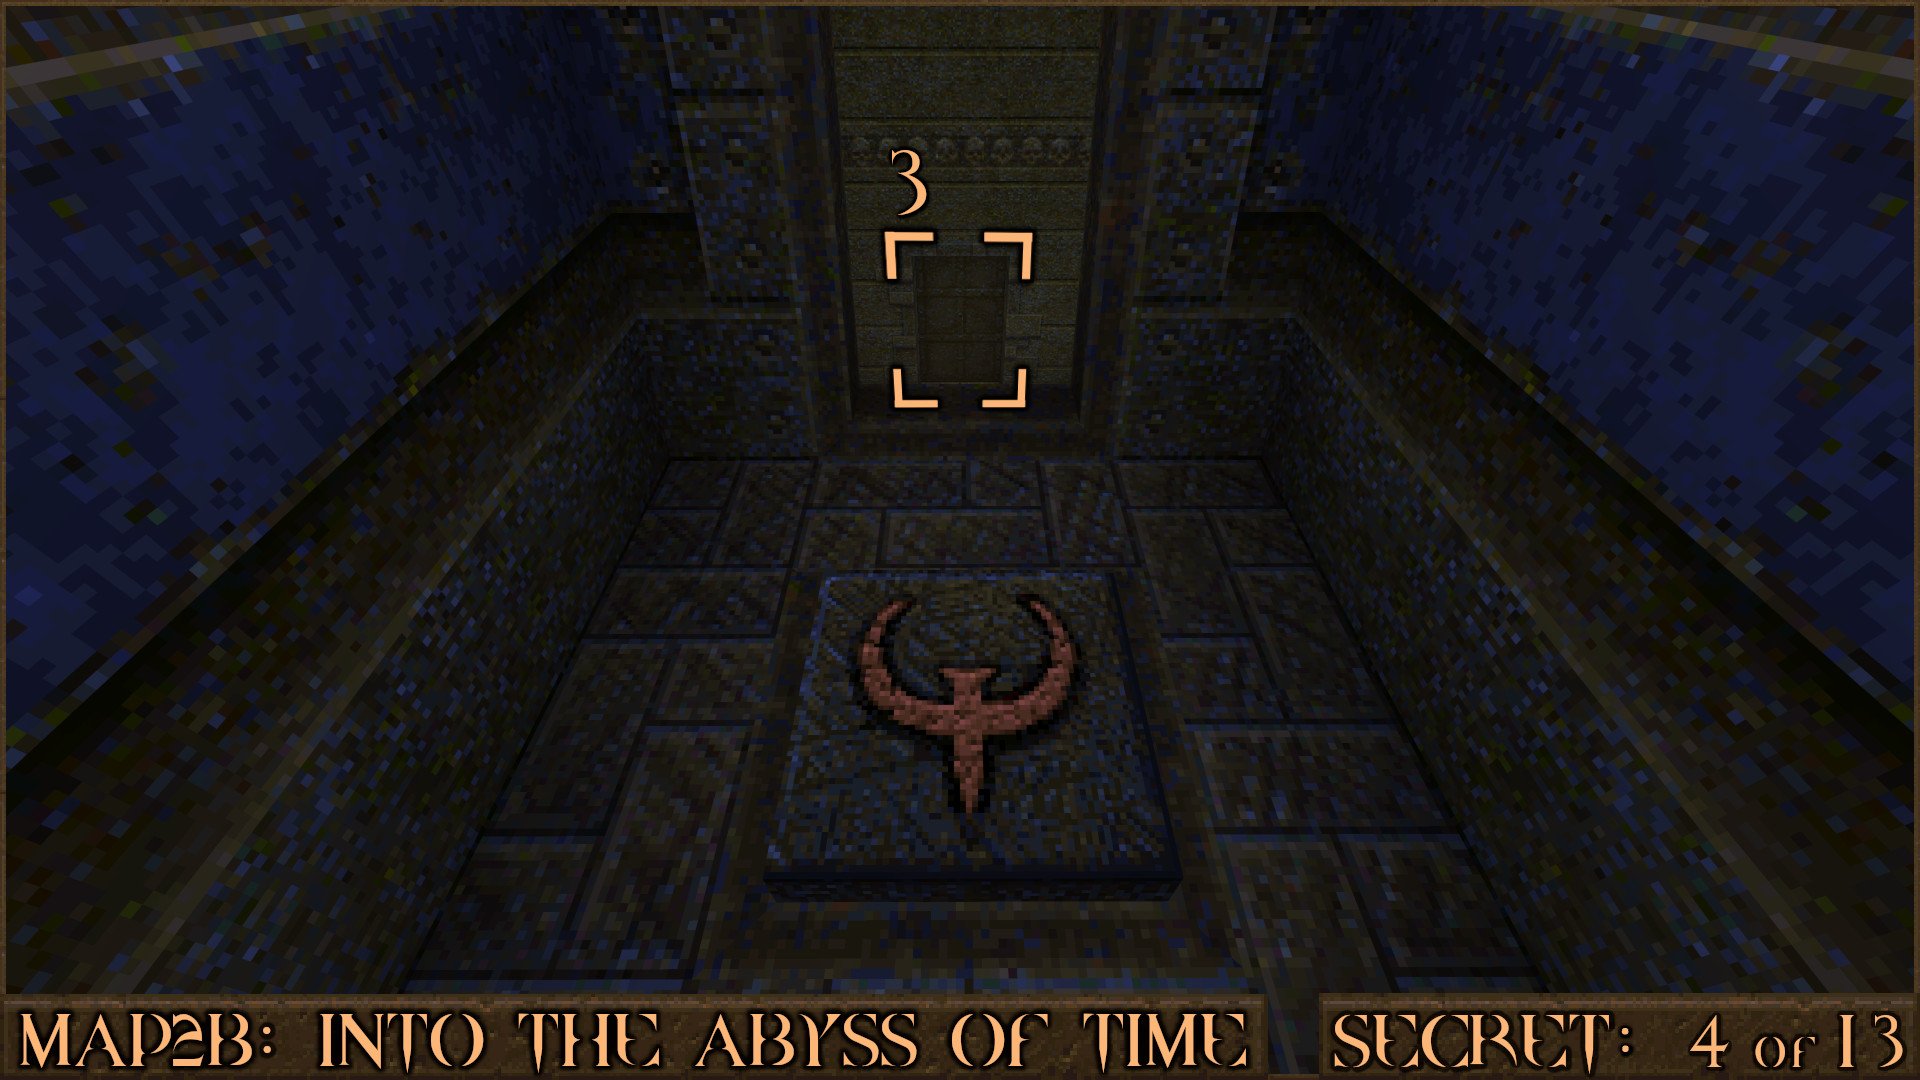
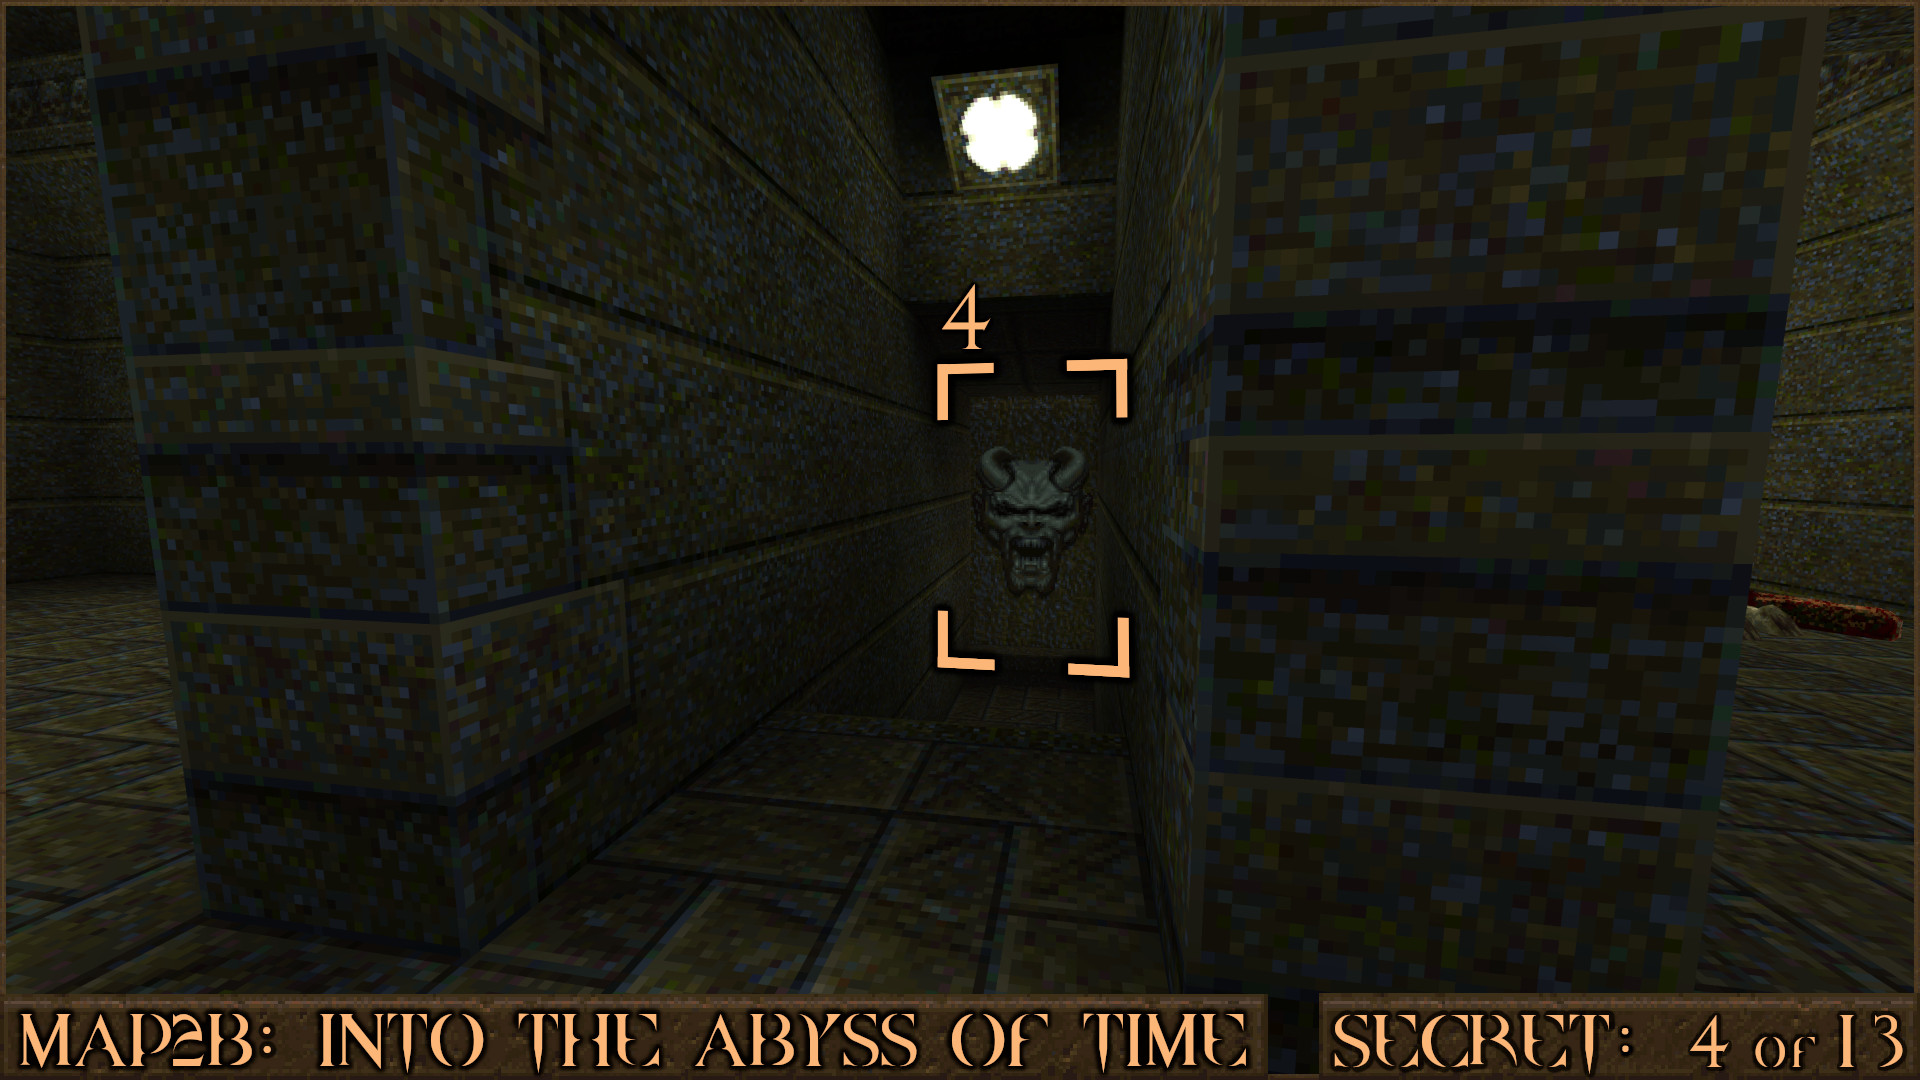
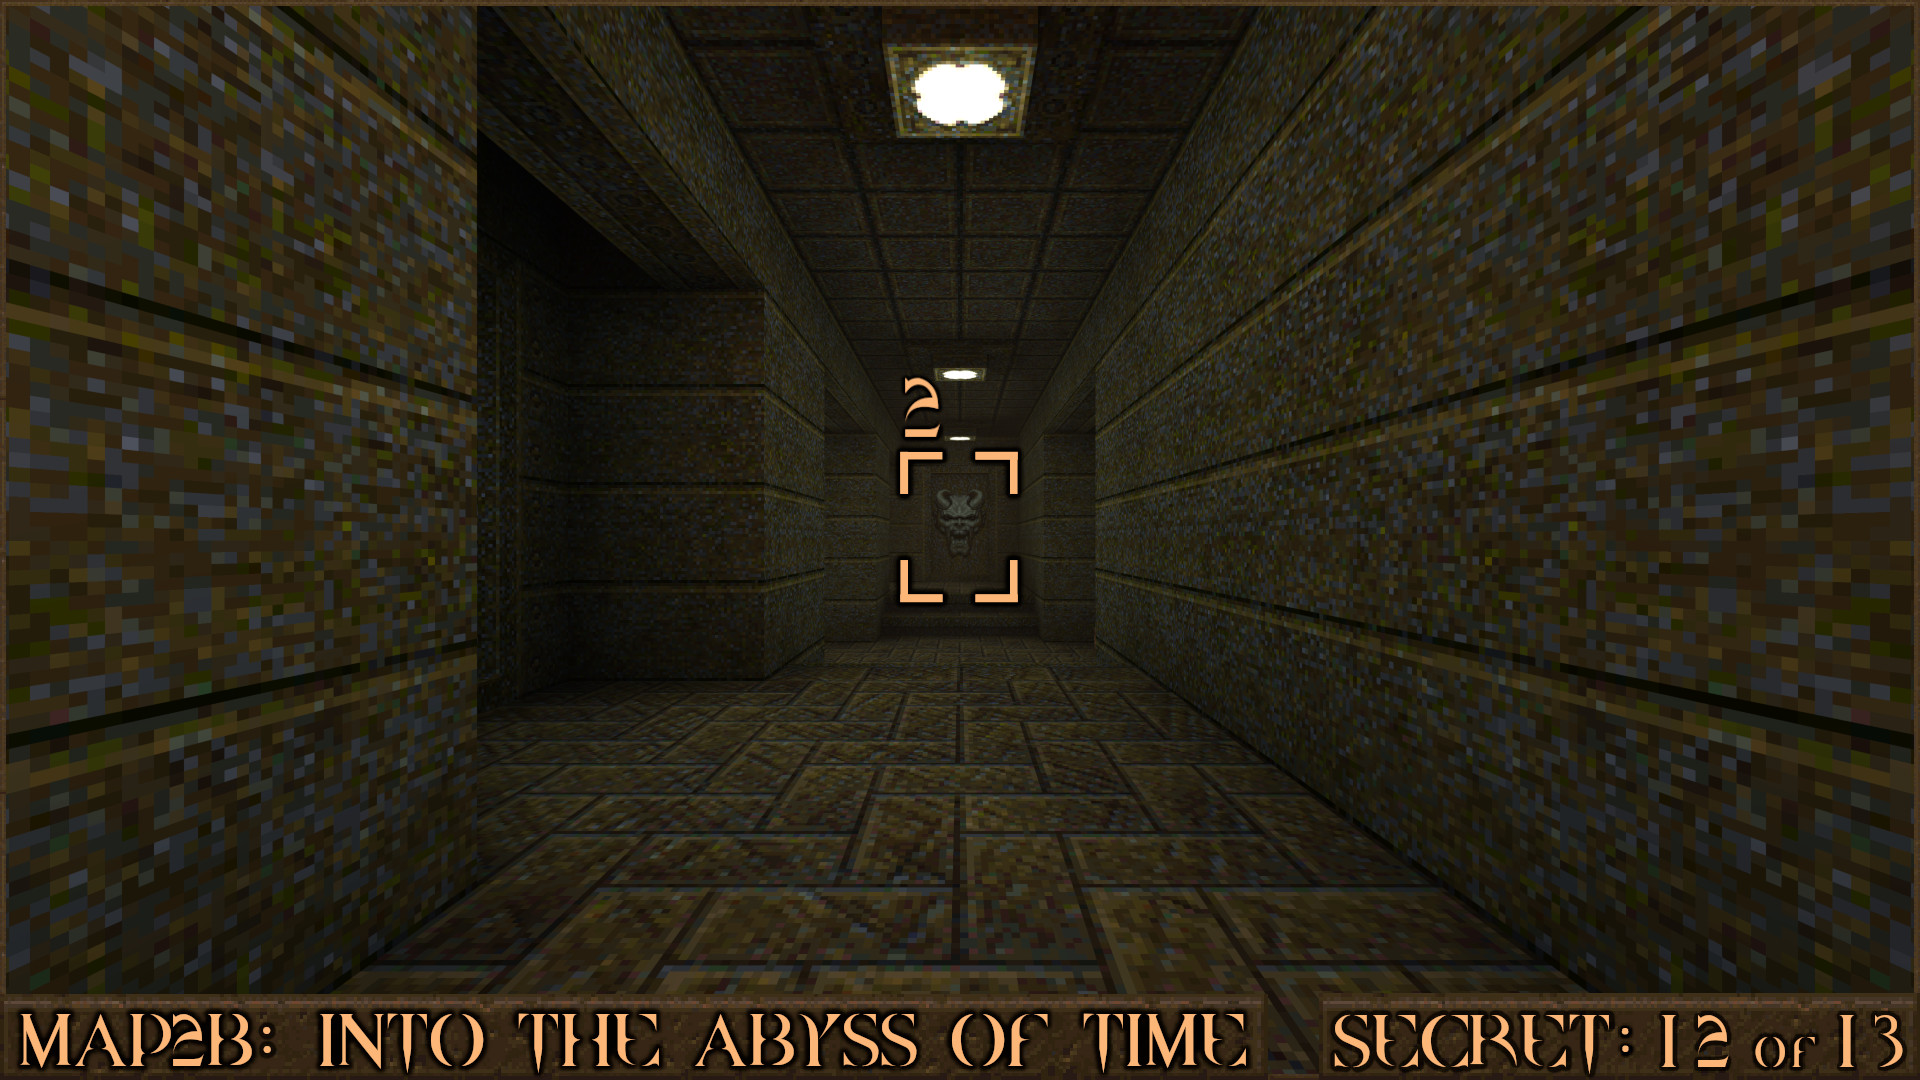
You'll enter a large room with a double wall crushing trap. Along the edge of the trap are thin platforms () you can use to climb it. The Silver Key is on the top of the left part of the trap but for the secret climb the trap very quickly and jump over to the top of the right side instead ().

From here you can step on a floor switch to trigger a door below ().

Drop down to the door and look to your right to see a grey gargoyle head panel move and let you into the secret (). Kill the enemies inside to disable the double wall crushing trap.

Reward: Yellow Armor Small Health

Secret 5 of 13
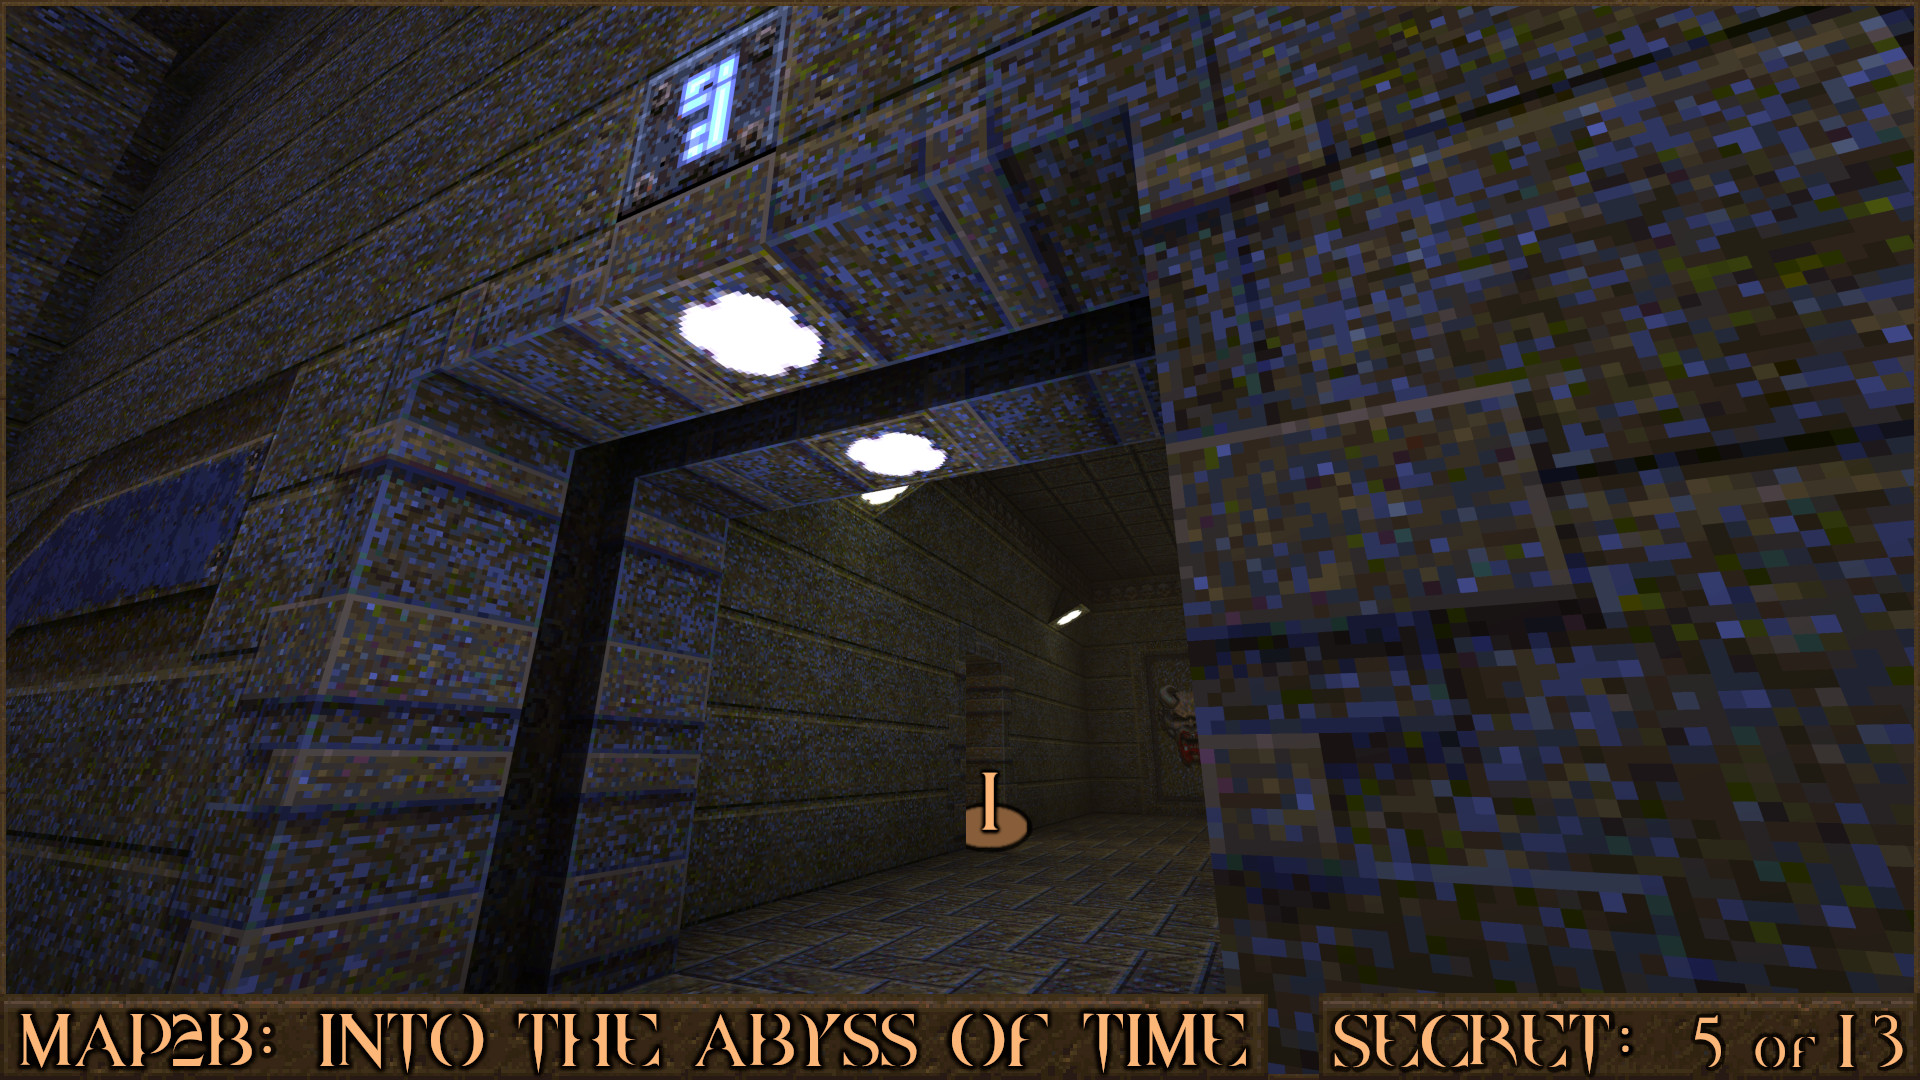
After opening the Silver Key Door immediately enter the door on your left () and go up the stairs to find a secret.

Reward: [Health Capacity Upgrade]

Secret 6 of 13
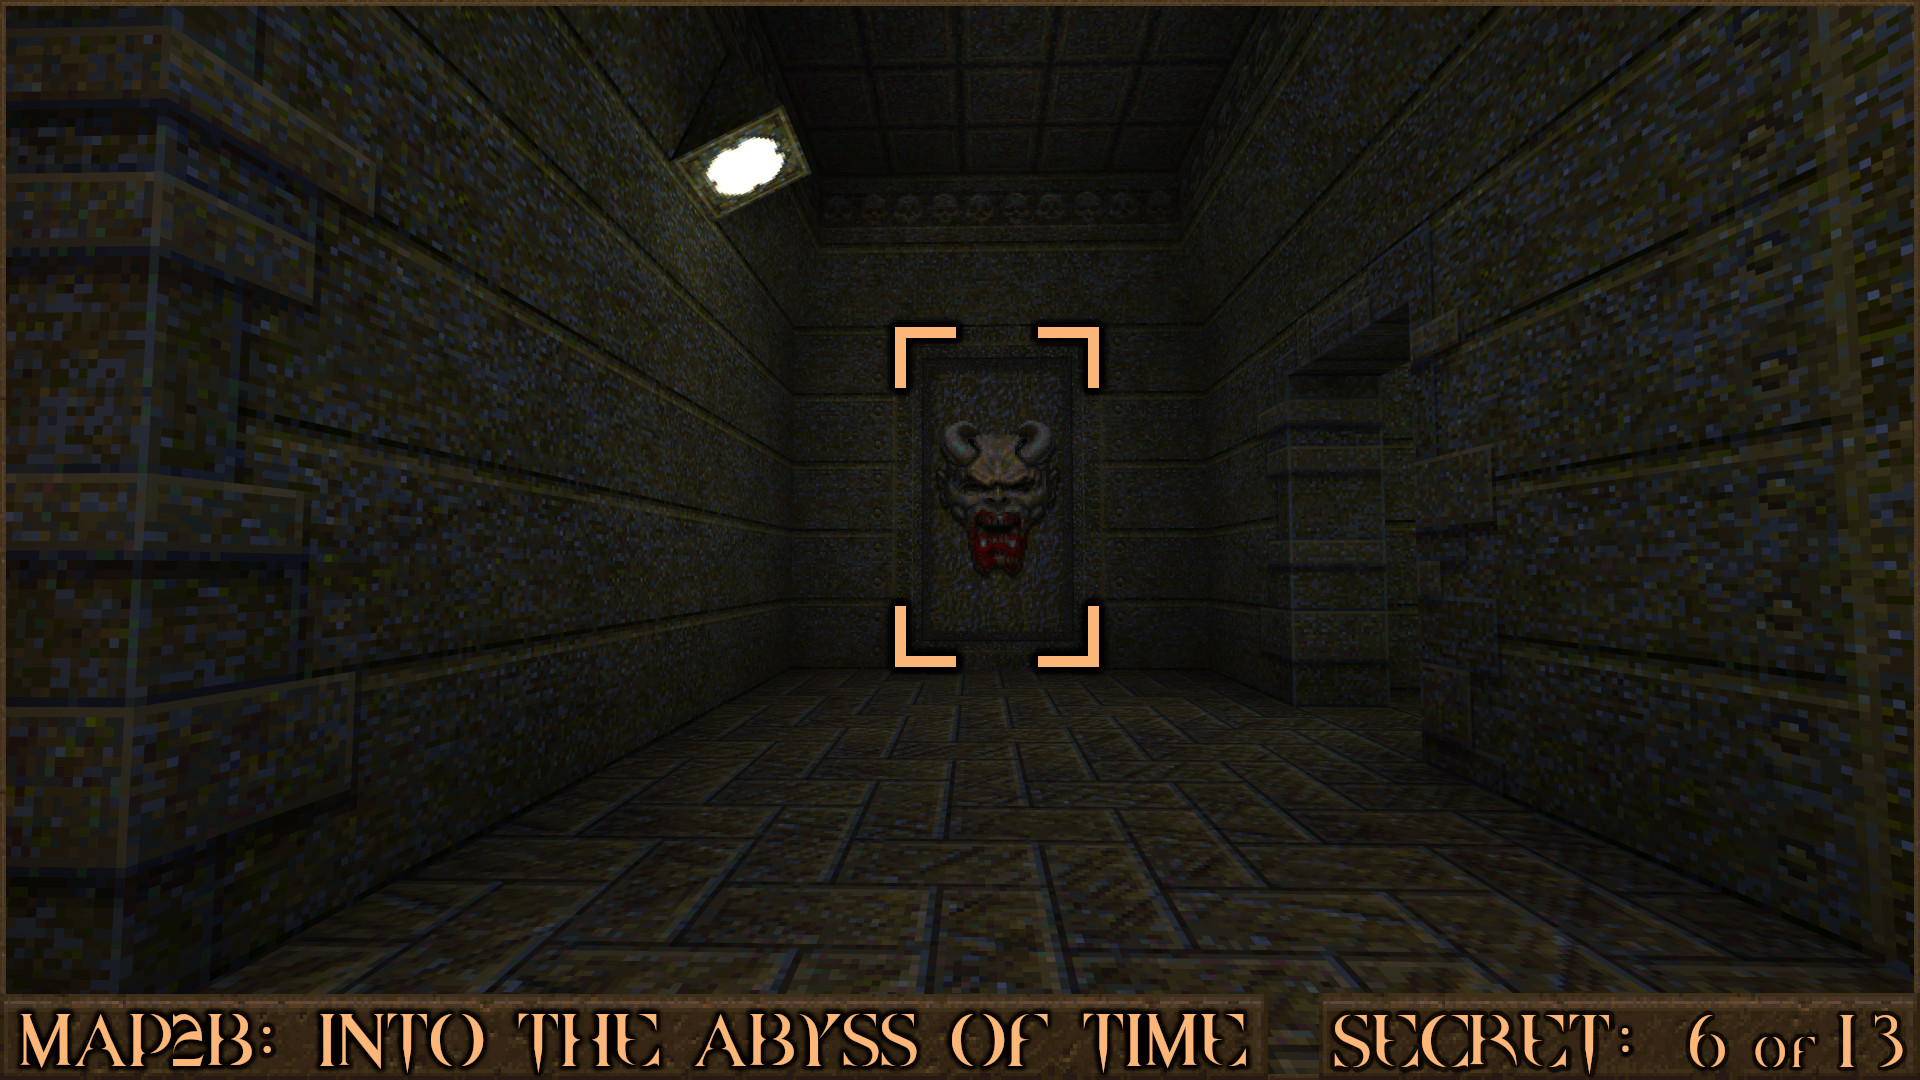
Go back down to the Silver Key Door and look nearby for a bloody gargoyle face panel. Shoot it to access the secret.

Reward: Megahealth

Secret 7 of 13
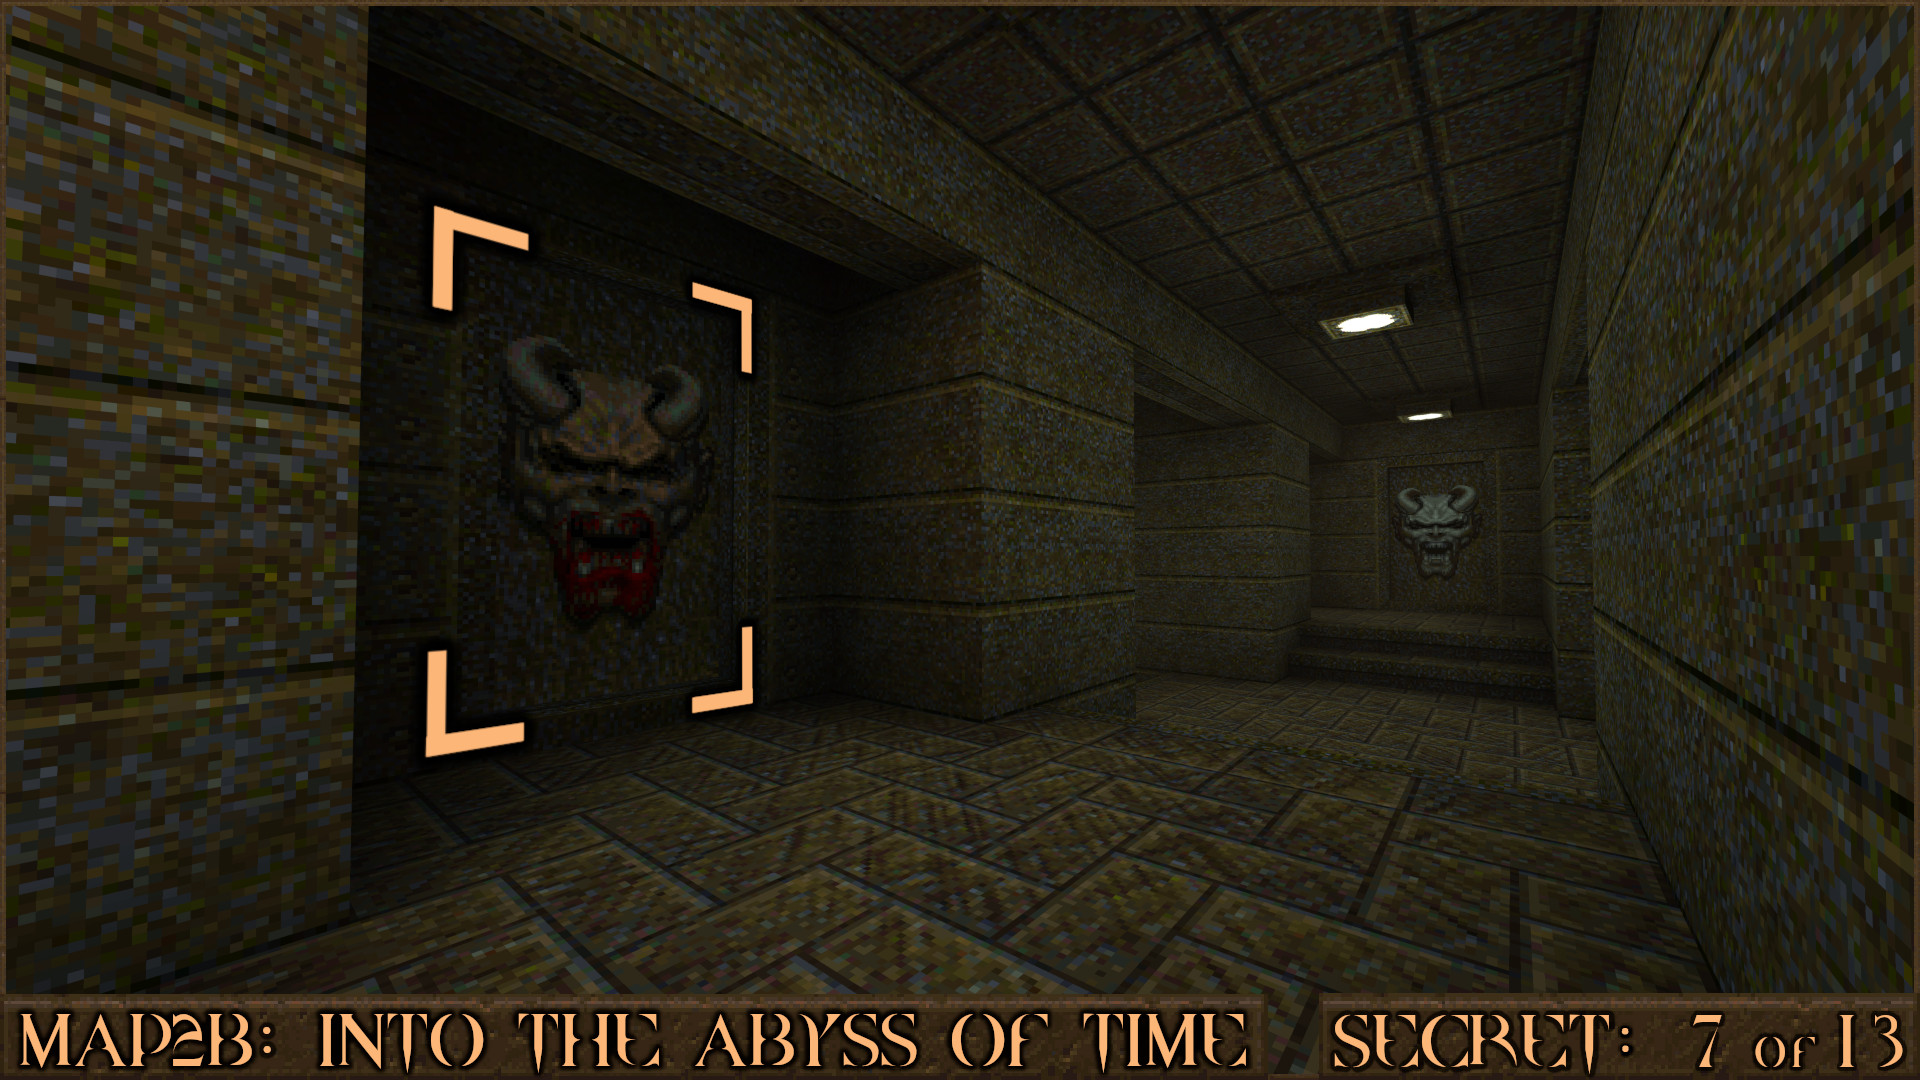
Shortly after passing a Rune of Sacrifice Door you'll see another bloody gargoyle face panel on your left. Shoot it to reveal a Quad Damage which makes the next arena fight much easier.

Reward: Quad Damage

Secret 8 of 13
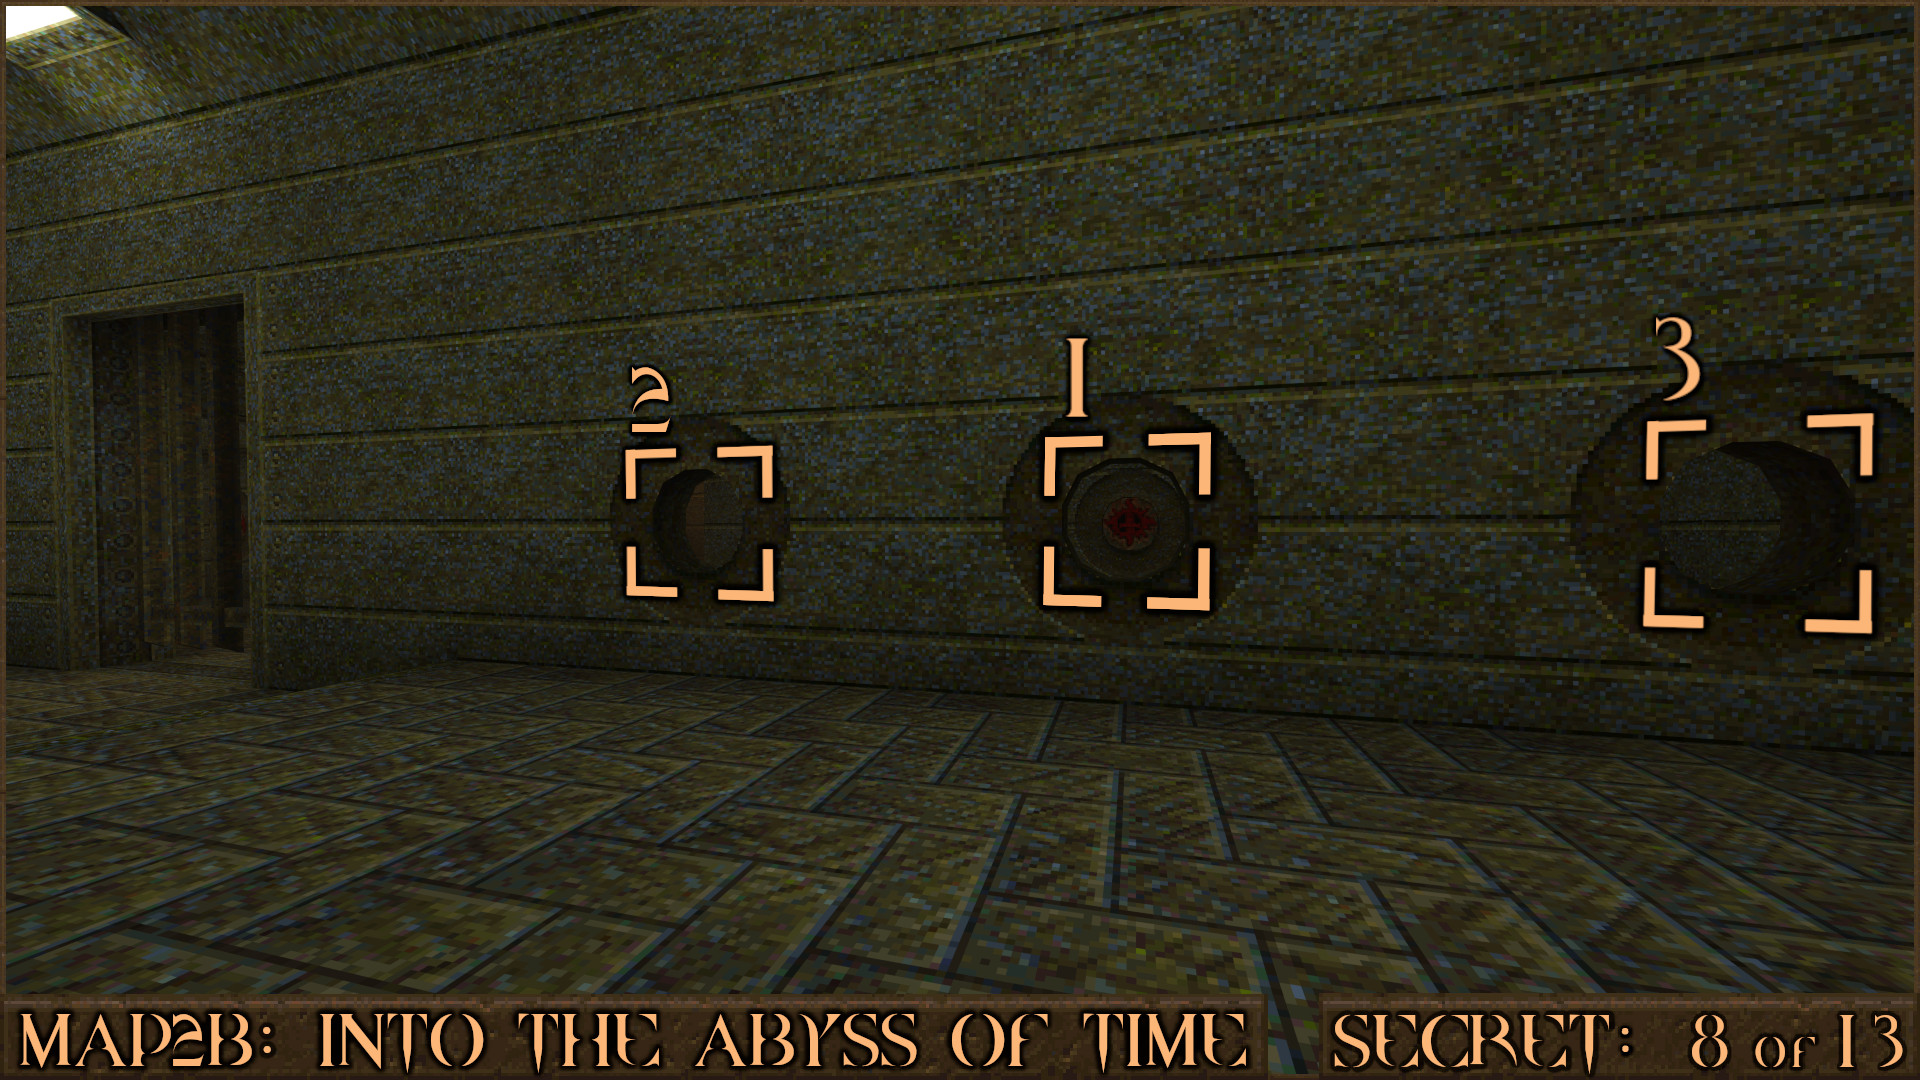
After the arena you'll ride a pillar up to the upper level. Near here you will see an upgrade behind some metal bars. There are two sets of three holes in the wall by the metal bars. Shoot the centre target () to make two more adjacent targets appear (+) that must also be quickly shot to complete that part of the puzzle. Now do the same for the other set of holes and the bars will open.

Reward: [Rocket Capacity Upgrade]

Secret 9 of 13
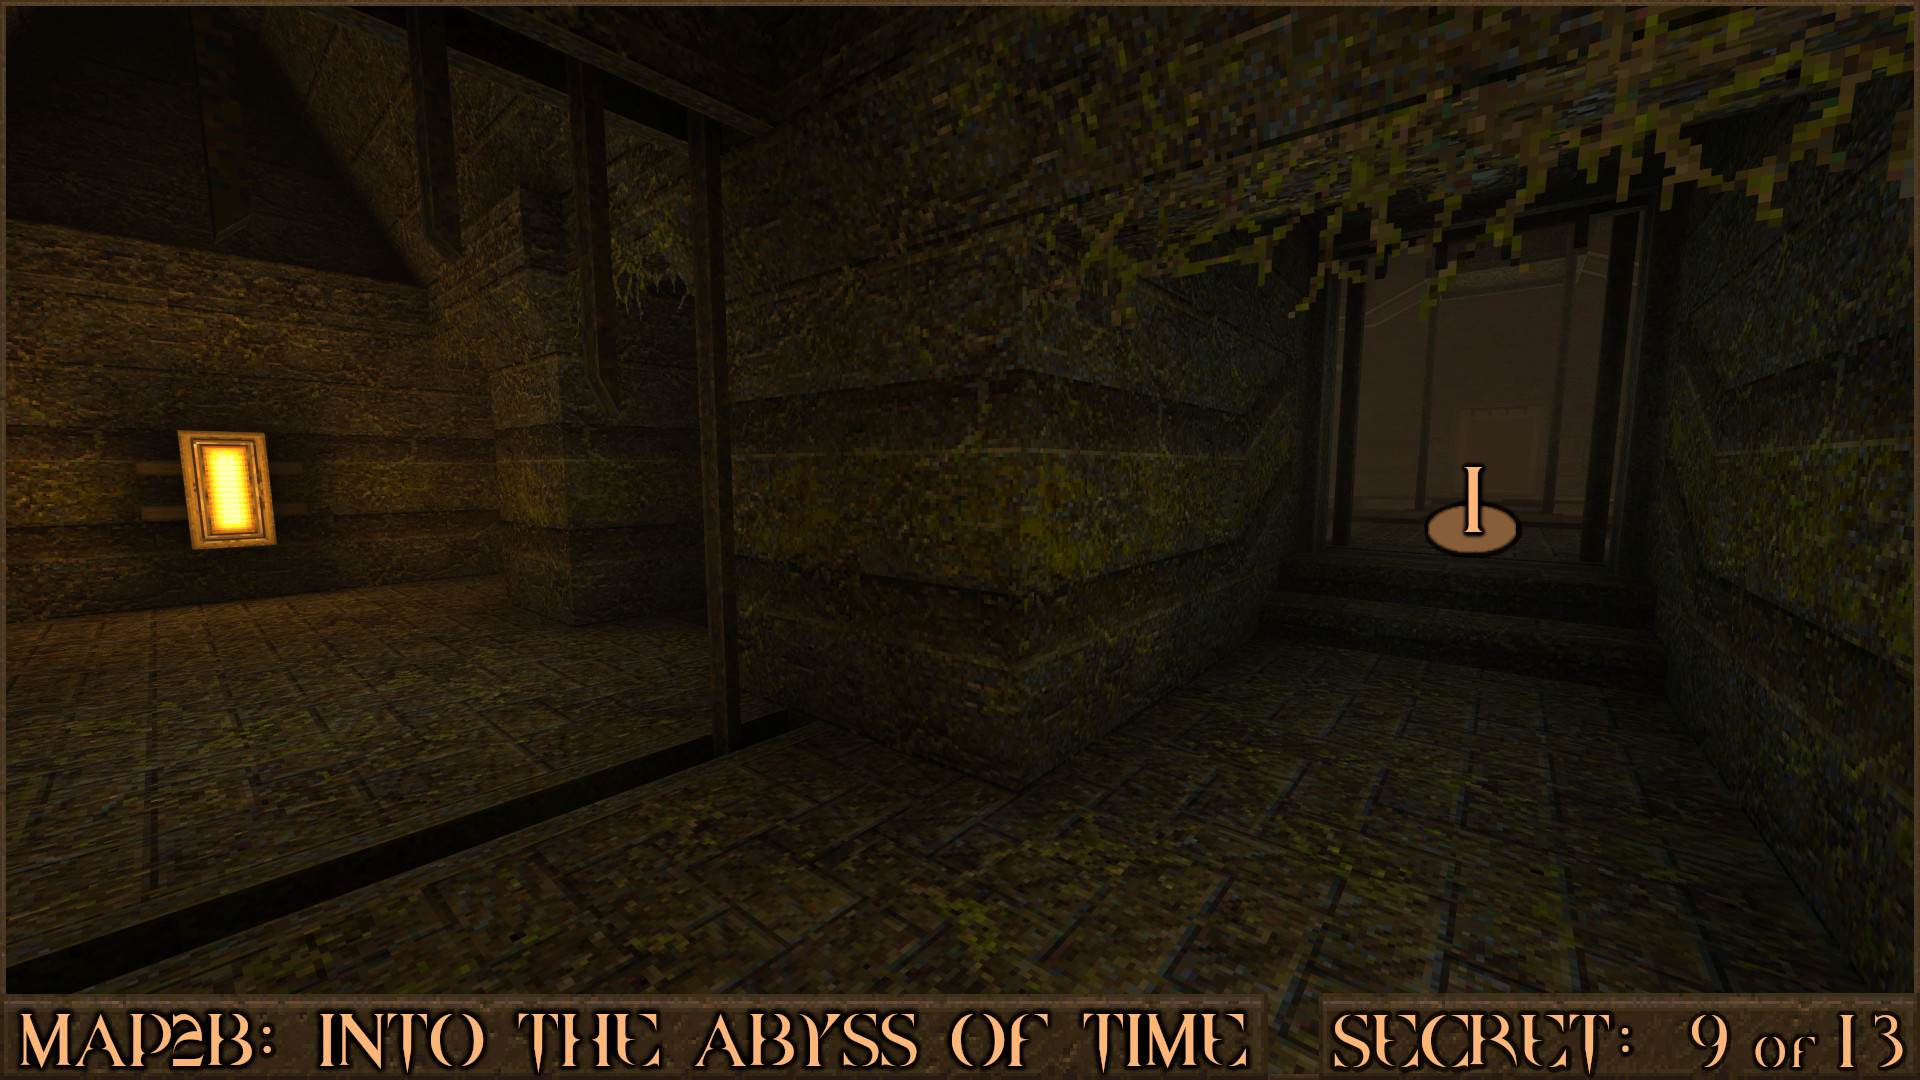
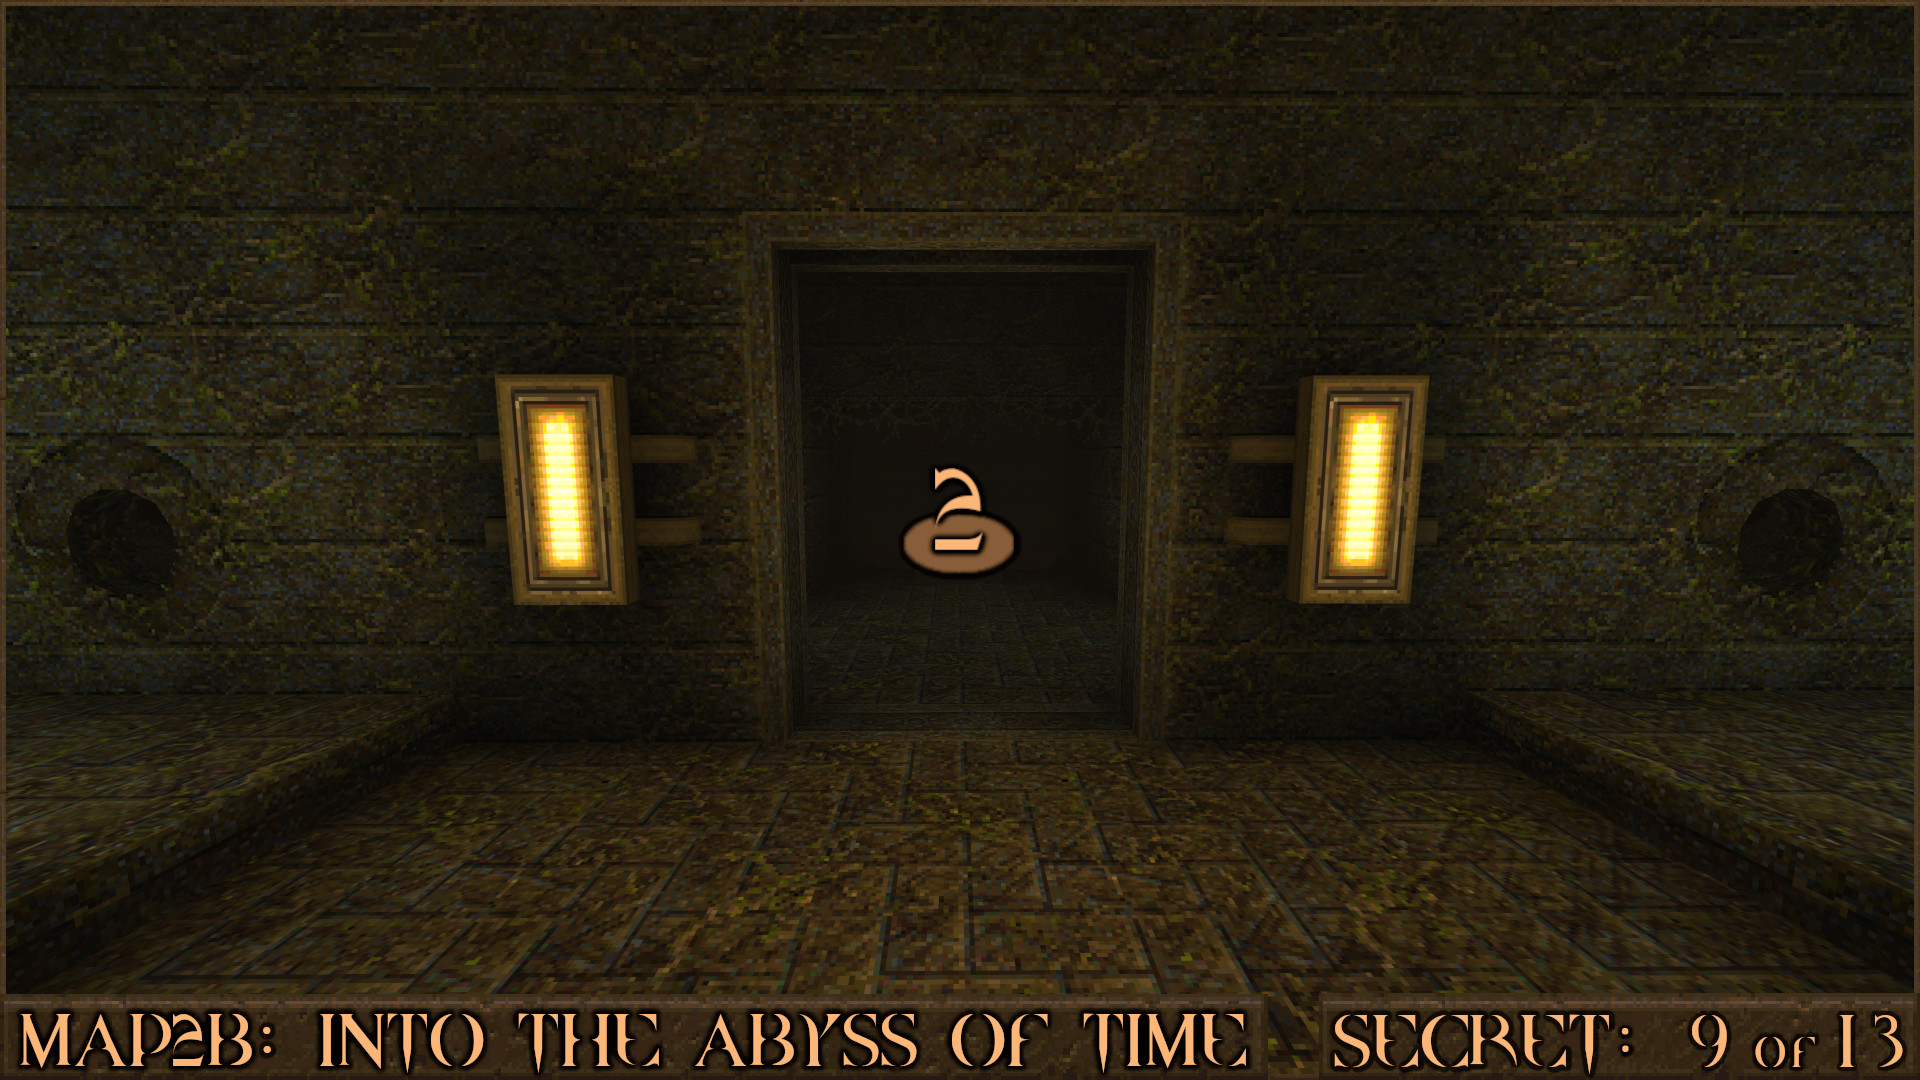
As soon as you pick up the Time Ring and shift to the future immediately return the way you came () and head back in the direction of Secret 8.

Drop down the back of the room () into some water and you'll find a secret area.

Reward: Red Armor

Secret 10 of 13
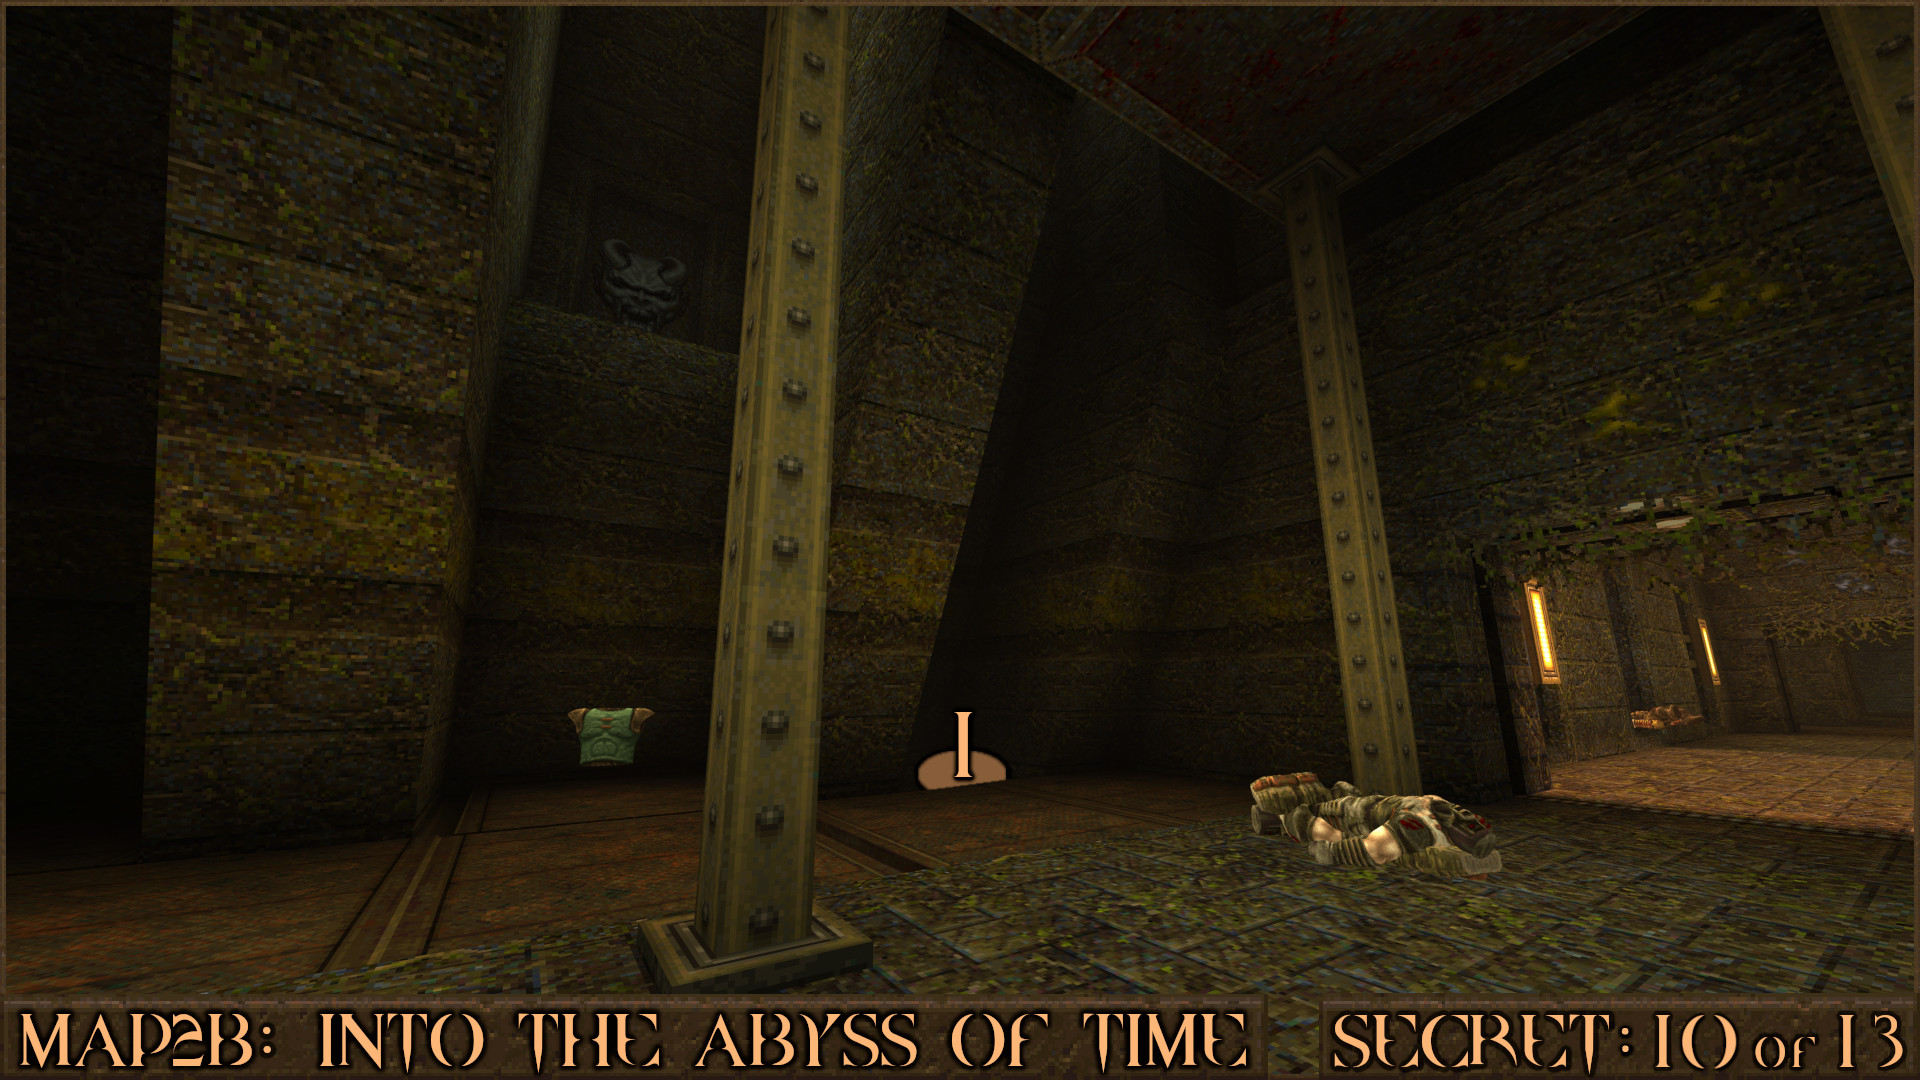
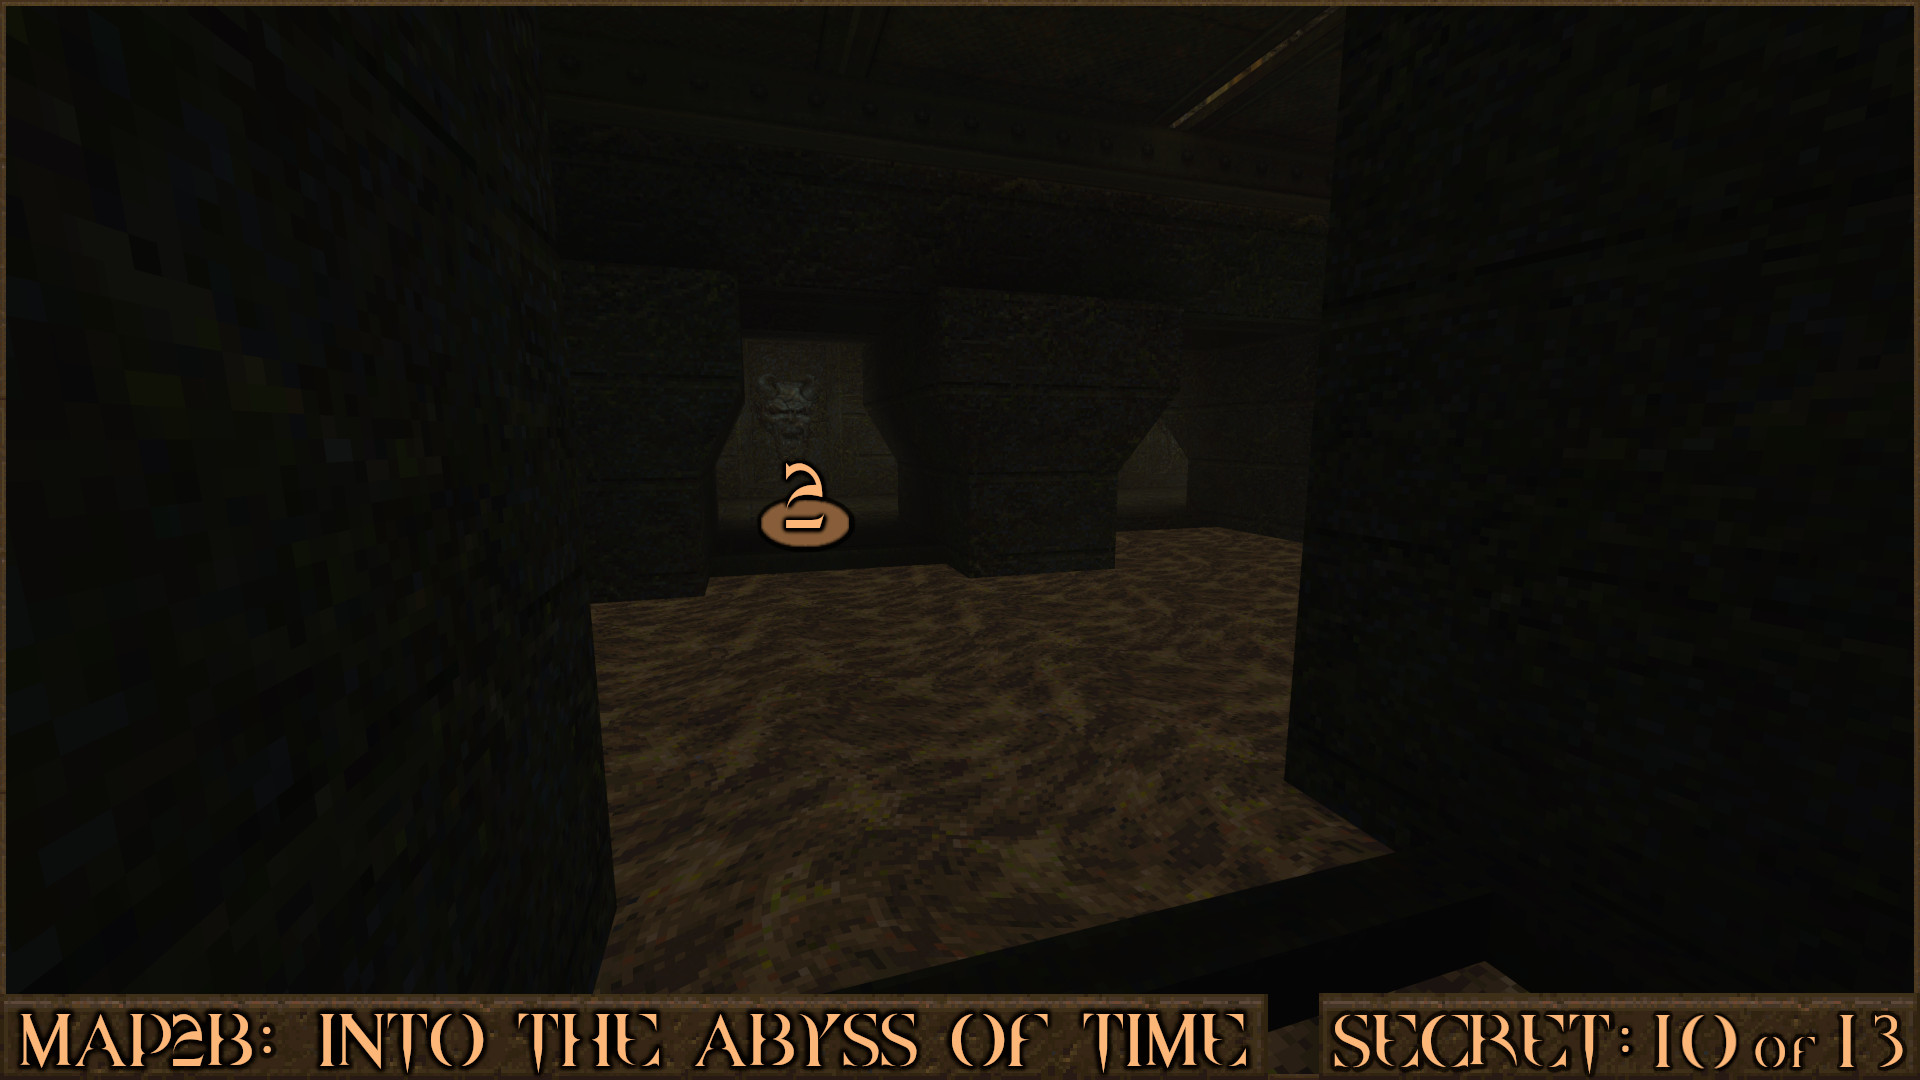
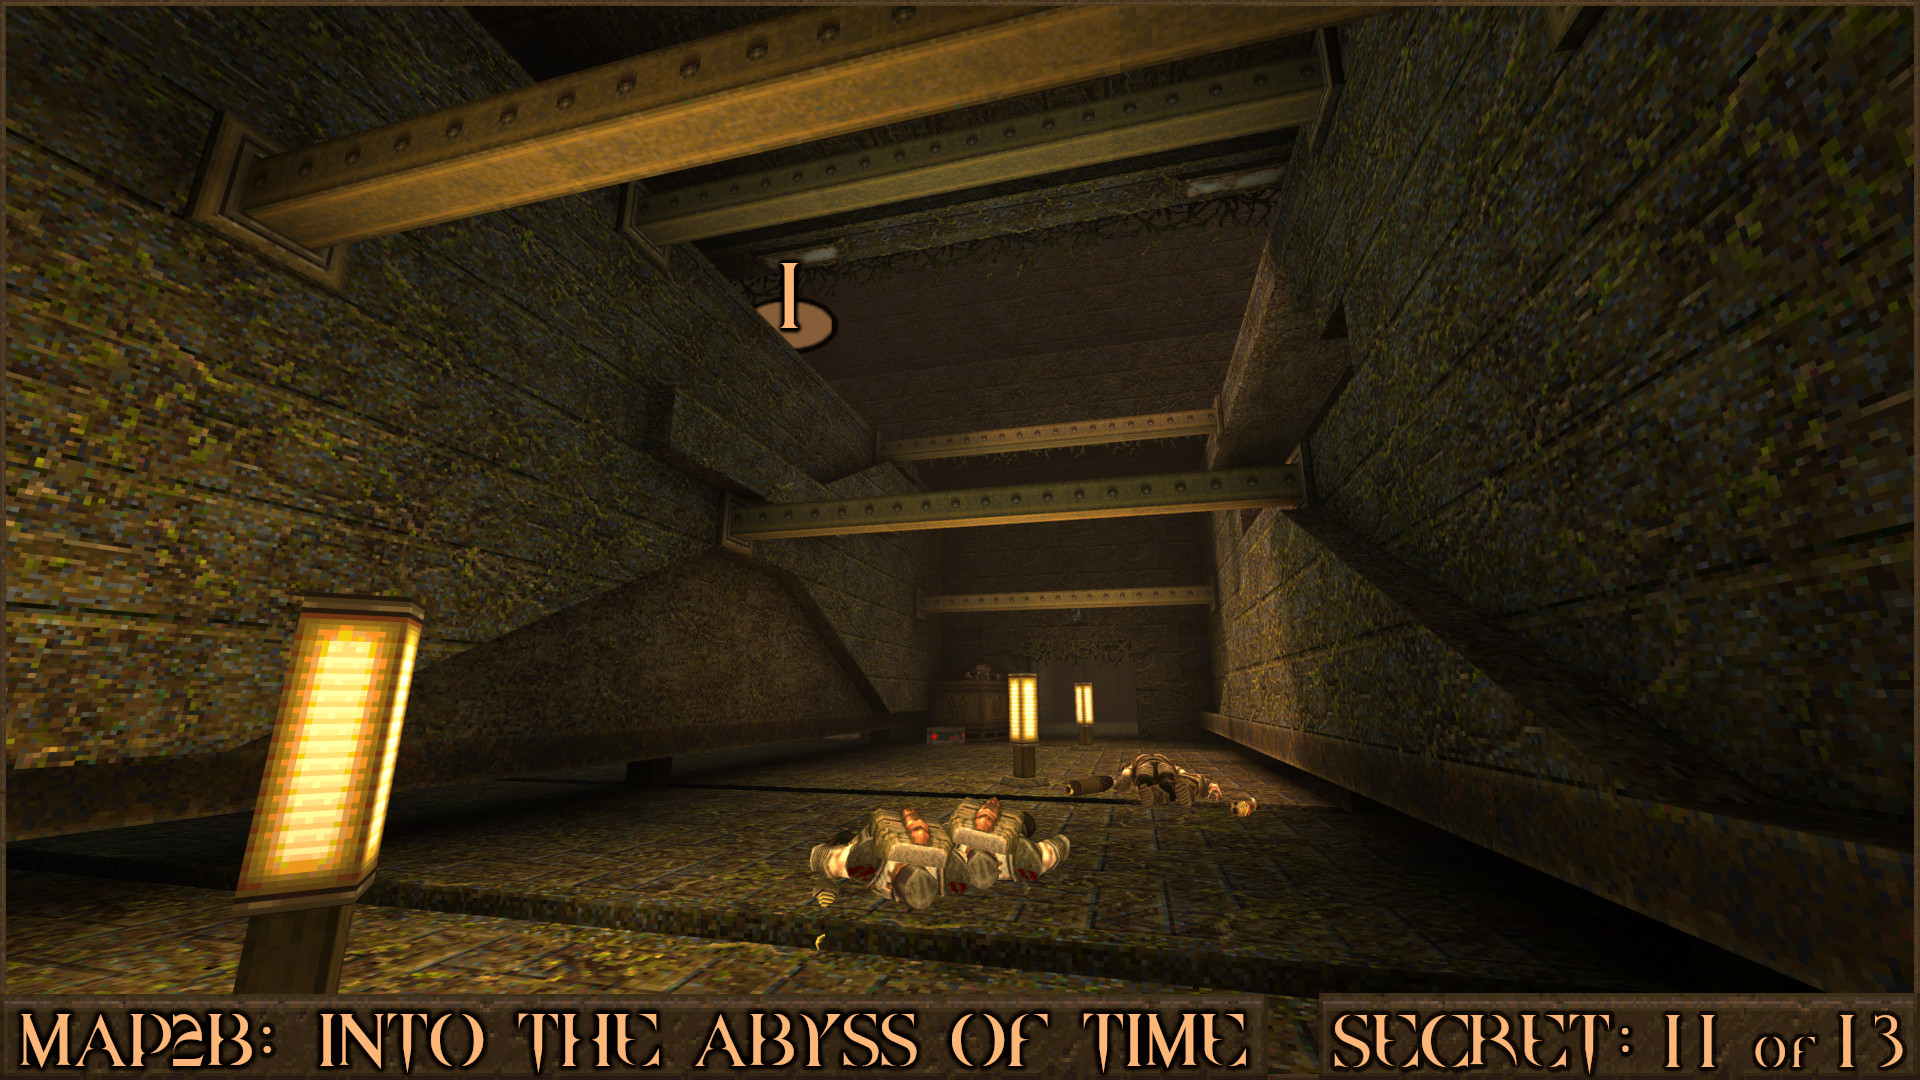
Locate the area containing the large overhead crusher trap from Secrets 2 & 3. In this future it is now supported using several metal beams. Once again look over the edge () and drop down to where the metal platform was for Secret 3.

Simply jump over to the old secret location () to find a new item here.

Reward: [Shell Capacity Upgrade]

Secret 11 of 13
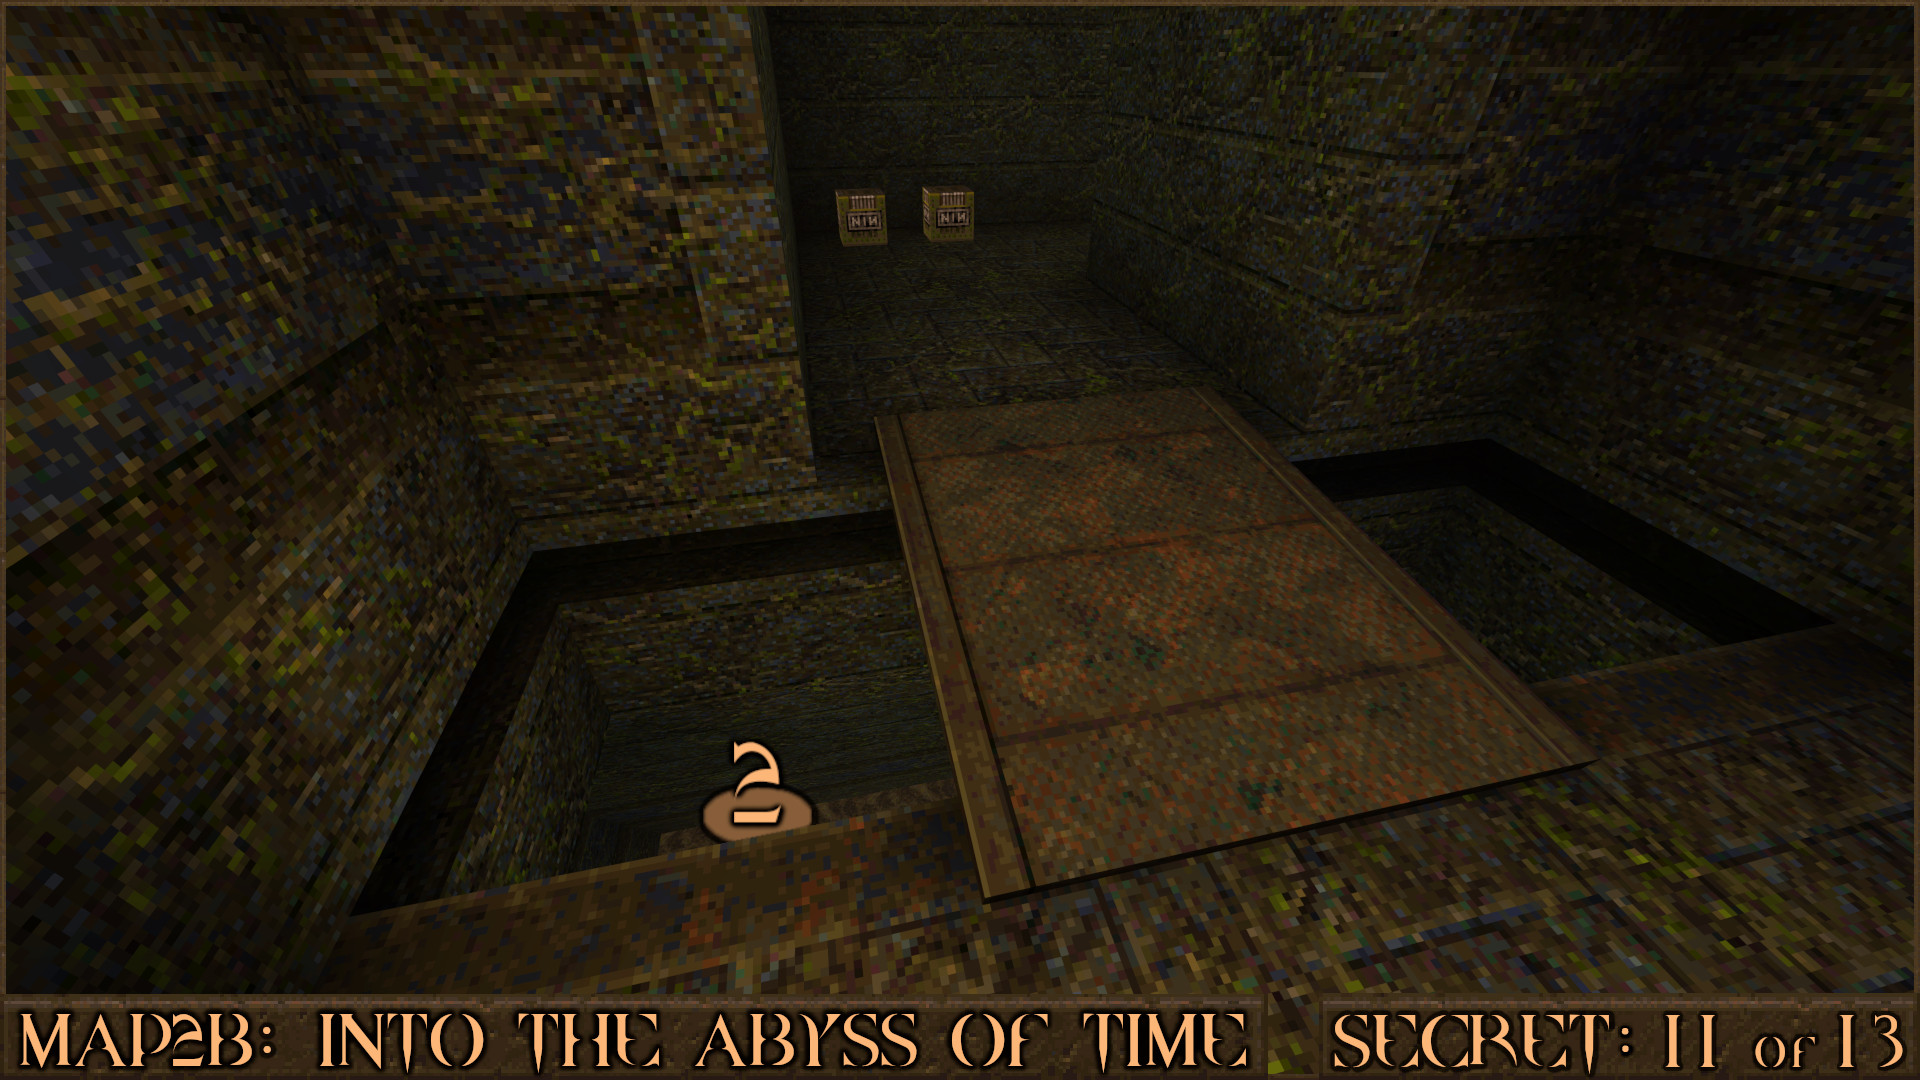
Continue on until you find the double wall crusher from Secret 4. It is now broken and blocked by metal bars. Climb up to the top of it and get on the left side ().

Drop down to the water below () instead of going through the entryway. You will find some items down behind the crusher.

Reward: Yellow Armor Large Health

Secret 12 of 13
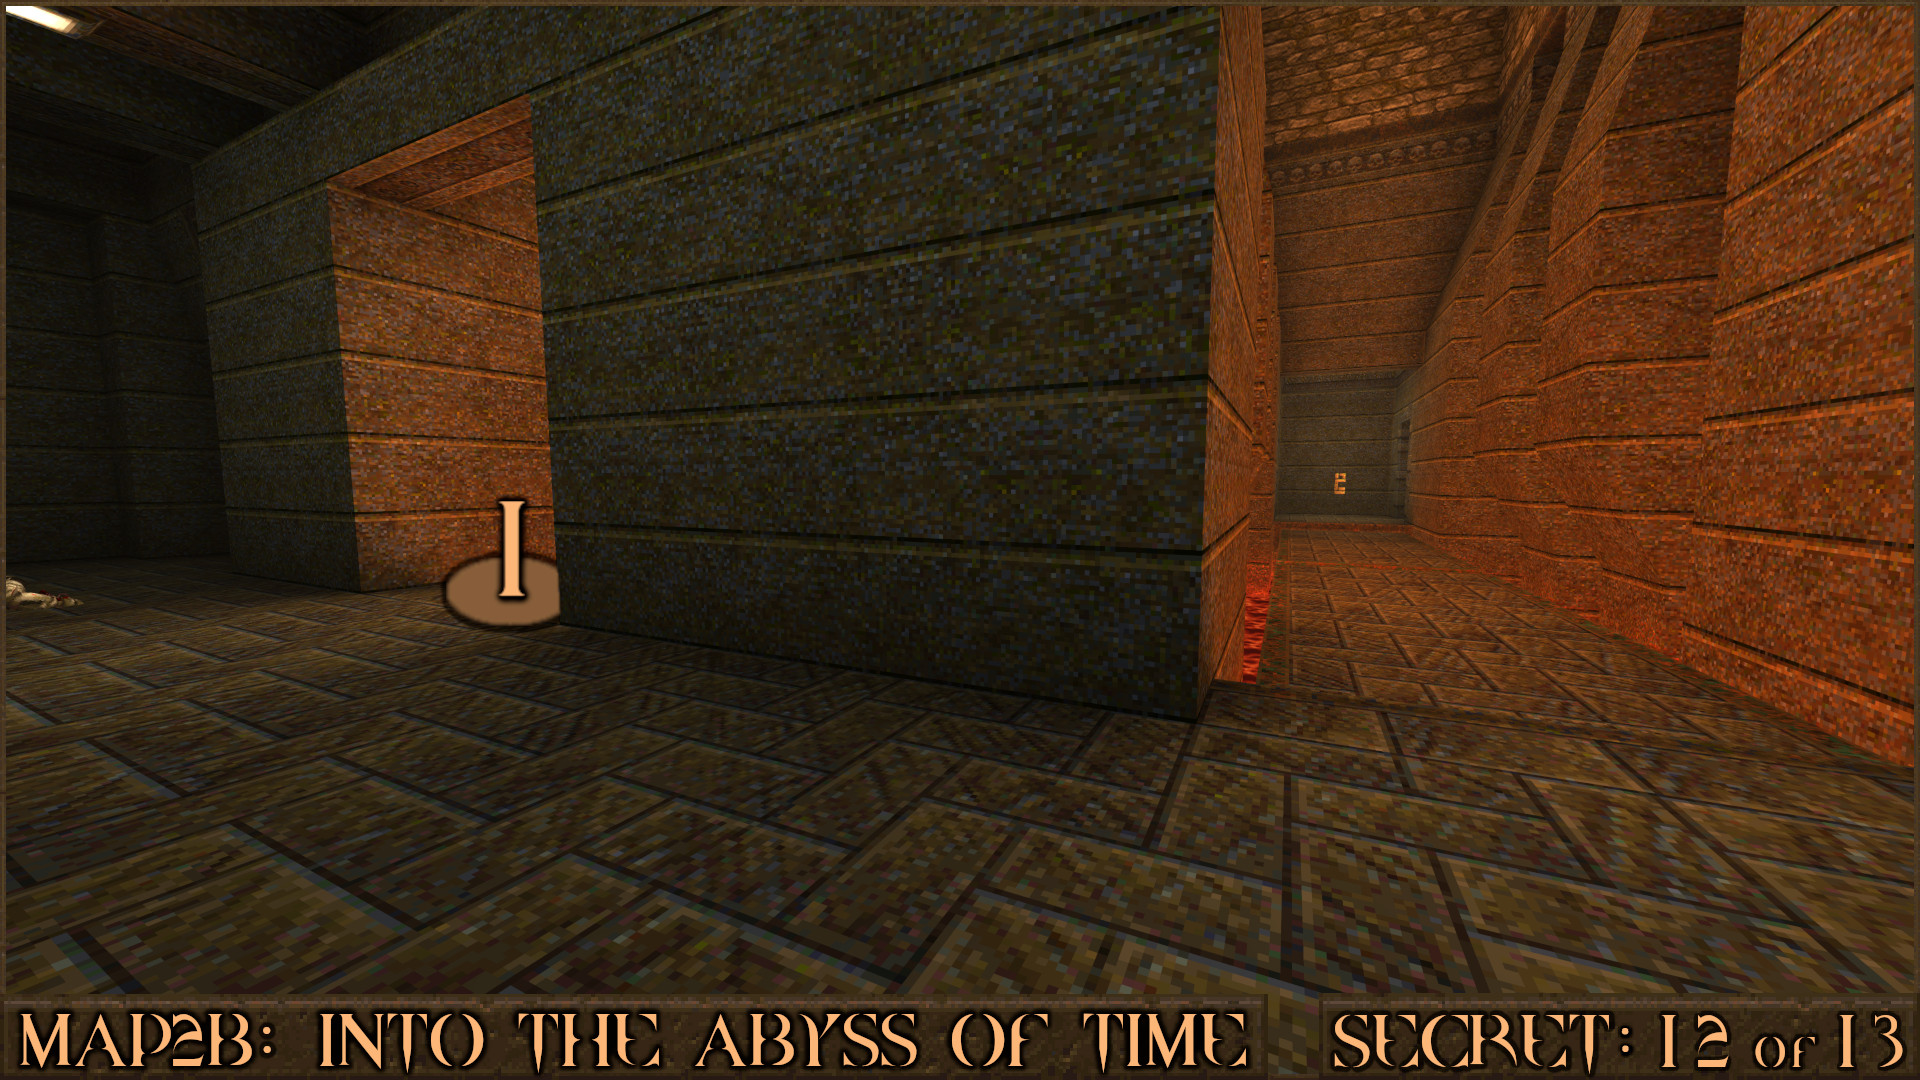
After using a Time Ring to shift to the past you will be facing two bridges. The Gold Key is on the right bridge but instead head down the left bridge ().

A gargoyle face panel () will lower as you approach and allow you into an area with a floor switch that resets the lava arena room. The stairs lead back to a Time Ring in case you want to return to the future and explore further but I recommend retracing your steps and returning to the Gold Key.

Reward: Large Shells Large Nails Armor Shard×4

Secret 13 of 13
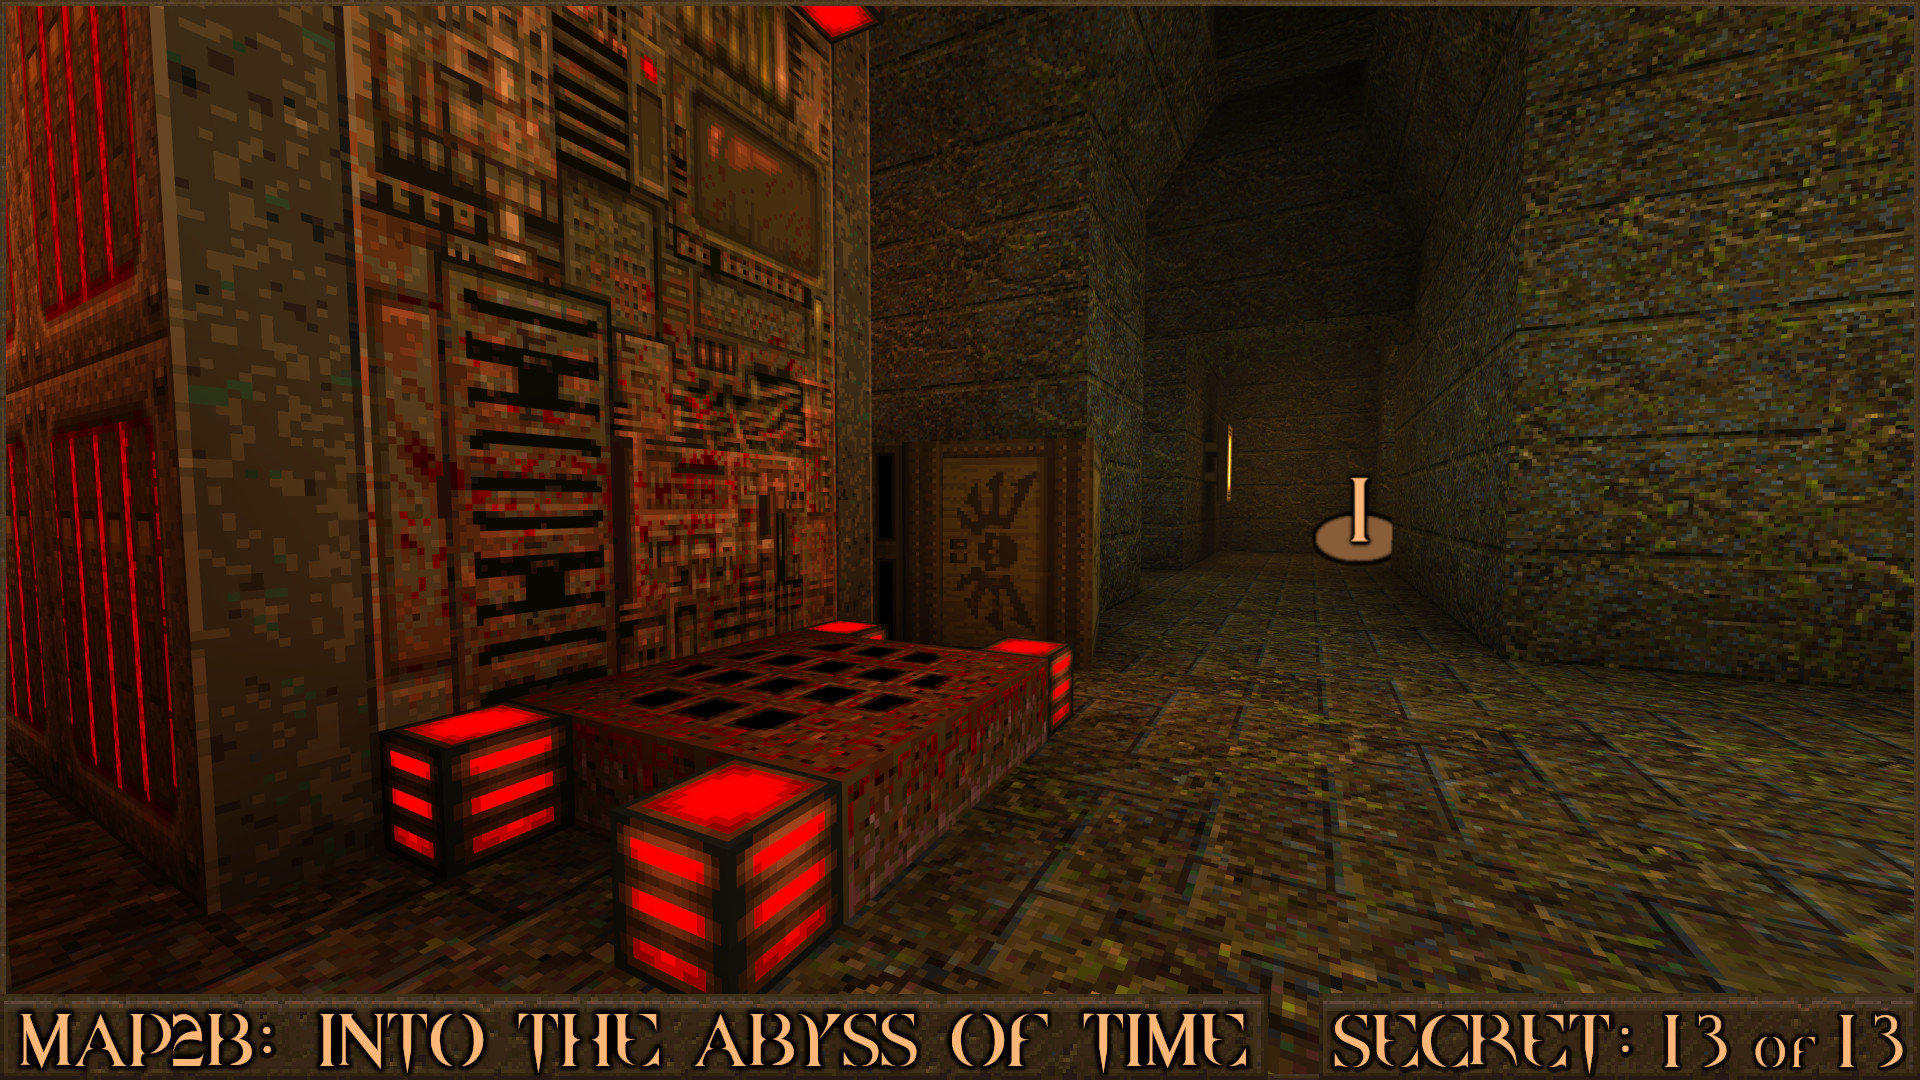
After the mini-boss fight and another shift to the future you will be at the end of the level but don't enter the red Slipgate yet. Instead you should go up the stairs to the right () to find an upgrade.

Reward: [Nail Capacity Upgrade]
‎‏‏‎ ‎‏‏‎ + Rune Secrets
NOTE: During Part 2 the secret count increases from 13 to 14.

Secret 14 of 14
Requires Rune of Sacrifice
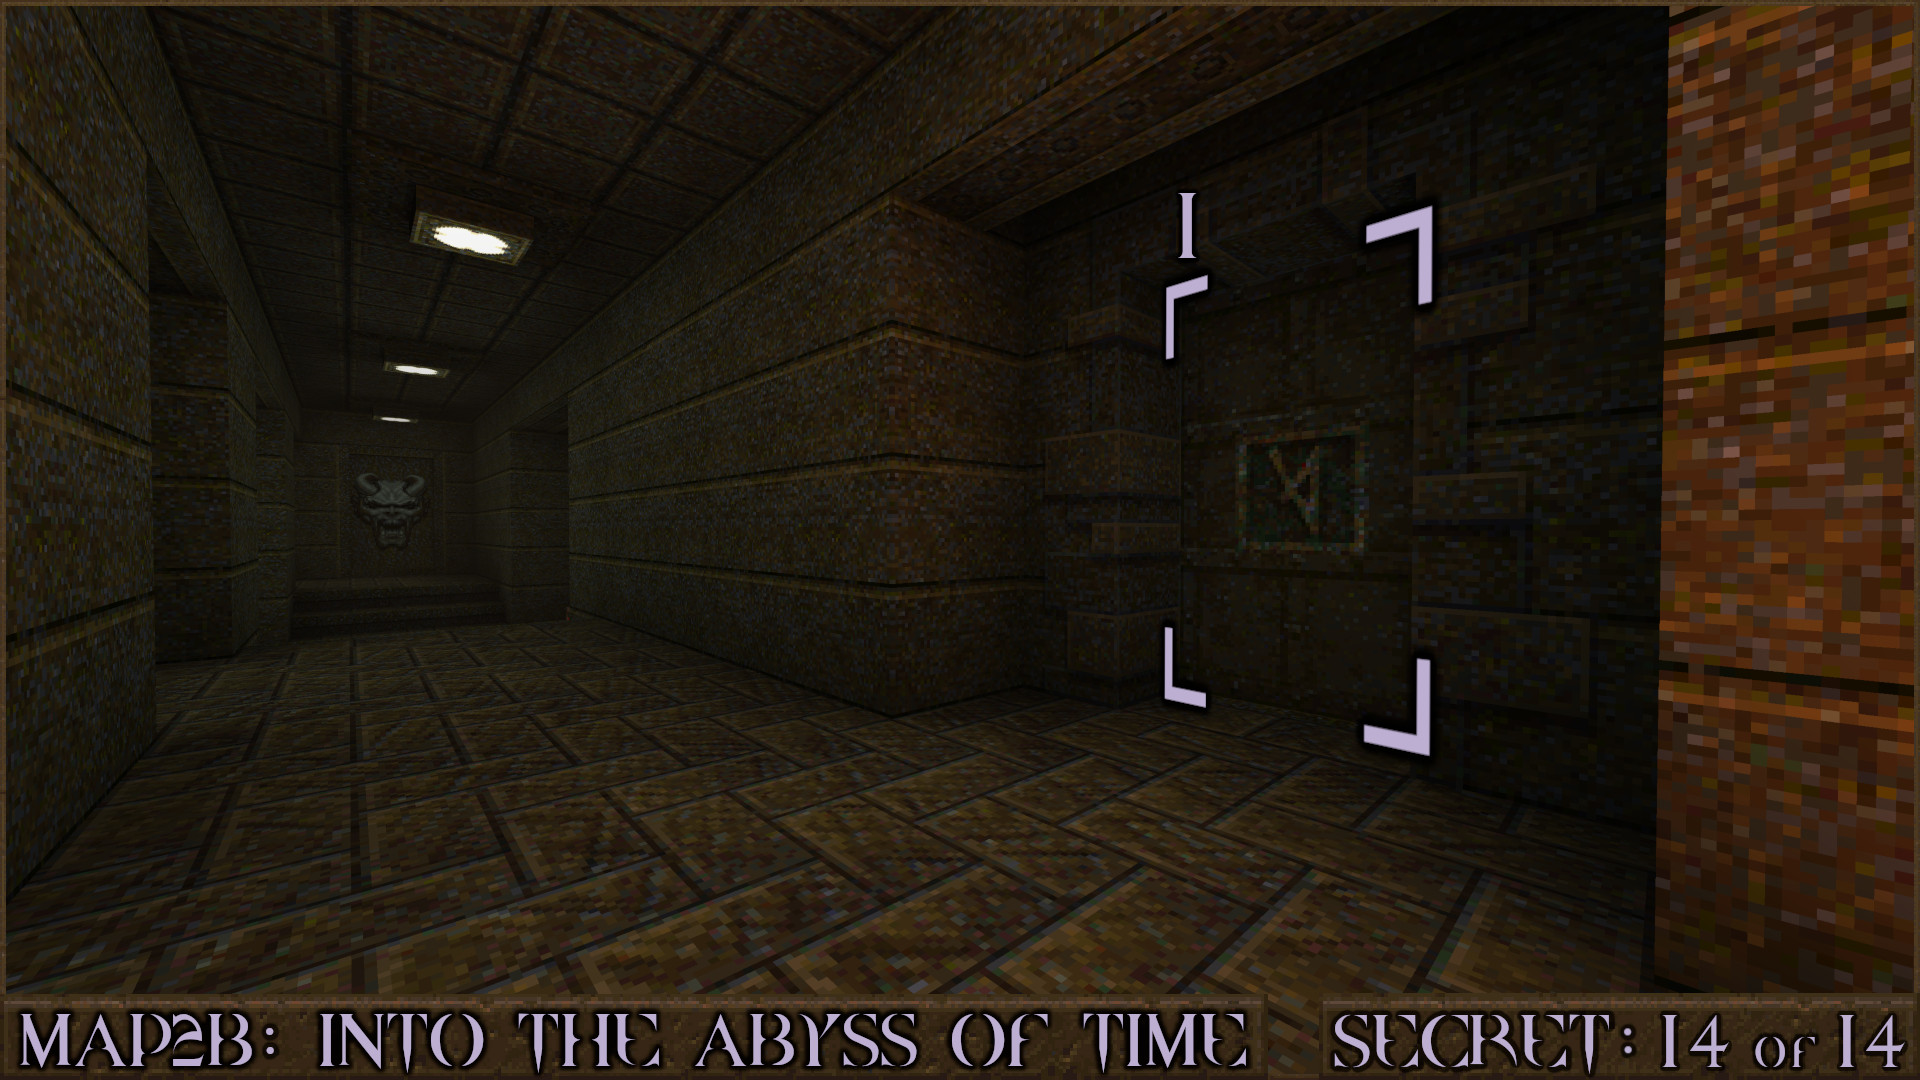
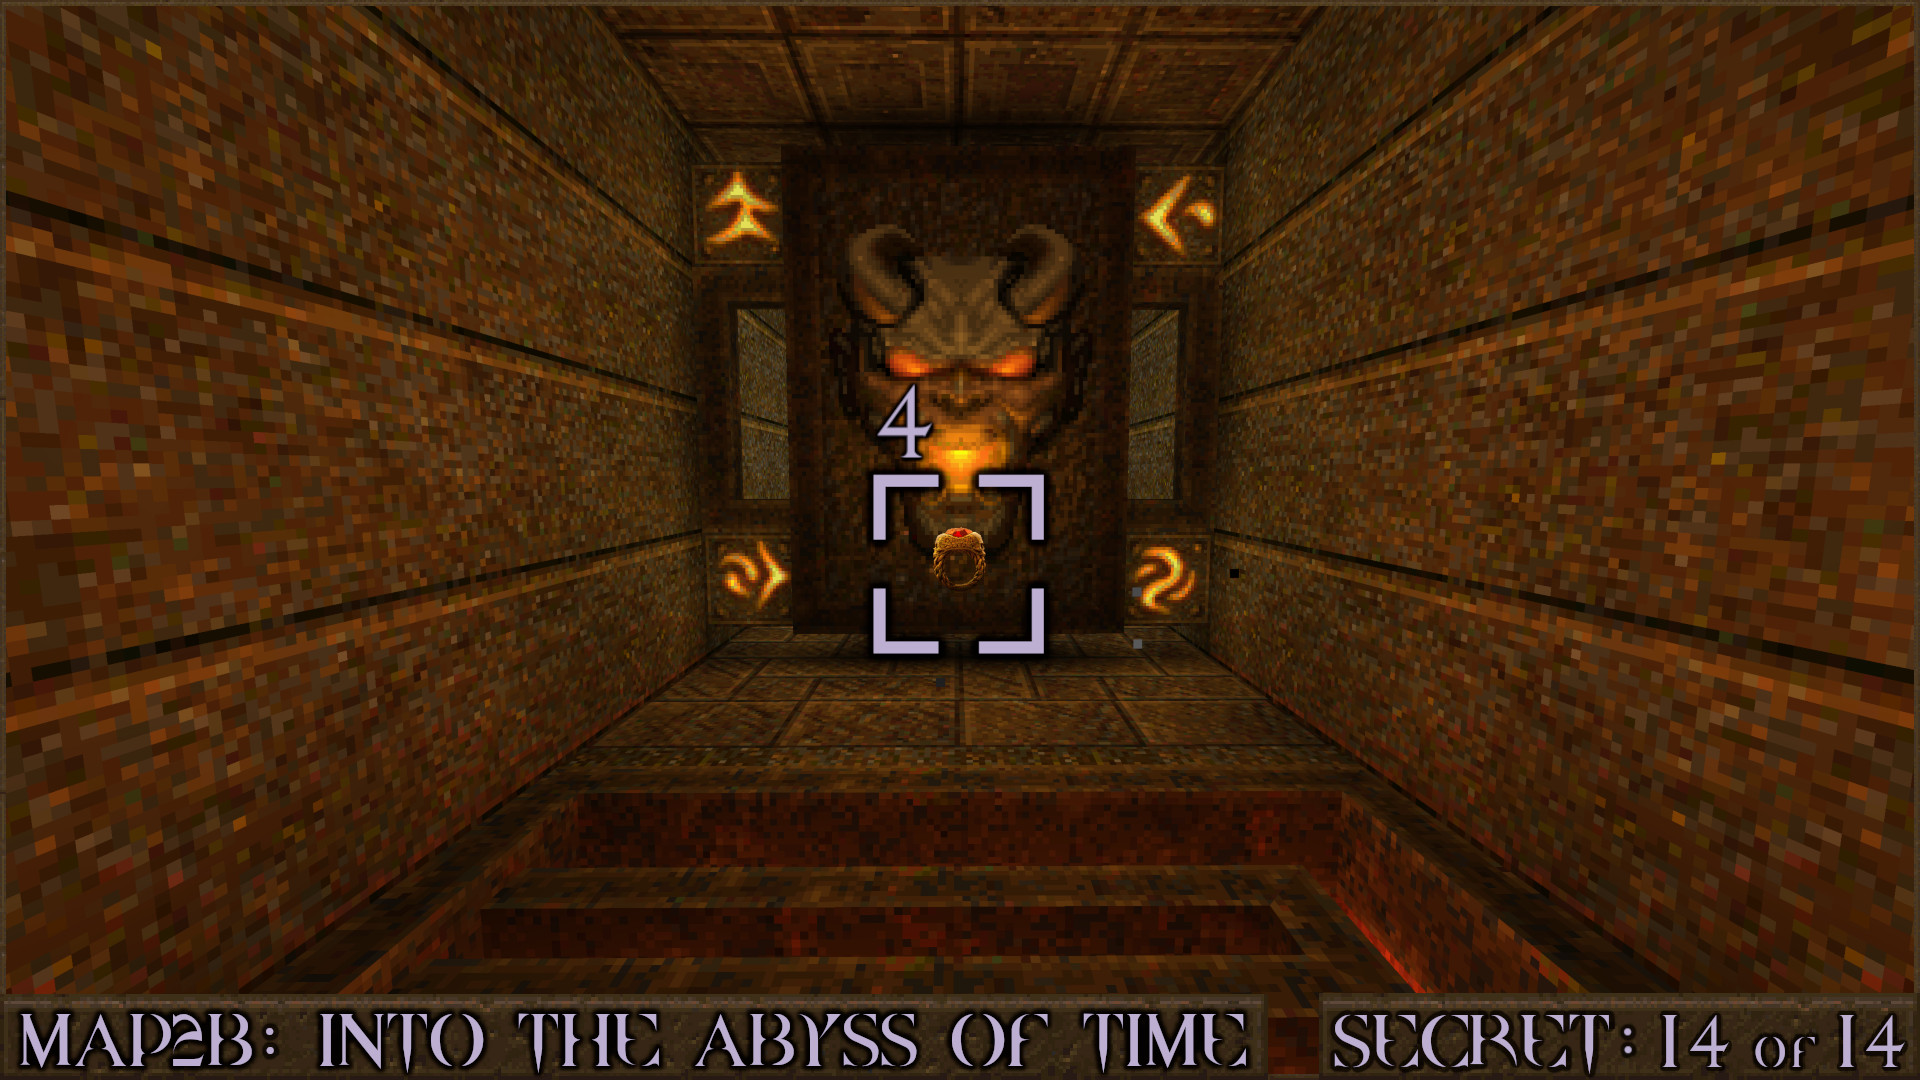
After walking across a bridge over lava and shortly before the bloody gargoyle face from Secret 7, look to your right to see a Rune of Sacrifice Door (). Open it to access the secret containing a Pentagram of Protection and a shortcut to the Gold Key.

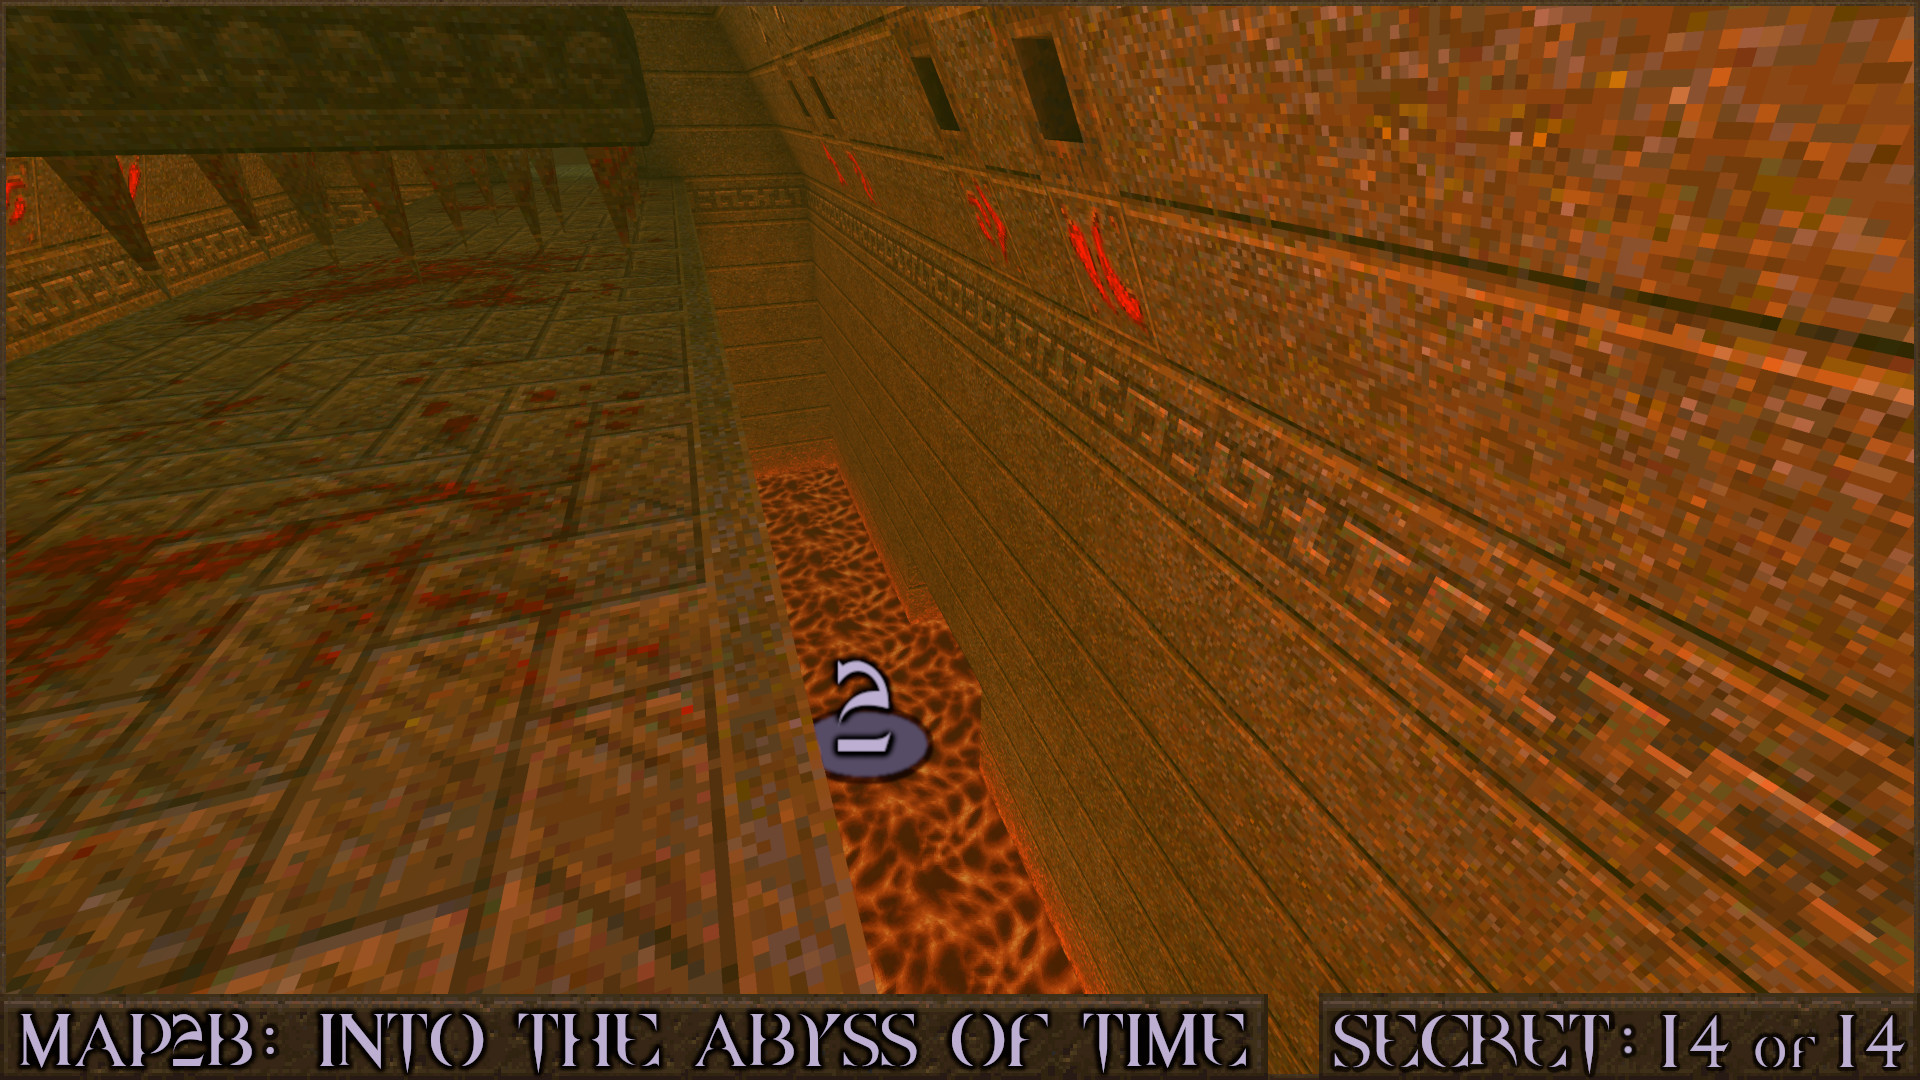
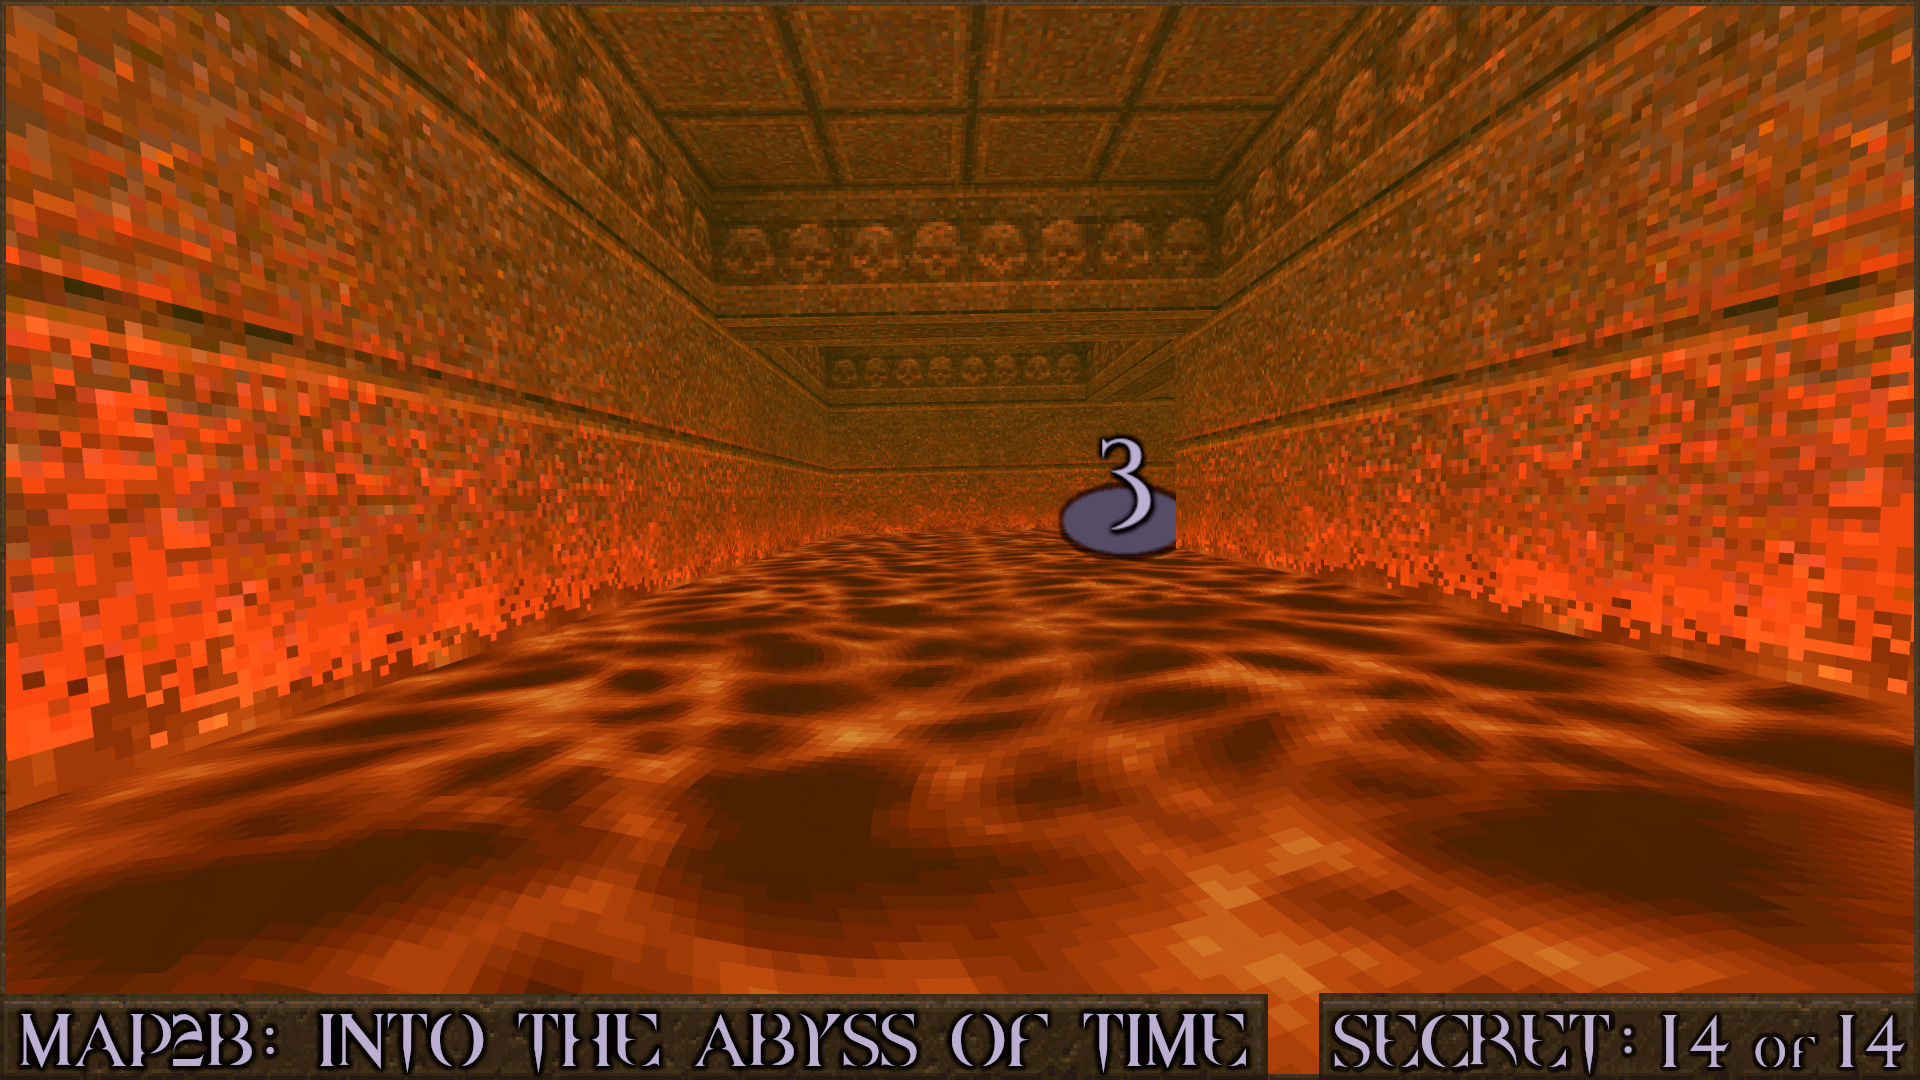
There is a way to utilise the invulnerability of this item to skip even more of the level. Grab the Gold Key, go up the stairs and through the Gold Key Door. When you see the crusher trap above you immediately jump over the side () and look for a corridor in the lava.

Swim through the lava corridor as quickly as you can and around the corner ().

You'll surface near a Time Ring () that will skip the mini-boss fight and teleport you straight to the final room with the Slipgate exit.

Reward: Pentagram of Protection
‎‏‏‎MAP3: Veils of the Old Ones
Secret 1 of 13
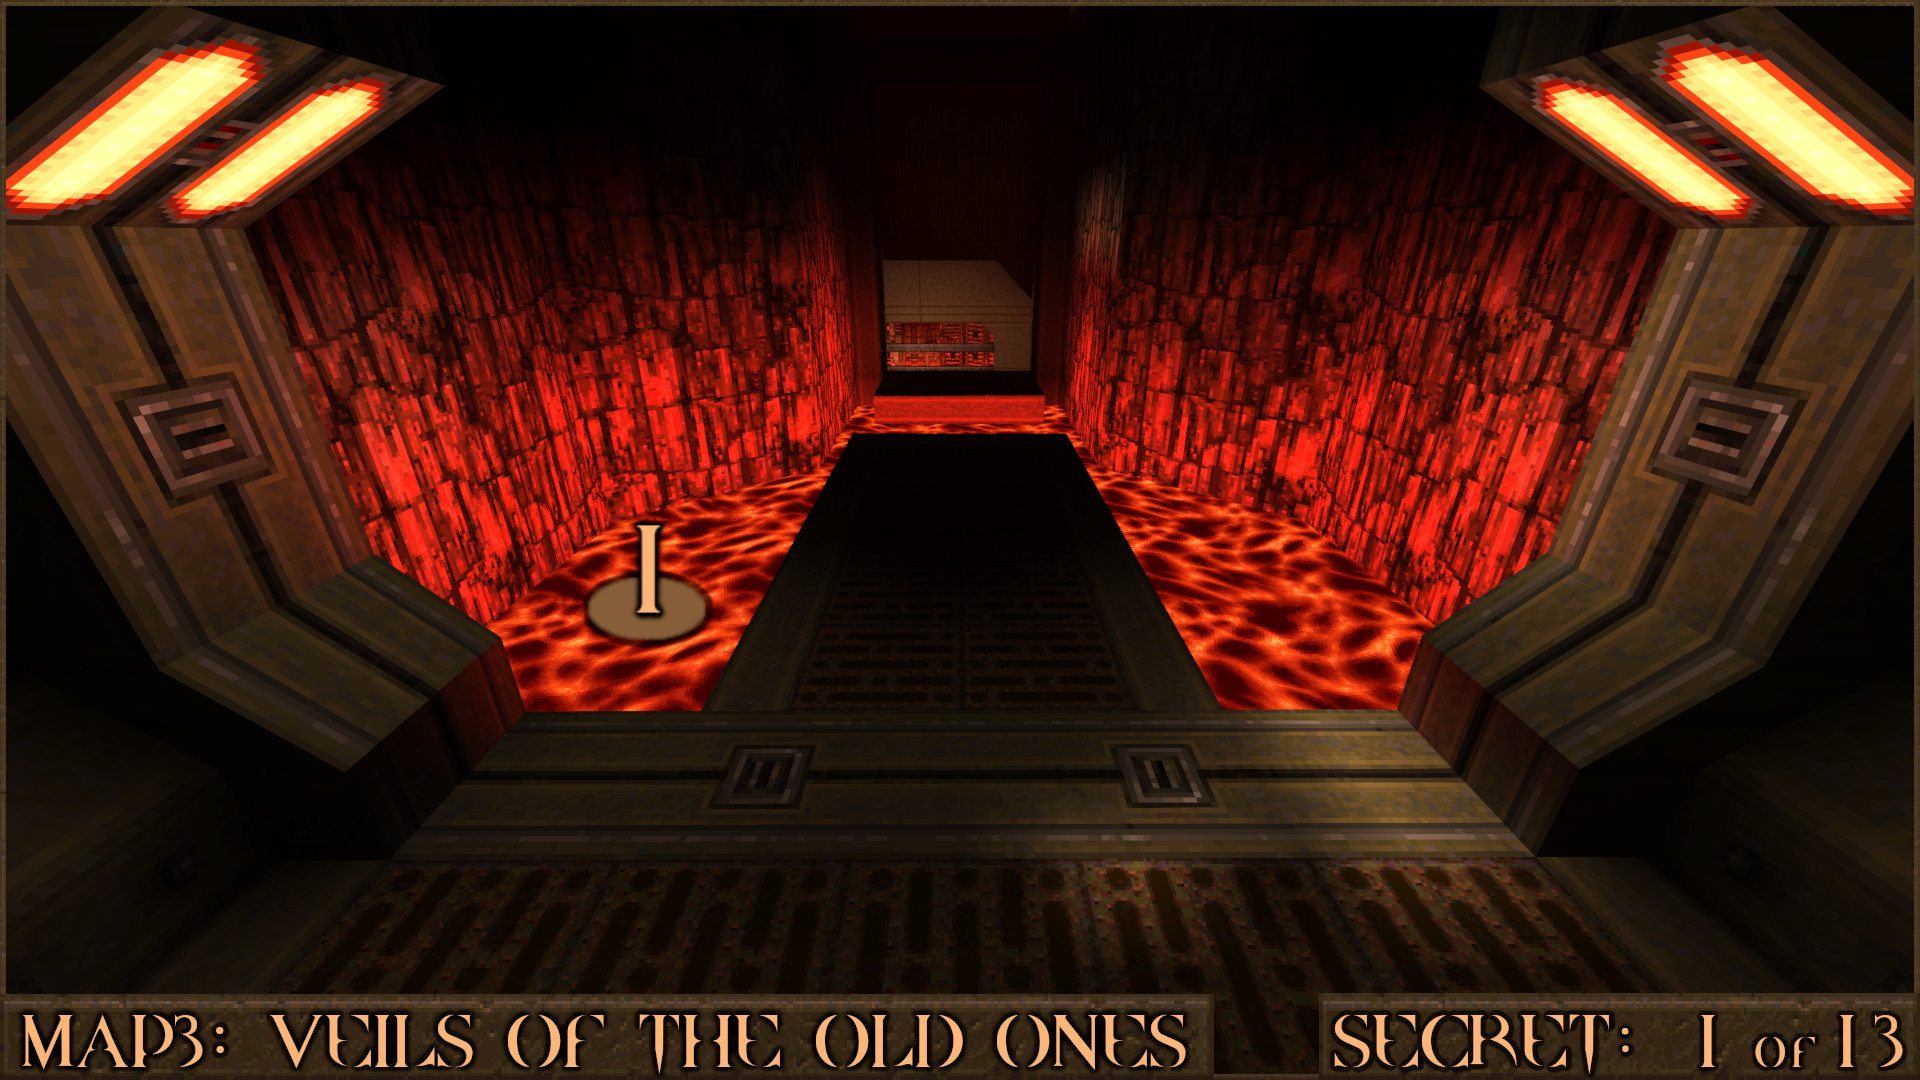
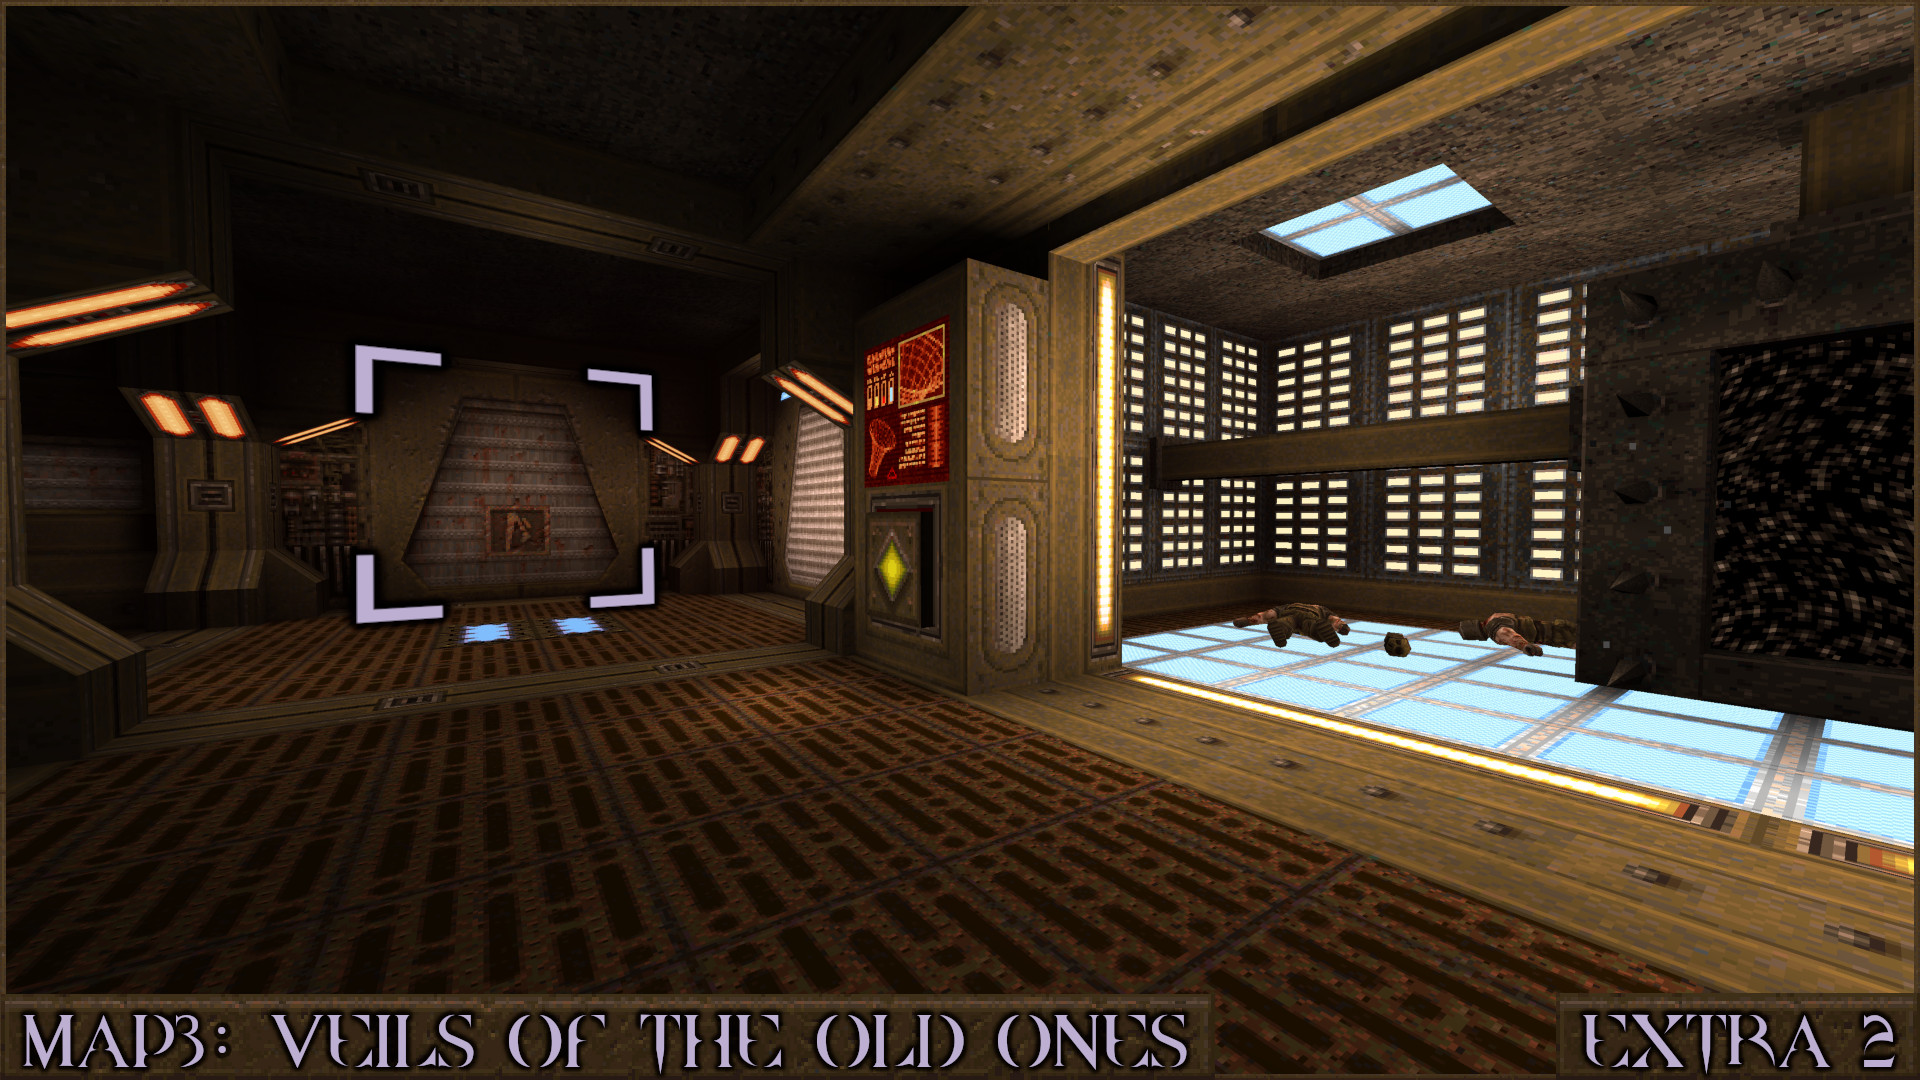
After entering the facility take a left when you see the Yellow Armor and look for a small corridor that appears to have lava flowing around it. The lava is actually a hologram () and you can drop through it to find a secret.

Reward: Armor Shard×4

Secret 2 of 13
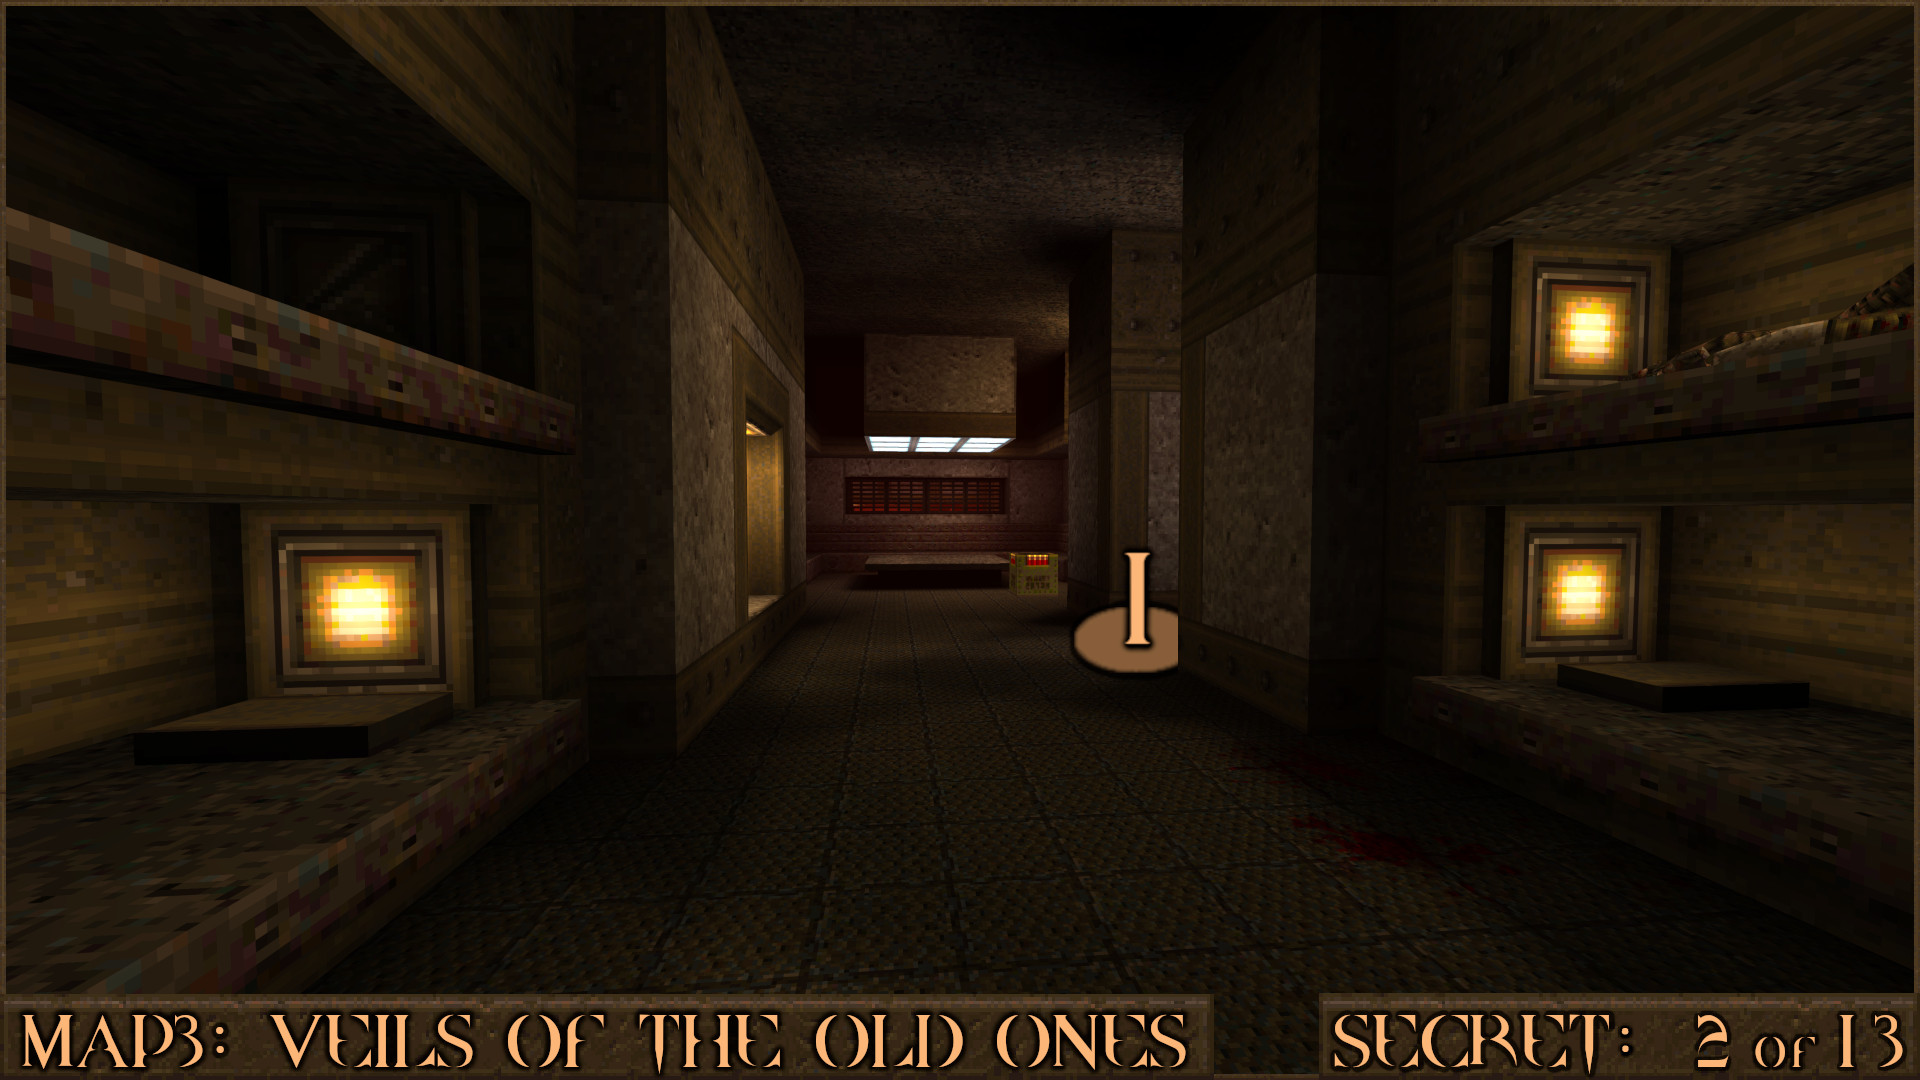
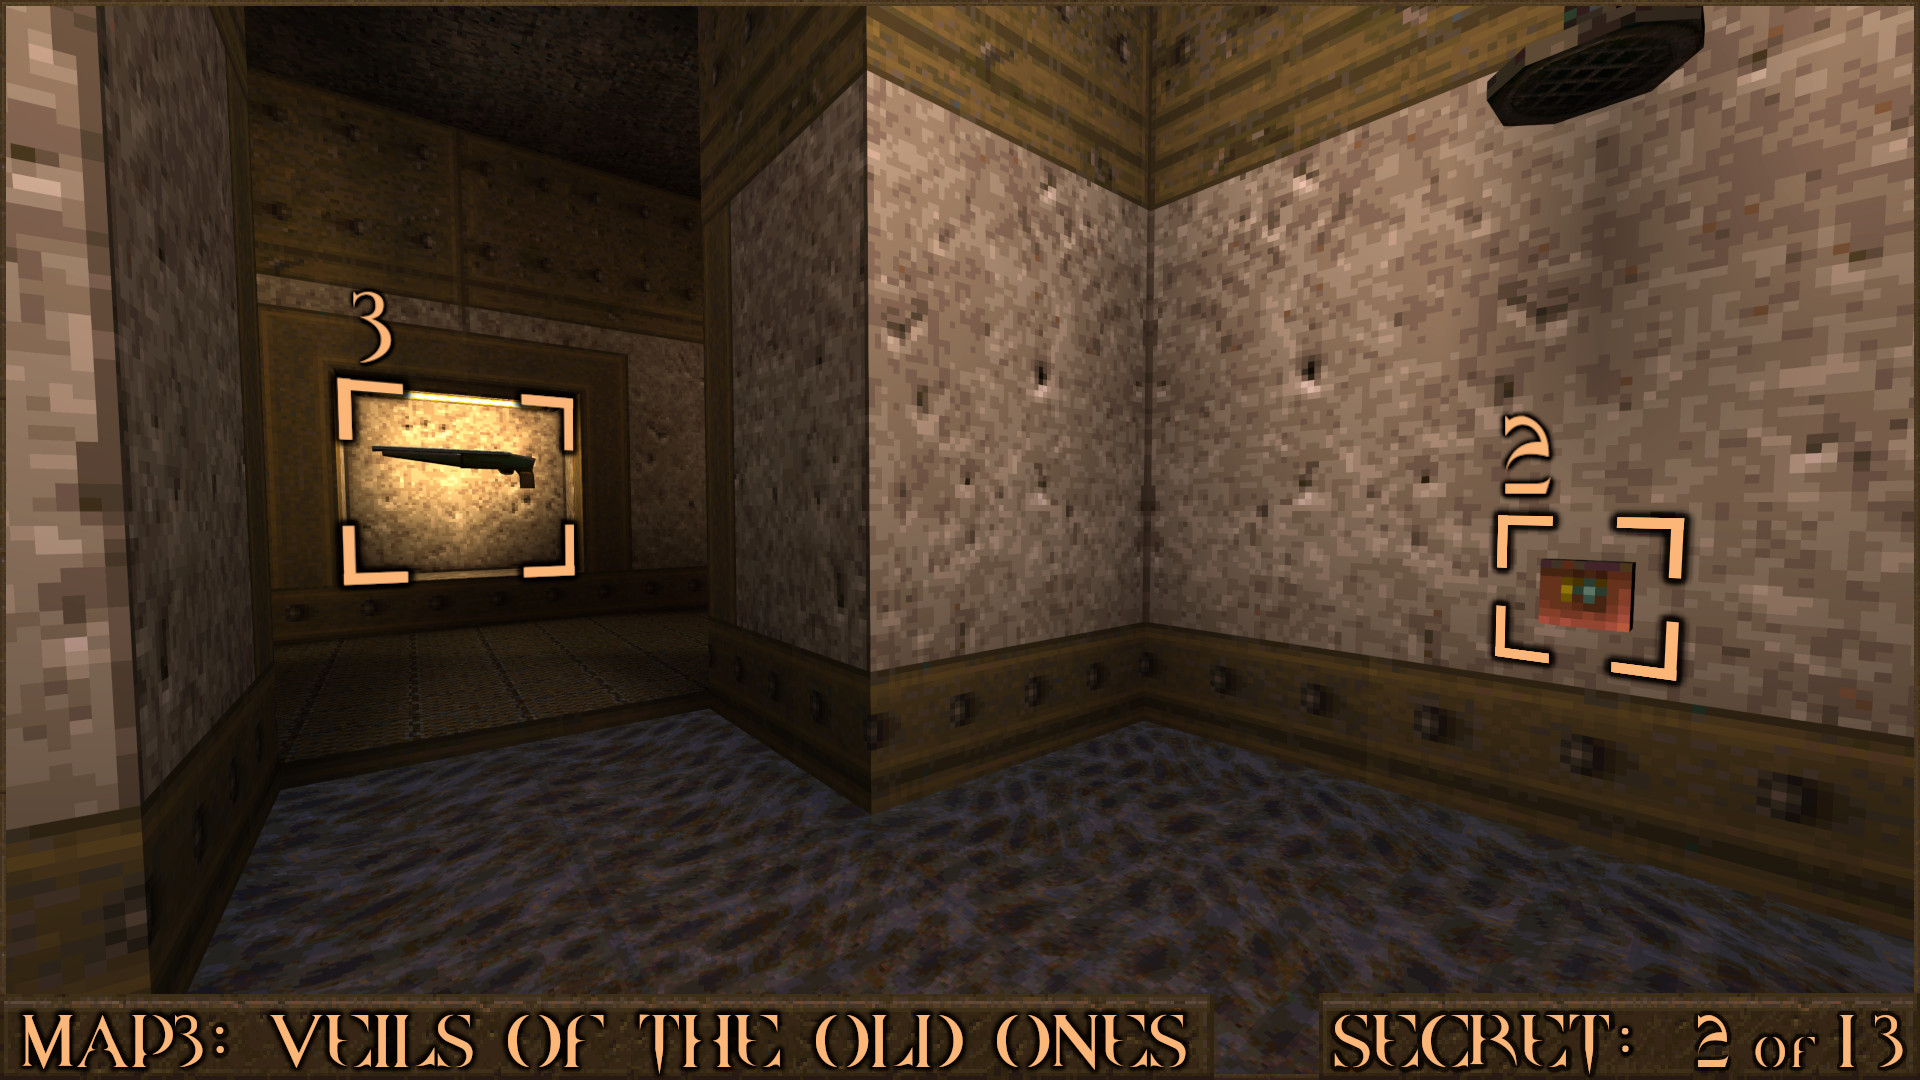
After passing through a damaged wall section into the room with several bunk beds look for a nearby shower area ().

Press the unusual button () to shift a section of wall behind a Double-Barrelled Shotgun () revealing the secret.

Reward: [Shell Capacity Upgrade]

Secret 3 of 13
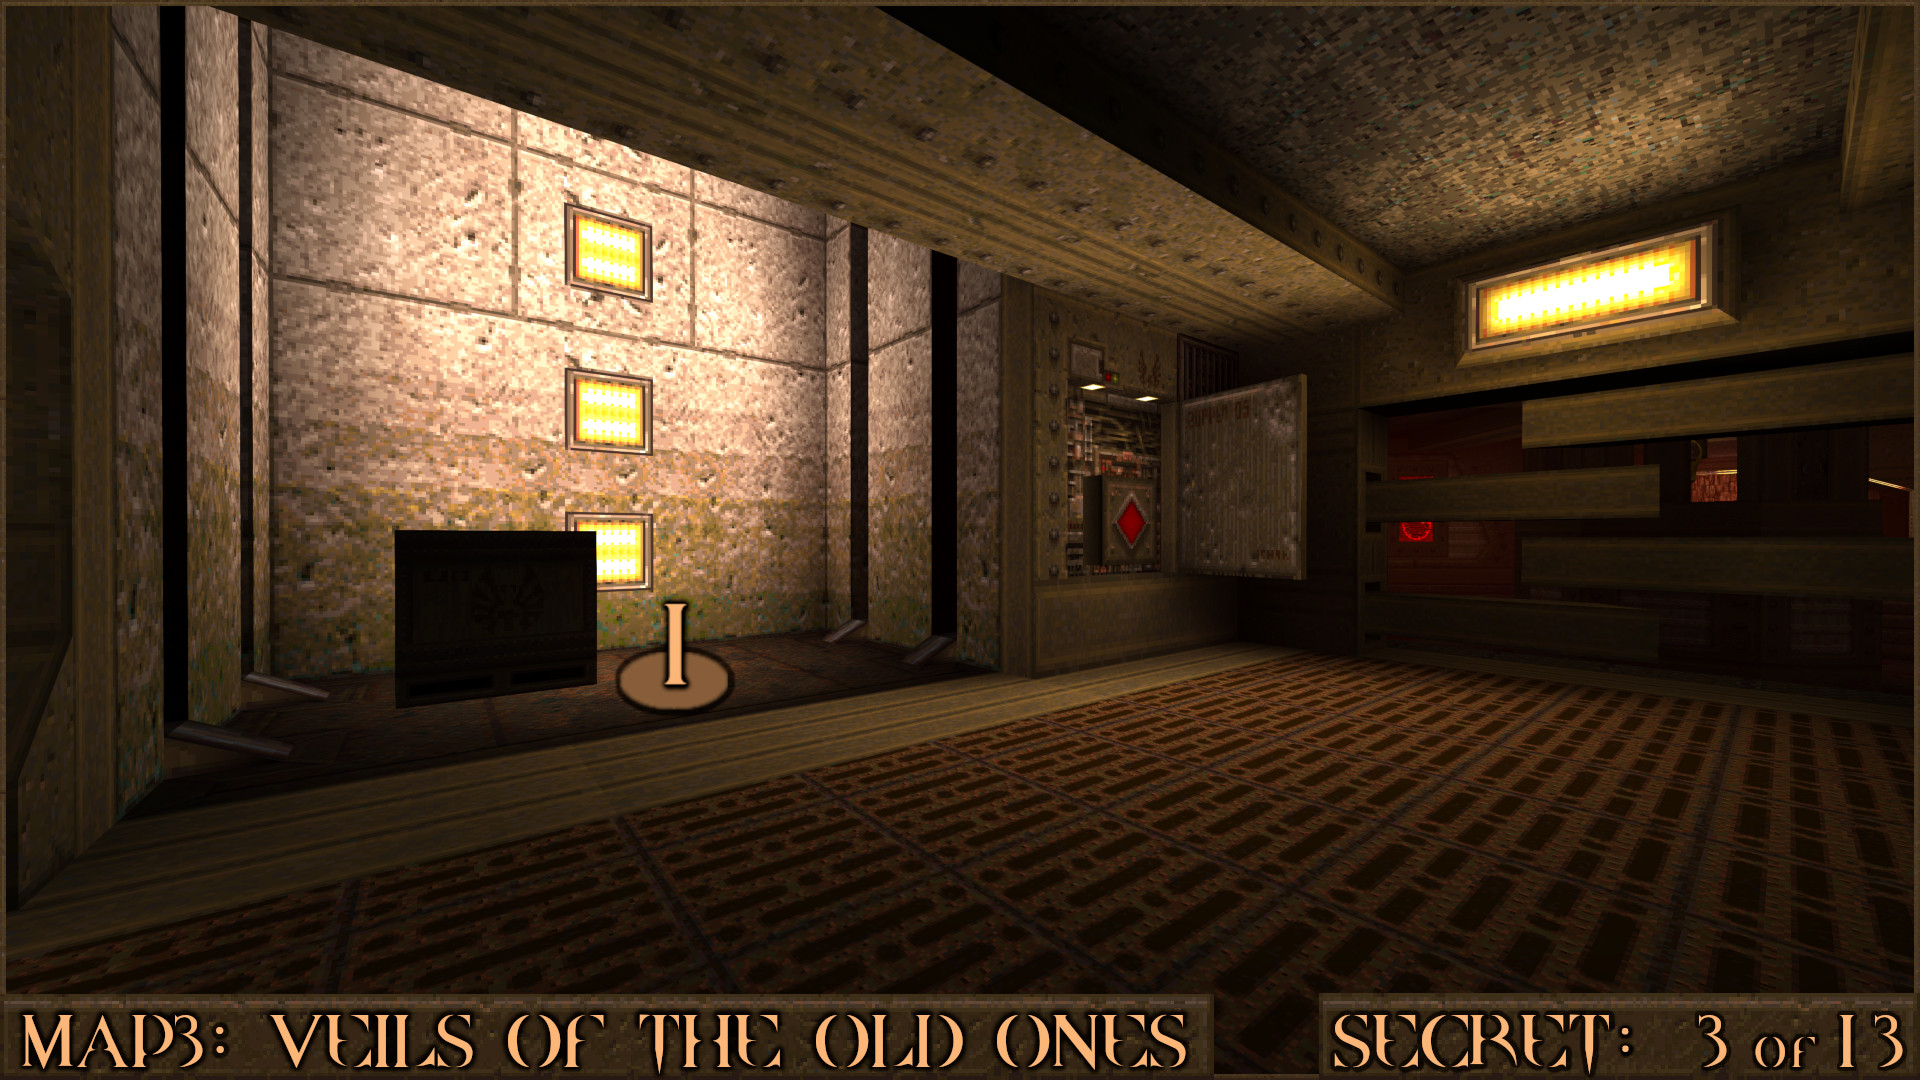
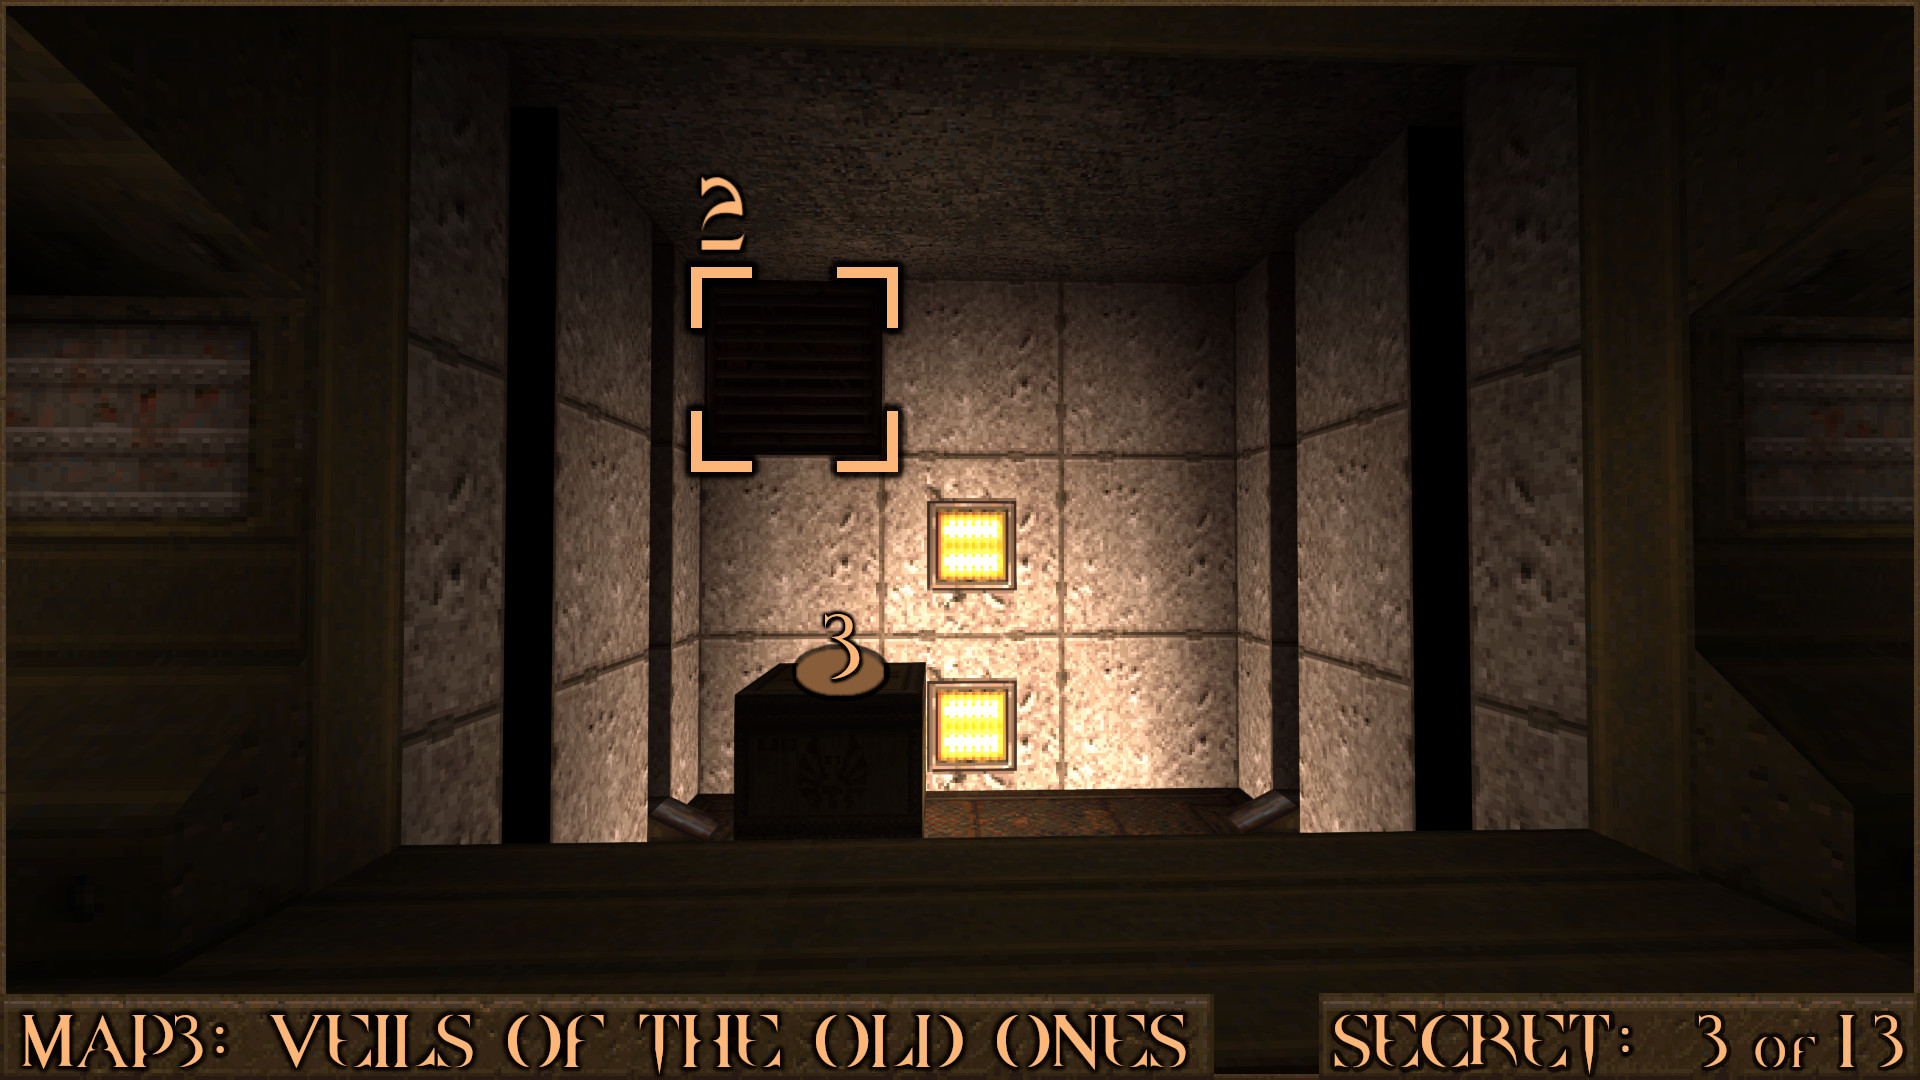
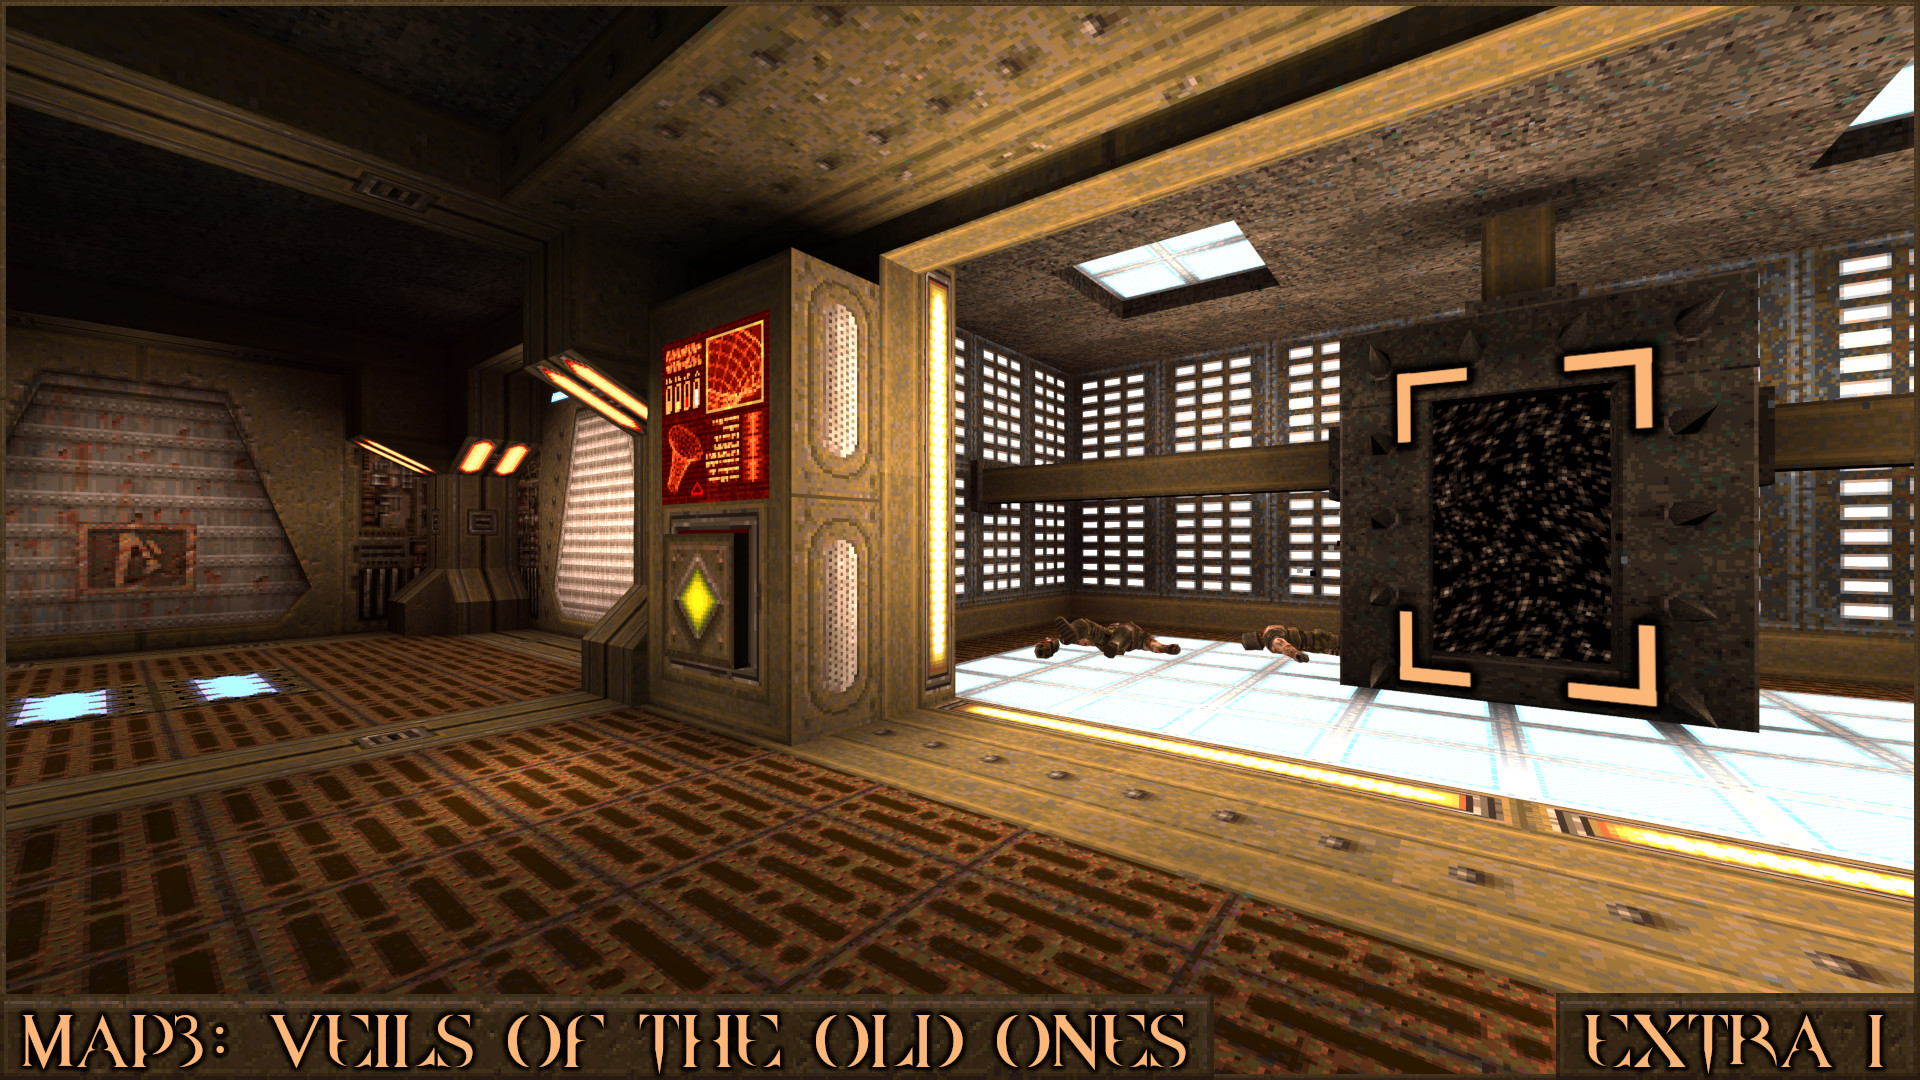
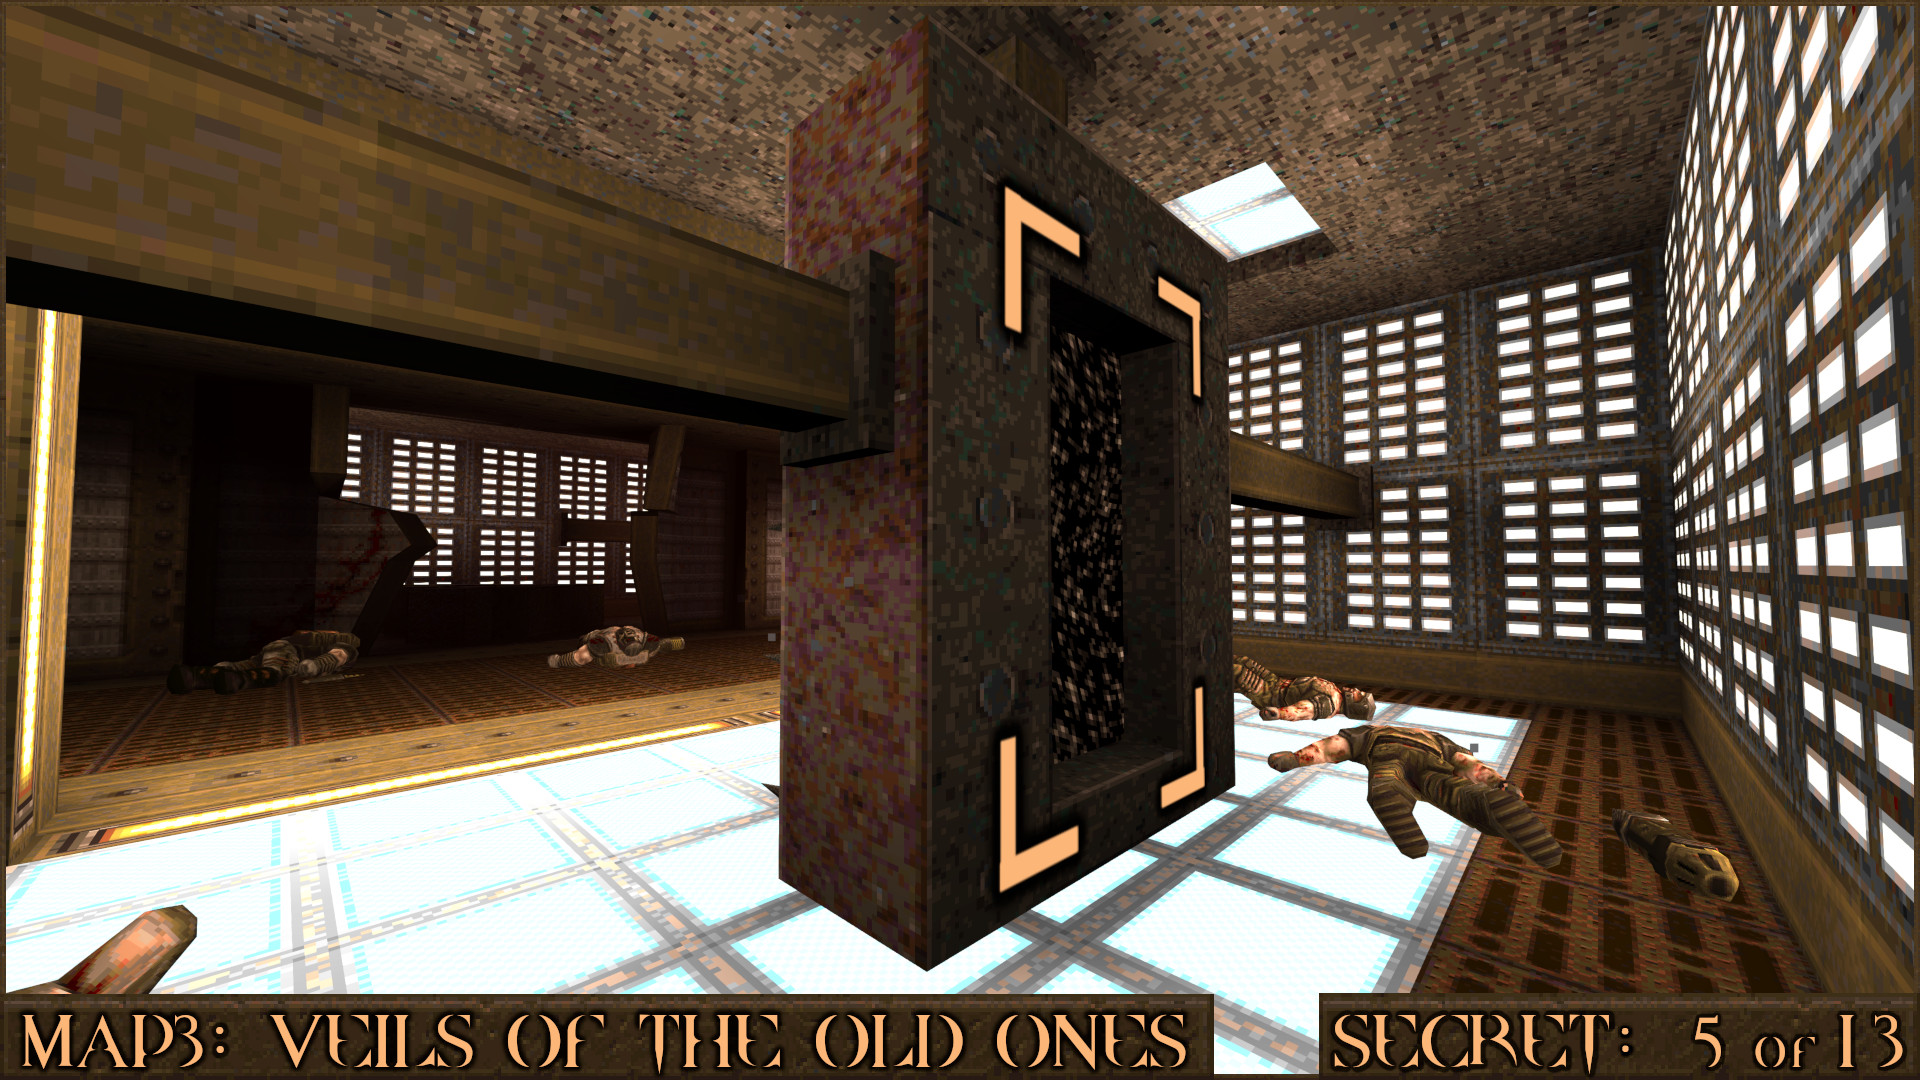
When you come across a cargo elevator () with a crate on it ride it to the upper floor and step off.

Now turn around and shoot the dark panel () in the upper left and jump onto the crate () on the elevator. It should lift you up just high enough so you can jump into the hole for the secret.

Reward: Large Nails

Secret 4 of 13
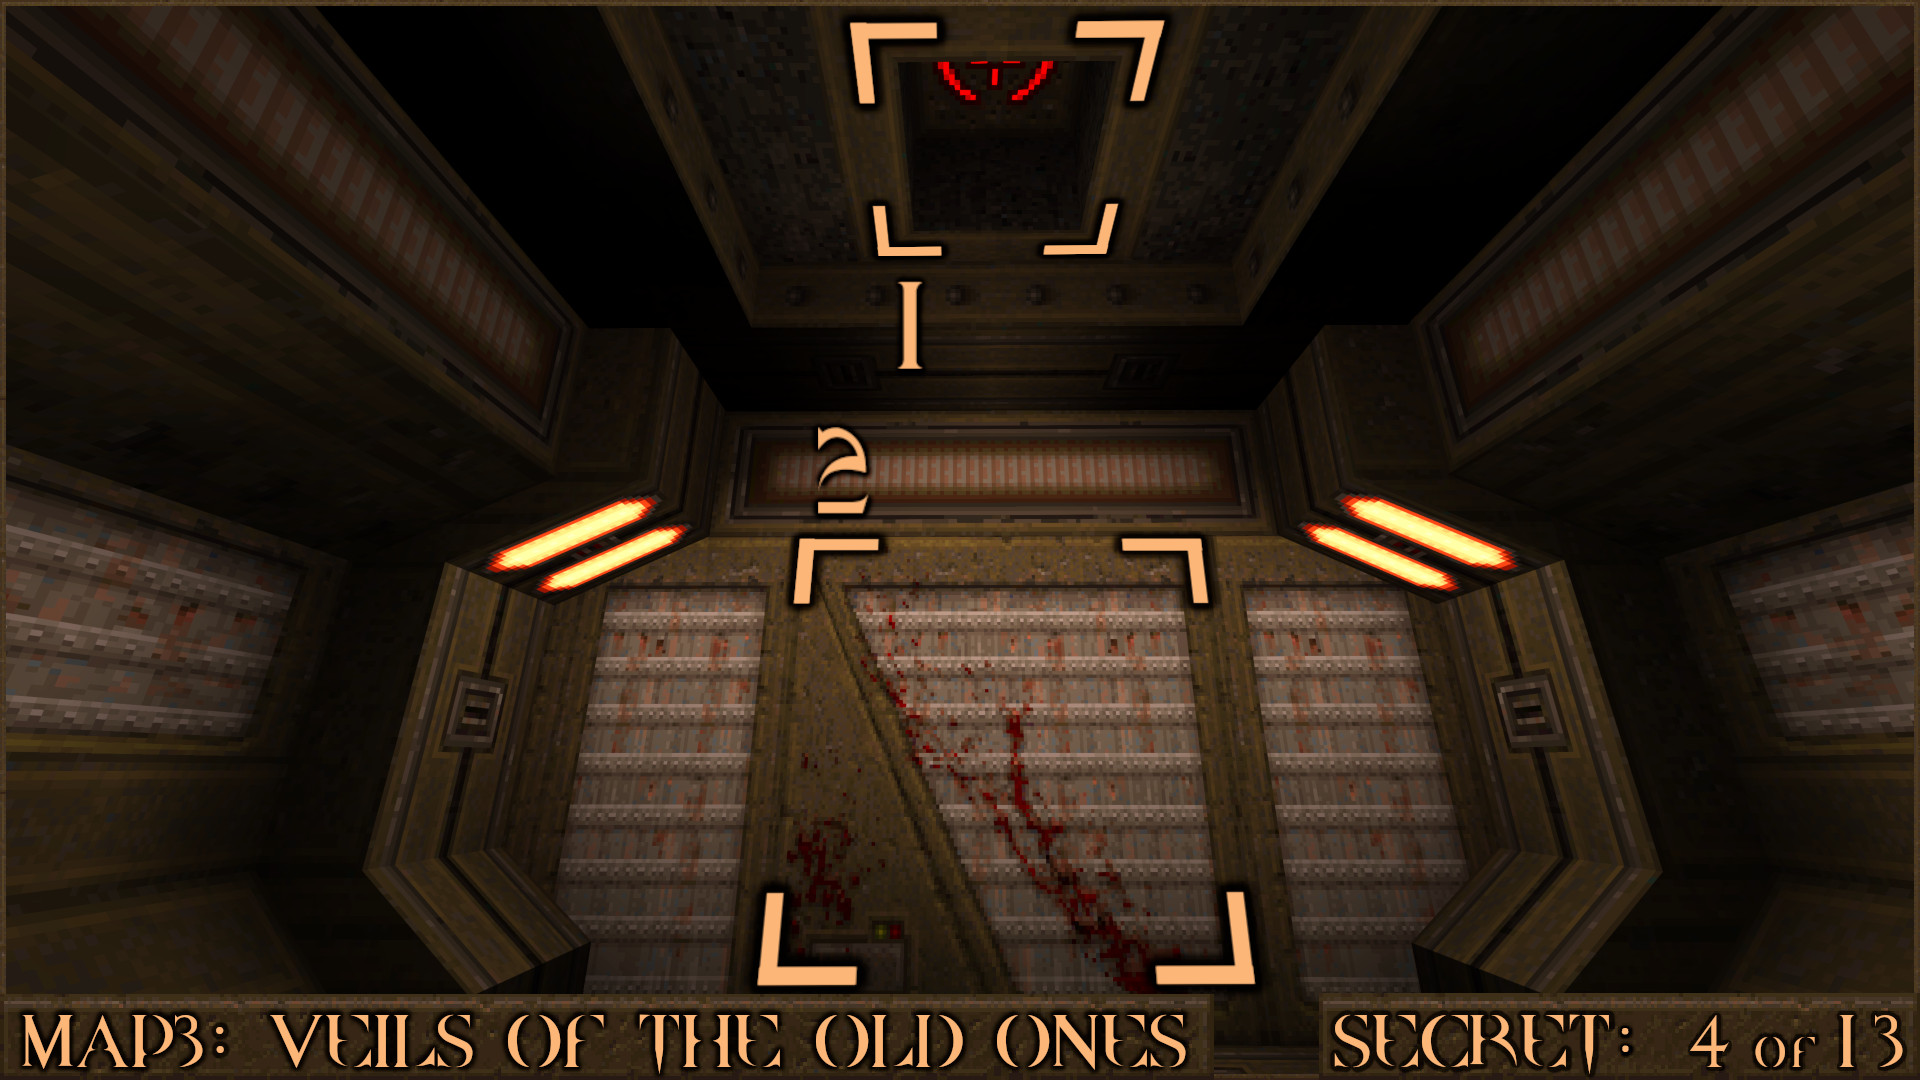
Ride the elevator from Secret 3 up to the upper floor and move to the end of the corridor. From here look up to see a red shootable button () that shifts the wall () revealing a large secret room.

Reward: Yellow Armor

Extra Secret 1
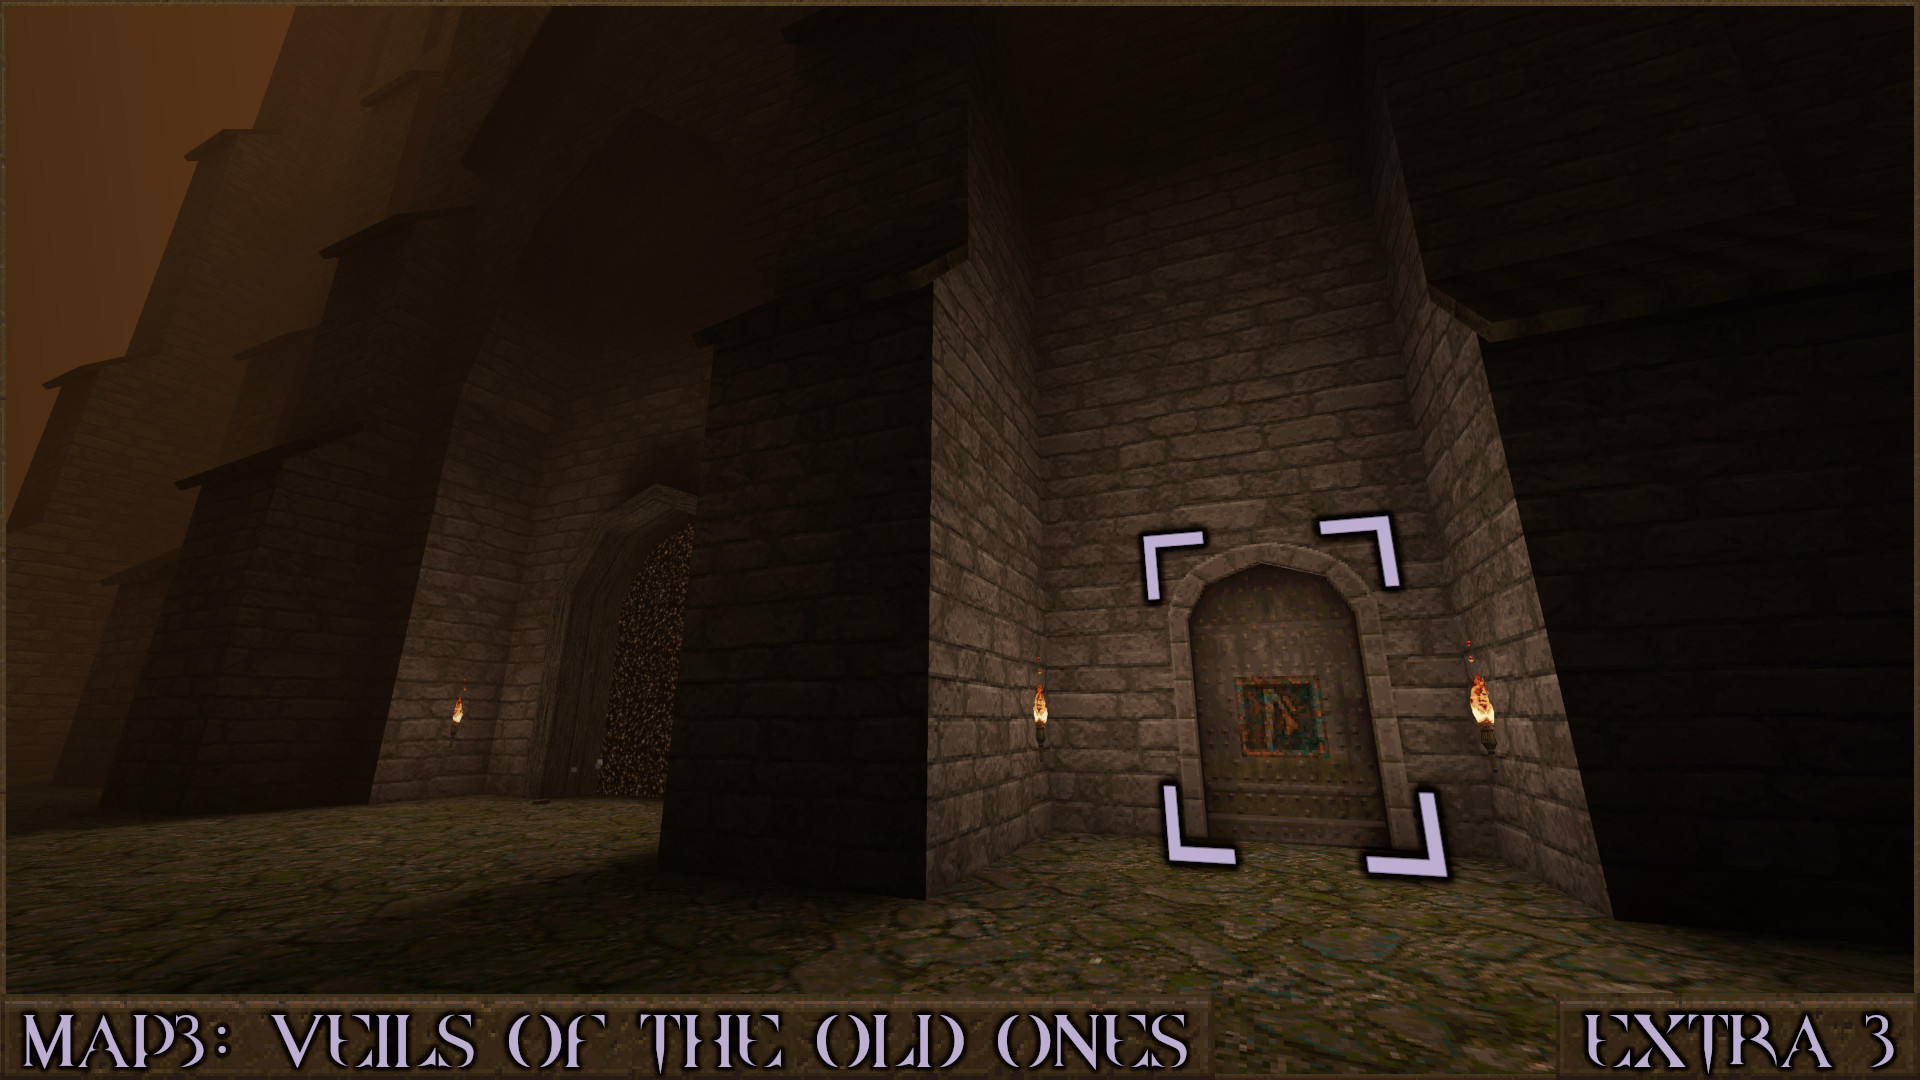
Near the Rune of Sacrifice Door press a red diamond button to reveal a large teleporter. Go through it to be teleported to an enemy ambush that also contains a valuable upgrade.

Reward: [Nail Capacity Upgrade]

Secret 5 of 13
Return to the teleporter from the previous Extra Secret but this time go around the back and enter the teleporter. You'll find yourself teleported to a mysterious island with plenty of items and enemies.

Reward: Small Shells×4 Small Nails×3 Armor Shard×3 [Health Capacity Upgrade]

Secret 6 of 13
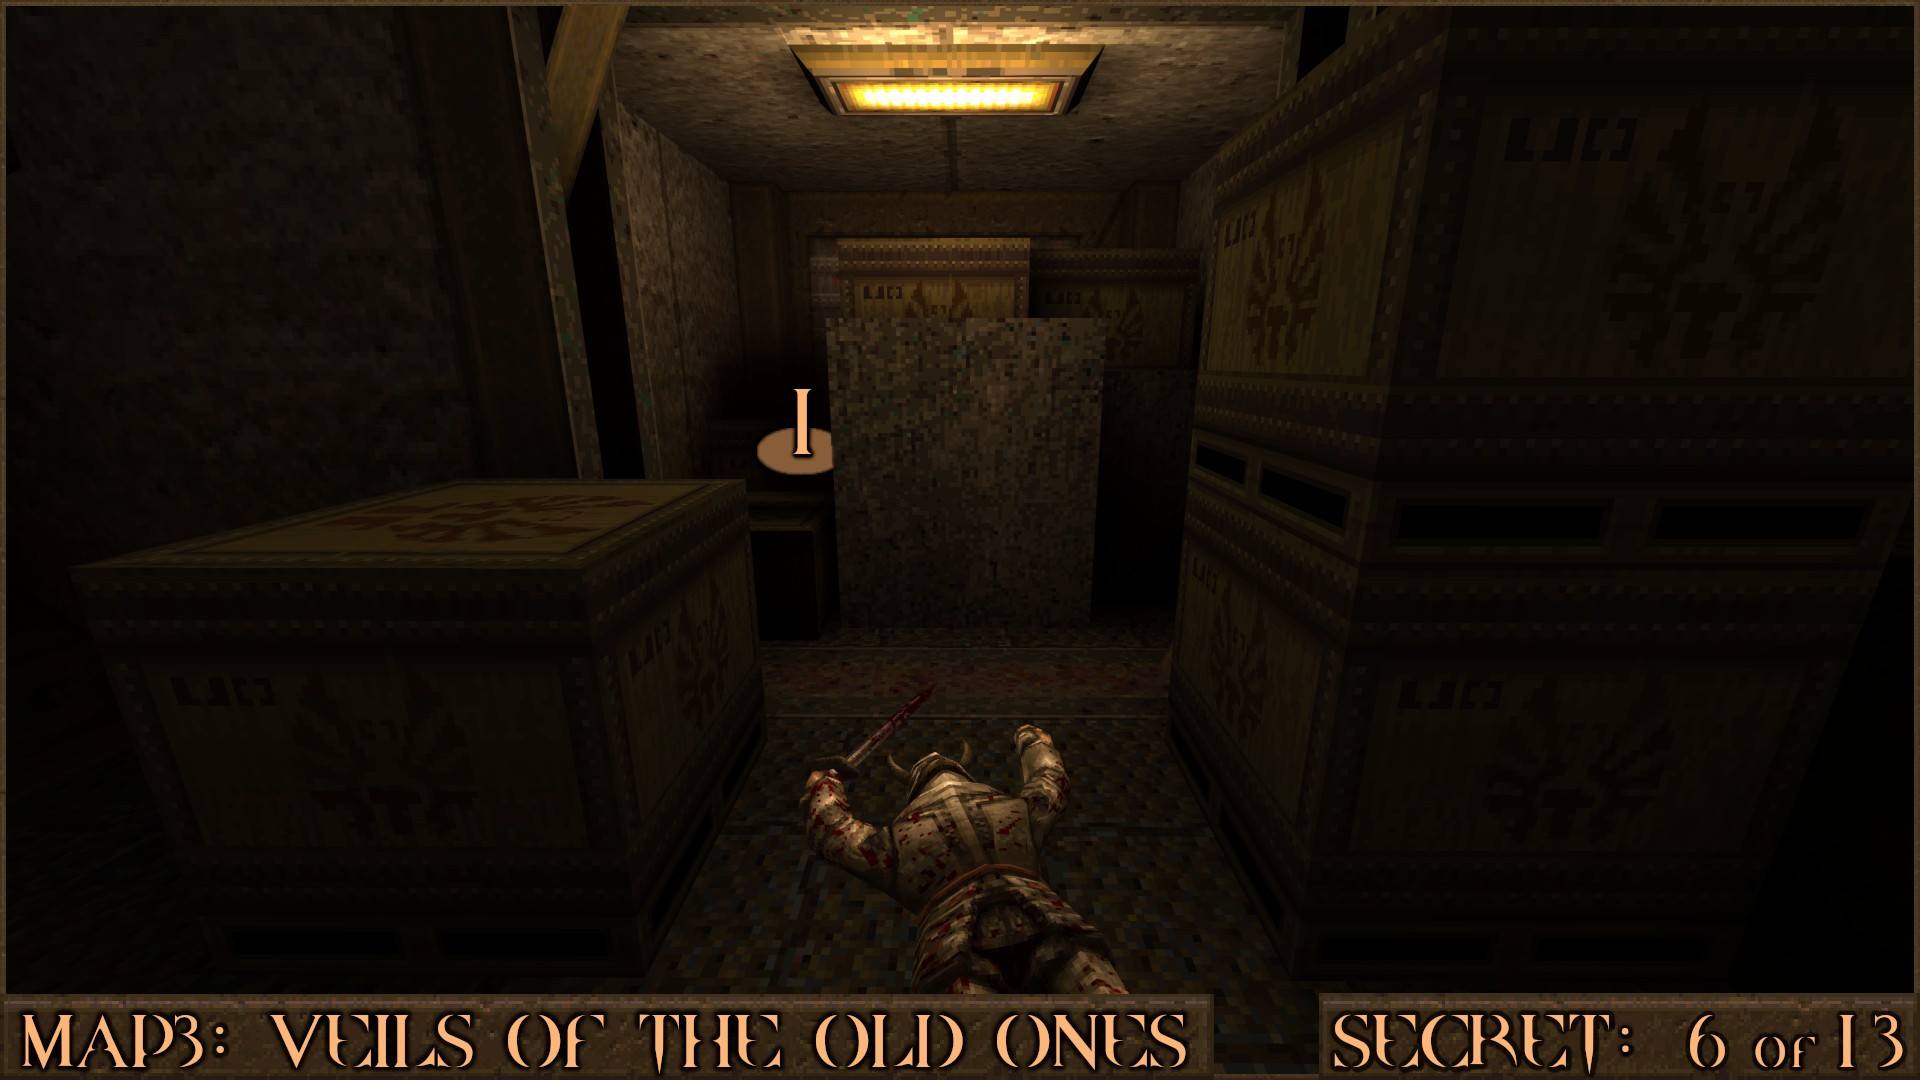
After removing a large chain plug from the floor you will drop down to a lower level. Behind you is the end of a dark corridor filled with crates. Jump up the left side of the crates () to find an upgrade hidden at the back.

Reward: [Rocket Capacity Upgrade]

Secret 7 of 13
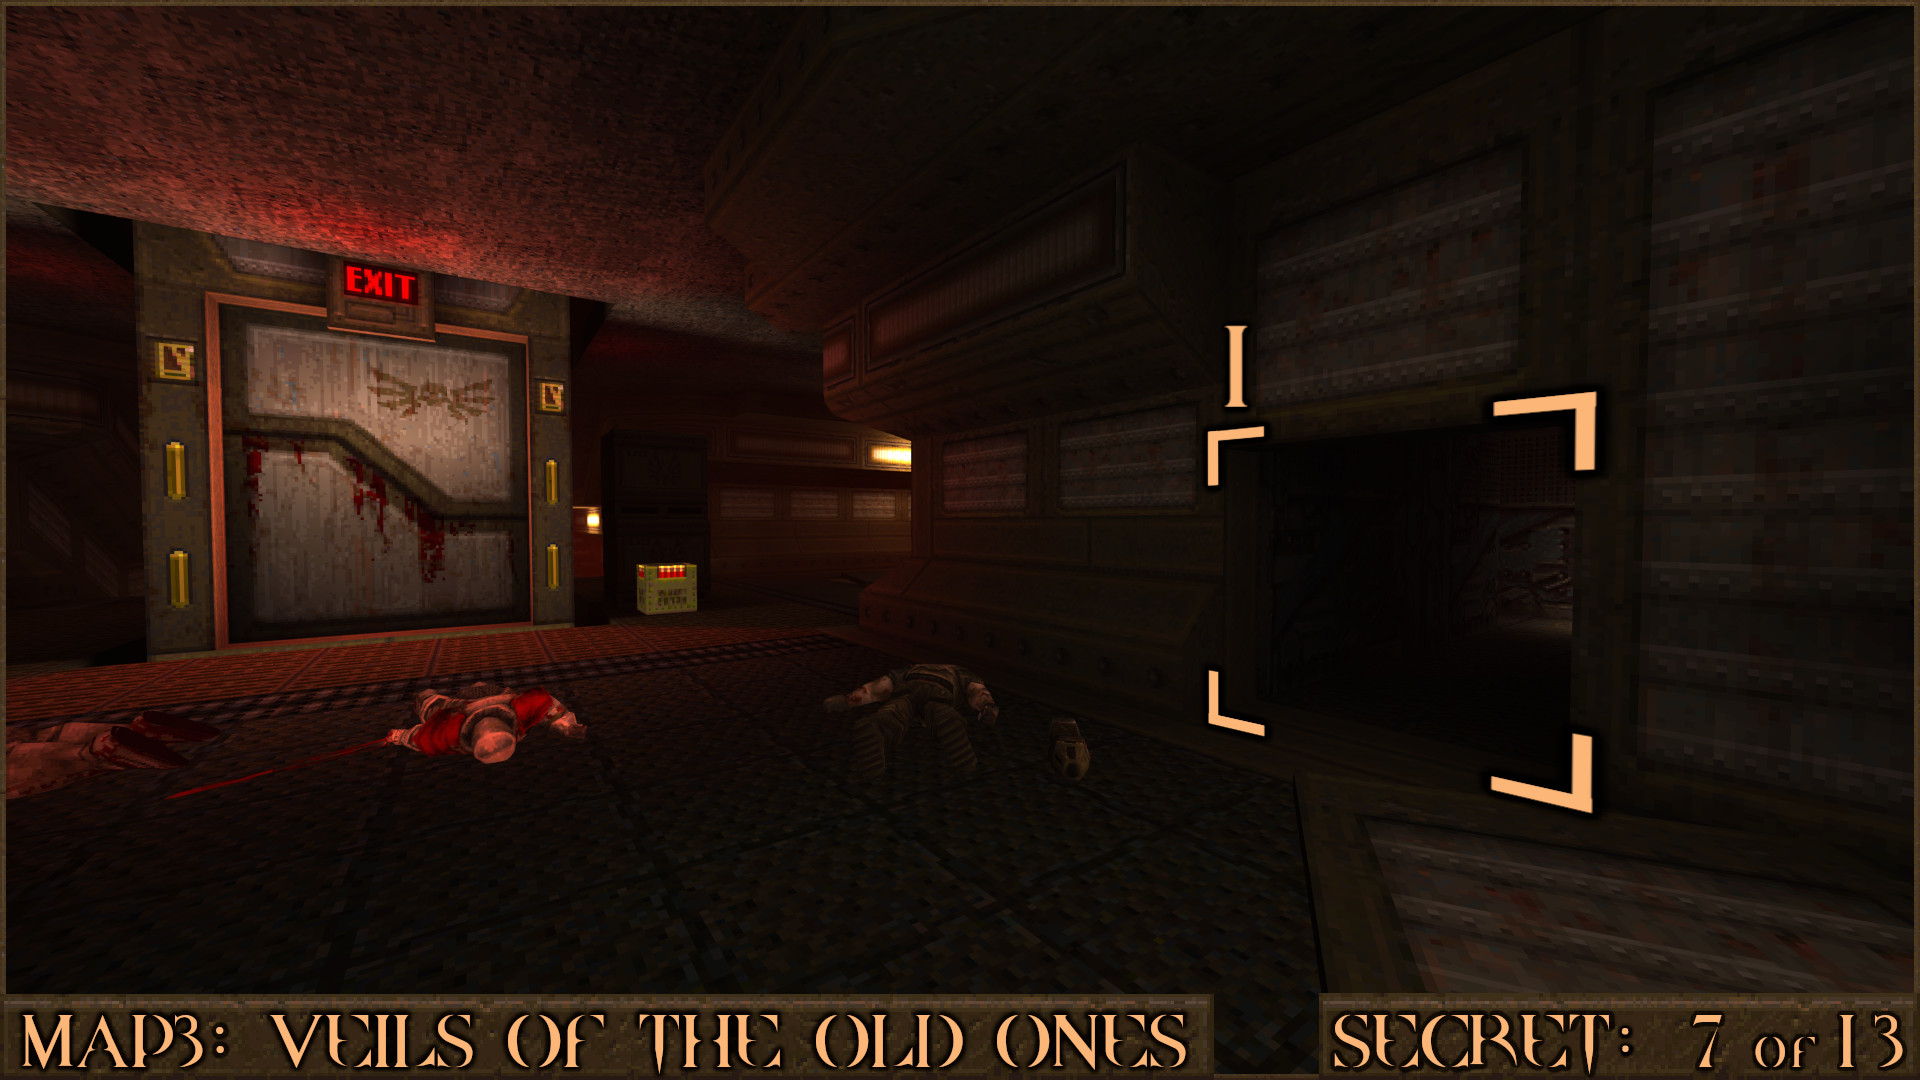
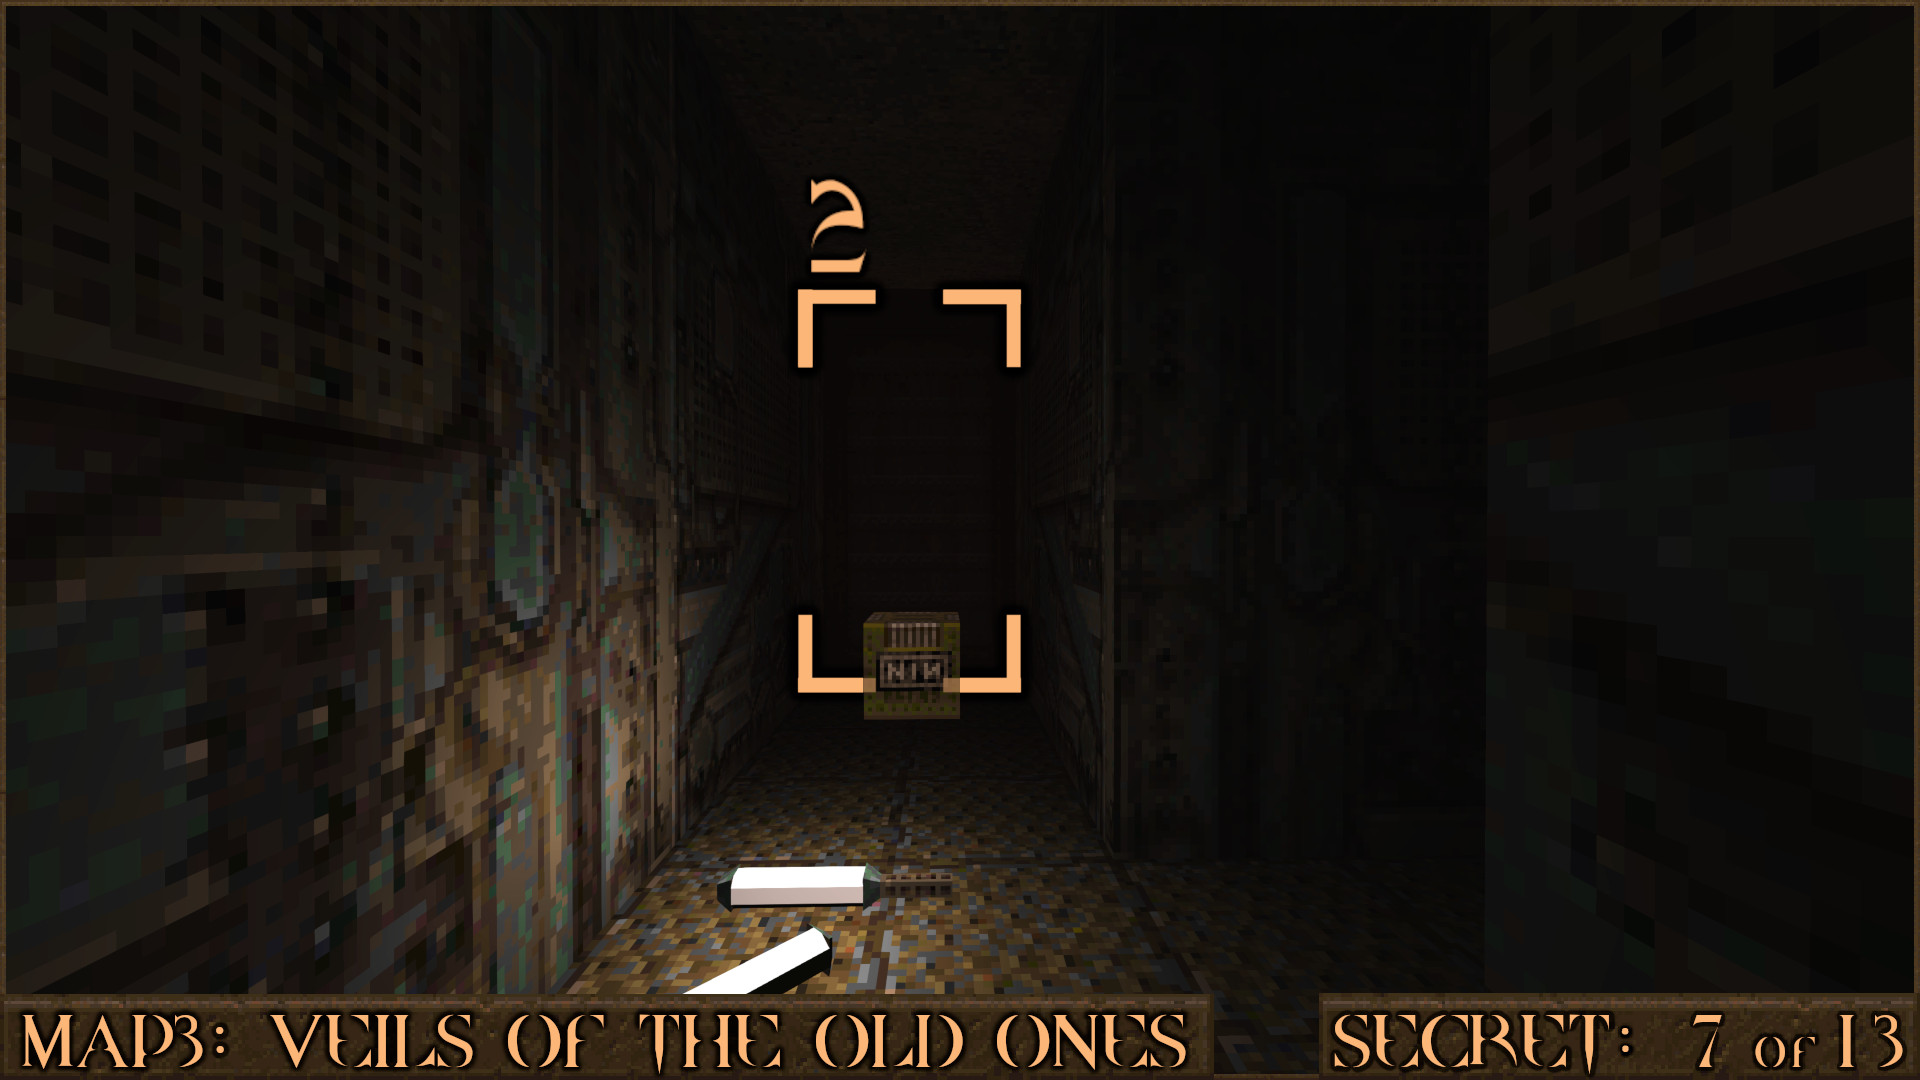
When you see the Gold Keycard Door look to your right to see an open vent () that you can enter.
Follow it to the right then shoot the dark wall behind some Nails () to reveal a secret area.
Reward: Small Rockets Ring of Shadows

Secret 8 of 13
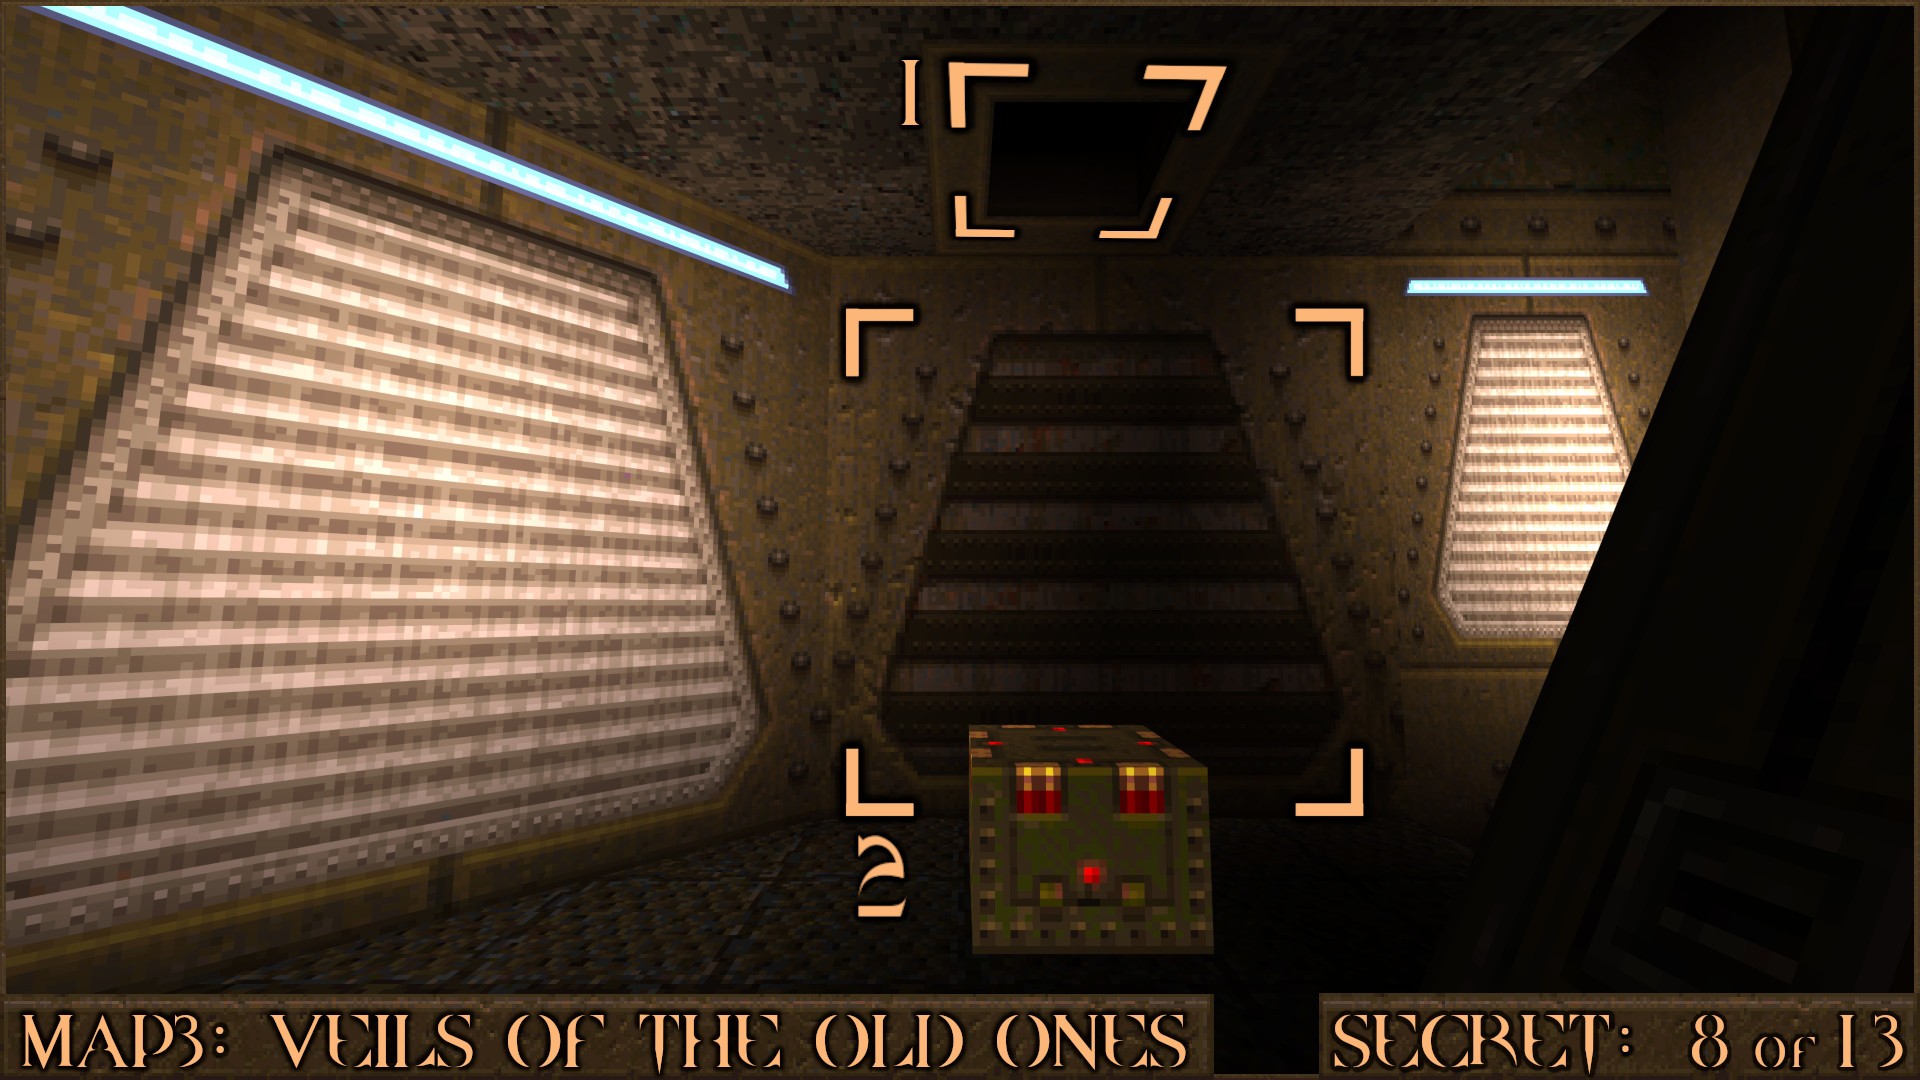
In the room with slime in the centre make your way around the room all the way to the upper corner near some Large Shells. Look above you to see a square hole () in the ceiling and a red shootable button. When shot it will shift the adjacent wall () to reveal a Biosuit which is useful for finding the next secret.

Reward: Biosuit

Secret 9 of 13
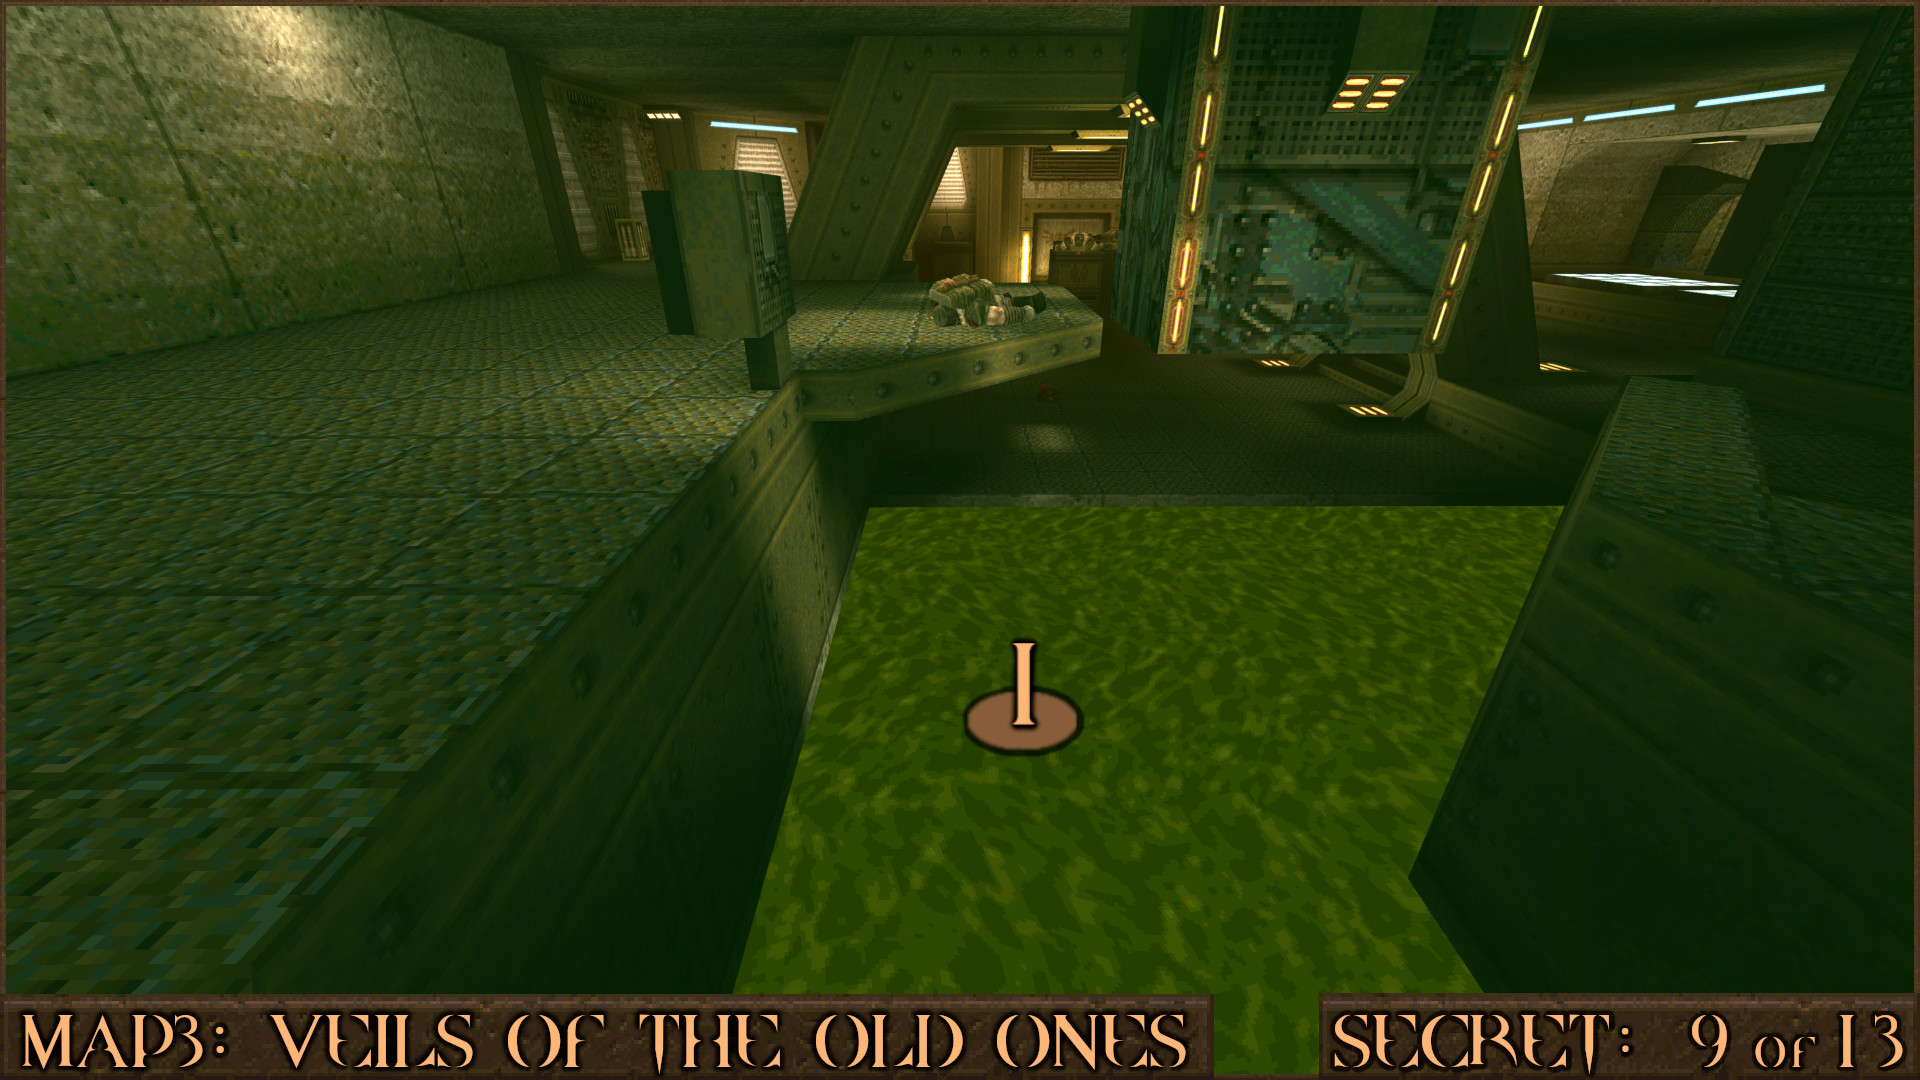
After grabbing the Biosuit from Secret 8 quickly jump into the slime (). Swim through it and surface inside a small room containing the secret.

Reward: Yellow Armor

Secret 10 of 13
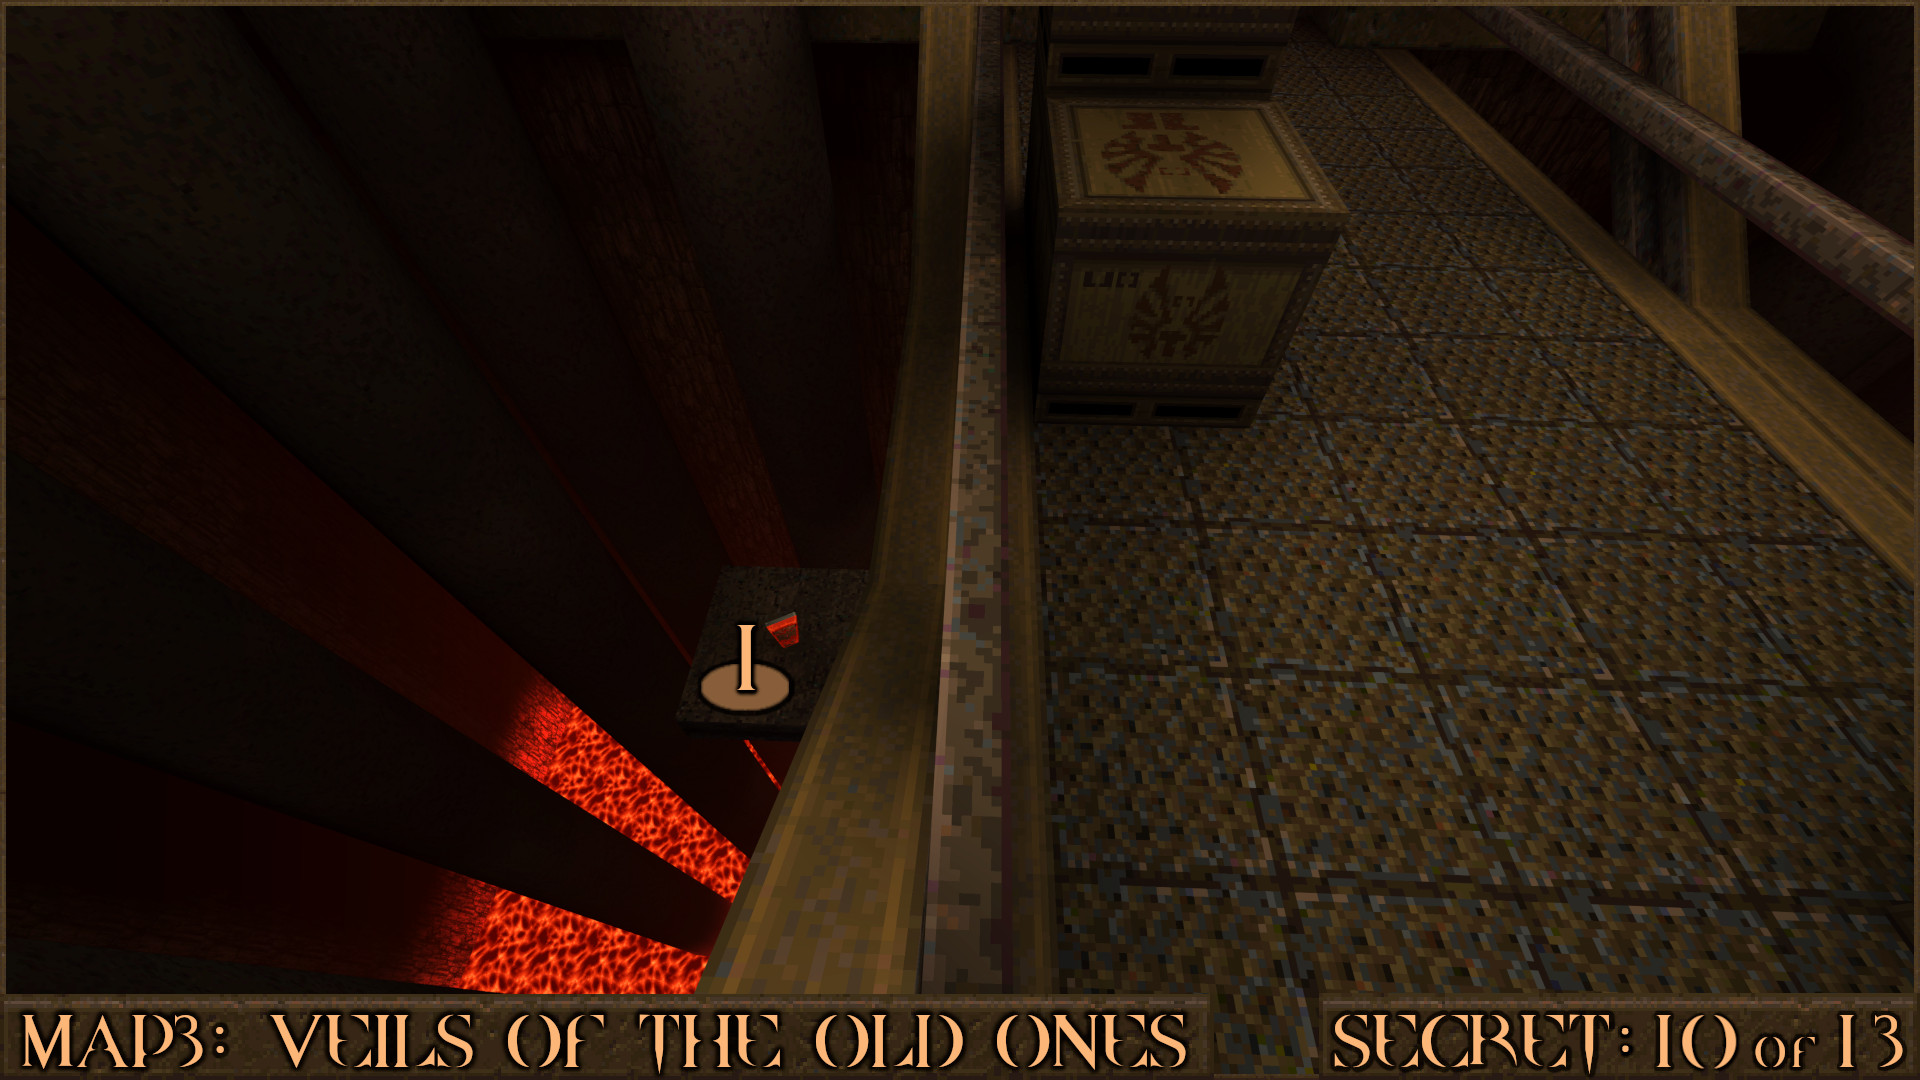
After opening the Silver Keycard Door look over the side of the bridge to see a metal platform below you. Drop down to it () to find the secret under the bridge.

Reward: Armor Shard×4 Quad Damage

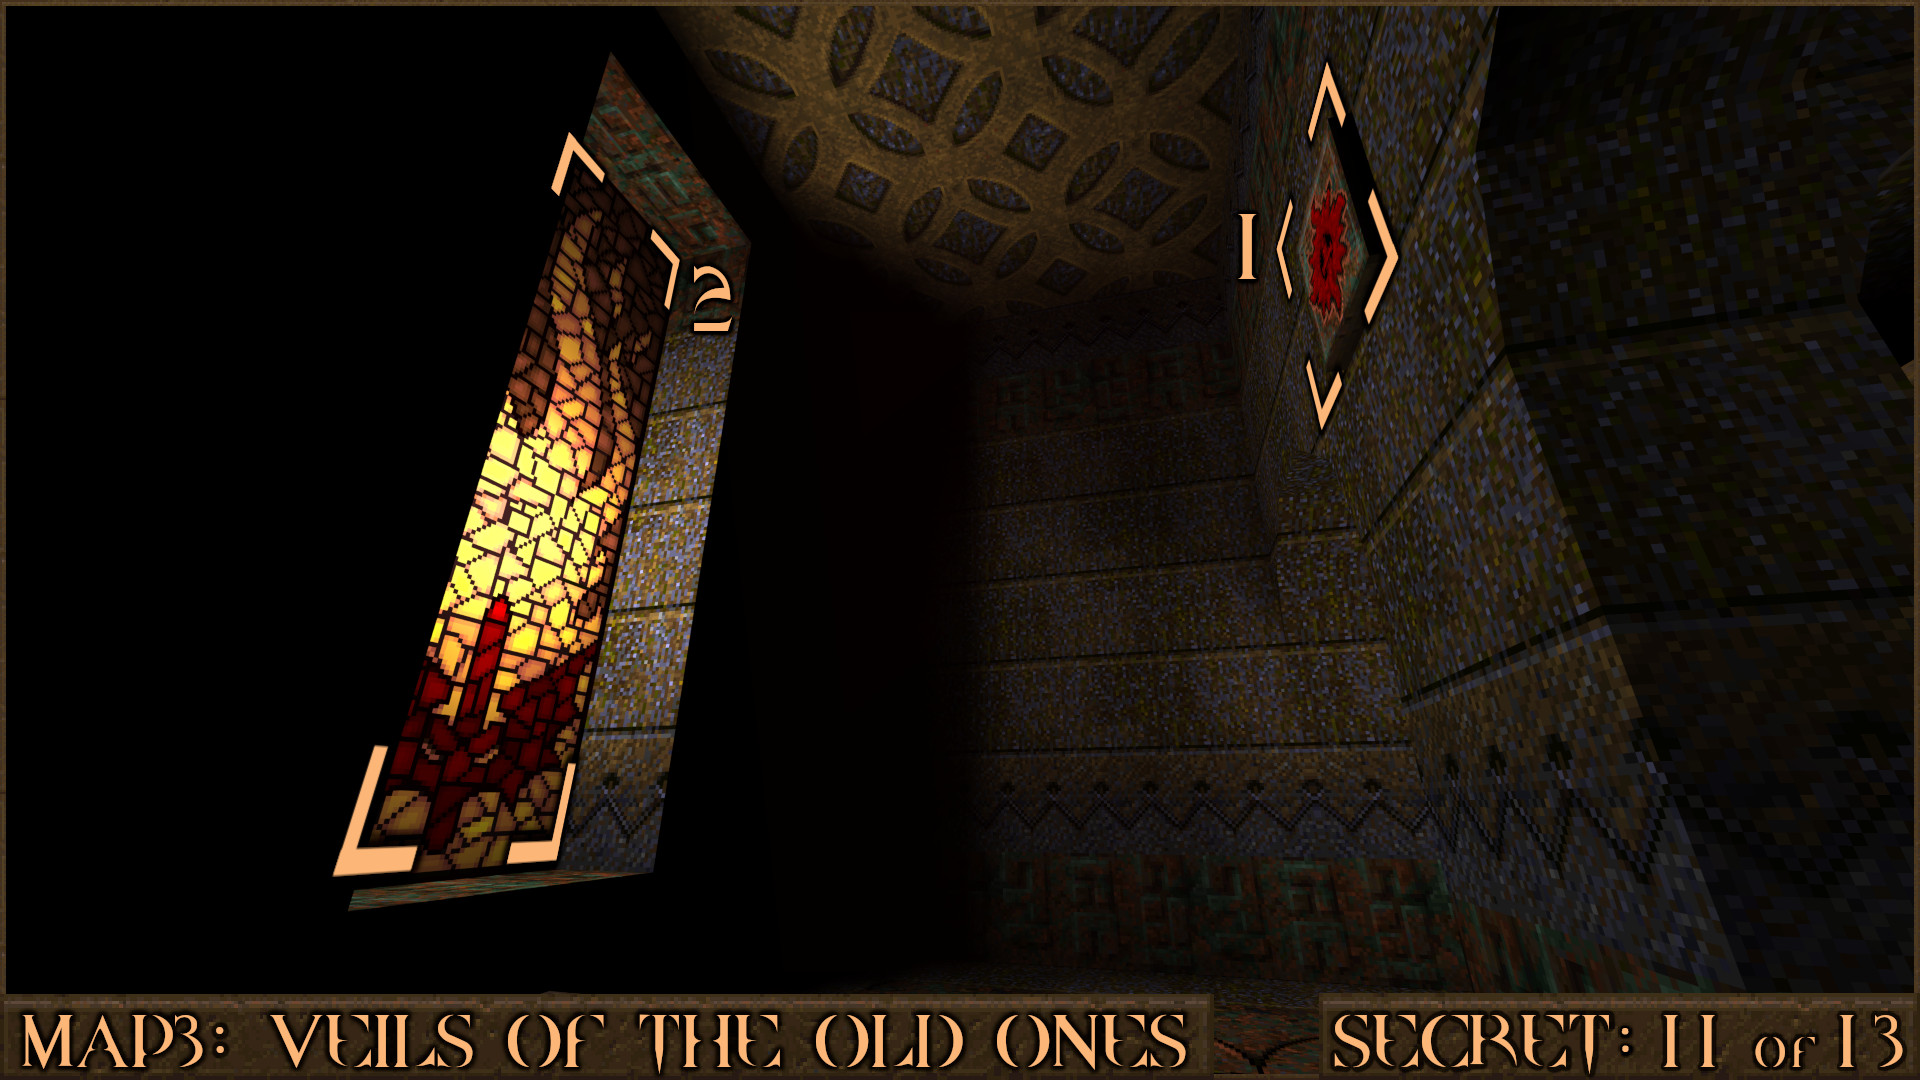
Secret 11 of 13
While descending the stairs into the strange ruins look to your left and find a stained glass window. Opposite this is a red shootable button () that will move the window () and reveal the secret.

Reward: [Cell Capacity Upgrade]

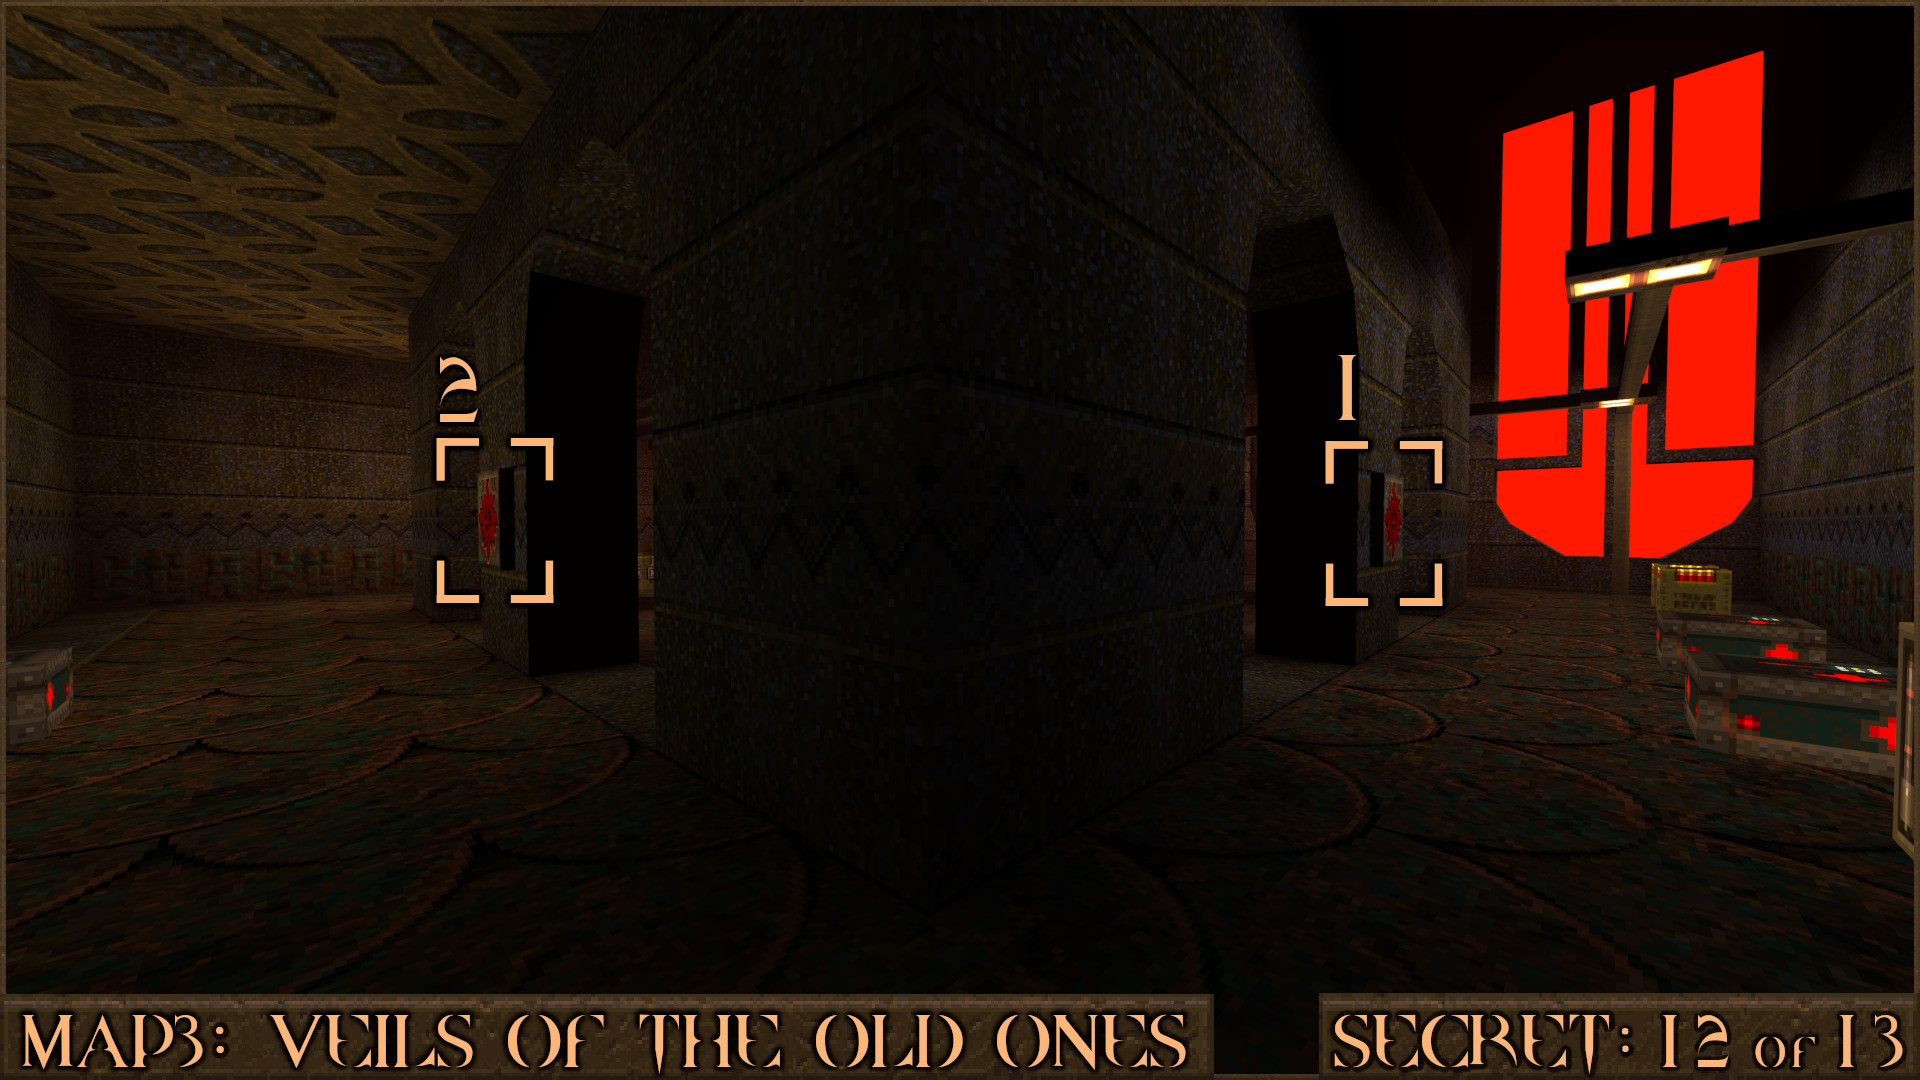
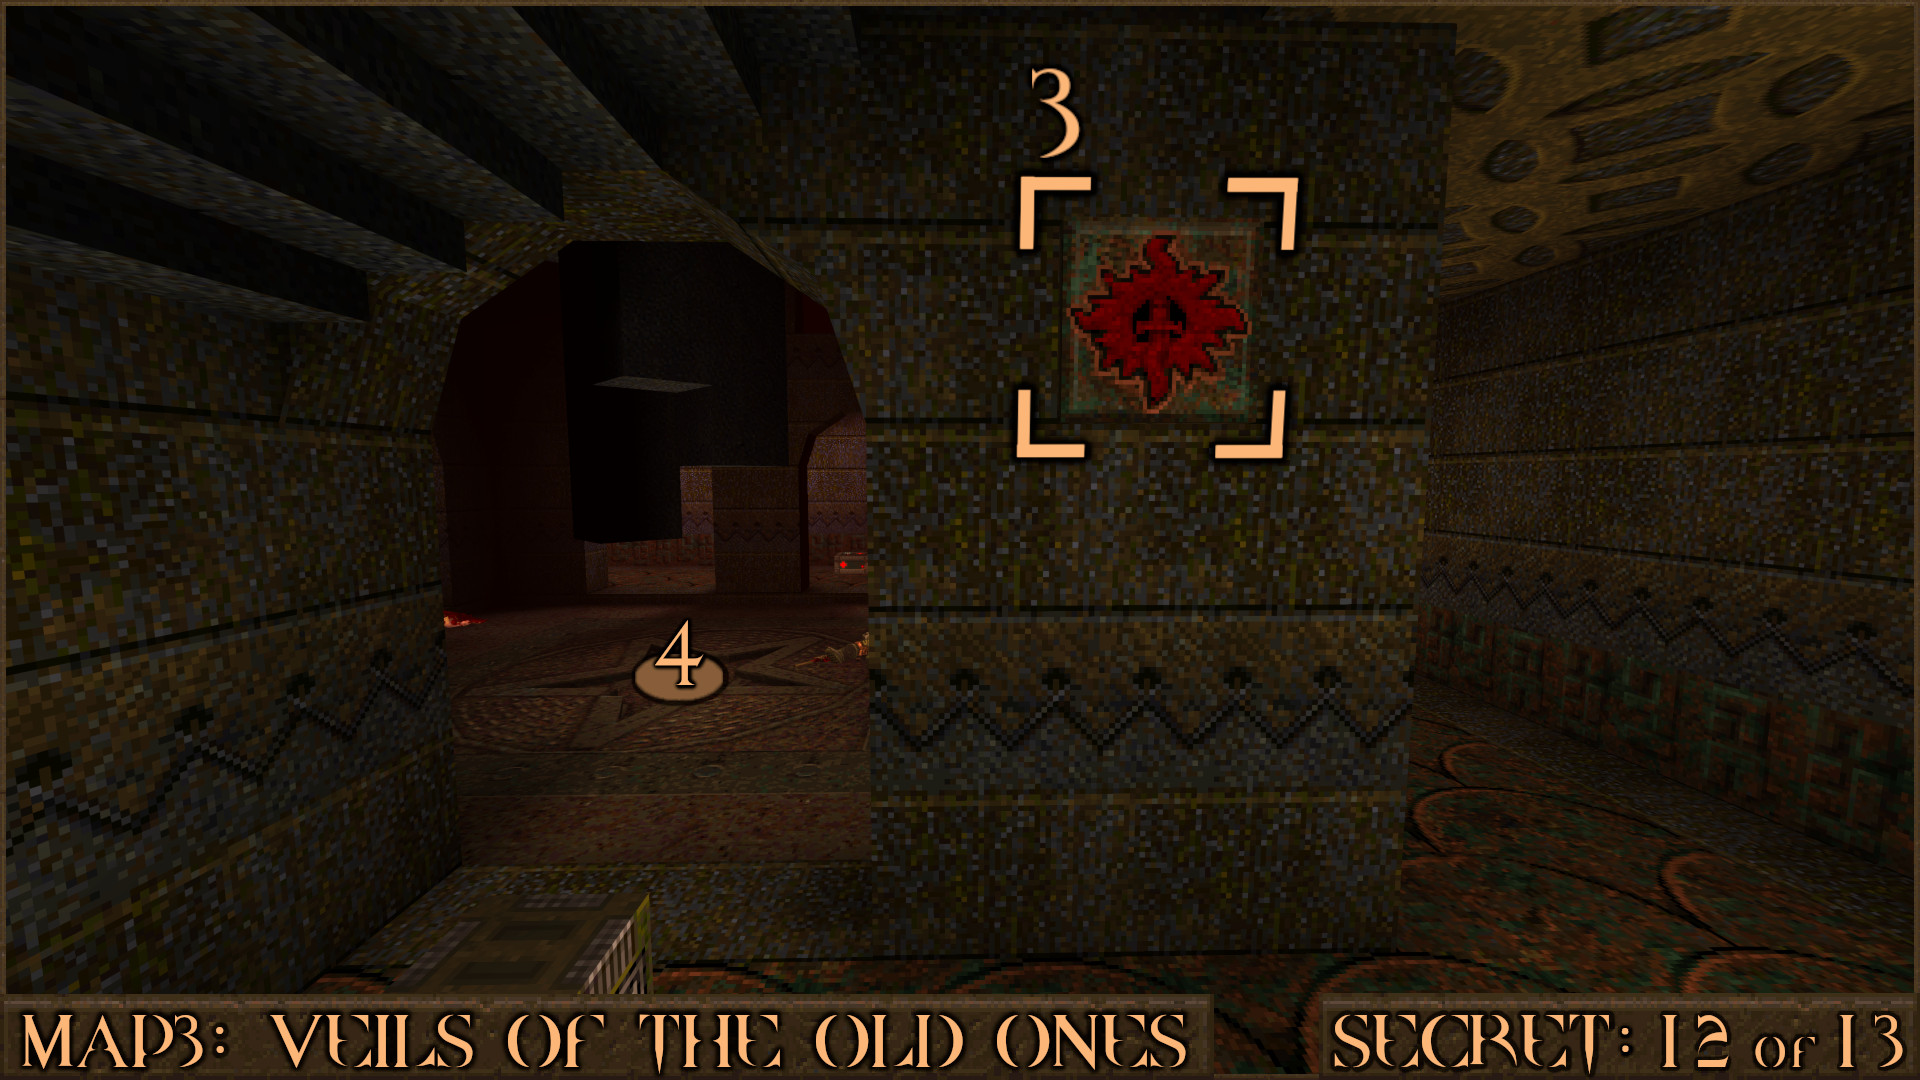
Secret 12 of 13
At the bottom of the ruins you'll find the Gold Keycard. Look at the walls here and find 3 red shootable buttons. Shoot the 1st and 2nd buttons (+) then go around the corner.

Shooting the 3rd button () reveals a teleporter in the centre of the floor () that teleports you into a grave. Shoot your way out of the grave to find yourself outside a strange castle filled with enemies and items.

Reward: Small Shells×3 Small Nails×5 Large Health×4 Small Rockets Large Rockets Red Armor

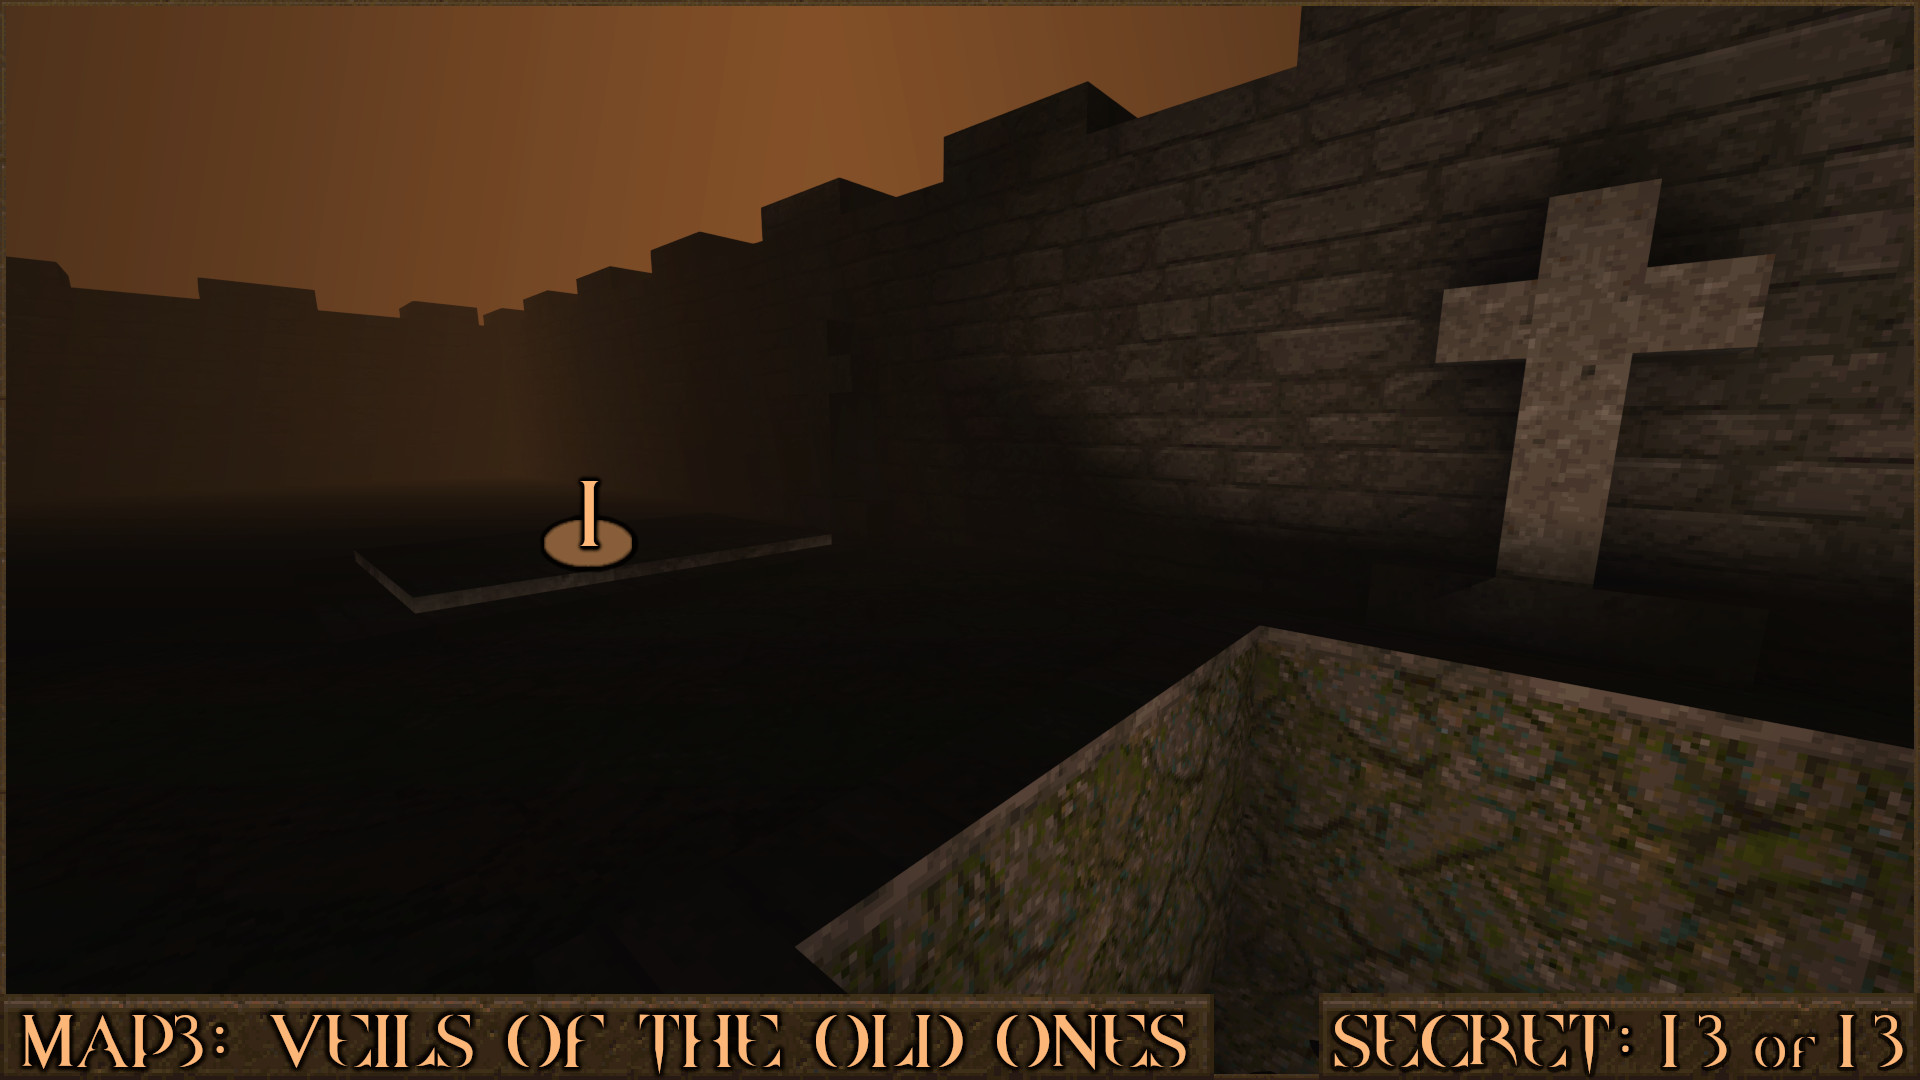
Secret 13 of 13
While still in the secret area from Secret 12 shoot the grave () next to the one you emerged from to reveal some extra health.

Reward: Large Health×2
‎‏‏‎ ‎‏‏‎ + Rune Secrets
NOTE: During Part 2 a new secret exit is accessible.

Extra Secret 2
Requires Rune of Sacrifice
When you go down the corridor which contains the teleporter from Secret 5 continue to the end to see a Rune of Sacrifice Door. Open it to enter a new area that functions as a shortcut to the room containing the strange ruins much later in the level.

Reward: Large Shells Large Nails

Extra Secret 3
Requires Rune of Sacrifice
Head to the bottom of the strange ruins and shoot the 3 red shootable buttons to reveal the teleporter to Secret 12. Explore the area outside the castle and look for a Rune of Sacrifice Door on the side of the castle. Head inside to find a secret exit to the level: SECRET5: The House of Delusion.

Reward: [Secret Level]
‎‏‏‎SECRET5: The House of Delusion [Secret Level]
NOTE: During Part 2 this secret level can be accessed from a rune secret in MAP3: Veils of the Old Ones. The Rune of Madness can be found here.

Secret 1 of 9
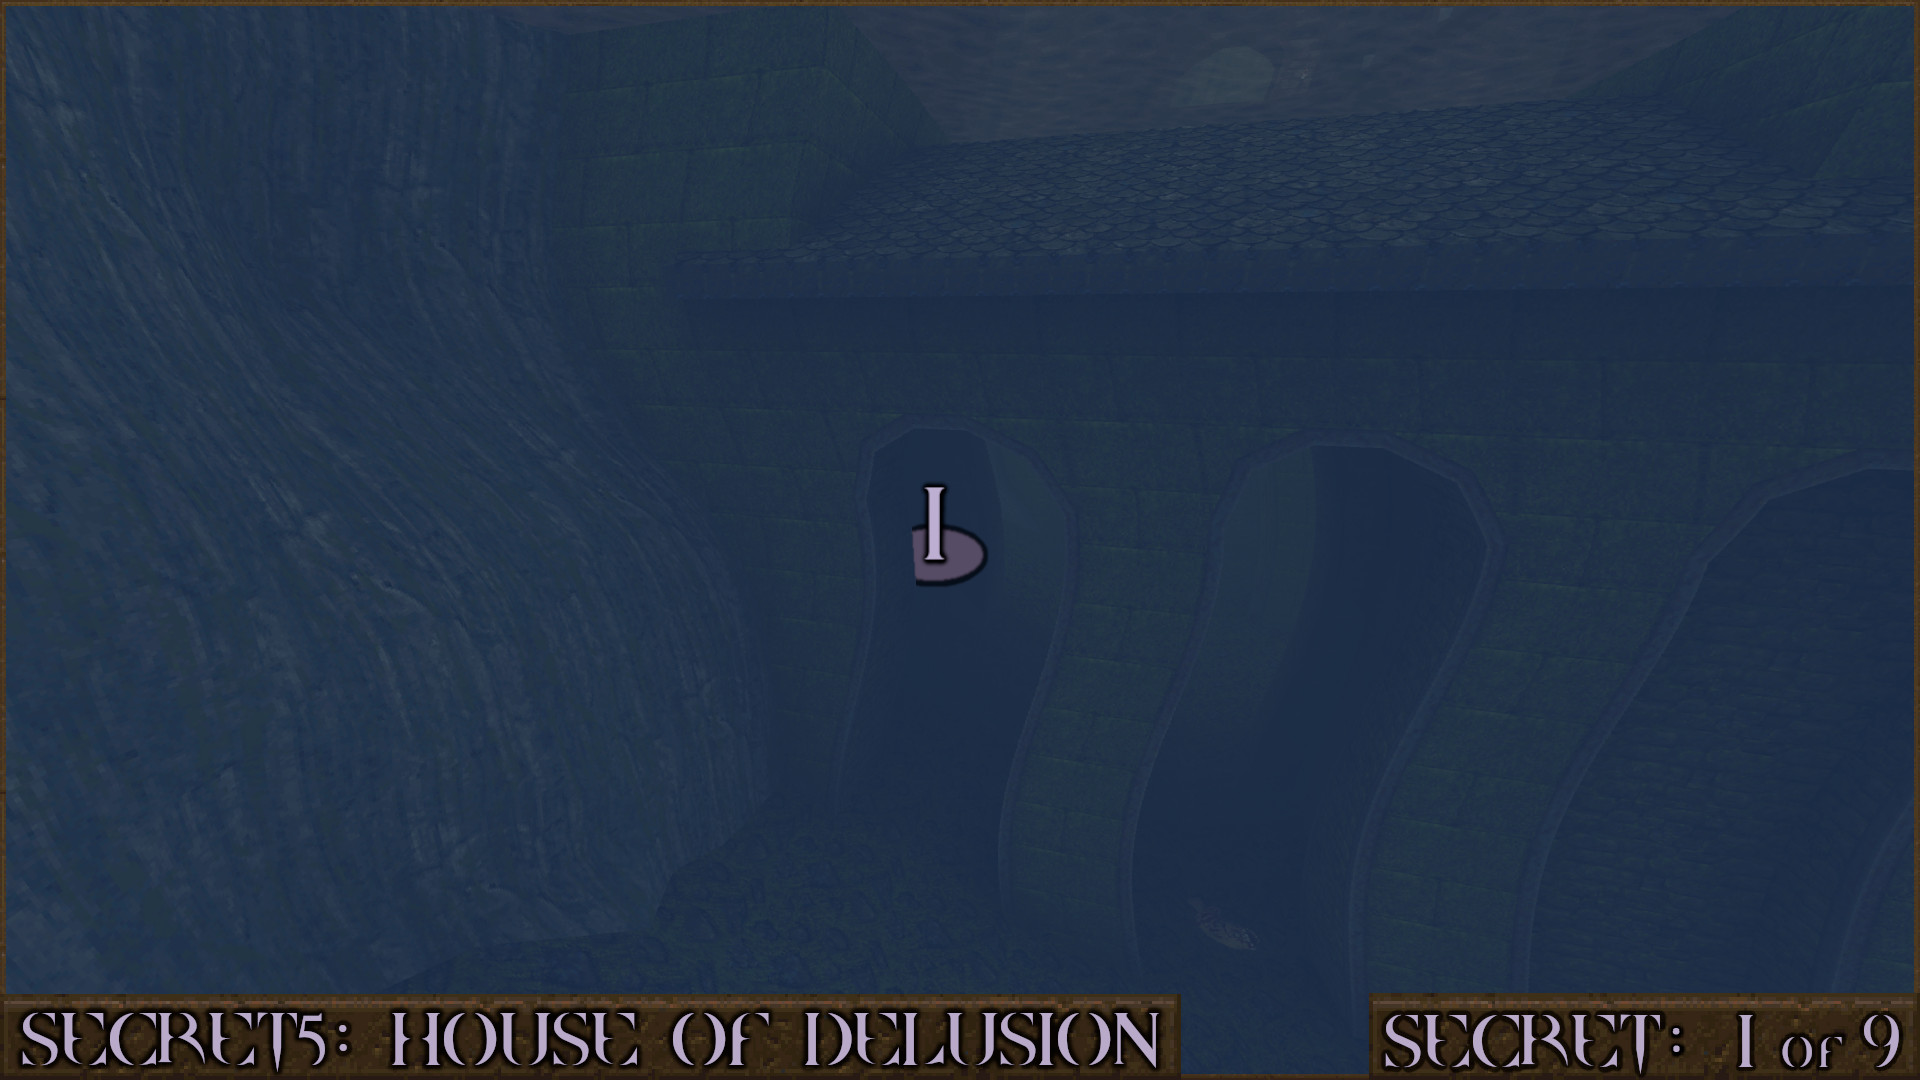
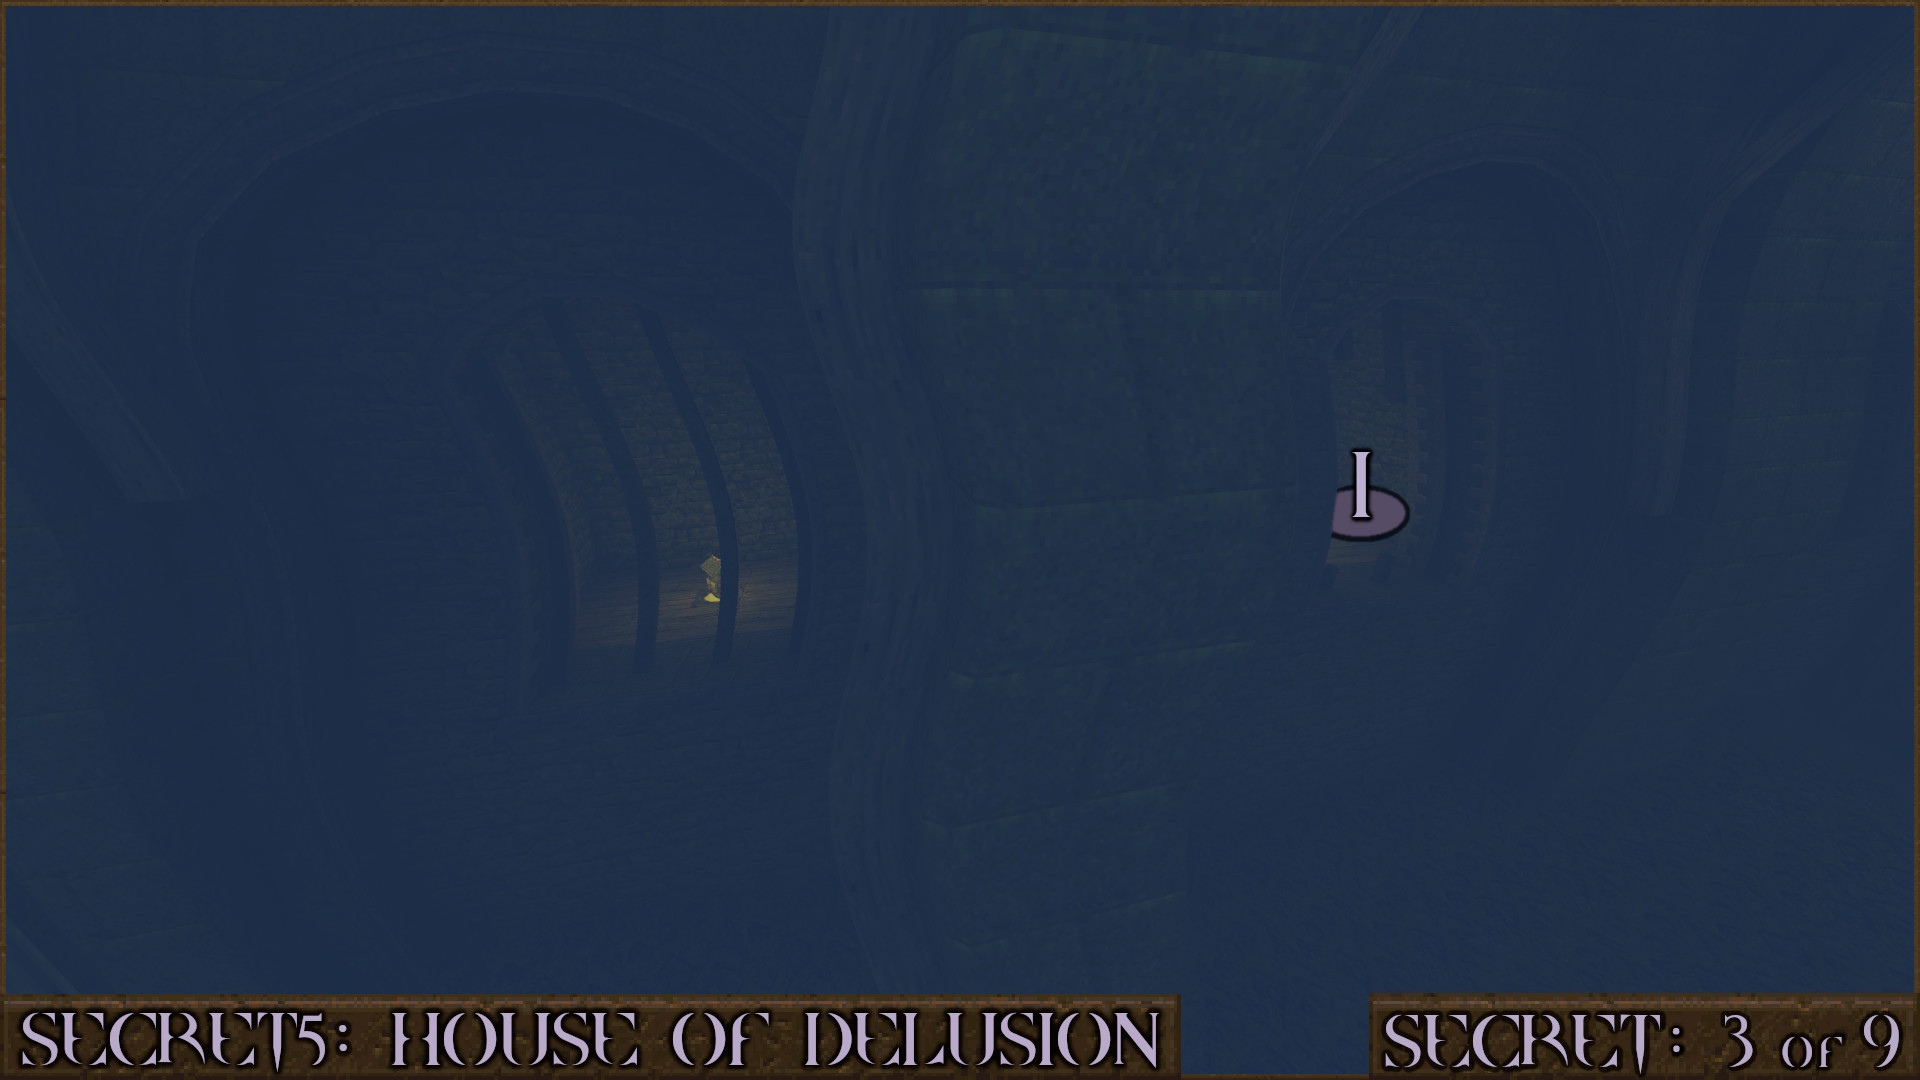
When you reach the outside area with the large section of water dive down into it. Swim under the large arches () and turn left to swim down a dark tunnel past some crates.

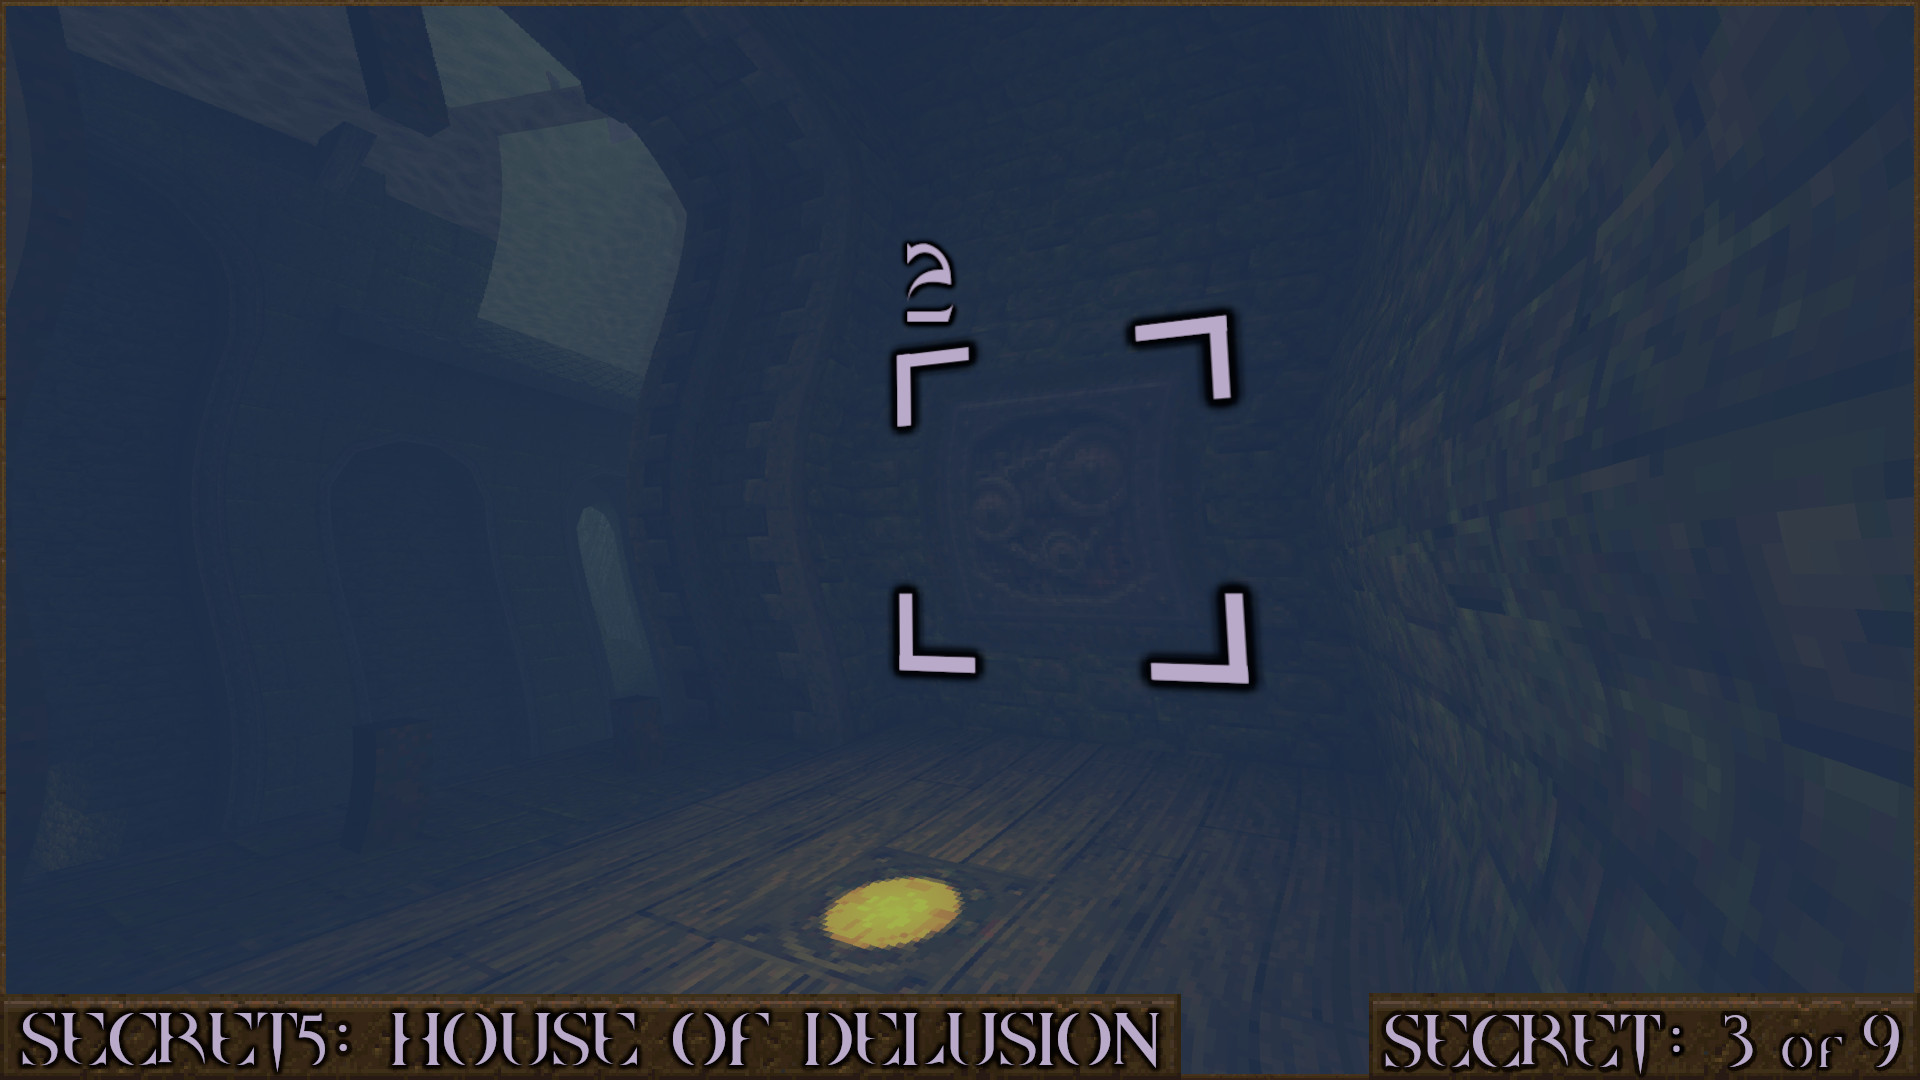
You'll surface next to an elevator with an Axe button () that will take you to the upper floor.

Once you've cleared the upper floor use another Axe button () to open a door behind you that leads outside to the secret.

Reward: Small Shells×2 Large Shells×2 Large Nails×2 Large Cells Megahealth [Health Capacity Upgrade]

Secret 2 of 9
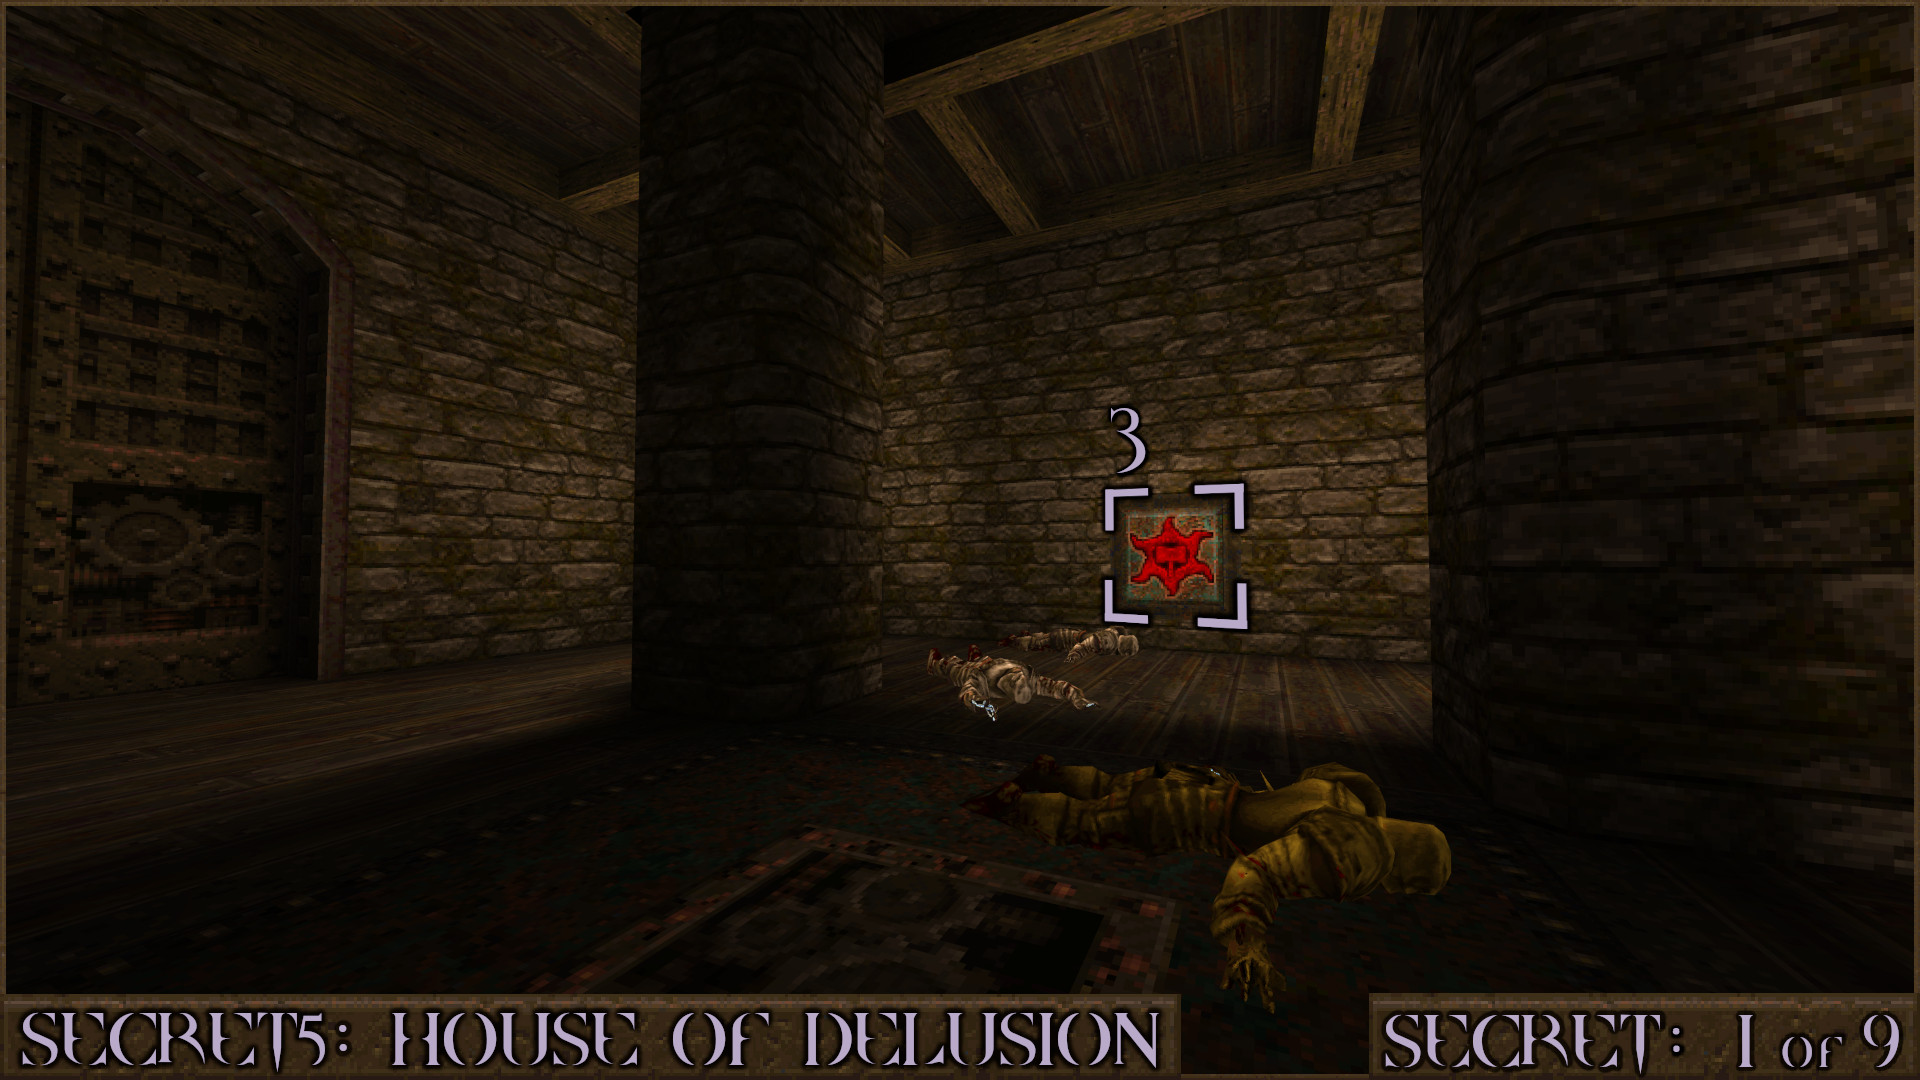
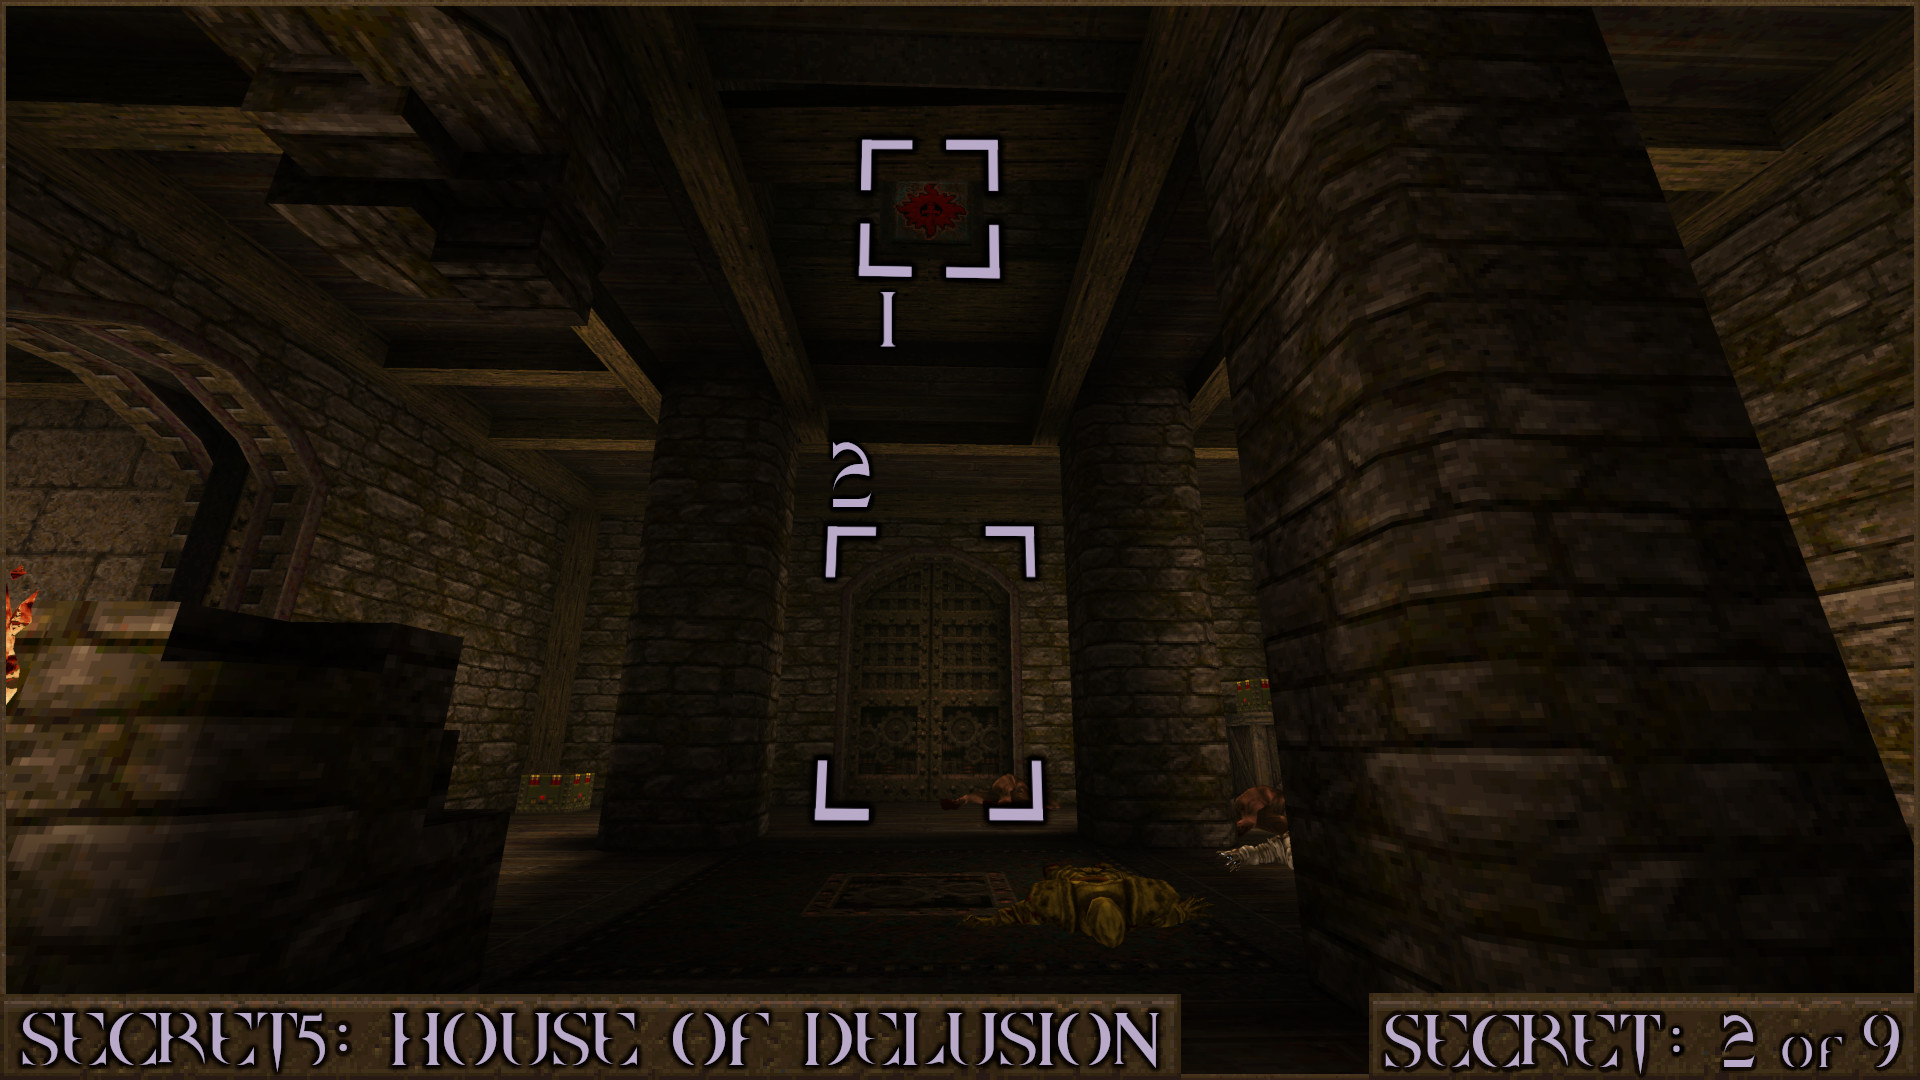
While still in the area from Secret 1 look up to the ceiling. There is a hole between the wooden planks and you can see a red shootable button (). Shoot it to open two doors, one in front () and another one behind you, that contain an enemy ambush and some secret items.

Reward: Large Cells×4

Secret 3 of 9
Dive down into the water outside again and look for an upgrade behind some bars. Swim to the nearby alcove () which you actually can enter.

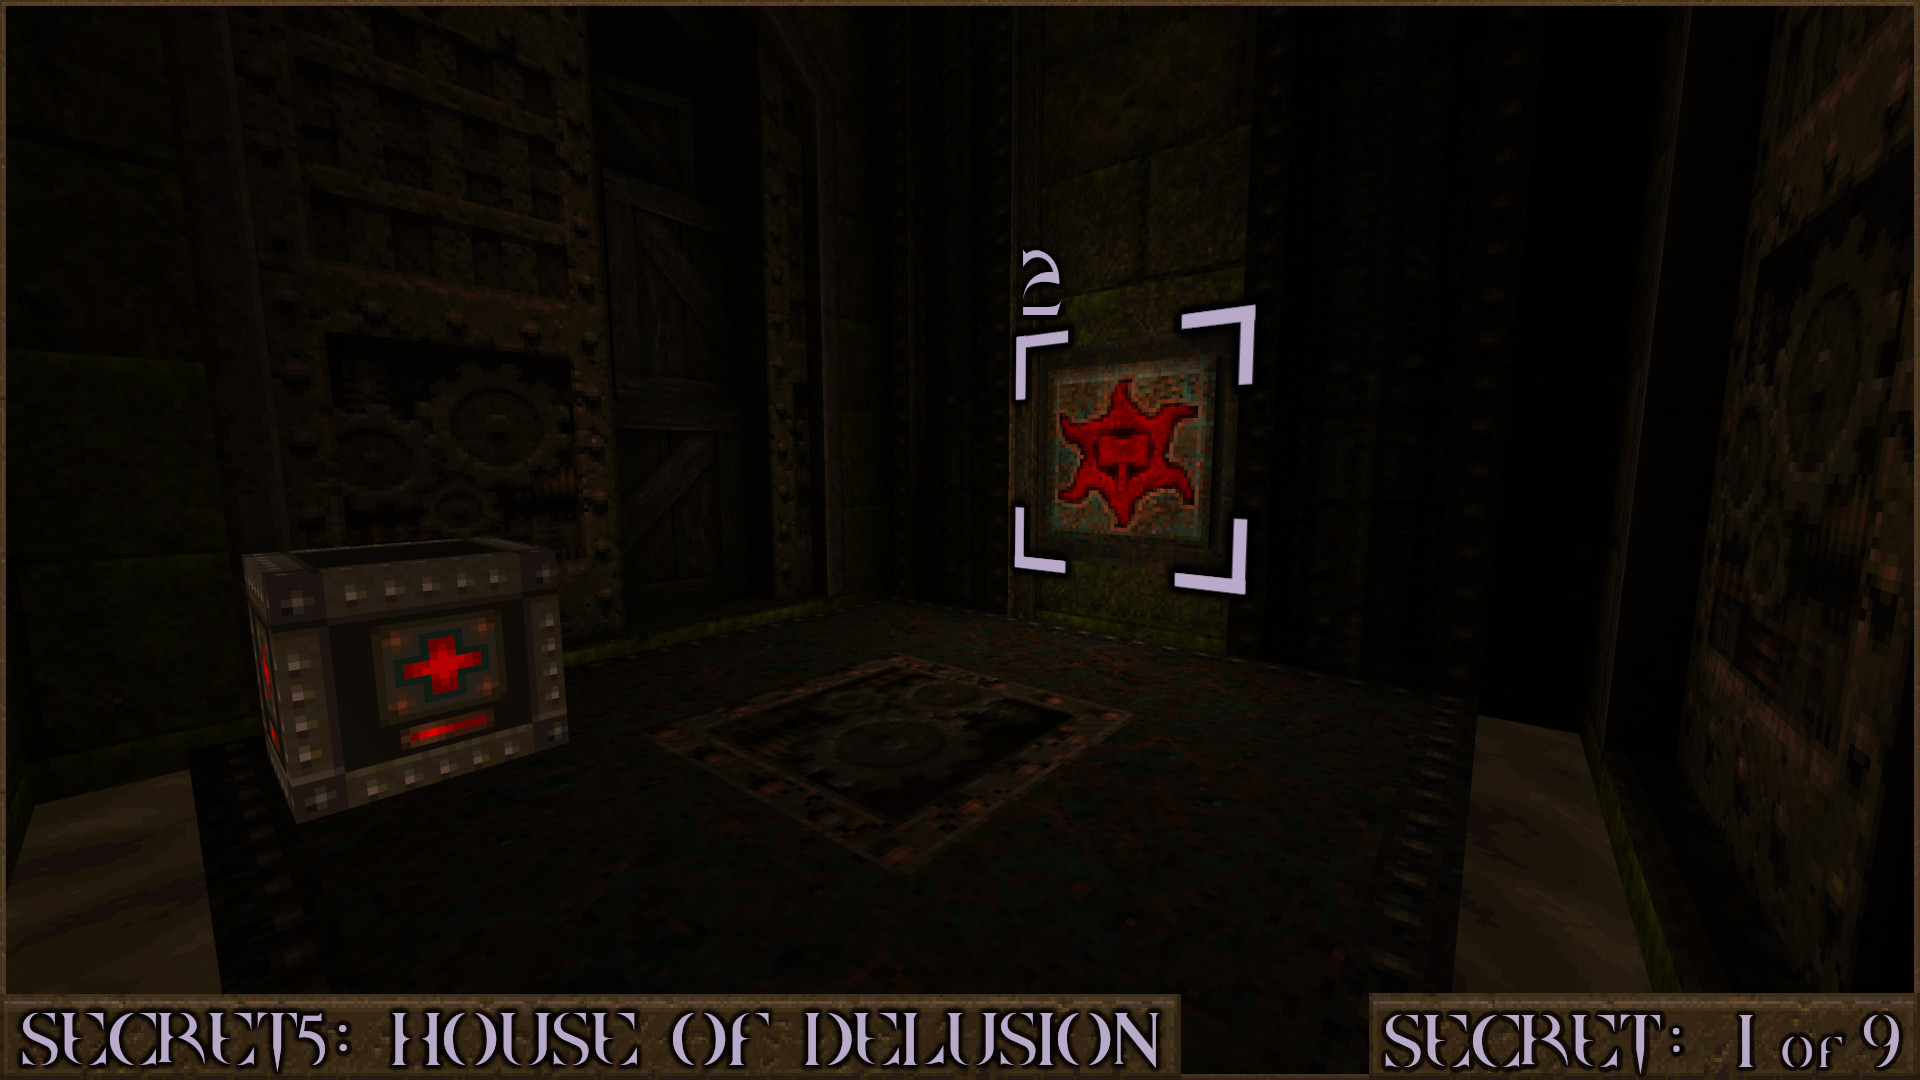
In here shoot the cog panel () to shift the wall allowing you to access the secret.

Reward: [Shell Capacity Upgrade]

Secret 4 of 9
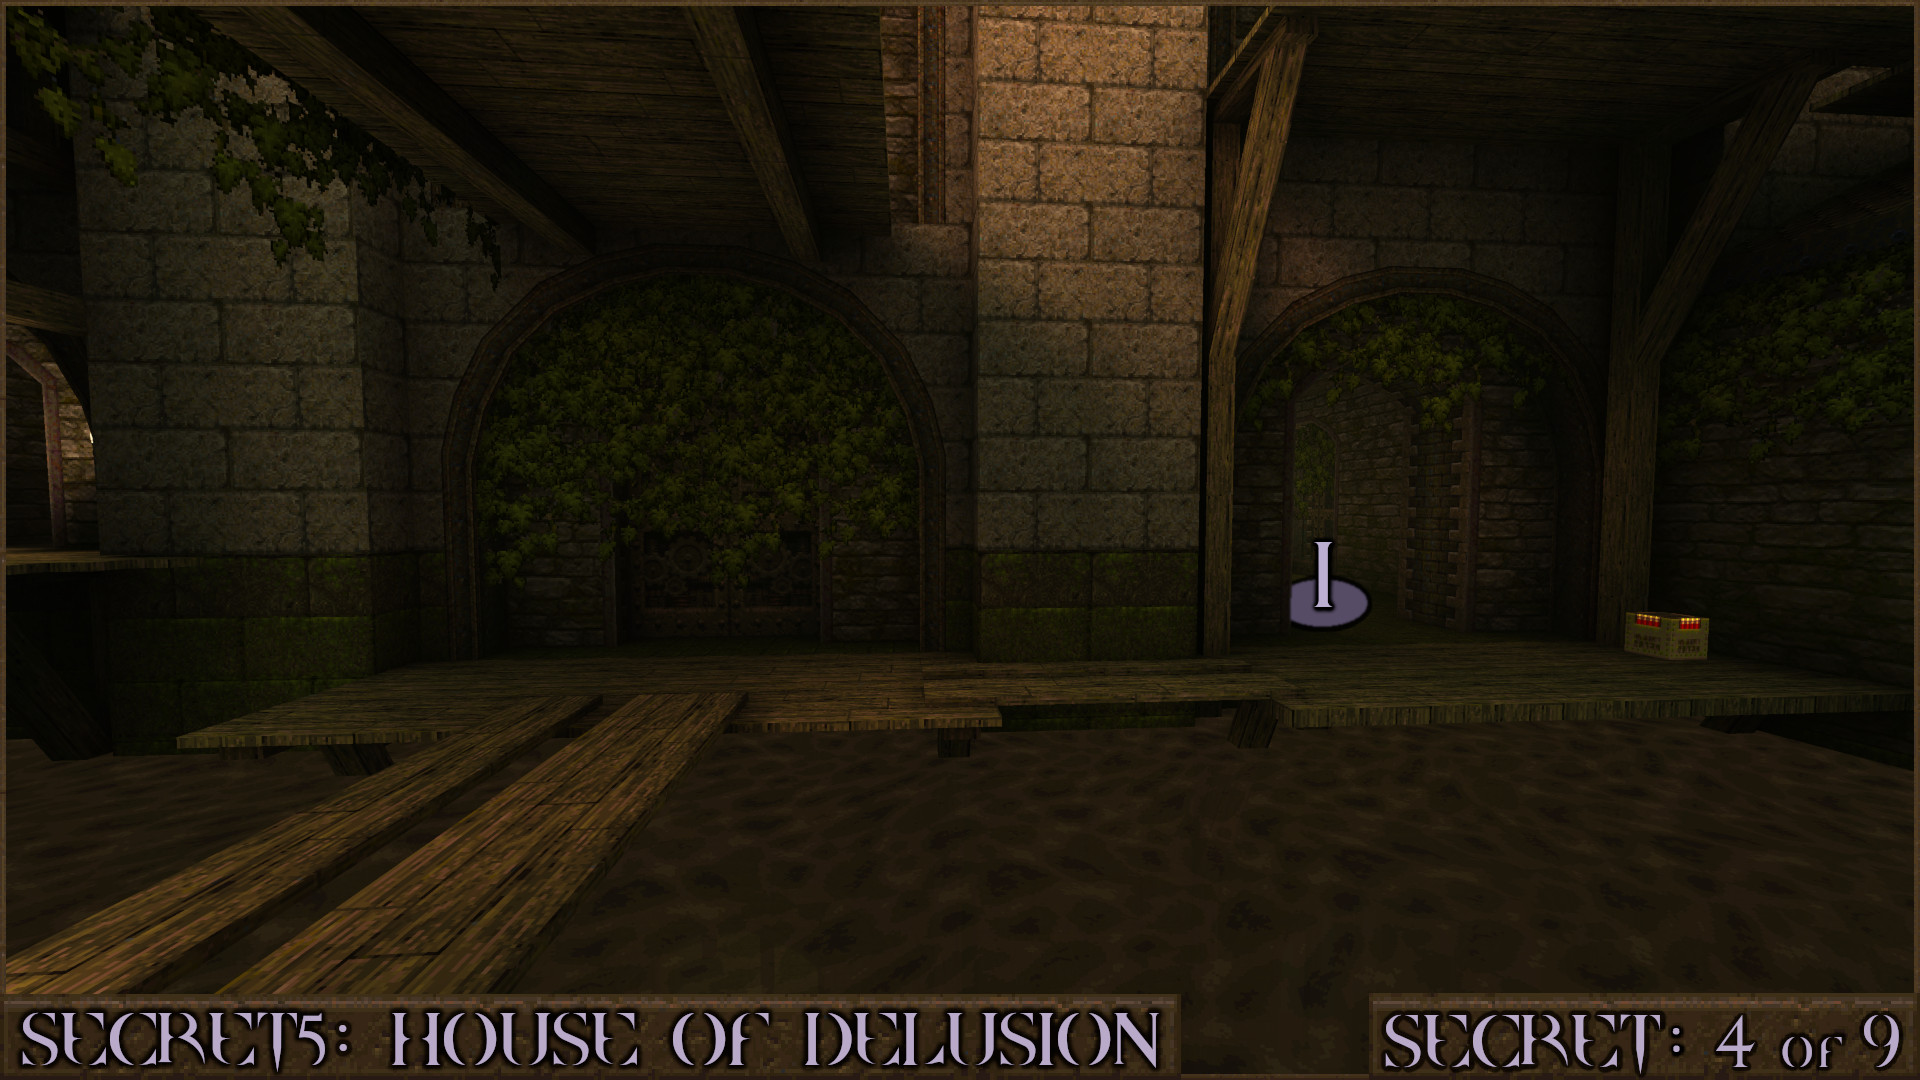
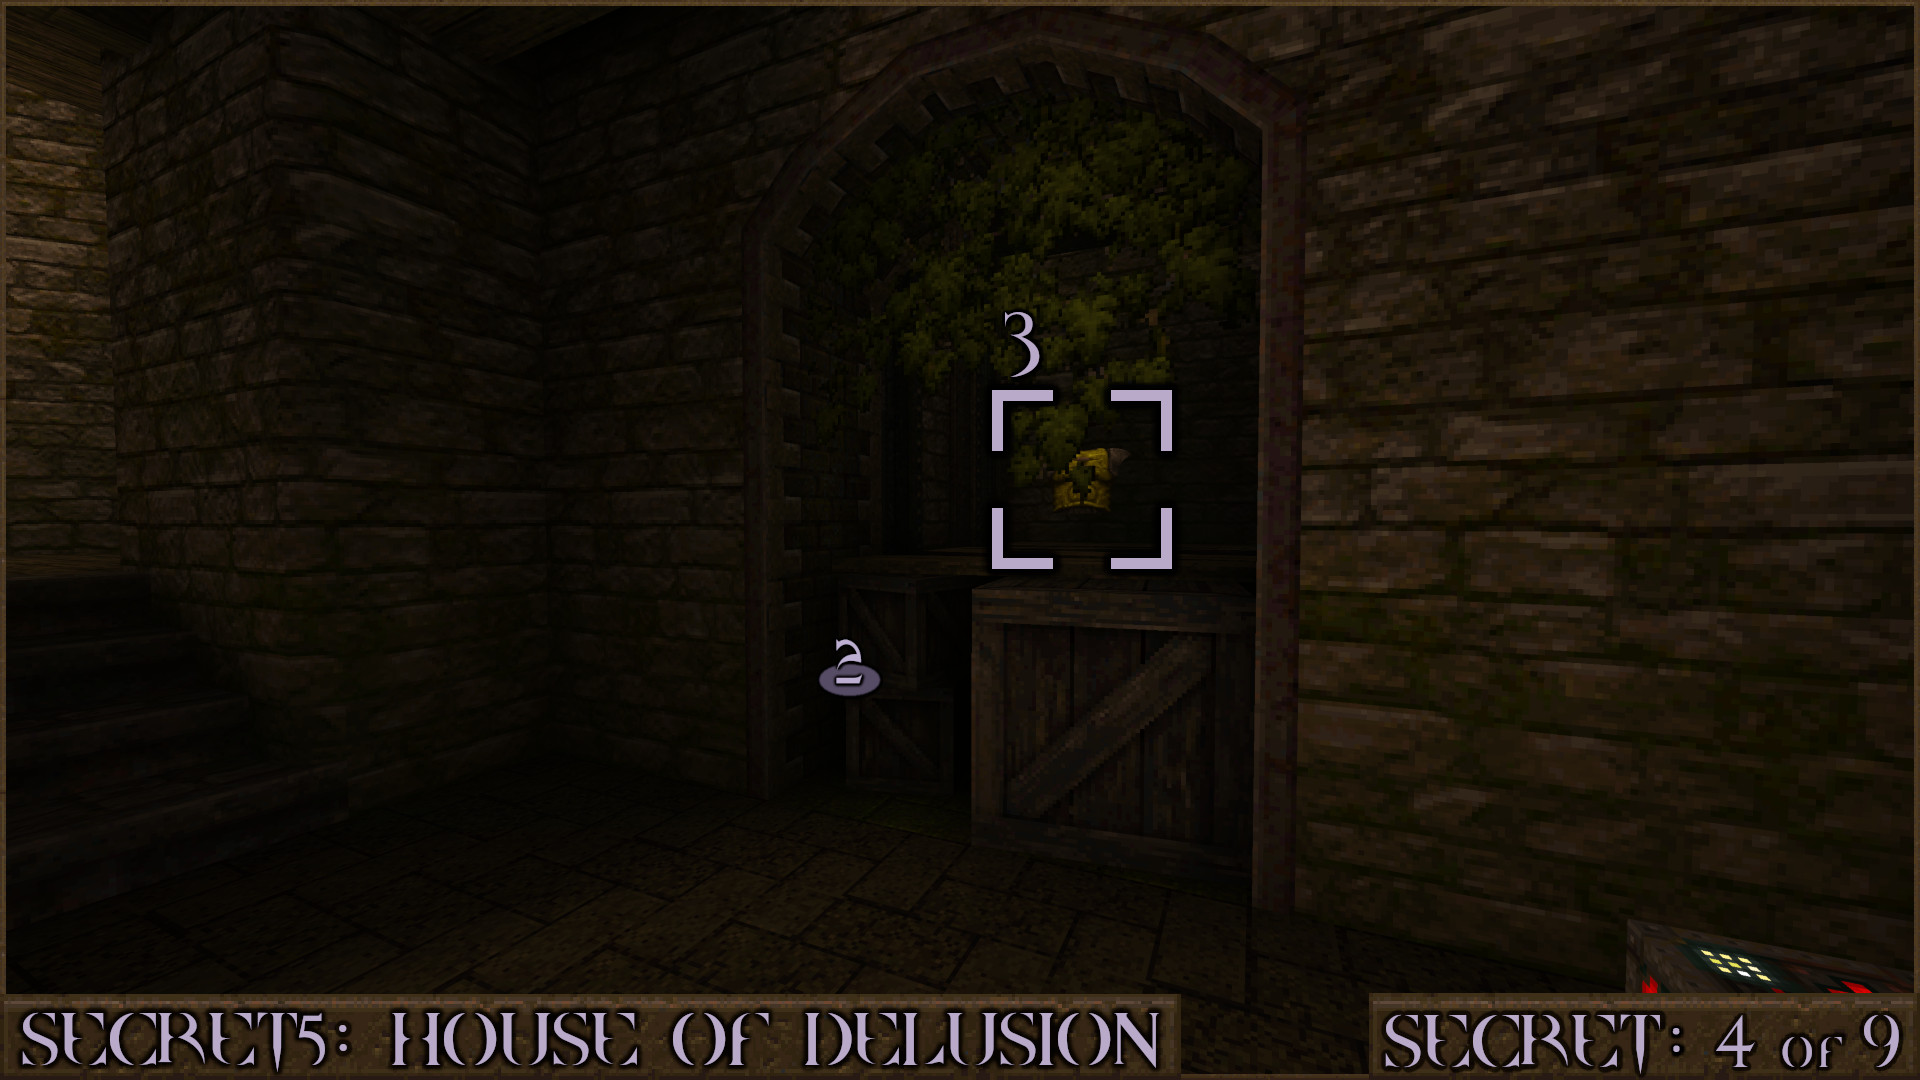
Exit the water onto the central platform. From here enter the nearby building via an entryway ().

In this room you'll see a Yellow Armor on some crates. You can actually use the very edge of the small crates nearby () to jump up to it and pick up the item ().

Reward: Yellow Armor

Secret 5 of 9
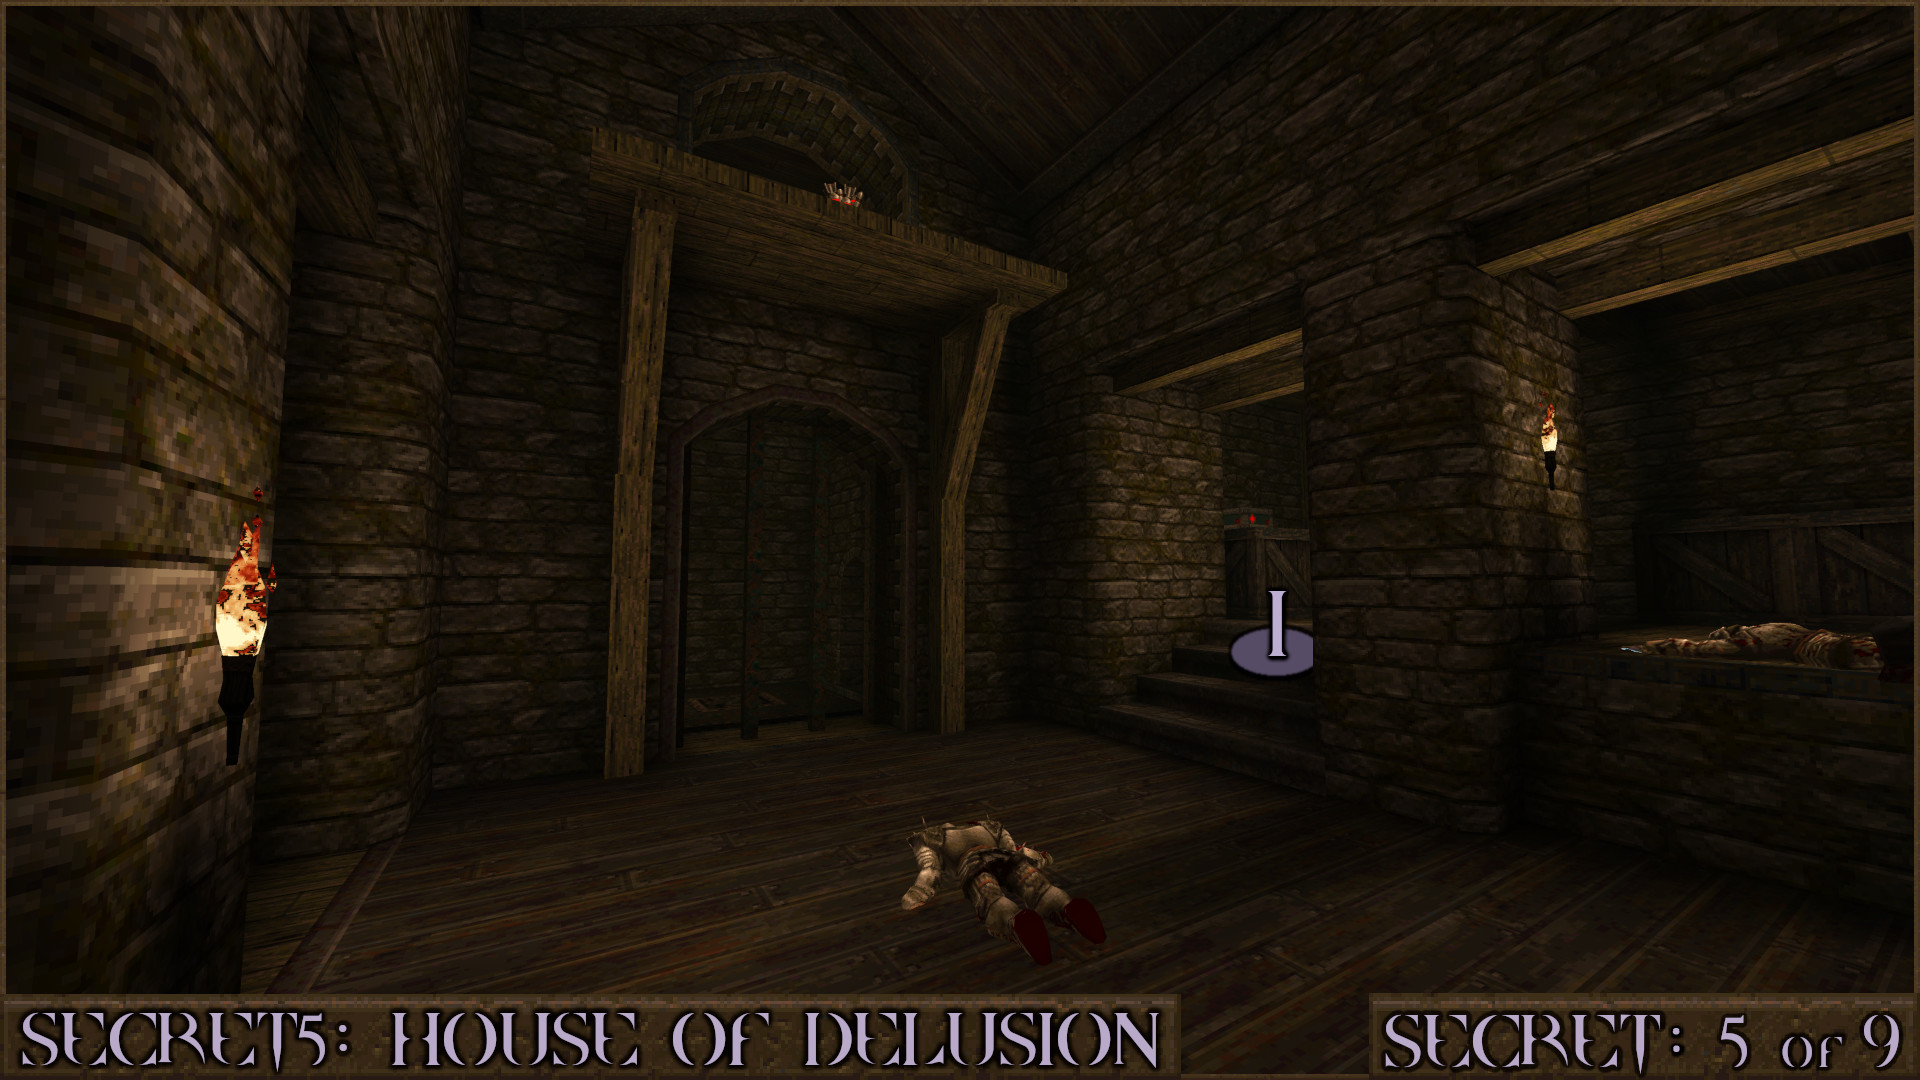
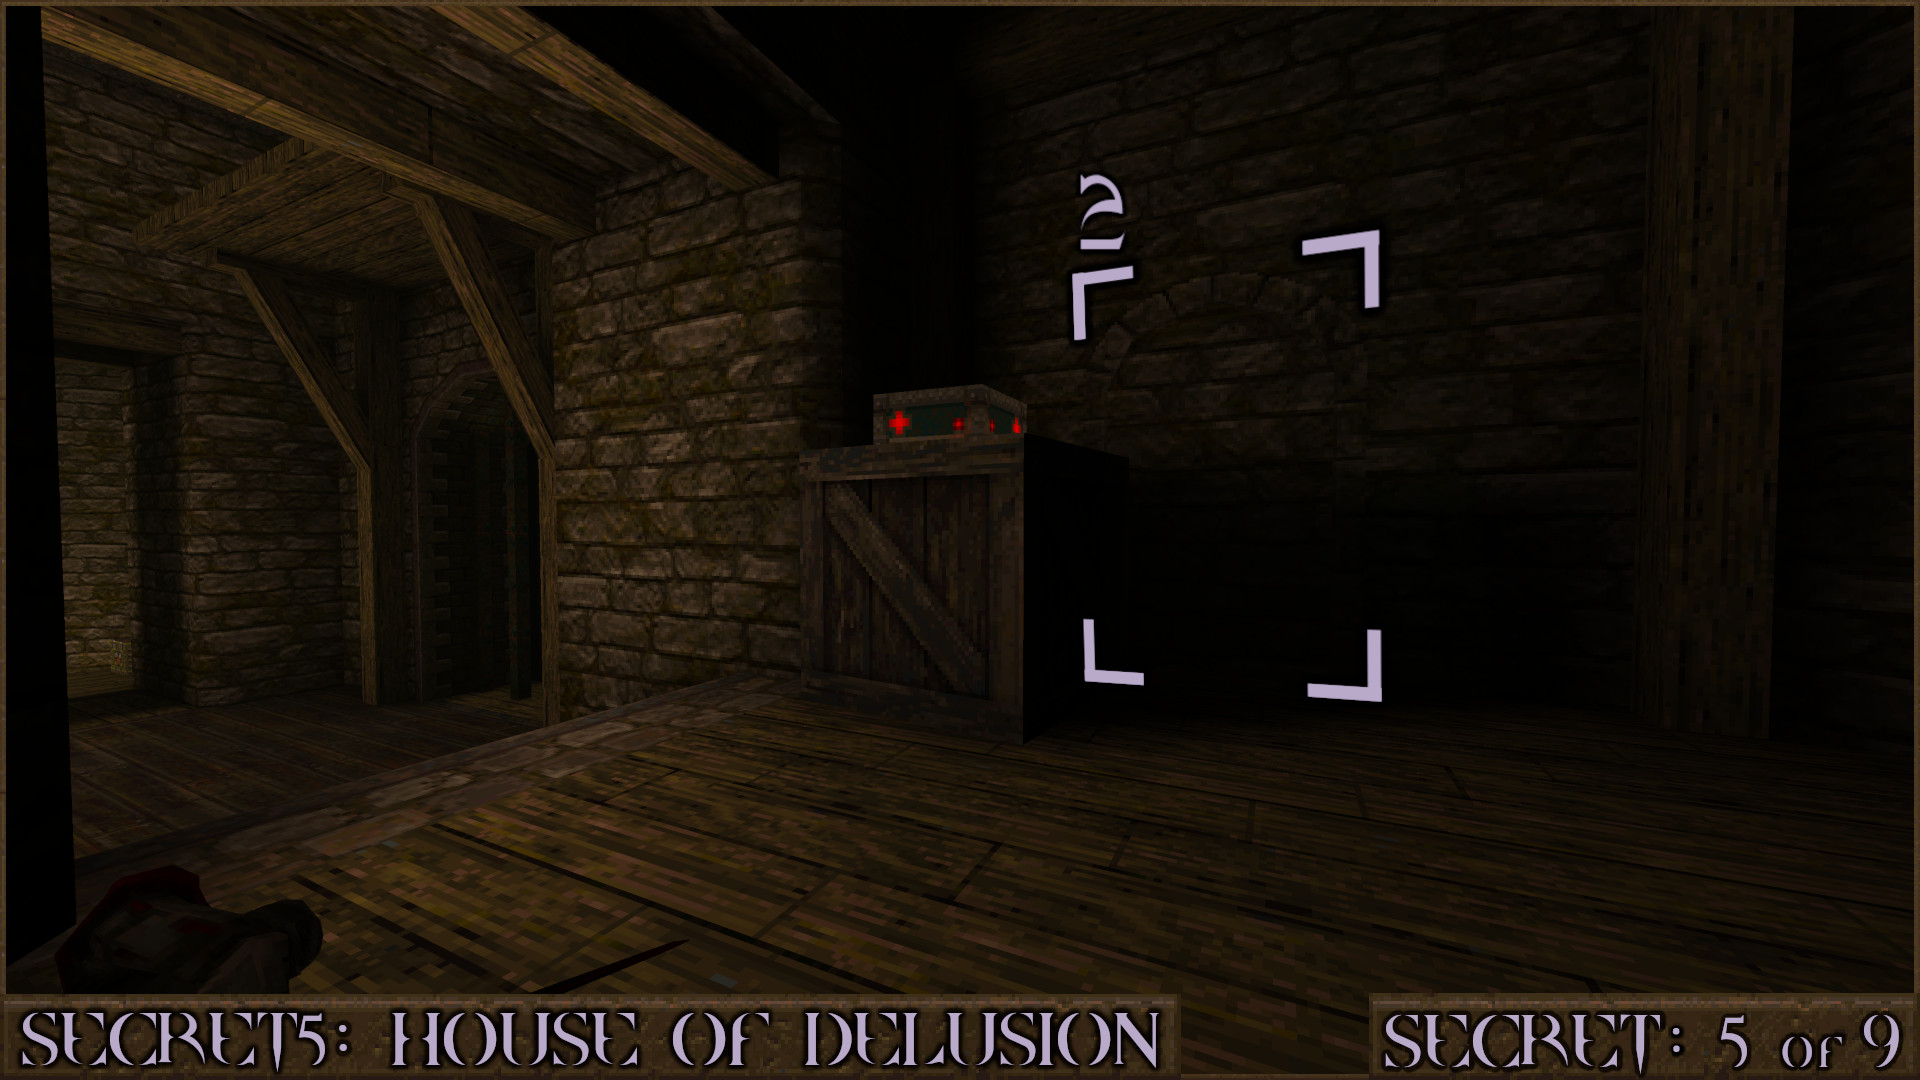
Go up to the next floor above. When you see an upgrade on a ledge above you head up some small stairs nearby ().

From here shoot a blocked alcove () by a crate to reveal an elevator up to the secret.

Reward: [Rocket Capacity Upgrade]

Secret 6 of 9
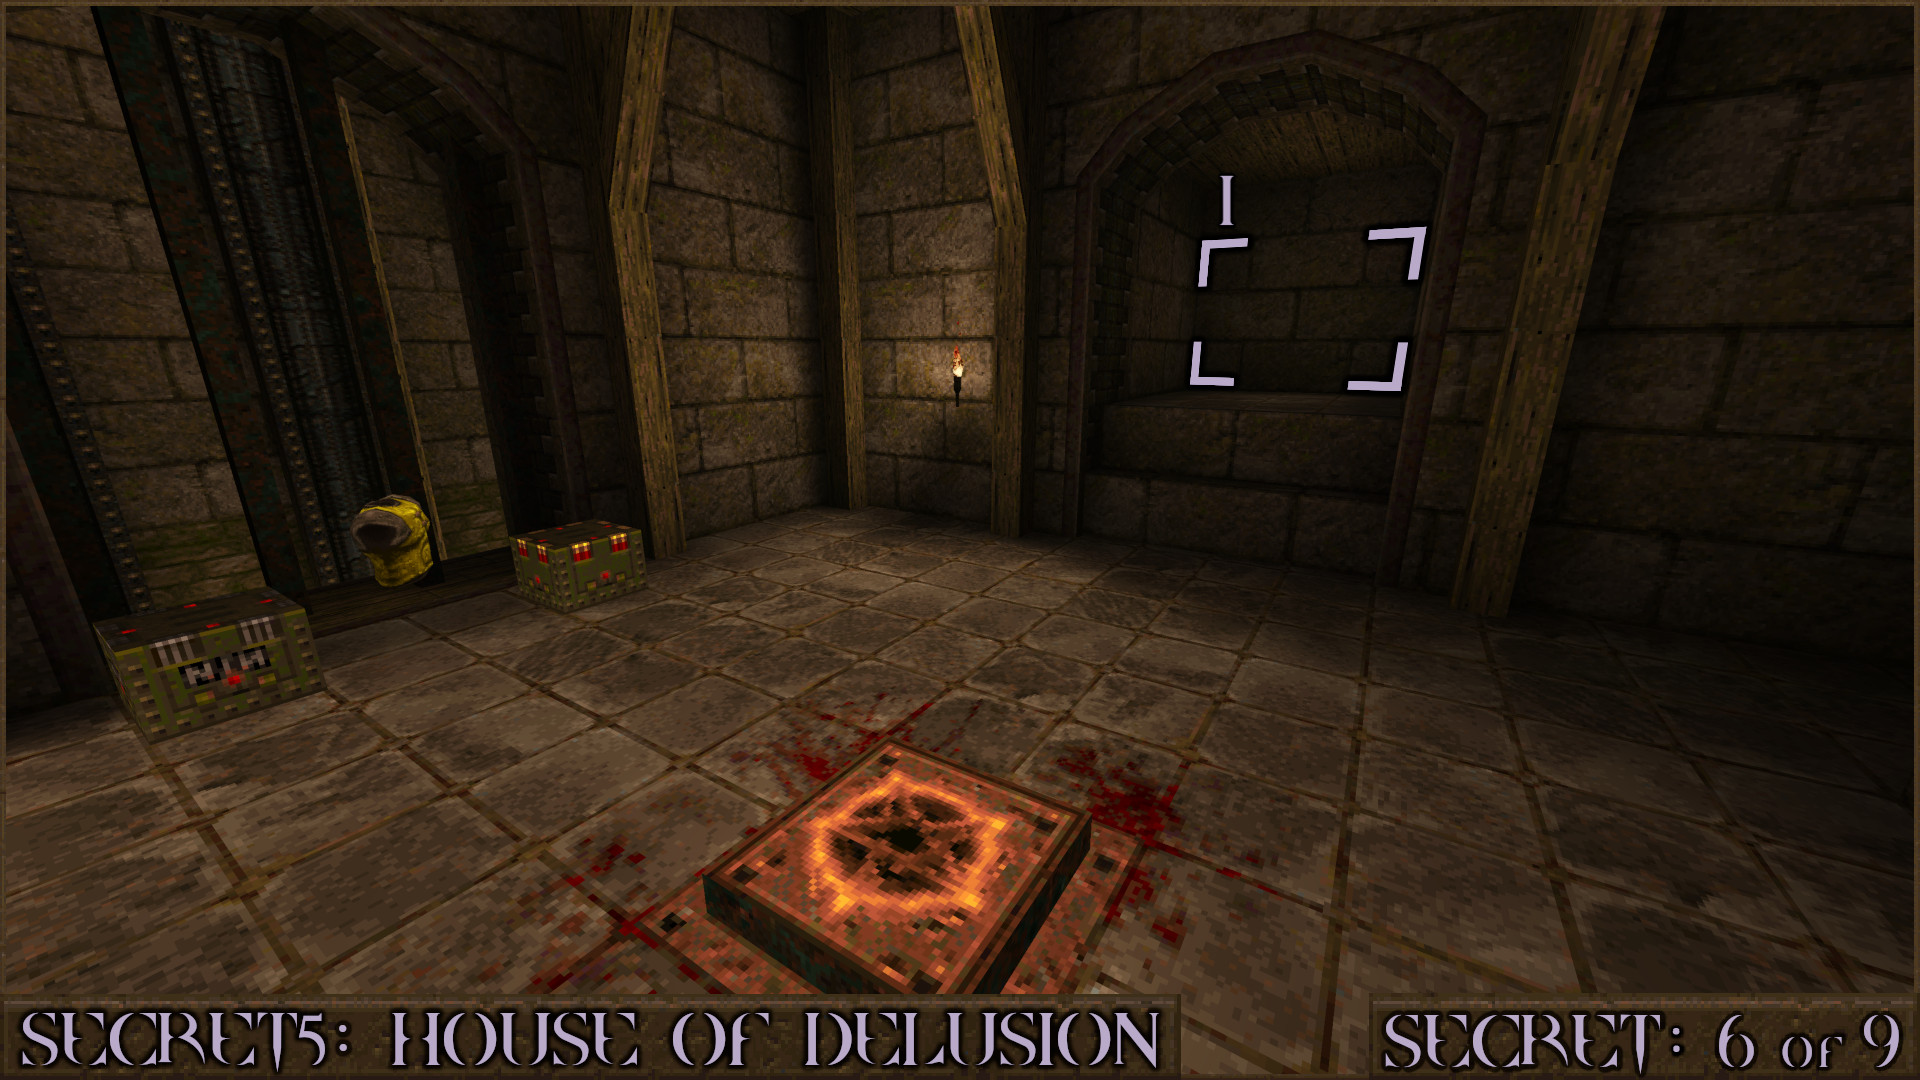
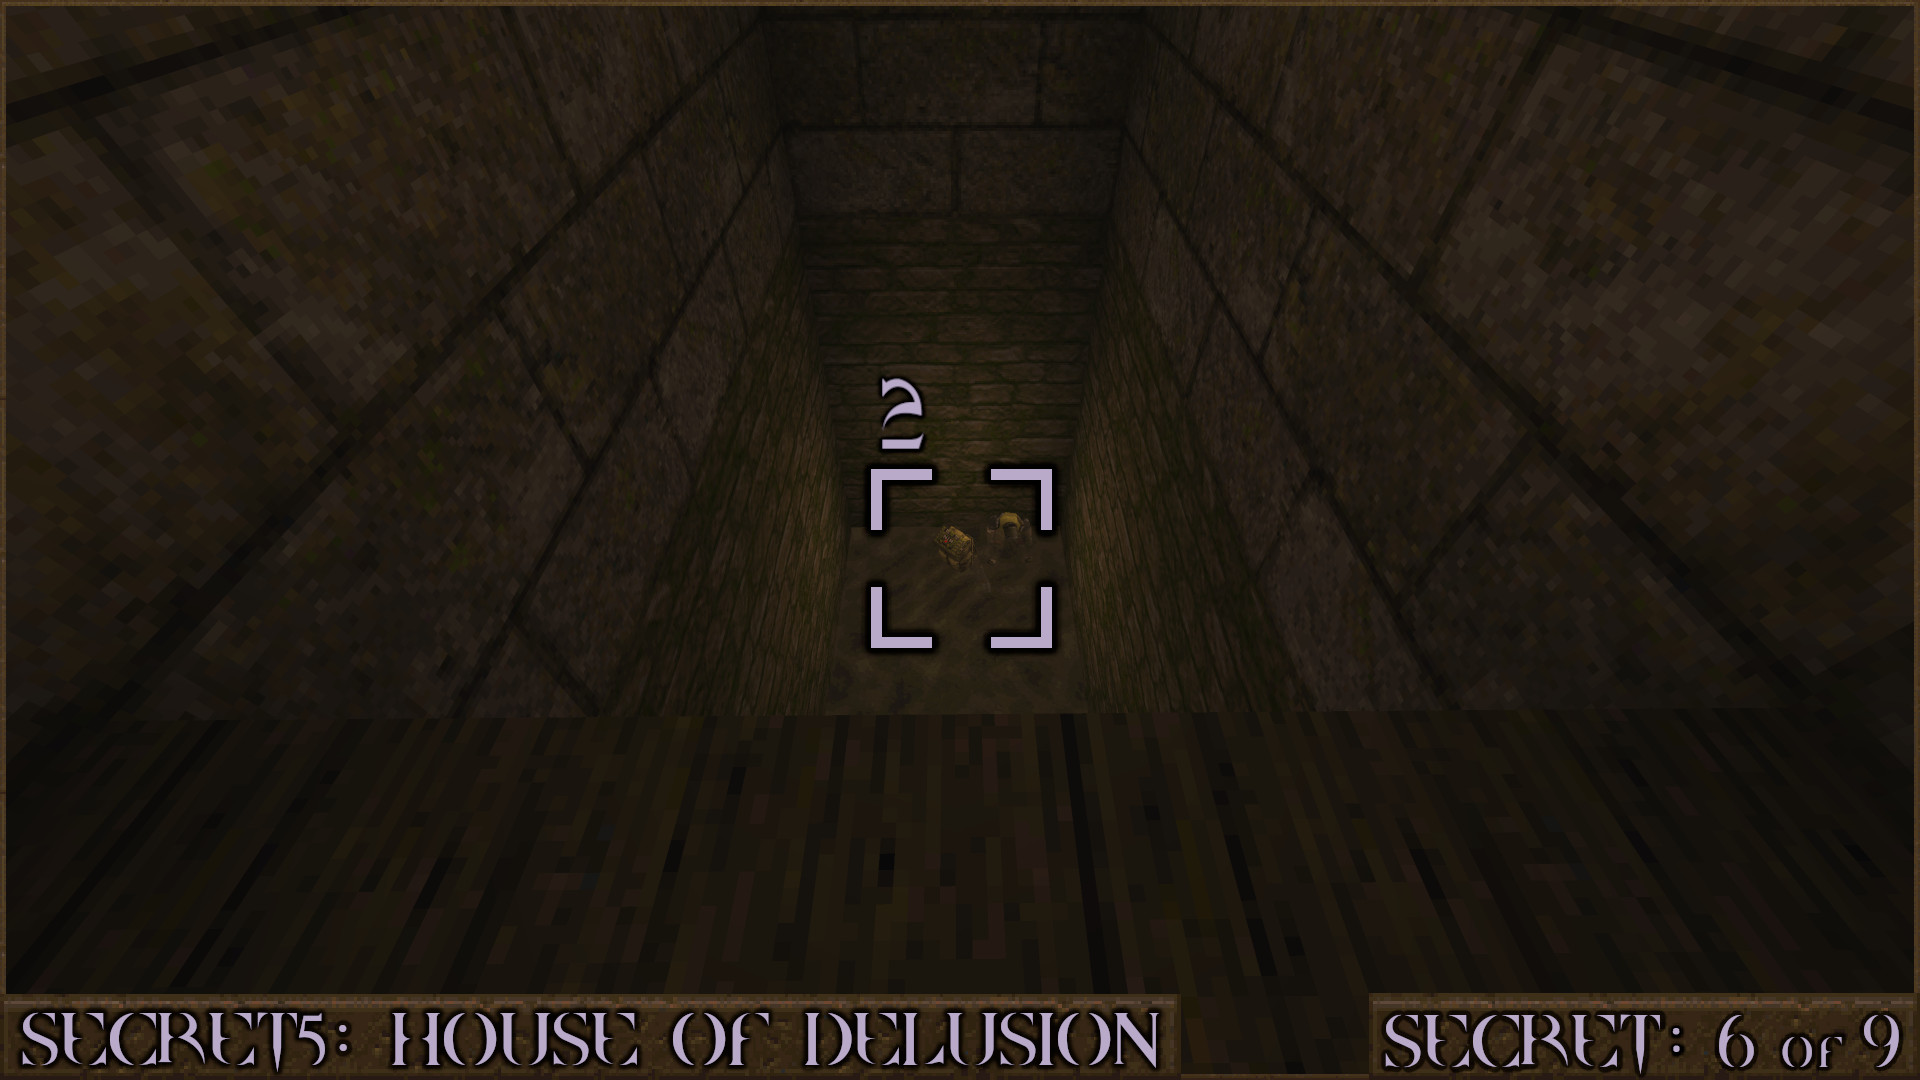
Before pressing an orange floor plate (this drops the floor down into a watery dungeon) look to your right and jump up to a nearby alcove. From here shoot the misaligned bricks () to reveal a secret Quad Damage behind the wall.

Fall down the back here to get the drop on an enemy ambush and also find an upgrade () a little earlier then normal.

Reward: Quad Damage [Nail Capacity Upgrade]

Secret 7 of 9
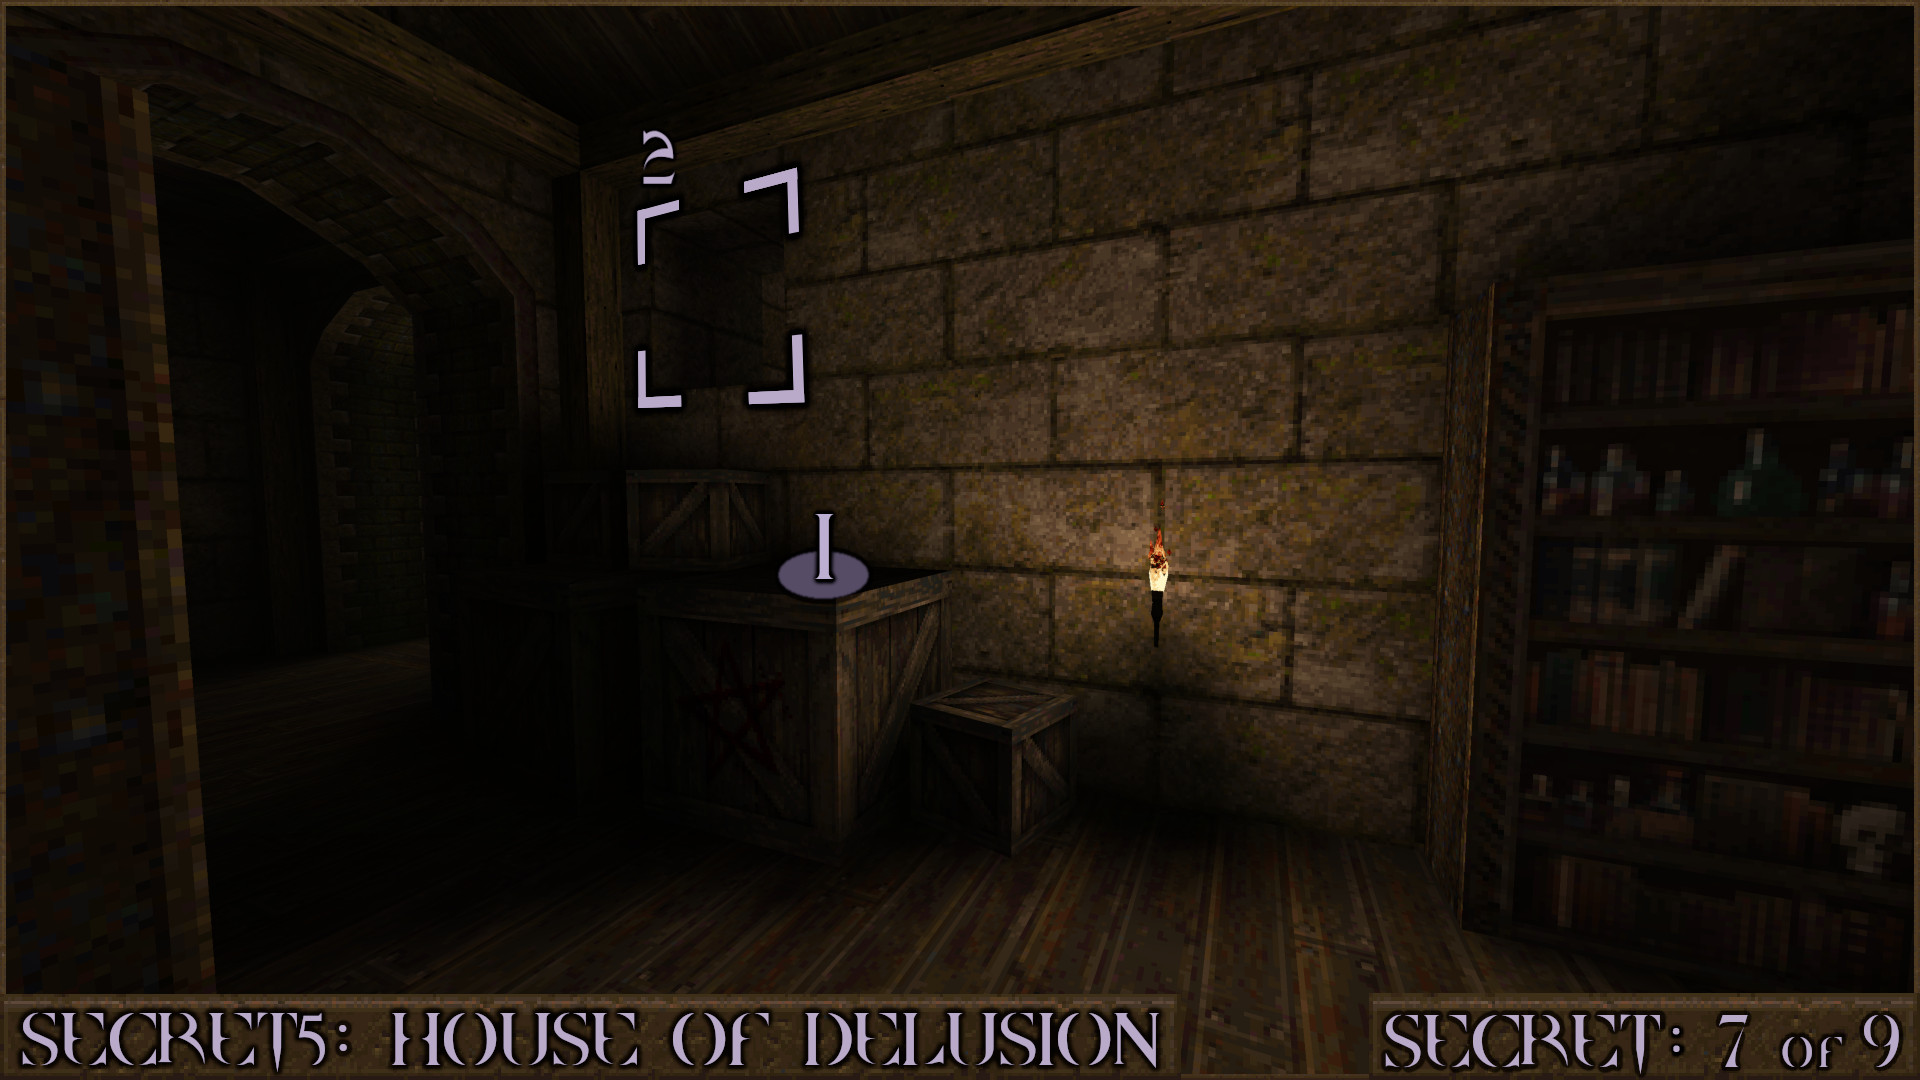
After escaping the dungeon by taking an elevator to the next floor look for a stack of crates near some bookshelves. One of them has a red pentagram on it. Climb this stack of crates () to reach an alcove containing the secret ().

Reward: [Cell Capacity Upgrade]

Secret 8 of 9
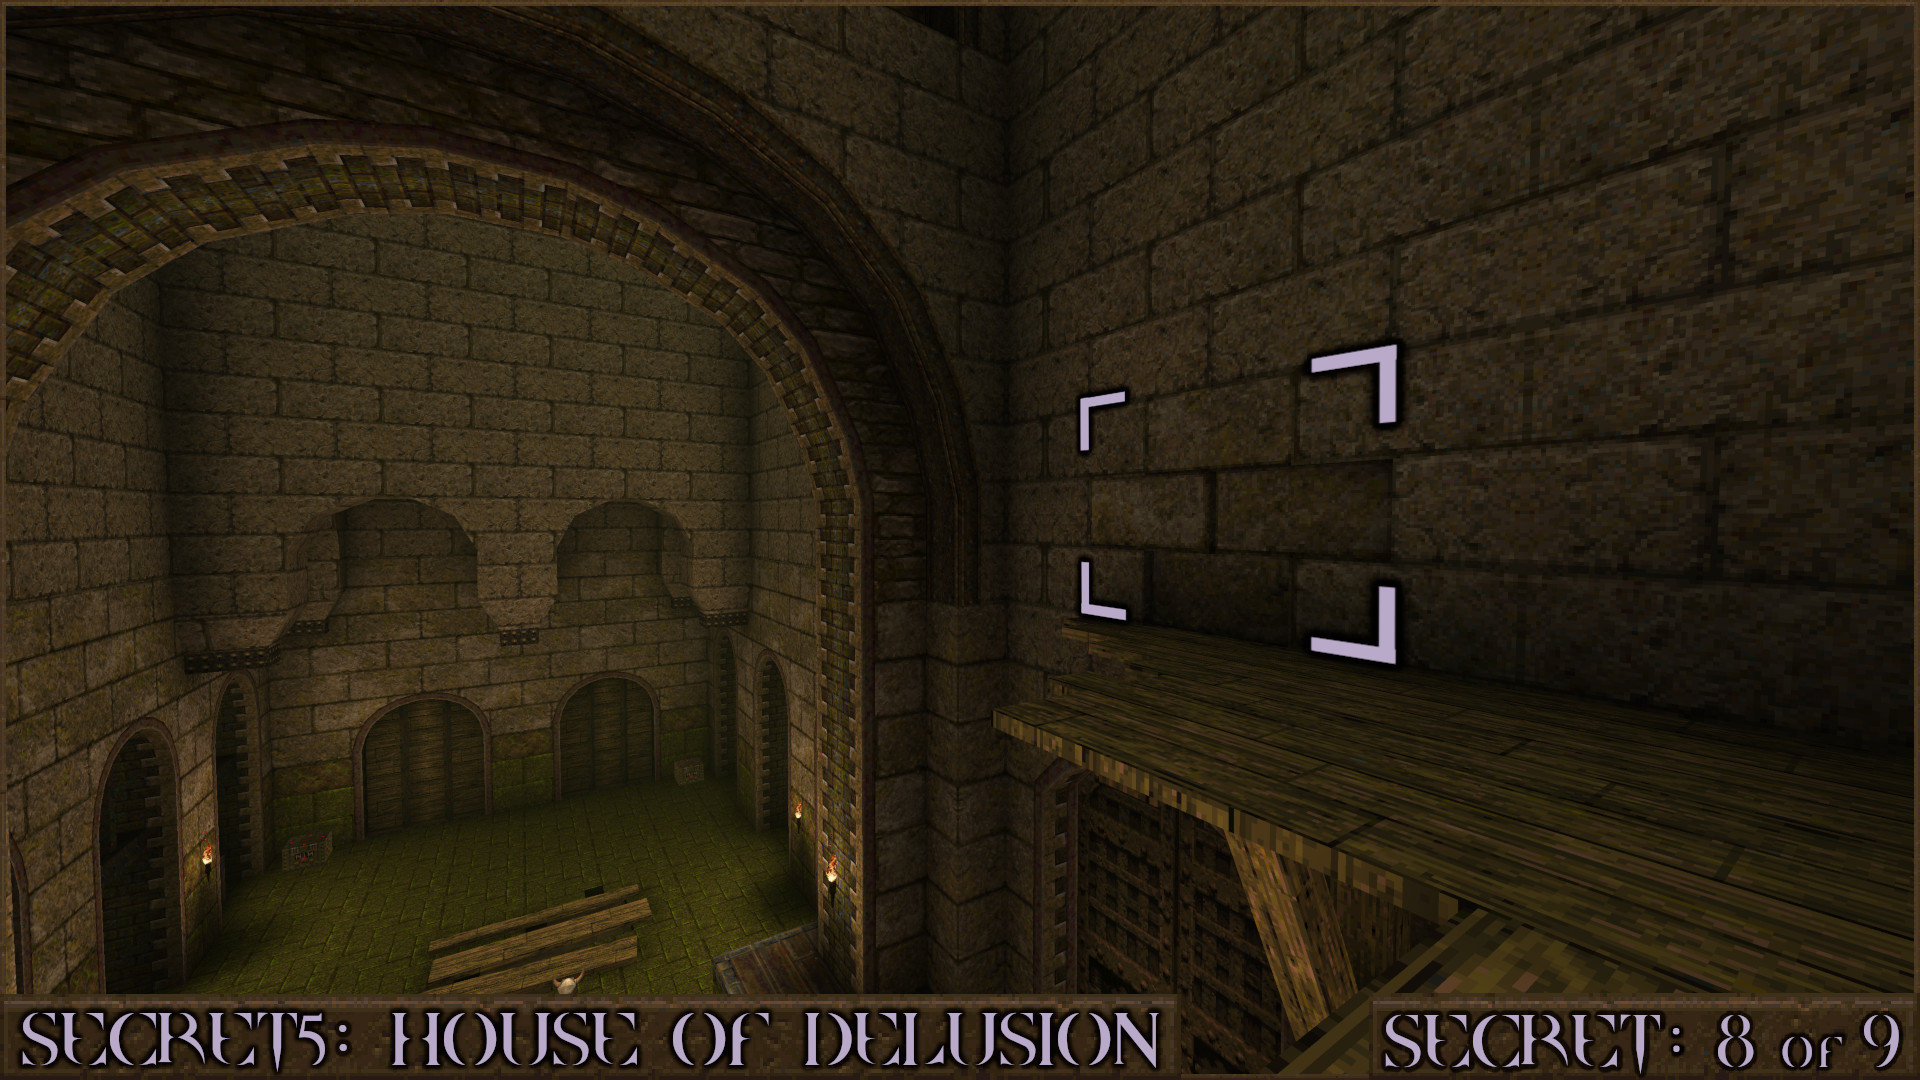
Shortly after the previous secret you will go out onto a ledge. To the right of this is a misaligned brick wall that when shot will reveal a hidden ledge behind it containing a Megahealth. Drop down and you can also activate a small shortcut between two parts of the level.

Reward: Large Shells×2 Large Nails×2 Large Health×2 Megahealth

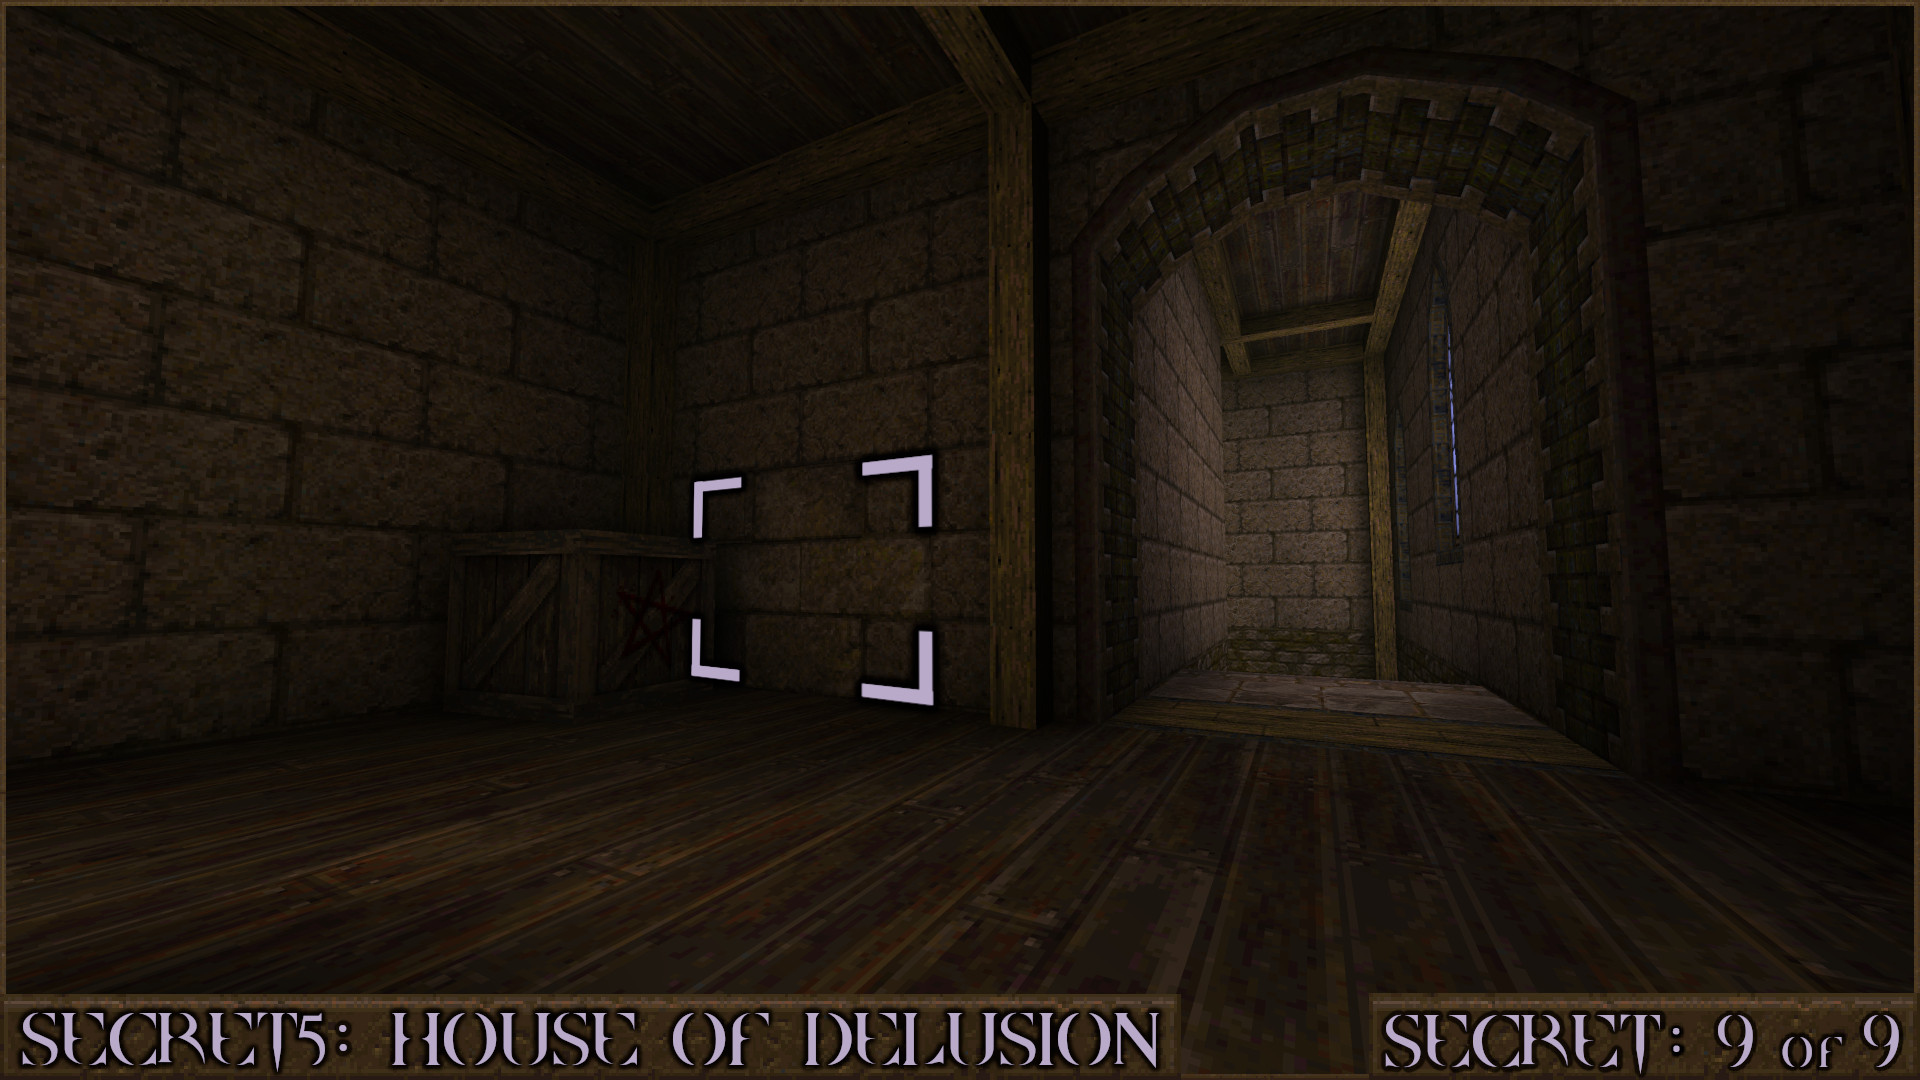
Secret 9 of 9
Head back up to the ledge from Secret 8 and look on the opposite wall to see another section of misaligned brick wall near to a red pentagram crate. Shoot it to reveal the secret.

Reward: Yellow Armor
The Rune of Madness!
Near the end of this level you will acquire another rune, the Rune of Madness! The level exit will take you directly back to the The Runic Nexus hub.
‎‏‏‎MAP4: Of Shattered Minds
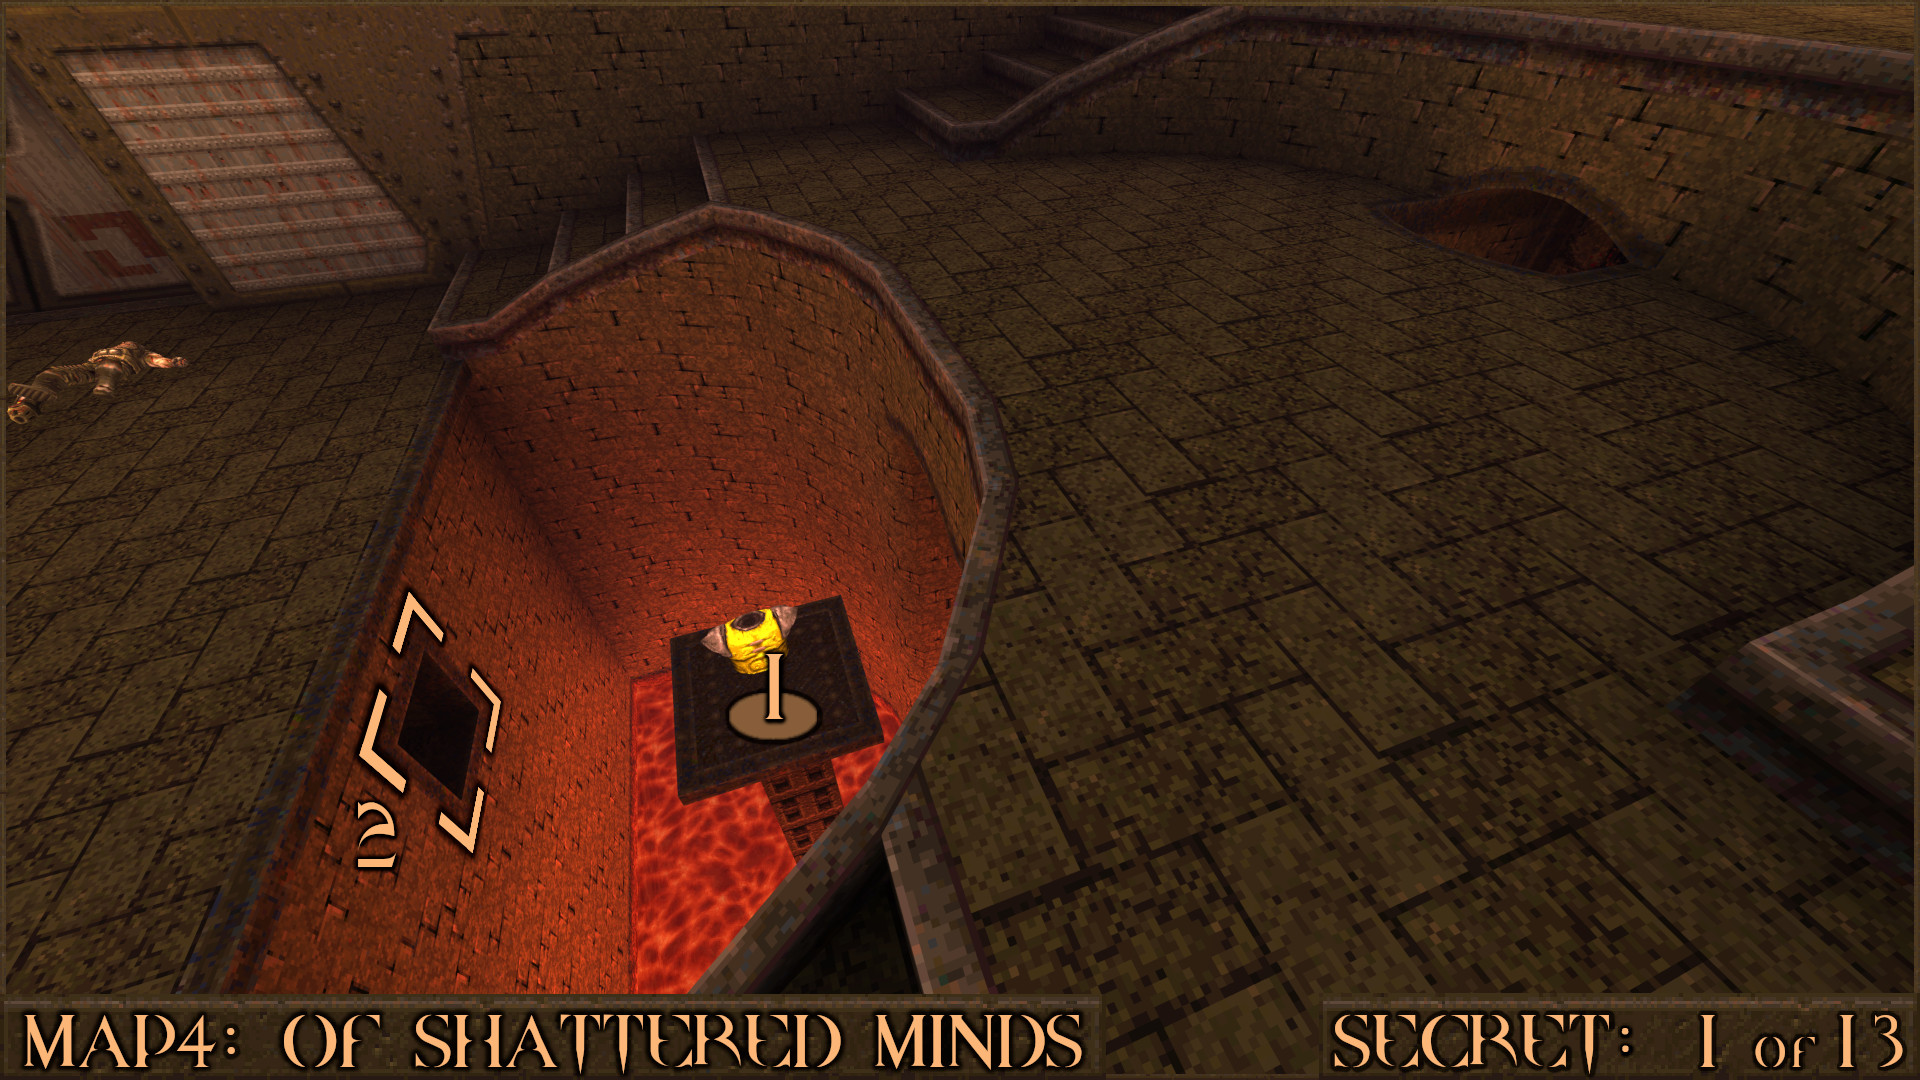
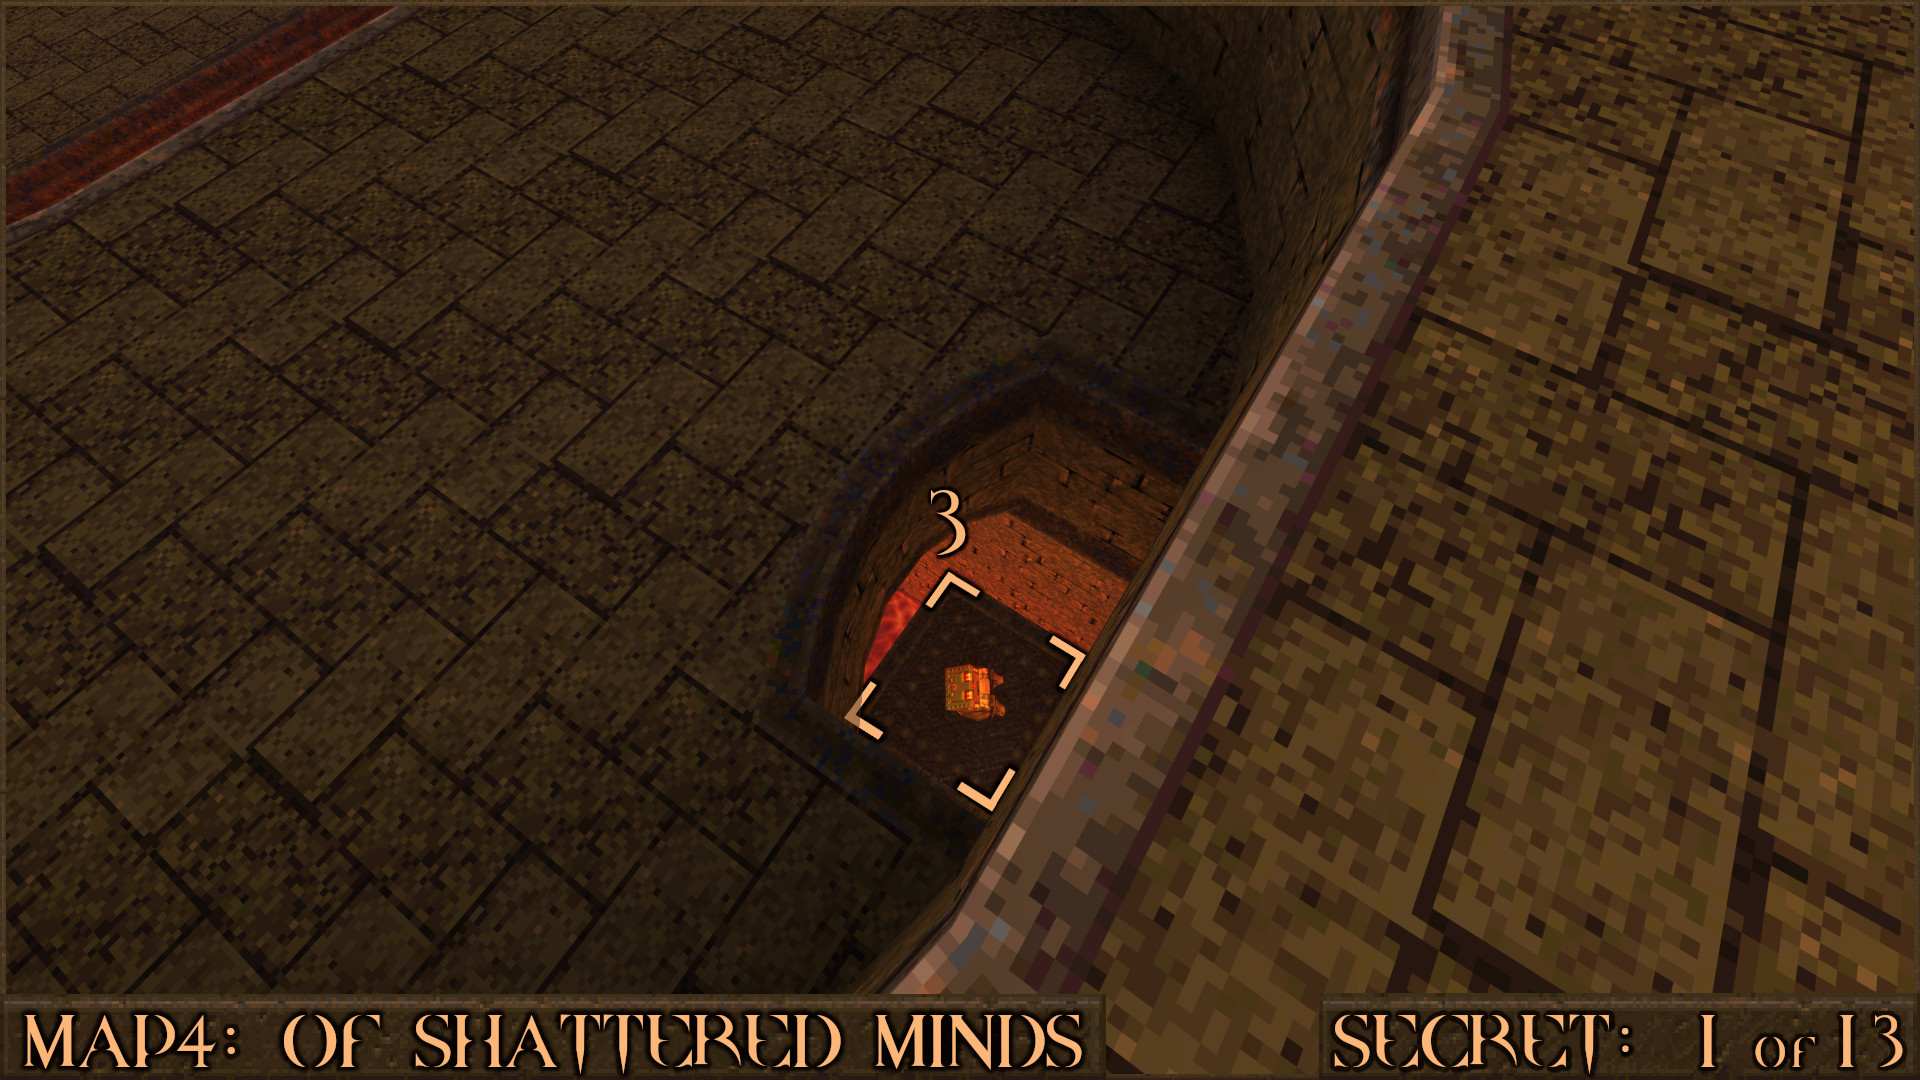
Secret 1 of 13
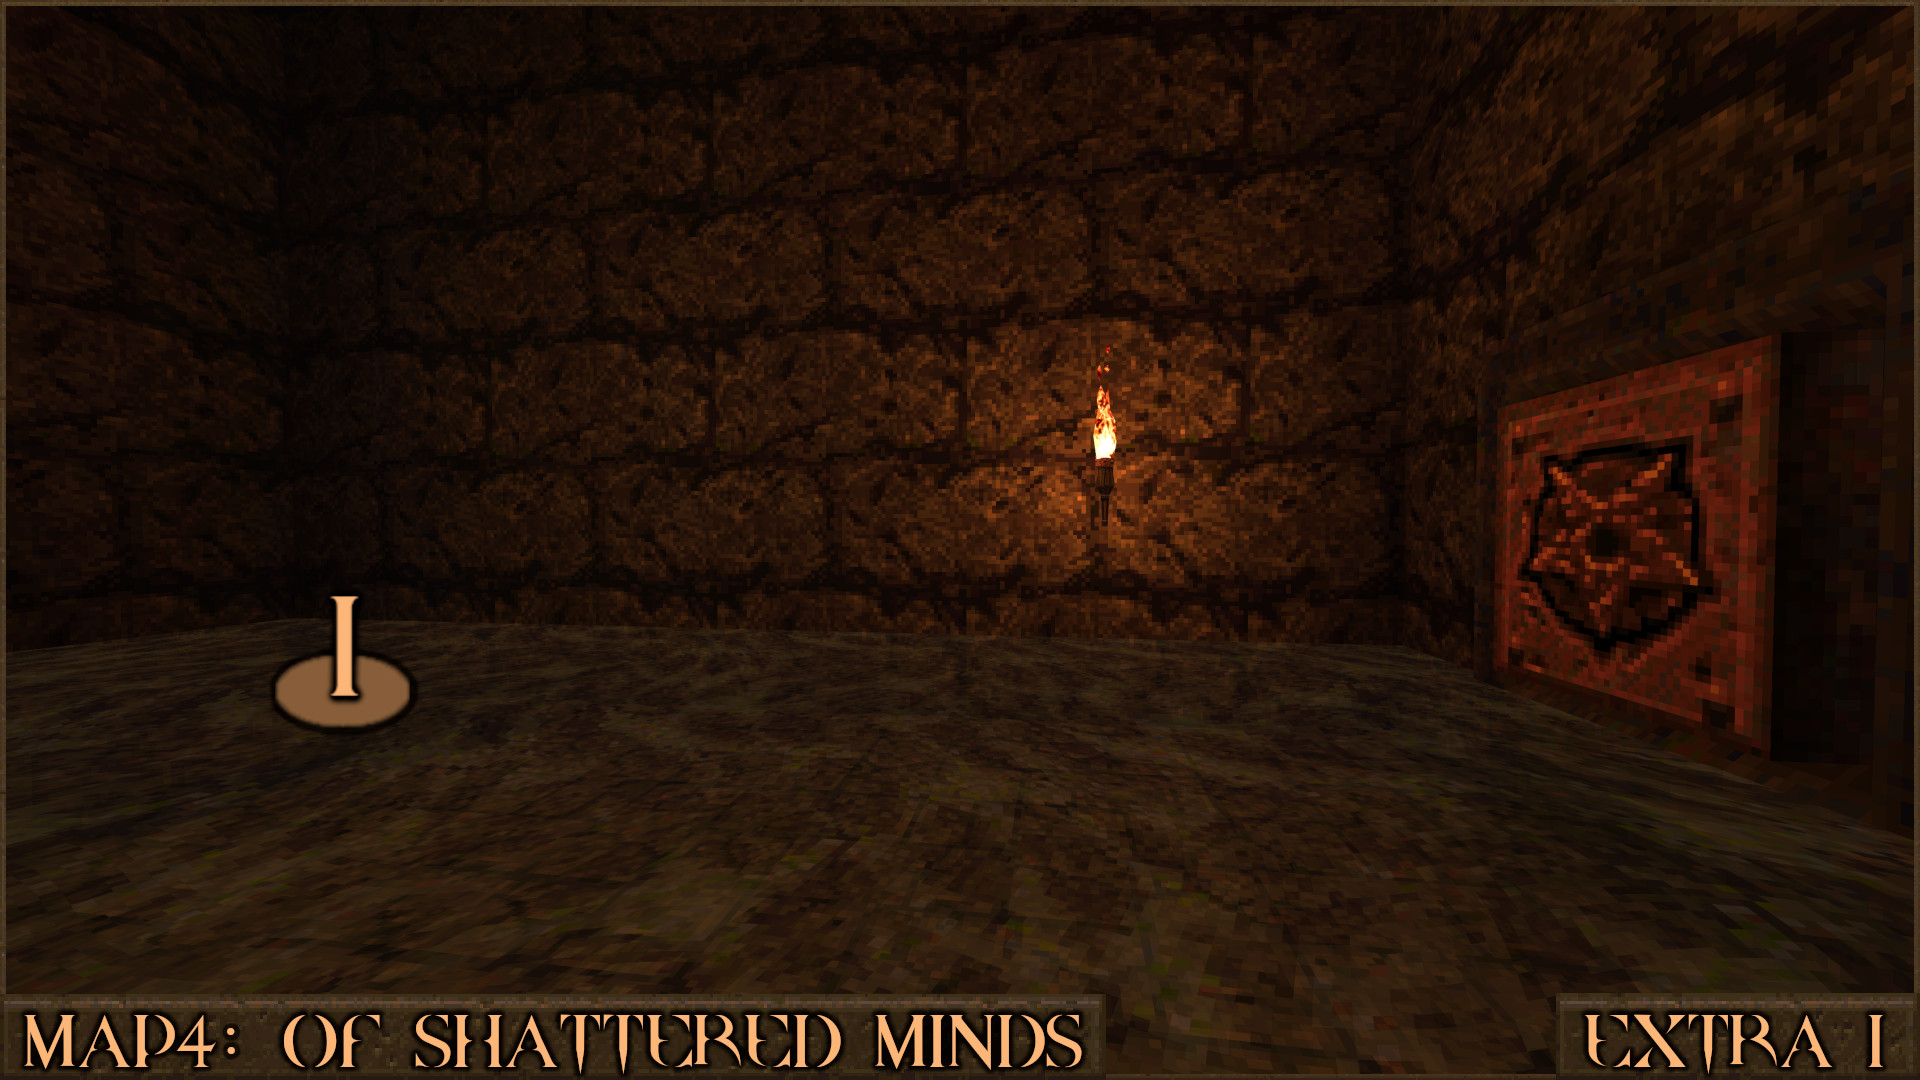
In the starting area drop down to the Yellow Armor () and turn around to see a red shootable button behind you (). Shoot it and jump into the teleporter.

Now drop down the other hole () nearby to land on the secret.

Reward: [Shell Capacity Upgrade]

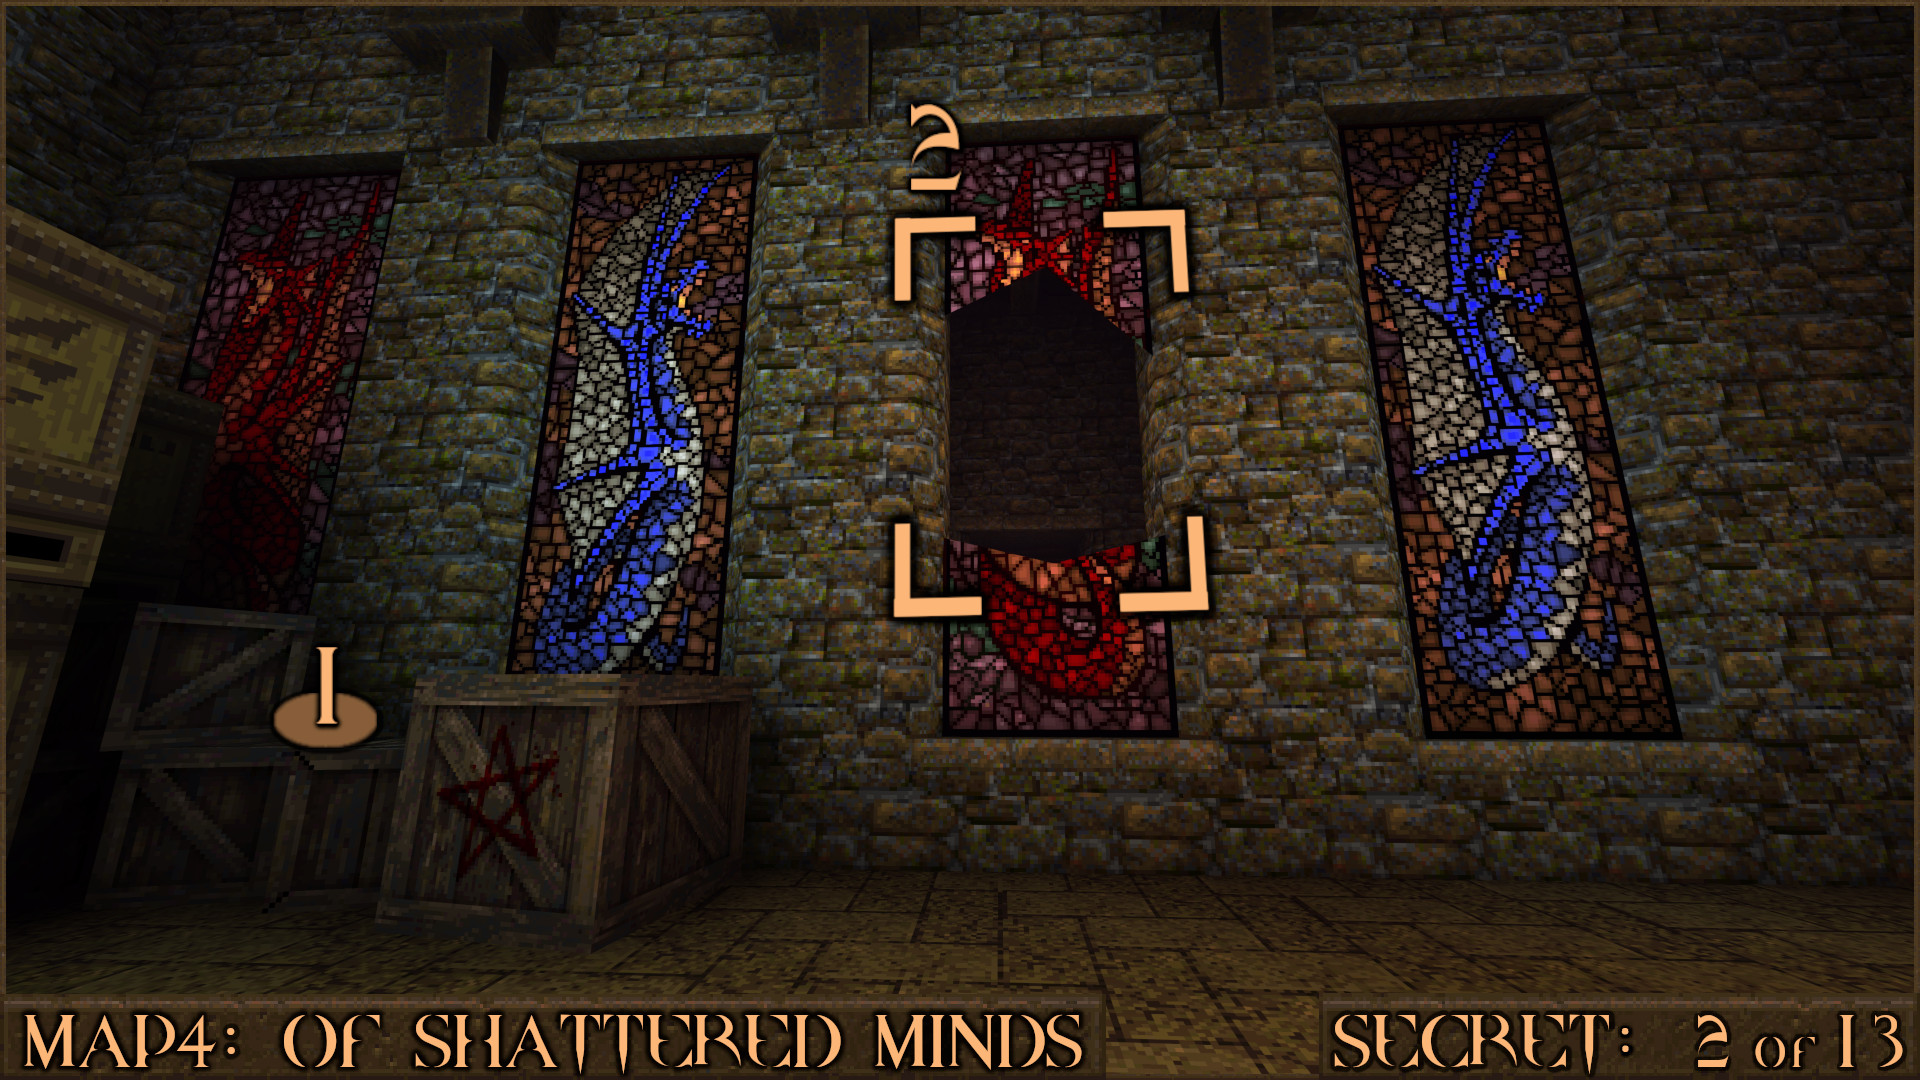
Secret 2 of 13
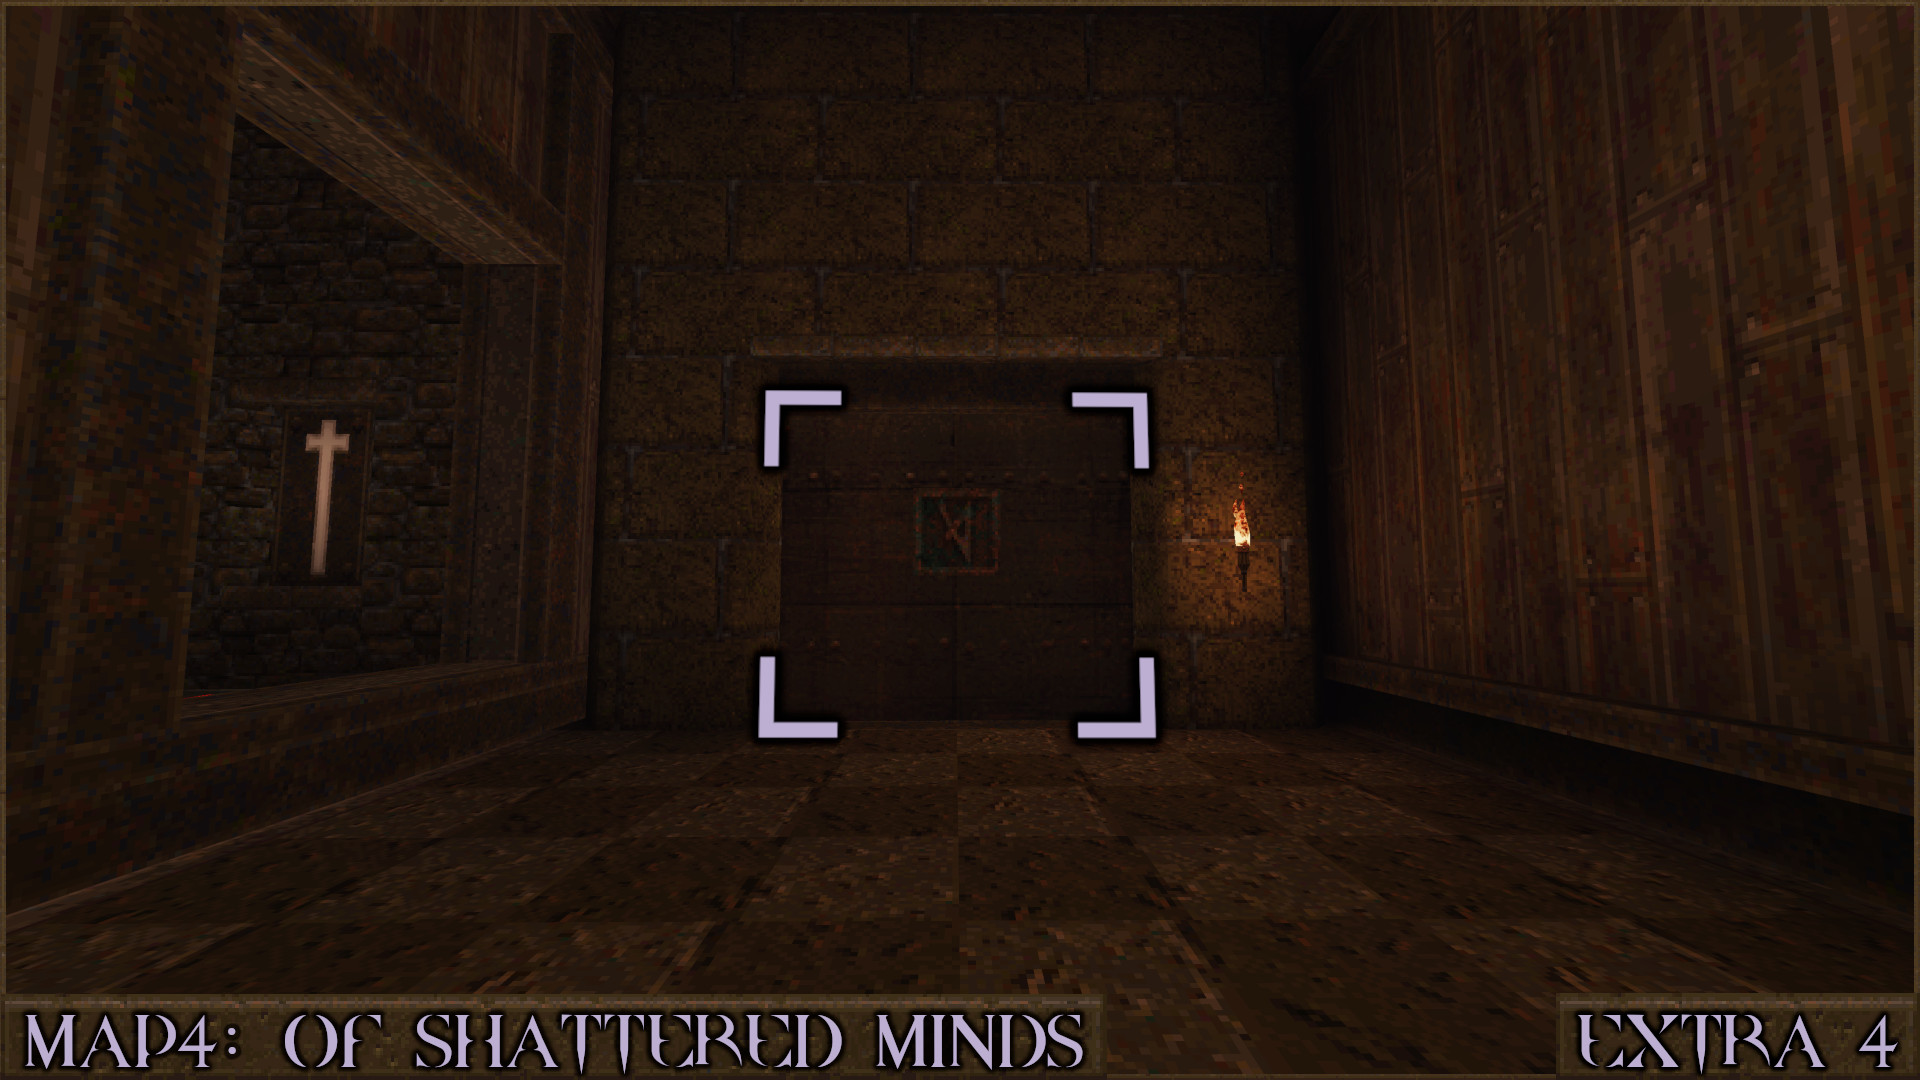
Take the left door from the starting area and soon you will find a room with four stained glass windows but one of them is broken. First shoot some grenades in there to clear out the explosive crates then use the nearby crates () to jump into the window () and drop down into the secret area.

Reward: Small Shells Small Rockets×3 Green Armor Small Health×3 Large Health [Rocket Capacity Upgrade]

Extra Secret 1
While inside Secret 2 look carefully in one of the corners opposite the orange button to see a small underwater tunnel () which you can swim down into and visit an old friend.

Reward: Armor Shard×6

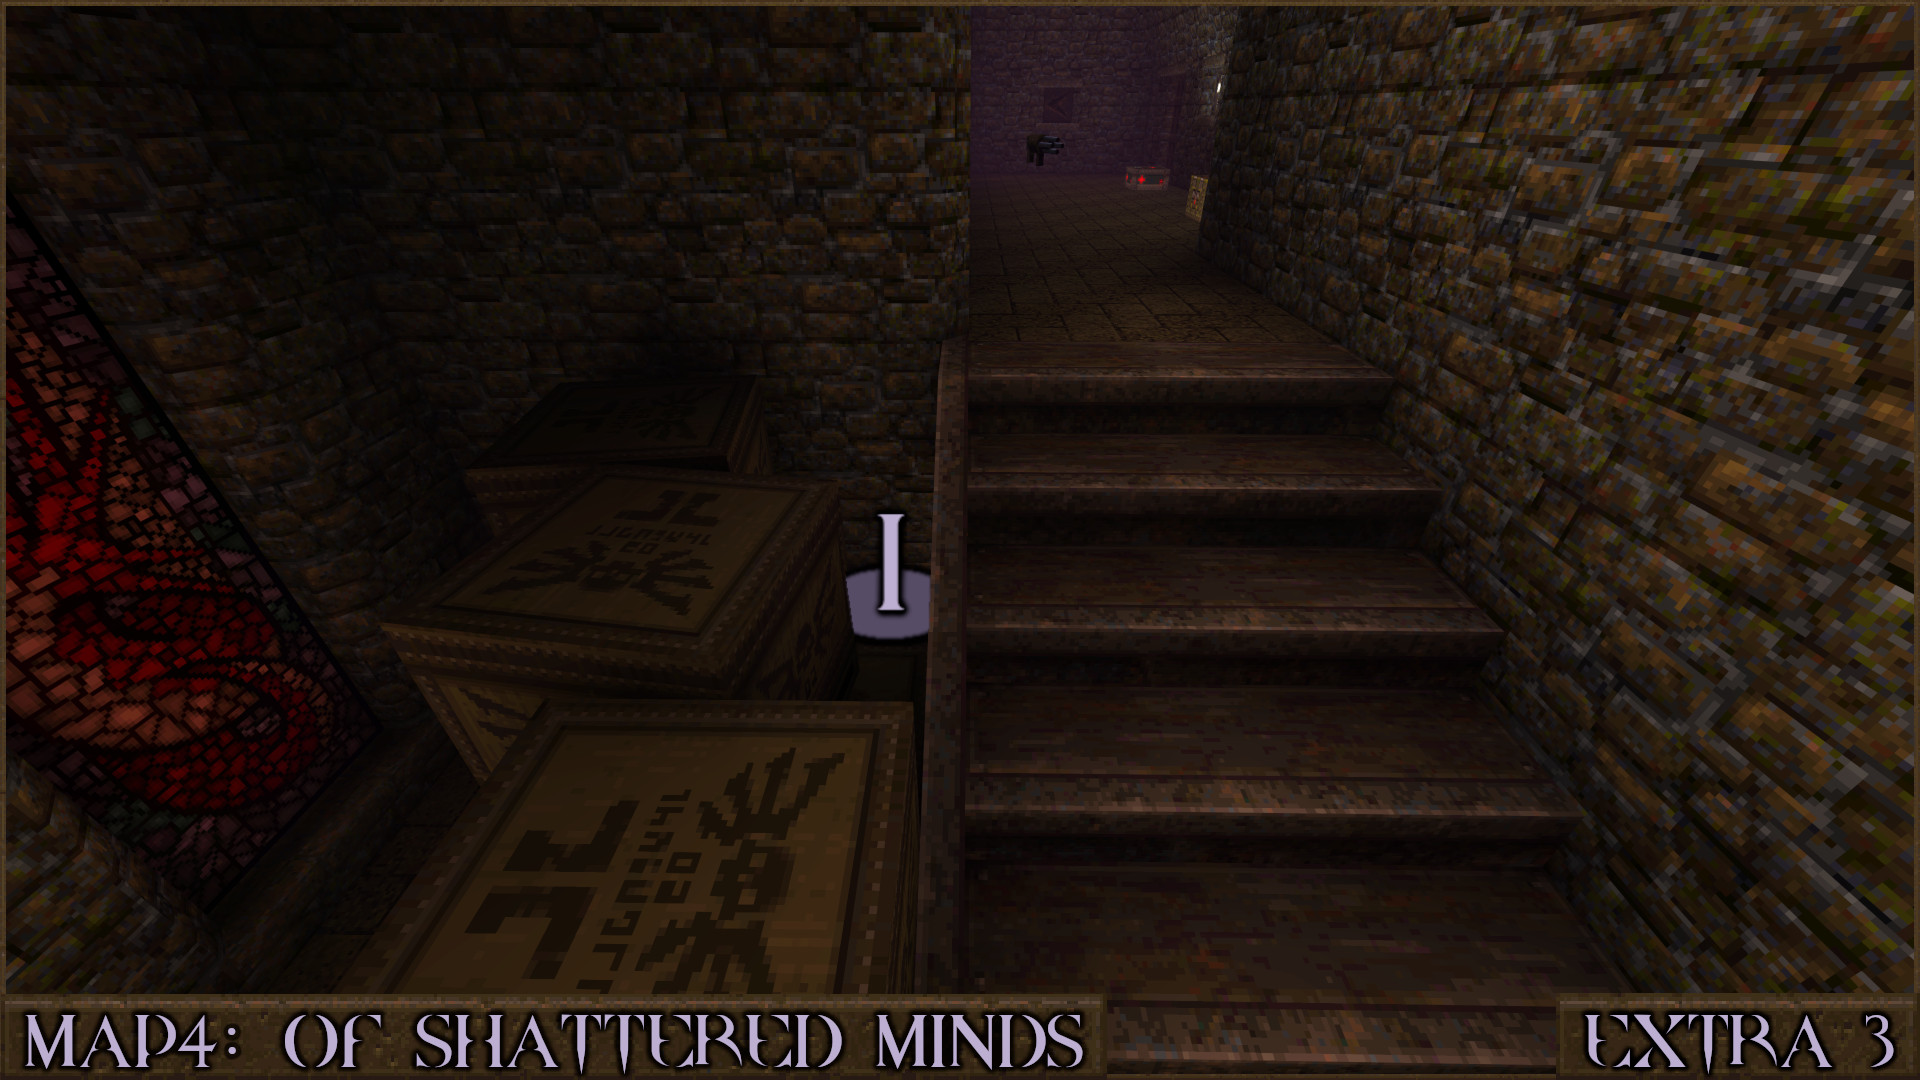
Secret 3 of 13
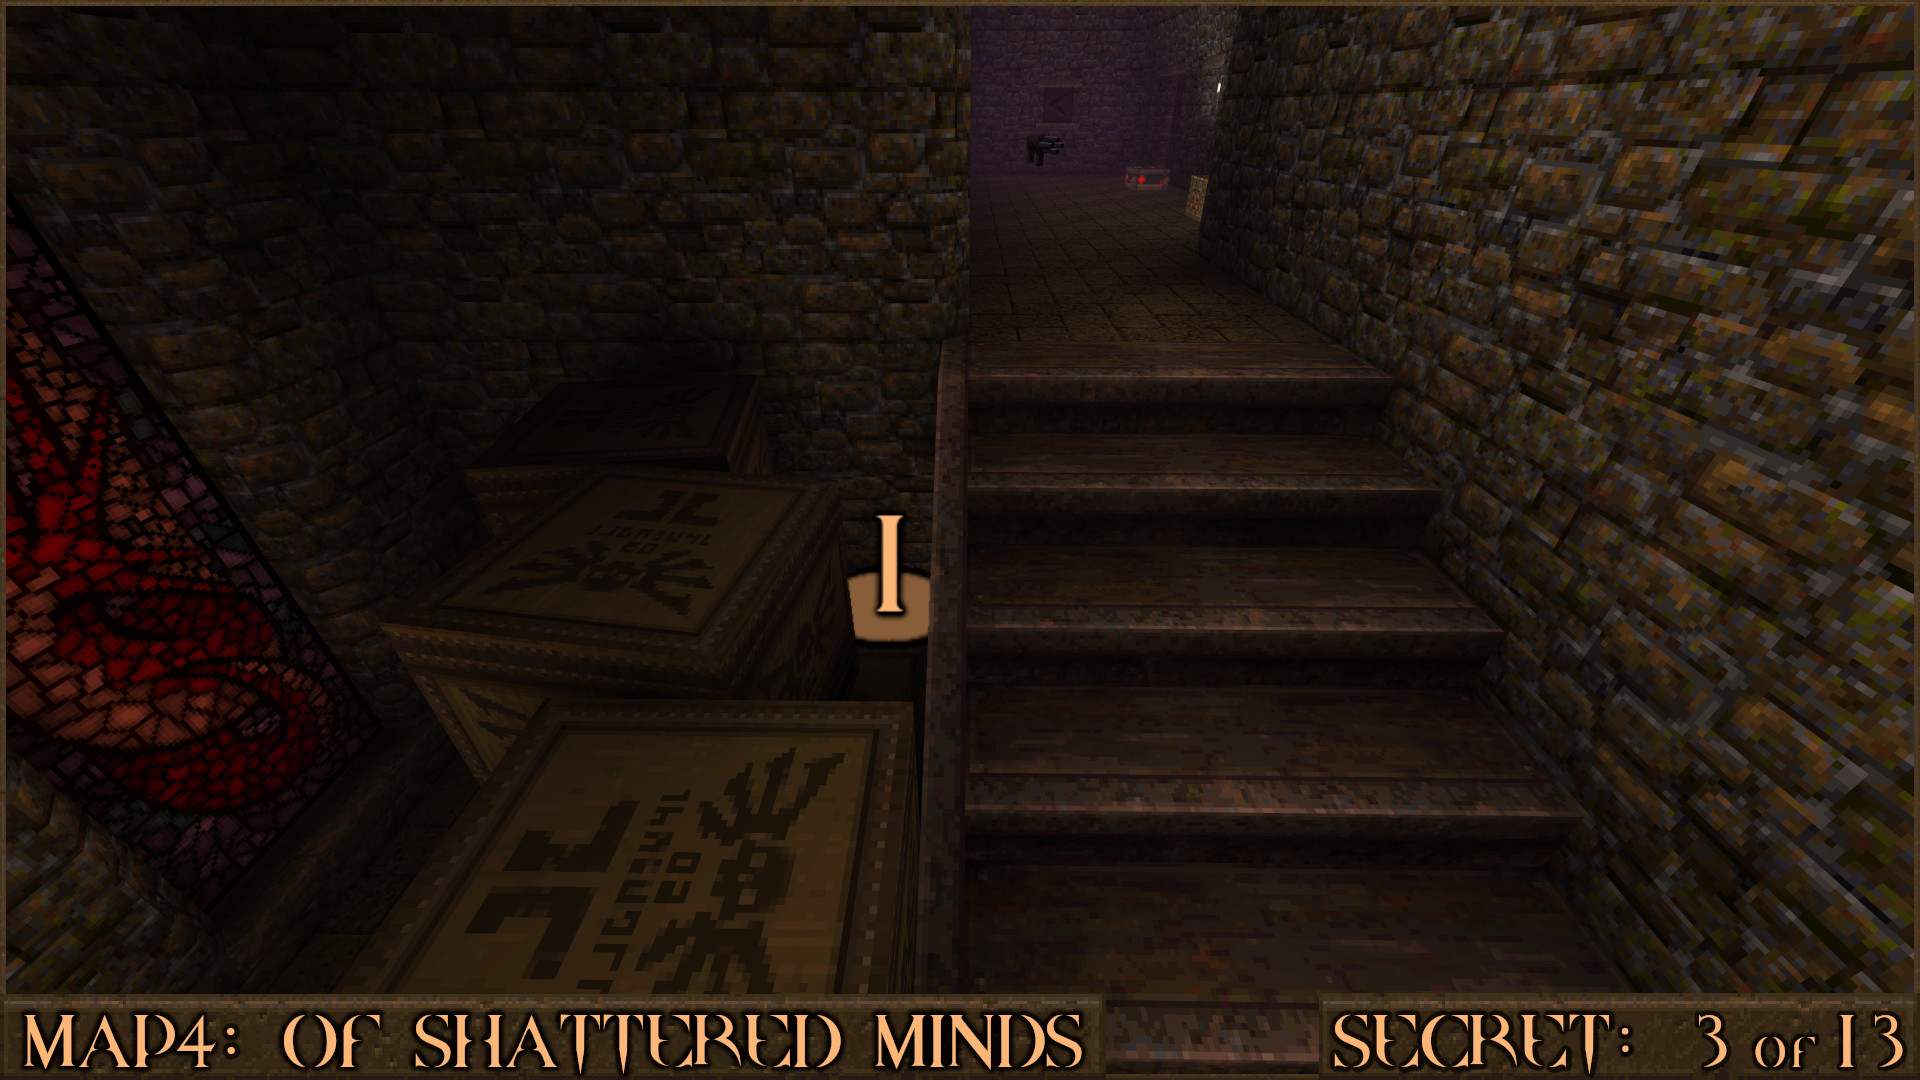
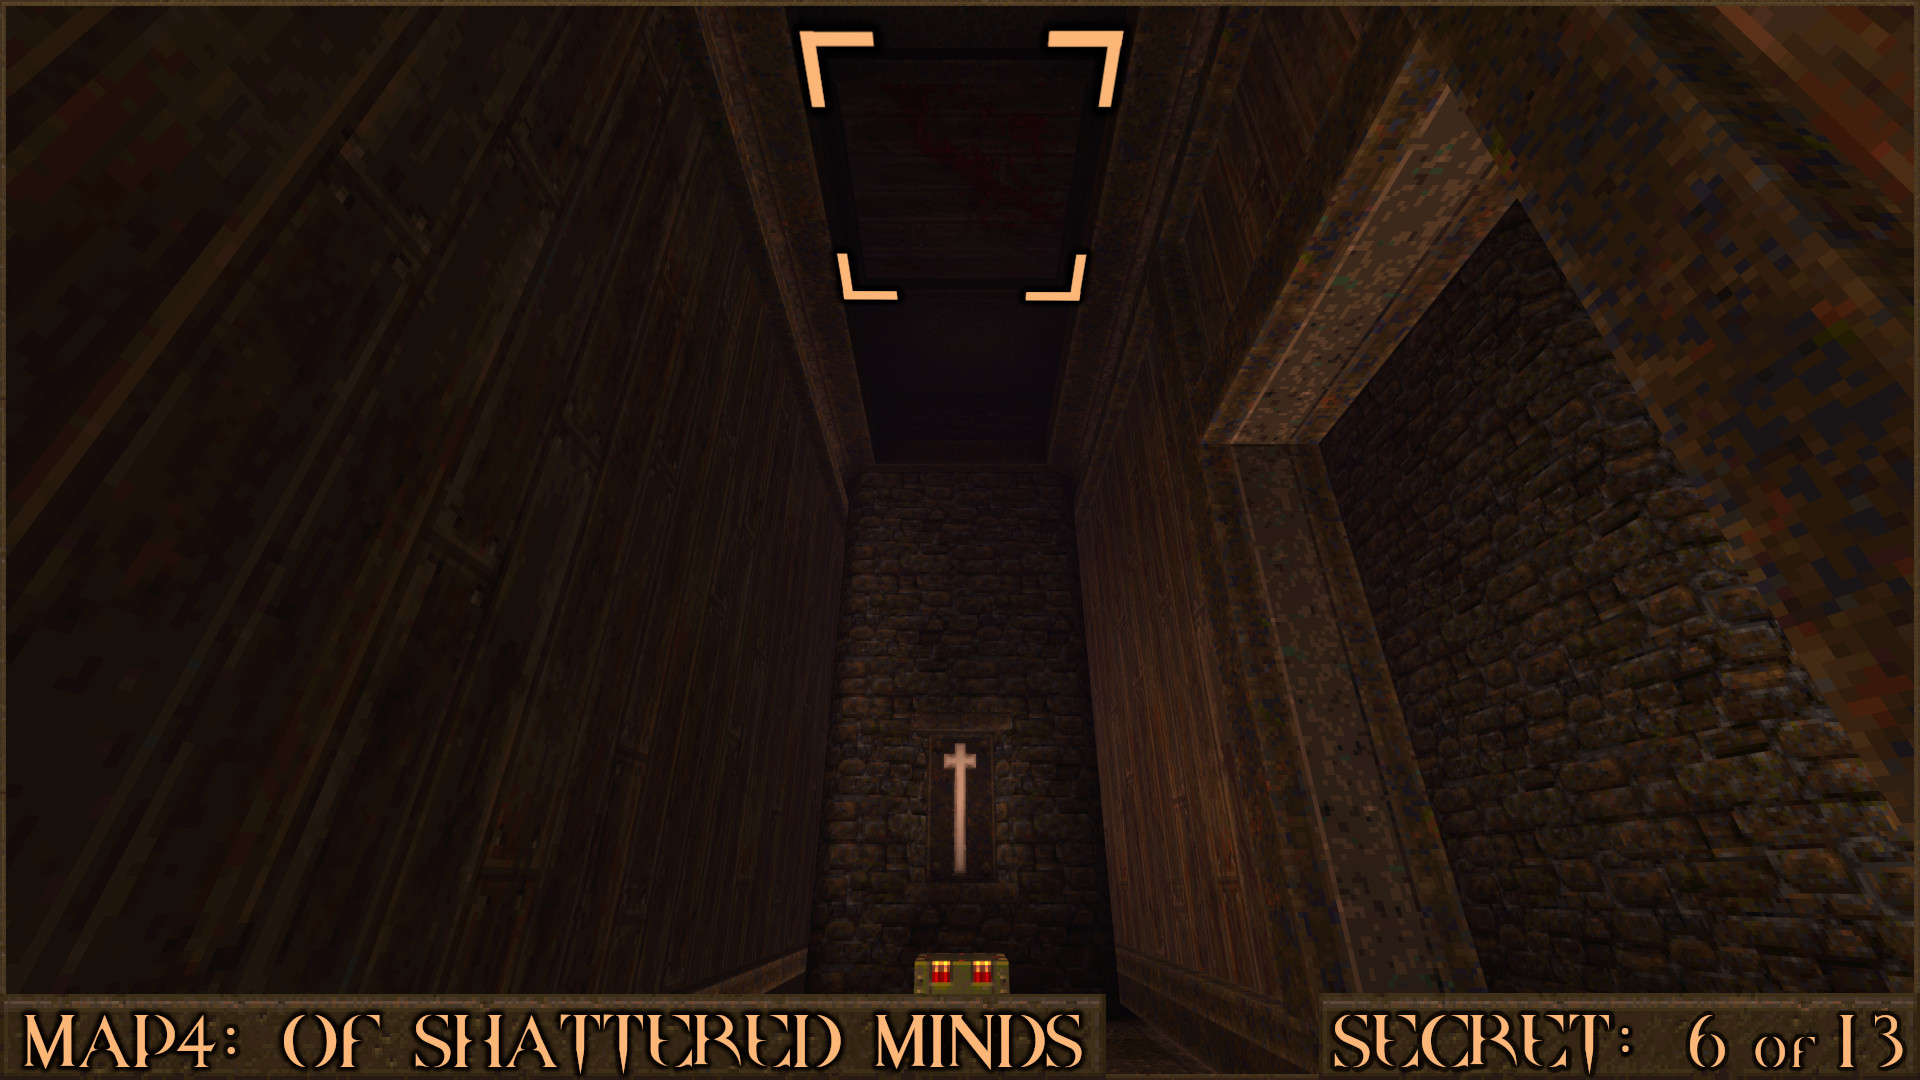
You'll come across a small set of stairs with several crates stacked to the left it. Between the top of the stairs and the crates is a small gap () you can drop down into.

Reward: Megahealth

Secret 4 of 13
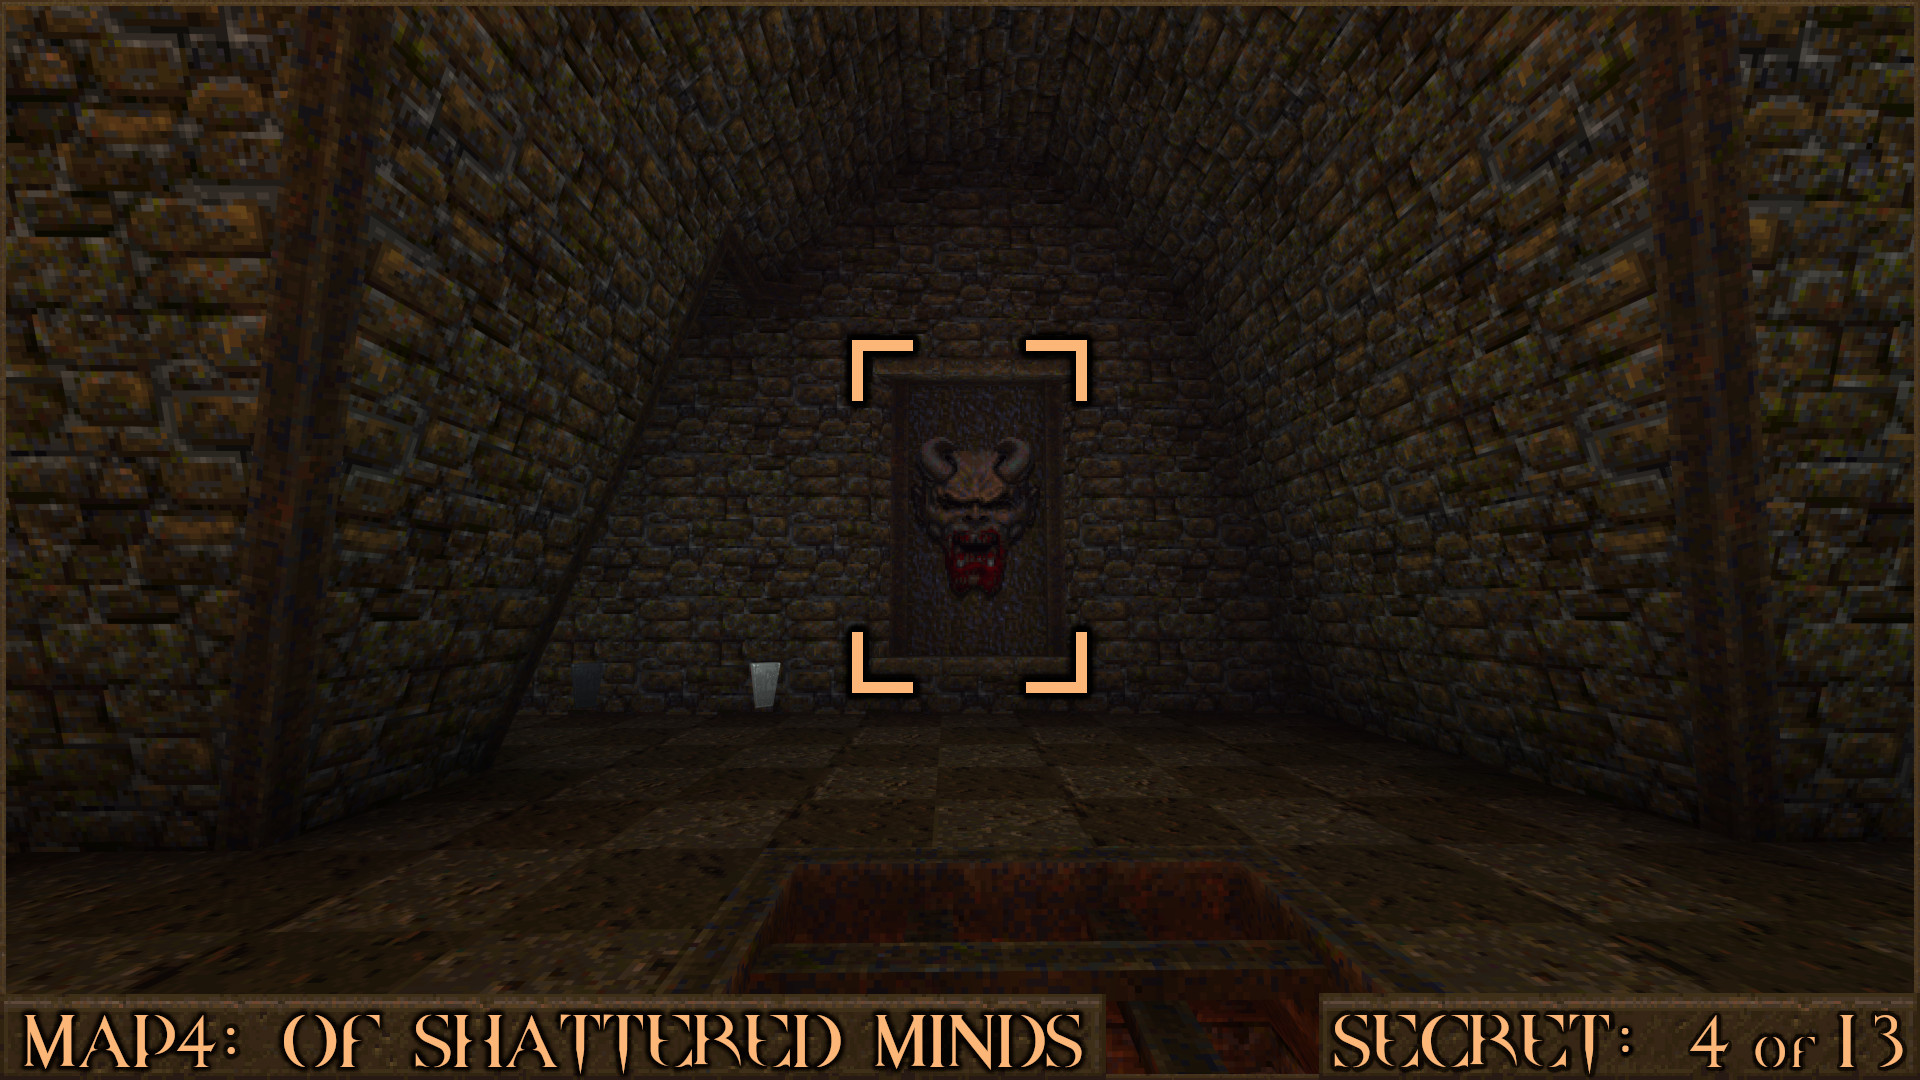
Shortly after ascending the large nail trap stairs you'll see a bloody gargoyle face near a Quad Damage. Shoot it to access the secret behind it.

Reward: Red Armor

Secret 5 of 13
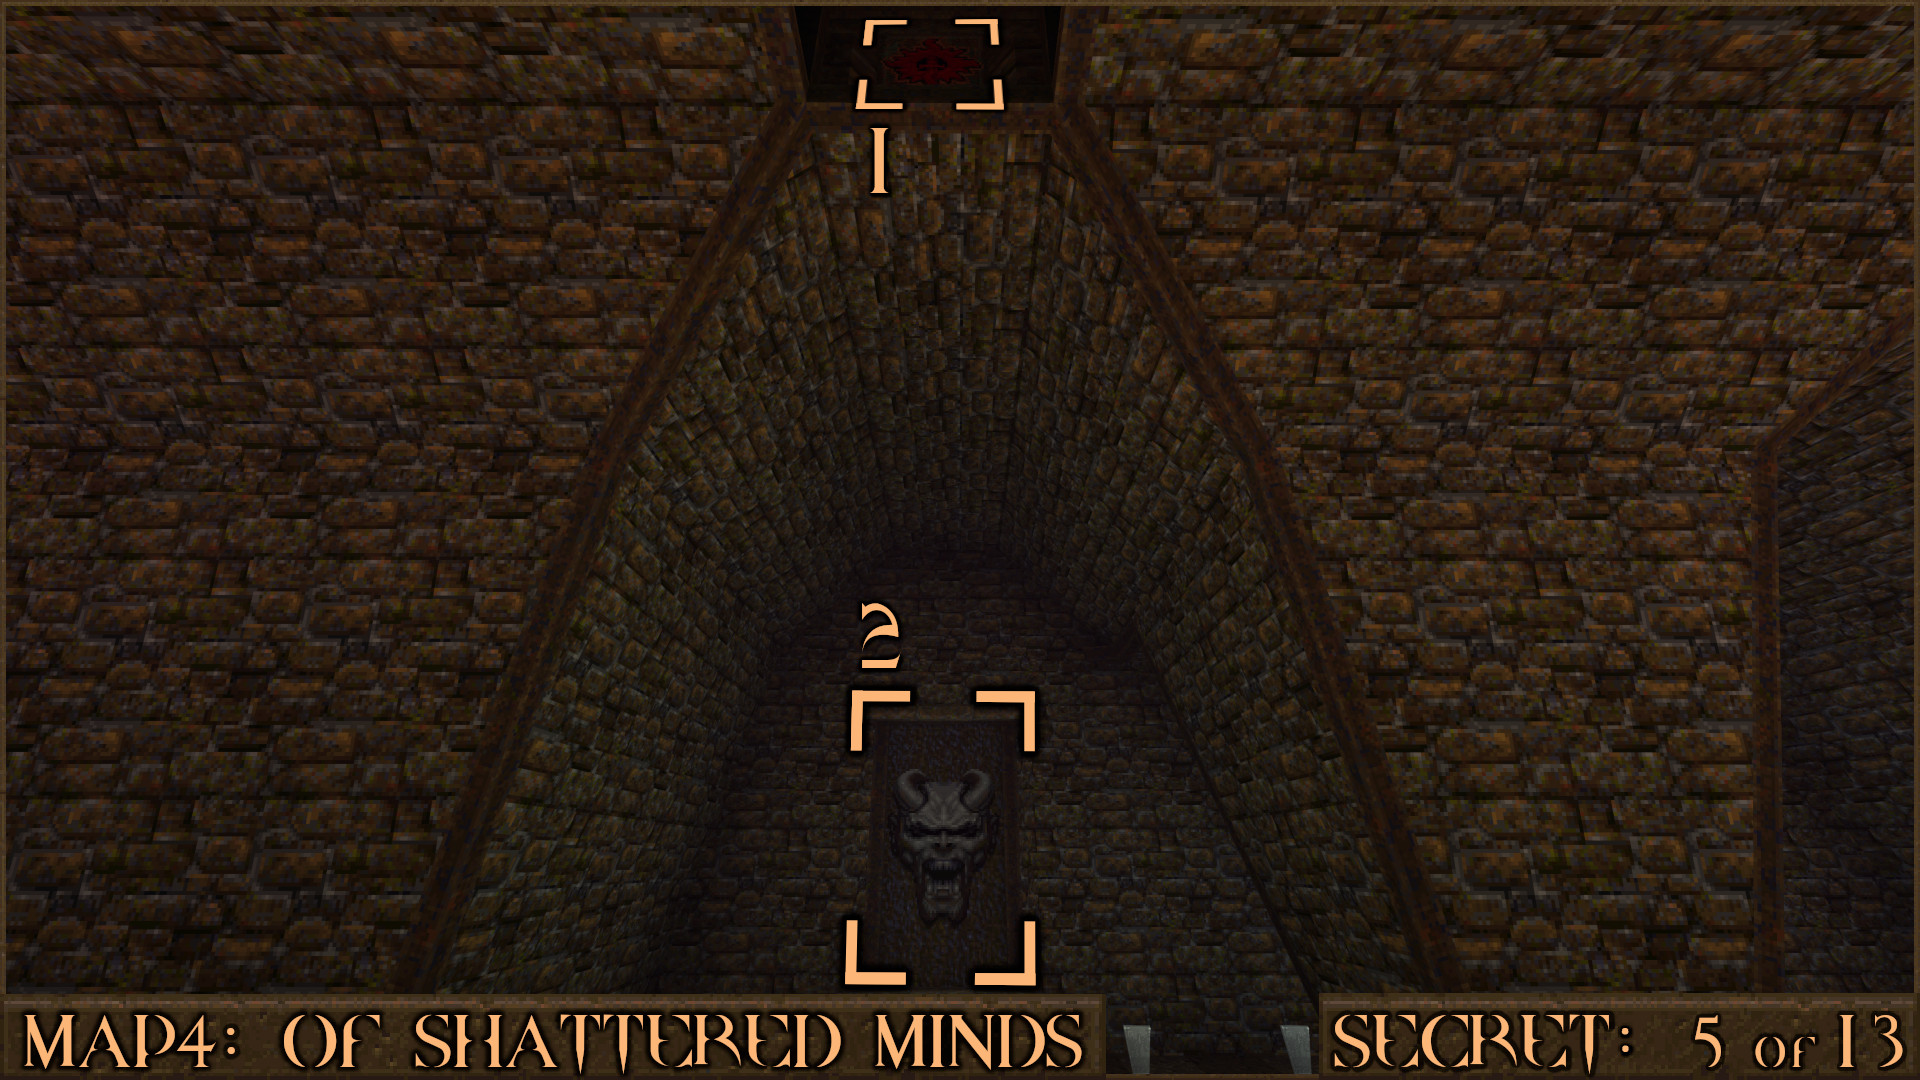
The other gargoyle face here can also be opened. Stand in front of it and look straight up to see a red shootable button () embedded above you. That will shift the gargoyle panel () and reveal the secret.

Reward: Megahealth

Secret 6 of 13
After jumping through the first moving walls section look straight up and shoot the bloody ceiling panel to drop a Quad Damage to the ground.

Reward: Quad Damage

Secret 7 of 13
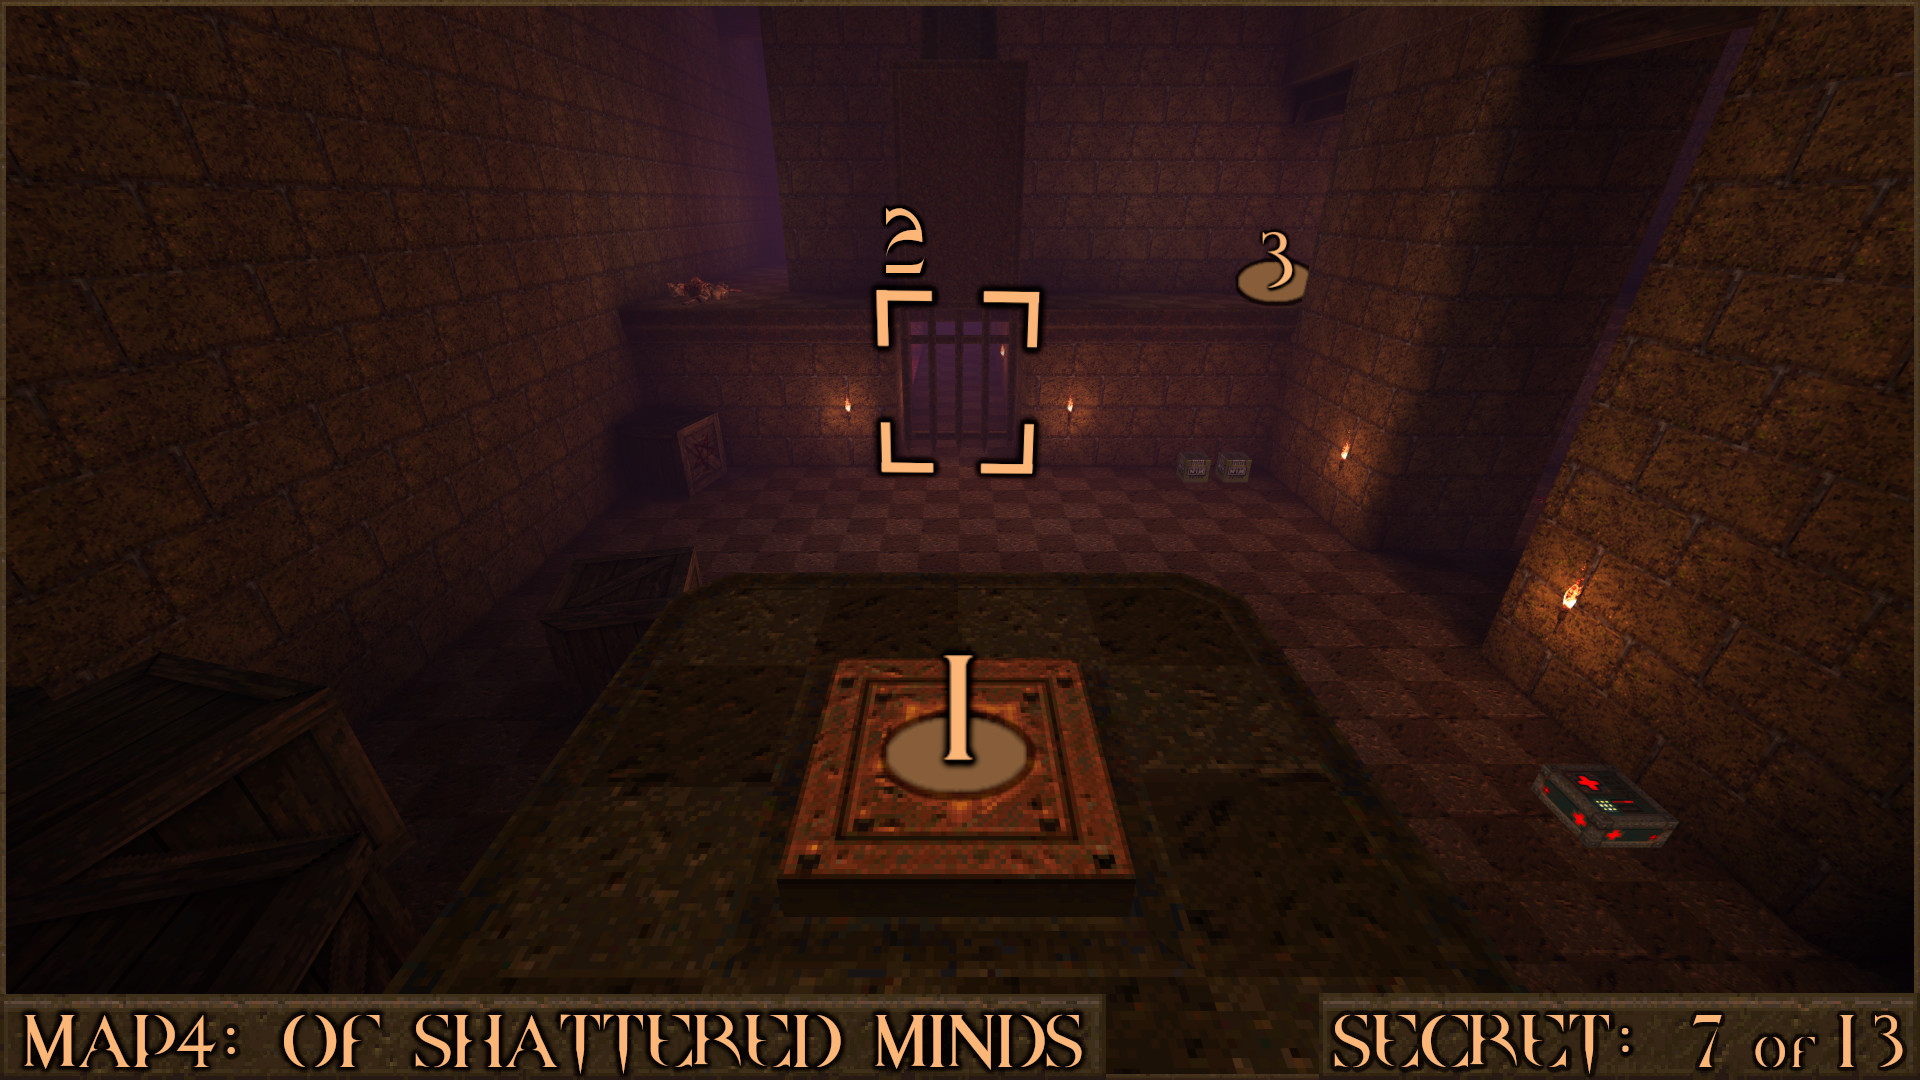
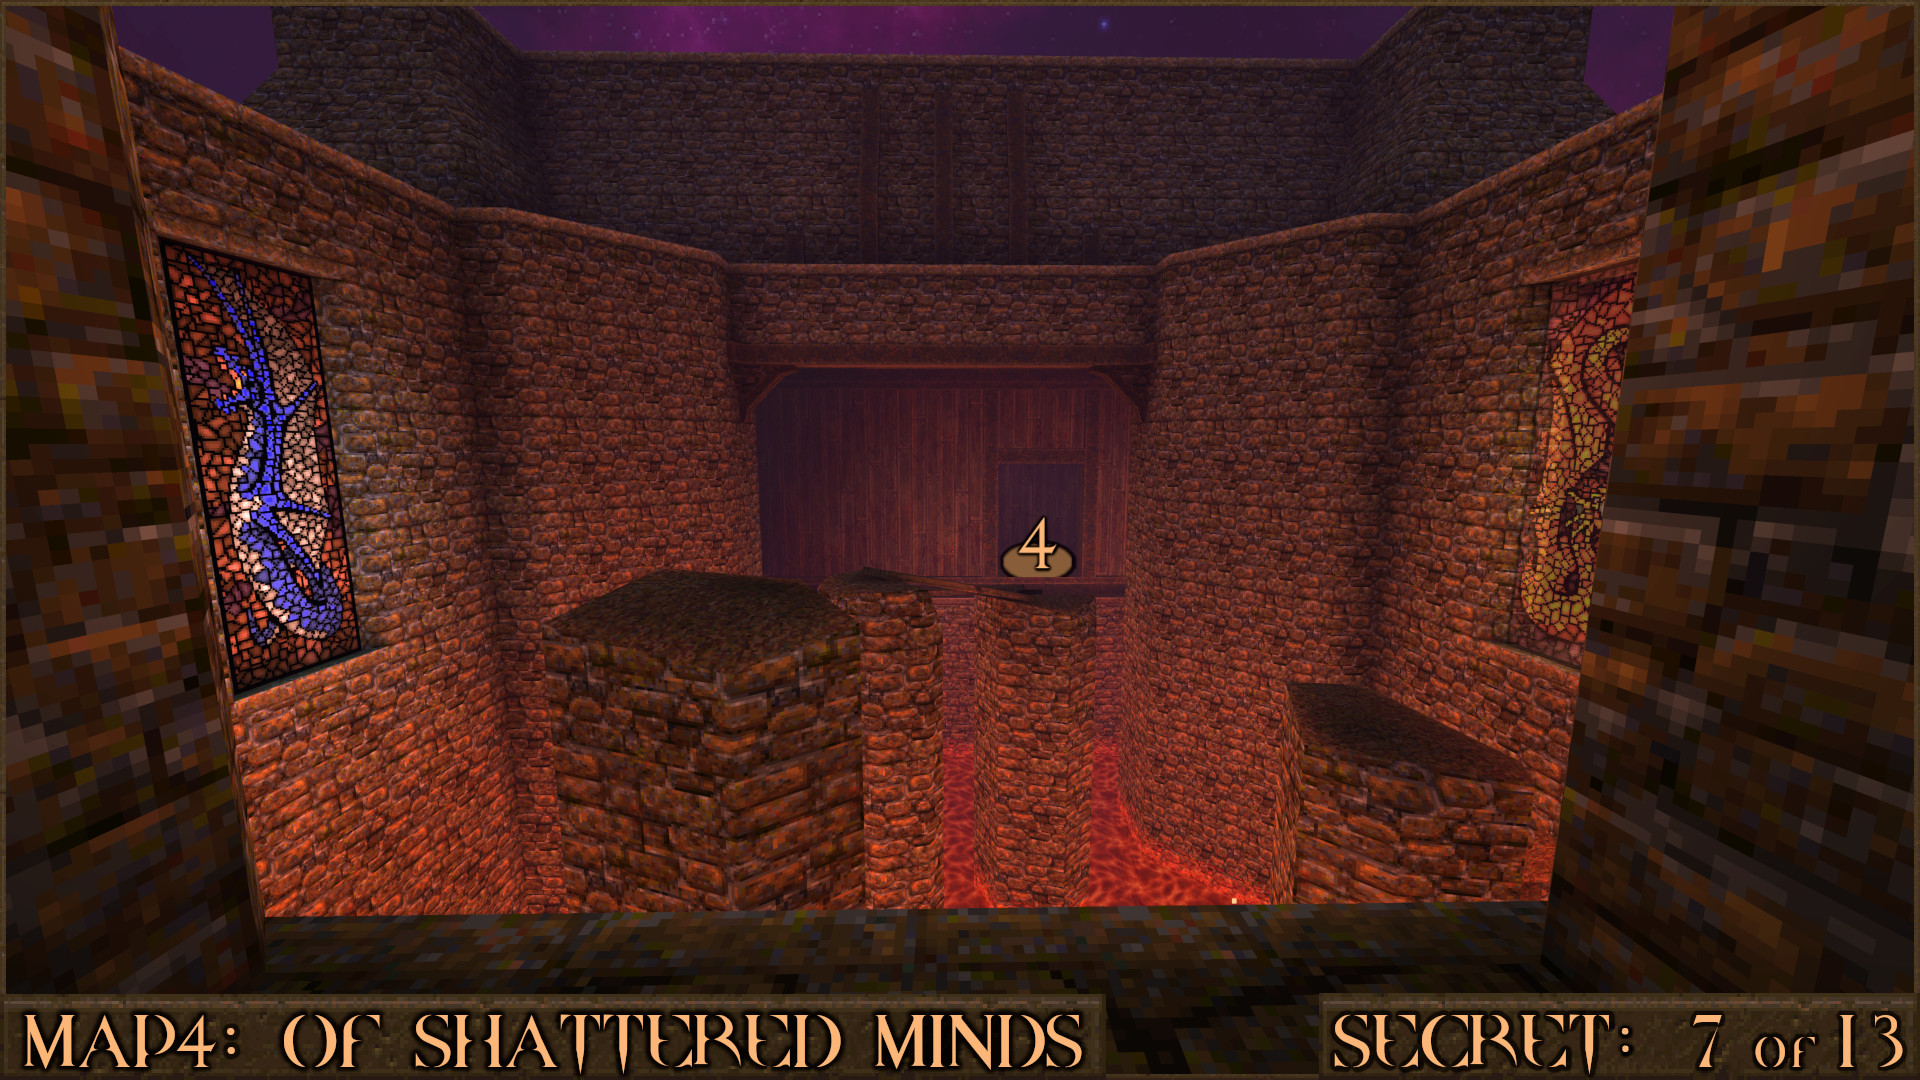
You'll come across a floating lava raft but ignore it for now and instead ascend some stairs and press a floor switch (). This raises some bars () letting you return to the previous room, go up some stairs and run across the upper platform ().

When you see the pillars sticking out of the lava carefully jump across them and then through the hole () in the shifting walls. The secret lies beyond these.

Reward: Large Shells Large Cells Armor Shard×5 [Health Capacity Upgrade]

Secret 8 of 13
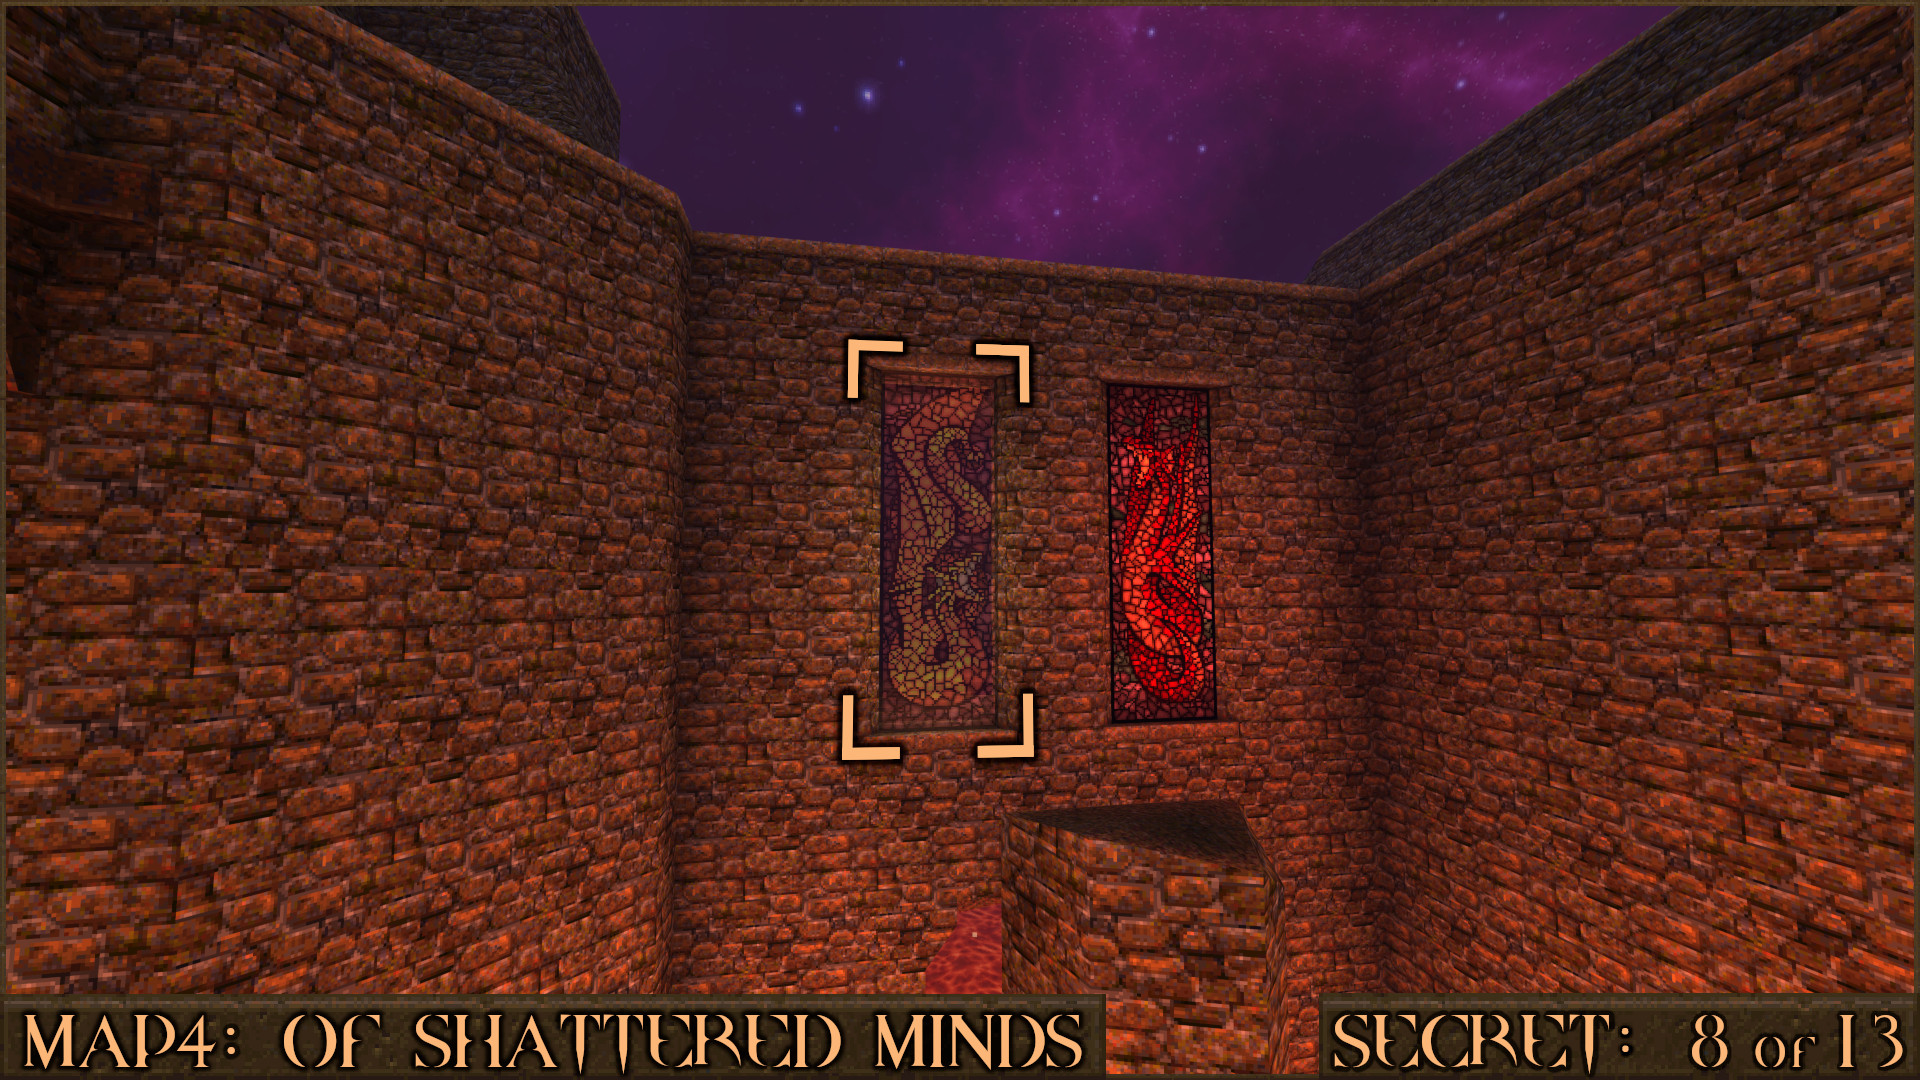
Return to the pillars above the lava and this time jump through the left translucent stained glass window.

Reward: Ring of Shadows

Secret 9 of 13
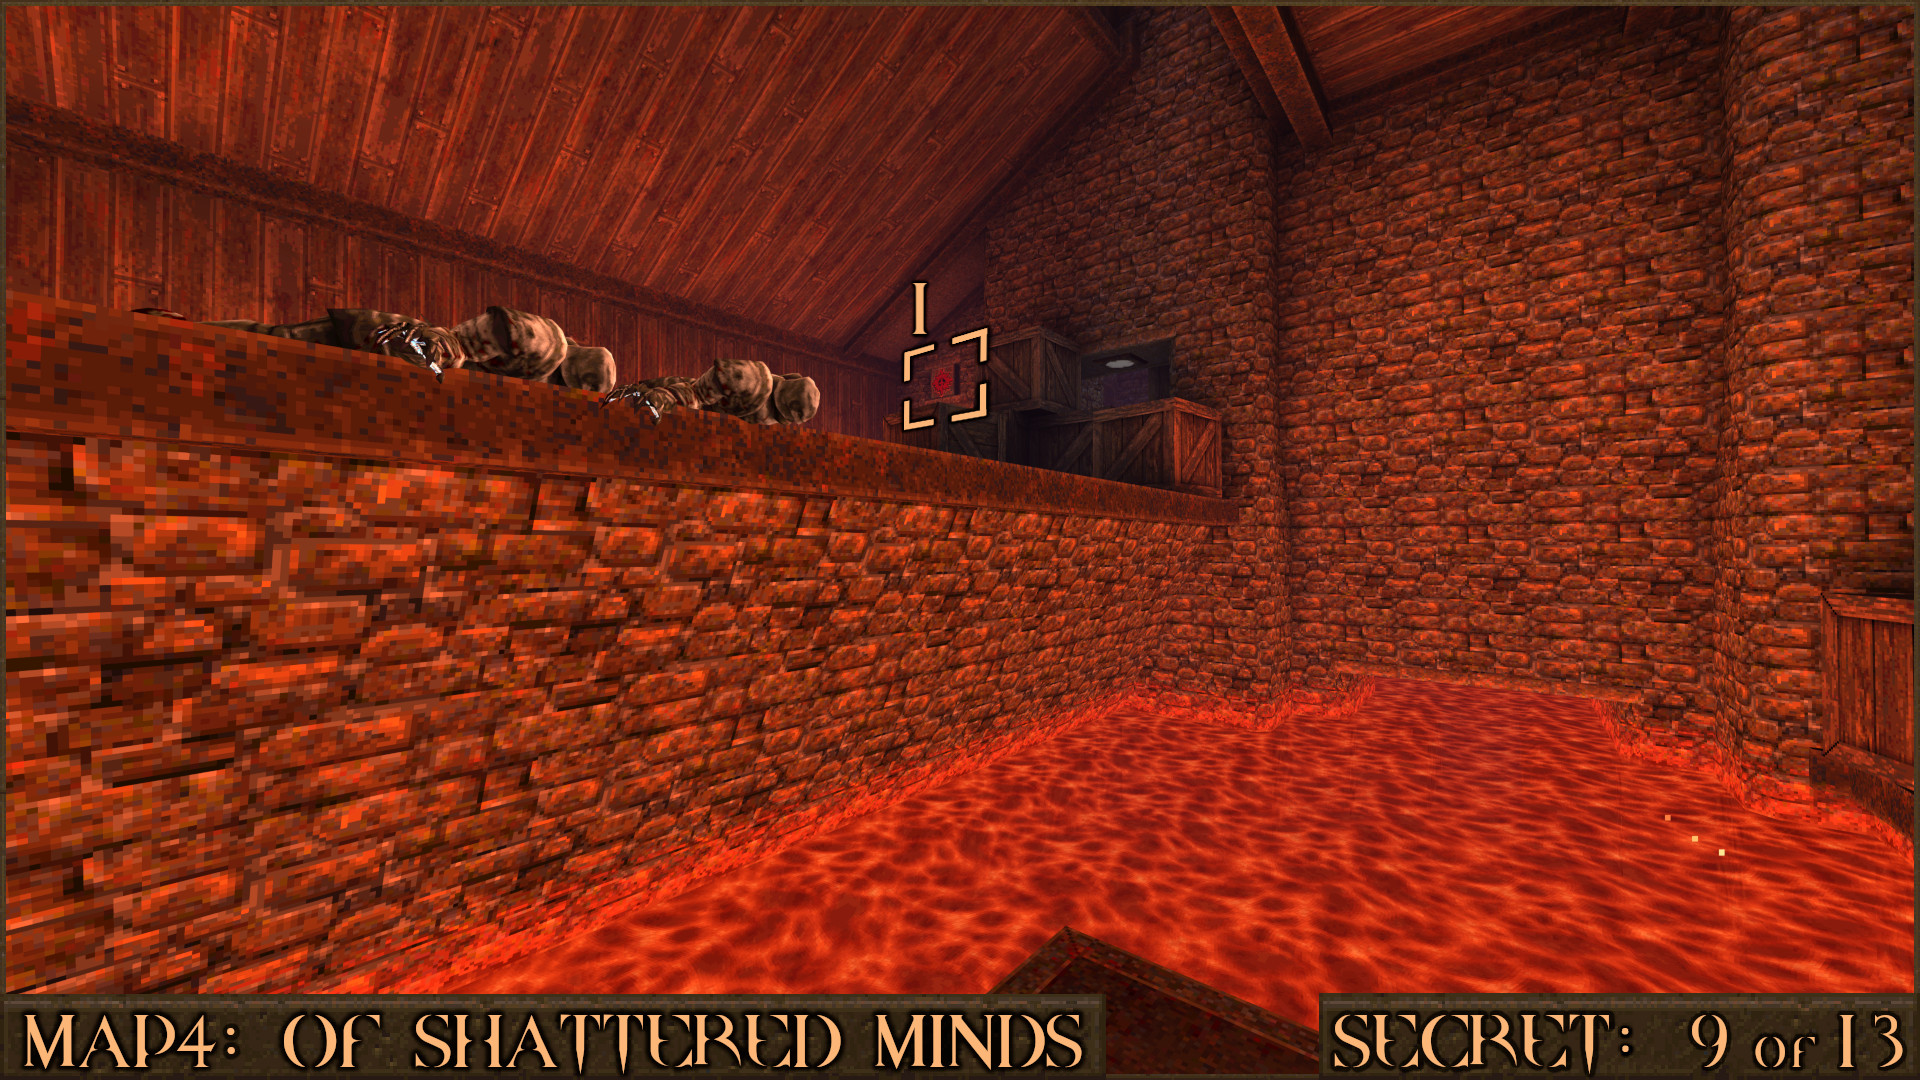
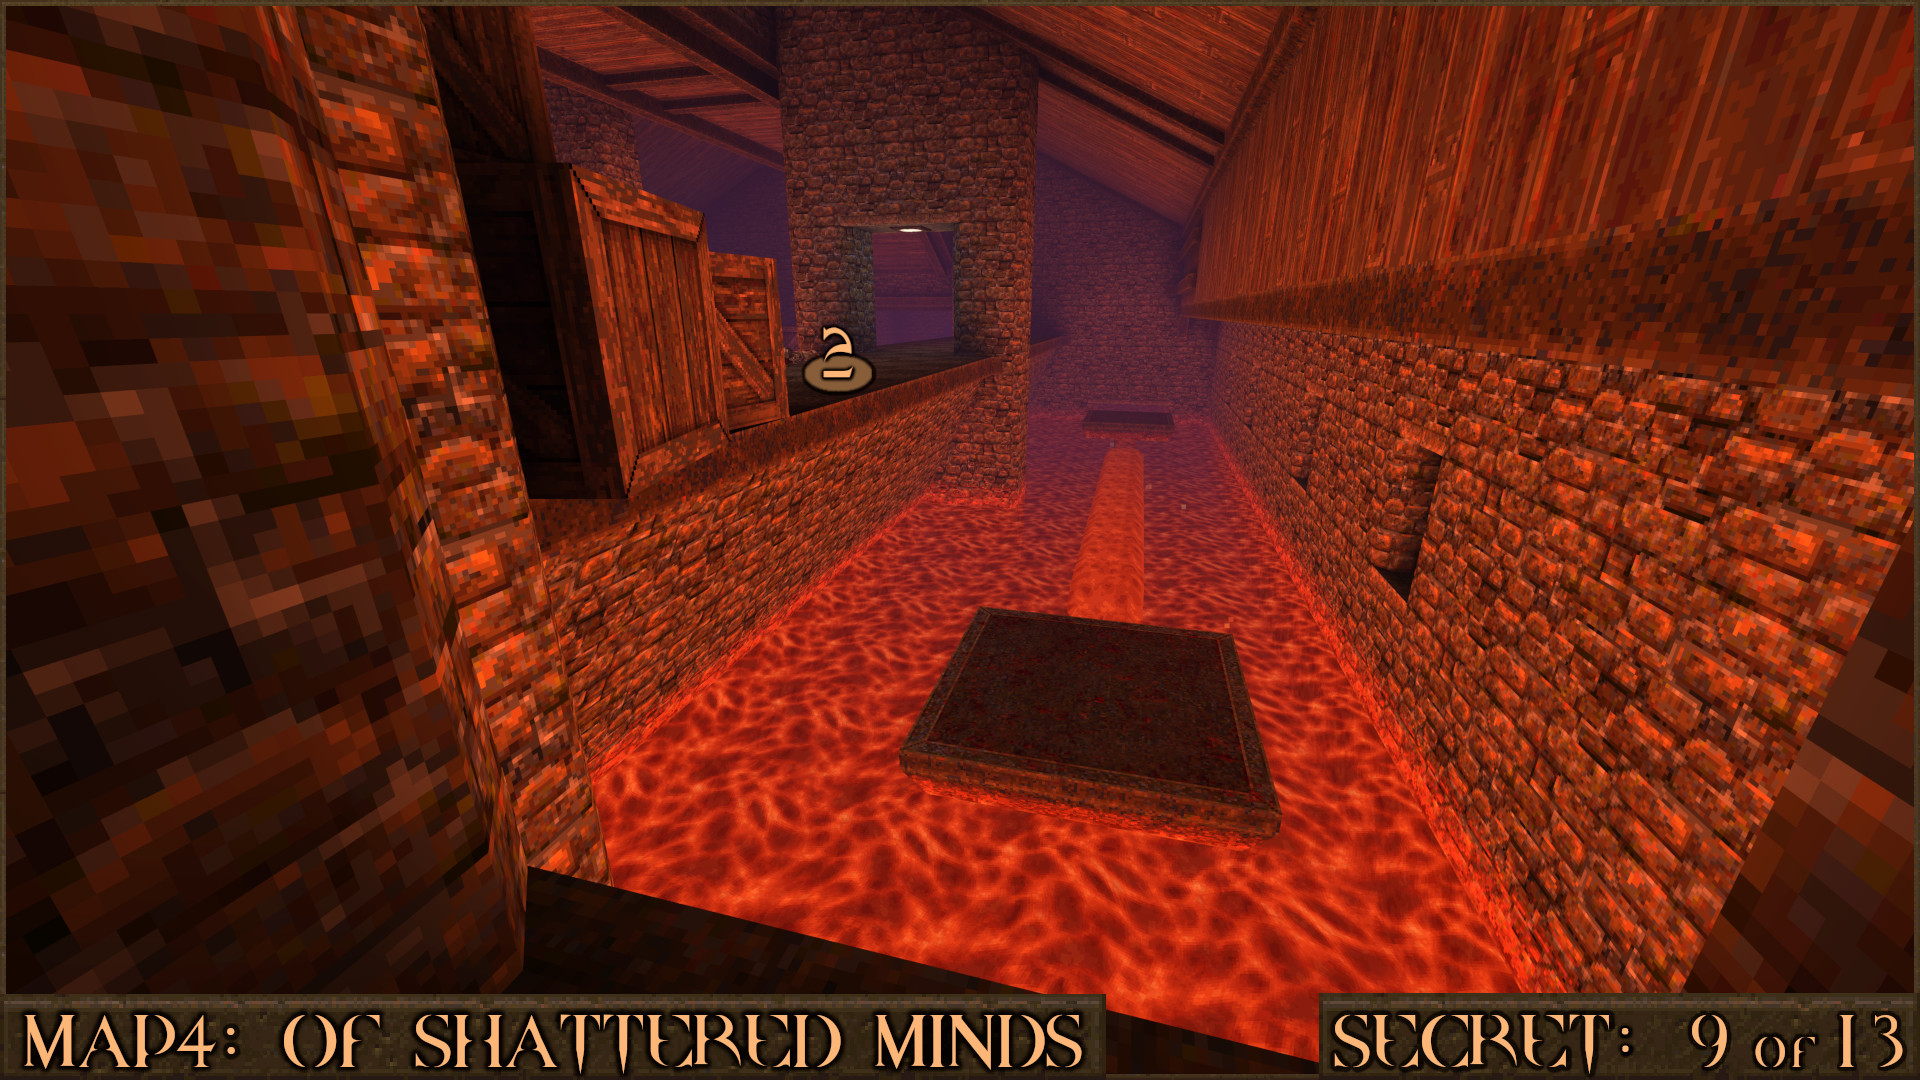
While on the lava raft look up to your left in the distance to see a red shootable button ().

After shooting it go up the stairs and around the side to access that area. Use the rising lava rafts to reach the platform () and discover the secret. From here jump over to the crates to claim the Red Armor.

Reward: Red Armor Large Health

Secret 10 of 13
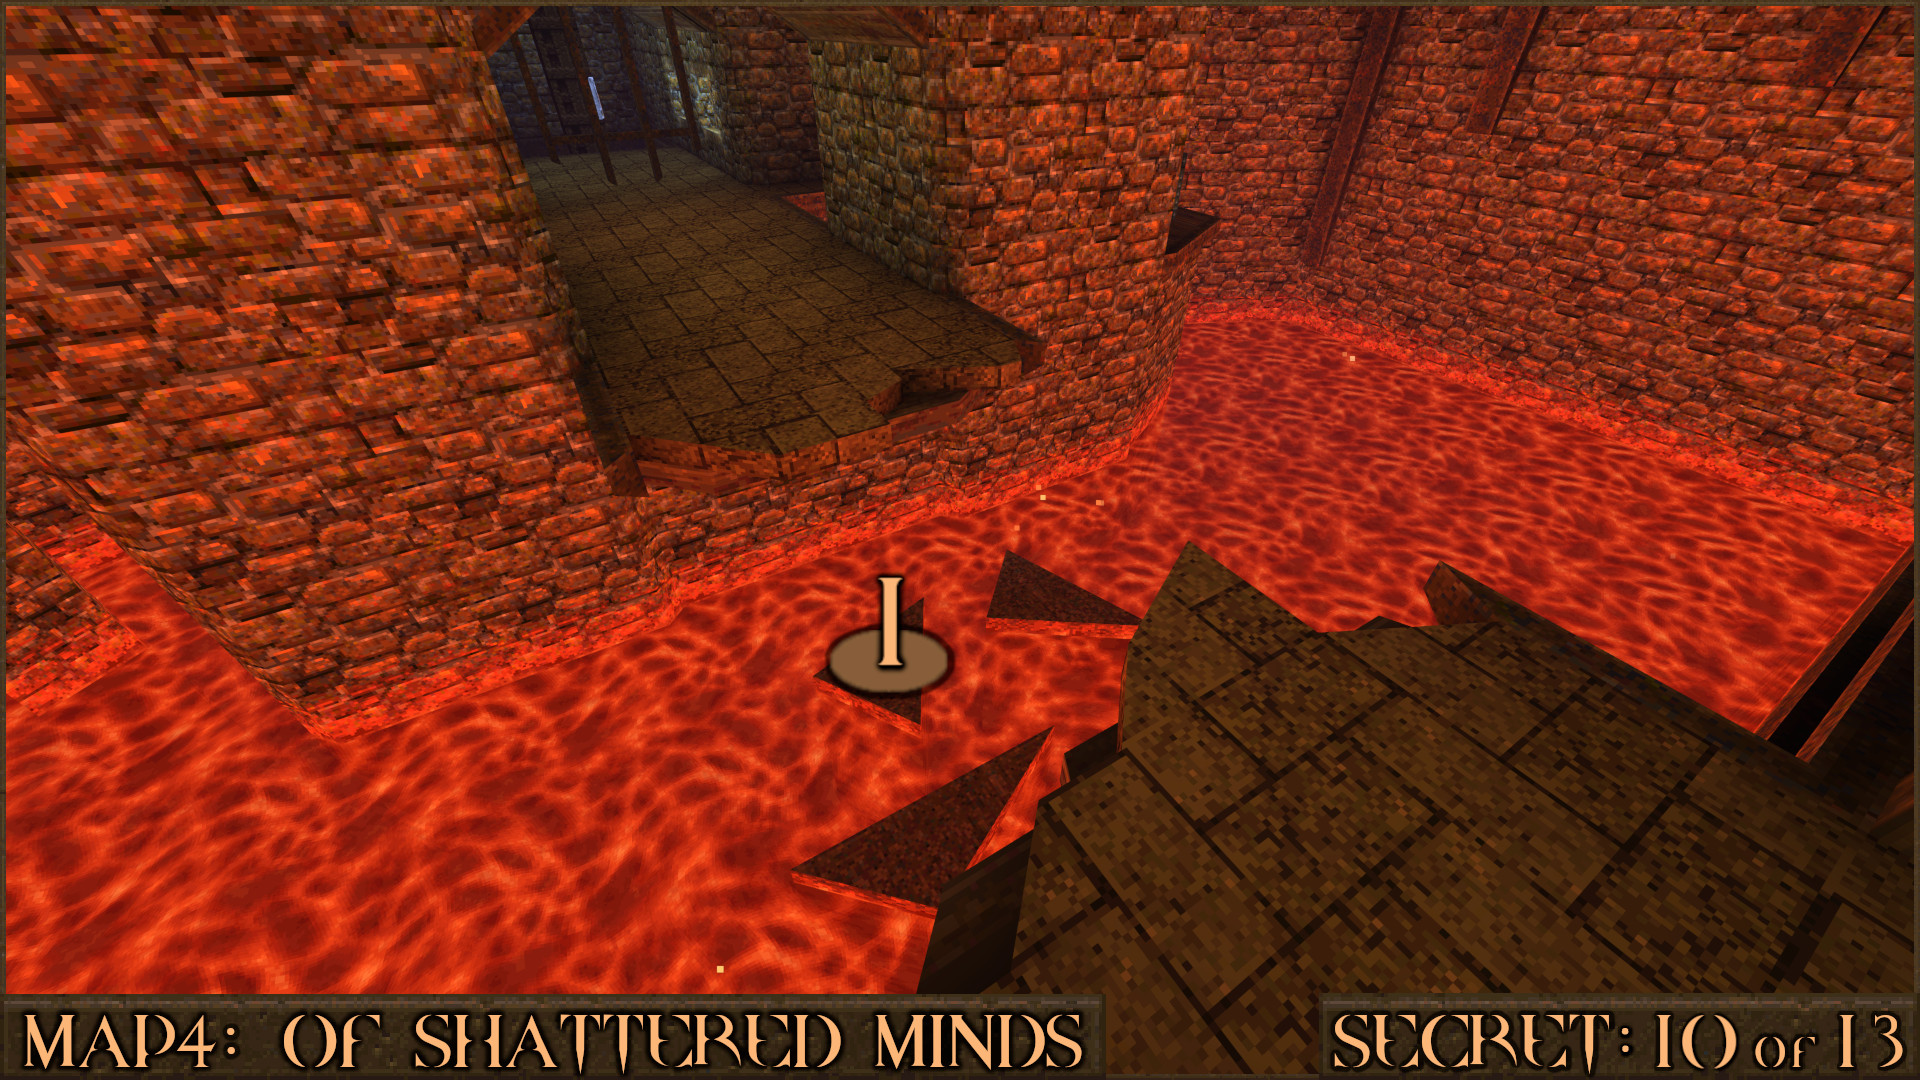
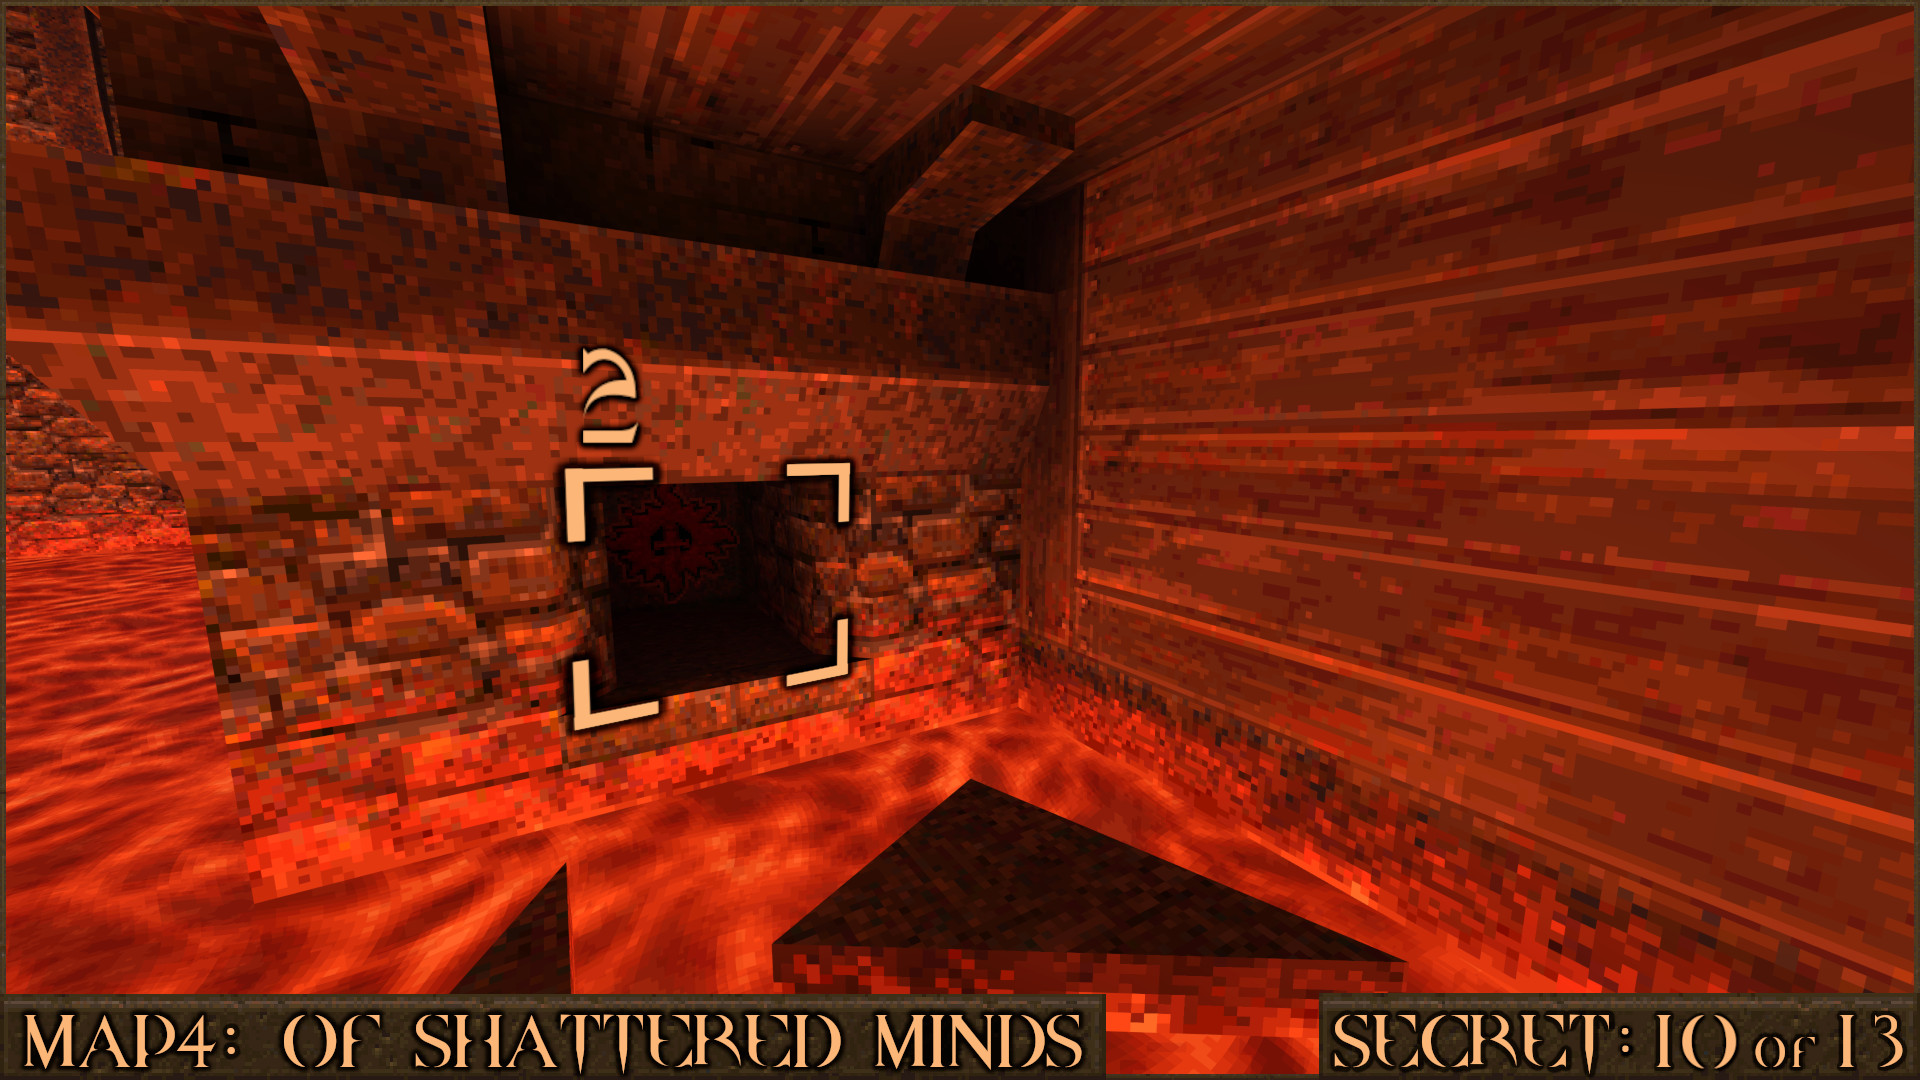
After returning to the starting room head down the other path on the right. Look for a broken bridge leading to the Silver Keycard. Underneath it are several stones sticking out of the lava you can safely drop down to ().

From here shoot a red shootable button () to shift the adjacent wall.

Reward: Quad Damage

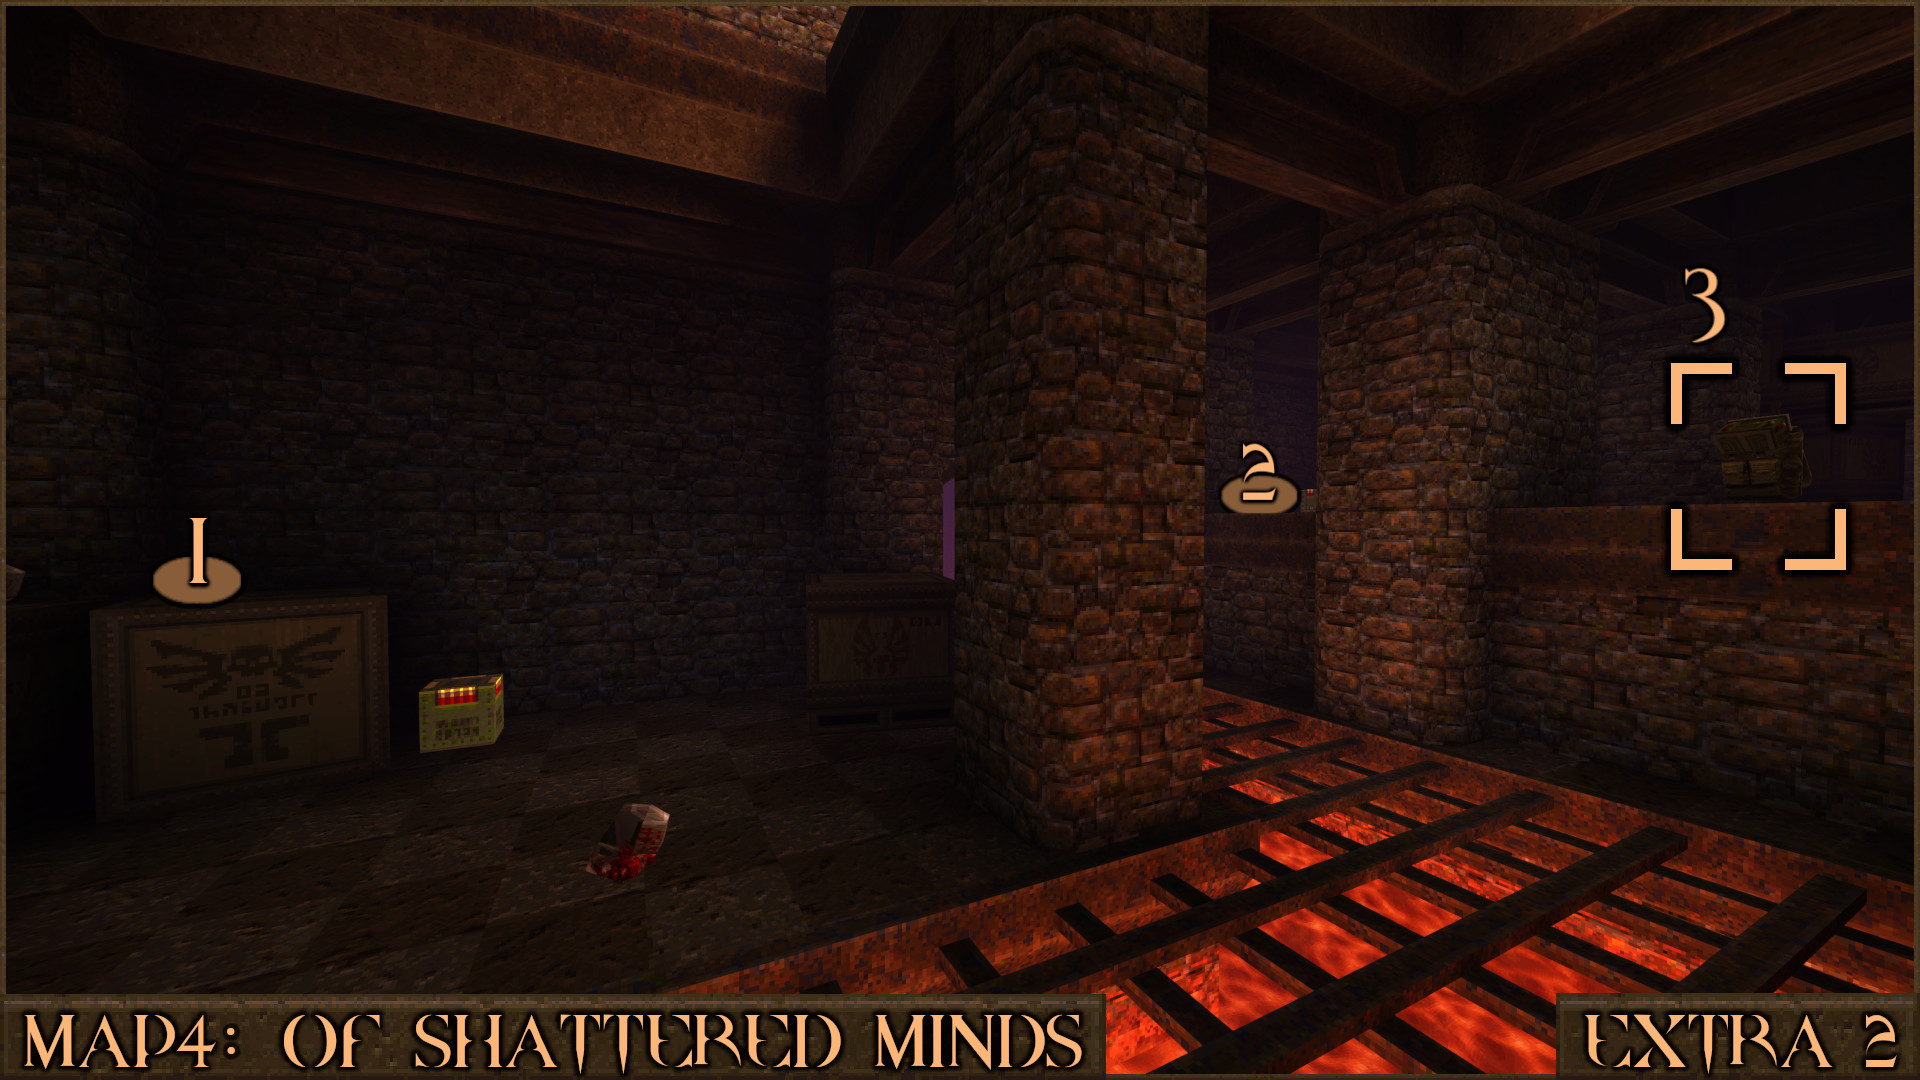
Extra Secret 2
Nearby is a dark room with several crates and you can also see an upgrade on an upper ledge. To reach it jump across several nearby crates () to reach the ledge () and claim the upgrade ().

Reward: [Cell Capacity Upgrade]

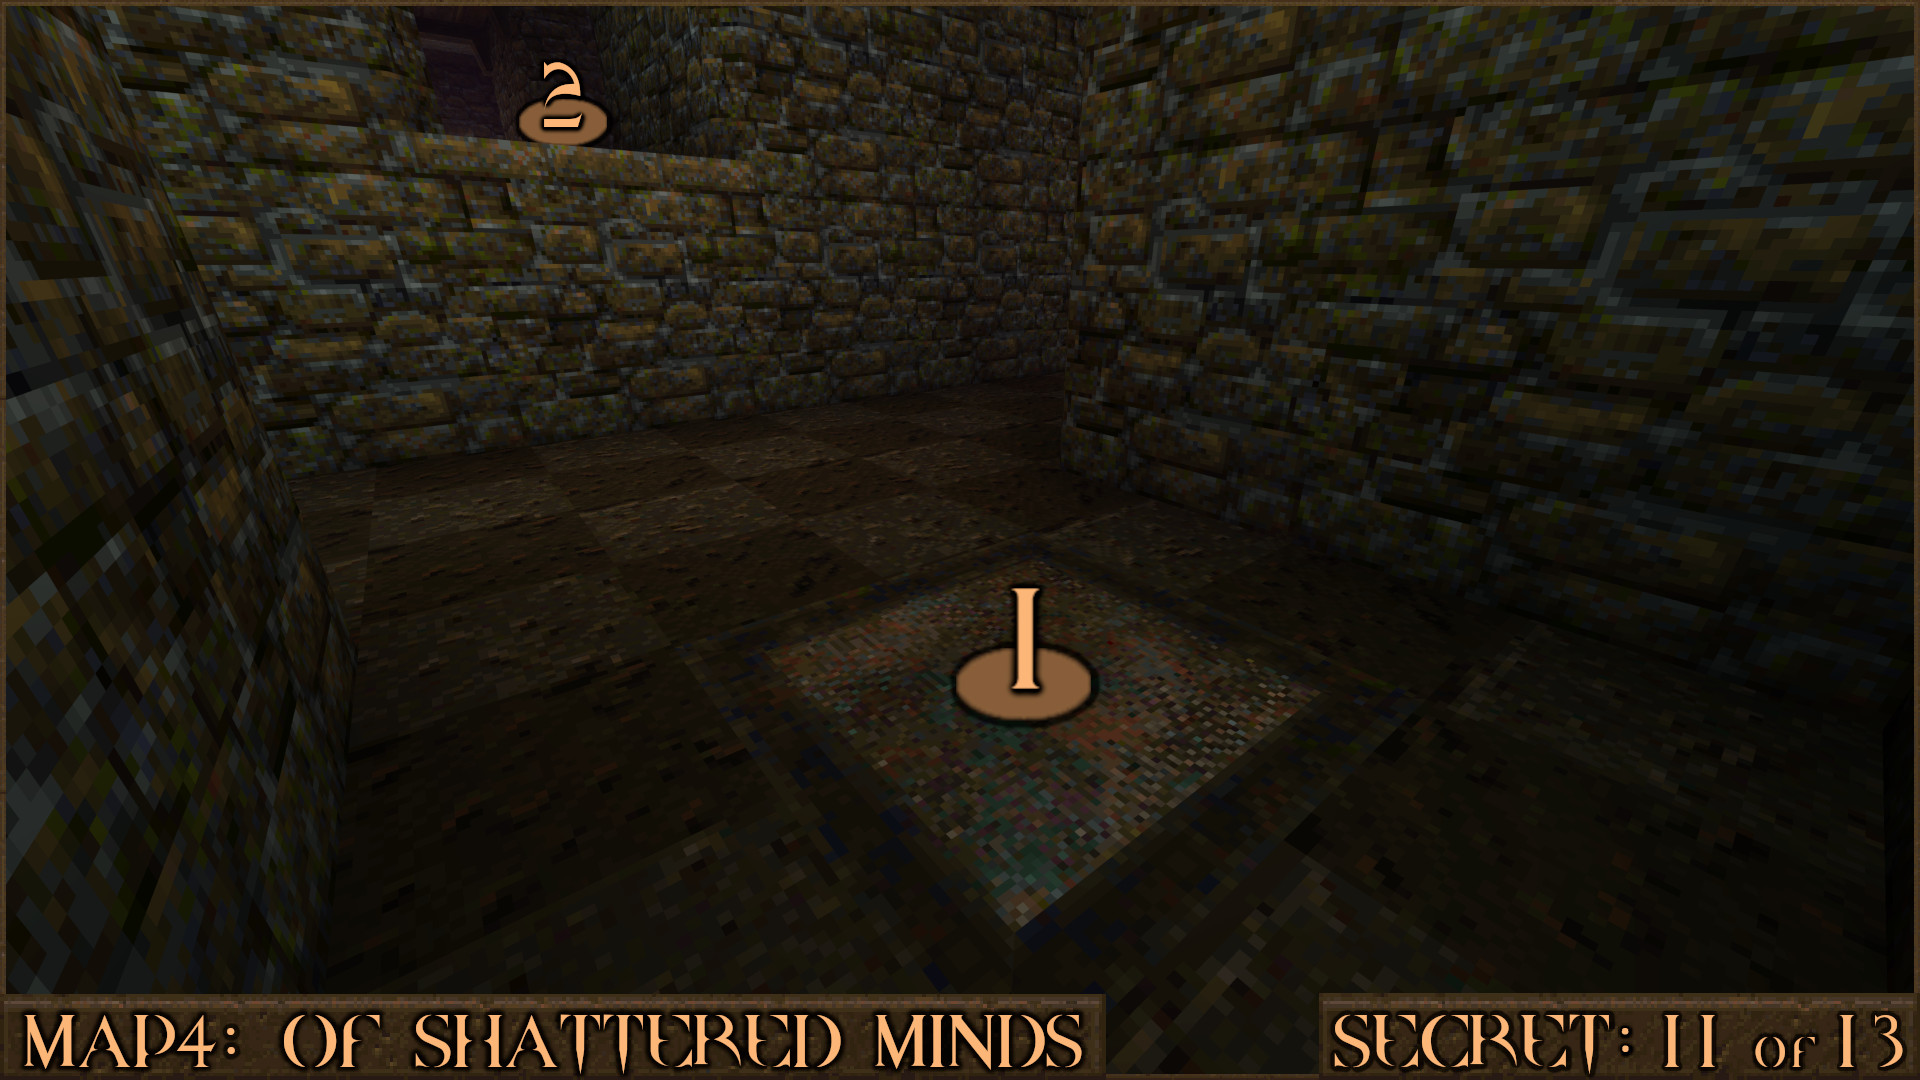
Secret 11 of 13
Proceed through the Gold & Silver Keycard Door and after crossing over some thin planks you'll enter a room with several nail traps built into the wall. Between the traps carefully look at the floor and find a metal square (). Stand on it then shoot it to raise yourself up to a higher ledge containing the secret ().

Reward: Red Armor

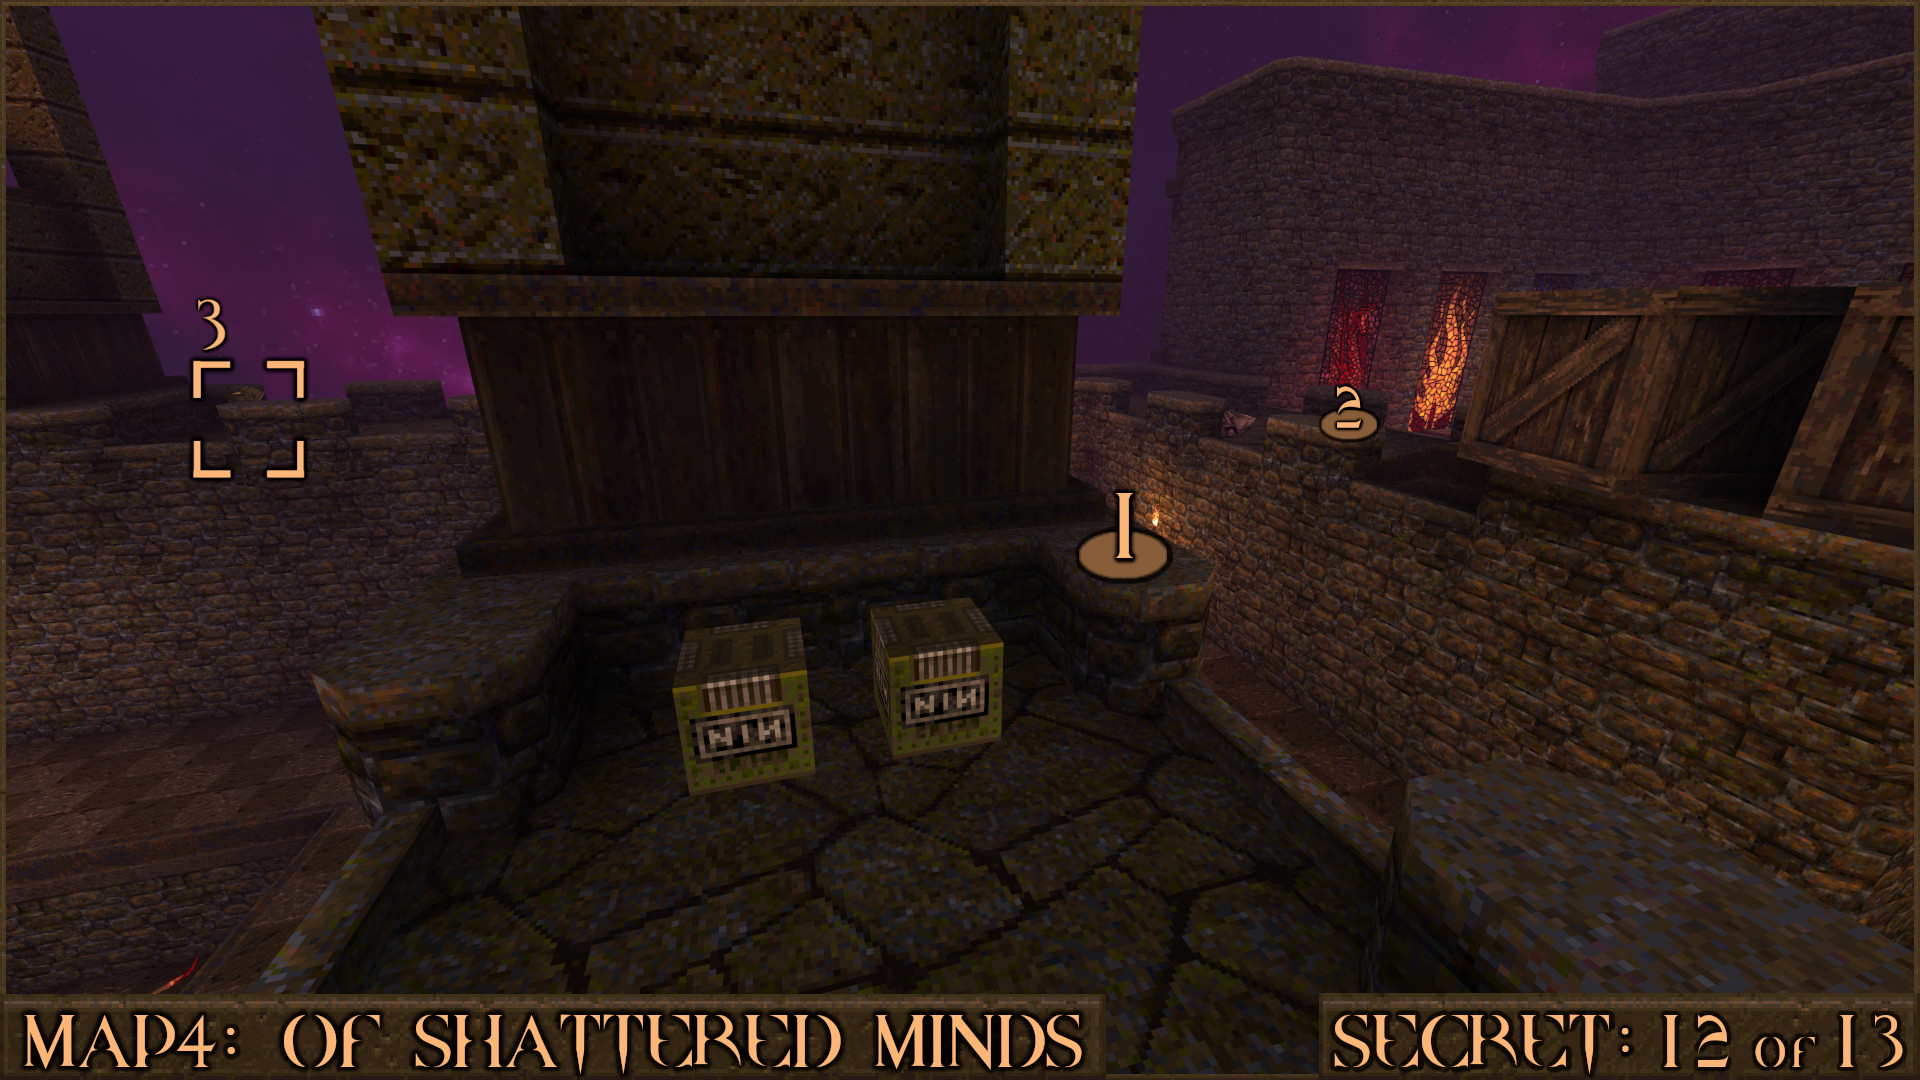
Secret 12 of 13
Once you reach the upper battlements look for a large stack of crates. Make a tricky jump from the battlements () to just behind the crates () and the upgrade will be nearby ().

Reward: [Nail Capacity Upgrade]

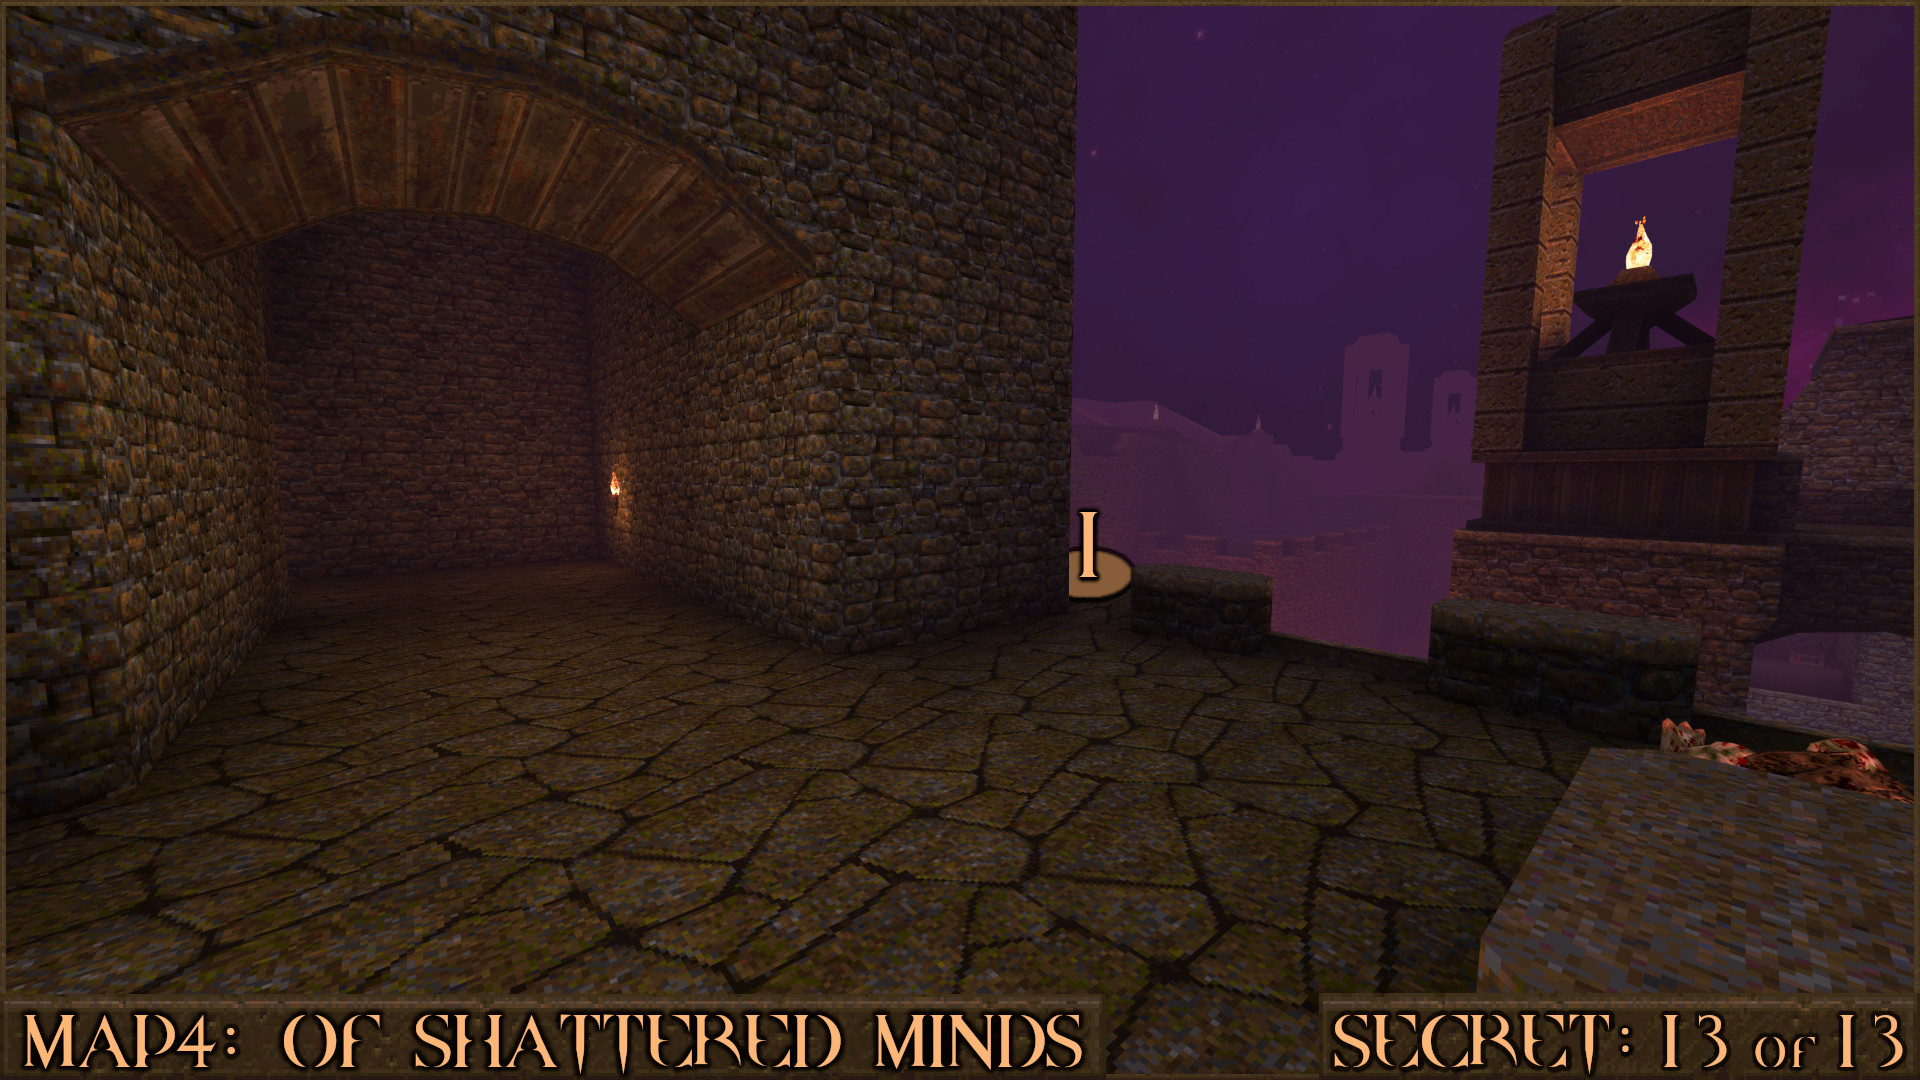
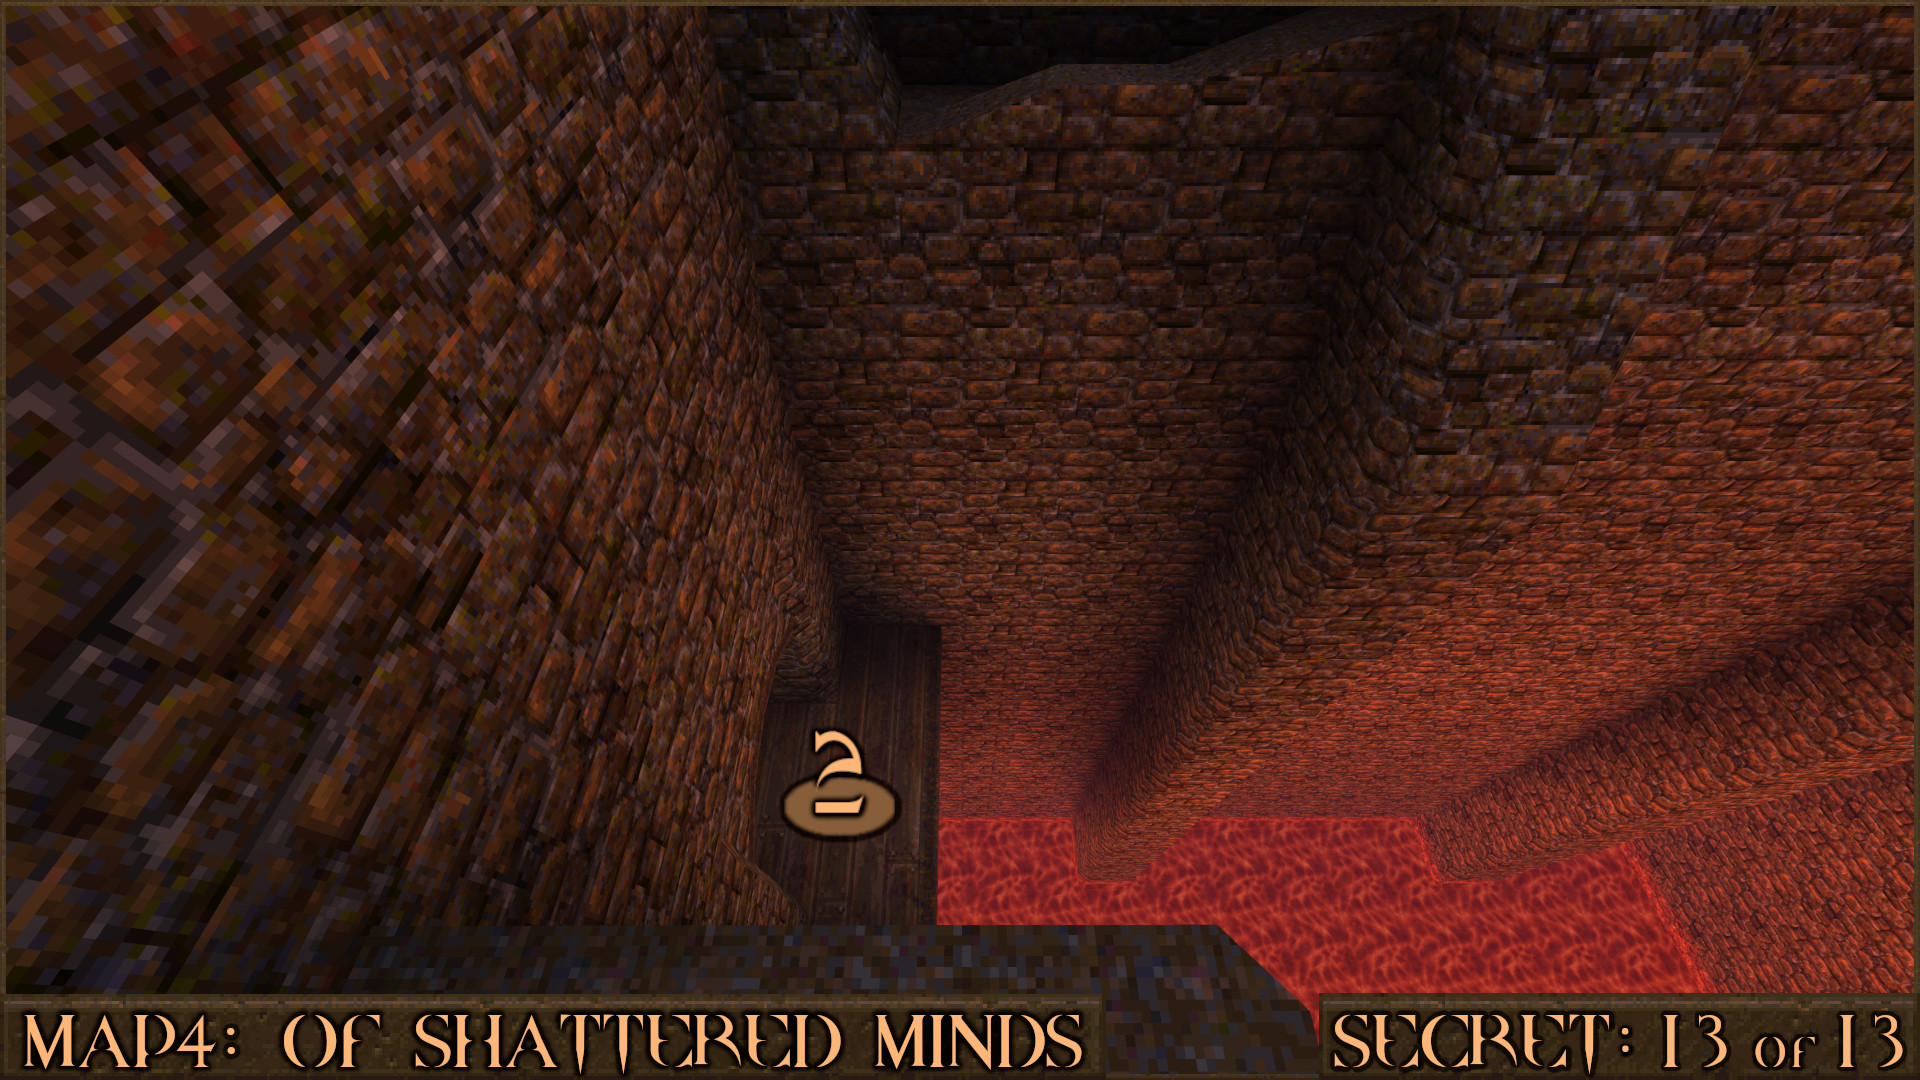
Secret 13 of 13
Head back to the upper battlements area and go around a corner ().

You will see a broken section of wall. Look down below it to see a ledge () and then drop down to it. Inside is a secret exit to the level SECRET6: The Haunted Tower.

Reward: [Secret Level]
‎‏‏‎ ‎‏‏‎ + Rune Secrets
NOTE: During Part 2 you can return to this level to find the optional Bloody Knight's Head which enables Bloody Nightmare Difficulty and can unlock Part 3 later.

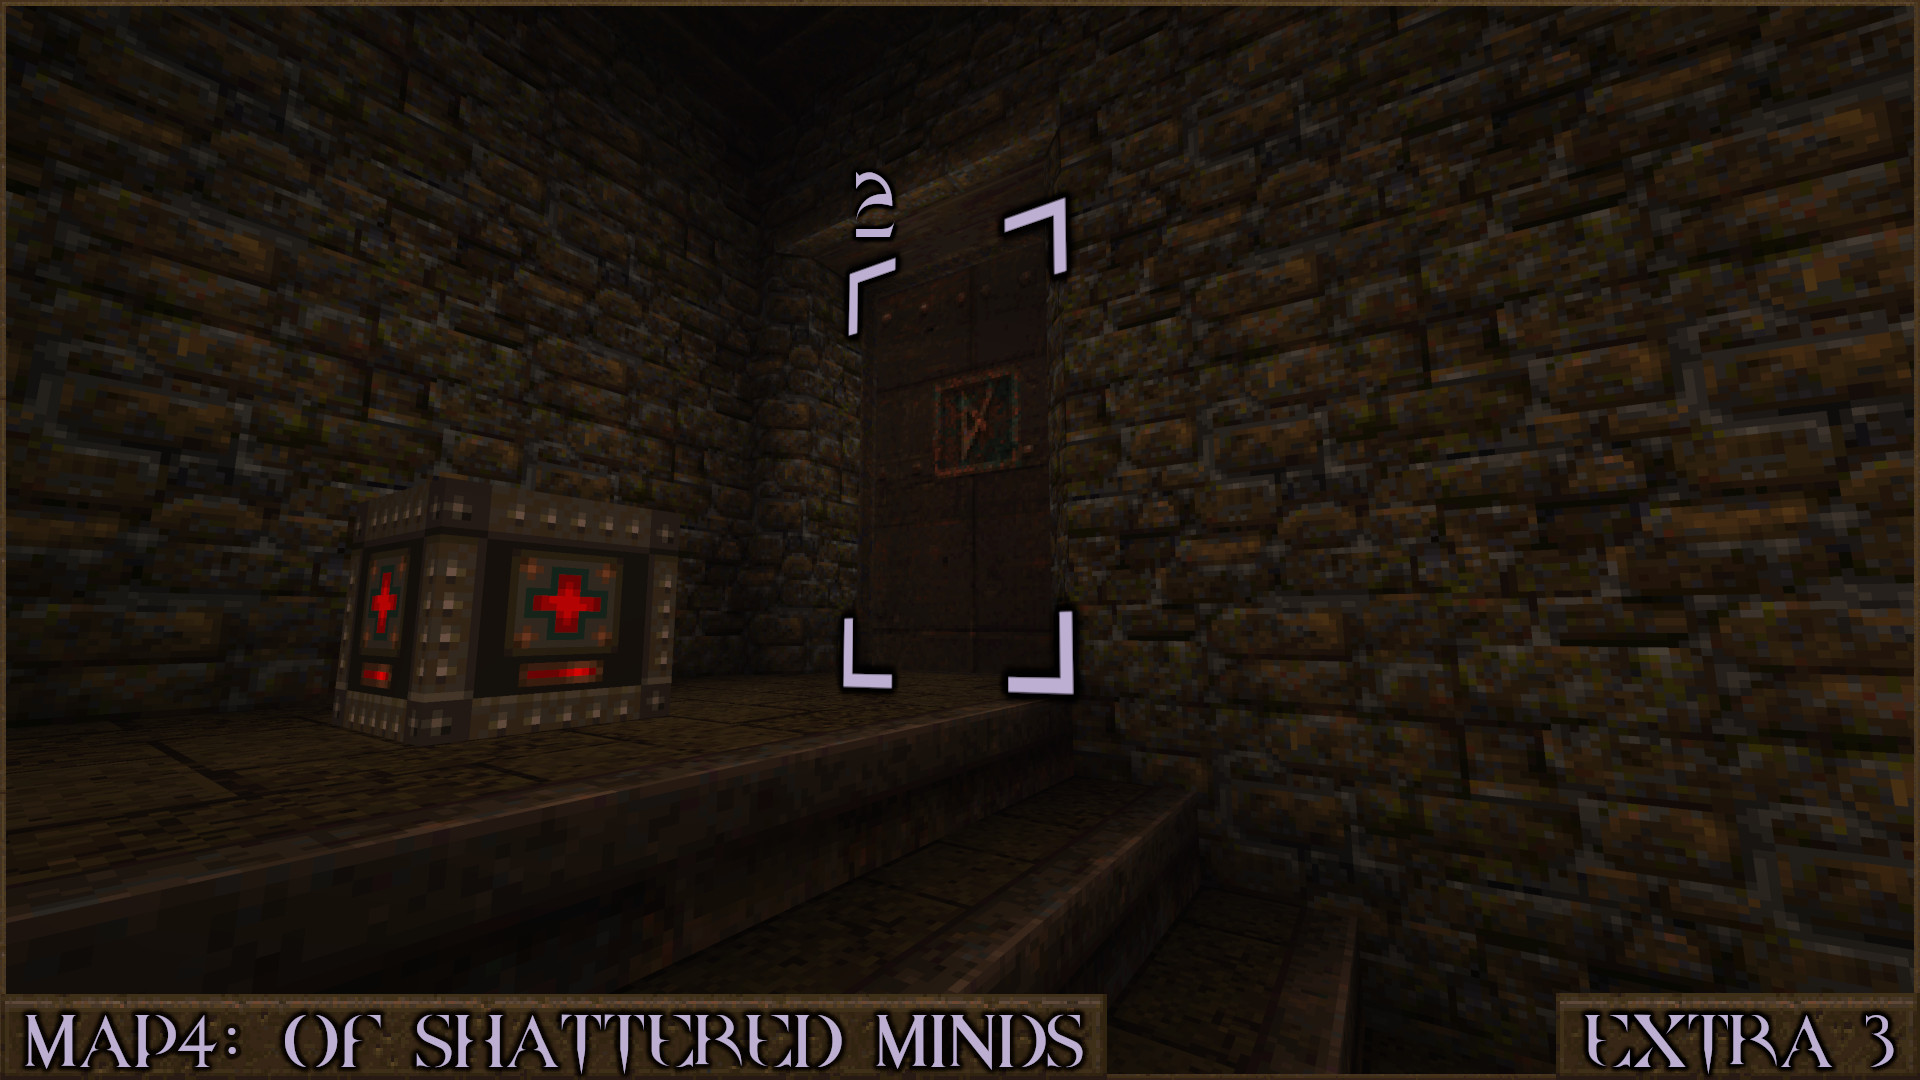
Extra Secret 3
Requires Rune of Sacrifice
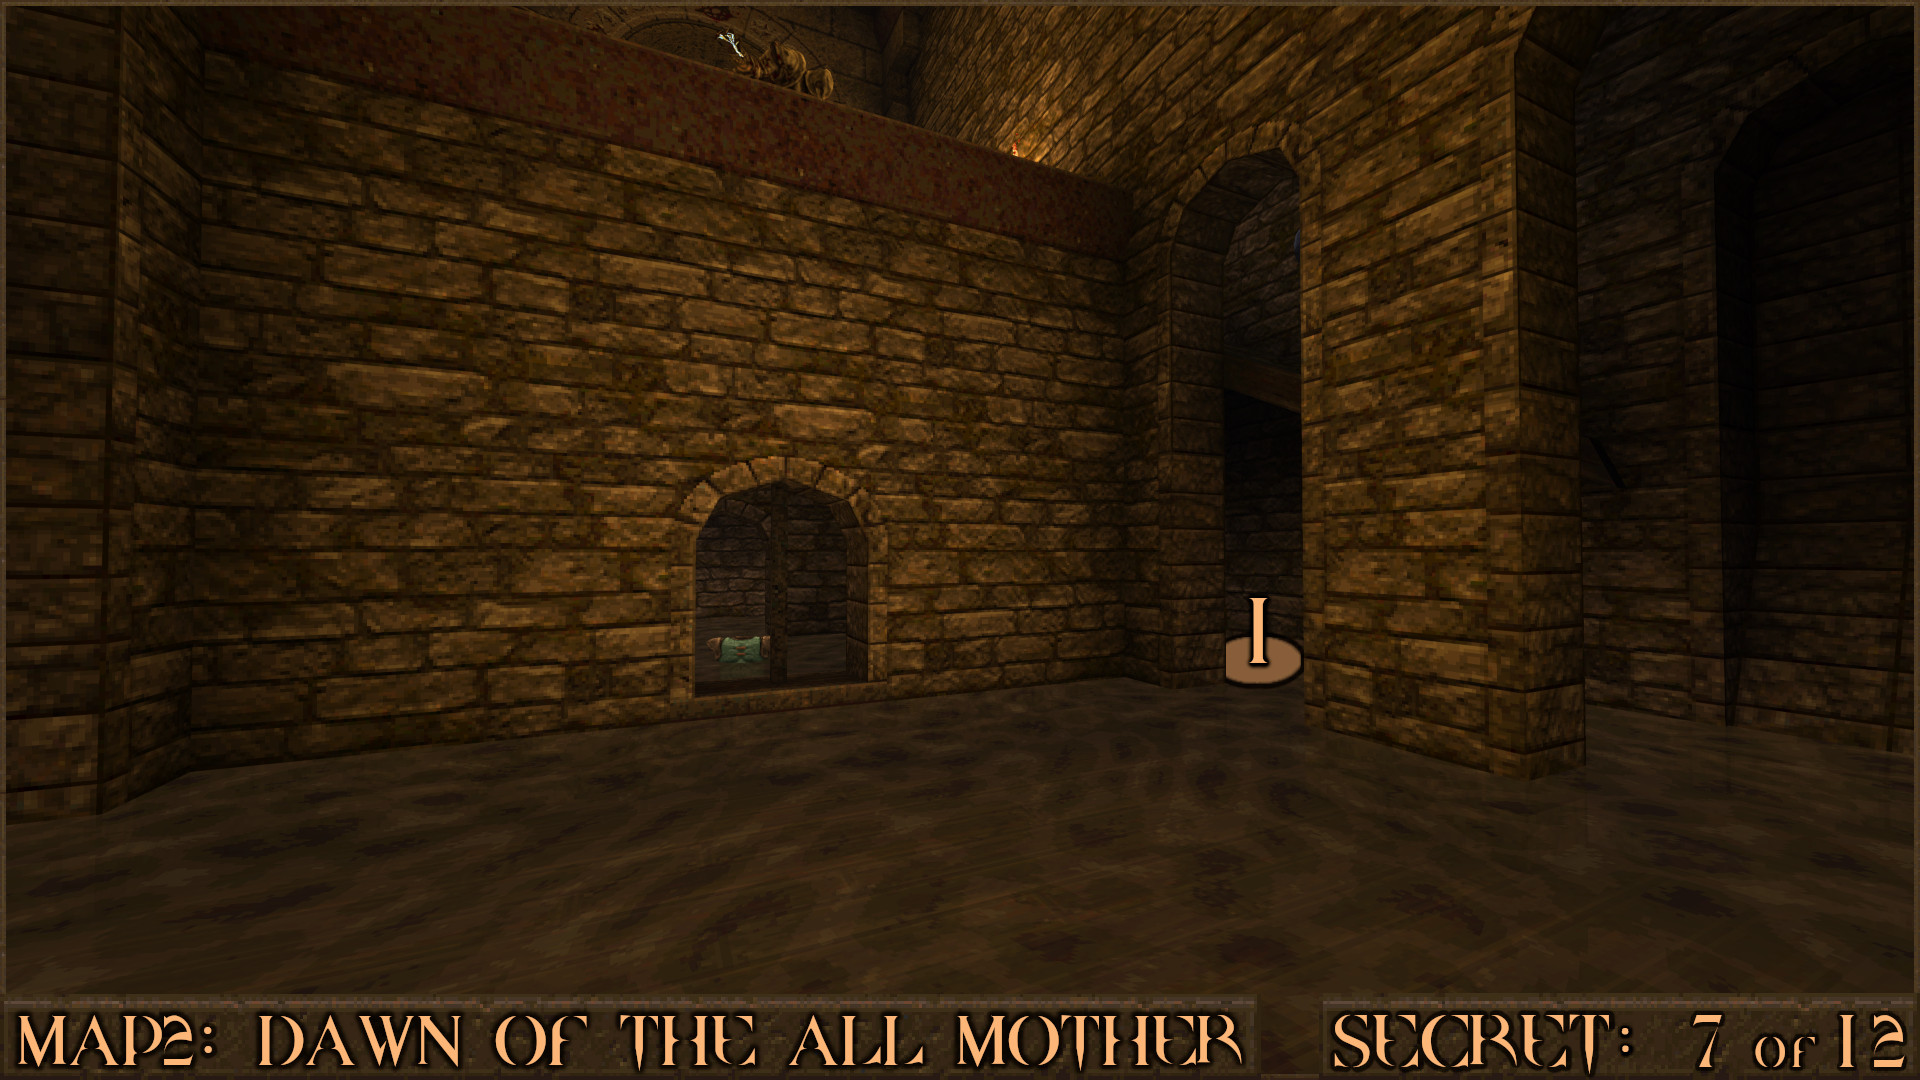
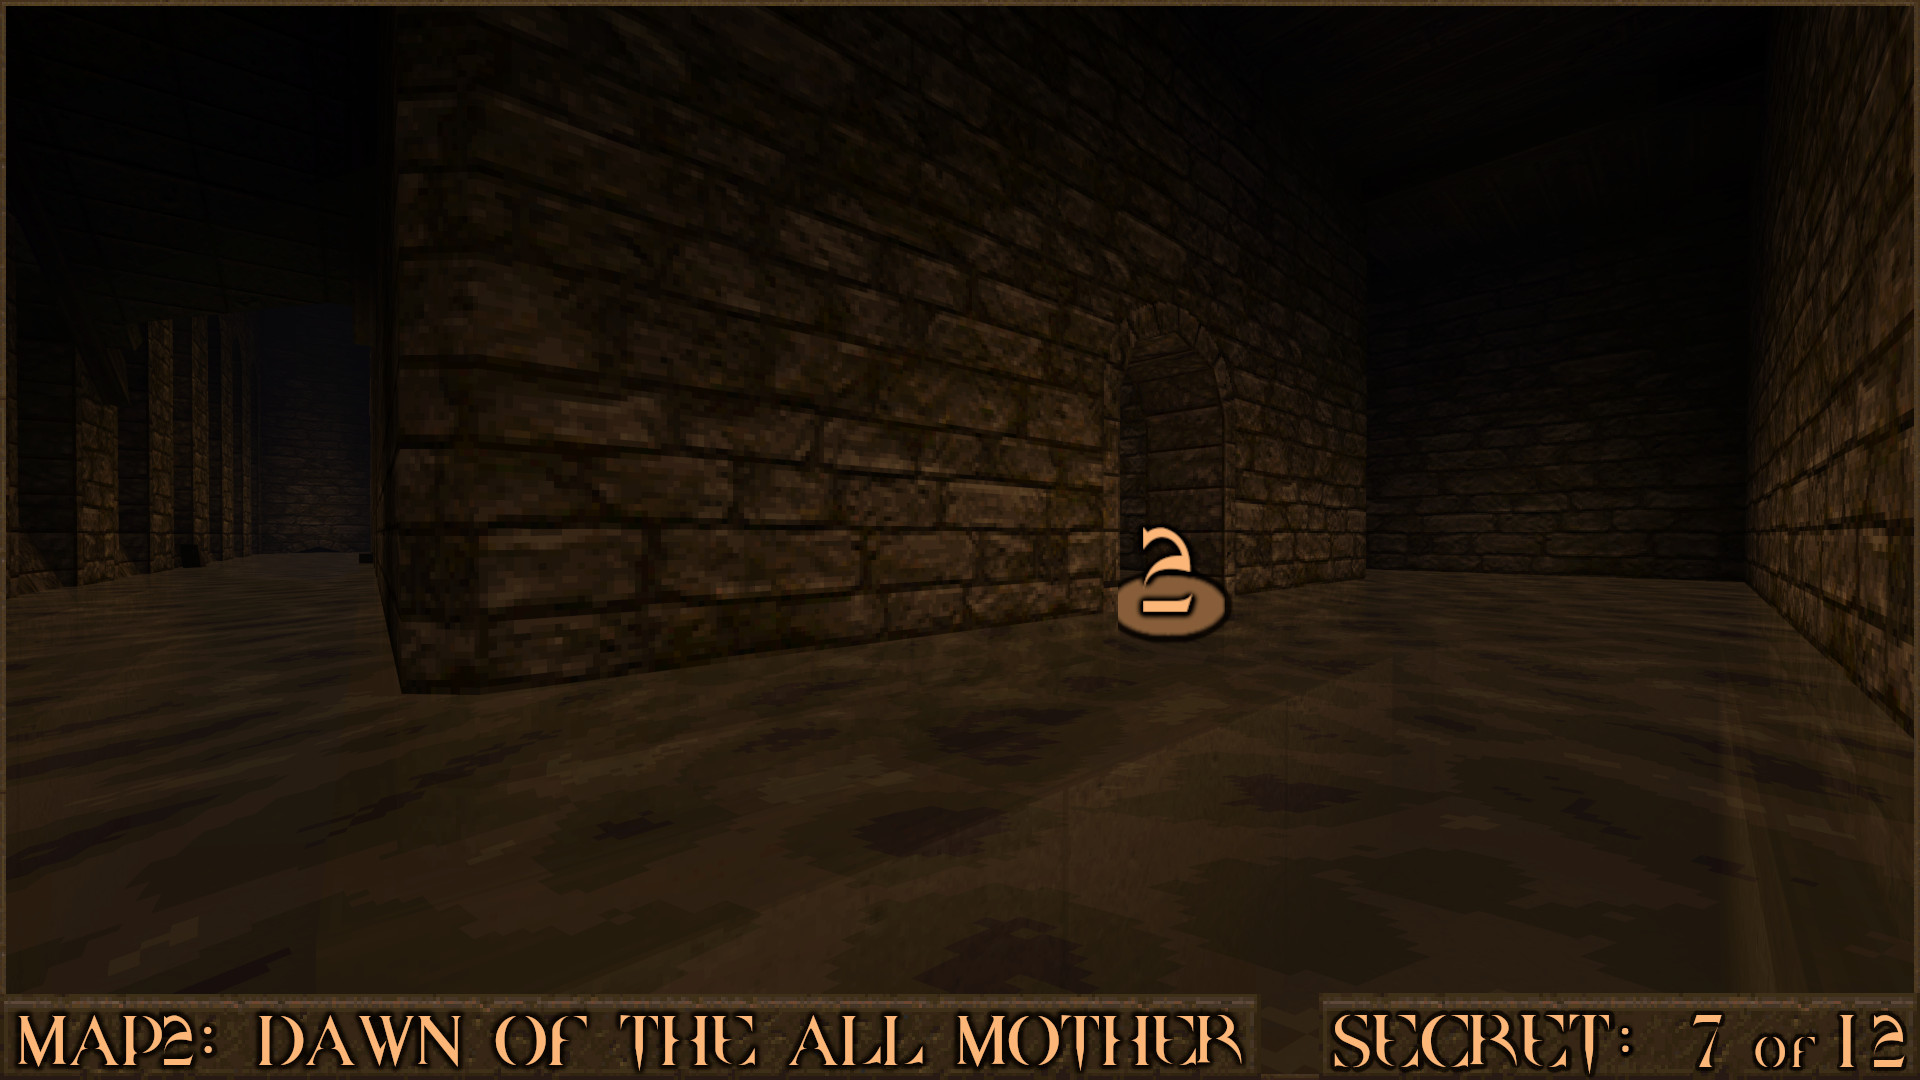
From the start take the left door and proceed through the level as normal. Return to the location of Secret 3 which consisted of several crates stacked by some small stairs ().

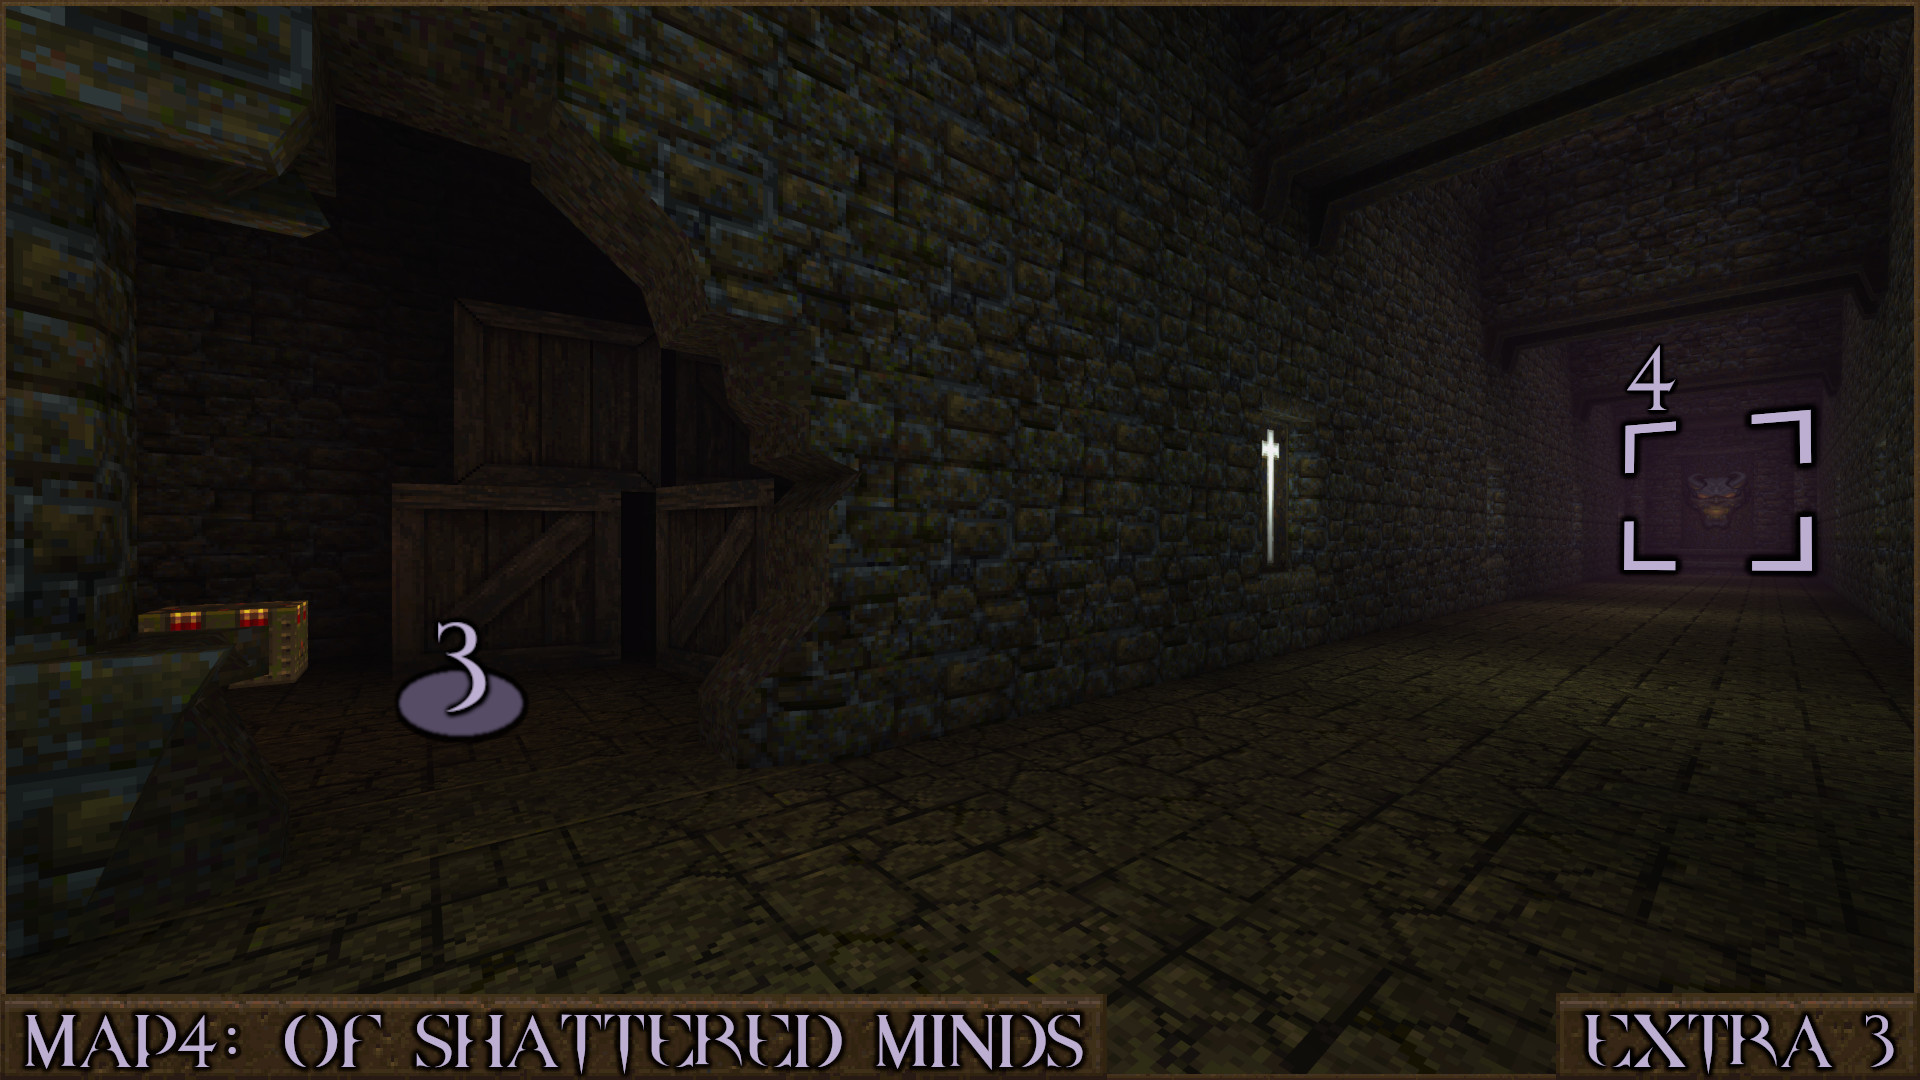
Inside this secret is a Rune of Sacrifice Door ().

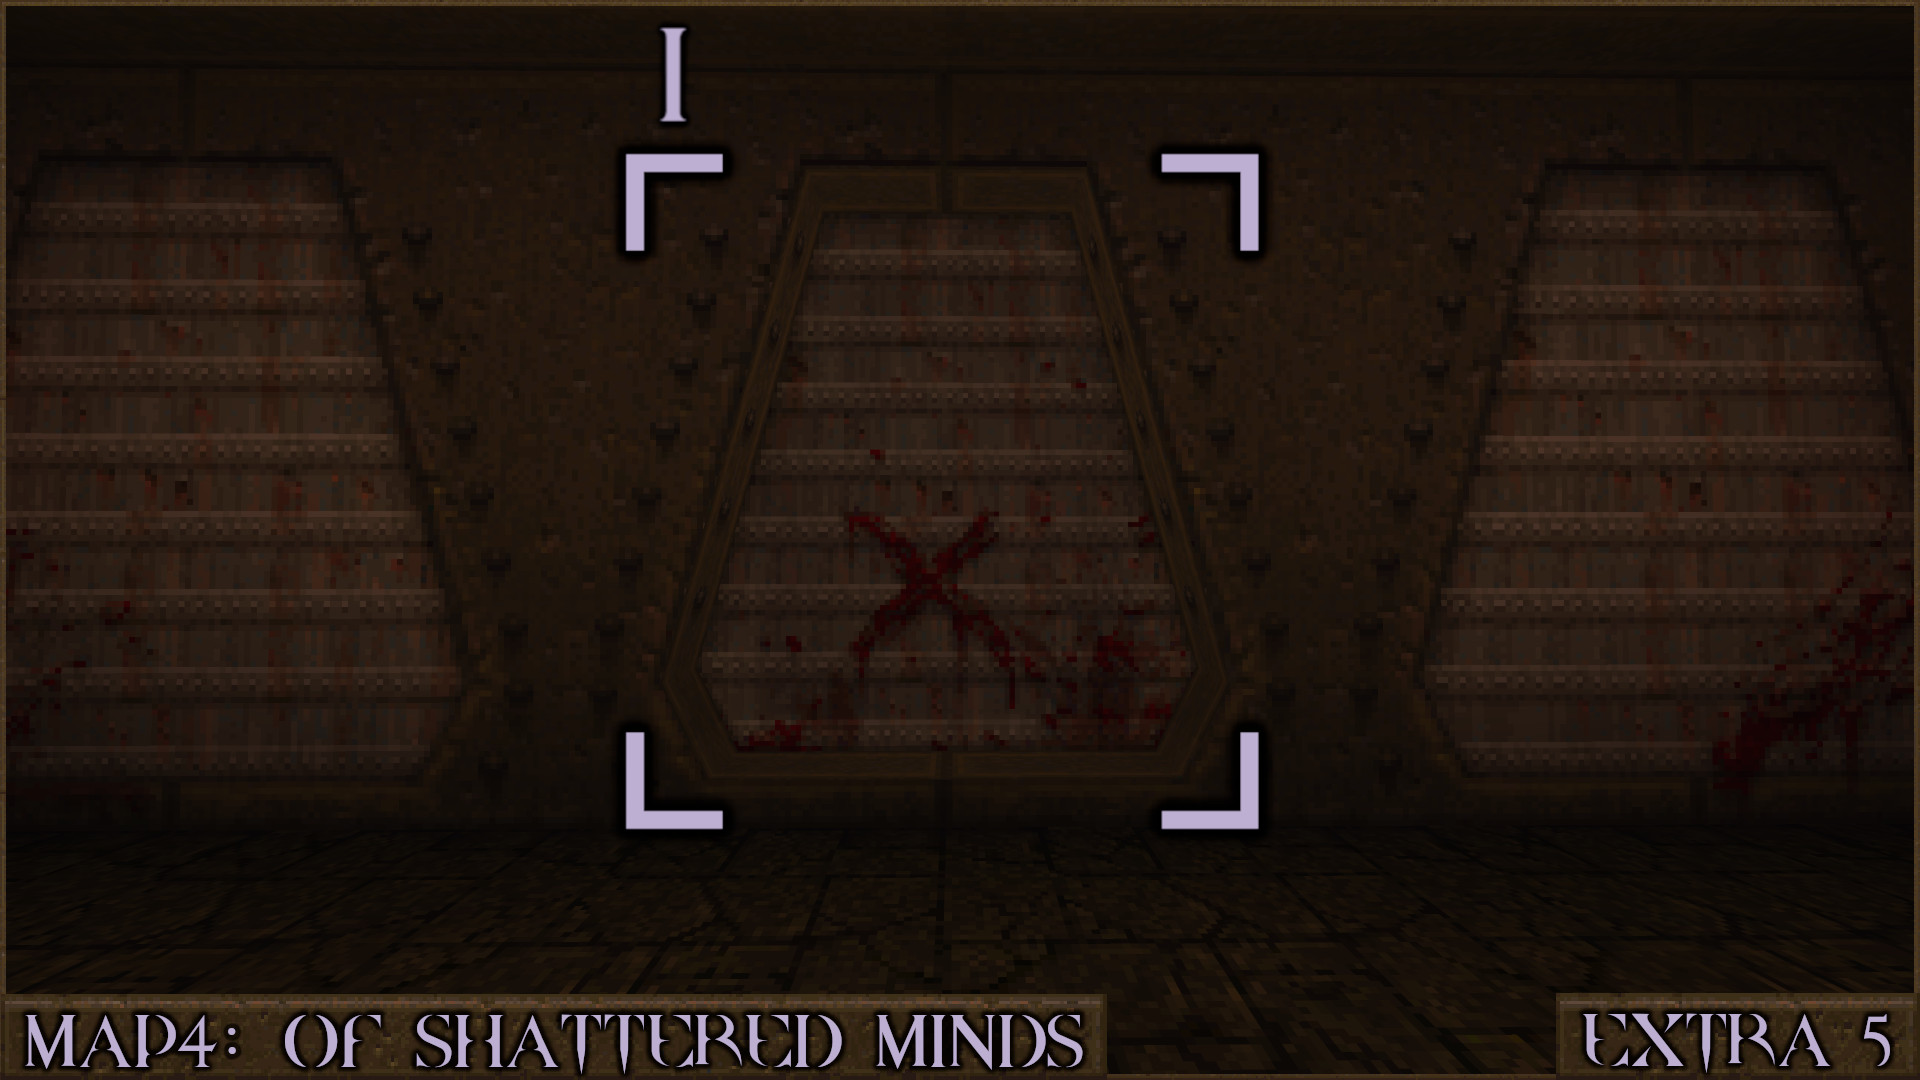
There are a few items in the hole in the wall on your left () but ignore the red X marked wall for now and instead investigate the long corridor. At the end is a shortcut () that skips you past the Gold & Silver Keycard Door almost to the end of the level.

Reward: Large Shells Small Rockets Large Health

Extra Secret 4
Requires Rune of Sacrifice
Return back to the path before you entered Secret 3 and continue on as normal. Shortly after getting through the moving walls near Secret 6 you'll see a Rune of Sacrifice Door on your left. This door provides an alternate way to access the reward from Secret 7 so unfortunately you probably already have the Health Capacity Upgrade from this secret. However this route does also provide a shortcut that skips part of the level.
Reward: None

Extra Secret 5
Requires Rune of Sacrifice
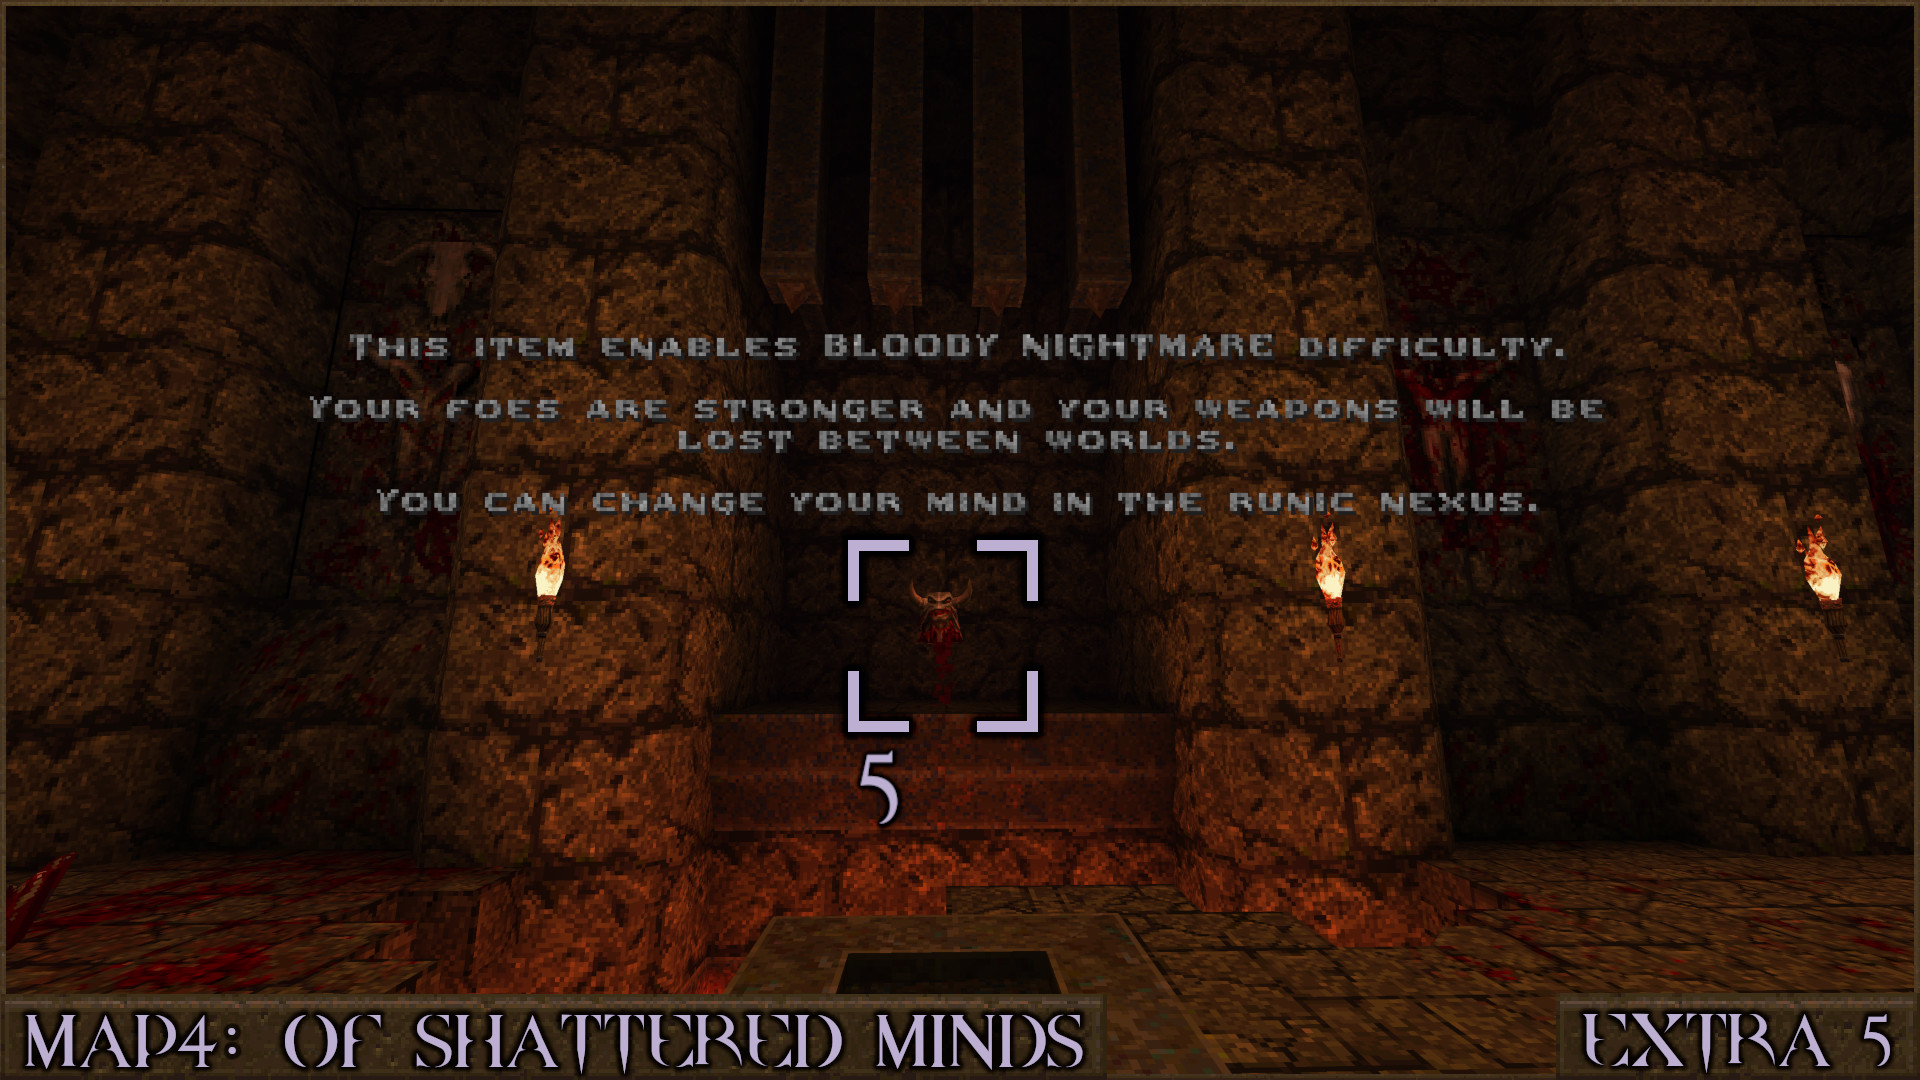
This secret will lead you to the Death Knight's Head item. It is important that you do not use the Gold or Silver Keycards on the door near the start of the level as you will need them both to unlock this secret instead. Proceed through both paths of the level and collect both the Gold Keycard and Silver Keycard. Go back through the left path again and return to the Rune of Sacrifice Door from Extra Secret 3. Continue forward and go through the broken hole in the wall and this time shoot the red X on the wall () to access a small room.
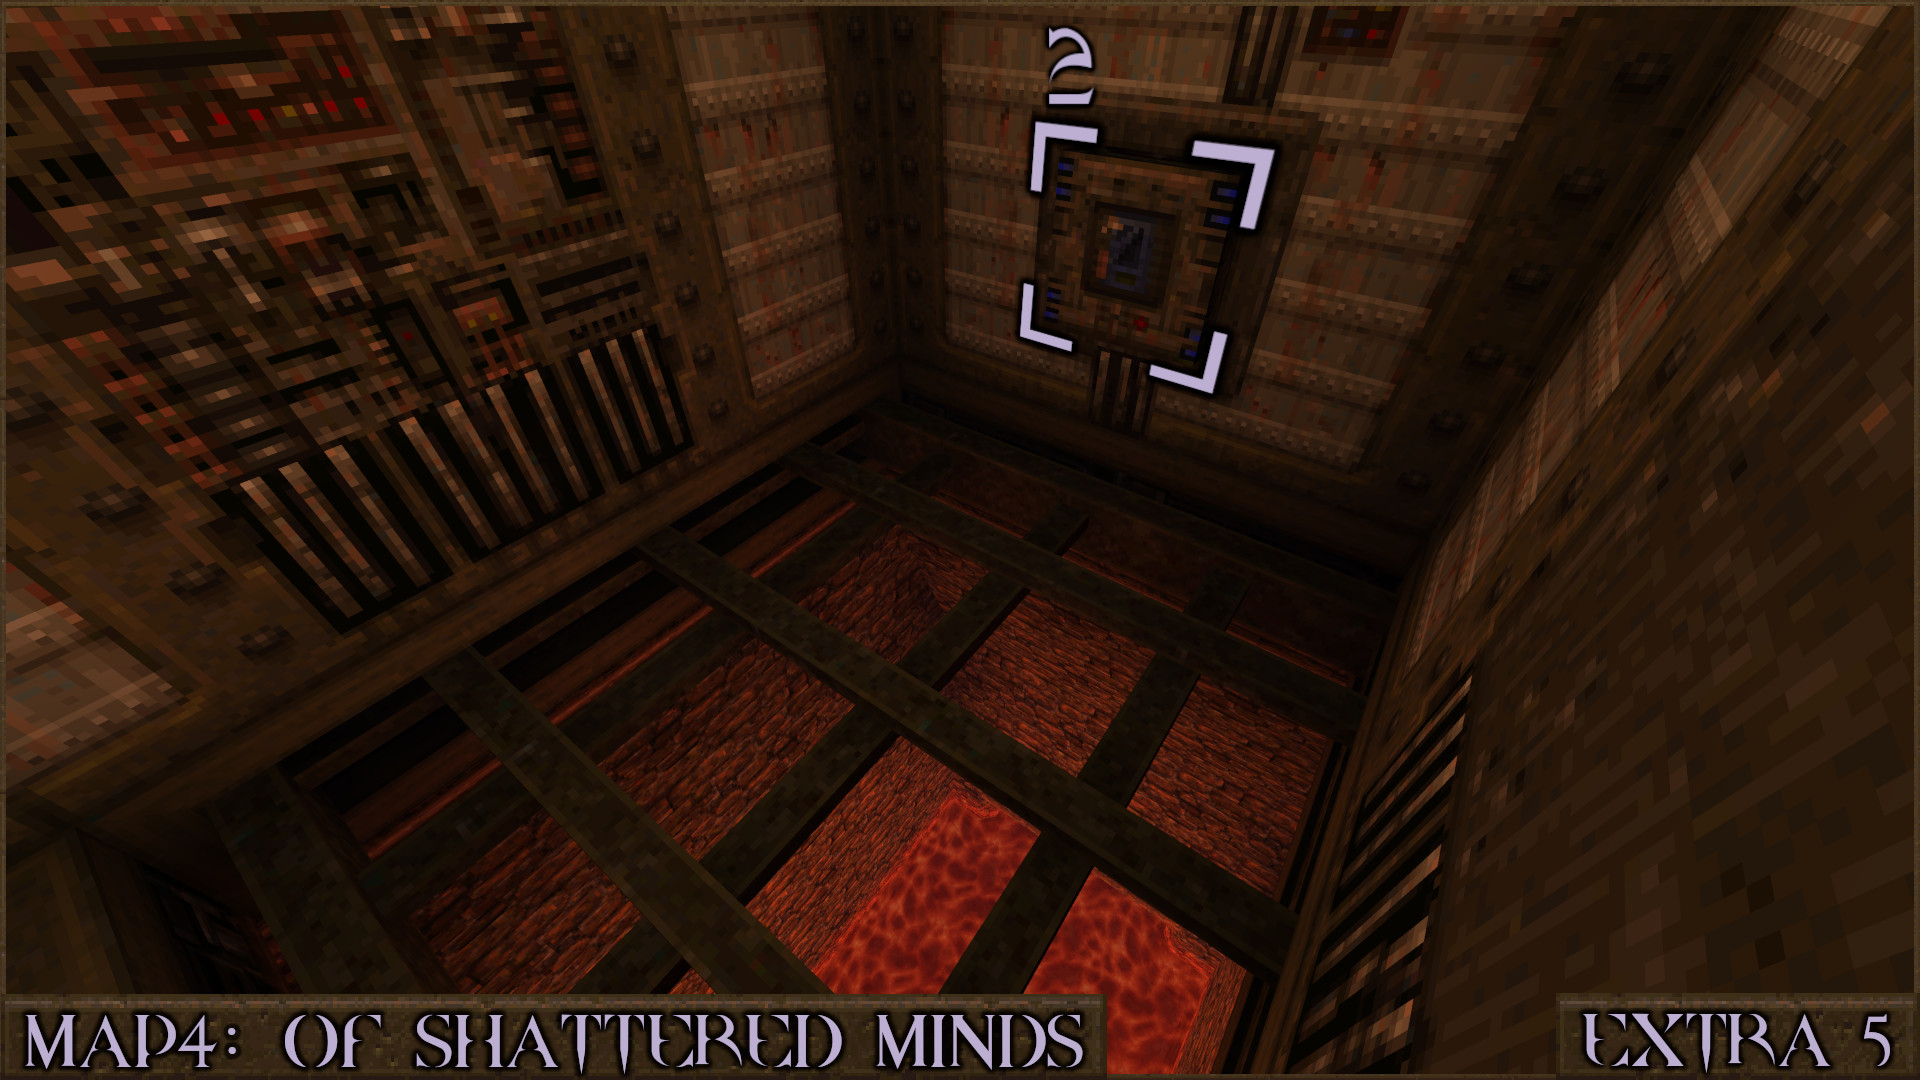
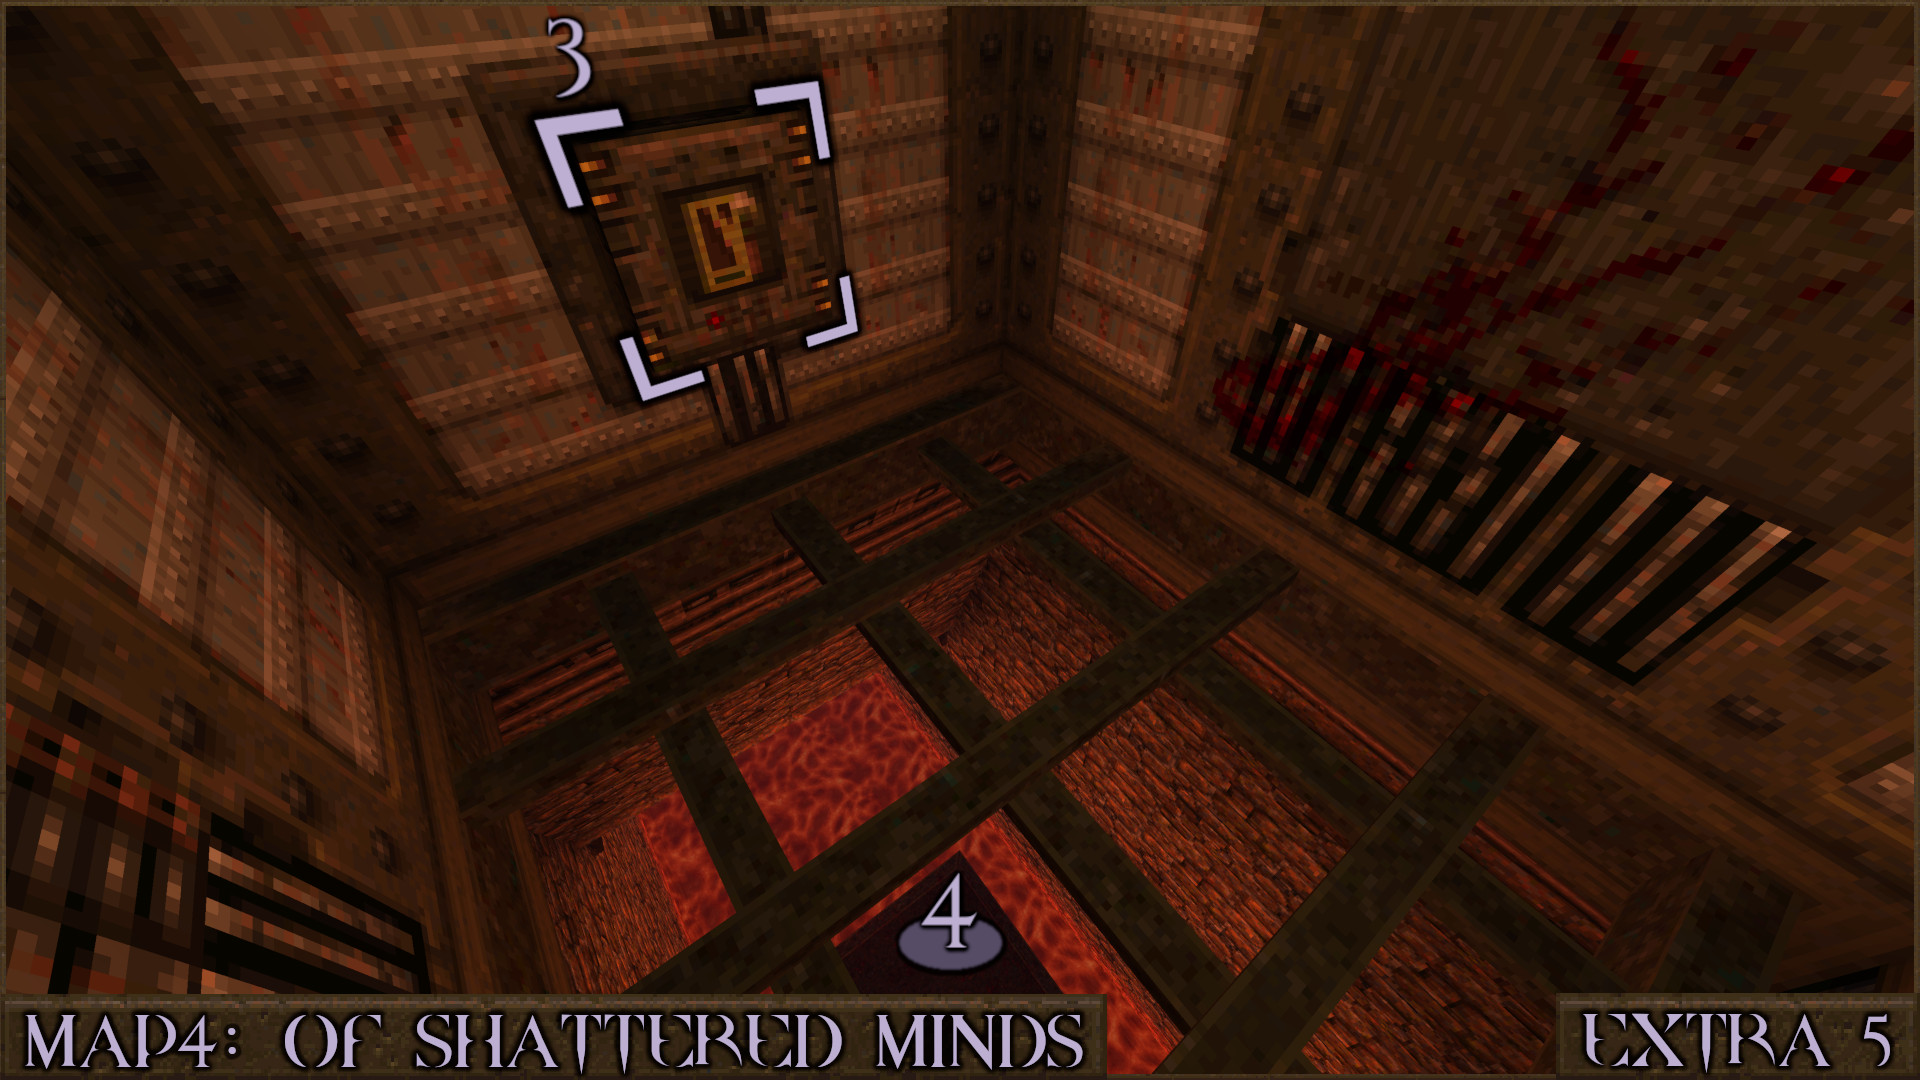
First use the Silver Keycard Button () to activate a lava raft below you.

Then use the Gold Keycard Button () when the lava raft is directly below you () to drop down onto it.

Ride the raft across the lava and then jump into a tunnel to access a room containing the Death Knight's Head (). Picking up this item immediately changes the difficulty to Bloody Nightmare Difficulty and if you go on to beat the boss later you will proceed to Part 3. However if increasing the difficulty is unappealing to you then you can simply leave the level without picking it up. The left teleporter returns you to the level while the right exit portal leads to the The Runic Nexus.
After picking up the item if you happen to return again to this secret later then a Megahealth has replaced the head.

Reward: [Bloody Nightmare Difficulty]

If you took the Death Knight's Head then the difficulty will now have changed to Bloody Nightmare Difficulty which is even harder than Nightmare as you lose all your weapons at the start of each level and enemies have more health and new attacks.
More importantly, if you later beat the boss at the end of the last level (BOSS: The Sleeper Awakens) while Bloody Nightmare Difficulty is active you will proceed to the ultimate challenge: Part 3.

‎‏‏‎ ‎‏‏‎ + Bloody Nightmare NG+ Secrets
NOTE: During Part 3 after finding the Rune of Sacrifice you can return to this level once again to find a mysterious secret.

Extra Secret 6
Requires Bloody Nightmare New Game+ & Rune of Sacrifice
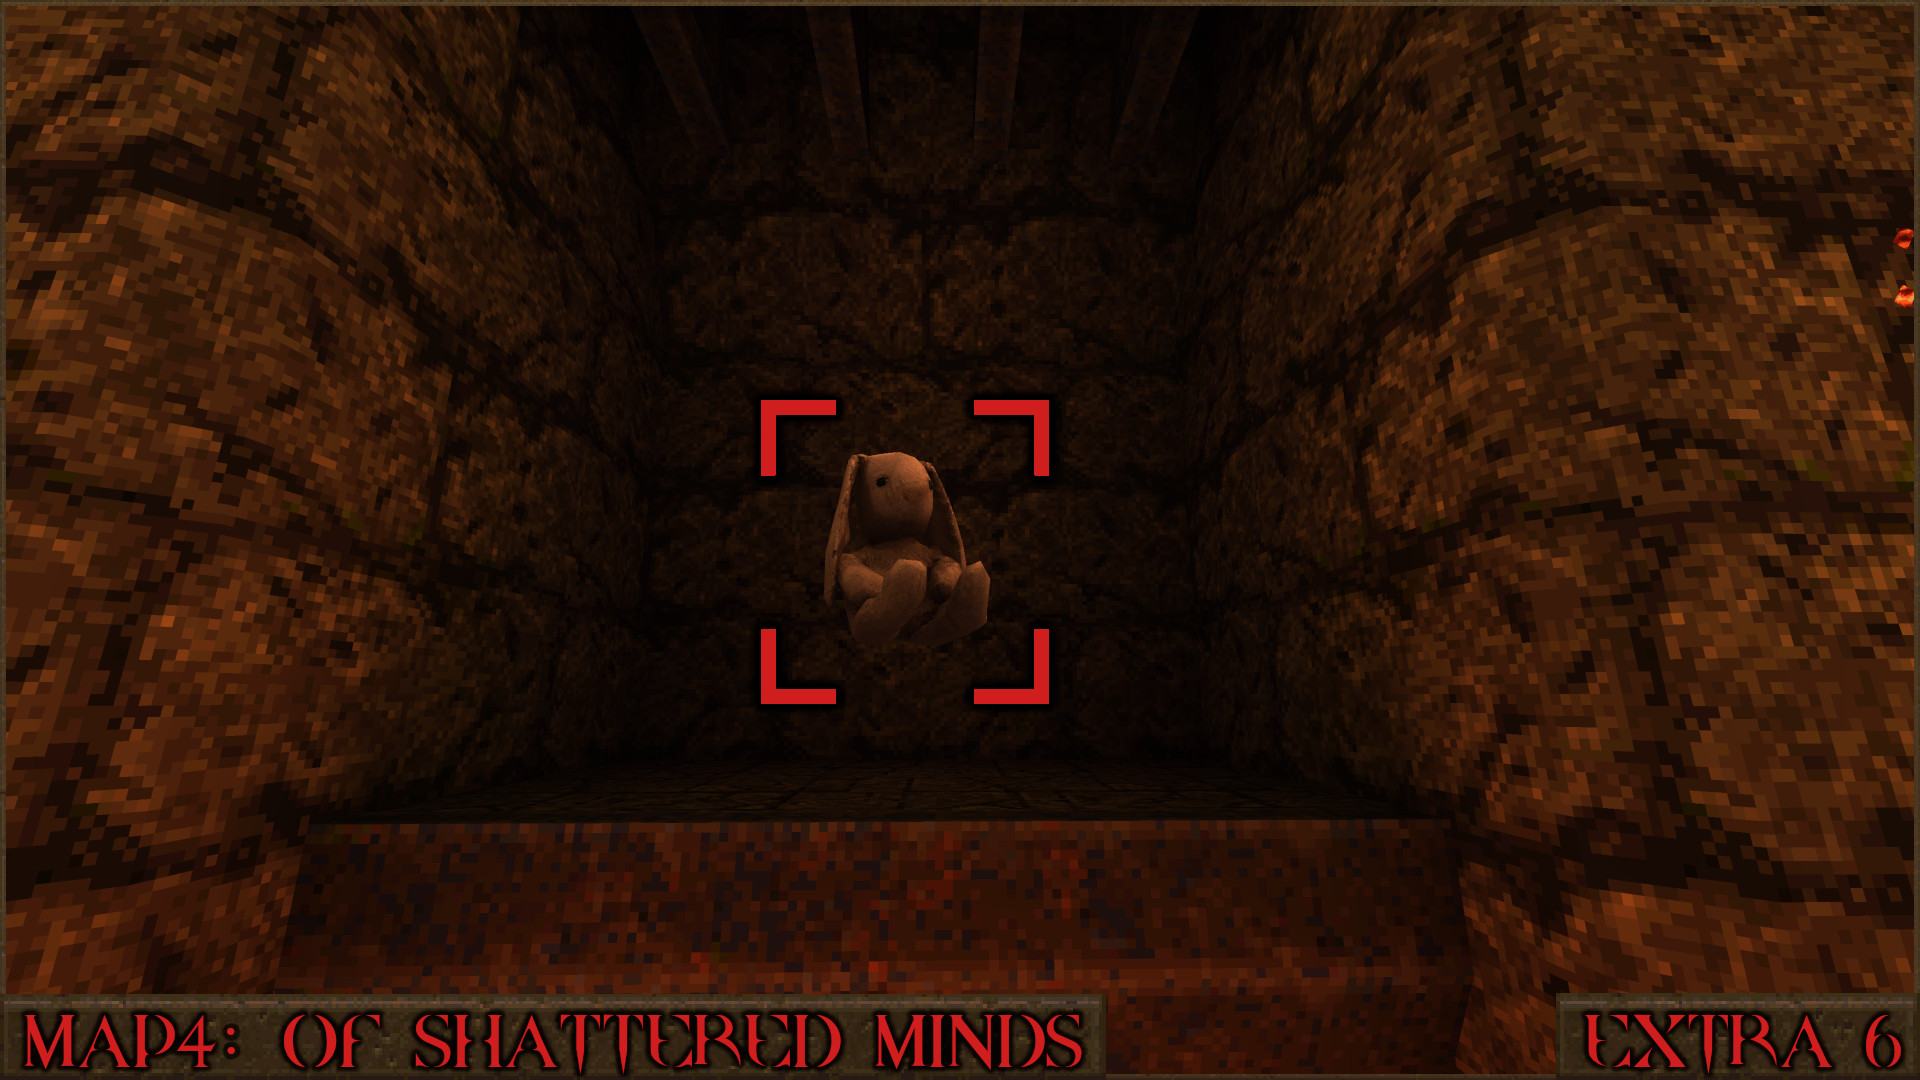
Return to this level and acquire both keys. Open the Rune of Sacrifice Door in Extra Secret 5 and then use the keys to activate the lava raft that leads to the location of the Death Knight's Head. The head has been replaced with... a plush bunny toy called the Nightmare Defender! It can be picked up but does it have a use? It remains a mystery...
Leave and return to this level again and it will be replaced with a Megahealth.

Reward: [Nightmare Defender]
‎‏‏‎SECRET6: The Haunted Tower [Secret Level]
NOTE: This secret level can be accessed during Part 1 onwards by using the secret exit found in MAP4: Of Shattered Minds (Secret 13).

Secret 1 of 3
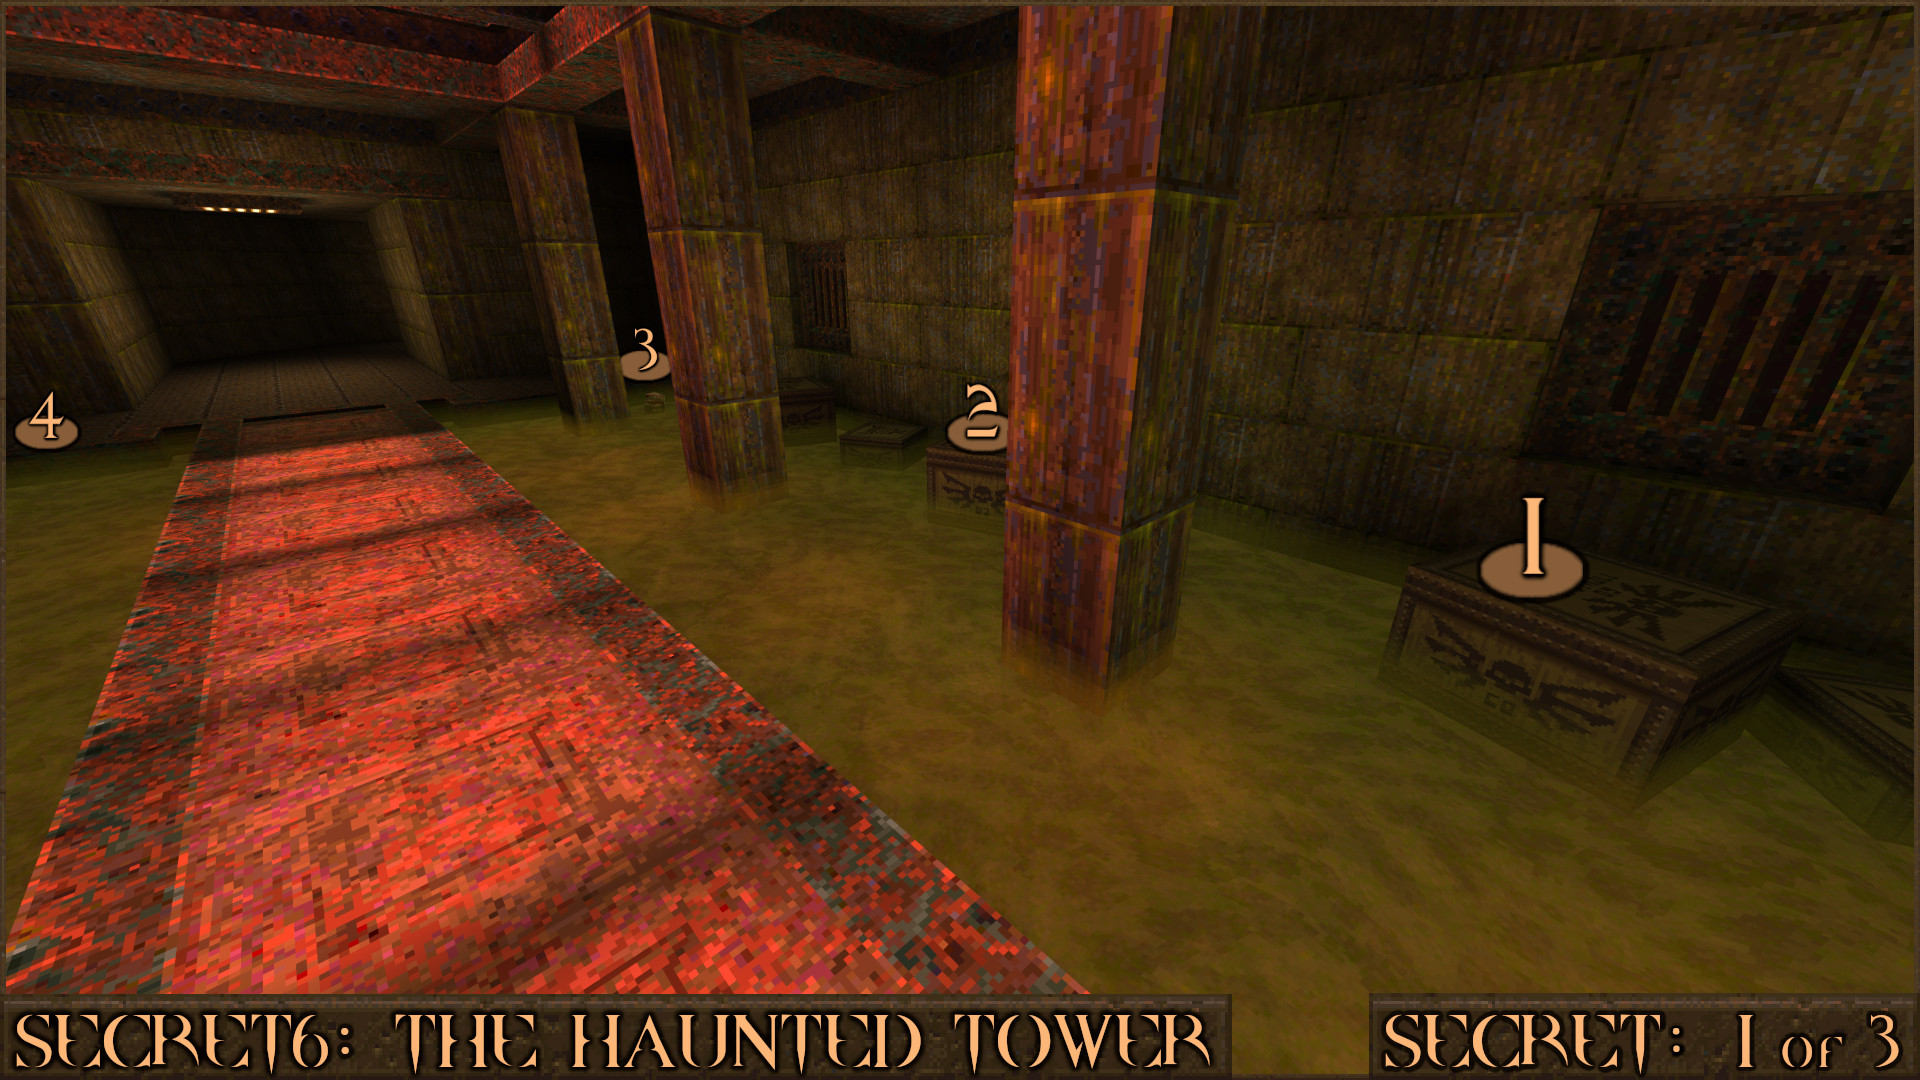
After ascending the teleport maze tower you will enter the bridge room. Moving through different parts of the room shifts you to a different dimension. The four variants are: Bright, Toxic, Hellish and Arcane.
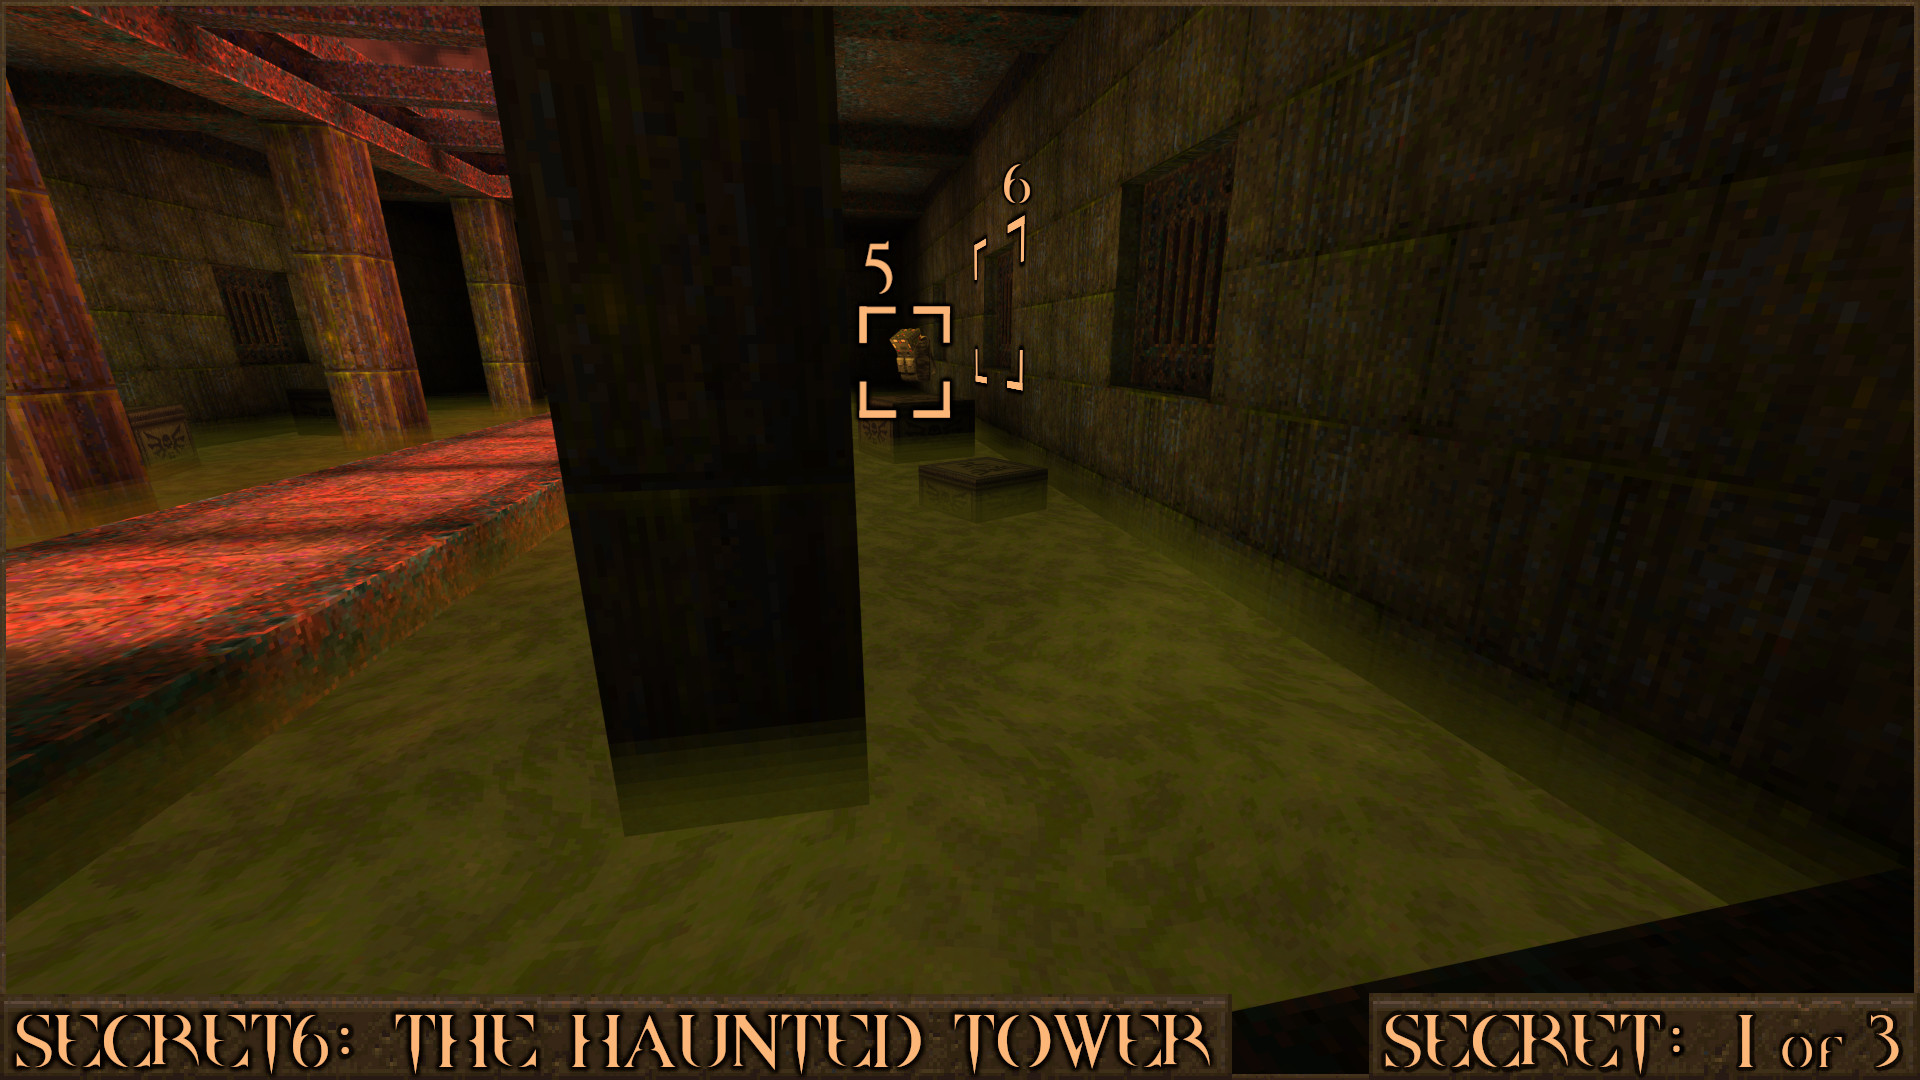
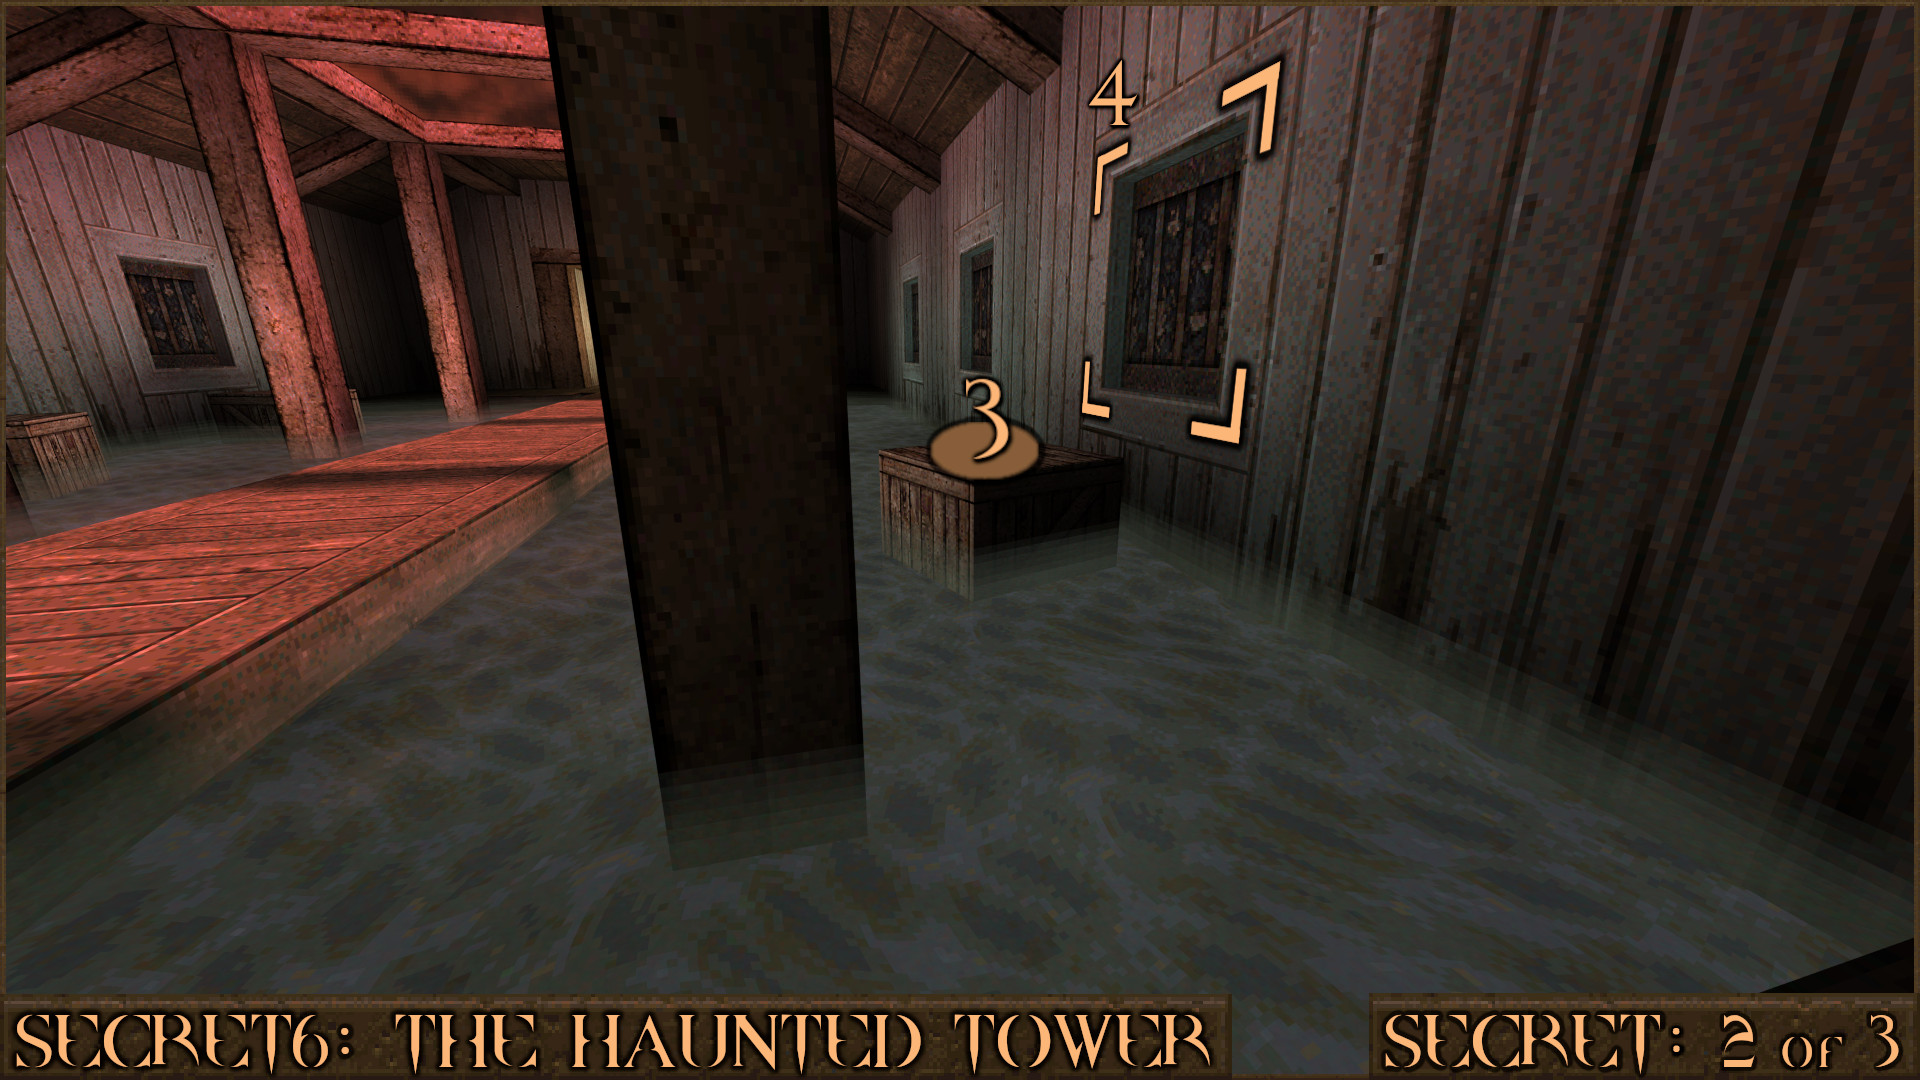
Approach the middle of the bridge to shift to the Toxic dimension. Don't move forward any further or you will shift into the Hellish dimension. Instead leap onto the crate on the right () and then the next crate () until you get to the end of the room (). Avoid going back to the bridge and instead move to the opposite corner ().

From here (you should still be in the Toxic dimension) run and jump over to the crates to pick up the Shell Capacity Upgrade (). Then shoot the centre vent panel () and go inside to find the actual secret. When you try to leave you will shift to the Arcane dimension where a Vore is guarding a Megahealth. Leaving the area will return you to the Bright dimension.

Reward: Grenade Launcher×2 Megahealth [Shell Capacity Upgrade]

Secret 2 of 3
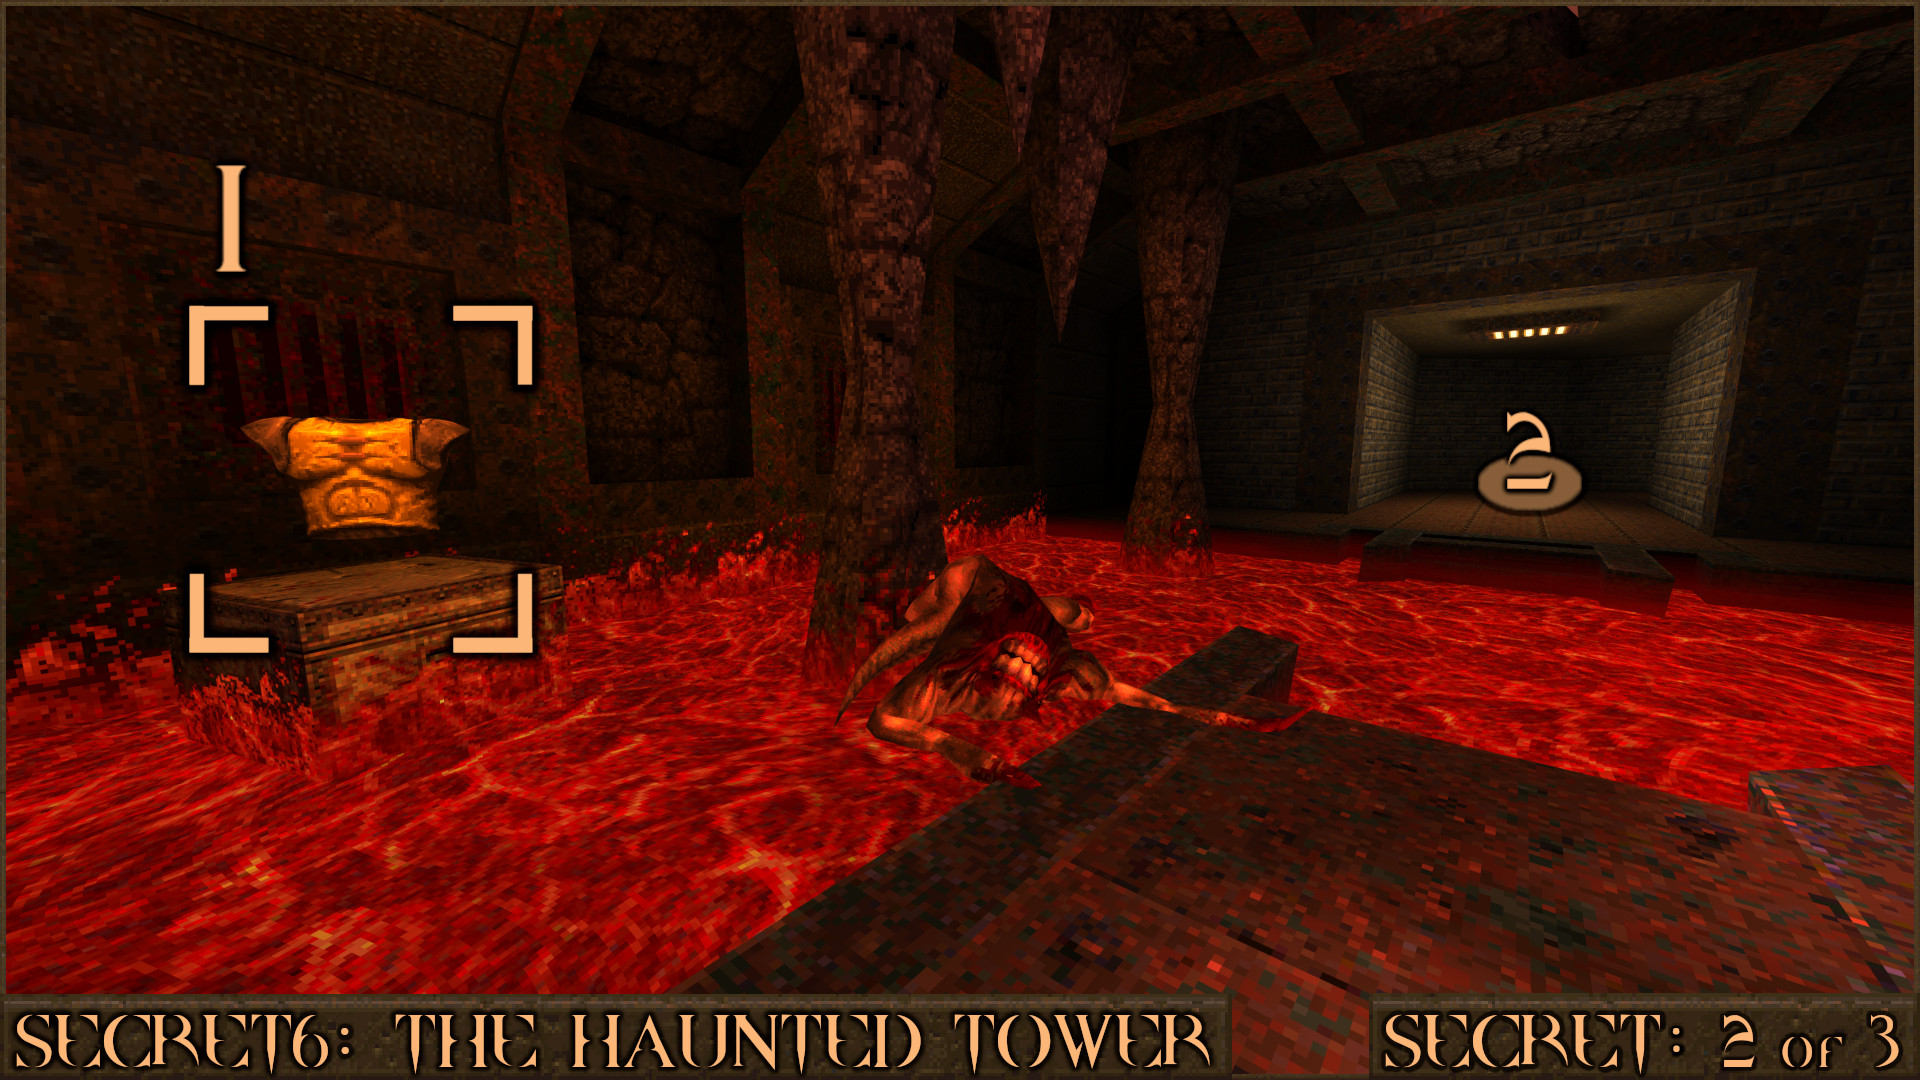
While still in the bridge room run across the bridge until you enter the Hellish dimension. There is a Yellow Armor () nearby that you won't be able to reach as you shift if you get too close. Instead head towards the exit () and you will return to the Bright dimension.

Stop and turn around and head back into the corner again. Jump on the nearest crate () and shoot the vent on the right () to access another secret area containing some ammo. As you try to leave you will shift back to the Hellish dimension and be facing the Yellow Armor which you can now claim.

Reward: Large Shells Large Nails Yellow Armor

Extra Secret
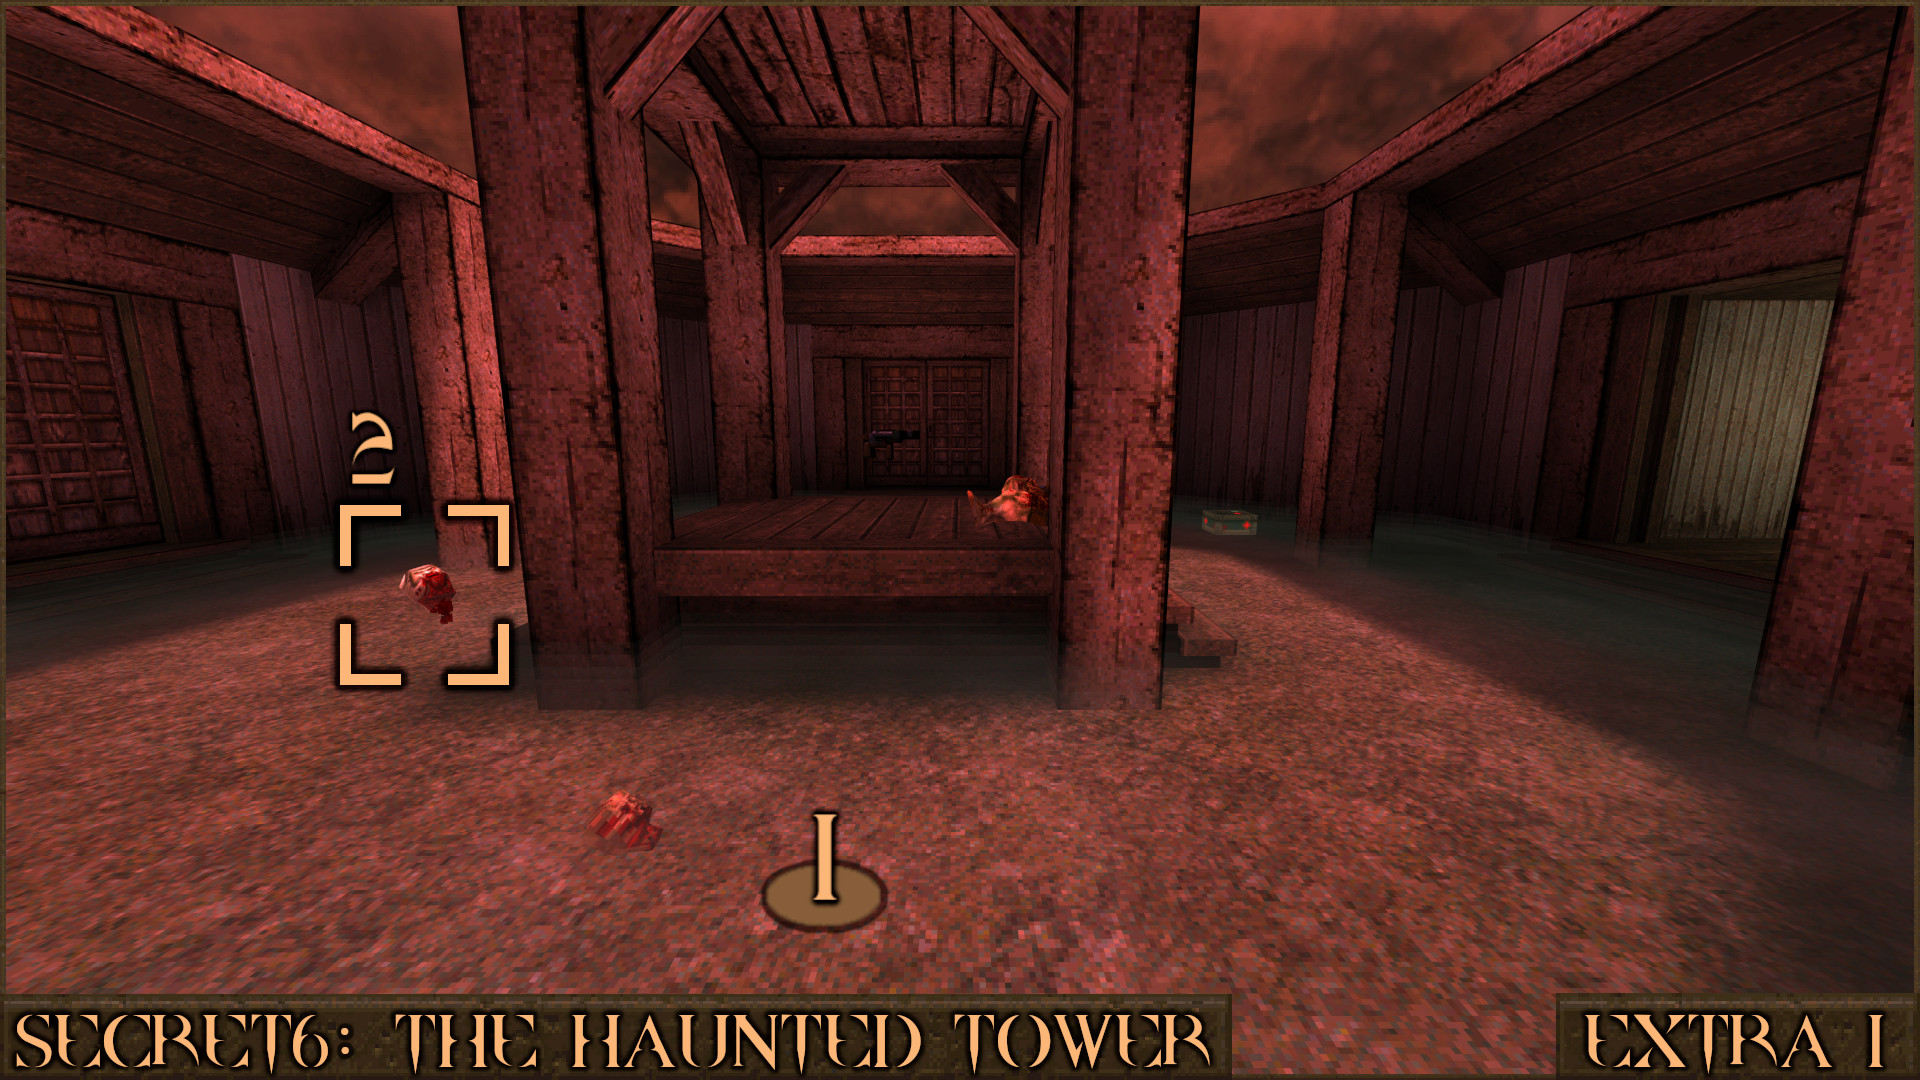
Move into the next area and you'll start in the Bright dimension. Do not walk over the centre stairs platform yet. Instead walk around the platform () and you'll see a Health Capacity Upgrade behind it ().

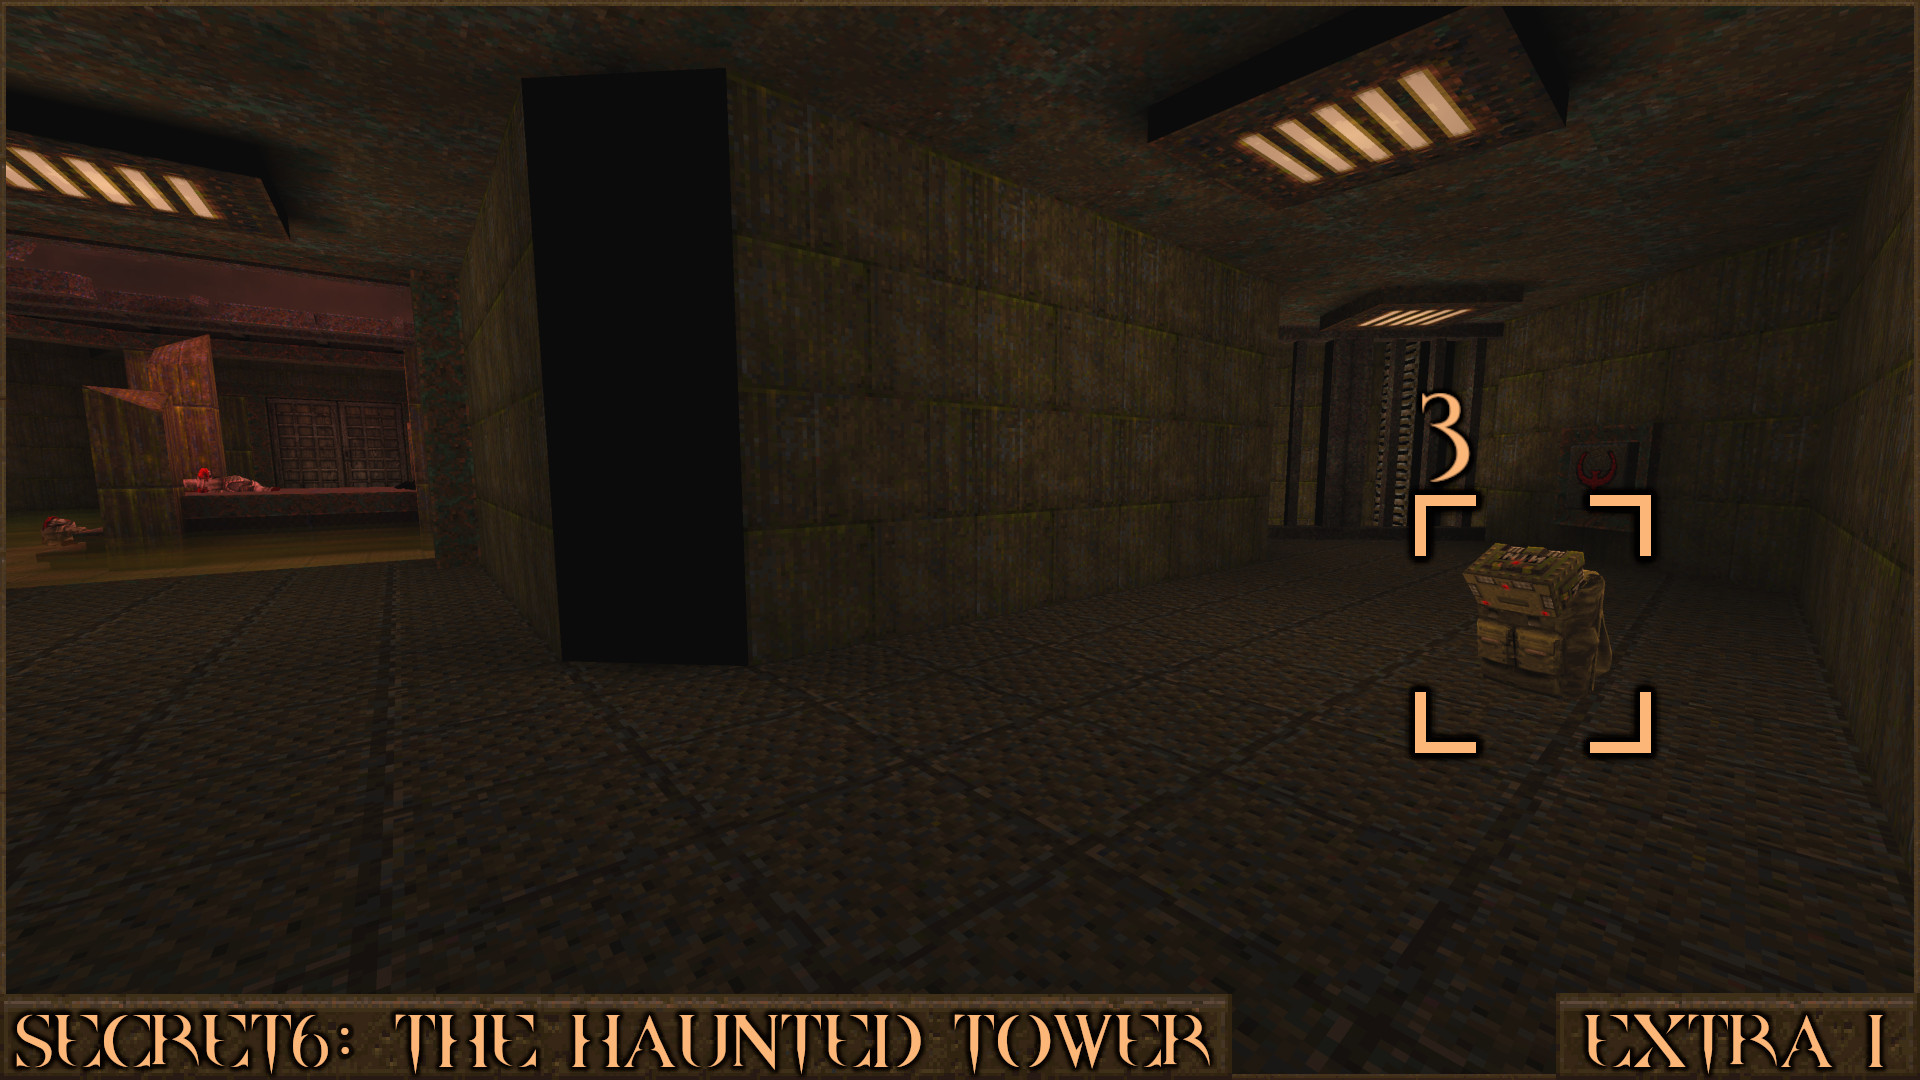
After picking up the item walk over the stairs platform to shift to the Toxic dimension. In the next corridor you will also find a Nail Capacity Upgrade ().

Reward: [Health Capacity Upgrade] [Nail Capacity Upgrade]

Secret 3 of 3
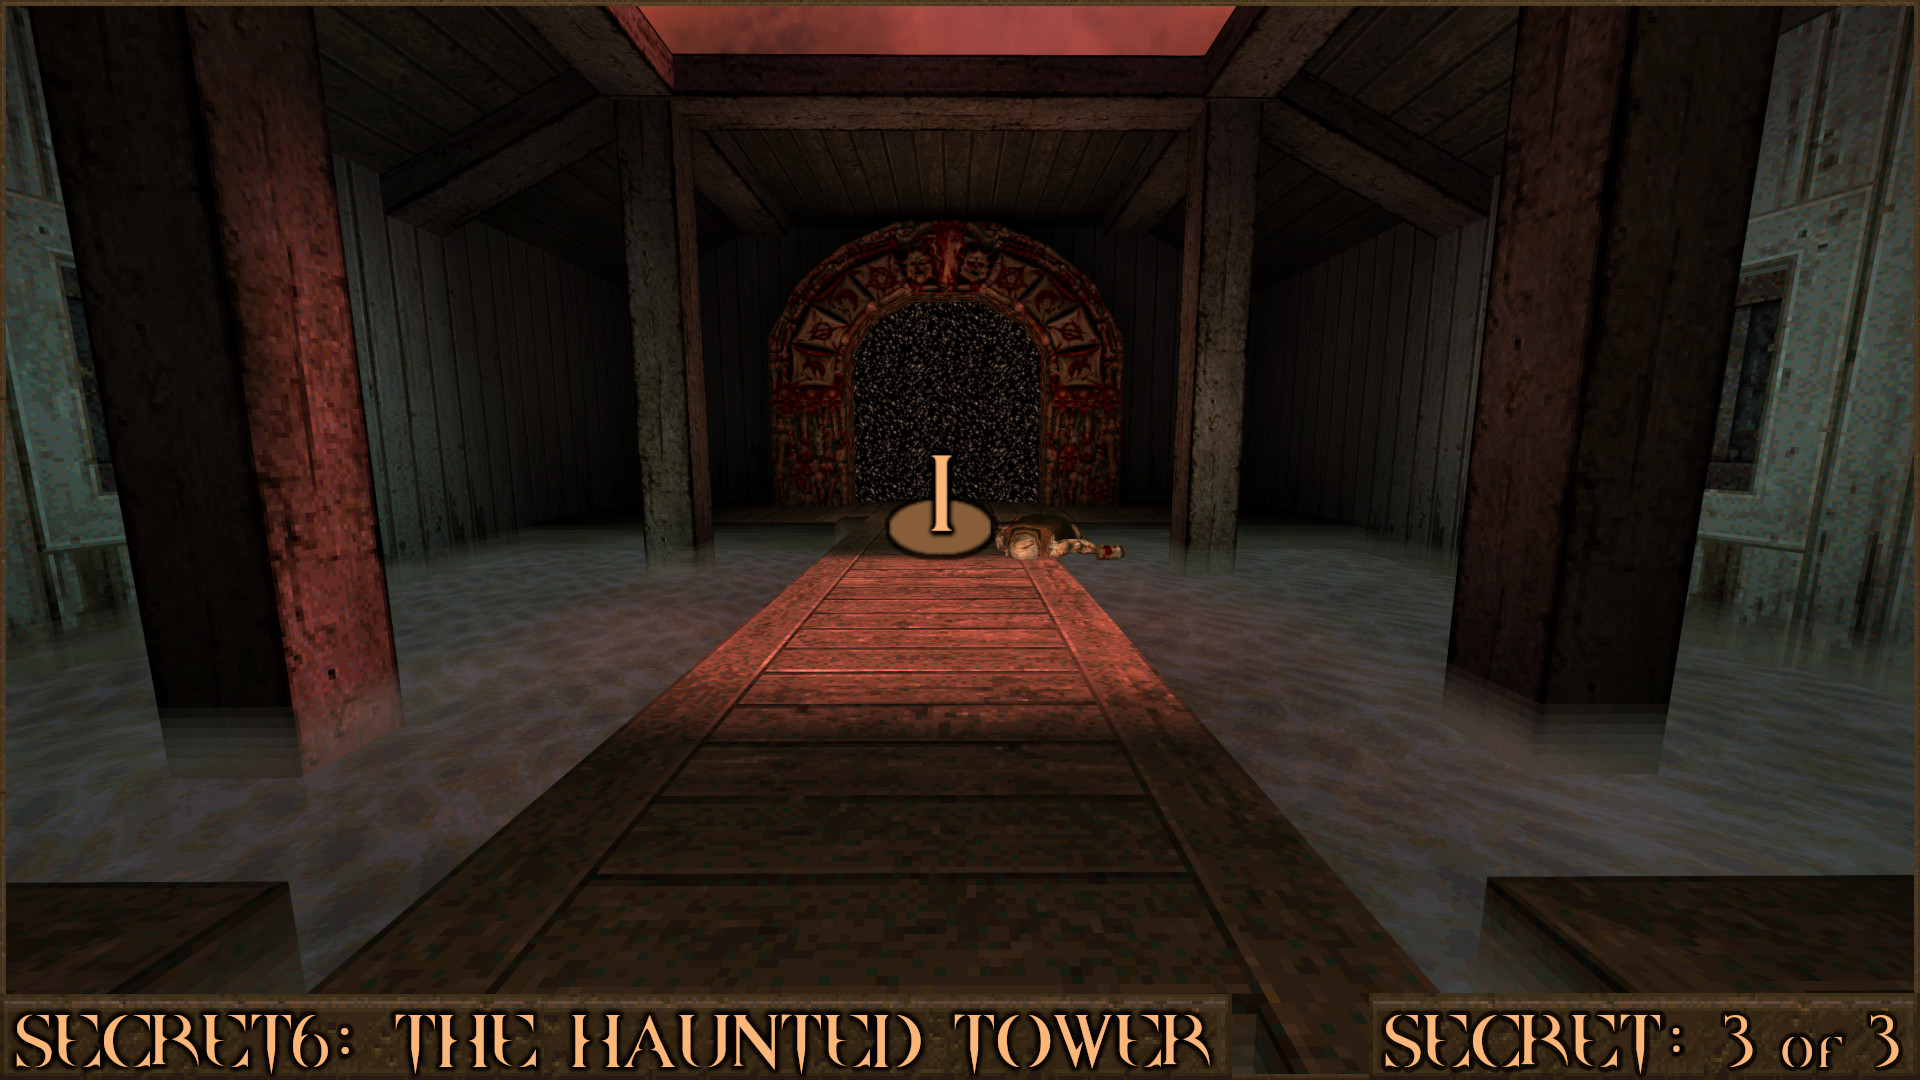
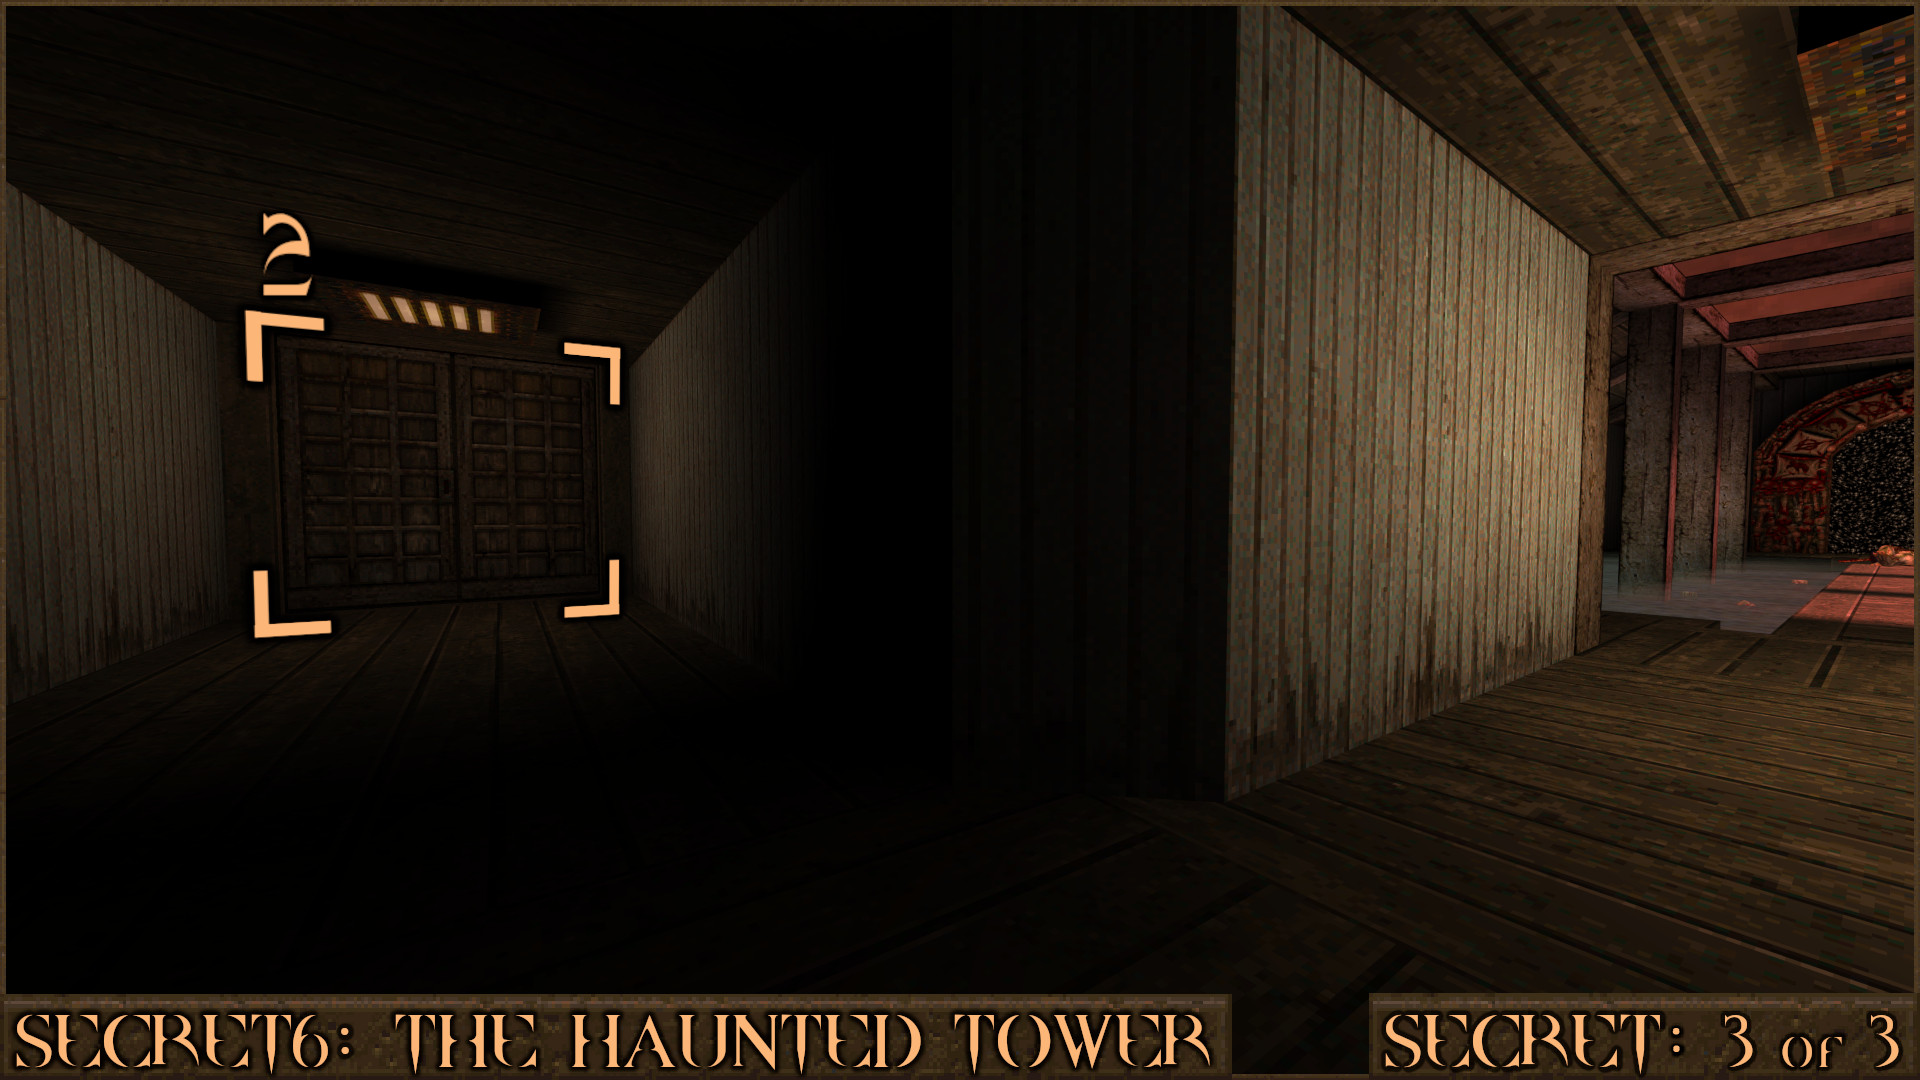
In the final room you will see the large exit portal. However each time you approach it () you shift to an alternate version of the room with more enemies.

After the 3rd shift don't go through the portal yet, instead turn around and attempt to leave through the door that you originally entered (). It will lead to a new room containing the secret.

Reward: Megahealth
‎‏‏‎MAP5: Requiem
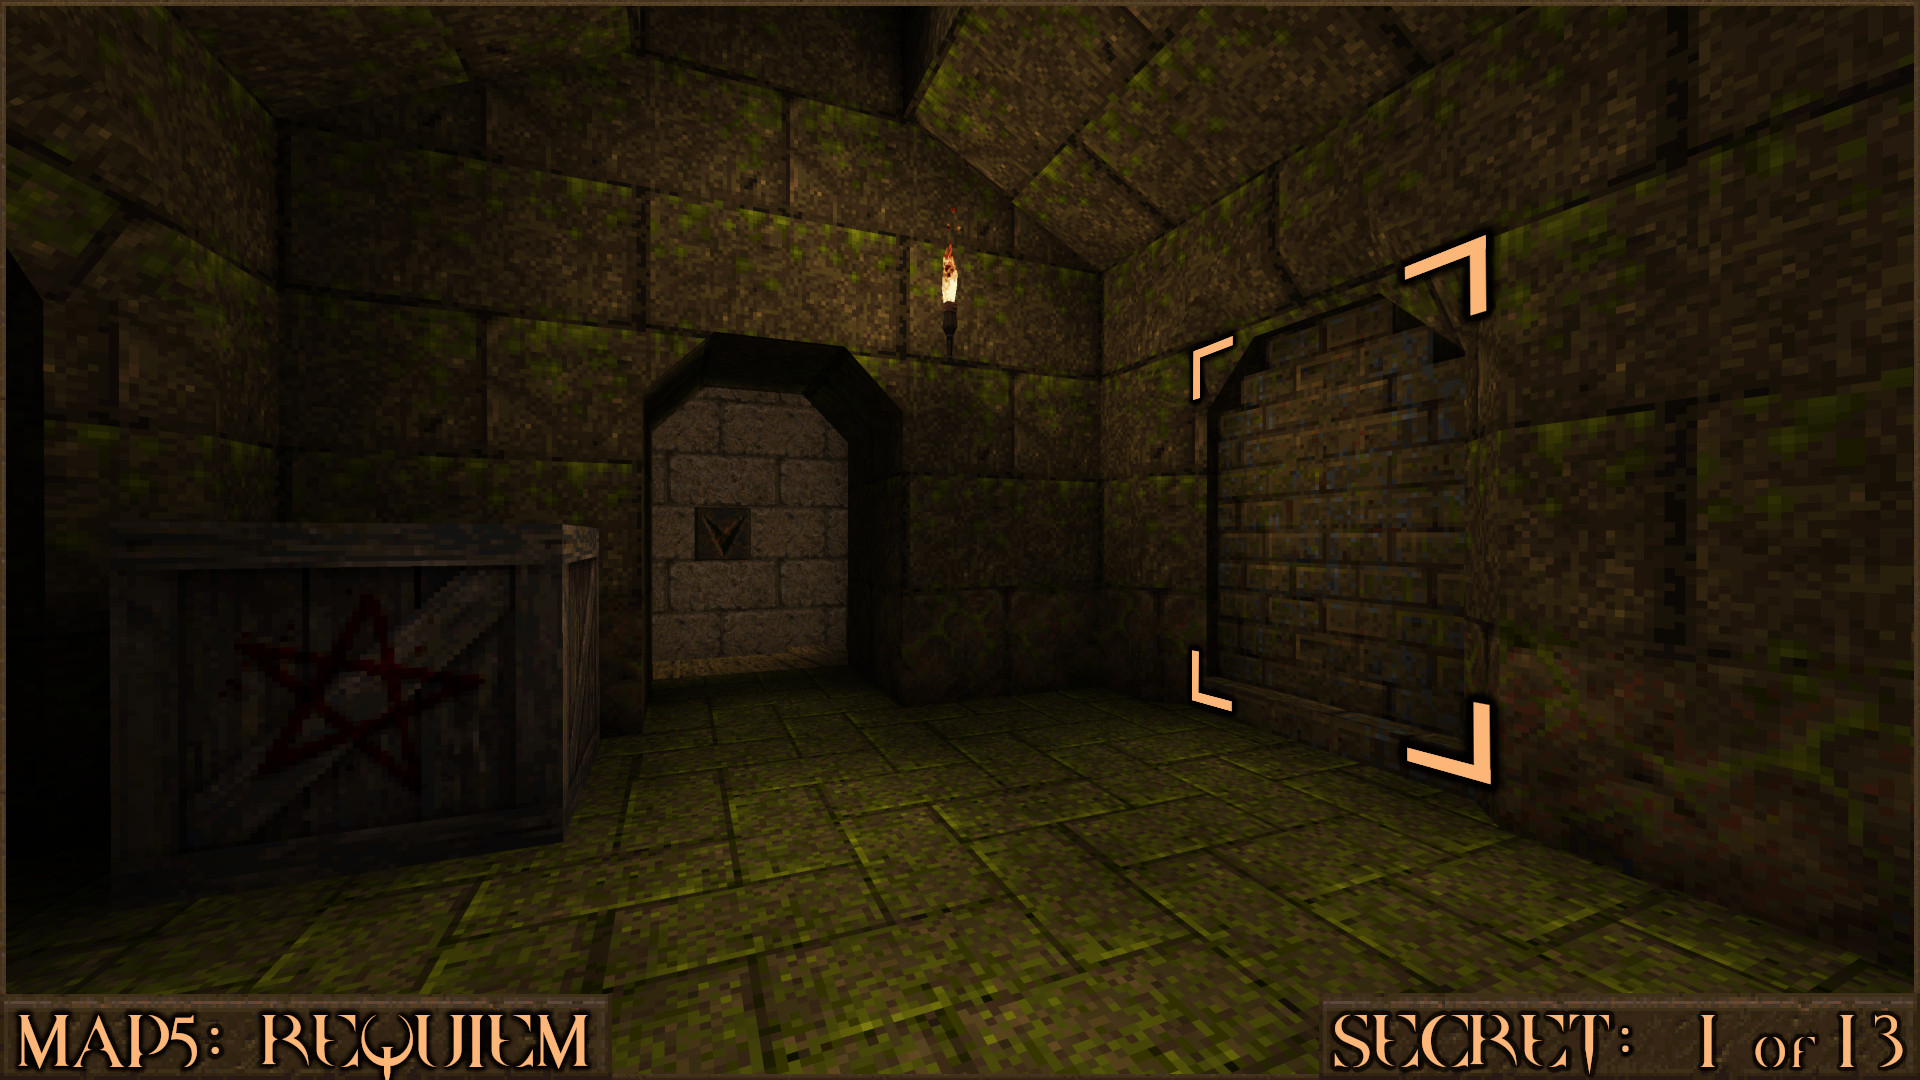
Secret 1 of 13
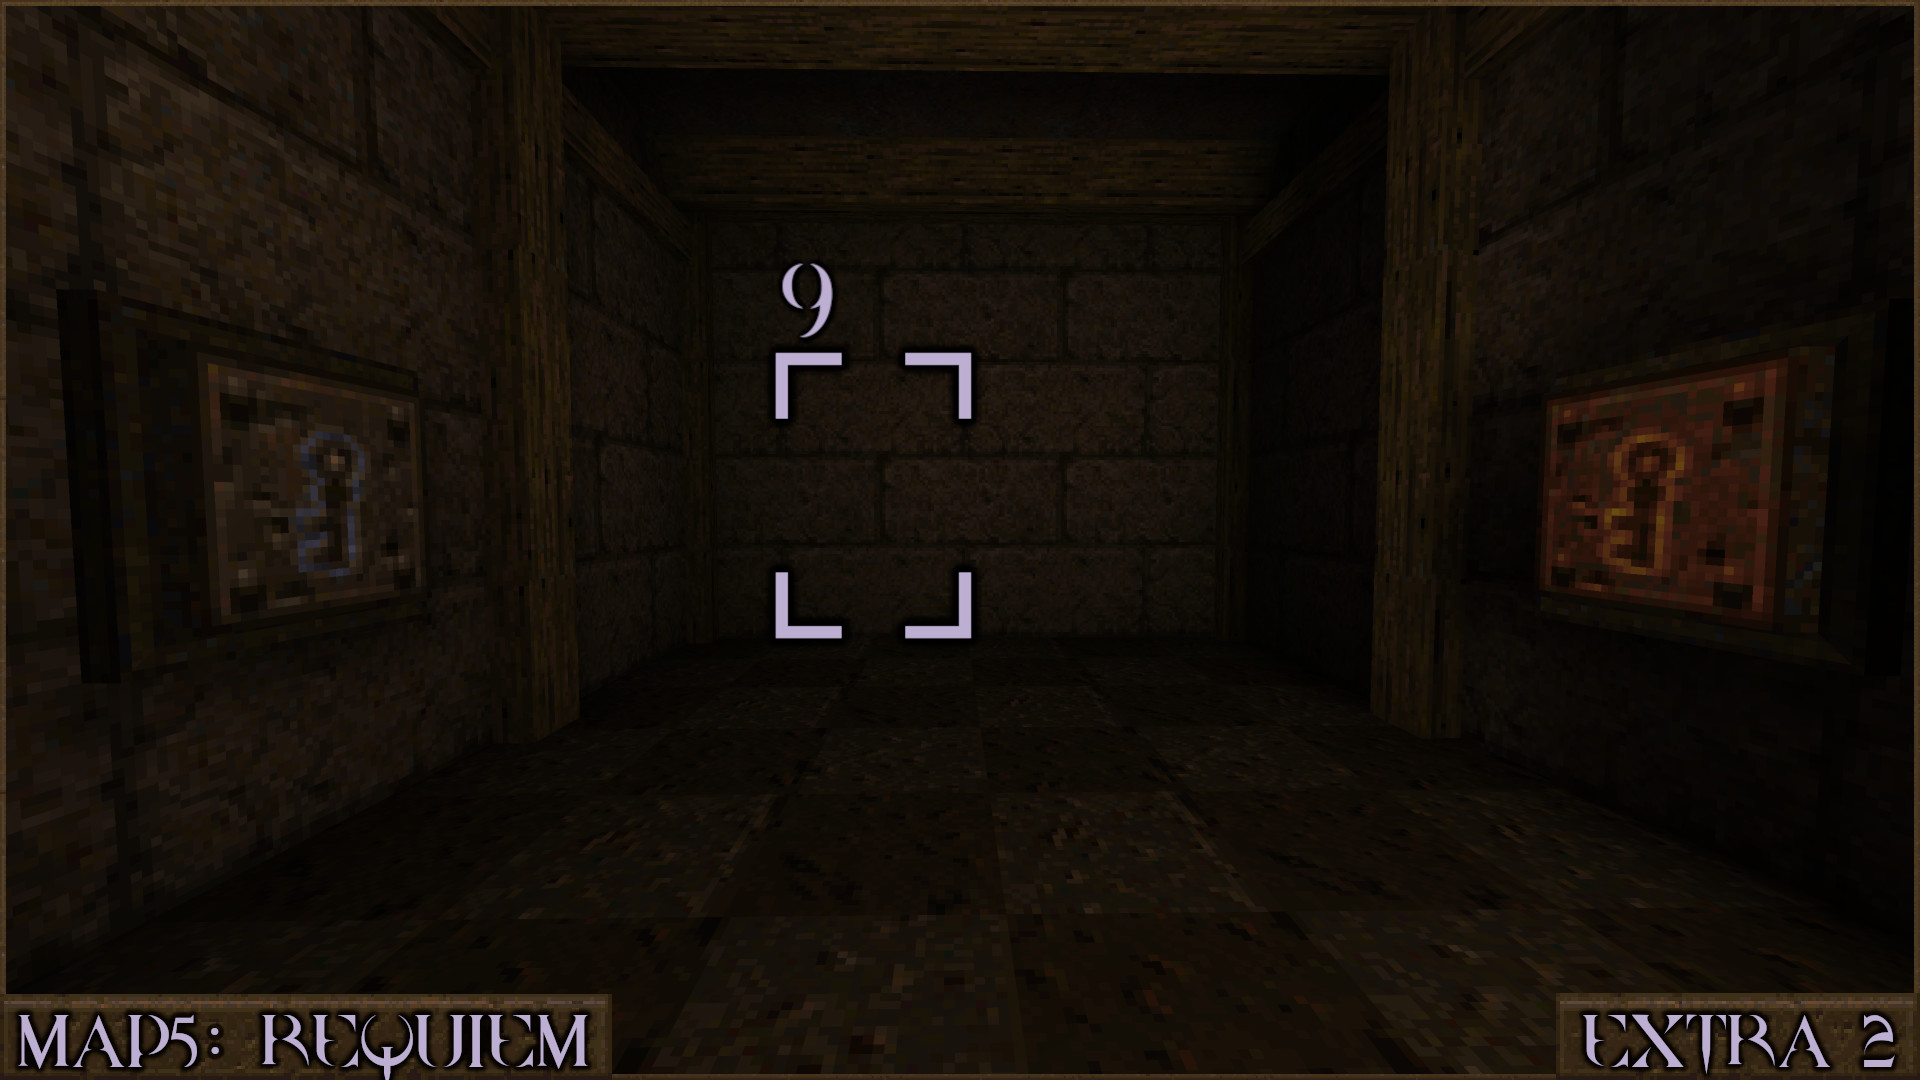
When you see an arrow pointing down don't drop down there yet. Shoot the wall to the right of a red pentagram crate to access a secret.

Reward: Nailgun Small Nails

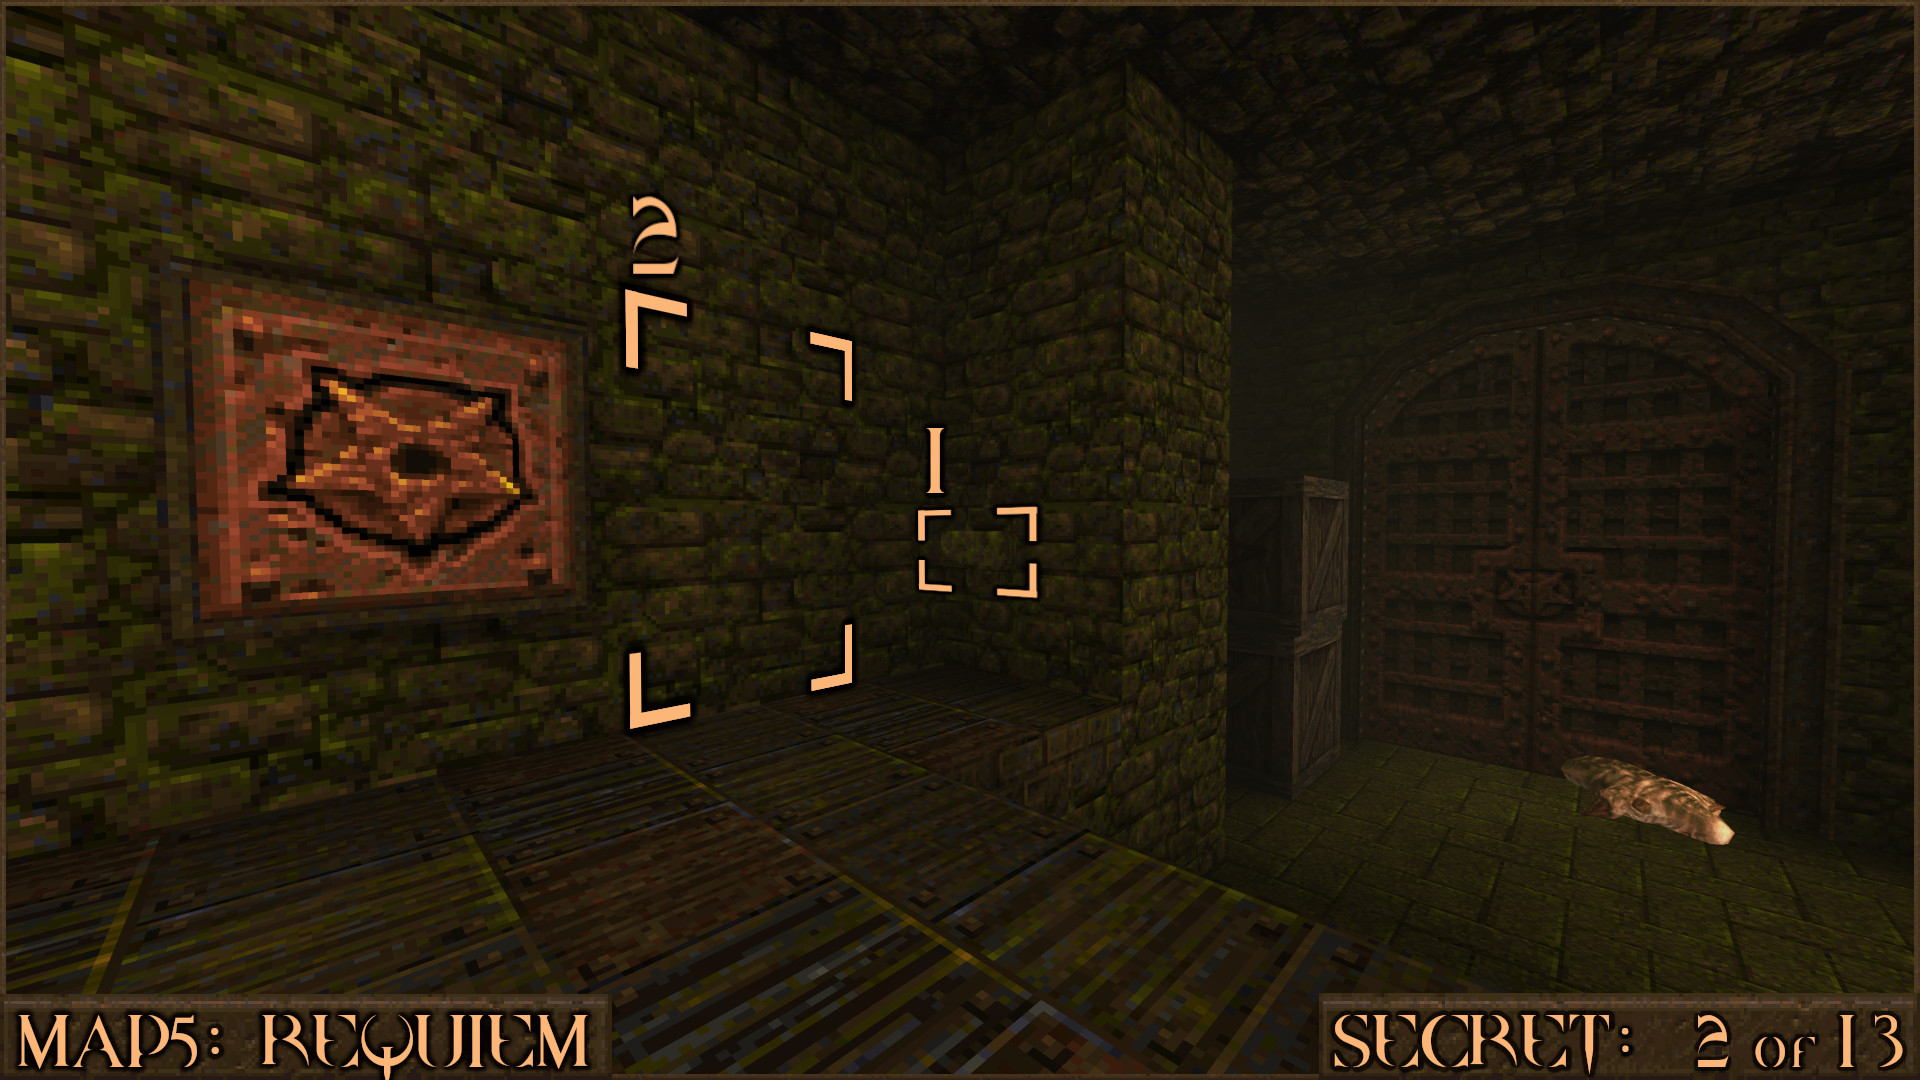
Secret 2 of 13
Shortly after swimming into the next building you'll see a large orange button that opens a nearby door. Just to the right of this a small brick () is sticking out of the wall. Nudge it to shift the adjacent wall ().

Reward: Quad Damage

Secret 3 of 13
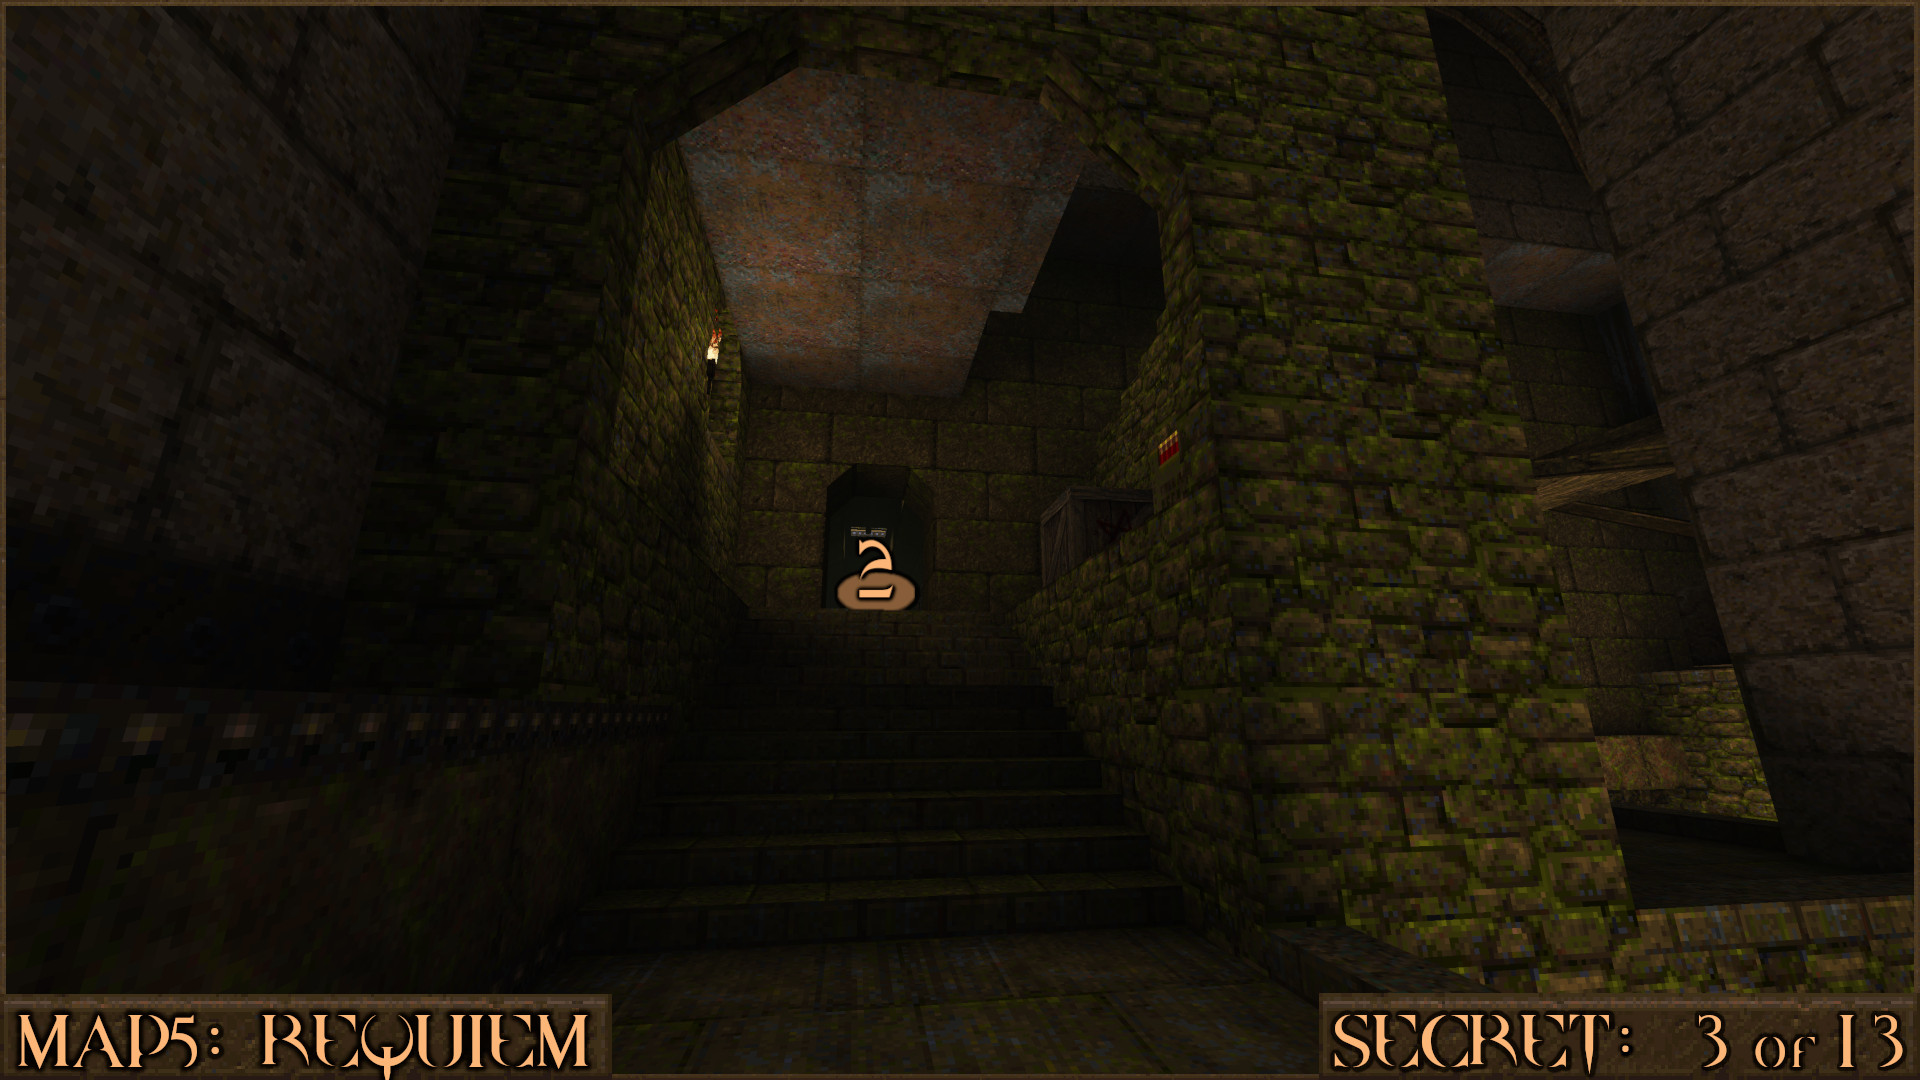
Once you're outside on the upper walkway follow the path to the left of the leafy ruined building and go under a blue beam ().

From here go up some steps into the building () and you'll find a secret upgrade and a shortcut back to the start of the level.

Reward: [Shell Capacity Upgrade]

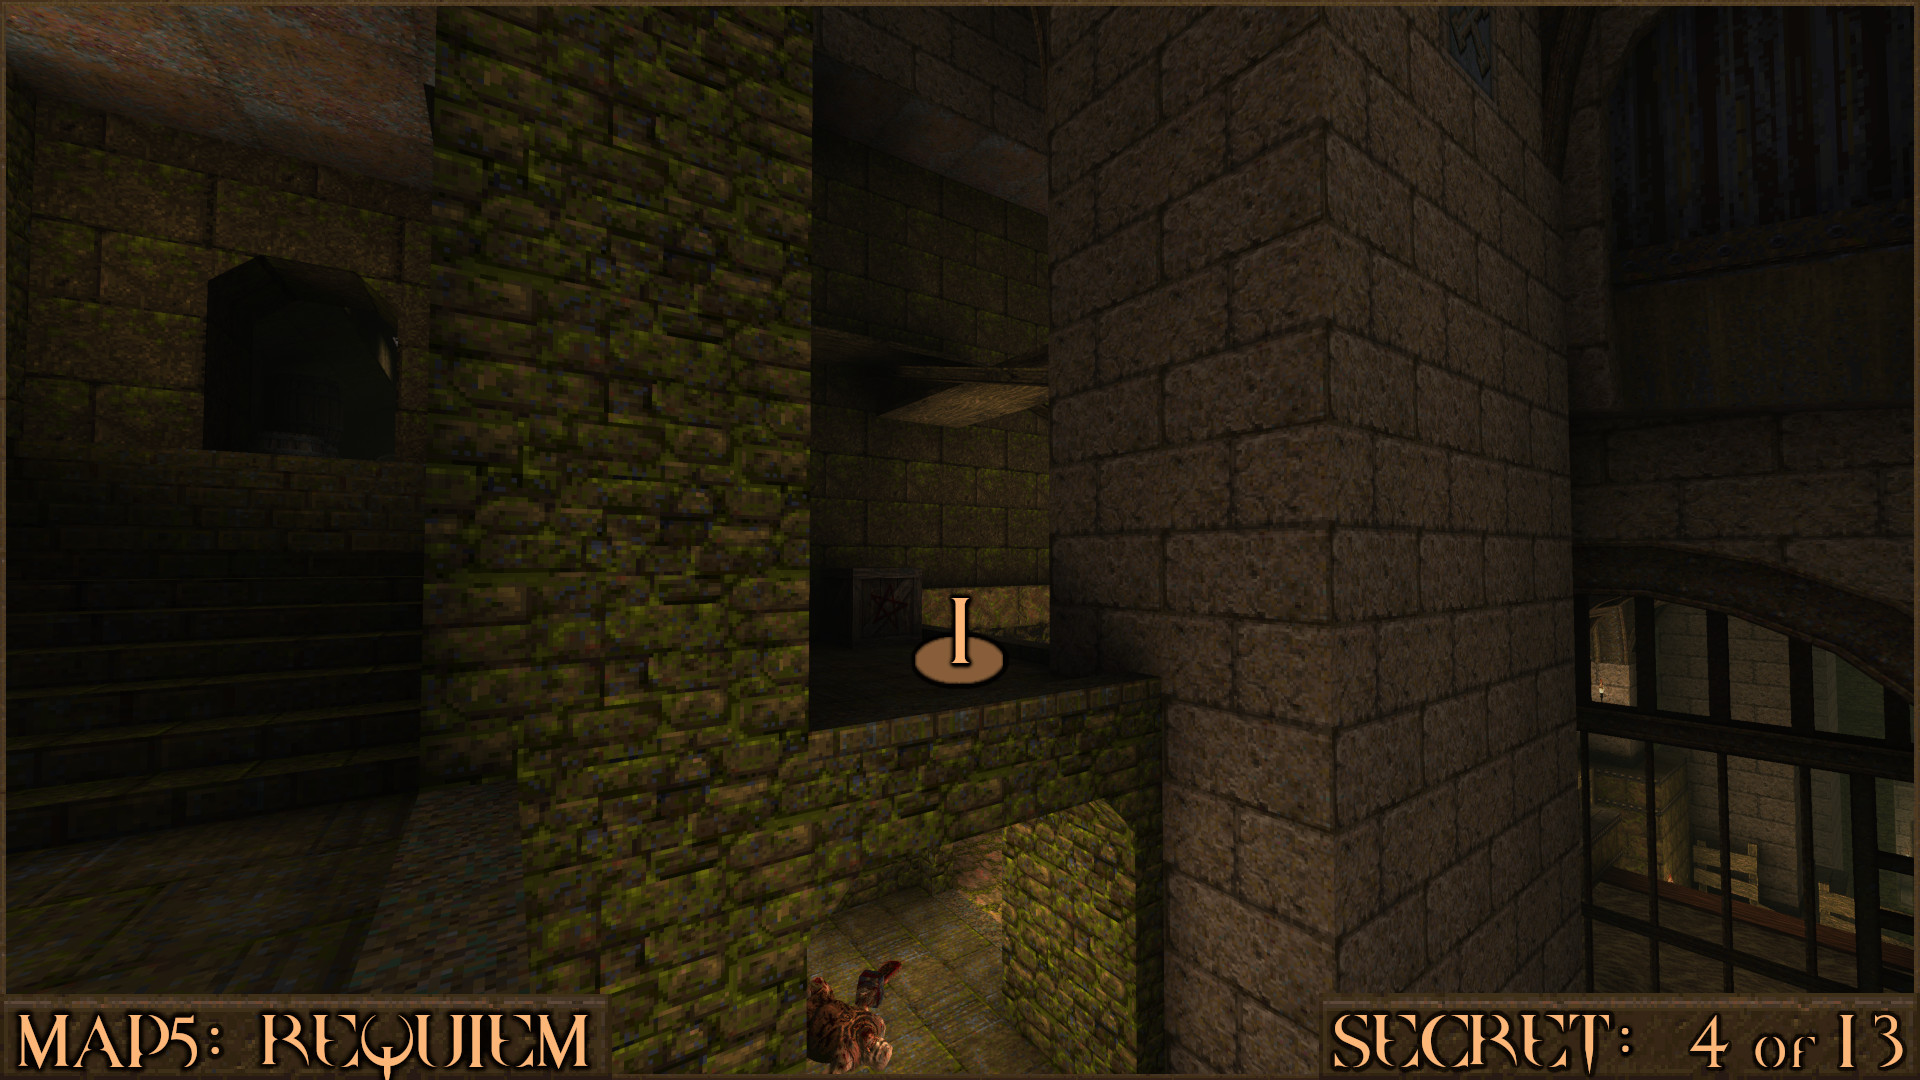
Secret 4 of 13
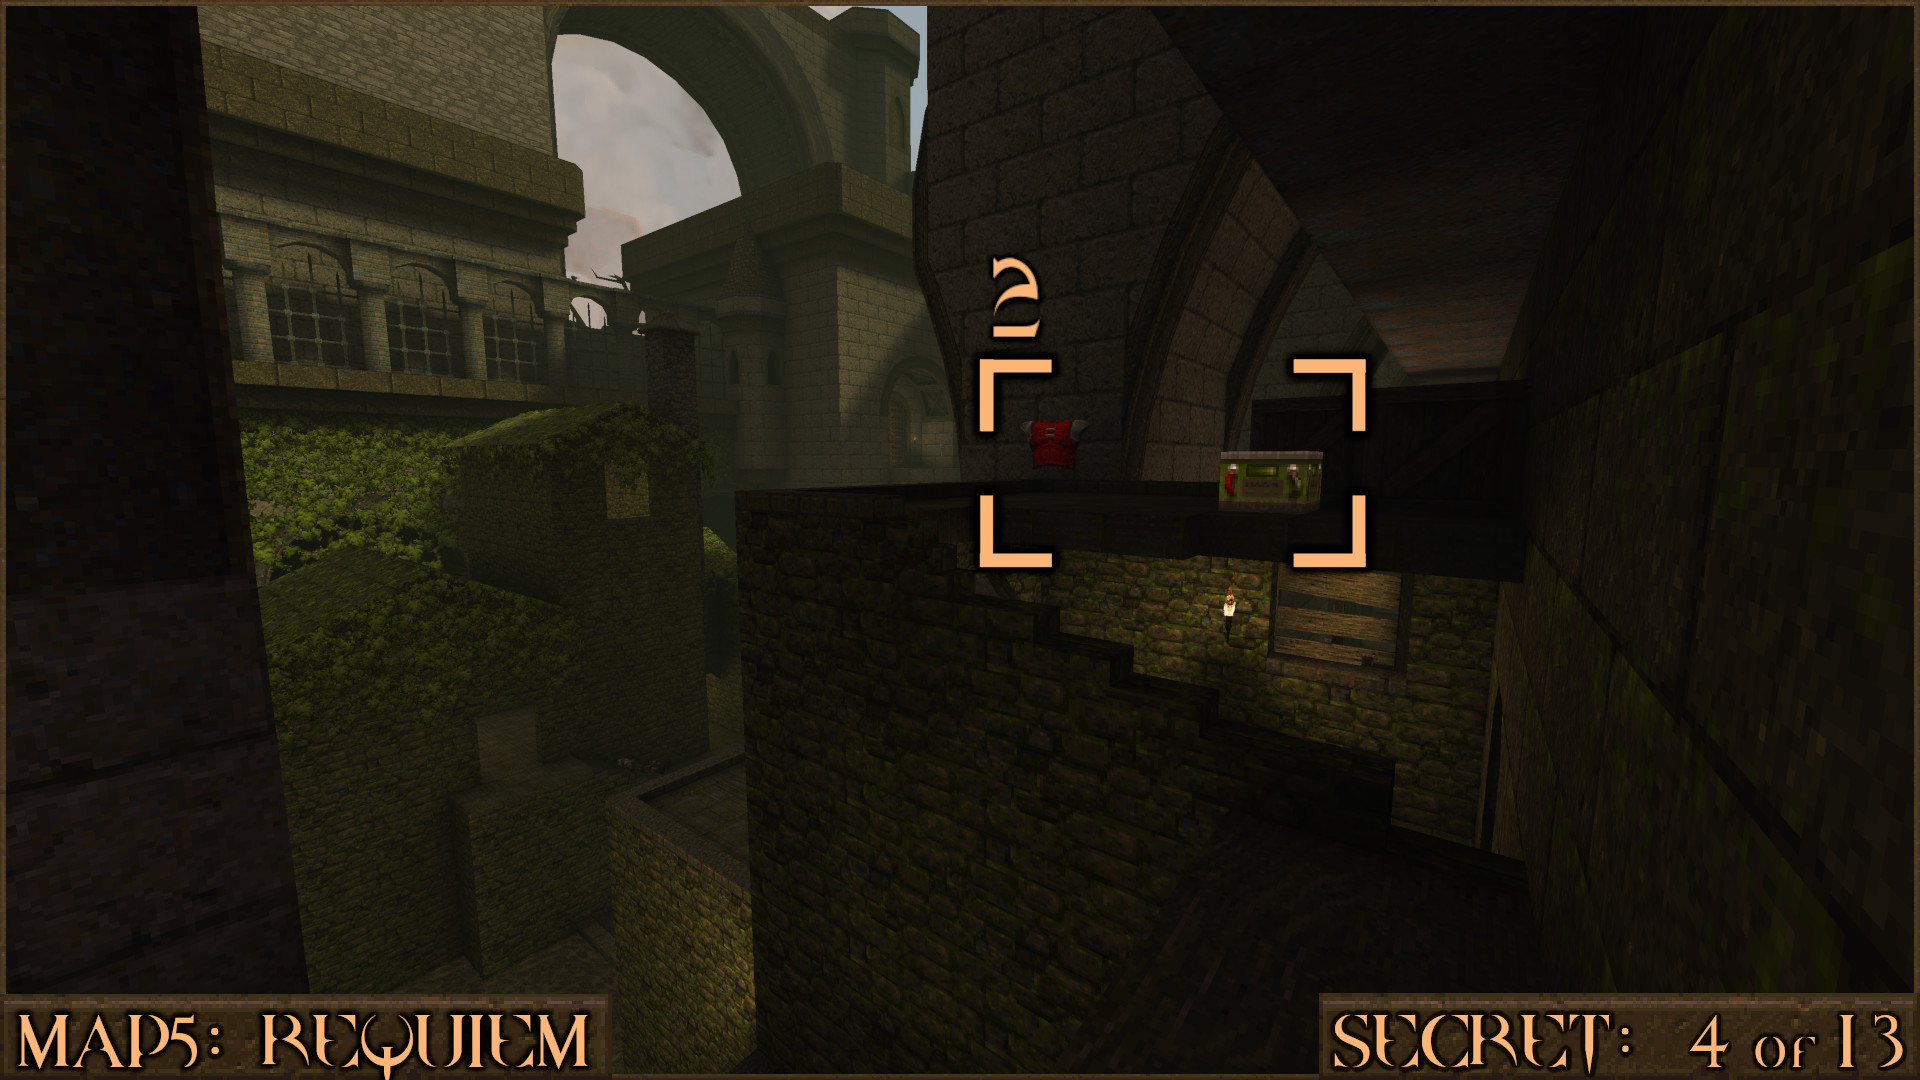
Head back to the stairs leading to Secret 3. Look nearby to see another red pentagram crate on a ledge. Jump over () and climb the wall behind it.

Once you reach the top you'll see the secret items () on the roof.

Reward: Large Cells Red Armor

Secret 5 of 13
While still on the roof from Secret 4 drop down onto the blue beam () and then jump over to the leafy wall and walk over the roof ().

Walk onto another blue beam and you'll see the secret Quad Damage () in an alcove behind some leaves.

Reward: Quad Damage

Secret 6 of 13
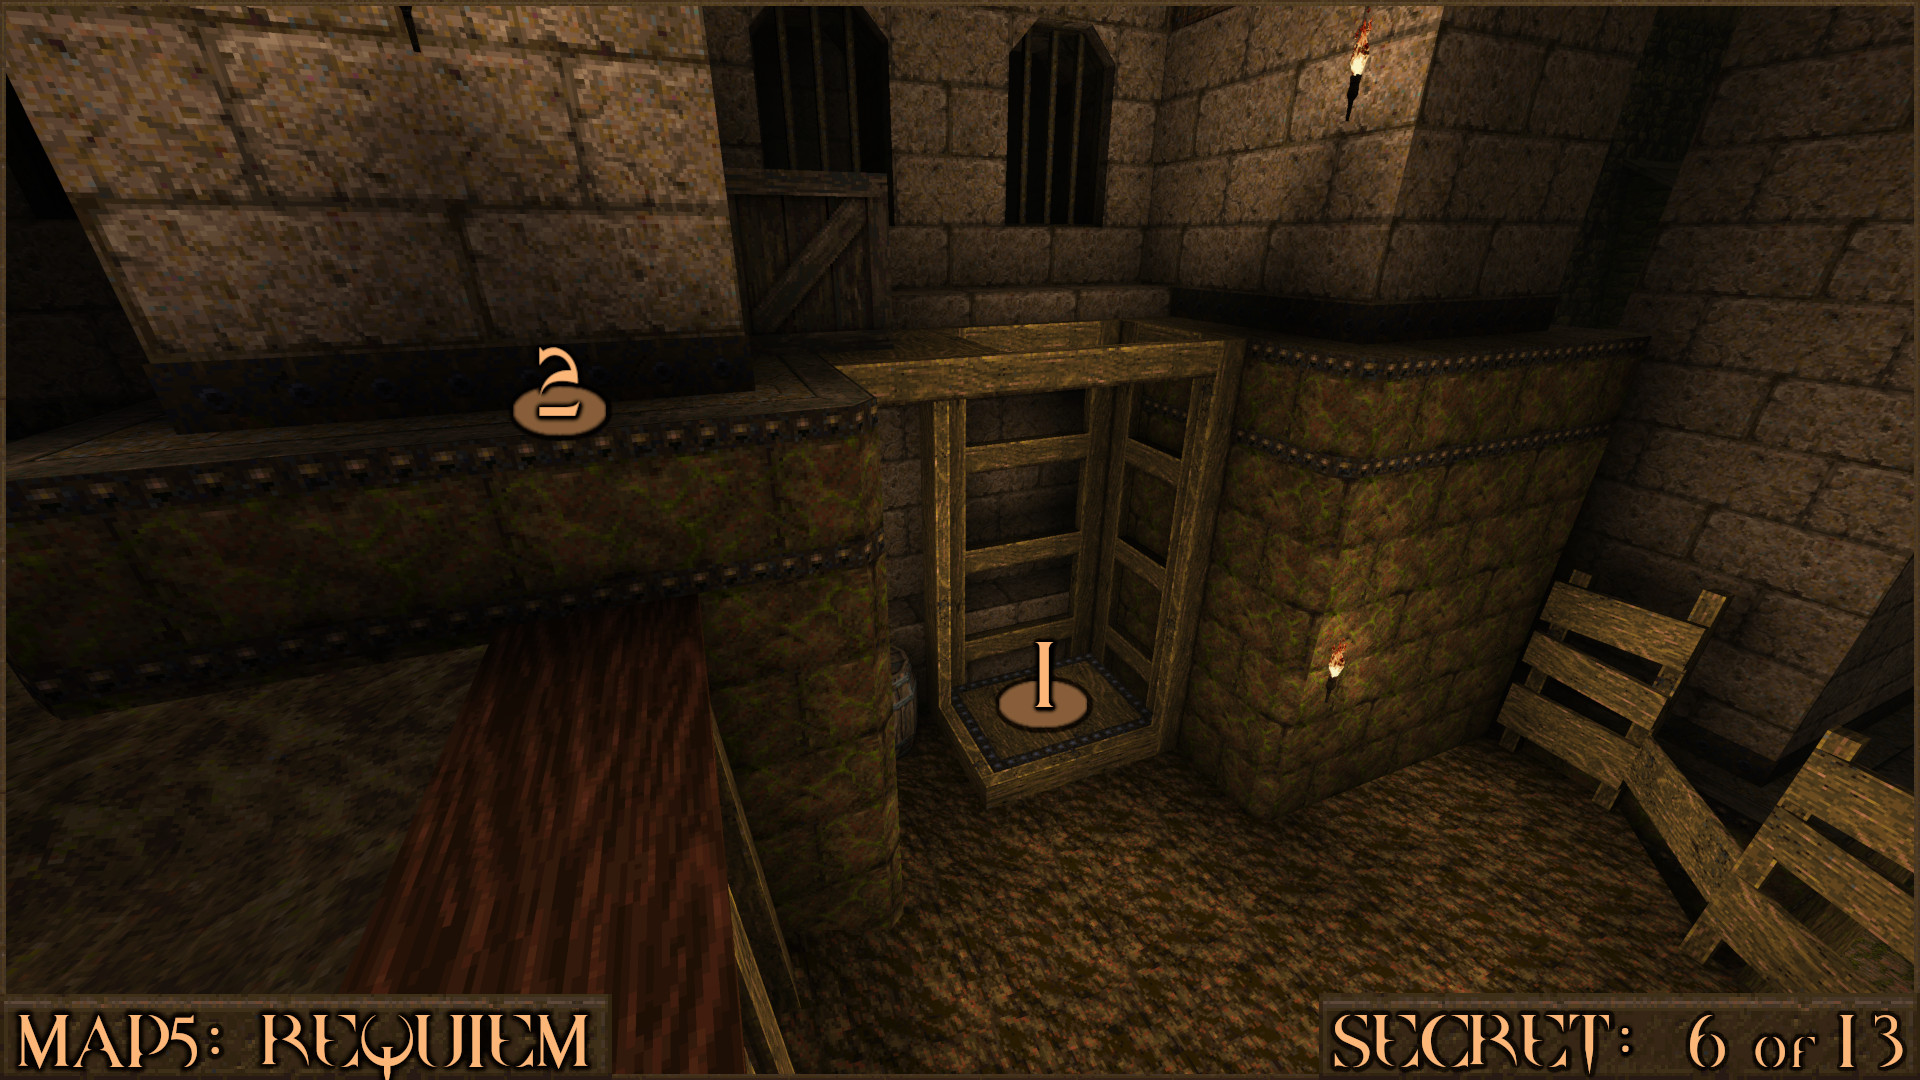
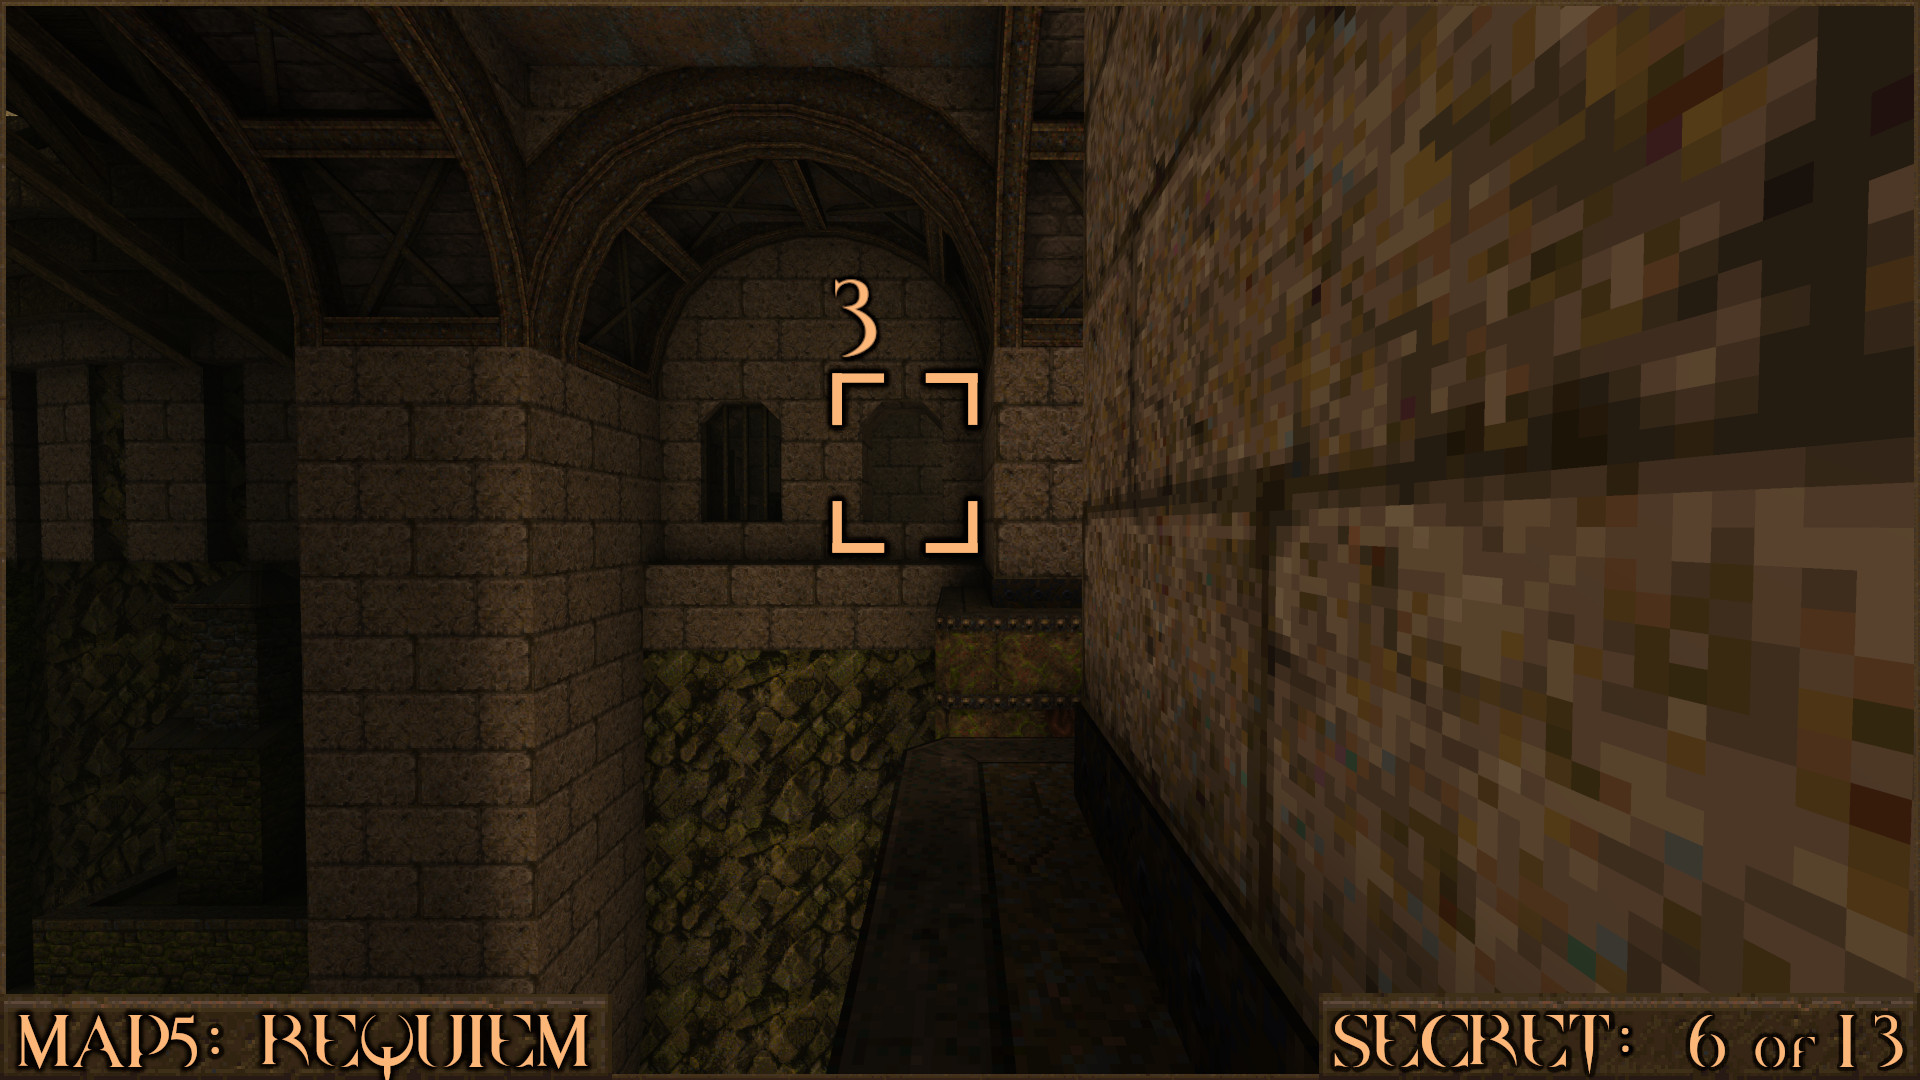
After emerging out of the water onto the top of the dam look down to see a wooden elevator (). Drop down and ride it up and then head left across the top of the wall ().

Jump across several sections of the wall until you reach a window () you can jump into and find the secret room.

Reward: Large Shells Large Nails Large Rockets Large Cells Large Health

Secret 7 of 13
Return to the elevator from Secret 6 and ride it to the top again. This time follow the wall the other way around () and you'll see the secret items around the corner.

Reward: Small Rockets [Rocket Capacity Upgrade]

Secret 8 of 13
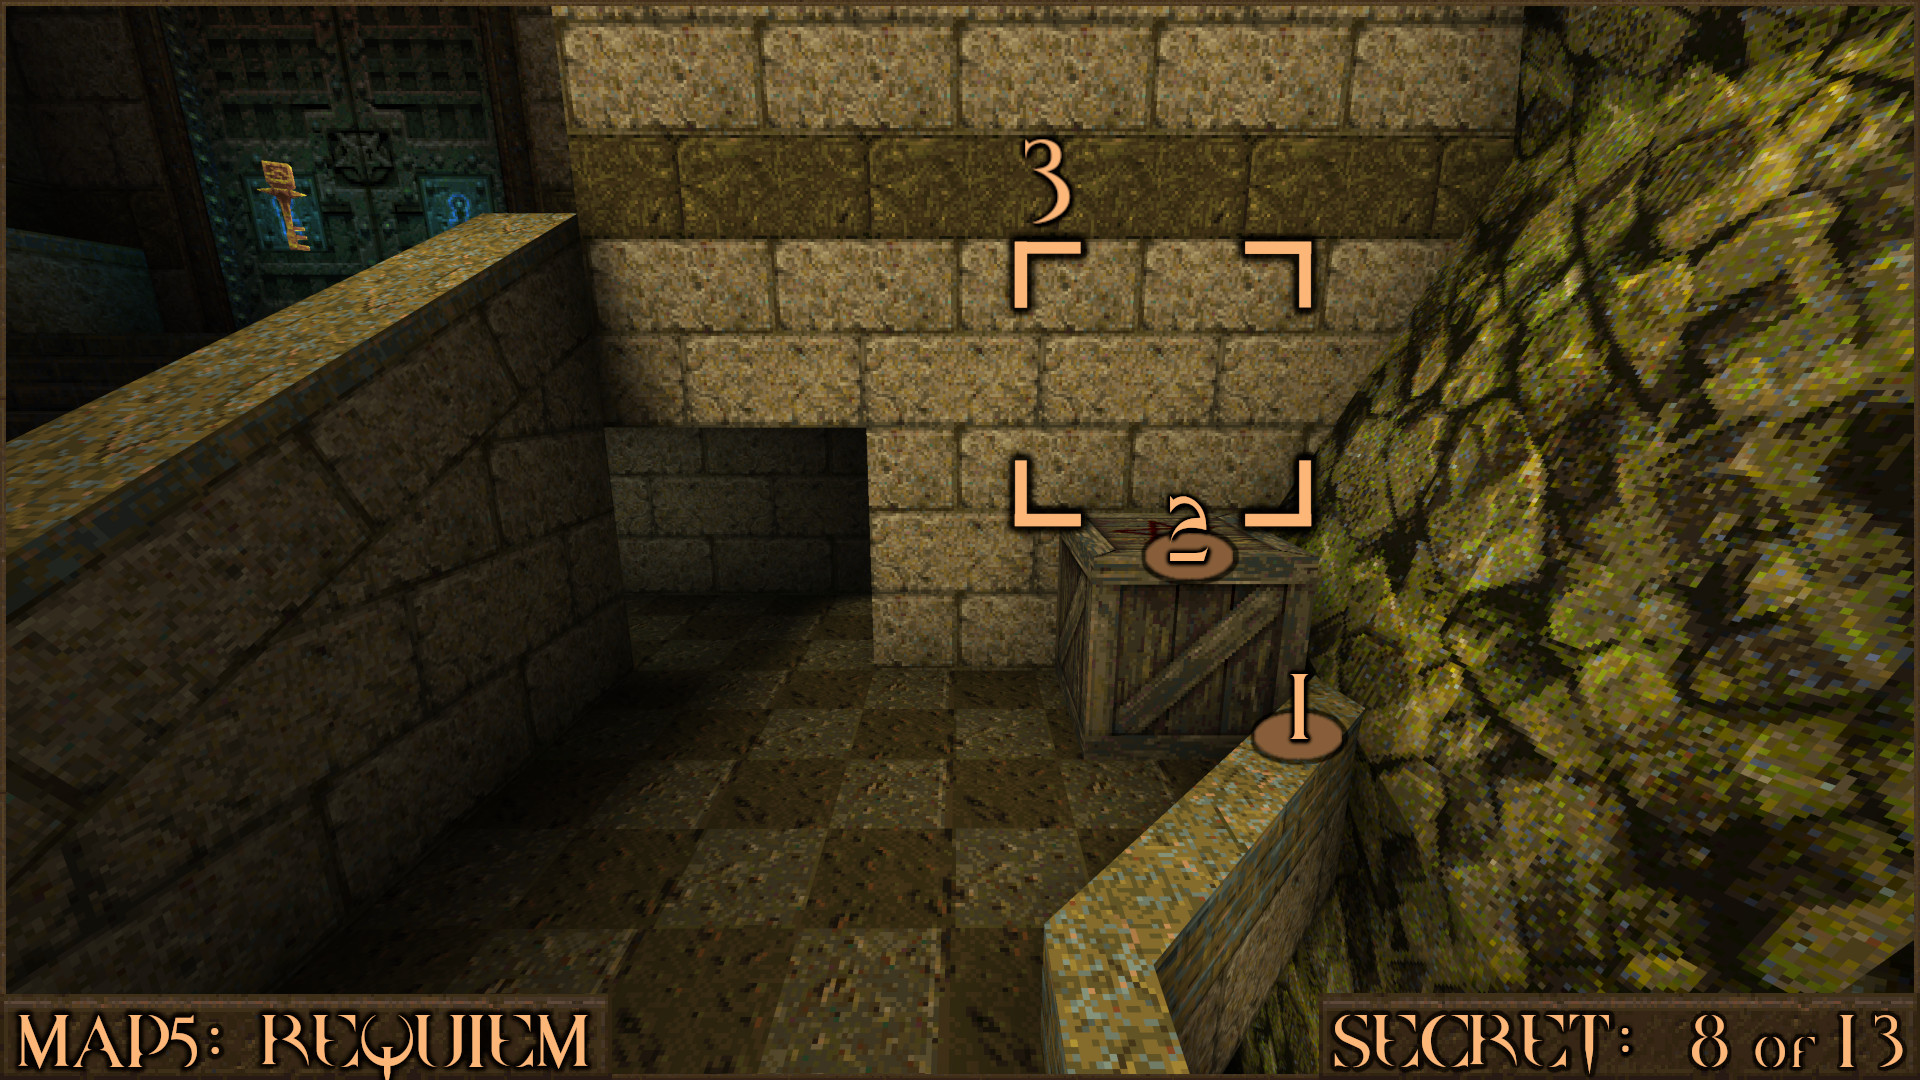
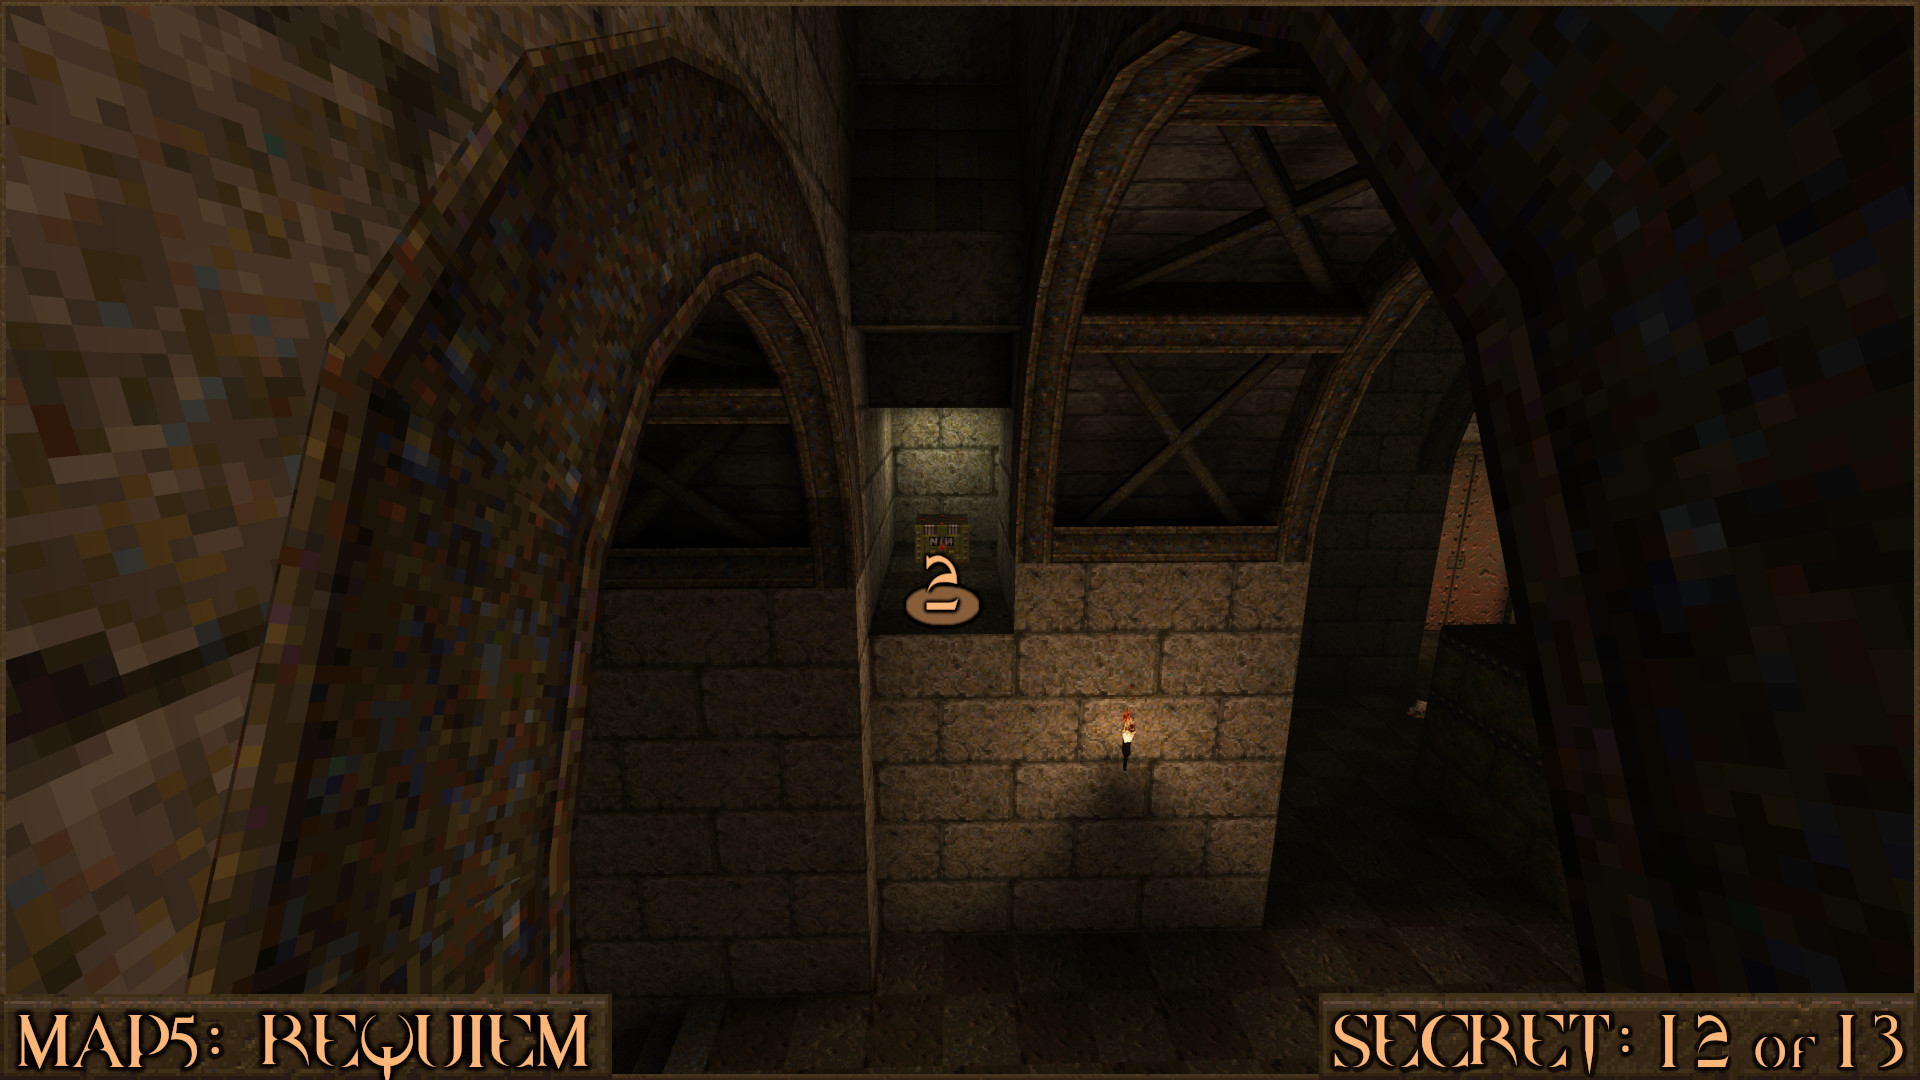
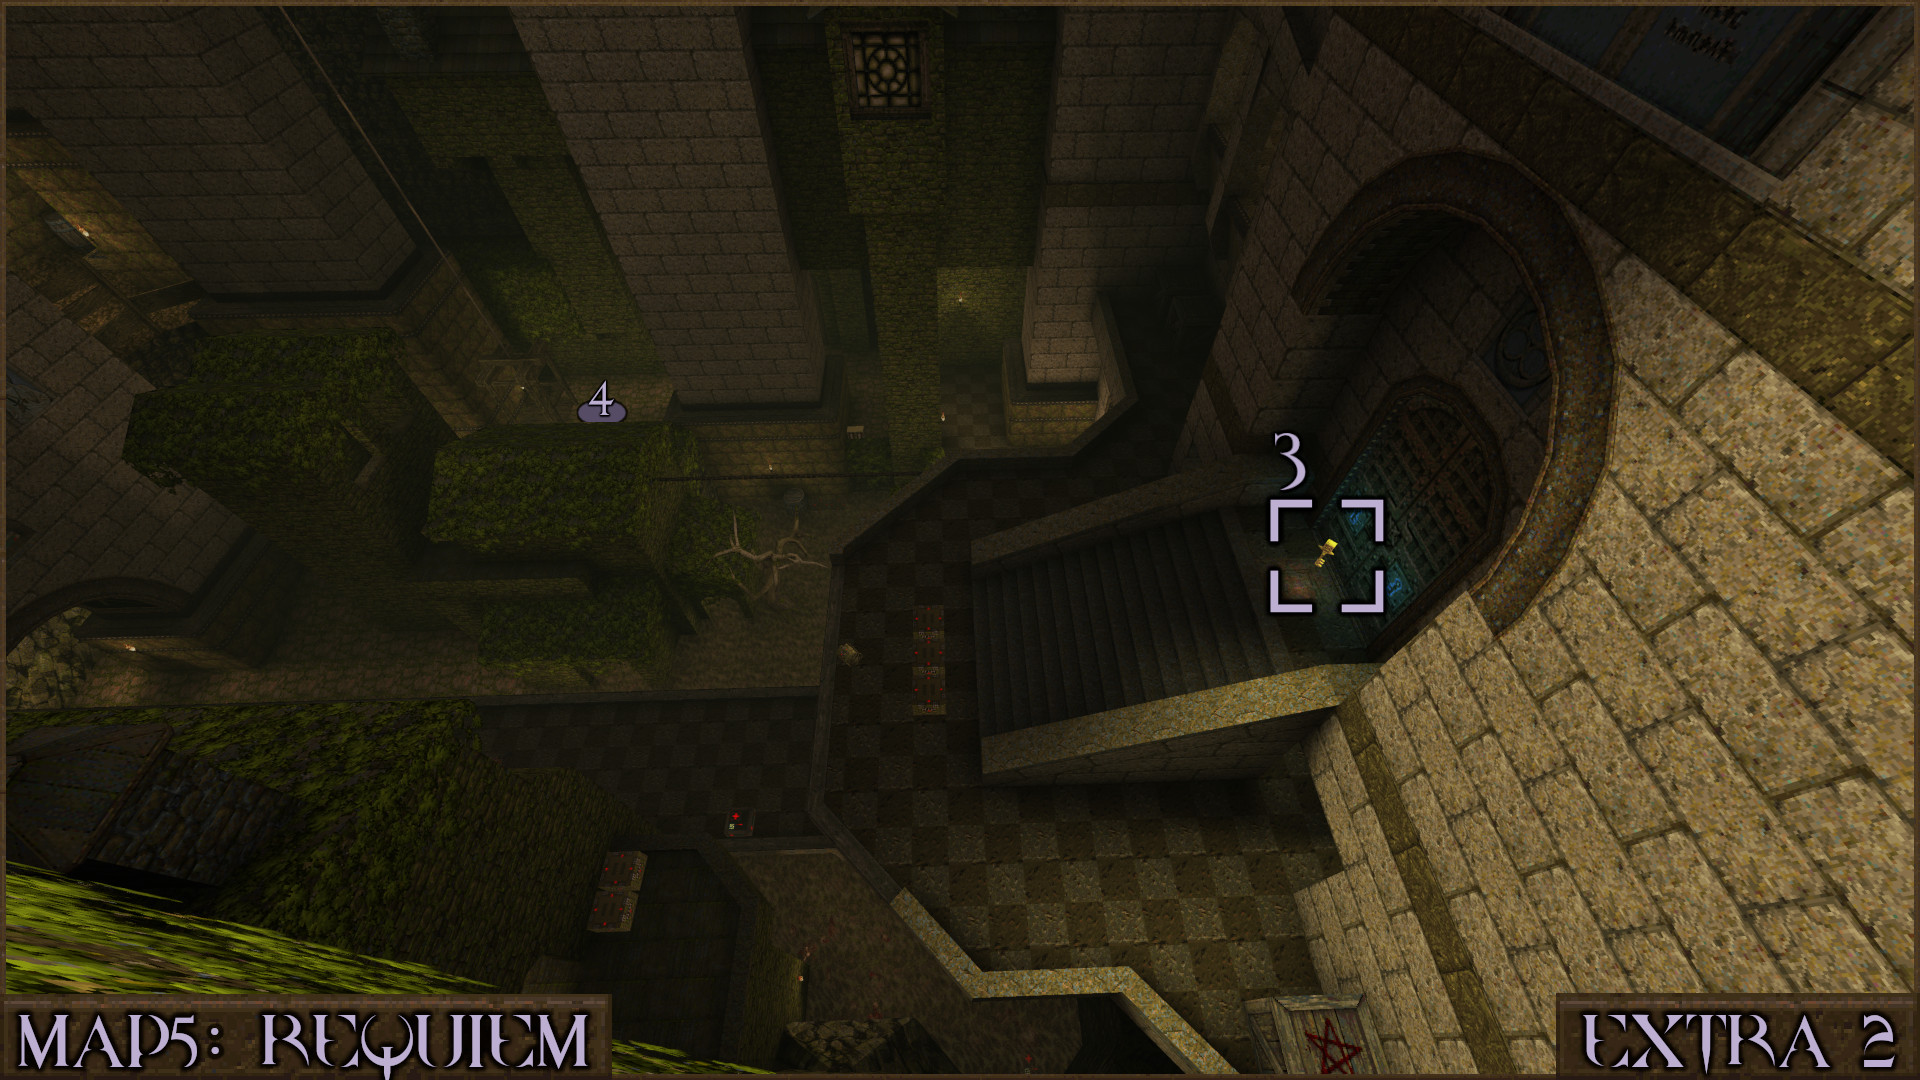
Continue with the level until you see the Gold Key by the Silver Key Door. To the right of this is another red pentagram crate. Use the nearby wall () to jump onto it () and trigger the nearby wall ().

Reward: Quad Damage

Secret 9 of 13
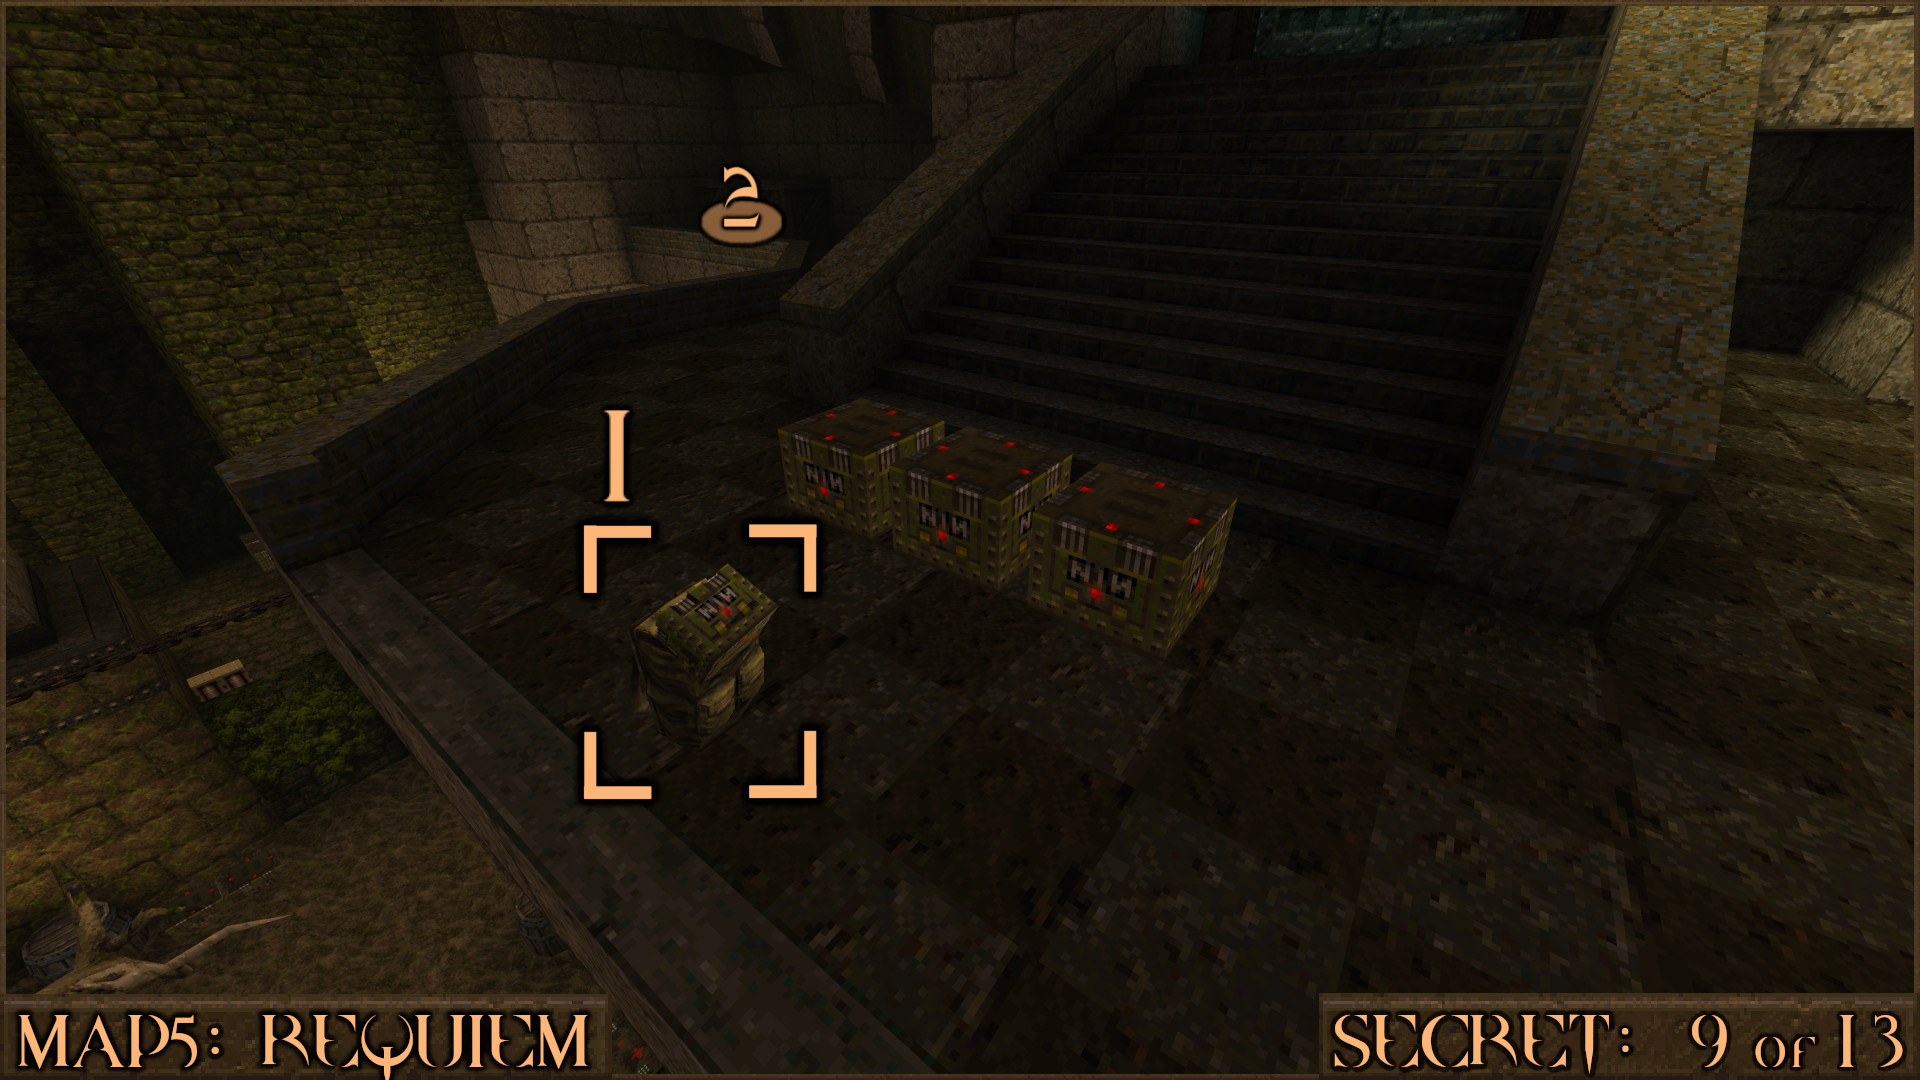
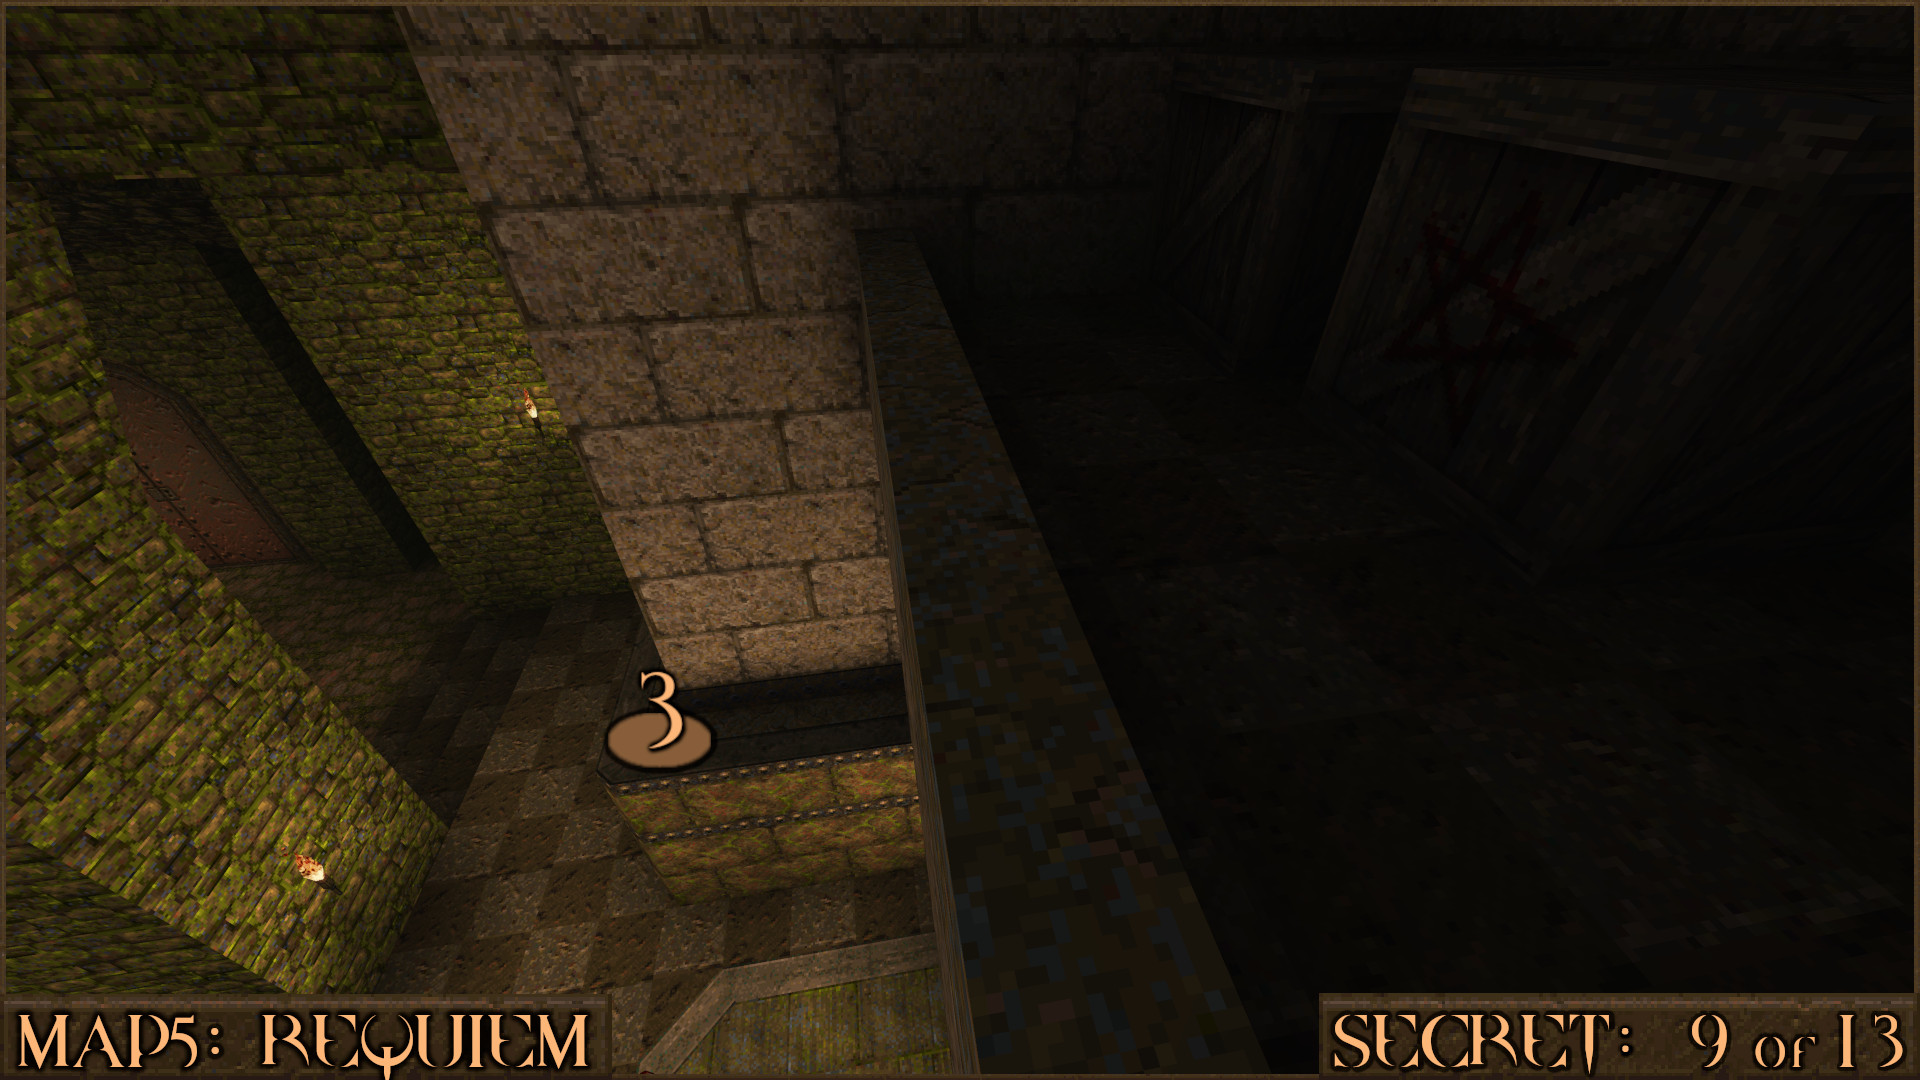
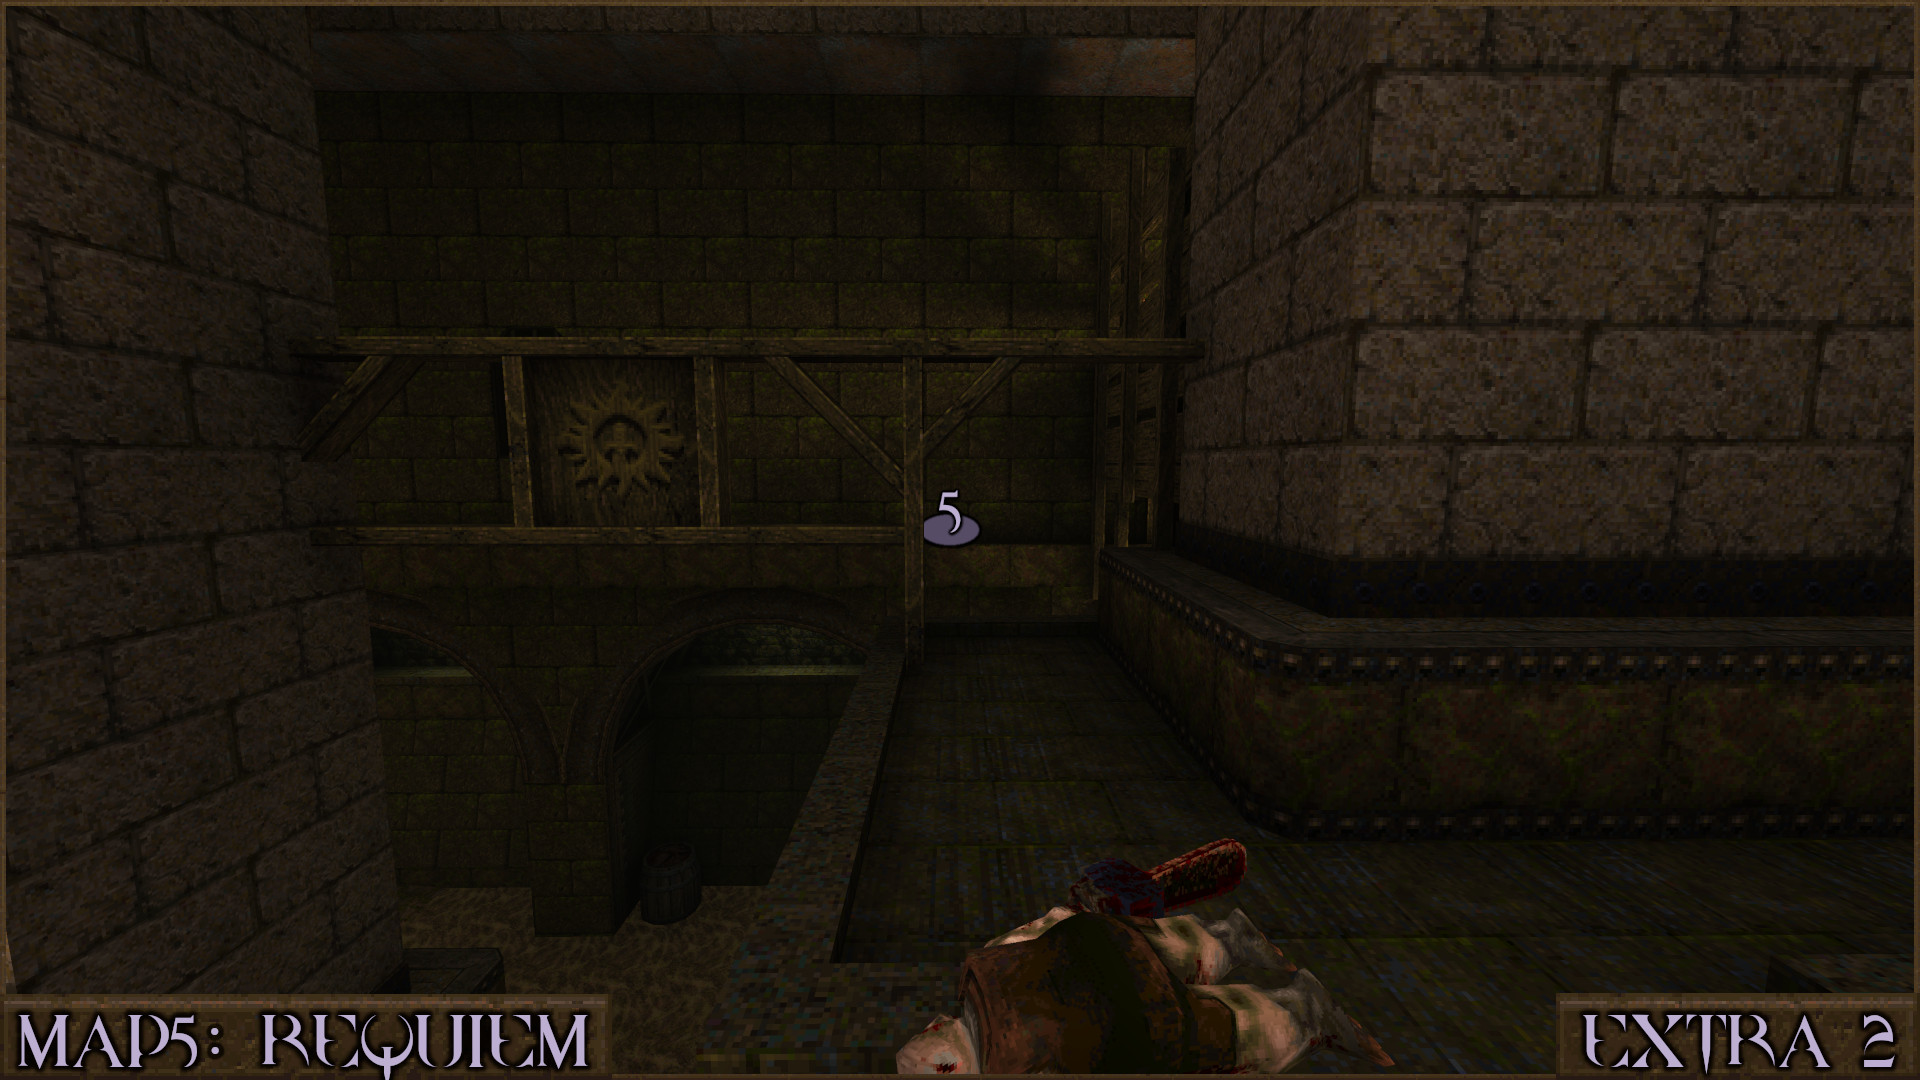
In the same area as Secret 8 make sure to pick up the Nail Capacity Upgrade () that is nearby. Then continue on to the other side of the balcony ().

Look down over the edge from here and drop down to the wall below (). Follow it around to find the secret.

Reward: Large Nails Megahealth [Nail Capacity Upgrade]

Secret 10 of 13
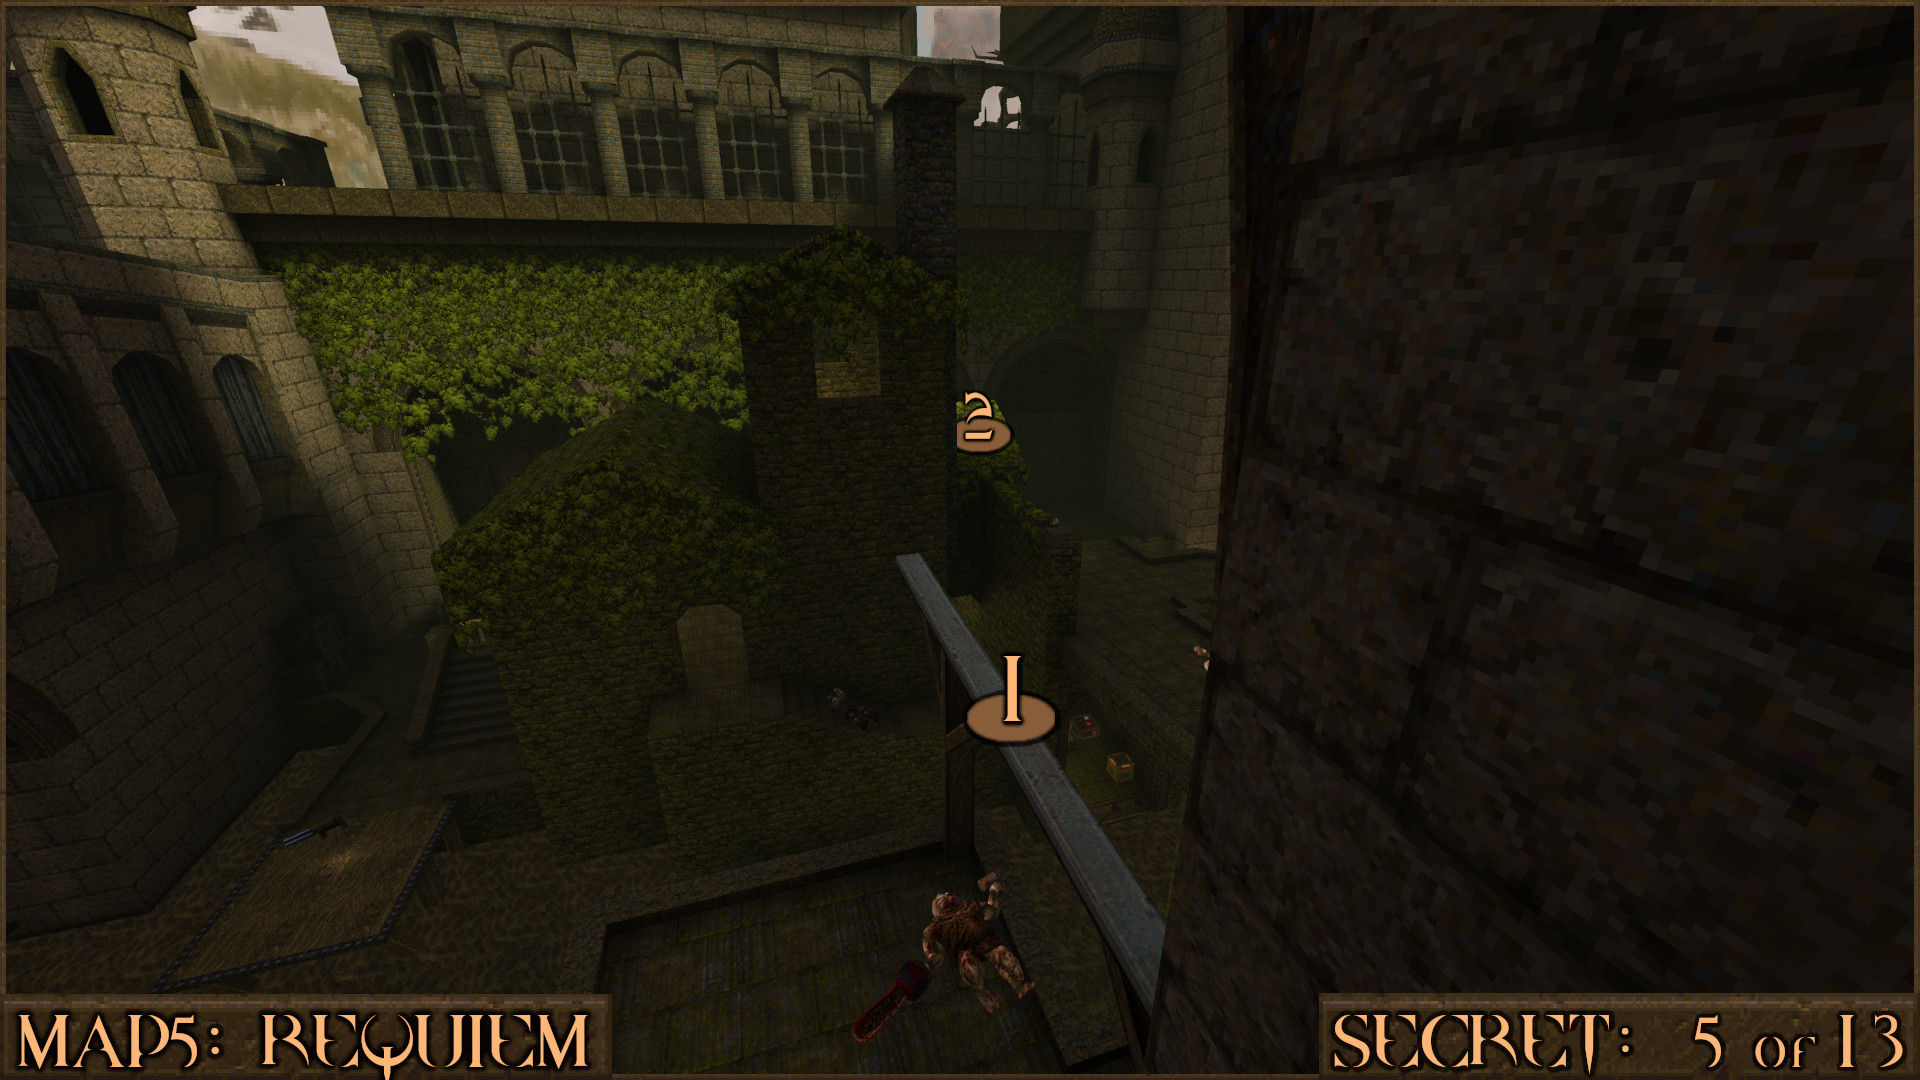
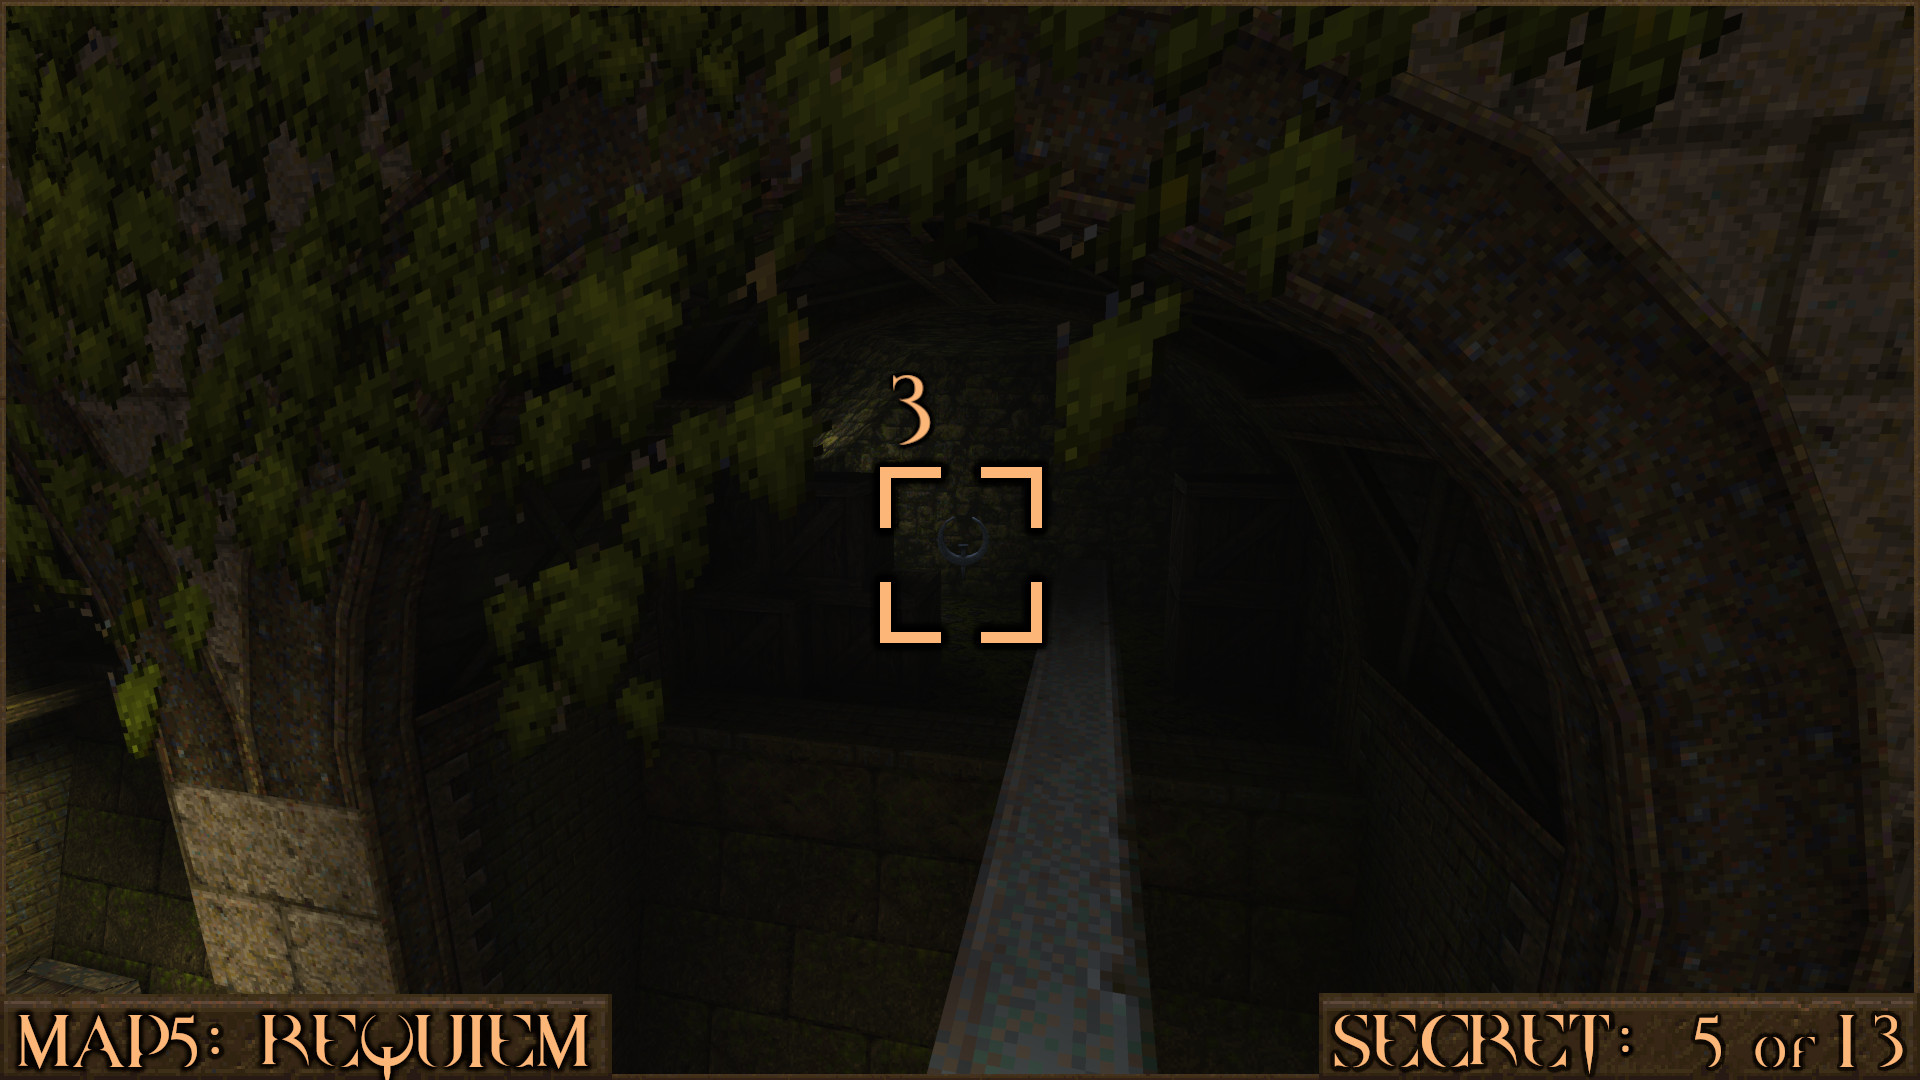
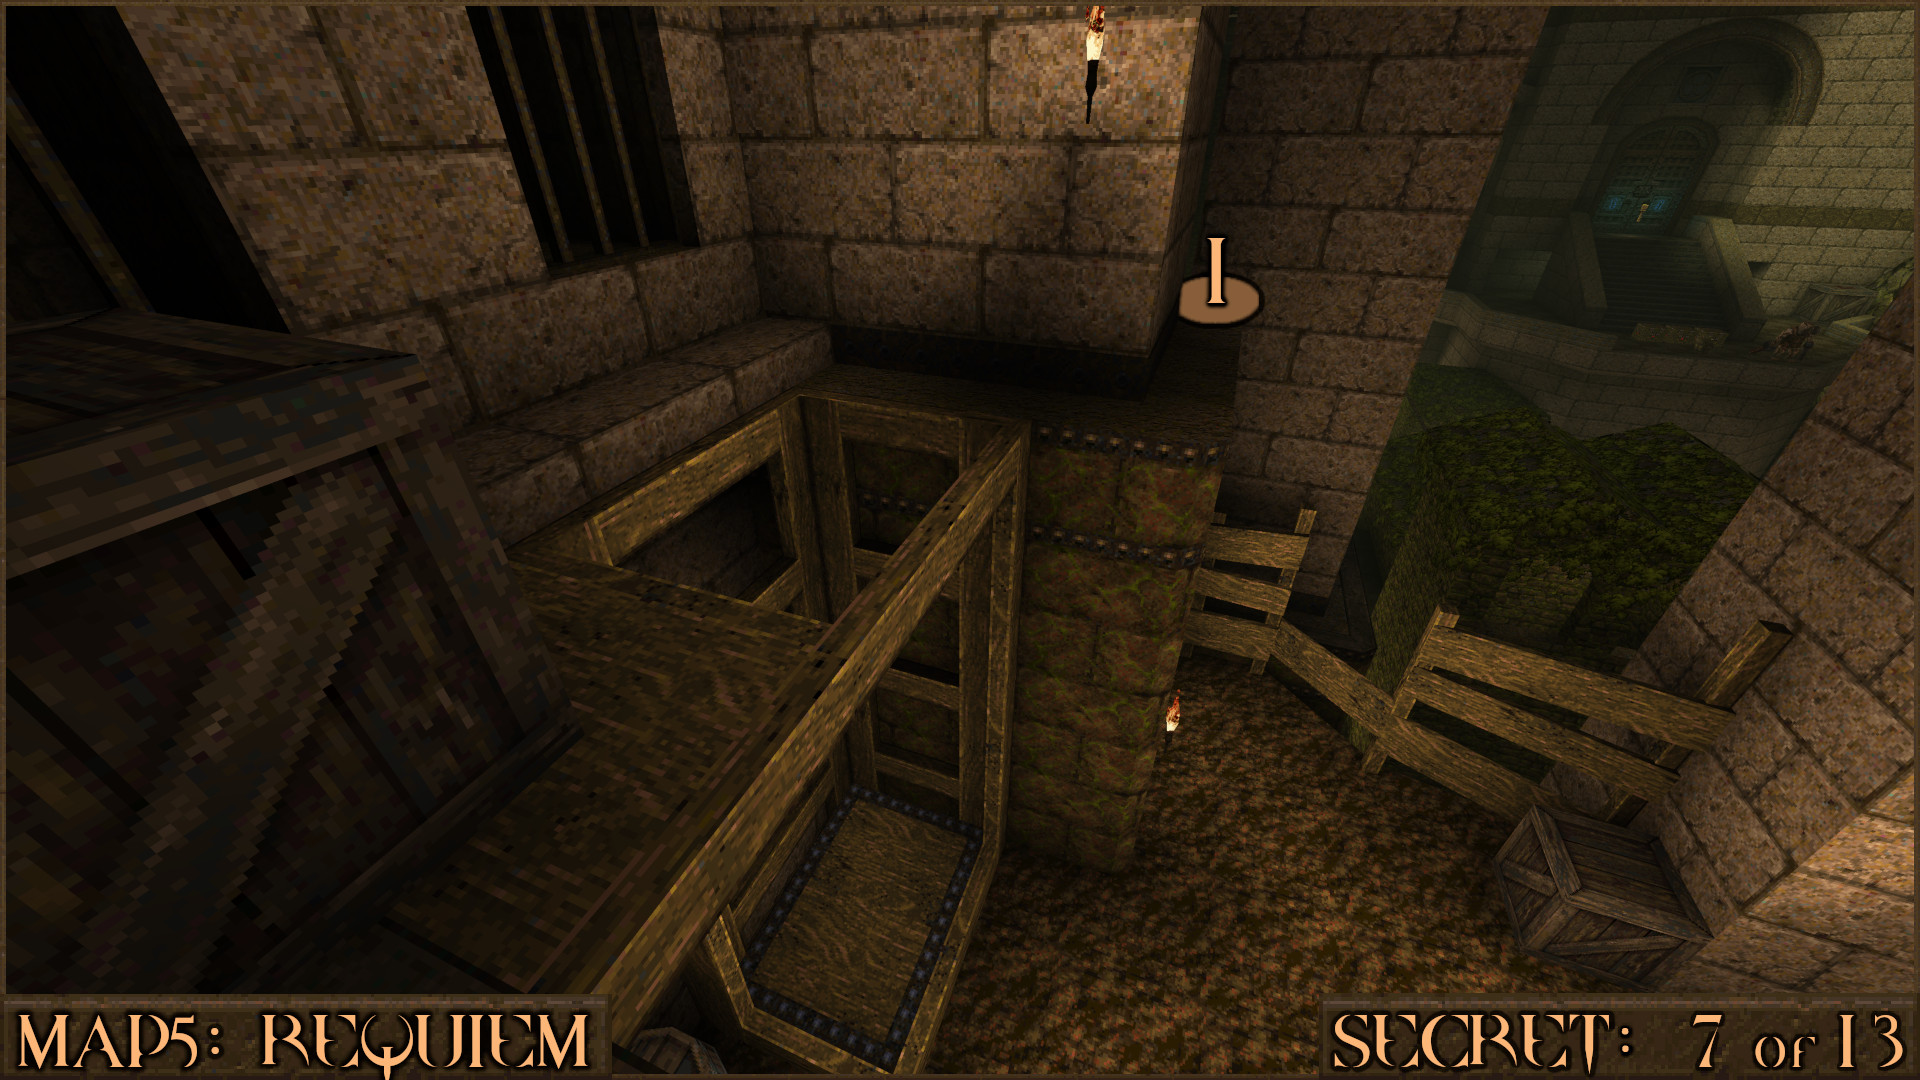
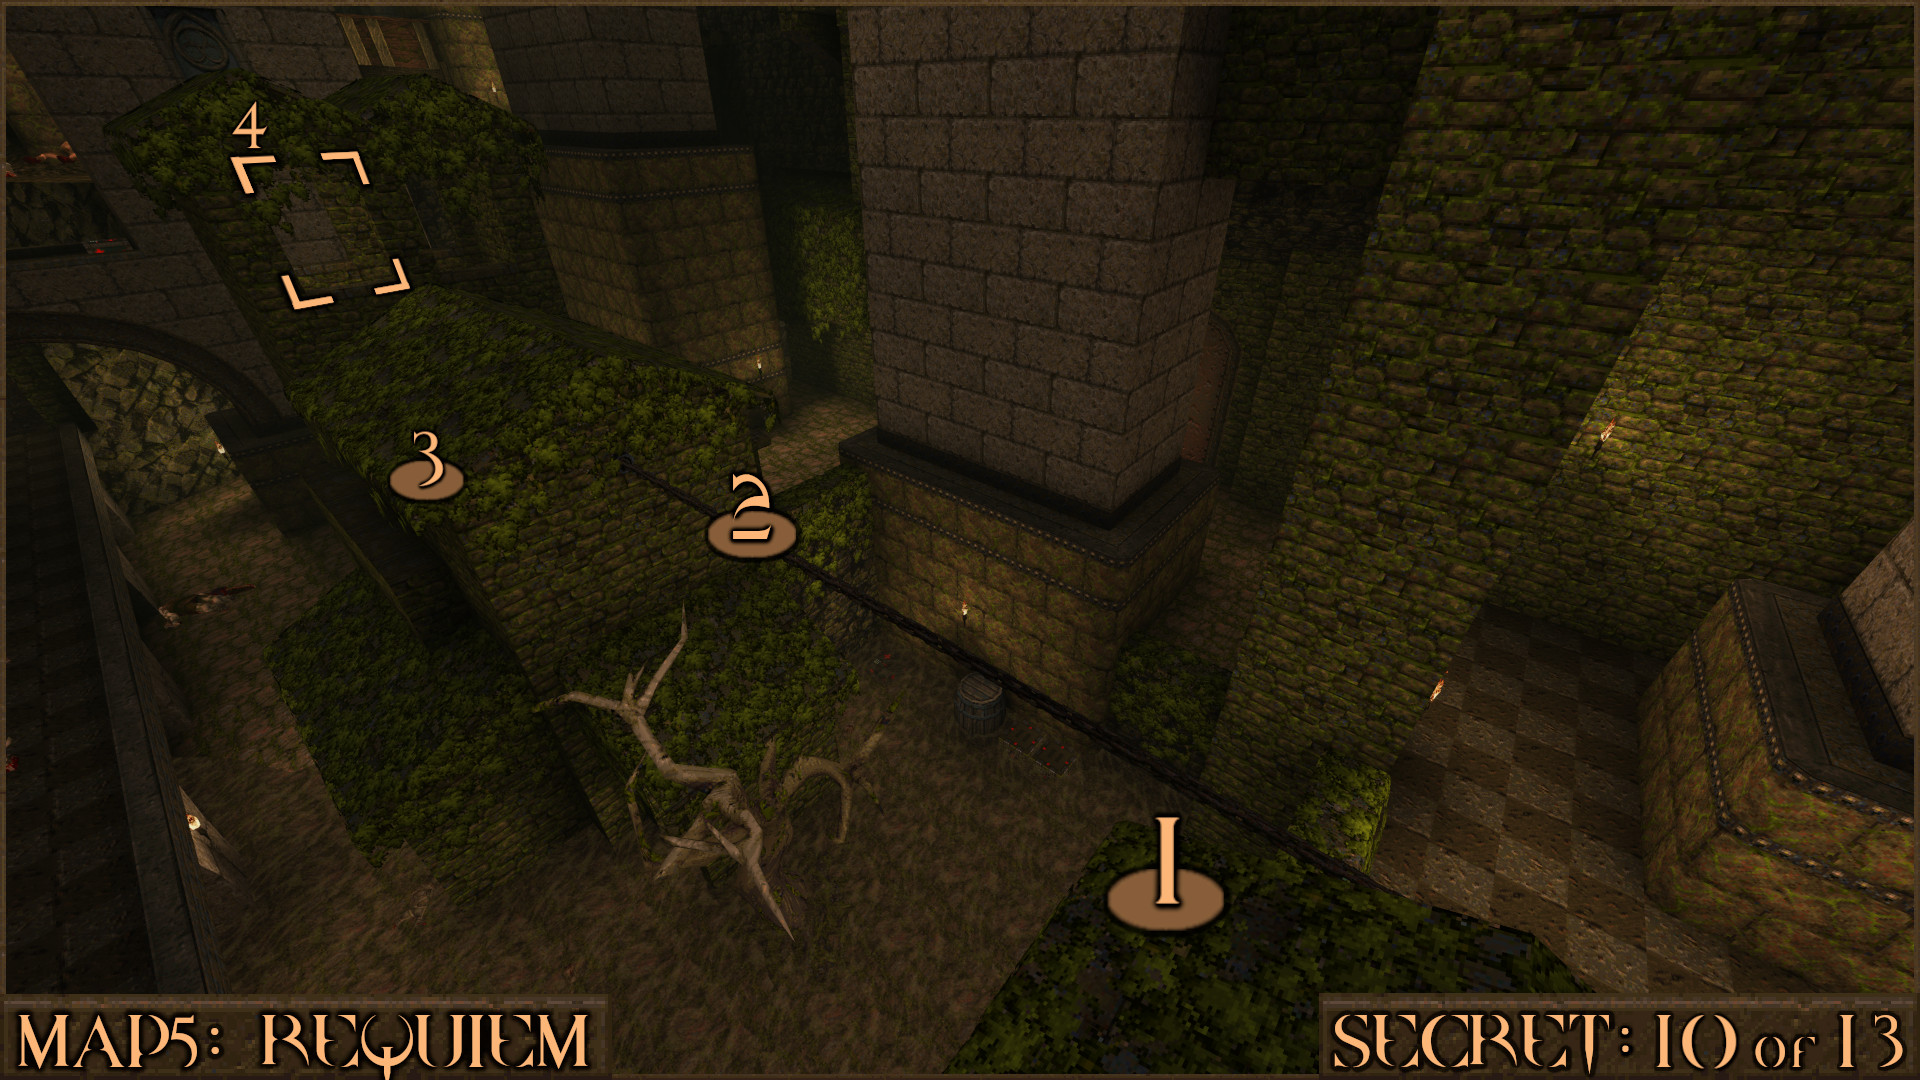
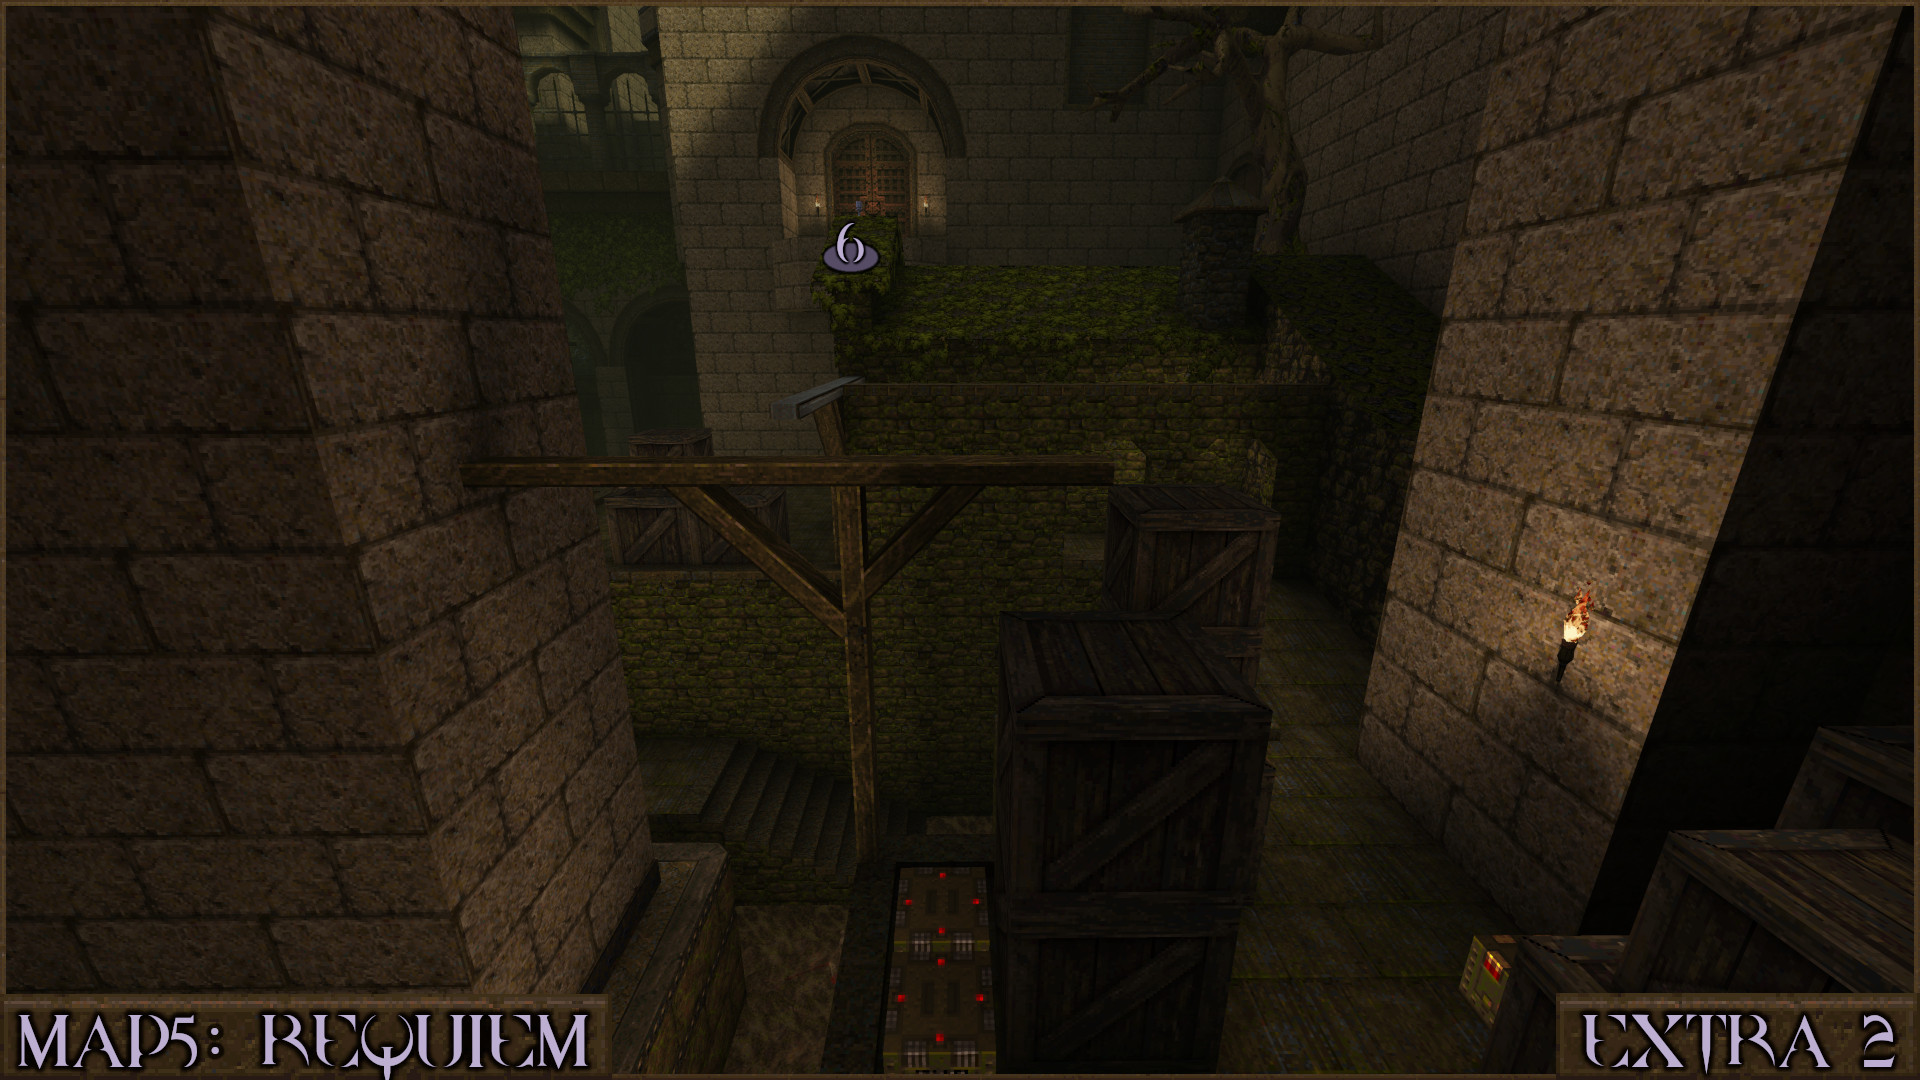
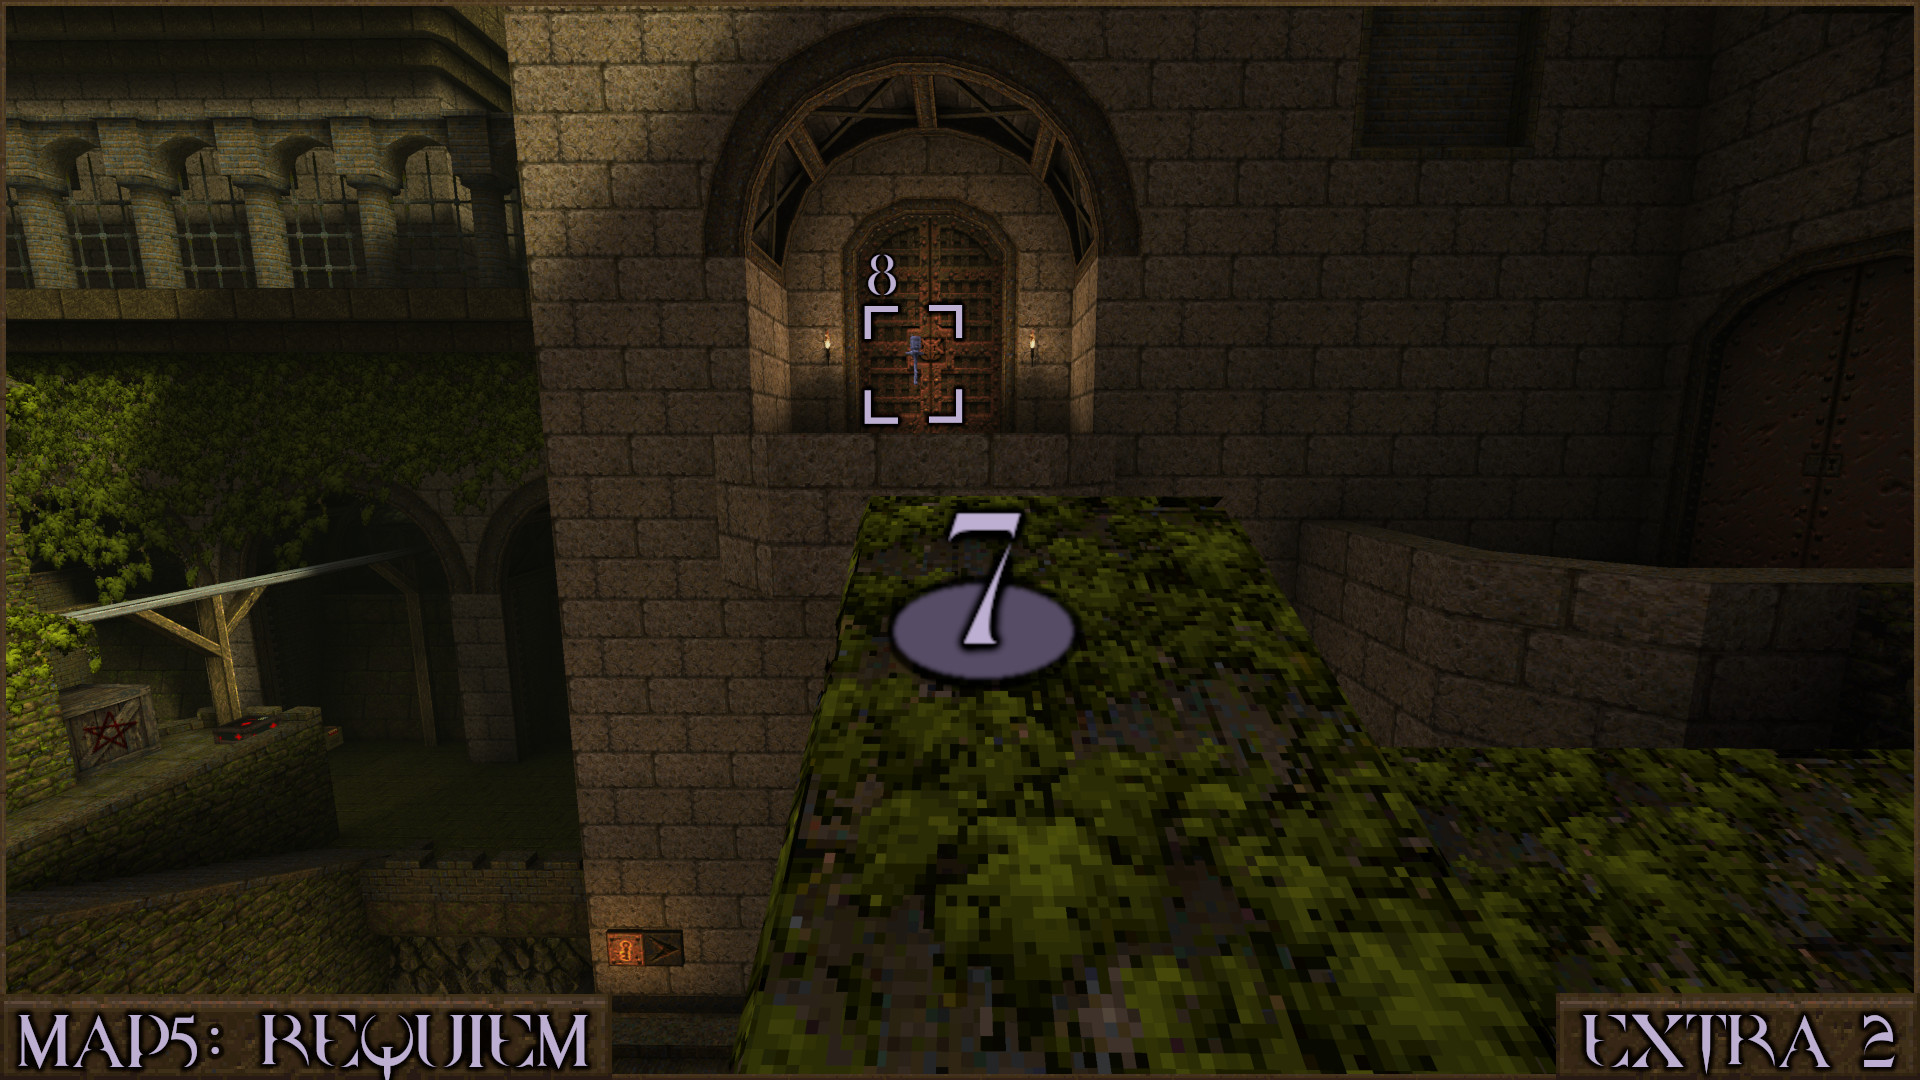
Go back up to the balcony again and this time drop down to the leafy roof () next to a metal chain. Run along the chain () and make a tricky jump onto the corner of another leafy building (). Then jump through the window of the nearby tower () to land in the secret.

Reward: Thunderbolt Small Rockets

Secret 11 of 13
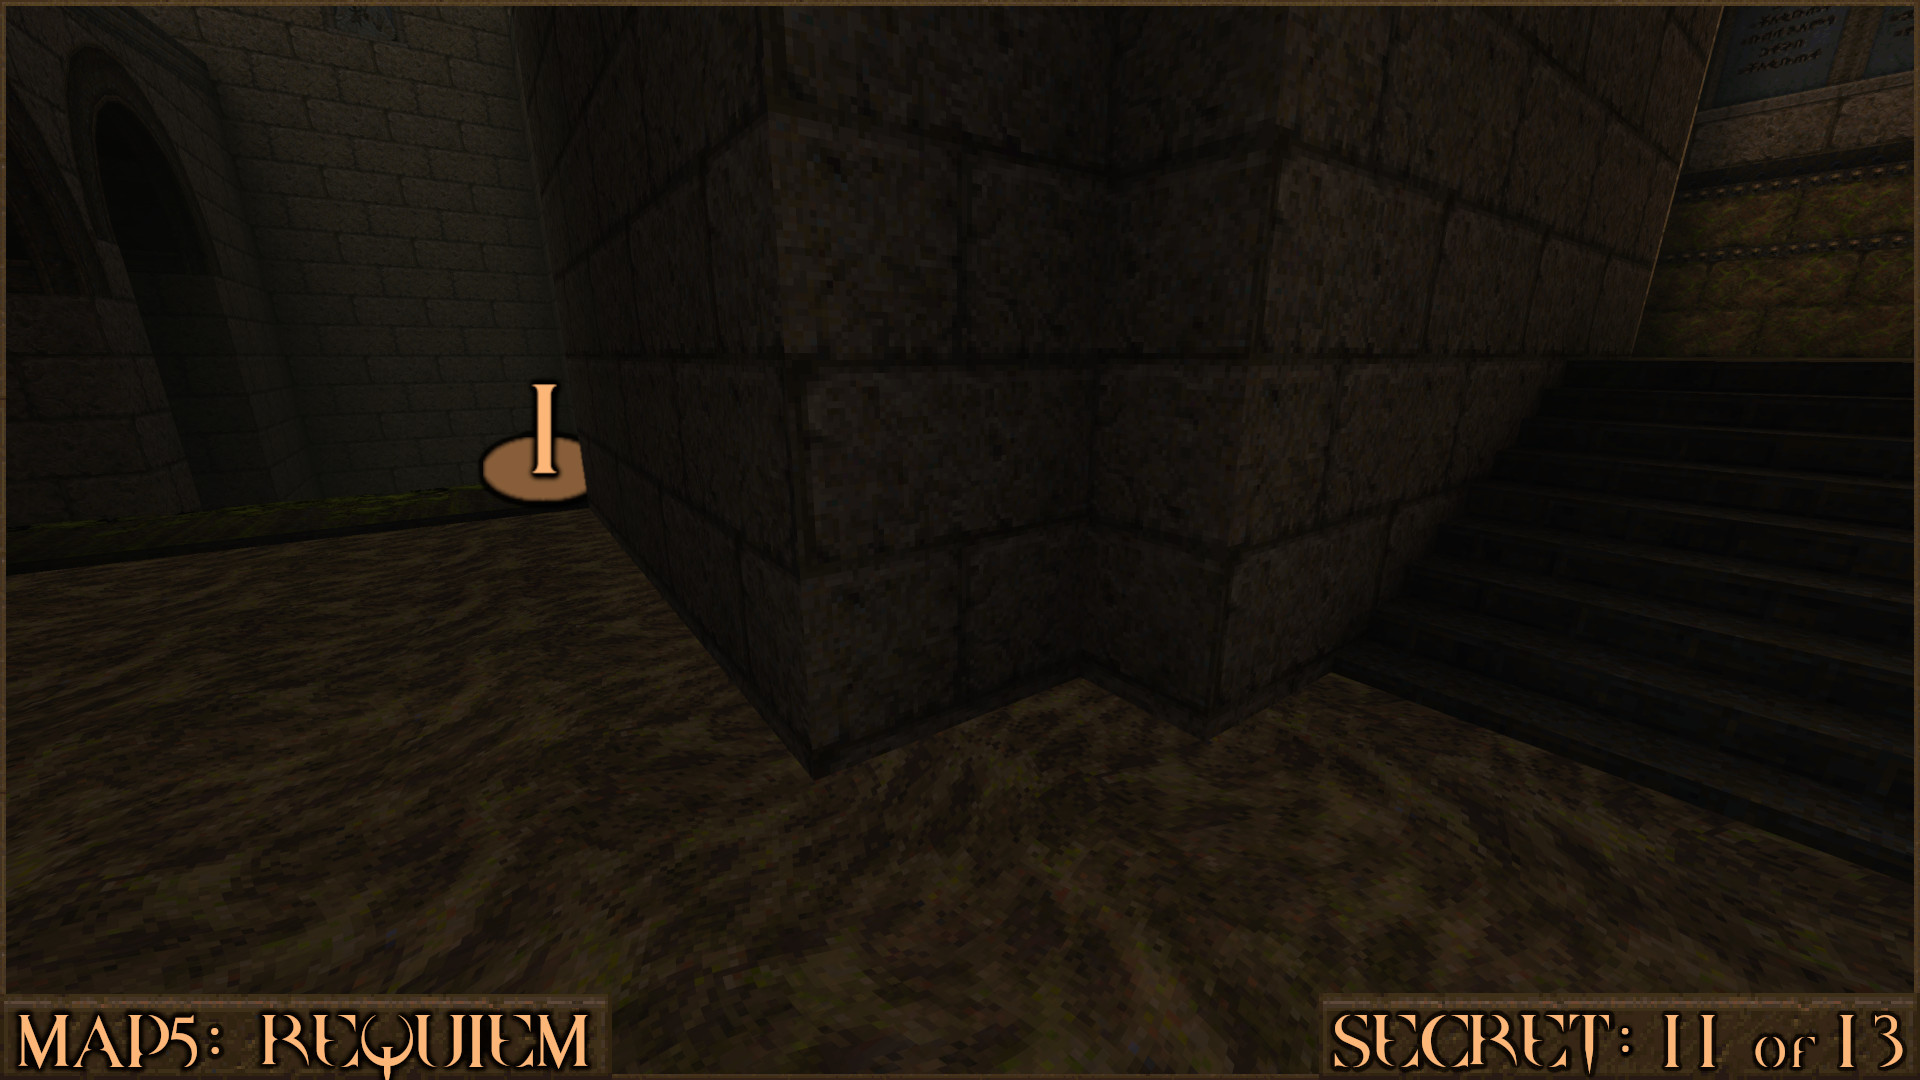
After opening the Gold Key Door go down the stairs into some water and turn right. Follow a green ledge around the corner () to find the secret.

Reward: Quad Damage

Secret 12 of 13
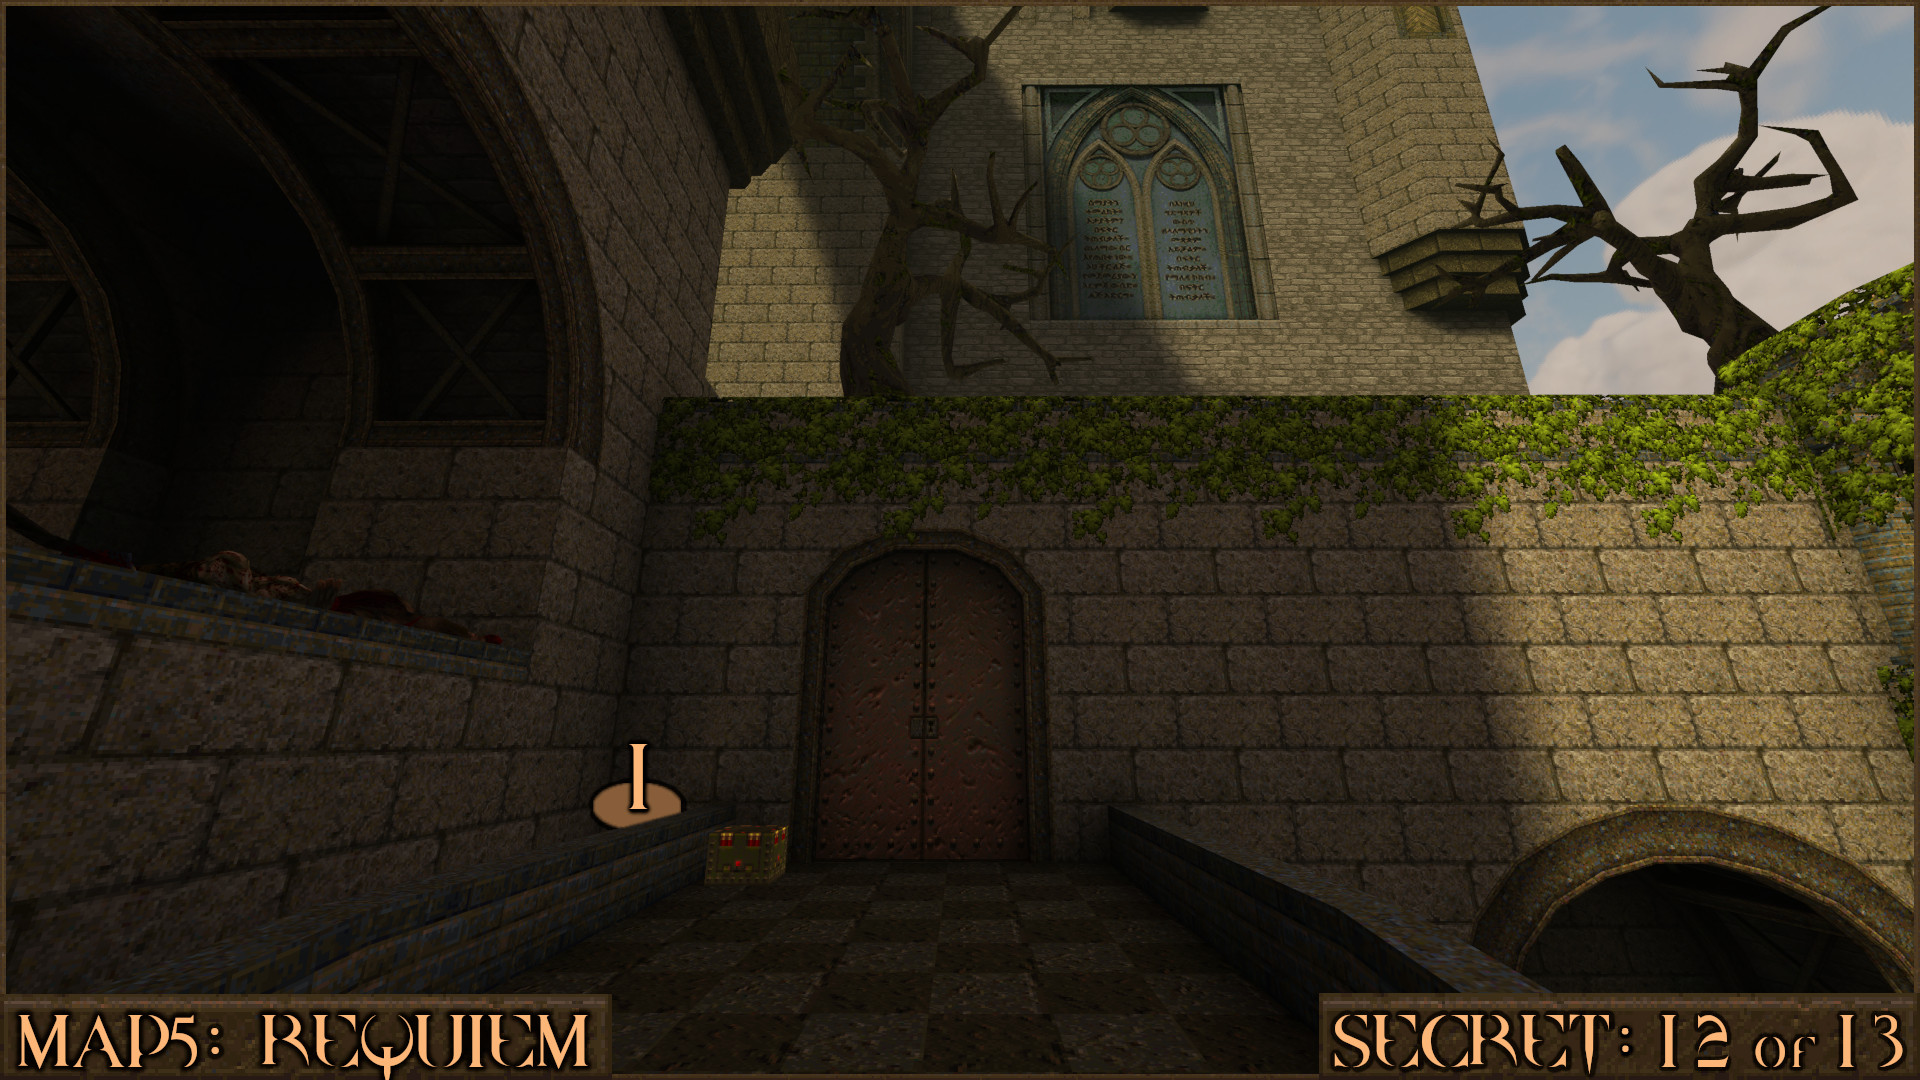
After going up several ramps you'll come to a double door below some dead trees. Drop off the left side () to land on a platform below.

Jump over to the nearby ledge () to find the secret items.

Reward: Large Nails Red Armor [Cell Capacity Upgrade]

Secret 13 of 13
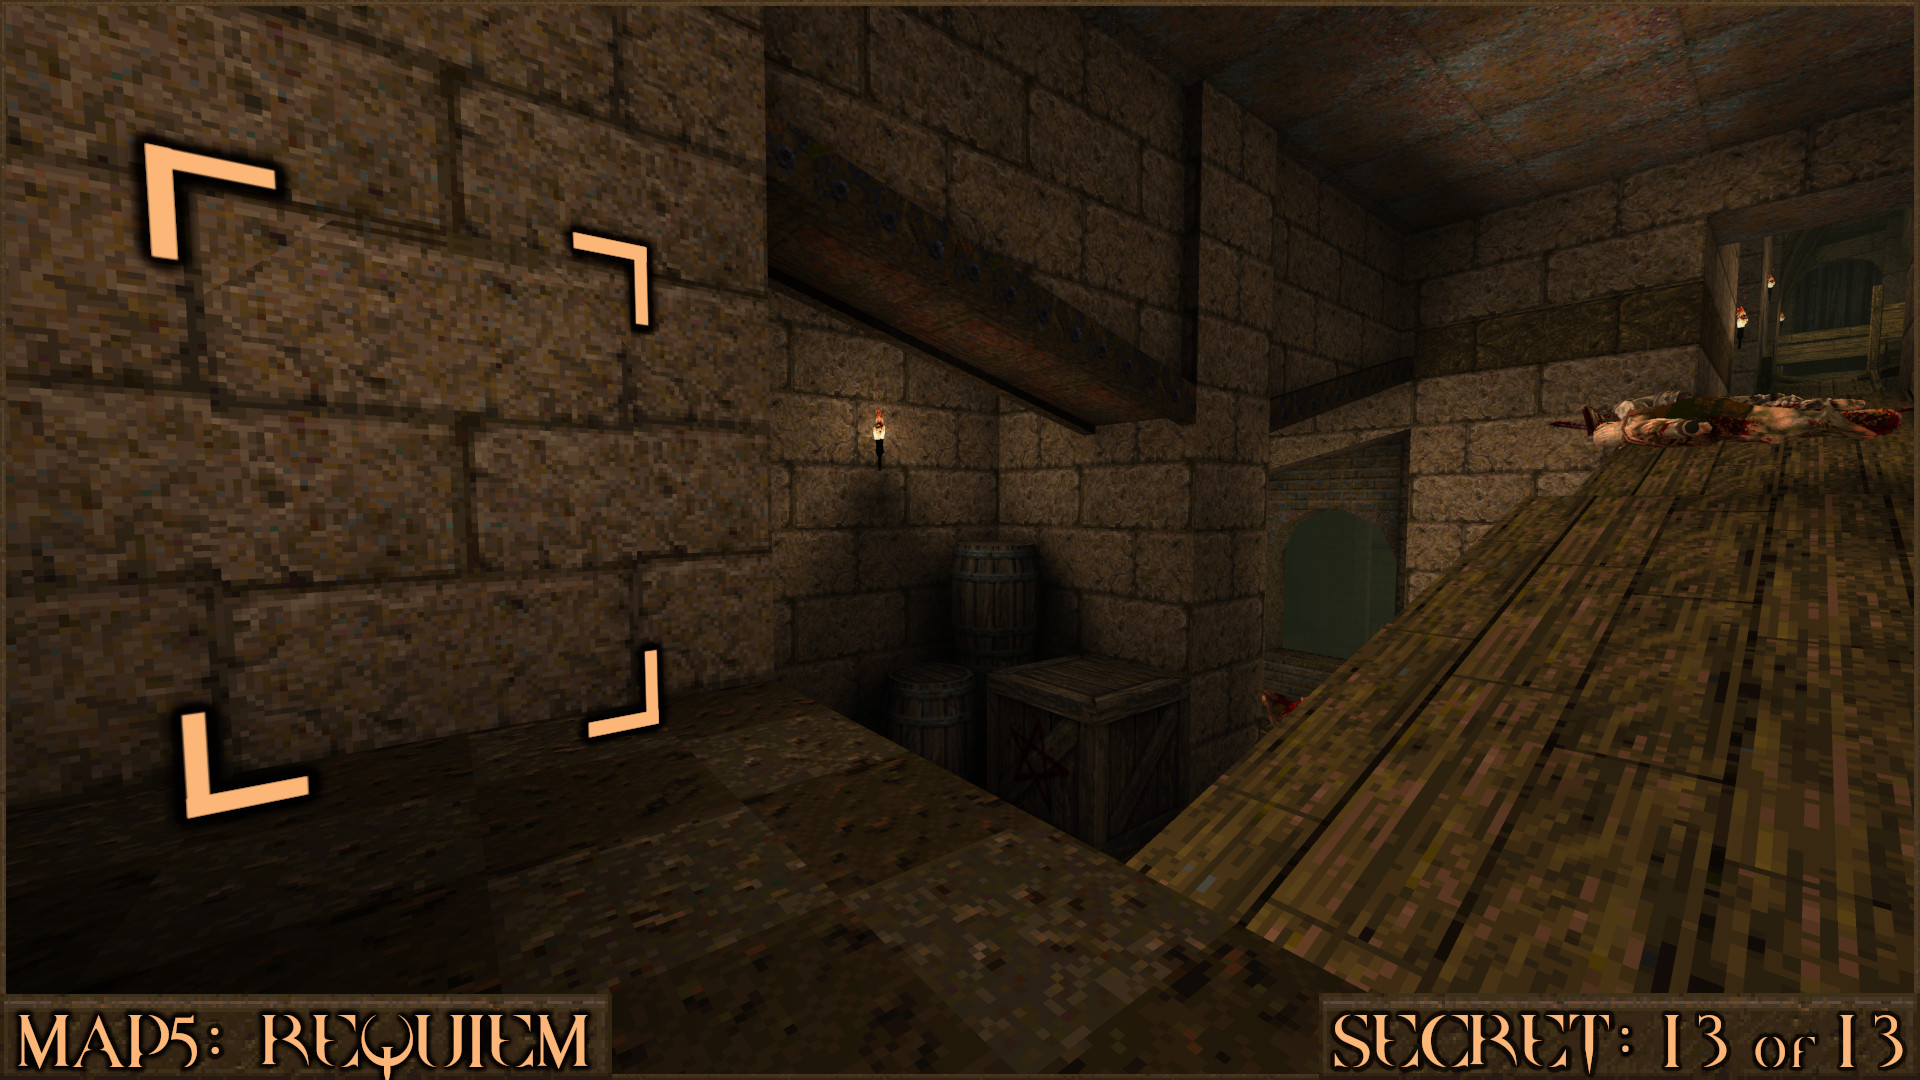
After opening the Silver Key Door stop before going up some wooden planks. The left stone wall is slightly offset and when shot will reveal the secret behind it.

Reward: Red Armor
‎‏‏‎ ‎‏‏‎ + Rune Secrets
NOTE: During Part 2 a new secret exit is accessible. The secret count increases from 13 to 14.

Secret 14 of 14
Requires Rune of Sacrifice
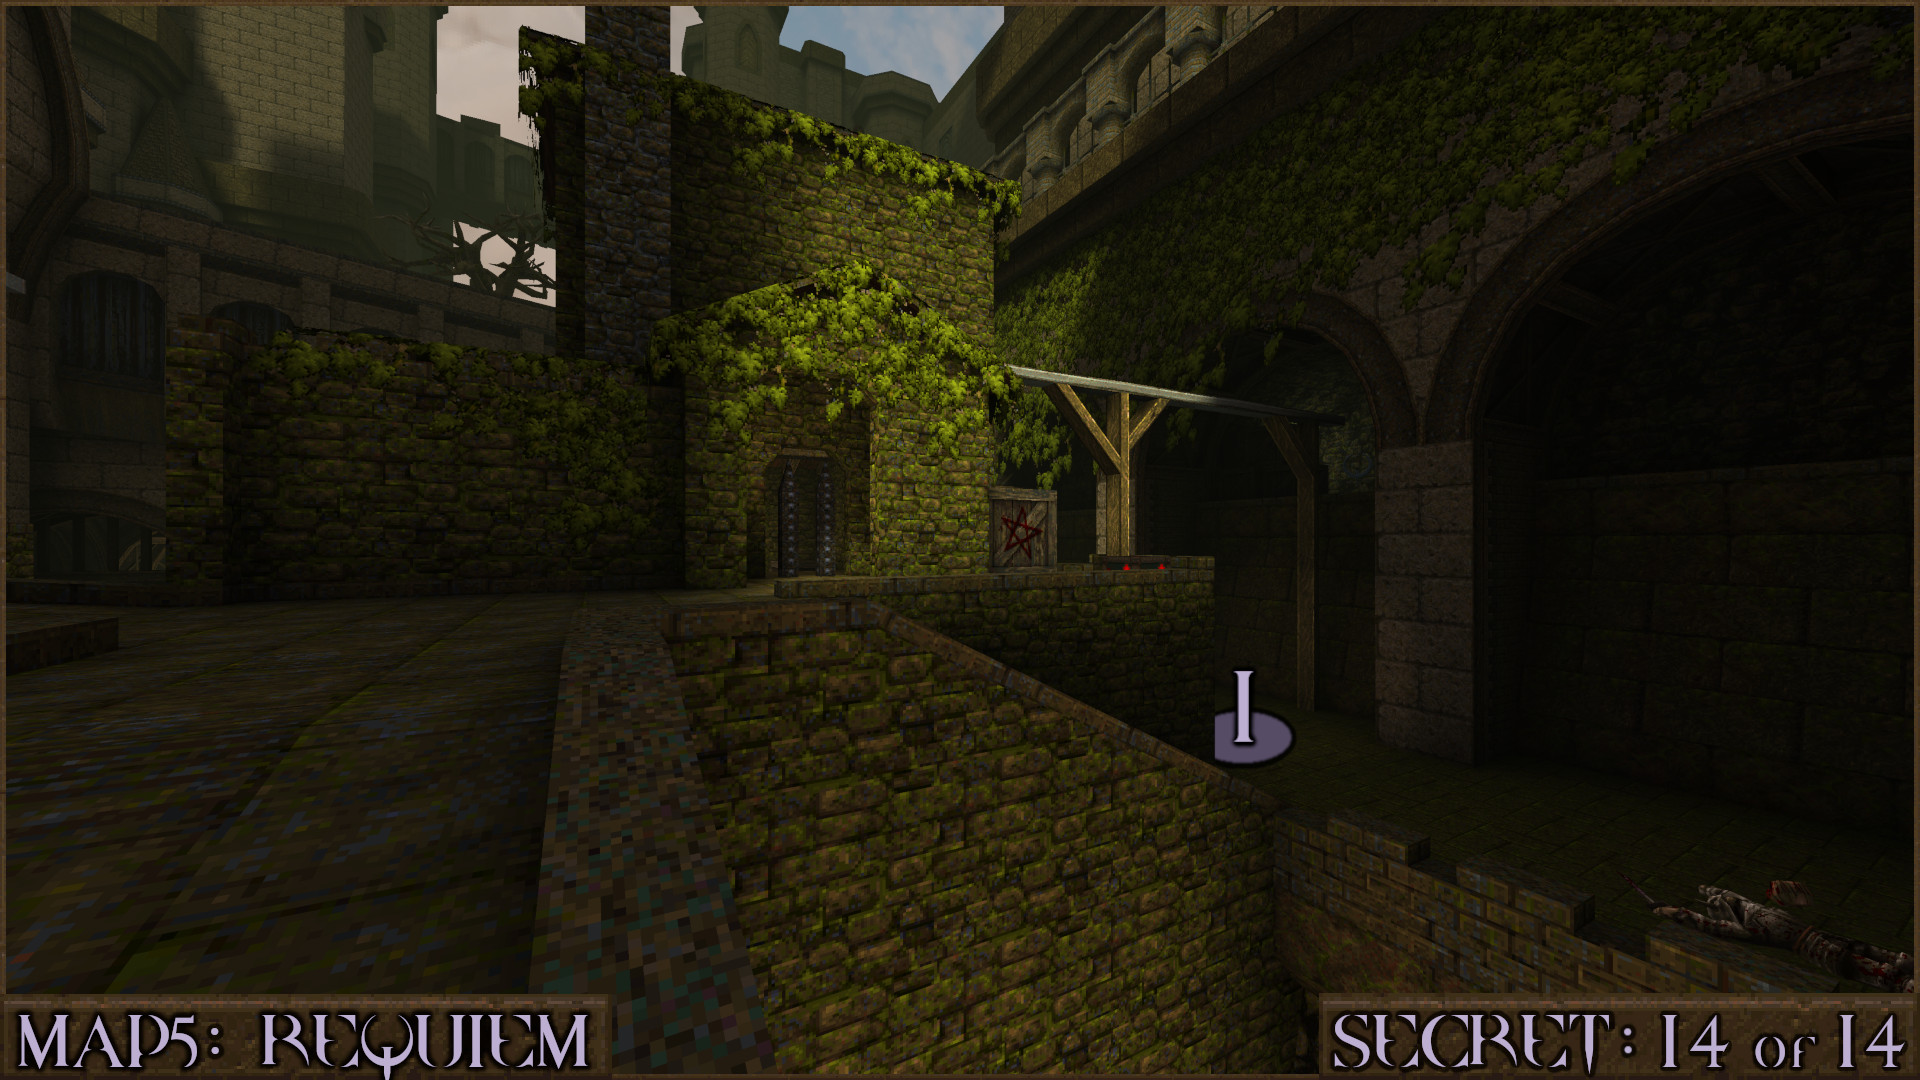
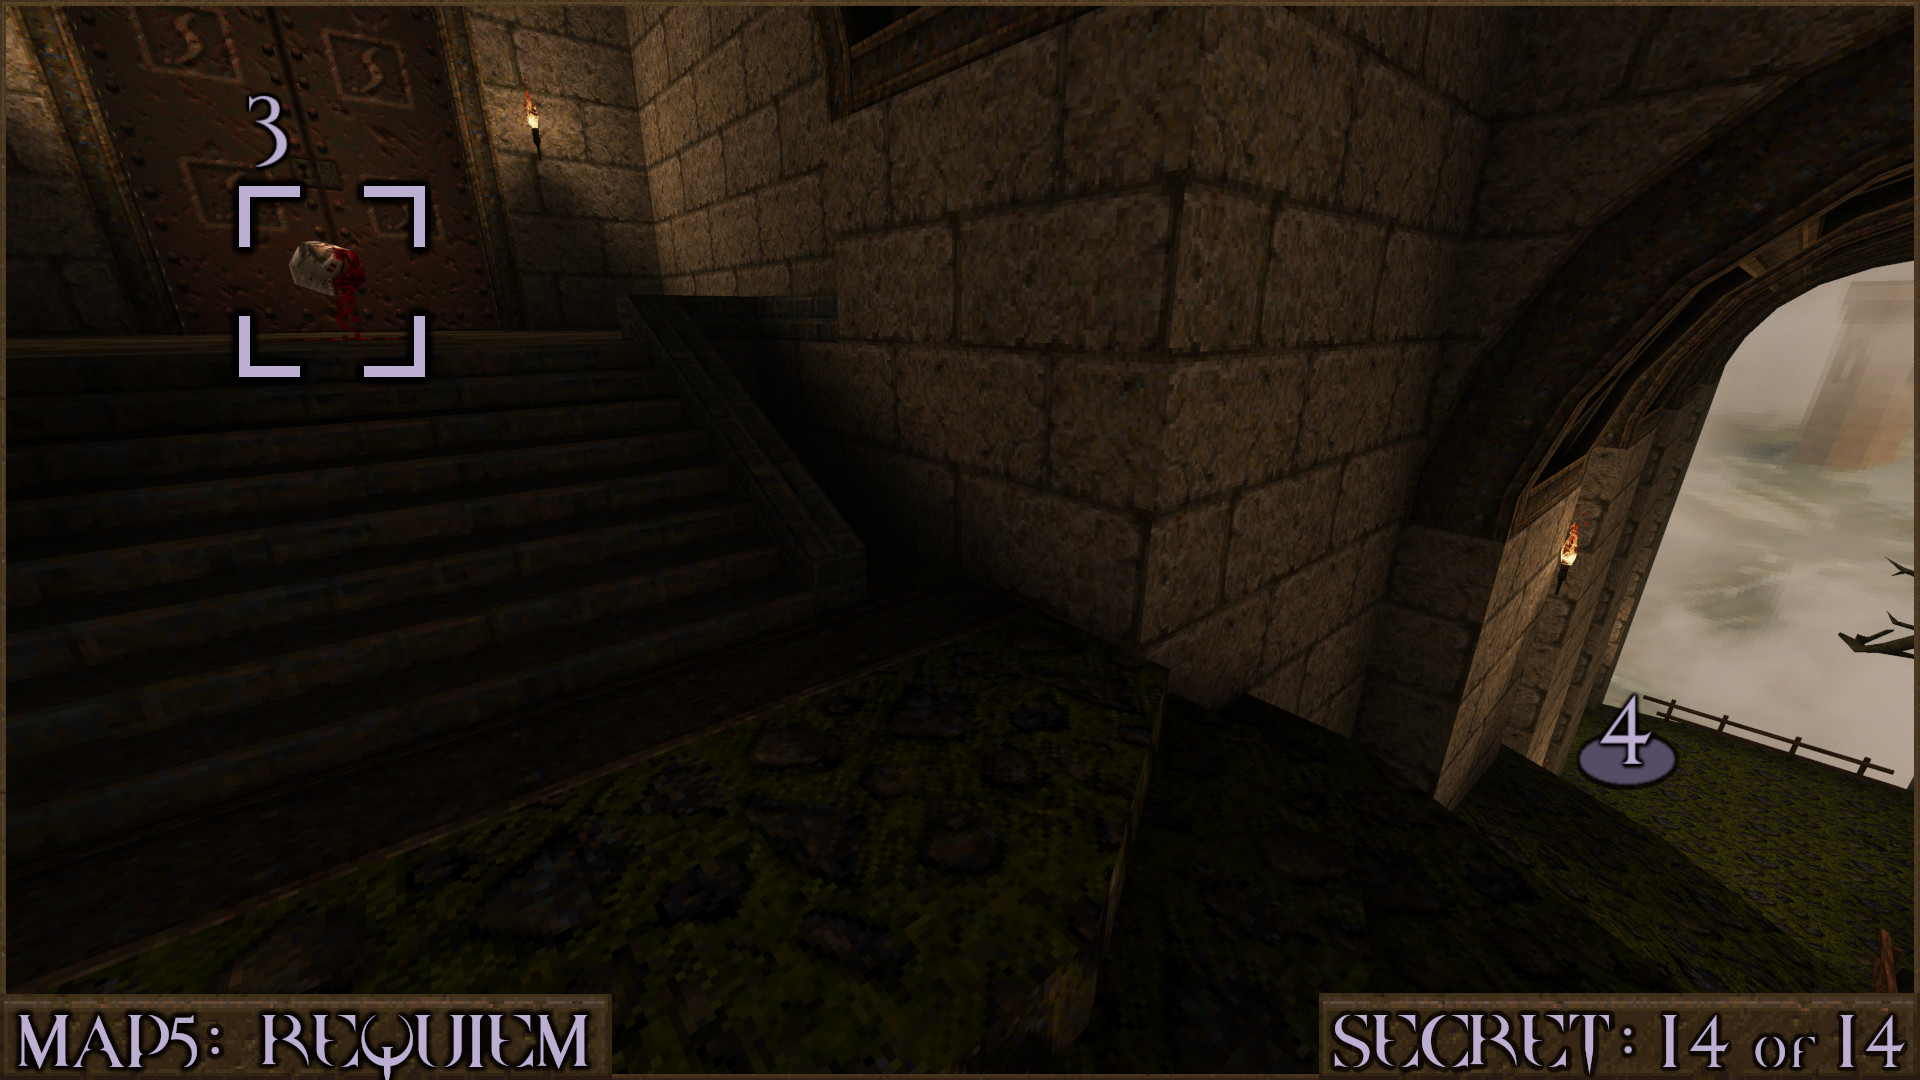
When you reach the upper outside area head down some stairs to the right of the leafy ruined building ().

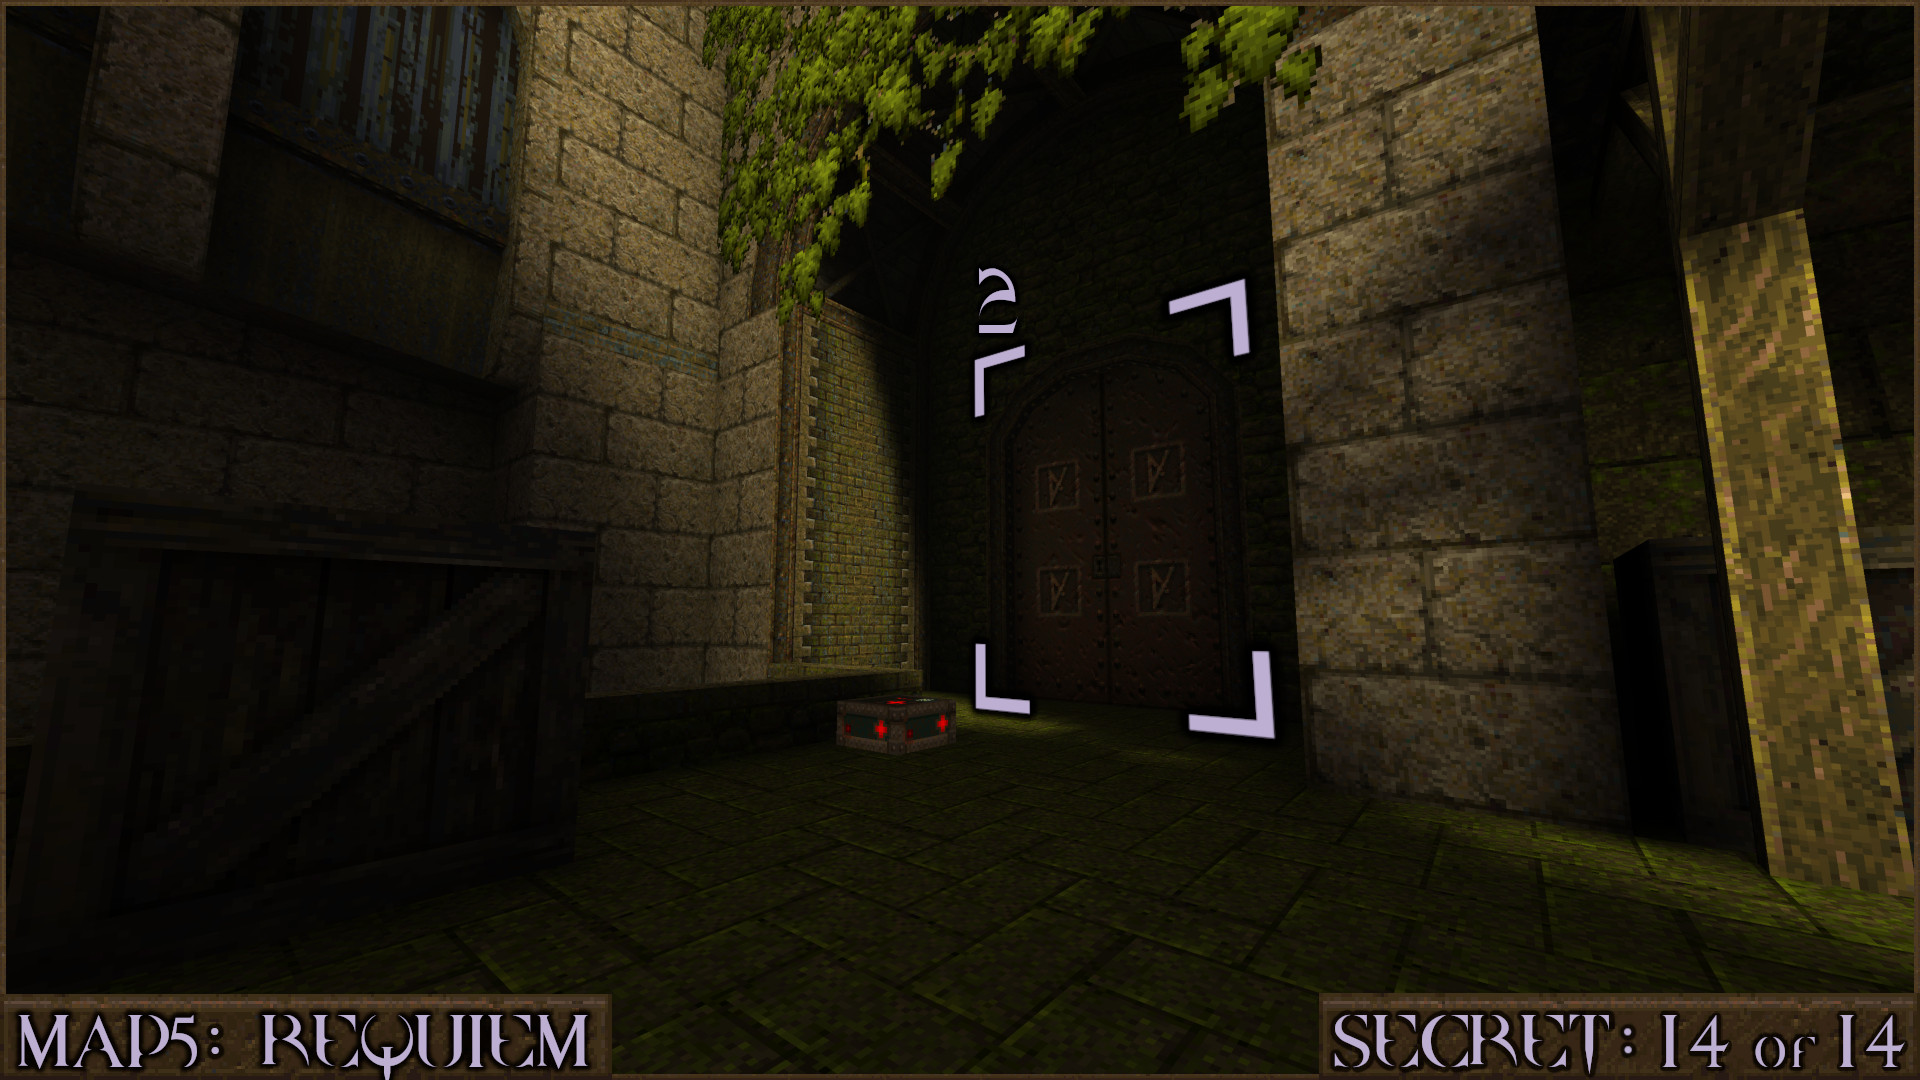
On your right you will see a Rune of Sacrifice Door () which you can now open.

Once inside collect the Health Capacity Upgrade () that is in front of the Rune of Sorrow Door. You won't be able to open this rune door yet but the secret exit in the lower part of this area () leads to the secret level SECRET3: Mist of Torment. There you will be able to find the Rune of Sorrow.

Reward: [Health Capacity Upgrade] [Secret Level]

Extra Secret 1
Requires Rune of Sorrow
After acquiring the Rune of Sorrow from the secret level you can return to Secret 14 and open this door. It essentially opens a shortcut to the final fight on the large bridge at the end of the level.

Reward: None

Extra Secret 2
Requires Rune of Sorrow
After exiting Extra Secret 1 turn right and follow the ledge () to get behind the curved stairs.

Under here covered by some leaves is a misaligned wall () you can shoot to gain access to a small room. You'll need both the Gold and Silver Keys to proceed further.

Look down over the edge to see the Gold Key (). Drop down there without taking too much damage and pick it up. To return to the upper level work your way to the wooden elevator () that is waiting to take you back up.

If you don't have the Silver Key already retrace you steps via the shortcut to the start of the level. Near the leafy building in the upper outside area jump over to a thin ledge () and follow it down to a stack of crates.

Use the beams and boxes to get over to the highest sloped part of the roof ().

Use the momentum from running up the slope and jump at the top () to do a large jump over to the Silver Key ().

Once again go through the rune shortcut back to the hidden door and use both keys to shift the wall and enter (). Here you can visit a shrine for a beloved pet. Rest in Peace Britta.
In the corner you'll find replacements for both keys if you want to explore the rest of the level more easily.

Reward: [Gold Key] [Silver Key]
‎‏‏‎SECRET3: Mist of Torment [Secret Level]
NOTE: During Part 2 this secret level can be accessed from a rune secret in MAP5: Requiem. The Rune of Sorrow can be found here.

Secret 1 of 7
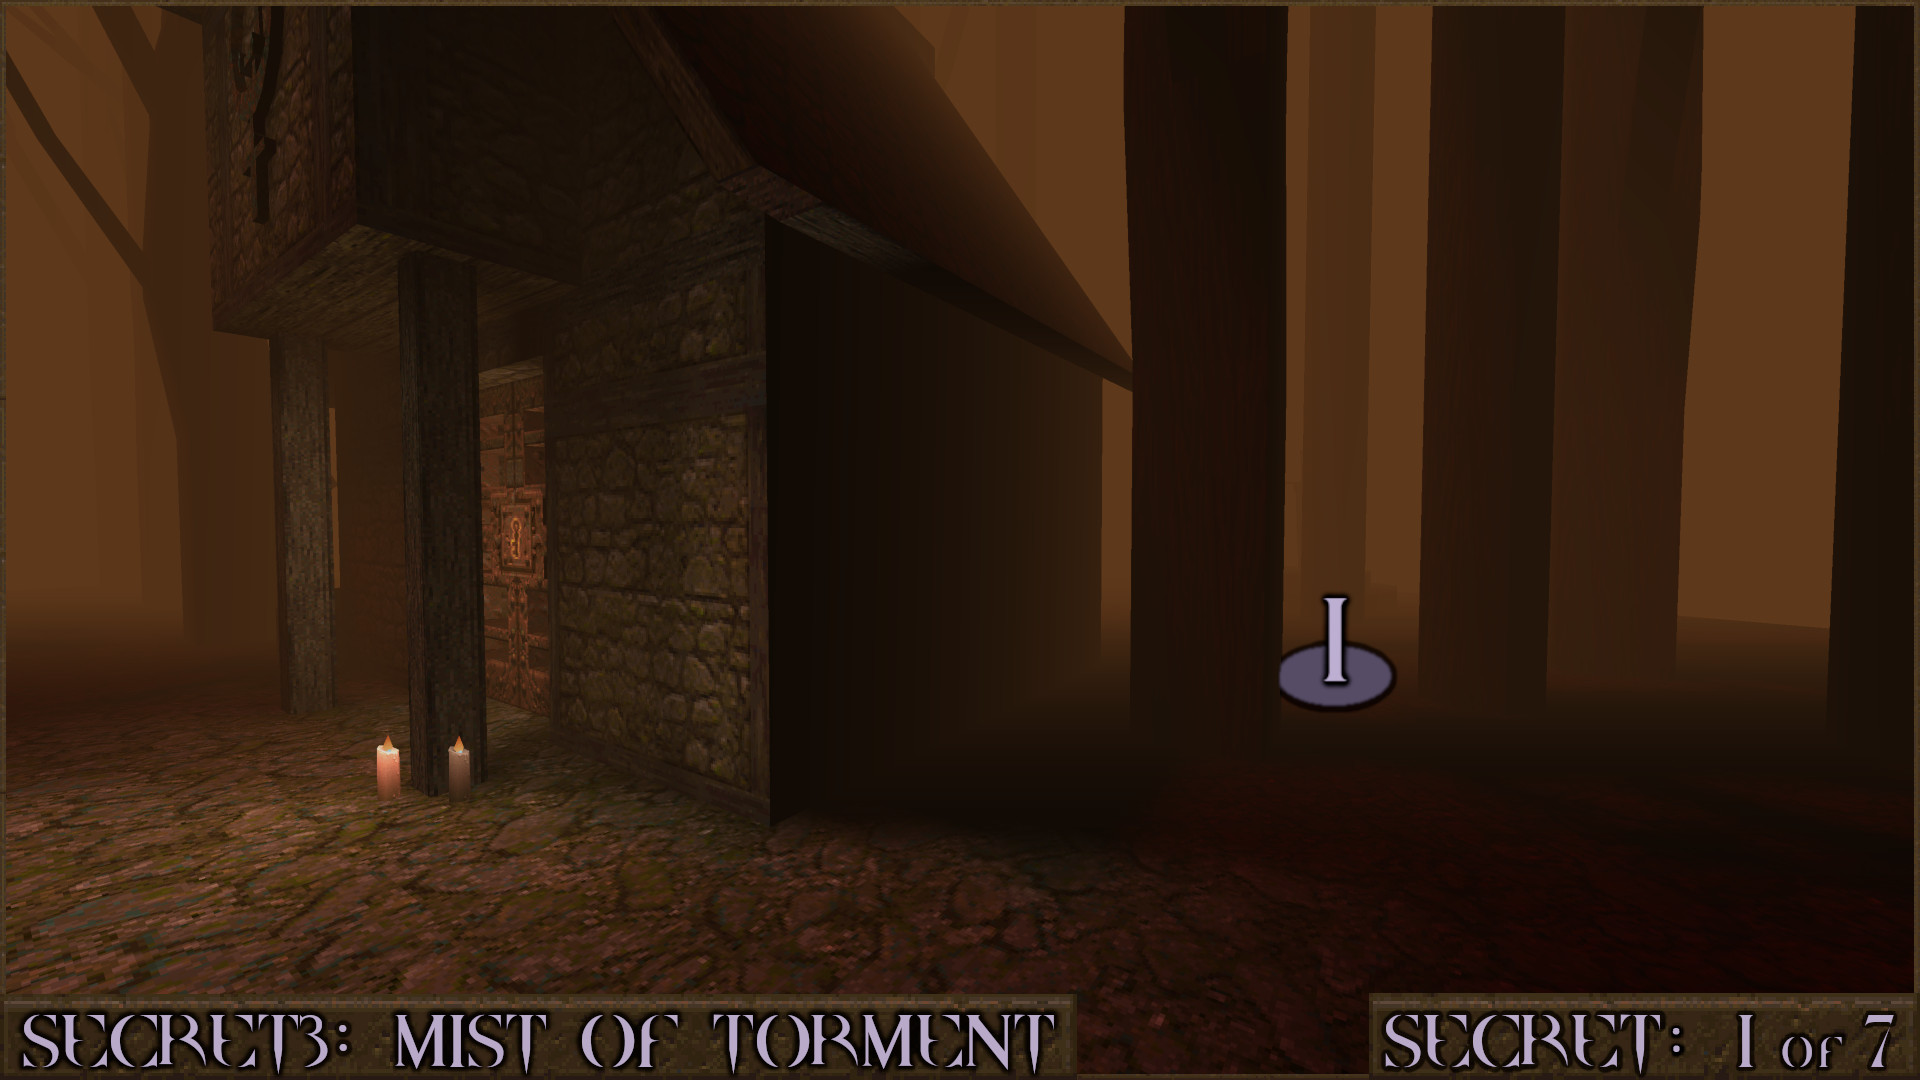
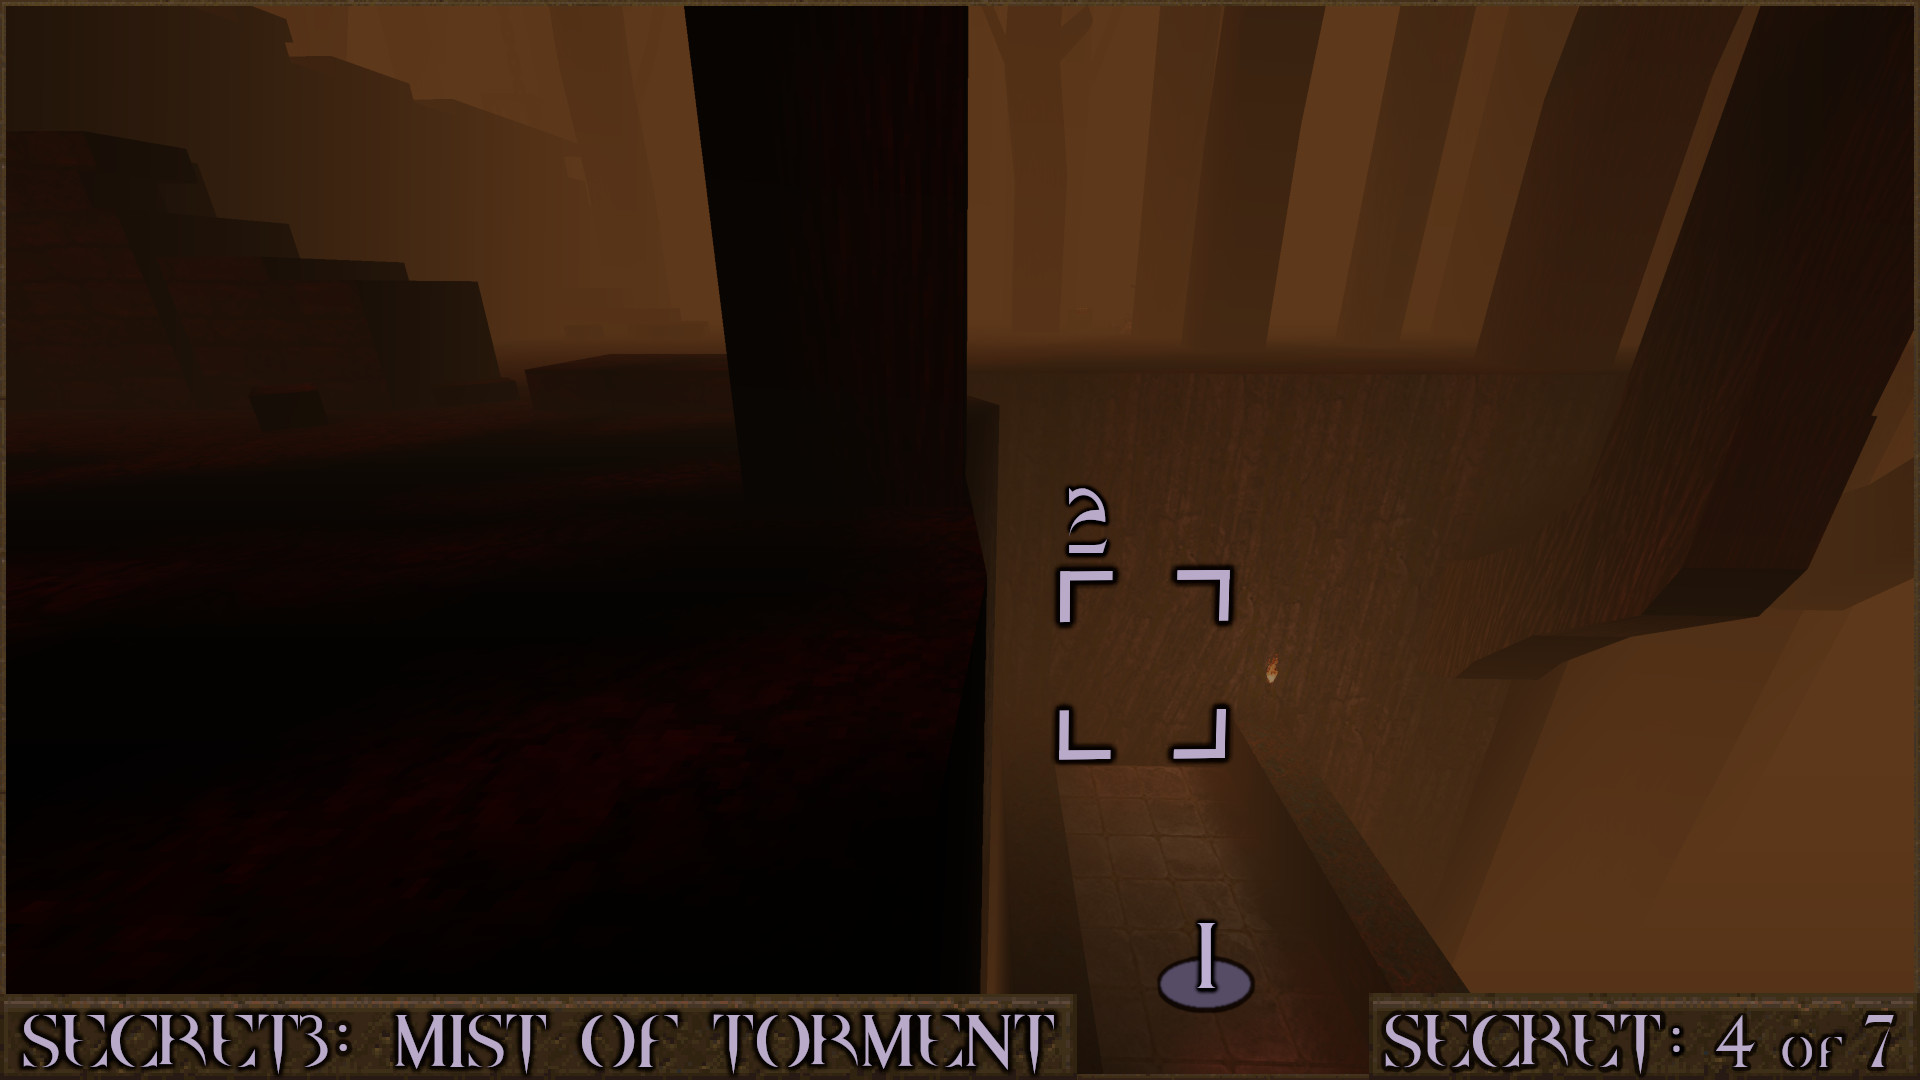
From the start of the level look to your right for the building with the Gold Key Door. Head down the right side of it ().

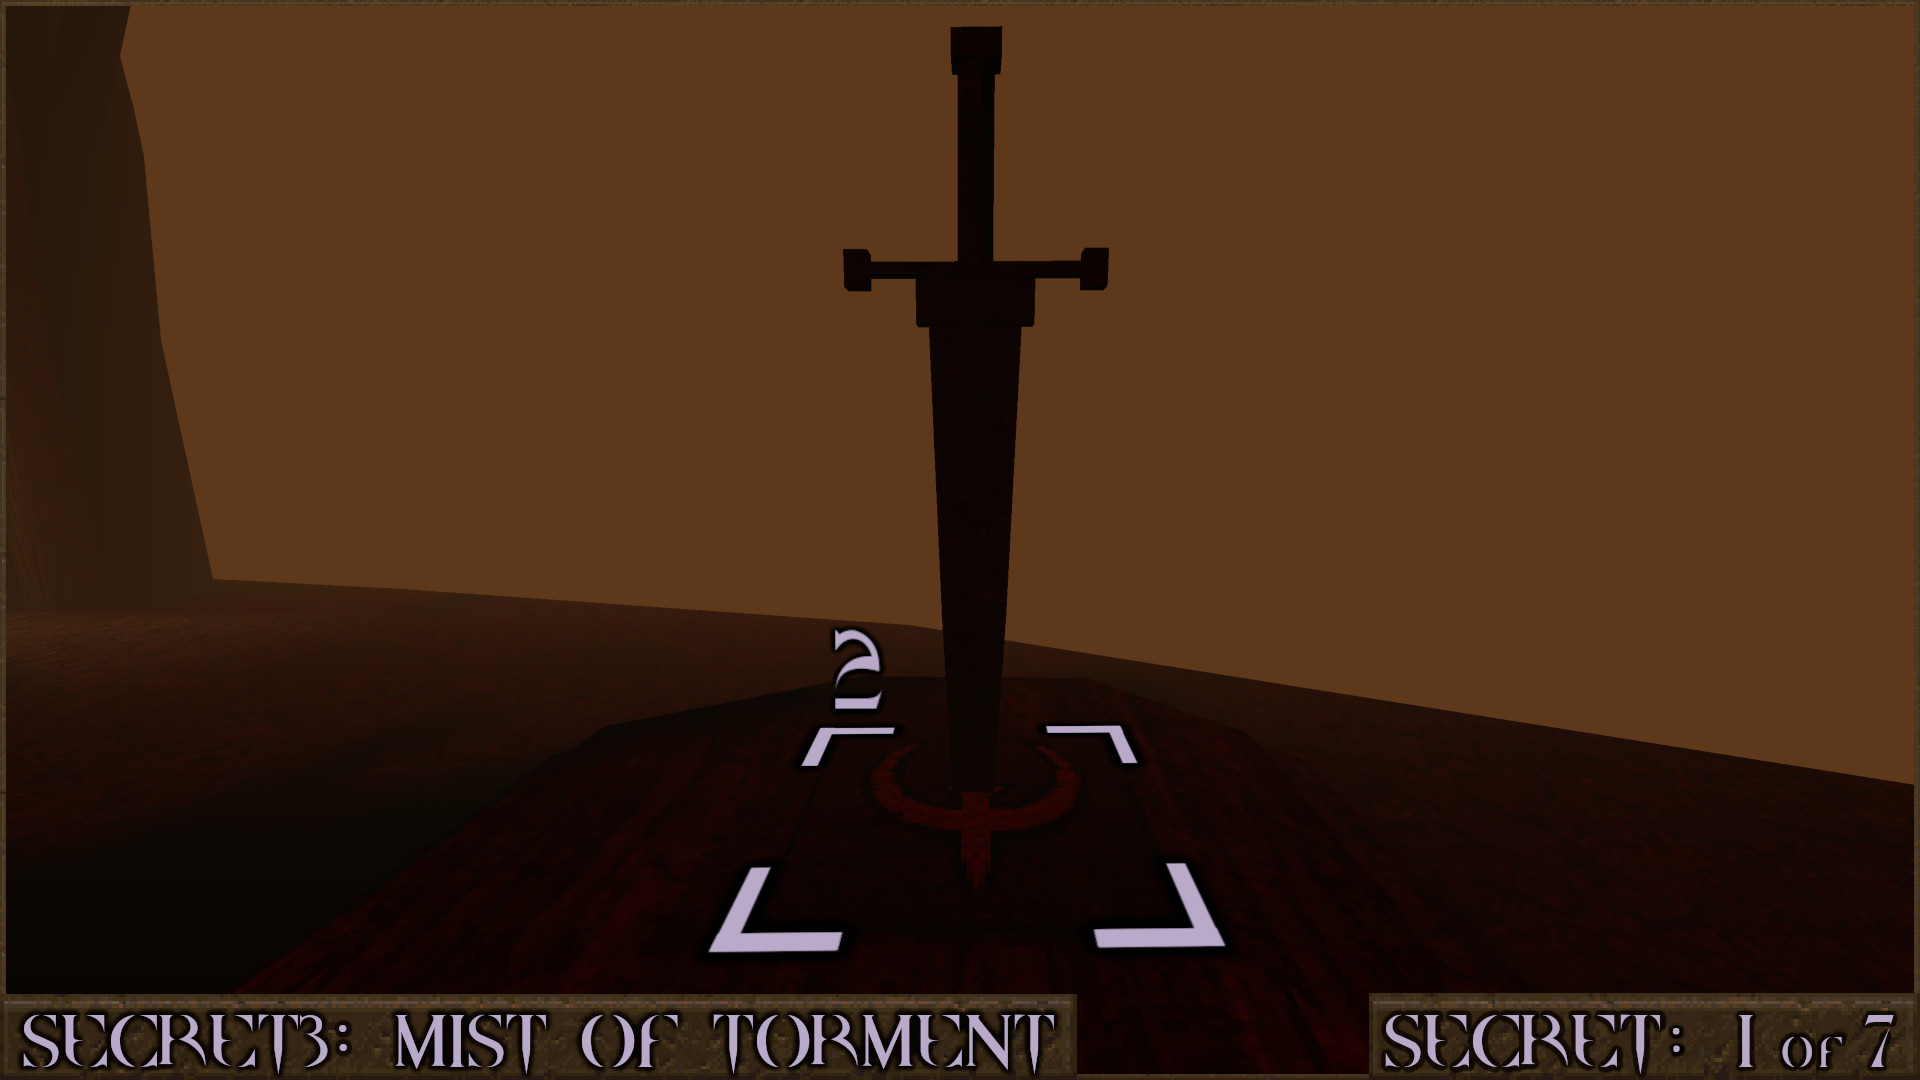
You'll see a large sword monument near the edge. Walk over the pressure plate beneath the sword () and it will slide down into the ground and reveal the secret Quad Damage above it.

Reward: Quad Damage

Extra Secret
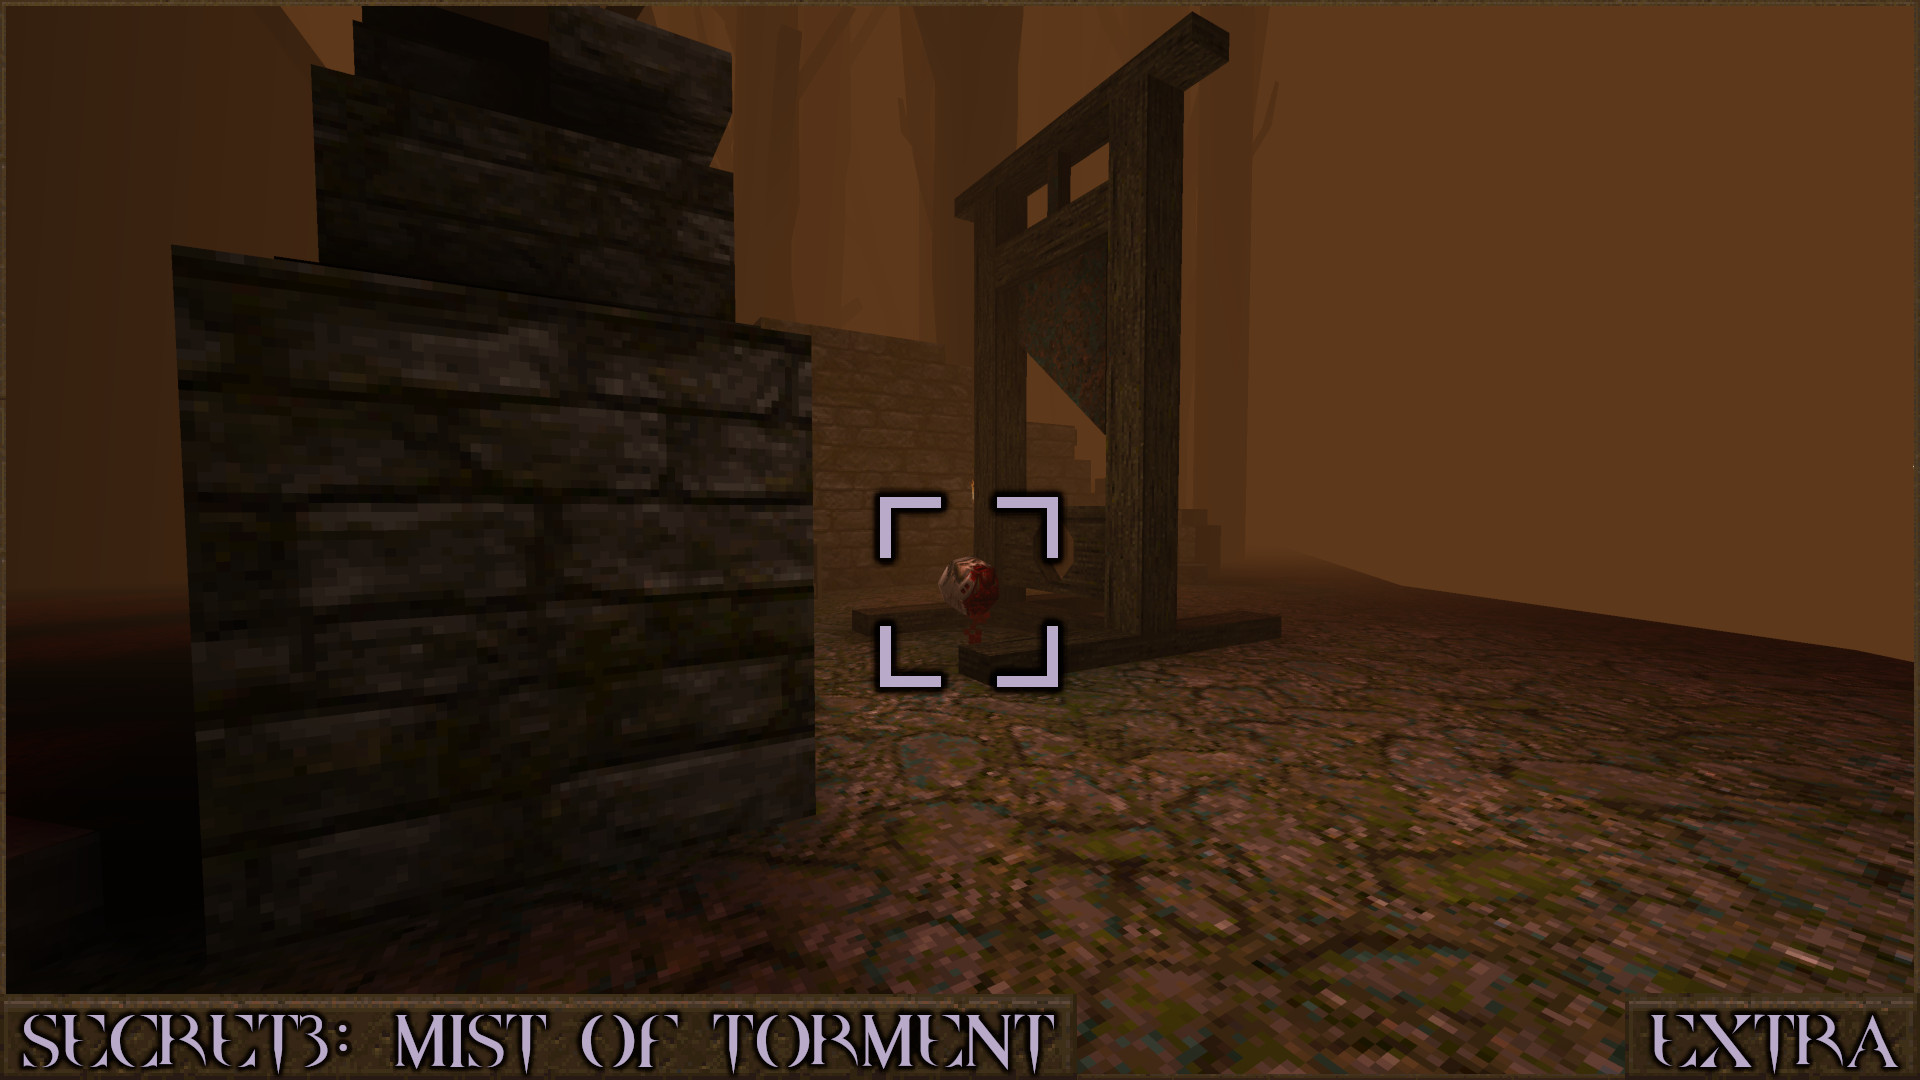
Just to the left of Secret 1 is a large guillotine behind some walls. A Health Capacity Upgrade is near it.

Reward: [Health Capacity Upgrade]

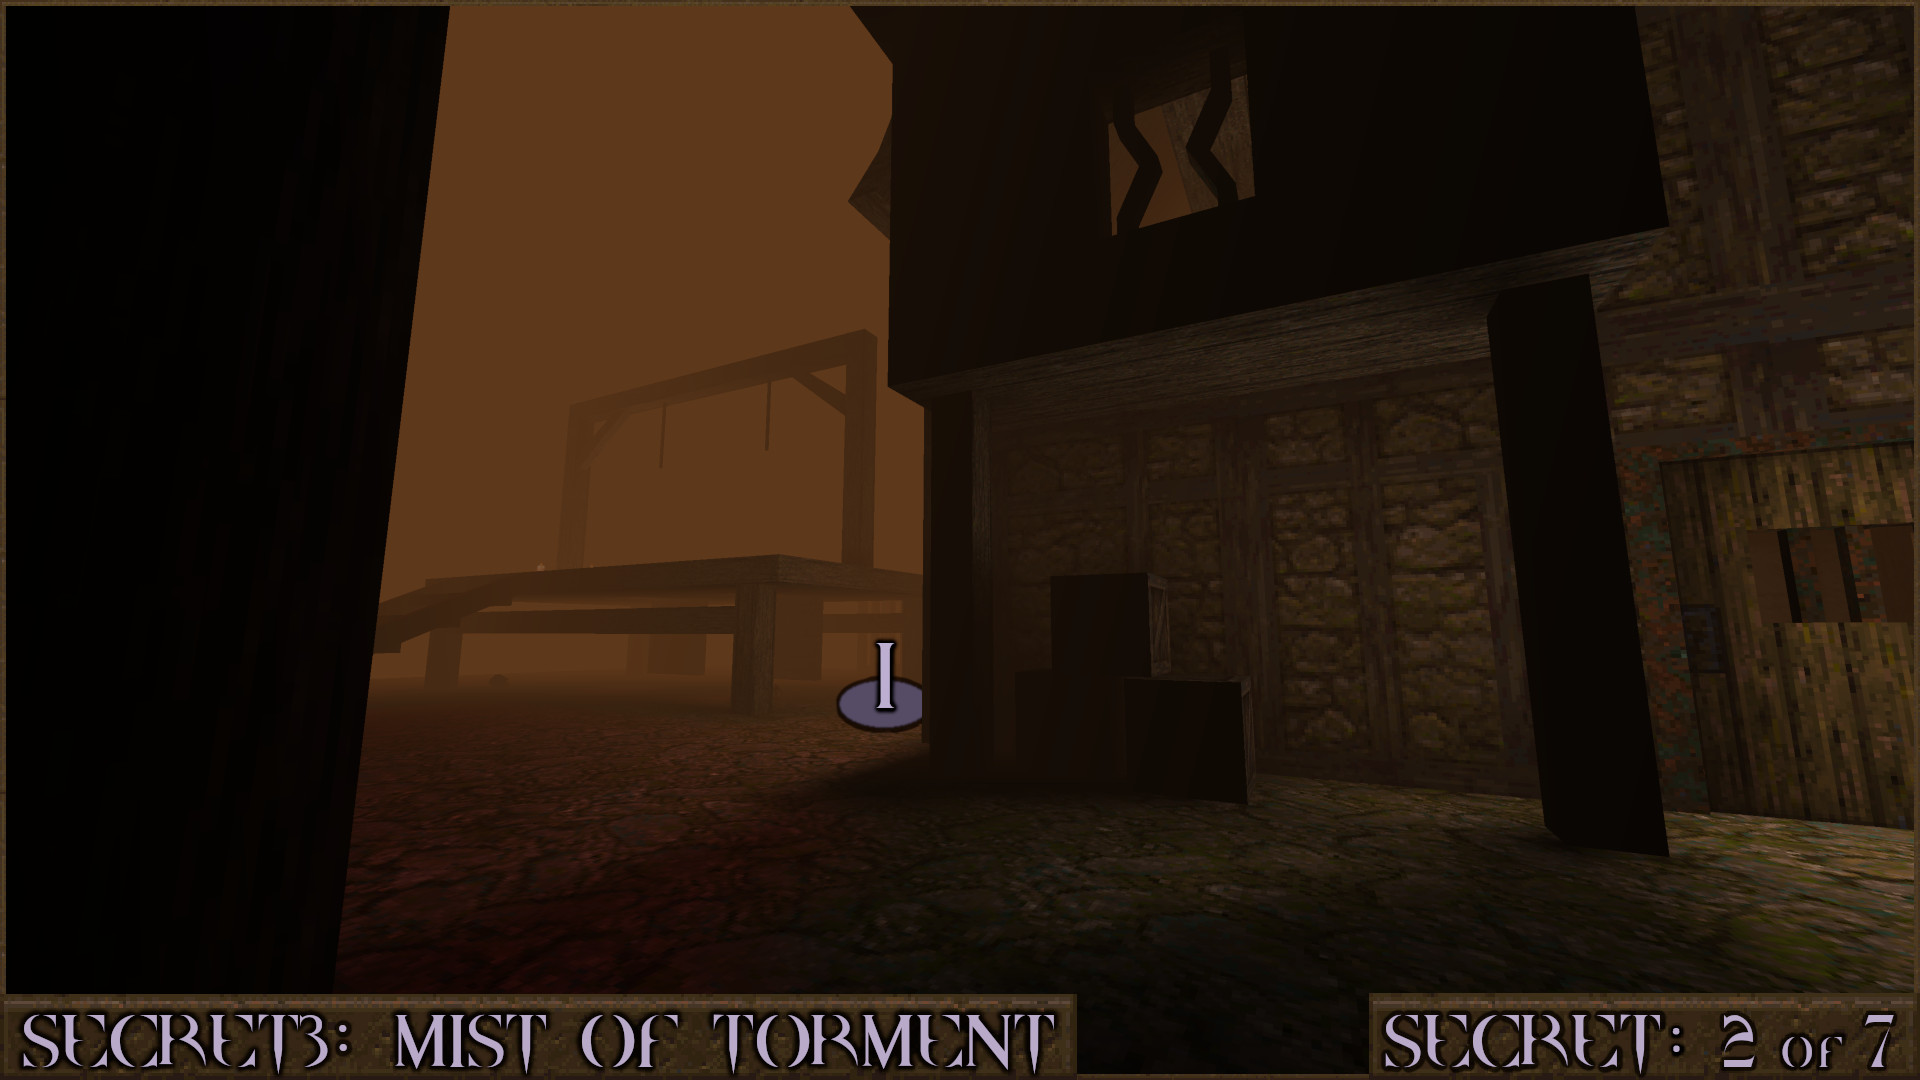
Secret 2 of 7
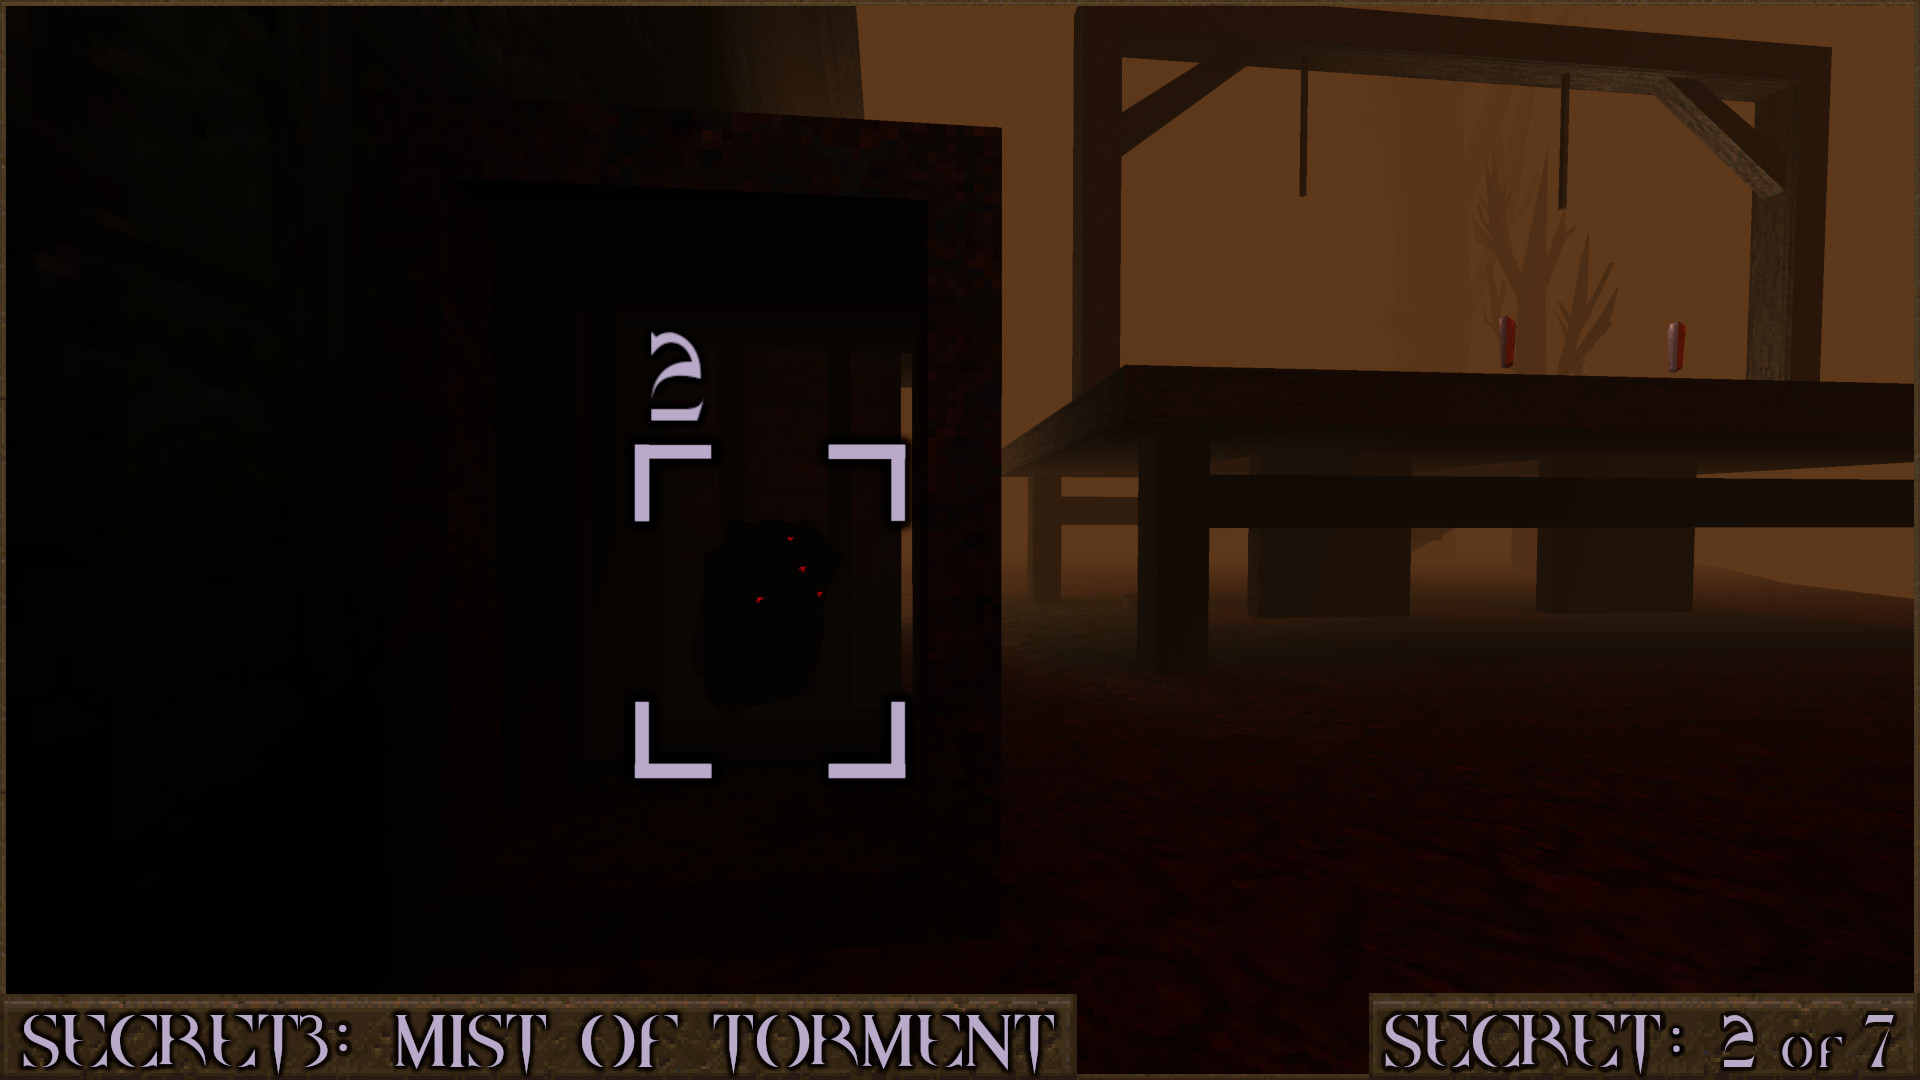
Keep going and follow the outer edge of the level past a large building. On the left side of the building you'll notice a large gallows. Head between the building and the gallows ().

Look for a metal cage () in the darkness here and take the upgrade inside it.

Reward: [Shell Capacity Upgrade]

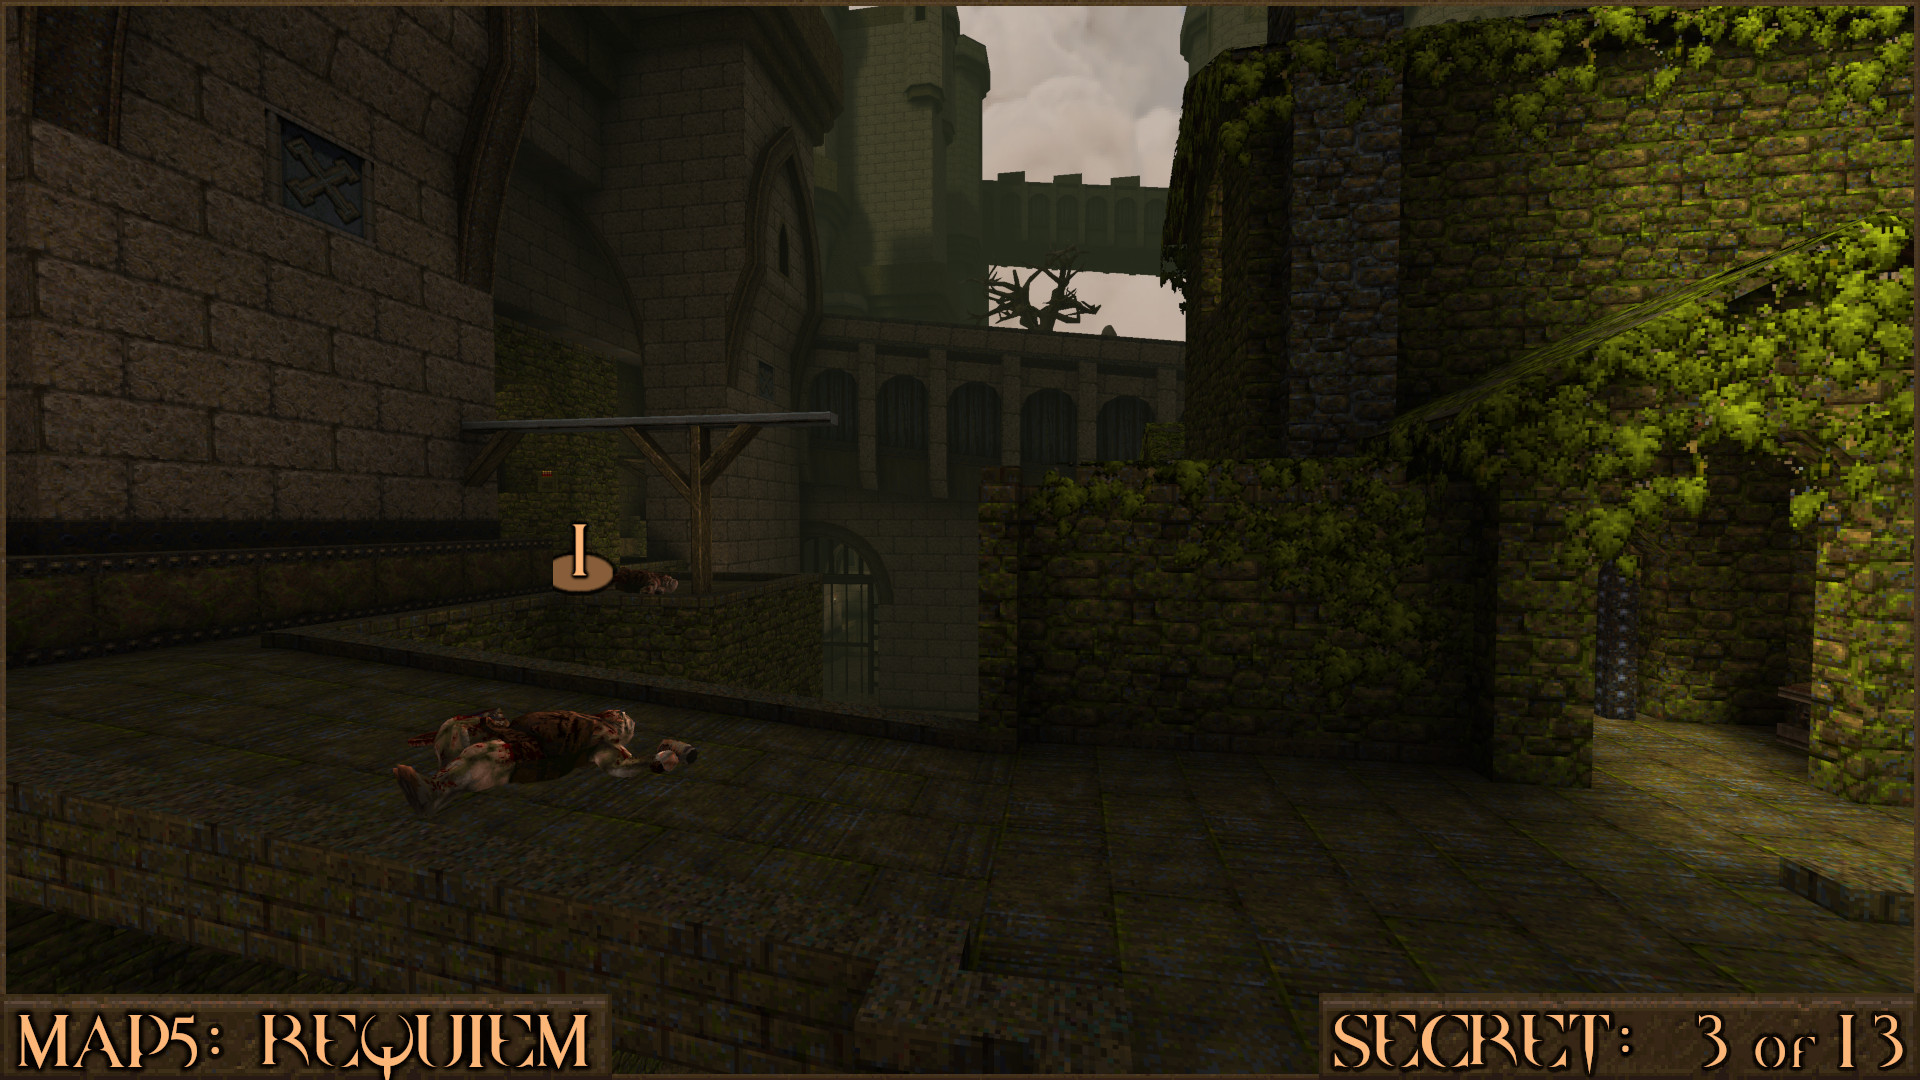
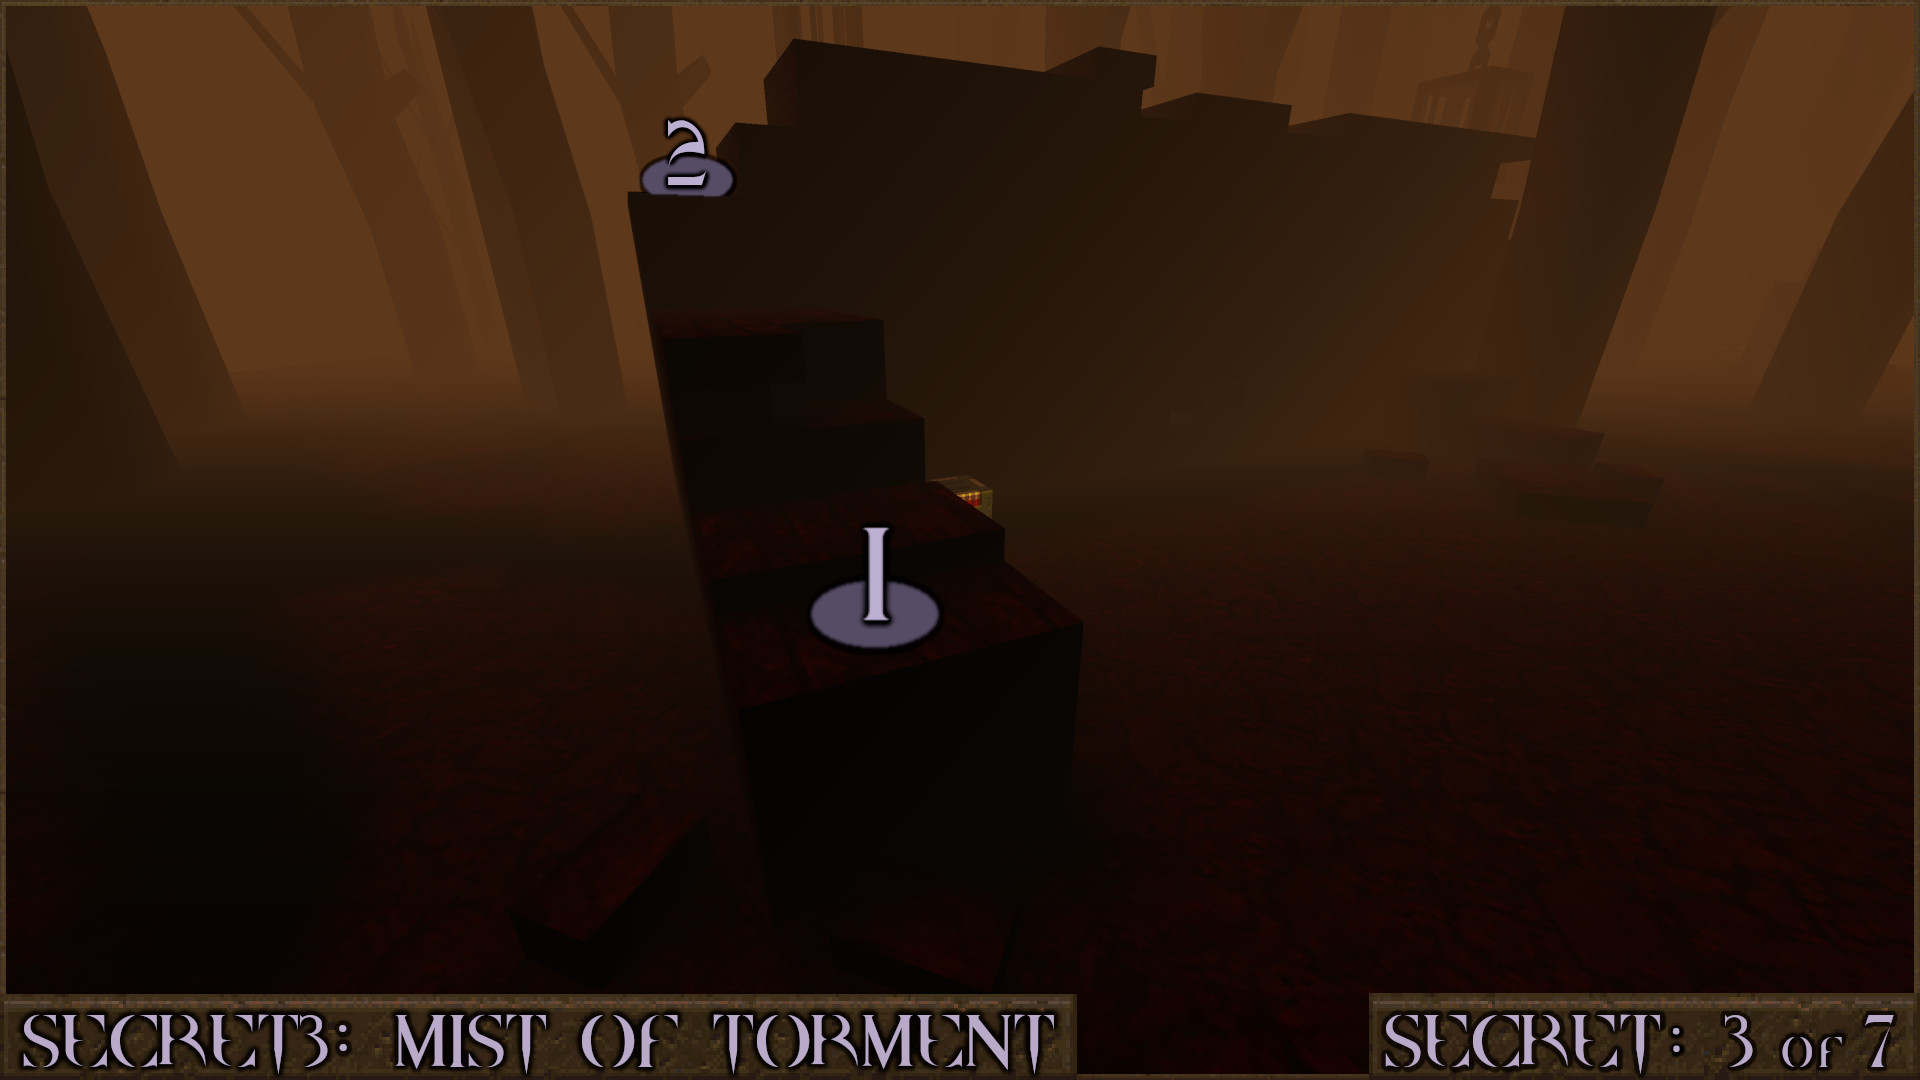
Secret 3 of 7
Opposite the gallows is a large ruined wall. Walk around it and find the lowest point you can jump onto the wall () and then climb to the top of it ().

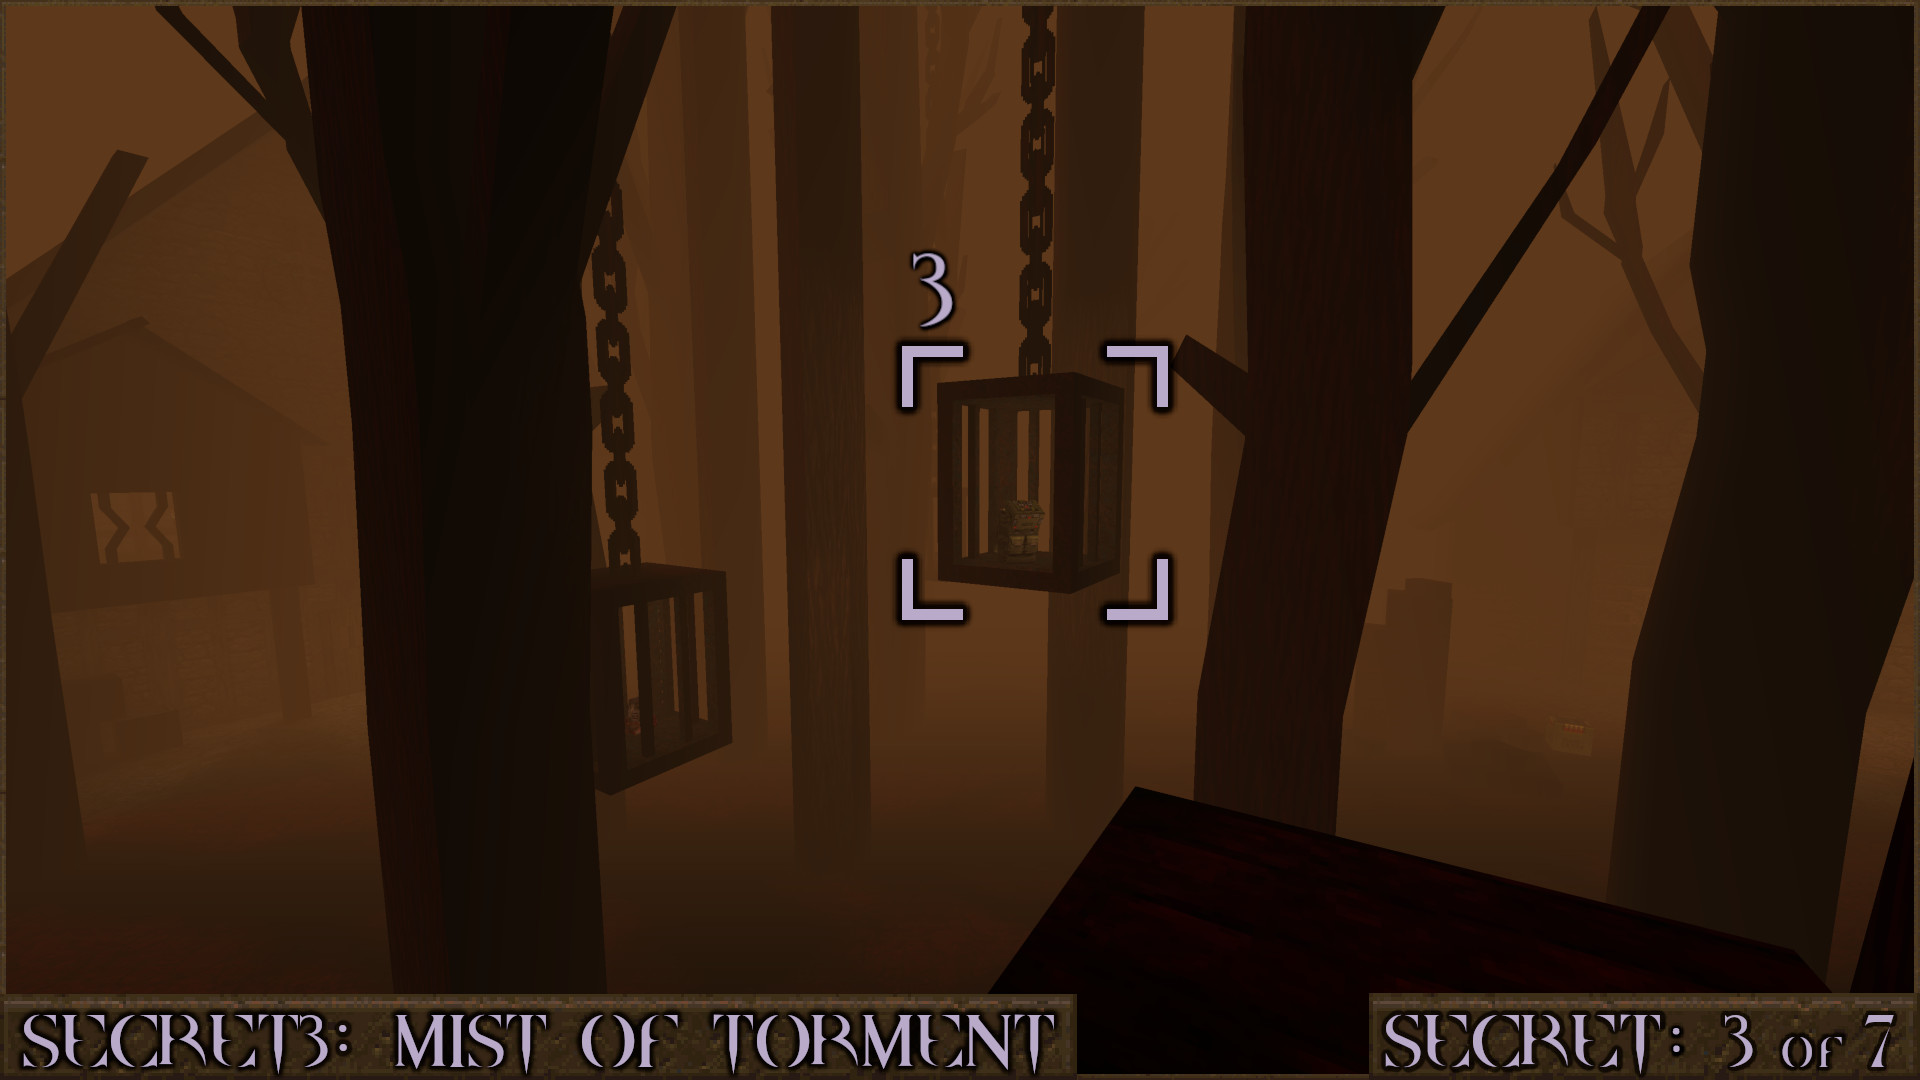
At the far end of the wall you can see a cage hanging nearby (). Make a running jump to the cage to claim the upgrade.

Reward: [Nail Capacity Upgrade]

Secret 4 of 7
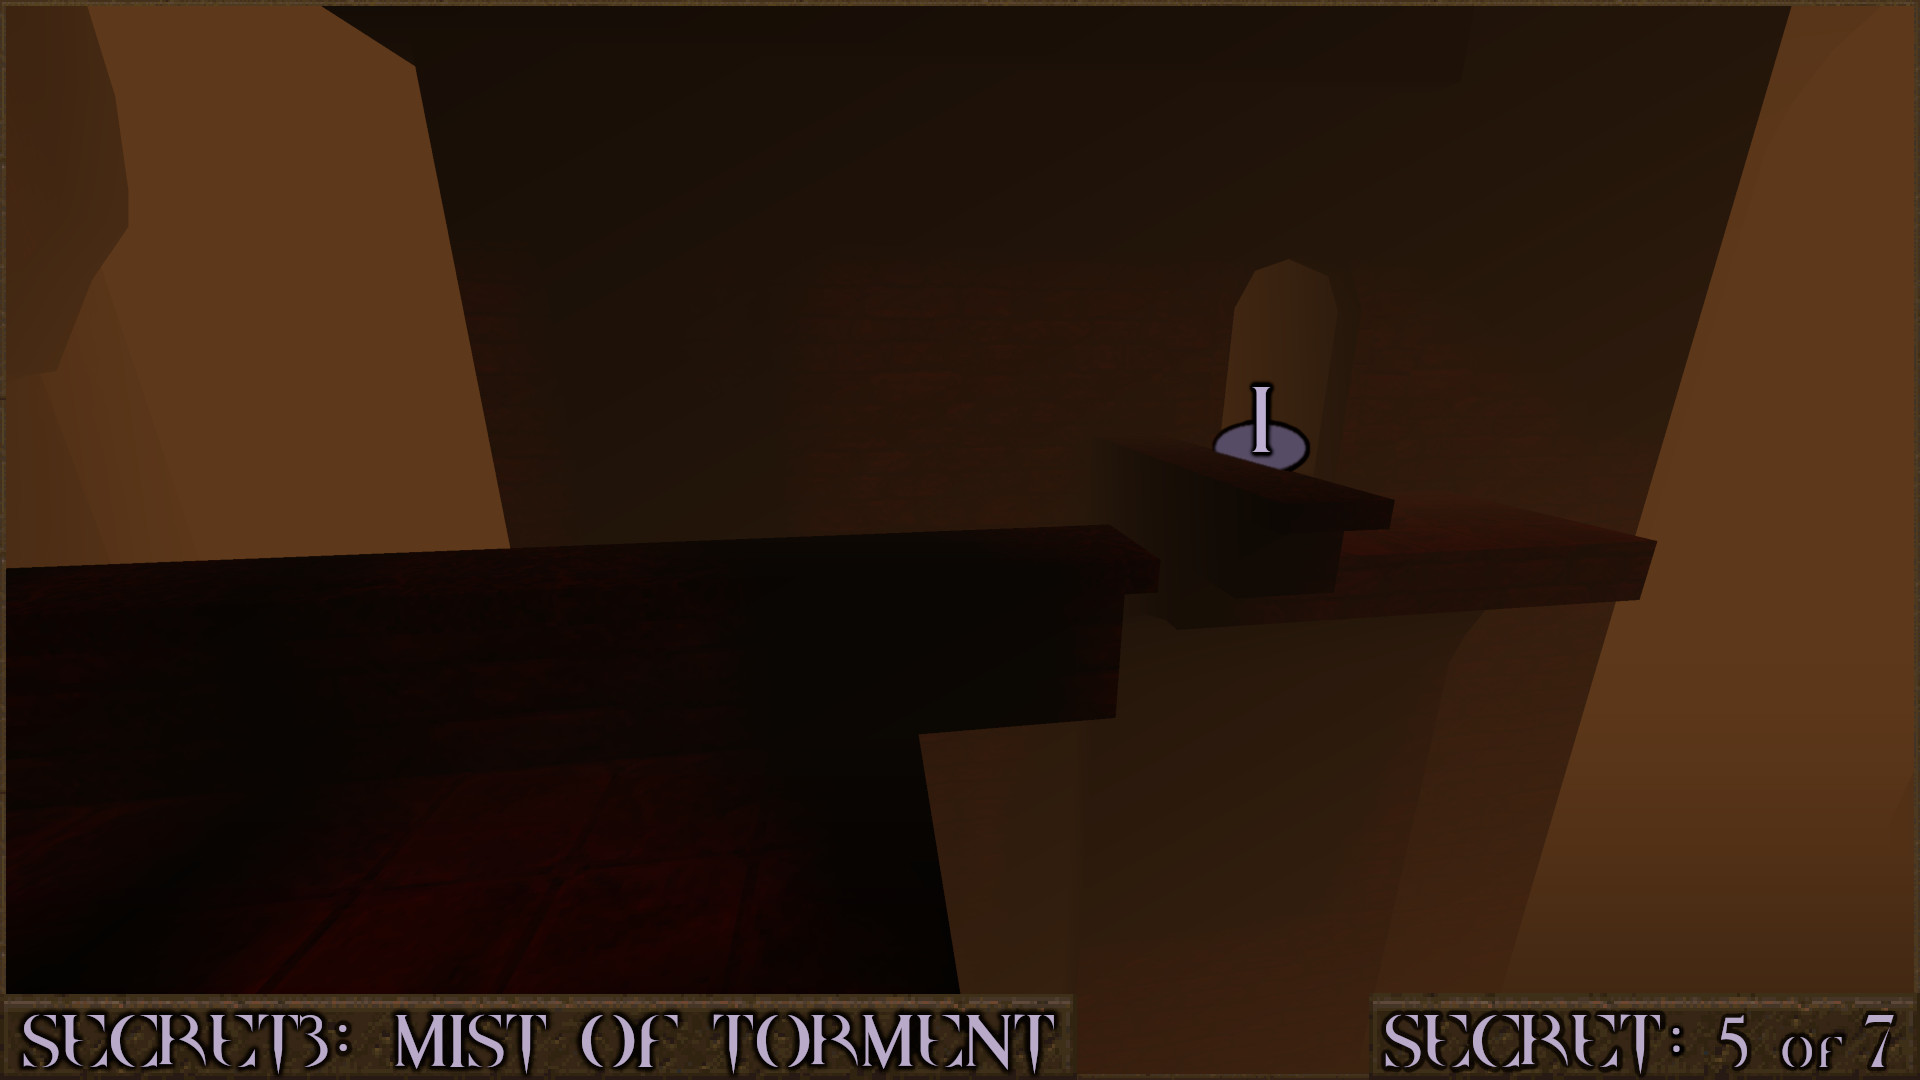
Return to the ruined wall from Secret 3 and look over the edge nearby. There is a bridge below () so drop down to it. The bridge leads directly to a cliff wall () that when shot will shift out of the way letting you into the secret.

Reward: [Cell Capacity Upgrade]

Secret 5 of 7
After exiting Secret 4 head to the end of the broken bridge and jump over to a nearby window (). Inside is a secret and a teleporter.

Reward: Yellow Armor

Secret 6 of 7
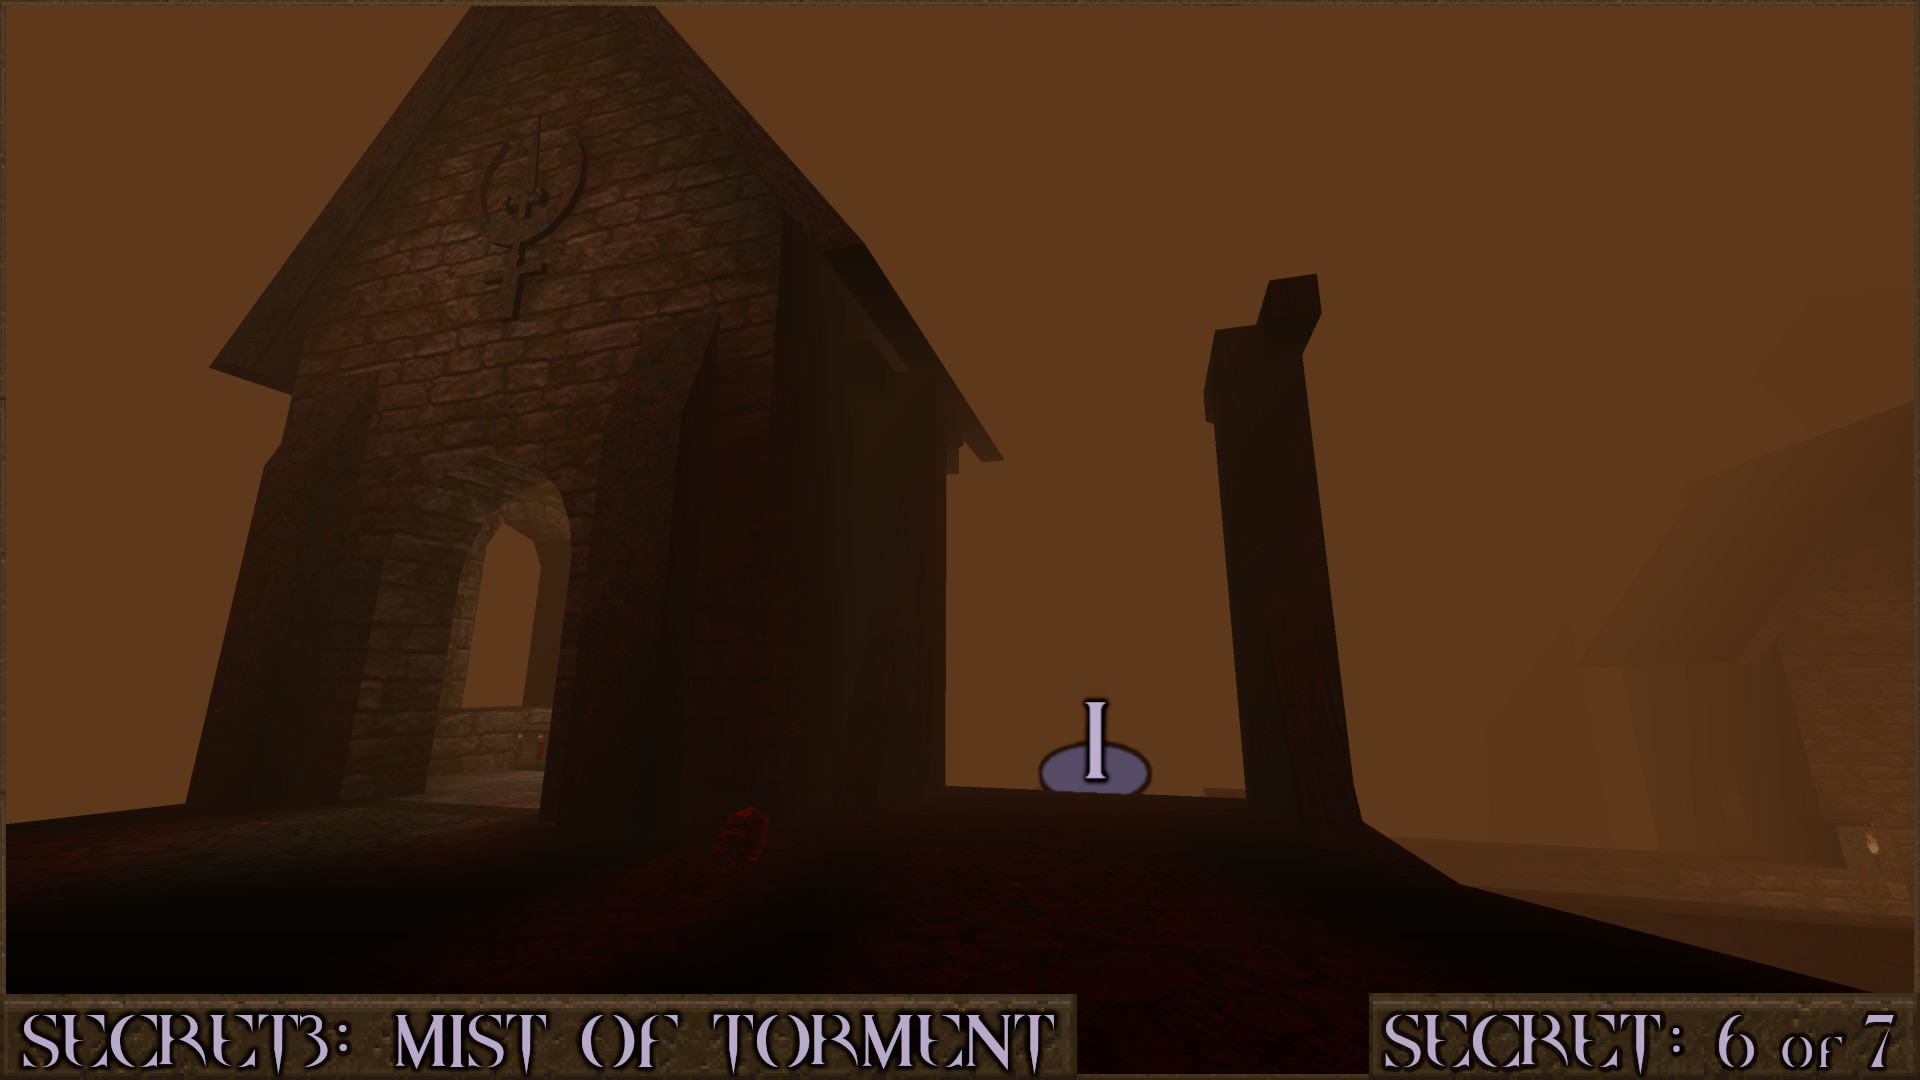
Continue on with the level by going past a small building () and then drop down to a large bridge.

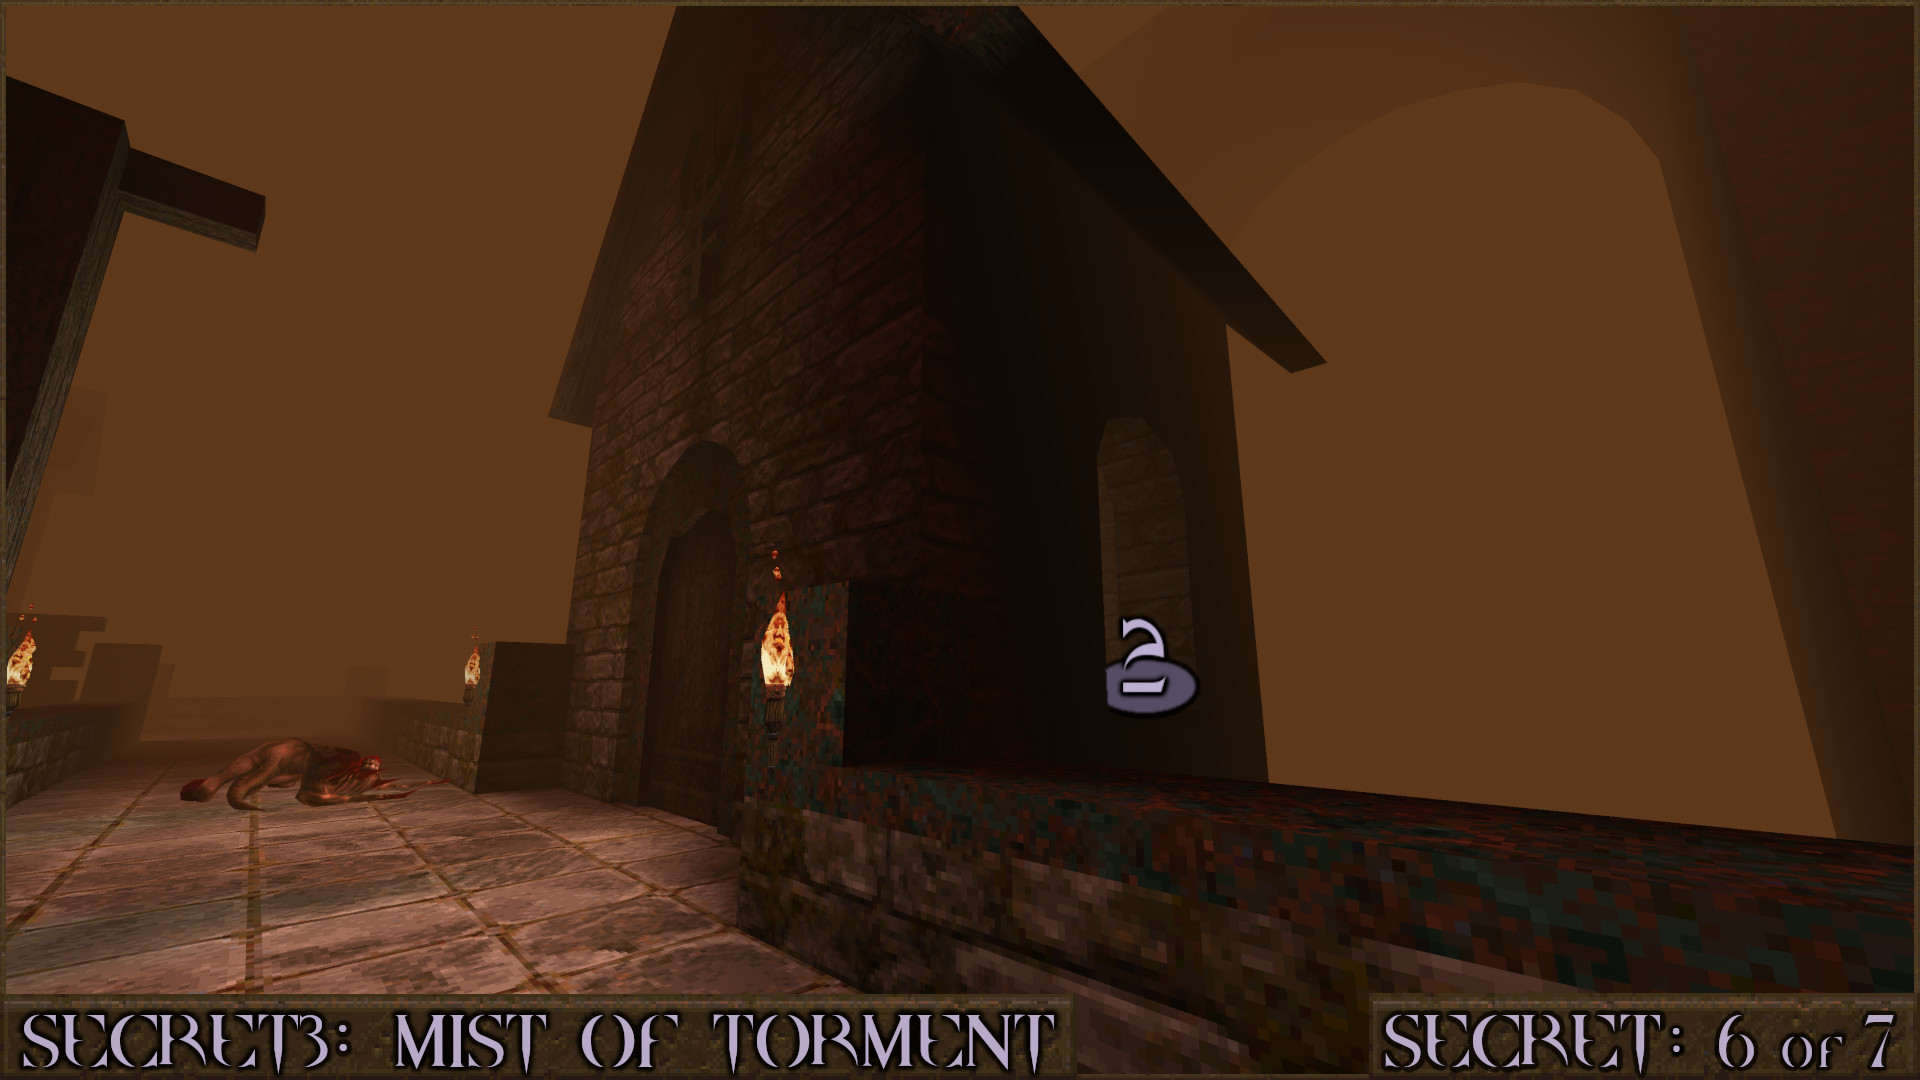
You'll walk past a building embedded into the bridge but the door is closed. Head around the side and jump in through the window () to enter the secret.

Reward: Super Nailgun Small Nails×2 Large Health

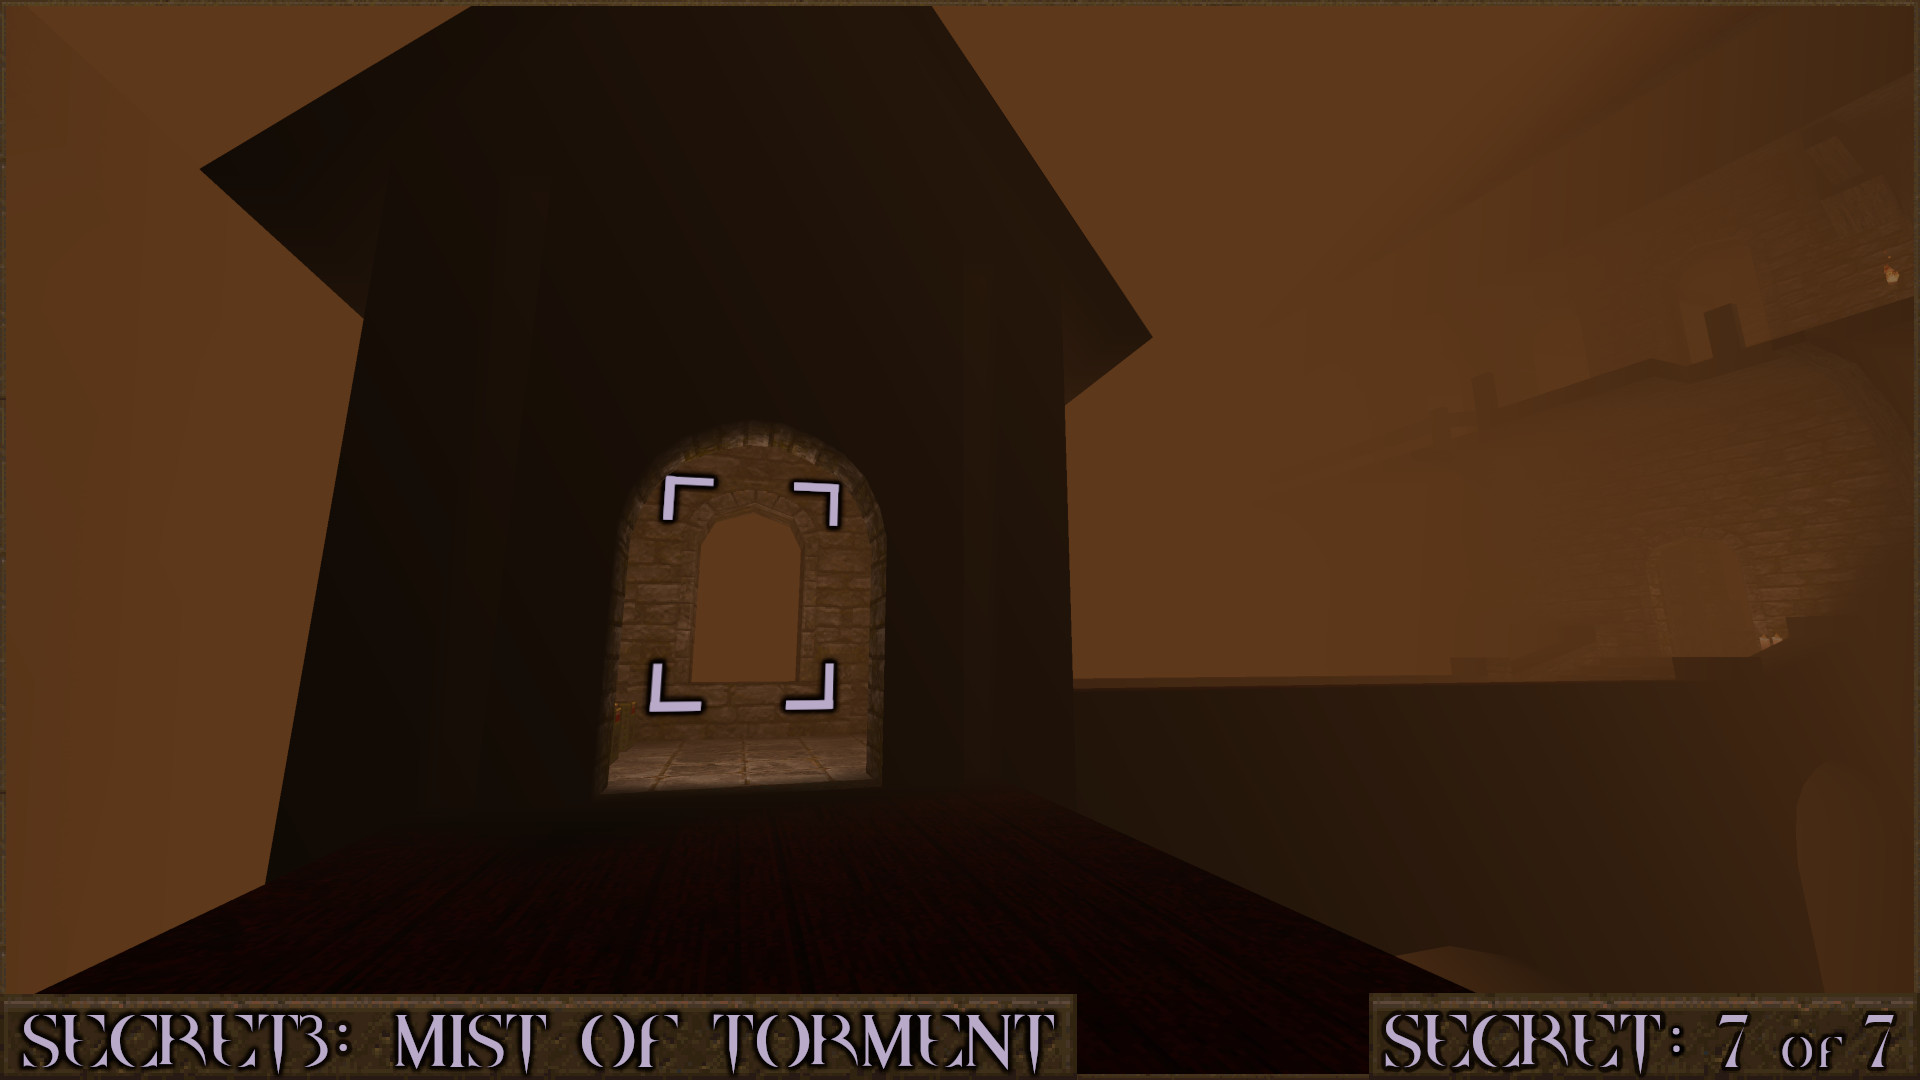
Secret 7 of 7
After using an orange button to lower a bridge across to another tower head across it and carefully jump through a window. There is a ledge behind the window containing a secret.

Reward: [Rocket Capacity Upgrade]
The Rune of Sorrow!
Near the end of this level you will acquire another rune, the Rune of Sorrow! The level exit will take you directly back to the The Runic Nexus hub.
‎‏‏‎MAP6: The Matriarch of Decay
Secret 1 of 13
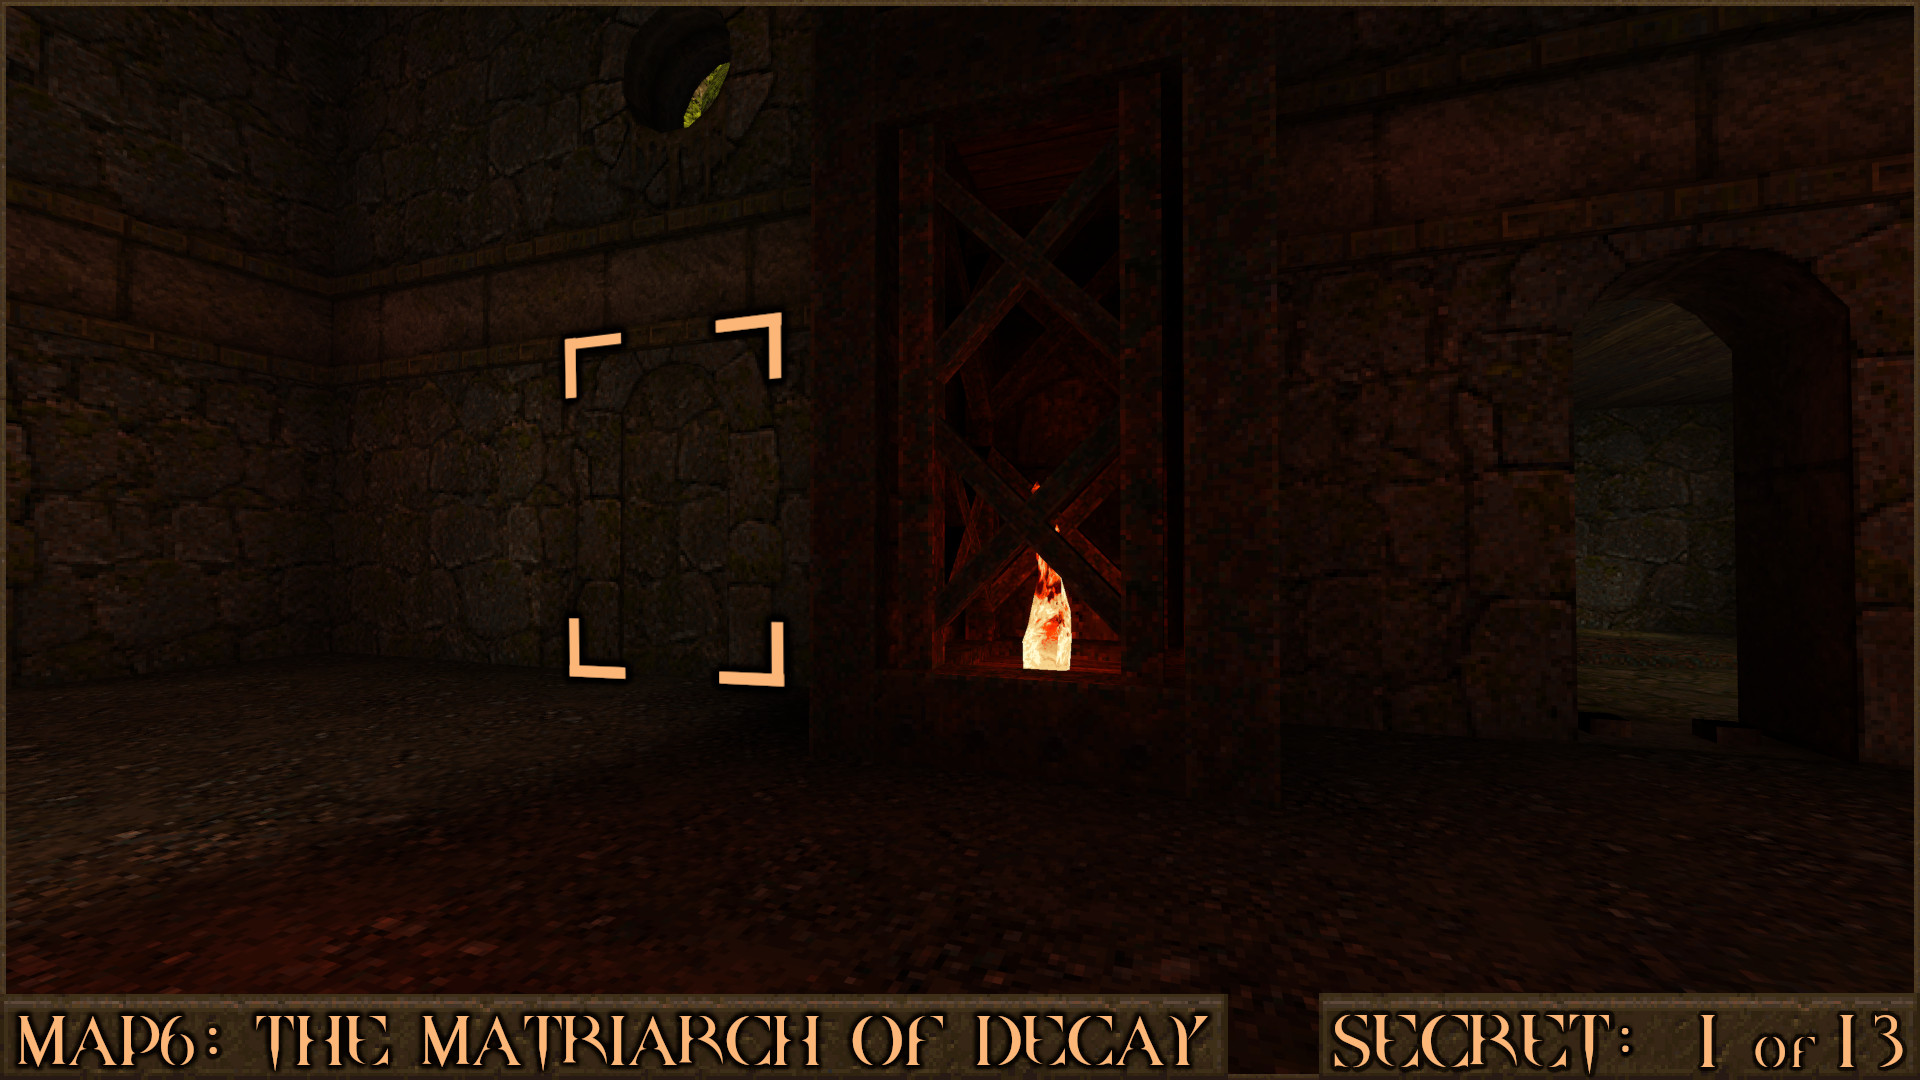
Exit your cell into the large jail area and turn right. Shoot the bricked up alcove to access the room behind it.

Reward:

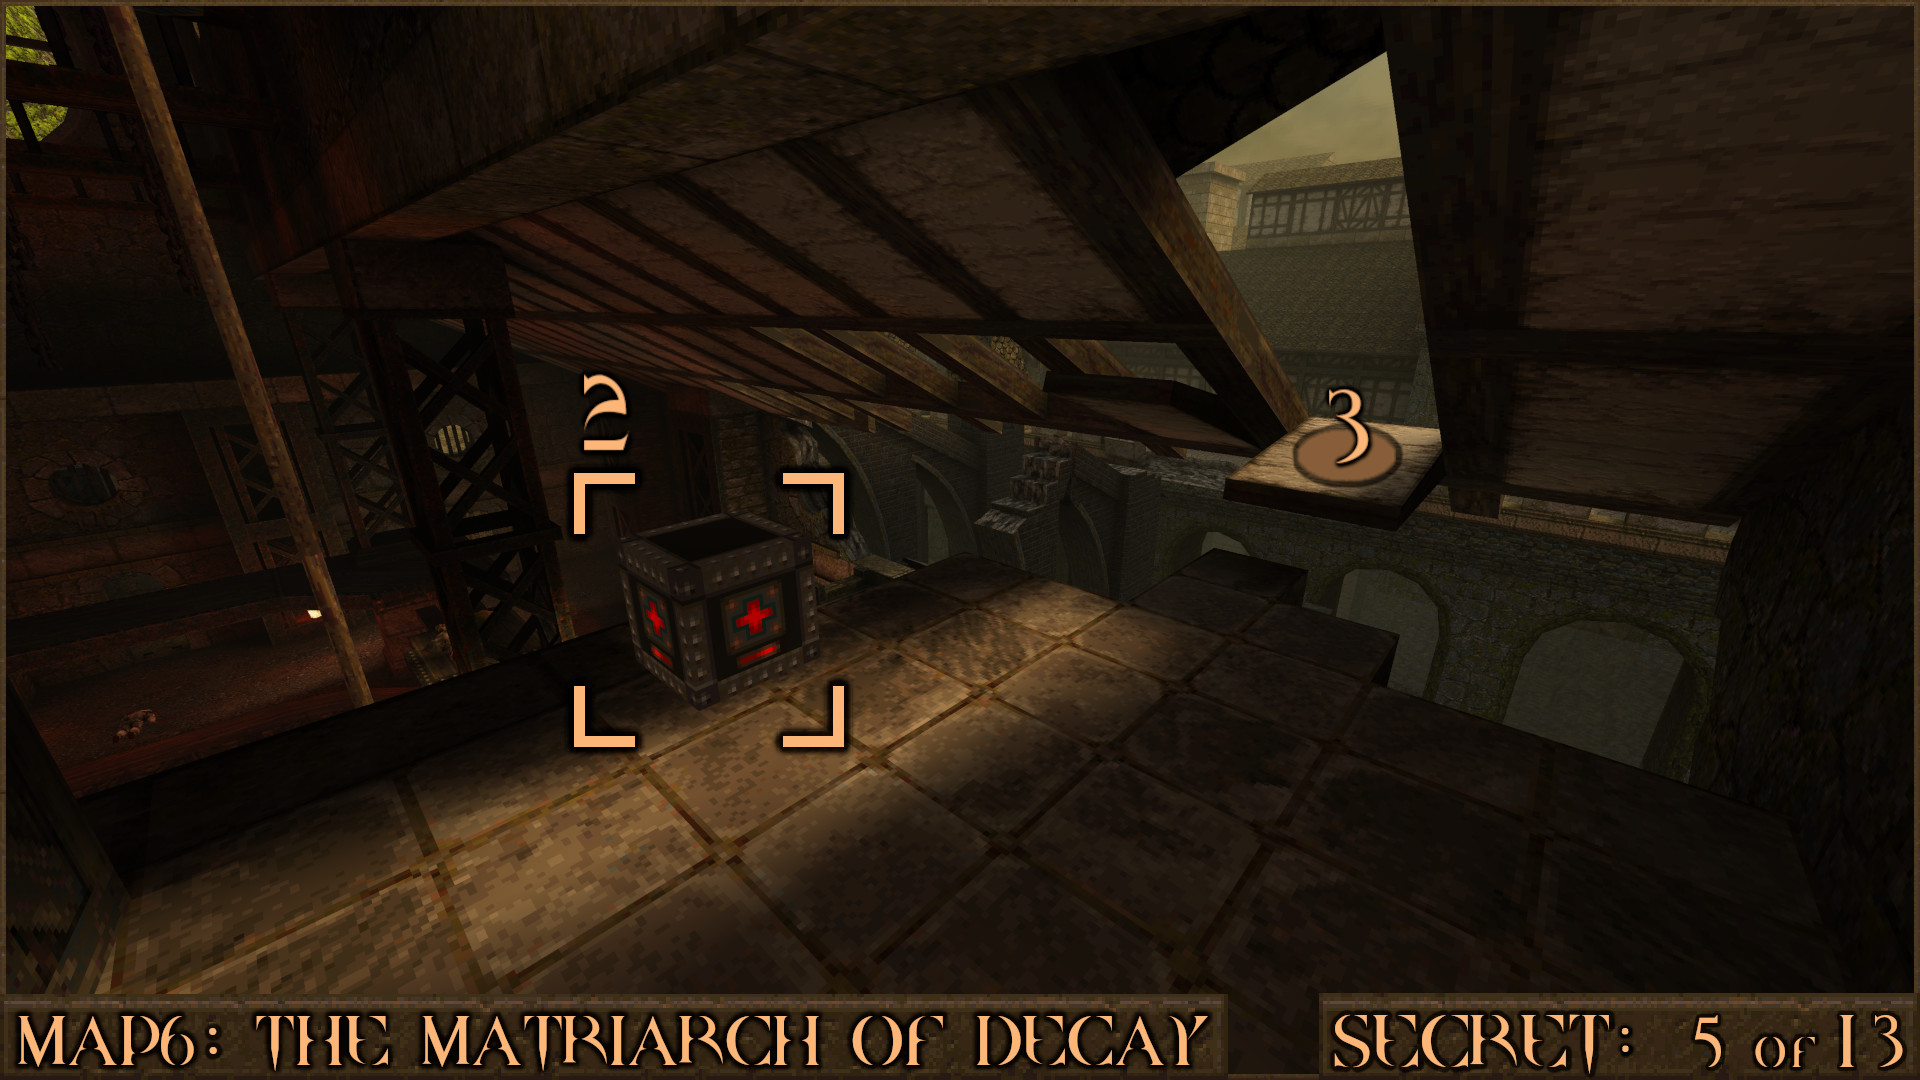
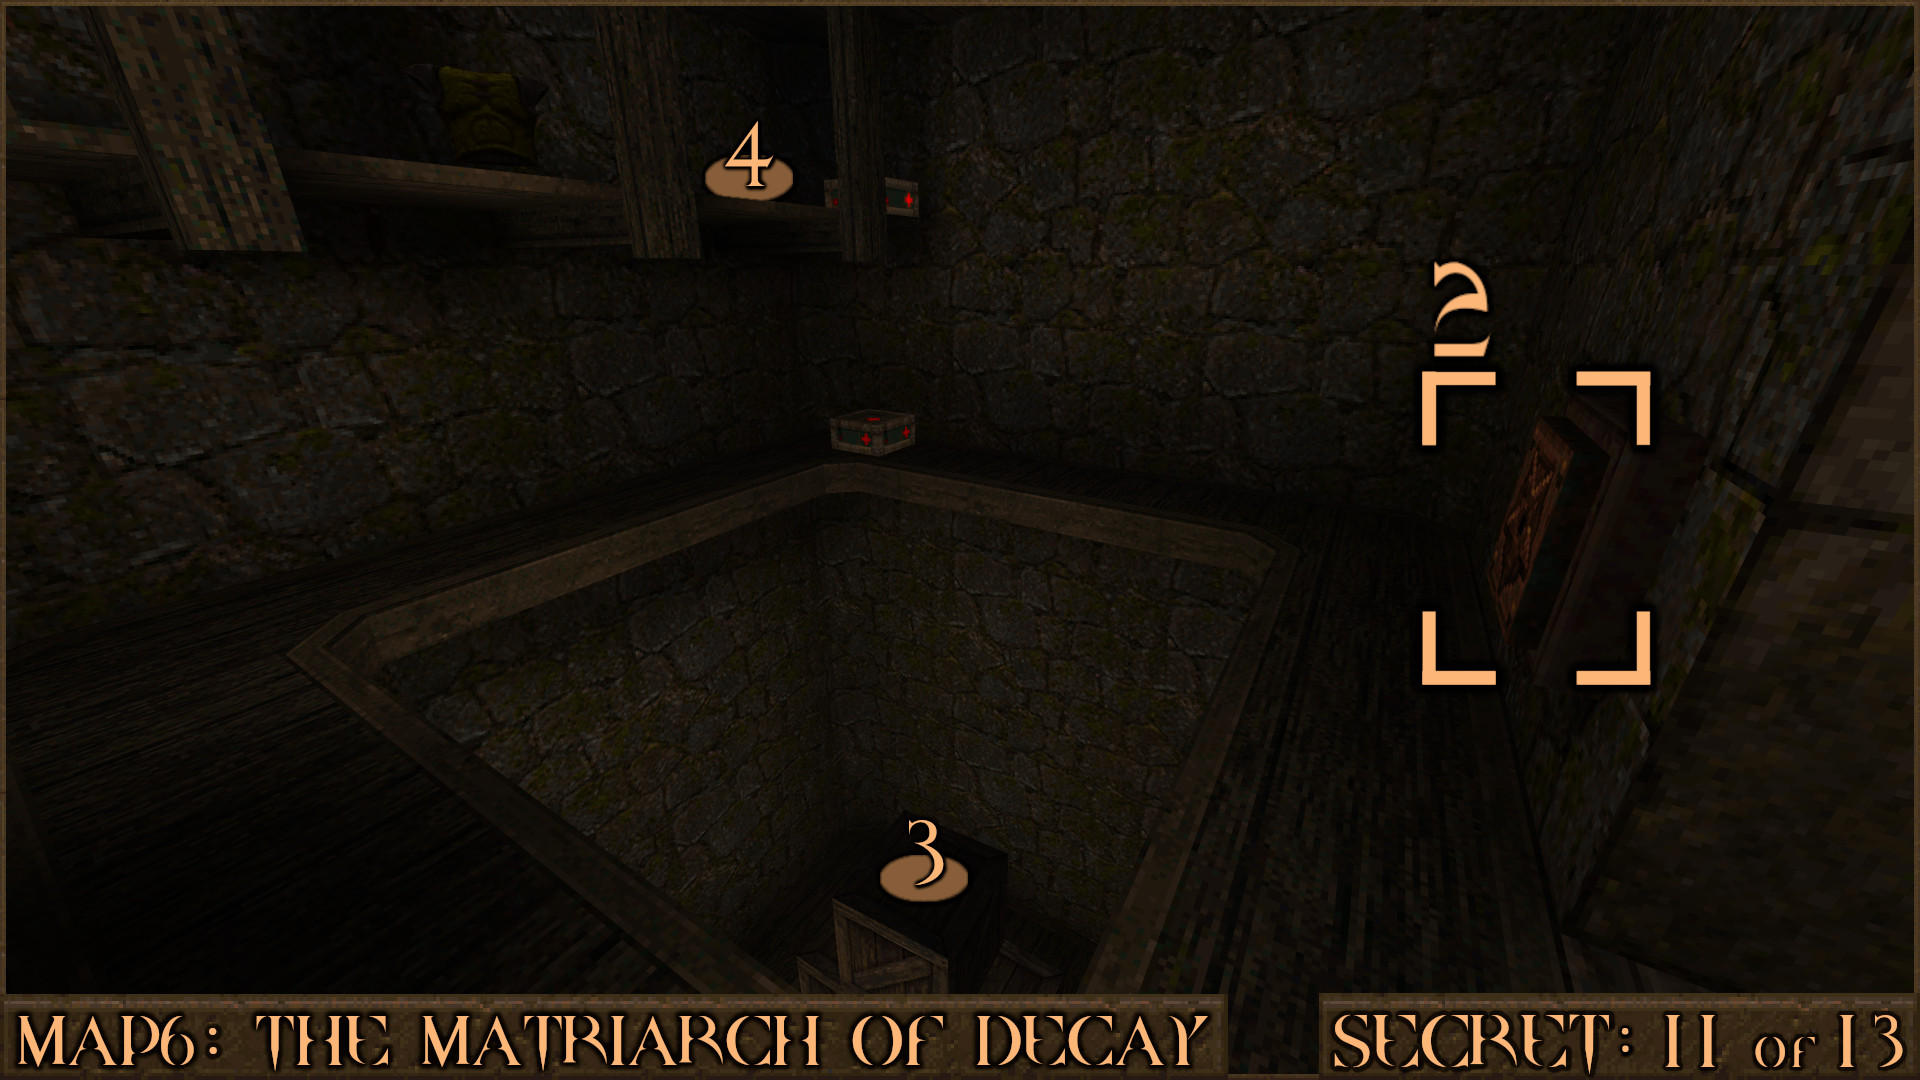
Secret 2 of 13
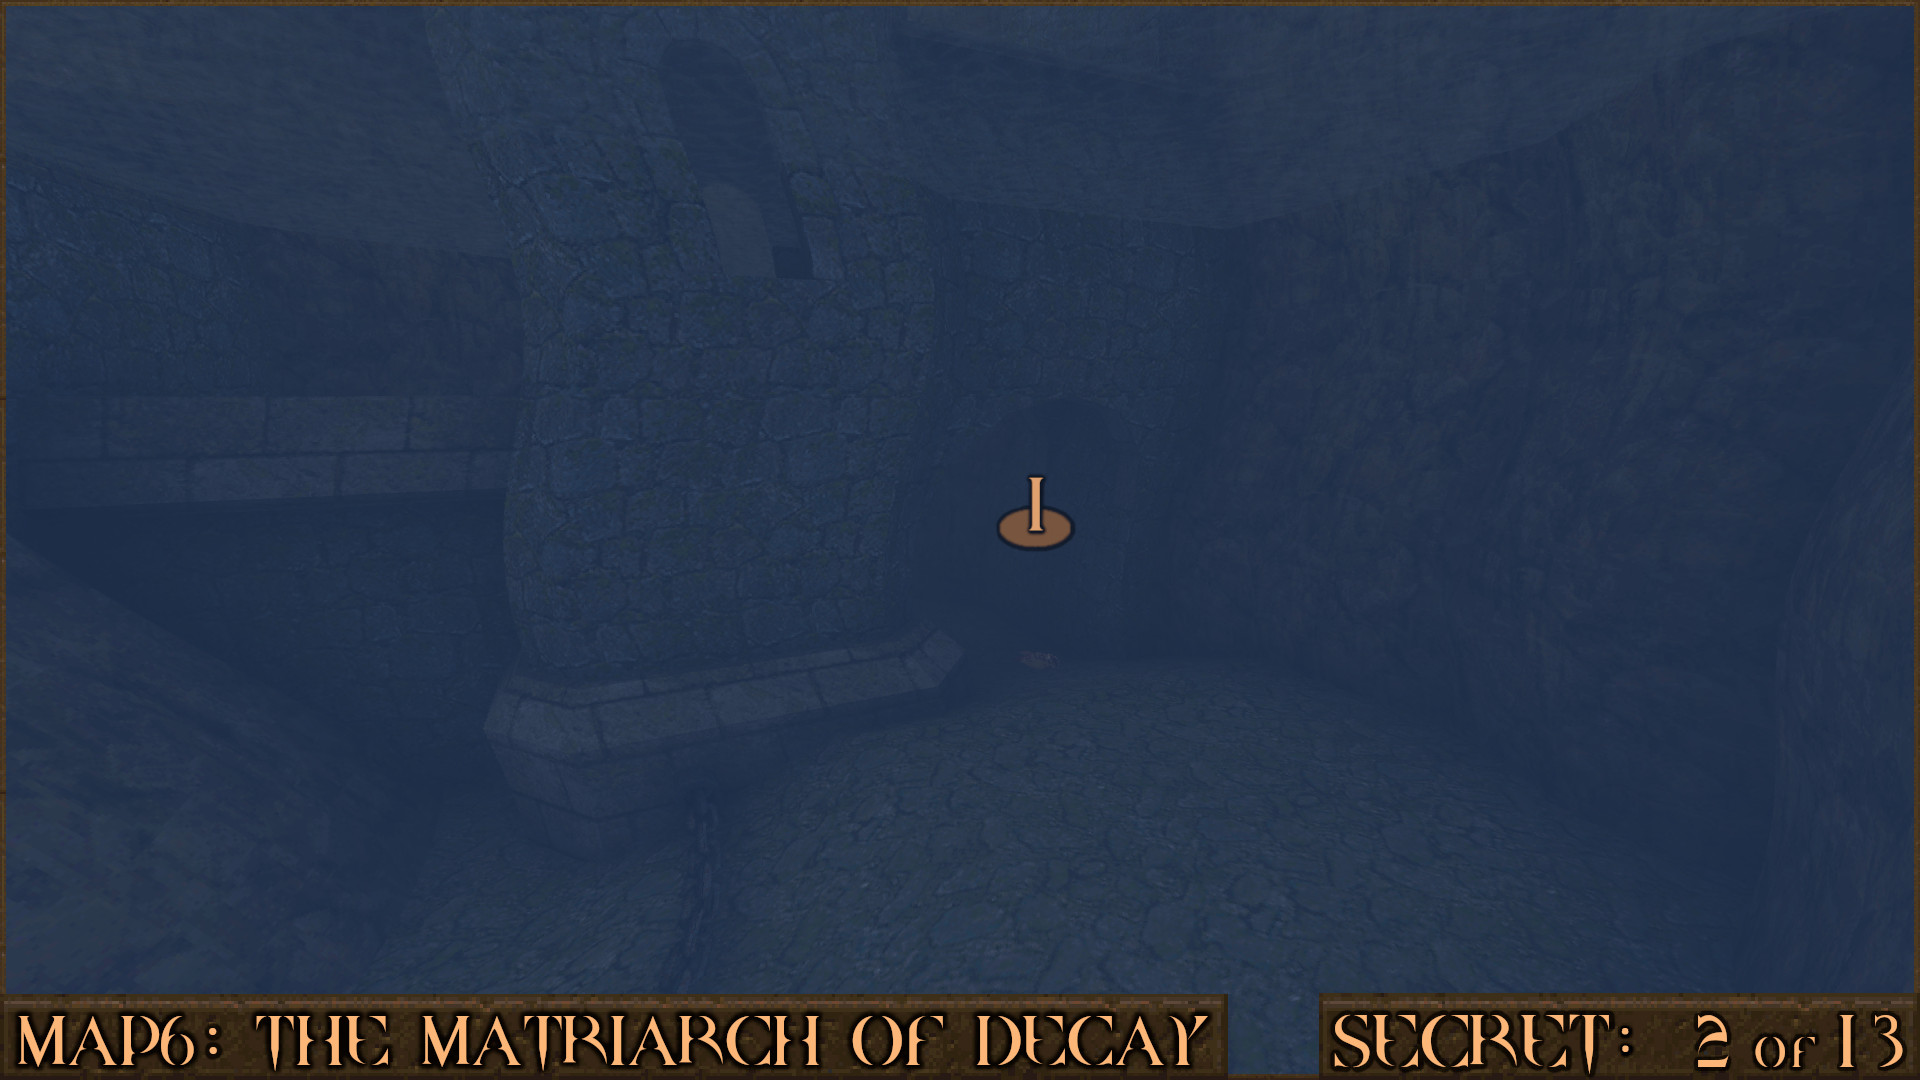
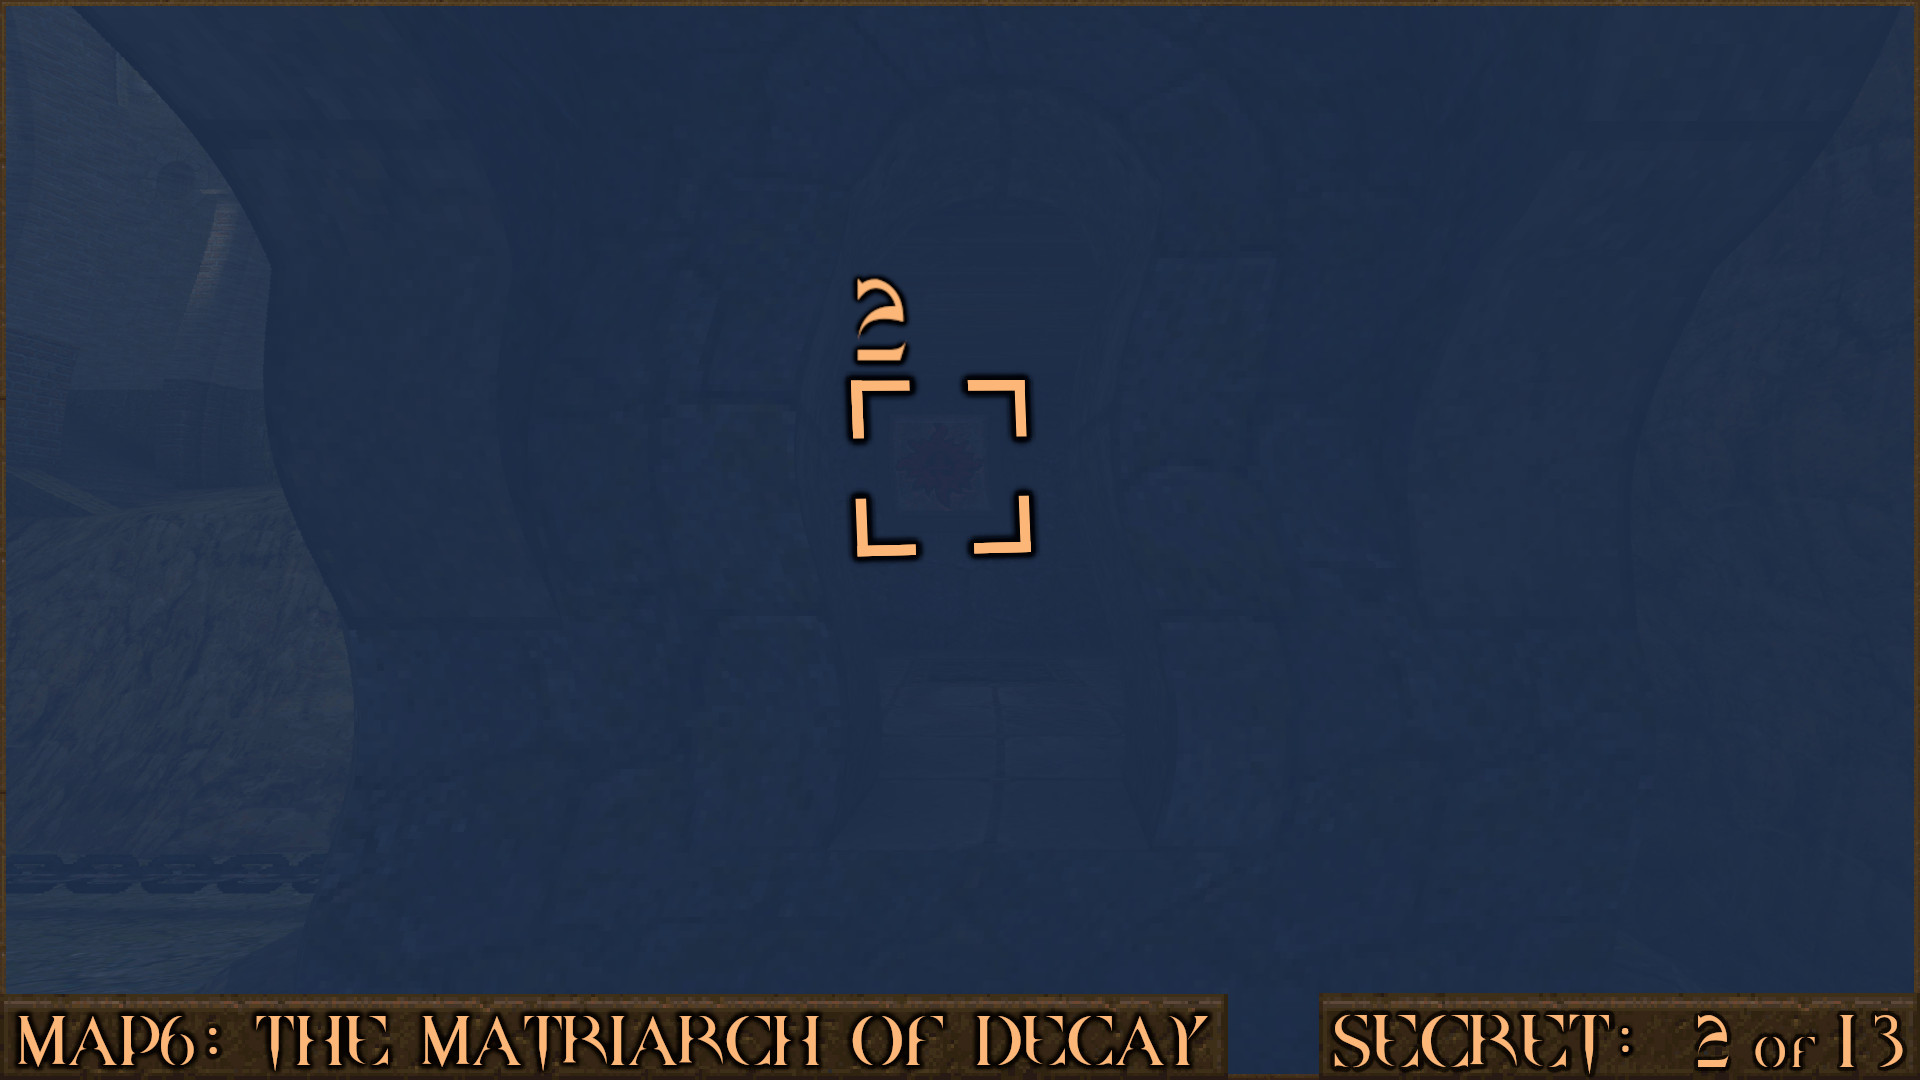
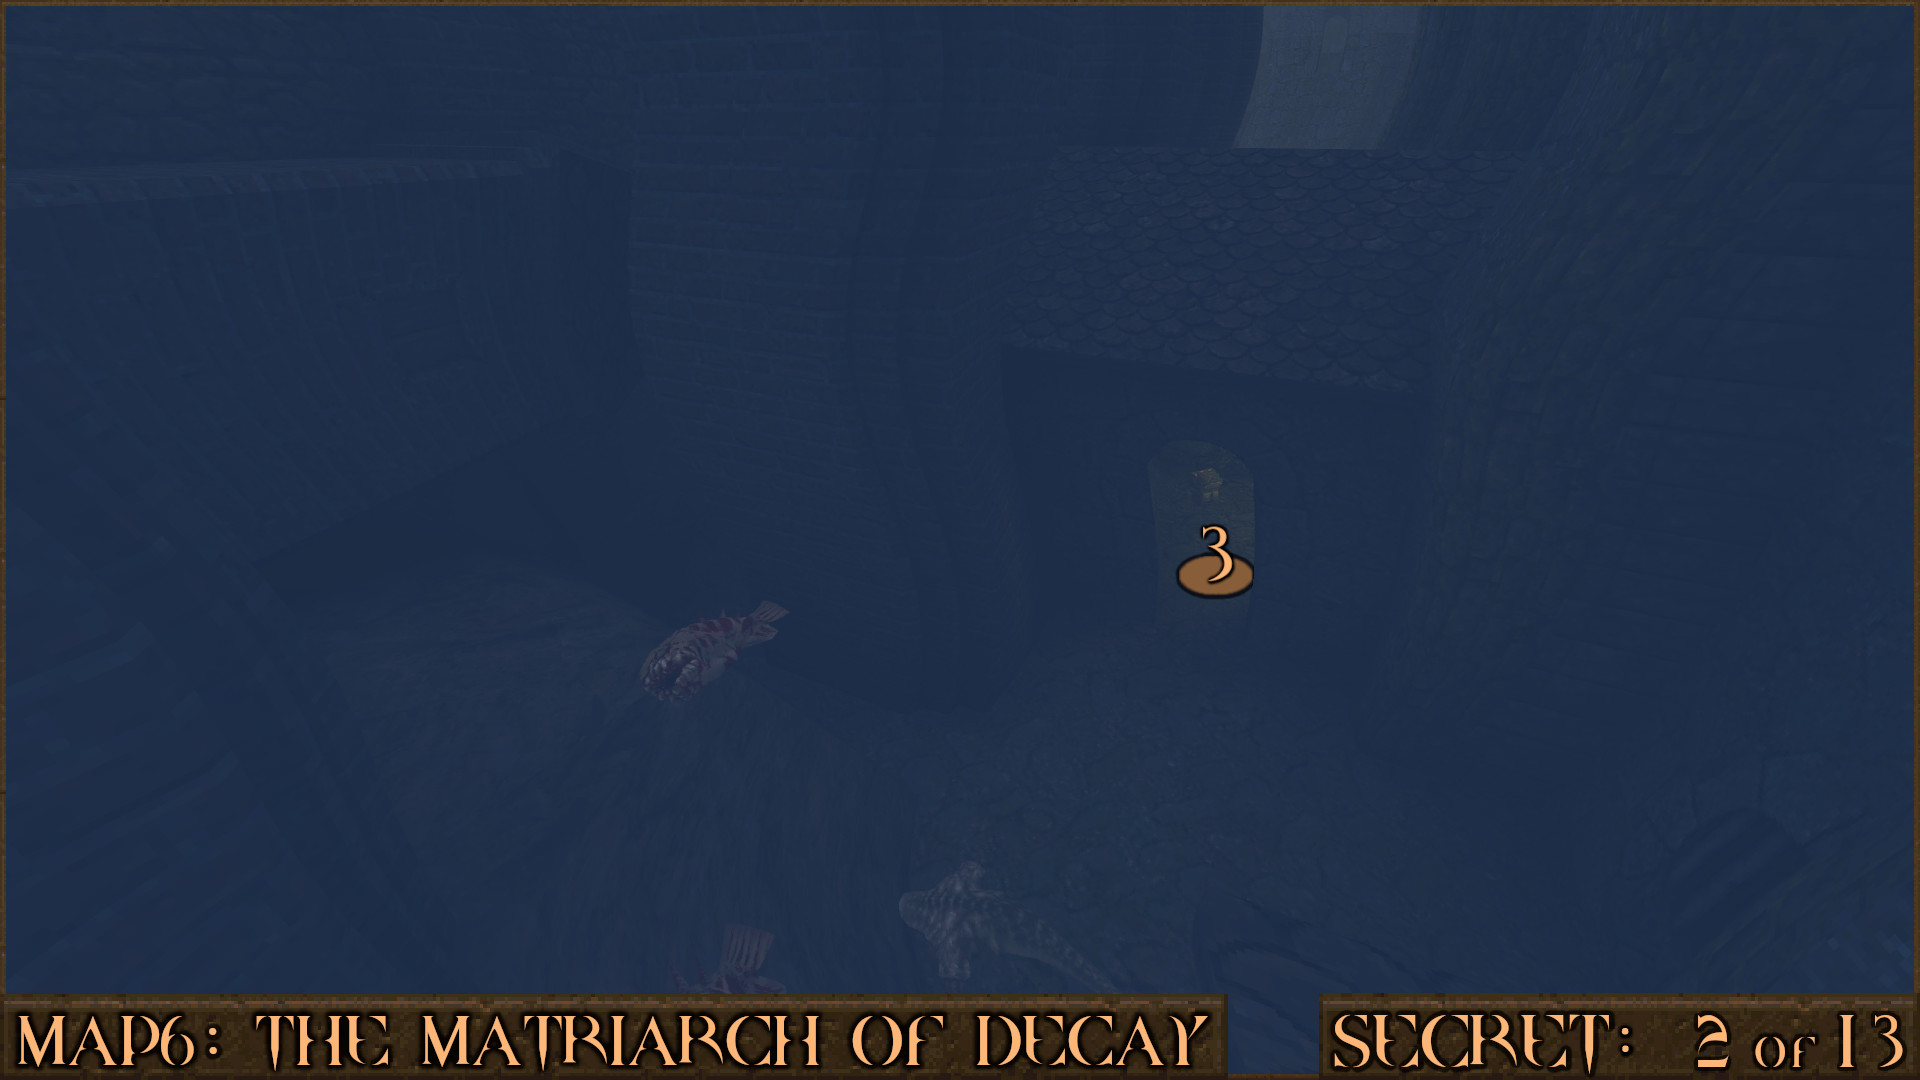
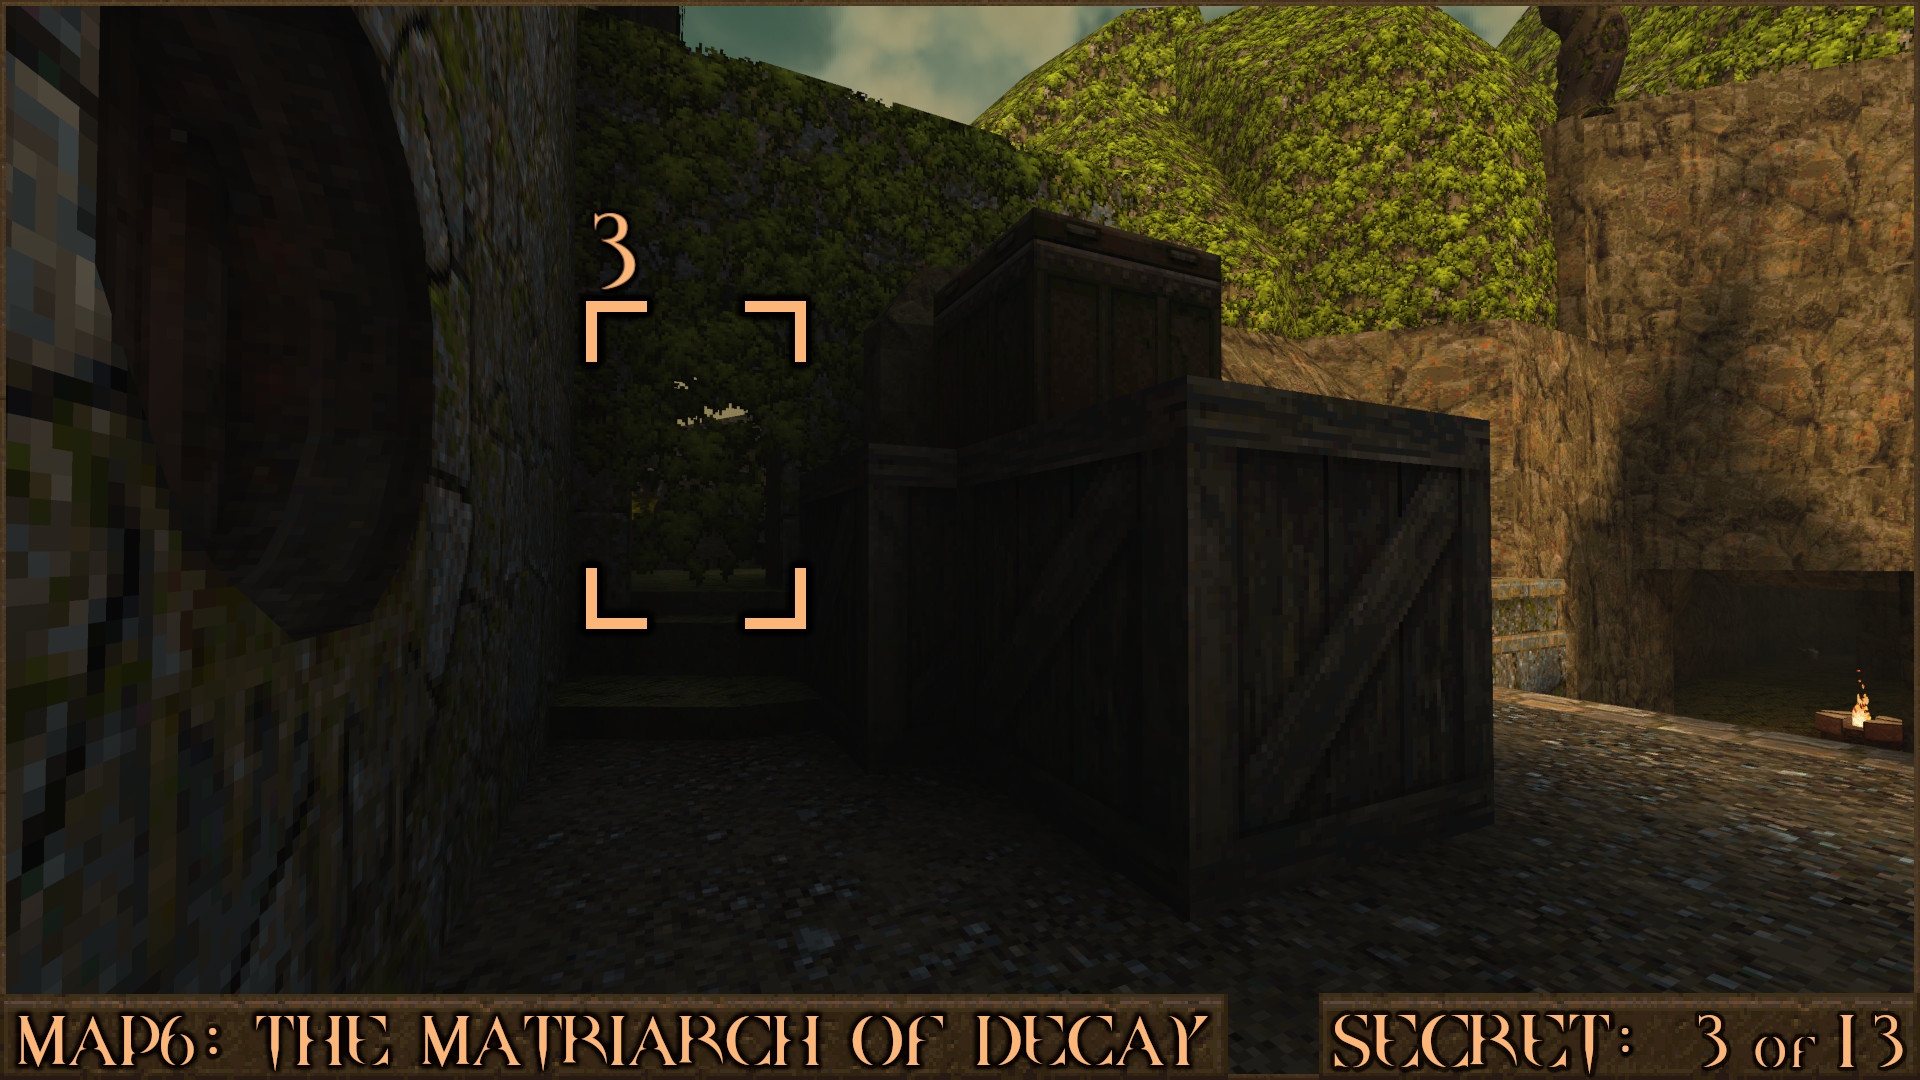
Outside is a large area of water. Swim to the far corner and look for a sunken structure (1).

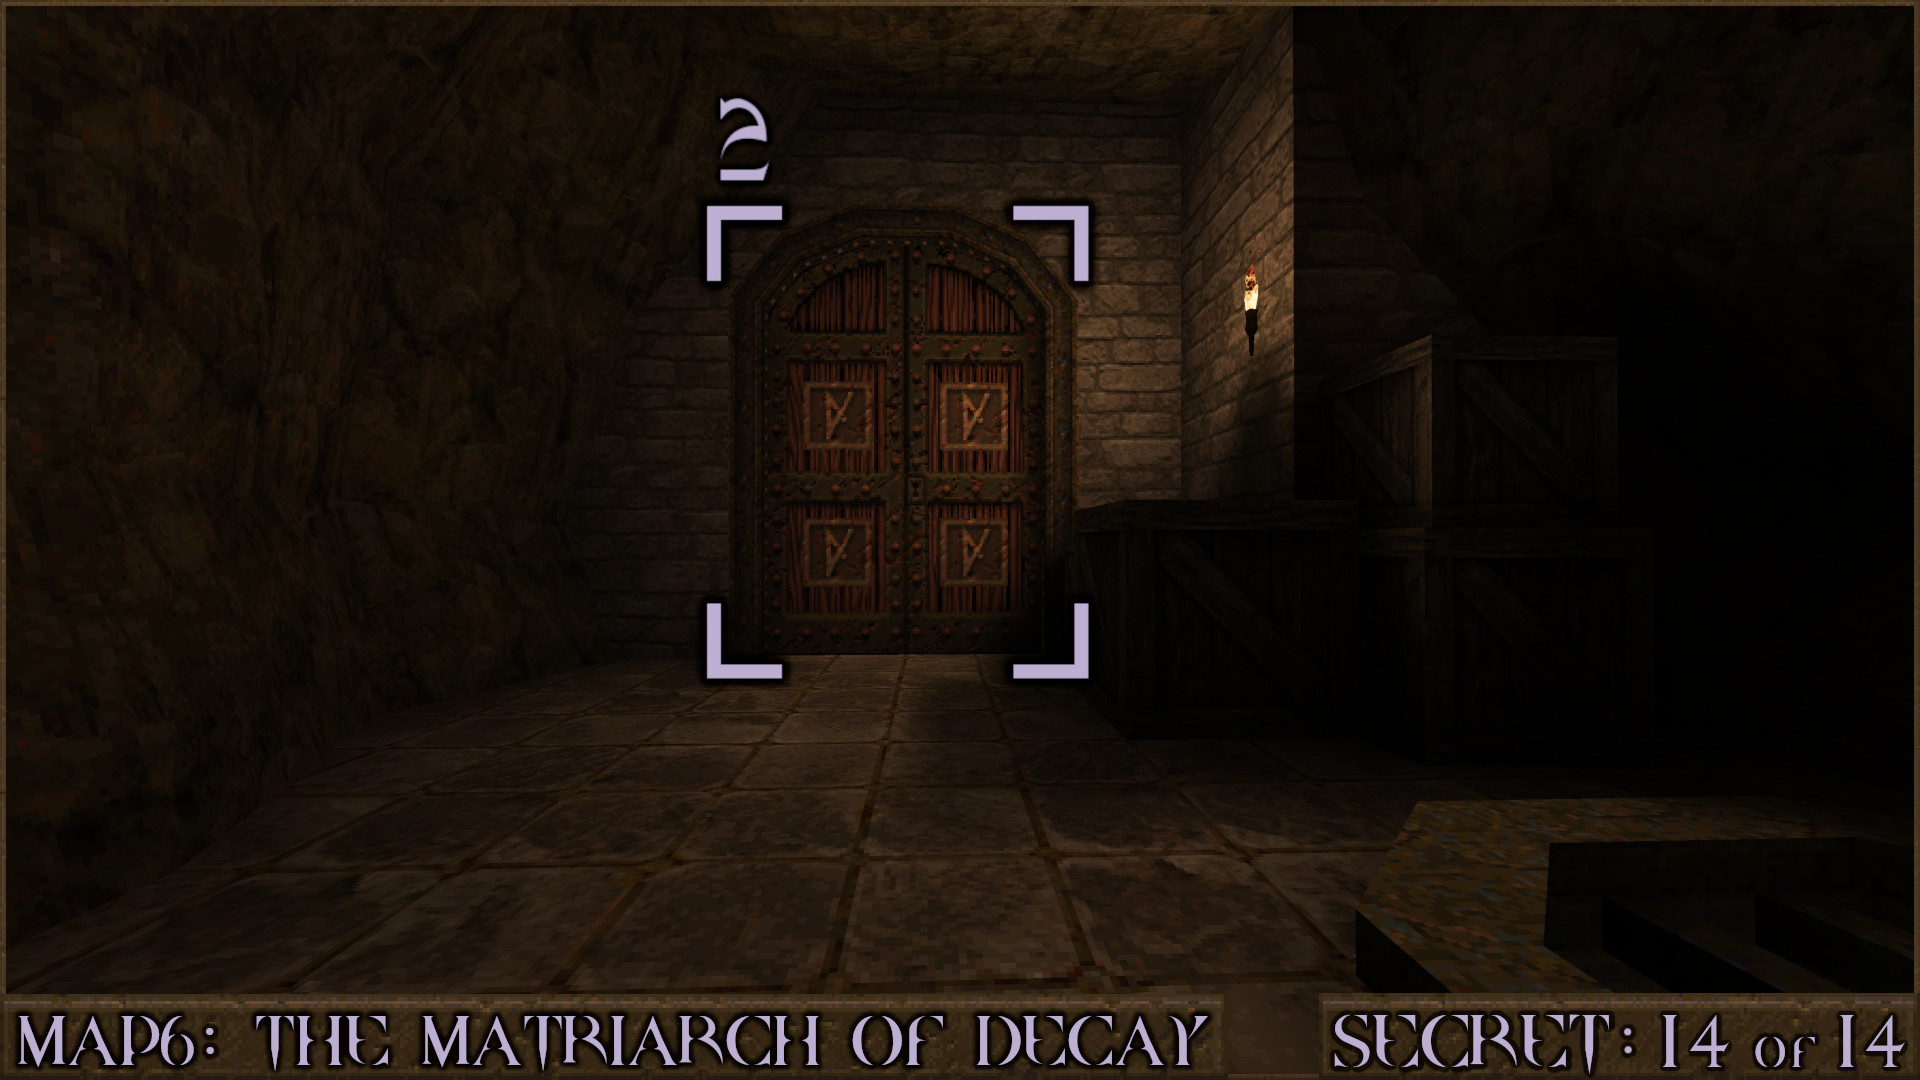
Look inside to see a red shootable button (2). Shoot it and follow the metal chain outside to another structure nearby.

The bars blocking this structure have moved and you can now enter (3).

Reward: [Shell Capacity Upgrade]

Extra Secret [Step 1]
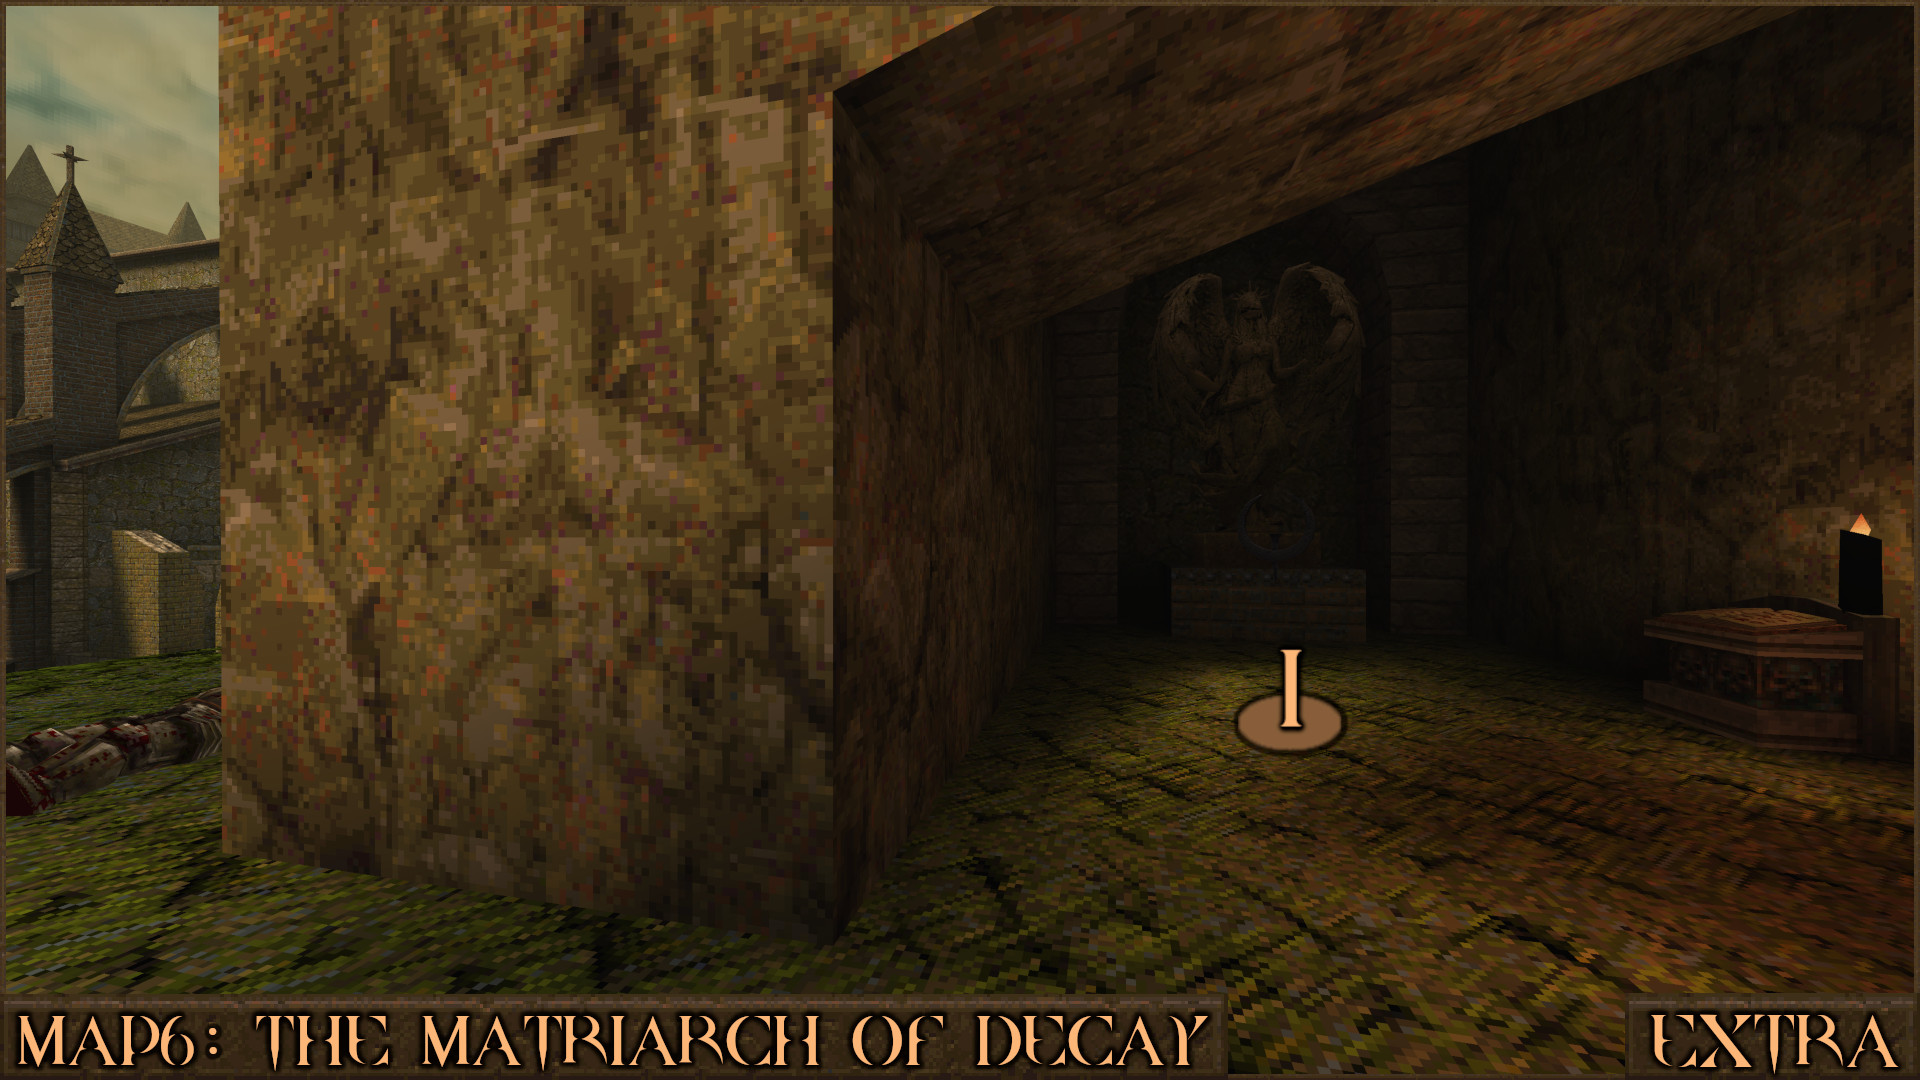
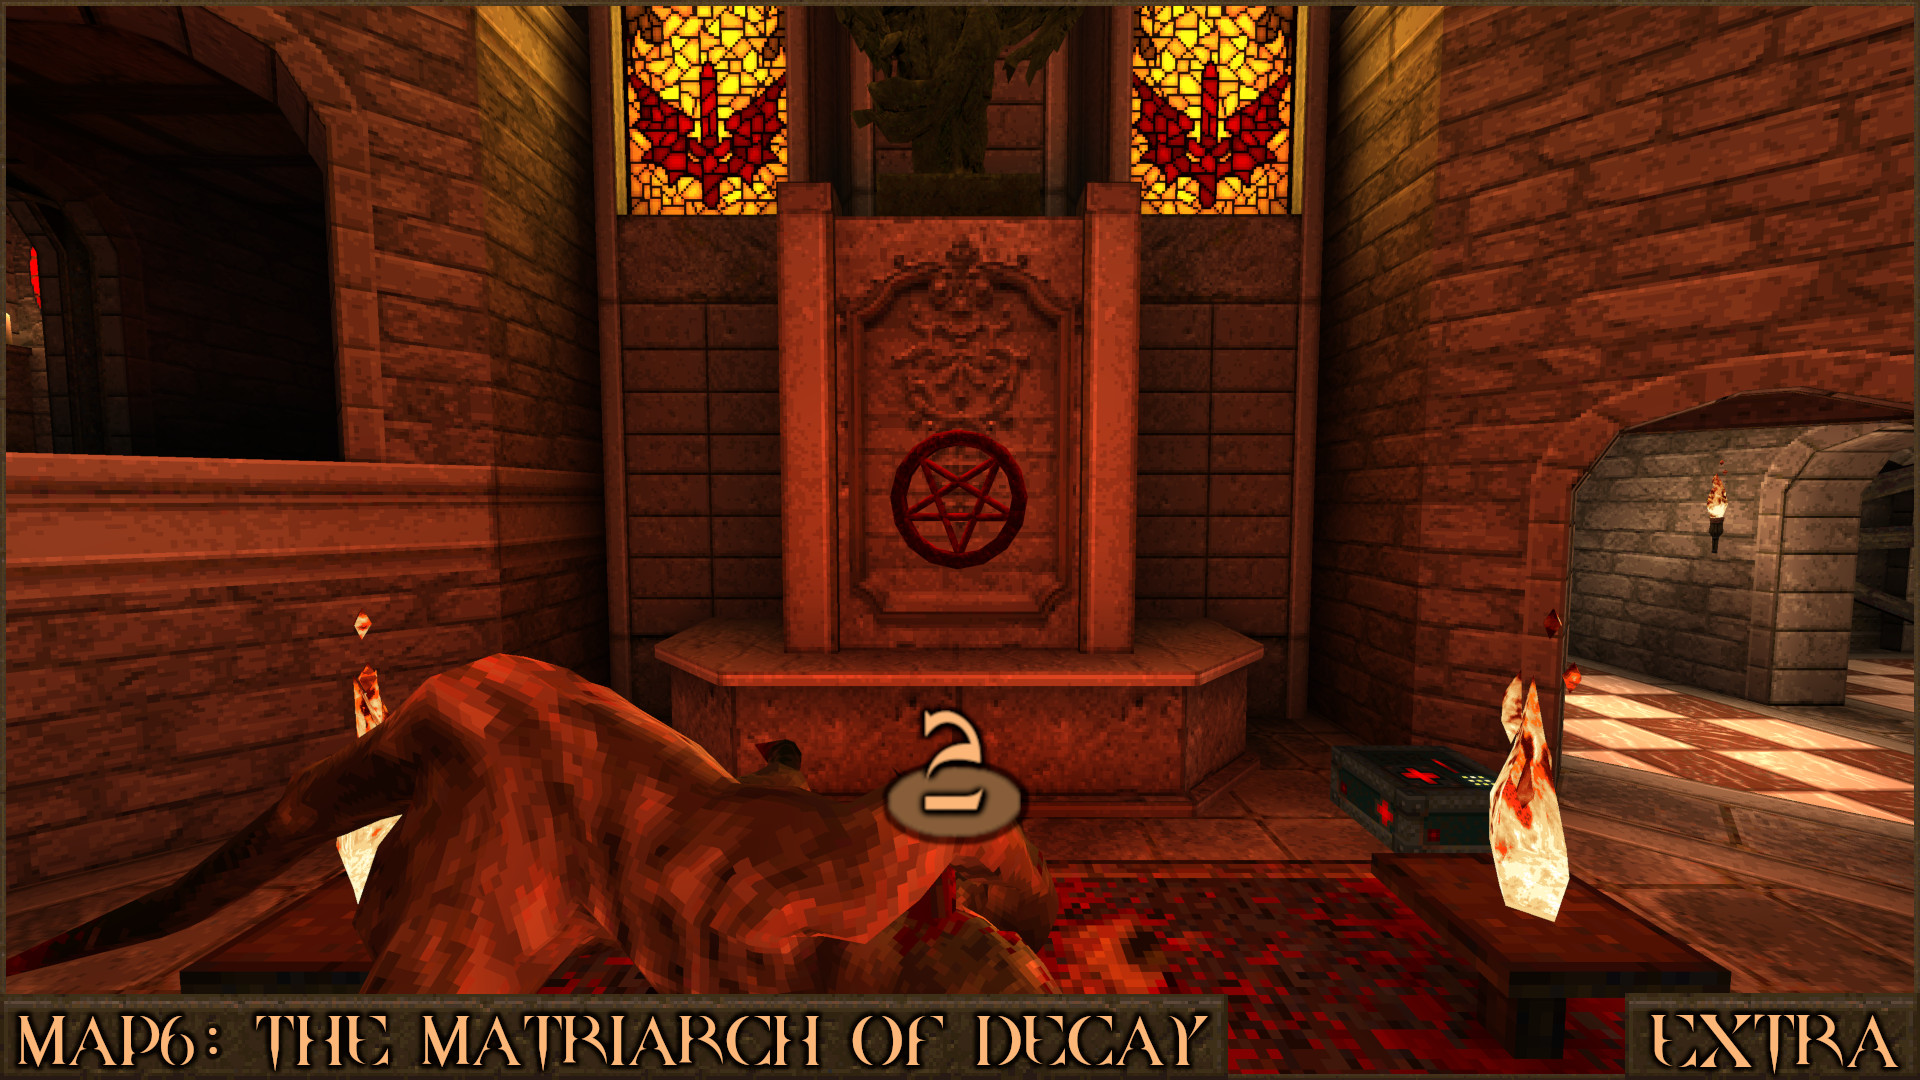
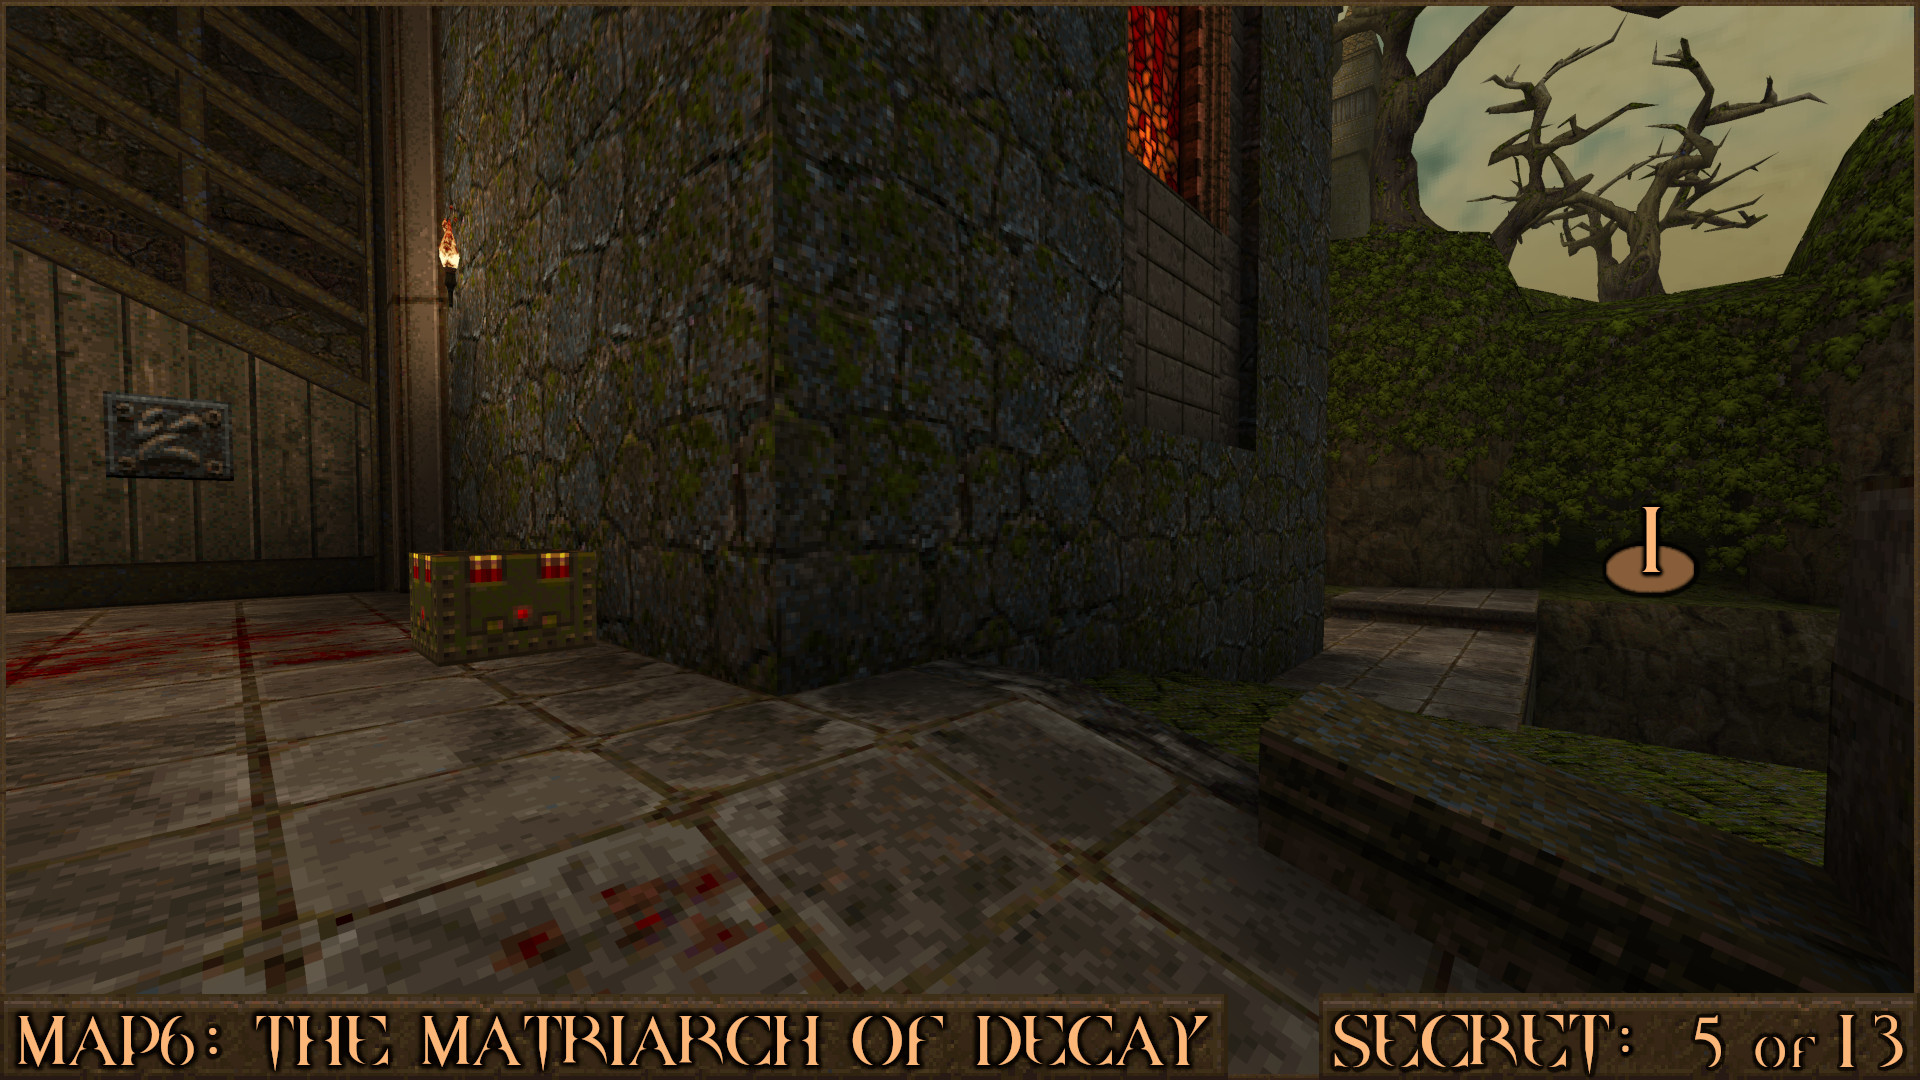
If you avoid two "gifts" from the queen during this level you will experience an interesting Extra Secret later on. After going up some steps by a cliff you will see an angel statue in a small cave next to a Quad Damage (1). Do not take this "gift" and move on.


Secret 3 of 13
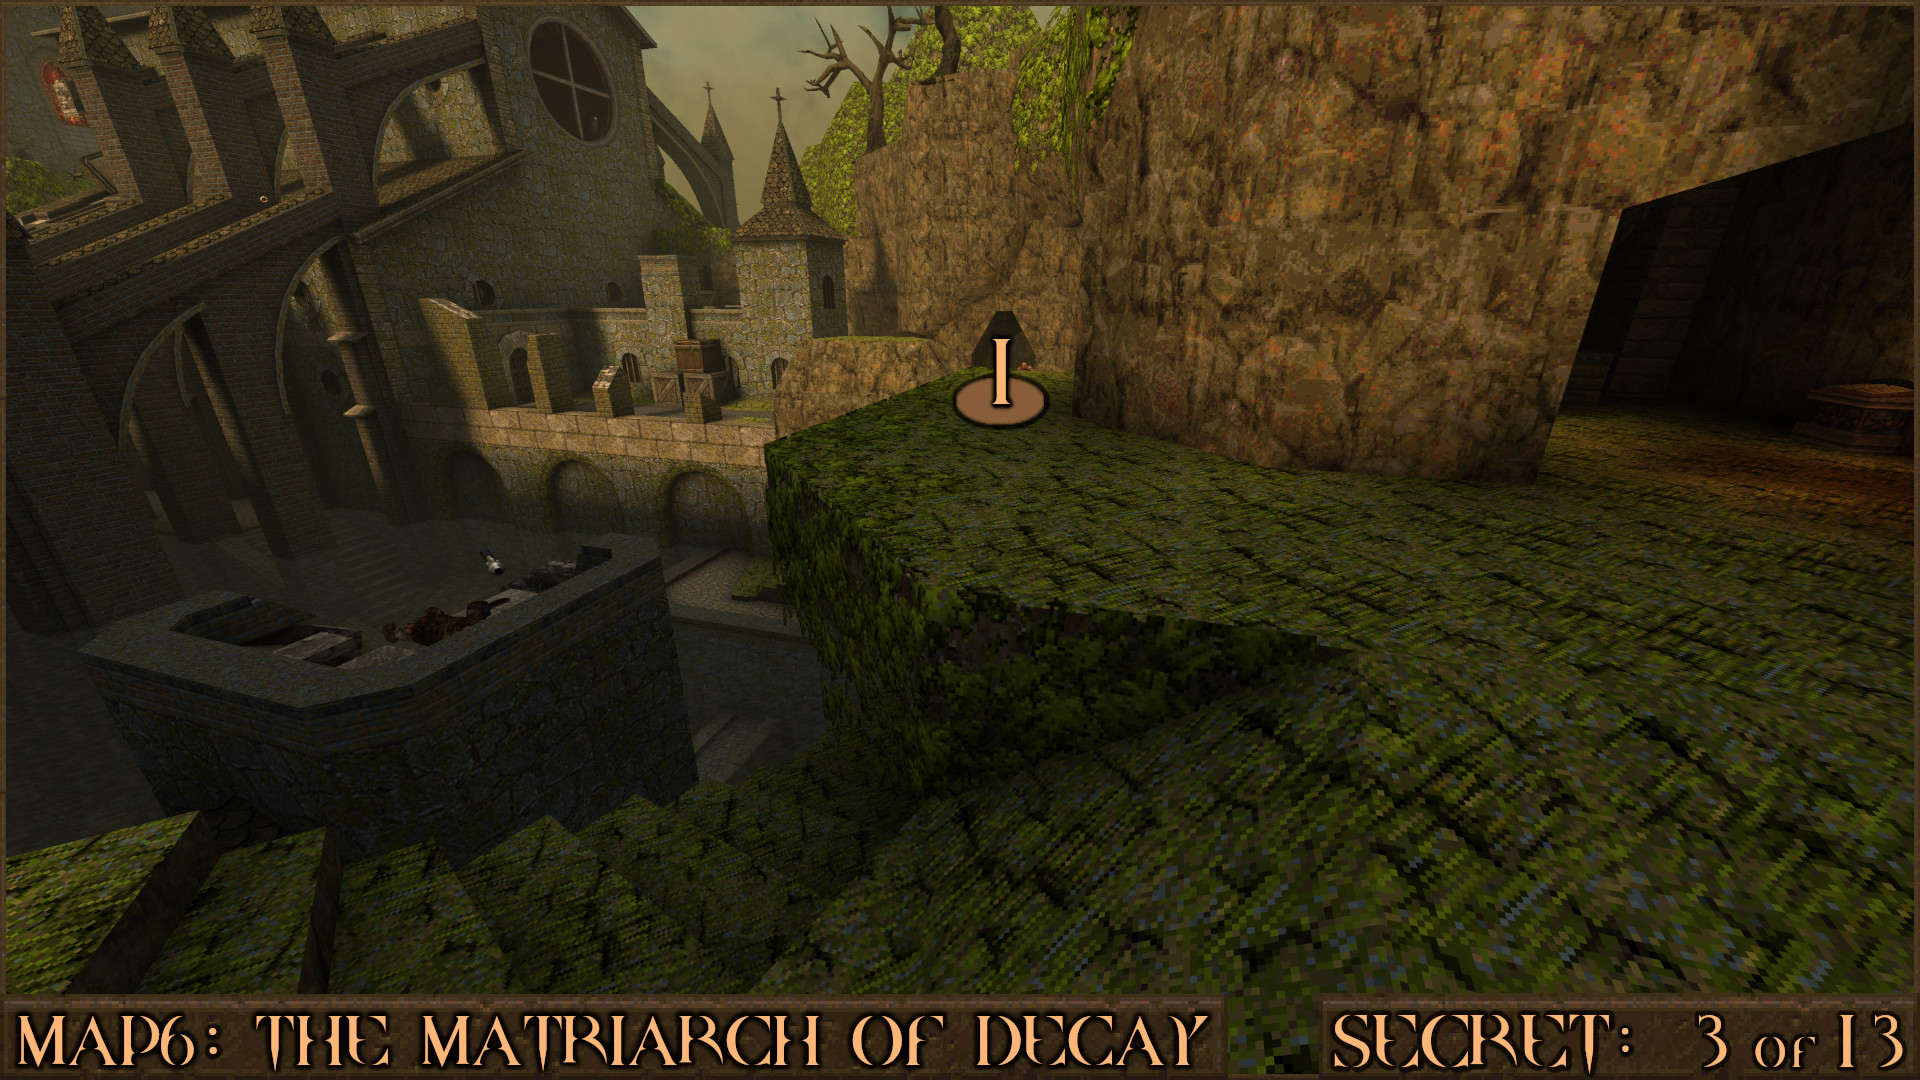
Follow the path to the left side of the cliff (1).

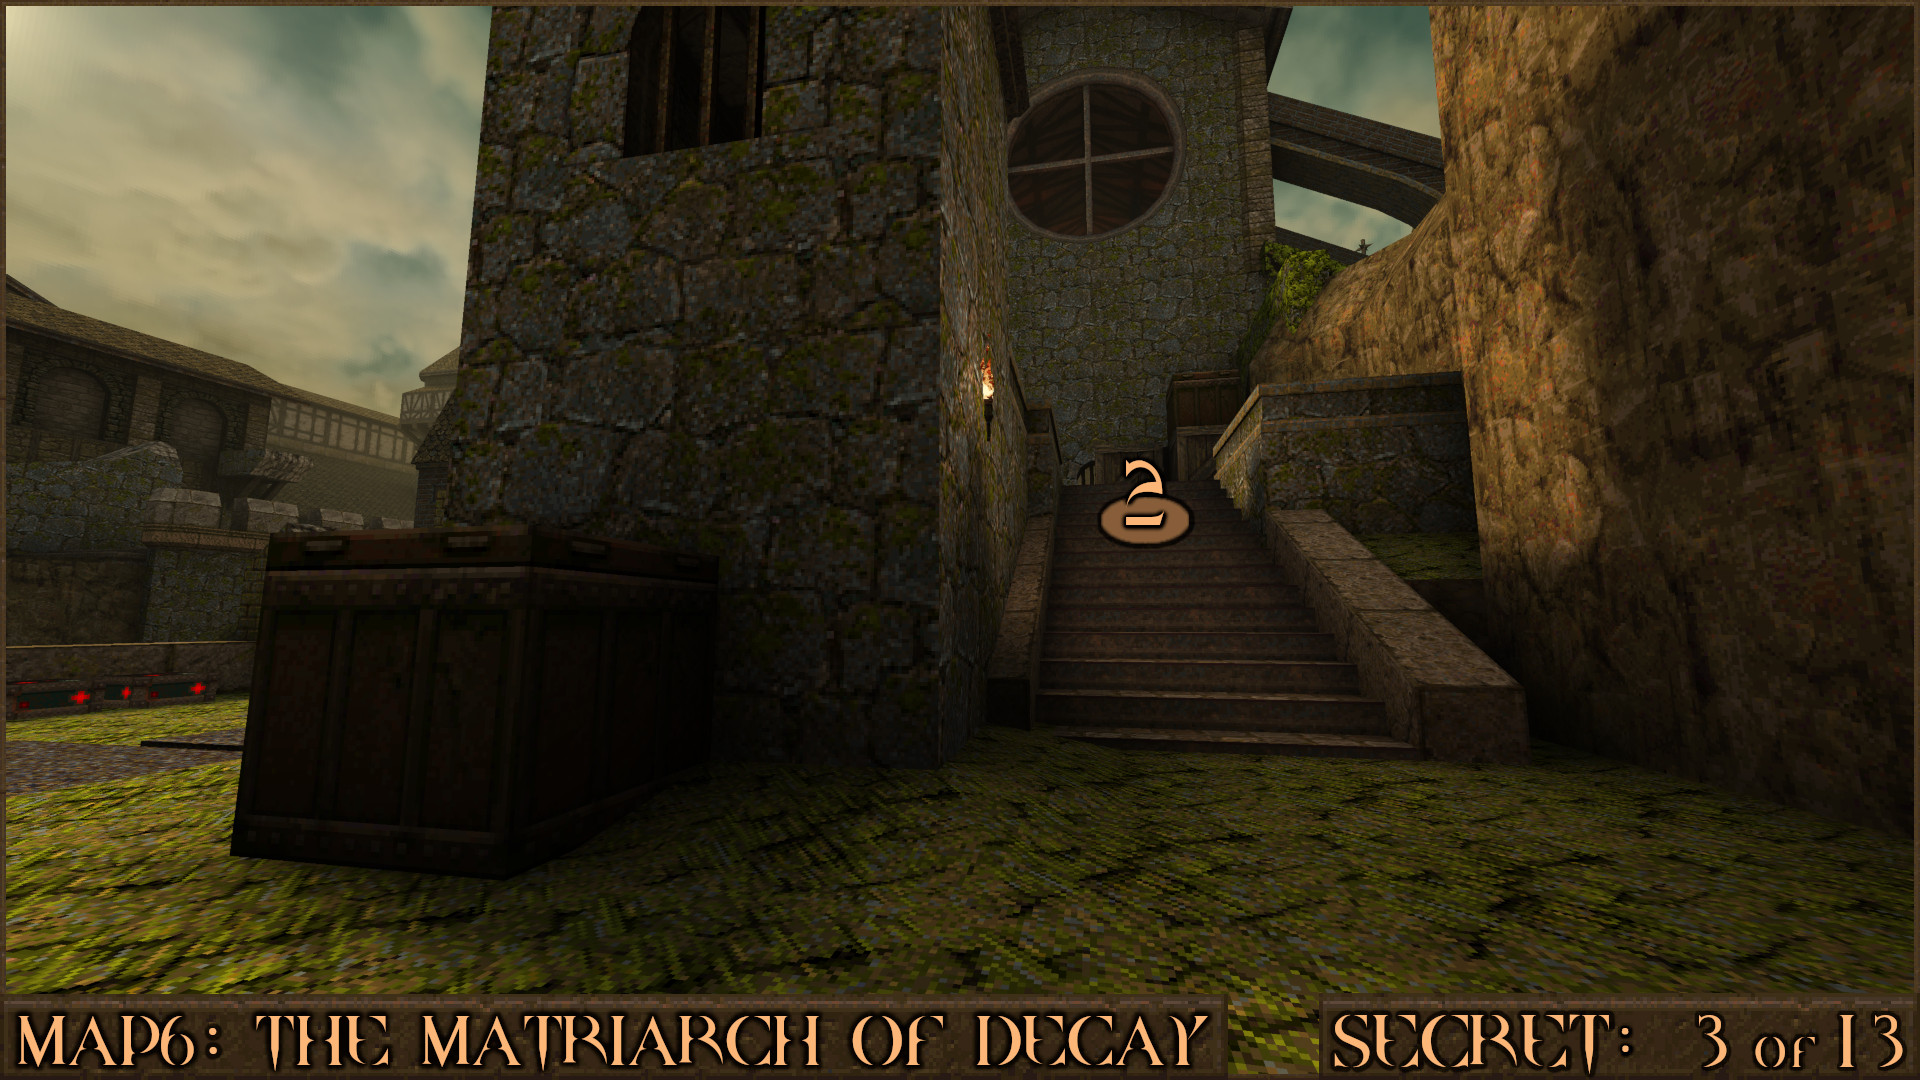
Drop down and nearby are some stairs (2) leading up the side of a building.

At the top of the stairs behind some crates are some leaves (3) covering the entrance to the secret.

Reward:

Extra Secret [Step 2]
Enter the church and near the bloody altar and beneath an angel statue is a Pentagram of Protection (2). Do not take this "gift" either.


Secret 4 of 13
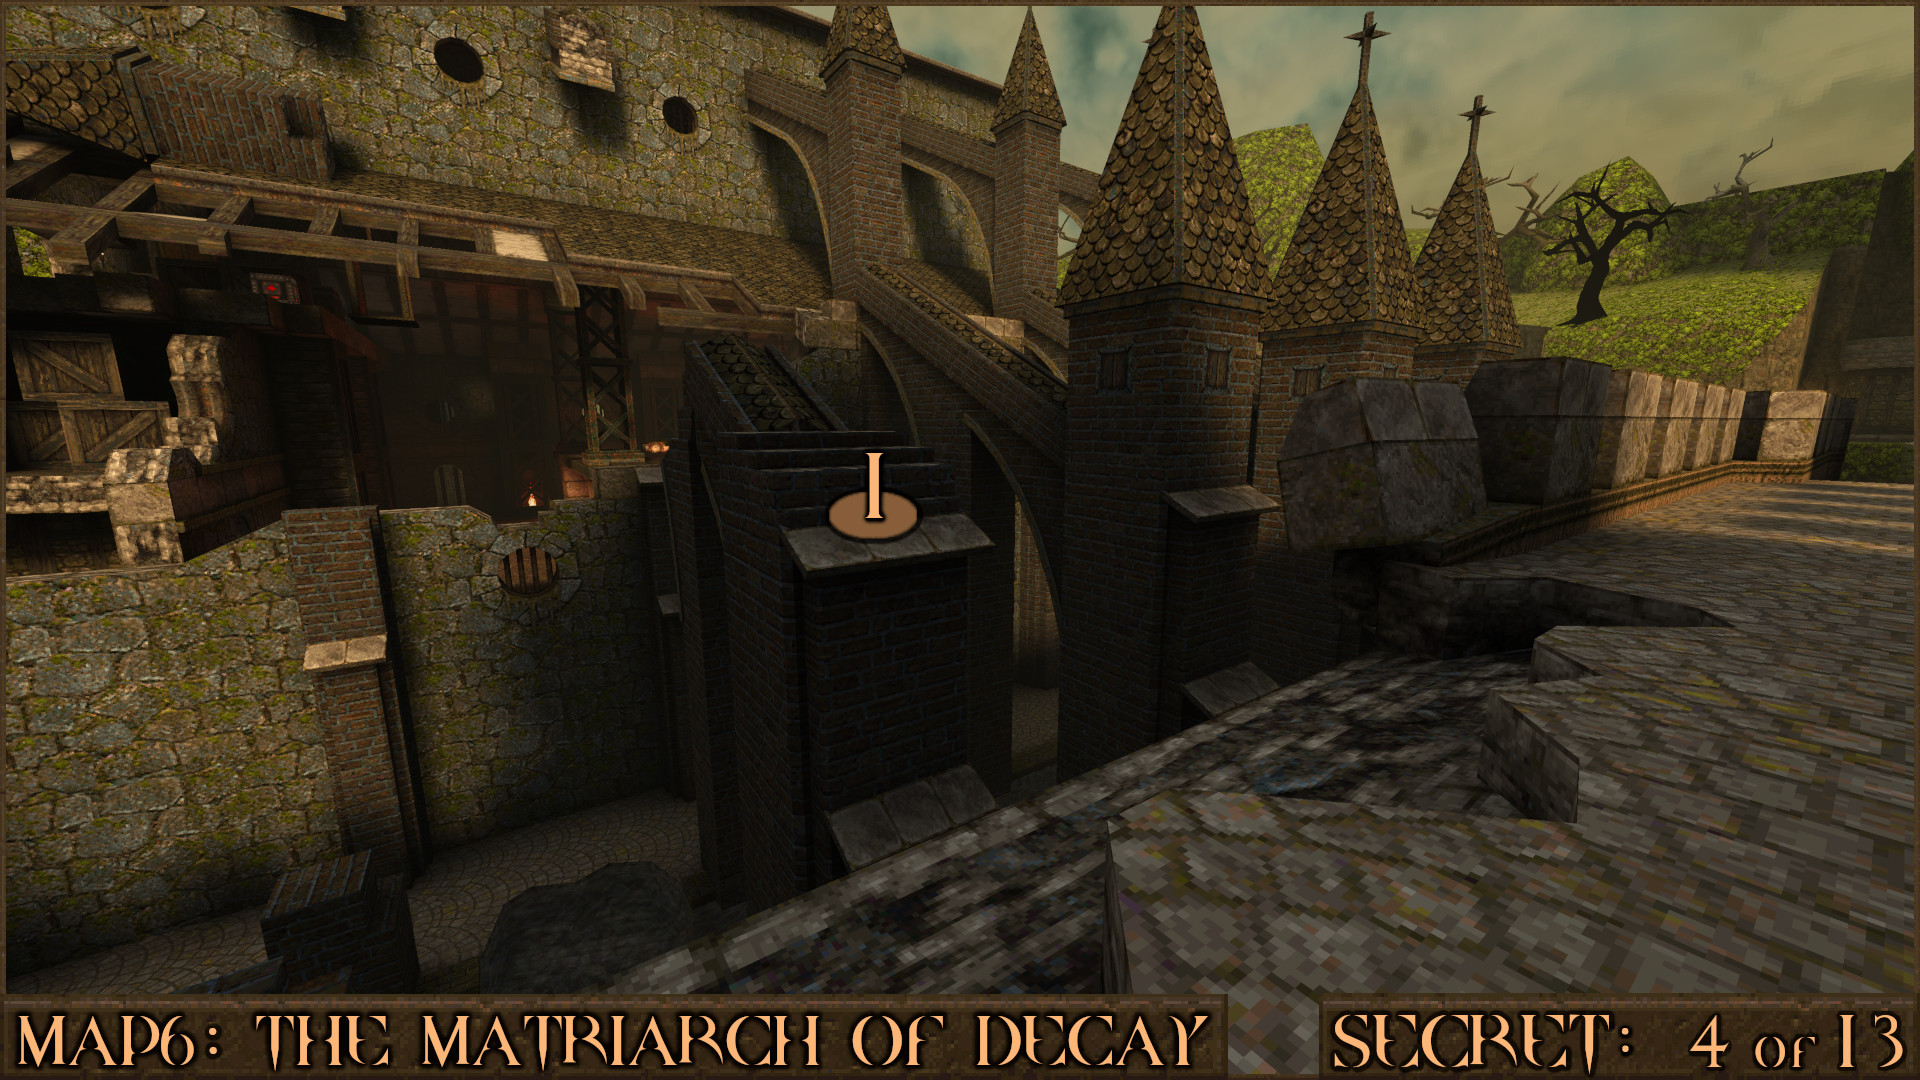
After reaching the long bridge lined with crenelations look for the damaged section. A tower has been destroyed and you can jump onto the broken stone platform (1). Run across the damaged support and jump over to the building.

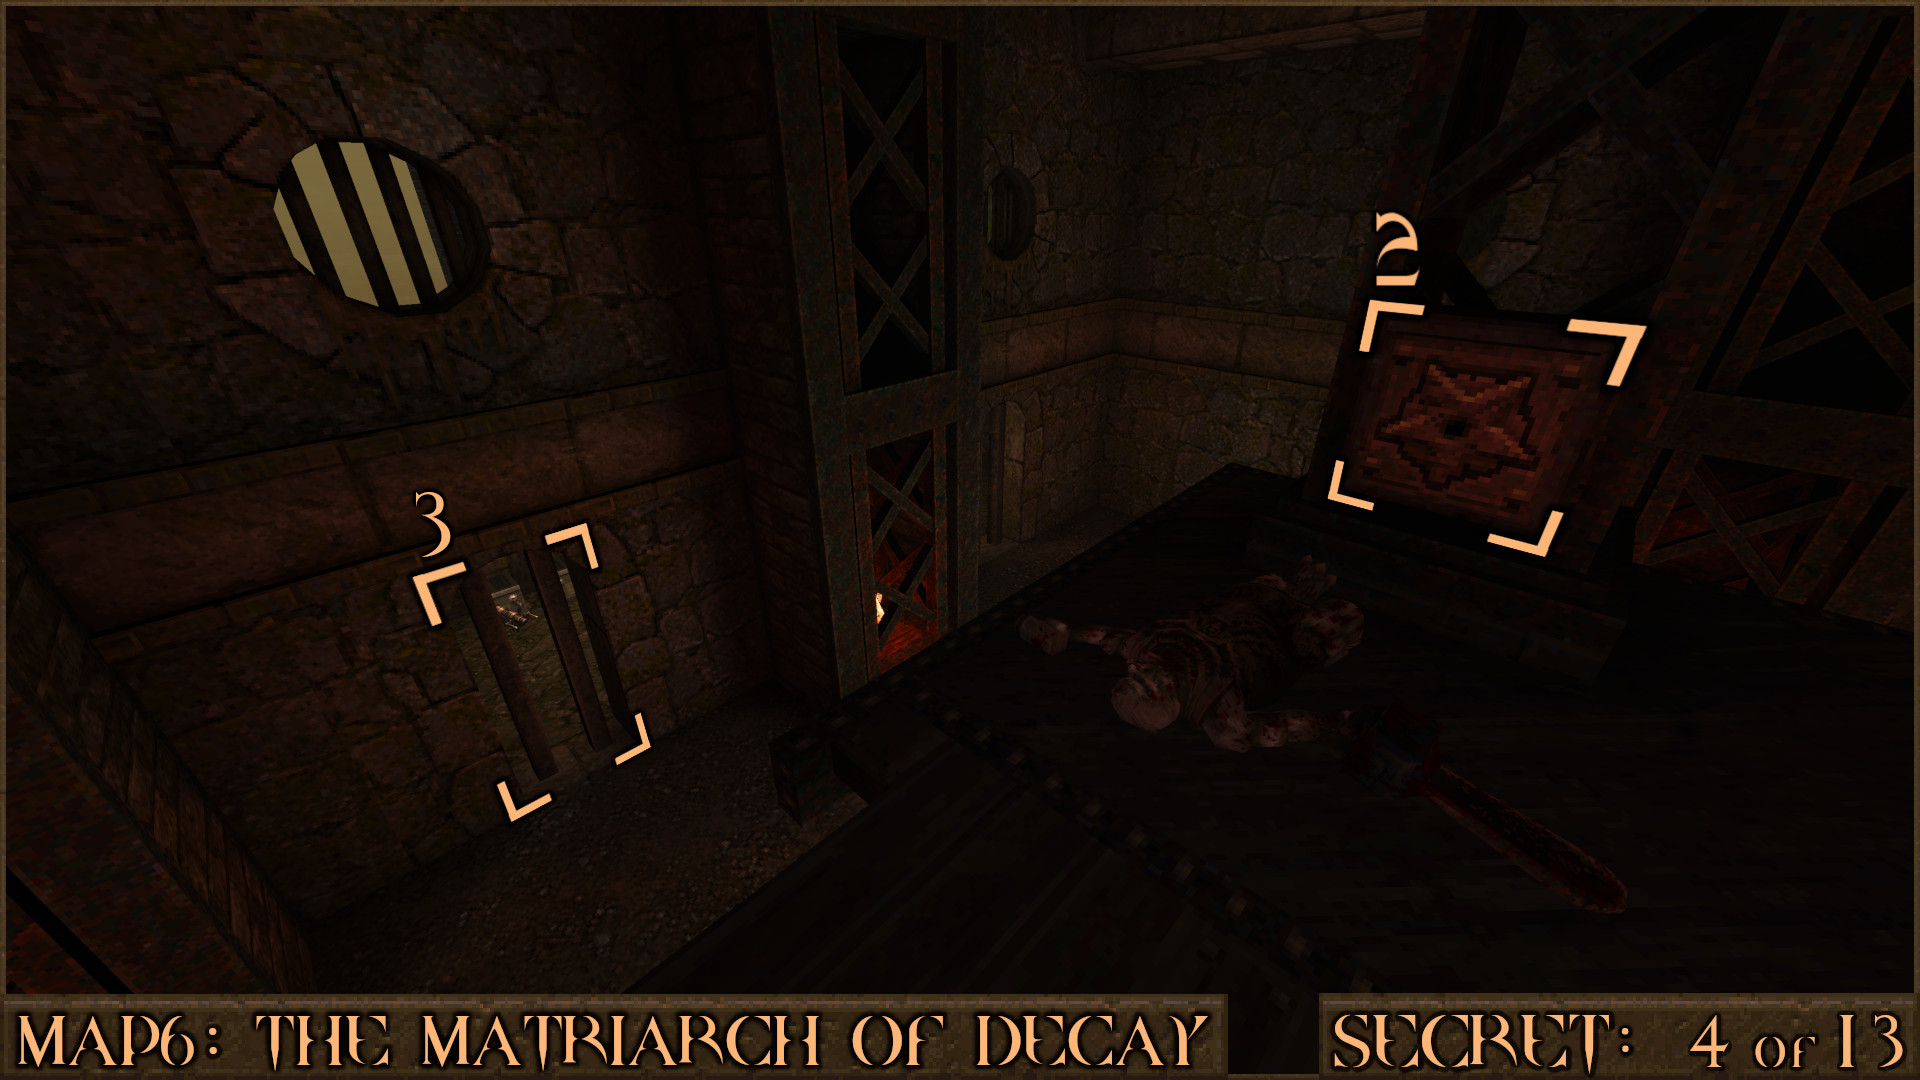
You will be in the upper part of the jail area. Press the orange button (2) to open all the cell doors below and one of the cells contains the secret (3).

Reward:

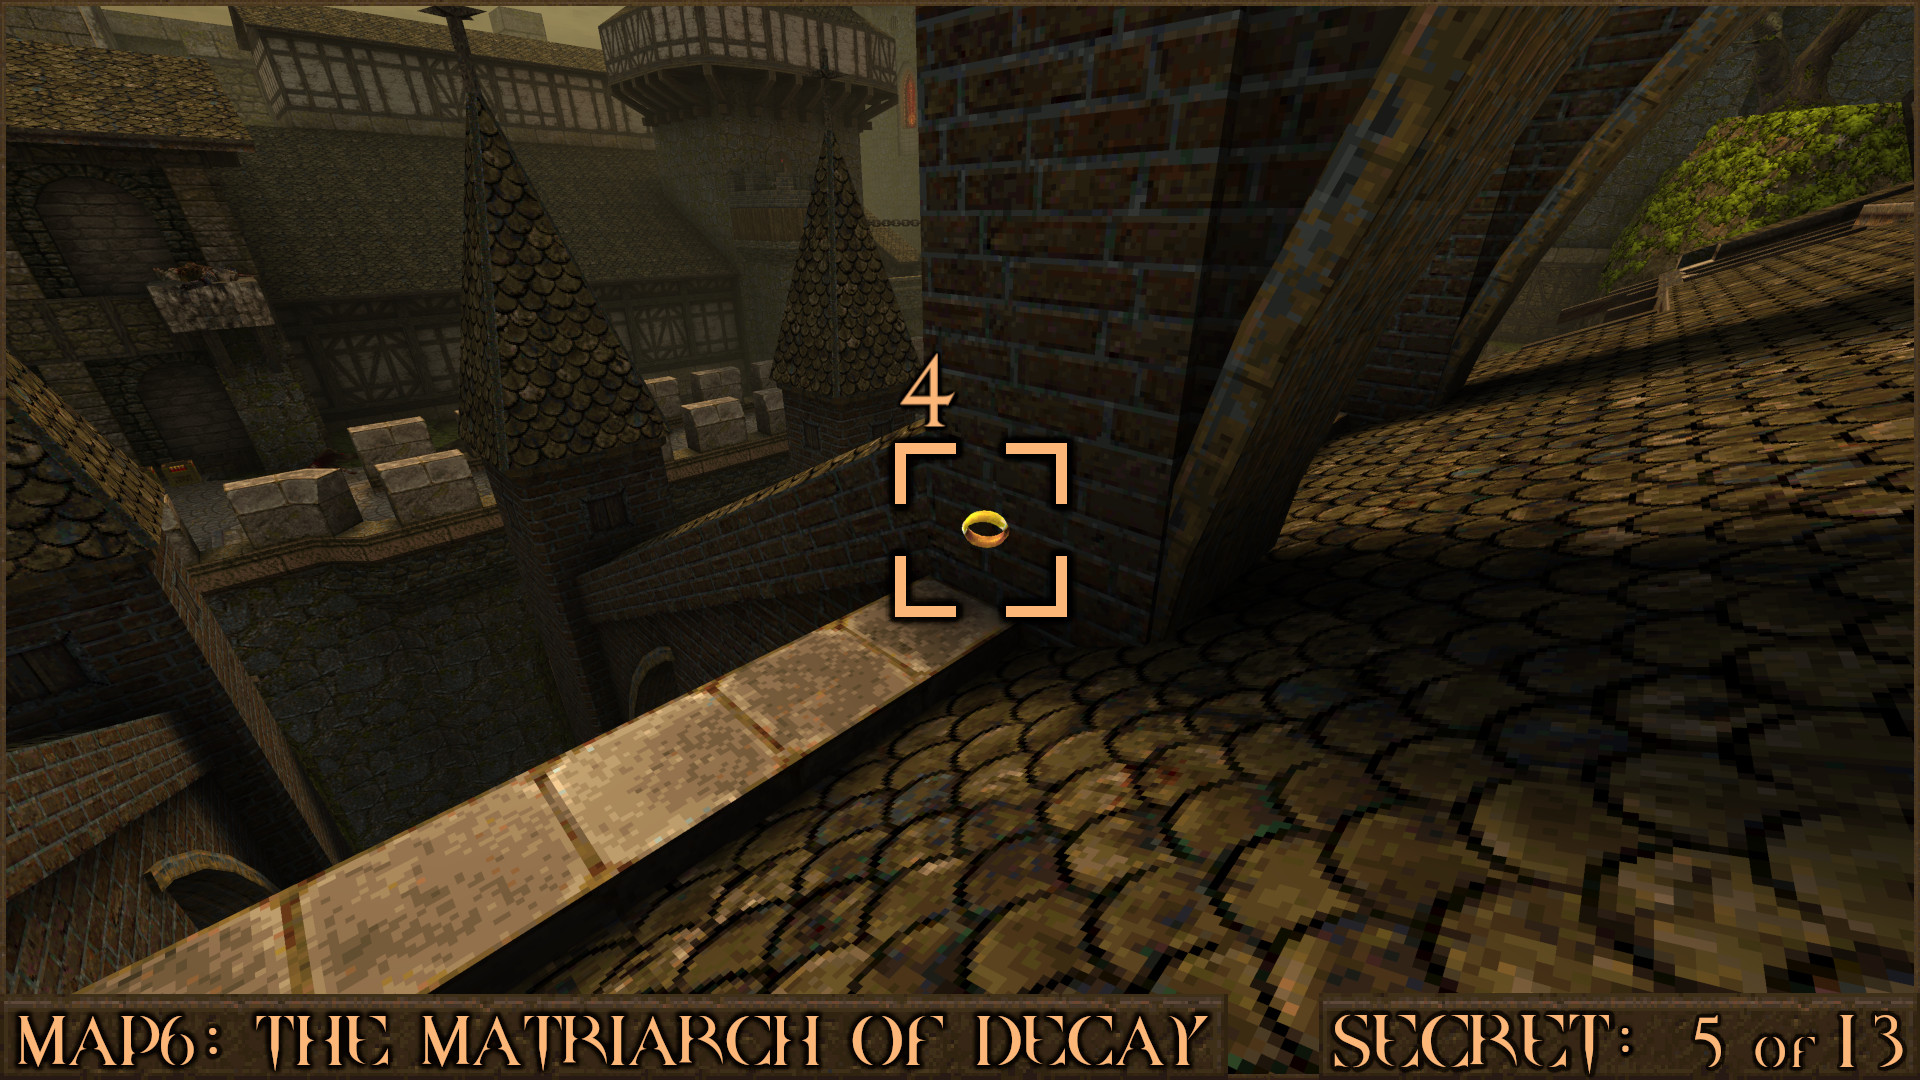
Secret 5 of 13
After crossing the long bridge take a right through a cave covered with leaves (1). On the right you'll go into the building through a hole in the roof.

You'll find a Megahealth (2) and a shortcut elevator here. For an extra item head outside onto the roof (3).

Behind one of the supports is a hidden Ring of Shadows (4).

Reward:

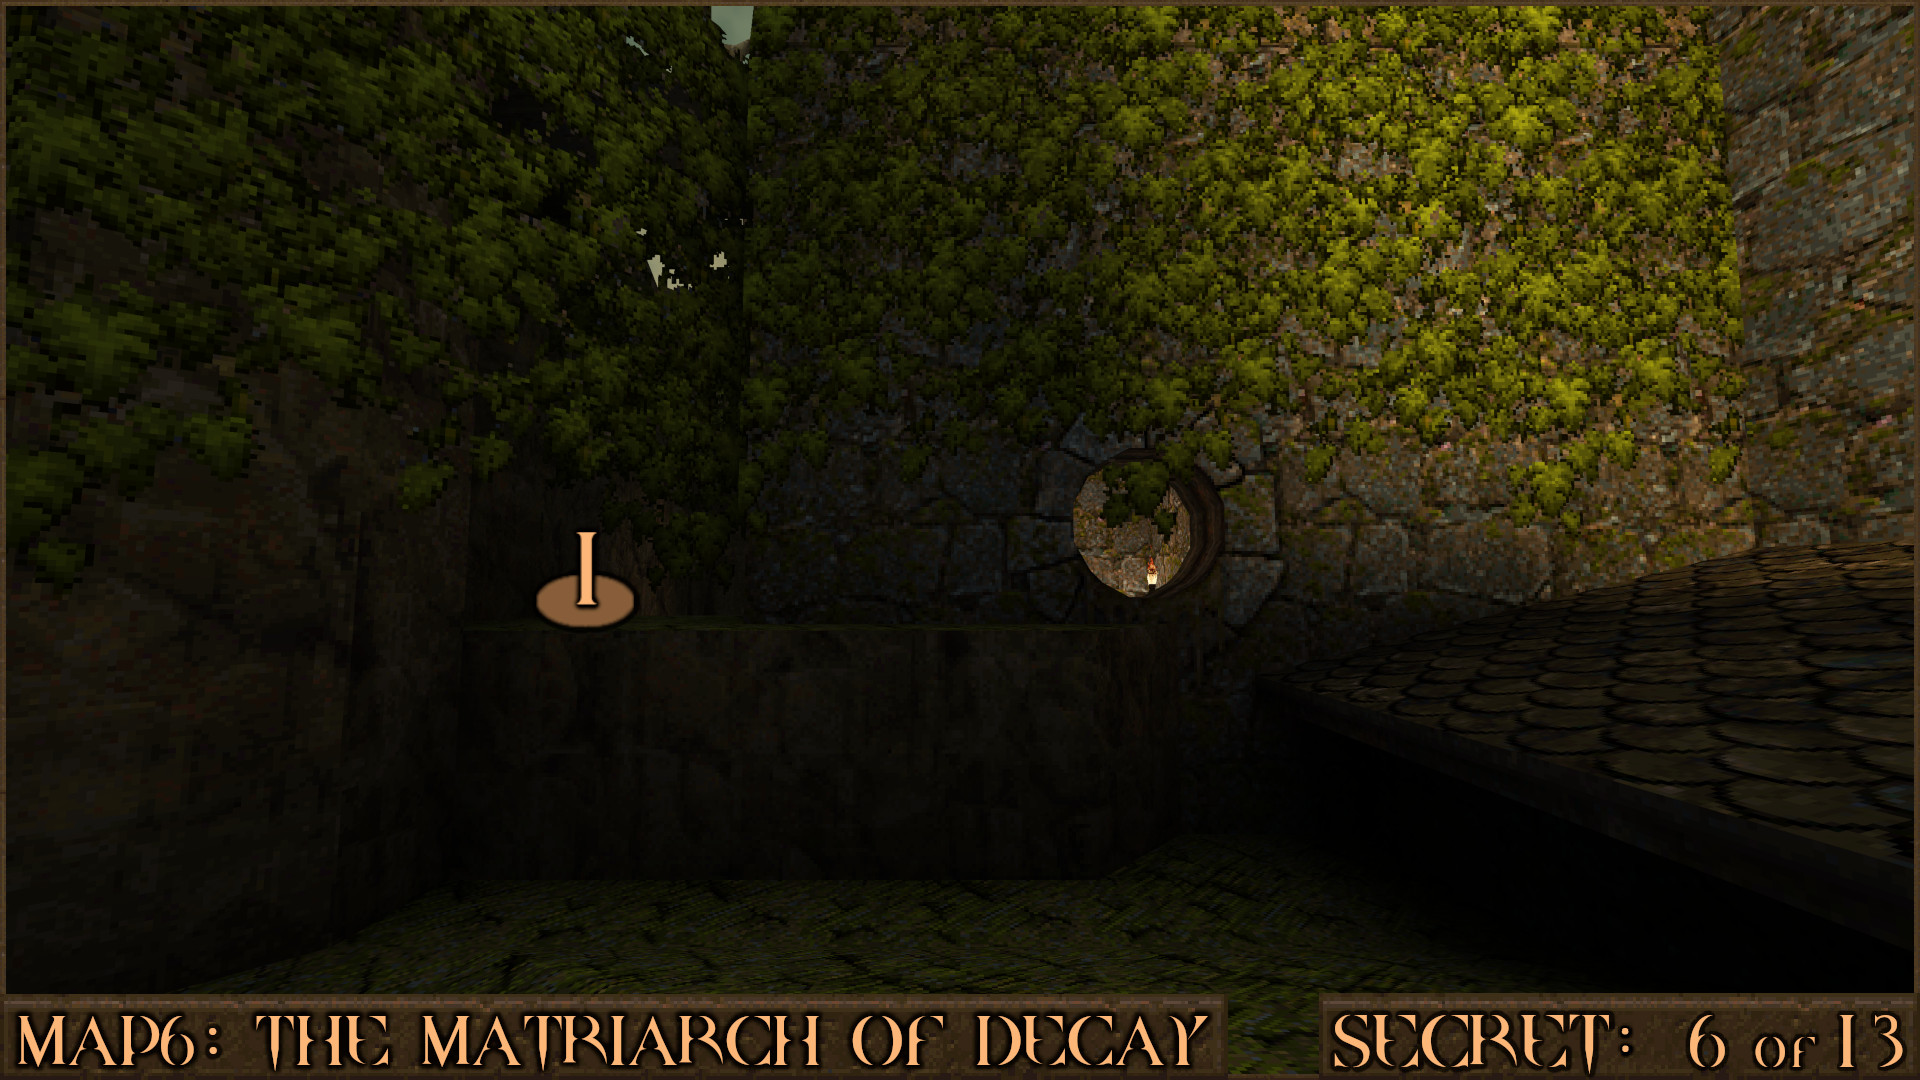
Secret 6 of 13
Return to the area past the cave leaves from Secret 5 and look for a circular window. To the left of it is a secret room behind some more leaves (1).

Reward:

Secret 7 of 13
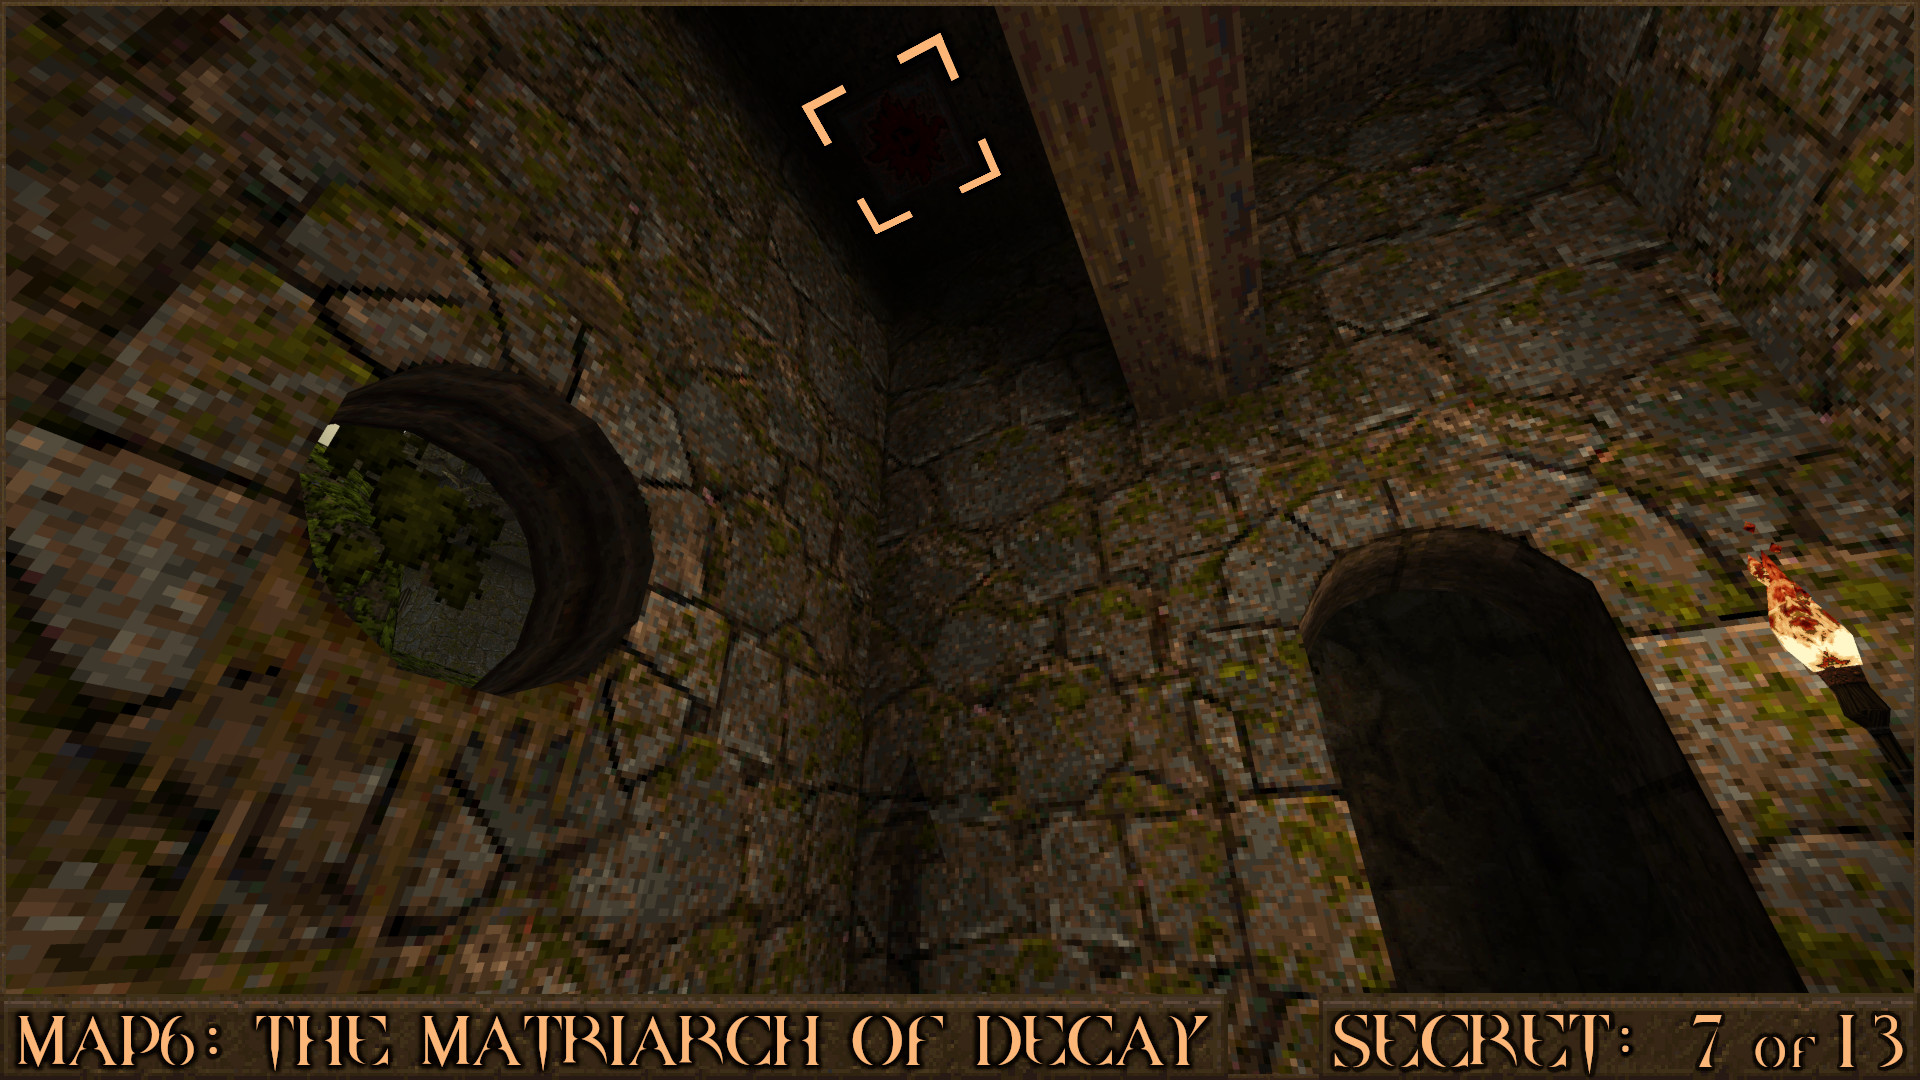
While still in the room from Secret 6 look up to see a red shootable button. It shifts the floor and you will fall into another secret.

Reward: [Rocket Capacity Upgrade]

Secret 8 of 13
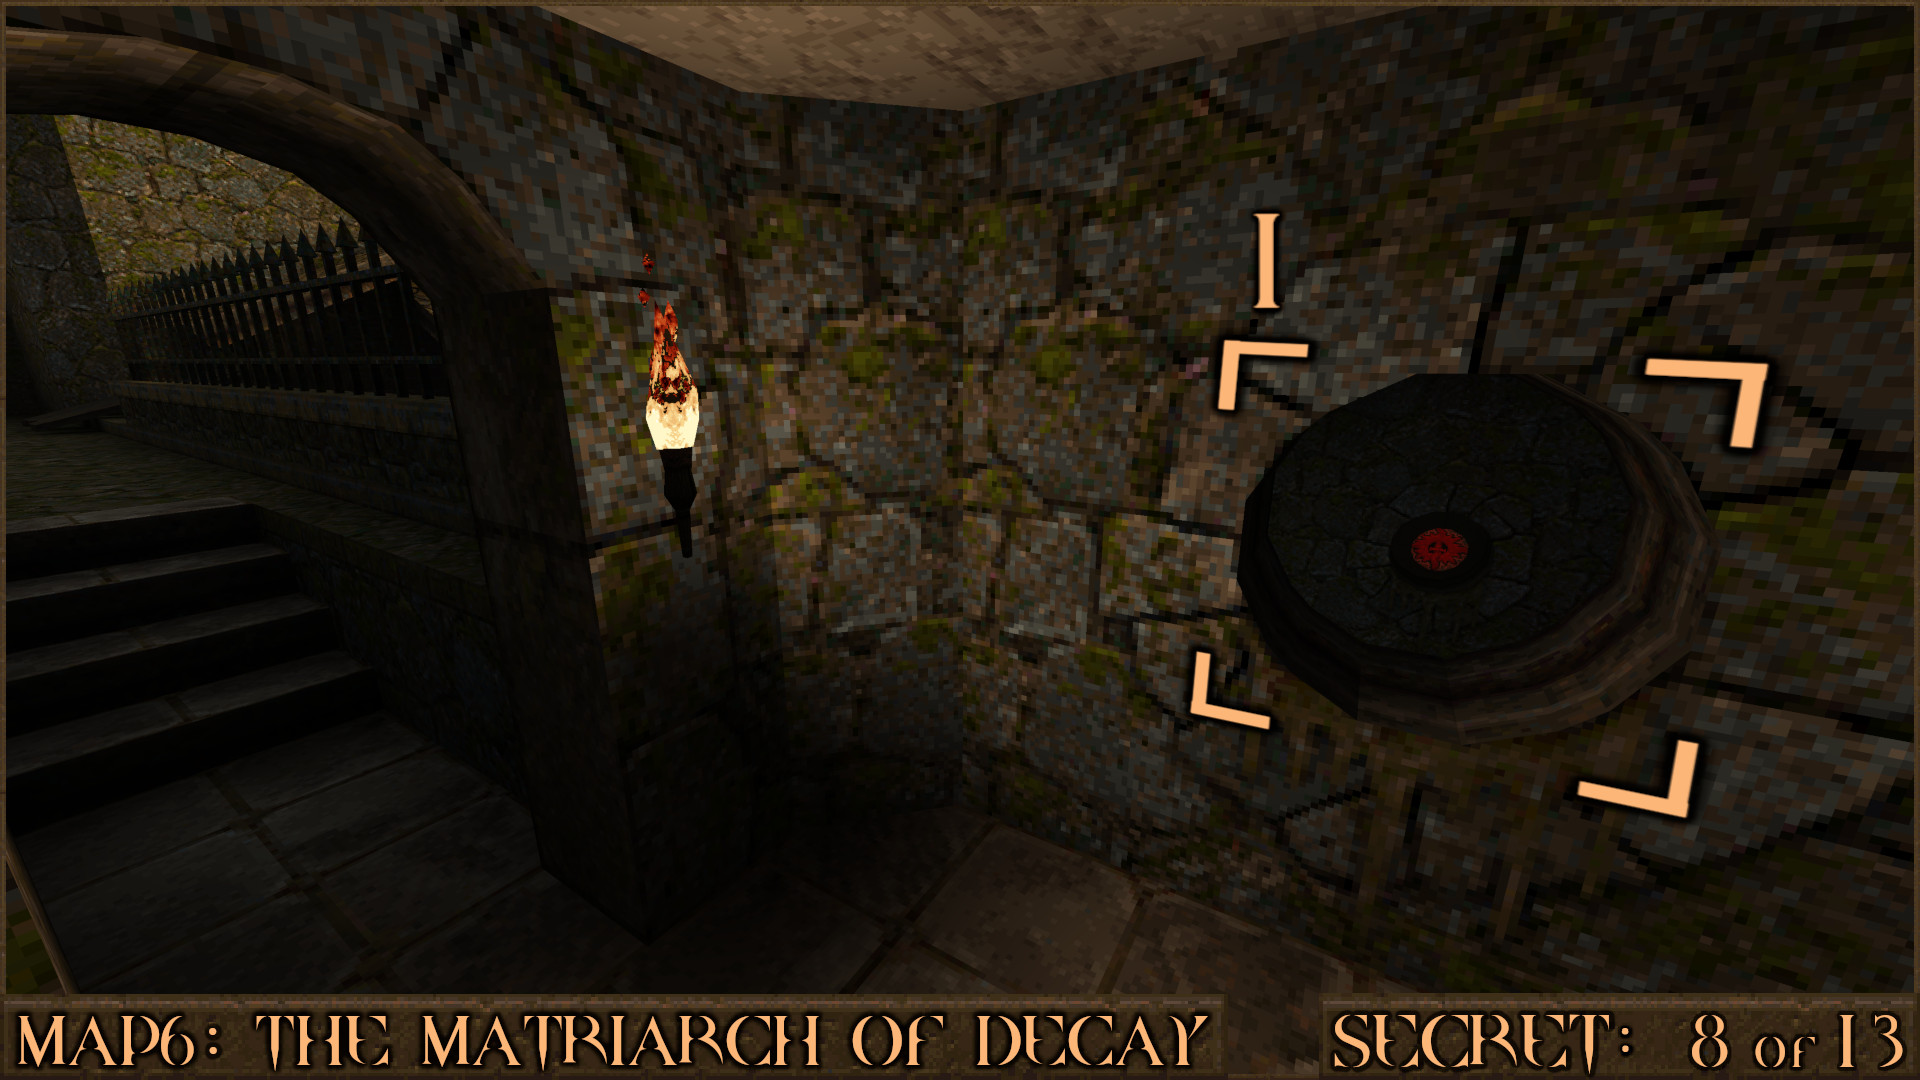
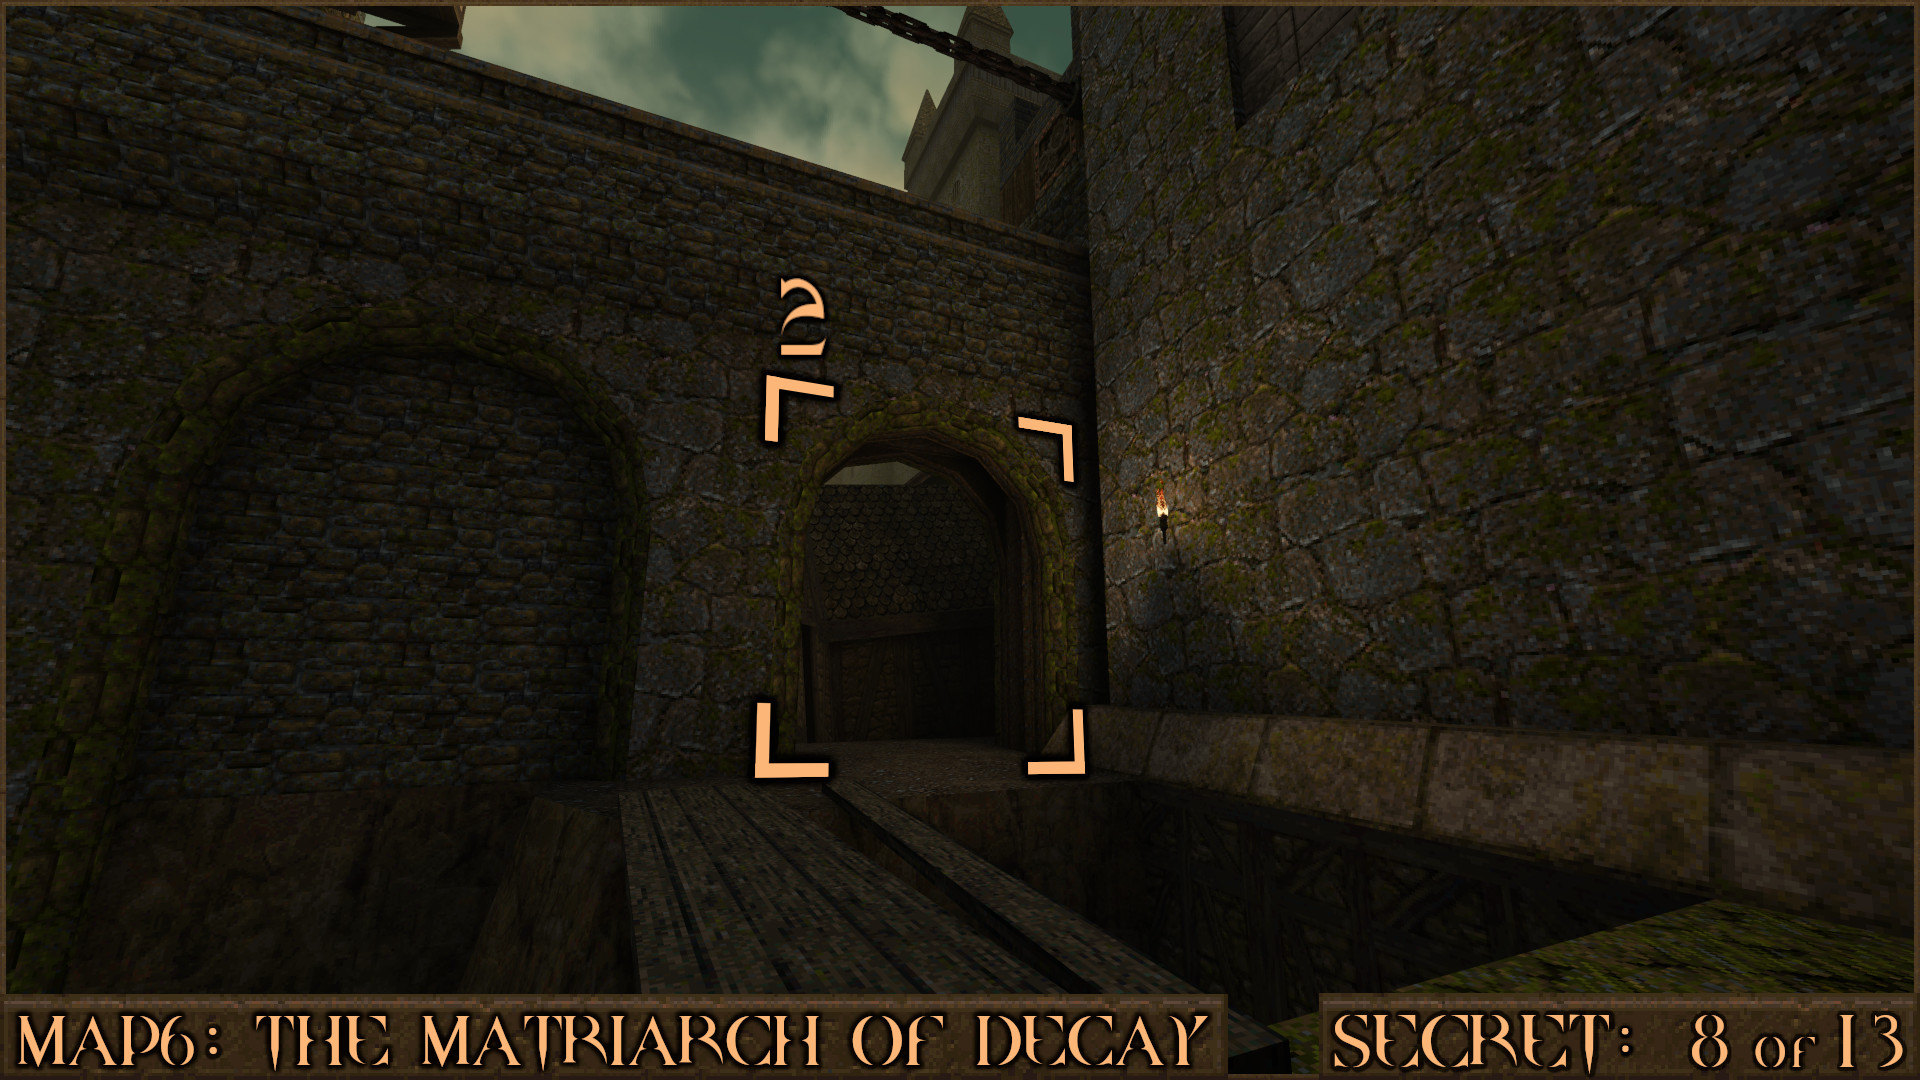
To the left of the main castle entrance is a small entryway. When you see a circular window jump and look out and you will see a red shootable button (1) behind another window. Shoot it and it will open the door below you outside.

Head down there and through the entryway (2) and you will discover a path to the secret level: SECRET4: The Crooked Village. You can return later to this exit if you wish to explore the rest of the level first.

Reward: [Secret Level]

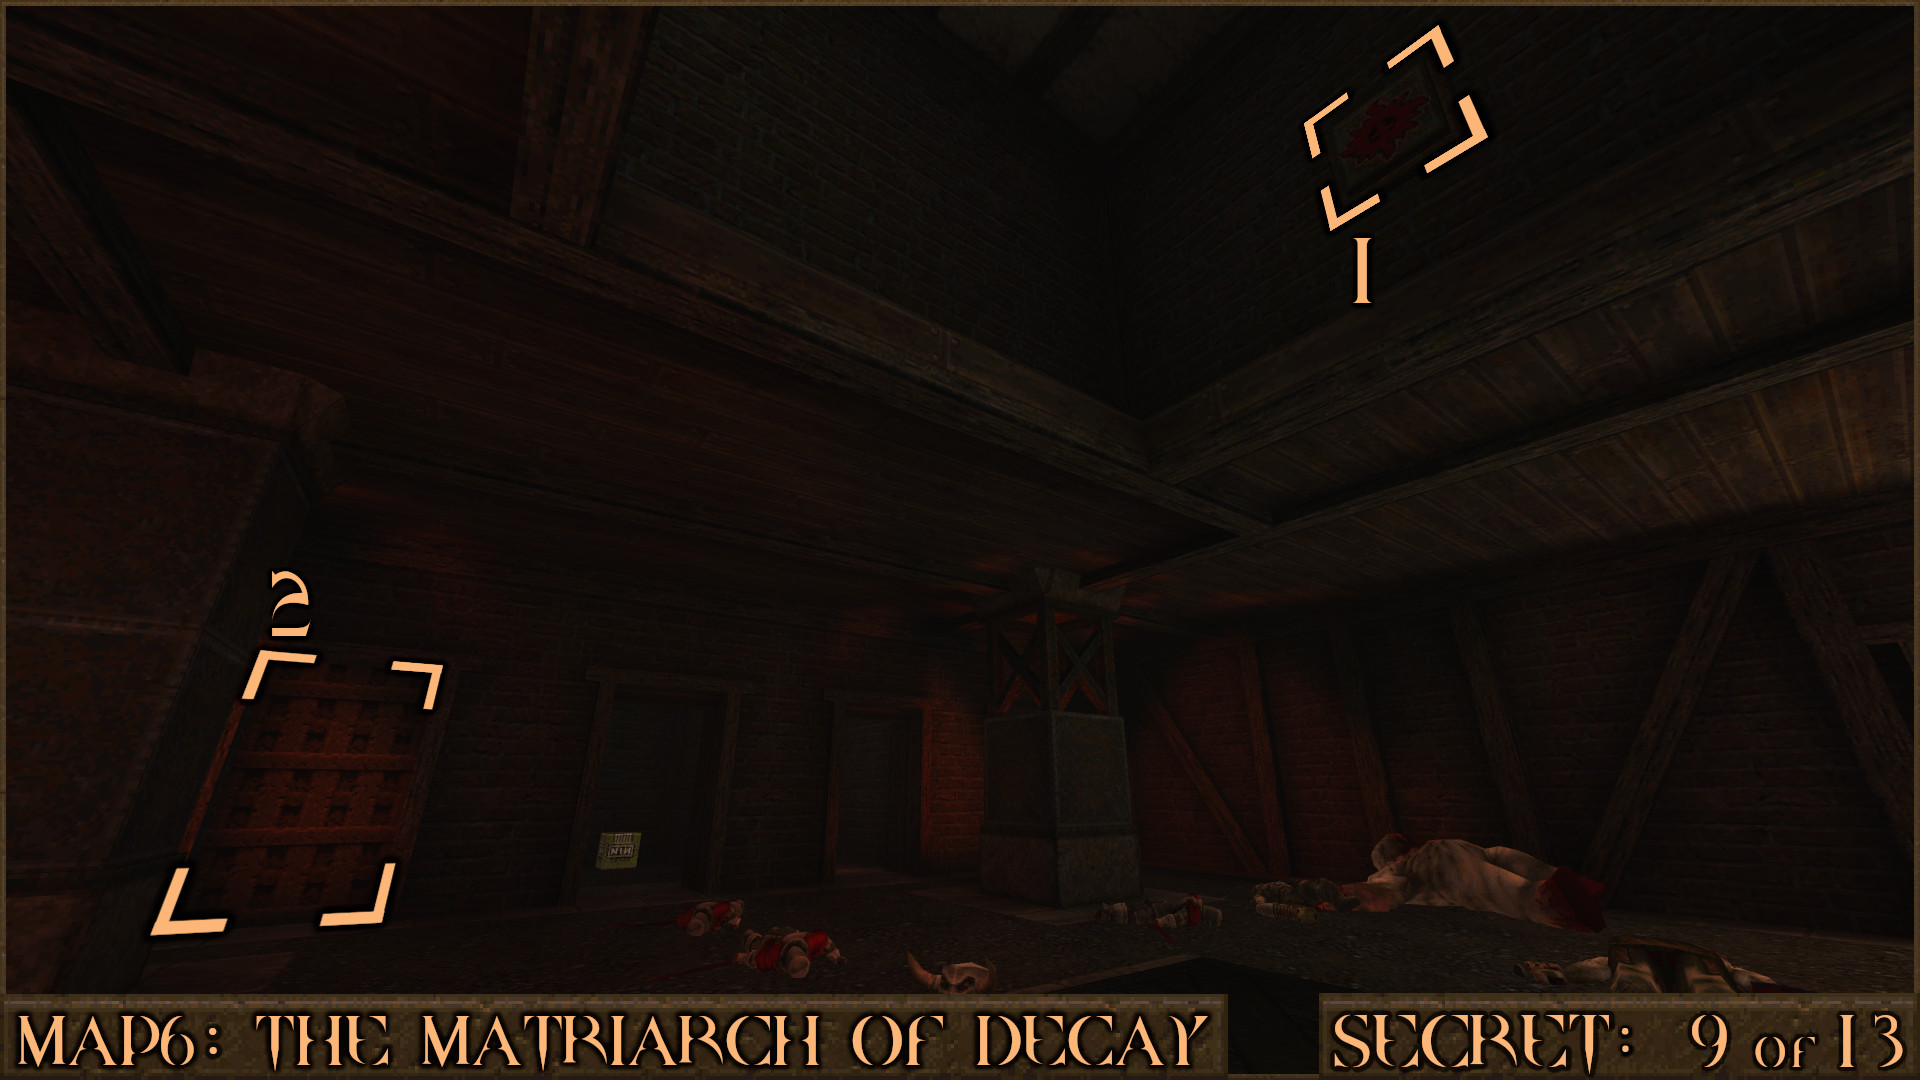
Secret 9 of 13
In the underground red dungeon area you'll press a floor button that will lower the centre platform. Stand on it and look up to see a red shootable button (1). It opens one of the cell doors (2).

Reward:

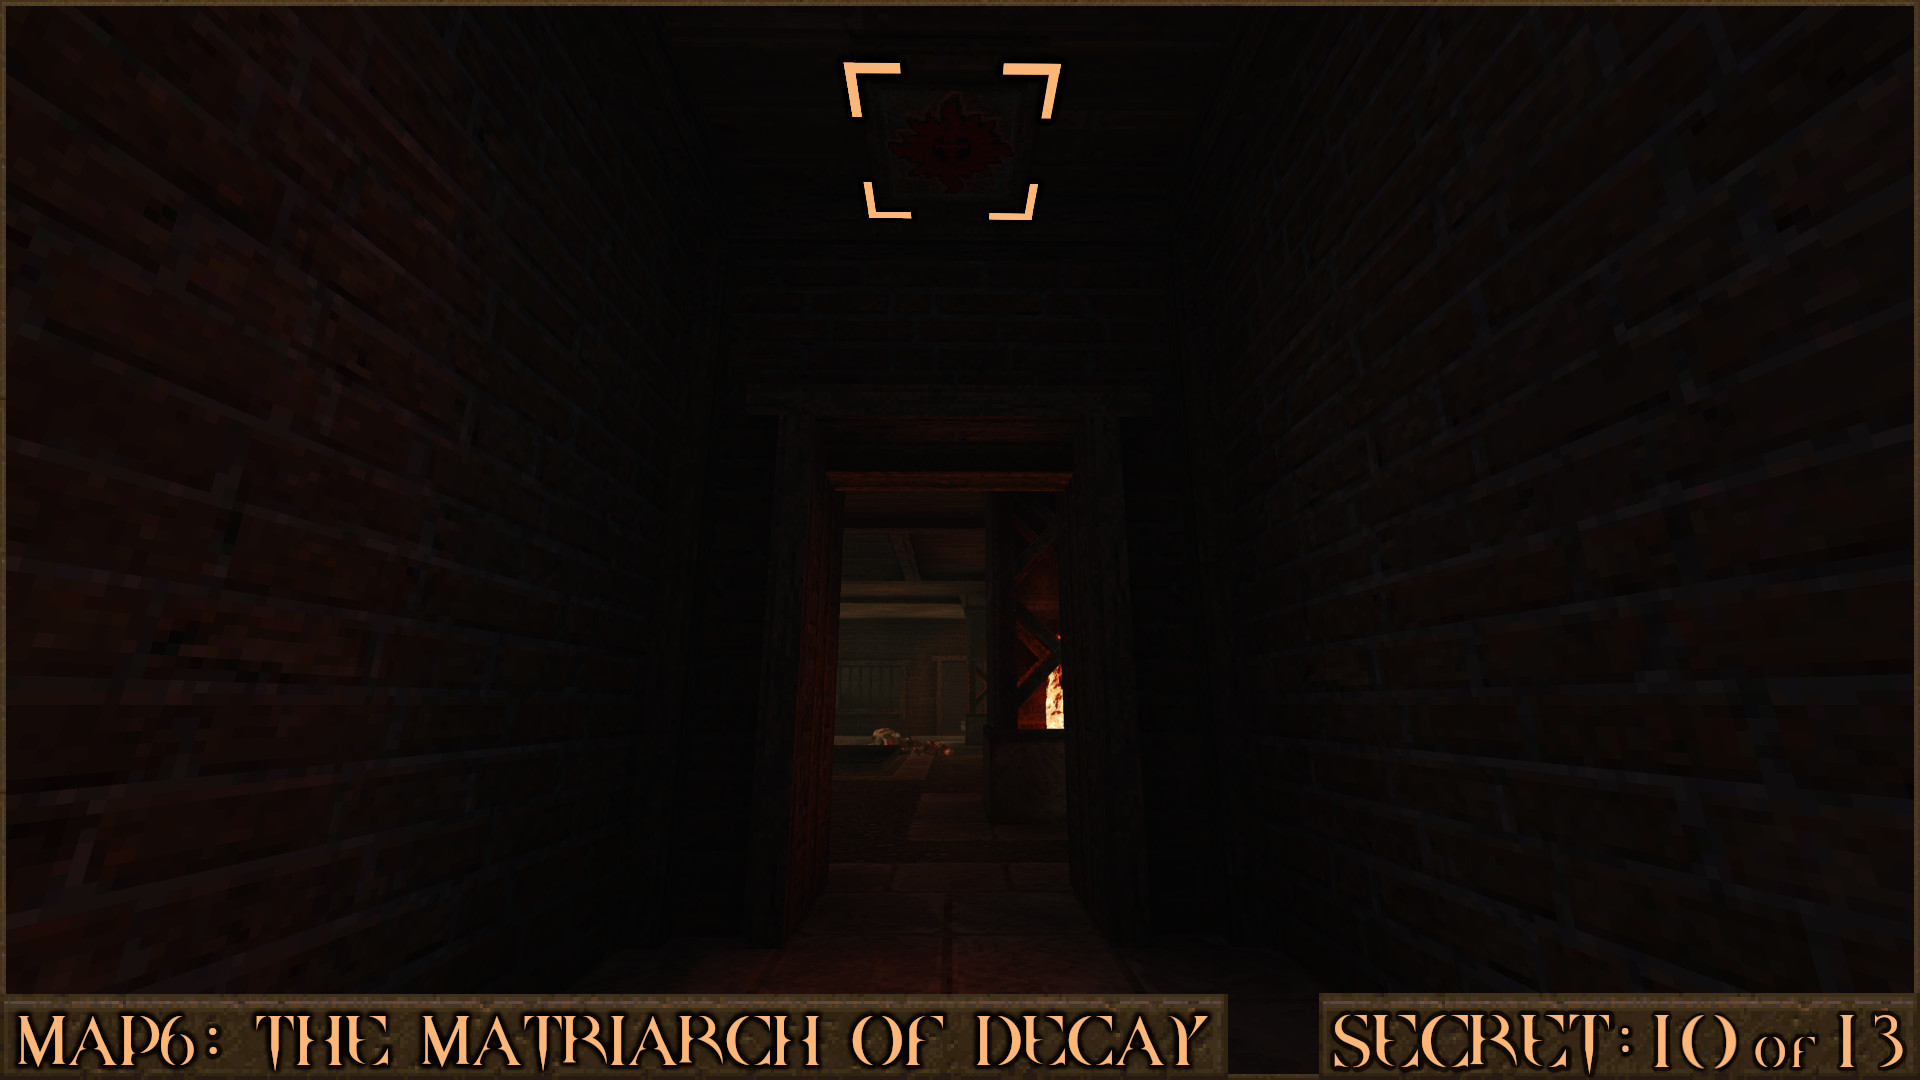
Secret 10 of 13
While inside the jail cell from Secret 9 look up to see another button. This one will take you down to a strange secret featuring a Rottweiler. Pick up the Health Capacity Upgrade to claim the secret.

If you decide to kill the dog here there is more to discover. As punishment an extra trap will be added later to a corridor after the Gold & Silver Key Elevator in which you will be ambushed by many Demo Dogs.
However, if you regret killing the dog return to the huge spike pit near the jail cells at the beginning of the level and jump in. You won't die and instead you'll be given a chance for redemption which disables the Demo Dogs corridor trap.
Reward: [Health Capacity Upgrade]

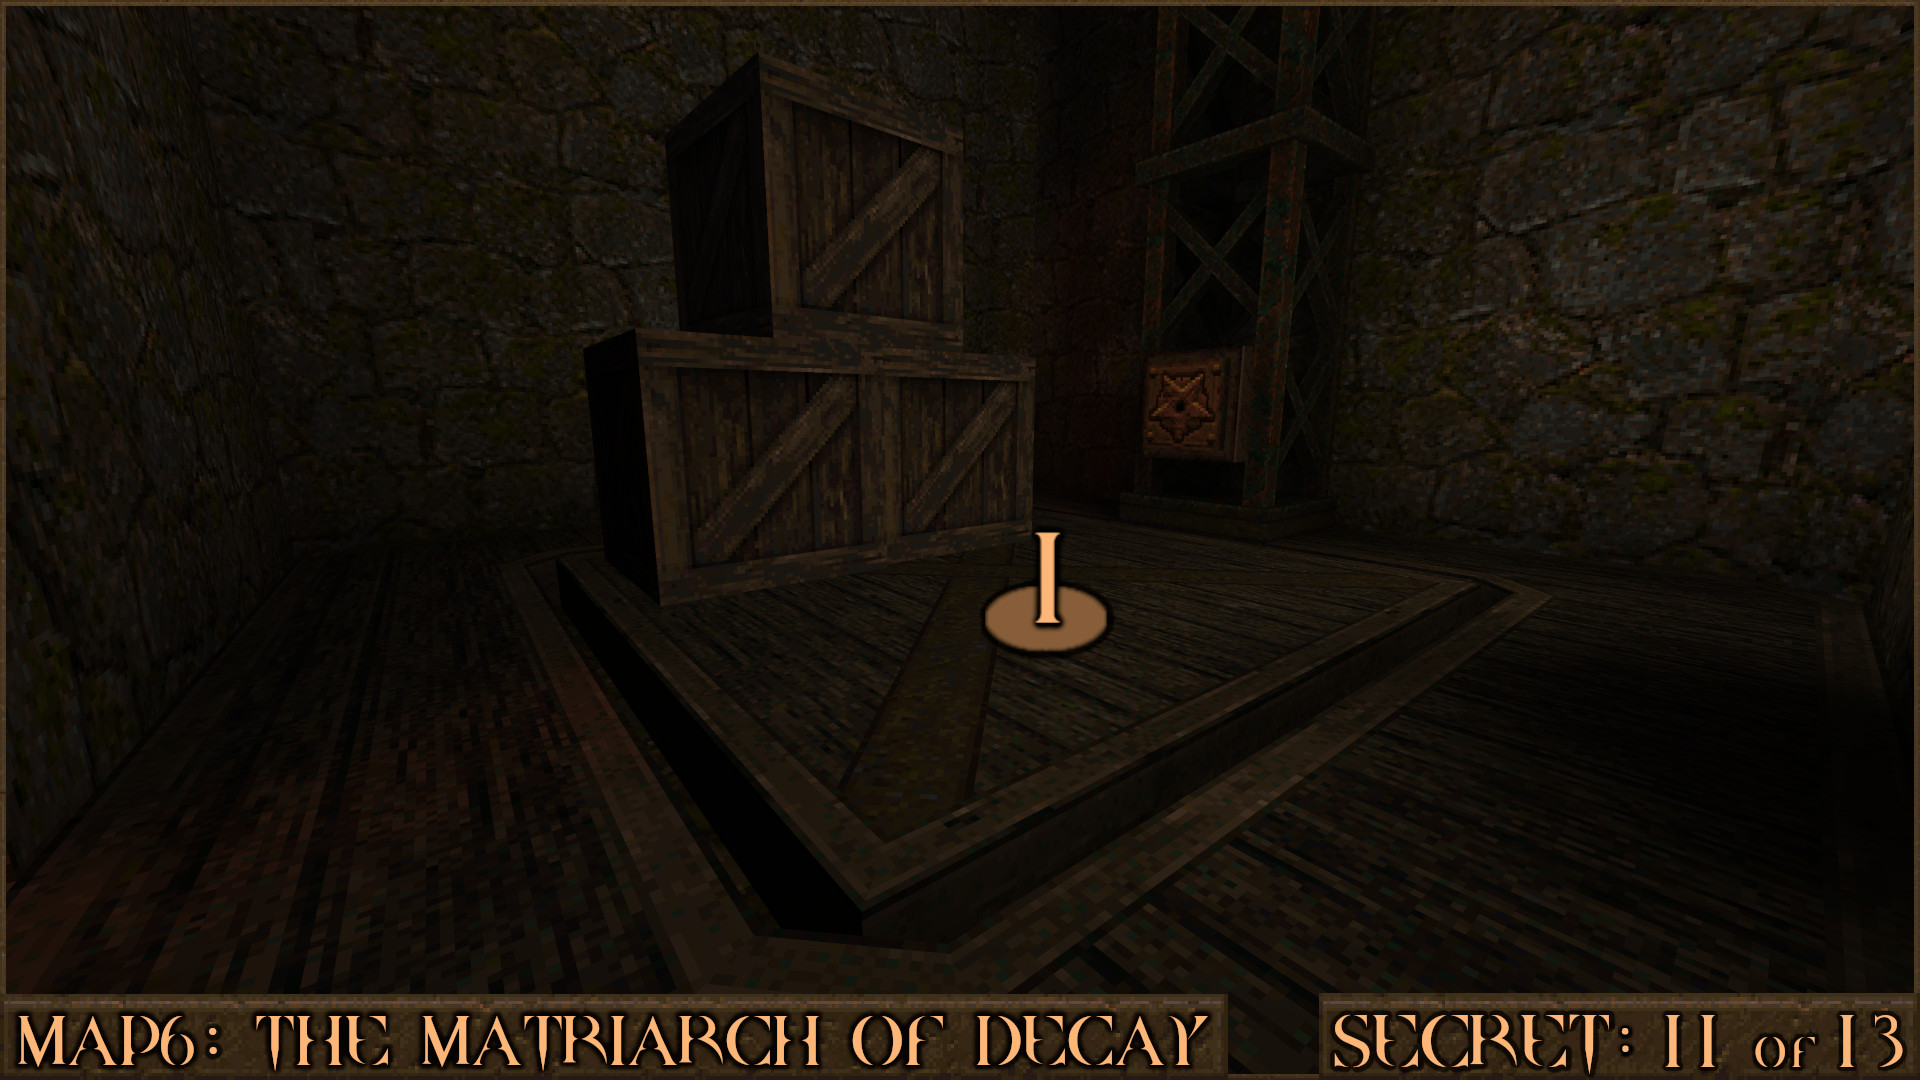
Secret 11 of 13
Next to the red dungeon area is a large cargo elevator (1) with three crates on it. Ride it to the top and step off, then let it reset to the lower position.

While on the upper floor press the orange button (2) to call it and quickly jump on the top of the stack of crates (3). This will move you high enough to reach the upper ledge (4) of the room containing the secret.

Reward:

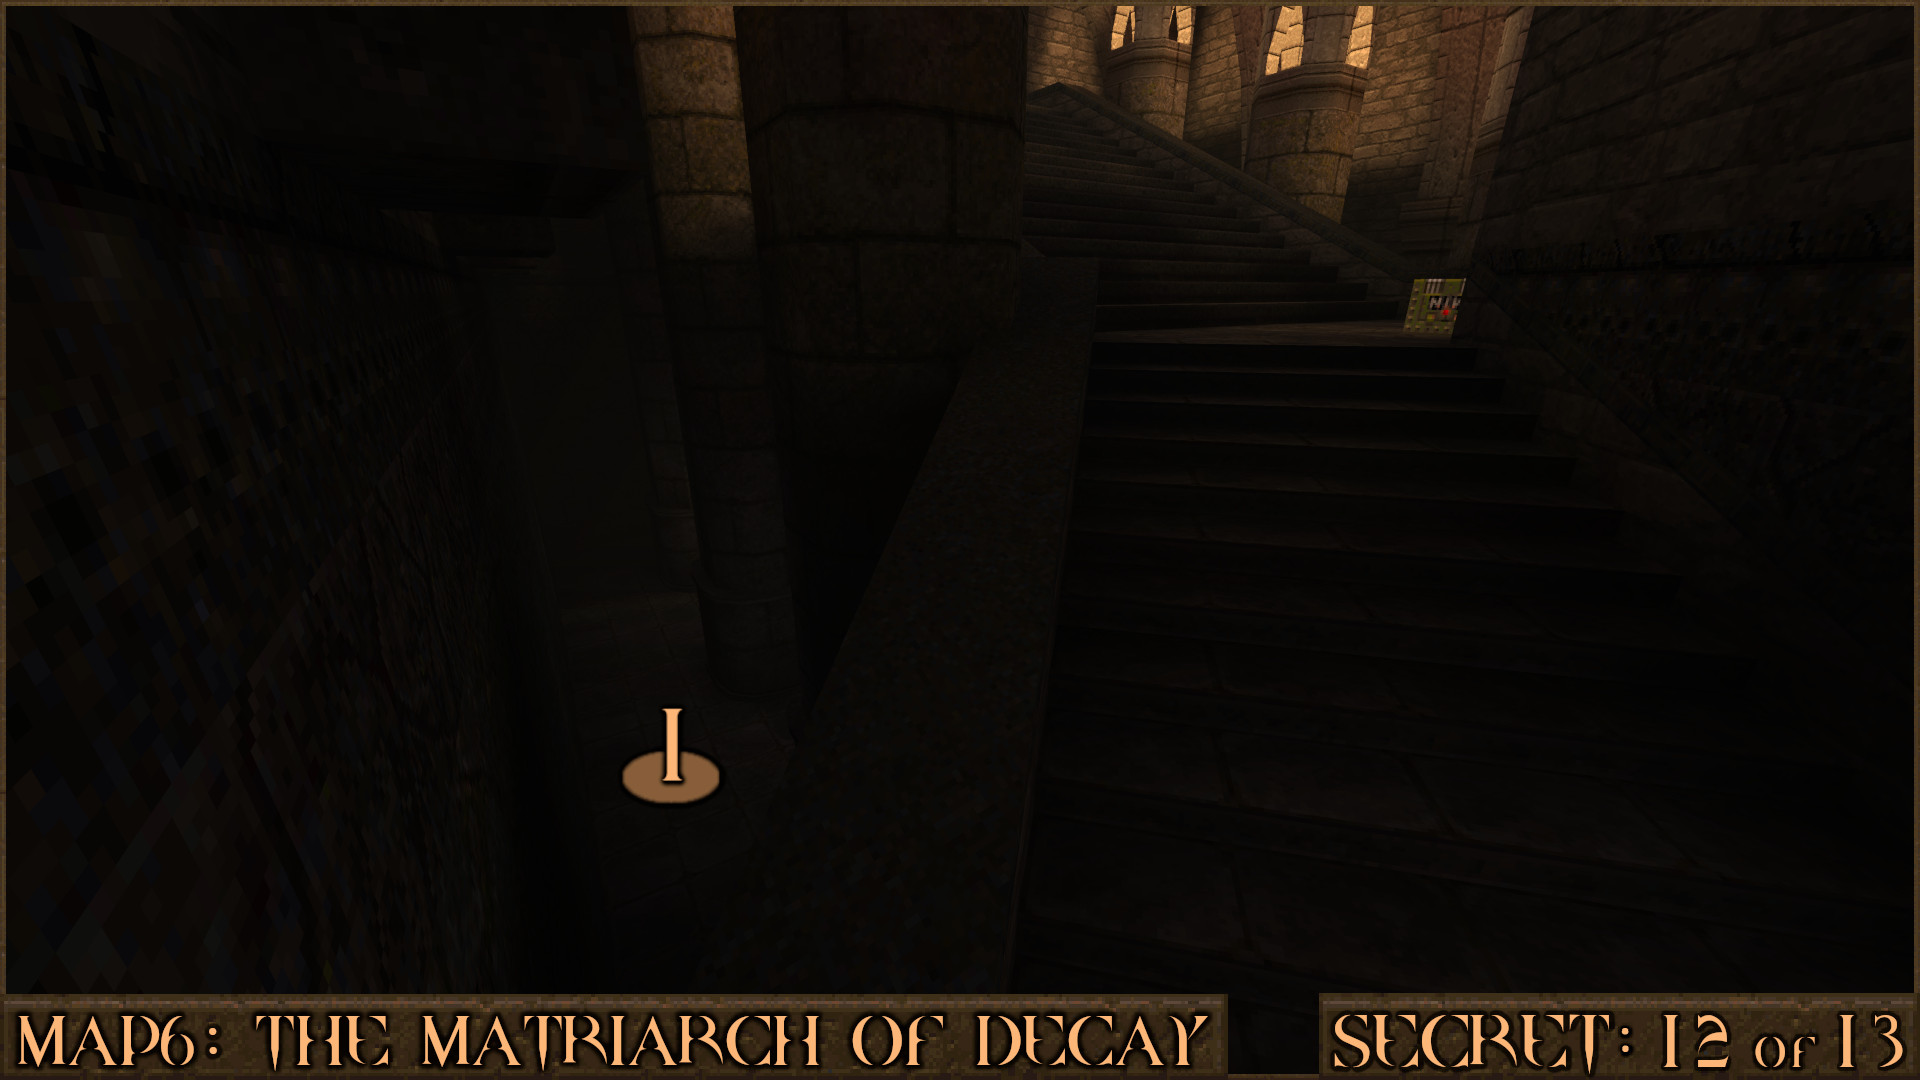
Secret 12 of 13
After finally entering the main castle you'll see a huge staircase ahead of you. Simply jump over the side of this (1) to explore the secret area behind the staircase. When you take the elevator up you will find the secret.

Reward:

Extra Secret [Step 3]
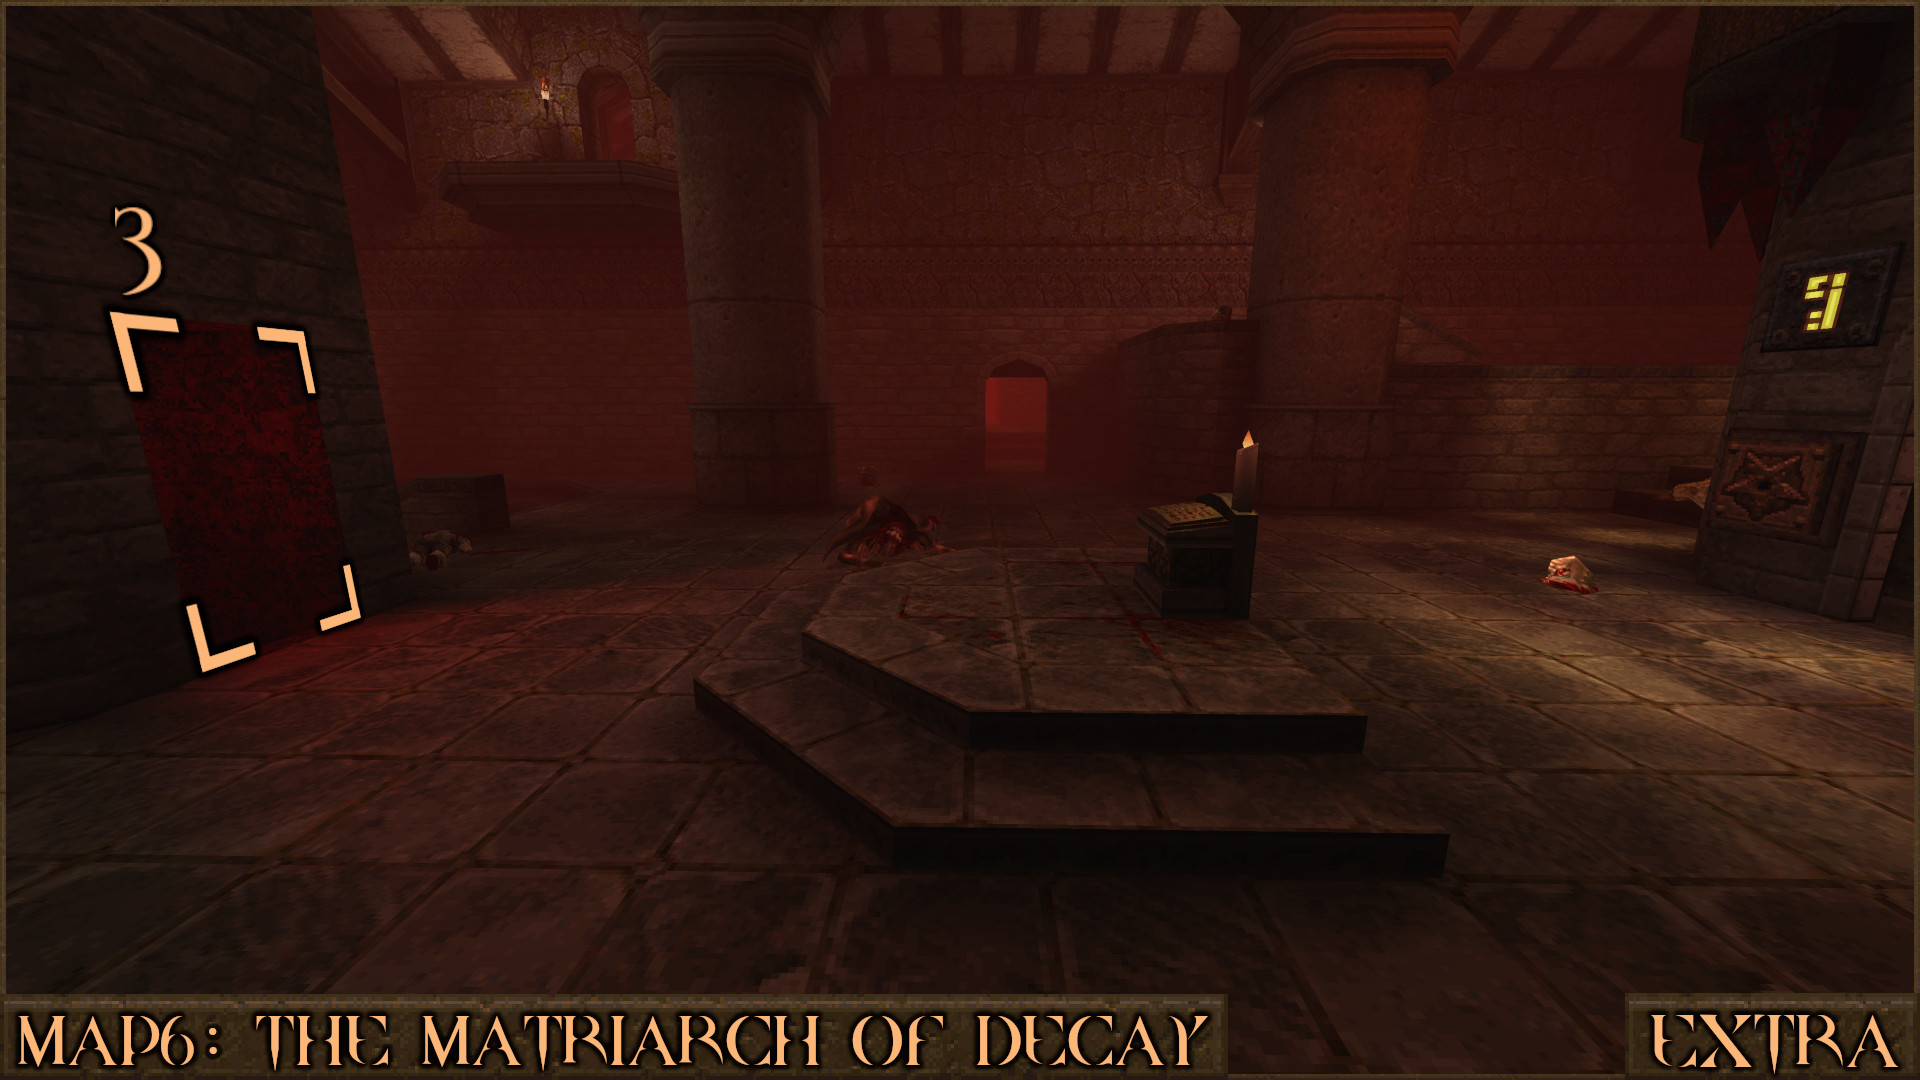
When you reach the large room with the Gold and Silver Key Elevator look at the wall directly opposite it. If you didn't take the Quad Damage and Pentagram of Protection "gifts" from earlier in the level you will see a dark hole (3). Jump down and you will be able to witness the true form of the queen.

Reward:

Secret 13 of 13
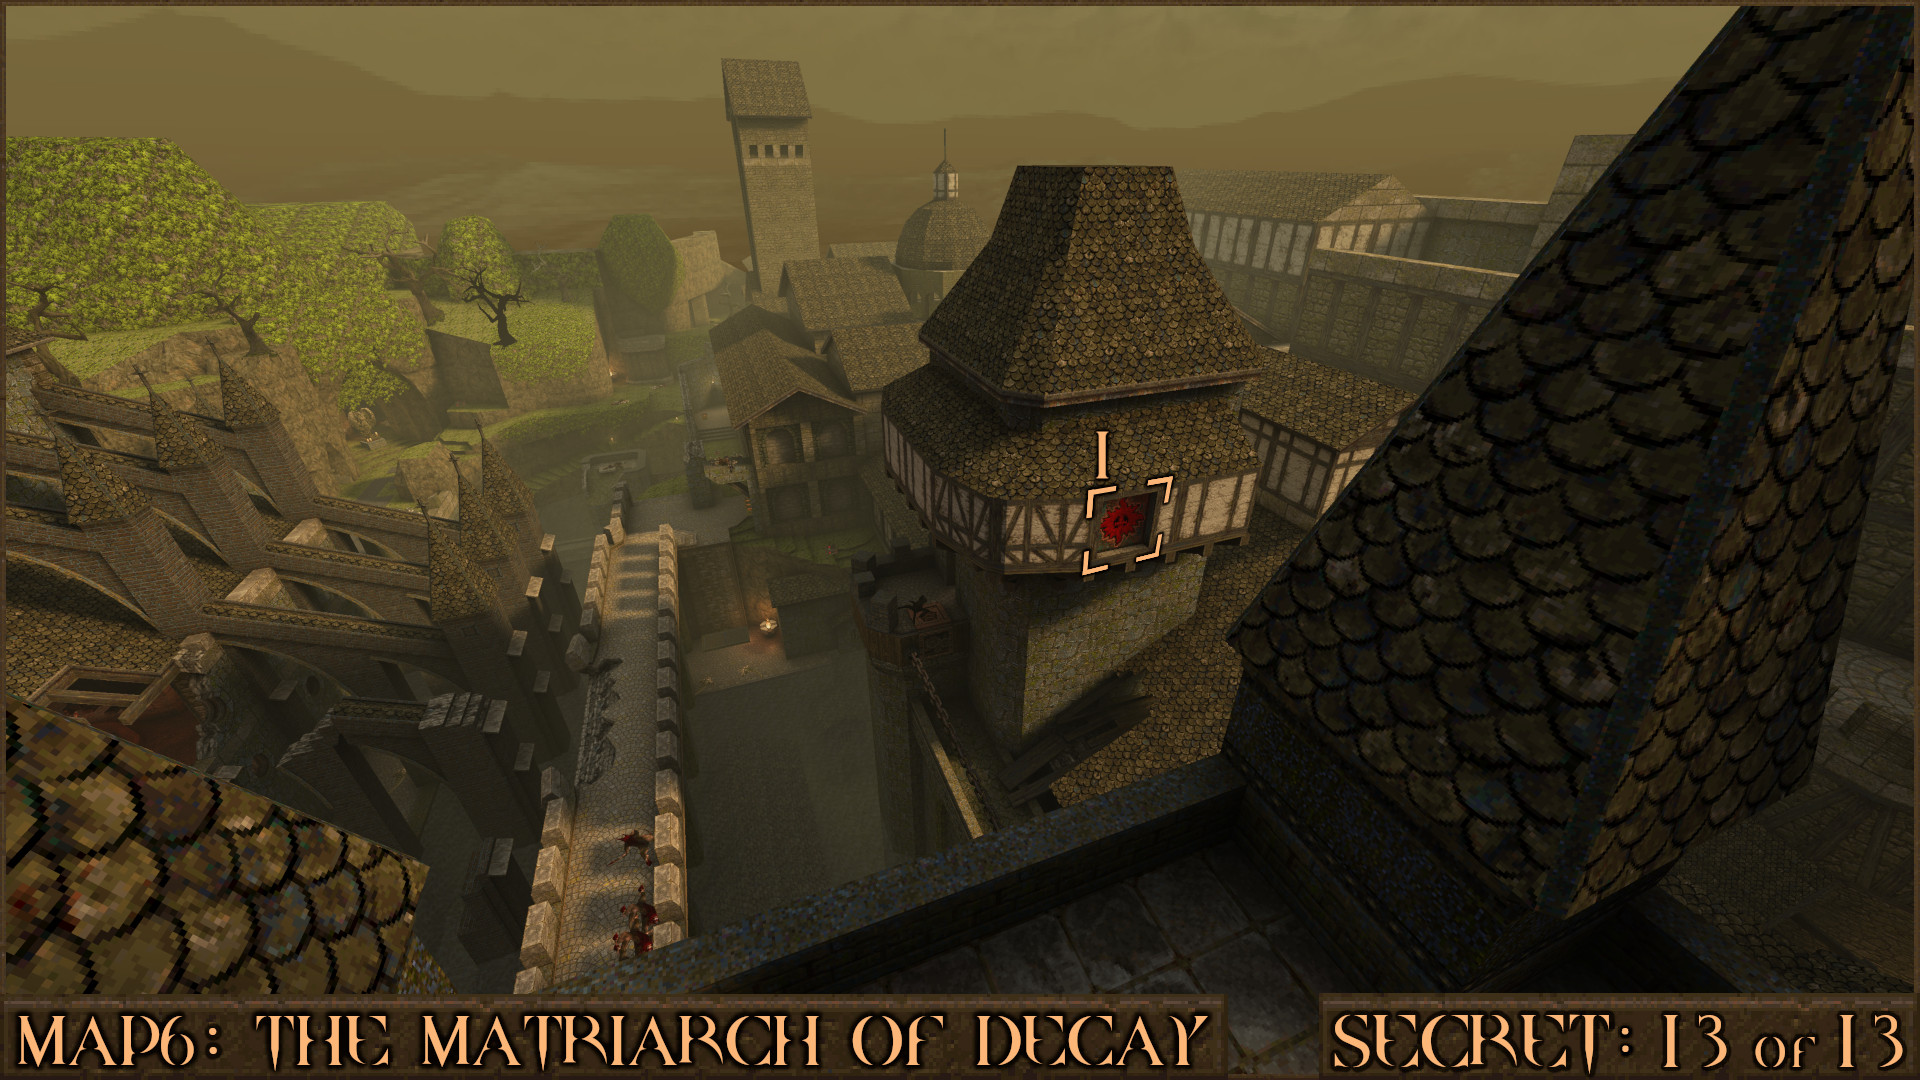
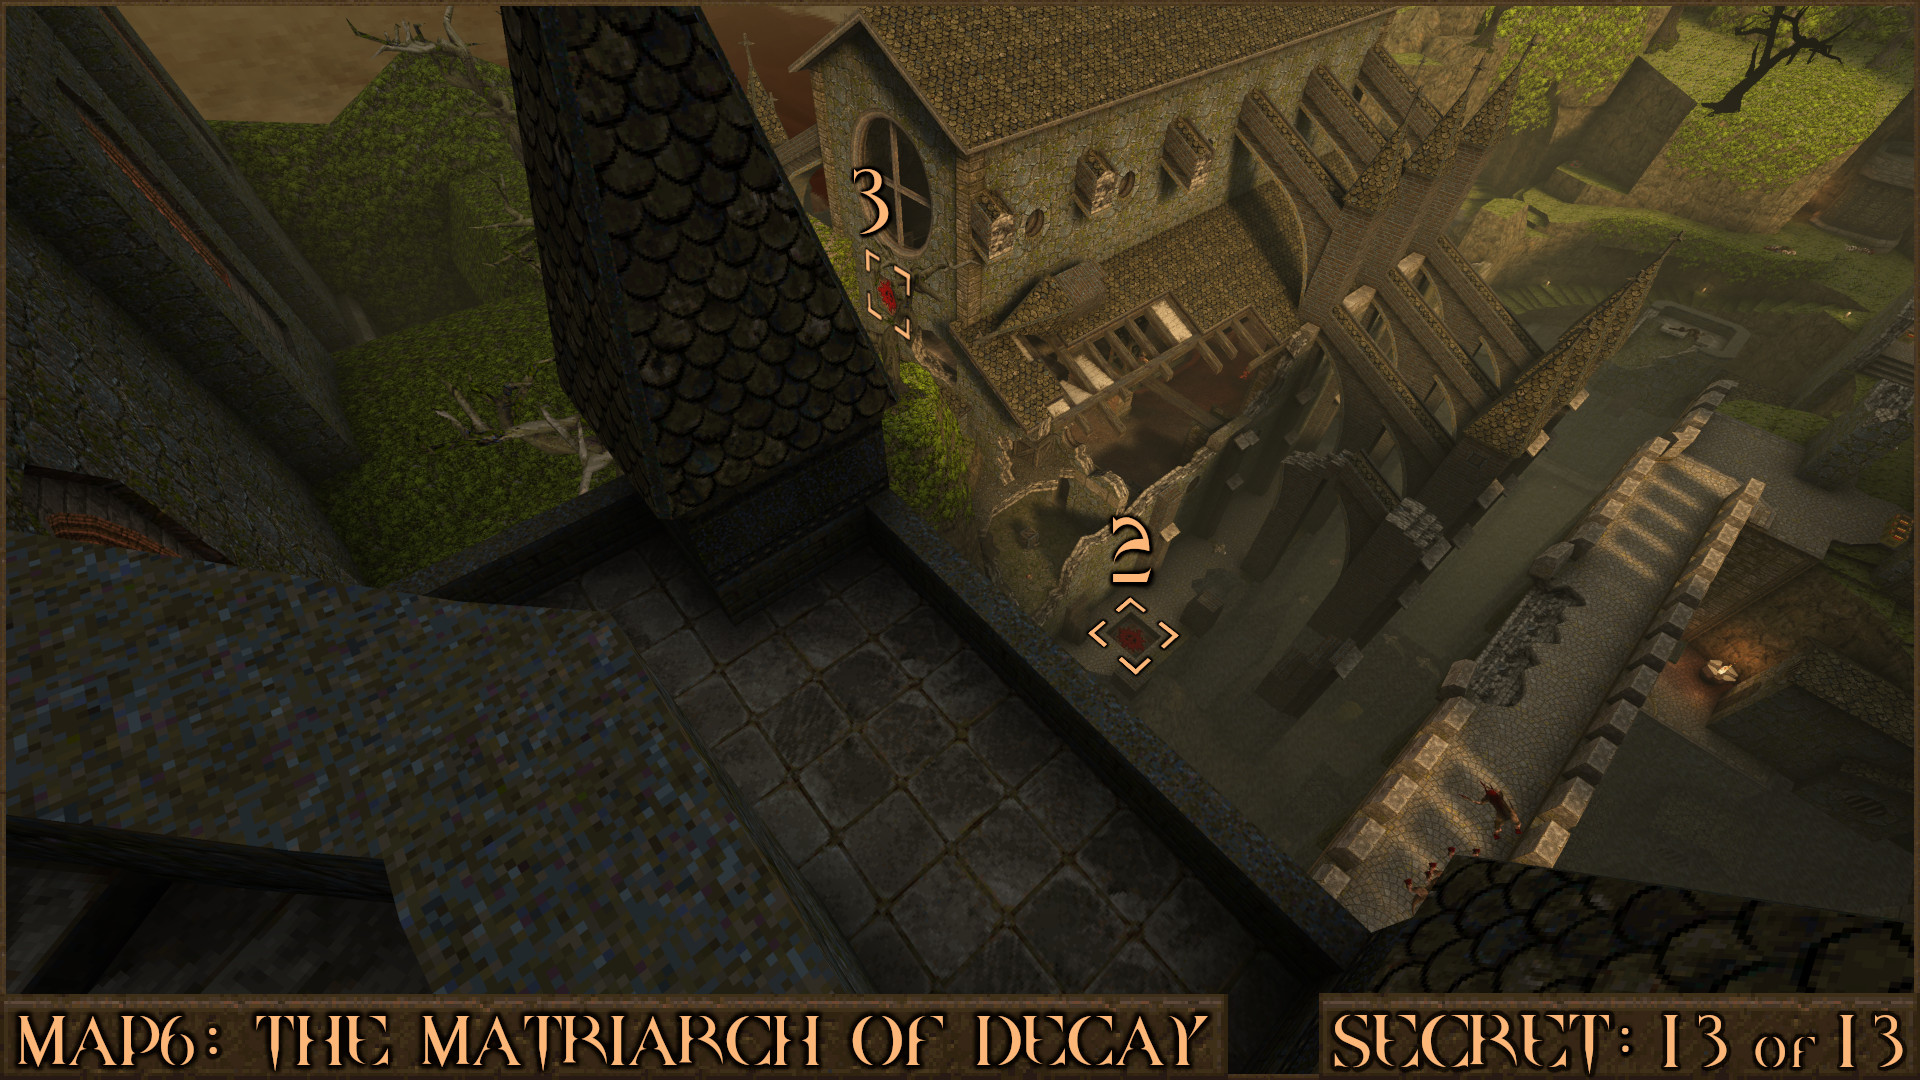
When you see the normal exit portal at the end of the level head outside to the nearby balcony. While overlooking the level there are three large red shootable buttons placed across the level. The 1st button (1) is on the right side embedded in a building.

The 2nd button (2) is set in the floor below so try jumping to help you see it. The 3rd button (3) is below a large window on the left side.

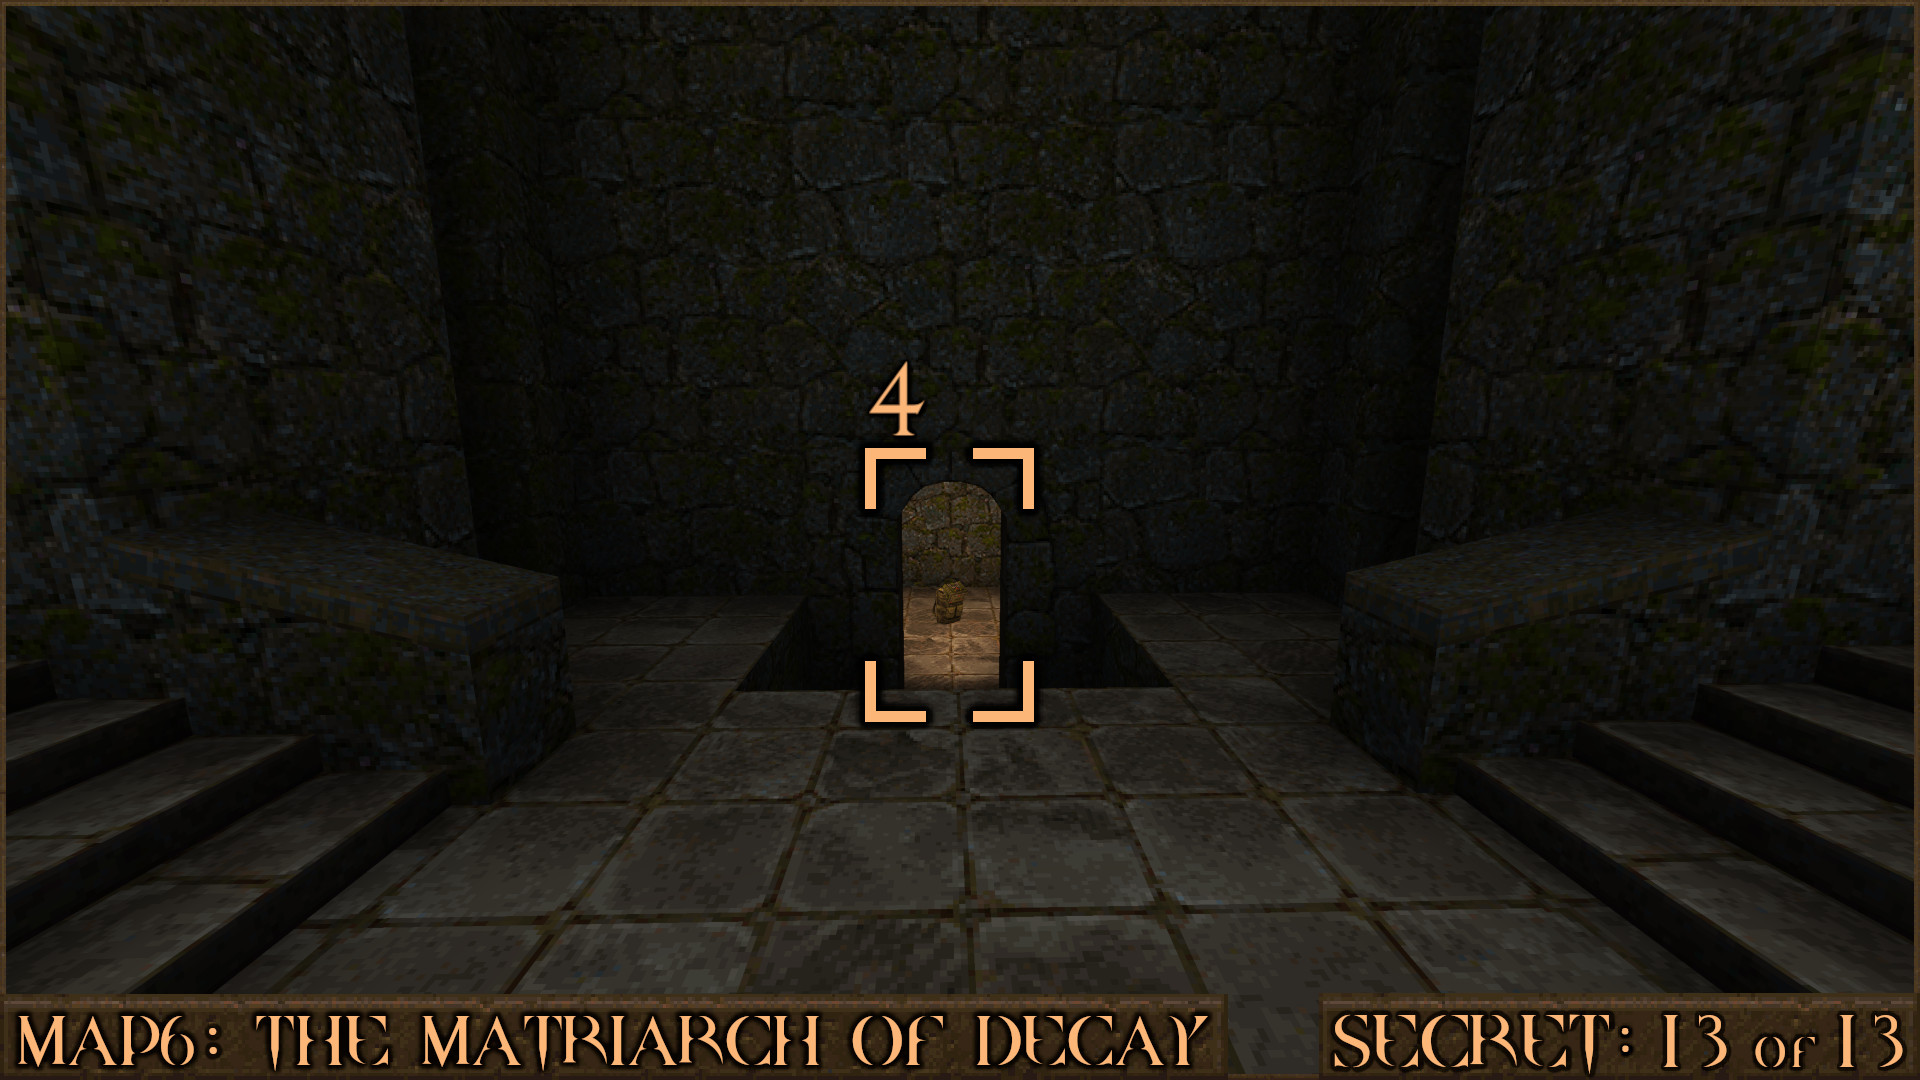
Once they've all been activated turn around to proceed into the secret area (4).

Reward: [Nail Capacity Upgrade]

NOTE: You now have the option of using the normal exit or retracing your steps to Secret 8 and using the secret exit.
‎‏‏‎ ‎‏‏‎ + Rune Secrets
NOTE: During Part 2 the secret count increases from 13 to 14.

Secret 14 of 14
Requires Rune of Sacrifice
In the jail area near the start head into the jail cell () near to the plank over the spike pit.

At the back of this room is a Rune of Sacrifice Door () that contains the secret.

Reward: Large Cells×2 [Cell Capacity Upgrade]
‎‏‏‎SECRET4: The Crooked Village [Secret Level]
NOTE: This secret level can be accessed during Part 1 onwards by using the secret exit found in MAP6: The Matriarch of Decay (Secret 8).

Extra Secret 1
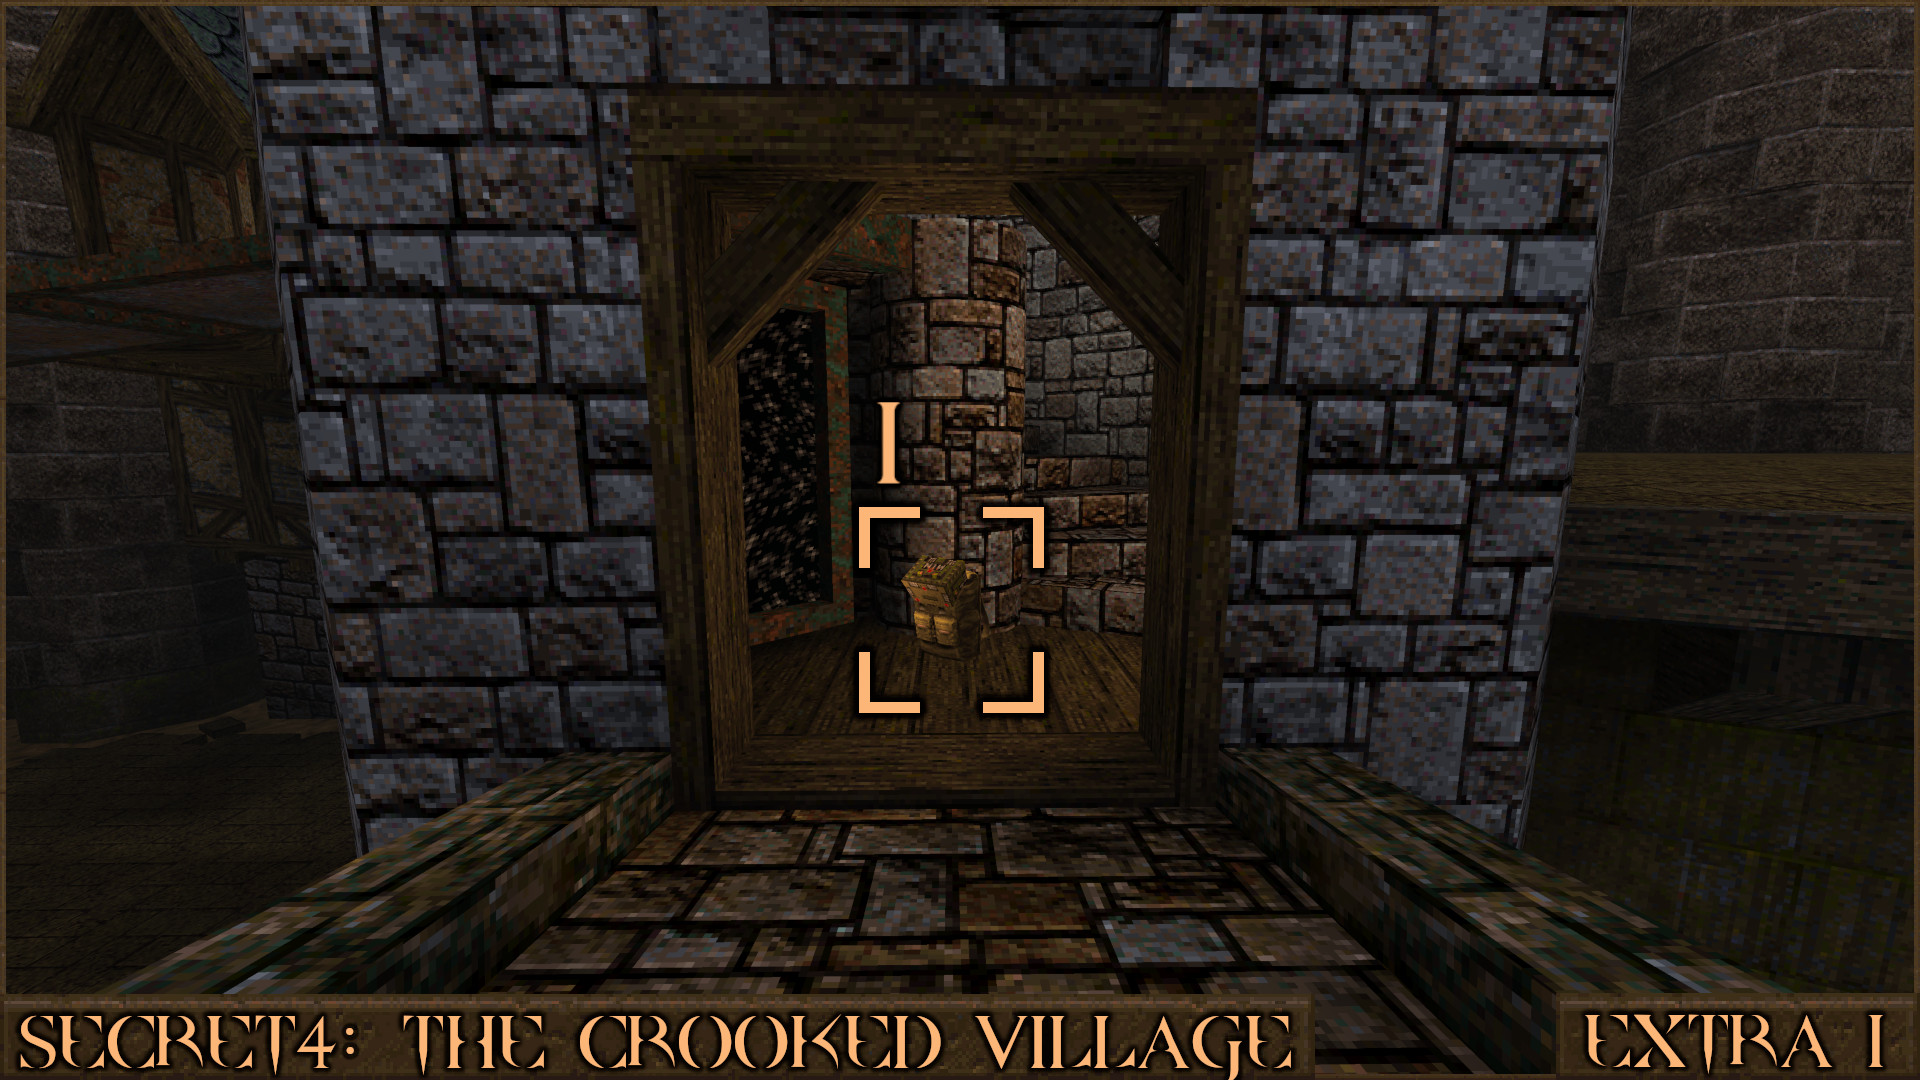
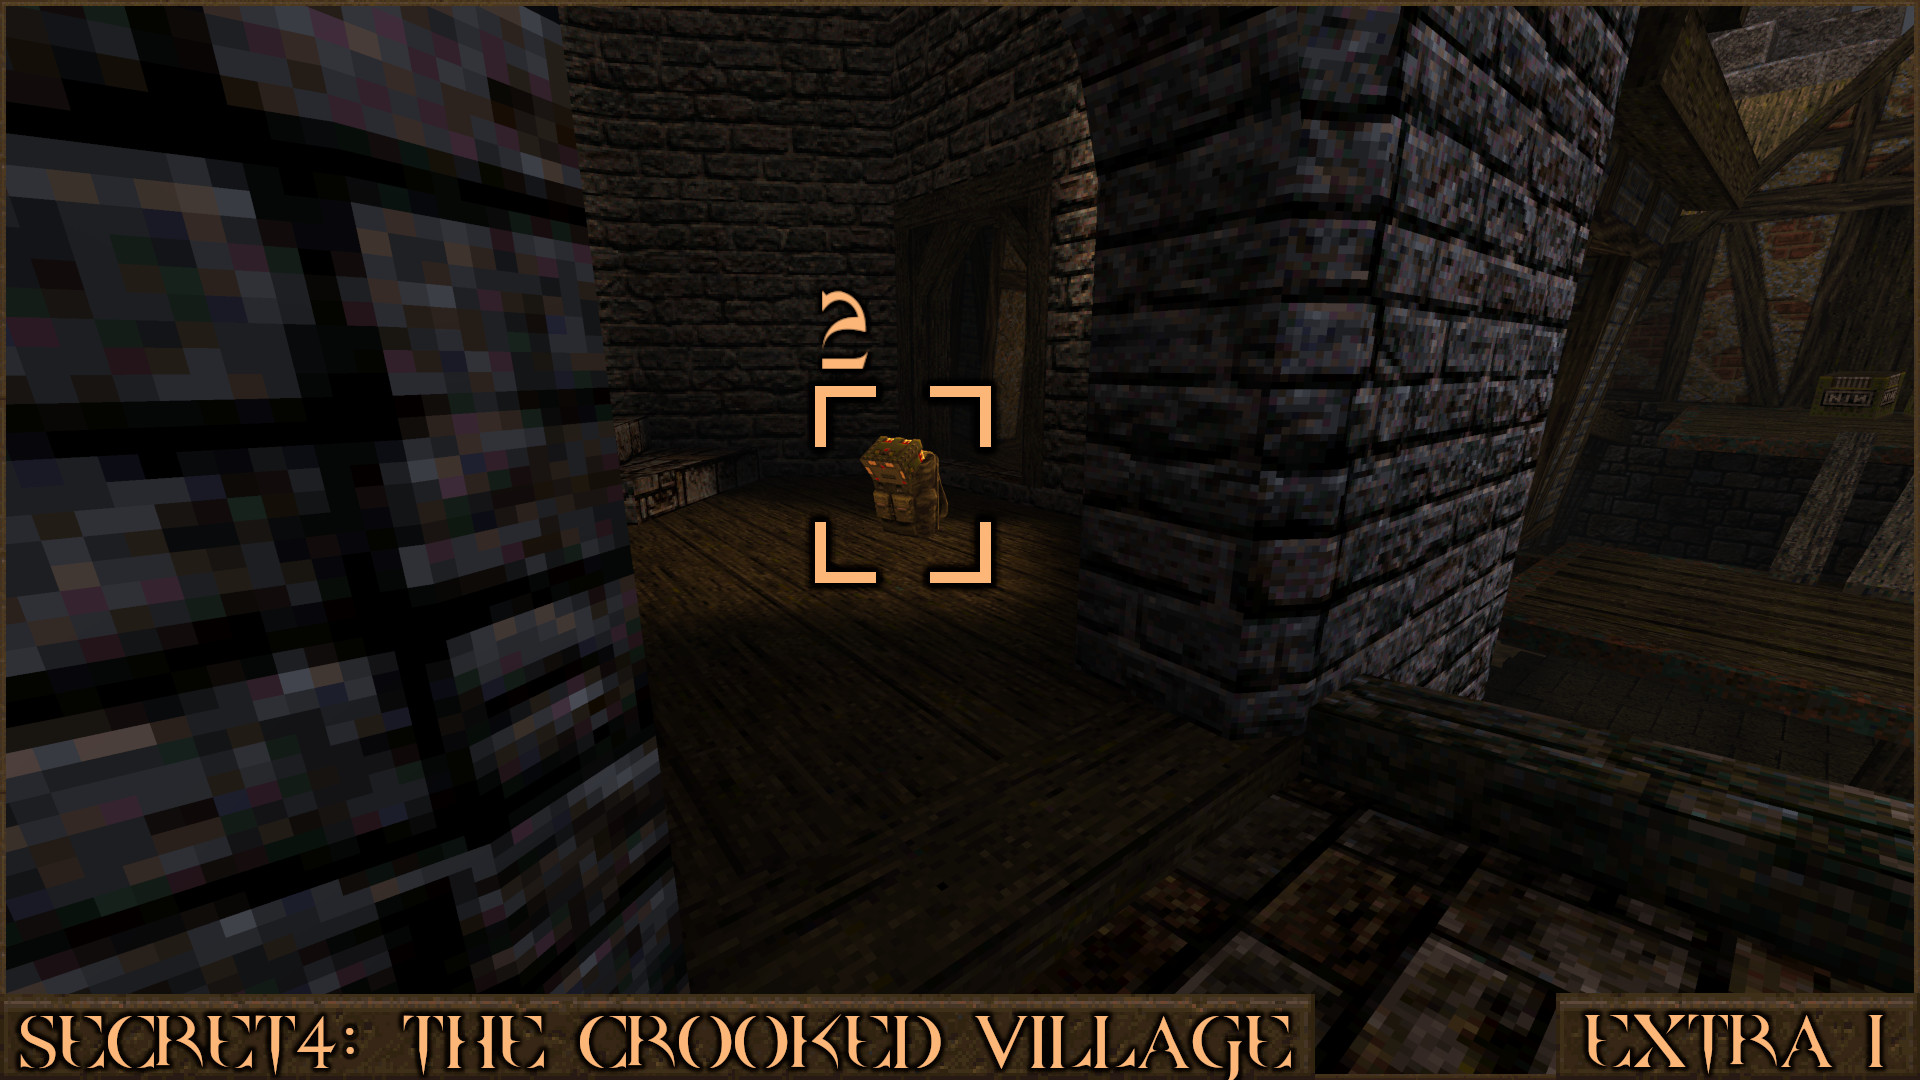
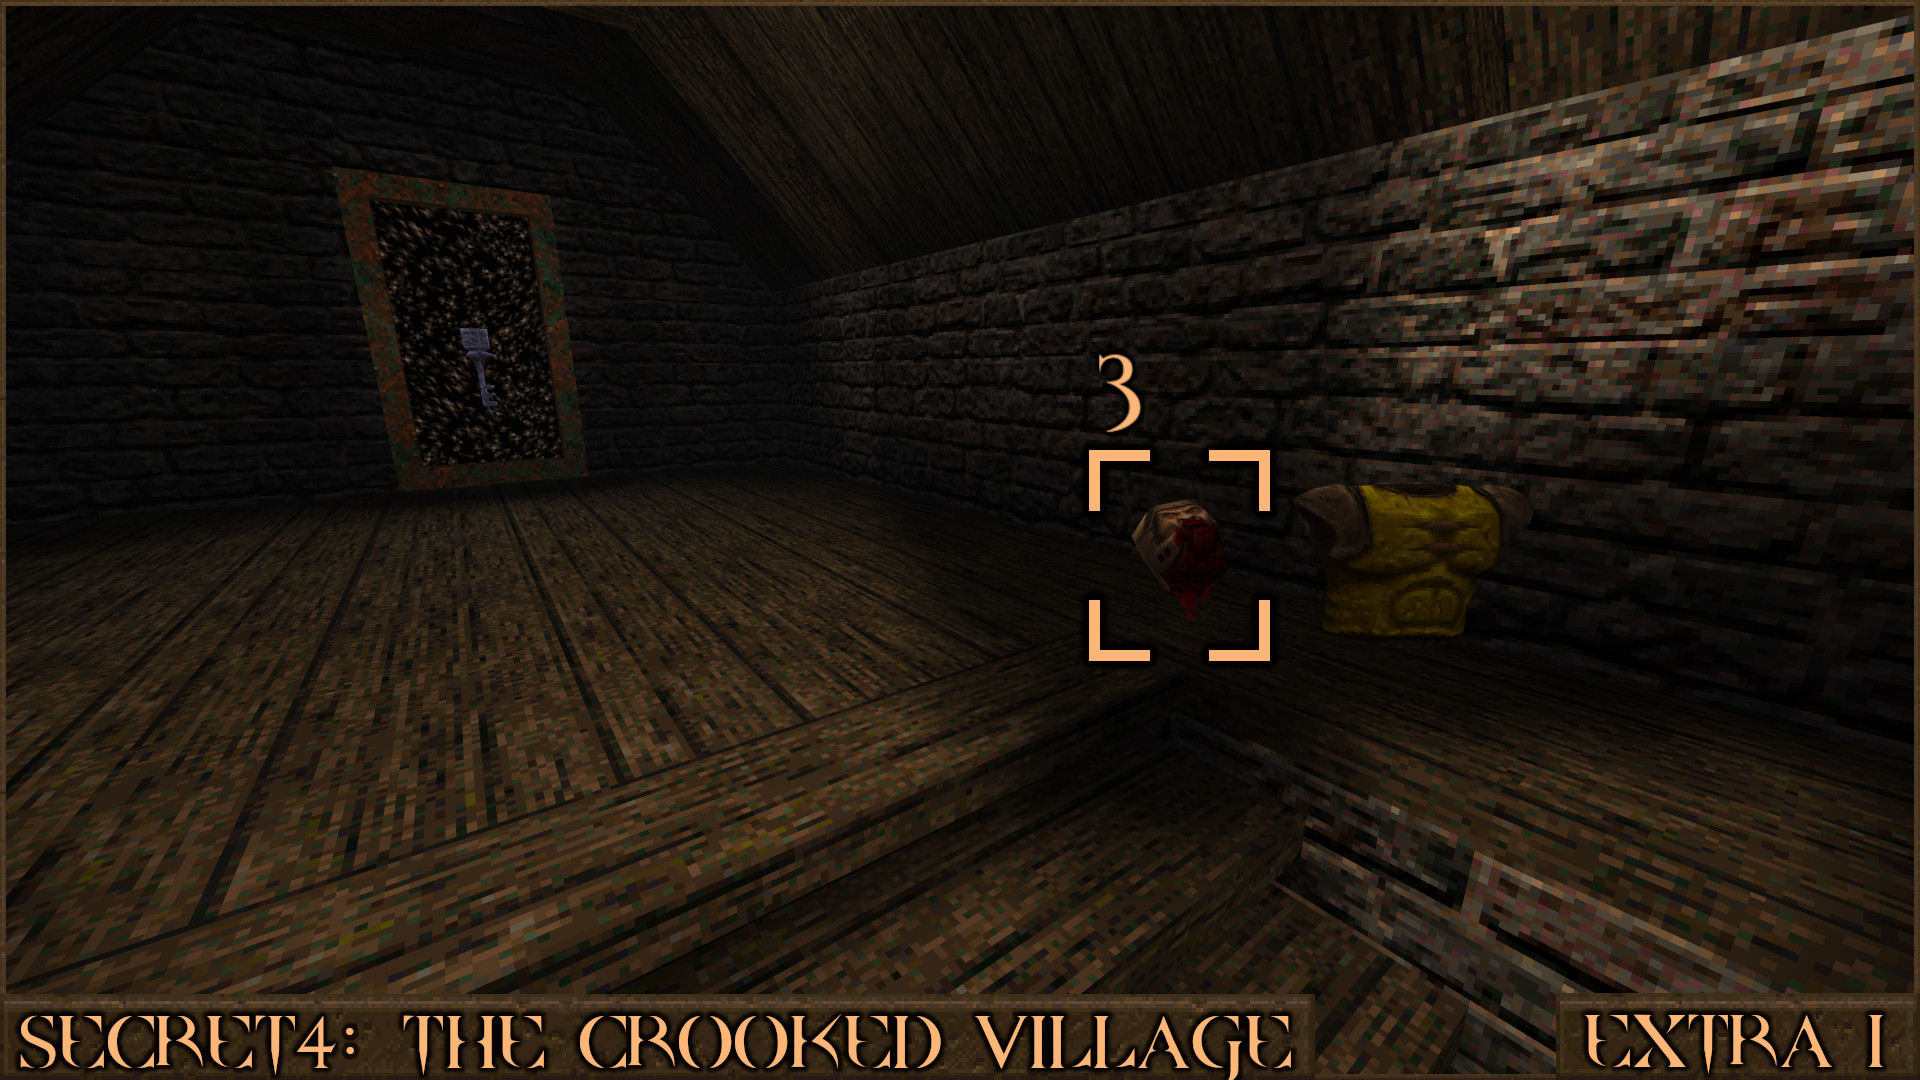
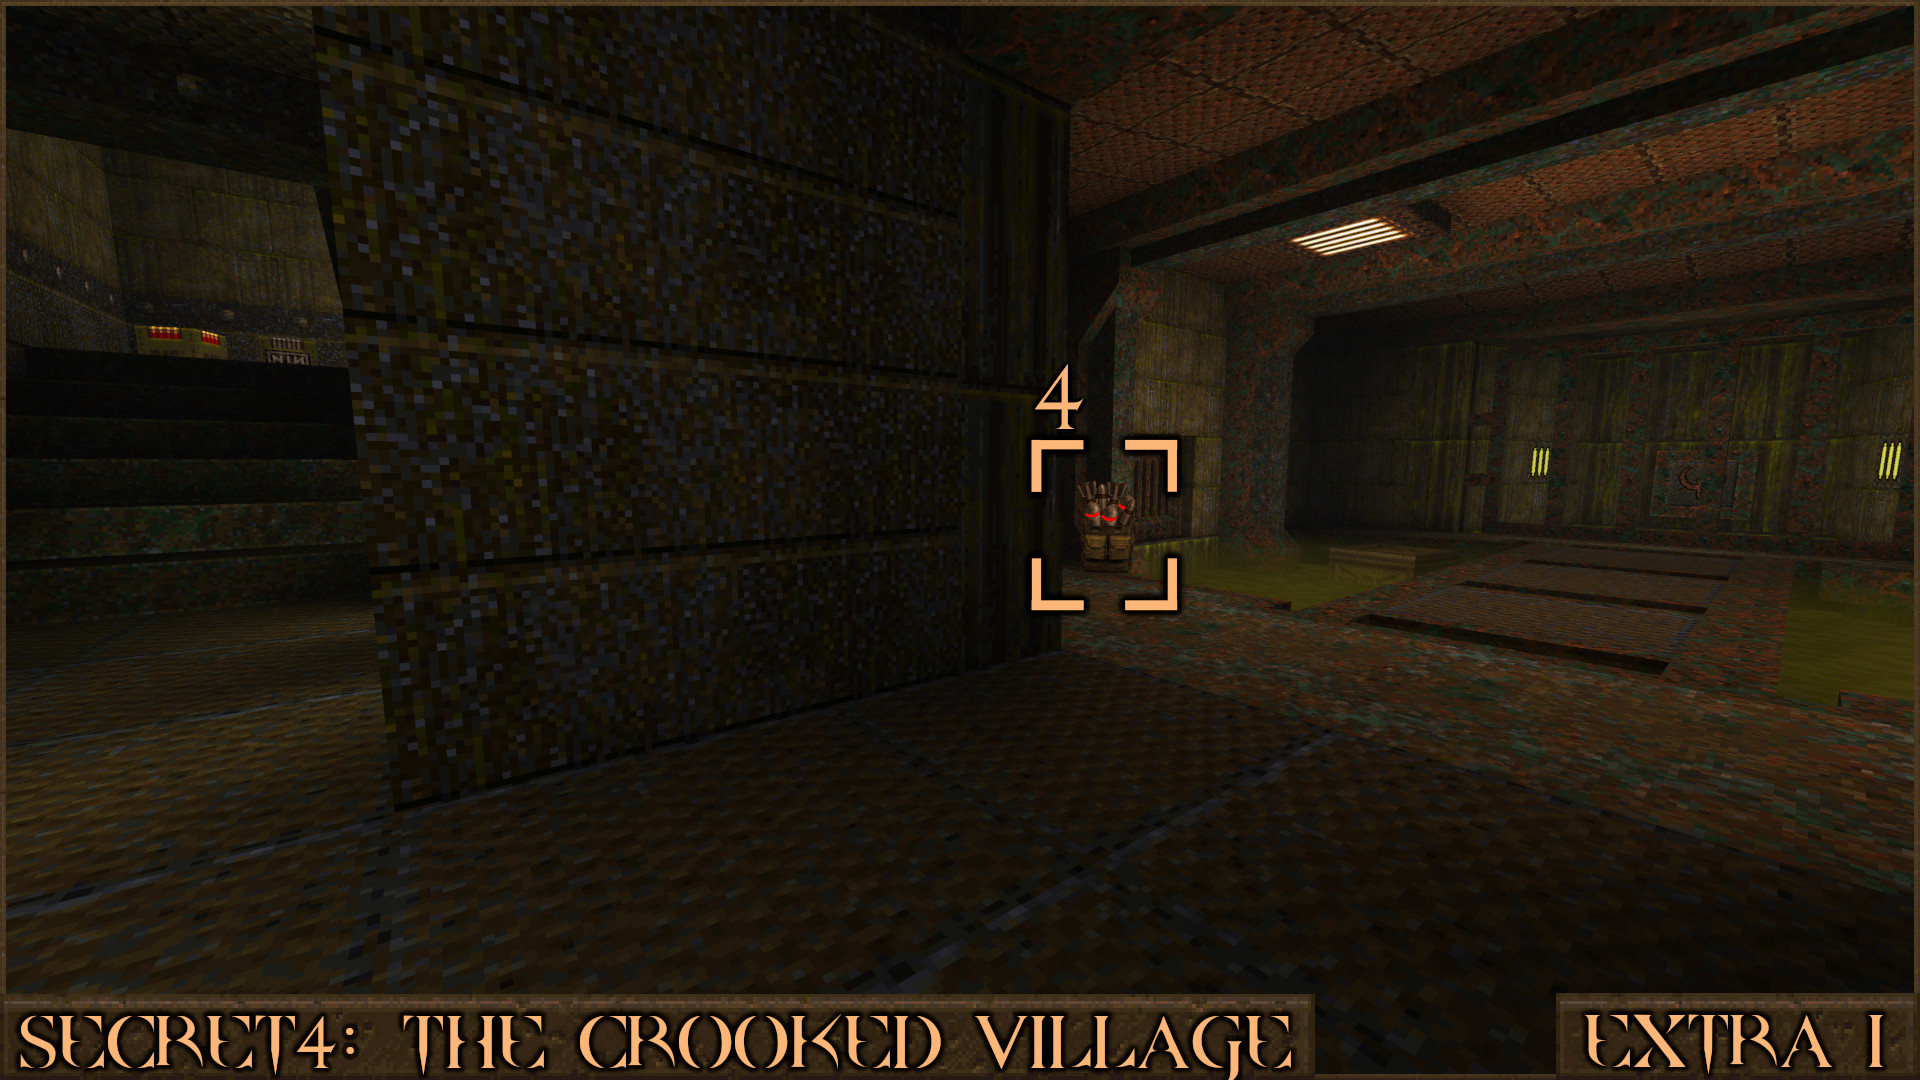
The upgrade items in this level are just found normally as you progress through the level. Work your way to the central tower with the spiral staircase to find the Nail Capacity Upgrade ().

Walk over the small curved bridge that connects to the spiral tower and you'll see the Shell Capacity Upgrade ().

Reach the upper room of the level and you'll find the Health Capacity Upgrade () near to the Silver Key.

After opening the Silver Key Door descend into the lower levels to find the Rocket Capacity Upgrade ().

Reward: [Health Capacity Upgrade] [Shell Capacity Upgrade] [Nail Capacity Upgrade] [Rocket Capacity Upgrade]

Secret 1 of 1
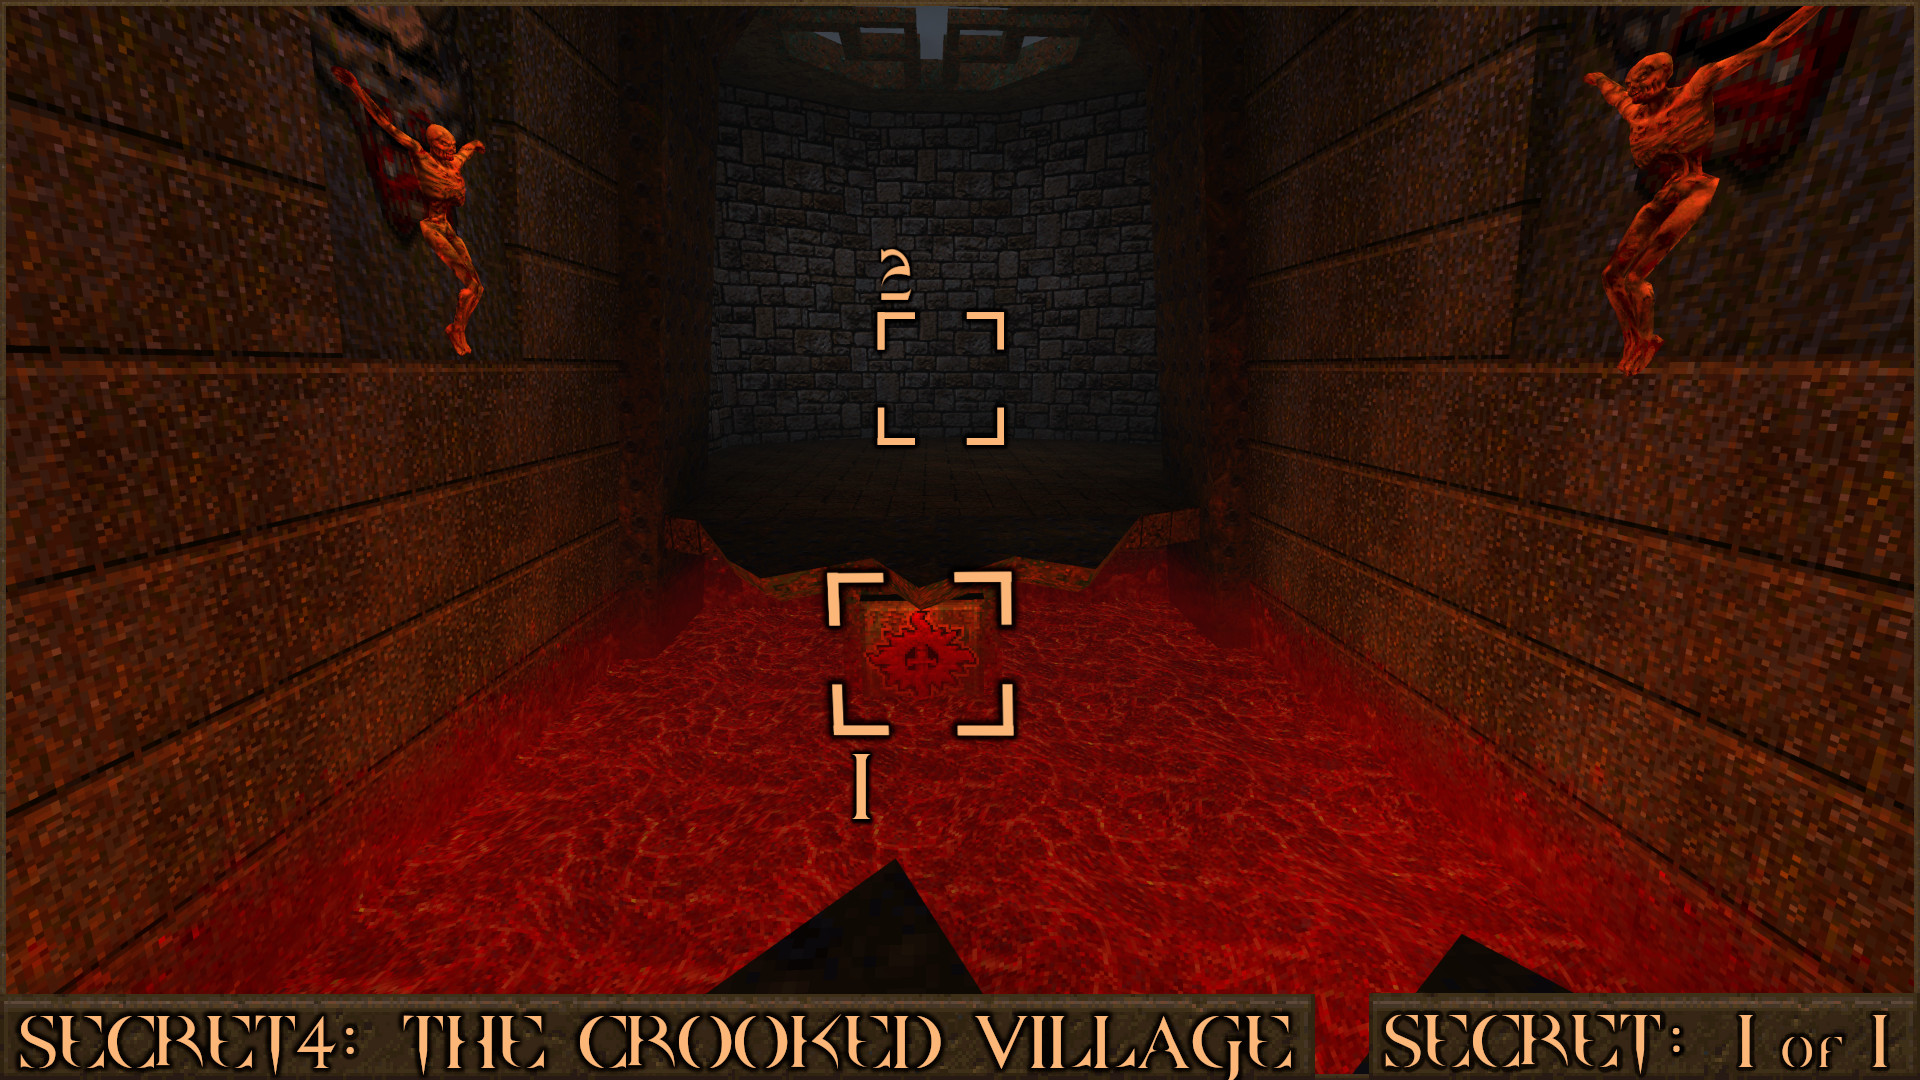
Right at the end of the level you will jump over some lava to reach the exit portal. Turn around and look under the broken bridge to see a red shootable button (). Shooting it activates a wall in the distance that leads to a teleporter ().

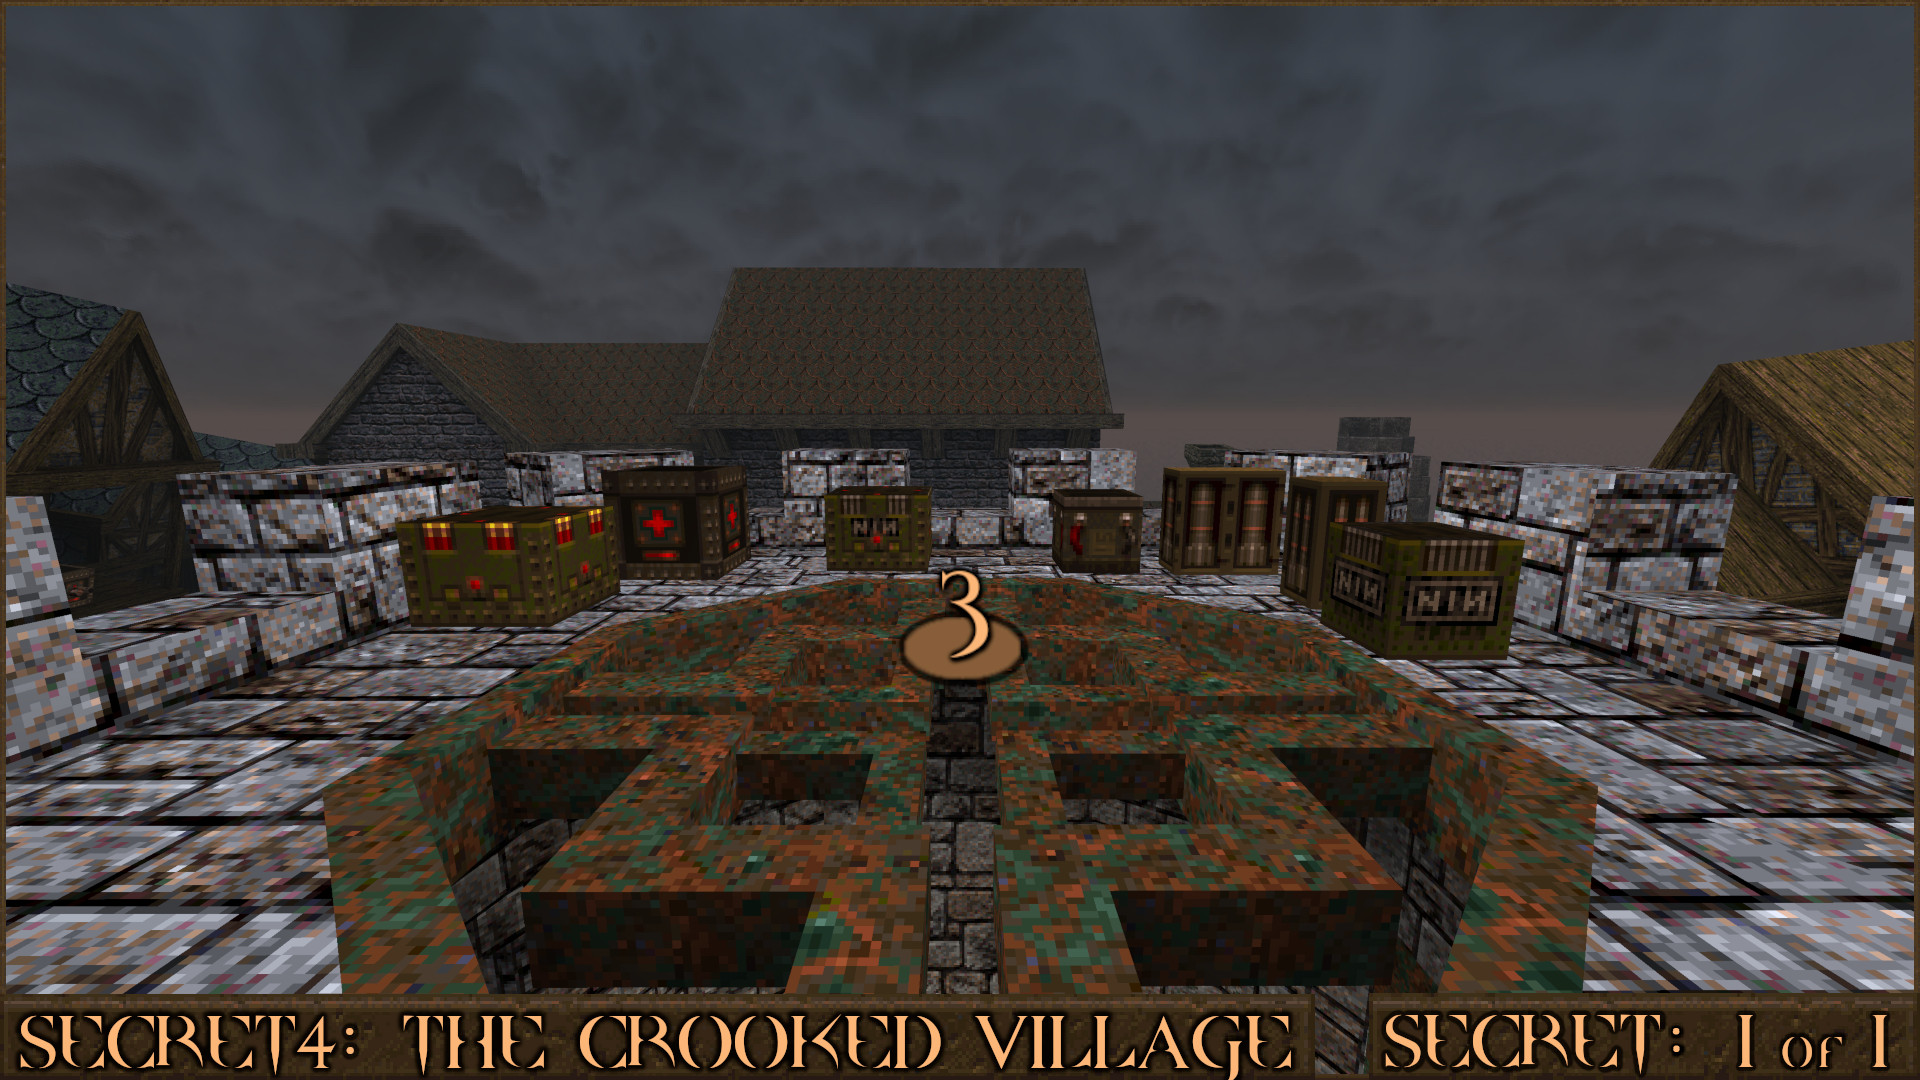
After teleporting you'll be given a choice of one of three items:
Ring of Shadows
Pentagram of Protection
Quad Damage
Once you've made your choice go through the teleporter to appear on top of a tower () containing lots of items and a huge fight will begin.

Reward: Large Shells Small Nails Large Nails Small Rockets Large Rockets Small Cells Megahealth
‎‏‏‎ ‎‏‏‎ + Bloody Nightmare NG+ Secrets
NOTE: During Part 3 a new weapon upgrade is available here.

Extra Secret 2
Requires Bloody Nightmare New Game+
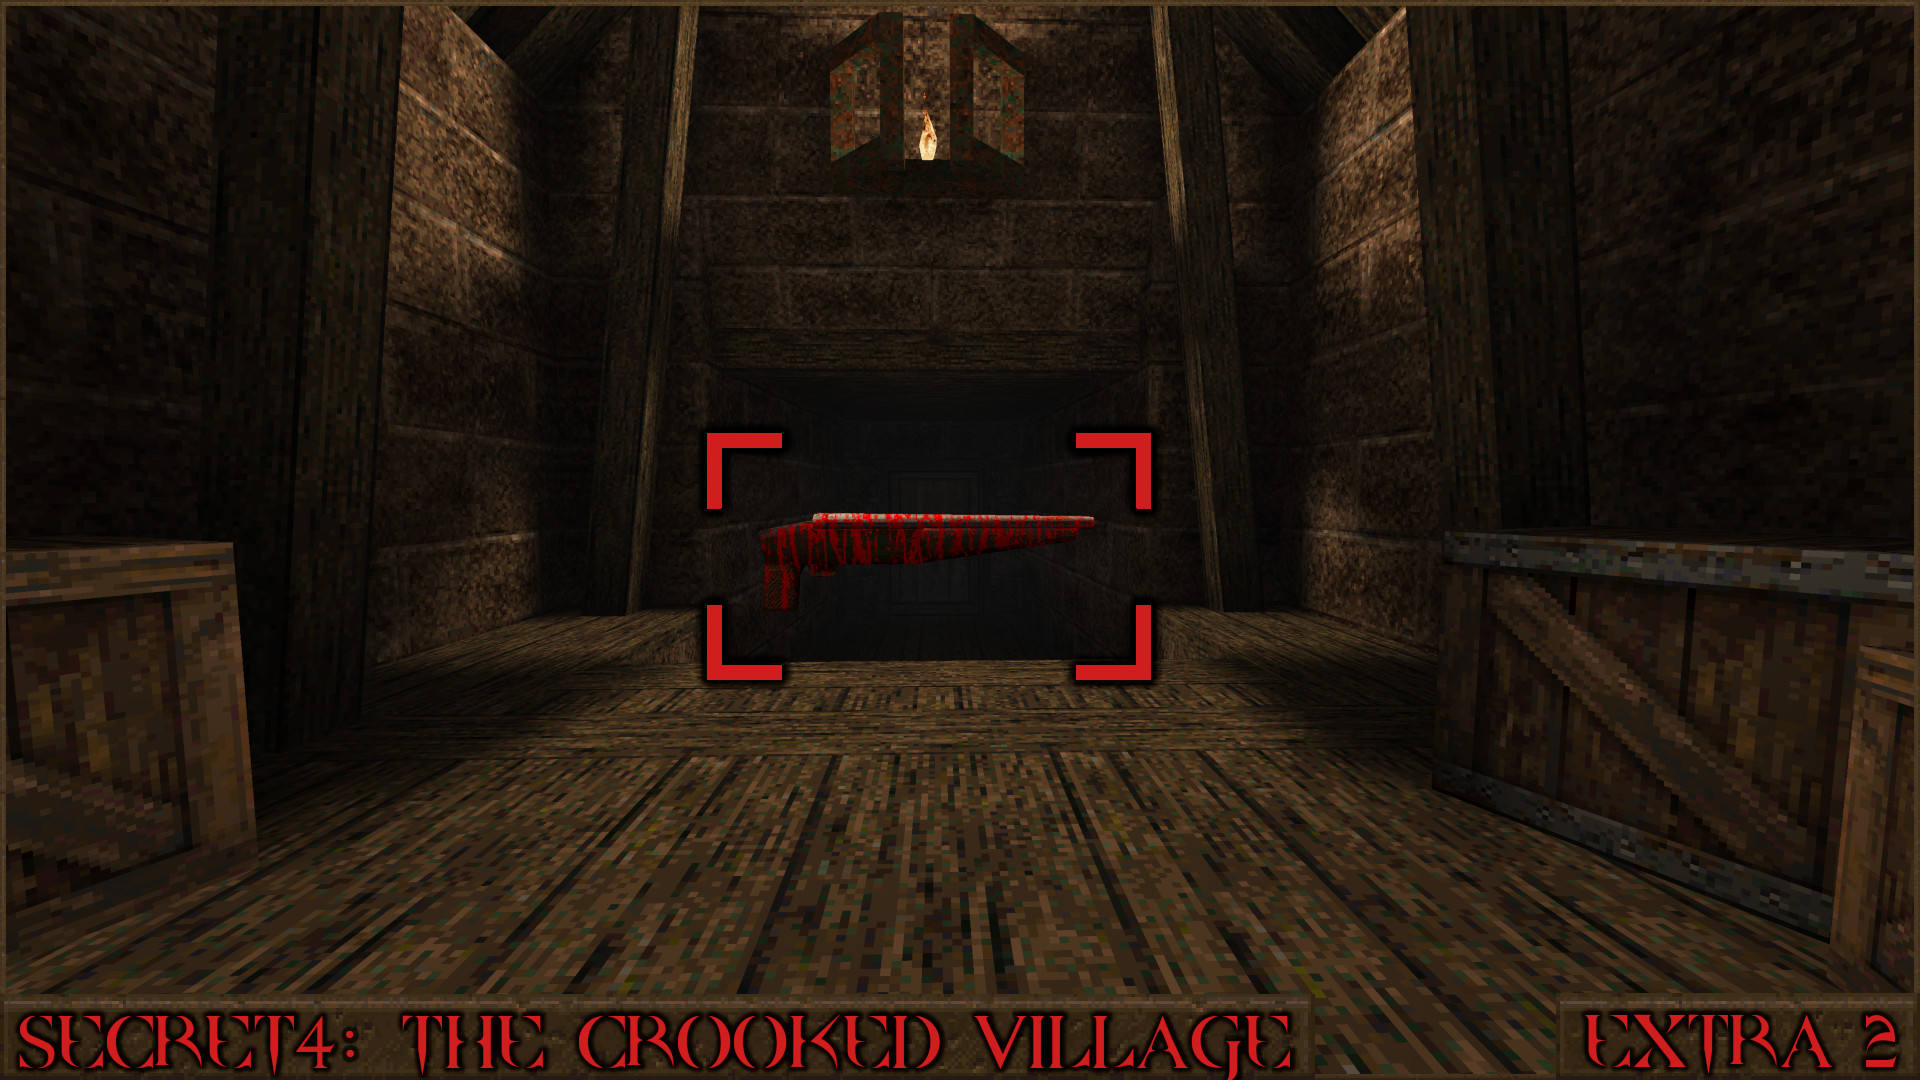
Return to this secret level and you will find the Bloody Double-Barrelled Shotgun upgrade at the start. This permanent upgrade increases the number of pellets shot and widens the spread which results in higher damage output compared to the regular Double-Barrelled Shotgun, especially at point-blank range. It is also available immediately at the start of each level from now on.
This upgrade will not appear merely by picking up the Bloody Knight's Head and returning to this level during Part 2. It will only appear during Part 3.

Reward: [Bloody Double-Barrelled Shotgun]
‎‏‏‎MAP7: Revelation of the Arcane
Secret 1 of 15
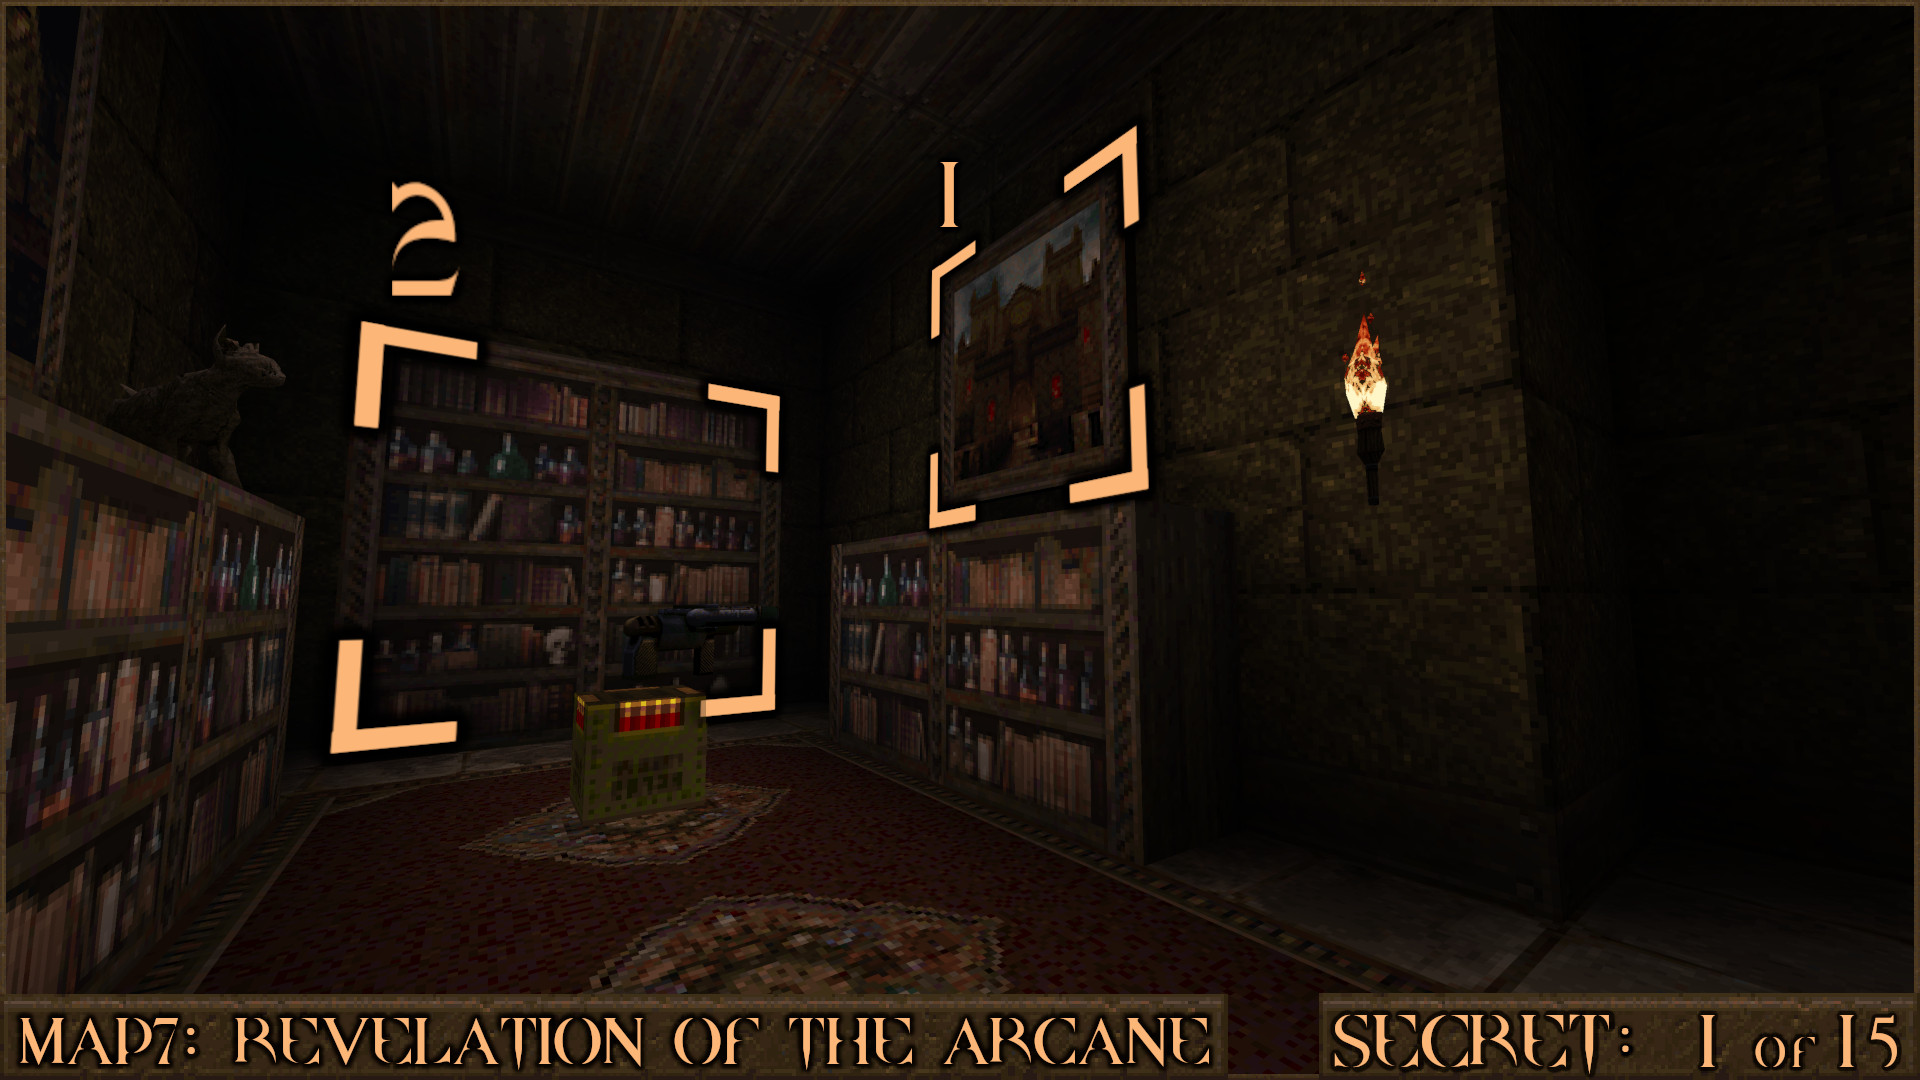
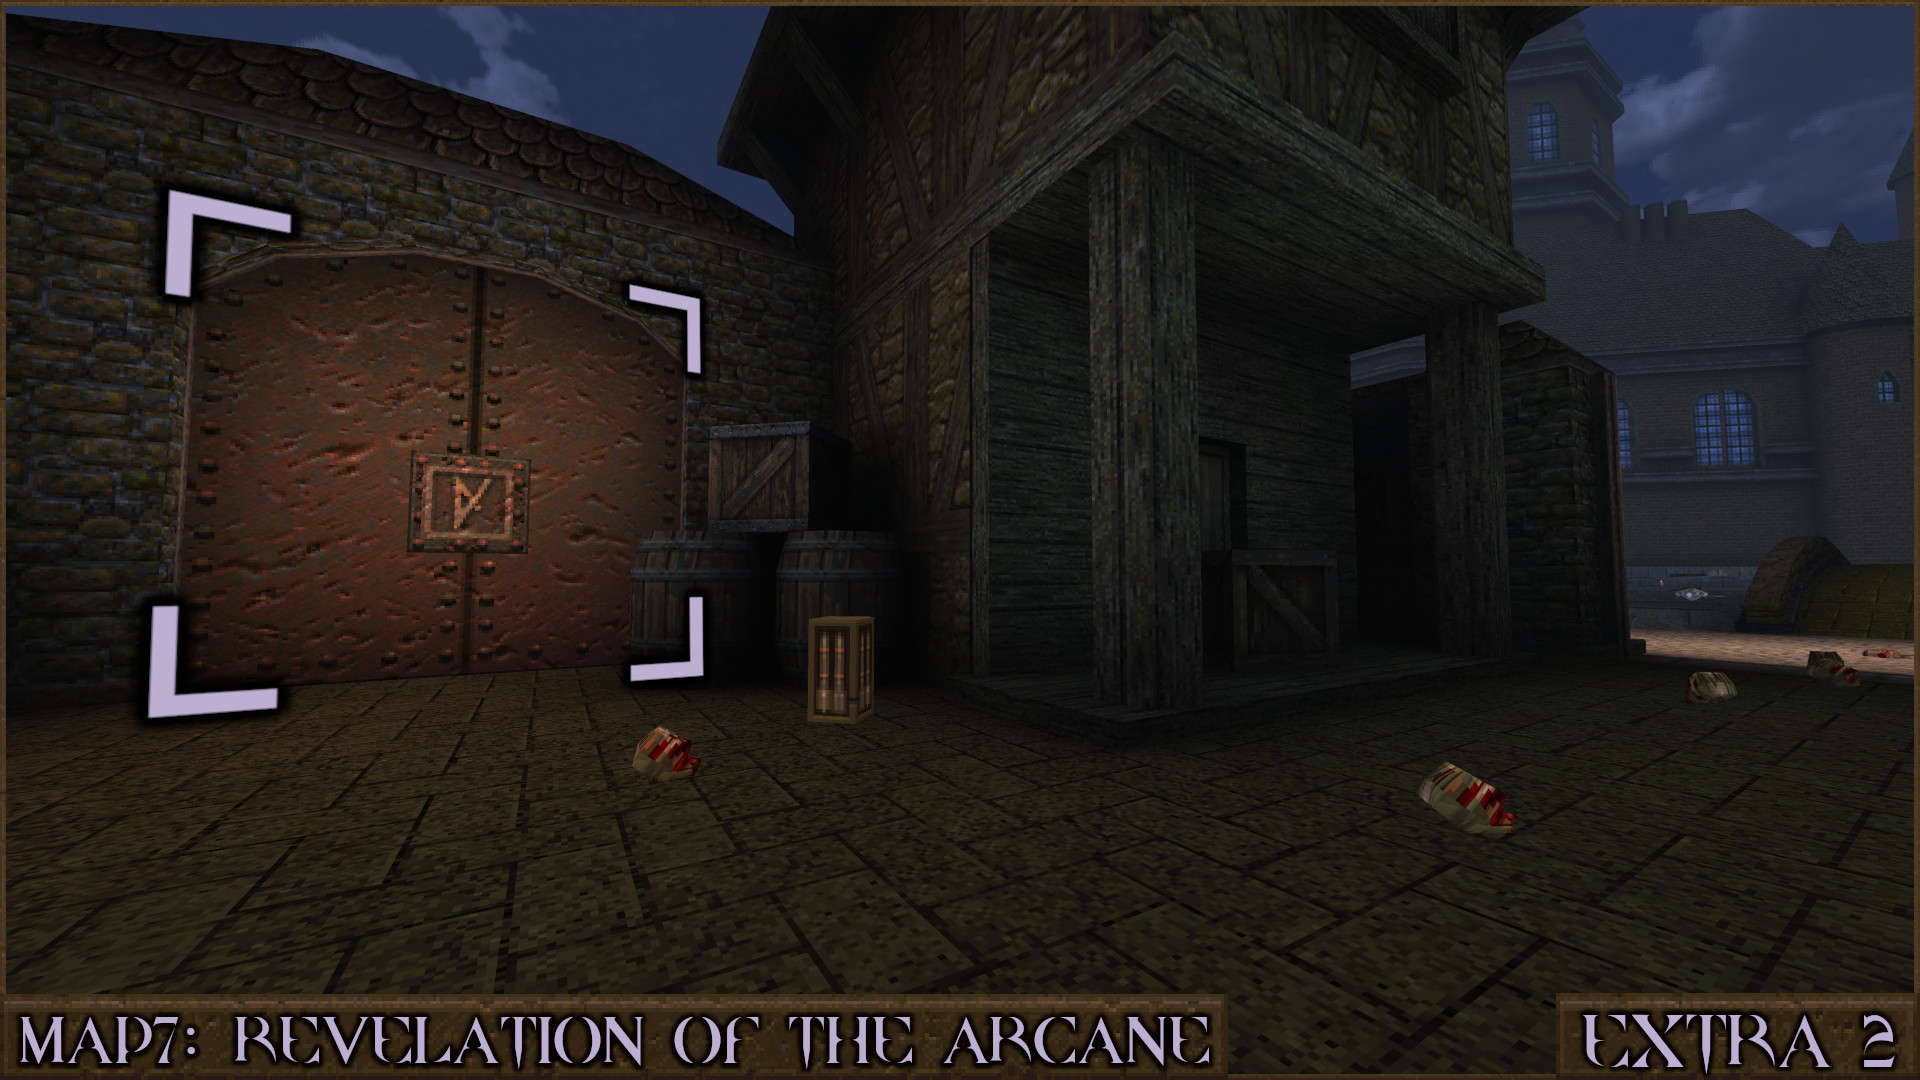
After going down the spiral staircase shoot the picture of the castle () above the bookcase to shift a nearby wall ().

While inside this secret make sure to shoot the red shootable button behind the bars () as this allows access to a later secret.

Reward: Yellow Armor

Secret 2 of 15
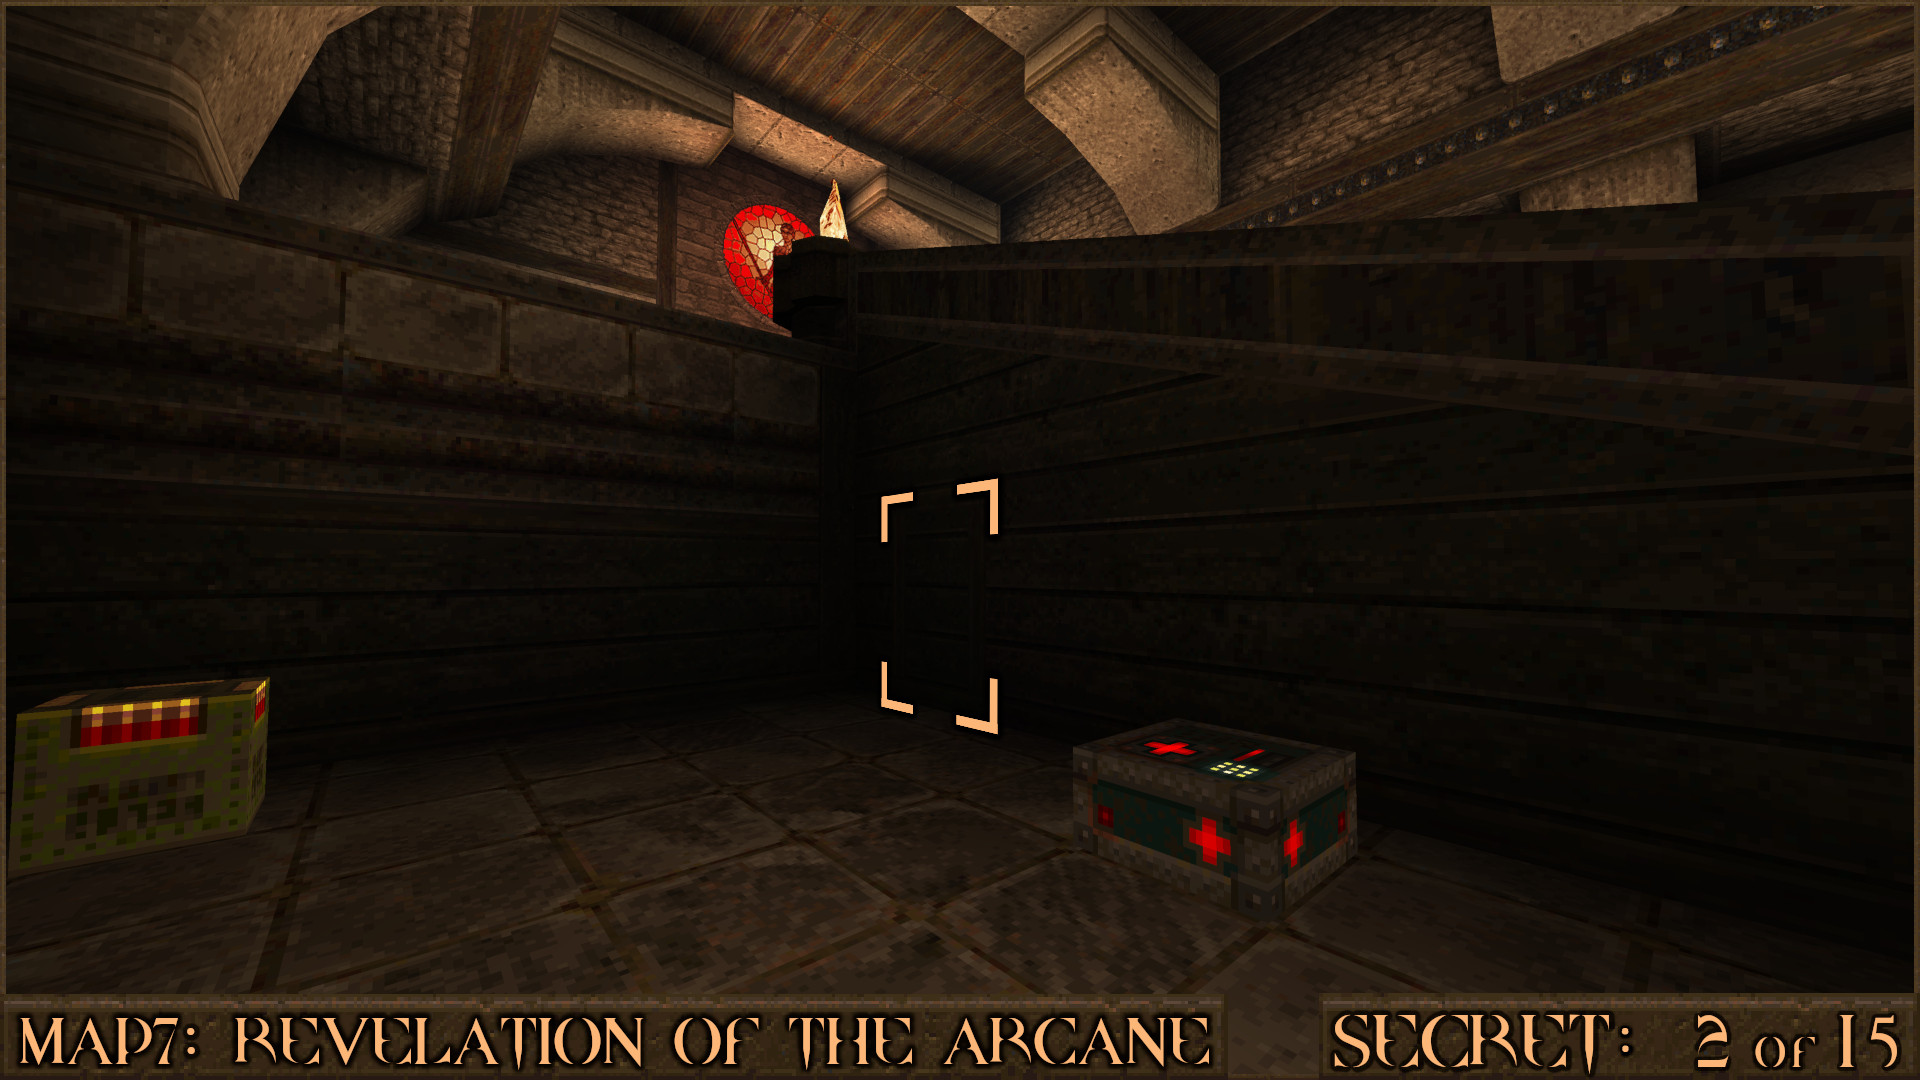
In the large entrance hall go down the left side of the large stairs. Look for a rectangular panel and shoot it to access the secret.

Reward: Large Shells Large Nails

Secret 3 of 15
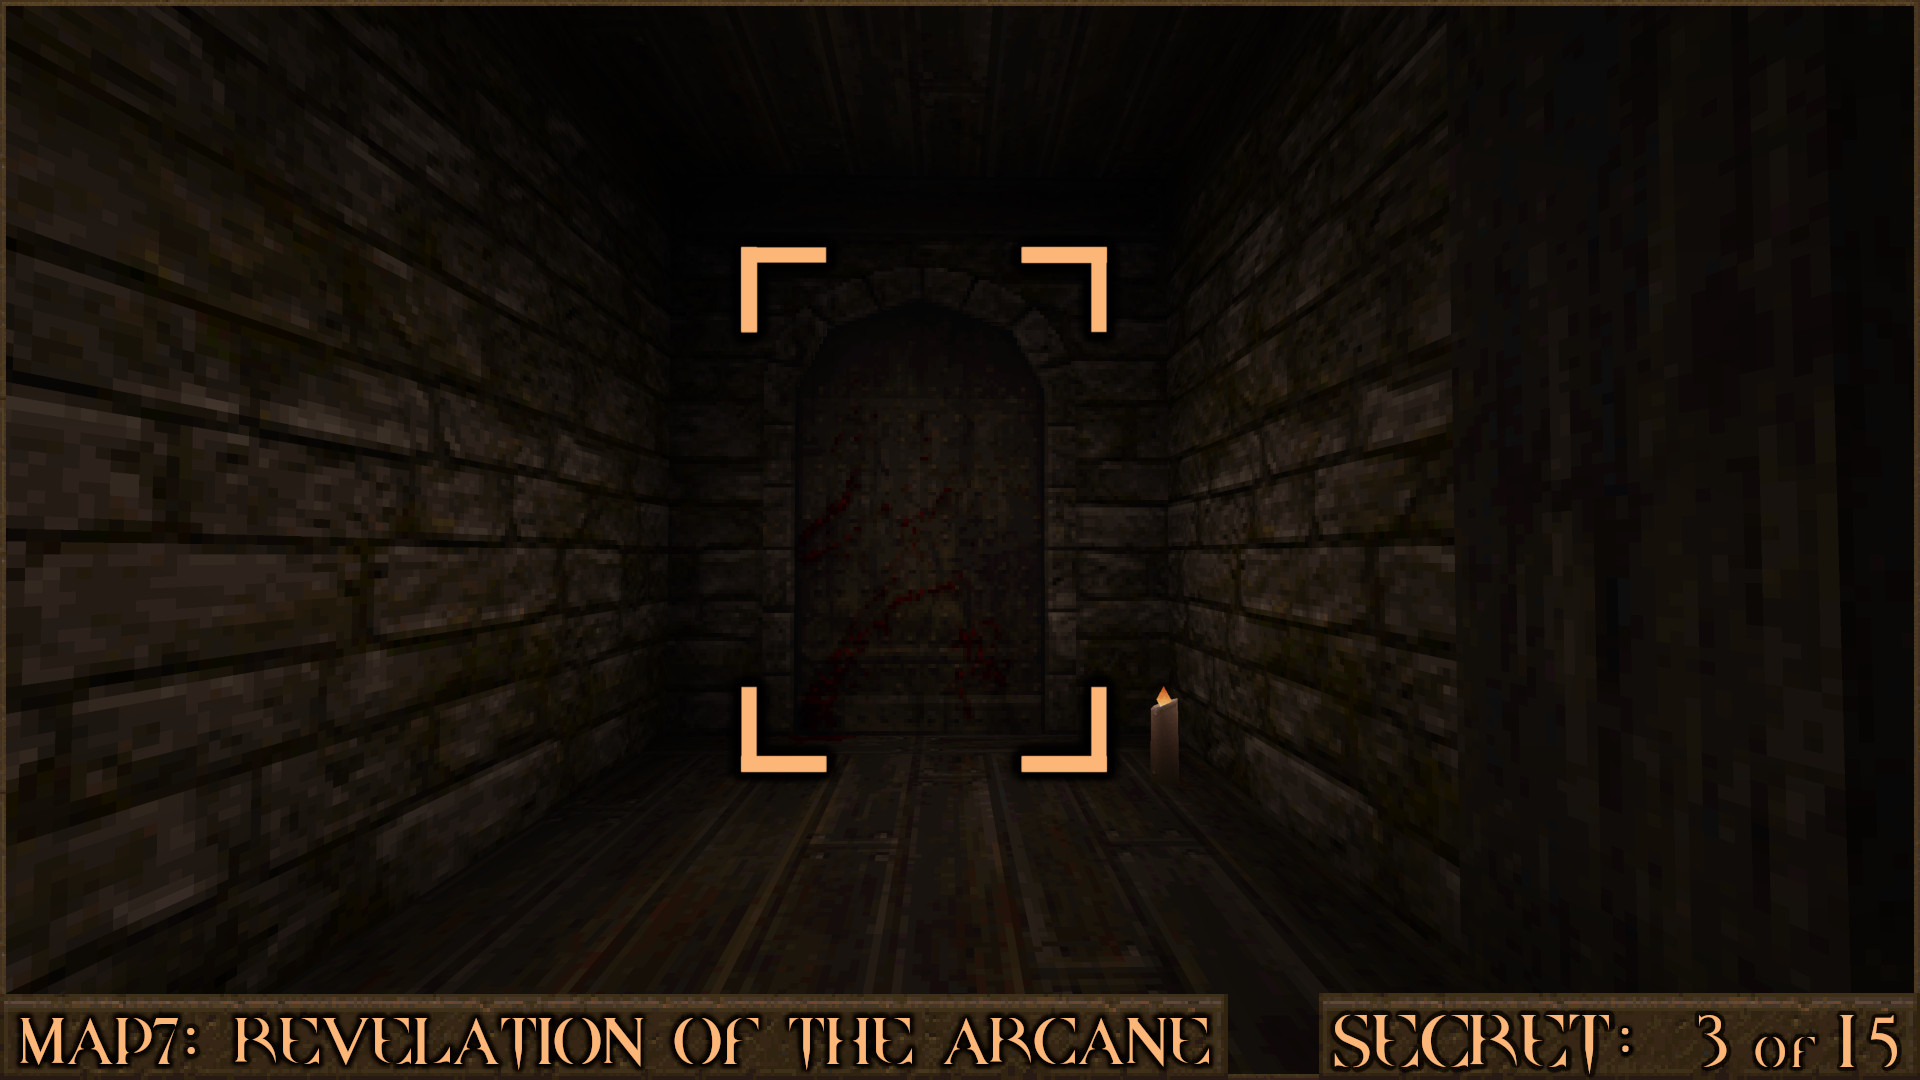
While inside Secret 2 use the Axe on the bloody door. If you have shot the red shootable button while you were inside Secret 1 the bars will also be lowered and allow you into the secret room.

Reward: Small Rockets [Health Capacity Upgrade]

Secret 4 of 15
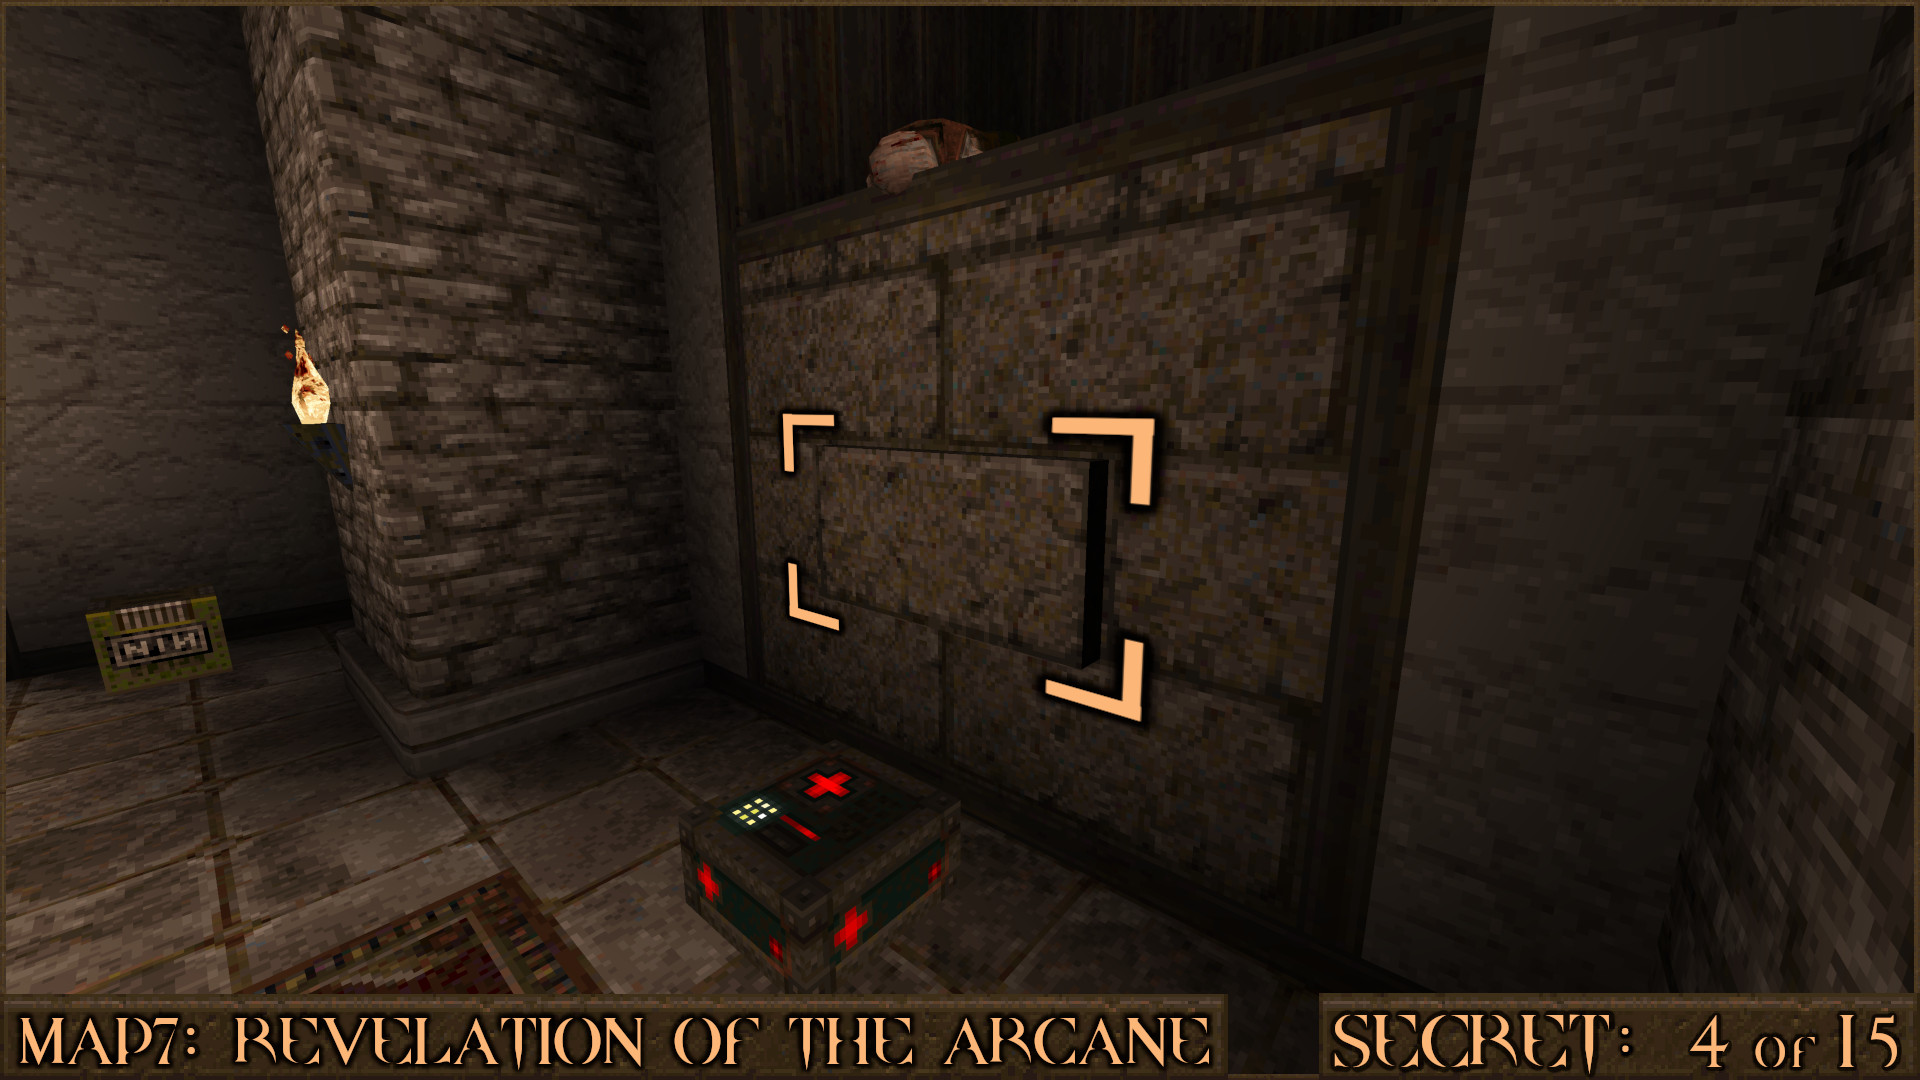
After going up the entrance hall stairs take a left and go up the corridor. You'll see an Ogre above a brick wall. Look closely at the brick wall to see a brick sticking out and hit it with your Axe. This will shift the wall back to reveal the secret.

Reward: [Shell Capacity Upgrade]

Secret 5 of 15
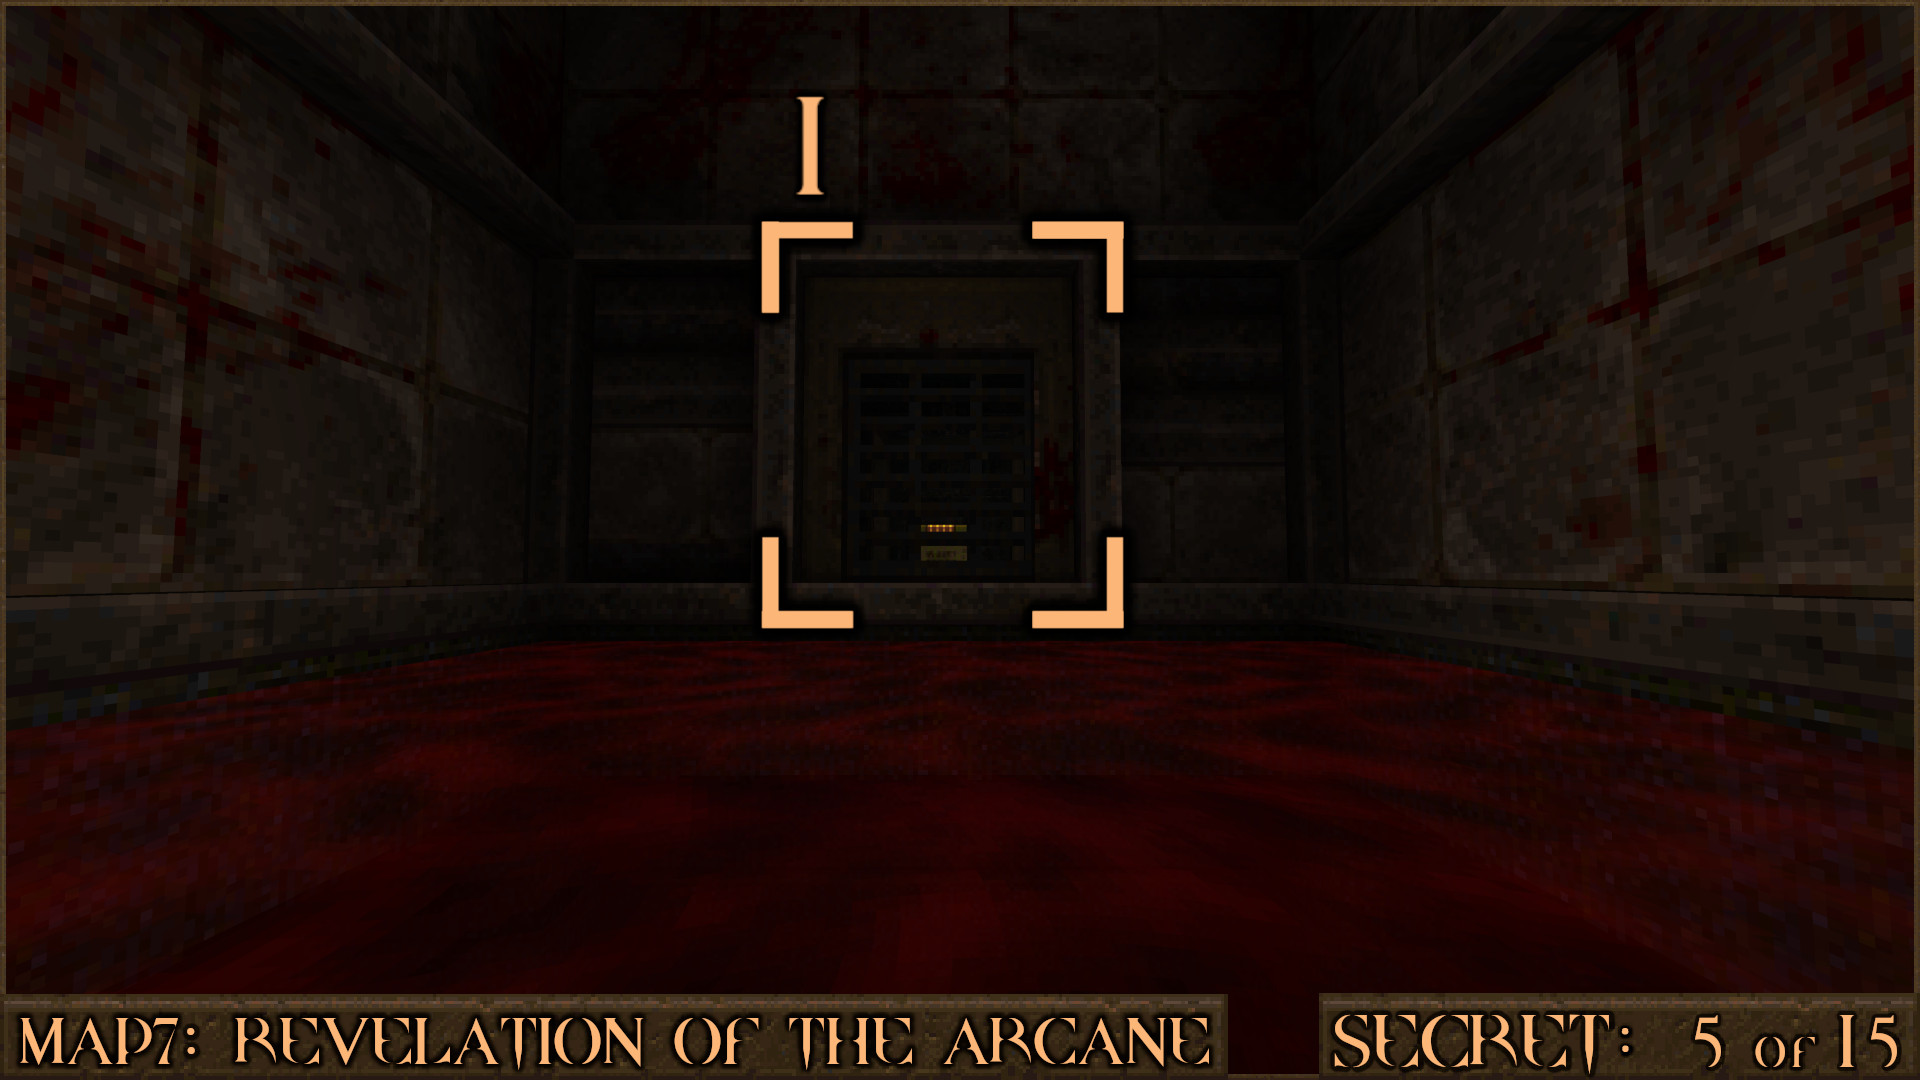
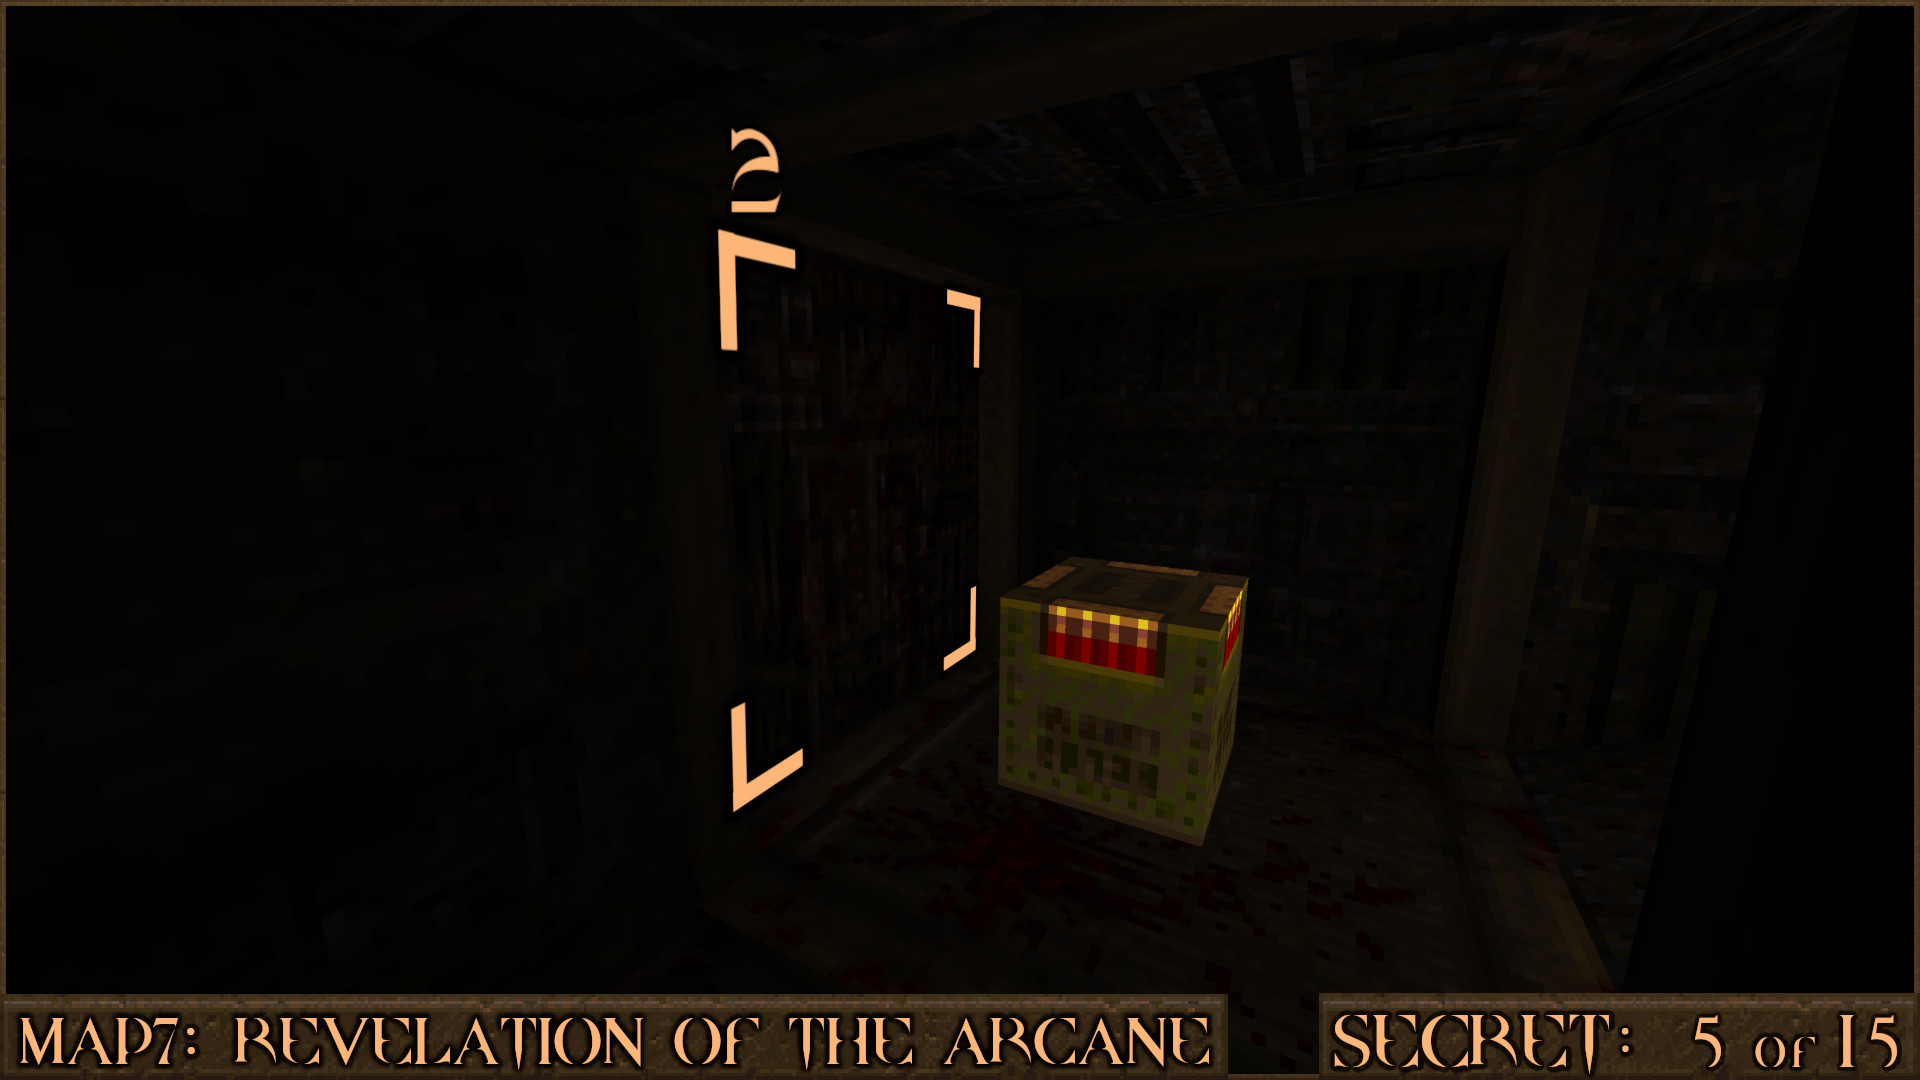
After falling down into the blood water below the dead Ranger exit via a small vent ().

Immediately strike the panel on your left () as you go through the vent to reveal a secret.

Reward: Quad Damage

Secret 6 of 15
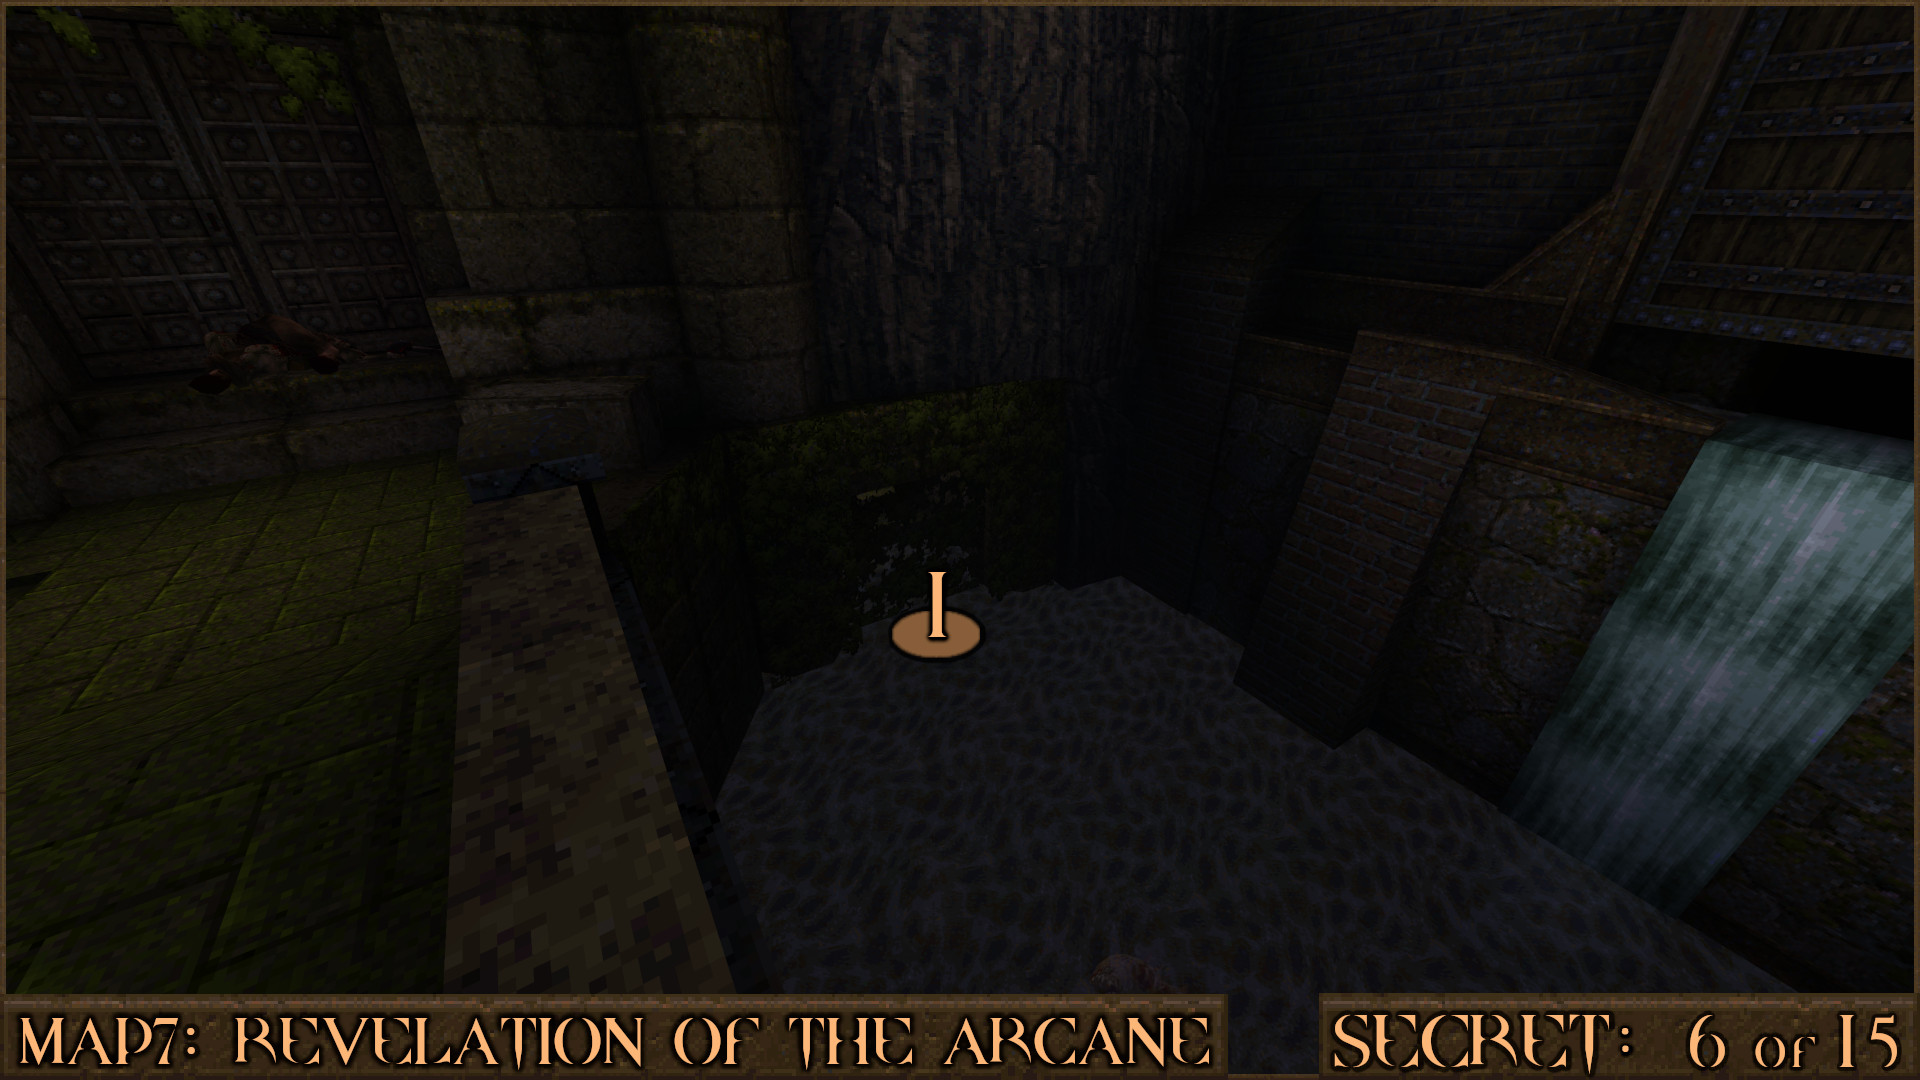
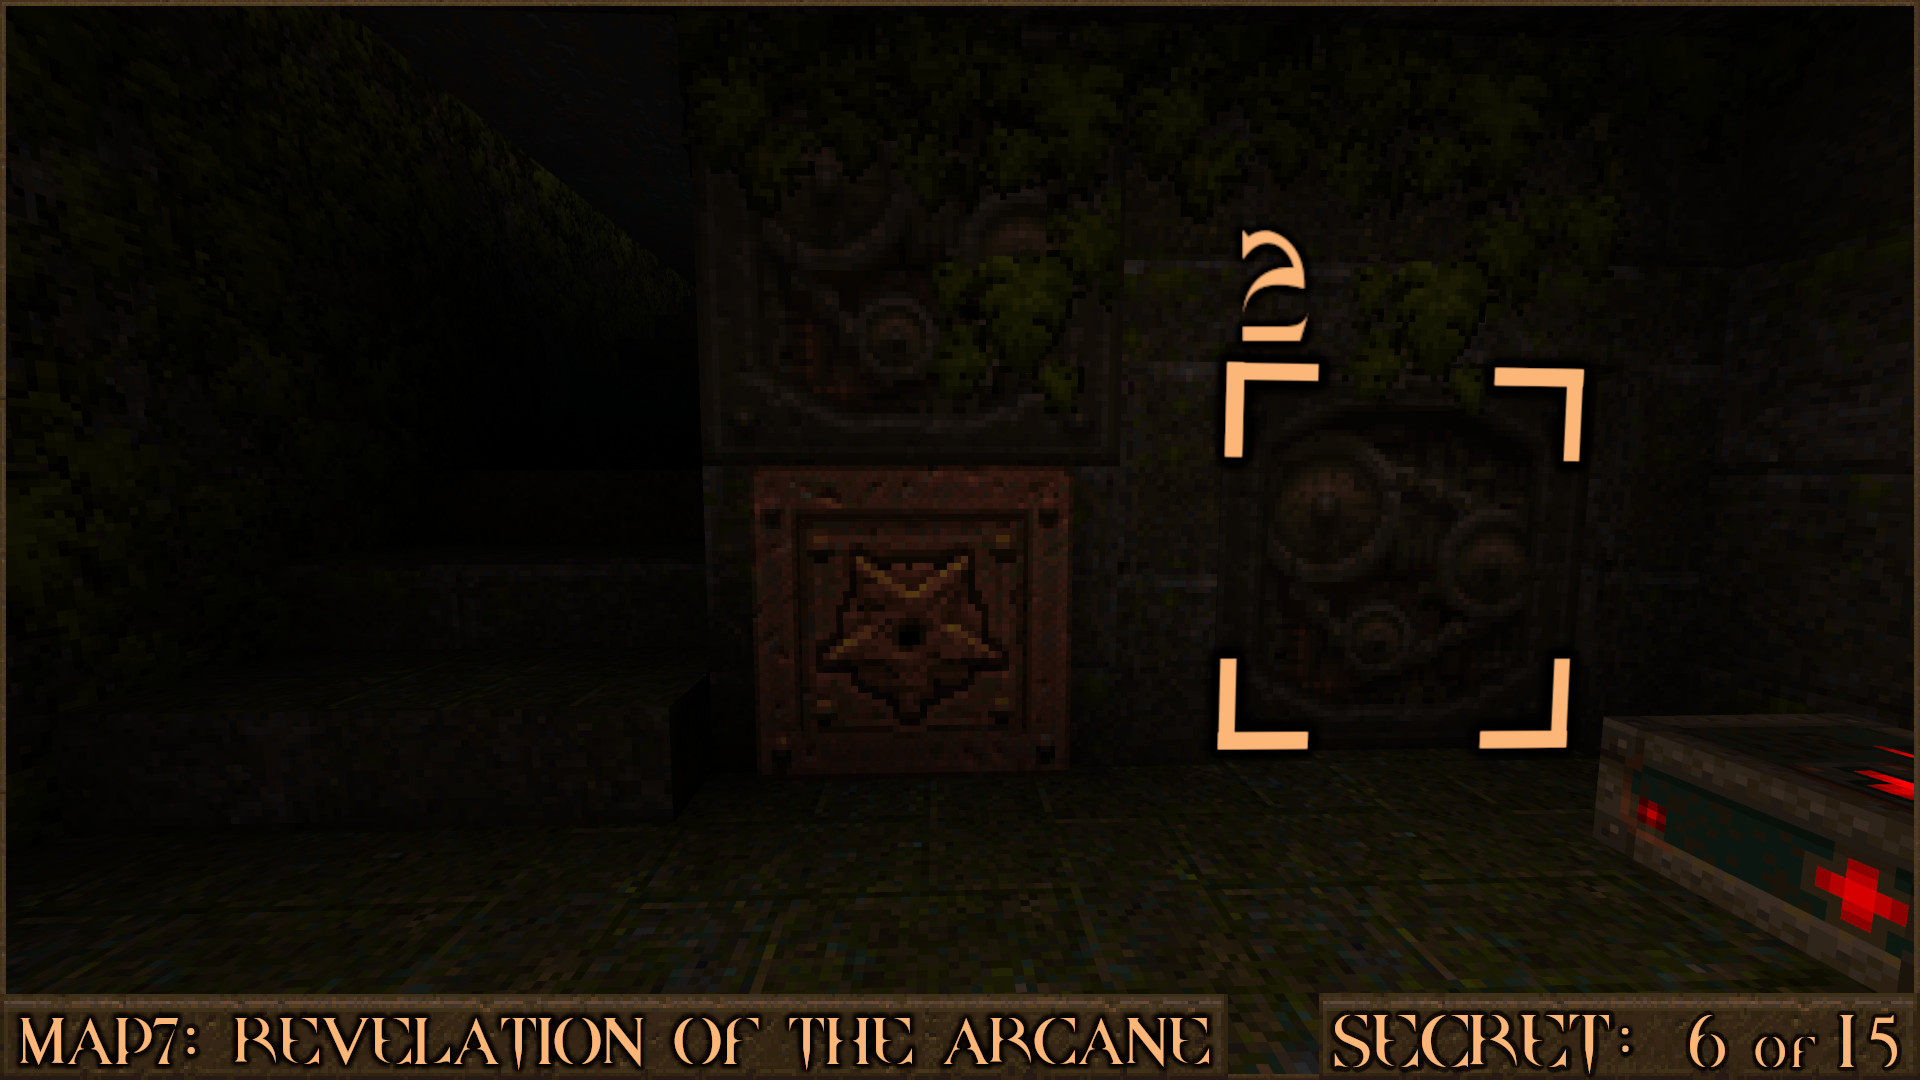
When you reach the outside area with a bridge drop down into the water and look for an entrance covered by leaves ().

Head inside and shoot the cog panel () to the right of the orange button to access the secret.

Reward: [Nail Capacity Upgrade]

Secret 7 of 15
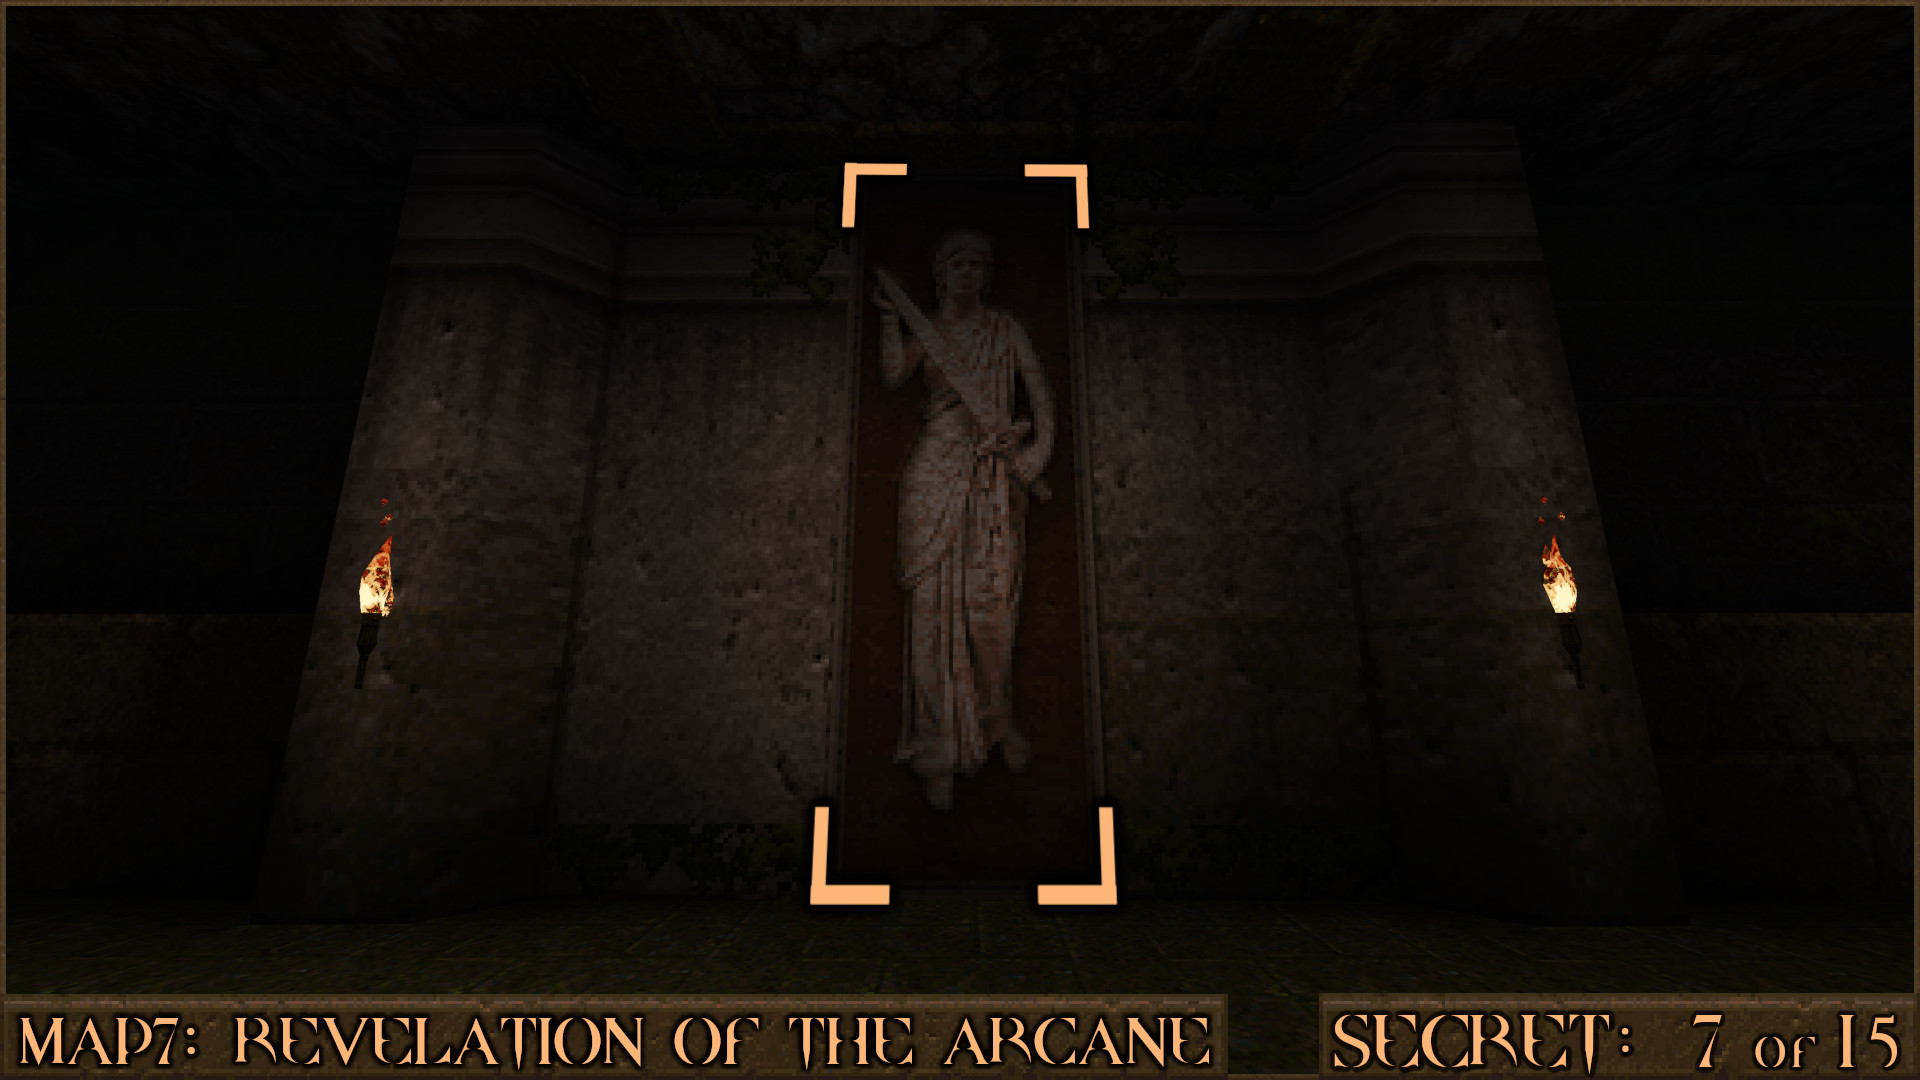
In the next room with the large decoration of a woman with a sword use your Axe to strike it and reveal the secret.

Reward: Laser Cannon Armor Shard×2

Secret 8 of 15
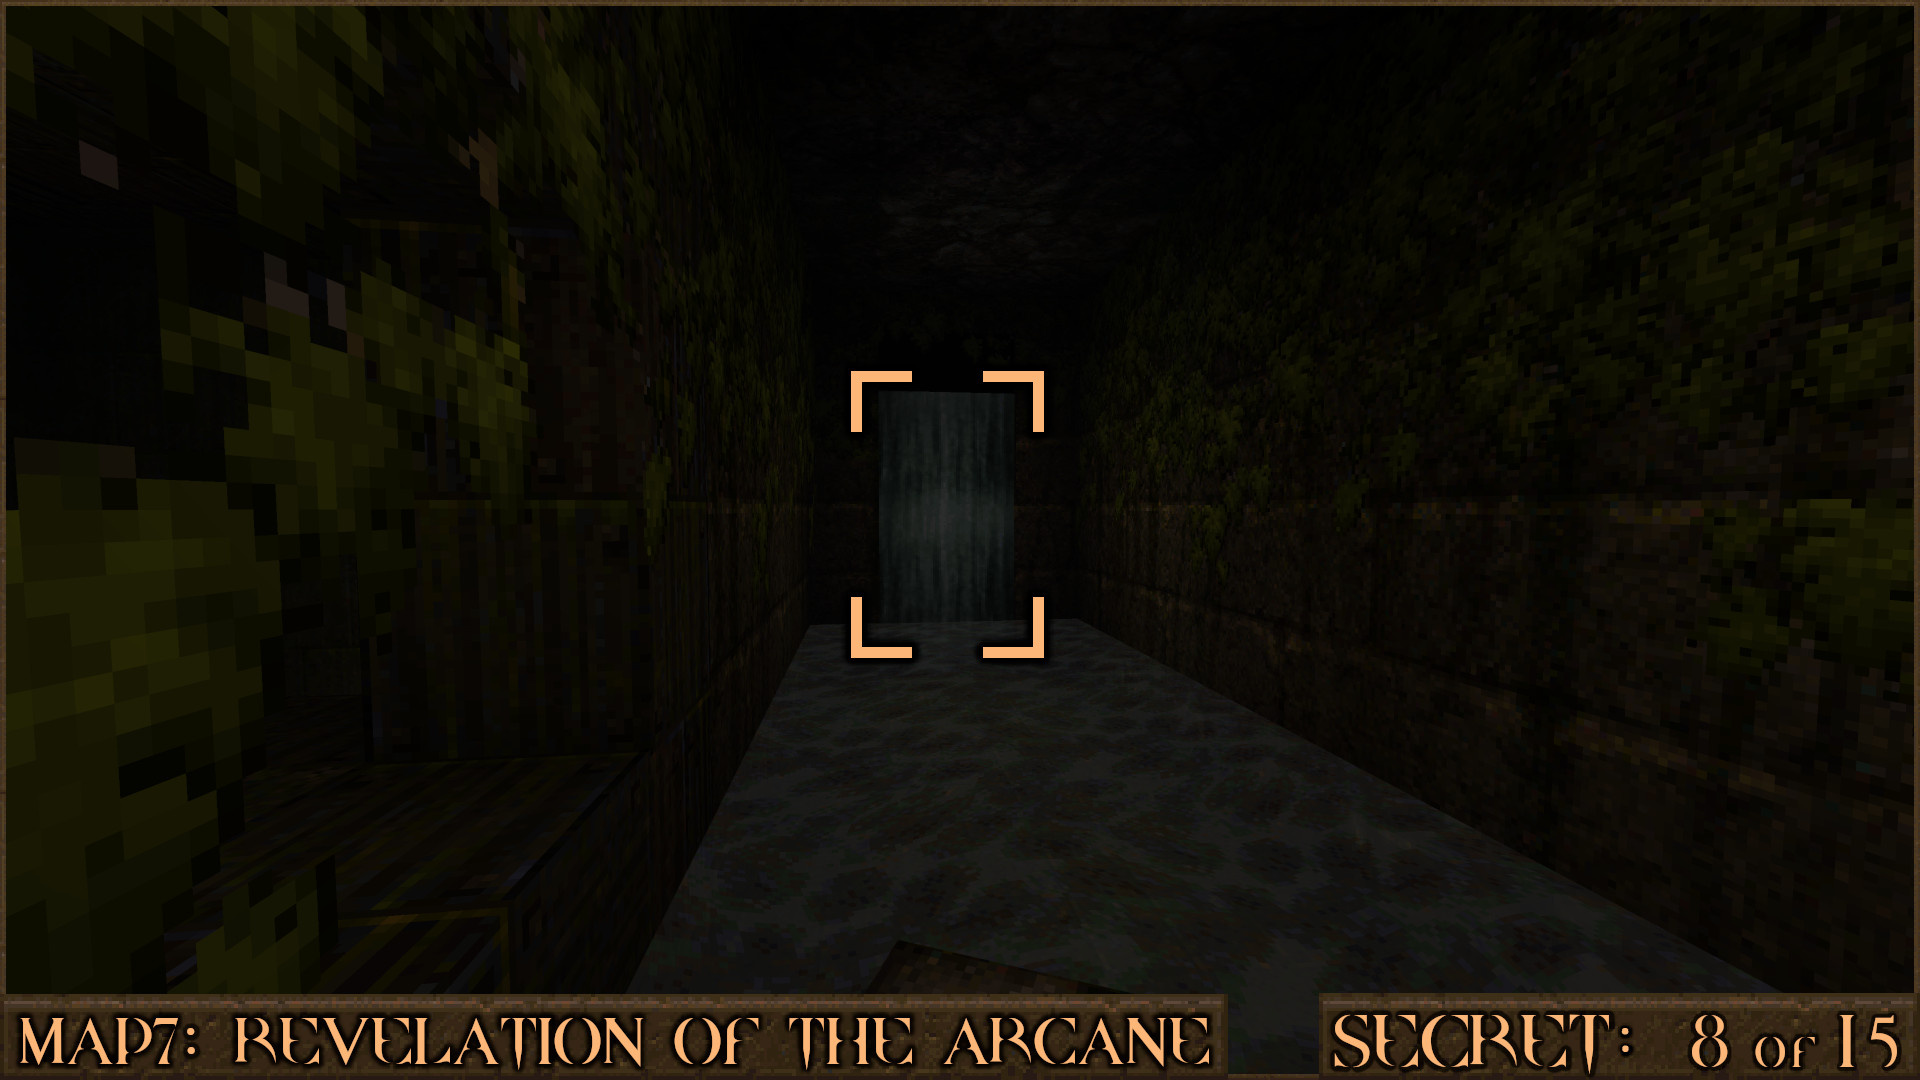
After taking the elevator up to the next room look left to see a small waterfall. You can walk straight through it to enter the secret.

Reward: Megahealth

Secret 9 of 15
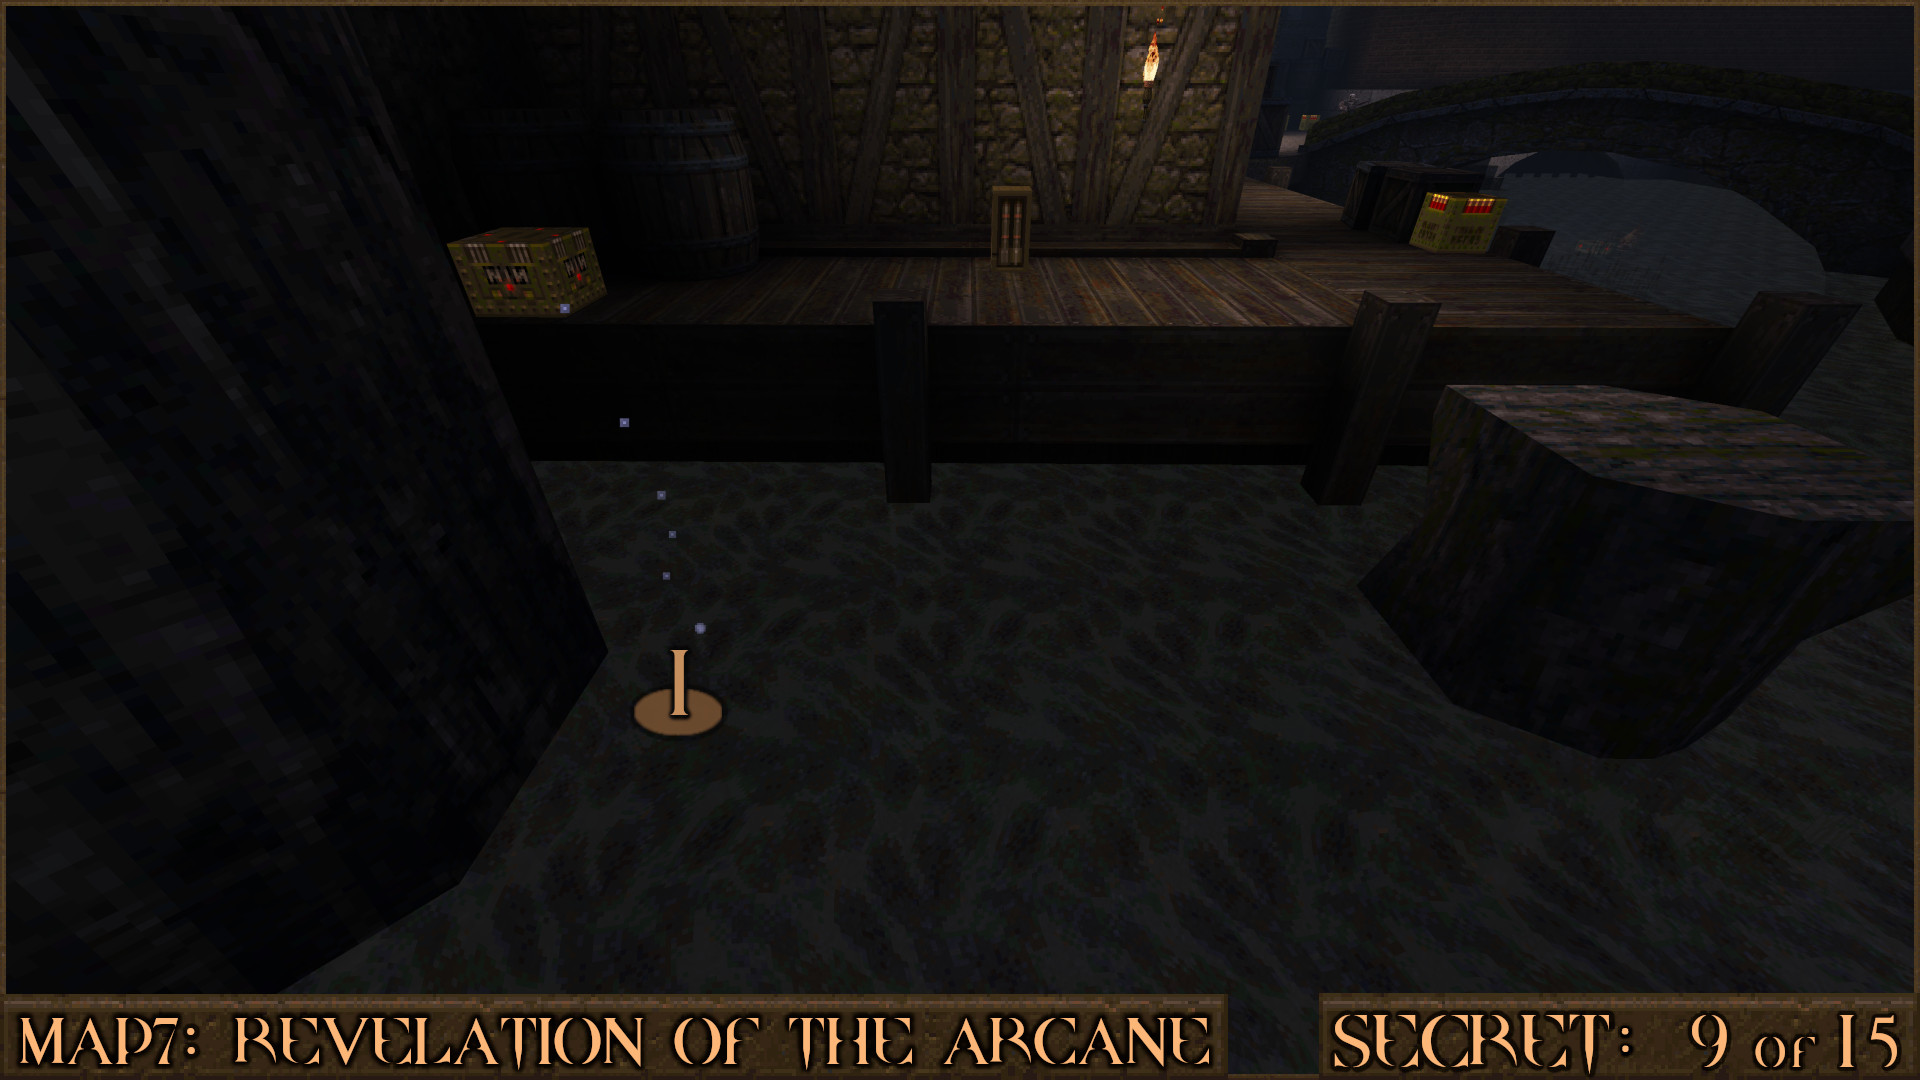
As soon as you head outside look to your lower left for some bubbles in the water (). Swim down to find a small cache underwater.

Reward: Large Cells

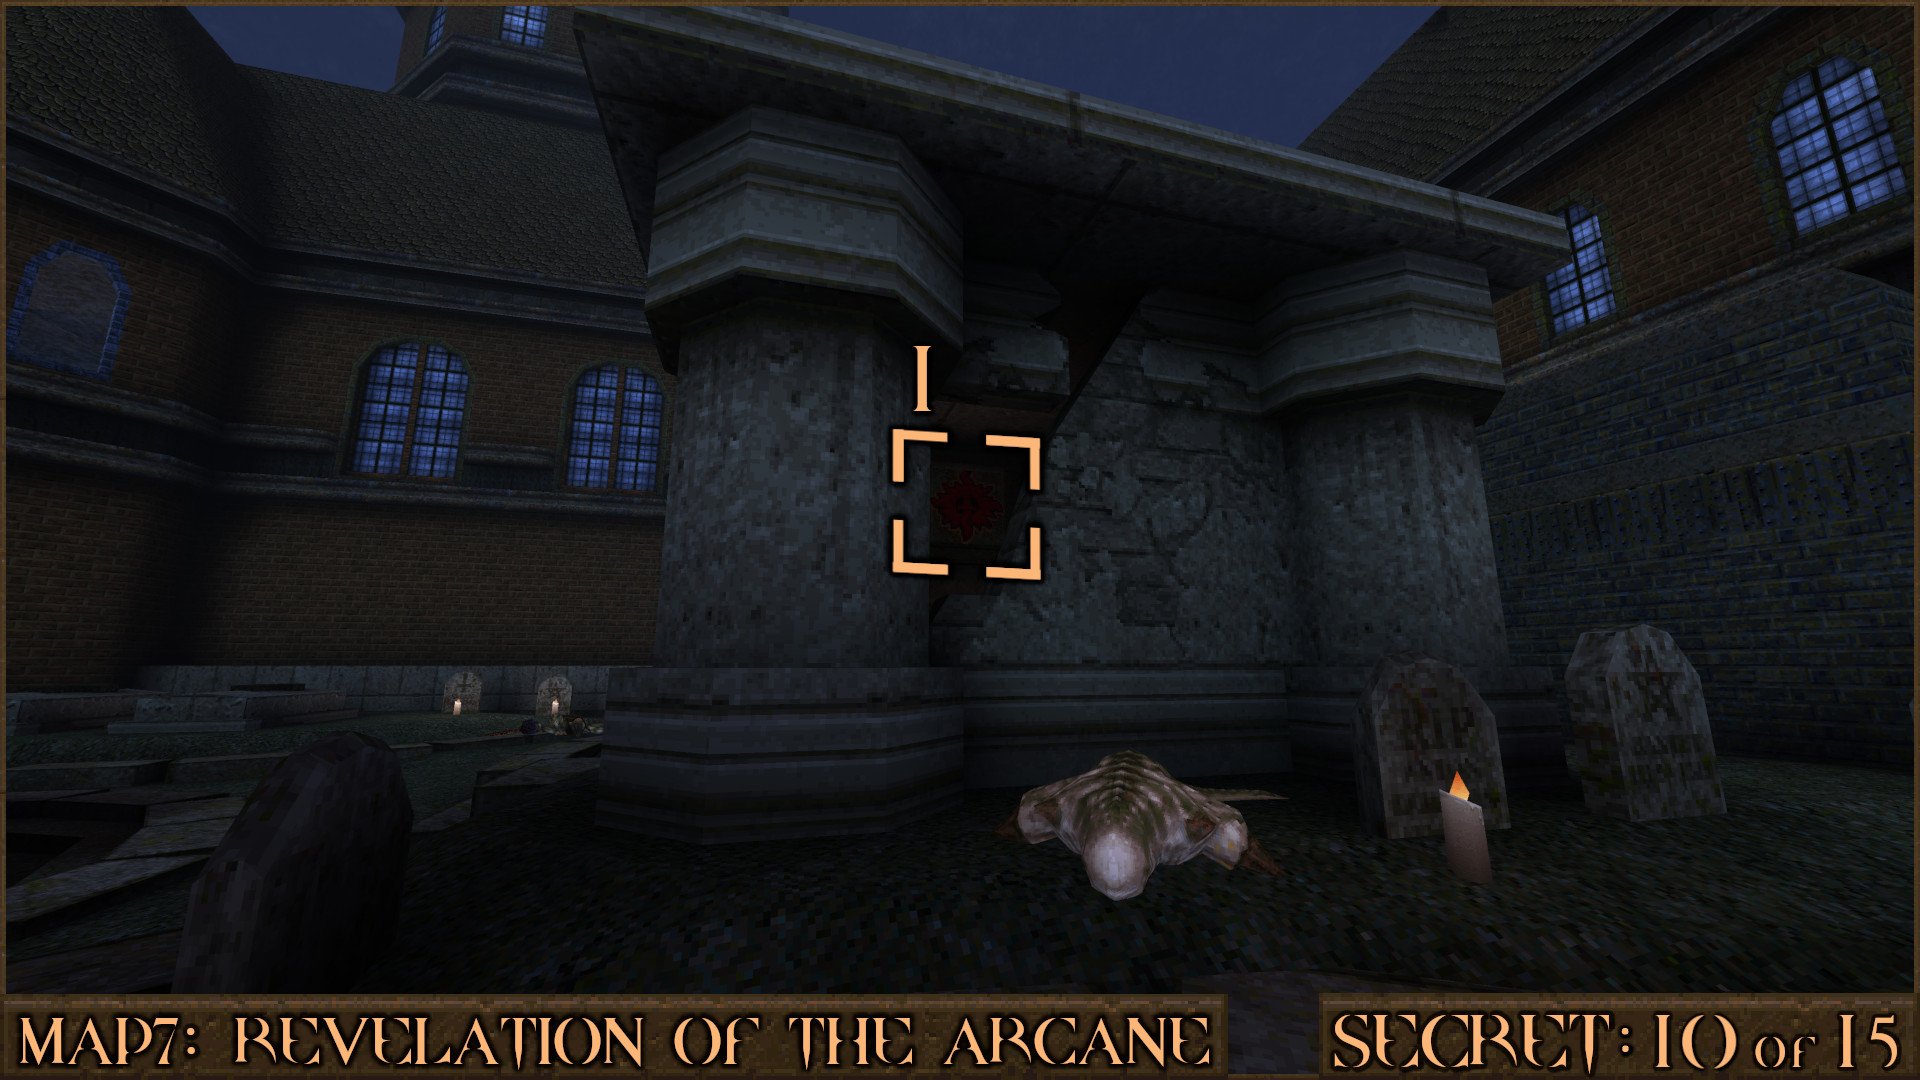
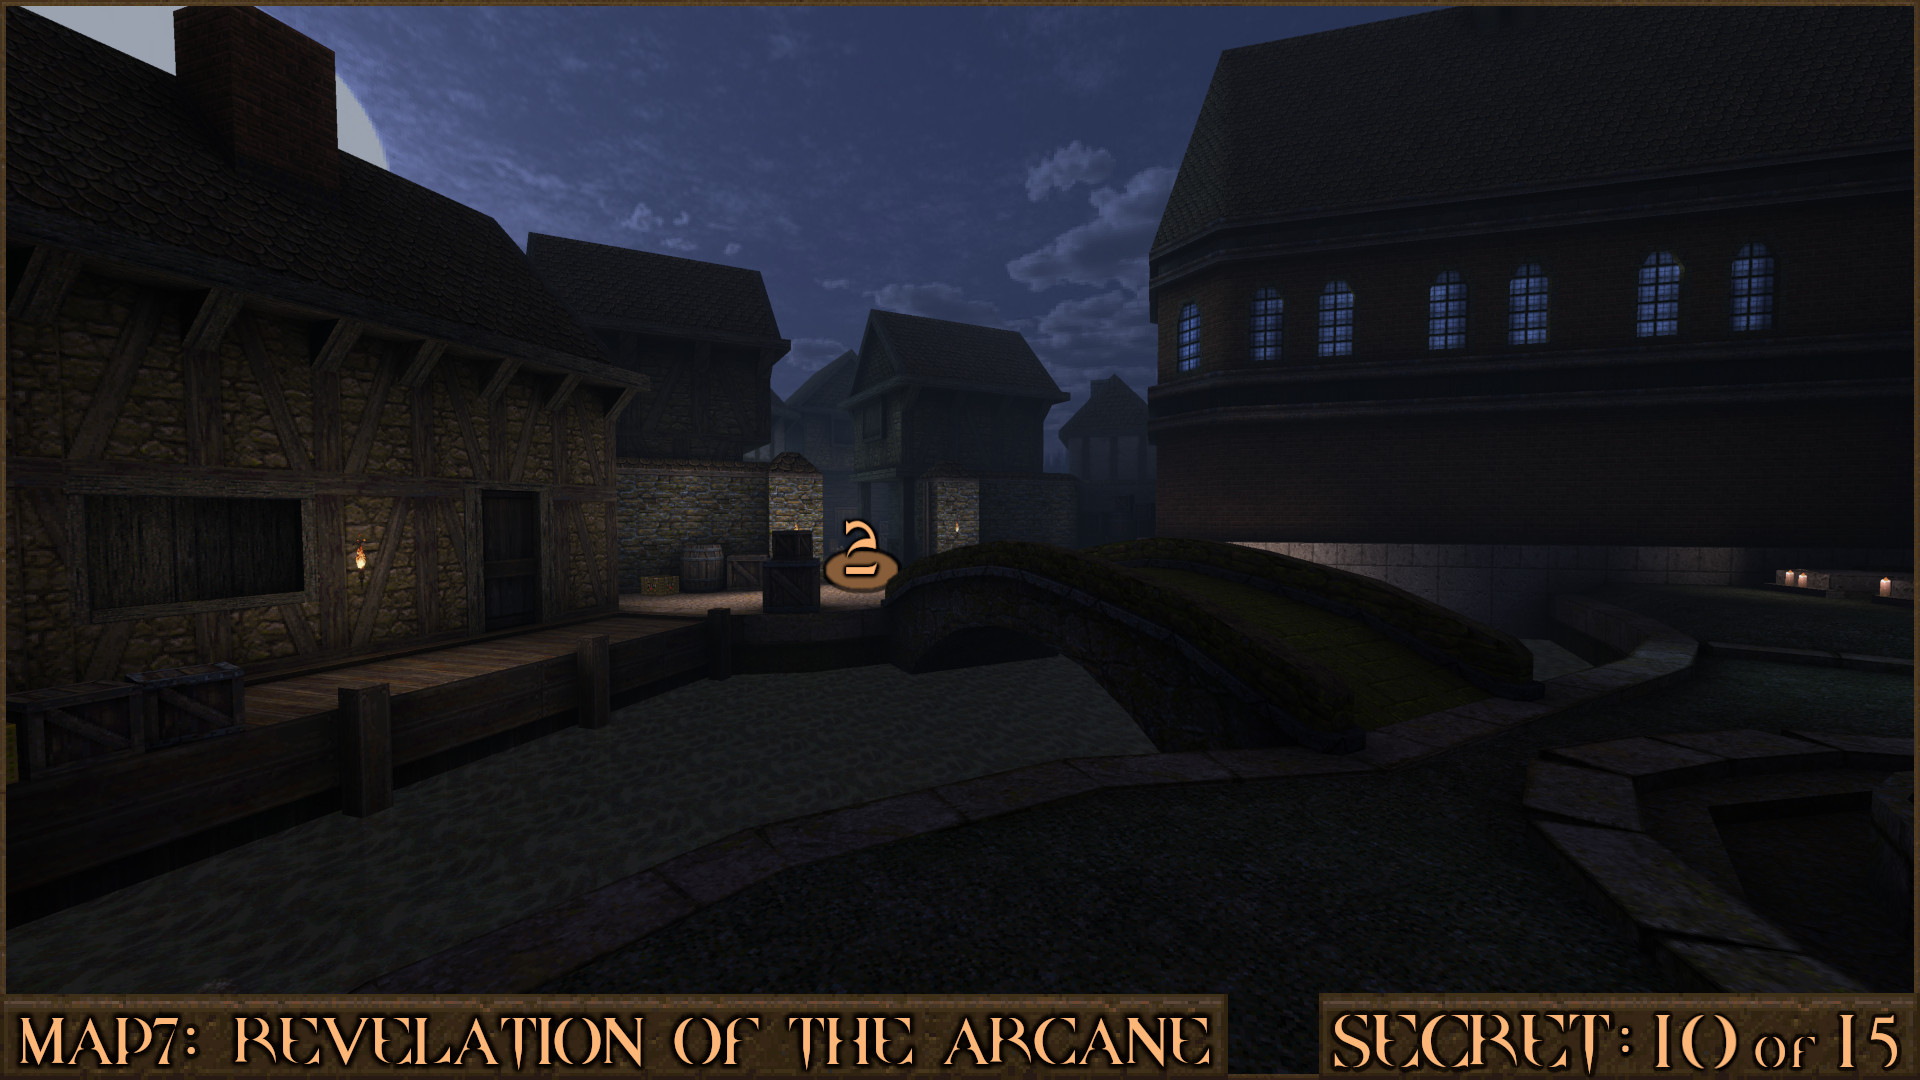
Secret 10 of 15
Near to the Gold Key is an outdoor crypt. Peak through the crack in the wall and shoot a red shootable button () to gain access.

When you leave the crypt a door in the distance will explode () and Zombies will attack. Head past the exploded door to find some more Rockets.

Reward: Small Rockets×2 Large Health [Rocket Capacity Upgrade]

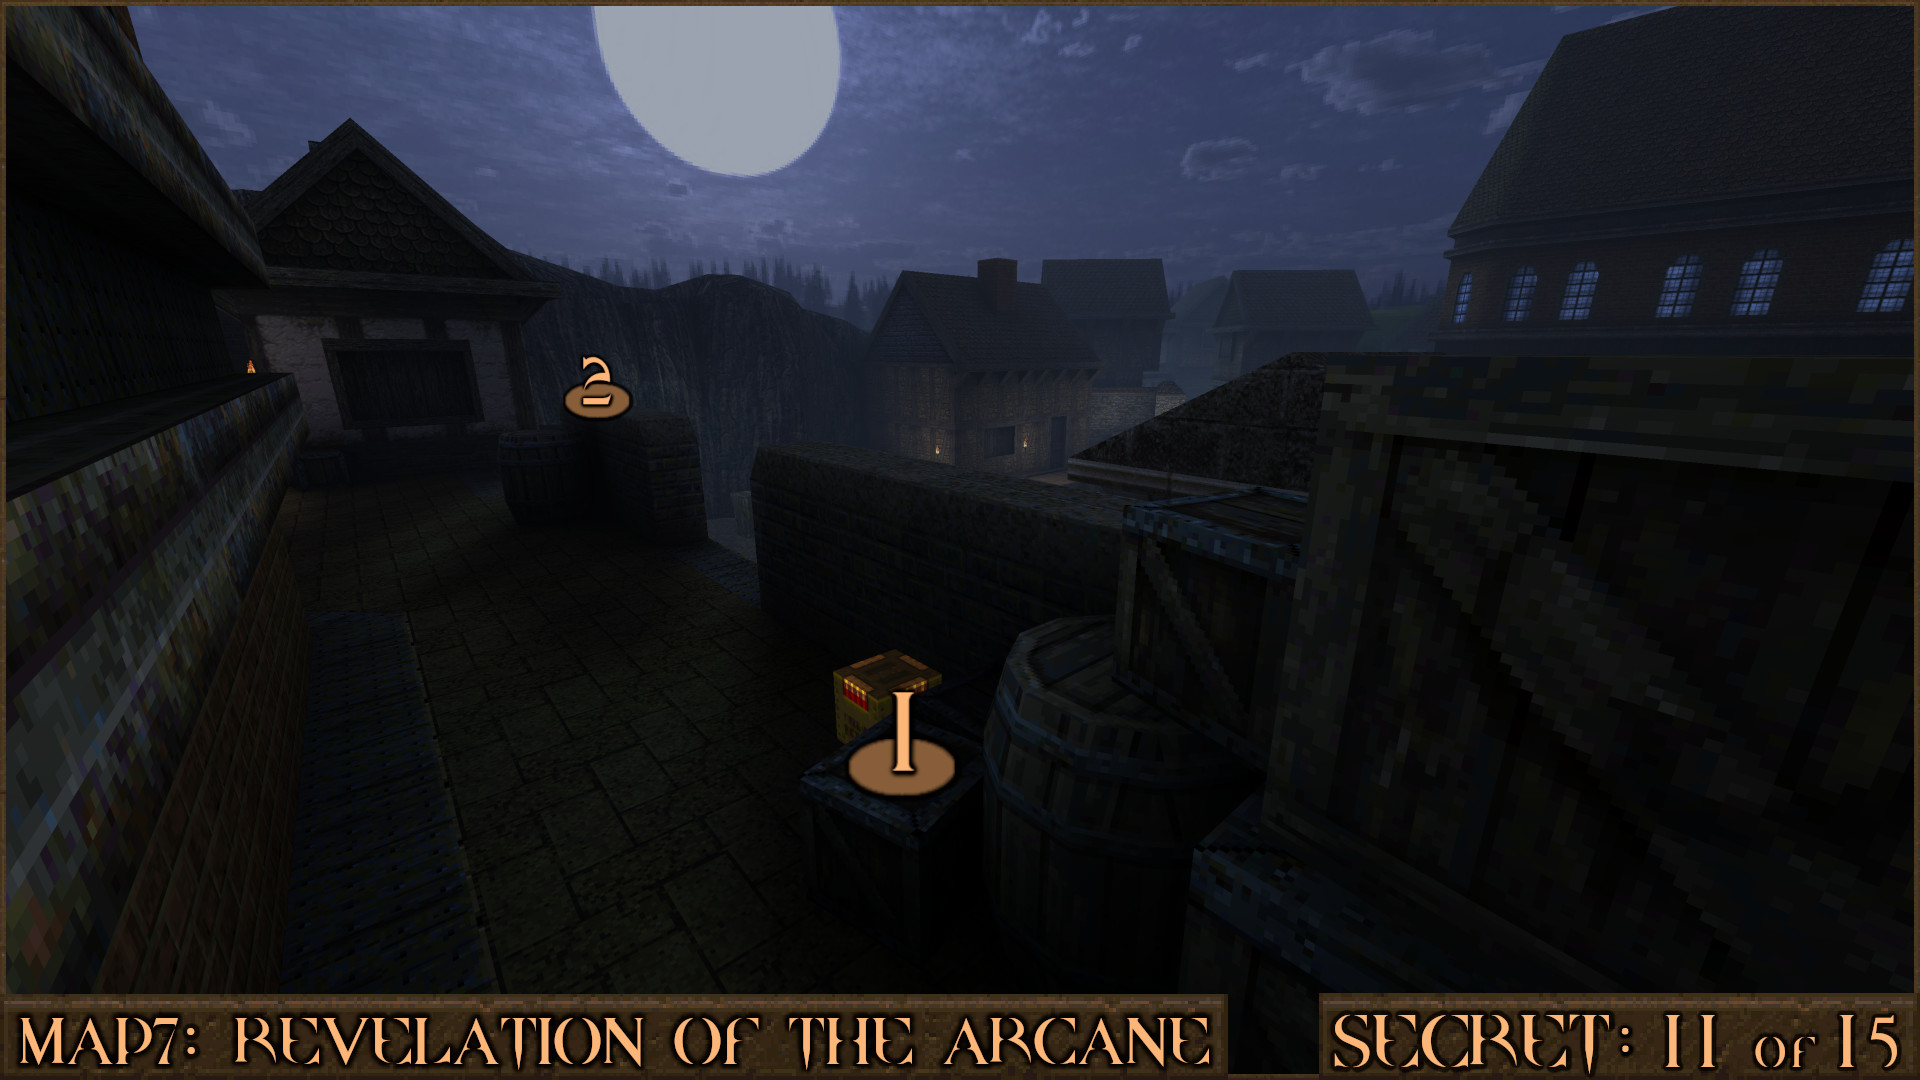
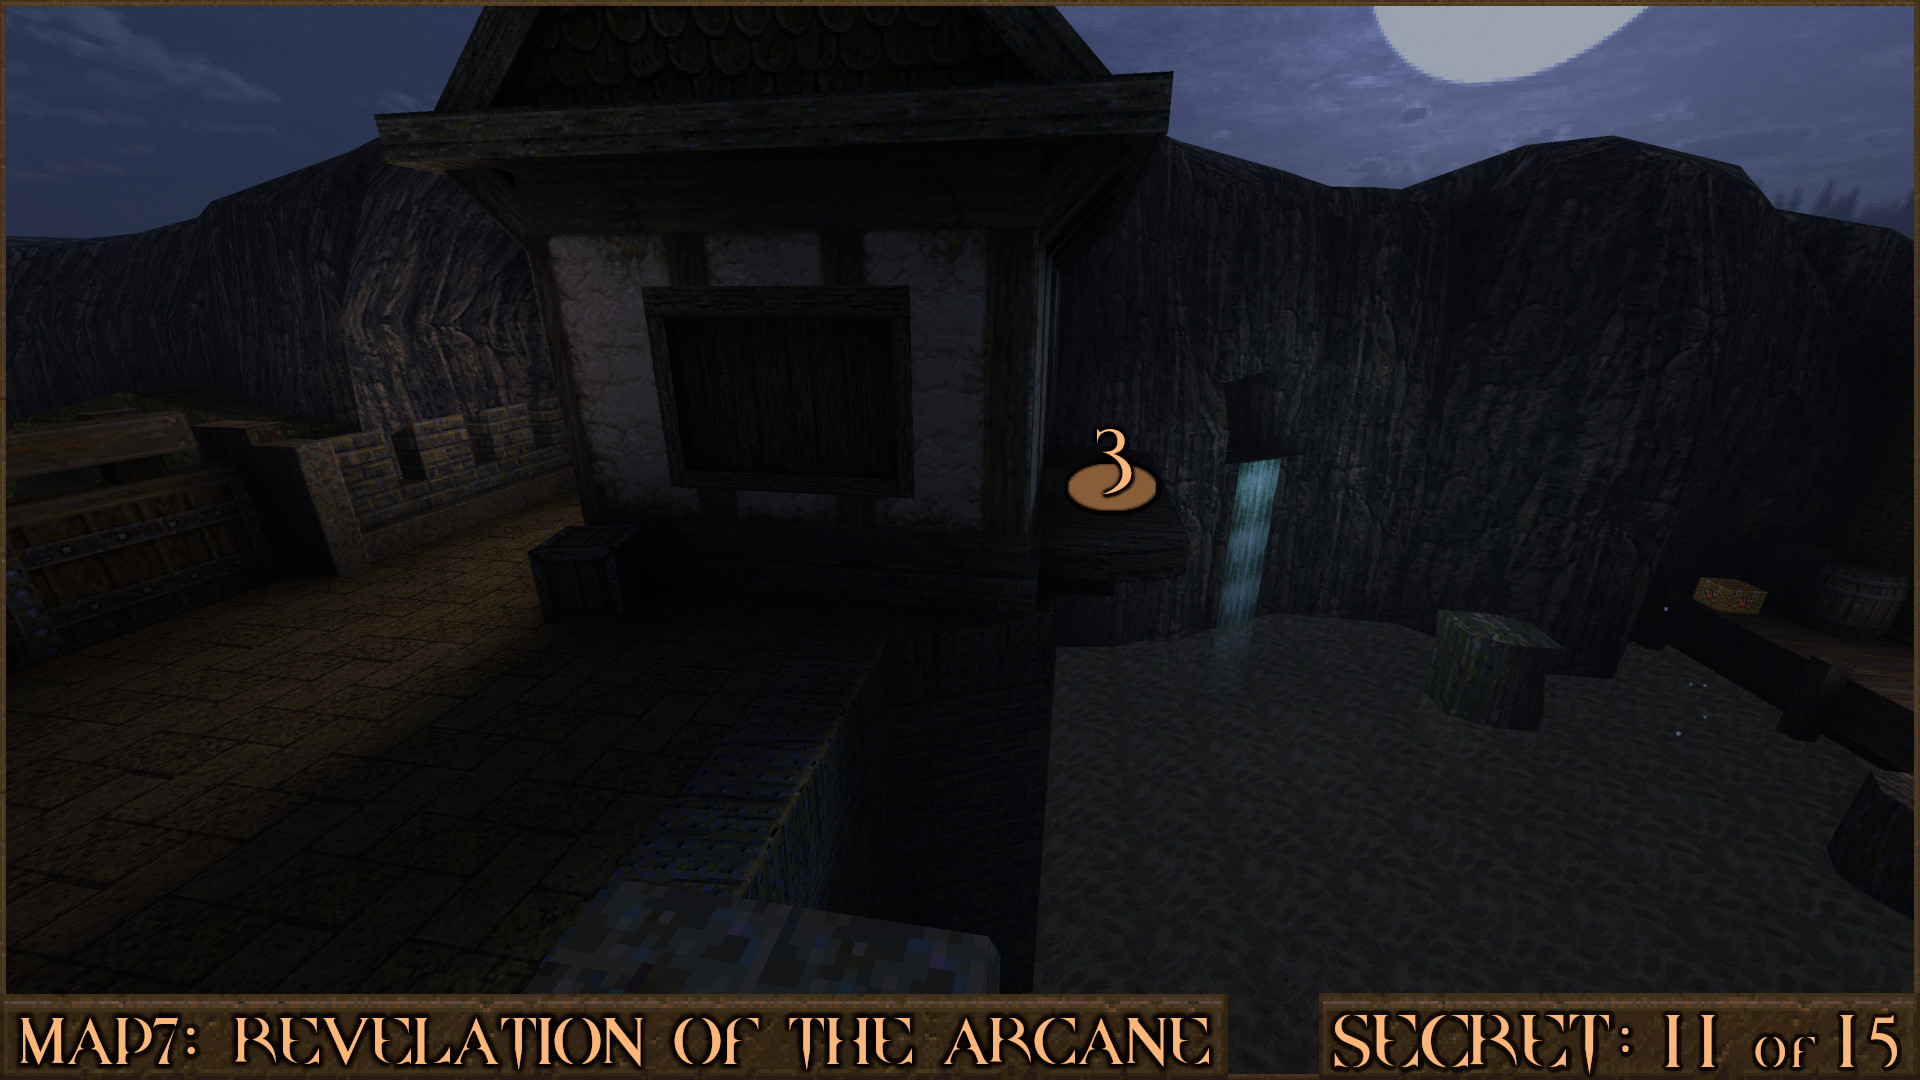
Secret 11 of 15
Continue forward and head to the upper section of this area. Jump up a stack of crates (), turn around and run along the wall ().

From here jump over to a small ledge () by a building. It will automatically open and allow you into the secret.

Reward: Small Shells Yellow Armor

Secret 12 of 15
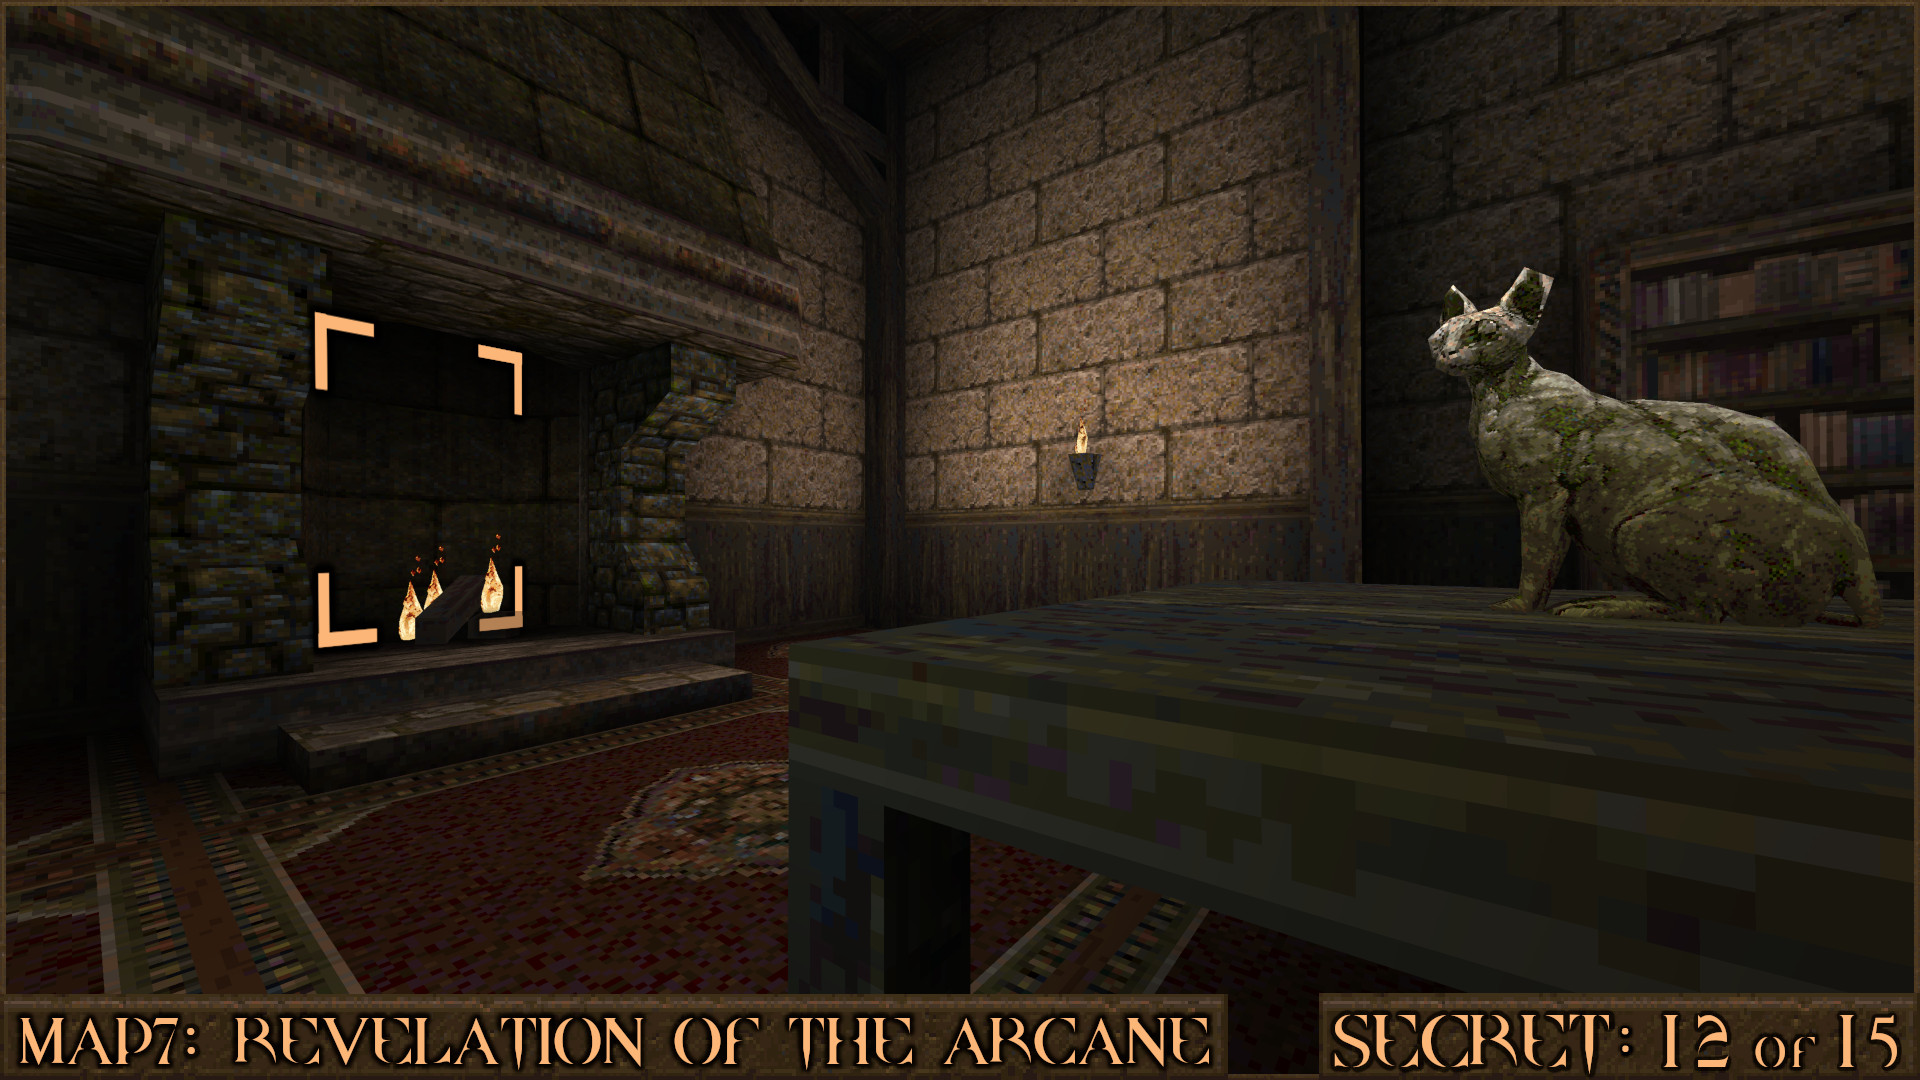
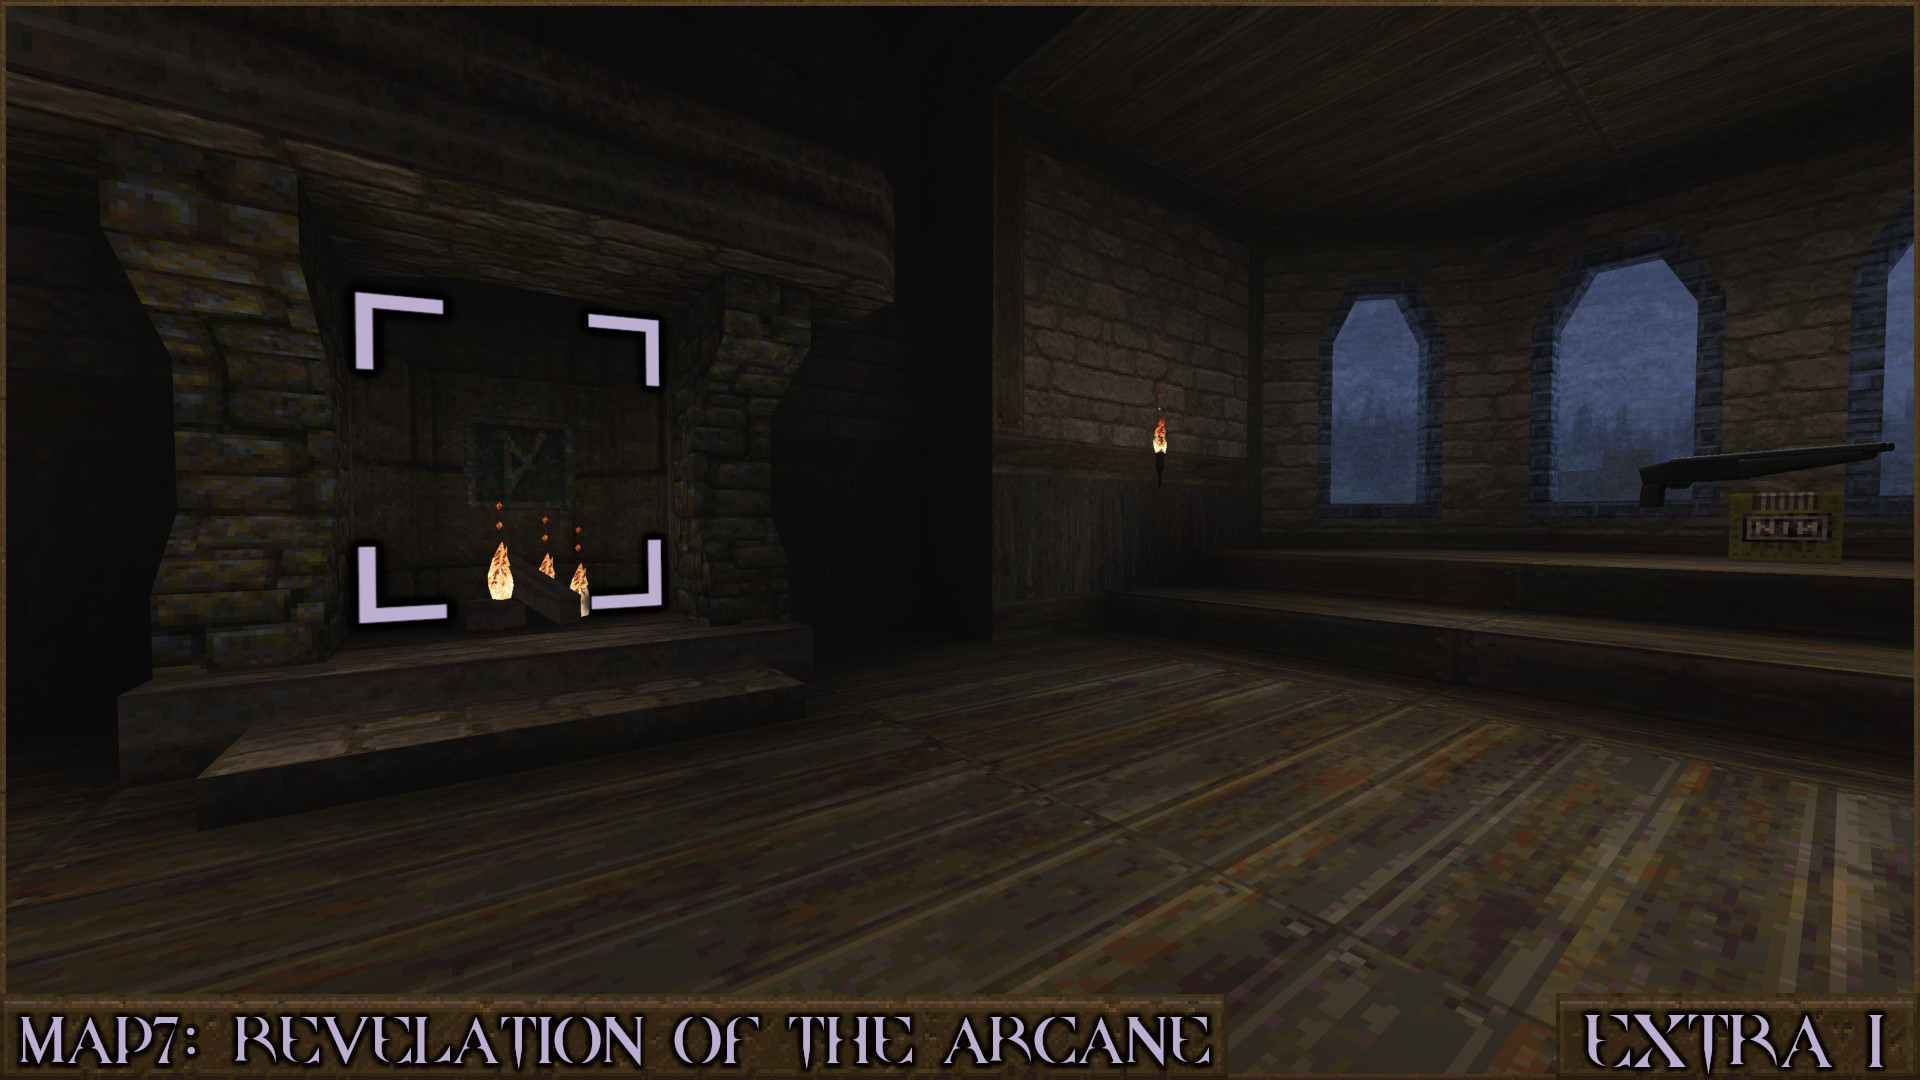
After climbing through the window you'll be in a room with a fireplace. Use the Axe on the wall behind the fireplace to find a secret and a shortcut back to the start of the level.

Reward: Yellow Armor

Secret 13 of 15
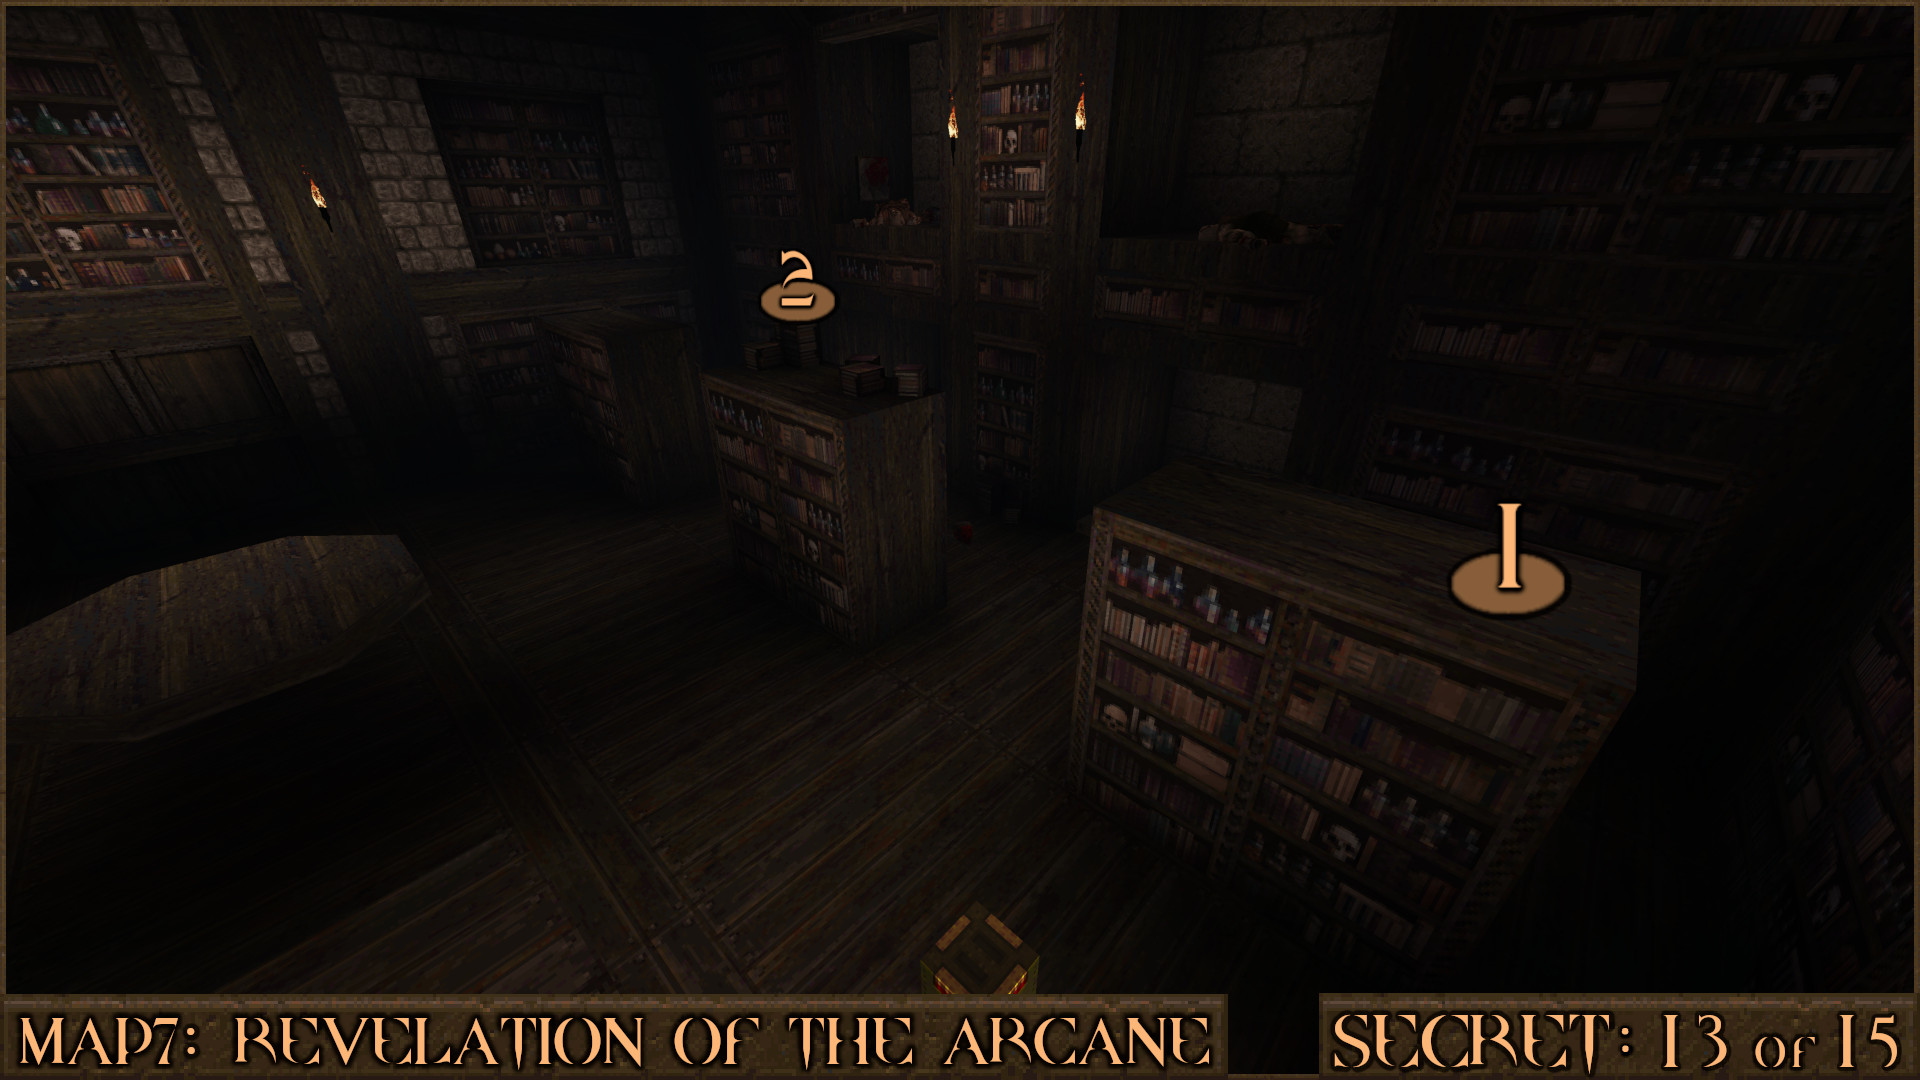
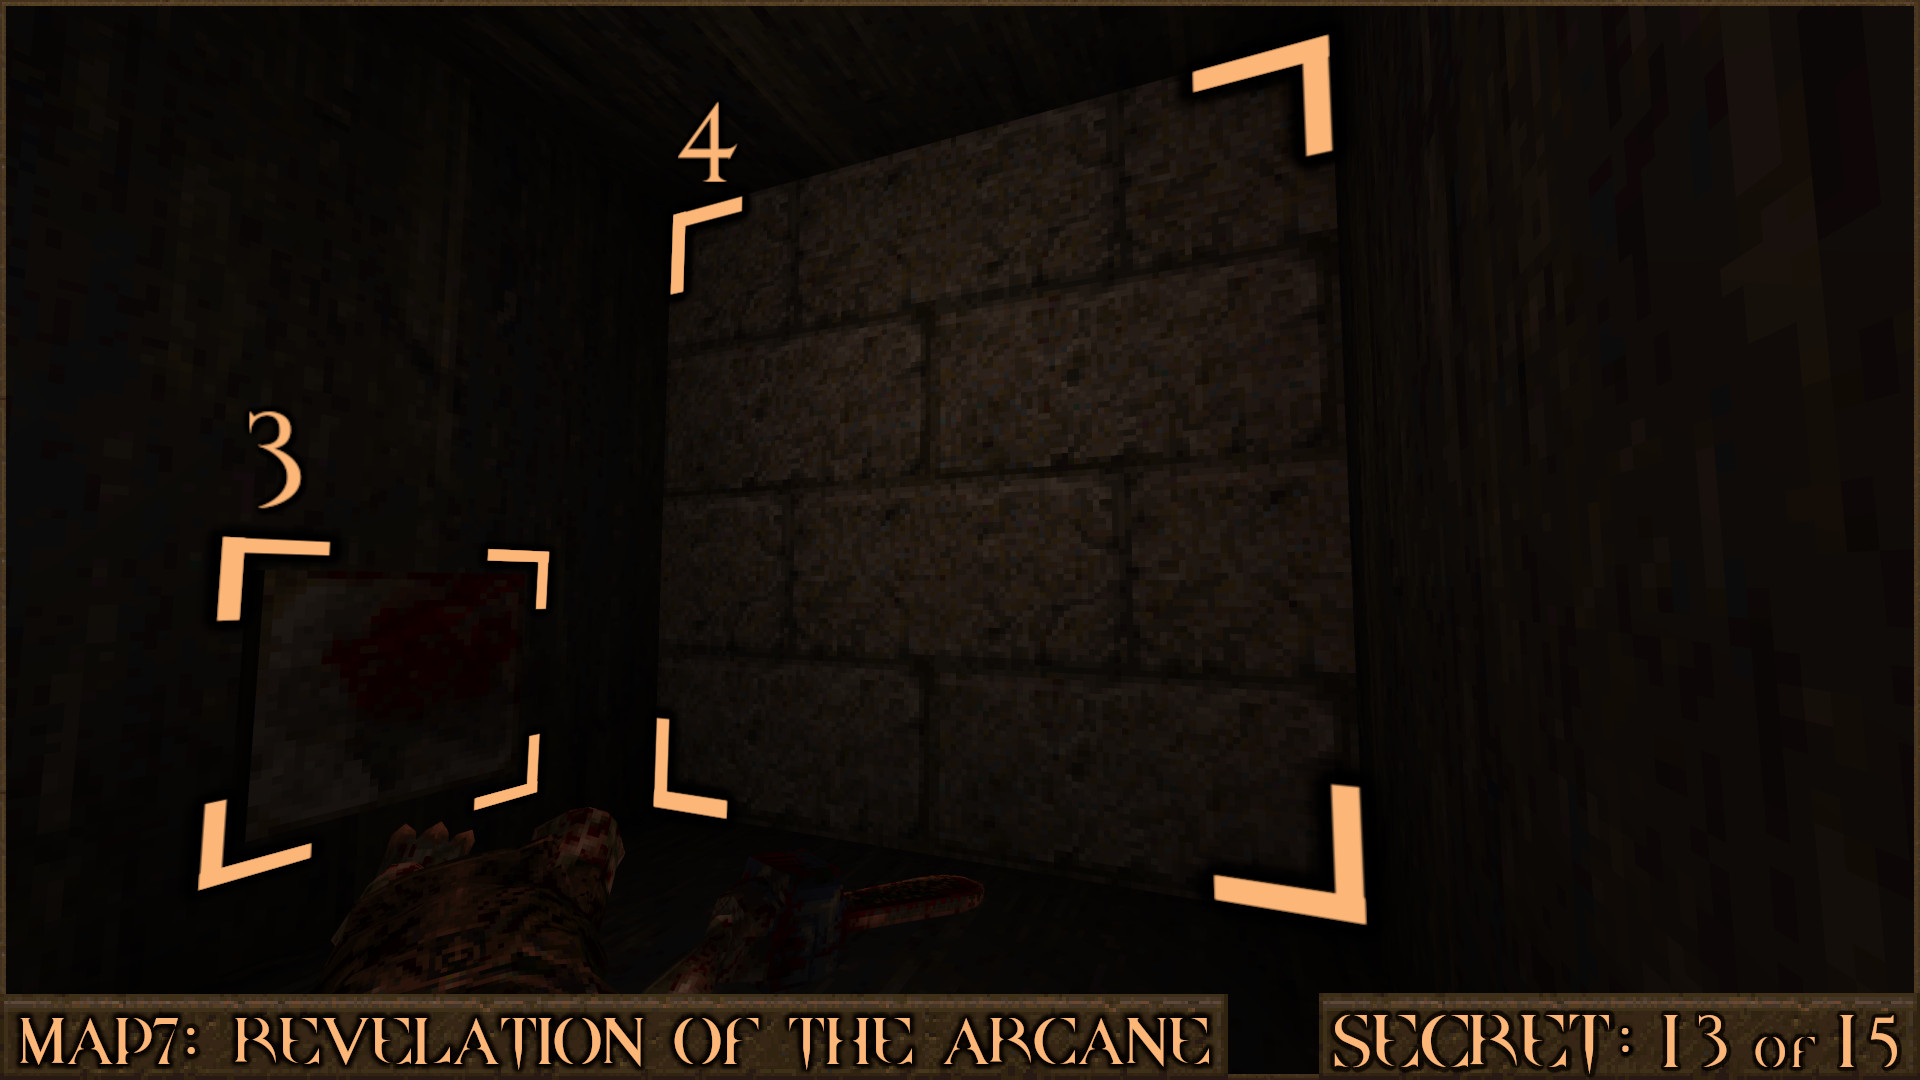
After picking up the Silver Key in the library ascend the stairs and leap onto the nearby bookshelf () and then jump over to the next one. Use the stack of books () to jump up to the nearby ledge.

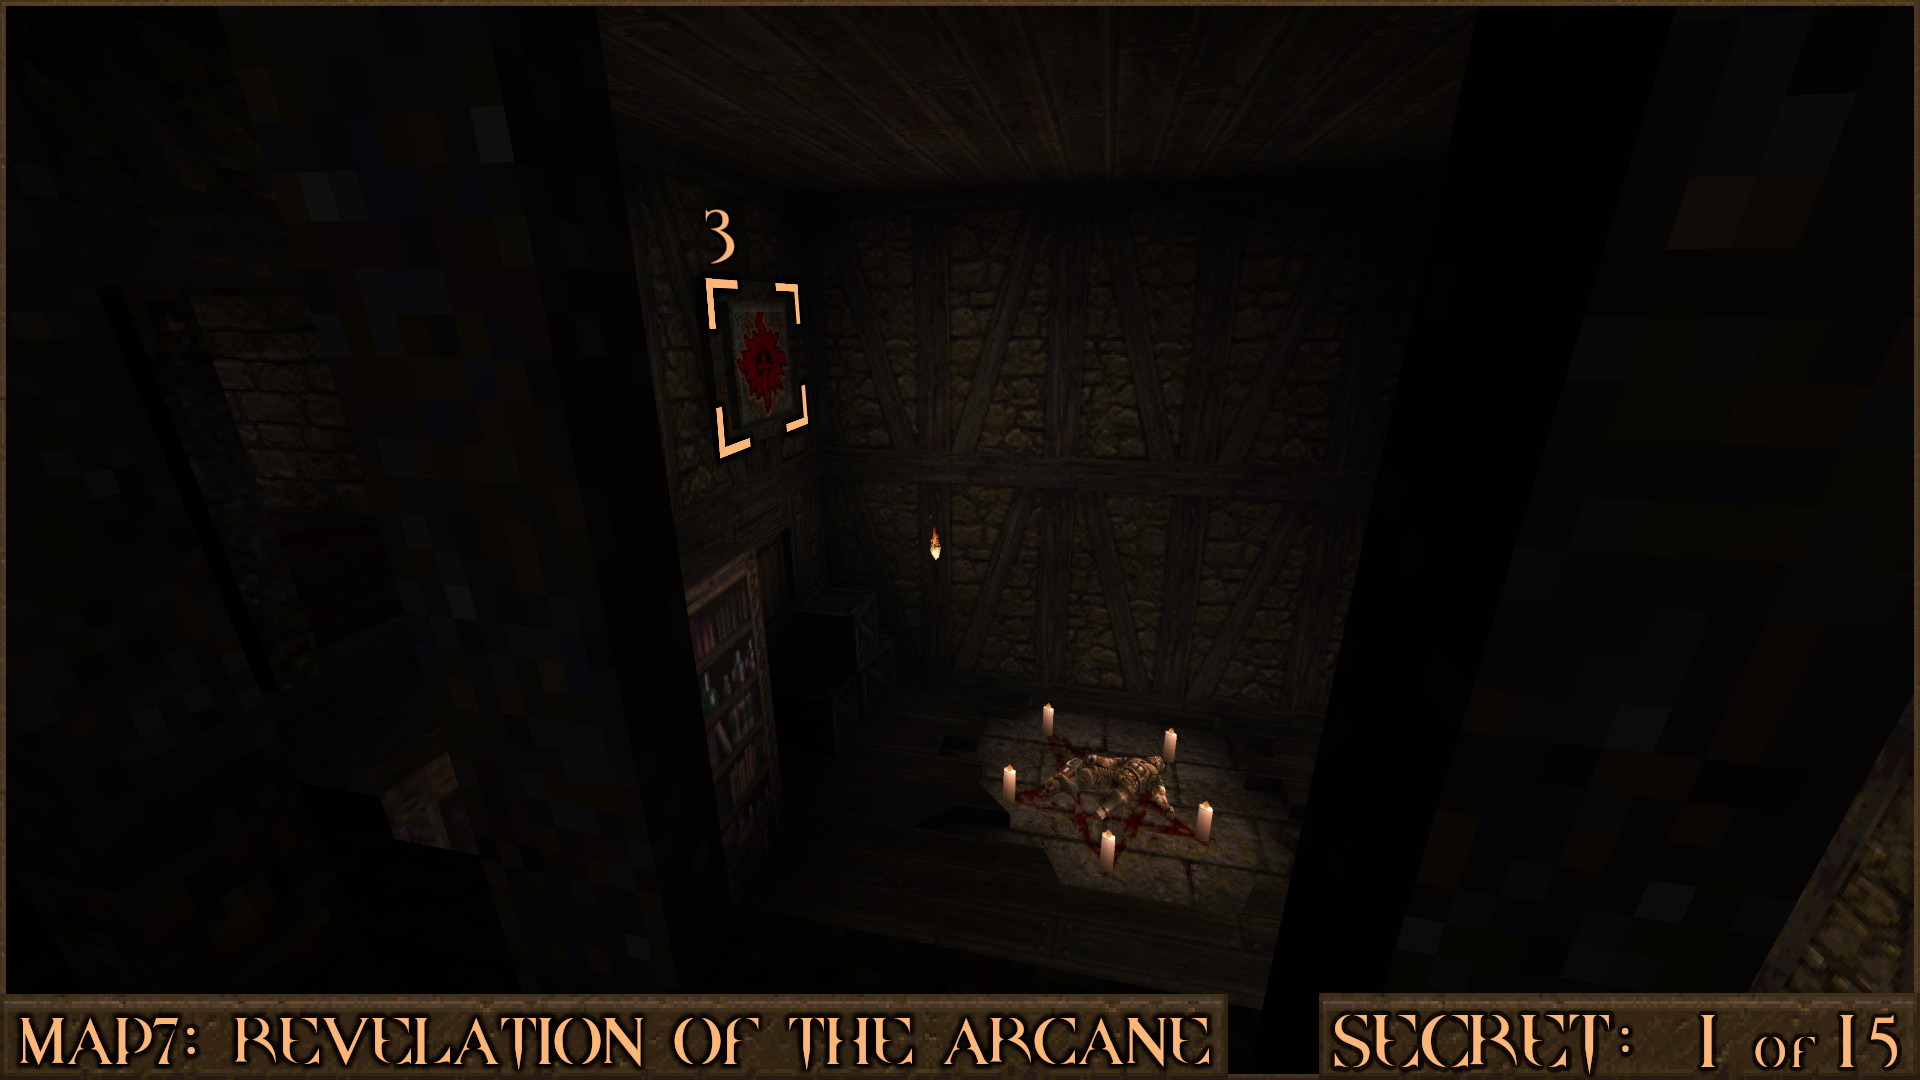
Press the nearby bloody panel () to shift the adjacent wall () and reveal the secret.

Reward: Yellow Armor

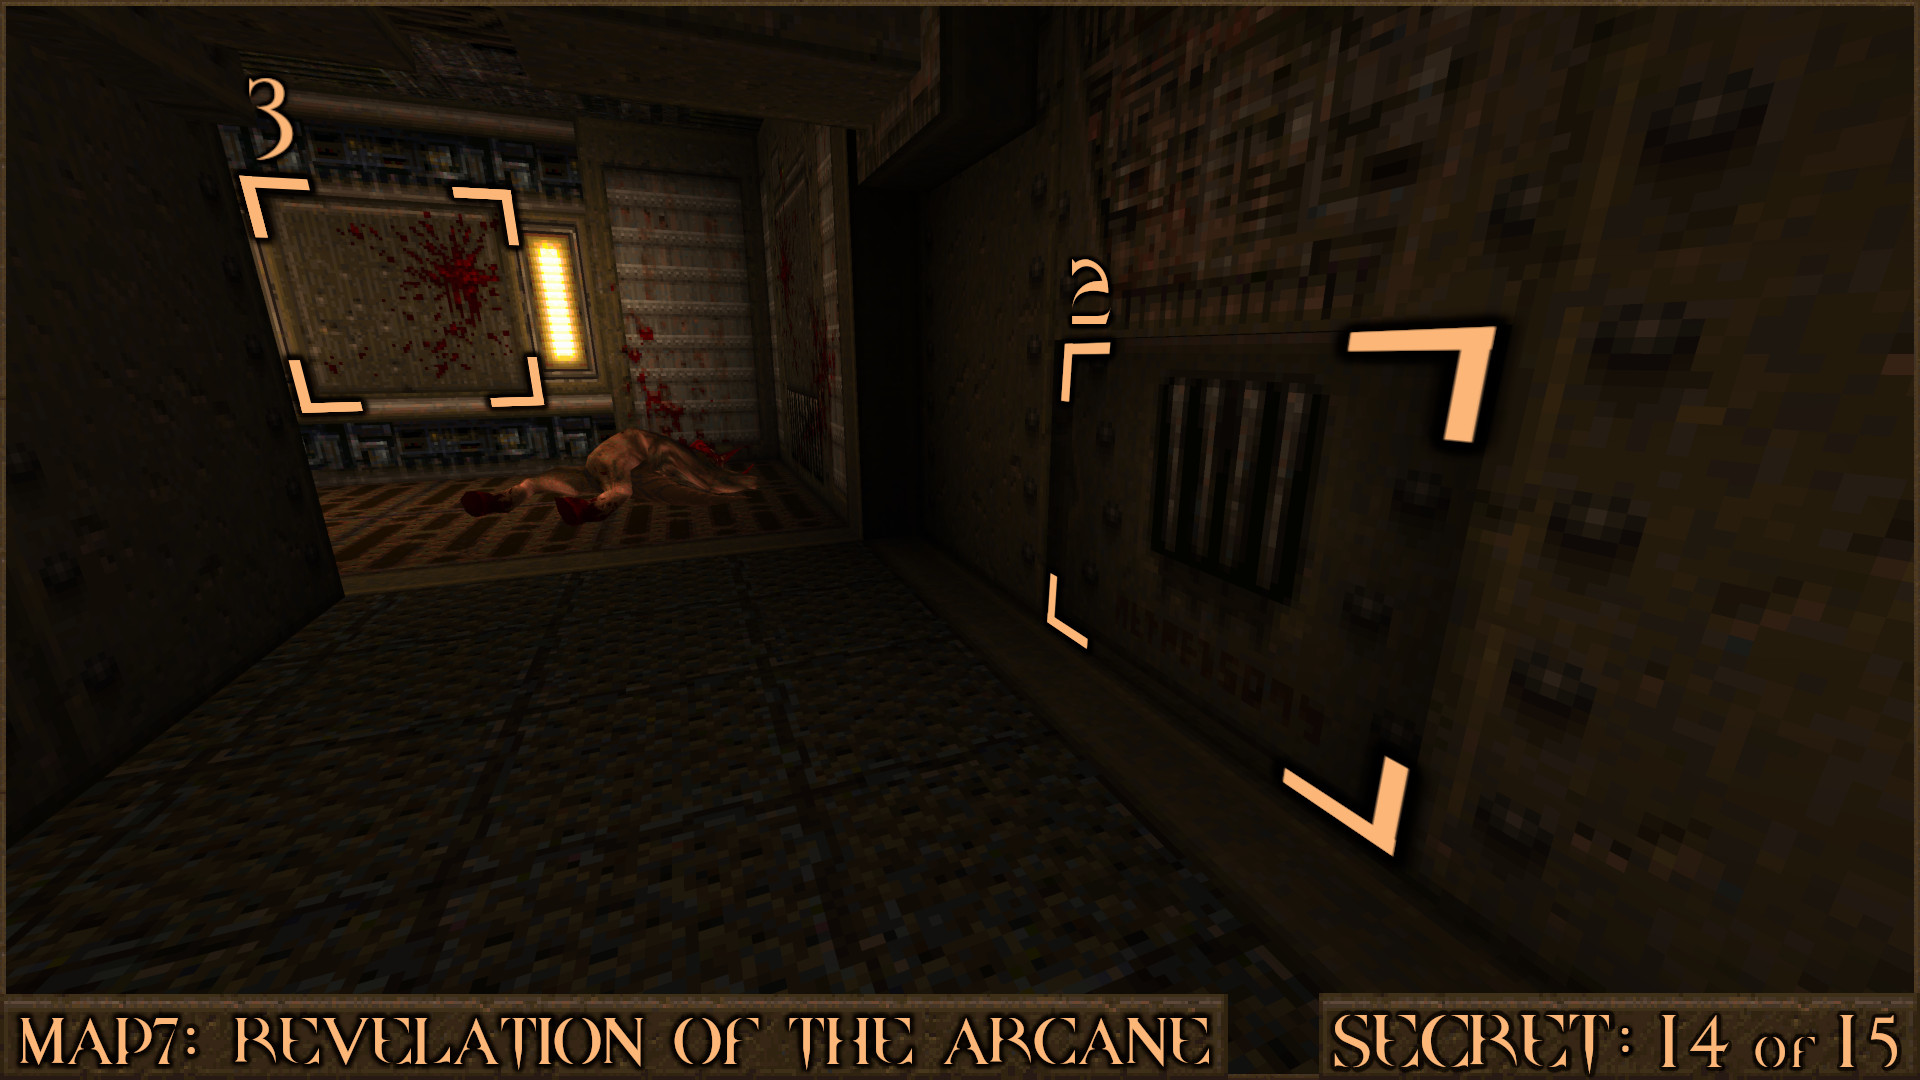
Secret 14 of 15
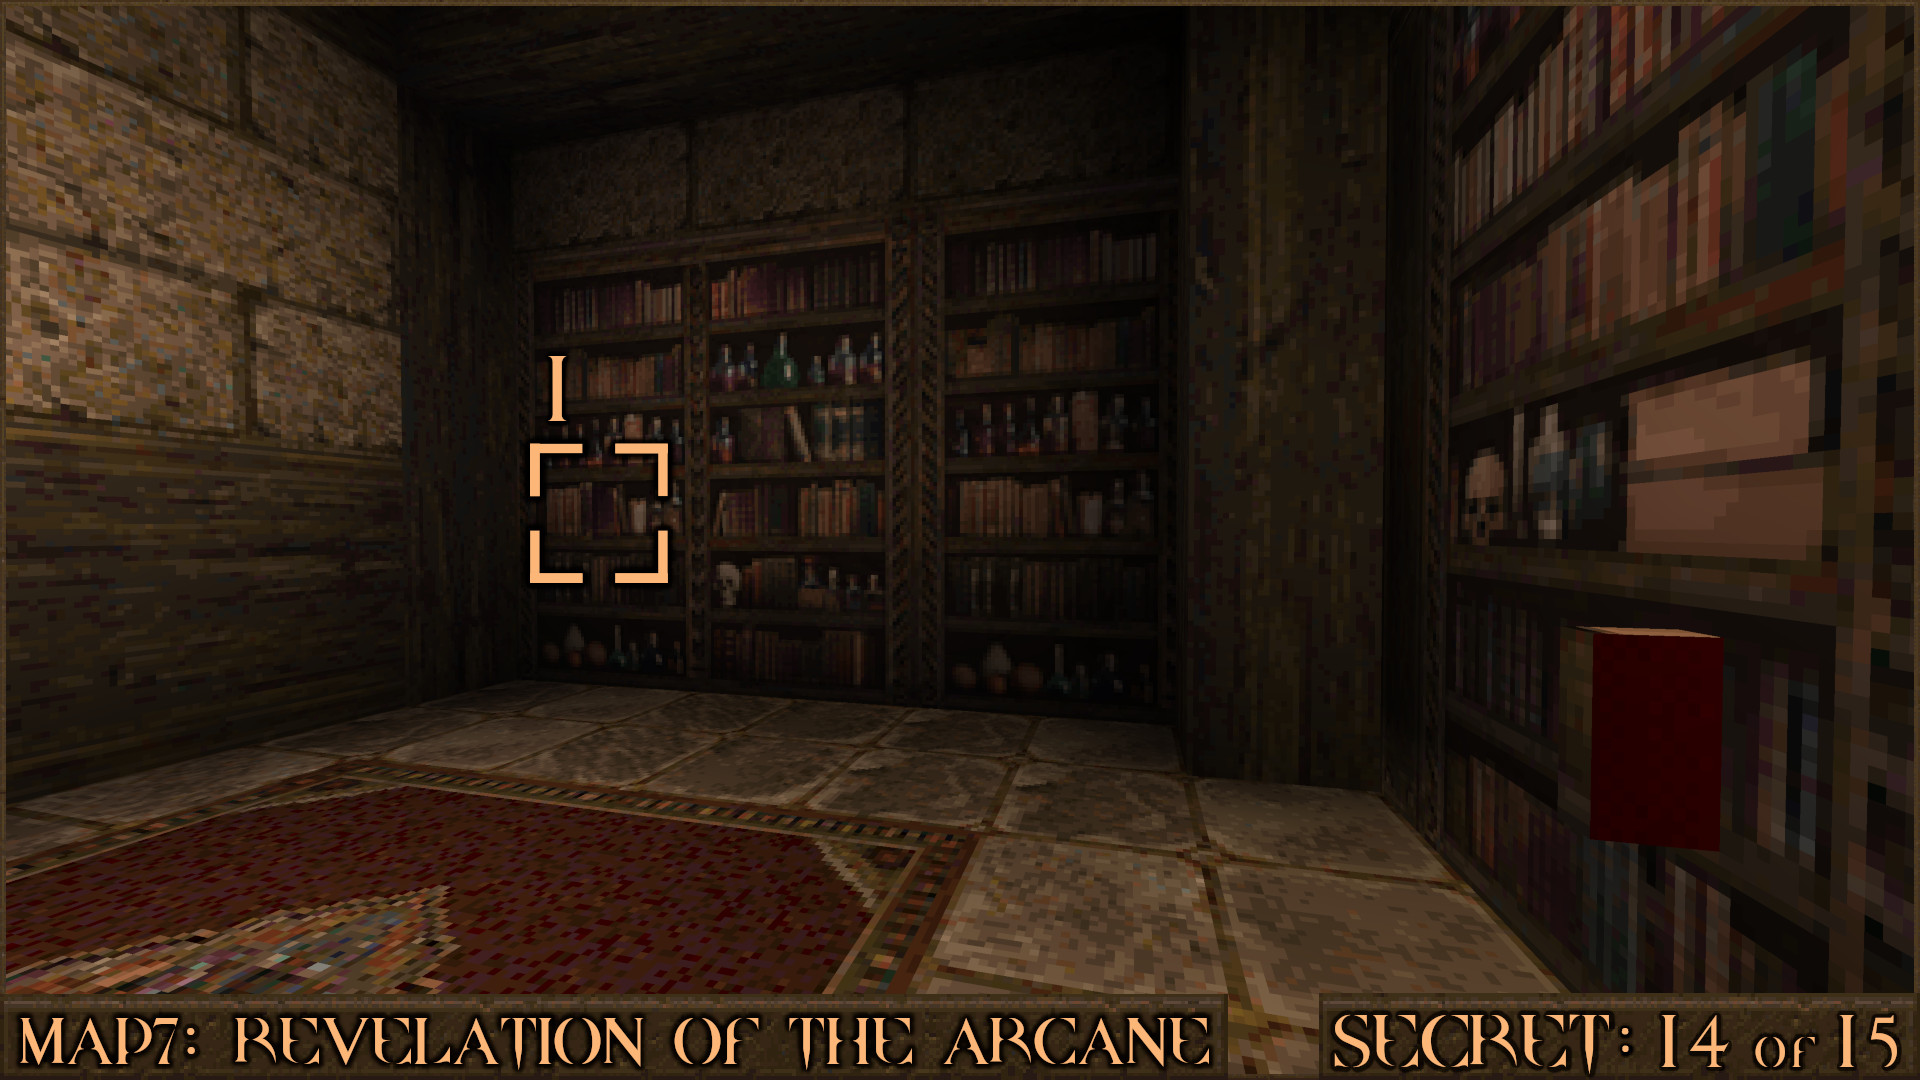
After opening the Silver Key Door press the purple book () on the left bookshelf.

Go inside and shoot the vent panel () and the target button behind it to shift a nearby bloody panel which covered the secret ().

Reward: Megahealth

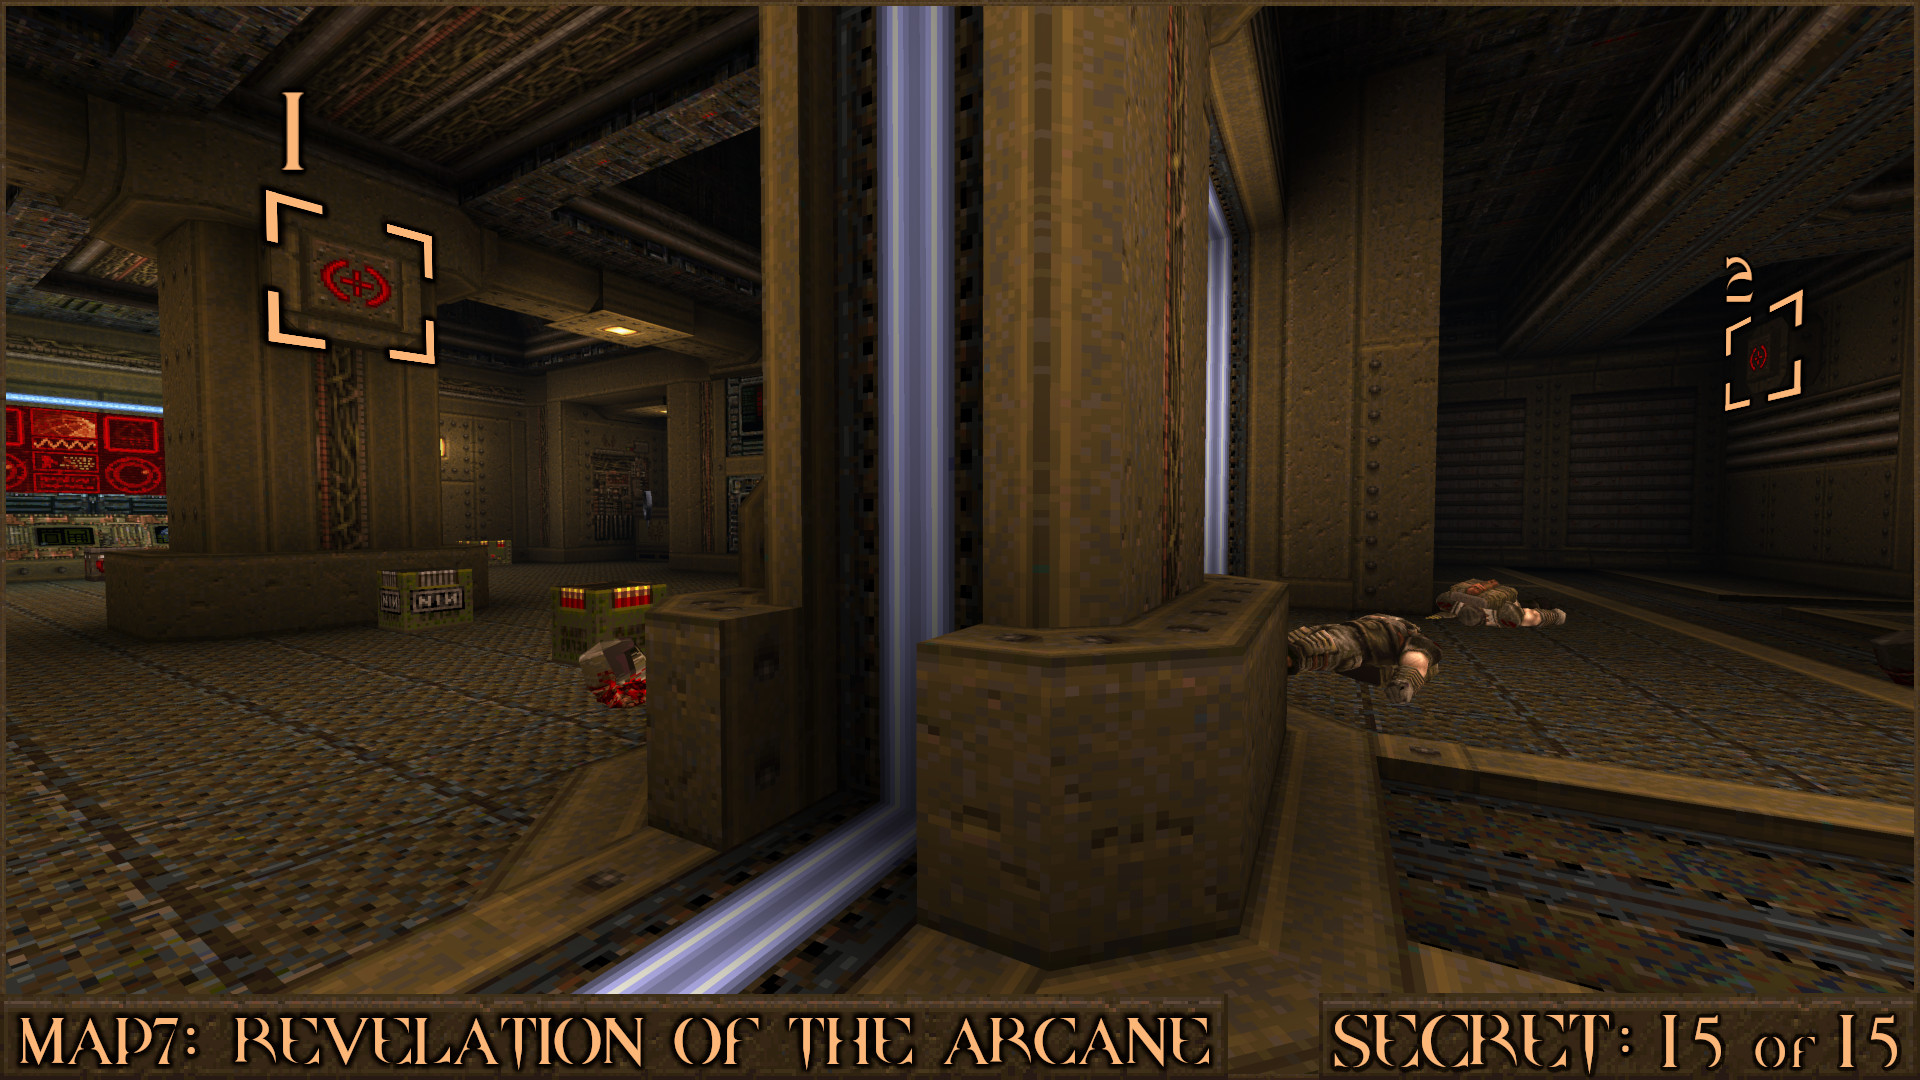
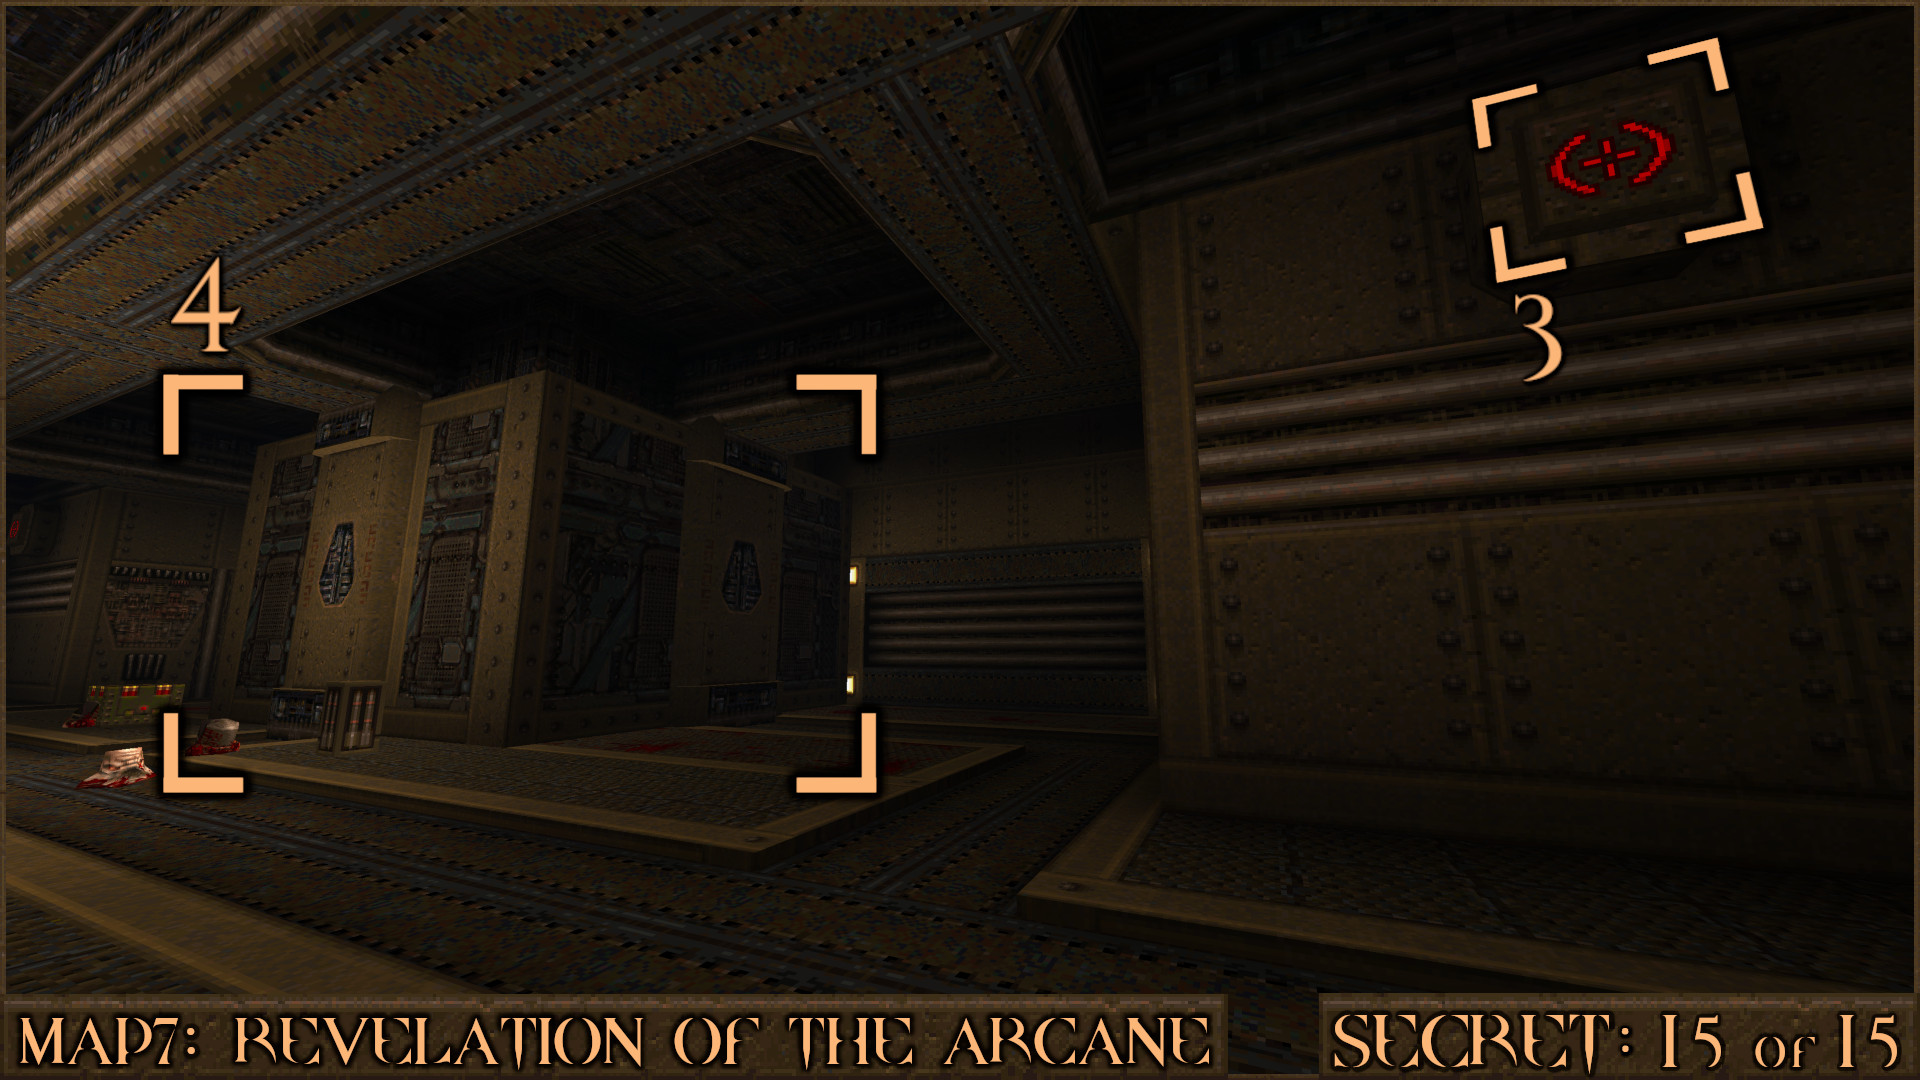
Secret 15 of 15
After teleporting into the hi-tech area with a forcefield and large containment unit, you need to look around and shoot three target buttons. The 1st button () is in the centre opposite the forcefield. The 2nd button () is in the corner to the left of the large containment unit.

The 3rd button () is in the opposite corner to the right of the containment unit. The containment unit () will open and release the Vores inside but that will also allow you to pick up the secret items.

Reward: Large Shells Large Nails [Cell Capacity Upgrade]
‎‏‏‎ ‎‏‏‎ + Rune Secrets
NOTE: During Part 2 there is no change to the secret count.

Extra Secret 1
Requires Rune of Sacrifice
At the very start of the level look behind the fireplace to see a Rune of Sacrifice Door. Opening it reveals an alternate way into Secret 12 and is also essentially a shortcut to a much later part of the level.

Reward: None

Extra Secret 2
Requires Rune of Sacrifice
Head to the outside area with the crypt from Secret 10. The shortcut from Extra Secret 1 offers a quick way to get there if you jump out the window. Head inside the crypt to trigger the door explosion and Zombie attack. Look beyond the door that exploded to find another Rune of Sacrifice Door that leads to an exit portal. It takes you back to The Runic Nexus.

Reward: None
‎‏‏‎MAP8: The Sacrifice
Extra Secret 1
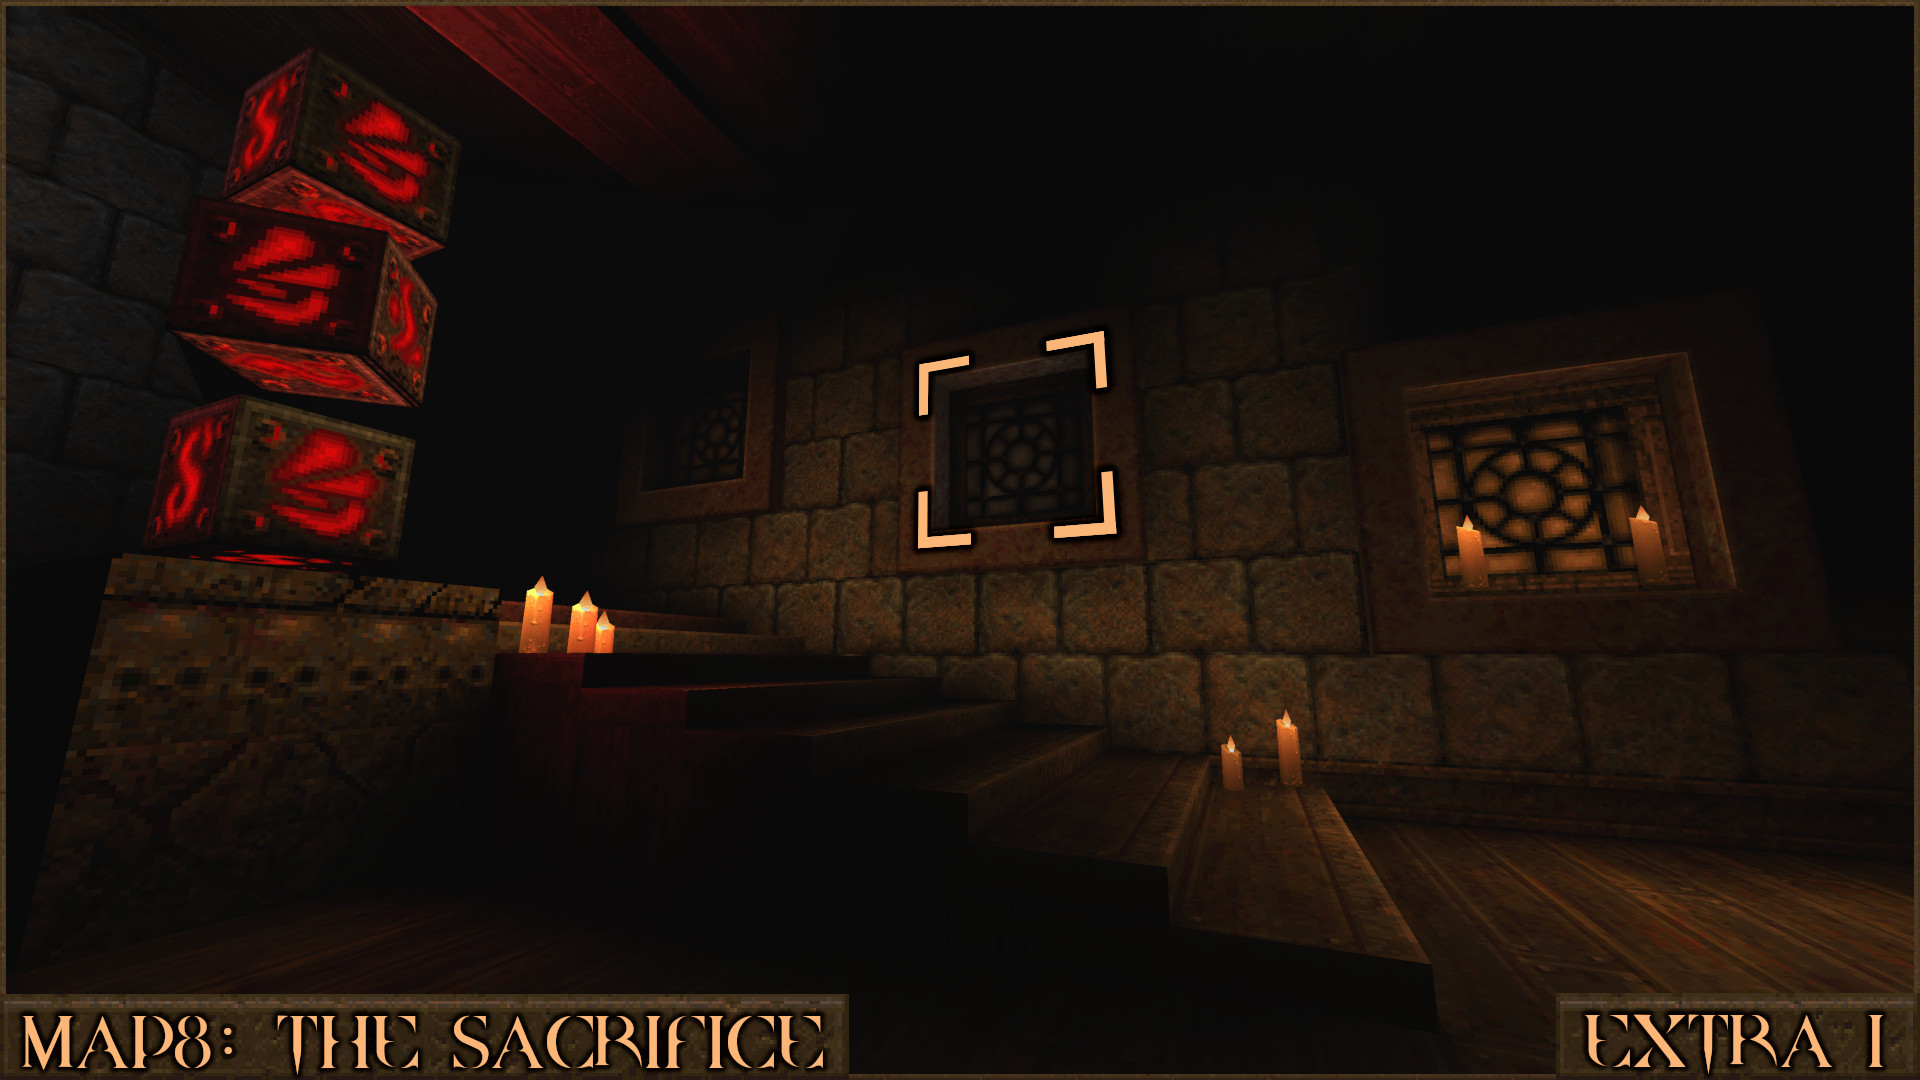
In the second room of the level shoot the centre window to reveal some extra ammo. Jump from the top of the nearby stairs to reach it.

Reward: Large Nails

Secret 1 of 7
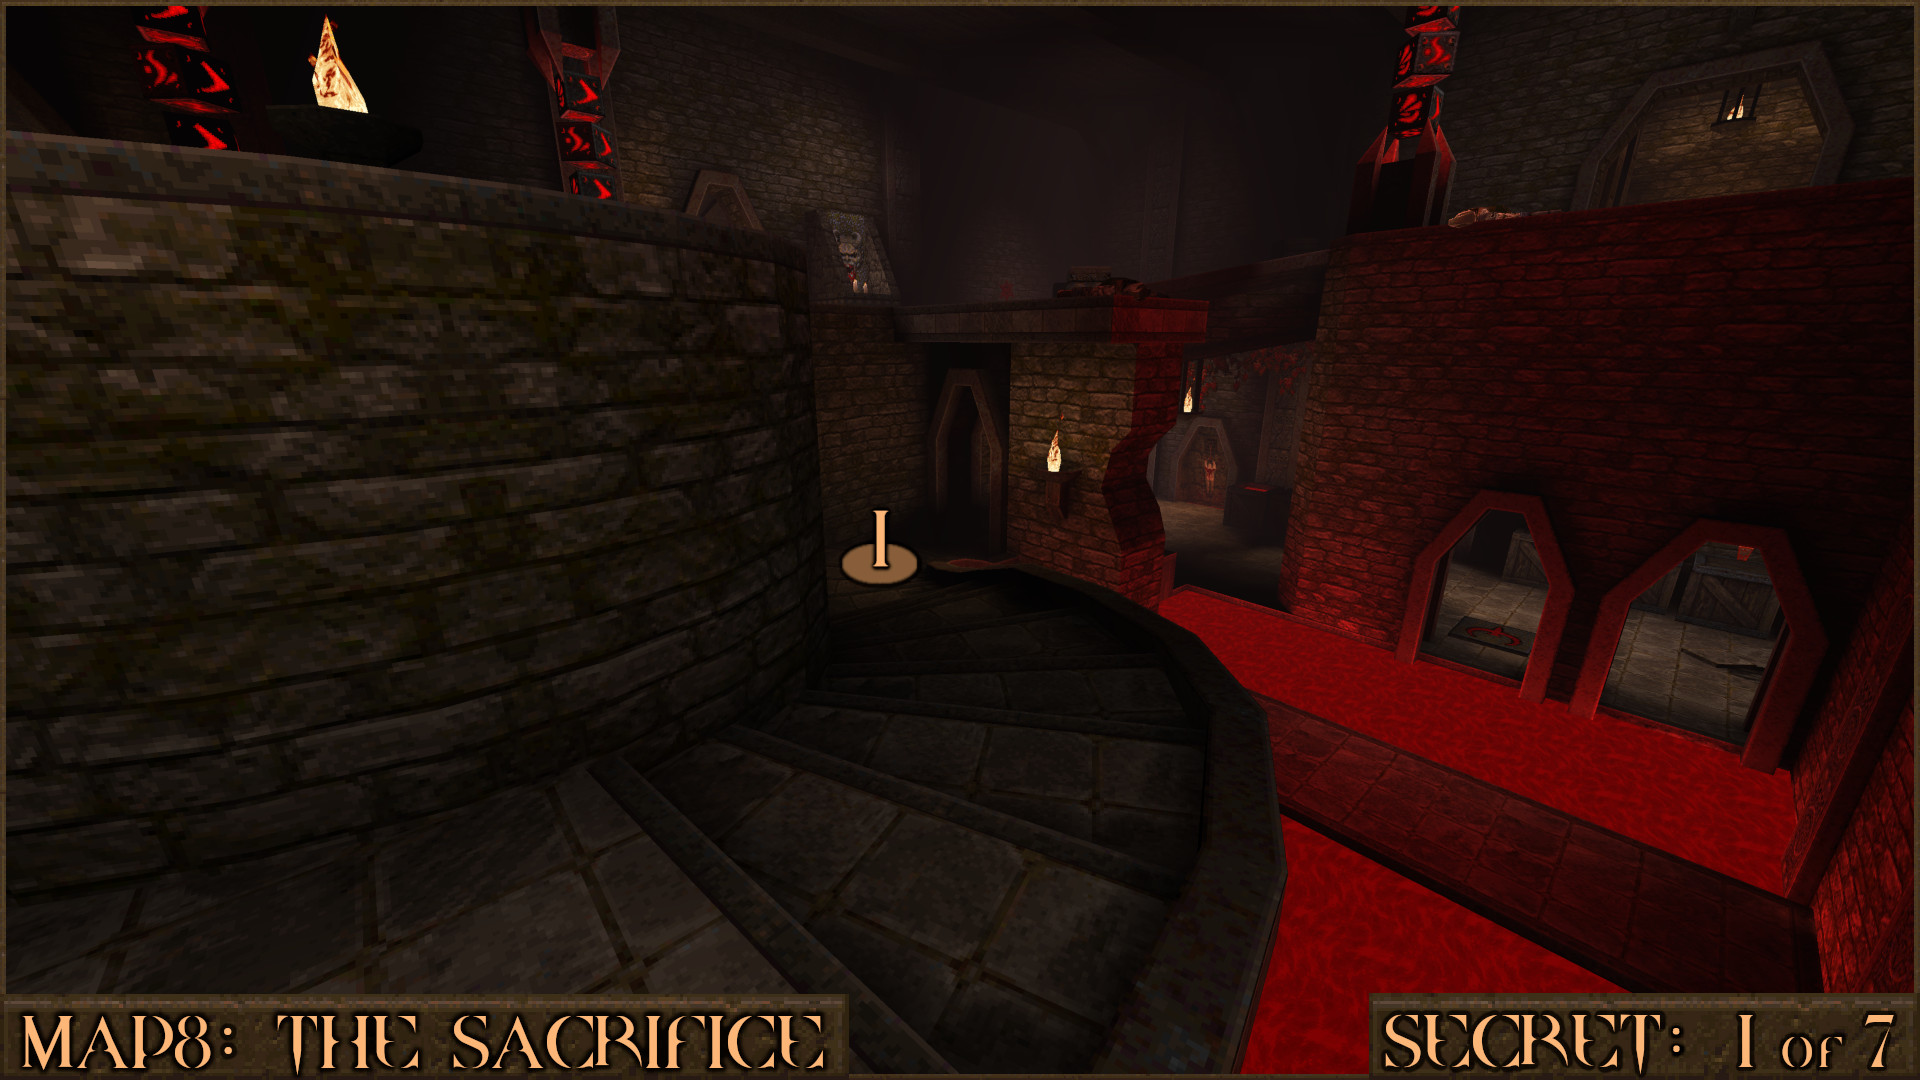
When you reach the location with a large shallow pool of blood water below you head down the winding stairs ().

From here you will see an elevator that is activated using an Axe button (). Strike the button but quickly pull back () as the elevator ascends without you.

Embedded in the elevator is an alcove you can walk into and strike the Axe button again () to be taken underground to the secret.

Reward: Small Shells Small Nails Large Health [Rocket Capacity Upgrade]

Extra Secret 2
While still underground in Secret 1 pull the same trick again and strike the Axe button () and pull back () to send the elevator back up.

You'll see another Axe button () that will drop you into a trap below and chastise you for your greed.

Reward: Rocket Launcher Small Nails Small Rockets Armor Shard×2 Large Health

Secret 2 of 7
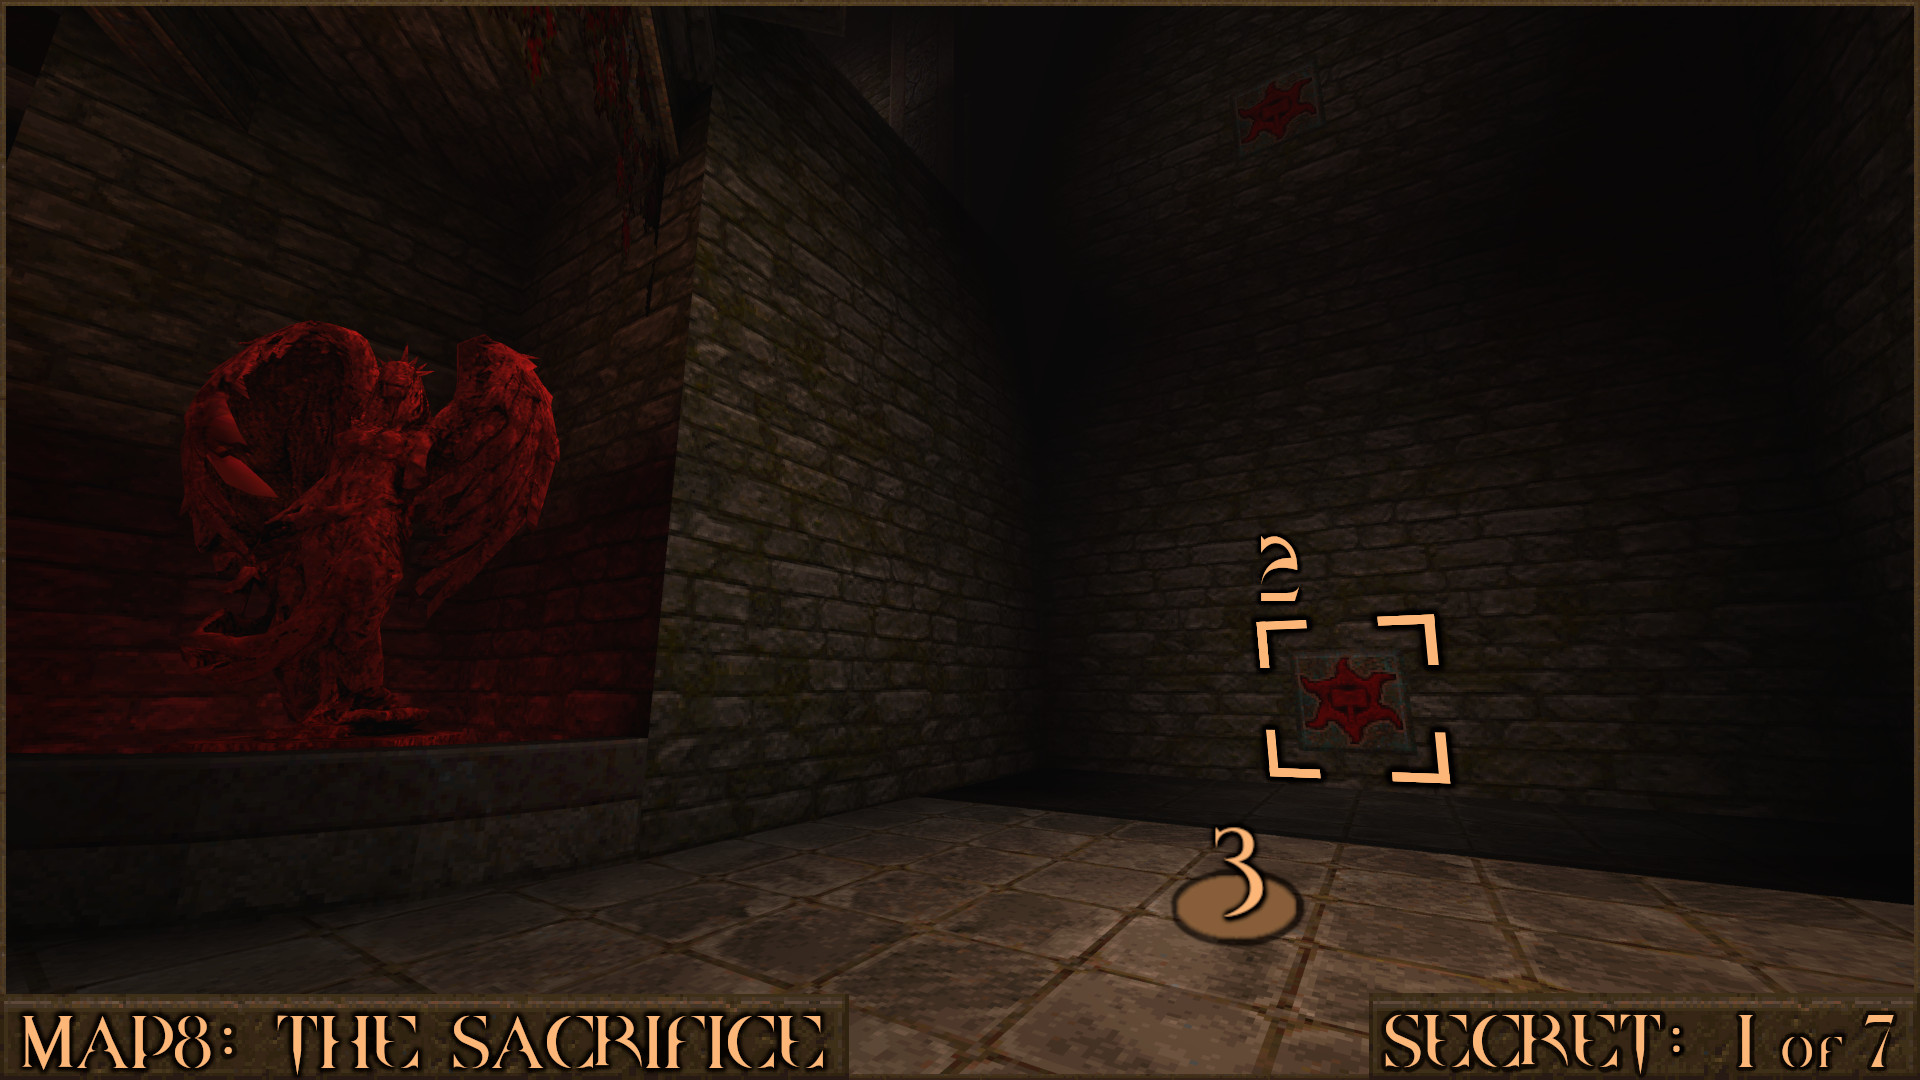
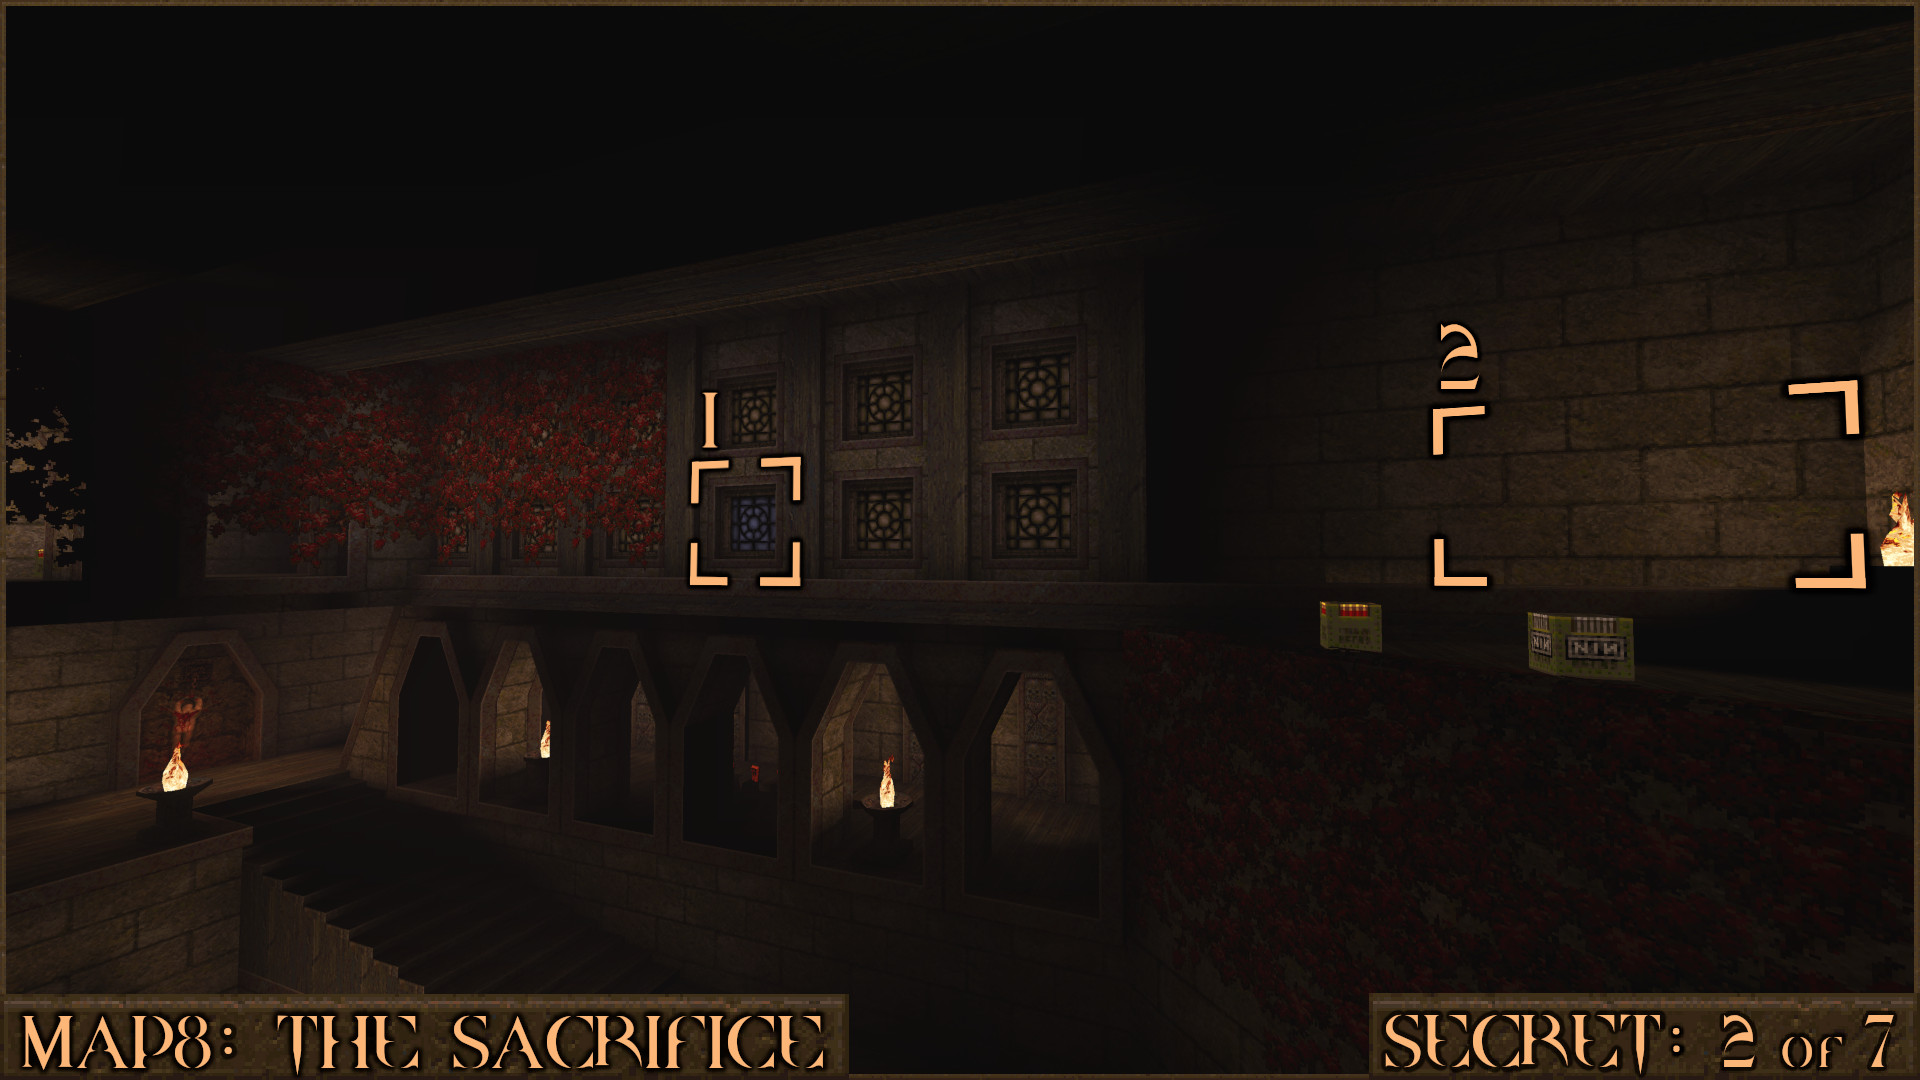
You'll enter a large room with a set of window panels above you. Some of them are covered with red leaves and one of them is blue. Shoot the blue panel () to start a timed shooting gallery in which you must quickly shoot all the buttons as they appear. If you succeed the wall on the right () will shift allowing you into the secret.

Reward: Small Shells Small Nails Yellow Armor

Secret 3 of 7
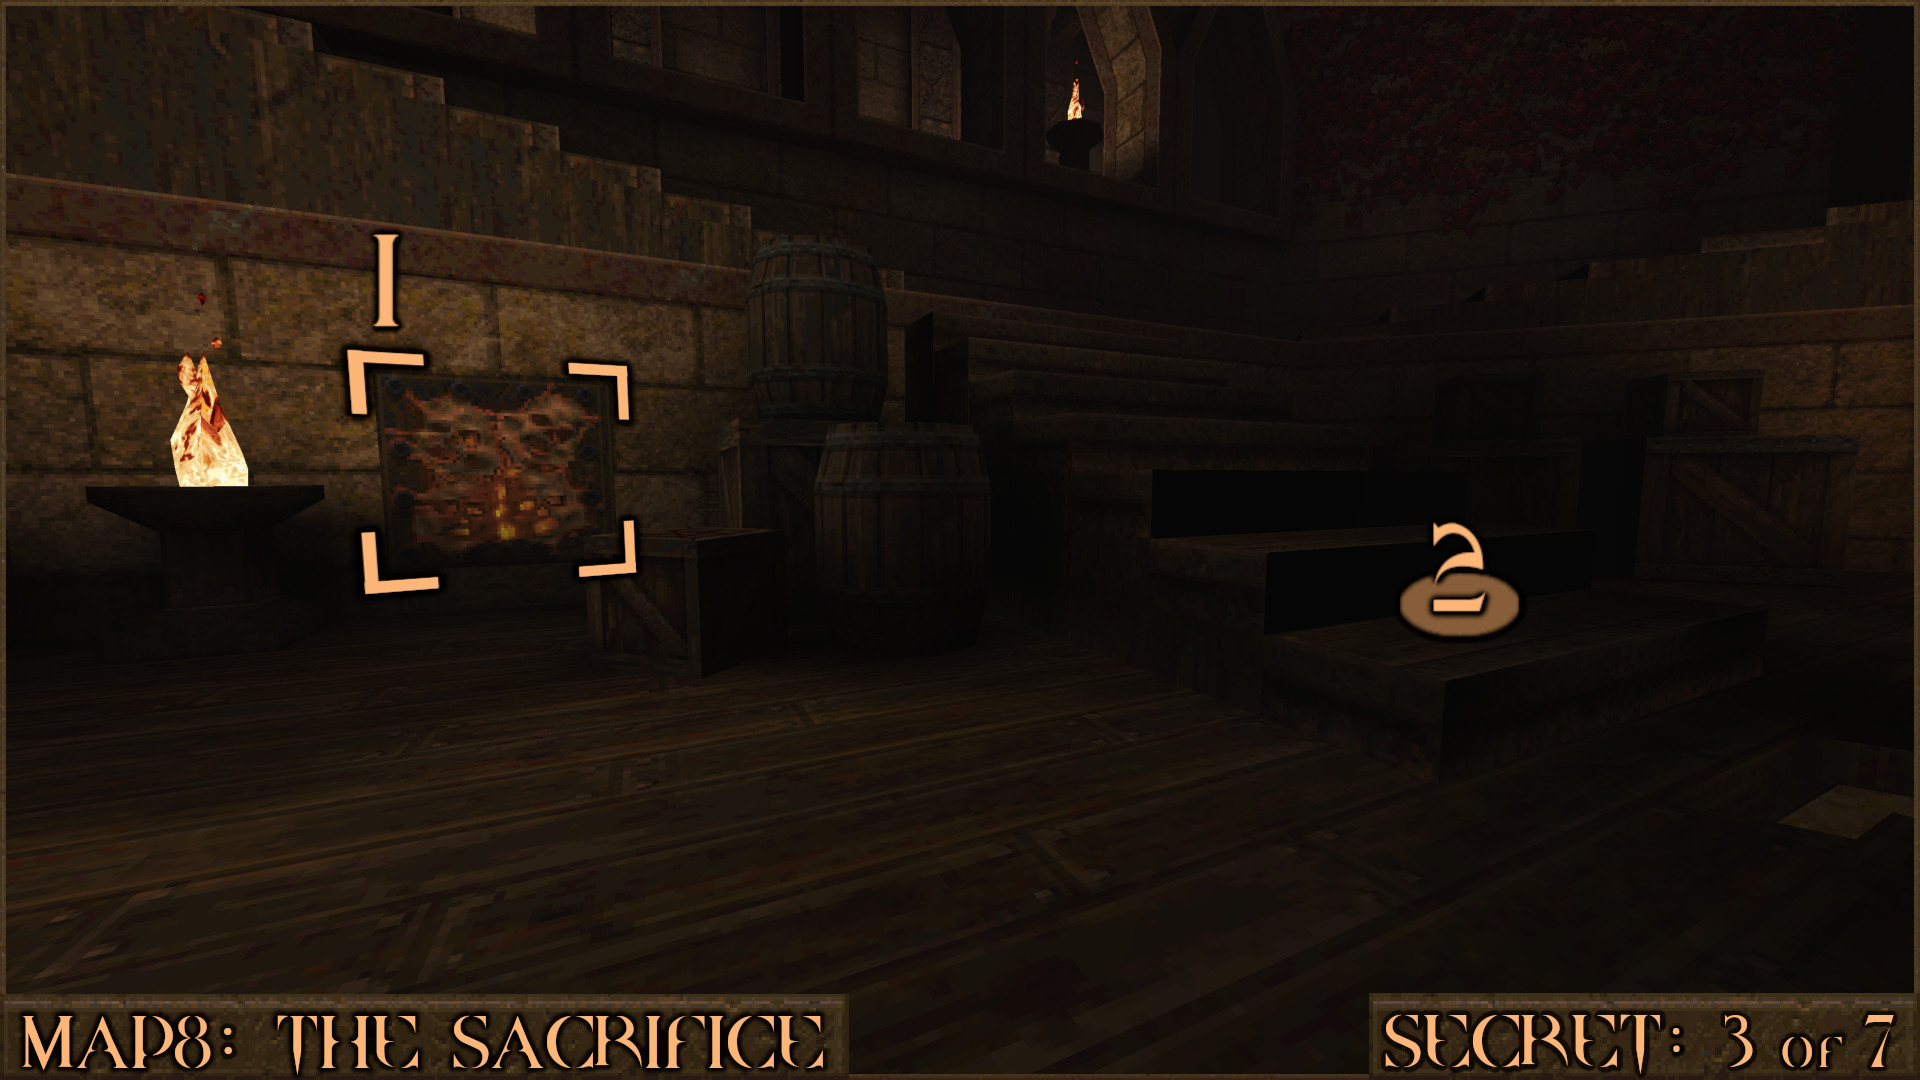
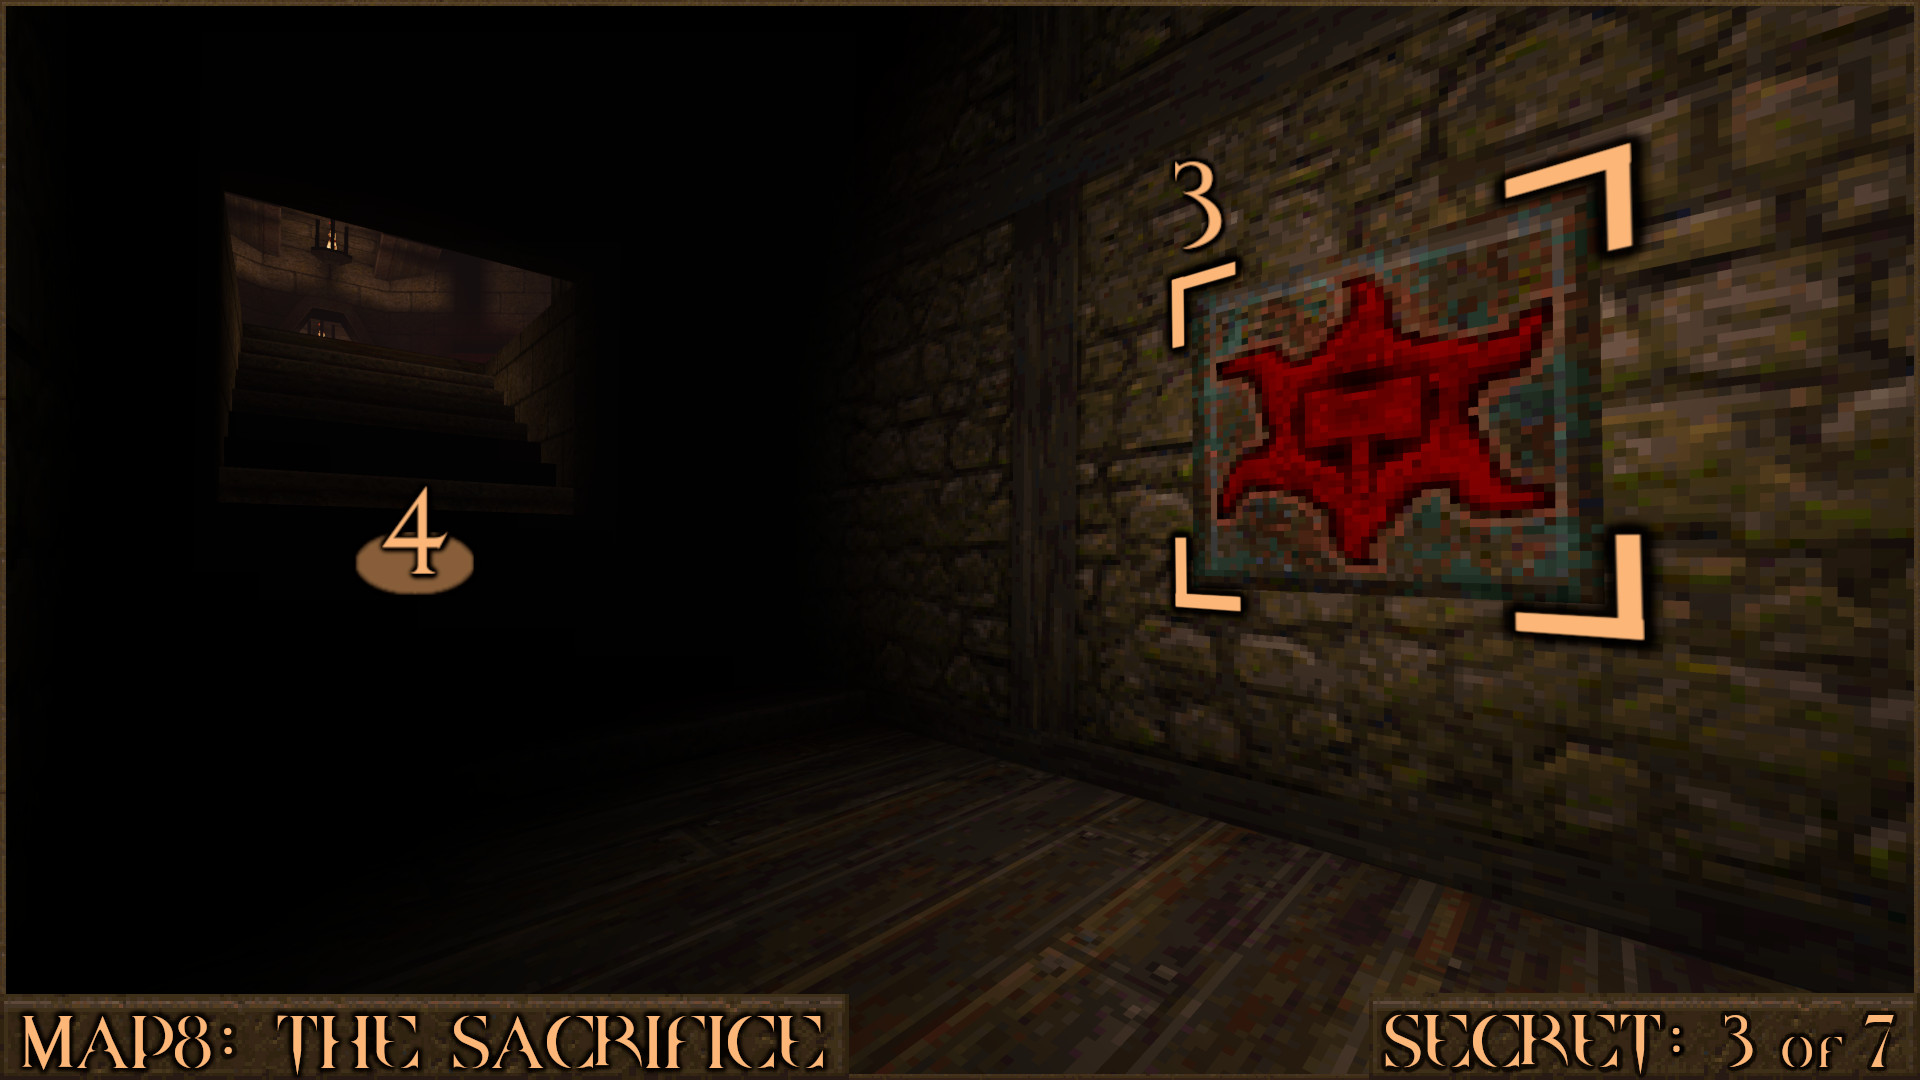
Head to the bottom of the large room from Secret 2 and look for a tortured face panel (). Shoot it to lower the nearby stairs and head down them ().

You'll soon see an Axe button on your left (). Strike it to make the stairs you just descended move back up and reveal a hidden secret behind them ().

Reward: Large Cells

Secret 4 of 7
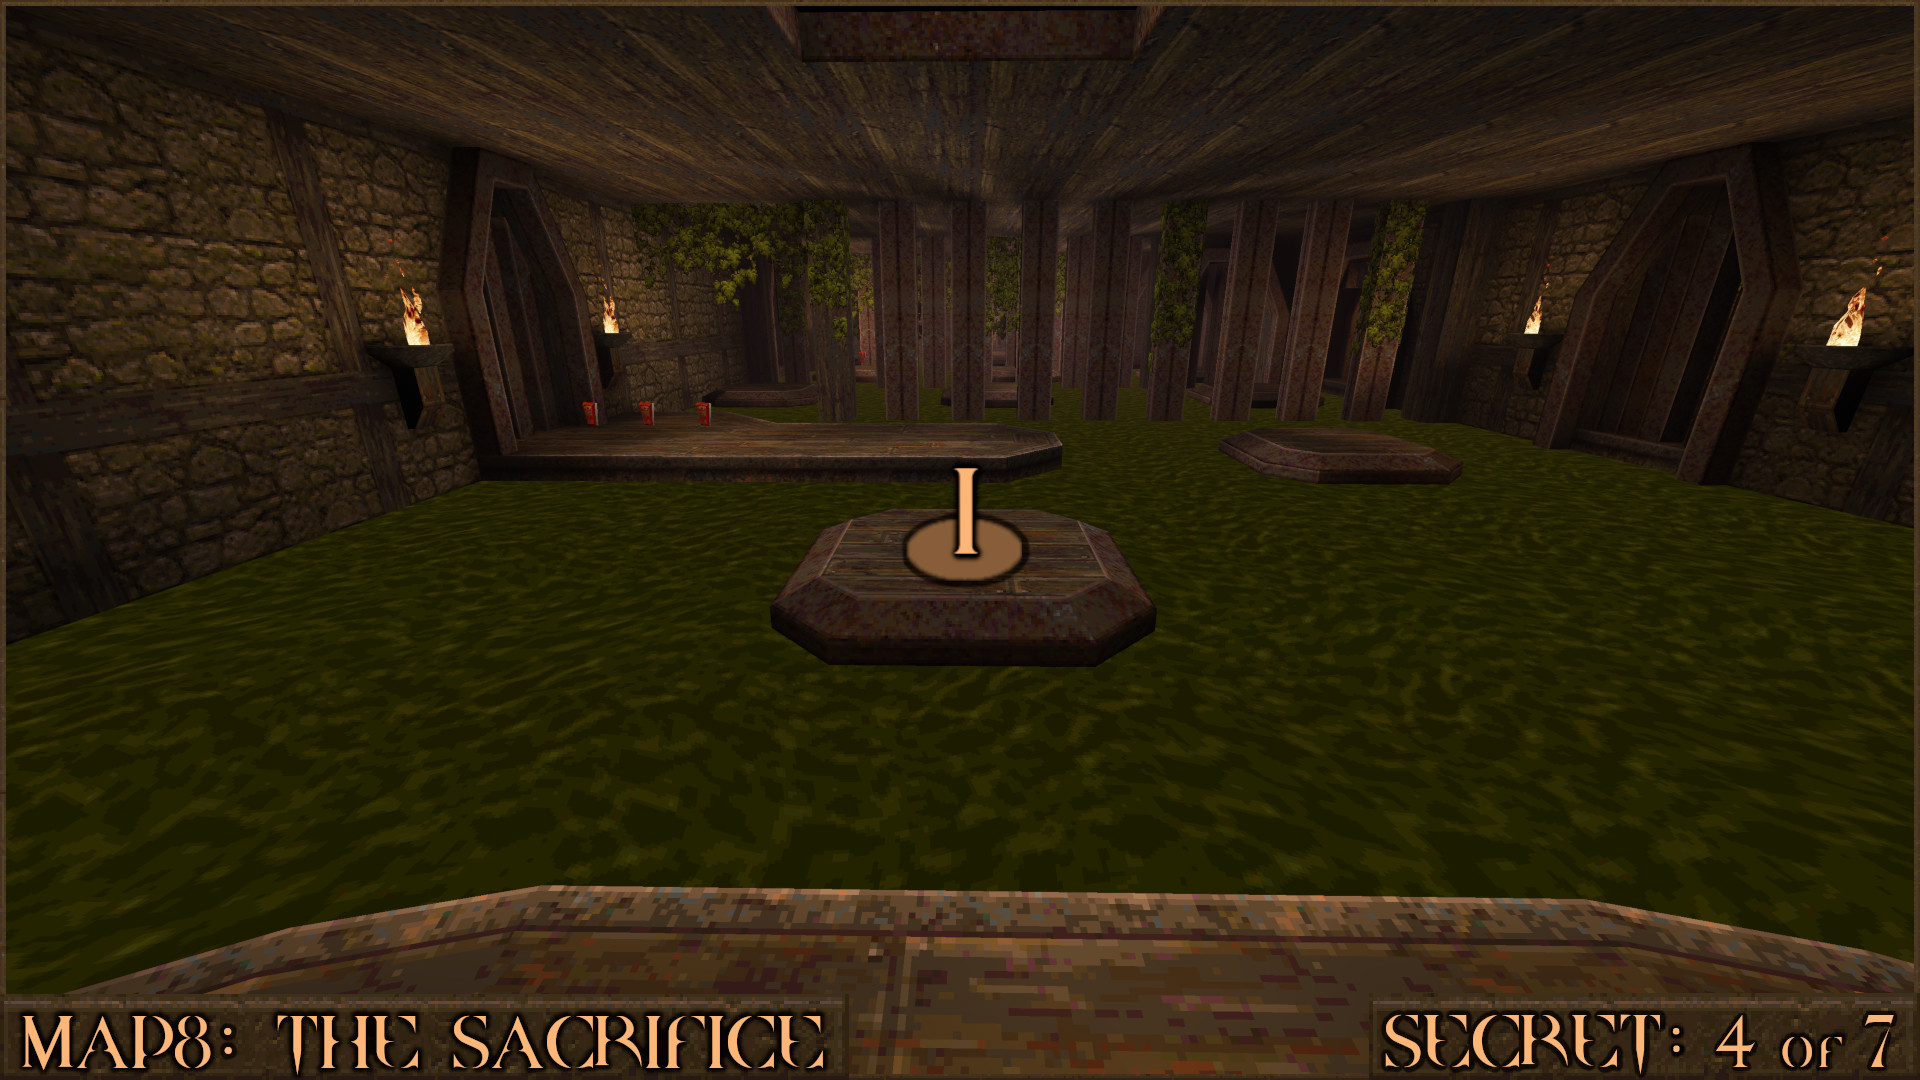
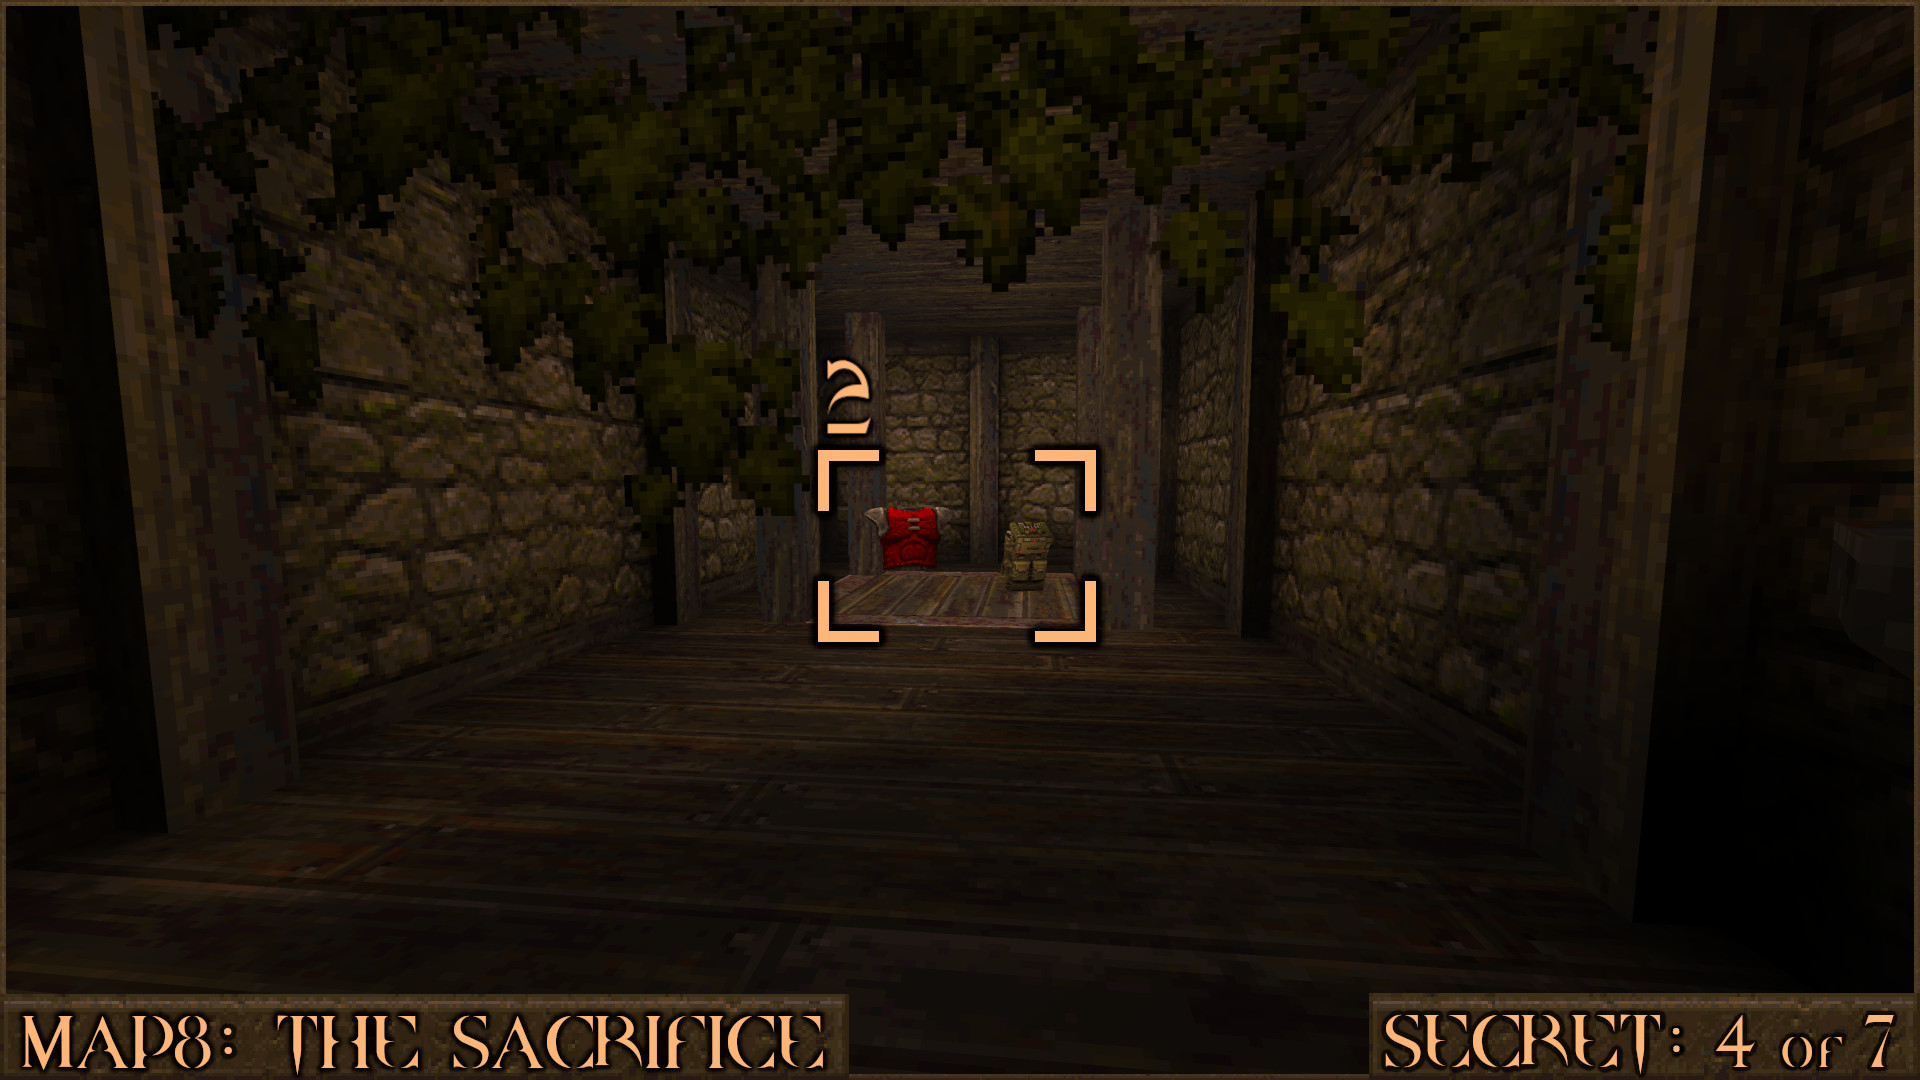
Carry on down the tunnel from Secret 3 and you'll encounter a secret with a dangerous jumping trial filled with items. Sinking platforms () rest on the slime so you have to be quick as you move through the puzzle.

At the end of the trial you'll be able to finally claim a Red Armor and a Nail Capacity Upgrade ().

Reward: Small Shells×5 Small Nails×6 Large Nails Small Rockets×2 Red Armor×2 Armor Shard×10 Large Health×2 Megahealth [Nail Capacity Upgrade]

Secret 5 of 7
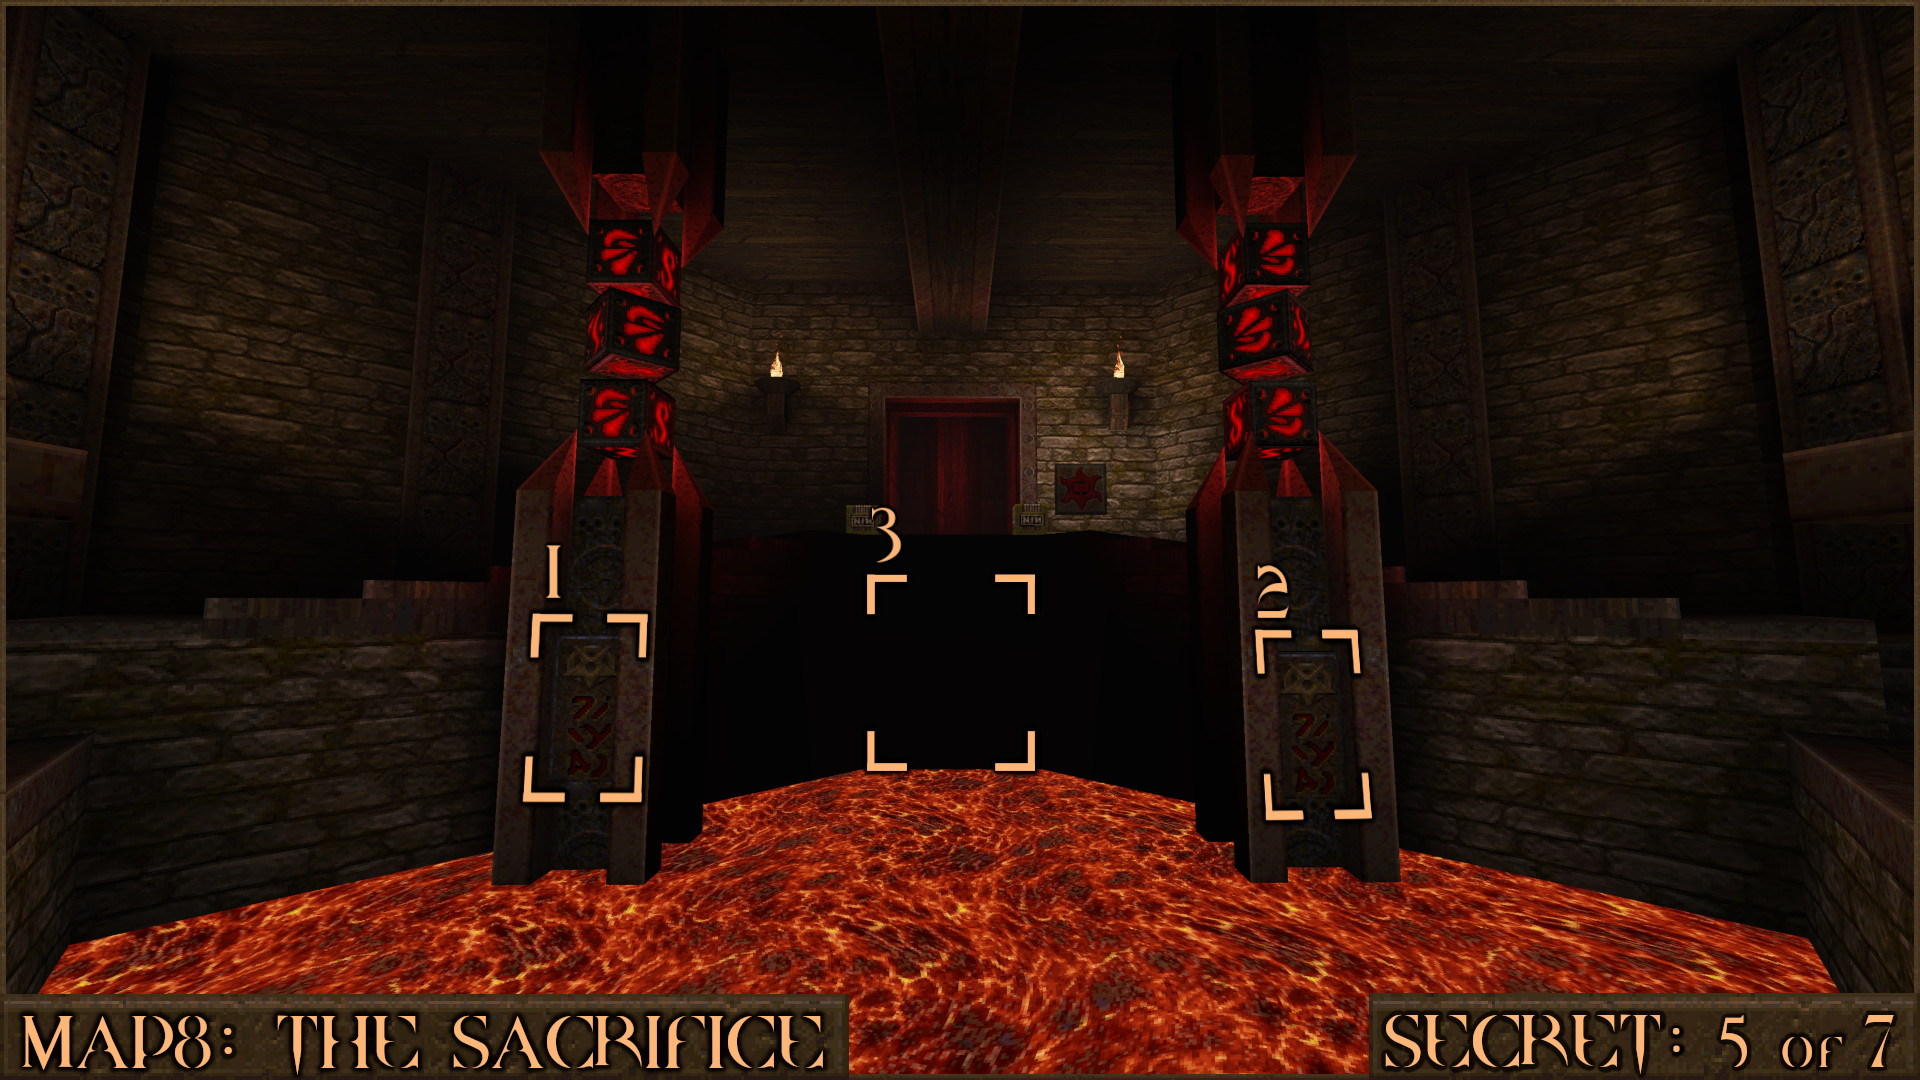
Later after talking an elevator down you'll be in an arena featuring Vores and Shamblers around a lava pit. After the fight look at the side of the pillars rising out of the lava and shoot the two runic decorations (+). This will raise a bridge and shift a wall to let you reach the secret ().

Reward: [Cell Capacity Upgrade]

Secret 6 of 7
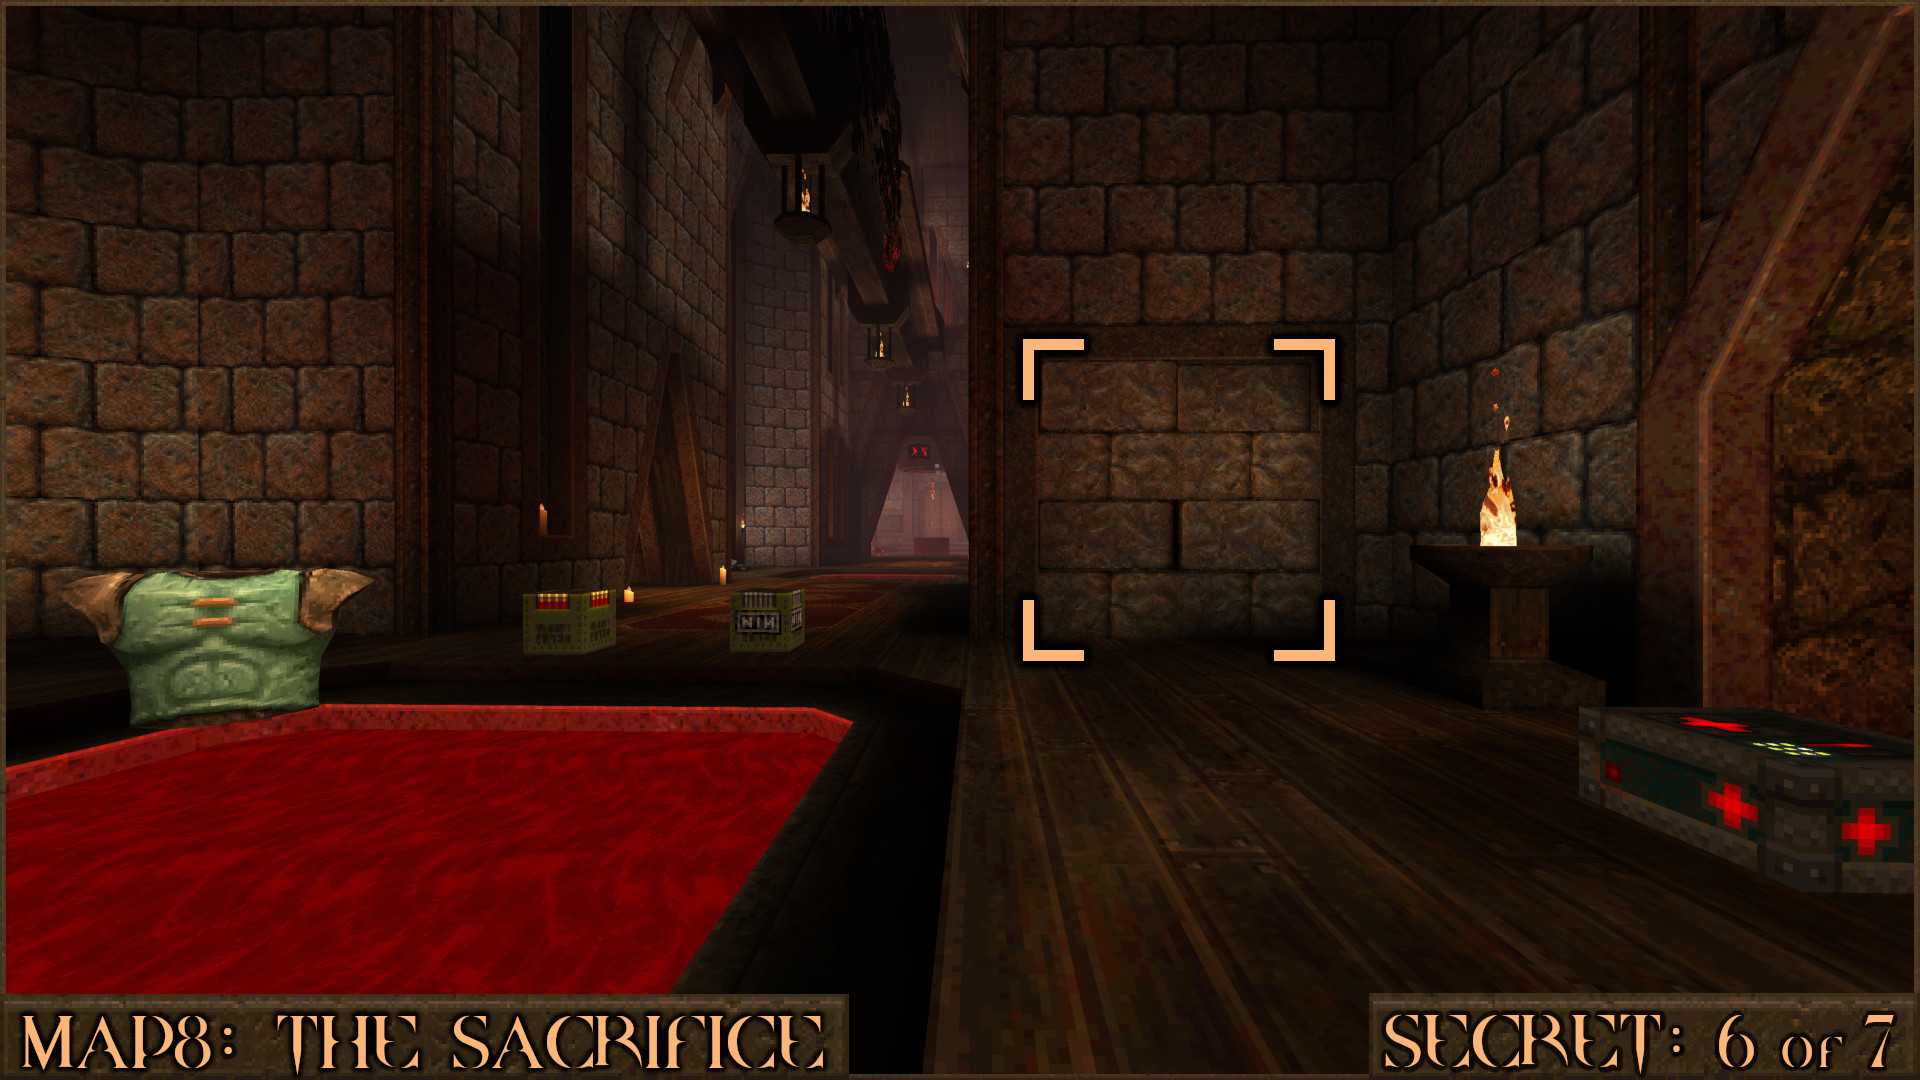
In the long corridor you'll see a Green Armor above a pool of blood water. Don't try to pick it up as you'll drop through the water into the room below but instead search nearby for a crooked brick wall. Shoot it to move it and enter the secret.

Reward: Yellow Armor

Extra Secret 3
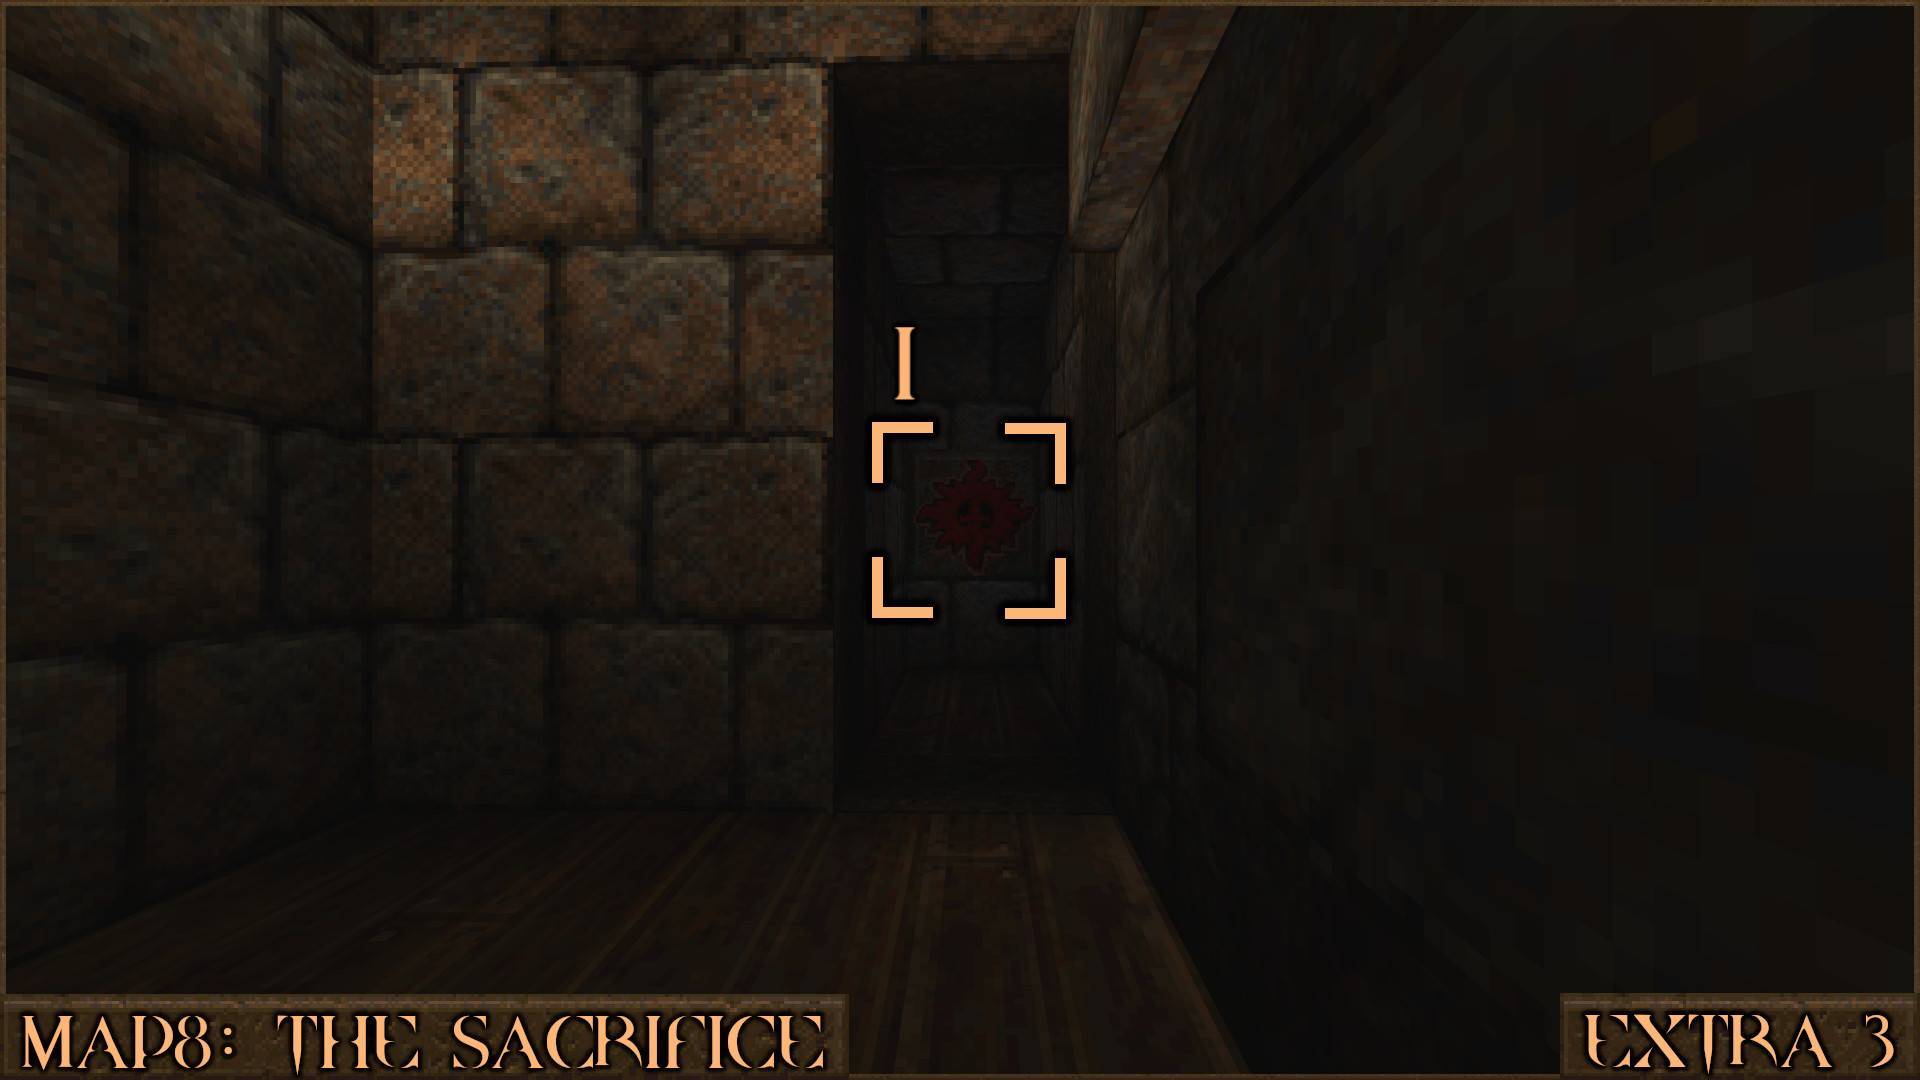
Stay inside the small room from Secret 6 and wait for the crooked brick wall to reset. Now look in the nook where the door slid to see a red shootable button () that reveals an Axe button elevator.

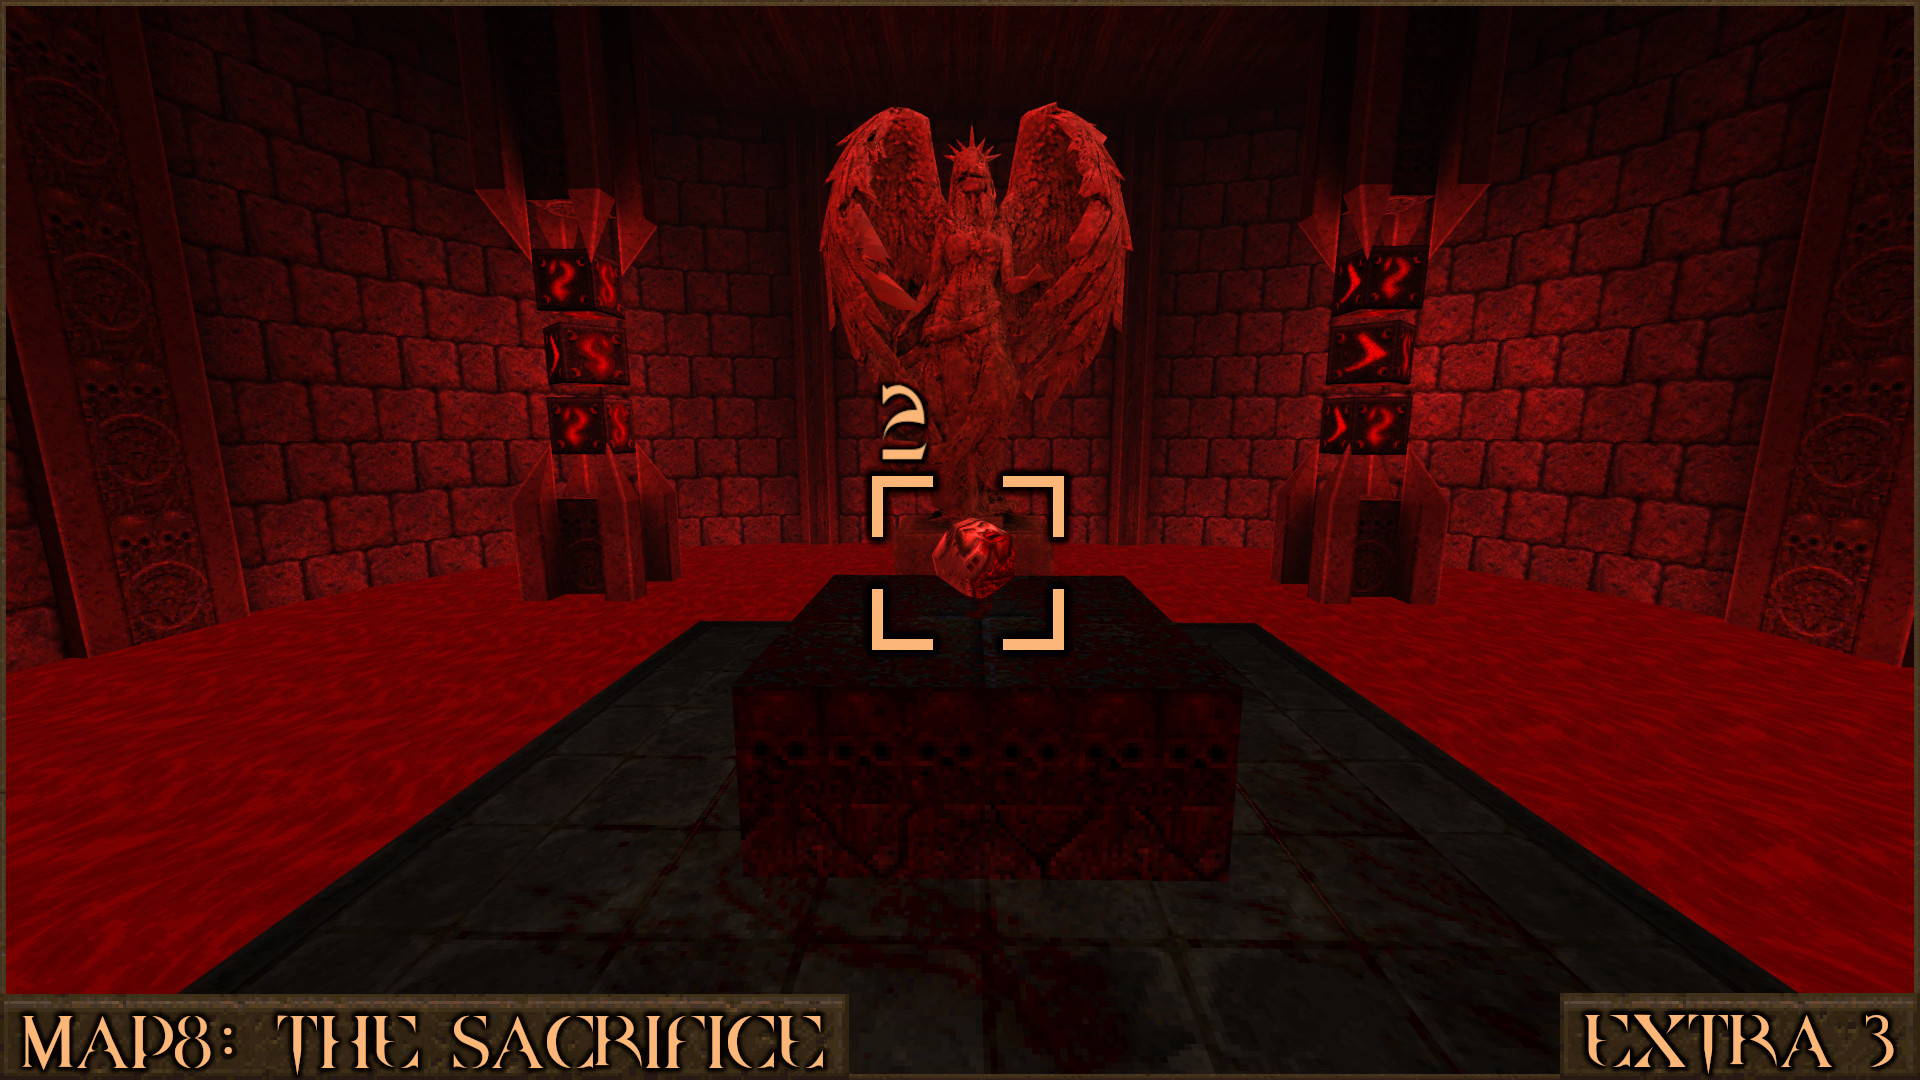
Ride it down and you'll soon see a Health Capacity Upgrade () on a suspicious altar. Grab the upgrade but prepare for an ambush.

Reward: Small Shells Small Nails×3 [Health Capacity Upgrade]

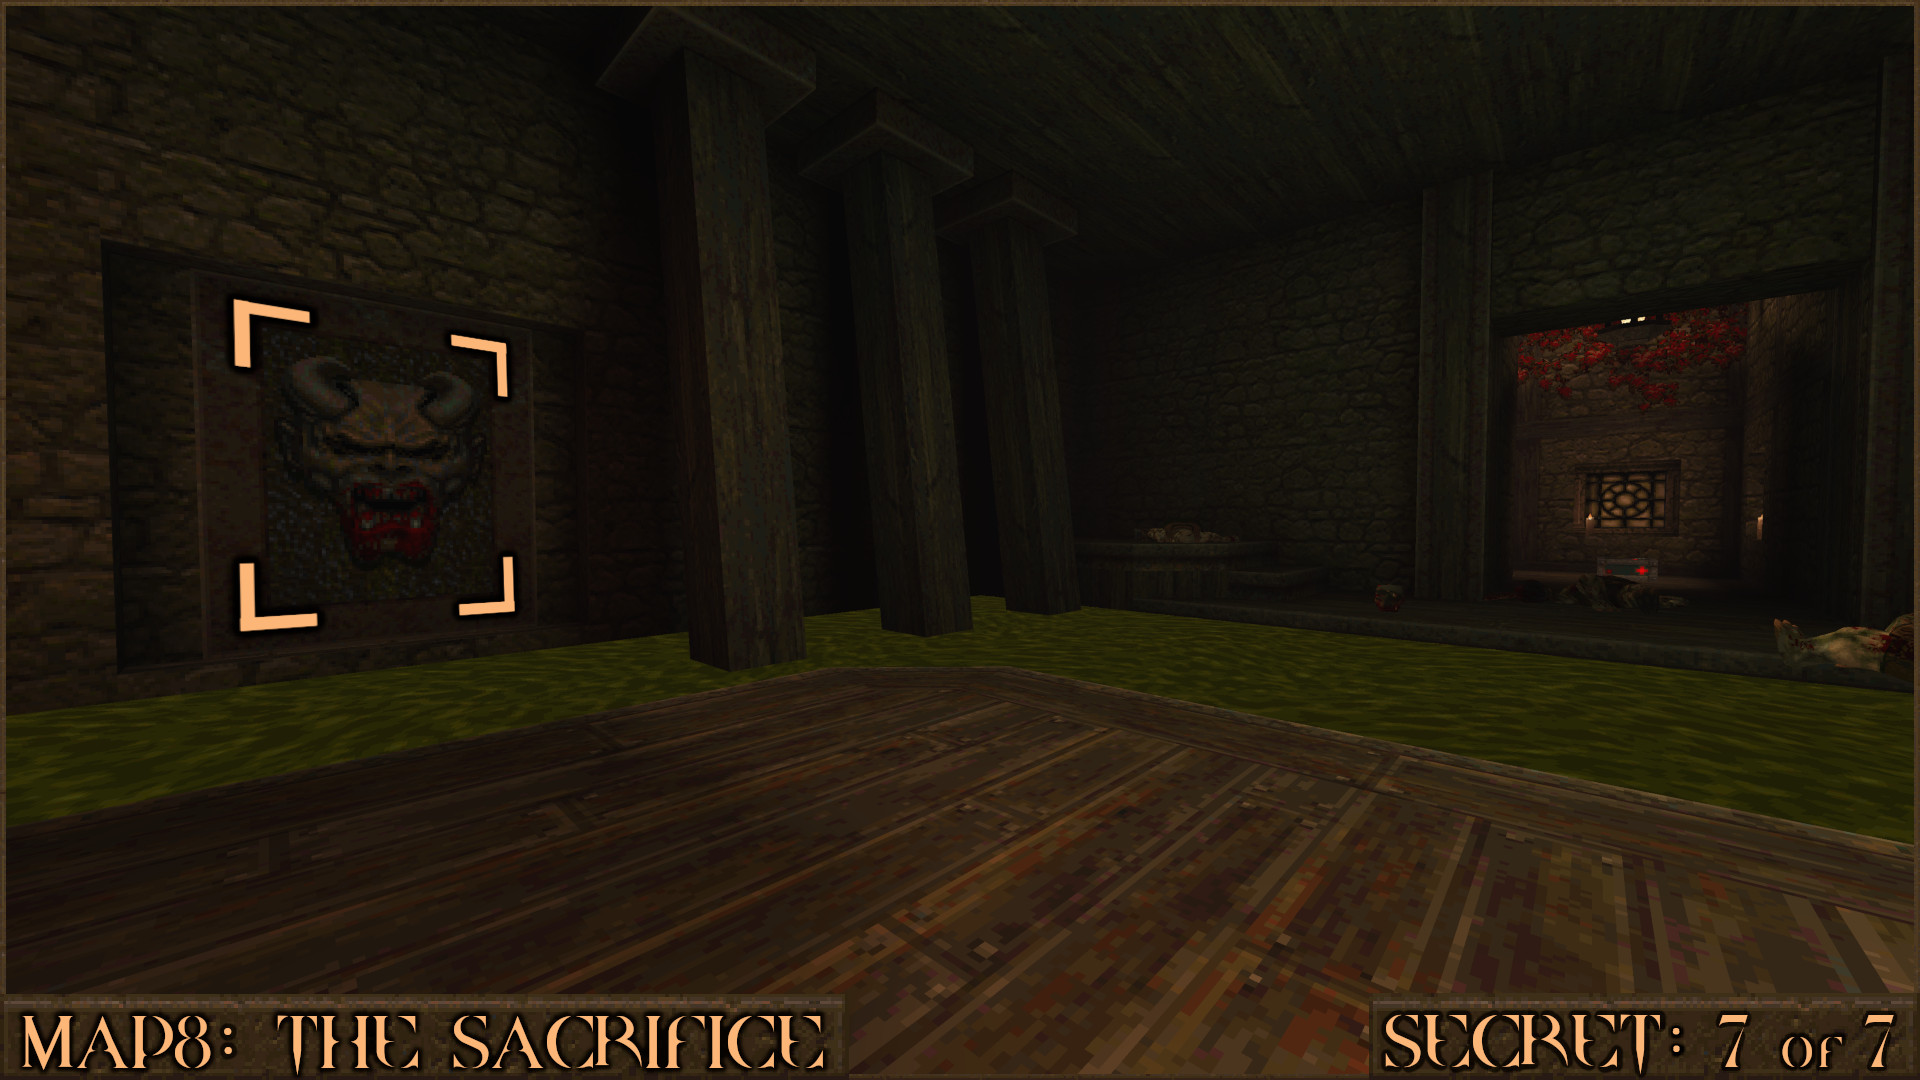
Secret 7 of 7
Return to the corridor with the Green Armor above the fake blood pool near Secret 6 and drop through it into the room below. Once it is clear of enemies shoot a nearby bloody gargoyle face panel to reveal the secret.

Reward: [Shell Capacity Upgrade]

The Rune of Sacrifice!
Near the end of this level, after sacrificing all the Rangers and returning to the altar, you will acquire your first rune, the Rune of Sacrifice!

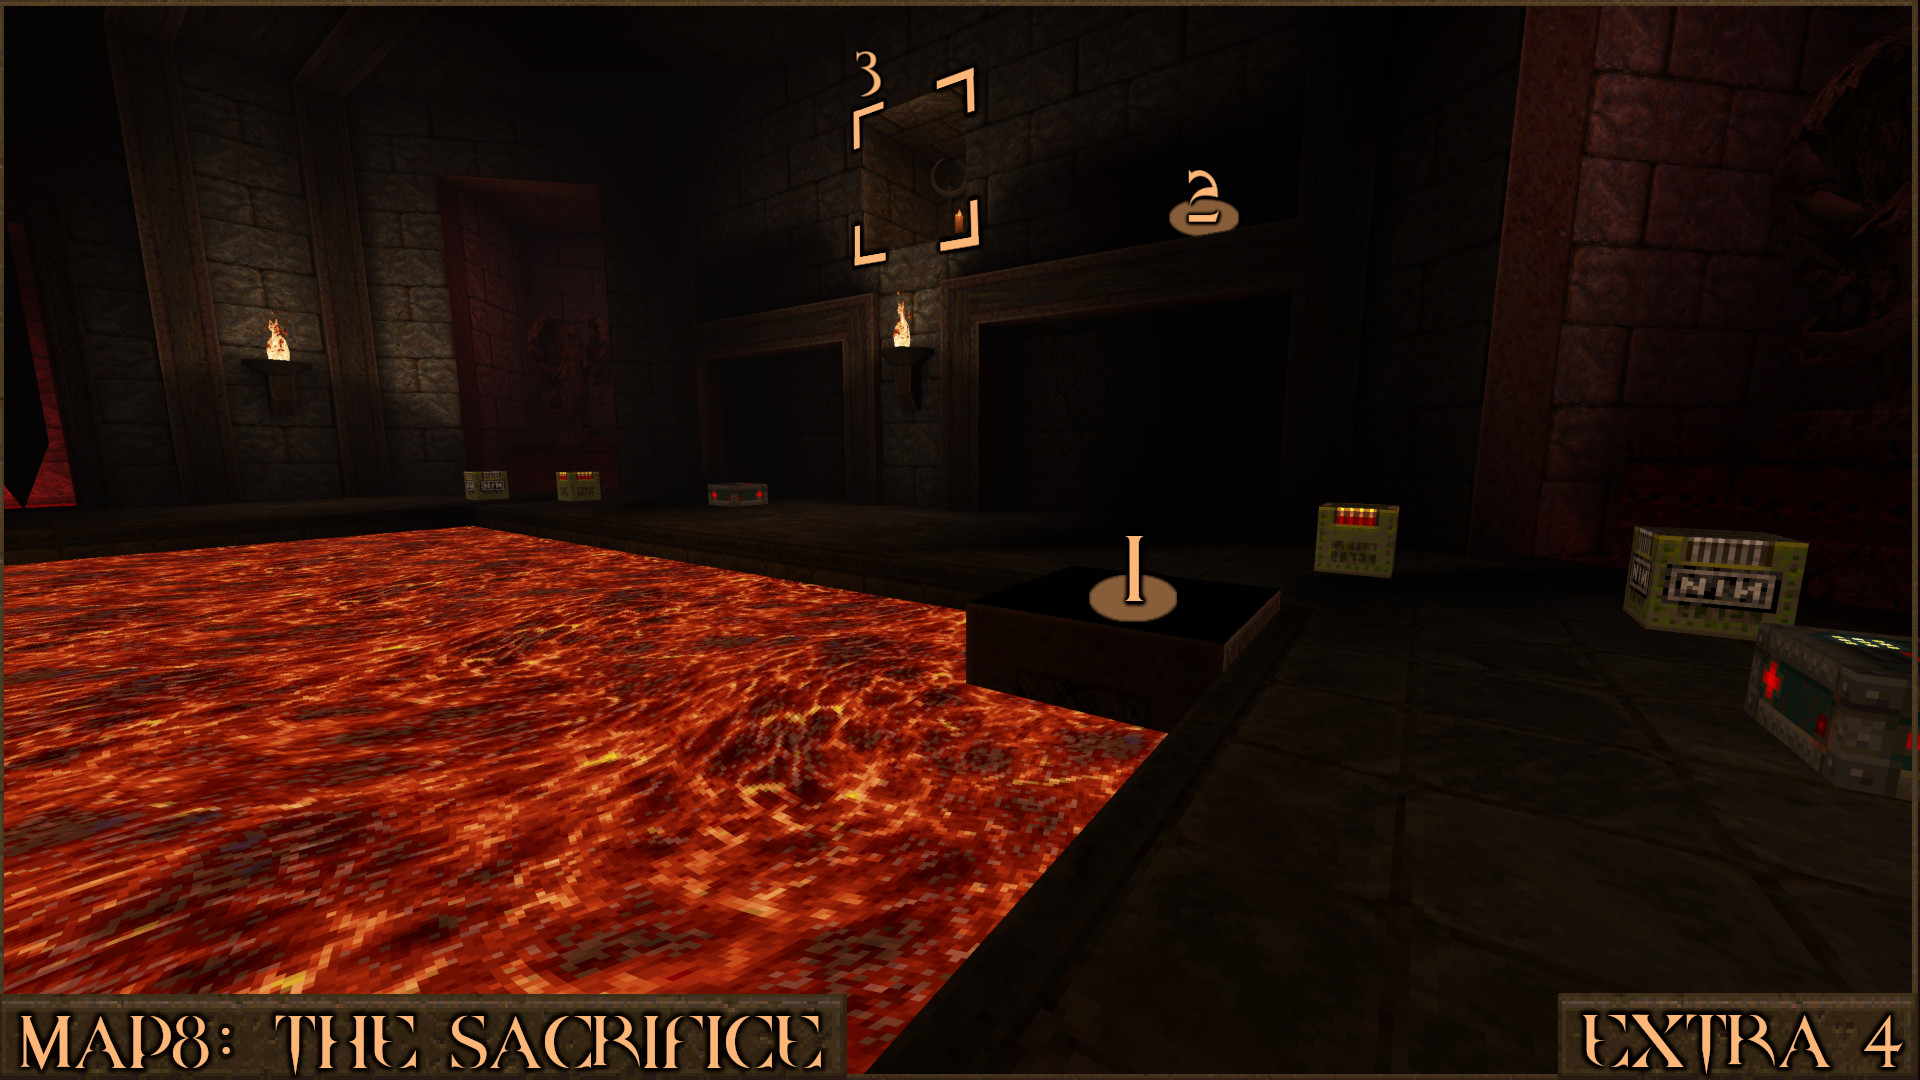
Extra Secret 4
In the final room of the level approach the exit and some metal bars will stop you. A set of pillars will start to rise and fall around the lava pit. Quickly jump onto the pillar () as it rises and then over to the thin ledge sticking out of the wall (). From here you can jump into an alcove containing a Quad Damage () which will is very useful against the enemies that appear in this arena.

Reward: Quad Damage
‎‏‏‎HUB: The Runic Nexus
Part 2 of the episode starts here as you now have the Rune of Sacrifice and access to the The Runic Nexus. In the nexus the previous levels are accessible via four Slipgates. Revisiting these levels with the Rune of Sacrifice means you'll be able to access new rune secrets including three new secret levels which each contain another rune. After you acquire a full set of all 4 runes the 5th Slipgate in the nexus will become available. It leads to the final levels SECRET2: The Nightmare Machine and BOSS: The Sleeper Awakens.

If you find yourself lost within the levels here is a list of all level exits that return you directly to the nexus:

  • SECRET1: The Sundered Column (Normal exit)
  • SECRET5: The House of Delusion (Normal exit)
  • MAP4: Of Shattered Minds (Rune Secret exit)
  • SECRET3: Mist of Torment (Normal exit)
  • MAP7: Revelation of the Arcane (Rune Secret exit)
  • MAP8: The Sacrifice (Normal exit)
  • BOSS: The Sleeper Awakens (Extra Secret exit)

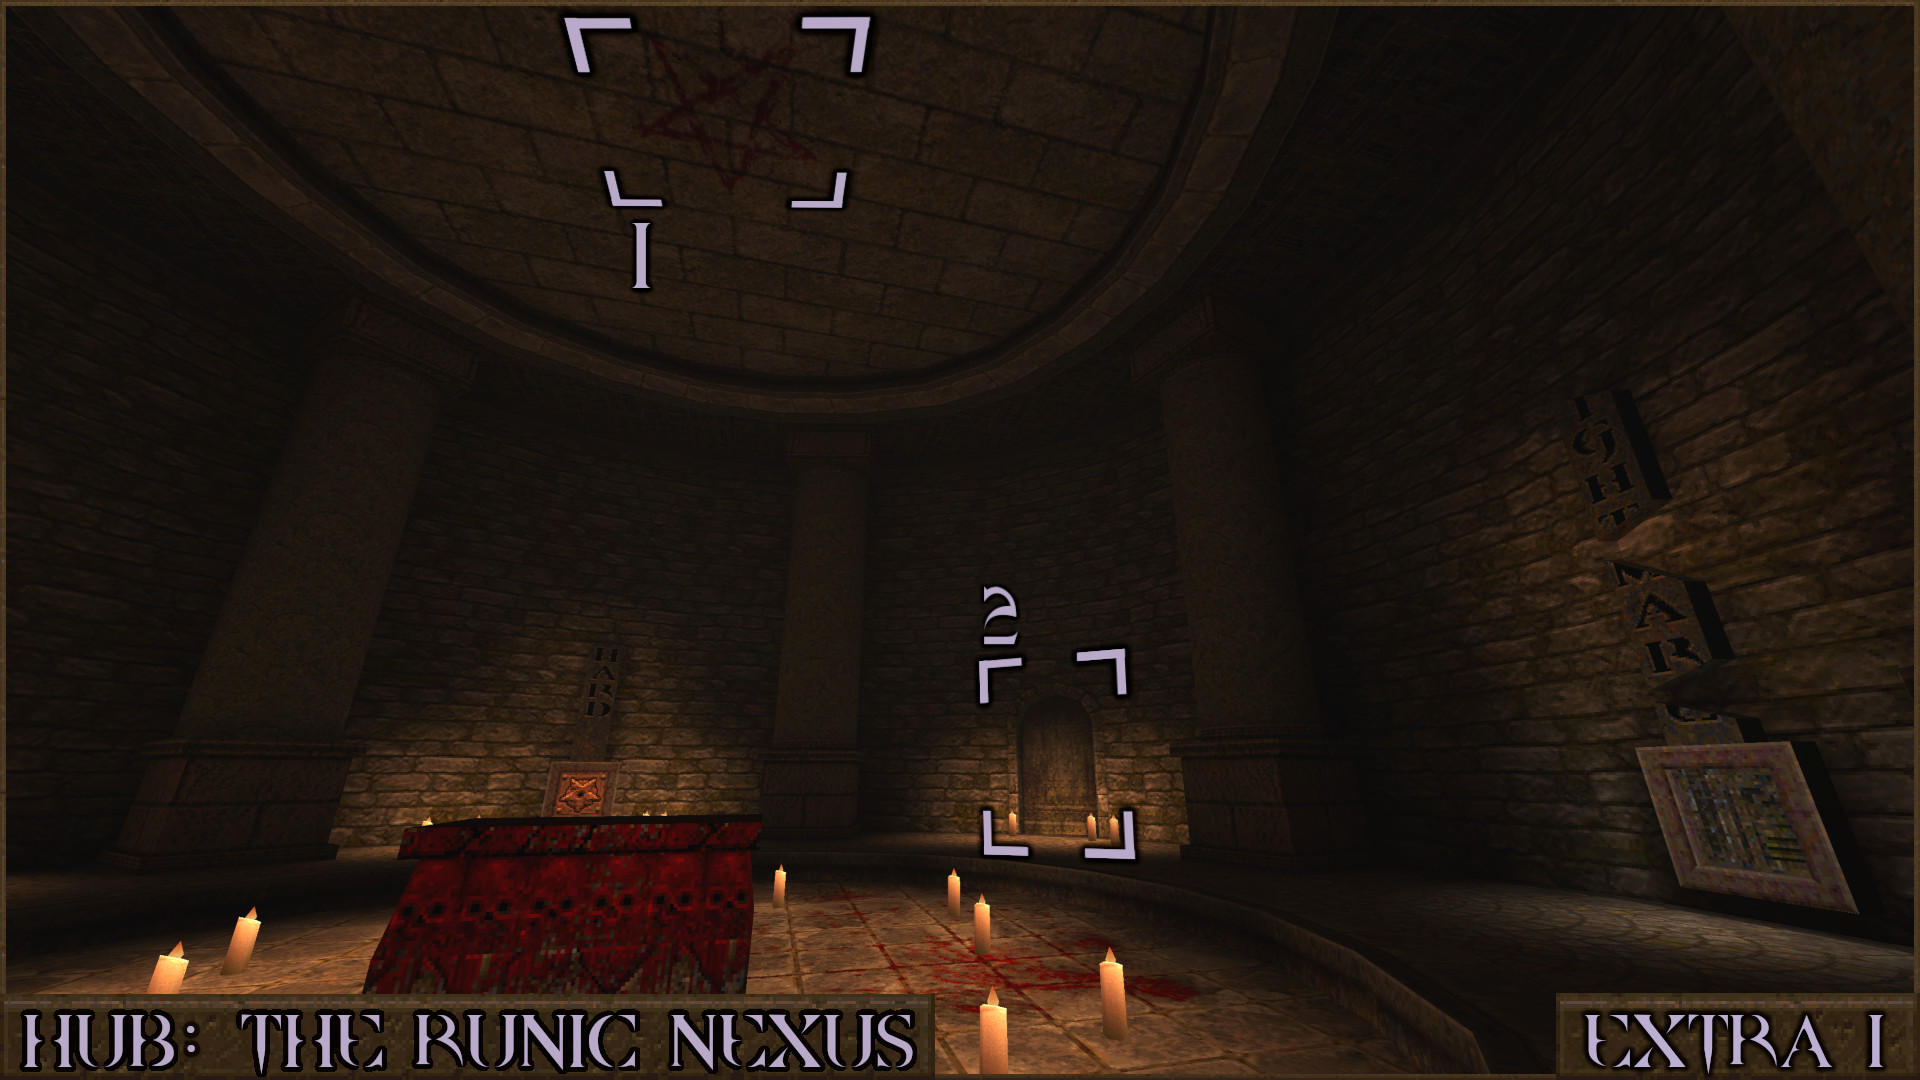
Extra Secret 1
There are some secrets to find in the nexus itself. Head to the lower section of the hub to find a room that lets you change the current difficulty but it appears that the Nightmare Difficulty button is broken. If you shoot the red pentagram on the ceiling () you can unlock a door nearby () that leads to a functional Nightmare Difficulty button.

Reward: [Nightmare Difficulty]

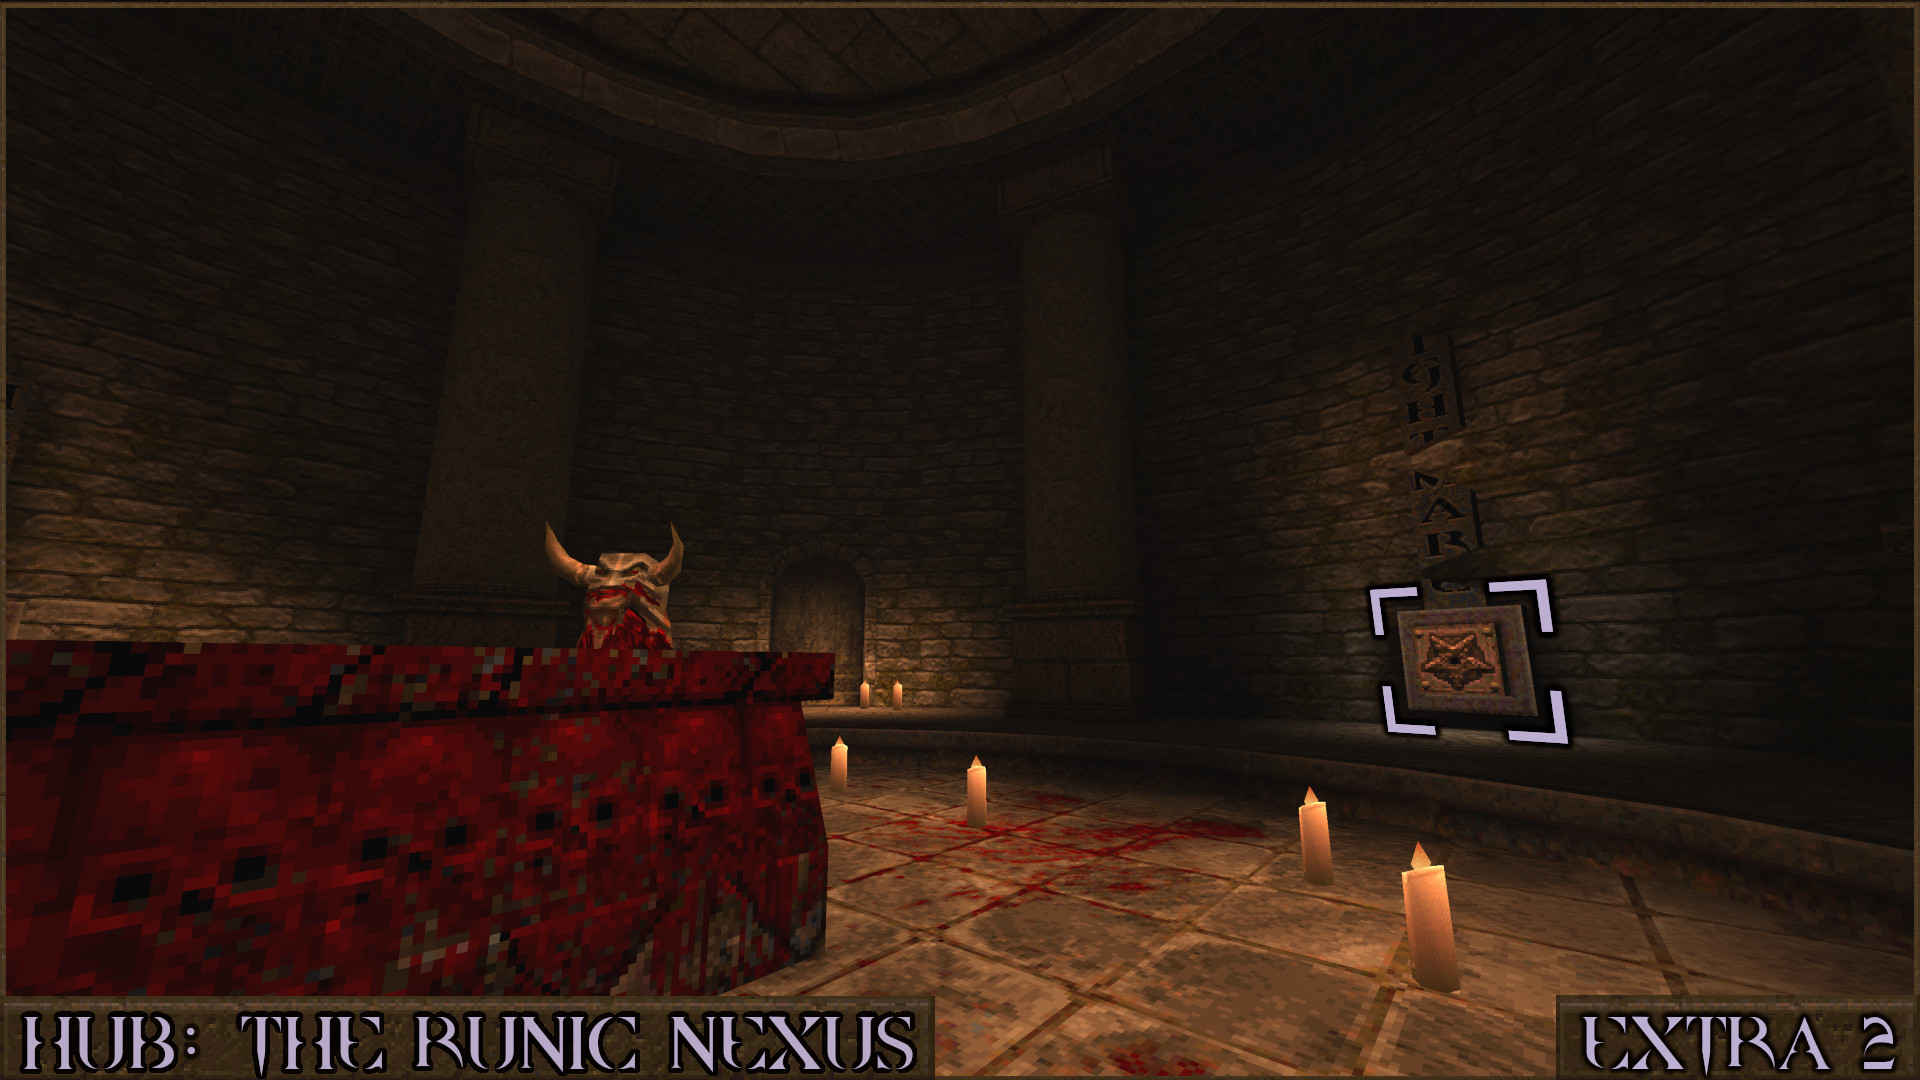
Extra Secret 2
If you acquire the Bloody Knight's Head later in Part 2 from the level MAP4: Of Shattered Minds then it will appear on the bloody altar in this basement. The broken button nearby has been restored and can now be used to re-activate Bloody Nightmare Difficulty at any time.

Reward: [Bloody Nightmare Difficulty]
‎‏‏‎SECRET2: The Nightmare Machine
NOTE: Once all four Runes have been collected you can access the 5th Slipgate in The Runic Nexus that leads to this level: SECRET2: The Nightmare Machine.

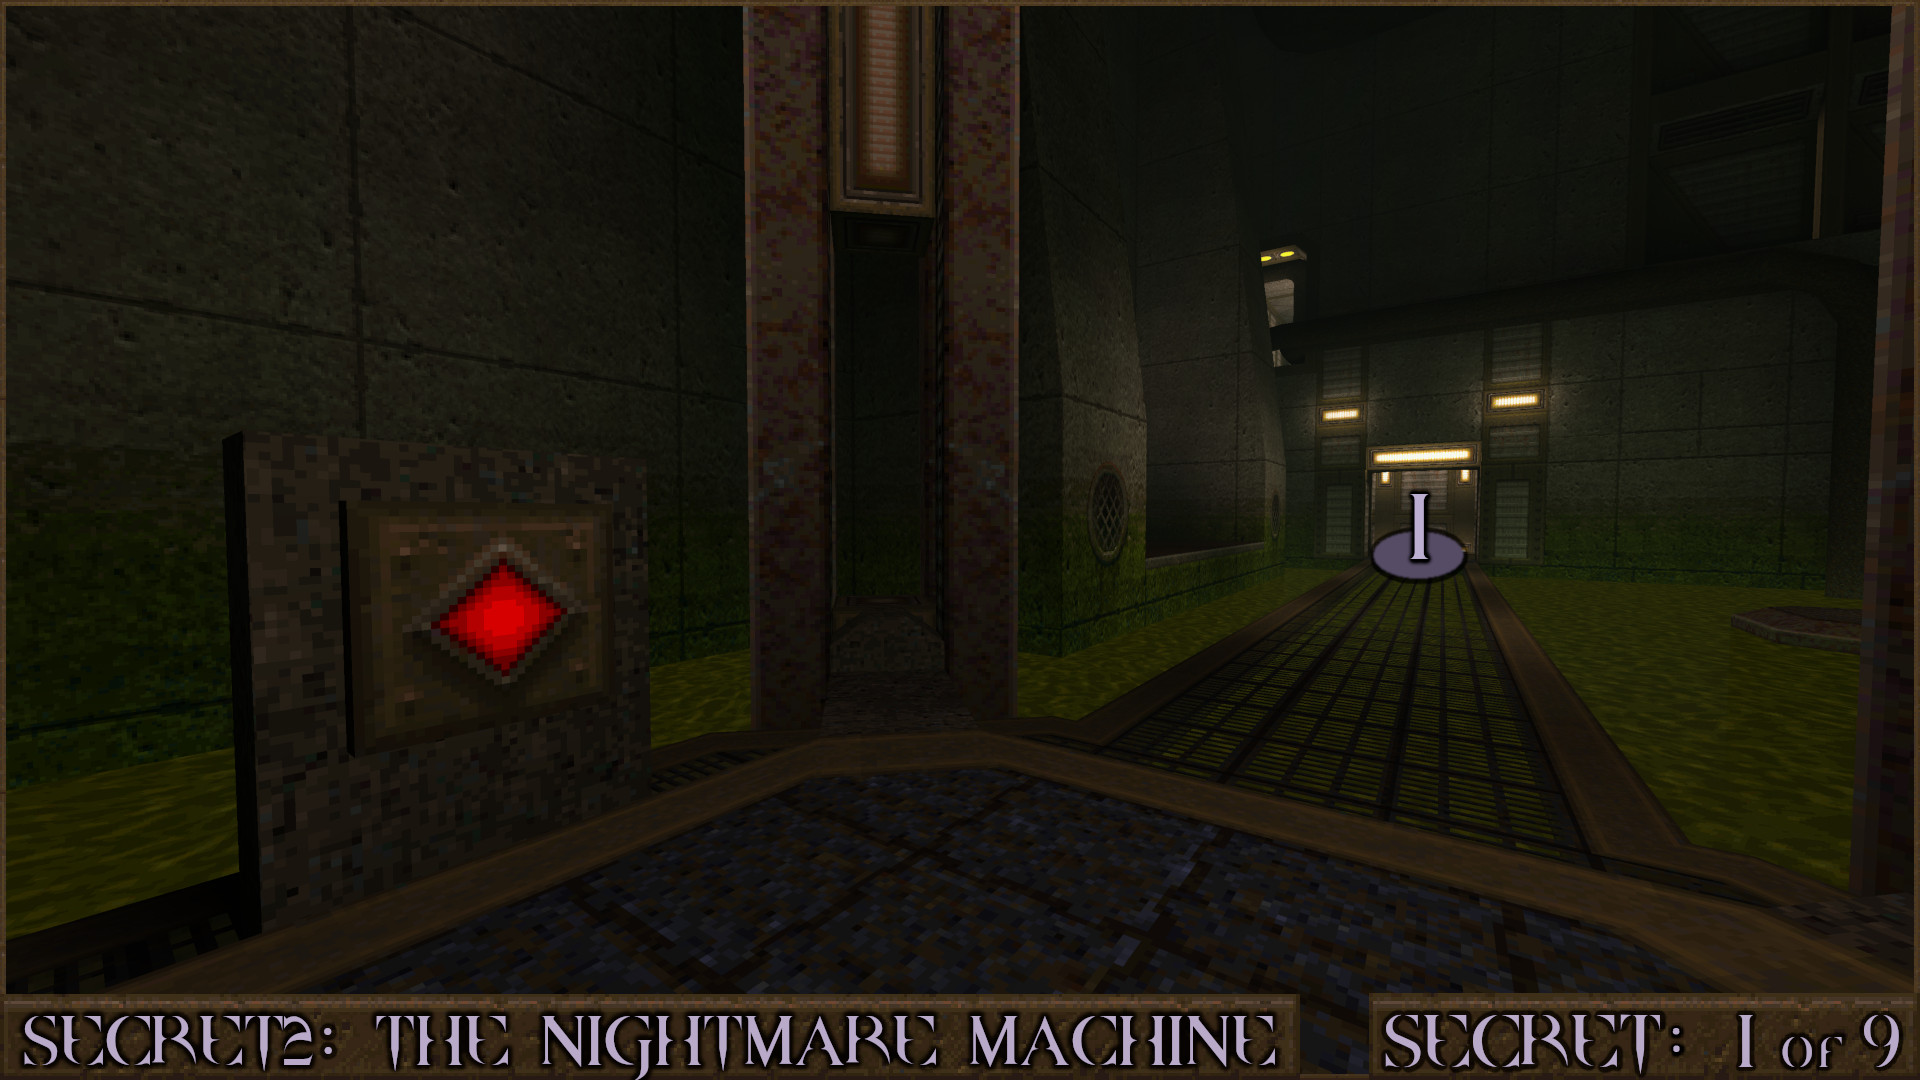
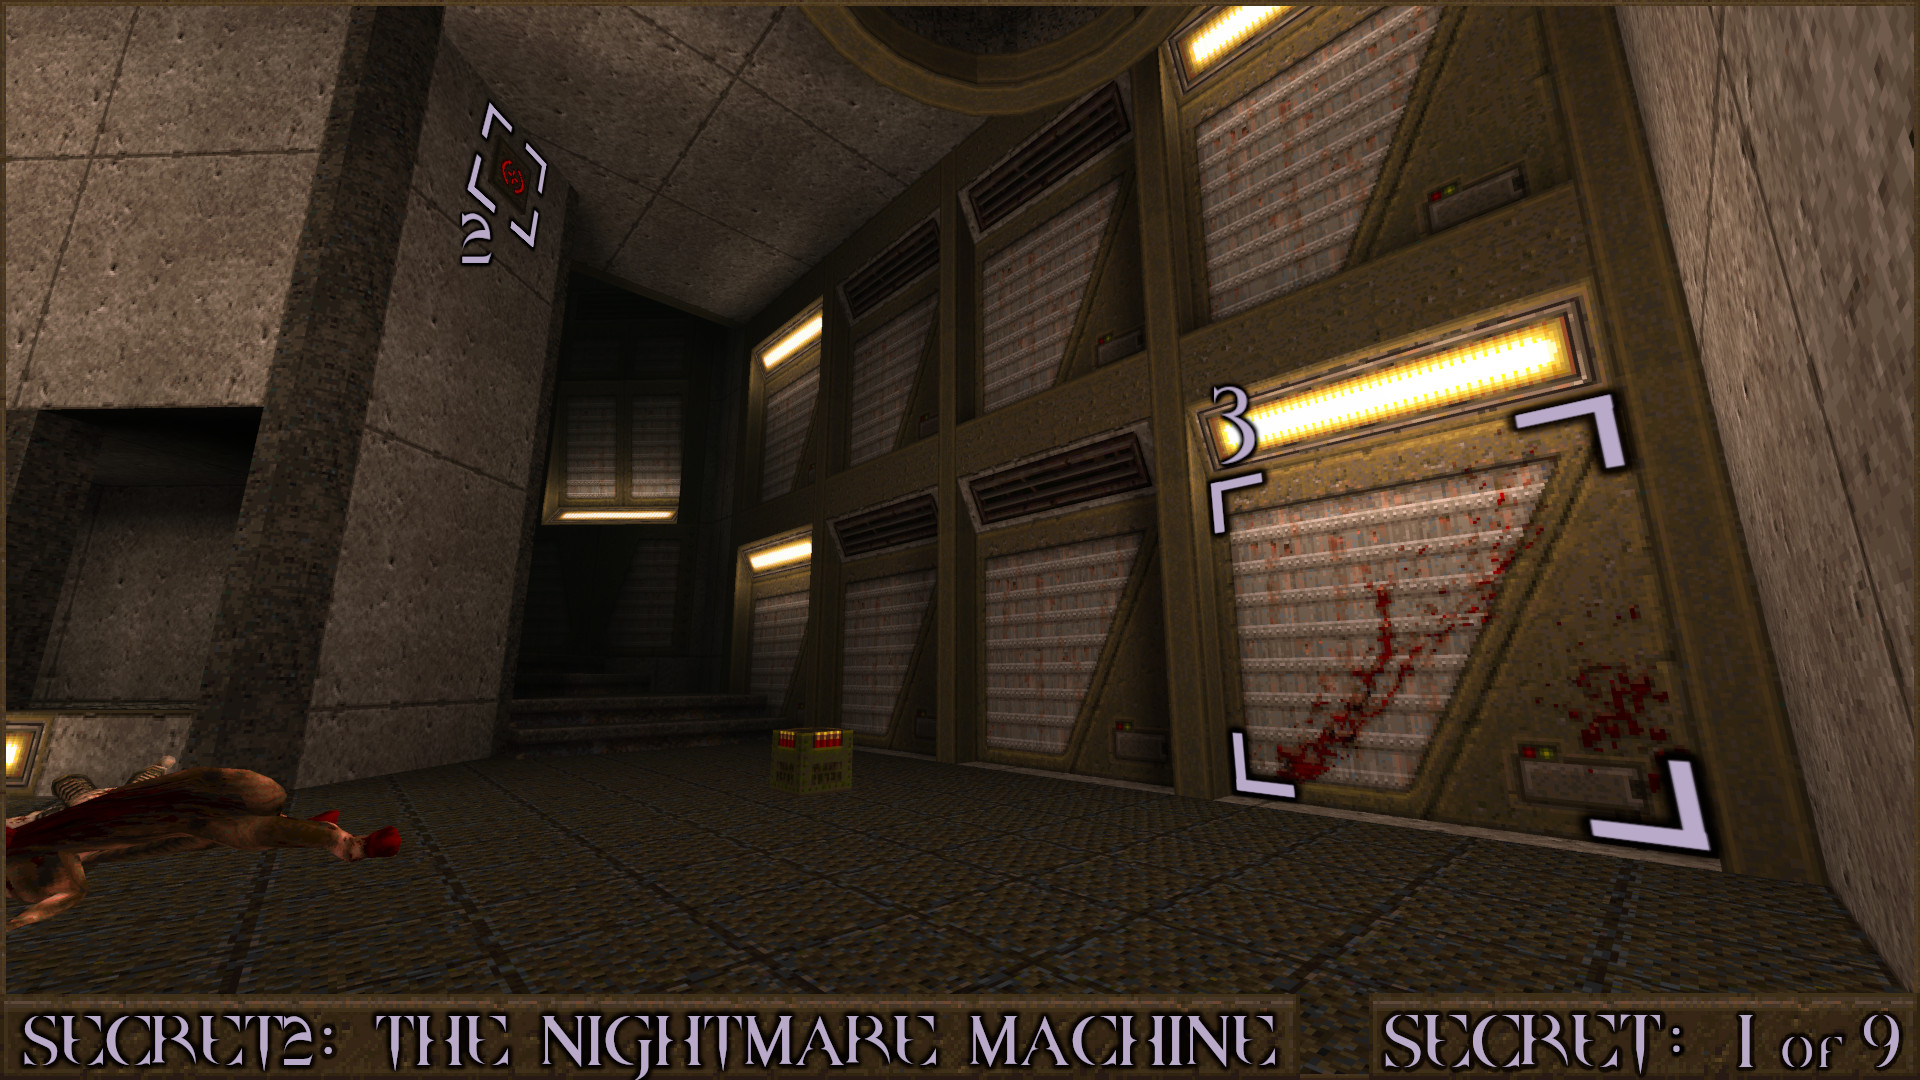
Secret 1 of 9
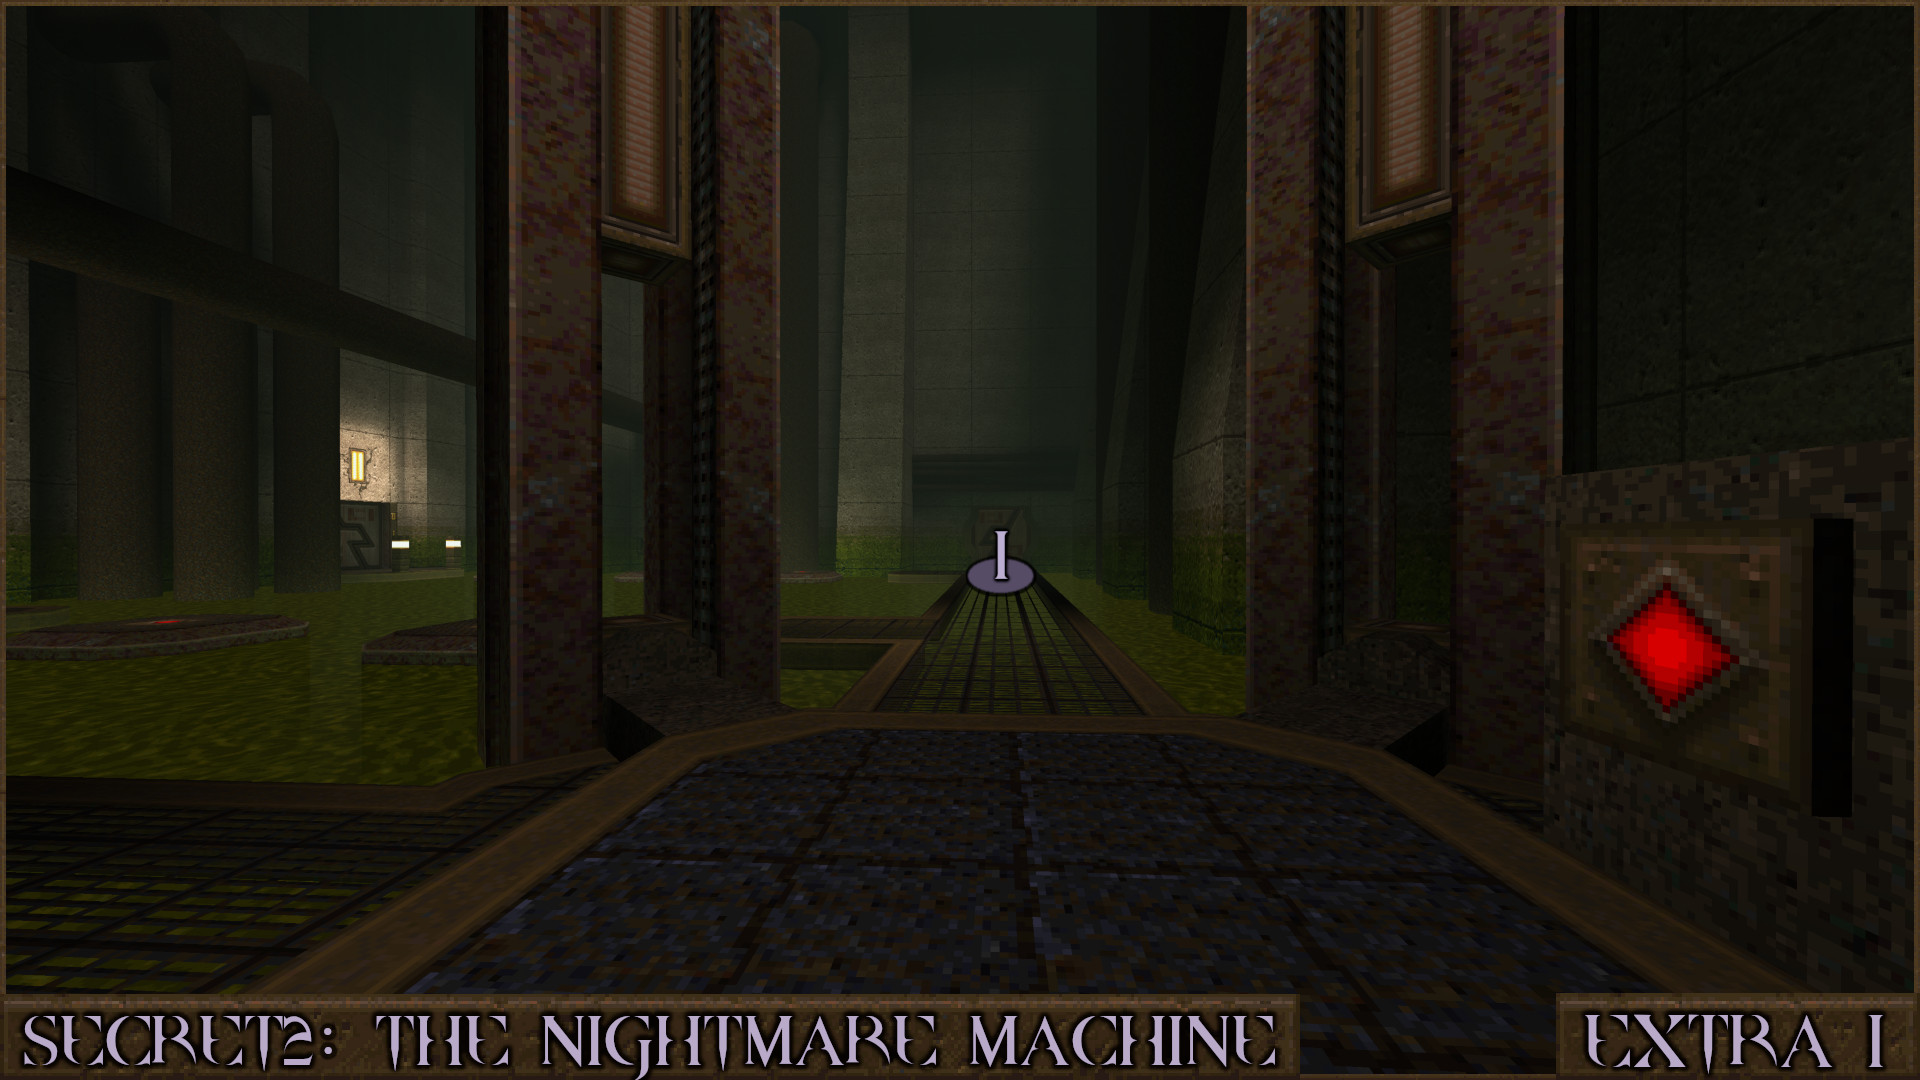
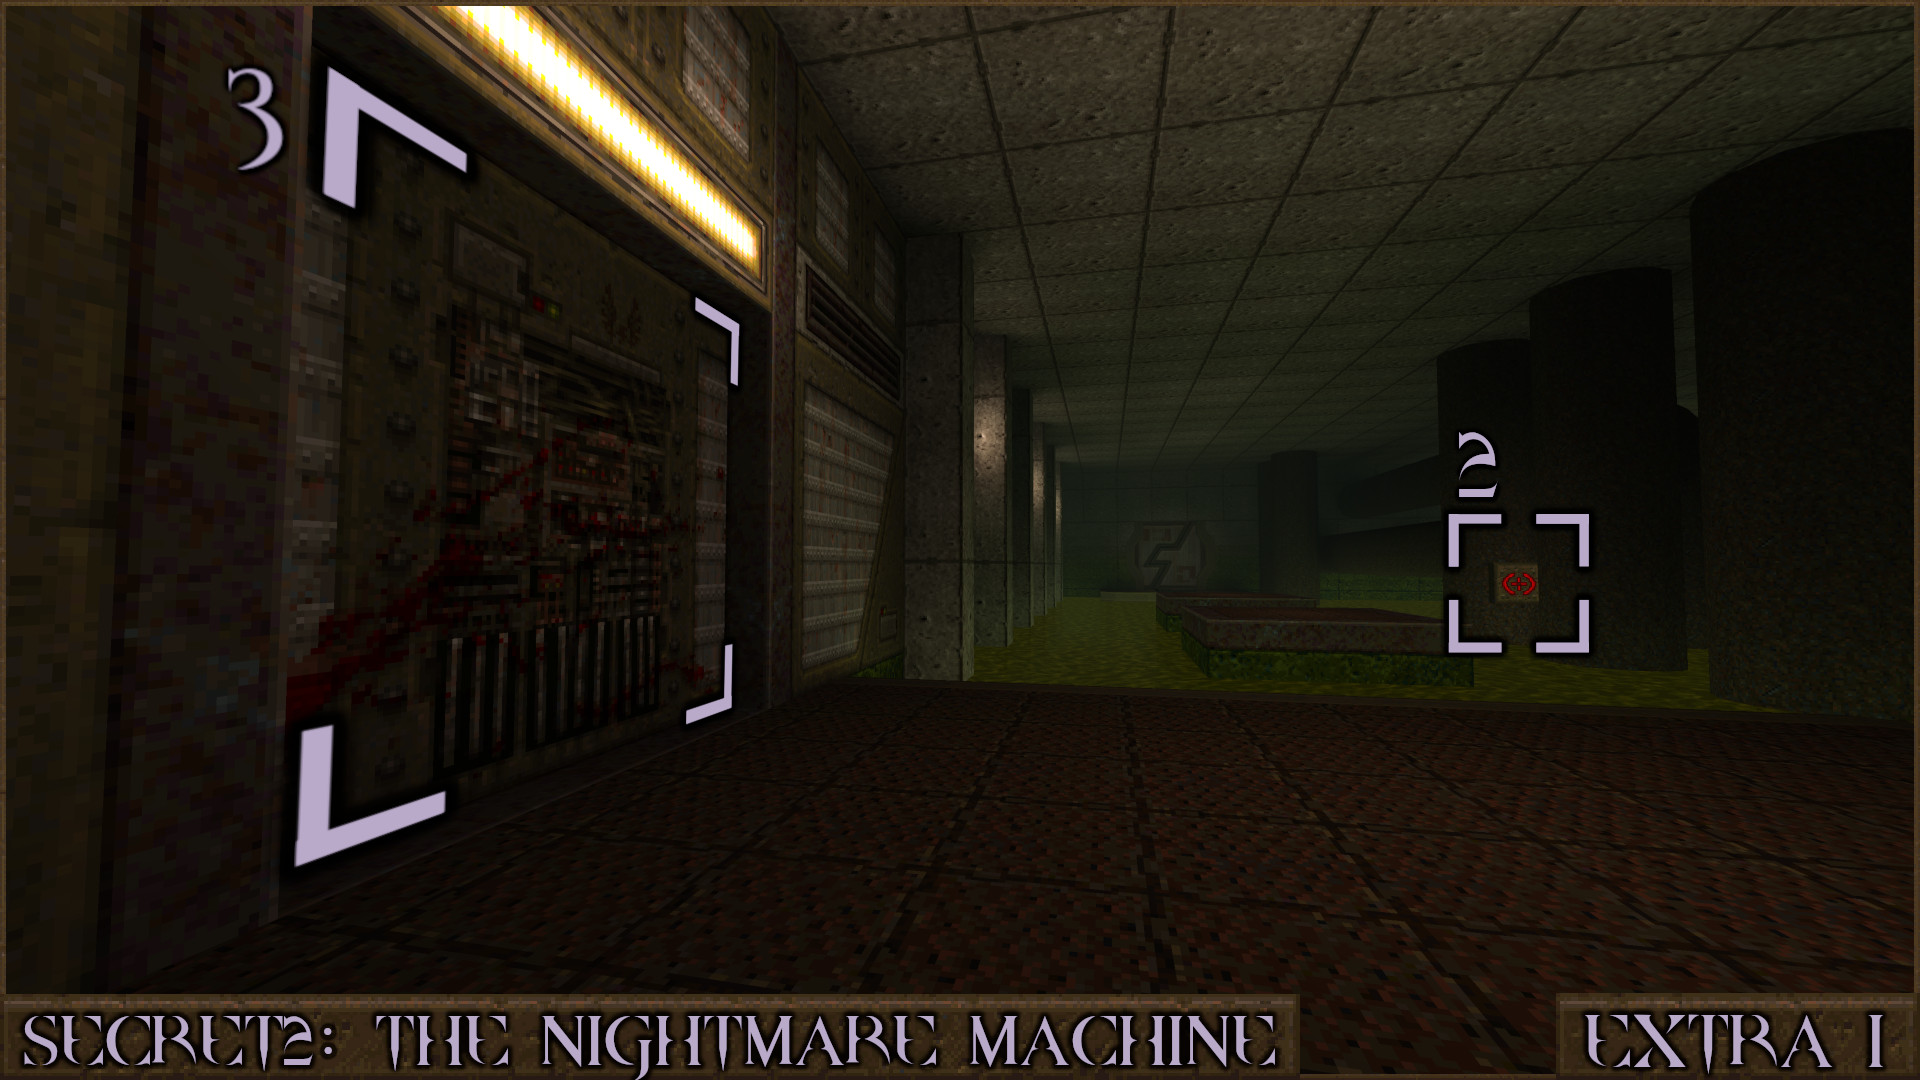
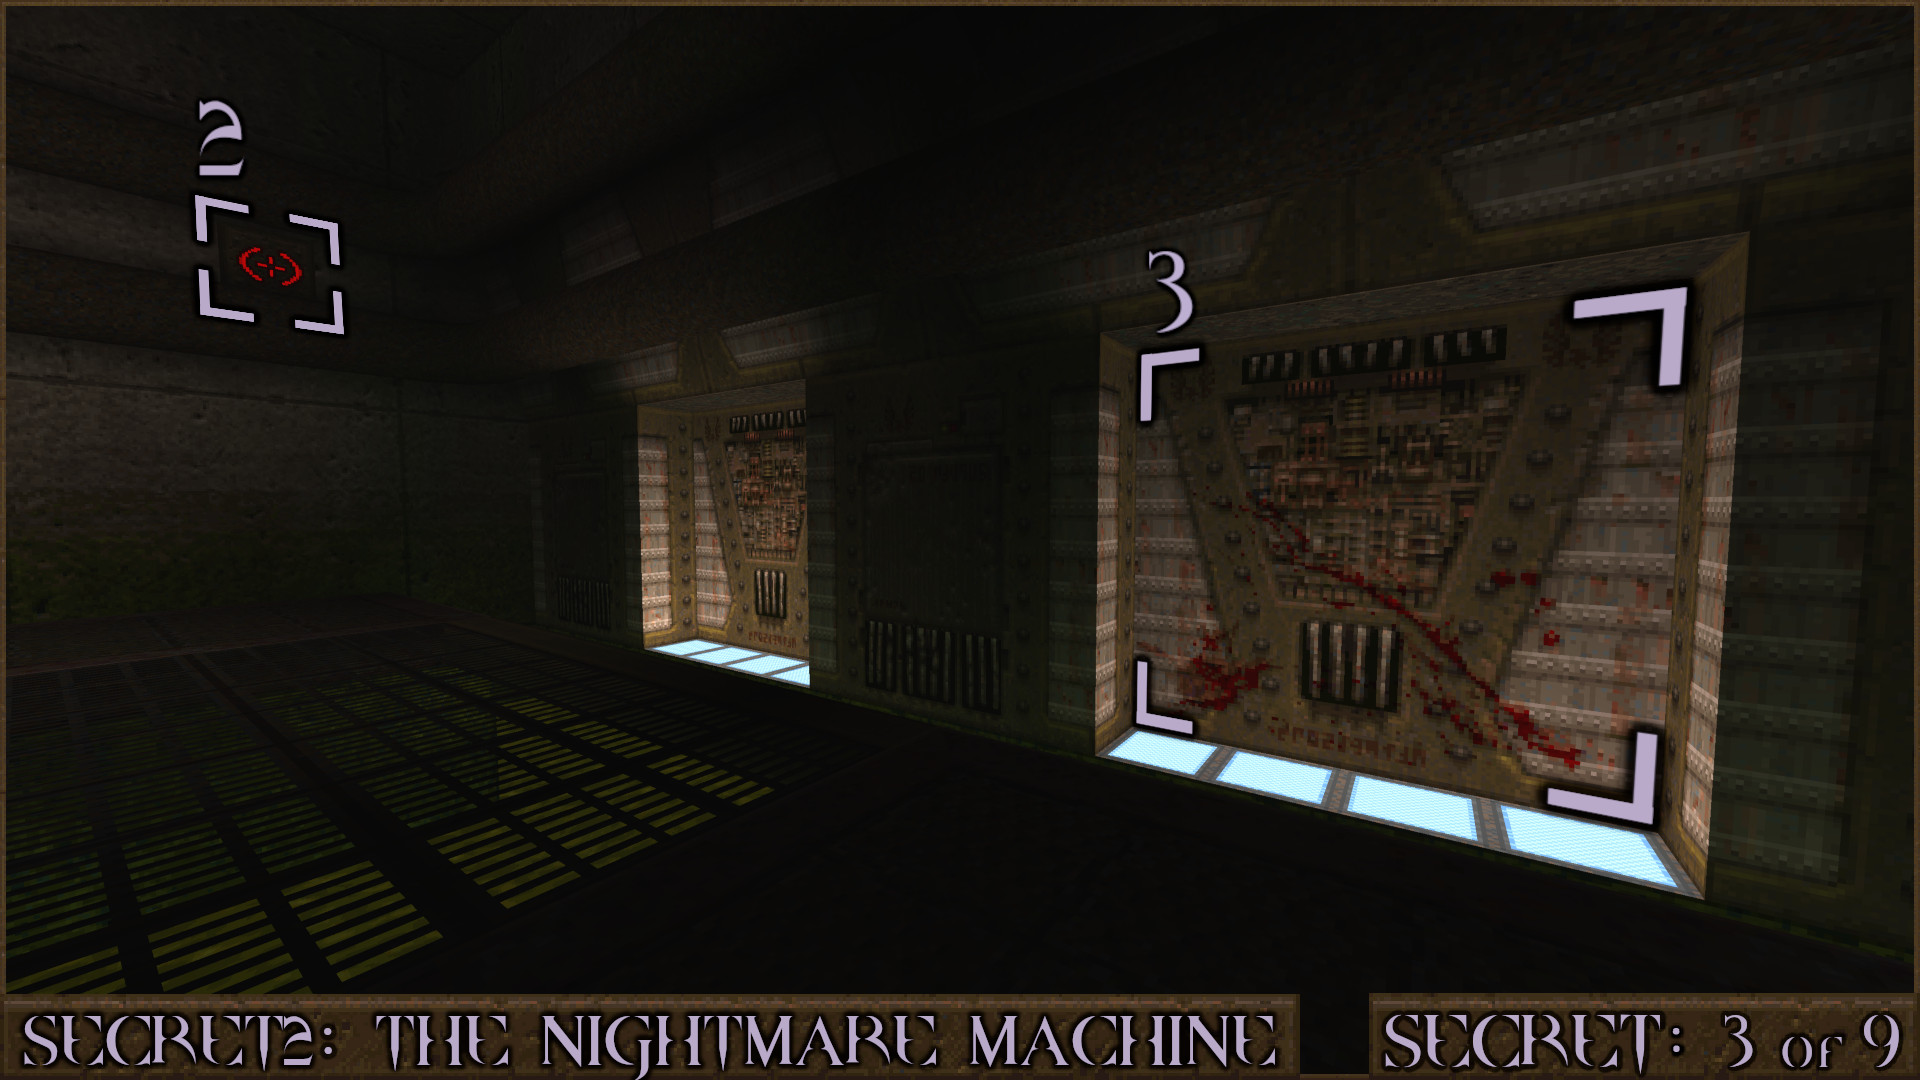
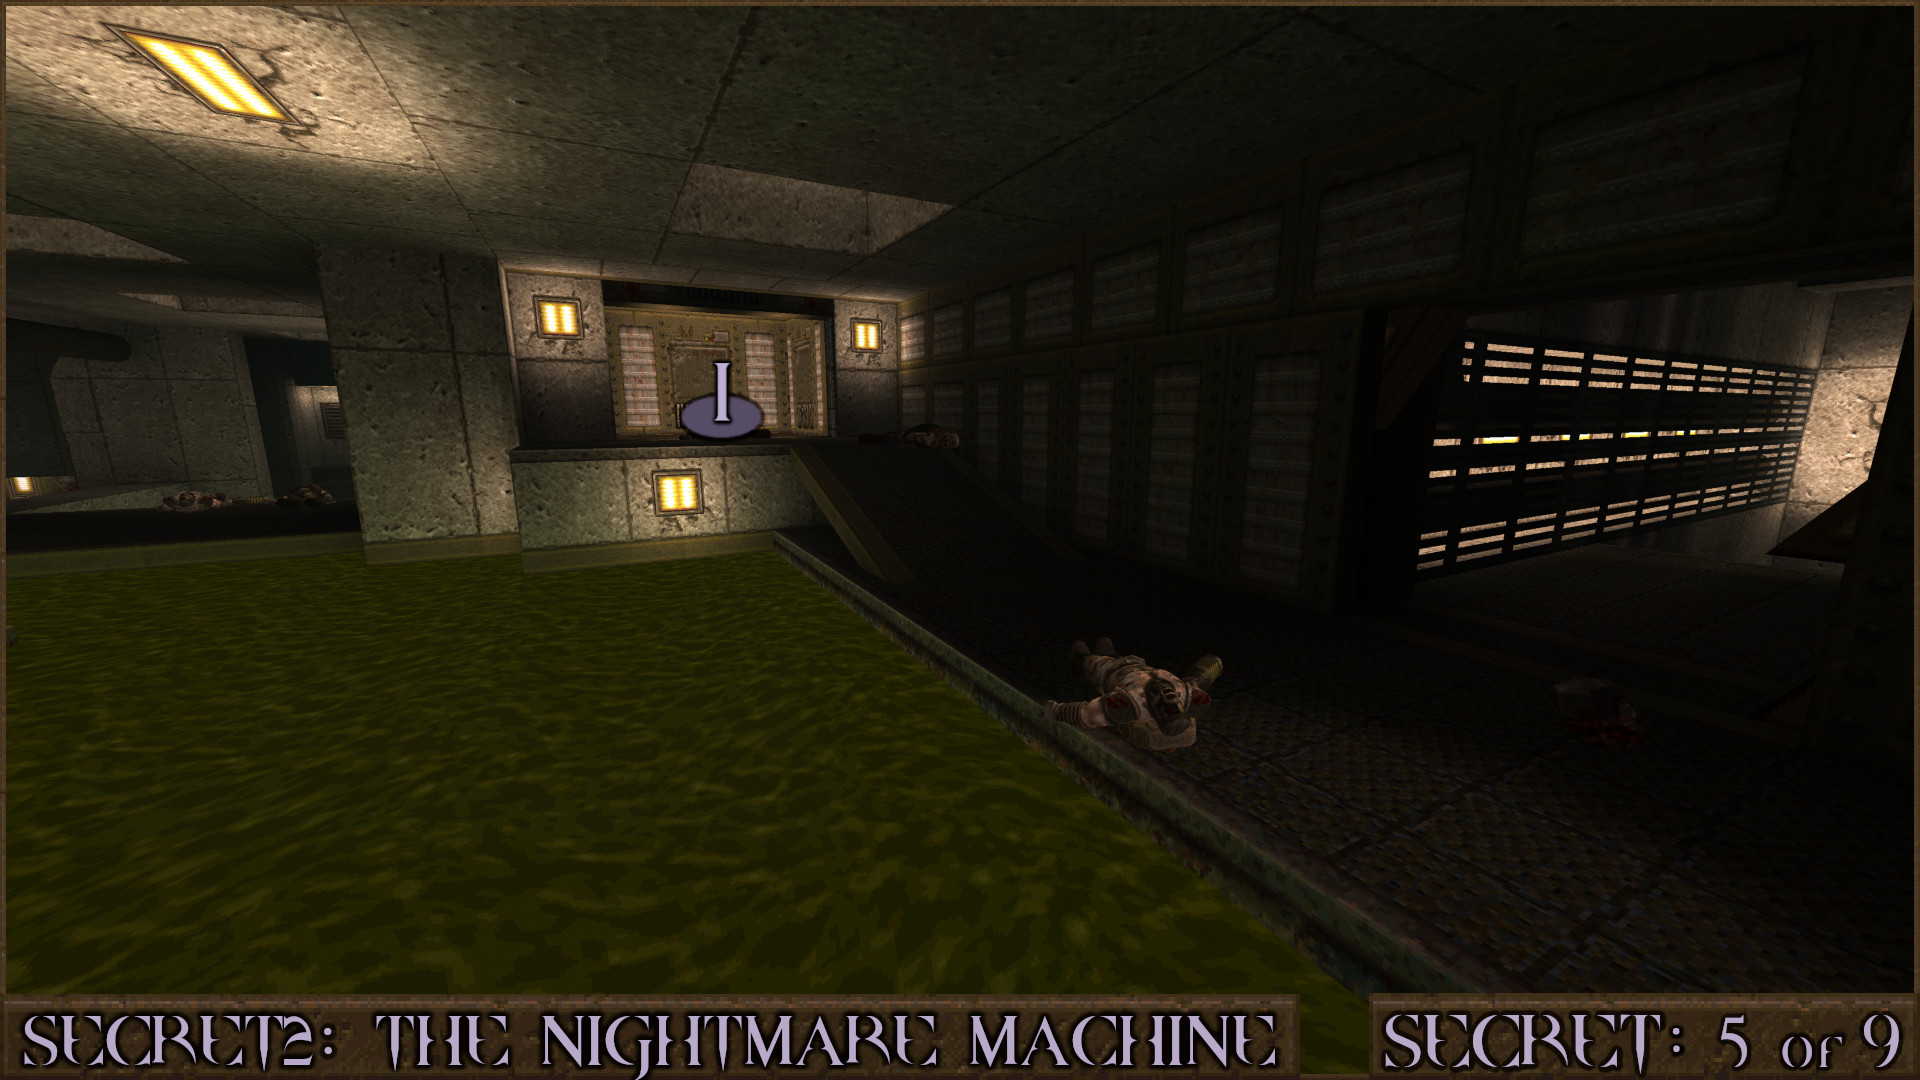
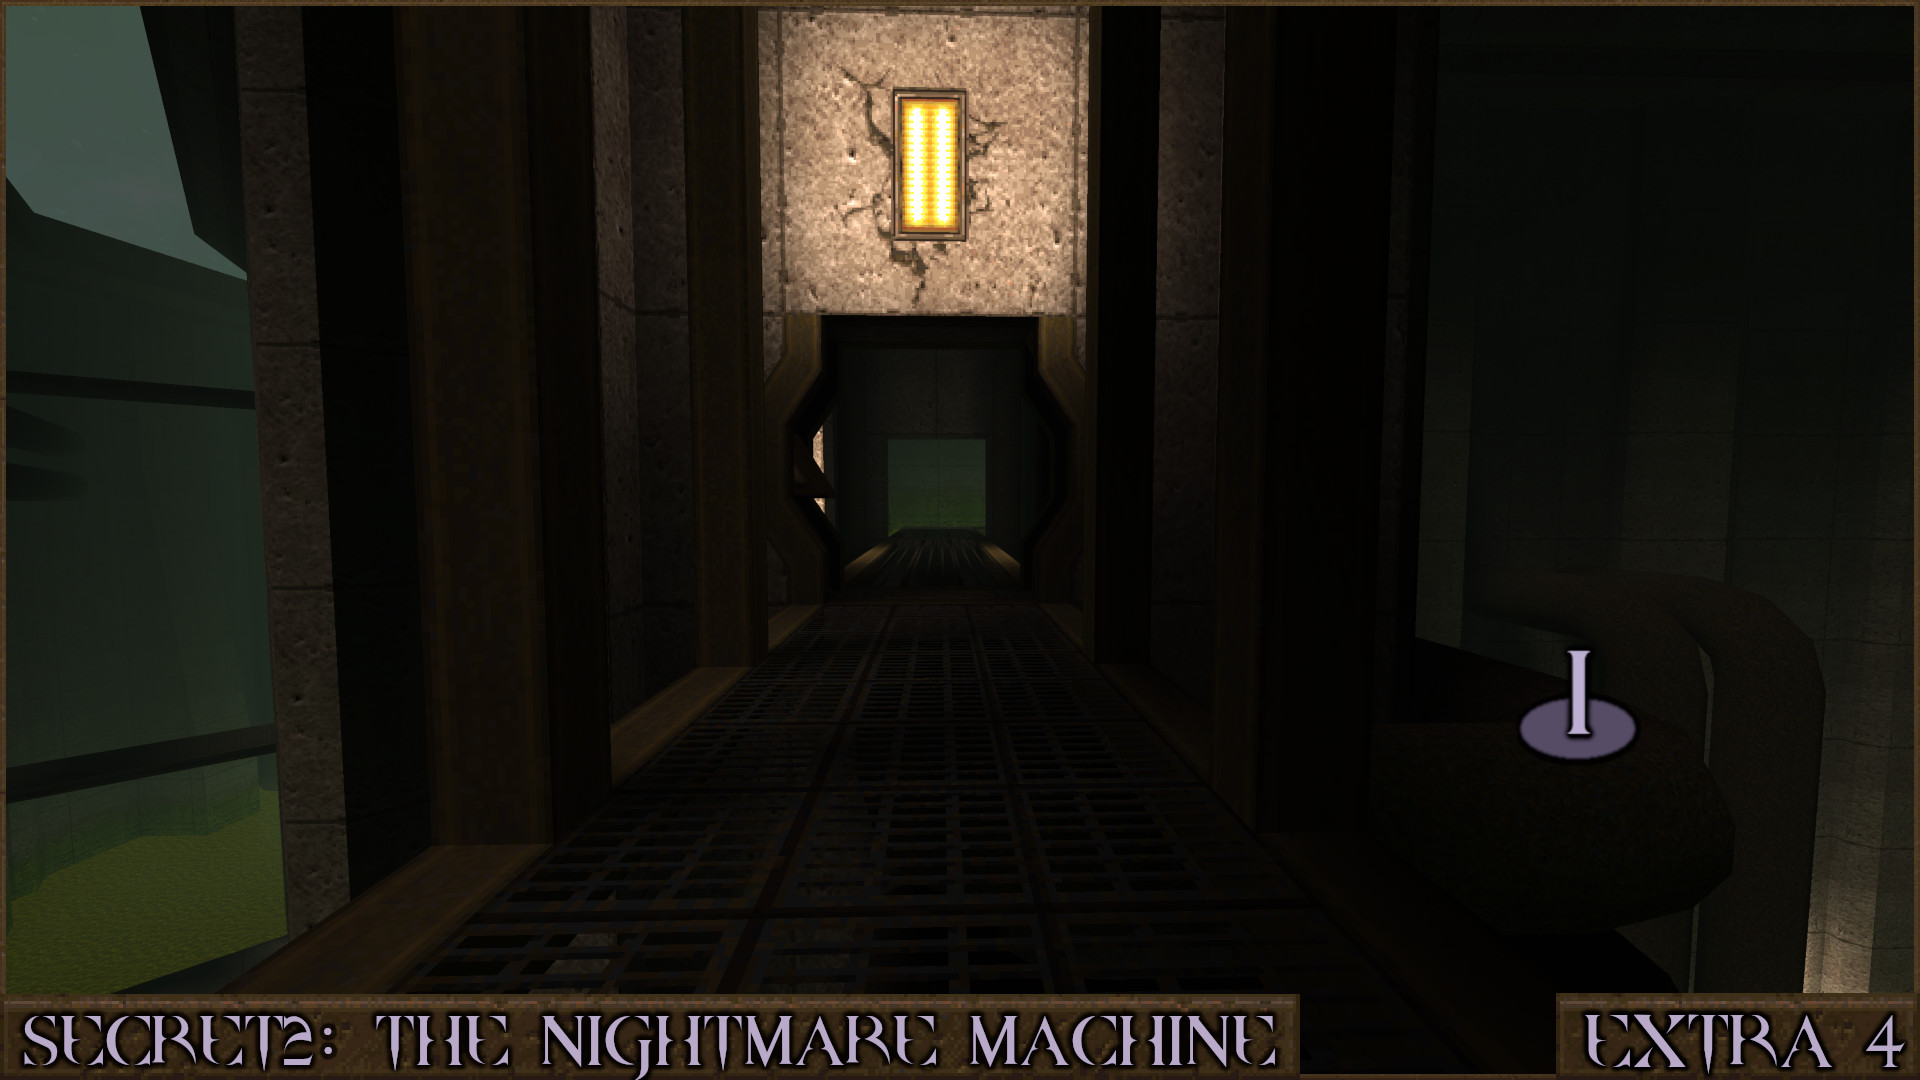
From the unpowered elevator on the ground floor, take a right and head through the door ().

When you turn around a corridor, look up and shoot a target button () to shift a nearby bloody wall (). Follow the large pipes to a secret.

Reward:

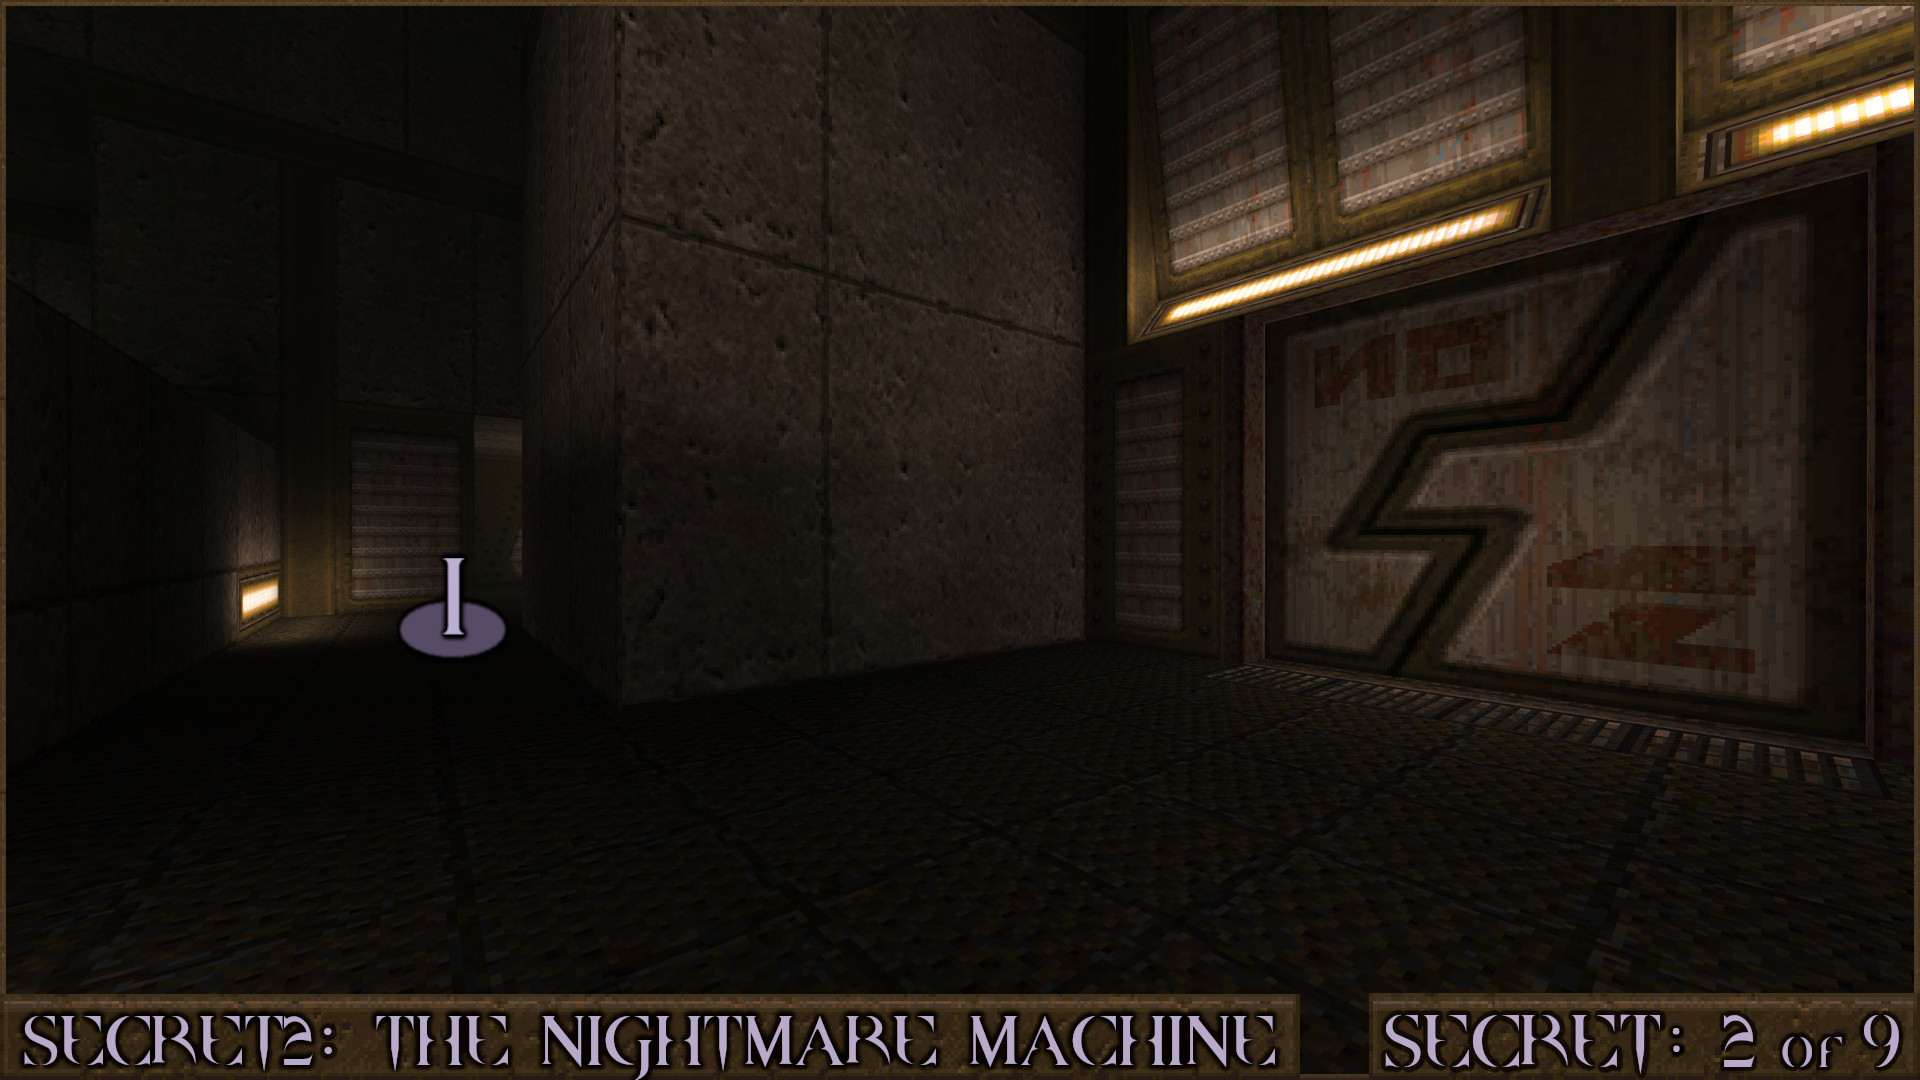
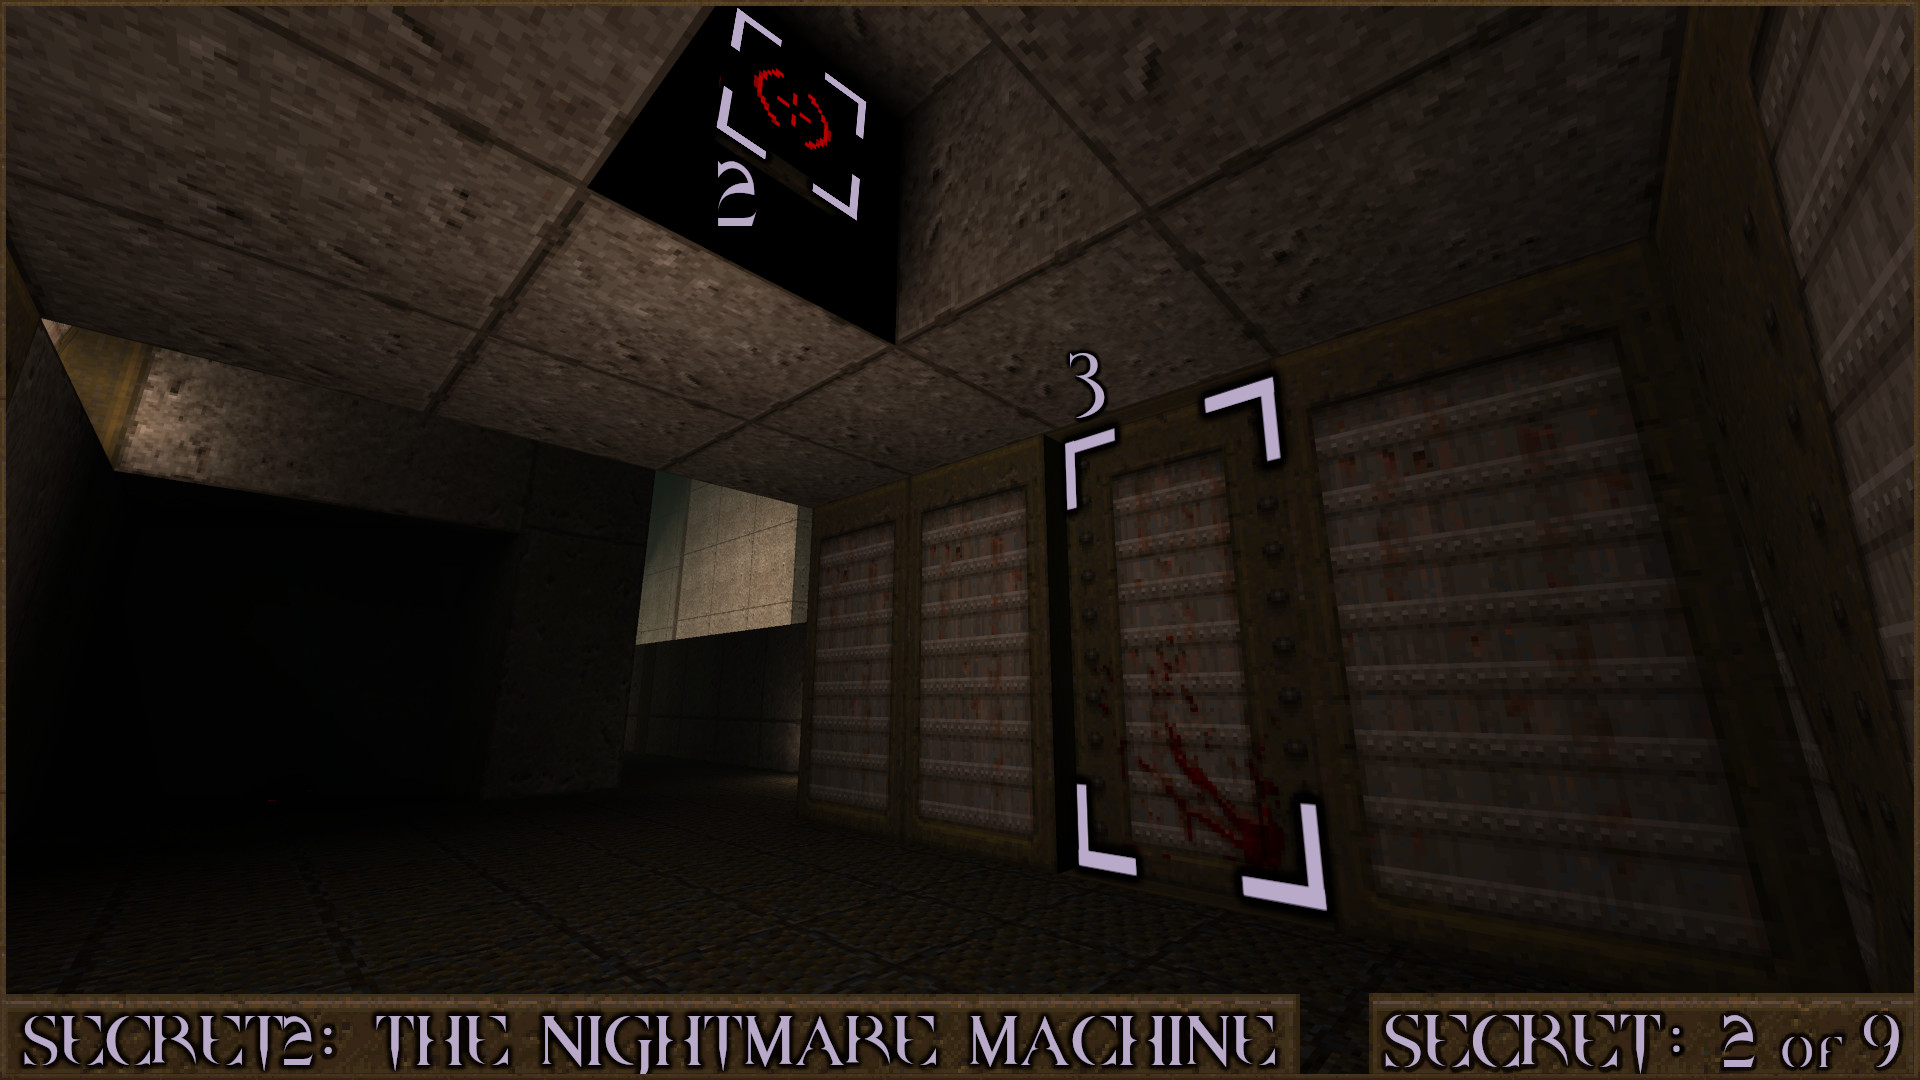
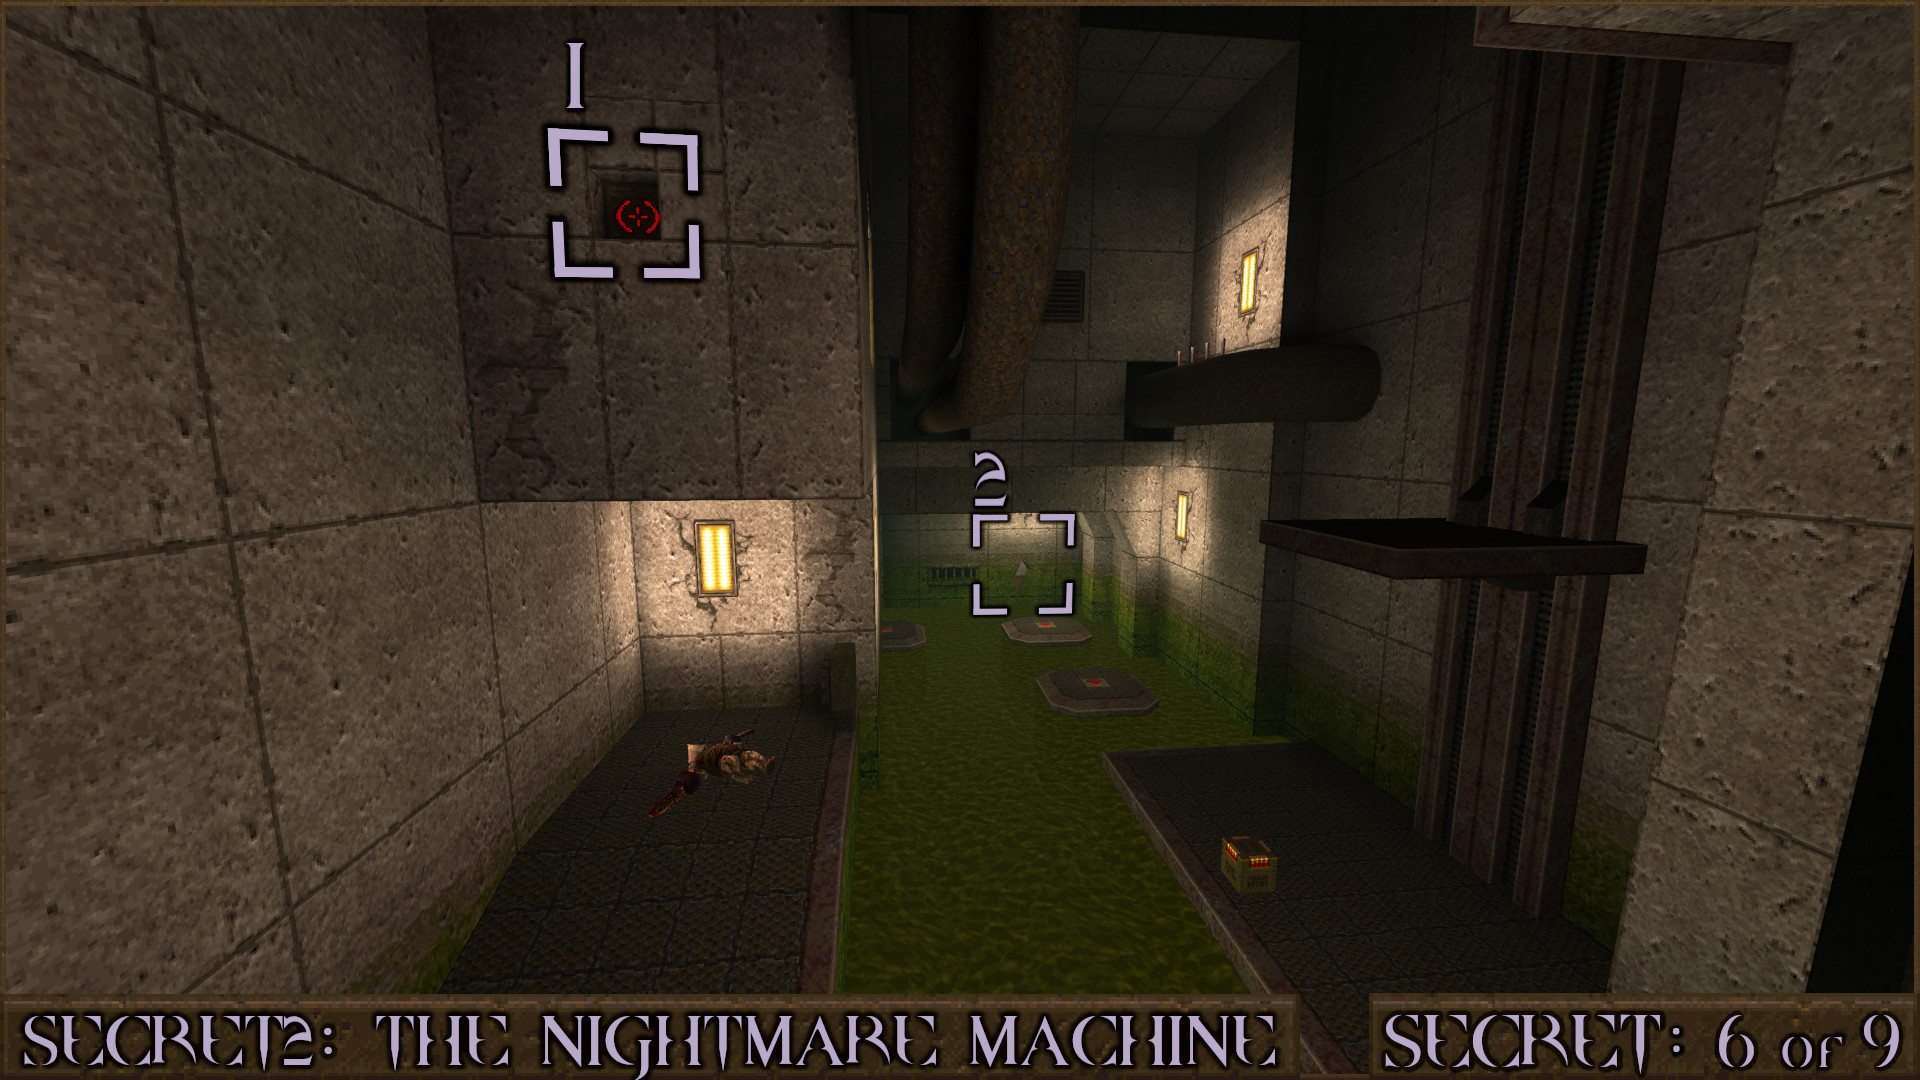
Secret 2 of 9
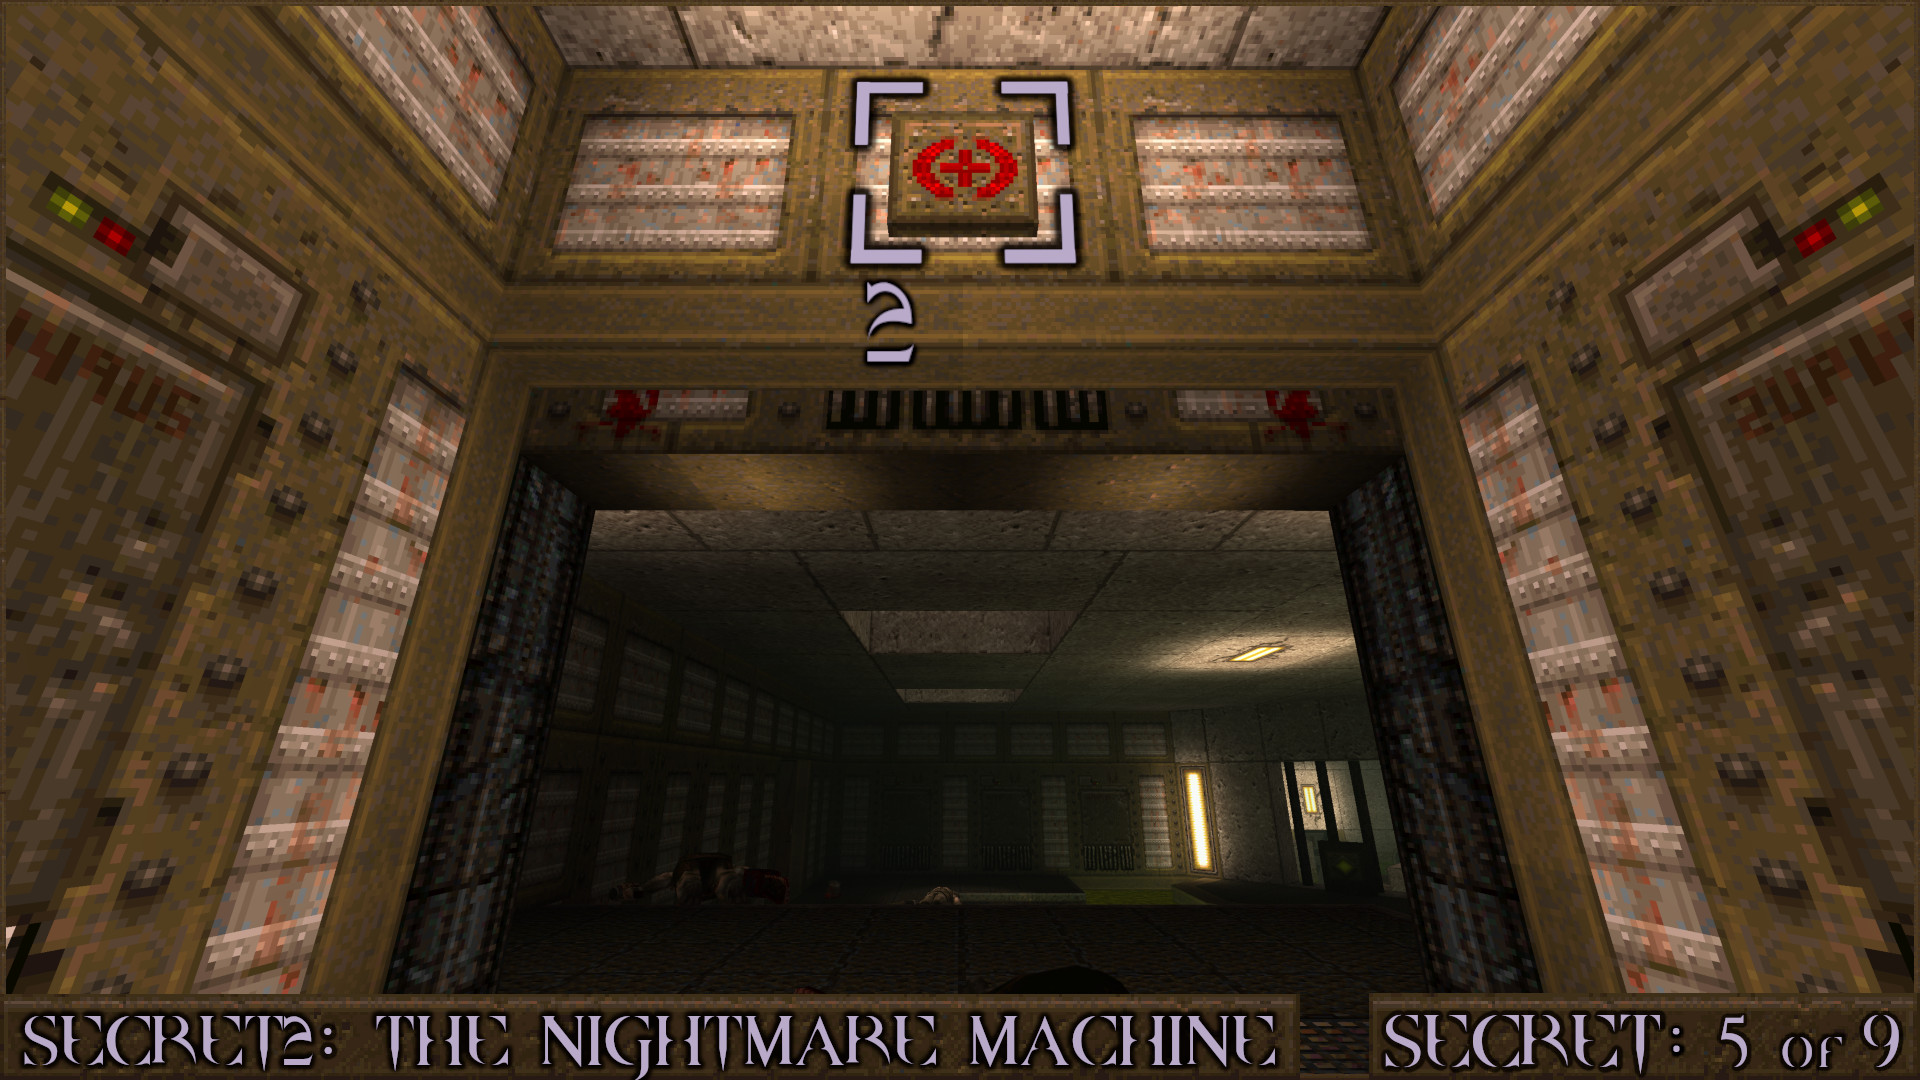
Shortly after Secret 1 ignore the door and walk into a corner ().

Look up and shoot the target button () to access a secret behind the wall ().

Reward:

Extra Secret 1
After returning to the unpowered elevator this time take the opposite path ().

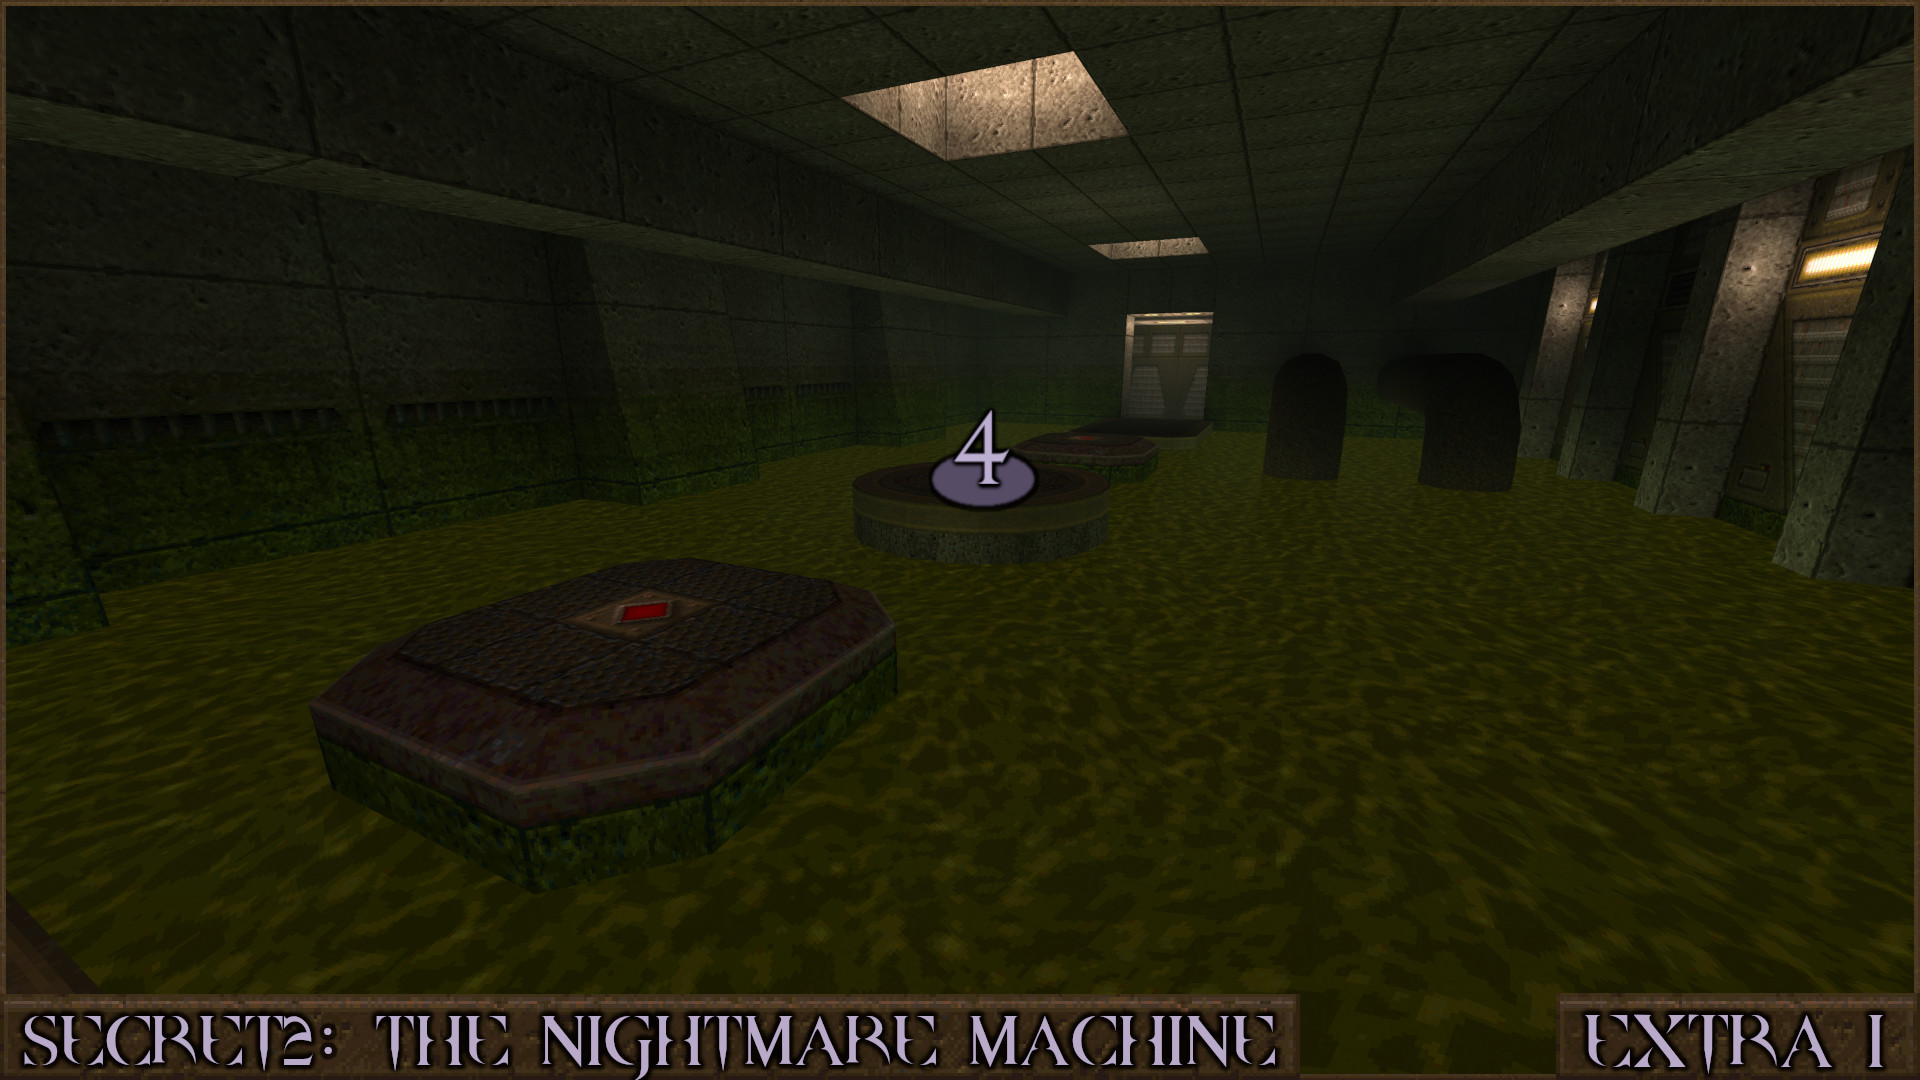
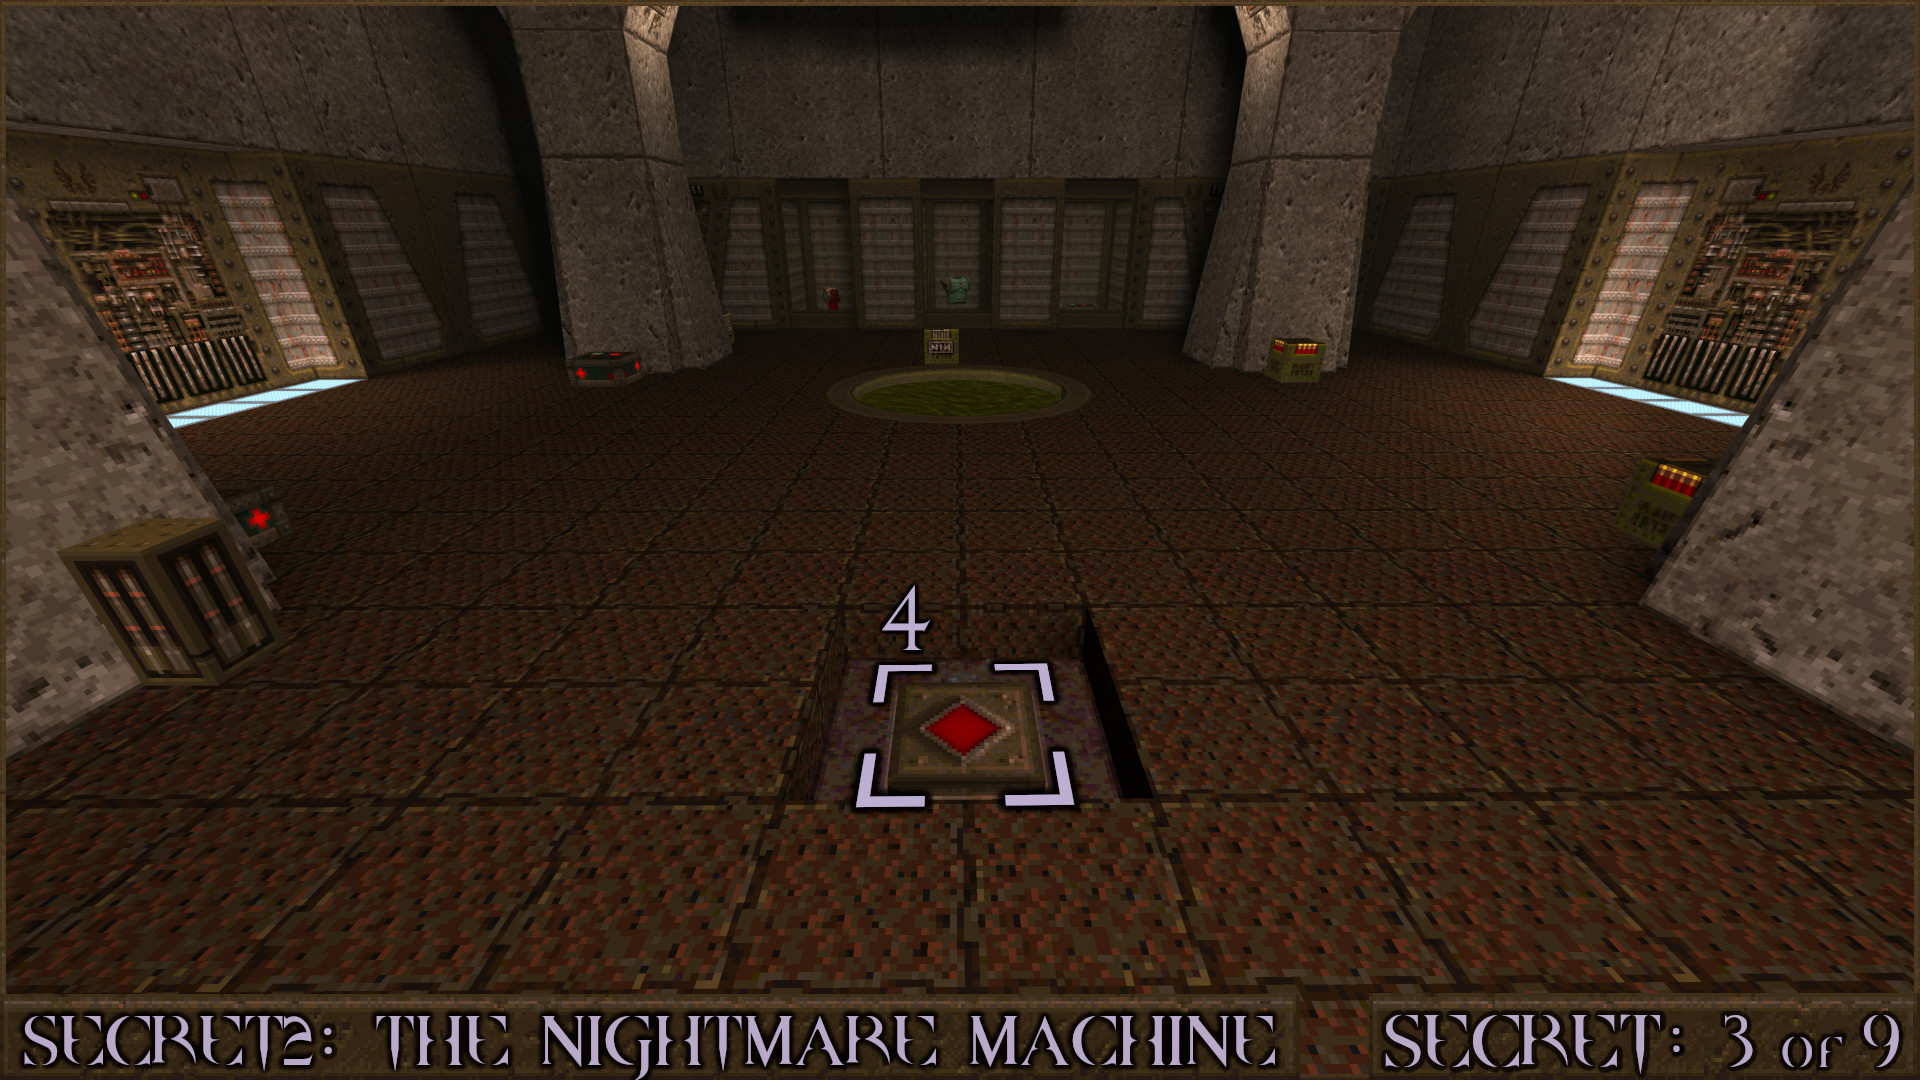
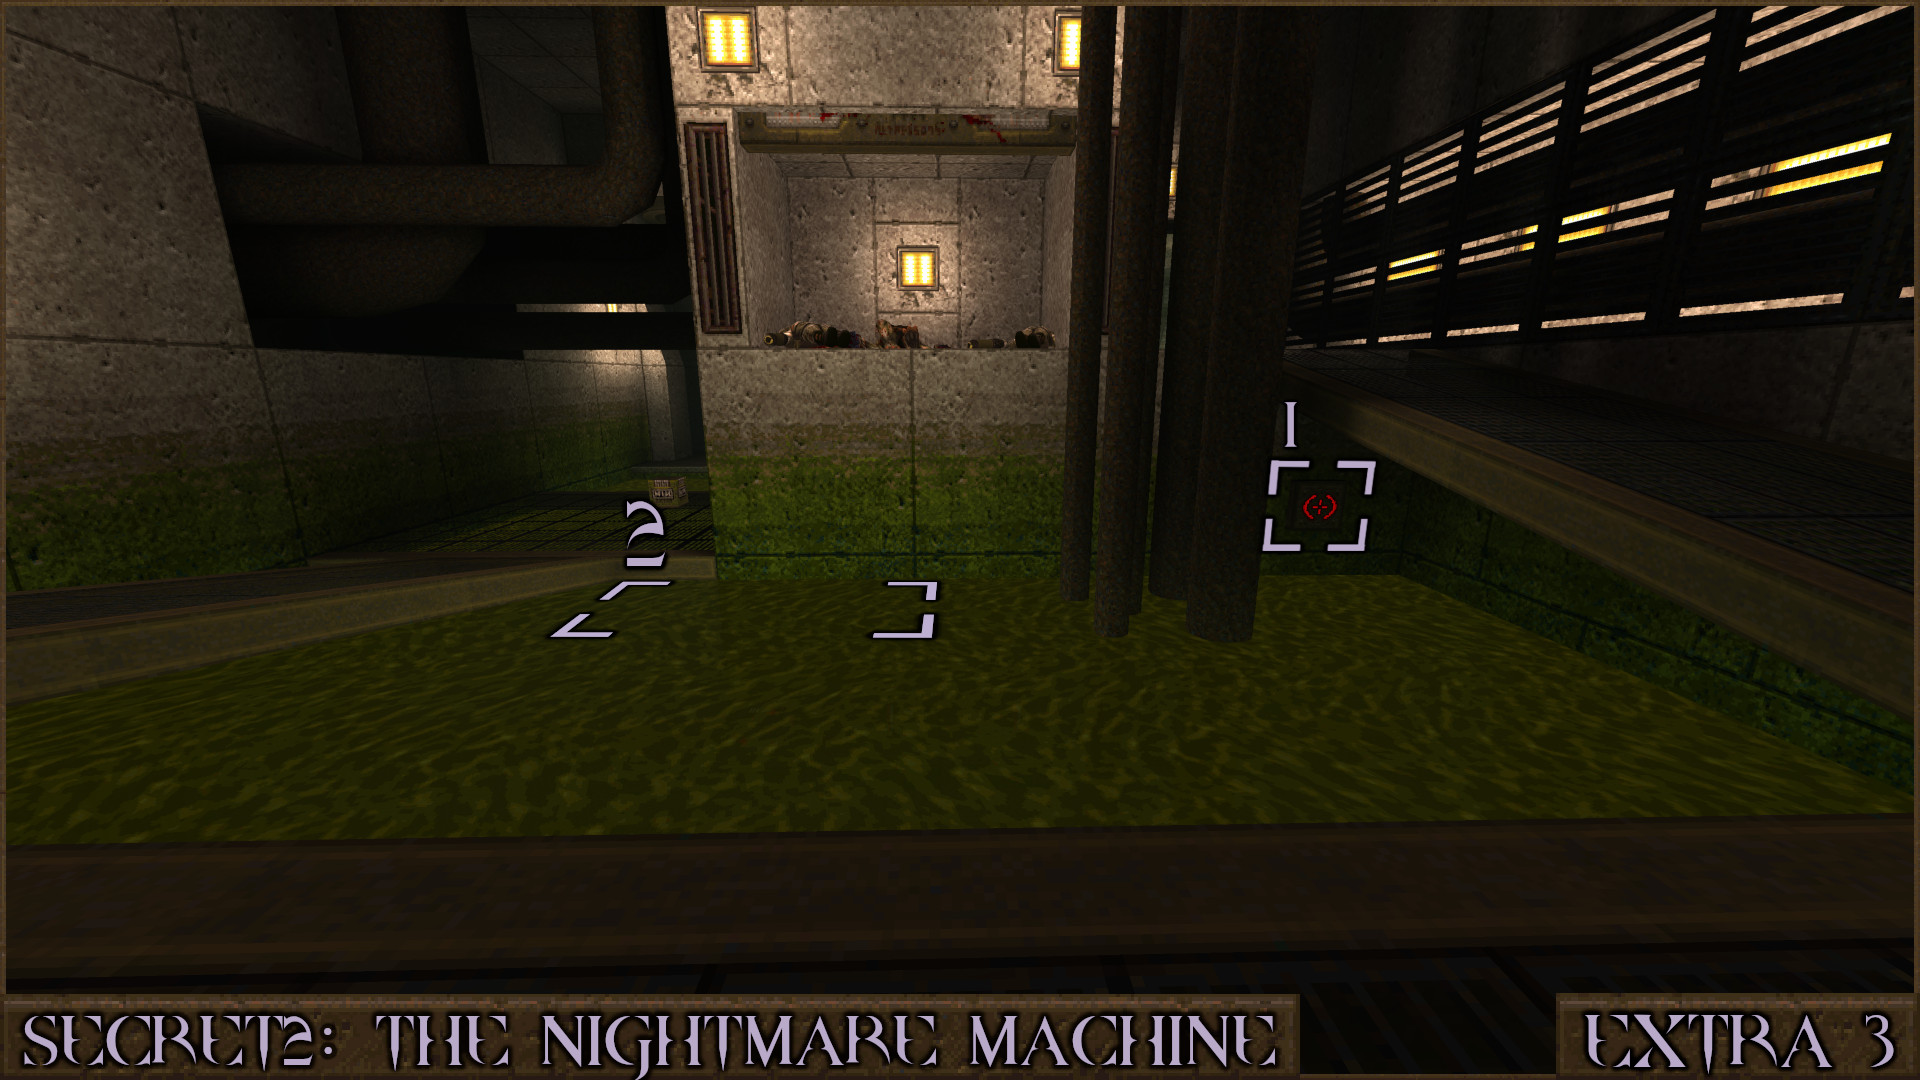
After emerging from the slime you will go into a room and jump over three sinking blocks. Turn around and shoot a target button () to shift a nearby bloody wall ().

In this hidden room if you land on the circular centre platform () you'll fall down into a trap containing more items and enemies.

Reward: ×2 ×2

Secret 3 of 9
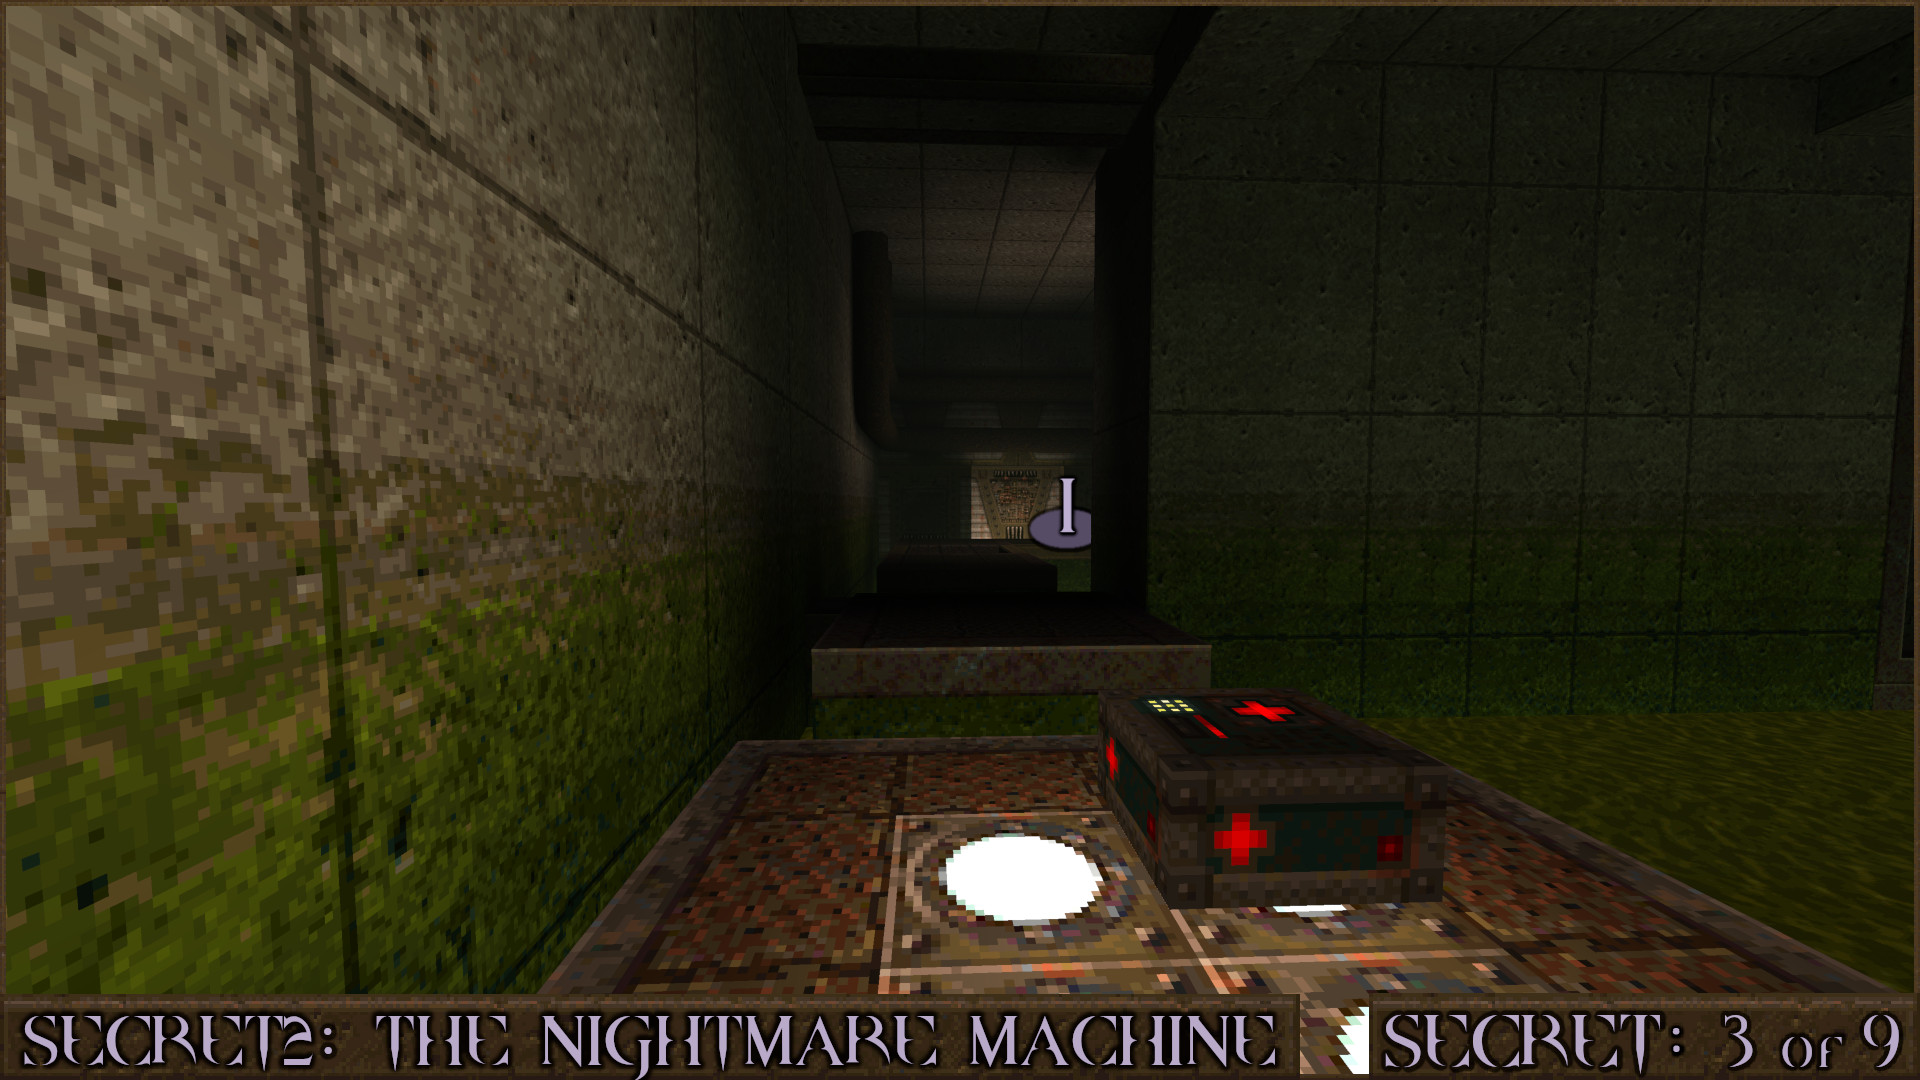
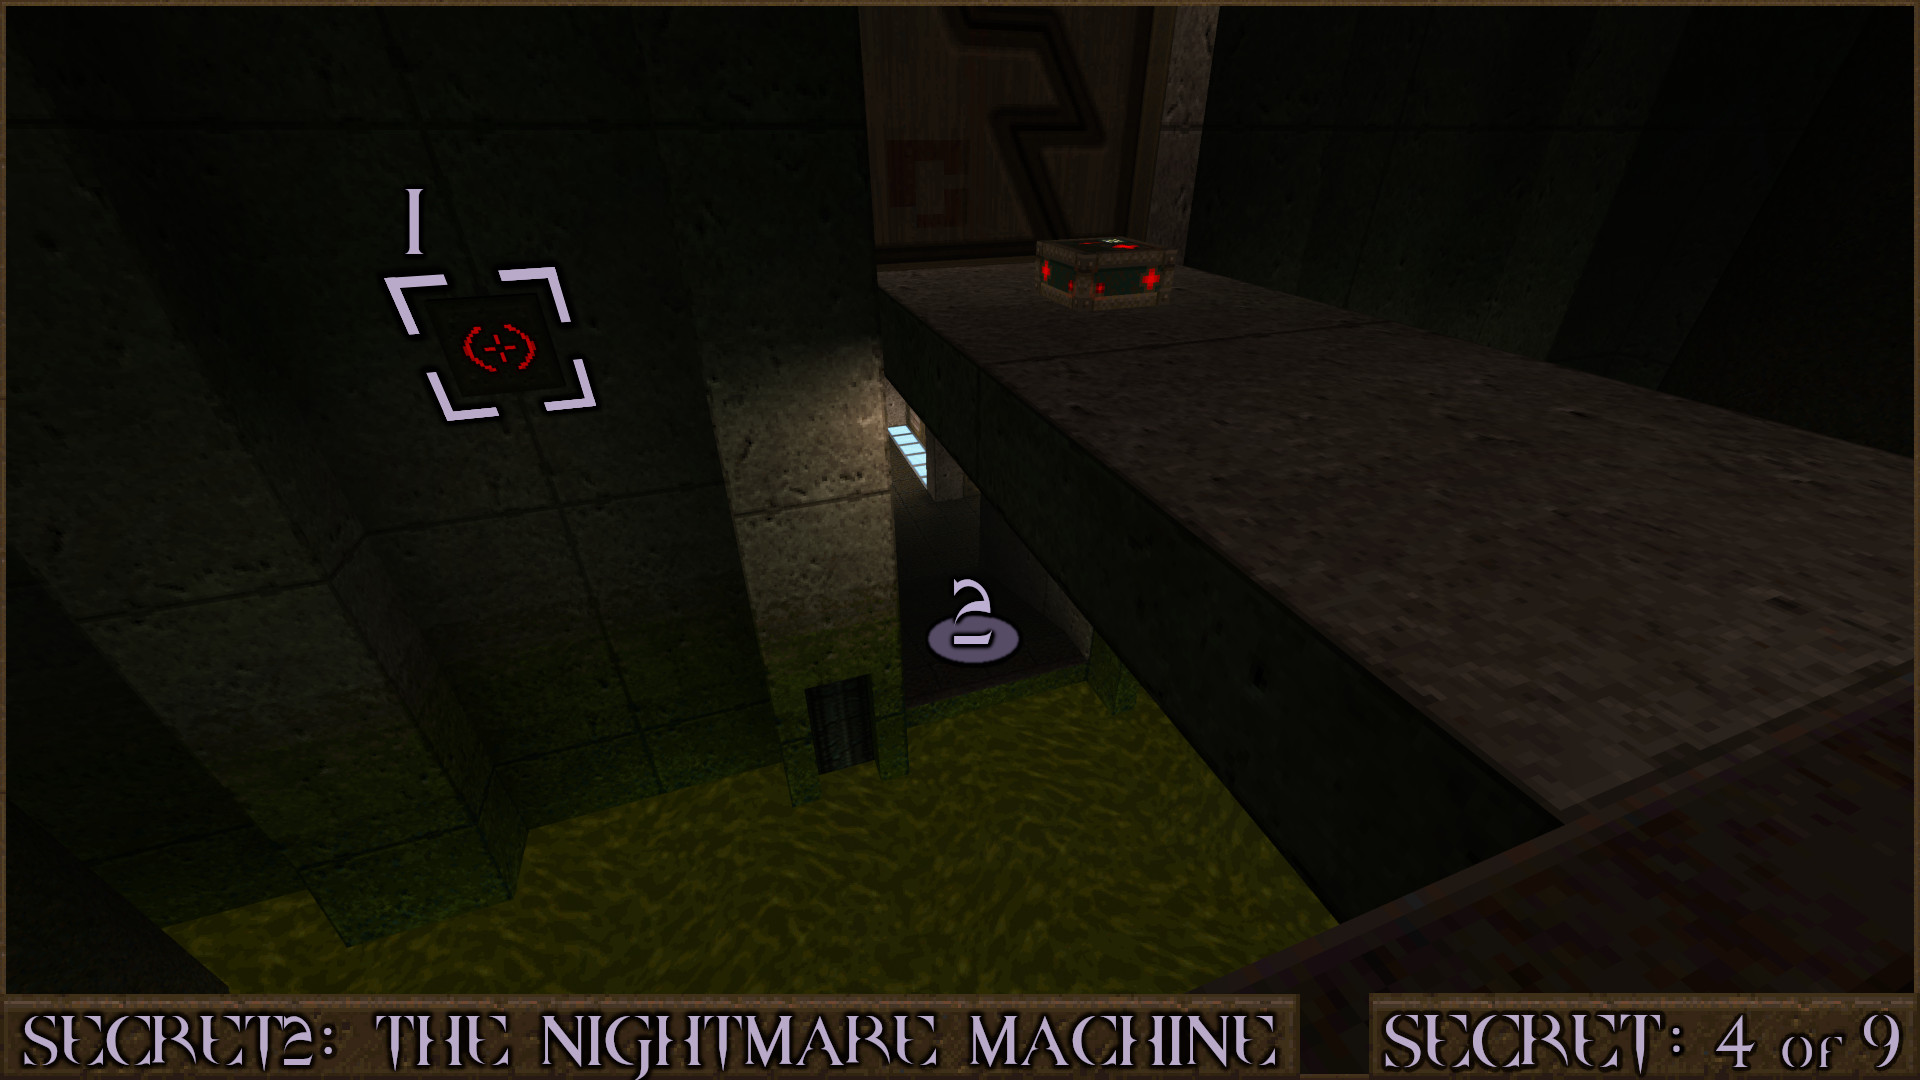
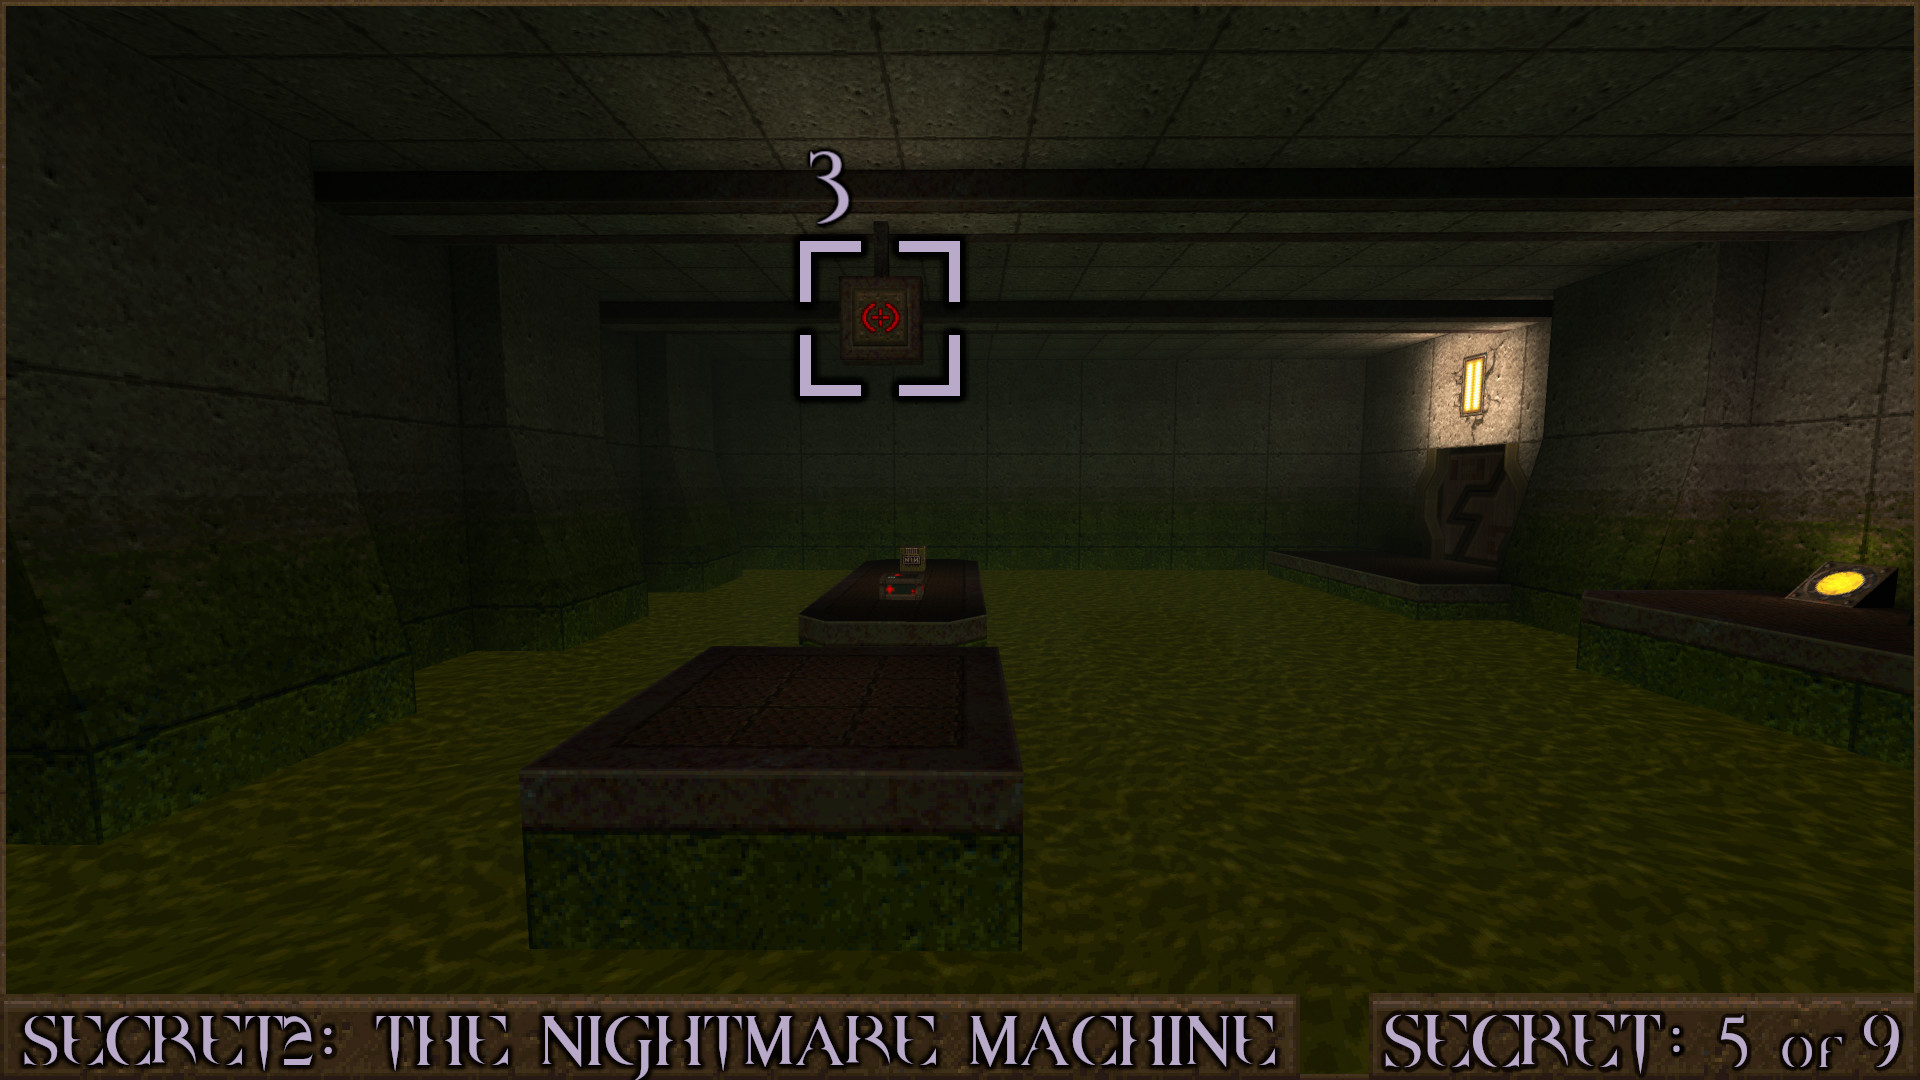
In a huge slime room you will jump over several rising platforms and eventually make your way into a dark corridor ().

While in the corridor turn around and look behind you to see a target button (). Shoot it to shift another bloody wall () and enter the secret.

Once inside the secret you must press the red button () repeatedly and defeat the enemies to claim all the rewards.

Reward: [Health Capacity Upgrade]

Secret 4 of 9
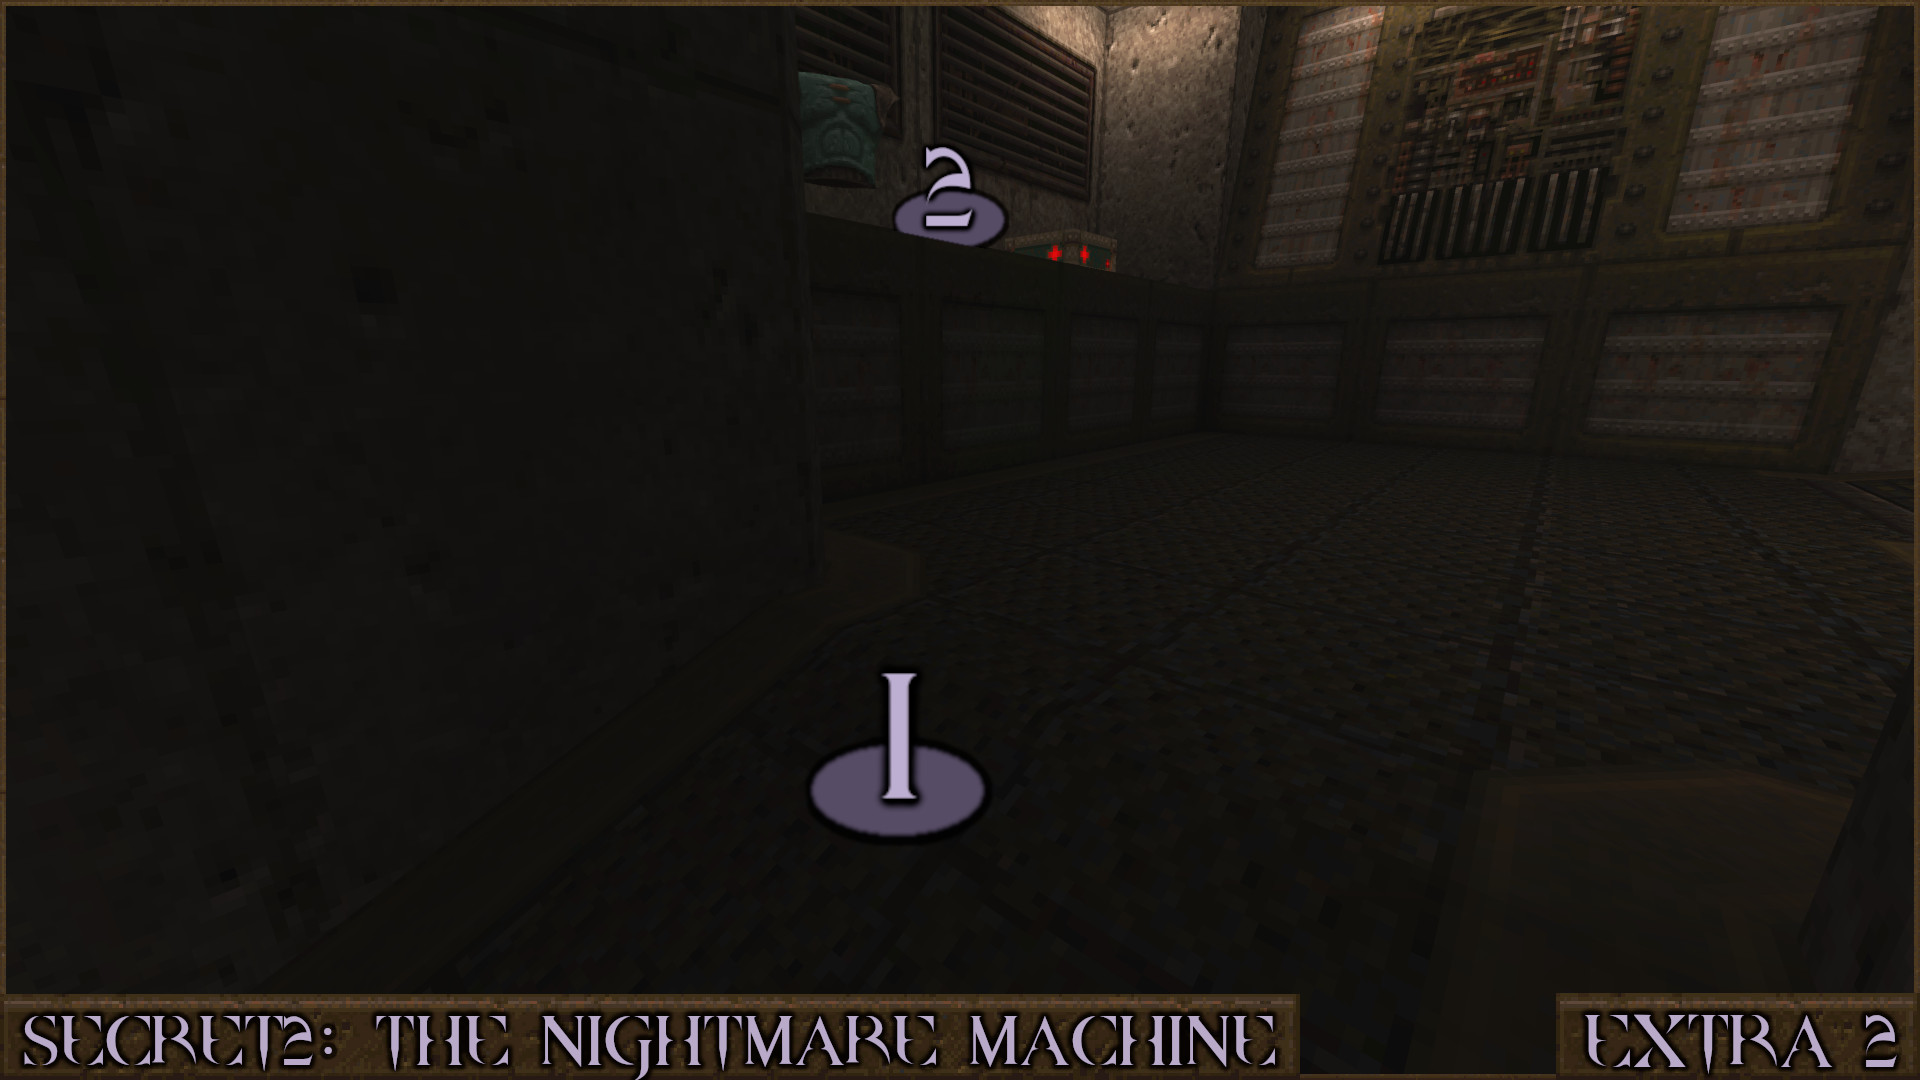
After crossing over the bridge in the huge slime room you will go up an elevator and through two doors. Turn around and look for a target switch on the wall (), Shoot it and then drop down to the lower platform () to find the secret nearby.

Reward: [Rocket Capacity Upgrade]

Extra Secret 2
After returning to the unpowered elevator again this time go through the Silver Keycard Door. After a few rooms you'll see a Green Armor on a ledge out of reach. Jump while going up the ramp () to get a small boost to your jump height which is enough to reach the ledge ().

Reward:

Secret 5 of 9
Shortly after the previous secret you'll press a red diamond button which opens an alcove nearby (). Clear out the enemies inside it and then head into the alcove.

Look up to see a target button () that when shot will activate the elevator and take you down.

Shoot another target button () to swap the platforms and you'll reach a room containing several slime tubes. Release and kill all the monsters here to claim an upgrade.

Reward: [Nail Capacity Upgrade]

Extra Secret 3
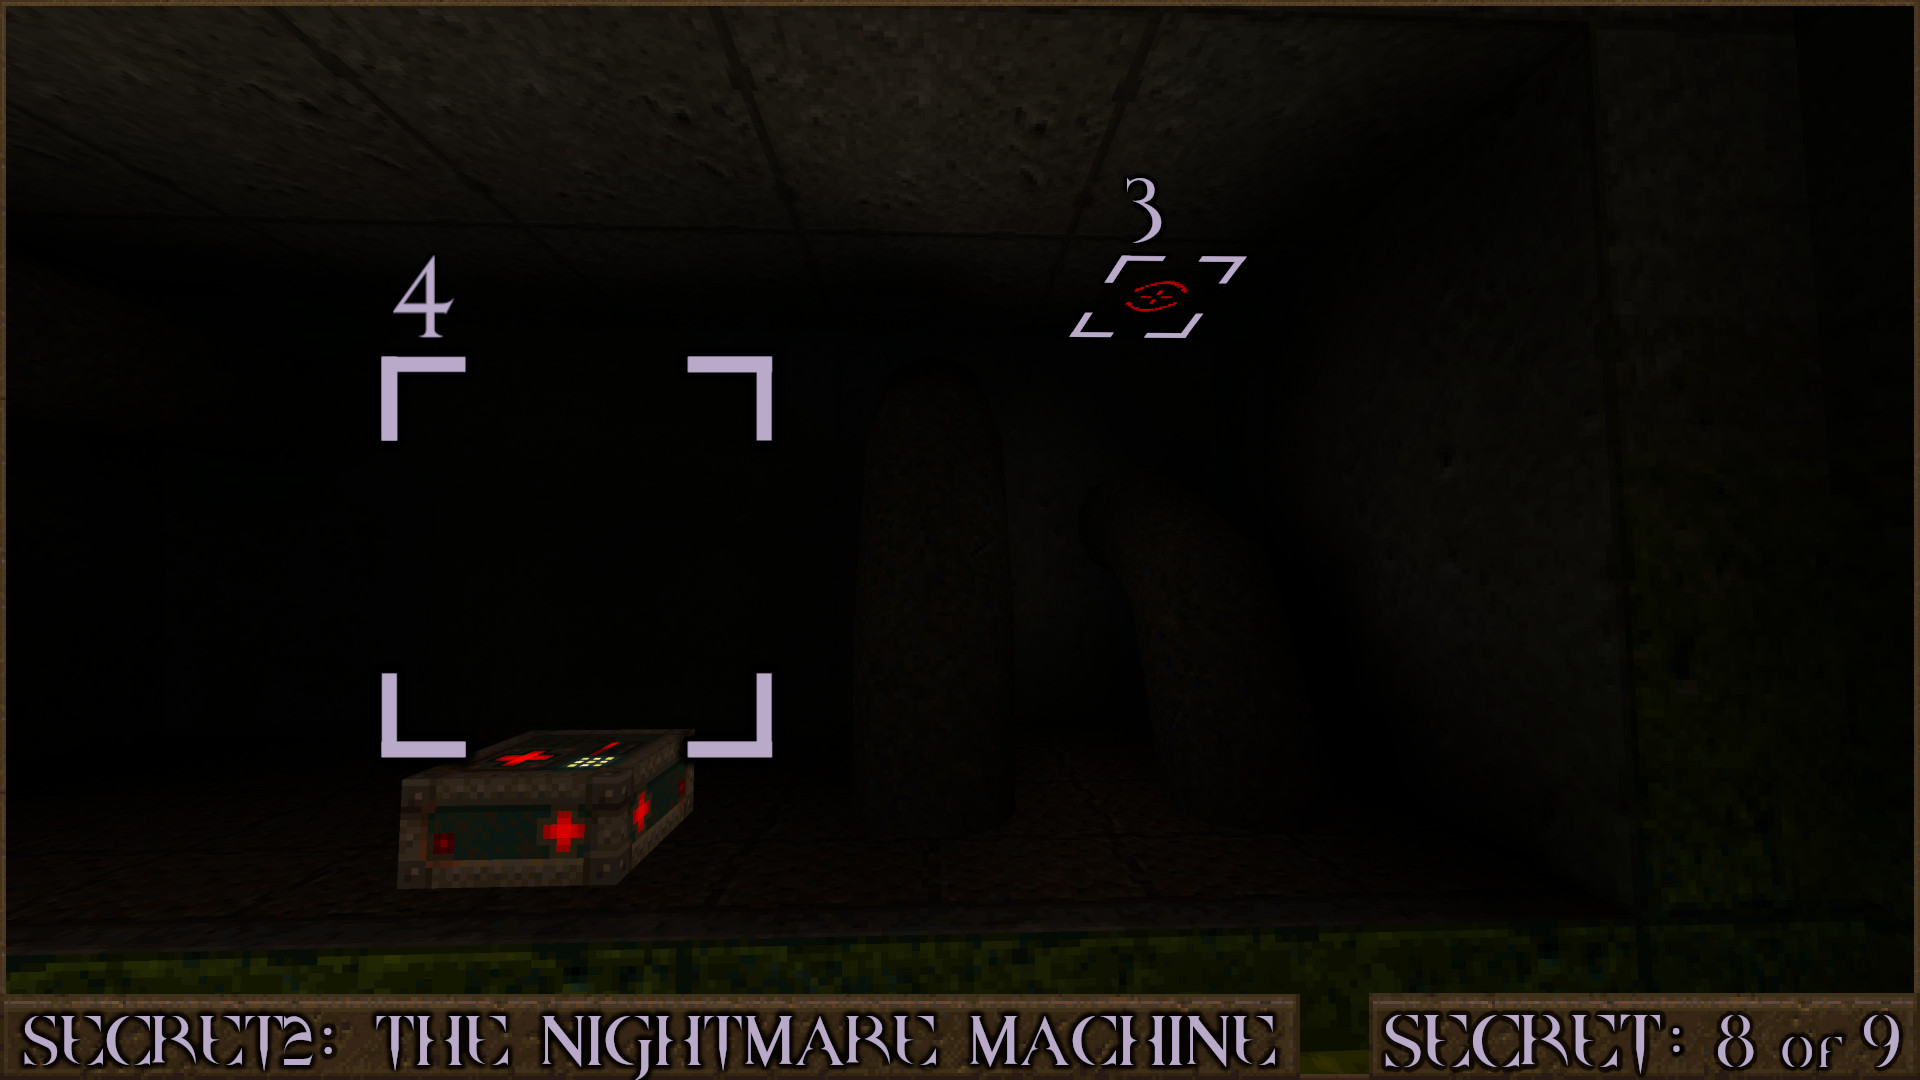
You'll go down a ramp over some slime and a row of enemies will ambush you. Look under the ramp for a target button () that reveals a few items ().

Reward: ×2

Secret 6 of 9
After taking an elevator up you'll be on a small balcony. From here look for a target button () embedded in the wall. When shot it shifts a wall in the distance () revealing the secret.

Reward: [Shell Capacity Upgrade]

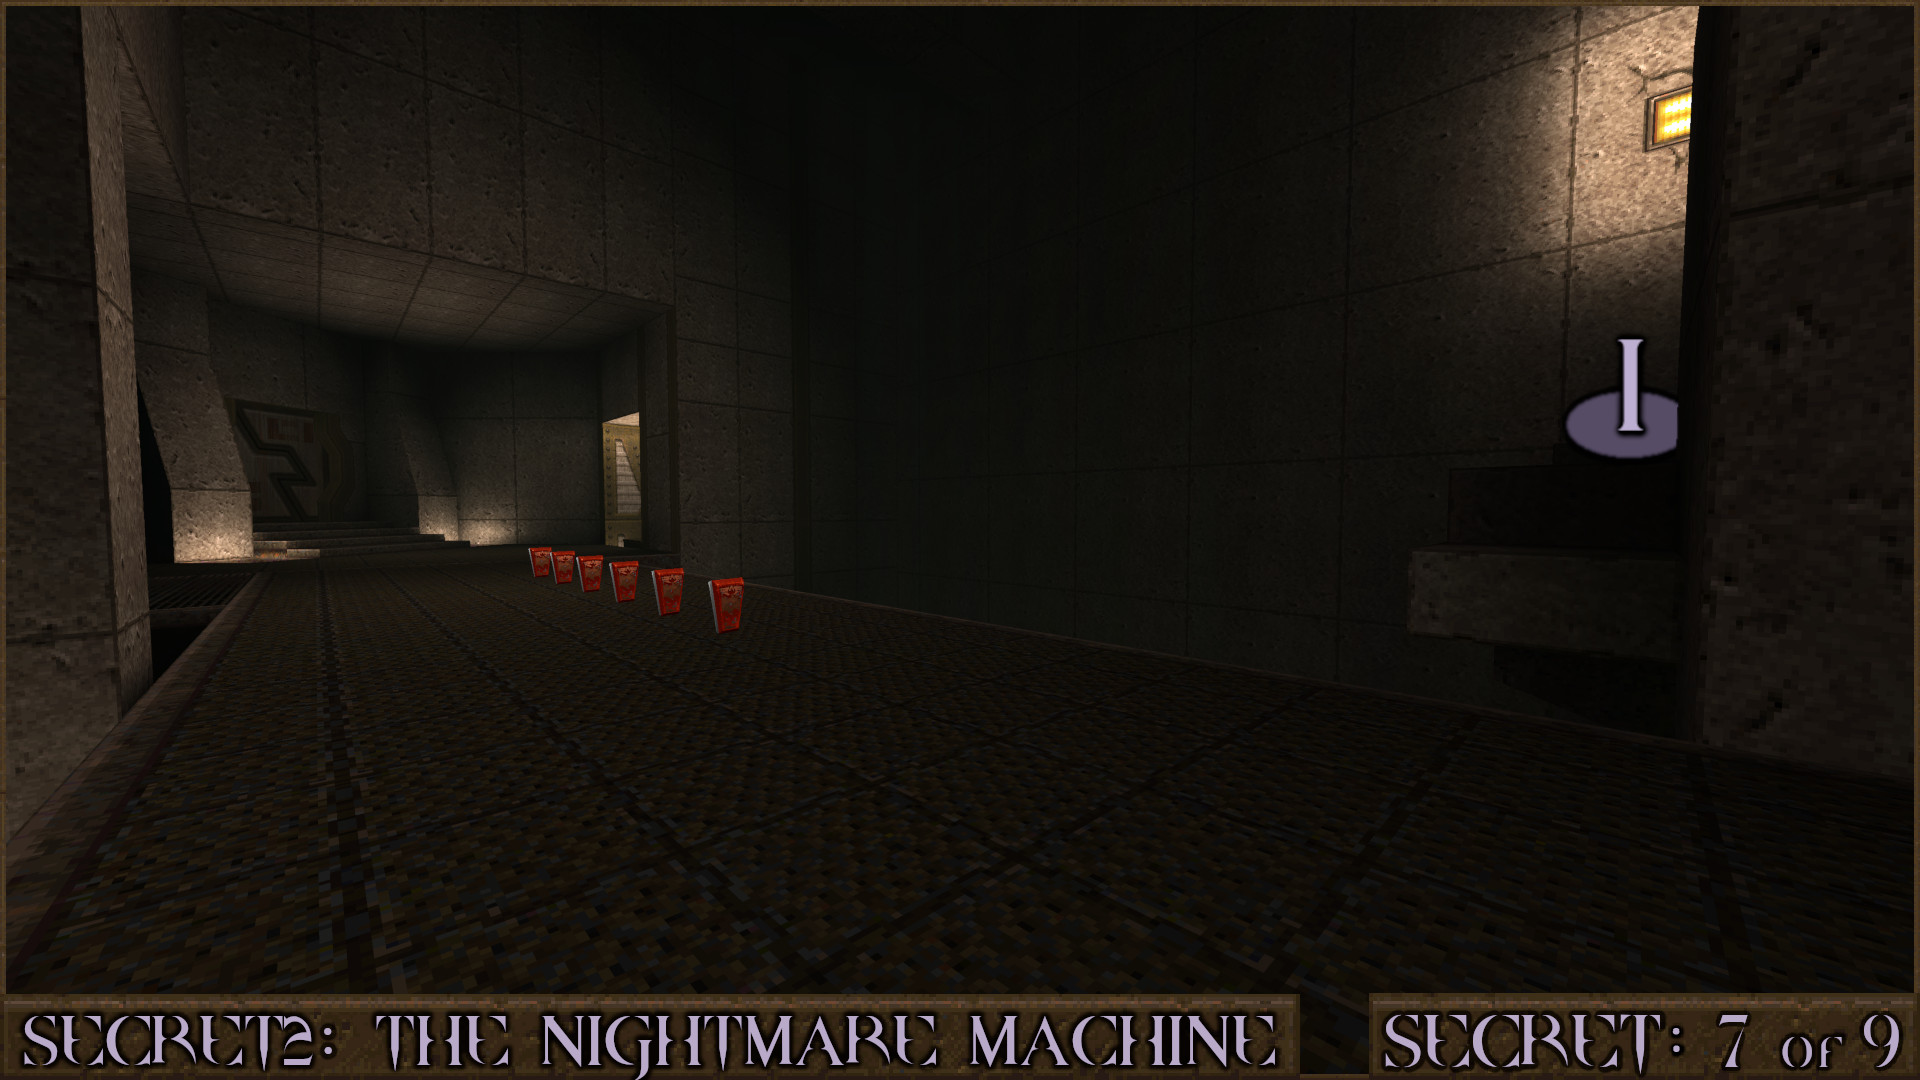
Secret 7 of 9
In a room high up with a bridge, look for some concrete blocks nearby () and use them as steps to reach the secret above.

Reward: [Cell Capacity Upgrade]

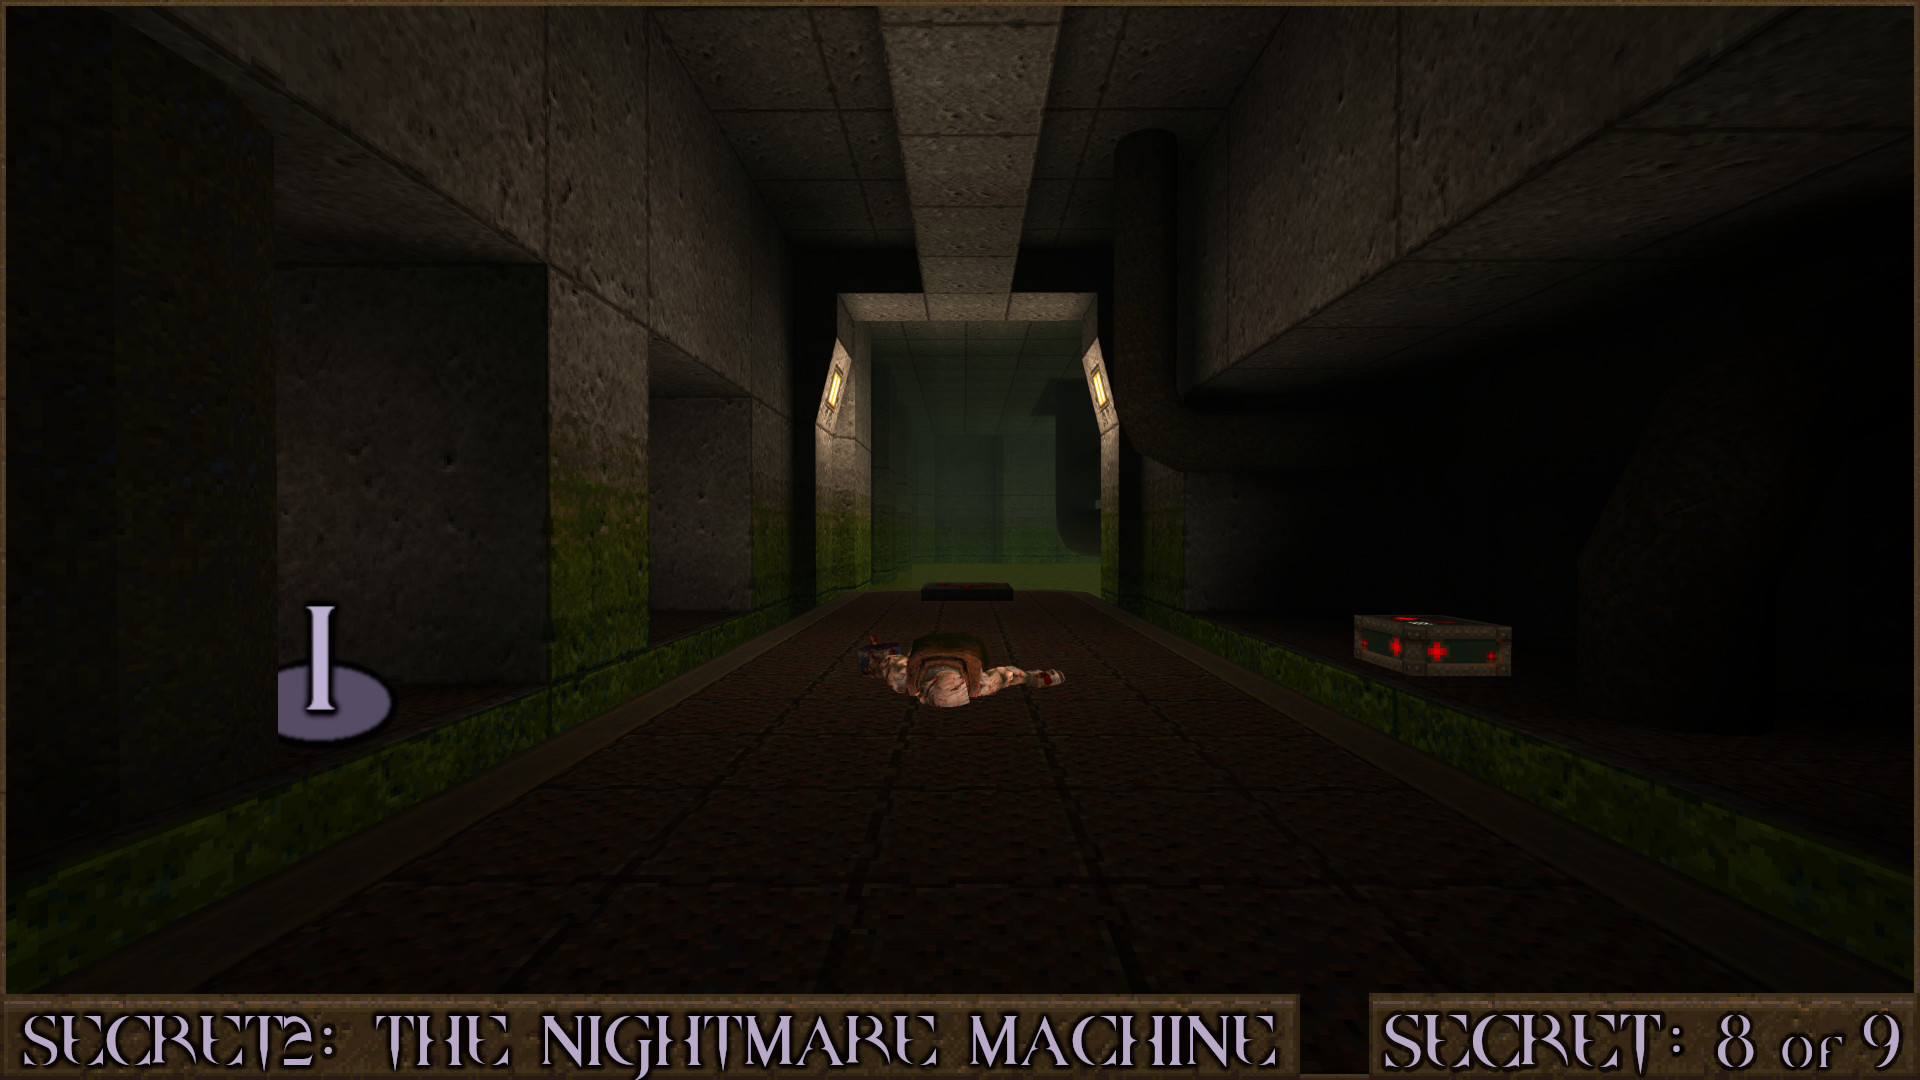
Secret 8 of 9
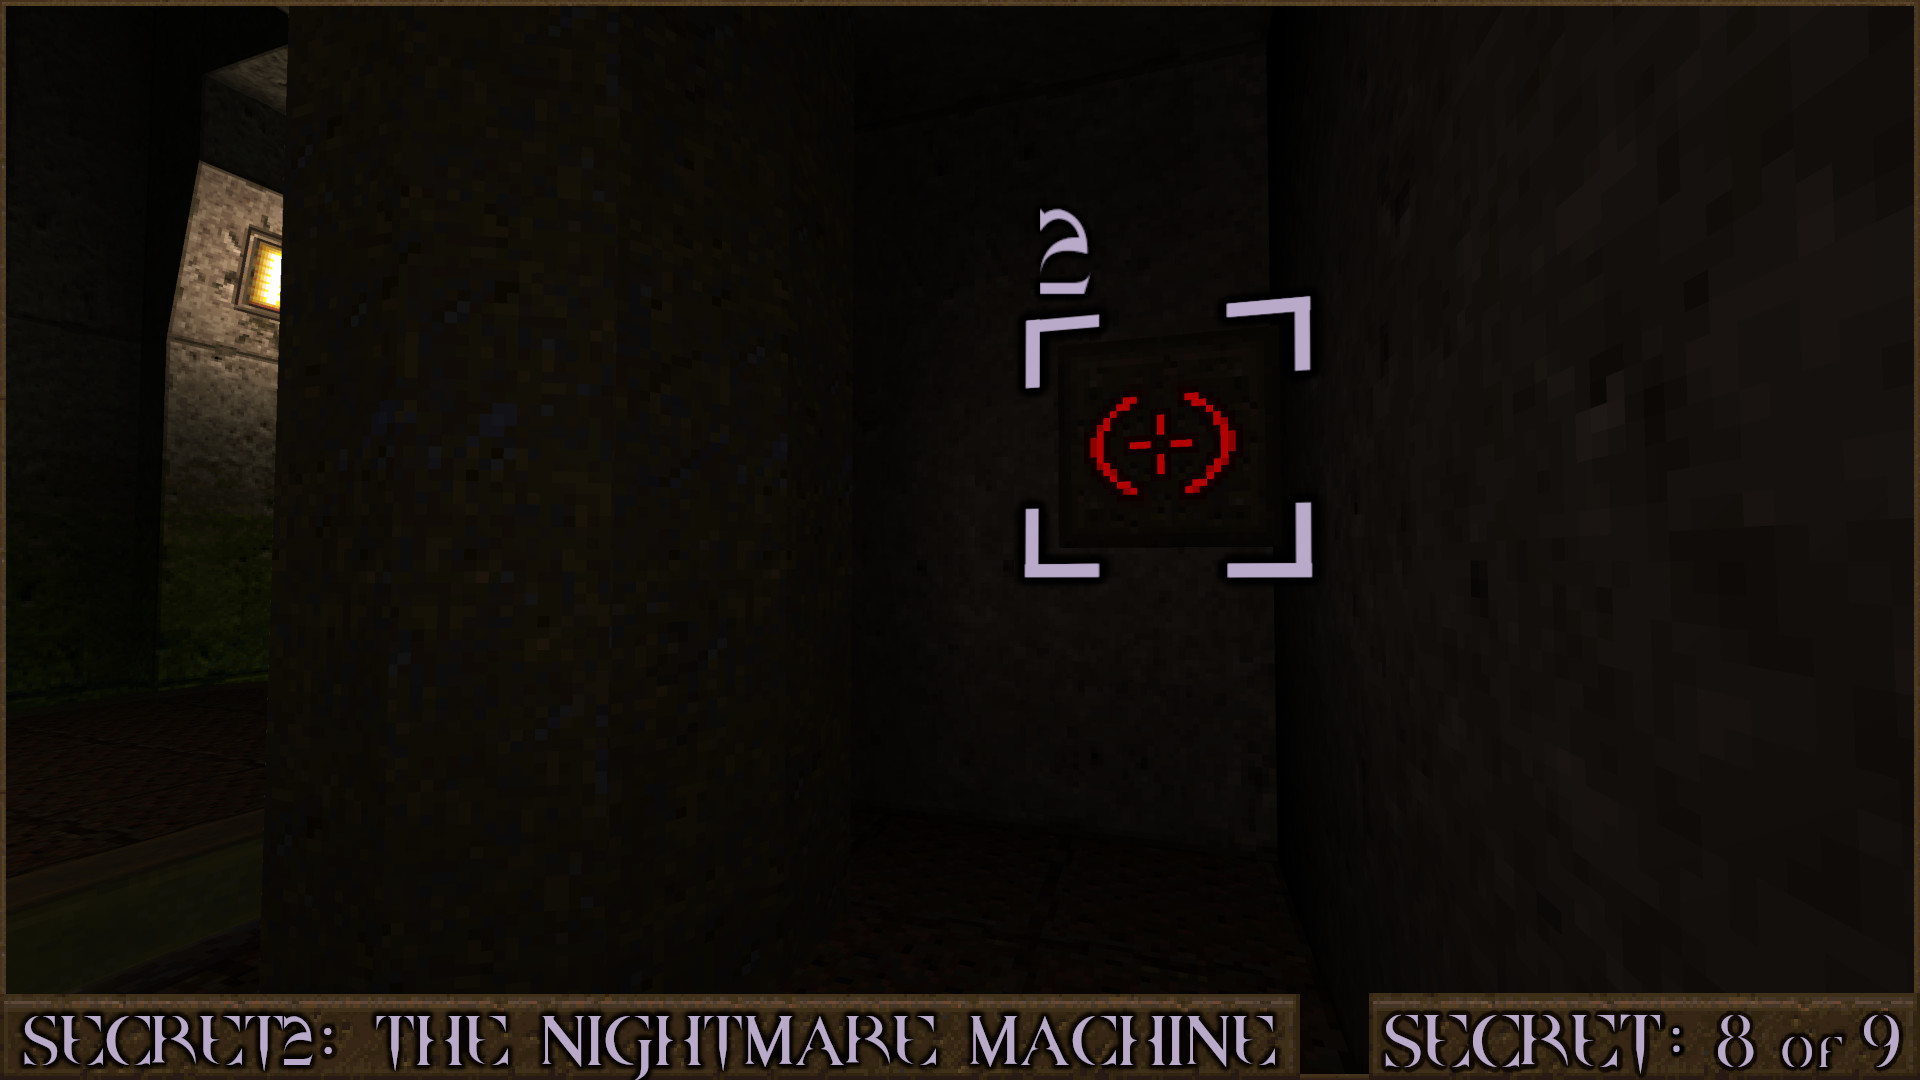
Once again you'll return to the unpowered elevator and finally go through the Gold Keycard Door. After jumping over some more sinking blocks you'll enter a small corridor with pipes on your right and small alcoves on your left. Head into the alcove ().

From here shoot the 1st target button ().

Look nearby to see the 2nd target button (). Shooting both of them will shift a wall () and reveal the secret.

Reward:

Secret 9 of 9
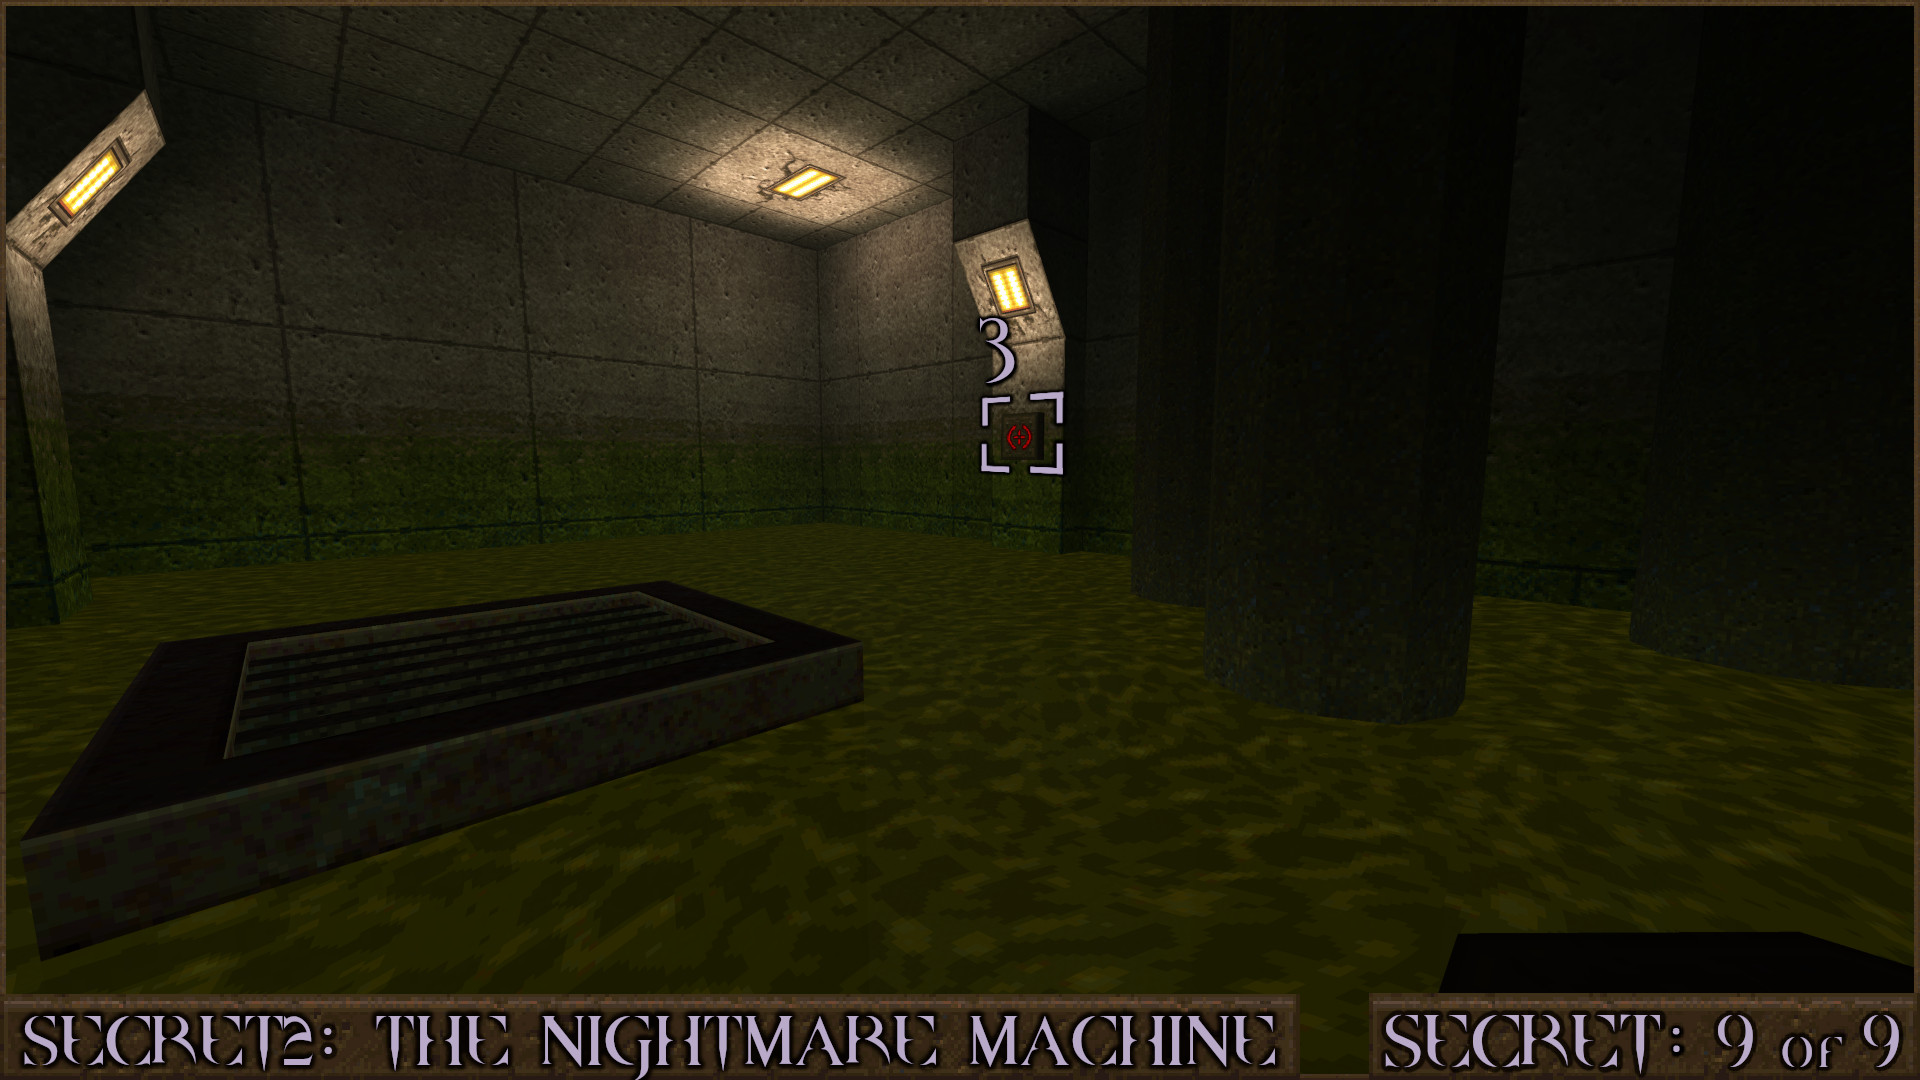
After discovering Secret 8 turn around to see another target button on the wall above (). Shoot it to shift a nearby wall ().

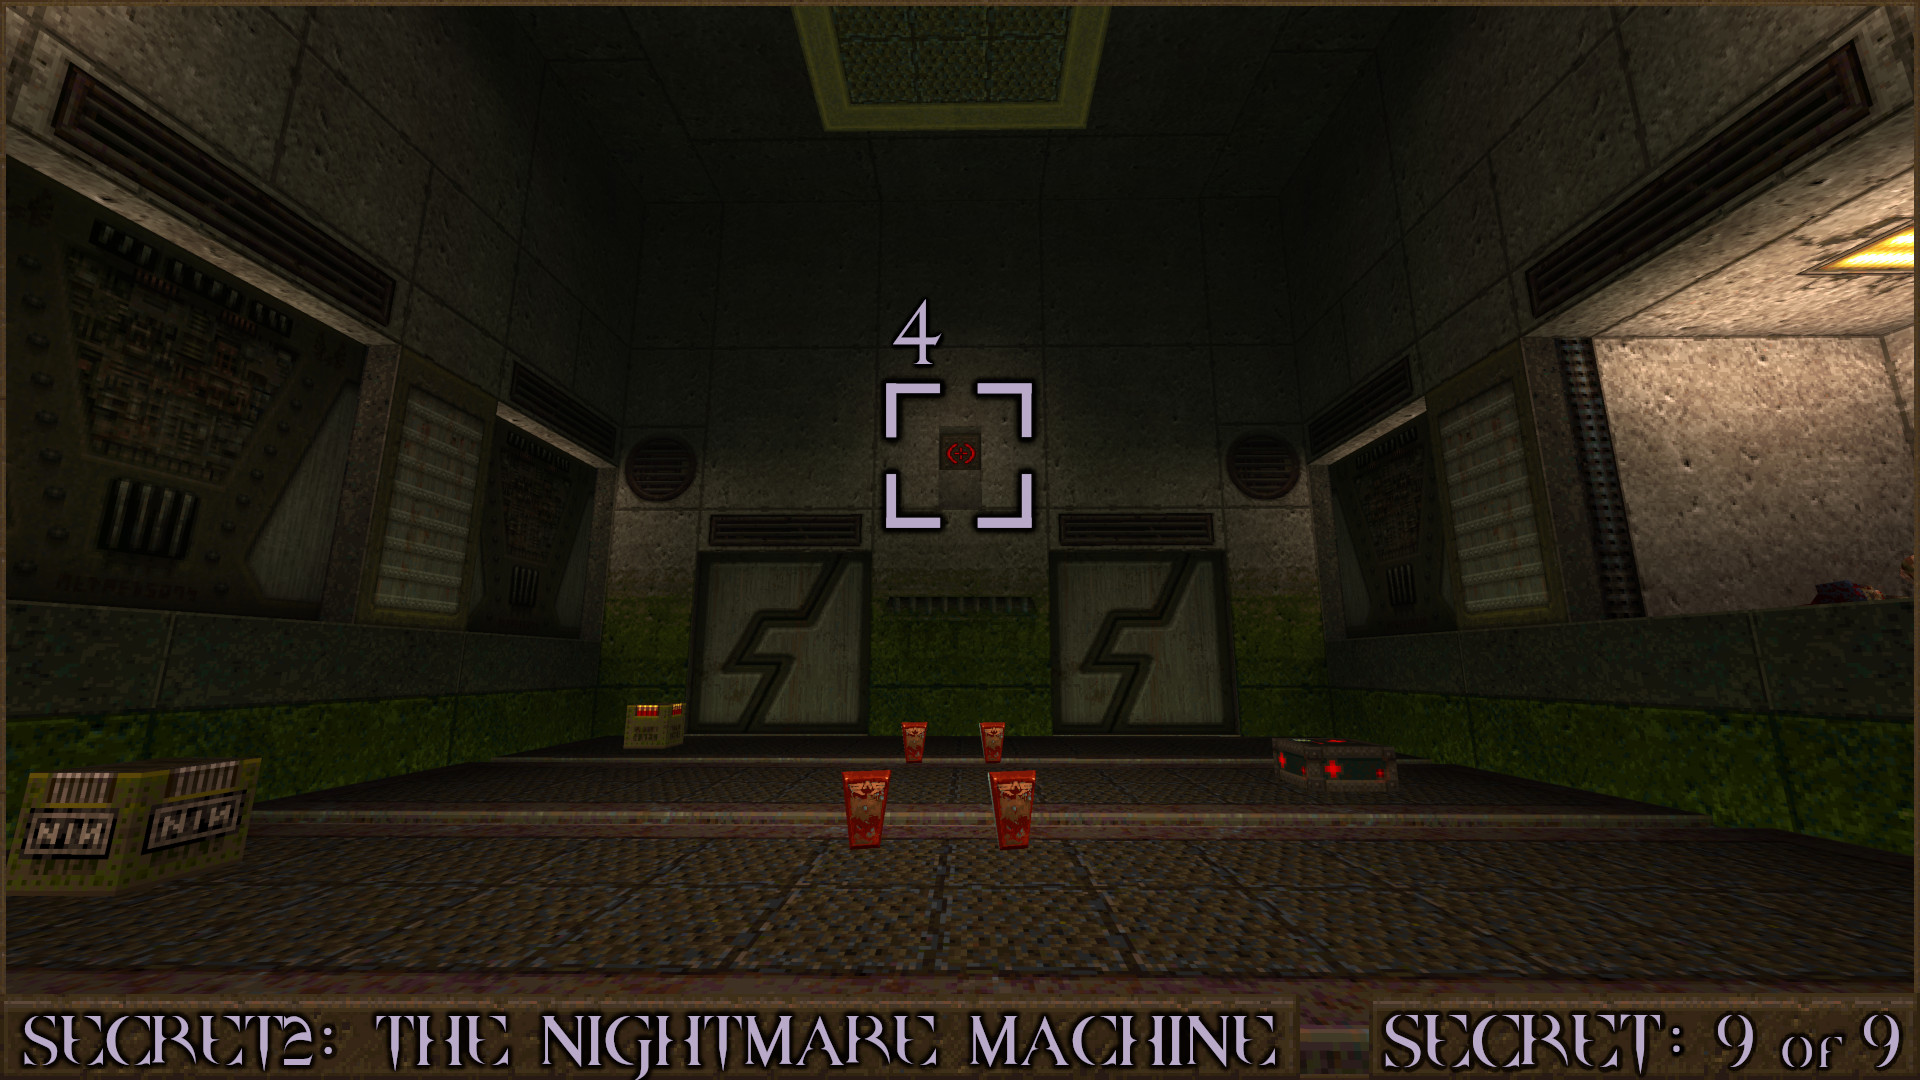
In the next room shoot another target button () to proceed.

Shoot the another target button () to start the fight. In this arena you will need to kill the enemies while jumping across constantly shifting platforms. Once all the enemies are dead you can claim the reward.

Reward:

Extra Secret 4
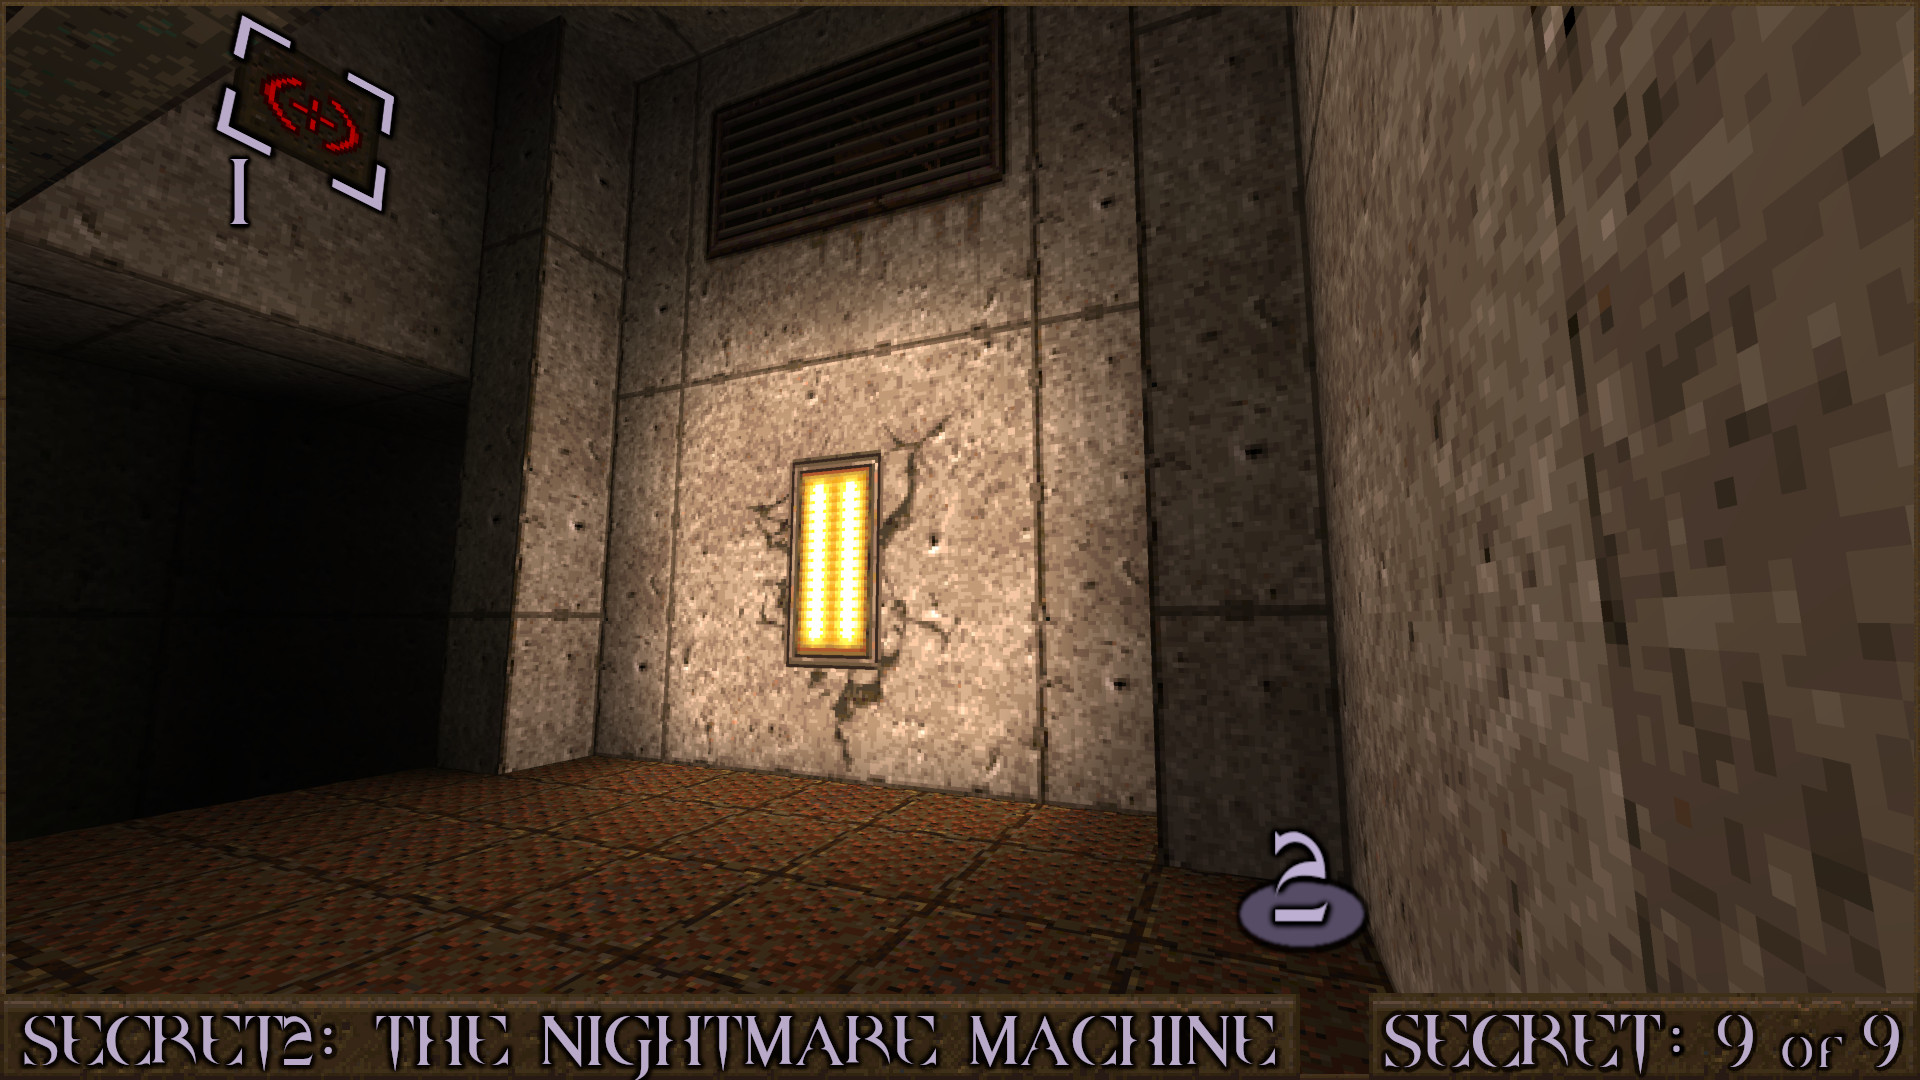
After finally restoring power to the elevator ride it to the top and then follow a pipe to the right around the corner ().

Reward:
‎‏‏‎BOSS: The Sleeper Awakens
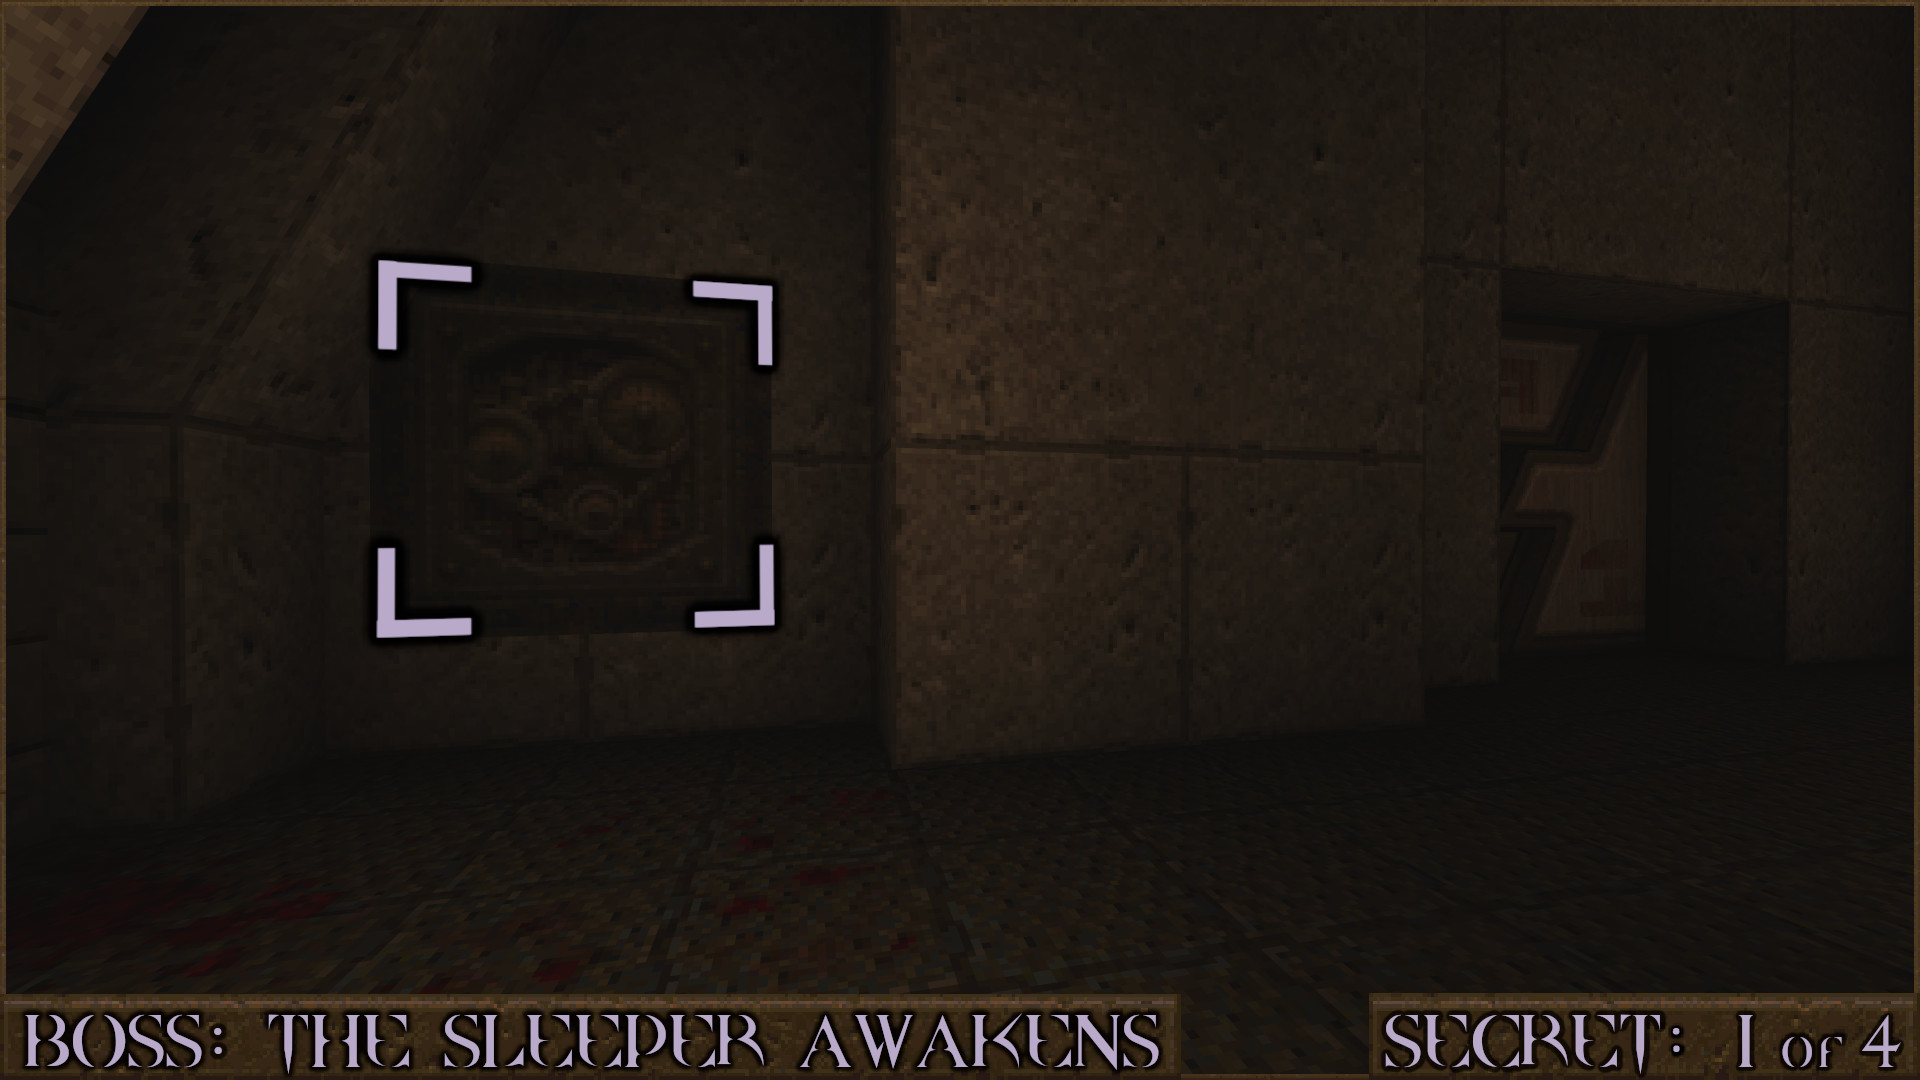
Secret 1 of 4
In the starting room shoot a cog panel in the corner to reveal a secret.

Reward: Large Rockets

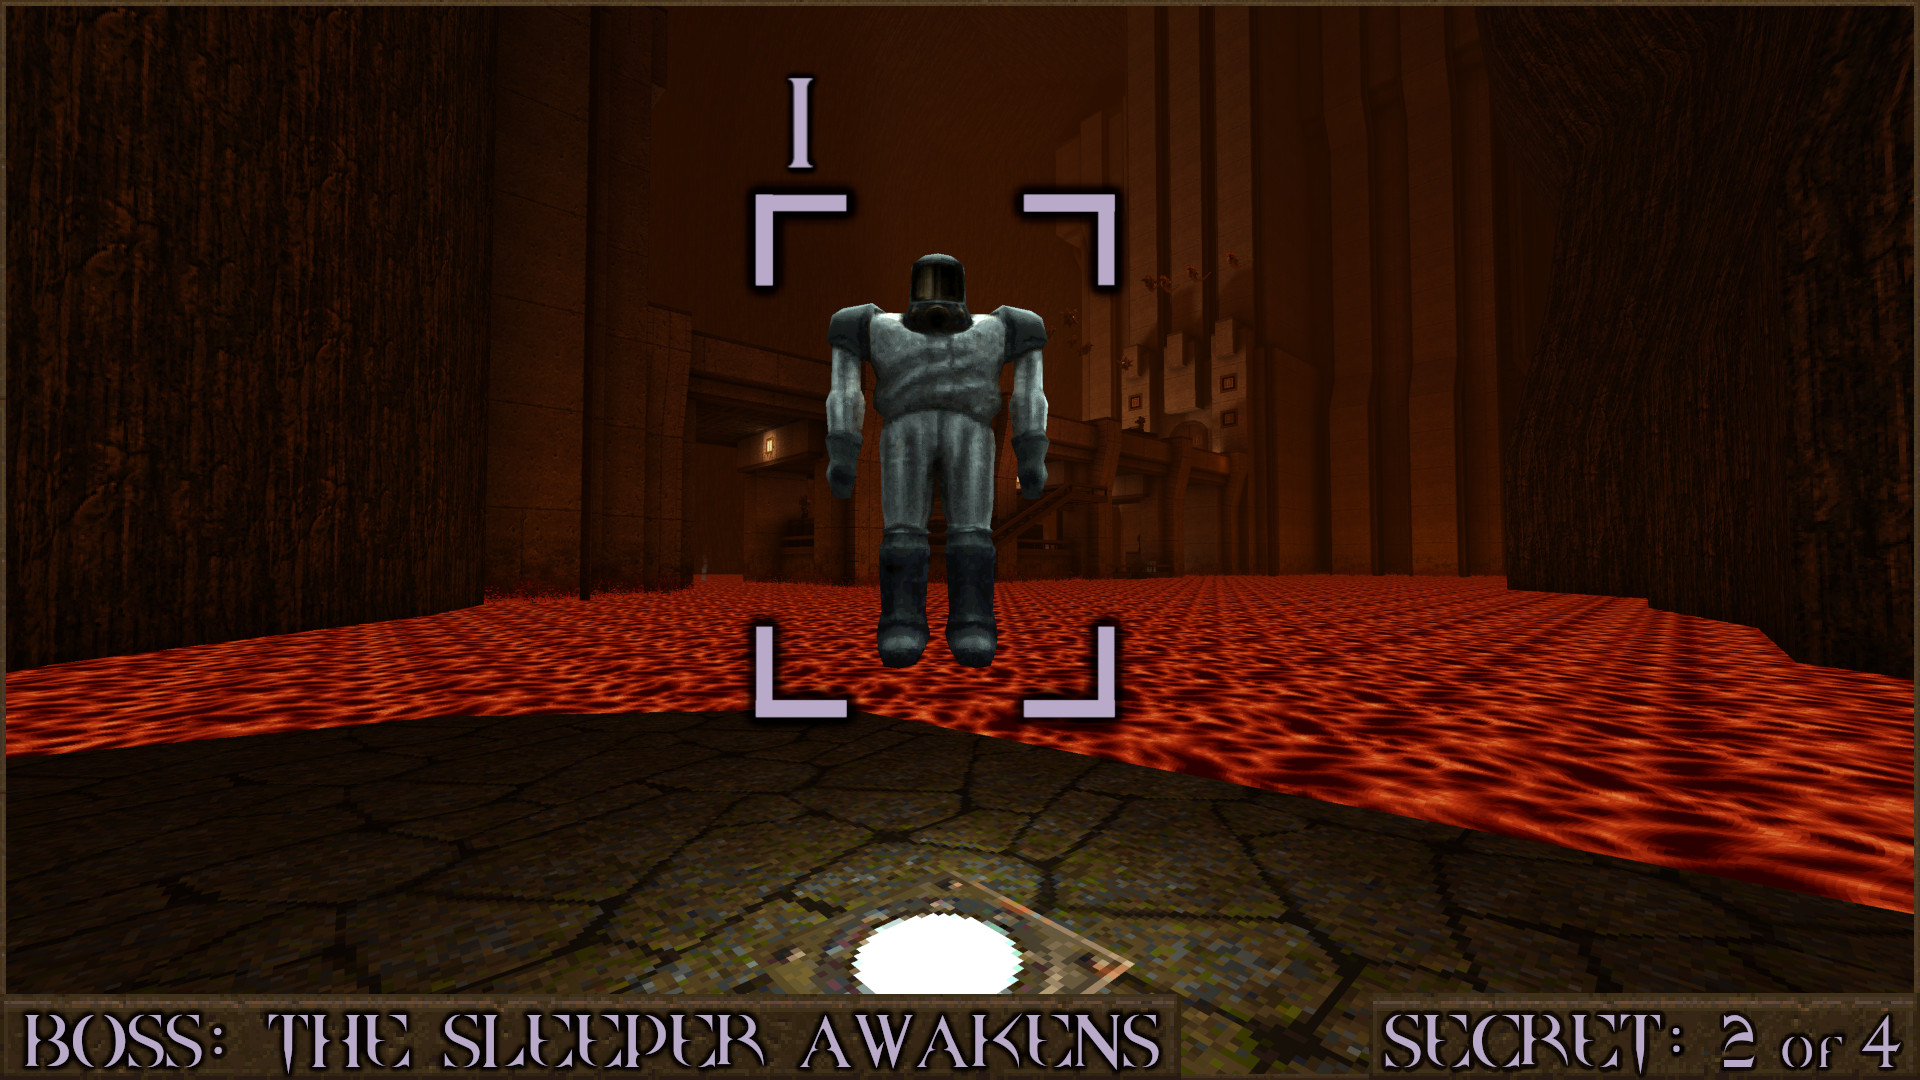
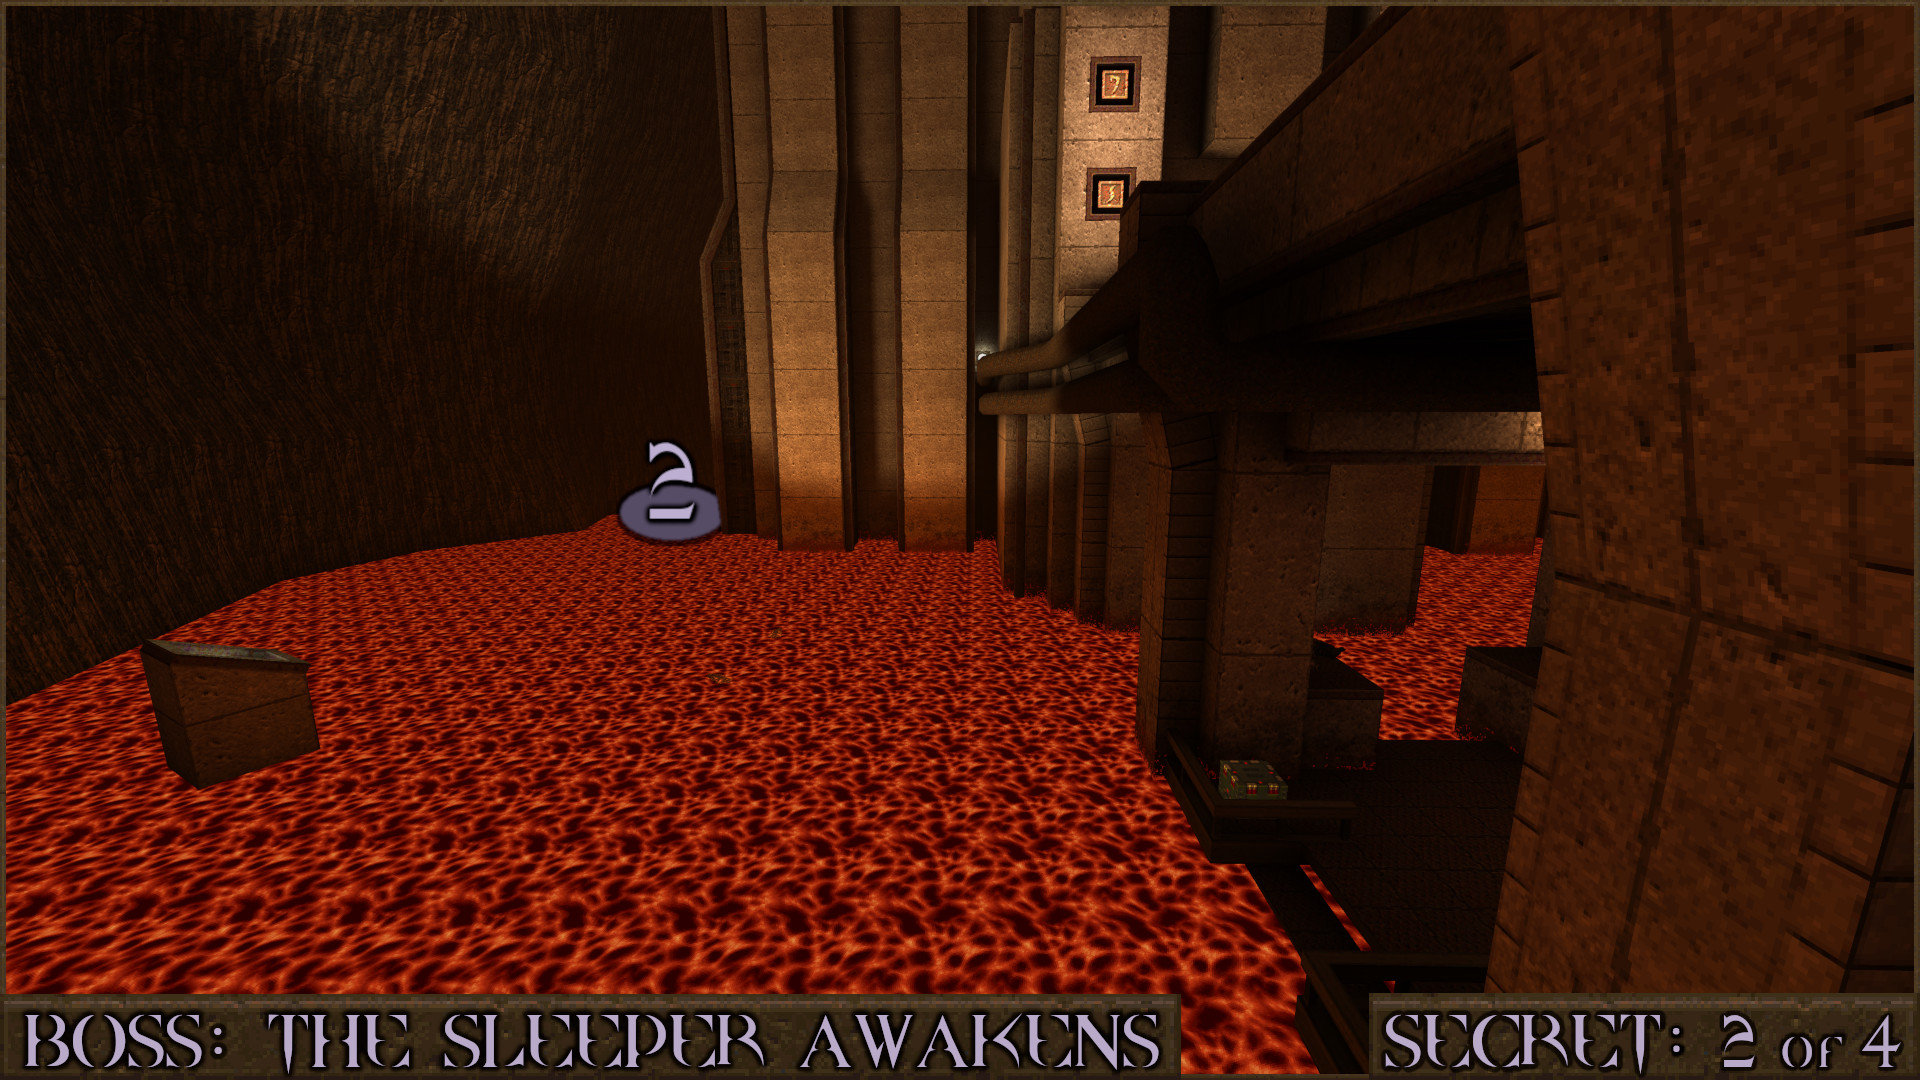
Secret 2 of 4
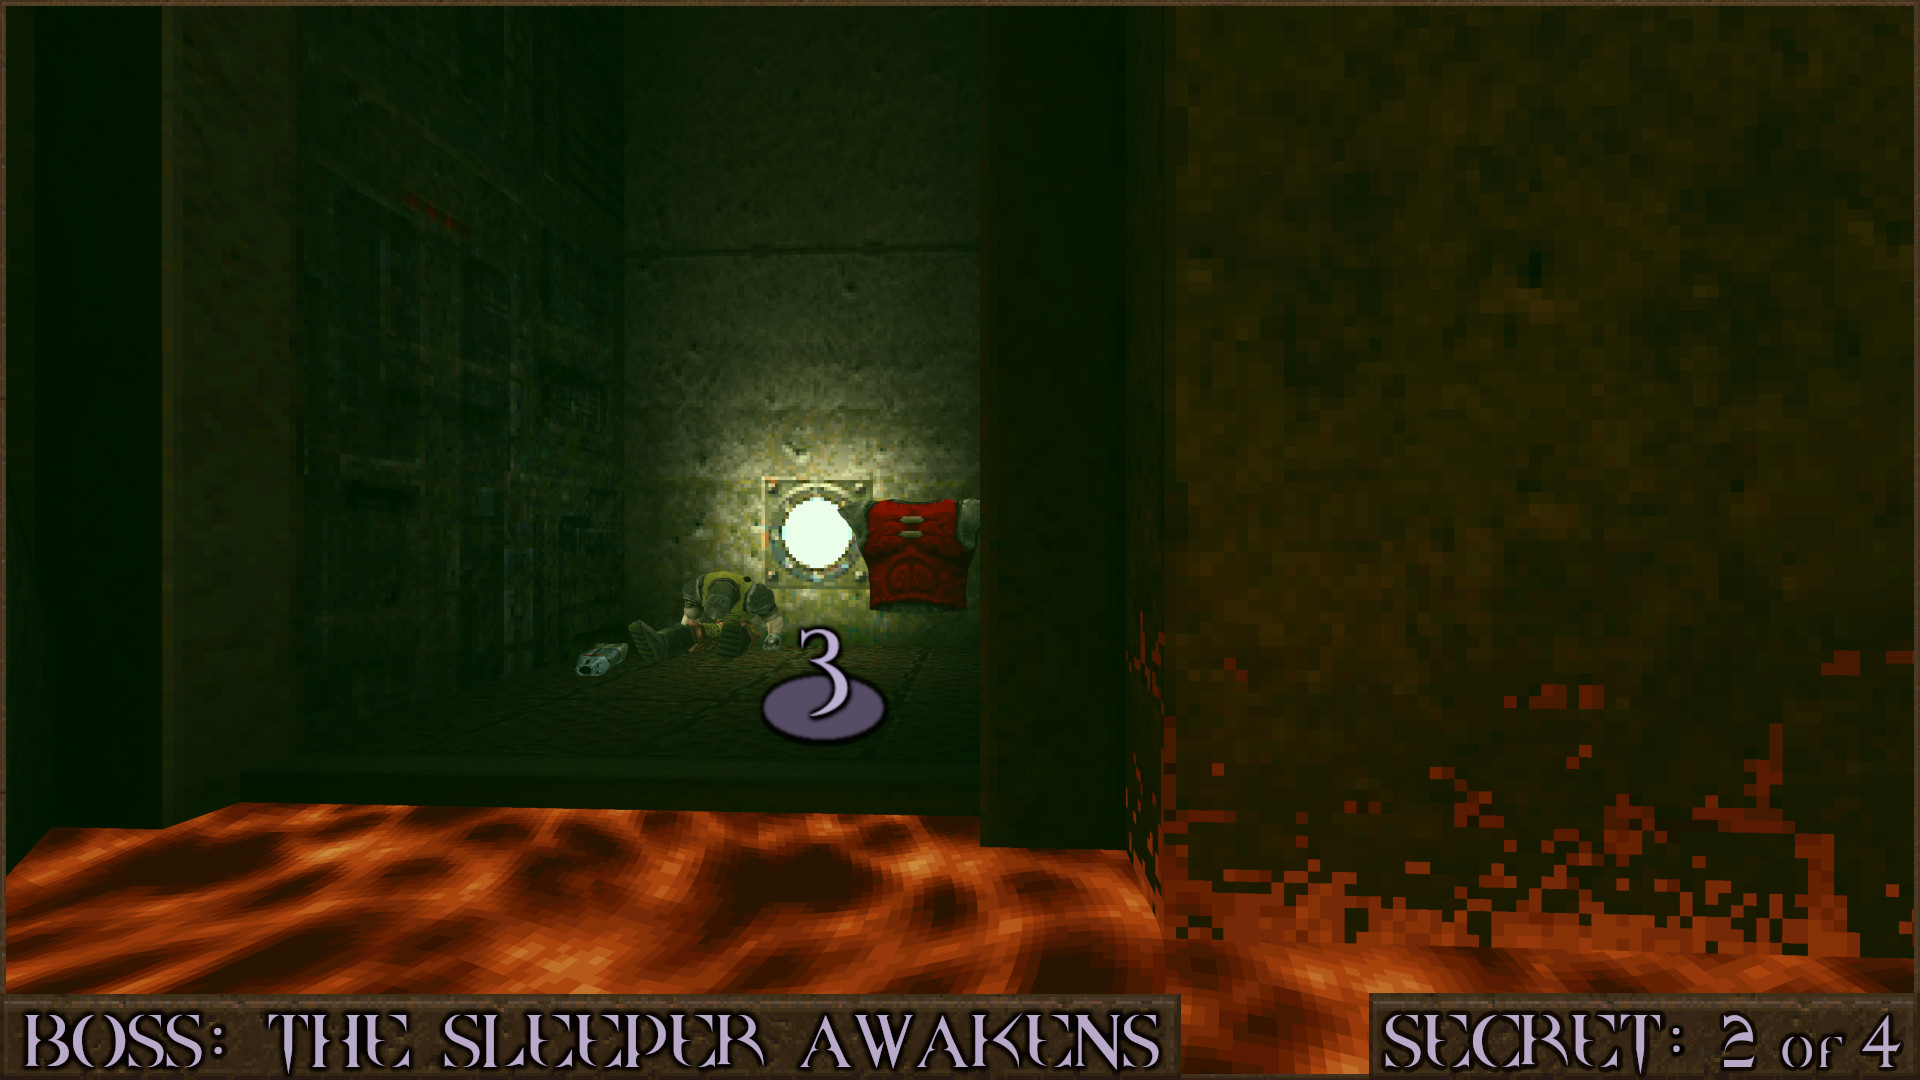
Pick up a Lavasuit () from somewhere in the level and start heading left deep into the lava field.

In the far left corner quickly proceed down the side of the building ().

Look for the platform with the dead Ranger to find the secret (). There is also another Lavasuit nearby to help you get back.

Reward: Red Armor Lavasuit

Secret 3 of 4
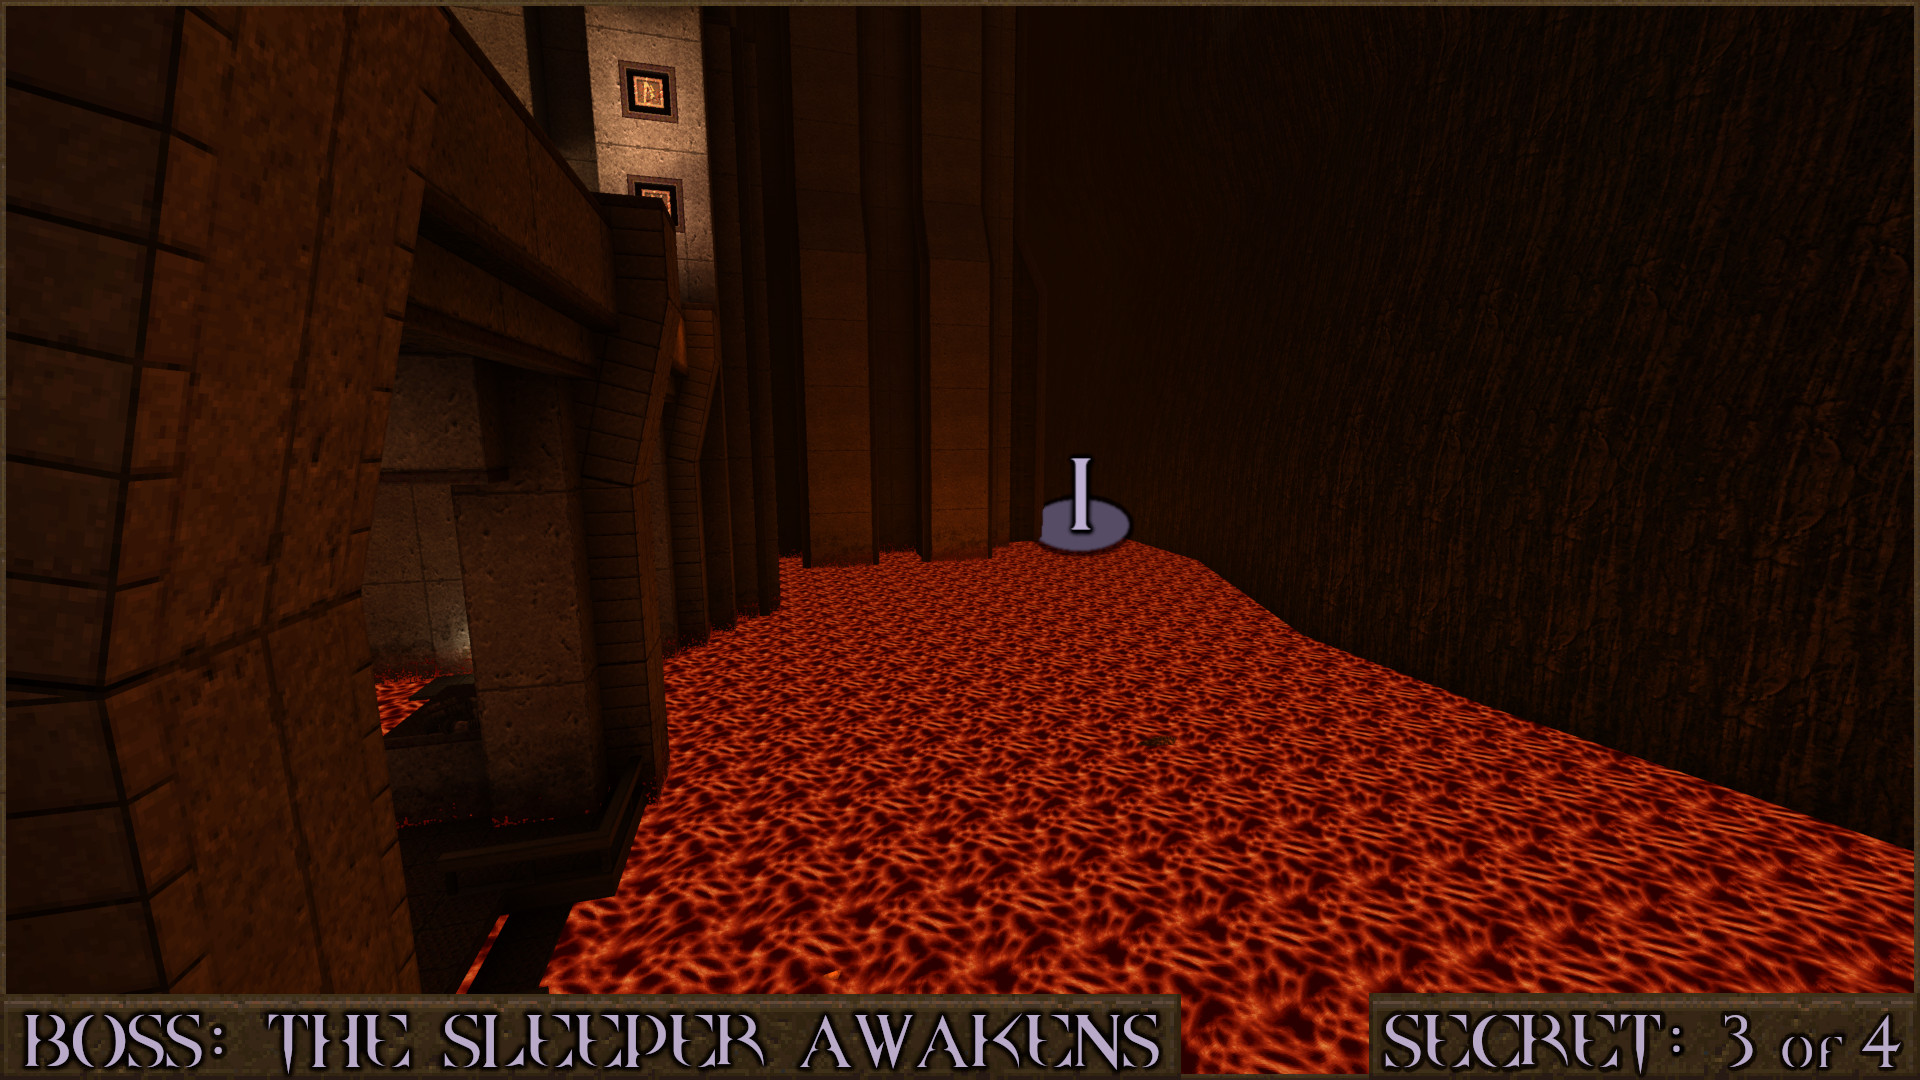
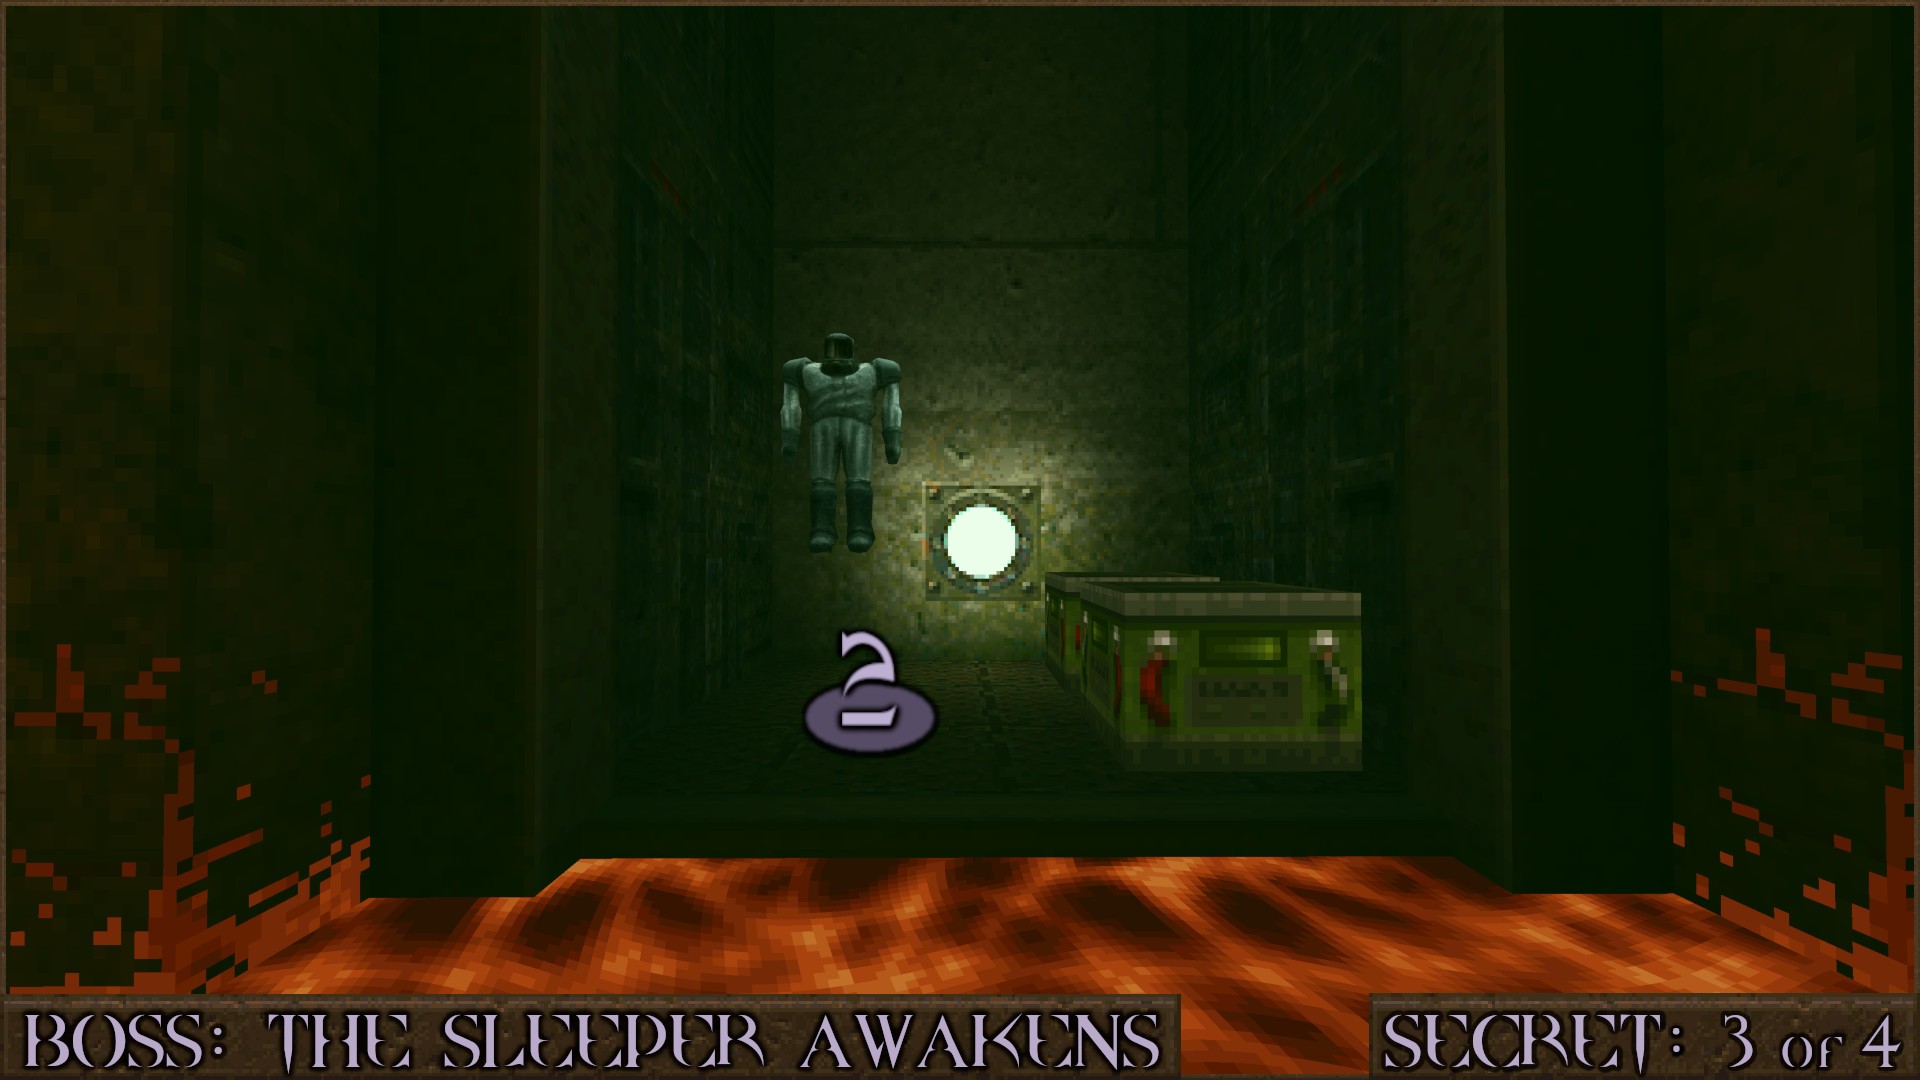
Grab another Lavasuit and head back onto the lava but this time head down the right side of the building ().

There is another platform here containing the secret ().

Reward: Large Cells×2 Lavasuit

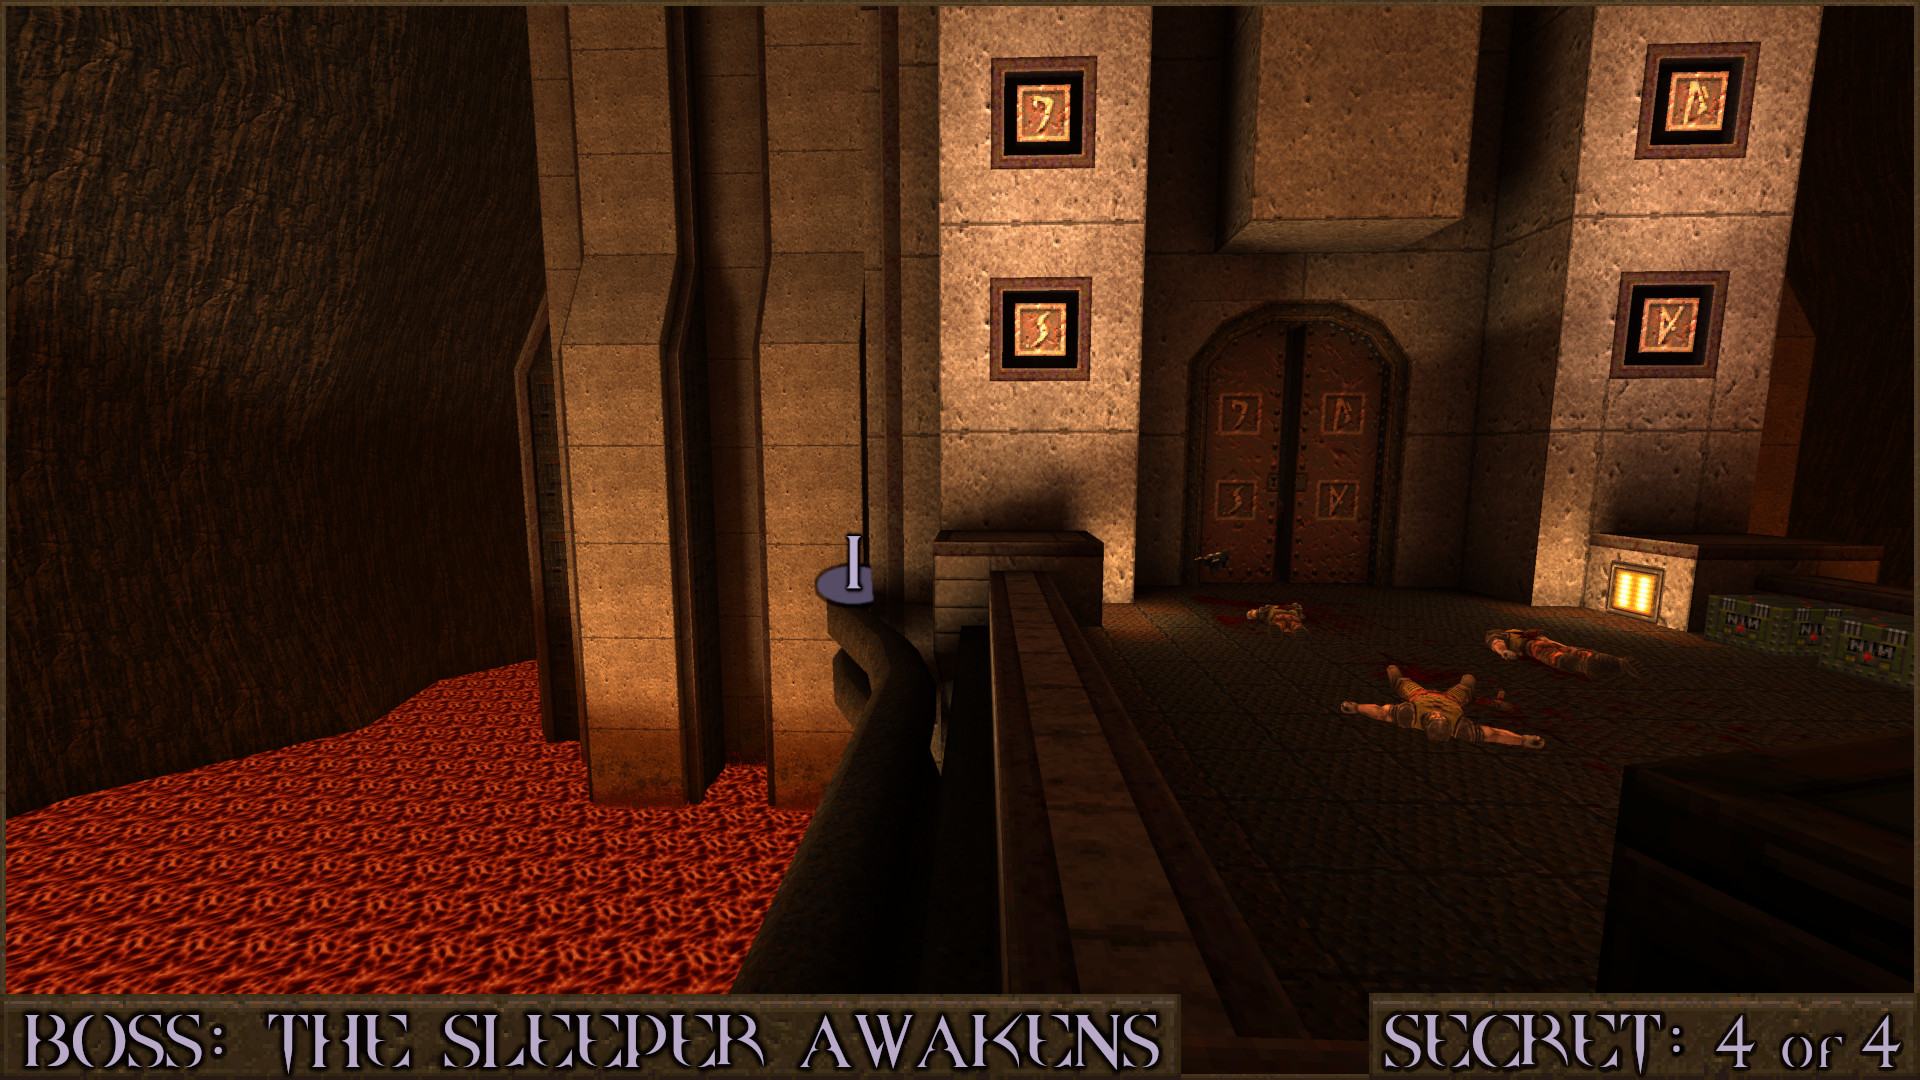
Secret 4 of 4
Climb to the top of bridge and approach the 4 Rune Door. Jump over the left side onto a pipe () and follow it to find a secret.

Reward: Megahealth

Extra Secret 1
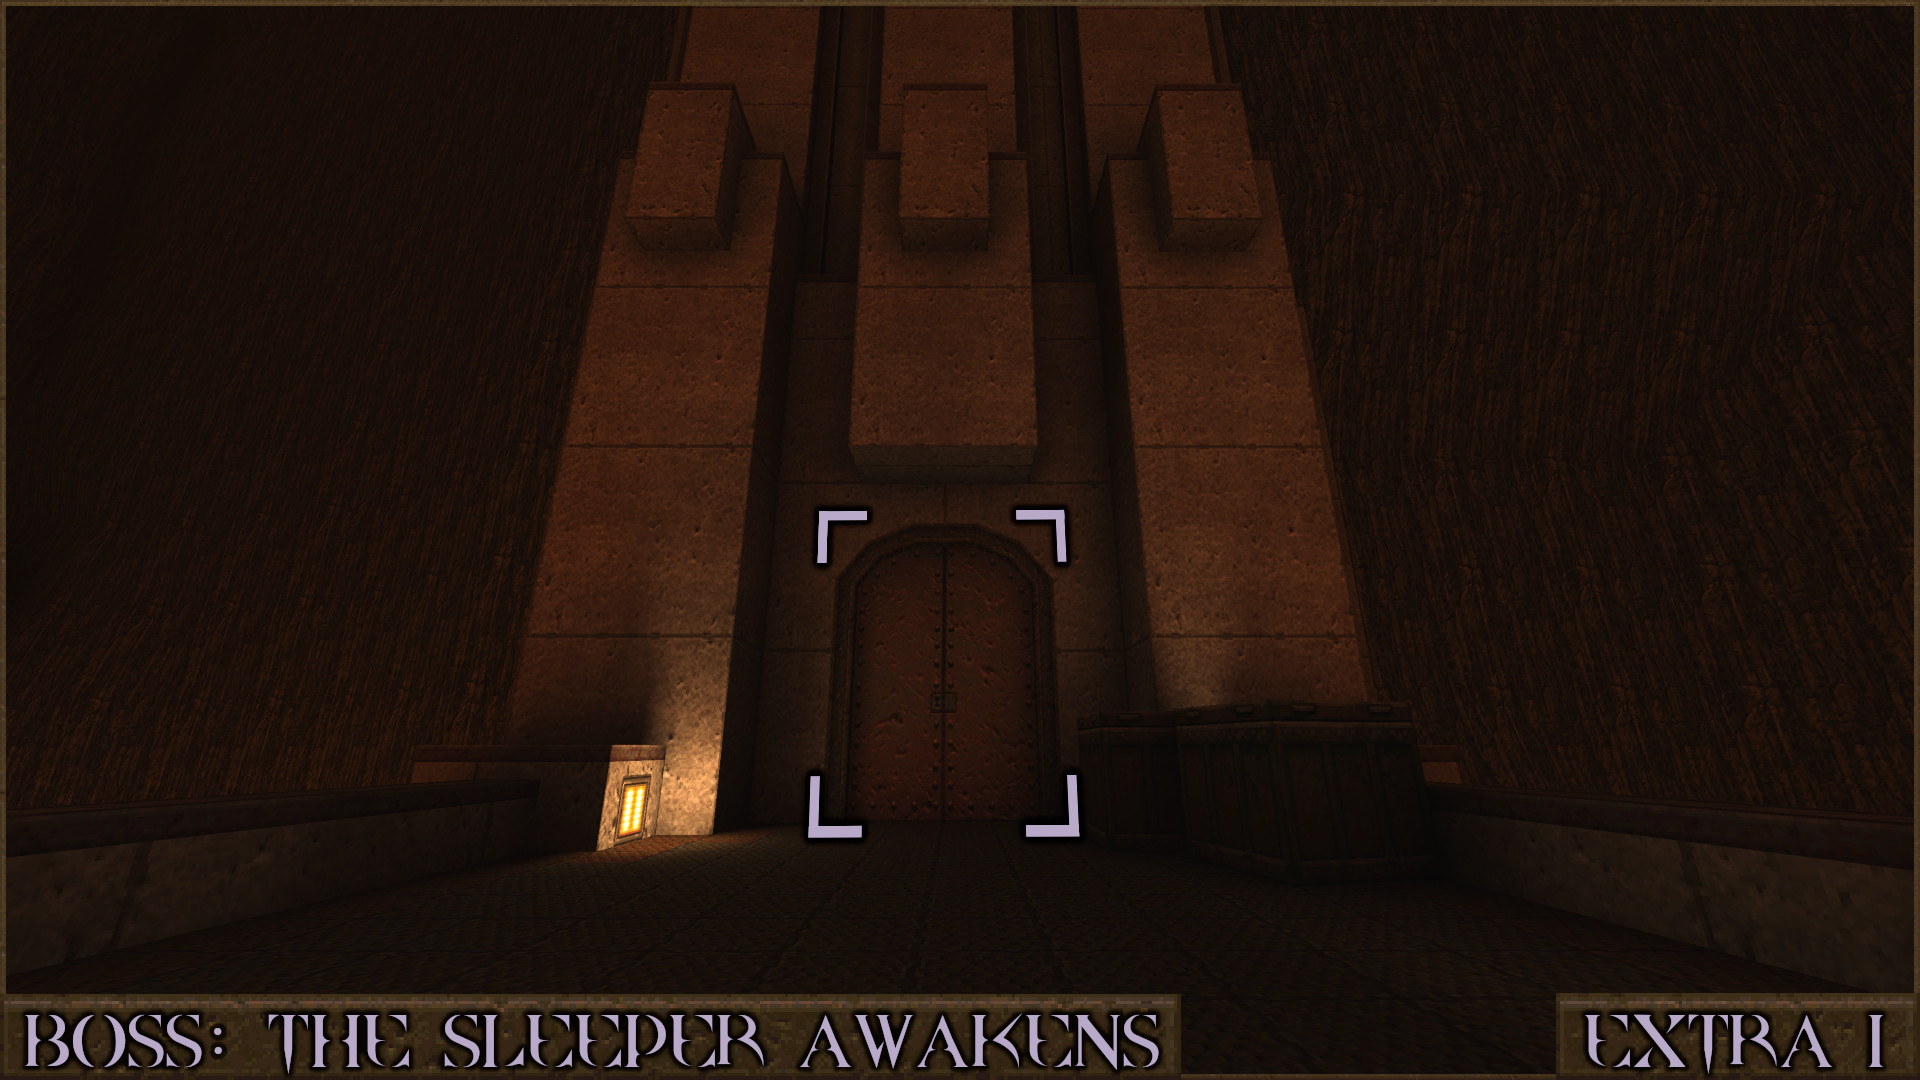
On the opposite end of the bridge is a normal double door. Head inside here to find a Slipgate that can take you back to the hub level The Runic Nexus. This is particularly useful if you have changed your mind about picking up the Bloody Knight's Head that leads to Part 3 and wish to return and retrieve it.

Reward: Armor Shard×2 Small Health

Extra Secret 2
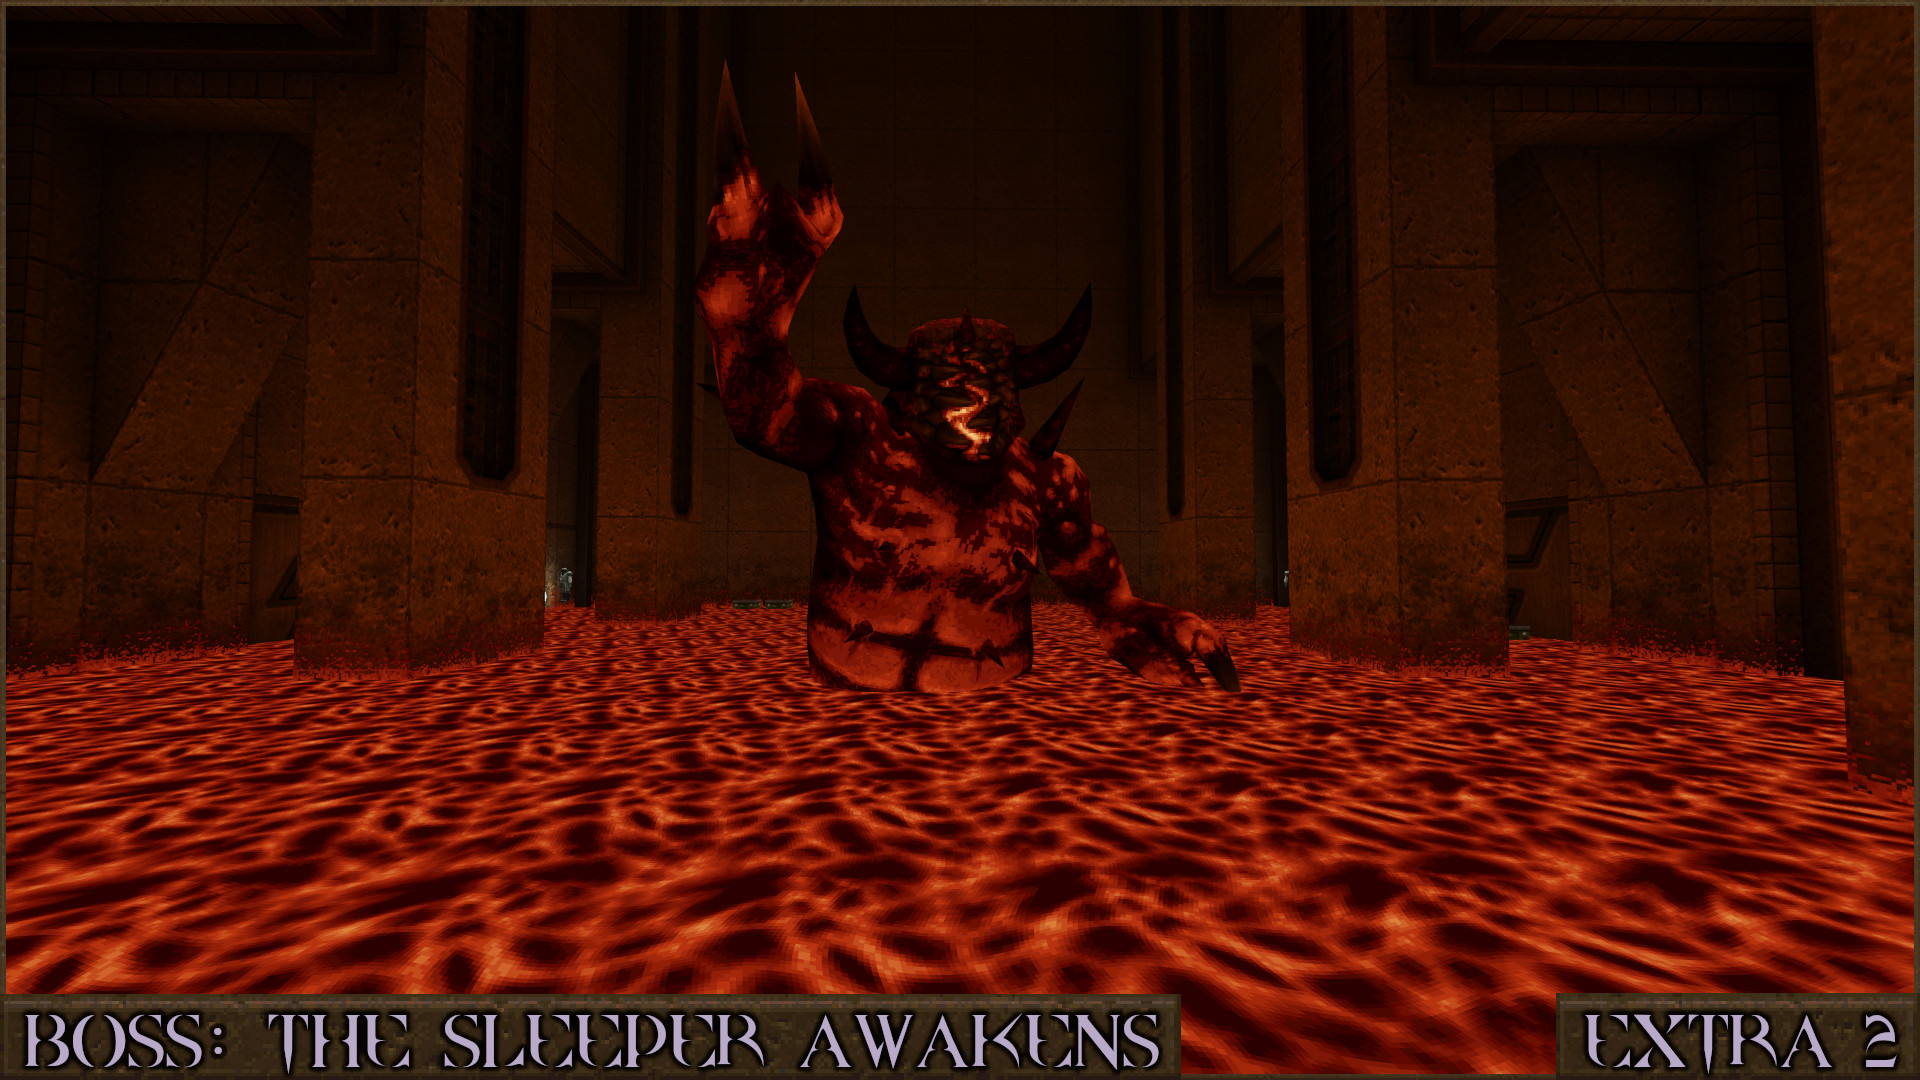
If you picked up the Bloody Knight's Head in the rune secret during the level MAP4: Of Shattered Minds and currently have Bloody Nightmare Difficulty active then there is something special to discover. Proceed with the level and kill the boss.

Upon defeating the boss you will be teleported back to the level MAP1: Through the First Arch and you will now start Part 3.
Part 3 is a full playthrough of the entire episode again exclusively under Bloody Nightmare Difficulty conditions. You will lose all your weapons, health & ammo capacity upgrades and all runes. The only upgrade you keep is the Super Axe. There are however new weapon upgrades to discover here and an alternate final boss awaits at the end.
Reward: [Bloody Nightmare Playthrough]
‎‏‏‎BOSS2: A Dancing God
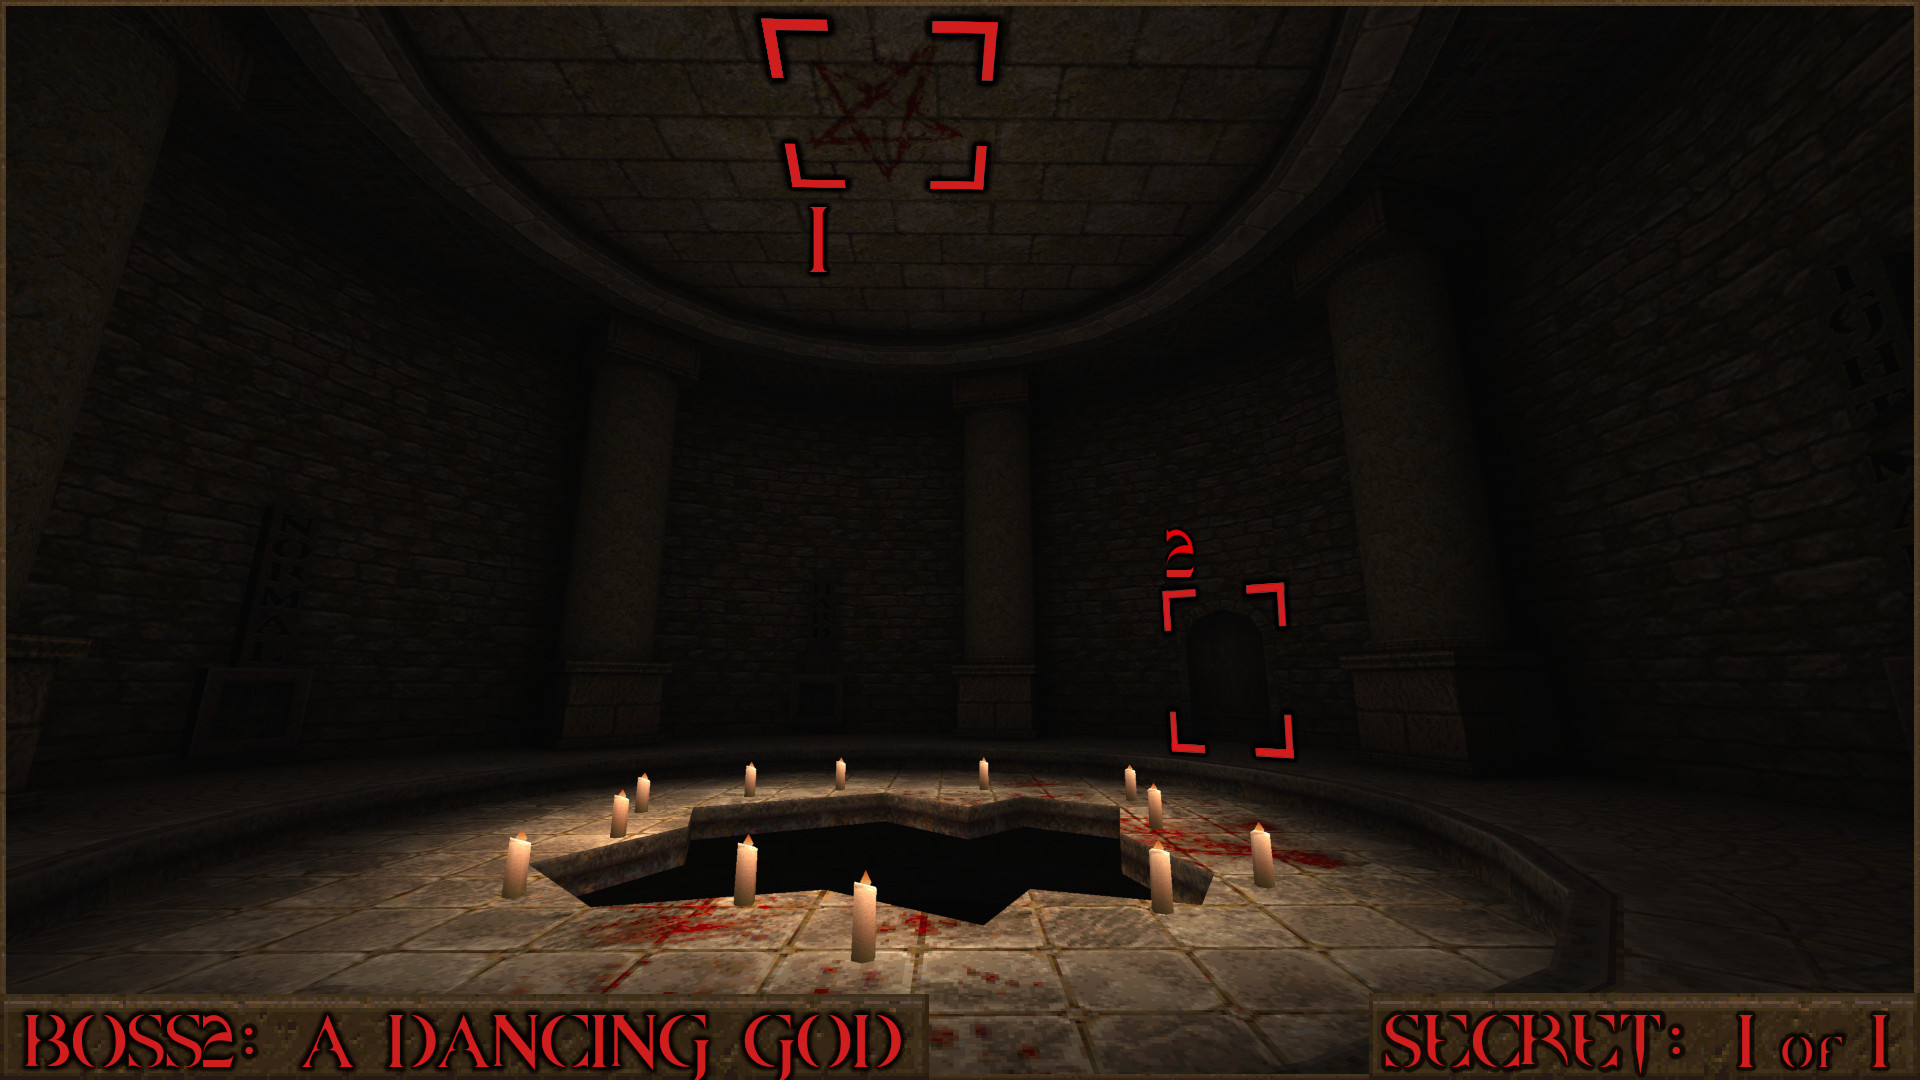
NOTE: During Part 3 once you have collected all 4 Runes and attempt to go through the 5th Slipgate in the nexus (that previously lead to SECRET2: The Nightmare Machine) you will instead get teleported to the alternate final boss level: BOSS2: A Dancing God.

Secret 1 of 1
Requires Bloody Nightmare New Game+
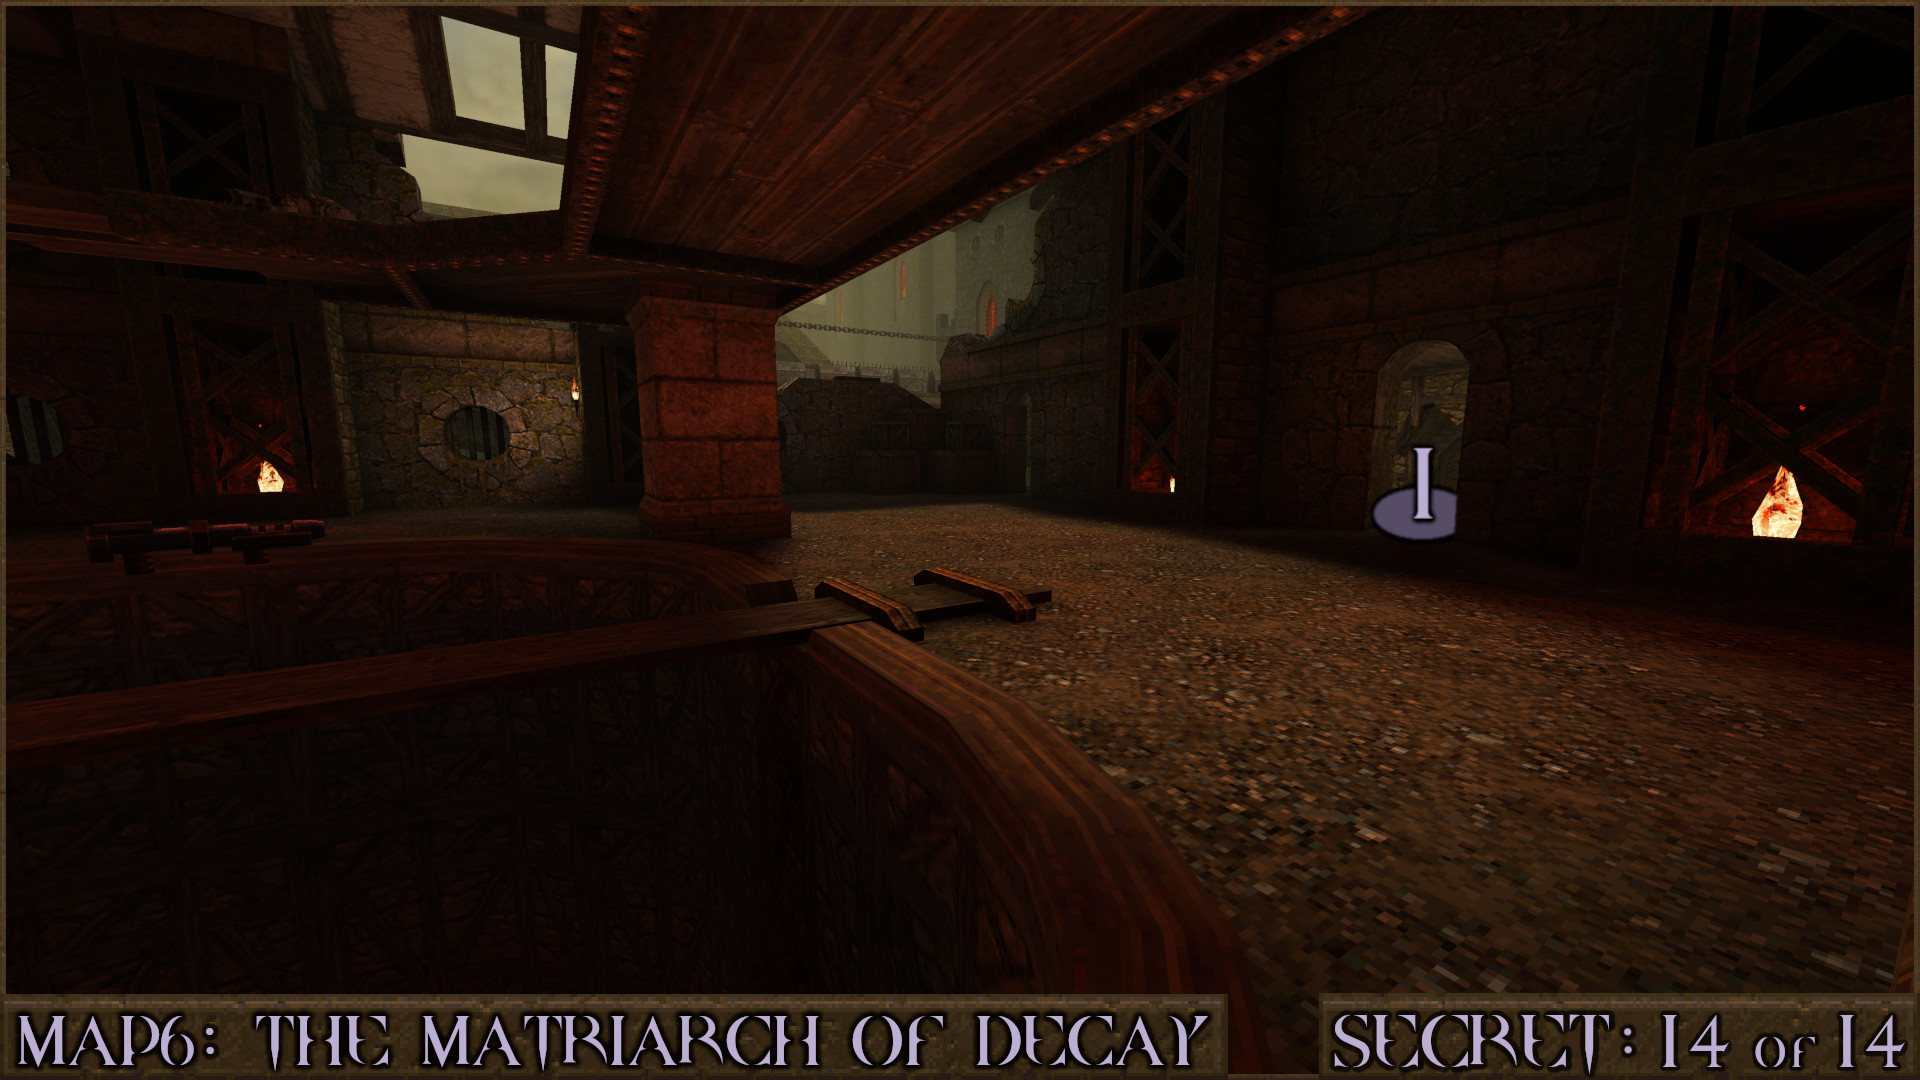
The final level is an alternate form of The Runic Nexus. Head down to the lower level and the altar will crumble away but before you drop down to fight the boss look up at the ceiling. Shoot the red pentagram () just like before and it will open the nearby door again (). Head inside to find the final secret.

Reward: Red Armor
81 Comments
Sep 14 @ 3:37am 
Excellent guide
Sep 10 @ 6:49pm 
Personally I just tank the bonus fight using the Pentagram of Protection from the extra secret.
Sep 10 @ 1:35am 
It works only after visiting Secret 10 and killing the Rottweiler in it. After that you will be able to jump into the pit with spikes at the beginning of the map and get a chance not to die.And even to repent for the sin committed.

If you kill the Rottweiler and don’t jump into the pit, at the end of the map we will be attacked by Death Knights and a bunch of Grenade Rottweilers. But if you jump and repent for the sin you’ve committed, all these enemies will automatically die and you’ll be able to proceed to the exit almost unhindered.
Sep 9 @ 3:57pm 
I don't quite understand the redemption thing mentioned in Matriarch of Decay, when I tried the spike pit again I just died.
Xazuki  [author]
Sep 7 @ 9:57am 
That particular secret in Requiem is covered in the additional + Rune Secrets section as it is highly recommended to return later with the runes to access the shortcut, which lets you collect the keys without opening the doors.
Sep 6 @ 5:26pm 
Really good guide.
Could you please document a way to reach the cat memorial in Requiem without noclip?
Xazuki  [author]
Aug 31 @ 10:49am 
Yeah unfortunately there is one of each upgrade in The Nightmare Machine level and it is skipped over during the Bloody Nightmare playthrough meaning you end up five short of a complete set.
Aug 31 @ 7:21am 
At Playthrough 3, health is only 190?
We just don't go to The Nightmare Machine level where the Health Capacity Upgrade is.
Aug 29 @ 9:20pm 
amazing guide
Aug 25 @ 11:59pm 
Another moment: during the 3rd playthrough it's no longer possible to change the difficulty on the HUB: The Runic Nexus but there’s a small box of cells near the “Hard” button, a large box of rockets near the “Bloody Nightmare” button and in Extra Secret 1 we will find Yellow Armor every time we visit this map.

I think this is worth mentioning as well.