
R.E.P.O.

R.E.P.O.

129 ratings
R.E.P.O. Monsters, Upgrades, and Weapons Guide
By tigre96tbf and 2 collaborators
R.E.P.O. - The Complete Employee's Guide

Welcome, new employee! Are you struggling to survive the hazardous retrieval operations in R.E.P.O.? This comprehensive guide is your essential resource for navigating the horrors, collecting valuable assets, and making it back in one piece.

Inside, you'll find detailed information on:

* All Known Entities: Learn about each monster's behavior, attacks, health, and how to best avoid or confront them.
* Upgrades Explained: Understand every available upgrade at the Service Station and how they can enhance your abilities.
* Weapons & Gear: Get the rundown on all weapons, grenades, and tools, including their uses and how to manage your energy.
* Essential Tips & Strategies: Discover crucial advice for efficient looting, effective teamwork, stealth, survival, and successful extraction.

Whether you're just starting your contract or looking to optimize your runs for maximum profit, this guide has everything you need to become a successful R.E.P.O. operative.

Good luck out there – the company is counting on you!
4
2
13
   
Award
Favorite
Favorited
Unfavorite
R.E.P.O. - The Employee's Essential Guide
Welcome to R.E.P.O. - Your First Day on the Job


Welcome, new employee, to R.E.P.O. (Retrieve, Extract, and Profit Operation).
Your mission is simple but dangerous: venture into hazardous areas, collect valuable assets, and return them to the Company. Teamwork is your greatest asset.

R.E.P.O. features a unique revival system: if a teammate falls, you can collect their head and bring it to an Extraction Point or the Ship to revive them (at 1 HP). For high-tier operations, the Defibro tool now allows for immediate on-site resuscitation.

Gameplay Loop Fundamentals

The core loop has expanded with the v0.4.1 Cosmetics Update:
  • Explore locations for physics-based objects and the new, fragile Cosmetic Boxes.
  • Transport these items to Extraction Points to earn [SURPLUS] and Tax Tokens.
  • Use the Service Station between missions to buy permanent upgrades, gear, and legendary cosmetics.

Health and Team Recovery

Survival depends on managing your health pool across the team. Upon returning to the Ship after a successful round, you will now regain 50 HP (increased from 25).

Pro Tip: The Ultimate Health Transfer
With the new 50 HP recovery, the "Neck Interaction" is more vital than ever. If a teammate is near death, transfer 20 HP to them. Since the Ship restores 50 HP to you anyway, you are effectively healing your team for free every single round. Always top off your teammates before the extraction is complete!

Handling Valuables & Fragility

All items have physics and can be damaged. Handling them roughly reduces their market value.
  • Cosmetic Boxes: These are the most fragile items in the game. If they take too much damage from falls or collisions, they break permanently. You can "heal" a box by holding interact, sacrificing 10 of your own HP to repair it.
  • C.A.R.T.s: Use these to move multiple items. Their cushioned interiors are essential for protecting fragile loot from fall damage.
  • Extraction Zones: Ensure items are fully inside the zone. Partially placed items may be destroyed by the extraction pulse or fail to count toward your quota.

Understanding the Entities - The Threats You Face
Venturing into the abandoned facilities is fraught with peril, and the primary source of danger comes from the hostile entities that inhabit them. These creatures are varied, unpredictable, and often terrifying. Understanding their unique behaviors, strengths, and weaknesses is not merely helpful – it is absolutely crucial for your survival and the success of your extraction mission.

Ignoring or underestimating an entity can quickly lead to your demise, or worse, compromise the entire operation and the valuable assets you've collected. Knowledge is your first and most vital defense.

Entity spawns vary by level range, influencing the number and types of monsters you'll encounter:

Level Range
Lvl. 1 Monsters
Lvl. 2 Monsters
Lvl. 3 Monsters
1 to 2
1
0
1
3 to 5
1
1
1
6 to 8
2
2
2
9 to 10
2
3
2
11+
2
3
3

Orb Values Upon Defeat

Defeating these entities does not remove just the threat but also provides a source of [SURPLUS]. Most entities will drop a valuable orb upon death that can be collected and extracted.

Here is a list of known entities and the approximate [SURPLUS] value range of their orbs:

  • Animal: ~$2,000 - $4,200.
  • Apex Predator (Duck): ~$2,000 - $3,000.
  • Banger: N/A (Does not drop a valuable orb).
  • Birthday Boy: ~$4,000 - $6,500.
  • Bowtie: ~$3,000 - $5,000.
  • Chef: ~$2,000 - $5,000.
  • Cleanup Crew: ~$5,500 - $7,500.
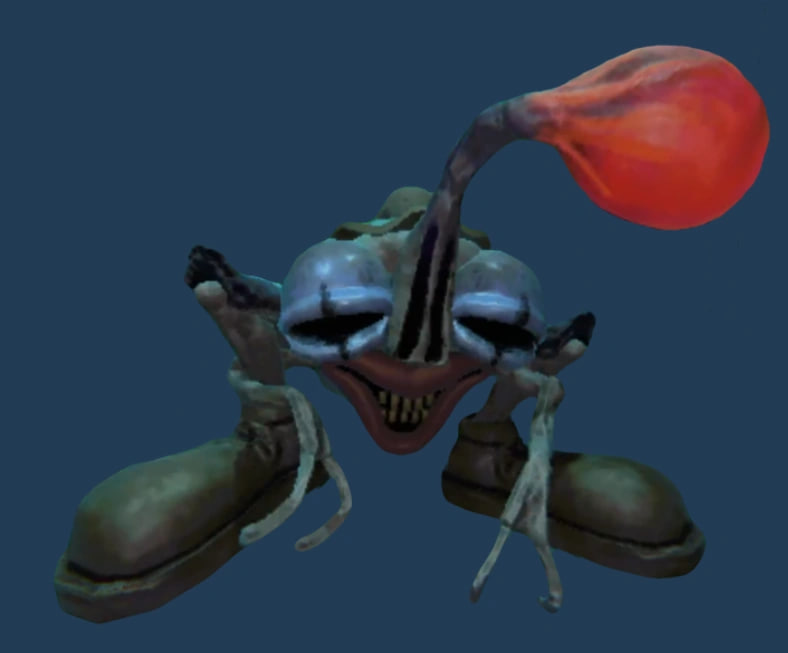
  • Clown: ~$5,000 - $8,000.
  • Gambit: ~$6,000 - $9,500 (High Value).
  • Gnome: N/A (Does not drop a valuable orb).
  • Headgrab: ~$1,500 - $3,000.
  • Headman (Floating Head): ~$4,500 - $8,000.
  • Heart Hugger: ~$2,000 - $4,500.
  • Hidden: ~$3,500 - $7,000.
  • Huntsman: ~$3,000 - $8,000.
  • Loom: ~$4,000 - $6,000.
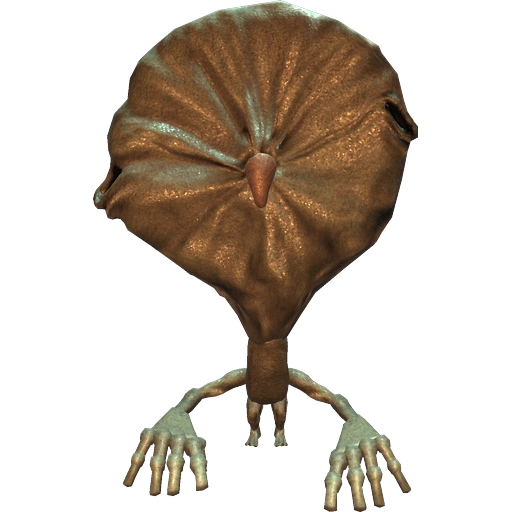
  • Mentalist (Teleporting Alien): ~$3,000 - $5,000.
  • Oogly: ~$7,000 - $10,000 (Very Rare/Hard to Kill).
  • Peeper (Eye): ~$2,000 - $4,000.
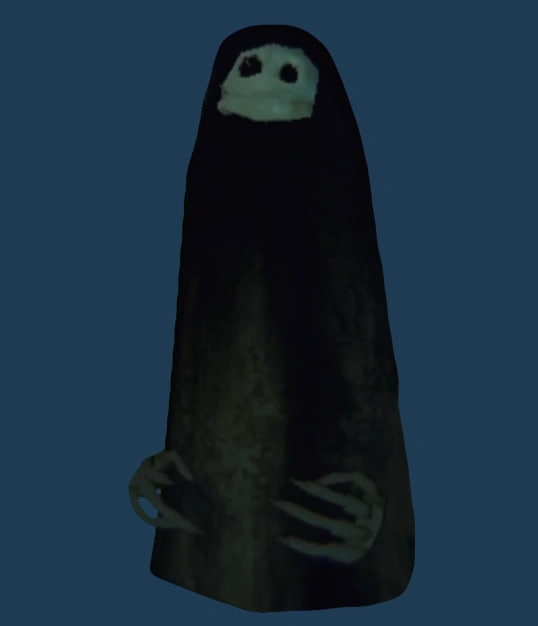
  • Reaper: ~$6,000 - $8,000.
  • Robe: ~$5,000 - $8,000.
  • Rugrat: ~$2,000 - $4,000.
  • Shadow Child: ~$2,600 - $5,000.
  • Spewer: ~$1,000 - $4,000.
  • Tick-smol: ~$500 - $1,200 (Low value, often in swarms).
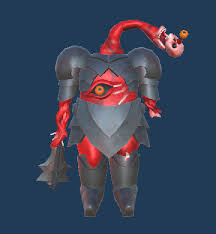
  • Trudge: ~$5,000 - $8,000.
  • Upscream: ~$2,000 - $4,000.

Note: Orb values can vary slightly or be influenced by the orb's condition at the time of extraction. There can be approximately up to 20 orbs dropped.
Understanding the Entities - Monster Database (Small)
The facilities you will explore are inhabited by various hostile creatures. Learning their behaviors, strengths, and weaknesses is vital for survival.

Here is a list of known entities in order of smallest to largest

Monster Database - Small Entities

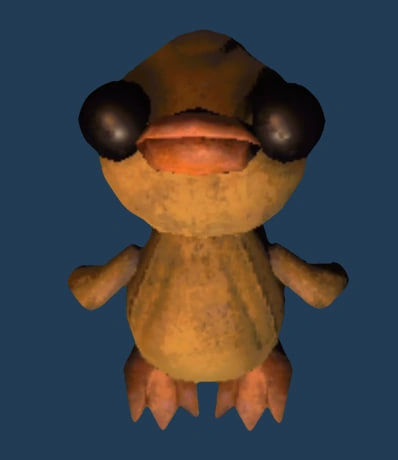
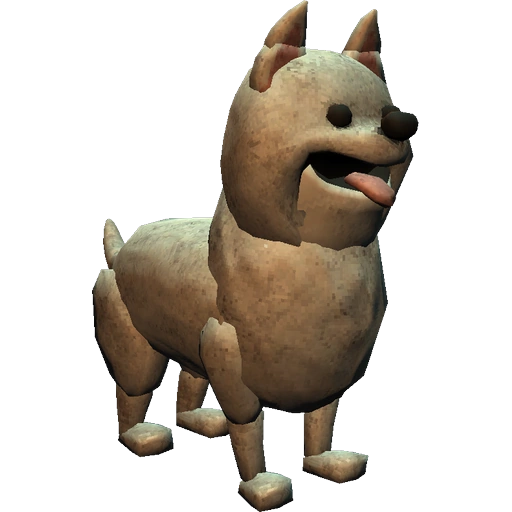
Apex Predator (Duck)
Description: Appears as a small, seemingly harmless duck, following players and turning aggressive if picked up or harmed. It also makes noise, so watch out for other entities near you.

Strength Needed: 4 (to lift).
Attack: Lunge (10 damage).
HP: 150.

Spawn Locations And How to Deal: Manor, Station, Academy.
Stunnable by: Putting it in a cauldron or flushing it in a toilet. You can also use collectibles from the shop to either stun or kill it.


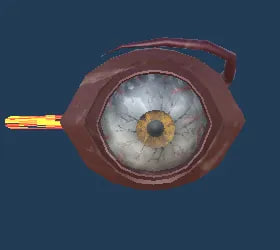
Peeper (Eye)
Description: Appears as a large eyeball on the ceiling. Damages players who look at it for more than a few seconds.

Strength Needed: N/A (Cannot be lifted).
Attack: Damage over time after ~3s of eye contact (2 damage/s).
HP: 50.

Spawn Location And How to Deal: Unknown (appears in various levels).
Avoid direct eye contact. Use any object to block line of sight. It cannot be killed nor stunned.


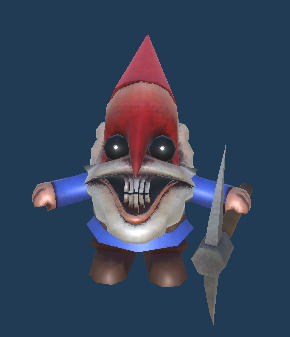
Gnome
Description: Small humanoid creature. Attacks in groups, often targeting valuable items.

Strength Needed: 0
Attack: Melee (10 damage)
HP: 20.

Spawn Location And How to Deal: Manor, Station.
Easily killable by picking them up and throwing them against surfaces. They can also be thrown at other monsters to stun them.


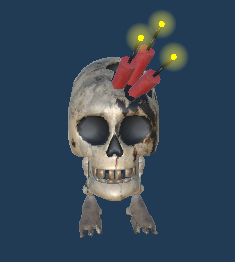
Banger
Description: Small skull with dynamite sticks inside. Runs towards players and explodes ~10 seconds after lighting their fuse.

Strength Needed: 0
Attack: Explosion (30 damage) + Knockback.
HP: 50.

Spawn Location And How to Deal: Unknown (appear in various levels).
Pick them up and throw them against a surface to have them detonate from a safe distance.
They explode on the third bounce, so throw them far away!


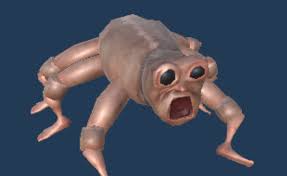
Animal
Description: Small six-legged creature. After seeing you, he will panic and run around, damaging anything on his way (players or items) without a criteria.
Strength Needed: 4 (to lift).
Attack: Melee (2 damage if provoked).
HP: 150.

Spawn Location And How to Deal: Various (often ground level).
Can be lifted and carried. Multiple players can temporarily freeze it. Usually not a major threat.


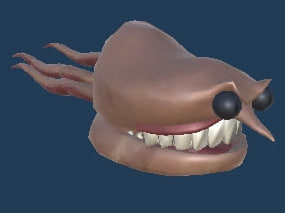
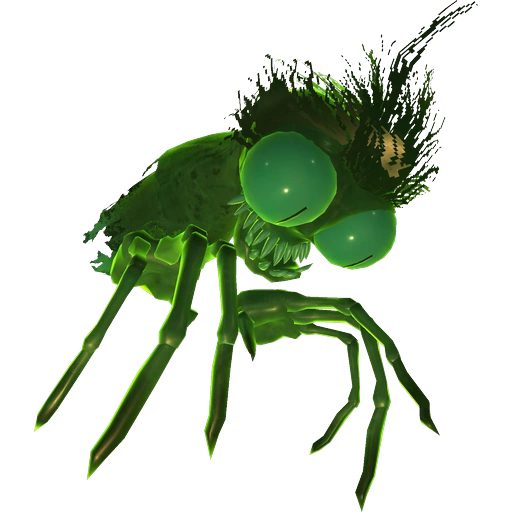
Spewer
Description: Creature able to attach to players. Vomits at fixed intervals wherever the player is looking at, damaging items and potentially harming other entities or players. Look down to avoid damaging valuables.

Strength Needed: 0 (to grab/push), 4 (to smack on surfaces).
Attack: Attach/Melee (10 damage).
HP: 65.

Spawn Location And How to Deal: Unknown (appear in various levels).
Can be grabbed and pushed away to prevent attachment. At Strength 4, you can smack it onto surfaces.


Upscream
Description: Creature with a smiling face. He will grab and throw players in the air, causing them to take fall damage.

Strength Needed: 4 (to lift & kill by throwing).
Attack: Melee (10 damage) + Stun.
HP: 50.

Spawn Location And How to Deal: Unknown (appears in various levels).
More of a nuisance than a major threat due to low HP and damage. Can be killed by lifting and throwing.


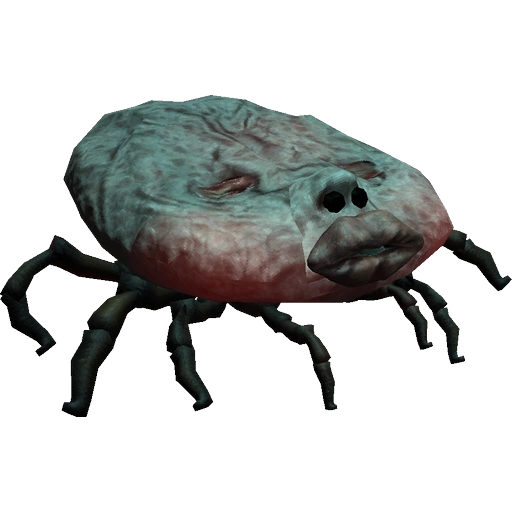
Tick-smol
Description: Small parasites that latch onto players to drain health and stamina. They are weak individually but dangerous in large swarms.

Strength Needed: 1 (to shake off).
Attack: Parasitic Drain (10 HP per tick).
HP: 20.

Spawn Locations And How to Deal: Station, Academy Basement.
Stunnable by: Easily killed by jumping on them or using any melee tool. High-tier Flashlights can deter them.


Puffistik(Elsa)
Description: A deceptive, fluffy entity that appears completely stationary and harmless. However, it requires constant "attention" (looking at it). If ignored for too long, it transforms into a jagged, aggressive form that strikes with surprising speed.

Strength Needed: 2 (to push away in base form).
Attack: Spiked Lunge (35 damage in transformed state).
HP: 600.

Spawn Locations And How to Deal: Museum, Manor.
Stunnable by: Constant visual contact keeps it in its "cute" state. If it transforms, a Stun Grenade or a hit from a Magic Staff will force it back into its dormant form.


Oogly (The Starer)
Description: A bizarre creature with oversized eyes. It freezes when looked at but moves at extreme speeds when the player turns away.

Strength Needed: 1 (to resist shove).
Attack: Neck Snap (High damage).
HP: Invulnerable (usually).

Spawn Location And How to Deal: Deep Station, Academy.
Establish a "staring rotation" with your team. One person must always keep it in sight while others work. If solo, back away slowly while maintaining eye contact until you reach a door.


Understanding the Entities - Monster Database (Medium)
The facilities you will explore are inhabited by various hostile creatures. Learning their behaviors, strengths, and weaknesses is vital for survival.

Here is a list of known entities in order of smallest to largest

Monster Database - Medium Entities

Mentalist (Teleporting Alien)
Description: It's able to lift players and valuables before slamming them on the ground.
You can hide from it, since it loses aggro quickly.


Strength Needed: 4 (to lift).
Attack: Slam (50 damage).
HP: 150.

Spawn Location And How to Deal: Unknown (various levels).
When grabbed, place a Pocket C.A.R.T. underneath you to prevent damage. Save teammates by grabbing/running during the red circle phase.


Rugrat (Child)
Description: Four-armed creature. It will grab any item near him and throw them at players.

Strength Needed: 4 (to lift).
Attack: Scream (damage + stun), Thrown objects (19-225, depends on object size).
HP: 150.

Spawn Location And How to Deal: Unknown (appear in various levels).
Quickly take them down individually with melee before they group up. Stun grenades are effective.


Shadow Child
Description: Appears alongside a child's laugh. Damages players who stare at it for more than 4 seconds. Can also teleport away.

Strength Needed: 9 (to lift).
Attack: Damage after ~4s of staring (30 damage).
HP: 150.

Spawn Location And How to Deal: Unknown (appear in various levels).
Counter: Immediately break eye contact upon hearing the laugh and wait for it to teleport away.
Useful Tip: You can walk backwards while putting items on the C.A.R.T.


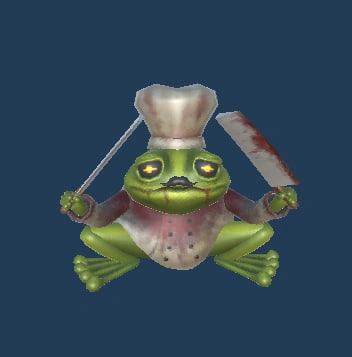
Chef
Description: Frog-like creature with knives. Jumps relentlessly towards players once he spots them. Staying on high ground can help you avoiding damage. After it jumps, you can move and hide to lose aggro.

Strength Needed: 9 (to lift).
Attack: Multiple knife hits per bounce (10 damage/hit).
HP: 150.

Spawn Location And How to Deal: Unknown (appear in various levels).
Avoid its jump attack. Can be dangerous in groups. You can trigger him to jump in the void with the right timing.


Reaper
Description: Robed figure that attacks with melee weapons. She will lose aggro quickly, move to other rooms and hide.

Strength Needed: 9 (to lift).
Attack: Melee (10 damage/hit).
HP: 150.

Spawn Location And How to Deal: Unknown (appear in various levels).
Avoid the Reaper if possible. If you have high ground or a long table, you can stand there to draw her attention and assist your teammates.


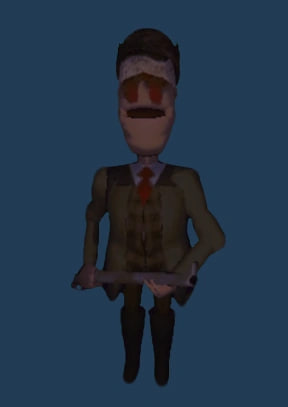
Huntsman
Description: Blind figure armed with a sniper rifle. Since he's blind, he will only attack after hearing players, dropped items or other noisy enemies. Avoid writing in chat, running, jumping or talking.

Strength Needed: 9 (to lift).
Attack: Powerful ranged (100 damage).
HP: 250.

Spawn Location And How to Deal: Unknown (appear in various levels).
Best to avoid it by crouching and maintaining distance. Attacking is not recommended unless you have a gun (ranged weapon). It can be briefly stunned if it trips on stairs or is blocked with an item. Use this moment to grab it (requires Strength 9) or smash it as a team.


Hidden
Description: Ghostly figure that drags players back to a previous location (often a spawn point). Be warned: if the Headman is on the map, it might drag you directly to him, likely resulting in death. You can detect it by the sound of breathing and subtle shadow movements.

Strength Needed: 5 (to lift).
Attack: No direct damage.
HP: 100.

Spawn Location And How to Deal: Manor.
Not dangerous in terms of health, but its ability to drag players back to previous locations can put you in a bad position. Be aware of your surroundings. It requires Strength 9 to lift, though lifting does not kill it.


Bowtie
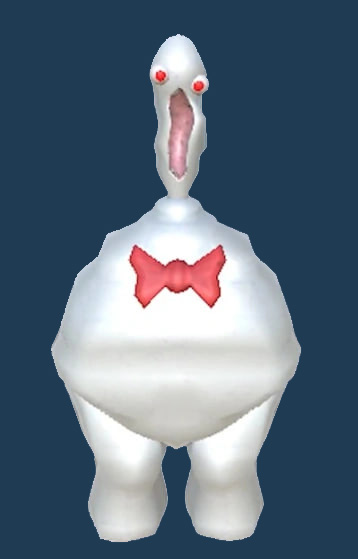
Description: Large white figure wearing a bowtie. Slow-moving, emits screams. Can enter a fast frenzy state running over players/objects.

Strength Needed: 9 (to lift).
Attack: Screams (5 damage/hit when pinning), Frenzy (runs over players/objects).
HP: 100.

Spawn Location And How to Deal: Unknown (appear in various levels).
Best avoided by hiding and letting it patrol. It's difficult to kill, and lifting requires Strength 9. If you must fight, use a gun. Be careful of its screams, which can damage players pinned against walls.


Bella (Chick on a Bike)
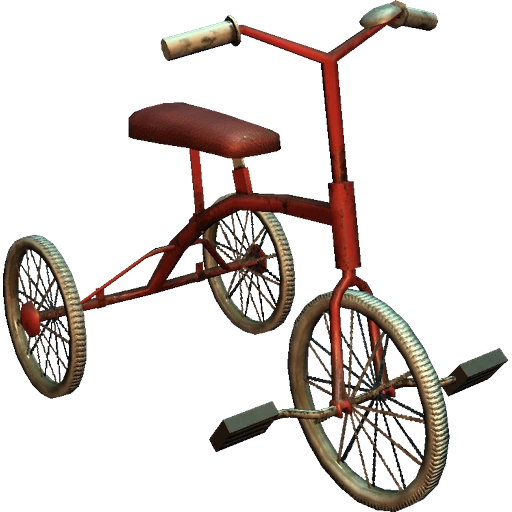
Description: An incredibly fast bird-like entity riding a bicycle. She patrols long hallways and will try to run over any employee in her path.

Strength Needed: 4.
Attack: High-Speed Collision (40 damage + Knockback).
HP: 250.

Spawn Locations And How to Deal: Station, Manor.
Stunnable by: Side-stepping at the last second or hiding behind corners. Throwing a heavy item like a Grandfather Clock in her path can cause her to crash and stun her temporarily.


Understanding the Entities - Monster Database (Large)
The facilities you will explore are inhabited by various hostile creatures. Learning their behaviors, strengths, and weaknesses is vital for survival.

Here is a list of known entities in order of smallest to largest

Monster Database - Large Entities

Headman (Floating Head)
Description: A floating head that attacks players illuminated by flashlights. Moves very quickly when it sees you. Run to another room and hide to avoid getting hit.

Strength Needed: 13 (to lift).
Attack: Lunge (50 damage) + Stun.
HP: 250.

Spawn Location And How to Deal: Manor, Station.
Avoid pointing your flashlight at it. Stay crouched and hidden; running is often ineffective. A gun is an effective weapon against it. Objects placed in its path can block and damage it, but be cautious as the objects will also be damaged. Remember it will always take the shortest path to reach you.


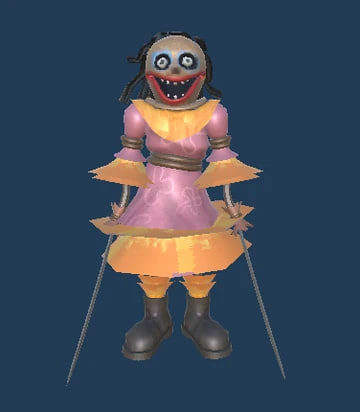
Clown
Description: Large, intimidating monster. Charges and fires laser beams (pointing at the players' heads). Kicks if unable to use the laser or close enough to a player.

Strength Needed: 13 (to lift).
Attack: Laser (100 damage), Kick (50 damage + Knockback).
HP: 250.

Spawn Location And How to Deal: Academy.
The laser aims high if you stand, low if you crouch. To avoid the laser, change stance accordingly (crouch if standing, stand if crouching). You can avoid its kick attack by jumping.


Robe
Description: A large, dark robed figure that attacks players on sight or when nearby. It moves quickly when pursuing but is slow while patrolling. Be aware it can attack players even under hiding spots like chairs or tables.

Strength Needed: 13 (to lift).
Attack: Powerful attack (100 damage), Crouch (50 damage).
HP: 250.

Spawn Location And How to Deal: Unknown (appear in various levels).
Difficult to deal with. If you don't have high Strength (13 required to lift), a gun is the best option. Be aware other guns may cause it to recoil quickly. A Tranq Gun can be useful for crowd control when working with a group.


Trudge (Red creature)
Description: Massive, slow-moving, and extremely durable creature. It can pull players in. Its attack has a vacuum-like effect, and it can even damage players behind walls.

Strength Needed: 13 (to lift).
Attack: Powerful melee (100 damage).
HP: 500.

Spawn Location And How to Deal: Unknown (appear in various levels).
It is the most durable monster. Best to entirely avoid its line of sight; you can safely run or make noise behind it. If you choose to fight, use grenades or a shotgun.


Gambit
Description: A roaming monster that captures players and forces them to spin a giant roulette wheel in its mouth. The outcome is purely luck-based and can restore your health, drop loot, or instantly leave you with 1 HP.

Strength Needed: 3 (to resist grab).
Attack: Randomized Spin Wheel (Potentially lethal).
HP: 150.

[[b]Spawn Location And How to Deal:[/b] Swiftbroom Academy, Headman Manor.
Avoid line of sight. Keep distance to prevent grab; if caught, the wheel decides your fate. Stun batons can interrupt its sprint. It flees after a spin, giving you a window to escape.


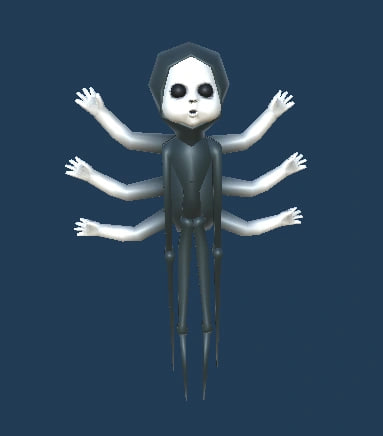
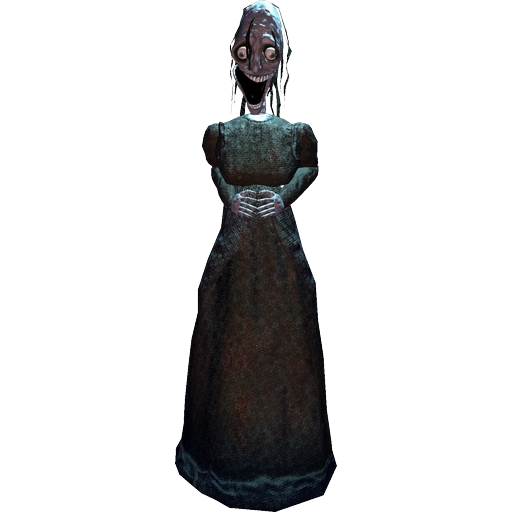
Loom (The Weaver)
Description: A tall, spindly entity that weaves webs to trap unsuspecting players. It prefers to ambush from corners or high ceilings.

Strength Needed: 2 (to break webs).
Attack: Melee strike (35 damage) + Entangle.
HP: 500.

Spawn Location And How to Deal: Station, Manor.
Watch the ceilings and floor for silk strands. Use a melee tool to clear webs. If spotted, stay mobile; it is fast but has low health and can be taken down quickly with coordinated hits.


Cleanup Crew (The Sweepers)
Description: Humanoid robots programmed to "sanitize" the area. They don't just pick up trash; they see players as organic waste to be incinerated.

Strength Needed: 5 (to push back).
Attack: Flamethrower / Grab (Continuous damage).
HP: 200.

Spawn Location And How to Deal: Factory, Academy Basement.
Listen for mechanical whirring. Stay out of narrow corridors where their fire is unavoidable. They are slow; circle-strafe them or use water/extinguishers if available to disable their weapons.


Headgrab (The Leaper)
Description: Small, agile parasite that leaps from dark spots. Once attached to a player's head, it obscures vision and drains health rapidly.

Strength Needed: 1 (to pull off).
Attack: Vision Obscurity + Drain (15 HP per sec).
HP: 30.

Spawn Location And How to Deal: Any interior (Vents, Dark rooms).
If you hear a high-pitched screech, look up. If it latches on, a teammate must hit it off, or you must spam the struggle key. Very weak to any light source.


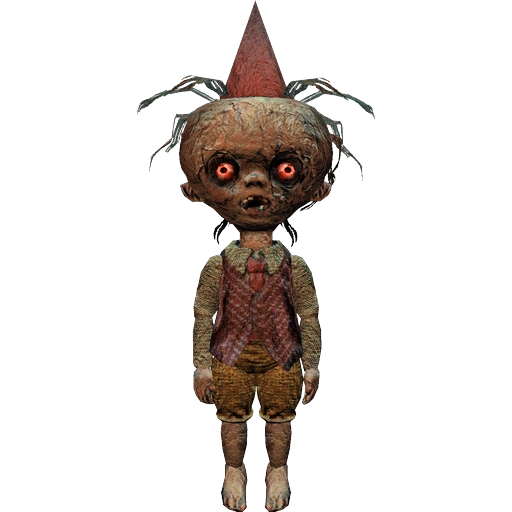
Birthday Boy
Description: A disturbing, festive-looking creature carrying a "present". It remains stationary until approached, then chases with explosive intent.

Strength Needed: N/A.
Attack: Festive Explosion (Instant Kill/Heavy AOE).
HP: 50 (Explodes on death).

Spawn Location And How to Deal: Academy, Manor.
Do not be fooled by the loot-like appearance. If it starts giggling, run. Best dealt with by shooting from a distance to trigger the explosion safely away from the team.


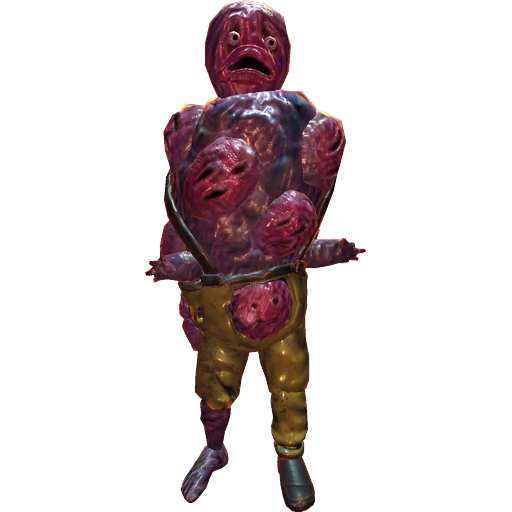
Heart Hugger (The Clinger)
Description: A fleshy, pulsating parasite that targets the player's chest. It doesn't kill instantly but latches on to "sync" with your heartbeat, causing stamina exhaustion and slow health decay.

Strength Needed: 4 (to rip off).
Attack: Cardiovascular Strain (Stamina drain + 5 HP/tick).
HP: 45.

Spawn Location And How to Deal: Academy Basement, Deep Station.
Listen for a wet, thumping sound. It’s faster than it looks. If it latches, you cannot sprint. Use a melee weapon to kill it before it jumps, or have a teammate pull it off. High-tier flashlights can briefly stun it during its leap.


Mission Scaling: The Moon Phase System


Moon Phases

With the v0.2.0 "Museum Update", REPO introduced the Moon Phase system — a rotating set of global difficulty modifiers that activate every 5 levels. These phases progressively increase mission difficulty and influence energy stability.

When It Happens:

A new Moon Phase begins every 5 levels (Level 5, 10, 15, etc.). You can check the current phase in the Escape menu or by looking at the Skybox.

The Phases
  • Crescent Moon (Level 5+): Standard increased difficulty. Enemies become slightly tougher. Basic Overcharge begins appearing on high-tech tools.
  • Half Moon (Level 10+): Overcharge builds faster. Some creatures begin to resist stuns. Energy tools may flicker or glitch if used for too long.
  • Full Moon (Level 15+): High difficulty. Frequent group ambushes. Most creatures resist stuns significantly. Ambient noises increase, making it harder to hear stealthy threats like the Loom.
  • Super Moon (Level 20+): Critical difficulty spike. Maximum Overcharge build-up; surges can damage carried cargo. Even minor creatures may become lethal due to aggressive buffs.

What Changes Globally:
  • Enemy Buffs: Higher phases grant creatures more HP, speed, and stun resistance.
  • Overcharge Activation: Energy weapons accumulate heat/charge. If not vented (by turning them off briefly), they can cause a burst that damages you and teammates.
  • Environmental Effects: Lighting conditions and ambient threat behavior change—Full and Super Moons often feature darker interiors or flickering lights.

Tips for Survival:
  • Toggle your tools: During Half/Full moons, don't keep flashlights on. Flash them to see, then turn them off to vent Overcharge.
  • Melee Priority: In Super Moon phases, energy is a liability. Focus on high-efficiency melee like the Sword or Frying Pan.
  • Team Coordination: Avoid triggering Overcharge bursts near fragile cargo or wounded teammates.
  • Stun resistance: Use knockback weapons (Baseball Bat/Sledgehammer) when enemies resist stuns during Full/Super Moons.

Note: Higher Moon Phases also act as a [SURPLUS] multiplier for extracted orbs, rewarding the extreme risk with much higher profits.


The Service Station & Purchasing Strategy
Ecco la versione aggiornata della sezione Service Station, integrando i nuovi upgrade (Tumble Climb e Death Head Battery), le modifiche allo shop e la nuova strategia di efficienza energetica che abbiamo discusso.

Welcome back, employee! After a successful (or even unsuccessful) run, you'll find yourself at the Service Station. This is your crucial hub between missions, where you convert your hard-earned profits into tools for future operations.

Your efforts in retrieving valuables and eliminating threats earn you [SURPLUS], the Company's currency. Use it wisely to improve your chances of survival!

What the Service Station Offers

The Service Station offers a variety of essential items:
  • Upgrades: Permanent enhancements to your abilities (Strength, Speed, Health, etc.).
  • Weapons: Tools for self-defense. Now categorized by Energy Efficiency.
  • Utility Drones: Automated help for transport, protection, and recharging.
  • C.A.R.T.s: Essential vehicles for mass-transporting loot.
  • Consumables: Health Packs and Energy Crystals (now with dynamic pricing).

Important Shop Changes (2026 Update):
  • Dynamic Pricing: Prices increase with each level and each purchase of the same type.
  • The Hidden Shop: Check near the Health Packs; high-tier weapons often spawn there exclusively.
  • Stock Rotation: Inventory is randomized. If you see an Energy Crystal at a low price, buy it immediately!

Suggested Purchasing Strategy & Tips

Initial Buys (The "Efficiency" Start):
Prioritize Strength and the Indestructible Drone. Protecting high-value fragile items early is the fastest way to snowball your [SURPLUS].

Updated Upgrade Priority:
  • Strength: Aim for Level 13 to lift heavy entities.
  • Stamina & Crouch Rest: Essential combo for infinite kiting.
  • Death Head Battery (New!): High priority if you use ranged weapons. It makes every Energy Crystal last longer.
  • Extra Jump: 1-2 levels are enough for most skips.
  • Tumble Launch + Tumble Climb (New!): This combo unlocks advanced vertical movement. You can now roll into a wall and immediately scale it.
  • Sprint Speed: Do not exceed Level 4 unless you are a pro; the involuntary jumps can destroy fragile loot.
  • Tumble Wings: Vital for levels with high verticality to negate fall damage.
  • Map Player Count: Buy only in Co-op to track teammates' locations.

Weapons & Energy Management:
  • Eco-Fighting: Use the Frying Pan for small pests. It has the best hits-per-charge ratio.
  • Reliability: The Sword is the best all-rounder (500 total DMG per charge).
  • Energy Ranged: The Boltzap is currently the most efficient ranged stun tool (1 Crystal = 4 shots).

Health Packs & Healing:
In early levels (1-4), use the HP Transfer Mechanic: give 20 HP to a teammate before extracting; you will regain 25 HP upon a successful return, creating a net gain for the team. Buy Health Packs only when the discount is active or before heading into Level 7+.

Pro Strategy: If Energy Crystals are too expensive ($30k+), focus on Melee weapons and Strength upgrades to minimize your reliance on the shop's fluctuating prices.
The Service Station - Upgrades
As a R.E.P.O. employee, you can use your earned [SURPLUS] at the Service Station to purchase upgrades. These are consumables that, once used, permanently enhance your abilities for the current operation, making future retrievals easier and safer.


Important Note on Prices: The cost of upgrades, like other items, tends to increase with each new round and each time you purchase a specific upgrade type. Prioritize upgrades that align with your goals and the immediate challenges.


Stamina Upgrade
Effect: Increases your maximum stamina by 10 points per upgrade. Allows you to sprint and perform actions for longer.

Cost: ~$2,000+


Sprint Speed Upgrade
Effect: Increases your sprinting speed. Helps you escape danger faster.

Cost: ~$6,000 - $8,000+

Note: Be aware that with high levels (e.g., 4+ speed), sprinting can cause involuntary jumps which may make it difficult to control movement or damage carried items.


Health Upgrade
Effect: Increases your maximum health by 20 HP per upgrade. Makes you more durable against monster attacks and environmental hazards.

Cost: ~$6,000 - $8,000+


Strength Upgrade
Effect: Enhances your lifting capacity, allowing you to carry heavier valuable items and monsters. Crucial for solo play or moving high-value/heavy items.

Cost: ~$6,000 - $8,000+

Note: Specific Strength levels are required to lift different monsters (e.g., Strength 13 for the largest). It is also recommended to lift items with Feather Drones for better control and less damage, as this makes them weightless regardless of your Strength level.


Range Upgrade
Effect: Increases the distance from which you can pick up items/entities and interact.

Cost: ~$6,000 - $8,000+


Tumble Launch Upgrade
Effect: Extends the distance of your tumble launch (default Q). Turns the ability into a more effective dodge roll.

Cost: ~$4,000 - $5,000+

Note: The Tumble Launch upgrade extends your dodge roll distance. While skilled players can use it offensively to damage and sometimes stun entities, its primary recommended use is for quickly escaping danger. Each tumble inflicts 15 damage to enemies and 5 to yourseflf.


Tumble Wings Upgrade
Effect:The Tumble Wings Upgrade enhances your dodge roll by deploying wings during the Tumble Launch (activated by pressing "Q"). This allows your character to glide gently to the ground, reducing fall damage and enabling more controlled landings.

Cost: ~$4,000 - $6,000+.


Crouch Rest Upgrade
Effect: The Crouch Rest upgrade accelerates your stamina regeneration while crouching. This is particularly useful for stealthy maneuvers or when you need to recover stamina quickly during tense situations.

Cost: ~$7,000+.


Extra Jump Upgrade
Effect: Grants you an additional jump. Useful for reaching higher platforms, accessing hidden areas for loot, and navigating complex environments.

Cost: ~$12,000+


Map Player Count Upgrade
Effect: Displays the number of living teammates on your map (Tab). Investing in more upgrades can show their specific locations.

Cost: ~$11,000+

Note: Only useful when playing with other players.


Tumble Climb Upgrade
Effect: Allows you to initiate a climb immediately after or during a Tumble Launch (Q). This is essential for vertical mobility, allowing you to scale walls or reach ledges that are otherwise inaccessible.

Cost: ~$10,000+

Note: The Tumble Climb consumes a significant amount of stamina per use. It’s highly recommended to pair this with the Stamina Upgrade or Crouch Rest to ensure you don't run out of breath mid-climb and fall.


Death Head Battery Upgrade
Effect: Enhances the battery life and efficiency of all your energy-based tools and weapons. It effectively increases the maximum capacity of your items' internal power cells.

Cost: ~$15,000 - $20,000+

Note: This is a top-tier upgrade for energy management. It works passively on everything from your Flashlight to the Boltzap, making every Energy Crystal you use much more valuable by giving you more shots/time per charge.


The Service Station - Utility Gear (Drone, C.A.R.T.s and Tools )
Beyond upgrades and direct weapons, the Service Station offers various tools that provide utility, aid in transport, or help you manage energy.

Feather Drone
Effect: Attaching this drone to a valuable item makes it weightless and easy to carry, regardless of your Strength. Can also be used on monsters or to help players reach high places/cross gaps.

Cost: ~$15,000 - $48,000.


Recharge Drone
Effect: Provides a portable source of energy to recharge energy-based weapons and tools while out in the level. Requires Energy Crystals to be recharged back at the truck.

Cost: ~$4,000 - $15,000.


Indestructible Drone
Effect: Attaching this drone to a valuable item protects it from taking damage during transport, even from falls or monster interactions. Highly valuable for protecting fragile, high-value items.


Cost: ~$22,000 - $48,000+.


C.A.R.T. / Pocket C.A.R.T.
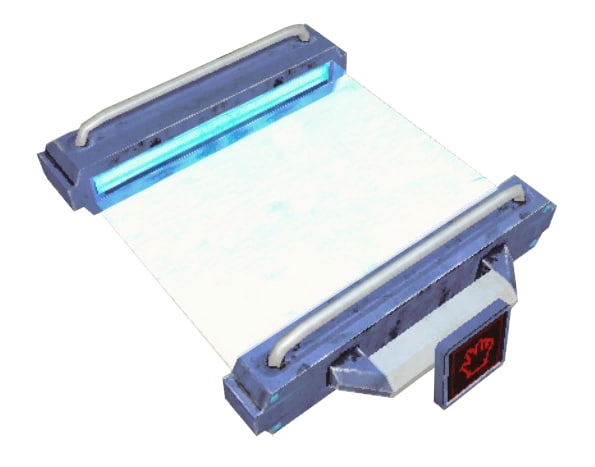
Effect: C.A.R.T.s are essential for transporting multiple valuable items at once. The standard C.A.R.T. is large, while the Pocket C.A.R.T. is smaller and can be stored in your inventory. They have cushioned interiors that reduce damage to items placed inside or prevent players from taking fall damage.

Cost: C.A.R.T.: ~$37,000+ , Pocket C.A.R.T.: ~$12,000.


Valuable Tracker
Effect: Helps locate the nearest valuable items in the environment. Useful for efficiently clearing areas.

Cost: ~$15,000.


Extraction Tracker

Effect: Helps locate the nearest extraction point. Useful when you've gathered enough loot or need to make a quick escape.

Cost: ~$6,000.


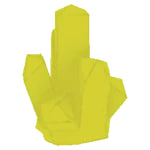
Energy Crystal
Effect: Consumable item used as a power source in the truck's recharging station or with a Recharge Drone to replenish energy for weapons and tools.

Cost: ~$7,000 - $50,000.

Note: It is recommended to purchase at least one whenever possible, as they are needed frequently and their price increases very rapidly. Discounts may apply depending on the number of players in the party. Larger groups typically receive better pricing.


Cannon C.A.R.T.
Effect: Comes with four total charges, each used per shot. Every projectile inflicts a minimum of 500 damage, making it highly effective against tougher enemies or crowd control. Ideal for emergency defense or clearing a path.

Cost: ~$41,000 – $47,000.

Note: Due to its high damage output, it's a strong investment for runs with multiple hostile threats. Keep track of remaining charges.


Laser C.A.R.T.
Effect: Fires a precision energy beam with infinite range and high accuracy. Deals 350–400 damage per second while focused on a target. Consumes energy continuously while active, so pair it with a Recharge Drone or Energy Crystals for sustained use.

Cost: ~$44,000 – $52,000.

Note: Great for safely eliminating monsters from a distance. Be mindful of energy management.


Bridge
Effect: Deploys a temporary platform beneath your feet, allowing you to cross gaps or reach elevated areas.The platform remains active for a short duration before dissipating.

Charges: 3 charges per deployment, replenishable over time or through specific in-game actions.

Cost: ~$20,000.


The Service Station - Throwables & Mines
Throwable items and deployable mines are useful tools for dealing with monsters, controlling areas, or creating opportunities for escape.

Stun Grenade
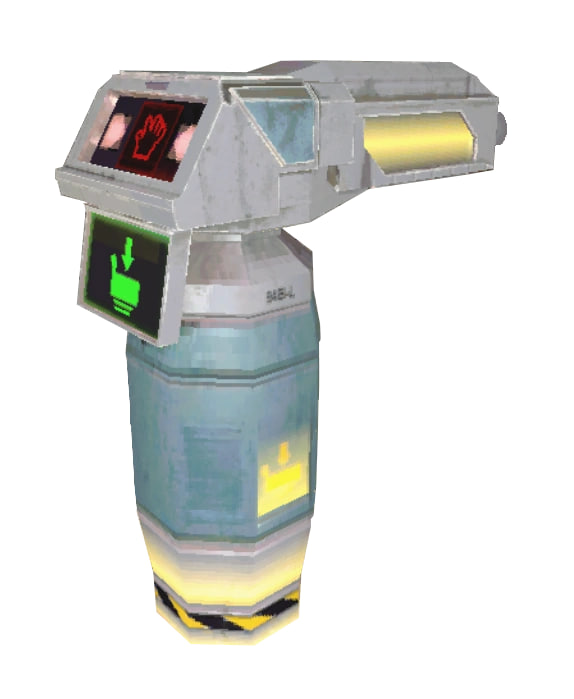
Effect: Explodes in an area, stunning entities caught in the blast. Deals no damage, but invaluable for crowd control or setting up attacks.

Cost: ~$3,000 - $8,000+


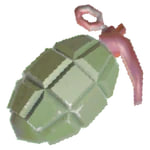
Grenade
Effect: Standard explosive grenade that deals damage in an area.


Cost: ~$3,000.


Human Grenade
Effect: Deals less explosive damage than a regular Grenade.

Cost: ~$2,000.

Note: Can be found only on hidden shop.


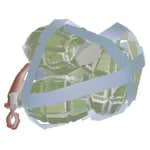
Duct Taped Grenades
Effect: Explodes once on impact, then scatters several Human Grenades that also explode. Effective for hitting multiple entities in a small area.


Cost: ~$2,000.

Note: Can be found only on hidden shop.


Shockwave Grenade
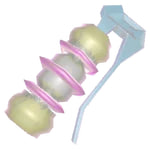
Effect: Explodes to both stun and damage entities in an area.

Cost: ~$3,000+.


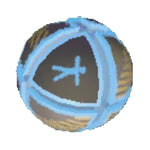
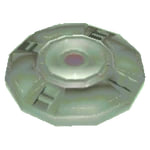
Zero Gravity Orb
Effect: Creates a dome of zero gravity, lifting and disorienting entities and objects caught inside. Can provide an escape window or disrupt monster movement.

Cost: ~$35,000+.


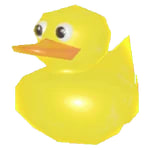
Rubber Duck
Effect: A throwable item that bounces around upon impact, dealing damage to anything it hits. It can also explode after bouncing. Throw it far away and take cover!

Cost: ~$16,000 - $20,000+.


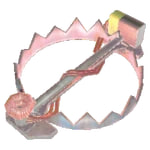
Stun Mine
Effect: Deployable mine that stuns any entity (player or monster) that steps on it. Activate by holding and pressing Use (default E), place on the ground. Can be deactivated by picking it up again and pressing Use.

Cost: ~$3,000.


Explosive Mine
Effect: Deployable mine that explodes, dealing damage to any entity that steps on it. Activate/Deactivate like Stun Mines.


Cost: ~$3,000.


Shockwave Mine
Effect: Deployable mine that both stuns and damages any entity that steps on it. Activate/Deactivate like Stun Mines.

Cost: ~$3,000 - $6,000+.


Duck Bucket
Effect: You can put this bucket on top of a duck to stop it from chasing you around.
Pro tip: Use it to kill the duck by putting the bucket on the duck with a grenade inside.

Cost: ~$5,000 - $8,000+.


Note: The Duck Bucket is actually a valuable item you collect for [SURPLUS]! It is not a throwable weapon like the Rubber Duck.

Note on Item Availability: While many of these items appear in the main Service Station shop rotation, some might be found more consistently or exclusively in a 'hidden shop' area, reportedly located near the Health Packs at the Service Station. Keep an eye out!


The Service Station - Weapons
Weapons are your primary means of defense against the entities lurking in the facilities. The Service Station offers various tools of destruction to aid your survival. The following weapon data is based on information found on Fandom.

Melee Weapons
Melee weapons are useful for close-quarters combat, dealing with smaller threats, or conserving energy.

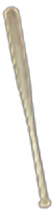
Baseball Bat
Effect: Provides a melee attack. Causes a brief stun and immense knockback.

Damage: 20 per hit. With knockback, most enemies take [25] additional damage on-hit/slam. With a down-angled swing, [25-50] additional damage.

Reloads/Charges: 6 hits before needing to recharge.
Crystal Efficiency: 1 Crystal charge = 1 Full Recharge (6 hits).

Cost: ~$25,000 - $49,000.

Note: Great for pushing enemies back and causing extra damage by slamming them. Max amount that can exist at once: 1.


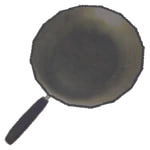
Frying Pan
Effect: Provides a melee attack. Known for being surprisingly effective as a weapon.

Damage: 15.

Reloads/Charges: 12-15 hits before needing to recharge.
Crystal Efficiency: 1 Crystal charge = 1 Full Recharge (12-15 hits). Most Efficient Melee!

Cost: ~$23,000 - $30,000.

Note: Deals damage to players (outside the shop) and monsters. Can knock down small enemies and players. Max amount that can exist at once: 1.


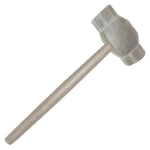
Sledge Hammer
Effect: Provides a heavy melee attack. It is exceptionally good at pushing large enemies.

Damage: 150.

Reloads/Charges: 6 hits before needing to recharge.
Crystal Efficiency: 1 Crystal charge = 1 Full Recharge (6 hits).

Cost: ~$40,000 - $47,000.

Note: Heavy weapon, strength does not seem to make it easier to swing (needs testing). Great for pushing stunned large enemies off ledges. Extremely head-heavy hammer. Max amount that can exist at once: 1.


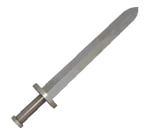
Sword
Effect: Provides a fast melee attack.

Damage: 50

Reloads/Charges: 10 hits before needing to recharge.
Crystal Efficiency: 1 Crystal charge = 1 Full Recharge (10 hits).

Cost: ~$23,000 - $30,000

Note: Fast weapon, deals damage. Max amount that can exist at once: 1.


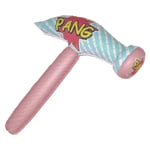
Inflatable Hammer
Effect: Provides a melee attack with a chance for explosion.

Damage: 3 (base) or 250 (on explosion).

Reloads/Charges: ~24 hits before needing to recharge.
Crystal Efficiency: 1 Crystal charge = 1 Full Recharge (~24 hits).

Cost: ~$9,000 - $18,000.

Note: Has a ~5% chance to cause an explosion dealing 250 damage. Max amount that can exist at once: 1.


Prodzap
Effect: Close range taser that stun enemies and cause impact damage when enemies hit surfaces.

Damage: 2-4 (base) + 25 (impact damage per wall/floor hit).

Reloads/Charges: 10 charges.
Crystal Efficiency: 1 Crystal charge = 3 Weapon charges.

Cost: ~$28,000 - $29,000

Note: Good for stunning and causing impact damage via environmental, but it stuns for short period of time. So wont have time to grab and throw entities in the void or smash them. Max amount that can exist at once: 1.


Ranged Weapons
Ranged firearms allow you to deal with threats from a distance. They generally use Energy, which needs to be recharged.

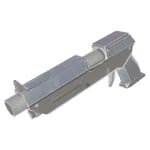
Gun
Effect: Allows the Player to damage both Monsters and other Players from range.

Damage: 100 (Monsters), 100 (Players).

Reloads/Charges: 6 shots before needing to recharge.
Crystal Efficiency: 1 Crystal charge = 1 Full Recharge (6 shots).

Cost: ~$19,000 - $44,000.

Note: Standard ranged weapon. Max amount that can exist at once: 1.


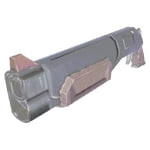
Shotgun
Effect: Fires a total of 5 pellets. High damage at close range.

Damage: 5x50 (50 damage per pellet hit).

Reloads/Charges: 4 shots before needing to recharge.
Crystal Efficiency: 1 Crystal charge = 1 Full Recharge (4 shots).

Cost: ~$44,000 - $67,000.

Note: Very effective against single, durable targets or close groups. Powerful but requires getting close. Max amount that can exist at once: 1.


Tranq Gun (Tranquilliser Gun)
Effect: Fires darts that can stun any enemies for ~15 seconds.

Damage: 0 (Monsters), 0 (Players). Does not kill with direct damage.

Reloads/Charges: 5 shots before needing to recharge.
Crystal Efficiency: 1 Crystal charge = 1 Full Recharge (5 shots).

Cost: ~$15,000 - $18,000.


Pulse Gun (Pulse Pistol)
Effect: Fires energy projectiles that stun enemies and cause impact damage when enemies hit surfaces.

Damage: 2 (base) + 25 (impact damage per wall/floor hit).

Reloads/Charges: 6 charges.
Crystal Efficiency: 1 Crystal charge = 2 Weapon charges.

Cost: ~$15,000 - $16,000.

Note: When shot, throw the enemy far a way. Max amount that can exist at once: 1.


Boltzap
Effect: Fires projectiles that stun enemies and cause impact damage when enemies hit surfaces.

Damage: 2-4 (base) + 25 (impact damage per wall/floor hit).

Reloads/Charges: 12 charges.
Crystal Efficiency: 1 Crystal charge = 4 Weapon charges. Best Ranged Efficiency!

Cost: ~$11,000 - $18,000

Note: Same effect as Prodzap. Max amount that can exist at once: 1.


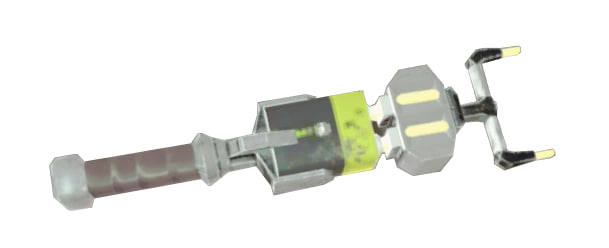
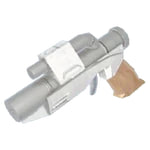
Photon Blaster(Handheld Portable Cart Laser)
Effect: Fires a powerful laser beam that can push teammates and potentially deal significant damage to enemies.

Damage: 210 damage for charge.

Reloads/Charges: 4 charges.
Crystal Efficiency: 1 Crystal charge = 1 Full Recharge (4 charges).

Cost: ~$40,000-~48,000.

Note: Max amount that can exist at once: 1.


General Weapon Notes:

  • Ranged Firearms generally use Energy Crystals as ammunition or for recharging. Ensure you have a supply!

  • Weapons appear in the main Service Station shop rotation as you progress. Some high-tier weapons may be found more frequently or exclusively in the 'hidden shop' area (reportedly located near the Health Packs at the Service Station).

  • It's advisable to have at least two different firearms available before reaching Level 8 to handle varied threats.

  • The value 'Max amount that can exist at once' indicates the maximum number of that specific weapon that can be present simultaneously (likely between the shop and players).
Unique Interactive Items & Enviromental Effect
Within the levels of R.E.P.O., you may encounter certain items or environmental objects that have unique interactions or trigger special effects when used or manipulated. These are distinct from standard weapons, tools, or basic valuable items.

Frog
Location: Any.

Effect: If dropped, the frog will start jumping around for ~10s and making damage.

Value: ~$400. Note that it loses value if dropped and it starts jumping.


Love Potion
Location: Academy.

Effect: While held, it sends pre-set chat messages, often expressing affection or admiration towards the potion itself or nearby players.

Value: ~$2,400.


Music Box (Carillon)
Location: Headman Manor.

Effect: Plays music when activated and makes player spin clockwise.

Value: ~$2,500-$3,500.


Clown Toy
Location: Any.

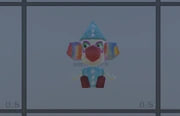
Effect: This item related to the Clown monster can be activated (e.g., by interacting with his nose 3 times) and thrown to cause an explosion, does 250-300 damage.

Value: ~$2,500.


Fan
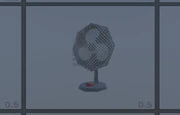
Location: McJannek Station.

Effect: If you attempt to pick it up incorrectly (e.g., facing the blades), it can blow you away or cause you to drop it.


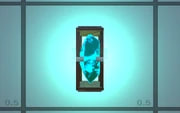
Power Crystal Blue Crystal
Location: Academy.

Effect: When broken explodes dealing 50 damage to both enemies and players.

Value: ~$7,000-$9,000.


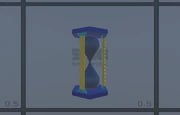
Hourglass
Location: Academy.

Effect: When held, it will slow the player and lowers the voice's pitch and speed.

Value: ~$6,300-$7,100.


Gumball Machine
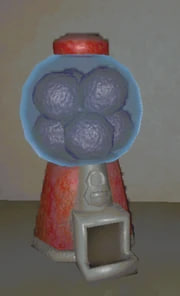
Location: Museum

Effect: When grabbed it creates a hypnotic effect for all nearby players making them stare at the machine, with a zoomed effect, even if they weren't looking at it.


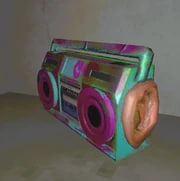
BoomBox (Stereo)
Location: Museum

Effect: When grabbed it starts to play music. Dangerous since it can make enemies aware of your location


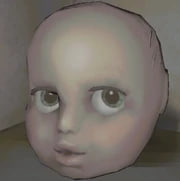
Baby Head
Location: Museum.

Effect: This item acts like newborn babies. If its head is in an upright position, its eyes open and starts crying and jumping around. This can be stopped if one of the cheek sides are facing the ground (Like if its asleep). If the head starts jumping it can lose some of its value, so be careful on how you position it.

Value: ~$2,000-$7,500.


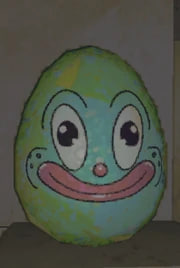
Egg
Location: Museum.

Effect: Damaging impacts break its outer layers. Once reached the last layer, it starts screaming which will lead to an explosion, dealing 300 damage to monsters and 100 to players.


Value: ~$4,000-$9,000.


Ice Saw
Location: McJannek Station.

Effect: Activates when picked up. Its spinning blade deals damage to anything it touches.

Value: ~$4,000 - $4,500.


Scream Doll
Location: Headman, Manor.

Effect: When picked up and held, it flails and screams, which can damage the player holding it (2 damage per hit) or the doll itself.

Value: ~$6,000.


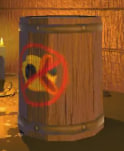
Animal Crate (Fragile Crate
Location: Any.

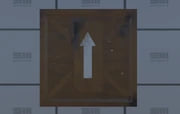
Effect: If turned the wrong way, it takes damage and can explode, keep the arrow always facing upwards.

Value: ~$22,000.


Dumgolf's Staff (Wizard Dumgolf's Staff)
Location: Swiftbroom Academy.

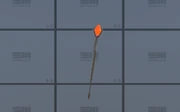
Effect: When damaged, it fires a laser beam that deals 10 damage to enemies and 35 damage to players per tick.

Value: ~$18,000 - $25,000.


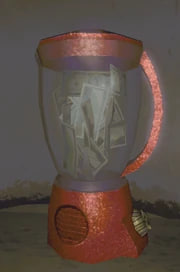
Blender
Location: Museum.

Effect: When grabbed and hold for at least 2 seconds, it will starts to churn the money inside and then explodes after it runs out of money inside.

Pro Tip: Use the indestructible drone to avoid any value loss when carrying it.

Value: ~$18,000 - $25,000.


Traffic Light
Location: Museum.

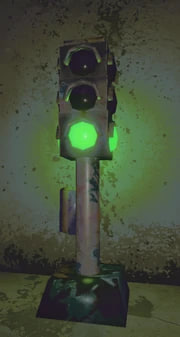
Effect: When grabbed, it cycles through green, orange, and red lights. Grabbing it while the red light is active, it causes an explosion that knocks back and stuns players (dealing 10 damage if they hit a wall). The explosion does not affect monsters and doesn't damage the item directly, but the displacement can cause the item to lose value.

Value: ~$28,000 - $50,000.


Broomstick Display Broom
Location: Academy.

Effect: No effect until the box is broken. The broomstick will fly and damage anything end even itself. If happens grab it and hold it until the extraction is complete.

Value: ~$12,000.


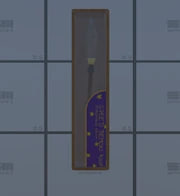
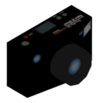
Antique Camera
Location: Museum.

Effect: Randomly takes photos while held. The flash blinds the player and teammates for 2 seconds. However, the flash can momentarily stun "eye-sensitive" monsters.

Value: ~$3,200.


Uranium Items (Mug, Plate, Petri Dish)
Location: Manor, Station.

Effect: These items are radioactive. While held, they slowly drain the player's HP and cause a green blurring effect on the screen. The drain stops once the item is placed down.

Value: ~$1,200 - $3,000.


Propane Tank
Location: McJannek Station.

Effect: Extremely volatile. If dropped from a height or hit, it leaks gas and explodes after 3 seconds, dealing 100 damage to players and massive damage to monsters.

Value: ~$3,500 - $4,500.


Teeth Bot
Location: Museum.

Effect: A mechanical mouth that randomly "bites" the player holding it (5 damage). The bite causes a flinch that can make you accidentally drop other items you are carrying.

Value: ~$2,000 - $3,000.


Eye of Orpigox
Location: Academy.

Effect: The eye watches you. Holding it for too long triggers "Paranoia," causing the player to hear fake monster sounds (growls or footsteps) that aren't actually there.

Value: ~$3,500 - $4,500.


Poison Chalice
Location: Academy.

Effect: Drains HP significantly faster than Uranium items and completely prevents stamina regeneration while held in your inventory.

Value: ~$2,000 - $3,000.


Strategy Tips
Mastering strategy is crucial for survival and success in R.E.P.O. Here are some tips to help you and your team navigate the dangers and maximize your profits:

Managing Your Health (HP):
  • Your health bar (HP) shows how much damage you can take before being defeated.
  • When monsters or environmental hazards hurt you, your HP goes down. If it hits zero, you are defeated.
  • You can get HP back with Health Packs you can purchase at the Service Station between missions. Teammates can also heal each other directly.
  • Keeping your HP high(more than 100) is essential for being able to carry items, run from danger, and finish objectives safely.
  • Always heal up after fighting monsters or before heading into risky areas.

Handling Large and Heavy Items Effectively:
  • Heavy items like the Piano, Grandfather Clock, or big statues are worth a lot, but they make you very slow.
  • Moving slowly makes you an easy target for monsters.
  • A smart plan is to take these heavy valuables to the nearest extraction point.
  • Remember to use drones to speed up the process.
  • When you extract a heavy item, you can move much faster and make room for other items in the C. A. R. T.
    Afterwards, you can explore deeper areas of the map later on or make a run for your life since you no longer need to deal with big high-value objects.
  • Think about running away from a monster – it's much easier if you're not carrying a heavy statue!

Strategic Extraction Point Usage:
  • If a map has more than two extraction points, try saving the one closest to your ship for the very last extraction.
  • Early in the game (before Level 7), the order doesn't matter much, but at Level 7 and higher, completing the second-to-last extraction often causes many monsters to spawn near the remaining exits.
  • If the closest exit is the last one, you have the shortest distance to run back to the ship during this dangerous time, which greatly increases your chance of survival.

Reviving Fallen Teammates Mid-Game:
  • If a teammate is defeated, they will drop their head.
  • You can revive them during the mission by finding and taking it to any active extraction point or back to the ship.
  • Bringing the head back to the ship is usually safer and more reliable, as extraction points can sometimes get surrounded by monsters.
  • Strategically, bringing a head all the way back to the ship for revival makes the most sense only if there are just 1-2 extraction points left and your team has nothing else valuable to sell except the additional money bag ([SURPLUS]). Otherwise, using an active extraction point for revival might be better, as it revives them closer to the current area, allowing them to rejoin the team and looting efforts faster.

Optimizing Ship Respawns and Emergency Plans:
  • When you bring a fallen teammate's head to the ship, try putting it in the right corner under the bench.
  • Players revived here often spawn while crouching, which can help them avoid being seen or attacked right away if monsters are near the ship.
  • If revived teammates are in immediate danger, or if the situation gets too risky with new threats, be ready to leave the level quickly with any loot you've already secured.
  • Also, if you've met your quota and are *only* bringing back the extra money bag ([SURPLUS]), the player with the most HP should carry it. They are more likely to survive if attacked on the way back.
Cosmetics


Cosmetics & Customization (v0.4.1 Update)

Cosmetics in R.E.P.O. are the primary way to personalize your employee and show off your veteran status. With the v0.4.1 "Cosmetic Update", the system has shifted from a simple shop-buy model to a dedicated "Loot & Craft" progression system.

Are Cosmetics Purely Aesthetic?
Yes and No.
Officially, cosmetics do not provide stat bonuses (like extra health or speed). However, they offer a tactical "Passive Advantage":
  • Visual Stealth: Darker suit colors (Black, Charcoal, Navy) make you significantly harder to spot in low-light areas for players, and some community tests suggest they slightly reduce detection range for certain "sight-based" entities.
  • Team Identification: Matching colors or specific hats help high-level teams identify roles (e.g., "The player in the Red helmet is the Medic/Defibro carrier").

How to Unlock Cosmetics
There are now three main ways to unlock new gear:

1. Cosmetic Boxes (The New Primary Method):
  • Finding them: Boxes are rare loot spawns found deep inside facilities. They occupy an inventory slot.
  • Extraction & Fragility: You must extract the box intact. If you take too much damage, fall from a great height, or throw the box against a wall, it will break, and the item inside will be destroyed.
  • The "Heal" Mechanic: You can repair a damaged box by holding the interact key. This transfers 10 HP from your health to the box's integrity.

2. Tax Tokens:
  • Extracting a Cosmetic Box grants you Tax Tokens, a special currency separate from [SURPLUS].
  • These tokens are spent in the Token Shop or the Customize Menu to buy specific parts you desire instead of relying on random drops.

3. The Token Shop (Service Station):
  • A new rotating stock at the Service Station specifically for cosmetics. Some legendary items can cost up to 100+ Tokens.

Customization Categories
  • Suits: Changes the full-body jumpsuit. Available in various colors (Neon, Camo, Solid).
  • Headgear: Masks, hats, and helmets. Some are themed after defeated monsters (like the Birthday Boy Hat).
  • Oxygen Tanks: Customizes the model and color of the tank on your back.
  • Patterns/Decals: Apply textures or Company logos to your existing suit.
  • Emotes: Special animations to communicate with your squad.

Pro Tips for Completionists
  • Check the Hidden Shop: Rare "Limited Edition" cosmetics often appear in the secret shop area near the Health Packs.
  • Prioritize Boxes: If your inventory is full and you find a Cosmetic Box, it is often worth dropping a low-value orb to secure the permanent unlock.
  • Moon Phase Exclusives: Some cosmetics only appear in the shop during Full Moon or Super Moon phases.

Credits


Documentation & Resources
  • Official Wiki: Images and raw data used in this guide were obtained from the R.E.P.O. wiki on Fandom.com.
  • Modding Support: For technical enhancements and installation procedures, refer to our Modding & Operations Manual.

Personnel Credits

30 Comments
tigre96tbf  [author]
Jul 1 @ 3:21am 
@Xen0r unfortunately, I’m not playing anymore, so I haven’t kept up with the latest updates on that. A quick search suggests it deals 10 damage and if its shoots the magic towards the direction the wand is facing(each shot fired let the wand lose $300); here’s the link to the Reddit post for the video I’m referring to. (https://www.reddit.com/r/REPOgame/comments/1tdz0xk/they_changed_the_magic_wand/)

Tell me if is needed to be add on the guide and if you need something else!
Jun 30 @ 9:20am 
what about the star magic wand in swiftbroom Academy?? i think she does damage but how many please
May 30 @ 3:13pm 
@tigre96tbf no, thank you !
tigre96tbf  [author]
May 22 @ 1:29am 
@W0ring 🍷🇫🇷 fixed, thanks! I forgot to fix it after the draft
May 21 @ 2:45pm 
loom actually has 500 hp and elsa has 600 hp apparently
tigre96tbf  [author]
May 14 @ 4:32am 
I think I've added everything or almost everything, if anything is missing or you would like something more explained and detailed (as @Huhn said for energy, and I changed the description of the items) let me know!
tigre96tbf  [author]
May 9 @ 10:43am 
The guide will be updated in the next few days. I hardly play anymore due to work, so please be patient and let me know if anything is missing! (I'm already updating as I write this comment.)
Apr 29 @ 3:12pm 
kinda missing the most important info, which weapon has good energy efficiency
Apr 20 @ 7:18pm 
the clapping lady is loom
Mar 31 @ 5:47am 
What about the clapping lady?