TERA

TERA

599 оценки
Beginner Guide - What You Need To Know
От Saia
Get basic informations about the game, plus some helpful tips you should know.
   
Награда
Добавяне към любими
В любими
Премахване от любими
General
Welcome to TERA.

  • TERA is no point-and-click or tab-targetting MMO.
  • This is the NA version of the game[tera.enmasse.com], hosted by En Masse Entertainment. This means you're playing on servers in america. The EU version[en.tera.gameforge.com], hosted by Gameforge, is not available on Steam. The EU version is now available on Steam, but this guide was made for the NA version.
  • Be nice and friendly! You don't know the person sitting behind the computer or what is happening on their side of the world. If a group or dungeon run doesn't work out, don't get upset over it. In the worst case it's better to leave than to ruin your day because of one or two people.

  • Attacking or getting attacked in TERA makes you go into Combat Mode. Your character will pull out his/her weapon and slow down while walking. Certain actions like riding aren't available in Combat Mode. After some time of not getting hit or killing the last enemy that has aggro towards you, you will leave Combat Mode again.
  • Your first mount will be obtained during a quest after the starter island. A quest will lead you to the stables in Lumbertown where you can choose one of three horses. You can also get a green raptor mount (speed 275) by doing certain achievements, a guide is below in "Useful Links".
  • Ignore [Global] chat in the beginning. Most times it's pretty toxic and 50% of the written content is simply wrong, trying to make jokes, fool people, troll.
  • If you don't know where to go, follow the red questlines. If no red quests appear you may be underleveled. Do the yellow quests (some can be skipped, but most should be done), run dungeons or farm monsters for XP.
  • If your leveling area is too populated or you face PKs (player killers, most times higher level than you, just on PvP servers) change the channel. This can be done on the radar.
  • If you use a leveling scroll to get a character to level 60 you literally will just get the level ups. You get no gear and no quests are done. This is mainly for veterans who don't want to go through the leveling process. Don't skip leveling as a newbie!
  • If you are no healer class but need heal inbetween fights, every merchant (in every town) does sell Minor/Major/Prime Recovery Potables.
  • Try to buy a couple "Sroll of Rapid Resurrection" at a Specialty Store when you have the chance. It's much better than the normal resurrection scroll and can save your party if your healer dies in an instance and nobody can resurrect him in a fast manner.
  • If you need guidance in the game find a guild that is newbie-friendly. You can ask in global chat or press "G" for the guild menu. Here you are able to search for a guild by using filters. The official Guild Finder Tool is as well an option.[guilds.enmasse.com]

  • The standard UI layout is pretty awful. But you can customize your UI to look cleaner more info in the UI section.

  • Some tips to make TERA look nicer/run better (FoV, Font, etc)
  • Flying mounts have been introduced. They are limitied in where they can fly and have stamina that will regenerate. At level 65 you can get a quest to get a free flying mount from Morick in Amadjuk Trading Post. Detailed information here[tera.enmasse.com]. Apparently you can't use a flying mount before level 65.

Updated on 20th November 2016
Controls
  • In TERA you control your character movement with WASD, rotate the camera with your mouse and use keys for skills and items. You don't use your mouse to use skills.
  • Press Alt to bring up your mouse cursor and control your interface. This lets you click menus, move skills on your hotbar by pressing and dragging, and click on NPCs, objects or players. You can also move around menus and your interface.
  • Normally new skills get assigned to your skillbar. If you need to add a skill again press K to bring up the skill menu and drag a skill into your skillbar.
  • If you get stuck in a location, bring up your main menu (press ALT to bring up the mouse), click the gear symbol and use "Unstuck"
  • To preview an item on your character hold Control on your keyboard and Rightclick with your mouse on an item in your inventory.
  • To link an item in chat hold Control on your keyboard and Leftclick with your mouse on an item in your inventory.
  • At some point you might have a lot of skills and want to change your keybindings, so that you can use skills on Q,E,R,Y,X,C,V and similar. On your skill bar you have three red-yellow buttons that will expand and lock your skill bar. Put a skill on the second skill bar, go to Options - Shortcuts and find the entries "Extended Lower" and "Extended Upper" and fill in the keys you want to use. Ofc you could change the entries from 0-10 and F1-F12 if you wanted.
Interface
  • Every part of your UI can be rescaled by going to Options (press O) - UI Settings. Scale the UI as a whole or select single parts and scale them seperately.
  • You can move every part of the UI by clicking and dragging.
  • You can lock menus in place by using the lock symbol on the top right. Once it's red, the menu will always appear at the same location
  • Display your current FPS by going to Options - UI Settings - "Show frame rate (FPS)".
  • Check your ping by hovering over your clock/FPS.
  • If you want to move your effect icon bar and its direction is going outside of your wanted borders,

    go to Options - UI Settings - "Display Effect icons" and change the direction to what you want. In my example, right
  • You can turn off the main menu bar when you don't have the mouse up. Go to Options - UI Settings - "Show Main Menu only in UI Mode" and turn it on.
  • It is possible to automatically hide some menus while you are in combat. If you bring up the mouse in combat the menus will come back too tho. I'd imagine you want to keep the chat open in party play.

Updated on 20th November 2016
Leveling and Map
Do all red quests as they lead you to new places. Don't skip too much of the yellow quests, otherwise you have to farm your XP by killing monsters or doing dungeons, since some red quests require a certain level to appear. Obtainable quests have an exlamation mark. On questions marks you can continue a questline. Quests that you can hand in are marked with a star symbol. Repeatable quests have a symbol with a rotating arrow, they're not worth doing in general. For endgame Alliance quests will be purple and Daily quests will be green.

You don't need to worry about your equipment till level 20. During leveling you will get the avatar weapons. Dungeon drops can be stronger, but keep in mind that they don't crit as much on same-lvl monsters. Critical hits are by far the biggest source of damage in TERA. So once your avatar weapon doesn't crit insanely good anymore (because the enemy monster level is too high), and you don't have the next version of the avatar weapon, you can use a dungeon weapon with better stats. Questing will award you with armor and jewelries. In general dungeons drop the best armor and jewelries tho. The Trade Broker can also be a good place to check for gear.

Bring up the quest log with "L". The first tab will show your Story Quests, where the different stories are split into sections. You can collapse and expand by clicking on the individual bars. Grey quests are below your level and won't give much experience. If they have a "Done" written in front of them, guess what, you did them. White quests match your level and needed experience, while orange ones are a bit harder. Red quests are far above your level and possibly hard. If an enemy is too high of a level the damage of your skills will significantly drop. Crits will also be much harder to land. If you click on a blue text in the quest text, this will bring up your map and your target location will pulsate blue.

Zone quests, the second tab, contains all yellow (optional) quests, which doesn't mean you should skip them all. Alliance Quests will be used in the endgame. Daily Quests refers to an old system that is still doable and reward some cosmetic goodies. Those quests will be available later on in the game.

If you open up the map with "M" you see all available quests. Quests are marked in their respective colors and icons. The player character is a blue triangle. Party members would be blue dots. If you clicked on a blue quest text, the target location will pulsate blue like in the screenshot. With rightclicks you zoom out and with leftclicks on locations you zoom in. Hover over icons to see their names. The single zones have their recommended level written on them (not visible in the screenshot). Dungeons are marked with blue spirals.
Avatar Weapons (for leveling)
After you reach Lumbertown (after the starting island and the first city) you will sometimes find avatar relic pieces. For every couple levels there will be one specific avatar weapon. Collect all relic pieces (random drops from monsters) to acquire the avatar weapon. Avatar weapons are for the most part the strongest weapons you will find before endgame (they're just there to help you leveling). They have a very high chance to crit same-lvl monsters.
Battle Solutions Stamina and Charms
These new items are an all-in-one solution for buffing and the replacement for everything older players have known. The Stamina system has been removed. With it Panaceas, Campfires, Charms, Firewood, Bandages, Onslaught Scrolls and Battle Nostrums.

There are Minor, Major and Prime Battle Solutions and are intended for players level 1-30 players, 31-60, and 61-65 respectively. They last for 30 minutes with the following buffs:
  • Increases Power by 9/18/27%.
  • Increases Endurance by 7/14/20%
  • Replenishes 4.5/9/13% MP every 5 seconds.
  • Decreases cooldown of attack skills by 5/10/15%.
  • Increases Crit Power by +0.54/1.07/1.42 for Tanks and DPS.
  • Increases Attack Speed of Healers by 5/7/10.

I have not played for a longer period of time, but buying them from other players through the Trade Broker (5G per 1 for Prime) is way cheaper than buying them from the Specialty Store (32G per 1 for Prime)at the date of this writing. You will definetly have a way easier time using those items and I'm assuming you will be expected to use them in party play.

Added on 20th November 2016
Crystals (for Weapons, Armor, Rings, Earrings)
Crystals are very important for lvl20+. In big towns are Crystal Merchants that sell crystals for cheap. Those are white (common) crystals, the better version is uncommon (green) and drop from monsters. Be careful that the weapon or armor you need the crystals for has the level that the crystal requires. Depending on the level range the crystal supports its name varies ("Hexage", "Pentant", "Concach" up to the lvl58 crystals "Crux" and the lvl65 crystals "Niveot" and "Vyrsk"). The icon color of the crystal tells you what equipment type it is for. Red is weapon, blue is armor and green is rings and earrings (green crystals are available at endgame). There is as well a blue rarity for crystals, but those are fusions of crystals with double effects and will not be important till endgame.


You can put them in and out of your weapon and armor. Depending on the weapon/armor item rarity you have a different amount of crystal slots on your weapon/armor. Find the crystals that sound right for you. A healer might need movement speed and mana regeneration in a dungeon, but flat damage increase while leveling. A tank wants more aggro in a group or dungeon, but flat damage or crit power from behind while leveling. Depending on how good he can get behind the enemies in time. A DPS class wants to be on full damage always. For PvP there are some special crystals.

Keep in mind the following icons are from lvl65 crystals, the crystal form looks different, but the image on it is always the same throughout all crystal types.
The most important weapon crystals (PvE) are:

Icon
Name
Effect
Pounding
Increases damage to monsters by x%.
Savage
Increases Crit Power by x when attacking from behind. (Works in PvP)
Focused
Increases Crit Power against enraged monsters by x.
Bitter
Increases Crit Power against montsers by x when attacking from behind.
Forceful
Crits increase Power when attacking from behind. Applies Forcefulness x. (Applies a buff to boost power for a couple seconds)
Carving
Increases the chance to crit by x%.
Threatening
Increases aggro by x%.
Brilliant
Replenishes x MP for 5 seconds.
Swift
Increases Movement Speed by x while in combat.

The most important armor crystals (PvE) are:

Hardy
Reduces damage from monsters by x%.
Relentless
Increases maximum HP by x.
Vigorous
Recovers x HP per 5 seconds.

Crystals can break upon death. Keep in mind that for crystals that work just from behind you seriously have to be behind the enemy and you need to land a critical hit. It works like this:
Is your crit power 2.0? Then your normal hit does 100 damage, while your crit does 200 damage. If you use a crystal that gives you 1.0 crit power more when you crit from behind your normal hit does still 100 damage, but your crit does 300 damage now.

It's absolutely crucial to use Crystals! Especially in combination with the avatar weapons they're highly effective (due to avatar weapons very often critting your crystals will trigger very often).
Glyphs

Glyphs will be available at level 20. Find them in your skills menu by pressing "K". You get 1 glyph point per level. Use them to increase the effectivity of your skills. Decide glyph point cost against its effect when choosing glyphs. Glyphs that reduce the MP cost of skills are in general not worth taking, with some exceptions. Attack speed, cooldown reductions and attack damage (if you're not a healer) ar in general a good choice. Tanks want to use aggro generation on top of that. Keep an eye open for skills that increase damage of another skill or speed up another skill and similar effects. Those are interesting to take a look at and figure out combos with them. As a Warrior use the HP cost reduction on Combative Strike.

Upgrades for glyphs (Uncommon rarity, green) will be available later in the game from endgame dungeons, Vanguard Initiative dailies/merchants and battlegrounds.
They often include glyph point cost reductions that enable you to use more glyphs at once. Go get them all.
Combat
Avoid using the space bar for combos. You will not be able to play effectively with it in later levels. If you feel the urge to jump around in combat rebind the key from spacebar to something else, since spacebar will trigger spacebar combos. You can also go to "Chained Skills" in your skills menu ("K") and remove them, but it will not compeletely remove the spacebar combo popups. Also avoid using the basic attack. Some classes need the basic attack for mana regeneration (Slayer, Zerker, Warrior, Lancer). Reaper, Archer, Sorcerer, Gunner have skills for mana regeneration. While Slayer and Zerker have those too they're not as effective. Some classes can use basic attack efficiently by placing combo attacks between other skills (Warrior, Gunner). In endgame you will most likely not need to do this anymore due to buffs and skills to regenerate mana. But a general rule is that you always have a skill on cooldown that does more damage than basic attack or regenerates more mana than basic attack.

General role and positioning in group fights

Most dungeons in TERA are designed for 5 players. There are the occasional exceptions, leading to 10-man, 3-man, 1-man dungeons. As a general rule everybody should have a certain task: Healing, Tanking or Damaging. Read up on all 3 roles to learn what everybody should aim to do.

Healer
Priest, Mystic

As a healer you're the support. Your task is to heal when needed, buff your group before the fight and debuff or CC the boss/monsters during the fight. Also don't forget to use skills like Energy Stars (Priest) during the fight to increase the stats of your group or other skills to give everybody mana back. Be very aware of your support skills, they're very important in endgame especially! Damage Dealers will run out of mana much faster (Haven't tested myself: with the new Battle Solution items Mana might be less of a problem) if you do not use i.e. Mana Charge (Priest). Less mana = less skill casts = longer boss fight. Certain bosses in endgame dungeons have buffs that should be debuffed, you can surely find a guide online by specifically searching for those dungeon guides.TERA has some unique healing skills that are instant AoEs or pickup heals. Be warned that not everybody will have an understanding or awareness of that. People will dodge or run out of your heals or not use your pickups. If somebody dies you have to decide if it's safe to leave the group without heals for a moment and resurrect the dead player and heal/rebuff him. This player should pop his consumables again. Don't get upset if the player runs unhealed, and unbuffed back into the fight and dies instantly again. Those people are just nervous or upset about their death. It happens all the time. It also happens all the time that somebody accepts your resurrect just in the moment when an AoE attack hits nearby and kills him instantly again. As healer you're supposed to stay away from danger, your armor doesn't give much and you die fast. But this doesn't mean you shouldn't be in the action. Knowing the boss mechanics makes it easier for you to walk behind and around the boss. Staying at maximum range usually makes you more inefficient since you have to close more distance to reach a player that needs help.

Tank
Lancer, Warrior, Brawler, Berserker (at Lvl 65)

As tank your job is to keep the boss faced to you. This means you block to absorb damage, you attack to do damage and hold aggro, and use basic attacks to get mana back. Also you want to apply your endurance debuffs. Bosses have certain mechanics that will make it impossible to make them always face you. They jump around, hit backwards, initiate a special mechanic/phase. If you have aggro you see that indicated by a orange-red circle beneath your feet. There's also a purple-blue circle indicating secondary aggro. If a player has this second circle beneath his feet this means usually the boss is about to do a certain attack on this player. This very often results in the boss turning around or jumping away. Don't get frustrated by this. A general rule of tanking is to stand with your back against a wall (but it's not always the best way to tank). This makes you get pushed against the wall, meaning you don't move from boss pushing. The damage dealer have an easy time attacking the boss from behind then. You will need to train this, since your camera will be out of place, making it hard for you to see the boss and his attacks if the boss is very big. Depending on the dungeon adds can be more or less dangerous. You can try to walk to them and get aggro with a shout and walk to your tanking position again. But depending on the situation it might be better to let the damage dealers deal with the adds and keep the boss busy and not let him jump into the pile of adds. Important for new players is that tanking with Lancer and Brawler is currently easier, followed by Warrior, followed by Berserker (at Lvl 65).

Damage Dealer
Berserker, Slayer, Warrior, Reaper, Archer, Sorcerer, Gunner

As damage dealer you're supposed to do as much damage as possible. The most damage happens by doing critical hits. Those get a lot of additional damage from crystals in your weapon, that get triggered when being behind the boss. This means you should try to always hit the boss from behind. The arc behind the boss that counts as "behind" is pretty wide. To be safe a 120° arc behind the boss should be fine (that's 60° to the left and 60° to the right if you would stand directly behind him). Always be sure that you have the correct crystals in your weapon and the correct glyphs. Also, at least in endgame, use consumables like Battle Solutions. Learn the attack patterns of bosses so you can dodge enemy attacks and not take damage or die. If you need healing do not run around your healer who tries to target you or tries to cast an AoE spell underneath you. As a damage dealer you have to learn to use your skills efficently. This means that the strongest skills always should be cast with highest priority, but without running out of mana and standing around not being able to do anything. You can search online for class guides that will teach you skill rotations for certain situations. If your Tank can't hold aggro (and as a general rule for the endgame) you should consider using an Eclipse Potion that reduces your aggro generation reducing your damage output, since Eclipse Potions have been removed from the game. It feels nice to pull the aggro away from the tank, because you had a series of big crits. But it's also something that can turn the boss around and kill somebody or wipe the party. If you are playing a ranged class don't think you have to stay at maximum range at all times. In general you want to be closer to the boss. If he turns around you have a smaller arc to walk or dodge through the boss to get behind him and backcrit damage again. If you stay too far away and the boss gets repositioned or turns around, then you have to walk a much bigger distance to do damage again. Instead learn the mechanics and dodge attacks (or in case of Sorcerer use shields to absorb damage).

Updated on 20th November 2016
Banker and Trade Broker
Banker (+ Parcel Post and Wardrobe)
To bank items find a Banker. They're in all towns and have literally a key symbol on the map. You can also send items and messages in form of letters (Parcel Post) to other players here. A popup will appear in your main menu bar notifying you of new messages. Since the latest patch you can get items directly from the main menu bar that where sent to you via Parcel Post. To store costumes there is an extra option called "Wardrobe". Costumes can still be stored in the normal bank. Some costumes seem bugged and are not possible to store in the Wardrobe section. For example some of the Achievement hats.

Trade Broker
This is the player market. Sell and buy items here. They're always near Bankers in all kinds of towns. As non-elite member you'll have to pay a small gold fee to put an item up for sale. You can find a more detailed guide here: http://tera.enmasse.com/game-guide/gameplay/the-brokerage

Every important NPC will also have the same symbol that they have on the map floating above their head.

Updated on 20th November 2016

Enchanting, Masterworking, Rerolling and Awakening
Enchanting is to "plus" an item. During your leveling you will sometimes see dropped equipment that is called i.e. "Supergreat weapon +3". So this weapon is +3. You can enchant your weapon to +9. Then you need to masterwork it. A masterworked item can be enchanted to +12. Certain highend equipment can be awakened, which makes it possible to enchant it up to +15. Starting at +7 the item will have a blue glow, that changes to purple, then red (+12). Is the item awakened it will gain an increasing amount of fire wings (+13 to +15) and a color that goes from golden to red.
Equipment also has rerollable stats and a hidden masterwork bonus from 1-3% that increases the base attack/defense value.

You can read up everything about Enchanting, Masterworking, Rerolling and Awakening in Zephyas guide on essentialmana.com.[www.essentialmana.com]

You can read up on Awakening (endgame mechanic) on the thread of Treeshark in the EME forums.[tera-forums.enmasse.com]

A tool to calculate the masterwork bonus on your masterworked item can be found here.[www.essentialmana.com]

Updated on 20th November 2016
Dungeons
The first dungeon is available at level 20 and called Bastion of Lok. It's located north of Crescentia (east of Lumbertown). The red quests will lead you there and then to other dungeons. Once a new dungeon is available you can see it in your Dungeon Matchmaking Tool, which is as well available in the main menu bar once you reach level 20. If you join a dungeon it might happen that somebodys wants to change the loot rules. A long time ago it was decided to change the loot to "not class restricted", which means an Archer can roll on a Priest staff. That makes of course no sense. And people who are new might just roll on everything. So if everybody is fine with it, change the loot to "class restricted". This can be done just by the party leader. In general tho, keep an eye out for what you roll. If you can't use it, pass on the item and somebody else who can actually use the item will roll on it. In endgame there's "fodder runs" and in general "fodder" items that nobody needs or wants anymore and usually everybody rolls on them to dismantle them into Feedstock (used for Enchanting, there will be a tutorial quest in the first small town you visit). But it will happen that somebody rolls on something you would have needed. Even if he didn't need it. It happens occasionally if people don't pay attention. But during leveling it's not that big of a deal, your gear gets replaced fast. Also keep in mind that a party leader is not above other players. Some guy has to be the party leader if you queue, but the opinion of every player is equally important.

Instance Matching
Throughout the game you will also be able to use Instance Matching in your main menu bar to queue up for Dungeons that are for your level. You can mark multiple dungeons and click "Find Group" to start the search. The probability to be a party leader raises by marking "Able to lead the party" above the "Find Group" button. Dungeons are marked with a message "Item level too low" if your gear still needs to get better (make sure you weren't enchanting before and forgot to put on some gear before instance matching). This can be achieved by better equipment, jewelry or by enchanting your current gear. Slotting Crystals has no effect on your iLvl which is displayed in your Profile above the "Combat" tab as a number. "Ace Dungeons" are for Lvl65 and therefore not important for a beginner. On the very top are 3 symbols: A shield, 2 swords and a cross. They represent Tank, DPS and Healer. Some classes like Warrior are able to queue for 2 positions (Tank and DPS in the case of Warrior).

Updated on 20th November 2016
Battlegrounds
The first battleground is available at level 20 and called Kumas Royale. Once you're level 20 you will have a Battleground Matching button on your main menu bar that you can use to queue into a match.

Kumas Royale (Level 20+)
Kumas are one of the first BAMs you will fight. In this mode two teams that control those monsters fight each other. One member on each team gets to be the big kuma, which needs to be defeated by the other team. Pylons can spawn here that are able to heal attackers. A guide is here[news.mmosite.com].

Iron Battleground (Level 25+)
Two teams fight each other in tanks. Since this mode came after my time I have no actual experience with it. There are four different types of tanks with different properties: Power, Napalm, Speed and Ultimate. The Ultimate Tank can't be chosen at the beginning of the match, but will spawn 30 seconds before the match ends in the center of the map. When your tank is destroyed you can still walk with your actual character around, do damage, man turrets. There are also Repair Pylons throughout the game that will heal your tank if you're close. There is a detailed guide to find here[news.mmosite.com]

I have to admit that I'm no fan of Kumas Royale or Iron Battleground, which is why I will leave the description for Corsair's Stronghold in here which is now a level 65 battleground instead of level 30.

Corsair's Stronghold (Level 65)
Corsair's Stronghold is now a level 65 battleground instead of a level 30 battleground. I'll let the old information stay in this section:

You can find the official Corsair's Stronghold guide here: http://tera.enmasse.com/game-guide/battlegrounds/corsairs-stronghold
A 5min video guide is available here: https://www.youtube.com/watch?v=7jXPNDneOjY

Battlegrounds are different from dungeons. Here you need a leader who decides everything. The leader can hopefully lead the battleground, people can apply to be the leader when queueing. If the leader doesn't know what to do, he can pass lead to somebody else. If you get into a battleground where the leader doesn't respond, try to write him in say/raid/party chat to give the lead to somebody else.

A leader is especially important in battlegrounds because you have a big group of people who have different ideas. There are a lot of different strategies in battlegrounds, but you need to work together to make a certain strategy work. Usually the leader will tell parties (who have numbers, you see your number below your HP/MP. If it doesnt show up check the other partiy numbers in your UI. If you see the parties 1,2 and 4 then you must be 3) what to do. It doesn't help if people run off in different directions and everybody does what pleases him. It's the least succesful strategy (beside of being AFK).

Of course once and again you will have a leader who isn't very good at what he does or gets a lot of disagreement. That's unfortunate, but still it's better to work with the leader anyways. When 10 people do what the leader wants and 10 other people do something else you have 2 strategies running that don't work with so less people. So work together! And if you are defending in Corsair's Stronghold and you see the Ladders at the inner walls unprotected you might decide to be the guy who stands there and keeps watch, otherwise you will have a couple enemies climbing exactly that ladder and nuking the crystal inside the castle in seconds, which means you very likely lose.

At level 65 you will have 3 more battlegrounds: Gridiron, Fraywind Canyon, Champion's Skyring.

Updated on 20th November 2016
Vanguard Initiative Requests
This is the new faction that is the base of a new daily quest system. Not outstandingly useful at low level, but it will be a big ressource of income at later levels. Dungeon runs, battlegrounds, killing monsters or gathering will award you with extra items and gold. For low level it will guide you through the story quests. Access it with "H".


Vanguard Badges shows you how many quests of different kinds you still can do for the day. Doing the story quests will give you extra rewards. If you do a certain amount of quests per week you also get the Weekly Bonus. Logging in daily will keep the Roll Call up and gives you different bonus stats to all your characters for 3,5 and 7 days. With the Teleport button you can instantly teleport to the location of the quest (or start Instance/Battleground Matchmaking). This can be very useful in PvP servers when you get ganked during leveling. You can instantly teleport away as long as you're not in Combat Mode/as long as you did not get hit yet, by clicking the Teleport button and confirming the teleport.

Achievements
There are a lot of achievements to gather in TERA, if you're into that kind of thing. The little medaillon on your main menu bar opens up the achievement menu. There you're able to see which achievements you've completed soon and browse through the available ones. Most achievements give Title rewards, but others give unique items, gold and even permanent pets or mounts. Like the green raptor mentioned in the "General" section.

Finishing achievements gives also Points. If you have enough you will get different Laurels. Bronze, Silver, Gold, Diamond and Champion. Those Laurels work in seasons. Each season some achievements might get archived, but for sure others will be added. This means your total points go down and you might need to get the new achievements to get your Laurel again. In my case (on NA) I've kept a Gold Laurel through 3 seasons while being inactive, so it's not too bad if you're not aiming for the Champion Laurel. Which is an incredible farm as a newcomer and will take a long time.
Useful Links
Communities

Guides

Online Tools

Databases

Updated on 20th November 2016
Change Log and Credits
Thanks for reading.

I'd be happy to see some comments and recommendations what you think needs change or what could be added.

Change Log
Date
Version
Changes
7th May 2015
1.0
Release
9th May 2015
1.1
  • Added "Useful Links" category.
  • Added hint to raptor mount guide in "General".
  • Typos
20th November 2016
1.2
  • Added "Archive (outdated sections)" category with its first entry "Stamina and Charms". This will contain whole sections that are outdated, but will be kept for newer players to understand what older players might be talking about.
  • Moved "Gunner: The newest class" to archive.
  • Changed "Stamina and Charms" to "Battle Solutions Stamina and Charms" and updated the section with new information.
  • Replaced links for Enchanting Calculators and Guides with working/up to date links.
  • Removed outdated information in the "General" section and updated the advice about Bandages to Recovery Potables.
  • Combined "Banker" and "Trade Broker" section and updated information.
  • Updated "Combat" section
  • Updated "Interface" section
  • Updated "Dungeons" section
  • Updated "Battlegrounds" section
  • Typos
4th March 2017
1.3
  • Updated with information that TERA EU (published by Gameforge) is now on Steam. Thanks to Costy.

Thanks...
...to Bluehole Studios for developing such a great game.
...to En Masse Entertainment for doing a great job at publishing TERA NA.
...to Magical_T-Rex for answering on my reddit post.
Archive (outdated sections)
Stamina and Charms

STAMINA AND CHARMS HAVE BEEN REPLACED BY BATTLE SOLUTIONS.

Stamina
Always keep your stamina up. A high stamina value gives you bonus stats. The more it drops the more bonus you lose and at some point you get a penalty. If your stamina is 40% or lower you can't receive charms anymore. You get stamina by standing at a campfire or using a potion like Arunic Panacea, Combat Panacea or Battle Panacea.

Always keep some Arunic and Combat Panaceas on you. Arunic are occasional drops from monsters and are available on Trade Brokers. Combat Panaceas can be bought from Specialty Stores. They aren't that attractive for completely new players because they cost quite amount of gold. You will get enough Arunic Panaceas.


Campfires and Charms
Using a charm at a campfire will give all players close a certain buff. Those can be useful for leveling. If you can get your hands on them, use them. If you're a fast player "Infused" will help keep your mana up.

The standard charms in endgame dungeons that are always used are "Greater Power" or "Greater Keen" (more power or crit chance), "Greater Infused" (more mana regeneration), Greater Enduring" (more defense). Those are rare (blue) charms, they guarantee the strongest effect of its type. Uncommon (green) charms are much cheaper, but have a random effect stength. Since stronger effects don't get overwritten by weaker effects you can buy a lot of green charms and throw them till you randomly get the strongest effect. One blue charm costs about as much as eight green charms and you can buy them at a Specialty Store in every smaller town.

There are 3 types of charms: Offensive, Supportive, Defensive. You can use 1 charm for each category at a time. A maximum of 3 charms. A charm is greyed out on your effect icon bar when you use it. Once you enter combat the effect starts and its timer will run. Charms last for 15 minutes.

There are 3 types of campfires. The orange fire has no special effect, you can buy them at any merchant. The pink ("Charming Campfire") fire will double the duration of used charms. The blue ("Hasty Campfire") campfire restores your Stamina double as fast. Pink and blue campfires can be available from dungeons, boxes and in general you can get them on the Trade Broker. They're not too attractive since their cost is much higher than that of a normal Campfire.


Gunner: The newest class

NOT SO NEW ANYMORE.


I want to give some information about the Gunner to fight a certain spreaded misconception. A lot of people seem to assume Gunner is a ranged equivalent to the Berserker, having the image of being the slowest class in the game. This is simply not the case. If played correctly, the Gunner is a very fast-paced class that has a lot of movement and mostly fast attacks. The Gunner is also not most effective ranged, but at melee to mid-range. The main skill Scattershot is a spreaded shot like a shotgun. If the Gunner is too far away, some of the five shots will simply miss. The second main damage skill is definetly Arcane Barrage due to the possible resets on it. The longer the skill needs to fly to hit the target, the longer it will take to trigger its cooldown. Keep in mind tho that you can use other skills while the ball of Arcane Barrage is traveling. Scattershot has a Glyph called "Slick Scattershot", this reduces the recoil by 40% and is extremely useful to not get pushed too far away from the enemy (this might be your intention in PvP tho).

Balder's Vengeance is a very cool looking skill and I'm sure everybody wants to spam it. Sadly it has a 6min cooldown, unjustified in my opinion. The base damage of skills of other classes come pretty close to Balder's Vengeance base damage and they're on cooldowns of 30seconds to 1minute. In any case, investing glyph points in this skill might not be worth it. The two available glyph points cost 5 and 7 points. Those points are better invested in other skills where you can dish out way more damage in the timeframe of 6 minutes (or 4m48s glyphed). It is viable tho if you need, for whatever reason, very high burst damage. For example to clean up the incoming raid behind a breaking gate in Corsairs Stronghold.
69 коментара
Ω Sasha 2 юли 2023 в 19:37 
I believe the console version exists still.
Saia  [автор] 7 юли 2022 в 11:06 
I believe the latest version of the game differs quite a bit from this guide. Many more systems have been added since I wrote this, and I believe that Enchanting is completely different now. General tips might still hold up, but it's very outdated ^^
peipei 7 юли 2022 в 3:55 
does this still work?:steamhappy:
Saia  [автор] 6 апр. 2020 в 14:56 
Hey everybody. I'm always happy to read new comments :) Just keep in mind that this guide is very out of date. The general tips will still apply. But since I'm not playing myself anymore (at max checking on the game every 6-12 months once) there are many things that have changed that I don't know about. From classes to consumables. Cheers!
Kaytus 6 апр. 2020 в 13:09 
Vey very nice guide, some of these guidelines about toxicity should be on every guide for every MMO!
✨🆉🅴🆃🅰 ヤスミン 1 апр. 2020 в 15:17 
:steamhappy:
Voltastic 9 юни 2019 в 3:17 
Thank You
Irradiot 4 апр. 2018 в 20:19 
you can do updates at the top instead of changing everything
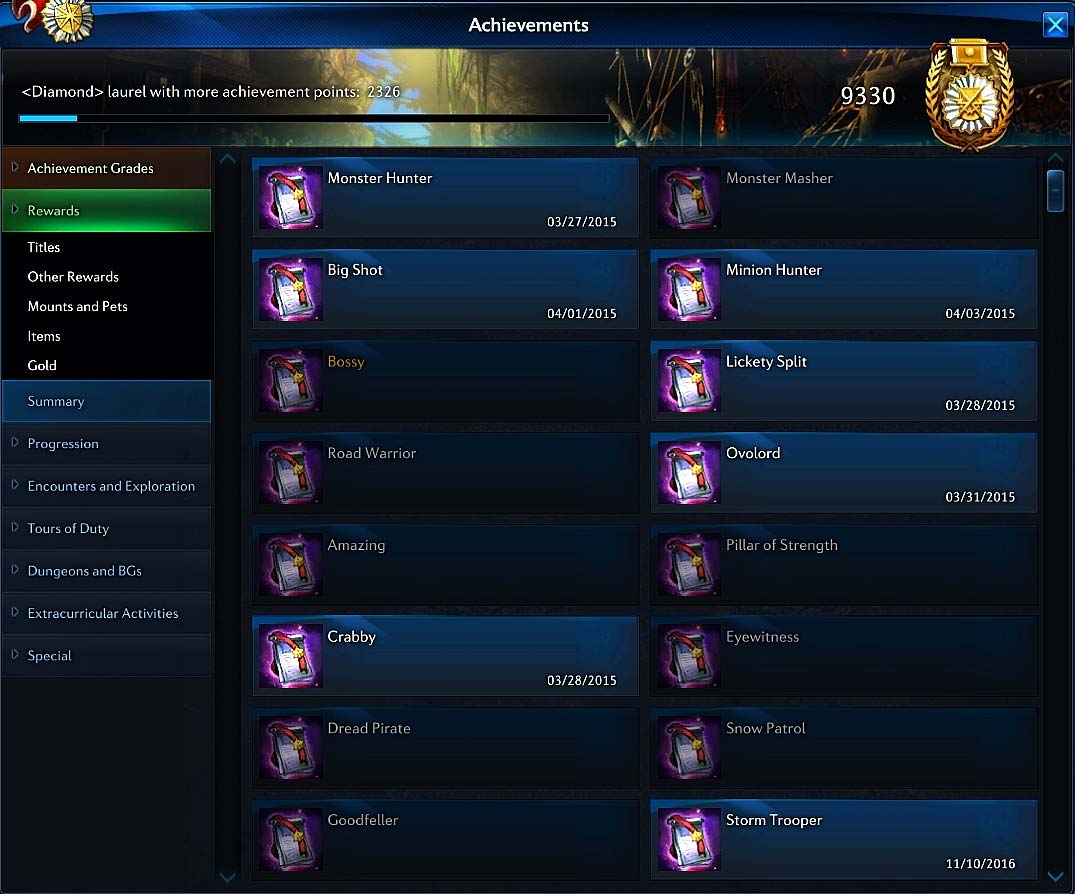
good guide, is good enough, maybe do a 2.0 condensed
my starter guide: (good for any game, really)
run as fast as you can, do all the quests, use gear you find, kill stuff along the way, customize your keybinds (controller)
if you like doing quests, complete one area then move on to the highest level area you can do. run some dungeons to level up to the next area if you are close. You can use alts to complete different areas, just to enjoy the experience of the various quests instead of trying to do them all on one character.
Don't waste too much effort on crafting, just level it up and sell your extra mats, or bank em for alts.
pvp: stick with the team, know your role; stay close to the healer
Saia  [автор] 2 авг. 2017 в 10:33 
Also this guide gets naturally more and more outdated as time goes on. I'm sometimes checking into TERA and see what has changed, but I don't think I'll update this post very much anymore. In half a year or so the enchanting will get an overhaul and then that section.. ye. I will see if I update it.
Saia  [автор] 2 авг. 2017 в 10:30 
@Proctor Cain
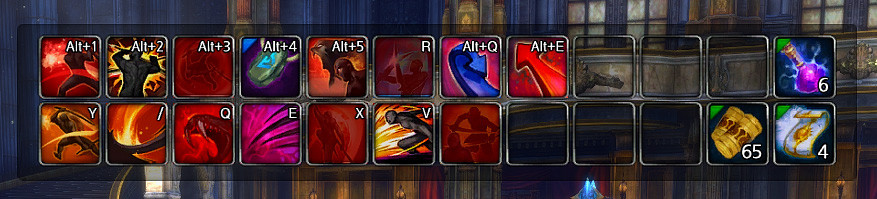
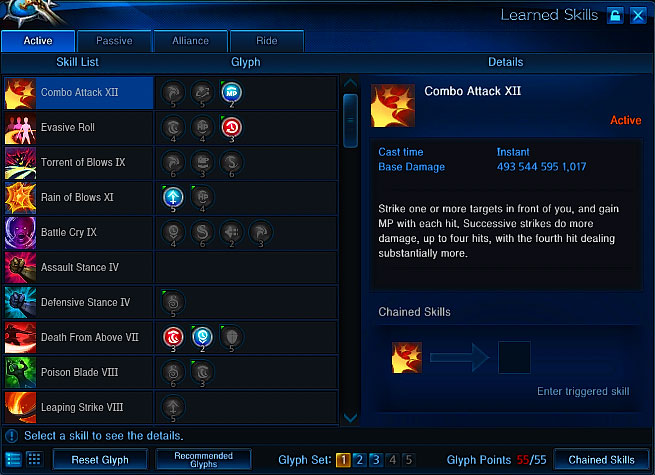
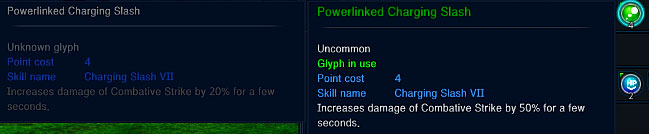
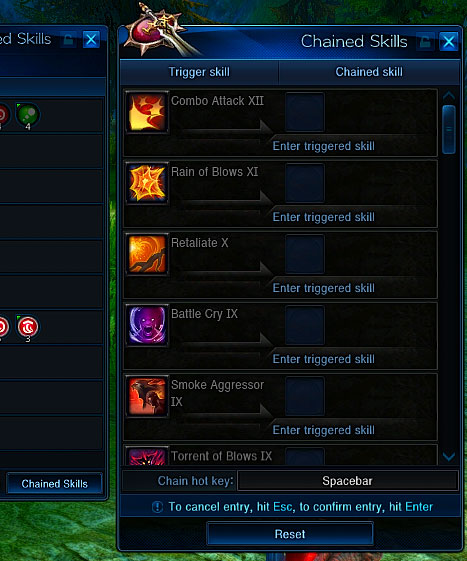
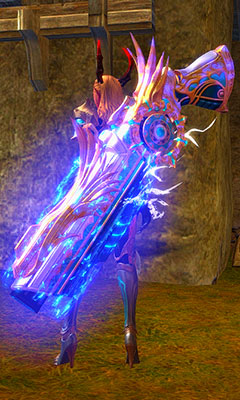
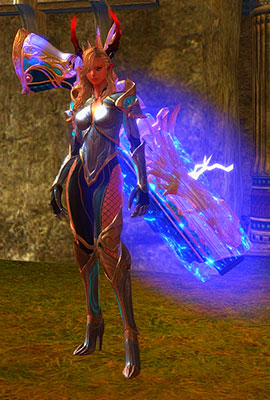
Yes, pretty much. When using a skill the spacebar will often lead to executing the next recommended skill. Some people get very used to just spamming spacebar a lot and ending up ruining effective combos. It's better to avoid using the spacebar from the beginning and learning the combos by pressing the respective skill buttons manually. This will make it easier later in the game to use the most effective class combos because you know how to chain it yourself.