Cladun Returns: This Is Sengoku!

Cladun Returns: This Is Sengoku!

41 évaluations
Cladun Returns: This Is Sengoku! Game Mechanics and Post-Game
De tjpart
In this guide I will cover basic game mechanics as a basis for an explanation of post-game.
5
   
Récompenser
Ajouter aux favoris
Favoris
Retirer des favoris
Introduction
The majority of post-game revolves around rangeons and making your characters stronger. Creating the strongest characters in this game requires a firm understanding of the game mechanics at play. It also requires a dedication in terms of time and effort.

Most of your stats will come from the magic circle, followed by endgame equipment, and finally, character base stats. Character base stats take the most effort and knowledge, though if you work on them along the way, you will max what you need by the time you collect endgame gear.

The first hurdle is storing 99 levels in each job for the characters you want to max, though before I get into that I will go over basic game mechanics.
Basic Stats

Class - Which class your character is.

Lv - The level of your character, from 1-99

Mana - A resource used in the magic circle to strengthen a different character. There is no hard cap on mana, though there is a soft cap due to re-job losses (explained later).

HP - Health points, from 1-999*. When this character is the main character, you are defeated when this reaches 0. When this character is a sub in the magic circle, its HP reduces before the main when taking damage.

SP - Skill points, a resource used to activate skills.

ATK - Attack, from 0-999*. This number determines how much damage you can deal.

DEF - Defense, from 0-999*. This number determines how much damage you receive from monsters, before resistances are calculated.

*The 999 cap can be surpassed using special titles.

Swing Speed (green sword)/Bow Charge 1 - The delay before an attack input actually happens. The lower this number, the faster your character will attack after a button press, with a minimum of 1.
When using a bow, this is replaced by the duration the attack button must be held before the bow reaches charge level 1. A smaller number is faster.

Recovery Speed (blue sword)/Bow Charge 2 - The delay after attacking. This number determines how long you have to wait in order to attack again or move. The lower this number, the faster you "recover" from an attack, with a minimum of 1. In some cases, recovery speed can be negated entirely by block cancelling.
When using a bow, this number represents the duration the attack button must be held before the bow reaches its final charge level. This will be noted by a white circular aura around the character.

Critical Strike Chance - This number determines how often you will Critically Strike. It can go beyond 100 because your critical strike chance appears to be modified by the direction you attack an enemy from. It is easier to critically strike from behind or the sides, but not when directly facing an enemy. Critical strikes do not appear to deal more damage, but rather reduce or ignore an enemy's resistances for that attack (not confirmed).

Shield Defense boost - The extra defense gained when blocking.

Walk Speed - Determines the base walking speed of your character. Higher numbers are faster, capping at 350.

Run Speed - The amount of speed added to your walking speed when running. Higher numbers are faster. DEF is halved when running.

Resistances - There are 6 resistances in the game, each ranging from 0-300. At 0, your character will take double damage from the associated damage type. At 100, your character takes 100% of the associated damage type. At 200, your character is immune to the damage type. Anything over 200 heals your character for a percentage of the "damage" received, up to 100% at 300.

Slash Resistance - Resistance to slashing attacks.

Pierce Resistance - Resistance to piercing attacks, such as arrow traps.

Blunt Resistance - Resistance to blunt attacks, such as earthquake traps.

Fire Resistance - Resistance to fire elemental attacks.

Ice Resistance - Resistance to ice elemental attacks.

Spirit Resistance - Resistance to spirit elemental attacks.

Job Skill - Can be seen during character creation, and under the status menu in magic circle. These are passive effects determined by a character's class. The main character's job skill level will start at 5.


Other stats:


Weapon Strength % - This is the range of your damage based on total ATK and determined by the weapon you are holding.

Shield Defense - This number determines how many times you can block damage with your shield in a stage before it becomes ineffective. The higher the number, the more times you can block.

Jump Control - Jumping does not restrict your direction of movement, this number represents how much you can move your character while it is in the air.

Drop Rate - the likelihood of items dropping when an enemy is killed. Ranges from 0-400, with 400 being the highest chance of receiving an item.

Low Rank Titles Cut - Titles operate on a ranking system, with low tier titles at the bottom. Every point of title cut prevents those ranks of titles from appearing on dropped items. This indirectly increases the likelihood of high tier titles by preventing low tier titles from spawning.

HP Drain Rate - Heal HP based on a percentage of damage dealt.

Sp Drain Rate - Regenerate SP based on a percentage of damage dealt.

Status Effects
There are various status effects in the game, detailed here:

Speed Boost - Speed is increased, damage taken is also increased.

Slowed - Speed is reduced, but damage taken is also reduced.

On fire - Periodically take fire damage. Makes your basic attacks fire elemental.

Frozen - Your character will slide around for the duration. Makes your basic attacks ice elemental.

Lucky - Periodically heal a percentage of your HP.

Cursed - Periodically lose HP. This debuff can stack, and cannot be removed if it hits level 3. The damage is considered spirit elemental.

Poison - Lose health periodically, cannot be reduced by resistances.

Death Curse - Damaging an enemy within 5 seconds will transfer the debuff, otherwise one of your vassals will die. If there are no more vassals, your main character will die.

Sleep - unable to take actions. Repeatedly pressing the directional keys will wake your character faster.

Fire/ice weapon - A personal buff which makes your basic attack have the associated element for the duration.

Fire/Ice/Spirit Res Up - A personal buff which increases one of your elemental resistances for a duration.

G Obtain - A personal buff which increases the amount of coins that drop when an enemy is killed. The duration and power increase with level.

Part Destroy - A special status effect inflicted on enemies, it reduces one of their stats by a percentage for ten seconds. This status effect is more likely to trigger with weapons such as hammers. Some skills always apply part destroy.

SP Debt - Unlocked by special artifacts, SP debt allows you to cast a spell when you do not have enough SP to cast it. The SP cost of the spell will be doubled, and you will have negative SP. During this time, you will not be able to run or cast more spells, and your SP will slowly return to 0.
The Magic Circle And How It Works


Cladun is a unique game in part due to the magic circle. You only ever control one character at a time, but the magic circle lets you use your other characters to buff the main character. They do this by unlocking placed artifacts using mana, as well as by being a physical blockade using their HP. Most of your stats will come from the magic circle, so understanding how it works provides you a powerful tool.

The main character will always be over the red T in the center. Their HP is shown over their blue bar as well as with all their stats on the card to the right side of the screen.

A sub character's HP is denoted by the number over their blue bar. A sub character's mana is denoted by the number over their yellow bar. These are the only two stats that matter for a sub character (besides their job skill).

When playing through a stage, your magic circle subs and their HP will appear in the top right hand corner:


The character in the center over the blue arrow is the one you are controlling, and the orientation will shift based on the direction your character is facing.
In general, sub characters will block damage from the direction it is received, though your main character will not lose HP until all sub characters are knocked out (In the image above, the main character's maximum HP is 972, he has not lost any health).

In the magic circle, there are three different types of stat modifiers; Artifact slots, fixed space effects and sub slot effects.
Artifact Slots


Artifact slots are small squares with a symbol/s denoting which type of artifact can be placed there. Hovering over the slot and selecting it will bring up a list of the artifacts you own which can be placed in that slot.
Every artifact slot is connected back to a sub character slot by the small red arrows between them. Artifacts will only activate if they are connected to the sub character by other placed artifacts, and that character must have the mana required. A placed artifact will light up when activated, or be dull when unactivated. Mana/widen artifacts can be placed in any slot and will activate even when not connected.

The symbols are explained below:

Heart - HP boosting artifacts can be placed here.

Two lines in a swirl - SP boosting artifacts can be placed here.

Triangle with two crossed lines above it - ATK boosting artifacts can be placed here.

Cross hatched square - DEF boosting artifacts can be placed here

Curve with two lines (appears to be a wing) - Can place speed boosting artifacts here

Star - Can place critical strike chance or drop rate boosting artifacts here.

Hexagon with symbol in it - Can place magic/ability boosting artifacts here. The number in the slot determines which skill it effects.

Sprout - Growth artifacts can be placed here. A growth artifact will increase the stats gained on level-up of the SUB character it is connected to. Maximizing stats will be explained later.

A quick note on Widens; These are powerful artifacts that multiply the effects of every artifact past them (including mana cost). A single Widen doubles everything beyond it. Widens stack additively, so two Widens will multiply everything beyond by 3, 3 Widens will multiply everything by 4 and so on. When placed in an M/A slot, a Widen will instead enhance the associated skill, usually increasing its area of effect and/or number of times the skill will hit. In order to get the highest stats in the game, you will need lots of Widens.

Joint is a title an artifact can have, the title makes it connect with other joint artifacts next to it. When artifacts are joined, they share the stats of all other artifacts in the chain, essentially multiplying the stats of the chain by the number of artifacts in the chain (including mana cost).
Fixed Space Effects


Fixed space effects are unremovable magic circle effects activated when a character or artifact connects them back to the beginning of the chain. In the image above, two "manax3" and a "won't heal" fixed spaces are immediately adjacent to the sub character, so their effects will always be active if a sub is placed there and alive. Positive spaces are green or blue, neutral spaces are yellow and negative spaces are red. The effects of all fixed spaces are detailed below:

HP-x% - Any sub that activates this has their max HP reduced by the percentage listed (in multiples of 20). This effect is not permanent, it only applies to the sub activating it when used in that circle.

Awaken mana x - When the effects of the awaken ability are active, the sub gains the listed number of mana.

Defend x% - The sub who activates this effect takes the listed percentage of all damage received. This can be useful to protect more important sub characters.

Won't Heal - The sub who activates this cannot heal during combat. They can still be healed from angel gates.

Fatemate - When a sub activating this space dies, every other sub who is activating a fatemate slot will also die.

Element All-x - When a sub activates this space, all of the main character's resistances are reduced by the amount listed.

Fire Ice and Spirit Res-100 When a sub activates this space, the main character's elemental resistances are reduced by 100. Costs 10 mana and will automatically activate when connected unless the sub doesn't have enough mana.

Slash Pierce and Blunt Res-100 When a sub activates this space, the main character's physical resistances are reduced by 100. Costs 10 mana and will automatically activate when connected unless the sub doesn't have enough mana.

Rev. Gate - There is a 10% chance the activating sub will revive when going through any gate. Costs 20 mana to activate, will automatically activate when connected unless the sub doesn't have enough mana.

Absent ATK/DEF/move +/-x - When there is no placed sub character, or the placed sub character is dead, ATK, DEF or move increases or decreases by the amount listed.

Absent Delay-1-1 - When there is no placed sub character, or the placed sub character is dead, attack delays decrease by 1.

Swing and Recovery-1 - When activated, costs 25 mana and reduces swing and recovery delay by 1. Will automatically activate when connected unless the sub doesn't have enough mana.

Mana+/-x - When activated, increases or decreases the sub's mana by the amount listed.

Mana*x - The sub who activates this has their current mana multiplied by the amount listed. If the mana*x space appears after artifact slots, your sub's mana when the mana*x space is activated will be multiplied. The mana boost is not retroactive. Example: If you have 100 max mana, but place an artifact that costs 50 mana right before a mana*2 fixed space, your current mana will become 100 again, not 150.

Widen x - acts like a permanent fixed widen/s, multiplying the effects of all artifacts placed beyond it.

Seal - When a sub activates this space, ALL fixed space effects in the magic circle are disabled. This also means that if the sub activating this space dies, the fixed space effects become active again.
Sub Slot Effects And Job Skills


Some magic circles will provide an effect for free just because a sub is placed in the slot. There are two types of bonuses:

[Stat] Boost x - the SUB character placed in the slot will gain a boost to the listed stat when they level up.

Job Skill x - The placed sub character will give its job skill to the main character at the listed level of the slot. This allows you to have one strong job skill, or multiple weaker ones, depending on the subs placed in these slots.

The job skills of each class are listed below:

Samurai - Super Slide: Slide distance increases. Level 5 = 0.3 seconds of extra sliding.

Magician - Debt Recovery: +SP debt recovery (max 10), level 5 = +2.0 SP recovery. When in SP debt, recover 2 sp per second.

Saint - Undead Slayer: % to one-shot undead (max 100%), level 5 = 50% chance. This is the only way to permanently kill skeletons.

Vile Priest - Stalwart: Bonus shield resistance (max 39), level 5 = previous elemental RES 7. This skill increases your bonus shield resistance based on the last type of damage received.

Swordsman - Landscaper: level 5 = Move res -40 (max -144). This skill reduces the slowdown from terrain such as bushes.

Merchant - Hidden Funds: Lose less G when defeated, level 5 = keep 80% gold. Base is 50%.

Onmyoji - Quick Cast: Faster M/A casting (max 42%), level 5 = cast meter 16% full. This skill reduces the cooldown to cast magic and ability skills.

Ninja - Boss Killer: Extra DMG to bosses (max 42%), level 5 = 10% extra DMG. This skill increases damage to black enemies.

Tactician - Demolisher: Chance of stat destroy power x1.1, level 5 = 50% chance of power +1. This skill increase your chances of applying the part destroy debuff, which reduces an enemy's stats by a percentage.

Shaman - Debt Recovery: Debt Recovery: +SP debt recovery (max 10), level 5 = +2.0 SP recovery. When in SP debt, recover 2 sp per second.

While useful, you do not need to worry very much about increasing job skills, at least until end-game.
Skills Learned By Class (Incomplete)
Samurai:
Sword skills – forward thrust, mad rush, fire slash, ice slash, heaven slash
Axe skills – brandish, axe-erang, multi chop, spirit chop
Spear skills – pierce, parry, fire pierce, ice pierce

Magician:
Spells – fire, flare burn, fire storm, G fire, D flare burn, fire wall, fire breath, ice, cool burn, ice storm, G ice, D cool burn, ice wall, ice breath

Saint:
Spells – fire, flare burn, G fire, ice, cool burn, G ice, all heal, wound heal, lucky, exorcise, mon LVLUP, mind resist, flame weapon, ice weapon, awakening
Axe skills – brandish, axe-erang, ATK enhance, DEF enhance
spear skills – pierce, parry, spirit pierce
Bow skills – fire arrow, ice arrow, power arrow, multi arrow
Dagger skills – vital spot, swift strike, snipe

Vile Priest:
Spells – fire, flare burn, G fire, ice, cool burn, G ice, wound heal, exorcise, purify, mon LVLUP, mind resist, flame weapon, ice weapon, awakening
Axe skills – brandish, axe-erang, multi chop, ATK enhance, DEF enhance, spirit chop, multi axe-erang
(?)Spear skills – pierce, parry, fire pierce, ice pierce, spirit pierce, fierce pierce, pierce mirage

Swordsman:
Sword skills – mad rush, fire slash, ice slash
Spear skills – pierce, parry, spirit pierce, fierce pierce, pierce mirage
Bow skills – power arrow, multi arrow

Merchant:
Spells – wound heal, mon LVLUP, fire resist, ice resist, awakening, G obtain
Spear skills – pierce, parry, fire pierce, ice pierce
Bow skills – power arrow, multi arrow
Dagger skills – swift strike, snipe, illusion,

Onmyoji:
Spells – fire resist, ice resist, mind resist, awakening
Bow skills – power arrow, multi arrow, fire arrow, ice arrow, homing
Dagger skills – vital spot, swift strike, snipe, dance of light

Ninja:
Spells – fire, fire wall, ice, ice wall, awakening
Dagger skills – shadow run
Shuriken skill – sonic throw, penetrate, triple throw, omni throw
Kama skills – whirling dance, soul reap

Tactician:
Spells – flame weapon, awakening
Sword skills – forward thrust, mad rush, multi thrust, wave slash
Axe skills – brandish, axe-erang, multi chop, DEF enhance
Kama skills – whirling dance, soul reap, moon shadow, ATK enhance, close shave, typhoon sickle, 1000 cuts

Shaman:
Spells – G fire, G flare burn, D flare burn, fire wall, fire breath, fire chaos, G ice, G cool burn, D cool burn, ice wall, ice breath, cool chaos, purify, fire resist, ice resist, mind resist, awakening
List Of Magic Circles
Every class learns 20 magic circles in addition to the starter circle (inexperienced). There are also magic circles unlocked through the shrine, as well as for completing a 99 floor rangeon under specific conditions.

The 20 magic circles learned by each class are listed below:

Samurai
light feet, wolf, fortification, warrior's spirit, guard, distribute, tenfold strength**, defend, samurai skill, trio, wounded wolf, success in life, iron wall, expert, two greatest, famous general**, twin snakes, flash, dark power, tenson korin

Magician
trainee, 2 sorcery, nie's 3 sets, change jutsu, 2 great magicks, co-op magic, demon, focus magic energy, three-way, spirited retreat, believer of blood, puppet, forbidden magic, great magician, alter ego, 3 prayers, demon's bond, overflowing evil, sorcerer supreme, better than buddha*

Saint
imperial court, family, relief, mercy, honor, prosperity, elegance, assistance, all power, imperial family, attendant, courtesy, evil plan, battle line, purge, 2 levels, reconnaissance, purify, imperial army, heavenly flower

Vile Priest
life choices, ibuki, all defense, ellude, mysterious training, pugilist, precipice, remaining soul, the first move, guard duty**, growth, body building, ascetic temple, backup plan, reflective mirror, summer showers, mandala, seventh sense, banquet, core power

Swordsman
research, wait and see**, caution, tsubame gaeshi, technique, four seasons, great swordsman, school, red line, godspeed sword, conservative, fabled sword skills, forsake, hero, secrets, mad soul*, phantasmagoric, batto jutsu, sword dance, sensei

Merchant - freshly caught, nuisance, growth police, give and take, oppression, rise, first investment, only one, man down, procrastinate, greed, limited fortune, ride or die, asura, tenth, easy peasy, money whirlpool, wealthy merchant, new world, wealthy

Onmyoji
onmyodo's way, kuji, silhouette, curse, direct hit, grave curse, spellbound, empowered curse, fortune teller, self defense, shikigami, freed from curse, quick evil, cursed awakening, cursed doll, earthly body, 4 vert 5 horizon, watch your back, crimson gear, child of darkness

Ninja
insect jutsu, katabami jutsu, iwao jutsu, agility jutsu, human sacrifice, sealing jutsu, poison insect jutsu, falling star jutsu, ninja bomb, spread jutsu, piledriver jutsu, four insect jutsu, limitless jutsu, chakra jutsu, jutsu drought, dual arts, horseback jutsu, sasuke sarutobi, hanzo hattori, kotaro fuma

Tactician
woodpecker, single point, rules of wisdom, defeating death, western tactics, truly talented, all attack, god's eye, crossroads**, concentrate, resourcefulness, phoenix's dance, heaven dance, lenient, no room for error, checkmate, cooperation, void, blue dragon, hakke

Shaman
dark invitation, gathering mana, cursed power, revelation, power of numbers, secret skill, orochi, twin spells, cursed body, servant driving, meat wall**, closed, 100 shackles, shinra bansho, cursed box, dark haunt, isolation, eight insects, search, abyss

*Very useful for post-game
**needed for magic circle based quests

Unlockable magic circles and their requirements:

Shrine
First Awakening - Bought
Six Skills - Bought
Master Craftsman - Bought

Neo-geon
Neo-geon King* - Clear a 99 floor Neo-geon.
Well-trained army - Clear a 99 floor Neo-geon with enemy levels over 200 on the final floor.
Ultimate Conquest - Clear a 99 floor Neo-geon with enemy levels over 500 on the final floor.
Anything's Possible - Clear a 99 floor Neo-geon with enemy levels over 1,000 on the final floor

Tri-geon
Tri-geon King - Clear a 99 floor Tri-geon in normal or transition area.
- Clear a 99 floor Tri-geon in Heaven area.
Chaos King - Clear a 99 floor Tri-geon in Chaos area.
Surpassing Limits - Clear a 99 floor Tri-geon with enemy levels over 300 on the final floor.
Above And Beyond - Clear a 99 floor Tri-geon with enemy levels over 500 on the final floor.
Complete Body - Clear a 99 floor Tri-geon with enemy levels over 600 on the final floor.
Proof of Ultimate - Clear a 99 floor Tri-geon with enemy levels over 1000 on the final floor.
Surpassing God* - Clear a 99 floor Tri-geon with enemy levels over 1500 on the final floor.
Level Up Bonuses And Base-Stat Maxing
Your characters can level up in two ways, either as a main, or as a sub. The stats they gain are based on their class, but in general, if a character levels up as a main, they will gain stats that make them a better sub, and vice versa. To be more specific, if a character levels up as a main, they will gain more HP and Mana. If a character levels up as a sub, they will gain more SP/ATK/DEF. This encourages you to switch your main character and try out different equipment/magic circles.

You cannot permanently screw up a character, so do not worry too much if they seem weak, just switch your main character for a few levels. You only need to worry about maxing a character's stats once they have stored 99 levels in every job.

The table below is taken from the Cladun X2 japanese wiki, since the stats seem to be the same in Sengoku. It shows the amount of ATK, DEF, and mana a character will gain if leveled from 1-99 as either a main or a sub:

Profession
Sub for levels 1-99
Main for levels 1-99
ATK/DEF/mana
ATK/DEF/mana
Warrior (Samurai)
69/49/72
11/9/206
Magician
42/58/133
6/9/390
Saint
61/57/104
10/9/313
Guardian (Vile Priest)
47/61/77
6/11/197
Ranger (Swordsman)
54/53/90
8/10/265
Merchant
52/61/108
7/10/342
Swordmage (Onmyoji)
59/54/98
8/9/294
Ninja
63/54/105
10/10/303
Dragoon (Tactician)
73/42/109
11/6/352
Shaman
40/59/138
6/7/409

This table shows that tacticians gain the most ATK (73) when leveled as a sub from 1-99, that Vile Priests/Merchants gain the most DEF (61) when leveled as a sub from 1-99, and that Saints have the most even ATK/DEF (61/57) growth when leveled as a sub from 1-99. It also shows that Shaman's gain the most mana (409) when leveled as a MAIN from 1-99. These notes are important for maximizing stats in the endgame.

When a character reaches level 10 they have the option of re-jobbing at the shrine; resetting their level to 1 as the same or a different job, but losing 30% of their current base stats. If an individual character gets to level 99 in every class, they only lose 10% of their stats when they re-job. Do not bother attempting to max a character's stats if they have not gotten every job to 99, as the 30% loss of base stats when re-jobbing is a lot of wasted effort.

Reaching level 99 in every job sounds tedious, but it can be sped up with the Better Than Buddha magic circle, which is the 20th magician circle. This circle only allows one sub, but provides manax9, allowing massive boosts to your stats. This is useful for leveling because the starting enemy level in Tri-geon is based off of your HP, ATK and DEF. If the enemy level is higher, you gain more experience. There is also a bonus to experience when you leave a rangeon and the enemy level is about 20 higher than your characters.


If you would rather move slow and steady, you can max job levels for 5 characters with the Mad Soul circle from the Swordsman class. This circle will also be useful later for maxing the combat stats of the final main character.

But before we get to why Mad Soul is so useful, lets talk about growth artifacts. A single Growth L artifact will add 13.5 to its specified stat over 99 levels for characters only leveled as subs. Just like in Cladun X2, there is a cap of 8 growth L artifacts applying to a single stat for a single character. This means that there is a max of +97 to a stat of a sub character over 99 levels (We would expect it to be +108, but the cap seems to be +97). Remember that Tacticians only gain 73 ATK from levels 1-99 as a sub. So with maxed growth artifacts, you can more than double the growth of your characters.

But there are no magic circles with 8 growth slots for a single sub. That is where the Mad Soul (MS) circle comes in.


MS has four growth spaces with four spaces before them. This means that you can use widens to make those four growth spaces turn into 12. The two slots on the left are doubled, the two slots on the right are multiplied by four.
This gives you the option of getting the maximum +97 in one stat and +54 in another, or an evenly balanced +81 to two stats per 99 levels.
Which option you choose depends on whether you want the highest balanced stats or the max for a single stat. Your choice will also determine which class you re-job as when maxing your final main character's combat stats.

If you want the highest balanced stats, you will re-job your final main as a saint sub in MS similar to the picture above. This will provide a theoretical soft cap of about 1,420 ATK and 1,380 DEF for your main character's base stats, though you will probably want to stop sooner than that due to minimal increases past a certain point.

If you want the maximum ATK, you will re-job your final main as a tactician sub in MS, with two ATK growth L on the right, and two DEF growth L on the left. This will provide a theoretical soft cap of about 1700 ATK and 960 DEF (again, you will want to stop sooner).

While you do this, you might as well be maxing your mana subs. At endgame you will want up to 8 characters who have as much mana as possible, since most of your stats will come from artifacts in the magic circle. You can get to endgame with just one or two mana subs with 3.5k mana, though you will eventually want more.

According to the table above, Leveling a shaman from 1-99 as a main character will provide 409 mana per re-job. With 10% loss every re-job, there is a theoretical soft cap of 3677 mana, but you will see minimal increases past 3.5k, so I suggest stopping there until you have at least four mana subs with 3.5k mana.

Once you are satisfied with the base stats of your main and mana subs, you should make their final re-job as the class with a job skill you want.

If you re-job them as a different class than the one they were maxed as, their final stats will be different than they were and always lower for mana subs, so only do this if you must have the job skill.

(For the fastest endgame levelling, a weapon and shield with 1 Divine and 3 Bravery titles each will give you damage immunity even when using Mad Soul, allowing you to run Death-geon)
Titles
Every time an item drops, there is a chance it will have bonus effects beyond the basic version of the item. These will be indicated by added adjectives called titles. Artifacts can only have one title, but equipment can have up to four. If using a one-handed weapon and a shield, you can have up to 12 titles total, but with a two handed weapon you cannot use a shield and therefore can only have 8 titles. Titles can provide powerful effects, such as unlocking the 999 cap on ATK and DEF, allowing you to avoid activating traps when walking, or even making you immune to all damage, so collecting and managing titles is an important part of the postgame.

Enter the blacksmith. In the smithy, you can talk to a special owl. If you give him equipment with titles, he will destroy the item and "store" the titles for you. You can also have him put titles on equipment, but it will cost multiple titles to do so. For most equipment, it will require 4 of the same title for the first slot, 8 of the same title for the second slot, 12 of the same title for the third slot, and 16 of the same title for the fourth slot. Because you cannot have 12 titles with a two handed weapon (Axes and Bows), those weapons only require 4 of the same title for every slot.

The Blacksmith himself will place titles on weapons with a resource called KO points. Every time you kill something, the weapon you used will gain a number of KO points based on the enemy type and level. The titles available to unlock are based on the rarity of the weapon, and the cost of titles scale with its value. For the most part you do not need this guy's services, though he does allow you to farm EXPert titles very easily, which will help your main level up faster in the early game. Late game you can farm Divine/Holy/Shinobi/Chosen titles off of high tier equipment.

For high tier titles and artifact titles, you will mostly have to get lucky with dungeon crawling, though there are ways to help you in your search. Increasing your drop rate with artifacts or titles is a good way to get more items, and the heaven section of Tri-geon has a lot of chests by default. A better way is to use title-cut titles such as bliss (to get started). By removing the lowest ranks of titles, you indirectly increase your chances of higher tier titles. This allows you to farm useful titles to help you get stronger.

Once you reach a certain level, a shield will be sold in the shop with the Bliss title (-8 titles). A set of gear with this title will allow you to farm higher tier titles such as Insight and Mystique (unlock 999 ATK and DEF limits, respectively). Once you unlock the stat caps, you can push your stats higher and farm better gear/titles.

The best title setup will include 3 Divine titles (title effects x2, one for each piece of equipment), 1 Bravery title (+20 all RES), 1 Mythic title (surpass 999 ATK/DEF limit), 1 Shinobi title (traps don't activate when walking), and 6 other titles of your choice. I would suggest Flail, Samson, ATK+50, or Chosen, but these are all very endgame builds. (Vanish becomes kind of a waste when you are immune to damage)

Before you reach that point, you will want one piece of equipment (a shield) with 4 Angel/Goddess titles (maxed drop rate, -40/48 titles) and another piece of equipment (weapon) with 4 Bliss/Holy titles (-32/60 titles) in order to farm the top tier equipment and titles. If you have trouble finding Insight/Mystique titles, put bliss in as many slots as you can (besides angel) to help you get started.

The reason I suggest a shield for Angel/Goddess titles is because you will swap out your shield less often than your weapon, and because you can buy a shield from the shrine (once you have enough fame) which comes with an angel title. Keeping all Angel/Goddess titles on the same piece of equipment lets you swap your weapon more easily while maintaining max drop rate. Keeping your insight/mystique/mythic/bravery titles on your armor lets you use it on any character. Shinobi (don't activate traps when walking), and Vanish (keep items even if you die) are also very useful when collecting gear/titles.

Late game you will have 8 Holy titles, 4 on your weapon, 4 on a shield (total -120 titles cut) for farming items.
The Road To Endgame
This game can be very long if you don't know how to make things go faster, so here are some tips from someone who has played the game extensively:

After completing the story missions you should be around level 60ish, if not, get there. At around that level, you can buy a shield from the shop which has the Bliss title (titles -8). You need 104 of these titles to place on your best gear. If you haven't already bought it, buy the offering shield from the shrine (unlocked after a certain amount of fame). It comes with an angel title (drop rate +100, titles -10) in the fourth slot. This will be your shield for a long time. When you come across more angel titles, slowly add them to the shield until it is full.

While you farm for better looting titles and the gold to buy your second Widen, you should work on maxing the jobs of 2-9 characters. This means getting each one to level 99 in every job. This can be a very slow process unless you game the system a bit.

Trigeon's starting enemy level is based on your HP/ATK/DEF, so if you push your stats as high as possible, you will fight higher level enemies, and thus get more EXP. Remember that you get bonus EXP if you leave the dungeon when the enemy level is about 20 higher than the highest level character in your magic circle. Also remember that you only get half EXP if you die. Running 10-20 floors of Trigeon is the fastest/safest way to grind EXP.

The best way to artificially raise your stats is with the Better Than Buddha magic circle (20th magician circle). It only allows two characters, but will multiply your mana by 9. This will allow you to afford even high tier joint artifacts once you have a strong mana sub. You will need Insight/Mystique titles to break the 999 cap on ATK/DEF, but with your Bliss gear you should start seeing it once your stats are at 999/999.

Besides character grinding and the magic circle, equipment is the only other way to increase your stats at this point (don't even think about fortification, its too expensive). You can get fairly high tier equipment from quests, and also from Bath-geon (unlocked with fame, you will want the shadow run ability learned from the ninja class for this), though I would recommend buying the Widen before you spend a lot of gold on quest weapons. Daggers are probably the most useful at this point, since you will see a lot of transition areas, and the enemies there are weak to pierce damage (you can't use a shield with a bow, but if you are just EXP grinding they work).

Once you max all jobs for your eventual main character (and hopefully a mana sub at the same time), you will want to switch to stat maxing your eventual main as a sub with the Mad Soul magic circle (from swordsman class), while your mana sub acts as a temporary main, grinding mana as a shaman. Stat maxing is explained in the "Level Up Bonuses And Base Stat Maxing" section.

The game becomes more open-ended here; you can choose to keep grinding characters, farm items/titles, or you can try to finish Neo-geon/Tri-geon for the unlockable magic circles. You get a very good magic circle just for completing Neo-geon, though the best magic cirlce is unlocked from finishing Tri-geon with enemy level over 1500. Once you have Shinobi and Vanish titles on your gear, you should be able to finish Neo-geon with Better Than Buddha.

You will want to farm Shinobi titles, since they are a useful title that is harder to come by late game when you have higher title cuts. You will also want to slowly work up to a weapon with four Holy titles and a Shield with four Goddess titles. After you can max drop rate easily with the magic cirlce (using Neo-geon King with joint and/or high tier widened drop rate artifacts for example), you can switch to using a shield with four holy titles as well.

Once you have a maxed main character and a few decent mana subs with the Neo-geon King magic circle, you can tackle unlocking the rest of the magic circles and buying wall stones for fortification (this costs a lot, G Obtain is your friend).

You only need about 6k ATK to be able to kill level 9,999 enemies with basic attacks (technically you only need 999 ATK with boosted skills), so once you have 6k ATK and close to that in DEF with almost complete immunity from fortification, you can start running Death-geons and leveling them up to max. This is when you will start to see the top tier titles and equipment, as well as extra Widens drop.
Maximizing Artifact Efficiency "How Many Widens Is Enough?"
Even with 3.5k mana, it is easy to run out when doubling, tripling, or quadrupling the effects of your artifacts, and there are a limited number of artifact slots, so getting the highest stats can be tricky.

First lets look at Widen efficiency. Because of the way widens work, we do not even need artifacts to optimize (though they are used in the images as a proof, look at the ATK stat). Widens effectively add artifact slots by multiplying the effects of those slots. So if there is a chain of six artifact slots, one widen will multiply the remaining five slots by two, providing 10 artifact slots:


Two widens with the same six slots leaves four empty slots, but they are multiplied by three, providing 12 artifact slots:


Three widens with six slots leaves three slots multiplied by four, which is also 12 artifact slots:


Four widens with six slots leaves two slots multiplied by five, providing 10 artifact slots:

Thus it is optimal to use either two or three widens in this scenario for the maximum number of artifact slots (half, or half-1). Since Widens are hard to come by, two is best, unless you have extra widens and only a few high quality artifacts.

But what if there are only 5 artifact slots? If our number of slots is odd, We cannot have half of the artifact slots be widens, only one less or one more than half.

Two widens with three artifact slots yields nine spaces (3x3, ignore the empty slot):


while three widens with two artifact slots left provide only eight spaces (2x4, ignore the empty slot):


We can extrapolate from this and say that with an even number of slots, half or one less than half should be widens for the maximum number of artifact slots. If we only have an odd number of artifact slots, there should be 1 more artifact than there are widens.

Now for artifact optimization. Here mana efficiency is the key, since we won't be able to afford the highest mana cost artifacts when there are effectively 12 or more of them. Below I do a bunch of nerd math with Death Incarnates and maximizing ATK, but I will summarize at the bottom.


Somewhat Useful nerd math:

Using the Surpassing God magic circle and the optimal Widen/artifact setup with all God titles (Eff.x2 Manax0), max attack will be 5 Death Incarnates (120 ATK for 560 mana) and 6 Widens on top of the 4 built in. 240x5 = 1,200 x11 = 13,200 ATK for 0 mana

Using the Surpassing God magic circle and the optimal Widen/artifact setup with all Star 10 quad titles (Eff.x7 Manax4), max attack would be 840x5 = 4,200 x11 = 46,200 ATK for 2,240x5 = 11,200 x11 = 123,200 mana. Sadly we can only get 3677x4 = 14,708 max mana with this magic circle. Even one Death incarnate with this title is too expensive to multiply 11 times (24,640), so lets try a different title.

Using the Surpassing God magic circle and the optimal Widen/artifact setup with all Star 100 mil titles (Eff.x5 Manax1), max attack would be 600x5 = 3,000 x11 = 33,000 ATK for 560x5 = 2,800 x11 = 30,800 mana

This means that a combination is going to be best;
Using the Surpassing God magic circle and the optimal Widen/artifact setup with 2 Star 100 mil titles (Eff.x5 Manax1) and 3 God titles (Eff.x2 Manax0) max attack is 600x2 = 1,200 x11 = 13,200 ATK for 560x2 = 1,120 x11 = 12,320 Mana
Plus 240x3 = 720 x11 = 7,920 ATK for 0 mana
For a total of 21,120 ATK for 12,320 Mana (mana sub only needs 3,080 mana to afford this, though you will want slightly more to afford a SPD artifact to max your walk speed)

You might think that a sub-optimal Widen setup would give more ATK, and we could afford it, but the loss of that third DI with the God title doesn't make up for the boost. The reason is that we are trying to make up for 240x11, or 120x22. The two additional Star 100 Mil DI's and two God DI's would have to total more than that to be worth it, but we are only adding 120x10 and 240x2, for a total of 120x14:

If we add a Widen and take away a DI with the God title, the total ATK becomes 20,160 for 13,440 mana (only need 3,360 mana to afford this)
600x2 x12 = 14,400 ATK for 560x2 x12 = 13,440 Mana
Plus 240x2 x12 = 5,760 ATK

Unnecessary nerd math below (I left it in because some people might find the examples helpful, these examples use Neo-geon King or Better Than Buddha):

We could use normal Death Incarnates with the Infinity title (eff.x2, manax0), or Luck 100 Mil title (Eff.x3), but we might get more out of joint or titled rares. Rare artifacts have the best mana efficiency, so a rare death incarnate will provide the highest ATK for mana (96 ATK for 320 mana). With a star 1000 title (eff.x5, manax3), a Luck 100 Mil title (eff.x3), or joint title, it may surpass the normal Death Incarnate.

Lets assume we have six artifact slots in sequence, two of them will be widens.

If there are four normal death incarnates (DI's) with the infinity title, they will provide 240x4x3 = 2,880 ATK for 0 mana.

If there are four normal DI's with the Luck 100 Mil title (eff.x3), they will provide 360x4x3 = 4,320 ATK for 560x4x3 = 6,720 mana. Unless we have a mana*x fixed space, we won't have enough mana for this, it would have to be halved to 2,160 ATK for 3,360 mana. But with the Better Than Buddha circle, we can get 31,500 mana. This would allow us to have 4 atk spaces doubled on one side, and four spaces on the other. Assuming we had eight DI's with the Luck 100 Mil title, they would provide 360x12 = 4,320 ATK for 560x12 = 6,720 mana (indicating we should utilize joint instead for this circle).

If we use rare DI's (96 ATK for 320 mana) that have the star 1000 title (eff.x5 manax3), they will provide 480x12 = 5,760 ATK for 960x12 = 11,520 mana. Joints are still probably better since we will have to use Better Than Buddha to afford this.

If we return to the six artifact slot scenario, and use rare DI's (96 ATK for 320 mana) with the Luck 100 Mil title, they will provide 288x4x3 = 3,456 ATK for 320x4x3 = 3,840 mana. A single mana sub can't have more than 3,677 mana, but if the last artifact was switched for a normal DI with the infinity title, it would work, providing 288x3x3 = 2,592 ATK and 240x3 = 720 ATK for 3,312 ATK with a cost of 320x3x3 = 2,880 mana.

Using the Better Than Buddha magic circle, eight rare joint DI's and four more joint artifacts, we can get 96x4 = 384 ATK per artifact x6 joint artifacts = 2,304 ATK on each side, but one side is doubled, so 2304x3 = 6,912 ATK for a cost of 320x4 = 1,280 mana per artifact x6 joint artifacts = 7,680 x3 = 23,040 total mana cost (plus the minimal mana cost of the other 4 joints). The best Budda can do is 33,093 Mana (3677x9).

End of Nerd Math summary

Using the best ATK artifacts (Death Incarnates with the Star 100 Mil and God titles) in the best magic circle (Surpassing God), max ATK boost (before base/weapon stats are added) is 21,120 ATK for 12,320 Mana (mana sub only needs 3,080 mana for this, though you will want more so you can afford a SPD artifact to max your walk speed)

Since you only really need about 6k ATK to deal max damage, this is a bit overkill, but as long as you keep in mind the proper number of widens to use and try to maximize your mana usage, you shouldn't have any problems reaching the necessary stats. Part of the fun of this game is playing around with and optimizing the magic circle. Hopefully the demonstration above is useful to somebody other than me.
Farming The Best Equipment (And Gaining Damage Immunity)
The top tier equipment in the game is very rare. It requires very high enemy level and good drop rate. This makes Death-geon pretty much the optimal place to farm for the best equipment. In order to do this effectively you will want to be immune to damage, so lets look at resistances.

Every class has a total resistance value of 565, distributed differently. In order to be immune to all damage, a character needs a total resistance value of 1200 (200 for all 6 resistances), leaving us 635 short. The way we reach total immunity is with a combination of armor stats, titles, and fortification.

An Oracle Vestment can give us +50 all (total 300), and fortification can give us up to 292. Unfortunately that only gives us 1,157, so in order to be fully immune to damage, we must use a title slot. This is where the Bravery title comes in, since it gives +20 all (total 120), or double that (total 240) with a Divine title. Since this puts us over 1200, it means that there is leeway for us to obtain immunity.

If you don't have an Oracle Vestment, you can use fortification or two bravery titles to make up for it. If you have an Oracle Vestment and both titles, you can remove some fortification to use for other stats.

For optimized fortification with an Oracle Vestment and a Divine boosted Bravery title:
Fortification requirements - 7 max slash wallstones, 1 junk slash wallstone, 7 max pierce wallstones, 1 junk pierce wallstone, 7 max blunt wallstones, 1 junk blunt wallstone, 25 max spirit wallstones for complete immunity with an Oracle Vestment and one Divine boosted Bravery title.

Endgame equipment stats/images are in spoiler boxes below, mouse over to see, otherwise continue below.


Endgame Armor


Endgame Sword


Endgame Axe


Endgame Staff


Endgame Spear


Endgame Bow


Endgame Dagger


Endgame Shuriken


Endgame Kama

[/screenshot] [/spoiler
Fortification
Fortification is a huge late game gold sink, you shouldn't even bother with it until you have a main character with maxed base stats and can earn gold very quickly.

Fortification Details:
Floor 1 - 8 normal slots, 8 junk slots
Floor 2 - 24 normal slots, 1 SP slot, 1 RES slot
Floor 3 - 29 normal slots
Floor 4 - 58 normal slots, 1 HP slot, 1 SP slot, 1 ATK slot, 1 DEF slot
Floor 5 - 18 normal slots

Total - 137 normal slots, 8 junk slots, 1 HP slot, 2 SP slots, 1 RES slot, 1 ATK slot, 1 DEF slot
(151 total slots)

Max Wall Stone Stats:
(All junk stats are +1)
HP +20
SP+10
ATK+5
DEF+5
CRT+3
RES+2

It is hard to increase your resistances in other ways, but fortification lets you do so fairly easily. With 146 slots for resistance based wall stones, you can be immune to all but one or two damage types.

Once you can put a Divine and two Bravery titles on an Oracle Vestment you can be immune to all damage without fortification. This gives you the flexibility to have +698 ATK from fortification if you wish, or if you don't have an Oracle Vestment, you can use a Divine and two Bravery titles on a lower tier armor with some fortification.

However you will eventually want to switch to a single Bravery title, and the +698 ATK is not all that necessary. Your fortification setup will be based on which endgame build you want to use.
Endgame Builds
Once you have about 6,000 ATK you will reach the damage cap of 9,999.99 even when attacking level 9,999 enemies. Level 9,999 enemies' HP ranges from under 9,999 to 80,000, which means that if you want to kill them faster, you must optimize your attack delays, or use skills that hit multiple times.

This opens up two different styles of endgame builds, those that focus on basic attacks, and those that focus on skills. Your choice may change which armor you use, but in both cases a Wind God shield is the best choice since it reduces attack delays (and all the other stats are meaningless when you are immune to damage).

(Running around exploding everything with a hex outburst build sounds really fun, but I won't cover any specific magic focused builds since there is no spirit element magic skill, and switching between fire/ice wastes time, assuming you can't one shot everything with hex outburst. That being said, magic focused builds would look similar to the skill build below, just with high powered magic and hex outburst or high level magic and SP debt)


Skill Build (Work In Progress)

This build focuses on high DPS through skill usage, meaning it is best suited for weapons which have multi-hit skills (sword, axe, spear (meh), bow, dagger, shuriken, kama). While ATK is important, skill power and skill availability is much more valuable, so this build will not focus purely on maxing ATK, but also use ability artifacts to achieve endgame dps.

Lets start by adressing the abilities you will use;
Sword - Heaven Slash: AoE, hits multiple times, Wave slash: Spirit AoE (kills ghosts)
Axe - Multi Axe-erang: hits three to six times depending on range. Spirit Chop is useful.
Spear - Pierce Mirage: hits three times, four if widened. Fierce Pierce may be faster.
Bow - Arrow Rain: hits five times, ten if boosted with a widen
Dagger - Thunderbolt: Spirit AoE (kills ghosts), hits 6+ times (Shadow Run is also useful)
Shuriken - Crimson Lotus: AoE, hits multiple times (more at center) (Blade Barrier is also useful)
Kama - 1,000 Cuts: Large AoE, hits 3-4 times, Typhoon Sickle: Ranged AoE, hits multiple times

Class Choice - (Work In Progress, you may want to ignore this section and skip to titles) Since this is a casting build, the best class choice is onmyoji for decreasing the time it takes to use your abilities. Your main will be an onmyoji, with two onmyoji subs, four swordsman subs and two shaman subs. This build gives you 41.6/42% cast speed reduction, 128/144 movement resistance, and 3.2/10 SP per second debt recovery.

You may want to switch out the shamans for another swordsman and a samurai to get max movement and some slide distance if you aren't using SP debt.

If you are using SP debt you may want 6 shaman subs instead of the swordsman subs to get the max 10 SP per second debt recovery.

Title setup - 3 Divine (one per piece of equipment), 1 Bravery, 1 Mythic, 1 Shinobi, 6 (ATK+50, Flail, Samson, an ability increasing title, or SP drain)

If using an axe or bow - 2 Divine (one per piece of equipment), 1 Bravery, 1 Mythic, 1 Shinobi, 3 (ATK+50, Flail, Samson, an ability increasing title, or SP drain)

Equipment requirements: Oracle Vestment for damage immunity, Wind God shield for the attack delay (not really necessary), whichever endgame weapon you will be using.

Artifact requirements for capping damage;
Heaven Slash:
Multi Axe-erang:
Pierce Mirage:
Multi-Arrow:
Thunderbolt:
Crimson Lotus: Blade Barrier:
1000 Cuts: Typhoon Sickle:

Fortification - If you use the Surpassing God magic circle (you will for this build), you need 12 max slash wallstones, 1 junk slash wallstone, 12 max pierce wallstones, 1 junk pierce wallstone, 12 max blunt wallstones, 1 junk blunt wallstone, 4 max fire wallstones, 2 junk fire wallstones, 5 max ice wallstones, 2 junk ice wallstones, and 30 max spirit wallstones since Surpassing God reduces all resistances by 0/5/10. This leaves you with 63 normal spaces and 1 junk space, so 321 ATK.


Chosen Build (Work In Progress)

The chosen build revolves around stacking the Chosen title (+50% ATK when alone) and using no sub characters. Because there are no sub characters, there are no artifacts, which means that SP costs will be high and skill power cannot be artificially boosted. It also means you will move relatively slowly. The other downside is that you cannot have Holy titles for title cut, but at this point in the game you should have collected the endgame equipment you want. The upside to this build is you no longer need any sub characters.

This build focuses on basic attacks more than skills, so optimizing attack delays is important. Fortunately quite a few endgame weapons have attack delays of 1. Unfortunately, some weapons are not suited for this build (axes, bows, staves).

Class Choice - Since you can only have one job skill and you will not be focusing on skills, Swordsman is probably the best choice, allowing you better movement through the map.

Title setup - 3 Divine (one per piece of equipment), 1 Bravery, 1 Mythic, 1 Shinobi, 6 Chosen (+600% ATK)

With this title setup, a Saint maxed main with an endgame weapon will have over 17k ATK. This will easily cap your damage against anything.

Equipment setup - an endgame sword, spear, dagger, shuriken, or kama. In the case of swords and kama, you will need to lower attack delays, which means you will want a Divinity Cape instead of an Oracle Vestment, since Divinity Capes reduce attack delays by 2. This also requires more resistance fortification, but your ATK will be boosted so high the fortification loss won't matter.

Fortification requirements - 25 max slash wallstones, 25 max pierce wallstones, 45 max blunt wallstones, 2 max fire wallstones, 1 junk fire wallstone, 2 max ice wallstones, 1 junk ice wallstone, 40 max spirit wallstones
9 commentaires
N4choxContreras 6 nov. 2021 à 15h28 
https://steamcommunity.com/sharedfiles/filedetails/?id=2647894783 Magic circle you get by finishing Tri-geon in heaven
tjpart  [créateur] 22 oct. 2017 à 13h08 
All endgame equipment is dropped randomly. Just gotta keep farming lvl 9999 enemies. Might as well take 120 title cut since you will be farming for awhile.
ki11erryan 28 sept. 2017 à 13h55 
Hey, is there a specific way of getting the oracle vestment? I'm asking cause I've been attacking max lvl deathgeon for quite a long time, and it still won't drop it. I even got quite a few legendary weapons and shields from finding the darn thing.
tjpart  [créateur] 5 sept. 2017 à 17h05 
120 title cut isn't totally necessary for endgame, it just gives you the best chance of seeing high tier titles while allowing you to still equip specific useful ones. Once you have the titles you need, title cuts are no longer useful.

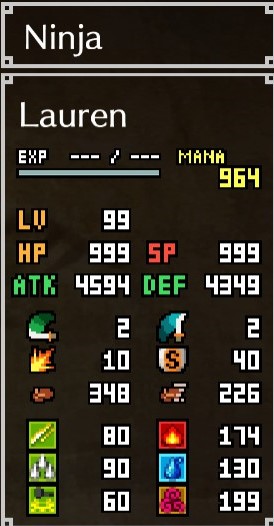
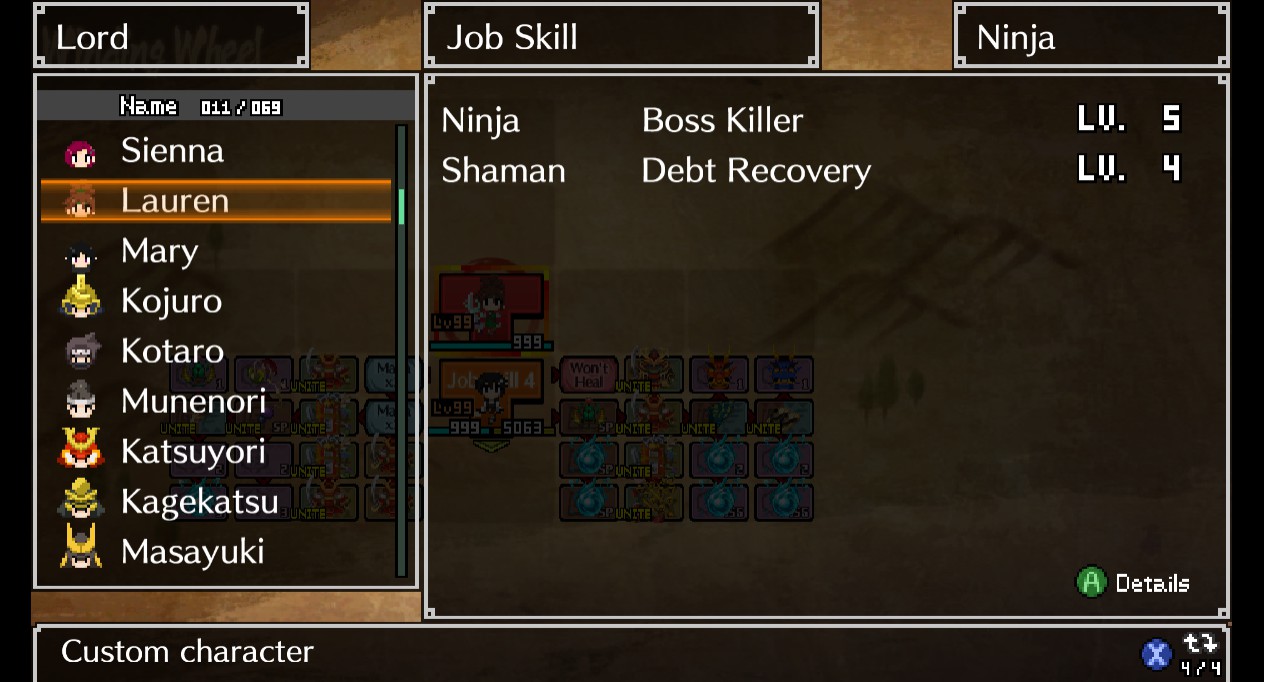
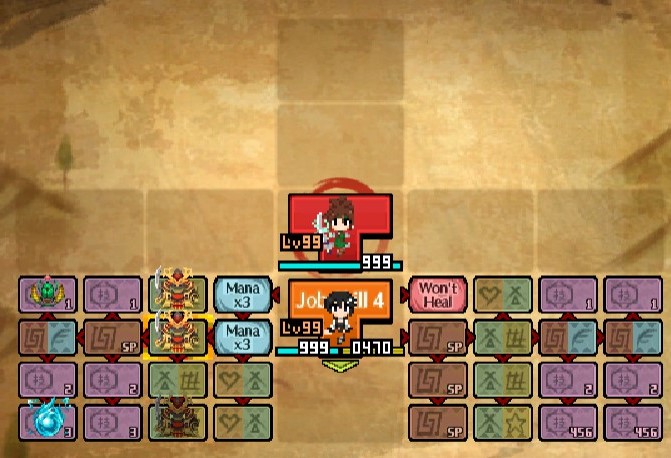
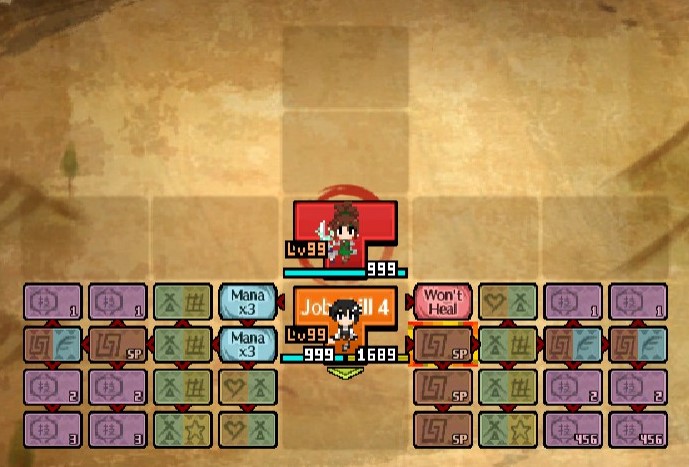
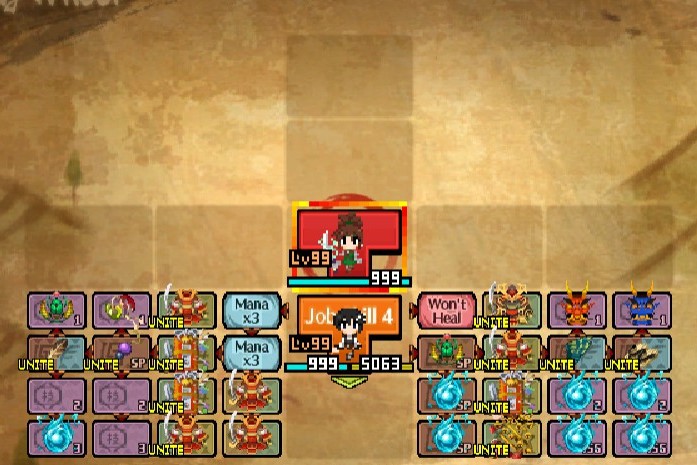
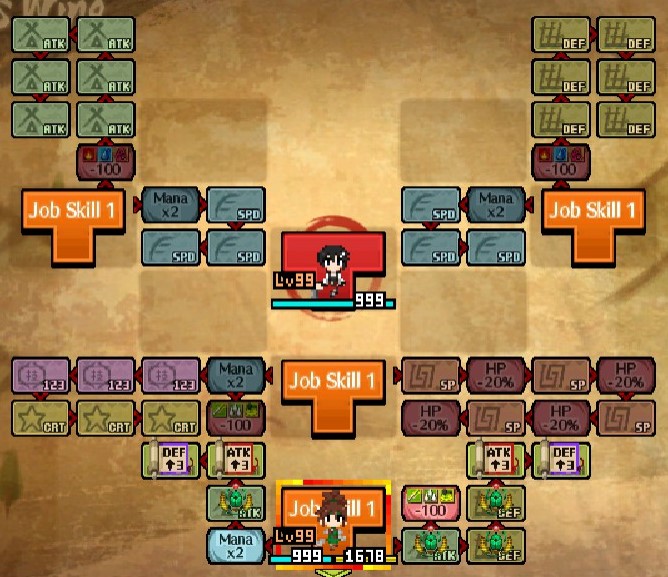
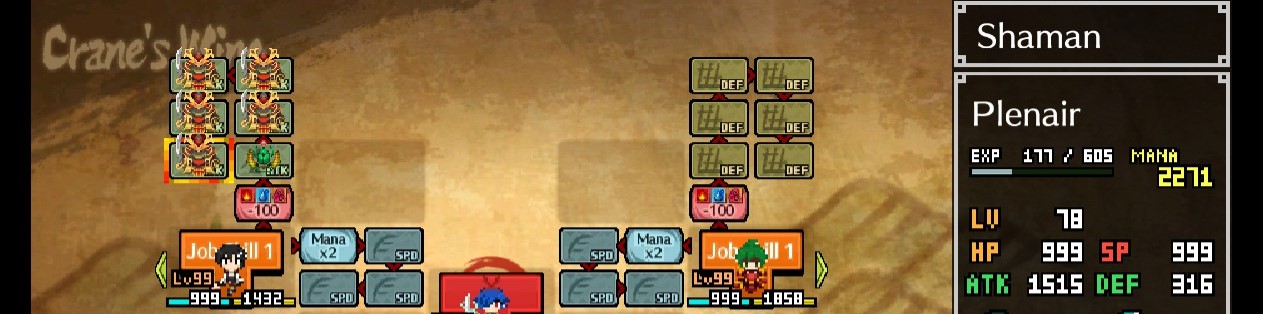
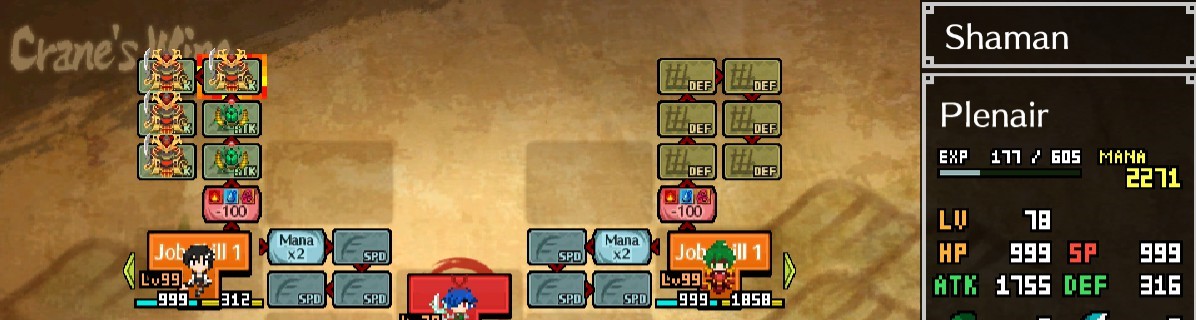
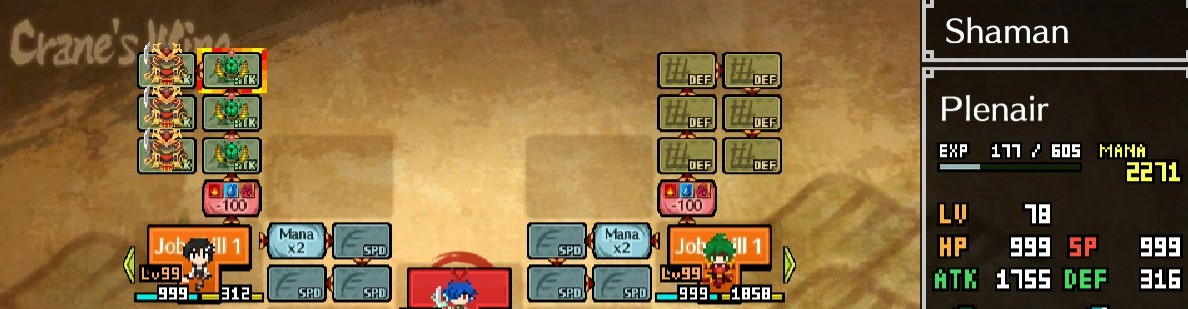
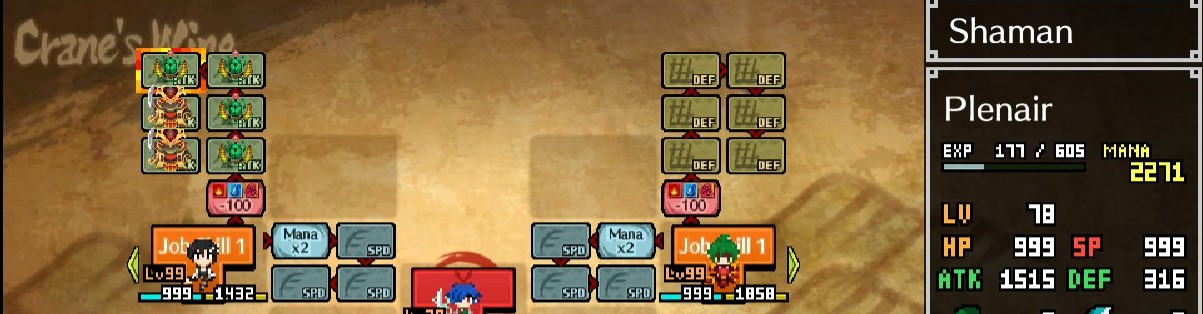
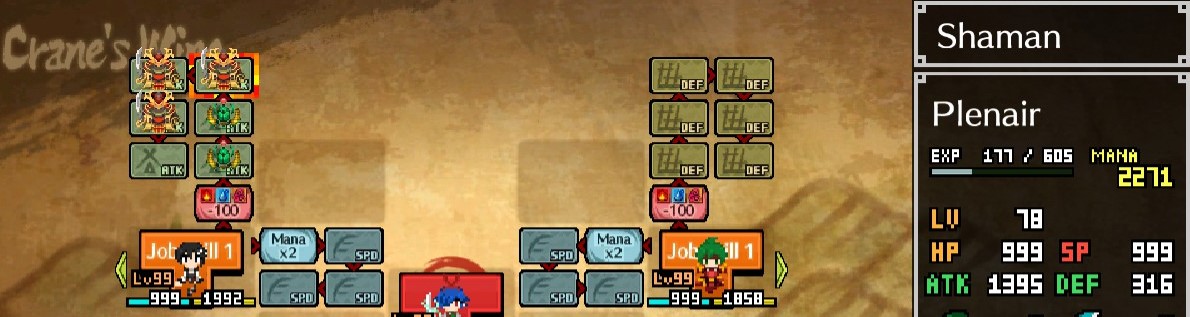
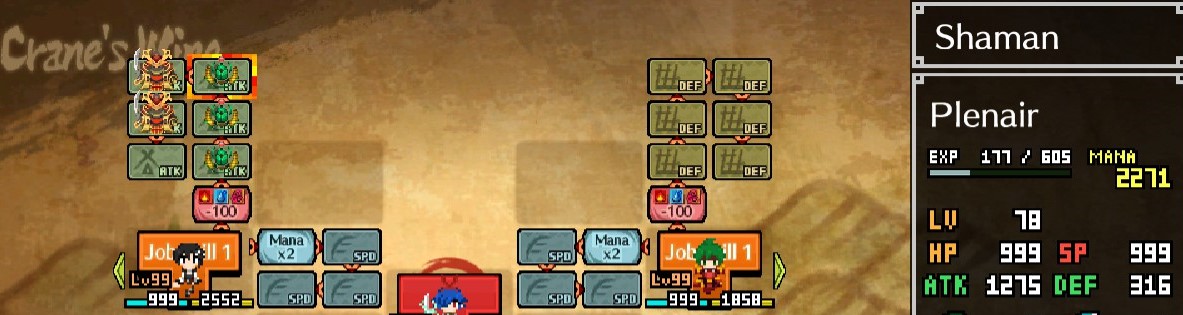
Personally I haven't tried out SP drain yet, it hasn't been necessary for Deathgeon, though I tend to mix skill use with basic attacks. Once you get to an endgame setup, you have 6 free title slots to use for whatever you want. SP drain seems very useful if you focus on skill use, but basic attacks are still effective if your ATK is 6k+ (unless you are using a staff).

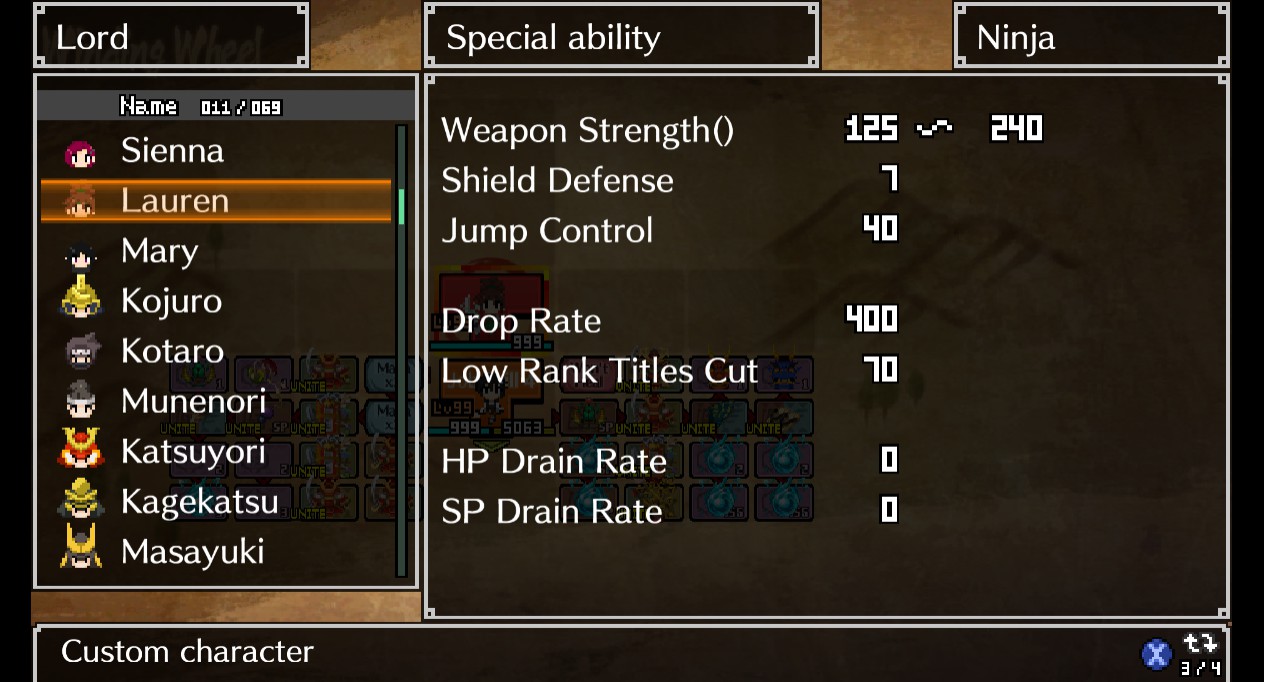
Divine does not work on title cuts, though iirc it does work on the drop rate portion of them.
Fairy 3 sept. 2017 à 17h23 
This is a great guide. Thank you! I'm currently using a skill build with SP Drain. But then I can't have 8 holy titles as you suggested for end game. How viable to use skills without SP drain? Or will normal attack be enough? I don't want to use the chosen build because I may run through some death trap.

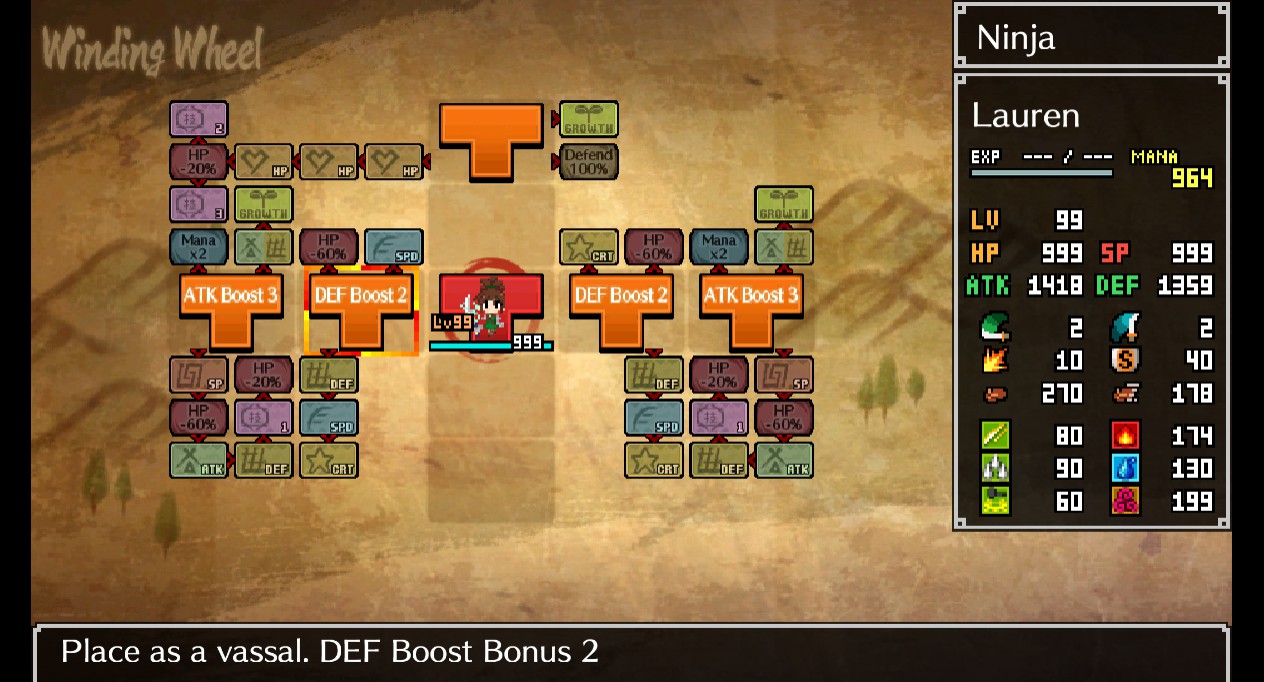
I plan to have mythic, holy, shinobi and sp drain on my armor, 4 holy on shield, and divine, bravery, goddess goddess on my weapon. I heard that divine doesn't work on title cuts.
tjpart  [créateur] 10 juil. 2017 à 16h42 
Glad I could help!
Roda the Red 10 juil. 2017 à 12h58 
Amazing guide! it's unbelievable just how deep are the mechanics of this game, i managed to find out most of this stuff by myself but you explained many things i wasn't able to grasp. i guess it's time to search for Insight/Mystique as im about to reach the 999 caps.
tjpart  [créateur] 5 juil. 2017 à 19h10 
In the shrine there is an owl you can talk to.
Pleinair the Red Star 5 juil. 2017 à 18h18 
quick question, how does one change their jobs? I sort of missed that part in the tutorial. lol