Baldur's Gate II: Enhanced Edition

Baldur's Gate II: Enhanced Edition

91 ratings
In-depth guide to Cleric/Mage
By ÄmJii
Tired of Kensai/Mage? Played through entire BG series with Sorcerer more times than you'd want to admit?
Want to try out the ultimate swiss-army knife character who slings spells all day long?

Look no further, you've come to the right place!
5
   
Award
Favorite
Favorited
Unfavorite
Why (Multiclass) Cleric/Mage?
Cleric/Mage character offers a rather unique gameplay experience: Ability to mix and match Arcane and Divine spells for various effects.
You've got all the important clerical buffs, decent summons and handful of surprisingly useful damage/CC spells... on top of that, you're also getting all the Mage goodies!

Best way to sum up Cleric/Mage would be "Better spellcaster Clerics than just pure Clerics" or "Crazy versatile casters. Slices, dices, it even does the laundry!"

Compared to pure Mages or Sorcerers, Cleric/Mage can do following:
- Wear shields and helmets WITHOUT affecting Arcane spellcasting!
- Gain decent THAC0 ratings thanks to Cleric side.
- Place Cleric spells in Sequencers, Spell Triggers and Contingencies. Some of these combinations are real blast.
- Cast an absurd amount of spells per day, even moreso if you pump all the Wisdom Tomes on PC. No other character can even come close to your # of spellslots.
- Instead of using up Mage spell slots, you can use Cleric-equivalents instead and memorize other Mage spells instead. This includes things like Animate Dead, Skull Trap <-> Holy Smite, True Sight <-> True Seeing (different spelling, same effect), Flame Arrow <-> Flame Strike and many many more.
- Obtains decent Lore skill due to high INT and WIS scores.
- Gains quite respectable HP compared to Mages + gains slightly better Saving Throws vs Death.
- You can wear Robe of Vecna & Amulet of Power to speed your Cleric spell casting times as well. Neat!

Biggest downside, however, is the slow level progression speed: By the end of Shadows of Amn, you'll be lucky to reach 8th level Mage spells and you won't gain 9th level Mage spells anytime soon either (about halfway ToB). However, you'll have access to 6th level Mage & Priest spells before halfway SoA.
Cleric/Mage, especially the Multiclass variant, is a teamplayer and SHOULDN'T be relied as your only Arcane spellcaster!
Multiclassed Cleric is enough to cover all the priest spellcasting necessities, but for Arcane bombardment you'll want at least one full-time Mage for the heavy-lifting.
Cleric/Mage build options
Multiclass is widely considered the preferable build option for a Cleric/Mage. Two races can do that, each with their pros and cons.

1. Half-Elf Cleric/Mage: Gains access to all Cleric & Mage spells. This is the one you'll see suggested most often as it gives you the "full experience". If you want Mage's Necromancy spells (especially Skull Trap & Horrid Wilting), this is the option you'll want to go for. Bit squishier than the gnome due to lack of "Shorty Saves" and a bit short on mage spell slots in early-midgame, but Necromancy contains some of the best nukes.

2. Gnomish Cleric/illusionist: A rather specialized option, this build gives up Mage's Necromancy spells but in return gains better Saving Throws (based on CON) and +1 to ALL 1-9th level Mage spell slots. Since multiclassed Mages gain levels slow as molasses, those extra spell slots become extra tempting in a long run.
The loss of Necromancy spells won't affect your Cleric spells, you can still Animate Dead as a Cleric and you can replace Skull Traps with party-friendly Holy Smites (3rd level Cleric spell).
Ultimately, it boils down to "Do I want Horrid Wilting or can I manage without it?"

I'll go over dual classing options in a next section, feel free to look it up or skip it at your leisure.

Regardless of which kind of C/M you're playing as, you'll want to priorize maxing Intelligence & Wisdom, at least 16 Constitution (max if you're playing Cleric/illusionist) and at least decent STR & DEX.
But what about Dual Classing?
While dual-class builds certainly are possible, I'm really not an expert on the subjet.
Thanks to super friendly and helpful Reddit user, I winded up trying a human C/M as well. First let's get the obvious differences out of the way:

1. Dual class variant certainly gains gains Mage levels quicker, thus opening Arcane spellslots, Seq./Triggers/Contingencies and HLAs much quicker, but keep in mind your Cleric spells stops scaling the moment you dual-class. Luckily, best clerical buff spells tend to be 3rd - 5th level spells anyways, so you don't necessarily mind losing the high-end spells (Arcane spells tend to be more powerful anyways).

2. To give you a perspective on the difference of leveling Multi vs Dual class: Half-elf C/M will have ONE 9th level spell slots at 6 Mil experience, while Dual Class gets their first 9th level mage spell at 3 mil + whatever XP your Cleric level required. On top of that, Dual Class variant can reach the same number of spell slots as an unkitted pure Mages can, assuming you dual class on Cleric 13 or below. When you start viewing your character as a "Pure Mage and also an adequate Cleric", it starts to look a lot more appealing.

2. Dual class builds have "downtime" after dualing, the higher you dual from the longer the downtime. Most builds work just fine when dualed at 7-9th level, but if you're dualing from level 12 or higher you're in for a longer haul (unless you don't mind "going solo & scribe hundreds of scrolls" XP exploiting).
In C/M's case if you dual at 7th level, all you really get is a Mage with few Doom, Remove Fear, Chant/Hold Person and Death Ward freebies... handy, but not terribly exciting imho.

3. If it's your first time trying a non-solo C/M dual, I'd suggest dualing at around Cleric level 10 - 12 and bringing Jaheira for the ride: This way you'll get the really important 4th-5th level utility spells (Free Action, Chaotic Commands, Death Ward, Lesser Restoration, Prot. From Evil 10' and True Seeing), while Jaheira can fill the gaps during your downtime. Once you've regained clerical abilities, Jaheira can focus more on Druid-only goodies while you handle the buffs + heals. 11th level nets you one 6th level spell slot and extra use of Cleric Kit abilities (see below), whereas 12th level yields a second 6th level spell slot.

Since your 1 Round/Level buffs won't last long you can forget the polymorph/shapeshift shenanigans mentioned later in the guide, but with a party that's really not mandatory. Another downside is that your Clerical damage spells (mostly Holy Smite and Flame Strike) loses their oomph a bit faster. Furthermore, Clerics have ♥♥♥♥♥♥♥ natural THAC0 until 2.475 Mil EXP, so you're stuck with Mages THAC0 for good portion of the game. You can use Holy Power and toss some sling shots here and there, but that's not really playing into C/M's strengths.

4. On a plus side you get to pick Cleric Kit over the vanilla-Cleric class:
- Evil Clerics of Talos get Lightning Bolt and Storm Shield (protects vs Lightning/Fire/Cold and Normal missiles). Lightning Bolt backfires more often than not, but Storm Shield is quite juicy as an emergency button.
- Lawful Clerics of Helm gain extra True Sights and Seeking Sword (a +4 Cleric-only weapon, strikes 3 APR). Seeking Sword disables spellcasting while active, but if you can disable your enemy beforehand it's good for finishing 'em off.
- Good Clerics of Lathander gain Hold Undead (same as 3rd level Mage spell) and a rather good special ability (a stackable Boon of Lathander, +1 to THAC0 & damage & All Saves, extra Attack Per Round and immunity to Level Drain). Pick this is you wanna get in some weapon swings, the added APR really helps.

My verdict on Dual Classing C/M

Overall, I personally think Multi-Class is the safer way to go. Dual-class is certainly viable (and possibly stronger in late-ToB) but you really need to plan ahead what kind of character you want, even moreso than with the infamous Fighter/Mage duals since C/M duals have more breakpoints. I ended up playing a Cleric of Helm 15 -> Mage and I regret dualing that late in the game. I ended up with a strong caster, but the downtime was quite a mood dampener.

For reference, here's a summary of different Dual Classing breakpoints and the XP required to re-activate Clerical abilities. Bolded options are the ones I'd consider sensible build picks:

Cleric 10: Gets a slightly better natural Save vs Death than pure mage (6 vs 8) and an extra 4th & 5th level spell slots over Cleric 9.

Cleric 11: Gains a second use of Cleric kit abilities and one 6th level spell slot.

Cleric 12: Gains extra 1st, 2nd, 3rd and 6th level spell slots.

Cleric 13: Another bump in Save vs Death, and extra 2nd, 3rd and 4th spell slots. Nothing really worthwhile in the long run compared to Cleric 12, but this is the last breakpoint where you can reach max Mage spell slots (level 28).

Cleric 14 [NOT RECOMMENDED]: Gets an extra 4th and 5th level spell slots, and gains the first 7th level spell slot. Compared to Cleric 12, only notable changes are extra 5th & 7th level spell slots, for a not-so-low price of 450k of Experience, plus the added 1,125 Mil XP required to finish the dual class.

Cleric 15: Fully scaled Animate Dead summons and an extra 4th & 5th level spell slots. Have fun with your dual downtime (I didn't).

Cleric 10 -> Mage 11: 450k + 375k = 825k XP
Cleric 11 -> Mage 12: 675k + 750k = 1.425 Mil XP
Cleric 12 -> Mage 13: 900k + 1.125 Mil = 2.025 Mil XP
Cleric 13 -> Mage 14: 1.125 Mil + 1.5 Mil = 2.625 Mil XP
Cleric 14 -> Mage 15: 1.35 Mil + 1.875 Mil = 3,225 Mil XP
Cleric 15 -> Mage 16: 1.575 Mil + 2.25 Mil = 3.825 Mil XP

With a 5-man group, you can expect to hit 3 Mil XP hallmark around the time you're in SoA's final stretch if you've done majority of the SoA's sidequests.
[Continued] Dual Classing woes?
One important thing regarding Dual Classes, one that's not immediately apparent through progression charts and XP tables, is that Dual Class C/M is somewhat starved on 5th level spell slots. Why is this a big deal, you ask?

Chaotic Commands and True Seeing. Without those spells, you're gonna have a miserable time after early-SoA. So what can we do to get around this issue?

First off, use all the WIS bumping thingies on your main character. This means starting off in BG1 with 18 WIS roll, using all three Wisdom tomes on your MC and then importing yourself to BG2.
That gets your WIS score to 21. This confers you a +1 5th level spell slots and a bunch of spell slots for 1st - 4th levels (https://pihwiki.bgforge.net/Baldur%27s_Gate:_Races_and_Stats#Wisdom)

In late SoA, one of the Hell Trials rewards you with +1 WIS if you take the Good Path, and there's another +1 WIS available for the taking in Watcher's Keep level 4.
With those boosts, you're looking at WIS score of 23... in ToB.

The good news is that we have other means to alleviate the issue. 6th level spell Wondrous Recall lets you restore two previously cast spells, so you can cast them again. Assuming you dualed at Cleric 11 or 12, that's 2 or 4 more 5th level spell casts to play around with! If you don't find yourself using Aerial Servants or Heals often, this is a viable option.

Third option is rather simple: Pick yourself a Cleric of Helm kit on character creation. At Cleric 11, you're looking at a FREE 3x True Seeing casts per day.

With these tips you should have all the means necessary to memorize & cast Chaotic Commands and True Seeings when needed. And you even have a slot or two to spare for other nifty spells like Greater Commands or Magic Resistance.
Gear selection - Dress to Impress
One of our strong suits is the fact we don't need to contest other characters for gear: We can use whatever we've got at hand and do just fine.

Shield of Harmony grants us nice array of immunities while Reflecting Shield gives us permanent Physical Mirror (reflect ranged weapons back to attackers). Reflecting Shield remains useful through entire game, even finding some use in Watcher's Keep and ToB final battle.
Grab it from Ribald's store, it's a real barter!

Early on you can pick whichever helmet you want, it really doesn't matter which one you pick. Rasaad's quest nets you an Eye of Beholder, which can be used to cast paralyze/hold/fear on single target once a day. Once you reach Chapter 6 in SoA, you can buy Helm of Brilliance from Ribald's special stock, should you need more Fire Resistance or if you want to blast things with Prismatic Sprays or Fireballs.
In ToB, once you reach Amkethran, you can buy an ioun stone that nets you +1 WIS when worn. If you grabbed all the WIS bonuses mentioned in Dual Class section, your non-gnomish C/M should end up with 24 unbuffed WIS. That means two additional 6th level spells to be used at your own leisure.

Mostly you'll be using a sling+shield, but you always have the option to wield Maces, War Hammers and Flails if nobody else in your group uses them.

Eventually you'll want Robe of Vecna, Staff of Magi and Cloak of Non-Detection. Rest of the gear choices is really up to you.

Try to obtain Planar Sphere as your stronghold, this way you'll get both Ring of Acuity (extra 2-4th level Mage spells) and Ring of Wizardry (extra 5-7th level Mage spells) if you play your cards right.
Following Jaheira's personal storyline yields another Ring of Wizardry, giving you another good reason keeping her around.
Teamplayer C/M - General spell selections
Here it is, the meat and potatoes of this guide.
Since kamster99 has already made a spectacular guide on Spells and Abilities, I'll try not to describe every spell too much.

Instead I'll just go through which spells I tend to pick on corresponding spell slots.
I'll also include screenshots of general spell book loadout examples (taken on my last playthrough, late-ToB).
Level 1 - Priest Spells
Priests have a lot of nice utility spells on level 1, some of them remain useful through entire BG saga.

Early on, we'll be using Bless, Remove Fear, Doom and Cure Light Wounds.
Remove Fear and Doom remain useful through entire BG saga, Sanctuary kinda works like Invisibility (handy before getting Staff of Magi). Armor of Faith is a nice filler spell, it's better for melee clerics but extra protection is always welcome.

Doom has long casting time, in order to get the most out of it you'll want to combo it with another spellcaster. It takes a while getting used to, but the Saving Throw penalty is immensely useful when tackling single tough targets such as dragons.

Protection from Evil is rather handy, but it gets completely overshadowed by 4th level AoE variant.

Level 2 - Priest Spells
Level 2 spells range from "Mildly useful" to "Great" depending on what kind of priest you're playing.

As a caster Cleric, early on we're mostly interested in Chant and Hold Person, but it never hurts to have couple Resist Fire/Ices and a single Slow Poison memorized all the time. Once Hold Person starts to run out of use, we can swap them out for other general buffs.

Flame Blade is handy when you're taking on Trolls in early SoA (hint: Slaver Boat in the Slums and de'Arnise Keep), I'd keep two FB's memorized when venturing in those areas. Otherwise not too great.

Silence '15 Radius might seem great, but it's severely hampered by two factors:
1. Most mages have superb Save vs Spells, making it unlikely to stick even at -5 penalty (yikes!)
2. Even if it hits, most mages have Vocalize memorized (which they'll cast immediately). It gets even worse in ToB, where mages casts Vocalize via scripts (ie. they have infinite Vocalizes).

Draw Upon Holy Might is awesome spell for Fighter/Cleric characters, but less so for Cleric/Mage. Can be useful if you like shapeshifting spells, but for general use you'll want to memorize other stuff.

Level 3 - Priest Spells
Now we're talking! This level contains two of Cleric's powerhouse spells: Animate Dead and Holy Smite. Animate Dead scales with your level up to lvl 15, which nets you big Skeleton Warriors: These bad boys have 90% Magic Resistance (yes, 90% Magic Resistance!), making them ideal for dispatching every spellcaster you come across.

You could just fill all your slots with AD's and HS's and call it a day, they're just that powerful.

Dispel Magic is better left to single class spellcasters (success rate is based on caster level vs target level), but in a pinch you can memorize few of these.

Miscast Magic shares the same weakness as Silence '15 Radius: Mages have great Save vs Spell -> Not enough consistency. Druids gain much better alternative in a form of Summon Insects.
On a bright side, at least Mages can't just Vocalize their way out of this one.

Protection from Fire is situational, but highly useful under right circumstances (ie. certain red dragon in SoA). If you like hurling Fire spells all over the place, cast this on your frontliners before you unleash your inner arsonist.

Strength of One gets a special mentioning for those who like to cast summons. Most summons have trashy Strength, this will alleviate the issue in a single casting. To make it even better, casting this won't break your invisibility/Sanctuary!
Combine with Haste to make your summons formitable damage dealers.

Remove Paralysis is a good pick in similar circumstances as Free Action. Except this thing can be cast at range, it has AoE and it doesn't invalidate Haste effects. It won't protect you from getting held/paralyzed, but it gets your party members unstuck from sticky situations.
Some sources also imply it can remove Stun effects, but I haven't tested it. If true, this works wonders with Symbol: Stun.

Level 4 - Priest Spells
Level 4 is slight disappointment after Level 3 awesomeness, but still contains some useful buffs.

You'll definitely want to memorize multiple Death Wards, couple Protection from Evil 10' Radius and few Lesser Restorations. Rest of the spells are situationally good.

Free Action combines well with Web, but it also offers good protection against Demons and Undead creatures as some of them inflicts Paralyze. Depending on your playstyle, you can keep 1-3 memorized or don't memorize any at all.

Mental Domination is a decent filler spell, occasionally you'll get lucky and nab a strong melee combatant. Remains somewhat useful in ToB thanks to -2 Saving Throw penalty, it's worth trying on Fire Giants.

Poison is another decent filler, albeit I haven't had as much luck with this one. Damage potential is juicy, but requires some setup to overcome Saving Throws.
A poor man's Finger of Death, if you will.

I like to memorize one Animal Summoning I just so I'll have some fodder to throw at enemy mages. Mages tend to cast Death Spell immediately once they spot a summoned creature, might as well throw some weak fodder to soak it up.

Level 5 - Priest Spells
Most important level 5 spell is Chaotic Commands, hands down. It stops just about any mind-affecting spell from taking place (be it charm, confuse or psionic blast).
Secondly, you'll want True Seeing if you're not running Inquisitor in your party. True Seeing is just about the best anti-illusion spell you can get, and mages sure love their illusion spells...
Besides that Greater Command is good Crowd Control spell, it's basically a Divine equivalent of Emotion: Hopelessness: Only works on living creatures, but it's damn effective at disabling enemies.

Flame Strike is one of Cleric's few direct damage spells. It does good damage but the long casting time makes it less useful than it could be (plus, Wand of Heavens exist).
Slay Living is another poor man's Finger of Death except this one requires successful touch attack. Unlike Poison, it still deals some damage on successful Save vs Spell, making it marginally better once your THAC0 reaches reasonable rate.
Priorize Slay Living if you're facing lots of Fire resistant mobs, otherwise you can stick with Flame Strike.
If you're not getting much use out of these, Magic Resistance is a reasonable spell to consider.

Raise Dead and Mass Cure are both fillers, you should priorize other spell listed above before memorizing any of these.

Champion's Strength has a niche use for Thief/Mages: Fueling their backstabs. Cast this on your T/M, have your T/M cast Mislead and let the backstab mayhem begin!
As I said, fairly niche use and you can do without it just fine.

Level 6 - Priest Spells
Lots of interesting picks here.
Aerial Servant is always good pick, but don't underestimate the two Mountain Bears you're getting from Conjure Animals: They're less tanky, but they hit hard (their attacks are treated as +3, letting them injure just about any foe besides demi-liches) and they attack THREE TIMES PER ROUND. If left unchecked, they can put a serious dent on your enemies.

False Dawn usually gets overlooked, but it's handy for dual classed C/M, or if you're otherwise unable to Turn Undead you're currently facing. Bypasses MR, no Save vs confusion and goes through Liches innate spell immunity. Nifty tool if you need something to interrupt Liches spell casting.

Blade Barrier is intended for melee clerics, but spellcaster clerics can abuse this spell: Make yourself invisible, walk in middle of enemy group and cast this. You'll remain invicible while Blade Barrier does its dirty work. You could try having this (+Globe of Blades) on if you intend to let C/M do some mage tanking. TIP: If you Haste yourself, Blade Barrier & Globe of Blades both proc twice per round instead once per round.

Heal sets targets HP to full, I probably won't need to say how darn useful this is. Take several.
Harm on the other hand puts your target at 1 HP, no Saving Throw allowed but Magic Resistance can nullify this. Your Cleric needs to make successful attack roll, but I haven't encountered a single foe that's outright immune to this spell.

Bolt of Glory deserves a shout-out for being so awesome against demons (and a certain prince, in particular): Bypasses Magic Resistance and no Saving Throw allowed. Highly situational, but great when it works.

Wondrous Recall is a good filler spell if you don't fancy 6th level priest spells. You can use this to swap used spells for something else, for example after spending two Chaotic Commands you can un-memorize them, swap in two Mass Cures and cast Recall for couple extra healing spells.

Level 7 & HLAs - Priest Spells
Plenty of good spells to choose from, and some terrible ones.

Firestorm gives us a good AoE bombardment spell, it bypasses Magic Resistance and doesn't allow Saving Throw. You'll need a Fire resistant ally as a bait to get most use out of this, but you'll quickly roast any non-resistant critters you come across (such as Drows).
Finger of Death can be used to dispatch single nasty foe quickly, but try not to become overly reliant on it.

Symbol: Stun/Fear are both great Crowd Control spells, though you'll need some preparations to make sure they don't backfire on your guys.

Other than that, Renegeration grants massive health regen buff on single ally. If you're expecting melee slugfest, memorize couple of these.


Out of all High Level Abilities, Implosion and Energy Blades provide most reliable source of damage.
Summon Deva is a good summon, but not good as Planetar... still, worth grabbing early as it's one of best summons Clerics can get.

Otherwise your Cleric HLA's are better spend on grabbing those Extra Mage Spell Slots ASAP.

Level 1 - Mage Spells
You can play through entire BG1 with Magic Missile, Shield and Sleep. However, once you reach BG2 you'll primarily want to stick with Magic Missile, Blindness and possibly a Spook or two.

None of the other spells are worthwhile in a long run imho.
I've seen people saying Glitterdust is better than Blindness, but I honestly think Blindness is very underrated spell: Compared to Glitterdust, it has insane duration of 100 Rounds. That's 25 times longer duration than Glitterdust!

Blinded foes are completely helpless against ranged weapons, once your foe gets blinded he/she/it is good as dead.

Level 2 - Mage Spells
Oh dear, there's too many useful spells to summarize them shortly... generally, this is where you'll find lots of good CC and defensive spells.

Glitterdust, Horror and Web are all good Crowd Control tools (Web having the most longevity even in ToB, thanks to -2 Save penalty). Try them all and see which one you like the best.

Melf's Acid Arrow is good at disrupting spellcasters, but otherwise the damage-over-time is too low to actually kill anything on its own.

Mirror Image & Invisibility are staple defensive tools, you should always have couple of these memorized.

(Honestly, I have no idea why I had Ray on Enfeeblement memorized, I don't think I cast it even once...)

Level 3 - Mage Spells
In BG1 you'd probably load up on Fireballs and you'd do just fine. However, in BG2 most useful spells you'll see on level 3 are undoubtedly Haste, Slow and Skull Trap. Coincidentally, they're all good options for Spell Sequencer for different reasons.

Flame Arrow gives good competition for Skull Trap: Although ST deals damage to multiple foes, sometimes it's unwieldy to use properly without blasting your allies into bits. This is when you'd rather have Flame Arrow's precision damage or a Holy Smite instead.

If you have room for it, Melf's Minute Meteors are great pick. You won't find more damaging ranged weaponry for Cleric/Mage in quite a while, you'll get good mileage out of this spell.

Level 4 - Mage Spells
Lots of goodies here!
Staple spells include Greater Malison, Stoneskin and Minor Spell Sequencer.

Polymorph: Self works great as anti-mage tool: Mustard Jelly form comes with 100% Magic Resistance! I always keep one memorized until I get to summon Skeleton Warriors.

Fire Shields have niche use in conjunction with Cloak of Sewers + Armor of Faith: Rat form has 90% resistance to physical damage, with Armor of Faith it reaches 100% easily.
Cast AoF, Fire Shield(s), run up to melee grunts and turn into Rat form. Sit back and watch enemies whack themselves to death. Tedious, but it gets the job done.

Since Sequencer combos are near endless, I'll go through them in greater detail in later section.

Level 5 - Mage Spells
Mostly debuffs and buff disablers. Big ones on this level include Chaos, Breach and Lower Resistance.

Besides the ones mentioned above, you can try Feeblemind/Hold Monster if you want more disabler spells.
Spell Immunity is handy if you ever feel like getting fancy with Project Image clones (Spell Immunity: Divination), or if you want to try mage vs mage dueling (hint: Spell Immunity: Abjuration protects from Imprisonment, which is "quite useful" if you run into certain demi-lich in SoA...).

Conjure Elemental spells should be considered ONLY if you're sorely lacking summons that are immune to normal and +1 weapons. Even then they're unreliable to cast in middle of combat since there's a chance your elemental simply turns hostile.

Level 6 - Mage Spells
Best spells this level has to offer are Improved Haste, Pierce Magic and True Sight, However, since we're getting True Seeing as a Priest spell it's better to memorize that one instead and save your Mage slots for something else.

Speaking of illusion spells, Mislead is quite a cheesy one: Park you illusion clone on other end of the map and you can safely keep casting spells without breaking invisibility.
Thief/Mages get even more use out of Mislead as they can keep backstabbing foes long as Mislead stays up.

You should always have one Death Spell memorized, most high level mages like to cast Summon Efreeti which is annoying to kill with conventional means (it can turn into Gaseous Form and regenerate to full). Death Spell gets rid of it instantly. This also works wonders vs trolls of all variety (in SoA at least), one cast will clear out entire mobs of trolls.

Contingency has plenty of uses, one of the simplest ones being Invisibility when you've been rendered helpless (immobilized) or casting Stoneskin when you get hit.
You can also use Cleric spells, for example cast Mass Cure or Heal when you're getting low on health.
Very flexible defensive spell, definitely worth a slot.

Level 7 - Mage Spells
Couple of really good spells and some of them aren't so great.

The ones that really stick out are Mordenkainen's Sword, Project Image and Spell Sequencer.

If you're playing Cleric/illusionist, Delayed Blast Fireball serves as decent alternative to Skull Trap. Not quite as devastating, but 15d6 ain't nothing to scoff at.

Ruby Ray of Reversal/Khelben's Warding Whip are good if you're having trouble with some mage encounters. Ruby Ray in particular is handy when dealing with certain pesky wyrm in ToB (the ONLY enemy in unmodded game you'll encounter who casts Spell Immunity: Abjuration. If you play with SCS mod, expect to get more mileage from Ruby Rays).

Project Image is also an obvious pick. It creates a duplicate of your character, which basically doubles your spellcasting potential per day. The clone gets dispelled either when you get hit OR by True Sight (can be countered with Spell Immunity: illusion), and your character gets rooted in place while the clone is active. Bit cheesy and I don't use it often as I should, but it's definitely worth keeping memorized.

Limited Wish requires good Wisdom for good results, which happens to be the case with C/M. Using a repeatable wish, you can confer a Minor Globe of Invulnerability to your whole party in one go, making you immune to 1st - 3rd level spells. Great synergy with Skull Traps or Web/Stinking Cloud .

Load up on Mordy's Sword, you're gonna use them from the moment you unlock them till the end of ToB.

Level 8 - Mage Spells
This is the spell level where being pure Cleric/Mage really pays off: Cleric/illusionist misses out on Horrid Wilting (aka the best party-friendly AoE nuke). But fear not, there are plenty of good spells to choose from, including substitute AoE (though not as good) Incendiary Cloud.

Other good picks include Spell Trigger, Power Word: Blind and Pierce Shield.

Simulacrum is a fantastic spell for Fighter/Mage builds, but since our main focus is spellcasting over physical combat, we're better off taking 7th level spell Project Image.


We're also getting Symbol spells, but we can memorize them via our Cleric side.

Level 9 & HLAs - Mage Spells
As expected, some of the top tier spells are found in this level. Yet somehow there's lots of trashy options as well.
While Cleric/illusionist suffered a bit on missing Horrid Wilting, having that extra 9th level spell slot is a welcome compensation.
Cleric/Mage on the other hand just barely reaches two 9th level slots at max experience level (which you'll only obtain either by soloing or by intentional grinding).
There's a good reason why I suggested running pure mage alongside C/M at the start of the guide.

Out of 9th level spells, best all-around picks here are Chain Contingency and Time Stop.
Meteor Swarm is an inferior Firestorm as it deals static damage AND it gets halted by Magic Resistance. We have absolutely no reason to memorize them.

If you like self-buffs you'll get good mileage out of Shapeshift. Nice to have when soloing, but if you're playing with a party you don't need to jump in the fray.

Wish spell gets a shout-out for being a real champ in drawn out fights. Having one memorized makes the ToB end boss more manageable (one of the options includes refreshing every party members spell book & special abilities).
If you don't want to keep this memorized all the time, alternatively you can keep Wish scroll in quick-slots, cast Project Image and use clone's scroll instead.
It's situationally good, but there's always a chance you don't get the wish options you wanted.


High Level Abilities

For Cleric/Mage, the Big Two HLAs are Summon Planetar and Improved Alacrity. Hold off on Dragon's Breath and Comet for a while. Energy Blades should be left last since we're getting the same HLA on Cleric side much quicker.

Dual class variant gets to enjoy Mage HLAs much earlier than multiclassed C/M, something to keep in mind when planning your main char.
Contingencies, Sequencers and Triggers - All the fun stuff
Since there are soooo many possible comboes, I'll go over the ones I've found conventional.
Note that I'm focusing strictly on Spellslinger setups here, if you want to read about melee buffs then skip ahead to "Polymorph, Shapeshifting" section.

Note that if you mix and match "Choose a target" and self-targeted spells in a Sequencer/Trigger, you'll have to aim the Sequencer/Trigger on yourself. Otherwise combat log says "Spell failed" and the effect is lost.
Same thing happens if your spells have different spell range, ie. you can't cast Touch spell from afar. Therefore, try getting close to your foe before using Seq/Trigger.

Minor Spell Sequencer
(4th level Mage spell)
Lets you store two 1-2 level spells.

Bless + Chant - Convenient quick-cast party buff. If you like casting summons regularly, this combo also buffs them.

Remove Fear + Mirror Image - Fear protection and miniature Stoneskin in one package, can't complain.

2x Blindness - My top choice for single target de-buff, works wonders on dragons and other nasties. Unlike Glitterdust, this thing lasts 10 Turns... in other words, 100 Rounds.
Once blinded, you can pelt your target with spells and ranged weaponry effortlessly.

2x Web, Stinking Cloud, Horror or Glitterdust (or any combination of these) - Popular Crowd Control choices, forcing all enemies rolling two Saves instead of one.

Doom + Blindness/Hold Person - Great for BG1, somewhat handy in BG2. Note that Doom travels slowly and the range ain't too impressive, it'll likely hit after the other spell effect.


Spell Sequencer
(7th level Mage spell)
Store up to three 1-4th level spells. Huge array of good options here, ranging from direct damage bursting to Crowd Controlling and party buffing:

3x Skull Trap or Holy Smite - Strong AoE burst, pick either raw damage (Skull Trap) or party-friendly (Holy Smite).

3x Flame Arrow - When you need that precision striking against one tough foe, this is a good pick.

Greater Malison, 2x Slow OR Slow + 2nd level Crowd Control spell - Enhanced version of Minor Spell Sequencer's Crowd Control combo. Greater Malison takes a while to reach its target, so try not to cast this combo from afar.

Strength of One + Haste + Chant - Good array of buffs for your summons, wrapped up in one neat package.


Spell Trigger
(8th level Mage spell)
Store up to three 1-6th level spells. There are two particular comboes for stripping spell protections quickly, but otherwise rest of the comboes are bit gimmicky.

Pierce Magic + Breach + Lower Resistance - Staple combination for ToB boss encounters, this gets rid of just about every protection AI likes to cast and lowers Magic Resistance to boot.

3x Lower Resistance - A follow-up for the combo mentioned above, gets rid of the remaining Magic Resistance.

3x Flame Strike - If you REALLY want another direct damage burst...

3x Bolt of Glory - Puts a serious dent (if it doesn't outright kill it) on any Demon you'll encounter. No Magic Resistance, no Saving Throw, just raw damage.

3x Mass Cure - For those instances when chugging down Healing Potions just won't cut it.


Contingency
(6th level Mage spell)
Store one 1-6th level spell (scales with your level) which triggers under specific condition.
Mostly used for defensive purposes, it can be used as automated Greater Malison (you can never have too many of those!).

When hit:
Stoneskin, Invisibility, Mislead, Mirror Image - Fairly standard defensive spells.

When at low health:
Mass Cure, Heal

See enemy:
Greater Malison OR False Dawn (only if you're facing lots of Undeads).

When rendered helpless:
Free Action, Heal, Mislead, Dispel Magic, Invisibility - To get you out of those sticky situations.


Chain Contingency
(9th level Mage spell)
Store up to three 1-8th level spells which triggers under specific condition.
A real multi-tool spell, ranging from massive AoE bombardment to quick summoning.

3x Horrid Wilting - Possibly the most damaging burst damage party-friendly combo there is. Sorcerer's favorite combo for plowing through encounters.

3x Symbol spells - Cleric/illusionists can try this instead. Lots of Crowd Control potential here.

3x Firestorm/Implosion - Lots of damage potential here, both of these bypasses Magic Resistance entirely.

3x Mordenkainen's Sword - Best used when taking on tough melee foes.

3x Gate/Summon Fiend & Spell Sequencer with Protection From Evil 10' Radius + Haste + Chant - This combo is pure evil (pun intended), gates in lots of demons and buffs them. Protection From Evil keeps them from attacking one another while Haste + Chant makes them hit like a truck. Amusing combo, but sadly you're not getting XP for Demon's kills.
Flying Solo - C/M version
While I haven't done it myself, I have no doubt Cleric/Mage wouldn't be capable of soloing the entire saga.
Let's cross that off from to-do list, I completed my SoA+ToB Cleric/illusionist solo run with flying colors.

In BG1 you'll be relying on same tools as solo Mages in general: Sleep, Hold Person and other CC tools alongside wands you come across. Since BG1 is a low level campaign, you can clear most mobs with single use from Wand of Fire/Ice, in prolongued encounters you can make good use of Stinking Cloud + Animate Dead combination.

Things starts getting bit more complicated in BG2 as mobs start having higher Health and Magic Resistances. This is where you'll want to start using Animate Dead intensively alongisde Strength of One + Haste to mow down enemies you come across.
You'll wanna grab Cloak of Sewers early as possible (sewers in Temple District), which permits you to melee more effectively with Holy Power + Draw Upon Holy Might + Troll form. Your AC might not be that great, but your fast regen speed should sustain you through most encounters in Chapters 2 and 3.
If you need a "tanky summon", consider 6th level Conjure X Elemental Mage spells: They're all immune to Normal and +1 weapons (that includes a lot of early enemies btw).

Around Chapters 4-5 you'll start running into enemies which require +2 or better weapons to injure them, this is when you'll need to switch out Skeleton Warriors for other summons. Aerial Servants (6th level Priest spell) hit as +4 and they hit HARD, albeit only once per round which needs to be remedied with Haste. Demon summoning spells are worth considering, you don't mind missing XP since you're gonna hit the XP cap inevitably well before ToB end-game: They cast nasty spells, hit often (4 or 5 APR) and they hit reasonably hard too. Just make sure you got Protection From Evil.

Eventually you'll start using Mordenkainen's Swords as your main summons, they're completely immune to physical damage (and psionics) making them ideal anti-melee summons. As always, you'll wanna buff these summons as well.

When summons fail

Luckily Cleric/Mage (nor Cleric/illusionist) ain't short on firepower. While Mage spells are better suited for damaging purposes, don't overlook Clerical spell book either: Holy Smite and Flame Strike offer good bang for the buck while Slay Living/Harm can sometimes dispatch bothersome foes with impunity.

On top of that, Blade Barrier/Globe of Blades, Bolt of Glory, Firestorm and Implosion bypasses Magic Resistances entirely. Neat!
And then there's the Mage goodies for even more bombardment.

When spell bombardment fails

Lots of Magic Resistant foes in sight with a blend of Fire Immunes in the mix? It's time to go nuts with polymorphing/shapeshifting.

Cleric/Mage has unique interaction with shapeshifting spells: All the Sequencers/Triggers and such are available even when shapeshifted.
On top of what Mages can do with shapeshifting, C/M can boost their forms stats absurdly high and granting immunities via Sequencers that Mages can only dream of.

If you want to try soloing, you'll definitely want to master shapeshift + self-buffs discussed in following sections.
How about turning yourself into Sword Spider with 20+ STR, max damage per hit effect that last 1 Round/Level, weapons treated as +3, 8 Attacks Per Round and all sorts of Mage protective spells? Even Kensai/Mages feel uncomfortable looking at such an itsy-bitsy abomination.


You'll have all the necessary tools to tackle ToB bosses, either via heavy spell bombardment or Polymorph/Shapeshift + self-buff shenanigans combined with Time Stop if needed.
Check below spoilers only if you're stuck and feeling desperate.

Solo-Irenicus

First Irenicus fight can be handled like all other Mage encounters, leave it to your Skeleton Warriors (they've got skyhigh Magic Resistance). Bait out Death Spell and then keep sending Skellies at him, he'll fall easily.

In second encounter with Irenicus, you'll wanna handle his demon minions quickly:
- Leave couple summons near one of the staircases, otherwise Irenicus just Death Spells them instantly
- Cast Polymorph: Self and all the important melee buffs (you'll need Enchanted Weapons unless you're in Flind form) on yourself before opening the door
- Once the fight starts, make a beeline towards your summons (make sure all demons are following you) and chop them down fast as you can
- Send one minion at Irenicus to bait Death Spell, then follow in with rest
- Keep dispelling his buffs (you'll need at least True Seeing/Sight, Pierce Magic and Breach), he'll occasionally cast things like Protection from Magic Weapons so be ready with de-buffs/dispels
- Keep wailing on him and he shouldn't prove too difficult.
Solo-Tob bosses (Spoilers!)
Solo-Illasera

Anything works, really. Such an easy encounter

Solo-Gromnir

Equip lots of Fire resistance gear + buffs, put 3x Incindeary Cloud in Chain Contingency and have your Staff of Magi + Cloak of Non-Detection readied. Swap out SoM to make yourself visible, lure all the enemies in clouds and go invisible again.

Solo-Yaga Shura

Slap him once to make him retreat momentarily. Make sure you have Cloak of Reflection (important!), keep using Death Fog & Cloudkill (spam via Wand of Cloudkill) to keep mob count under control and wait for Yaga-Shura to reappear. Once he shows up, hit him with Lower Resistances (Spell Trigger) and bomb him with non-Fire spells while kiting to avoid getting surrounded.

Solo-Draconis

Let your Planetar handle his human form while you stay out of his sight, he cannot harm the Planetar.
Once the second phase starts, cast another Planetar or Deva and send it to meet him. This makes him trigger his prepared spells pre-maturely: He casts Spell Immunity: Abjuration (only Ruby Ray of Reversal counters that), Non-Detection and he can go invisible at will making him real pain to hit with spells (and he sees through your invisibility).
Once your Planetar/Deva bites the dust, go to your Pocket Plane, rest and come back to see his buffs gone (cheap, but Draconis ain't exactly playing fair either). Immediately cast few summons to distract him, start wearing down his Magic Resistance, cast Improved Alacrity (if you have it memorized) and start bombing him with spells.

Alternatively, after coming back from Pocket Plane just cheese him with Shapeshift: Mind Flayer + Time Stop.


Solo-Abazingal

Kite around the center area to aggro Ice Salamanders & pick them off one at a time. Once you've cleared the area, summon couple Mordy Swords and few summons of your choice (preferably something that lasts long). Now challenge Abazingal, his human form can't kill Mordy Swords. Buff summons as you see fit, once Abazingal takes enough damage he goes to his second form.

He starts off by blowing everyone backwards, have your summons regroup on him while you do the spell bombardment (yes yes, I know I'm repeating myself). He's vulnerable to Fire, so go nuts with Imp. Alacrity + Flame Arrows & Flamestrikes and everything else you've got.
I find him much easier than Draconis.


Solo-Sendai

This is a multi-phased fight, so take it slow. Whenever you kill one of Sendai's statues, two Drows spawn near entrance staircase. Deal with those waves one at a time.
None of her statues are particularly tough, but if you keep killing statues too fast you might get overwhelmed by Drows.

Fortunately, this area is just big enough for you to hide from Sendai's line of sight: You can abuse this by going to your Pocket Plane for resting.

When you wreck all her statues, she shows up. She summons some skeletons and spiders, but she's really not too challenging. Just keep True Sight active and let your summons chop her up.


Solo-Balthazar

You'll want to end this battle quickly, otherwise you'll just get stunned and killed.
Most reliable way to killing him is to use polymorph/shapeshift + self-buffs (Enchanted Weapons + Righteous Magic + Imp. Haste are mandatory!) and Time Stop. Equip Cloak of Reflection before the battle so that your Time Stop doesn't get disrupted (Balthazar has some nasty scripted skills he spams).
Cast Polymorph:Self all your buffs before ascending the stairs.

As soon as the fight starts, run right next to the balcony railing and start casting Time Stop immediately. Once Time Stop activates, run next to Balthazar, turn into Sword Spider and start whittling down his HP. He should die before Time Stop runs out.


Solo-Ravager

Memorize all the Energy Blades + Minute Meteors you can, equip Shielf of Reflection and buff your THAC0 much as possible. Summon Mordy Swords to distract Bone Blades and challenge Ravager to a shoot-out. This got me through Ravager on the first try.

Solo-Melissan

Have one Wish memorized, it makes the end-battle more manageable!
My tactic is bit long winded to describe, so I'll leave this here: http://i.imgur.com/kvt5gD7.jpg

Basically, have summons to distract Melissan (preferably ones that can't be killed by Death Spell), have all THAC0 boosts you can get, wear down her Magic Resistance and slap her with Harm to 1 HP. Have Planetar help out on clearing mana pool guardians, set up your Contingencies/Triggers etc. and then Wish for Rest option (might take couple tries even with high WIS). Make sure you let Planetar wear off before starting next phase, so that your C. Contingency pulls out your Deva.
Rinse and repeat, Quick Save often!

Hint: Keep Shield of Reflection for Fallen Solar: You can kill it with its own arrows!
Hint 2: Melissan likes to Dispel your Harm, Spell Immunity: Abjuration prevents this from happening.
Soloist self-buffs
Since the previous list was aimed more towards generalist spellslingers, I hadn't included Melee Cleric self-buffs. Since the list isn't as long, I'll keep it short.

Priest Spells

1st Level
Armor of Faith - Adds flat percentage on your Physical resistances, stacks with other forms natural resistances. Damage reduction is always welcome, load up on these bad boys.

2nd Level
Draw Upon Holy Might - Raises STR, DEX and CON by 1 for every three Cleric levels. As a Melee Cleric, 80% of your 2nd level spell slots should be dedicated for DUHM.

4th Level
Holy Power - Adds 1 THAC0 and HP per each Cleric level, set STR to 18/00. Cast this before casting other STR boosting spells.
This is crucial spell for powering low STR forms, so take several.

Death Ward - Protects against most insta-kill spells (except Petrify & Imprisonment). Doesn't come into play too often, but it never hurts to throw this on.

5th level
Righteous Magic - Adds 1 STR for every 3 Cleric levels and 1 HP for every Cleric level. Caster deals max damage per hit while this is active.
This is kinda like Holy Power 2.0, load up on these as well.

Chaotic Commands & Magic Resistance - Good filler spells, use them if you have slots to spare.

6th level
Blade Barrier - Nearby creatures must Save vs Spell or take 8d8 Slashing damage.
This is a staple spell for Melee Clerics, take several.

Heal - You can put this in Contingency as an "Oh sh-!" button. Take several as well.

7th level & HLAs
Aura of Flaming Death, Globe of Blades & Regeneration - All of these are spectacular Melee Cleric buffs. Try grabbing at least one of each.


Mage spells

2nd level
Mirror Image - Stoneskin-Lite, take several.

Blur - Makes you harder to hit.

3rd level
Haste - Generally not as good as Imp. Haste, but you can place this in Spell Sequencer.

4th level
Enchanted Weapon - Put this in a Spell Sequencer and it enchants your creature weapon. This way your Spider form can mow down elementals, undeads and other nasties.

Polymorph:Self - Grants access to various monster forms. If you're looking to get use out of Melee Cleric buffs, this spell is mandatory.

Fireshields - Part of Hedgehog tactic, which involves abusing Rat forms resistances. Still good overall Melee Cleric buff, use liberally in Sequencers/Triggers.

Stoneskin - I really don't have to explain why this is mandatory, do I?

5th level
Protection from Normal Weapons - This carries over to monster forms. Try and see how you like it.

6th level
Contingency - Use either as an "Oh Sh-!" button or toss in a Greater Malison to empower Hedgehog tactic

Improved Haste - Mandatory. Don't ask why, just load up on these.

Mislead - Cheese potential ahoy! Keep pummeling your foes and they're none the wiser. Just park your Mislead-clone in safe distance.

Tenser's Transformation - Kensai/Mages love this spell, but we can use it too! It stacks nicely with our Clerical STR boosts... who needs Fighters anyways?
This spell disables all spellcasting, INCLUDING SEQUENCERS/TRIGGERS (but not Contingencies), keep this in mind when planning sequences/trigger comboes.

7th level
Spell Sequencer - Mandatory for pulling off all the self-buff comboes.

8th level
Spell Trigger - Ditto

9th level
Chain Contingency - Lets us store even more spells. You can pull off some really mean comboes with this.

Shapechange - Unlocks even more forms. Iron Golem and Greater Wolfwere are really strong, and so is Mind Flayer when used properly.

Time Stop - All attacks during Time Stop are auto-hits. Useful as it sounds.
Polymorphing and Shapeshifting mechanics explained
In this section we're looking through various shapeshift forms & self-buff combinations, which turns our back-row caster into a fierce melee beast in a flash.
When you're playing with a party, you don't absolutely need to do any of these comboes, but for solo players will find use for these when dealing with groups of Magic Resistant foes.


Some overall facts regarding Polymorph/Shapeshift mechanics:
- Shapeshifted THAC0 is always based on your natural THAC0. Possible THAC0 boosts from high STR or weapon enchantments each form may have are added on top of your base THAC0.

- While you're in another form, you're forced to use creature's own weapon. Previously you could get around this by casting Spiritual Hammer, but now you'll just revert back to humanoid form instantly if you try it.
However, now you can overcome this with 4th level Mage spell Enchant Weapon!

- On a similar note, your own Weapon Style profs (if you have any) applies to creature weapons. For example, if you shapeshift into creature that carries one 1-handed weapons & if you have one prof in 1H style, you get the bonuses (Crit on 19 or 20 instead of just 20 + 1 AC).

- Any stat-enhancing spells you've cast before shapeshifting (Holy Power, DUHM and such) gets re-applied after you've changed your form. You don't have to go through sequencer/trigger hassle each time you wanna shapeshift.

- Stat boosts from helmets, rings, amulets and other accessories (not gloves, armor, shield or such) are automatically applied right after shapeshifting takes place.

- You can freely swap out helmets, rings, amulets and other accessories while shapeshifted.

- Most forms have less than 18 DEX. After shapeshifting, you can put on Dexterity Gauntlets to artificially boost your AC.

- While you cannot equip a shield while shapeshifted, you CAN equip it before shapeshifting and net the AC boost and other possible benefits from having a shield.
This only applies to forms that use 1-handed weapons.

- Each creature comes with their own natural armor. However, you CAN equip another body armor AFTER shapeshifting (while not in combat, of course) to override it.
Combined with other item swapping mentioned above, this can lead to some ridiculous AC values:

-15 AC? That's bearly enough!

And before you ask, I had not cast any buff spells yet.


Now that we've got that mandatory tidbit out of the way, let's take a closer look at Polymorph/Shapeshift forms we've got.
Cloak of Sewers forms & stats
Cloak of Sewers forms:

- Rat

Physical stats: Same as Humanoid form
AC: 10
Weapon: 1d2, counts as +3 weapon (lol)
APR: 1 (2 with Imp. Haste)
Speciality: 90% Physical Resistance. Stacks with Jansen's AdventureWear and Armor of Faith!

Comments: This is practically designed for The Hedgehog tactic: Lousy AC assures you'll get hit repeatedly while skyhigh Resistances keeps you ticking and kicking.
Quite cheesy when used this way, but it's tough to think of other practical use for this form.

- Troll

Physical stats: 17 STR, 11 DEX
AC: 3
Weapon: 1d10 Piercing (+1 dmg from STR), counts as +2 weapon
APR: 3 (6 with Imp. Haste)
Speciality: Regenerates 1 HP/s. Immune to Stun effects.

Comments: With 3 APRs and creature weapon which counts as +2, this makes a great option for self-buffed melee beastie early on. Regeneration is welcome addition, but other forms have even more potent regen.
Too bad you don't have the same "Can only be killed by fire or acid" speciality as regular Trolls do. However, you are immune to Stun effects, such as Symbol: Stun!

- Mustard Jelly

Physical stats: 14 STR, 9 DEX
AC: -1
Weapon: 1d6 Crushing (not affected by STR), counts as +3 weapon
APR: 2 (2 with Imp. Haste)
Speciality: 100 % Magic Resistance, some Piercing/Missile resistance. Save vs Polymorph on hit against Slow effect.

Comments: 100% MR obviously makes this form great for bashing mages, unless they summon a bunch of creatures to fight you. Since the damage doesn't get affected by STR, this form ain't so great against other melee creatures.
Polymorph:Self forms & stats
EDIT: Following stats are based on older version, I'll update this section once I have more time.

Polymorph Self forms:
- Black Bear & Brown Bear share same stats:

Physical stats: 18/00 STR, 12 DEX
AC: 5
APR: 3 (6 with Imp. Haste)
Weapon: 1d6 Crushing (+6 from STR), counts as Normal Weapon +1 weapon

Comments: If only these forms had the same +3 Weapon as Mountain Bears, these forms would be so much better. Despite having 4 Attacks Per Round and good Strength to boot, bear forms gets trumped by Spider form as we can buff our STR in numerous ways. Now that spided form has been nerfed, the bear forms look more lucrative.

- Flind

Physical stats: 17 STR, 17 DEX
AC: -2
APR: 3 (4 with Imp. Haste)
Weapon: Halberd +1 (Deals some Fire damage), 1d10 + 1 Piercing (+1 from STR)
Speciality: Weapon counts as +3 when determining what it can injure.

Comments: Good amount of Attacks Per Round and a weapon that's treated as +3! You'll be using this against elementals, vampires and demons for a long time.
Extra Fire damage becomes useful when bashing through Mage's Stoneskins or knocked down Trolls.

- Mustard Jelly

Same as Cloak of Sewers Jelly.

- Ogre

Physical stats: 18/00 STR, 9 DEX
AC: 5
APR: 2 (2 with Imp. Haste)
Weapon: 4d6 Crushing (+6 damage from STR), counts as Normal Weapon (boo!)

Comments: Deals massive Crushing damage, making this form okay against Clay Golems. Oddly enough doesn't get affected by Improved Haste.
Statistically deals roughly the same damage as un-Hasted Bear forms, but I'd say with Righteous Magic this form dishes out more pain due to higher weapon damage dice.

If you want to try this form, you'll want to replace Haste with Enchanted Weapons in your Sequencer/Trigger)

- Spider

Physical stats: 16 STR & DEX
AC: -3
APR: 5 (8 with Imp. Haste) 2 (4 with Imp. Haste)
Weapon: 1d4 (+1 damage from STR), counts as Normal Weapon
Speciality: Immune to Web. Poisonous melee attacks.

Comments: Assuming you're not facing lots of Piercing resistant foes, this is easily the best DPS-melee form when buffed properly. Damage ramps up considerably with self-buffs and the Web immunity makes it easier to sequence in Crowd Control spells.
This form got heavily nerfed and thus has been de-throned. They retain their immunities, but the loss of APRs is too hefty.

Summon Spiders & Call Wyvern summons are immune to Web, something to consider if you're fond of Minor Spell Sequencer: 2x Web.

- Wolf

Physical stats: 15 STR, 18 DEX
AC: 2
APR: 4 (6 with Imp. Haste)
Weapon: 1d8 Slashing, counts as Normal Weapon
Speciality: Fast movement speed

Comments: Doesn't offer anything worthwhile besides fast movement speed. Skip this entirely and don't look back.
Shapeshift forms & stats
Shapechange forms:
- Mind Flayer

Physical stats: 10 STR & DEX
AC: 5
APR: 4 (8 with Imp. Haste)
Weapon: 1d2, counts as +2 Weapon
Speciality: Devour Brain (-5 Int on hit)

Comments: Remember all those times when Mind Flayers stunned you and sucked your brains out? Well, now YOU get to do that!
Int drain can be used to kill supposedly un-killable characters (such as Yaga-Shura prior to Nyalee's questline), thus being popular trick amongst speedrunners.

You can cast Time Stop on top of this to assure you're auto-hitting your intended targets.
Too bad you're not getting the Mind Flayer's Magic Resistance from this, but it's still very lean mean killing machine.

- Giant Troll

Physical stats: 18 STR, 20 DEX
AC: 0
APR: 3 (6 with Imp. Haste)
Weapon: 2d6 Piercing (+2 damage from STR), counts as +2 Weapon
Speciality: Regenerates 2 HP/s

Comments: A very minor improvement over Cloak of Sewer's Troll form, slightly better regen and higher Strength aren't good enough reasons to call this an "upgrade".


- Greater Wolfwere

Physical stats: 19 STR, 19 DEX
AC: -2
APR: 3 (6 with Imp. Haste)
Weapon: 1d12 Slashing (+7 damage from STR), counts as +1 Weapon
Speciality: Regenerates 8 HP/s (whoa!) + 50% Fire/Cold/Electricity/Acid Resistance.
Immune to Normal & +1 Weapons.

Comments: This pretty much puts Giant Troll into shame. Despite having lower +x enchantment level, the difference between regeneration speed is staggering. The elemental resistances are a nice icing on the cake too.

Unless you absolutely need higher enchantment levels, this should be your primary melee form once you unlock Shapeshifting spell.

- Iron Golem

Physical stats: 24 STR, 9 DEX
AC: 3
APR: 1 (2 with Imp. Haste)
Weapon: 4d10 Crushing (+12 damage from STR), counts as +4 Weapon
Speciality: Immune to elemental damage + 100% Magic Resistance, 20% Physical Resistance, immune to Normal & +1 Weapons.

Comments: Now THIS is an upgrade to Mustard Jelly! Any mage you encounter is powerless to stop you from stomping them down.
You probably won't even need STR buffs with this form (other than Righteous Magic), but Tenser's might still be in order.

- Earth Elemental

Physical stats: 19 STR, 9 DEX
AC: 2
APR: 1 (2 with Imp. Haste)
Weapon: 4d8 Crushing (+7 from STR), counts as +4
Speciality: Immune to Normal & +1 Weapons

Comments: Seems like toned-down Iron Golem. Really, it's inferior to Iron Golem in every aspect. Don't bother with this.

- Fire Elemental

Physical stats: 9 STR & DEX
AC: 2
APR: 1 (2 with Imp. Haste)
Weapon: 3d8 Crushing + 1d6 Fire damage (+x from STR), counts as +4
Speciality: Immune to Normal & +1 Weapons, immune to Fire

Comments: The good news is this thing deals Fire damage, allowing you to chomp through Stoneskins little better. And it's immune to Fire damage, letting you spam Incindeary Clouds and Firestorms with impunity.
Those are about the only uses I can think for this form.
Shapeshifting and self-buffs - Let The Games Begin!
Now that we've established which forms are good candidates (and which ones aren't), we can finally get down to business.

You've probably heard of the usual Kensai/Mage buff combinations (who hasn't), I'll try to focus more on combinations that are only available to Cleric/Mage.


Minor Spell Sequencer
Draw Upon Holy Might + Chant - Stat boost and buff/de-buff, pick whichever you prefer. Chant is better option if you're using Blade Barrier and/or On-Hit weapons.
Honestly, any combination with DUHM works fine.

Armor of Faith + Mirror Image - Low level damage mitigating combo, remains useful through entire saga.

Spell Sequencer
Both Fireshields + Greater Malison - Part of the Hedgehog combo, Greater Malison makes Blade Barrier more damaging.

Holy Power + Death Ward/Haste/Ghost Armor + Enchanted Weapon - Adds STR & THAC0, enchants creature weapon and adds a buff of your choice. Quite flexible with combinations, this one is intended to be triggered first right after shapeshifting.

Spell Trigger
Improved Haste + Righteous Magic + Tenser's Transformation - A variation of Kensai/Mage's popular combination, we're tossing in RM for sheer awesomeness. Note that while Tenser's is active, you can't cast spells OR Triggers!

Righteous Magic + Magic Resistance/Heal + Blade Barrier - More defensive combination, this is more of a "second wind" boost than an initial buff.

Chain Contingency
Aura of Flaming Death + Globe of Blades + Blade Barrier - Double blades AND yet another Fireshield-ish effect. This is the penultimate Hedgehog combination.

Regenerate + Improved Haste + Protection from Magic Weapons - Another "second wind" loadout, this casts a strong regen on your character, hastes you AND gives you breathing room for regen to kick in.


There are many more combinations waiting to be discovered, but these should get you started.
Feel free to experiment, you might accidentally stumble on some truly earth shattering combos by yourself!


Hedgehog combo in action:


That's the most foul, cruel, and bad-tempered rodent you ever set eyes on!


That is the beauty of Cleric/Mage.
23 Comments
Luka Sep 22, 2024 @ 12:27am 
I prefer Sorc tbh. Cleric/Mage a close 2nd
Max Feb 3, 2022 @ 10:04am 
Nice guide. +1
ÄmJii  [author] Jan 16, 2021 @ 8:47am 
@2Poor4Bannerlord

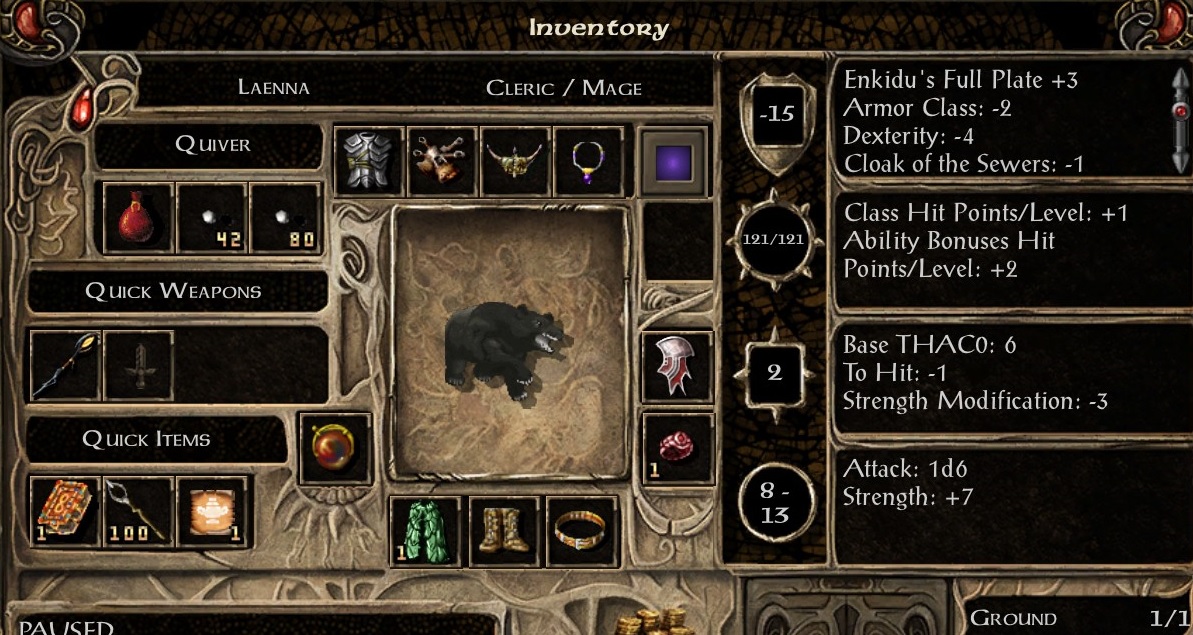
You can tank CHA (you'll get Ring of Human Influence very early in SoA + you can use 1st lvl mage spell Friends), after that I'd be willing to dump STR a bit (it's mainly for carry weight) to either 12 or 14.

DEX is more important because it factors in to your AC and ranged THAC0 (slings, Melf's Minute Meteors etc.).

In short
STR 12 or 14 (there's plenty of STR belts in BG2)
DEX 18
CON 16
INT 18
WIS 18
CHA dump stat because of RIng of Human Influence

That's achievable with stat roll of 85 or higher.
A Jan 16, 2021 @ 12:58am 
How should stats be allocated if I want a combination of solo selfbuff + spell slinger? No stat cheese at creation but maybe aiming for at least 90 with my roll
Luka Nov 6, 2020 @ 10:35pm 
I made a new game as cleric/mage on higher difficulty. Fun fun
RARESTKARMA Nov 6, 2020 @ 6:46pm 
ps dont use the silly wingless avariel her stats are insanely hopeless
RARESTKARMA Nov 6, 2020 @ 6:45pm 
better to just put a fighter in that mix too lol why not you pick the xp build from hell (cleric/mage)might as well get the full work out grinding that beast to completion
ÄmJii  [author] May 26, 2020 @ 2:13pm 
@Luka

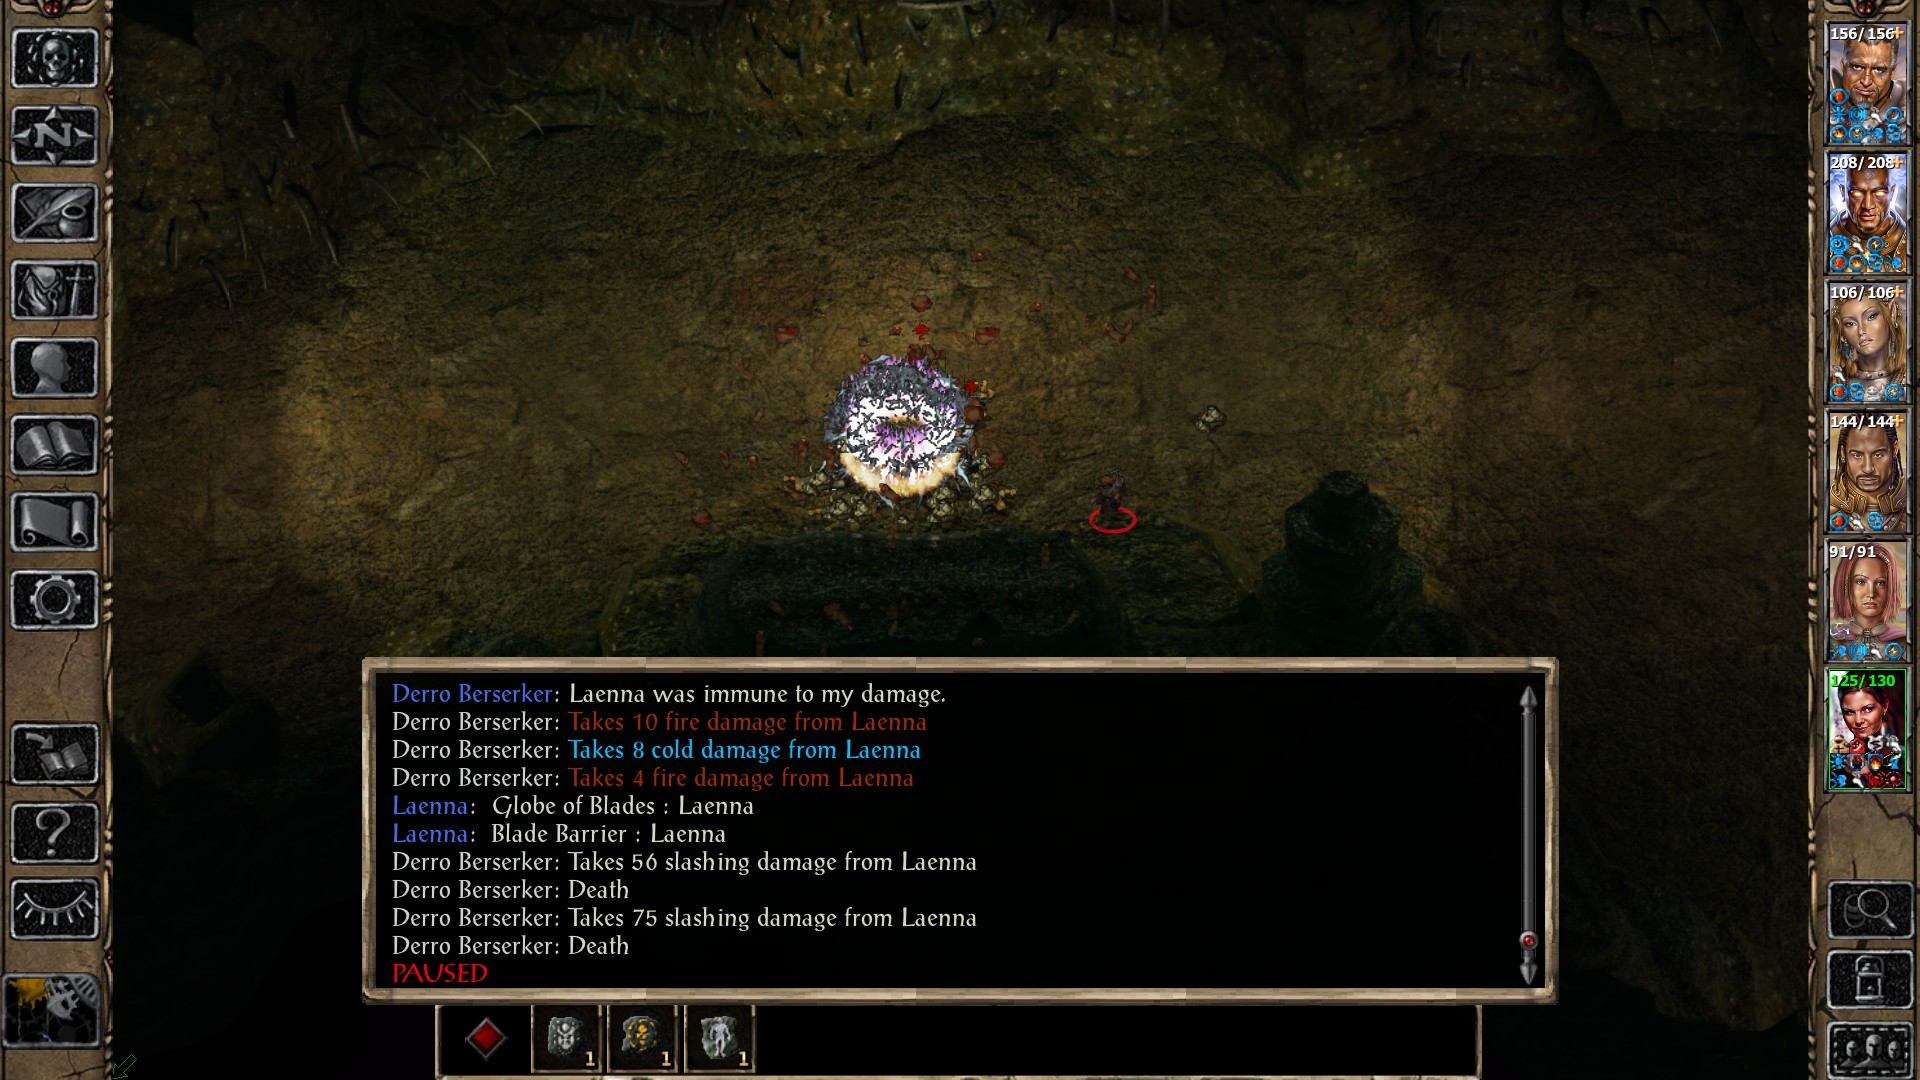
Personal mileage may wary, of course, but I personally prefer C/M over Sorc. They're fairly comparable in terms of power, Sorc being bit better and C/M being more flexible of the two.
C/M fares much better against magic resistant mobs thanks to polymorph/shapeshift, but Sorc does gain access to higher lvl spells much quicker.
They're both fully viable for solo playthrough long as you know how to steer them.

Sorc is largely the same as pure wizard, so they fit any party composition that'd normally run a wizard. C/M can fill the same role as pure cleric and also serves as a secondary wizard of the group. I wouldn't use C/M as main wizard in a full party, whereas you could get away with just one Sorc for handling all the arcane casting.

tl;dr: C/M takes more experimenting to get the most out of it, whereas Sorc can just pew-pew Skull Traps & Horrid Wiltings through entire game. Latter is probably stronger in grand scheme of things, but personally I think it gets old pretty fast.
Luka May 26, 2020 @ 12:36pm 
How do you feel about Cleric/Mage compared to Sorcerer? And which is better for what situations? Like party composition and such
Vorpal Spoon May 1, 2020 @ 9:27pm 
Was picturing "Oxiclean" rep Billy Mayes narrating while reading your guide.

Excellently crafted and detailed C/M guide.