STAR WARS™ Rebellion

STAR WARS™ Rebellion

149 avaliações
Star Wars Rebellion: HOW TO WIN FROM A GUY WHO ONLY TOOK FOUR YEARS TO WIN
Por Dogberto
Welcome to a walkthrough on how to succeed at a campaign of Star Wars: Rebellion on the difficulty setting of Easy with a galaxy size of Standard.

I begged my dad to purchase this game for me day one in 1998 at age 10. It took me only four years to beat a campaign and it was one of my greatest gaming moments. This is a strategy game very similar to the original Total War in regards to managing your empire, but is real time and does not rely on turns. This strategy guide will NOT tell you how to conduct space battles, because it's one section of the game I find insufferable (just click all your ships and spam spacebar).

So, without further ado, I will provide you with the strategy I have used to conquer this game many times since my first.
2
3
10
4
2
2
   
Premiar
+ favoritos
Nos favoritos
- favoritos
What is Star Wars: Rebellion?
So you want to play this game that is older than The Phantom Menace, do you?

Well good news for you! I pestered my dad into buying this game for me day one, and it only took me four years to win a campaign on easy with a standard galaxy size.

WITH THAT BEING SAID, LET US DIVE INTO STAR WARS: REBELLION.

Now the best way to describe this game is 1998 version of Total War, but instead of Europe, North Africa, and the Middle East we have the Star Wars™ Galaxy.

Getting Started:
Let's walk through some menus. Once we get to the main galactic map, we will begin a long winded discussion on each unit available in the game.

As you load up the game, you'll be greeted by an old school LucasArts logo as well as a classic Star Wars intro with an opening crawl, describing to you th--*click*

Alright so you're at the menu now.

The numbered sections of the main menu:

1) This is the difficulty setting. Keep it locked in at the X-Wing, that's the Easy setting. The Star Destroyer is the Intermediate setting and the Death Star is the Hard setting.
2) This is the galaxy size setting, keep it locked in at the first, which is Standard. The second is Large, and the third is Huge.
3) This is the save/options menu. This will allow you to load your game and change some sound and graphic settings (graphic settings apply to space battles).
4) This is the credits section. It is incredibly important to go thr--
5) This is the game type setting. There are two types of gameplay: Standard and Headquarters only. This is the first example we see how the Rebel Alliance gets some ♥♥♥♥♥♥♥♥ easy ways to help you survive the game.
-A Standard game requires the Rebel Alliance to do the following: Capture and defend Coruscant, capture Darth Vader, and capture Emperor Palpatine. Once you have completed these objectives, you will win. The Empire requires you to destroy the Rebel Headquarters (which is located in the outer rim sectors and can be moved at will [♥♥♥♥♥♥♥♥♥♥]), capture Mon Mothma, and capture Luke Skywalker. Sounds easy, right?
-A Headquarters Only game's objectives simply applies to Coruscant and the Rebel Base.

6) These two buttons start your game and picks which side you want to control.
7) This is the head to head online multiplayer section (which apparently someone fixed on Steam with a mod?).
8) This would technically eject you into the cold vacuum of space, but it's just the exit game button, which ejects you into the cold vacuum that is your life.


Choose a side and watch yourself go into hyperspace.
Welcome to the Galaxy!
Ahhhhh you will now be greeted by your protocol and astromech droid slaves. In the original version (on CD) of this game, you were able to skip the introductions you receive. You cannot on the Steam version. This introduction is nearly five minutes long and it's worth watching the very first time, but not the second. Go wash your hands, take a leak, and then wash your hands again. Walk backwards, on your hands, back to your room and you should be back with about a minute to go.

Rebel Alliance players will (unfortunately) be greeted by C-3PO and R2-D2. Galactic Empire players will be greeted by Imperial Military Protocol - 22, also known as IMP-22 (GET IT HE'S YOUR IMP BECAUSE YOU THE DEVIL), and your information droid SD-7.

Now we finally come to the galaxy map.


What's on the Galaxy Map?:


1) Starting from the top left, we have the Legend. Double click this to see how you can read your galaxy map based on the filter you have chosen for it (we'll get to filters at around five on this list).
2) This is your resource bar. We will go more in-depth into resources later in this guide, so your questions will be answered. On the left side is the amount of mined raw materials you own, the middle section is the amount of refined materials you own, and the right section is your maintenance points section (this will be the most important number).
3) This is the game speed selector and day counter, which will be what you watch most in this game.
4) This is your message section, more on that later.
5) This is your filter, more on that later.
6) This is your encylopedia, more on that later.
7) This is your personnel finder, more on that later.
8) This is your troop finder, more on that later.
9) This is your fleet finder, more on that later.
10) This is your planet finder, more on that later.
11) This is the button that takes you to the save menu.

________________________________________________________________________
Now, there are a great many things you can do with IMP/3PO and SD/R2. You can right click the latters at any second and filter out what messages they will make sounds for. However most of your right clicking will be done on both 3PO and IMP.


Your protocol droid can help with the following:


1) Building you troops.
2) Building you facilities.
3) Building you ships.
4) Showing you a galactic overview, which will bring up the number of every single unit you own, and the amount of maintenance you spend on each.
5) Objectives, in case you need that for some reason. ]
6) Managing garrisons automatically for you, which you should usually do once the game begins.
7) Maximizing output of all planets' energy sources for mines and refineries, more on that later.
8) Translating for R2/SD.
9) Protocol advice. These are great to read if you're new to the game, incredibly annoying to hear about if you're not. Once you get a firm grasp of how the game works, go ahead and do this next image.


________________________________________________________________________
Now let's look at an actual map, shall we?


This is a sector. You get to this map by clicking on a sector from the galaxy map itself. This sector is completely controlled by the Alliance. How do I know that? Because the Rebel planets are red and the Imperial planets are Green.

Let us look at a planet, look at Deyer right in the center (sort of).

There are several things to notice about this planet:


1) The very bottom bar, the solid red one, is the loyalty bar. Once upon a time this bar was mostly red with some green in it. That shows just how loyal a system is to you. If you're in control of a system and you start losing loyalty, you'll need to garrison more troops into that system in order to maintain its loyalty. If you send units on diplmatic missions to neutral planets (Which will appear as a light blue), you can actually see the loyalty bar shifting to your favor if you sit and watch for a bit. Loyalty from a system is factored by many ideas. If an enemy fleet arrives at a friendly planet and starts shootin' it to seven shades of ♥♥♥♥ and escapes unharmed, then you'll lose loyalty throughout your sector. If you try to invade an enemy planet, but you suck and fail, you'll lose loyalty of friendly systems in the same sector. IF YOU HAVE A DEATH STAR AND BLOW UP A PLANET, EVERY SECTOR WILL LOSE LOYALTY.
2) Above that section is a set line of dots that are an orange-ish color. These are the raw materials this system has to offer you. Each box represents one mine you can build for the planet (if you have enough energy, which is the next bullet point). If you look around at the other systems, you'll see that I severely neutered them. A solid orange bar means that there are no more raw materials to be had. A solid blue line means there is no more energy to be had. Speaking of energy.
3) Energy, to be short and simple, is the amount of facilities (mines, training facilities, shipyards, shields, etc) you can place on a system. A system like Deyer is amazing because you can place a ton. For each energy spot you fill, the box will turn from blue to white. Use your energy wisely. There'll be more on that in the strategy section.


Three other points you'll see here: Look again at Deyer, but notice the little gun icon on the bottom left corner. That's a recount of all defense and personnel units that will be on the planet.


In this I have two planets open to show two tabs at once.

The first tab opens deals with your personnel tab. Any units whom you may have sitting still, being in a position of leadership, or ready to deploy will appear here. If they are in this tab, then they are ON the planet.
The second tab (the left window) is your troop garrison tab. In a system with incredibly low loyalty, there will be notification of saying how many troop regiments must be garrisoned in the location to maintain order on the planet. A high troop garrison with a personnel in a position of leadership (more on that later) will foil many enemy missions on the planet (more on that later).
The third tab is how many starfighters you have available ON the planet. They will automatically shift into defense if there is an enemy blockade of the planet and will join your own fleet if an enemy invades.


The fourth and fifth tab are planetary defenses and batteries.
The fourth tab shows any shields you may have built for your planet. Planets with shields can USUALLY survive bombardment early on in the game. Planets with TWO shields cannot be invaded via planetary assault.
The fifth tab deals with planetary batteries, which will automatically fight back if there's an enemy fleet blockading your planet. One battery in particular allows your personnel to leave a system unharmed if it is being blockaded. IF YOU HAVE PERSONNEL ON THE WAY BACK TO THE PLANET AND IT STAYS BLOCKADED, THEY WILL MOST LIKELY BE CAPTURED. Be aware of that.

I can't fit the next section here, so it'll be "Galaxy Map Part II."

Galaxy Map Part II
Now where was I after being rudely interrupted? Oh yes, the map tabs.


Now, if you look in the top left, you'll see a small little factory icon. Double clicking that opens the manufacturing tab, which I've parsed into three images for some reason.


These show your three main manufacturing facilities (what they produce will be in a later section)

Look at the ship construction box. The ratio numbers there represent how many installations you currently have on a planet. The 8:9 ratio means that I have nine total shipyards, but only eight are available. This means that one could be under construction or being delivered to the planet. to build something, you right click and click build ships/buildings or train troops for the other facilities. You may also right click and change the destination of the item you are going to create (If you want to reinforce a fleet, you can change the destination simply by clicking that fleet's fleet window [more on that later]).

Here's an example of building a ship.


The left side represents the amount of refined materials are needed to purchase the item, the maintenance points display how much it will cost to maintain the item.

Best time to completion shows how many in-game clock days (top right of Galaxy Map) it will take for the unit to be made. The more shipyards you have, the faster your ships are built. Same applies to troops with training facilities and facilities with construction yards.
Best time to deployment shows how many days it will take to deliver a unit. If you are building it for the planet the facilities are on, it will be zero.
There are other tabs at the top of this full menu to display refineries and to display mines. We'll discuss these later.
__________________________________________________________________________

And the lasssst button you have to press is displayed elsewhere in the sector. It is that green star destroyer icon (red nebulon frigate for Rebels). This represents a fleet. In my case, I have my fleet over enemy territory (we'll discuss more on what you can do with that later).

Here's some basic information about the fleet window:


The fleet window appears as a double vertical menu. On the left you will see which fleets are over the system (you can have multiple ones or parse them as you choose). if you double click the fleet, it will display every ship. Some have icons representing what is onboard. Some are fighter symbols for fighters, troops for troops, and an officer looking one represents any personnel or characters you might have on board.
If you wish to put a ship in a fleet of its own, you can simply drag it out and place it over the planet and it will create a new fleet.

Clicking between each tab will show what fighters are available, troop availability, and personnel/character availability.

If you click the fighter or troop tab, you will see something like this:


The number on the left represents how many fighters you currently have in your fleet. The number on the right represents the max you can have. The same applies to troops. If you have fighters on the planet, you can add them in simply by dragging them into the fleet window (on the actual fleet icon under the fleet name). They will automatically be placed in a ship that can hold them. If you wish to have certain fighters (more powerful ones) placed in more powerful capital ships, then you can drag them to the ship icon itself.

We'll get back to fleets later.
__________________________________________________________________________
Here's a very brief description of the save menu, before we move on to the next section:


    1) This is the save button, you type a name first into the middle section and then click this. GET IT, IT'S LEIA GIVING R2 THE PLANS.2) This is the load button.3) This button returns you to the main menu (WARNING IT WILL NOT PROMPT YOU TO SAVE AND WILL RUIN YOU IF YOU FORGET TO).4) This button returns you to your game.5) This button will exit the game, but will prompt you before.

There's also the volume sliders on the right. By the way, this movie plays John Williams's score, so if you choose to turn it off because you "don't like it," I want to ask you how it feels to be a liar.

The next section will deal with each separate section of the bottom tabs in the galaxy map, from there on there will also be unit discussions per group.
The Message Center
The Message Center is where you will spend about 8% of the game's time purely based off of the influx of messages alone.


Explanations:

1) This is the all messages tab, it is the absolute worst one to have open unless you are in day 3k+ and are deleting everything you get. You can hold the delete button and it will delete them for you.
2) This is the diplomacy/informant center. You won't get many informant messages (it will be alerted to you as "there is a message coming in from a planetary system) but you will receive tons of diplomacy messages. This is basically showing whether or not your attempts at diplomacy (or your enemy's for that matter) have failed. Planetary systems joining you will list themselves as "Duros Joins" with opposing planets saying "Ghorman joins enemy." There are times throughout the game where winning one planet in a sector over will convert multiple planets to your cause, more on that later.
3) This is the fleet message center. If you move a fleet, their arrival will be noted here. If a fleet has a damaged squadron of fighters, that squadron's repairs will be noted here. If a capital ship is repaired, it will be noted here. If you move troops/fighters to different destinations, those will appear here as well.
4) This is the mission center. These are the messages you will receive the most. Any missions you send any of your personnel on will show their outcome here. If your personnel are captured/injured/healed/killed, then those messages will pop up as well. There are troop garrisons as well on planets and, if there are enough, you will see MANY "Enemy Mission Foiled" messages. Any personnel/characters that arrive at a destination will also make their appearance here. Some PvE moments (Han getting captured by bounty hunters, Luke fighting Vader, detecting force sensitve characters) also get mentioned here. IF YOU DELETE A MESSAGE AND YOU WANT AN ONGOING MISSION TO KEEP GOING ON, DELETING IT WILL AUTOMATICALLY CONTINUE THE MISSION. THIS WILL LITERALLY SAVE YOU A NET TIME OF 45 MINUTES IN LONG GAMES.
5) This is the resource message tab. Your most common messages here will be "Mine deployed at" or "Refinery deployed at" messages. Later on in the game you will face the dreaded "Natural Disaster on Ando," or "Raw Materials Reduced on Sullust" messages. These basically will indicate that some random dice roll ♥♥♥♥♥♥ your ♥♥♥♥ up and you'll most likely lose a large portion of facilities on that planet. More on that later. You might be lucky and get more energy points, but nah.
6) This is the manufacturing tab. If you have a facility that has finished production, you'll get a "Construction yards idle on Coruscant" message. If you have teams researching new tech, their efforts will be displayed here with a "Nebulon-B Frigate now available for production" message with a "Research Exhausted" message once you've completed all forms of it. This tab will also have the "Orbital Shipyard deployed at Carida" messages and so on and so forth. There's also the very real possibility the computer has shoved itself into you late in the game and you're running low on maintenance points to which you'll receive endless "Maintenance Shoftfall" messages, which indicate something out of your control has been destroyed to reach positive maintenance points.
7) This is the defense message section. If you build troops/shields/batteries on systems, their deployment will show up here.
8) This is the conflict message center. If you blockade a system, invade a system, bombard a system, have a recap of a battle, or someone sabotages something of yours, then those messages will pop up here.
9) This is the head to head chat message room, but this ♥♥♥♥ has never worked. The manual used to have some loser typing "I have you now" on the screen.
10) This is the agent advice message area, which you'll literally never use after your first couple playthroughs.

The buttons on the right panel all have different functions. The top right button closes the entire panel (same button for all panels we'll look at. The second button will take you to that sector. The third button with SD/R2 will turn off (or back on) sound notifications for these messages. The final button will...take you back to the screen you were previously on (so if you open a message, you can click that button to take you back to the message screen, but there's already a button for that).


That's pretty much it for the Message Center. Next section!
The Galaxy Map Filter
This is a short section, but it is the most useful one. This will do a short detail of the galaxy map filter.


Now the filter is fairly straight to the point. If you have a specific question about what's going on with your facilities, you can go to the manufacturing tab. Asking it to display the amount of shipyards you have will change the map features. If you click the legend in the top left of the map, it will tell you how each representation of the question asked will be displayed. For example, if you want to see how many shipyards you have, you filter it to ask for for shipyards and it will chagne the way each system looks on the map as a whole. Systems with larger amounts of shipyards will appear as larger stars.

You can use this filter for the following:

Popular support across systems. Uprisings in your systems.
Idle fleets, or fleets en route (their destination will be highlighted on the map).
Active personnel or idle personnel.
Resources: This can show available energy, available raw materials, most refineries, most mines. It is, for me, the one I use the least.
Manufacturing, as displayed in the image.
Defense: This will show troop garrisons, shield generators, defense batteries, or fighter squadrons.

You can choose any option you'd prefer to have the map at. I usually have mine, early on, set at "idle construction yards" and later on as "idle fleets." That's just me.

Next section!
The Encyclopedia
Short section, but if you really want to get your nerd on, you can totally use the encyclopedia. Clicking it automatically sets your game speed to "Very Slow."


There are seven tabs for the encyclopedia.

The first tab has all entries located.
The second is the planet tab, which will display all planets from your current galaxy setting. There will be a short description of each including sector, analysis, and world location. You can study this and become a huge nerd in information that is no longer canon.
The third tab is the ship tab, which will tell you specific information for every ship you can build or encounter in the game. It is pretty useful. I have most of these stats with other information/strategies written for another section.
The next tab is the manufacturing tab. I have all of this information for another section.
The next tab is the mission tab, which I also have as another section.
The next tab is the troop tab to which, you guessed it, same ♥♥♥♥.
The last tab is for personnel/characters. You know the drill.

Here's an example of an encyclopedia entry.


Dam Son, now I know where Horch got his power. It should also be noted that none of these descriptions are canon anymore and are officially considered "Legends" in the Star Wars universe.
Personnel Listing
Now here's where it gets interesting!

You have two types of personnel to choose from in Rebellion. You have the actual characters...


...and purchased personnel. The game refers to them as Special Forces, so I'll refer to them as whatever I feel like when I'm typing out this guide.


Let's start with the SpecFo. The Alliance and Empire both have the ability to create special forces that can carry out specific tasks or missions (mission info will be in a later tab). They cost maintenance and resource points, but these points are usually incredibly low.

On the Alliance side, there are four possible special forces units you can create:


1) Bothan Spies who will carry out espionage missions for you.
2) Guerillas who will carry out missions regarding uprisings. They can either attempt to incite them or to subdue them.
3) Infiltrators are an incredibly busted unit. They can abduct enemy characters, they can rescue friendly characters, sabtoage enemy units, or sabotage the death star is there is one.
4) Y-Wing Longprobe Team carry out reconaissance missions for you.


On the Empire side we have four SpecFo units as well:


1) Imperial Commandos can incite or subdue uprisings and sabotage Rebel units.
2) Imperial Espionage Droids carry out espionage missions, if you couldn't tell.
3) Imperial Probe Droids carry out reconaissance missions.
4) Noghri Death Commandos carry out abduction, assassination, and rescue missions.


Now, we move on to the real characters of Star Wars. The...characters...of Star Wars.

Here is a list of characters you can control when playing as the Rebel Alliance, with links to their wookieepedia entry if you're that interested in reading about them (I am). It should be noted that all six of the primary staritng characters for the Alliance (which will be noted) all start on Yavin.

Adar Tallon[starwars.wikia.com] - Adar Tallon can research new designs in all three categories: Facilities, Starships, Troops
Afyon[starwars.wikia.com]
Gial Ackbar[starwars.wikia.com] - Shipresearch
Bren Derlin[starwars.wikia.com]
Borsk Fey'lya[starwars.wikia.com]
Carlist Rieekan [starwars.wikia.com] - Troop research
Chewbacca[starwars.wikia.com] - Starting character
Crix Madine [starwars.wikia.com] - Troop research
Garm Bel Iblis[starwars.wikia.com]
Han Solo[starwars.wikia.com] - Starting character, can recruit more characters
Hiram Drayson[starwars.wikia.com]
Huoba Neva[starwars.wikia.com]
Jan Dodonna[starwars.wikia.com] - Starting character
Kaiya Adrimetrum[starwars.wikia.com]
Lando Calrissian[starwars.wikia.com] - Facility research
Leia Organa[http//shttp] - Starting character, can recruit more characters
Luke Skywalker[starwars.wikia.com] - Starting character, can recruit more characters and take force sensitives into Jedi Training
Mazer Rackus[starwars.wikia.com]
Mon Mothma[starwars.wikia.com] - Starting character, can recruit
Ma'w'shiye[starwars.wikia.com]
Arhul Narra[starwars.wikia.com]
Orrimaarko[starwars.wikia.com]
Roget Jiriss[starwars.wikia.com]
Sarin Virgillo[starwars.wikia.com]
Syub Snunb[starwars.wikia.com]
Talon Karrde[starwars.wikia.com] - Facility research
Tura Raftican[starwars.wikia.com]
Vanden Willard[starwars.wikia.com] - It should be noted that the character is Vanden Williard, but the image present is Bob Hudsol. Vanden Williard is the guy that hugs the hell out of Leia when she gets back from the Death Star.
Wedge Antilles[starwars.wikia.com] Starting character, ship research

The Empire characters are here, note that Palpatine always starts on Coruscant and the rest are random.

Amise Griff[starwars.wikia.com]
Bane Nothos[starwars.wikia.com]
Brandei[starwars.wikia.com]
Bevil Lemelisk [starwars.wikia.com] - Bevil Lemelisk can research all three categories, like Adar Tallon.
Bin Essada[starwars.wikia.com]
Darth Vader[starwars.wikia.com] - Starting character, can recruit more characters and take force sensitives into Jedi Training
Dorja[starwars.wikia.com]
Firmus Piett[starwars.wikia.com] - Starting character
Freja Covell [starwars.wikia.com] - Troop research
Garindan[starwars.wikia.com]
Gilad Pellaeon[starwars.wikia.com]
Grammel[starwars.wikia.com]
Tiaan Jerjerrod[starwars.wikia.com] - Starting characater
Kendal Ozzel[starwars.wikia.com] - Starting character
Labansat[starwars.wikia.com]
Lorth Needa[starwars.wikia.com] - Starting character
Maximilian Veers[starwars.wikia.com] - Starting character, troop research
Menndo[starwars.wikia.com]
Natasi Daala[starwars.wikia.com]
Niles Ferrier[starwars.wikia.com]
Noval Gariant[starwars.wikia.com]
Orlok[starwars.wikia.com] - Facility research
Palpatine[starwars.wikia.com] - Starting character, can recruit more characters
Pter Thanas[starwars.wikia.com]
Terrinald Screed[starwars.wikia.com]
Shenir Rix[starwars.wikia.com]
Thrawn[starwars.wikia.com] - Ship research
Titus Klev[starwars.wikia.com] - Ship research
Villar[starwars.wikia.com] - Facility research
Zuggs[starwars.wikia.com]

________________________________________________________________________

Character Stats will continue in the next section!
Personnel Stat Page/Finder
Character Stats:

Each character has a set of stats that they are initially proficient in. The actual stat numbers themselves change each time, but they will always be in the same range each time you play the game. To see a character's stats, right click the character and click "Status" and this window will pop up:


The numbers you'll most commonly look towards will be the Diplomacy, Espionage, Combat, and Leadership ratings. You can also see which characters are suitable for research and what leadership positions they can take part in if you scroll further down.

Diplomacy Ratings - How well a character can be used on diplomatic missions to attempt to raise support for your faction. These are your most important characters early on with researchers and can be vital at endgame as well when it comes to planetary assaults, as most of the time those systems won't support you if you assault them.
Espionage - Espionage ratings help see how well your character will do at espionage missions and is a combined effort in your work for sabotage missions. The Rebels also put a heavier indicator on this stat for the Rebel-only Death Star Sabotage missions.
Combat - This rating affects abduction missions, assassination missions (Empire only), and is a part factor for sabotage missions.
Leadership - Great leaders are perfect for subduing uprisings, inciting uprisings, or being in a position of leadership.

Positions of leadership:

At any point during the game, you can right click any of your characters and see if there's a command option for them. You'll have three different selections to pick for them. Not all characters receive this (bounty hunters and guerillas do not) and these characters that can lead become incredibly important at the end of the game.

Admiral - An admiral's position improves the speed at which capital ships move and perform in battle.
General - Easily the absolute most important leadership role in this game. There should always be a general on your headquarters planet and flagship fleet. Generals, along with their troop regiments on planets and fleets, drastically reduce the percentage of a successful mission against you in the general's system or fleet. If you ever spot a general on a planet BEFORE you send your personnel on a mission, it's very important to understand that your characters have a much greater chance of being captured if sent to that planet. More about how to deal with generals when we get to strategy.
Commander - Commanders boost the effectiveness of your starfighters either on the planet or in a fleet.

____________________________________________________________________________

Force Sensitive Characters:

At times throughout the game, you'll encounter force sensitive characters. When you recruit a new character, there's a possibility they will have the ability to use the force. Vader detects force sensitives for the Empire and Luke for the Alliance (sort of for Luke, more on that at the end of this guide). After you discover this (and you can have multiple, I had six once), you can send these people in groups with Vader or Luke on a mission to a planet for Jedi Training EDIT: (A reminder must be put here that Luke can only take Force sensitives after he achieves the rank of Jedi Knight, which only takes place after the PvE event of him leaving to and returning from Dagobah). Jedi Training, if successful, will raise all stats on the character. Here's an earlier screen again:


Notice how the Force Ranking is listed at "Trainee." You get a set of force points per training, and there are five ranks:
Novice: 10 points
Trainee: 20
Jedi Student: 80
Jedi Knight: 100
Jedi Master: 120

Jedi masters are baller and own. I once had Chewbacca at full master with 300 combat/espionage. Anyone he tried to abduct he killed.

JEDI Only Luke and Vader (Luke at the rank of Jedi Knight) can also detect other Jedi. You send any force sensitives on a mission and an enemy force sensitive is there, you'll fail the mission unless you use your force sensitive as a decoy (more on how to do that later). Force sensitives can also discover traitors. If you find a traitor and discover one, the only way you can get rid of that unit is to retire it. If you do not retire the character, they will report information to your enemy and you'll be under constant pressure from a fleet bombardment. This is also pretty useful for when you're trying to find Luke in the endgame, or Vader and Palpatine.

____________________________________________________________________________

PvE Moments:

For whatever reason, the game thought it'd be a good idea to take your best characters away from you for a while. If you're playing as the Alliance, you'll lose Luke at some point because he goes to train with Yoda at Dagobah. He'll come back and own, though. If Luke fights Vader at any point, there will be some kind of telling to Luke's heritage and he'll leave immediately to Dagobah.

If you capture Luke with Vader, and Palpatine is not on the planet, Vader will randomly take him off planet to Palpatine for The Final Battle. Luke could straight up ♥♥♥♥ kick you here and totally capture Vader and Palpatine in the process, soo it can be incredibly frustrating.

If you're also playing as the Rebels, you'll randomly see that Han Solo gets attacked by bounty hunters, and you'll randomly see that bounty hunters will provide Solo's location for you if you're playing as the Empire. Solo can also be kidnapped by bounty hunters and taken at any time to Jabba the Hutt. At this point, you'll lose Leia, Luke, and Chewie as they go to rescue him. HAVE FUN!

____________________________________________________________________________

Personnel Finder on the galaxy map allows you to easily track your own characters (both PvE and SpecFo) and your enemy characters' last known position.


Simply scrolling down the list will give you a brief location of where the enemy was last loc--CHEWIE NOOOOOOOOOOO!

The tab on the right with a photo of some Bothans/Probe Droid will allow you to view your Special Forces (training facility produced mission undergoers).
Troop Finder/Stat Page
The troop finder will display every single regiment/ground force you have in the game by number. It will not give you individual locations.

This section will also deliver the stats for each regiment as well as their cost.


The troop finder is pretty straight to the point. It will also display all known troops your enemy has from your previous encounters with them (whether through assaults/bombardments or espionage).

Without further ado, here are the stats for each troop. ALL STATS CAN ALSO BE VIEWED IN GAME FROM THE ENCYCLOPEDIA.

Empire: Troop researchers for the Empire are Maximilian Veers and Freja Covell. Bevel Lemelisk can also research.

Imperial Army Regiment: While AT-AT's may look tough in movies, they're pretty god awful for assaults in Rebellion. They're decent at defense and are cheap. These are the go-to units if you got a ♥♥♥♥ system trying to rebel and you need to fill a garrison.
Refined Material Cost: 6
Maintenance Cost: 3
Attack Strength: 3
Defense Strength: 5
Bombardment Defense: 5

Imperial Fleet Regiment: Eeeeee you think those helmets are stupid? They are. These guys are basically the army regiment, but flipped in stats. They're seven points each, and there's really no point to creating these unless you're REALLY penny pinching. Just build stormtrooper regiments instead.
Refined Material Cost: 7
Maintenance Cost: 5
Attack Strength: 5
Defense Strength: 3
Bombardment Defense: 2

Stormtrooper Regiment: Ha ha! The elite shock troops of the Galactic Em--alright these may suck in the movies ('cept Rogue One, RIP fallen heroes), but they're pretty good all around in this game. They're a six across the board and are easily your most useful starting troop unit in the game.
Refined Material Cost: 9
Maintenance Cost: 6
Attack Strength: 6
Defense Strength: 6
Bombardment Defense: 6

War Droid Regiment (MUST BE RESEARCHED): When you see the image for these in-game, you might pitch a tent. They are big. THEY HIT LIKE TRUCKS. THEY'RE PERFECT FOR ASSAULTS. They also melt to any form of planetary assault. Do yourself a favor and stack these with stormtrooper regiments as well. The second you have control of a planet you assault, put the stormtroopers on it and move these babies off.
Refined Material Cost: 9
Maintenance Cost: 8
Attack Strength: 8
Defense Strength: 2
Bombardment Defense: 2

Dark Trooper Regiment (MUST BE RESEARCHED): Pretty much replaces every single troop on the Empire side. These dudes, who have guns so big you have to have a suit to wear them (PLAY DARK FORCES) replace all all other units. The only reason you should NOT build this unit is if you're really poor and out of money. They're expensive to build and maintain, but they are the mainstay of your garrison forces late game.
Refined Material Cost: 12
Maintenance Cost: 8
Attack Strength: 8
Defense Strength: 8
Bombardment Defense: 6

Alliance: Troop researchers for the Alliance are Carlist Rieekan and Crix Madine. Adar Tallon can also research.

Alliance Army Regiment: You never really see these units in the movies, because they suck. Same rules as the Imperial Army Regiment.
Refined Material Cost: 6
Maintenance Cost: 3
Attack Strength: 3
Defense Strength: 5
Bombardment Defense: 5

Alliance Fleet Regiment: Here's another ♥♥♥♥♥♥♥♥ stat. The ♥♥♥♥♥♥♥ that get slasher filmed at the end of Rogue one and melt like butter at the beginning of A New Hope cost just one point of refined material cost and maintainence, but get plus one attack and PLUS TWO BOMBARDMENT DEFENSE? These are great for early assaults on the Alliance side (which you should never be doing if you follow my strategy, which has yet to come.)
Refined Material Cost: 8
Maintenance Cost: 6
Attack Strength: 6
Defense Strength: 3
Bombardment Defense: 5

Sullustan Regiment (MUST BE RESEARCHED): This regiment will research first. While they're cheap and they blow for everything on attack and defense, Sullustans get this OP factor where they can very easily foil an enemy mission, even without a general on the planet garrison. Put three in each garrison and you're safe for a while.
Refined Material Cost: 3
Maintenance Cost: 1
Attack Strength: 1
Defense Strength: 4
Bombardment Defense: 2

Mon Calamari Regiment (MUST BE RESEARCHED): Second to be researched. These frogs are actually not frogs, but mountains. They can take a massive beating and are INCREDIBLY annoying to assault against. These are the mainstay defense for the alliance once they are researched.
Refined Material Cost: 6
Maintenance Cost: 4
Attack Strength: 2
Defense Strength: 8
Bombardment Defense: 9

Wookiee Regiment (MUST BE RESEARCHED): Final research. These hairy beasts have a soft spot in my heart, and usually create many soft spots on their enemies as they preforate their corpses. They're not even too shabby defensively, though it would still be recommended to never use them when you have the OP Calamari defense. These are perfect for assaults.
Refined Material Cost: 10
Maintenance Cost: 8
Attack Strength: 8
Defense Strength: 4
Bombardment Defense: 4
Fleet Finder/Ship Stat Explanation
The Fleet Finder:

Works just the same as the troop finder, except it will look like this:


Now the fleet finder will display all of your fleets. Unless you change its destination to a fleet, any time you create a new capital ship at a shipyard will create a new fleet, giving you some funky numbers later.


If you click the single tab on the right, you can see each individual ship in your navy. Any item you click on this tab or the fleet tab will open that sector for you.

You can always read the stats and history of a ship in the encyclopedia.

____________________________________________________________________________

Capital Ships and Fighters

Capital Ships and fighters have a bevy of stats to them, and since this guide only walks you through the idea of simulating battles, their weapon stats will be available, but do to the poor creation of the space battle, they were nevery too reiable.

WEAPON STATS will be displayed as w/x/y/z. W = Fore (front of ship), X = Aft (ass), Port (Left), Starboard (right).

TURBOLASER - Used for fighting OTHER capital ships.
ION CANNON - Used for disabling ships.
LASER CANNON - Used for fighting one man fighters.


Now normally I would have put these images and explanations together, but the explanations and stat pages were so long, I couldn't even bold each ship. So the next two sections will detail Rebel ships and Imperial ships in that order.

Remember: YOU CAN ALWAYS SEE THESE STATS IN GAME IN THE ENCYCLOPEDIA.
REBEL SHIP STATS
Alliance, NON RESEARCHED:

Alliance Dreadnaught: A ship that makes up the bulk of my fleets. Usually gets damaged but can carry a fighter and two regiments. Good for assaults.
Material Cost: 44
Maintenance Cost: 33
Fighter Capacity: 1
Troop Capacyity: 2
Shield Strength: 200
WEAPONRY: Turbolaser ONLY, power 40/20/70/70

Alliance Escort Carrier: Another staple ship for me. Escort carriers carry six fighters in them. Melt against capital ships and if they die, your fighters die too (unlesss they have hyperdrive).
Material Cost: 32
Maintenance Cost: 29
Fighter Capacity: 6
Troop Capacyity: 0
Shield Strength: 200
WEAPONRY: Laser Cannon ONLY, power 30/0/60/60

Bulk Cruiser: The only good thing about these is that you can send them en masse (they're cheap as dirt) and try to soften up some star destroyers for your real fleet. They blow, other than that.
Material Cost: 30
Maintenance Cost: 30
Fighter Capacity: 0
Troop Capacyity: 0
Shield Strength: 200
WEAPONRY: Turbolaser ONLY, power 15/0/30/30

Bulk Transport: These are NON-COMBAT vehicles and they look like a suitcase. That's the joke. Useful for transporting troops for assault...and that's it.
Material Cost: 24
Maintenance Cost: 22
Fighter Capacity: 0
Troop Capacyity: 6
Shield Strength: 200
WEAPONRY: None, sucka.

Corellian Corvette: Useful only if you want to recreate the opening scenes of A New Hope. They melt like butter in between the folds of my fat to capital ships. They OWN against fighters, though.
Material Cost: 14
Maintenance Cost: 23
Fighter Capacity: 0
Troop Capacyity: 0
Shield Strength: 200
WEAPONRY: Laser Cannon, ONLY. Power 120/9 0 (see in game for joke)/120/120

Medium Transport: DO you want to recreate the scene from Rogue One where the Transport gets its ♥♥♥♥ kicked in by Vader's Star Destroyer as it comes out of hyperspace? Then build this. Other than that, it's a waste of resources, build a bulk transport instead for your assaults.
Material Cost: 10
Maintenance Cost: 12
Fighter Capacity: 0
Troop Capacyity: 2
Shield Strength: 100
WEAPONRY: Laser Cannons, ONLY, sort of. Power 0/0/30/30 (DAMN SON, YOU BLOW)

X-WING: Fighters in this game are actually OP. The X-Wing is no exception to that. Fighters can straight ♥♥♥♥ a capital ship that doesn't have laser cannons. Always make sure you have some in your fleet, or a bunch of anti-fighter capital ships at least. X-wings are very balanced and fight starships and fighters well.
Material Cost: 5
Maintenance Cost: 4
Laser Cannon Strength: 8
Ion Cannon Strength: 0
Shield Strength: 5
THEY GOTS A HYPER DRIVE and can run from battle if allowed.

Y-Wing: These are bombers, but you don't use them as bombers because this game was made in 1998. They got ion cannons though and can disable ships if you're brave enough to try and use the battle gameplay. They straight murder starships, but suck against fighters.
Material Cost: 5
Maintenance Cost: 4
Laser Cannon Strength: 5
Ion Can. Str: 3
Shield Strength: 5
They have a hyperdrive.

Alliance ships, RESEARCH ONLY: You need to use Wedge Antilles, Adar Tallon, or Ackbar to research these ships. The ships will be listed in the order in which they are ALWAYS RESEARCHED. They will never research in some amazing order for you, just as the list will be here.

Nebulon-B Frigate - A legit capital ship that you can use to replace your dreadnaught if you choose. It has stronger turbolasers but is also equipped with laser cannons to fight off fighters. It shouldn't be used to combat fighters only and cannot carry troops, but it is still a good starship. At one cost point more, it could be worht your time to replace the dreadnaught with. It is extremely versatile.
Material Cost: 34
Maintenance Cost: 35
Fighter Capacity: 2
Troop Capacyity: 0
Shield Strength: 300
WEAPONRY: Turbolaser Power 80/0/40/40. Laser Cannon 60/60/30/30

Mon Calamari Cruiser: It is incredibly busted for being only the second research ship you acquire as the Rebels. It does very well against capital ships and will pretty much be your flagship in your fleets until you unlock the bigger guns at the end of the research line. Very susceptible to fighters, so fill it up with a-wings for protection.
Material Cost: 92
Maintenance Cost: 70
Fighter Capacity: 3
Troop Capacyity: 1
Shield Strength: 300
WEAPONRY: Turbolaser Power 60/60/120/120. Ion Cannon 40/40/60/60

A-Wing: These fighters are made of paper, and should NEVER be attacking capital ships. However they are perfect for defending your own capital ships and are great for defending B-Wings and Y-Wings attacking capital ships. Pretty cheap, too.
Cost: 5
Maintenance: 4
Laser strength: 5
Ion strength: 0
Torpedo strength: 0
Shield strength: 5
Hyperdrive: Yes

Corellian Gunship: This capital ship is better than the Corellian Corvette and is used only for combating fighters (it destroys them). Melts against capital ships. Add at least two to your fleet, but no more than four.
Cost: 10
Maintenance: 23
Fighter capacity: 0
Troop capacity: 0
Shield strength: 200
WEAPONRY: Laser Cannons ONLY. Power 90/90/150/150


B-Wing: You wanna wreck some capital ships that don't have much protection against starfighters? Here you go, bruddaman. B-Wings should replace Y-Wings and absolutely murder capital ships. They suck against fighters, however.
Cost: 7
Maintenance: 8
Laser strength: 8
Ion strength: 6
Torpedo strength: 12
Shield strength: 9
Hyperdrive: Yes

CC-7700 Frigate: This ship has a gravity well, which means opposing fleets cannot flee battle. They melt against capital ships, but can fend off some starfighters. If you want to play the battles, never move this ship from it's start position.
Cost: 42
Maintenance: 37
Fighter capacity: 0
Troop capacity: 0
Shield strength: 300
WEAPONRY: Laser Cannons ONLY. Power 60/90/90/90

Assault Frigate: Now here's your conundrum. You like the Mon Calamari Cruisers, but they 'spensive. These have firepower relatively equal to the cruisers at a cheaper cost (and more shielding[!]). They don't hold fighters or troops, though, so be sure to bring an escort carrier and a bulk transport with you.
Cost: 60
Maintenance: 60
Fighter capacity: 0
Troop capacity: 0
Shield strength: 600
WEAPONRY: Turbolaser Power 70/0/120/120. Ion Cannon Power 50/0/40/40

Liberator Cruiser: This thing looks like one of those paper folds you'd shoot at people with rubber bands in school. And just like those paper folds, this thing can wreck some bodies. Some people say you can replace your Mon Calamari Cruisers with those, and some say you can't. I'm with the former. They're cheaper, they hold more fighters (B-WINGS TO REPLACE LOST FIREPOWER RABBLE), and hold three troop regiments. A fleet of five of these can be devastating. Their shields are also superior.
Cost: 66
Maintenance: 55
Fighter capacity: 6
Troop capacity: 3
Shield strength: 600
WEAPONRY: Turbolaser Power 40/40/80/80. Ion Cannon Power 40/0/80/80

CC-9600 Frigate: These things look like bugs that will jump on your appendages and suck your blood. They do the same to capital ships. These, combined with Liberators and Gunships, can be incredibly formidable. Don't let it's goofy-ass look throw you off because it will wreck you for it.
Cost: 58
Maintenance: 53
Fighter capacity: 0
Troop capacity: 1
Shield strength: 600
WEAPONRY: Turbolaser Power 60/40/120/120. Ion Cannon Power 40/0/40/40

Dauntless Cruiser: This ship, like Doctor Evil's from The Spy Who Shagged Me, has a pretty big ♥♥♥♥. If you hadn't replaced your Mon Calamari Cruisers with Liberators, Assault Frigates, or CC-9600s yet, this is what you replace it with. Better in every way, sans cost.
Cost: 136
Maintenance: 90
Fighter capacity: 4
Troop capacity: 2
Shield strength: 800
WEAPONRY: Turbolaser Power 120/60/200/200. Ion Cannon Power 60/60/200/200

Bulwark Battlecruiser: "That's a huge ♥♥♥♥♥!" Load it up with A-Wings to defend it.
Cost: 248
Maintenance: 175
Fighter capacity: 10
Troop capacity: 4
Shield strength: 1100
WEAPONRY: Turbolaser Power 600/120/300/300. Ion Cannon 200/80/150/150
IMPERIAL SHIP STATS
Empire ships, NON-RESEARCHED. Same as before with the Rebel Alliance. The ship rsearchers are Klev and Thrawn. Bevel Lemelisk can also research.

Carrack Light Cruiser: Some imperial ships are equal to Alliance ships, and this is the first example. The Carrack Light Cruiser is fast and can fight fighters pretty well. It even has some turbolasers that will be like shooting spitballs at Andre the Giant. Useful for early fleet building (if you're into that).
Cost: 26
Maintenance: 24
Fighter capacity: 0
Troop capacity: 0
Shield strength: 200
WEAPONRY: Turbolaser Power 5/5/15/15. Laser Cannon Power 60/60/90/90

Death Star: This is immune to capital ships. You can only send in fighters to kill one. Chances are it will be reinforced with fighters, so you pretty much ♥♥♥♥♥♥ if this goes against you, mate. If YOU make one and you get into a space battle, you can use the laser to destroy a capital ship of your choice. VERY EASY TO SABOTAGE. If you blow up a planet, you'll lose popularity on a galactic level.
Cost: 584
Maintenance: 600
Fighter capacity: 24
Troop capacity: 18
Shield strength: 2000

Galleon: This is the worst vehicle in the game. It can only transport troops, two regiments at that. Less than the Bulk Transport. BUT IT MIGHT HAVE WEAPONS, RIGHT? NAW, FAM, EVEN THE ♥♥♥♥ MEDIUM TRANSPORT HAS WEAPONS. THIS ♥♥♥♥ HAS NONE. If you cannot afford any other kind of transport, however, I guess you should use this.
Cost: 10
Maintenance: 10
Fighter capacity: 0
Troop capacity: 2
Shield strength: 100
WEAPONRY: Some cotton candy dispensers.

Imperial Dreadnaught: Read the description for the Alliance Dreadnaught. Exact same ship.
Cost: 44
Maintenance: 33
Fighter capacity: 1
Troop capacity: 2
Shield strength: 200
WEAPONRY: Turbolasers ONLY. 40/20/70/70

Imperial Escort Carrier: Read the description for the Alliance Escort Carrier. Same ship, with a 30 power aft laser cannon.
Cost: 34
Maintenance: 30
Fighter capacity: 6
Troop capacity: 0
Shield strength: 200
WEAPONRY: Laser Cannon ONLY. 30/30/60/60

Imperial Star Destroyer: YOOOOOO YOU KNOW WHAT THIS LOOKS LIKE. YOU KNOW IT BIG. YOU KNOW IT BAD. YOU KNOW IT'--♥♥♥♥♥♥♥♥♥ expensive. Takes a long time to build, but can combat most of the Alliances early ships and first few research ships too. Make sure you always fill it with fighters and troops. Fighters can wreck it as well.
Cost: 112
Maintenance: 71
Fighter capacity: 6
Troop capacity: 3
Shield strength: 300
WEAPONRY: Turblo Laser Power 100/40/60/60. Ion Cannon Power 100/40/40/40

TIE Fighter: The early fighter available for the Empire. It does pretty well against fighters, but sucks against capital ships. Mix them with TIE Bombers early on for a good composition of fighters.
Cost: 3
Maintenance: 3
Laser strength: 5
Ion strength: 0
Shield strength: 0
Hyperdrive: no

Victory Star Destroyer: Like a regular Imperial Star Destroyer, but smaller with less firepower. Bombards planets better, though.
Cost: 68
Maintenance: 44
Fighter capacity: 2
Troop capacity: 2
Shield strength: 200
WEAPONRY: Turbolasers ONLY. Power 120/0/100/100

EMPIRE SHIPS, RESEARCH ONLY.

TIE Bomber: This is great for fighting against capital ships, but gets wrecked by fighters. Mix them with TIE Fighters early on.
Cost: 3
Maintenance: 3
Laser strength: 5
Ion strength: 3
Torpedo strength: 8
Shield strength: 0
Hyperdrive: no

Lancer Frigate: This is like the Corellian Gunship for the Alliance side on crack. Four in a fleet can handle almost any fighters sent at it. It is a staple of every fleet.
Cost: 14
Maintenance: 30
Fighter capacity: 0
Troop capacity: 0
Shield strength: 300
WEAPONRY: Laser Cannons ONLY. Power 150/150/150/150

TIE Interceptor: See, these are like TIE Fighters, but fight other fighters incredibly well. They are just as good as TIE Fighters against capital ships, which is not very.
Cost: 3
Maintenance: 3
Laser strength: 8
Ion strength: 0
Shield strength: 0
Hyperdrive: no

Star Galleon: This is like the Galleon, but it can carry one more troop and it has some laser cannons to defend themselves against fighters. Not reliable in a fight, but should be used more for transporting in assaults.
Cost: 15
Maintenance: 20
Fighter capacity: 0
Troop capacity: 3
Shield strength: 200
WEAPONRY: Laser Cannon ONLY. Power 0/30/30/30

Assault Transport: This has much better weaponry than the Star Galleon, and can really wreck some fighters. However you can only transport one single regiment, as opposed to the Star Galleon's three.
Cost: 12
Maintenance: 29
Fighter capacity: 0
Troop capacity: 1
Shield strength: 300
WEAPONRY: Laser Cannon ONLY. Power 150/0/60/60

Interdictor Cruiser: This is the Empire's gravity well, and one is required in every single fleet.
Cost: 40
Maintenance: 34
Fighter capacity: 0
Troop capacity: 0
Shield strength: 600
WEAPONRY: Turbolaser Power 10/0/20/20. Laser Cannon Power 90/0/60/60

Victory II Star Destroyer: A stronger version of the Victory Star Destroyer, with more weaponry to damage capital ships. Can get around some strong shields when it comes to planetary bombardment.
Cost: 72
Maintenance: 63
Fighter capacity: 2
Troop capacity: 0
Shield strength: 600
WEAPONRY: Turbo Laser Power 120/80/80/80. Ion Cannon Power 40/40/40/40

TIE Defender: YOOOOOOOOOOO. YOU WANT A FIGHTER THAT WRECKS OTHER FIGHTERS ANNNND CAPITAL SHIPS? WELCOME TO THE MOST OP UNIT IN THE GAME. Not even expensive to create. Load up all of your fleets with these once available.
Cost: 5
Maintenance: 7
Laser strength: 10
Ion strength: 0
Torpedo strength: 10
Shield strength: 5
Hyperdrive: yes


Strike Cruiser: This looks like a dildo or an eclair, your choice. It is VERY good at fighting capital ships, but is suspectible to fighters, so make sure you have some Defenders doing just that for it.
Cost: 70
Maintenance: 60
Fighter capacity: 1
Troop capacity: 0
Shield strength: 600
WEAPONRY: Turbolaser Power 120/80/40/40. Ion Cannon Power 60/0/40/40

Imperial II Star Destroyer: Like a normal Star Destroyer, but larger and stronger. It is INCREDIBLY busted against other capital ships.
Cost: 158
Maintenance: 99
Fighter capacity: 6
Troop capacity: 3
Shield strength: 800
WEAPONRY: Turblolaser Power 200/60/120/120. Ion Cannon Power 200/20/80/80.

Super Star Destroyer: "That's a huge ♥♥♥♥♥!" Load it up with Defenders to defend it.
Cost: 282
Maintenance: 170
Fighter capacity: 12
Troop capacity: 9
Shield strength: 1200
WEAPONRY: Turbolaser Power 500/150/300/300. Ion Cannon Power 200/100/200/200.
Mission Information
Missions are the most crucial part to your winning experience. If you ever end up playing on a huge galaxy, you'll legitimately start a quad digit number of missions.

Missions complete goals for you. Whether that goal is gaining popular support, sabotaging, assassinating, etc, it will attempt to achieve that for you. Missions are determined by stats, which we went over already in the character stat section.

Without further ado, let's go through the missions in alphabetical order.

Abduction

Abduction does just that to an enemy character. It abducts them. It is based off of the personnel (character or SpecFo) combat rating. Any character can attempt an abduction if they want, but you'll get some dudes with combat ratings of two and eleven. That's bad. There's also a chance that the target can be killed during abduction, which, like, works? That's fine with me. Captured characters can always have a chance to escape. This mission is determined by a combat rating.
SpecFo that can abduct: Infiltrators and Noghri Death Commandos.


Assassination (EMPIRE ONLY)

Assassination attempts to kill the target. Very rarely will this happen on the first go, like one in 1000 attempts. Most of the time assassination missions will complete with no results, keep trying them though and you'll eventually either off the character or wound them. If wounded, they have a greater chance of dying during an abduction or can be assassinated easier. You cannot assassinate: Han Solo, Leia Organa, Mon Mothma, Luke Skywalker. This mission is detrmined by a combat rating.
SpecFo that can complete this mission: Noghri Death Commandos.

Death Star Sabotage (ALLIANCE ONLY)

Straight up: your enemy will never build a Death Star. If you need to blow up a Death Star for whatever reason, make sure the planet doesn't have a Death Star Shield, because you'll need to sabotage that first before you can sabotage this. This mission is determined by both an espionage and combat rating.
SpecFo that can complete this mission: Infiltrators

Diplomacy

Diplomacy missions, along with sabotage and research, are the most important in the game. This will win you planets in the core and outer rim systems. This will prevent you from being screwed over by a planet you just invaded or bombarded. Your diplomats are the most important characters you have. Most of the time they can not only subdue uprisings but raise the loyalty for you at the same time. This mission is determined by a diplomacy rating.
Imperial diplomats: Piett, Jerjerrod, Pellaeon, Thanas, Palpatine, Vader, Essada.
Rebel Diplomats: Calrissian, Kaarde, Mothma, Skywalker, Organa, Dodonna, Drayson, Willard.


Espionage

Espionage missions will gain you intel about the system. Who is on it? What are their defenses? are they manufacturing anything? What are their raw materials like? is there a garrison? Do they have a battery? Successful espionage missions on core systems will also reveal great info about another core system, and will be in the Espionage report in the message center. A successful espionage mission is determined by an espionage rating.
SpecFo that can complete this mission: Bothan Spies and Imperial Espionage Droids.

Incite Uprising

Straight up: this mission only works if you have a system leaning towards your favor (50% or more in your favor) and they require a military garrison. It is absolutely worthless other than that. For the record, this mission is determined by a leadership rating.
SpecFo that can complete this mission: Guerillas and Imperial Commandos.

Jedi Training

Use Vader/Luke to take your force sensitives on Jedi Training. They have to be on the same planet. Keep going until they reach the rank of Jedi Master.

Reconaissance

You have two sets of planets in the game. Core planets (inner galaxy) and the Outer Rim. Outer Rim planets are unexplored and you need to go about two ways of exploring them: Take a fleet there and it will reveal the planet. If a fleet reveals a planet, it will determine whether or not it is uninhabitable. A recon mission (done by Probe Droids and Longprobe Y-Wing Teams) may not reveal that all the time. Recon missions can also be used on occupied planets to see what units might be on that planet. Recon missions RARELY succeed on occupied planets.
SpecFo that can complete this mission: Imperial Probe Droids and Longprobe Y-Wing Teams.

Recruitment


Without a doubt the most important early game mission with diplomacy. This unlocks all thirty of your usable characters. The Rebels are OP and get to do it with Solo, Organa, Skywalker, and Mothma. The Empire only gets Vader and Palpatine. Your mission may not always recruit someone, by the way, so don't get angry.

Rescue

Rescue missions rescue captured personnel. It's a lot harder to rescue personnel if there's a general on the planet. This mission is determined by combat rating.
SpecFo that can complete this mission: Noghri Death Commandos and Infiltrators.

Sabotage


Sabotage is the most important late game mission. You can sabotage ANYTHING you can build/train in game. Troops, ships, facilities, SpecFo, fighters, defenses, batteries. It is a very broken stat. If you blockade a planet with your fleet and can eliminate the enemy garrisons (or sabotage them one by one) you can systematically sabotage every building on that planet and neuter its production. This mission is determined by both espionage and combat ratings.
SpecFo that can complete this mission: Imperial Commandos and Infiltrators.

Subdue Uprising


This will take a while to complete, but it will successfully subdue an uprising in one of your systems. This mission is determined by the leadership rating of the subduer.
SpecFo that can complete this mission: Imperial Commandos and Guerillas.
____________________________________________________________________________

Research Missions:

Facility Design Research: These yield new building facilities. This will be discussed later on in depth, but this will be the most important research mission you start. The unlocking of advanced facilities will double your production time in all areas. Research order will be discussed later.

Ship Design Research: Your second most important research field. This will unlock all those starships you read about in the other section over time. You can do this right off the bat on the Alliance with Wedge Antilles. Research order for ships is listed on the ship listing section.

Troop Training Research: This training will be done quick and the trainers you use for these missions are great generals for both sides. This mission can be done with the Empire out of the gate with Veers. Research order for troops is in order on the troop section.
Facility Information
Facilities are the backbone of your campaign in Rebellion. Everything you do revolves around facilities, from the economy of the game to the ultimate goal: mass fleet production. We'll get into that later, for now let's go through each facility available.

First up is the Construction Yard and its upgrade, the Advanced Construction Yard.

The construction yard constructs facilities for you across all of your systems and sectors. You can build an item on Coruscant to transport it to Bilbringi. You will always start the game with at least ONE construction yard. If you lose all construction yards, you need to gain favor with a core system that has some. If you have NO core systems left to bring and you have zero construction yards, you need to high tail it to the outer rim and find a planet with one. These are incredibly important buildings and any system you load up with construction yards should have top notch protection and a general later on (Covell, Veers, and Rieekan are great for this, as they lose their "usefulness" once they finish researching). We'll talk about strategies with construction yards in a couple of sections. Once you research yourself the Advanced Construction Yard (pictured below), you will need to replace your older ones by scrapping them one at a time and replacing them with an Advanced Construction Yard each time. The ACY builds facilities at double the time of a normal CY.

Note: I'd recommend having a planet in each system dedicating their entire set of energy to construction yards.


____________________________________________________________________________

Next up we have a GenCore Level I Planetary Shield and its upgrade, the GenCore Level II Planetary Shield.

Planetary shields are incredibly useful. They don't ALWAYS survive bombardments, but they usually do. If you have two on a planet, that prevents them from being assaulted by enemies. You should use shields at your own discretion, but if you have a planet that has tons of energy available and you load up nine shipyards on that planet, you should definitely invest in shielding it. Later on, you can upgrade your GenCore Is to GenCore IIs (pictured below), which double the power of shields. Having a single GenCore II prevents you from being assaulted. Edit: This has been brought to my attention of being incorrect. You must always have at least TWO GenCores to have a planetary shield to protect you from assault.

____________________________________________________________________________

Next up we have the KDY-150.


This is an ion cannon, the same as you see in The Empire Strikes Back. The main, and only, purpose of this defense facility is that you're able to extract any personnel on the planet in the event of a planetary blockade without risking their lives.
____________________________________________________________________________

Next up we have the Training Facility and Orbital Shipyard and their upgrades in the Advanced Training Facility and the Advanced Orbital Shipyard


The Training Facility and Orbital Shipyard produce your ground troops/usable personnel and your ships. These work exactly like Construction Yards, except they produce the aforementioned units as opposed to facilities. Their advanced counterparts work the exact same way as the Advanced Construction Yard with time spent creating a unit halved. It is recommended you load up at least one planet per system with lots of Training Facilities and at least one planet per system with lots of Orbital Shipyards (and a fleet to protect them in each as well).

____________________________________________________________________________

Next up we have the Mine and the Refinery.


The Mine and Refinery are what make your presence in the galaxy possible. Mines harvest raw material (raw material is the red bar located under a planet. The fewer the red bars available, the fewer mines you can put on it (this also is reliant on the energy avilable in the sector). I'll be 100% honest, after I dedicate three planets to each of the unit/facility producing facilities (shipyards, training facilities, and construction yards), I go ahead and right click IMP/3PO and check off the "Manage Production" ability:

(Pretend I had it checked off)

Doing this will cause IMP/3P0 to use all available construction yards to create AS MANY MINES/REFERINIES POSSIBLE. Do NOT check this off until you have all the facilities you need to have in each system. Having lots of mines makes lots of raw materials, having the raw materials refined turns them into maintenance points. You get a net set of maintenance points, the leftovers of which you use to purchase actual units.
____________________________________________________________________________

The last, and probably most useless facility for your to build on this list, is the LNR Series I and it's advanced LNR Series II.

This piece of ♥♥♥♥ allows you to blow up ships who try to bombard your planet. In all my years of playing this game, no enemy fleet has ever assaulted or bombarded a planet with an LNR gun that I built without sabotaging it first. Keep this piece of ♥♥♥♥ at home, and MAKE SURE YOU ALWAYS SABOTAGE THESE PIECES OF ♥♥♥♥ IF THE PLANET YOU WANT TO BOMBARD HAS ONE, OR IT WILL DESTROY YOUR CAPITAL SHIPS. THAT IS ITS PURPOSE. IT IS AWFUL. I HATE IT.

Building Facilities, Personnel, Ships, and Troops.
So you want to build stuff with your facilities, eh?

Here we go! You can do this by two different methods, you can right click IMP/3PO and click one of the three options available.


You can also go to the planet where you have your facilities located on the galaxy and double click the little factory at the top left of the planet. This is what will pop up:


Now the tabs at the top are all pretty straightforward. Click any of the tabs besides the opening one and you can see the amount of construction yards, training facilities, orbital shipyards, mines (and available raw materials as well), and refineries. These other tabs will also show you any facilities currently under construction/in transit to the planet. Rightl-clicking these and checking their information can tell you the day they will arrive at the planet/be completed.

The number ratio under the image (this one says 8:9), represents how many active facilities are available/in-use compared to the number of facilities that are currently taking up energy on the planet (the missing one represents either facilities under construction or in transit).


Anyway, you can also right click any of the facilities in the facility hub and click build.

The build screen is the same for all three facilities. There's a dropdown box will you will select what you want to build.

A facility in use will look like this:


Blockades, Bombardments, and Assaults
So this is where we start to get into some actual interactivce suff.

If you want to start messin' some planet's ♥♥♥♥ up, pay attention. You need an active fleet with capital ships that are able to bombard planets (see the stat page). Anyway, bombardment is tricky dicky. You can wipe out an entire planet's defenses with one single shot, or you can ruin an entire planet's material production. Once you move your fleet into position over a planet (whether hostile or neutral [don't do that, it's a stupid idea]) you might be greeted by enemy ships (if they too have moved over a neutral system [they won't, it's stupid]) and a battle will commence!

NOTE: It is important to understand that blockading a planet (or having yours blockaded) will not let any personnel on the planet escape (unless a KDY-150 is present). Having a personnel attempt to cross a blockade puts a high chance it for being killed/destroyed or captured.

Now I don't do ship combat in this game because it's tedious and doesn't really respond well, but it's got some good screens to produce.

Here's the battle screen!


Now, there are lots of tabs to be seen here. Let's look at them from top right and moving down.

Clicking that weird computer panel tab takes you to the system assets, showing you almost everything on the planet (If you're the Empire, it will also show you the Alliance Headquarters if it is there). You'll see all buildings, personnel (both characters and maintained), troops, and facilities on the ground. This is pictured below.


The Rebellion tab will take you to all space forces on side of the rebellion.


The Empire tag will show you their respective forces.

(That A-Wing is ♥♥♥♥♥♥)

The planet tab returns you to the first screen you saw, alerting you to battle.

Now, at this screen, there are three buttons available for clickin'.


The first button, the one that shows you running away, retreats your fleet to the nearest friendly planet.

The third button, the one that shows you playing chicken with your enemies, takes you to the battle screen. Though I do not use it, it is still something you should play to experience. Hell, maybe you'll even get good at it and spend yourself a week writing a guide too! Anyway, the button I always go with (unless I know a fleet's gonna bend me over) is the middle one, with the computer. This auto-generates an ending for you, which takes to one of two screens, one of which I do not have a screen for.


This screen means that you have (or have been) completely eradicated the enemy fleet (or been ♥♥♥♥ on by the enemy). Clicking the respective tabs will show you all losses sustained. it is important to note that if you encounter any named personnel (characters), there's a high chance they will be killed during the battle, most often retreat to the closest friendly planet. If their are no planets for the personnel to escape to, then you will have captured them. Non-killable personnel will usually be sent to the planet/captured.

The other screen, which I don't have, shows a fleet jumping to hyperspace away from the battle. This screen is shown at a retreat or at a battle that was lost without a ship that prevents retreat (whether you were there or computer generated). Losing a battle, or having an enemy survive and treat, often drops your favorability across the system.

BOMBARDMENT:
Anyway, so you get to the planet and whether there's resistance or not, if your fleet is the last one standing, it will reveal most personnel on the planet. If you have personnel on your fleet who can do missions, now's a great time to do so. In order to bombard, you right click the ship icon on the galaxy map and this will pop up:


Targeting military facilities will target construction yards, training facilities, orbital shipyards, planetary defenses (shields, batteries, troop regiments). IF YOU BOMBARD A PLANET THAT HAS AN LNR SERIES WHATEVER THE ♥♥♥♥, YOU. WILL. LOSE. A. SHIP. If a planet has this, you MUST destroy this first. If you lose a planet to planetary assault and bombard and destroy the occupying forces, the planet will instantly return to your control, and vice versa. There IS a chance you can destroy civilian facilities by doing this, so that is your warning.

Targeting civilian facilities is a big no-no, unless you WANT to be a ♥♥♥♥? Now, targeting civilian facilities will legitimately not help you win in any way whatsoever. Destroying civilian facilities will lower your influence in the entire system and will also turn neutral systems in the area to the opposing side. It also might start an uprising if you then assault hte planet later on.

General bombardment is if you wanna blow a place to seven shades of ♥♥♥♥. I usually do general bombardments on outer rim planets, during the endgame. General bombardment targets everything and also destroys a planet's energy and raw material source. Never do this in a core system.

Any successful bombardment will display this screen:


Click through the tabs and you can see the destruction that took place.


Unsuccessful bombardments will yield this screen:


PLANETARY ASSAULTS:

Now let's say you destroy all the troop defenses on the planet and you take out any double shield generators that might exist as well, you can now assault the planet. Always have some kind of personnel on your fleets that can run sabotage missions, just in case you run into any planetary shields or batteries.


Assaulting a planet can give you a tricky screen. You need to read the text that appears on it to see the actual outcome of the assault.

This successful assault shows me taking over the planet, as it is described. You may not kill all defenses on the planet


Once you successfully assault a planet and take over, you need to immediately send a diplomat to the area to gain favor on the planet. During this time period, an occupying force will be necessary. Dropping the occupying force below the garrison requirements will cause you to immediately lose the planet and all troops on the planet will be destroyed.


If you look at the troop screen, there would be a text line under the "Troop Regiments" reading "Garrison Requirements: X." The X variable here will be required.

This brings up a NEW hint for you. At the start of your game, you right click IMP/3PO and you go ahead and check of "Manage Garrisons."


IMP and 3PO do an amazing job of building up the best possible defensive troops for your planet and will manage your garrisons to an excellent extent. This is the best task they can be used for.

Actual Strategy
Alright, so we've made it to the final part of this section.

By now you've learned a bunch of ♥♥♥♥♥♥♥♥ that will eventually become muscle memory to you. Now we're down to the actual meat and bones of this game.

First thing you do:

Go ahead and turn that clock down to VERY SLOW.

Empire:Now, if you're playing as the Empire, since you've picked the naturally dicky group of individuals, you need to figure out what two planets you're occupying by military force. Your first task is to send Piett to one for diplomacy and Jerjerrod to the other for diplomacy as well.

Right-click IMP and check off "Manage Garrisons."

Palpatine, who is ALWAYS going to be on Coruscant, needs to be sent on a mission to Coruscant right away for Recruitment.


Same thing for Vader, wherever he is. Keep sending new recruits on missions that will be suitable for them, but do not risk sending your combat/espionage personnel on dangerous missions to other planets for sabotage. Save that for when you have them aboard fleets and when they're in blockade formation. Send Veers to a planet with a training facility to conduct troop research.

Next thing you do, scout out an area of planets you control with a high amount of energy available (or on Coruscant, if you have four to five energy points available). Once you have found it, or if Coruscant has enough, go ahead and use the Construction Yard on Coruscant to build that many more Construction Yards. Those will take a while to build, 40 days for the first one, 20 for the second, 10 for the third, and so on. If you have another planet with a Construction yard, go ahead and do this same process for a planet. If the second planet with a Construction Yard is in another system, try to build the facilities for a planet with a high energy count there.

Basically, repeat this process with Training Facilities and Orbital Shipyards. Once you get this done, go ahead and check off "Manage Production" on IMP. If you're going to make your way into a new system you have no presence in, make sure to uncheck this until you get your three planets in the sector with the important facilities necessary, then go ahead and check off "Manage Production." Repeat this process any time you move into a new system.

Rebellion:
Right-click 3PO and check off "Manage Garrisons." Go to Yavin IV. You need to immediately send all personnel on missions to other planets in the Core Systems. Send Leia and Dodonna to diplomacy to any planets you may find of interest. Send Han Solo and Luke Skywalker to separate Core System, Rebel-friendly planets on recruiment missions. Send Wedge Antilles to Ship Reseach at any system you control with a shipyard. Send Mon Mothma on a recruitment mission to whatever planet she is currently on.

Basically repeat the same info when it comes to building facilities as I listed it in the Empire field.

____________________________________________________________________________

After you build all that, turn your clock back on to normal (or fast, if you wish to get it done. By endgame you'll have the clock permalocked to fast unless you're in a very dire situation). Your goal is to build a fleet for every sector you have. If you're the Alliance, go ahead and combine your fleets into one sector. Don't attempt to retake the planets in dissent against the Empire, you'll get ♥♥♥♥ on by Star Destroyers. As you're building fleets, send as many diplomats as possible to take as many core systems as possible. While you're doing this, cancel production at one of your training facilities (or find an idle one) and build recon units (Probe Droids or the Y-Wing recon units) and start exploring the Outer Rim. If you find a planet out there that's able to be visited by people (and it's neutral) send a diplomat out there. It should be noted that it will be some few hundred days by this point, but continue to run diplomacy and recon missions while you're construction your facility planets/fleets. Your garrisons will be maintained by IMP/3PO.

Once all the Core Systems are under control of either you or the enemy, begin prepping a fleet with some transports and troops on it. Place some personnel for sabotage/rescue missions in the fleet as well and begin a blockade. Heads up, blockading will always bring a fleet to you eventually. If you're lucky, it might arrive in pieces. If you're lucky, it might suck. If you're like me, you'll get every ship the enemy controls bearing down on you. Just prepare. Bombard the planet (sabotage defense shields and batteries first) and target only military facilities. Assault the planet and have a diplomat resolve the situation immediately. Once you complete this for the Core Systems, create some big ♥♥♥♥ badass fleet to send to the outer rim and rinse and repeat. If you're the Alliance, make this type of fleet for taking Coruscant. After you take Coruscant, keep that fleet there, and keep adding to it whenever you get the time. The Empire will ALWAYS send a massive fleet to try and retake it. If you're the Empire, you need that type of fleet to find the Alliance Headquarters out in the Outer Rim. If you take Courscant as the Alliance, you can totally bring the Headquarters there, but that's super dangerous (I always do that).

Make sure that your fleets you use for blockading have an Admiral and a General on it with lots of troops as well. Fighters (Escort ships are excellent for this) are also necessary to a good fleet. If you're not going to bring fighters, at least bring anti-fighter capital ships (Corellian Gunships for Alliance and Lancer Frigates for the Empire). By this point it'll be somewhere between day 2000-5000.

NOTE: The Alliance HQ can be moved at will, and the computer does this quite often, usually bouncing it between planet to planet. If you've taken over the entire core, it will be a chore for you to find it in the Outer Rim. Just take your huge fleet and go to each planet. If you don't want the hassle of having to assault -> mass diplomacy -> rinse and repeat, then you can simply conduct General Bombardment of the area to reduce their energy reserves to zero. The Alliance HQ does require one single point of energy to run on, so it becomes easier and easier to filter out which planet is which.

NOTE iI: Be sure to also constantly check planets that you had reconned before that turned out to be "uninhabited." The computer does extensive recon and one of these planets could have become "inhabited" since your last recon.

That's pretty much it. The actual strategy is easy as hell, the understanding of EVERYTHING ELSE takes...time.


Hell, it only took me four years, after all.

I hope you enjoy playing this game, and I hope you receive the help you need from this guide.
64 comentário(s)
Cowardly Camper 4/nov./2024 às 18:40 
With Rebels, you go to an enemy system adjacent to one of yours in a corvette that is garrisoned. Once you sabotage one of their garrison with a team with around 6 decoys, success or failure, it usually shows their leader and the incoming Imperial fleet and when it will arrive. Take out the leader with a large decoy team, leave the system 1 turn before the Star Destroyer arrives, and have Han and his team travel separately to your adjacent planet (can't be on a ship to Millennium Falcon). That's when you launch a mission to kill the Star Destroyer, and then return to sabotage. You can take over the entire planet in maybe 10 to 15 turns. Do it on 2 or 3 more planets and the entire system falls to you from diplomacy.

Once the Imperials lose too many, they can no longer rebuild fleets, so it's over. It's amazing how fast the game ends.

Unfortunately, once you beat the learning curve, it stops being fun as you never get past corvettes and the space battles are lame.
Cowardly Camper 4/nov./2024 às 18:32 
Playing as Imperials starts off pretty unpleasant as you constantly get hit by sabotage, especially your shield generators. It's a good idea to keep rebuilding them while you use your high leadership to slowly take out saboteurs. It's also a good idea to have espionage missions going around the clock, and droids are cheap.

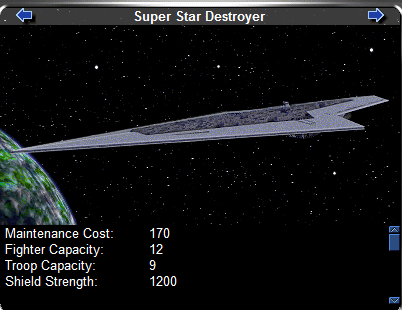
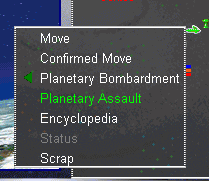
The nice thing about Star Destroyers is you can siege a planet while your leaders incite uprising and start a very slow cascade of the system. The rebels aren't strong enough to kick you out.

The bad thing is it's slow and your leaders are stretched thing while you're in early recruiting.
Cowardly Camper 4/nov./2024 às 18:24 
Imperials are really strong at leadership because they have to make up for being pathetically weak. They start with several garrisoned planets, poor diplomats, and only 2 recruiters. The Star Destroyers are nice early game where corvettes are no match, but they still suffer against XWings. Once you use Han's fast travel to get all your agents into battle, the Rebel sabotage and diplomacy ends up being far stronger than leadership.

With that, Rebels depend a lot on Han and Luke for their strength, so make sure to protect them with lots of decoys. Once Han sabotages the starting Star Destroyers, the game is over. Nothing can stop the corvettes at that point, and the planet cascade effect.
Cowardly Camper 4/nov./2024 às 18:04 
The manual comes with the game. Right click on it, go to properties, browse the installed directory, and open Manual.pdf. For most people, that will be SteamApps/Common/Star Wars - Rebellion/Manual.pdf.

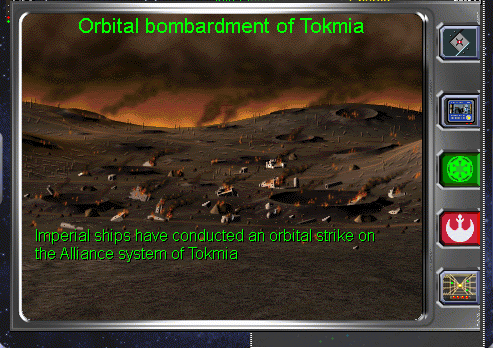
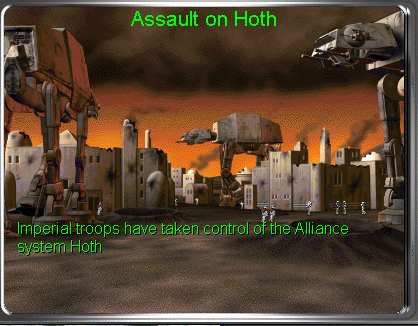
The AI eventually starts attacking outer system planets, usually just bombard griefing and colonizing a few uninhabited ones just to make cleaning them up more tedious should you let their leaders escape. Later game, be sure to put shields on them. Of course, the game is so trivial once you beat the learning curve, this is really only for people that want to enjoy late fleet battles and intentionally let their opponent live long enough.
iceride 4/nov./2024 às 12:58 
Also, someone mentioned this game had a 200-page guide with it. Does anyone have a link?
iceride 4/nov./2024 às 12:03 
Dropping army units on uninhabited planets lets you build buildings on them, becoming inhabited planets. They are actually better than core worlds for mines and refineries because the AI wont really attack them.

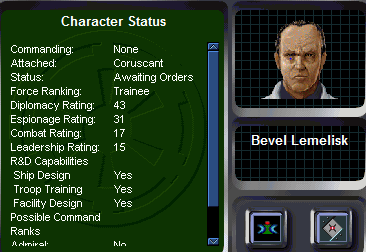
Also, it is imperative that you balance your resource production and production capacity. If you dont have enough resources - as is the case at the start -, it is useless to have a lot of production buildings.
So I basically try to build Construction ards and resources first.
Once I have more resource income than I use for basics, I can build a fleet that is basically undefeatable by the poor AI in no time.
But until there is a ship with a gravity well (Interdictor or CC-77), the enemy will run. So I basically only start to build up my fleet when the Interdictor types are researched soon. Until then, I make do with some basic ships and lots of fighters.
iceride 4/nov./2024 às 12:03 
Regarding strategy...
Against the poor AI, you dont have to fight any battles that you wont win. Just retreat. Dont even start fighting if you dont have a chance of killing at lest one enemy ship.
X-Wings are tons better than Ties. They will also make short work of any shieldless ships with their torpedoes.
Unless you have an enemy capital ship without fighter cover, Y-Wings will not lokely to do much damage as they are the first to be targeted by enemy fighters.
Especially because the enemy will just retreat.
iceride 4/nov./2024 às 12:03 
I suspect that sending multiple agents on a mission does not add their stats together. It seems likely that additional agents give a part of their skill to the primary agent, but nt full.
So a force user with a combat skill of 150 is better than two agents with 75 each. (If anyone has additional info, I would happily hear about it).

For the above reasons, Rebels have a hard time formenting rebellion. I usually post 3-4 leaders working together on a single mission, and 3 such groups will still incite the natives rather slowly.
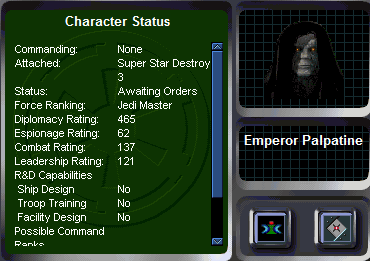
The empire can do it with single agent missions if Palp is on Coruscant, and can send all the leaders to a single planet which will change the mood of the natives rather fast.
iceride 4/nov./2024 às 12:02 
I will add my thoughts that I do not remember others mentioned. If it has already been mentioned, well... better twice than never.

Palpatine gives +50 Leadership to all Imperial leaders if he is on Coruscant. That is insane. They lose the bonus if Palaptine leaves Coruscant until he returns.

With this bonus, single Imperial leaders can incite rebellion on rebel planets, working alone, with a reasonable rate of success if there is no garrison to arrest them.

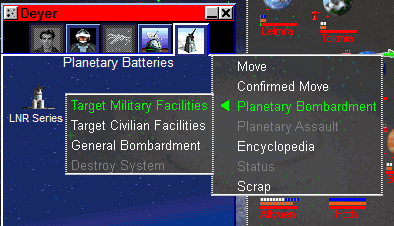
Also, I think Admirals give a significant bonus to bombardment strength. It is probable that the higher the Leadership, the higher the bonus.
Northstar1989 1/mai./2022 às 21:27 
Cowardly Camper, glad to see people still think about this game!

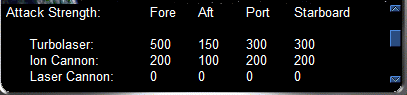
*Turbo* lasers hit starfighters infrequently. Laser Cannons on capital ships are actually very good at hitting fighters, and are the main offensive armament of ship classes like the Lancer Frigate (as well as being not-insignificant on the oft-undervalued Carrack Cruiser).