Shadowverse
144 valoraciones
Deck Construction Guide
Por free luigi
This guide will learn you the basics of constructing Decks in Shadowverse. Even if you are a netdecker (meaning you copy Decks from the internet), you can still use this guide to better understand the deck and even make your own tech changes or preference changes.
2
   
Premiar
Favoritos
Favorito
Quitar
Intro
All current meta decks once started as an idea by a fellow player, who used his knowledge of deck crafting and the meta at the time to create an optimal decklist. Over time, the decklist may have changed because of new cards or changes in the meta. Understanding these changes, and especially why these changes are made, is an important skill to have in CCGs. Deckcrafting itself is an important aspect of CCGs. It is essential for high level players to change their staple decks accordingly to the most played decks, so they have a better chance of winning and thus a better chance of climbing the ranked ladder. In this guide i will try to give an insight in the thought process behind creating and changing Decks.
Choosing a Deck Archetype
The word archetype in Shadowverse means a set of guidelines and staple cards for a certain deck. For example, a Dimension Shift Runecraft deck needs to have a lot of removal tools, preferably removal that is enhanced by Spellboost. Also, it needs to have several methods of card draw, since this will enlarge your hand (hopefully with Spellboostable cards) making the most out of the Spellboost mechanic. It also needs to run some specific cards, for example it needs Flame Destroyer (to set up the Dimension Shift-Flame Destroyer OTK combo), Fiery Embrace and Windblast (to deal with enemy threats) and of course Dimension Shift itself. Certain other cards in the deck can be replaced by alternatives, may it be because of the meta, personal preference or a small budget. For example, The Merlins in a Dimension Shift deck can be replaced by Spectral Wizards if you don't have enough Vials to craft 3 Legendaries.


In Shadowverse, there are 4 main archetypes, consisting of Aggro, Midrange, Combo and Control.
These four main archetypes all have a lot of subarchetypes, which are different per class.
For example, Forestcraft has the (Combo) OTK Roach archetype and Havencraft has the (Combo) Seraph archetype. Listed below are the 4 main archetypes and a brief description of them.

It is very important for deck to follow one of the three archetypes, and also contain cards that match with the archetypes' philosophy. Putting High-Cost followers in an Aggro Deck or not having removal in a Control Deck is most likely going to have very poor results. Choosing an archetype is the first step of deck construction, and will determine the kind of cards and the win condition you will include in your deck.

After you've determined your main archetype, you need to create a decklist with the philosophy of that archetype or a variation of one of the many sub archetypes. These subarchetypes usually consist of a core package (the win condition) and more replacable cards that help you achieve this win condition. For example, Bloody Mary decks are combo decks that include Bloody Mary and multiple ways of self-damage. PtP Forestcraft are Control Decks that use Path to Purgatory and cards that provide Fairy generation. Aside from the staple cards in these decks, you are free to pick whatever card that meets the requirements.

Aggro
Aggro decks are decks that have a lot of cheap (1-4 cost) followers and a few removal tools, mostly in the form of direct damaging spells or followers who have the ability to deal damage with Fanfares or Last Words. The goal of these decks is gaining board dominance during the first few turns, and rushing the enemy leader down before he can do anything to regain board control. However, if the enemy leader can regain board control, by using an AoE board clear like Themis Decree, Aggro decks usually have a hard time restabilizing. Aggro decks are a very populair choice for budget players, since they don't require a lot of Legendaries (because Legendaries usually are high-cost Control or Combo cards).


Midrange
Midrange Decks are decks that have cards with a wide variety of costs (most of the time 7 or lower cost). Usually they have a balanced variety of spells and followers, usually including some form of removal or direct damage. Midrange Decks are considered to be the middle ground between Aggro and Control. Midrange decks are really Curve-focused, meaning that they usually play as much on Curve as possible. This is in contrast with Control Decks who usually hold on to cheap powerful removal and even skip turns all together. The goal of these decks is to gain board presence, win the board by using follower trading or removal to remove the enemy board and then winning the game by having followers on the board while the enemy doesn't.
These decks are usually weaker in the early game than pure Aggro Decks, and are weaker in the lategame than Control Decks. However, this also means that Midrange decks are better in the lategame than Aggro Decks and stronger in the early game than Control Decks.
This means that you need to identify the archetype you're palying against and play accordingly.

Control
Control decks are decks that have a lot of high cost (5+ cost) followers and usually a lot of removal. The goal of these decks can vary, but most Control decks have some kind of win condition they are working towards. These win conditions are usually very strong high-cost followers. An example of win conditions are Path to Purgatory, Genesis Dragon, Bahamut and Heavenly Aegis. Basically Control decks win when the opponent can't deal with the huge and powerful followers that Control decks dish out.
The drawback of these decks is that they have a very weak early game, meaning that they can be overrun before they can gain any presence on the board. Especially Aggro decks are very effective at countering Control decks. Control decks usually require a several Legendaries and Gold cards, making them a bad choice for budget players.


Combo
Combo decks are decks that, similar to Control decks, contain a lot of removal. The difference between Control and Combo is that Combo decks usually use a certain combination of cards to kill the opponent in a single turn. In order to do this, they need a lot card draw to get the combo peices, as well as a lot of PP to use said combo pieces in a single turn. In order to survive until you can play these pieces and have enough PP to play them, Combo decks utilize a lot of removal and stalling tools. Combo decks usually run a combination of hard removal, soft removal and Ward followers to buy themselves as much time as possible. Then, when their combo is ready, Combo decks can usually OTK the opponent without having any followers on board. Examples of Combo decks that utilize these kinds of OTKs are Dshift/Giant Chimera Runecraft and White Wolf Forestcraft. Combo decks are particularly strong against Control decks, as they don't have to win the board to win the game.
Determine the Win Condition
After you have determined your main and sub archetype, it's time to put a win condition in your deck.
A win condition is basically the main way to achieve victory with your deck. This can be a specific set of cards, or just the general structure of your deck. An example of a win condition which is a specific set of cards is the Enstatued Seraph + Countdown reducers package. An example of a win condition which is a general structure of your deck is an Aggro deck with a lot of Storm followers and direct damage spells.

Both versions of win conditions can work, as long as you build your deck around your win condition.
If your win condition is to rush the opponent down before they can react or recover, including a lot of cheap cards with Storm or direct damage is the way to go. You can also opt to simply win board control using powerful on-curve followers, and use this to win the game before the opponent can take back board control. Midrange and Aggro decks usually use this kind of win condition, but some of them also use a specific set of cards to win. For example, Midrange Shadowcraft's win condition is winning the board and overwhelming the opponent, but they are kind of dependant on Demon Lord Eachtar and Underworld Ruler Aisha as a finisher.

Control decks usually have strong lategame followers as a win condition. This means that if they can reach the lategame and play these followers while having reasonable Defense left, they usually win.
Examples of lategame non-combo win conditions are Bahamut, Mordecai the Duelist and Heavenly Aegis. These followers are either very hard to deal with (very hard to remove and can trade into opponent's board for free) or shatter the opponent's board, which gives you an opportunity to take back board control.
In order to reach this win condition, Control decks include a lot of cheap defensive cards and removal to survive and buy time. Combo decks also use this strategy, but instead of relying on individually strong lategame followers, they use a package of certain cards to win in the lategame.
This package is usually designed to win the game in one or two turns, regardless of board state.
Examples of these decks are Seraph Havencraft, that uses an amulet that wins you the game when popped, or Roach/White Wolf OTK decks that simply use high Attack Storm followers to kill the opponent in a single turn.
Play Point Curve
The "curve" is the amount of cards you have dedicated to any one play point cost in your deck in relation to all other cards with different mana costs in the deck.

The curve of a deck varies based on the archetype of the deck. For example, Control Decks usually have a large amount of midgame (turn 4-7) and lategame (turn 7+) cards. They usually do have some early game (turn 1-3) cards, but those usually fulfill a defensive purpose (like Bellringer Angel or Unica). Aggro decks on the other hand have a lot of early and midgame cards. This allows them to gain board control early and start chipping at the enemy leader's HP bar. Aggro decks usually have a few late game finishing cards (like Genesis Dragon or Albert), just in case they can't end the game during the midgame. An example of the play point curve of an Aggro deck is listed below.


As you can see, Aggro Bloodcraft has a lot of 2 and 3 Play Point cards. This allows them to gain board control and maintain it. It also makes it possible to play multiple cheap cards on later turns. The deck also includes some mid and lategame cards as possible finishers.

While your card draw is random, you do have some influence over your curve. Putting a lot of lategame cards in your deck makes it more likely that you will draw a high PP cost card when you don't want to. This basically creates the scenario where the opponent can fill his board while you can't play any card until later turns.

On the other hand, putting too much early game cards in your deck may cause you problems in the later stages of a match, because you can easily dump your hand on the board.
Not only this, but because low PP cost cards usually are far less powerful than lategame cards, drawing an early game card on turn 10 can cost you the game.

For this reason, it is very important to make a deck with a 'good' curve, which contains cards from each power level (early, mid or late). How much cards of each power level you put in your deck depends on the archetype of the deck. As said earlier, aggro needs early and midgame cards, with a few lategame finishers. Control needs a few early game cards, accompanied by a vast amount o f midgame and lategame cards. Midrange decks usually have about the same amount of cards for each power level, however some of them have a smaller amount of lategame cards.
Cards that build a board or Removal
In Shadowverse there are two main types of cards; cards that build your own board and cards that remove the opponents board. Almost every deck has several cards of both types, although the ratio of the cards of both types vary depending on the deck archetype.

For example, Control Decks usually focus on removing the opponents board during the early and midgame, so they can survive to the point that they can play powerful cards to turn the tides.
Aggro Decks usually have a lot of cards that build their own board, so that they can use their followers to kill the opponent before they have a chance to build their own board. However, Aggro Decks tend to run a small amount of removal, in case the opponent plays big threats or Ward followers.


Besides the two main types (Board Building and Board Removal) there are also cards who can do both. There are a lot of followers that can provide some kind of removal. These hybrid cards allow the player to build their own board, while removing a threat from the enemy. Examples of cards that do this are Dance of Death, Dragon Warrior and Siegfried. This kind of cards is very powerful, and thus widely used across a variety of decks.

It is very important for deck building to consider both types and the hybrid type for your deck. Keep your archetype in mind and implement cards of both types according to the archetype of your deck.
Individual Value of a Card
The individual value of a card basically means the amount of stats (Defense+Attack) and the usefulness/power of it's effect (if it has one). Stats are in most cases the most important way to determine if a card is valuable enough to be included. There are guidelines that determine if a follower has good stats for it's cost. Most of the time, followers will be compared with the vanilla follower (meaning it has no effects) of the same Play Point cost.


For example, a 1/2 or 2/1 statline is the amount you want from a 1-cost follower. If a follower of that cost has a lower statline and the same cost, you want it to have an effect powerful enough to compensate for the lost stat point. For example, Elf Child May and Fairy Whisperer are widely used even though they don't have an optimal amount of stats for their cost. The reason for this is that their effects are useful and powerful enough to compensate for the lost stats.

The individual value of a card is extremely important in Take 2, since you can't rely on the synergystic value of the card there. This is of course because you get random cards. This means that you have a low chance to get certain powerful card combo's (like Mordecai+Urd or Wildfang Dragonnewt+Altered Fate).
Synergistic Value of a Card
Not only the individual value of a card is important. Another important aspect of deck construction is the synergy between the cards in the deck. A card may be bad or suboptimal on it's own, but when combined with other cards in the deck, it becomes much better. For example, Luxfang Kit is a pretty bad card on it's own. It's just a 2 pp 2/1 on it's own, but when combined with a discard effect, it suddenly becomes a free 2/1. This is the reason Luxfang Kit is commonly used in Discard Dragon decks.


Shadowcraft followers who can only attack the enemy leader or followers with Ward are another example of suboptimal individual cards. If the enemy doesn't destroy them or play a follower with Ward, their Last Words effects won't trigger. But when you combine these followers with cards that can destroy your own followers (like Soul Conversion, Urd or Necroassassin), they suddenly become a lot stronger. These kind of synergies are very important to consider when constructing a deck.
Contenders of a Card
When condering to add a card to your deck, you have to compare it with cards of similair Play Point Costs or cards with a similair effect. For example, there are a lot of 2 cost followers, but you only need a few of them. Also, it is important to compare a card to cards with similair effects. For example, Dance of Death and Execution both are 5 Play Point Spells that have the ability to destroy an enemy follower. However, putting both in your deck is not efficient, especially against Aggro Decks. Which means you have to choose for the bonus effect of dealing 2 damage to the enemy leader (Dance of Death), or the option to destroy an Amulet instead (Execution).
Aggro Decks or Storm Decks will usually go for Dance of Death, while Execution is used when decks that depend on powerful Amulets like Banner Swordcraft, Elana (Seraph) Havencraft are populair.
Tech Choices
Too put the cherry on the cake, you can choose to replace certain cards in your standard decklist with some cards that are used to counter specific things. One of the most well-known tech cards is Odin, which is used as a specific counter to Seraph's Havencraft and Mordecai the Duelist. It allows you to destroy the win condition of the enemy, usually destroying their chances of winning. However, it is bad against most other decks, especially against decks that don't use important Amulets.


Another example of a tech card is replacing Dance of Death with Execution. Both cards have the ability to destroy an enemy follower for the same Play Point cost, but they have different bonus effects. Dance of Death deals 2 damage to the enemy leader, which helps you to reach lethal, while Execution can be used to destroy an Amulet instead. You can replace Dance of Deaths in your decks with Executions when you are facing a lot of decks that depend on powerful amulets, like Elana Havencraft or Purgatory Forestcraft.

You can also opt to replace some of your single target removal cards, like Dance of Death, with AoE board damage when Zooish decks like Forestcraft and Swordcraft are populair. Especially Banner Sword doesn't have huge single threats, but multiple smaller ones, making AoE removal more efficient against them. This also works vice versa; if decks with big single threats like Dragoncraft or Runecraft become populair, u can opt to replace some of your AoE removal with single target removal.
Play Testing
Last but not least, playtesting is essential for building a competitive deck. You just finished constructing a deck and now it's time to see how it matches up against other decks.
When playtesting it is very important that you keep track of your deck's performance (wins/losses) against every kind of deck you encounter. You also need to keep the meta in mind while playing your deck. Which kinds of decks are popular, and thus likely to encounter while playing?

If your deck isn't very successful, try to determine why that is. Maybe your tech choices don't match the meta, or your deck has bad matchups against the popular decks at the moment.
In this case you could either try to change your tech choices to counter these decks or try to build a deck with a design philosophy that works better against the current popular decks.
For example if you keep losing to aggro decks, include more removal or Ward followers to counter their aggression. If you lose because you can't deal with the huge followers the opponents play, try to include more hard removal or Storm followers.

It may be the case that your deck works now, but it begins to fail after a couple of expansions. This is likely caused by meta changes, which means people play other decks or deck types. Keep adapting your deck to keep up with the changing meta. If people suddenly play more aggresive decks, you should replace hard removal with AoE or softer removal. If people suddenly play more control decks, you should replace your cheaper cards with more expensive and powerful removal/followers.

Also keep in mind that you may not be very successful at the beginning. This is natural, because you don't have a lot of experience playing the deck, as well as the matchups against other decks. As you play more and more you learn how to pilot your deck, and how to play against specific decks.
Ending
I hope this guide helped you to start building your own decks.
Deck building is, in my opinion, one of the most fun aspects of CCGs. It allows you to experiment and create this feeling of making something unique. That's a lot more fun than copying the most popular Daria Rune decklist and spamming it, if you ask me.

If you have suggestions or comments, feel free to post them in the comment section below. U can also add me if u want to conversate about this guide or other things.
8 comentarios
Lumiore 18 NOV 2023 a las 15:25 
generally good guide even if its real outdated considering the meta
Darkmage108 27 JUN 2022 a las 20:42 
great guide helps a ton
Taiki Taka Talks 29 ENE 2022 a las 1:49 
Love this guide, concise and straight to the point! <3:marijaonlooker:
Texyalen 8 MAY 2019 a las 12:34 
Nice guide, sadly I see this guide on later stage of my.
Val Cinnabar 1 SEP 2017 a las 5:03 
This guide covers a lot of concepts with good depth and context, great job!
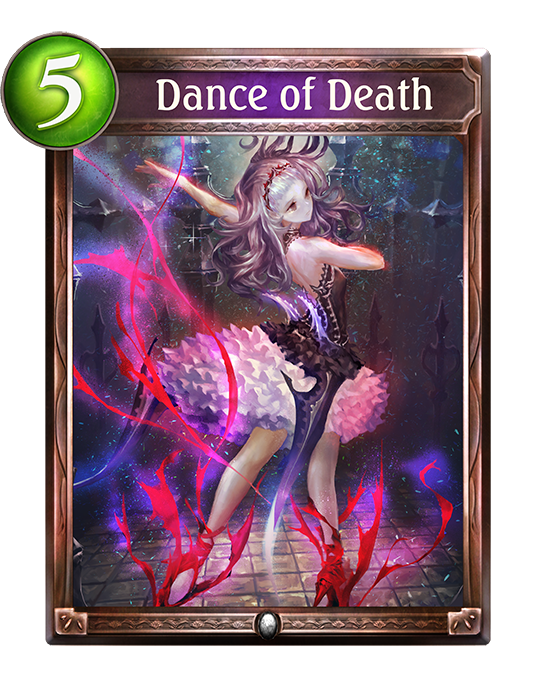
However, one nitpick and tip to anyone reading this. Do not use Execution on standard Haven amulets unless you specifically want to activate them. This can be useful if you can kill a Regal Falcon to stop storm or blow a Death Sentence before placing followers... but please don't cast Execution on Seraph or Grail.
징게이제브 1 JUN 2017 a las 5:11 
a real walkthrough right here buddy. Nice job
free luigi  [autor] 5 FEB 2017 a las 2:19 
Going first or second isn't something u have control over. However I do agree that it is wise to put the 'staple 4pp evolve cards', like Floral Fencer or Priest of the Cudgel, in your deck to get the most value out of your evolution points.
Zu 4 FEB 2017 a las 14:32 
Nothing about turn 4 going first and the Evolve war in general? That's kind of a big deal when building your deck.