Terraria
69 évaluations
Destroying the Destroyer
De Darkstar
The Destroyer is kind of like a cat; it has lots of life, but there are so many ways to skin it. This guide covers a wide variety of different strategies for the Destroyer from different classes.
   
Récompenser
Ajouter aux favoris
Favoris
Retirer des favoris
Introduction
The Destroyer is usually the first hardmode boss that players face, and for good reason. Not only is it generally the easiest, but there are so many viable strategies for taking it down. This guide will cover a fair number of those strategies. Make no mistake; some of these strategies are undoubtedly more effective than others. But, if you don't feel like collecting the materials necessary for some of the more advanced ones, or just want to try something new, these alternative strategies may be for you.

If you don't feel like reading the whole thing (it is rather lengthy), you can just read whatever sections sound most interesting, as any strategy here can be followed without knowledge of the others. Nonetheless, it will be helpful to read the section on general preparations first, regardless of what other section(s) you intend to read. If a section is referred to as #X, X refers to strategy #, rather than section #, as strategy #1 is section 3.

For clarity, no vanity items were worn in any of the screenshots, and all images were recorded from fights using on-tier equipment (other than the last picture of "Rough DPS Comparisons for Strategy #7", and of "Bonus Mechanical Strategies (cont.)"). Not all of the fights pictured were started at the beginning of night, or were even the only boss fought that night. Looking at the displayed DPS will give a much better estimate of how quickly a given strategy kills the boss than will looking at the in-game time, or at how much time is left on buffs. The displayed DPS should be seen only as an approximation, as you will likely not be using the exact same gear that I did. Even if you do, such factors as critical hits and the Destroyer's movements can cause DPS to fluctuate slightly throughout a battle.

Lastly, I won't be explaining how to acquire every item mentioned in this guide, as that would take up a lot of space and distract from the main point. If you don't know what an item is or how to get it, you can check the Terraria Wiki[terraria.gamepedia.com].
General Preparations
While a number of different tactics can bring the Destroyer down, there are a few things that will be of use to you in almost any case (unless specified).

What you want:

Wings: While not strictly necessary depending on arena construction, you'll probably already be using them, and they can save your life if the Destroyer moves lengthwise across the platform you are standing on.

Orichalcum Armor: The set bonus on this one was practically made for the Destroyer. The petals attack fairly frequently, and they pierce. Note that not all strategies necessarily benefit from Orichalcum armor. In fact, some are more efficient without it (when specified).

Healing Potions: This is a given for most boss fights. Defensive buff potions may be unnecessary depending on the strategy, but having something to quickly restore HP will be helpful in case something goes wrong.

A Standard Entourage of Buff Potions: Another given for most bosses, these include offensive and defensive potions, those being wrath/rage, ale or sake (for melee users), magic power (for mages), summoning (for summoners), ironskin, endurance, regeneration, and lifeforce. Whether or not to use ammo reservation as a ranger is at your discretion; unless you run out of ammo mid-fight it won't affect your survival. Not all of these potions are strictly necessary for all strategies, and you could probably forgo buffs altogether if you're skilled enough. Because well-fed is so easy to get via fishing and making cooked fish, (not to mention the fact that it lasts long enough to cover the whole fight, even if you take all night) you might as well use it even if you aren't using any of the other buffs.
/, , , , and (all classes). or (melee), (magic), (range), (summon).

Class Emblem: You get these from the Wall of Flesh, and they boost damage of a given type by 15%. Every class can get one for themselves (except throwing, which should tell you something). The extra damage will be much appreciated, especially considering that the Destroyer's main body segments have 30 defense (and are immune to ichor), compared to the Wall of Flesh's central mouth, which only has 15 defense.

Passive Regen Items: A campfire is the least you can do; if you have a spare life crystal, you should also use a heart lantern. Heart statues wired to a timer or pressure plate are also welcome. Star statues and a star in a bottle will help with your mana. A honey pool can be added as a final touch, but you'll need an indent at least two blocks wide with a solid floor to make one. Alternatively, you could suspend the honey over bubble blocks.

Passive Damage Items: Because the Destroyer is so large, anything that can passively inflict damage over time (such as fired nimbus clouds) will almost certainly hit. Traps could also be used, but standard dart traps likely won't help much unless you have a ton of them. Unless you are using a strategy that relies heavily on piercing* (and isn't #4), adding two nimbus clouds will likely be an unfettered good.

Stationary Item Buffs: Are you a melee fighter? Use a sharpening station. Ranger? Ammo box. Mage? Crystal Ball. Summoner? Bewitching Table. Or why not just use them all, just in case? Which leads me to my next point...

Minions: Even if you aren't a full summoner, having the two minions allowed (1 base + 1 bewitching table) can't really hurt. Except when it can, such as having a ton of mini twins whose piercing* will interrupt one anothers' (and your) attacks.

*(Piercing attacks trigger a 1/6 second invulnerability to other piercing attacks, so if your primary weapon is piercing it may be better to forgo weaker piercing abilities that might interrupt your assault.)

Moon Stone: This is far from necessary, but since it is technically possible to acquire one before the Destroyer, you should probably use it if you have it. The bonuses only function at night, but the Destroyer can only be fought at night.

What you don't want:

Low Damage Weapons: The Destroyer's main body segments have 30 defense, which is 15 points of damage reduction on normal mode. Anything that hits for less than 17 damage on an unarmored target will be reduced to a measly single point of damage against the Destroyer. Leave your Minishark at home.

Poor Multi-Target Damage: While the Uzi is pretty good for attacking single targets, it isn't very useful against the Destroyer. Even the Chain Gun, a Frost Moon weapon, yields subpar results. The Destroyer has a ton of HP, so in order to whittle it down faster you will need to take advantage of its numerous hitboxes. While a number of melee weapons can hit the Destroyer multiple times with a single swipe (as it drags its segments through the attack) the same cannot be said of projectiles that dissipate immediately upon striking their target. Using a gun against the Destroyer is in general not advised, but if you must do so at least use crystal or exploding bullets. The meteor shot's piercing abilities are too weak to be recommended. Note that single-target weapons can still be used against the probes.

Flasks: The Destroyer is immune to all debuffs, so don't bother wasting a flask on this fight. Well, I suppose you could use a Flask of Party for the lulz...
Strategy 1: Super Tank (Melee)
Overview:
This strategy is simple but effective: challenge the Destroyer to a DPS (damage per second) race. With sufficient offensive power, you can kill it before it kills you.

Armaments:
A good melee weapon, preferably Fetid Baghnakhs, though Arkhalis or a Cutlass can also work. Your weapon should either have good piercing or a very high rate of attack. Orichalcum armor can be useful for obvious reasons, but Adamantite can outperform it due to its better melee boosts depending on your weapon and accessories. If using a weapon that cannot have its speed modified (e.g. flails), then Orichalcum (or Titanium) armor will likely outperform Adamantite.

You should use the standard entourage of potions. A thorns potion will also serve you well, but is not necessary.

A Cross Necklace or Star Veil is integral to the strategy, as it will effectively cut in half the rate at which you take damage.

Introduced in version 1.4, a placed Bast statue grants a buff that increases your defense by five, with the same range as campfires. This can be used with non-tank strategies as well, but couldn't be fit into the general prep section due to character limitations.

If attempting this on expert mode with a corruption world, you will find the Worm Scarf to be of use. Expert mode will result in a brutal DPS sprint, regardless of who wins, so aside from Star Veil put everything you can into offense.

Arena:
For this strategy you don't need a proper arena, per se. What you will want is something to keep your HP regen up, and that's about it. Put down some heart statues wired to a one or five second timer, along with honey deep enough to trigger its buff but not to drown in. For a normal arena it may not be prudent to submerge the statues themselves, but in this case it is recommended (though not necessary, especially if using a heartreach potion). The setup should be near or on the ground in a wide, open area. Obviously include a campfire and heart lantern. The Bast statue, introduced in version 1.4, will also be helpful, as it increases your defense by five when nearby.

The Battle:
As the name of the strategy implies, you will be face-tanking the Destroyer basically the entire battle. If using a lower DPS weapon you may need to break away to allow yourself to regen, but with sufficient offensive power you will be able to kill the boss before HP becomes an issue. If you have enough offensive power to immediately kill probes as they spawn, you can drain hearts from them to keep yourself alive. This can even work on expert mode, but you'll really want to tear into the Destroyer with everything you've got. Despite the Worm Scarf, Crimson worlds will still have a much easier time due to the overwhelming power of the Fetid Baghnakhs. Keep in mind that you don't strictly need to tank every hit; the Destroyer's head is disproportionately buffed on expert mode, boasting a whopping 280 attack! You would do best to avoid it...

Essentially, you just need to stand there and attack the Destroyer as much as possible. The boss will continue to move forward after initially hitting you, dragging its hitboxes across you and letting you hit them in rapid succession. You can use an Obsidian Shield to permit a constant assault, or you can just grapple yourself to the ground. While in most situations I don't find thorns potions to be useful, this is an edge case, as you will be getting hit by physical attacks a lot and thus will get good use out of it. Sometimes you may wish to move even if you are high on HP. For example, if the Destroyer crosses over itself you will want to target the point of intersection for increased damage.

The strategy in action (with Orichalcum armor):


Despite what your instincts might tell you, just standing there and letting yourself get hit is actually a pretty good way to kill this boss. So long as you have high defense and regen, you'll be (virtually) invincible (on normal mode). This strategy is so effective that I have even used it to kill the Destroyer pre-1.4 with Titanium armor and a Ball O' Hurt!
Strategy 2: Head to Tail (Ranged, Magic)
Overview:
The Destroyer has a ton of segments, each with its own hitbox. By piercing it from head to tail you can maximize the number of hitboxes struck per attack, and by extension, the amount of damage dealt per shot.

Armaments:
Weapons with advanced piercing capabilities are a must*. Water Bolt and the Magical Harp can do this, though the former's DPS may be lacking, and its low projectile speed makes it better suited to a ricochet chamber strategy (see #3). Jester's Arrows fired from a repeater are ideal for the job, while the limited piercing of unholy arrows makes them less viable. Using the Daedalus Stormbow here will actually be inefficient, as you cannot easily direct the arrows. If using arrows, a Magic Quiver and an archery potion are of great importance. Jester's Arrows disappear after being airborne for a short time; the added aerial velocity afforded by the quiver and potion will allow you to pierce more segments**. Luminite bullets would work splendidly, but obviously you won't be using these during your first attempt. The Star Cannon is also excellent for this, but acquiring its ammo in significant quantities may be difficult. The Hellwing Bow could work too, if you have sufficient damage boosts. Using the same gear and arena as the 'aggressive rope tower' (explained below), I had an average DPS of ~1000. With a more defense oriented build, its lower damage shots are unlikely to do much. Bear in mind that the Hellwing Bow uses wooden arrows for its special attack, rendering Jester's Arrows unnecessary if using one.

*(One exception to this rule would be Cursed Darts. Their dripping effect allows them to hit many segments per shot if fired correctly. Keep in mind that you need to deliberately overshoot the Destroyer in order to maximize the dripping, rather than fire directly at it. Firing in the direction of the Destroyer's movement, i.e. tail to head, is actually more efficient here. Firing directly upward can also be effective.)

**As of 1.4.1, Jester's Arrows incur a 10% stacking damage penalty for each additional target hit, limiting the total possible damage of any individual arrow.

The standard entourage of potions is generally recommended, but defensive potions may be unnecessary if you play defensively.

Arena:
For this strategy, you can use an arena similar to the one for #1, or an arena a bit farther off the ground. This will make it hard (but not necessarily impossible) for the Destroyer to make physical contact with you, while still letting you shoot freely at it (if you make the floor out of platforms). It can still retaliate with lasers and probes, however. If you put a few solid blocks down, you can stand on them to take cover from its lasers, especially so if the blocks are depressed (e.g. a honey pool). The taller you make the arena, the more difficult it will be to pierce a large number of segments, but you are likely to survive longer. Take this into consideration when playing on expert mode. An example defensive aerial arena is below.


On the other hand, if you wish to trade defense for offense you can build an arena consisting of wood platforms placed at regular intervals with a rope going up through the center. In that case your arena would look something like the one on the left. The Destroyer will be able to climb onto your arena and attack at close range, but this will make it an easier target for your attacks as well. The arena doesn't need to be as tall as the one pictured.

The Battle:
The fight is fairly straightforward. When the Destroyer comes at you, shoot through its body lengthwise from head to tail (in that general direction, you don't strictly need to shoot the actual head). If it is moving towards you its movement will allow your attack to hit even more segments than it ordinarily would. You can fire in the opposite direction, but you probably won't deal as much damage.


Keep in mind that your high rate of damage will spawn probes fairly quickly, and these are unlikely to be killed by shots fired across the Destroyer's body. You may need to stop attacking the boss proper to deal with them, especially on expert mode.

If using a rope tower arena this will be exaggerated, as you will almost always have a clean shot at the Destroyer at the cost of having no respite from its lasers or probes and being vulnerable to its physical attacks.

The strategy in action: (aggressive rope tower vs. defensive aerial arena)

If you build your arena so high that you cannot see the Destroyer anymore it will likely be beneficial to use holy arrows instead of Jester's Arrows, even without the Daedalus Stormbow. With the same setup as in the battle image on the right, holy arrows provided a stable ~2000 DPS. Though if you do that, your strategy isn't quite this one anymore.
Strategy 3: Ricochet Chamber (Magic, Ranged)
Overview:
If you fire enough ricocheting projectiles at the walls of an enclosed space, you'll create an unstoppable vortex of death within. Now to force the Destroyer through that vortex...

Armaments:
A weapon capable of attacks that ricochet several times is required for this strategy. While the Magical Harp works great, you will need to kill the Twins to get it. Crystal darts can also work, and can technically be used with the blowgun or blowpipe without the need to farm infection mimics for the dart pistol/rifle. However, with the pre-hardmode variants DPS will be lacking. Then again, it is entirely possible to defeat the destroyer with this setup using only Water Bolt. While Crystal Storm ricochets, it does not pierce at all and dissipates after a dealing damage only once, making it ill-suited for this strategy (and the Destroyer in general). The meteor shot's piercing and ricocheting abilities are far too weak to be effective.

The standard entourage is recommended, as well as mana regeneration potions for mages, if needed. Magic/Celestial Cuffs may obviate the need for that. A Charm of Myths may be useful, as this strategy restricts your possible defensive maneuvers. For that same reason, you may wish to use an Obsidian Shield as well.

What you don't need are wings or running boots. The arena is small enough that you will be able to easily walk across it and use a grappling hook for vertical movement, potentially freeing up accessory slots.

Arena:
This part is of great importance. The strategy is named after the arena setup, after all. What you'll want is an enclosed box large enough to comfortably move around in, but small enough that ricocheting projectiles will create a dense field in the air.

An example ricochet chamber:
The fact that it is built in a the 'palm' of a Crimson chasm's 'hand' alludes to my preferred strategy against the Brain of Cthulhu (who, coincidentally, shares a boss theme with the Destroyer). While the construction of the arena itself is important, the location of the arena is rather flexible.

The Battle:
You will want to be attacking non-stop the entire battle in order to sustain maximum projectile density, so mages will need to maintain their mana. Mana potions are not recommended, as this will decrease your DPS noticeably, especially as you are relying on sheer volume of hits to deal damage, rather than on individual hits being strong.

You will want to attack the probes directly, as, due to the nature of the setup, your attacks will eventually hit the Destroyer no matter where you aim. The probes can drop hearts and are less likely to be hit by stray shots. While you should be able to dodge the Destroyer's physical attacks it will be very difficult to dodge its lasers with this setup; the frequent damage will keep your mana up if using Magic/Celestial Cuffs, but may actually kill you if you aren't careful. For this reason, this strategy may not be suitable for expert mode. If you find yourself losing HP quickly, use a potion earlier than absolutely necessary so that by the time you really need one you won't be waiting for potion sickness to wear off. While the Life Drain spell may seem like a good way to heal up quickly, its healing effect is not triggered while attacking the Destroyer. Even if it were, the healing effect is generally lackluster.

The strategy in action:

  • Deadly Dart Pistol + Crystal Darts with Titanium armor ~ 1500 DPS
  • Magical Harp with Adamantite armor ~1000-4000 DPS depending on how much of the Destroyer intersected the arena
Strategy 4: Petal Storm (Any Class)
Overview:
Ever wanted to kill a boss by attacking it with your armor? You're in luck! The Orichalcum armor set really is self-sufficient!

Armaments:
The Orichalcum armor set bonus, and by extension the armor itself, is inherently required for this strategy. If your world didn't spawn Orichalcum you can get some by opening hardmode fishing crates. Other than the armor, everything is negotiable. However, fast hitting weapons with decent range are preferred, especially ones that do not require active attention (e.g. Crimson Rod, minions). Due to the fact that most of the damage will come from Orichalcum petals, the indictment against low-damage weapons does not apply here (a Minishark with an Endless Musket Ball Pouch will work quite well). Crystal Storm will require some maintenance, but can also be focused on the probes. You could bring a strong single-target weapon to deal with the probes, but you don't have to. A Bee Gun will give you a lot of bang for your buck as far as hits per second are concerned. Melee users can simply drop a flail onto the boss and hold down the mouse, letting the Destroyer repeatedly injure itself by moving through the weapon (though this will leave you more vulnerable to attack than if you were using a weapon with more range). In reality, classes cease to have meaning here, as the petals can be procured from the weapons of any class, and as you are not relying on the damage from your actual weapons you would be better off using a weaker, faster weapon from another class than a slow one from your own. Though you might not need to, you can use as many mana potions as you like, since the vast majority of your DPS will be coming from the Orichalcum petals rather than from your direct attacks.

I cannot confirm whether or not general damage boosts (such as that from a wrath potion) affect the power of the petals, but from my testing it does not appear that they can critically hit.

Arena:
Any arena can work for this strategy, but an arena of platforms a ways off the ground will help you defensively without hindering your offense. Making it out of solid blocks will block the Destroyer's lasers, and if you fire a crimson or nimbus cloud at the ground you can rain through a one block barrier.

The Battle:
The idea is to hit the Destroyer, a lot. Since the Orichalcum petals will be doing the heavy lifting it doesn't really matter what you use to attack, so long as you hit frequently enough that the petals attack at their maximum rate. You can also attack the probes freely, as the petals produced from this will still likely hit the Destroyer. An inferno potion will let you hit the Destroyer frequently whenever you are near it, but may be difficult to acquire, and certainly isn't necessary. Not always the fastest strategy, but it can work even with just shurikens. or copper shortsword

The strategy in action:

As you can see, most of my direct attacks are only dealing one damage, yet I am able to sustain a DPS of over 500. Depending on the orientation of the Destroyer's body (and your luck), the petals' DPS may vary wildly over the course of the battle, from 300-1200.
Strategy 5: Bird-Eater Spider (Summoner)
Overview:
If a spider can eat a bird, and a bird can eat a worm, what will a spider do to a worm? Dive bomb it, of course! Spider gear to the rescue!


Armaments:
The full spider armor set along with a Spider Staff are needed for this strategy. A sentry such as the Queen Spider Staff is highly recommended. The slime mount deals summon damage and so can also be used if one wishes to get up close and personal with the Destroyer, but you will be more vulnerable. In addition to the standard entourage, don't forget the Bewitching Table buff!

For accessories you should focus entirely on offense. I will explain why down below.

Arena:
An aerial arena is preferred, especially if you aren't using the slime mount. You can build it out of solid blocks (which will protect you from the Destroyer's lasers) unless you plan on leaving the arena for more than a few seconds and returning mid-battle. You might also want to build a small platform below the main one, onto which you can summon the Queen Spider.

Don't forget that your spiders can climb on background walls! You'll want to place backwalls below your arena (even simple dirt walls will do) in order to improve your spider's mobility. It may be a bit difficult to place the walls below a high altitude arena, but you can use the Portable Cement Mixer to make things easier, as well as grappling to the bottom of your arena to reset your flight time.

The Battle:
When standing on your aerial arena, simply summon all of your spider minions below the floor. They will attack the Destroyer repeatedly, allowing you to focus on defense. You can also summon a sentry onto the ground below, or onto a platform just below the arena proper. If your arena is very high up then it may not be able to hit the Destroyer if it is on the ground, especially for explosive and lightning sentries, as they have no projectile. A decent single target weapon, such as Crystal Storm or a Phoenix Blaster will help you deal with the probes, but if you're a summoning damage purist you'll have to jump on them with the slime mount, or use a whip in order to consistently attack. Note that a whip will attract your spiders to attack the probe, which may or may not be desirable.

While it is safer to remain higher up, you can jump down on the Destroyer with a slime mount if you must. Repeatedly attacking with the slime mount will make the battle more chaotic, and arguably more exciting, but it is very risky as the Destroyer will repeatedly tear into you with its lasers. If you plan on doing this be sure to bring some defensive accessories (such as Charm of Myths, Star Veil, and Flesh Knuckles). Taking time off from jump attacks to hide in your honey pool can increase your longevity, but if the Destroyer cannot reach your arena, you will likely need wings in order to return to it from below.

Your setup might look something like this:
(This setup failed to include backwalls, but they are recommended)
Admittedly, this screenshot isn't very helpful for anything other than general setup, so I will explain the strategy in a little more detail. Also, the displayed DPS is misleading, as damage fluctuated throughout the fight, sometimes exceeding 1000 DPS.

The first thing you will want to watch out for is a sudden mass release of probes, which may occur early in the battle but is less likely later on. If your spiders are dealing a lot of damage to the Destroyer, it is likely to release probes quickly. When it does, the spiders may attempt to attack the probes, hopefully killing them before they can reach you. The reason you want to focus your accessories on damage is to allow the spiders the best chance at disabling probes before you are forced to fight them yourself. Otherwise you may be forced to fight ten probes at the same time. Of course, it is still possible for high damage spiders to simply miss the probes altogether despite your efforts. If there are backwalls below your arena, your spiders will be more mobile, increasing their chances of effectively targeting the probes.

Sometimes the spiders may fall off of the Destroyer to the ground below. The more backwalls you place, the less likely this is to happen. If your arena is very high up, they may not be able to reach the Destroyer. If this happens (you will usually be able to tell because your DPS will plummet), then you need to cancel the spider minion buff and resummon them. Just be careful not to cancel the summoning buff, (which I did just before taking the above screenshot), as the buff icons bare a passing resemblance.

The opposite problem is the spiders returning to your main platform. You can lure them off the edge and back onto the Destroyer by jumping off the side, at which point you can quickly fly back to the arena. However, you may sometimes wish to leave a spider or two on the main platform with you to help combat probes, or even deliberately summon some up there. Of course, doing so will decrease your DPS against the Destroyer itself.
Strategy 6: The Gold Standard (Ranger)
Overview:
If someone ever told you that they beat the Destroyer in thirty seconds with the Daedalus Stormbow and holy arrows, they must have been mistaken. They probably meant twenty.

Disclaimer: The Daedalus Stormbow has been nerfed as of version 1.4. While this strategy is still likely effective, it is probably not as overpowered as it once was.

Armaments:
The Daedalus Stormbow and holy arrows are the key to this strategy. While everything else is technically optional (as the bow can carry the whole fight on its own), things will go much more quickly if you put everything into offense (a Magic Quiver is especially advised). Adamantite or Titanium armor are preferred over Orichalcum due to their superior damage bonuses. In addition to the entourage of offensive potions (defensive won't be necessary due to the swiftness of the kill), an archery potion will also be useful.

Arena:
Due to how quickly the Destroyer will die, a specialized arena is not required. So long as you have a clear shot at the boss, things should go smoothly.

The Battle:
Shoot the Destroyer until it dies. If it crosses over itself, shoot the point of intersection. It is really that easy.

Case in point:
Keep in mind, this is with on-tier equipment. Given that the Destroyer has 80,000 HP in normal mode, we are looking at a kill in 15-20 seconds. Did you kill the Eye of Cthulhu this quickly and easily? King Slime? Wall of Flesh? I didn't think so!

Despite being a hardmode boss, the Destroyer is uniquely vulnerable due to being multi-segmented. You can potentially kill it even faster than the Eater of Worlds, due to the fact that the Eater has to stop every time a segment is broken. The Destroyer does no such thing, leading to an uninterrupted smackdown!

If you are looking to farm the Destroyer for Hallowed gear, this is the way to do it. Even many post-Plantera weapons cannot kill it as efficiently as this.

Unless, that is, you are able to push strategy #1 into hyperdrive. With the right setup, a Super Tank can outperform a similarly equipped Daedalus Stormbow user. With Adamantite melee armor and Legendary Fetid Baghnacks, a Lucky Star Veil, Menacing Moon Stone, Menacing Warrior Emblem, Violent Power Glove, and Violent Feral Claws, I was able to exceed a DPS of 12,000 with crossed segments, and ~8000 without them. http://steamcommunity.com/profiles/76561198269432442/screenshot/281847490926414528

Fetid Baghnacks have been nerfed as of verions 1.4, so this DPS may no longer be possible.


Despite this, the Daedalus Stormbow is still likely the most practical on-tier farming method due to its relatively low barrier of entry, requiring only two items to make the setup work, only one of which requires any real effort to obtain.
Strategy 7: The Platinum Standard (Any Class)
Overview:
Believe it or not, we can beat a 15 second kill without pre-nerf Fetid Baghnacks, but we'll need a very specific arena setup (and a bit of luck) to do it. If we can influence where the Destroyer spawns, we can kill it while it's still coiled up.

Armaments:
Assuming all goes well, you will want to put everything into offense. A weapon with infinite* piercing or an AoE effect (e.g. explosions) is necessary, unless you are using an extremely rapid melee weapon, such as Fetid Baghnakhs. In the latter case, a knockback preventing accessory is key, otherwise you won't be able to maintain contact. Orichalcum armor is not recommended, as its piercing attacks will only serve to interrupt the ones from your main weapon. Unless using them as your primary means of attack, minions are recommended against for similar reasons. If using AoE weapons, the bigger the blast radius, the better. Puny explosions won't be able to penetrate the entire coil, hampering your DPS. You may want a backup weapon (and plan) in case you can't reach it before it uncoils. While wings won't help your DPS directly, they can sometimes be useful in helping you reach the boss in its coiled state. Alternatively, you could use a flying mount, such as a Pigron.

*(The one exception to this is Luminite Bullets. While they don't technically have infinite piercing, their piercing is so powerful that they can still be used here.)

Arena:
Your arena setup is just as important as, if not more important than, your offensive capabilities.

According to the wiki, the minimum spawning distance from the player is 62 tiles to the left or right, and 35 tiles up or down. The maximum is 84 tiles to the sides and 47 tiles up, though enemies can spawn farther down if there is open space between 35 and 47 tiles down, and the ground is farther than 47 tiles down. Therefore, if you inhibit all spawns 62-84 tiles to the left or right, and 35-47 tiles up and down, leaving one spot open will force enemies to spawn only there.

In theory, anyway. I never could get an arena to work with only the minimum specifications. In fact, during my experiments the Destroyer resisted every attempt I made to confine its spawn, going so far as to spawn in front of player-placed backwalls, and to spawn much farther away than any normal enemy would be permitted.

Thus, convincing it to spawn in a certain location required a different approach. As far as I know, it is impossible to force the Destroyer to spawn in a specific location. However, it is possible to significantly increase the odds of it spawning within a certain region if that region is within normal spawning range and is not inhibited.

The arena I eventually had some success with was this monstrosity:
It's far from pretty, but it gets the job done. The dirt backwalls are likely unnecessary, and are merely an artifact from a previous version of the arena. The pink slime blocks are used to prevent fall damage, so as to allow wings to be replaced with a damage-enhancing accessory. The ash in the arena can be substituted for any inert block type. By leaving a wide, open area for the Destroyer to spawn in, it is less likely to spawn extremely far away. Though the Destroyer didn't spawn within range every time, I had significantly better results with this setup than any other I tried. The ash blocks in the air on the left and right are also likely unnecessary, but the ones below the arena are important. There is no point in not restricting the Destroyer from spawning below your arena, as even if this causes it to spawn even farther away, you wouldn't have been able to reach it in its coiled state anyway.

Generally speaking, you will want your arena to be as tall and wide as you think you can move quickly. The taller and wider the arena, the greater the chance that the Destroyer will spawn in it. However, if it is absurdly tall then the time it takes to fall to ground level may allow the Destroyer to uncoil to a significant extent.

TLDR: The ideal arena is large and open enough to catch the Destroyer's spawn, small enough to be traveled across before it significantly uncoils, and has all of the areas immediately nearby sealed off (which, as per the arena being just small enough to cross in time, you wouldn't be able to reach anyway).

The Battle:
Before the battle begins, open your minimap (not overlay, not fullscreen map) and zoom to the point where you can just fit the entire arena in your field of view. While holding onto the center piece of rope in the air (just under the triple Ultrabright torches in the screenshot), summon the Destroyer. Immediately glance at your minimap to see where the Destroyer spawned; its head will appear on the minimap to indicate its position. Minimap View -->

If you cannot see its head then the run is a bust and you'll have to fight it using conventional means. If you can see the head on your map, jump off the ropes towards it and unload into its coil as quickly as you can. With the right weapon (and ammo, if applicable), you can kill the Destroyer in less than five seconds, with on-tier equipment. Even if it manages to uncoil itself you will still likely be able to deal a significant amount of damage, making the ensuing battle much easier. Depending on your weapon you may end up summoning a small army of probes, though! If using a melee weapon, try to move around within the coil to maximize damage.
Rough DPS Comparisons for Strategy #7
All stats (except Stardust Dragon) taken with wrath potion in effect. Archery potion was used for arrow firing weapons, Magic Power potion and Crystal Ball were used for magic weapons, and ale and Sharpening Station were used for melee. Magic Quiver was used with arrow-firing weapons and was replaced with Putrid Scent for non-arrow firing weapons (except Stardust Dragon). Class appropriate emblem used for all weapons (except Stardust Dragon), along with Moon Stone, Shark Tooth Necklace, and Ankh Shield. Unless specified, all weapons used Titanium armor of their class variant. Most accessories were reforged to either menacing or lucky. Entries mark with an asterisk substituted Celestial Shell for Putrid Scent, Destroyer Emblem for Ankh Shield, Celestial Stone for Shark Tooth Necklace, and, if applicable, a specified accessory for Moon Stone, as well as using Solar Flare Armor with Melee weapons, and Vortex Armor (stealth) with ranged weapons. In all cases, the Destroyer was on normal mode. (As Medusa's Head was greatly buffed in 1.3.1, and these tests were conducted in 1.3.0.8, the listed DPS for that weapon is much lower than what would actually be achieved in 1.3.1. It was then reworked in 1.4, further distancing itself from the result listed here.).

  • Orichalcum Petals with Minishark ~1000-1500 DPS (poor focus?)
  • Godly Sunfury with Adamantite Armor ~2000 DPS (difficult to maintain contact)
  • Deadly Hellwing Bow + Wooden Arrows ~3000-4000 DPS (poor accuracy)
  • Unreal Shotgun + Exploding Bullets ~4000-5000 DPS
  • Grenades with Fossil armor (1.3.5) ~4000-8000 DPS
  • Deadly Daedalus Stormbow + Holy Arrows (1.3.5) ~7000-8000 DPS
  • Legendary Fetid Baghnakhs with Adamantite Armor (1.3.5) ~8000-9000 DPS
  • Godly Medusa Head (1.3.0.8) ~9000 DPS (spam), 16,000-20,000 damage per fully charged hit
  • Unreal Elf Melter with Sniper Scope ~10,000 DPS*
  • Bouncy Grenades with Fossil armor 1.3.5~11,000 DPS
  • Demonic Flying Knife with Adamantite Armor ~14,000 DPS
  • Deadly Titanium Repeater + Hellfire Arrows ~15,000 DPS
  • Deadly Uzi + Exploding Bullets ~10,000-20,000 DPS
  • Masterful Toxic Flask ~15,000-20,000 DPS
  • Ruthless Nettle Burst ~15,000-20,000 DPS
  • Godly Life Drain ~20,000 DPS
  • Demonic Star Cannon ~20,000 DPS
  • Legendary Star Wrath with Mechanical Glove ~21,000 DPS (finite pierce)*
  • Demonic Rocket Launcher + Rocket I ~15,000-30,000 DPS
  • Deadly Magical Harp ~30,000 DPS
  • Deadly Titanium Repeater + Jester's Arrows ~30,000 DPS
  • Ruthless Stardust Dragon with Stardust armor and Papyrus Scarab ~30,000 DPS
  • Demonic Electrosphere launcher + Rocket III,and Sniper Scope ~31,000 DPS*
  • Deadly Daedalus Stormbow + Jester's Arrows (1.3.5) ~35,000 DPS
  • Unreal Tactical Shotgun + Luminite Bullets and Sniper Scope ~30,000-40,000 DPS*
  • Unreal SDMG + Luminite Bullets and Sniper Scope ~30,000-40,000 DPS*
  • Demonic Rocket Launcher + Rocket III ~50,000 DPS
  • Godly Paladin's Hammer* ~50,000DPS
  • Mythical Inferno Fork ~30,000-60,000 DPS
  • Godly Solar Eruption with Avenger Emblem = Instant Kill*
  • Demonic Terrarian with Avenger Emblem = Instant Kill*
  • Unreal Celebration + Rocket III and Sniper Scope (1.3.5) = Instant Kill*
  • Unreal Snowman Cannon + Rocket III and Sniper Scope = Instant Kill*

Just to reiterate, these are only rough values, and should be taken with a grain of salt. The level of testing required to achieve precise numbers would tempt me to make an entire guide on Destroyer speedkilling, rather than what I am actually doing. On that same note, this strategy is best employed for those seeking the fastest possible kill or the highest possible DPS, rather than those having trouble beating the Destroyer at all. Given how long the arena setup might take, combined with the luck aspect, killing the Destroyer for the first time with this method simply isn't practical in most cases. Using the ocean can, however, provide a quick and dirty version of this arena. The reason that the last few entries lack an explicit DPS is due to the fact that the Destroyer was killed instantaneously, or nearly so, in those instances, and that a DPS of ~80,000 does not serve to differentiate them. Curiously, the Snowman Cannon somehow achieved a DPS readout exceeding 100,000.

As predicted, a number of trends bore out across the scale. Weapons with large AoEs significantly outperformed those with smaller ones, and those with more advanced piercing outperformed those with less. Using the same strategy as #6 here netted us an only marginally higher DPS than before, owing to the limited piercing of holy arrow stars. (As of 1.4, Holy Arrow stars no longer pierce.) Especially of note is the massive difference in DPS between using Rocket I and Rocket III. During testing, the Rocket Launcher had a displayed damage of 102, with 71 damage added with Rocket I, and 116 added with Rocket III. 158 (Rocket Launcher with Rocket I reduced by Destroyer's defense on normal mode) is roughly 78% of 203 (with Rocket IIII), However, the DPS of Rocket I (~30,000) is only 60% of Rocket III (~50,000), clearly indicating the effect of the increased blast radius. One last note is that because Stardust Dragon cannot be directly controlled, its potential DPS may be higher than what is listed depending on where and when it chooses to attack.

The strategy in action:

At this point, calling it a 'battle' would just be devaluing the word. Poor guy never had a chance.
Strategy 8: The Dairy Standard (No Class)
Overview:
Do you have any shame at all? Can you beat the Destroyer with any of the previous seven strategies? Do you ever pass up an opportunity to cheat? If you answered 'no' to all of these questions, then this strategy may be for you! (Or maybe you just wanted to try this for variety's sake, I won't judge).

Armaments:
You'll need a decent quantity of cheese. Doesn't matter what type. Cheddar, American, Swiss, it's all good. Oh, and you'll also need an enemy statue, preferably a weak one, like a slime. On top of that, you'll need a weapon capable of remotely attacking without killing the monster inside the box. Traps count too, but using regular dart traps alone won't likely have the DPS to kill the boss in time unless you have an absurd number of them. Try adding minions, just make sure they can't kill the statue monster. Sentries won't kill it if the box is sealed, but normal spider minions might. Weapons that can attack originating from a point outside the box, such as the Meteor Staff, are ideal for a setup like this. Just be sure not to hit your box directly; if the weapon deals splash damage this will likely kill your statue monster unless you've made the box a few blocks thick. By pairing the Meteor Staff with Magic or Celestial Cuffs you'll be able to attack almost continuously the entire battle. If you have a Daedalus Stormbow, that would also be very effective... so effective that it wouldn't be worth the trouble of doing this as opposed to #6 in the first place. You can summon Crimson Rain or nimbus clouds through a small hole in the box, but if you miss it will rain inside, killing your statue monster. Defensive potions are unnecessary unless you are taking more than one point of damage from your monster statue. Don't use Orichalcum armor, as its petals could break the setup.

Arena:
Make a small box filled halfway with honey and put your enemy statue of choice inside. Keep a campfire and heart lantern nearby. Either allow the box to be sealed completely, or leave a small hole through which you can attack. Since apparently slimes can squeeze through one block holes, you'll want to use an actuatable block for your hole, or put one in front of it, so you can prevent your monster from escaping. If using a larger monster this shouldn't be an issue. According to the 1.3.1 changelog, slimes can no longer squeeze through one block tall holes, so a hole of that size should present no issues. Location doesn't matter.

The Battle:
Make sure there are no enemies nearby (you can check with the radar's effect) and then summon the statue monster. Inhibiting natural spawns with a peace candle and sunflower may make this easier. Now, jump into the box and seal it to the extent desired. Actuators in the ceiling can serve as a substitute to digging it out and manually replacing it. You can grapple yourself to the floor to prevent knockback. After that, it is simply a matter of killing the boss without killing the enemy that is providing you invincibility frames. You need to maintain HP regen faster than the rate at which the box is hurting you, but the combined honey, campfire, and lantern will do most of the heavy lifting for you. A few lesser healing potions wouldn't hurt, just in case. The only way to lose is running out of time.

In the end you'll get something like this:
Strategy 9: A Worthy Foe (Throwing)
Overview:
Remember my comment about throwing in hardmode? At this point in the game the throwing class is obsolete. But, a sufficiently dedicated thrower will not let that stop them! To the Destroyer, and beyond!

Armaments:
In terms of armor, you won't have a whole lot of options. You could use Orichalcum melee for the defense and set bonus, but relying on the petals may turn this into something more akin to #4, so purists will want to stick with Fossil Armor. As of version 1.4, throwing weapons are classified as ranged damage, and thus hardmode ranged sets will be much stronger. As for weapons, you'll want something fast to be able to hit the probes, and a second weapon focused on raw DPS. Bone throwing knives or Frost Daggerfish are suggested for the former, and bouncy grenades for the latter. Bouncy grenades deal slightly more damage than normal ones and can be thrown slightly faster, but will run you one pink gel per two grenades. A full stack each of knives and grenades should be enough for the fight even if you don't have a lot of damage-boosting accessories. If you are trying this on expert mode, you are insane you could use a Bone Glove instead of knives.

Because throwing weapons don't tend to deal a lot of damage, focusing your setup on offense is advised. With a fossil set you'll never be a tank no matter what you do, but even a few extra points of attack can be the difference between hitting for 7 damage and for 11, an over 50% increase in DPS. (I am specifically referring to the damage output of bone throwing knives against probes.) Bone Javelins can't pierce, and their sticking damage counts as a debuff (to which the Destroyer is immune), rendering them impractical for this battle.

Depending on how confident you are in your abilities, you may wish not only to bring the standard entourage but also import fish from a world with the opposite evil biome so that you can use wrath and rage potions at the same time. Remember how I said the Moon Stone was totally optional, and that I didn't expect you to own one? That's still technically true, but if you are having a lot of trouble you might want to consider getting one. There are a number of methods to enter the Lizahrd Temple early[terraria.gamepedia.com] out there, and you can easily farm Lizahrds for Solar Tablet Fragments by grappling to the ceiling and dropping grenades on them. You can use a similar technique to farm the eclipse itself, but be wary of the vampires (your targets), as they can fly.

Arena:
You are going to want to use an arena that is at least a little ways off the ground. Ideally the Destroyer's entire body will be aboveground during the fight, leaving you a clean shot. At this point it should go without saying that that you'll want a campfire, heart lantern, honey pool, Bast Statue, and as many heart statues as you can find. If you have more than three then be sure to separate them into individual groups; if more than three are in close proximity then only three will be able to spawn hearts. To really go the extra mile you could add a sunflower and a peace candle.

I used this for my test fights:

You can place it higher in the air if you want, with the same general tradeoff of extra security at the cost of DPS.

The Battle:
Your activities during the battle should generally be towards one of three ends: DPS, probe killing, and regen. Throw your (bouncy) grenades at the Destroyer as rapidly as you can, especially aiming at parts that have crossed over one another. If your arena is very high up, you won't be able to tell when this happens, but keeping yourself alive will be easier. If the Destroyer comes up onto your arena be sure not to accidentally hit it at close range, or you will be hurt from the blast of your grenade. Depending on how high you've boosted your attack, you might wish to throw down a mass of spiky balls and lure the Destroyer through them. This can be done as a passive, auxiliary method of attack while hiding in your honey pool to regen.

Sooner or later the Destroyer will start spawning probes. Due to the fact that probes will take several knives to kill it is advised to focus entirely on them whenever they appear, lest they quickly accumulate. There is also the fact that your low defense will make it harder to deal with the probes' attacks. This part can be tricky, however. In theory, all you need to do is attack the probes with your bone throwing knives. But, because the knives have strong piercing* and are affected by gravity, even if you pierce multiple probes with a knife it will likely fall through your arena and hit the Destroyer (Frost Daggerfish have weaker piercing). Dealing extra damage to the Destroyer at this point is a dual-edged sword; you want to keep your DPS up, but you don't want to spawn more probes. As a result, you may find yourself attacking only probes for longer than expected, as more spawn due to damage incidentally inflicted on the boss itself.

*(Despite their piercing, bone throwing knives still have lower DPS against the Destroyer due to their relatively low base damage. The probes have less defense than the boss itself, allowing them to remain effective in this case.)

Because the Destroyer's (and probes') lasers can't penetrate solid blocks, your honey pool can prove to be an especially effective defensive position. You can continue to attack probes from within it, but it may be difficult to attack the Destroyer (and if you are low on HP you won't want to spawn more probes anyway). Keep a close eye on the Destroyer's HP and the in-game time. You should use this to judge your pacing for the battle, as you will need to balance offense and defense in order to kill it before morning while keeping yourself alive.

Or you could just jack up your attack and spam Beenades. With sufficient damage boosts, this is embarrassingly effective. If you throw too many, though, the game will lag... a lot. Or maybe that was just my lousy computer...

Though this strategy may seem extremely difficult (it isn't easy), it is entirely doable. Honestly, I think many strategies for the Destroyer render it a laughably easy boss. However, I found fighting the Destroyer with throwing weapons and an ordinary level of preparation to be quite an enjoyable challenge. It is likely to be a bit easier in 1.4, as throwing weapons now benefit from ranged bonuses. I would post a video of the fight, but my computer barely meets the minimum requirements to run Terraria, so recording things simply isn't feasible. Though that might change, since I've found better recording software since the original posting of this guide.
Bonus: Mechanical Strategies for a Mechanical Boss (Mechanic)
Is 'mechanic' even a real class? I won't answer that question, but I will show you a few ways to kill the Destroyer using pre-Plantera mechanisms. I'm not going to talk about a dart-trap battery, partly because it would too closely resemble #8, and partly because it would be highly impractical to gather enough dart traps for the setup pre-Plantera.

Armaments:
Technically, you don't need a single item in your inventory to carry out any of these strategies, though wings and a knockback-immunity accessory will be useful. Since you don't have to attack directly you can go for entirely defensive gear. Nonetheless, having a halfway decent backup weapon will help you deal with the probes.
____________________________________________________________________________
B1: Boulderdash
Overview:
You hate boulder traps. I hate boulder traps. The Destroyer hates boulder traps. Wait... what?

Arena:
Your actual arena setup here is dedicated entirely to increasing the efficiency of your boulder salvos. Boulder salvos can be constructed in either a horizontal or vertical variety. This is in reference to the firing direction of the salvo; both versions require stacking the boulders vertically.

If using horizontal salvos, you will want an arena that is as long as is practical, and for vertical ones a tall arena is preferred. Note that both types of salvo can be used in the same general setup. On the right here is a series of horizontal salvos, and on the left is a vertical salvo.

Because the horizontal salvo contains several columns of boulders, the levers have been painted to match the color of active gemspark wall placed behind the column of boulders it activates. Technically, levers are not needed for a horizontal setup, as one could use a pickaxe to disturb the bottom boulder instead. However, a triggering device is needed for a vertical salvo, as the boulders will simply roll off the top to the left if disturbed with a pick, rather than falling straight down.

If you wish to use more columns in a horizontal setup than exist gemspark colors, you have a few options. You could paint the active stone blocks instead, and place torches in holes below them (or gemspark blocks, preferably diamond, so as to avoid confusion) so you can see which color is where, but this will be harder to notice than using gemspark walls. Also, increasing the number of columns will likely make it hard to determine the proper column quickly; firing the wrong column will result in all of its boulders breaking uselessly against the adjacent column. It might be easier to just build a second salvo on the other side of your arena. Keep in mind, however, that boulders will naturally roll left if there is nothing obstructing their path. While most columns in a salvo will prevent the adjacent column from rolling in the wrong direction, the last column will roll left unless it is obstructed. If only the bottom boulder is blocked from going to the left, other boulders higher up may still begin rolling that way.

Each salvo type has its own strengths and weaknesses. The use of a vertical salvo is more straightforward, as all of the boulders will fall through the Destroyer immediately, whereas with a horizontal salvo you need to wait for them to fall and roll. Because a horizontal salvo using triggering devices necessitates multiple triggers, it is easier to fire a vertical one. However, a series of vertical salvos will require that you lure the Destroyer to different areas. Also, depending on your setup, it may be difficult to lure the Destroyer onto a vertical salvo. The vertical salvo pictured is not necessarily a good example, as I had difficulty leading the Destroyer into it. Or, perhaps there is just difficulty inherent in leading the Destroyer on a vertical chase. You could use solid blocks to give the Destroyer something to grip, but you'll need to put actuators in them and wire them to the same switch that drops the boulders, otherwise the boulders will bounce off of the solid blocks and almost certainly miss their intended target.

The number of boulders you will need can vary greatly depending on how accurately you hit the boss. Using the boulders from the horizontal salvo pictured, I was able to reduce the Destroyer's HP to ~20,000, but using them less carefully barely brought the boss to half health. During my test kill I used ~130 boulders, though this was by no means a maximally efficient kill.

Boulder statues (craftable only in a graveyard) can be activated with wire to drop boulders, as well, though their 15 second cooldown limits their utility.

The Battle: The battle is relatively simple... in theory. Lure the Destroyer over to the salvo of your choice and activate it for major damage. Actually getting the Destroyer to behave is another matter entirely. If the Destroyer is not completely level, then the potential damage of your boulders will be significantly reduced. Take this screenshot for example:
(Boulder DPS is not recorded, so ignore the DPS readout here)

This is an essentially perfect launch. If the Destroyer moves in an arc of more than a few degrees, any launched boulders will only be able to hit it twice, once on the part coming out of the ground and once on the part going in. If a boulder launch goes imperfectly, you may be able to salvage some of the damage by chasing the boulders and hoping the Destroyer runs into them. As the screenshot suggests, the boulders will frequently spare launched probes, making a backup weapon highly recommended.

When attempting to lure the Destroyer to a certain area keep in mind that it tends to launch itself at you directly. Therefore, if it is below you it will tend to launch itself out of the ground at a high angle (though almost never straight up, unless its head was directly below you). In order to straighten it out try sprinting from your salvo of choice to the other end of your arena, and then back again. It is not always ideal to stand directly on the ground. Keeping just off the ground (say, grappled to the wood platforms in the horizontal salvo example) will often cause the Destroyer to launch just off the ground, pulling its other segments just above ground level, but still low enough to be targeted by boulders. Do not expect the Destroyer to line itself up correctly every time; you may need to run back and forth across your arena multiple times to line up a clean shot.

This strategy is admittedly somewhat tricky to pull off, especially if you do not have a large supply of boulders. My test kill took almost the entire night, but if you have a massive surplus of boulders you can afford to fire a bit more recklessly. Regardless of your overall boulder supply, unless you build a large number of columns you will eventually need to 'reload' a column by re-actuating the blocks below and putting more boulders on top. Alternatively, you could simply place boulders onto a work bench or table, which they will fall through immediately, essentially allowing you to fire individual boulders at will. You could even use this as your primary means of attack, though it wouldn't really be a mechanical strategy anymore if you did.


___________________________________________________
Timeout section: Necessary Filler


As you may have noticed, the 'thumbnail' on the left is actually really huge.


I can't do anything about that.


Nor can I do anything about the arbitrary character limit imposed upon each section of a guide for mysterious reasons.


I'm about to hit that character limit, so I'll have to cut this short.


No commentary on the making of this guide for you!
Bonus Mechanical Strategies (cont.)
B2: Blasting Range
Overview:
You hate explosives traps. I hate explosives traps. You know where I'm going with this...

Arena:
You'll need some explosives (as in, the item called 'Explosives'), an explosion-proof block (such as dungeon brick), some wire, and a triggering device.

This is technically all you need:
Make sure that the explosives block is an absolute minimum of twelve blocks off the ground, otherwise you will kill yourself when you activate the trap. It would be better to put it a little higher so you have margin for error, especially if you are using an actual detonator, as the detonator was dislodged by an explosion from the minimum height. Alternatively, you could put it as low as ten blocks so long as the triggering device has at least ten blocks horizontally between it and the explosives. You could put it even lower if you make the ground out of explosion-proof blocks. The number of explosive nodes used is at your discretion. More nodes means less frequent reloads and more flexible options when attacking.

The Battle:
Lure the Destroyer to a node. Detonate. Reload node(s) when necessary. Repeat. This means that you will want to carry explosives with you during the battle so you can place more when they've been used up. Yes, this will cost you money. Yes, this is a novelty strategy (but is still arguably easier than B1). No, you should not attempt this if you are having trouble with the Destroyer. You will likely want a backup weapon to deal with stray probes, along with wings to more easily reach the nodes (if aerial). The number of explosives you will need will depend on how good you are at hitting large numbers of segments. I used ~20 for my test kill, which comes out to 13 Gold if all base materials are purchased without the discount card.

The strategy in action:
The DPS listed here does not account for explosives damage and should be ignored.


____________________________________________________________________________
B3: Out With A Bang
Overview:
The Destroyer is dead! Let's throw a party, with fireworks and everything! Huh? What do you mean it's still alive? Let's shoot off some fireworks anyway!

Arena:
You'll want something that basically looks like this:
The pink slime blocks are an artifact from my arena for #7 and are not required. You'll need some sort of triggering device (in this example, a switch in the bottom center) wired to all of the fireworks. You will need ~130 fireworks (not fireworks box) to pull this off on normal mode. This amount will cost you 19 Gold 50 Silver.

The Battle:
All you need to do is lure the Destroyer over to your setup and activate it while the Destroyer is above the entire thing. The degree to which the Destroyer is coiled is irrelevant, so long as you assure that all rockets hit. If the entire salvo connects and there are a sufficient number of fireworks, then you should be able to secure the kill with the initial firing. Wide, horizontal movements will lure the Destroyer to move more horizontally, making it easier to line up the shot. However, you still need to boss to jump up at a bit of an angle to clear the setup, rather than move completely horizontally like in B1.

This screenshot was taken with a less compact version of the arena. The same approximate number of fireworks are required for the kill in either case, so it makes more sense to compact it. Ignore the DPS in the shot, as it is misleading. (Fireworks DPS is recorded, however)


You might now be wondering why bother with #6 or #7 when this strategy can secure us an immediate Destroyer kill with minimal gear and little luck involved. The first reason is that (without the discount card) the kill will cost you almost 20 Gold each time, cutting into potential profits. Second is the fact that the fireworks must be set up after each kill, which means that although the kill itself will take mere seconds, the number of times the Destroyer can be killed per night will be no better than with #6, at the added cost of ~19.5 Gold per kill. If you have good gear, there are far more practical strategies. However, if you are merely looking for the path of least resistance, you've come to the right place.
Aftermath
Now that we've killed the Destroyer over one hundred times (well, I did in order to make this guide) we're looking at a (potential) mountain of loot.

So, what do we do with all of this stuff?

Hallowed Bars:
These are dropped by all three mechanical bosses (15-30 of them on normal, 20-35 on expert) and have no ore form. They can be used alone to craft most Hallowed equipment including the full armor set. In general, Hallowed gear is a straight upgrade from Adamantite. I kept Hallowed armor until after defeating Golem, even on expert mode, so I can attest to its quality. The great thing about Hallowed Bars being non-specific is that you can easily farm the Destroyer for all of the Hallowed gear you could ever want (except the pick/drill) without ever touching the Twins or Skeletron Prime. Once you no longer have need for more Hallowed gear you can either use the bars as expensive paperweights (they are placable) or sell them for a decent profit. All Hallowed headpieces sell for 5 Gold, whereas the bars required to make them sell for 4 Gold 80 Silver. Alternatively, you can combine them with Souls of Might (more on this below).

Souls of Might:
Each mechanical boss drops its own unique souls (20-40 on normal, 25-40 on expert). Souls of Might are a crafting component in a few items that use all soul types (such as Drax/Pickaxe Axe) as well as in two items that do not require the other boss souls: Light Discs and the Megashark. Light Discs are unique boomerangs that can be stacked up to five discs in one item slot, allowing them to be auto-thrown with up to five airborne at once. Everyone knows what Megashark is. Remember 'Half shark, half gun, completely awesome.'? He's that guy's older brother. Paired with crystal bullets, the Megashark is phenomenal against the Twins. The most profitable way to sell Souls of Might is to combine them with Hallowed Bars and Souls of Light to craft Light Discs for resale, earning 10 Gold compared to a little over 5 Gold for the base materials.

Greater Healing Potions:
Not the most exciting boss drop, but certainly practical. These will remain a staple item for every boss fight from here on out. If you consistently win your boss fights you should never actually need to craft these, as the number dropped by bosses will almost always be greater than the number you used during the fight. If they're taking up too much inventory space you could sell them. At 10 Silver each it's enough profit that it doesn't feel like you're just throwing them away. Of course, even if you do sell them all it will only contribute modestly to your overall profits.

Trophy:
Every boss has a trophy, which has a 10% chance of dropping upon its defeat. You could hang it on the wall, sell it for 1 Gold, or hoard them in a treasure chest like the incurable pack rat you are! Or maybe I'm just projecting here...

Destroyer Relic:
This fancy furniture item has a 100% drop rate, but is master mode exclusive. It sells for 1 gold.

Destroyer Mask:
Did you ever want your face to look like a robot worm? Well your dream has just come true! What? You didn't? Well, I guess you could put it on a mannequin, or in an item frame. Or... in the garbage can, since they have no sell value.

Horned God Robe:
Another vanity item with no sell value, this one is old-gen console-exclusive. Each mechanical boss drops one piece of the set, so you'll need to farm them all if you want all three pieces. Each vanity item (including the Destroyer Mask) has a 1/7 (~14.3%) chance of dropping upon their respective boss's defeat.

Mechanical Wagon Piece:
The Destroyer's expert mode exclusive drop doesn't have any immediate practical value aside from a sell value of 50 Silver. Combine the pieces dropped from all three mechanical bosses, however, and you'll create the powerful Mechanical Cart. It should be noted that while the sell values of the individual components are 50 Silver each, the cart itself sells for 3 Gold. Thus, combining the parts and selling Mechanical Carts will earn double profit over selling the pieces individually.

World Changes:
In addition to the items dropped by the Destroyer, defeating your first mechanical boss will cause some changes in the world. If the Destroyer was not your first mechanical boss, then these will have already happened. In the Underworld, Red Devils and Lava Bats will begin spawning, with the former having a small chance to drop the Unholy Trident magic weapon and the latter having a higher drop rate for the Magma Stone than Hellbats. More importantly, Life Fruits, the only item capable of raising your permanent max HP above 400, will begin spawning in the underground jungle. If playing on console or mobile, then they will be available earlier, but defeating a mechanical boss will increase their growth rate.

If the Destroyer is your last mechanical boss, then upon defeating it you will receive the message "The jungle grows restless...", signaling the spawning of Plantera's bulbs in the underground jungle. Breaking a bulb with a pickaxe will allow you to challenge Plantera, and further progress in the game.

Steampunker and Goods:
If the Destroyer was your first mechanical boss, this will also satisfy the move-in requirements for the Steampunker NPC. She can sell you, among other things, teleporters for instantaneous travel, and the Clentaminator, which can purify or create areas of Crimson, Corruption, Hallow, and Blue Mushroom... if you have the money to fuel it. The Travelling Merchant also stocks a few new items after defeating your first mechanical boss.
Final Words
And that concludes 101 Ways to Kill the Destroyer. What do you mean "that's not what it's called"? Well, maybe there aren't 101 ways to kill the Destroyer, but there sure are a ton. If any individual strategy here isn't working out for you, you could use a hybrid strategy instead. Maybe you want to use Water Bolt in a ricochet chamber, but use Orichalcum armor for a significant portion of your DPS as well. Maybe you want to tank the Destroyer with Magic Cuffs and spam high-powered spells instead of using a fast melee weapon.

Or, you could come up with your own novelty strategies. Maybe you want to kill the Destroyer exclusively with damage from a Spore Sac. Maybe you want to fight the Destroyer in a big explosion-proof cage and go wild with bombs and dynamite. Maybe you want to run through the Destroyer lengthwise repeatedly with a minecart while wearing tanky gear. Maybe you want me to end this list because beginning a bunch of consecutive sentences with the same word is your pet peeve. (Disclaimer: None of those methods were actually tested, so I have no idea how well they work).

If you have any questions (or comments, obviously) feel free to leave them in the comment section below, and I'll answer them to the best of my ability (assuming I see them).


VIDEO SUPPLEMENT :
Somehow, I found recording software that can output a mostly stable framerate, even on my lousy computer.

Strategies 1-6:
https://www.youtube.com/watch?v=VAMGnXunzjY&feature=youtu.be

If the video is not working in your browser, use this direct link, removing the space after youtu: https://youtu .be/VAMGnXunzjY
81 commentaires
Piace 11 aout 2023 à 0h30 
ur an insane madman
Spookypizza 30 sept. 2021 à 10h26 
this is overrated...
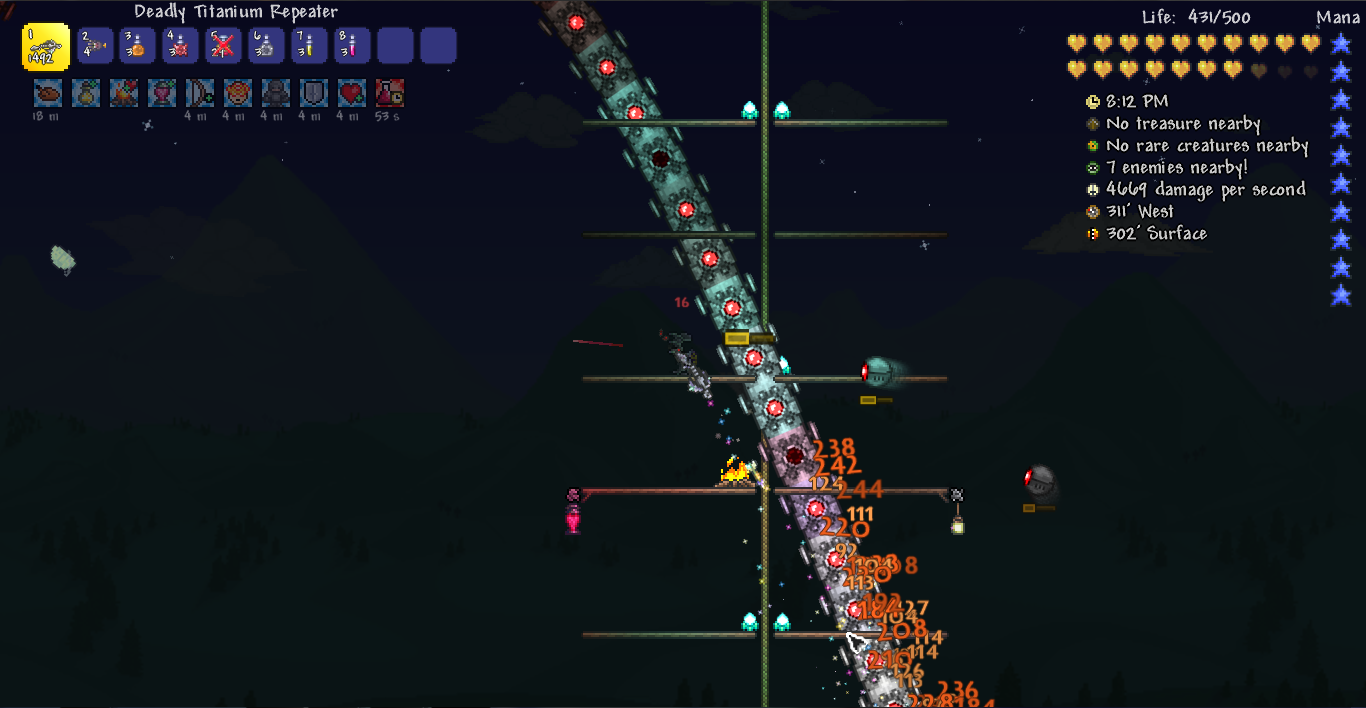
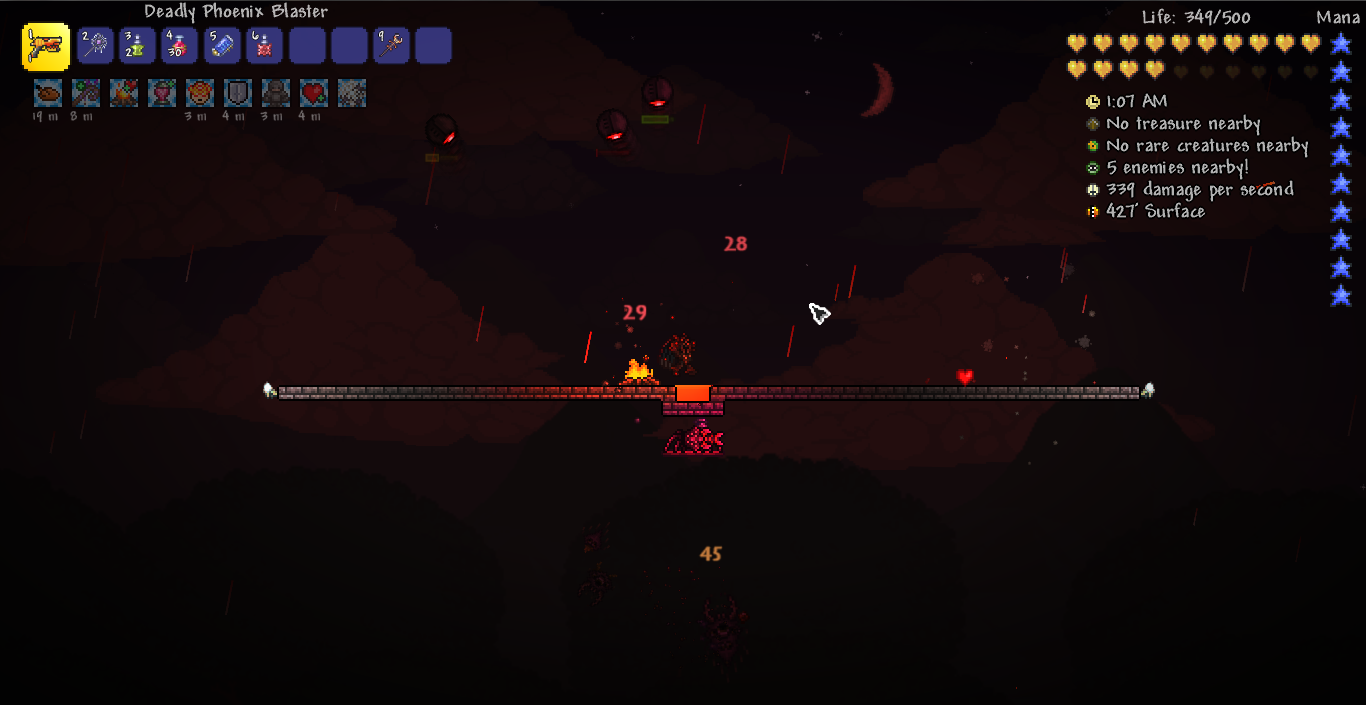
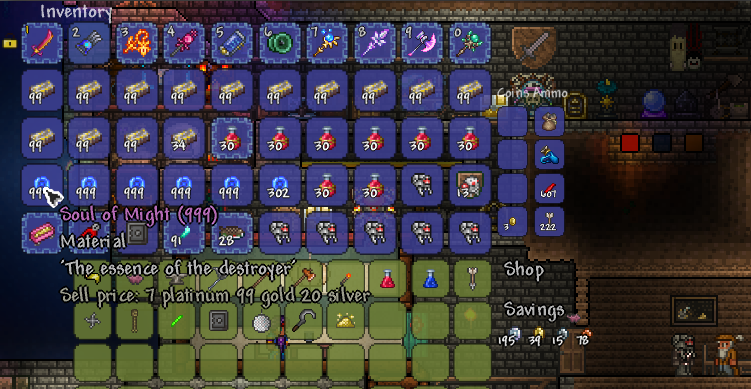
just get a life drain and ichor, some spider staff summons, titanium armor, and summon him. go to him as fast as u can on the minimap, shower ichor, and use the summons. Bewitching table can help. He will spawn in a way all worm type spawn, so take this to your advantege. Keep damaigng hm as long as u can, and ull defeat him EZ PZ. this is literalyl the best and works on EVERY MODE. even master ftw!
RedWalker 2 juil. 2019 à 15h26 
thanks :steamhappy:
Darkstar  [créateur] 2 juil. 2019 à 15h22 
According to the wiki, the Destroyer is 239 blocks long, therefore, the platform should ideally be at least 240 blocks off the ground, perhaps more. One easy way to measure this is to take a stack of rope of the height you want to go (say, 250 rope), and then build up with it while climbing, until the entire stack is used. You can then attach some platforms to it, and build your arena from there.
RedWalker 24 juin 2019 à 12h33 
thanks...how high does the platform need to be?
Darkstar  [créateur] 21 juin 2019 à 16h13 
Okay, ancient reply here (haven't been on Steam in a while):
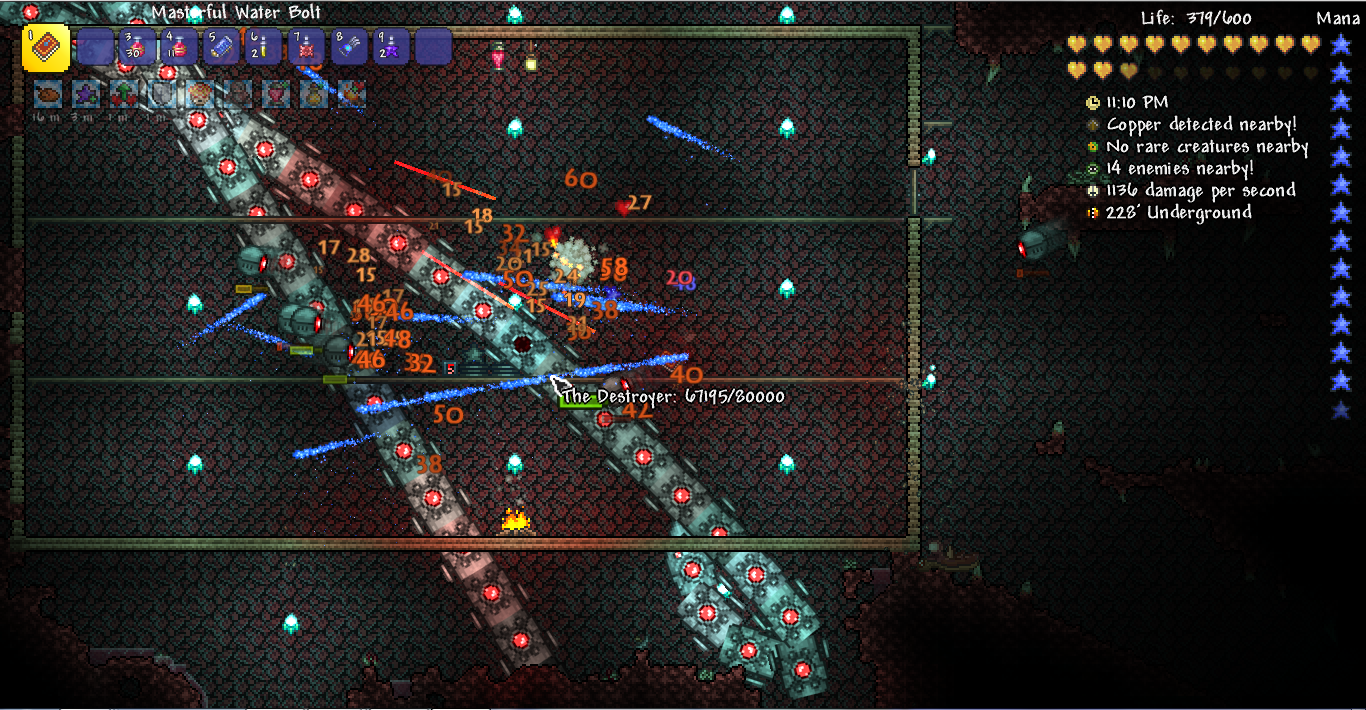
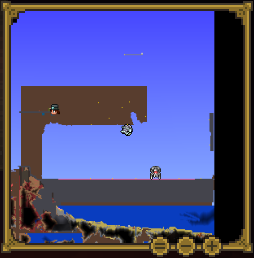
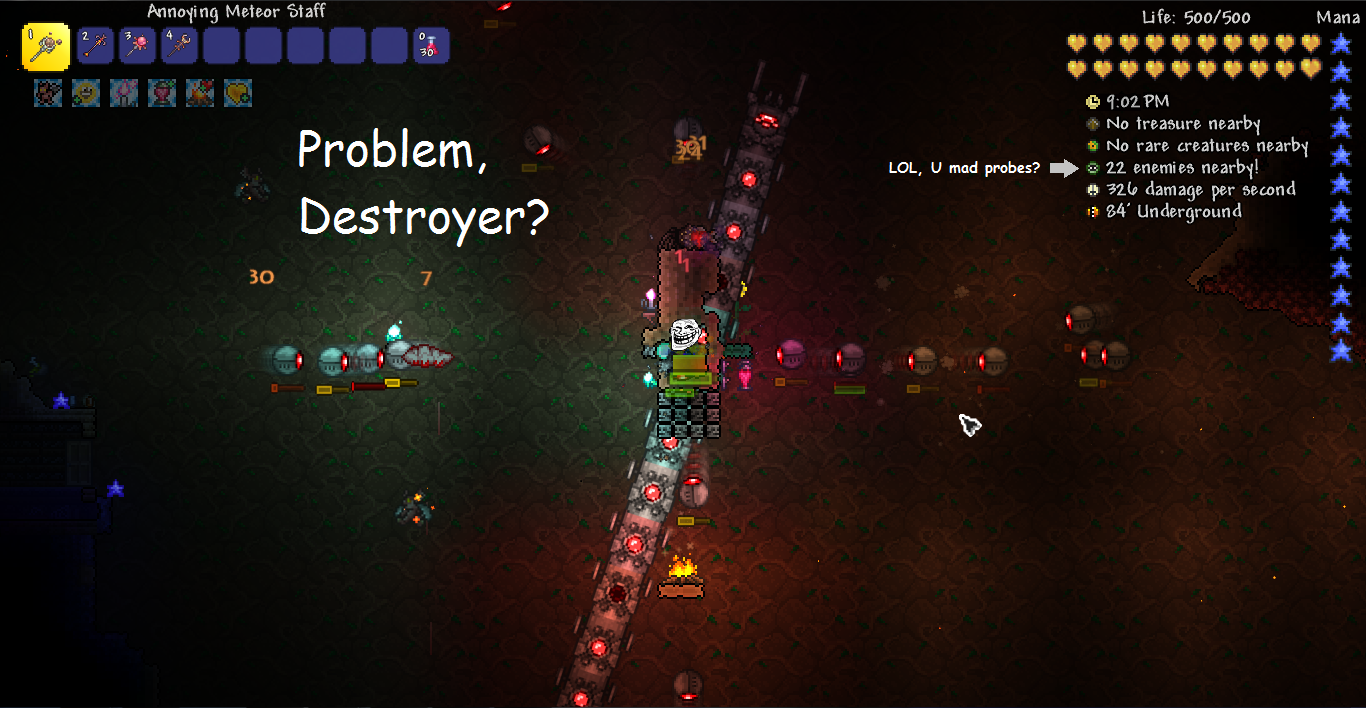
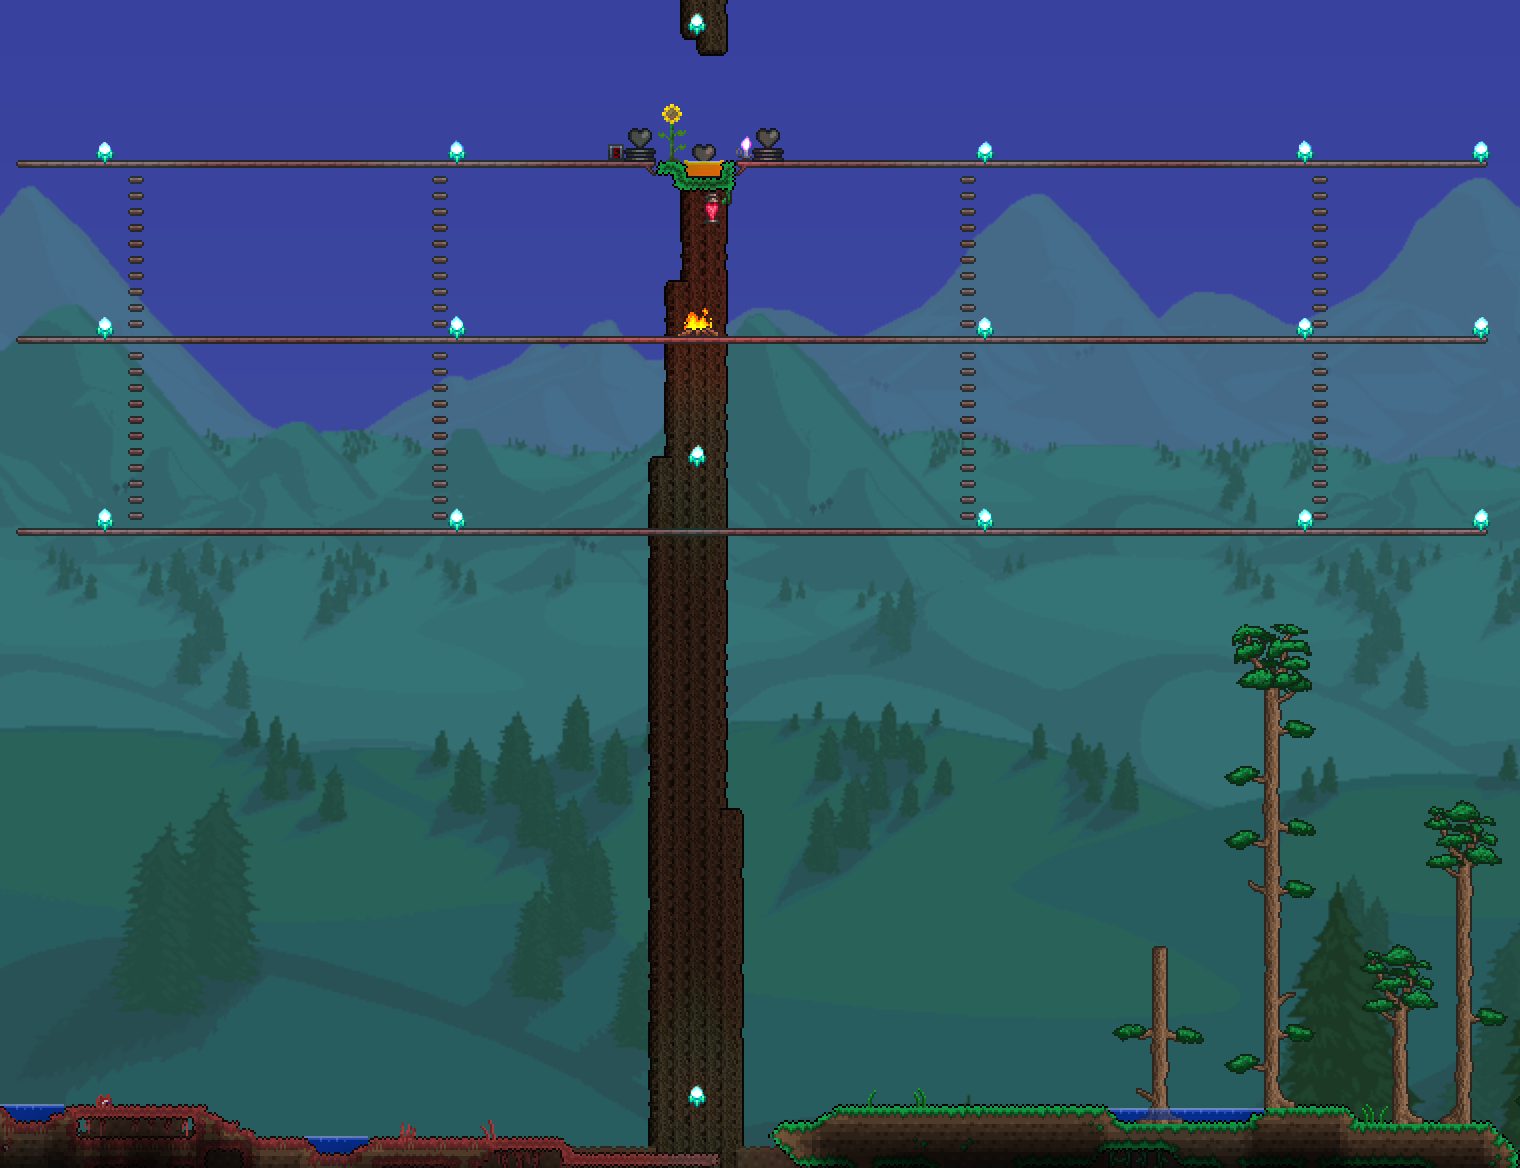
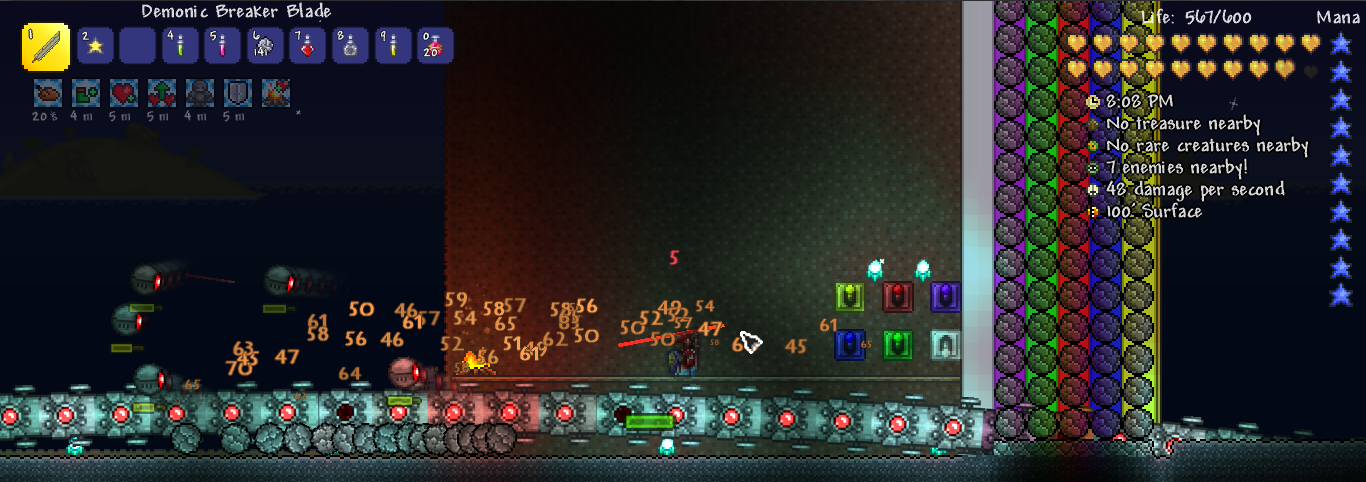
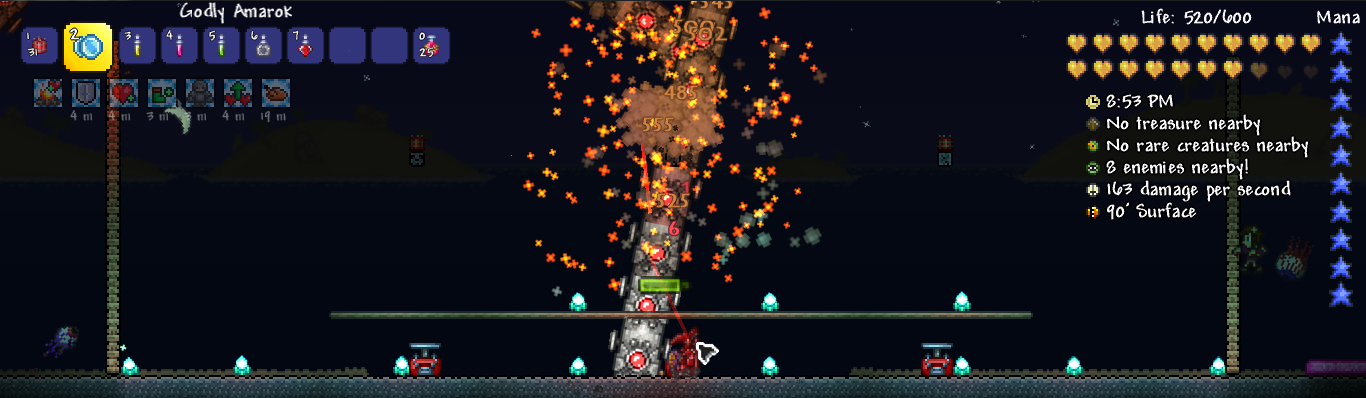
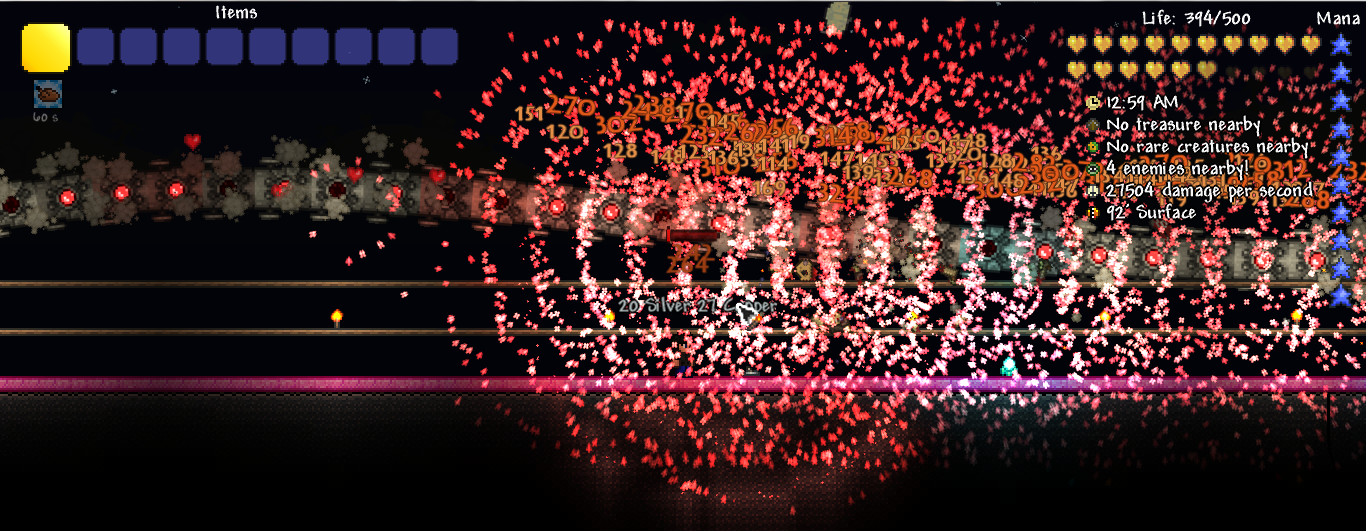
Syltor the wildling: Yes, you can make a platform high enough that it can't reach, as I think is demonstrated in the video, but it can still shoot lasers in your direction (which can be blocked with solid blocks), as well as probes (which pass through blocks). You can let it summon on its own by chance, or use a Mechanical Worm to summon it, which can rarely be dropped by enemies prior to defeating the boss, or crafted.

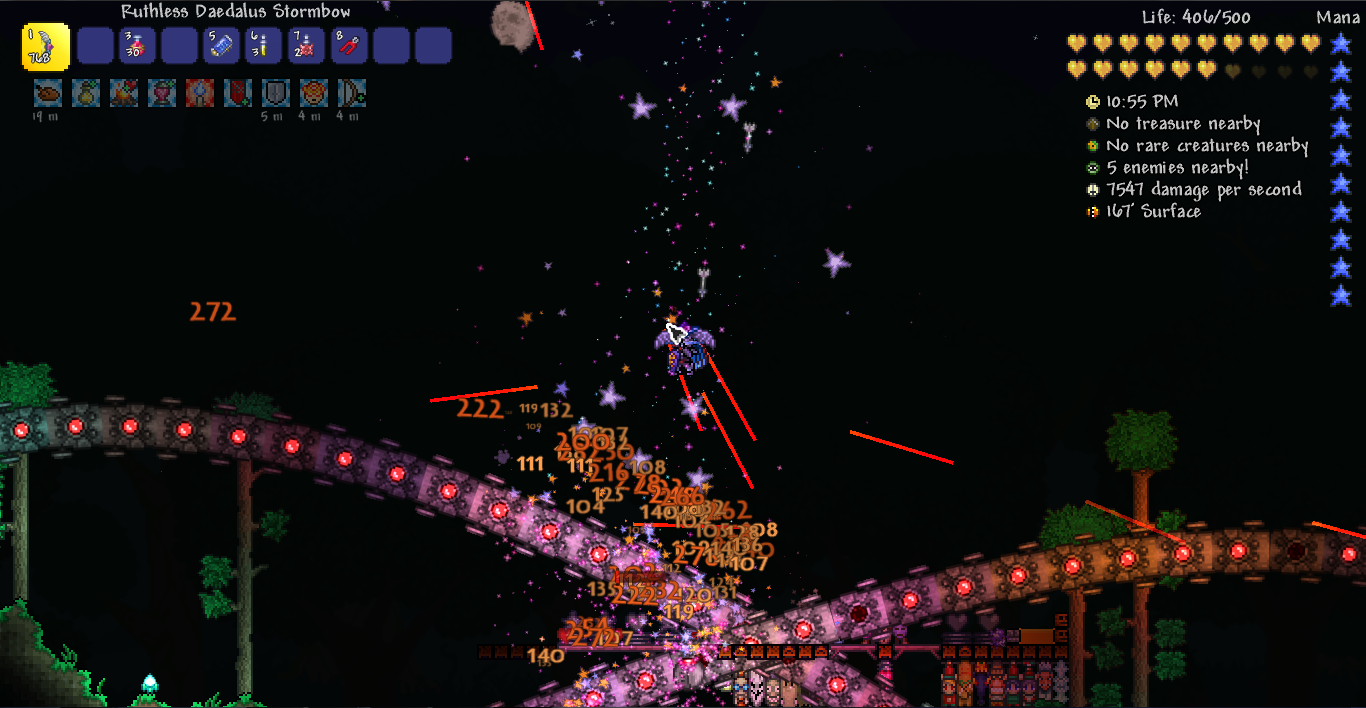
Terrorist: The Daedalus Stormbow is dropped by Hallowed Mimics, and Holy Arrows can be crafted.

I know that both of you probably already figured this out, but I'll leave the answers here anyway, in case other people could make use of them.
E_Esty 15 avr. 2019 à 16h45 
weres the daedalus stormbow with holy arrows?
RedWalker 11 avr. 2019 à 21h10 
and how do you summon it?
RedWalker 11 avr. 2019 à 21h07 
is it possible to make a platform high enough to hit the Destroyer but he cannot hit you?
Delusional Hypocrite 15 sept. 2018 à 20h52 
but still i only fight the destroyer last cause it most difficult for me