Enola
27 ratings
Enola Spoiler-Free Guide (Normal Mode)
By Jill of Trades
Walkthrough, lamps, kills, endings, letters...
   
Award
Favorite
Favorited
Unfavorite
Please read this first!
Need help finding the third ending! Please post if you know something!

http://steamcommunity.com/app/263520/discussions/0/405693392904833549/

About Game:
First off, if you were a victim of ra-pe, sexual abuse, child abuse, and/or any of above, it is best not to play this game. Steer clear from it. This will probably trigger your past moments. I know there are people in this world who are victims of such things, and playing this made it feel so real. I'm not kidding.

About Guide:
This guide covers Normal Mode. If you are playing Nightmare Mode, then the gameplay may differ from this guide. This guide will list the walkthrough for Normal Mode. Also, it will cover save points, lamps, letters, and possible bugs and how to work through them.
What is Normal Mode?
Normal Mode is the original game. It has two possible endings that depend on how many people you kill. Comparing to Nightmare Mode, the gameplay is slightly more condensed and easier. Normal Mode does not include the crystals, which are found only in Nightmare Mode. The story varies at the end of the game.

If you are not playing Normal and looking for the guide for Nightmare Mode, go here:
http://steamcommunity.com/sharedfiles/filedetails/?id=636205072
List of bugs by stage.
Before going through the game or pursuing further, I recommend checking this section for game breaking bugs.

Stage 4: Church
Bug Type: Glitch. Can be ignored.
You may come to a moment where you no longer have [Medal with Small Child] in your inventory. You will still have it bound to you once you pick up three medals coming up.

Bug Type: Glitch. Possible startover.
When picking up the [Key with Angel Face], you can avoid the shadow figure. However, if you return to the room, he is still there. He won't attack you, but may corner you, and you won't be able to move. The only option is to exit to the main menu and continue from your save.

Stage 7: Factory
Bug Type: Glitch. Can result in game over.
On the Wheel Puzzle, there is a bug with the puzzle that if you click on the wheel right when you get the room, the clock still ticks and when it runs out of time, you'll still die even if you go through the door.

Stage 8: The Island (Construction Site)
Bug Type: Glitch. Can result in game over.
In rare cases when trying to climb down a ladder, you may instantly jump all the way up in the air and fall down. Once you fall onto the ground, you'll die.

Stage 9: The Tower
Bug Type: Glitch
If the black gate doesn't open at the playground and you have the key, exit the game and try again.

Bug Type: Glitch. Can result in game over.
When climbing the last ladder, you may jump up a bit or fall down. Depending where the blade is, you'll either be safe or it's game over.
Quick Perfect Run Sheet
Just want to be sure you got all the lamps and letters in each stage? Here you go!

Stage 2: Island
*Note: This excludes the one near the entrance of the church. You will get it before entering Stage 4: Church*
LAMPS: 5
LETTERS: 6

Stage 3: Lake Cabin
*Note: Make sure you have 10 lamps before going down the elevator. The last one will be down below.
LAMPS: 11
LETTERS: 13

Stage 4: Church
LAMPS: 17
LETTERS: 24

Stage 5: Midnight Heaven
*Note: Before taking the elevator going down, be sure you have 21 lamps. The last one will be after exiting the elevator*
LAMPS: 22
LETTERS: 29

Stage 6: Underworld
LAMPS: 26
LETTERS: 33

Stage 7: Factory
LAMPS: 30
LETTERS: 42

Stage 8: The Island (Construction Site)
LAMPS: 32
LETTERS: 42

Stage 9: The Tower
*Note: Before entering the black gate, make sure you have 41 Lamps. The last one is within the maze near the small building*
LAMPS: 42
LETTERS: 42
Controls
ESC - Pause
i - Inventory
Left Ctrl - Crouch
W,A,S,D - Movement or combat
Shift - Hold to run
Left click (Right click if 'invert mouse' is enabled) - Pick up or read item.
Stage 1: Home...?
(OPTIONAL)When the game starts, feel free to explore the room on your left to give you a hint of the story. The next room, when trying to open the door, will have some dialog. The doors on your right once the game starts will have some dialog as well.
(OPTIONAL)Possible bug: Upon leaving the room, there is a possibility the couch and carpet will disappear. This is possibly due to a "Field of Vision" glitch.
Go up the stairs.
(OPTIONAL)On your left, you can go in the room. Again, the doors in the room will have some dialog as well.
Head to your right and go through the door.
Once in the room, go through the next door that is opened.
Go to the white table. There is a key and letter on the table. LETTER #1
Pick up [Rusty Key].
Leave the room.
Go down the stairs.
Open the door with the padlock on it. [Rusty Key] will be used.
Go through the hallway and through the tunnel.
Stage 2: The Island
Once the map loads, head to your left towards a cage. There will be figures reaching out books outside of the cage that contain pictures. LETTER #2, #3, #4, #5
Continue your way to the same direction. There will be a shining object ahead.
This is a LAMP. You will come across many of these throughout the game. Be sure to pick up as many as possible to know more of the story and an extra scene when you finish the game!
Pick up LAMP #1.
After picking up the LAMP, continue the same direction towards the music.
You will come across a MUSIC BOX. This is considered a save point for the game. Be sure to save as much as possible throughout the game, as you will come across many obstacles!
Click on the MUSIC BOX to save.

After saving, go back to where your first LAMP was. Head to the path that is ahead to your left.
On the trail, there is a LETTER on the ground. LETTER #6.
Continue on the trail until you see a broken lantern on the ground.
From there, head right and go over the wooden bridge.
Head towards the house and go inside.
On the first floor behind the staircase, go inside the room.
There is a LAMP on the chair. Pick up LAMP #2.
On the right side of the house upon leaving, there is a MUSIC BOX.
From the MUSIC BOX, head straight ahead until you come across another LAMP on the fountain.
Pick up LAMP #3.
From the LAMP, head to your right.
Continue the same direction past the fenced machinery.
After coming across the amusement ride, look to your right to see a LAMP on the benches.
Pick up LAMP #4.
Head back to the house.
Go to the MUSIC BOX.
From there, head northwest. You will come across a cabin.
Go to the other cabin behind it. From the entrance, as if you were leaving the cabin, head straight until you hit a large object. From there, take a right. There is another cabin ahead.
Go inside the cabin. There is a LAMP on the table.
Pick up LAMP #5.
(OPTIONAL) Upon leaving the cabin where you picked up LAMP #5, head left towards a caged area. You will see another LAMP, but you cannot get it currently. Head behind the caged area. There will be a MUSIC BOX on a lone rock.

Head back to the first cabin you came across (the one with writing behind it and a fire near the entrance).
Go inside the cabin and go through the door. You will be in another area.

PERFECT RUN CHECK:
LAMPS: 5
LETTERS: 6
Stage 3: Lake Cabin
Go through the long hallway and climb up the ladder.
When you finish climbing, there will be a LAMP on the ground to your right.
Pick up LAMP #6.
Go through the door.
Head straight towards the light.
Pick up [Flashlight].
Turn around and head towards the white table. There is a MUSIC BOX on it.
Go through the next door that isn't blocked.

Stage 3.1: House
After the scene, head straight.
There is a ring on the table with notes.
Pick up [Golden Ring].
There is a LAMP on another table nearby.
Pick up LAMP #7.
Behind the LAMP, there is shelf with a LETTER. LETTER #7.
Head back to where you came. Head to the first door on your right (upon where you first entered the area.)
When entering the room, there is a door to your left that leads to an elevator. Keep note of that.
Turn right and go down the stairs.
After you come down, there is a LAMP straight ahead.
Pick up LAMP #8.
After picking up the LAMP, go through the door to your left.
Turn right and go through the next door.
Again, go to the next door to your right and head down the path.
There is some [Pieces of Wood] to the right of you on the shelf.
Pick up [Pieces of Wood].
There is also a MUSIC BOX in the room.

Head up the path and leave the room.
Head to the otherside of the boiler.
Go to the area with a small metal door. It will automatically open as you try to approach it.
(OPTIONAL)Possible Bug: If the door does not automatically open, restart the game.
Use [Pieces of Wood] on the opening of the door.
Step back and the door closes. Go to the wheel on the left side.
Click on the wheel. The boiler will work now and the electricity will be on.
Leave the room.
As you leave the room, there is a key on the table to your left.
Pick up [Key With Doll Face].
Continue through the other door.
Go through the stairs and take the door to your left to return to the large room.

Stage 3.2: Doll Area
Go up the stairs and through the door. [Key With Doll Face] will be used.
Follow the trail of papers and go through the door.
Upon entering, there is a LETTER in the shelf to your right. LETTER #8.
Continue straight. There is another LETTER that is on the desk. LETTER #9.
Turn left, and there is another LETTER on the next book shelf. LETTER #10.
Leave the room and head straight through the door on your left.
There is a MUSIC BOX on the table in the room.(SAVE RECOMMENDED!)
Head through the next door on the left.

On your left there are some guns. On your right there is an incomplete picture with two buttons.
(RISK OF DEATH ONCE YOU ACTIVATE PUZZLE!)
There are many ways to solved this. Here is one of them:
Right, Left, Left, Left, Right.
Once the picture is complete, you'll hear a noise. Leave the room.
The door that was previously barred is now accessible. Go through the door.

After the scene, look to your right. There is a LAMP on the table.
Pick up LAMP #9.
On the side of the bed, there is a small table with a leafy object.
Pick up [Golden Laurel Crown].
Leave the room.(SAVE RECOMMENDED!).
Go through the door to your left to leave the area.

(FIGHT!)This will be your first fight with a shadow figure. Start mashing the "W,A,S,D" keys and keep left clicking. If you fail to mash the keys and left click, it's game over and you will have to start from the previous save point.

After the fight, continue down the hallway and head through the door to go back to the large room with stairs.
After the scene, head down the stairs.
From there, head through the left-most door.

Stage 3.3: Three Paths, Three Gifts
Head to the end of the hallway. Press the button on the side and wait for the path to be accessible.
Head straight to the caged pathway. There is a LETTER on the side. LETTER #11.
Turn around and go through the path again. Press the button once.
Follow the path and go through the door.
After the scene, leave the room.
Press the button once, follow the path, and go through the door.
In the room, there is a table in front of you with a [Red Rose] on it.
Pick up [Red Rose].
Leave the room.
Press the button once to head back to the area with the cage.
Use [Golden Ring], Use [Golden Laurel Crown] and Use [Red Rose] on the mannequin.

The path nearby is now accessible. After the scene, head downstairs.
There is a LAMP to your right.
Pick up LAMP #10.
Head through the door to your left.
There is a key on the table. Pick up [Elevator Key].
Leave the room and go through the other door in the hallway.
After the scene, leave the room.
Head up the stairs and through the path, upstairs, and through the door. Press the button once to head back.
Continue to the other side of the room and go through the door. You will be back in the room with the stairs again.
Head straight to go through the door. (SAVE RECOMMENDED! Do you wanna do the button path thing again? Didn't think so.)
Leave the room and go through the door to your right.
Go through the door to your immediate left.
Go inside the elevator. There is a keyhole below the buttons.
Click on the buttons. [Elevator Key] will be used.

Stage 3.4: Down Below through the Elevator
After the elevator opens, circle around it until you see a rod on the ground.
Pick up [Old Lever].
Go through the door with the stone(gray) border.
On your right, there is a LAMP on the table.
Pick up LAMP #11.
Leave the room.

Go through the second door in the elevator room.
Go straight and head down the stairs.
(OPTIONAL) You can go into the room on your right and explore.
Continue the way until you're in the room with some shelves.
Go to the left-most shelf and head to the back. There is some sort of gear you can pick up.
Pick up [Old Gear].
Go up the stairs and exit the path. Once you see the large room, turn left and go through the next door.

On your right, there is a table with a LETTER. LETTER #12.
Continue straight and go through the door.
Go down the stairs. There is another table with another LETTER on your left. LETTER #13.
Continue the path and go through the door.

?KILLER? There is a small vault ahead holding the item. To your right there is a lever with a heaven's gate symbol on the wall. To your left, there is a lever with a fire symbol on the wall. Please note that from here on out, whether you kill people or let them live will affect your ending. NOTE: This kill will count as two on killcount!

After you make your choice, the vault will open there will be two keys inside.
Pick up [Gear Shaped Key] and [Key with Symbol].
Retrace your steps back to head to the large room.
Go to the machine on the wall that is to your left.
Use [Old Gear] on the gears.
Use [Gear Shaped Key] on the buttons with the keyhole.
Use [Old Lever] on the hole with the missing lever.
Click on the lever to pull it down. The door nearby will be accessible.
Go through the door.

PERFECT RUN CHECK:
LAMPS: 11
LETTERS: 13
Stage 4: The Church
After leaving the Lake Cabin stage, head back to the area in The Island where the house was. From the MUSIC BOX on the side, head northwest until you come across a caged area with a white X inside a white circle.
Open the gate. [Key with Symbol] will be used.
There is a LAMP on your left.
Pick up LAMP #12.
Go through one of the three doors.

Stage 4.1: Sanctuary
Upon entering, there will be a LETTER in front of you on a table. LETTER #14.
On the right side, there is a MUSIC BOX.
Head straight ahead to the throne. Turn around. Go to the first set of benches on your right.
One of the robed figures is holding something in their palms.
Pick up [Rusty Key].
From the throne, facing the robed figures, go left and enter the door. [Rusty Key] will be used.

Go straight to the fenced bedroom. There is a LETTER on the desk. LETTER #15.
Go to the other side of the staircase.
There is a LAMP in the back on the right side.
Pick up LAMP #13.
Heading away from the LAMP, go to the door on your right.

Stage 4.2: Courtyard
Go up the stairs and go right.
Go through the first door you see.
There is a MUSIC BOX in the room.
Leave the room and go near the fountain.
To your right, there is a LAMP on the bench.
Pick up LAMP #14.
Go to the three benches near the fountain. Two of them have two LETTERS. LETTER #16, LETTER #17.
On the left side of the last door, there is another bench with another LETTER. LETTER #18.
Head back to the room with the MUSIC BOX. (SAVE RECOMMENDED!)
Go through the last door.

Go down the stairs and crawl under the blades. If the blades hit you, you'll die. For safety measure, stand up until you're on the next set of stairs.
Go down the next set of stairs and stay on the side of the grates. If you hit the grates, spikes will come up and kill you.
At the end of the staircase, go through the door.

Stage 4.3: Mausoleum
In the hallway, there is a MUSIC BOX.
Go down one of the two stairs on your right. There is a LAMP on the floor near the wall in the room.
Pick up LAMP #15.
In the lit area, there is an altar with a cup and a LETTER. LETTER #19.
Click on the cup.
After the scene, head back up stairs and go to the room, now lit, where you see a coffin.
In the coffin, there is a key.
Pick up [Blue Star Key].
Leave the area.
Head all the way back up the stairs. Remember to not step on the grates and be sure to crawl under the blades.
Go through the door in the top floor.
Go to the MUSIC BOX room and save (RECOMMENDED!).
Head down the stairs to leave the courtyard.

Stage 4.4: Blue Star
Go down the staircase and open the door. [Blue Star Key] will be used.
Head to the light area straight ahead.
In the hall, there is a key on the table.
Pick up [Key with Angel Face].

(FIGHT!)Remember that the battles with shadowy figures will get harder each time. Remember, mash the "W,A,S,D" keys and click the left mouse button!

After the fight, head straight into the dark area and through the fence. There is a LAMP on the roller bed.
Pick up LAMP #16.
Look near the lit statue on the wall, the third one to your right. There is a coin in front of it.
Pick up [Medal With Small Child]
Leave the dark area and exit the room.

Head back to the courtyard and go back to the room with the blades again.
Head down the stairs and crawl under the blades.
Open the door with an angel on it. [Key with Angel Face] will be used.

Stage 4.5: Angel Room
There is a LAMP straight ahead of you.
Pick up LAMP #17.
Go through the first door on your right.
There is a safe and a LETTER on the table. LETTER #20.
Leave the room and continue down the hallway until you see a LETTER on the fence to your right. LETTER #21.
At the end of the hallway, there is a MUSIC BOX on the table (SAVE RECOMMENDED!).
Head back to the end, turn around and take the first door on the left.

Go to the side of the shelf and click on it to push it.
Go down the hallway and through the door

RISK OF DEATH!
This puzzle is a mathematical puzzle. Basically, it's one to make the equation true, which is a weird one.
To solve it, press the 21 on the wall, then the 7, then 29.
After you solve it, you can go through the other door.
On your right, there is a table with a coin on it.
Pick up [Medal With A Machine].
Head back out of the puzzle room, through the hallway, and through the door.
Take the next door to your left.

There is a MUSIC BOX to your left (SAVE RECOMMENDED!).
Crawl under the spinning blade, towards the next open door.
On the white dresser, there is a LETTER. LETTER #22.
The LETTER mentions something about 2 weeks, 14 days, and 336 hours. Remember this for later.
Crawl again under the blade to go to the end of the hallway.
There is a coin on the roller bed.
Pick up [Medal With A Woman].
Crawl under the blade to make your way back to the entrance, towards the MUSIC BOX (SAVE RECOMMENDED!).
Leave the room

Head through the door that is straight ahead to your left.
There is a LETTER on the white dresser. LETTER #23.
The LETTER contains symbols similar to the ones on the vault.

Leave the room.
Go through the double doors at the end of the hallway.
There is a LETTER on the table straight ahead. LETTER #24.
On the left side of the room, there is a knob on the white table and a photograph.
Pick up [Metal Rod].
Leave the room and return to the room with the vault.

Days, Hours, Weeks.
Apparently, the vault has three symbols. The total number that fits would be hours.
Put in the code with the symbols. Basically, hit the first and second one three times, then the last one six times.
Once the code is put in correctly, which is 336, the vault will open.
Inside the vault, there is another medal.
Pick up [Medal With Weird Shape].
Head out of the room and leave the area.

Head back to the church entrance by crawling under the blades to get back to the top area.
Leave the room.
In the courtyard, go down the stairs and go through the door.
Head northeast and go through the door to get back in the sanctuary.

Stage 4.6: Sanctuary (Medal Puzzle)
Upon entering back in, go to your right and you'll come across a box on the wall.
Click on it. Apparently it is a vault with another puzzle.
According to the story, you have to place the medals in a certain order.
From left to right, place the following in the order:
[Medal With A Woman], [Medal With A Machine], [Medal With Small Child], [Medal With Weird Shape].
When solving the puzzle successfully, it will open. There is a key in there.
Pick up [Green Key].
Behind the throne, open the double door. [Green Key] will be used.

PERFECT RUN CHECK:
LAMPS: 17
LETTERS: 24
Stage 5: Midnight Heaven
After going through the door, you'll be back on The Island.
Head left towards the cage, then go northeast until you come straight to a cliff.
There is a pedestal on the ground.
Use [Metal Rod] on it.
Go across the platforms after they're up.
Upon crossing, there is a LAMP to your left.
Pick up LAMP #18.
From there, head northeast until you come across a tower.
There is a MUSIC BOX near the door on the table.
Go through the door.

Stage 5.1: Lounge
Stop drooling, continue the path, and head through the door.
After the scene, you'll be back to the same spot upon entering.
There is a LAMP in front of you on a white table.
Pick up LAMP #19.
There is a MUSIC BOX on the right side of the room.
Continue the path and there will be a staircase.
Go down the long staircase. It will take a while, but you'll reach the end.
Go through the door when you come across it.

Head across the room and go through the door that's on the left of the jukebox.
You'll be back in the lounge again, only it is different.
Head straight to the area with the three chairs and table that are covered.
There is a rod on the table.
Pick up [Spikes Rod].
There is now a LETTER next to the jukebox. LETTER #25.
The MUSIC BOX is now behind the bar on the shelf (SAVE RECOMMENDED!).
Go through the door behind the bar.

Stage 5.2: Personal Rooms
Go through the first room on your right.
On the wall on a plank of wood, there is a key hanging.
Pick up [Costumes Room Key].
On the second hall to your left, there is a note on the wall near the elevator. LETTER #26.
Continue down the hallway and go through the door on the right after 'Sarah.'
There is a LETTER on the bed. LETTER #27.
Leave the room and go through the door that says 'Mari.'
Approach the figure. There is something in the mouth.
Pick up [Golden Rings Rod].
Leave the room.
(RISK OF DEATH!) Once you go to the end of the hallway, the path will be blocked behind you.
Go to the right-most room that is openned.
There is a LAMP on the dresser.
Pick up LAMP #20.
Slowly walk out of the room until you see a figure. Get back in the room once it turns its head.
Wait until the figure walks to the next room.
After you no longer see it, go to the other end of the hallway.
(If the figure sees you, dodge him and go to the far right room that is open and crouch behind the crates. YOU CANNOT WIN THE FIGHT AGAINST IT!)
There is a bottle on the table to your left.
Pick up [Wine Bottle].
Press the button on the wall and quickly go crouch behind the crates.
Wait until you hear the footsteps fading away.
Once you no longer hear footsteps, head out of the room.
The path is now openned again.
Head to the end of the hall, if you hear a voice behind you, start running towards the door at the end and go through.
(SAVE RECOMMENDED!)
From the bar, head straight and go through the door to your right.

Stage 5.3: Costumes Room
Continue to the end of the hallway and open the Costumes Door. [Costumes Room Key] will be used.
On the group of mannequins back to back, there is a rod on the floor between one of the mannequin's feet.
Pick up [Knife Rod].
Head through the door on your right.
Go down the hall until you see a LAMP on your right.
Pick up LAMP #21.
Head through the door that was on your left.
Ahead, there is a LETTER on the table to your right. LETTER #28.
After the scene, head to the next table. There is a heart-shaped key in the small box.
Pick up [Heart-Shaped Key].
Leave the room.
(FIGHT!) Mash the "W,A,S,D" keys and left click as much as you can!
Head to your right to leave the room.
Upon leaving, you noticed that your flashlight is broken. (The dialog means your flashlight, not the LAMP in the area.)
Go through the door, then go through the door that is on the other side of the room.

In front of you, there is a LETTER on the table. LETTER #29.
On the other table, there is a thin faucet.
Use [Wine Bottle].
Press the button on the wall that is in between the tables.
After it finishes filling up, pick up [Wine Bottle With Red Stuff].
Leave the room, and head through the door that is straight across the room.
Continue down the hallway to your right and go through the door that is on your left.
Go to the side of the machine with the funnel.
Use [Wine Bottle With Red Stuff].
Press the button on the machine.
Leave the room, head right, and through the door.
Head through the door on the left.
Go down through the hallway and through the door.
(OPTIONAL) There is a chance where the figure will come after you behind you, so just run!
Go through the door.

Stage 5.4: I'll Put on the Music
(SAVE RECOMMENDED!)
Go to the jukebox. There is another puzzle.
According to the LETTER by it, it describes the order.
From left to right, here is the order of the three rods you have to place:
[Golden Rings Rod], [Spikes Rod], [Knife Rod].
Upon successfully solving the puzzle, which is indicated by the flashing rods, go through the bar door.
Go to the elevator located on your left.
Press the button to activate the elevator.
In the elevator, press the buttons on the wall.
After the elevator finishes, you'll transport to another room.
There is a LAMP on the left on the table.
Pick up LAMP #22.
Go to the end of the room, pull the lever that is on the left side of the door, and go through.

PERFECT RUN CHECK:
LAMPS: 22
LETTERS: 29
Stage 6: Underworld
Upon entering the previous path, you will be teleported back to The Island.
Head straight to the pedestal that is near the vault door.
Click on the keyhole with the gold heart symbol. [Heart-Shaped Key] will be used.
Wait for the vault door to open and then go through.

Follow the path until you come across a pond.
Look behind the rock on the left side, There is a LAMP behind it.
Pick up LAMP #23.
Continue on the path and go across the bridge.
There is a MUSIC BOX on the rock to your right.
Continue the way until you come across some wooden fences.
(OPTIONAL)Follow the path to head into the cabin. Explore it if you want.
Head straight into the elevator. It will automatically go down.
After the scene, continue the path. You won't be able to run for a bit.
Go through the cracked wall. There is a MUSIC BOX on the crate (SAVE RECOMMENDED!).
From there, follow the path to go up some stairs.
(FIGHT!) Before you head up to the stairs, you will come across a shadow figure.
Continue climbing the set of stairs.
Continue the path until you come across a room with a hole.
There is a MUSIC BOX to the right of you on the table (SAVE RECOMMENDED!).
Jump down the hole.

This looks familiar. Head straight to leave the room.
There is a LAMP near you to your right.
Pick up LAMP #24.
Head up the spiral stairs.
Head to your right and go through the lit room.
On the white desk, there is a key.
Pick up [Rusty Key].
Leave the room and go straight to go through the other door. [Rusty Key] will be used.
After the scene, go to the end of the room and go through the tunnel.
Continue the path, past the fire, and through the upcoming hole to get into another area.
Head down the stairs, turn right, and go behind the staircase.
Make a turn. There is a LAMP on the side of the staircase.
Pick up LAMP #25.
Head back to where you came down the stairs and go straight to the elevator.
Press the buttons on the side of the elevator.
Go inside and press the buttons on the wall.

When in the next area, there is a LAMP in between two stairs to the left of you.
Pick up LAMP #26.
Across from the elevator to the other side of the room, there is a MUSIC BOX on a thin table (SAVE RECOMMENDED!).
Stage 7: Factory
Stage 7.1: Offices
Continuing from Underworld, you are in a different area.
From the MUSIC BOX, head through in between the stairs.
Go through the two doors straight ahead, then take a left from the upcoming elevator.
Go through the door. On your left, there is a lever on the wall.
Pull the lever by clicking on it.
Head back to the entrance where you went in between the stairs and go through the next path.
Upon going through the opening, turn immediately right and go in the room.
There is a LAMP in the room.
Pick up LAMP #27.
Leave the room and continue the path until you come across a set of stairs.
Go down the stairs.
Go through the opening and continue the path until you come across a lever to your left.
Pull the lever.
Open the elevator by pressing the buttons on the side.
Go in the elevator and press the buttons on the wall.
Exit the elevator once you reach the end. You'll be in the same area where you went to pull the first lever.
Go left, then turn left again to go back to the set of stairs.
Go up the stairs.
Upon entering the hall, turn left and go through the room straight ahead.
There is a LAMP in the room.
Pick up LAMP #28.
Head out of the room and go left, then right towards the door on the wall.
Go through the door. If the door is still locked, then double check to make sure if you pulled both levers.

Stage 7.2: The Test
Go through the door to your left.
Go down the hallway until you come across a door.
To your left, there is a MUSIC BOX on the table.
Continue at the end of the hall until you come across an elevator.
Press the buttons on the side of the elevator and go inside.
Press the buttons inside on the side of the elevator door.
Go down the stairs and click on the phonograph to your left. LETTER #30.
Continue the path until you come across a silo.
Head right on the circular path of the silo. Continue until you can cross to the other side.
Cross on the other side and continue straight. Turn right and go up the stairs.
There is a MUSIC BOX on the left side on the table (SAVE RECOMMENDED!).
Go through the openning and drop down.
?KILLER? Read the LETTER on the wall. LETTER #31.
You have the choice to kill or spare the person. Remember, the decisions you make will affect your ending.
(There is a glitch in the game where you'll no longer see the people when you exit the game. As long as you save and read the letter to either spare them or kill them, it will still count.)
In the next room, there are three buttons you have to press in order to exit the area. The one on the left is the hardest, so it's best to start with that one first. You...did save right?
Go to the left to stand beside the first pounding pillar. After the second one rises up, go to the wall, press the button, and run back fast.
Head to the other side and crawl under the pipes. Wait until the pillar rises up to go to the other side.
Press the button on the wall.
Make your way back once the pillar is high enough and crawl under the pipes.
Go across the center pillar until it is high enough, and turn left to the path.
There is a button ahead, but the pillar is over it. Once it is safe to go across to press it, run to press the button and run back.
(There is a glitch. Once you exit the game, you will have to solve the puzzle again to get out of the room, so try to avoid this area!)
The door is now opened in the room to get out. Be careful when making a break for it, as alongside the wall in the other room, there is a blade on the right side upon entering.
Once the pillar that is blocking the door goes up, go through the door. Remember the blade! Crouch down once you enter the room to avoid the blade.
Ignore the first room you see and continue straight ahead.
Go through the room on the left. There is a MUSIC BOX on the table (SAVE RECOMMENDED!).
Leave the room until you see a grate with a lever.
Run across the grate while clicking to pull the lever.
(SAVE RECOMMENDED after you pull the lever!)
Once you pull the lever, head back to the room you skipped. Remember to watch out for the blade!
Go up the stairs.
?KILLER? There is a LETTER on the wall. LETTER #32.
Make your choice and leave the area by retracing your steps to go over the grate.

Stage 7.3: Collect Them All
Follow the trail on the right to head back to the previous hallway, but instead of going straight, take a left.
Go down the hallway and go through the door.
There is a card on the floor to your left.
Pick up [Astrid Tarot Card].
Go on the elevator and press the button.
Once it reaches on the second floor, jump down on the grate and go through the door.
Go straight through the path and through the door. The lever on the wall will not work.
There is a card on the floor in front of you.
Pick up [Caleb Tarot Card].
Leave the room and cross the path.
Go through the door.
Jump down to the floor by jumping down on the pipes and boxes.
Get on the elevator again and wait until it reaches the top floor.
Walk across the grate and go through the door.
There is a LAMP straight ahead.
Pick up LAMP #29.
Head to your left, and at the end, take a right.
Go through the next room in front of you.
?KILLER? There is a LETTER on the wall to your left. LETTER #33.
After you make your choice, leave the room and take a left.
Follow the path until you come across an elevator. Press the buttons on the wall.
Wait for the elevator to come up, then go in.
Press the buttons on the wall.
Head straight, take a right, then another right (where you see a stained-glass window).
Go into the stained-glass window path, then drop down onto the floor.
Continue, then take a left and go up the ladder.
Straight ahead, there are some pictures with a lever. On the other side, there is a MUSIC BOX on the table (SAVE RECOMMENDED!).
Pull the lever.
Before dropping down into the next room, pay attention to the spinning blade below. Once the blade isn't near, drop down.
Once you're down, take a left. DO NOT RUN!
There is a spinning blade right on the turn. Crawl under to get to the next room on the left.
On the next room, there are two spinning blades and grates in between them. There is a LETTER on the wall on the other side.
Once the blades are on opposite sides, run across the middle to get to the other side.
?KILLER? Read the LETTER on the wall. LETTER #34.
After you make your choice, follow the same strategy to get back on the other side.
Take a left to go into the other path.

Stage 7.4: Second Floor Silo
You are now on the second floor of the silo. Go straight, and take a left.
The elevator in the silo should be open, but do not go in yet. Instead, continue.
When you see a path with a square tile, crawl to the end of the path. There is a trap on the wall that is triggered when you press the tile.
Continue, and crawl under the spinning blades. Continue to go into the next room.
?KILLER? There is a LETTER on the wall straight ahead. LETTER #35.
After you make your choice, go to the shelf in the room.
There is a card on the shelf.
Pick up [Monster Tarot Card].
From the shelf, go to the room straight ahead.
Drop down from the grate (Don't worry. You won't die).
Drop into the hole on the ground (Again, don't worry.)
Stage 7: Factory cont.
You will be in the room with the MUSIC BOX that was found after completing the pounding pillar puzzle.
(SAVE RECOMMENDED!)
Run over the grate, take a right, and go inside the silo.
Take the elevator to go back on the second floor of the silo.
(After using the elevator, each time you start the game in the area, there will be a bug as if the elevator is moving in whatever area you are at. This is normal.)
Go on the path to your left (where you see bathtubs ahead).
Press the lever on your left (before the bathtubs.)
Continue walking, then take the first right hallway.
Go through the hallway.
At the end, take a right and enter the last door on your right.
?KILLER? There is a LETTER on the wall. LETTER #36.
After you make your choice, leave the room.

Go through the third door to your right.
There is a LAMP on the bed.
Pick up LAMP #30.
Go through the hallway to leave.
At the end of the hallway, take a right and follow the path down the stairs.
Before you come across an elevator, there is a MUSIC BOX to your right (SAVE RECOMMENDED!).
Do not enter the elevator. Instead, take a left.
There is a lever to your right on the wall.
Pull the lever. A new path is created.
Continue through the new path and two sets of stairs.
Go through the room. The doors will close in front of you and behind you.
Keep clicking the wheel at the first corner you go to, every half second, until the door fully opens and the clock stops ticking.
(There is a bug with the puzzle that if you click on the wheel right when you get the room, the clock still ticks and when it runs out of time, you'll still die even if you go through the door.)
Go through the next door.
There are three spinning blades you have to cross. Luckily, you can cross one at a time if you wish.
After you pass the last blade, run towards the dead end, as there are pounding pillars above you.
There is a card on the table.
Pick up [Angelica Tarot Card].

Run across to get near the first spinning blade, and retrace your steps back to where the elevator is.
(SAVE RECOMMENDED!)
Head back up the stairs to the area with the bathtubs.
After the last stairs, go straight, then right, then follow the path straight to get to the silo.
Go inside the silo and take the elevator to go back down.
Once down, press the button again and step off right after you press it.
Wait until another elevator platform comes up.
Press the button, but stay on the elevator this time.
Wait until you come down.
Across from the crib room, there is another room. Go in that room.
There is a LETTER on the wall. LETTER #37.
After you make your choice, leave the room and jump down to your right. DO NOT jump down on your left.
There is a MUSIC BOX on the table (SAVE RECOMMENDED!).
Go into the next room. There is a straight hallway. Run to the end as there are some grates on the ground that can kill you.
In the room, look for a table. There is a key and card on it.
Pick up [Machine Tarot Card] and Pick up [Key with Heart Symbol].
After picking up the items, the room will close. There is a control panel in the room.
Looking around the room, one of the number codes is not like the other. One does not appear more than once.
Click on the control panel, and put in the numbers "587."
Run across the hallway again and leave the room
(SAVE RECOMMENDED)
Go up the ladder and take the elevator back up.
Once you're up, press the button again, but step out of it quickly!
Wait until the elevator platform comes down, get on it, and press the button to go on the second floor.
Once you're up, head to the area across with a table.
There is a LETTER on the door. LETTER #38.
Apparently, you have to place the tarots cards in a certain order.
Here is the correct order of the cards:


After successfully solving the puzzle, the door in front of you will open (you will hear an unlock noise when successful).
Go through the door.

PERFECT RUN CHECK:
LAMPS: 30
LETTERS: 38
Stage 8: The Island (Construction Site)
After going through the door, you'll be back on The Island, but near the house this time.
(SAVE RECOMMENDED!)
Go along the cliff area until you come across a gate. You're going the right way if you come across some fences on the cliff.
There is a pedestal nearby. Open the gate by clicking on it. [Key with Heart Symbol] will be used.
Follow the path until you come across two ladders. Watch your step from now on!
Go up the first ladder and cross quickly, as the platform you get on will fall.
(OPTIONAL)You can take the ladder going down, run across to the small platform on the ladder, and climb up to head into the same area.
Continuing from the first ladder going up, go right and go down the set of stairs.
From there, head left, then straight, then go down the next set of stairs.
There will be a LAMP to your left.
Pick up LAMP #31.
Head back up the stairs, then go right.
There is a moving bar to your left. Wait until it is very close to you, then quickly hop on.
Go near the very end of the bar and hop on once it is very close to the next platform.
There is a ladder on the left, face the opposite side of it, then walk backwards to slowly get down.
Follow the path until you come across a set of stairs, and go down them.
Go left then take another left until you come across a rod connecting two platforms.
Walk across on the rod.
Head right then left to go down a ladder. Follow the same procedure on getting down.
There will be another ladder. Again, go down and follow the same procedure.
Head right, left, then left again.
Again, there is another ladder. Go down the ladder.
Head left, then right, then left to go down the stairs.
Go right, then cross the bridge.
There is a LAMP on the ground to your left.
Pick up LAMP #32.
Nearby the LAMP, there is a small set of stairs. Go down.
There is a MUSIC BOX on the left (SAVE RECOMMENDED!).
Go back up and go inside the front door of the house.
Stage 9: The Tower
Stage 9.1: Orphanage
Upon entering, on the left, there is a LAMP.
Pick up LAMP #33.
On the right side of the room on the side of the stairs, there is a MUSIC BOX on the table.
Go up the stairs, take a left, and take the first door on your left.
There is a MUSIC BOX on the table.
Go through the door on the right.
There is a mask on the table.
Pick up [Leather Mask].
After the scene, there is a LAMP on another table.
Pick up LAMP #34.
Leave the room, then take the door on your left to leave the area.
Ignore the last door to the right. It just takes you back to where you openned it.
Go up the stairs besides the broken elevator. There is a LAMP in front of you.
Pick up LAMP #35.
Once you're on the next floor, go left, then another left to go to the next floor.

Continue until you're on the top floor and the stairs are blocked.
At the end of the room, there is a LAMP on a table.
Pick up LAMP #36.
Go through the door on the left.
Go into the second room on the left.
There is a mask on the table.
Pick up [Metal Mask].
Go the room across from the one you're in. There is a LAMP in there.
Pick up LAMP #37.
On the table to the right, there is a key.
Pick up [Black Key].
Leave the room and go right, then take another right into another room.
There is another LAMP that is on the bed.
Pick up LAMP #38.
Leave the room, and go back to the beginning of the hallway to leave the room.
Go to the other end of the hall and go through the last door on the right.
There is a LAMP ahead on the white dresser.
Pick up LAMP #39.
Leave the room and go down the stairs.
Once you're down the floor, take a right, and go down again. Repeat until you're at the bottom floor.

Stage 9.2: The Garden
From the last set of stairs you're off, go left and go through the door straight at the end of the hallway.
There is a LAMP on one of the dining room tables in front of you.
Pick up LAMP #40.
Leave the room, and go through the door at the other end of the hallway.
On your left, there is a LAMP on one of the white benches.
Pick up LAMP #41.
On the left of the entrance to the garden, there is a MUSIC BOX on the table.
(SAVE RECOMMENDED!)
Go to the black gate and open it. [Black Key] will be used.
(OPTIONAL)Possible Bug: If it doesn't open and you have the key, exit the game and try again.

Follow the path of the maze and keep going straight. Do not make any turns unless you come to a corner.
(FIGHT!) You will come across a shadowy figure at one point.
After the scene on one of the long paths, when you take a left, take the first left you see.
Follow the path, and go through the narrow path, and continue until you come across a small building.
On the side of the building, there is a LAMP on a crate.
Pick up LAMP #42 (The last LAMP).
Go around the building to the entrance. There are two statues.
Use the [Leather Mask] and use the [Metal Mask] on the statues.
The door is open. Go through the door.
You won't be able to run for a bit. Continue the pathway.
You will come across a scene. Continue straight and go through the door.

Stage 9.3: Climbing to the Clock
Go left and continue the path.
After the scene, continue the path and go to the first left.
Get on the lift.
Leave the lift and there is a MUSIC BOX nearby (SAVE RECOMMENDED!).
Go through the door. Do not worry about grabbing the mallet, as it will be bound to you once you enter.

Climb the stairs.
Get on the wooden platform.
After the scene, climb up on the ladder, but crouch once you get up!
Crawl under the blade. You'll come across some moving gears and more spinning blades.
Get on the first gear, then run over to the next one on the left. Watch out as you'll be close to the blades.
Run to the wooden platform on the other side and get on it.
There is a moving spinning blade nearby. Crawl under it to get to the other side.
Jump onto the gear platform that is moving up and down.
Once it reaches the top, jump down on the wooden platform.
Follow the path.
Once prompted, begin the mass clicking!

After you finished, look for a lever on the right side of the organ and pull it to open the large door nearby.
(Check the endings section for more information on the different endings of the game and how to get them.)
Endings
Normal Mode Endings:
1. Found Ending (Kill 0-2 people.) AKA Good Ending.
--Extra Scene: Collect all 42 lamps to see an extra scene. Hint to indicate that you got it: Graveyard.
2. Monster Ending (Kill 3-9 people.) AKA Bad Ending.

???
3. Astrid (Ending is bugged. Thank you tishinna32 for finding it!)

Nightmare Mode Endings:
4. Sarah Ending (Killed less than 5 people and collect EXACTLY 5 white crystals.)
--Extra Scene: Collect all 42 lamps to see an extra scene. Hint to indicate that you got it: Graveyard.
5. Freedom Ending (Killed less than 5 people and collect EXACTLY 5 red crystals.)
6. Protector Ending (You will get this ending if you do not meet the requirements above)
Complete List of Lamps
During the game, you will come across some lit objects that shine. These are called LAMPS. Each LAMP you come across will hold a statement from a character in the story to learn more about them or the story. There are a total of 42 Lamps located in the game. If you collect all the LAMPS in Normal Mode, there will be an extra scene in one of the endings.

Stage 2: The Island
#1: In between the cage and music box near the beach.
#2: Inside the house in the room behind the staircase.
#3: On the fountain that is behind the house.
#4: At the far east end of the house at the amusement park area on a bench.
#5: Far west area of the house passed the caged area inside the small cabin on the table.

Stage 3: Lake Cabin
#6: After entering the Lake Cabin through the blood-stained broken door, follow the hallway and climb up the ladder.
#7: Once you enter the living room after you get the flashlight, it is near the middle of the room on a table.
#8: First door to your right in the living room, then the next right door. Follow the hallway and down the stairs, and it will be in front of you.
#9: Through the doll-face area, after solving the picture puzzle, go through the door that was previously barred. It's at the end of the room near the end of the bed.
#10: After adorning the mannequin with three items, go down the stairs that was previously caged. The lamp will be to your right.
#11: After exiting the elevator, take the door to your left. The lamp is on a desk to your right.

Stage 4: Church
#12: Before entering the church doors on The Island.
#13: Behind the staircase leading to the blue star room on the side.
#14: On the white bench around the fountain in the courtyard.
#15: In the mausoleum, first right down the stairs, and it's against the wall.
#16: In the blue star room on the east side of the room behind the bars. It is on a roller.
#17: After going through the Angel Door, it is straight ahead.

Stage 5: Midnight Heaven
#18: After using the [Metal Rod] on the pedestal in The Island, cross over the platforms once they are up and the lamp will be in front of you.
#19: Upon entering the Midnight Heaven building, go into the next room. You will be teleported back to the entrance and there will be a lamp on the white table to your left.
#20: Through the door behind the bar, at the end of the hallway, inside the room to your right. The lamp is on the dresser.
#21: Through the door by the jukebox, in the Costumes Room, go through the door to your right and follow the path straight until you come across a lamp to your right.
#22: After going down the elevator that is through the door behind the bar. The lamp will be to your left on a table.

Stage 6: Underworld
#23: After entering the large doors, follow the path until you come across a lake. Across from the lake to your left, look behind the rocks and there will be a lamp.
#24: After dropping down in the hole, exit the room and the lamp will be near you to your right.
#25: Once you leave the area of the house and go downstairs, look behind the same staircase and there will be a lamp.
#26: After going down the elevator, the next lamp will be in between two stairs that are to your left.

Stage 7: Factory
#27: After entering from the Underworld, go in between the stairs and turn right. On the first room to your right, there is a lamp on the table.
#28: On the second floor, look for an open door. There is a lamp on the table in that room.
#29: In the silo area, take the first available hallway and take the first left. Take the small elevator to the top-most grate. Go through the door and the lamp will be straight ahead in the red room.
#30: On the second floor of the silo, go through the hallway where there is a bathtub. Follow the path until you come across a dark hallway to your right. Turn left and the first room on the right has a lamp on the bed.

Stage 8: The Island (Construction Site)
#31: Upon opening the cage to the construction site, follow the hallway and you'll notice a lamp on your right. Use the ladders and stairs around to get to the lamp.
#32: Once setting foot on land and before entering the building, there will be a lamp on the grass.

Stage 9: The Tower
#33: Once you enter the building, there will be a lamp to your left.
#34: Go left after you take the first stairs you see and take the first room to your left. Go through the right door to get in the office, and there will be a lamp nearby to your left.
#35: The lamp will be in front of you once you go up the first set of stairs.
#36: Go all the way up the stairs until it is blocked. Straight ahead, there will be a lamp on the table near a bench.
#37: On the top floor, go through the last door on your left. Go into the second room on the right and there will be a lamp on the bed.
#38: Same as above, but it is the third room on the right. The lamp will be on the bed.
#39: On the same floor, go through the last door on the right. There will be a lamp in front of you on a white dresser.
#40: Upon entering the bottom-most floor, turn left to go through the door at the end of the hallway. In the dining room, there is a lamp on one of the large tables in front of you.
#41: Head down to the basement floor, turn right, and go through the door at the end. In the garden, there is a lamp on the bench to your left.
#42: At the end of the maze, look on the side of the building. There will be a lamp on a crate.
Complete List of Letters
In the game, you will come across a variety of Letters. While it is not required to complete the game or unlock any secrets, they can provide hints and insight to the story.

Stage 1: Home...?
#1: "You've always been there when..."

Stage 2: The Island
#2: (Cabin Photos)
#3: "Pay close attention to..."
#4: (Midnight Heaven Fliers)
#5: (Graveyard Photos)
#6: "You came looking..."

Stage 3: Lake Cabin
#7: "After studying..."
#8: "The device is..."
#9: "...and I can't even..."
#10: "My head started..."
#11: "My gift was..."
#12: "There was a young..."
#13: "One of the..."

Stage 4: Church
#14: "I come looking..."
#15: "I know we..."
#16: "The first one..."
#17: "Yesterday I had..."
#18: "She had told me..."
#19: "As a token..."
#20: "I'm not strong..."
#21: "Do you care..."
#22: "After the incident..."
#23: (Translation to symbols)
#24: "Sometimes I have..."

Stage 5: Midnight Heaven
#25: "Nine Rings..."
#26: "Dance for..."
#27: "I'm the only..."
#28: "I invented a..."
#29: "Break her..."

Stage 7: Factory
#30: "You decided to..."
#31K: "The man inside..."
#32K: "They say women..."
#33K: "The story is..."
#34K: "She might be..."
#35K: "He's another stupid..."
#36K: "I really despise..."
#37K: "A girl owed..."
#38: "We met under..."
Complete List of Kills
In Normal mode, you can get up to 9 kills. The killcount determines one of the three endings(out of total of six) you can get. You have the choice of sparing or killing the person.

To check your total killcount in the game to help you determine your progress for an ending, open the console and type in this command:

GetAll EnolaPlayer killcount
The number on the far right that appears is your total killcount.

Stage 3: Lake Cabin
#1 and #2: This is found when you progress through the story. (There is only 1 person to kill, however, it counts as 2.)

Stage 7: Factory
#3: Going through the first hallway without taking a left and going up the stairs. Before going into the pounding pillar room, there is a letter on the wall.
#4: After escaping the pounding pillar room and crouching to avoid the spinning blade on the wall, take the first left you come across. There is a letter on the wall once you go up the stairs.
#5: In the first hallway, go left and go up the elevator. Enter the door, go left, and follow the trail. You'll be in front of a room with a letter to your left.
#6: After taking the elevator to your right before entering the room with a letter to your left, continue the path without going up the ladder. You'll come across a room with grates and two spinning blades on the ground. Cross them and read the letter on the other side.
#7: On the second floor silo, before getting access to the elevator, go over the wooden platform where you have to crouch to avoid two blades on the side of you. Continue until you come across a letter on the wall.
#8: At the first floor of the silo when you have access to the elevator, press the elevator button inside the silo and quickly get off. Wait until another elevator comes up, get on it, and press the button. Upon entering the basement floor, go into the first room that is accessible. There is a letter on the wall in the room.
#9: Use the elevator to get to the second floor silo. Go through the new path that is accessible (the one with the turned over bathtub.) Follow the path until you see a long, dim hallway. Go through the hallway and turn right. At the last room to your right, there is a room with a letter on the wall.
Cheats/Console Commands
When playing the game, the console in the game is enabled by default, which can help with debugging or getting through the game quicker. I recommend only using these console commands when you come across a bug and/or stuck and cannot go back.

Lamps
To change your Lamp count in the inventory, type the following, and press enter:

Set EnolaPlayer dollcount ##
Replace ## with number. The maximum number of Lamps you can earn in the game is 42. However, you can put in any number.

To check your Lamp count, simply open your inventory.

Kills
To change your killcount, open the console, type the following, and press enter:
Set EnolaPlayer killcount ##
Replace ## with number. The maximum killcount you can earn in the game is 9. However, you can put in any number.

To check your total killcount in the game to help you determine your progress for an ending, type in this command:

GetAll EnolaPlayer killcount
The number on the far right that appears is your total killcount.

Ghost Mode
In "Ghost Mode," you can walk through doors or gates without the need for keys. However, you can only travel through the currently loaded map and, in some cases, may affect certain events.

To activate Ghost Mode, type this in the console:

ghost

Items
Here are a complete list of Item IDs. To acquire the items, open the console and type in the following:

Set EnolaPlayer PickedItem ##
Press Enter, then type this:

AddToInventory
Press Enter again.

Replace the ## with one of the needed Item IDs below:

Note: items with "(unused)" by them are not acquired normally through the game.

Item IDs:
3 [Bottle Filled With Blood] (unused)
4 [Old Gear]
5 [Key with Angel Face]
6 [Key with Circular Shape] (unused)
7 [Elevator Key]
8 [Gear Shaped Key]
9 [Rusty Key]
10 [Blue Star Key]
11 [Old Lever]
12 [Green Key]
13 [Golden Laurel Crown]
14 [Blood Covered Key] (unused)
15 [Medal With Small Child]
16 [Medal With A Machine]
17 [Medal With A Woman]
18 [Medal With Weird Shape]
19 [Combination Cylinder] #1
20 [Combination Cylinder] #2
21 [Combination Cylinder] #3
22 [Pieces of Wood]
23 [Antique Key] (unused)
24 [Combination Cylinder] #4 (unused?)
25 [Costumes Room Key]
26 [Wine Bottle]
27 [Wine Bottle With Red Stuff]
28 [Knife Rod]
29 [Golden Rings Rod]
30 [Spikes Rod]
31 [Key With Doll Face]
32 [Midnight Heaven Key] (unused)
33 [Golden Key] (unused)
34 [Key with Symbol]
35 [Key with Heart Symbol]
36 [Key With Arrow Shapes] (unused)
37 [Heart-Shaped Key]
38 [Red Rose]
39 [Golden Ring]
40 [Angelica's Broken Mirror] (unused)
41 [Freya's Broken Mirror] (unused)
42 [Broken Black Mirror] (unused)
43 [Old Cold Key] (unused)
44 [Glass Sphere] #1 (unused)
45 [Glass Sphere] #2 (unused)
46 [Angelica Tarot Card]
47 [Astrid Tarot Card]
48 [Caleb Tarot Card]
49 [Monster Tarot Card]
50 [Machine Tarot Card]
51 [Golden Piece] #1 (unused)
52 [Golden Piece] #2 (unused)
53 [Black Key]
54 [Leather Mask]
55 [Metal Mask]
56 [Green Crystal] (unused)
57 [Red Crystal] (unused)
58 [Blue Crystal] (unused)
59 [Jack's Card] (unused)
60 [Caleb's Card] (unused)
61 [Christian's Card] (unused)
62 [Edmund's Card] (unused)
63 [Ashley's Card] (unused)
64 [Metal Rod]
Credits and Contributors
This guide was made possible by:
DarthMagnolia - For a list of console commands, item ids, endings, and emphasis on the crystals. Many thanks!
blood 1504 - For the "ghost" console command.
tishinna32 - For finding the title of the third ending.

Plan to use this guide on an external site? Give us credit by providing a link to this guide!
20 Comments
tishinna32 Dec 22, 2023 @ 7:03pm 
You're welcome! I also did a small video .

Thank you for all your guides for this game!
Jill of Trades  [author] Dec 21, 2023 @ 7:36am 
@tishinna32 : After all these years, thank you so much!
tishinna32 Dec 21, 2023 @ 3:41am 
About the third ending, if anyone's interested what it is (I don't know how to activate it, it's likely bugged 'cause I've tried everything).

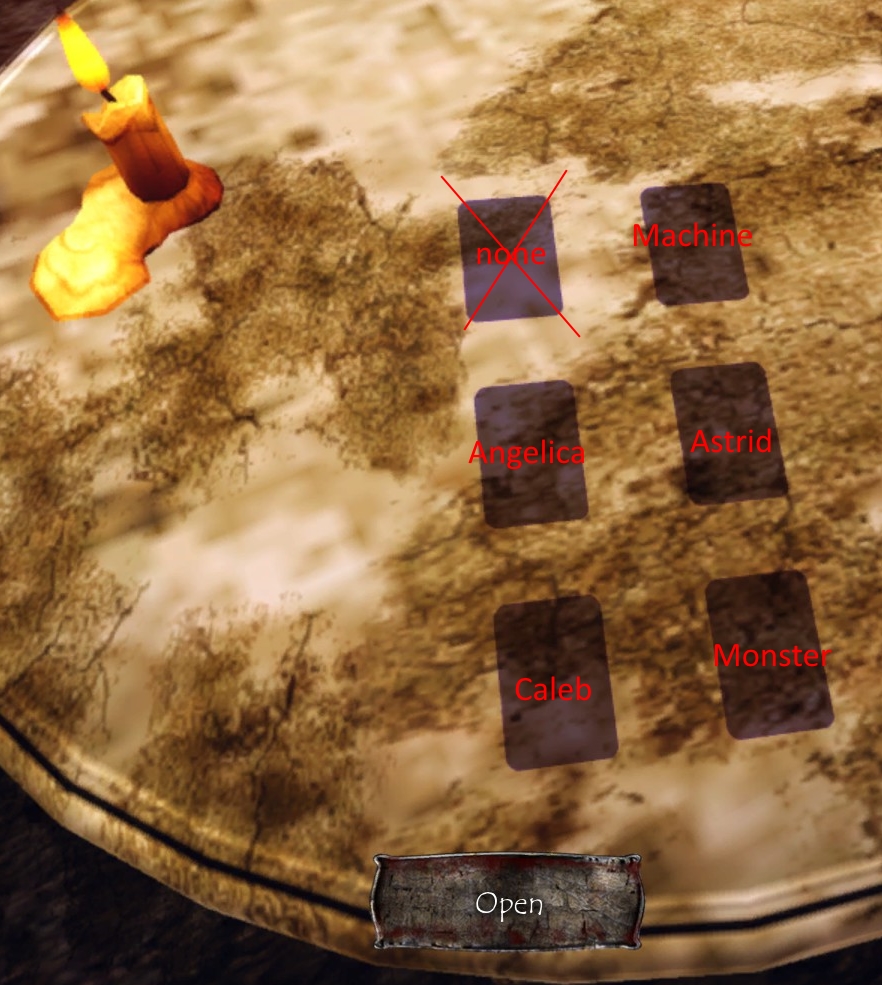
It's called "Astrid" and it's a variation of a normal good ending, except it is followed by a scene of Astrid removing her mask. The audio for this ending is Ashley saying "She's not free, she'll never be free" (like in the bad ending), but I think what she (Astrid) was actually meant to say (according to the game text file) is "I hope you take good care of her. I'll be watching you".
Jill of Trades  [author] Nov 15, 2023 @ 4:34pm 
Fixed. Thanks for pointing that out
Kenpoleon Bonaparte Nov 15, 2023 @ 2:07pm 
Great guide. Found a typo in 'Stage 6: Underworld'.
This line...
" Continue the path, past the fire, and through the upcoming hole to get into another area.
Head down the stairs, turn left, and go behind the staircase.
"

You actually turn right and go around behind the staircase.
Jill of Trades  [author] May 13, 2018 @ 12:42pm 
For that door, it was available in the alpha version. Now it does nothing at all.
MordredMS 鬱賢 May 13, 2018 @ 12:25pm 
Dang... I wonder if we're missing some kind of ultra-secret, totally different ending, or just a variation of one of the two main ones. It's weird, though, there doesn't seem to be anything that's up to the player's choice except for the killcount, in normal mode; besides, there should be a console command or some sort of file related to that. Maybe it has something to do with that "super secret ending" that Darth Magnolia mentioned in the other thread, the one related to the weird door in the burned house but that was never implemented?
Jill of Trades  [author] May 13, 2018 @ 7:54am 
Same here. I tried every possible scenario from certain deaths to modifying console to searching files...nothing:(
MordredMS 鬱賢 May 13, 2018 @ 2:46am 
Sorry for bothering you again, but... have you had any luck finding the third normal ending, by any chance? I got both the good and bad endings listed here, and all three Nightmare endings, but I still have a "locked" slot in the gallery...
Jill of Trades  [author] Apr 30, 2018 @ 9:56am 
No problem. I only got one screen and using an american keyboard...so I wouldn't have been much help^^;