Strong Bad Episode 2: Strong Badia the Free

Strong Bad Episode 2: Strong Badia the Free

30 vurderinger
Strong Bad's Cool Game for Attractive People EP2: Strong Badia the Free - Walkthrough
Av VolnuttHeroP64
In this Guide, I will walk you through on Strong Bad's Cool Game for Attractive People (or SBCG4AP for short) Episode 2-5: Strong Badia the Free (PC, PS3 & Wii Versions).
2
2
   
Utmerkelse
Favoritt
Favoritter
Fjern som favoritt
1. Episode 2 Story


https://www.youtube.com/watch?v=vMVLYAPg3VA
https://www.youtube.com/watch?v=-Cozh2ZNg1w

When Strong Bad fails to obey the King of Town's totally unfair email tax, he's placed under house arrest. Once freed from his wrongful imprisonment, Strong Bad goes on a mission to unite the local warring factions under the Strong Badian flag. Is Free Country USA ready for such an awesome ruler?
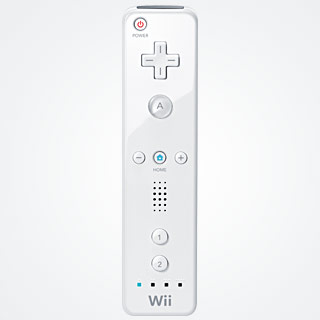
2. Wii Controls


Pointer: Used to manipulate the cursor on-screen.
A Button: Used to activate pointer where it's pointing.
B Button: Used as a cancel button. Also can be used during any dialogue scene to skip it.

- Button: Accesses the inventory.

+ Button: Check your game status, which includes your handy map of Free Country USA,
your collected extra items, and your overall stats of stuff you've done.

2 Button: During the basic run-around gameplay, you can use this to bring up Photo Mode. In Photo Mode, you can take snapshots to save to your Wii Console.


Movement: Click a spot anywhere in the field and the big SB will shuffle his tape legs over there. If you double click, Strong Bad will pick up the pace a little. Also, holding down the A button will make Strong Bad try to follow your cursor as diligently as a one-legged puppy.

Interaction: Any time your cursor comes upon a "hot spot", you'll see a small text blurb describing it. Click on it and Strong Bad will walk over and talk about it, to it, or try to do something with it.

Dialogue: Click on any of the famous h*r characters to begin negotiations. Sometimes the conversation will be scripted and that'll be it. Other times, you'll be given a little dialogue window with topics to talk about. Furthermore, you will sometimes be given a little Angel SB, or a Devil SB to select. These can be used to vaguely compliment or rudely berate who you're talking to, respectively. Safe to say, it's always awesome to try both.

Items: Once you snag and bag an item, it will be in your inventory. You can access that item by clicking on the inventory button at the upper-left corner of the screen, or by pressing the - button. Click on whatever item you wish to play with, which will be attached to your cursor. Then, click on the object or person in the field you want to use it on.
3. Tutorial
http://www.hrwiki.org/w/images/0/0b/suspense_music.ogg
OH NO!!! Strong Bad's Computer has been Lappynapped... AGAIN!!! You may remember Strong Bad as Pretty Much the Coolest Guy or Sandwich Ever '98, or the fellow what stole your girlfriend. This is the required-by-video-game-law tutorial portion of his Super Awesome video game. It seems as though someone has stolen his Lappy Computer, and you, yes you, need to help him find out who.

Use your mouse to move the Pointer than Left-Click to move Strong Bad. Move the Pointer to the Missing Lappy to Examine the Stain then Click on the Magnifying Glass to pick it up. (Strong Bad totally stole this from his nerdy little brother Strong Sad. Man, that guy is such a whiny Dump baby. He's probably crying over losing it right now.) Whenever Strong Bad finds a useful item during an Episode of Strong Bad's Cool Game for Attractive People, he'll pick it up & add it to the Inventory (It's the Book Icon on the Upper Toolbar). Click on the Book Icon in the upper Left corner of the screen to open up the Inventory. You'll see a Section of items appear inside it, the item of choice is your Magnifying Glass. Select on it to Equip it onto the Pointer. Then just point and click on things you want to use the magnifying glass on. In this case, you'll want to use the magnifying glass on the Stain where the Lappy used to be.

Afterwards, head to Strong Sad's Room to talk to him. (You'll Reconize him as a whiney sack of gray dump) Clicking on him means you want to talk to him. The Icons in the Talk Balloons represent Topics to discuss. You may want to talk to Strong Sad about his own Heaping Dump of Emo Self first. Sometimes when talking to people, you can choose between saying something nice or saying Something Strong Bad would say. Choose Angel Icon to say something nice, or the Devil Icon to be more of a jerk. (Either one doesn't matter in this case.) Then, Talk to him about Strong Bad's Stolen Lappy. Afterwards, use the magnifying glass on Strong Sad to return it to him.

Next, you'll need to get to Bubs, to do so, you'll need to add Bubs' Concession Stand to the Map Screen. (It's what Strong Bad uses to get from point A to place B. You can access this map at any time by clicking the map icon in the top left part of the screen. You can Rearrange Any Icons on the map screen in anyway you like.) In the case, you'll want to place Concession Stand to the Map Screen.

Once at Bubs, You'll find that there is usually a variety of ways to change people's moods. You'll figure this out as you go. Generally Strong Bad finds kissing up or breaking their stuff usually gets the desired response. In this case, select the Angel Icon when Talking to Bubs then Select the Lappy Icon to get the Lappy back and completed the Tutorial.

Now you're ready to play all 5 Episodes of Strong Bad's Cool Game for Attractive People! Now get out there and have some fun at the expense of others.
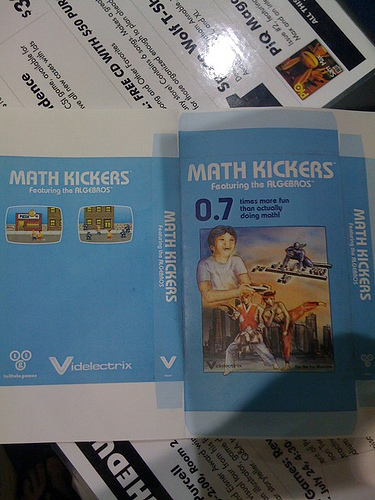
4. Math Kickers featuring the Algebros Manual & How to Play
https://www.youtube.com/watch?v=CCcIyrcAFd4


In the game, you play as two fighters, Dex and Ryu, facing back to back. Dex subtracts and Ryu will add, and the goal is to fight Ninjas and attack number bosses.


How to Play:
Dex's attacks subtract ninjas from his side. Ryu's Energy Ball Attack adds ninjas to his side. The idea is to restore the balance.

Example:
3 Ninjas on Left, 1 Ninja on Right: 3=/1
Dex subtracts one Ninja from his side: 3-1=/1
Ryu adds one Ninja to his side: 3-1=1+1

When the Balance is restored, all the Ninjas will disappear, and Dex and Ryu can move on.

After several waves of Ninjas, Dex and Ryu will split up for a boss battle against a quadratic equation. Attack the quadratic equation up on the sidewalk, then, run down to the street when it rises up to slam down into the ground.

As you level up, the going gets tougher, as the Ninjas and Bosses get stronger.

You start the game with 6 Lives and lose a Life every time Dex or Ryu take damage from the ninjas, who throw mathematical operators at you, or if you get crushed by the boss. When all your Lives are gone, your game is over.


Game Manual:
Notes
Logarithm Attack = Left, Down, Right, Up + Dex
Polar Coordinates = Right, Up, Left, Dex + Ryu
Divide By Zero = Left, Right, Left, Right + Ryu


Controls:


=Wii Controls=
D-Pad: Moves Dex/Ryu
1 = Dex Attack
2 = Ryu Attack
+ = Start the Game
- = Quit the Game


=PC Controls=
Arrows Keys: Move Dex/Ryu
Z: Dex Attack
X: Ryu Attack
S: Start the Game
Q: Quit the Game
Spacebar: Pause the Game


=PS3 Controls=
D-Pad/Left Thumbstick: Move Dex/Ryu
X/L1: Dex Attack
O/R1: Ryu Attack
X: Start the Game
Select: Pause the Game
Start: Quit the Game
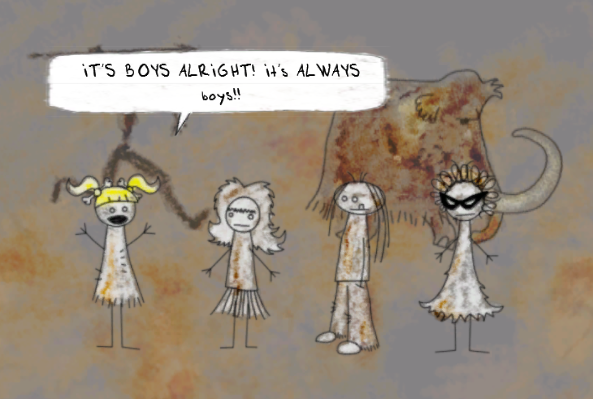
6. Cave Girl Squad


The girls take a trip through prehistory in their eternal quest to attract boys.

Opening:
Cave Girl Squad!
Cheerleader!/Cheer Cheer!
So and So!/So So!
What's Her Face!/What Face!
The Ugg-ly One!/Ugg One!


The following are "minor deaths" (noted by Strong Bad chuckling after the death):
Any girl receiving the Cat during scenes 1, 2 or 3.
Any girl receiving the Mammoth Skin during scenes 1, 2 or 3.
Any girl receiving the Tar Pit during scenes 1, 2 or 3.
Any girl receiving the Machine Gun during scene 2.
Any girl receiving Thomas during scene 2.
Any girl receiving the Ribbon during scene 3.

The following are "major deaths" (noted by Strong Bad laughing strongly after the death):
Any girl receiving both the Tablet and Chisel (in that order) during any scene.
Any girl receiving the Dinosaur Egg during scene 1 (and left alive through the end of scene 3).
Any girl receiving the Dog during scene 3.
So-and-so receiving the Wheel during scene 3.
Any girl receiving Charles Darwin during scene 4.


Results Screen:
It's Over!
If at least one girl survived = -20 Points
All four girls died = No Points
One girl died a major death = 18 Points
Two or three girls died a major death = 41 Points

All four girls died major deaths = 358 Points

All four girls died major deaths and Charles Darwin was used in scene 4 = 6000 Points
(Required for Max Awesomeness Score)


Items:
Chisel
Tablet
Ribbon
Mammoth Skin
Wheel
Machine Gun
Cat
Dog
Dinosaur Egg
Thomas
Tar Pit
Charles Darwin
7. Countries in Strong Badia the Free
In Strong Badia the Free, various parts of Free Country USA are established as sovereign countries by the various characters. Strong Bad's goal is to unite them all as part of his own country, Strong Badia.
7-1. Countries in Strong Badia the Free - Bleak/Blecch House
https://www.youtube.com/watch?v=Q8gyuK5Wvwo


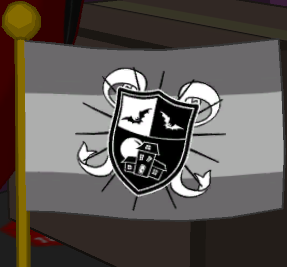
Named after the novel by Charles Dickens, Bleak House is ruled by Strong Sad and consists of the House of the Brothers Strong. Strong Sad crowns himself king of this constitutional monarchy. He bases the legitimacy of his new nation on the national flag he designed for it and two national documents he authored: a constitution and a bill of rights. Its flag has three stripes, the top and bottom are dark gray with a light gray stripe between them, and a black and white coat of arms with images of two bats and a house. Strong Bad derisively calls the country "Blecch House".


Strong Sad:
You have no hope of reaching the castle. Why not just give up? We're all going to wither and die anyway.

Doesn't it depress you to know you're doomed to failure?

We're all pawns, really, in a tragic game of death to be repeated over and over again throughout history.

Everything is hopeless. I had dreams for a great country, only to see them smashed by a cruel dictator.
7-2. Countries in Strong Badia the Free - The Cheat & Tirerea


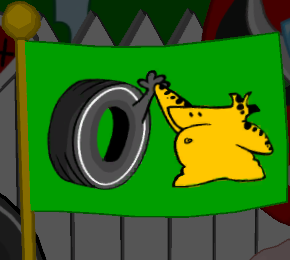
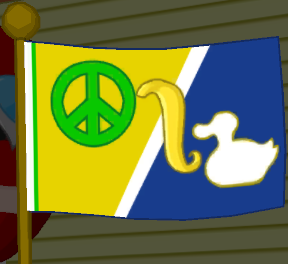
The Cheat and Tirerea is a secessionist territory in Strong Badia ruled by The Cheat, consisting of the area near the tire. Strong Bad considers its name to be the nastiest he's ever heard. Its flag consists of a Powered By The Cheat drawing of The Cheat giving the tire a high five on a green background.

The name (at least, the Tirerea portion) may be a reference to Eritrea, an African country which broke away from Ethiopia in the early 1990s. It may also be a reference to Bosnia and Herzegovina, one of the countries formed in the breakup of Yugoslavia.
7-3. Countries in Strong Badia the Free - Coachnya
https://www.youtube.com/watch?v=PvU2QhiAWfo


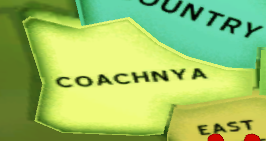
Coachnya is ruled by Coach Z. Its location is unknown as it is never visited, but it is likely to be around either the race track or the gymnasium, as Coach Z says it has a scoreboard. Coachnya buys up all the weapons from Concessionstan's black market in order to defeat the Fhqwhgadi rebels. Marzipan states that it is not a "developed country," no doubt due to having to fight off the rebellion.

The name of the country refers to Chechnya, an autonomous republic of the Russian Federation, notable for its attempts to break away from Russia since the dissolution of the Soviet Union.
7-4. Countries in Strong Badia the Free - Concessionstan/Concessionstantinople
https://www.youtube.com/watch?v=SDDYTEvLr18


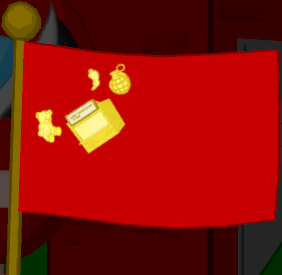
Conncessionstan, also known as Concessionstantinople, is ruled by Bubs and consists of his concession stand. Bubs describes it as an autonomous commonwealth. Its form of government is unclear, but Bubs asserts that it is Neutral Territory. Therefore, Strong Bad cannot conquer it (nor is it necessary to do so to win the game). Its flag features yellow images of the concession stand, a bear, a grenade, and an organ against a red background, a design similar to the flags of many communist states.

"Concessionstan" references several places in Central and Southern Asia that use the suffix "-stan", which essentially means "place of"; its usage to refer to the concession stand is both alliterative and accurate. "Concessionstantinople" is more alliterative, referring to Constantinople, presently known as Istanbul (and referenced by both names in a song that's been performed by They Might Be Giants).
7-5. Countries in Strong Badia the Free - Country
https://www.youtube.com/watch?v=ihpDTjSAR0U


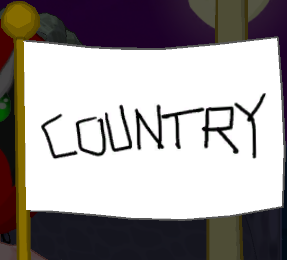
Country is ruled by Strong Mad, and is located at the stone bridge. Papier-mache skulls litter the landscape, and a giant Taranchula (cardboard cutout), which an unseen announcer claims to be Country's most endangered species, also occupies the area. It seems to always be night here. Strong Mad is described as the nation's "brutal but just warlord". Its flag is simply the word "COUNTRY" written by Strong Mad in all-capital black letters on a white background. Strong Bad is not impressed by the country's name or its flag.

Strong Mad:
GO AWAY!!!
DO NOT ENTER!!!
PROTECT STRONG BAD!!!
RAAAAAARRRRRR!!!
7-6. Countries in Strong Badia the Free - Homsar Reservation


https://www.youtube.com/watch?v=0JzGkLhfCkQ
https://www.youtube.com/watch?v=pm6KH32xFhA

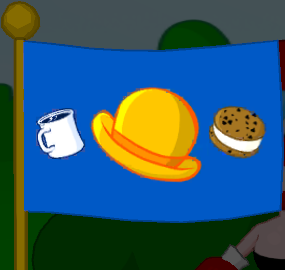
The Homsar Reservation is ruled by Homsar, although what form of government it has is unclear. Indeed, little is known about the area or its inhabitant except that they speak a language no one understands. It is implied that the territory is a developing country, as Strong Sad is unsure if the water is safe to drink or if there is modern health care (though it turned out that they had subsidized healthcare). Its flag consists of Homsar's bowler hat and his "parents", a cup of coffee and a Chipwich, against a blue background. An unseen announcer calls it "The Dark Continent", an outdated reference to Africa.
7-7. Countries in Strong Badia the Free - Marzistar/Homezipan
https://www.youtube.com/watch?v=YD5HzFhbAfU


The name of the country ruled together by Homestar Runner and Marzipan is under debate. Marzipan insists on Marzistar, but Homestar prefers to call it Homezipan. The country consists of Marzipan's front and back yards, and possibly her house. Marzipan says that "Marzistar is a Hostile Territory", while it seems that Homestar is a bit too concerned over declaring fruit. Marzipan refers to the country as a Free People's Republic, which might suggest that it is a communist state; however, she also talks about having "queening" to do, and some of her and Strong Bad's dialogue refers to Homestar as a king, suggesting that the country is a monarchy.

Hank "the Tank" Benedetto (Fridge), Little Johnny Benedetto (Toaster), Marty Benedetto (Pencil), Ramon Benedetto (Waffle Iron), Tom Benedetto (Blender) & Li'l Brudder all reside here as well. A Memorial of Frank Bendetto can also be found here.
7-8. Countries in Strong Badia the Free - Pompomerania


https://www.youtube.com/watch?v=8RqyXXEljpo

Pompomerania is ruled by Pom Pom, and appears to consist of Club Technochocolate (although Strong Bad refers to the club as being in the nation's capital, suggesting the possibility that the country has additional territory). Pom Pom is referred to as a shogun, a type of Japanese warlord. Bubs and (after conquering The Cheat and Tirerea) The Cheat can also be found here, tending the bar and serving as DJ, respectively. Its flag consists of a circle colored like Pom Pom against a white background, resembling the flag of Japan.

The name refers to Pomerania, a historic region on the shores of the Baltic Sea, currently divided between (and historically contested by) Germany and Poland.
7-9. Countries in Strong Badia the Free - Poopslovakia


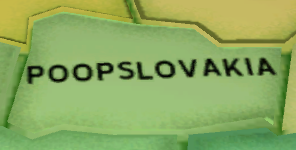
Poopslovakia is ruled by The Poopsmith. Its location is unknown, and it is never visited during the game. Its currency is hinted to be the "poopee", a reference to rupees or the Asian currency of the same name. Bubs claims that 100 quesos is at least a million poopee.

The end of the name is a reference to the European country Slovakia, although the full name may be a reference to the former Czechoslovakia.
7-10. Countries in Strong Badia the Free - Strong Badia
https://www.youtube.com/watch?v=NBEicLXK0Jo
https://www.youtube.com/watch?v=zZayi1PhV80


Strong Badia (sometimes misspelled as Strongbadia) is the field behind the dumpsters that is ruled over by Strong Bad, though so far these dumpsters remain to be seen. In monument, it is revealed that Strong Badia is also directly adjacent to The Field.

Strong Badia National Anthem:
Come to the place where tropical breezes blow.
Come to the coolest place I know.

The people are so great,
But really there's only me,
And that means I'm so great,
And also there's The Cheat.

Oh there's The Cheat...
in the place where the tropical breezes blow.
The Cheat in the coolest place I know.

The ones are always cold,
And the parties last all night,
And there's probably lots of chocolate,
And population tire.

{falsetto} Population... Ti-i-i-ire...
7-11. Countries in Strong Badia the Free - Minor Countries
While these countries are discovered in the game and have flags, they do not figure into the end of the game.

Frontzeatserland/Hatchbackistan: Switzerland and Pakistan.
Snapshakland: -land is a relatively generic country suffix. e.g. Thailand, Finland.
50% Off Apple Pie Charts: A non-sequitur.
Sticktenstein: Liechtenstein, a small country in the Alps.

Union of Soviet Socialist Repubricks:
A pun on the official title of Soviet Russia, "Union of Soviet Socialist Republics".

The People's Republic of Front-au-Fence/Backfence Revolutionaries:
Port-au-Prince is the capital of Haiti.
8-1. Walkthrough - House of Strong
Strong Bad receives an e-mail from "Roy T." at "Castle Hill" asking about the King of Town's ruling practices. After slagging the King and concluding his e-mail with a statement about the King's "lazy faire" methods of governing, none other than KoT himself runs in and announces Strong Bad to be under arrest for failure to pay the new e-mail tax: one Creamy Ding Snack Cake for every e-mail sent or received (which is news to Strong Bad; BAD news). As punishment for non-payment, a collar is placed around Strong Bad's neck, an invisible fence is set up outside his front door, and his map is confiscated and consumed, meaning he's stuck in the house until the fence and collar are deactivated. (Which means Strong Bad Breaking the Law)

Go to the window of the computer room. Marzipan, Strong Mad, Homestar, The Cheat, and Coach Z have gathered outside to protest matters.

Ask about the stick by the fence. It's an orfigy arfigy RPG first person shooter effigy of the King of Town, but it doesn't look enough like him for them to burn it.

Leave the window and check your diagram from the intro. Looks like the effigy is missing a few items.

Go to Strong Sad's room. Strike up a conversation, calling him names in the process.

Ask Strong Sad about the fence outside. He'll start to tell you how to circumvent it before realizing that doing so might be illegal. Further pleading will only gain you another hilarious Strong Sad name. (Which I'd LOVE to see Strong Sad get Arrested for once!)

Go to the bathroom and grab Strong Mad's red towel.
Look at the shower to call Strong Sad another name.

Head downstairs to Strong Bad's room. On the way, grab the eyepatch from the box of Cheat Commandos O's in the kitchen.

Grab the crown off of his bookcase.
Snatch the Black Metal Detector and shovel while you're there.

Optionally, play some Math Kickers, and look at the drawing table. Turns out he's out of drawing paper.

Head downstairs.
Grab the pillow from atop the washing machine.
Look in the dryer to find a pair of Camo-Pants.
There's also some loose stuffing in the couch. Take that too.
On your way back upstairs, use the pillow on Strong Sad to call him another name.

Race back up to the computer room and back to the protesters. Give them the stuffing, towel, pillow, and crown, in any order.

The Cheat assembles the items on the "effigy", using the stuffing for a beard, the crown as the crown, the pillow as bulk, and the towel as a robe. Now the effigy of the King of Town looks like the real deal, and the mob demands a sacrifice. Even Marzipan concedes it might help. As Strong Sad predicted, the fire destroys the fence and renders your collar useless. You're outta here! (And Strong Bad has Broken the Law! Add Violating House Arrest/Suspension to the list of Criminal Charges... Until you're recaptured again that is.)

Strong Bad assembles the forces in Strong Badia, informing them that he has seceded from the Municipality of Free Country, USA, and the rule of "The Of Town". He further calls for open rebellion. The call works, but not as Strong Bad anticipated: everyone forms their own independent lands and Free Country USA is split into many different autonomies; including having a piece of your nation sliced from you by The Cheat! D'OH!

Well, this calls for world domination, then...
8-2. Walkthrough - Strong Badia/The Cheat & Tirerea 1-2
Grab the game board from in front of the sign. Strong Bad will alter it to look like a map.

Go to the game box and find the play money lying around. Strong Bad will take it as actual currency.

Talk to The Cheat and find out he, too, has seceded, dividing Strong Badia into civil war.
Mention reunification, and the Cheat will feel like he's been pushed around.
Offer the Cheat the Vice-Presidency, and he'll demand tangible proof.

While you're here, dig around with the Detector and find... a power strip?
Dig around on the opposite side of Strong Badia to find some of Gampaw's old war medals.
Head to the House of Strong, which is now known as Bleak House.

Checkpoint: If you have done all of the above you should have the Taranchula Metal Detector, a power strip, and some Strong Badian currency in your inventory. You should also have the map, with Strong Badia in red, have called Strong Sad four names, and have found three costume items.
8-3. Walkthrough - Bleak House 1-2
Check the package at the door. It's a special pin from Trans-Place Airlines, congratulating Strong Bad on surviving their flight without crying and landing the plane while making out with stewardesses.

Snoop around with the Detector and find... a 3-ring binder? Okay, then.
Check the mailbox to find a page to Strong Bad's Math Kickers manual. His foresight is amazing!
Go inside to Strong Sad's room.

Strong Sad will inform you that he's formed a constitutional monarchy, complete with Bill of Rights and flag.

Converse with him a while and call him a few more names. He'll also give you an idea for making your subjects feel more important.

Take his fake sword from by the bed.
Use the fake sword on Strong Sad. You'll call him another name.

Offer Strong Sad the pilot wings. He won't get them, but you'll call him another name, if you haven't already.

Look under the box on his bed and find a Bleak House flag.
Check his bookcase to pick up an ancient scroll with a great Teen Girl Squad idea.
You're done here, for now. Race back to Strong Badia.

Checkpoint: You should have added a three-ring binder, TPA medal, and fake sword to your inventory. You'll have one Teen Girl Squad card, the cover to your Algebros Manual, and the Bleak House souvenir flag. You should also have one character at attention and have called Strong Sad eight names.
8-4. Walkthrough - Strong Badia/The Cheat & Tirerea 2-2
https://www.youtube.com/watch?v=OoWtUo9KGNU
Give the Cheat the pin.

It worked! The Cheat feels special after you use the pin to deputize him Chief of Police. Civil War is over in Strong Badia! On top of this, The Cheat returns your not-BMW-due-to-copyright-purposes-but-still-a lighter that he used to start the effigy. Good times!

Poke around behind the tire to find a The Cheat & Tirerea flag.
Burn the Maps and Minions box with your lighter.

Checkpoint: You'll have exchanged the TPA medal with the lighter, gained a flag from The Cheat and Tirerea, and set one item on fire.

All right, now that Strong Badia is unified, let's get to conquering! Note that the following three nations can be visited in any order.

Dateline: Strong Badia! A nation long devastated by civil war: brother against brother, tire against cinderblock. Now the long national nightmare is over, thanks to one charismatic leader.
Strong Bad, your star is on the rise!
8-5. Walkthrough - Bleak House 2-2
https://www.youtube.com/watch?v=OoWtUo9KGNU
Go to Strong Bad's bedroom and set fire to his bed with your lighter.

In the living room, use the lighter on the smoke detector. Not hearing it go off reassures you that you're 0% safe.

While we're burning random crap, use your lighter on the barred window to get another Teen Girl Squad idea.

Return to Strong Sad's room.
Burn his flag, Constitution, and Bill of Rights in any order.

With no proof of authority over Bleak House, it becomes a battle of wills between Strong Bad and Strong Sad, and that's a lopsided contest if ever there was one. Bleak House is conquered!

Talk to Strong Sad after *ahem* conquering his nation to call him another name.

Bleak House surrenders! In a humiliating display of not courage, His Lordship "King" Coolberius Strong Sad Edgar Allan Poe the First did everything but collapse into heaving sobs when confronted by Strong Badia's superior military fists. Better luck next time, doughboy!
8-6. Walkthrough - Concessionstantinople 1-2 & other The Field nations
Talk to Bubs. He'll tell you his concession stand is a neutral country only interested in the economy.

Ask about what you can buy, and he'll sell you a (malfunctioning) Strong Bad doll for your play money. The doll causes Strong Bad to shake uncontrollably. (Since Bub's is all Sold Out of the Good Stuff)

At this point, an option for the "Black Market" appears. Ask Bubs about it, and he'll slyly claim he knows nothing while making it clear he does.

End the conversation and walk around back.

Knock on Bubs' back door. Sure enough, there's the black market.

Ask about weapons, artifacts, and organs. He's not into weapons much (and Coach Z has them anyway), he's out of organs (but would love to get his "hands" on one), and he has a single artifact from Homsar; for trade only, no sale.

Leave the Concession stand and poke around in the bush behind it.
You'll find a Concessionstantinople flag.

Stroll around the Field. Look under the box by the Picket Fence for an Algebros Manual page.
Head to The Stick and use the Detector to find... erm, a tuning fork?
Out of curiosity, ring the tuning fork. Sounds like Homsar.
Walk behind the Brick Wall to find a Strong Badian flag.
8-7. Walkthrough - Pompomerania 1-2
https://www.youtube.com/watch?v=OoWtUo9KGNU
Upon entering the club, you see Pom Pom chilling in the corner near some Japanese artifacts: a katana and two kimonos. DJ Teh Cheat is playing a Geddup Noise remix, and Bubs is tending bar.

Talk to Pom Pom. He'll refuse an alliance because he doesn't think you're stylish enough.
The nerve!

Use your lighter on the leftmost kimono to set it on fire.
Head over to Bubs and ask about how to impress Pom Pom. He'll tell you it's all in the dance.
Go to DJ Teh Cheat's stash of glowsticks and grab one.
Head back to Bubs and ask for "the brightest, glowiest drink in the house".
Drop the glowstick in the drink. Now THAT'S glowy!
Take your super-glow drink.

Strong Bad will head with it to the dance floor and bedazzle the club occupants. Pom Pom agrees to an alliance, and Strong Bad didn't have to do any dancing (which is probably a good thing)! Two down, three to go!

Head back to Bubs and ask for a "special" energy drink. (You may have to ask twice.)
Bubs will throw in a Pompomerania flag for free.

Look under the box next to the bar to find another Algebros manual page.

The next two countries, the Homsar Reservation and COUNTRY, can be visited in any order. You will automatically visit Marzistar/Homezipan in between them. It is recommended that you visit them in the following order.

Checkpoint: Your inventory should now contain the metal detector, a power strip, a three-ring binder, your former-BMW lighter, a Strong Bad doll, a tuning fork, and a fake sword. (Don't worry, you'll be coming back for the real one soon.) You should now have two TGS cards, three Algebros Manual pages, and five flags. You'll have set seven items on fire, have called Strong Sad nine names, and found three costume items.

Pompomerania, jewel of the east! And now that jewel's in Strong Bad's crown, as he's bounced into their heathen land and showed them how our boys do things back home! From here, Strong Bad can set his sights on ALL the free nations of the world! Maybe we should all start brushing up on our "awesome"!
8-8. Walkthrough - Homsar Reservation 1-2
Strong Bad brings Strong Sad and Strong Sad's incurable whininess along with him to the Homsar Reservation to serve as a cultural advisor. Strong Sad brought along a first aid kit, his luggage, and hypochondria.

Check the bush behind Homsar to get a Homsar Reservation flag.
Use your lighter on that same bush to burn it.
View the cave painting on the left to launch Cave Girl Squad.
Use the Detector around here to find another Cave Girl Squad idea.
Show Strong Sad the Tuning Fork to call him another name.

Talk to Strong Sad. Mention a Cold One and Strong Sad will panic, since he thinks he drank contaminated water.

At this point, ask him about his health until he spills the beans: he thinks he has acute aphasic pretendicitis. Its symptoms are fever, shaking, and inability to comprehend language. The only cure is a pretendectomy.

Use the lighter on his first aid kit. Strong Sad will take his temperature and think he has a very bad fever.

Give Strong Sad the malfunctioning doll. Strong Bad will slip it in Strong Sad's fanny pack, causing Strong Sad to think he's got the shakes.

Go back to talk to Homsar and select the derby hat option. Strong Bad will pretend to speak Homsar's language, and Strong Sad will overhear it and think he's gone insane.

Strong Sad rushes off to get the pretendectomy (Which serves Strong Sad right for being a Fat wad of Crybaby Dump!). When he returns, he announces he was allowed to keep his organ in a jar.

Take the organ.
Use the fake sword on Strong Sad again to call him another name.
8-9. Walkthrough - Concessionstantinople 2-2
Offer the organ to Bubs. He'll tell you that it's not "legitimate business".
Go to the black market and offer it again.

Bubs accepts the pretendix and trades it for the artifact: a pottery shard. Looks like he got the better end of the deal, but looks are deceiving.

Now that you've called Strong Sad another name, swing by Pompomerania.
8-10. Walkthrough - Pompomerania 2-2
Use the fake sword on the real one. Strong Bad will swap them out right under Pom Pom's, um, nose.

Go back to the Homsar Reservation.
8-11. Walkthrough - Homsar Reservation 2-2
https://www.youtube.com/watch?v=OoWtUo9KGNU

Use the shard on the "mysterious pylon".
Some weird light show goes off, and the red light on the pylon is now lit.

Talk to Homsar about the pylon. He still speaks mostly gibberish, but you make out the words "sacred elemental items".

One by one, drop the power strip, 3-ring binder, and tuning fork into the pylon. Each time you add an item, the yellow, purple and green lights, respectively, light up.

Whoa; the ground is rumbling, and suddenly you feel lighter and enlightened! Of course! You've unlocked the secrets of Homsar!

Talk to Homsar again. This time he makes perfect sense! Ask about joining Strong Badia, and he'll accept.

When you leave the conversation, Strong Bad and Homsar will perform an ancient ritual together. The pylon explodes and the cave opens. Although Homsar is back to his non-sequitastic self, the alliance is strong and full! Let's go on!

The Dark Continent: The Homsar Reservation! Who else could bring modern conveniences to this backwards land, other than the intrepid emancipator Strong Bad? Welcome to the 20th Century, Homsar! "Raised by a cup of coffee" indeed!
8-12. Walkthrough - Marzistar/Homezipan 1-2
Upon arriving, you see Pom Pom, The Cheat, Strong Sad, and either Homsar or Strong Mad waiting alongside Marzipan and Homestar. Marzipan isn't too thrilled to see you.

Use the Detector in the backyard near the onions to pick up a flag of Marzistar.
Talk to Strong Sad to call him another name.

Talk to Marzipan. She informs you she's signed a non-aggression treaty with the Municipality and will refuse to allow Strong Badia's army through.

Ask about the display behind Marzipan. It's a "model United Nations", depicting cultural oddities from all civilized leaders (and Coach Z).

Talk to Homestar. He's more willing to listen to your offers, but he needs to put the Homestarmy back together.

Ask about the Homestarmy, and he'll tell you he needs five recruits to complete it. Strong Sad, Pom Pom, and Homsar are three of them. (The Cheat doesn't count for whatever reason.) He says he may need the draft to fill out the roster.

You can ask him to run the draft, but it invariably lands on one of the Bennedettos. He won't draft any more of them, for one reason or another. There's not much more you can do here, for now. (The Draft will be explained in Part 2 of Marzistar/Homezipan.)

On your way out, look in Marzipan's mailbox for the last Algebros Manual page.
Head on over to Country.
8-13. Walkthrough - Country
https://www.youtube.com/watch?v=OoWtUo9KGNU

Welcome to Strong Mad's country, eloquently named "Country". Yup, looks like Strong Mad is being held back another year. Strong Bad tries to get Strong Mad's help, but Strong Mad isn't articulate enough to carry on much of a conversation. Fortunately, The Cheat shows up to "translate".

Use the Detector near the flagpole to get a Country flag. That's all 8!
Ask Strong Mad (via the Cheat) how to gain an alliance.

Strong Mad wants to test the valor of Strong Bad. Strong Bad must now pass a test. And by "pass a test", we mean "slay a monster". And by "monster", we mean "Strong Mad standing behind a Taranchula cardboard cutout."

Use the sword on one of the heads. Strong Mad will promptly re-attach it.
Set the pile of skulls on fire. That's better.
Set the lone skull and lonely skull on fire while you're at it.
Slash the fire head (on the left). Strong Mad will work on re-attaching it, and while he does...
Slash the ice head. It'll fall into the bonfire and be consumed. Strong Mad will react by spurting ketchup from the wound, and as he does...
Slash the fire head again. It falls into the river!

The monster is slain! Strong Bad and Strong Mad are re-united. Strong Mad gives Strong Bad a gift: Tony Stony, his "Vice-President". Well, whatever works. Let's see if this is enough.

Checkpoint: By now your inventory will contain the metal detector, the lighter, the katana, and Tony Stony. You should have three Teen Girl Squad cards, all four manual pages, and all eight flags. You'll have set eleven items on fire, have called Strong Sad twelve names, and found three costume items.


Dateline: Country! Once a proud land filled with proud person, this developing nation now waves a new flag: the Strong Badian Empire's. Their army taken over, their most endangered species driven to extinction. What can stop this Red Menace? {pronounced "Mena-chay"} Er, menace. Red menace. Sorry. Thought that was an Italian word.
8-14. Walkthrough - Marzistar/Homezipan 2-2
Ask Homestar if you have enough people now. You're still one person short.

If you run the draft again at this point, it will always land on one of the Benedettos.
Homestar refuses to draft any of them.

Place Tony Stony in Strong Badia's slot on the model UN.

Try running the draft. You'll notice the wheel jerks to a stop at Homestar Runner; who, obviously, can't draft himself (and nearly starts a riot with himself trying).

But when the wheel turns back around, Tony Stony's on the bottom. A-ha! The model UN and the wheel are connected! All you have to do is put Tony Stony in the right place!

Put Tony Stony in Pompomerania's shelf (the Bull Honkey caffeinergy sauce) to activate Li'l Brudder for a hilarious scene.

Move Tony Stony to Poopslovakia's shelf.
Run the draft again. Coach Z is drafted!

Now Homestar has the five men he needs for his army. Marzipan sees the draft being held, and she's none too happy with this development. Homestar gives her a piece of his mind, and they end up dividing their land, dropping Marzipan out of the picture. Now, all the recruits are lined up, and Homestar merely waits your word to attack. (Not to mention that Marzipan Dumps Homestar... again!)

Strong Bad will pace back and forth in front of his recruits, with Col-o-nel Homestar on the side. Clicking on any recruit will allow Strong Bad to do his best sadistic drill sergeant impression on them. This will get the character to stand at attention, adding to your Awesomeness score. Talking to all 5 men; or, alternately, just clicking on Homestar; will signal your readiness. Let the invasion begin (Onward to Victory! Death to The Of Town)!

Homestar details the invasion in a flashback sequence. The Cheat and Coach Z deserted early on, making things more difficult (Or Most likely turned Traitor). But he promises he will complete this soon and return to Marzipan's side...

...oh, wait, he's being stupid again. Turns out the invasion lasted all of 5 minutes and the King of Town surrendered way too easily. That was a week ago, and right now Strong Bad is bored out of his mind. Strong Mad won't let him leave the castle, either. Only Homestar and Strong Sad are there to keep Strong Bad company, which is worse than if he'd been alone. Time to reverse fortune back!

Here's the Draft Wheel's Combos BTW:
Tony Stony + Strong Badia = Homestar Runner
Tony Stony + Bleak House/Blecch House = Tom Benedetto
Tony Stony + Homsar Reservation = Ramon Benedetto
Tony Stony + Pompomerania = Li'l Brudder!
Tony Stony + Concessionstan (Concessionstantinople) = Marty Benedetto
Tony Stony + Poopslovakia = Coach Z
Tony Stony + Coachnya = Little Johnny Benedetto
Tony Stony + Country = Hank "The Tank" Benedetto
8-15. Walkthrough - The King of Town's Castle
Ye find yeself in yon castle. Obvious exits are... blocked by Strong Mad.

Talk to Homestar. He'll tell you that the Homestarmy doesn't need to stand down, and that he will protect Strong Bad with his life. Whoopee.

Ask Strong Sad about the King of Town. Strong Sad will tell you he has Strong Bad's old job; checking e-mails. And the King is in no hurry to switch back, apparently.

Check the board on the table.

Hey, what do you know! The Of Town had his own Maps and Minions game, with pewter pieces of all the Free Country USA inhabitants! Now Strong Bad can order his army to perform missions... except not even the three remaining loyalists will listen to him anymore.

Stare at the fish skeleton repeatedly until a Teen Girl Squad idea comes to Strong Bad.
Use your lighter on the unlit candlestick.
Check the food on the right side of the throne to find the Of Town's spare beard.
Enter the unguarded door. The King has a Computer Room? Who knew?
Check the plug under the table. The Of Town's spare crown will pop up. Take it.

Check his computer. You find the email from the beginning! "Roy T." was the King of Town! This was all a ruse! Chicanery! Trickery! A heinous plot to get you on the throne! Well, two can play at that game.

Return to the room and hop on the computer.
Select "Templates". One of them is for a tax decree.
Send an email to theoftown@strongbadshouse.res, letting him know you've decided to tax his snack cakes. (Doesn't matter how much; it's the principle of the thing!) The Of Town will read the email and become as angry as you were! War is back on!

If you send an email by selecting "Food Request" and ask anyone for your 'Lectric Boots, a box containing the boots will appear by the computer.

Return to the main room and select the game board. Strong Bad will decide to help the other side.
8-16. Walkthrough - Endgame: Maps & Minions
Your side is the Rebel side. You control The Of Town, The Poopsmith, Homsar, The Cheat, and Coach Z. Your opponents are Homestar, Strong Mad, and Strong Sad. You go first.

Each turn, each piece may move to an adjacent territory. If two pieces try to occupy the same space, there is a battle. Unfortunately, Strong Bad's belief that the rebels needed him turns out to be accurate; they don't win a single battle, and as a result are almost always pushed back one space (or, if they meet Strong Mad, many spaces). The Rebels win when The Of Town crosses the board safely. The Homestarmy wins when one member captures The Of Town.

Fortunately, two of the three Homestarmy members move predictably. If Homestar can see The Of Town, he'll head right to him; otherwise, he'll try to pick off another Rebel piece. Strong Mad patrols back and forth in the two territories right in front of the Castle; your goal space. Strong Sad's movements are seemingly random, however.

In addition, you have a few other things working your way. Strong Mad's friendship of The Cheat is such that he will stop fighting when he finds him. Strong Sad uses psychological warfare to demoralize your troops, but Homsar's randomness renders him immune. Both of those fights will be draws, which locks off the space and prevents the Homestarmy from moving. In addition, The Poopsmith has a "Fog of War" surrounding him at the start of each turn. Whoever moves into the space The Poopsmith abandons will be invisible to the enemy (and barely able to breathe, but that's a minor concern).
8-17. Walkthrough - Endgame: Maps & Minions Strategy
Have The Poopsmith make a beeline for the other side, with The Cheat in front of him and The Of Town following his stinky trail. Homestar won't be able to capture The Of Town if he can't see him.

Send Homsar to Strong Sad to keep Strong Sad from stumbling on The Of Town.

For whatever reason, Homestar prefers to chase Coach Z if given a choice. Send Coach Z to Homestar, then don't move him after the first battle; Homestar will keep chasing the Coach into retreat.

At the end of the board, use The Cheat to keep Strong Mad busy.

Let The Poopsmith step aside as soon as Homestar is too far away to catch The Of Town. Homestar will see him, but he can only move one space at a time, which isn't enough to bridge the gap!

Send The Cheat to An Open Field to find the beret.
Par is 10 moves, which is needed to achieve Awesomeness.
The best possible score is 8 moves.

As soon as you win the mini-game, the King of Town storms his own castle and finds Strong Bad, who is all too happy to concede defeat. Through use of reverse psychology, he not only gets The Of Town to return to the throne, but convinces him to repeal the e-mail tax that kicked off the whole campaign! Strong Bad's halfway out the door before The King Of Town realizes he's been had.

Congratulations! You've beaten the game! Now just sit back, enjoy a professional recording of Marzipan's protest song, and get ready for extended mode, where you can put those Cave Girl Squad ideas to good use!
8-18. Walkthrough - Extended Play
Use your lighter on the UN model in Marzipan's back yard.
Now that you have access to the Homsar Reservation again, you can take the Darwin card to it and get a 6000-point comic.

Go to the House of Strong and get a final insult in on Strong Sad.

If you haven't already, play some Math Kickers to get an Awesome high score of over 2000 points.

If you missed talking to any character just before the siege (and, thus, didn't get them at attention), return to Pompomerania and switch the real sword for the fake one. Then use the fake sword on Coach Z, Strong Mad, Pom Pom, or Strong Sad to "knight" them and get them at attention.

If you've followed this walkthrough to completion, you should attain the rank of Lord High Fantasticus and get the bonus Max Shirt.
9. Cave Girl Squad Cards
There are four ancient scrolls, each containing an image that gives Strong Bad a great idea for the Cave Girl Squad.

Tar Pit = On Strong Sad's bookcase
Dinosaur Egg = Received after signaling with the lighter out Strong Bad's barred window
Alien = Buried on the Homsar Reservation
Darwin = In the Ex-fish on the King of Town's wall
10. Math Kicker featuring the Algebros Manual Pages
Strong Bad was brilliant enough to tear the pages out of his Math Kickers manual and hide them around Free Country USA in case... this game... happened.

Cover = Strong Bad's mailbox
Page 2 = Marzipan's mailbox
Page 3 = Under the box by the Picket Fence
Page 4 = Under the box by the bar in Pompomerania
11. Flags of the World
There are eight commemorative flags for Strong Bad to find on his conquering adventures.

Bleak House = In the box on Strong Sad's bed
The Cheat and Tirerea = Behind the Tire
Concessionstan = In the bush behind Bubs'
Strong Badia = Behind the Brick Wall
Pompomerania = Order two cans of Bull Honkey from the Pompomeranian bar
Homsar Reservation = In the "mysterious bush" on the Homsar Reservation
People's Republic of Marzistar/Homezipan = Buried near Marzipan's onion patch
Country = Buried by the flagpole of Country
12. Things Set on Fire
There are thirteen flammable items.

Maps and Minions box
Strong Sad's Flag
Constitution
Bill of Rights
Strong Bad's bed
Smoke Detector
One of Pom Pom's wall-hanging kimonos
The mysterious bush near Homsar
Lone skull
Lonely skull
Pile of skulls
The King of Town's candles
Marzipan's model UN
13. Strong Sad Names
You can call Strong Sad 13 funny names; most involving the word dump.

"Little Lord FATleroy" = Talk to Strong Sad while under house arrest before jailbreaking out & breaking the law even more.

"Dumpelstiltskin" = Use the pillow on Strong Sad before giving it to the protesters
"Dumplo" = Talk to him twice about the invisible fence
"Obsessio Depressio" = Examine the shower
"Doo-doo-ronomy" = Talk to Strong Sad about joining Strong Badia
"Your Dumpiness" = Offer Strong Sad the Pilot Wings
Alternatively, "Your Dumpness" = Ask him again to join Strong Badia
"Your Grayness" = Ask him once about his nation
"Lumpy" = Talk to him in his room after conquering his nation
"Sir Dumpsalot" = Knight him with the fake sword
"Dr. Dumpington" =- Show the tuning fork to Strong Sad at the Homsar Reservation
"Dumpenheimer" - Use the fake sword on Strong Sad at the Homsar Reservation
"Dump-tenant" = Talk to Strong Sad in Marzistar
"Dumpling" = Talk to Strong Sad in Extended Play


Other Uses of the Word Dump can be found in Homestarrunner.com such as:
Email 50 emails = When Strong Bad tries to recall an email after Homestar crashes his computer, he imagines the sender's name to be "Dumpface".

Email island = Strong Bad calls Homestar Runner dumpface.
Email huttah! = Strong Bad refers to one of his senders, named "Mito", as Dumpo.
Email autobiography = Strong Bad refers to his brother as dumpus.

Email kids' book = In Strong Bad's edited version of the Original Book, entitled
"Strumstar Hammer", Strong Bad writes the word "dump" on Homestar's shirt.

Email kind of cool = Strong Bad refers to Senor Cardgage as "an ugly dumpy guy."

Email dangeresque 3 = During the end credits for Dangeresque 1: Dangeresque, Too?,
Strong Sad is credited to his role as "Passerby (Hot Tub)" under the name El Dumpo.

Experimental Film = The Cheat presumably explains that when he was animating Strong Sad,
he tried to be as dumpy-accurate as possible.

A duct tape-constructed wallet was a Weekly Fanstuff. The wallet had Strong Sad's face on it, and was captioned "dump tape wallet".

Email rampage = Strong Bad calls his brother DJ Dumpy Dump.

Email record book = Strong Sad achieves the world record for being the "biggest waste of dump", and is given the name "Strong 'The Biggest Waste of Dump' Sad".

Email narrator = Strong Bad does the voiceover for the trailer of the movie "Things That Go Dump In the Night," starring Strong Sad. Also, the company that supposedly produced the first Strong Sad-related film was "Lump of Dump Pictures".

Email pizza joint = Strong Sad says that every time he tried to add Strong Bad to his "Pizz list", he would call him "Thelonious Dump".

Jibblies 2 = Strong Sad refers to himself as one of Pom Pom's "dumpier friends".
8-Bit is Enough = Strong Bad calls Strong Sad "Dumpa-Loompa" & "Dumpy Kong Jr.".
14. Costume Items
In addition to the costume items found while playing Homestar Ruiner, there are seven more costume items to be found, plus one bonus costume item and another hidden shirt.

Sugar-Frosted Eye Patch = In the Cheat Commandos-Os Box
Camo Pants = In the dryer
Gampaw's War Medals shirt = Buried to the left of Strong Badia
Spare Beard = In the King of Town's Throne-rigerator.
Crown = Unplug the King of Town's, um, computer.
'Lectric Boots = Send an email asking for them. Speedy delivery!
Beret = Send The Cheat to An Open Field while playing Maps and Minions
Max Shirt = Attain the "Lord High Fantasticus" rank

Kevin Bruner Shirt = As with the previous episode, walking underneath the doorway of the photo booth will cause Strong Bad to automatically wear a hidden shirt. Get beneath the booth floor by walking off the right edge three times while not wearing any costume items.
15. Math Kickers featuring the Algebros Score
2000 points are necessary for the maximum Awesomeness level.
16. Inventory
3-Ring Binder = Used on the Pylon at the Homsar Reservation

BMW Lighter = Used to set things on Fire, Destroy the Bleak House Flag, Bleak House Documents & on Strong Sad's First Aid Kit.

Clockwork Strong Bad Doll = Used on Strong Sad at the Homsar Reservation

Fake Sword = Used to Put the Homestarmy at attention or on Strong Sad.

Glowstick = Used on the Glowing Drink at Pompomerania

Katana = Used to Defeat the Taranchula Standee Monster at Country

Paper Crown = Used on the KoT Effigy to Destory the Invisible Fence & Break the Law

Pillow = Used on the KoT Effigy to Destory the Invisible Fence & Break the Law

Pilot Wings = Used on The Cheat at The Cheat & Tirerea

Pottery Shard = Used on the Pylon at the Homsar Reservation

Power Strip = Used on the Pylon at the Homsar Reservation

Pretendix = Used on Bubs at the Black Market to get the Pottery Shard

Quesos (Strong Badian currency) = Used to purchase the Strong Bad Doll

Red Towel = Used on the KoT Effigy to Destory the Invisible Fence & Break the Law

Stuffing = Used on the KoT Effigy to Destory the Invisible Fence & Break the Law

Taranchula Black Metal Detector (now with shovel attachment) = Used to Find the Homsar Artifacts & Collectable Items

Tony Stony = Used on the Model UN at Marzistar/Homezipan.

Tuning Fork = Used on the Pylon at the Homsar Reservation
17. PlayStation 3 Trophies
Long Burn the King!
Help create an effigy of the King of Town and spark a rebellion by Escaping House Arrest & Breaking the Law.

The People's Republic of Marzistar
Enter the People's Republic of Marzistar.

It's Good to be the King
Do the unthinkable: Make Strong Bad the King of Free Country, USA.

It's Not So Good to be the King
Return all of Free Country, USA back to normal.

Burninating the Countryside
Set all possible things on fire.

Attention!!!
Make all members of the Homestarmy stand at attention.

A Sad of Many Names
Have Strong Bad call Strong Sad by all his sad names.

I Can Start My Own United Nations!
Collected all the souvenir flags of the world.

I'm A Stylin' Machine!
Collected all available costumes.

Learning is Fun!
Collected all pages of the Algebros manual.

Algebros Master
Get at least 2000 points in Algebros.

The Secret Scrolls
Collected all papyrus Cave Girl Squad scrolls.

The Perfect Evolution of Cave Girl Squad
Get the highest possible score in Cave Girl Squad.

Homestarmy: Medal of Honorable Mention
Finished the Homestarmy game in 10 rounds or fewer.

Lord High Fantasticus
Achieve the highest possible Awesomeness level.
12 kommentarer
Aethelia 10. juli 2021 kl. 14.49 
"Strong Sad's movements are seemingly random, however."

No.

Strong Sad moves to the KoT if possible immediately.
If KoT is not nearby, Strong Sad moves to KoT's allies if possible immediately, other than Homsar. If two or more arenearby, priority is determined from bottom-to-top, right-to-left priority.
If not near anyone other than possibly Homsar, Strong Sad moves towards The Embittered Crag if possible.
If not near anyone other than possibly Homsar and already on The Embittered Crag, Strong Sad moves to Rotten Egglund if possible. Strong Sad will continue moving between The Embittered Crag and Rotten Egglund until it is possible to move to KoT or his non-Homsar allies.
If blocked by Homestar Runner, Strong Mad, or Homsar, Strong Sad may not move at all.

Strong Mad follows similar logic, but tries to move to East Homezipan if possible, avoiding The Cheat, and moves to East Marzistar if already on East Homezipan.

All three move in a deterministic way. There is no randomness.
VolnuttHeroP64  [skaper] 27. jan. 2018 kl. 6.19 
yw
franeldense 27. jan. 2018 kl. 4.21 
Thanks for the guides of the games!
VolnuttHeroP64  [skaper] 5. des. 2016 kl. 9.15 
@martin.blanch85
Since you beat episode 2, it's onto the Battle Royale of the Bands! Episode 3!
Marto, aquel que no termina nada 5. des. 2016 kl. 8.49 
I just finished ep 2, just have to restart the game :(
Marto, aquel que no termina nada 1. des. 2016 kl. 19.27 
Jr786, thx for your answer, i try to give bubs the quesos by the front, but when i select him strongbad goes to the back and say nope
VolnuttHeroP64  [skaper] 1. des. 2016 kl. 14.56 
@martin.blanch85
Use the Quesos on Bubs in the front of the stand. As for the Contraband in the Black Market, go around the stand. This is an Inventory Adenture.
Marto, aquel que no termina nada 1. des. 2016 kl. 8.56 
8-6, i cant get the clockwork doll and bubs is stucked looking for the black market and won't talk from the front of the stand... did i screw up? (i've got quesos)
Jordan` 17. apr. 2016 kl. 9.41 
Yeah, but the guide says that you only get -20 points if you don't kill all of the girls, and all minor deaths should be 0.
VolnuttHeroP64  [skaper] 17. apr. 2016 kl. 8.54 
those were all minor deaths, Jordan. Killing all 4 girls with Major deaths plus Chuck Darwin nets you 6000 Points.