Sunless Sea

Sunless Sea

195 Bewertungen
Beginner's Guide to Sunless Sea
Von aardvarkpepper
Guide for beginners. Better than many other beginner guides. Seriously. Key concepts, best use of resources and why. Spoiler-free beginning, tons of spoilers later.
4
2
   
Preis verleihen
Favorisieren
Favorisiert
Entfernen
Concepts of Sunless Sea (Relatively Spoiler Free)
REMEMBER

Control the vital variables of

Fuel, Supplies, Terror, Hull, Crew, Hold space, and Echoes.

Each has tradeoffs that indirectly affect the others.

The best ways to manage resources early game are very different to the best ways late game.

Something Awaits You

Every so often, you'll see a lighted lantern in the top right corner of the dialogue box in the lower left corner. This is "Something Awaits You", hereafter abbreviated as SAY. If you see the lantern, you have SAY. If you do not see the lantern, you do not have SAY.

If you are not docked, and if you do not have SAY, you will get SAY in time. You do not lose SAY until you dock somewhere and choose an option that uses SAY. If no options using SAY are available, or if you do not choose such options, you will not use SAY.

SAY is important. It'll come up later.

PHASES OF THE GAME OVERVIEW

Beginning game: Small ship so low fuel costs. Small crew so low supply costs. Your echoes are best spent on fuel and supplies, in roughly an 8 Fuel : 5 Supply ratio using starting ship. Do not attempt to buy cargo from *regular shops* to sell. You cannot afford to do this. Not even a little bit. Your income comes from exploration and "special cargo" you can find in some ports and/or from events. More on this later.

Early game: Still in a small ship, but with a few thousand echoes. Do not upgrade ship or equipment. Go around and pick up cheap officers. (See later spoiler-filled section for more details). Conserve Echoes. You need them to make more echoes. Need.

Run from enemies unless they're super weak. Full Power to the Engines risks hull damage, lost crew, and Terror, but don't hesitate if you're in real danger Your engines MIGHT blow up, but that's usually better than being seriously damaged or destroyed.

Reliable money comes from turning in port reports to the Admiralty. Early game, you do NOT want to do cargo runs, including the Venderbight Last Tour, ignore guides that say you should. The exception is running Sphinxstone from the Salt Lions, but you don't even want to focus on that. If Salt Lions are on your way back home and you have cargo room, great, if not, no problem.

Don't take chances trying to make mapping loops just a bit bigger so you can map a bit more before returning to port. You always want to keep a reserve in case something unexpected happens. You can lose crew, supplies and/or fuel to event or attack; similarly you can get a sudden jump in Terror, etc. It is a lot better to make it home safely with a few less net Echoes than to take chances trying to squeeze out a few more Echoes and get killed in the process. If you're reading this guide, you will have plenty of Echoes so won't have to worry about achieving 100% conceptual efficiency.

Mid game: There is no mid game, as profits go to lodgings and/or savings. That doesn't change gameplay much, so "mid game" is really just an extension of the beginning game.

Late game: Using same starting ship (so keeping fuel and supply costs low), the map should be explored to the point that you know where all the ports are. You should have picked up all the officers and progressed or finished a lot of quests.

Assuming you've done the prerequisites, this is the best time to do Red Honey runs. There is a consistent way to move Red Honey into London that is safe and profitable (detailed later). 100% safe and effective, so I recommend running Red Honey into London a few times for the play experience, then editing save file if you're still desperate for Echoes.

End game:

You need a hefty reserve of Echoes before upgrading to a new ship. Besides new crew, filling hold with fuel/suppiles, and new equipment, a bigger ship uses more fuel, and larger crew eats more supplies. This means you can *no longer just rely on turning in port reports for income*. Running out of Echoes can effectively kill your captain as you run out of fuel and supplies. No fuel, no supplies, you can't go anywhere, game pretty much over.

You could do Red Honey runs or cargo runs in a larger ship to earn Echoes, but that's really just not much fun. So I recommend doing everything in your starting ship you can until you *have* to upgrade your ship. When do you have to upgrade? When you need increased cargo hold space to carry loads of items to finish some quests, or increased hit points and firepower to hunt monsters to finish other quests. With your new big ship, finish quests then retire your captain.

There really isn't a "middle game" during which you slowly upgrade things. If you're following this guide (or even just playing normally), you can quickly progress to Red Honey, then you can just skip over the middle tier entirely. Spending on the middle tier just leaves you stuck without starting capital to invest in Red Honey, leaving you to grind up to stronger stuff, and that's not much fun.

FAST GAME OR SLOW GAME

You can choose to play a fast game, or a slow game, or a mixture.

Fast game: You're selling off stuff as soon as you can. You lose all those very rare limited availability items that unlock the best equipment and ending storylines that fulfill your captain's ambition. You have a lot more short-term Echoes, though, and you use that for quick progress, getting the best ship and equipment that can be bought with Echoes, getting a mansion, or whatever.

This is particularly tempting to new players because you don't *know* what a lot of things are; you don't know if you'll need XYZ down the line, but you know you can sell XYZ for a hundred or a thousand Echoes *now*. Sure, you might lose story progression later, but it beats dying *right now*.

Slow game: You hold everything that could possibly be used to unlock new content. You have lots of stuff in your hold that you're lugging around, because you don't want to sell it and lose a later storyline. Your income is pretty terrible even if you know what you're doing, because hoarding prevents you from getting the Echoes you need to spend to unlock even more ways of getting Echoes.

This is particularly tempting to new players because you don't *know* what a lot of things are, and you don't want to lose out on things later because you acted rashly now. If you're very careful, then sure, you can save XYZ for later down the line because you're not in danger of starving / running out of fuel / etc. so you don't *need* to sell XYZ and you can maybe use XYZ down the line for story progression. But if you're saving all your items and never selling anything for Echoes, it's hard to get the Echoes you'll need to make more Echoes, and your progress will be very slow.

Mixed game: Too fast and too slow are not ideal, but easy for new players. A mixed game is best, but requires knowing what you're doing. If you have a good idea of where you are in the game, and you know when you will need X amount of Y item, maybe you know you can dispense with any of that item you're currently carrying, if you also know you can find more without too much difficulty through the course of the game. But that requires knowing 1) that you *can* find the item, 2) *where and when* you may find the item, 3) your progress in the game relative to having the resources necessary to progress certain storylines. More on this in a spoiler-filled guide to follow.
Early Game - First Voyage Exploratory Loop (Relatively Spoiler Free)
EARLY GAME - FIRST VOYAGE EXPLORATORY LOOP

First voyage. Small ship so low fuel consumption, small crew so low supply consumption. This is ideally suited to exploration. Early money comes from turning in Admiralty port reports. There is a way to do this properly, and I will teach you to git gud. Do not attempt to make cargo runs. Whatever profit you make is wiped out by fuel and supply costs. Turning in port reports is much better.

Your first voyage will be an exploratory loop, heading northeast to Hunter's Keep, then northwest to Venderbight, then Whither, then Codex, then east for a while, then south, then west towards London. You will not double back, and will constantly be exploring new areas, docking at new ports, and making port reports. You should not attempt the Last Tour at Venderbight, or Sphinxstone from Salt Lions now.

Fallen London

Read the book if you like, then sell it. If you are absolutely sure you will get Echoes from dropping off a Tomb-Colonist in Venderbight, spend all Echoes on fuel and supplies, so your ratios will be at something like ten fuel per six or seven supplies. If you are *not* absolutely sure, keep 10-20 Echoes. Do *not* hire crew.

Take a note of how much fuel and supplies you are at when you leave, and take note of fuel and supplies you take on through your first voyage. This will help you determine the right amount of fuel to supplies you want to carry.

Visit Admiralty's office and get a location to retrieve Strategic Information from. You are now able to make and turn in port reports, your major source of income early game.

Visit Lodgings and read the papers to get Recent News, and sometimes 1 Supply. If you get it, great, if not, no worries.

Pick up Tomb-Colonist to take to Venderbight.

Do not leave yet. Continue reading until the end.

Fuel, Supplies, Terror, Hull, Crew, Hold Space, Echoes. These are the variables you must control.

Terror in Early Game
When you leave London, you want your lights on to reduce Terror. You may find something out there that effectively and reliably reduces your Terror later, but you do not know where these fine things are yet. That is why you are exploring, to find the wonderful things.

Your Terror-limiting mechanics early game are 1) reducing terror to 50 when you dock in London with SAY, 2) trading Recent News at a nearby Light-Ship for -5 Terror and 1 Zee-ztory, 3) paying 10 Echoes each to get -1 Terror and 1 Restful Night at your lodgings.

50 Terror is a dangerous place to be. You do not want to mess with that early game.

You only get one Recent News per SAY. You could spam SAY, but if you follow this guide, you won't need to suffer that drudgery.

So what you're really looking at is 10 Echoes per Terror. Other guides say don't turn lights on. But no, turn your lights on by all means. You reduce terror and have better line of sight, so you'll get more fragments by spotting things easily. Plus the fuel you burn and pay for means a point of Terror you never have. The fuel pays for itself early game in Terror mitigation.

Recent News: Recent News can be used at a Light-Ship to reduce Terror by 5, which is worth 50 Echo. Using Recent News at Hunter's Keep gives 1 Supplies worth 20 Echo. If you're there at the right time and remove Hunger, it's almost like 2 Supplies, but that's still only 40 Echo. So use Recent News at Light-Ship.

There is a light-ship docked just east of London. It's always there. Trade Recent News there. There are others scattered over the map, but don't count on finding one by chance.

Lights: If you're docked in certain places within the light of a light-buoy, sometimes your Terror will not increase, so you can save fuel by turning lights off. I think if you're over deep water and there's a large light-buoy near, though, your Terror still increases. Experiment in different places to see where you can conserve fuel.

Lights and enemies: If you see an enemy you want to avoid (and you want to avoid most monsters, believe me), turn lights off and head away immediately. Do not try to get close to see what it is. Just get away. Use Full Power to the Engines *if* necessary.

Crew You want crew to be at least at half. Any lower, and your ship's speed is reduced. But you shouldn't literally stay at just half crew. TYou will lose crew to random events or monster attacks, so take a few extra.

For the starting ship, the target is 8. If you hit 9, not to worry too much. But do not hire on another crewman, even for 1 Echo, unless you have a very particular reason. More crew eats more Supplies, and you need to keep costs down.

Hold Space You haven't left London yet, right? Good. When you get to Venderbight, don't take on the Tomb-Colonists. You want to save hold space. Quite apart from the huge expense of losing 12 Supplies early in the game, your hold simply can't afford to be filled with Tomb-Colonists, especially if you don't know exactly where you're going. Even if you did know where you were going, between fuel, supplies, and Tomb-Colonists, things would get very difficult very quickly. Remember, hold space is at a premium. Apart from fuel and supplies, try to keep the hold as empty as you can most of the time.

Echoes You want to have some Echoes. Echoes are for discretionary spending if you see something that might be useful, or for emergency spending to mitigate high Terror, or to stock up on Fuel or Supplies.

Make sure to only spend Echoes on things you need, and play things a bit safe. If you don't stretch yourself to your limits and always play it a bit safe, you may not get the maximal profit per voyage, but on the other hand, you have a lot less chance of dying, or of getting stuck someplace remote having to buy emergency relief and footing a huge bill. Don't try to make 50-60 extra Echoes and risk getting stuck with paying 500 Echo to limp home. That's a bad deal.

Zee-Bats

Zee-Bat Scouting Launch zee-bats constantly. When you see a Zee-Bat report appear near the lower left of your screen, click it, and a bat icon will show up on your chart. You can get an idea of what your heading should be from your chart, then head more or less straight for the target, checking the chart on the way now and then to correct course as necessary.

Zee-bats extend your scout range immensely. With zee-bats, you're not limited to finding things by moving your ship close to them. Zee-bat scouts head far out into unseen territory. If they come back with a report of a place, you can head straight for it. But if they don't come back with a report, you know there's nothing nearby, which is also useful to know. That means you can make huge scouting loops, with zee-bats covering the unseen flanks.

Proper use of zee-bats, making wide scouting loops with your ship, using zee-bats to pinpoint new locations to head to and map, and heading directly to those points saving fuel, and *not* retracing your steps so landing at new docks, is *the* way to make money with port reports.

Granted, you're not primarily trying to make money, it's probably just a couple hundred Echo per run if done right. But you're also exploring, finding those things that will help you later.
First Voyage Exploratory Loop (spoilers)


To this point, I wrote about things like best use of resources, zee-bat scouting, &c. Time to get a little more detailed, which means spoilers.

Above is a map of a first voyage. No legacy items, nothing fancy, just plain first captain, with a shadowy past (so not even any bonus to statistics or starting crew), no editing save file to give more money, nothing.

This run was made in a previous version of Sunless Sea, in which enemies weren't quite so aggressive/fast/dangerous, and Pigmote Isle was incredibly useful (giving a big reduction in Terror *and* loads of free supplies). But the same basic idea holds in current versions. Make a pretty sizable loop. Get money from turning port reports in to the Admiralty.

You can see that more or less the route is very straight, from port to port. That's partly because I know what scouted locations are ports and which are not. Like, if my zee-bat scouts "The Crow Rocks" or something, I know that's not a port, so I don't have to head there.

But also, routes are very straight because I home in on the next port with zee-bats, long before I can see them. That makes my routes very efficient. I don't waste fuel going up then down or whatever. Point to point.

Second, take another look at the route. You see it's a gigantic circle, with a huge area of unexplored territory in the middle. That area isn't quite as "unexplored" as it looks - not even close - because I was launching zee-bat scouts the whole time. I know for certain much of the black area in the loop has nothing to see. There are almost certainly a couple unmapped locations near the *center* of the unexplored territory, but that's okay - I'll cut through the unexplored territory on future trips and map on the way.

Making such a wide loop absolutely ensures I will not backtrack. That's essential - if you're even *close* to backtracking, that's not good. You want to be cutting through very much unexplored territory as much as you can, to make sure you're getting port reports on all new locations.

Third, take *another* look at the route. You see that I did not just head in a vague loop. I very deliberately cut south at a certain point. Look at that point. You want a big loop, yes, but you never want to get *too* far from London on that first voyage. You loop around, and when you're at 5 fuel and/or supplies, you start to head back towards London, giving you a little margin in case of enemies or whatever. It's okay not to make a huge loop like the one shown, and it's okay to make port with some fuel and supplies left. You want to play it a bit safe. When you have more experience, you'll know better what's more or less risky, and you can cut things a little finer - remembering of course random encounters may cause unexpected problems.

I headed 3:00 to the end of London's docks, then 12:30 following the light-buoys to Hunter's Keep. Spoke to the middle sister to get Stone's attention. If you're stranded at zee, sacrificing to Stone might just eat up supplies and do nothing much - or you might get a Wound and get some fuel. That's a pretty good deal. Messing with Salt or Storm, though, I don't do. They can do weird things. Weird things that will kill you dead. Generally do not take chances with angering the gods of the zee. It is expensive to remove their anger, and it is almost *always* worth a small price to not incur it. (Note: If you cut things very close, of course you may have to anger a god to survive, which is all the more reason to play things safe. Be safe!)

After Hunter's Keep, I headed 11:00 towards Venderbight. Sometimes you meet a zee-bat swarm on the way.

Enemies Of the enemies you can face in your little ship, it's pretty much zee-bats for +1 supply 1 Terror or -1 Terror, Auroral Megalops (small yellow crab looking thingy) for removal of existing Hunger or 1 Fragment (probably not worth it), Pirate Steam Pinnace at 30 hit points and 5 crew (random items) - maybe slightly larger ships.

But don't tangle with bigger stuff. Even if you can kill bigger things, it's usually not worth the fuel, supplies, and damage you take on. You can come away completely unscathed from killing a 300 hit point ship with your wee 75 hit point ship and pea shooter (although this is much less true after the update), but you'll have burnt up so much fuel and supplies, and gained so little in return, it will not be worth it.

Reached Venderbight, unloaded Tomb-Colonist, took on First Curator's quest (just taking it on doesn't hurt so may as well), explored, made port report (you always make port reports, I won't even mention it after this), ignored Last Tour Operator. As mentioned in previous section, you cannot afford to take that on just now.

Then headed 12:00 to Whither. On the way, *before* you reach Censor's Arch, you may see a Lifeberg. (edit - AVOID THE LIFEBERG - they changed the spacing between buoy and outer arch so you CANNOT safely kill the lifeberg) This is the only major enemy you can kill safely in your dinghy.

(edit - removed former way of killing lifeberg safely, as with the edited game it is NO LONGER SAFE to kill lifebergs easily. You CAN still get lifebergs stuck in a few other places with narrow spacing but it's much more difficult and not worth your time.)

Anyways, you head on to Whither. You do NOT want to pay 50 Echo there for shore leave. Generally early game you want to avoid paying out Echo unless it's going to bring you something quite substantive, or unless it's absolutely necessary. Like using 1 Echo at Mutton Island to get a port report - if you don't have the 1 Echo, no port report, so no 1 Fuel + 5 Echo for turning that port report in to the Admiralty.

Then on to Codex. Then east. You don't know what you might find next, because the islands change.
Early Game Location Guide (spoilers)
Previous sections detailed concepts of the game, including effective use of resources and zee-bat scouting, then an example with picture of first scouting loop.

First scouting loop should be followed by second scouting loop, then routes to cut across unexplored territory, possibly take on profitable cargo, then return to London. Exploration is key.

The following addresses locations - what to expect, what to do, what you may gain.

Venderbight/Whither/Codex: Don't revisit these places regularly. Whither's the only easy source of Mutersalt, but at 5 Zee-ztory per, you have to put things off until you get more Zee-ztories in the course of playing the game. You can trade Supplies for Tales of Terror, but you probably shouldn't need to. Little to do at Codex other than with one of your Officers but that's much later. You may find things to drop off for the Last Curator at Venderbight, and there's a Lifeberg you can hunt on the route, but by and large these are not high-profit locations. After scouting them, mostly leave these places alone.

The Avid Horizon: Some ports have story options with a closed fist icon, and if you select such, you get a notice with the fist icon saying "Time is!" and you'll get Memoirs: Beginner's Luck. Once you do one of these, that's it for the whole game. You will not see the closed fist icon again.

Most closed fist locations give you stuff that isn't horrible, but not really good either. The Avid Horizon, though, is *the* place to go. If you're not lucky, you get 3 Fuel, 3 Supply, 3 Casks of Sapphires, I think maybe some other stuff. That's pretty good! If you're lucky, you get an Eyeless Skull mascot that can be also used for some quests, 3 Supplies, other stuff. Excellent!

The Avid Horizon is always in the north somewhere. Port report pays well. You can also get a Hunter's Eye in exchange for fragments, which is used for the Last Curator's quest in Venderbight.

Pigmote Isle Used to be abusable for Terror reduction and supplies, but expansion changed that. Now it's not a key location. You can stop by if it's on the way somewhere, but don't go out of your way to go here.

Mount Palmerston: Fuel costs 9 (less than 10 at London) Supply costs 22 (more than 20 at London). Remember every Echo counts. Still, this can be a good restocking location as most other places have fuel costing 20 and supplies costing 30.

The Lonely Deviless is here; you want to talk her up a bit so eventually you can access the Brass Embassy in London. There you can sell Red Honey for 999 Echo apiece. Also, the Mount Palmerston port report can be used at Adam's Way for access. You can buy Devilbone Dice at Mount Palmerston. That's used for some storylines and quests, plus can be sold at Khan's Shadow.

Terror exploit here; you can give up supplies and gain Terror but maybe get something good. One of the possibilities you can get is Lamentable Relic, which is required for some quests.

Abbey Rock/Gaider's Mourn If you're loaded with excess Supplies - maybe you've been spamming Pigmote Island a bit to reduce Terror, and got overloaded on supplies - here's where you sell them, at 20 Echoes apiece. That's pretty much as good as you're going to find out on the convenient part of the map. Watching the Convent may get you a Strange Catch, which is used for some missions.

Frostfound Take tea here with SAY for 1 Fuel, 1 Supplies, Terror mitigation (I think -10). You can also often find an officer here that costs 20 Echo and increases fuel efficiency by 5%.

The above are what you can often find useful on the first scouting run, with notes for later.

The second run you take should be another loop to the north, this time going all the way out to Irem in the far northeast corner. The main reason to go is to be sure to hit the Avid Horizon in the north. The second reason to go is you'll cut through a big slice of unexplored territory by taking a direct route northeast instead of following the previous loop. The third reason to go is you should have so much fuel that you may as well burn it off for something, and Irem's a good place to head south from to find all new unexplored territory. The fourth reason is if you've played Fallen London a bit and got a Whisper-Locked Box, and if you talked to the fellow at the University, you'll have a storyline advancement to open the Whisper-Locked Box that has you going to Irem.

After cutting south from Irem, here's the more useful stuff you may find

Polythreme - with six empty space in cargo hold, pick up Clay Men and ship to London. I think it's 20 profit per. One might go mad and you might lose some crew, but it's still a pretty significant profit, especially if you don't have to go much out of your way. Polythreme's also one of the best places to sell A Casket of Sapphires, which you may pick up from Port Carnelian.

Khan's Shadow Sells A Crate of Human Souls, cheaper than London, a few other things. But one of the great reasons to visit Khan's Shadow is its port report at the Admiralty reduces Terror.

Empire of Hands Explore here to unlock something in London, after which you return to the Empire of Hands and do things. There's content to unlock here, which is the main reason to come, but you can also trade Tales of Terror!! and Mushroom Wine for Zee-ztories with the Treasure Hunter. Not someplace you go to make a profit, but if you're in the area, you may as well stop by. If you read the port report in your lodgings instead of turning it in to the Admiralty, you get a Secret.

The Chelonate Mysterious Crate to take back to London, plus story things. Best place to sell A Casket of Sapphires, but it's usually too far to be worthwhile. The purpose of cargo runs isn't to shuttle back and forth making money slowly - it's done because you know your fuel and supply requirements, and are going certain places for quests anyways, so you fill up the extra hold space with stuff to turn a small profit.

Port Cecil Make sure your Terror is low before coming here if you want to progress the island's quest. By doing things, you can eventually get a chap to show up and come with you.

Salt Lions - Not until the return leg of the second voyage, at the earliest. Even then, it may not be useful if your hold is filled up with loot from destroying monsters and random encounters and Clay Men from Polythreme or whatever. If you have 20 hold space free, and 200 Echo, you can carry Sphinxstone to London for 500 Echo for a net 300 profit.
Enemy Guide: What You Need to Know (spoilers)
Enemies

Killing enemies does give 1 or more Terror reduction, but what with the Terror increase just by zailing around during combat, plus burning fuel and supplies while fighting, fighting is often not a good idea. If you're much stronger, then maybe fighting is not a huge waste of time, but generally just turn lights off and head away.

If you're determined to fight, getting an enemy in the lighted arc of your ship lights lets guns lock on faster.

Bat Swarm: Swarm of bats. That's what it looks like. 20 hit points, excellent maneuverability and speed, ram attack, 1 Supplies, 1 Terror, or -1 Terror. Not a terrible thing to fight off, but watch the Hull. If you're about to set off on a long voyage, getting messed up at the start by bats, even a little bit, is maybe something to avoid. If you're getting a bit low on hull, consider avoiding. Otherwise, it's a bit of damage, and a very small bit of time, for net + 1 supplies (terror reduction for killing, terror increase for chopping them up to eat)

Auroral Megalops Small yellow crab looking thinger. Smaller than your dinghy. 20 hit points, excellent maneuverability and speed, ram attack. Eat for hunger mitigation (so there's not much benefit if your hunger bar is low), or chop up for 1 Fragment. Usually not a good use of your time.

Jillyfleur Small jellyfish looking thing. 75 hit points. Excellent maneuverability and speed, good-damage ram attack. Chop up for sometimes 1 Strange Catch (I think); letting it dissolve gives 1 Zee-ztory. But this thing is going to do you some considerable damage. Normally try to avoid it.

(assorted ships): 75 hit points or less. If you get behind them and keep maneuvering to be behind them, they won't hurt you. You might take some damage initially, especially if they surprised you or if you're inexperienced, or just in the course of approaching them. Destroy them, get some salvage, sometimes kind of nice stuff. But be aware your Fuel, Supplies, and Terror are all going down/up while you're fighting. That's why you don't fight stuff with more than 75 hit points if you're doing 10-14 damage per shot - even if you're not hurt, you burn up so much fuel and supplies, whatever you salvage often isn't worth the trouble.

Anything else, just turn lights off, move away, and don't fight, until you have some very nasty guns and maybe Blue Scintillack for instant reloading. There are things that will catch and kill you unless you use Full Power to the Engines, so if something big and nasty is catching up - some terror, hull damage, and lost crew is better than being dead.
Midgame Location Guide / Spending Echoes to Get Echoes (spoilers)
To be added, details some of the more profitable ways to make Echoes, and what is needed to unlock those ways, if applicable.

For now, though, just the really important stuff.

While you stick with your starting ship, fuel and supply costs are low enough that turning in port reports to the Admiralty should give a profit. Each port report will give you echoes and 1 fuel; the echoes will be enough to pay for supplies and to alleviate Terror, plus a bit extra. This assumes your routes from port to port are reasonably efficient (that you're using zee-bats to scout and making wide loops instead of just trying to visually find everything)

On top of that, there are a few things that happen on any run that really help out. The first run from London to Venderbight carrying a Tomb-Colonist nets a small but significant profit. The Blind Bruiser shows up and forks over a load of nice stuff. These things only happen once, but they definitely help, and should carry you at least until you've found most of the ports in the game.

After you've found the ports (or as the opportunity arises), you also want to pay attention to these:

Salt Lions: With 20 cargo space and 200 Echoes, you can carry Sphinxstone back to London for 500 Echoes. Profit 300. You can't do this forever, and it's not really worth going terribly out of your way to do, but if you find Salt Lions, it's a good idea to plan mapping expeditions so you swing back by the Salt Lions at the end of the run, when your cargo hold is emptying.

Polythreme: With 6 cargo space, pick up Clay Men to take to London, for a straight profit of 20 Echoes per, or 120 Echoes profit. Yes, a Clay Man might break out and kill a crew member, but it's still a good risk. Don't worry about getting a secure compartment. You want to maximize profit per time spent in game, and using up a valuable equipment slot just to help secure 20-30 or whatever Echoes worth (Clay Man plus crew replacement) doesn't really do that. It helps a bit, but that equipment slot is usually best spent on something else.

Mount Palmerston: Have tea with the Wistful Deviless and do the things she wants. She'll want a Crate of Human Souls (or you could give her your soul though I've never done that) down the line, will want you to bring some messages to London, then you'll bring messages from London to her. Whatever. Tea with the Wistful Deviless is the only way to access the Brass Embassy in London, and that is where you sell Red Honey for 999 Echo apiece, the most reliable and safest profit route in the game (unless it's nerfed later).

Isle of Cats: Do some horrible things and get in good with a sponsor to access Red Honey. The easiest things to trade in are fragments (though you'll have to make repeat trips) or Lamentable Relics (as Lamentable Relics don't take up cargo space). You could also swap in some other things like fuel, but that's costly and pretty impractical. Eventually after doing a lot of shady stuff, you can access Red Honey. Red Honey doesn't take up cargo space either. So you spend almost all your Echoes on Red Honey at 600 Echo apiece, then sell them at the Brass Embassy in London at 999 Echoes apiece. Safe, reliable, easy, no danger, low supply/fuel costs.

Mutton Island: You'll notice if you go to London with SAY, you may get searched. If the wrong sort of people search you (there's two different sorts of searches), all your lovely Red Honey will get confiscated (or perhaps whatever other contraband you're carrying). However, you can completely avoid this by parking at Mutton Island until SAY, using SAY at Mutton Island, then using Full Power to the Engines all the way into London (reactivating Full Power to the Engines if necessary). With the added speed, SAY won't reactivate before you get into dock at London, so you won't be searched.

That's all you need to make ridiculous amounts of easy Echoes.

You used to be able to fill up Mirrorcatch boxes at the surface with sunlight for easy Echoes, but the game changed so each time you fill a box with sunlight, you increase Yearning, Burning, and that makes you start opening the boxes of sunlight as you travel, and each time you open a sunlight-filled box you get a wound, and at three wounds you die. Plus, if your Yearning, Burning goes above 100 or something like that, if you go to the surface, your game simply ends, and that *really* puts a stop to repeat sunlight farming. Your Yearning, Burning can decrease over time while you're in London, but farming sunlight just doesn't work now.
Item / Location Guide (what you need to know; spoilers)
The six-digit numbers are the ID of the resource in your save file. Editing the "Level" of that item decreases or increases what you have in stock. Make backup saves before you change anything. If you don't have any of an item in stock, you usually won't find the number in your save file; you need to have at least 1 before the item shows up and you can change its level - unless you know what you're doing in which case you probably wouldn't need to read this.

I'm not absolutely sure about the numbers, I took them from an old Notepad file I saved with a lot of jumbled notes.

There are also comments on how to get some things.

102028: Echoes
102027: Fuel
109902: Fuel Efficiency
108975: Crew

117204: Yearning Burning: You want this at 100 or more, along with a Dread Surmise and a Judgment Egg or Sunlight-Filled Mirrorcatch Box when you enter the thing at Frostfound. Increasing this is easy, fill Empty Mirrorcatch Boxes (available at Khan's Shadow) with sunlight at Aestival or at the surface.

102025: Terror

108545: Fragment
102022: Memory of Distant Shores
102032: Secret
108974: Outlandish Artefact: Get lucky when trading in supplies at Mt Palmerston.

109714: Hunting-Trophy: Kill lifeberg (recommended spot north of Venderbight, trapping near the arch as described earlier in this guide - EDIT - THIS IS NO LONGER SAFE, HUNT LIFEBERGS AT YOUR OWN RISK)

109102: Drowning-Pearl: Give fuel or supplies to the zeppelin at the Empire of Hands, or take Scintillack (I think it's a minimum of 5 or 7 at a time) to the Fathomking's Hold to trade.

108653: Strategic Info: The Admiralty sends you to specific spots, and sometimes you can get this when you get there. Or you can randomly get it. Never ever trade this stuff in as it is. Always convert to Vital Intelligence.

102023: Zee-Story: Trade in Recent News at a light-ship; the trade also reduces terror.

108764: Tales of Terror
110312: Vision of the Surface: I think you can get this at Grand Geode. Maybe not?
105975: Extraordinary Implication
108656: Lamentable Relic: Get lucky when trading in supplies at Mt Palmerston.
108655: Ambiguous Eolith: Buy at Mount Palmerston.
108975: Captivating Treasure: Reward from Last Curator at Venderbight when you turn in certain things.
108657: Judgment Egg
115930: Intriguing Snippet

109744: Vital Intelligence: Created by "Use" on two Strategic Info in your inventory, with a certain amount of Mirrors and something else (Moves in the Great Game, Memories of Distant Shores, or a Zee-Story I think). Vital Intelligence is used to progress with the major powers. You *will* want to use this.

111726: Searing Enigma

108938: A Lump of Blue Scintillack (or maybe it's 102027?) You need to have Port Report: Fallen London by having going to Iron Republic and getting a port report there when Iron Republic Days = (I think it's 16-20 maybe but I forget). Then you trade the Port Report: Fallen London in to the Brass Embassy in London and get the Blue Scintillack.
111569: Ray-Drenched Cinder (111352? not sure) available at Empire of Hands after doing some things.

108741 Revelatory Chart

Mutersalt - trade in 5 Zee-Story at Whither.

Strange Catch - available at Irem. There's a lot of stuff available at Irem, but generally you don't go there to shop unless you edited your save file so have trillions of Echoes.

Soothe & Cooper Long-Box - also available at Irem, costs Secrets.

Dread Surmise - I forget, but I think it's something like this - you can buy Searing Enigmas in Irem with Secrets, and you can trade in Searing Enigma for Dread Surmise at Iron Republic when Iron Republic Days is 0 to 4. Then you can sell the Dread Surmise at Irem for profit of +1 Searing Enigma, then you can repeat the process. Something like that.

Giant Lorn Fluke (name's something like that) - dropped by large sea-urchin looking creatures. Use a good ship and good guns; these things do plenty of damage.

Watchful Idol: Again, I forget. Maybe it's not called Watchful Item. Anyways you take an owl-looking statue thingy that you can buy at Irem to Polythreme, show it to the king who upgrades it, then you can give it to the Curator at Venderbight. There's another place to get it, I think, but I can't remember.

Live Specimen: Your first captain wont see the zoo or whatever it is in Fallen London that lets you straight up buy Live Specimens. If you want a Live Specimen, you have to find it in a random SAY event that I think involves a panther looking thing or something.
Recommended First Playthrough (spoilers)
First playthrough, I recommend getting not choosing shadowy past for the *entire* game (don't talk to anyone about your past), delivering the final Sphinxstone to London, progressing the Station III or bringing the Hunter's Rock survivor (if there is one) to the surface, progressing the Carnelian Exile and Irrespressible Cannonneer quests, then right before finishing off with the Carnelian Exile (which ends the game) finish raising Anarchists to 7 (which disables the good stuff at London but it won't matter much fi you're really ending the game anyways).

This gives you three legacy items in total to raise your next captain's Iron, Hearts, and Veils. The Irrepressible Cannonneer will let you access the Memento Mori. Why these specifically? Carnelian Exile end removes your will (even if you buy another one, it goes away), removes your Scion, you lose all your Echo, and Veils, Mirrors, Hearts, Pages, and Iron are all set to 1.

So for your next game you can bring a weapon, or 50% of your Echoes (nothing), your existing map (but that means you lose a load of fragments as you won't get fragments easily as the whole map is mapped), or an officer (like 20-50 Echo . . . whatever. It's a bit of a hassle to re-maximize some officers, but it's not THAT big a deal). The Memento Mori, though, is a really nice weapon.

More details on exactly how to do this, perhaps later.
26 Kommentare
Dalfi 11. Jan. 2022 um 9:20 
Thank you!
aardvarkpepper  [Autor] 10. Jan. 2022 um 17:56 
@Dalfi: Thanks for your inquiry. I know the guide needs updating for the current implementation; the first mapping loop should be a good deal smaller, and there are other significant changes. In the middle of taking notes, though, I ended up moving; I hope to be able to tackle the project again in July.

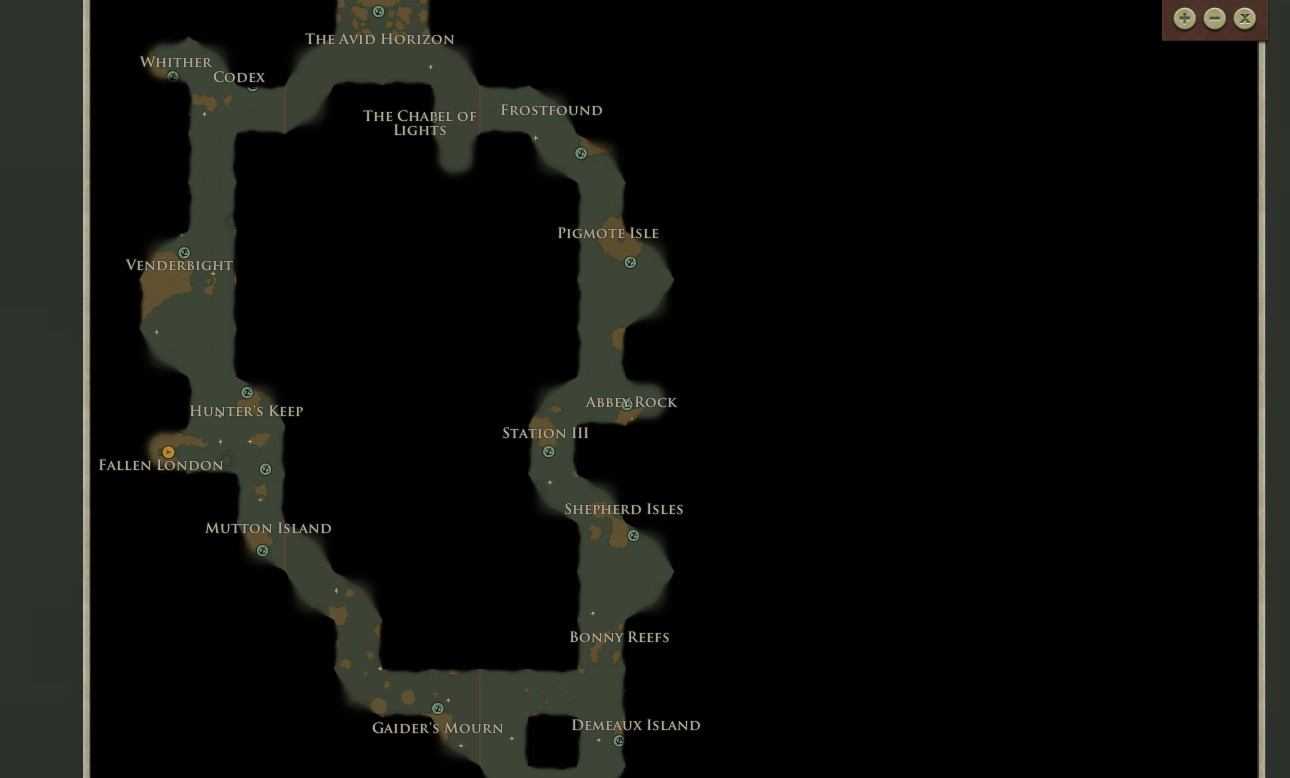
But though *details* have certainly changed, avoiding spoilers, a few things have remained constant. You must watch fuel, Terror, Echoes, damage to your ship, and certain events that may happen in certain ports. Upgrading your ship type is usually a trap; more expensive ships burn more fuel and need more crew (so need more supplies), and running out of Echoes that way is how captains can easily end their game.

If you're looking for more tips for beginners, please let me know if you have something particular in mind.
Dalfi 2. Jan. 2022 um 10:08 
Hello, in the end did you update this guide? Thank you for your work
aardvarkpepper  [Autor] 1. März 2021 um 6:07 
There is one other tip I have for now. When you're in harbour you continue to burn fuel and supplies unless you pause the game. You can continue to do read story etc. while the game is paused, you only have to un-pause to launch your ship. If you take your time reading (which a new player would), this could easily see you losing all your fuel and supplies to reading time. So pause the game! I'll make sure to make that tip prominent in the rewrite.
aardvarkpepper  [Autor] 28. Feb. 2021 um 14:07 
I've played the game several times this past week. Compared to earlier builds it seems much easier and faster to get story-related items, but more difficult to get basic things such as fuel and supplies. I'd initially written the guide to avoid spoilers but I'll rewrite it from the top with a much more directed approach (with spoilers) that should be more helpful to new players playing the current version so they know what, specifically, to prioritize. I'll be playing through the Carnelian Exile quest a few times before starting the writeup so it'll be quite a while. Thanks again for the feedback, apologies that I did not keep it up to date.
aardvarkpepper  [Autor] 28. Feb. 2021 um 14:06 
BTW you will not need to make Codex to make enough echoes to survive. Before you depart Fallen London, go to the Admiralty and talk to them so you'll be able to turn in port reports. The first time you turn in a port report for a particular port you'll get a chunk of Echoes and fuel. If you destroy weak enemies and loot them (some are more lucrative, some far less, you'll find which are worth the trouble) and sell items you don't know the use of, then you shouldn't die of hunger for quite a while. I'll have more tips in the eventual rewrite of this guide.
jasque101478 22. Feb. 2021 um 18:47 
Thank you for the reply. Your graciousness shames me.
aardvarkpepper  [Autor] 21. Feb. 2021 um 21:45 
@jasque101478: I knew the developers made some changes, like how lifebergs can no longer be farmed, then they removed easy farming of sunlight, and they were adding quests to the Island of Masks last I checked.. I'll have to give the game another run through sometime to see what's changed and edit the guide. Thanks for your comment, sorry you had difficulty with the gameplay. (I myself enjoyed it for a while, but it isn't exciting getting from point to point after you're used to the game, I think.)
jasque101478 21. Feb. 2021 um 19:26 
Wow. I have tried four times now to follow your guide. I have either run out of fuel, run out of food, run out of health, or run out of echoes, every time. And I NEVER got past my initial loop! I just didn't have enough resources to get to Codex and back, and nothing short of that trip will net enough echoes to survive.

Your guide may have been useful at one time, but now it is completely useless. Your stated goal was to get people past the, "This is fucking ridiculous! I quit!" point, but this guide just proves that Failbetter just designed Sunless Sea as a massive troll.

I'm glad you enjoyed the game; I'll go find something else.
aardvarkpepper  [Autor] 27. Dez. 2016 um 6:32 
Yes, I tested it and they changed the spacing between buoy and outer arch so the lifeberg doesn't get stuck any more. Thanks for the comment; edited the guide.