Monstrum

Monstrum

242 ratings
Aye aye Cap'n. An ol' Sea Dog's guide to Monstrum
By ChaosConvexum and 1 collaborators
Hello crew! This ancient manuscript has been created with the intent of instructing new crewmates as for which their duties are as good residents in our Ship! I shall update this guide when I come up with something useful.

Success is not dictated by the reading of this guide, however it could make your experience easier if you're not familiar with the game yet.

This is no walkthrough. It's a basic explanation on how the game apparently works and what's there to be done.

W: I decided to give this old guide a round of polish, and as I'm now with much better recording softwares I'm thinking of continuing that video series. Don't expect updates, but I'll see what I can do.
8
   
Award
Favorite
Favorited
Unfavorite
Are ya ready kids?
I hope ya are. Survival's not easy, with those monsters lurking around, ya know? Let's give you a small briefing here:

Monstrum is a randomly generated roguelike survival horror game set on a derelict cargo ship, wherein you'll need to find the correct items to escape through the multiple vehicles present. But watch out, you're not alone! One of the three monsters currently implemented in the game will randomly be picked to hunt you for the duration of your current life.

By failing or succeeding, whichever happens, the entire Ship will be reset, items will be again scattered around the map and some small variations in the Ship's terrain layout might happen.

In this guide, the Cap'n shall treat the following topics:

  • The Ship
  • The Monsters
  • The Items
  • The Escapes
  • Tips and Tricks
  • All of the Achievements

He won't treat the topics of notes and tapes as he himself didn't unlock them all and isn't particularly interested. This guide is for gameplay, not lore.

Ready? Let's begin.
Keys and Basics, aka Learn To Put One Foot In Front of The Other
Controls
You can rebind controls at your will, you're not forced to stick with the default; the Tape Listen/Stop key is mysteriously missing from the binding list and binding another key to V will unbind the Tape key. To rebind it, you'll have to reset to default.
Key
Effect
W
Move Forward
S
Move Backwards
A
Move Left
D
Move Right
SPACEBAR
Jump
Left Control
Crouch
Left Shift
Sprint (hold the button)
Q
Lean Left
E
Lean Right
C
View Notes Found
V
Tape Listen/Stop
TAB
Journal
F
Interaction/Action (some actions require holding the button)
Left Click
Use Selected Item
Right Click
Throw Selected Item
Mouse Wheel
Scroll Between Items (Up = Next; Down = Previous)
Numbers (not numpad)
Select Items
The game will by default prompt you to press certain keys when near an interactable object or surface.

Noise
Noise can only be produced by smashable and distraction items. Any other action that would logically make noise, like running, will only be heard by you. Noise will attract the monster to its source. See the Monsters, Items and Tips and Tricks sections for more details on how to use Noise to your advantage.

Tripping
On the upper decks, there are weakened parts of the floor that you'll trip on if you run or jump on them. During a chase, this can prove fatal. Walk calmly over them, or jump over them during a chase.

Light
Lights are found is most areas of the Ship, some of them cannot be disabled, and will prevent you from wandering in complete darkness. Other sources of light are certain items and the Brute's face. Monsters cannot see your light sources, so it's fully safe to point that flashlight at them. Not that there would be a reason to do it anyways. See the Items and Tips and Tricks sections to know everything you need to know about Light and Sight in Monstrum.

Hiding
You can hide inside any locker and under any desk or regular bed. Monsters will occasionally check these spots (they can also destroy some of them). Try not to let them see you hide, or it will be useless as they'll drag you out and kill you. As an anti-frustration feature, if they accidentally find you in a hiding spot, they'll throw you out but not kill you instantly, giving you time to put some distance from them.

Death
There are only a few ways to die, but they're all adequately painful. You can die by:
  • Monster: the most common cause of death among sailors, this entity will actively hunt for the player across the whole Ship and use their skills to chase and kill - or fill their belly with - them.
  • Steam: steam is present within the belly of the Ship in practically all corridors located beneath Deck 5, and on your computer. You can disable steam emissions for a single pipe by turning the red valve nearby. If you want to stop all Gabens at the same time, you'll need to access the Master Steam Valve Room in the Engine Area. Steam will instakill you if it hits your entire facial area, but it'll only damage you for 50% of your life if you walk into it while it's already emitting. Life regenerates over time.
  • Falling: since the human body isn't made to withstand excessive fall heights, falling from the Liferaft's Deck will kill you. There's no achievement about falling to your death.
The Ship, aka You'll Get Lost Inside of Me
The Cargo Ship is where you'll need to navigate in order to find what you need for your survival. It is fairly large, and contains several points of interest and levels. These are the major areas:

The Crew Deck
The Crew Deck is one of the two places you can spawn in at the beginning of your game. It extends for 6 levels (From 3 to 8), where:
  • Decks 3-4 are subfloors, and will take you to the belly of the Ship. It's also possible to reach the Engine Room, the Cargo Area and the other major area of the Ship, the Lower Decks. They contain long hallways with dangerous steam pipes that can be disabled, and some rooms to be checked for items or hide.
  • Decks 5-8 are mostly residential areas, the 8 being the Bridge Deck. Lots of rooms are present in this area, filled with various items, mostly, but not only, long-term-survival-dedicated. These Decks contain Automated Cameras that will Detect you and raise the Alarm if you're not careful, luring the monster on their position in mere seconds.
  • The Liferaft Escape vehicle is located at the same level of Deck 7.

Outside
This area serves mainly as upper transition between the Crew Decks and the Lower Decks. You're likely to walk through here multiple times during a single play. There are no items here, but the mid contains the Helicopter Escape vehicle

The Lower Decks:
Ranging from 3 to 1, these Decks are usually filled with useful Escape items. All of them have connections with the Cargo Area and Deck 1 contains the Submarine Escape vehicle.

And now for the points of interest (Escape Areas will be treated in their respective section)

Engine Room
This area develops in four floors. There are two accesses, located on either side of the room, and are both connected to Deck 3. A few rooms with chance of Escape Items will be available for exploring and looting. It's a fairly enclosed area, and escaping the monster here could prove difficult in some cases. There are two aspects that make this area unique:
  • There are four telephones, one on each floor, that can be used to lure the monster somewhere specific. To activate the four phones, you'll need to spend a Fuse on the uppermost floor's Fuse Box.
  • The Master Steam Valve is located on the lowest floor, behind a barricaded room. The player cannot open the room by themselves, but they can call Phone #2 to lure the monster in the room, breaking the barricade in the process. Disabling the Master Steam Valve will disable all Steam emissions on the Ship, instead of having to turn every single individual Steam Valve (PIPES NEXT TO HELICOPTER WILL REMAIN FUNCTIONAL FOR ESCAPE PURPOSES). This action can give you a considerable advantage in monster chases, and will basically nullify the chance of Death by Steam (your wallet might still be vulnerable).

Cargo Area
This area is obvious to the sight: it's covered in containers. Most of these containers are sealed shut, but some of them have been gutted from the inside, allowing entrance. Container tunnels are randomly generated in layout and items found, but usually contain some useful Escape Items. It's possible to travel from one side of the Ship to the other through these containers, but beware enclosed spaces.

Barricaded Rooms
Rare randomly picked between rooms present in all Decks, these special rooms are assured to contain an Escape or Rare item. However, the player cannot open them by simply pressing the Action key. Instead, they'll need to lure the monster in that room. The best way to do that is throwing an activated Egg Timer or Radio through the opening, making enough noise to attract the monster there and smash the door open. Pickup the loot when the coast is clear.

Powered Rooms
Rare and randomly located on any Deck, these special rooms are assured to contain an Escape or Rare item. However, they'll start off unable to be opened. Luring a monster in there to bash the door in is impossible. BUT! To access a Powered Room, you'll have to spend a Fuse on the nearby Fuse Box connected to the room. Since Fuses are often fairly hard to obtain, you might want to save at least one for said rooms.
The Monsters, aka Full-Time Killing Machines
Aaah, such formidable specimens, these guys! They come in diverse shapes, colors and abilities, but ultimately they're all good at doing what they do. Hunting you. Let's have a look at our adorable wannabe killers, shall we?

The Brute
This thicc boi over here is the strongest and fastest of the bunch. He's about as fast as your sprinting speed, and he can annihilate doors by simply touching them. No locked door's gonna stop his neon butt. However, this is where his skills end. He's dumb as a rock (get it? Because he looks like he's made of rock and magma? Ok I'll go shoot myself now...), and hiding from him is fairly easy. He'll almost never check hiding spots, and he'll be easily fooled by any distraction. He's feral in mind, and will most likely linger longer than the other monsters where he last sensed potential prey. Telltale signs of his presence in the area are loud growls and equally loud heavy footsteps. (Because of how bad the sound system is, sometimes he sounds like he's on a different floor than yours while he's not.) Try to avoid any sort of confrontation with him, go with a stealthy approach, and remember you can easily outrun him where there are a lot of deviations and stairs. In case of close encounters, the Fire Extinguisher is your best friend.

As a little extra to that last part, remember this important aspect regarding the Brute: he's completely left unharmed by Flare Guns. Completely. Only use Flare Guns as distractions if he's the current monster, or don't pick them up altogether, lest you waste precious inventory space.


The Hunter
If you're having any sort of difficulty seeing her, don't worry, it's her strategy. This little lass here is slower than the Brute, but still faster than your Walking Speed, so get to runnin' if you're seen by her. Unlike the other monsters, she tends to dwell into vents and conducts not accessible by the player, and will be able to spawn almost anywhere on the Ship to chase the player, only to despawn should her hunt go wrong. She's known to leave Egg Sacs all across the Ship. These Egg Sacs are dark slimy bubbles that the Hunter may use as additional Spawn points and "proximity alarms" that will alert her of the player's presence should they step near the Eggs. Although in my view this is the easiest monster to survive against, she's got some good skills too: she's the only monster that can effectively use Cover & Ambush tactics, the only one that can appear "out of thin air", and definitely the only one genuinely interested in eating you. Any Defensive Item works against her, and locking a door will take a couple seconds from her to destroy. She's also mildly intelligent and will not linger in the same spot for long, actually attempting to check hiding spots given the occasion. So don't underestimate her, that's the last thing you'll do before she eats your face. She tends to be quieter than the other monsters, and the only sign she's moving around are the squishy noises she makes when walking (sometimes she also screeches. It's not a mating call). Stealth is a viable approach against her, but she's stealthy too, and will often ambush you, so always be ready to run should the need arise.


The Fiend
Does this look like the face of mercy? Definitely not. This will be one of your worst nightmares, actually. Highly intelligent and with supernatural powers at his whimsical desires, his goal is to annihilate you in the most creative, gruesome and cruel of ways. A difficult monster to survive against, you'll need to be smarter than him. Don't let his slow movements fool you for a second: although your running speed is far superior to his, he can still use his powers to stun and damage you from a distance and catch up with you; so make sure to break line of sight as soon as possible. When he's about to stun you, you'll see purple tendrils form around your sight; breaking LoS with him will make them go away and nullify his stunning attack. Given his high intelligence, any distraction used against him will work for an extremely limited time. Whenever he reaches the distraction, he'll realize he's been fooled and shortly go away, looking in quieter places. He'll actively search for you in hiding spots, even "sensing" your general location at all times. Any Defensive Item works on him. Another unique skill of him is using his telekinesis to close and temporarily lock a door he doesn't want you to use. His low strength means he'll need some time to unlock a locked door. Telltale signs of his presence in the area are consistently flickering electrical lights (yes, even the flashlight) and a low droning noise, so he can't really hide his proximity from you. Stealth will sometimes be useless with him if he doesn't feel like letting you have fun, so always be prepared to run.
The Items, aka Pick Me Up I'm Useful!
Items are collectible objects that will help you survive and escape the Ship. There are several categories of items:
  • Escape Items are items used to prepare one of the Escape Vehicles. Most of them are usually found within the belly of the Ship, but they can more than occasionally be found in the upper Crew Decks too. When selected, they will sport a Wrench Icon
  • Defensive Items are items used to stun the monster and buy yourself a few seconds to survive a tight situation. They sport a STOP! Icon
  • Sight Items are light sources that will make it easier for you to see in the dark... but will also expose you to the monster! They sport a Lightbulb Icon
  • Distraction Items are noisy objects that will lure monsters to certain areas, possibly out of harm range. They sport a Soundwave Icon
  • Utility Items are items that will help you by unlocking certain doors or giving you small helps to survive better. They sport various icons, notably a Key Icon, a ? Icon (Duct Tape only) and a Flame Icon (Gas Cans and Flare Guns)

Let's see these categories in detail:

Escape Items
Bolt Cutters - This item will be used to cut the wires holding the Helicopter down and to open the nearby containers in search of the Fuel Pump. They are mostly found within the belly of the Ship or inside special locked rooms.

Chain Spool - This item is used on the Crane to pick the Liferaft up and move it to open waters to ready it for the Escape. It's mostly found within the belly of the Ship or inside special locked rooms.

Duct Tape - This item is used on the Liferaft to fix its ruptures and enable manual inflating through the Air Compressor Pump. It can be found anywhere on the Ship, and often even spawns in the Upper Decks. A secondary function of Duct Tape is disabling cameras by using it on their lenses. Duct Tape will be expended upon use on the Liferaft, but not upon use on a camera.

Gas Can - This item will serve as refiller for the Fuel Pump used to fill the Helicopter up before the Escape. Two Gas Cans are needed to fulfill this task. They can be found anywhere on the Ship and are fairly common. You can also spill the fuel contained within them by holding Left Click. This will create a pool of fuel that can be ignited using a lighter, as a deterrent for any monster but the Brute.

Helicopter Keys - This item is needed to open the Helicopter's door. They can spawn anywhere on the Ship, mainly on the Upper Decks, on desks and drawers, less often even inside sinks in bathrooms. I'm not joking.

Air Compressor Pump - This item is needed to reinflate the Liferaft after sealing its ruptures with Duct Tape. A prolonged pression of the Action key is needed for the inflation process to complete. It can be found mainly within the belly of the Ship, but it can even spawn near the Liferaft itself.

Submarine Battery - This item is needed to fix the Submarine. It can mostly be found within the belly of the Ship, uncommonly in the Cargo Area.

Submarine Headlights - This item is needed to fix the Submarine. It can mostly be found within the belly of the Ship, but it can also spawn near the Liferaft.

Welding Kit - This item is needed to fix the Submarine. It can mostly be found within the belly of the Ship.

Defensive Items
Fire Extinguisher - Universal defensive item of close range stunning wonders, it can be used a limited (4) number of times before discarding it. The effect is a close range stun on the monster aimed.

Flare Gun - This rare item, only found inside barricaded or powered rooms, is a powerful three-round light and noise maker, and ranged stunner. Aim carefully for optimal results. After three flares shot it'll become completely useless and should be dropped to free up inventory space.

Sight Items
Flashlight - This item will be offered to you at the start of the game. It has limited battery life, but as long as it's alive it'll enlighten your path like nothing else. Monsters are immune to retinal damage caused by the intense light, somehow. Left Click to ON/OFF.

Glowstick - This item can be found pretty much anywhere on the Ship, it's highly common, and will offer decent close range illumination with unlimited durability. Can be stacked to 3 units in a single slot and dropped to the ground once activated to mark an area.

Lighter - This item has even less range than the Glowstick, however it can serve two purposes: one is, well, providing light; the second purpose involves using it to ignite spilled fuel from the Gas Can, making a fire wall to ward the monster off.

Distraction Items
Smashable - Stackable up to 3 in a single slot, this is actually a subcategory of items including glasses, cups and bottles that can be thrown and smashed on surfaces, producing a shattering noise that will alert the monster if in hearing range. Unfortunately, they aren't very powerful distractions, the noise mostly heard by you, and can't be dropped without shattering them and making noise, so their use is actually questionable in most cases.

Egg Timer - This item will produce a strong noise of three alarm ticks after a while that it's been activated. Left Click to activate, Right Click to throw. Throw into a barricaded room to lure the monster in, wherever he was at the moment.

Radio - This item will produce a strong noise as soon as it's been activated, and will continue until manually deactivated or destroyed by the monster. Left Click to activate, Right Click to throw. Throw into a barricaded room to lure the monster in, wherever he was at the moment. (The Hunter is more swift to react to this, as she has a fetish for electronics).

Utility Items
Backpack - This item is a passive bonus, meaning that picking it up won't consume inventory space and will instead grant a permanent boost (and by permanent I mean until the next game). The effect is increasing your inventory slots amount by 2 (default: 6). You can pick multiple Backpacks up, with stacking effects. Finding a Backpack can make your life considerably easier as it lets you carry more items at the same time.

Fuse - Uncommon and invaluable, this item can be used to power Fuse Boxes, which unlock doors, activate lights and open up more strategic options. It's also an Escape Item, as one Fuse is always needed to get the Submarine Escape. Once a Fuse has been placed, it can't be removed, and you'll have to manually activate the Fuse Box. You can find up to 4 Fuses in any Run.
The Escapes, aka Fix Me and GTFO
What you're working on in each game. There are three Escape Vehicles and all of them are always available and in the same locations, so you can't miss them. Here we'll analyze them and see how they work and what they require.

Liferaft:
Usually regarded to as the easiest Escape Vehicle to get working, don't let it fool you for a second. Remember your success in using any of the Vehicles is dictated by how quickly you find the required items. Located in Deck 7, easily accessible in an area containing some potentially useful items (the Air Compressor Pump, the Submarine Headlights, Gas Cans and Glowsticks can spawn near the Liferaft, so check the place out!).


The Liferaft requires the following items and actions to be done:
  1. Inspect the Liferaft -> Before you can get to work on the Liferaft, you need to interact with it a first time without using any item; this will pull the Liferaft towards you and update your Journal with more details. Steps #2 and #3 are influenced by this Step, but not #4
  2. Seal the Ruptures -> You'll need Duct Tape for that. Duct Tape will be expended upon use on the Liferaft, so you might want to first disable all cameras you can find if you know you'll need to explore more.
  3. Reinflate the Liferaft -> You'll need the Air Compressor Pump. If you're lucky, you'll find it sitting on a barrel or crate in the area, but if you aren't, remember Escape Items are usually found within the belly of the Ship, but also in Powered or Barricaded Rooms. This step cannot be done before #2.
  4. Replace the Crane's Chain Spool -> After finding a Chain Spool, just approach the crane's base and place the Chain Spool in the relative slot, a cranny in the upper part of the base.
  5. Prepare the Liferaft for the Escape -> Now you'll need to set the Crane all the way to the left and down to extend the Chain to the Liferaft. You'll have to manually attach the hook of the Chain to the Liferaft, then go back to the Crane's Controls, lift if up, bring it all the way to the right and lower it until your Journal updates. Then you'll need to go all the way back to Deck 5, get Outside and interact with the small gate near the lowered Liferaft. Yay, you've Escaped! This Step will only be available after the Liferaft has been completely repaired and inflated, and the Chain Spool has been replaced. However, the Crane can be moved even without the Chain Spool if you want to set it up preventively

A small heads up: the Liferaft Escape is the most manual of Escapes, meaning you'll need to stand still for most actions. The Crane's movements (and apparently the Air Compressor Pump) both need some time to use, and will produce noise that will likely attract the monster to your location, potentially interrupting you several times. Usage of strong distractions like the Egg Timer and the Radio are advised, but try to save at least one for the run to Deck 5 after all major steps have been completed and you only need to reach the lowered Liferaft


Submarine

Located in Deck 1, in a fairly large room with 6 entrances (3 doors and 3 vents, the latters only usable by the Hunter), developing in two levels separated by stairs, with the lower level having a draggable cart able to block one of said entrances, and the upper level containing a Fuse Box and a Console with two buttons, this Escape Vehicle is the only one that will require an Utility Item to work. The Sub's pieces seem to be slightly more common than other Escape Vehicles', but as always, randomized generation means you could also not find them at all.

The Submarine requires the following actions and items to be used:
  1. You need to find and use on the Submarine, in no particular order:
    Item
    Action
    The Submarine's Battery
    Use on right side of the Vehicle
    The Submarine's Headlights
    Use on the front of the Vehicle
    The Welding Kit
    Use on left side of the Vehicle
  2. You need to place a Fuse on the Fuse Box located on the upper level of the Sub's Room to power the Console.
  3. You have to press the left button to start the launch sequence. It'll take 2 minutes, during which the monster will be attracted by the noise and will attempt to break the console, nullifying this Escape choice. You'll need to hold it off of the console during those 2 minutes, and it's less risky than it sounds as you can wait until it almost reached you on the upper level just to drop down from the stairless side, forcing the monster to go all the way back to the stairs and giving you a head start. Another, very effective strategy is to interact with the tank cart in the room and move it in front of the doors as the monster tries to break in. This technique is assured to work with the Brute, and most likely works with the Fiend (NOTE: The Hunter can use vents to get in the room, that can also be blocked, but it might make it harder to keep it out). Aternatively, you can create a small pool of fire by using a Gas Can and a Lighter or Flaregun right at the bottom of the stairs. The Hunter is scared of fire and this technique will build you some calm time.
  4. When the countdown ends, you'll have to press the right button to release the Submarine. Done that, quickly drop down, approach the Sub and press Action on it to end the game successfully.


Helicopter

Located Outside, in the middle between the two extremes of the Ship, in a large, open area with four stair entrances, of which two blocked by persistent Steam, and four containers near the Vehicle, this is often regarded to as the hardest Escape Vehicle to achieve. However, it's far from impossible and is, in my view, overestimated.

The Helicopter requires the following actions and items to be used:
  1. The Helicopter is locked in the beginning. That means you'll need to find its Keys and use them on the "Locked" label on one side of the Vehicle.
  2. Bolt Cutters will be needed to cut the wires holding the Vehicle down, and to open the four containers nearby.
  3. One of these containers have a Fuel Pump in it. Once found, you'll need to drag it near the Fuel Hose attached to the Helicopter; it will automatically position itself correctly once close enough.
  4. Two Gas Cans are needed to fill the Fuel Pump; you can fill the Pump by interacting with the Fuel Hole located on the Pump itself. Doing so will consume the Gas Cans. If you found Gas Cans before finding the Bolt Cutter, you should drop two of them near the Helicopter ASAP to have them ready when the time comes.
  5. Once all the above has been done, you can start the Pump by pulling the lever located on the object. This process will take some time, around 2 minutes, during which the Pump will produce a lot of noise that will most surely attract the monster to its location. The monster will attempt to destroy the source of noise, potentially nullifying this Escape. You'll need to keep it away. To achieve so, you have two choices: let it chase you for the duration of the refueling process OR use the valves between the double stairways to alternate where the undending steam comes out from. The steam will prevent any monster, even the Brute, from getting through. You'll be notified once the refueling process has been completed.
  6. Now you only need to run back to the Helicopter and interact with the inside of it, now reachable since the Keys have been used and the doors unlocked. Success!
Advanced Notions, Tips and Tricks
This Section is dedicated to life-saving advices and small exploits you can use to survive

  • There is a hidden health indicator shown when you take damage from damage sources like Steam emissions and the Fiend's ranged stun. It will be displayed as blood on the sides of your screen. Further damage will make the blood invade more and more screen. Your health automatically regenerates after a while that you aren't damaged. As you supposedly imagined, depleting your health will result in death (ooo it rhymes).
  • As stupidly obvious as it is, explore every room you see. You never know what you might find in there.
  • Always have with you at least one Distraction Item and one Defensive item. They'll boost your survival greatly. Light items are advised as well, but you can boost your gamma if you're against that choice.
  • Despite the heavy breathing noises, your Stamina is unlimited. You can run for how long you wish.
  • Crouching will make you slightly less visible, but it'll make you slow and unable to use certain items.
  • The Upper Decks may have small pieces of broken terrain. Running across them will make your character Trip. To get up quickly, spam your Jump key. Tripping when no monster's around will help you greatly as this will disable the trap permanently.
  • Never stay in one place for too long, or the monster will eventually find you.
    • However, because of this, you can purposefully stay in one place for a while to lure the monster far from another place you need to be, then stealthily leave for said place and have a couple minutes of freedom (the monster will have to search your old location a bit, then travel all the way to you). This generally happens naturally, however.
  • Interacting with doors and hiding spots only produces noise for your ears.
  • Monsters seem to have a sort of proximity sense, and the closer they are to you, the more likely they are to stop by and meticulously check their corners.
  • Monsters slow down briefly when having to turn around a corner: taking a lot of deviations can put a lot of distance between the monster and yourself, leading to a short chase as they will be confused as for the direction you might've taken.
    • The Brute is the most affected by this, as he's normally quite fast when running. Forcing him through many deviations will minimise his best natural attribute.
    • The Hunter is already quite slower than your sprint. Taking deviations with him is only meant to be a way to lose her more efficiently, which is still a good reason to do so.
    • The Fiend is much slower than you, however you want to break his line of sight constantly to avoid his ranged stunning attack. So, as with the monsters above, take a lot of deviations and your future will magically become brighter
  • Funnily enough, light sources coming from the player, or the light conditions in general don't seem to affect a monster's perception in any noticeable way.
  • A Lighter or Flare Gun and a Gas Can can be used to create a temporary Fire Wall to prevent the monster from treading there. Beware, though, this technique requires preparation and the Brute will be unaffected by it. It's not practical, and as such I'd avoid it in most cases.
  • Smashables are only useful in select situations, and they cannot be dropped without making noise. You're probably better off not picking them up until you feel you need them as they're so common you'll find them all around the Ship anyway. As the noise they make is still very short ranged, if the monster is away don't be too afraid to drop them, or if you still are, do so outside, in the water. You'll still hear the breaking noise, but that's just because of the genius level sound design.
  • There is a small television in a two-entrance room inside the Crew Decks. This television can be activated, producing noise to lure the monster.
  • Telephones in the Engine Room can be used not only to lure the monster to the Master Steam Valve Room, but also to free up one of the four levels. Monsters will destroy phones they hear ringing. You may interrupt the call manually at the right time to prevent them from permanently disabling the phones.
  • Before deciding to unlock a Powered or Barricaded Room, see if you can find out what important item is held in there. If you already have a certain key item, or if the item offered it useless to your cause, there's no need to spend your resources in having it.
  • Monsters cannot be killed, nor permanently locked in a room, nor stunlocked: in fact, they have a pretty generous amount of I-Frames between stuns Fire Extinguisher or Flare Gun. Defensive Items aren't for fighting, they are for escaping. They also will never drop body collision, so if you stun a monster who is standing in a doorway you NEED to go through, you're going to regret it.
  • Drop an Activated Glowstick to mark a position, so you always know where you've been so far. Especially useful in the Cargo Area as that place is a literal maze. Glowsticks are pretty common anyways.
  • Hiding under desks might be your best choice, especially if they're near the exit. A monster checking a room is likely to take a few steps inside before checking hiding spots, so a risky but useful move would be to wait until they're a few steps in the room with their back turned and quickly get out of the hiding spot to sprint somewhere else. Be careful not to touch them as that will likely prompt a 180-noscope.
  • Monsters will take a second to react to your presence, or any distraction. They'll be completely motionless during that second. Quickly running past a short hallway while they're nearby but have their back turned will most likely end with you not being detected. However, expect them to close in your location soon. Not that it matters much as they universally use hax.
  • Cameras can be disabled by using Duct Tape on them. Do it before you use it on the Liferaft to have an easier time in the Crew Decks.
  • Against the Brute:
    • Closing doors is most unnecessary as he can just run through them, and having a clear way to keep watch of him is necessary
    • Hiding is more useful with him than with other monsters as his little challenged brain leaves him confused when you magically disappear.
    • Use all the distractions you can against him, he'll be mesmerized by them. Literally.
    • Remember that the Flare Gun and Fire Grounds are completely useless against him. Use the Fire Extinguisher if he gets too close for comfort.
  • Against the Hunter:
    • She's the only monster that can "despawn" and "teleport" around the Ship. She also seems to have a cooldown forced on her whenever she despawns to teleport again. This is her traveling through the vents. Use this cooldown time to freely run around the Ship and collect as many items as possible to bring your objective forward.
    • Locking doors will grant you a few seconds as she's not as strong as the Brute. However, she'll soon shred the door to pieces with her claws, so act quickly.
    • Beware the Egg Sacs, as she can use them as warping stations.
    • She'll react to any distraction, but she won't linger as long as the Brute as she's smarter.
  • Against the Fiend:
    • The Fiend is the polar opposite of the Brute as he's slow, but highly intelligent.
    • He has a perfect memory. Any place he visits will be written down in his brain, and if he detects even an insignificant change, he'll investigate.
    • He'll always check hiding spots if he knows or thinks you're around.
    • If a distraction is used against him, he'll go investigate, but soon realize what happened and go away to search elsewhere. Use this knowledge to your advantage.
    • Locked doors will take him a few seconds to telekinetically unlock. In a tight situation, you can use this to build some distance and/or time.
Some vids for the heck of it
Achievements
This section is dedicated to all Achievements currently discovered by the author of this guide. If Junkfish decides to add more Achievements in future, I'll attempt to achieve them and list them here

Regular Achievements
Name
Requirement
Got To It
Use the Helicopter Escape
Women And Children First
Use the Liferaft Escape
The Hunt For Me Is Over
Use the Submarine Escape
Well Done
Win a game against the Brute
The Most Dangerous Game
Win a game against the Hunter
Fiendzoned
Win a game against the Fiend

Secret Achievements (SPOILERS)
These Achievements aren't listed in the game by default, so read here at your own spoiling risk. (Hover your mouse arrow over one of the small black rectangles to reveal)

Name
Requirement
Aim Away From Face
Use the Fire Extinguisher to Stun a monster
Bait 'N' Switch
Make the Hunter appear from one of his traps by tossing an item near them.
Steam Won't Connect
Disable the Master Steam Valve
I Don't Know What I Expected
Use the Flare Gun against the Brute... failing horribly
Let There Be Light
Use 2 Fuses in 2 different Fuse Boxes that power an entire area in one game.
I Love It When A Plan Comes Together
Lure a Monster to a barricaded room and make it destroy it so you can enter.
Charlie's Devils
Get killed once by each monster (easiest achievement ever)
Now Think About What You've Done
Lock a monster inside a Powered Room by luring it in, closing the door and disabling the Fuse Box. Don't expect to lock it there forever though...
A Sequence Of Unfortunate Events
Die to the monster right after tripping.
Child Of The 90s
Have 6 Glowsticks in your inventory at once (2 slots required in total)
A note about "that one achievement"
This is a short section about the achievement Bait 'N' Switch which has caused more than a few frustrations among the players due to its unclear unlock conditions. Under spoilers due to the achievement itself being a secret.

Credit to user Xenorvya for providing information on their method

It was unlocked by dropping an inactive Egg Timer near a cluster of eggs. The Hunter spawned from the cluster following the act and the user had the achievement unlocked immediately as a result. This indicates that in order to make the bait work, you as the player must be placed somewhere not too near, but not too far from the cluster, as it would respectively result in either triggering the ambush yourself, or being too far for the ambush spot to activate
Aye aye, Cap'n!
I can't hear you!

I hope this guide helped you understand the mechanics that make this wonderful indie horror title, and made your experience more comfortable.

Thanks for reading my guide. Here, have a complimentary Cute Brute!


Rate, Favorite and Review to save Spongebob!
151 Comments
ChaosConvexum  [author] Apr 4 @ 2:26pm 
Thank you a thousand. You have been credited, unless you'd prefer otherwise. This will hopefully help other people in the future with an issue that has been plaguing the game overmuch due to a lack of clarity and most likely obtuse mechanics.
⛧Legoshi⛧ Apr 4 @ 2:14pm 
Of course, you can. Side note for proof: look at my recent achievements on Monstrum, my profile ain't private, it'll show I just got it.
ChaosConvexum  [author] Apr 4 @ 2:12pm 
That's interesting. With your permission, I'd like to mention it in that section
⛧Legoshi⛧ Apr 4 @ 2:11pm 
Okay so I dropped an egg timer near an eggsac (it didn't ring, I just dropped it and I saw the Hunter come out), then I immediately got the achievement. I guess going too close spawns the Hunter and being too far and dropping the item won't do anything. It must have an invisible trigger zone that spawns it if you wander in it or if anything enters it such as a chair or items.
ChaosConvexum  [author] Apr 4 @ 2:00pm 
I had no idea about this one
⛧Legoshi⛧ Apr 4 @ 1:58pm 
Out of all things I died to a bug. Is it known that for some reason you grow bigger and bigger the longer you're in the map? Maybe it's because I ran sideways to be slightly faster, but that ended up with me being on par in size with the Brute, and I couldn't open the locker door anymore because I was so tall looking down didn't give me the option to open the door, so I was stuck and had to play radio for him to open the door, but he was too dumb to get me out of it and ended up killing me when I played the radio as he was in the same room as me, after calling him twice to the room I was stuck in.
ChaosConvexum  [author] Apr 4 @ 1:18pm 
To specify, the area fuseboxes are typically going to be found in non-descript parts of the ship that makes them disconnected from any obvious specific functionality. IIRC, you're likely to find them just hanging around in hallways
ChaosConvexum  [author] Apr 4 @ 1:16pm 
The fuse one iirc is about finding specific fuseboxes that are used to power up the general electricity in whole ship areas (so, i.e., not those that simply unlock blast doors).

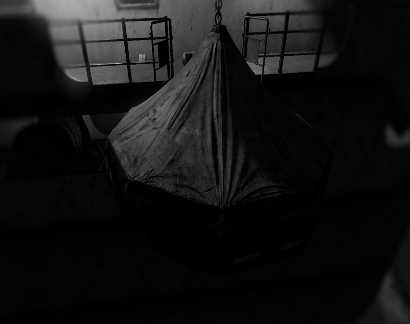
Yes your best bet at finding the flaregun would be trying to get into barricaded rooms (monster needs to be lured into them) or blast doors (with fuses).

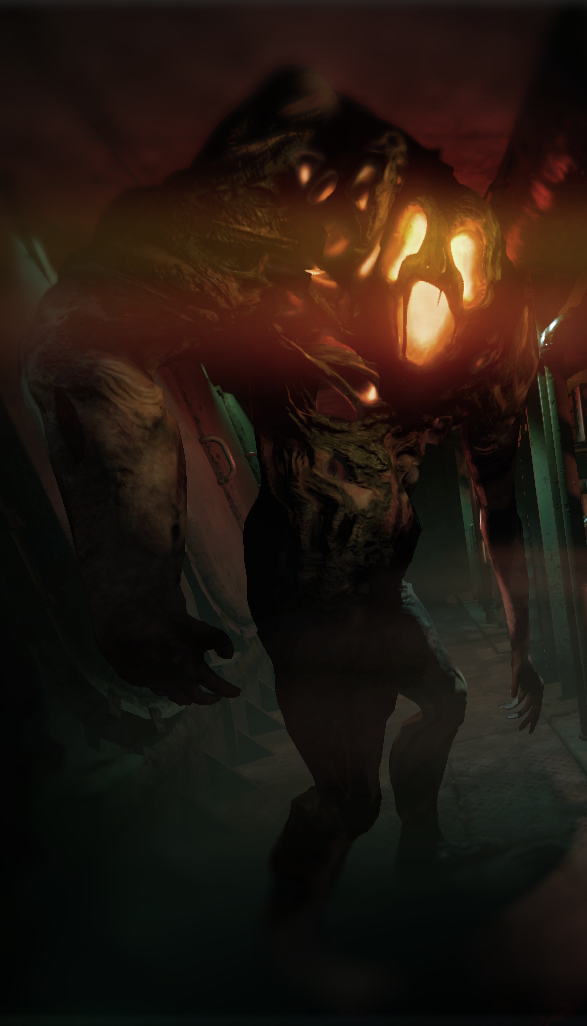
As for the tripping I'm not gonna say "definitely this is true" but I would avoid trying with Fiend because I have no idea if the achievement will keep tracking if it, say, does the ranged stun at you after you trip and possibly resets your stance. Conjecture, but, worth minding the possibility.
⛧Legoshi⛧ Apr 4 @ 1:10pm 
Thanks and yeah I read some of the previous comments. I just have to die after tripping, use the flare gun on the Brute (if I'm to believe this guide it spawns in barricaded rooms/locked rooms), spawning the Hunter through its eggs via items and powering 2 sections with the fuses. I'm not sure what they mean by powering "2 sections", like all fuse boxes on the same floor? The same side of the boat? It's sort of confusing.
ChaosConvexum  [author] Apr 4 @ 1:09pm 
Really, if someone who unlocked it remembers exactly what they did I'd like to know. I dedicated pretty much that whole second-to-last chapter of this guide to mentioning this issue