STAR WARS™ Empire at War: Gold Pack

STAR WARS™ Empire at War: Gold Pack

470 ratings
A Guide to Imperial Units and how to Counter Opposition
By Suleiman the Magnificent
This comprehensive guide will do more than introduce you to the units of Star Wars: Empire at War and Forces of Corruption: it will teach you about the history of the Empire's units, both space and planetary, as well as inform of the most efficient ways to use them on the field (or space) of battle to counter opposing units of the Rebellion and the Consortium. Now, I can't promise this will be the best guide, as it is my first, but I will attempt my best to suffice, as I have worked diligently to create this. If there is anything in this guide that you believe is insufficient, please give me some constructive criticism on how to improve it, feel free to comment as well!
11
7
3
18
4
4
4
2
   
Award
Favorite
Favorited
Unfavorite
Introduction
Ah, the Empire! Possibly the most powerful faction in this game and the Star Wars universe as a whole, and most of this is thanks to the help of its potent navy and army. The Empire has a very diverse line-up of units, from gargantuan capital ships to small TIE-series Star-Ships and Stormtrooper companies all the way up to the massive AT-AT walkers. If you want to be the evil Emperor overlord of the galaxy, then you must know all these units like the back of your hand. You must study them, examine them, eat with them, live with them, thoroughly study them and know them better than your name. Sounds like no easy task, but fortunately this guide is here to teach you everything about using these units to their full ability to become the supreme military commander, one who is able to counter the largest Rebel, Pirate or Zann force with a small number of units, and one who fully understands the versatility of his units to adapt them on all planets.

Rest assured fellow Imperial Cadet or Commander, this guide is written by a Star Wars and Strategy games veteran. Take my word for it, either I am really a veteran or really good at ethos, and believe me, I am average when it comes to rhetoric. Even if you don't find the entire guide useful, there maybe a thing or two you will enjoy and you might learn something new, regardless of your experience in this game.


Taking control of the galaxy will not be easy, trust me; however, after you understand the advanced functions of your units, you will soon control every system in the Galaxy, from Courscant to Hoth.


This guide will be split into 2 main categories, Land units and Naval units, as well as several sub-categories.
The Imperial Tech Tree
It is important to familiarize yourself with the tech-tree, to understand when you will get some units and the overall military unit structure of the Empire.

Vanilla Land Tech-tree


Vanilla Space Tech-tree


Forces of Corruption Land Tech Tree


Forces of Corruption Space Tech Tree

Part A: Land Units
Land units are necessary for both defense and offense. Most systems require land battles to be taken over, and upon taking them over you must defend them. Each land unit is unique in its own way and is able to support other units on the battlefield. Pools or armies of land units must be diverse, containing both infantry and vehicles able to counter any unit the Rebels or Consortium throw at you.

You should always have defensive pools to protect systems, how large this defense pool is should depend on the system. A very valuable system like Courscant should be defended by a large pool, since it is important to your cause, while a planet that is not as valuable should have a less potent defense since credits are valuable and your maximum unit capacity should be put into consideration. How valuable a specific system is depends on you, you should hand-pick what units you want at which planet since not everyone views specific systems as valuable or worthless, it varies between player.

Attacking armies should also be considered. Make sure attacking armies are sizable and capable of attacking and wiping out any planetary base with ease. Depending on what galactic map you are playing, you should choose how may armies you want. If you are playing with a 43 or 55 system map, then it is wise to have 2 or more armies to fight on several fronts. Usually I myself prefer to have a commander in each army. You do not need to do this, but it is better to have a leader to support your forces such as Emperor Palpatine, Lord Vader or Colonel Maximillan Veers.
1: Infantry
Infantry units have always served as cannon-fodder, being the first to be sent out and the first to perish. They may seem insignificant at first glance, but the competent commander can use them as a game-changer(no pun intended). Infantry can scout, destroy other infantry units, be used as bait, and most importantly, they can capture build pads to construct strategic devices such as turrets, bacta tanks and repair stations
Stormtroopers
The iconic Stormtroopers makes up for most of the Empire's muscle. They are cheap, abundant and fierce, capable of laying down almost any other infantry unit that gets in its way. Now don't be confused, these troops are not clones, with the exception of troops recruited on Kamino and the 501st(Not available in this game, with the exception of the mods), but they can still lay down some, well uhm... "accurate" fire. Fine, aside from their abysmal accuracy, one company of Stormtroopers can dispose of Rebel infantry platoons fairly quickly, since they outnumber them. Use the "take cover" ability when they are fighting while stationary or defending some locations. Holing up your Stromtroopers in bunkers to defend them well and give them a noticeable advantage against infantry and most light vehicles is also encouraged. Now, since your vehicles don't have the capacity to deal with PLEX soldiers or Grenadiers, your Stormtroopers must protect them against such threats. Your Stormtroopers are also capable of building strategic buildings on build pads, such as turrets, to help them deal with impending threats or set up a defense, or healing stations for either your infantry or vehicles. Your Stromtroopers can also be used as a lure or bait.Since they are not very valuable, your troops can walk up to enemies and make them follow the unsuspecting prey to a trap or ambush, considering the enemy isn't too powerful and able to kill your troops in a few blows.

Now, one very important aspect of warfare is formation, you should always ask yourself "which unit should I put up front?" It's an important question that every competent commander, fighting in either land or space, should question themselves. When it comes to Stormtroopers, it depends. See, the Empire has the luxury of being able to send cheap, albeit expendable, probe droids to scan enemy locations, knowing their base layout(exclusive to Forces of Corruption) and what units they are commanding to resist any invasion party. It also depends on the units in the respective army; if you have, let's say, AT-ATs that are fighting against a large rebel force capable of countering your vehicles with ease, then put your troops up front to be cannon fodder. Amid the fog of war, the rebels will see the Stormtroopers approach first and will focus fir on them instead of your valuable AT-AT, since they may not be in range. You may also use your troops as recon, to check if there is a threat to your more valuable units; such as an MPTL artillery piece, capable of making short work of most Imperial units. If approaching a small rebel force, then the opposite applies, as your troops will assist your vehicles if there is a threat they are incapable of dealing with, such as PLEX soldiers.


Scout Trooper
The Rebels once had a joke: "what's the last thing to go through a Scout Trooper's head after he hits a tree? His afterburner!" When you learn how to exploit the Scout Trooper to his full potential, you will make the Rebels regret uttering this mess of a joke.

The Scout Trooper is a really interesting and unique unit, first used by the Empire in the Battle of Endor as seen in Star Wars Episode VI: Return of the Jedi. Scout Troopers are generally and mostly used for scouting, but Imperial forces have used them as Sniper units as well, too much dismay the game does not have this feature.The Republic had a similar type of troop known as BARC Speeder troopers, that were utilized well against the Separatists during the Clone Wars.
The Scout Trooper is a fast, light-armored recon unit used for scouting, go figure. There are two primary ways to use this unit: reconnaissance and hit-and-run attacks, these are the most effective. Let's go over how to use these two tactics effectively.

Reconnaissance: Don't risk expensive vehicles just to locate the enemy, Stormtroopers may scout as well, but alas they are too slow. This is where the Scout Trooper really shines. They are very fast and able to scout ahead to detect enemy units so that you have the advantage of getting ready to know which unit you will use and what to expect. Scout troopers, however, are fragile and could be destroyed quickly, so make sure you are able to scout fast and get out of there. Also, use the pause button to your advantage. Pause the game when your scouts are among the enemy and take a peek at what they have, this also buys your troopers some time to get out of there quickly with minimal damage inflicted.

Hit-and-Run: The special ability of the Scout Trooper is to drop thermal grenades, capable of wiping out most infantry platoons and dealing some serious damage to vehicles, guaranteed they are fast enough to do so. The Hit-and-run attack is mostly effective when you use reconnaissance first. Always identify the location of said enemies to strike. The unit which I recommend you attack and focus on the most with the Scouts are the MPTL, get close to the MPTL artillery piece then use both the thermals and speeder blasters to destroy it, MPTLs are not able to attack up-close, so your scouts will make short work of them; however, if they are escorted by units able to counter your scouts then just drop the thermals and run. It is important to destroy any enemy artillery since they are often the most lethal to your units since they can strike hard and outside your range. They could be hiding out behind the fog of war, picking off your precious units one-by-one. I also recommend you stay away from PLEX soldiers, use your Stormtroopers to counter them. It is possible to wipe out any vehicle with the thermals as long as you are fast enough and your troops work together.

Note that if the Scout Trooper's bike is destroyed, he will dismount as one trooper and continue the fight on foot. The Scout Trooper off of his bike is actually useless, since he does less damage with his blaster than an average Stormtrooper since he carries a blaster pistol, not a rifle. Also, he has less armor than a Stormtrooper, so after he is dismounted do not bother using him on the frontline and keep him back to preserve him for the next battle, where he will have his bike.
Dark Troopers
Dark Troopers are cyborgs used by the Empire as heavy troops, exclusive to Forces of Corruption. They come in three phases, each phase tackles has its own role and strategy and can be lethal against certain enemy vehicles. To produce Dark Troopers, there must be an Arc Hammer over the orbit of the planet in which you want to produce the Dark Troopers on.

As previously mentioned, 3 Phases of the Trooper can be produced.


Phase I

Evoking similarities to a Western European Knight of the High Medieval Era, the Phase I Dark Trooper is an anti infantry unit best used to support vehicles against troops like PLEX launchers and Grenadiers, which can be deadly to your own vehicles. Such troops are best used alongside AT-STs, AT-ATs and 2M Repulsor tanks, since they can easily be destroyed by enemy Anti-tank infantry.

Using them alongside Stormtrooper companies is a bit redundant since they can already tackle infantry threats on their own. It is best not to let this unit go out alone, since it is very vulnerable to enemy vehicles. This Phase of the Dark Trooper is present as a complementary unit and should not be expected to hold its own. Rather, it should be put to work helping your vehicles against enemy threats.


Phase II

Standing taller than his regular, non-Cyborg counterparts, the Phase II Dark Trooper lives up to the 'Dark Trooper' name. Armed with a massive laser infantry support gun, the Phase II Dark Trooper's job is intended for anti-infantry, anti-artillery and anti-light vehicle defense. Even the dreaded Rebel MPTL fears this metallic man!
The Phase II Dark Trooper's gun can take out lighter Rebel vehicles, and his ability to fly using his jetpack gives him great mobility. The Phase II Dark Trooper is great against the infamous MPTL, and thanks to his jetpack he can ambush them and destroy them with ease.
This Dark Trooper can take more risks than his Phase I counterpart and is probably the most versatile and best all-round Dark Trooper of the 3 phases. Using him for support is great. One good strategy to use to counter MPTLs is to have him move alongside your units, and once you detect an MPTL firing, have him use his jetpack to quickly destroy out and clear the way. Keep in mind, though, this trooper can be easy prey to Rebel tanks. Even though he can hold well on his own, it is still advisable to use him for support.


Phase III

Intimidating in appearance as he is in size, the Phase III is the zenith of Dark Trooper development and the culmination of Imperial robot and cyborg technology. This monstrous trooper can hold well on his own against enemy vehicles and can be used on his own alongside support purposes. The Phase III can be deployed to fire, but it also has a laser which it is capable of using while still mobile. It's deployed weapon, however, is more powerful but comes at the cost of mobility for the Dark Trooper, as he cannot move whilst deployed and it does take some time before he can fully deploy. Once deployed, he can fire lethal missiles at enemy vehicles. He is great for dealing with the Rebel heavy T4B tank, which is one of their best armored units. He also has a jetpack for better mobility, and can be used as a turret, therefore making this Dark Trooper is the best of the three for planetary defensive purposes, but that doesn't mean he's bad at offense either. Although slow, he can be a valuable asset to your invasion force since he can make short work of Rebel vehicles. He almost fills the role of the PLEX trooper for the Empire and is one of the few anti-vehicle units the Empire can deploy.

2: Land Vehicles

One area of military the Empire excels at is its vehicles. The Empire mostly uses slow, albeit powerful, vehicles with giant guns and resilient armor. When the Empire does use its lighter vehicles, it doesn't exactly excel there since the armor of light Imperial vehicles, such as the TIE Mauler, is not very durable. Imperial vehicles with proper armor lack proper speed. Virtually every planetary battle you will fight will have you using vehicles to attain victory and knowing which vehicle you must use and how you intend to use it can affect the tide of battle.
AT-ST
The All-Terrain Scout Transport is part of the AT-series of vehicles, famed for its use by both the Empire and the Republic. The predecessors of the AT-ST are the AT-PT and AT-RT, versatile and exceptional vehicles that saw service with the Republic during the Clone Wars and the early days of the establishment of the Empire.

The picture on the right is of a Republic AT-PT, the predecessor of the Imperial AT-ST.

The AT-ST is one of the first vehicles you get in Galactic Conquest as the Empire, and it is a considerable foe for your adversaries. It has excellent armor, for a vehicle of its level, and one brigade is able to wipe out and make short work of the T2B tank. The AT-ST has a decent speed, not too fast but still capable of scouting and performing recon tasks. The AT-ST is capable of running, or in its case walking over, enemy troops; however, it is not very fast so it may take a few tries to be able to do it and I myself would not encourage it. The AT-ST is also capable of barraging areas with blaster fire; use this when it is facing against stronger adversaries or with the intention of destroying buildings.


The AT-ST is an all-round versatile unit; it's good during the first few tech levels and even after you have unlocked all the Empire's best toys, you may still use the AT-ST since it is a very combat-capable weapon. Only times I would not recommend you use the AT-ST is against PLEX soldiers, they are able to overwhelm most vehicles, and the AT-ST is no exception. Also, try and use this weapon as support when facing stronger units. Let me elucidate for you. The first few tech levels, specifically 1 through 3, the AT-ST is able of holding well against most Rebel units, except for PLEX and MPTL units. By tech level 4 and 5, you may most likely have a considerable amount of credits, so if you wish, you may spare the expense and buy a few support brigades of AT-ATs to back up your stronger units. The exceptional armor and speed of the AT-ST makes it a very versitale vehicle and worthy adversary, so your enemies may take some time to destroy your AT-STs, which you should place up ahead in front of your stronger units. The AT-STs will act as cannon fodder for the enemy while your AT-STs or long-range vehicles pick off all the enemies, who are unaware of your excellent strategy.

You see, to become a successful commander you must tie together your strategy of Galactic Conquest with your strategy of planetary battles, always consider the value of your units.
TIE Mauler
The TIE(Twin Ion Engine) Mauler is a light, fast and cheap low-tech Imperial assault vehicle mainly used for anti-infantry duty, or at least that is how you should be using it. Like the AT-ST, the TIE Mauler is one of the earlier vehicles that you will obtain in your campaign for the restoration of the Galaxy and it is one you should utilize well, since you will use it for quite a while.

The TIE Mauler is excellent for anti-infantry duty, since that is its primary role. The TIE Mauler is also a very fast vehicle, capable of performing recon duty as well; however, it is quite fragile as its armor is light and it can easily be destroyed by a light vehicle. Now, you should use the TIE Mauler and treat it as an anti-infantry vehicle, but if you do not have any Scout Troopers availible then you may use it as a recon vehicle too.

When first starting out Galactic Conquest, the TIE Mauler is one of the first land units you get to start off with, the AT-ST as well. During the first few days as the Empire, where your tech level will be 1, you must utilize what you have. I know that it is not very satisfying to use the smaller guns, but you must manage until you can get your hands on the real toys. The AT-ST is good enough to counter vehicles, yet its slow fire-rate does not make it very ideal against infantry, especially PLEX troopers... those imbeciles! But, I digress. The AT-ST needs a counterpart to be able to deal with infantry, and that specific counterpart happens to be the TIE Mauler. Now be cautious, you have to be fast with the TIE Mauler to be able to wipe out infantry threats with ease, since PLEX troopers can scrap TIE Maulers fairly quickly. The TIE Mauler is also capable of running over enemies with ease due to its great speed, so feel free to do so as it is easy and is a good way to dispose of PLEX troopers. You should always try to have back up units with the TIE Mauler to fend off any vehicles trying to destroy it.

Once you are able to master the ability to utilize anti-infantry vehicles with anti-tank vehicles in a threatening hybrid, able to counter any infanrty or vehicle unit with excellent efficiency, then you will become the supreme commander of planetary warfare
2-M Repulsor Tank
Now we move on to the 2-M Repulsor tank, arguably the most balanced support vehicle in the game. The 2-M Repulsor is a tank you get at tech-level 2, it is superior to the AT-ST and is an indirect spiritual successor to it. This vehicle is what I recommend you use for your defensive pool since it is expendable, considerably inexpensive and powerful. One company consists of 4 tanks; they come equipped with a standard tank blaster that is capable of destroying a T2B with ease when all tanks work in unison and shields that prevent blaster damage as long as they are active, but remember that shields only prevent blaster fire, it does not prevent projectiles such as PLEX missles.

Some history on the 2-M Repulsor first and things you need to know. Firstly, and most importantly, this is a Repulsor-lift vehicle and it does not work on all planets. Also, it cannot run over enemy infantry since it does not have legs or treads; however, it has an advantage. Since this is a Repulsor-lift vehicle it can hover over water and surfaces inaccessible to most other Imperial vehicles, not to mention it has a speed advantage. Now for the history, it is actually quite interesting. The 2-M is actually the predecessor of the TX-130 Saber-series tanks used during the Clone Wars. The TX-130 was an exceptional vehicle, and the 2-M is very similar since it shares the same fundamental design with the TX, yet the 2-M is a huge improvement with superior armament, shielding, armor and overall combat efficiency.

The two images on the sides are of a Clone Wars era TX-130.


One unique thing about the 2-M is how it is a vehicle that does not really require a specific strategy. The 2-M is, and will be in the mid-tech levels, your standard and you will be able to drown your enemies in them. You may still use strategies to command 2-Ms, but even the most incompetent of commanders can put it to good use.

The 2-M is an admirable foe for most units, it can deal with most medium vehicles with ease, but heavy vehicles such as the Canderous tank or the T4B tank are a threat and you should try to keep your Repulsors away from them. The 2-M is best when supporting Stromtroopers, align them in a convoy formation with the 2-Ms up front and the Stormtroopers in the back. If you are, however, dealing with an infantry only threat then I recommend the Stormtroopers up front since the infamous PLEX is a very, very large threat to all vehicles and considering how projectiles are able to penetrate shields, keep away from PLEX troopers. Now, aside from the 2-M being the standard in planetary battles and a very generic vehicle it is an excellent defense pool vehicle. At the beginning of tech level 2, you may be a bit short on credits and you should use the 2-Ms for defense of important planets at first, later on,however, you will have ample credits and your Intergalactic bank account will be bursting that not even the entire planet of Munnilinst will be able to store them! Star Wars jokes aside, the 2-M is expendable and very competent as a unit and is a must for any Imperial Army.

So, to conclude, the 2-M is a unit requiring little strategy and capable of holding well on its own, it is also a very good vehicle for Planetary reserve duties.


SPMA-T
Another toy you get at the 2nd tech-level is the Self-Propelled Medium Artillery, the first artillery piece you acquire as the Empire. It is capable of inflicting considerable damage to enemy units and buildings from afar, and comes equipped with small laser cannons in case it must defend itself from enemy infantry or light enemy armor if they come in too close. The SPMA-T is the successor of the SPHA, a heavy artillery piece used by the Grand Army of the Republic during the Clone Wars, which was a heavier variant with slow movement and a powerful cannon. The SPMA-T is simply a scaled down version of the SPHA, to act more as a mobile artillery piece capable of quick deployment. You acquire the SPMA-T at the 2nd tech-level, what's good about this is that the 2nd tech level is when you also unlock the 2-M Repulsor tank, which is a very good compliment to the SPMA-T, I will elaborate more on that later.


Too much grief, sorrow and dismay(yes, it is that unfortunate) the SPMA-T is not even close to be a decent rival to the Rebel MPTL, the MPTL is superior to the SPMA-T, no argument there. The SPMA-T comes equipped with a single turbo-laser cannon that fires from a reasonable range and you get 3 vehicles per company; on the other hand, the Rebel MPTL has 5 Missile pods that fire several missiles consecutively and with great speed. Remember what I said about shields earlier? Shields protect units only from laser and blaster fire, yet missiles and solid projectiles go through shields with ease. This means that the MPTL can destroy vehicles such as the 2-M Repulsor without even having to damage the shield, the SPMA-T,however, does not damage vehicles directly since it uses a blaster-type weapon. The SPMA-T is also inferior since it does not come with a spotter, which is a small, unarmed droid that scouts ahead to bring units within the sites of an artillery unit to open fire, the MPTL has spotters which gives it a HUGE advantage over the SPMA-T.


Now, you think to yourself: "what a useless piece of junk! I should be playing as the Rebellion instead!" Don't worry, despite its many flaws the SPMA-T can still be a good support unit. Personally, however, I would advise using it very conservatively and in niche roles, like when you have to strike a long range or uphill target or to lay down support fire while your units engage enemies.
AT-AT
Now we move on to the really good stuff. The iconic, fan-favorite, towering All Terrain Armored Transport is part of the renowned All-Terrain series used by the Republic and Galactic Empire. The AT-AT is a superior unit and arguably the best one in the Imperial Army, and its performance varies between Empire at War and Forces of Corruption in only one way. The AT-AT in Forces of Corruption can destroy infantry with ease, while in the default game it does not have the capacity to deal with infantry and only works against vehicles. Keep this in mind while reading this section of the guide, since you have to familiarize yourself with this unit as it is a very, very competent unit and one that you will use a lot throughout your adventures and exploits throughout the galaxy.

Some history on the AT-AT first. The All Terrain Armored Transport is a heavy vehicle/artillery vehicle/infantry transport used by the Galactic Empire. It had its first canon appearance in Star Wars Episode V: The Empire Strikes Back(which is my personal favorite Star Wars movie) on the snowy planet of Hoth. It is a combat and psychological weapon since its size and armaments are very intimidating. The original precursor and basis for the design of the AT-AT was the Republic AT-TE, All Terrain Tactical Enforcer, which was armed with multiple laser cannons as well as a massive rail-gun capable of dealing immense damage. The AT-TE saw cordial service with the Republic as well the Empire during its early days, before it became obsolete after the introduction of the AT-AT.

On the right side is an image of the Republic AT-TE, precursor of the AT-AT.

The AT-AT is available for the Empire at tech level 3, yet Veers is available at tech level 2, but I digress. The AT-AT is a bit expensive at first when you are spending money on maintaining your Planets and constructing structures to uphold your interests in the Galaxy. The AT-AT will be a novelty unit at first, but later on it will spearhead most of your operations and become the leading vehicle in your army. The AT-AT is armed with two massive laser cannons that inflict substantial damage on buildings and vehicles alike from an impressive and safe distance. The AT-AT is very good at holding on its own, but it is very slow and cumbersome, so if several units are attacking your AT-AT from two flanks or more, then you might be in trouble since the AT-AT takes a long time to turn around to face other belligerent attackers and the guns also take a while to fire, making the AT-AT awkward at eliminating large groups of units, especially infantry(note, the AT-AT can wipe out infantry units with little trouble in Forces of Corruption, yet for the default game you need infantry support. Why would you even be playing the default game in the first place? Forces of Corruption is superior since it has the exact same features plus several other great features that make the game better than its vanilla counterpart). The AT-AT is capable of deploying troops onto the Battlefield, these troops are reserve troops and losing them will not count as a casualty for you. The AT-AT has a total of 2 companies, each company has 2 squads, you may only deploy 2 at a time on the battlefield. Deploy these troops when you have to capture a point or capture a build pad to construct a bacta tank, sensor node, repair station or defensive structure. The AT-AT can counter virtually every unit, but for the most part you may need infantry support, 2-M support or AT-ST support to help out the AT-AT if it cannot destroy a unit too fast for it. The AT-AT is, overall, an excellent unit with outstanding combat performance, it has long range and powerful cannons and may drop Stormtroopers to fight alongside the AT-AT. The AT-AT is also a very good escort unit, it is better to keep it up front if you are fighting a mechanized army with vehicles as the primary form of offense/defense, yet vice versa applies if fighting against an infantry-oriented army.

Lastly, and most importantly, always have an AT-AA alongside your AT-AT when fighting the Rebels. Rebel Snowspeeders can tie up AT-ATs in wire cables and instantly tip them over, rendering them obsolete and useless. Always have a company of AT-AAs to fend off any Speeders, since the AT-AT is a very valuable unit and can easily be destroyed with just one Snowspeeder, and the AT-AT has no capacity to deal with them. Also, keep in mind that AT-ATs take a while to produce and are exorbitant in price, so using it as a reserve unit to defend a planet is not ideal except if the planet is extremely valuable or is under constant attack.


AT-AA
Now, we proceed the to AT-AA, All Terrain Anti-Air. As you may have guessed, this is another entry to the All-Terrain series. This vehicle saw development during the late stages of the Clone Wars, yet it never say service with the Grand Army of the Republic and was later used by the Empire before the Galactic Civil War.
The AT-AA is an excellent compliment for the Empire, and it is a must if you are fighting the Rebellion. At first, I myself was always very skeptical and underestimated the AT-AA, thinking to myself "pfft... why do I have to use up credits on this thing, the Rebels don't use that much Snow Speeders anyway, do they?!", I said sarcastically. Then my AT-ATs were swiftly defeated when several of them were tipped over by tow cables. Don't underestimate this unit, it's a misconception that getting one is futile and will only be a burden on your population limit and credit account, but in reality this is one of the most important units in the game for the Empire. The AT-AA comes with, go figure, an anti-air gun. It also comes with a missile-jamming field, which is very good against PLEX troopers and MPTLs, two of the best Rebel units in the game. The AT-AA also, with no extra charge, can fight against infantry, although its not the most effective at this task.

Now, how do you use the AT-AA effectively? Well, for one always have your AT-AA as an escort to your AT-AT. When it comes to weapons, the anti-air gun does what it says on the tin, it is best used against Rebel Snow-speeders. The other weapon available on the AT-AA is its small ground defense system, suitable only against small infantry threats and minor light vehicle encounters, so don't rely on this weapon too much. The AT-AA also comes with a missile jamming field, this is best used against the two most loathed Rebel units; the MPTL and PLEX Trooper. The field reduces the accuracy of missile projectiles greatly, the field is, however, makeshift(temporary) and will need time to recharge.

So, you see. The AT-AA is an essential unit, so always be sure to have at the very least one companies per 2 or 3 AT-ATs. The use of this unit is indelible throughout your campaign, hence it is important to understand this unit like the tip of your tongue.
HAVt B5 Juggernaut


Now, we move on to the B5 Juggernaut. The predecessor of this vehicle is the Republic-era B6 Juggernaut, a heavily armored version with tendency towards combat rather than transport. The B6 had heavier armor and more guns than its sister, the B5, which is a scaled-down version. Despite the B5 being less combat-efficient than the B6, it is still a very useful unit and a welcome edition to the Imperial forces.

The HAVt B5 Juggernaut, or simply B5 or Juggernaut, is a unique vehicle in the Empire's forces. This vehicle is exclusive to Forces of Corruption, just so you know. The B5 is a troop transport, not really a combat weapon, but more of a support-oriented weapon used to ferry troops around the battlefield safely and to be frank, it is actually very useful. At first, when I was just a novice at this game, I was very skeptical towards the Juggernaut, but was I wrong. The B5 can safely transport your Stormtroopers around the battlefield to capture reinforcement points or build pads without risking them being shot down by more powerful adversaries. The B5 comes equipped with an anti-infantry gun, the same caliber as the anti-infantry turrets erected from build-pads.This weapon is quite useful against small threats such as, you guessed it, infantry. Stay away from heavier vehicles such as large battalions of T2Bs or T4Bs. It is always wise to have one brigade of 2-M Repulsor tanks escorting the B5 since they can keep up with it because of their somewhat equal speed and the considerable armament of the 2-M which can deal with most mechanized threats. The B5 is ideal for carrying troops around the field of battle quickly, you will be able to capture points with ease as well as have the ability to deploy Stormtroopers anywhere on the battlefield. This vehicle is also quite good for scouting, but that should not be its primary role. No balanced Imperial Army is complete without one, so always try and keep at least one in reserve so whenever you fight on a planet with bad weather conditions you could deploy one, since bad weather affects troops significantly and gives you a huge disadvantage.
Lancet Wing
As we conclude the Land Units section, we will speak of the final Planetary unit available for the Empire, the Lancet Wing(exclusive to Forces of Corruption). The Lancet Wing is of the TIE-series, and Lambda-class shuttle family. It is by far one of the best Imperial units in-game, with only a few enemy units being capable of countering it. The Lancet wing has a Proton beam cannon, which is moderate, nothing too special. It takes some time to destroy enemies with this cannon since it affects them slowly. The Lancet Wing is vulnerable to a few units, including the ever-dreaded PLEX trooper as well as the Canderous-class tank and any unit on a high enough altitude to destroy the Lancet. The Lancet has questionably weak armor, so it doesn't last long in a fight against a capable foe.


The Lancet can kill virtually every unit, and if it is facing forces with no anti-air capable units then it is able to wipe them all out with ease, unless they build anti-air turrets. The Lancet wing is also very ideal for scouting, as long as there is no presentable threat. Lancets can also provide good support to units such at AT-ATs, 2-Ms or AT-STs if you are still using them late in the game. Lancet Wings are good for defense, as well as offense.

One may go as far as to say that this unit is overpowered, and in a sense, it is, but it helps fill the gap of the Rebel Snowspeeder-type unit in the Imperial Army, only this is slower and more vulnerable than the Snowspeeder.
Part B: Naval Units
Oh, ha ha ha! Yes! Take off your Stromtrooper General Helmet and put on your Admiral Cap! We are about to move on to my favorite part of this game, naval combat. Naval combat is extremely essential, if you are to take control a system you must occupy the space over it. Some systems, such as The Maw or the Vergesso Asteroids, need to be occupied by space only and no land battle will be initiated then, yet it never hurts to have a fleet over a system. Use your fleets to blockade a planet you wish to attack later if you are preparing army or just have too much to focus on. I also highly recommend that you keep a fleet safely tucked over a planet when fighting a land battle to call in fire support, trust me it is very helpful. When a game commences, your number one priority is to focus on developing a good economy and constructing buildings on your planets to aid your quest for galactic control. Your number two priority is to develop a capable navy with several unit types that compliment each other. The Imperial Navy is very diverse, ranging from small TIE Fighters to a massive, 19 km long Executor-class ship. Each unit in the Navy plays a different role, yet they all have just one goal: to win the battle. When you are completely aware of how to use your respective units, you will then command the skies!.. Ah, I mean the...space I guess?

The Importance of Combined Arms in Building a Fleet
Now, before you read this part of the guide, go in keeping in mind that the key to success in Space is combined arms. No one ship can destroy everything and bringing in one type of ship can result in defeat if you are fighting a well-combined fleet, which most fleets you will be facing will be. History has taught that true strategic success stems from the effective use of combined arms. Whether it's the Napoleonic Wars or the 2nd World War, a combination of all forces, cavalry, infantry, light infantry, paratroopers, artillery, skirmishers, medium tanks, heavy tanks, mechanized infantry, is the most effective way to counter any force since it's best to have units that will fulfil any need that arises. As the saying goes, better have them and not need them than need them and not have them. Space warfare is no different, the key to the success of any Admiral is his effective use of all ships. Capital ships, fighter, bombers, frigates and the like all need to work in coordination to win the battle. There are of course circumstances where you will need to use some ships more than others, but even then the other ships will act as compliments to your heavy duty ships, defending them or taking loads off their back whilst they fulfill a certain objective.
Familiarizing Yourself with Space Weapons
Before we kick off this segment of the guide, I want to stress the importance of understanding the weapons fielded by the Empire's Navy, having an understanding of these weapons is key to avoiding the most threatening as well as knowing when to use these respective weapons.

  • Lasers: Laser cannons are primarily fitted on small ships and small frigates, cruisers and Starfighters. They are small in caliber and work against small ships and Starfighters, but for frigates and Capital ships you are going to need a bigger gun. Laser size and caliber varies between unit; on Starfighters(such as the TIE Fighter and TIE Interceptor) you have the smallest kind which is used in dog fighting against other Starfighters, the largest is found on small cruisers and small frigates such as the Tartan Patrol Cruiser and Acclamator-class, it is used to quickly destroy Starfighters and enemy cruisers such as the Corilliean Corvette.


  • Turbolasers: Turbolasers are the standard in Naval duty, they are large cannons fitted mostly on frigates and Capital ships. They come in two versions: Standard and Enhanced. The standard version is less powerful and is available exclusively on the Acclamator Assault Ship. The enhanced version is found on the larger Victory, Imperial Star Destroyer and Executor Super Star Destroyer and is more powerful than the standard. Turbolasers inflict considerable damage on virtually every enemy ship with the exception of Starfighters, which are too small to be hit by such a large cannon. You always need to have a fighter or cruiser compliment with larger ships to protect it against bombers since turbolasers have a hard time hitting them due to the immense size of the laser and lack of decent accuracy. Turbolasers, like all lasers, cannot penetrate shields and must inflict sufficient damage on a shield to temporarily shut it down, opening a window of attack. After a shield is down, you should target the hardpoints of a ship which you think are essential to its demise. For example, if the enemy is about to retreat then destroy the engines to prevent them from jumping into hyperspace or destroy the shield generator(if there is one, some ships have shield generators inside the ship itself) to render a ship virtually defenseless against your Imperial might.


  • Proton Torpedoes : Woo, these guys are trouble. Proton torpedoes are arguably the deadliest of the deadliest weapons when it comes to space battles. Protons are the standard for bombers, every bomber fires them as well as some ships, including the Acclamator which has one Proton torpedo bay. Now, what makes Proton torpedoes so valuable, so deadly? Well, for one, it's the massive damage they inflict as well as their ability to penetrate shields.Yes, I am dead serious. Protons can slice through shields like a knife through butter, the only disadvantage they have is their weak range. On bombers, the bomber has to get up close and personal to a ship in order to fire its torpedoes and get a hit, ships with proton bays on the other hand, can fire from a slightly farther range, but have a high chance of missing if the target is moving. Despite this, Protons still inflict decent damage and have the ability to destroy a ship without even harming its shields. I will elucidate on how to use Proton torpedoes with great effect in the TIE Bomber and TIE Defender sections.


  • Concussion Missiles: Alright, remember how we talked about Proton torpedoes penetrating shields? Well, another projectile that also penetrates shields is the concussion missile. Now, despite the fact concussion missiles penetrate shields, they do not inflict as much damage, yet have superior range; however, the accuracy is questionable, since fast-moving targets may dodge these missiles with ease. They are, however, deadly towards Starfighters, if they actually do hit it, it can destroy half or even an entire squadron with the missile's explosion. These missiles are very similar to Proton torpedoes, with the exception of improved range and less damage, so if you know how Protons work, then you also know how concussion missiles work.


  • Ion Cannons: Ion Cannons are a bit more obscure than the rest of these other weapons, mostly because their effects are difficult to observe in-game. The ion cannon may appear as if it is very similar to standard turbo-lasers and laser cannons in how it acts, but it is quite different in its behaviour. Ion cannons do more damage to shields than lasers, but they damage ship hulls far less. They are almost the opposite of turbo-lasers, which have strong hull damage and standard shield damage, and they aren't a unique weapon in the same way proton torpodoes and concussion missiles are. Even though they aren't too notable within the game, it's still best to take note of ion cannons and their effects.


1: TIE-Series Starfighters
TIE(Twin Ion Engine) Starfighters act as a compliment for large Imperial ships ranging from the small Acclamator-class Assault Ships to large Super Star Destroyers. Now, TIEs come in several shapes and sizes and each different TIE has its own unique array of weaponry. TIEs act as either cannon-fodder or competent supports, depending on the TIE being used and the good Admiral can use TIE Fighters to inflict damage on the enemy without risking his or her ships or simply softening up the enemy so your fleet can destroy the aggressors with ease. The Empire has an advantage over the Rebellion and Consortium when it comes to Starfighters, that being that the Empire can does not have to build individual squadrons of Starfighters, rather each ship you build comes with its very own squadrons(there are some exceptions, such as the TIE Phantom and TIE Defender which come equipped with hyper-drivers allowing you to individually construct them in any number you wish), the number of squadrons you get depends on the ship class. Some actually call this a disadvantage, since you are not able to modify the number of squadrons you have so that you may have the same number of ships as the enemy, yet more squadrons.

Let me illustrate with an example; there is a Rebel Fleet of one Mon Calamari Cruiser and an Imperial Fleet of one Imperial Star Destroyer. The Imperial Star Destroyer has 10 TIE Fighter squadrons and 5 TIE Bomber Squadrons since the ship comes with that specific number of fighters, yet the Mon Calamari Cruiser comes with no Starfighters at all since it lacks hangar bays;however, the Rebel Captain took account of this and built 20 X-Wing squadrons and 10 Y-Wing Squadrons before going into battle, outnumbering the Imperial fleet. Albeit you may have a slight disadvantage since the enemy can create as much as they wish, but since your ships comes prepared with these Starfighters this will save you some credits and keep in mind that those TIEs will also carry over to the next battle since they are reserves and don't count as casualties if lost, guaranteed their respective mother ship is not destroyed.

There are several strategies when it comes to TIEs. They may be used as cannon fodder; distracting the enemy while your fleet is preparing to retreat or setting up for a strike or flank on the enemy, simply to soften up the enemy fleet to minimize casualties on your part, or using them as a compliment to your ships to deal with threats it cannot deal with itself. Remember, most Frigates and Capital Ships do not have the capacity to hit small enemy Starfighters, so your fighters are necessary in protecting your ships from such threats.
TIE Fighter


Vintage TIE Fighter! A robust Starfighter with an iconic engine "hum" and blaster "pow!" The TIE Fighter is one of the first TIEs you will come across, and while it is inferior to the X-Wing, it is essential to spearhead attacks against Rebel and Consortium forces. It is a good fighter and it will serve you well until you inevitably get the TIE Interceptor upgrade(Forces of Corruption only).

The TIE Fighter is powered by a twin ion engine, hence the name(George Lucas also thought that they looked like bow ties and came up with the name during the first Star Wars trilogy, just a little trivia for you). The TIE Fighter also comes with a twin laser cannon, unlike the X-Wing with 4 and the Mandalorian Fighter with heavy lasers. TIE Fighter squadrons have 7 fighters in each, this gives them a numerical advantage and a worthy one too, since they are weaker than their Rebel counterpart. TIE Fighters come with with all ships for free upon purchase. If a TIE squadron or even five are destroyed in a battle, they will be replaced by the same number in the next guaranteed their mother ship is not destroyed; however, if you lose your squadrons during battle, then they will not be replaced during the battle itself. There are, like all units, different ways to use TIE Fighters, as long as you don't go near Crusader-class ships or Correllian Corvettes, in this case, however, there is one effective strategy which very suitably fits the TIE Fighter Of course, indubitably, we will go over this strategy as well as another one which is not as important, yet is a welcome method to your book of strategic and tactical maneuvers.

This strategy is what I like to label 'the fleet compliment'. This is a strategy where TIE Fighters are used to destroy threats most frigates, cruisers or Capital ships are incapable of. Perform this by keeping the flanks of your ships secure with TIE Fighter squadrons. Your TIEs will get rid of any enemy Fighter or Bomber threats. One unit you have to watch out for is the Y-Wing, it is very dangerous towards all ships. Y-Wings have proton torpedoes, so you probably should know how big of a threat this is just off of the weapons it carries. Thankfully, it is slow enough to be countered by TIE Fighters, so your main focus with TIEs is always going to be the destruction of enemy bombers. Also, keep in mind that TIE Fighters are inferior to X-Wings, so you need around two squadrons to quickly and effectively destroy them. When a battle is almost over and most noticeable threats are gone, I recommend you use the 'hunt for enemies' ability to sniff out any remaining belligerents for your fleet to destroy.


TIE Bomber
We talked about the TIE Fighter, now it's time to move on to its sister unit; the TIE Bomber. The TIE Bomber is a very important unit and an important part of any Imperial Armada. TIE Bombers are small, which makes them ideal to infiltrate the space around a frigate or Capital ship and sabotage certain components, or to completely annihilate the respective enemy ship. Large ships, as I said earlier, have no capacity to deal with small fighters and bombers, despite the fact that the TIE Bomber is a slow starfighter, it is not very vulnerable to fire from large turbolasers.


TIE Bombers are best used against medium to large sized frigates or Capital ships to destroy their tactical components such as turrets, shields and engines, depending on what you, as an Admiral, see fit. If you are fighting a battle where you greatly outnumber the enemy and you wish to prevent them from escaping, then using TIE Bombers to destroy their engines is best, since they will lose their capability of entering hyperspace. Bombers can turn the tide of battle, never underestimate them since they can inflict considerable damage on your ship and have a devastating effect against dissidents and criminals unfortunate enough to face the Imperial Navy.

Their proton torpedoes are effective against virtually every ship, but whether or not you can harm that ship depends on the ship itself. The most ideal target for a proton torpedoes are large frigates and capital ships, since the torpedoes can penetrate the shields and inflict great damage on several hardpoints. It is also ideal since these large ships have little defense against the small bombers.

The strategy I would recommend when using TIE Bombers in a fight where there exists no priority to prevent the enemy from escaping into hyperspace is the shields. When you demolish their(the enemy's) shields, you are giving a window of opportunity for your larger ships to attack and destroy the enemy without having to go through the trouble of disabling shields first, then attacking. Remember, TIE Bombers have proton torpedoes, which penetrate through shields. Also, keep in mind that you need to protect your TIE Bombers while they are on their runs. The best tactic to do this is through either having a simple compliment of a few TIE Fighter/Interceptors with your bombers, which is dangerous since there may be a Corellian Corvette ready to perform an ambush on your helpless squadrons or an X-Wing or A-Wing squadron that outnumbers your very own starfighters. So, how do you fix this and create a competent force that can hold up while while your TIE Bombers are battering down the enemies?

A squadron(or preferably squadrons) of TIE Bombers are to be escorted by several other TIE Fighters spearheading the assault and accompanying them, right by their side is a Tartan Cruiser and next to it, but ahead of the TIE Fighters and Tartan Cruiser there must be an Acclamator or Victory-class Frigate to draw fire. The Frigates purpose is to engage any anti-starfighter ships, the Tartan is there to destroy any Y-Wings or X-Wings that risk the safety of the frigate or TIE Bombers, respectively, and the TIE Fighters are there as a compliment. Once a TIE Bomber destroys the shield generator of an enemy ship, the Frigate does most of the bulky work and the bombers help out as well. This is, in my opinion, the most ideal formation for a bombing run. I know what you're thinking: "Gee, why don't I just send over my entire navy to wrap around the TIE Bombers?! All this just for a lousy bombing run!"

Well, this isn't just any "lousy bombing run", this formation is capable of delivering quick and decisive blows to the enemy. This tactic is best used when you have a detachment of your navy engaging the enemy directly, and your small bombing task force is there to flank and destroy enemy units engaging your units from up front or to destroy dispersed or reserve enemy units intended to reinforce flank your very own line.

So, I hope now you see how the TIE Bomber is a unit with decisive effect in naval battles and great performance against large enemy ships.
TIE Scout
Fast and nimble, the TIE Scout is a poorly armed reconnaissance spacecraft which can be great for scouting duty. Keep in mind, this unit does require a fair bit of micromanagement during Space Battles, so using it may be a bit tedious, yet tactically rewarding.


The TIE Scout is one of the fastest starfighters in its class, and it does have a hyperdrive which allows it to travel on its own from system to system. TIE Scouts aren't provided with any ships, so if you want them you need to build them on their own. TIE Scouts have a very useful ability called "Sensor Ping" which allows it to send out a signal to scan an area for units. This can be extremely helpful since it can allow you to deploy your ships in far parts of the map or see enemy ships, getting an idea of what they are bringing, how much of it and where it is. This intelligence is vital in determining how you're going to engage the enemy, with what you'll do it and whether you should engage in the first place. Had it not been for this ability, the TIE Scout would have been useless since the TIE Interceptor is also very fast and much better armed, cut out for reconnaissance duty, not to mention that your ships' hangars can deploy scores of them. Do bring a few if you are taking part in any major galactic offensives. They can be especially helpful if you are confronting a fleet which is very powerful or superior to your fleet. Do make sure to keep them protected though, they are practically vulnerable to everything.
TIE Interceptor
The next evolution of the TIE series, the TIE Interceptor is, like the Phantom and Defender, exclusive to Forces of Corruption. Pilots who have successfully flown several missions and sorties in the TIE Fighter and survived whilst displaying great merit can be eligible for a placement in a TIE Interceptor, The TIE Interceptor can hold well on its own against the X-Wing and even the revered A-Wing can still have trouble in a tussle with the Interceptor. 7 Interceptors come per squadron, but even if it were 5 it would be enough. Once you reach the 2nd Tech Level you will unlock the TIE Interceptor for the Victory and Imperial Star Destroyers. It has pretty much the same strategy as the TIE Fighter, interception, attacking targets that are no longer shielded and supporting the TIE Bomber on its runs. It is a great upgrade over the TIE Fighter and will serve you very well.

TIE Defender


An elite multi-purpose fighter-bomber that can hold its own against enemy starfighters and bomb large enemy ships to smithereens with its one-of-a-kind arsenal, the TIE Defender is a TIE ship unlike any other. The ship comes with a hyperdrive and comes as a compliment with the ARC Hammer. Though, most Defenders you will be using will come after you build them yourself. Imperial naval doctrine generally doesn't favor the use of starfighters in primary combat roles, unlike the Rebel Alliance, but there is still value in using the Defender. It is a very effective bomber and can hold its own well against enemy squadrons. It is still very vulnerable to anti-starfighter ships like the Correllian Corvette so you should still not engage it with everything. Each squadron comes with 3 TIE Defenders. They are very durable ships that can withstand a good amount of punishment and you should use them alongside your TIE Bombers to harass large enemy ships. It does deliver a bigger punch than your average TIE Bomber, so having scores of them to bomb enemy ships will help greatly. Do keep in mind that these ships must be brought in, so they do take up unit population during space battles.

The TIE Defender is a fantastic starfighter, but it can't fill many unique roles because of the fact that it doesn't suit Imperial Naval doctrine.
TIE Phantom
The peak of space reconnaissance ship development, the TIE Phantom is the stealthiest ship in the Imperial arsenal. It acts almost like the SR-71 of the Empire, and like the SR-71 it should not be expected to fight. The ship can fight, but you only get 3 per squadron and its guns aren't too powerful. While more costly, its better scouting ability gives it an edge over the TIE Scout. In fact, this ship should replace the TIE Scout once you have it. The TIE Phantom can only be built over The Maw or be deployed by the Arc Hammer. It does have a cloak, which can make it disappear like a spectre and scout ahead without too much risk. It can also be put over enemy planets in the campaign mode without engaging in combat. It is also quite fast and agile, cut out for reconnaissance duty, and damn good at it too.

2: Cruisers, Destroyers and Frigates
The most common type of ships in your fleet, cruisers, destroyers and frigates range from smaller ships that fill certain combat roles, like the Broadside, Tartan or Interdictor, to main battle spacecraft which will form the backbone of much of your early fleet and act as subordinates to your capital ships, once you acquire them.


Tartan Patrol Cruiser


A light and fast-moving spacecraft, the Tartan Patrol Cruiser is among the first ships you'll get to use in space combat playing as the Empire. The Tartan Patrol Cruiser is armed with light laser cannons meant to shoot down star-fighters and bombers and tackle small threats. The Tartan is one of those ships that will always be reliable and a must-have in your campaign.

To understand why its important to have the Tartan, it's best to look no further than the naval doctrine of the Rebels and the Empire.

The Empire's naval doctrine centers around using larger ships, frigates, cruisers and capital ships, to overwhelm the enemy with firepower. The Imperial Fleet is a concentrated around its heavy ships. TIE Fighters and Bombers only exist alongside these ships as compliments, not as primary combat tools. This is evident in the fact that TIE Fighters and TIE Bombers don't have hyper-drives, which means they can't travel from one star system to another unless accompanied by a fleet of frigates, cruisers or Star Destroyers.

Conversely, Rebel naval doctrine is centered around lighter ships and quick strikes. The backbone of the Rebel Fleet is its crack fighter and bomber squadrons. X-Wings and Y-Wings have hyper-drives and it sometimes is possible to expect them to harass large enemy ships on their own without any support from its fleet's larger ships.

So, looking at both battle philosophies, it is possible to take away two things: the Empire uses heavy ships to destroy its foes, but heavy ships don't have proper fighter defense aside from their squadrons, which aren't always the most reliable since the X-Wing is better than the TIE Fighter, and that the Rebels primarily focus on skirmishing and taking down their enemies with light, mobile strike fleets that engage in hit and run and try to disorient the enemy with fast ambushes rather than mass firepower (which is what the Empire does).

Now, to counter enemy X-Wings and Y-Wings, which can be a major threat to even your heaviest of ships, the Tartan Cruiser is perhaps your best bet. The Tartan doesn't have hardpoints, unlike heavier Imperial ships like the Victory, Acclamator or Star Destroyer, which means that even if it takes a lot damage, the ship's engines, shields and guns will function at normal capacity. Already this seems like the ideal counter to those pesky fighters and bombers! Furthermore, it's fast and has guns that are meant to counter the Rebels' fighters and bombers, so it is the most effective ship to destroy enemy X, A Y and whatever letter of the alphabet-Wings the Rebel Alliance has.

Keep in mind, this ship is still light and can't sustain too much fire from heavier ships like the Nebula Frigate. Always make sure to maximize the use of combined arms and never keep a Tartan alone. Sometimes, you can allow a Tartan to room free for purposes of chasing down any remaining enemy fighters or conducting reconnaissance. Even then, it's best to simply use TIE Fighters or, even better, TIE Scouts for Recon purposes. Always have Tartan ships as compliments to your heavier ships, because they can counter threats those ships otherwise can't.

The Tartan is, all-in-all, a brilliant spacecraft. It's well armed to counter Rebel fighters and protect larger Imperial Ships and is a fantastic compliment to your fleet.
Broadside-class Cruiser


More of an artillery piece than a spacecraft, the Broadside Cruiser is a long range ship armed with Diamond-Boron missiles. This ship is not ideal for use in front-line service, and should serve as a support unit in the back. The Broadside has a very long range, and it can take out enemy targets that are out of range through lasers.

This means that the Broadside is especially most perfect to take out space stations or large enemy ships from far away. Keep in mind, however, since the Broadside uses Diamond-Boron missiles, which are a slow projectile, using it against fast moving or mobile targets isn't too good, since it's easy for those units to dodge the missiles. Instead, use the Broadside Cruiser to destroy stationary targets or slow moving ships, like Capital Ships.

Now, I did mention earlier that its best to keep this ship in the back. This is because it's defenseless against enemy fighters, bombers and ships. Do keep in mind though that when keeping it back you should not keep this ship too isolated, otherwise it could be ambushed or destroyed. Committing ships outright just to protect the Broadside is a waste, since you are limited in how many ships there can be in a battle and every ship you have should be committed to the battle in some way and not idle. So, to keep the Broadside in check always insure that it stays behind your fleet, but not too far behind. Try and keep it within proximity of your fleet to prevent it from being destroyed quickly or to prevent enemies from having an easy shot at taking out the ship.

The Broadside Cruiser can be of some value early in the campaign, where you are limited in your choice of heavy ships and wouldn't have enough firepower to take out formidable space stations. In such a case, bringing in a Broadside Cruiser can help to damage the enemy's space station or more valuable, slow moving ships. Later on, however, once you unlock the magnificent Star Destroyer and heavier, more powerful ships it can become easier to overwhelm the enemy with lasers.

Initially, this might be a good unit, but later on it becomes very possible that it will become relegated by ships with superior firepower. Of course you, as the commander, will have to determine whether or not this ship will be worth your time. If you see value within using it, even after you've unlocked better ships, then it is completely your choice to keep on using it, however I would just recommend building massive Doom Fleets and using large ships to overwhelm enemy fleets and space stations with fire power.

Acclamator-class Assault Frigate
The beginner's ship as the Empire, this vessel is one of the most versatile units in the game and can take on most early Rebel ships, yet does not withstand much punishment against more intermediate rebel ships such as the Nebulon-B frigate.


A hardy spacecraft with a good assortment of weapons, the Acclamator is the first heavy ship you will use as the Empire. Put into service by the Galactic Republic since the early days of the Clone Wars, the Acclamator was used as an assault craft intended to support its big brother, the Venator, and to transport units and equipment. The Empire inherited several of these ships after its declaration at the end of the Clone Wars and continued to produce this ship.

Pictured to the right is an Acclamator in service during the Clone Wars


This ship carries a small compliment of starfighters, a couple lasers, turbolasers and proton torpedoes. The Acclamator is the only one of the three main Imperial ships, the other two being the Victory and Star Destroyer, to carry a proton torpedo launcher, which allows it to target hardpoints on other ships and damage them before the shield is shut down, softening up the enemy. It is a good ship for the start and it will be the staple of your fleet, but it is week against enemy bombers, heavier ships and can have trouble taking down Level Three Space Stations. It is a good starting ship, but after you have access to the Victory class and Imperial Star Destroyer, it is simply best to use this ship for planetary reserve duties. Though, it is best to use alongside the Victory before you unlock the Star Destroyer, after that you need to use the Victory alongside the Star Destroyer and ditch the Acclamator.

Great at the start of the game, a robust and versatile ship, the Acclamator will nevertheless be of less use later on in the game when facing better enemy ships and having the option to get better ships.
Victory-class Star Destroyer
The next main ship you will unlock after the Acclamator Frigate, the Victory-class is a terrific warship. It was developed in the Republic during the latter stages of the Clone Wars, but never did see action until after the Empire took a hold of them. It is a pattern in Imperial weapons and spacecraft that you will notice, a lot of their designs and plans are inherited from the excellent technology of the Galactic Republic. The Victory, specifically, was actually developed fairly later in the end of the Clone Wars by the Republic and the program was continued by the Empire even after the Republic had ceased to be.

While not as versatile in its arsenal as the Acclamator, the Victory has a larger TIE compliment, is more heavily armed and can take more of a beating than its Republican predecessor. Unlocked at the second tech level, the Victory will relegate the Acclamator and become your main ship of the line. While vulnerable to starfighters and bombers, the ship can still deal with most other ships on its tech levels and lighter ships. Always do remember though to protect it from bombers, the enemy will target important hardpoints on your ship and will deal serious damage. Initially, you should support this ship with the Acclamator, but after unlocking the Imperial Star Destroyer, the Victory should replace the role of the Acclamator. The importance of anti-starfighter ships goes without saying of course, this rule of thumb applies to all naval engagements.

Not to expensive nor too weak, the Victory class is a great ship, and even after you unlock the Imperial Star Destroyer it will still serve you well since having it will diversify your fleet and also because it is quite economical to build relative to the Star Destroyer.
Interdictor-class Star Destroyer
A ship which fills a very niche role, the Interdictor is not too valuable of a ship to bring along, but having one in your fleet just as a back up can be helpful. The Interdictor is lightly armed with laser cannons which can be effective against starfighters, but it isn't as fast as the Tartan so it should not fill that role. Instead, the Interdictor is used as a support unit. It's gimmick is a missile jamming field, useful against concussion missiles, and a gravity well which prevents ship from exiting into Hyperspace. These jamming countermeasures can be quite useful, particularly against proton torpedoes and various physical projectiles from Rebel ships. This jamming field is perhaps the best aspect of the Interdictor, being the most practical for ordinary space battles. Considering that proton torpedoes are some of the most lethal weapons against Empire ships, being able to ignore shields, this can be invaluable.

I would still, however, discourage its use in combat in most cases. Its weapons are only present for self-defense purposes and the real meat of this ship is its jamming abilities. When you're in a large battle and are starting to finish up and completely win, bringing in one of these ships will allow you to prevent the enemy from retreating. This can be valuable in the fact that it can allow to deprive the enemy of ships which they can use against you later. Strategically speaking, these ships will be less of a pain to you in the future. The jamming fields can be useful during a battle, but I'd prefer to bring in a ship that can boast more firepower, rather than a specialized craft that isn't the best offensive asset.

There really is not much else to write about in regards to this ship, it is quite an odd addition to any fleet and fills such a specific role that it lacks versatility. You should determine whether or not bringing one is worth it. Personally, I like to have just one in reserve, just in case I ever need it.

3: Capital Ships
The mainstay of your fleet late into the game and the largest ships available to the Empire, Capital Ships are heavy ships that are the fleet's heart and soul. They lay down the most firepower and deploy the most Starfighters. Once you unlock these ships late in the game, all other ships will become penultimate and will serve as support ships rather than your primary ships.

Imperial-class Star Destroyer
A ship that is 1,600 meters (5,249 feet) in length and one that has no shortage of turbolasers, the Imperial Star Destroyer lives up to its name with the fact that one alone is enough to make a star system submit. The Star Destroyer will serve as your primary ship when unlocked and it will serve you well. At the hands of such a ship, how can any rebellion succeed?


We have reached the Imperial Star Destroyer, in my opinion, the best ship in the whole Star Wars saga, not even the Millennium Falcon comes close. The Imperial Star Destroyer is a large capital ship. As a Capital Ship, its role is to be the leading ship of a fleet and the strongest and most capable one. The Imperial Star Destroyer was commissioned shortly after the formation of the Empire and the dissolving of the Republic. It is part of the Star Destroyer series of ships, which is as renowned and as excellent as the All Terrain series.

This ship is the successor of the Venator-class, a capital ship used by the Republic during the Clone Wars. After the end of the Clone Wars and the Declaration of the Empire, the Venator was used for some time but it was quickly retired and replaced by the Star Destroyer because it did not fit into Imperial Naval Doctrine. Imperial Naval Doctrine emphasized firepower and mass barrage of lasers to overwhelm the enemy. Republican Naval Doctrine, on the other hand, was more focused on carrier operations, hence the Venator was developed as a fairly compact capital ship that boasted a large fighter compliment and was small enough to conduct atmospheric operations. ISD's are large and while they do boast a fighter compliment, it doesn't have a large hangar like the Venator and is very large in comparison to it, around 500-600 meters (1640-1969 feet) longer.

On the right is the Venator-class Star Destroyer, predecessor of the Imperial Star Destroyer

You will acquire this ship once you reach the 4th tech level. Once you unlock the Star Destroyer, it will be a harbinger for better days, a symbol of the Empire's might, it is the pride of the fleet. The Star Destroyer carries a load of four turbolasers, two Ion Cannons, a shield generator, several engines, a tractor beam emitter and a hangar. The hangar can deploy 10 TIE Fighters/Interceptors and 5 TIE Bombers, a worthy compliment for an exceptional ship.


When you have the ability to construct this ship, it will come at the ludicrous price of 5900 credits. It is, however, a worthy investment, since this ship will dominate the galaxy, so long as you have a proper navy to support it. One ship is good at first, but as soon as you take more planets and have a prolific and prevalent amount of mines, you'd want to get more ships built.


Now, let us talk strategy. The Imperial Star Destroyer is, of course, the number one of the fleet,with the exception of the Executioner-class which you may unlock very late into the campaign. The Star Destroyer is packed with powerful weapons and can take on virtually every cruiser, frigate or corvette. It is only matched by the enemy's capital ships, like the Mon Calamari, but I would highly recommend having frigate or bomber support to put the odds in your favor, since every enemy Capital Ship can give the Star Destroyer a run for its money. That doesn't mean that the Star Destroyer is inferior, oh no! It is just to be sure, because you never know what trick the enemy might have up their sleeve whether it be bombing runs or ambushes. In terms of position, placing the Star Destroyer in between two frigates is always best strategy to use. The Star Destroyer is a powerful ship, but it should not take on all enemies on its own. Placing one Tartan Patrol Cruiser alongside the Star Destroyer is also wise, since it can intercept any bombers attempting to initiate runs against your Star Destroyers, and bombers are the biggest threat to a Star Destroyer. Two frigates on the side of the ship, preferably Victory-II frigates, can deal with any nuisances to the Star Destroyer. This means that if your Star Destroyer is taking on, say, a Mon Calamari and the Rebels try to stray your Star Destroyer by sending a cheaper, more expendable unit(like a frigate or corvette) then your frigates can deal with them while your Star Destroyer concentrates fire on larger, higher priority targets.

Executor-class Star Destroyer


An absurdly long ship at 19 km long (11.8 miles), the Executor-class is a powerful, unlisted ship that will be unlocked at the final tech level. You cannot build this ship on its own. Once you reach the final tech level, Darth Vader will be upgraded from his X-1 TIE Fighter to a more rewarding position aboard the aptly named Executor-class Star Destroyer.

A game-breaking ship that will turn heads and break hearts, the Executor-class is more about brute force than strategy. Boasting a massive fighter compliment and a seemingly endless array of turbolasers and shield generators, taking this ship out is an almost impossible task. When using this ship, you can just bring it in on its own against a fairly small or weak fleet and win with ease. Do bear in mind though, it is easy to overestimate the abilities of this ship. When facing a powerful or large fleet that boasts at least one or two capital ships, do bring in support. The Executor is strong, but it can get overstretched doing everything on its own. If you want, you can even bring it in the middle of the battle to deliver the final below. Though, by the time you will unlock this ship you will likely be in control of over half the galaxy, so the fleets you will go up against will not be too strong. Still, do preserve this ship; it is precious and replacing it will cost you a pretty penny.
4: Super Weapons
Colossal weapons of mass destruction that cause pain, misery and death on an unimaginable scale. Horrific contraptions of warfare, the two Death Stars make up the Super Weapon category in the game. They exist to do one thing and one thing only: destroy.
Death Star I
Unlocked at the final tech level, the 20,000 credit Death Star battle station is a sound investment for the Empire. Capable of destroying entire planets on its own with its laser, the Death Star is truly a dangerous weapon and one that can be very, very lethal in the right hands. Thankfully, it is in the right hands; the Empire's hands!


The Death Star should always be escorted by your fleet. When on its own, it comes with a compliment of two Victory-class Frigates and two Tartan Patrol Cruisers. Not necessarily the best ship compliment, hence why it's always wise to keep it under escort by Star Destroyers and the like.

After all, why should such a frightening battle station have such a disappointing entourage?

When deploying the Death Star, the station will charge up and prepare to fire. With the flip of a switch, its laser will be concentrated and the weapon will fire, destroying any planet unfortunate enough to lay in its way. Bear in mind! Don't use this on every planet. Determine how strategically important a planet is to you then determine whether or not is it worth destroying. Of course, you can also just use this late in the game to not have to bother to fight any planetary battles. One of the most effective ways to use this battle station is to use it on planets which the enemy sees as important. This can include planets which are host to many units or important structures for the enemy. Though, do still keep in mind whether or not the ownership of the planet is needed. If the planet is like Kuat or Mon Calamari and can produce capital ships, keep it! If the planet has great bonuses like production output increases or discounts like Mustafaar, keep it! If the planet is economically important and produces large amounts of credits like Bespin or Alzoc-3, keep it!

Do also be careful, just because you have a massive battle station doesn't mean that the enemy can't find a weak point and destroy it, so always remember the strong fleet complement.
Death Star II


A behemoth of epic proportion, the Death Star II is larger and more powerful than its predecessor. The Death Star II can do everything the first station can do, and more.

Although incomplete, the Death Star II is still a fierce battle station. Built after the unfortunate destruction of its first model in the Battle of Yavin, the Death Star II boasts a larger fleet compliment of two Tartans, two Victory-classes and one Imperial Star Destroyer. Everything you know and learned about the Death Star I can be applied here, and everything I wrote about it also applies here, yet there is one great additional feature aboard the Death Star II. It can fire a smaller, less concentrated laser beam to destroy enemy ships. Always target the high value enemy ships, large capital ships or, if not, the most advanced frigate they have. It can only fire a few times during battle, twice or thrice, depending on the length of battle, so make each target count! You can even target the enemy space station, if you so desire. In fact, I encourage that you do. One thing worth mentioning: the Consortium can recruit IG-88 to destroy the Death-Star II. It costs a lot of credits for them to do so, but it's still very possible and there really isn't a counter to it since it doesn't happen in a battle but rather on the campaign map. Do beware of IG-88 and try hard to cripple the Zann Consortium as soon as you can because it is probably the largest threat you will face in the Forces of Corruption campaign, IG-88's ability is one of the reasons for that.

So go out there and show your enemies the might of this fully-functional battle station!

Conclusion
Thanks a lot for taking the time to read this guide! I hope that you enjoyed reading it or benefited from reading it, preferably both! I started this guide a year ago, and I wrote most of it then. I didn't get around to finishing it until a few days ago from its date of publishing. It took a lot of time and effort to make, and I had a lot of fun writing it, so I thank you sincerely and kindly for going through the guide. I hope you enjoyed reading it as much as I did writing it.
199 Comments
Luke5Arman Nov 7, 2023 @ 6:08pm 
Thank you, and I feel ya on being busy. Real life is more important. I finished that campaign (eventually), and I found a few more items.

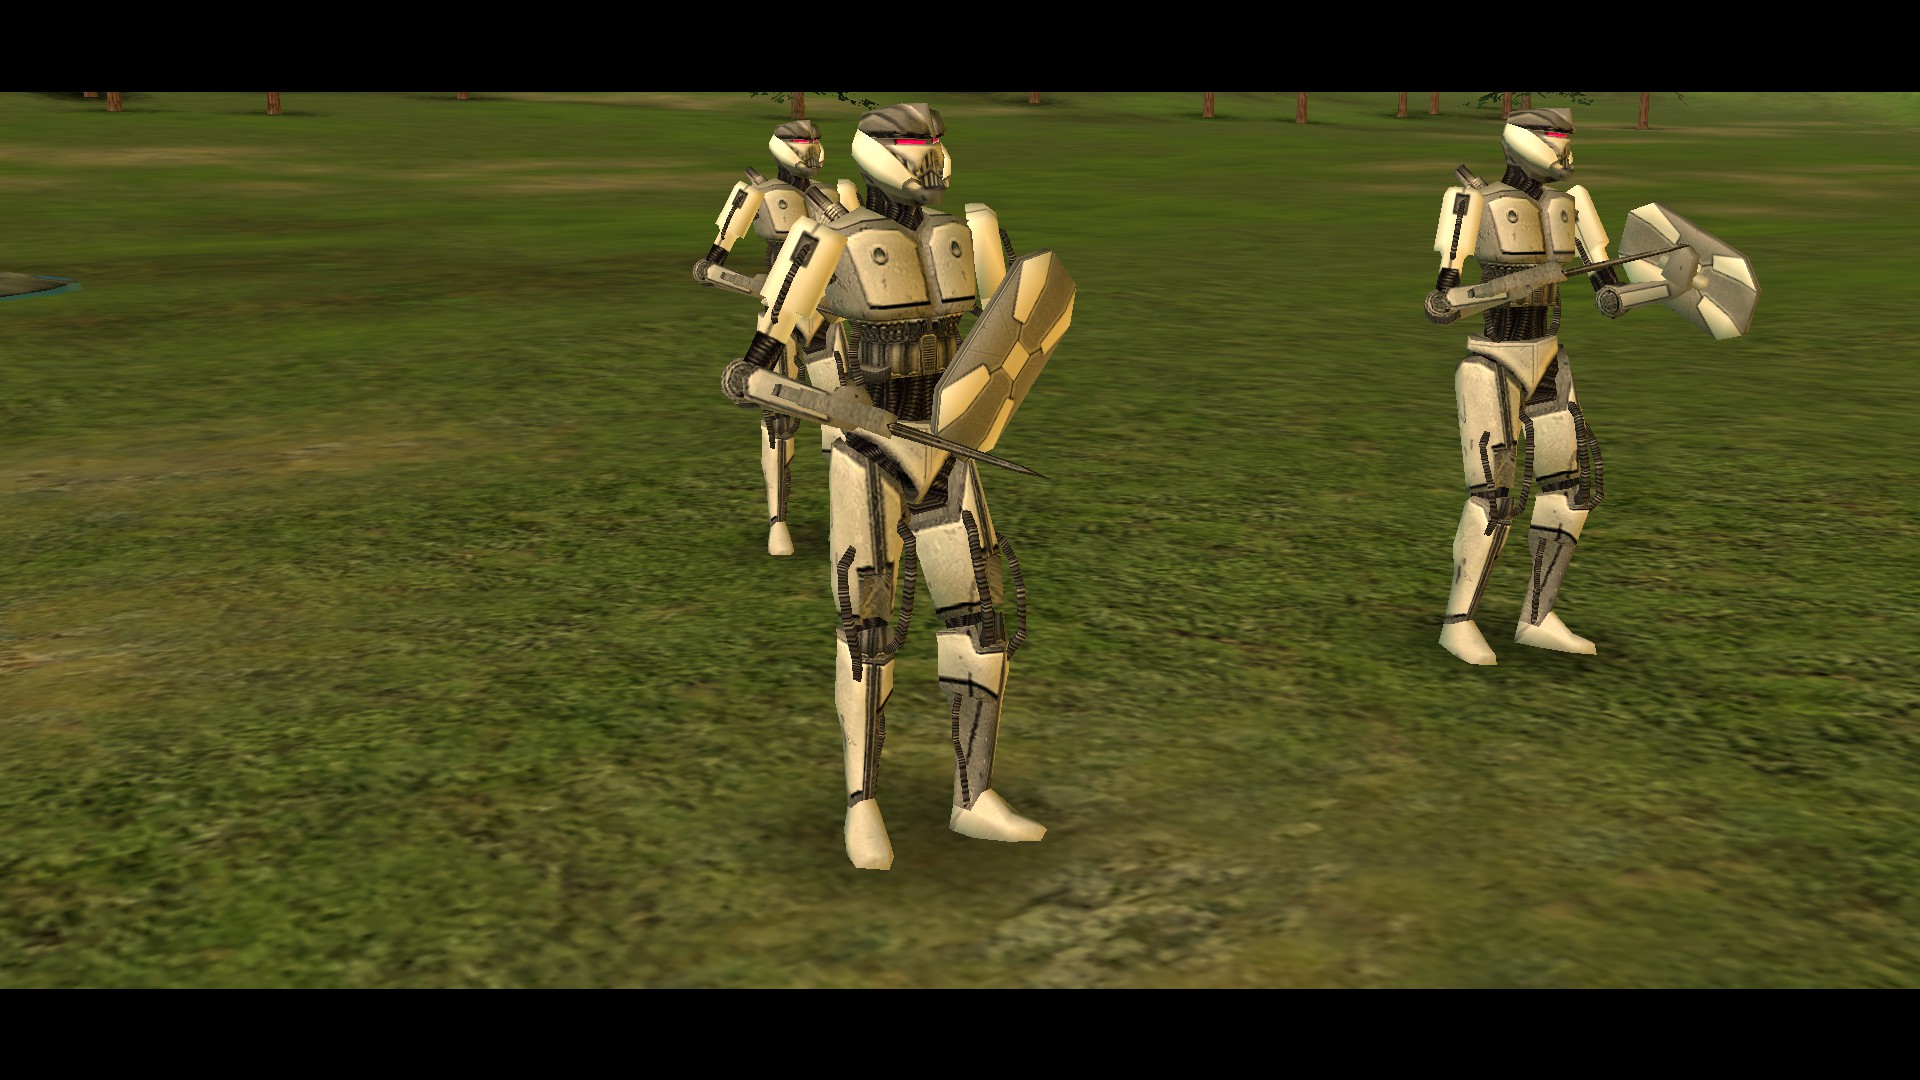
Nohgri do semi-decent damage against non-vehicle heroes. I only had Obi-wan as a test point, but a squad of Nogrhi chunked his health a fair amount, and stranger still, he didn't seem to be deflecting their bolts. Not sure if it was a bug.

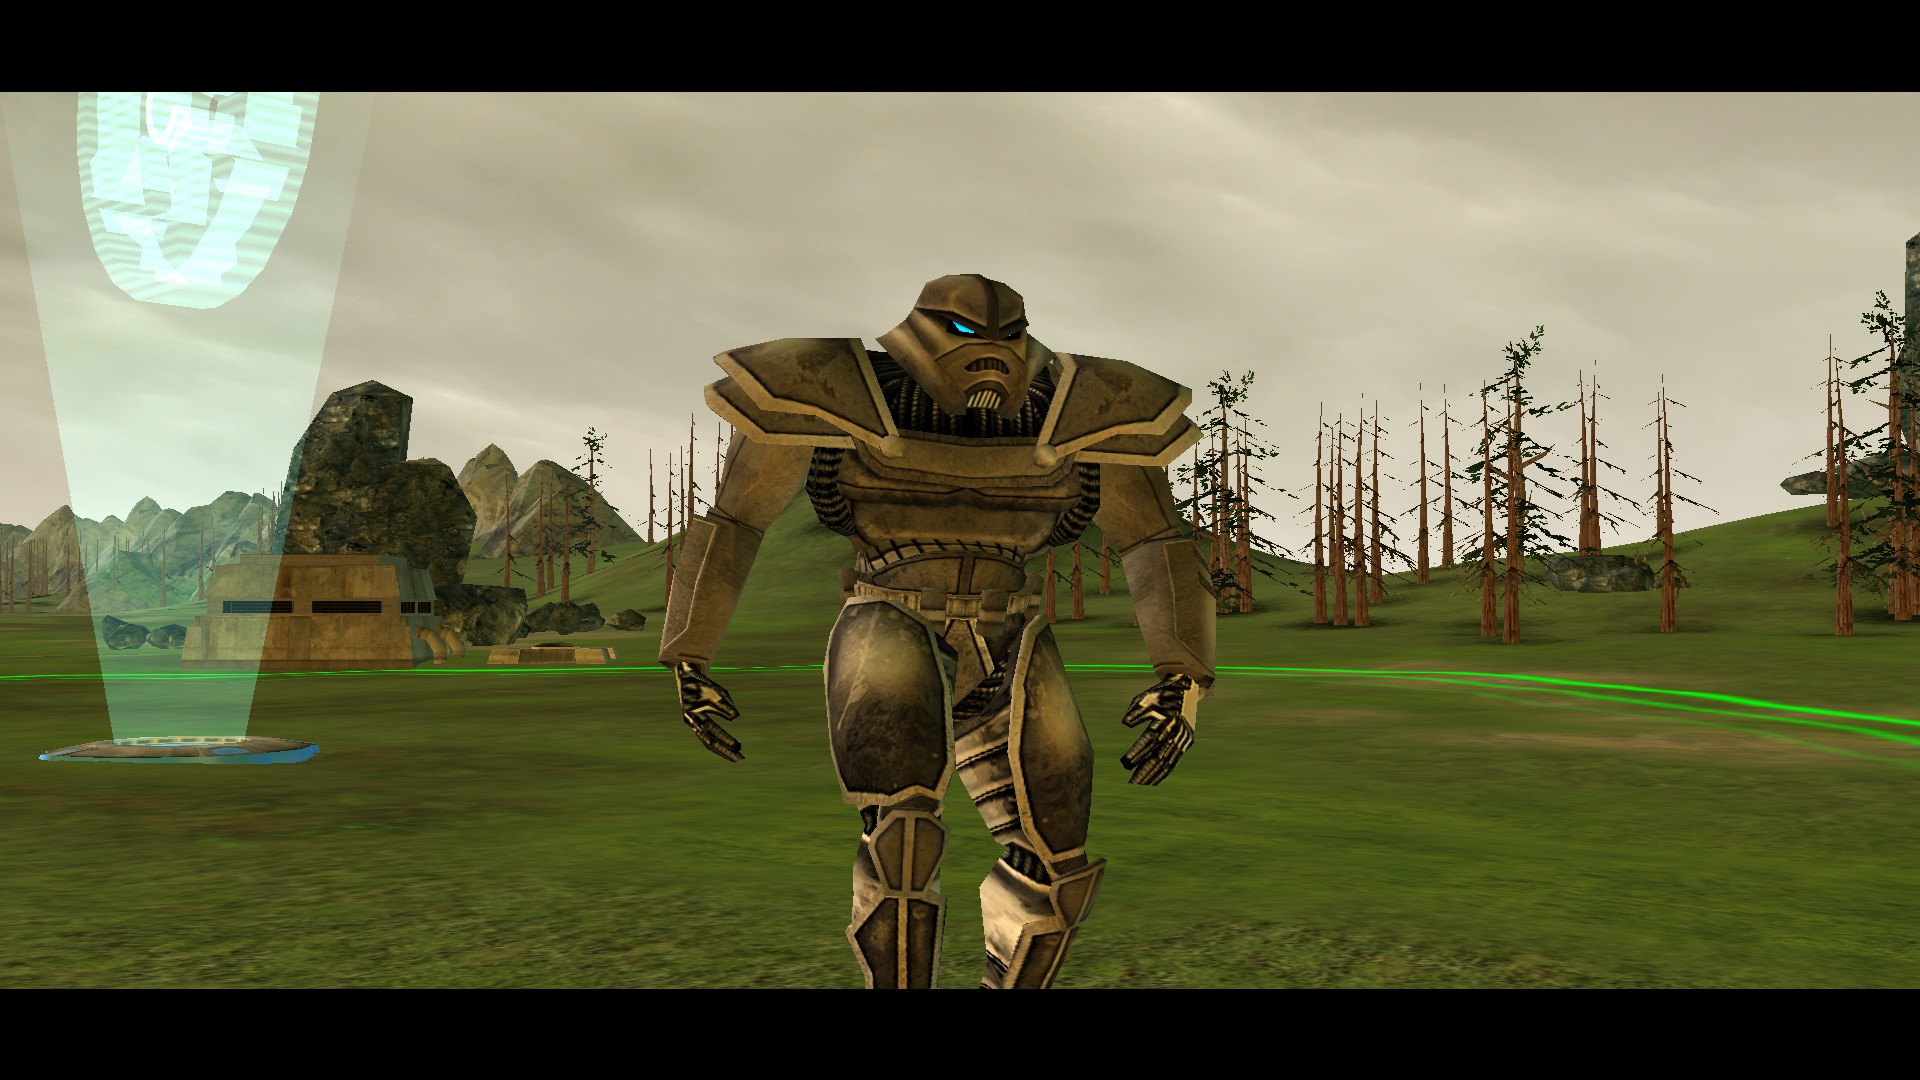
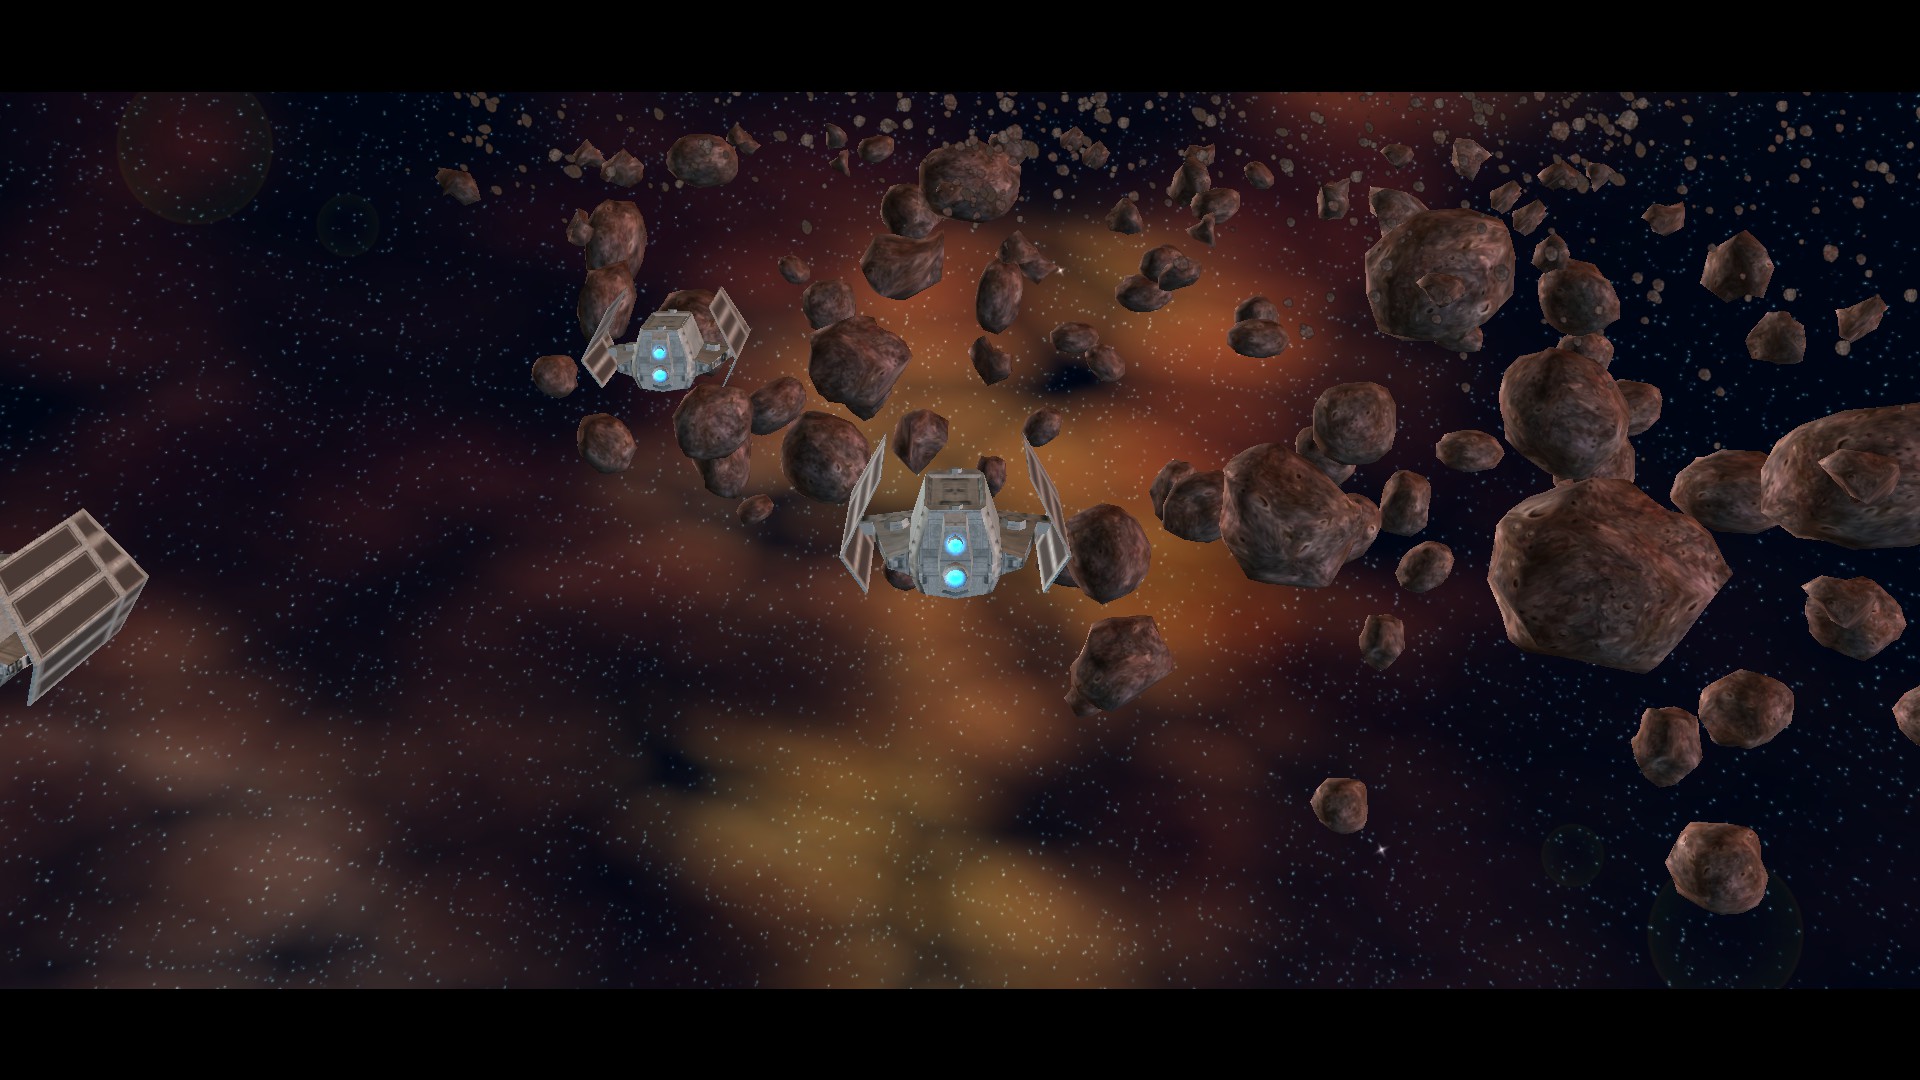
The Juggernaught can carry dark troopers of any phase. This is especially handy for third phase dark troopers, since they are fairly slow outside of jetpack jumps. You may also want to mention the Juggernaught's ability to shoot down missiles with point defense. Incredibly useful against opposing artillery, particularly consortium, since their rof is slower. Once you see a bombardment starting, click it on, and the juggernaught can usually stop anything short of multiple groups of artilliary firing at once. Veers + Juggernaught + Phase 3's filling out the rest is a fairly solid deathball based on my testing.
Suleiman the Magnificent  [author] Sep 15, 2023 @ 12:44pm 
Thanks a lot for your effort, Luke. This is really exhaustive, and it seems like you did some pretty thorough testing. I admit life has been keeping me a little too busy to put too much work into this guide, but should I have the time I think the work you did on the Noghri here is really stellar itself and would make a great inclusion (of course you'd get all the credit for it too).

I appreciate the enthusiasm that you have for the game too. It makes me feel bad because I feel as if I haven't been able to adequately meet it since this guide published, and since this game had a rebound in popularity some time after it was published. Efforts like these are the threads which really do keep the community sewn together. When time comes to add the Noghri, I'll more than certainly be indebted to you for the information on them.
Luke5Arman Sep 13, 2023 @ 7:53am 
As far as unit pairings go, I like pairing them with ground commanders if there's room for it, since the extra vision makes them even more potent at taking out troublesome infantry before they get in range. They also make a good pair with Phase 3's, allowing the Phase 3's to focus on cutting down vehicles with missiles while the Noghri snipe any infantry before they become a major threat.

I have yet to test them against enemy heroes, mostly because I have either not had Nohgri in the battles when fighting enemy heroes, and because I've also mostly tried to kill ground heroes in space to avoid the trouble of dealing with them on ground. If I do get the opportunity to test it, I'll let you know of the results.

If you're considering adding Noghri to the guide at some point, I hope this helps!
Luke5Arman Sep 13, 2023 @ 7:52am 
Overall, a decently powerful anti-infantry unit. I've come to prefer them over Phase 1's for 3 main reasons: 1) Less Plex vulnerability, 2) It frees up the Arc Hammer to produce Phase 2's or Phase 3's, 3) Long blaster range means you can cut down Plex troopers before they get close.

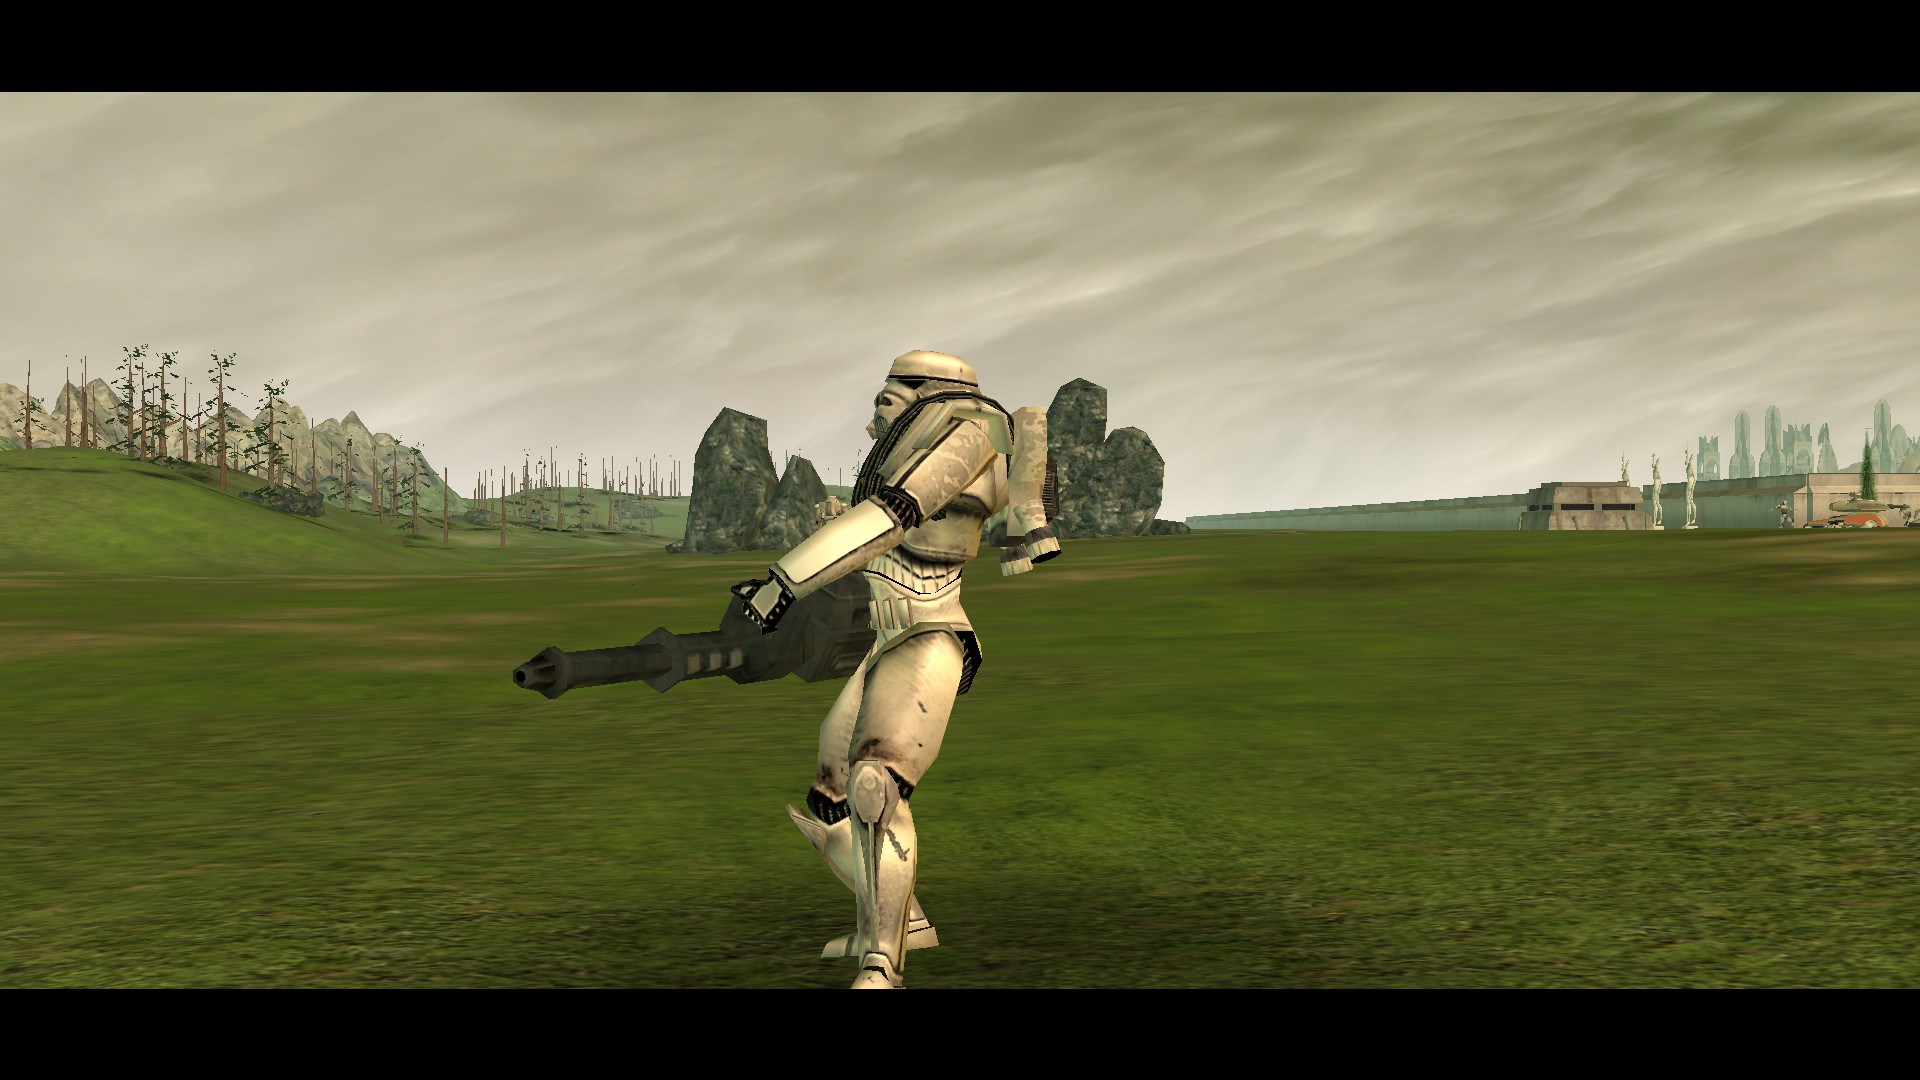
Not sure if it's a bug, but with AI being able to constantly move units, it's a pain for Phase 1's to keep up with Rebel infantry since it seems like the second that they get in range the Rebels start moving erratically, getting just out of range so that the attack animation doesn't finish. Phase 1's are definitely powerful against infantry, but they have to be able to make physical contact with said infantry and if they AI (or opposing player) knows how to micro their infantry in the right way, one squad can distract the Phase 1's while they get cut down by something else with basically zero losses. Noghri on the other hand can just start blasting once the enemy gets in range.
Luke5Arman Sep 13, 2023 @ 7:51am 
Here's my general assessment of the pros and cons of the Noghri:

Cons:
- Can only be produced on one planet (as opposed to the Arc Hammer producing them wherever)
- Vulnerable to anti-infantry weapon (esp anti infantry turrets or artillery)
- Low vehicle and building damage
- Can be slow compared to some vehicles

Pros:
- Cheaper than Phase 1s (In my current campaign all units are discounted, but the current prices are 450 for Phase 1s and 270 for Noghri)
- Can capture build pads (unless I'm mistaken, Phase 1's can't)
- Can outrange turrets
- Incredible range for infantry (almost to the edge of vision)
- Blaster one shots all standard infantry, so they can cut through most infantry pretty quickly
- Cloak allows for either scouting without taking damage (good for sneaking right into the middle of the enemy base and call down a bombing run), or to get out of sticky situations
- Not exceptionally vulnerable to Plex missiles, unlike other Imperial anti-infantry units
Luke5Arman Sep 13, 2023 @ 7:51am 
Have to post multiple comments because of length. I started up a new GC as the Empire, and this guide has been great for re-familiarizing myself with the units.

A while back I asked about Noghri, and you mentioned that you hadn't tested them much. I've played them a decent amount, so I may be able to save you some of the trouble of testing them if you wanted to add them to the guide later.

I've realized that the best thing to compare the Noghri to is the Phase 1 Dark Trooper. Both have the same unit count per squad and fill similar roles, but I've reached the point of preferring Noghri over Phase 1's.
Suleiman the Magnificent  [author] Aug 29, 2023 @ 3:46pm 
Thank you for your kind words. My focus with this guide is purely on the vanilla game experience (inclusive of the expansion pack). I never made with this intent of talking about mods, and this is something out of scope which I would not have been able to discuss well with any kind of specificity. Also, back when I first wrote and published this guide there was no Steam workshop, so the modding scene looked quite different than how it does today. Your comment is greatly appreciated.
thebeatleprince Aug 29, 2023 @ 3:16pm 
good job i like it but you should also talk about the mods but everything else is really good
Suleiman the Magnificent  [author] Apr 22, 2023 @ 7:48pm 
Thanks sincerely for your comment, I'm flattered you enjoyed it and found it helpful. This makes the effort of having made the guide very worthwhile (also glad to see someone else also puts stock into preventing their casualties!).
Agion Apr 22, 2023 @ 11:30am 
I love being evil, haha! Anyways, all that bravado aside, this guide is the best of its kind. A surprisingly entertaining read too! There's a lot of stuff I just didn't think of and thanks to this guide I can decrease my abhorrent casualty count.

Thanks again!