Voyage: Journey to the Moon

Voyage: Journey to the Moon

41 értékelés
Walkthrough & Puzzles Guide (And how to get the game to work)
Készítő: Cyan
This is a complete walkthrough about how to solve most of the puzzles, and how to get the game to actually work since it is very annoying on Windows 7 and higher.

I love this game a lot. Please note that some of the puzzles are randomised, So I cannot just tell you the answer - instead I have explained how to solve it using an example where possible. Also some puzzles can be accessed before you actually need to solve it, for example: When on the moon, in the centre there is a few puzzles which I ignore as they aren't required to progress yet. I do however come back to these at a later stage.
3
   
Díjazás
Kedvenc
Kedvenc
Törlés
Section 1 - Getting the game to launch
I'm going to keep this quick and simple - I found this basic solution of getting the game to launch off the discussions, so any credit goes to the person who first discovered it.

1. Go into your C:\ drive, into 'Program Files (x86)', and find 'Steam'. (If you don't have the x86, I guess it would be in just Program Files). Find 'SteamApps\common\Journey to the Moon'.

2. Right click the 'Game.exe', Select 'Properties'. Go to the 'Compatibility' tab at the top of the new window that opens. Tick the box that has 'Run this program in combatibilty mode for:' and select 'Windows XP (Service Pack 2)' from the list. Click 'Apply' and close.

3. The game should now have a chance of actually working - Although having it in fullscreen may produce issues. You can disable fullscreen by going into the 'config' file, and where it says 'bFullScreen=1' change the 1 to a 0.

4. Double click the 'Game.exe' a bunch of times. Sometimes it will say 'JCM has stopped working.' If this happens, just close the program and launch it again until it actually finally launches the game. You will have to do this every time you want to play the game, but it seems like it is the only way to get it working.

I'm not 100% sure if this will work. But I have managed to get it working in Windows 7 Home Premium using this method. I have not tested this in Windows 8, But I imagine it is the same. Some people have used this method and have had it launch perfectly every time, so you may not need to keep clicking Game.exe if it isn't telling you JCM Stopped working. Others have tried the method and it has failed to work. I am sorry if you cannot get it working, Try using a different computer if you are having trouble.

NOTE: There is also a bug in which the game menu shows no buttons, if this happens try relaunching the game and make sure it is in the compatibilty mode with Windows XP mode, if that doesn't work try using a different computer because I do not know a fix for this.
Section 2 - In the Shuttle
NOTE : - Spoilers are beyond this point, Though I wont spoil future events until I reach them. I should note that some puzzles are randomised, so I cannot give you some answers - only teach you how to solve it with an example.-

Beginning of the Game

You awake in a shuttle pod of some kind, It is bullet shaped and has a cabinet with two sleeping passengers infront of you. Your name is Michel Ardan.

If you walk forward you will learn that the passenger on the left is called Barbicane. After examining the right passenger you learn he is Captain Nicholl. You should notice a newspaper above the right body about yourself and this trip to the moon. Just to the left of that is a wrench tied to the wall with a short strap. Take the Short Strap and the Monkey Wrench which falls to the floor.

Enter your inventory by right-clicking. Then press the 'Auto' button to sort items into it. Pick up the Monkey Wrench and right-click to get out of the inventory. You are now holding the wrench, use it to loosen the bolts off the windows. You only need to do this on the bottom window on the floor of the shuttle currently.

After a cutsceen, you will notice blood is spreading from Barbicane's body. He is dead. Pick up the small Cabinet key from the floor and read the note in his hand. You can also remove his hat. Use the key to open the cabinet, inspect and grab every item in it if possible. The glass on the left can be used to drink water, this is very useful throughout the game so be sure to not forget it. You can cut open Barbicane's hat with the Small Knife (found in the cabinet) to reveal more of the story.

Turning around, walk over to the thermometer and air measurements. Take the Can of Potassium from the floor and the Funnel off the tank. Go into your inventory and combine these items by clicking the Can of Potassium and then the Funnel, or vice versa.


If you begin to suffocate from a lack of oxygen

At some point around now you should begin to suffocate - their isn't enough oxygen in the pod! Click the metal thing over the bunsen burner and it will open. Enter your inventory and look for the Chlorate of potash (Looks like a bag and reads KCI O3, it was in the cabinet). Place this into the metal container and move it back over to the bunsen burner. Note you can change the heat of the burner, if the room begins to get too cold raise the heat by turning the handle, if it is too hot lower the heat.

Go over to Nicholl and examine his body, you will find that he is also dead, take the rifle and read the note in his pocket. Examine his head, you will notice a bitter odor and learn he was poisoned. Using a piece of Raffia from the cabinet, you can tie up the bodies and take them into your inventory.. Yeah.. I know... You will find a Can-opener under Nicholl's body which can be used to open the cans of food if you get hungry.

There is a rooster on the floor which you can examine, You apparently smuggled it aboard for a joke. There is a burnt up piece of paper next to it which you should take. Lower the heat on the bunsen burner to the smallest flame, then use the burnt paper on it to be able to read it.

If you begin to float around

Use the container with the funnel attached to collect the bubbles floating around. Shortly after you will fall back to the ground. You may need to change the temperature by adjusting the bunsen burner.

In your inventory, Smash open the Powder Barrel using the monkey wrench, you will get Explosive powder which you can put into the Blue Retrorocket. You can also use the Small knife on the Cartridges to get the same item, you might need this later in the game so keep it. Now exit your inventory and click the two coloured circles at the bottom of the pod to open them, and place the corrosponding retrorocket in each. Press the button, the pod is now falling - but too fast.

Throw out the two bodies, and any other items you can find. You cannot throw out the Monkey Wrench, frying pan, glass, explosive powder, can-opener or any food items. You also need to loosen the bolts off the other windows.

You should have landed successfully on the moon. The next Section carries on from this point.
Section 3 - Forest on the Moon
So you have made it to the moon. Before exiting the shuttle, you can pick up the two Spent retrorockets if you want, although you have a chance to collect the later if you don't want them yet.

Strange Plants

Exit the pod and you will see some strange plants, Michel will examine the rock that stopped your pod falling off the cliff, and a small bug will fly around you. Collect 3 Fruits of Strangulica (Green Fruits). Walk to the end of the cliff and turn around, a yellow fruit can be found here. This is the Fruit of Mephitia. Turn back around and you will find you can leap to certain areas where there are large spiked pillars. Jump over to the right where the Green and Yellow plants intersect, if you walk down to them you will notice they are aggressive and won't let you pass them. You may be able to see some items from your shuttle lying around beyond them. Jump over to where the Yellow and Blue plants intersect and you'll notice it has two spikes, and inbetween them you can jump again to a fire-lit area in the cliffside.

Look at the two ideograms, Fire and Water. On the floor there is some Lunar coins. You can also catch some Fruit of the Voracia (Blue) which float up the cliffside next to the patch of soil (Though there is some more later which are easier to collect). Turn around and you will notice some more ideograms on the wall, although this time Michel wont tell you what they mean. They have a picture underneath though, clearly telling you that two plants are fighting, and one will win. If you are clever, you will be able to know what each plant is by looking at them back in the middle forest sections. The symbol on the left means the Voracia (Blue), and the right is the Purple plant (Which I wont say the name of until it comes along.) To the right you should notice some steps you can jump over to.

Up the steps you'll notice another bunch of ideograms, this time with the purple plant and another. See if you can guess what each of the plants are by their looks. Turn to the left and continue jumping up the steps. You'll notice some more Fruit of Voracia (Blue) which you can collect. Continue jumping up the steps, at each one you'll find another ideogram until you reach the top where there is more steps but they aren't broken like the others. Turn around and you'll see a cog thing, clicking on each section changes it's colour. See if you can solve what to do - If you can't figure it out, this will be explained later when it is required. Walk up the stairs, and you will see a alien creature with a purple and a green plant on each shoulder, He will spit on the floor and look at you, Michel won't take this otherwise he might be attacked. The creature won't let you pass any further, so turn back and walk down the stairs to the cog puzzle. From here at the top you can jump back down to the two pillars area, and then jump into the middle of the forest where there is a blue glow.

Center of the Forest

Michel will notice a part of his shuttle. Collect the twisted plating and turn around. Walk down to the left side first, there is a panel with a puzzle and some buttons, ignore these at the moment and pick up the Lunar coin from the floor then go over to the right side. Examine the telescope object and put a coin in the slot, you will learn two ideograms, pay/money, to see/to know. There is also some Lunar reeds you can take. Walk down to the middle of the structure and you can jump down to a unusal looking machine. It needs some grease or oil to work, there is some Fruit of Mephitia (Yellow) on the floor. Take some and turn around and walk into the room.

You will notice a closed door, and some sort of organ machine with buttons. Walk over to a pile of dirt and shells with some blue raffia. Collect 3 of each of these. There is also a dead branch on the floor you can take. Using the lunar potting shells collected, you can plant a fruit in it to get a seedling of the fruit you combined it with. This means if you combine the Potting Shell with the Fruit of Mephitia (Yellow), You will have a seedling of the Yellow plant, Mephitia. You will require 2 of each of the possible saplings, so make 2 yellow, 2 blue and 2 green. You shouldn't have any other fruits yet to use. Once you have made these head back up to the middle where you found the twisted plating from your shell, where you can see the forest. Then jump to the two spikes, and head back up to the cog puzzle. From here you can see the entire forest - Which is quite useful.
Getting past the aggressive plants

You should notice that the yellow forest is next to the green and blue. This part might sound confusing at first, but it's quite simple to understand. Since each of the plants are very aggressive you should assume that the yellow plant likes the green plant, and the yellow also likes the blue plant. Although since the green and blue do not touch, they are enemies and would kill eachother if placed next to eachother. If you turn to the right and look at the ideogram, this one says that blue > green, so the blue would kill the green plant.

The seedlings can be used to 'scare' the plants so you can pass into the sections of the forest, although since both plants are angry at you, you need to 'scare' them both at the same time. This means you need to tie two plants together using raffia. Since green and blue do not like eachother, you cannot tie together these seedlings. You can only tie together the seedlings where two forests meet. So:

  • Yellow + Green
  • Green + Purple
  • Purple + Red
  • Red + Blue
  • Blue + Yellow

Any other combinations will result in one plant defeating the other, which the ideograms on the stairs represent. You should make one Green+Yellow seedling, and one Yellow+Blue seedling.

Now that you have the seedlings, you have to find the right plants to 'scare'. Which means you have two options, either go to each possible combination of plants and attempt to scare them using the seedling, or read the ideograms and figure out the combination.

The ideograms on the stairs tell you that:

Blue > Purple > Yellow > Red > Green > Blue
(Where '>' means beats, so 'Yellow > Red', means Yellow beats Red)

So A Yellow+Green seedling will be used to scare the Red & Blue plants, since Yellow beats Red, and Green beats Blue. And the Yellow+Blue seedling, this scares Red and Purple plants, so use it to enter that section of the forest.

At where the Red & Blue plants meet, Once both plants are scared, you can enter the Red/Blue Forest section, and are able to pick up some Fruit of Gladiata (Red), walk forward again and you can pick up items that fell from your shell. Be sure to pick up everything.

At where the Red & Purple plants meet, you can pick up the last fruit, the Fruit of Sagittaria (Purple). You will also notice there is a alien creature in this section, so you cannot pass any further to collect items fallen from your shuttle.
(The seedling highlighted in the image has an error in the name, 'A' is put twice.)
With each of the seedling combinations, You should be able to visit each section of the forest, taking any items you can see, with the exception of:

Red/Purple area : Creature (with Blue & Yellow Plants on shoulders)
Purple/Green area : Creature (with Blue & Red Plants on shoulders)
(Also I take note of that creature at the top with Purple & Green Plants)

In the next section, I will explain how to deal with these creatures, but see if you can solve it yourself first - There is a big clue in their locations in the forest, and before they see you, they are eating fruits...
Section 4 - Creatures & Civilisation (or Civilization)
In the last section I took note of three creatures I had found and are blocking my path.
You need to return to the fire-lit area in the cliffside now, where there is a pool of fire/lava.

Making friends with Alien Creatures

Using the frying pan, combine it with two fruits and you can make a compote, some of which has a special effect on your body or vision. For those who aren't bothered in testing for themselves, below are the recipies.

Hover over here ->
  • Frying Pan + Yellow Fruit + Green Fruit = Mephitia-strangulica compote (Effect: Increased Metabolism, allows you to jump further)
  • Frying Pan + Purple Fruit + Red Fruit = Sagittaria-gladiata compote (No Effect, Normal Food)
  • Frying Pan + Green Fruit + Purple Fruit = Stangulica-sagittaria compote (No Effect, Normal Food)
  • Frying Pan + Red Fruit + Blue Fruit = Gladiata-voracia compote (Purple Vision)
  • Frying Pan + Blue Fruit + Yellow Fruit = Voracia-mephitia compote (Green Vision)


You can remove any effects by drinking water.

You need to give the correct food to each creature, for the two in the forest, this is easy because they are in the locations of their favourite food, for example the Blue&Yellow Creature is in the forest section where Red & Purple plants meet, so it is obvious he likes the Red&Purple compote. After giving this to him, he will turn around and eat it, leaving you to pick up some Viscous Secretion and pass him to pick up other items from your shuttle. The Blue&Red Creature wants the Green & Purple compote, you should now be able to get past him too.
In one of the forest sections you should have also picked up a Plugged-up Conch Shell. This item is important later on, so don't forget it. You should now be at the point where the forest has been completely searched, and there is only one creature to deal with, since this guy isn't in the forest it's a little harder to find his food, but looking back at what plant beats what tells us.

Blue > Purple > Yellow > Red > Green > Blue

The creature at the top has a green plant, and green likes to eat Blue, while the purple plant eats yellow, So we know he wants the Yellow & Blue compote. After cooking this, before going up the stairs, you should have picked up a Vine Plant from the forest, you can plant this in the fertile soil next to the fire pit, expect Michel tells us it wont survive - mostly due to the blue plant here already. By combining the Vine Plant with a Voracia (blue) seedling and a raffia, we can strengthen it. After planting it, it grows and produces Lunar grapes - which have a black colour when cooked but only have one recipie:

Frying Pan + Blue Fruit + Lunar Grape = Voracia-lunar grape compote (Tipsy Effect)

The effect can be removed by drinking water as mentioned before. You can now use this vine plant to climb up to the top without having to go up the steps, give the Yellow & Blue compote to the creature and step past him.

Cog Puzzle to Open the Doors

You will notice a large door with a open panel on the left which requires a cog, turn around and go back down the steps to the cog puzzle (If you haven't solved this already). Click each of the sections of the cog so it matches the colours of the forest. So starting at the top and going clockwise: purple, red, blue, yellow and green. Go back to the door and put the cog in the slot, pull the lever, and then enter the door when it opens.

Turn left, you will see another door which requires a cog. This time it needs the cog to be in reverse order though. Go back to the cog puzzle and flip the colours from left to right, so from the top and going clockwise the colours should be: Purple, green, yellow, blue and red. Also take an extra version of the normal cog, you will need one later on, but be sure not to confuse them. Use the reverse order cog to open the door - but before you go inside turn right at the gate.

Lunar Necropolis

Move forward and there is a gate, you should be able to see some ideograms on the other side though, to see/to know, something circular and a teardrop. Make a note of these, then look at the panel on the left and enter them in. The door will open, go inside. You have now learned two new ideograms, earth and death. Move forward and turn to the left, you will see a grave different to the others. Open it using the Can-opener.
Inside you will a Lunar tool, a Leakproof globe, a iron bar and a selenite key. Go back, and turn left to another grave which is open slightly, use the iron bar to push it open and you will find human remains. Collect the damaged mechanical arm and damaged flute and the golden necklace. Use the lunar tool on the damaged mechanical arm to separate it into parts. Notice two parts are corroded and need replacing. Now turn to the gate and click the panel on the right of it. You will see shapes and coloured lights.

Maths Shapes Puzzle (Getting out of the Necropolis)

The coloured lights represent what shapes you need to use. Each shape has so many sides/vertices, count these on each of the green-lit shapes and add them together, then click the shape in that has that many sides. For example:

My first part had Triangle and the shape that looks like an M with the bottom right missing. The triangle has 3 sides, while the M has 7. So I need to click in a shape with 10 sides (Since 7+3=10)
This shape is the one on the right of the M which looks sort of like a diagonal 8 I guess. I could just say it's a irregular decagon though since it has 10 sides. When clicking that in, the sphere on the bottom opens slightly and two new lights come on. Add these together again and click the next button in.
If for some reason, you need to go back into this room, you will be locked in again and will require solving the puzzle again, except next time there will be RED lights too, which need subtracting instead of adding, and after that comes BLUE which means multiplication and YELLOW which means division. I strongly advise not going in and out of this room without a good reason too since this puzzle is quite a nuisance after the third time and will probably require a calculator if you can't do simple maths like me.

After solving the puzzle go through the open gate and turn right, enter the caves.

Into the caves

Infront of you is a window lookout out onto the forest, turning right you will see an ideogram of death/terror. If you click forwards Michel will die from falling down an elevator shaft, instead click the button to call it. Using the selenite key, place it into the 0 slot, green lights show which floors you can go to with that level key. If you go one floor down, on the left you'll notice some exploding orange things, and on the right is a long corridor. Step back into the corridor and go down to the third floor (to see/to know). You will be taken to a creature who can talk to you, listen to the conversation.

Michel has now planned a return trip to earth in his book which opens a list of objects you will need. You should read this. I'm not going to explain what each of the buttons does in this room, since the creature will for me, just examine them and listen to him.

Click the central button on the desk infront of you to start a test about the written ideograms. If you want the answers they are below.


Conquer, aggress
Air, breathing
Empty, zero, reset
Light, truth, wisdom, luminous liquid ("lumen")
Gloom, secret
Hunger
Moon, Supreme Lunar Ruler
Sagittaria (Purple Plant) fruit
Voracia (Blue Plant) fruit
Gladiata (Red Plant) fruit
Strangulica (Green Plant) fruit
Mephitia (Yellow Plant) fruit
Section 5 - Gaining Intellect
Overall your goal from now on is to discover a way of getting home. To do this however you are going to need better keys, so you can access the lower levels in the lift/elevator. In the bottom left, the bug that landed on you long ago gives you a intelligence reading, when this reaches 200, you can request the level 1 key. Currently, I have 238, so you should be able to do this. However after clicking the button, you require understanding how to speak selenite - or at least listen to it.

Understanding Selenite

In the dignitary office, Use the organ looking machine on the left to do this. You will need to match the sounds of the buttons to their ideograms, since this puzzle is randomised, I cannot provide an answer. Though I recommend actually attempting to learn the sounds of the ideograms on the right, since these do not change. Some of them sound very similar though so this is difficult.
After doing this puzzle once you can do it again, but next time you can only make so many mistakes - and after that you can do it again but one mistake and it all resets, although this is not required to finish the game, and there are other ways of getting a better intelligence score.

The best method I think of doing this puzzle is to click the buttons on the right side, hear the sound and try to remember it, then search for that sound on the left, when you have found it you can then click the button on the right too. You can click any number of buttons on either side, but once you click a button on the left and then the right, it will take this as a mistake if this is not correct. Once a button is pressed down on the left side, there is no way to cancel (but you can switch to a different button), but clicking a button on the right side will just play the sound.

Level 1 Key

Once the puzzle above is complete, and you have an intelligence score of 200 or higher, you can click the button on the left side of the desk to gain the level 1 key. Once you have obtained this you can now access the laboratory floor and lumen production, except before you go there, go back to the 'go to earth' floor where the exploding orange mushrooms are.


Lunar Mathematics

Stand below the exploding mushrooms on the 'go to earth' floor. Throughout the cave structures you may have come across loads of dots and lines, this is actually the selenite version of numbers. A dot represents 1, and the line represents 5. So two dots would be 2, and a line and a dot would be 6. You may notice that on the floor there is the number 6 in selenite. This is a key piece of information used to solve the puzzle. Go into the panel and look at the top number. Whatever the top number is, you have to add 6 to it. This number is a two digit number however, so be careful - In selenite, 10 is still a single digit, displayed by two lines. Only when you reach 4 lines (20) does it carry over to a single dot on the left side - Although this should not be needed in this current puzzle. An example is on the left. You don't need the room that this panel opens yet, but you can go inside and Michel will tell you what it is for. There are two doors to go through, to enter the second door you must close the first door, and vice versa.

The reason I went to that puzzle first, is because it has information on the left and it is easier to solve, although the room it opened is not required at this time. Now go to the laboratory & lumen production floor. Here, there is another panel - on the floor there is 1 dot, then 2 dots, (which is the number 22 for us). Open the panel, and add 2 dots to the number on the right first, it should push it over 20, put a remainder if you have one and then add 1 dot to the left side, and then another dot from the carried over 20. Again, an example is seen on the left. This should be all the maths you need for now.

Laboratory

On the right you will see a creature who is working a machine, that room is the lumen production except he prevents you from taking any items from the room. The room on the left however - opened by the panel on the wall you just solved is the laboratory. Enter the laboratory and the alien fly will congratulate you, and tell you what each machine is. There is some potting plants and blue raffia in the room, as well as fire and water (Which are actually labelled the wrong way around, But I doubt anyone but me noticed that...).

The large machine on the left is broken, it is missing three items - Each of which can be found in the lumen production room, Although all three items can also be obtained from other places:

  • Short Strap + Long Strap = Straps in a loop (Used as a belt)
  • Leakproof Globe (You should have one from the Necropolis)
  • Shovel (In the 'food' room, explained below)

You can use the items above if you wish, but you need to take the items from the lumen production room anyway.

Stealing from the Lumen Production room

If you go up to the 'food' floor, and turn right, you will find a room containing each of the fruits, as well as another place with a fire and water. There is also a Shovel on the left of the fruits which you should take, this is for the hole in the machine back in the laboratory - but as I mentioned there is a second one in the lumen production room. There is also a Cogged Cylinder on the right of the fruits, which you should take.

You need to make the compote which increases metabolism, this will keep the creature in the lumen room busy. The recipie is below if you don't want to find it out yourself.


Frying Pan + Yellow Fruit + Green Fruit = Mephitia-strangulica compote (Effect: Increased Metabolism)


Place the compote into the food mixing machine, Michel will be pleased with his addition. Go back to the lumen floor and you can now steal items from his room, take the following items:

  • Blue Ore
  • Shovel
  • Azotic acid (Using the container to hold it)
    From the cabinet on the right side of the room:
  • Axe
  • Cogged Cylinder
  • Handle
  • Belt
  • Leakproof Globe

Belbaab Conch

Use the Plugged-up conch shell with the Azotic acid and it will unlock the Belbaab Conch, you can now listen to any creature or animal. Get some more Azotic acid in your container, then go back to your shell and you can chat with your rooster friend. (You will have to scare a green plant to get inside. Use a Gladiata (Red) seedling to do this, a hybrid containing that also works.)

Return to the laboratory, fix the machine using the Shovel, Belt (or Strap loop) and Leakproof Globe. The next section explains how to use the laboratory.
Section 6 - Using the laboratory
We have fixed the machine in the laboratory, but it still requires something to use it. The valves on the machine get too hot when using it - And requires grease or oil to work automatically, since we don't have this yet we need to manually open the valves but they are too hot when the machine is running. We need to fix the mechanical arm we got from the necropolis, we can do this by buying the mechanical elbow and mechanical hand, both of which are 40 lunar coins from the shop in the dignitary office. You can get this money by selling items to the dignitary, you can sell a Lunar Grape to him for exactly 80 lunars. . Buy the two items, then combine them with the other parts of the arm which you separated using the lunar tool. This will give you the fixed Mechanical arm.

You now can use the laboratory to make the items needed for your return trip to Earth. Each of the following recipies are shown on the stone tablets each side of the machine.

Grease/Oil
The first substance to make is the grease/oil substance, it doesn't matter what order you do these recipies in, but this one first would make sense since we can grease the machine and not have to use the mechanical arm anymore. You only need to make the grease once, it wont run out.

Combine the frying pan with the Fruit of Sagittaria (Purple) and the Fruit of Gladiata (Red), then cook this mixture and place it into the Shovel of the laboratory machine. Go into your inventory quickly and select the Mechanical arm. Then look at the machine and wait for the valves to turn red, when one does, click the mechanical arm on it. Repeat this four times, until the machine stops, then click the Shovel to remove Zubroo conentrate. Combine this with some Vicious Secreation to obtain Zubdssik's greasy amalgam. Use this to grease the machine's valves.

Glue
Next is to make glue, Combine the frying pan with the Fruit of Sagittaria (Purple) and the Fruit of Strangulica (Green), then cook this mixture and place it into the Shovel of the laboratory machine again. This time there is no need for the mechanical arm since it has been greased. Wait and click the Shovel to obtain Yrsagtt conentrate. Combine this with some Vicious Secreation to obtain Yrshnouff's gluance.

Using the glue, we can now get the Level 2 key. Combine Yrshnouff's gluance with the Damaged Flute and some Lunar Reeds. (Lunar reeds are found in the center of the forest if you didn't pick any up, or you can buy one at the shop.) You can now speak selenite.

Level 2 Key
Getting this key also requires a intelligence score of 300 or more, which I think you should have by now if not nearly 400. Go to the dignitary office and press the button to recieve the key, you will need to talk to the Supreme Ruler, which orders you to return the items you stole from the necropolis. We need the Leakproof Globe however, so will return them after we use it.

Explosive Powder
For our return trip, the next item to make is some sort of explosive powder, which we need 3 of in total. If you still have the Cartridges you can cut them using the Small Knife which I mentioned way back at the start of the game. The other two need to be made using the recipie in the laboratory shown on the left. First however, you should notice it requires a Leakproof Globe with Mushroom Spores inside, this can be got from the 'go to earth' floor, you need to click on one of the falling mushrooms and catch it, then quickly combine it with the globe in your inventory before it explodes.

If you cannot catch the mushroom, you can use the Metabolism compote to make it much easier. Go back to the laboratory room, if you haven't sold one, you should haveA a Sagittaria-gladiata hybrid (purple-red) seedling. Place this into the laboratory machine, after it finishes you will obtain Prultuuk's crystalline powder, combine this with the Mushroom spores and you will obtain Prulmis's explosive mixture. Combine this mixture with one of the retrorockets, and if you have the explosive powder use that with the other retrorocket. Now repeat the process to make another Prulmis's explosive mixture to be used later.

A quick note
For the next couple of recipies, there are actually multiple ways of doing them, or multiple ways of getting their ingredients - I will explain both methods, if you want a high intelligence score you should do both methods.

Salt (For Shrinking Star) - Method 1 - Breaking the Supreme Ruler Bust
This method is easier, but doesn't give much intelligence score in the end. Go to the 'food' floor, and go left to visit Scurvy the Insomniac, who is incharge of the sleeping quarters. On the left of him is a panel and a slot for the Level 2 Key. Open the panel and a Bust of the Supreme Ruler is displayed, click the bust and it will fall to the floor and break. Pick up the broken bust, then smash it using the Monkey Wrench. Inside you will find some Salt or Sodium Chloride which somehow is 'magically' separated from all the broken bust parts. You can use the glue to fix the bust and place it back in it's place.

(Scurvy may confiscate your level 0 key if you leave it in the elevator with another key, if you notice he has your key, don't worry. I will explain how to get it back later, when it is needed to take back to the necropolis.)

Salt (For Shrinking Star) - Method 2 - Water Puzzle
This method is still fairly easy, but harder to find unless you have a guide. Cook the compote which gives you Purple Vision, the recipie is below if you don't want to figure it out yourself:


Frying Pan + Red Fruit + Blue Fruit = Gladiata-voracia compote (Purple Vision)


Before eating it, travel to the center of the forest and down to where the potting shells and organ looking machine is, take the passage on the right of the organ machine. There is a picture on the wall, below it is some ideograms stating that the 'blue + red compote is food, and will allow you to see wisdom'. Now eat the purple vision compote and you will see this picture on the wall change, two numbers appear at the sides. This image is a birds-eye view of the structure you are currently standing in, remember the two numbers, left=1, right=8. Now turn to the right, there is a locking mechanism. To solve this puzzle use the correct button to move the bolt from left to right, the correct order is below:


Left,left,right,right,left,right,right


The door will open, go outside and turn around, start by walking over to the right side and examine the panel next to the pool of water. For this puzzle, you need to press in the 'water' ideograms so each column and row has only 1 button pressed in. The answer is shown on the left, the panel will open and a lever appears, turn it until the water flows to the LEFT, then turn to the left where there is red buttons. The buttons are numbered, press the button with the single dot first, then two dots, etc, 5=line remember. Only do this up to 8 though (including 8), then head to the left side.

This is the same puzzle except some of the ideograms are scratched out - It should however be simple enough to guess where the water ideograms would be, there is only one possible combination. When that is solved, make the water flow to the right, and press the first dot button only. A sound will play, and Michel will say 'What do you know?!'. Return to the image on the wall inside, the image has moved and salt is inside. You can take some salt, though you only need 1.

Return to the laboratory now, and in the next section I explain how to use it.

Section 7 - Shrinking & More laboratory stuff
Shrinking Star

Now you have salt, you can use it to make the Shrinking star, illustrated on the stone tablet as shown here. Place a Sagittaria-Strangulica (Purple&Green) seedling into the laboratory machine, it will produce Xulmi's crystalline powder which can be combined with the Salt you collected to make Xuldakir's Star.


Secret Basement

Now enter the elevator and use the Level 2 key to go to the 'gloom/secret' level at the bottom, step out of the elevator and place the star in the star-shaped slot right infront of you.
Michel will be shrunk down and after a cutscene will grow again to normal size. You will be facing the small door you just entered through, turn to the right and walk forward, then turn left and look at the ideogram on the wall. Take the Broken Mirror on the right, and the Painting, Mechanical elbow and Mechanical hand on the left.
Turn around and you will see a machine with a pink liquid in a tank at the top, this is Klipsaggt's decanter-measure. We need exactly 3 measures of this pink liquid to make a paint which will make our shuttle weightless so it can be moved to the shuttle launch area on the 'go to earth' floor which we unlocked earlier by the first lunar numbers puzzle.

We need a Empty Can however, and currently you should have some yellow Azotic acid in it, if you don't you will have to go back to the lumen production room and steal some - (Go back to that section if you need instructions on how to do this). I will return to this puzzle later.

Making lumen

The Azotic acid is used to make lumen - Which we can use later to make a replacement for Chlorate of Potash, but also it can be used to power a machine to contact earth. Go to to 'planet earth' (top) floor and straight foward is a wall with two human-figures on. You need to use the bottom arrows to move the image along and copy it onto the top, but you can only see one square at a time on the bottom - and they are jumbled up. If you want you can put a Level 2 key in, which will make them un-jumble, (and a Level 3 key will show all images at once, but still jumbled up). The answer to solve this puzzle is below, or you can work it out yourself. A draw will open inbetween the fire and water below with a Control box inside. Take this and take the hallway on the left.


A machine is on the left, pick up the Hopper and Ax. In your inventory combine the Ax with a Cogged Cylinider and a spare Coloured Gear from the puzzle used to open the doors ages ago, this makes a Crushing Roller, place this between the other two rollers on the left of the machine and place the Hopper on the end on the rollers. You should also have a Handle which goes on the right of the machine, and you need to use your Glue to stuff the holes in the pipes, and Grease for the top of the machine.


Place a Funnel on the small pipe above the rollers, put the Azotic acid in it, then place some Blue ore in the hopper. Click the handle and the machine should turn on. Use some Glue to fix the Broken Mirror from the basement and replace the mirror on the right with it. Place the Control Box in the slot attached to the mirror along with the lumen pipe and a fire pipe, then click the box. The ideogram in the basement told you that the lumen needs a number of 7 while fire needs 4. Once entering these numbers in, you can contact earth.

Here you can choose for earth to send items to the moon for your return trip - However all the items can be found in other ways which will give a higher intelligence score - and most of them you will already have. I recommend, if you don't have a shell window or bolts you should get these - since you require them to shield the shell window before launch.

Potassium - (If you don't use Earth)

For the return trip, we are going to need Potassium to purify the air, using the Dead branch you got ages ago, burn it in a fire source and you will obtain some Potassium for the return trip. If you can't find the dead branch - don't worry, you can also burn a piece of raffia or other types of vegetation.

Chlorate of Potash (If you don't use Earth) - Method 1

Both methods are pretty easy - since the second requires lumen which you have just made anyway, but if you use the Leakproof Globe you can catch Chlorine Gas which is at the end of the long corridor on the 'go to earth' floor. Combine this with Potassium to make Chlorate of Potash.


Chlorate of Potash Replacement (Brozludjak's oxygenizing preparation) - Method 2

This is a replacement for Chlorate of Potash, you need to use your Empty Can to collect lumen from the lumen machine, then head to the laboratory. Place a Fruit of Sagittaria (Purple) in the laboratory machine to obtain Brozlyss concentrate then combine this with a Fruit of Voracia (Blue) and the Lumen to obtain Brozludjak's oxygenizing preparation.

In the last section I will explain how to obtain 3/4 of the pink liquid, how to move the shell to the launch area and finish the game.
Section 8 - Launching Preparations
We are almost ready to launch the shuttle - But first we have to move it to the launch room, in order to do this we need to make some paint to lighten the shuttle, then push it off the cliffside where it will land on the same level as the launch room. Here we need some help from creatures to take it to the launch room for us.

Essence of Klipsaggt (3 Measures) - Method 1 - (Using the basement machine)


Back down in the basement, there is a machine containing a pink liquid. There are multiple ways to get 3/4 units of the liquid, however this is the way I do it, and it seems like the easiest I can find.

First place your Empty Can on the left, grease the lever in the middle and pull it to the right side, the arrow on the right lights up. Pull the lever in the top left corner, this fills the can with 4 units. Click the center button to transfer this to the right side. Repeating this, Click the top left lever again, and the button in the center again, now the left has 8 units in. Fill the can again using the top left lever, then use the button, it will transfer 1 unit over to fill the right side, leaving 3/4 in the can.

Essence of Klipsaggt (3 Measures) - Method 2 - (Using the painting & Lunar cotton)

Using the communications to Earth, if you ask for 'Some earth plants that I will try to acclimate to the moon.', it will be launched into the red/blue section of the forest, and Lunar cotton plants start to grow. Take a piece of Lunar Cotton, then go down to the basement floor where the machine with the pink liquid is, simply place the Empty can on the left side and fill it with 4 units using the top left lever, then take the can back and combine the Essence of Klipsaggt (4) with the Lunar Cotton and the Painting: Tunnel of Communication, it will make a new painting and will leave Essence of Klipsaggt (3/4 units).

Lightening Paint

Go to the laboratory and place a Sagittaria seedling (Purple) in the machine, this makes Klipsgaal's isotopes and one of these isotopes is lighter than the others. Place the isotopes in the other machine behind you, place four isotopes on each weighing platform - If you are very lucky, you will have the lightest isotope on the first try, if not next weigh one (without an x) on each platform - You then might have done it on the second try, if not repeat this with the last two isotopes to find the lightest on the third try.


Combine Light Isotope with a Fruit of Voracia (Blue) and Essence of Klipsaggt (three measures to make Klipso's lightening paint. Go to your shuttle and paint it using this, you may need to scare a green plant with a red seedling if you haven't been back there yet. If the paint dries before you get there, warm it on a fire to return it to normal.


Next use the Iron bar or the Rifle on the rock stopping your shuttle from falling, it will fall down to the next floor below. If you go to the 'go to earth' floor, and look through where the Chlorine gas is, you can see your shuttle.


Getting creatures to help move your Shuttle

Next we need to get 3 creatures to help us move the shuttle into the launch room, since we cannot get past the chlorine gas. Turn around from where the gas is, and walk forward, turn left and look at the machine, then click the first button on it (not including the zero)- You will notice the door opens, go though this door. (Notice this machine is a weighing machine, when you stand on it, it goes up by 1 unit, but if you step off it goes back to 0.)

You are back where the Potting shells are, turn left and walk towards the organ, then turn left again and go into the passage. Pull both the air and water levers, then head up the stairs and go outside. Earlier you might have done these puzzles to get the salt, if not look at the panel and click down the water icons so that each column and each line has a water pressed in, do this for both the left and right sides, and have the water following down the pipe which enters the doorway down to the water supply.


If everything is done correctly, go back to the organ machine and click one of the buttons - Michel will say 'It works!'. Take note of the poster on the left on the wall, There is three sets of coloured lights - these represent the alien creatures we met ages ago in the forest area. We need to call them by using this organ.

Lets start with the first (Blue & Yellow). This one likes the purple & red food remember, so press the following combination:

Purple, Red

The creature will call, Repeat what he said:

Purple, Red, Go/Come, Friendship.

Repeat, adding a single part each time, in total this makes:

Purple, Red, Come, Friendship, Friendship, Come, Red, Purple

He is now standing right next to you. Now we need to get the other two here as well. The Green & Purple creature likes the Blue & Yellow food, so, repeat the same process above but use Blue instead of Purple and Yellow instead of Red. He will then be waiting as well.

The next one (Blue & Red) likes the green and purple - But be careful, you need to replace Purple with Green, and Red with Purple in the example above in order for the song to work properly. Once that song is complete all three creatures will be standing on the weighing machine, and the door will open allowing them to pass through, follow after them. Turn left and you will be able to see them down at the end of the corridor next to the chlorine gas. Go back to the elevator and go to the 'food' level.

The next section explains how to get the creatures to help.
Section 9 - Scurvy's Questions
Asking Scurvy to order the creatures

On the food level, turn left and visit Scurvy. If he isn't feeling right, go to the food room and click the lever next to the food mixing machine to flush out any compote effects, then go back to him. Ask about the Exiles, then ask him to order the exiles to transport your shuttle. Accept his puzzle, he will ask you to listen to a selenite law carefully:

When facing the sacred artificial jaw of Selenos the First, every lunar inhabitant must crack his nasal cartilage as a sign of respect. On every other occasion, proper etiquette absolutely forbids making that sort of noise.

He will ask:

Q: What must absolutely follow, if lunar inhabitants find themselves in front of Selenos the First's sacred artificial jaw?

A: They should crack their cartilage.

Q: What conclusion can I draw concerning the sacred artifical jaw, when the lunar inhabitants crack their cartilage?

A: The artifical jaw is in front of lunar inhabitants

Q: What can we say about lunar citizens, when the artificial jaw is not in front of them?

A: Lunar beings don't crack their cartillage

Q: Should the inconceivable occur, and a lapse in the respect of a custom happen, what might we observer?

A: The artificial jaw is not before the lunar citizens, while they crack their cartillage.

Q: If, as etiquette would have it, the rule is stickly observed, what can I say about the sacred artificial jaw if the lunar citizens are not cracking their cartilage?

A: The artificial jaw is not set before lunar citizens.

He will congratulate you, then ask a second set of questions:

When the Supreme Ruler, Master of all that lives in our hospitable caves, blinks his frontal ommatidia, all the lunar citizens present light up their cerebral lobes as a token of approval and repect.

Q: Since all lunar citizens scrupulously respect our customs, what happens if the Supreme Rule blinks his frontal ommatidia?

A: The lunar citizens who are present light up their cerebral lobes.

Q: If the rule is respected, what can we say when lunar citizens light up their cerebral lobes in the presence of the Supreme Ruler?

A: We cannot affirm anything for sure.

Q: What happens if the Supreme Ruler does not blink his frontal ommatidia?

A: We cannot affirm anything for sure.

Q: If the rule is unfortunately not respected, what will we observe?

A: The Supreme Rule blinks his frontal ommatidia, and the lunar citizens present do not light up their cerebral lobes.

Q: If the lunar citizens do not disobey the rule, but refrain from lighting up their cerebral lobes in the presence of the Supreme Rule, what can be said about the latter?

A: The Supreme Ruler does not blink his frontal ommatidia.

His questions are now complete, talk to him and ask him to order the exiles to move his shell and after a cutscene you will be standing infront of the shell in the launch room. The final section explains how to set up the final things.

Section 10 - Launch!
Setting up the explosives

Place some of Prulmis's explosive mixture on the table behind the pod, you should also notice that it requires a Level 3 Key which we need to get, but before we can we need to return items to the necropolis that we stole. Before doing this though, enter the shuttle and put the retrorockets in place. Then put a Protective shield on the window, If you don't have this but have a twisted version you can straighten it out in the Earth communication room by squashing it in the machine producing lumen. Put Bolts on the shield and tighten it using the Monkey wrench. Next exit the room, close the door behind you and open the other door, go to the elevator and head back to the necropolis.

Returning items to the Necropolis

Be sure to take the Selenite Level 0 key from the elevator before heading to the necropolis. If the key cannot be found - Scurvy may have confiscated it, head back to the 'food' room if this happens, you should see it next to him. You need to get him drunk by using the Lunar Grape & Voracia (Blue) compote, add this to the food mixing machine then talk to him to get the Level 0 Key back.

Go to the necropolis, enter it and go to the far grave and replace the following items:

  • Level 0 Selenite Key (Top Right)
  • Lunar Tool (Middlle Right)
  • Leakproof Globe (Bottom Right)
  • Iron Bar (Left)

Exit the necropolis, you need to solve the shape puzzle again - this time it is harder though. Remember, Green = addition, Red = subtraction, Blue = multiplication, Yellow = Division. You may need a calculator if you aren't good with the last two like me.

Level 3 Key

Once done, go to the dignitary office and request the Level 3 key. If you haven't completed your investigation yet, be sure to talk to the rooster aboad your shuttle - He will give you the last few clues.


Launch time!

(I recommend saving the game at this point, incase you decide to return to before you launch to improve your intelligence score)


Finally, we have almost finished, head to the launch room and use the Level 3 Key on the key slot above the explosives, then head into the middle room and give yourself enough time to get into the shuttle. (You will fail if you launch the ship without you inside, or get killed by the explosion, or if you don't close the shuttle door.) Click the lever then run into the room and get into the shuttle, close the shuttle door behind you.


Congratulations, You have completed the game - Now see if you can get the intelligence score of 999. In this playthrough I managed 840, and I wasn't even trying, so it shouldn't be that hard.

Thankyou for reading this guide, I hope it has been of some help to you :)
43 megjegyzés
Dryspace 2022. júl. 3., 18:09 
@oppe99 Windows 10+, I presume? Anyone who loves playing older games should be using Windows 7, either exclusively, or as a second OS.
oppe99 2022. júl. 3., 6:37 
The cutscene when you start to float never appeared and thus i cant land or continue with the game. Dont think im doing anything wrong as im doing everything else in this guide. Anyone else encouter this issue?
Dryspace 2021. jún. 19., 15:30 
@csmelwebb Nice!
天朝理科生 2021. jún. 19., 11:18 
Sooooooo helpful!!!! :steamthumbsup:
mkthegreat 2021. máj. 22., 2:53 
It took a lot of trial and error but I managed to get a lunar intelligence score of 999. Yay! And I only had to use this guide a few times. I remember playing this as a kid and the math absolutely killed me. I was stuck on it for days. This time I understood the base 20 much more clearly.
Rytäux 2021. ápr. 16., 4:43 
Hi, i just bought the game but i can't launch it, it always get closed.
I tried combatibilty but it doesn't work, im on windows 10 if it can help, hope someone can help me out !
e-lányok reggelire 2021. márc. 11., 10:24 
HUGE THANKS FOR THE GUIDE!

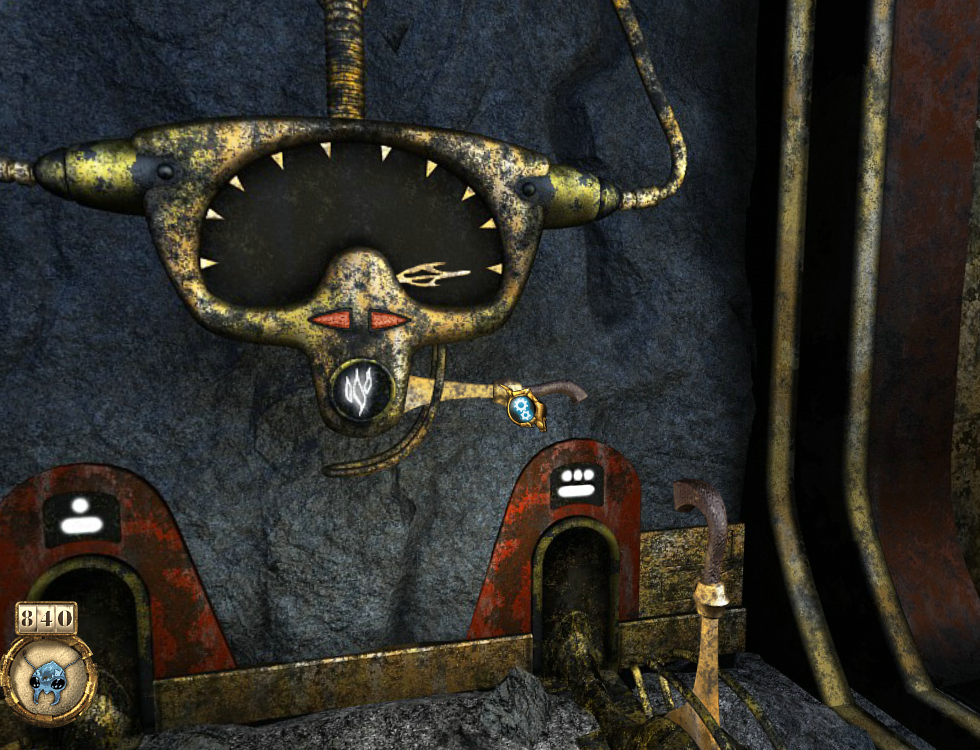
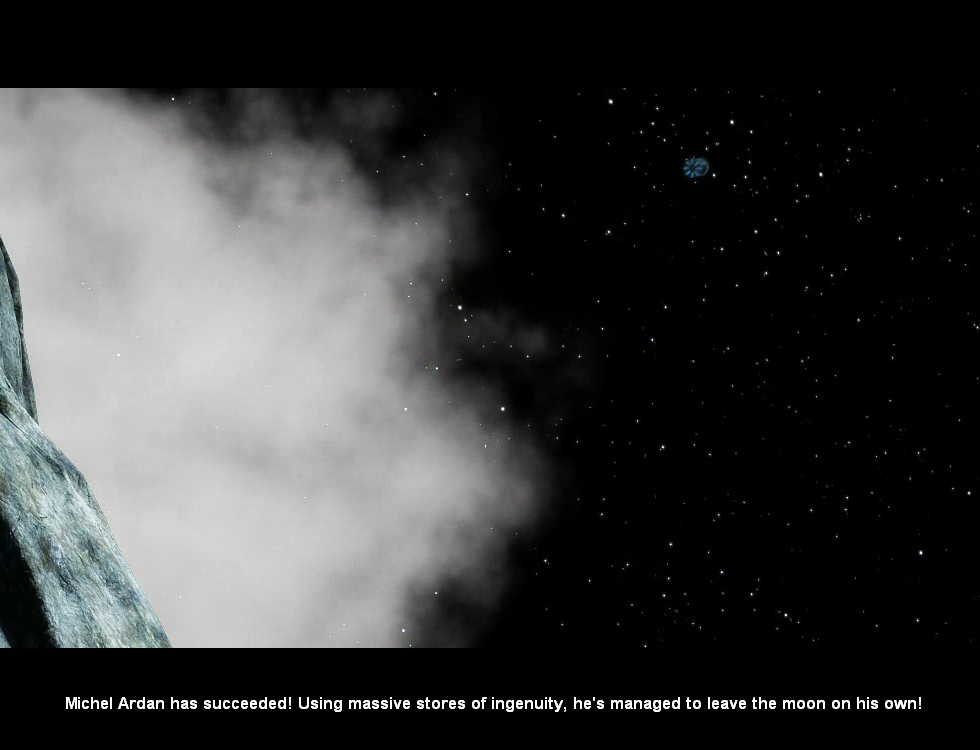
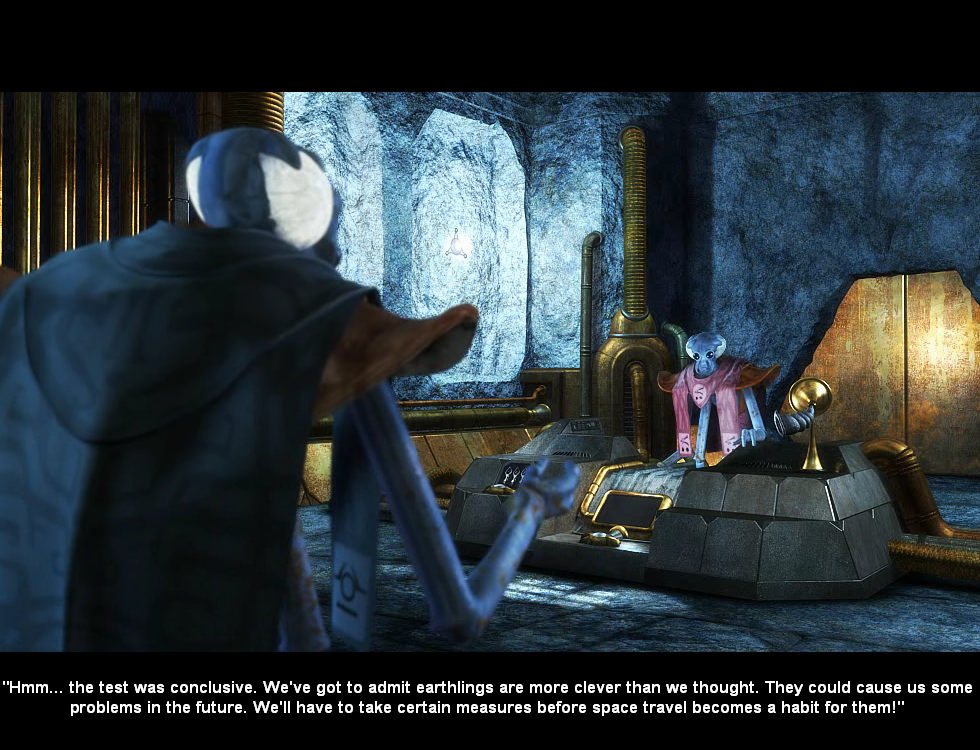
I remember playing this game with my mum back in 2006 or so, we couldn't understand any english words. We manually had to translate all of the text word by word. Today we decided to relive this game, because for us it's very nostalgic. Now that I learned english the game was easier, but still really difficult! We scored 865 points. Couldn't have done it without this guide, many elements of the game wasn't straight forward. Such a shame the developers don't make any more games. Next I'll revisit the game where Mina was stranded.

Thanks again
Kendo 2020. aug. 11., 7:28 
I wouldn't have managed the game without it, thanks
Dryspace 2020. júl. 20., 18:47 
@DTK Cxalis Windows 10, I presume? I've played it twice on Windows 7, and had no problems.
DTK Cxalis 2020. júl. 20., 12:14 
I just got this game, and sadly every time I try to break open the barrel or cut open the cartriges in the first section of the game, it freezes on me, and doesn't allow me do to anything :( How do you fix it?
(I've done the set compatibility to xp service pack too, first thing I did, and it doesn't seem to do anything!)