Blue Prince

Blue Prince

Ocen: 72
Mount Holly Archives - Collections of notes, books, letters and puzzles [Spoilers!]
Autorzy: StephENT hawking i 1 innych współtwórców
My name is Detective Bon Margle, Red Guard in service of Fenn Aries’ Ministry of Investigation.

By order of the royal court, I’ve been assigned to document every detail of the Mount Holly Manor.

This archive contains photographs and notes on the manor’s books, letters, locations, and the various puzzles scattered throughout the estate.

Should you come across any errors or inconsistencies (and I won’t pretend there aren’t likely a few), report them to me—I’ll see they’re corrected.

And if you happen to notice something I’ve overlooked, I’d appreciate the insight. Every clue helps.

Detective Bon Margle
Red Guard
2
3
4
2
   
Przyznaj nagrodę
Ulubione
Ulubione
Usuń z ulubionych
Archive Directory
Below are some sections + subsections. Because of the size limit on sections on the steam guides, some sections are broken down further or rearranged by topic instead of location.

Books
All the books that I originally had have been moved to Mount Holly Library

Useful section
  • Permanent Unlocks - details on all the things that can be permanently unlocked
  • Red Letters - a list of all the red letters in the manor and how to find them
  • Emails - a list of all the emails found within the various terminals of the manor
  • Blackbridge - a list of admin logs and user info found in the Blackbridge grotto
  • Classrooms - a list of all the worksheets from grades 1 to 8 + final exam
  • Mailroom - a list of all letters from Randolph and Dad
  • Shrine - has details on the blessings + monk blessing interactions
  • Trade Post - has details on what can be traded for what
  • Workshop - shows the list of contraptions that can be built
  • Rumpus - All Alzara's fortune transcripts + accompaniment screenshots
  • Mora Jai Box - list of rule pages found
  • Colored Memos - a collection of colored memos found throughout the manor
  • Blue Tent Memos - a collection of blue tent memos found

Notes based on Locations
Below is a table of all the rooms with either notes/photos
46th Room
Abandoned Mine
Antichamber
Aquarium
Archives
Attic
Basement
Bedroom
Billiards room
Blackbridge
Boiler Room
Bookstore
Bunk room
Casino
Catacomb
Chapel
Classroom
Clock tower
Cloister
Closed Exhibition
Coat Check
Commissary
Conference
Conservatory
Darkroom
Dormitory
Dovecote
Draftroom
East wing hallway
Entrance
Freezer
Foundation
Foyer
Furnace
Gallery
Garage
Gemstone Cavern
Grounds
Guest Bedroom
Her Ladyship's Chamber
Hovel
Kennel
Kitchen
Laboratory
Laundry Room
Locker Room
Lost and Found
Maid's Chamber
Mailroom
Master Bedroom
Morning Room
Mount Holly Gift Shop
Music Room
Nook
Observatory
Office
Orchard
Orindian ruins
Pantry
Parlor
Planetarium
Pool
Precipice
Pump Room
Reservoir
Root Cellar
Safehouse
Sauna
Schoolhouse
Sealed Entrance
Secret Passage
Secret Garden
Security
Servant's Quarters
Solarium
Spare room
Study
Terrace
Tomb
Trade Post
Treasure Trove
Tunnel
Underpass
Utility Room
Vault
Wine Cellar
Weight Room
Workshop


Puzzle specific sections
  • Music sheet puzzle - details on the music sheet found throughout the house
  • A new clue puzzle - Analysis of the clues hidden in the book, A New Clue.
  • Chess puzzle - details on all the chess pieces found throughout the house
  • CASTLE puzzle - details on the secret CASTLE message found in the chess room
  • Angels puzzle - details on the 8 angles found throughout the house
  • Paired Painting puzzle - details on the paired art found throughout the house
  • Royal Scepter puzzle - details on how to get the royal scepter
  • Blue Room - details on how to get to the blue room behind the tunnel
  • Atelier - details on how to get to the Atelier
  • Mount Holly Blueprints - details on how to solve the Mount Holly Blueprint maze
Books
All the books that I originally had have been moved to Mount Holly Library as this guide was getting increasingly difficult to organize.

here is a list of books I currently have:

  • The Red Prince (Original Manuscript) - Can be found in the Catacomb when solving the angel statue puzzle using the secret order found in Herbert's will
  • The Red Prince - can be checked out from the library, there's also another one in the master bedroom
  • A New Clue (Original Manuscript) - Can be found in the Catacomb when solving the angel statue puzzle using the secret order found in Herbert's will
  • A New Clue - purchaseable in the bookshop for 50 coins, can be checked out from the library
  • Swim Bird - can be checked out from the library
  • The History of Orindia (First edition) - purchaseable in the bookshop for 50 coins, can be checked out from the library
  • The History of Orindia (Second edition) - can be checked out from the library
  • Realm & Rune - purchaseable in the bookshop for 20 coins, can be checked out from the library
  • The Fixed Stars: the stargazer's companion to constellations - can be checked out from the library, there's also another one found in the observatory.
  • A Signtseer's Guide to Reddington - can be checked out from the library
  • Drafting Strategy Architectural Digest (Vol. 1) - found in the dormitory
  • Drafting Strategy Architectural Digest (Vol. 2) - found in the drafting studio
  • Drafting Strategy Architectural Digest (Vol. 3) - can be checked out from the library
  • Drafting Strategy Architectural Digest (Vol. 4) - purchaseable in the bookshop for 8 coins, then checked out from the library
  • Drafting Strategy Architectural Digest (Vol. 5) - purchaseable in the bookshop for 8 coins, then checked out from the library
  • The Curse of Black Bridge - purchaseable in the bookshop for 40 coins, then checked out from the library
  • Gardener's Logbook - Found in the orchard
  • (The original) Gardener's Logbook - found behind a hidden wall in the green room, requires a power hammer to access it
  • Her Ladyship's Sleep Diary - Found in her ladyship's chamber, the key is hidden in the tomb (see section for more details)
  • Mount Holly scrapbook - Found in the far corner of the upper floor of the library
Permanent Additions
6 known fixtures of the manor can be permanently unlocked:
  • The Orchard - adds 20 extra steps (see the Darkroom section for more details)
  • The Gemstone Cavern - start each day with 2 gems - requires you to solve the utility room puzzle (see section for more details)
  • The West path - gain access to the outer rooms (see the Garage section for more details)
  • The Blackbridge grotto - gain 1 free use of any terminal from another terminal (see the Laboratory section for more details)
  • The Blue Tent - adds blue memos to rank 8 of blue rooms (see Gift Shop section for more details)
  • The Satellite Dish - gain access to advanced laboratory experiments + staff announcements (see A New Clue section for more details)

Below is a list of shortcuts that can be opened with various items
  • shortcut to open up the precipice - see the precipice section
  • shortcut from foundation to basement - see foundation section
  • shortcut from ground to basement - see sealed entrance section
  • shortcut from abandoned mine to the precipice - see abandoned mine section
  • Hidden entry into rotating gear - see reservoir section
  • elevator to precipice - see precipice section
  • hidden greenhouse entrance - see greenhouse section
  • tomb to abandoned mine - see tomb section

There are also additional permanent resources/items that will help navigate through the manor.
  • Upgrade disk - these permanently upgrade various rooms, I recommend the Cloister of Draxxus (great source of dice), nursing room (allows you to abuse experiments when you get the -10 steps when opening the map experiment)
  • Allowance tokens - add +2 coins (cumulatively) to the envelope in the entrance. There are many ways of getting allowance tokens, but the most renewable is from the laboratory experiments.
  • Stars - can be used to gain powerful buffs/items from the observatory, see Observatory section for more details. multiple ways to gain stars, but the easiest way is from the laboratory experiments.
  • Chess buff - see Chess room puzzle section
  • Royal Scepter - see royal scepter section
  • Treasure Trove - Each time you visit the treasure trove, you add +5 coins to the room
  • Books - whatever you purchase from the bookstore shows up on the checkout catalog in the library
  • swim trunks - permanently add 2 chests to the pool room (see gift shop section)
  • lunch box - add a lunchbox to the dining hall that gives you +10 steps when you reach rank 5 (see gift shop section)
Red Letters
There are a total of 8 letters of which (based on Great Alzara) you will only ever find 7. The letters are listed below.

Red Letter #1
Letter #1 is located on the upper level of the rotating gears in the underground area. This requires activating the red door leading up to the inner sanctum which can be done by activating the long rectangular box in the boiler room.


The code to the lock is MAY8 this can be deduced by the fact that all locks are related to dates and there's only one digit (8) on the last row. By process of elimination, the only 3-letter month that is available on the pad is MAY.


Red Letter #2
This letter can be found in the safe in the study. The code is 1208, the hint for this is the position of the queen (i.e. D8 = Dec 08 = 1208)


Note: There was a "closed exhibit" floor plan on top of this blueprint

Red Letter #3
Note: not sure if this letter is actually accessible, as great Alzara mentioned (see Rumpus Room section, transcript #2), we will only find 7 of the 8 letters.

Red Letter #4
This letter is found in the safe in the Boudoir, hidden behind the dressing screen. The code is 1225, the hint is the photograph by the mirror, which shows Christmas decorations.

Red Letter #5
The letter can be found in the tiny safe in the drafting studio. This requires a magnifying glass to use. The code is 1108 11 from the calendar and 8 for the 8 gates in the calendar (there are hints to the gates when decoding the paired art puzzle).

Red Letter #6
The letter can be found in the safe inside the drawing room. The safe is hidden behind a painting that can be accessed by turning the candle handle (hint of this can be seen in herbert's painting). The code is 0415 04 from 4 paintings of women taking small steps and 15 from the 15 paintings of men taking small steps. (The hint is also part of the paired art puzzle i.e. count small gaits)


Red Letter #7
The letter can be found in the Shelter's time-locked safe. You would need to enter the current date/time (+ 1 extra hour) in the terminal for the safe to open. You can use the checkout cards inside the checked books in the library. Or add the current day to the starting date (Nov. 6 see drawing studio calendar)

Note that patch 1.0.4 updated the second paragraph from "...deeper involvement in those events 6 years ago." to "...deeper involvement in those events four years ago."

Red Letter #8
The letter can be found in the hidden safe in the office. There's a dial inside the desk drawer. The code is 0303. The hint is the book title Count on March. In the Foyer there are 6 busts of prominent figures and one of them is Count Isaac Gates (notice also his last name is Gates). You can find 3 busts of the Count throughout the room. March + 3 busts = 0303.


Mora Jai Box
Mora Jai Box

Found in the master bedroom


Found in Orindia's inner sanctum room


Found in Arch Aries inner sanctum room


Found in Fenn Aries's inner sanctum room


Found in Eraja Arei's inner sanctum room


Found in Corarica inner sanctum room


Found in Mora Jai inner sanctum room


Found in Verra inner sanctum room


Found in Nuance inner sanctum room


Found in the throne of the blue prince
Colored Memos
Found in the security room
Note: Under the "RED MEMOS = LIES" it says "unless written by hand" (readable with a magnifying glass)


Found in the Darkroom


Pinned in the security room


Found in the commissary


Found in the conference room


Found in Hallway


Found in the Laboratory


Found in the Weight room


Found in the Locker room

Found in the Breakroom (upgrade of the billiards room)


Found in Servant's Quarters

Found in Randolph's 13th letter


Blue Tent Memos (A-L)
Blue Tent memos start to appear in the 8th rank of blue rooms once you get the blue tent (see Mount Holly gift shop section). Below is a table of room/location/memo. Thanks to Tiny Umbreon for a large portion of the memos.

Room
Location
Memo
Notes
Attic
beneath the framed photo with two kids
S.H.S was born three years after H.S.S
S.H.S is Simon H. Sinclaire and H.S.S is Herbert S. Sinclaire, Main Charater's great uncle
Aquarium
In the bottom right of middle fish tank
This tank contains a red herring.
The middle tank did not contain any hints for the filing cabinet in the archive.
Ballroom
Underneath the bench on the right side, near the door opposite the piano.
The majority of gems found in the house are artificially produced.
Referring to the flower gems (see the original gardener's logbook found in the greenhouse)
Billiard Room
Near the Dart board
The bullseye operation can trigger multiple times.
-
Boiler Room
Steel beam near the elevator, first floor
The high pressure condenser box is connected to not one. but two remote power boxes.
hinting at the red door (see underpass section) and the blue door (see blue door section)
Chamber of Mirrors
any of the corners, behind the finger with the hat.
If an item would be spread into the chamber of mirrors, four of those items are spread instead.
-
Classroom (grade 1)
-
Flag colors: Green for nuance. Pink for verra. Orange for corarica.
Clues for inner sanctum sigils
Classroom (grade 2)
-
The figure of eight, in its symbolic guise as infinity, has long served as a vessel of both death and the unfathomable.
-
Classroom (grade 3)
-
The scientific foundation of architectural drafting, combining advanced principles of spatial suspension and temporal anchoring, was developed and refined at the Pharias High Institute of Corarica at the beginning of their realm's 15th era.
-
Classroom (grade 4)
-
Of the three major expeditions to the south key, only one party returned. The cartographers among them conducted a cautious survey of the coastline but refrained from making landfall.
-
Classroom (grade 5)
-
The illustrations in The Red Prince and Swim Bird were made by Marion Marigold herself.
-
Classroom (grade 6)
-
The third king of Orindia was the last in the line of Oris.
-
Classroom (grade 7)
In the chalk holder
The three advanced operations in modern mathematics are squaring, inversion, and rounding.
Useful for advanced billiards puzzle.
Classroom (grade 8)
-
Lune is the Erajan word for water. Essa is the Erajan word for love. Joro is the Erajan word for father.
Useful clue to translate Clara's letter in the tomb (see section)
Classroom (final exam)
-
The answer to the exam's final question is equal to its number.
-
Clock Tower
on the table at the top of the tower, underneath broken sigil piece
Inneclipses only appear in the north sky.
-
Coat Check
Far right side of coat check desk, under curtains
Coat check is drawn slightly more often the day after checking a new item.
-
Closet
Right corner, half covered
The closet was one of the original 46 rooms of Mount Holly
-
Conference Room
Underneath the red memo
Red memos were created by Kirk Darren and approved by the baron and questionably served as the estate's primary security system.
-
Dining Room
Behind one of the glass cabinets
There are 10 Different dishes that can be served in this room
require blessing of Chef to see some of the dishes
Drafting Studio
Found in the trash can
The full directory comprises 46 numbered rooms plus eight categories of eight rooms. (with "46 + <46>" where <> is the diamond operator from advanced mathematics)
-
Den
under some books under one of the paintings
The sin associated with this room is often associated with one’s use of time.
referring to sloth in Room 8
Dovecote
In one of the holes next to the door, eye level.
Three members of the Sinclair family have attended school overseas in Corarica.
-
Drawing Room
left side of the cabinet below the painting of three men walking to the right
Months are slightly longer than days.
I'm not sure what this memo means. Maybe it's referring to the gait length of a woman vs. a man for the safecode?
Foundation
-
Despite the directory being reorganized and renumbered several times throughout the years. The foundation has always maintained its position as the first floor plan of Mount Holly.
Note, if you already have the foundation placed outside rank 8, there's a process to remove it (see foundation section)
Freezer
Underneath the crates in the main section
The ice in Master Sinclair's personal freezer can only be thawed by applying a direct heat source.
Hint for accessing the frozen mail (see freezer)
Gallery
Side of the bench next to the painting with 8
The titles are synonyms.
Hint for the gallery puzzle (see section)
Garage
Inside the car requires car key to access
The license plate on this car is an acronym.
Licesnse plate: SWNSNG. Not sure what the acronym is though.
Kennel
On the left side of the central leash storage, up high
Sinclair's four canine companions are named Carter, Thoughtless, Hot Sauce, and Drawbridge
-
Laboratory
On the shelves with white bottles, in the middle of the central bench, opposite the side of the terminal.
Synka Inc. founded in 1933, has two facilities - Synka Labs in Reddington and Synka Court, a 16-story facility located in downtown Oris. Featuring 8 floors above ground, and 8 floors below ground.
-
Library
Second floor, on the middle row of the bookshelf diagonally opposite to the stairs.
If you have a hall pass, bookshop will be more likely to be drawn while drafting in the library
-
Locker Room
Next to green memo about "Kirk Darren is a pseudonym." it was in the locker closest to the far side door
The memo next to this is a lie.
-
Blue Tent Memos (M-Z)
The memos were broken up into two sections due to word limits.

Room
Location
Memo
Notes
Mail Room
-
Only six of the notorious "Red Letters" were addressed to Herbert S. Sinclair
the two that weren't addressed to Herbert were letter #2 (M from Caleb), and letter #6 (Mary, from Herbert). This implies the missing letter 3 was addressed to Herbert.
Mechanarium
Inside the door directly to the right of entrance. Note you'd need to have enough mechanic room to spawn the door.
On the coat of arms, the first number is one numeral. The rest are each two numerals.
hint to a locked box in Vault
Music Room
Behind the piano, right side
There is a major key hanging on a wall in the safehouse.
I believe this is related to "We seek what's in the shade of Truth", a hint at the solution to Mount Holly Blueprints (see section)
Nook (reading nook)
On the shelf across from the rook
The rook can perform a special move with another piece.
Hint at the Castle puzzle (see section)
Observatory
-
The largest planet in the night sky is named after the paragon of ash.
The largest planet (and angel) is Veia
Office
on the bookshelf right of desk
The king can castle by swapping with another piece
A hint at Castle puzzle (see section)
Pantry
-
"There is a letter missing."
Might be a reference to red letter #3. Note also that it's in quotes for some reason.
Parlor
By the small dresser in the corner of the room
The gems are in the Black
box.
This note might show a different color depending on that day's parlor answer.
Planetarium
one of the back row chairs
The Ink Well is not the largest constellation.
referencing the spiral of stars constellation (see observatory)
Pool
On the ceiling near the pool rules sign
There is only one location in the estate where every room in the drafting pool can be drafted.
I think this is hinted at the outer room using monk blessing (see shrine section)
Pump Room
Below the pipe, underneath the pump panel
The Massive Reservoir below Mount Holly receives a natural filtration from the continuous flow of fresh water from two neighboring underground springs, before making its dramatic exit via a waterfall on the south-facing cliff.
-
Room 8
Side of the bin labeled "Wrath"
The elephant belongs in this bin
A hint to Room 8 solution (see section)
Rotunda
on the pillar in the center of the room
There are 4 different methods to rotate rooms.
Blessing of Dancer, Rotundra, Ornate Compass, Dovecote
Rumpus Room
Underneath TV
The Real Alzara was an Erajan soothsayer who belonged to the royal court of Aries. He was banished from the realm in the fifteenth year of Ejera for a prophecy that did not come to pass.
-
Sauna
Right side of steaming rocks floor level.
Saunas are commonplace in both businesses and residences in Corarica.
A possible hint that Corarica is snowy
Security
Behind the paired paintings
Surveillance Recordings can only be accessed via the terminal located in security.
A hint to the surveillance system (see security)
Spare Room
-
There are 12 different potential spare room upgrades.
3 from first upgrade, 3x3 from the second set of upgrades.
Storage Room
Far left corner from entrance, underneath some pallets and a crate.
There are six permanent additions
See Permanent addition section for more details
Study
Corner of the room, by the chair and stack of books
The Chess Board in this room contains a Portmanteau.
Hint to the code to the safe (D8 = Dec 08)
Throne Room (after turning blue)
behind the right pillar facing away from the throne
The family core is kept in the family vault
Hint to a locked box in the Vault
Trophy Room
Under the rug underneath a chair
There were a total of eight gems removed from the ruby crown of Orinda Aries.
We only encounter 6 in all the safes.
Utility
Back of the breaker box, requires you to solve the VAC Puzzle.
D.C Power’s designs for the V.A.C Controls were partly inspired by the gift they received from their client: an original Mora Jai Box
-
Vault
In the cart, bottom left corner of the painting
The family core is unlocked only by the sum of its digits
Hint to a locked box in the Vault
Walk-in Closet
Right side, eye level
Her ladyship Clara Epsen was laid to rest on the 11th of June 1983.
-
Wine Cellar
the top shelf on the far right, as seen from the entrance, next to a green bottle
The numerals below the coat of arms are four different numbers, not one.
Hint to a locked box in the Vault
Workshop
In the wood pile in the corner
Certain rooms, like mechanical rooms, are more likely to contain security doors.
-


Emails
These emails below can be accessed from the respective terminals found in the manor. In order to access them, you will need to know the password "Swansong" which shows up as a hint through the manor. Most accessible of which is probably that found in security room or commissary (requires a magnifying glass to see).

The Staff announcements and Synka Experiment Update also require access to the satellite dish (see A New Clue section for more details)

  • Shelter
  • Office
  • Security
  • Laboratory
  • Blackbridge
  • Staff announcements
  • Synka Experiment Update

Shelter

Office
Security
Laboratory

Staff announcements
These messages are only accessible after turning on the satellite dish (see A New Clue section on how to unlock this). This requires burning of the sundial base in Orchard, then rotating the base so the grooves line up.


Synka Experiment Update

Notes based on location (A-B)
46th Room
See the 46th Room section

Abandoned Mine
see Abandonded Mine section

Antichamber

Aquarium
The aquarium can be drained through the pump room. When done so, we see hidden markings next to some of the furniture.

Archives
See the Archive section

Attic
Found in a suitcase above the stairs to the right, this is related to the Home Surveillance System (see Security section for more details)
Not sure if this is significant, but a swan is a motif in the game.

Ballroom
Music sheets #6 and #7 can be found here (see Music Sheet Puzzle section for more details)

Basement
The basement can be accessed using a power hammer on the planked wall behind the grounds.
Notes were found on the desk tucked away in the upper right corner.


Bedroom
If you happen to have a treasure map that points to the bedroom, you can dig up a secret message. The easiest way to do this is to get the treasure map first, then try and draft the bedroom where the x is using rerolls.

The answers are:
  • in MAT e
  • m ART ini
  • NOT ary
  • mol TEN
  • not ICE
  • in SECT
The week's solution is - MANTIS

Billiards Room
The Billiards room contains a dartboard puzzle that, when solved, offers a couple of keys or 1 special key (silver key, keycard, etc). The puzzle starts off relatively simple, but gets more complicated the more you solve. See the classroom 2 and classroom 7 sections for some hints.

Speakeasy
Note that the Billiards room can be upgraded to the Speakeasy, which makes the dart game much easier, as well as adds a few interesting details.
Note from Christoph relating to their moonshine operation behind the trade post (see section)

Break Room
The billiards room can be upgraded to a breakroom, adding a bulletin board containing a couple of memos (see Memo Section), a staff notice message from Mrs. Babbage (the same notice in the maid's chamber), and a staff notice message about passwords (the same notice in the security room)

Additional notes on the dartboard chalkboard.
This is a reference to the speakeasy blackboard.

Blackbridge
See the Blackbridge section

Boiler Room
The boiler room contains a central boiler that requires steam from three tanks to power. Once powered you can direct the power out of the room to power certain rooms for special effects, such as powering the garage door.

The room also contains a red rectangle which, when powered, can help open the red door (see underpass section) and the blue door (see blue room section)

There are these metal plates that block access to one of the steam tank. They can be moved by passing steam to certain pipes within the room. Looking at the grates carefully, each grate consists of 4x4 rectangles in two shades. Below is the list of shading encoded as 0s and 1s where 1s are dark rusted color starting from the top left corner moving to the bottom right:
  • Gap
  • 0000 1000 0000 0011
  • Gap??
  • 0000 0000 0000 0000
  • 0011 0100 0000 0000
  • 0000 0000 0000 0000
  • 0000 1100 1000 0000
  • 0000 0010 0010 0010
  • Large gap
  • 0100 0000 0001 0000
  • 0000 1000 1010 0000
  • 0000 0010 1000 0010
  • 0000 0000 0000 0000
  • 0000 0100 0100 0100
  • 0011 0001 0000 1000
  • 0110 0000 0000 0001
  • Gap?
  • 0000 1000 0000 0011
  • 0011 0100 0000 0000
  • 0000 0000 0000 0000
  • 0000 1100 1000 0000
  • 0000 0010 0010 0010
  • Large gap
  • 0100 0000 0001 0000
  • 0000 1000 1010 0000
  • 0000 0010 1000 0010
  • 0000 0000 0000 0000
  • 0000 0100 0100 0100
  • Gap?
  • 0011 0001 0000 1000
  • 0000 0110 0000 0000
  • 0110 0000 0000 0001
  • 0000 1000 0100 0000
  • 0000 0000 0000 1000
  • 0000 1000 0000 0011
  • 0011 0100 0000 0000
  • 0000 0000 0000 0000
  • 0000 1100 1000 0000
  • 0000 0010 0010 0010
  • Gap
  • 0100 0000 0001 0000
  • 0000 1000 1010 0000
  • 0000 0010 1000 0010
  • 0000 0000 0000 0000
  • 0000 0100 0100 0100
  • Gap??
  • 0011 0001 0000 1000
  • 0000 0110 0000 0000
  • 0110 0000 0000 0001
  • 0000 1000 0100 0000
  • 0000 0000 0000 1000
  • Repeat from the start

Bookstore
Note that this article was updated on patch 1.0.4. Previously it says "comes only four months after the distressful report of the author's mysterious and unexplained disappearance."

Could this be Mora Jai Box related?
Also note that a corner of the bookstore seems like it holds a hidden room

Bunk room
Only two VCR tapes have legible text.

Herbert's Journal was found on the side of the bed. Contains writing from his brother Simon in red.
Notes based on location (C-E)
Casino

Catacomb
The catacomb can be accessed by activating the 7 statues in the tomb in the correct order. (see Angels puzzle) In it, you see a statue of Draxxus that you can activate by pulling on its sythe. Depending on the order in which you activate the 7 statues, you can unlock a secret passage to the abandoned mine or a secret room containing the original manuscript for the red prince and a new clue.
If you activate the Draxxus statue, it unlocks a secret passage to the abandoned mine.

The table before the statue also contains a piece of a map. The other two pieces of this map can be found in the circular room in the abandoned mine and behind the breakable wall in the Weight room. Combining it together, you can see a message "the eighth angel points to our dreams"
This is a hint that, if you activate the statue, the scythe points to a particular location on the map where you will find a trunk with a sanctum key.


Cellar

Chapel
The walls of the chapels contain stained glass murals of the 8 angels. This is related to the angle puzzle in the tomb (see Angle puzzle section)
The chapel also contains two lightable candles that, when lit, raise the podium to reveal a piggy bank which when broken return all the gold you lost to the chapel, Note that this can only be done once the next time you return to the chapel the podium is lowered and the candles are already lit.

Not sure if these statues are important, but added just in case

Classroom
See the classroom section

Cloister
The inner courtyard can be accessed by clicking the bottom of the pillars facing the Orinda statue (see Solarium note).
The markings behind the statue are for the CASTLE puzzle (see section)

Note that it's possible to upgrade Cloister with an upgrade disk, where you get to choose 1 out of 3 out of a possible 8 paragons

Clock Tower
See Clock Tower section

Closed Exhibit
The closed exhibit is a black print that can be found in the red letter inside the study safe.
Note that the backside closest to the crown shows a security panel that can lower the barrier and disable the security system for 10 seconds. Giving you access to the red crown.
If you accidentally trigger the security, it locks the crown up. You can reset the panel again through the security panel.

Coat Check
Not sure if it's significant, but you can see numbers in the back of the room

Commissary
The commissary is a shop that sells various items (salt shaker, shovel, running shoes, etc.) or resources (keys, gems, bananas)
The commissary also contains a bulletin board with a staff notice with the terminal password (same as one seen in the Security room), as well as two memos (see Memo Section)


Conference
There's also a red memo on the table (see Memo section)

Conservatory
This room allows you to set the rarity of 3 randomly chosen floor plan when drafted. The blueprint for this room can be found after completing the music sheet puzzle. (See Music Sheet Puzzle section)

Darkroom
See the Darkroom section

Dormitory
You can find the draft strategy vol. 2 book on the desk (see Mount Holly Library for more details)

Banner for Cornarica University, a hint for the inner sanctum

Dovecote
The dovecote is a blueprint that can be added through the drafting studio. It allows you to rotate floor plans if it's within the drafting drawing.

In one of the alcove, there's a box containing additional letters from Mary.


Drafting Studio
Note there's a small safe in the diorama that can be opened with a magnifying glass (See red letter section).

Drawing Room
Note there's a safe hidden in this room that requires you to pull a candle handle (see Herbert's painting). The code to the safe is 0411.

East wing hallway

Entrance
When you first get an allowance.

Entrance Letter after Inheritance
If you used a monk's blessing on the foundation, you receive this letter the next day and a repellent spray can that can remove a room for a week.
Notes based on location (F-H)
Foundation
The foundation is a room that, when drafted, will be permanently set in that location for future runs. To remove it you need to draft it in the outer room using the monk's blessing (see shrine section). Which will add a repellent spray at the entrance the next day. This item can remove the foundation for a week.

The foundation contains an elevator that can be lowered by sliding the lever from the back of the foundation room. This requires another room leading to the wall of the foundation.

Foyer


Freezer
When the freezer is opened, it freezes your coins and gems, making them inaccessible until the next day. You can reverse this effect by stepping into a furnace room or sauna afterward.


The item encased in ice (except for things within the mini freezer), as well as the ice wall in the freezer, can be thawed in the following ways.
  • using a burning glass on the iced objects
  • Refreezing your asset after it melts increases the freezer temperature
  • Having the freezer closer to the furnace (at least 2 rooms) will melt the ice (thanks @RuneCrypt The One for the info)


There's a letter by Herbert encased in ice in the mini freezer. You need to melt the ice with a burning glass to get it out. There might be a puzzle involved with the dots on the servers; these are likely from the blackbridge grotto (see section).


There is also an ice wall to the left side that can also be melted, revealing two server racks and a letter from Denny Revance.


Gallery
See the Gallery section.

Garage
To open the garage door, you would need to either connect power from the boiler room to the garage. Or turn on the power to the garage through the utility closet (the easier method IMO), once open, you are able to gain access to the outer room as well as permanently unlock the west path to the outer room for future runs.


Note: found inside the car, requires a car key to open, which can sometimes randomly be found in the manor. The keys can also open the trunk, revealing an upgrade disk the first time and a couple of items the next time.

Gemstone Cavern
The Gemstone cavern is a permanent unlock that can be accessed by solving the VAC indicator in the utility room (see section), once opened it provides 2 free gems at the start of each day.

A jackhammer can be used on the Gemstone Cavern to generate more gems, however doing so reduces the integrity of the cavern. Each gem extracted increases the likelihood of the cavern collapsing, removing the permanent +2 gem a day benefit. There is currently no known benefit of collapsing the cavern.

Greenhouse
Music sheet #5 can be found here (See Music Sheet puzzle section for more details)
There's a broken Antichamber lever here that can be activated with a broken lever.
There is also a secret breakable wall to the left of the room that can be broken with a power hammer. This will reveal a secret logbook of the old gardener, which can be read in the Mount Holly Library

Grounds

At the south end of the grounds, you will encounter a dark tunnel. If you go deep into it, there are two lightable torches that, once lit (burning glass), you gain access to the tunnel floor plan and the clipboard. The crates here can also be removed with advanced experiments (see the Laboratory section)


Once you have the option to perform advanced experiments (see laboratory section), you have the option to "remove a crate from the Tunnel." If you perform enough of this, you gain access to a door to the Unknown (see section) as well as a filing cabinet for the abandoned mine (see section).

Guest Bedroom

Her Ladyship's Chamber


There's a locked diary that can be opened by finding the key in the Tomb (see Tomb section for more details)
To read the diary head to Mount Holly Library

Hovel
This note seems to be a reference to the numeric core puzzle (see Atelier section for detail)
Valve for the precipice elevator.

I believe the "coincidence" is referring to the fact that ((45*2)/9)-2 = 8, which is a prominent number. The operation is based on the color (similar to the dart game).
Note, you can also find the valve for one of the blue flames needed to unlock the precipice (see section)
notes based on locations (I-L)
Inner Sanctum
See the Inner Sanctum section

Kennel
Note, this is a secret for the CASTLE puzzle (See CASTLE puzzle section)

Kitchen
You can purchase food from the kitchen, which will add steps. Some common food items are:
  • 2 coins - Banana (+3 steps) - there's always 5 bananas available for purchase
  • 8 coins - Chef Sandwich (+15 steps) - always available
  • 8 coins - Bacon & Eggs (+10 steps and adds morning room to the draft pool) - not always available
  • 5 coins - Tomato soup (+5 steps for every red room) - not always available
Note the kitchen also has a working faucet, it requires water to be pumped from the pump room (see Pump Room Section). This allows you to refill the watering can with additional water.

Laboratory
The laboratory contains a terminal that allows you to run experiments as well as check emails (See emails in the email section for additional information)
The terminal can be further upgraded with the satellite dish (see A New Clue puzzle section)


If you order the chemical symbol in the order shown by the other table's numbers, you get the message.

Pu S H Th Re Eu Pa F Te Rn I Ne -> Push three up after nine

A clue to the machines with the handles in the corner of the lab. In order to activate the machine, you will need to direct power from the boiler room to the lab room, then if you pull the 9 lever after the 3, you gain permanent access to the Blackbridge Grotto.
Number on a box, not sure if it's significant.
Notes on a wall, not sure if significant.

Laundry Room
The laundry room allows you to exchange different resources for a small coin fee:
  • 5 coins - Spin cycle - swap all gems with all coins
  • 5 coins - Wash & Dry - swap all keys with gems
  • 10 coins - Fluff & Fold - swap all keys with coins

There's also an additional washer that can be powered up with the power from the boiler room, which allows you to exchange more advanced resources:
5 coins - Shoe Shine - swap all steps with gems
5 coins - Star Treatment - swap all Stars with Allowance Tokens
5 coins - Die cleaning - Swap all dice with keys

Note there's also a dig spot in front of one of the dryers (hinted at in the aquarium) that reveals a filing cabinet key which can be used in one of the filing cabinets in the archives.

Library

This is where you can order books from by filling out the catalog card. The book will arrive the next day. On the second floor, there are also two books, one is just filled with various statistics about your game, and another shows additional details such as stamp collections, number of contraptions you built, etc.

The empty shelves on the second floor turn to windows when the library is next to the outer wall.

Locker Room
Note: likely from the original gardener
First time seeing a green apple in one of the lockers, idk if it means anything, the room was powered by the boiler if it makes any difference.

Lost and Found
A piece of sigil can be found on the shelf (a hint for the inner sanctum)

Occasionally you can see a Mila statue (see angels puzzle) on the shelf as well.

Anagram of Denoted In Verse, Does It Never End, etc.

A clue for the core puzzle, note this was previously "true=3" but was updated in one of the patches.
Notes based on locations (M-O)
Maid's Chamber
clue for the angels puzzle in the tomb (see angels puzzle for more details). Note sometime the angel doesn't appear not sure what the condition is for this.

Mailroom
See the Mailroom section

Master Bedroom
The room contains a copy of The Red Prince. There's a small illegible scribble, but I didn't have a magnifying glass to see it clearly.

Found in the typewriter, my guess is that Herbert died while writing the letter.
The coat of arms, the same one can be found in the wine cellar. required to open vault 53 (see Vault section)

Morning Room

Mount Holly Gift Shop
Once you reach the 46th room, the gift shop becomes a draftable location. The shops sell various items


The lunch box, once acquired, will show up in the dining room in future runs. Picking the box up in the dining room will add 10+ steps once you reach rank 5 of the house. Also note that the box contains a hint to the Angels puzzle (see section)


Blue Tent can be purchased for 400 coins after acquiring at least 8 trophies. Once purchased, you are able to find new blue memos in blue rooms on rank 8 of the manor (See Memo section for more details)


Postcards on the carousel

Music Room

The music room contains 4 music sheets (see music sheet section for more details) as well as a note hidden behind a music stand in the music room.

Note, this area also provides an inner sanctum key (see inner sanctum for more info)

Nook
Zooming in on the book shows hints to the billiard dart rules as well as the message "Sinclair has many rare(?) secrets that he will take to his Grave(?)"

Observatory
See observatory section

Office


The office contains a terminal that you can activate to spread coins to the rest of the manor. The terminal also provides access to some emails (see email section for more details).

In the desk drawer, you see a switch (not sure if the color means anything here) for a hidden safe (see red letter for more details)

Orchard
This is located behind the campsite (outside the manor). The combination for the padlocked is 1128, the combo can be found through one of the darkroom images.

There is a valve that turns on one of the flames for precipice elevator.
The shed in the back contains the gardener's logbook (See Mount Holly Library in the books section).
Interestingly, there's also a gem stand in the corner of the room.
The sundial in the back can be activated by scorching the base with burning glass and then turning the base so that the grooves match. This activates the satellite, which is required for advanced experiments + staff announcements. Hints to this can be found in A New Clue (see section).

Orindian Ruins
Once you open the metal sealed entrance in the Blackbridge Grotto (see section), you will see a winding steps to an old stone ruins.


At the center of the ruin is a slab of stone that has the throne blueprint resting on top.

In the distance, you can see a castle, I believe this is Featherfall Keep from the Sightseer's Guide to Reddington book.
Notes based on locations (P)
Pantry
There's part of a secret message hidden in this note. See "A New Clue Puzzle" section for more details.
Parlor

Funeral Parlor
You will find a casket in the parlor room if it's upgraded to the funeral parlor.
Next to the casket is a new poem. I'm wondering if this is a clue to "call it a day" under a certain condition as a solution to some puzzle? (E.g., have a sleep mask, in the last room drafted, with one roll of a die left, etc.)

Patio
Note, there's a filing cabinet key for a cabinet in the archive that is buried in front of the grill. Hints of this can be seen in the aquarium when drained.

Planetarium
The planetarium floor plan is hidden within the telescope in the Observatory (see section).


Note, if you have the telescope item, you can gain a permanent buff to the planetarium by using it in the room.
Planet
Nick name
Buff
Fennmora
Red Stone
Apple
Mamora
Guiding Light
Ivory Die
Veia
Dark Shadow
Dirt Pile
Dauja
The Untamed
Trunk
Mora
Our Colorful World
Prism Key

Pool
Drafting the pool allows you to draft the Sauna, Pump room, and Locker room. Once the pool is drained using the Pump Room, you can find some coins at the bottom of the pool. You can also purchase a pair of swim trunks from the Gift Shop, which will add two trunks to the bottom of the pool in future runs.

Precipice
To access the precipice, you would need to open four valves that reveal an elevator on the grounds. The four valves can be found in the Schoolhouse, Hovel, Orchards, and Gemstone Mine.

Taking the elevator down, you will find the chess room (see chess room section for more details). There is also a hidden entrance to the "Unknown" (see the Unknown section for more details)

A worn-out copy of Realms and Runes is also in the far corner.
The locked door can be accessed from the other side by lighting the candles in the circular room in the abandoned mine.


Note that in the chess room of the precipice, there is a cracked wall that can be broken with a power hammer, which reveals the below. See the CASTLE puzzle section for more details.

Pump Room
The pump room is added to the draft pool once the Pool is added. This room allows you to change the water level in various rooms, each with its own benefit.

Additional details on how to operate the pump can be found in the EPCW guide book from the library (See Mount Holly Library)

Some of the rooms are:
  • Fountain (level 0) - Drains the fountain in front of the manor. This gives you access to a basement door (requires basement key to open), which gives you access to the south side of the abandoned mine.
  • Reservoir (level 13) - allows you to move the boat from the south of the underground (abandoned mine) to the north (the reservoir)
  • Reservoir (level 6) - gives you access to the saferoom. Requires the boat to be on the reservoir side.
  • Reservoir (level 0) - gives you access to the chests at the bottom of the reservoir, which contain an inner sanctum key (see Inner Sanctum section). Note, in order to drain the reservoir fully, you would either need to fill the reserve tank in the pump room (by supplying power from the boiler room) or by using an advanced experiment (see Laboratory Section)
  • Aquarium (level 0) - draining the aquarium reveals some hidden clues (see Aquarium section)
  • Kitchen (level 3) - Working faucet to refill the watering can
  • Greenhouse (level 5) - Working irrigation system (I believe this allows the gem flowers to bloom)
  • Pool (level 0) - reveals the bottom of the pool, which contains coins or trunks (if swim trunks are purchased from the gift shop)

notes based on locations (Q-T)
Reservoir
See Reservoir section

Room 8
See Room 8 section.

Root Cellar
Note, if you zoom in on one of the roots, there's a faint writing of "Simon P. Jones", and the message "besoiled chil(d?)"
Note the x y z a b c written faintly at the bottom. The message here is a clue for some puzzles found in "A New Clue" (see section).

Rumpus Room
See the rumpus room section

Saferoom
See saferoom section

Sauna
Not sure if this is just texture, but there are some symbols below the XII on the clock hanging on the wall.

Sauna can also unfreeze your account if you walked into the freezer (see section)

Schoolhouse
Found as one of the outer rooms.

A valve for one of the blue flames


Sealed Entrance
A hint for the underpass secret


Secret Garden
The secret garden is a room that spreads fruit throughout the estate when drafted. The garden can be accessed by unlocking a door to a side room (west or east wing) with the secret garden key. The key can sometimes be found as a reward in the billiards room, a major key in the music room, a special key in the locksmith, etc.
On the far side of the garden, there's a weather vane with a swan on top and 3 valves (one hidden behind a breakable wall) that rotate the three arrows on the vane.

Turning the valves until all three arrows align will rotate the alcove to the pointed cardinal direction:
  • North - Rogue Moon
  • East - east antechamber lever
  • South - Orindian sigil
  • West - Western antichamber lever


Secret Passage
The secret passage contains 5 colored books, each of which corresponds to a room type. When one of the books is selected, the passage will lead to the chosen colored rooms.

The code can be seen on the back of the secret passage. See the CASTLE puzzle for more details.

Security
See the Security section

Servant Quarter
The servant's quarters contain a key for every bedroom drafted. I tried drafting all the rooms associated with each bell but it didn't seem to have an effect.

Shelter
The shelter contains a letter, a safebox and a terminal. The safe box can be opened by entering the current ingame time (+ 1 extra hour ahead) in the terminal interface. The safe contains red letter #7 (see red letter section).

The terminal can also be used to measure radiation level in the house, when level exceeds a certain threshold it open all locked doors within the manor. The traditional threashold can be exceeded by performing 3-4+ laboratory experiments (see Laboratory section)
The keyboard is missing an I for some reason.

Solarium
Noticed a crescent moon on the ceiling, not sure if there's any significance.
Shaded region within one of the window panes, again, not sure if significant.
Storage Room

Study
Note this room contains a safe with a red letter (see Red Letter section) as well as major hints for the paired painting puzzle (see Paired Painting puzzle section)

Terrace
Saw a statue from the Terrace outlook with a boat nearby. East wing, rank 4, I think.

Tomb
See the Tomb section

Trade Post
See the Trade Post section

Treasure Trove
See the Treasure Trove section

Tunnel
The tunnel is a floor plan that can be found in the dark tunnel to the south of the grounds. To access it, you will need to light the two torches on either side of the crates blocking the way, revealing the floor plan on the crate. Also note regarding the grounds tunnel, the crates can later be removed with an advanced experiment (see Laboratory section)

Note, if you were to put the tunnel in the manor and it reaches all the way to the edge of the manor, you are able to find a Morai Jai box.


notes based on locations (U-Z)
Underpass
See the underpass section

Utility Room
The utility room contains a fuse box, shown below. At the top is a breaker switch that turns off all the key access. This is useful if the keycard system is set to unlock in the security room.
The following switches can be turned off or on for various benefits

  • Garage - when turned on, allows you to open the garage door, which gives you access to the west path
  • Gymnasium - when turned off, negates the -2 steps debuff when travelling through that room
  • Darkroom - the darkroom lights turn off when you enter the room; you will need to flip this switch back on to reactivate the room lights.

The next section shows VAC indicator lights. There are hints in the mailroom and the office on how to solve the VAC system. You need to turn the lights to [Off] [Blue] [Green] [White] [Red] [Purple]
This can be done by:
  • turning all lights to green
  • Turn lights 1-5 to blue
  • turn 6th light to red
  • Repeat the previous step for light 5 to 1 until every light is purple
  • make 4th light WHITE.
  • make 6th red
  • make 5th red (turns 6th purple)
  • make 3rd light green
  • make first light off
Once this is done, the wall opens up to reveal a lever to open the gemstone cavern, which gives you +2 gems for all future days.

Vault
Occasionally, you will encounter vault keys within the manor. This can be used within the vault to open certain deposit boxes, specifically:
Found in Vault 233
Found in Vault 149


Found in Vault 304


Found in Vault 370 along with an inner sanctum key

Opening vault 53 with the room 8 key (see gallery) reveals a letter. The number 53 is the family core and can be derived from computing the numeric core (foreman's office in the abandoned mine) of the family crest (Found in the master bedroom and the wine cellar).
This secret code is a clue to the Atelier (see section)

West Wing Hall

Wine Cellar
Note that the Roman numeral on the bottom spells 1213. This, combined with a secret letter found in the foreman's office (see abandoned mine section), will give you the clue to open a specific vault (see vault section)

Weight Room
There is a breakable wall behind one of the punching bags that can be opened up with a power hammer. There is a memo, an antechamber lever, and a piece of a map (two other map pieces can be found in the abandoned mine and the catacomb)

Workshop
See workshop section
46th Room
Once you reach the 46th room (the second time), you will see a blue crown on the desk. I've heard online that if you already have the blue crown in your inventory, the red paper crown from the closed exhibition will show up, but I have never verified it. Also, note that if you somehow have both the blue crown and the paper crown, you don't get anything. I encountered this myself :(

In the corners of the room are busts of the family heads. Marigold's missing for some reason. One interesting detail is the symbols on the crest. Each generation is a combination of the parents' heritage. Jones seems to be a treble clef.
Note about hints to the keys to the 8 inner sanctum rooms (see inner sanctum section for more details)
Note: likely written by the old gardener. Evidence is behind the hidden wall in the greenhouse (see section for more details).

There's a map with the words 8 realms in 8 months with numbered pins. This is a puzzle for the postcards you find in the inner sanctum, where you are supposed to pin the location that Sinclaire traveled to based on the details in the postcards. Once all the pins are correctly placed, it opens up to reveal two documents.

Herbert's Will - Found in room 46 behind the map

Deed - Found in room 46 behind the map
Found in room 46 behind the map

Abandoned Mine
Part of a map piece that is found on top of the sigil table in the circular room with candles. Another piece can be found in the Weight Room and the catacombs.
In the dark tunnel south of the grounds, if you clear the crates by performing the advanced experiment, you will gain access to a file cabinet key on top of a coffin.
This allows you to unlock a filing cabinet in the room hidden on the SW tooth of the rotating gear. which reveals the letter below.

Found in the shortcut tunnel leading to the precipice from the circular room (requires lighting the candles in the room)
Archives
Scrapbook
Note that the date was changed from Feb 21 - '87 to Feb 22 - '87 in patch 1.0.4.


Found in the bottom drawer of one of the cabinets (key is in front of the grill and requires a shovel, see aquarium "x")

Found in the middle drawer of one of the cabinets (key is in front of one of the dryers in laundry room see aquarium "x")
Blackbridge
There are 6 large server panels surrounding the walls of the room. Each panel consists of 3 rows of 9 subpanels. Each subpanel consisted of 2 rows of blinking lights with 6 possible positions. In case there's a message hidden in the lights, I've made the table below showing the blinking light position in binary. starting from the first rack on the left, going clockwise.
Monitor #1 and Monitor #2
Rack 1
Row
Col1
Col2
Col3
Row 1
110000 110011
000011 110011
Monitor #2
Row 2
100001 100001
100001 111101
Monitor #2
Row 3
010001 110101
000011 100111
010001 110101
Row 4
100011 111111
100011 100011
100011 100111
Row 5
100001 001101
100001 011001
110000 011100
Row 6
Monitor #1
100110 100110
100011 111000
Row 7
Monitor #1
000001 111001
000001 011011
Row 8
000101 001101
100101 111101
010101 011101
Row 9
000001 110001
110011 000011
000011 110011
Rack 2
Row
Col1
Col2
Col3
Row 1
000011 110011
110000 110011
Monitor #2
Row 2
100001 111101
100001 100001
Monitor #2
Row 3
000011 100111
010001 110101
010001 110101
Row 4
100011 100011
100011 111111
100011 100111
Row 5
100001 011001
100001 001101
110000 011100
Row 6
100110 100110
Monitor #1
100011 111000
Row 7
000001 111001
Monitor #1
000001 011011
Row 8
100101 111101
000101 001101
010101 011101
Row 9
110011 000011
000001 110001
000011 110011
Rack 3
Row
Col1
Col2
Col3
Row 1
000011 110011
-
-
Row 2
100001 111101
-
-
Row 3
000011 100111
-
-
Row 4
100011 100011
100011 111111
-
Row 5
100001 011001
100001 001101
110000 011100
Row 6
100110 100110
Monitor #1
100011 111000
Row 7
000001 111001
Monitor #1
000001 011011
Row 8
100101 111101
000101 001101
010101 011101
Row 9
110011 000011
000001 110001
000011 110011
Rack 4
Row
Col1
Col2
Col3
Row 1
000011 110011
110000 110011
Monitor #2
Row 2
100001 111101
100001 100001
Monitor #2
Row 3
000011 100111
010001 110101
010001 110101
Row 4
100011 100011
100011 111111
100011 100111
Row 5
100001 011001
100001 001101
110000 011100
Row 6
100110 100110
Terminal
100011 111000
Row 7
000001 111001
Terminal
000001 011011
Row 8
100101 111101
000101 001101
010101 011101
Row 9
110011 000011
000001 110001
000011 110011
Rack 5
Row
Col1
Col2
Col3
Row 1
110000 110011
Monitor #2
Monitor #2
Row 2
100001 100001
Monitor #2
Monitor #2
Row 3
010001 110101
010001 110101
010001 110101
Row 4
100011 111111
100011 100111
100011 100111
Row 5
100001 001101
110000 011100
110000 011100
Row 6
Monitor #1
100011 111000
100011 111000
Row 7
Monitor #1
000001 011011
000001 0110011
Row 8
000101 001101
010101 011101
010101 011101
Row 9
000001 110001
000011 110011
000011 110011
Rack 6
Row
Col1
Col2
Col3
Row 1
000011 110011
110000 110011
000011 110011
Row 2
100001 111101
100001 100001
100001 111101
Row 3
000011 100111
010001 110101
000011 100111
Row 4
100011 100011
100011 111111
100011 100011
Row 5
100001 011001
100001 001101
100001 011001
Row 6
100110 100110
Monitor #1
100110 100110
Row 7
000001 111001
Monitor #1
00001 111001
Row 8
100101 111101
000101 001101
100101 111101
Row 9
110011 000011
000001 110001
110011 000011
Blackbridge Logs
Blackbridge Grotto is a cavern to the east of the grounds that can be accessed once you solve the machine puzzle in the laboratory (see section for more details)

In it, you see a podium with microchip slots. Once all the chips are collected (see A New Clue puzzle section for details), you will open up a passage to the Orindian Ruins (see section).

You also see a terminal that requires an admin key, the keys are in the form XxxxY, where X is the first 4 letters of the last name and Y is the first letter of the first name.

Found on the side of the wall in the cavern, a clue for the CASTLE puzzle (see section)

User Database

admin logs LeeB
Note: these logs are when you are logged in as LeeB


admin logs ThomK

admin logs RibbJ
You get a hint to RibbJ and WithP in the checkout slip for the book "EPCW Pump System User Manual" (see book section for more details)


admin logs WithP
Classrooms
The classroom is one of the rooms that can be drafted in the drafting studio. It's also available from the schoolhouse. Note that each classroom drafted the grade increases; each grade covers a different subject. A total of 9 grades are available (requires both the schoolhouse and already drafted from the drafting studio).

Not sure if the banner color means anything, as far as I know, they are the same order for every classroom.

Grade 1

Grade 2


Grade 3

Grade 4
Grade 4 contains two large maps that contain a lot of details about the world.


Grade 5


Note the paired art in the back spells: NOT CLUE

Grade 6

Grade 7

Grade 8

Final exam

Exam Results
The day after you finish the exam, you get your test result back. If you aced the exam, you are rewarded with a trophy.
Clock Tower
Clock tower is one of the draftable floor plan from the drafting studio.


If you are at the top of the tower when the clock strikes 1:30 a secret passageway opens up to reveal 8 clocks with memos contained in each clock.


The goal is to set the correct time for each clock based on the memos provided.

  • #1 - Blue (True) - Each of these clocks should be set to a different time
  • #2 - Blue (True) - Five of these clocks should be set to a time ending on the hour
  • #3 - Red - Set this clock to a time containing all different numbers
  • #4 - Blue (True) - This clock's neighbors should both be set to a time containing a 7.
  • #5 - Red - This clock should not be set 'on the hour' (ending in :00)
  • #6 - Blue (True) - None of these clocks should be set to times that contain the number 1,2,3 or 4
  • #7 - Blue (True) - This clock should be set to a time that contains the same three numbers of another clock here but in reverse order
  • #8 - Handwritten Red (True) - The clocks are positioned so that their times will go up in ascending order

Here is how I solved it through logical deduction:
  • Since #4's neighbors must have a 7 and #5 has to be on the hour, it has to be 7:00.
  • Since 1,2,3, and 4 can't appear in any of the clocks, that only leaves hours 5-9 and minutes 00,05-09,50,55-59 as possible clock time.
  • since there are only 5 possible hours and 5 clocks have to be on the hour, 5:00, 6:00, 7:00, 8:00, and 9:00 have to appear on the clocks.
  • since all the clocks are ascending and there are only three clocks after 7:00, and it's impossible for #7 to be on the hour, #6 and #8 have to be 8:00 and 9:00, respectively
  • since 5:00 is the lowest time and 5:00 has to appear on the clock,s #1 needs to be 5:00
  • only 5:57 contains a 7 and has at least one same number,r so #3 has to be 5:57
  • #4 has to be 6:00 since it's between 5:57 and 7:00
  • By process of elimination, the only times that are still available are 8:05 and its reverse, 5:08 for #7 and #2, respectively.

Solving this reveals another sanctum key.

Darkroom
By default, when you enter the darkroom the lights turns off. To prevent this you can use the shelter room buff that negates any negative effect of red rooms. Or turn the light back on by flipping the switch in the utility closet.


Note that Hartley is the longest serving servant in the manor, and his room is likely referencing the servants' quarters.


Dining Room
Note: You get some of these from the Chef blessing from the Shrine of the Monk

Note: There's a missing "S" in dessert.
Gallery
The goal of the Gallery is to guess the names of the 4 paintings that are hung on the wall.

There is a small hint in Herbert's will (behind the map in the 46th room) that reveals the first letter of each painting (T, P, R, R)


Another hint in the glossary of terms that can be found on the terminals. If you look in the room directory for Parlor (room 5), Billards (room 6), Gallery (room 7), Room 8 (not accessible until after solving the gallery) you will see the answer to the puzzle hidden in the descriptions.


Hints:
  • starts with T (Herbert's will)
  • thin K
  • no clue what the chains and flying hand mean
Title: Think


Hints:
  • Apple, rose, stop sign, wagons are all red things
  • The stop sign the P is on is mirrored (RED | DER)
  • P on DER
Title: Ponder


Hints:
  • Actual Objective -> Real eyes
  • VERI table
  • Genu wine -> genuine
Title: Realize


Hint:
  • fINs, pINs, sINs, animal skIN rug, bINs
  • (room IN) eight (I'll admit I'm reaching a bit)
Title: Ruminate

Once each of the titles is solved, it opens two chests in the middle of the room, one containing the keys to room 8 (see section)

Fun fact: the gallery is actually made by a real artist, Christopher Manson. He created the book MAZE which was a large inspiration for this game.

Inner Sanctum
The inner sanctum, found at the end of the underpass, contains eight locked doors, one for each in-game realm, and a lever to Room 46.
The center of the room contains the Mount Holly Crest with the words "Ovinn Nevarei" ("to new beginnings/look towards the future" In Erajan) and the core of the 8 realms bordering it.
I don't know if it's significant, but there look to be two hidden doors on the sides of the entrance to the inner sanctum.
Each door unlocks with an inner sanctum key and leads to a device that modifies the sigil on the far wall by adjusting its border, rays, and motes. To solve the inner sanctum puzzles, match each core with its correct sigil design. Full instructions are in the Realm & Rune book (see Mount Holly Library). Solving the puzzle unlocks access to both sides of the room: the left leads to a Mora Jai Box, the right to a realm mural, postcard, and souvenirs.
Clues to solve the sigil appear throughout the manor. For example, stamps from letters found throughout the game, such as Randolph’s mail in the mailroom, the freezer, and the tomb, contain details of the realms. Note stamps examined with a magnifying glass will later appear in the Mount Holly scrapbook (see Mount Holly Library).

Treasure Trove memos also include various clues (see Treasure Trove section), books, broken sigil pieces, etc.

Orindia Room
The design of Orindia Sigil can be discovered in the secret garden by pointing all the weather vane arrows south (see section for more details).

Fenn Aries Room
The Fenn Aries design can be found throughout the manor, There is an example of it in the back of the Realm & Runes book, as well as on each of the passports in the vault (see section).

Arch Aries Room
Element
Design
Notes
Core
Mountain
-
Transport
Train
From the book History of Orindia - chapter 3
Weather
Stormy
From Arch Aries stamp or from the book History of Orindia - chapter 2
Motes
Industrial
From Arch Aries stamp
Border
Yellow
From grade 1 classroom, the original red prince manuscript in the catacomb

Eraja Room
Element
Design
Notes
Core
Hourglass
Transport
Train
From the book History of Orindia - chapter 3
Weather
Rainy
From Eraja Stamp
Motes
Poetic
From the book History of Orindia - chapter 2, piece of sigil in clock tower
Border
Violet
From grade 1 classroom, Clara's diary cover in Her Ladyship's chambers, piece of sigil in clock tower
The phrase "Lorja Yenna, Ajlor Lune" translates to "Goodbye land, hello water".

Corarica Room
Element
Design
Notes
Core
Heart
-
Transport
Roads
From Orrspere map in grade 4 classroom (the left side has Corarica symbol with an art of a long road path below)
Weather
Snowy
From Corarica stamp
Motes
Academic
From banner in Dormitory
Border
Orange
From banner in Dormitory, grade 1 classroom

Mora Jai Room
Element
Design
Notes
Core
Fan
-
Transport
Navel
From Mora Jai stamp
Weather
Normal
-
Motes
Agricultural
Secret garden description about Mora Jai fruits, January 10th 1993 staff announcement
Border
White
Mora Jai stamp moto: "The white sea of Yore", the original red prince manuscript in the catacomb

Verra Room
Element
Design
Notes
Core
Jigsaw Piece
-
Transport
Turtle
Verra stamp, there's a VCR tape in the bunkroom called "Turtles of Verra"
Weather
Heat
Broken sigil in Lost and Found
Motes
Spiritual
Broken sigil in Lost and Found
Border
Pink
Broken sigil in Lost and Found

Nuance Room
Element
Design
Notes
Core
Diamond
-
Transport
Aviation
From Nuance stamp
Weather
Windy
Clock Tower poem (westwardly winds)
Motes
Martial
Memo from Treasure Trove
Border
Green
From Nuance stamp

Once all the sigil puzzles are solved, a trophy appears in the main room.
Mailroom
Misc Notes

letter from dad in mailroom

Randolph's Letters
You can run experiments in the laboratory that deliver these letters to the mail room. Below are the letters I've received so far from Randolph.

Randolph's Letter #1
Randolph's Letter #2
Randolph's Letter #3
Randolph's Letter #4
Randolph's Letter #5
Randolph's Letter #6
Randolph's Letter #7
Randolph's Letter #8
Randolph's Letter #9
Randolph's Letter #10
Randolph's Letter #11
Randolph's Letter #12
Randolph's Letter #13
Note: 5 memos came with this letter; these can be found in the memo section.
Randolph's Letter #14
Randolph's Letter #15
Randolph's Letter #16
Randolph's Letter #17
Thanks, HappyFaceSpider, for the screenshot!
Drafting Sweepstake
If you are able to get 20 or more dead ends in the manor, you will receive a trophy and 200 coins the day after in the mailroom.


A screenshot of the packing slip you get when getting items delivered, the items will be different every time you get a package.
Observatory
Note there's a hidden floor plan for the Planetarium inside the head of the telescope; you can access it by rotating the telescope counter clockwise, raise it parallel to the floor, then clockwise until it reaches face level.


When the sail constellation is observed (first one @15 stars), posters can be found throughout the manor.

When you reach 50 stars, you get the ink well constellation, which allows you to use stars as dice.


At 100 stars, the spiral of stars constellation appears. Each time it's activated, a new word is added.


Below is a list of constellations found for various star counts. Not really sure what the exact pattern the stars appear in.
  • 35 - Florealis, sail,
  • 39 - Clavis, Farmer's apple, Diamondus minor, Florealis
  • 44 - Twin, Slice, Diamondus minor, Farmer's apple, clavis, Florealis
  • 59 - ink well, diamondus minor, southern cross

Reservoir
The full map can be found in one of the teeth of the rotating gear room.

Note: there's also another map split into three pieces that can be found hidden in the weight room, abandoned mine, and the catacombs. The map here is photoshopped together of those three pieces. Note the message "the eighth angel points to our dreams" is a hint to the sanctum key (see catacomb section)

If you have the magnifying glass, you can also see a hidden 10. Digging at that spot reveals the "lost and found" floorplan.


When the reservoir is fully drained, you can access the bottom where there are a bunch of scattered boxes. I'm not sure if the position of the boxes changes each run but I found the box with sanctum/and 3 allowance token marked below and made some notes on the color/symbol/note color/note.

Below are memos from the locked boxes in the empty reservoir. This table is not exhaustive.

Locations
Box Color
Symbol
Card Color
Memo
Notes
Reservoir
Blue
Sun
Blue
Green memos in boxes near this box are both lies.
*
Reservoir
White
Wave
Green
Green memos are lies
Was near *
Reservoir
Black
Wave
Green
The sanctum Key is not in a box. It is buried.
Was near *
Reservoir
Pink
Moon
Red
A black box contains allowance tokens.
-
Reservoir
Black
Moon
Red
The box containing allowance tokens is marked by crescent moon.
-
Reservoir
Black
Wave
Red
Sanctum key is in a blue box.
This box was in the water.
Reservoir
White
Sun
Blue
This box contained 3 allowance tokens!
This box was in the water. Contained 3 tokens
Reservoir
Pink
Moon
Green
Only one box in the reservoir has a prize.
This box was in the water.
Reservoir
White
Sun
Blue
Only one blue box in the water contains a memo with a true statement.
This box was in the water.
Reservoir
Pink
Sun
Blue
Green memos in white boxes are lies.
-
Reservoir
Pink
Sun
Blue
Pink boxes marked by sun always contain blue memos.
-
Reservoir
Pink
Sun
Blue
All boxes marked by sun contain memos that are true.
-
Reservoir
Pink
Sun
Blue
The sanctum key is not in a box in the water.
This box was in the water.
Reservoir
Blue
Moon
Green
The box containing allowance token is white.
-
Reservoir
Black
Moon
Blue
This box contained a sanctum key.
Contained sanctum key, near the pillar
Reservoir
Blue
Moon
Green
The sanctum key is in a black box.
-


The upper levels of the rotating gear room can be reached from the Red Door on the way to the north lever. The door requires steam power to open the rectangular box in the boiler room.
Room 8
Accessible with the room 8 key from the Gallery (see Gallery section). The puzzle here is to place all 8 animals in the right bins.


  • Bear: If we spend a min or ten lounging in the den, you’ll know which bin I’m often in
  • Dog: You won’t find my bin in between sin, for I deserve to be in a bin down on the end
  • Elephant: To my chagrin, my neighbor’s sin is written thin to fit it all in
  • Lion: To first begin, place me within a bin with an “N” within its sin
  • Monkey: The bin I tend to wind up in is near the bend in the tail of the skin
  • Penguin: The sum of my sin, as it is penned, is a number within the room we are in
  • Rabbit: I share a trend with my neighbor’s sin: a letter and its twin appear on each bin
  • Swan: I recommend you think again if I am ever in a bin far from the fin

Answer in order of solving for me.
  • Penguin: GLUTTONY - only sin with 8 letters
  • Monkey: HUBRIS - bin next to the tail of the rug
  • Dog: MUNDANITY - only bins that are not between bins are hubris (taken by monkey) and mundanity
  • Bear: SLOTH - closest sin relating to "lounging", bears also hibernate in a den.
  • Elephant: WRATH - the neighbors of GLUTTONY are sloth (taken by bear) and wrath
  • Lion: ENVY - only other sins with N's are mundanity (taken by dog) and gluttony (taken by penguin)
  • Swan: LUST - only two bins are next to the fin painting, and ENVY has already been taken.
  • Rabbit: AVARICE - Only words with the same letters are neighbors are avarice and mundanity. Since the dog is in mundanity, the rabbit is in avarice

Once all the animals are placed, an alcove opens up that reveals an allowance coin and a trophy.
Rumpus Room
Transcript #1
And, as it was foretold,
I am awakened by at the sound of a dropping coin.
You find yourself
face to face with the great Alzara.
And... I suspect you wish me
to look into your future.
The image is becoming clear...
I see a boy,
a boy standing on a shore of white sand.

He is looking for something...
...something he was told he would not find.

I see a black cat tied to a red flag.
I hear the wind blowing
but the flag does not stir.

I see...
a door marked by a rogue moon
a door that is always locked...
yet it has no key
It is the door that you have been searching for
yet it will not find
a lost room beyond the dark waters...
Commentary: The vision of the door looks like the entrance to the safe house (see the Safe house section)
what you have heard here has been foreseen
by the great Alzara.
Until the dawn of the following day.
I will have nothing more to say.

Transcript #2
And, as it was foretold,
I am awakened by at the sound of a dropping coin.
You find yourself
face to face with the great Alzara.
And... I suspect you wish me
to look into your future.
I see the darkened cloud of ruin,
now decrepit, rundown and in disrepair.


I see eight red envelopes
resting upon eight pedestals.
And in these eight envelopes
I see eight letters penned by eight different hands.
Eight letters of which you will only ever find and read
seven.
Commentary: The missing 8th letter is marked #3; the letter was likely in the orchard at some point but stolen by Denny Revane the former gardener
Just like the art hanging on the walls of these rooms,
there is a letter missing...
what you have heard here has been foreseen
by the great Alzara.

Transcript #3
And, as it was foretold,
I am awakened at the sound of a dropping coin.
You find yourself
face to face with the great Alzara.
And... I suspect you wish me
to look into your future.
Yes...
...the fog is clearing.
I see a shadow in the doorway.
Commentary: This shadow looks a lot like mine... (Detective Bon Margle)
Silent footsteps in the hallways...

An unlatched gate, you did not open...

A missing item, you did not take...
Commentary: From the vision, it looks like a bird and a lantern is missing. This could also be a reference to the missing red letter #3 or the red gem?
I see a young boy watched from afar,
a young boy who once was brave,
but now...
...afraid.
what you have heard here has been foreseen
by the great Alzara.
Until the dawn of the following day.
I will have nothing more to say.

Transcript #4
And, as it was foretold,
I am awakened at the sound of a dropping coin.
You find yourself
face to face with the great Alzara.
And... I suspect you wish me
to look into your future.
The image is becoming clear...
I hear the pattering steps of children
running in the forest.
The joyful echos of laughter in the courtyard.
I see an old man
an old man sitting in an even older chair.
A seat that has served many generations.


each with their own stories...
each with their own secrets...
each with their own endings.


But all...
...in the same chair.
What you have heard here has been foreseen
by the great Alzara.
Until the dawn of the following day.
I will have nothing more to say.

Transcript #5
And, as it was foretold,
I am awakened at the sound of a dropping coin.
You find yourself
face to face with the great Alzara.
And... I suspect you wish me
to look into your future.
Faintly in the mist...
I see a figure.
A statue cradled in a courtyard of sentinels.
Commentary: This looks like the statue from the Fenn Museum (see museum map in the safe house)
You will find yourself one day wandering these paths.
Walking in the footsteps of the past,
wandering...
...and waiting.
Searching for a shadow that will never be cast.
Longing for the day to end...
...the hours to pass.
What you have heard here has been foreseen
by the great Alzara.
Until the dawn of the following day.
I will have nothing more to say.

Transcript #6
And, as it was foretold,
I am awakened, for one last time,
By the sound of a dropping coin.
You find yourself face to face with the great Alzara.
And I suspect you wish me to impart to you
one final vision...
Commentary: Vision of metro behind the safe house


Commentary: Vision of room 8 and bridge from the black bridge

in the dim,


I see cavern walls of stone...

A hollow, lit by a sea of a thousand burning stars...
Commentary: This might be a reference to the Atelier but the vision doesn't look like it.

I see a treasure, buried beneath the cliff rocks...
A black mirror, hidden...
...among the memories of falling sands.

And within the black mirror...
I see a figure...
a figure standing in sullen snow.
Commentary: This looks like the chest that houses the stone effigy (see shrine section)
All of what I have told you my young baron,
I wish you to now know.
Until we meet again some distant day,
I will have nothing more to say.
Safehouse
How to get to the Safehouse
To get to the safehouse, you would need to ride the boat into the hole on the side of the reservoir. Hints to this can be seen behind the red door (see underpass section). These are the steps required:
  • Drain the reservoir by 1 level from the pump room
  • Move the rowboat from the south side to the north side
  • Drain the reservoir to level 6 from the pump room
  • get on the rowboat
Interestingly, the entrance to the safehouse looks like a vision found in the Rumpus room (see section)


The sketch seems to match the monitors in the security room. Zooming in on the "A" monitor shows footage from the archive. This is a hint on how to access the Home Surveillance System (see satellite dish puzzle section)


Musem map
The map here shows a hint on how to get the paper crown in the closed exhibition.


Metro Station Map

This is a hint to the Home Security System (see A New Clue puzzle section for more details)


Note, this is a hint to the breakable chess room wall. See CASTLE puzzle.


Security
Note: the scribbled-out password is "Swansong," which can be seen with a magnifying glass


Home Surveillance System
A note in the saferoom and in the attic points to a secret message in the monitors in the Security room.

When taking the first letter of each room that appears in the monitors, it spells out `Swansonghss`

This is a password to the home security surveillance system, which can be accessed through the security terminal.

This brings up a directory of camera footage by year; however, only 1993 and 1987 have any footage.

1987
1987 gives you access to 3 footage.


One labeled library shows footage of presumably Herbert and Mary in the library


The one for the entrance shows Herbert moving a vase (a hint at one of the microchips)


The one in security shows Mary holding what looks like a standing cat.

This is a reference to the train station map, an alternative clue used in solving A New Clue puzzle (see section)

1993
Opening year 1993 shows various cutscenes that you have acquired so far (e.g., Alzara cutscenes, intro, etc.). Note that there's a curious blank spot between BB Grotto and 4th Rumpus Room. Not sure what the significance of this is.
Shrine
The shrine is a room selectable from the Outer Room. In it there's a statue of a monk where you can offer it coins to get a certain blessing. The coin cost and blessing type can be found in the list below.

Shrine Blessings
  • 1 - Dancer: While drafting, you may pay 1 gem to spin floorplans.
  • 3 - High Roller: Each time you draft a shop, gain an ivory die. Gain 10 gold whenever you roll an ivory die.
  • 5 - Gardener: Add 8 Courtyards to today's draft pool.
  • 7 - Chef: For each different type of spread that you do today, add an extra dish to the Dining Room.
  • 8 - General: After you draft a red room, if you have at least 5 different ranks containing red rooms, gain 5 gems.
  • 11 - Tinkerer: Whenever you draft a Mechanical Room, trigger your current experiment.
  • 13 - Monk: If you call it a day in a room on your estate, you will draw that room while drafting from the grounds the following day (see below for specific room/monk blessing interactions)
  • 15 - Berry Picker: While drafting, instead of picking a floorplan, you can pick a berry; if you do, draft a random floorplan from your draft pull, disregarding rarity.
  • 17 - N/A: Repeat from the start, but all buffs last for 4 days instead of 3 days
  • 33 - N/A: Repeat from the start, but all buffs last for 5 days instead of 3 days

Note, if you take the coins back, you will be cursed for a few days; each room costs an additional resource (step, coin, key, or gem) depending on the room type.

There is also a cursed coffin that you can purchase from the Mount Holly gift shop, which, once purchased, appears in this room. The coffin contains a stone effigy that is required for a throne room puzzle.

Monk Blessing
The monk blessing allows you to draft the room that you called it a day on the previous day to the outer room. Below are some unique interactions.
Entrance
Doesn't seem anything special, the vase can be broken for allowance, any experiment results with "adding a small chess to the entrance hall" also apply here.
There seems to be some weird glitch with the reflection of the paintings. Words are ineligible
Antechamber
The center podium reveals the basement key and allowance (if you have the Quest bedroom), the note, however, is changed to "So close, yet so far away."
The side doors (if opened) are blocked by rubble, but the far door reveals the shrine with a note showing a clue on how to reclaim the throne room (see throne room section).
Garage
If you place the garage, opening up the garage door will also reveal the same shrine room found in the antechamber, with the same message on reclaiming the throne.
Treasure Trove
The treasure trove looks the same except for a unique locked chest with three Oriandia symbols on top. This chest can be opened using the Key of Aries (see Royal Scepter puzzle)
46th room
Nothing seems to have changed with regards to the 46th room, except the blue crown is missing and has been replaced with the deed to the manor. The map compartment only shows the will.
Secret Passage
The secret passage looks similar however, there is now a new white book on the shelf. see Atelier section for more details on this.
Secret passage normally.
Throne Room
The throne room is a blackprint that can be obtained from the Orindian Ruins (see section). This requires the gathering of the three microchips (see microchip puzzle section)

The room costs 5 gems to draft, and you will find a lever to open the 46th room behind the throne.

The following note can be found when drafting the antechamber in the outer room, using the blessing of the monk from the shrine (see shrine section)

This note is a clue on how to reclaim the throne. To do this, you need:
  • The blue crown - found in the 46th room
  • The royal Scepter - see Royal Scepter puzzle section
  • The cursed Effigy - found in the shrine room after purchasing it from the Mount Holly gift shop
The easiest way to gather all the items is by getting the cursed effigy into the coat check in an early run. Then on another day, with the scepter in hand (this item stays with you between days if you follow the item's condition) reach the antechamber to get the blue crown, draft the throne room, and the coat check close to each other to have all three items together while visiting the throne room.

Reaching the throne room will open a cutscene and upgrade the throne room to the throne of the blue prince. Which is a necessary precondition to open the blue door (see blue door puzzle section)

Once converted to the blue throne, there's a new mora jai box with blue tiles.
Tomb
The tomb is one of the rooms that can be selected from the Outer Room slot. This room contains a secret passage to the Catacomb, which leads to the abandoned mine underground. (see Angle puzzle section for more details)


Deep in the tomb, you can find a letter from Herbert:

There are two hidden chambers that can be accessed by lighting the candles on the ruby candle stands using a burning glass. One contains some allowance/upgrade disk.

The other contains a secret passageway to Clara Epsen's Coffin. Clara's area contains a note written in a different language.
The letter can be translated to English with the information from grade 6 classroom as well as some small clues in the treasure trove memos.
Note in Erajan
Ov-eld-aj-iris,
Ul-eld-dau, ul-eld-nai, ul-eld-mora.
Ov-ul-el-gift eld-hew ov-iss. Nev-dau uld-arei-le.
Nev-dau eld-arei-lu. Aj-el-bid ul-heed eld-lor: Ul-odd-iris.
Hew-sinclair-lu. Hew-epsen-lu... Forget uld-ein inn.
Uld-jor-jeari. Uld-arei ov-iss fenn-vo. Uld-ein-joro-vo.
Ov-eraja. Ov-iss nev-arei.

Lor-ja eld-iris,
Uld-jora
Literal translation of the note
Toward-my first-child(?),

You-mine-day. You-mine-night. You-mine-world.
Toward-you-I-gift my-house toward-south. New-day your-future-my-absence.
New-day my-future-your-absence. First-I-"bid" you-"heed" my-word: you-high(?)-child(?).
House "Sinclair" your-absence. House "Epsen" your-absence... "Forget" your-dream(?) north.
Your-name-"jeari".. your-future toward-south "Fenn"-away. Your-dream(?)-father-away.
Toward-"Eraja". Toward-south new-future.

Last-word my-child(?),
(Your-mother)
Semantic translation of the note
To my first child,

You are my day, you are my night, you are my world.
To you I gift my house in the south. Tomorrow you'll be without me.
Tomorrow I'll be without you. First I bid you heed my word: You are a princes.
You are not House Sinclair, you are not House Epsen... Forget your dreams north.
Your name is Je Ari. Your future is south, away from Fenn. Away from your father's dream(?)
Toward Eraja. A new future in the south.

Goodbye my child,
Your Mother

There is a diary key for Clara's diary (in Her Ladyship's chamber) hidden behind the portrait. The key is hinted at in Herbert's will (See 46th Room section)
Trade Post
Trade Post is one of the Outer Room. Where you can exchange items for another one.

Below is a list of trading exchanges I encountered, not sure what exactly determines what they will offer, but I found some patterns:
  • Some items are grouped, for example, car keys, silver key, and coupon book often cycle between themselves.
  • The trader will only trade you things you don't have and will refresh the offer if you gain the item. For example, if a lockpick trade with car keys and you happened to get a car key some other way, it might turn into a silver key.

Trade Post exchanges
  • Basement Key - Prism Key, Keycard, Gear wrench
  • Battery Pack - 2 gems, magnifying glass, 1 key
  • Blue Crown - Cannot be traded
  • Broken Lever - Battery Pack, salt shaker, magnifying glass, 2 gems, 1 die
  • Burning glass - lock pick, hallpass, lucky rabbit's foot
  • Car Keys - salt shaker, compass, magnifying glass, coupon book, coin purse
  • Chronograph - Keycard, 4 dice, hallpass
  • Compass - Car Keys, salt shaker, Magnifying glass, 2 gems, coupon book, battery pack
  • Coin purse - car keys, coupon book, 2 dies, compass
  • Coupon Book - Compass, magnifying glass, car keys, 2 ivory dice, coin purse
  • Cursed Effigy - Allowance token
  • Detector Shovel - hallpass, prism key,
  • Electro Magnet - Gear Wrench
  • Emerald Bracelet - Upgrade disk, allowance token
  • Filing cabinet key - untradable
  • Gear wrench - Prism key, telescope, Secret garden key, lock pick,
  • Hallpass - Silver key, lock pick, gear wrench
  • Jackhammer - 4 ivory die
  • Keycard - Silver Key, coupon book, 3 ivory dice, car keys, 2 gems, lucky rabbit's foot, compass
  • Knight's shield - Silver Key, lock pick, keycard, lucky rabbit's foot, running shoes,
  • Lock pick - Keycard, silver key, car key, 1 key, coupon book, metal detector
  • Lucky Purse - Gear wrench
  • Lucky Rabbit foot- Gear wrench, keycard, running shoes, coupon book, lock pick
  • Magnifying glass - 2 gems, salt shaker, sleeping mask, 1 ivory dice, 1 key
  • Master key - 5 ivory die
  • Metal detector - coupon book, lock pick, lucky rabbit's foot, coin purse, running shoes, silver key
  • Moon pendant - Keycard, Car keys,
  • Ornate compass - Upgrade disk, Allowance token,
  • Prism Key - Metal Detector, telescope, lock pick, hallpass, secret garden key, gear wrench, running shoes
  • Powered Electromagnet - secret garden key, hallpass, prism key, gear wrench,
  • Power hammer - hallpass, gear wrench,
  • Rabbit foot - Car keys, 1 key, compass
  • Running shoes - 3 ivory die, coupon book, lock pick, coin purse, car keys
  • Salt shaker - 2 gems, 1 key, magnifying glass, battery pack
  • Secret Garden Key - Gear Wrench, prism key, hallpass
  • Shovel - Car Keys, coupon book, salt, coin purse, compass
  • Silver key - Keycard, 3 ivory dies, lock pick, car keys, 1 key, Coin purse
  • Silver Spoon - Keycard, Car keys,
  • Sledge Hammer - Coin purse, Magnifying Glass, 2 dies, coupon book, car keys, compass
  • Sleeping mask - 2 gems, magnifying glass, 1 ivory dice, 1 key
  • Telescope - 4 dice, silver key,
  • Treasure map - 2 gems
  • Upgrade disk - Gear wrench, prism key, lock pick,
  • Vault key (370) - Car keys
  • Watering can - Hallpass, gear wrench, prism key
  • Wind-up key - car keys, 2 gems

there's also a dynamite in this room on the left side. When blown up (i.e. ignited with a burning glass), you get access to a room with moonshine distallery, 40 coins, and a letter from Denny.


Treasure Trove
Below is a table of memos found in Treasure Trove.

Box Color
Symbol
Memo Color
Memo
Notes
White
Moon
Green
The green memos you find in this room will always be true.
False
Blue
Moon
Blue
The green memos in white boxes are always lies.
True
Blue
Sun
Green
The true treasure of the trove is not in the house
True
White
Waves
Red (handwritten)
The previous box in this room contained a true statement.
True
White
Waves
Green
Two Realms have the same color banner
False
Black
Moon
Green
Boxes marked with Moon always contain false statements.
False
White
Wave
Red
The True treasure of the trove is not in this room
False
Black
Sun
Blue
All boxes marked by sun contain memos that are true
True
Blue
Moon
Green
Pink boxes marked with moon always contain false statements
True
Red
Moon
Green (handwritten)
There is no realm that flies the white flag.
False, but True for a different color.
Red
Wave
Red
The Previous box in this room contained a true statement
False
Black
Sun
Green
You will need a key to obtain the true treasure of the trove
True
Blue
Moon
Blue
Blue boxes marked by wave contain false statements.
True
White
Wave
Red
Green memos in blue boxes are sometime false
False
Blue
moon
Green
Fenn Aries Borders a poetric realm
True
White
Wave
Green
It never rains in arch aries
False
White
Sun
Blue
Green memos in pink boxes are always false.
True
Pink
Moon
Green
You have seen all the memos that appear in this room
False
Blue
Sun
Blue
The next four boxes marked by moon contain false statements.
True
Red
Wave
Green (handwritten)
Red memos in blue boxes are always true.
False
Black
Sun
Blue
Handwritten green memos are always false, but would be true if you changed one color in the text.
True
White
Wave
Green (handwritten)
The next three green memos you find in this room will all be true.
False, but true for blue memos
Black
Moon
Green
As you have always suspected, there is more to the den than meets the eye.
False
White
Moon
Blue
The symbol infinity is used to denote the unknown, death, and the number 8.
This should be true because it's a blue memo, but it's in a moon box, which should be false based on the second-to-last blue memo?
White
Moon
Green
There are three memos with false statements in the clock tower.
False
Red
Wave
Green
The true treasure of the trove is in the house.
False
Red
Wave
Red
No realm is considered spiritual.
False
White
Moon
Red
The last door of 8 is in the inner sanctum.
False
Red
Moon
Green
There is an antechamber lever hidden in the drawing room.
False
White
Wave
Blue
The baron began and ended his travels in the same realm.
True
Black
Moon
Red
Nuance is known to be a peaceful realm
False
Blue
Moon
Red (handwritten)
The sacred hour is not technically "on the hour"
True
Blue
Moon
Blue
The power must shift to perform the ritual of castling
True
Black
Wave
Green (handwritten)
The family core can be found in a red room with a 5-letter name.
False, but swap red with blue and it will be true (Vault)
White
Wave
Red
Calendars never hide important dates.
False
Red
Sun
Blue
Yenna Means both rain and ruler in Erajan
True
Black
Sun
Green
There are secrets in the rooms you drain.
True
Black
Moon
Green
You must don the mantle of the knight to perform the ritual of castling.
False
White
Moon
Green
The previous box in this room contained a true statement.
False
Blue
Moon
Blue
Page six of "A New Clue" hides a secret.
True
Red
Sun
Blue
Ein means dreams in Erajan
True
White
Wave
Green (handwritten)
A secret door lies hidden in the red house.
False, but true for greenhouse
Black
Sun
Green
The true treasure of the trove is in this room but is not in the house
True
Red
Wave
Red (handwritten)
The monk waits beyond the second chamber.
True
Blue
Moon
Green
The last train has left the station.
?
Black
Wave
Blue
You have seen all the memos that appear in this room.
True, I believe it just randomly chooses an old box after this.
Underpass
The underpass is the section that can be accessed behind the rotating gears of the underground section.


This location leads to the inner sanctum, there's also a little nook (on the right) that leads you to a red door. To open the door, you would need to power the red box in the boiler room.


This red door will lead to the upper level of the rotating gear. There are two paths, on the left it leads you to a locked gate where you can get red letter 1 (see red letter section for code) as well as a view of the black castle and a clipboard.


On the right path, you can see a hint about the water levels in the reservoir as well as another clipboard.


Interestingly, the rivets on the structural ring in the underpass do not seem to be uniform. There might be a hidden message here? I've created a table below, each ring has 8 positions where a rivet can be on both the front side and backside (e.g., B3 means backside, 3rd position from the left).
Row
Front (F)
Back (B)
Note
1
1111 1111
0000 0000
entrance to the underpass
2
1111 1111
1111 1111
between ring 1 and 2 has a light fixture
3
1111 1111
1111 1111
-
4
1010 1111
1111 0101
-
5
1111 0111
1110 1111
F3 and B6 are discolored
6
1111 0111
1110 1111
between ring 5&6 is a light fixture
7
1101 1111
1110 1011
F6 no rivet but is discolored, between ring 7-8 there's a side path to red room
8
0110 1111
1111 0110
B5 no rivet but is discolored
9
1110 0111
1110 0111
B5 no rivet but is discolored
10
1111 1011
1101 1111
B3 no rivet but is discolored
11
1110 1111
1111 0111
B5 no rivet but is discolored
12
1111 1111
1111 1111
there's a light fixture between 11&12
13
1111 1111
1111 1111
-
14
1111 0111
1110 1111
-
15
1100 1111
1111 0011
-
16
1110 0111
1110 0111
-
17
1111 1011
1101 1111
-
18
1001 1011
1101 1001
light fixture between 18&19
19
0111 1011
1101 1110
-
20
1101 1111
1111 1011
-
21
1111 1111
1111 1111
-
22
0111 0111
1110 1110
-
23
1111 0111
1110 1111
last ring before the inner sanctum

Note also that the corner rivets (B1 and B8) on the backside are marked slightly differently
Workshop
Note you can find music sheet 8 on the table (see music sheet puzzle for details)


Workshop contraptions
  • Burning Glass = Magnifying Glass + Metal Detector -> Can ignite certain surface and light candles.
  • Detector Shovel = Shovel + Metal Detector -> Greater chance of finding Coins and Keys. Much greater chance of finding Coins and Keys while digging.
  • Dowsing Rod = Shovel + Compass -> While drafting, points toward rooms that may contain more items than usual.
  • Electromagnet = Compass + Battery Pack -> You are more likely to draft Mechanical Rooms while drafting. Automatically collects Coins and Keys when entering a room.
  • Jack Hammer = Shovel + Battery Pack + Broken Lever -> Vastly increased rewards from mining Dig Spots.
  • Lucky Purse = Coin Purse + Rabbit's Foot -> Doubles the amount of Coins gained.
  • Pick Sound Amplifier = Lockpick + Metal Detector -> Has a greater chance of picking high sensitivity locks.
  • Power Hammer = Sledgehammer + Battery Pack + Broken Lever -> A stronger Sledgehammer that can also knock down weak brick walls.
Music sheets puzzle
There are a total of 8 music sheet which can be found in the following rooms
  • Music Room — Pages 1, 2, 3 and 4
  • Green House — Page 5
  • Ballroom — Pages 6 and 7
  • Workshop — Page 8


When examining the sheets closer you can notice that each sheet contains a bolded word. Piecing them together, you get the phrase:

"First words on the sheets are true message"

Taking the first word in each music sheet you get another phrase:

"Find among the white trees under two stones"

There is a location behind the campsite with two stones surrounded by a bunch of white bark trees. Digging this spot with a shovel will reveal a hidden conservatory blueprint.
A New Clue puzzle
A new clue is a book written by Marion Marigold (see full book in Mount Holly Library)

Microchip location
On one of the pages, you notice faint numbers next to some of the words
Using a magnifying glass, you are able to see the numbers more clearly. Putting the words next to the numbers in order, it spells out the sentence: "all checked corner case rooms, had a low case clue found in the rooms."

This message is a hint at another page with a list of corner rooms with checks next to them. Specifically, Patio, Nook, Office, Pantry.

Looking through the notes in each room, you will find words that are written in lowercase. Putting them all together, you get the message "Buried Beside West Bridge". Using a shovel by the bridge connecting to the outer room, you are able to find one of the microchips.

Blackbridge Admins
On one of the pages in the book, there's a list of names with ages next to them.

There's also a blue note on one of the pages with the message "The suspect is minor"

Combining these clues, three names pop out:
  • Bo Lee, Age 16
  • Sandra Dillon, Age 14
  • Richard Scott, Age 12

When using these names in the Blackbridge terminal using the admin key format (see BlackBridge section), you are able to access specific admin logs.

Train route
The first clue On one of the pages, there's a message, "seen all the signs?". There are signs found throughout the book; collecting them together, you get the following.
In the safehouse, there's a map of the metro. Following the instructions from above with the map, you get the following path through the stations. We will keep this in mind for later.
  • 8 - Royal Station
  • 7 - Angel Tower
  • 3 - Aries Crossing
  • 10 - Tanner Fork
  • 1 - Oris Train Hall
  • 13 - Dead End.
Note that a similar hint can be found in one of the recordings in the home surveillance system (see Security section)

Word search
There are three clues you need a magnifying glass to find:
Clue #1
The color refers to the book titles found earlier in "A New Clue" (i.e. clue #3).

Clue #2
The train station number found above can be used to map "x->y->z->a->b->c" to "8->7->3->10->1->13"
Clue #3
These titles can be rearranged to review their true title.

  • Tender Cipher -> Red Prince
  • Lunar Renamed -> Realm and Rune
  • Uncle Awe -> A New Clue
  • Draft the Sixes -> The fixed Stars


Putting it together, you get:
  • Red Page A Word X -> Red Prince Page 10 Word 8 -> Turn
  • Green Page C Word A -> Realm and Rune Page 13 Word 10 -> Scorched
  • Violet Page B Word Y -> A New Clue Page 1 Word 7 -> Sundial
  • Blue Page Z Word X -> The fixed Stars Page 3 Word 8 -> Base

"Turn Scorched Sundial Base".

The message here is telling you to burn the base of the sundial in the orchard. This can be done with a burning glass and when done so the base is able to rotate. Aligning all the grooves in the base will open up slots to insert the microchip. Inserting the chips from the Blackbridge grotto will activate the satellite dish.

This dish allows you to gain access to advanced experiments done in the laboratory, as well as additional staff announcements in the terminals.
Chess puzzle
In various rooms within the manor, sometimes you encounter a chess piece. Below is a list of chess pieces found in each room.

Chess rooms
Pawn Rooms
  • Bedroom
  • Bunk Room
  • Den
  • Dining Room
  • Drawing Room
  • Drafting Studio
  • Freezer
  • Guest Room
  • Lost and Found
  • Nursery
  • Parlor
  • Secret Passage
  • Solarium
  • Storeroom
  • Walk-In Closet

Rook Rooms
  • Clock Tower
  • Conservatory
  • Nook
  • Vault

Knight Rooms
  • Armoury
  • Observatory
  • Security
  • Treasure Trove

Bishop Rooms
  • Attic
  • Bishop
  • Bookshop
  • Chapel

Queen Rooms
  • Her Ladyship's Chamber
  • Study

King Rooms
  • Office
  • Throne

Within the Precipice, there's a room with a chessboard in the shape of the manor and 6 pieces lying next to it. To solve this puzzle, you would need to activate each chess piece by placing them on the board corresponding to a room within a manor that you have the corresponding piece in.

For example, if you placed an office (which contains a king piece) in the top right corner of the manor, then placing the king on the chessboard in the same position will light it up.


Once all pieces are activated, the wall in the back opens up, revealing large chess pieces. You are able to obtain the power of one of the chess pieces, the powers are listed below.

  • Pawn: When you reach Rank 8 each day, you may choose Knight, Bishop, Rook or Queen. Gain the power of that piece until the end of the day.
  • Knight: Add the Armory to your draft pool.
  • Queen: Each time you draft a room on the Queenside (West Wing) of your house, lose 5 steps and gain 1 key.
  • King: Each day, you may choose a color. Rooms of the chosen color are more likely to be drawn while drafting.
  • Bishop: You do not have to pay tithes. Instead, gain 30 gold the first time you enter the Chapel each day with this power.
  • Rook: You may draw floor plans up to 4 times when drafting the 4 corner rooms of your house.

Once obtained, you are able to keep the power permanently, unless you want to switch to a different piece you will have to reactivate the board again on a different day.

This room also leads you to a secret hidden room Unknown (see unknown section for more detail)


CASTLE puzzle

In the precipice (an underground area accessible once you light the four blue flames) there's a room with chess pieces. There's a crack on the left side of the room that can be broken with the power hammer, revealing the image below


Around various parts of the manor, you can also see various letter markings

Kennel

Secret Passage - behind

Cloister - behind the statue of

Locker room - in one of the lockers

Vault - in safety box 149

BlackBridge

Grade 7 Classroom (thanks to Каспей on the Blue Prince discord)


If we stack all these letters on top of each other, we get the following.


This is part of the clue needed to solve puzzle for the the Royal Scepter (see section)

Angels puzzle
Throughout the manor, you see references to 8 angles. Each angel has a name and holds a particular object which we are able to pair by finding clues from various locations (Drafting strategy book, statuses throughout, notes, etc)

In the Tomb, there are statues of these angels with movable arms. By moving each angel's arm in a certain order, you are able to access a couple of secret areas. There are two numerical orders for these angels. One can be found by looking at the stained glass windows in the chapel (see the chapel section for more details). The other order is from Herbert's will found behind the map in the 46th room. (thanks to @spookybroom for the tip!)

The table below shows the angel's name, item, and orders.

Name
Item
Chaple Numbers
Order in the Will
Notes
Rynna
Hoe
1
3
Found in the gardener's logbook in the orchard
Veia
Duster
4
6
Name is found in the Drafting Strategy Vol. 5
Draxus
a scythe
8
8
Name is found in the Drafting Strategy Vol. 5
Mila
Broom
5
7
Statue can be found in the maid's chamber or Lost and Found (see sections)
Lydia
horse whip
6
2
Name is found in the Drafting Strategy Vol. 1 (require magnifying glass)
Joya
pizza peel
2
4
Found on the lunch box, from the gift shop
Dauja
pitch fork
3
5
Name is found in the Drafting Strategy Vol. 1 (require magnifying glass)
Orinda
staff
7
1
The Orindia stamp shows her with a staff
Credit to Lu for some of the details.
Note that all the names can also be discovered through upgrading the Cloister (see section) to their specific angel variant.

When activating Draxius (in the catacomb), you either open up a passage to the abandoned mine (using the chapel order) or to the original manuscript of the red prince and the new clue (using the order in the will)


Paired Painting puzzle
In each room of the manor (besides the antechamber, outer room, and 46th room), you are able to find 2 paintings. The painting depicts objects where one is an exact spelling of another with an additional letter. For example, a stage is a stag with an extra e.

If you were to record each letter in the 44 rooms, it spells out the message. IF WE COUNT SMALL GATES EIGHT DATES CRACK EIGHT SAFES

This is a clue to the locked safe boxes you can find throughout the manor.

Minor note: the foundation also has a pair of paintings, but you need to take the elevator shaft down below to find it.
Royal Scepter puzzle
To access the royal scepter you will need to activate the King's power followed by the Rook's power or visa versa (see chess puzzle for more detail on how to activate the pieces). This swaps the two pieces performs the casting move in chess which reveal a hidden corridor to the Unknown room.


In the center of the room is a coffin and surrounded by statues holding Mora Jai Boxes. And a portrait of an old man in the back.


When solved, each box contains a cryptic note.


The hint implies that you need to go back to this crypt at 1:30 (sacred hour) without any items or resources (empty arms without gifts nor gold nor mannered charms) and with the southern cross installation activate from the observatory (a sullen cross as five stars align)

Once all the conditions are met the crypt rises up to reveal an adjustable clock.


Using the clues from the CASTLE puzzle (see section) you would know to set the clock to 1:09 (CIX=109 in roman numeral) then to 1:15 (ADD SIX) and finally rotate counter-clockwise (TOR in Erajan) the minute hand to the word east (LOR ETT in Erajan)

This will reveal the Key of Aries.


This Key can then be used to open the treasure trove chest, revealing the royal scepter

This item is needed for the Throne room (see section for more details)

Interestingly, each color has its own symbol.

If you ever lose the scepter, you can find it back in the treasure trove


Blue Room
At the southern end of the grounds, there's a dark tunnel. This tunnel can be lit up (with a burning glass) to reveal the tunnel floor plan. The rest of the tunnel is blocked by crates. Later on, you also gain access to an advanced experiment in the laboratory (see laboratory section) that allows you to remove one crate from the tunnel. If this experiment is conducted multiple times, it will reveal an entrance to a door.

Opening the door with a regular key reveals a basement door.
Opening the basement door with a basement key reveals a keycard door.
Opening the keycard door with a keycard reveals a room with a breakable wall to the right.

Breaking the breakable wall with a power hammer reveals a steam-powered door.
Opening the steam-powered door by providing power to the red box in the boiler room (see the boiler room section) reveals two lightable candles. (Note this door does not stay unlocked and will always require the red box powered in the boiler room in order to stay open.)


Lighting the candles with a burning glass will reveal a room with microchip slots
Inserting the microchips from Blackbridge Grotto (or the sundial) will reveal the blue door. (Note for some reason the chips do not stay on this pedistal it resets to the blackbridge grotto the following day for me)

To open the blue door, you must first reclaim the throne room (see the throne room section), then draft 8 blueprints consecutively to unseal this door.

In the blue room are three parlor boxes.

The left contains a copy of The Blue Prince; see Mount Holly Library to read the book.


The one in the middle is empty.


Opening the one on the right shows a cutscene of a disappointed Simon opening the empty box.


Note there's an unusual spiral within the box.


Also if you are curious, opening all three boxes on the same day did not do anything special. Believe me, I tried...
Atelier
Below is the secret cipher found from Vault 53 (see vault section)

PIGS
SAND
MAIL
DATE
HEAD
CLAM
PEAK
HEAT
JOYA
WELL
TOAD
CARD
WILL
TAPE
LEGS
TREE
ROAD
MAID
SLAB
ROCK
HAND
VASE
SAFE
CLAY
TOES

Converting each letter to a number using alphabetic order (A=1, B=2, ...) then applying the numeric core algorithm (see hidden letter from abandoned mine) we get the following numbers. (Note that we are applying operations left to right not PEMDAS)

16 – 9 ÷ 7 x 19 = 19
19 ÷ 1 - 14 x 4 = 20
13 – 1 x 9 ÷ 12 = 9
4 – 1 x 20 ÷ 5 = 12
8 – 5 ÷ 1 x 4 = 12
3 x 12 ÷ 1 - 13 = 23
16 – 5 x 1 ÷ 11 = 1
8 x 5 ÷ 1 - 20 = 20
10 x 15 ÷ 25 – 1 = 5
23 - 5 * 12 ÷ 12 = 18
20 – 15 ÷ 1 x 4 = 20
3 – 1 x 18 ÷ 4 = 9
23 - 9 x 12 ÷ 12 = 14
20 ÷ 1 – 16 x 5 = 20
12 – 5 ÷ 7 x 19 = 19
20 – 18 x 5 ÷ 5 = 2
18 – 15 ÷ 1 x 4 = 12
13 x 1 – 9 ÷ 4 = 1
19 – 12 ÷ 1 x 2 = 14
18 – 15 ÷ 3 x 11 = 11
8 - 1 x 4 ÷ 14 = 2
22 ÷ 1 – 19 x 5 = 15
19 -1 ÷ 6 x 5 = 15
3 x 12 ÷ 1 - 25 = 11
20 – 15 ÷ 5 x 19 = 19

Converting the number to alphabet using the alphabetic order reveals the following message.
S
T
I
L
L
W
A
T
E
R
T
I
N
T
S
B
L
A
N
K
B
O
O
K
S

This message has two parts. The STILL WATER is referring to the copper still found hidden within the trade post a clue that can be found within the original gardener's logbook.
The BLANK BOOKS is referring to the blank books found in the library. To use this clue, you would need to fill an empty watering can with the water found in the still, then use it on the blank books in the library. Revealing hidden messages in the books.

The next step to this puzzle is hidden in the message "The waters of the west spring shall reveal more secrets than these mere passages." From this text, you get a hint that the next step requires the use of the secret passage. Specifically, you will want to set the outer room to secret passage using the monk's blessing (see section)

Using the distilled water on one of the books, which will turn it from white to blue. I'm not sure if there's a better hint to doing this, as "west spring" seems like a very weak hint to using the secret passage in the outer room with still water. If anyone has a better explanation, please let me know.
Pulling the blue book will reveal the atelier room.


In the center of the room is a letter written by the baroness.

Opening the door at the opposite end will open up the Mount Holly Blueprints (see section)


Mount Holly Blueprints
Beyond the Atelier is the Mount Holly Blueprints, an enormous area that contains a grid of rooms (5 columns and 9 rows). The rooms are separated by corridors, and each face of a room has a colored lantern hanging above it.

Each room contains a mora jai box with a word in it and a pair of paintings. Each room is a replica of one of the rooms in the room directory, covered in blue texture.


A map of each of the rooms, each room is labeled with the name of the room (and its corresponding color), the word in the Mora Jai box (and the color of the Mora Jai box corners), and the associated words for the paired painting. The colored dots represent the lantern, black dots are dead ends.

Collecting all the missing letters from the paintings spells out the following
T
H
E
S
E
V
Y
I
N
G
P
L
A
N
S
F
O
R
G
E
B
A
R
O
N
C
R
E
S
T
A
M
O
N
G
H
E
W
A
M
B
L
E
S
T

Solutions
Solution 1
Collecting each word within the Mora Jai box spells out the following
Through
Lantern
Light
in
Sketches
Cast
A
Tint
Of
Truth
To
Find
Our
Path
A
Hue
Of
Wisdom
To
Turn
Us
Right
A
Shade
Of
Rain
To
Pass
The
Light
Through
Lantern
Light
In
Shadow
Past
We
Seek
What's
Left
Of
The
Lies
We
Cast

Breaking the message down:
> Through lantern light in sketches cast, a tint of truth to find our path.
Start from the blue light (color of true memos)
> A hue of wisdom to turn us right.
Turn right when we encounter orange lanterns (orange is the color of the Mora Jai box where we found the word wisdom, it's also the color of Corarica the academic realm)
> A shade of rain to pass the light through, lantern light in Shadow past.
continue straight "pass" when encountering violet light (one of the planet Veia has the description Dark Shadow, see planetarium, rain is also associated with Eraja, which is violet)
> We seek what's left of the lies we cast.
Turn left when encountering red (lies = red memos) lights.

Following these instructions will lead you to a blue door that was previously where the furnace entrance was.
  • Start from the pantry (on the side with the blue light)
  • Turn left into the gallery
  • Turn right, then into the library
  • Turn left into the observatory
  • Go straight into the music room
  • Turn right into the ballroom
  • Go straight into the spare room
  • Go left until you reach the furnace.

Solution 2
In the safehouse there's a phrase written on a board "we seek what's in the shade of truth". There's also a blue tent memo in the music room: "There is a major key hanging on a wall in the safehouse."

If you look at the blue words from the Mora Jai boxes, we can see that the same words from the safehouse phrase create a path through pantry -> gallery -> Library -> Observatory -> Music Room -> Ballroom -> Spare room -> Furnace, which happens to be the solution to the maze.

Blueprint Gallery
One interesting detail of the gallery in Mount Holly blueprints is that each of the title tiles is prefilled with a letter, spelling out "MOON".

Interestingly, the solutions to the titles are the anagrams of painting letters of the rooms through the 4 paths. For example, if you look at the painting, the letters that make up the correct path it spell out "SWANSONG".
Path
rooms
letters
solutions
Red lights
cloister->gymnasium->archives->pool->vestibule[/td]
M,P,T,Y,E
Empty
Orange lights
cloister->dining room->foundation->archive->chapel->lantern vestibule
M,O,R,T,H,E
Oneself
Purple lights
maid's chambers->drawing room->west wing hall->pasageway->den->pump room->vestibule
L,E,F,O,S,N,E
Oneself
True/Blue path
pantry->gallery->library->observatory->music room->ballroom->spare room->furnace
S,W,A,N,S,O,N,G
Swansong

ROSEWARY
Additionally, if we look at the letters from the rooms named on the Atelier door, it contains the letters for "ROSEWARY," a clue found in the still watered book in the library.

Blueprint 46th Room
Inside, you will find the blueprint version of the 46th room on the desk is a mora jai box that contains the word "blue", and in the map alcove, you will find the will of Baroness.


Komentarzy: 58
Rozza 8 maja o 7:07 
Thank you for this guide!

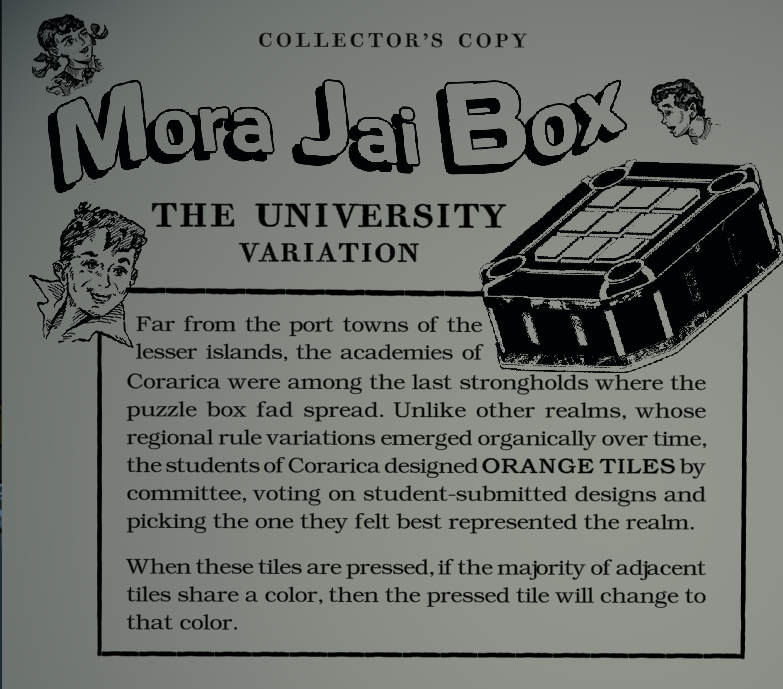
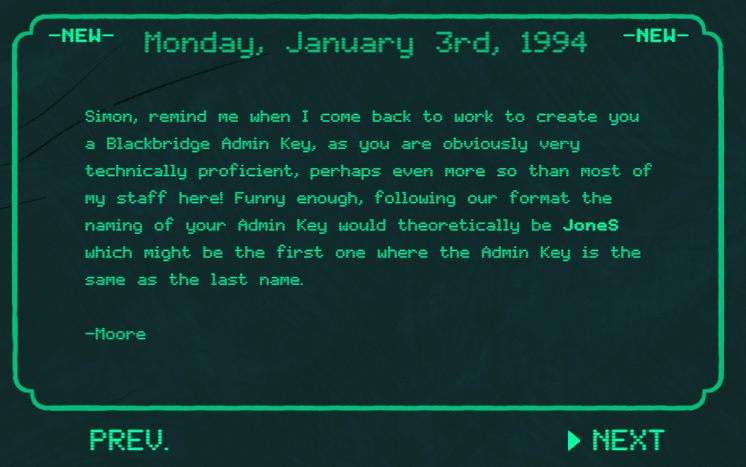
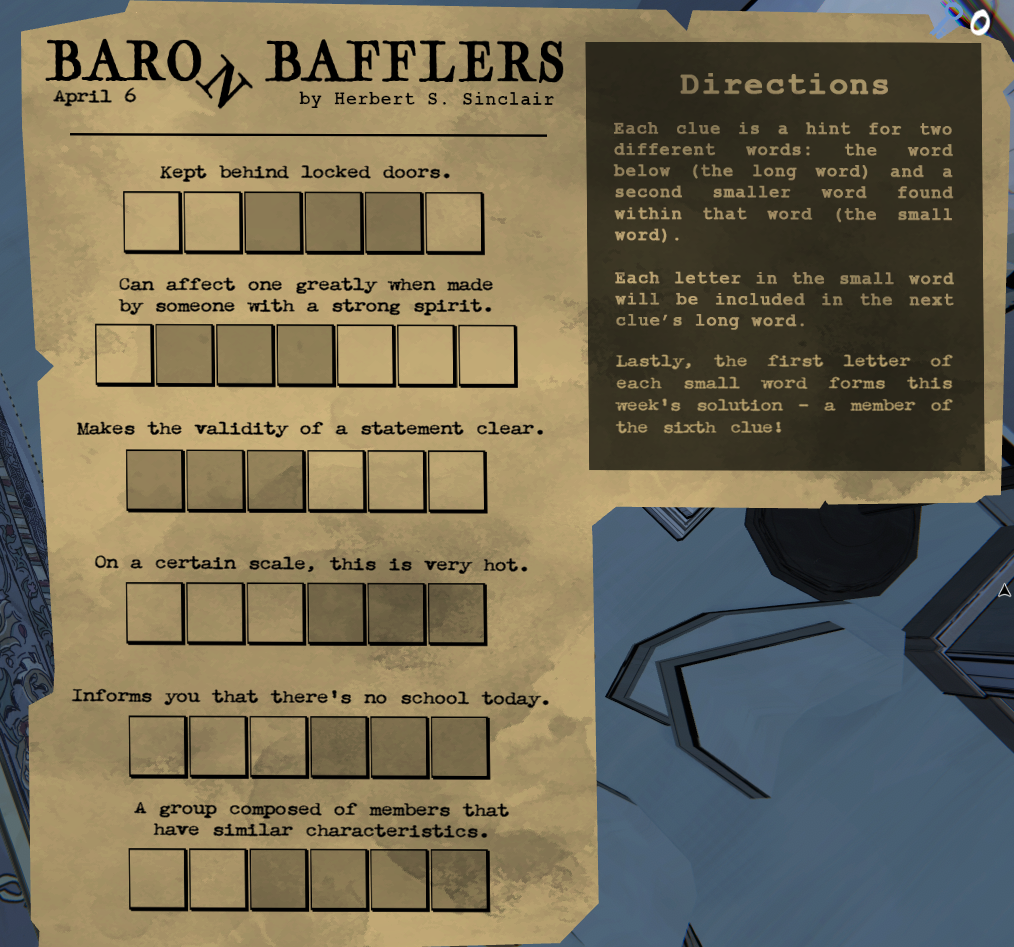
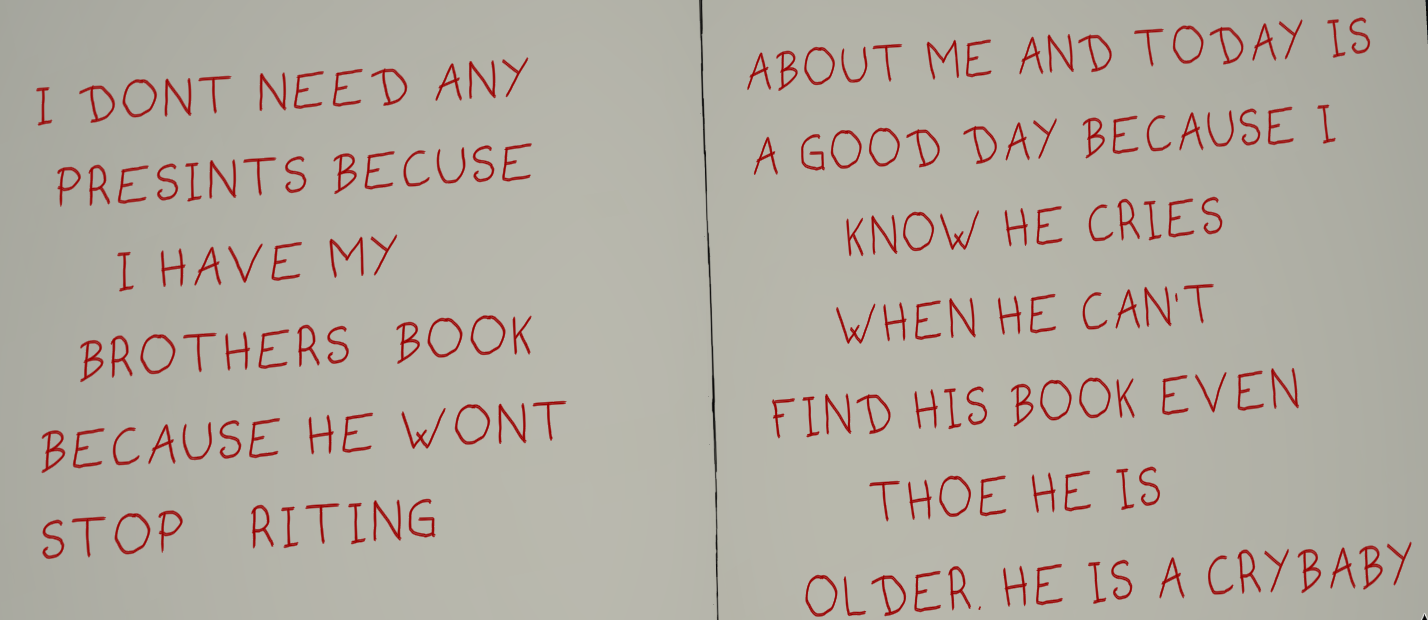
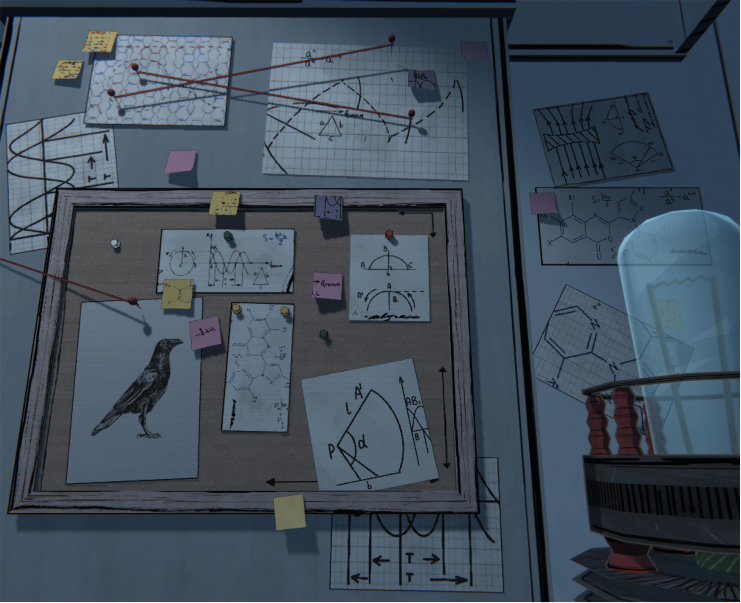
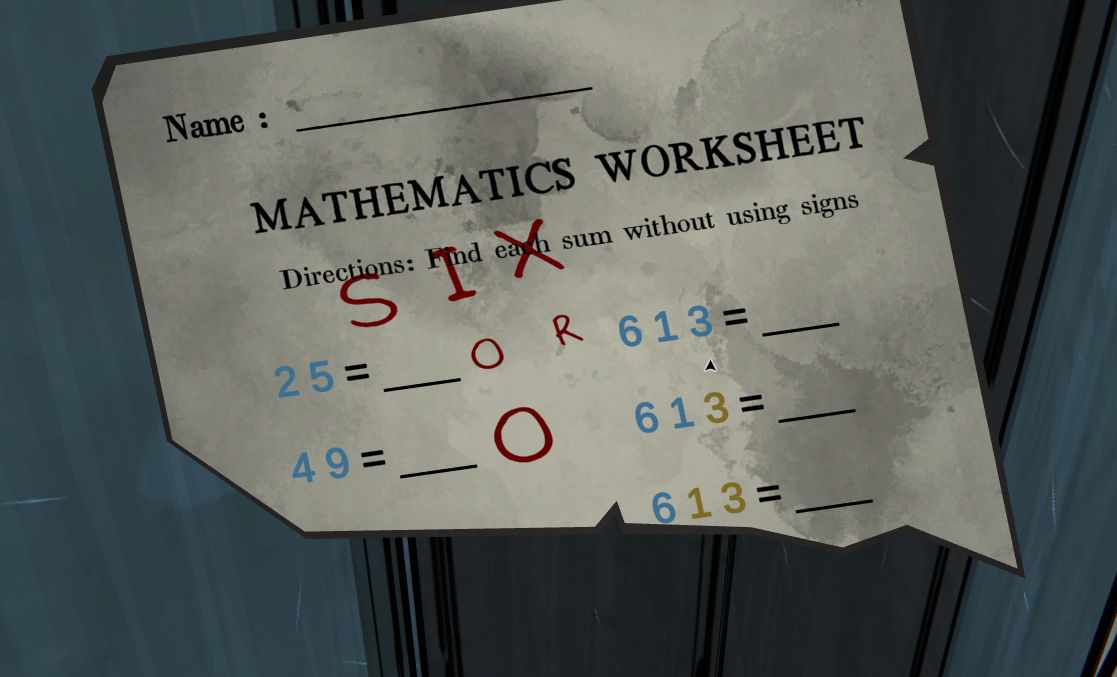
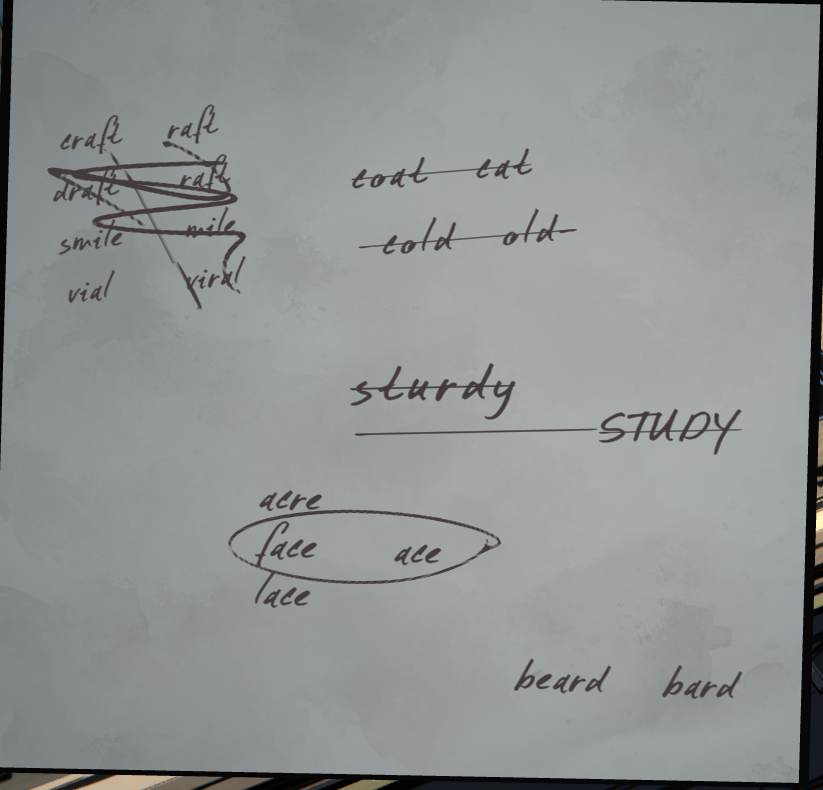
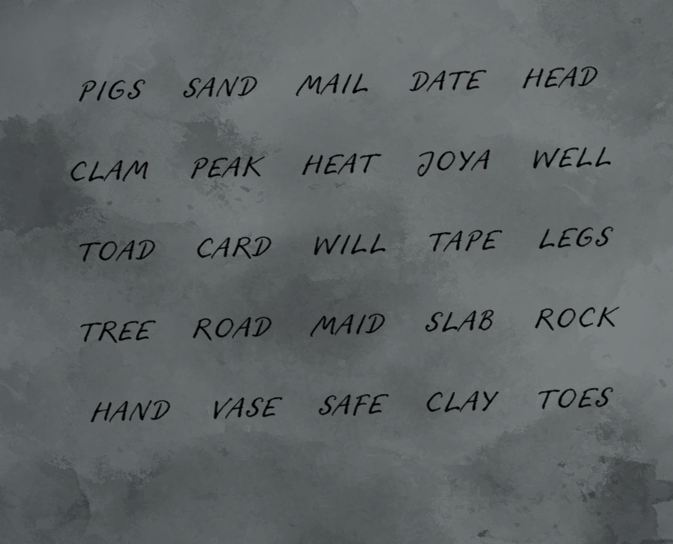
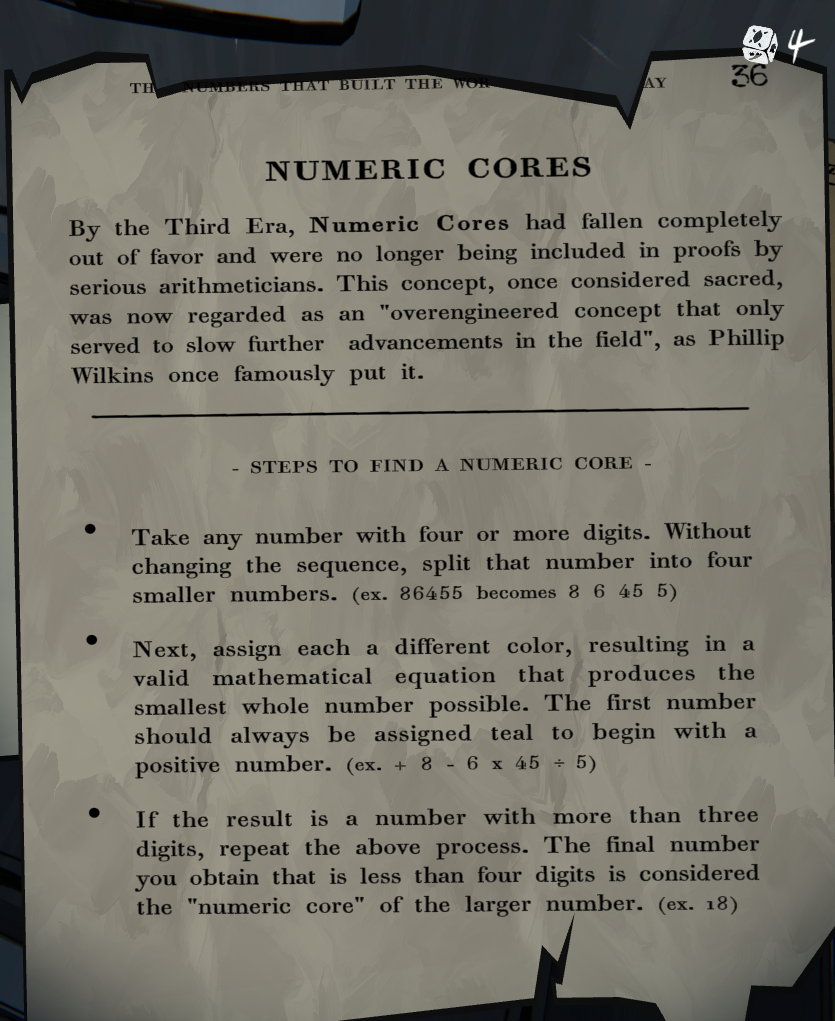
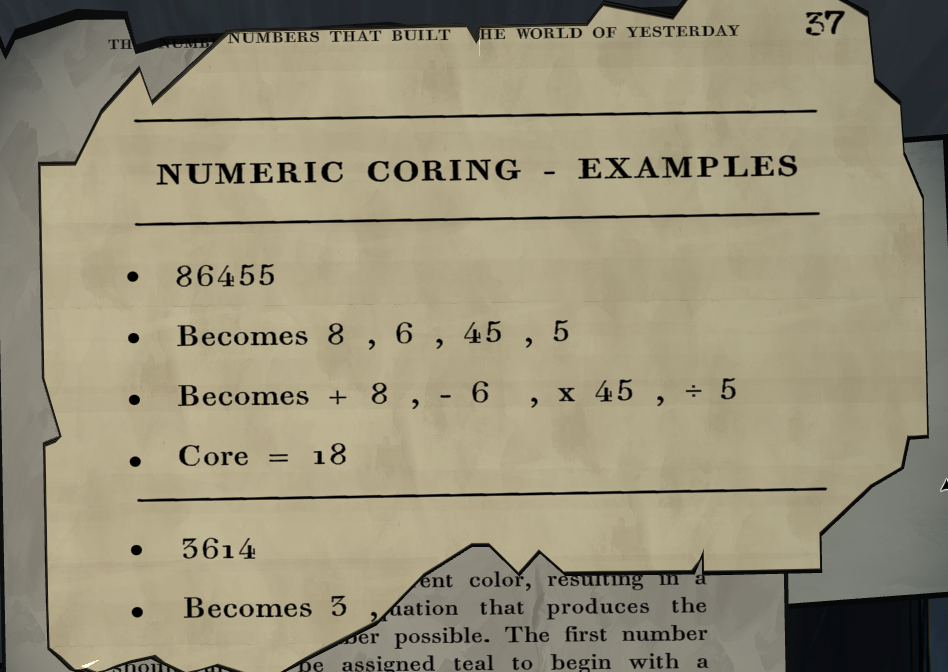
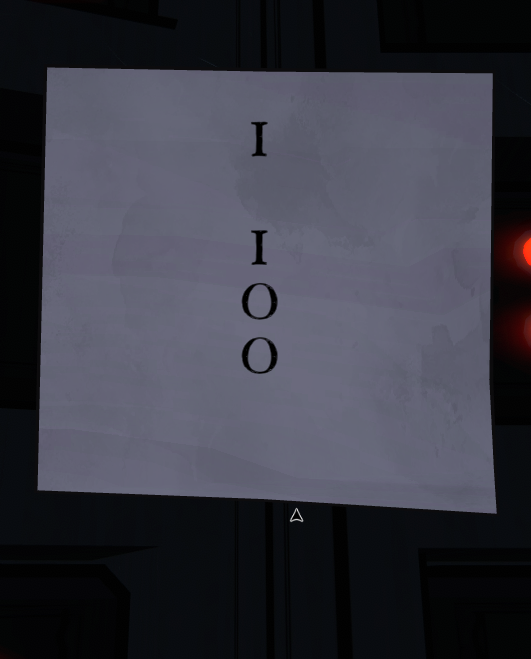
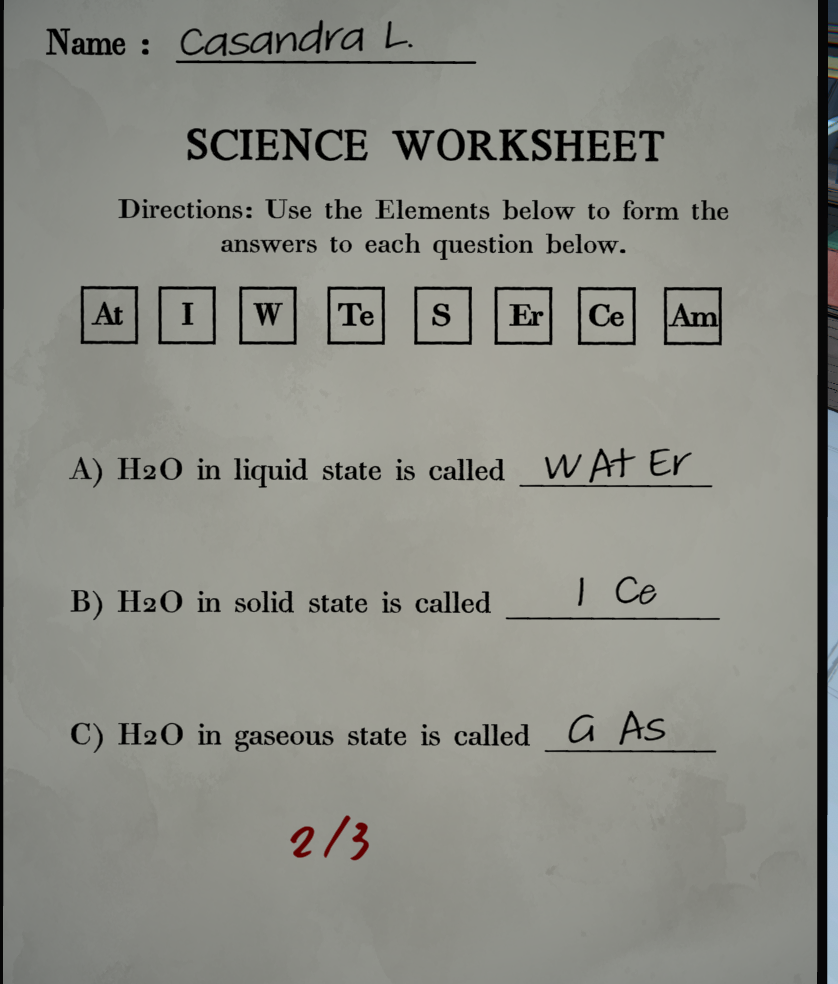
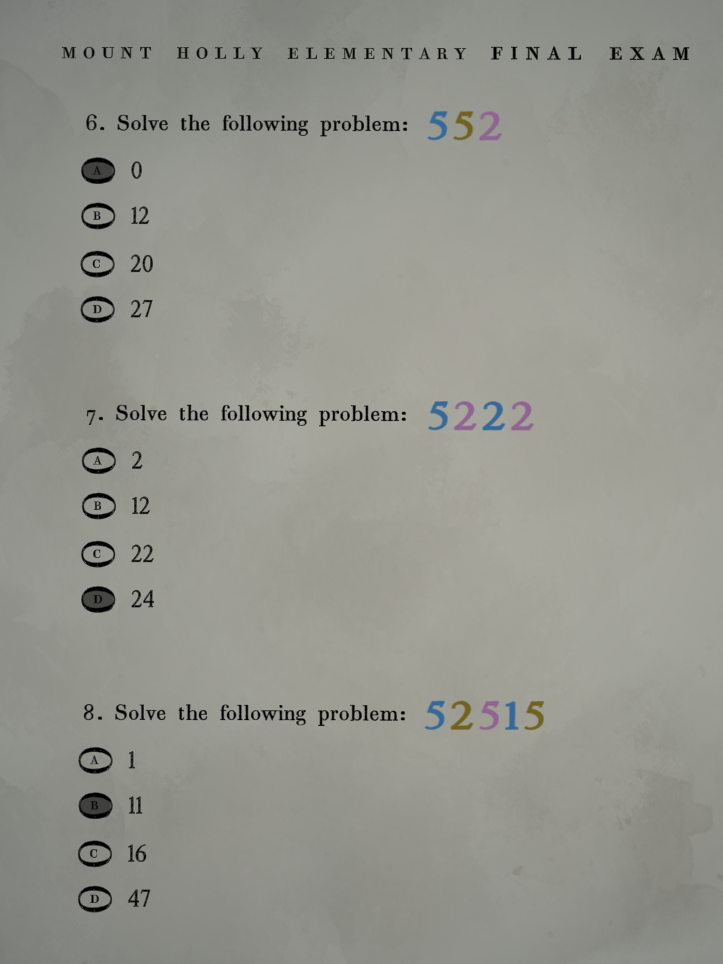
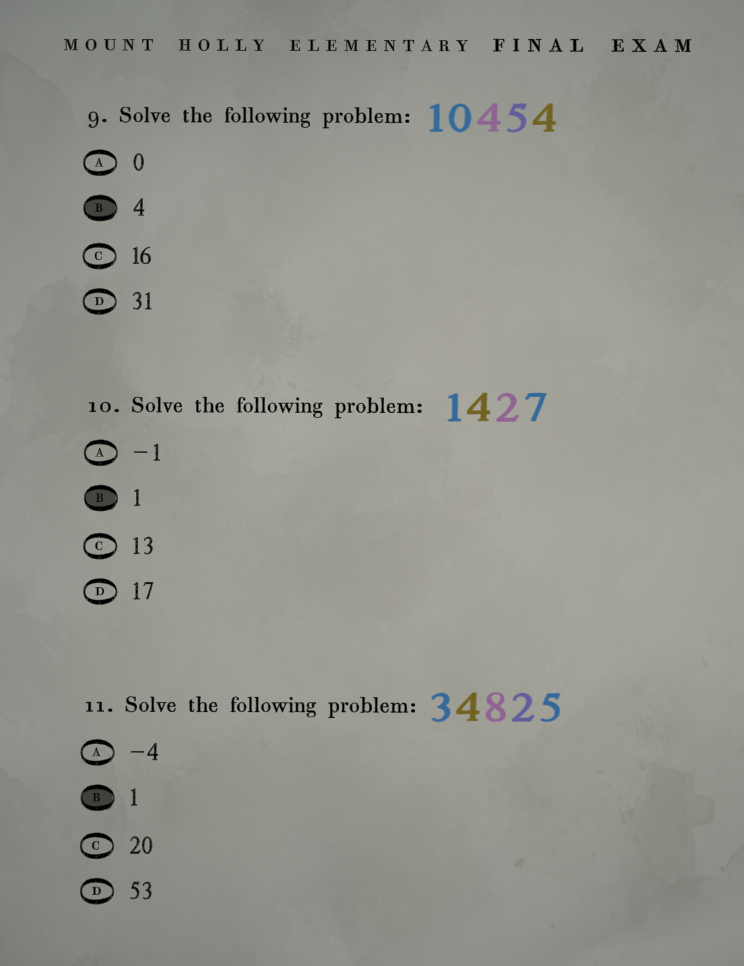
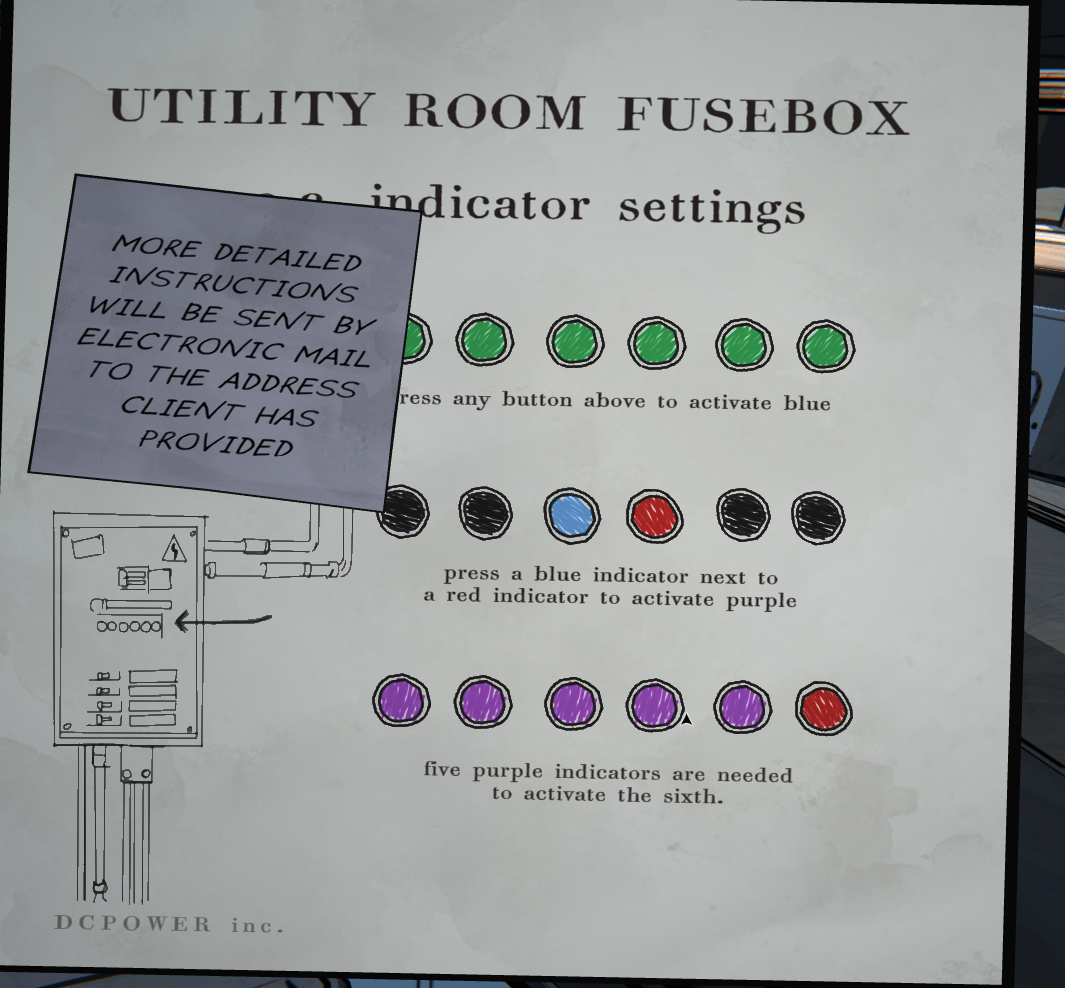
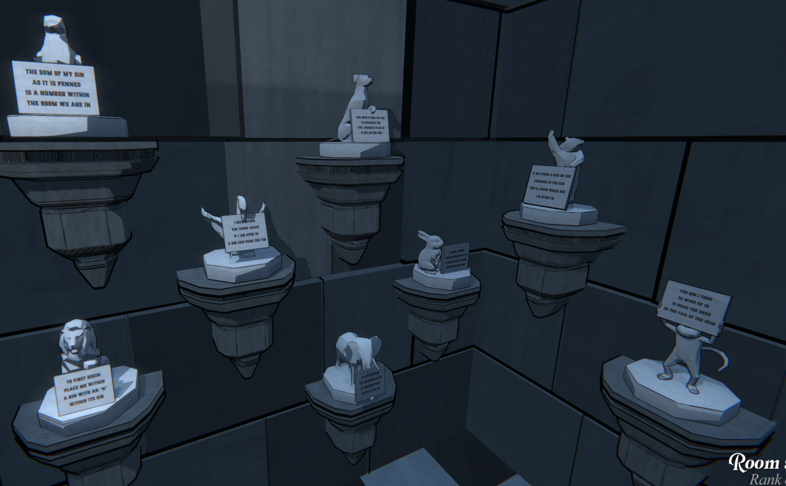
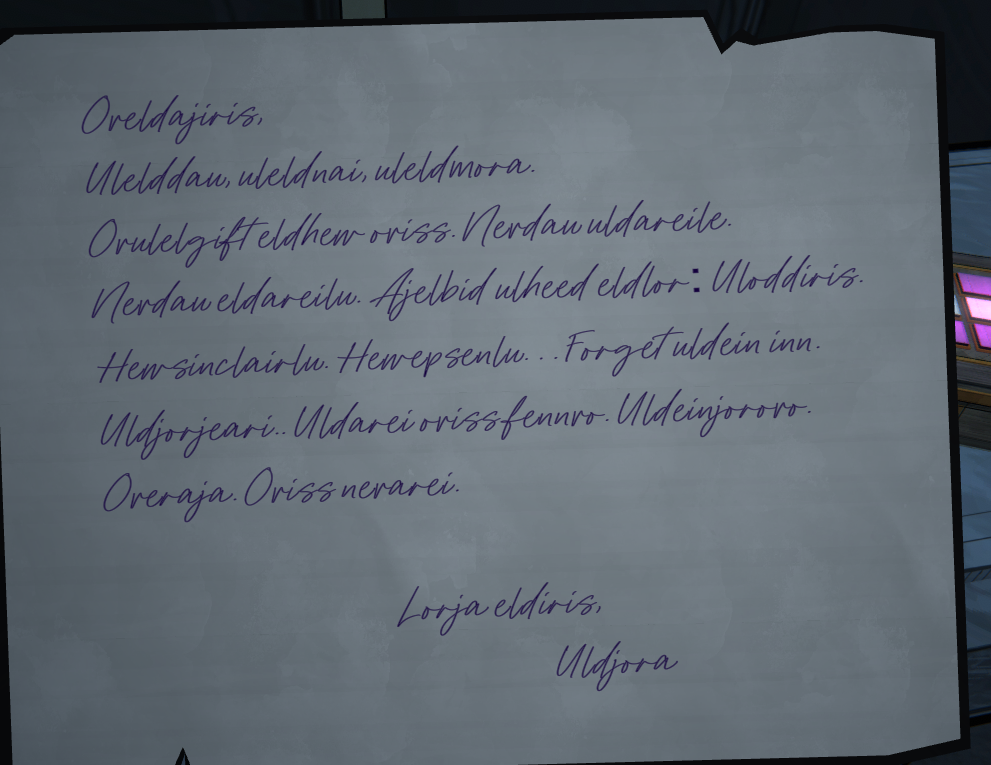
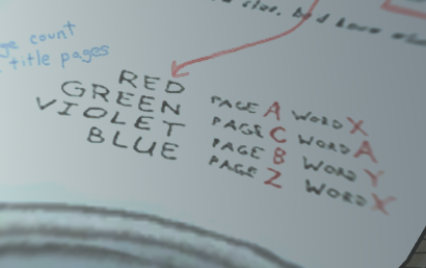
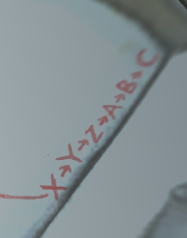
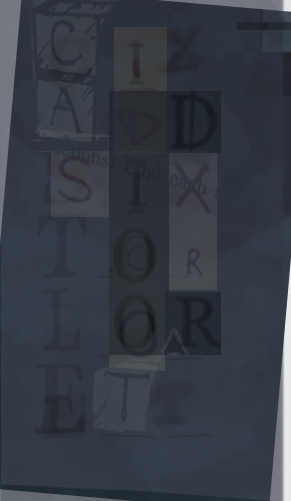
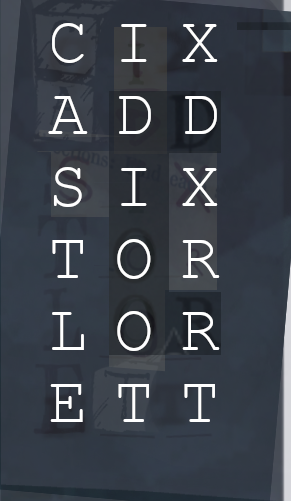
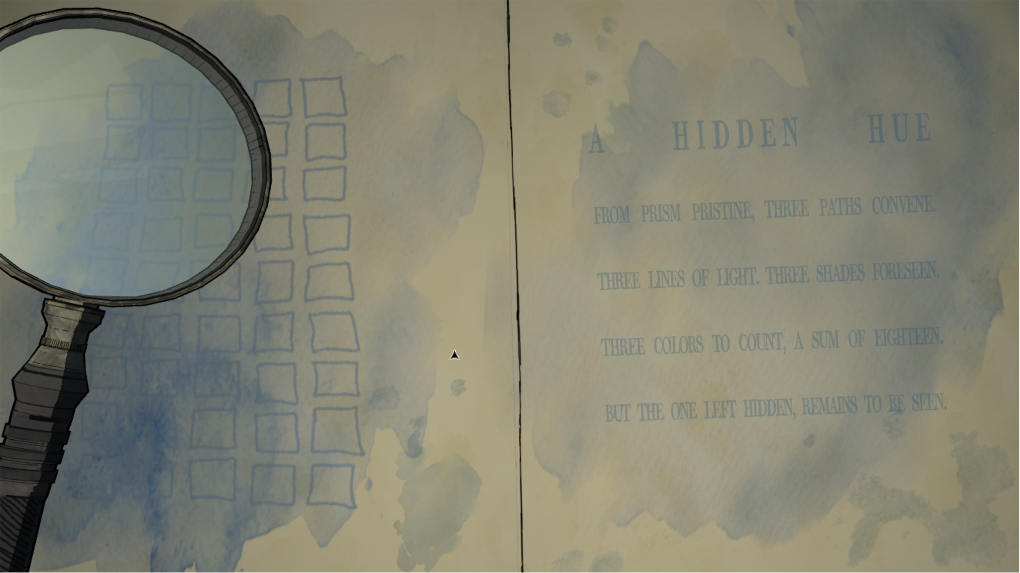
There's a minor mistake in the table you used showing the working for the coring cipher that gives the "STILL WATER TINTS BLANK BOOKS" result .

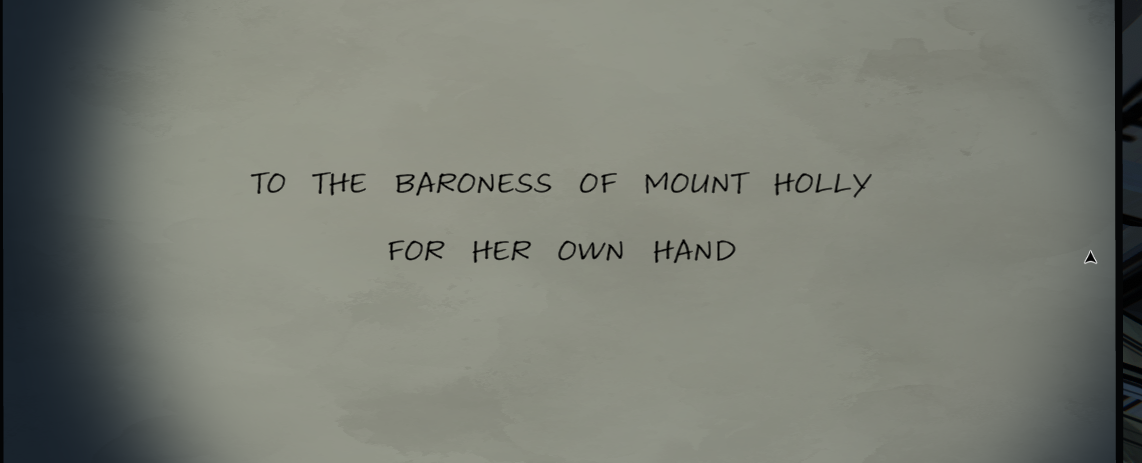
One of the rules is to not re-order numbers/letters, but for the 2nd "B" (in BOOKS) you have re-ordered the letters in HAND to get 2 out (effectively you have HADN).
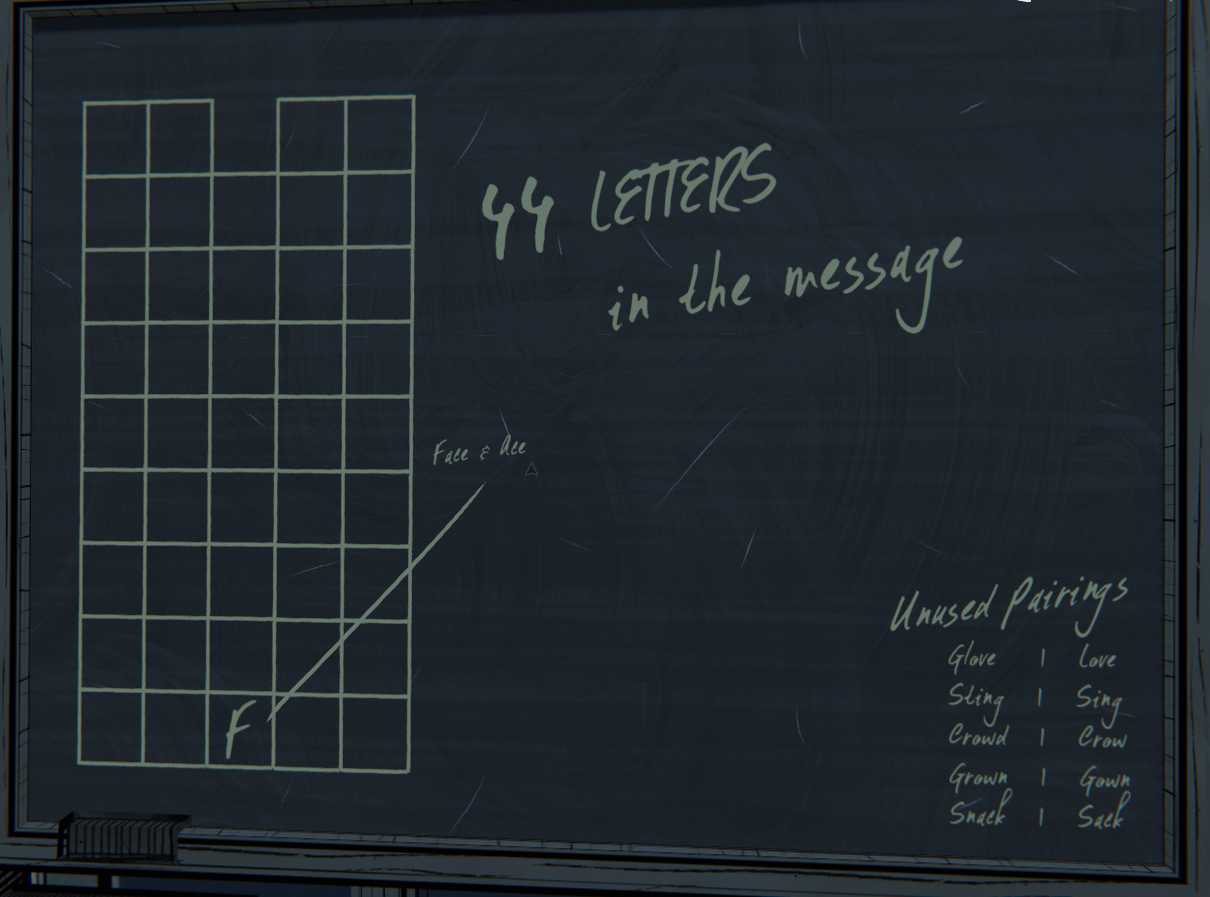
The correct equation I think should be:
+ 8 - 1 / 14 * 4

It maybe feels a bit weird because the divide gives you 0.5 and not a whole number, but the multiplication by 4 brings it back to the land of integers.


It's the same result regardless so it's not a big issue, but could confuse people as it technically breaks the rules.
λℓкøи23 6 maja o 9:35 
Oh @POUIP Feena I got it now indeed, I also thought of lowering the elevator from the inside using some shortcuts, but the repelent seems more useful indeed...

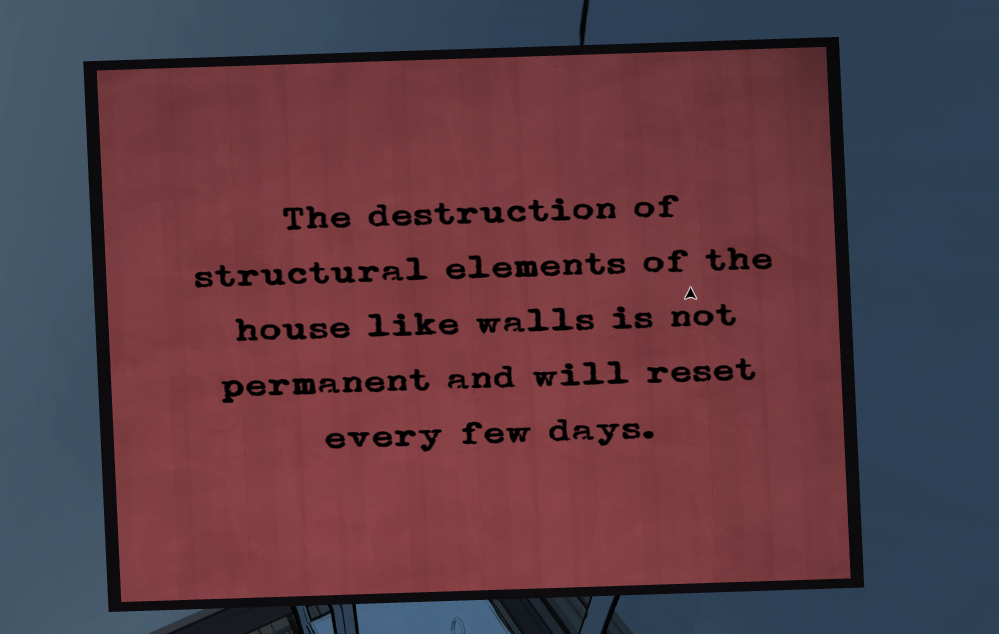
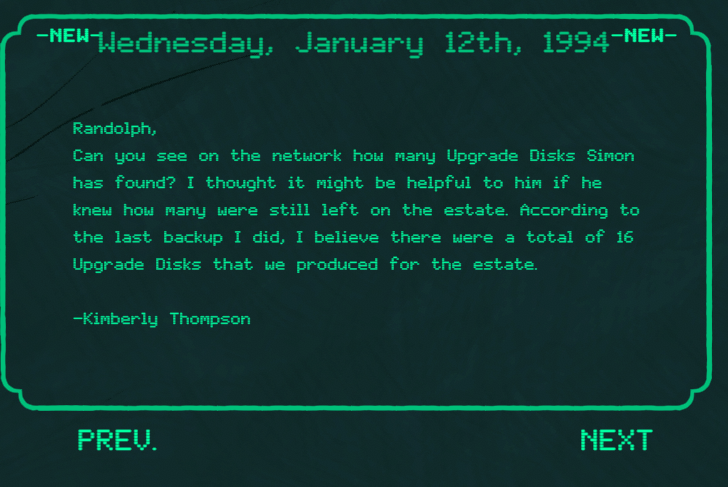
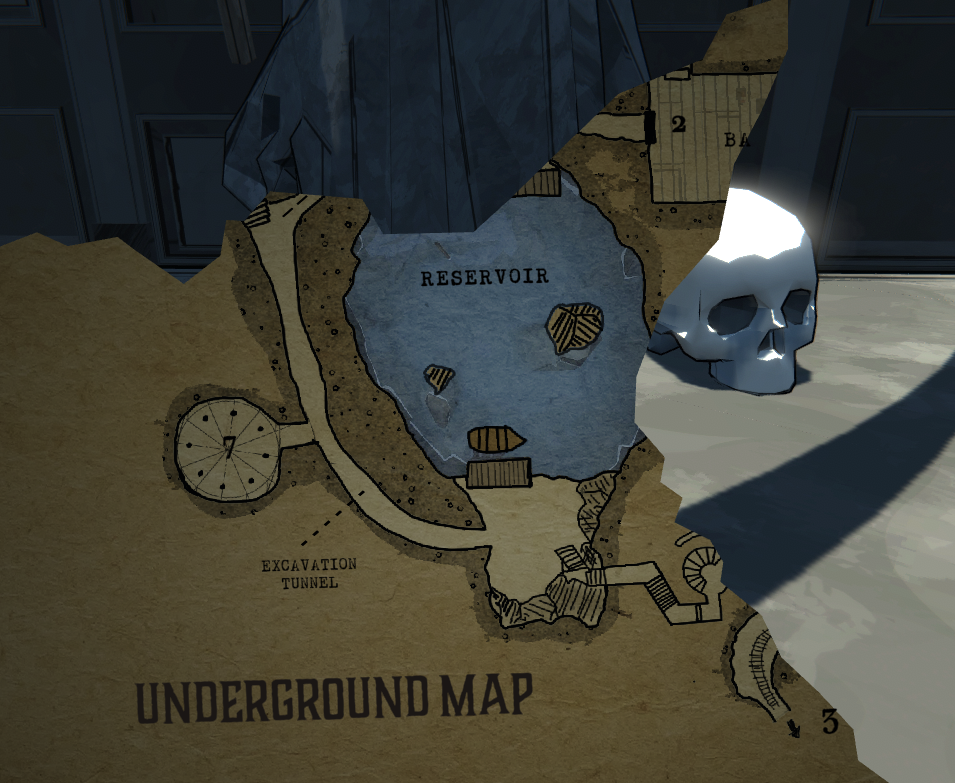
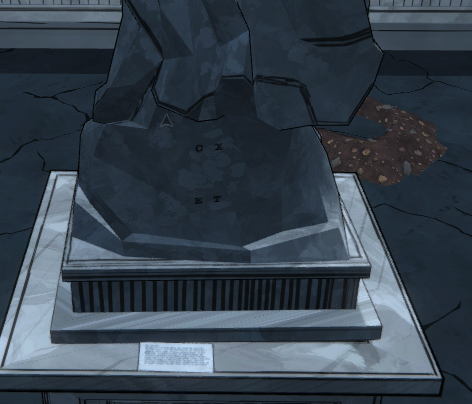
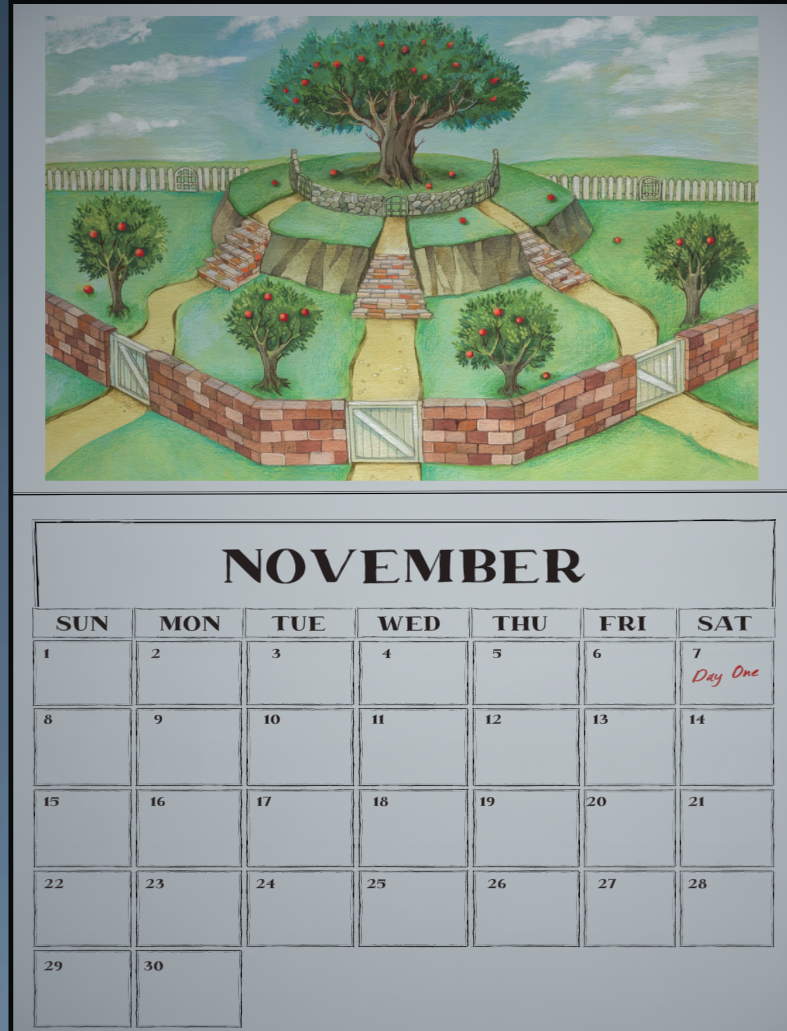
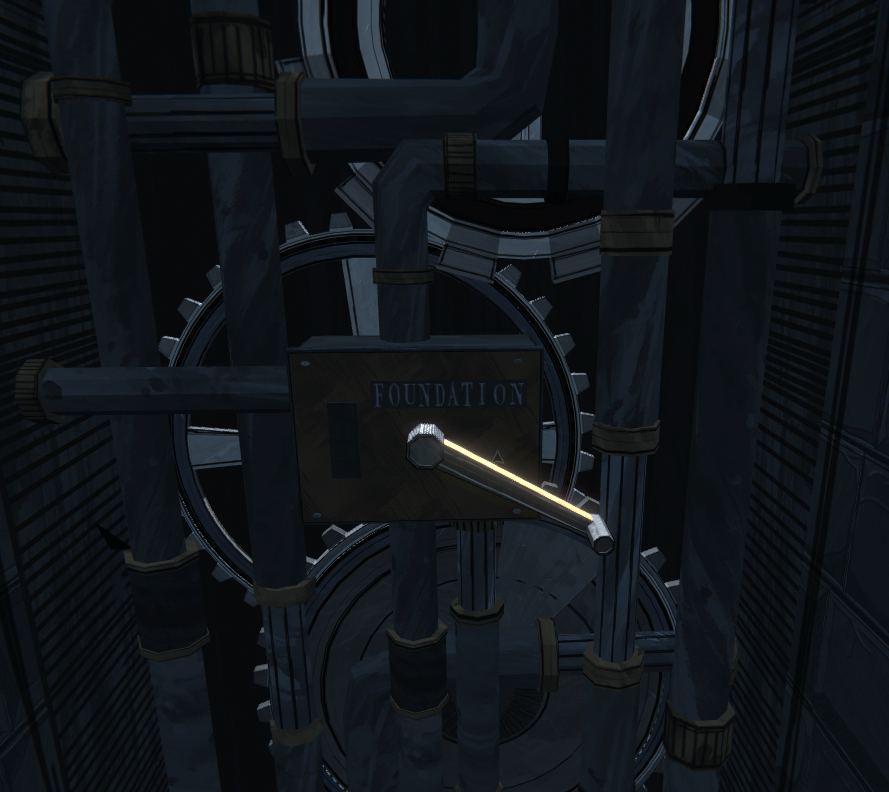
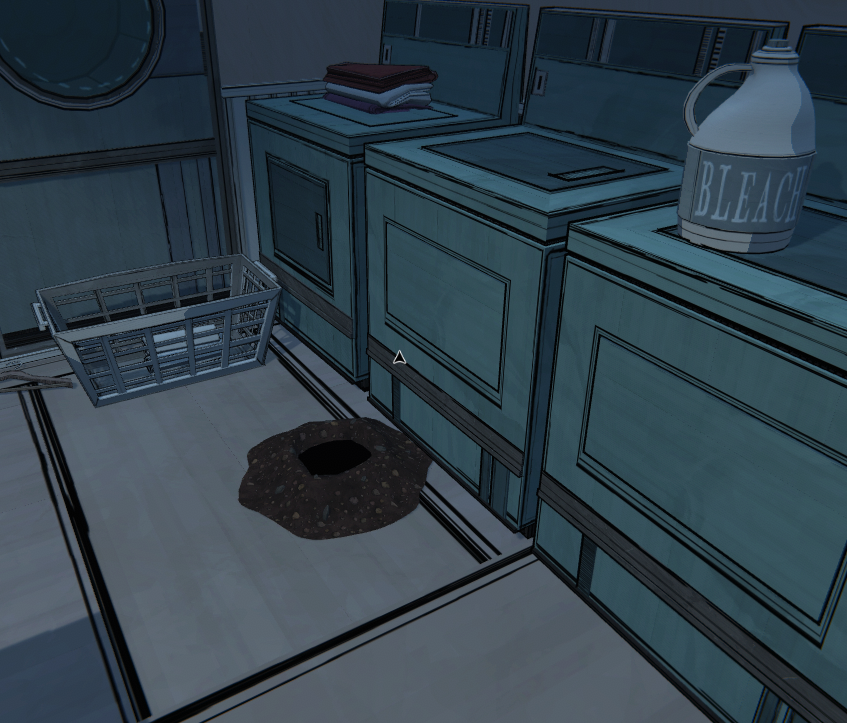
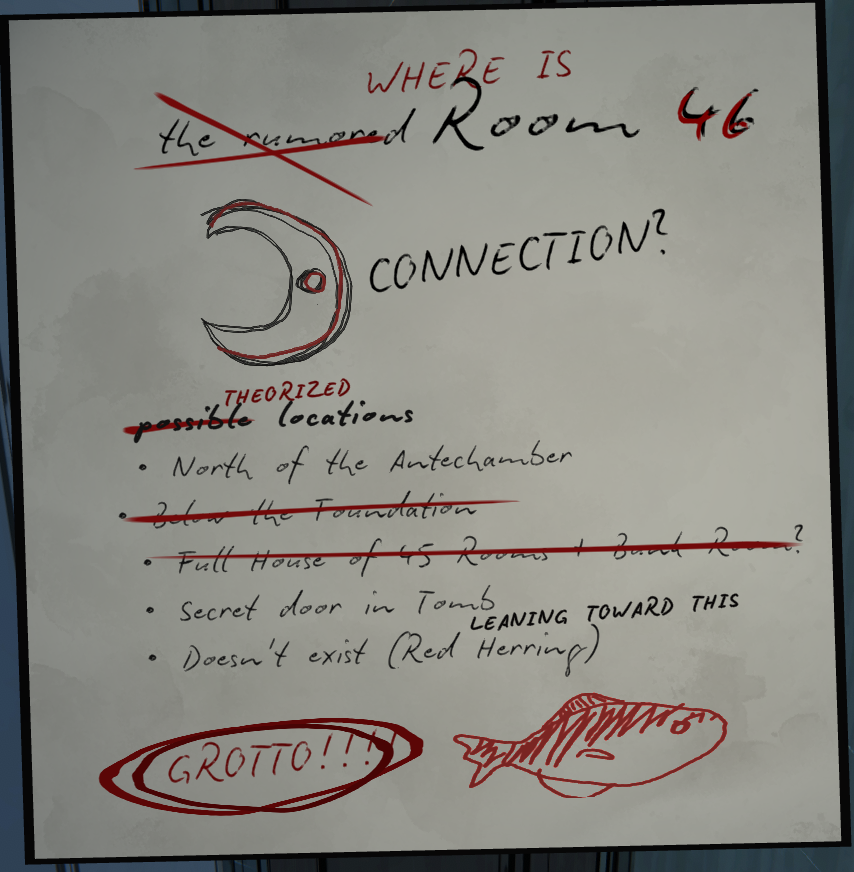
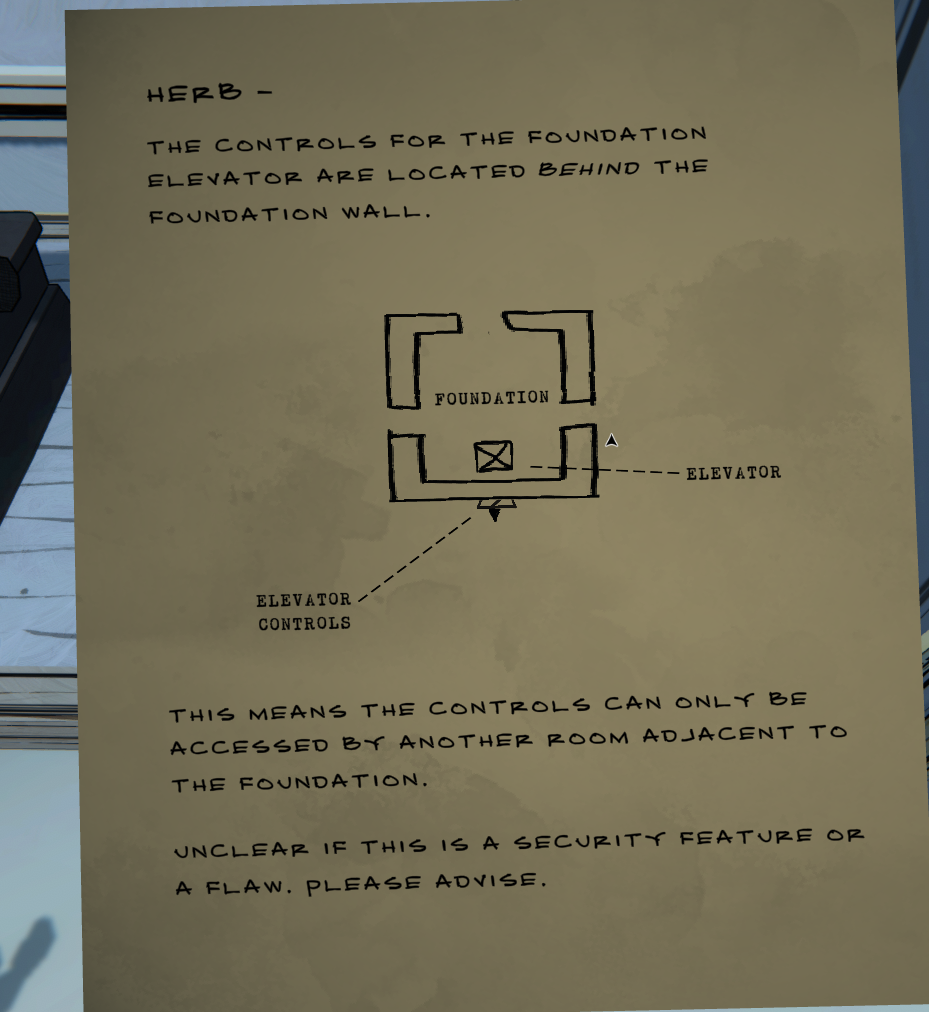
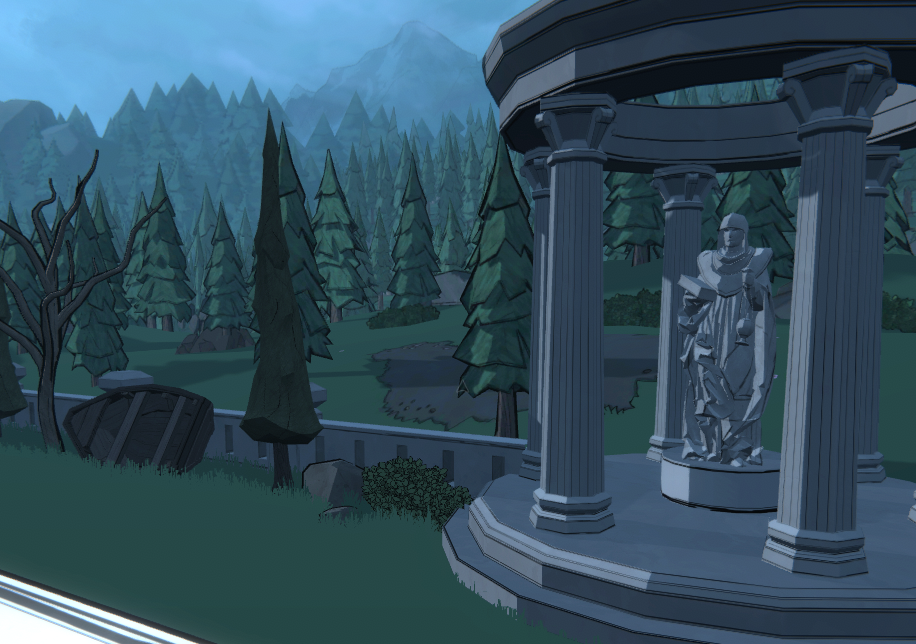
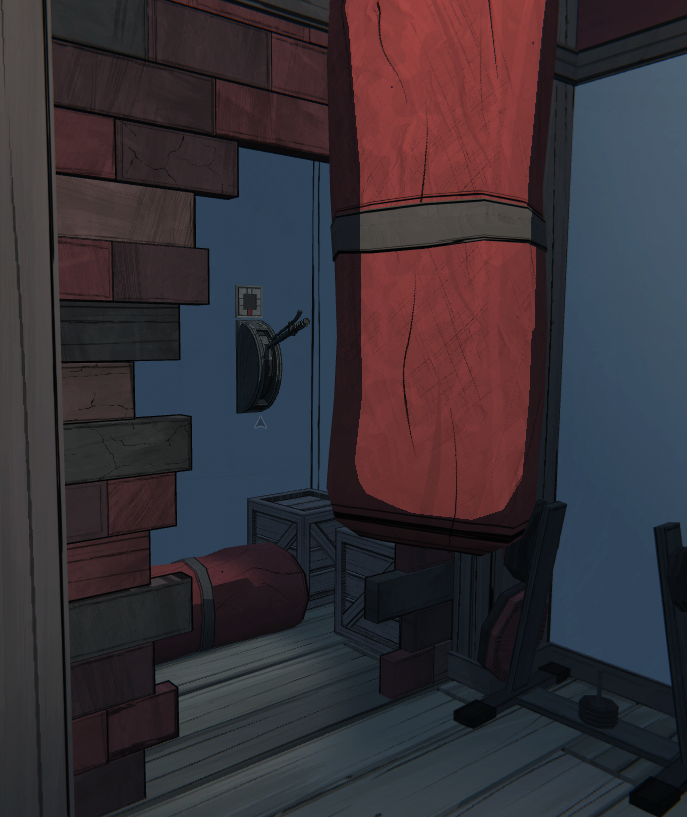
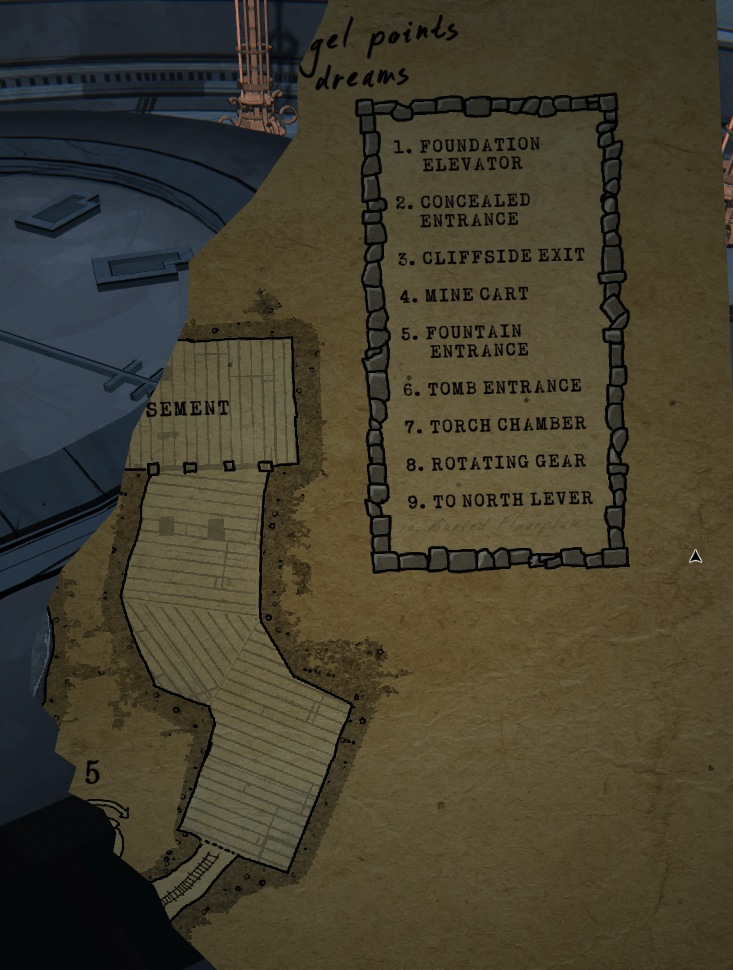
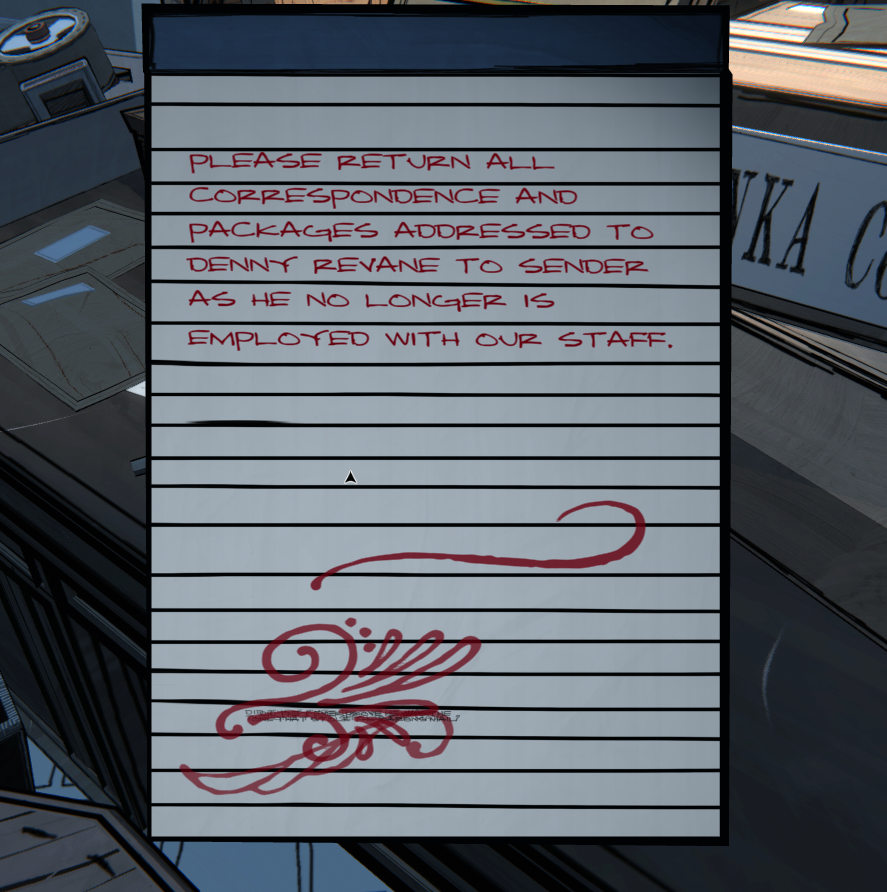
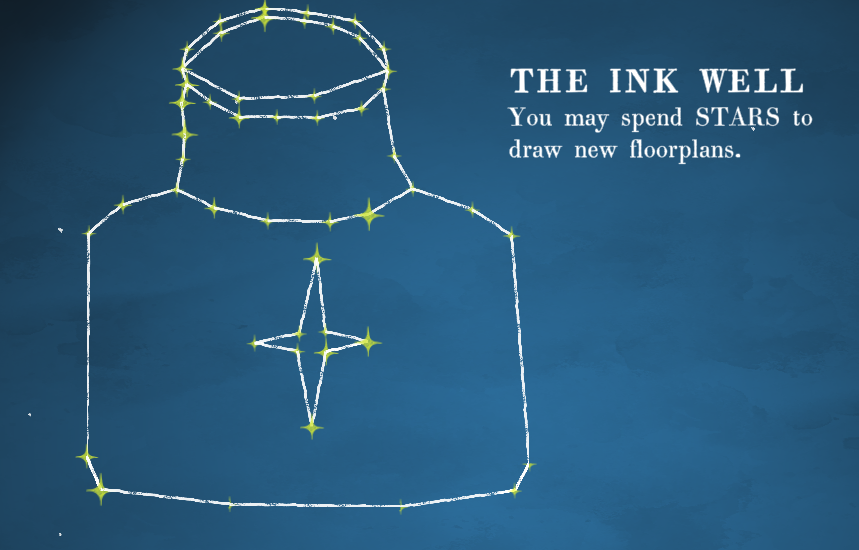
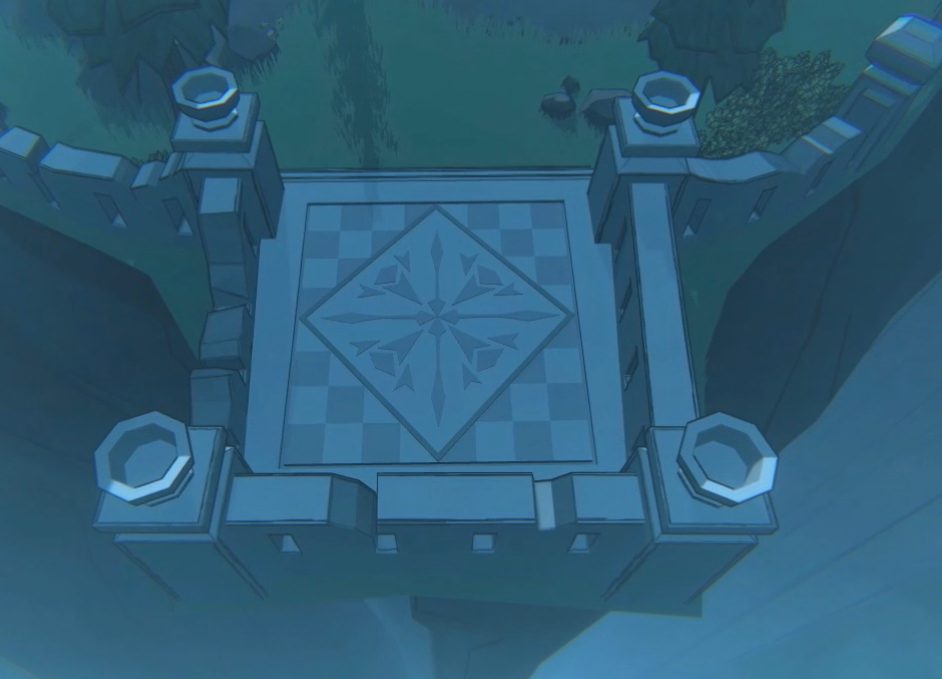
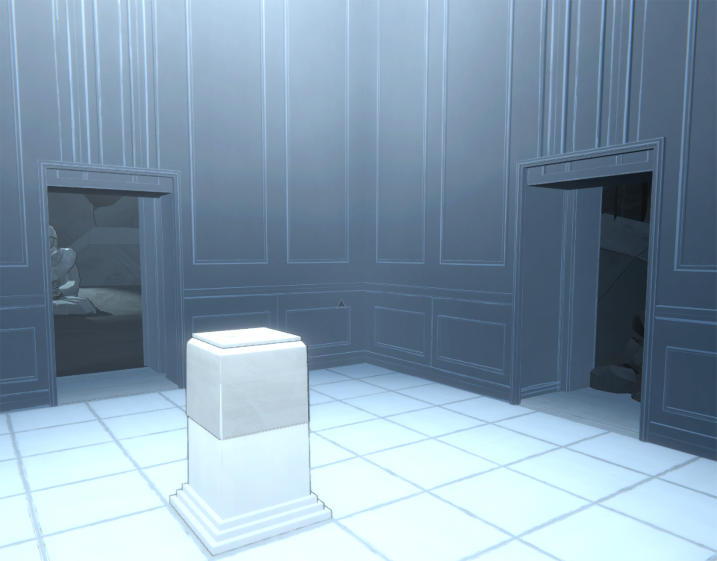
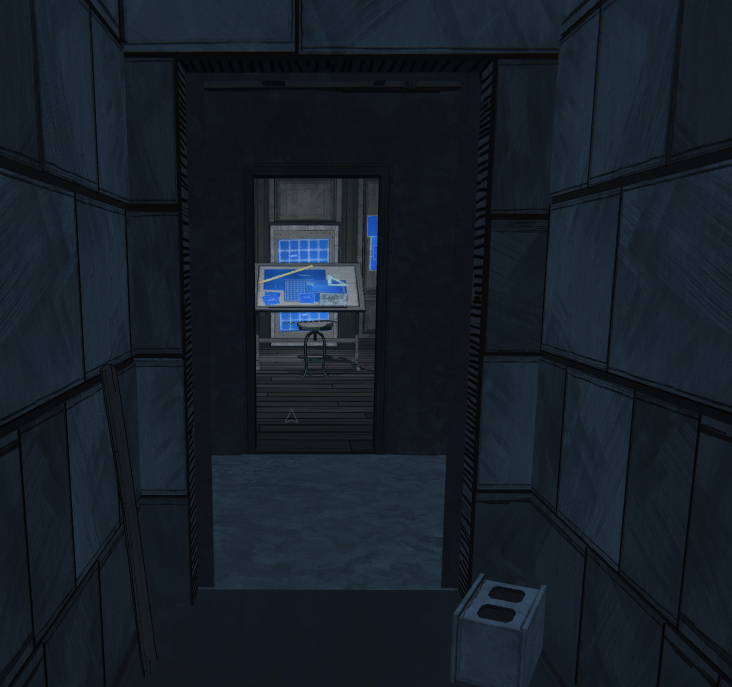
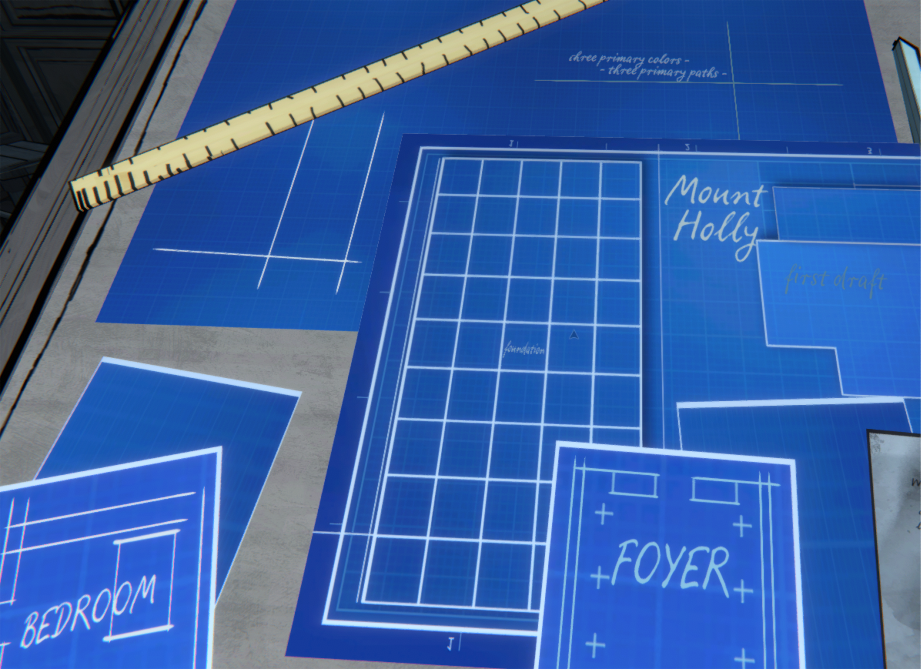
Then the interaction may be useful to relocate the foundation if it's location was not so good on the first time.
POUIP Feena 6 maja o 9:16 
Then you can obtain the foundation again in a draft and place it somewhere else in the estate
POUIP Feena 6 maja o 9:13 
and you can actually use the elevator while you have 2 foundations, it's just transparent but it works ! (and the picture frames are all purple, I wonder if it's more than just a joke)
POUIP Feena 6 maja o 9:12 
@λℓкøи23 it's not :) Babbage comes to the rescue
I thought at first that i was softlock but it was just funny
λℓкøи23 6 maja o 9:07 
Actually, it is a game blocker, the foundation will disappear from the estate the next day and the elevator in the outer foundation is not reachable.
λℓкøи23 6 maja o 9:03 
Not relevant but important to know monk blessing interaction is that The Foundation will not reset.

Altought it makes sense, I'm not sure if this was intended as it may become a game blocker...
kiryen 6 maja o 8:04 
There's at least one additional email in the Office after you turn on the satellite dish. (I've got one from the lawyers, but I'm only on day 30.)
StephENT hawking  [autor] 4 maja o 13:49 
@homnomz thanks for the detail. I've updated that section.

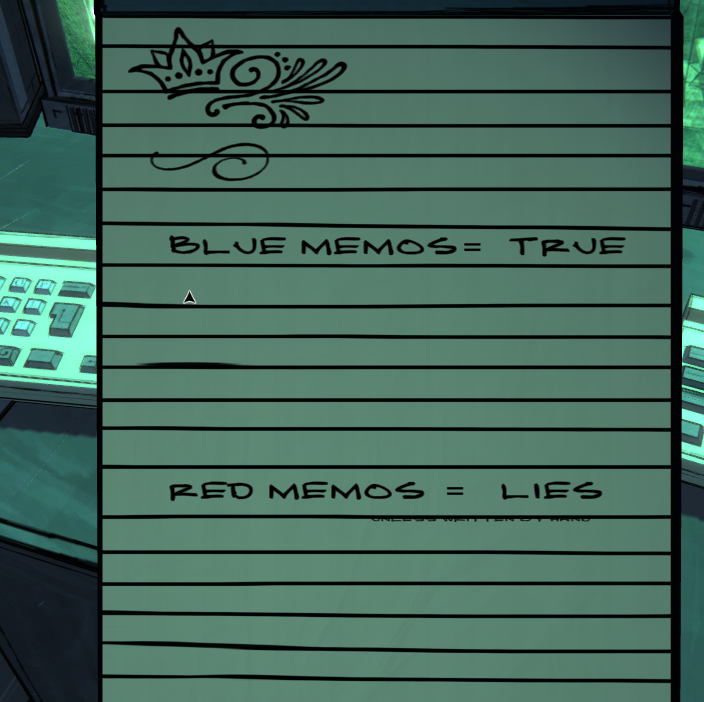
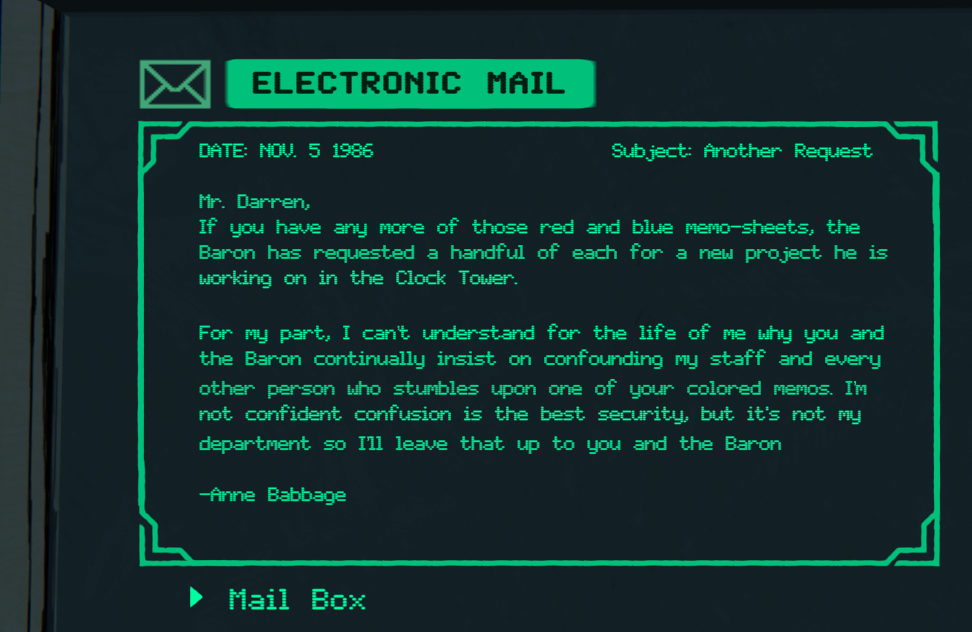
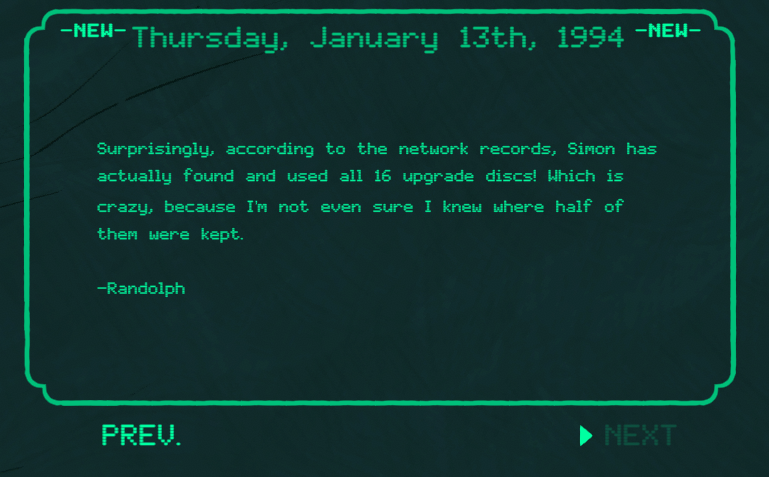
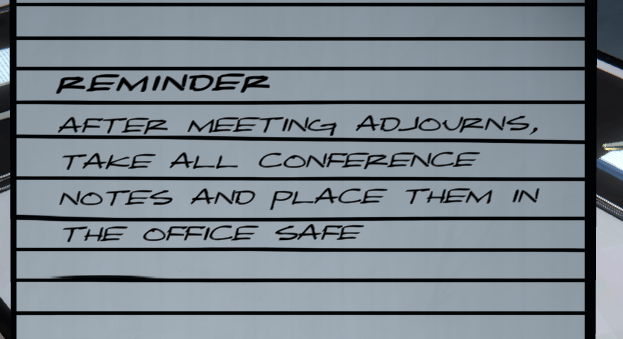
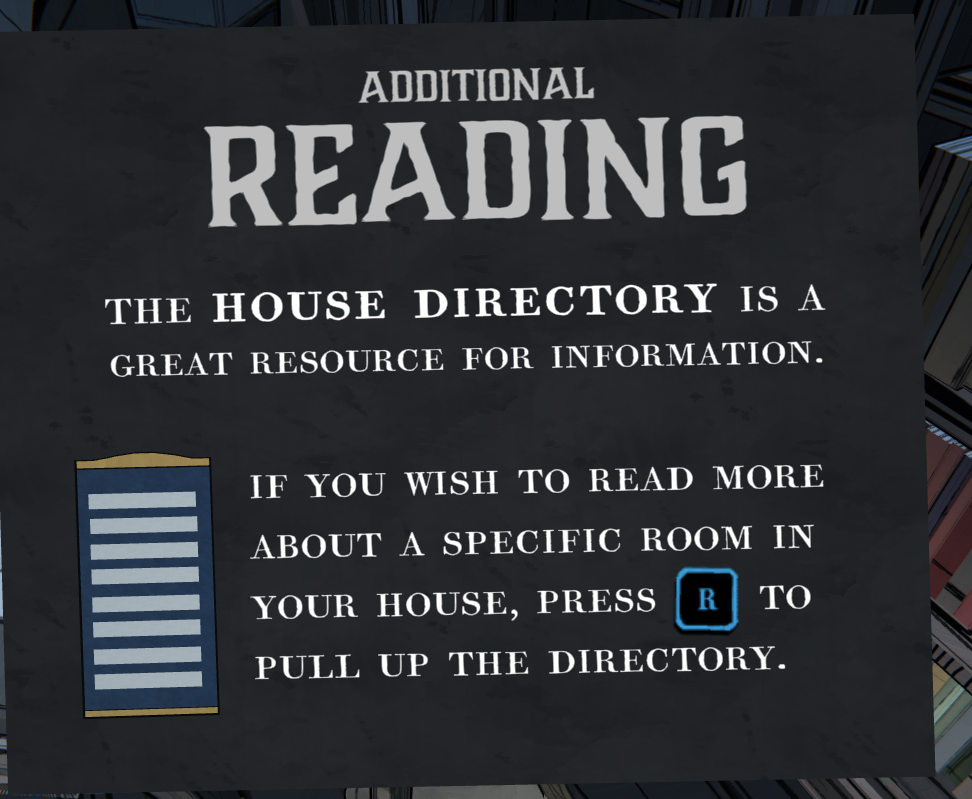
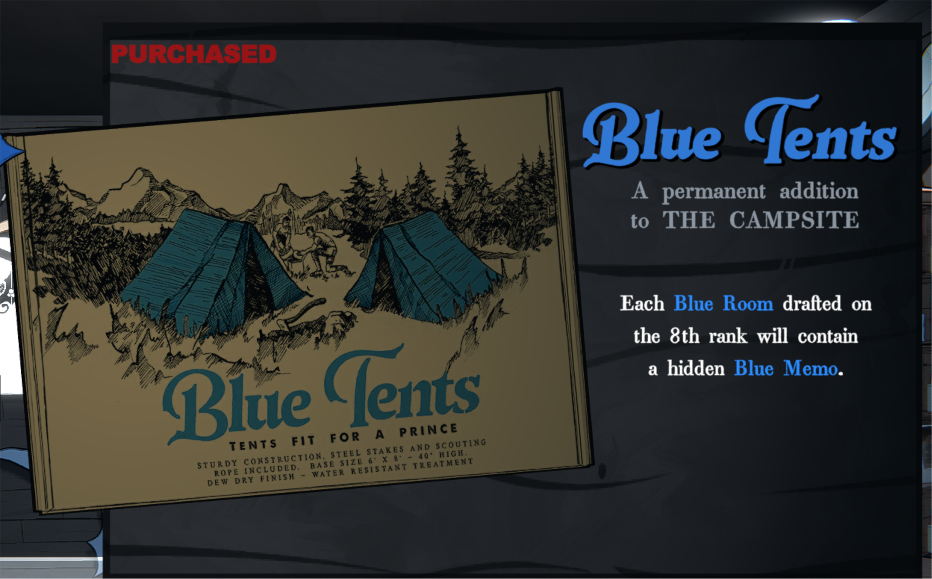
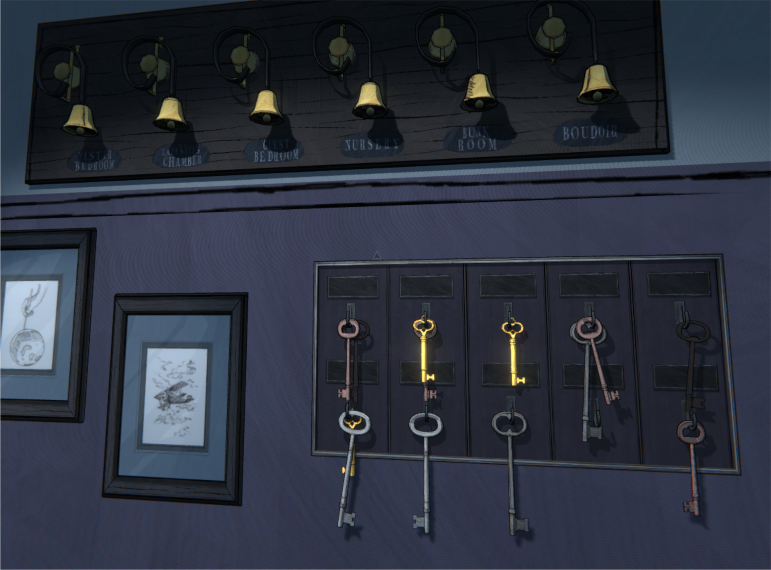
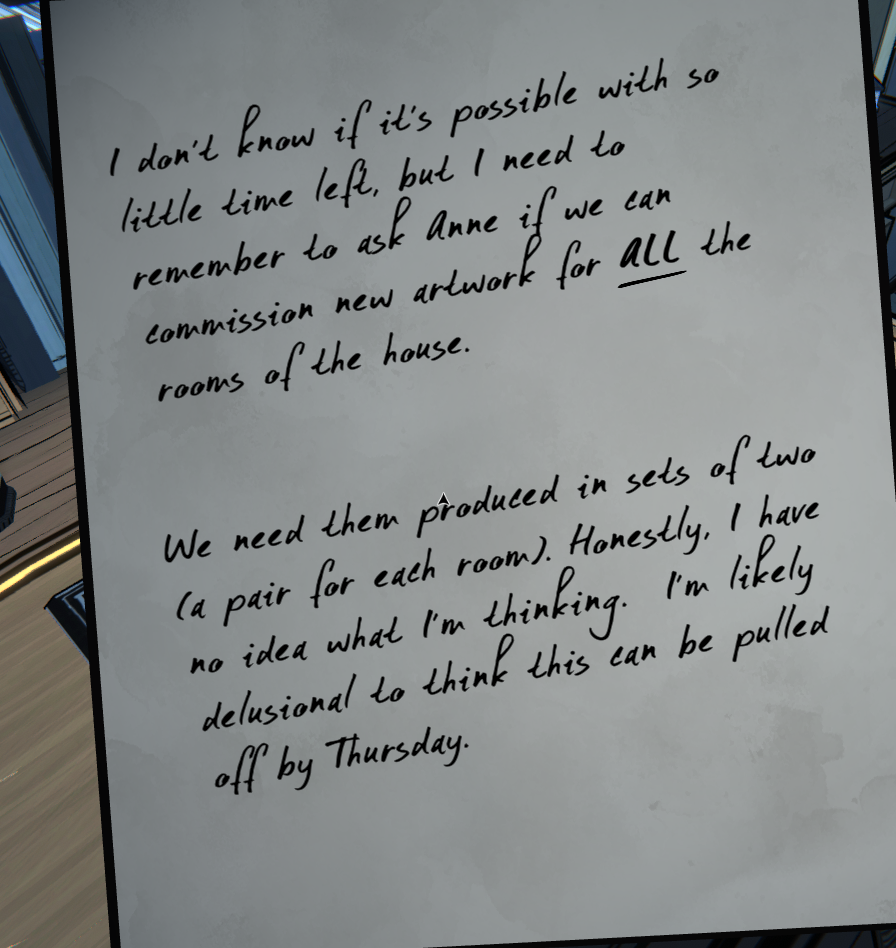
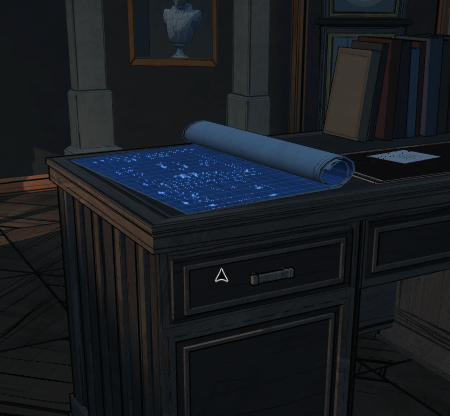
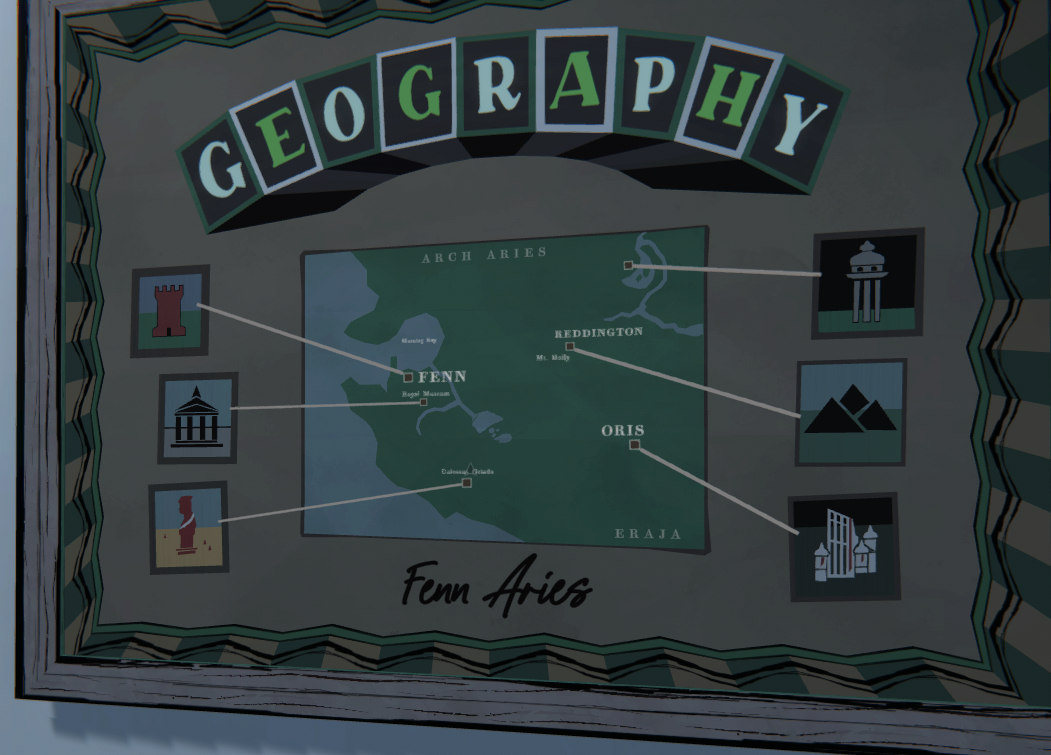
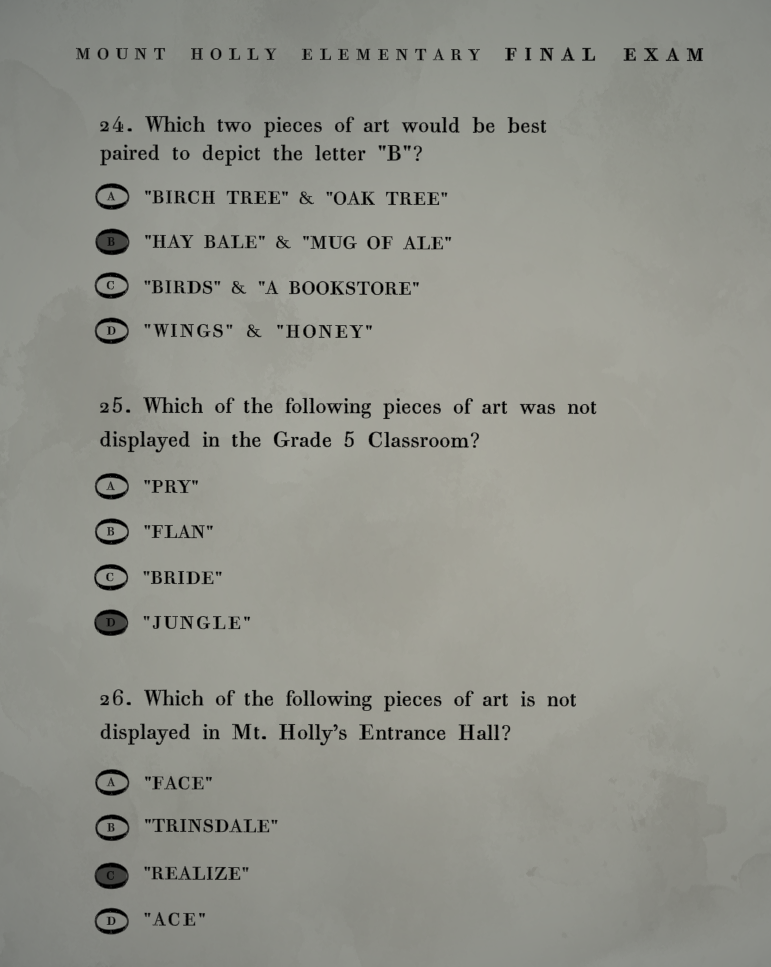
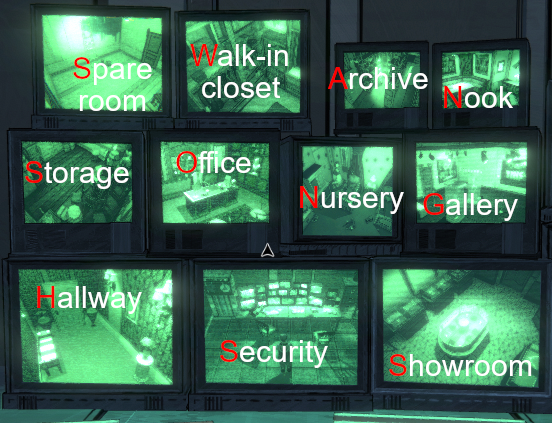
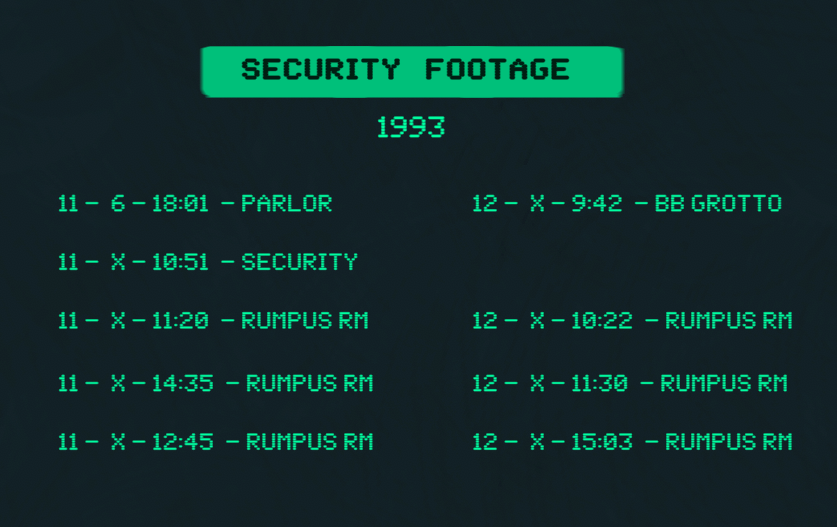
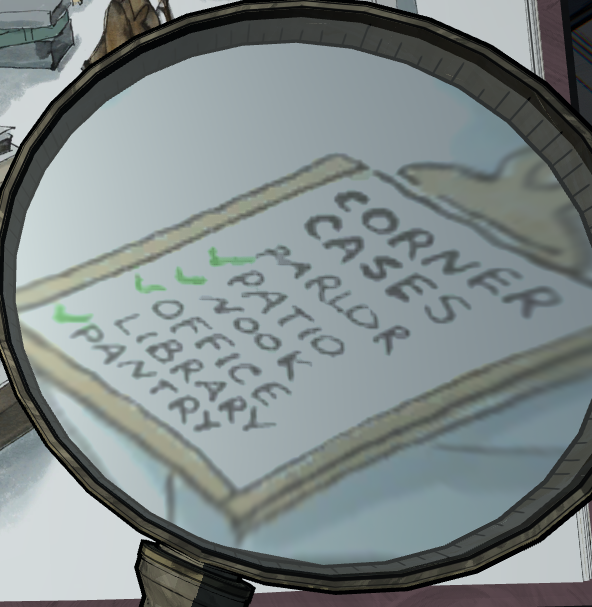
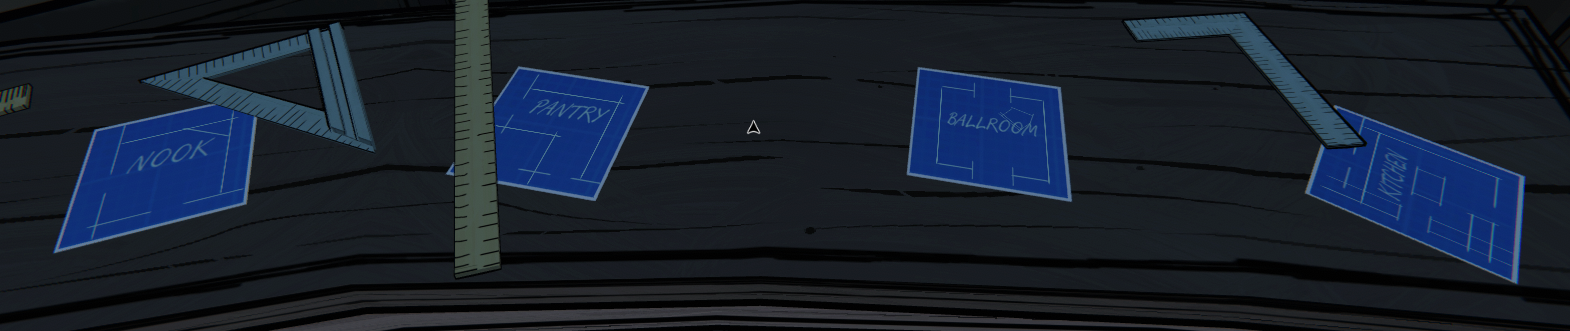
@HappyFaceSpider thank you for the detail! I've updated the blue memo section to include all the classrooms

@JxE I've sent you a friend invite.

Appreciate everyone's comments!
homnomz 4 maja o 13:36 
Re: Gem Cavern, additional gems may be extracted with the Jackhammer (shovel + battery pack + broken lever), though this compromises the cavern's structural stability (indicated by a "health bar" percentage) and risks collapsing the cavern, presumably eliminating the daily 2-gem "allowance". Having not gone to those lengths myself, I can't confirm that this is the case or if there is a different "permanent" effect.