Schedule I

Schedule I

1,173 beoordelingen
Uncle Nelson's Guide to Building Your Empire [Mid-Game+ Guide]
Door xyrilyn
A comprehensive guide to efficiently build your empire (alone, or with friends!)
53
37
8
29
6
10
4
8
4
3
4
4
4
3
3
2
   
Prijs
Toevoegen aan favorieten
Toegevoegd aan favorieten
Verwijderen uit favorieten
Preface
(ahem) OK kid... you must already know the basics by now (otherwise you wouldn't have made it this far) but now you want to know MORE.

Hopefully, this little ol' notebook of mine will be of use to ya.


This is not a guide intended for complete beginners to the game. Knowledge of the core game-play loop is assumed throughout the guide.
Avoiding Repetitive Strain Injury
  • During mixing, packaging, oven cooking and cauldron cooking, hold right-click to drag items within a circle
  • During packaging, click + drag the baggie to both seal it and sweep it into the drop-box
  • Shift + right-click to move exactly 1 item from a stack
  • Shift + left-click to move entire item stack
Getting Around Town (Quickly)
The Golden Skateboard is pretty good. Oh, and then there's these other ways of getting around town:

Smoke For Speed


Granddaddy Purple + Energy Drink + Paracetamol = Anti-Grav + SPEED

Keeping some of these on you at all times is very helpful for mobility (and for escaping the cops by climbing onto buildings).


Ocean Teleport Skip


With Anti-Grav + Speed active, you can strategically sprint and jump from on top of the dumpster behind the pawn shop, into the ocean towards the docks to force yourself to respawn at the docks and get there quicker.

With the skateboard, the reverse direction works by getting on and off the skateboard mid-air.

Without the skateboard, the reverse direction only works from the docks towards the central canal, and not towards the pawn shop.


Mixing Automation
Wiring the Automation


(Example of a mixing automation setup with 2 chemists and 2 handlers)

1. Maximizing price multipliers from effects during mixing is necessary since each customer can only make one deal per day

2. Meth and coca can share the same mixers as base meth and base coca do not have their own starting effects (unlike the different weed variants)

3. Each property can only hire up to 10 employees; each chemist can run 3 stations 4 stations (as of v0.3.3f15) and each handler can move items along 5 routes -- you'd want at least 2 chemists and 2 handlers to run 8-9 mixing stations

4. Chemists will move the output from a mixing station to the next mixing station while mixers are moved from shelves to the station by handlers

5. The best mixer combinations can be found here: https://schedule1-calculator.com/all_seeds

As of the time I'm writing this, the best mixer combinations (seeds) are:

Example of a simple Docks Warehouse layout

Blueprint Link: https://schedule1.lsdl.kr/9f6ecd958f7040b3b4b240c7a724731b

There are many, many ways to set up your bases! There are many guides floating out there that describe in detail how to achieve such a setup. With the current state of the game, you will be making money faster than you can launder them so min-maxing every detail isn't needed (for now).

Stuck Employees
1. Employees must be able to path to all shelves and mixing stations in order for automation to work (most of the time, that is... they sometimes still bug out...). They need 2 "tiles" worth of space to walk.

If there are no pathing issues and they STILL get stuck (smh), the options available to you are:
  1. Talk to them
  2. Punch them
  3. Save and reload

2. If you have botanists getting stuck, ensure that you have ALL their required supplies available in their assigned supply shelves. This includes additives! If your growing pots are assigned all 3 additives (i.e. PGR, Fertilizer and Speed Grow), your botanists will get stuck if their supply shelf is missing any one of them!

3. If you had chemists working before the v0.3.3f15 update (where the number of assignable stations was increased from 3 to 4), you will have to re-assign all their stations to get them unstuck.
Supply Logistics
Your automation is likely going to be bottle-necked by resupply issues (base meth or coca, mixers, or both). Best thing you can do is to get more friends to help out. Regardless, some of these tips may help.

"Outdoor" Storage


You can't place furniture outside of your own properties. However, you can park Veepers practically anywhere.

Example: Expanding "loading dock" storage
  1. Buy Veepers at $9k each and use them as storage by parking them beside the loading docks
  2. Unload everything into the storage Veepers
  3. Immediately order new deliveries


Supplier Stash Credit
To increase the rate of requesting dead-drops from various suppliers, stash as much cash as possible in their stash in advance. By paying in advance, you can request drops back-to-back as you go about your day.

In the current version of the game, it seems that only dead-drops earn you relationship points with the supplier. (This seems like a bug / oversight.) Maxing out the relationship with any supplier ASAP is recommended because this will unlock phone deliveries for that supplier.

Botanist Supply Shelves


The largest shelf in the game currently holds 8 stacks of items. If your growing pots are set to use all 3 additives (Fertilizer, PGR and Speed Grow), you will find that you need to restock these shelves frequently -- there's just not enough space!

To make matters worse: botanists become stuck when their supplies are missing any one type of additive assigned to any growing pot!


Until Tyler gives us a larger shelf, a better alternative is to just have more growing pots across multiple properties and drop 1 additive. I use only Fertilizer and PGR.

Assign each botanist their own supply shelf to make supplies last longer. Botanists don't work very fast, and when fully assigned 8 pots / racks, they take a while to complete their rounds.

Dual Location Production
Each property can only hire up to 10 employees. One property working on a 8-mixer coca automation will not have enough automated growing and drying output for coca to keep the mixing automation working all the time.

Manual support from players will help, but we ideally want to automate as much of it as possible.

With one property dedicated to growing plus drying, and another for mixing and a little growing plus drying, you'll be making several bricks per day fairly easily.
  1. Produce base meth or coca at one property, and do all mixing in another
  2. You can drop 1 additive during growing to make supplies last longer for botanists (see above)
  3. Only buy or deliver additives (Fertilizer, PGR, Speed Grow) from hardware stores
  4. Gasoline and Extra Long-Life Soil can be supplied by Oscar's Store instead of the hardware stores to free up delivery slots

Possible spoilers ahead: In the game files, there is a "manor" or "mansion" property mentioned which I think is the Hyland Manor beside the Barn. For this reason, I set up my grow farm at the Barn. (If... or when the manor is added, I'd then move my mixing operations to the manor so that they are close together.)

Late Night Shopping (4am)
  1. The game time stops at 4am, so you have plenty of time to move supplies
  2. Zero pedestrians that will walk into your vehicle and accidentally trigger a police chase
  3. No police road-blocks
  4. Remember that you can park a Veeper in the loading parking spot of stores to buy items from the store into the Veeper's inventory directly
Rush Delivery
Street Deals and Customer Max Daily Spend
As you run around town, you should make street deals whenever you can.

Street deals let you see the % chance of success, and this lets us optimize the final offer down to the exact dollar.

To do so, you need to figure out the customer's maximum spend for that day:
  1. Offer some product to be able to set a price
  2. Increase the price using the buttons until the success rate changes from non-zero to zero (unfortunately, the success rate only re-calculates when you use the buttons)
  3. The exact dollar before it changes to zero is that customer's maximum spend for that day

Once you've discovered the max daily spend, simply offer MORE product until the % chance of success is high enough to your liking.

Usually, customers of the same spending tier have similar max daily spends. (Annoyingly, there are some customers who are exceptions to this rule.)

Delivery Locations
There are currently 46 delivery locations in the game. Only a handful need special mentioning:

1. "Next to barbershop" and "South Overpass": Depending on the time of day, there is a police sentry or roadblock directly facing these locations. Crouch and place yourself behind the tree nearby to prevent the police from catching you.

2. "Behind the dealership", "Behind the western Gas Mart" and "Behind the auto shop": You can talk to the customer through the fence.

Bricks, Jars and Baggies
When giving product to dealers, bricks are better. The dealer will automatically "unpackage" the bricks into jars and baggies on their own.

By the way, fun fact: you can unpackage product in the Packaging Station by clicking on the "package" arrow in the UI. This will reverse the inputs and outputs -- you can get back your product and baggies this way.
Art of the Deal


Different customers have different spending amounts. You should assign Low Spenders to dealers, and take all Medium or higher Spenders as your own customers and deliver during Late Night (12am - 6am) for a 20% curfew bonus.

Remember: the game clock stops at 4am, so you never run out of time for Late Night deliveries.


I wrote a mod to replace this entire section because the calculations depend on many dynamic factors, so it's more practical to just calculate them in-game. The content that was previously here has been archived.

GitHub here: https://github.com/xyrilyn/Deal-Optimizer-Mod

NexusMods here: https://www.nexusmods.com/schedule1/mods/515


Example of UI after clicking [Counter offer]


Example of a deal that is guaranteed to succeed


Example of a deal that is guaranteed to fail, and its reason for failure


Counteroffers (i.e. via text message) and street deals use slightly mechanisms for calculating success but they share many factors such as:
  • Player rank
  • Customer's adjusted weekly spend (affected by relationship and rank)
  • Customer's order days (affected by current addiction and relationship)
  • Customer's average daily spend
  • Customer's max daily spend (calculated as 3x average daily spend)
  • Value proposition of customer's offer (affected by product market price, and your asking price per unit)
  • Value proposition of player's offer (affected by product market price, and your asking price per unit)
  • Product enjoyment (e.g. customer product affinity, product quality)
  • Customer's current addiction
  • Customer's relationship
Art of the Deal (Archived)
This section will NOT be updated moving forward because the numbers will keep changing as the game progresses. If you want more accurate offer evaluations, please use the mod I mentioned above.


Requirements
All numbers below assume that you meet these requirements:
  • 8 mixers by Shibka[schedule1-calculator.com] recipe (fair market value of $735)
  • Max product quality (Heavenly / gold star)
  • Max customer relationship
  • Max customer addiction levels
  • Product priced at $999

If you haven't met these requirements yet, or are getting rejections, you can lower your offer initially by a few hundred and then work your way up in small steps.

High+ Spenders
Recommended Counteroffer: 2x for $2200 (Baron) - $2500 (Kingpin)
Recommended Street Offer: Same as counteroffer OR 4x for all their cash (except Lily and Ray)
  • ~$2931 @ Baron V (??)
  • ~$3085 @ Kingpin II (75%)
  • ~$3171 @ Kingpin III (66%)
  1. Fiona Hancock
  2. Herbert Bleuball
  3. Jen Heard
  4. Lily Turner
  5. Michael Boog
  6. Pearl Moore
  7. Ray Hoffman
  8. Tobas Wentworth
  9. Walter Cussler

High Spenders
Recommended Counteroffer: 2x for $1700 (Baron) - $1800 (Kingpin)
Recommended Street Offer: Same as counteroffer OR 3x for all their cash
  • ~$1735 @ Baron ? (??)
  • ~$1767 @ Baron V (??)
  • ~$1851 @ Kingpin II (75%)
  1. Alison Knight
  2. Carl Bundy
  3. Chris Sullivan
  4. Dean Webster
  5. Dennis Kennedy
  6. George Greene
  7. Geraldine Poon
  8. Hank Stevenson
  9. Harold Colt
  10. Jack Knight
  11. Jackie Stevenson
  12. Jeremy Wilkinson
  13. Jessi Waters
  14. Karen Kennedy

Medium Spenders
Recommended Counteroffer: Always 2x for $1300 (Underlord) - $1500 (Kingpin)
Recommended Street Offer: Always 2x for all their cash
  • ~$1473 @ Baron V (71%)
  • ~$1542 @ Kingpin II (68%)
  • ~$1585 @ Kingpin III (66%)
  1. Anna Chesterfield (Docks)
  2. Billy Kramer (Docks)
  3. Cranky Frank (Docks)
  4. Genghis Barn (Docks)
  5. Javier Perez (Docks)
  6. Jerry Montero (Westville)
  7. Lisa Gardener (Docks)
  8. Mac Cooper (Docks)
  9. Marco Barone (Docks)
  10. Melissa Wood (Docks)

Low Spenders by Region
Northtown:
  1. Austin Steiner
  2. Beth Penn
  3. Chloe Bowers
  4. Donna Martin
  5. Kathy Henderson
  6. Kyle Cooley
  7. Ludwig Meyer
  8. Mick Lubbin
  9. Mrs Ming
  10. Peggy Myers
  11. Peter File
  12. Sam Thompson

Westville:
  1. Charles Rowland
  2. Doris Lubbin
  3. Joyce Ball
  4. Keith Wagner
  5. Kim Delaney
  6. Meg Cooley
  7. Trent Sherman

Downtown:
  1. Elizabeth Homley
  2. Eugene Buckley
  3. Greg Figgle
  4. Jeff Gilmore
  5. Jennifer Rivera
  6. Kevin Oakley
  7. Louis Fourier
  8. Lucy Pennington
  9. Philip Wentworth
  10. Randy Caulfield

Docks:
None (all customers are Medium to High Spenders)

Suburbia:
None (all customers are Medium to High Spenders)

Uptown:
None (all customers are High Spenders)
Dealer Configuration 1 - Low Only
Assign all Low Spenders to Dealers who are as close to them as possible

Benji Coleman (Northtown):
  1. Austin Steiner
  2. Beth Penn
  3. Chloe Bowers
  4. Donna Martin
  5. Kathy Henderson
  6. Kyle Cooley
  7. Ludwig Meyer
  8. Mick Lubbin

Molly Presley (Westville):
  1. Charles Rowland
  2. Doris Lubbin
  3. Joyce Ball
  4. Keith Wagner
  5. Kim Delaney
  6. Meg Cooley
  7. Trent Sherman
  8. Mrs Ming (extra from Northtown)

Brad Crosby (Downtown):
  1. Peggy Myers (extra from Northtown)
  2. Peter File (extra from Northtown)
  3. Sam Thompson (extra from Northtown)
  4. Elizabeth Homley
  5. Eugene Buckley
  6. Greg Figgle
  7. Jeff Gilmore
  8. Jennifer Rivera

Jane Lucero (Docks):
  1. Kevin Oakley (extra from Downtown)
  2. Louis Fourier (extra from Downtown)
  3. Lucy Pennington (extra from Downtown)
  4. Philip Wentworth (extra from Downtown)
  5. Randy Caulfield (extra from Downtown)

Other dealers are not assigned any customers
Dealer Configuration 2 - Low + Medium
Assign all Low and Medium Spenders to Dealers who are as close to them as possible

Benji Coleman (Northtown):
  1. Austin Steiner
  2. Beth Penn
  3. Chloe Bowers
  4. Donna Martin
  5. Kathy Henderson
  6. Kyle Cooley
  7. Ludwig Meyer
  8. Mick Lubbin

Molly Presley (Westville):
  1. Charles Rowland
  2. Doris Lubbin
  3. Joyce Ball
  4. Keith Wagner
  5. Kim Delaney
  6. Meg Cooley
  7. Trent Sherman
  8. Jerry Montero (Westville Medium Spender)

Brad Crosby (Downtown):
  1. Mrs Ming (extra from Northtown)
  2. Peggy Myers (extra from Northtown)
  3. Peter File (extra from Northtown)
  4. Sam Thompson (extra from Northtown)
  5. Elizabeth Homley
  6. Eugene Buckley
  7. Greg Figgle
  8. Jeff Gilmore

Jane Lucero (Docks):
  1. Jennifer Rivera (extra from Downtown)
  2. Kevin Oakley (extra from Downtown)
  3. Louis Fourier (extra from Downtown)
  4. Lucy Pennington (extra from Downtown)
  5. Philip Wentworth (extra from Downtown)
  6. Randy Caulfield (extra from Downtown)
  7. Anna Chesterfield (Docks Medium Spender)
  8. Billy Kramer (Docks Medium Spender)

Wei Long (Suburbia):
  1. Cranky Frank (Docks Medium Spender)
  2. Genghis Barn (Docks Medium Spender)
  3. Javier Perez (Docks Medium Spender)
  4. Lisa Gardener (Docks Medium Spender)
  5. Mac Cooper (Docks Medium Spender)
  6. Marco Barone (Docks Medium Spender)
  7. Melissa Wood (Docks Medium Spender)

Other dealers are not assigned any customers
Dealer Configuration 3 - Low, Medium and High
Assign all Low, Medium and High Spenders to Dealers who are as close to them as possible

Benji Coleman (Northtown):
  1. Austin Steiner
  2. Beth Penn
  3. Chloe Bowers
  4. Donna Martin
  5. Geraldine Poon (Northtown High Spender)
  6. Jessi Waters (Northtown High Spender)
  7. Kathy Henderson
  8. Kyle Cooley

Molly Presley (Westville):
  1. Charles Rowland
  2. Dean Webster (Westville High Spender)
  3. Doris Lubbin
  4. George Greene (Westville High Spender)
  5. Jerry Montero (Westville Medium Spender)
  6. Joyce Ball
  7. Keith Wagner
  8. Kim Delaney

Brad Crosby (Downtown):
  1. Ludwig Meyer (extra from Northtown)
  2. Mick Lubbin (extra from Northtown)
  3. Mrs Ming (extra from Northtown)
  4. Peggy Myers (extra from Northtown)
  5. Peter File (extra from Northtown)
  6. Sam Thompson (extra from Northtown)
  7. Meg Cooley (extra from Westville)
  8. Trent Sherman (extra from Westville)

Jane Lucero (Docks):
  1. Anna Chesterfield (Docks Medium Spender)
  2. Billy Kramer (Docks Medium Spender)
  3. Cranky Frank (Docks Medium Spender)
  4. Genghis Barn (Docks Medium Spender)
  5. Javier Perez (Docks Medium Spender)
  6. Lisa Gardener (Docks Medium Spender)
  7. Mac Cooper (Docks Medium Spender)
  8. Marco Barone (Docks Medium Spender)
  9. Melissa Wood (Docks Medium Spender) **

Wei Long (Suburbia):
  1. Alison Knight (Suburbia High Spender)
  2. Carl Bundy (Suburbia High Spender)
  3. Chris Sullivan (Suburbia High Spender)
  4. Dennis Kennedy (Suburbia High Spender)
  5. Hank Stevenson (Suburbia High Spender)
  6. Harold Colt (Suburbia High Spender)
  7. Jack Knight (Suburbia High Spender)
  8. Jackie Stevenson (Suburbia High Spender)
  9. Jeremy Wilkinson (Suburbia High Spender) **
  10. Karen Kennedy (Suburbia High Spender) **

Leo Rivers (Uptown):
  1. Elizabeth Homley (extra from Downtown)
  2. Eugene Buckley (extra from Downtown)
  3. Greg Figgle (extra from Downtown)
  4. Jeff Gilmore (extra from Downtown)
  5. Jennifer Rivera (extra from Downtown)
  6. Kevin Oakley (extra from Downtown)
  7. Louis Fourier (extra from Downtown)
  8. Lucy Pennington (extra from Downtown)
  9. Philip Wentworth (extra from Downtown) **
  10. Randy Caulfield (extra from Downtown) **

** = Unassigned - there aren't enough dealers to cover all Low - High Spenders
4am Home Deals
To squeeze even more cash out of your customers by the end of the day, you can find them in their homes and bring the deals to them. This is a list of where they will be at 4am. Maybe this will be of use to someone out there.

Northtown
North Warehouse: Geraldine Poon
North Apartments: Peggy Myers
North Apartments: Kim Delaney
Chinese Restaurant: Mrs. Ming
Motel Room 3: Peter File
Motel Room 4: Beth Penn
Motel Room 5: Jessi Waters
Motel Office: Donna Martin

Westville:
Jerry's Tent: Jerry Montero
Sitting Outside Tent: Cranky Frank
Caravan: Joyce Ball
Western Gas Mart: Charles Rowland
Mick's House: Doris Lubbin
Mick's House: Mick Lubbin
Sherman House: Trent Sherman
West Apartments Room 2: Kathy Henderson
West Apartments Room 3: Keith Wagner
Webster House: Dean Webster
George and Molly's House: George Greene
Kyle and Austin's House: Kyle Cooley
Kyle and Austin's House: Meg Cooley
Kyle and Austin's House: Austin Steiner

Downtown
Casino Bar: Philip Wentworth
Casino Dealer: Melissa Wood
Casino Dealer: Jennifer Rivera
North Warehouse: Greg Figgle
Apartment Buiding: Anna Chesterfield
Apartment Buiding: Kevin Oakley
Apartment Buiding: Chloe Bowers
Apartment Buiding: Jeff Gilmore
Apartment Buiding: Louis Fourier
The Crimson Canary: Carl Bundy (not accessible - bug?)
Overpass Building: Eugene Buckley (not accessible - bug?)

Docks:
Randy's Bait & Tackle: Randy Caulfield
Docks Shipping Container: Genghis Barn
Fish Warehouse: Mac Cooper
Docks Industrial Building: Lisa Gardener
Docks Industrial Building: Billy Kramer
Central Gas Mart: Javier Perez

Suburbia:
Kennedy House: Dennis Kennedy
Kennedy House: Karen Kennedy
Wilkinson House: Jeremy Wilkinson
Knight House: Alison Knight
Knight House: Jack Knight
Holt House: Harold Colt
Stevenson House: Hank Stevenson
Stevenson House: Jackie Stevenson

Uptown:
Church: Walter Cussler (not accessible - bug?)
Church: Pearl Moore (not accessible - bug?)
Upscale Apartments: Fiona Hancock
Upscale Apartments: Jen Heard
Mayor's House: Tobas Wentworth
Afterword
(ahem) I've given you all the wisdom I have kid... now get outta' here and go get yourself rich! (remember your old uncle when you've made it!)


This guide is a work-in-progress and will be updated with the game. If you have any helpful information you'd like to see added, or see anything that needs fixing, please leave a comment down below. Thanks and enjoy the game!
125 opmerkingen
Korovaemae 12 mei om 5:45 
In no way shape or form Louis Fourier is a low spender, take the guide with a grain of low quality meth
Frog 9 mei om 3:52 
@Estus I wouldn't worry about it IMO. Some people min-max it by putting drugs with certain effects to dealers assigned to customers who like those effects, but I just dont think it's worth the effort. But if you think it would be fun, then go for it :)
Estus 8 mei om 21:24 
should i worry about what drugs to give to my dealers? seems i cant find anything on this
Pixie 6 mei om 15:49 
A note to the 4 am selling part:
Customers reset their option to make deals on a timer, not on the clock.
So as long as you have supplies and patience, you can go out at 4 am, sell to everybody, wait like 20 minutes and repeat it, until you run out of supplies.
Combined with the meth production, that also doesn't go by clock, but timer, you can in theory create and infinite grind loop at 4 am as soon as you got meth unlocked.
Batza 25 apr om 4:25 
@Frog (part 2) So in order to make the customers have more money, you have to grind the kingpin levels. I found out that the money caps at lvl 66 for some reason (I'm at 118 now, lol). And that's why it's good to also do manual deals, but only when its still 100% success, and not to try to cap the customers money, just to get that extra XP.

It's also pretty bad to play too much during the 4AM break, so it's best to set all deals fore late night, you can start dealing at 10-11PM, most of the customers will already be waiting at their spot by then, and using the speed+low gravity weed from this guide, you can serve all the customers before the 4AM break, and go to sleep and start a new day.

So no, even if you're 100% successful with stealing the drugs back, it';s a waste of time. :)
Batza 25 apr om 4:25 
@Frog: I use a slightly different method - it's between 1 and 2 - I serve all the customers from uptown, suburbia and docks, but I can't be bothered to serve the few rich customers in the other 3 areas, I leave them to my dealers (the more people you serve yourself, the more money/XP you get).

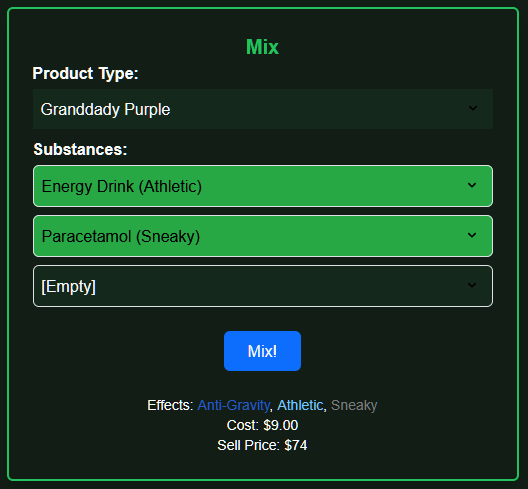
I think it's better to focus more on XP instead of the money first - that way the customers will have more money to spend. Also, in this very guide Xyliryn has a link to his mod, the deal optimizer, it's brilliant and the only one I use. So you can use it and milk out the most of your customers. And remember, you can haggle for more units to sell, not just price increase per unit.
Frog 24 apr om 19:19 
@Batza

Also, do you bother trying to pickpocket your drugs back?
Frog 24 apr om 19:13 
@Batza

So you'd recommend method #2 listed here? At this point I'm just grinding out the 10M achievement. Im just on a loop of restocking my coke industry most of the time, and learning what balance to do when selling the stuff. I thought method 3 would be best since when you do a scheduled sale most clients only buy 1-2 pieces of coke max. With a couple exceptions of course. Maybe I should be doing more door-to-door direct sales?
xyrilyn  [auteur] 24 apr om 8:42 
@Pyrotarlu: Hey, thanks for letting me know! I check this guide, nexusmods, and the github, so posting on any one of these places is enough.

If you can / are willing, screenshots and a save file (the folder that looks like "SaveGame_#") would be very helpful!
Batza 24 apr om 3:04 
@Frog - It depends what your goals are, and how you prefer to play the game.

If you want to maximize your money earned + get a lot of xp (xp increases the amount of money customers have when you level up) a good setup is to deal yourself at late night for the richest 3 areas (uptown, suburbs, docks) and leave the dealers take care of the rest.

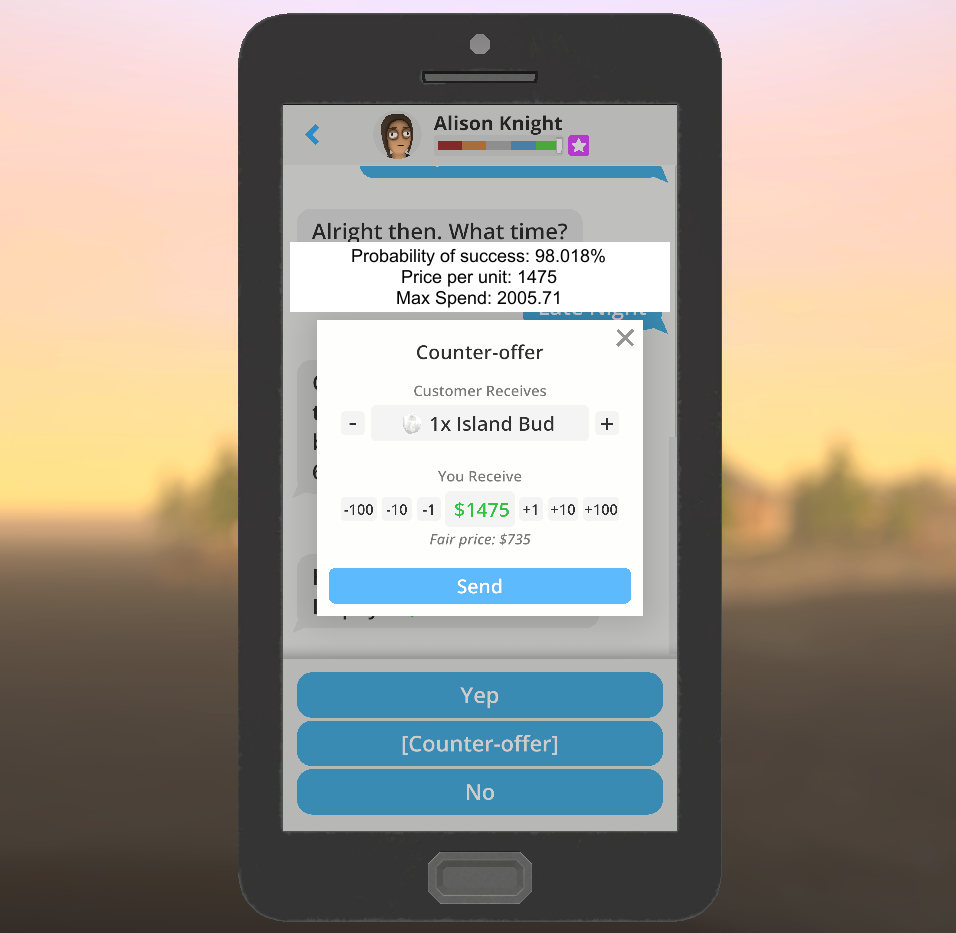
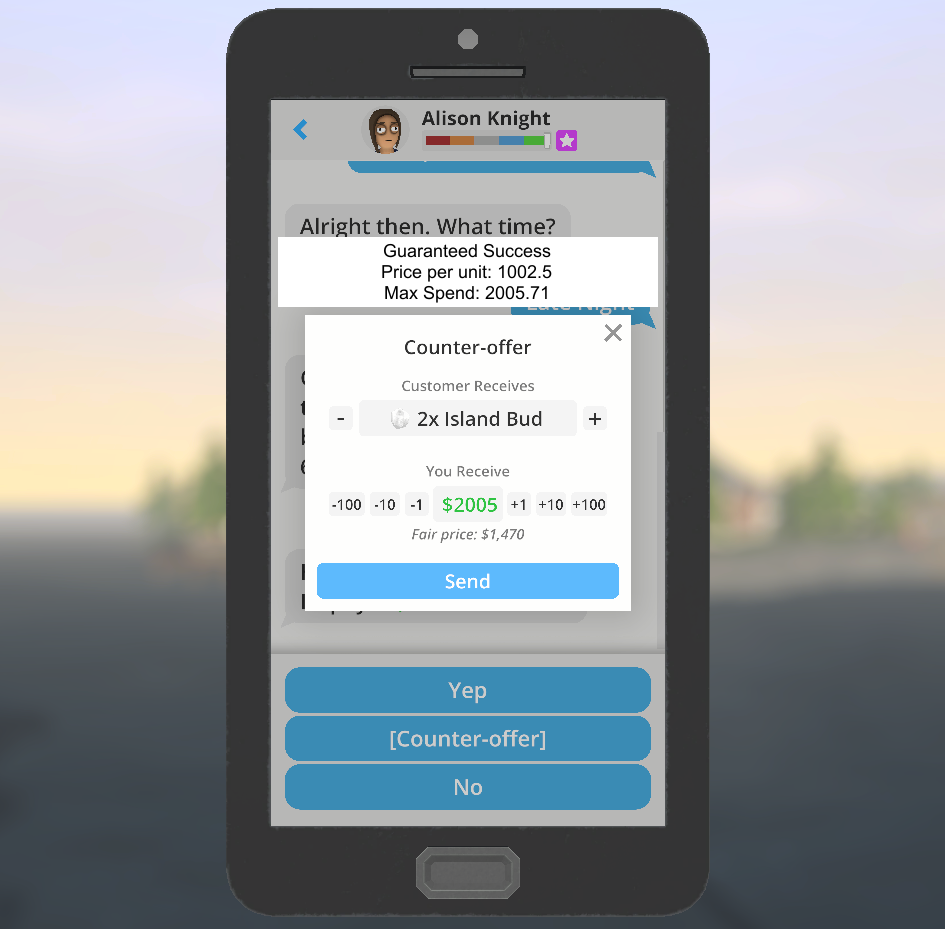
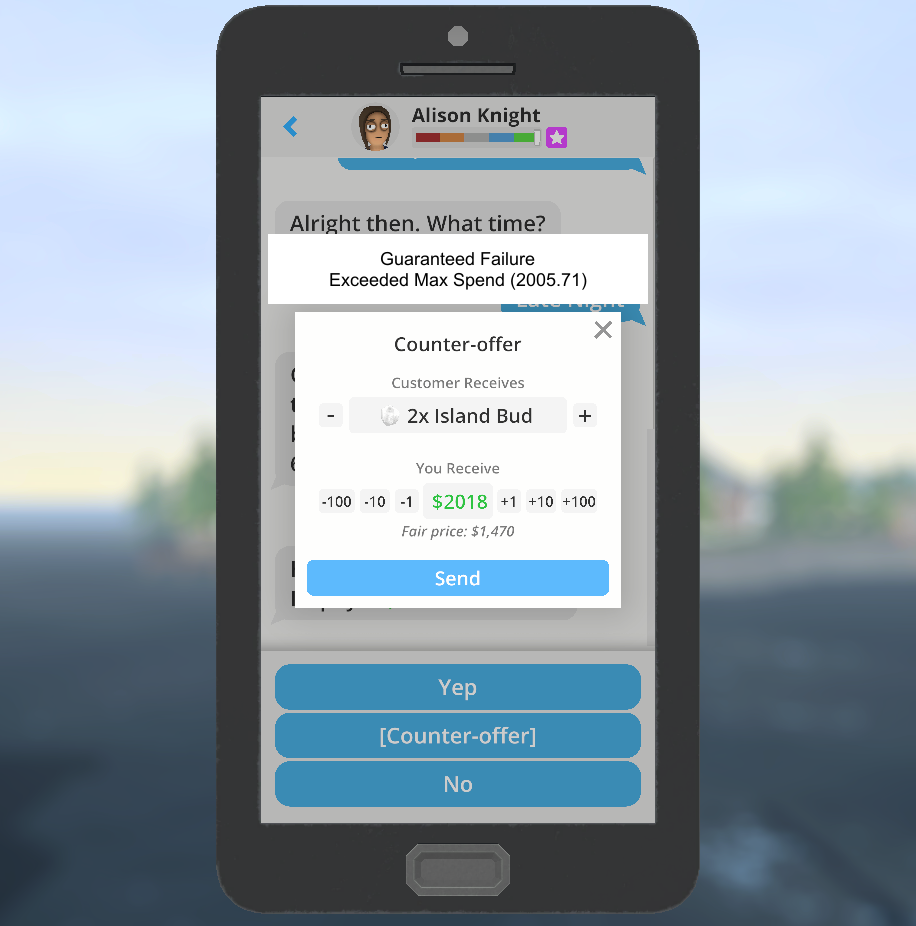
That's because you get 20xp per completed deal you made yourself, and 10xp for a deal your dealers made. Plus, you can haggle to get a better price and/or more units sold per person, it works better for richer folk, and there's no police there at night.

Your dealers don't haggle, and take a 20% cut, but - it's better to have the dealers do some work, as you will be inundated with messages, and probably will spend a lot of time to complete the deals during the 4am break, and it's usually a bad idea to spend too much time in it.