Look Outside

Look Outside

199 vurderinger
Look Outside Guide - 100% Achievements, Items, and More!
Av Llamakazi
A Look Outside guide on how to get all achievements, collectables, and items, as well as some extra helpful details!
21
11
2
3
8
4
2
2
3
   
Utmerkelse
Favoritt
Favoritter
Fjern som favoritt
Introduction


Hello there! I didn't see a guide posted for this yet, and there's been a ton of questions asked about these (and many more) so I thought I'd get the ball rolling to help each other out with this absolute gem of a game!

Note: There will absolutely be spoilers in here, even with the spoiler tags like this in many places, so please be careful if you haven't progressed past certain points before consulting this guide.


...and an urge to 100% all of the achievements and collectables too!

Status/Progress Update:
Currently ALL 92 Achievements (and the collectables related to them) have details on how to get each one; *however* I will be still continuing to flesh out details for those that are still unclear or have additional information uncovered.


This could be you!

Note: if any additional achievements are added in the future; I'll be absolutely sure to cover those as well.

If you are so inclined, you can hit the Favorite & Like buttons up top to easily come back and consult this guide in the future. It also helps with overall visibility!
Achievements - Progress & Collection
Exploring

Stepped out of your home.

Progress - Third Floor
This one's pretty simple; very likely your first achievement, just step outside of your apartment door for the first time then start exploring!


Down the stairs

Reached the second floor.

Progress - Second Floor
Grab the {Padlock Key} after defeating the wounded neighbor (your first enemy) then use it to unlock the stairwell at the east end of the hall. Walk downstairs to the 2nd Floor (2F)!


Labyrinth

Reached the first floor.

Progress - First Floor
You can reach the 1st Floor (1F) through Lyle's Apartment #21 on the 2nd Floor (2F).


Terra Firma

Reached the ground floor.

Progress - Ground Floor
Place the {Earth Disc} and the {Mars Disc} in the 2 round slots in the stairwell to access the Ground Floor (GF). Both Discs can be found on the 1st Floor (1F).


Depths

Reached the basement.

Progress - Basement
Get the {Basement Key} from the Landlord's Apartment on the Ground Floor (GF), then use it in the Basement (B1) stairwell.


Shortcut

Fixed the Elevator

Progress - Elevator
Kill the Elevator Thing in the Basement (B1), located just past the parking garage, which fixes the elevator.


Exposure

Reached the roof.

Progress - Roof
After providing 4 offerings to Jasper, you'll get the {Roof Access Key} (usable in the 3F stairwell) and some {Dark Robes}. There's no going back once you're up there, so plan accordingly!


One day at a time

Survived one day.

Progress - One day at a time
Simply get far enough into the game that some time passes and your character can sleep in his bed and progress to the next day. If you try to go to bed too early it'll state that "It's way too early to sleep."

Game Collector

Found 10 game cartridges.

Collection - Game Collector
You'll start with 3 video games on your shelf, so you'll have to find an additional 7 to trigger this one!

See the "Complete Video Game List & Skills" section below for how to find each!


Completionist

Found all game cartridges.

Collection - Completionist
You'll start with 3 video games on your shelf, so you'll have to find an additional 17 to trigger this one!

See the "Complete Video Game List & Skills" section below for how to find each!
Achievements - Party Recruitment 1
Teeth Child

Welcomed Joel into your home.

Recruit Joel
Joel can be found on F3 in the apartment across from you after the 1st day has passed. You'll want to grab the {Teddy Bear} (Fuzzy) in the bedroom first, and when Joel asks who you are, make sure to tell him "I'm a neighbor".

There's a kind of disposition "how much can I trust you?" system at play here, and being "his neighbor" puts him the most at ease. You can still recruit him IF you choose the other options, but it'll be more difficult. Be sure to ask him "how he's doing" and to "give him a hug" to get massive boosts in Joel's trust!

Continue speaking with him until he loses control, then use the {Teddy Bear} on him. You'll get the {Door Knob}, which you can use to progress to the rest of the apartment. If you try speaking with him again he mentions his mom, and doesn't do anything else yet. Explore the rest of the apartment and defeat Madison.

Talk to Joel again, now instead of talking about his mom, now he talks about helping his sister, which is the Baby Teeth boss (Note: you do NOT have to fight her to recruit Joel)

Say "You can't stay here..." and "You can come with me." to have Joel join your party if he trusts you!


Grinner

Welcomed Leigh into your home.

Recruit Leigh
On F2 at the end of the hall, you'll pick up the {Apartment 21 Key} then shortly after you'll get chased by the Grinning Beast. Defeat it instead of running away (Note: it's weak to [Slash] attacks) and you'll be able to go into the previously boarded up room across from Eugene's Shop.

You'll find Leigh inside, who is surprisingly friendly! You can Trade/Buy/Sell with her, enabling an early way to sell Vendor Trash items, and you can also request that she joins your party! Note: if she joins your party, you won't be able to Buy & Sell from her anymore.[/spoiler]


Creep

Welcomed Dan into your home.

Recruit Dan
Will randomly show up at your door and ask to come in.


Maniac

Welcomed Hellen into your home.

Recruit Hellen
Will randomly show up at your door and ask to come in.


Rodent

Welcomed Rat into your home.

Recruit Rat
You'll find the rat baby in a crib in a first floor apartment. If you choose not to kill it, it'll follow you and enter your inventory. There's another room with a face on the wall that wants to be fed a child (needs to be done to get a planet disc and progress). You can refuse this and offer it an arm instead (losing either melee or ranged weapon capability). The Rat Baby will then move in and you can care for it. After enough care it can be recruited as a party member.


Vermin

Welcomed Roaches into your home.

Recruit Roaches
Occasionally you'll find cockroaches that slip into your inventory. If you go home without removing them they'll hunker down in your place. If you leave food out (cook it but don't eat it) it'll disappear the next day and the roaches will leave you a note showing their appreciation. After doing this enough, you'll find a new character to recruit standing in your bathroom.


Beggar

Welcomed Ernest into your home.

Recruit Ernest
Will randomly show up at your door and ask for food. You can try asking him to come in, but he'll say he's "been tricked before", so all you can do is give him some food. Note: the quality of food you feed him does absolutely matter!

I ended up feeding him 2x {Ham Sandwich} which restores 40 HP, and is "Very Filling". You can prepare it at your Oven with {Bread} and {Raw Meat}. After feeding him twice, I was able to recruit/invite him inside on his 3rd and final appearance.
Achievements - Party Recruitment 2
Little Menace

Welcomed Sophie into your home.

Recruit Sophie
Her mother will randomly show up at your door and ask if you've seen her. After this Sophie can show up at your door and ask to come in. If you reunite them, Sophie will leave your party, but you'll get some items in return!


Janitor

Welcomed Papineau into your home.

Recruit Papineau
Papineau can be found in several locations. If you make it to the the Ground Floor (GF) with 1 or less allies recruited (i.e. in your active party & in your apartment), then he will easily be found in the Men's Bathroom standing in front of a sink. He'll be there as a backup/safety recruit, just in case you've gotten unlucky with getting new party members up until now.

Warning: if you find Papineau in the Ground Floor (GF) Men's Bathroom but you DON'T recruit him after the bus crashes, after some time the bus monsters will have gotten to him, and he'll be dead when you return later.

The other (and most likely) way you'll encounter Papineau is behind the locked Ground Floor (GF) Janitor's Closet next to the stairwell door, the key for which is much, much further ahead. You'll need the {Janitor's Keyring} which is found in the Basement (B1) Parking Garage at the very end, guarded by the Garbage Worm.


Troublemakers

Welcomed Xaria and Montgomery into your home.

Recruit Xaria & Monty
Will randomly show up at your door and ask to come in. Will also kick you out of your room. As a note, both must be in the party together, you can't bring just one of them.


Scavenger

Welcomed Morton into your home.

Recruit Morton
Will randomly show up at your door and ask for any of your extra {Junk}. He joins once you've given him 15 or more pieces (Note: doesn't have to be all in one transaction!)


Moth

Welcomed Philippe into your home.

Recruit Philippe
In the basement, south of the little friendly monster collective, there's a fungal infestation. You'll find a little moth guy trapped in fungal growth which you can save. Have him join your party right then and there to trigger the achievement. If you try to leave the area or don't hug the Spore Mother, he'll reveal he was a mushroom mimic all along and become hostile!


Shadow

Welcomed Shadow into your home.

Recruit Shadow
This one takes a total of 5 random encounters with the Shadow before it can be "recruited". Note: the Shadow is not an actual party member, but it still helps out and hangs out in your apartment. There will also be a disposition/trust system at play with the Shadow, so be sure to treat it as nicely as you can for the best results!

1st encounter: After some brief questions, you'll find out it is hungry, and get the option to give it some food. Give it something high quality (like food that mentions that it is "very filling") for the best result. The possible responses are "It seems like it enjoys the food a lot." (best), "It seems like it enjoys the food." (2nd best), and "Eating seems to have made it happy." (worst)

2nd encounter: Somewhere in the building on a new day, it'll give you a small scare, then you can ask it some questions before leaving. Avoid asking the negative questions!

3rd encounter: Somewhere in the building on a new day, it will give you a {Tongue} Key Item. Be sure to accept the gift, then you can give it a Key Item that has no other use, like the {Army Guy Figure} after finishing Apt 32 F3 (Joel's Apt) for another disposition boost.

4th encounter: Right in front of your apartment on a new day, it should give you a {Rose} Key Item if you've been nice enough to it. If you haven't been nice enough, you'll get some other random item, and you won't see it again.

5th encounter: In your bedroom on a new day, it will approach you. Choose all the options to resist, then say "Never do this again." and "Can you behave?". Afterwards it will now "understand boundaries", then hang out in your living room and give you items regularly!
Achievements - Miscellaneous 1
One last game

Played with Benjamin

In one of the rooms, one of the kids, Ben will be on the floor. Talk with him and choose the following for the best result (Note: if your party has his brother Joel, he'll give you hints about what choices to make):
  1. "Sit down."
  2. "Show your Army Guy figure."
  3. "What are you playing?"
  4. "That looks fun!"
  5. "Can I play too?" (Note that he likes the helicopter the most)
  6. "Attack the tank." (Keeps the chopper safe)
  7. "Take the army guy."
  8. "(Villain Voice) You fell right into my trap!"
  9. "Your own army guy comes to the rescue!"

If you do it right, you should see "you're an excellent playmate" highlighted!

Choose to "Give him a hug.", then he'll give you several items in a row:
  • {Kill to Shoot} video game
  • {Teeth Pendant}
  • 5x {Hard Candy} & {Chocky Bar}
Note: you won't get the video game if you don't hug him, even if "you're an excellent playmate".


Would you still love me if...

Led Nestor to Rafta.

Misc - Nestor
There's a pipe in the Destroyed Apt on 1F (after Lyle's Apt) with someone named Rafta in it. Talk to her and get her a {Fountain Pen} from the Rat Child Apt on 1F, and {Stationary} from the Mailroom Office on the Ground Floor.

She'll write a letter that you can deliver to Nestor in the Ground Floor bathroom. Tell him "Give her a chance!" and "Absolutely!" and he'll go find her. Head back to 1F for the pipe with Rafta and check on the both of them!


Unhinged Crossword Maniac

Completed the crossword book.

Misc - Crosswords
Play the crossword puzzle (retrieved elsewhere in the building, shows up next to bookshelf in your Apartment's Living Room) for as many hours as you can until they are fully completed!

For me getting through the 4 levels of puzzles (ending with expert) took 71 hours and 73 puzzles to completely finish it. If you have Morton, then he'll help you with the puzzles as you go, decreasing the amount of time it takes. If you have completed the {Crossword Challenge} video game, then it will also additionally decrease the time it takes, due to your expertise!

When you finish, you'll get a code: "What's this? There are numbers scrawled on the margins of the book's final puzzle. 22817..." This code is randomly generated for everyone, and is different on every playthrough. The code is also currently UNUSED as of v1.02 as it was part of cut content, but it may have some use in future versions of the game!


Living Dangerously

Stayed away from home for more than 8 hours.

Misc - Danger
This one's pretty simple; just spend more than 8 hours outside of your apartment in one go. Visiting new locations and getting into fights will do it!


A Chat with a Rat

Spoke to a rat.

Misc - Rat Chat
Wear the {Rusty Crown} from the Rat King then speak with ANY rat the on the 1st Floor. Try not to kill any before then!


Hat Trick

Was tricked by a hat.

Misc - Hat Trick
In the leftmost part of Frederic's Apartment there will be a suspicious looking {Cowboy Hat} sitting on a table. Pick it up and put it on; you won't be able to remove it!

Speak to Toxic Fred in the next room, where he'll threaten you into killing the other Freds. The achievement should trigger as he gives you a {Stained Key}.

Fun facts: the actual {Cowboy Hat} description is "Yeehaw." The fake {Cowboy Hat} description is "Yeeeeehaw! A lucky hat!", then it turns to "Yeeeeehaw! A lucky hat?" after you realize it can't be removed!

If you attack Toxic Fred immediately, Sam will be KO'd and your party members will have to save you, otherwise it's an instant game over (Note: currently a little bugged with an infinite fight, careful with this option)


See the "Side Quests & Optional Content" section below for more details on all the Frederics!


Just some guy

Got angelic Fred to drop the act.

Misc - Godhead Guy
In Frederic's Apartment on 1F, find Godhead Fred (a.k.a. Angelic Frederic) in the back. Talk to him, refuse his quest, then say "You're just a painting." and he'll drop the act!

See the "Side Quests & Optional Content" section below for more details on all the Frederics!


Smeck

Kissed Lyle.

Kiss Lyle
Simply let Lyle (2F Apartment #21) smooch ya for some {Photo Paper}. Pretty easy!


How could you

Peeked at Lyle's true form.

Misc - Peek Lyle
To get this achievement, you MUST have let Lyle kiss you for the initial {Photo Paper}, if you don't, then you're locked out of this one for the playthrough! Come back with the {Exposed Paper} later, and have Lyle develop it. Come back the next day to pick it up, then he'll ask for "another kiss". That's your cue! Go ahead and take a peek at your first opportunity.

Afterwards, Lyle will be embarrassed and lock himself in the darkroom! Here's a possible rendition of what's behind the door after peeking: https://steamcommunity.com/sharedfiles/filedetails/?id=3456390677
If you're also trying to get the Photography Enthusiast achievement (e.g. "Defeated Shutterbug") then you'll be locked out of that one, as well as any other Dark Room achievements. Plan ahead!


Crunch

Fed the wall.

Misc - Fed the Wall
On the 1st floor after saving the Rat Child, there's a room nearby that has a mouth monster that won't let you go unless you feed it a child. You can accept and feed it the Rat Child to get this achievement, or you can refuse, and propose that you feed it your arm instead to get the Selfless achievement instead.


Selfless

Saved the rat child.

Misc - Saved Rat
There is a mouth monster on the 1F labyrinth in Apt #13. If you saved the Rat Child from another room on 1F then it won't let you leave unless you "feed it a child". Refuse, try to leave through the infinite hallway, then return. It should now say "no escape". You'll get a new option to feed it one of your arms instead to save the Rat Child!

Gameplay Consequences (and some Easter Eggs):
If your Left Arm (Ranged Weapons) is Gnawed Off, you can still "equip" the Crossbow! In this case, presumably you are grafting it to your stump Evil Dead style.
Speaking of Evil Dead, if you named your main character "Ash", "Williams", or "EvilDead" (case sensitivity doesn't matter), then if your Right Arm (Melee Weapons) is Gnawed Off, you can still "equip" the Chainsaw!
Achievements - Miscellaneous 2
They grow up so fast...

The Rat child grew big and strong.

Misc - Rat Grown
Save the Rat Child on the 1st Floor, by feeding the Mouth monster your arm instead and you'll be taking care of it safely within your apartment. You'll need to feed & care for it until it eventually becomes full grown enough to join your party!


Bestowal


Received Katana
If you buy the {Massacre Princess} video game for $120 from the Gamer who randomly shows up at your door, he'll say it was an accident and he'll pay you $200 for it back. Refuse, and he'll up the ante by offering you a katana in exchange! Accept and the katana is yours. If you're trying to collect all games though, you'll have to get it in another run.


Power of Friendship

Completed Massacre Princess

Misc - Power of Friendship
Buy {Massacre Princess} from the Gamer. He's a random person who knocks on your door and sells to you. Refuse to give it back for money or the katana, then set aside a LOT of time to play it through to completion!

It takes a whopping 12 gaming sessions to complete it, and teaches you the {Meteor Strike} skill for finishing it. The skill is unfortunately useless, since it costs 999 STM and is basically a joke option.


Model Tenant

Fully Paid your rent

Misc - Paid Rent
Keep progressing through the Landlord's Apartment and keep paying him to proceed.


He's real g*d d*mn it


Misc - Philippe Denial
Have Philippe join your party at the beginning of the mushroom infested area in the basement OR ask him to wait at the entrance. Either try to leave, or take him all the way to the end without inhaling any spores. Either way he fights you as a mushroom, say all the dialogue options that try to bring him "back". The responses are: "The fungus got into your brain...?" -> "Don't worry Phillippe. I'll save you!" -> "Don't worry Phil. I don't believe his lies." -> "You're my only friend Phillippe. I'll find a way."


Heartbroken

Was rejected by your plant

Misc - Plant Rejection
Make sure to keep talking to your plant every day (and watering it) until it breaks your heart </3

Optionally, you'll be asked if you want to bring the plant into the light after a few days. If you want to keep it relatively simple, just leave it where it is, and just water it and talk to it exactly once per day for the easiest trigger.


Ultimate Gamer

Beat at least 10 different games in one playthrough.

Misc - Ultimate Gamer
In your apartment, you'll start with 3 video game cartridges, and eventually accumulate up to 20 total over the course of the game. Play each one through multiple sessions until you learn a skill from it. Keep doing this until you've learned at least 10 skills to trigger this achievement!

See the section below titled Complete Video Game List & Skills for how to find each!


One million little enemies

At war with the roaches.

Misc - Roach War
Bring roaches back to your apartment without removing them from your inventory, and antagonize them as much as you possibly can by squishing them (and eating them, if you're so inclined) until you get a letter from them saying "IT WAR!! YOU BAD!"

You can potentially do this in a single day, as you can move between your living room, bedroom, and bathroom and squish as many as possible (seemed near unlimited amounts after bringing home 5-6 roaches throughout the building). Go to sleep for the night, and there should be a roach with a letter in it's mouth in the living room waiting for you.


One million little friends

Made peace with the roaches

Misc - Roach Peace
Bring roaches back to your apartment without removing them from your inventory, then be nice to them until they start giving you notes!


With your sweat and tears

Bought the trophy from Mutt's shop.

Misc - Sweat and Tears
Shows up in Mutt's Shop on the Ground Floor (GF) after 14 days have passed (e.g. when the calendar says "Only 1 days left...") The baseline cost for it is [$200].

Be careful if you've been buying special goods from him all game, as everything increases in price significantly with compound interest (ended up costing more than [$900] on my first playthrough) Simply buy it and the achievement is yours!


Frederic

Helped Frederic get rid of his portraits.

Misc - Frederic
Help the first Frederic you encounter, which is actually Fake Frederic, since he stole the face of the Real Frederic in the back. You won't be able to trigger the achievement by helping any of the other Frederics, including the real one.

Fortunately, completing Fake Frederic's quest to kill all other Frederics provides a {Paint Palette}: "A mysterious paint palette, held in place of a ranged weapon. Adds random status effects to melee."


See the "Side Quests & Optional Content" section below for more details on all the Frederics!
Achievements - Bosses
Grin

Defeated the Grinning Beast

Boss - Grinning Beast
On Floor 2 at the end of the hall, you'll pick up the Apartment 21 Key then get chased by the Grinning Beast. Defeat it instead of running away! Afterwards you can visit the room the beast came from and find Leigh, who will act as a Buying & Selling shop, or a new Party Member!


Teething

Defeated Baby Teeth

Boss - Baby Teeth
After sleeping for the first day, the Apartment 32 door (on Floor 3) just across from your apartment will be open. Defeat Clint in the hallway, then get the doorknob from Joel in the bathroom. Go through the house, defeat Madison, then on the way back you'll get ambushed by Baby Teeth from the shadows! Intentionally get into a fight, and then defeat it!


Photography Enthusiast

Defeated Shutterbug

Boss - Shutterbug
Lyle (2nd Floor Apt #21) turns into this if you attack him! Make sure to attack the photo and destroy it quickly leaving Lyle/Shutterbug as your only enemy (Molotovs are great here) Delay a bit until his true form is revealed.


Identity Crisis

Defeated Painter

Boss - Painter
Frederic in the first room is actually Fake Frederic (a.k.a. Face Taker), as he stole the real Frederic's face. Real Frederic (a.k.a. Faceless Frederic) can be found in the very back locked behind a door that needs the {Stained Key}, which you'll have to get from Toxic Fred. Defeat Face Taker for the achievement.

See the "Side Quests & Optional Content" section below for more details on all the Frederics!


The stars gazed back

Defeated Stargazer

Boss - Stargazer
Found on the Third Floor Apartment 31. Turning off the lights will reveal it!


Writers' Block

Defeated Typewrither

Boss - Typewrither
Found on the second floor after fixing the elevator.


Surveillance

Defeated Panopticon

Boss - Panopticon
Found in the Security Room in the basement. Disc combo to get in: Neptune (16) & Mars (2) Discs, then the Sun (13) & Pluto (5) Discs. For the extra door, use Uranus (28) & Negative (-10) Discs.


Iron Crown

Defeated the Rat King

Boss - Rat King
Can be found wandering the First Floor labyrinth.


Got out of hand quickly

Defeated Crawling Hand

Boss - Crawling Hand
You can find the Crawling Hand on the ground floor after the bus crashes into the Main Lobby.


The Crawler

Defeated Crawler

Boss - Crawler
Found in the B1 stairwell after the bus crashes into the Main Lobby.


Polyglot

Defeated Argot

Boss - Argot
Argot can be found in the basement behind the Neptune (16) Disc locked door.


Absolute Zero

Defeated Pompom

Boss - Pompom
In the frozen apartment across from yours on the 3rd floor. You can potentially miss out on this if you don't use the ice melt salt properly. There are other ice melt salt items elsewhere in the building outside of the apartment.


Foxhole

Defeated the Grave Digger

Boss - Grave Digger
Progress through the Landlord's Apartment, shortly after paying your last bit of rent you'll run into this boss.


Waterlogged

Defeated Boiler Beast

Boss - Boiler Beast
Found in the sewers after hitting the lever that lowers the metal bars.


Burned Out

Defeated Furnace

Boss - Furnace
Found in the sewers in the basement. You'll have to kill every tick on the pipes, including Lil Tickle (the nice tick who trades in friendship points) then investigate the furnace.


Mycelihumor

Defeated Laughing Mold

Boss - Laughing Mold
In the mushroom area in the basement, the mushrooms you can step on trigger mushrooms to rise and fall elsewhere. Find the one that traps you on the right side of the room, then wait 30 seconds or so for it to rise up and start moving! You can talk to it and be nice and you won't have to fight and still get the achievement.


Mushroom Queen

Defeated the Spore Mother

Boss - Spore Mother
Found at the end of the mushroom area in the basement. Defeating her will remove all the spores and enemies in the area, including Phillppe (party member), Claire (carpenter /w apt upgrades), Sylvain (card guy), Jean Pierre (weapon crafter), Roderigue (can't be saved), Danielle (can't be saved), since they were mushroom mimics the whole time.


Traffic Stop

Defeated the Police Car

Boss - Police Car
Found halfway through the parking garage in the basement.


In the Salad Basket

Defeated SWAT Truck

Boss - Police Truck
Found at the end of the parking garage in the basement.


Car Hell

Defeated the Hell Car

Boss - Hell Car
Found at the north side of the parking garage in the basement next to a Flamethrower. If you don't defeat it in time you'll be taken to car hell! (another achievement) Behind it is the Hellsword - probably the strongest melee weapon in the game!


Garbage Disposal

Defeated Garbage Worm

Boss - Garbage Worm
After fixing the elevator in the basement, go up one floor to the ground floor then walk north to fight the Garbage Worm. Drops the Janitor's Keyring.
Achievements - Unique Deaths
Look Outside

Followed Instructions.

Death - Look Outside
Simply start up the game and look out the window!


Behind the Mask


Death - Behind the Mask
After being friendly with the Shadow Mask, it'll eventually show up in your room and try to invite you into it's coat; don't try to resist!


Worm debate


Death - Worm
After the Rafta & Nestor situation happens assuming you followed Nestor's head up to the 2nd floor shop, you'll now be talking to Nestor instead of Eugene. Ask him the following: -> "What did you do to Eugene?" -> "Is he dead?" -> "Let him go." -> "You are torturing him!" then commence the consequences!


It DID last longer.


Death - Photograph
If Lyle (2F Apt #21) is attacked, they'll start to develop a photo of you in the corner (it can be defeated). Let the fight progress far enough without destroying the photo to reap the consequences!


Through the looking glass


Death - Telescope
Look through the telescope on the 3F Apt #31 after pointing it outside. You can also die by looking at the projection on the ground after turning off the lights.


Projector Doom


Death - Projector
On 3F Apt #37 (Victor's Apartment), the Golf Room's projector will be the cause of this one. Get the {Void Disc} turned into the {Negative Disc} from F3 Apt #31, and bring it here.

Project the {Negative Disc} image from the outside directly onto the wall instead of tilting the head down and look at it.


Dark Room


Death - Darkroom
In 2F Apt #21 (Lyle's Apartment) you'll get the {Dark Room Key} after defeating Lyle. Note: you can get unlimited {Photo Paper} in the dark room, if you don't already have some.

To get some {Exposed Paper} of the image that will kill you, use the {Void Disc} turned into the {Negative Disc} from F3 Apt #31, and bring it to F3 Apt #37 (Victor's Apartment) in the Golf Room with the projector. Do the following: "Tilt the head down." -> "Place photo paper" -> "Insert disc." -> Use {Negative Disc} -> "Switch it on." -> Get {Exposed Paper}.

Bring the {Exposed Paper} back to Lyle's Dark Room and use the basins to develop the photo. Keep trying to look at the photo as it develops!


Oculus


Death - Oculus
Stare at the big eyeball in one of the doors on 1F (the one hallway with too many doors) for way too long. Check the maps section below to see exactly where it is.


Vehicular Manslaughter


Death - Bus
On the Ground Floor (GF), the first time you go into the Main Lobby, a bus will crash into the building. Quickly run over to the front of it and get hit!


One With The Fungus

Embraced the spore queen.

Death - Spore Queen
Reach the end of the mushroom area in the basement with Phillippe in your party. When he goads you into embracing the Spore Queen (regardless if you've accidentally touched any spores) go ahead and do it!


Car Hell

Was brought to hell (by car).

Death - Hellcar
On the north side of the parking garage in the basement, right next to a {Flamethrower} on a bench, you'll encounter the Hellcar! Get into a fight, then after it swallows you whole, fail to escape in time.


All you need is love

Tried hugging the Fred who bites.

Death - Hug Teeth
Basically, talk to Fred Who Bites until you get options to try to calm him down, then offer to give him a hug. Keep trying way, way too hard to give him a hug, and don't give up! (until you die, of course)

See the "Side Quests & Optional Content" section below for more details on all the Frederics!
Achievements - Endings
Truth

Looked upon the visitor's true form.

Ending - Ritual Truth
Give 4 correct offerings of the Visitor to Jasper on the ground floor, then meet on the roof.

The correct offerings are:
- A Painting of the Visitor. It can be found in Frederic's Apartment on 1F. Get a {Canvas Bag} from Fake Frederic, then put the painting that is BLUE and WET into it. The correct one is in the upper left corner of the darkened painting room.
- A Photograph of the Visitor. Starts with the {Void Disc} and Telescope on 3F. Turn it into the {Negative Disc}, then place {Photo Paper} in front of the Projector in the Golf Room in Victor's Apartment on 3F. Take the {Exposed Paper} to Lyle on 2F to develop.
- A Recording of the Visitor. In the basement there is a Security Room with the Panopticon boss. Defeat it, then place the {Guinea Pig} in the chair. Change the feed until they turn into a monster, which is confirmation that the feed was the correct one. Record the feed on the {Blank Tape} from the Convenience Store on the ground floor.
- A Manuscript of the Visitor. On 2F after fixing and using the elevator, in the apartment with the Typewrither boss. The correct manuscript is the {Loose Manuscript}.

Defeat the Exalted Four, then when the Visitor offers to let you see it's true form, you must accept.


Denial

Looked away from the visitor's true form.

Ending - Ritual Denial
Give 4 correct offerings of the Visitor to Jasper on the ground floor, then meet on the roof.

The correct offerings are:
- A Painting of the Visitor. It can be found in Frederic's Apartment on 1F. Get a {Canvas Bag} from Fake Frederic, then put the painting that is BLUE and WET into it. The correct one is in the upper left corner of the darkened painting room.
- A Photograph of the Visitor. Starts with the {Void Disc} and Telescope on 3F. Turn it into the {Negative Disc}, then place {Photo Paper} in front of the Projector in the Golf Room in Victor's Apartment on 3F. Take the {Exposed Paper} to Lyle on 2F to develop.
- A Recording of the Visitor. In the basement there is a Security Room with the Panopticon boss. Defeat it, then place the {Guinea Pig} in the chair. Change the feed until they turn into a monster, which is confirmation that the feed was the correct one. Record the feed on the {Blank Tape} from the Convenience Store on the ground floor.
- A Manuscript of the Visitor. On 2F after fixing and using the elevator, in the apartment with the Typewrither boss. The correct manuscript is the {Loose Manuscript}.

Defeat the Exalted Four, then when the Visitor offers to let you see it's true form, you must refuse.

Definitely considered the "best" happy ending of the bunch!


Open Your Eyes

Performed a flawed ritual.

Ending - Flawed Ritual
Give 1-3 correct offerings (and the rest wrong) of the Visitor to Jasper on the ground floor, then meet on the roof. Defeat the astronomers once the transformation happens!


No Going Back

Survived 15 days.

Ending - No Going Back
Simply wait 15 days and then leave your front door.


Screaming Sky

Ran from the exalted four.

Ending - Screaming Sky
Give 4 correct offerings of the Visitor to Jasper on the ground floor, then meet on the roof. When speaking with the Exalted Four, you must run away instead of trying to fight.


Failure

Completed failed the ritual.

Ending - Failure
Give 4 completely wrong offerings of the Visitor to Jasper on the ground floor, then meet on the roof. The easiest set to give to qualify for this is the {Guinea Pig}, the {Crumpled Manuscript}, {Clean Manuscript}, and plain {Photo Paper}. There's no boss fight at all for this one, so it's by far the easiest ending to get for the challenge run achievements.


XIN-AMON

Defeated the True XIN-AMON.

Ending - Xin-Amon
Give 3 correct offerings of the Visitor and the {Guinea Pig} Cinnamon to Jasper on the ground floor, then meet on the roof. You must successfully defeat the true XIN-AMON once the transformation happens.


Eternity

Was defeated by XIN-AMON

Ending - Eternity
Give 1-3 correct offerings of the Visitor and the {Guinea Pig} Cinnamon to Jasper on the ground floor, then meet on the roof. You must then lose to the true XIN-AMON once the transformation happens. Note: you can make it go faster by unequipping armor and just guarding. All enemies will evolve and do more damage over time.
Achievements - Challenges
Miasma

Reach an ending without taking a shower.

Challenge - No Showers
You'll miss out on the Calm +10, Hygiene +60 and Morale +4 from the showers, but otherwise you'll be just fine without using it (if a little smelly) even in a regular run.

I don't recommend trying to get it on your first playthrough since your main character will voice their thoughts on most things that are happening to them, akin to a hint system (and the writing in this game is wonderful, so try not to miss out!)

See the Challenge Achievements Run Guide below to get this achievement and the others all at once!


Loner

Reach an ending without making any friends.

Misc - No Friends
Decently tough challenge, as adding more party members is a massive force multiplier for battles. Just be sure to refuse any party members and you'll trigger this one no problem (see above for Party Recruitment achievements so you know who to avoid)

See the Challenge Achievements Run Guide below to get this achievement and the others all at once!


Insomnia

Reach an ending without sleeping once.

Misc - No Sleep
Sleeping is totally optional as you can quite literally stay up as long as you want (and become "Exhausted" which reduces your stats)

See the Challenge Achievements Run Guide below to get this achievement and the others all at once!


Ascetic

Reach an ending without eating a single meal.

Misc - No Eat
Fairly simple to achieve this one; all you need to do is avoid using the oven in your kitchen at all! You can still eat all kinds of inventory food to solve your HP, STM, and hunger problems.

See the Challenge Achievements Run Guide below to get this achievement and the others all at once!


Gamer's Bane

Reach an ending without playing a video game.

Misc - No Games
This one's pretty simple; the skills from the video games are mainly nice to have, and aren't required to beat the game if you're fairly thorough (or playing on easy)

See the Challenge Achievements Run Guide below to get this achievement and the others all at once!


Long Weekend

Reach an ending in only 3 days.

Misc - 3 Day Clear
You're very likely to combine this one with many of the other challenge achievements (especially "Insomnia") The best ending for this one is the "Failure" ending, since you don't need to fight a final boss at all.

See the Challenge Achievements Run Guide below to get this achievement and the others all at once!
Challenge Achievements Run Guide
The 6 challenge achievements are:
Long Weekend - Reach an ending in only 3 days.
Gamer's Bane - Reach an ending without playing a video game.
Insomnia - Reach an ending without sleeping once.
Miasma - Reach and ending without taking a shower.
Loner - Reach an ending without making any friends.
Ascetic - Reach an ending without eating a single meal.


If you do it right, then these'll all pop at once!

These are the steps you can take for completing the 6 challenge achievements in one playthrough quickly and easily (and 1 of the endings, if you don't already have it!)
  1. First, start the game on Easy. This enables autosave & save anywhere, which'll save you a lot of time if you die from a rough encounter!
  2. [3F] > Leave apartment > Follow the trail of blood > Equip {Baseball Bat} > Kill Wounded Neighbor & Take {Kitchen Knife}, healing items, & {Padlock Key} > Go to Vincent's apartment > Get the {Guinea Pig} from the bedroom (1st Offering) > Head to stairs @ end of hall to the right > Open stairwell and go to [2F].
  3. [2F] > Go all the way to the end of the hallway > Get Apartment Key #21 > Defeat the Grinning Beast (weak to [Slash] weapons) to enable an early Shop (Buy & Sell options from Leigh) > Enter Apartment #21 > Get {Photo Paper} from Lyle (the 2nd Offering) & the {Crossword Puzzles} > Go through the bathroom in the top left and follow it downstairs to [1F].
  4. [1F] > Reach the Rat Child Apartment by going Right, Up, Up, Right (OR see the simplified F1 map for directions) > Get the Rat Child > Reach Apartment #13 by going Left, Down, Right, and feed the Mouth the Rat Child (sorry buddy!) > Pick up the {Earth Disc} > Reach Apartment #11 by going Right, Up, Up, Left > Avoid the Rat Freak, get the {Mars Disc}, and leave > Head to the F1 stairwell by going Right, Up, Up, Right > Go downstairs and use the {Earth Disc} + {Mars Disc} unlock the [GF] door.
  5. [GF] > Trigger the Bus Crash event > Pass 4.5 hours to open the Landlord's Apartment door (the Crossword Puzzles in your apartment are great for this) > Enter the Landlord's Apartment & get the {Basement Key} (it'll be available after the 3rd phase paying rent) > Go to [B1]
  6. [B1] > Activate the lever in the sewers bottom right > Run left from the Boiler Beast > Head to the friendly monster room > Go through parking garage > Reach the Elevator > Kill the Elevator Thing & use elevator to go to [2F]
  7. [2F] (via elevator) > Take the {Crumpled Manuscript} from the desk (3rd Offering) > Take the {Clean Manuscript} from the top right room (4th Offering) > Head to [GF]
  8. [GF] > Go to Jasper north of crashed bus and give him the {Guinea Pig}, the {Photo Paper}, the {Crumpled Manuscript} and the {Clean Manuscript}.
  9. [Roof] - Finish with the "Failure" ending. No final boss fight necessary!


Challenge Achievements Run - Video Guide - No Commentary
If you're more of a visual/video learner, I've also recorded a video of a sub-30 minute run that meets ALL the requirements for the challenge run! You can check it out here:

Complete Video Game & Skills List
Full list of the 20 video game cartridge locations in the order they'll be displayed on your shelf, as well as what skills they teach after completing it:

01 {Wake the Blood Knight}
Location: Found on 3F Apt #34 just past the boss, Pompom. You'll need enough {Ice Melt Salt} to get it.

Skill: Teaches {Blood Madness} after 4 sessions (8 hours) - "Driven mad by blood! Need to be bleeding to use. Lose control, but become resilient and deadly." Costs 5 STM.

02 {Wizards Hell: Arcane Tears}
Location: Found on 3F in Vincent's Apt #37 in the Golf Room.

Skill: Teaches {Painful Stab} after 10 sessions (13 hours) - "Cause a small but very painful wound. Pain reduces accuracy and subtracts 1/10th of HP every turn." Costs 2 STM.

Inspired By: Dungeon Keeper

03 {Super Jumplad}
Location: You start the game with this in your collection.

Skill: Teaches {Jump Attack} after 2 sessions (4 hours) - "Weapon attack boosted by your agility. Slightly increased chance to damage your weapon." Costs 2 STM.

Inspired By: Mario, Platformers

04 {Super Jumplad 3}
Location: Bought from the Gamer who randomly shows up at your door for $60.

Skill: Teaches {Numbness} after 5 sessions (9 hours) - "Lose 10% of current life, but become immune to most status effects for 10 turns." Costs 5 STM.

Inspired By: Mario, Platformers, Wildly Different Sequels

05 {Catafalque}
Location: Found in the sewers. It's at the end of a hallway right of the 2nd lever, which you need to activate to open the metal bars blocking the door.

Skill: Teaches {Risk Taker} after 4 sessions (8 hours) - "Boosts melee attack and ballistics, but also increases all damage received for 3 turns." Costs 4 STM.

Inspired By: Old School Castlevania

06 {Honko's Grand Journey}
Location: Found in Frederic's Apt on 1F in the dark painting room.

Skill: Teaches {Cash Sock} after 4 sessions (8 hours) - "Attack based on accumulated booty. Lose 5% of treasure at every use." Costs 2 STM.

07 {Madwheels 97}
Location: You start the game with this in your collection.

Skill: Teaches {Nitro Boost} after 5 sessions (10 hours) - "Boost your party's AGI and Evasion by 30% for give turns. Also helps to stave off sleep actions." Costs 3 STM.

Inspired By: All Racing Games, Mario Kart, Need for Speed

08 {Wraithscourge}
Location: Found in the Landlord's apartment on the Ground Floor (GF), when it's in the final mutated state with the Grave Digger boss. There is a room to the west of where you blow the rubble with a sapper charge to find the Old Rifle. In that room, take the south east door and it will lead you to this game on a table!

Skill: Teaches {Dungeon Dance} after 4 sessions (8 hours) - "Move in, attack, move aside! The combat waltz of all dungeon crawlers. Counterattacks for four turns." Costs 2 STM.

Inspired By: Old School Dungeon Crawlers, Wizardry, Might & Magic, King's Field

09 {Massacre Princess}
Location: Bought from the Gamer who randomly shows up at your door for $120. He'll ask for it back if you buy it; stay firm, refuse the money, and the katana (another achievement) to keep it!

Skill: Teaches {Meteor Strike} after 12 sessions (28 hours) - "Rush Braver's forbidden technique." Costs 999 STM, so it's basically a joke option!

Inspired By: Every JRPG, Final Fantasy, Dragon Quest

10 {Kill to Shoot}
Location: Found on 3F in Apt #32 after playing with Ben and getting the best result (see the "One last game" achievement)

Skill: Teaches {Aim The Killshot} after 4 sessions (8 hours) - "Aim carefully for that next attack..." Costs 2 STM.

Inspired By: Modern FPS Games, Call of Duty Campaigns (single player)

11 {Myrmidon}
Location: You start the game with this in your collection.

Skill: Teaches {Combat Medic} after 7 sessions (14 hours) - "Heals 25% life to one target in battle, but has a 25% chance to cause bleeding." Costs 4 STM.

Inspired By: Strategy Games, Fire Emblem

12 {Myrmidon XII}
Location: Found in the convenience store on the Ground Floor (GF)

Skill: Teaches {Garrison} after 6 sessions (10 hours) - "Stay put, but increases ballistics, ballistic defense and shooting crit rate for 4 turns." Costs 3 STM.

Inspired By: Strategy Games, Fire Emblem

13 {Screamatorium}
Location: Found by interacting with the left side of the bookshelf in your living room multiple times.

Skill: Teaches {Screamer} after 4 sessions (6 hours) - "Aaah! Chance to cause panic on all enemies. How obnoxious!" Costs 4 STM.

14 {Frogit About it}
Location: Found in the bathroom of the Jungle Apt on 1F.

Skill: Teaches {Croak Orders} after 5 sessions (8 hours) - "Boss an enemy around into fighting for you! Can charm one target for up to 4 turns." Costs 4 STM.

15 {Blood Ghoul Orgy 3}
Location: Bought from the Gamer who randomly shows up at your door for $60.

Skill: Teaches {Hurt Me Plenty} after 4 sessions (8 hours) - "Taunts enemies into attacking you, and reduces incoming damage by 25% for 5 turns." Costs 3 STM.

16 {Octocook}
Location: Bought from the Gamer who randomly shows up at your door for $60.

Skill: Teaches {Octostrike} after 4 sessions (6 hours) - "Attack random targets 8 times in a row." Costs 8 STM.

17 {Space Truckerz}
Location: In the room behind the growth (requires {Herbicide}) in Lyle's Apt on 2F.

Skill: Teaches {Long Haul Flow} after 4 sessions (8 hours) - "Lose control of Sam for a few turns but recovers 10% STM a turn." Costs no STM!

Inspired By: Desert Bus, Euro Truck Simulator, American Truck Simulator

18 {Reptile Football}
Location: Found in Eugene's Shop on 2F; you need to "level up" his shop by spending enough money over 5 days. The money spent thresholds are Lvl 1 [$75], Lvl 2 [$150], Lvl 3 [$300], Lvl 4 [$400], and Lvl 5 [$500]. At max level, he'll have it for sale!

Skill: Teaches {Running Tackle} after 4 sessions (8 hours) - "Ram into the target. Receives a damage bonus from your defense." Costs 1 STM.

19 {Crossword Challenge}
Location: Found in Mutt's Fish and Chips shop on the Ground Floor (GF), after some days have passed.

Skill: Teaches {Confusing Word} after 5 sessions (8 hours) - "Use a powerful word. May confuse all enemies." Costs 5 STM.

20 {Unlabeled Cartridge}
Location: Found on the Ground Floor (GF) behind 2 locked Disc doors. 1st door solution: Earth [1] + Uranus [28] 2nd door solution: Mars [2] + Sun [13]

Skill: Nothing!


All Video Game Party Interactions - Full Playthroughs - No Commentary
If you're curious about all the possible party member interactions as well, then I've also chronicled them all for you all here:

Side Quests & Optional Content
Frederic's Apartment (F1)


Frederic's Apartment can be found on the 1st Floor (F1) labyrinth across from Aurelius' Room, one of the Astronomers looking for observations of the Visitor. You can just get the {Painting} key item, leave and ignore everything else, but if you stick around there's some great additional things to do here!

When you first enter you'll see Frederic, the Painter. All the other doors are locked. Speak with Fred and he'll ask you for help with his 9 paintings that have come to life and are "plotting something". He'll then give you the {Painter's Key} and also tell you about Wriggly Fred in the fridge.

Nearly ALL of the 10 Freds will talk to you and try to convince you to help them in some way. Here's the lowdown of all the Freds and their Quest Rewards:

Frederic, the Painter (a.k.a. Fake Fred/Face Taker) The first one you talk to after entering. He rewards you as you start killing the other Freds around the apartment.

Those rewards in order they're given are:
1 other Fred - 4x {Turpentine}
3 other Freds - a {Canvas Carry Bag}
6 other Freds - 6x {Bandages}, 2x {Tonic}, 1x {First Aid Kit}
ALL 9 other Freds - a {Paint Palette} (Goes in your ranged slot. It adds random status effects to melee attacks!)

Killing him as the Face Taker rewards a {Paint-Stained Apron}, a {Beret}, a {Torn-Off Face}, the {Canvas Carry Bag} (if you don't already have it) and the "Identity Crisis" achievement.


Bright Fred Heals your party once a day. Reward for killing all other Freds is a much bigger party heal once a day, as well as a portable {Medic-in-a-jar} item that can heal you once a day as well.

Wriggly Fred Can be found in the fridge after getting the {Painter's Key}. Reward for killing all other Freds is the refrigerator, a thank you, and his friendship...!

Godhead Fred In the back (trying to scam you). Provides the "Just some guy" achievement if you get him to drop the act. The reward for killing all other Freds is $400 if he dropped the act, otherwise it's a middling jewelry accessory called the {Strange Feather} (gives a small Luck boost)

Fred Who Bites Provides the "All you need is love" achievement if you talk and ask if there's "something to get his stress down" and suggest "Uh... a hug?", then go ALL IN. You can also give him "tonic, tranquilizer, and meds", but none of them seem to do anything (and as of right now the "tranquilizer" doesn't seem to exist anywhere)

Toxic Fred The one that tries to trick you with the hat. Reward for killing all other Freds (with the hat on) keeps the hat stuck to you, but now provides immunity to poison.

To get the {Stained Key} you need to kill both Toxic Fred and ALL of his Green Paintling minions around the apartment as well.

There should be 9 total you'll need to defeat:
2 Green Paintlings in the Living Room
3 Green Paintlings in the Fake Cowboy Hat Room
1 Green Paintling in the South Hallway
2 Green Paintlings in the North Hallway
and the "Not A Cowboy Hat" minion


Scared Fred Hides in a closet. There is a kind of "fear" level at play here, so to get him to come out, you'll either need to reduce his fear!

Factors:
- Party Members 1: Alone, or Joel & Sophie (-fear)
- Party Members 2: Hellen, Papineau, & Leigh (+fear)
- Weapons 1: No weapons (-fear)
- Weapons 2: Melee & Guns (+fear)
- Items: Give him a juice box or a soda (-fear)

You can also pry open the closet doors with enough damage!


Tumor Fred Found in the bathroom. The reward for killing all other Freds is a {Tumor Lump} throwable combat item, retrievable once a day when you run out. If you leave ANY remaining {Tumor Lump} items in your inventory overnight (at around 4 AM), they will split & duplicate! You can easily keep doing this until you max out at 99!

Shadow Fred Found in the top right of the darkened painting room.

Faceless Fred (a.k.a. Real Fred) The faceless one locked away in the back (his face was stolen by Fake Fred/Face Taker). The reward for killing all other Freds is a one time use to duplicate a piece of non-weapon equipment! Takes 1 day to finish.


Frederic Interactions & Quest Rewards - Video Guide - No Commentary
If you're still curious about all the interaction possibilities and visible quest rewards not covered here, then please check out this no frills video walkthrough (if you are so inclined!)


Fungus Lair (B1)


The Fungus Lair area can be found in the Basement (B1), just south of the friendly monsters beyond the sewer maze area. This entire area is optional since the {Neptune Disc} can be found halfway through, and is not actually required for any of the current endings!

Many achievements can be found here, and some are quite missable if you are not careful. Regardless of what difficulty you're playing on, be sure to save before attempting it for the first time, and even after making significant progress.

For a full experience on your first (or future) playthrough, be sure to do the following:

Phillippe 1 - Recruit him by sending someone home or coming with 3 or less party members. If you already have the achievements related to him, then you can just skip this for future playthroughs (unless...?)

Laughing Mold - Get trapped in the east part of the 2nd puzzle room to be exposed to Laughing Mold's routine. If you clear the final boss of the area first, then he'll disappear, and you'll miss your chance!

Spore Queen 1 - Goaded by Phillippe after reaching the "Princess", Hug her the for the achievement when given the chance (save first). You do not need to be exposed to any spores to do this.

Spore Queen 2 - The fight can get tricky if your party is highly susceptible to the [Charm] status effect. Bring both [Charm] resist Gear as well as [Poison] resist Gear, if you can. She's also susceptible to most status effects & [Acid] damage, but resistant to [Crush] damage.

Spore Queen 3 - Be sure to clear out most of the zone first before fighting her, as the entire area will completely cleared of all enemies, including all of their EXP and money!

Phillippe 2 - Get {Phillippe's Remains} by waiting until turn 2 after getting him to reveal his mushroom form. This can be done either at the exit of the zone OR with the Spore Queen.

Then say "The fungus got into your brain...?" -> "Don't worry Phillippe. I'll save you!" -> "Don't worry Phil. I don't believe his lies." -> "You're my only friend Phillippe. I'll find a way." and then killing him and any of his cohorts!


Fungus Basement (B1) - Video Guide - No Commentary
Curious about all the possibilities for the multitude of dialogue choices & possibilities in this area? Check out this video showing a full playthrough of the zone as well as some alternative decisions you could potentially make!

Door Encounters - Merchants
When your main character is at home doing anything that passes the time (e.g. taking showers, playing video games, cooking food, etc.) there's a chance that you'll run into ANY of the encounters listed below when someone knocks on the door.

It's entirely possible to miss one or more of these in a playthrough, so be sure to save constantly and always try to answer the door (and pray to RNGsus as well). I've provided all currently known door encounters here for reference, as well as possible alternative outcomes too.

Food Trader
Sells a randomized selection of 9 items at a time. Currently known possibly sold goods:
  • {Cheez-Stix} [$4]
  • {Chocky Bar} [$4]
  • {Frozen Veggies} [$8]
  • {Gummi Bears} [$8]
  • {Juice Box} [$6]
  • {Lemon Drink Can} [$4]
  • {Onion-Os} [$10]
  • {Pizza Bites} [$4]
  • {Potatoes} [$5]
  • {Raw Pork} [$12]
  • {Rice} [$4]
  • {Rolling Pin} [$16]
  • {Steak Knife} [$8]
  • {TV Dinner} [$4]
  • {Vodka} [$4]


Gun Trader
Sells a randomized selection of 9 items at a time. Currently known possibly sold goods:
  • {Acid Flask} [$40]
  • {Ammo Belt} [$60]
  • {Army Boots} [$200]
  • {Combat Knife} [$40]
  • {Explosive Round} [$20]
  • {Explosive} [$60]
  • {Flak Jacket} [$960]
  • {Gas Bomb} [$40]
  • {Gatling Gun} [$1600]
  • {Grenade} [$60]
  • {High Caliber Bullets} [$16]
  • {High-Caliber Rifle} [$800]
  • {Machete} [$32]
  • {Magnum Bullet} [$25]
  • {Magnum} [$480]
  • {Molotov} [$20]
  • {Rifle Bullet} [$8]
  • {Shuriken} [$20]
  • {Shotgun Shell} [$10]
  • {SMG Bullet} [$4]
  • {SMG} [$240]
  • {Throwing Dart} [$10]
  • {Throwing Knife} [$14]


Nurse

Sells a randomized selection of 9 items at a time. Currently known possibly sold goods:
  • {Balm} [$25]
  • {Bandages} [$6]
  • {D-Clogger} [$25]
  • {First Aid Kit} [$70]
  • {Medicell} [$15]
  • {Purocare} [$25]
  • {Scalpel} [$25]
  • {Smelling Salts} [$80]
  • {Soap} [$8]
  • {Stimulant} [$120]
  • {Tonic} [$40]
  • {Toothpaste} [$12]
  • {Vinegar} [$25]


Tough Guy

Sells a randomized selection of 9 items at a time. Currently known possibly sold goods:
  • {Baseball Bat} [$20]
  • {Baseball Cap} [$12]
  • {Bicycle Helmet} [$96]
  • {Chest Guard} [$600]
  • {Energy Drink} [$24]
  • {Football Helmet} [$200]
  • {Granola Bar} [$6]
  • {Hockey Helmet} [$280]
  • {Metal Bat} [$32]
  • {Padded Jacket} [$420]
  • {Pool Cue} [$16]
  • {Rapier} [$32]


Gamer

Sells a selection of 7 items:
  • {Super Jumplad 3} [$60]
  • {Octocook} [$60]
  • {Blood Ghoul Orgy 3} [$60]
  • {Massacre Princess} [$120]
  • {Cola Can} [$8]
  • {Energy Drink} [$24]
  • {Bocky} [$10]

If you buy {Massacre Princess}, he'll ask for it back and offer $200 ($80 profit!) If you refuse, he'll offer you a {Katana} instead. If you refuse one more time, you'll get to keep it.


Curio Merchant

Sells a randomized selection of 9 items at a time. Currently known possibly sold goods:
  • {Asbestos Amulet} [$250]
  • {Carnelian Ring} [$250]
  • {Circlet of Reason} [$250]
  • {Elixir} [$250]
  • {Eye Amulet} [$250]
  • {Gloves} [$250]
  • {Lapis Band} [$250]
  • {Ring of Alertness} [$250]
  • {Ring of Purity} [$250]
Door Encounters - All Others
Delivery Guy (Pizza)


The Pizza guy will have varying sizes and types of pizzas, which will be high quality food items you can take with you on the go. They tend to restore lots of HP, STM, and hunger!

The known possible sizes of pizza are:
  • {Small} (4x slices)
  • {Medium} (6x slices)
  • {Large} (8x slices)
  • {X-Large} (12x slices)
  • {XX-Large} (16x slices)
The known possible types of pizza are:
  • {All-Dressed} (+28 HP +8 STM)
  • {Cheese} (+20 HP +6 STM)
  • {Deluxe} (+40 HP +10 STM)
  • {Italian} (+24 HP +12 STM)
  • {Meat Lover's} (+44 HP +4 STM)
  • {Pineapple} (+20 HP +14 STM)
  • {Rotten} (+12 HP +2 STM)
  • {Vegetarian} (+16 HP +16 STM)

It can also come with some bonus items, like {Cola Can}! Sometimes the whole order is also 50% off, or there's a "two for the price of one" deal that doubles your order.

Note: If you give him a big tip, then he's significantly more likely to show up at your door again in the future!


Dan


Simply invite him in to get a new party member & roommate!

Has a small chance to be a corrupted encounter where Dan has mutated and you'll have to fight him. This corruption chance will increase as the days go on; so if you're trying to recruit him, try to get as many door encounters as you can as early as possible.


Ernest


You can try to invite Ernest in, but he'll say he's been "tricked" before, so he doesn't trust you quite yet. Give him good, high quality food (like sandwiches prepared in your kitchen that are "very filling")

Giving him food makes it extremely likely he'll show up again, but if you don't give him any, then he won't show up again.

After enough times doing that you can then invite him in to get a new party member & roommate!


Morton


Morton accepts all your {Junk} that you've been collecting around the building. Giving him some makes it extremely likely he'll show up again.

After giving him enough {Junk} (15 or more pieces) he'll suggest "working together". After that, you can invite him in to get a new party member & roommate! You can still give him {Junk} while he's a party member, you just need to talk to him in your living room.

Has a small chance to be a corrupted encounter where Morton has mutated and you'll have to fight him. This corruption chance will increase as the days go on; so if you're trying to recruit him, try to get as many door encounters as you can as early as possible.


Hellen


Simply invite her in to get a new party member & roommate!


Xaria & Monty


Let them crash at your place and you'll get 2 party members & roommates! Note: Xaria & Monty come as a pair, you can't add them to your party separately.


Sophie


Her mom's gone missing and she needs a place to hide out. Let her hideout at your place for a new party member & roommate!


Harriet


If Sophie's in your apartment hiding out, you can re-unite them and receive an {Elixir}, 2x {First Aid Kit}, and 4x {Tonic}! Harriet will also offer help and to visit them at Apartment 22 on 2F.

Has a small chance to be a corrupted encounter where Harriet has mutated. Goes without saying, but if you notice something off, do NOT turn Sophie over to her. This corruption chance will increase as the days go on.


William


William is injured in some way, and he'll hint to you what time of healing item you can give to him to solve his problem. If you do it right and give him something appropriate, you can earn anything from $60 to $120 for helping him out.

Has a small chance to be a corrupted encounter where he has mutated and you'll have to fight him! This corruption chance will increase as the days go on.


Nobody (Gift)


Nobody's there, but there is a free gifted random item on the ground, how nice!


Door Encounters - Video Guide - No Commentary
If you'd prefer to see all of the possibilities in one go, then check this out video! It currently contains ALL of the current door encounters (as of v1.02):

Items - Consumables & Crafting
Consumables - Healing:
  • {Bandages} Heals 20% HP & Cures Bleed (out of combat only)
  • {Tonic} Heals 40% HP
  • {First Aid Kit} Heals 50% HP & Revive (out of combat only)
  • {Balm} Cures Bleed, Burn, & Acid
  • {Antidote} Cures Poison
  • {Smelling Salts} Revive & Cures Sleep
  • {Disinfectant} Cures Infection
  • {Medication} Cures most physical status effects
  • {Stimulant} Heals 50% HP & 50% STM & Revives
  • {Elixir} Heals 100% HP & 100% STM

All Crafting Recipes:
  • 5x Bandages = Cloth + Disinfectant/Purocare
  • 2x Tonic = Vodka + Purocare
  • 2x Disinfectant = Vinegar + Medicell
  • 1x Explosive = Cleanerex + Gasoline
  • 2x Explosive = D-Clogger + Herbicide
  • 1x First Aid Kit = Disinfectant + Tonic
  • 1x Gas bomb = Klysox + Vinegar
  • 2x Gas bomb = Klysox + Cleanerex
  • 1x Herbicide = Vinegar + Cleanerex
  • 1x Molotov = Cloth + Gasoline/Whiskey/Vodka/Medicell
  • 1x Acid Flask = Vinegar + Purocare
  • 2x Acid Flask = D-Clogger + Purocare
Items - Melee Weapons
Melee - Crushing Weapons:
  • {Broken Handle} "[Makeshift/Crush]" (+4 ATK)
  • {Bottle} "[Makeshift/Crush]" (+8 ATK)
  • {Broom} "[Makeshift/Crush]" (+8 ATK)
  • {Candlestick} "[Makeshift/Crush]" (+8 ATK)
  • {Metal Detector} "[Crush]" (+10 ATK)
  • {Nightstick} "[Crush]" (+12 ATK)
  • {Golf Club} "[Crush]" (+12 ATK)
  • {Baseball Bat} "[Crush]" (+14 ATK)
  • {Hammer} "[Crush]" (+14 ATK)
  • {Rolling Pin} "[Crush]" (+15 ATK)
  • {Frying Pan} "[Crush]" (+16 ATK)
  • {Metal Bat} "[Crush]" (+16 ATK)
  • {Mop} "[Crush]" (+18 ATK)
  • {Ernest's Metal Bat} "[Crush]" (+19 ATK)
  • {Hockey Stick} "[Crush]" (+20 ATK)
  • {Joyeuse} "[Makeshift/Crush]" (+24 ATK)
  • {Jawbone Club} "[Crush] A fleshy club made out of a deformed jaw. 15% chance to stun opponents." (+24 ATK)
  • {Sledgehammer} "[Crush]" (+30 ATK)
  • {Folding Chair} "[Crush]" (+32 ATK)

Melee - Slashing Weapons:
  • {Bread Knife} "[Slash]" (+5 ATK)
  • {Steak Knife} "[Slash]" (+6 ATK)
  • {Old Axe} "[Slash]" (+12 ATK)
  • {Kitchen Knife} "[Slash]" (+16 ATK)
  • {Chef's Knife} "[Slash]" (+20 ATK)
  • {Cleaver} "[Slash]" (+22 ATK)
  • {Machete} "[Slash]" (+24 ATK)
  • {Fireman's Axe} "[Slash]" (+26 ATK)
  • {Claymore} "[Slash] A large, medieval two-handed sword. A very sturdy weapon. Can survive breaking twice." (+30 ATK)
  • {Katana} "[Slash]" (+30 ATK)
  • {Combat Knife} "[Slash]" (+38 ATK)
  • {Scalpel} "[Slash]" (+42 ATK)
  • {Rat Tail Whip} "[Slash] A whip made from the entwined rat tails. Attack hits multiple foes, may cause disease." (+10 ATK)
  • {Misshapen Limb} "[Slash] A strange limb with claws and too many elbows. It attacks three times." (-4 ATK)
  • {Sewage Blade} "[Slash] Mystical blade of crystalized refuse. Deals acid damage, and may reduce target's defenses." (+28 ATK)
  • {Chainsaw} "[Slash] Gasoline-powered. Unwieldy, but cause catastrophic wounds." Loaded w/ {Gasoline}. Must be empty to load. (+80 ATK)
  • {Hellsword} "[Slash] A heartbeat thrums against your hand. Deals Corruption damage. Reduces your max HP and STAM." (+80 ATK, +8 AGI, -60 Max HP, -20 Max STM)

Melee - Piercing Weapons:
  • {Carving Fork} "[Pierce]" (+6 ATK)
  • {Rake} "[Makeshift/Pierce]" (+7 ATK)
  • {Pool Cue} "[Pierce]" (+12 ATK)
  • {Rat Claws} "[Pierce] Gnarled rat claws you can use as weapons. Attacks twice. May cause bleeding." (+12 ATK)
  • {Dagger} "[Pierce]" (+16 ATK)
  • {Venom Dagger} "[Pierce]" (+16 ATK)
  • {Mosquito Knife} "[Pierce] A blood-drinking dagger." (+16 ATK)
  • {Rapier} "[Pierce]" (+20 ATK)
  • {Spade} "[Pierce]" (+26 ATK)
  • {Patchwork Club} "[Pierce] A lump of wriggly stitched flesh fashioned into a club. 30% chance to perform counterattacks." (+26 ATK)
  • {Pitchfork} "[Pierce]" (+32 ATK)
  • {Spear} "[Pierce]" (+32 ATK)

Melee - Special Weapons:
  • {Mace} "[Crush/Pierce] An antique spiked mace. Very strong. Can survive 2 breaks." (+24 ATK)
  • {Stun Baton} "[Shock] Battery-powered. Delivers an electric shock that stuns enemies." Loaded w/ {Batteries}. Must be empty to load. (+32 ATK)
  • {Cattle Prod Spear} "[Shock] Battery-powered. Delivers an electric shock that can paralyze foes." Loaded w/ {Batteries}. Must be empty to load. (+60 ATK)
  • {Furnace Edge} "[Fire] A white-hot blade pulled out of the heart of the furnace beast." (+42 ATK)
Items - Ranged Weapons & Ammo
Gear - Ranged Weapons:
  • {SMG} "A submachine gun." (+24 BLS) Loaded w/ {SMG Bullet}.
  • {SMG Special} "A submachine gun." (+32 BLS) Loaded w/ {SMG Bullet}.
  • {Pistol} "A small caliber handgun." (+32 BLS) Loaded w/ {Pistol Bullet}.
  • {Custom Handgun} "A small caliber handgun." (+40 BLS) Loaded w/ {Pistol Bullet}.
  • {Magnum} "A magnum revolver." (+50 BLS) Loaded w/ {Magnum Bullet}.
  • {Silver Magnum} "A magnum revolver." (+64 BLS) Loaded w/ {Magnum Bullet}.
  • {Chill Touch} "Customized paintball gun covered in mysterious arcane symbols..." (+12 ATK, +24 BLS, -4 AGI) Loaded w/ {Paintball}.
  • {Old Rifle} "An old hunting rifle." (+12 ATK, +58 BLS, -4 AGI) Loaded w/ {Rifle Bullet}.
  • {War Rifle} "An old rifle used in the war." (+12 ATK, +72 BLS, -4 AGI) Loaded w/ {Rifle Bullet}.
  • {Hunting Shotgun} "" (+12 ATK, +64 BLS, -4 AGI) Loaded w/ {Shotgun Shell}.
  • {Shotgun} "" (+8 ATK, +74 BLS, -4 AGI) Loaded w/ {Shotgun Shell}.
  • {High-Caliber Rifle} "A high-caliber rifle capable of burst fire. It has a bayonet." (+16 ATK, +52 BLS, -4 AGI) Loaded w/ {High Caliber Bullets}.
  • {Gatling Gun} "A high-caliber, belt-fed machinegun." (+20 ATK, +80 BLS, -8 AGI) Loaded w/ {Ammo Belt}.
  • {Crossbow} "A projectile weapon that fires bolts." (+8 ATK, +40 BLS) Loaded w/ multiple different {Bolt} types.
  • {Acid Sprayer} (+40 BLS)
  • {Flamethrower} (+48 BLS)
  • {Slingshot} "A projectile weapon that fires marbles." (+20 BLS) Loaded w/ {Marble}. Equippable by Sophie & Joel.
  • {Super Slingshot} "A projectile weapon that fires marbles." (+30 BLS) Loaded w/ {Marble}. Equippable by Sophie & Joel.

Items - Ammo:
  • {Pistol Bullet} "Low caliber bullet for a handgun."
  • {Magnum Bullet} "Magnum revolver bullet."
  • {SMG Bullet} "Small caliber bullet for an SMG."
  • {Rifle Bullet} "Bullet for a hunting rifle."
  • {Shotgun Shell} "Buckshot shell for a shotgun."
  • {High Caliber Bullets} "Bullet for a high caliber rifle."
  • {Ammo Belt} "Ammo belt for a belt-fed Gatling gun."
  • {Standard Bolt} "Projectile for a crossbow."
  • {Flame Bolt} "Incendiary projectile for a crossbow."
  • {Acid Bolt} "Acid projectile for a crossbow."
  • {Explosive Bolt} "Explosive projectile for a crossbow."
  • {Special Bolt} "Strange projectile for a crossbow."
  • {Paintball} "Tiny capsules filled with something foul. Monty makes these."
  • {Marble} "Can be used as ammo with a slingshot."
Items - Gear - Armor & Accessories
Gear - Head:
  • {Baseball Cap} "The baseball cap of a team you don't like." (+2 AGI)
  • {Beret} "Helps to keep your thoughts together. Helps resist Charm, Confusion, Panic and Rage."
  • {Blood Cap} "Cursed helmet gives you great power, but drains your life over time." (+4 ATK/BLS +2 DEF/BDF/AGI, +40 Max HP, +10 Max STM)
  • {Cowboy Hat} "Yeehaw." (+1 ATK, +2 BLS)
  • {Cowboy Hat} "Yeeeeehaw! A lucky hat!" (+2 DEF, +10 LUK) Only Sam can equip this!
  • {Cowboy Hat?} "Yeeeeehaw! A lucky hat?" (No Stats) Only Sam can equip this!
  • {Not a Cowboy Hat} "This fake cowboy hat won't come off your head. It makes you immune to poison." (No Stats) Only Sam can equip this!
  • {Football Helmet} "Protective headgear for football. Protects you from crushing damage and stun." (+4 ATK, +6 DEF, -2 AGI)
  • {Gas Mask} "Protects from poison and sleep attacks, and grants some protection from acid fumes."
  • {Giant Rat Skull} "The misshapen skull of a monstrous rat." (+4 DEF +2 BDF/AGI/LUK)
  • {Hard Hat} "Protective headgear for work environments. High protection from crushing damage and stun." (+3 DEF)
  • {Headphones} "A pair of noise-cancelling headphones. Grants 50% resist to panic, charm, confusion and rage."
  • {Motorcycle Helmet} "Heavy helmet, grants high protection and an agility boost at the cost of accuracy. Protects from stun." (+2 ATK, +8 DEF, +4 AGI)
  • {Patchwork Hat} " hat made from warm, wriggly bits of leather. Increases max HP and grants 25% bleeding resistance." (+2 DEF/BDF, +25 Max HP)
  • {Pickelhaube} "Ostentatious helmet that attracts the attention of enemies." (+6 DEF, +4 BLS, -2 AGI)
  • {Rusty Crown} "Rusty old crown that was worn by a grotesque rat monster. You hear squeaking in your head..." (+2 ATK, +1 DEF, +1 BDF) Makes all rats friendly & chatty!
  • {Trilby} "Not quite as stylish as it used to be." (+2 DEF, +3 BLS, +4 LUK)

Gear - Body:
  • {Breastplate} "An authentic Medieval breastplate. Extremely tough, but the metal is quite cold. Resists piercing." (+28 DEF, +12 BDF, -8 AGI)
  • {Denim Vest} (+4 DEF, +2 BDF, +1 AGI)
  • {Flak Jacket} "This flak jacket can even protect from bullets. Resists Bullet damage." (+20 DEF, +18 BDF, -4 AGI)
  • {Hoodie} (+4 DEF)
  • {Leather Vest} (+2 ATK/BDF/AGI, +8 DEF)
  • {Mackinaw Jacket} (+4 ATK/DEF, +1 AGI, +2 LUK)
  • {Monty's Jacket} (+4 ATK/BDF, +6 DEF)
  • {Old Uniform} (+4 DEF/BDF/LUK, +2 AGI)
  • {Padded Jacket} (+10 DEF, +3 BDF, -3 AGI)
  • {Patchwork Jacket} "Jacket made from warm, wriggly bits of leather. Increases max HP and grants 50% bleeding resistance." (+4 DEF/BDF, +50 Max HP)
  • {Polo Shirt} (+2 DEF)
  • {Rags} (+1 DEF)
  • {Studded Jacket} (+6 ATK, +16 DEF, +8 BDF, +2 AGI)
  • {T-Shirt} (+1 DEF, +5 AGI)
  • {Tank Top} (+3 ATK)
  • {Vampiric Jacket} "Cursed armor gives you great power, but drains your life over time." (+10 ATK/BLS, +6 DEF/BDF/AGI, +100 Max HP, +20 Max STM)
  • {Windbreaker Jacket} (+5 DEF, +2 AGI)
  • {Winter Coat} (+12 DEF, +1 BDF, -4 AGI)
  • {Coat of Arms} "A suit made from tangled limbs. 50% chance for the wearer to act twice per turn." (-2 ATK/DEF/BLS/BDF -8 AGI)

Gear - Feet:
  • {Army Boots} (+4 BDF +4 AGI)
  • {Patchwork Boots} "Boots made from warm, wriggly bits of leather. Increases max HP and grants 25% bleeding resistance." (+4 AGI)
  • {Rubber Boots} "Protects from acid damage and from dangerous fluids on the floor. Grants Kick ability."
  • {Running Shoes} (+8 AGI)
  • {Vintage Sneakers} (+4 AGI +2 LUK)
  • {Work Boots} (+6 DEF +3 AGI)

Gear - Accessories:
  • {Glasses} "Increases accuracy, but reduces critical hit rate."
  • {Gloves} "Improves your grip with firearms." (+4 BLS)
  • {Mycelium Cloak} "A damp, fibrous cloak of mycelium. Protects from Stun and Paralysis." (+4 AGI)
  • {Needle Gloves} "The fingers are tipped with long needles. Grants a bleed effect to all regular attacks."
  • {Plastic Gloves} "Grants limited protection from acid, poison and infections."
  • {Rat Tail Belt} "A giant rat's tail tied around the waist like a belt. Boosts luck and agility." (+4 AGI, +2 LUK)
  • {Tie} "Lucky tie. Resists status effects." (+3 LUK)
  • {Trauma Kit} "Gives combat-only skill 'Staunch Wounds'." (-4 AGI)

Gear - Jewelry:
  • {Asbestos Amulet} "Protects from fire and burns."
  • {Carnelian Ring} "Grants immunity to bleeding and increases max HP." (+20 Max HP)
  • {Copper Bangle} "A bangle of engraved copper. Boosts wearer's agility." (+4 AGI)
  • {Crimson Ring} "Cursed ring that grants life regeneration."
  • {Emerald Ring} "Strange, green ring. Bolsters your STM, and protects from Acid damage." (+50 Max STM)
  • {Eye Amulet} "Grants immunity to blindness and increases critical hit rate."
  • {Gold Bracelet} "A valuable-looking gold bracelet. Bolsters most stats." (+2 ATK/DEF/BLS/BDF/AGI/LUK, +10 Max HP, +5 Max STM)
  • {Gold Ring} "A valuable-looking gold ring. Increases slashing damage resist."
  • {Golden Locket} "A valuable-looking golden locket. Feels like a lucky charm. Increases Crushing damage resist." (+8 LUK)
  • {Jade Earrings} "A pair of valuable-looking jade earrings. Increases piercing damage resist."
  • {Lapis Band} "Grants immunity to poison and increases defense."
  • {Odd Necklace} "Strange necklace. It feels very cold to touch. You have a bad feeling about it." Boosts critical hit rate, but increases damage taken.
  • {Ring of Alertness} "Grants immunity to sleep and increases evasion."
  • {Ring of Purity} "Grants immunity to infection, and increases STM." (+5 Max STM)
  • {Ruby Ring} "Strange, red ring. Bolsters your HP, and protects from fire damage." (+100 Max HP)
  • {Sapphire Ring} "Strange, blue ring. Bolsters both HP and STM, and protects from Cold damage." (+50 Max HP, +25 Max STM)
  • {Teeth Pendant} "A little charm made from bits, bobs and a few teeth." (+12 ATK, +4 AGI, -20 Max HP, -10 Max STM/DEF/BDF)
Items - Key Items - Discs & Offerings
Key Items - All Discs:
Note: [Square brackets] denote # of moons value for door puzzles.
  • {Negative Disc} [-10] The {Void Disc} turns into this by turning the 3F Apt #31 bedroom lights off, then imprinting the telescope image onto it.
  • {Void Disc} [-1] Found on 3F, in Apt #31 inside bedroom with the telescope.
  • {Mercury Disc} [0] Found on 3F, in the frozen apartment just past the Pompom boss.
  • {Venus Disc} [0] Found on the GF women's bathroom (requires {Herbicide})
  • {Earth Disc} [1] Found on 1F, in the Mouth monster room (must feed it first)
  • {Mars Disc} [2] Found on 1F, in the Rat Freak room (needs {Earth Disc} to open)
  • {Pluto Disc} [5] Found on 3F, in Apt #31 inside bedroom /w telescope.
  • {Sun Disc} [13] Found in the GF Mail Room (past the crashed bus)
  • {Neptune Disc} [16] Found in the B1 mushroom area.
  • {Uranus Disc} [28] Found on the GF in Mutt's Fish and Chips bathroom.
  • {Jupiter Disc} [95] Found on the GF, in the Landlord's apartment, once it's fully mutated (after fully paying rent) in the maze of tunnels.
  • {Saturn Disc} [146] Found on the GF Mail Room just past the Saturn door.

Key Items - All Offerings Accepted by Jasper:
  • {Painting} [correct] When you leave the darkened room in Frederic's Apartment, the painting you touched should be wet and have blue paint. It should be the in the top left corner of the room, the uppermost painting in the center. Store it in the {Canvas Carry Bag} from Frederic.
  • {Painting} [wrong] Any other Painting picked up and placed in the {Canvas Carry Bag}.
  • {Canvas Carry Bag} [wrong]

  • {Loose Manuscript} [correct] Get it from defeating the Typewrither boss on the 2nd Floor (F2) after fixing the elevator, then combine it with the page in the typewriter in the same apartment, or it won't work.
  • {Crumpled Manuscript} [wrong]
  • {Clean Manuscript} [wrong]

  • {CCTV Recording} [correct] Whichever one turns the {Guinea Pig} into a monster when you change feeds in the Basement (B1) Security Room. Note: you CANNOT get this without sacrificing the {Guinea Pig}. "Equal Sign" Door Puzzle solutions: Neptune [16] + Mars [2] == Sun [13] + Pluto [5] OR numerous combinations of Mercury [0], Venus [0], Earth [1], Mars [2], & Void [-1] (does not work if Void [-1] has become Negative [-10])
  • {CCTV Recording} [wrong] All other recordings from the Basement (B1) Security Room.
  • {Blank VHS Tape} [wrong]

  • {Photograph} [correct] Photo of the Visitor from the telescope with the {Negative Disc}, developed by Lyle (or yourself, if Lyle/Shutterbug is dead)
  • {Photograph} [wrong] You can make a photo of any of the other discs, which doesn't work.
  • {Photo Paper} [wrong]

  • {Guinea Pig} [wrong, kind of] Causes the XIN-AMON endings (get it? Cinnamon?). It's also used to get the correct {CCTV Recording} in the Basement (B1). Do not give it to the Shadow, or you'll get locked out of some endings. Counts as a "wrong" offering.
Items - Special Shops & Trading
Mutt's Fish and Chips Shop - Special Inventory - Ground Floor (GF)
These are "one-of-a-kind offers" that increase in price by 25% for every other item you buy.

This is calculated based on compounding interest, so an item costing [$100] becomes [$125] then [$156] then [$196], and so on! This can get out of hand pretty quickly, so buy the baseline expensive items first if you can.

The prices here are the baseline cost without any of the adjusted prices, and Mutt will continue to have new inventory every day until the final day.
  • {Auntie Wilma's Crossword Challenge} [$80] "...a hardcore crossword video game. For experts only."
  • {Breastplate} [$100] "A medieval breastplate made with modern steel. Cumbersome, but highly protective." (+28 DEF, +12 BDF, -8 AGI)
  • {Cattle Prod Spear} [$200] "A powerful two-pronged skewer that uses batteries to deliver a powerful discharge. May paralyze enemies on hit." (+60 ATK)
  • {Chainsaw} [$200] "Cuts through monsters like butter. You need a supply of gasoline to keep it working." (+80 ATK)
  • {Champion's Belt} [$200] "It gives a small increase to HP and STM, and also boosts all stats." (All Stats +2, +20% HP, +20% STM)
  • {Coffee Machine} [$200] "Will produce 4 cups of coffee in your home every morning."
  • {Comfort Belt} [$50] "A comfortable belt. Halves max HP, but doubles max STM."
  • {Crossbow} [$40] "It uses bolts as munitions. It's powerful, but needs to be loaded in between every shot. The purchase comes with 12 bolts. Speak to me to buy more bolts, including special explosive bolts."
  • {Lockpicks} [$50] "Reusable, and will open most simple locks."
  • {Pickelhaube} [$60] "A highly decorated pickelhaube helmet. Ostentatious headgear that provides protection, but also attracts attention from foes. Ideal to have a stronger ally take hits on your behalf." (+6 DEF, +4 BLS, -2 AGI)
  • {Stun Baton} [$30] "Battery-powered. Delivers an electric shock that can stun, even paralyze sometimes." (+32 ATK)
  • {Training Belt} [$40] "A special belt. It doubles the wearer's max HP, but halves max STM."
  • {Trauma Kit} [$80] "An accessory that grants the ability to heal wounds in battle. More effective for treating heavy wounds, but performs poorly with light wounds."
  • {Trophy} [$200] "Will make you feel like a winner at home." Always appears last on day 14 (1 day left). Provides the "With your sweat and tears" achievement!
  • {Venom Dagger} [$30] "A dagger coated in deadly poison. Very high likelihood to infect those you attack."

Trading with Emmanuel (Cassette Tapes) - Ground Floor (GF)
Found in the bottom left corner inside Mutt's Fish and Chips on the Ground Floor.
  • {Fingernail Bomb} (1 tape) - "Strange explosive that projects keratinous shrapnel. 80 piercing damage to all enemies, may cause Bleed."
  • {Misshapen Limb} (2 tapes) - "[Slash] A strange limb with claws and too many elbows. It attacks three times."
  • {Elbow Pads} (3 tapes) - "Protective pads used in various sports."
  • {Crown of Fingers} (4 tapes) - "Disquieting crown of wriggling fingers. Normal attacks gain 30% to inflict confusion."
  • {Coat of Arms} (6 tapes) - "A suit made from tangled limbs. 50% chance for the wearer to act twice per turn."

Trading with Tickle (Friendship Points) - Basement (B1)
Found just north of the giant Furnace in the sewers. Note: You have to kill Tickle in order to fight the Furnace boss, so buy everything from him before you do that!
  • {Bloodclot Bomb} (1 pt) - "Inflicts heavy Bleeding on all targets."
  • {Mosquito Knife} (2 pts) - "[Pierce] A blood-drinking dagger."
  • {Blood Helmet} (4 pts) - "Cursed helmet gives you great power, but drains your life over time."
  • {Vampiric Jacket} (6 pts) - "Cursed armor gives you great power, but drains your life over time."
  • {Crimson Ring} (10 pts) - "Cursed ring that grants life regeneration."

Trading with Clara the Cheese Rat - 1st Floor (F1)
Found in the F1 "Rat Lair" Apartment (see simplified F1 map below). Must be wearing the {Rusty Crown} dropped by the Rat King to speak to them.
  • 2x {Cheese Wedge} ($20) - "A pungent wedge of very sharp cheese. Recovers 32 HP, 16 STM. Somewhat filling." Available once a day!

Trading with the Rat Hole (Rat Tails) - 1st Floor (F1)
Found in the F1 Rat Hole Hallway next to the Lost Letter to Jasper; there's a hidden path slightly to the northeast.
  • {Filth Bomb} (1 tail) - "Explosive that sprays toxic filth. 20 acid damage to all enemies, and may cause Poison and Disease."
  • {Rat Tail Whip} (2 tails) - "[Slash] A whip made from the entwined rat tails. Attack hits multiple foes, may cause disease."
  • {Rat Tail Belt} (3 tails) - "A giant rat's tail tied around the waist like a belt. Boost luck and agility."
  • {Giant Rat Skull} (4 tails) - "The misshapen skull of a monstrous rat."
  • {Filthy Ring} (6 tails) - "A disgusting, greasy, cursed ring. Grants disease affinity: ailments grant you power."

If you're having trouble navigating the 1st Floor (F1), you can find the location of both Clara and the Rat Hole from this video, as well as the Hidden Rat Shop and all Rat Interactions with the {Rusty Crown}:

Additional Notes - Maps, Details, etc.
Not sure where to integrate some of these yet! In case they help you out in the meantime, please check these out:

All Maps
https://imgur.com/a/wt7eUr0
From this thread by Gravity Eater: https://steamcommunity.com/app/3373660/discussions/0/594018634646501846/

Simplified 1st Floor (F1) Map

Open image in a new tab and zoom in for best resolution

The main trick to the 1st Floor being confusing is the "To A" connected hallways in the map above. There's 4 horizonal hallways but it "feels" like 3 horizontal hallways because of that, and screws with your mental map. The "Rat Hole" hallway is also connected what feels like vertically, but it drops you off at completely different parts of the map, leading to even more confusion!

Known Hidden Stats & Effects
Social/Loneliness Statuses:
"Being lonely reduces your evasion, and sometimes makes you fail to attack. What if they're a friend...? To manage loneliness, try to find some friends and speak to them. Looking at social media can also help a little bit to feel less alone..."
"You feel much less lonely."
"You feel kind of lonely." Triggers Lonely (Lowered Evasion, "Attack" replaced with "...Attack?")
"You feel isolated."
"You feel completely alone."


Calmness/Tranquility Statuses:
"Being anxious reduces the XP you gain. So much weighs on your mind, you just can't focus. To manage stress, you need to go back home and relax. Playing some video games could help."
"You feel relaxed."
"You feel stressed." Triggers Listless (-50% XP Gained, Lower Hit Rate, Lower Crit Rate)
"You feel anxious."
"You feel very paranoid."


Energy/Vigor Statuses:
"Exhaustion halves your max stamina, reduces your speed, evasion, and eats away at your stamina over time! You really need to get some rest, and fast!"
"You no longer feel tired."
"You feel a bit drowsy." Triggers Tired (-25% Max STM)
"You feel tired."
"You feel exhausted." Triggers Exhausted (-50% Max STM, -25% AGI, Lower Evasion)


Hunger/Food Statuses:
"This halves your max health, reduces your attack damage, and eats away at your health over time. You need to eat!"
"You no longer feel hungry."
"You feel a little hungry."
"You feel hungry." Triggers Hungry (-25% Max HP)
"You're starving." Triggers Starving (-50% Max HP, -25% ATK, -25% BLS)


Hygiene/Cleanliness Statuses:
"Smelliness reduces luck, makes you more vulnerable to ailments, and enemies will not detect you from further away! To manage hygiene, shower and brush your teeth at home. Some mint gum can help in a pinch, but it can only do so much..."
"You no longer feel grimy."
"You feel a bit disheveled." Triggers Smelly (-50% LUK, More susceptible to Status Effects, +Aggro Range)
"You feel grimy."
"You feel disgusting."


Morale/Productivity Statuses:
"Depression increases all damage taken! To manager your morale, you need to improve your overall state and make progress exploring. Small victories like beating video games can help in the short term."
"You no longer feel useless."
"You feel unproductive." Triggers Depressed (+50% All Damage Taken)
"You feel useless."
"You feel utterly worthless."


Overall Statuses (Combination of the above):
"You feel much better."
"You feel unwell."
"You feel despair."
"You feel on the verge of a breakdown."


All Locked Safe Contents
Either a {Simple Key} (single use) or the {Lockpick} (infinite use) are required to open these:

[F3 Apt 32] {Old Rifle} & 12x {Rifle Bullets}
[F3 Apt 31] $320 & {Gold Locket}
[F1 Fred's Apt] $200 & {Silver Bracelet}
[F1 Jungle Apt] $100 & {Stamp Collection} (vendor trash)
[F2 Lyle's Apt] $200 & {Jade Earrings}
[GF Landlord's Apt] $250


"End Results" Score Contributors & Point Values
Baseline Stats:
Ending - Perfect Ritual/XIN-AMON +1000pts, Flawed Ritual/No Going Back/Screaming Sky +500pts, Eternity +200pts, Failed Ritual +100pts
Days Elapsed - Starts at 1550pts, -200pts per day passed
Friends - +200pts per friend recruited
Bosses Defeated - +100pts per boss defeated

Bonus Points from Challenges:
Miasma - Did not shower once. +10pts
Insomnia - Did not sleep once. +500pts
Ascetic - Did not eat any meals. +500pts
Loner - Did not make any friends. +500pts
Gamersbane - Did not play any video games. +500pts
Long Weekend - Beat the game in 3 days or less. +1000pts

Difficulty Multipliers:
Easy - 1x
Normal - 2x
(Hard Mode sometime in the future?)

Possible Rankings from Overall Score:
F < 500
D < 1000
C < 2000
B < 3000
A < 4000
S < 6000
SS < 8000
SSS >= 8000

Personal Current Final Highscore: 4560 (Rating: S)
Known Bugs & Unfinished Content
Updated as of v1.02
Note: None of these are meant to be comprehensive lists! I wanted to put the more prominent bugs & unfinished content here to help with the more common issues & experiences folks have been encountering.

Known Bugs & Workarounds:
* If you choose to Attack Leigh for a rematch, you can do it infinitely for 100 EXP and $20 each time. Not sure if this is a bug, but it's absolutely 100% abusable early on!

* The "Toxic Fred" & "Green Fred, Left" fight becomes unwinnable (infinite health enemy) if you wear the trick {Cowboy Hat} and try to fight back & attack in a certain order. It looks like you can fix it by using {Duct Tape} in battle to "reset" things.

* If you stall on the final day 15 by doing Crossword Puzzles, you can get to day 16 and cause the game to crash!

* Sometimes Sam will randomly get access to his arm again, even after you've let the Mouth Monster chomp it off. Nobody can pinpoint it yet/what triggers it, but while the sprite stays the same, you can equip melee/ranged & 2-handed weapons again. Current word on the street is that it "should be fixed next patch"!


Known Unfinished Content:
* Landlord's Apartment - There are only 2 hidden {Radio} cache locations, 1 wall to blow up with the {Explosive}, and only 1 {Dog Tag} to turn in (for now)

* Despite the {Saturn Disc} being locked behind a puzzle, it doesn't appear to do anything (yet).

* The randomly generated code at the end of the marathon of solving all the Crossword Puzzles doesn't seem to do anything (yet).

* Sophie & Harriet's Apartment #22 on F2 is supposed to be accessible, but the developers ran out of time before release. In the future it may (hopefully) be finished and available!

* The latter half of the game can get too easy with a full party and the right setup, but a balance patch "is planned for the future" to smooth out the difficulty curves so it feels more satisfying. A "Hard Mode" seems to also be planned.
Easter Eggs & References
Gameplay 1: If your Left Arm (Ranged Weapons) is Gnawed Off, you can still equip the {Crossbow}! In this case, presumably you are grafting it to your stump Evil Dead style.
Gameplay 2: Speaking of Evil Dead, if you name your main character "Ash", "Williams", or "EvilDead" (case sensitivity doesn't matter), then if your Right Arm (Melee Weapons) is Gnawed Off, you can still equip the {Chainsaw}! A handy replacement for a lost arm, to say the least.

Characters & Inspirations 1: Xaria & Montgomery are inspired by a duo from Baldur's Gate, Xzar & Montaron. Xaria's starting ranged weapon "Chill Touch" is also named after one of Xzar's spells! (from the official developer stream)
Characters & Inspirations 2: The sheer number of recruitable characters are also inspired by Baldur's Gate, in that you wander around and stumble upon a multitude of potential party members! (from the official developer stream)
Characters & Inspirations 3: Hellen is also a recruitable character in Malison: the Cursed City by the same developer (not yet released! from the official developer stream)
Characters & Inspirations 4: Probably the biggest inspiration for Look Outside was the Famicom game Sweet Home ( https://en.wikipedia.org/wiki/Sweet_Home_(video_game) ) which also has been considered as laying the groundwork for the Resident Evil and the Survival Horror genre in general.
Characters & Inspirations 5: Papineau was named after a famous Quebec leader who led a rebellion in the 1800s. His name is culturally associated with wisdom - there's an expression that translates to "you don't need Papineau's head" to mean something isn't difficult or complicated (from the main developer)

References 1: The "Would you still love me if..." achievement name (and what happens at the end of the Nestor & Rafta side quest) is a reference to the "Would you still love me if I was a worm?" meme ( https://knowyourmeme.com/memes/would-you-still-love-me-if-i-was-a-worm )
References 2: {Meteor Strike} costing 999 STM absolutely seems to be a reference to Final Fantasy IV's Tellah having Meteo cost 99 MP, but only having 90 MP maximum! A sweet reference to one of the original "storytelling through game mechanics" classics!
References 3: The {Baseball Bat} being your first weapon (and also the mention of it being a "cracked baseball bat" alludes to an Earthbound reference, as that's Ness' same exact first weapon at the start. Also, enemies like the Tire Stack/Tirepede, Traffic Cone/Traffic Crab, etc. also seem to allude to Earthbound's strange sentient inanimate objects as enemies.
References 4: The video game {Wraithscourge} was named after 2 weapons in Hexen, the Wraithverge and the Bloodscourge! (from the official developer stream)

Development 1: It's been stated that when the "LISA: The Painful" and "Fear & Hunger" communities/fans got ahold of the original game jam demo, it greatly encouraged turning Look Outside into a full fledged release! You can find it available here on itch.io: https://frankiesmileshow.itch.io/look-outside

In-game Hints 1: You're given several hints that the {Cowboy Hat} before encountering Toxic Fred is bait!

If you're on the right side of the room behind the boxes, then a green blob is walking around on the table. If you're next to the hat, there's some legs and a little green sticking out of it. Also, if you have a REAL {Cowboy Hat}, then the item description is very different!


Hopefully at least one of these tipped you off!

For an extra special interaction, try picking up the hat and selling it *before* speaking with Toxic Fred in the next room (⌐■_■)


Music & Sound Effects: The noises the shadow creatures make (the ones that show up when out exploring for too long) are reversed audio Quebec profanity/swears! (from the official developer stream)

Locale & Setting: Look Outside takes place in the city of Montreal (in the province of Quebec, Canada) It is never outright stated anywhere in the game, but there are several *hints* at where Sam's apartment building is located.

* Placide (the friendly water heater monster in the basement) mentions getting the water from the St. Lawrence River to service the building (and why you can still take hot showers!)

* There is also a fun little social cutscene with Morton in the kitchen involving a "I Heart Montreal" mug.

* "Papineau" is also named for famous Quebec leader from long ago, and he tends to say a lot of terminology very specific to the region like "tabarnak!" ( https://en.wiktionary.org/wiki/tabarnak ) as well as a lot of other French Quebec slang.

* The "Dollar Coin" and "Two-Dollar Coin" also allude to coins used for Canadian Dollars (CAD), both in their style and their usage!

* The cylindrical traffic cones in the Basement (B1), specifically their style and the sheer number of them, also allude to the city being Montreal; it jokingly referred to as the "cone capital of the world".

* The "Tuque" enemies in the ice filled apartment on F3 are a reference to a French Canadian word "toque/tuque", a fun colloquialism for beanies & knit caps!

* The friendly NPCs in the basement playing cards (Carlos, Laurent, & Rana) mention CEGEP, which is a public, two-year collegial institution that serves as a bridge between secondary school and university in the Quebec education system.

* If you say "Who are you?" to the Gun Trader who shows up at your door, he'll mention his "social security number" (SSN) implying that he's from the States! Canada has a Social Insurance Number (SIN) instead, so it's very likely he's not from "'round these parts".
Credits & Outro
The main developer for the game can be found regularly here:
https://www.twitch.tv/frankiepixelshow
and on the Frankietown Discord:
https://discord.gg/3JEVSjH
There's also an incredibly enlightening Devolver podcast discussing the game here:
https://forkcast.devolverdigital.com/episodes/episode-180-just-dont-look
Check 'em all out when you get the chance - tons of very cool insights and folks!

Eric Shumaker composed the music and did much of the writing as well:
https://www.mobygames.com/person/734769/eric-shumaker/credits/
Probably best known for Barkley, Shut and Jam: Gaiden, as well as Katana Zero!

The artist for the *awesome* achievement images can be found here:
https://www.instagram.com/oasiscommander/

Dan, Sam (+ Rat Kid), and Sophie!

Major credits for additional details, guidance, and information in this guide:
  • TheChemicalCat (party recruitment)
  • Lord Tekron (party recruitment)
  • Gravity Eater (maps)
  • Naughty Maggot (challenges)
  • Cauvin (references)
  • And everyone in the comments!

Still TODO:
  • Find out if there any interest in a walkthrough? Could potentially transform this to an all-in-one guide, if that ends up being the case.
  • Still have to wrap up the Items section (more notes, locations, and stats)
Spot anything I missed or found something you would like to add? Add a comment and I'll look into it when I get the chance!

Want more? Then please check out my other:
Please do not copy without my permission! (I'm talking to you, random blogs online) If you'd like to support my work by buying me a coffee I'd greatly appreciate it! https://ko-fi.com/llamakazi

Also if you can, please help out with this guide's overall visibility by clicking the real versions of these buttons up top - many thanks y'all!
116 kommentarer
Llamakazi  [skaper] 10 timer siden 
@Candy
Aye, totally my bad! Call that one an editing error, it's definitely not $25...I never got around to updating their full inventories - I'll add that one now; and try to flesh out all the merchants possible inventories soon!
Candy 11 timer siden 
Just ran into the gun merchant selling the gatling gun, he had it priced at $1600 for me
Llamakazi  [skaper] 12 timer siden 
@getlwkshdjfk
Just saw your comment, I have no idea, sorry! I presume it's just a bug, and it'll be solved in relatively short order. As of patch v1.03 they've been knocking them out of the park, so it's only a matter of time.
Llamakazi  [skaper] 12 timer siden 
@MaliceCrimson
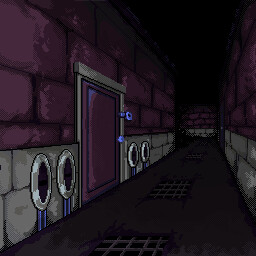
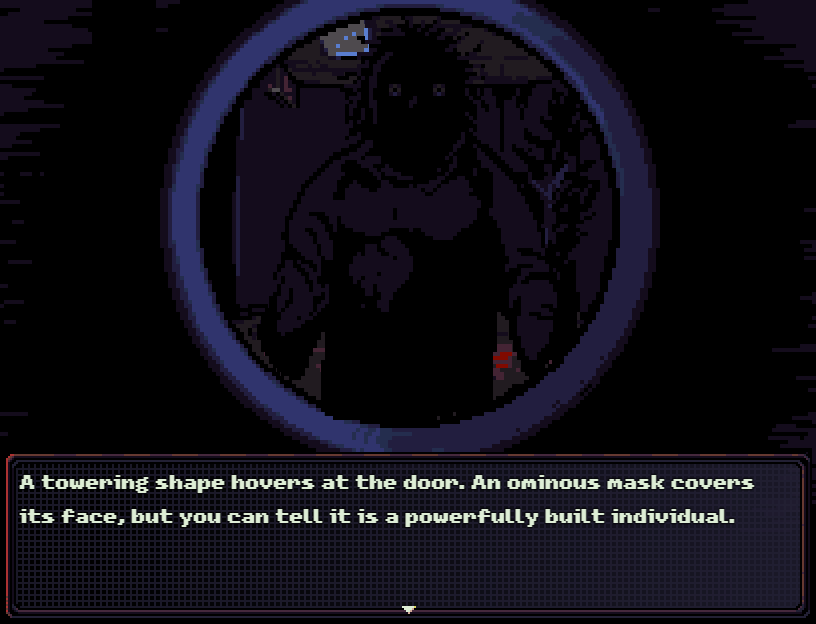
I do indeed take tips! I've got a video above that tests all the Door Encounters out; including what happens if you try attacking them all - you'll indeed get a Scalpel from the Nurse, and the Katana from the Gamer! I'll see if I can fit that in somewhere in text form, for those not interested in the video chronicling all of the Door Encounters.
MaliceCrimson 12 timer siden 
Ok, so I don't know if you take tips aswell, but I'd like to note that if the nurse shows up at your door, if you kill them they can drop a Scalpel like the one in the patchwork house, which can be extremely useful as an early means of obtaining it.
Llamakazi  [skaper] 12 timer siden 
@逍遥HEHE
Oh sweet that's rad as hell! Must've been added in patch v1.03? I'll add that where I can, thanks!
Looks like also that if your left arm (ranged weapons) is gnawed off, you can still equip a Crossbow, presumably because you're grafting it to the stump there too
逍遥HEHE 21 timer siden 
Google Translate: Found an Easter egg that pays homage to the Evil Dead series. ( About Ash Williams ) When you name yourself "ash", "williams" or "evildead", you can still equip your right arm with a chainsaw after losing your left arm.
逍遥HEHE 21 timer siden 
发现了一个致敬《鬼玩人》系列的彩蛋( 关于阿什·威廉姆斯 )。 当你给自己命名为“ash”、“williams”或者“evildead”时,在失去左臂之后仍可以给右臂装备链锯。
Driving Crooner 25. apr. kl. 7.44 
Solved Below:
Do not inhale any spores when entering fungus area, go to Phillipe, save him, try to leave until he stops you from progressing further. Full party guard for first round. Do dialogue options outlined in this guide, kill him. Collect remains, achievement pop.
Driving Crooner 24. apr. kl. 10.05 
Having trouble with the "He's real god damn it" achievement. Went through the whole spore area with Phillipe, got to the spore mother and even got the 3rd option to say "Wait you mean the mushroom thing" to which Phillipe confirms that I didn't injest any spores.

I've tried pretty much every set of circumstances up to the fight I can think of and followed the dialogue options you outlined but still can't get the achievement to pop. Do I need to try again without including Phillipe in my party?