Tokyo Xtreme Racer

Tokyo Xtreme Racer

211 ratings
Importing custom decals
By Silent
With this guide, you can replace the stock decals with your custom images for use in the Livery Editor.
15
7
2
3
5
4
   
Award
Favorite
Favorited
Unfavorite
Introduction & required tools
With this guide, you can replace the default decals with your custom ones. It's currently unknown if adding decals is possible.

To import your own decals, you'll need:
Extracting the original decals
  1. Open FModel.
  2. Add Tokyo Xtreme Racer to the list of games in FModel. You will only have to do these steps once.
    1. Click on the arrows under ADD UNDETECTED GAME.
    2. Click on ... and navigate to the game directory, then select it.
    3. Click on + to add the game to the list.
    4. Click on the UE Versions dropdown and select GAME_UE5_4.
  3. Select Tokyo Xtreme Racer from the list and click OK. If FModel mentions available updates, you may safely dismiss this dialog.
  4. Set a proper AES key for the game. Again, you will only have to do these steps once.
    1. Navigate to DirectoryAES.
    2. In the Main Static Key field, paste this key and press and press OK:
      0xD499D0D1C8E2B87D576EA9756B5137306D1A96D378124C16A6F033BE2A9CBB4A
    3. If done correctly, pakchunk0-Windows.utoc in the GAME ARCHIVES list will no longer be greyed out.
  5. Double-click on pakchunk0-Windows.utoc and navigate to the directory with decals: 'TokyoXtremeRacer/Content/ITSB/ArtAssets/Models/Livery/Vinyl'.
  6. Find the decal(s) you want to replace. Right-click on each and select Export Raw Data (.uasset).
  7. If done correctly, the decal(s) will be extracted to a new directory created where FModel is. The decal(s) will be located in 'Output/Exports/TokyoXtremeRacer/Content/...'.
Replacing the decals
For each decal, do the following:

  1. Open UE4-DDS-Tools.
  2. Navigate to the directory with the extracted decals ('Output/Exports/TokyoXtremeRacer/Content/...'), drag and drop the .uasset file into the field that says Drop .uasset here!.
  3. Drag and drop the image you want to replace the decal with into the field that says Drop an image here!.
  4. Change the UE version field to 5.4 if necessary.
  5. Press Inject.
  6. A new .uasset file will be created in an 'injected' directory. Take this asset, and replace the original asset from FModel's 'Output' directory with that one.
Importing the decals back into the game
  1. Open the Command Prompt in a directory with UnrealReZen.
  2. Run:
    UnrealReZen.exe --content-path "<path-to-fmodel>\Output\Exports" --game-dir "<path-to-game>\TokyoXtremeRacer\Content\Paks" --output-path "<path-to-game>\TokyoXtremeRacer\Content\Paks\CustomDecals_P.utoc" --compression-format Oodle --engine-version GAME_UE5_4 --aes-key 0xD499D0D1C8E2B87D576EA9756B5137306D1A96D378124C16A6F033BE2A9CBB4A
    where:
    • '<path-to-fmodel>' is the path where FModel is located. Next to that should be an 'Output' directory where you extracted the original decals.
    • '<path-to-game>' is the path where Tokyo Xtreme Racer is installed. Notice this path is present twice in the command. A correctly constructed path must include TokyoXtremeRacer twice.
  3. If done correctly, CustomDecals_P.pak, CustomDecals_P.ucas and CustomDecals_P.utoc files will be created in '<path-to-game>\TokyoXtremeRacer\Content\Paks'. If the decals are packed correctly, CustomDecals_P.ucas will not be 1KB in size. If it is, you've done something wrong.
  4. If later you want to come back and repack the archive after adding more custom decals, do note that due to a bug in UnrealReZen, the tool currently cannot overwrite existing archives and it will crash when trying to do so. To fix this, go to '<path-to-game>\TokyoXtremeRacer\Content\Paks' and delete CustomDecals_P.pak, CustomDecals_P.ucas and CustomDecals_P.utoc, and re-run UnrealReZen.


You may now use your decals in the Livery Editor. Please note that the preview images will NOT be replaced! Custom decals only show once you place them on your car.

Other links
If you want to follow my work, check out one of those places:
http://twitter.com/__silent_
https://cookieplmonster.bsky.social/
https://www.youtube.com/user/CookiePLMonster

Also take a look at my blog, featuring modding and programming related articles and more!
https://cookieplmonster.github.io/
89 Comments
シンデレラ Feb 18 @ 4:55am 
[21:46:19 INF] Loading Game Archives...
[21:46:19 INF] Pak "pakchunk0-Windows.pak": 2119 files (73 encrypted), version 11 in 00:00:00.0076101
[21:46:19 WRN] "pakchunk0optional-Windows.pak" has strange mount point "/", mounting to root
[21:46:19 INF] Pak "pakchunk0optional-Windows.pak": 0 files, version 11 in 00:00:00.0010141
[21:46:19 INF] IoStore "pakchunk0optional-Windows.utoc": 14 files, mount point: "TokyoXtremeRacer/Content/", version 6 in 00:00:00.0020111
[21:46:19 INF] IoStore "pakchunk0-Windows.utoc": 42850 files (42850 encrypted), version 6 in 00:00:00.1104168
[21:46:19 INF] Packing Contents...
[21:46:19 INF] Packing files...
Done! 0 file(s) packed
シンデレラ Feb 18 @ 4:55am 
./UnrealReZen.exe --content-path "C:\FModel\Output\Exports" --game-dir "C:\Program Files (x86)\Steam\steamapps\common\TokyoXtremeRacer\TokyoXtremeRacer\Content\Paks" --output-path "C:\Program Files (x86)\Steam\steamapps\common\TokyoXtremeRacer\TokyoXtremeRacer\Content\Paks\CustomDecals_P.utoc" --compression-format Oodle --engine-version GAME_UE5_4 --aes-key 0xD499D0D1C8E2B87D576EA9756B5137306D1A96D378124C16A6F033BE2A9CBB4A
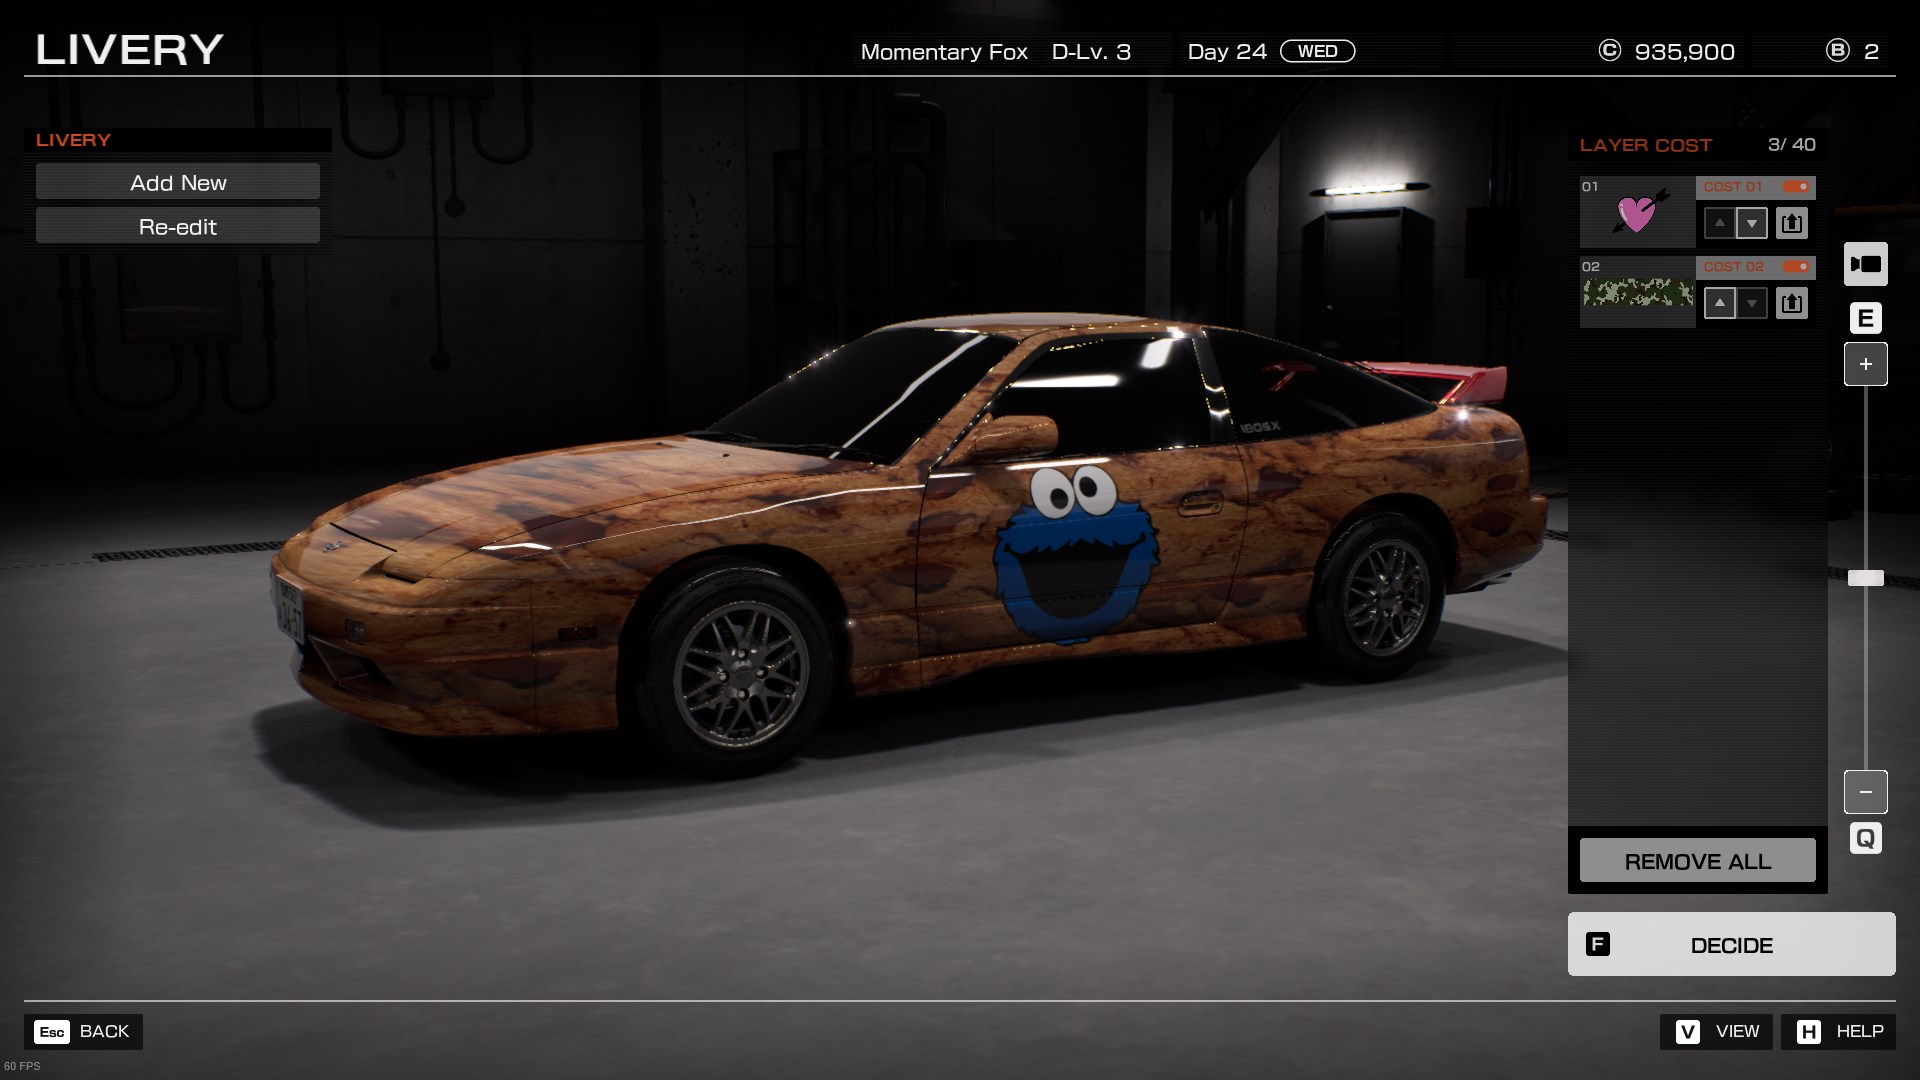
Game Directory: C:\Program Files (x86)\Steam\steamapps\common\TokyoXtremeRacer\TokyoXtremeRacer\Content\Paks
Content Path: C:\FModel\Output\Exports
Unreal Engine Version: GAME_UE5_4
Output Path: C:\Program Files (x86)\Steam\steamapps\common\TokyoXtremeRacer\TokyoXtremeRacer\Content\Paks\CustomDecals_P.utoc
シンデレラ Feb 17 @ 11:59pm 
I successfully entered the command, but now the file is 1kb.
I don't even know what's wrong anymore.
themcpolo Feb 16 @ 12:26am 
Took a while to understand and having to reread somethings but it was well worth it!
mtamoria1 Feb 14 @ 5:53pm 
After getting the swing of this, I've been adding livery from other games and movie cars....Love this.
♥ luna ♥ Feb 9 @ 3:26am 
im not sure if im doing something wrong, but the decals just aren't showing changed in game. im fully putting the decals i changed on the car and going back to garage and still unchanged. CustomDecals_P.ucas is 59kb so it definitely worked. im pretty sure i followed the steps correctly. i started over completely at least 5 times making sure i was following steps and still nothing for some reason. perhaps something is wrong with the images im using to replace them with?
DeMino Feb 8 @ 12:12pm 
Ok since I just solved my problem this guide doesn't explain well what you gotta do with UnrealReZen and the cmd prompt. You have to make the folder where UR is and make that the directory you are actively using.

So you need to do the command

cd "path to UnrealReZen folder"

then you put in the command shown
Stratos Feb 6 @ 9:15pm 
Im at the importing back part and this is making no sense to me. the command still says that Unrealrezen is not recognized even when i add .\ like adrian said
adrian Feb 6 @ 6:48am 
if anyone counters
"UnrealReZen.exe : The term 'UnrealReZen.exe' is not recognized as the name of a cmdlet, function, script file, or opera
ble program. Check the spelling of the name, or if a path was included, verify that the path is correct and try again." error,

try using ".\UnrealReZen.exe" instead of "UnrealReZen.exe"
Divoras Feb 3 @ 11:43am 
OMggg thank you <3 awarded!