Cosmochoria

Cosmochoria

110 ratings
General Cosmochoria Guide
By Phiteros
This guide provides a general tutorial and explanation of the game's elements. While I explain how to accomplish various objectives in this guide, I recommend the player try to go as far as they can without referring to this for help. Part of the fun of this game is in discovery. However, people occasionally get stuck, in which case, I hope this helps. I'm trying to keep this up-to-date as updates and patches roll out, but sometimes I might get something wrong or not have come across something from the latest update. Therefore, if you notice anything wrong in this guide or have anything you think should be added, please let me know.

Again, PLEASE DON'T READ THIS UNLESS YOU'RE STUCK. This game is about discovery! So as much as possible, try to figure things out yourself.

Join the Cosmochoria discussion on the forums[3030.ca]!
   
Award
Favorite
Favorited
Unfavorite
Gameplay Basics
Cosmochoria is a relatively simple game. It can be controlled using the WASD keys and the mouse. A and D are used to move around a planet's surface or to rotate while in space. Tapping W while on a planet's surface will allow the player to jump. Holding W will activate the jetpack, boosting the player in whatever direction they are pointing. The Right Click on the mouse will also jump/jetpack. Pressing S activates the actions menu. From this menu, the player can use the mouse to select different actions. Once you have selected an action, you must hold down S for the action to be completed (except for the Ultranova)

Action Menu Items (From bottom, clockwise):


  • Plant Flag - Plants a flag on a planet, claiming it as your own! Doing this will also name the planet. Once you've planted a flag, you can begin the process of reviving the planet.
  • Plant Seed (1 seed) - Begins planting a seed.
  • PewPew Tower (1 brick) - Builds a pyramidal tower which will shoot at the nearest enemy.
  • Shield Base (1 brick) - Builds a shield generator that can take a small amount of laser fire and fire attacks before deactivating. Recharges automatically.
  • Ultranova (1 Ultranova) - Releases a large explosion, damaging enemies and destroying any buildings. Enemies killed using the Ultranova will not yield crystals.
  • Flame Temple (2 bricks) - Creates a tower which launches bolts of fire at enemies. Also generates a field around itself, similar to the Shield Base. The field blocks lasers and ice.
  • Moai Smash (10 seeds) - Creates a Moai statue which will damage ground enemies near it. Moai statues will also regenerate a planet slowly.
Note: Buildings can take damage and be destroyed. If this happens, you can rebuild it by moving to its ruins and holding S.

In order to progress in the game, you must bring planets back to life by planting plants on them. When a planet has enough plants on it, it will be fully revived. Once revived, you can heal yourself by standing on the planet. The larger the planet, the more plants it takes to revive it, and the more health it will heal you for. The amount of plants needed to revive a planet, as well as the amount of health it has stored is indicated by the heart gauge inside the planet. When you revive a planet, a chest will appear containing items to help you on your quest. These items could be bricks, crystals, seeds, artifacts, or other items. Opening the chest will damage or kill all enemies on screen.


While replanting the cosmos, you will encounter many different enemies attempting to stop you (Detailed in the Enemies section). You can use Left Click to fire your weapon in defense.
Towers and Shield Bases will help you defend yourself.

When starting a new game, you can buy upgrades before starting. These are detailed in the Upgrades section. In this menu, you can also choose to use a Dimension Stone as a save point. Using a Dimension Stone will spawn you in a universe with a certain number of planets already revived. Some of the bosses will also have been defeated. You will have the same number of seeds as when you last played.
Unlockables
At the beginning of each playthrough, you will have an opportunity to purchase various unlockables using crystals you have gathered by playing the game. These unlockables come in the form of Character Skins, Weapons, Upgrades, and Consumables.


Character Skins are cosmetic changes, and some give special upgrades. More skins can be unlocked by finding them as artifacts.
  • Default
  • Tighty Whiteys - Makes your jetpack...erm...smell. Found in a chest.
  • Neko - Get it by finding some Fire Yarn, then dunking it in lava then water.
  • Ninja - Makes you invisible when you're planting or building. Enemies can't hurt you when you're invisible. Get it by returning Turboninja's sword to him.
  • Panda - Have four bamboo plants sprout on the same planet.
  • Glitch - Fly through several glitch portals. Will randomly hurt or heal you.
  • Robot - Using your jetpack doesn't use up fuel. Get it by finding some Unobtanium, jumping into some lava with it, then jumping into a pool of water.
  • Simon from Yogscast, available only to the Yogsnaut tier backers from Kickstarter via secret code.

Weapons are different weapons that your character can carry. You can only have one weapon equipped at a time.
  • Pea Shooter (N/A) - The starting weapon. This is relatively weak, but has decent accuracy. This weapon cannot utilize the dropped weapon upgrades. Firing is fully automatic.
  • Laser Blaster (100) - A fast, fully automatic weapon. Fires two shots at once, as fast as the Pea Shooter. The shots have a pretty wide spread, though not as wide as the Shotgun. Upgrading increases the number of shots fired as well as the firing speed.
  • Shotgun (300) - Fires ten shots in a very wide pattern. Very devastating up close, but not as effective at long range. Firing is semi-automatic. Upgrading increases the number of pellets.
  • Sniper Rifle (300) - Fires a long range piercing shot with high accuracy and damage. Effective at long ranges, but it is slow, so it is easier to get swarmed. Firing is semi-automatic.
  • Plasma Shot (1500)
  • Homing Blaster (1500) - A rapid-fire blaster whose shots follow enemies. The homing is not super precise, so sometimes shots will circle around an enemy. Useful at close ranges, but can be annoying when trying to fight an enemy who is far away.
  • Illumina Sword (LOCKED) - A melee weapon which deals high amounts of damage, but only close to you. Swings in a circle which can hit enemies inside the planet. The Illumina Sword reflects projectiles directly back when they hit it. You don't need to swing the sword to do this, simply let the projectile hit the sword. You can hold the attack button to charge up the sword. Releasing it fires a laser beam. Unlock the Illumina Sword by finding it as an artifact and bringing it to Turbogunninja.
  • ???? - Beat the game.

Upgrades are unlockables which increase the character's abilities. Most of these are fairly self-explanatory.
  • Health (100, 200, 300, 400) - Increases your maximum health.
  • Adrenaline (200, 400, 600, 800, 1000) - Increases the length of time you are invincible after being hit.
  • Speed (150, 300, 450, 600, 750) - Increases how quickly you run.
  • Acceleration (150, 300, 450, 600, 750) - Decreases how long it takes you to get up to full running speed.
  • Jump (200, 400, 600, 800, 1000) - Increases how high you can jump.
  • Jetpack Fuel (150, 300, 450, 600, 1000) - Increases the amount of jetpack fuel you carry.
  • Jetpack Thrust (200, 400, 600, 800, 1000) - Increases how much thrust your jetpack produces
  • Jetpack Refuel (500, 1000, 1500, 2000, 2500) - Increases how quickly your jetpack refuels.
  • Construction Speed (250, 500, 750, 1000, 1250) - Increases how fast you are able to build towers using bricks.
  • Starting Seeds (600, 900) - Determines how many seeds you start each game with. You begin with the first level of this unlocked already.

  • Crystal Magnet (750) - Causes crystals to be drawn in towards you.
  • Fertilizer (250) - Decreases how long it takes to plant a seed. This can also be unlocked by bringing poops to the worm NPC.
  • Double Crystals (2500) - Makes each crystal found worth 2x its original value.
  • Space Friction (500) - Allows you to slow yourself down while in space by pressing S.
  • Cosmic Map (1500) - Upgrades the map feature. The map will now show all un-revived planets, as well as detailed information about each planet. Can also be unlocked by talking to the scientist NPC.

Consumables are items which can be used during the game. Each costs 5 more crystals than the last one bought.
  • Ultra-Nova (5x) - Creates an explosion that kills/damages enemies and destroys towers. Can buy up to 10.
  • Bricks (5x) - Used to build towers. Can buy up to 99.

Artifacts are items found in game which can be used to increase (Cursed Artifacts) or decrease (Blessed Artifacts) the level of difficulty by toggling various effects on and off. For example, enemies can do more damage, spawn more frequently, or planets could store more health for you. Artifacts are found from chests in-game, and can be brought to the Old Man. Doing so will unlock the option from the Artifacts screen of the Main Menu. The Artifact will not turn on when you turn it in to the Old Man, so you don't need to worry about making the game harder right in the middle of it. Artifact icons will be green or red depending on whether or not they are good or bad. Activating more Blessed Artifacts will decrease your chances of finding rare items. Likewise, activating Cursed Artifacts will increase your chances of finding rare items.
(Picture coming soon).
Enemies
Over the course of the game, you will encounter numerous enemies. When enemies are defeated, they will drop crystals for you to pick up. All enemies will hurt you if you touch them.

Common Enemies
These enemies can be encountered across the galaxy and will attempt to prevent you from reviving planets.
  • UFOs (1 crystal, Gun Upgrade) - Common flying enemies, they lasers at you. They don't do much damage, but in large numbers can be dangerous. When close to a planet's surface, they can drop Aliens. It's best to take these enemies out before they can swarm you. They cannot move through planets. Flashing UFOs will drop Gun Upgrades that you can pick up to power up your weapon.

  • Aliens (1 crystal) - Walk around on the surface of planets. These are melee-only enemies. They cannot attack at range and cannot move through planets.

  • Bad Plants (1 seed) - Occasionally grow from a planted seed. They will fire short-range attacks at you, but can be defeated by shooting them. When they are defeated, they will leave behind a thorny vine which will hurt you if you walk over it.

  • Wasps (3 crystals) - These flying enemies will chase you around. They spew a green gas which will slow you down if you move through it. They will melee attack, but cannot attack at range. They can move through planets.

  • Hives (7 crystals, 1 brick) - These are stationary enemies which will spawn Wasps. Sometimes they will fire lasers at you.

  • Robots (5 crystals) - These enemies begin appearing after you have revived a few planets. They have more health and are more accurate than UFOs and can also move through planets. These spawn in sets depending on how many planets you have revived. Initially, they spawn singly, then in pairs, then triplets, quadruplets, etc. They only appear when you're in space.

  • Space Demon Satellites (3 crystals) - Will orbit a planet, periodically firing a large lightning burst onto the surface. The burst also fires lasers out in a circle. If you're on the ground close to where the lightning hits, you will be damaged. The size of the lightning is dependent upon the size of the planet.

  • Evil Diamonds (x crystals) - These appear to be diamonds just sitting in space, but get too close to them and they will start biting you. They drop a gun upgrade when killed.

  • Eye Orbiters (3 crystals) - Fly back and forth across a planet and drop Timebombs. Timebombs will explode after a certain amount of time, or will explode faster if shot. Eye Orbiters will not be attacked by turrets.

  • Vacuum Dragon (10 crystals) - Fly around and will charge at you if shot. Otherwise, they simply gobble up crystals left on the screen. They spend a long time waiting before and after they dart at you, so you kill them at your leisure.

  • Crawlers (x crystals) - Will burrow up from under a planet's surface, then scurry around on top. They jump up and down and fire green bolts which slow you. Before a Crawler unburrows, the ground will flash to let you know there is one there.

  • Glitch Portals - Not really an enemy, this is a patch of space which will teleport you to a random location on the map. Try not to run into them unless you need a quick getaway.

  • Tejon Monument - Not really an enemy, these blinking red lights will disable your jetpack when you're on the planet. Destroy it by shooting it.
Bosses
Bosses
Bosses are encountered after a certain number of planets revived. They have a large health bar which appears on the top of the screen. They can be very difficult to defeat, but yield a very large amount of crystals when defeated. They can move through planets and will chase you around the galaxy. They are listed below in order of appearance. Defeating a boss will grant you a Dimension Stone, which acts as a restore point so that you can quit and not lose progress.
  • Blue Dragon (2 planets, 250 crystals) - Fires flames at you. If it collides with you, it will immediately back directly away for a second or two.
  • Fire Dragon (6 planets, x) - Also fires flames at you, but has more health and a longer tail than the Blue Dragon.
  • Ice Dragon (9 planets, 250) - Fires ice balls which can freeze you. Has more health than the Fire Dragon. Can fire through planets.
  • Mothership (13 planets, x) - A giant UFO which has a beam weapon capable of firing through planets. Very slow, but lots of health. It will also constantly spawn UFOs. By hitting it on top you can do extra damage. When you're close to the Mothership, your jetpack will regenerate more quickly.
  • Big Jelly (18 planets, 2 Diamonds) - A large ball of green slow gas that will engulf the planet you're on. Disables your jetpack and will spawn small Jellies. The small Jellies will chase you, but are this boss's only source of damage. Keep shooting its heart to defeat it. Small Jellies will also shoot ink at you that will cause your screen to be temporarily obscured when it hits you.
  • Bossworm (24 planets, x) - A blinking blue light (a Tejon Monument) will appear and keep you from using your jetpack. This light will also shoot you for high damage if you attempt to attack it. A worm will spawn and spew green goo at you. When it burrows back into the ground, it will leave behind two bombs. Pick up the bomb that is flashing more slowly. The other one will explode. Then, wait until you see a flashing notification on the ground. Drop the bomb there. Bossworm will appear and eat the bomb.
  • SUPER ULTIMATE ANGRY DEATH MASTER 9000 (25 planets, x) - WARNING: THIS BOSS IS EXTREMELY DIFFICULT. DO NOT ATTEMPT WITHOUT ALL THE UPGRADES.
  • Big Al (35 planets, x) - Essentially a large, mobile version of the Moai Smash, this boss will jump around and attack you at melee range. When it jumps, it will create a large shockwave upon landing. This shockwave will completely destroy buildings, leaving behind bricks that you can pick up. When fighting Big Al, it's useful to be on a large planet with lots of atmosphere. That way, you can constantly hover above him, as he cannot jump high enough to reach you. By the time you come across Big Al, you should be able to tank the smaller enemies, and occasionally use an Ultranova to clear your screen.
  • Blue Wizard (42 planets, 3 diamonds) - Will hover and shoot you with waves of fireballs and yellow lights. He is also capable of spawning Thorn Plants. He can teleport around, so my advice is to camp on a planet with turrets covering every approach. That way you can have the turrets deal with him without worrying about having to shoot him yourself.
  • Triple Dragons (45 planets, x) - All three dragons at once. Try to focus them down from weakest to strongest. Fly from planet to planet if you need health.
  • Final Boss (50 planets, x) - Collect all the Dimensional Stones and talk to the Old Man to unlock the final boss. When you fight the Final Boss, you're given a very special weapon. Use it and your skills to defeat him.

Boss Strategy
Bosses can be pretty difficult to defeat, especially before you've finished buying all the upgrades. However, there are strategies to help you defeat them.
  • Planets
    Picking the right planet to face a boss on is important. The larger the planet, the more plants it can have on it, and the larger its health reservoir. A revived planet will heal you while you stand on it, so fighting a boss on a larger planet gives you a bigger health boost.
  • Towers
    Towers can help give you that extra damage output you need to beat a boss. I advise using PewPew Towers. They're cheaper than a Flame Tower and also more accurate. Since they're cheaper, you can build more of them and cover a larger area.
    Don't forget to leave space for plants on the planet's surface so that you can keep up your health.
  • Fighting Strategies
    Each boss has a different way to beat it, but one thing to keep in mind is that it's important to keep your health up. If the boss you're fighting doesn't confine you to a single planet, you can fly around to different planets to heal up. If your warp planets are relatively large (>6 plants), you can fortify them with towers and Moai Smashes then warp quickly between them. (Thanks, BoosterGold87)
Planets
There are currently three different kinds of planets - Circular planets, Square planets, and Cratered planets, all in various sizes.

  • Circular planets are the most common, and the simplest.
  • Square planets are easier to defend with PewPew towers, but can sometimes be difficult to walk around on. Placing PewPew towers at each corner of a Square planet can give it a full 360 degrees of defense.
  • Cratered planets can be similarly difficult to navigate, but can entrap enemies within the crater.

Near the center of the map, there is also a special planet with 5 Warp Gates on it. Once the planet has been revived, these Warp Gates will allow you to travel to distant planets instantaneously. Four of the Warp Gates each link to planets in different corners of the map. The central Warp Gate links to the planet with the Old Man.
NPCs
Across the cosmos, you will encounter several different NPCs who you can interact with.

  • The Old Man explains your purpose, and gives you grandfatherly advice. If you bring him the numberball, he will reward you with some crystals. If you bring him the egg, he will give you some hints as to how to use it. Any artifacts you find can be brought to the Old Man to learn what they do and to unlock them from the title screen.


  • McAphelion will let you purchase gun upgrades for 25 seeds each. He's found on some random planet, and looks like a general.


  • The Scientist will take the Gamma Rod from you. If you return to him a little later, you can get the upgraded galaxy map from him for 500 crystals. (Thanks, ssg_roguey!)

  • Turbogunninja is looking for his Illumina Sword.


  • Holopods are passive, and are occasionally found on planets. When activated, a hologram will appear and give you a bit of backstory or some interesting dialogue.

Items
Scattered on various planets or in space are items which can aid you in your journey.

  • The Numberball lands on the planet the player starts on. It will present you with various messages when you pick it up. Taking it to the Bearded Man will earn you some crystals.
  • The Egg is found on a random planet and will allow you to hatch a pet. For more information on this, see the section about pets. Alternatively, you can eat the egg for a health boost.
  • The Green Rod is found on a random planet and does something I have not yet been able to figure out.
  • Gun Upgrades increase your weapon's rate of fire and damage. These are dropped by flashing UFOs and Evil Diamonds or bought from The Soldier (see NPCs). If you run into an enemy, you will drop the powerup. However, you can pick it up again if you're fast enough. Being hit by ranged weapons or running into a boss will not cause you to drop the powerup.

  • Crystals are used to purchase upgrades before the game begins. These are dropped by enemies when killed.
  • Diamond are dropped by some bosses, found in meteors, or found around the map. They are worth 250 crystals. Diamonds can be differentiated from Evil Diamonds by the way that they 'tink' when shot.
  • Brickes are required to build PewPew Towers, Shield Bases, and Flame Towers. These are carried over between games.
  • Artifacts are mysterious objects which you can find scattered across the cosmos. Most commonly, these are found from the treasure chests you get when you fully revive a planet. Artifacts can be brought to the Bearded Man to unlock them. Once they've been unlocked, you can activate them from the Main Menu. Each Artifact has different abilities.
Pets
Pets are special companions that will help you on your journey. The first step to obtaining a pet is to find an egg. The egg will be on some random planet in the galaxy. Eating the egg will restore some of your health, but you can't hatch a pet that way!

Once you have the egg, you can take it to the Old Man. He'll tell you that you can eat the egg or hatch a pet from it. He'll also tell you that "The pattern on that one looks familiar."

In order to begin hatching the egg, you must first find the right planet. This planet should have the same pattern as on the egg. After you find the right planet, you have to revive it.

When the planet has been revived, the egg will begin to hatch. At this point, you will be swarmed with enemies. You must defend the egg in order for it to hatch. The egg will shaking. The harder it shakes, the closer it is to hatching. If the egg gets hit by any enemies, it will increase how long it needs to hatch. In order to protect it, I recommend placing it in between two Shield Bases, with PewPew Towers on either side.

Once the egg has hatched, you will gain a pet! The pet will follow you to whatever planet you go to and help you in various ways.

The Dragon and the Cat will attack enemies:


The Alien will pick up crystals:


The Monkey will plant seeds automatically:


The Puppy will lick you to heal you:


The Turtle creates a time vortex that slows down enemies and enemy projectiles:
(Picture coming soon!)

The Robot fires reflecting lasers at enemies:
Achievements
  • Selfless Savior - "Navigating the cosmos with seeds in hand, he successfully grew new life so grand."

    Revive one planet.

  • Double Dragon - "See both the fire breather trying to heat up his heart, and the ice breather trying to break his smile apart."

    Encounter both the Red Dragon and the Ice Dragon at the same time. My advice is to plant 5 planets (and defeat the blue dragon), then prepare four small planets which are close together so that they only need one more plant. Then, finish the planets and wait.
    Alternatively, wait until the Triple Dragons boss spawns.

  • The Mod - "NeoGAF's orbit became overrun fast. He nuked the thread with a megaton blast."

    The requisite for this achievement appears to be firing off enough Ultranovas. This can be done either by using them yourself or by opening chests.

  • Right Round, Baby - "The stars spun dizzily through skies above. The soil beneath restored with love."

    Getting this one is pretty simple. Just run around a revived planet clockwise a bunch of times. (Thanks, Sharl, for the direction clarification).

  • A Solar Shave - "He jet along the red razors edge. No fuel left-but living life was his pledge."

    Fly into the danger area of the map and stay there until you run out of fuel.

  • The Pacifist - "Their bullets hit, his skin was bruised...but his weapons remained unused."

    Allow enemies to hit you for a while without fighting back.

  • Part of the 1337 Team - "Their forces combined and changed the Earth. He dreamed of such power since before his birth."

    Plant 1337 seeds across all your games.

  • Destiny's Errand - "He found the one to whom 8 belonged. From behind a beard rewards were spawned."

    Return the Number Ball to the Old Man.

  • Wisdom - "The truth revealed, the story told. Not quite sure why he's so darn old."

    Find the Old Man and listen to his story.

  • Photon Sin Thesis - "Encountered evil within three seeds, vanquished that evil without concede."

    Defeat three carnivorous plants in one game.

  • Dedicated - "Three planets to train him, three more to inspire. And three more yet-it's what the achievement requires."

    Revive 9 planets in one game.

  • We Win, Gracie - "The rock creeped closer-impending fear. When the bombs went off: victory cheer."

    Destroy an asteroid with a Ultra-Nova.

  • Ma...ma...? - "Tended egg from love to life. Now a creature helps fight fiends with friendship rife."

    Hatch an egg.

  • In the Rough - "Asteroid suspicions of treasure concealed. Rock cracked in half: rewards revealed."

    Destroy an asteroid and find a diamond inside it.

  • Cold Embrace - "For a twelfth of an hour all he'd know was distant planets hung far below."

    To get this achievement, revive at least two planets, then hang around in space without landing for 5 minutes. (Thanks Ausmerica)

  • Phew - "His last lifeline thought lost to infinte space. Yet he made it back to soil: so safe."

    Use your jetpack to fly off-planet, then land again.

  • Neutralmonism - "The option placed before his eyes. He chose to fight. He chose to try."

    Choose to fight the final boss.

  • The Blue Pill - "People say that ignorance is bliss. To be clueless was his only wish."

    Choose to hand over the One Stone.

  • The Cataclysm - "The truth revealed, a fight fully fought - fate then sealed and victory brought."

    Defeat the final boss.

  • Construct, Too - "His hands were calloused, as were his knees. One hundred structures did he see."

    Build 100 structures.

  • Shinobi - "A sword was found and then returned. A ninja's trust was rightly earned."

    Get the Ninja costume by returning Turboninja's sword to him.

  • I'll Be Brief - "Through the fabric of the finest loom's fruit, he'd charge his gun, jump, and then he'd toot."

    Unlock the underwear costume by finding it in a chest.

  • For Jesse - "With enough food grown for a cupboard of bears, the secret revealed just over there."

    Unlock the panda costume.

  • Domo Arigato - "You're wondering who I am-machine or mannequin. With parts made in Japan, I am the modern man."

    Unlock the robot costume.

  • Armoury - "Bullets, lasers, armour and shells. His choices for battle shall suit him well."

    Unlock all the weapons. (Not sure about this one; I got it when I started the game one day after all these had been added.)

  • Glitchin' - "The fabric of all time and space shred into pieces and displaced."
    (Picture soon!)
    Unlock the Glitch costume

  • For Nick - "With faith while lava burned him hard, the fire yarn spun to immaculate garb."
    (Picture soon!)
    Unlock the Neko costume

  • RRSP - "A lifetime of saving for a few years of rest. He wishes he spent it when he felt at his best."
    (Picture soon!)
    Save up 100000 crystals.
Tips, Tricks, and Advice
Here is some advice to help you get through the game.

  • If you're having problems, buy more upgrades.
  • Once you're able to defeat the Blue Dragon, start saving up for the Double Crystals upgrade immediately. It's worth it.
  • Don't stand still for too long on unplanted planets - an enemy will pop out of the soil and hurt you.
  • Planets can be planted past their heart gauge. Planting more plants will increase how much health it has in reserve.
  • Shooting through clouds powers up your shots.
  • Enemies appear in greater numbers the more planets you revive, so it generally pays to save your bricks for later in the game.
  • I recommend placing Moai Smash statues on warp planets and very large planets so that you can keep your health up.
  • In order to get a planet's health reserve as high as possible, I recommend planting seeds as close together as you can.
  • After you've gotten the Galactic Map and can tell where you're going, there's a pretty simple strategy to follow. Head towards whatever corner is nearest to you. The corner planets always have portals on them. Revive the planet to be able to use the portal. You will be taken to the portal hub. From here, you can get to the Bearded One.
  • If you find a square planet, placing PewPew Towers on the corners will cover pretty much an entire 360 degrees. If you find two planets that are close together, you can place towers on both of them to increase the damage output.
89 Comments
LiamisaHero1 Mar 27, 2021 @ 4:32am 
The final boss also offers a fairly fast way to get the RRSP achievement. Killing the boss itself doesn't seem to give you any crystals but the meteors crashing onto the surface can contain diamonds. With the upgrade that doubles crystal gain, each diamond gives you 500 crystals, and if you continuously run in a clockwise direction around the planet then you'll never take damage from the final boss and can simply collect the diamonds when the meteors break. You will still take damage from the meteors and eventually die, but you can just start at 50 completed planets again, talk to the Old Man, and then reenter the fight and continue. It may take an hour or two depending on how lucky you are and how many crystals you started with. It might be worth buying the upgrade that makes you run faster, and anything else that might help you survive the fight for longer, but absolutely get the crystal doubling upgrade.
LiamisaHero1 Mar 27, 2021 @ 4:30am 
For anybody confused on the final boss, the weapon you get has two modes: the first is like a shotgun blast that does good damage against regular enemies, but does almost nothing to the final boss. The second mode does a LOT more damage, and is activated by holding down left click (or whatever your firing button is). It takes a few seconds to fully charge, and it seems to be interrupted when taking damage, but it does truly stupid amounts of damage to everything in the game and makes future runs of the game a breeze. But it does consume jetpack fuel at a high rate, so you have to be mindful of that.

Anyway, with that charge attack, the final boss is relatively straight forward. Just rotate around the planet in a clockwise direction to dodge his attacks (he's always on the left), and try to dodge the meteors as best you can while you're charging up your weapon.The meteors do almost negligible damage compared to his attacks, so don't be too afraid of them.
sharl May 17, 2020 @ 10:56pm 
I echo d-schuele on the last boss... haven't been able to win at all.
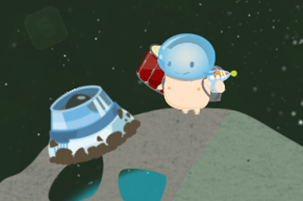
@Phiteros - do you want a picture of the Turtle pet?
bernd Feb 4, 2019 @ 1:45pm 
Can someone give me a hint on the final boss?
that guy's health bar is ridiculous.
so I either must be doing something completely wrong.
Or this fight is insane compared to the rest of the game! :O

Can someone help please?
Phiteros  [author] Jan 29, 2019 @ 1:29pm 
Lol yes, it's a joke.
CyberjenicPanda Jan 27, 2019 @ 11:38pm 
"SUPER ULTIMATE ANGRY DEATH MASTER 9000 (25 planets, x) - WARNING: THIS BOSS IS EXTREMELY DIFFICULT. DO NOT ATTEMPT WITHOUT ALL THE UPGRADES." is this supposed to be a joke? I shot it once it and it died immediately, and I didnt even take any damage either.
G I N S Ξ N G Sep 4, 2017 @ 12:26pm 
Are pets permanently unlocked or does it need to be on every playthrough?
tonymoreno2908 Jul 6, 2017 @ 12:01am 
GOOD! THANKS
Søren Ryge Gaming Apr 22, 2017 @ 12:52pm 
i just found some poop and i am 100% sure that ive found a farmer before any help on that?
Phiteros  [author] Jul 25, 2016 @ 7:23pm 
Yeah, I actually have that in there, under "NPCs"