Uncle Chop's Rocket Shop

Uncle Chop's Rocket Shop

110 ratings
Guide to Washing Machine Codes [COMPLETE]
By Xesdra
This guide shows the locations and solutions of the puzzles in the game that give codes for the washing machine in the basement. (Spoiler tags are included around puzzle solutions and explanations but NOT around locations)
15
5
4
2
7
6
2
2
3
   
Award
Favorite
Favorited
Unfavorite
Status
Update: Jan-14 2025: Puzzle 10: Speakeasy 1 (Ciphertext) solved!
Update: Jan-12 2025: Puzzle 10: Speakeasy 1 (Ciphertext) Progress
Update: Jan-3 2025 Puzzle 4: Speakeasy Butterfly solved!
Update: Jan-1 2025 Happy New Year! Puzzle 16: Basement Cat solved!
Update: Dec-30 2024 Puzzle 24: Magpie Chart solved!
Update: Dec-22 2024 Puzzle 11: Guidebook %a-i solved!
Update: Dec-21 2024 Puzzle 15: Hive VR solved!
Update: Dec-18 2024 Puzzle 23: Calendar & Puzzle 8: Guidebook Cipher 2 solved! (also added list of Unlocks)

Found 24/24
All 24 have been found.

Solved 24/24
All 24 have been solved.

Introduction
What are Washing Machine Codes?
You may have noticed the washing machine in the basement is attached to a keypad with a strange set of keys. It turns out there are a series of hidden puzzles in the game that when solved give codes for this keypad which open the washing machine, giving dialogues, new outfits and achievements. If you want to find and solve these yourself, stop reading now and get to work!

This guide will give locations, solutions and reasoning for all these puzzles in the game. The locations and pictures of the puzzles will not be hidden to make it easier to find the answers for specific ones that you get stuck on, however the solutions and reasoning will have spoiler tags.

Note: You can only enter each code once, if you enter the same code twice it will give the same response as entering a wrong code.

Where can I keep track of my Washing Machine Codes?

There is a page in the guidebook (located between Reliable Home Power and - Fuel -) that tracks which codes you have entered with a stamp that looks like a Yinyang symbol. If viewed under the blacklight in front of the parts shop at night, it also gives clues to the locations of the puzzles. The puzzles are usually marked with the same Yinyang symbol.


How do I find the puzzles?
Look for this symbol!


Unlocks
In the spoiler below is a list of the rewards for entering codes:

# of codes
Reward
1
Achievement: Spin Cycle
3
Skin: Plaid Wilbur
6
Skin: Metal Wilbur
11
Skin: Naked Wilbur
17
Skin: Mankini Wilbur
24
Achievement: No More Laundry
Guide Terminology
Puzzles
The puzzles will be numbered as follows:

Keypad
The keys will be referred to in this guide as follows:

You are required to press ENTER at the end of every code to submit your attempt. If you fail, you will be able to retry in a few seconds. If you succeed the washing machine will open.
Puzzle location icons
When viewed in the blacklight, the icons in the guidebook correspond to the location of the puzzle as follows:
Icon
Location
That's you!
In the Guidebook
In the environment around Uncle Chop's Rocket Shop
In VR
Along the Cultist ending
Along the Empyrean ending
Along the Magpie ending
Along the Lawmakers ending
Along the Hive ending
Puzzle 1
Location
???

Solution
1 4

Explanation
Not 100% sure, but this number shows up a lot everywhere throughout the game. It's also written on the wall just to the right of the keypad.
Puzzle 2
Location
In the Guidebook, inside the front cover, visible under the blacklight in front of the parts shop.
Solution
7 3 2 7 8 3

Explanation
What you see is what you get. Probably one of the first ones you're supposed to get, as an introduction to the game mechanic.
Puzzle 3
Location
In the Guidebook, on the page before the pink AI section, visible under the blacklight in front of the parts shop.
Solution
7 3 6 SMILE BRIMSTONE X 1

Explanation
Overlay the pattern on the keypad, the dot tells you where to start
Puzzle 4
Credit to Démorck for solving this one
Location
Left wall, top floor of the speakeasy.
Solution
1 6 6 1 3 2 2 3

Explanation
The butterfly depicted is known as the common brimstone. Either using the fact that brimstone is an archaic term for suifur or the colour of the wings, you can make the link to sulfur. Elemental sulfur has an atomic number Z=16 and the most common isotope has a mass number A=32. So Z, mirrored Z, A and mirrored A gives you the solution.


Puzzle 5
Location
Inside the Warehouse VR where you need to find the correct 3-digit box.
Solution
5 5 7 4 1 5 4 8 6 3 7 2

Explanation
There are 4 shelves that are labelled 1 2 3 4. Each of these has one 3-digit box stored on it. The answer is the four 3-digit numbers combined in shelf order (12 numbers total).
Puzzle 6
Location
In the Guidebook, on the page before the Headlights section, visible under the blacklight in front of the parts shop.
Solution
9 4 2 5 7 3

Explanation
Plotting each set of functions on a graph draws the icons of the buttons.
There is an example here: https://www.desmos.com/calculator/daagjajjgi
Click the circular icon to the left of "Nth Symbol" to show and hide each one.

Puzzle 7
Location
In the Guidebook, across from the "Emotional Shutdown" page in the AI section, visible under the blacklight in front of the parts shop.


Here are the numbers in text form if you want to use it:
14-09-14-05/07-10-23-06/08-11-24-07/11-04-15-09/
10-19-25-22/11-14-01-10/14-07-18-12/26-12-03-21/
14-23-03-26/02-14-05-23/24-19-24-15/04-16-07-25/
18-01-07-04/19-22-09-18/07-19-10-02/23-16-01-21


Solution
9 5 5 HALF 4 5 HALF 7 4 7 9 7 4 5 7 HALF

Explanation
The cipher reads left to right, top to bottom.
First transform numbers to letters using A=1, B=2, ..., Z=26. The first 4 letters will transform into NINE but the rest is still garbled. Each set of 4 letters after the first is shifted 1 forward from the previous. You need to shift the 2nd set of 4 letters back 1 letter, the 3rd set back 2 letters, etc.


Puzzle 8
Location
In the Guidebook, across from the "Emotional Shutdown" page in the AI section, visible under the blacklight in front of the parts shop.

Solution
1 3 7 5 8 4

Explanation

Imagine each set of 4x4 numbered grids represents buttons on the keypad as seen on the image. Press the keys corresponding to the number "14" (which is an important number in the game e.g. Puzzle 1) in order from left to right, top to bottom. Repeat this for each of the four sets of 4x4 numbers from left to right (the image shows the leftmost/first set).


Puzzle 9
Location
During the Cultist questline, in the microwave.
Solution
8 8 BRIMSTONE 8 8

Explanation
Follow the guidebook to create a Cooler Rock, then put it in the microwave and cook it. Not sure if there's a direct clue to solving this, maybe it's just a reward for experimenting with everything in the Cultist area.
Puzzle 10
Big credits to everyone who helped on Discord as this one was a massive group effort:
throckwoddle, ForgottenLands, Archaicjinn, Sirius)(Black, ℜ𝔞𝔣𝔞𝔢𝔩, Pugnippets, Creadeyh, ;/, Plystire, Démorck, Myst & others that I probably missed scrolling through

Location
Above the bar in the speakeasy.
Solution
9 SMILE 8 INFINITY X BRIMSTONE X INFINITY X X SMILE INFINITY X 8

Explanation
Thanks to ForgottenLands for letting me use their images here!

Firstly convert the text to English letters. The letters are modified from a font family called 'Bradley'. The same font is used on the cover of the guidebook and the letters on the butterfly puzzle (Puzzle 4). Each letter translates to the same as the base letter that it is modified from. The small 'x' at the end of certain words is not a letter and will be used later.

The alphabet (minus J as the ciphertext only has 25 unique characters) is given here. Top row is the ciphertext, middle row is a reconstruction made using the base letter, bottom row is the base letter from the Bradley font.


This gives the text:
VES BQY GHZGXR EWTVMOR RONY HFB LOIRG AHZ QOVG MHR ZGKKVNSV GGHR. IWZRG WH GWL MMZVLOGRM NRHVPSXGZ. VY GSR TMF RLUSM QRGW. RRDLVE MW PVDC LVS.

Run this through an Atbash cipher decoder (potentially hinted by the "mirrored" butterfly in Puzzle 4) to give:
EVH YJB TSATCI VDGENLI ILMB SUY OLRIT ZSA JLET NSI ATPPEMHE TTSI. RDAIT DS TDO NNAEOLTIN MISEKHCTA. EB THI GNU IOFHN JITD. IIWOEV ND KEWX OEH.

Now use a skip cipher decoder with a skip of 56 (i.e. in the decoded text there are 55 characters between two consecutive characters in the encoded text) with spaces and punctuation removed:
EEXEDVOIDINFINITETHEINTOANDSTARSTHEPASTLAZILYSMILEDITSBYVHOWKNEWITJHOUGHBACKSMILENOTDIDITEMPTINEJSTROUBLINGVCATJH
As a note, 56 = 14 * 4 or alternatively it is half the length of the 113 character ciphertext.

Adding some spaces:
E EXED VOID INFINITE THE INTO AND STARS THE PAST LAZILY SMILED ITS BY V HOW KNEW IT JHOUGH BACK SMILE NOT DID IT EMPTINEJS TROUBLING V CAT JH

Rearrange all the words to form coherent sentences matching the word lengths and punctuation of the original ciphertext. You can do this manually or you can read off the decoded text in this pattern:


Here is the final text. The words marked with small x's in the ciphertext are marked with *.

J(T)HE CAT* SMILED* LAZILY PAST THE STARS* AND INTO THE INFINITE* VOID*

V?EXED BY ITS TROUBLING* EMPTINEJ(S)S*

IT* DID NOT* SMILE* BACK

J(T)HOUGH IT* KNEW* HOW

Left over: V


There are a few anomalies:
  • 1 unused V
  • J needs to be replaced with T twice and S once
  • LAZILY is 6 letters instead of 7 in the ciphertext (because of the spare V)
  • The E in the first JHE/THE is located in a different position than it should be
  • The V in VEXED is located in a different position than it should be

The code is given by pressing buttons according to the marked words in the same order as you read them:
A few notes:
  • TROUBLING likely matches BRIMSTONE because of the negative connotations (e.g. the phrase "fire and brimstone")
  • IT as a pronoun is replacing the phrase THE INFINITE VOID, so you press those buttons again
  • KNEW can be associated with the 8 key by seeing it as a lightbulb flash (for knowledge) or treating it as a sparkle/shine (for something 'new')

An alternative solution (and maybe the one intended by the devs after speaking with them), is to ignore the font analysis and just apply skip56 -> mono-alphabetic substitution to the original ciphertext with an arbitrary letter assignment, but this is how we solved it.

Clicking images in the spoilers is a pain so here are the links if you want them:
Ciphertext with English transcription: HERE
Alphabet: HERE
Sentence arrangement order: HERE
Corresponding buttons: HERE
Puzzle 11
Thanks to Pugnippets for inspiring my solution
Location
Scattered throughout the guidebook, visible under the blacklight in front of the parts shop.
Solution
9 5 9 3 8 5 5 3 2

Explanation
The marks %a, %b, %c, ..., %i are scattered throughout the guidebook and all link to this puzzle even though they each have a symbol.
First, count the page number where each mark appears. The inside cover is page 0, page 1 starts with "ITEM & CONTENTS ARE SOULBOUND".

The % symbol indicates the modulo function (this is used in computer programming languages such as C++ or Python). The modulo (a.k.a remainder) function works as follows: A mod B gives you the remainder of A divided by B, so (5 mod 3 = 2) since 5 divided by 3 is 1 with 2 left over.

Take the modulo of each page number with 14 (the special number in this game) and rearrange the numbers so the corresponding letters (in %a, %b, ...) are in alphabetic order.
Example: "%a" appears on page 51, 51 mod 14 = 9, so the first digit of the answer is 9.


Puzzle 12
Location
At one point in the Empyrean Questline you will go underground to a laundromat.
Solution
6 X 1 SMILE 2 HALF 4 9

Explanation
The shirts in the washing machine have pictures of the keys you need to press on them. The large pause between shirts signals the start/end of the sequence.
Puzzle 13
Location
In the punchcard machine during the Magpie questline
Solution
6 4 SMILE BRIMSTONE INFINITY X 9

Explanation
The circles are aligned with a 4x4 grid that corresponds to the keys you need to press on the keypad. Follow the lines to a circle in the same order that your punchcard in the game is used: i.e. Column 1, top to bottom, Column 2, top to bottom, etc.
Puzzle 14
Location
Interact with the Pistol in the Lawmakers questline.
Solution
1 2 8 2 9 9

Explanation
When racking the slide to load the pistol you can see a number written on each bullet. The answer is just these numbers in the order that they load into the gun. The ENTER symbol indicates the start/end of the sequence. You will need to refill the magazine to get the full sequence as it is longer than the capacity.
Puzzle 15
Credit to Pugnippets & Plystire on Discord for helping me get this one!
Location
During the Hive questline, when you go into VR.
Solution
1 5 5 7 2 9 4

Explanation
When you meet Lolligo (the one-eyed dude) in the Hive VR, you can see they are pulsing with a bright blue-white light.

He actually has two different pulses, the bright one which you will notice first and a dull pulse which is harder to spot. These correspond to 1s and 0s in a binary code.

Using ASCII translation from binary to text you will likely get the phrase "BeWorse!".
This is a clue that is meant to guide you to restart the Hive questline but fail to meet quota on both Day 1 (which doesn't actually end your run) and Day 2. When Lolligo pops up to kill you at the end of Day 2 they will flash a different code translating to "1557294!" which is the solution.

I'm not sure if there's an alternate way to trigger the answer code. If there is you can leave a comment and tell me. It might also be possible to get the answer code without ever seeing "BeWorse!" if you're bad at making donuts.
I also don't believe there is a way to tell where the start/end of the binary sequence is, but both phrases end with "!" and you can always cycle the first digit of your binary code until the translator spits out something coherent.


Puzzle 16
Credit to Riding_The_mmWave for solving this
Location
In the basement expansion for the workshop that you can purchase.
Solution
Press the 9 button 81 times.

Explanation
It's a square cat. The cat button is 9, 9 squared is 81.


Puzzle 17
Location
In the crew quarters where you sleep during the Lawmakers questline.
Solution
X 1 3 2 5 4

Explanation
The symbol on the center of the locker is the key, the tally mark next to it is the order.
Puzzle 18
Location
In the workshop area, left wall above the door to the parts shop.
Solution
1 5 2 3 6 4 7

Explanation
Press the buttons corresponding to the Roman numerals in this order: closest to farthest from center, lowest to highest if same distance,
Puzzle 19
Location
Far left side of the shop, near where you pay 1st and 3rd R. E. N. T.
Solution
INFINITY 4 1 1 4 INFINITY

Explanation
ONE = 1, FOR = 4, ALL = INFINITY
Puzzle 20
Location
Far left side of the shop, near where you pay 1st and 3rd R. E. N. T.
Solution
INFINITY SMILE HALF X SMILE BRIMSTONE

Explanation
The squares match the colours of the buttons. Read top to bottom.
Puzzle 21
Location
Go right from the sleeping area, on the front wall of the diner
Solution
1 2 4 7 5 3 X 6 8 HALF SMILE 9 INFINITY 6 3 5 4 SMILE

Explanation

Overlay the image onto the keypad then press all the buttons along the curves. The dots mark the start of the curves and also the order in which to follow them (from 1 to 4).

Puzzle 22
Location
In the Guidebook, near the back cover, visible under the blacklight in front of the parts shop.
Solution
1 3 4 7 2 5 1 4

Explanation
The graph shows a plot of the Riemann zeta function ζ(0.5 + i*t) on the complex plane. It's a pretty high-level but well-known mathematical function. You can read more on wikipedia: https://en.wikipedia.org/wiki/Riemann_zeta_function
The first non-trivial zero has an imaginary part approximately equal to 14.13472514, which matches the clue in the book with xx=14. The digits in square brackets form the answer.

Puzzle 23
Location
On the wall to the left of the keypad, near the entrance to Kyle's area.
Solution
9 1 6 BRIMSTONE SMILE INFINITY 7 HALF SMILE

Explanation

Map the calendar days to the keypad as shown in the image (The image only shows the first map, you have to repeat this two more times with the rest of the calendar).
The X's correspond to the ENTER key and the yellow circles are the buttons you need to press.
If a circle overlaps many squares it counts as being present on all of them.
Press all the marked buttons in order in the same way you would read the calendar, i.e. left to right, top to bottom.


Puzzle 24
Credit to person322 for solving this
Location
During the Magpie questline, top floor of the warehouse.
Solution
7 SMILE INFINITY BRIMSTONE 7 5 9 X 4 2 INFINITY BRIMSTONE

Explanation

Map the keypad onto the chart like tiles as seen in the image. Press the buttons corresponding to the top-most square of each column from left to right

Final Words
Thanks to everyone in the comments and on the official Discord who helped work on these puzzles!

If you spot an error please let me know in the comments. Thanks for reading!
58 Comments
racerock99 Apr 28 @ 10:29pm 
Thanks for the guide, this is amazing work!
Tri-B-Dojel Feb 10 @ 2:24am 
So 14 might also be because Droose has the code to his phone be 1414141414 in the Empyrean ending.
alex GG Jan 20 @ 1:31pm 
found out how you're supposed to get code #1! the true ending skin has tally marks on it. guess what they add up to...
Plystire Jan 15 @ 4:14pm 
A www, you remembered me =3
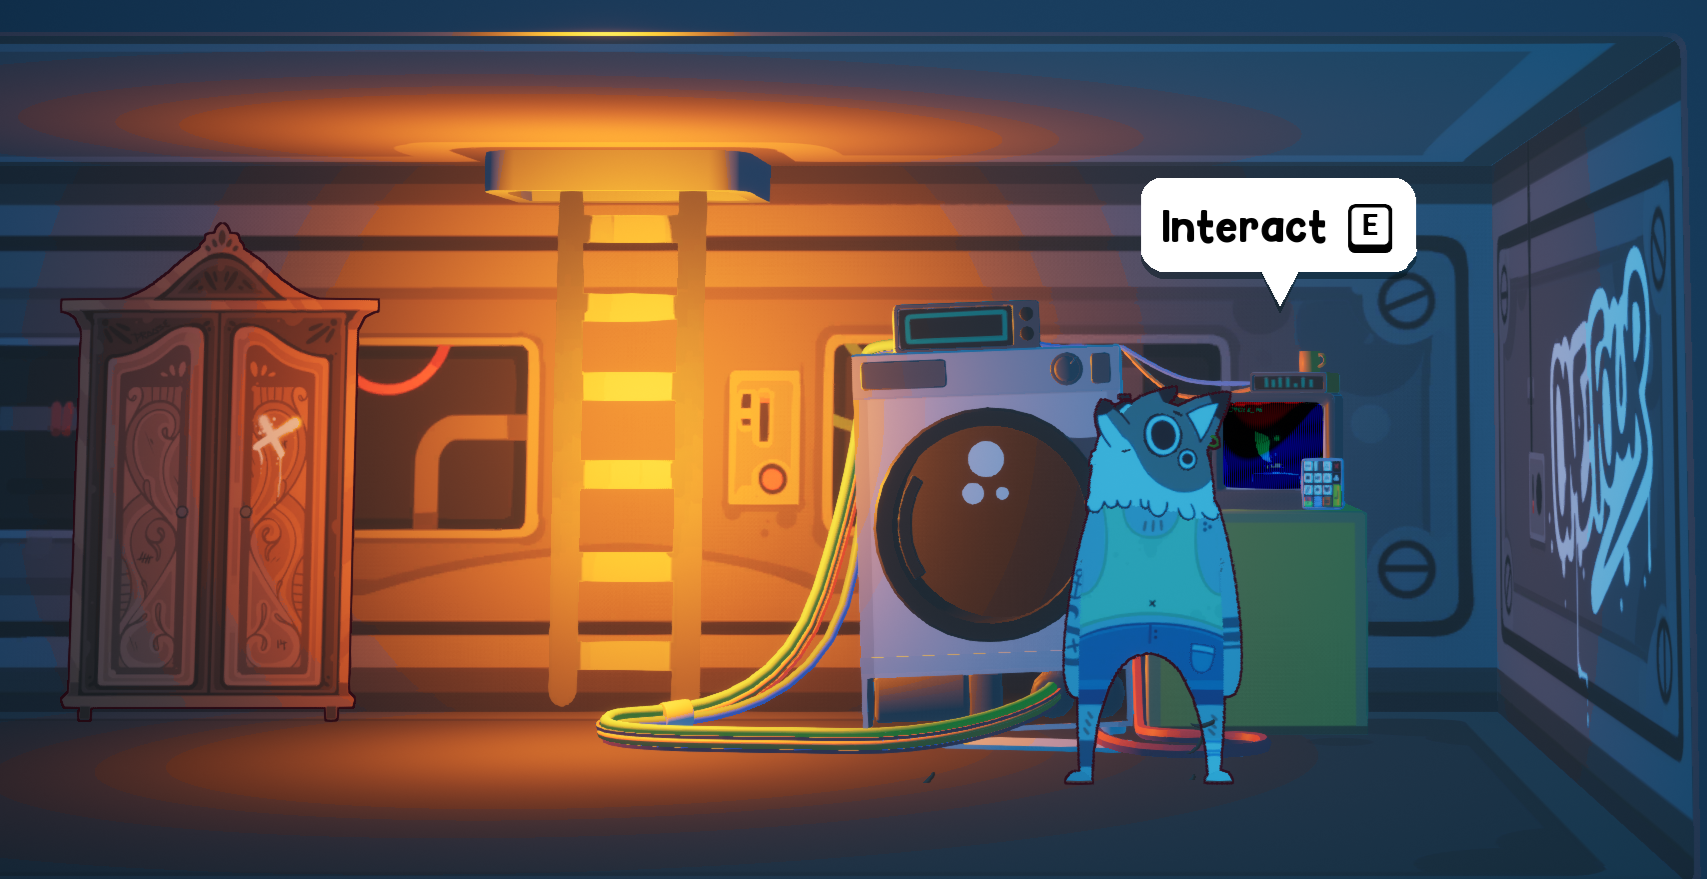
Thanks for documenting all of this! Job well done on this guide!

And it's honestly hilarious to me the difference in explanation length between the speakeasy bar and literally every other puzzle xD
Infinity Overdose Jan 15 @ 5:11am 
Thanks for the guide and impressive puzzle solving. I would never have figured those out myself. The developers put more work into these than the actual gameplay lmao.
Mutantsushi646 Jan 14 @ 2:47pm 
These puzzles are evil, I don't know whether to kiss the developers or clock'em in the jaw.
missiloon Jan 14 @ 2:07pm 
Yay gratz, amazing!
MarcMatti Jan 14 @ 11:16am 
IT... IS... DONEEE:powerinverter:
The little Potato Jan 14 @ 4:59am 
Congrats! Definitively the hardest one to solve
Xesdra  [author] Jan 13 @ 4:52pm 
We did it! Thanks to everyone who helped!