Factorio

Factorio

92 ratings
Guide to DLC
By Lokken
Hello Engineers! This guide is to share my experience with DLC that might help you.
7
2
3
   
Award
Favorite
Favorited
Unfavorite
Hello Engineers!
Since i had trouble trying to find few answers to my questions, after spending some time and finding solution on my own, i wanted to share with you some tips and tricks that can help you.


Note: I transferred my old save into the new game version, so if anything I mention is inaccurate, let me know! Converting a save works well, but a few processes/technologies can be used before they are researched (e.g., coal liquefaction). New planets are generated using a new algorithm, however, Nauvis remains the same.
General tips
You should ensure the ability to construct remotely on each planet—this is crucial for dealing with unplanned situations. Make sure to bring solar panels and batteries, even if they aren’t the most efficient on the designated planet. They provide a reliable, albeit intermittent, power source. Always set up roboports with construction robots for remote building.
After deploying to a planet, you’ll need to build a rocket silo to leave, so be prepared. Everything will have to be provided from Nauvis.
Craft and transport spidertron to Gleba, Aquilo and Vulcanus, it is great backup plan and it can do many things remotely.
Connect your rocket silo to all planetary resources for backup support.
Ensure your Nauvis base is self-sustaining, as you won’t be able to assist it for extended periods.
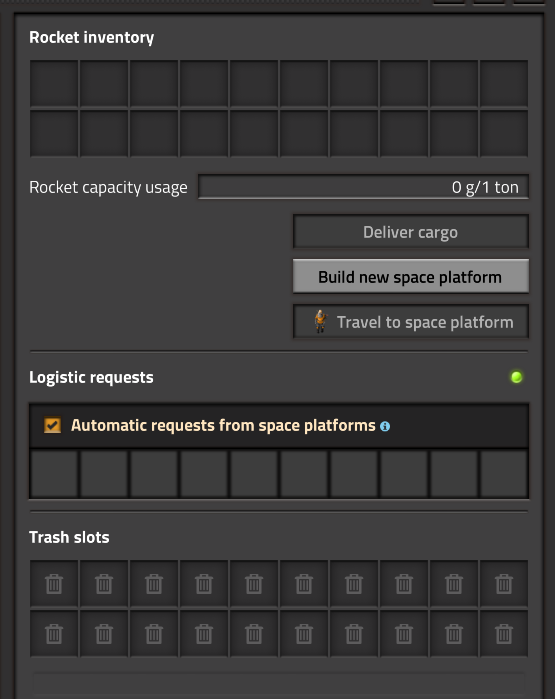
Make sure to enable “Automatic Requests from Space Platforms” in the rocket silo for easier resource access.
Power armor with roboports, shields, lasers are crucial for your survivability and for easier base building.
Radar coverage is extremely useful on all planets.
Elevated rails and mech armor are valuable, especially on Fulgora and Aquillo.
Building cargo landing pad is for drops from orbital platform, it allows you to request resources from platform (another step into automation), but also your drops will always land in this building. It has limited space but it can be expanded by "Cargo bay".
Nauvis?
Although Nauvis is not a DLC planet, your journey with the DLC starts here.

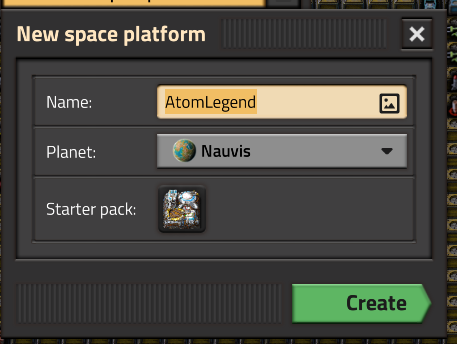
Open the map and click "+ Add Space Platform" (you can enter a name or change it later).
OR open the rocket silo and click "Build New Space Platform."

Craft the "Space Platform Starter Pack" (either manually or with an assembler), put it inside the rocket, and launch it!

Within a few seconds, your first platform should be created. You can access it by opening the map and selecting it in the top-left corner.

Supplying the Platform: To ensure the platform has all necessary resources in the main platform building, the Space Platform Hub, make sure to check "Auto Request Missing Construction Materials" and "Automatic Requests from Space Platforms" in your rocket silo.

Building on the Platform
Building on the platform is a bit challenging at first, but you’ll get used to it. To place a building, click E, select the building, and place it. Once it’s placed, the platform will automatically request all necessary materials from the planet or rocket silo and will construct it. Note that this might take a few minutes.

Managing Rockets and Supplies
Rockets aren’t as expensive as before, and you won’t need to send them as frequently, so even if you aren’t producing large amounts of blue circuits, low-density structures, and rocket fuel, it’s beneficial to build a few rocket silos. You’ll notice the advantages soon enough!
Vulcanus
Vulcanus offers unlimited lava, some coal, calcite, tungsten, and liquid sulfuric acid.

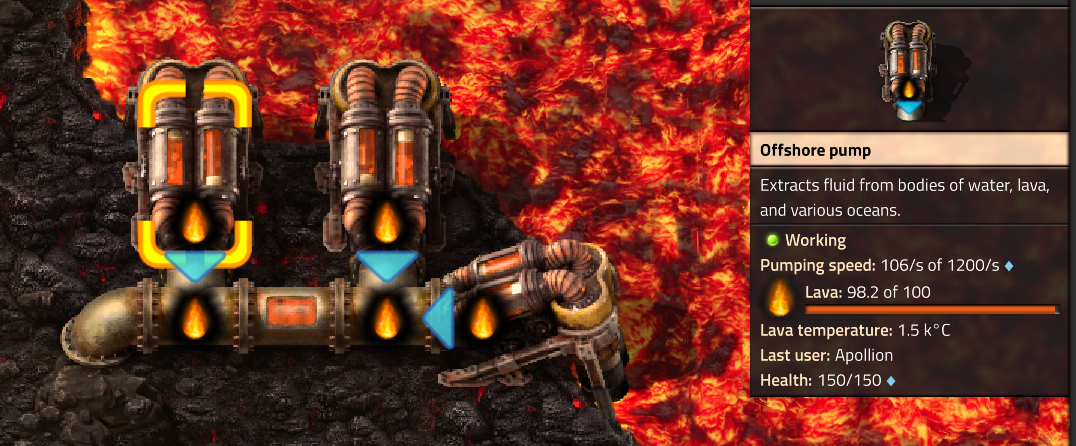
Lava Gathering: You can gather lava using a standard offshore pump!
Foundry Production: The Foundry is your friend. With it, you can produce Iron, Copper, Steel, and Low-Density Structures.
Big Mining Drill: Vulcanus has new miners called the "Big Mining Drill," which must be manufactured there but can be sent to other planets later.
Metal and Circuit Production: With easy access to metal and copper, you can produce basic items like green circuits.
Tungsten Processing: Tungsten ore can be smelted into tungsten plates or tungsten carbide—both very useful later, so it’s wise to increase production.
Solar Power Bonus: This planet has a +300% solar power bonus due to its proximity to the sun, so solar panels and accumulators should support a medium-sized base.
Acid Neutralization: Later, you’ll unlock "acid neutralization," which combines acid and calcite to produce steam, which can be converted into water (useful for concrete production and if needed power generation).
Circuit Production: You can easily make green circuit boards and, using simple coal liquefaction, produce heavy oil, light oil, gas, plastic, red circuits, and blue circuits. Now, 1/3 of the rocket parts are automated!
New Enemy - Demolisher: This enemy defends its territory. If tungsten is within its area, well… it has a problem. Uranium ammo, lasers, or robots don’t deal much damage. The easiest way to defeat it is by transporting a tank and using uranium tank ammo. Alternatively, you can craft an atomic bomb on Vulcanus, which will take down the Demolisher in one hit.
Closest to your base are only small demolishers (30k HP, 80% resistances to most things), further away medium(100k hp) and even further big demolishers (300k hp). I have atomic bomb with +580% damage so i was able to kill small and medium one with one hit to the head, but big demolisher needed 3 hits with atomic bomb to the head(head is weaker than rest of the body). But it has low physical resistance so railgun can be great choice here.
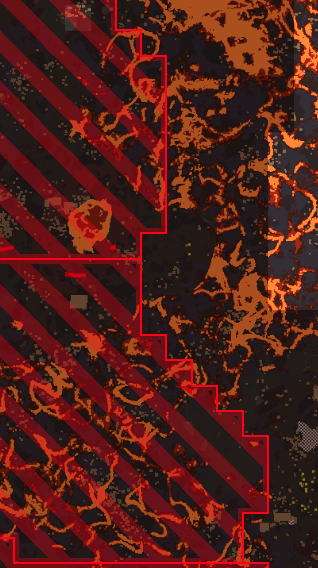
Red boxes you see on the map are territories of each demolisher. Once demolisher is defeated, this territory is yours.

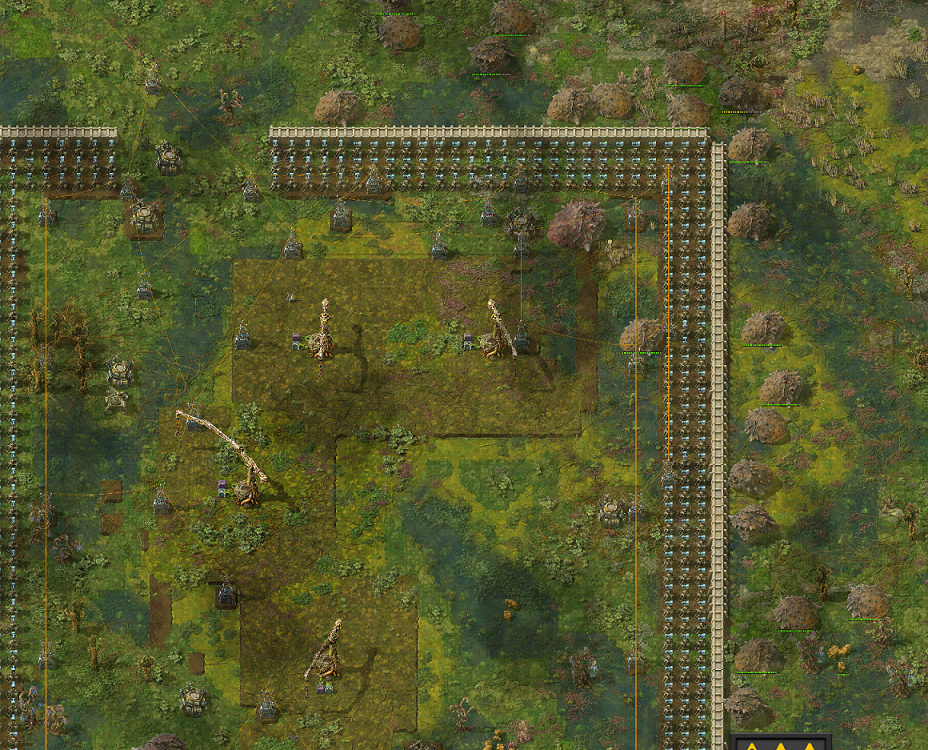
This is how demolisher teritory looks like.


What to bring on your first launch to Vulcanus:

100x Assembling Machines
500x Solar Panels and 500x Accumulators
100x Substations
300x Bulk Inserters (or any inserters)
50x of each type of Logistics Chest
500x Pipes and 100x Underground Pipes
100x Electric Mining Drills (optional)
500x Logistics Drones
200x Construction Drones
50x Roboports
50x Electric Furnances
50x Pumpjacks
100x Chemical Plants
To prepare for a return rocket:

1000x Steel Plates
200x Processing Units
200x Electric Engine Units
100x Pipes
1000x Concrete
300x Rocket Fuel,
300x Blue Circuit Boards,
300x Low-Density Structures (these can be crafted on the planet if researched)
With tungsten plates and tungsten carbide, you can make Metallurgic Science Packs—useful for late-game research. Transport belt crafting has changed, so now you can make all transport belts here, including the new Turbo belt!

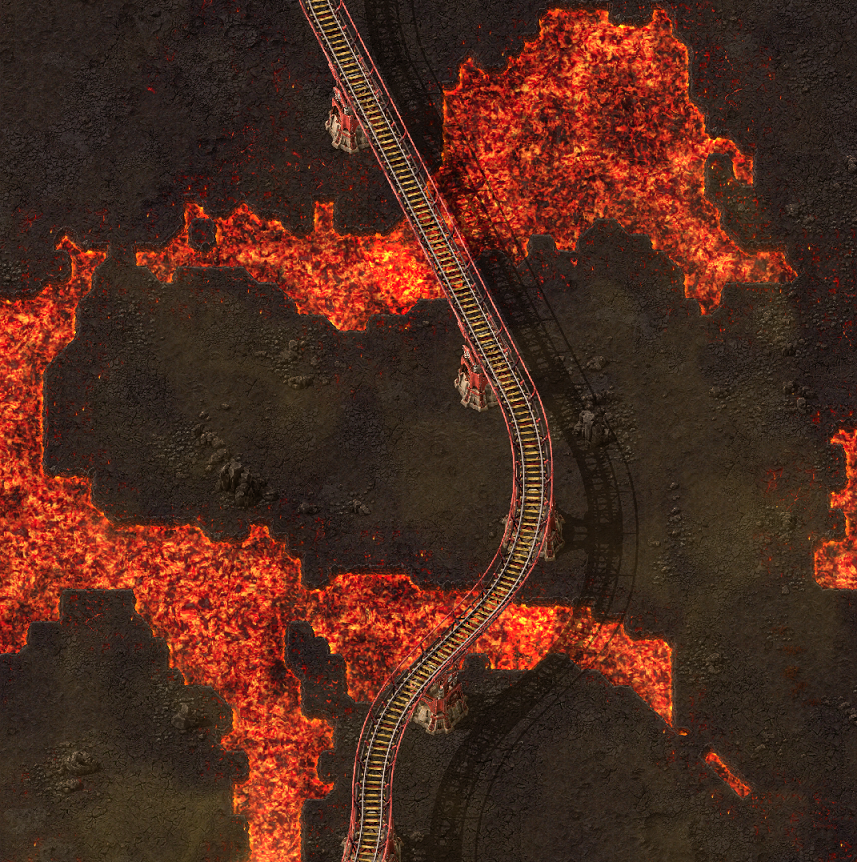
If you need more tungsten, calcite, or coal, you’ll have to venture far from the starting position. To transport these resources, trains are your best bet. Elevated rails make this much easier to set up. However, keep in mind that to build on lava, you’ll need an endgame foundation.


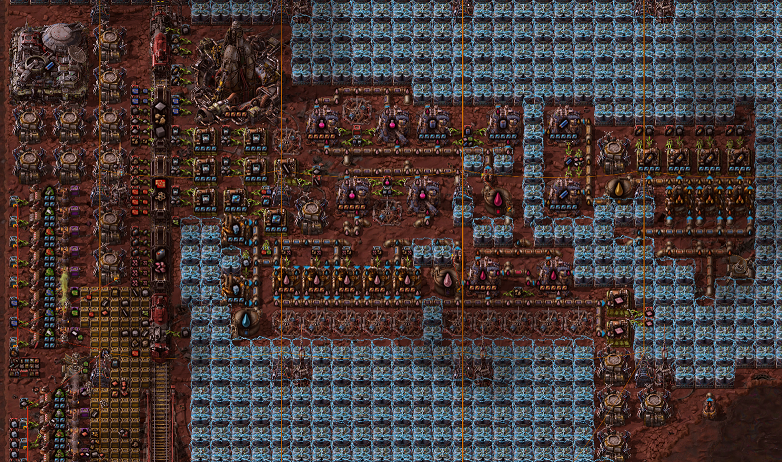
My complete base:

Fulgora
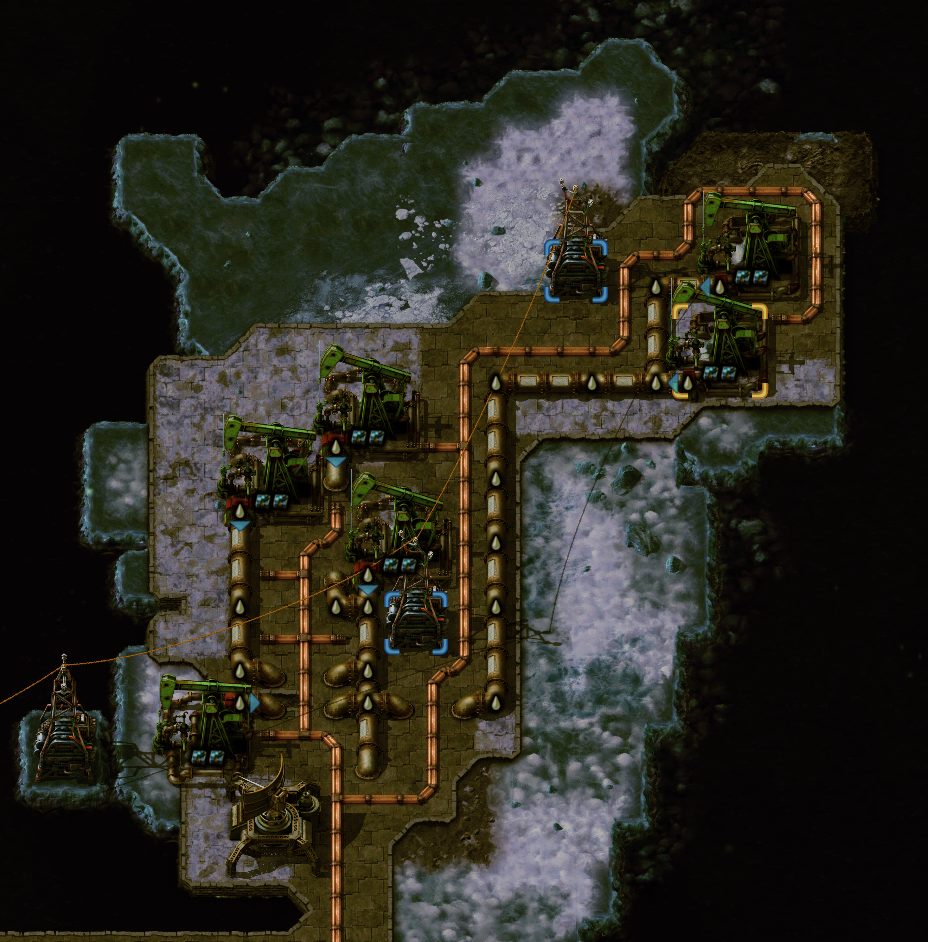
Fulgora has oceans of heavy oil and frequent thunderstorms, which can damage or destroy your base but also generate power with lightning rods/collectors.

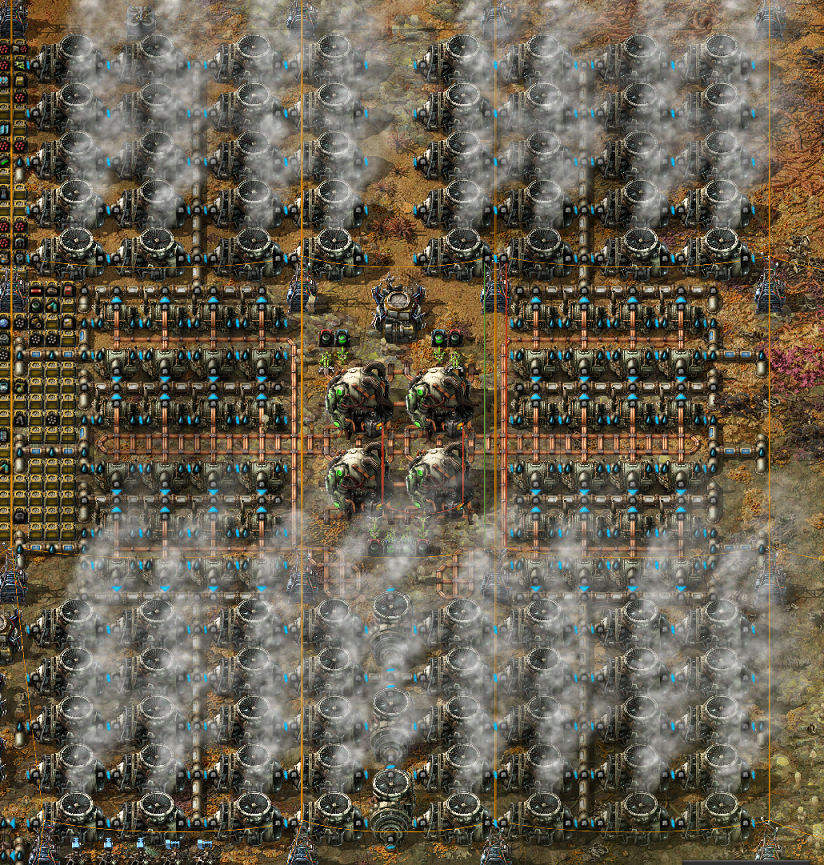
Power: The best way to generate power is by using lightning rods/collectors with many accumulators. One setup of 1x Substation, 1x Lightning Rod/Collector, and 79 accumulators works well—duplicate as needed.
Starting Out: You can’t build over oil oceans, so look for a large landmass with scrap nearby.
Recycling Scrap: On Nauvis, you crafted items from raw materials; here, you’ll recycle scrap to reverse the process. Blue circuits to red circuits, red circuits to green circuits, and so on. Note: Recycling only returns 25% of the original materials.
Rocket Fuel: Blue circuits and Low-Density Structures can be made from scrap, so you’ll only need to produce rocket fuel, which is easy due to the heavy oil ocean. Water can be produced by processing ice.
Holmium Solution: Produce plenty of this for holmium plates and electrolytes, essential for crafting superconductors and supercapacitors.

NoteYou can use belts, but after hours of test, it is much better and easier to build everything on robots. While reaching Fulgora, you should be able to produce them.

What to bring on your first launch to Fulgora:

50–100x Lightning Rods (later upgraded to Collectors)
100x Assembling Machines and 50x Roboports for the main base
1000x Robots (both construction and logistics) to ensure recyclers run smoothly
50x of each type of Logistics Chest
50x Substations (can be crafted locally)
Since you can easily access blue circuits, Low-Density Structures, and rocket fuel here, bring materials only for the rocket silo.

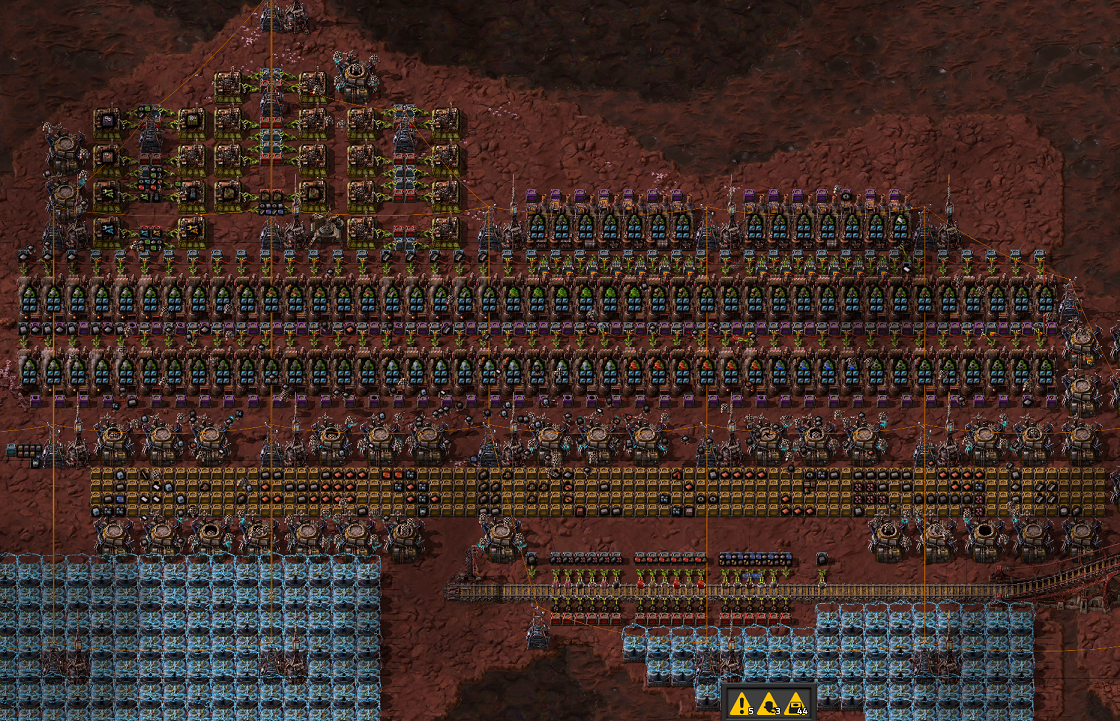
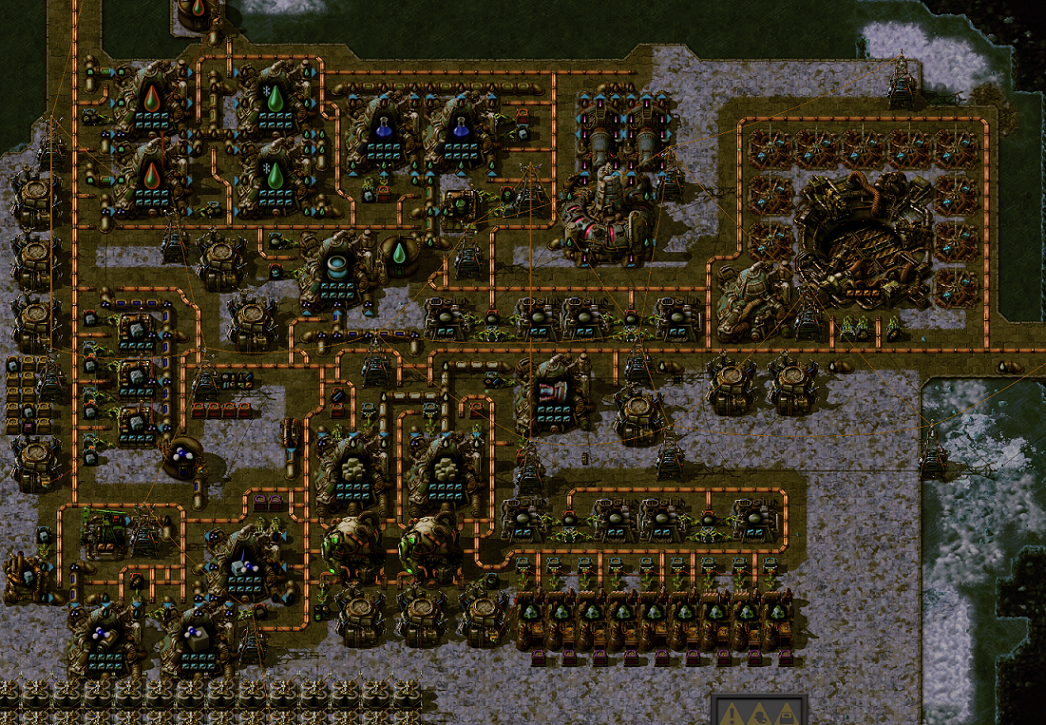
I've divided my base into 3 smaller ones.
Main one for rocket, science pack, supercapacitors and superconductors production.

Second base is just big recycler

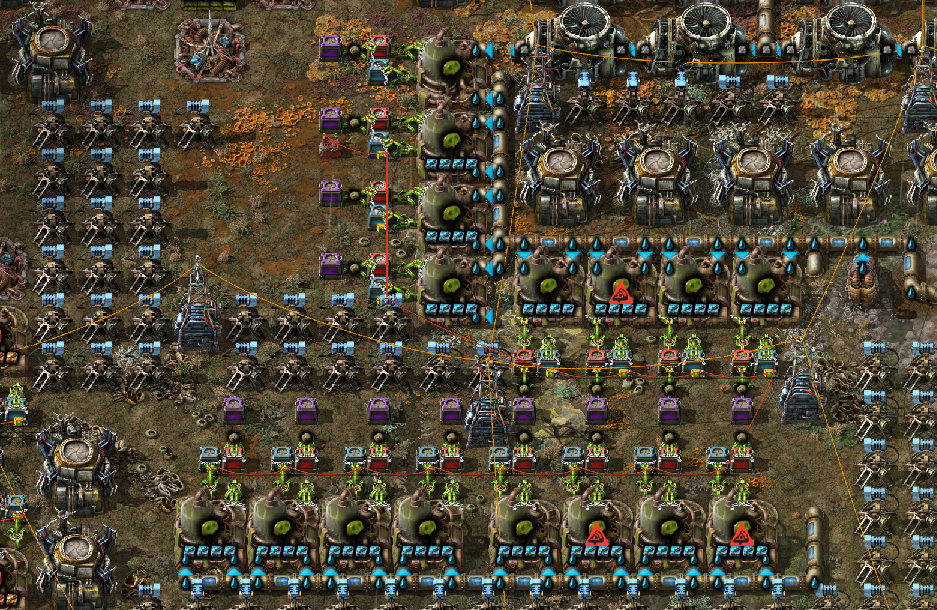
Third one is just miners.

Got too much uncessary stuff and dont know what to do? Here is solution

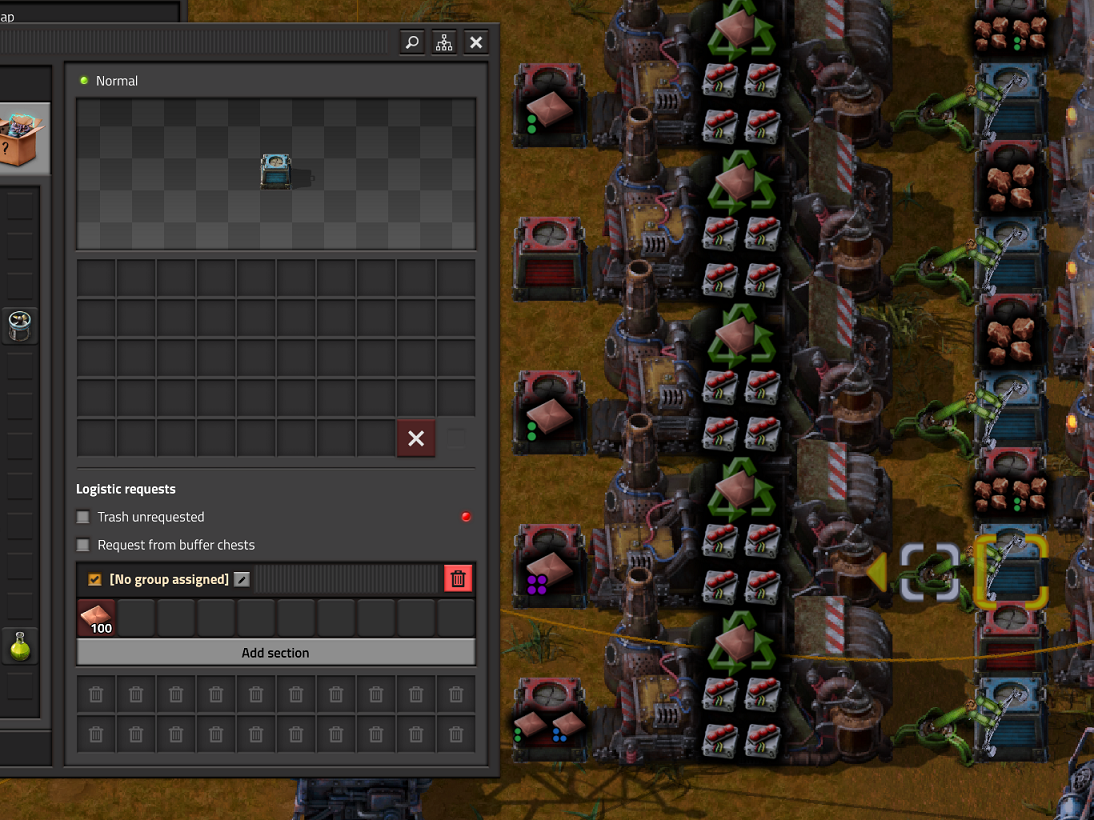
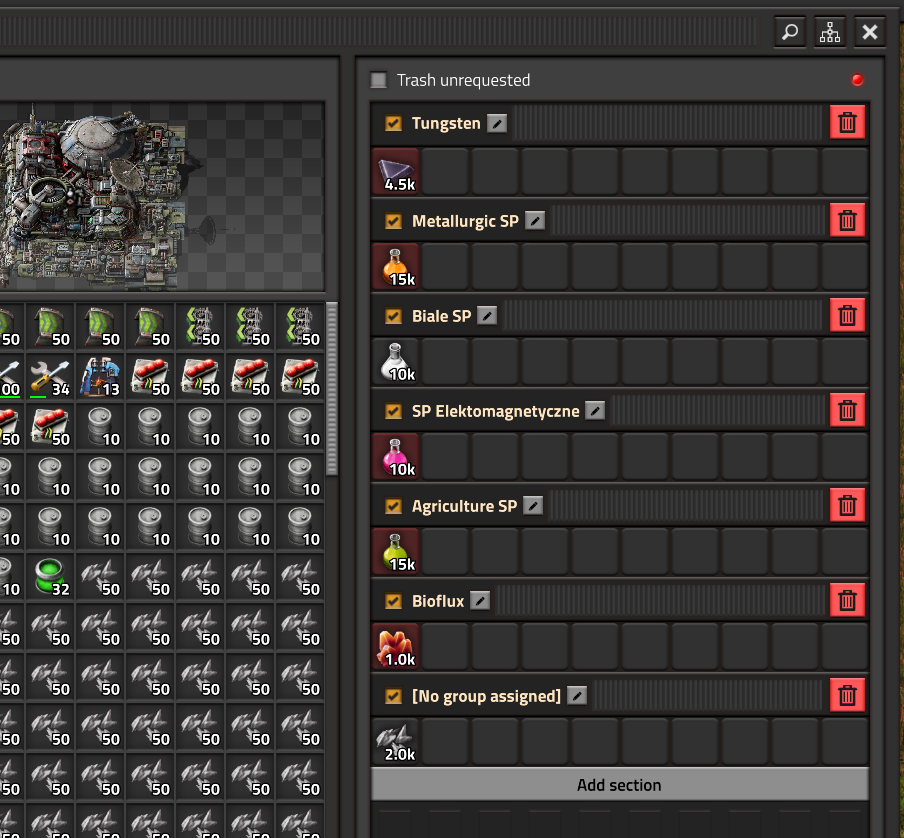
Using bots is mandatory here. Make sure to check each requester chest to "set requests." The "Trash unrequested" option is optional, but in this case, it’s better to disable it.

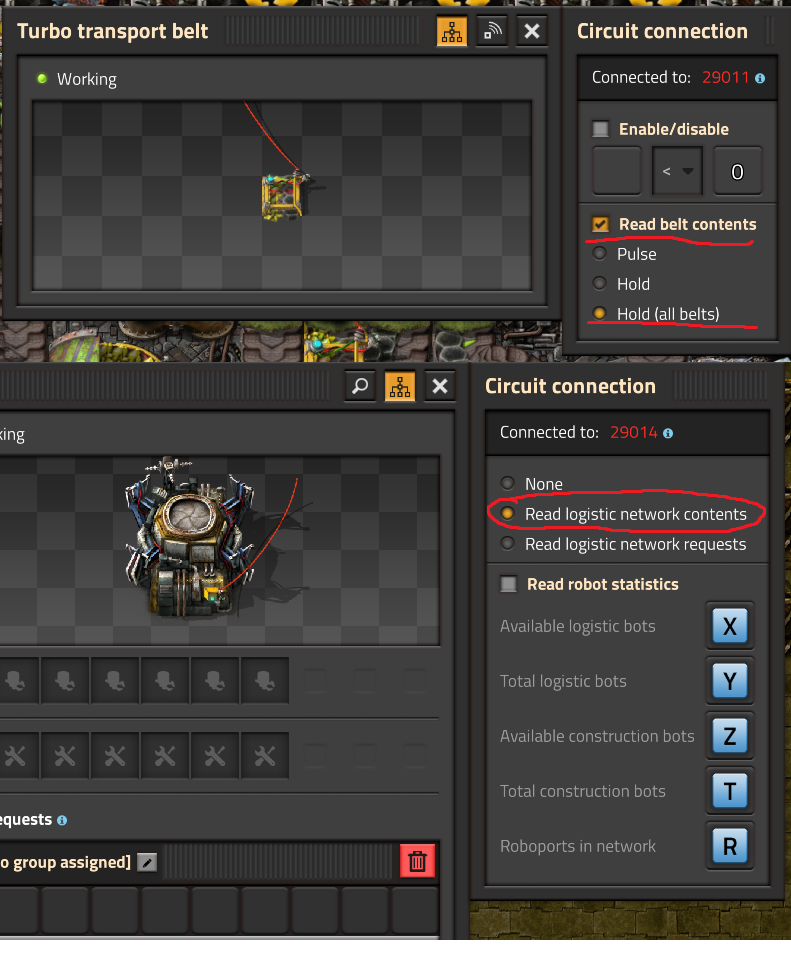
Next, you'll need at least 20 Decider Combinators and 1 Arithmetic Combinator. Connect them to a roboport to read the contents of the logistics network.


Each Decider Combinator is set to handle one type of item. Let’s start with Red Circuit boards:

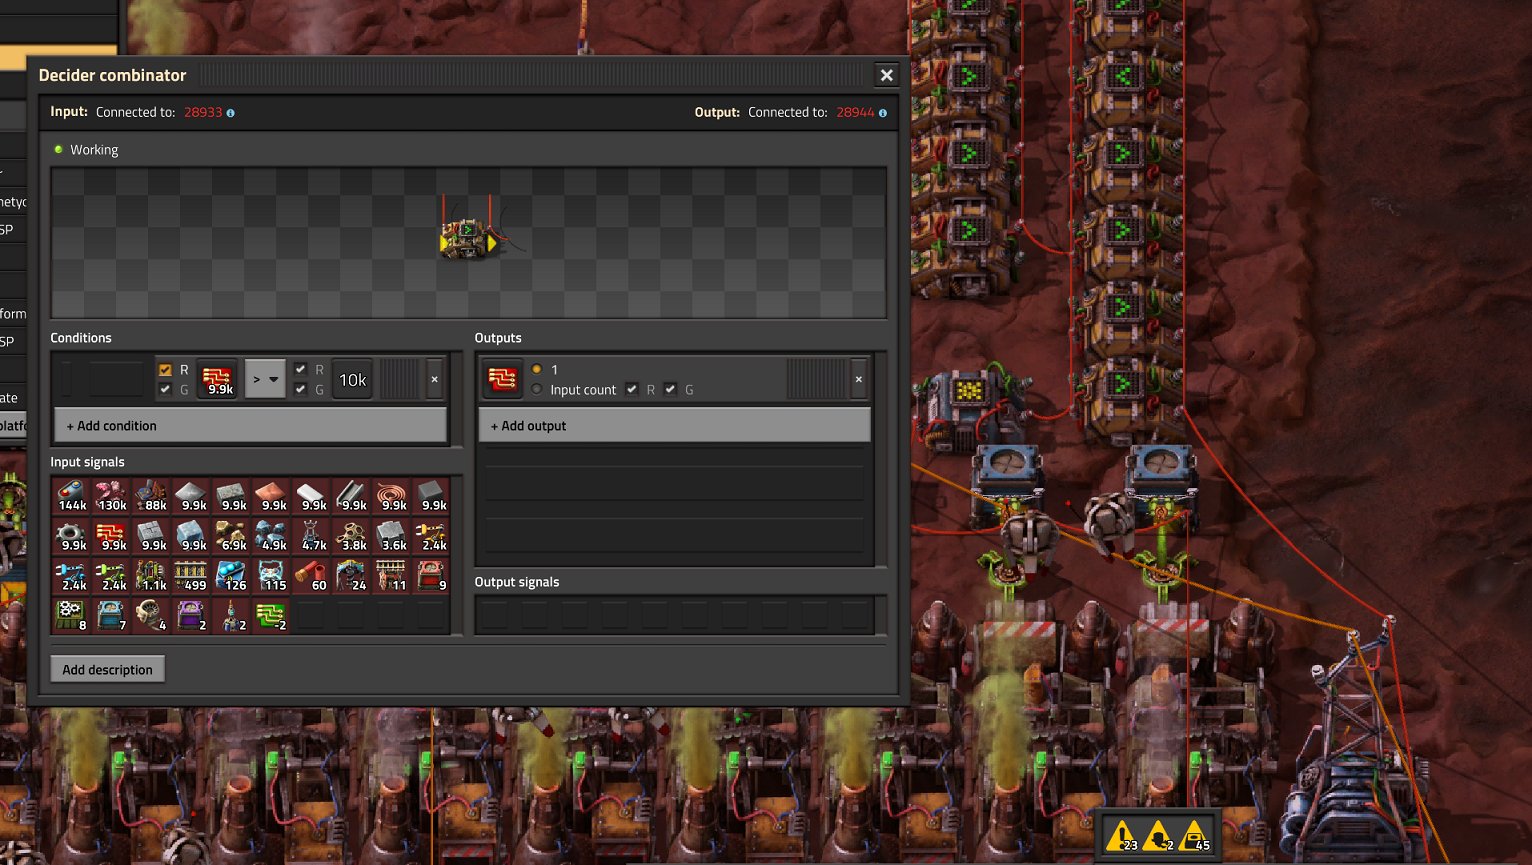
Set up the first Decider like this:


We need to configure the condition to generate an output.
First, select "Red Circuit" as the input, then choose the condition > to compare it to a threshold of 10,000.
If the condition is met—meaning we have more than 10,000 red circuits—the output is "Red Circuit 1."
Note: The reason we use "1" as the output will be explained later.

Repeat this setup for other resources, like blue circuits, metal plates, copper plates, etc.

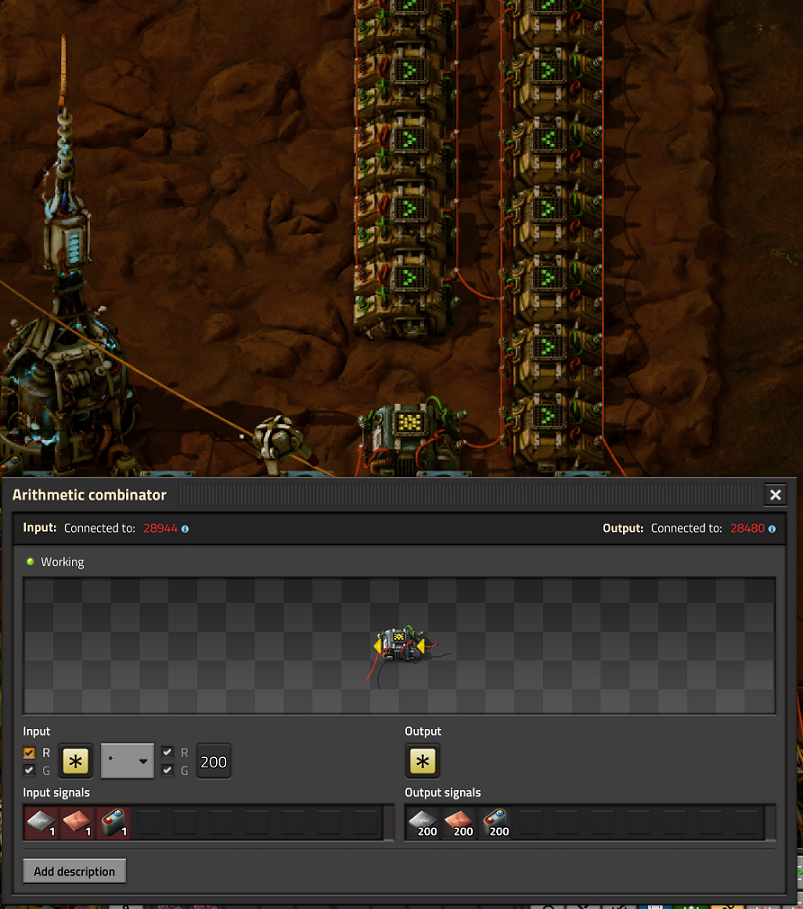
Since we have multiple inputs, such as 1 Red Circuit, 1 Green Circuit, and 1 Blue Circuit, connect those inputs to an Arithmetic Combinator to adjust their values. In this setup, each value is multiplied by 200, so instead of requesting 1 red circuit board in each requester chest, it requests 200. You can adjust this multiplier, but 200 is an effective value.


Now, with this setup, you should consistently maintain 10,000 units of each resource. Any surplus beyond this threshold will be automatically directed to recycling, keeping your storage organized and efficient.

Gleba
Gleba offers iron and copper from bacteria and new ingredients, but you will encounter enemies here. Laser turrets are highly recommended in large quantities.

Power: Solar panels only work at 50% efficiency here, so it’s better to use nuclear reactors and transport fuel. But you must start with solar panels.
Spoilage: Almost everything here spoils (typically within 3–5 minutes), after which it becomes “spoilage.”
Biofuel: Convert spoilage into nutrients (used as fuel here) in a biochamber. Assembling machines can perform this for free.
Agriculture: Build bases in bright green and violet biomes, using Agricultural Towers to produce plants for bioflux.
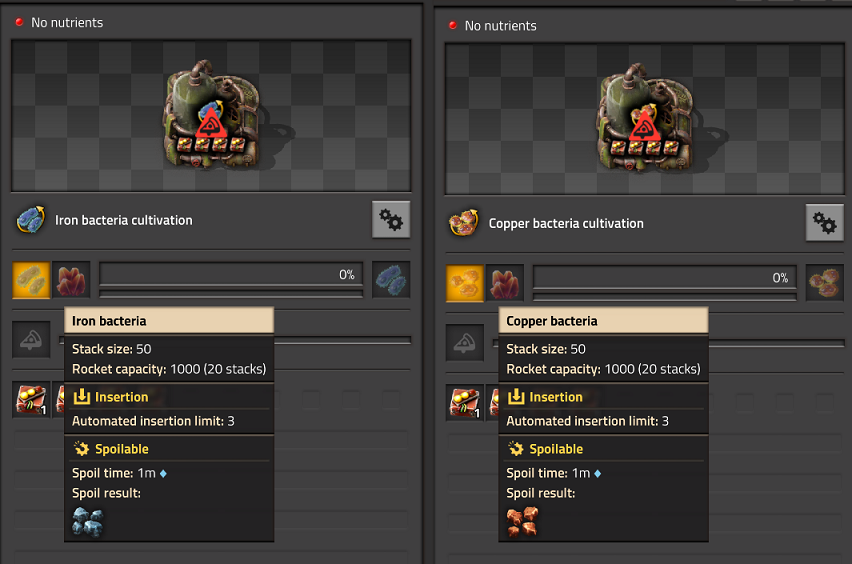
Iron and Copper Production: Iron and copper are obtained from bacteria, which can be cultivated using bioflux.
Pentapodd Eggs: Be cautious with pentapodd eggs needed for science packs, as unprocessed eggs turn into enemies after 15 minutes.

470MW power is just enought for small/medium base
Be ready to defend yourself

What to bring on your first launch to Gleba:
100x Assembling Machines
50x Solar Panels
50x Accumulators
100x Substations
300x Bulk Inserters
50x of each type of Logistics Chest
Components for a nuclear plant setup
Laser turrets (the more, the better)
Prepare materials for the rocket silo and parts of the rocket. Low-Density Structures and rocket fuel can be crafted locally, but bring blue circuits.

Tip: To prevent enemy attacks, use artillery to eliminate distant enemy bases. As long as your pollution doesn’t reach these bases, you should remain safe.

The ideal solution is to set up just a few artillery turrets and transport ammunition from another planet. Once you’ve cleared the area around your base, maintaining peace shouldn’t require much additional ammo.

Tip 2: It is highly recommended to use productivity modules in every biochamber, especially if you want to expand production of Yumako or Jelly. Once you reach a level where you’re producing excess seeds, you can use them as fuel to sustain your boiler.

Tip 3: A Stomper Pentapod shell contains a Pentapod egg that does not expire or turn into spoilage. You can save these and use them if you ever run out of Pentapod eggs.
Aquillo
Aquillo is challenging, with limited resources and extreme conditions.

Power: Solar panels work at only 1% efficiency, so bring them just to start. A nuclear plant with heat pipes is essential to provide power and heat for your base.
Heat Pipes: Heat pipes require concrete on ice, which must be transported from other planets.
Ice Storage: Ice can accumulate and fill your storage quickly. Use recyclers from Fulgora to discard excess ice.
Cryogenic Science Packs: Produce at least 2500 Cryogenic Science Packs and research the fusion reactor.
Logistics Drones: Drones consume 5x more power than on Nauvis, but transport belts must be heated.

My Aquillo base:
Final journey
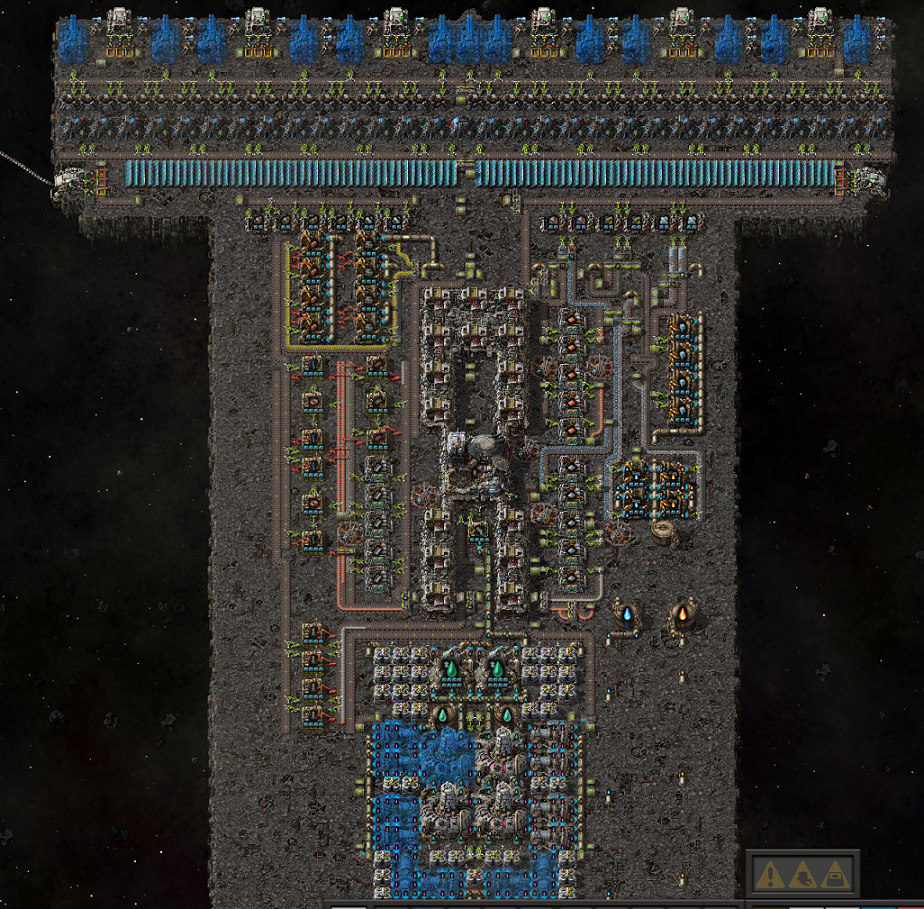
For the Solar System edge and Shattered Planet, you’ll need a self-sustaining ship with a fusion reactor, multiple turrets, and resources for asteroid defense.

Endgame platform - im still in process of testing few things, but it is possible to build self almost sustaining platform.
Resources: use advanced asteroid crushing to get metal, copper, sulflur, carbon, calcite and ice. Thats almost everything you need.
Fuel: advanced thruster processing - water, iron ore/carbon and calcite.
Ammo:
Piercing rounds - Steel + Copper + metal
Rockets - Metal + dynamite
Railgun ammo(for huge asteroids) - Steel + copper cables + dynamite
Power: Bring fluoroketone (cold) and fusion cells. This is the only thing you need to bring with you.

Quality
This is a new mechanic you can explore or ignore entirely. Here’s how to check the bonuses associated with higher quality items:

View Bonuses on Items: Look at an item’s attributes. Those with a blue square indicate attributes that will improve.
Assembling Machine View: In an assembling machine, select the item you want to check, choose the quality level (at the bottom), and see the outcome.
Pros:

All items can have Normal, Uncommon, Rare, Epic, and Legendary quality.
Legendary quality items can offer impressive bonuses.
Quality modules increase the chance of crafting higher-quality items. Using uncommon ingredients increases the chance of producing uncommon items, but can also yield rare items and so on.
Modules themselves can be legendary to provide even greater bonuses. For example, a Level 3 Normal Quality Module increases quality by 2.5%, whereas a Legendary Module increases it by 6.25%.
Legendary speed modules offer additional speed boosts to machines.
Cons:

Speed modules decrease quality!
Consider a setup where a miner has two Level 3 Normal Quality Modules (+5% quality). This setup will mostly produce normal quality items, with some uncommon and rare items.
If you refine uncommon ore in a furnace with two Level 3 Normal Quality Modules (+5% quality), you’ll likely produce uncommon iron plates, with a small chance of rare iron plates.
However, processing higher-quality items can be challenging. For example, if you’re crafting with iron and copper, an assembler set to produce normal items won’t accept higher-quality materials. An assembler set to rare will only accept rare ingredients.

Tip: Using quality modules inside recycler does give you chance to get higher quality item as output! Meaning if you provide normal iron plate to recycler with 4x quality module lvl 3, there is a chance even for legendary iron plate, although keep in mind that recycler is giving you back only 25% of resources.


Is it Worth Playing with Quality? Definitely, yes! Is it Worth Rebuilding Your Base for Highest Quality? Not necessarily.

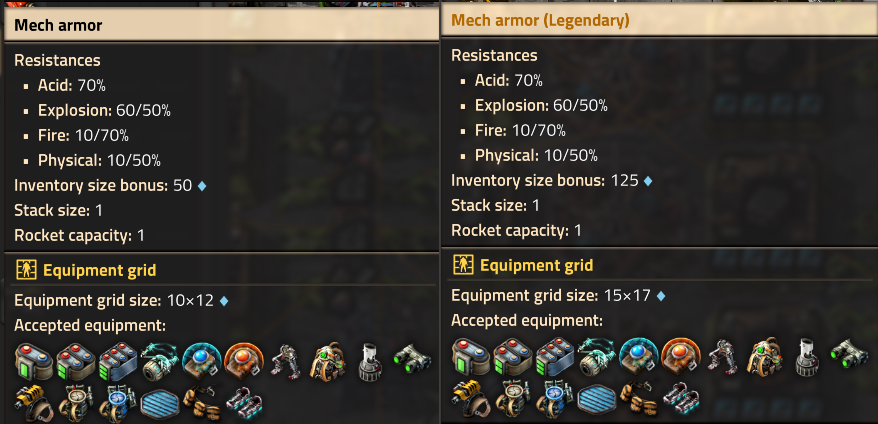
Having legendary items like Legendary Armor (more inventory, module space), Spidertron, or Lasers (increased range) is highly beneficial. Legendary furnaces, for example, are 2.5 times faster than normal ones, and legendary radars have a larger range. However, not every building benefits as much—some items like transport belts (which only gain more HP), chests, trains, and pipes are unaffected.


Lets assume you want to try quality, here is more tips how to start:
1. Build small independent base.
2. Make sure to put Quality Module Lvl 3 to miners, furnances, assembling machines.
DO NOT put quality modules into refindery, chemical plant (while doing liquids). Liquids does not have quality! Ok, but acid is done using sulfur which can have quality? It doesnt matter, end product is still a liquid.
3. Bring alot recycler from fulgora.
4. Depending on your goal:
A) Legendary only - recycle normal quality ore, you will get enough uncommon, rare and epic ores which can reach higher quality while processing.
B) Rare/Epic items - then no need to recycle anything, while processing stuff, your items should easly reach rare/epic quality.
5. Craft Quality module lvl 3 Legendary and replace every normal quality module lvl 3. This will significantly improve your chances for higher quality items. WIth 4 slots, quality module lvl 3 thats 4x2.5% chance so 10% increase in total. With Quality module lvl 3 legendary its 4x6.25% so 25% increase.

Productivity modules
Lets setup layout of making green circuits.
1x Legendary only, 1x Epic only, 1x Rare and 1x uncommon, we just ignore normal quality for now.
So assembling machine set for uncommon green circuits can have 4x Quality modules that will increase chance for higher quality output. But with Legendary item, there is no point of using quality modules, it is 100% chance that using legendary ingrediants you will get legendary output. But, you can use productivity modules that will actually produce more legendary items at the same cost! Consider using it as much as possible!

At this point everything should be within your reach.
Tip for main base: Use legendary quality buildings (furnances, assembling machines, turrets even roboports!) but ignore things like pipes, transport belts, circuit boards, iron plates etc. Thats why you need small independent base, to make sure that quality ingrediants do not mix up with normal quality ingrediants.
Just few legendary items that are OP:
Miners - consume only 16% of resources.
Roboports - can charge robots at higher speeds 4x1.25MW (instead of 4x500kw)
Mech Armor - 15x17 eq. grid and +125 inventory slots.
Artillery has around 30% bigger range,
Assembling machine - 3.125 crafting speed (normal one is 1.25),
Furnance - crafting speed 5 (Normal one is 2)

Things that are nice, but way too expensive related to their bonus:
Robots - higher energy capacity, can fly longer,
Inserters - they do work faster, green and white one has 2160 degree/second while normal one has 864.

Automation
Our job is to make our life easier so lets automate moving stuff from one planet to another.

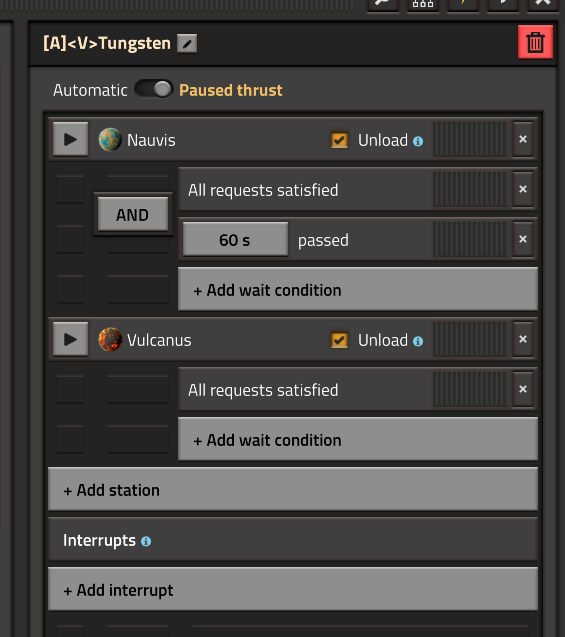
1. Build dedicated platform, for example small platform with lasers, solars and accumulators to get tungsten from Vulcanus.
2. Enter planets that this platform would have to visit and set condition "All Requests Satisfied"
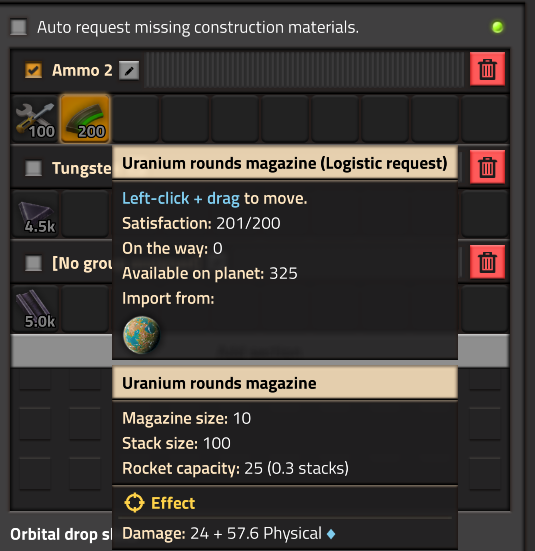
3. So our request is to get ammo and repair packs from Nauvis
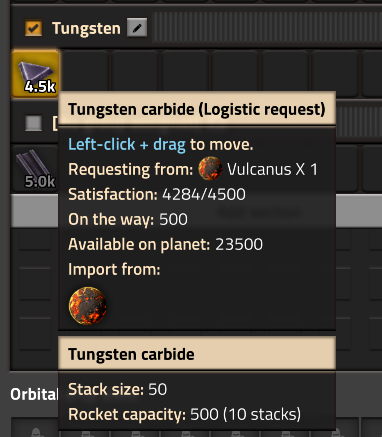
4. And tungsten from Vulcanus
Note that you can request here anything and select planet from which platform should request it.
5. Make sure your planet is producing stuff you need, so in our case, Vulcanus - tungsten. And make sure to check that box "Automatic request from space platforms. Having that once platform is in Vulcano orbit, it will request tungsten from planet, rocket silo will request it from logistics network.
6. On second planet, in our case Nauvis inside Cargo landing pad, on right side add request:
And thats it! You have automated transfer process of tungsten from Vulcano to Nauvis.
Circuit's and combinators
Ok, I know this isn't DLC-related, but it might help you a lot, especially on platforms to balance asteroids on belts, crafting on Gleba, etc. If I create a guide related to the 2.0 patch, it will be moved there.

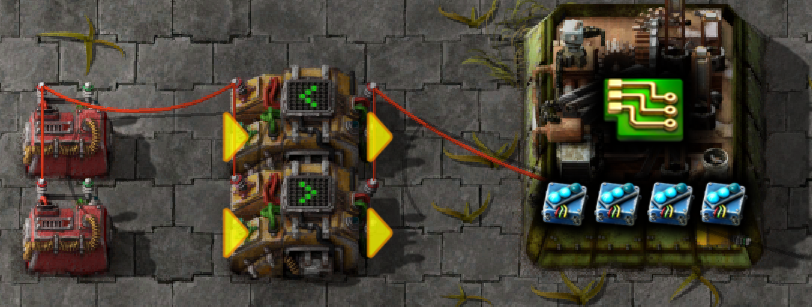
Let’s say we have 1 assembling machine that should change its crafting based on the amount of input resources.

Example:
Let’s assume that:

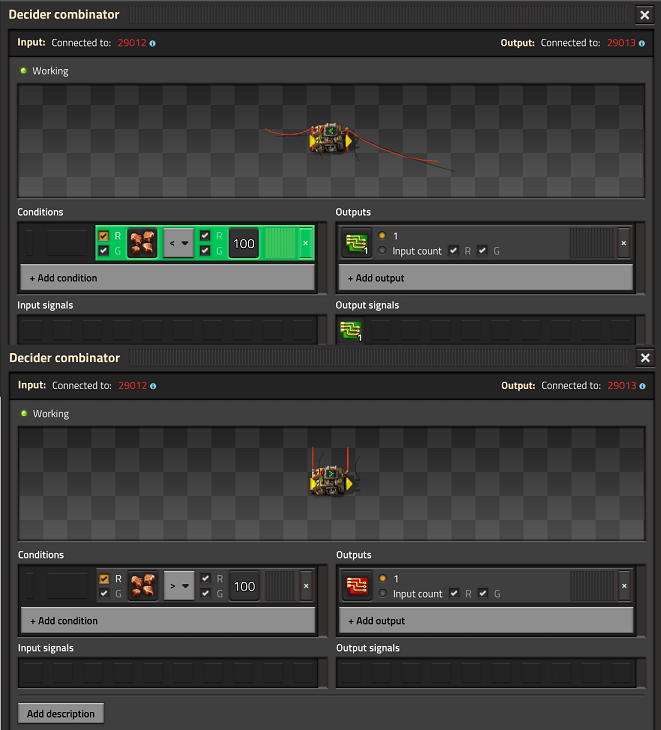
IF we have less than 100 Copper Ore, then we make Green Circuits.
OR if we have more than 100 Copper Ore, we make Red Circuits.
I know it doesn’t make sense, but the point is to show how it works. Once you understand the logic, you can apply it to anything!

For demonstration purposes, we’ll use a Constant Combinator for input, but you can also read from the logistics network, transport belts, or chest contents.


Step 1: Using Decider Combinators
If you want to have only two conditions like IF A < B or A > B, then two Decider Combinators will do. If you need more complex conditions, you’ll need to provide specific numbers or complicate things further—but feel free to experiment!
You could use more decider combinators, if copper ore is between 0 and 50, output is X=1, If copper ore is between 51 and 100, output is x=2 and so on. Nextly another decider, If x=1 then set crafing A, if X=2 set crafting B, and so on.


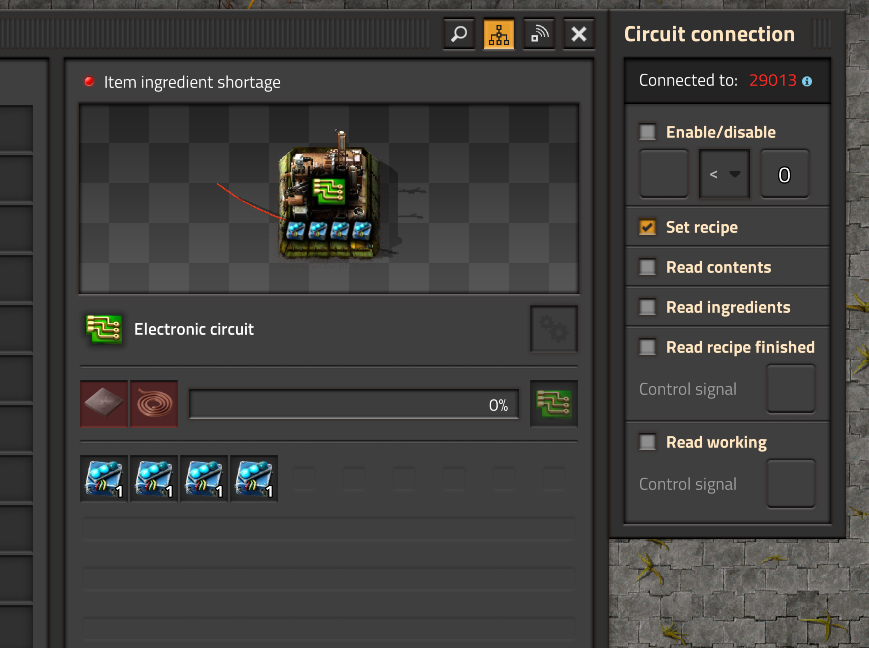
Step 2: Setup Output Logic
So, if our input (Copper Ore) is less than 100, then the output is Green Circuit (set to 1). If it’s more than 100, the output is Red Circuit (also set to 1).

The last step is to connect everything:

Left part: Constant Combinator (replace it with a connection from logistics network/transport belt/chest content).
Middle part: Decider Combinator to decide what to do.
Right part: Assembler, Crusher, Chemical Plant, etc.

Make sure to check Set Recipe. Why did we set the output to 1? This is only to set the recipe, so it doesn't matter whether the output is 10,000 Green Circuits or just 1. The assembler (or any other building) will still focus on producing Green Circuits.


Step 3: How to Use This Setup
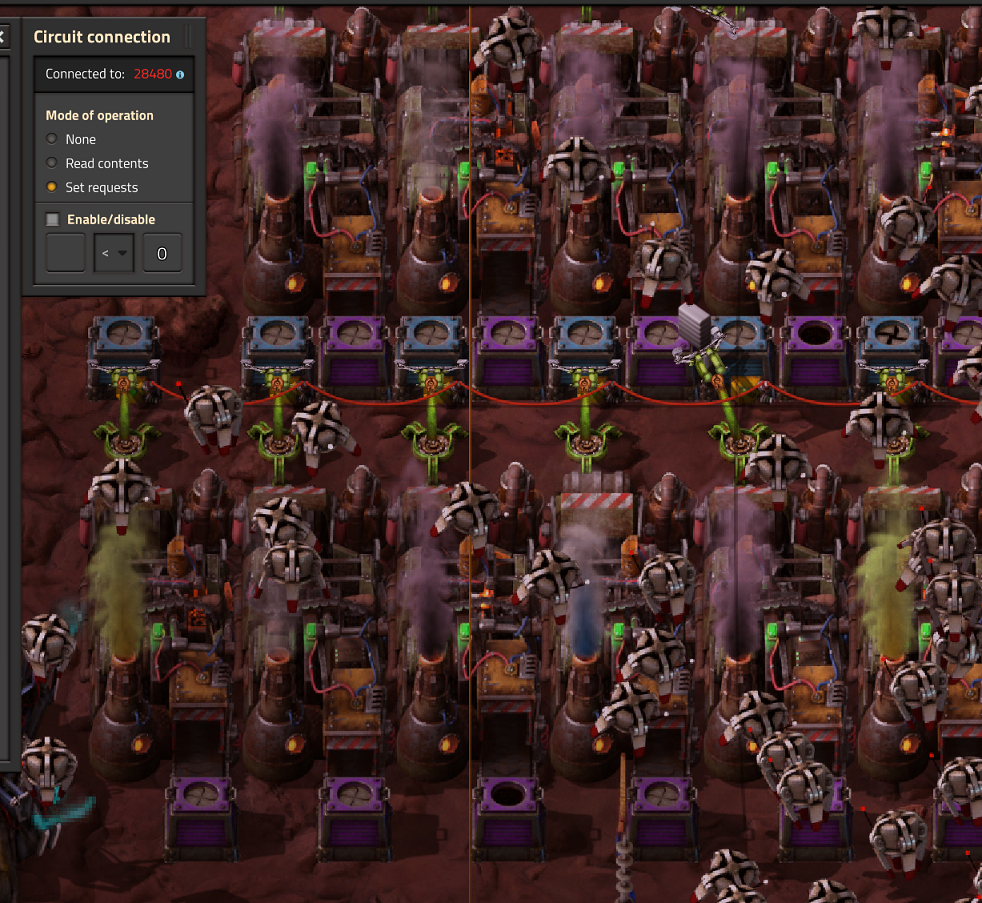
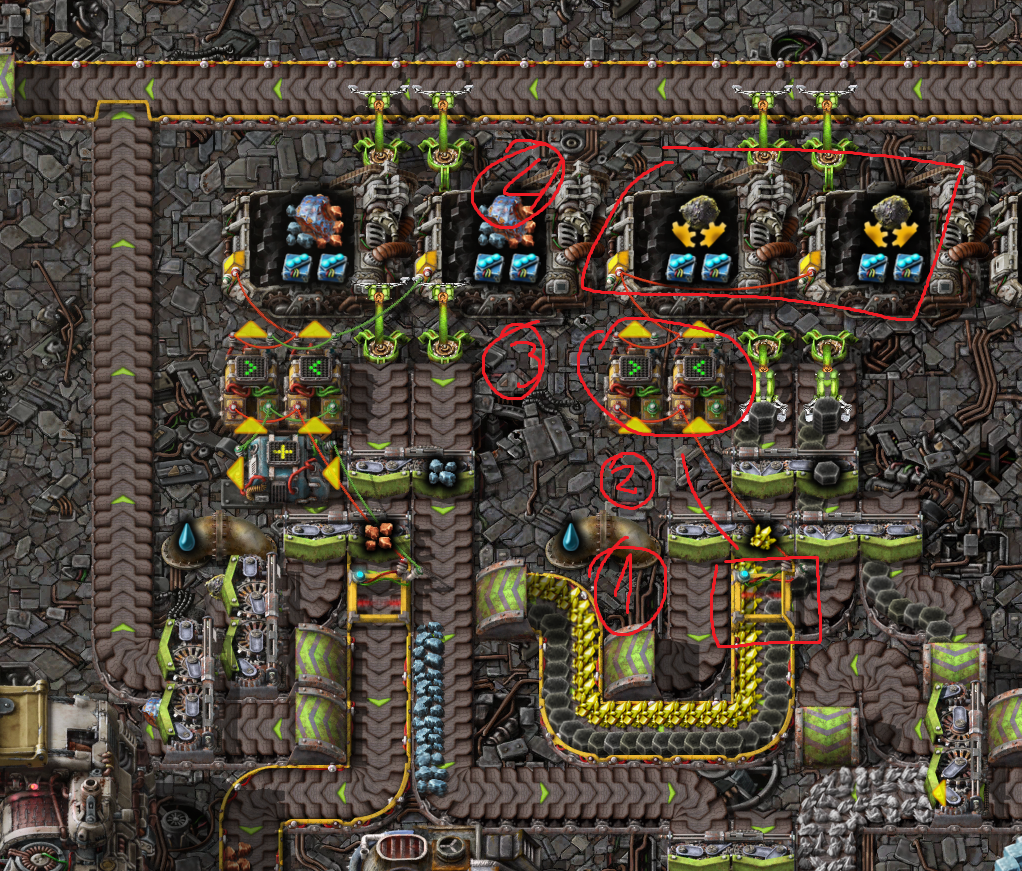
Look at the screenshot below, where we can decide which crafting to use based on the input. For example, if we have more than 30 sulfur on a transport belt, the crushers will set to standard carbon asteroid crushing. If we have less than 30 sulfur, they’ll switch to advanced carbonic asteroid crushing.


Adding Complexity
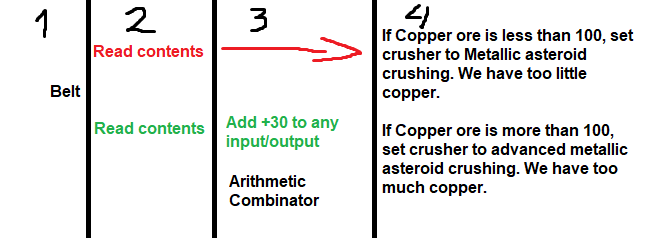
Now, let's make it a bit more complicated. In the left part of the screenshot, we have additional Green Wires and an Arithmetic Combinator. What it does is set one crusher to produce metal ore faster, while a second crusher continues producing copper ore for a longer time.

End
Reaching edge of solar system is now new end. You can continue playing and researching technologies or trying to reach shattered planet!

https://factorio.com/galaxy/Calcite%20III:%20Eta1-7.G4T1

Thanks for reading my guide. If there is anything i have missed or you have question let me know in the comments and i will try to provide answer or guide.


Congratulations on beating the DLC! But is it truly over? No!

The factory must grow!

Keep pushing forward and expanding your operation. There's always more automation to set up, more resources to gather, and new challenges to conquer. Whether it's fine-tuning your existing systems or venturing into uncharted territory, the journey continues. Good luck, and may your factory flourish!

If you enjoyed my guide, and you would like to see similar guide focused on Nauvis and version 2.0 please let me know!
17 Comments
Paunda Nov 24, 2024 @ 12:08am 
@The_Pastmaster solar is still really good on Vulcanus, with night time only lasting like 20 seconds. the panels and accumulators are also really easy to make there. I might have gotten lucky with my starting area having sufficient space, but with 4 solar arrays (200 panels and 145 accumulators each) I've been completely fine using only that while producing around 100 SPM and exporting green belts, and other Vulcanus exclusives almost constantly.

personally I didn't have access to the nuclear steam turbines until after Vulcanus since the nearest uranium deposits were blocked by cliffs (which I had to go to Vulcanus to destroy). when I go back to start ramping up science production tho, steam is definitely going to be the way I power everything
The_Pastmaster Nov 23, 2024 @ 12:18am 
Hey, why bring solar panels and accumulators to Vulcanus? Just make steam and use Steam Turbines since the steam is 500C. Since your starting area is quite limited, I would think that solar is too much of an initial space investment.
Lokken  [author] Nov 15, 2024 @ 9:17am 
Hi, I'm still working on it and i didnt reached it yet.
Бергхайн Nov 14, 2024 @ 10:30pm 
Hi. Please give me the blueprint for the ship to fly to the destroyed planet
KusoLP Nov 9, 2024 @ 10:55am 
@Lokken tell us :P
Lokken  [author] Nov 9, 2024 @ 10:52am 
@KusoLP Thanks! However I actually missed one thing on Nauvis :)
KusoLP Nov 9, 2024 @ 10:49am 
@Lokken dont worry i was just joking around, ur tips are graet tho will usee them later
Lokken  [author] Nov 9, 2024 @ 10:23am 
@KusoLP Most of the recent changes that impacted Nauvis come from version 2.0, not the DLC itself. There are a lot of tutorials and guides available online that cover these updates. However, for content specific to the DLC, resources are still pretty limited. But if i'm wrong, let me know.
KusoLP Nov 9, 2024 @ 3:22am 
when u gonna drop some juicy tips on the planet u forgot, nauvis
Lokken  [author] Nov 6, 2024 @ 2:13am 
@SimplyTheBeast Thank you, you are right i forgot about it. You could craft it locally, but bringing it will save alot of time.

@Wassermelone Nice ship, It looks much better than my square ship, although i'm rather big fan of big independent machines.