UFO 50
300 értékelés
Grimstone Ultimate Guide - Maps, Skills, and More!
Készítő: Llamakazi
A classic throwback guide for Grimstone! Maps, Skills, Items, Secrets, Tips & Tricks, and more!
28
8
4
20
7
5
2
2
   
Díjazás
Kedvenc
Kedvenc
Törlés
Introduction


1P, RPG
"Praise Biggan, the four of you survived the saloon fire. But somethin' tells me this story's just gettin' started..."

If you're looking for maps, character guidance, items, or secrets, then you've come to the right place! I've been having a ton of fun playing this, so I thought I'd chronicle my journey in a nice guide-y way to hopefully help fellow players (like you!)

Spoilers will be labelled appropriately like so, in case you just want a little bit of information and to enjoy the experience of discovery on your own! Most things will also be organized in chronological order, in case you get a little stuck and just want a small hint without getting spoiled.

Grimstone is very reminiscent of early Final Fantasy (as you'll soon see); I can totally imagine a world where this was our "Final Fantasy 1" equivalent, and eventually we'd be on "Grimstone XVI" now!

After starting the game, you'll come up to one of the biggest choices you can make in this game: your party roster! Lots of folks tend to have choice paralysis here, so I'll do my best to help you out!

Characters - Anne, Bull, Doc, Lee
Anne


"This beautiful young woman is dressed like a dancer. She radiates a fierce independence."

Anne is a dancer with skills that can buff & heal the whole posse. She's a relatively fragile jack of all trades, but she's definitely a late bloomer with strong posse buffs, better pistols, and the passive "Doc" skills. She is also the only character that starts with the Dual Wield skill (only one other gets it much later in the game). She can also ONLY equip light body armor.

Notable Stats:
High SP, SPD, EVD, RES
Low HP, VIT

Level Skills Learned:
Lv. 1: Pistol 1, Dual Wield
Lv. 5: 2-Step
Lv. 8: Spirit 1
Lv. 12: Tango
Lv. 18: Doc 1
Lv. 24: Waltz
Lv. 30: Pistol 2
Lv. 36: Spirit 2
Lv. 42: Doc 2
Lv. 50: Pistol 3

Unique Story Vignettes: In the town of Rio Valle, visit the Pub and speak with everyone there. You'll get a unique fight with an enemy called Possum. If you defeat him, Anne can dance on stage and learn a new skill, the Cha-cha! (ATK up buff for entire posse)

Bull


"This cowboy has a tough exterior, but you sense a gentle soul inside. There's sadness and determination in his eyes."

Bull focuses on dealing lots of damage with little SP and no Skills to worry about or manage. Customize him with a gun to your liking, and have him deal massive damage! He is also the ONLY one who can equip the strongest body armor in the game.

Notable Stats:
High ATK, VIT, HP
Low SP

Level Skills Learned:
Lv. 1: Pistol 1, Shotgun 1, Rifle 1
Lv. 5: Pistol 2
Lv. 10: Rifle 2
Lv. 16: Heavy 1
Lv. 23: Shotgun 2
Lv. 31: Rifle 3
Lv. 40: Heavy 2
Lv. 50: Harden

Unique Story Vignettes: In the town of El Pasaje, after resting in the Hotel, speak with the General Shop owner to exchange some words. After a brief discussion, Bull will learn the skill Protect.

Doc


"It's a one-armed man who is sharply dressed. Next to him is a doctor's bag but the contents are empty."

Doc and his skills focus mainly on healing and protecting the posse via items and skills. Note that the "Doc" skills work both in AND outside of combat for healing items! When you get certain levels of the "Doc" skill, using an item like "Bandage" it will become "Bandhalf" with another use, instead of being completely used up.

Notable Stats:
High RES, SP
Low ATK

Level Skills Learned:
Lv. 1: One Arm, Pistol 1, Doc 1
Lv. 4: Shield
Lv. 8: Doc 2
Lv. 12: Pistol 2
Lv. 16: Heal
Lv. 20: Doc 3
Lv. 26: Anti
Lv. 32: Heal 2
Lv. 38: Pistol 3
Lv. 44: Spirit 1
Lv. 50: Doc 4

Unique Story Vignettes: In Fort Jason, visit the Hotel's second floor, and speak to the man lying on the bed in the first room. If you have a Medkit and say "Yes" to fixing him up, Doc will learn the skill Revive! You can get an immediate Medkit from Rio Valle for 8000 Teeth. Note: if you wait too long, the soldier will die and you'll miss out on the skill permanently, so be careful!

Lee


"It's a lean man with a handsome face and cauliflower ears. There is a feeling of resilience about him."

Lee is kind of like a Blue Mage (from Final Fantasy) where at level 3 he later gains an skill "Study" that allows him to learn attacks from enemies. Thankfully, unlike Final Fantasy, they don't actually have to use the skill on you in order to learn it from them! See the "Skills Learnable by Lee" section to see which additional skills he can learn from various enemies.

Notable Stats:
Average all around

Level Skills Learned:
Lv. 1: Melee 1, Pistol 1
Lv. 3: Study
Lv. 9: Spirit 1
Lv. 16: Melee 2
Lv. 24: Spirit 2
Lv. 33: Dual Wield
Lv. 43: Melee 3
Lv. 50: Spirit 3

Unique Story Vignettes: In the town of Auster, visit the Hotel and speak to the woman in the only open room on the second floor. After exchanging some heated words, Lee will learn the skill Survivor! (Chance to survive lethal damage)
Characters - Maria, Pearl, Rufus, Umbra
Maria


"You recognize her from wanted posters. She's a notorious outlaw known for her deadly aim."

Maria can learn Pilfer (steal skill) at level 2; and has stats and additional skills that lean towards the evasion/thievery archetype. The absolute best damage dealer with Rifles! (single target damage)

Notable Stats:
High ATK, EVD
Low SPD

Level Skills Learned:
Lv. 1: Pistol 1, Rifle 1
Lv. 2: Pilfer
Lv. 10: Rifle 2
Lv. 18: Conceal
Lv. 26: Rifle 3
Lv. 34: Execute
Lv. 42: Rifle 4
Lv. 50: Rifle 5

Unique Story Vignettes: In the Bandit Caves past Rio Valle with the locked door in the back, you'll encounter Bad Betty and 2 Outlaws. Maria will get unique dialogue and the ability to pay off a fella named Ol' Ned's debt for 4,000 Teeth. If you do, afterwards you can buy as much Coffee (restores ALL SP) as you want from Bad Betty for 1,000 Teeth each! She also has some unique dialogue for Mr. Blue, from the game Rail Heist! (which Maria is also from)

Pearl


"It's a tall, elegantly-dressed woman. In her muscular arms she grips a large purse very tightly."

Pearl is similar to Bull in that she mainly focuses on tanking damage and dealing lots of damage, but specializing specifically against groups and large enemies via Shotguns and Heavy Weapons. She also gains significantly more SP than Bull, which means she's a good target for the "Mine" skill since she doesn't have anything else to spend it on.

Notable Stats:
High ATK, VIT, HP

Level Skills Learned:
Lv. 1: Pistol 1, Shotgun 1
Lv. 6: Pistol 2
Lv. 10: Bribe
Lv. 12: Heavy 1
Lv. 18: Shotgun 2
Lv. 24: Shotgun 3
Lv. 30: Heavy 2
Lv. 36: Heavy 3
Lv. 42: Shotgun 4
Lv. 50: Heavy 4

Unique Story Vignettes: In the Santonio bank, speak with the person in the upper left for a hint that Pearl's uncle was about to transfer money to Pearl's account. On the way to Heston, he ended up in the Black Prison! You'll find him on the first floor of the Black Prison with the letter. Return it to the Santonio bank to get 3000 Teeth deposited in your bank (Note: can go over the limit of 100k)

Rufus


"This one-eyed dog lays quietly next to Lily O'Mule, who has sadly succumbed to the heat of the fire."

Rufus is a dog! You can't control him in battle, so he controls like a Berserker (also like in Final Fantasy) Can Forage for items in the overworld. Can protect other party members as they're getting hit. Can ONLY equip neck armor. Rufus is also the most likely to cap their EVD stat first at 60, either from leveling up or Dog Treats!

Notable Stats:
High ATK, SPD, EVD, RES
Low HP, SP

Level Skills Learned:
Lv. 1: Dog
Lv. 3: Forage
Lv. 5: Melee 2
Lv. 10: Survivor 1
Lv. 15: Melee 3
Lv. 20: Melee 4
Lv. 30: Survivor 2
Lv. 40: Survivor 3
Lv. 50: Melee 5

Unique Story Vignettes: If you speak with the Coyote southwest of the Black Prison, they'll give you a Dog Treat E (HP & EVD up)!

In the town of Rio Valle, talk to the dog on the left after entering town. You'll get a hint to a hidden Dog Treat A (HP & ATK up) west of Mission Angelina.

He can also speak with various dogs in towns for bonus dialogue, and also additional bonus dialogue after visiting Lily O'Mule's house outside the Serpent's Path.


Umbra


"A strong spiritual aura surrounds this woman. You can tell she has a close relationship with multiple dimensions."

Umbra learns useful spells from talking to the various wandering animals! You'll be given multiple options to choose from each animal, so she's heavily customizable to your playstyle, and a extremely flexible slot in every single posse. See the "Skills Learnable by Umbra" section to see which additional skills she can learn from the animals you find on your adventure.

Notable Stats:
High SP, RES, VIT

Level Skills Learned:
Lv. 1: Melee 1
Lv. 5: Pistol 1
Lv. 12: Spirit 1
Lv. 19: Spirit 2
Lv. 26: Melee 2
Lv. 33: Spirit 3
Lv. 40: Spirit 4
Lv. 50: Spirit 5

Unique Story Vignettes: In the Chapel of Cactus, after entering the Cactus Dimension, you'll encounter Umbra's mom in the upper right corner of the first area. After speaking with her briefly, she'll give you the Shaman necklace which "extends your spiritual power" (+50 max SP).
Characters - Suggested Posse Comps
The posse members you can choose at the beginning can definitely give folks some choice paralysis, so to help out and prevent a game restart, check out the following suggested posse compositions to maximize your time, gameplay, and fun!

All Bases Covered OR "Only One Playthrough": Bull, Lee, Umbra, Anne
Bull can equip ALL gun types, Lee can learn a LOT of enemy skills to fill in the gaps (including Maria's Skill Pilfer), Umbra can be heavily customized and learn a LOT of skills (including Rufus' Skill Forage) from animals, and Anne for her unique posse buffs, heals, & ability to Dual Wield!

Min-Max Mayhem: Bull, Lee, Maria, Umbra
Same as the previous comp, but swapping out Anne for Maria instead (less posse buffs/healing, more consistent non-glass cannon damage) Bull for maximum attack, defensiveness, and weapon variety. Lee & Umbra for maximum utility and the fun factor from ways to learn numerous skills.

Top Tier Talents: Lee, Maria, Umbra, Anne
If you want maximal amounts of skills in your fights, choose these folks for plenty of that choice!

Hit, Heal & Hype: Bull, Pearl, Doc, Anne
Focus on heavy damage dealers as well as the support for them and the entire posse.

Ravage & Ruin: Bull, Pearl, Maria, Rufus
Focus on maximum possible regular attack damage.

Minimal Masters OR "I Don't Wanna Think Too Hard": Bull, Pearl, Doc, Rufus
Probably the most minimal inputs required for you to complete the game.

The Classic OR "That Posse In Attract Mode": Bull, Doc, Anne, Rufus
The "Default" posse AKA the posse that's in the Attract Mode when you leave the game on the title screen!

The Understaffed Underdogs: Select less than 4 characters to start
If you really want things spicy (or simple), choose only 1, 2, or 3 characters instead of the usual complement of 4! XP is divided among posse members, so this may alleviate the grind somewhat, at the expense of having less actions/options.

Speedrunner's Delight: Bull, Maria, Umbra, Anne
Bull tanks hits for the posse in order 1 and deals high attack damage. Maria also deals high attack damage and provides early pilfering of Peacemakers through Possum (requires Anne) & early Coffee through Bad Betty. Umbra is your healer with spare SP for major damage. Anne can make you basically immune to bosses with 4 stacks of EVD+ from the Tango.

Wolf Pack OR "Barkzerkers": Luna, Fang, Misty, Dingo
See Terminal Codes for this one! You can basically play the game like an Auto Battler; useful if you're pre-occupied or want to just watch the spectacle! Your game won't save though... so you'd have to do this in one sitting.
Characters - Tier List
Spoilers abound here! Do not reveal unless you're okay with story details about why any given character is a given tier!

Anne
In General: A tier - Early game she's somewhat dead weight, she doesn't really come into her own until she learns the Tango (EVD+ for the whole posse), the Cha-cha (ATK+ for the whole posse), and equips late game Pistols like the Peacemaker. Her buffs are stackable, so stack that EVD & ATK for tough fights!
Ease of use: B tier - Once you get Pistols that shoot 3 times (like the Peacemaker), good luck hitting all your shots Dual Wielding 2 of them! (Try learning the Focus skill to help land all her shots) Posse wide dance skills are just fire and forget though, which is great!

Bull
In General: A tier - Lots of damage, lots of defense; definitely either have him or Pearl on your team. Is the only character that can equip the high defense Demon armor.
Ease of use: S tier - Very easy to land timing shots for all of his weapons. No skills (besides the occasional Protect if you learn it) to worry about!

Doc
In General: A tier - Low damage, skills do nothing if your posse is not hurt, but amazing for battles of attrition (e.g. most of the game)
Ease of use: S tier - Heal people up with items or his skills, otherwise just shoot 'em up with his pistol!

Lee
In General: S tier - Great damage and utility once you've got a fair number of skills learned! Later on he'll do pretty good regular attack damage Dual Wielding melee weapons too.
Ease of use: A tier - Gotta learn all his skills from enemies first, which means you gotta do a little legwork. Once you do though, you'll be spoiled for choice.

Maria
In General: S tier - Specializes in Rifles, which do massive damage to single targets. Can equip the strongest weapon in the game. Teach her the skill Focus to make landing red skill shots easier. Easy and cheap access to Coffee (full SP recovery) midway through the game before it's accessible in other ways.
Ease of use: A tier - Fairly easy to land timing shots with Rifles, her specialty. Equip the special Neck Armor Focus from a chest in Serpent's Path to give her a permanently larger red critical bar, then she'll likely become one of your most reliable damage dealers.

Pearl
In General: A tier - Lots of damage, lots of defense; definitely either have her or Bull on your team. Starts with Pistols, then specializes in Shotguns and Heavy Weapons. Unfortunately can't use Rifles, unlike Bull!
Ease of use: S tier - Very easy to land timing shots for her specialties: Shotguns and Heavy Weapons.

Rufus
In General: B tier - Low stats without Dog Treats, and tends to miss a bit outside of your control. Can be extremely overpowered once you get access to buying Dog Treats later, though, if you don't mind grinding for Teeth.
Ease of use: S tier - No inputs required at all! Just do a little legwork to find/buy his Dog Treats, and he'll do well. If you equip him with the Focus necklace, he will no longer miss, unless the enemy evades a non-crit attack.

Umbra
In General: S tier - Since animals give you a choice which skills you'd like to learn, she's massively customizable to cater to your posse lineup. She's also the only one who can make full use of Bows. Can learn the Camo skill, dramatically reducing enemy spawn rate (easier than carrying around lots of Salt items that do the same thing)
Ease of use: S tier - Animals are pretty easy to find! Once you get her up to speed with Skills, they're very easy to use too. Landing shots with Bows is similar to Rifles, if she has them equipped. Can learn all the best heals and keep you alive during a long and difficult journey.
Spoiler Free Tips & Tricks
VERY IMPORTANT - ABOUT SAVES
Do not quit the game before returning to town! You can lose a lot of progress otherwise. It also saves if you rest at a Hotel (or equivalent) and when you're leaving town, in case you've done some shopping.

Attrition & Healers
Most of the game you'll be dealing with some pretty hardcore attrition, and long, dangerous stretches with no safety in between Dungeons and the overworld.

If you want to avoid having to restart your game from an unfortunate party composition, make sure you bring a specialized Healer like Doc, Umbra (with Heal), or a late game Anne. Note that the skill Heal can bring back dead characters, including themselves!

Inventory & Items
Always try to fill your inventory to full (20 slots, or 2 pages) before going to a new Dungeon or area. You'll be glad you did! For characters like Bull and Pearl, try having multiple weapon types handy (Shotguns, Rifles, Heavy Weapons) to swap on the fly in case you encounter areas with high defense/evade stats or massive groups (5+) of enemies.

Combat & Weapons
During the timing mini-game for the ATTACK command, you can hold RIGHT (→) to speed it up significantly!

Melee, Pistols, and Rifles have a Yellow Bar for regular hits (can be evaded), and a Red Bar for critical hits (higher damage, 100% accuracy/cannot be evaded).

Shotguns only have a very easy to hit yellow bar, and can cause lots of single target or splash damage, or almost none at all (especially if they have high evade). Note that they have a higher chance to hit against enemy sprites that are large or massive!

Heavy Weapons have an easy yellow bar you just hold the button down to trigger 8 total big hits (splash damage), but must be reloaded the next turn.

Grinding & Posse Composition
Some posse compositions also greatly alleviate the need to grind (see Posse Comp section). You can do things under-leveled, but if you have low defenses, low damage, no healing, and no sustain; you're probably going to need a do a bunch of extra battles to stay competitive and stay alive.

Posse Order
The order of your allies does absolutely 100% matter!

Whoever is at the front (or top i.e. order 1 & 2) is more likely to be attacked, and those at the back (bottom i.e. order 3 & 4) less so, BUT it will still happen occasionally, just less likely overall. Place your high DEF & HP allies at the front of your posse to tank those attacks!

Additionally, if there is a tie for the SPD (speed) stat between your allies, the one that is higher in your Posse Order will ALWAYS go first.
Overworld - Area 1
Town - Pleasant


The first town and the place you start the game in! Start by getting your bearings and spend the first 200 Teeth you're given to outfit your team.

You'll then want to beat a few baddies outside to get at least level 2, and enough money to finish outfitting your party before venturing further.

General Shop
  • Bandage (40)
  • Deranger (50 - Weapon - Pistol): 6 ATK
  • Litevest (30 - Armor - Body): 4 DEF
  • Worn (25 - Armor - Boots): 2 SPD

Hotel
10 Teeth for full posse HP, SP, & status recovery (will not revive dead party members)

While talking to folks in town to get your bearings and get a feel for the world, you will encounter a fella on the 2nd floor of the Hotel that offers to sell you a "rare black demon stone" for 100,000 Teeth - don't worry about this for now!

Chapel
Revive your party members here! For a small fee, of course (20 Teeth per level) You'll also start here when Continuing a saved game.

Overworld Points of Interest & Major Landmarks

Open image in new tab and zoom in for best resolution

Map Markers
  1. The town of Pleasant (starting town)
  2. Mission Francesco (counts as a town for saving & horses - safe area)
  3. A Forage spot that commonly gives Herb (restores HP) and rarely gives Mintleaf (restores SP) You can sell these at Shops if you need money!
  4. A Rabbit that Teaches Umbra the skill Heal OR Forage (highly recommend Heal if you don't have Doc, otherwise Forage is fine)
  5. The major town of Santonio.
  6. The Eastern Bridge. Broken and impassible, it has a few workers that mention a toolbox for repair lost in Guano Mine to the west.
  7. An optional dungeon, the Desert Cave.
  8. Sam's House (nothing here until you rescue him)
  9. The Guano Mine dungeon.

Overworld Enemies
Tumbleweed, Mole Rat, Hawk, Robber, Alp

Town - Santonio


The other major town in this first area. There's lots of upgrades for your team here already, but you likely can't afford it for a bit. Invest in the bank, do some fighting, then come on back to kit out your posse!

Another heads up, some items may be hidden in non-obvious tiles/places, that aren't simply laid out like chests. For example, there's a hidden Bandage behind the Bank, hidden next to a barrel:


General Shop
  • Bandage (40)
  • Antidote (60)
  • Lasso (60)
  • Kitchen (160 - Weapon - Melee): 8 ATK
  • Bandana (30 - Armor - Head): 2 EVD
  • Wool (150 - Heavy Armor - Body): 6 DEF
  • Cotton (20 - Light Armor - Body): 1 DEF
  • Leather (90 - Armor - Boots): 4 SPD

Gun Shop
  • Deranger (50): 6 ATK
  • Coach (400): 18 ATK

Hotel
20 Teeth for full posse HP, SP, & status recovery (will not revive dead party members)

Saloon
120 Teeth for a Root Beer that restores SP!

Bank
How the Bank works: deposited Teeth (money) has 2% compound interest that increments after a single battle. Yield is the total interest you've accrued thus far.

If you deposit 5000 (numbers are always rounded up):
After 1 battle you'll have 5100 = (5000 + (5000 x 0.02))
After 2 battles you'll have 5202 = (5100 + (5100 x 0.02))
After 3 battles you'll have 5307 = (5202 + (5202 x 0.02))
and so on... This adds up very quickly!

If you've got a decent initial investment (or invest every chance you get) and some patience, you've basically got infinite money from here on out! Do be mindful that the bank caps out at 100k, so you'll need to check back in every now and again not to "waste" any interest.

Another strategy if you're going out adventuring: deposit all your money in the bank if you're going somewhere dangerous. When you have a full party wipe, you will be transported to the last town/chapel you visited and lose all the money you were carrying, BUT all the money in the bank will be completely unaffected.

Stables
Costs 100 Teeth to rent horses for your entire party. Activate on the overworld in your menu. Can move very fast on the overworld, and enemies only move 1 tile for every 2 tiles you move, which makes them much easier to avoid. As soon as you return to any town, they'll return to their stables, so plan ahead!

Train Station
Fast travel between towns that also have a Train Station! You can't do anything with it yet when you first get here, but you'll be able to unlock other towns later and then this becomes usable.

Town - Mission Francesco


Not really a town per se, but definitely a safe area! It also counts as a town for dismounting horses, so be careful if you spent money and came all the way out here. You can rest here for free!

You get your first real "objective" from Zad (the Angel), who saved you at the beginning. You are pointed to the Black Prison to the northeast to save Leo (another Angel), which in turn gives you the current objective of fixing the Bridge east of Santonio.

Map Markers
  1. Holy Water
  2. Antidote
  3. Dog Treat D

Dungeon - Desert Cave

Open image in new tab and zoom in for best resolution

A small optional dungeon on the easternmost tip of this area, southeast of Santonio. At the end of the dungeon is Sam, the apparent culprit who burned down the Saloon in Pleasant!

He seems to feel genuine remorse for what he's done, and heads back to his house to check on his brother after you rescue him. Meet him later back at his house west of Pleasant.

Map Markers
  1. Bedrolls (Item - Consumable): Heals HP and some SP (overworld use only)
  2. Wood (Weapon - Bow): 12 ATK, only has a red crit area (unless equipped by Umbra)
  3. Bat: Teaches Umbra the skills Flap (Raise Ally Evade) OR Leech (Steal HP from target enemy ignoring defense)
  4. Sam

Enemies
Bat, Mold, Mole Rat, Alp, Centipede

Landmark - Sam's House


Found directly west of Pleasant. Come here after saving Sam from the Desert Cave southeast of Santonio for a 500 Teeth reward (shaded area shows the path to his hiding place)

Dungeon - Guano Mine

Open image in new tab and zoom in for best resolution

Found directly west of Santonio. It can be a real drain unless you're prepared! Bring a fully equipped posse and as many recovery items as you can can.

If you have Lee, I recommend not leaving here until you've used the Study skill to learn the Multhit from a Knocker enemy.

Map Markers
  1. Worn (Armor - Boots)
  2. 100 Teeth & avoidable enemy ambush left of the chest
  3. Bandage
  4. Antidote
  5. Mining spot: Iron Ore, Silver, Gold, Topaz, Emerald, Ruby
  6. Iron Ore
  7. Pepperbox (Weapon - Pistol) & avoidable enemy ambush above the chest
  8. Boss (Big Alp and 2 Alps)
  9. Toolbox (Key Item)

Enemies
Bat, Mold, Knocker, Alp, Big Alp (Boss)
Overworld - Area 2
Overworld Points of Interest & Major Landmarks

Open image in new tab and zoom in for best resolution

  1. The Eastern Bridge (now repaired)
  2. The town of Heston.
  3. A location that has a Prickly Pear that you can pick up once in a while.
  4. A Mountain Pass with angels blocking the way. You can't cross without permission (yet)
  5. A Forage spot that commonly gives Herb (restores HP) and rarely gives Mintleaf (restores SP)
  6. A Coyote that Teaches Umbra the skill Howl (Raise ally attack) OR Fang (Damage target enemy ignoring defense). If you have Rufus, they will also give you a Dog Treat E!
  7. A Dungeon, the Black Prison.

Overworld Enemies
Coyote, R. Coyote, Bandit, Robber, Hawk, Rattler, Bogwad, Tarantula

Town - Heston


A much needed reprieve from the dangerous wilds just past the bridge, but something's amiss here... Speaking to the first townsperson you can see, you get a stern warning: "You've arrived at Heston, but I recommend you leave the way you came."


You can make ample use of the amenities in town, but the new Weapons, Armor, and Items are likely quite expensive for you when you first get here.

Early Money Making Strategy: For ample XP & Teeth to prepare your posse this early, you can farm the Guano Mine Boss (the Big Alp & 2 Alps) endlessly for 440 XP & 359 Teeth a pop! You can also leverage the Bank in Santonio for (nearly) endless Teeth once you have a good amount deposited and accruing interest per battle.

Note: the Chapel is off limits (no saves here) and no drinks at the Saloon (no Root Beer to restore your SP). Even just chatting with demon or two will get you into trouble!


This town CAN be liberated from the demons, however you need to be decently strong (or crafty enough) to fend them off.

First you'll need to contend with Xafan, the bodyguard standing watch at the Sheriff's. He's exceptionally tough at the point in the game, so be sure to prepare appropriately beforehand.

Xafan Strategy: Bring defense piercing skills OR stronger weapons (like Rifles) to actually deal appreciable damage to him. Have someone use Lassos on him every turn. If you're lucky there's a good chance he won't even be able to make a single move. If you win, you'll get a whopping 6666 XP for your entire posse, so I highly recommend trying to eliminate him!

Alternatively, you can give him an item that grows in the desert to the northeast, a Prickly Pear, as a bribe, but you won't get the massive XP bonus for fighting him.


Inside the Sheriff's office is Gobbler & 4 Impling minions. A much easier fight than Xafan, so if you can manage it, you can save Heston basically as soon as you arrive.


Afterwards, you'll have access to the Train Station, the Saloon, and the Chapel!

General Shop
  • Bandage (40)
  • Antidote (60)
  • Lasso (60)
  • Bedrolls (200)
  • Bolo (100 - Armor - Neck): 4 EVD
  • Leather (1300 - Armor - Body - Heavy): 12 DEF
  • Wool (40 - Armor - Body - Light): 2 DEF
  • Snake (200 - Armor - Boots): 8 SPD

Gun Shop
  • Pepperbox (800 - Weapon - Pistol): 8 ATK - Attacks twice!
  • Coach (400 - Weapon - Shotgun): 18 ATK
  • Long Rifle (1200 - Weapon - Rifle): 20 ATK

Hotel
60 Teeth for full posse HP, SP, & status recovery (will not revive dead party members)

Saloon
120 Teeth for a Root Beer that restores SP! (after you liberate the town)

Train Station
Fast travel between towns that also have a Train Station! (after you liberate the town)
Also FYI you can't use the train station if you currently have horses rented!


Landmark - Prickly Pear Cactus


Found northeast of Heston. A small area with a regrowing Prickly Pear that you can either use yourself (restores SP), or use to bribe Xafan to leave in Heston.

Dungeon - Black Prison - Floor 1

Open image in new tab and zoom in for best resolution

After a long journey, we've finally arrived at the Black Prison to attempt to save Leo (another angel) at the insistence of Zad. This will be the longest dungeon we've faced thus far, so hopefully you've come fully prepared for a lengthy dungeon crawl.

If Pearl is in your posse, her unique story vignette is here: you can find her Uncle dead in one of the cells on the first floor. Search his body for a Letter, then take it back to the bank in Santonio in exchange for 3000 Teeth.

Map Markers
  1. 50 Teeth
  2. Silver
  3. 100 Teeth
  4. Long Rifle (Weapon - Rifle)
  5. Root Beer
  6. Bolo (Armor - Neck) & Enemy Ambush (to the right of chest)
  7. Skeleton Pearl's Uncle
  8. Enemy Ambush

Enemies
Impling, Forsaken, Tarantula, Bogwad, Hellhound, Bandit, Warden, Mold

Dungeon - Black Prison - Floor 2

Open image in new tab and zoom in for best resolution

Map Markers
  1. Wool (Armor - Body)
  2. Ointment
  3. 1500 Teeth
  4. Emerald
  5. Lasso
  6. Dagger (Weapon - Melee)
  7. Bandage
  8. Nothing
  9. 139 Teeth
  10. Snake (Armor - Boots)
  11. Lasher (Boss), Leo the Angel, Feather (Item)

Enemies
Impling, Forsaken, Tarantula, Bogwad, Hellhound, Bandit, Warden, Lasher (Boss)

After defeating the Lasher, freeing and speaking with Leo, he reveals that he was the one who paid Sam to have the Saloon from Pleasant burnt down! He says he had a "good reason" and asks for forgiveness, but at this point you probably already guessed that things aren't quite so simple in Hell...

Afterwards, he mentions he's heading to Fort Jason, and that the angels blocking the Mountain Pass will now let you through, so we have our next objective! Use the Angel Feather he leaves behind to warp to safety, and head over to the Mountain Pass when you're ready.

Dungeon - Mountain Pass

Open image in new tab and zoom in for best resolution

Found northwest of Heston. Angels are blocking the route, and you'll need permission from Leo (found in the Black Prison) before you can proceed here.

Map Markers
  1. Ointment
  2. Hawk: Teaches Umbra Hawkeye (Grant ally critical hit up) OR Gust (Damage all enemies, ignoring defense)
  3. 890 Teeth
  4. Bedrolls

Enemies
Coyote, R. Coyote, Eagle, Hawk, Bandit, Rattler, Skunk Ape, Stonefist
Overworld - Area 3 - Part 1
Overworld Points of Interest & Major Landmarks

Open image in new tab and zoom in for best resolution

Map Markers
  1. The Mountain Pass we've just crossed; no longer blocked.
  2. The major town of Auster.
  3. The major landmark of Fort Jason.
  4. A Tortoise that will teach Umbra Shield (raise an ally's defense) OR Snap (lowers an enemy's attack)
  5. The Smuggler's Pass, which is blocked by rocks that can only be removed with a Detonator.
  6. A lone cactus with a hidden Feather item when you check it.
  7. A forest hugging the mountains that only spawns groups of Skunk Ape & Bisonman enemies (good XP farming consistently in this area)
  8. A Forage spot where you can get Herb, Mintleaf, & Ointment.
  9. The town of Rio Valle.

Overworld Enemies
Cabra, Skunk Ape, Dust Devil, Tornado, Dark Rider*, Jackalop, Bisonman, Eagle, Jump Bean**
*Dangerous Enemy
**Rare Spawn

Town - Auster


A good break from the chaos of the Black Prison, Auster is another major town with a Train Station where you can get some R&R and restock your (likely) depleted supplies.

There's no Bank here, so if you need your cash easily go back to Santonio's Bank, you're going to need to free up the Train Station from the clutches of Hyena Joe:


Note: if you say "Yes" to the train operator to get rid of Hyena Joe, you'll be teleported to a train car with no way out but to fight, so be careful!

There's no Gun Store in town, but there is a hidden 4-Barrel Shotgun behind the counter of the "Saloon"! to reach it, you can take a hidden path starting near the hotel:


Lee's unique story vignette can be found here: On the 2nd floor of the hotel speak with the woman in the only open room. After Lee exchanges some heated words with Rosie, he will then learn the skill, Survivor!

In the Sheriff's office, you can buy an item for 5000 Teeth that permanently teaches you the skill Focus! This skill is incredibly useful for Bull, Anne, Doc, & Maria. Pearl can learn it too, but with her focus on Shotguns and Heavy Weapons (yellow bar only), you likely won't get much use out of it. Rufus, Lee, & Umbra can't learn it.


General Shop
  • Bandage (40)
  • Ointment (120)
  • Antidote (60)
  • Lasso (60)
  • Dagger (2000 - Weapon - Melee): 14 ATK
  • Poncho (8000 - Armor - Body - Heavy): 20 DEF
  • Leather (1600 - Armor - Body - Light): 8 DEF
  • Eelskin (900 - Armor - Boots): 10 SPD

Hotel
120 Teeth for full posse HP, SP, & status recovery (will not revive dead party members)

Train Station
Fast travel between towns that also have a Train Station! (after defeating Coyote Joe) Costs 40 Teeth per town passing through (max 120)

Stables
200 Teeth to rent horses in until the next town visited!

Saloon
No Root Beer here - it's actually a Church instead! You'll need to ride the train elsewhere to restock.

Town - Fort Jason


We've finally arrived at Fort Jason, however, you'll need to fight off some Demons laying siege to it first. Note: if you kill the Captain but your posse dies, it'll still count as a clear when you're revived!


Final Fantasy 4 callback, perhaps?

Afterwards, you'll see that Leo is indeed here! Speaking with him again, he'll mention that the war in Lonestar is not going well, so he's going to head to a town called Lawbuck for help. You can now rest, shop, and save your game just like any other town.

After speaking with some of the soldiers at the fort, you'll get some major hints that the Smuggler's Pass to the east will take you to Lawbuck, where Leo has gone. The pass was blocked by a landslide to stop the demons, and there's dynamite to clear it, but the Detonator was stolen by thieves in the town of Rio Valle.

There are some hidden paths here starting here near the horses:


Back behind the fort, you can find something unique written on one of the gravestones, and a free Holy Water on the dead tree!

On the second floor of the Hotel you can find Doc's unique story vignette: give the injured soldier a Medpack, and Doc will learn the skill Revive! Note: If you wait too long, the soldier will die, and you'll miss out.

General Shop
  • Ointment (120)
  • Antidote (60)
  • Bedrolls (200)
  • Holy Water (1200)
  • Salt (200)
  • Lasso (60)
  • Ratling (10000 - Weapon - Heavy): 37 ATK
  • Charm (600 - Armor - Neck): 8 EVD

Hotel
Free rest! Full posse HP, SP, & status recovery (will not revive dead party members)

Town - Rio Valle


Welcome to Rio Valle! The Sheriff is nowhere to be found, and Outlaws roam the streets. There's no immediate hints as to where the thieves who stole the Detonator are, but after asking around, we do get a few leads.

You can find a hidden 1000 Teeth in the badge logo above the decrepit Sheriff's Office:


If you have Rufus, speak with the dog in town for a hint to a hidden Dog Treat!

Ol' Ned is hanging out in front of the well, desperate for Teeth to pay off the notorious outlaw Bad Betty. You can pay off his debt right then and there by buying his Magic Mirror, or by travelling to the Outlaw's Hideout to "fix" his situation! It also sounds like this may have had something to do with the stolen Detonator we're looking for, so let's follow up on that first.

You'll get an offer to buy a "tamed wild mustang" in the upper right corner for 1000 Teeth. The Horse will offer to teach Umbra either Gallop OR Kick! If you don't have Umbra, then you've just been scammed!

General Store
  • Ointment (120)
  • Antidote (60)
  • Lasso (60)
  • Bedrolls (200)
  • Sidewinder (8000 - Weapon - Pistol): 16 ATK
  • 4-Barrel (6000 - Weapon - Shotgun): 30 ATK
  • Infantry (12000 - Weapon - Rifle): 40 ATK
  • Ratling (10000 - Weapon - Heavy): 37 ATK

Hotel
200 Teeth for full posse HP, SP, & status recovery (will not revive dead party members)

Saloon
120 Teeth for a Root Beer that restores SP! You can also buy a Medkit for 8000 Teeth from the gentleman in front of the Bar.

Anne's unique story vignette is here: Be prepared for a fight with the guy called Possum in the upper right corner. If you can, try Pilfering Possum's Peacemaker Pistol for an early power spike! It is a rare drop though, so if you don't get it, you can easily reload and try again.

After you win the fight against Possum and then speak with the dancers to dance on stage, Anne will learn the Cha-Cha! (ATK up for entire posse)
Overworld - Area 3 - Part 2
Overworld Points of Interest & Major Landmarks

Open image in new tab and zoom in for best resolution

Map Markers
  1. The Bandit Hideout (where Bad Betty is located)
  2. A Forage spot that contains Herb & Mintleaf.
  3. A skeleton that contains a Dog Treat A (check behind the cactus)
  4. The major landmark Mission Angelina.
  5. The exit for the Mines behind the Bandit Hideout.
  6. The town of El Pasaje.
  7. The El Pasaje Mines.

Landmark - Bandit Hideout


Map Markers
  1. A hidden Coffee item in a conspicuous looking pot
  2. Bad Betty
  3. A locked door (Rusty Key required)

As hinted by the various townsfolk in Rio Valle, Bad Betty was hiding out here, and Ol' Ned owes her a lot of Teeth!

If you talk to her, this can play out in a few different ways. If you have Maria, one of her unique story vignettes is here: Maria will get unique dialogue with Bad Betty, and the ability to pay off Ol' Ned's debt for a discounted 4000 Teeth. If you do, afterwards you can buy as much Coffee (restores ALL SP) as you want from Bad Betty for 1,000 Teeth each!

If you don't have Maria, then you'll get into a fight after a brief chat! Either way, this will solve Ol' Ned's debt problem, and he'll give you the Magic Mirror he was trying to sell for free instead!

Landmark - Mission Angelina


After squaring away Ol' Ned's debt problem and retrieving the Magic Mirror from him, we've made our way to the Mission that we were warned about in Fort Jason. Something definitely seems off here though...

Map Markers
  1. 333 Teeth
  2. 333 Teeth

The Teeth in the chests add up to 666, as if the atmosphere from the denizens weren't already suspect enough! With the Magic Mirror in hand, speak to the pastor for a surprise:


After winning the fight against the Shapeshifter, a hidden staircase opens up behind them! We still haven't located the Detonator for Smuggler's Pass yet, so perhaps heading down there will give us some more leads to follow up on...

Dungeon - Mission Basement


Map Markers
  1. Holy Water
  2. Leather (Armor - Light)
  3. Ruby
  4. Enemy Ambush & Rusty Key

Enemies
Bat, Vamp Bat, Hellhound, Tarantula, Impling, Fungus, Mold

With the Rusty Key in hand, perhaps now we can open that door that we saw earlier in Bad Betty's Bandit Hideout and finally locate that Detonator!

Dungeon - Bandit Hideout Mine


Map Markers
  1. Lasso
  2. Salt
  3. 640 Teeth
  4. Ointment
  5. Lizard: Teaches Umbra Regen (Cure paralysis and heal the posse) OR Camo(!!!) (Lowers the enemy encounter rate for a time)
  6. Mining spot: Iron Ore, Silver, Gold, Topaz, Emerald, Ruby
  7. Enemy Ambush & Ratling (Weapon - Heavy)
  8. 909 Teeth
  9. Medkit

Enemies
Cabra, Mole Rat, Plagrat, Bat, Vamp Bat, Stonefist, Rattler, Demonoid, Impling, Centipede

Town - El Pasaje


Seems deserted, but we've just been through a decently long journey, and we're a long way from civilization, so we might as well take a look around... It looks there's some beds in decent condition in the Hotel, so we'll try spending the night.


We've woken up, but the Hotel is clearly no longer in ruin; and there's a even a nice gentleman to tell us where we've ended up:


The restored El Pasaje seems nice; with the fella in the northeast willing to teach us the secrets of the Mine skill for 8000 Teeth, and if you've got Bull in your posse, then speak to the shopkeeper Colt, exchange some words tinged with regret, then permanently learn the skill Protect.

It also appears this may be in the past... or rather, we are speaking with the lingering apparitions of a long dead and deserted settlement. The Demons appear to have poured out of the El Pasaje Mine to the northwest and destroyed everything in their path. Did anyone survive? This young kid might have, with his secret hiding spot in the well:


After finding out more about what this town once was; we've exhausted all of our options, and we've rested enough anyway. Let's get out of here.


Back to the former ruin it seems; let's check the well in the middle of town to see if that kid survived... Just a Dog Treat D and... oh!


One of the townspeople mentioned a mine to the north of here, so let's leave town, head that way, and try to find that Detonator.

Warning: There's no Chapel in El Pasaje, so if you perish ahead, you'll return all the way back to the last Chapel you've visited! Try to be extra cautious here if you can, and make return trips to El Pasaje to rest up.

Dungeon - El Pasaje Mine


Map Markers
  1. 1400 Teeth
  2. Bone (Armor - Neck)
  3. Mining Spot: Iron Ore, Silver, Gold, Topaz, Emerald, Ruby, Diamond, Abyssidian
  4. Ointment
  5. Enemy Ambush & Detonator

Enemies
Fungus, Mold, Skunk Ape, Demonoid, Bargest, Greenteeth, Giant Moth, Skelepede, Centipede

We can see now why El Pasaje met with the fate that it did! After a winding path (just past the mining spot) is an unavoidable enemy ambush, and finally the Detonator we've been looking for all this time!

Now that we've got what we came for, it's time for the long, arduous trek all the way back to Fort Jason, so we can enter Smuggler's Pass to the east, blow up the dynamite with the Detonator, and finally continue on to Lawbuck.

Dungeon - Smuggler's Pass

Open image in new tab and zoom in for best resolution

Map Markers
  1. Dynamite (Detonator required to pass)
  2. Salt
  3. 830 Teeth
  4. Thunderbird: After defeating it, drops a chest that contains a "Scale". Give it to the Sheriff in Santonio for a piece of "Resist" Neck Armor!
  5. Antidote
  6. Bedrolls
  7. 1800 Teeth
  8. Enemy Ambush & Dragoon (Pistol)
  9. Coffee

Enemies
Lechuza, Bandit, Outlaw, Eagle, Stonefist, Deathslab, Rattler, Cottonmouth, Thunderbird (Boss)
Overworld - Area 4 - Part 1
Overworld Points of Interest & Major Landmarks

Open image in new tab and zoom in for best resolution

  1. The Smuggler's Pass, now cleared of obstructions after using the Detonator.
  2. A series of tunnels known as the Serpent's Path.
  3. The Island House, where an important key item awaits.
  4. The final stretch of the Serpent's Path, blocked by lava.
  5. The major town of Lawbuck.
  6. A Wolf that teaches Umbra either Heal 2 (Restore an ally's HP by a moderate amount) OR Crush (Deals extreme damage to a single enemy, ignoring defense)
  7. The Temple of Cactus.
  8. An ominous looking Monolith.

Overworld Enemies
Deathslab, Hellcannon, Dark Rider, Pale Rider*, Gunslinger*, Tornado, Hangman*
*Dangerous Enemy

Dungeon - Serpent's Path

Open image in new tab and zoom in for best resolution

Map Markers
  1. Snake: Teaches Umbra Anti (Cures poison from one ally) OR Squeeze (ties up one enemy)
  2. Coffee
  3. 4280 Teeth
  4. Poncho (Armor - Body - Heavy)
  5. Focus (Armor - Neck): 4 EVD - Permanent focus buff (critical hit bar size up)
  6. Mining Spot: Iron Ore, Silver, Gold, Topaz, Ruby, Diamond, Abyssidian
  7. 390 Teeth
  8. 3600 Teeth
  9. Alligator Alley: Infinite Enemy Ambushes, 2-6 Alligators or 2-6 Cottonmouths. Probably the best endgame farming area for XP & Teeth, if you are capable of killing Alligators reliably! (For reference: 6 Alligators is as massive 16848 XP & 14400 Teeth)

Enemies
Cottonmouth, Rattler, Clot, Fungus, Vamp Bat, Greenteeth, Alligator*, Skelepede, Centipede
*Dangerous Enemy

We've encountered yet another dangerous dungeon after traversing the Smuggler's Path and a new area in the Overworld! You'll be hopping from sinkhole to sinkhole here until we find the way forward, so keep on travelling with attrition and perseverance in mind.

There's a unique(!) and hidden Focus Necklace here that you shouldn't leave without, as it gives several characters a major utility (and potentially damage) boost. It's the same as the Focus skill from Auster, but automatically gives you the buff at the battle start without having to activate it.

The Focus necklace is particularly great for Maria, Bull, Anne, Doc, and surprisingly, Rufus too! In fact, with this necklace on, Rufus will never miss again from not hitting the yellow or red bars! Note that enemies can (and will) still evade his yellow attacks, but his overall hit rate increases dramatically from this one accessory alone.

Landmark - Island House


The lava ahead in Serpent's Path is currently blocking us, and so after a bit of exploration, we've located an isolated house on a small island.

After speaking with everyone inside and reading the diary on the table, it's clear that this is where Lily O'Hare was living and planning to meet with "the seven" (that's us). You'll receive the Devil Horn Key Item as well, allowing us to progress!


You can rest here for free! Also check Rufus' dog bowl for a Dog Treat A! If Rufus is in your posse you'll discover Rufus was Lily's dog, and get some bonus dialogue.

Dungeon - Serpent's Path - Part 2


Devil Horn in hand, we approach the lava and fight the Scoria Worm!


If you die after defeating the Scoria Worm, Lawbuck is unlocked as a train destination, so take that instead.

Town - Lawbuck


After a long and grueling journey through both Smuggler's Pass and the Serpent's Path, we've finally made it to Lawbuck, "The Last Frontier of Mankind"!

In the Sheriff's office, you can buy as many Angel Feathers (teleport back to the last visited Chapel) as you want for 500 Teeth each.


Stock up on as many supplies as you can; outfit your posse, and ask around for information. You'll get a hint to check out the Temple of Cactus down south, the Black Monolith up north, and a Isolated Monastery that's been cut off from the state of Lonestar (we have no way to get there, yet):


Speaking with the only angel in town looking for Leo, you'll instead encounter Joph, who mentions that he was here but he didn't stay long. He said he had to meet up with someone...

You'll also get a hint that Lily O'Mule came here often, and would speak to anyone who'd listen about a Cactus Goddess... Since we now know that the Temple of Cactus is south of here, and since we can't find Leo to talk more about the "War", let's head down there and get more information.

Hotel
500 Teeth for full posse HP, SP, & status recovery (will not revive dead party members)

Saloon
120 Teeth for a Root Beer that restores SP!

Train Station
Fast travel between towns that also have a Train Station! Costs 40 Teeth per town passing through (max 120)

Stables
500 Teeth to rent horses until the next town visited!

Bank
Functions exactly the same as the Bank back in Santonio.

General Store
  • Ointment (120)
  • Medkit (600)
  • Antidote (60)
  • Bedrolls (200)
  • Holy Water (1200)
  • Salt (200)
  • Duster (24000 - Armor - Body - Heavy)
  • Silk (6000 - Armor - Body - Light)

Gun Store
  • Peacemaker (30000 - Weapon - Pistol): 38 ATK
  • Nocker (35000 - Weapon - Shotgun): 68 ATK
  • Buffalo (24000 - Weapon - Rifle): 64 ATK
  • Mitrail (20000 - Weapon - Heavy): 51 ATK

Landmark - Temple of Cactus


With Leo the Angel nowhere to be found, and the mention of Lily O'Hare speaking of a so called Cactus Goddess, we've come to the Temple of Cactus for answers. Luckily, they have a handy Elixir of the Cactus that proposes to do just that! Partake of the elixir, and be prepared to commune with the spirits...

Dungeon - Spirit Realm - Part 1

Open image in new tab and zoom in for best resolution


"Rufus, I have a feeling we're not in Kansas anymore..."

Map Markers
  1. Prickly Pear
  2. Holy Water
  3. Forage Spot: Herb, Prickly Pear, Salt, Topaz, Ointment, Antidote, Holy Water, Coffee
  4. Mocasin (Armor - Feet)
  5. Elder Shaman Umbra's Mom

Enemies
Crow, W. Alp, Shadow, Familiar, Skinwalker, Bisonlord*, Mooncat*
*Rare Spawn

Umbra's unique story vignette is here: speaking with the Elder Shaman in the northeast part of the Spirit Realm reveals that it's actually Umbra's Mom! After a brief chat and encouragement, she'll give you the Shaman necklace (10 EVD, +50 max SP)
Overworld - Area 4 - Part 2
Dungeon - Spirit Realm - Part 2


Map Markers
  1. Topaz
  2. Mescalita & R. Hand & L. Hand (Boss)

Enemies
Skinwalker, Shadow

At the end of the Spirit Realm we see an ominous looking building, and a similarly ominous looking figure in the middle of pyramid-esque room. Speaking with them further (and seeking some truth) we find that it's not quite that easy to come by! So we fight to prove we are worthy to know it!


A little truth bomb before the truth


If this isn't a "Cactus Goddess", then I don't know what else is!

After the fight, we get what we came for; who the heck are Biggan and Malus really? Why are Angels, Demons, and Humans fighting? Turns out we and everyone else who was dragged down into Hell were spun the same yarn: they are but players in a cosmic game, and human souls are mere tokens.

A true homage to our roots in JRPG tropes - now we need to talk to god for answers, and potentially attack and/or dethrone them! The Goddess directs us to seek further truth at the Black Monolith north of Lawbuck. The Shaman who gave us the Elixir to enter the Spirit Realm will give you a Horseshoe key item (don't forget it!)

Before we head to the Black Monolith, be sure to stock up supplies in Lawbuck. Bring Antidotes OR Umbra with the Anti skill. Bring a few Holy Water items as well, even if you have the Revive skill.

Afterwards, head north of Lawbuck, use the Horseshoe on the Black Monolith, then proceed to destinations unknown:


Overworld Points of Interest & Major Landmarks

Open image in new tab and zoom in for best resolution

We've finally arrived in the Blasted Lands of Hell proper, after only seeing it off in the distance adventuring around the state of Lonestar. There's a distinct linear-ish path for us to follow without much deviation, so we continue onwards until we reach a tall, Black Tower.

Map Markers
  1. The other side of the Black Monolith.
  2. The Black Tower.

Enemies
Infernal, Incubus, Bargest, Fallen, Horror

Dungeon - Black Tower - Floor 1

Open image in new tab and zoom in for best resolution

Map Markers
  1. Salt
  2. 201 Teeth
  3. Recurve (Weapon - Bow)
  4. 1890 Teeth
  5. Feather
  6. Antidote
  7. Pestilence (Boss)
  8. Exit Portal

Enemies
Plagrat, Blighted, Black Wind, Horror, Fungus, Pestilence (Boss)

After a game full of status effects basically not working on us; this floor is chalk full of enemies who can poison the entire posse at once!

We've come for answers, and Pestilence doubts we can find any here. If we've come to suffer, however, they'll certainly oblige us!


I hope you brought Antidotes!

Dungeon - Black Tower - Floor 2

Open image in new tab and zoom in for best resolution

Map Markers
  1. Peacemaker (Weapon - Pistol)
  2. 1190 Teeth
  3. Enemy Ambush & Blitzer (Tiles below chests & Weapon - Heavy)
  4. Musket (Weapon - Rifle)
  5. Obsidian (Weapon - Melee)
  6. War (Boss)
  7. Exit Portal

Enemies
D. Elite, D. Cavalry, Warhound, Hellcannon, Infernal, Incubus, War (Boss)

War knows we won't take no for an answer, but apparently that's fine by him! Time to give him what he's asking (and named) for.


What is it good for? Absolutely nothing!

Dungeon - Black Tower - Floor 3

Open image in new tab and zoom in for best resolution

Map Markers
  1. Nothing
  2. Nothing
  3. Nothing
  4. Nothing
  5. Nothing
  6. 100000 Teeth (...just kidding, it's nothing)
  7. Famine (Boss)
  8. Dog Treat E
  9. Exit Portal

Enemies
Dustball, Hawk Moth, Giant Moth, Recluse, Skelepede, Hellbird, Vamp Bat, Famine (Boss)

Famine lets us know that they admire the human spirit, because despite all the odds, we manage to persevere. Hell, we've come this far, we might as well keep going! Note: if you have Maria, then she'll recognize and call out Mr. Blue, her horse from Rail Heist.


Revenge is for all those empty chests!

Dungeon - Black Tower - Floor 4

Open image in new tab and zoom in for best resolution

Map Markers
  1. Medkit
  2. Feather
  3. Enemy Ambush & Hellfang (Weapon - Pistol)
  4. Lasso
  5. Enemy Ambush & 2220 Teeth (ambush on tile above)
  6. Holy Water
  7. Leo the Angel
  8. Death (boss)

Enemies
Shadow, Lost Soul, Beheaded, Wraith, Pale Rider, Hangman, Death (Boss)

We've finally caught up to Leo the Angel, mortally wounded, and found out who he was meeting up with... (Hint: it's Death)


We get his final words: he's done a lot of bad things for a "good guy", and Lily O'Mule and the others in the saloon were just a few of the people he's silenced. He wonders for the last time if Lily O'Mule was as bad as he was led to believe, before he collapses to the ground with a bullet in his back.

Up ahead, we confront Death himself for answers. Be careful! Rather appropriately, he has some instant kill abilities:


After winning the fight, Death admits he's too tired for this job, quits, and to take their horses and meet our makers to get the answers we seek:


We can fly! Also no more rental fees!

Note: use the "Mount" command from the menu to mount & dismount your newly acquired flying horses over solid ground!
Overworld - Full World Map & Endgame

Open image in new tab and zoom in for best resolution

Now we see why they call this State "Lonestar"!

Now that we have ours flying horses, thankfully relinquished by the 4 Horsemen, let's start going over some important new locations on the complete World Map.

Town - Agartha


Located southeast of Lonestar; you'll find some amped up Demons willing to do business with humans (and dogs). Some of the best weapons not hidden or found can be bought here, so make it one of your first stops!


Phew, don't have to make up a name for this place

General Store
  • Ointment (120)
  • Medkit (600)
  • Antidote (60)
  • Lasso (50)
  • Bone (16000 - Armor - Neck)
  • Demon (60000 - Armor - Body - Heavy)

Gun Store
  • Obsidian (16000 - Weapon - Melee): 49 ATK
  • Toothpik (50000 - Weapon - Melee): 72 ATK
  • Punter (45000 - Weapon - Shotgun): 88 ATK
  • Inferno (80000 - Weapon - Heavy): 100 ATK

Hotel
1000 Teeth for full party HP, SP & status recovery (will not revive dead party members)

Saloon
Unfortunately they refuse to do business with humans here, but you can still get some juicy information from the Demons.


Hey! That's the name of the game! (Insert Leo pointing gif here)


Another hint about where to go next, in case the hints in Lawbuck weren't enough.

Important locations for Umbra
The final animal, an Eagle, can be found north of El Pasaje and east of the El Pasaje Mine. They'll teach you either Revive (Revives an ally with low HP) OR Flurry (Deals high physical damage to all enemies):


At this point, should we really be "surprised" anymore?

A hidden Bow, the Eagle, can be found on a Cactus south of the Black Prison:


No relation to the other Eagle (probably)

Farming Locations
Armed with endgame gear, there's a particularly good spot for maximum XP/Teeth for your time: the Alligator Alley in the Serpent's Path dungeon. You will be constantly ambushed here (pretty much forever, since the ambush tiles refresh) and be fighting mainly Alligators and Cottonmouths.


An Alligator Alley Ambush, aieeeeee!


So many Alligators!


So much XP!

Landmark - Cloud Nine Saloon
Root Beers and Prickly Pears just ain't cutting it anymore for your SP restoration needs? Clamoring for a source of Coffee? Look no further - located just to the east of the Black Prison, make your way over to the clouds that look like this:


Hidden green horse optional

...then position yourself like in the image above, and move east until you've transitioned into a completely hidden location!


AKA The Sky Saloon or The Cloud Cantina


We should be able to buy enough coffee here to never need sleep again!

Landmark - Demon Gunsmith
Found just west of the town of Pleasant, accessible by flying horses only - is a Demon Gunsmith who only cares about crafting the finest weapons in Hell:


Knows exactly what she wants! We can dig it

You can find Abyssidian either from late game Mining locations (consult the rest of the guide) OR from the old man on the 2nd floor of the hotel in Pleasant:


Back where we started, this time loaded with cash


Calamity get!

You now have the most powerful Rifle in the game! Note that you can only get one, no matter how much Abyssidian you find.


Everybody gets one

Landmark - Isolated Monastery


Found just southeast of Pleasant - either stumbled upon or through hints given by various townspeople for our next objective:


You can also find infinitely purchasable dog treats for Rufus, if you've got the Teeth!


We're gonna make one very happy, maybe overpowered, dog

After a brief discussion with the only other person inside; you'll have your final objective, smash the Obelisks hidden around the world, and destroy Malus, once and for all!


Hidden Superboss - The Vilentcube
Just south of El Pasaje is a innocuous looking peninsula you can land on (now that you can fly). There is the standard complement of enemies found on the grey outskirts and blasted lands of Lonestar, however, there's a small chance you'll encounter the Vilentcube, a rare Superboss you can pit your posse against.

Be warned, they have massive ATK, can attack multiple allies at a time, and can use the skill "Delete" which will instantly kill one of your allies if it hits!


I thought this spot looked a little off...


We've found it! Or maybe it found us?


Victory! You get a sense of pride and accomplishment (and XP and Teeth)
Final Dungeon & Finale
After destroying the 3 hidden obelisks around the world, northwest of Lonestar (and west of Lawbuck) is the titular Black Citadel Grimstone. After preparing appropriately, we venture forth to see if we can end the war between Humans, Demons, and Angels once and for all! (and maybe get some answers while we're at it)


Several warnings before you proceed: there are several Orbs found around the Citadel don't need to be activated, but if you do, then you'll unlock a shortcut to the last boss! Make sure you activate all 6 before travelling through the labyrinthian sprawl of the Citadel, otherwise you'll have to navigate it all again to reach the end:


There's also a non-zero chance you'll encounter these enemies on both floor 1 & 2 - two to six(!) Assassins & zero to 2 Ghosts:


A truly distressing retro callback, just like the Sorcerers from Final Fantasy 1!

If so, be prepared for a run back from town, as the Assassins will spam "Garrote" which has a high chance of instakilling one ally, and the Ghosts attack multiple times at once for significant damage. If you don't encounter these guys, then count your blessings! (or buy some lottery tickets)

Dungeon - Black Citadel Grimstone - Floor 1

Open image in new tab and zoom in for best resolution

Map Markers
  1. Medkit
  2. Mocasin (Armor - Feet)
  3. 3000 Teeth
  4. Orb
  5. Salt
  6. Orb
  7. Enemy Ambush (Deathbison) & Orb
  8. 2 Orbs & Shortcut (after activating ALL 6 Orbs on both floors)
  9. Dark Lord (Boss)

Enemies
Assassin*, Ghost, Shadow, Hellbird, Horror, Fallen, Warhound, Lost Soul, Mamba, Dark Monk, Violator, Deathbison**, Dark Lord (Boss)
*Dangerous Enemy
**Ambush Only

Dungeon - Black Citadel Grimstone - Floor 2

Open image in new tab and zoom in for best resolution

Map Markers
  1. Orb
  2. Holy Water
  3. Punter
  4. Enemy Ambush & Diamond (Armor - Neck)
  5. 9999 Teeth, Nothing, Coffee, Ruby, Demon (Armor - Body - Heavy), & a Dog Treat D
  6. 666 Teeth
  7. Lasso
  8. Enemy Ambush (Violator)
  9. Royal (Armor - Body - Light)

Enemies
Assassin*, Ghost, Shadow, Hellbird, Horror, Fallen, Warhound, Lost Soul, Mamba, Dark Monk, Violator
*Dangerous Enemy

After a long trek through the citadel and hearing about this "Dark Lord Malus" throughout the world, we've finally come face to face with him at last!


After a surprisingly easy fight, Malus will escape upstairs. If you want to do any more preparation before the final fight, now's the best time to do so!


We even get a suggestion for exactly that from the Angels and Demons standing guard at the altar in the next room. If you haven't already done so, check out the "Endgame" suggestions to toughen up your posse, then prepare to fight the big man himself.


As you've probably guessed by now, Biggan wants the war to continue, as he also uses human souls for energy & enrichment (and apparently nutrition) They even plot to rid of Mescalita, the Cactus Goddess, after they "deal" with you! We've come this far, so we'll put a stop to both him and Malus too!


Some suggested strategies for this fight:
  • If you have Anne, or anybody with ally buffs, a reminder that they stack! For Anne in particular: you can alternate between Tango and the Cha-Cha to keep up the defense and the offense at the same time.
  • If you have Maria or Bull armed with the Calamity Rifle, they'll probably be your best source of single target damage against both Malus and Biggan.
  • If you have Doc, a reminder that a Medkit will have 4 total uses, greatly increasing your longevity. If he's leveled up enough for the "Doc 4" passive skill: a single Medkit will restore 999 HP, and a single Holy Water will revive someone with half their health!
  • If you have Pearl, then (somewhat appropriately) if you use the Bribe skill on Malus (with enough Teeth) he will accept and leave the fight immediately!
  • If you're low on SP and SP recovery items, Pilfering from Malus and Biggan will nab you a last minute Coffee!
  • The order you beat Malus and Biggan does actually matter! If you defeat Biggan, then Malus will automatically be destroyed. If you beat Malus first, then you'll be free and clear to take out Biggan with much less pressure on your posse.
If you land the final blow on Biggan with everyone still alive, his final words will change slightly, and you'll be guaranteed the Cherry Cart for Grimstone! If you don't, you can simply load up your saved game and try again.


With Biggan finally defeated, he takes the opportunity to get one last dig at humanity before dissipating. We, however, are having none of that:


Bonus if you have Rufus: put Rufus in the front of the posse (order 1) for a fun little Easter Egg for the victory speech!

Afterwards, we find out that they were apparently load bearing for the citadel, so it collapses very shortly afterwards. Enjoy the ending, and congratulations on finishing the game!

Full Video Walkthrough
Still having trouble? Check out this full walkthrough of Grimstone with the requirements met for the Cherry Cart!

Hopefully there is a technique or two not explicitly covered in the guide above that will help you accomplish your goals!

***Work In Progress Note***:
When I get a moment, I'll also try to add contextual subtitles to the complete video walkthrough.

Items - Equippable Weapons & Armor
Please cross reference the name of the Weapon or Armor with the guide above to find out where to get it (Ctrl + F text search is quite handy for this)

Additional note: Unique means there's only one copy of that item in the game, so be careful about selling or dropping it!

Weapons - Pistols
  • Deranger: 6 ATK
  • Pepperbox: 8 ATK - Attacks twice!
  • Sidewinder: 16 ATK - Attacks twice!
  • Dragoon (Unique): 24 ATK - Attacks twice!
  • Peacemaker: 38 ATK - Attacks thrice!
  • Hellfang (Unique): 66 ATK - Attacks thrice!

Weapons - Shotguns
  • Coach: 18 ATK
  • 4-Barrel: 30 ATK
  • Nocker: 68 ATK
  • Punter: 88 ATK

Weapons - Rifles
  • Long Rifle: 20 ATK
  • Infantry: 40 ATK
  • Buffalo: 64 ATK
  • Musket (Unique): 111 ATK - Requires reload!
  • Calamity (Unique): 200 ATK

Weapons - Heavy Weapons
  • Ratling: 37 ATK - Requires reload!
  • Mitrail: 51 ATK - Requires reload!
  • Blitzer: 76 ATK - Requires reload!
  • Inferno: 100 ATK - Requires reload!

Weapons - Melee
  • Kitchen: 8 ATK
  • Dagger: 14 ATK
  • Obsidian: 49 ATK
  • Toothpik: 72 ATK

Weapons - Bows
Note: For all Bows, there is only a red critical bar, unless equipped by Umbra.
  • Wood (Unique): 12 ATK
  • Recurve (Unique): 52 ATK
  • Eagle (Unique): 80 ATK

Armor - Neck
  • Bandana: 2 EVD
  • Bolo: 4 EVD
  • Charm: 8 EVD
  • Bone: 12 EVD
  • Diamond (Unique): 20 EVD
  • Resist (Unique): 6 EVD, 30 RES
  • Shaman (Unique): 10 EVD, Grants 50 additional max SP. Can be equipped on others besides Umbra. Restoring SP with it on, then taking it off, will allow you to keep the extra 50 SP until used!
  • Focus (Unique): 4 EVD, Permanent Focus buff (critical hit bar size up). Note that this is one of the only ways to get it on Rufus, dramatically increasing his effectiveness.

Armor - Body (Light)
  • Cotton: 1 DEF
  • Wool: 2 DEF
  • Leather: 8 DEF
  • Silk: 16 DEF
  • Royal (Unique): 24 DEF

Armor - Body (Heavy)
  • Litevest: 4 DEF
  • Wool: 6 DEF
  • Leather: 12 DEF
  • Poncho: 20 DEF
  • Duster: 32 DEF
  • Demon: 48 DEF - Can ONLY be equipped by Bull.

Armor - Feet
  • Worn: 2 SPD
  • Leather: 4 SPD
  • Snake: 8 SPD
  • Eelskin: 10 SPD
  • Gator: 12 SPD
  • Mocasin: 16 SPD
Items - Consumables & Key Items
Items - Consumables
Note that certain levels of the Doc skill not only boost healing from items, but ALSO grant extra uses for healing items! This works both in and out of combat (if the person with the Doc skill is still alive)

Usage example: with Doc 3 you can get 4 uses out of a single Medkit! (Medkit -> Medhalf -> Ointment -> Ointhalf)
  • Bandage: Restores minor health to one ally. Becomes Bandhalf with Doc 1.
  • Bandhalf: Restores minor health to one ally.
  • Herb: Restores low health to one ally. Becomes Herbhalf with Doc 1.
  • Herbhalf: Restores low health to one ally.
  • Ointment: Restores moderate health to one ally. Becomes Ointhalf with Doc 2.
  • Ointhalf: Restores moderate health to one ally.
  • Medkit: Restores major health to one ally. Becomes Medhalf with Doc 3.
  • Medhalf: Restores major health to one ally. Becomes Ointment with Doc 3.
  • Antidote: Removes poison status effect from one ally. Becomes Antihalf with Doc 2.
  • Antihalf: Removes poison status effect from one ally.

  • Mintleaf: Restores some SP for one ally.
  • Root Beer: Restores some SP for one ally.
  • P. Pear (AKA Prickly Pear): Restores some SP for one ally.
  • Coffee: Restores ALL SP for one ally.

  • Holy Water: Revives an ally with 1 HP.
  • Bedrolls: Restores moderate posse HP and some SP. Can only be used on the overworld. Will also despawn enemies.
  • Lasso: Can stun a single enemy for a brief time until attacked. Extremely useful for problematic enemies OR so Lee can spam Study on them.
  • Feather (AKA Angel Feather): Returns you to the last visited Town with a Chapel in it. You don't actually have to visit the Chapel to "register" the warp location, just have your game saved in that Town to trigger it.
  • Salt: Greatly reduces the enemy spawn rate for a short while.

  • Dog Treat D: Permanently adds max HP and DEF.
  • Dog Treat A: Permanently adds max HP and ATK.
  • Dog Treat E: Permanently adds max HP and EVD. Note: the EVD stat cap is 60!
  • Focus: Permanently adds the Focus skill to an ally.
  • Mine: Permanently adds the Mine skill to an ally.

Items - Key Items
  • Toolbox: From Guano Mine west of Santonio - use it to fix the bridge east of Santonio.
  • Letter: From Pearl's uncle Pete - return it to the Santonio bank.
  • Magic Mirror: From Ol' Ned in Rio Valle - use it in Mission Angelina, west of Fort Jason.
  • Rusty Key: From the Mission Angelina Basement - use it on the locked door in the Bandit Hideout.
  • Detonator: From the El Pasaje Mine - use it in Smuggler's Pass, east of Fort Jason.
  • Devil Horn: From the Island House (Lily O'Mule residence) - use it at the lava blocking the way at the end of Serpent's Path.
  • Horseshoe: From the Temple of Cactus - use it at the monolith north of Lawbuck.
  • Hammer: From the Isolated Monastery - use it to smash the 3 hidden obelisks around the world and gain access to the Black Citadel Grimstone.
Items - Foraging, Mining, & Pilfering
Items - Foraging Locations
Use the skill Forage on glowing areas next to vegetation (similar to Mine glowing areas).
  • NE of Pleasant: Herb, Mintleaf
  • SW of Black Prison: Herb, Mintleaf
  • SE of Rio Valle: Herb, Mintleaf, Ointment
  • NW of Rio Valle: Herb, Mintleaf
  • South of Lawbuck: Herb, P. Pear, Ointment
  • Spirit Realm: Herb, P. Pear, Mintleaf, Feather, Holy Water, Ointment, Antidote, Salt, Topaz, Coffee

Items - Mining Locations
Use the skill Mine on glowing areas next to rocks (similar to Forage glowing areas).
  • Guano Mine: Iron Ore, Silver, Gold, Topaz, Emerald, Ruby
  • Bandit Hideout Mine: Iron Ore, Silver, Gold, Topaz, Emerald, Ruby
  • El Pasaje Mine: Iron Ore, Silver, Gold, Topaz, Emerald, Ruby, Diamond, Abyssidian
  • Serpent's Path: Iron Ore, Silver, Gold, Topaz, Emerald, Ruby, Diamond, Abyssidian

Items - Mining Sellables
  • Iron Ore: Sells for 100 Teeth.
  • Silver: Sells for 200 Teeth.
  • Gold: Sells for 400 Teeth.
  • Topaz: Sells for 600 Teeth.
  • Emerald: Sells for 1200 Teeth.
  • Ruby: Sells for 3000 Teeth.
  • Diamond: Sells for 10000 Teeth.
  • Abyssidian: Sells for 50000 Teeth. Can be bought by the old man on the 2nd floor of the Pleasant Hotel for 100000 Teeth. Can be traded for the Calamity Rifle.

Items - Notable Pilferables
Most of the time you'll only get Teeth, but every now and again there's something decently valuable to stall for and try to nab. Will add here once confirmed, feel free to comment and help me add to it!

Also note that can have either a Common OR Rare pilfer item, so if you're targeting a certain drop, you'll have to either encounter them again or reload 'til you get it!

Normal Enemies:
  • Robber: Worn Boots (Rare)
  • Alp: Iron Ore (Rare)
  • Knocker: Iron Ore (Common), Silver (Rare)
  • Bandit: Pepperbox Pistol (Rare)
  • Rattler: Antidote (Common), Snakeskin Boots (Rare)
  • Outlaw: Sidewinder Pistol (Rare)
  • Gunslinger: Peacemaker Pistol (Rare)
  • Alligator: Gator Boots (Common) Can ONLY be obtained through Pilfering.
  • Warhound: Dog Treat A (Rare)
  • Deathbison: Diamond (Common), Abyssidian (Rare)

Bosses:
  • Big Alp: Silver (Common), Gold (Rare)
  • Lasher: Medkit (Rare)
  • Possum: Peacemaker Pistol (Rare) Early power spike; highly recommended!
  • Bad Betty: Coffee (Common)
  • Mescalita: P. Pear (Common)
  • Famine: Herbhalf (Common), Ointhalf (Rare)
  • War: Mitrail Heavy Weapon (Common), Blitzer Heavy Weapon (Rare)
  • Death: Diamond (Common), Abyssidian (Rare)
Skills - Passives, Actives, & Learnables
All Passive Skills
For Passive Skills with more than a single level that cause damage (all Weapon skills and the Spirit skill), it is directly increased by roughly ~50% per level (Note: there is still a bit of variation in play, including defense calculations, so don't take this as an exact number!)
  • Melee: Extra strength in hand-to-hand combat.
  • Pistol: The ability to wield Pistols.
  • Rifle: The ability to wield Rifles.
  • Shotgun: The ability to wield Shotguns.
  • Heavy: The ability to wield Heavy Weapons.
  • Dual Wield: Can wield two of the same type of weapon at once. (e.g. 2 pistols but not 1 pistol and 1 melee)
  • Doc: Heal items are extra effective.
  • Spirit: Skills are extra effective.
  • Survivor: Sometimes defies death.
  • Dog: Is a dog. Cannot be controlled.
  • One Arm: Cannot wield two-handed weapons.

All Active Skills
  • 2-Step: (Anne only) [14 SP] A full posse heal for minor damage.
  • Tango: (Anne only) [20 SP] Grants a buff that increases EVD (evade) up to all allies.
  • Waltz: (Anne only) [30 SP] A full posse heal for moderate damage.
  • Cha-Cha: (Anne only) [32 SP] Grants a buff that increases ATK (attack) up to all allies.

  • Pilfer: (Maria & Lee only) [4 SP] Attempts to steal from one enemy.
  • Conceal: (Maria & Lee only) [16 SP] EVD (evade) up buff for self.
  • Execute: (Maria & Lee only) [13 SP] Attempts to kill one enemy.

  • Forage: (Rufus & Umbra only) [8 SP] Allows you to find medicinal plants in the wild (search shiny tiles with plants for items)
  • Mine: (Everyone except Umbra & Rufus) [24 SP] Allows you to find rare minerals in the world. (search shiny tiles next to rocks/stone/etc.)

  • Heal: (Doc & Umbra only) [4 SP] Restore some HP to one ally. Can revive dead allies outside of combat.
  • Heal 2: (Doc & Umbra only) [12 SP] Restore moderate HP to one ally. Can revive dead allies outside of combat.
  • Anti: (Doc & Umbra only) [6 SP] Cures poison from one ally.
  • Shield: (Doc & Umbra only) [10 SP] DEF (defense) up for one ally.
  • Revive: (Doc & Umbra only) [30 SP] Revives an ally in or out of combat.

  • Bribe: (Pearl only) [0 SP] Attempts to bribe an enemy to leave the battle. Success and Teeth cost depend on that enemy's stats. Note: you will not get XP or Teeth for that enemy if they accept!
  • Protect: (Bull & Rufus only) [8 SP] Protects allies when struck.
  • Focus: (Everyone except Lee, Umbra, and Rufus) [10 SP] Grants a buff to self that increases critical hit chance (larger red bar)

  • Study: (Lee only) [2 SP] Attempts to learn a skill from one enemy.
  • Berserk: (Lee only) [6 SP] Auto attack for several turns and ATK (attack) up.
  • Harden: (Lee & Bull only) [7 SP] DEF (defense) up buff for self.
  • Leech: (Lee & Umbra only) [9 SP] Steal HP from one enemy ignoring defense.
  • Strike: (Lee only) [9 SP] Attacks a single enemy, ignoring defense.
  • Break: (Lee only) [14 SP] Stuns one enemy.
  • Multhit: (Lee only) [15 SP] Deals physical damage to all enemies.

  • Hawkeye: (Umbra only) [5 SP] Grants a buff that increases critical hit chance for one ally.
  • Fang: (Umbra only) [8 SP] Damage one enemy, ignoring defense.
  • Gust: (Umbra only) [8 SP] Damage all enemies, ignoring defense.
  • Howl: (Umbra only) [10 SP] Grants a buff that increases ATK (attack) for one ally.
  • Gallop: (Umbra only) [10 SP] Grants a buff that increases SPD (speed) up to all allies.
  • Regen: (Umbra only) [10 SP] Cures paralysis and heals the posse.
  • Camo: (Umbra only) [12 SP] Lowers the enemy encounter rate for a time.
  • Snap: (Umbra only) [15 SP] Lowers one enemy's attack.
  • Flap: (Umbra only) [15 SP] EVD (evasion) up buff for one ally.
  • Kick: (Umbra only) [18 SP] High physical damage to one enemy.
  • Squeeze: (Umbra only) [18 SP] Ties up one enemy.
  • Flurry: (Umbra only) [28 SP] Deals high physical damage to all enemies.
  • Crush: (Umbra only) [50 SP] Deal extreme damage to a single enemy, ignoring defense.

Skills Learnable by Umbra (talking to Animals)
About Umbra's single target buff skills: ALL stat buffs in this game are 100% stackable, so it may be worth grabbing those for emergencies, or to have something that scales better than just pure damage skills.
  • Heal* OR Forage (Rabbit): Restore some HP to one ally OR allows you to find medicinal plants in the wild (search shiny tiles with plants for items)
  • Flap OR Leech (Bat): Raise ally evade OR steal HP from enemy ignoring defense
  • Howl OR Fang (Coyote): Raise ally attack OR damage target enemy ignoring defense
  • Hawkeye OR Gust (Hawk): Grant an ally critical hit up (same as the Focus skill) OR damage all enemies, ignoring defense
  • Shield OR Snap (Tortoise): Raise an ally's defense OR lowers an enemy's attack
  • Gallop OR Kick (Horse): Raise the whole posse's speed OR high physical damage to a single enemy
  • Regen OR Camo* (Lizard): Cures paralysis and heals the posse OR lowers the enemy encounter rate for a time
  • Anti OR Squeeze (Snake): Cures poison from one ally OR ties up one enemy
  • Heal 2 OR Crush (Wolf): Restore an ally's HP by a moderate amount OR deal extreme damage to a single enemy, ignoring defense
  • Revive OR Flurry* (Eagle): Revives an ally with low HP OR deals high physical damage to all enemies
*Highly Recommended Skill Choice

Skills Learnable by Lee (using Study)
No skill to learn: "Lee studies X... but can't learn anything more from them."
A skill to learn, but unsuccessful: "Lee studies X... but can't quite figure it out!"
Learned skill successfully: "Lee studies X... and learns Y!"

Important Note: Lee has 10 skills to learn, but can only learn up to 9 total. The full skill list maxes out at 10, and 1 space is already taken up by Learn, so be careful!
  • Pilfer (from Robber, Bandit, Outlaw): Attempts to steal from target enemy.
  • Leech (from Bat, Vamp Bat, Famine): Steal HP from one enemy, ignoring defense.
  • Mine (from Alp, Big Alp, W. Alp): Mine sparkling locations in front of rocks for items.
  • Multhit (from Knocker, Hellhound, Lasher, Shapeshifter, Thunderbird): Attack all enemies.
  • Break (from Warden, Bisonman, D. Cavalry): Stuns one enemy.
  • Harden (from Forsaken, Stonefist, Deathslab): DEF (defense) up buff for self.
  • Strike (from Rattler, Centipede): Attacks a single enemy, ignoring defense.
  • Conceal (from Jump Bean, Shadow, Ghost): EVD (evade) up buff for self.
  • Berserk (from Impling, Demonoid, Skinwalker, War): Auto attack for several turns and ATK up.
  • Execute (from Deathbison, Death): Attempts to kill one enemy.

Skills Learnable from Items
  • Focus (from Auster Sheriff for 5000 Teeth): Increases the size of your red critical hit bar in battle.
  • Mine (from El Pasaje Miner for 8000 Teeth): Mine sparkling locations in front of rocks for items (similar to Forage for sparkling vegetation tiles)
Bestiary - Enemies List
Normal Enemies
  • Hawk (8 XP, 6 Teeth) [Overworld Area 1, Overworld Area 2, Mountain Pass]
  • Mole Rat (4 XP, 4 Teeth) [Overworld Area 1, Bandit Hideout Mine]
  • Tumbleweed (6 XP, 3 Teeth) [Overworld Area 1]
  • Robber (10 XP, 12 Teeth, Study - Pilfer) [Overworld Area 1]
  • Alp (20 XP, 13 Teeth, Study - Mine) [Overworld Area 1, Guano Mine, Desert Cave]
  • Bat (12 XP, 4 Teeth, Study - Leech) [Guano Mine]
  • Knocker (70 XP, 23 Teeth, Study - Multhit) [Guano Mine]
  • Mold (10 XP, 0 Teeth) [Guano Mine]
  • Centipede (320 XP, 189 Teeth, Study - Strike) [Desert Cave, Serpent's Path]
  • Rattler (187 XP, 187 Teeth, Study - Strike) [Smuggler's Pass]
  • Impling (49 XP, 49 Teeth, Study - Berserk) [Black Prison]
  • Bandit (80 XP, 66 Teeth, Study - Pilfer) [Overworld Area 2, Smuggler's Pass]
  • Coyote (35 XP, 21 Teeth) [Overworld Area 2]
  • R. Coyote (103 XP, 21 Teeth) [Overworld Area 2]
  • Bogwad (44 XP, 2 Teeth) [Overworld Area 2, Black Prison]
  • Forsaken (92 XP, 56 Teeth) [Black Prison]
  • Tarantula (77 XP, 37 Teeth) [Black Prison, Mission Basement]
  • Hellhound (366 XP, 66 Teeth, Study - Multhit) [Mission Basement]
  • Warden (186 XP, 250 Teeth, Study - Break) [Black Prison]
  • Stonefist (400 XP, 0 Teeth, Study - Harden) [Bandit Hideout Mine, Smuggler's Pass]
  • Skunk Ape (308 XP, 120 Teeth) [Overworld Area 3]
  • Cabra (192 XP, 192 Teeth) [Overworld Area 3]
  • Eagle (78 XP, 34 Teeth) [Overworld Area 3, Smuggler's Pass]
  • Jackalop (100 XP, 100 Teeth) [Overworld Area 3]
  • Dust Devil (73 XP, 10 Teeth) [Overworld Area 3]
  • Dark Rider (410 XP, 310 Teeth) [Overworld Area 3, Overworld Area 4]
  • Jump Bean (12000 XP, 0 Teeth, Study - Conceal) [Overworld Area 3]
  • Bisonman (1800 XP, 1800 Teeth, Study - Break) [Overworld Area 3]
  • Outlaw (300 XP, 199 Teeth, Study - Pilfer) [Smuggler's Pass]
  • Tornado (290 XP, 36 Teeth) [Overworld Area 4]
  • Vamp Bat (201 XP, 44 Teeth, Study - Leech) [Mission Basement, Bandit Hideout Mine, Serpent's Path, Black Tower - Floor 3]
  • Plagrat (130 XP, 98 Teeth) [Bandit Hideout Mine, Black Tower - Floor 1]
  • Bargest (1808 XP, 601 Teeth) [El Pasaje Mine, Blasted Lands]
  • Demonoid (164 XP, 164 Teeth, Study - Berserk) [Bandit Hideout Mine, El Pasaje Mine]
  • Greenteeth (510 XP, 1600 Teeth) [El Pasaje Mine, Serpent's Path]
  • Giant Moth (700 XP, 20 Teeth) [El Pasaje Mine]
  • Lechuza (600 XP, 124 Teeth) [Smuggler's Pass]
  • Deathslab (1981 XP, 0 Teeth, Study - Harden) [Smuggler's Pass, Overworld Area 4]
  • Deathcannon (2780 XP, 490 Teeth) [Overworld Area 4]
  • Pale Rider (915 XP, 605 Teeth) [Overworld Area 4, Black Tower - Floor 4]
  • Hangman (440 XP, 800 Teeth, Study - Break) [Overworld Area 4, Black Tower - Floor 4]
  • Skelepede (3200 XP, 189 Teeth) [Serpent's Path]
  • Cottonmouth (1136 XP, 900 Teeth) [Smuggler's Pass, Serpent's Path]
  • Alligator (2808 XP, 2400 Teeth) [Serpent's Path]
  • Clot (400 XP, 0 Teeth) [Serpent's Path]
  • Behandler (600 XP, 1100 Teeth) [Overworld Area 4]
  • Gunslinger (544 XP, 362 Teeth) [Overworld Area 4]
  • Skinwalker (1736 XP, 900 Teeth, Study - Berserk) [Spirit Realm]
  • Shadow (606 XP, 0 Teeth, Study - Conceal) [Spirit Realm, Black Tower - Floor 4, Black Citadel]
  • Crow (500 XP, 201 Teeth) [Spirit Realm]
  • Bisonlord (2800 XP, 2800 Teeth) [Spirit Realm]
  • W. Alp (598 XP, 800 Teeth, Study - Mine) [Spirit Realm]
  • Mooncat (24000 XP, 0 Teeth) [Spirit Realm]
  • Infernal (3996 XP, 2664 Teeth) [Blasted Lands]
  • Horror (651 XP, 500 Teeth) [Black Tower, Black Citadel]
  • Fallen (999 XP, 1666 Teeth) [Blasted Lands, Black Tower, Black Citadel]
  • Incubus (701 XP 701 Teeth) [Blasted Lands, Black Tower]
  • Blighted (971 XP, 890 Teeth) [Black Tower - Floor 1]
  • Black Wind (1578 XP, 160 Teeth) [Black Tower - Floor 1]
  • D. Cavalry (1230 XP, 1100 Teeth, Study - Break) [Black Tower - Floor 2]
  • D. Elite (801 XP, 700 Teeth) [Black Tower - Floor 2]
  • Warhound (960 XP, 0 Teeth) [Black Tower - Floor 2, Black Citadel]
  • Hellbird (599 XP, 238 Teeth) [Black Tower - Floor 3, Black Citadel]
  • Hawk Moth (1000 XP, 233 Teeth) [Black Tower - Floor 3]
  • Dustball (504 XP, 10 Teeth) [Black Tower]
  • Recluse (1101 XP, 400 Teeth) [Black Tower]
  • Beheaded (651 XP, 500 Teeth) [Black Tower - Floor 4]
  • Lost Soul (1156 XP, 300 Teeth) [Black Tower - Floor 4, Black Citadel]
  • Wraith (1313 XP, 0 Teeth) [Black Tower - Floor 4]
  • Ghost (1560 XP, 0 Teeth, Study - Conceal) [Black Citadel]
  • Mamba (2900 XP, 1280 Teeth) [Black Citadel]
  • Assassin (2020 XP, 1010 Teeth) [Black Citadel]
  • Dark Monk (6100 XP, 1800 Teeth) [Black Citadel]
  • Violator (5200 XP, 5201 Teeth) [Black Citadel]
  • Deathbison (10000 XP, 10000 Teeth, Study - Execute) [Black Citadel]

Bosses
  • Big Alp (400 XP, 333 Teeth, Study - Mine) [Guano Mine]
  • Xafan (6666 XP, 5 Teeth) [Heston]
  • Gobbler (1026 XP, 454 Teeth) [Heston]
  • Lasher (2360 XP, 874 Teeth, Study - Leech) [Black Prison]
  • Hyena Joe (2408 XP, 2000 Teeth) [Auster]
  • 5 D. Soldier & 1 D. Captain (2286 XP, 1475 Teeth) [Fort Jason]
  • Possum (544 XP, 362 Teeth) [Rio Valle]
  • Shapeshifter (3333 XP, 3333 Teeth, Study - Leech) [Mission Angelina]
  • Bad Betty (2256 XP, 1630 Teeth) [Bandit Hideout]
  • Thunderbird (2000 XP, 0 Teeth, Study - Leech) [Smuggler's Pass]
  • Scoria Wor (4000 XP, 3200 Teeth) [Serpent's Path]
  • Mescalita & L. Hand & R. Hand (6000 XP, 0 Teeth) [Spirit Realm]
  • Pestilence (3256 XP, 1300 Teeth) [Black Tower - Floor 1]
  • War (2907 XP, 8100 Teeth, Study - Berserk) [Black Tower - Floor 2]
  • Famine (4250 XP, 0 Teeth, Study - Leech) [Black Tower - Floor 3]
  • Death (8000 XP, 1800 Teeth, Study - Execute) [Black Tower - Floor 4]
  • Vilentcube (80000 XP, 80000 Teeth) [Overworld Peninsula south of El Pasaje]
  • Dark Lord (0 XP, 0 Teeth) [Black Citadel]
  • Malus (0 XP, 0 Teeth) [Black Citadel]
  • Biggan (0 XP, 0 Teeth) [Black Citadel]
Gift, Gold, & Cherry Requirements
For the Garden gift:
REACH EXP LEVEL 10
Just play through the game, you should achieve this around the time you're fighting through the Black Prison in Overworld Area 2

For the Gold cart:
BEAT THE GAME

For the Cherry cart:
WIN WITH ALL POSSE MEMBERS ALIVE
Consult the Final Dungeon & Finale section above for strategies to help you with this achievement!
Terminal Codes
  • BRIM - The shortcode for Grimstone. Combine with commands like HELP to make and enter HELP-BRIM (lists a bunch of additional possible commands)
  • WOLF-PACK - Start a new game of Grimstone with a party full of DOGS. Pretty fun if you want to play the game like an Auto Battler of sorts! Just like with other UFO 50 terminal codes, your game won't save (which is especially punishing for this one)
Easter Eggs
Spoilers here up to (and including) the ending, so be careful!

The World 1: In case you weren't already aware (or not from the USA), the World Map is directly modelled after the real state of Texas! The name of this World is Lonestar, which is also related to Texas AKA "The Lone Star State".
The World 2: Lonestar is also the same world that the game Rail Heist takes place.
The World 3: Many in-game locations are all based off real life locations in Texas:
Pleasant <-> Pleasanton (it's often cited as "the birthplace of the cowboy", thus making Pleasant a fitting starting town!)
Santonio <-> San Antonio
Heston <-> Houston
Auster <-> Austin
Fort Jason <-> Fort Worth
Rio Valle <-> Rio Grande Valley
El Pasaje <-> El Paso
Lawbuck <-> Lubbock


Characters 1: Maria is also from Rail Heist!
Characters 2 (and a late game boss fight): For the fight with Famine, Maria will make a comment about the horse they're riding on (Mr. Blue) which is the horse you escape on after finishing a level in Rail Heist.
Characters 3: The fact that Umbra can learn the skill "Camo" from a Lizard is likely a callback to the game Camouflage, where you do exactly that!

Hidden Secrets 1: A grave behind the Fort Jason walls says "The gravestone reads: R.I.P. Bola 1959-1988" directly related to the behind the scenes story at UFOSoft.
Hidden Secrets 2: Also related to the previous UFOSoft easter egg, there's an invisible NPC east of the entrance in the Spirit Realm (Part 1) that says "Strange things happen in leap years. Sometimes people just disappear."

Rare Encounters 1: A Mooncat enemy can be rarely encountered in the Spirit Realm.
Rare Encounters 2: There's a hidden superboss called the Vilentcube hidden in a small area on the overworld. This seems to be a direct retro callback to the infamous foe Warmech from Final Fantasy I.

Dangerous Enemies 1: The instant KO enemies encountered in large groups appear to be a direct callback to the Sorcerer enemy (basically Mind Flayers) from Final Fantasy I with similar instant KO attacks and game ending shenanigans.
Dangerous Enemies 2: There are a few tiles surrounding the Black Prison that have enemies from much later in the game. This is *potentially* an homage to the infamous "Peninsula of Power" from Final Fantasy I.

Finale 1: "Attacking and dethroning god" is a well worn JRPG trope, which is a pretty good callback if you're trying to mimic classic retro JRPGs! By fighting Malus and Biggan at the end, this is basically what shenanigans you're getting up to in Grimstone as well.
Finale 2: When you beat the game, your posse leader will make a short speech, and the ally in order 2 will comment on leaving before the citadel falls apart. However, If Rufus is your posse leader, he'll still make the same speech, and the ally in order 2 will say instead: "You can talk Rufus?! Well, no time to dwell on it... We need to leave now!"
Soundtrack
  1. Grimstone - Town[phlogiston.bandcamp.com]
  2. Grimstone - Shop[phlogiston.bandcamp.com]
  3. Grimstone - Church[phlogiston.bandcamp.com]
  4. Grimstone - Overworld[phlogiston.bandcamp.com]
  5. Grimstone - Encounter[phlogiston.bandcamp.com]
  6. Grimstone - Cave[phlogiston.bandcamp.com]
  7. Grimstone - Spirit Realm[phlogiston.bandcamp.com]
  8. Grimstone - Demonic[phlogiston.bandcamp.com]
  9. Grimstone - Final Dungeon[phlogiston.bandcamp.com]
  10. Grimstone - Saloon[phlogiston.bandcamp.com]
  11. Grimstone - Horseback[phlogiston.bandcamp.com]
  12. Grimstone - Curious[phlogiston.bandcamp.com]
  13. Grimstone - Dialogue[phlogiston.bandcamp.com]
  14. Grimstone - El Pasaje[phlogiston.bandcamp.com]
Outro
Grimstone is a massive multi-hour RPG so I'm taking quite a bit of time putting this together! It's currently in the finishing touches (95% complete) stage, but more suggestions to help your fellow players are more than welcome.

Supreme thanks to the developers of this game! Y'all rock!

Extra special thanks to the community for helping with putting this together! You can see in the comments that the whole experience is very reminiscent of that retro style where you piece together game mysteries as a small community, celebrating (and testing out) the major discoveries. =)

Spot anything I missed or found something you would like to add? Add a comment and I'll look into it when I get the chance!

Want more? Then please check out my other:
Please do not copy without my permission! If you'd like to support my work by buying me a coffee I'd greatly appreciate it! https://ko-fi.com/llamakazi

Also if you can, please help out with this guide's overall visibility by clicking the real versions of these buttons up top - many thanks y'all!
152 megjegyzés
NaMgAl márc. 23., 8:34 
In Black Prison Floor 2, you can search the pot in the cell just nearby the stairs and get a Holy Water.
Mr. Zik febr. 25., 13:38 
Great guide! I have what I think is a small correction regarding party order though. Rather than being a tiebreaker for speed, I think that it actually imparts a small speed penalty or bonus based on the character's specific postion. My evidence for this is that I have Lee in the top slot and Anne in the bottom. Anne has 2 more speed than Lee, yet Lee goes first.
Obi-Wan Cannoli febr. 23., 8:13 
In regards to what Blinky said, bribing Malus worked for me first try, but he took 26,664 teeth. I think you just have to have enough.
Llamakazi  [készítő] febr. 6., 0:12 
Sorry for the inconvenience y'all! Steam deleted images EVERYWHERE (other guides, mods, etc.) it seems. Likely a snafu with wherever they store their images (cloud issue/backups)

I've edited the metadata for each superficially and just forced a re-upload for each image again to solve it (for now). Fingers crossed it doesn't happen again...
epdmc.Rostabosta febr. 5., 19:34 
Yes, unfortunately, some of the images, esp of dungeons seemed to have dropped off the posts for some reason. Otherwise super helpful, thanks for posting.
flygone febr. 4., 23:44 
Some of the images seem to have broken or are not loading for me, would love pictures of the final dungeon specifically if anyone has them! Struggling to find the orbs.
Blinky febr. 4., 15:42 
I used Bribe on Malus on the final fight 4 TIMES IN A ROW and he refused all 4 times. I had 12K teeth on me. Either that tip is a lie, or there's crucial extra info missing from it
Ryusuta febr. 2., 20:57 
(2/2)

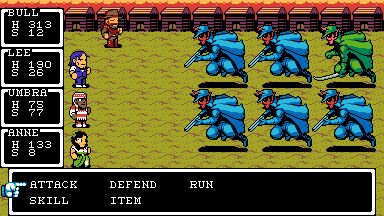
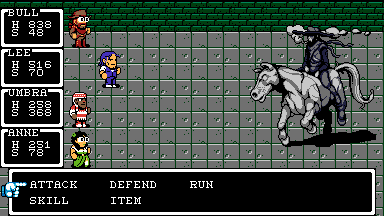
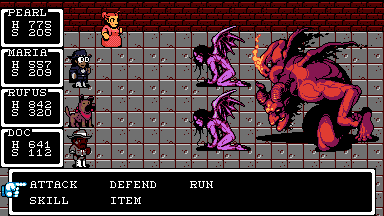
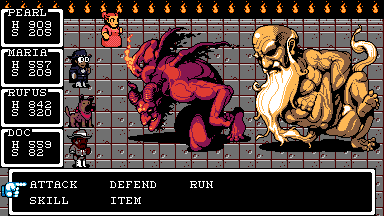
His attack style is both good and bad. The bad part is that he often hits yellows on the bar, so high evade enemies can be annoying for him. The good is that large, slow, beefy enemies are much easier to hit. And of course, the fact that he effectively ignores the blind status effect is a huge point in his favor when those annoying birds start pecking everyone's eyes out.

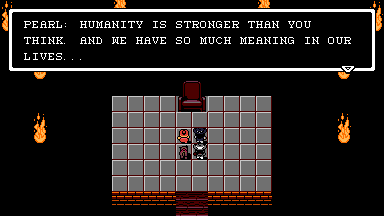
TL;DR - He can be challenging, but if you stay on top of the treat locations and build the team around him, he can be a legit carry for tougher fights and a solid member to have around.
Ryusuta febr. 2., 20:57 
(1/2)

An amazingly comprehensive guide! One thing I will say... Don't sleep on Rufus. He's actually got some really good stuff going for him. He definitely needs to get all of the dog treats to be decently effective, but he can be an excellent addition to the party if you play to his strengths.

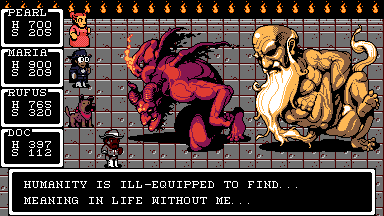
One of the best things about Rufus is that, because of his passive cover mechanic, you can use characters like Doc, Umbra, Anne, etc. to stack all of the defensive buffs on him. With 3-4 Shield spells, he'll be taking like... 20-40 damage from mid-game boss attacks, and because he is able to cover weakened allies, you can focus on only boosting and protecting him instead of everyone else.
amariyah jan. 27., 20:13 
This guide was SO helpful. I've never played a JRPG before in my life, but I really really enjoyed my time with Grimstone thanks to you! (And perhaps also thanks to finishing about 90% of the game before heals were nerfed... oop)