Moonring

Moonring

69 arvostelua
[SPOILERS] Moonring Full Guide
Tekijältä Sigh
Locations & Maps & Items & Stats & Quest & Steps & Secrets & Notes & Lore
2
2
2
   
Palkinto
Lisää suosikkeihin
Lisätty suosikkeihin
Poista suosikeista
Spoiler free section
NPC names change every run!!!
My guide uses NPC names from 1 specific run. I will change that one day lmao

- Talk to everyone (unspoken to NPCs have a "NEW" above their heads)
- Follow the roads to get to cities
- You can walk through forest tiles
- Watch the wind direction to avoid Amber fog, when you get the Amber Ward, use it
- Use Hotkeys
- Very often you can avoid combat by exiting the area or remaining stealth or Exchanging
- You can interact with inventory items by clicking on them
- You can craft potions by clicking on Empty Vials in your inventory
- Use Potions against unavoidable Rot zones / Amber / Encounters
- Take and read all books you can see (it does not count as stealing)
- Buy all lockpicks in Horrowdus and don't hesitate to enter any door
- To fast travel go to the ruins and walk while aiming at the correct monoliths (read the text to solve the location)
- Always look around for hidden walls
- Always collect the Amberward oil when going through dungeons
- While riddles may not be the most straightforward, they are solvable through items, or in level interactables like enemies or NPCs, or time
- Almost any playstyle is viable, from complete avoidance and saving to fight everything you see and use every resource you have except for boss fights
- Use followers / pets to your fullest advantage, they help immensely in fights
- This game is not bug free
- There are 2 endings

Here is another guide with a much less spoilery approach:
https://steamcommunity.com/sharedfiles/filedetails/?id=3052044823

A guide full of spoilers starts below, you have been warned :)
World Map
Download / open in browser to enlarge:
Yarrow / Moon-upon-Thoss
Map


Yarrow
You start the game here
Secret 1:
- Go to the ruined building outside the farm house, kill the Beetle, grab the note and Tiny Key in the spiderweb
- Check the farmhouse walls to find a false wall. Open chest with Tiny Key and grab the Graveyard Key
- Go North-East towards the graveyard, unlock gate with the Graveyard key, beyond is a dungeon, prepare before entering.
- Dungeon loot: Here you can find a carved stone with "Serpent's Eye" engraved on it, talk to Cellera, Zora, Nevin, and Roche whenever you get the chance, going down this route will result in the second ending.
Black Eyed Stone: This stone looks like the one your father spoke of in the note! Perhaps Cellera will know something about it

Secret 2:
When you have Roche's Bell: Ring the bell North-west by the water. Kill the Forlorn Spirit, Gain the name: Caryon


NPCs
Words
villager1
close, Serpent's eye, amber, angels, carem, follow one, dreammless, godless, five, dreams, viable, archon, dream, life, gods, work, petition, other, finally, moon-upon-thoss, beasts, neutrality, trader fees, was, god, neutral, roche


Moon-upon-Thoss (City)
Secret 1: Finding Nevin Northwest in the ruined part of the city


Secret 2: 2 Secret Doors to enter parts of the ruined city

Secret 3: The Jest Riddle: Head Northeast to the graves, initials around Hernie's grave spell "ALL"

Secret 4: Hidden wall riddle: By the graves head directly East towards the wall, hidden behind the grass is a carving "My heart hides behind a word made by walls". You can find the words scattered in different cities, they spell out "bypass", yell with y this phrase and the wall will unlock, grab the heart and permanently increase your health by 50

Secret 5:
Go all the way up North to The Keep, use a Lockpick to the doors to find a set of stairs.
Enter Beneath the Keep.

Go north, there is a secret door behind the empty chests.
Go along the walls of the fire pit to find more hidden doors.
Kill some Nomans, and grab the Cellar Note Diaries for some lore.
Head North-East to the pressure plate.
Head South-West, kill a Turret, it should drop a Large Lead key
Head South-East, unlock door with Large Lead Key, Kill turret for Shiny Oak Key.
Head North-West, unlock door with Shiny Oak Key, Kill the Tanks, there is a hidden pressure plate along the North wall.
Now the Locked door is opened.
Kill the 2 Nomans, step on Pressure Plate, pick up final diary part:
"Farewell, reader. This witless fool's flesh shall suffice for now. Our ways are not for mortal meat like you. We were here before, and shall be again."

Ask All priests about "relic" to get more information
NPCs
Words
Isobiella
chaos, moon-upon-thoss, isobiella, street of the gods, moons, petition, markets, balance
Guinevere
gives location of The Sea Cave on map, need ship to get there
Ianthe (shipwright)
You can buy a Ship Title here or get from raiding the Click Clack Hideout
Urien
tells you about Yeleba sea monster
Aurelya
secret, treasure (gives location of Fallen Tunnel)
Griffin
old
Zora (priest)
successor, gift, blessed, relics, moons, dreamless, five, endless dark, shell, archon, balance, ruined quarter, simple, chaos, caldera, noble, nothing, neutral, become archon, path, service, god, many years, the serpent's eye, predecessor
Brenai
fowl, kenner, knew, blame, amber, thrash, thrashers, dangerous, follow, hard work
Oli (priest)
keen minds, brighter, wander, sibaroon, wonders, lords of dust, devotion
Tressya (priest)
blood is all, dream, tinctures, alchemy, approve, sacrifice, lady, devote, tint, blood, disgust, skills
Chloelle (priest)
southeast, find, blades, trickster's mask, poison, relic, mistaken, wrong, entertaining, almarah, fabulous, proselytizing, blades, aesthetic, wit, finesse, brandy
Cassia (priest)
restless, sensitivity, dream, follow, dreamless, gifts, lifeforce, feel
Thalia (priest)
great forest wolf, strong, clean air, devote, strength, parley, kin-creatures, back down
Shell (Nevin - villager3):
who, nevin, knew, better, hope, farmer, roche, thief, truths, hunter, moons, amber, serpents, they, knew, alive, serpent's eye (ask about Roche in Barrow-Linn)
Archon Elwed (need Master key to unlock door?)
(he will stare at you blankly if you have nothing) (when you hold all relics you can talk to him for Ending 1)

Delera (Ruin)
Ruin clue: "One must fall"
Ruin answer: walk towards the ruin and it will spawn
Loot: Devotional Tear


Runacarr (Teleport)
- Northern Monolith: To Thossacarr
- Eastern Monolith: To Dusacarr (Barrow-Linn)
- Southern Monolith: To Resacarr (Hearthaven)
- Western Monolith: broken


The Lost Tunnels (Dungeon)
- Results of 1 run (one of the easiest dungeons)
- Enemies: Forgotten, Beetle, Archaea, Bat, Warlord,
- Traps: All types of traps
- Loot: Potions, Food, Weapons, Scraps of Ancient Metal
- Master Chest Loot: Noman's Hand Amulet


Ship

- Board and sail Boat Next to Moon-upon-Thoss
- You can get the Ship Title after defeating and looting the Click Clack Hideout or buying a Ship Title


The Sea Cave (Dungeon)
- You need a Ship Title to board the ship before you can arrive here
- Sail the ship towards this location
- Results from 1 run
- Enemies: Revenant, Corpselight, Flaming Skull, Demon, Warlord, Archaea
- Traps: Blinding gas trap, Webs, Amber
- Loot: Shiny Oak Key, Large Lead Key, Rosetta, Potions, Throwing Daggers, Advanced Cannon
- Master Chest Loot: Crystal Cube
Barrow-Linn
Map


Barrow-Linn (City)
- Secret 1: Ancestor's Crypt: hidden wall: Bael's Key

- Secret 2: Wall Clue: S has been inscribed on the wall in the North-west next to Occultist

NPCs
Words
Ulyssia
less academic, sunken edifice
Eirian (priest)
works, petitioner, lost circles, repository, divine gifts, locus box, visit, lord of dust, sibaroon, wisdom, stone circles, relic, magical, unlikely, death, ancients, parts, functioning
Says that "Sibaroons lived in the light of a "sun"" may be a clue for the spectral knight
Tristana (priest)
better, lords of dust, ancestors, respect, dust
Phelana
triangular key, funny, flimpy (she sends you to Flimpy)
Flimpy
fence, eye, guess (She sends you to Red Grove)


Barrow-Linn Ferry
- Can take Ferry to Moon-Upon-Thoss
- Free Amberward Oil in Ferry House


Dusacarr (Teleport)
- Northern monolith: To Mulacarr
- Eastern monolith: To Essacarr (The Red Grove)
- Southern monolith: To Fieracarr (Wintersholl)
- Western monolith: To Runacarr (Moon-Upon-Thoss)


The Sunken Edifice (Dungeon)
- Results from 1 run
- Enemies: Forgotten, Pale Forgotten (can go invisible), Incender (flamethrower lol), Beetle, Ghost bat, Warlord (Tanker), Turret
- Traps: Blind trap, Amber,
- Loot: Potion, Food, Weapon, Large Lead Key, Rosetta,
- Master Chest Loot: Ancient Amulet


??? 1
- 4 ghosts that are immune to Physical Damage, go invisible after a while
- Pick up Endera Herb and run


The Repository
- Need 5 locus parts for locus box
Bael's Tomb (South of The Red Grove)
The Poison Cross (East of The Red Grove)
The Enflamed Glade (North of Harrowdus)
The Venom Cube (Inside Sleathen's Wood)
The Magma Chamber (Very edge South of the Sea, need a ship)
- Reach the Repository through a stone circle
- Lot the Pale Heart from The Repository


Harrowdus
Map


Harrowdus (City)
- Secret 1: Lockpick house North-east and find a note, Find Espirus, Ask about "Literature"(they will send you to the Click Clacks Hideout)

- Secret 2: A letter 'B' is carved into the wall in the South-East near The Jest dungeon
- Secret 3: The Jest (hidden Dungeon):
Go into Grocer, along the wall is a hidden door. Go through mini maze until you reach a locked dungeon trap door.
- The Riddle: "The first is now hidden where no book should be. The second with hunters a word in the trees. The third is in ruins where four small lakes meet. The forth lies near bones in a mountain retreat. The firth rests with Herie Six feet underground, Initials west, south, east a word will be found"
- Riddle Answer:
First word: Go to Red grove, find hidden Harlequin faces, word is [Death]
Second word: Go to Wintersholl, bushes spell out the word [has]
Third word: Talk to Nuriel, go to Four Lakes, look at wall, word is [dominion]
Forth word: Go to Hearthaven, find hidden Harlequin faces, pick up note, 4th word is [over]
Fifth word: Go to Moon-Upon-Thoss, find the graves, note the Initials of the graves west, south, east of Hernie's grave, they spell the word [all]
Press y to yell by the dungeon door: Death has dominion over all (in 1 sentence)

- Enter the doors with the Jester Skull, solve mini maze, go down into Dungeon, there are a lot of traps so watch out, grab the Key and Trickster's Mask

- Enemies: Dandy, Turret, Dice, Impaler, Imp, Clapper, Death Maiden
- Boss: The Laughing One

- Sets fire around the entire stage, it throws fire a lot, do the opposite of what it says
"Stand on a square tile" = Don't stand on a square tile
"Stand on the door" = Don't stand on door
"Stand on the eye" = Don't stand on eye
"Stand on the leaf" = Don't stand on leaf
"Stand in a corner" = Don't stand in the corner
"Stand on my square" = Stand in the middle
"Don't stand on my squares" = Stand on the square tiles
- Boss Loot: Trickster's Mask
NPCs
Words
Priest1 (priest)
caldera, boons, insist, all three, phrase, help, hopeful, relic, die, the harlequin, the jest, understand, archon, do not, death's harlequins, joking, harrowdus
Apothecary
sells Witches' Solvent
Gousse (A talking Goose - villager2)
however, idiot, four others, history, our time, cataclysm, goose, henges, bael's key, supposed to say, touching the stones, intellect, honk, pitifully low, interesting, secrets (talks about the location of Bael's Key, how and where to use it, and henge lore)
Xelia
barrow-linn, although, neither, to this town, culture, why be serious, death's harlequin, triangular key, the jest, dying or killing, furtive
Petronela
exclusive, know more, fun
Espirus
Literature (they will send you to the Click Clacks Hideout)


Temple of the Rapier
- Need Great Key
- Enemies: Guardian, Spectral Blade, Turret
- Loot: Godsneedle


Issacarr (Teleport)
- Northern Monolith: To Essacarr (Red Grove)
- Eastern Monolith: To Resacarr (Hearthaven)
- Southern Monolith: Use Bael's Key on Monolith, To Nostacarr
- Western Monolith: To Fieracarr (Wintersholl)


Hasera (Ruin)
- Ruin clue: "A drunkard spied a gift for his beloved in the weeds and reached for it, but a hidden asp bit him, and though he slew it, he died"
- My clue: See symbols on the ground
- Answer:
Walk along the symbols this way: Eye>Diamond>Leaf>Hand>Snake>Sword>Skull
See = Eye, Gift = Diamond, Weeds = Leaf, Reached = Hand, Asp = Snake, Slew = Sword, Died = Skull. Draw a question mark around the pile of bones

- Loot: Devotional Tear


Heart Temple
Need rot protection / Sera-leaf Oil
- Grab heart to increase maximum health by 50


Click Clack Hideout
Need rot protection / Sera-leaf Oil
- Enemy encounter starts the moment you enter the hideout, so prepare beforehand
- Swiftblades can move more steps than you and can attack you even from a distance, good armour and remaining further away is recommended
- Breaking the lanterns creates fire
- Grand assassin is in the middle room, I suggest clearing the hallways of the little guys before fighting him
- Open chest to find Ship Title, go to Moon-upon-Thoss on the Overworld view and onto your ship :)
- Optional: There is a locked door, go around the building from the outside (you will have to walk into rot), find the hidden door in the wall to find 2 piles of bones in cages inside


Forlorn Spirit (Boss)
- Read on if you know what Roche means
- Ring the Bell near the Heart Temple South of Harrowdus
- Stand on the Tree Tile. Zoom in.

- Ring the bell to manifest the Forlorn Spirit, it hits very hard
- As it vanishes, the spirit whispers a word: "Balatoth"


Dusera (Ruin)
- West of Harrowdus
- Ruin Clue: "The lightless sky will bring him forth"
- My clues for you: It is not amber or blindness
- Ruin answer:Wait until any New Moon and the knight will spawn
- Loot: Devotional Tear
Sleathen's Wood
Map


Temple of the Mace
- Need Great key
- Enemies: Guardian, Spectral Blade, Turret
- Loot: Halterein


??? 2
- 4 ghosts that are immune to Physical Damage, go invisible after a while

- They can be killed by magical damage
- Pick up Endera Herb and run


Sleathen
- When running around you may come across Sleathen, he will be immune unless you have the right weapon
- There is a cave (The Hold, not to be confused with The Hole) southwest of Wintersholl
- Find the "Sleathen's Tooth" by completing The Hold dungeon
- Equip the Tooth in Melee and Kill Sleathen
- Take the Sleathen head and open the Garden of Lorelei
- Use an amulet to reduce fire damage, or use water
- Steadfast Hand is in Garden of Lorelei


Nostera
- Ruin clue: "Summon him with death"
- Ruin answer: Kill all enemies surrounding the knight
- Kill spectral knight that droops devotional tear


The Venom Cube
- Chest loot: Lost device fragment
- Has a lot of poison gas traps and a Noman


Lesser Ruins
- A few lesser ruins are scattered around the entire forest
- Good Scraps of Ancient Metal farm
- Common enemies: Needle construct, Turret construct, Spider construct


The Fallen Tunnel (Dungeon)
- Results of 1 run
- Enemies: Forgotten, Noman, Bat, Wormpod, Beetle,
- Loot: Food, Weapons, Potions, Scraps of Ancient Metal, Archaea
- Master Chest loot: Sigil Amulet


Temple of the Reaper
- Need Great Key
- Enemies: Guardian, spectral blade, spikes
- Loot: Harvester


Oveera
Ruins clue: "He is called by a banishing light"
My clue: Nothing to do with healing light. I used an orb of combustion on the pile of bones to have some fun and the tile is broken lol
Ruin answer: Stand on top of the bones and pour Amberward Oil into the the Amber Ward
- Loot: Devotional Tear
North of Harrowdus / South-East of Sleathen's Wood
Map


The Enflamed Glade
- Need Rot protection / Potion
- Enemy: Great gazer (can cause Deathly Sick)
- Traps: Flame trap
- Loot: Locus Device Fragment (locus part)


Soccera (Ruin)
- Ruin clue: "Speak the Sibaroon bright death"
- My clue: Read your Sibaroon notes
- Ruin answer: There are a lot of Dictionary books you can find that will mention Ancient Sibaroon words and their meaning. The word 'Ove' means "Bright" and the word 'Noss' means
"Death", yell "Ovenoss" with y to summon.


??? 3
- 4 ghosts that are immune to Physical Damage, go invisible after a while
- Pick up Endera Herb and run


??? 4
- 4 ghosts that are immune to Physical Damage, go invisible after a while
- Pick up Endera Herb and run


Crumbling Temple (Dungeon)
- Results from 2 runs
- Enemies: Forgotten, Pale forgotten (they can go invisible), Noman, Gourmand, Wolf, Beetle, Bat, Warlord, Moonbear
- Traps: Amber, Spike trap, Spore Gas Trap, Spike Trap, Amber Trap, Stun Gas Trap, Poison Gas Trap, Fire Trap (lol I got a really bad rng fun)
- Loot: Potions, Weapons, Food, Rosetta, Havenstone, Scraps of Ancient Metal, Large Lead Key
- Master Chest loot: Harrodius' Amulet


The Hole (Dungeon)
- Results from 1 runs
- Enemies: Bat, Forgotten, Pale Forgotten (can go invisible), Scarab, Slime, Warlord
- Traps: Grass, Amber, Web, Stun Trap, Spike Trap
- Loot: Weapons, Potions, Food, Large Lead Key, Shiny Oak Key
- Master Chest Loot: Old Maro's Amulet


The Hold (Dungeon)
- Results from 1 runs
- Enemies: Revenant, Scarab, Wormpod (becomes Toothworm), Archaea, Cyroden
- Traps: Fire,
- Loot: Potions, Food, Scraps of Ancient Metal, Large Lead Key
- Master Chest Loot: Tooth of Sleathen


Hearthaven
Map


Hearthaven (City)
- Secret Room 1: Walk towards the Hardware store and continue North the road, at the wall you will find a pile of bones on the floor and some notes with the word "over" for The Jest riddle

- Secret Room 2: Continue North, then East. On the northern wall is a door, follow it to some graves, continue walking east to find a hidden door

- Use a lockpick on the remaining doors to get more books
NPCs
Words
priest1 (priest)
tower of veils, wintersholl, enlightenment, no way in, relic, other, that which lies, stolen, greater plans
villager1
notional


Resacarr (Teleport)
Northern Monolith: To Issacarr (Harrowdus)
Eastern Monolith: To Fieracarr (Wintersholl)
Southern Monolith: To Thossacarr
Western Monolith: To Runacarr (Moon-upon-Thoss)


Temple of the Sword
- Need Great key
- Enemies: Guardian, Spectral Blade
- Traps: Fire traps
- Loot: Arthrona


Tower of Veils (Relic Dungeon)
Hunting down the key to the Tower of Veils Questline:
- Ask about "Red cloak" in Wintersholl
- Ask about "Triangular Key" in Barrow-Linn
- Ask about "Furtive" in Harrowdus
- Find Flimpy in Barrow-Linn, Ask about "Fence"
- Ask about "Stranger" in The Red Grove
- Ask about "Kenner" in Moon-Upon-Thoss
- Kenner is hiding 9 leagues South, 18 leagues east of a giant cross in the Calderan Sea. The cross is located North of Wintersholl. Kill Kenner and grab the Tower Keys.
Results of 1 run:
- Unlike the other dungeons where you go down, you actually go up the Tower lol so don't fall down the void / traps
- Enemies: Blindwolf, Scarab, Imp, Giant gazer, Bludgeoner, Ghost bat, Piercer, Blinding Maiden, Turret, Alchemist, Fallen petitioner, Lightwarden, Imp, Noman,
- Loot: Food, Weapons, Potions, Scrying Stone, Scraps of Ancient Metal
- Boss: Almas the Unseeing
Phase 1: Can teleport through you, Blinds (using Bow is no good i think)
When the fire goes out he becomes immune, you need to bait him to shoot flames into the altars
When he becomes invisible you need to bait him to light the altars, he will then return to the middle
- Boss Loot: All-seeing Eye


Alben's Bane (Dungeon)
- Good Rosetta farming spot
- Enemies: Revenant, Noman (drop scraps of ancient metal), Ghost bat, Wolf, Turret
- Loot: Scurying Stone, Potions, Food, Ungent of blindness
- Master Chest loot: Giant's Amulet, Sanguine Amulet
Wintersholl
Map


Wintersholl (City)
- Secret 1: Very North of the city you will find bushes spelling out the word "has" for The Jest riddle


- Secret 2: North-west you will find the letter "S" for Graveyard Door password: bypass

NPCs
Words
Hadrielle
brrr, place in the mountains, the hole
priest1 (priest)
twisted, relic, sleathen, keep well away, garden, guardian, little pride, not far, another way, dreamless, the beast, madness, hunting grounds
Lyria
north, ruin, tricksy, north (she gives location of the Four Lakes)
Jacob
weapon, pirates, disgrace, gumption, cost, rogue guardian, imbeciles, history
Gareth
recommend, city, wintersholl, red cloak, Harrowdus
Yeriel (villager1)


Fieracarr (Teleport)
- Northern Monolith: To Dusacarr (Barrow-Linn)
- Eastern Monolith: To Issacarr (Harrowdus)
- Southern Monolith: Broken
- Western Monolith: To Resacarr (Hearthaven)


The Garden of Lorelei (Relice Dungeon)
- Located North of Wintersholl, South-East of Sleathen's Wood
- Clear The Hold Dungeon for Tooth of Sleathen
- Kill Sleathen with Tooth to recieve Sleathen's Head
- Unlock the Dungeon door with Sleathen's Head
- Results of 1 run
- Enemies: Spider, Beetle, Scarab, Queen Hornet, Wilding Axeman, Rot maiden, Creeper, Greatwolf, Ripper, Archaea, Hulk, Imp,
- Traps: Web
- Loot: Food, Potions, Weapons, Lightning Bolt Amulet
- Boos Fight: 4 Briars, The Lord of Trees
Phase 1: 4 Briars, It can follow you, shoots out Thorns, can teleport, causes Stun and Bleed
Phase 2: immune until you break all connected Briars, using ranged to kill Briars reduces the amount of new Briars spawned, it will keep spawning new briars so keep breaking them
- Boss Relic Loot: Steadfast Hand


Four Lakes Meet
- Located North of Wintersholl, North East of Sleathen's Wood
- Has a lot of traps, avoid by using secret doors around the back and side of building
- The Jest questline: An inscription is scrawled on this stone. It is a single word: "Dominion"

The Red Grove
Map


The Red Grove (City)
- Secret 1: Northwest bookself is the word "Death" for The Jest riddle

- Secret 2: The letter 'A' is carved into the wall
- You can lockpick a few houses but there doesn't seem to be anything in them
NPCs
Words
Adara
blood is all, triangular key, Stranger, Kenner, aid, ship, fled, moon-upon-thoss
priest1 (priest)
blood is all, warranted, litany, lady, benefactor, candle, nourishment, necropolis, need very little, alchemists, brave its tombs, not enough, solvent, endera, only grow, stolen, brew
Auristela
blood is all, the hollows, obsessed
Drystana
blood is all, litany, handmaiden
Gommer (villager4)
blood is all, the hollows, big secret, conspiracy, talk, giant slor, Fenjaarl, cheese, guess, treasure, why, tell the world, idiot, everything (he gives the location of The Hollows)


Essacarr (Teleport)
- Northern Monolith: broken
- Eastern Monolith: broken
- Southern Monolith: To Issacarr (Harrowdus)
- Western Monolith: To Dusacarr (Barrow-Linn)


Heart Temple
- Grab heart to gain a permanent 50 health increase


The Hollows (Dungeon)
- Results of 1 run
- Enemies: Ghost bat, Warlord, Revenent, Flaming skull, Archaea
- Traps: Amber, Fire, Spike trap, Blind trap
- Loot: Potions, Food, Weapons, Rosetta, Crystal Cube
- Master Chest Loot: Amulet of Wintertree


Bael's Tomb (Dungeon)
- Many Nomans and spike traps, you can avoid quite a few by finding secret doors
- Results of 2 run
- Enemies: Revenant, Flaming Skull, Blindwolf (goes invisible), Greatwolf, Archaea, Warlord (Tank), Hulk
- Traps: Amber, Web, Stun gas trap
- Loot: Potions, Food, Rosetta, Broken Minor Construct, Weapons, Shiny Oak Key, Large Lead Key, Strange Lead Key
- Master Chest Loot: Crystal Cube


Temple of the Bow
- Need Great key
- Enemies: Guardian, Spectral Blade, Turret
- Loot: The Great Arc


The Necropolis (Relic Dungeon)
- Need Witches' Solvent to open door
- Enemies: Ghost bat, Revenant, Shimmershee, Shade spectre, Toxic Maiden, Corpselight, Spectral Blade, Moonmoth,
- Boss: Henar & Henas (Claw guy and sword guy)
If sword guy dies before Claw guy, Claw guy can revive him. So Kill Claw guy first.
Claw guy summons Thralls (Thralls don't aggro on you if they don't spot you, he can teleport away)
Sword guy can swiftblade through you (When 50% health he will heal off of your health, he is very difficult to brute force jesus)
- Some potential strategy:
Both enemies are quite slow, so you can run around and recover your shields.
Sword guy can friendly fire their friends during dash for a potential 100 damage, so consider lining them up so other hit each other.
- Boss Loot: Crimson Candle
--------------------------------------------------------------------------------------------------
- How I beat them:
Wear armour with bleed defence, sword guy hits bleed pretty hard.
Coagulated Cloak has decent bleed defence.
Melee: Obsidar 77 - 97 (great against boss, good against thrall, just a great weapon against them)
Melee: Halterein 78 - 98 damage per hit for both (great against boss, bad against thrall)
Melee: Moonblade 58 - 76 damage per hit for both (good against boss, ok against thrall)
Ranged: Arbalest + bolt 40 - 70 damage per hit for both
Rod of Shadow Bolt: 40 damage per hit for both
Throwing pins or weapons with raw magical damage on Thralls (they have physical resistance)

Obsidar can 2 hit thralls, so use it if you have it.
Coagulated Cloak, reduces bleed by 10 - 15 damage, so avoids most 1 hit poise breaks.

Always focus on Claw guy, he cannot recover his health.
Sword guy will heal himself off of you when he reaches 50% health.
Even if you manage to kill sword guy somehow, claw guy can revive him.
Claw guy also can spawn Thralls, once he is dead, they stop spawning!
So always kill Claw guy first. He takes around 20 - 25 hits in total to kill.
After claw guy is dead...
Hit Sword guy until he is 50%, this takes about 10 -15 hits.
Get as far away from him as possible to break the heal.
Do this 2 - 3 times in total. He no longer heals himself after this.
Now hit him, kite around the pools, or range him until he is dead.

Avoid getting rushed by the crowd, always attempt to kite around the group.
If you do get rushed, you can use Cross of Force (when the enemy has nothing behind them) to push them very far back. You can use wand of webbing on the Thralls to slow them, then get out of their sight to remove some of their aggro.
Remember press X to exchange before things get too bad!

Both are immune to Orb of Riddance, Orb of Venom, Orb of Negation, Orb of Imbalance, stone Puppet, stun effect (Orb of Sloth, combustion and insanity do nothing)
--------------------------------------------------------------------------------------------------
East of Red Grove
Map


Temple of the Shield
- Need Great key
- Enemies: Gurdian, spectral blades, Turret
- Loot: Shield of Warding


The Poison Cross (Lotus Part)
- Go around the back for a hidden door to avoid the poison traps
- Pick up Loctus Device Part


Meida's Hideout (Dungeon)
- Results of 2 run
- Enemies: Revenant, Corpselight, Turret
- Traps: Grass, Web
- Loot: Potion, Food, Weapon, Scraps of Ancient Metal, 7 Rosettas lol
- Master Chest Loot: Endera Herb, Crystal Cube
Open Sea / Edge of the World
Map


Heart Temple
- Located along the Eastern Edge of the Ocean
- Grab heart to gain permanent 50 health


Tulera (Ruin)
- Located along the Eastern Edge of the Ocean
- Ruin clue: "Six, four and then two will call him"
- Ruin answer: Kill the enemies in the order of their leg count. Scarab>Silverwolf>Moonbear. If you have already killed them exit the area and reenter the stage
- Loot: Devotional Tear


The Warrens (Dungeon)
- Results of 1 run
- Enemies: Warlord, Revenant, Corpselight, Ghost bat, Archaea, Imp
- Traps: Grass, Amber trap, Web
- Loot: Potions, Weapons, Jack $hit
- Master Chest Loot: Amulet of Resistance


The Magma Chamber (Locus Fragment)
- Located along the Northern Edge of the Ocean
- Protected by Borogs
- Lot's of Amber Traps, Fire splashes and Turrets
- Loot: Locus Box Fragment (need 5 in total to complete Locus Box Questline)


Yebela (Boss)
- Located South-East by some scattered islands in the Ocean
- Immune unless attacked by the Advanced Cannon
- A book talks about the Yeleba Cannon that is said to have been lost of pirates in the Calderan Sea
- Loot: The Great Key


Duera (Ruin)
- Located on an island South-West in the Ocean
- Ruin clue: "Three allies will summon him"
- Ruin answer: Summon 3 allies, for example 3 Minor Constructs
- Loot: Devotional Tear


Mulacarr (Teleport)
- Need anti Amber
- Located on an island North-West in the Ocean
- Northern Monolith: broken
- Eastern Monolith: broken
- Southern Monolith: To Dusacarr (Barrow-Linn)
- Western Monolith: To Thossacarr (island to the North-east of Mulacarr)


Roche's Cave
Don't look if you have no idea what Roche is
- Roche's Island is forever shrouded in Amber fog, so bring a bit of Amberward Oil

- Lots of free Amberward Oil at the back of the house
NPC:
- Roche: seek, amber-touched, Roche, worship, lives, move on, nothing, true names, free them, find another, tether, too old, long time, what must be done, archon, shades, learned much, gods, serpents, tharteus, guardian
- Roche will give you "Roche's Bell", you can ring it to find Forlorn Spirits and go down the Gods' True Names Questline
- There are also some books here you can pick up from the bookshelves


Nostacarr (Teleport)

- Located South-east outside the edge of the World, area can only be accessed by using Bael's Key on the Southern Monolith in Issacarr by Harrowdus and Teleporting
- Northern Monolith: To Issacarr (Harrowdus)
- Eastern Monolith: broken
- Southern Monolith: broken
- Western Monolith: broken


The Lament (Tether dungeon)
- Located South-east outside the edge of the World, area can only be accessed by using Bael's Key on the Southern Monolith in Issacarr by Harrowdus and Teleporting
- Need to collect all 5 relics and talk to Nevin and Roche before opening
- Here lies the Tether, kill it to free the world
- For a more in depth guide for this area see section "Ending 2: Sunlight..."


Thossacarr (Teleport)

- Located North-west on an island, area can only be accessed by Teleporting from Hearthaven teleport or Moon-Upon-Thoss teleport
- Northern Monolith: To Resacarr (Hearthaven)
- Eastern Monolith: To Mulacarr (Teleport South-west to thossacarr on an island)
- Southern Monolith: To Runacarr (Moon-Upon-Thoss)
- Western Monolith: broken


Mulera (Ruin)
- Located North-west on an island, area can only be accessed by Teleporting from Hearthaven teleport or Moon-Upon-Thoss teleport
- Ruin clue: "He seeks madness"
- Ruin answer: Take a madness potion
- Loot: Devotional Tear


The Repository (Relic Dungeon)
- Located North-west on an island, area can only be accessed by Teleporting from Hearthaven teleport or Moon-Upon-Thoss teleport
- Results of 1 run
- Dungeon seems to have multiple floors, option to leap into the void

- Enemies: Mage, Turret, Beetle, Tank, Torpor Maiden, Noman, Swiftblade, Warlord, Scarab
- Traps: Random Teleport pads, Fall traps (falling down a level will take quite a lot of heal and can break a lot of your potions), All types of traps tbh
- Loot: Potions, Food, Weapons, Rosetta, Mechanical Scraps, Devotional Tear, Circular Bone Key, Heavy Silver Key, Circular Maple Key, Small Maple Key, Pretty Lead Key, Shiny Stone Key, shiny Pine Key, Jewelled Copper Key

- Boss: The Lens Keeper
Phase 1: It stays in the middle, shoots out spikes from the ground, break all crystals to remove it's immunity
Phase 2: It will follow you and hits you with pulses while being immune, this time there are also Tanks shooting at you, break all crystals to remove it's immunity
- Boss Loot: Pale Heart, Scraps of Ancient Metal


The Thief's Hideout
- Proceed if you know what Kenner is


- Enemies: Swiftblade, Swordsman, Mage
- Boss: Thief of Keys
- Loot: Tower Keys (Keys to the Tower of Veils)
[Quest] Endera Herb
- Collect all the Endera Herbs, they show up as ??? on the Overworld Map
??? South-West of Temple of the Dagger
??? North_West of Sleathen's Wood
??? North of Temple of the Dagger
??? West of Barrow-Linn
Last Herb was stolen, in Meida's Hideout

- After collecting all Endera Herbs, go to The Red grove and talk to the Priest
(Bug: If you collect the Herbs before talking to her, or if you use the word "brew" before "solvent" you will never be able to get rid of the "solvent" speech option)
- She will give you The Witches' Solvent
- Use the The Witches' Solvent to unlock The Necropolis Relic Dungeon Door
- Loot the Crimson Candle
[Quest] The Jest Riddle / Harlequinn's Jest / Trickster's Mask
The riddle and the answers:
- "The first is now hidden where no book should be."
Word 1: The Red Grove has banned all books, there is a house located North-West of the city with a single book on the shelf. There is a Jester Face on the wall. It mentions the word "Death".
- "The second with hunters a word in the trees."
Word 2: Wintersholl is where hunters and wolves live together. Located at the far North of the city you will find Bushes spelling out the word "HAS".
- "The third is in ruins where four small lakes meet."
Word 3: Find Nuriel in Harrowdus and ask about the Four Lakes. Go to Four Lake Meet, look at the wall to find the word "dominion".
- "the forth lies near bones in a mountain retreat."
Word 4: When looking at Monoliths that teleport you to Hearthaven it will mention a "mountain retreat". Go to Hearthaven, find the hidden Harlequin faces North-west of the city, pick up the note near a pile of bones. The fourth word on the note reads "over".
- "The fifth rests with Henrie Six feet underground, Initials west, south, east a word will be found"
Word 5: Henrie's gravestone rests in the Moon-Upon-Thoss graveyard. Look at the graves west, south, and east of Henrie's grave, they spell out the word "ALL".

Harrowdus
- Turn East directly by the entrance, go all the way East through the doors and Mazes until you reach a locked trap door. Yell "Death has dominion over all" with y to enter.


[Quest] Hidden Heart / Moon-Upon-Thoss Graveyard Wall Riddle
Moon-Upon-Thoss
- Head to the graveyard, walk East towards the wall.
- It reads: "My heart hides behind a word made by walls"

Wall Clues:
- Harrowdus, near The Jest dungeon
A letter 'B' is carved into the wall

- Moon-Upon-Thoss: Shipyard
A letter 'Y' is carved into the wall

- Hearthaven, North of the city in the crypt
A letter 'P' is carved into the wall

- The Red Grove, near The Jest Riddle Book
A letter 'A' is carved into the wall

- Barrow-Linn, near the Middle of the city, walk West to reveal a hidden wall
A letter 'S' is carved into the wall

- Wintersholl, top North-West of the city
A letter 'S' is carved into the wall

All letters combined together make the word "BYPASS".


- Return to Moon-Upon-Thoss and yell "BYPASS" with y at the wall.
- It will open to reveal a Heart. Pick it up for a permanent 50 Health increase.
[Ending 1] "Submission" Becoming the Archon
Following this questline will directly affect the Ending you will get

Moon-Upon-thoss
- Zora (Priest) tells you about how the Dreamless can become Archon, she tells you to collect all 5 relics to earn the right to become Archon
- Ask all Priests the word "relic"


All Relics and their locations:
- All-Seeing Eye (Tower of Veils)
Need to track down the Thief of Keys Kenner by asking NPCs questions
Need Ship title / forged Ship Title
Kenner is in the North-East Ocean on an island, kill him to Tower Keys

- Trickster's Mask (Harrowdus - The Jest)
Need to solve The Jest Riddle
Answer: "Death has dominion over all"

- Pale Heart (The Repository)
Need to collect 5 Loctus Box Parts as well as Bael's Key
Bael's key: Barrow-Linn Ancestor's Crypt
Loctus Box Part 1: Bael's Tomb Dungeon (South of The Red Grove)
Loctus Box Part 2: The Poison Cross (East of The Red Grove)
Loctus Box Part 3: The Enflamed Glade (North of Harrowdus)
Loctus Box Part 4: The Venom Cube (Inside Sleathen's Wood)
Loctus Box Part 5: The Magma Chamber (Very edge South of the Sea, need a ship)

- Steadfast Hand (The Garden of Lorelei)
Need to clear The Hold dungeon to get Tooth of Sleathen
Need to Kill Sleathen in Sleathen's Wood to get Sleathen's Head

- Crimson Candle (The Necropolis)
Need to make the Witches' Solvent by finding all Endera Herbs, crafting the Solvent to melt the relic dungeon doors
Herb 1: South-West of Temple of the Dagger
Herb 2: North_West of Sleathen's Wood
Herb 3: North of Temple of the Dagger
Herb 4: West of Barrow-Linn
Herb 5: Meida's Hideout


Talk to the priest in Moon-upon-Thoss when you have collected all of the Relics:
- Talk to Archon Elwed in The Keep
[Archon Elwed stares at you feverishly, a rictus grin upon his lips.]
You have done well, Dreamless! The Gods have blessed thee!
All sins are forgiven!
Today marks the end of my reign as Archon...
and the beginning of yours!
Take the throne!
Sit! Claim your place as Archon!

- Go sit on the throne

But...something is... very wrong.
You hear...
"Our thanks, sweetmeat, for the gift of your flesh."
"We have waited long."
"And you have come to us, all ambition and pride."
"Your reward is to become our vessel."
"Our eyes."
"Our ears."
"Our avatar."
"Your mind will not survive."
"But be not afraid."
"It will be painless."
"You will barely notice."
"Goodnight, Archon."

Seated upon your throne, you note that the gods are true to their word.
You feel little pain as tendrils of mycosis begin their work.
Even as you hollowed out the infestation whispers truths.
The Cataclysm and amber were unleashed to provoke fear and devotion.
For adulation and suffering are provender for the ravenous 'Gods'.
You stare helplessly at your unwitting subjects.
And you scream in silence as your 30-year 'reign' begins.
[Ending 2] "Sunlight" Serpent's Eye / Nevin / Roche / Names of the Gods / Forlorn Spirits
Following and completing this questline will directly affect which Ending you will receive

Yarrow:
- Grab the Graveyard Key in a hidden wall in the Farmhouse
- Go North-east into the graveyard with the key, and complete the Dungeon

Moon-Upon-Thoss
- With the Black Eyed Stone in hand talk to Zora (Priest)
- Following their advice go North-West to find Nevin hiding in the corner of a broken house
- Mention his name and he will send you to find Roche in a place where Amber fog never leaves

Open Sea
- Grab a Ship Title, and sail to Roche's Cave
- Talk to Roche to get Roche's Bell, Keybind it and spam ring it everywhere
- Roche mentions that the gods can be banished by finding their Tether and speaking their true names

Gods' names and their location, you need to fight 4 pretty tanky Forlorn Spirits:
- Tarthus (given by Roche)
- Caryon (in Yarrow, by the water north-west of the farmhouse)
- Anun (In the Ocean water, near the Southern Edge of the World)
- Hezreh (Along the Northern Edge of the World, need to disembark ship to reach)
- Balatoth (South of Harrowdus by the Heart Temple)

After finding the names you must find the location of the Tether:
(Roche doesn't give you anymore clues)
- The Lament (teleport to it from Issacarr in Harrowdus to Nostacarr near the South-East Edge of the World) (this is a very difficult Tether Dungeon, I suggest bringing Legendary Weapons, followers as well as stock up on Potions. Going down the first few floors as very similar to regular Relic Dungeons)

There are multiple rooms with a fire altar in the middle.The Tether will be immune unless you yell all the correct name next to the alter to extinguish the fire. If you yell the wrong name The Tether will teleport to you, take from your health, attack you, and make you deathly sick.
(god names and location seem to be randomised each run, below is an example:)
North West: Caryon
North East: Balatoth
Middle: Anun
South East: Hezreh
South West: Tarthus

The Tether can cause all types of spells and attacks, Mad, Stun, Torpid, Blind, Flame, Deathly.
Stun is the most annoying one to deal with, so potion and Amulet up!

After completing The Tether Dungeon:
As you emerge from the gloom, you notice the Amber has gone.
And something strange and bright hangs upon the horizon.
Could this be the 'Sun' of ancient times? You wonder what else might have changed in the world!
There will no longer be a "moon cycle", and you will notice the "Date Unknown"
NPCs will have new dialogue reflecting the change happy the amber is gone, confused about the lack of dreams, and scared of the new sun, worried that it will kill them all.
Gousse will freak out, which is quite funny hehehe

Go back to Roche:
- He will be happy you have finally freed the world of the gods
- He will also be free to leave the place, and return to civilisation
[Roche smiles, deep in reverie]

Visit Archon Elwed in Moon-upon-Thoss to complete the ending:
- He will cry out of happiness that the gods are finally gone
Few will understand your achievement.
And fewer will think it a good thing... not for some time, at least.
We two shall know the truth.
Caldera will need a new leader. come. It is yours!
Everyone: hail the new Archon!
Hail Hail!
- Go sit on the throne for the End Credits.
Ending Two: "Sunlight"
The fireworks face, and at dawn a great light rises in the sky. A 'sun' like those gazed upon by the Sibaroon in centuries past. For now, the people are fearful, but with time this will pass. Caldera is now godless, dreamless, and free to forge its own destiny. To choose whether the land becomes paradise or purgatory. A new day has dawned. A day without Devotion, Gifts or Sin. And night will bring dreams of a different kind.
[Items] Quest Items / Relics / Clues / Spells
Name
Description
Advanced Cannon
An advanced cannon designed featuring spiral grooves within the barrel. These cause cannonballs to spin at a faster rate than usual, and pierce even the toughest timbers... or hides.
Black Eyed Stone
A stone with a translucent black surface resembling a reptilian eye. On the rear is a faint engraving mentioning the Serpent's eye.
Endera Herb
A rare plant used in the brewing of a powerful solvent used to break magical seals. It is said that its bitter flavour masks a powerful intoxicating effect, though its rarity is usually enough to deter such casual use.
Witches' Solvent
An acrid yellow liquid used to dissolve metallic flux. Once solely used by blacksmiths and other metalworkers, its popularity has increased amongst grave-robbers and adventurers seeking to unseal doors to forbidden places.
Tiny Key
A small iron key suitable for unlocking a small drawer or chest. A small label attached to it says: 'A key for a key.'
Tower Keys
Keys to the Tower of Veils, stolen from Hearthaven by Kenner.
Great Key
A Sibaroon device used to open weapon chaches
Pale Heart
A heart fashioned from cold alabastar, or some similar material. You can hear a faint ticking when you hold it to your ear.
Sleathen's Head
The head of a ferocious beast with a single missing tooth.
Steadfast Hand
A silver sculpture in the shape of a human hand. The fingers are peculiarly flexible, though the mechanisms enabling this are quite invisible.
Crimson Candle
A candle formed from some impenetrably hard red material. When lit it offers no light - only a faint scent of something like copper.
All-seeing Eye
A peculiar, colourless stone with something resembling an eye at its center. It is impossible to stare at for any length of time.

Spells:
- Apostasy: the cost is 1x Potion of Healing
- Apostasy: the first syllable is 'Vo'
- Apostasy: the second syllable is 'che'
- Avian: the cost is 1x Havenstone
- Avian: the first syllable is 'Cla'
- Avian: the second syllable is 'bi'
- Bounty: the cost is 1x Silverwolf Hide
- Bounty: the first syllable is 'Ge'
- Bounty: the second syllable is 'ni'
- Cool: the cost is 1x Minor Construct
- Cool: the first syllable is 'Ho'
- Cool: the second syllable is 'be'
- Dampen: the cost is 1x Panacea
- Dampen: the first syllable is 'Vo'
- Dampen: the second syllable is 'ha'
- Destruction: the cost is 1x Scrying Stone
- Destruction: the first syllable is 'Mu'
- Destruction: the second syllable is 'fu'
- Enshroud: the cost is 1x Rosetta
- Enshroud: the first syllable is 'Fu'
- Enshroud: the second syllable is 'be'
- Firewall: the cost is 1x Amberbane Ward Oil
- Firewall: the first syllable is 'No'
- Firewall: the second syllable is 'mi'
- Firewater: the cost is 1x Rosetta
- Firewater: the first syllable is 'Do'
- Firewater: the second syllable is 'go'
- Kindle: the cost is 1x Minor Construct
- Kindle: the first syllable is 'No'
- Kindle: the second syllable is 'fu'
- Mirror: the cost is 1x Amberbane Ward Oil
- Mirror: the first syllable is 'Fu'
- Mirror: the second syllable is 'mu'
- Mist: the cost is 1x Silverwolf Hide
- Mist: the first syllable is 'Hi'
- Mist: the second syllable is 'bo'
- Mutate: the cost is 1x Broken Minor Construct
- Mutate: the first syllable is 'Fe'
- Mutate: the second syllable is 'gu'
- Raise: the cost is 1x Large Potion of Healing
- Raise: the first syllable is 'Ama'
- Raise: the second syllable is 'fo'
- Shake: the cost is 1x Large Potion of Healing
- Shake: the first syllable is 'Yo'
- Shake: the second syllable is 'ne'
- Sluggish: the cost is 1x Silverwolf Hide
- Sluggish: the first syllable is 'Fu'
- Sluggish: the second syllable is 'mi'

Awesome Devices:
- Orb of Unlocking (replaces Lockpick, can unlock most doors)
- Amber Ward (when filled with Amber oil protects you from the Amber fog)


Things you can do:
- Repair "Broken Minor Construct" by clicking on it and using Scraps of Ancient Metal (you can reduce the amount of Scraps needed by having "Dust Devotion") After repairing it you will get a "Minor Construct" that will follow you on your journey hehehe


Crumbling Parchment:
I ... joke now! I finally see the humour in the great design... Oh, but it is a bitter jest!
It's not enough, ... must always be more.
[Items] Armour / Amulet / Cloak
Helmet
Name
Physical Defence
Stun Defence
Stealth
Others
Cap
2%
2%
Hat
2%
7%
Hood
2%
12%
Horned Helmet
7%
12%
-1 Tile
Physical Melee 1.2
Physical Defence 1.2
Iron Helmet
7%
26%
-1 Tile
Leather Helmet
4%
16%
Nose-guard Helmet
7%
21%
Padded Cap
2%
12%
Madness Defence 12%
Pointed Cap
2%
12%
Range Bonus 2
Physical Ranged Multiplier 1.2
Magical Ranged Multiplier 1.2
Steel Helmet
9%
-1 Tile

Armour
Name
Physical Defence
Stealth
Cotton Tunic
4%
Leather Armour
9%
-1 Tile
Chainmail Armour
12%
-2 Tile
Platemail Armour
16%
-3 Tiles

Gloves
Name
Physical Defence
Stealth
Chainmail Gloves
4%
-1 Tile
Leather Gloves
2%
Platemail Gloves
7%
-1 Tile

Greaves
Name
Physical Defence
Stealth
Chainmail Greaves
7%
-1 Tile
Leather Greaves
4%
Leggings
2%
Platemail Greaves
9%
-1 Tile
Skirt
2%

Amulets
Name
Description
Amulet of Desiccation
Anti-wet
Amulet of Immunity
Anti-venom
Amulet of Resistance
Rot, Mad, Stun, Torpor, Blindness, Bleed Flame all 14%
Amulet of Stone
Physical Defence 14%, Magical Defence 14%
Amulet of Wintertree
Flame Defence 55%
Amulet of the Cat
Blindness Defence 55%
Ancient Amulet
Torpor Defence 55%
Andera's Amulet
Perception Bonus 5
Coiled Amulet
Finesse Bonus 5
Gambler's Amulet
Luck Bonus 5
Ghostly Amulet
Stealth Modifier 5 Tiles
Giant's Amulet
Endurance Bonus 5
Harrodius' Amulet
Physical Defence 24%
Heart-shaped Amulet
todo
Lightning-bolt Amulet
Allows use of god's gift more often before exhaustion sets in
Noman's Eye Amulet
Magical Melee Multiplier 1.15, Magical Ranged Multiplier 1.15
Noman's Hand Amulet
Physical Melee Multiplier 1.15, Physical Ranged Multiplier 1.15
Old Maro's Amulet
Rot Defence 55%
Pugilist's rendent
Stun Defence 55%
Sanguine Amulet
Bleed Defence 55%
Scholar's Amulet
Intellect Bonus 5
Shield Amulet
Physical Defence Multiplier 1.3
Sigil Amulet
Magical Defence Multiplier 1.3

The Clown's Pendant
Madness Defence 55%
Vermier's Amulet
Range Bonus 5
Wolf Amulet
Strength Bonus 5

Cloak
Name
Physical
Defence
Magical
Defence
Other Effects
Waxed Cloak
Protects from rain and dampness
Reduces Wet effects
Cloack of Counterforce
todo
Woollen Cloak
2%
Stealth Modifier 1 Tile
Leather Cloak
4%
Spider Cloak
4%
4%
Velvet Cloak
4%
4%
Stealth +2 Tiles
Cloak of Inertia
4%
4%
Torpor Defence 24%
Coagulated Cloak
4%
4%
Bleed Defence 24%
Fetid Cloak
4%
4%
Rot Defence 24%
Masked Cloak
4%
4%
Blindness Defence 24%
Oiled Cloak
4%
4%
Madness Defence 24%
Scaled Cloak
4%
4%
Flame Defence 24%
[Items] Shields
Shield
Name
Shield block chance
Description
Buckler
10%
Round Shield
15%
Large Shield
20%
Stealth -1 Tiles
Heater Shield
25%
Stealth -1 Tiles
Kite Shield
30%
Need 10 Endurance, Stealth -2 Tiles
Shield of Warding
30%
Endurance Required 20, Rot Defence 4%, Madness Defence 4%, Stun Defence 4%, Torpor Defence 4%, Bleed defence 4%, Flame Defence 4%, Stealth -2 Tiles
[Items] Melee Weapons 1
Melee
Name
Hand
Required
Raw Physical Damage
Raw Magical Damage
Melee Critical Hit Chance
Stealth Modifier
Raw Bleed Effect
Attack time
Axe
2h
Strength 10
57-114
5%
-2 Tiles
30
Bright Pin
1h
Intellect 5
10-20
12-24
7.5%
-1 Tiles
15
Club
1h
30-60
2.5%
30
Courtblade
1h
Finesse 20
30-60
10%
15
Cutlass
1h
Strength 5
30-60
5%
0.3
24
Dagger
1h
27-30
10%
15
Dark Pin
1h
Intellect 20
7-14
15-30
7.5%
15
Darkblade
1h
Intellect 20
29-58
19-38
5%
24
Epee
1h
Finesse 10
28-57
10%
15
Greataxe
2h
Strength 20
62-125
5%
-2 Tiles
30
Greathammer
2h
Endurance 20
62-125
2.5%
-2 Tiles
30
Greatscythe
2h
Perception 20
62-125
10%
-2 Tiles
0.2
30
Greatsword
2h
Strength 20
62-125
5%
-2 Tiles
30
Hand-axe
1h
Strength 5
35-70
2.5%
24
Large Club
1h
Strength 15
67-135
5%
-2 Tiles
35
Mace
1h
Endurance 5
44-88
5%
-1 Tile
30
Maul
1h
Endurance 10
57-114
5%
-2 Tiles
30
Moon Blade
1h
Intellect 10
25-50
20-40
5%
-2 Tiles
24
Rapier
1h
Finesse 5
22-44
10%
15
Scythe
2h
Perception 10
45-90
10%
-2 Tiles
0.2
24
Shadow Blade
1h
Intellect 10
15-30
30-60
5%
24
Shortsword
1h
Strength 5
35-70
5%
24
Sickle
1h
Perception 5
10-20
11-22
10%
-1 Tile
0.1
15
Sword
1h
Strength 10
45-91
5%
24
[Items] Melee Weapons 2
Melee Weapons 2
Name
Handed
Required
Raw Physical Damage
Raw Magical Damage
Melee Critical Hit Chance
Stealth Modifier
Raw Bleed Effect
Attack time
Tooth of Sleathen
1h
15-30
10%
24
Godsneedle
1h
Fitnesse 30
72-80
13-15
10%
20
Halterein
2h
Endurance 30
55-110
5-10
2.5%
-2 Tiles
24
Arthrona
2h
Strength 30
70-100
14-20
5%
-3 Tiles
24
Harvester
2h
Perception 30
56-70
16-20
5%
-2 Tiles
20
Bloody Spike
1h
Finesse 20
41-82
10%
0.4
15
Brittle Dagger
1h
Finesse 30
56-70
16-20
10%
15
Eviscerator
1h
Finesse 30
16-20
4-5
10%
0.5
15
Flamemace
2h
Endurance 20
60-120
5%
-2 Tiles
Flame 0.2
30
Ghastblade
1h
Strength 5
30-60
5%
Torpor 0.15
24
Great Cutlass
1h
Strength 20
60-120
5%
0.3
24
Halftree
1h
Strength 20
60-120
10%
25
Hornetspite
1h
Intellect 30
44-49
19-22
10%
15
Lightblade
1h
Intellect 20
19-38
29-58
5%
-2 Tiles
24
Obsidar
1h
Strength 20
25-50
30-60
10%
Torpor 0.1
25
Rotpin
1h
Perception 5
7-15
7-15
10%
0.25
15
Rotten Club
1h
30-60
2.5
Rot 0.3
30
Shadow Greatsword
2h
10-20
40-80
5%
16
Sophire
1h
Endurance 20
50-100
10%
Blindness 0.2
25
The Jester's Jape
1h
Finesse 20
60-120
10%
24
Veiled Pin
1h
30-60
7.5
Blindness 0.1
15
Venemous Tooth
1h
20-40
10%
-1 Tiles
15
[Items] Ranged Weapons
Ranged
Ranged Weapons
Name
Required
Raw Physical Damage
Raw Magical Damage
Ranged Critical Hit Chance
Raw Bleed Effect
Attack time
Reload time
Arbalest
Strength 10
40-80
10%
34
50
Crossbow
Strength 5
30-60
10%
34
50
Flame-bow
Perception 10
25-50
10%
28
32
Great Arbalest
Strength 20
50-100
10%
34
50
Longbow
Perception 10
35-70
10%
28
32
Rock
5-10
10%
28
30
Shortbow
Perception 5
24-48
10%
28
32
Sightbane
Perception 25
44-88
6-12
10%
Blind 0.2
28
32
Staggerbow
Strength 30
45-90
17-35
10%
34
50
Throwing Daggers
Finesse 5
15-30
25%
0.1
28
30
Throwing Pins
Intellect 5
10-20
25-50
25%
28
30
The Great Arc
Perception 30
45-90
16-32
10%
0.2
32
32
Arrow
10%
Bolt
10%
[Items] Devices / Orbs
Name
Description
Uses
Other
Bael's Key
A device whittled from the finger-bone of some great creature, and formed into something between a wand and a key. It was created by Andre Bael, Roche's student, in order to seal and unseal certain Standing Stones shortly after the cataclysm. His reason for doing so is not clear.
inf
Cross of Force
A metal cross capable of sending a wall of force in one of the cardinal directions. Items such as these, looted from Sibaroon ruins, were used to construct Sibaroon roads, hence the orthoganal streets in Calderan towns.
3
Orb of Combustion
A purple glass orb holding a flame. Developed during the Sibaroon Era as an aid to lighting The Dancing Horse display during The Great Festival. In the wrong hands this device causes combustion and chaos.
3
Orb of Exchange
Two restless lights constantly switch places deep within this milky orb. Each Sibaroon house held one of these as a proof of trust. Uses causes the target and the holder to swap placed.
3
Orb of Imbalance
An orb filled with a circling stars. This orb simply confers the effects of Paleshroom alcohol on a specific area, bypassing the mouth. Many have debated the value of such a thing.
3
Orb of Insanity
An orb filled with a spiral pattern. Now forbidden, but in ancient times was occasionally used by the Second House of the Sibaroon to addle the mind. Whether the use was in the context of weapon or narcotic is unknown.
3
Orb of Negation
An obsidian orb with a dark center and a cold surface. These were fashioned by Fierdu sympathisers, and were used to disrupt the Three Houses during the First Uprising. Those targeted are incapable of complex thought, and are reduced to simply, bestial actions.
3
Orb of Riddance
A glass orb with a churning, iridescent center. A less sophisticated version of the transportation devices created by the Crenaya-atil, it moves the target to an 'appropriate' point nearby.
3
Orb of Sloth
A dark orb filled with thick grey fluid. An item of dark sympathetic magic originating in the farmholds of the Fierdu. Renders those affected by it extremely lethargic.
3
Raw Torpor Effect: 1
Orb of Unlocking
An orb filled with churning, coiling clockwork mechanisms. Prized by thieves both inside and outside the Three Sibaroon Houses. It is the ultimate thief's tool, allowing the user to unlock most doors.
3
Orb of Venom
A dark orb filled with green fluid. Rumoured to have originated with a Spider cult in the dark days before the First Sign. Now a favourite of Harrowdus' notorious Click-clack Boys.
3
Rod of Shadow Bolt
An ebony rod Thrumming with physical Shadow energy. Invented by Alben Bane, and considered a poor imitation of Roche's work.
8
Raw Physical Damage: 40-40
Stone Puppet
A Sibaroon puppet with articulated limbs fashioned from something like alabaster. These were outlawed during the Second Uprising, but some still remained in Fierfu hands. Their ability to force mimicry upon a target makes their use illegal in most of Caldera.
3
Wand of Moonlight
A pale wand glowing with magical Lumen energy, bane to corpses and spirits animated by Corpselight.
5
Raw Magical Damage: 40-40
Wand of Webbing
A black wand somewhat like a spider's leg with the ability to fire globs of sticky webbing. The leg is larger than the largest known spiders, suggesting that worse things exist tan the cave-crawlers adventurers have happened across.
3
[Items] Tools / Consumables
God Icons
Name
Description
Angel Icon
Icon of the Blind Angels. Burn it to clear curses from this deity and shift moon phase to the Umbral Moon.
Blood Icon
Icon of Our Lady of the Sanguine Moon. Burn it to clear curses from this deity and shift moon phase to the Sanguine Moon.
Dust Icon
Icon of the Lords of Dust. Burn it to clear curses from this deity and shift moon phase to the Ancient Moon.
Harlequin Icon
Icon of Death's Harlequin. Burn it to clear curses from this deity and shift moon phase to the Mordant Moon.
Wolf Icon
Icon of the Great Forest Wolf. Burn it to clear curses from this deity and shift moon phase to the Hunting Moon.

Consumables
Name
Description
Broken Minor Construct
A broken Sibaroon construct resembling a metallic spider. It is badly in need of repair.
Minor Construct
A Sibaroon construct resembling a metallic spider. You hear the click-clack of mechanical parts when you hold it to your ear. It may be deployed as an assistant to lonely adventurers.
Camp Kit
A flint, steel and small bedroll which can be combined with 10 Kindling to create a campsite in a suitable environment.
Crystal Cube
A brittle crystal cube which - when peered into - seems to hold infinite realities within. Use when standing over a minor dungeon entrance to warp the reality within.
Devotional Tear
A tear fallen from a devoted subject. May be used to gain a point of devotion toward any god.
Hull Patch
A flexible wooden patch used to Repair Ship-hulls. Such patches are kept moist in order to maintain their pliability and - surprisingly - reduce the threat of deterioration.
Lockpick
A piece of wire that has been bent into a complex, forked shape.
Roche's Bell
A small silver bell that reveals the departed, and draws the Gods' gaze. Similar Bells were used by the Sibaroon to commune with those who had passed on before the Cataclysm. Time has left the practice in poor repute, and most bells shattered.
Rosetta
Using a Rosetta upon an unknown device reveals its nature. Rosettas were created by the antiqquarians of Barrow-Linn. The invention and crafting of Rosetta devices was key to improving Calderan understanding of Sibaroon technology.
Scrying Stone
A dodecahedral stone fashioned from a semi-opaque rock known as Mnemoscite. Mnemoscite is known for its ability to absorb topographical information about a local area and then present this to anyone gazing into it.
Lifestone
An area-healing technology from the Sibaroon era in the form of a translucent, white, faceted stone filled with swirling motes of dark blue. Considered an invaluable tool by those who follow the Lords of dust, with their strange aversion to witchcraft and its curative potions.
Uses: 5
Bandage
A piece of clean cloth used to staunch Bleeding wounds.
Towel
A piece of delicate, absorbant parchment that can be used to dry wet things. Its fragility renders it a single use item.
Amber Ward
An iron cage holding a chunk of warm Lumoscite. Applying Amberbane Oil causes it to glow and dissipate nearby amber. Closing the shutters helps to conceal one's presence. The inventor, Tharteus Roche, died some fifty years after the Cataclysm, but his legacy lives on.
[Items] Food
Food
Name
Food
Moldy Hedgehog Meat
2
Moldy Badger Meat
5
Hedgehog Meat
5
Badger Meat
10
Moldy Berries
10
Berries
20
Brightfruit
20
Moldy Beef
25
Moldy Cat Meat
25
Moldy Dog Meat
25
Moldy Fowl Meat
25
Moldy Horse Meat
25
Moldy Mutton
25
Moldy Pork
25
Moldy Bread
30
Mushroom Jerky
40
Beef
50
Boar Meat
50
Cat Meat
50
Dog Meat
50
Fowl Meat
50
Horse Meat
50
Hunk of Bread
50
Moldy Mushroom Pie
50
Mutton
50
Mushroom Pie
100
Venison
100


[Items] Potions / Alchemy
Alchemy
Positive Potion Name
Effect
Acitra Nectar
Anti Stunned
Antidote
Anti Poison
Arnaut's Panacea
cure all
Bitterleaf Brew
anti amber mad
Blackwater Draft
anti Torpor
Sera-leaf Oil
anti Rot
Sightsalve
anti Blindness
Silent salve
anti Deafness
Attuner
anti Negation, you can use god's gift again
Large Potion of Healing
450 heal
Potion of Healing
225 Heal
Staria Root
replenish Energy, brewing creates Staria Draft
Staria Draft
replenishes more Energy than Staria Root

Negative Potion Name
Effect
Potion of Madness
causes Madness
Potion of Poison
causes Poison
Potion of Silence
causes Deafness
Potion of Stunning
causes Stunned
Potion of Torpor
causes Torpor
Potion of Phosphor
causes Fire
Spore-water
causes Rot
Ungent of Blindess
causes Blindness

Resource Name
Purpose
Water
Empty Flask
Phial of Blood
Angel's-pod
creates Potion of Phosphor
Bitter-root
creates Ungent of Blindness
Black-oil
creates Antidote
Blood-wort
creates Spore-water
Bone-berry
creates Large Potion of Healing
Brittle-seed
creates Potion of Healing
Curse-berry
creates Acitra Nectar
Curse-nectar
creates Arnaut's Pancea
Dream-berry
creates Potion of Poison
Dreams-sap
creates Potion of Madness
Grave-sap
creates Silentsalve
Grave-nectar
creates Sera-leaf Oil
Harrow-seed
creates Attuner
Hog-needle
creates Amberbane Ward Oil
Holy-oil
creates Blackwater Draft
Moon-nectar
creates Potion of Poison
Sera Leaf
creates Sera-leaf Oil
Holy-cap
creates Potion of Poison
Moon-cap
creates Potion of Silence
Curse-wort
creates Potion of Stunning
Silver-root
creates Sightsalve
Widow's-berry
creates Bitterleaf Brew
Black-pod
creates Water
Grave-leaf
creates Staria Draft
Amberbane Ward Oil
used to refill Ember Ward, commonly found in dungeons
Thrasher Glands
creates Amberbane Ward Oil

Trade Items
Trade Item
Description
Sack of Barley
A bundle of barley. Of no nutritional use by itself, but a staple stock of traders throughout Caldera.
Cord of Wood
A cord of wood. Of no practical use to the adventurer, but a common trade item.
Iron Ingots
An ingot of raw iron prized by smiths throughout Caldera, and a common trade item.
Kindling
A thin, dry stick. Little use alone, but if enough have been gathered they may be combined with a Camping Kit and used to start a campfire.
Scraps of Ancient Metal
A collection of broken mechanical parts from some device or other. Useful if one wishes to repair a Sibaroon machine.
Scraps of Chitin
Hard, shiny carapaces are of little use to an adventurer, but fetch a fair price in most towns.
Scraps of Fur
Small scraps of fur are of little value by themselves, butt tailors craft them into warm cloaks useful in colder climes.
Scraps of Hide
Tatters of skin with little fur attached, often used for making leather straps, and thus prized as a trade item.
Silverwolf Hide
The hide of a Silverwolf. It is highly prized by most of Calderan society.
Thrasher Gland
The gland of a Thrasher Eel plucked from the depths. highly valued for the Amberbane Oil that may be extracted from it.
[Notes] Books 1
Aesthetes (Beri-na-haldus)
(Beauty-banishes-darkness) is a study of the great Sibaroon House of artists and aesthetes. None of their work remains. The book leaves you feeling sad.

Almas the Unseeing (Agrators)
Lists the keepers of the Archon's Relics. In particular, you note that 'Almas the Unseeing' is literally blind, and lives in fear of the coming of a silent assassin.

Amber (Roche 1)
Contains the quote: 'If a machine for war were designed to break down a civilisation, while leaving the meat of man untouched, it would be Amber.'

Amber (Roche 2)
Contains the quote: 'Amber breeds fear and madness in those who encounter it, and provides justification for the most terrible of acts.'

Amber (Amber Play)
Details the use of Amber-madness in producing a manic state where the afflicted gains superhuman speed while insane. It sounds unsettling.

Amber and Roche
You find a treatise on the subject of Amber, and the role that Tharteus Roche played in enabling Calderans to survive during the Endless Dark.

Amberbane
A book on the shelf describes the methods used to harvest Amberbane Oil from the Thrash, vicious, eel-like creatures living deep in the Calderan Sea.

Amberbane
One book describes the history of the Lamplighters, and how it is one of the highest-paid jobs in Caldera, as only the maintenance of Amberbane lamps keep the lethal fog at bay.

Ancestors (Ancestors)
Details the Barrow-Linn people's worship of their ancient dead. The book also postulates that a great treasure is hidden in their ossuary.

Ancient Treasures (Ancient Treasures)
Speculates on the existence of a Great Key capable of opening ancient Sibaroon treasure caches. The key was allegedly lost to a great sea-monster.

Angels (Sighting)
A first-hand account of someone who saw the Angels in person, and was struck blind. The book instils you with both aw and terror in equal measure.

Archon
You find a pamphlet with a picture of a snake's eye on the front. Inside is a scathing article om the Archon, which even goes as far as suggesting he is not human.

Archons (Archon Carys)
Details the life of the second Archon in the year 71E.

Archons (Archon Elwed)
Details the life of the current Archon in the year 129E

Archons (Archon Arien)
Details the life of the first Archon in the year 22E.

Assasins
This book is missing most of it's pages. Those that remain are bloodied and seem to be on the topic of people believed to have been slain by Harrowdus' assassins.

Bawd (The Bawd of the Barrows)
Tells the tale of a blind gigolo in the first century after the Cataclysm. It is hard to tell whether the author admired or abhorred them.

Cataclysm (Cataclysm)
Is an attempt to document the appearance of the great Caldera that swallowed the heart of the Sibaroon Empire.

Click-clacks
A book discusses a criminal gang known as the 'Click-clacks' in Harrowdus. You are left feeling deeply uneasy.

Corn?
A book with a blank cover initially seems to be a collection of erotic short stories. On second reading, you realise that it is a farming manual written in a florid style.

Donations (The Gift of Giving)
Discusses economics, and the value of donation in boosting a town's economic level

Four Lake Meet
A book here contains a damaged map. You can vaguely make out a location where four lakes meet. It seems to be of some significance.

Henges
One book describes the workings of the ancient stone circles, stating that 'Both entry and exit points must be known' and that 'the direction of entering their center' is key to their use.

Heresies (Heresies)
Lists the various controversial statements made by notable figures over the years. The author's name is Carem. Your guardian.

Heresies (The Tether)
Seems controversial, or even heretical. Its central premise is that all of humanity is unknowingly enslaved by a single malevolent, alien intelligence.

Heretic
You find a book speaking of an area beneath the city once used for storage where a heretic was imprisoned a decade or more ago. There are no other records of this individual.

Miners
One book on the Lumoscite stone used in lamps lists the dangers inherent in mining the substance: rockfalls, amber-pockets and even Forgotten-changed members of former mining teams.

Moons (Our Friends in the Sky)
Seems to be a study of each moon's individual traits. For some reason it fills you with dread.

Mushrooms
This shelf seems to be entirely filled with books on the many ways one might prepare Caldera's principal crop. It warns against letting spores touch anything dead.

Newborns
The tome 'Newborns' gives suggestions on how best to name the pale amnesiacs who wander into towns to replenish those who have died.

Newborns (Why we forget)
It notes how in ages past, people grew from children into adulthood rather than emerging mindless and fully formed from unknown sources.

Paragons (Paragons)
Tells of an ancient 'Knight' class whose piety and skill in heavily armoured combat made them folk heroes. The fact that there are none left is not discussed.

Reason (Reason)
Discusses the merits of rhetoric and comparative morality: 'A thief who steals to east is not the same as a thief who steals for profit.'

Roche's Notes
The shelf contains Roche's notes on the gods, the Tether allowing them to feed on Caldera, and various complex diagrams.

Sea-Monster (Yeleba)
Speaks of an ancient sea-serpent below the waves of Caldera. It also mentions a great ship-mounted cannon. The fact that you have never heard of it suggests it is deadly, or non-existent.

Signs (Signs)
Explores the 'First and Second Signs': the first being the arrival of the moons to a lightless world, and the second being the Dreams of the Gods caldera now worships.

Sin (Sin)
Which describes ways to counter the gods' wrath by burning holy icons. The book notes that these are costly and only Moon-upon-Thoss keeps a regular stock.

Sleathen (Sleathen)
Tells of the fabled 'Beast of the Woods'. Allegedly, he is also the 'Champion of the Great Forest Wolf' and unkillable with conventional weapons.

Statesmen (Thera-nyotuth)
(Words-become-weapons) is a history of the ruthless Statesman Houses of the Sibaroon.

The Jest (The Jest)
Hints that the entrance to this legendary dungeon is hidden in the back-room of a shop in Harrowdus.

The Old ways (The old ways)
Speaks of hidden wisdom wielded long before the arrival of any gods. It suggests that its power lies in words spoken, dances, and objects held, but that its costs are significant.

Torpor (The Joys of Torpor)
A seemingly nonsensical treatise on the benefits of being forced to do everything twice as slowly. It's advice seems counter-intuitive at best.

Toymakers (Crenaya-atil)
(Toymakers) Details the history of the House of Sibaroon craftsmen whose number included the legendary Tharteus Roche.

Trickery (A Bow to the Trickster)
Suggests ways in which one may serve Death's Harlequin with increasingly murderous levels of piety. Satire, perhaps? Who can say?

Uprising (Fierdu)
('The Forest People' in Sibaroon) discusses the two great agrarian rebellions, the second of which occurred during the first days after the Cataclysm.

Wintersholl Trees (Teasing Topiary)
Tells of how certain Wintersholl's bushes have been plated to spell out a three-letter word. The fact that the word is apparently not rude is surprising.

Witch' Solvent (The Last Potion)
Is dedicated to uncovering the secret of the Witches' Solvent recipe. Apparently there are only five locations in all of Caldera where the required herb will grow.

Yeleba Cannon (Fire!)
Describes a powerful cannon designed to kill a terrifying sea creature named Yeleba'. It is thought to have been lost to pirates in the Calderan Sea many years ago.
[Notes] Books 2
Cellar Notes:
Day 8. The level of security here is ludicrous. It takes a full hour to leave safely. All for one prisoner. How much risk can they pose, locked up in here like this?

Day 22. They are pacing again. Pacing and muttering. They repeatedly walk the same square. West, South, East North. four steps, anticlockwise. But... I cannot hear their words.

Day 64. I finally heard them clearly. The words are in Sibaroon. Now I know why they need neither food nor drinks. It is magic, but not from the gods.

Day 109. The prisoner moves in a different manner, with a handful of dust. and the words have changed. I must listen intently if I wish to learn more. But I must be careful.

Day 109. I can see why the Archon doesn't want anyone to know of this. Magic works! I went to the forest. I moved as the prisoner did, and shouted the Sibaroon for wind: 'Ferr'. The wind... it changed!

Day 220. I know the words: I spoke them, and moved as they did with a handful of dust. My vision swam and I saw... I saw the world from inside the cell for a moment. What does this mean?

Day 422. Something is wring with me. I can feel the prisoner's eyes behind my own, even when I close them. And... their voice. Oh, Angels help me. What have I... The note stops, abruptly.

Dictionary 1 (Ancient Sibaroon 1)
'Hass' means 'Hidden'

Dictionary 2 (Ancient Sibaroon 2)
'Tul' means 'Sequence' or 'Order'

Dictionary 3 (Ancient Sibaroon 3)
'Mul' means 'Madness'

Dictionary 4 (Ancient Sibaroon 4)
'Socc' means 'Speak' or 'Shout'

Dictionary 5 (Ancient Sibaroon 5)
'Noss' means 'Death'

Dictionary 6 (Ancient Sibaroon 6)
'Era' means 'Fortress'

Dictionary 7 (Ancient Sibaroon 7)
'Del' means 'Battle' or 'Fight'

Dictionary 8 (Ancient Sibaroon 8)
'Iss' means 'Fire'

Dictionary 9 (Ancient Sibaroon 9)
'Dus' means 'Darkness'

Dictionary 10 (Ancient Sibaroon 10)
'Du' means 'People'

Dictionary 11 (Ancient Sibaroon 11)
'Ove' means 'Bright' or 'Open'
[Notes] By Location & Tags 1
Barrow-Linn
Sunken Edifice: Ulyssia: There's some kind of run in the southwestern part of Barrow-Linn.
The Pale Heart: The Pale Heart lies within the Repository.
The Pale Heart: The Repository can only be reached by using Stone Circles.
Locus Box: Locus Box parts can be found in Greater Ruins which can be seen from afar.
Locus Box: A Locus Box may be fashioned from Locus Box parts.
Locus Box: Working Locus boxes cannot be found in Caldera.
Locus Box: A Locus Box allows travelling to a stone circle one has not seen. But working Locus Boxes are rare.
Wall clue: An 'S' has been inscribed upon the wall
The Tower of Veils: Go to The Red Grove and ask about a stranger who may be trying to sell the keys to The Tower of Veils.
The Tower of Veils: Find Flimpy iin Barrow-Linn and about someone trying to fence stolen goods

Four Lake Meet
Strange Words: An inscription is scrawled on this stone. It is a single word: "Dominion"

Harrowdus
The Jest: It is some kind of trial filled with traps
The Jest: The Trickster's Mask is hidden somewhere called The Jest
The Jest: The entrance to The Jest is locked by a ward
The Jest: The word to The Jest can be broken by saying a phrase in its presence. Your only clue is this riddle: "the first is now hidden where no book should be. The second with hunters a word in the trees. The third is in ruins where four lakes meet. The fourth lies near bones in a mountain retreat. The fifth rests with Henrie Six feet underground, Initials west, south, east a word will be found."
Wall clue: A letter 'B' is carved into the wall
Forged Ship Deed: The Click-Clack Gang have the forged ship deed. They probably killed the forger,
Fake Ship Title: You found a crumpled note! "... delivered the ship title... best forgery I ever... left it with Espirus. Ask them about literature."
Party Location: You've been invited to a party, seemingly in the middle of nowhere
Henges: Gousse: Each stone within a henge may be touched.
Henges: Gousse: Henges link to other henges in Caldera.
Bael's Key: Bael warded a henge-stone, blocking access to it.
Bael's Key: A key to a locked henge stone may be hidden somewhere in the Ancestors ossuary in Barrow-Linn
The Tower of Veils: The thief seems to have gone to Barrow-Linn. Ask about a triangular key there.

Hearthaven
The Tower of Veils: The Tower is southwest of Hearthaven
The Tower of Veil: If you want the keys to the Tower of Veils, ask about a red cloak in Wintersholl.
Wall Clue: Someone carved the letter 'P' into this wall
All-Seeing Eye: This relic is locked in the Tower of Veils
Yeleba: Yeleba can only be killed with a special cannon.
Strange Words: You found a note!

Moon-upon-Thoss
The Red Grove: The Red Grove is in the hills ,far to the northwest.
The Steadfast Hand: The secrets of the Steadfast Hand are in Wintersholl, to the northeast.
Barrow-Linn: Barrow-Linn is over the sea to the southwest.
The Lady of the Sanguine Moon: The followers of the Lady subsist on blood.
Roche: Nevin believes roche lives somewhere wreathed in unmoving Amber.
Roche: Roche knows some great 'secret'.
Hearthaven: Hearthaven, is in the moutain, far to the north.
Archon: Dreamless may become Archon by collecting the Five Relics and returning them to the Priest of Balance in Moon-Upon-Thoss.
cave: A villager in Moon-upon-Thoss says there's a cave to the southwest only accessible by sea.
The Trickster's Mask: The secrets of the Trickster's Mask are to be found in the souteast of Caldera.
Sleathen: There is a beast named 'Sleaten' who lives in the forest.
The Crimson Candle: The Crimson Candle's secrets are held in the Red Grove.
Roche: Ask about Roche in Barrow-Linn.
Harrowdus: Harrowdus is far to the southeast.
Mon-Upon-Thoss is known for the Street of the Gods and the main market, selling high quality items.
Misc: The villager in Moon-upon-Thoss marked the sea-cave on your map.
The All-seeing Eye: The All-seeing Eye's secrets are held in Hearthaven.
Five Relics: More may be learned about each god's Relic by saying the word 'relic' to each preiest in Moon-upon-Thoss.
Roche: Roche should be long dead, but remains alive.
Caldera: The world is known as Caldera.
The Pale Heart: Finding the Pale Heart's secrets requires a ferry ride southwest.
Wintersholl: Wintersholl is hidden in the forests of the northeast.
Caldera: Caldera's period of lightlessness is known as the Endless Dark.
The Serpent's Eye: Nevin, the former priest of Balance may know more about the stone and its message. They live somewhere in the Ruined Quarter of Moon-upon-Thoss. Speaking the old priest's name may sooth their addled mind.
The Serpent's Eye: Nevin may be in the Ruined Quarter of Moon-upon-Thoss in the northwest of the city.
Fallen Tunnel: There are rumours of a cave on the road between Moon-upon-Thoss and Wi


The Red Grove
The hollows: Gommer thinks they know of a cave entrance in the mountains to the south. This alone appears to be a fact.
The Red Grove: The Red Grove has no books... or should not, at least.
Tower of Veils: The tief of keys is called kenner.
Tower of Veils: Ask about Kenner is Moon-upon-Thoss.
Tower of Veils: The thief of the keys is probbaly hding on an island in the Calderan Sea.
The Litany: The litany of The Red Grive is 'Blood is All'. This is how Handmaidens are addressed.
The Red Grove: The litany of the Red Grove must be spoken to gain audience with the Handmaiden.
The Crimson Candle: The Candle is found within the Necropolis.
The Necropolis: The Necropolis is southeast of The Red Grove.
The Necropolis: Endera herbs can be found at the center of areas marked by four standing stones.
The Hollows: Ask a sighing villager about the Hollows.
The Necropolis: The Handmaiden will create the solvent once five Endera herbs are found.
The Necropolis: A stolen Endera plant may be found in the mountains to the southeast of The Red grove.
The Necropolis: The entrance to the Necropolis requires a special solvent.
The Red Grove: The Litany is in two parts. Only the first needs to be recited.


Wintersholl
Steadfast Hand: The Steadfast Hand is in the Garden of Lorelei.
Four Lakes: If you go north of Wintersholl ,and hug the east coast, you'll find a ruin surrounded by four lakes.
Four Lakes: The ruin seem to be of some significance to the denizens of Harrowdus.
Four Lakes: There may be some sort of trick or joke to getting into the ruin.
The Hole: You heard about some cave or tomb west of Wintersholl.
Wintersholl Bushes: The bushes in the trees of Wintersholl seem to mean something
[Notes] By Location & Tags 2
Yarrow
Amber: Amber is a thick mist which covers parts of the Calderan countryside and causes madness. It also hides terrible creatures.
Moon-upon-Thoss: Moon-upon-Thoss is the capital of Caldera. Perhaps the priests there knew something about the Serpent's Eye Stone.
The Serpent's Eye: Your guardian, Carem, hid a stone with an engraving. The priests of Moon-Upon-Thoss may know something about the Serpent's Eye.
Gods: The gods are Our Lady of the Sanguine Moon, Death's Harlequin, the Lords of Dust, the Great wForest Wolf, and the Blind Angels.
Gods: There are five gods.
Dreams: The Dreamless are rare, but all Calderan Archons are dreamless.
Archon: Caldera's leader, the Archon, is very old, and Moon-upon-Thoss is looking for new candidates.
Dreams: With few exceptions, each Calderan citizen receives a dream in early adulthood.
Dreams: The Dreamless are rare.
Archon: Archons are expected to retain their neutrality, remaining unallied to any one god.
Archon: The Archon's successor is expected to be chosen fro among the Dreamless soon.
Yarrow Shed Note: You found a note! The graveyard key is in the locked chest behind the farmhouse's false wall. Beyond the graves is a cave. I hid a carved stone within it. Find the stone. Find others who recognise its sign, and may the gods and my belived be forever blind. Signed: your loving guardian, Carem..

Roche TODO

forlorn spirit swamp location

tear 1
Overworld Traders - Random Encounter todo
Work in progress


Sometimes you may randomly encounter traders in the overworld view, talking to them allows you to purchase items from them. Traders may also be attacked by bandits, if you save them, you will receive Gold as a reward as well as increase the standing with one of the few cities.

Potential items sold by each type of trader:

Occultist
Rosetta
Harlequin Icon
Angel Icon
Dust Icon
Wolf Icon

Apothecary
Moon-rot
Brittle-seed
Holy-cap
Amberbane Ward Oil
Attuner
Potion of Healing
Antidote
Large Potion of Healing

Ironmonger
Silverwolf Hide
Thrasher Gland

Armourer
Buckler
Cotton Tunic
Leather Gloves
Nose-guard Helmet
Padded Cap
Enemies and Loot todo
Work in progress

Wilding Axeman
40 Guineas

Borog

Swordman
38-50 Guineas

Archer
8 Arrow

Spider construct
scrap of ancient metal

Needle construct
scrap of ancient metal

Ancient ruin chest
Unknown Device
City NPC traders todo
work in progress

In the game it says that donating money to increases prosperity increases the quality of items sold in that city, however I did not notice any significant change.

Killing trader NPCs seems to kill them forever

Hearthaven
Armourer
Buckler
Large Shield
Woolen cloak
Leather Cloak
Waxed Cloak
Hood
Cotton Tunic
Heater Shield
Skirt
Hat
Leggings
Leather Gloves
Nose-guard Helmet
Leather Greaves
Chainmail Gloves
Leather Armour
Iron Helmet
Steel Helmet
Padded Cap
Chainmail Greaves
Pointed Cap
Platemail Greaves
Chainmail Armour
Platemail Gloves
Velvet Cloak
Spider's Cloak


Moon-upon-Thoss
Armourer
Buckler
Round Shield
Hat
Heater Shield
Cap
Hood
Leather Gloves
Cotton Tunic
Waxed Cloak
Leather Cloak
Skirt
Kite Shield
Leggings
Leather Helmey
Nose-guard Helmet
Leather Armour
Steel Helmet
Chainmail Greaves
Padded Cap
Pointed Cap
Iron Helmet
Platemail Gloves
Chainmail Armour
Platemail Armour
Platemail Greaves
Cloak of Inertia
Oiled Cloak
Coagulated Cloak

Weaponsmith
todo
Moon Blade
Greatsword
Arbalest
Venemous Tooth
Great Arbalest
Greatscythe
Courtblade
Eviscerator


The Red Grove
Armourer
Masked Cloak

Weaponsmith


Barrow-Linn
Armourer
Fetid Cloak
Scaled Cloak

Weaponsmith
Rotpin


Wintersholl
Armourer
Horned Helmet

Weaponsmith

Sources / Community / Information / Notes / TODOs
[1]
https://steamcommunity.com/sharedfiles/filedetails/?id=3046838502
https://steamcommunity.com/sharedfiles/filedetails/?id=3045083965
https://steamcommunity.com/sharedfiles/filedetails/?id=3046002753
https://steamcommunity.com/sharedfiles/filedetails/?id=3276011930
[2] Official Reddit Page: https://www.reddit.com/r/Moonring/
[3] Official Moonring Merch Store: https://robaroba.gg/collections/moonring
[4] Official Fluttermind Discord Server: https://discord.com/invite/zrPbXN6
[5] Official Moonring Fandom Wiki: https://moonring.fandom.com/wiki/Moonring_Wiki
There is basically no information on the wiki page itself as of 24.06.2024, if I have time in the future I may add to it. Feel free to take whatever you need from here and add it to the wiki if you want. Happy travels.
[6] Official Moonring on itch.io: https://dene.itch.io/moonring


TODOs (if i have time + if i feel like it cause I wanna play minecraft):
- readability improvements to maps, might greyscale + place coloured custom markers, also add a numbering system as categorisation
- add maps of all major cities (probably need to make them myself), maybe even make an interactable map on the wiki
- all notes and where they are found + I hope to find a command for this to ensure nothing is missed
- the #number on the notes depend on the order you find them in and have no other significance, so is not helpful to check if i missed one
- list of all NPCs, their locations, their full dialogue (their names change every run, might move all this to another guide to not make this guide a block of nightmare)
- all aggressive mobs and their loot table
- a comprehensive boss guide (would be better if someone else did this on their own guide)
- add to and finish the console command guide, need to see if there is an easier way

I welcome any corrections and suggestions.
I will also be improving the formatting gradually for better readability.
16 kommenttia
Sigh  [tekijä] 15.3. klo 13.30 
@Limbrogger ty! added!
Limbrogger 15.3. klo 13.13 
The letter Y can be found on a wall in Moon-Upon-Thoss's shipyard
Sigh  [tekijä] 25.10.2024 klo 5.55 
Thank you both. Added a little note in the boss section to clarify the name situation.
miran 24.10.2024 klo 20.34 
I would agree with K0rp0 - on my run, Ending 2 final dungeon, the names seemed randomized. Fortunately, you can just keep spamming yells, but I couldn't make much sense of why one was supposed to go one place and not another. For that matter, I didn't keep track of which name I got where and couldn't find that info in my notes - otherwise, it might have made more sense.

I didn't use Arnaut's Panacea throughout the entire game, which was great because I chugged about 7 during that final battle to avoid losing health instead.
Sigh  [tekijä] 25.9.2024 klo 23.45 
@K0rp0 Thank you for the info! I will check it out sometime this week!
K0rp0 25.9.2024 klo 23.16 
Thanks for the great guide!

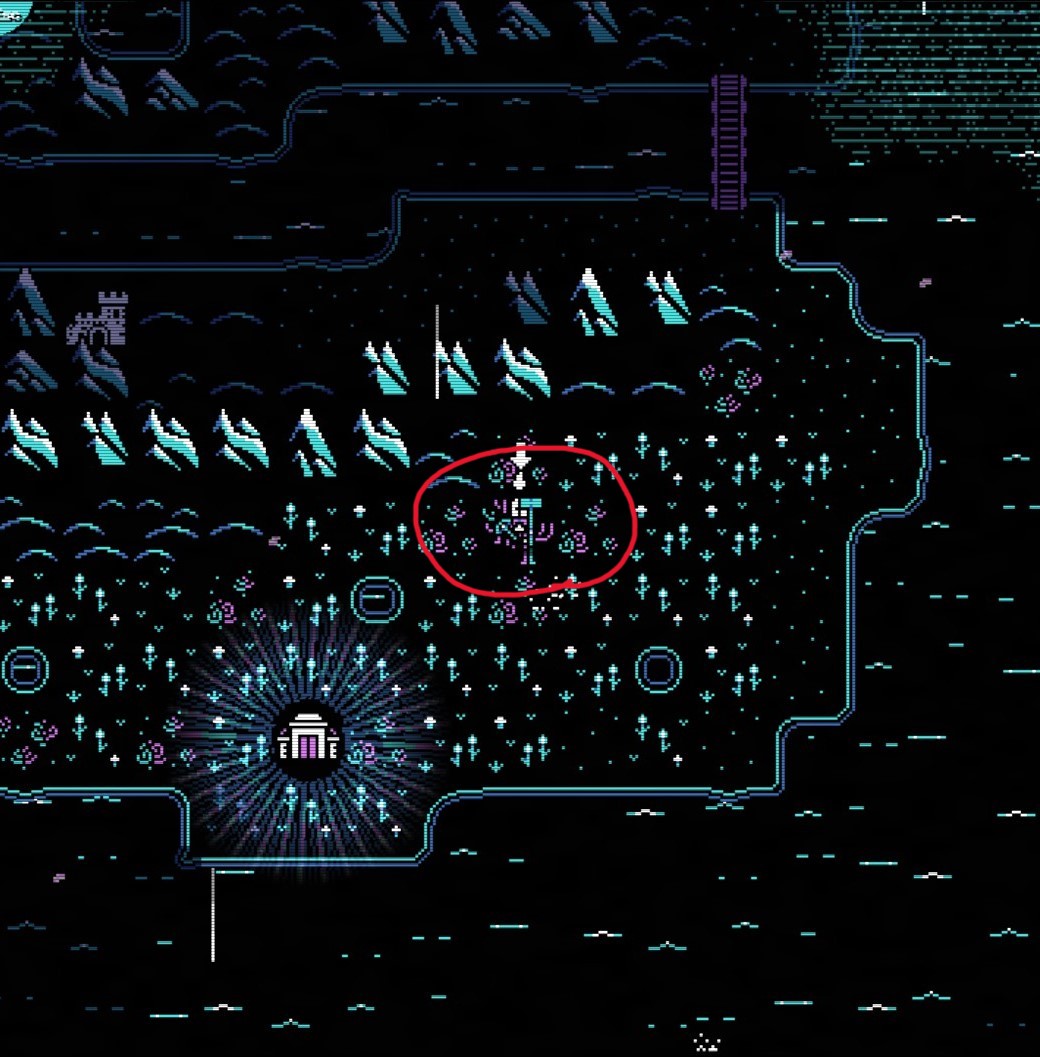
There seems to be a mistake in the Ending 2 section. It seems like there is some randomization involved which god is in what section, at least the given direction for where to shout names didn't work for me.

I don't know if the assignment of gods' names to gods is also random, in my playthrough they were:
Dust - Anun
Trickster - Caryon
Lady - Balatoth
Wolf - Tarthus
Angel - Hezreh


Oddly enough I could not find this information anywhere (mapping of names to gods), so I hope you can add it - if it was the same for you.

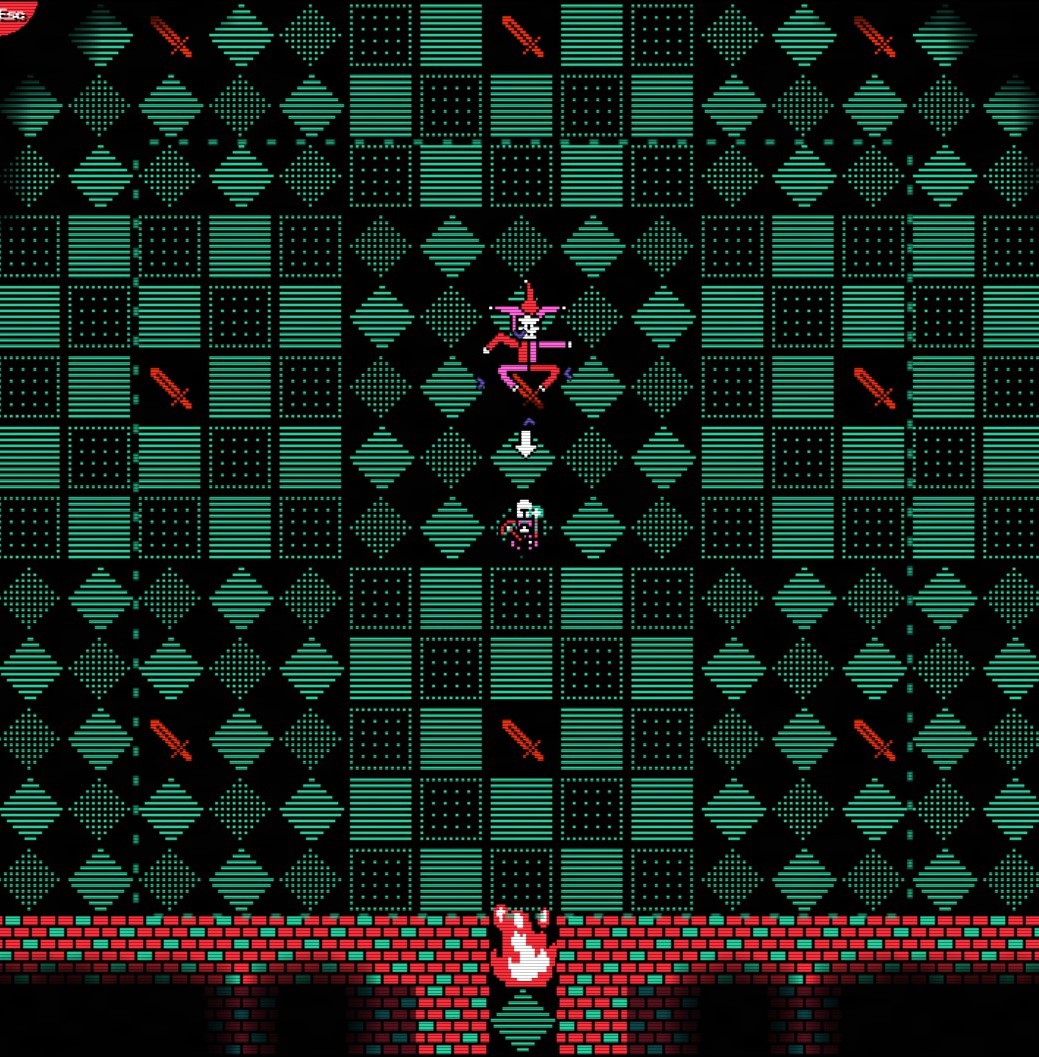
Also that boss fight sucks. :bunnyinablanket:
宅人居士 19.9.2024 klo 5.06 
Awesome! Thanks!:steamthumbsup:
Sigh  [tekijä] 31.8.2024 klo 3.07 
@jc64730 I bought the coagulated cloak at the armourer in Moon-upon-Thoss, don’t exactly remember how i got the obsidar.
jc64730 31.8.2024 klo 0.37 
Where do I find the coagulated cloak and obsidar?
Sigh  [tekijä] 20.8.2024 klo 6.56 
@Nell Thank you for the info! Updating it now :grwheart: