Ratopia
87 人が評価
Basic and Advanced Guide
作者: Roundabout
I wrote this before the game had in-game tutorials like it does now, hence going over basic information. I've also approached it several times by adding new sections without a complete rewrite, so pardon me if a few things get said more than once and some sections lack screencaps. This remains an evolving work in progress of a guide.
6
3
6
   
アワード
お気に入り
お気に入り
お気に入りから削除
Welcome to the world of Ratopia! I'm Professor Queek. What's your name? (Getting Started)
When it comes to your starting Character trait, Prestigious Scholar is the most tempting for that XP gain and the quick start by having extra Research so if you're not doing it you need to build the Lab sooner for steady research points faster. But if you get yourself into trouble and your rats start dropping dead then them leveling up faster won't matter, you're probably replacing them as fast as they arrive to your post-apocalyptic nightmare.

If you're doing a hard run or just still learning the game and have already failed a few times consider City's Idol for your next restart, the bonus happiness keeps the rats from rioting or just dropping dead if they have that trait where they die when they're unhappy and thus delays the doomcycle where you end up restarting plus the better new Migrants can help you get back on track faster.

Natural-Born Warrior is worth it too because you will wind up on the front lines quite a lot in most playthroughs.

Agile Explorer helps you micromanage the work by doing the grunt labor faster and more effectively, so when your rats aren't distracted hauling dirt from your shaft mining exploration you can keep them concentrated in one place where they're safe and doing more industry-related work.

The only one I consider really less advantageous is Prodigal Noble on easy since it doesn't give that big a boost compared to the others unless you're really confident in your playstyle as an advanced player and want to use trade to compensate for the lack of stuff you're doing in person. If you're playing hard its a LOT more useful since you only start with 5k gold which means getting to the tax office fast and taking 20% of your Ratizens income every day is less of a priority and gives you more breathing room to get to mining gold and minting it into coin.
Quick Survival
Wanna get right to it with minimal mistakes early without reading this entire guide? Here you go. I'll cover some of these in more detail later.

1) Be picky with immigrants. You're not trying to speedrun your growth except in Hard. Check their traits, try to get a double positive. Early on you'll probably pass most rats a lot and have short tax intervals, so rats that get unhappy passing by you and when they pay their taxes are pretty bad. Later in the game when trying tor happiness achievements that blanket -3 Happiness or unhappy thoughts about sleeping in a bed will drag you down too.

2) Harvest a lot of food. Harvest a lot of wood. You'll eventually wind up needing a lot of grass too. Flowers aren't as important early on. Get to creating Lumber and Stone Bricks at the Sawmill and Masonry in bulk, a lot of early construction will be using them.

3) Eventually you'll start having to fight foes. For a while you'll be your fortress defender, so your health will start taking hits. The normal solution is to go to sleep in your bed but you'll lack the resources early on in most runs to make it for a while; the Shrine Of The Snake is far easier to get to which grants you the ability to heal yourself on a cooldown timer, and stays useful the entire game by making it so your rats don't bleed out when injured.

4) Leave two empty spaces on the sides of your main ladder. You'll need them later in the game when you want to start upgrading the speed your settlement moves at.

5) Build dirt floors instead of leaving floors the natural landscape beneath your structures and on routes getting a lot of foot traffic. They improve the movement speed of your rats, making everything work better. Also, don't build them beneath resources like grass and wheat or spawnpoints for animals like bunny burrows, it destroys them.

6) Don't connect too much to your main route yet, enemy spawns may start coming from two places at once. Build a wooden gate if you need to.

7) Build a Laboratory and assign a rat worker to it to passively generate research points.

8) Watch your money. The more work rats do, the more they get paid. You'll need the Code Stone, Ratizen Register, and Tax Office to counteract this by taxing your rats.You'll have to play a balancing act between taxing them enough but not letting them go broke, and way later on you can engage in trade with other nations, currency manipulation, and even a workforce of robots that do mundane tasks which let you tax your rats less and give them more social safety nets.

9) Just because you're making a luxury doesn't mean your citizens can buy it. Without enough money or some already existing luxuries they'll be lower class and lower class citizens won't buy some goods even if they can afford it. You have to actually allow them to, or they'll starve because you turned all the wheat into bread or cooked all the raw meat.

10) Build a Royal Forge. Get yourself some basic armor and weapons.

11) Build beds as you go, set them to auto as you build them with 'q' and 'r'. This will keep your rats happier, unless they have that weird trait that makes them unhappy in a bed. See #1. Tables are also an easier way to make the rats happy, and don't need to be assigned nor do you need one for each rat.

12) Try to avoid building much on the surface at first since that's probably where most enemies will come at you from early and it saves you the headache when they destroy buildings. Consider Grass Roof as well above the places where your rats who harvest on the surface will be working, as well as above the ladder and the chest. Dry rats are better rats.
Jolly Holiday (Events)
Holidays are events where your Ratizens ask you to stockpile a certain amount of goods in a set amount of time, providing bonuses (and cosmetics/achievements) for doing so. Some events aren't holidays, but I didn't know where else to talk about them so they go here.

* Mayday
Late Summer. Stockpile 20 Lumber and 20 Petals, build a Maypole with those resources, then dance with a partner who gains +3 to all stats and +5 Happiness . Earns a piece of equipment (equipped at the Royal Forge) that will give a Happiness bonus to rats you pass by while wearing it.


* Locust Swarm
Autumn. Not a positive, a swarm of locusts will eat away some of the grown resources on the map and leave behind Locusts that will patrol around an area that has growing plants, like the surface or in underground biomes, and eat any they come across. You'll have to patrol around yourself to smash the buggers (they can't fight back much) and be careful not to smash spawners like bunny burrows and bat caves in the process.


* Harsh Winter
A number of random events reflecting the rough colder months can occur, requiring you to sacrifice a number of goods free of charge to prevent disease and death. Early on this is very punishing, but stockpiling goods can pay off.


* Halloween
One of the harder ones to get going, since I tend to find rats consume candles way faster than they can be made without putting a lot of workers into the industry. Consider banning them from buying them partway through summer if you need to. Once the holiday is over the ghosts refuse to leave, so you have one day to kill 20 of them (very easy). Each one drops a resource which not only can be traded for quite a bit of coin at the rotating merchant booth when that type of resource is the catch of the day, but also are how you build permanent Halloween decorations.


^ You'd think our army of Necromancer Umbarans could handle this, but nooo...

^ Kill the ghosts and make benches from their pumpkin heads!

* Christmas
First quest is to secure the resources to build the tree. Subsequent years its a large gift of Charcoal. Gets you a reindeer cosmetic outfit.


* Lunar New Year
Stockpile some goods, build a fireworks launcher, and every 12 hours you can fire them off for a quick boost of Happiness at the cost of gunpowder. Get yourself to the magma level and start harvesting some Niter from the flowers and Sulfur from the blocks to keep a steady supply from the Pharmacy. Note that you'll probably run out of Sulfur before too long, requiring you to dig deep or just trade for it. Thankfully its not so pricy compared to the other resources to boost Happiness quick.


* Octoberfest
Get the Bar and Brewery up and running, stockpile booze. Simple enough.


* Shadowy Organization
A one-time chance to invest. Invest as much as possible, the rest of the game you get income every year for nothing.

ProspeRaty (Prosperity and civilization progression)
Prosperity is basically your settlement level. Be aware the game will get more difficult as it goes up, rats get more likely to steal and complain and enemies get stronger and more frequent. Its a combination of the following:

1) Your degree of infrastructure and production. Just focusing on this alone is probably what you'll be doing most of your playthrough, which gets you to Prosperity 6 or so. For the record one of the win conditions is Prosperity 8, making that basically the cap. You get the achievement at Prosperity 9 though.

2) Your classes. The more middle and upper class rats, the higher. The issue is that although higher class rats have higher level stats due to better access to luxuries and resources, you have to actually provide those resources and also not tax the rats so heavily that they can't end up upper class in the first place. By designating some rats at the Codex into a specific group you can tax them more or less which can let you designate peasants or nobles basically if you want to. Hell, get your forging of copper and gold Mint your own currency plus stockpile plenty of stuff to trade and in theory you could get more of your city than not into the upper class, another win condition. Once you start getting your robot workforce going (more on that way later) its possible to just eliminate taxes on the poor with almost none on the middle class, resulting in it being possible to get a massive middle class and work your way towards that 30 wealthy rats at once achievement.

3) Decorations. That tab that initially seems useless? This is the use. You can also use fancier material floors than just dirt blocks, and a few (ice and jungle) improve the speed of the rats walking on it which can not only boost your Prosperity level but also your efficiency. Hanging plants and torches just take rope, wallpapers are a good use of your excess materials like slate and sandstone plus replacing the tree root/branch default wallpaper gives you free logs, and you can always create a top floor to your fortress for the throne room and art gallery plus some benches, fountains, and lamps.


^ View your progress.


^ [Level up music]


^ You now get bonuses to your civilization. Don't worry as much about the unlocked blueprints as the actual bonuses. The growth rate here would help way more in the longterm than two buildings that mainly are there for the upper classes (unless you want to make everything available for everyone). If you do pick something with blueprints you already have then the Research Points get refunded, meaning it may be even more beneficial to you for that freedom on what to do next.


^ Turns out that not taxing the poor and giving them a subsidy every day towards their needs results in higher work ethic and a more flowing economy while giving them more time for the humanities (ratmanities? ratrodentities?). Though the robots doing most of the hard labor probably helps too.


^ This is more than you guys deserve.


^ Fire whoever put my throne room above the mess hall...WHAT DO YOU MEAN IT WAS ME?!
Its all about that range (Building range)
Get used to clicking every building then clicking on the gear tab. Most buildings have a range they work at.

Wonder why all your rats are stinking vermin? Might be because the range of all your latrines basically only reaches the next floor.

Wonder why your rats aren't harvesting the plants they're right below? The range might only affect a few plants.

How about why your rats are miserable? The circus might only be catering to the floor above them, which isn't used by most of the ratizens.

If they’re passed out sleeping on the ground then they don’t have the ability to do their work, self-care, and make it to bed on time so consider building some beds near that spot and assigning them to those rats, or at least putting some conveniences close so they don’t have to go as far to see to their needs. Once you have the ability to place speed-boosting floor blocks, have elevators (or even electric elevators) and have turned most of the map into one giant city then you can afford to construct a skyscraper building for beds, but not at first. While Bunk Beds are the most space/time efficient consider the fancy bed for the more important rats since those take less time for your rats to get a full night sleep and gives them more hours for work/needs.

Likewise, too much range may lead your rats to go harvest things near scorpions which will get them killed, or your water gatherers to drain the ponds you need fish from.


^ Very early centralized bed space. They'll need a roof to prevent rain and snow from getting in though...

^ These water gatherers now will harvest from the water generators as well as any puddles from rain that accumulate elsewhere.
Sleeping Around (Beds and colonies)
As you might imagine, rats benefit from sleeping in an actual bed. If you've forgotten from the tutorial, rats need to be assigned a bed. Just because one exists doesn't mean they'll actually use it, you can have an entire dormitory floor and they'll all be sleeping on the actual floor even under snow and rain.

Thankfully, clicking the gear when examining a specific bed allows you to set it to automatic assignment. That said, its worth making sure that their bed is near enough to their job, the amenities they need (a source of Joy and a toilet usually plus a place to eat and bin containing food items is generally all they need). The result of this can quickly become a small colony apart from your main settlement as you need beds to support the Circus performer, a Hospital to take care of the hunters who can't manage to beat hermit crabs without being tenderly tucked into bed every five minutes, and so on.


^ This makes things so much easier.


^ This Hospital to support hunters is close enough to their amenities to just need a bed.


^ A small colony to harvest Jungle Logs, Joy Flowers, Bats, and Berries plus nearby spider webs. Not pictured is the previous Hospital in the middle of the Bat and Bee hunting areas, which uses these resources as well.
The Lonely Princess, The Frustrated Queen (Expansion speed and personal development)
For your first few runs you should focus on learning what to do, but you can start slow. You'll make mistakes, but you can either just avoid those next run or get to the point you can comfortably build a second set of whatever stuff you built in the wrong place then deconstruct the originals.

Enemies build up into bigger and bigger numbers as Prosperity (the complexity of your settlement) increases and you're going to want to have rats harvesting resources from renewables while you work on your own projects, but the Plague Rat enemies at the start can be easily dealt with by you alone once you have a personal bed to restore health or with just one or two guards. Once you have a centralized elevator/highway (discussed below) you can afford to take it slow, accumulate resources, and make sure your infrastructure is set up properly.

Once you get a steady supply of materials, mostly metal, build a Royal Forge and make yourself some gear. On hard difficulty that's a lot more of a priority, where you'll want it after the royal bed so you can make yourself some armor and weapons ASAP. Don't be like me and take six runs to realize it has tabs for armor and accessories, both of which can boost not just your ability to fight but your ability to work and rule.

Generally speaking until you get some decent armor you want the bow as soon as you can get it, as it won't be long before you get overwhelmed by foes. Your militia rats can form the meatshield so you can shoot the enemy past them. You can also build doors which you can shoot past without needing to retreat, and couple it with spike traps to deal damage as they're busy breaking it down. Be sure to reforge your gear too, since getting health regeneration and speed bonuses is fantastic at any point in the game. You can also add Crit to make over half of your attacks hit HARD, which is really helpful when focusing down the bigger enemies that tend to survive traps. Once you dig down into the magma layer (more on that later) you can eventually find the higher tier forge (a friendly fire crab which looks like some kinda demonic altar while its sleeping) which lets you do a second reforge on every item. Electricity is nice, but it will zap friendly rats too. Fire attacks will damage your rats and your buildings but deals a lot of damage, making it good if you're quick to deal with foes and also want to be able to focus down spawn buildings fast.

Once you have more than basic troops you want them in squads. They'll move together, and you can add classes that add bonuses to the entire squad; even basic troops hold up WAY better when buffed with more armor by a Legionary for example. Hitting the build button while your weapon is out lets you command squads, either to escort you and attack what you do or to just defend a specific point so you can weaken enemies then leave it to them to mop up the remainders.

Once you have some Schools you'll get a rat coming to give you free personal tutoring sometimes, letting you boost XP in one of the three stats. Since Dexterity increases just by running around and Strength by mining, fighting, and hauling, that leaves Intelligence which you don't really have a good way to passively raise. Boosting that will make the others rise faster, so I generally pick to be less stupid.

You can find tunnel sites as you explore, fix them up to connect them to a grid. The Royal Tunnels you build also connect to this grid. It costs gold to travel, but as time goes on that is less and less a concern. The transportation has an animation with one of the ants merchants use to pop in front of your chests, just hit 'escape' once to skip it.

Also, if you have a rat that happens to have built themselves into a corner and is currently starving to death behind a wall or under a floor...clicking the alert in the left corner then scrolling down to the "Summon Rat" option will free the dummy. You don't actually have to build the road/stairs/tunnel to free them.

If you go to the Admin screen (default 'G') then Leader and click the final tab there's now personal leader upgrades, you get one point per Prosperity level to distribute.


^ This would have helped me a lot in those early runs to know...


^ The blacksmithing minigame.


^ mE AM QUEEN, MAKE ME LESS BAD BRAIN PLEEZ


^ Surprise inspections can come at any time.


^ "Don't eat me, I'm friends with the Hollow Knight.
Civic Planning (How to plan your construction)
You don't need to just build underground, constructing upwards is easy and can prevent frustration later. If you're going for a skyscraper kinda thing then leave one space on each side of your ladder empty to replace it with an elevator later. Its perfectly fine to not connect it to anything like pillars, buildings don't need support structures to prevent them from falling down in this game (aside from rats, who can and will fall to their death if they or you are dumb enough to mine blocks they are standing on) so long as ratizens can reach the ladder the entire structure can be floating in the air.

Focus on rat convenience, you can make it look pretty later once you can spare research points for roofs, non-dirt blocks, and wallpapers. Bear in mind that if you do want to wallpaper things, rats can only reach three tiles high; that fourth space on taller floors for the taller buildings is going to be hard to wallpaper later, to the point that you may need to desconstruct then put in a ladder then reconstruct the building once the wallpaper is placed (this is less a pain than it sounds).

Each step your rats take will make them more tired, so try to maximize the work they can do in minimal steps. Give certain workshops a chest specifically for their raw materials and mandate those materials being put there if you really want peak efficiency, your slow Copper Bar production might just be due to them needing to walk down to the magma layer of your fortress where there's a chest for a hunter that all the Copper Ore ended up in. Make sure you add a top floor with nothing on it or a roof to absorb winter snow, including over ground level plants you rely on. You can deconstruct actual roof blocks to build another "roof" and some stuff on the previous one later.

There's two approaches, one more efficient for individuals and one more efficient for centralizing your rats which allows you to group up things like hospitals and entertainment where you know they'll be. For the former you should leave a gap between every two workshops to place a bunkbed and assign it to those workers, and a latrine next to that plus an entertainment building on every other floor in the middle of every six or so production buildings so your rats never have to roam for anything except for food, and on a floor with the tables for eating there should be a bakery and a storage chest so even that is centralized. Put the Joy buildings there or directly above/below so your rats can go for a dinner and a show before going back to their workshop space for bed.

The skyscraper is simpler. Use both a surface structure for living and workshops below. I like to use the lower levels of the structure as where the beds, hygiene buildings, and food tables are on different floors while the top is eventually a water dispenser (discussed below) and farms. It depends on how plants and resources and things you may not want to dig through have spawned, but I prefer the skyscraper a little ways away from the tree so I can expand in both directions and treat the tree like a tower that will connect to it. I put the gathering structures in the first basement floor below the resources they're harvesting. Just below that is where I put entertainment buildings. In levels below that I put the workshops.
The administrative buildings including your royal ones are in the tree tower itself, and hollowing out the tree provides ample wood for your early start which lets you stockpile a lot for when you start up mass producing parts and charcoal.

Generally speaking its recommended at the start to use one central ladder system connecting everything from the top of your skyscraper to the bottom of your settlement with one square gap on each side of it (the elevator is three squares wide).

The early floors should be three squares high since that's the height of most buildings aside from the most simple ones, some of the later floors should be four squares high reflecting the increased height of the higher tier buildings. If you want to wallpaper later and the construction size of the four-square structures won't let you, just deconstruct the building and replace it with ladders to get the wallpaper in then reconstruct it after demolishing the ladders.

Generally speaking, do ladder demolition yourself. Rats will destroy the base leaving themselves stuck like a rat in a tree.

Somewhere should be a long path that you'll want reaching both sides of the map as far as you've explored, which will be a rail setup as your rat superhighway.

I place the City Entrance close to the central ladder, as well as the Diplomatic Office once I build it so I can quickly send the rats exploring when they finish their routes. Don't forget you can deconstruct anything and rebuild it later if you want.

Bunkbeds take up more vertical space than beds. Save yourself some frustration redoing everything later by making the height of dorms above what the basic bed needs. Once again, remember to adjust the range of structures to make sure rats can access everything they need.

Be sure to replace the basic ground with intentionally built floors later. Rats move faster on them, and likewise replace rope ladders with wooden ones on important routes before the elevator is a thing.


^ The start to a tower.


^ A more endgame tower for beds, separate from the workshop tower and services tower (which you can see next door to the left.


^ The aforementioned services tower.


^ I don't trust rats not to strand themselves or fall to their deaths, so I'm doing this mining myself (while being careful not to strand or drop myself too of course).


^ *Record scratch* "You're probably wondering how I got into this situation."
Drop Pod Is Ready To Go (The elevator and railway)
You want a main elevator, which will make your rat efficiency soar plus your personal depth delving far better. You'll need rope to connect the stations which means a lumber camp nearby some jungle trees and a busy weaver, as well as regular wood and copper which means a lot of standard wood plus the kiln to make charcoal and furnace to smelt the bars. Make sure you have built your primary settlement with a vertical transition in mind, since one long elevator is more time efficient for your rats than a bunch of smaller ones, but if you need to create a second one to preserve a pond or something then try to be space efficient and don't be afraid of using dirt blocks to create a new floor as a station transfer space. Each station is three spaces wide, so if you need to redesign your base to space things out then take your time and consider creating new floors along the elevator path instead of scooting everything to the sides a space or two. Rope tiles go directly below the center of the station and begin directly over the top, which lets you link them together to the ones above and below. If not connected to a station the rats will use ropes like ladders, so don't worry about it blocking them although monsters and rioters will attack them, so don't completely forgo ladders. Its especially important to connect workshops to stockpiles and to beds and sanitation buildings so workers can maximize both their work time and their self-care. Guards being able to quickly access the different floors is also recommended. While it may be convenient to connect your royal quarters to the elevator, rioters taking out your law stone is frustrating while trying to get a city back under control so maybe allow that one to be a short walk away. The Diplomatic Post may be better to connect directly since it means you can quickly return to keep the explorers exploring while doing busy work or fighting.

As for rails, they only take 4 planks so they're easy to set up. Not quite as useful immediately, but definitely are necessary once you start tapping into the far-off resources.

You can establish stations along the rail line by putting ladders just above the track which the rats will stop at to jump up. That can let you make easy to reach dormitories or decentralize your production. In general, rats can jump two squares high but need a full square of clearance to do so. I'm not sure if this tires them out more, but once you have an elevator and rail lines that should be far less of a concern.
Oof, way too real... (Planning the travel time of rats efficiently)
Rats also have limited stamina. Its tempting to kind of group up all the latrines, and all the beds, and all the workshops, and all the tables, and all the entertainment, and so on into different floors, but that may cause too long a walk for your ratizens to walk to take care of all their needs. As a result they have to make a choice whether they're going to eat, sleep in a bed, relieve themselves and wash, or see a show and can't do all of the above in one day. There's a few fancy ways to accomplish it like meticulously assigning beds to each rat near their workhshop and sticking a latrine to each floor (which I do recommend for way-off gathering spots like fishers and mushroom harvesters) plus an entertainment building on the end cap, or just shrugging and letting them be a little unhappy so long as it pushes progress since it looks neater and requires less planning. Obviously faster floors and elevators/rails mitigate the problem somewhat.

Adding extra ladder routes down to the railway can alleviate things, but a convoluted mess of routes will sometimes have them take suboptimal routes up rope ladders when there's an elevator available, or allow invasions; plan effectively, and when you have an invader spawn point you want to deal with using traps instead of just demolishing it then make sure it has a semi-efficient route to your home (so they don't burrow into a random location) without leaving random floors vulnerable either.
Additional Supply Depots Required (Chest locations and efficiency)
Having chests near the elevator helps form easy access for the various supplies and workshops, and when it connects to the rail line down below the gatherers can offload easier. If you have the beginnings of a supply colony then consider putting a chest halfway between supply and demand; for example if you have a hunter gathering bats then putting the chest next to their job building lets them hunt more bats but the butcher and leatherworker have to travel further to get them, keeping the chest by your workshops lets the workers only have to walk a short distance to get the bats but makes a lot more of the hunter's time being carrying their prey.

Also, since a rat dropping off cargo prompts them to decide what to do next then putting a toilet or two next to it allows you to boost hygiene. In a central location that most of your colony will travel, such as just above where the elevator meets the railway, I like to put a number of Joy buildings as well.


Relocating chests is a pain since that's a LOT of hauling to do from one location to another for your rats plus they won't use resources not in the chest (so if that's all your food in the chest you just demolished you better hope they get to work ASAP), so if your start location isn't where you're going to want your "main base" then take your time building a new set of chests and basic infrastructure, moving some important stuff like food and raw materials your industries rely on the most by yourself, THEN demolishing the old stuff and letting the worker rats do the hauling.
Let Them Bake Cake (Avoiding Bankruptcy Early, Allowing Class Mobility)
When it comes to taxes you need to be aware that unlike most management games, your rats need money to buy food and access resources. It doesn't just affect their happiness. Untaxed rats will also accumulate more gold than you, if you let them. Its good when you have a low population enough to manage to check on the status of individuals and hit the tab showing their wealth to see who's got how much. What seems to work for me is a mix of high taxes and welfare, taking 15% of their income every two days if they get above 600 gold and giving them 100 gold per day if they dip below 150.

Adjust those numbers accordingly if you're paying attention to rats that get unhappy when taxes come. As you climb the tech tree the rats will need more and more money to access resources; the Perfumer has to spend more to do their job than a Butcher for example so when they go broke they'll act like they're unemployed until they build enough ladders and move enough dirt to afford to do their job again, and since the higher tier Services buildings are more efficient having a richer population is actually a good thing; they demand more but are happier when they get it. When you can be sure to increase the amount of money they get via welfare and the bottom level where they get it, and decrease taxes.

If you get into an emergency like your Code Stone got damaged or your tax collector died and you didn't notice until you started ticking down into debt, feel free to just tax 80% of the wealth of the entire population for one day or whatever. DO NOT FORGET TO TURN THAT OFF. Needless to say your rats won't appreciate suddenly being slaves, and as Machiavelli said make sure all cruelty is short-lived or they'll have nothing to lose by rising up against you.

You start with a fair amount of gold, but the more you assign your rats to do the more broke you will go. Prioritize the tax collector if you're having the laborers do the bulk of the mining and you're not helping out with construction, which can get very expensive. Assigning them to move stuff around and build dirt blocks is fine, putting them to work building a barracks or employing them baking bread will start to seriously tap into your finances. Its fine to wait for your rats to haul the goods for construction then do it yourself.

Also, if your Code Stone gets disabled such as by being submerged in water all your policies will be paused; sudden bankruptcy and starvation may occur. Make sure you reactivate them all. I honestly prefer to set up a "palace" for my queen that's got a decent roof and is far from invasion routes or rioting peasants. Feel free to build yourself a personal tower, why not. You deserve it!

If you get into a crisis of money consider a short-term law like something taking half the property of any rats who have over 200 gold. Just make sure to turn it off, rats want to accumulate gold and also rats can't migrate to higher classes of society unless they can stockpile it.

On that note, you can go semi-Communist/late-stage capitalism by just allowing any rats access to whatever resources and structures (the music hall is nice to set for peasants by the way) and taking so much of their gold its fairly difficult for them to either go broke or break out of poverty but still have enough gold to buy what they want. Otherwise you'll have to start treating the classes better; rats who have the money to buy better services want those services, you'll need to start reliably gathering hermit grabs and frogs and salt for the luxury services. Those rats who have access to better means will have higher stats and thus be better at their jobs. Basically the choice is a whole colony of jack-of-all-trades or have some rat supermen that you're going to want to reassign to more stat-based roles like soldiery or entertainment.
Unemployment isn't necessarily bad.
You need rats without jobs. While rats in their offtime with jobs will do stuff, unemployed have nothing else to do in order to earn money for food than haul stuff for you. Don't start going nuts building up industries if you're lucky enough to come into a lot of research points at once, without laborers to move stuff around and do the grunt work of mining and construction you're going to run into a bottleneck where nothing is making it to the storage chests. Likewise, admitting a ton of migrants right before winter because it seemed like you had enough food stored only to hit a roadblock that takes out your food production industry like snow covering your crops when you weren't looking or something taking out your supply of wild bunny meat. Taking smaller steps is better unless you know what you're doing.

If you start exploring via mining, you leave resources behind. The rats will then have it in their docket to go get those resources and bring them back to the supply box. They also favor things in order of when it was mined so if you cleared out a bunch of dirt reaching the gold and need that gold now then you'd better haul it yourself.

Its costing you food, wages, time, and most importantly the tasks they could be doing instead when they have a huge backlog of stuff to do. Consider either making an effort to haul supplies back before you get too ambitious, or establishing a railway and/or elevator (discussed below) and exploring along its path. If you reach something along your main elevator or railway like trees or spawn points you don't want to demolish, just end it there and put another continuation right above or below. You can use ladders above the rail as jumping up points (discussed below).
Avoiding Artificial Social Darwinism
Some items are reserved for some social classes by default. You won't even get the middle class or nobility for a while despite being able to produce goods and buildings intended only for them way before that. Since social class doesn't tie into the early game systems it creates difficulty trying to reach past the opening of the game if you don't know how to set permissions for the classes. Noble-only food can be the easier sources of reliable renewable food, like honey. Cooked food is only intended for the middle class and up by default.

If you've got a stockpile of 200 honey and your food at the top of the screen shows 230 food, that may be why your rats are unhappy and literally dropping dead frequently despite others seeming to survive just fine. You've got to set the resource permission to the lower classes. This also applies if you just feel like giving fancy luxuries like shoes and perfume to the lower classes, which can be useful if you want to boost happiness and they are abundant due to your environment.


Science!
The Grinder can produce a large number of resources, meaning depending on what you have access to it will produce more research points than it costs. Likewise even if currently useless, consider products like furniture or barrels just to get that research point from the first one, then turn it off so all your wood isn't going to waste right now. Pottery, leather and bones, and so on are also things to turn on then off just for that quick research point. Knocking apart a snow pile and dropping a snowball into your item box also gives you an easy research point. Consider killing a few animals yourself and dumping them off before a camp to hunt them for research now.

Also, the Laboratory under Production Structures is not the same as the Research Desk under the Royal Structures tab. I'm sorry to say it took me three runs to pay attention to the tutorial rat saying that, and finally noticed it. Build one of those once you start getting comfortable or else you're going to hit bottlenecks where you are desperate for more points and searching out new resources. Build a Laboratory, the sooner the better.
Electric Power Poor-rat-gone! (Electricity and Power)
(I'm still learning this, please have patience)

This one is for the long grind. Electricity takes a while to set up, and requires robust mining down into the magma layer near the bedrock level plus tons of iron and the rare resource Nickel down there. Power does NOT go very far and sucks up a lot of resources to set up. You're gonna need to be cranking out Iron and Copper Bars with Blacksmiths converting them into Copper Wire and Iron Plates. You'll also need some Glass and Gears ready.

Basically you have to wait until your scientist rat has the insight to construct the Engineering Workbench or get there on the tech tree under the Royal tab yourself, which contains an entire new tech tree which cost a LOT of research points. You'd better be good with all your regular researching for a while, since its gonna take time and points to go through the advanced tree.

At some point you'll want to upgrade your scientist from the standard wooden shop to the electrical one, the Advanced Laboratory, which you'll need for the extra research points. Any formal alliances you've maxed out with other civilizations can be to your advantage as you'll get a periodic choice to boost your relationship with them (basically useless once maxed out unless you tend to send rats to steal from their territory on the exploration map), money, or research points.

The basics are this: power is generated by buildings under the Raw Materials tab. The ones that are "green energy" (wind, water, lava, sun) have "Efficiency" which means that they generate more power if nothing is blocking their zone of influence (which you can see as the green around them when placing one). They don't need 100% Efficiency, you can take up a couple spaces with something without reducing power output and Transmission Wires/Ladders (explained below) don't block them at all. Despite what you may imagine, Solar Panels and Windmills both work underground. Be aware for the stuff you build on the surface that snow buildup during winter also cuts their Efficiency. You also have furnaces that can burn Charcoal, Coal, or the little lava kitten animals from the magma layer called Flameones (I find that to be the best, but you'll need a Hunter who can survive hunting them so consider turning one of your veteran soldiers who has developed a high Strength into the Flameone gatherer). The most basic power building is just a handcrank your rats turn, which...does not generate much power. But its how you're going to have to get started.

Power generation does nothing unless its connected to something. Connecting directly to a building that takes power means its being used as its being produced, which has the issue that a lot of buildings run by rats shut down when not being operated so they can take care of their needs. You're going to want a Battery connected to it (more on connecting below). That Battery is going to store the power as its produced, allowing the buildings to keep running in the background. Note that if you build the laser cannon (oh yes, there is one) it sucks power passively and can't just be deactivated so don't build it unless you're comfortable with power, and just disassemble it if you start having power issues. Be aware of production times, so for example Solar Panels will only run half the day so you'll need twice as many as you seemingly need, and depending on conditions your rats may only keep devices operating for a quarter to half of the day. Unless you have power stored then your scientist rat's workshop won't be powered when he has time to work.

All this stuff has to be connected. Transmission Blocks are walkable floors (but at reduced speed) that transmit power horizontally, Transmission Wires connected in any direction and rats can walk past them though they need Ladders to let rats access the construction space. Don't just simplify into making whole floors of Transmission Blocks; they take Iron Plates and one more Copper Wire than just Transmission Wires. You also don't have to connect Batteries directly to the things they power, the game generates automatic connections so you can have Dirt and Stone or whatever Blocks underneath those things. Transmission Wires can interrupt floors, but your rats can make a leap comfortably between Blocks or Ladders if you need them to in order to connect floors.

A lot of the progress is going to be bent towards upgrading your energy collection and your grid. You start slow with manual operation by the rats and either wind or hydroelectric power, none of which are super efficient because windmills take a huge amount of space between them for not much power, manual cranks require a rat meaning food/wages plus they have work hours, and the hydroelectric power requires a sophisticated setup with a pump and Dew Collectors already in place for also not a lot of power either. Solar Power generates more and you can make a long row easy but you're going to need to make the next floor much taller since they require empty space far above them to run well, and since they only run during the day you'll want to take advantage of a bunch of Batteries to make up for the downtime at night.

Once you have power set up and some Battery buildings full its time to get your machine parts going so you can build the good stuff. First you need at least one Parts Factory to produce Batteries and Motors. Once you have at least two Motors you can build the Circuit Factory. The CF makes three kinds of chips, and the Labor Chipset is the most important since its what lets you upgrade your power grid and make the basic laborer grunt rat robots (called Ratrons, more on them in the next section). Once you have four Motors you can build the Thermal Generator, the furnace I mentioned earlier which can entirely replace those rat cranks for a LOT more power generated.

As for a newbie trap you may or may not fall for: the green space on Windmills can overlap. The next windmill just can't be in the green of the last, but they can share the same green space. This will save you a LOT of room.

The real star is the Geothermal Generators. You'll need to have extensively scoped out the magma layer for spots to build them, and also almost certainly construct a Tesla Tower to send out the power they generate to another Tesla Tower connected to your manufacturing center. Thankfully neither of these things require a worker to operate.


^ Notice how the ladders and Transmission Wires don't affect the Efficiency, but the blocks do? Also notice how that Windmill above is working just fine despite being miles below the surface?


^ You're not really going to be able to max Efficiency on the Geothermal Generators, magma just doesn't spawn that way and there isn't a way to move or generate it.


^ Rats can jump these gaps in Ladders where Transmission Wires go.


^ This makes the Hoover Dam go BZZZZZZ.


^ At 89% Efficiency its still putting out the maximum 8 watts as a 100% Efficiency. Also notice how much closer these are than my other ones; I JUST figured out the green zone overlap with these ones.

Autorats, recharge and work out! (Ratrons)
Ratrons require a charging station, which is treated like a bed. You're going to want that structure near their workplace or along the route they'll take between it and the Chest they grab raw materials from. They are constructed from the Ratron Assembly Plant under the Royal tab, and you craft them like equipment only instead of tapping the action button like in a rhythm game you hold the button to charge a bar that will lift. You're aiming for the symbols matching the type of Ratron you are building and can make exceptional Ratrons who get more stats as you land on the correct symbols rather than just the +2 base stat.

You assign them the way you would any other worker, but clicking the Ratron tab at the top left of the assignment screen lets you do so.

Ratrons come in four varieties; the basic one has Strength as its only stat, and can run most of your grunt work buildings. The Dexterity stat produces your more intricate goods, and the next one can run the rare Intelligence-based job. The final one is a disposable military bot.

You can't replace your entire population with Ratrons, since you can have a maximum of 30. But the fact they don't get wages, don't require any necessities or food, can't rise up against you (yet...), don't need money to access your supplies, and take less time charging than Ratizens sleeping makes them a prize for high efficiency jobs. This also lets you invest more into getting your Ratizens into the upper class when the blue-collar labor market is all done by robots.

Ratrons assigned to a work station that have to walk a long distance to get their resources can lose power along the route sometimes. Build Wireless Charging Stations alongside common travel routes like your main lift or above your railway to give them a boost if you don't want to constantly manage stock levels of chests.

Drone Hangars will speed up your settlement. You can assign them to various jobs your rats will do when unemployed or in need of more money; mining, demolition, repairs, and resource hauling. It'll give your broke rats less to do to earn money, so this robot labor force should come with a Star Trek universal basic income (yay!). Resource Hauling works well with Water Carriers, giving your rats more time to work which combined with a Dew stack and a reservoir will give you plenty of water to sell to other civs when their demand for it comes around. You can build a new Drone Hangar when you have a huge construction project; they'll only build within 40 tiles of it, but will go anywhere to get the materials from chests on the map. Even though they fly, they'll still follow the logic of only building where rats can reach so sadly you can't wallpaper places they can't reach still.

Once you have a decent amount of Ratrons the Ratizens get upset about losing their jobs; this will result in a massive plummet to unpopularity if not outright revolt unless you assure them they'll only benefit from it and pay off the entire poor population of your city; so make sure you've got decent cash saved up, have a small poor class, or are ready to start beating the hell out of your Luddite citizens and repairing everything (Snake Totem allowing you to focus on the whoopass without them dying on the floor helps here).

I'm not sure if its a statement from the game creator or a way to make the game harder, but you can't assign your Ratrons to the Joy industries (AKA AI making art). They're for menial tasks only, and its very possible to end up with most of the actual work of your civilization being fully automated; not paying any wages allows you to trade a lot of surplus, making you wealthy enough to establish a full basic income like just giving the poor 400 gold a day for no reason, the middle class 250 gold, and reducing taxes on the wealthy until you get both the 30 Ratron achievement and the 30 noblility achievement since the population doesn't need to do much work anymore. BEAR IN MIND THAT JUST GIVING THEM MONEY DOES NOT BOOST THEIR CLASS LEVEL, YOU ACTUALLY HAVE TO PROVIDE THEM WITH JOY SERVICES AND NECESSITIES FROM SOAP TO CLOTHING TO JEWELRY. That's a bit of a trap as your rats accumulate money but don't put it back in your pocket unless your Ratrons are making shoes and purses for them to buy.


^ Ratrons doing the hard work so the workers can relax, do complex tasks, work on the arts of leisure, become better soldiers, or just chill out without jobs so they can get to any construction and mining I assign.


^ The power grid to support Ratrons can become pretty complex. I prefer rats to manage the furnaces since having the power-generating Ratron shut off due to lack of power because Charcoal is halfway across the map can result in everyone shutting down.


^ A Wireless Regarcher sucks up a lot of power, two Windmills worth, but giving your Ratrons a boost as they go up and down main travel routes can prevent headaches. Put it near workshops to just keep them continually working too.


^ I wasn't getting enough power from these Geothermals anymore, so I'm adding some Windmills. Sure its in the magma layer, but this is ADVANCED SCIENCE!
WAAGH! (War)
War is a lot less complex than it seems.

Decide who you want to go to war with. Its advised you explore a certain amount of the world. The longer you take to declare war, the more likely the various factions will have cemented alliances with each other.

As a result, consider making friends with half of them and cementing alliances. Other factions won't necessarily declare war on you, but their alliance buddies will take a huge hit on their friendship. more importantly when you invade them any alliances will send troops to defend them (don't worry, you can kill them without pissing off the nation that sent them). Your allies won't automatically send troops, rather their troops will be available to hire as mercenaries (more on that shortly).

My invasion force consisted of one Squad of Centurions and a Medic to make an unkillable force, one of Witches and Necromancers to make a killy force with stacking amount of troops, and one of Firerats to melt away opposition. I stockpiled money, and wound up spending about 8000 coins on the invasion with about as much left in my treasury afterwards.

If you let the war just kinda simmer the opposing force will send troops to raid, disappearing gold from your treasury. I suggest declaring war only when ready to roll in.

Once I went on an invasion I was asked what troops to bring, which included tabs to hire generic mercenaries and troops from my allied cities (I only had one ally on my first campaign, as you Vassalize more cities you can bring theirs too). I always hire all of them.

I was teleported to the enemy city like in a dungeon. It consists of your camp opposite the enemy camp along a road. A ladder links it together with three more roads, four in certain cities. Along each road on your side are flags, where you can station troops before the battle begins (do not use automatic placement, it splits your squads and they lose their bonuses). To the left of your camp is a rat selling traps, early on before I had access to a lot of troops I bought all of them but once I could flood the map in redshirts I started just relying on the ones that slow movement.

On the bottom track I didn't put any troops in my early wars, but put the explosive and electric traps as well as the webbers and one crusher. On the next track I put the silver rank mercenaries along with a webber and the rest of the crushers plus the Centurion Squad. On the next track I put the Firerats and spike traps. Finally, I put the black magic Squad plus the gold mercs and as many silver as I could (I put the rest of the silver that wouldn't fit down on the bottom track). This is also where I stuck the spikes.

Later on once I had access to enough rats I made sure to put troops that slow down enemies in the front, the bronze tier troops more often than not. Elites in the back to deal the killing blow.

Once I engaged battle I accompanied the weakest group (or alternatively the Necromancer army) just to shoot with my double poison bow, then when the top of the screen showed some of their troops getting towards my half of the map I rushed back to defend my camp. I did some damage then baited them back and forth until my troops broke through and reached the enemy camp then destroyed it.

Like that, I won the war.


With my vassal I can demand resources, population, and gold from them although since WORLD CONQUEST is a goal I instead gave them a gift of gold and started a trade deal since I don't want a rebellion. Remember, real conquerors build roads, not mass graves.

Once you've taken enough Vassals they'll start making requests, because of course they do. That will build their prosperity, and your relations with them. That in turn gives you better trade.

Civilized Living
Tables cost one research point and four planks, so as long as you aren't going for a speed run and have efficient log to plank flow there's no reason not to make a dining hall connected to your main elevator path for that super easy happiness point. Depending on your playstyle, graveyards may become very populated very fast so consider making a floor that can expand in either direction as far as you need it, or start making a skyscraper for your rat bodies. Better to be prepared to quickly dispose of bodies in advance to reduce the unhappiness that reminders of mortality provides.
Defend The Homestead (Defensive war)
Your Training Camp can produce Militia or Guards. Militia are faster, but Guards survive better; generally if you have an elevator setup that makes Guards better. That goes for all the other military structures too, they default to one kind of soldier but can make two or three different kinds.

Early on, especially on hard difficulty, consider building a block that will intercept the vomit attack of the big rats then going to poke the pulsing grave early. Being able to eliminate the spawns one by one instead of being rushed all at once is very helpful.

If going on the offensive against a site, especially a few years into the campaign when spawns get bigger or once dealing with weasels, consider bringing your troops with you by using the order button while your weapon is out and demanding Escort. If you have time to plan consider building some beds nearby to move your rats to once the fight is over to save them, or constructing the Snake Shrine and spending the 500 gold to invoke it since it prevents wounded rats from losing hit points for a time.

Lizards are the most dangerous, but also pretty slow. They can be baited and shot full of arrows confidently by yourself, especially with fire/poison and electric damage to hit multiples at once.

The Squad Headquarters building will let you set not only the range, but their actual active defense area: as you spread out to colonies you may notice that they don't rush to defend those. Unlike the other buildings, you can set the actual place they're active in, so if your colonies are close enough you can defend them all, otherwise you'll need a second Squad Headquarters and more troops to fill that squad. The fact you can have your squad defend an area they're far from is useful, but don't forget the travel time issue; you can put them up above the area they need to defend and rely on the elevator getting them down quick though.

Note that the Reptiles will send Intruders into your city. They'll steal food, preferring the fancier stuff then destroy your buildings. The Constable will beat them up, but only if they encounter them; depending on where you put your law enforcement that may end up with them doing a lot of rounds and missing the spies. You can hunt them down yourself of course, but putting a second constable nearer the main routes or perhaps on the opposite end of your settlement can help too. Remember that in later parts of the game you can just assign Ratrons to free up workers.


^ Note the WASD option in the bottom right corner?


^ Purging Lizard camps periodically is important, and eventually they'll build a skyscraper.


^ By keeping a known location and isolating it, I can funnel enemies into this killzone. By taking out any other ones that spawn and putting either a Management Office or Drone Hangar set to repair beneath it where enemies can't reach I can spend way less time bothering with them.


^ "Tell them we shall feast while their screams echo from the killzone. "


^ A SKINK SPY IS IN THE BASE?!
She’s a trap (Structure Defenses)
Traps will not be triggered by your rats, but if they do trigger from an enemy while a rat is in range it will hurt them too.

Using them well requires planning and observing where attacks are coming from and when your guards meet them. It also means leaving those spawn locations, though you can trigger them early while they are pulsing so you don’t get hit by all the spawns at once.

They also are destroyed quick by use, so a maintenance rat with an office off the enemy path with a range extending to all the traps is necessary to not have to do any work yourself in defense.

Barricades just buy you time to manage other threats first and let poison work or stops the enemies where a crusher will deal with them all at once. Spiked barricades deal damage, but not a lot so don’t go crazy with them if jungle wood is scarce. These also will make enemies group up into a blob making them harder to take out for sole guards or yourself.

A web launcher placed a short way away from their spawn point to trigger once they start marching will make them spread out as it hits the ones in front of the pack. If they reach it after a barricade groups them it will slow the whole group. Both have tactical advantage, staggered ones are easier for the guards and grouped for traps.

Poison will likely keel hitting the same ones in the group who are in front, but stacks like it does on you when hit by scorpions and will refresh the timer. It won’t solve your problem but is good with other traps.

The spring-loaded trap can be used to launch foes off cliffs which will cause damage. But they’ll destroy it rather than walk past it so its more useful if their route has them climb a ladder since you can place it between the ladder down and a ladder up. It also buys more time for poison to work and staggers their formation.

Spike pits are the most effective in my experience. Reliable damage, cheap. On the surface where your resources like wheat and trees are found its not going to give you a lot of space, and the foes climbing your main ladder or elevator won’t pass much space. But a long line of spike traps with barricades grouping them is gonna do a lot of damage.

The crusher is iffy. I’ve seen it trigger on just the first enemy on the mob and the rest go right past while its resetting, especially if its pressing on only one block of the two beneath it. I’ve also had to replan things since it was hitting my guards. Best after a barricade, and jn twos with one or two squares between them to ensure everything is being hit.

If the game pathfinding decides there are too many obstacles or too much space between their spawn point and your city they’ll create a structure (the ooze piles and weasel tunnels) to teleport closer to your hone or even inside it. So its gotta be somewhat convenient for them to attack along your planned route. They will destroy elevator stations they come across then climb the rope.

The fat spitter rats can be stopped from attacking where your guards meet the mob by building bricks just above head level, which will be destroyed but block some hits while guards deal with the melee foes. The blocks also protect traps like barricades for a bit longer. If those things are climbing they’ll attack up and sometimes demolish your floors under buildings, keeping those buildings closed until rebuilt under them. Either way they have to be rebuilt by your command, since maintenance rats ignore demolished blocks as if you mined them yourself.

The giant weasels seem to group up with the shamans and rank/file weasels and guards attack them last while stunlocking some guards and hitting them all at once. To make matters worse the healer weasels can totally mitigate your efforts. I like poison and crushers before they encounter your rats to make sure everything is a little hurt and keep the shaman busy, and I try to aid my guards by targeting the giant myself with a faster weapon once they’re tanking hits for me.

On earlier stages the rat zombie spawns and Weasel spawns will be in random places on the map, and they'll probably end up creating a tunnel to you and teleport directly into your city. Its advisable to destroy the spawn points aside from one which you'll give a special route directly to your settlement. Obviously you want to wall off other routes, and not make it too convoluted or they'll just build a tunnel. Then fill that route with traps to whittle them down, and set your military to encounter them once past the gauntlet (a lot of defensive buildings will also hurt your rats). Use of slime blocks and gates can slow down enemies while poison and fire whittles them down, ash blocks will deal fire damage to them. If for some reason you want the enemies to reach you faster you can use jungle log blocks and ice blocks.

Your kill zone is best served by having a Management Office down below it in a tunnel; even if the rat has a long route to walk to actually reach those structures its still within their work range, and you can rely on them to rebuild them.

Lizards are a whole different thing. Once one spawns its best to keep that spawn point around. They will continually expand from that point, allowing you to control where they are found. Construct tall walls of dirt blocks with ladders on one side, and surround them with blocks as well. Make sure that there is only one route from their base to yours, and that's where you create a killzone full of traps. Make sure to investigate each time they expand to make sure they haven't created a new path (such as the roof of their settlement letting them hop over the wall, or them building down and having access to your mining tunnels). For all this effort they're also the most rewarding to kill since they provide resources even before killing them via their animal pens.
Bread and circuses (and Christmas and beer!)
Holidays are a useful way to boost your Happiness. You'll need to construct the Christmas tree once you get the quest in your first winter, but you can build it anytime in the year afterwards.

When you have a stockpile of 20 Charcoal in Winter you can hand out that coal to your rats for a big happiness boost. Likewise, in Autumn you can turn 20 Beer into morale for your little goobers.


These Rats Get Around
You can use ladders horizontally to function like climbable bridges. The only reason not to do this over a dirt floor is you can't build buildings on bridges.
HobbRats
The Garden tech tree will make your civ far more efficient, and paired with the elevator you'll be doing well hitting the harder steps. Silviculture Posts are simple to build, and go alongside Gathering Camps to enhance the efficiency of the gathering points that are nearby which will give you some breathing room while you work on other priorities that depend on your local area resources.

Don't forget you can basically build a little home for your little farmrats by making a new floor in the air or below the gathering points and connecting it to the ground by ladders. Also don't forget that snow can block them in, so consider making ladders one tile higher than they would normally need to be, or building dirt floors above plants to create a kind of roofed area. If the place is far from your main base consider either connecting it by rail if later in the game, or giving them a nearby bed and latrine and assigning it to them so they don't get stuck sleeping in the mud too often.

The Large Garden will let you control where your resources are located, allowing you to build far more efficient setups than just relying on where things naturally grow. This will streamline your berry production which lets you gain efficient steady access to bat extract which means medicine which means far less dead rats via doctors and medical beds, as well as jungle trees which gets you all the rope you want.

The more exotic trees also gets you your luxury resources, enabling constant trade as well as spoiling your little peasants with the luxuries (don't forget to allow the other social classes to access anything you don't want to stockpile or sell). Also, once you can get a steady supply of flower petals build an apiary then allow the lower classes access to honey, it doesn't require the water resource tree but gets you a steady supply of food. Through these maximization techniques you'll go from worrying if your ratties have enough to avoid starving and get the excess needed to start making booze or cooked food.

Once again, gathering buildings of various kinds can have their radius of influence increased with the gear tab when the building is selected. Use it to make your rats gather beyond just the basic area, though be aware if you let them wander too much they may get killed by monster spawns. Don't be like me and assume its just the tab to rename the workshop...

It can bog down your rats to use one gathering point with a huge radius and telling them to harvest everything. If you want the big radius, consider one gathering building for each resource and letting the Silviculture workers to water everything.


Make A Water Dispenser
Just use this guide to do so. Don't forget to give them mad props for that guide, its awesome.

I don't have anything to add to it either, its just great.

With later updates to the game you can get a bit more complicated with things than the above setup which reflects early editions (its still useful, but you can do better). Water pumps exist which can move water from a lower floor to a higher one, and you can take advantage of the fact ladders facilitate both movement and the flow of water plus the seasonal storms that now cause water to fill up in order to make refilling reservoirs that your rats aren't in danger of dying from, or to lift water up from the water-creating sponges.


^ On the other hand, poor planning can cause you more work since the water tank rats won't work fast enough to handle this disruption. Roofs matter.
Don't Starve
The method to making through your first few years will likely come down to a few issues; starvation and bankruptcy, both of which will create a doom spiral.

To focus on starvation, the general rule is that although food doesn't stop growing in the winter it grows slower, so you want to generally have at least 10x your population in your food stockpile (so 400 food for a population of 40), though comfortably you want a few hundred more than that.

The way to accomplish this depends on your start. Rats moving things around takes time, and every step exhausts them a bit so even if you find a wonderful bunch of frolicking bunnies to hunt and feed on raw bunmeat and a meadow of grain on the other side of the map, if its too far away the rats may just pass out on their way to a meal, your hunters may drop dead of bunny nibble-related injuries before you can get to them, and the trip to watch the circus performers may cause a breakdown in food production. Once you get an elevator and rails going this is far less of a problem since your rats can get around the map quickly and not get tired doing it, but its a big concern early on.

Sometimes you will luck out and find dens of meat animals close by like bunnies and frogs, sometimes fields of grain, sometimes the seemingly useless flowers will be in abundance.

The breakdown is like this: relying on grain will be iffy if you grow past 30 since there's almost definitely not enough nearby you. You'll want to wander far to harvest distant seeds (which you do by either digging the square below them or by harvesting the plant/chopping the tree once its already regrowing) then create garden plots above or below the natural grain by your settlement where the gatherers and growers can easily reach them. Don't forget to pitch in yourself in the harvest sometimes, you'll work faster and a bunch of harvested grain sitting there while the plant regrows is preferable to the rats eventually getting around to it. I find around 10 plants for every 20 rats is about enough so long as they are watered and harvested promptly, but more is always better (don't forget once you start trading you can get a bread industry going for sale if you put in the work to stopckpile grain early). Don't forget that you need an abundance of water to grow grain, so you'll need the water gatherers. Of course the water dispenser setup is what you want to have ambition for, but if you need water fast consider chopping your way into the upper branches of the tree where you can find stockpiles of water. Be careful those water pools don't flood your buildings (like your Code Stone which pauses all your laws until you manually turn them back on) or else you'll be standing there scooping water into water drops for a while since your Ratizens won't do it aside from the water gatherers who do it very slowly.

If you have an abundance of flowers (don't forget to click the gatherer building to make sure they're harvesting them and the Silviculture one to water them) then you're set up for a honey industry. Make sure you've changed the laws to allow the peasants to eat honey of course. In my experience it takes 4 plots of flowers per honey farm, but remember that unless you stop by every so often to manually harvest the flowers then your gatherers may get bogged down taking care of their needs or harvesting way too many different things and not getting to the flowers. If you're using gardens I recommend a dedicated gatherer for those gardens.

Likewise, ample grasses means bunny milk. Grasses can be accidentally depleted however because you can end up using them in production, plus if you're busy mining and exploring or setting up a water dispenser you may deplete your food grass on ladders. While you wind up with a lot of them early on as you build into the tree and its branches (or at least that's what I like to do) that can make you cocky. Once you hook up trading you might find cities that will sell you grasses for practically nothing (just playing the stock market with the trade currency for a year can net you enough for a years work of bunny milk grass, or selling something you have in abundance like stone blocks or furniture can get you enough to make as many ladders as you want), but before that point of exploration and profit and taxing its something you have to keep an eye on. Replacing your primary vertical settlement ladder with an elevator will net you a lot of your grasses back, but it doesn't go as far as you think.

If you're relying on hunters, don't forget to build a butcher. "Killing" an animal basically just knocks it out for transport to a stockpile (hence why you build farms with "killed" animals), it takes an actual butcher to turn them into edible food. Monitor your stockpiles and build more butchers accordingly, bunnies have no use other than the ones you need to build bunny farms. Frogs on the other hand are useful for the grooming facilities (don't forget once you build those to set permissions since they're not for the lower classes by default) and you have to manually toggle the butchers to turn them into edible meat; you'll have to evaluate Sanitation vs more food when it comes to the frogs.

Once you start getting to 15%x the food stockpile to population (so if you have like 50 rats that means 750 food) you can start looking into better food; grinder+baker for wheat, grill for meat. Honey is already a better food. That will increase the happiness of your rats, and in the case of bread any rats on the verge of starvation will beg for bread from you which can help save your population. Just be careful of stressing your food production chain, rats can eat wheat and bread but not flour.
There is no rat hell.
Don't go nuts trying to reach the bottommost layer. Its just a layer of bedrock, there's no secrets, just a long drop to a floor you can't break through. You can establish a map-wide railway here to connect different elevators, but its not as efficient as a railway through the middle of the map or near the surface.

That said, there IS something further down; you can find nickel, obsidian, ash, sulfur, and flameone (little fire cat creatures) in the depths as well as a lot of metals and coal plus a certain NPC named Greed who has some...interesting offers.


^ Hey, good lookin'.


^ Fire kitties and minerals, what's not to love? (Fire. Its the fire.)


^ I was told there was a circus down here...
Death Of Rats
(Thank you to Drizzard for this)

If you can put up with the alarm notification about unburied bodies for a while, you don't have to actually bury rats. Just dump the bodies far enough away that your ratizens won't stumble across them (so don't harvest anything in that area and make sure its not the quickest path to something else) and wait an in-game year. The bodies break down into bones, saving you the stone and space for burials and also netting you some resources. Its up to you if you want to use this method or give your favorites an honorable burial (and use the graves as a buffer that invaders will attack before reaching actual important structures).


Also, if a rat dies you can click the notification to go to their body, hit the button to view info about them, then click the far tab to see their history and quickly determine what job you need to replace.

Monitor Them Before Making Your Move (Diplomacy and trade)
It takes a while for your exploring to turn up civilizations, though searching out in random directions can show colored squares which indicates its the territory of another nation. Making the rush to the ability to trade quickly before you have anyone to trade with is a waste of research points that could be doing something else.

Once you can trade however, you can get a bunch of easy research points by buying goods quickly, which can also be done just by buying one of someothing in the Trading Post (note: this will take up spaces in your storage chests). Obviously that means you want enough of an economy to invest in the trade currency, which you need a bank to start doing. While you can make a profit buying and selling the trade resource that's a longterm thing, and you're better off exploring while minting your own currency in gold for a while before bothering with actually talking to the outside world unless you're speedrunning.

Note that once you do discover nations, they'll start making gold requests of you and even asking you to choose between two of them to gain/lost reputation with. If you're not ready financially to start forking out 2k gold on a whim, or give gifts to make up for slighting someone, stay isolated for a while.

Note that regarding trade, demands and offers change. Don't get super invested in a resource thinking you have an infinite gold hack only to find out later that when you have a stockpile they don't want it anymore. Trade is done more on the small scale unless you luck into an easily adapted to resource (bunnies for example) being in high demand or have an existing large stockpile just for this occasion.

Once you've had your coffers drained enough trying to make friends you can make an Alliance. Once you do the diplomats will come to you every so often asking to enhance relations either by giving you 1k gold, some research points, or improving your friendship (which helps if you piss them off by taking the side of someone they are feuding with or if you send Explorers to steal ♥♥♥♥ from their territory). If those civilizations are in Alliances with each other they'll come in groups. Sadly you don't get many opportunities to enhance the relationship between nations.

You'll also get separate opportunities for mutual research projects, giving you research points and a boost to your Intelligence.


^ Your beards are both pretty, now go home.


^ Somewhere in the top left is a kingdom to discover. I'm not doing so yet because Farsight and Soldem are driving me both nuts and broke.


^ I invested heavily into hunting bats since that's what Farsight wanted. Now they want bunnies. I also now want to strangle their trade rep.


^ Unlike Civilization, you aren't strengthening a political rival by mutually benefitting.


^ mE AM SMART QUEEN, MAKE LESS BRAIN BAD TOGETHER PLEEZE, K THNX BYE
Kill-stab Plaguerats and Weasel-things, yes-yes.
Den Of Plagues (the radioactive-looking headstones) are where the monster attacks come from. At the start you shouldn't mess with them, since you likely won't have any soldiers and can't restore your own health. Once you have a royal bed you should be able to take them out yourself, be aware enemies spawn in twos as you attack it and if your positioning is in a way that one starts to leave your guards won't attack them; they mostly only care when a spawned attack is coming, so you gotta chase down stragglers yourself. Dens respawn over time, and the fog of war returns where they've spawned at so don't think you can purge the map and be done with them. Still, each one you take out will reduce monster attacks. You can also game the direction the attacks come from by leaving Dens untouched. Monsters attack whatever structures they come across, which is bad if they reach your elevator but they can also get bogged down wasting their time attacking a row of headstones in your graveyard. Be aware of the entrances to your city, and control how many directions you can be attacked from.

Later on they get replaced by weasels, who have walled encampments that will alter the landscape to make space for them (RIP unexploited resources). Those are far more difficult to deal with, requiring you to have some decent soldiers (probably 5+ Barracks level), possibly setting up nearby medical beds for fast recovery once the fight is over, and an upgraded rat queen. If you haven't been investing, just focus on repelling attacks and maintaining your health. Trap investments are worth it for the weasels unless you have at least 3 tier 5 troops to deal with them, but even then knocking out their spawnpoints ahead of time is best. With the Shrine Of The Dog bonus activated you can see them on the map when Eerie Presence comes, telling you where to tunnel to. With weasel camps you want to draw your weapon, then hit the build key to bring up the squad screen. Summon your troops, and when they're with you just work on the spawn building while they deal with the defenders.

I already talked about the Lizards quite a bit in previous sections since they're kinda the endgame enemy, but for the record the archer lizards are the most dangerous I think


Losing My Ratligion (Shrines)
Its not enough to just build Shrines, you also have to pay 500 gold to activate it. Only one can be active at a time.

I'm just gonna say Snake is the best. You don't have to rush to save your injured rats unless they're underwater, poisoned, or on fire. That's useful from start to finish. Your activated ability will heal everything in an area including yourself which lets you keep your army going longer in a battle and also sneak off to heal yourself without having to snooze.


^ HAIL SLYTHERIN!
Order and Chaos Are Not Binary (Religion)
Religion is a fairly straightforward system as you're building up a settlement, but harder to retroactively add to existing ones.

Currently there's Umbaran and Purgons. Both function basically the same, you construct a basic shrine for your first follower to be the primary religious figure of. By passing by it the rats are evangelized into the new religion. Every ten followers of it unlocks a new tier of the faith research building, the Spell Desk. Since a few buildings got shuffled into that building, old settlements have some unlocked before you have the follower tier to research it.

Once converted the faith of rats is treated like hunger or necessities; it needs to be refilled. Both have the effect of a rat passing the main "you may only build one" holy building having a chance to get converts, but Umbarans require passive reinforcement by putting an altar dedicated to an activity nearby that activity and Purgons require you to take a more active role in their faith. Both religions have luxuries you can make which reinforce the faith of the rats, but while you can buy Purgon ones from other nations and they're fairly cheap to produce via a supply chain specifically for them the Umbaran equivalents take higher quality goods used in other industries, can't be bartered for from other nations, and have unpleasant effects like making your rats slightly more likely to commit crime (though its not that much).

Unlocking tiers of the religion also scores you some recipes for your armor structure, so be sure to check it out again if developing an old settlement.

The main issue with the Umbaran religion is it requires deaths happening nearby its non-shrine structures; that's not super hard since you can construct it near where your hunters do their hunting, but its not going to be converting a lot of followers if the only rat nearby is always just your hunter. Relocating some industry nearby the hunter might be necessary to progress the early stages. Thankfully later on you unlock buildings that don't even require a worker to passively convert rats to followers just by doing the activity nearby, like sleeping near the Sloth shrine or eating near the Gluttony shrine. Production of Umbaran luxuries are gonna take Slate and Obsidian, making it more a thing for a developed settlement to reach the end of the tree. You also have to deal with Umbarans being a bit less serene than normal rats or Purgons, but the perk at the end of all the effort is the ability to make your rats way less reliant on rest and sleep plus you can even edit their traits, removing that "-5 Happiness if anyone else has the same job because this rat thinks its the real protagonist" with "-30% Joy decline rat because they know their place now". Unfortunately, you can't do this with Purgons so if you have an established settlement consider using mind control to alter personalities of the settlement first before turning your rats to praise the sun.

Purgons on the other hand are more reliant on immigration and thus way easier in new games, with the likelihood of new rat immigrants being already faithful going up the more you get into the tree. Actually building them up is fairly difficult, though you have two main advantages: you can make or buy a food item from other nations which has a chance of making your rats a follower (by default only available to middle and upper class, be sure to use a law to allow the lower classes if you want them). Once you get ten followers you can construct a Podium, which requires YOU to administer a sermon (this is done by checking the building status and choosing the option at the bottom). It automatically teleports all current Purgons to the building and reinforces their faith. Crafting their holy luxuries is its own simple supply chain combining hunters and gatherers, the latter gathering flowers from special graveyard buildings and the latter killing the critters who show up if those flowers aren't harvested. Purgons are way more docile thanks to the perks than non-religious or Umbaran rats, allowing you to be a bit more negligent in their other needs while you pursue a religious industry; settlements building slow and heavily incorporating Purgon development are gonna have a lot less worries about civilization bottle necks.

If you don't have any rats petitioning you to start the religion, make some unemployed ones. They won't ask to start a faith if they have a job already.

SUMMON THE ELECTOR RATS!
As far as I can tell monster attacks are based on your Prosperity level, which seems to be based on your stockpiles. If I'm wrong let me know and I'll correct this.

The first tier of rat soldiery are prone to being overwhelmed when monsters attack en mass, so you'll need to act as a medic for them. Consider having unoccupied beds near the main elevator for them.

The second tier are for bolstering the first tier, but still handle themselves better and are more likely to deal with monsters without needing you to tuck them into bed when the work is done.

The side tier of the more jungle-based troops are fairly likely to handle stuff themselves, the dodger class can bog down monsters by themselves while the druid is more helpful if you are manually putting them into squads and leading them into battle.

The third tier are the good stuff, they can handle the rat zombie stages mostly by themselves and can manage the ferrets as well as tier 2 infantry can handle zombies.

I find by Prosperity 5 you want at least two tier 1 and one tier 2 soldiers, but preferably two tier 2. If you can manage a tier 3 you can get away with any other kind of soldier. But my preference is a dodger and a tier 3 at that point. Remember that soldier rats don't take much to maintain once you have a good tax system and food harvesting system, so they're more the space you place them (near the elevator so they can access the entire settlement) and the metal to build their building.
Who's The Boss? (Bosses And Dungeons)

The Forgotten Ruins are just a speedrun. Slow down and you'll take damage from the swarms of insects, keep moving. Equip yourself for health and speed, maybe the trinket that eliminates fall damage. Nothing else matters statwise. Once you get down to the ground level head all the way to the left to the corpse of the Shaman for a buff. Once you reach the end you can either hand over the trinket for a 5k gold pay day, or keep it for a blueprint for a bed that takes higher tier ingredients but heals 2hp faster (and matches the Purgon jungle aesthetic). Neither are really significant, but I prefer the bed as a trophy.

^The Shaman's Body


Once you find the slime dungeon you don't have to worry, it won't do anything. The boss inside will pretty much destroy any soldiers you bring unless you stack end game troops with buffs, so don't bring them. Build the royal armory, make yourself a bow, reforge until you get poison, find the lava forge in the deeps and reforge another poison buff, save before going in, and take out the boss yourself. If you want to do it the hard way with a melee weapon its a hard fight since even though it telegraphs its moves it also self-heals making it a very long fight where you can't take many hits. Otherwise you can just stand on a ledge and spam the attack button to whittle down its health with a huge stacking poison tick and tank its fart attack. Once its dead you get a choice of three rewards, the first becomes a renewable resource of a special slime that lets the apothecary make healing potions while the third is a special weapon that's more powerful than your others and also boosts your mining abilities; I go for the third. The dungeon entrance remains on the map afterwards which you can deconstruct for a few of the special regen potion slimes.

^Stand and fire, the soldiers mostly just fall off the sides.

^As tempting as the Pickaxe is, outside speedruns I don't think its as useful as the mine since it becomes a renewable resource you can trade, make goods for your rats, and use as a component in creating a passive health regen item.

^The Mine might be a ways away from your fortress, but is usually near the Jungle Tree areas meaning before too long you should be able to assemble a fast and semi-direct path with Jungle Blocks and Wood Ladders. Giving a nearby bed and latrine, extras if you appoint hunters and harvesters nearby, helps too.

The second boss is harder until you know the trick.On the sides of the arena are health potions you can attack which can resurrect any downed but not yet dead troops, otherwise you just use the dirt on the ground to build five consecutive dirt blocks which knocks out the boar when it charges. It can attack from behind and in front but will lock itself in its animation which allows you to get some stabs in. You can partially construct the blocks ahead of time so long as you don't finish until its time. Once it runs to the left side of the screen just finish the blocks and stand on the right of them, stab away once it knocks itself out, and repeat for the rest of the boss fight. Watch someone do it here. Leave them a thumbs-up too, I learned it from them.

The mummy Weasel, the Weaselord, was a long endurance fight my first time with health regen reforges and lightning bow which made the first half easy and the second half an hourlong drudge. The second time I used poison reforged Bow with two squads, one of Witches and Necromancers for damage-buffed skeleton horde and another of Centurions for nigh-unkillable rats. Either way, the first half consists of six chambers on the sides and a large central stela with four urns. The corner chambers will spawn mummy weasels which are trying to get to the stela, each one who does lights an urn and once all four are lit its an automatic game-over. Each wave consists of a number of weasels divided between slow plodders, fast runners, healer shamans, and of very slow mummies that attack what's in front of them with increasing difficulty and number of more elite weasels each wave plus several waves attacking from more than one corner at once. Order each squad to guard one side, work on poisoning the weasels to soften them up while you try and smash all the urns plus a jackal statue on the left middle chamber. These grant you resources to build traps in the places where waves spawn, and each wave also drops resources. Place a few Rat-In-The-Boxes towards the end of the halls and on the place your squads are guarding, some Web-launchers as close to the spawn as you can, and some Spikes for the Web-launchers to push mummies back into repeatedly. The smashers are effective, but costly in resources so prioritize the other three. None of the traps need repair or wear out during the fight. Once you get past eight waves the stela collapses and the Weaselord appears on his throne. I mostly tanked his attacks, hanging out on the top during the second half of the fight when his mask breaks and used the Snake Totem to keep the Necromancers/Witches topped off when I got to half health. Almost all the damage came from the stacked Poison I got onto him, which melted him down in decent time. Once you beat him you have the choice of a bank that delivers interest on what you put in, eighty gold bars, or a staff that deals a huge amount of damage. Obviously the gold should be passed on, the bank is a very nice way of getting another source of constant revenue that requires no upkeep (though in my first run I forgot it existed and wound up with a LOT of gold in it). As for the staff, it relies on having a huge stockpile of unused gold to be effective which I put towards achievements and a rat utopia free from want plus a tower of gold and stained glass, so I call it pretty lame as a limited choice against the bank.
Once you win you can get a bank building you can deposit a bunch of gold in to see it increase over time.

^ The least fun I had playing this game the first time. But he's no Settra.

^ I kinda forgot about this thing...

^ Smashy smashy!

Don't forget to grab resources.

^ I prioritized all the traps other than Web-launchers on the Centurion side. They required no healing, the mummies barely scratched them, but needed help killing.

^ The Witches and Necromancers were turning the mummies into skeletal minions quickly and tied down all but the runners from the top left corner, though they needed a bit of healing towards the end.


^ He can outheal the bow, not so much the Poison.


^ Squeal, piggie.


^ Mine now.
Eight-legged Friends
Don't attack spiders, they're your renewable resource of webs which get you cloth materials and also water generation which hooks up your farms and also can be sold to desert cities. You can't farm them like you can other animals, they also don't bother you. Live and let live!

So wait, how do I win?
Unlike games like Dwarf Fortress there is a win condition. You want to build the giant statue to your accomplishments, starting with the base which is unlocked just by reaching a Prosperity level. After that you have to pick for the middle section what you're aiming for; don't worry if you're way past the point of the goal you choose, its retroactively applied. Then you choose your actual win condition from three for the final section, which unlocks achievements.

14 件のコメント
Mae 3月24日 16時28分 
Thanks for the great guide. I do have to disagree about the troops being useless in boss fights though. They killed the boar quickly enough that I never had to do the dirt mechanic, and the mummy they killed in the second boss wave while I was just attacking the summons. The squad buffs help a lot. I have a frontline tank squad with 3 legionaries, 2 medics, and a melee dps, and a backline dps squad of 5 witches and a necromancer. With all the witch buffs and 20 int, the necromancer has about 80 attack, which is more than my well geared leader.
Roundabout  [作成者] 2024年8月10日 17時52分 
@roguereader47
Thank you. I haven't played in a while so its not updated for the last few updates, I'm sorry. But I hope its helpful as-is.
roguereader47 2024年8月10日 16時44分 
This is an amazingly helpful thread! Thank you!
Meikyu 2024年8月10日 14時49分 
"Don't be like me and take six runs to realize it has tabs for armor and accessories"

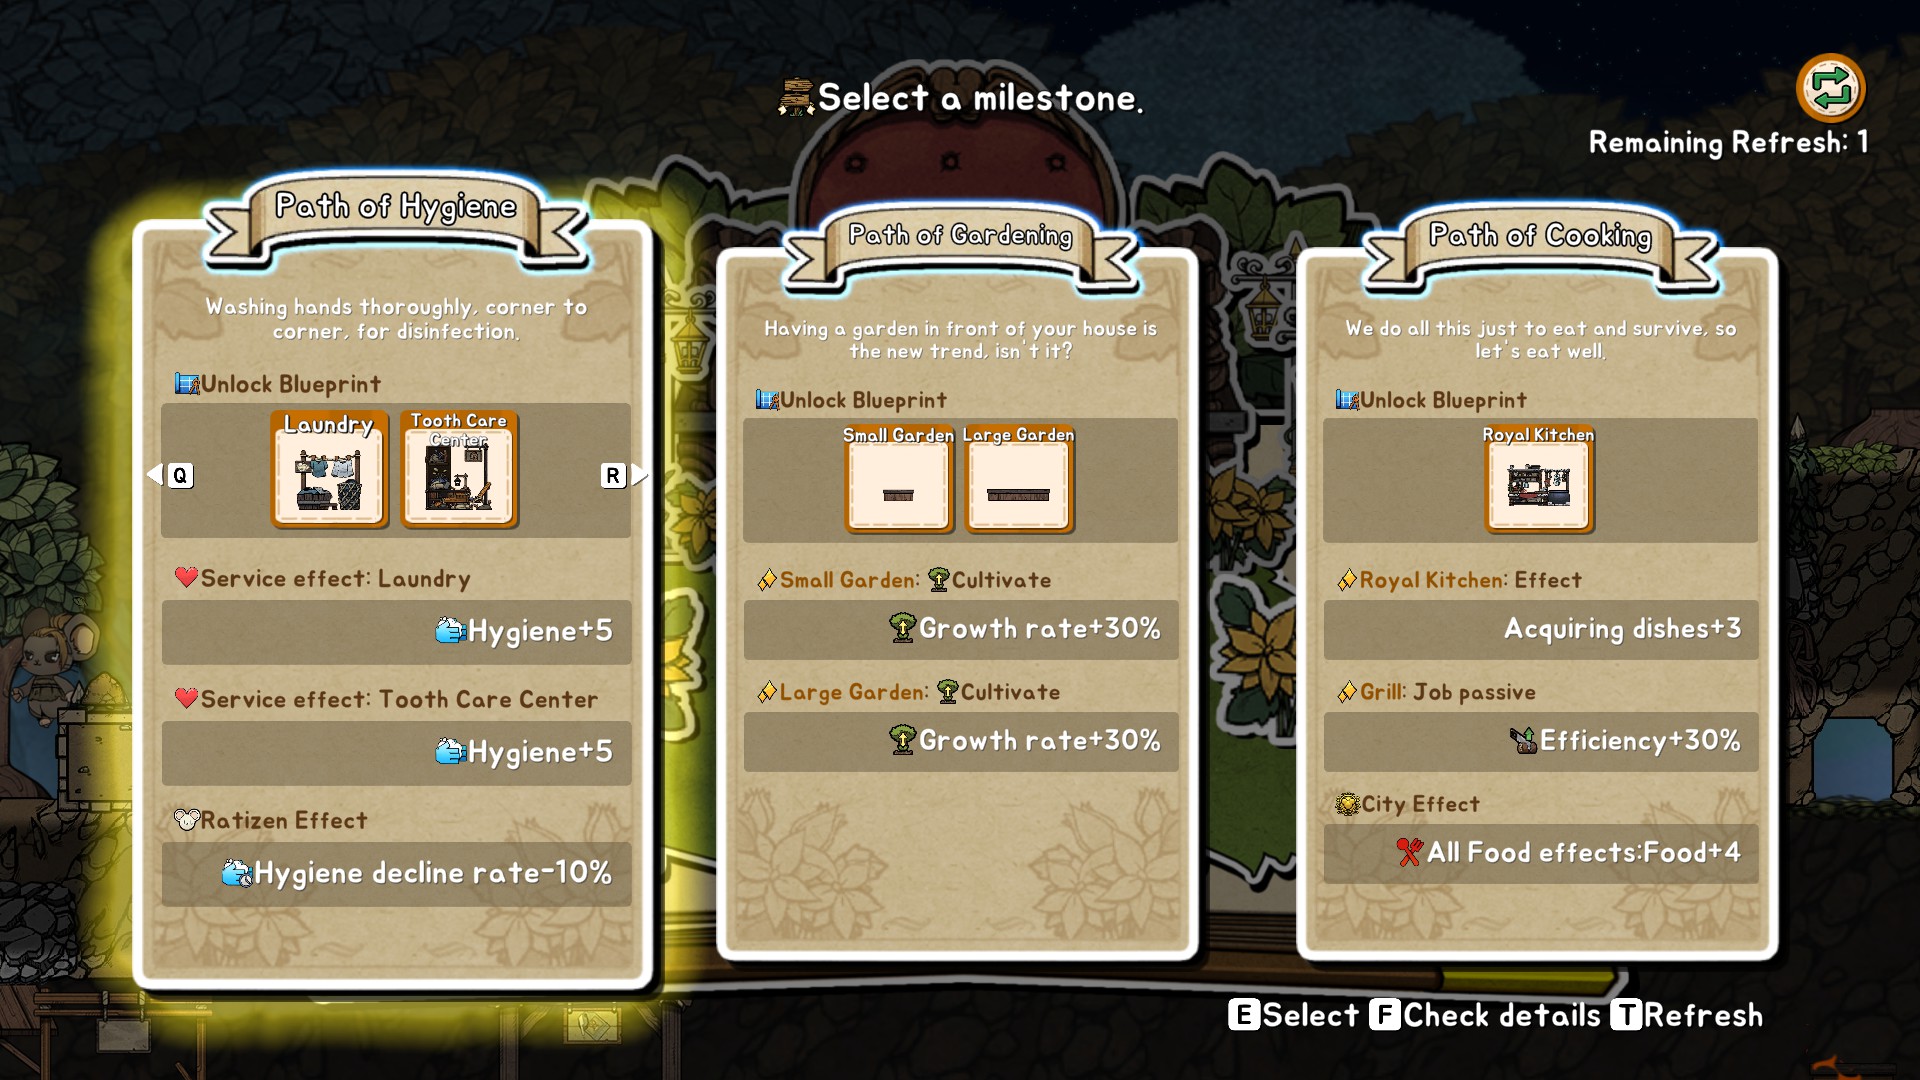
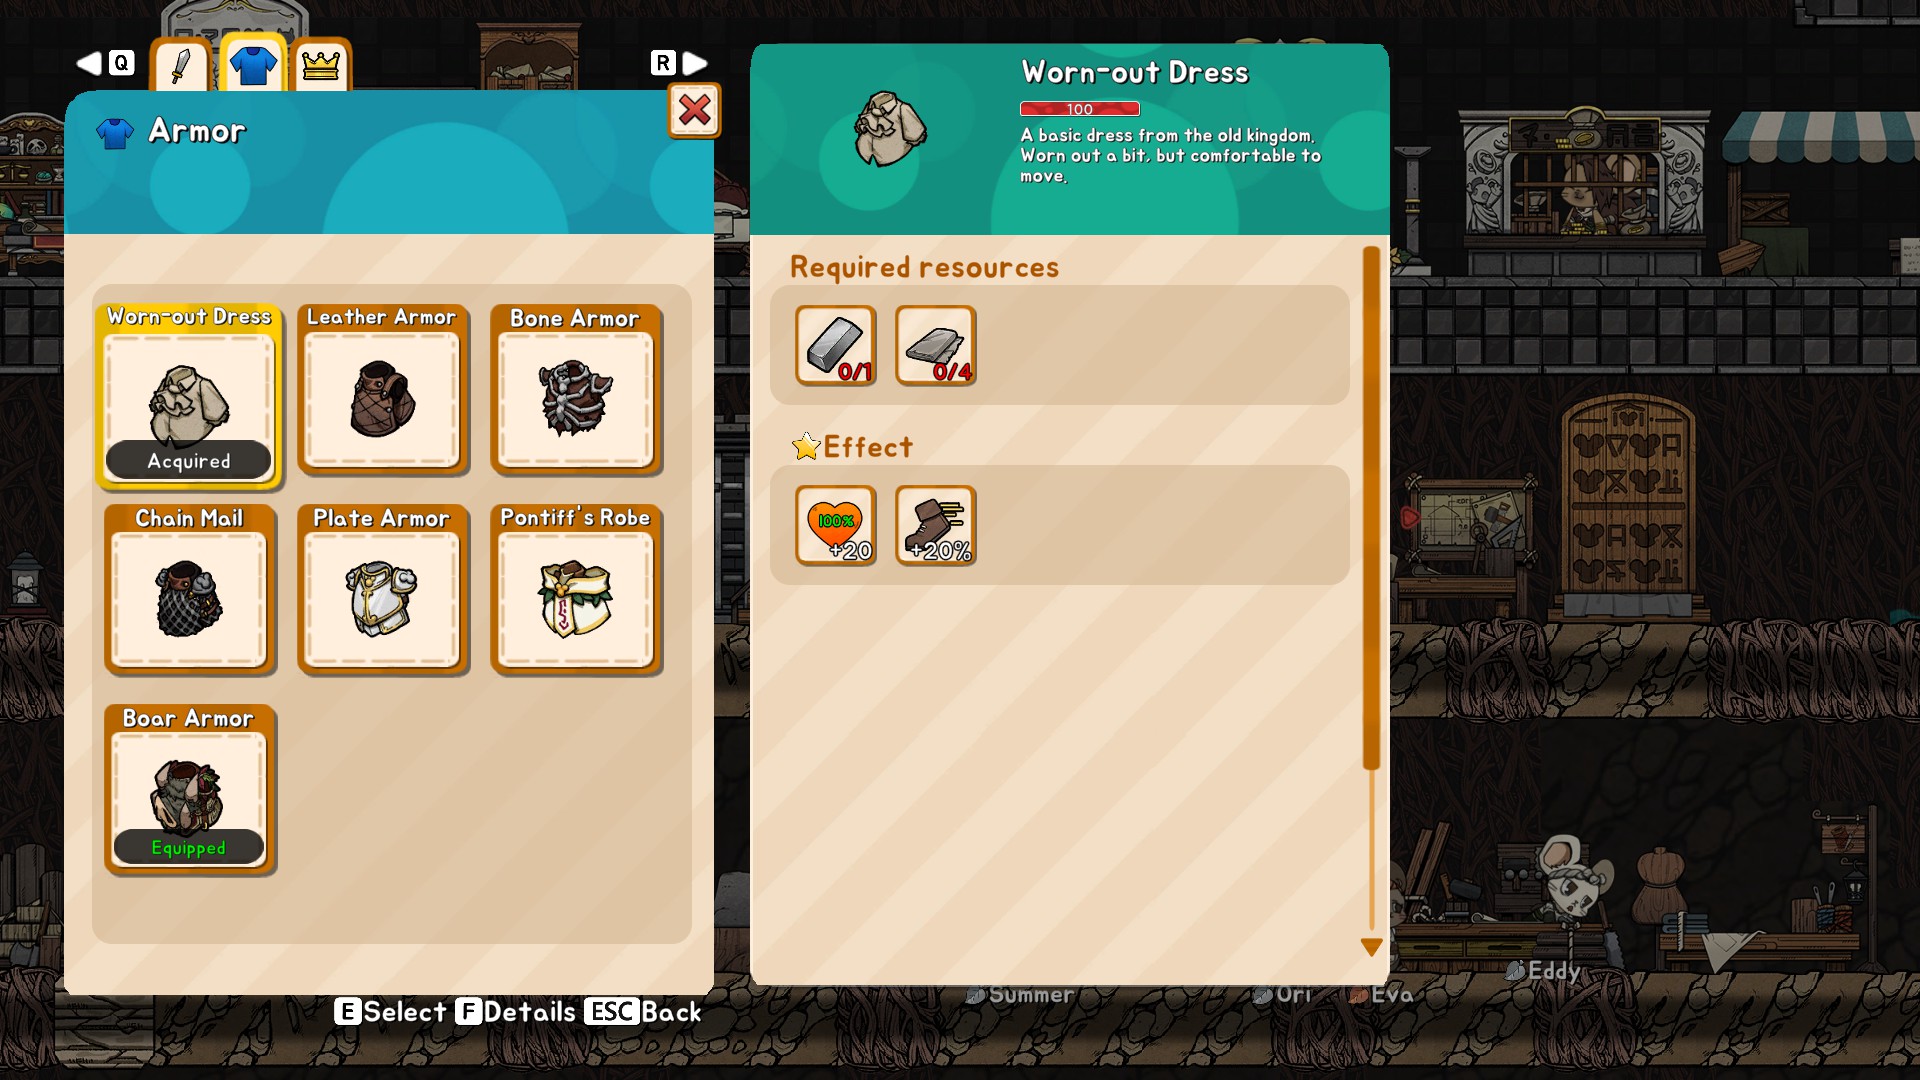
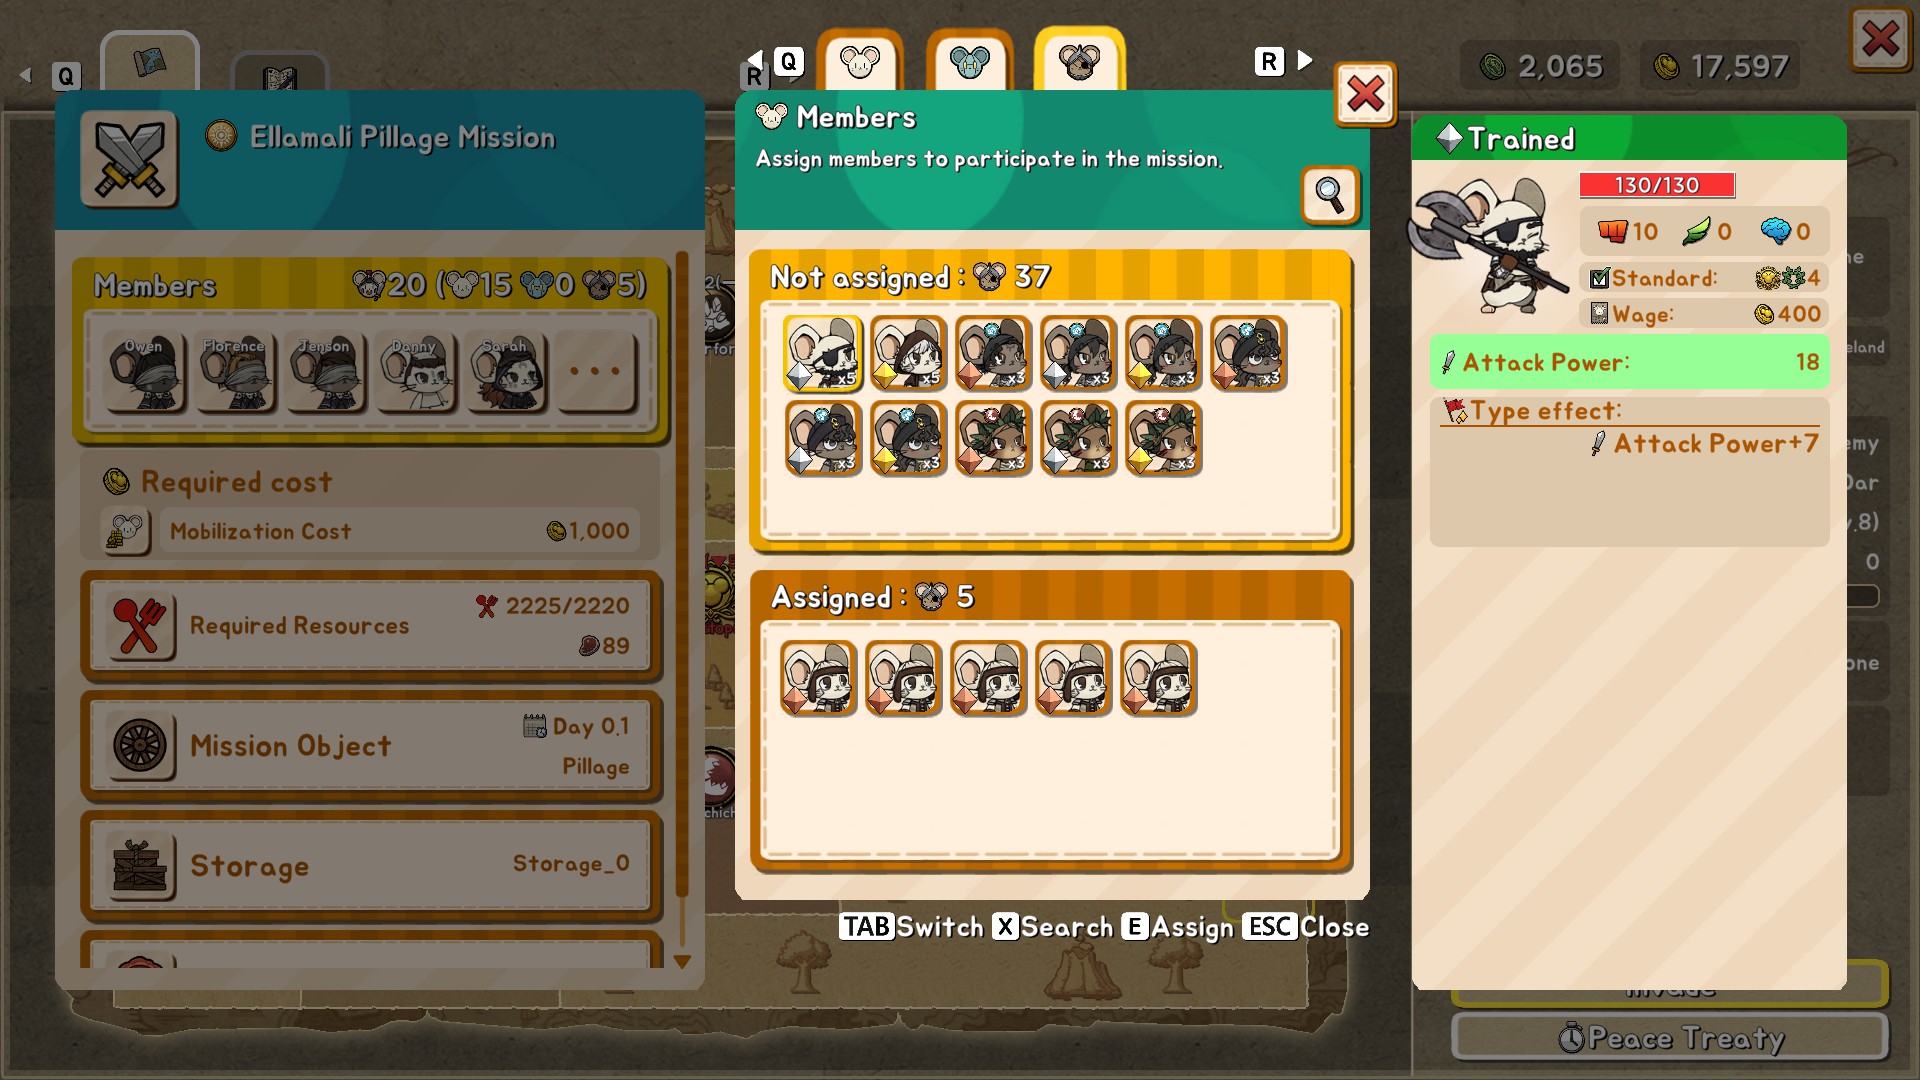
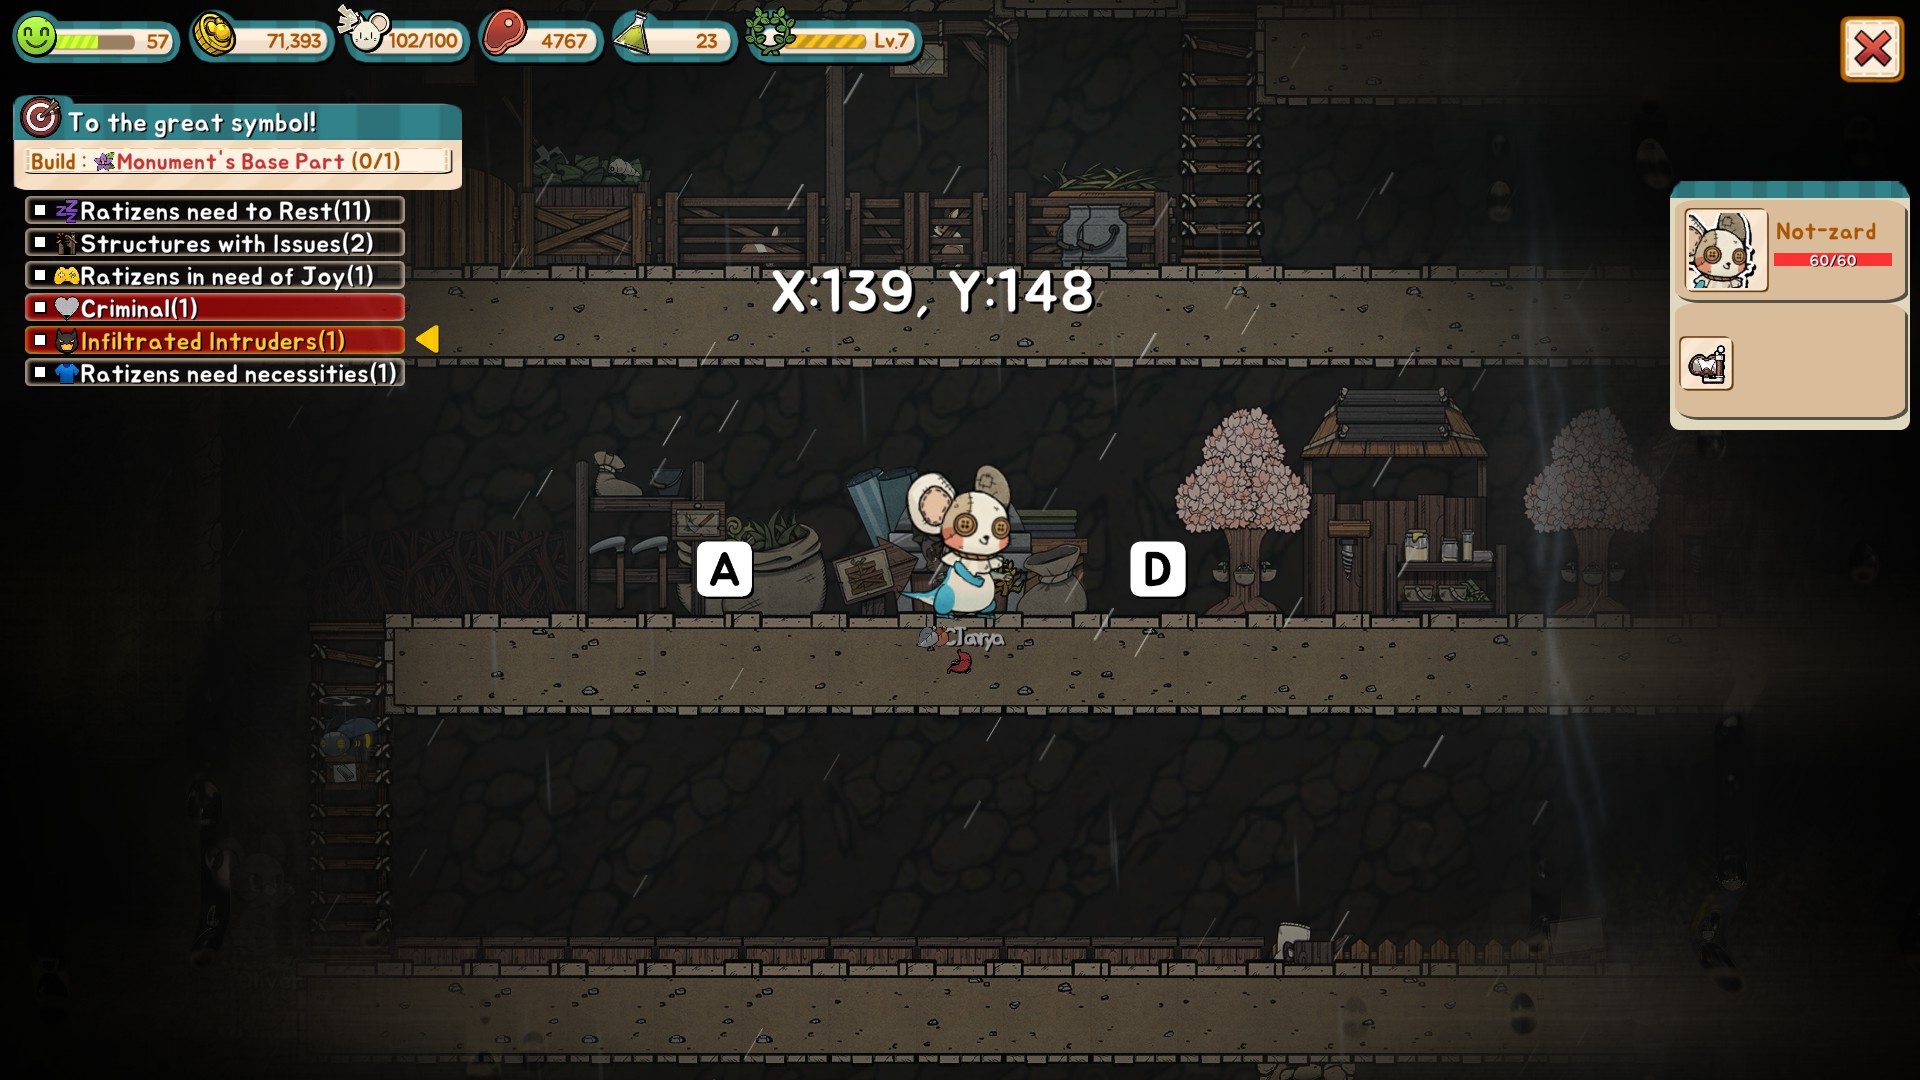
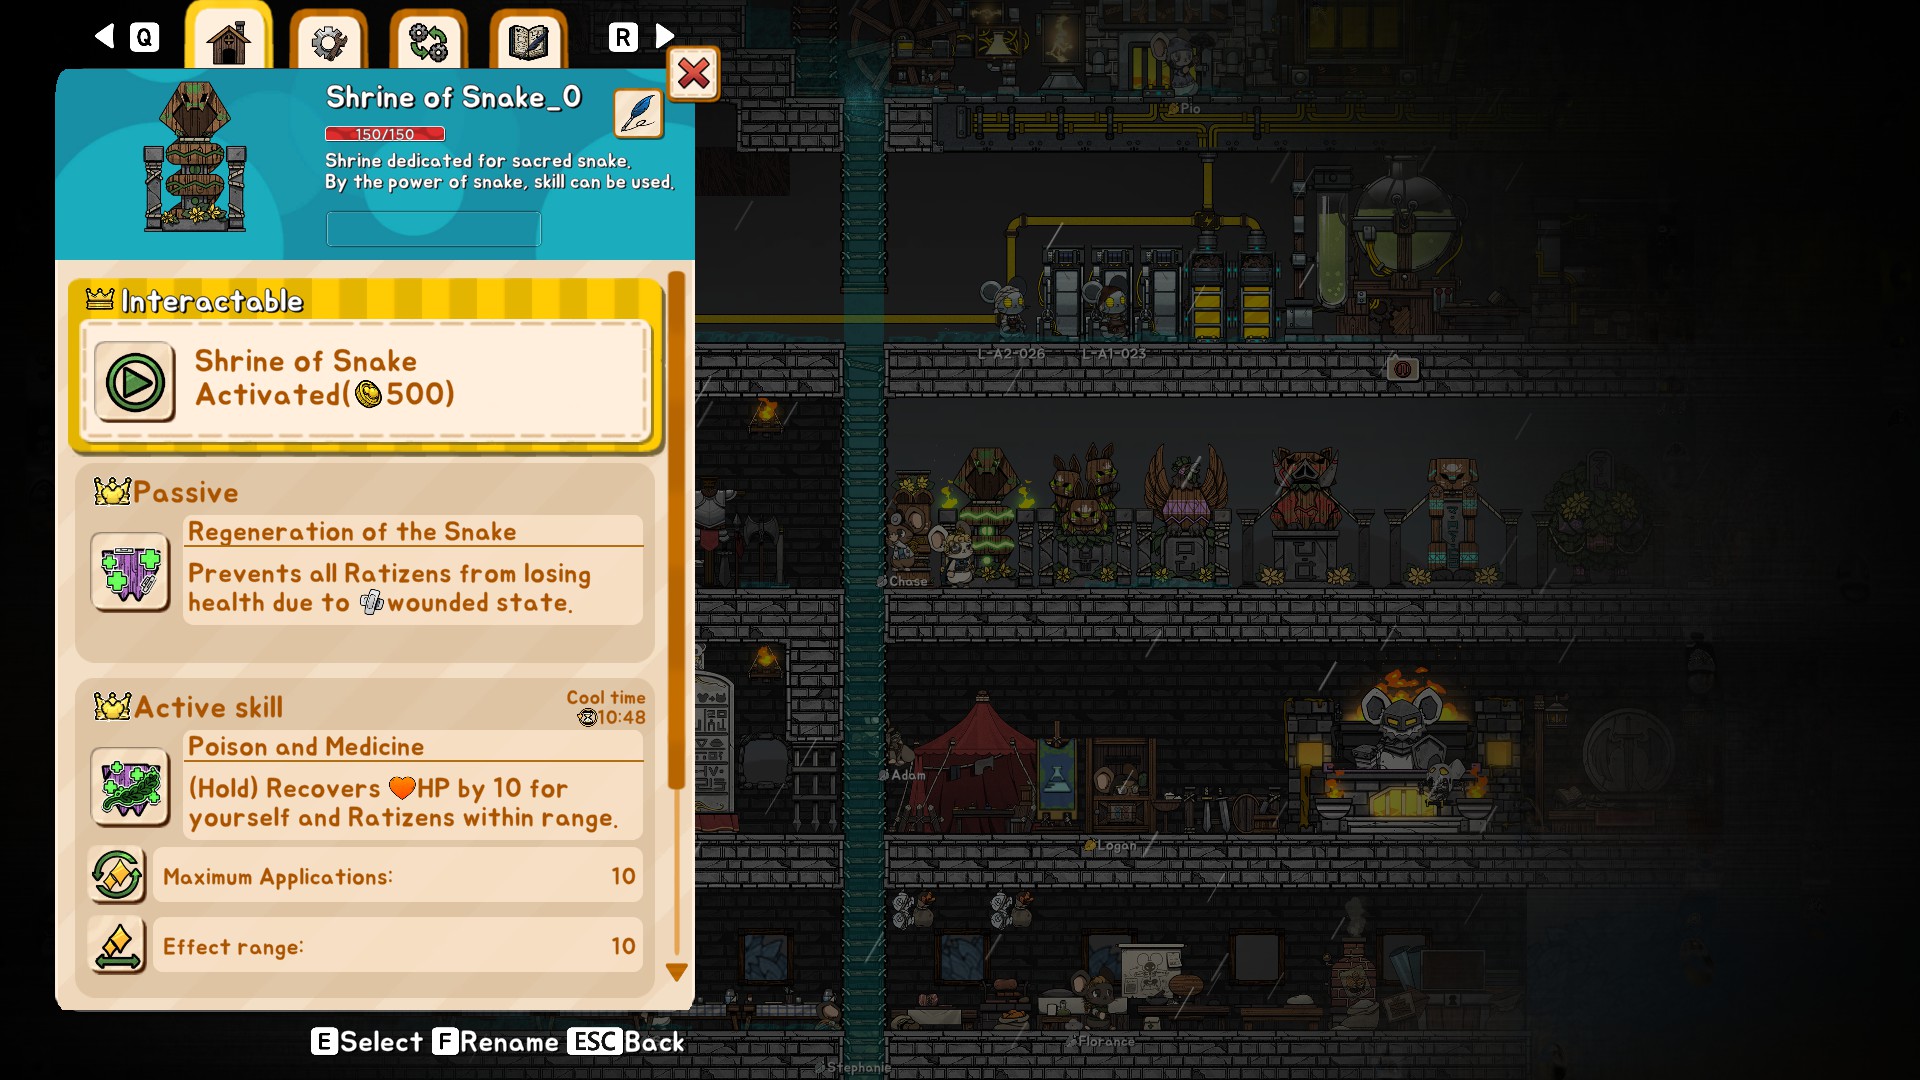
WAIT WHAT THE F HOW DID I NOT NOTICE THIS. The dev should really make a mission just for you to build your first armor or acc, im like 2 years into my 5st run and didnt notice the Armor tab wtf.
Gemeeni 2024年1月12日 11時01分 
Thanks ! I will do my best ! ♥
Roundabout  [作成者] 2024年1月9日 19時43分 
@Akimoto Esumi

Go for it!
Gemeeni 2024年1月9日 10時18分 
Hii ! Thanks for the Guide ! Im french and not seeing any guide in french, may i made one inspired by you ? (full credited of course !):GhostScared::GhostScared:
Roundabout  [作成者] 2024年1月8日 2時37分 
@soulskulptor
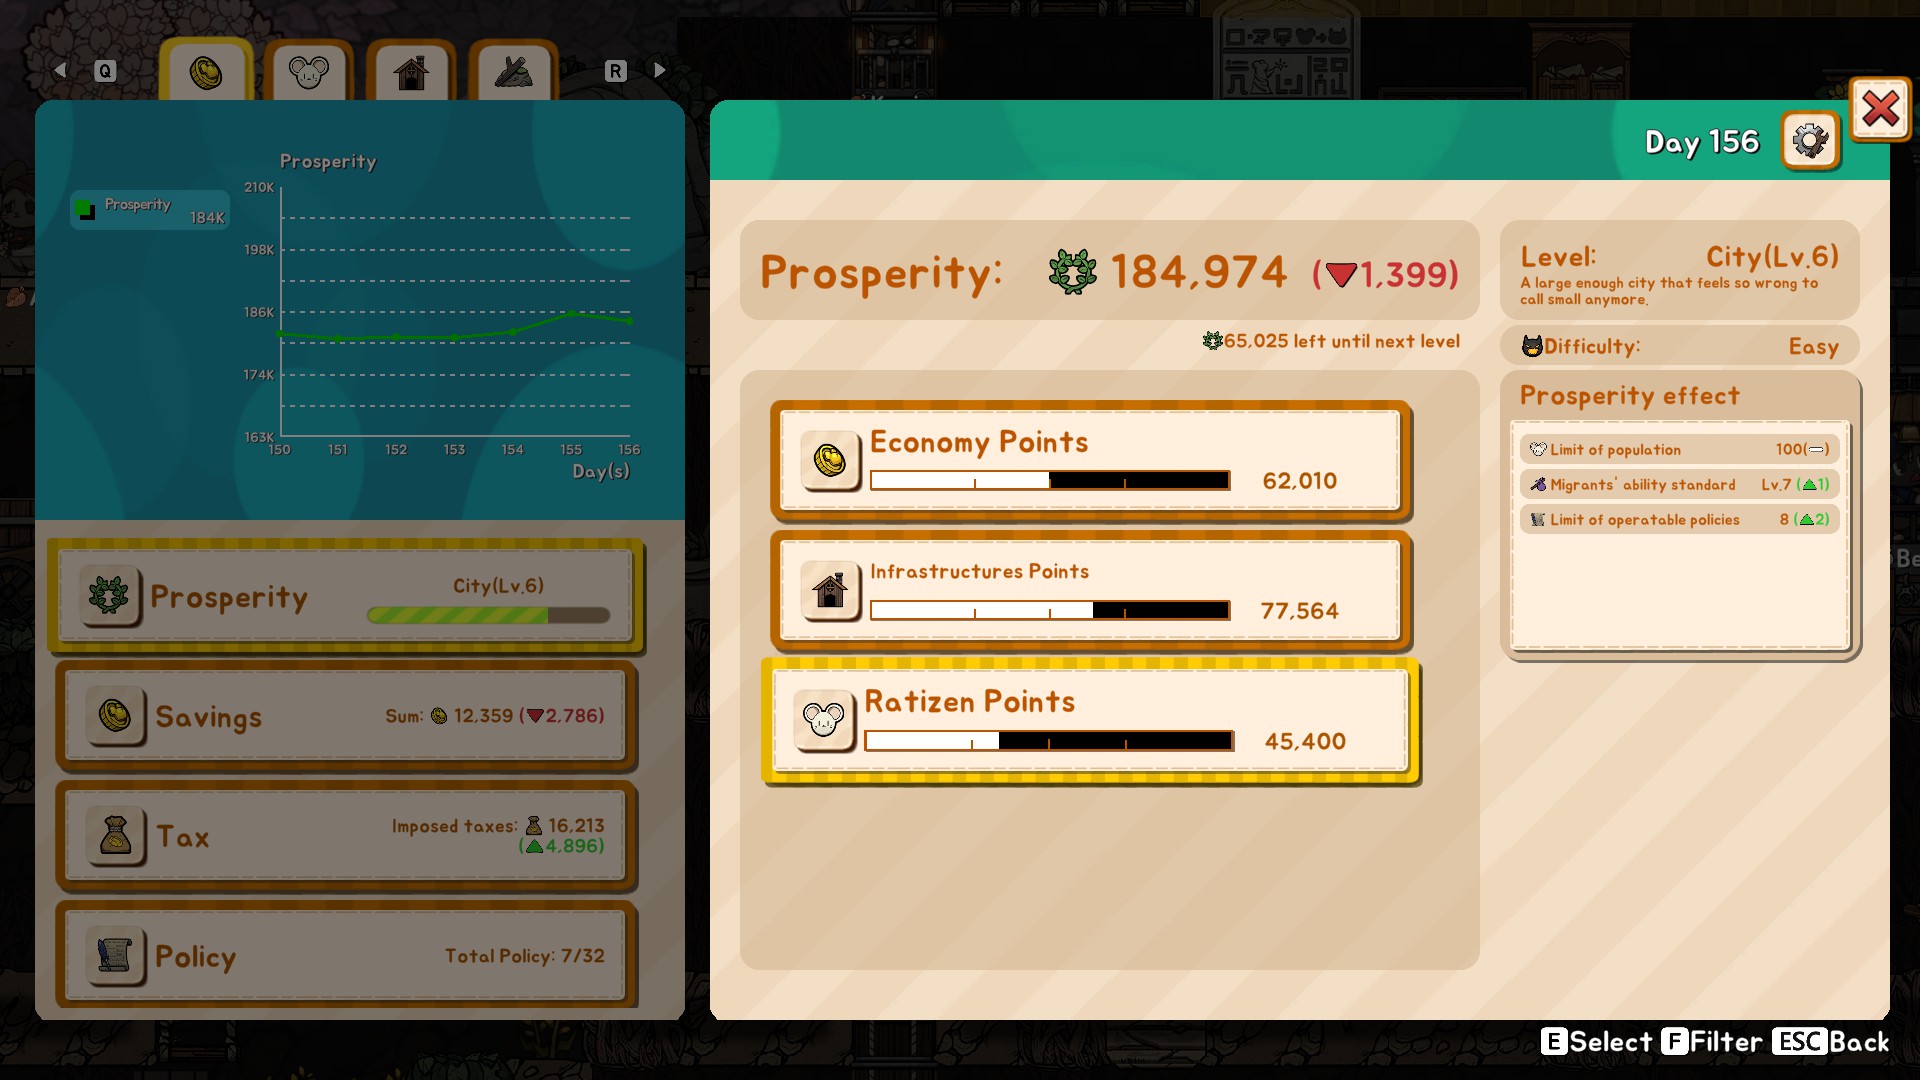
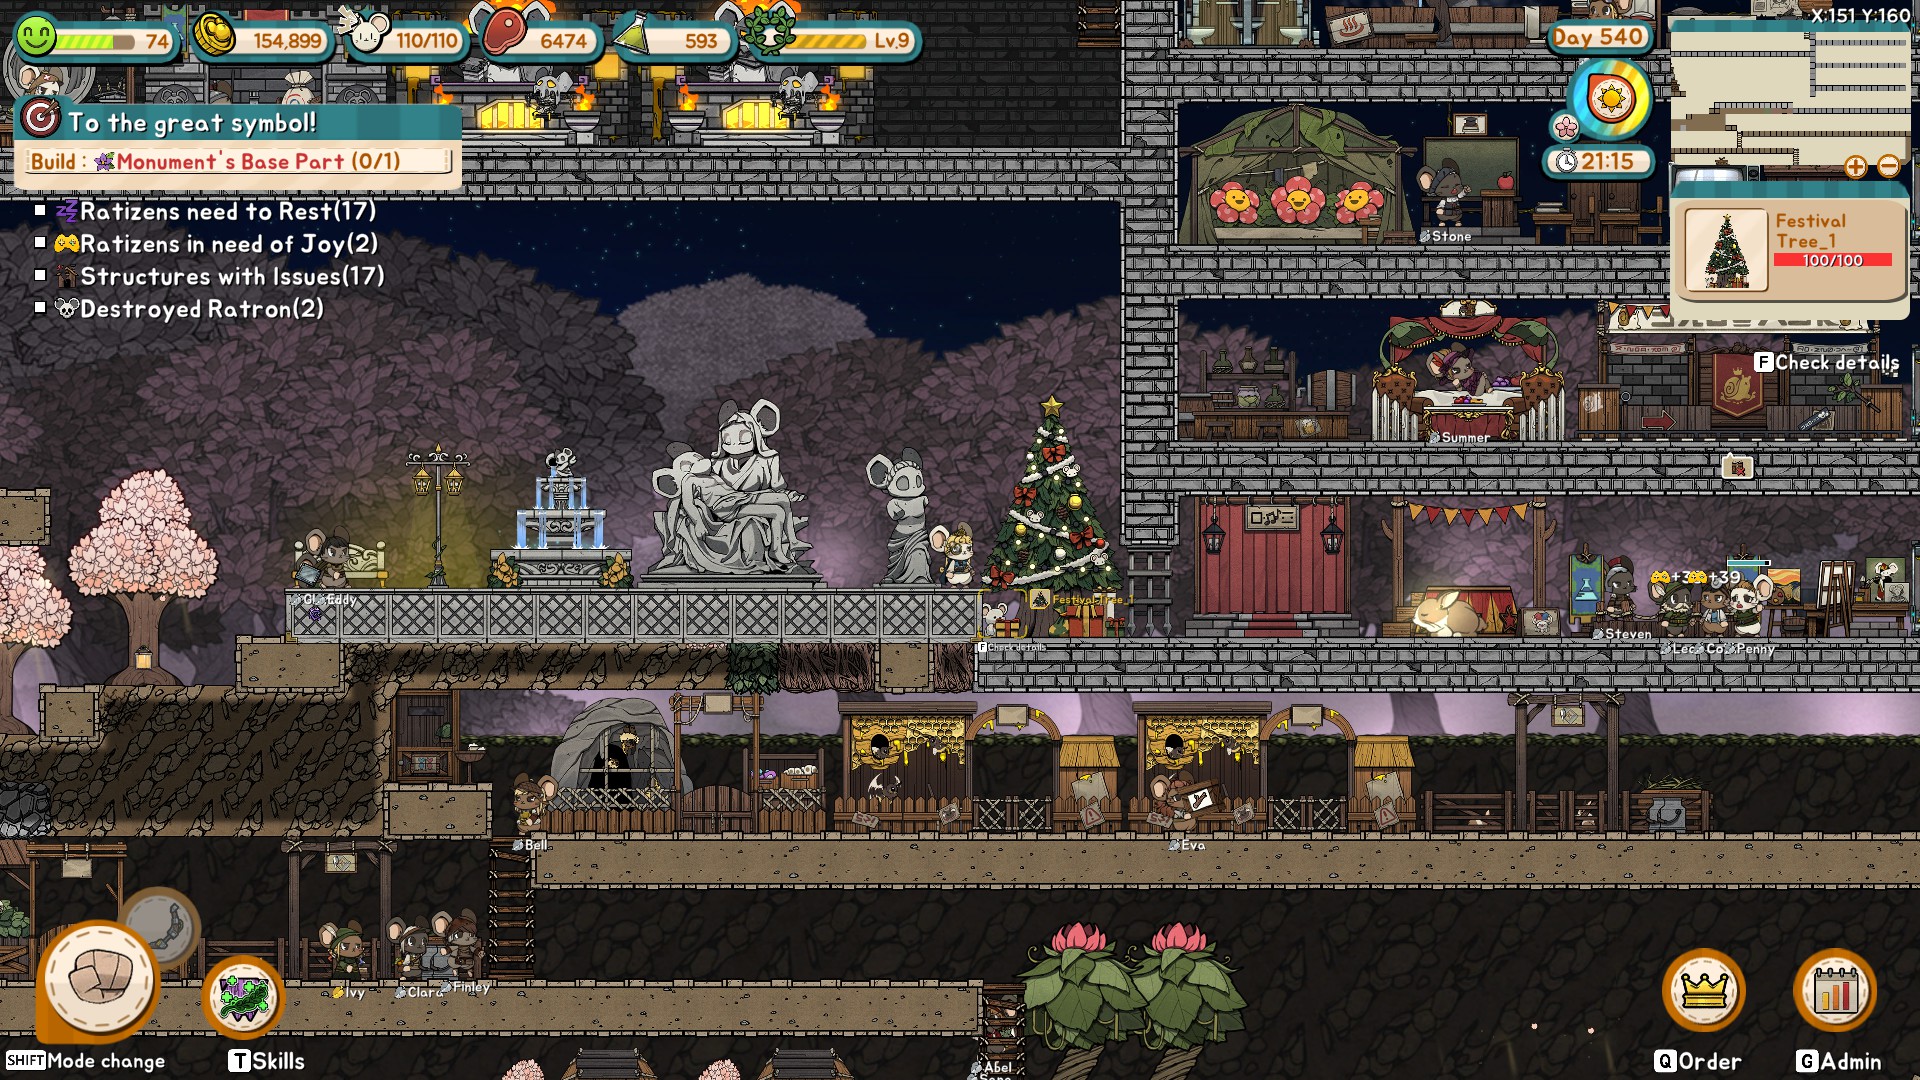
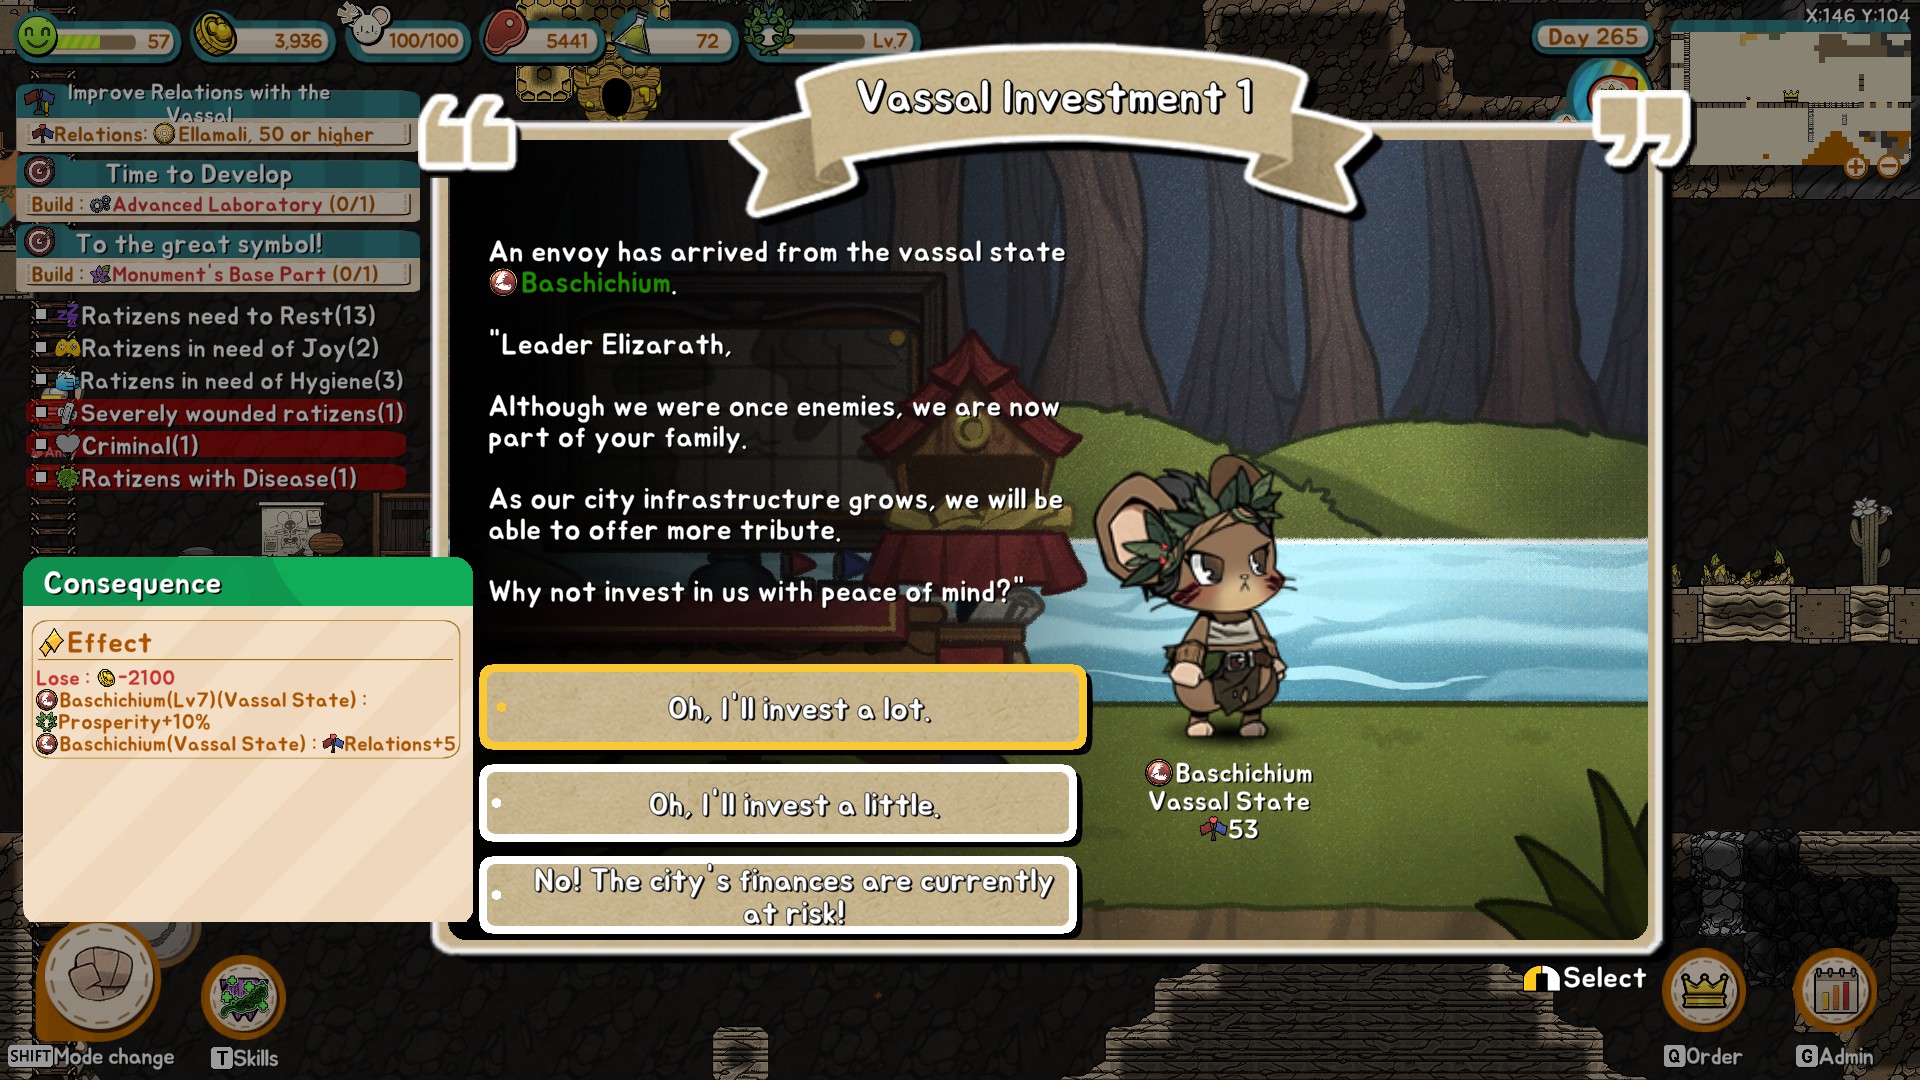
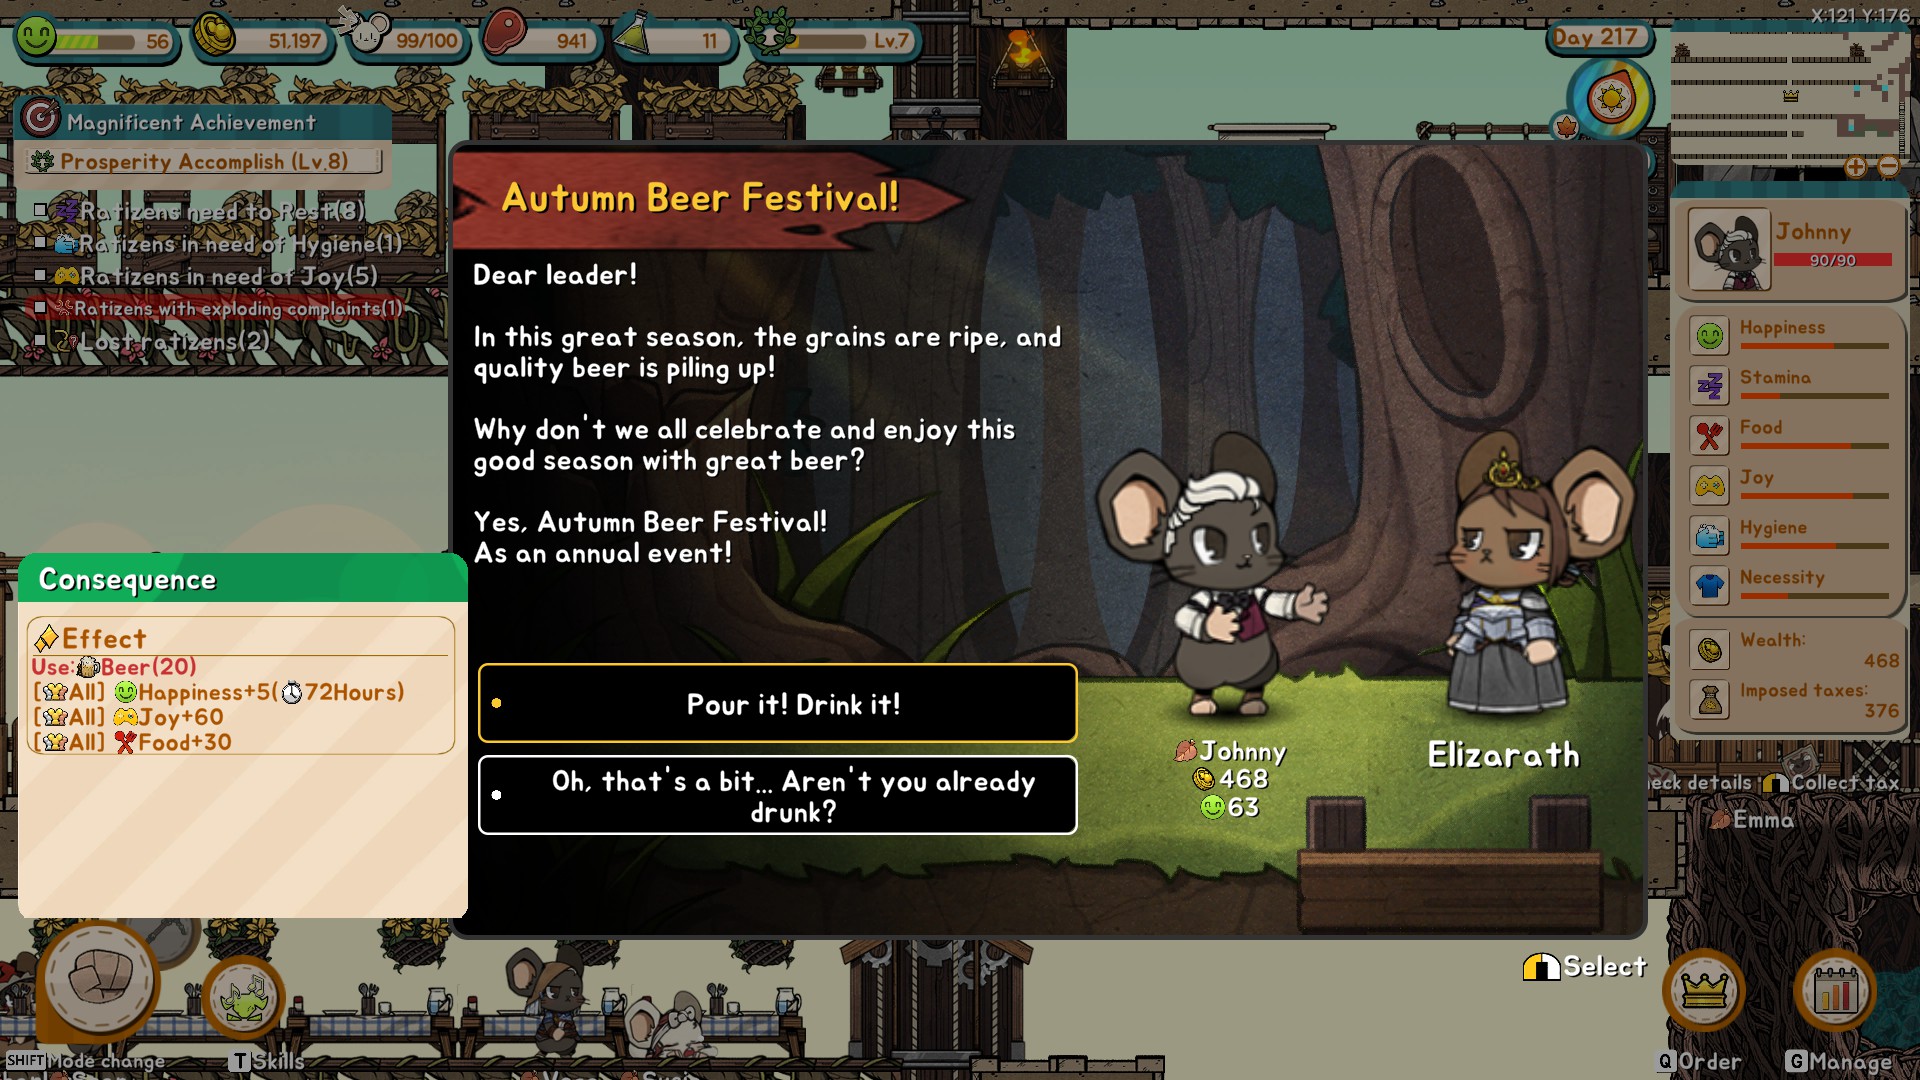
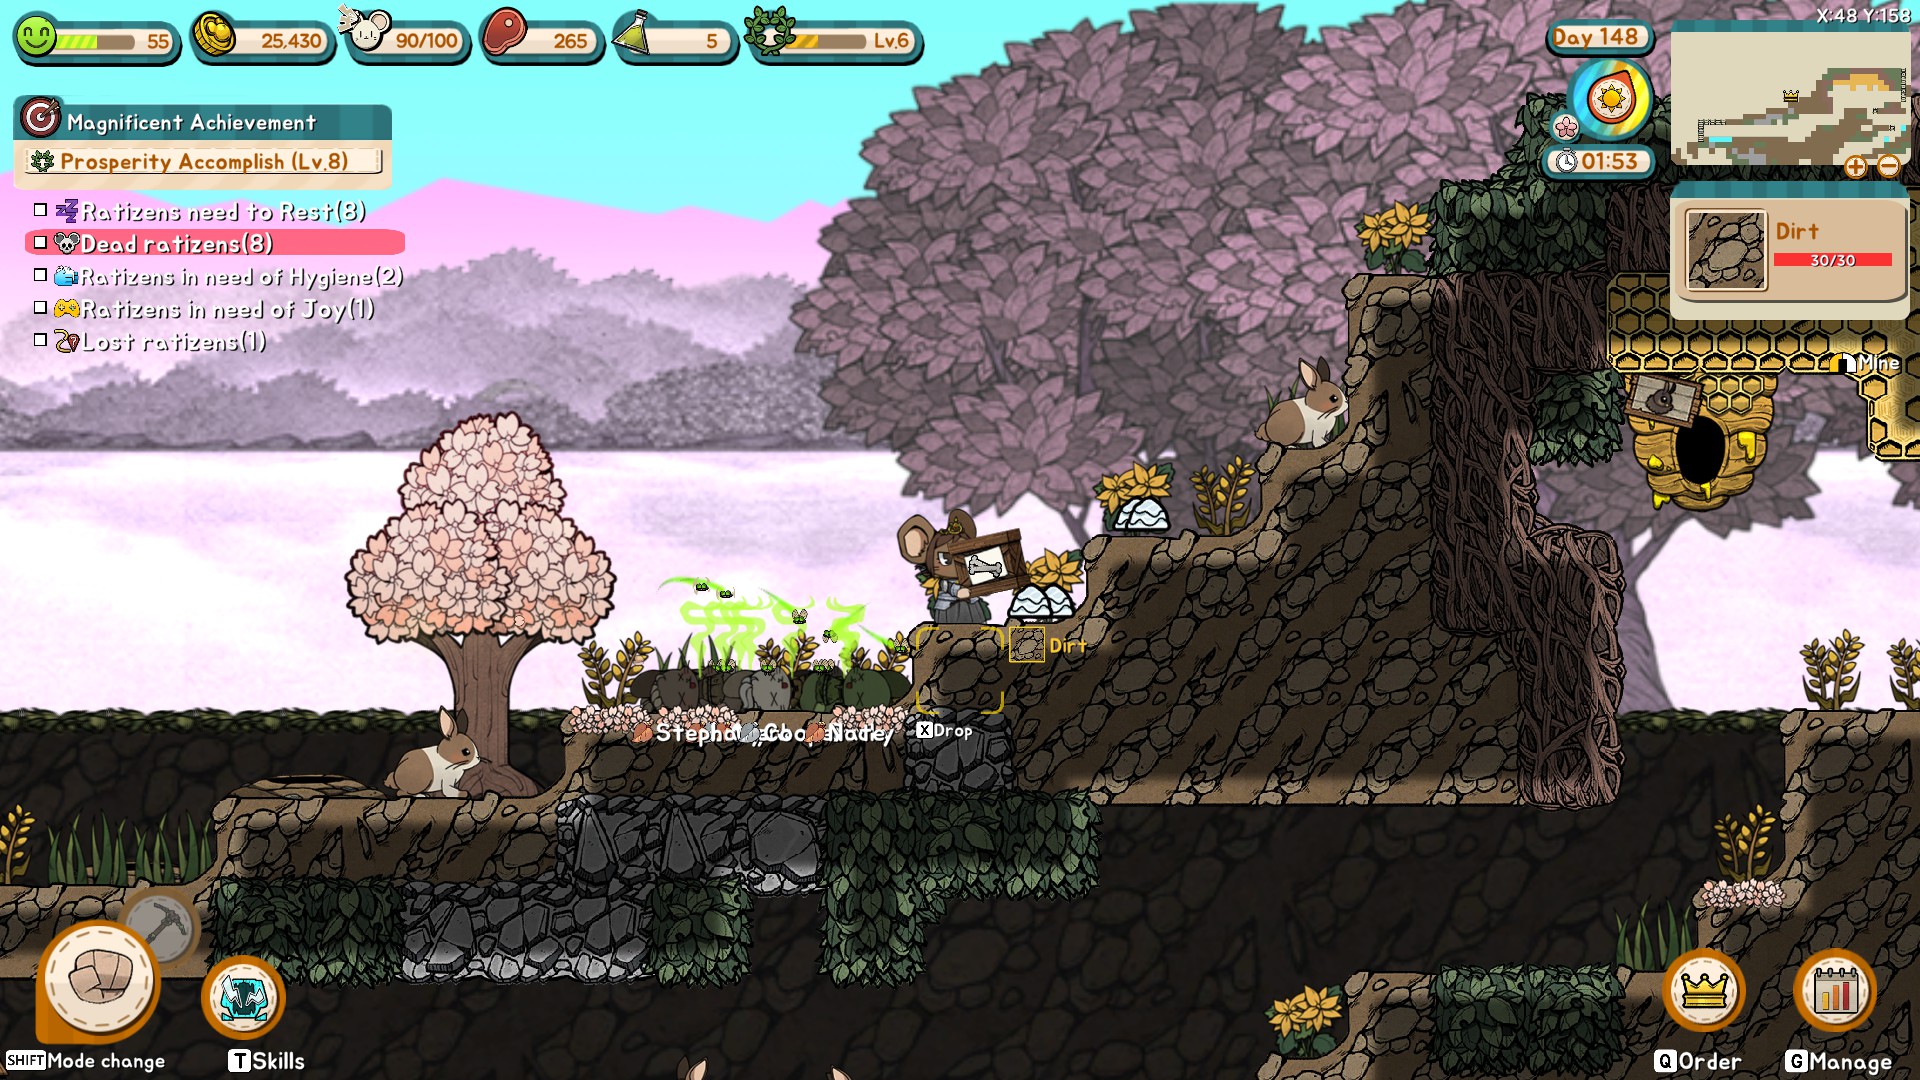
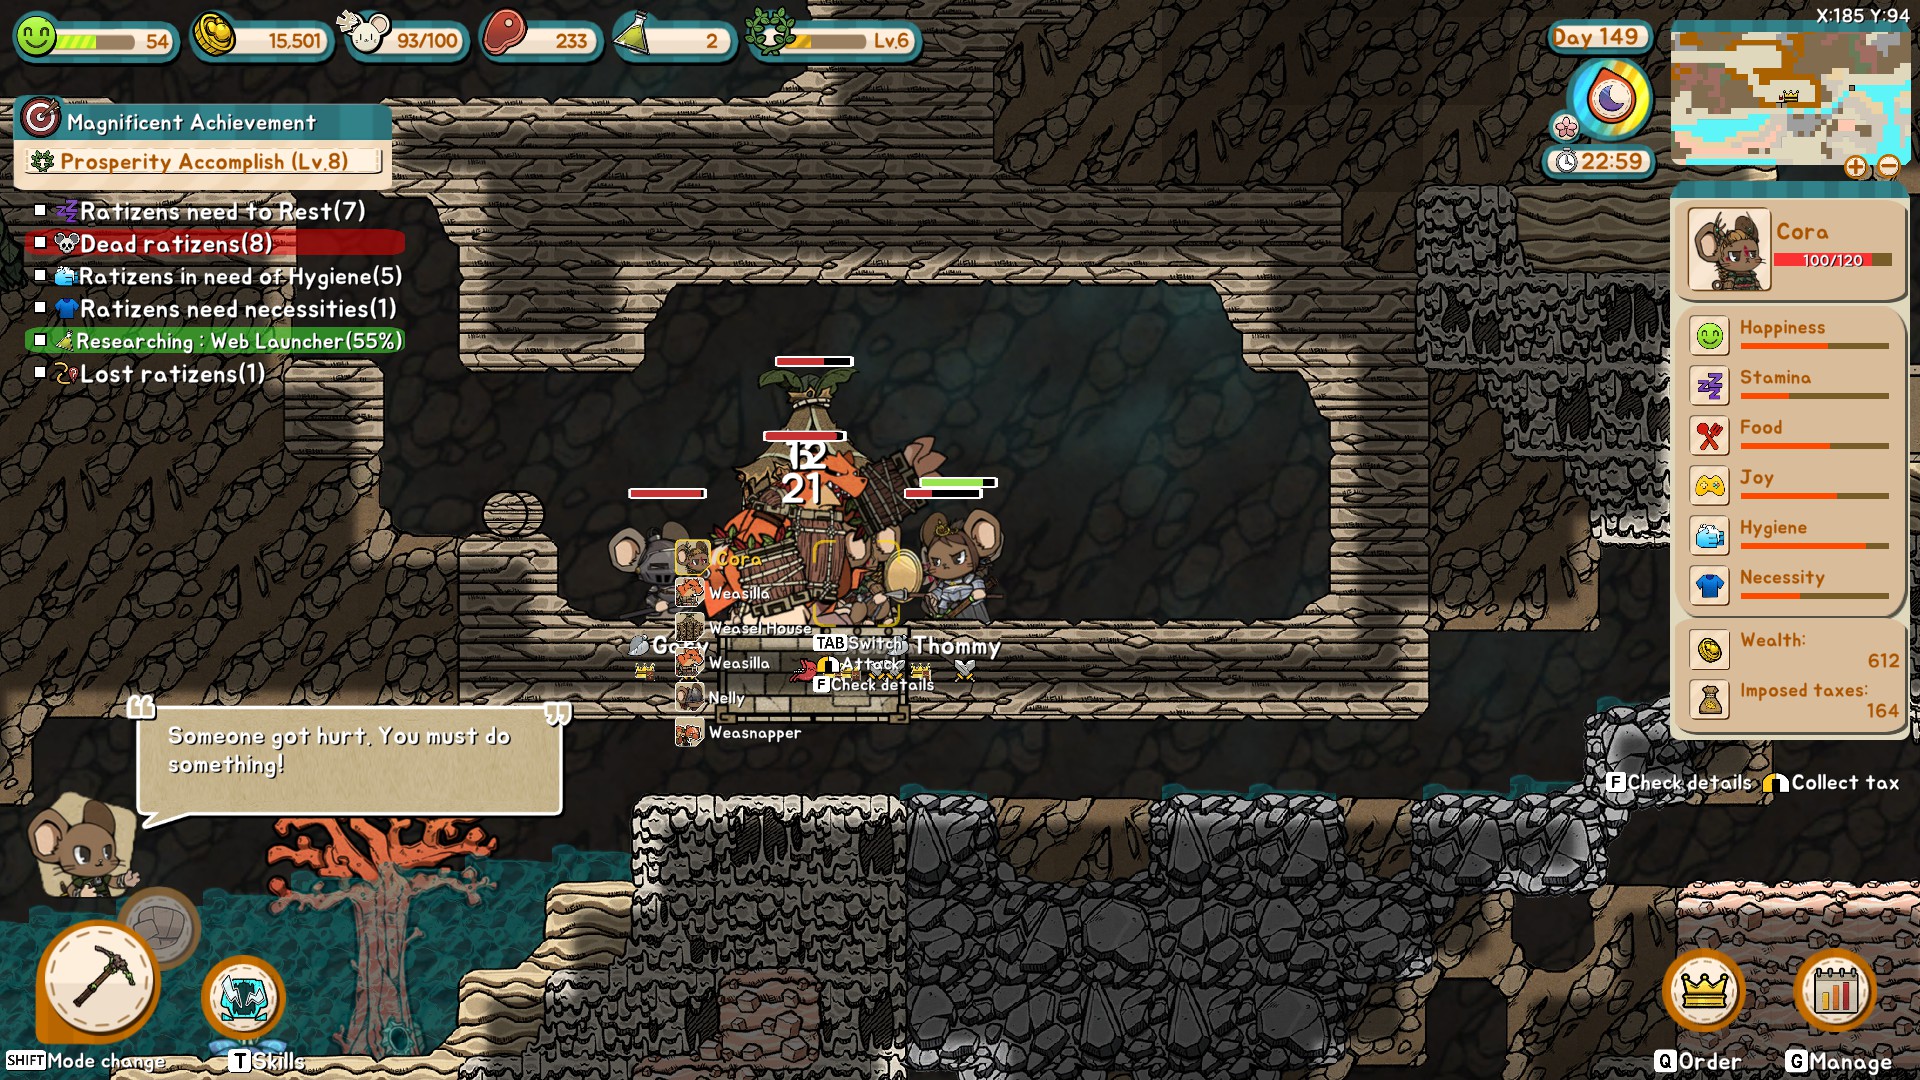
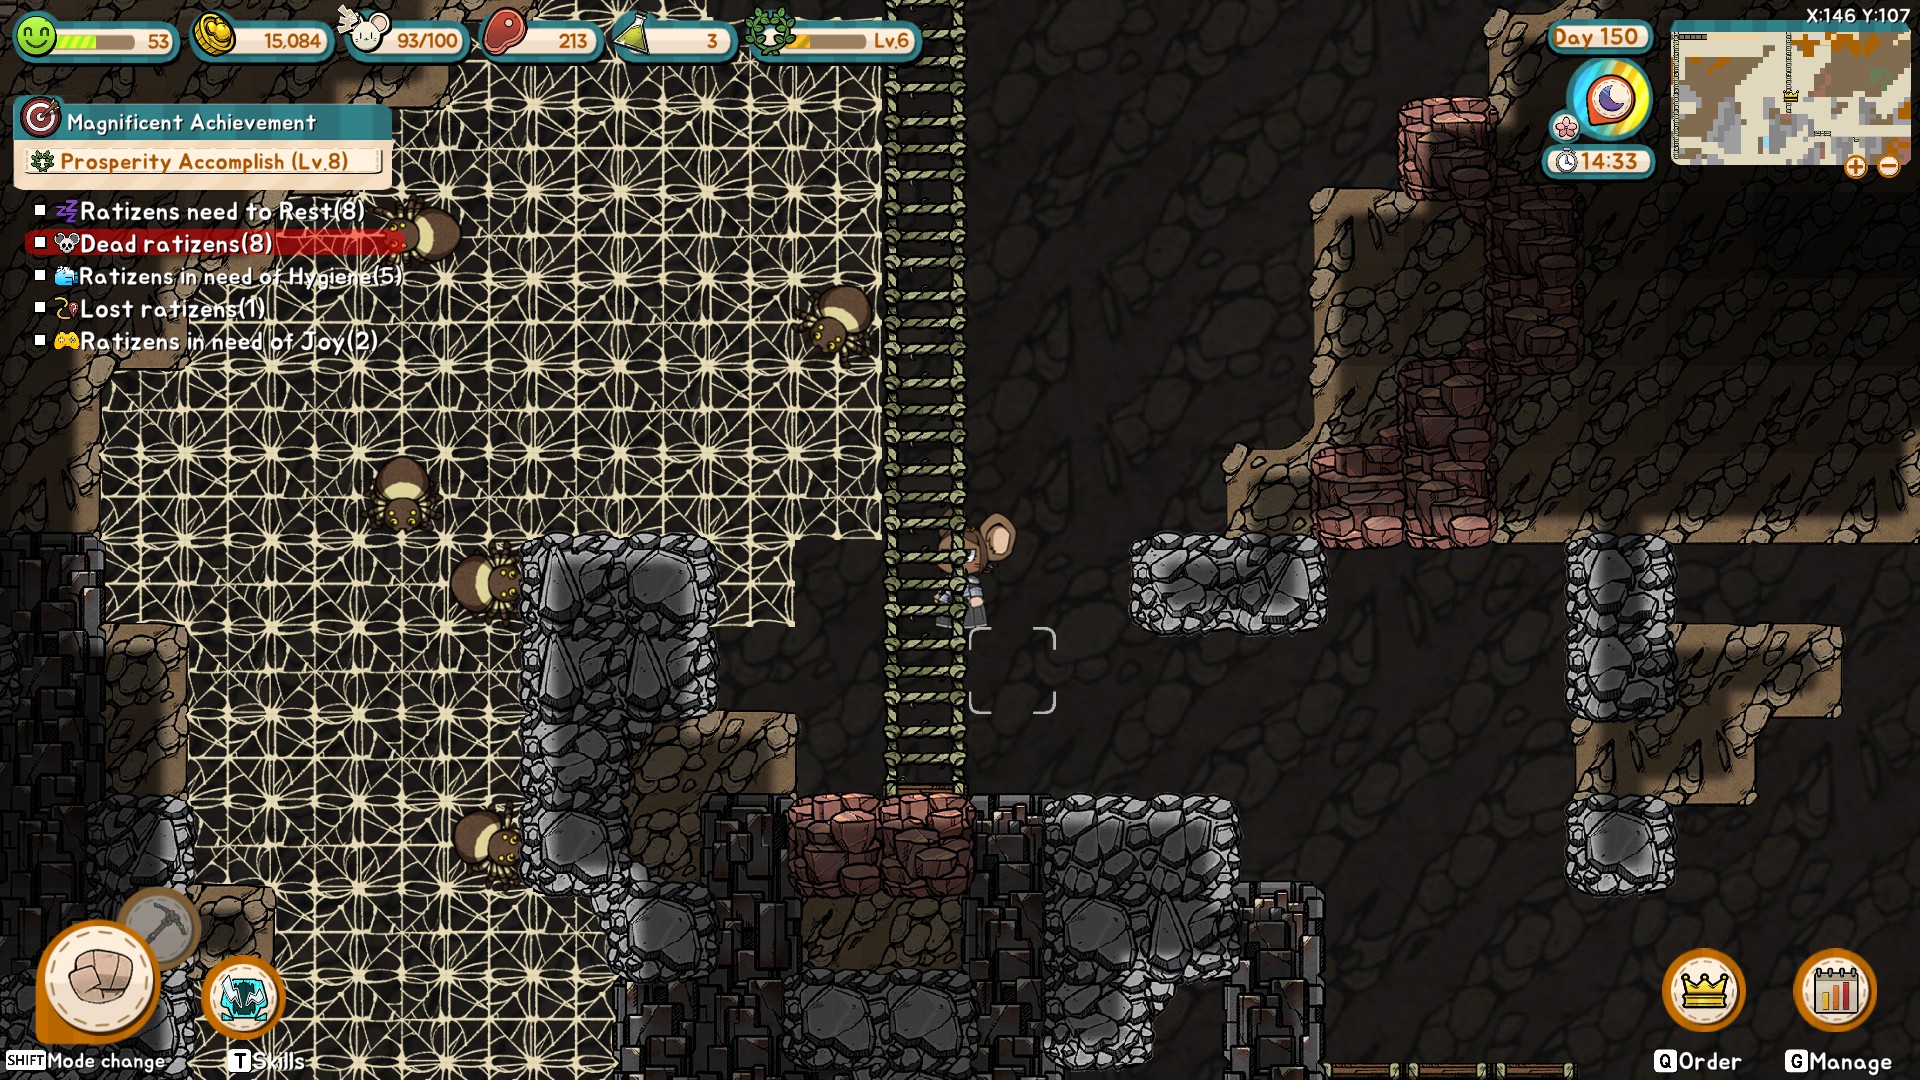
Found out Prosperity is your infrastructure, not stockpiles. Sorry.
Roundabout  [作成者] 2024年1月7日 13時23分 
@soulskulptor

(cont)

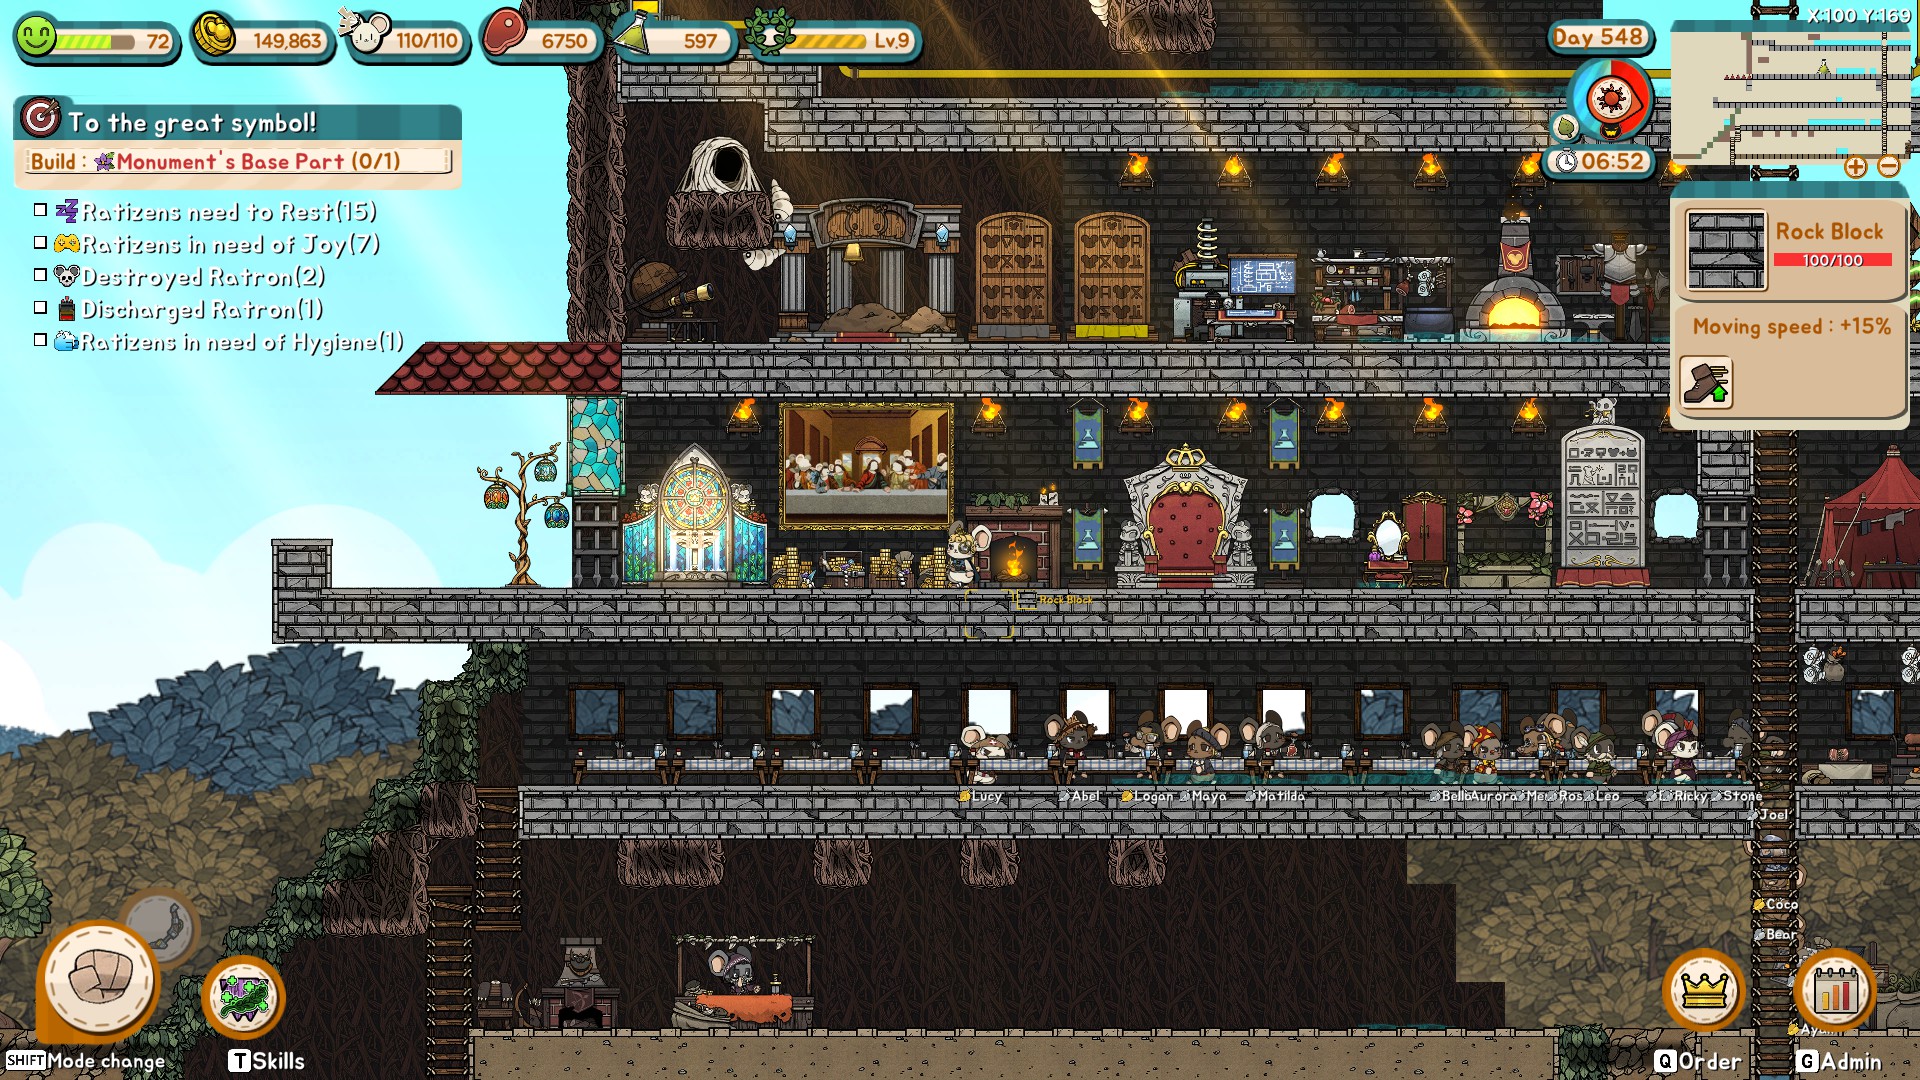
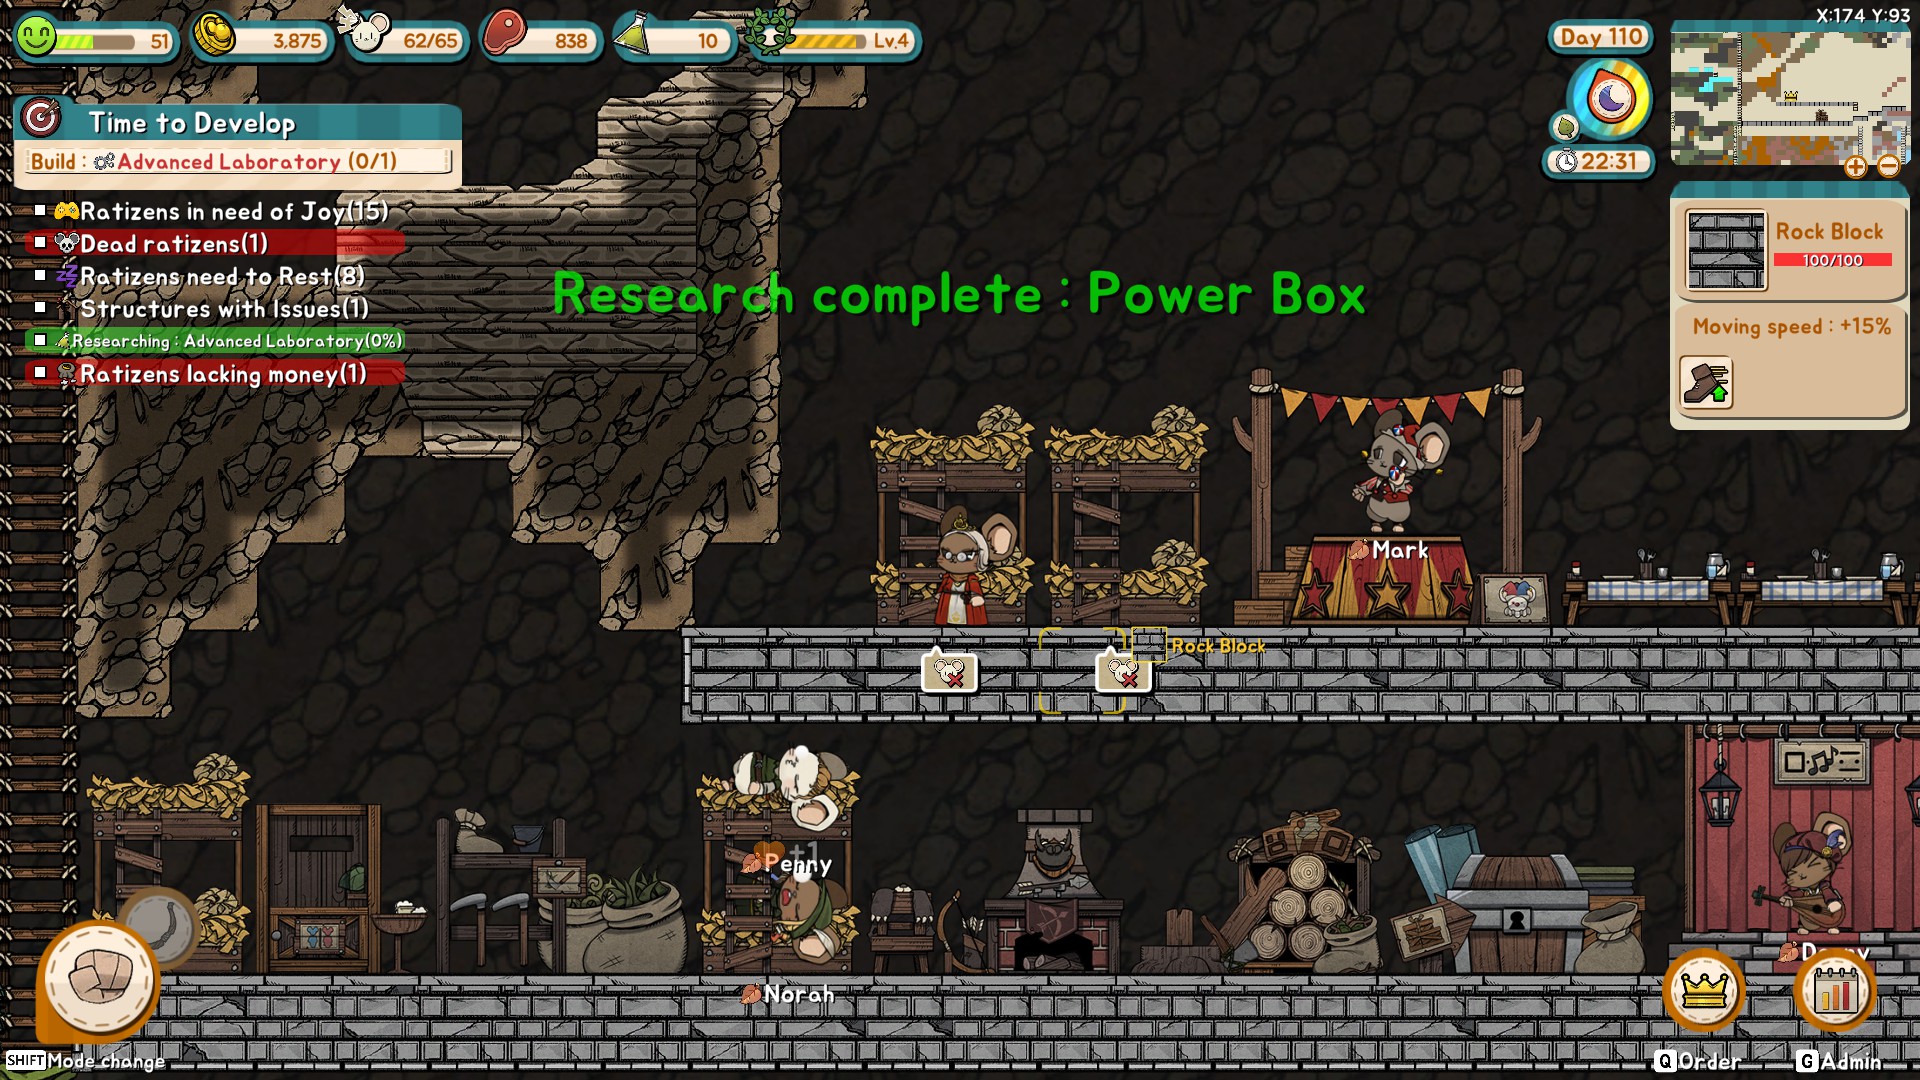
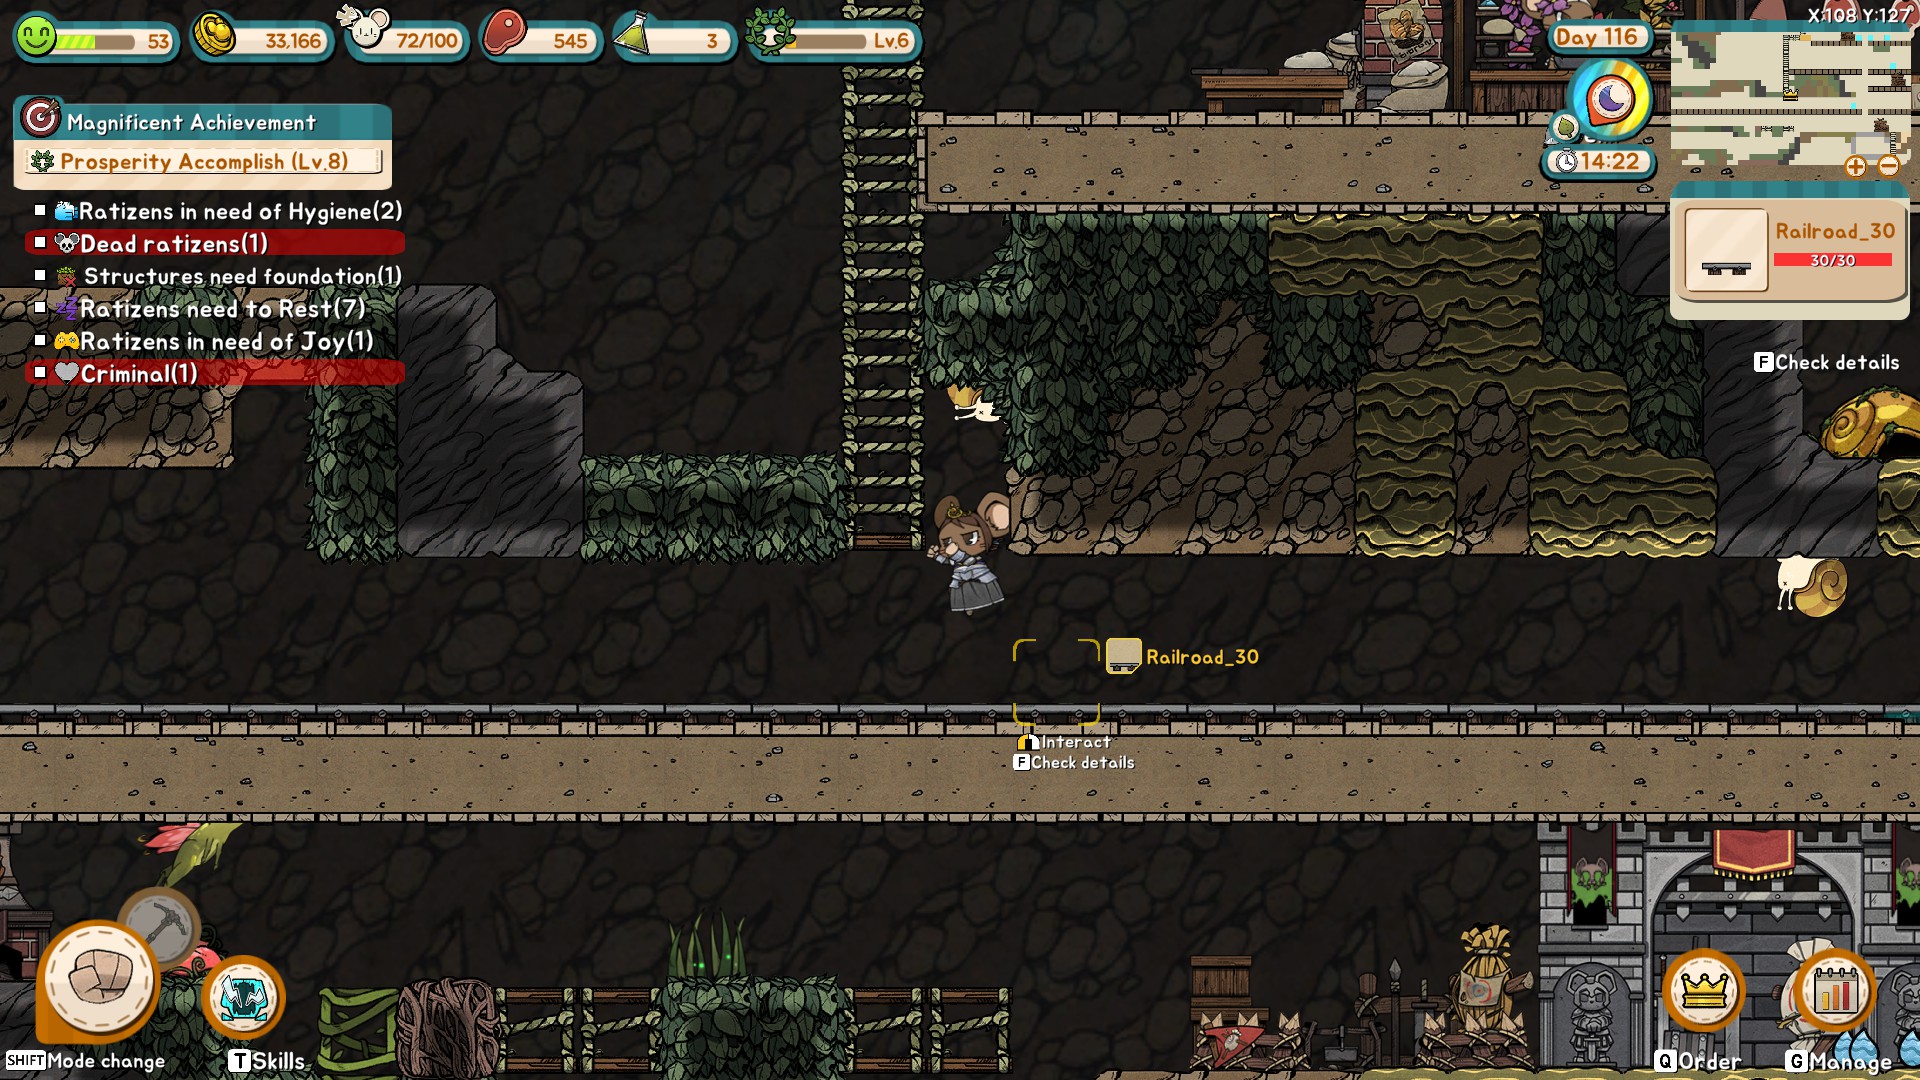
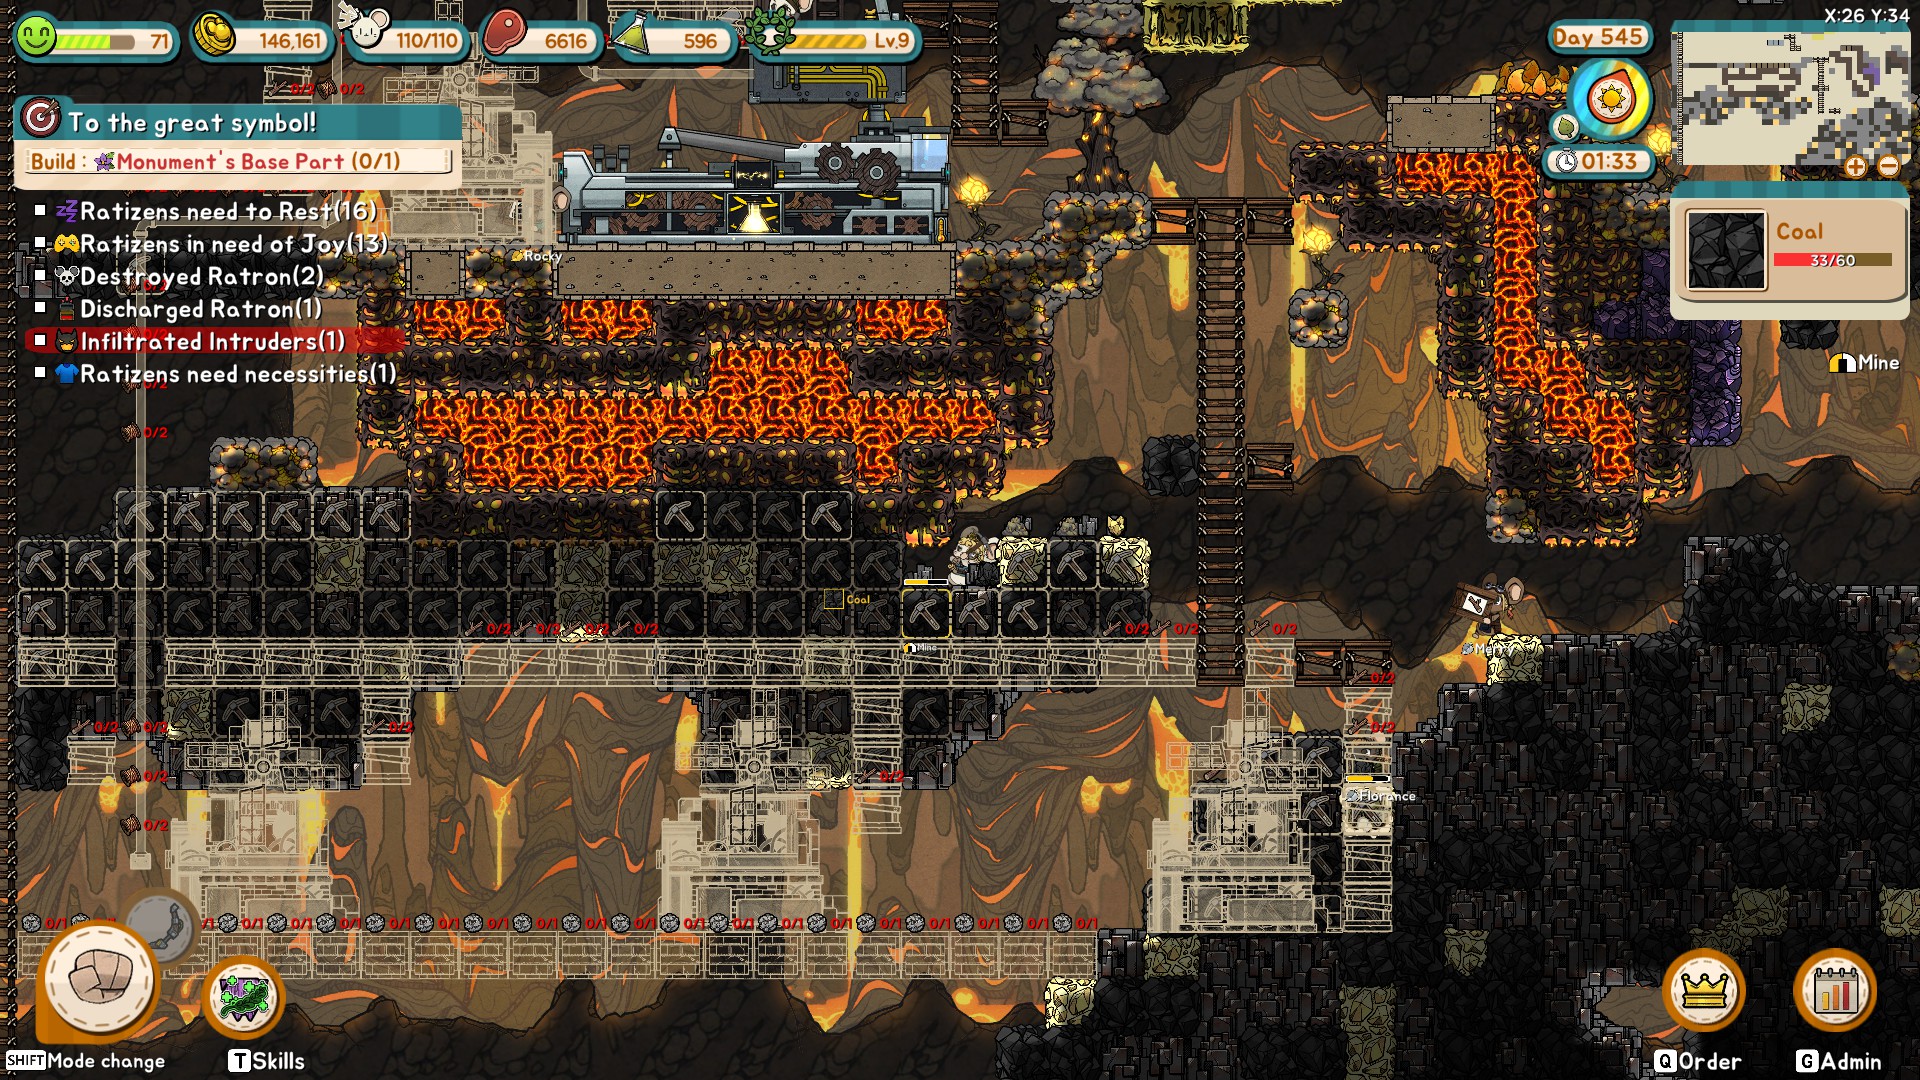
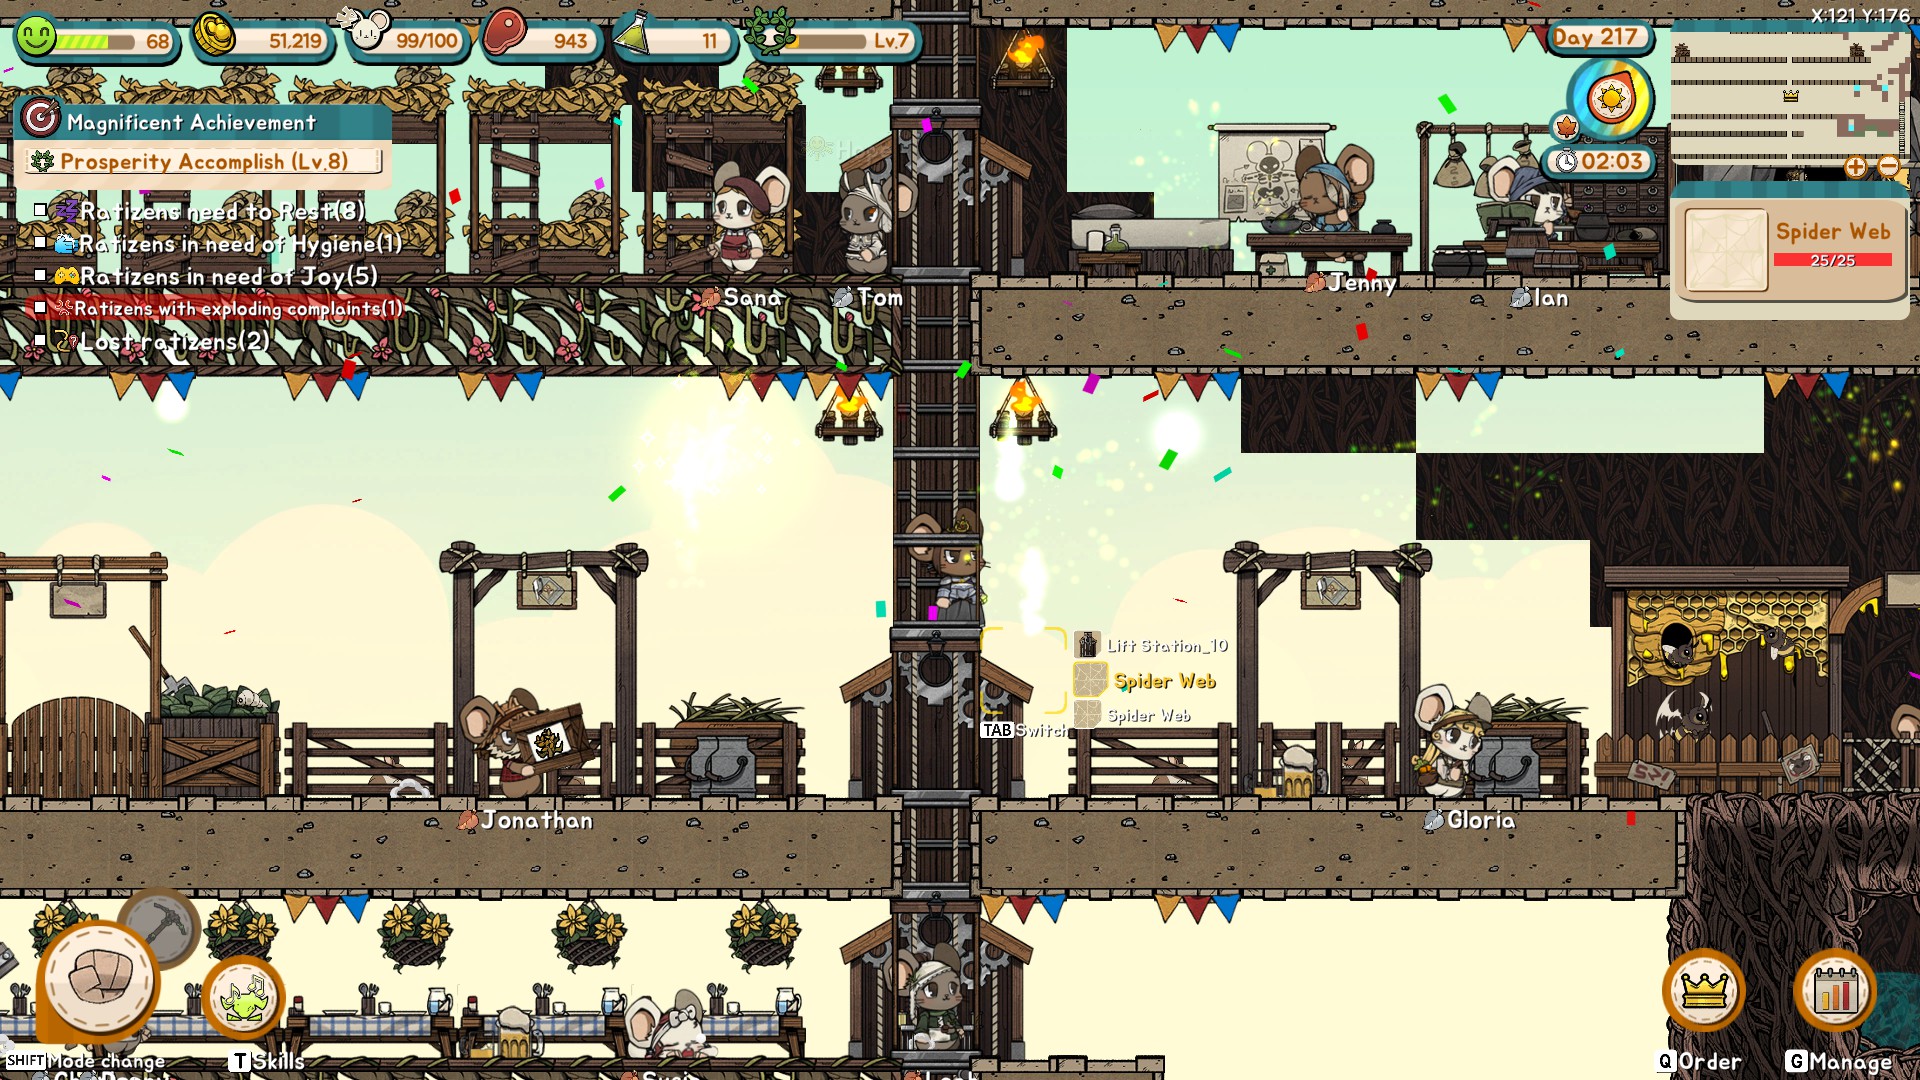
I think the general rule is that starvation will be a problem unless you have at least 10x food stored compared to your population, so 500 for 50 for example. The means of accomplishing that is just based on what's close at hand and what you luck into finding. But once you start getting into farming you'll want around 14 plots of grain, or if you're farming animals then 4 plots of gardens per structure at least per farm. I'll work on adding this info to the main guide.
Roundabout  [作成者] 2024年1月7日 13時23分 
@soulskulptor

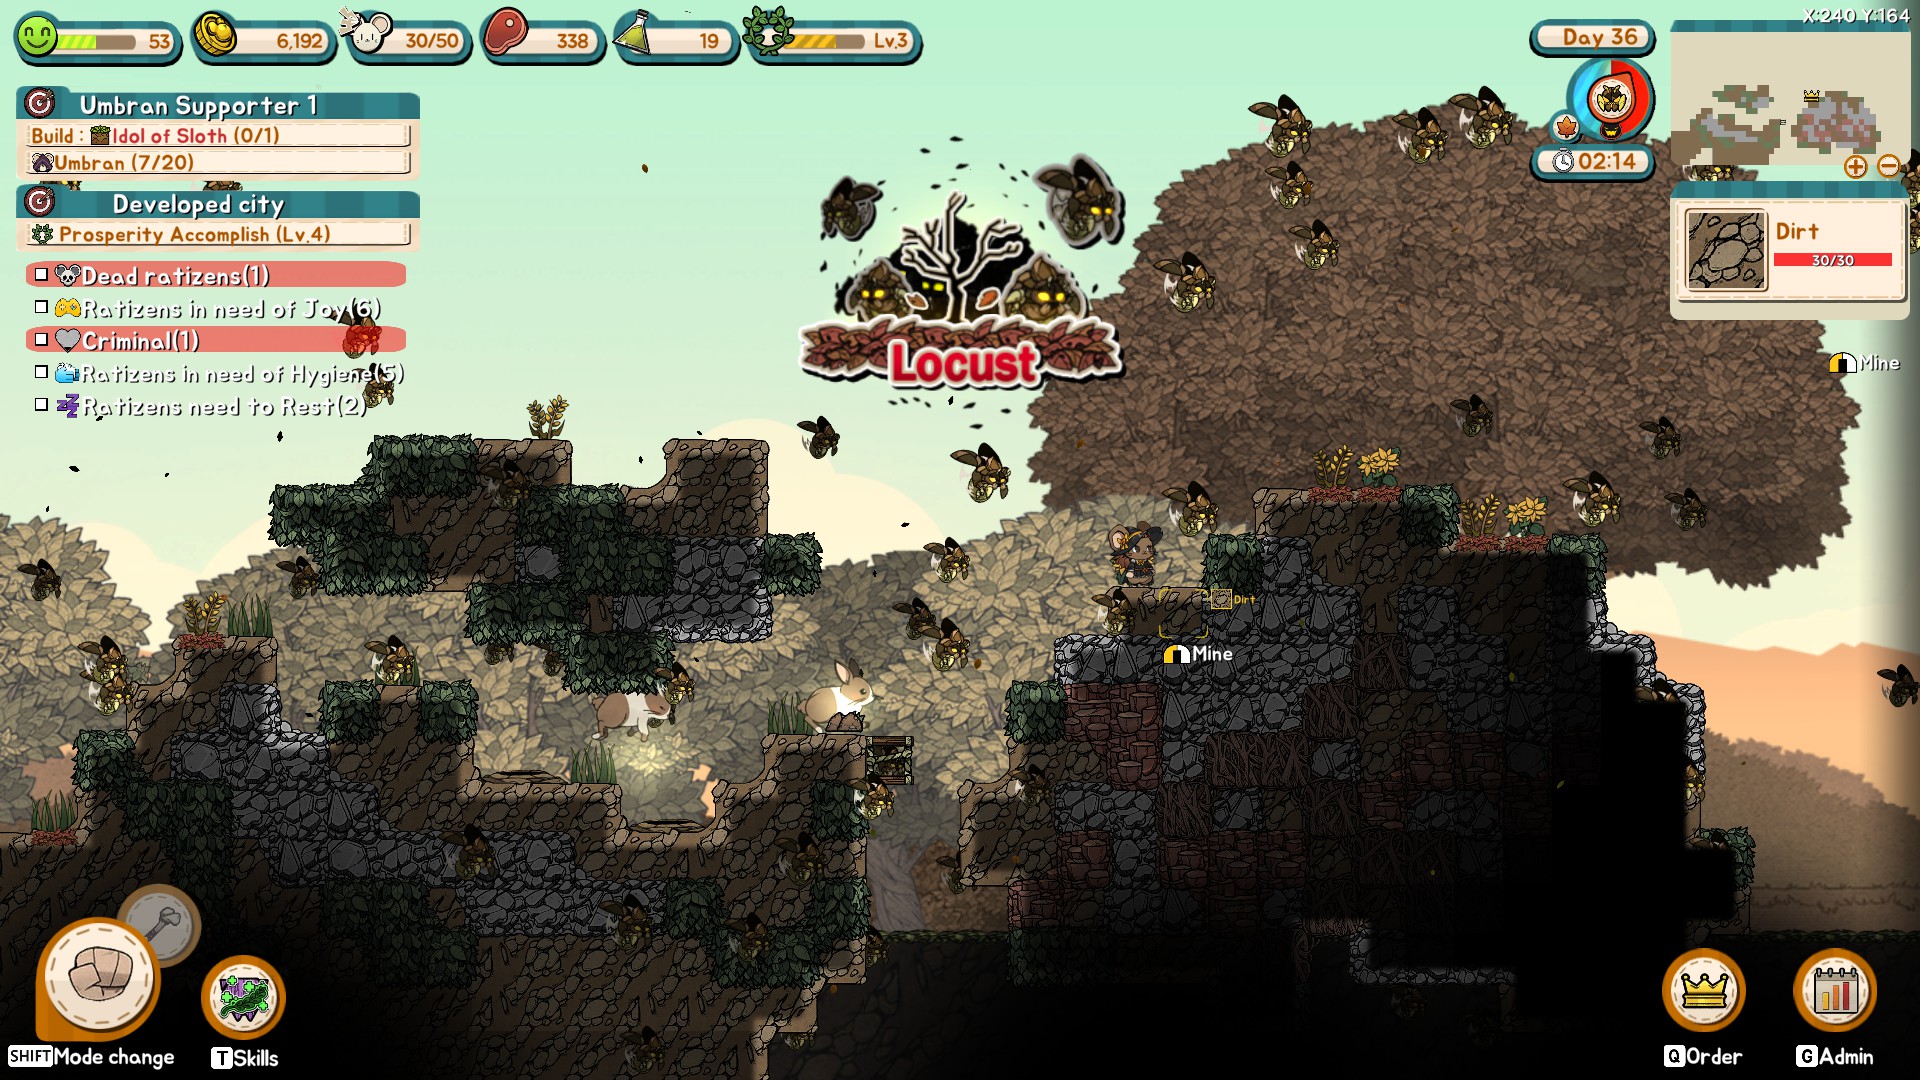
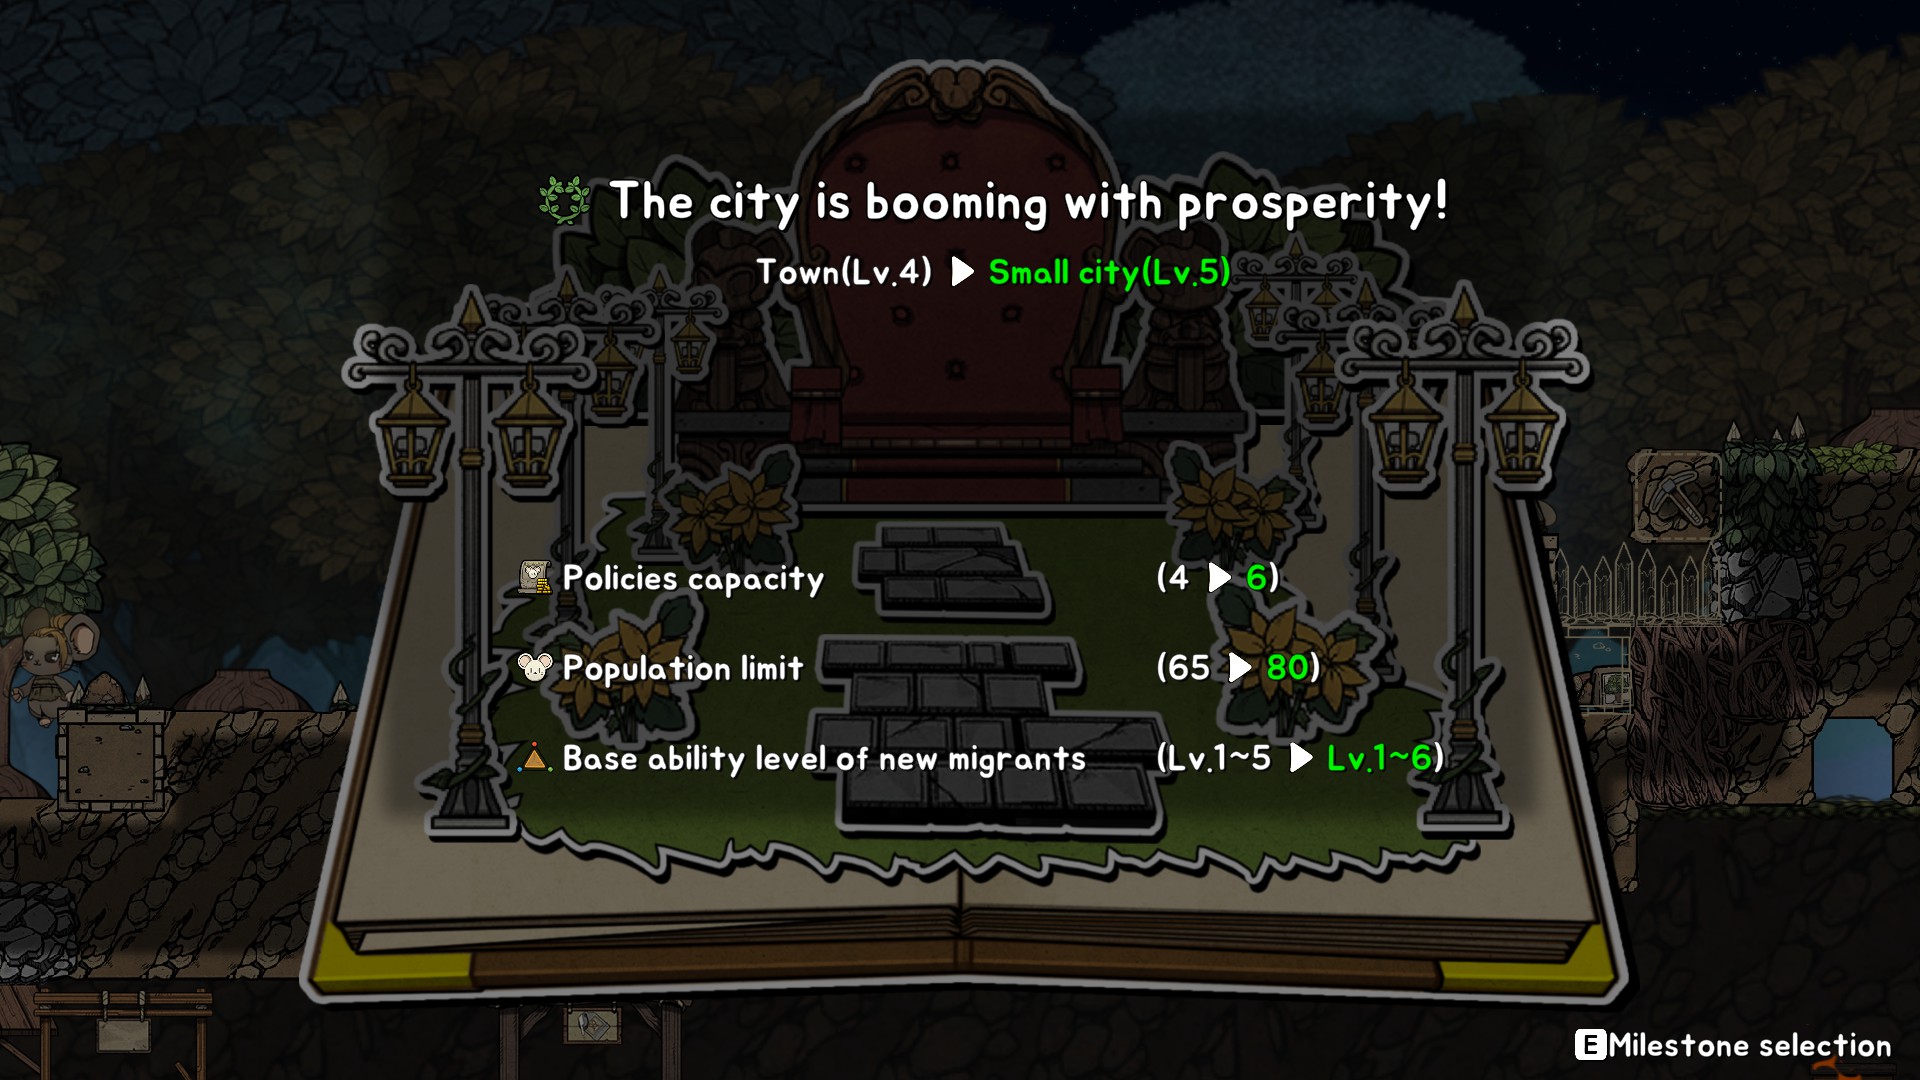
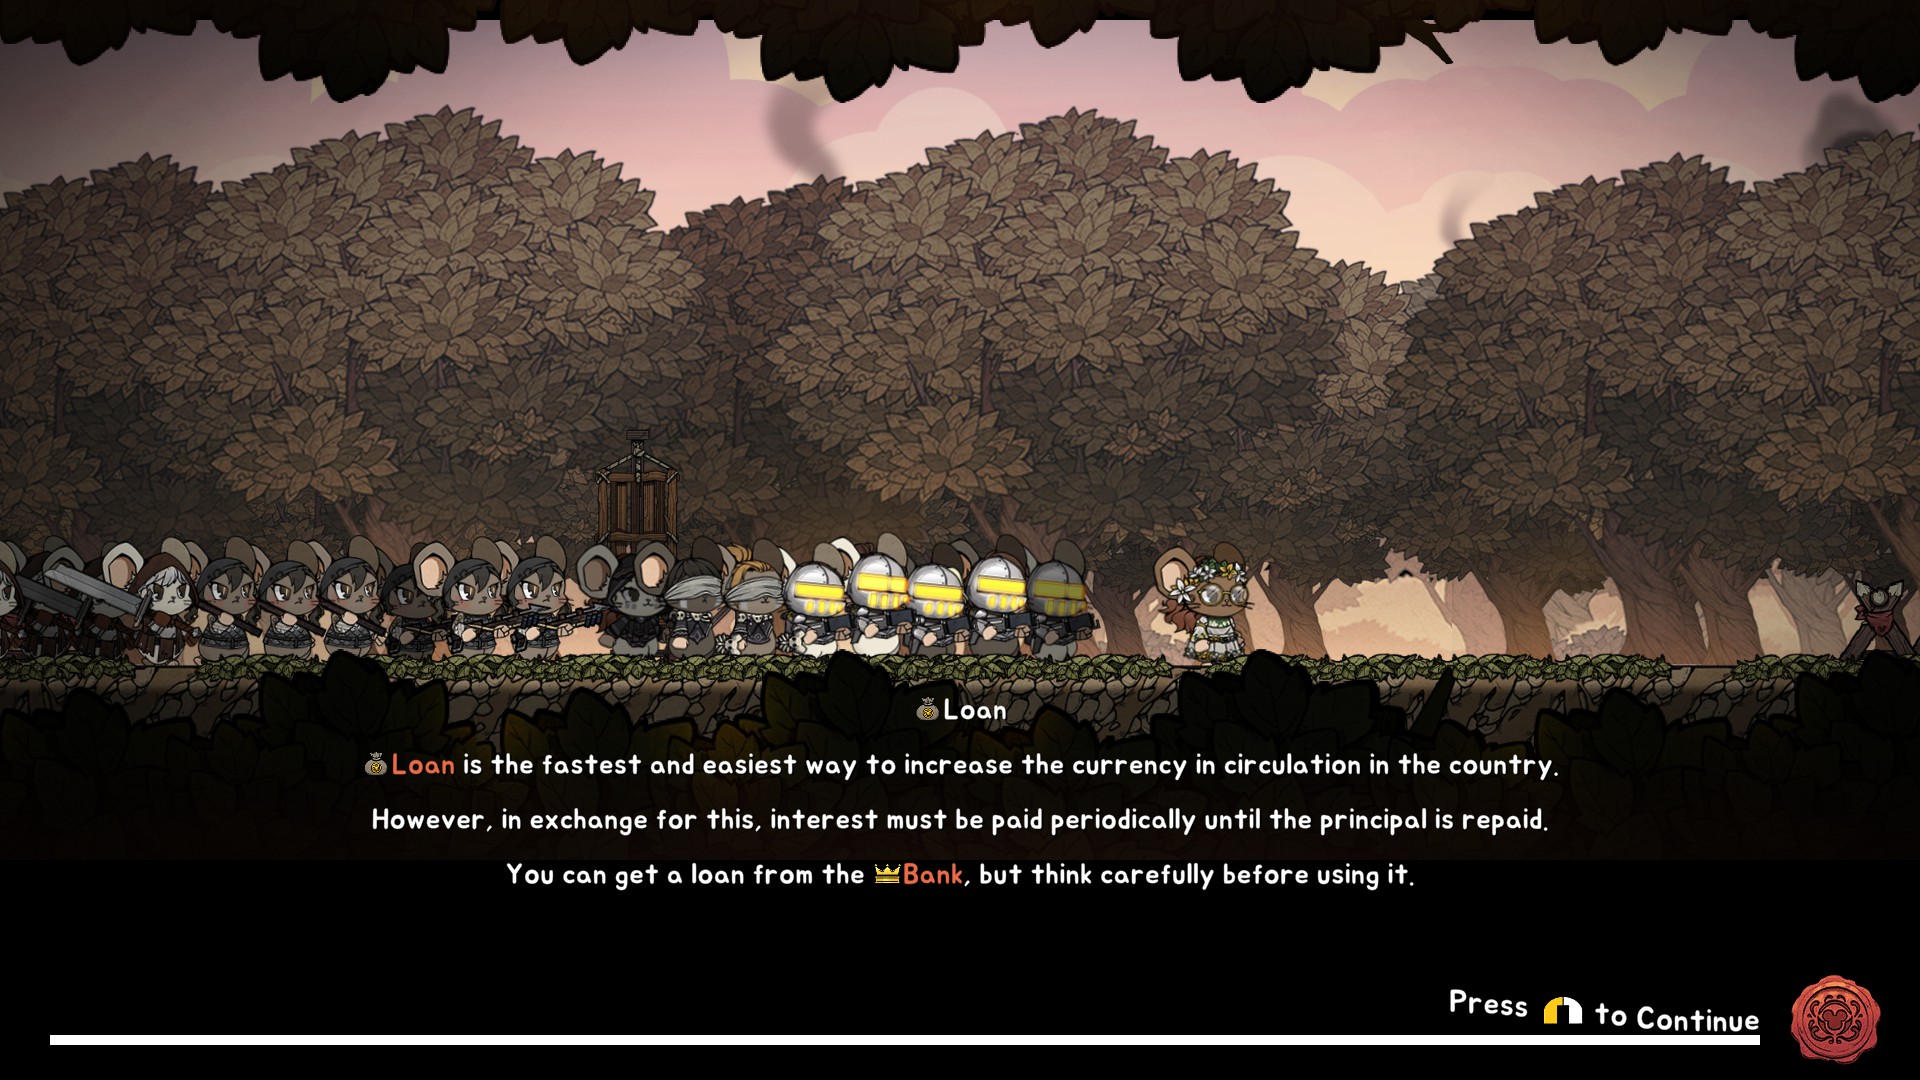
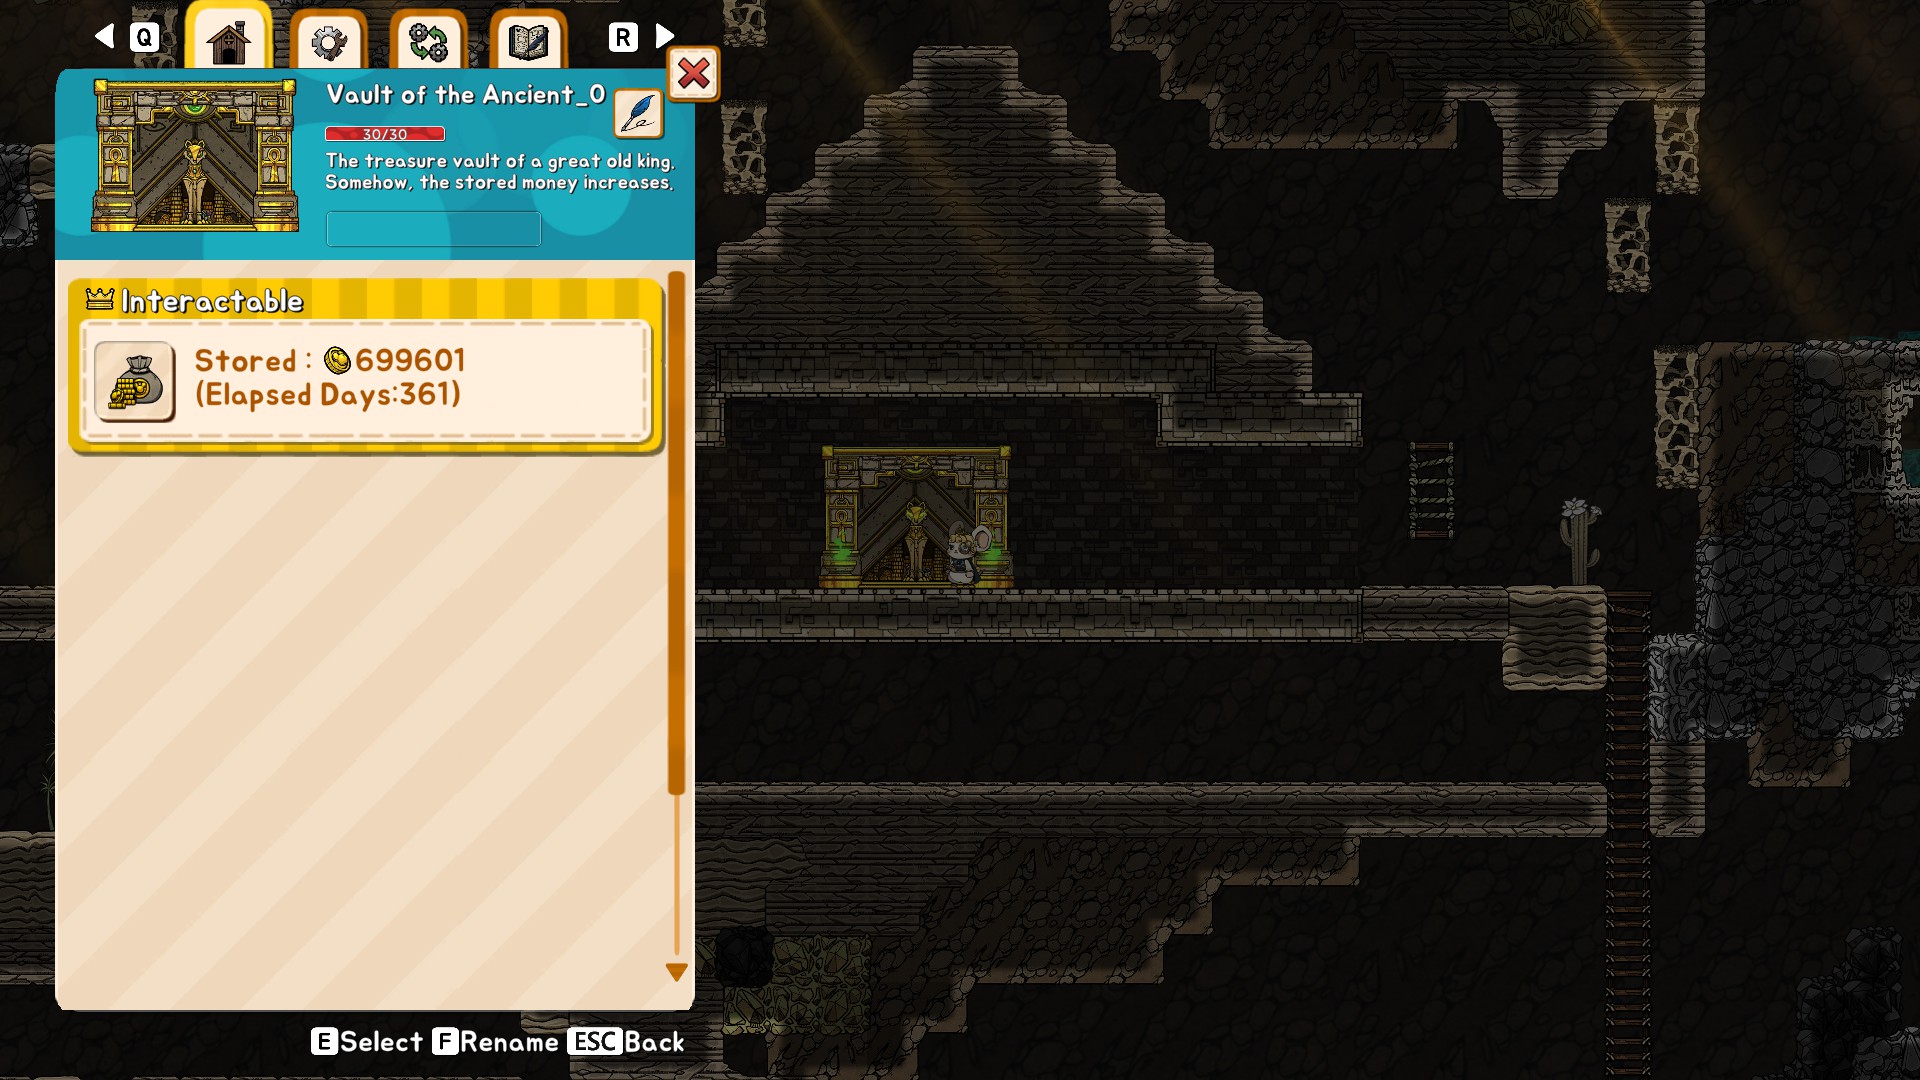
I think its based on Prosperity level, which I think is based on your stockpiles but I'm not sure.

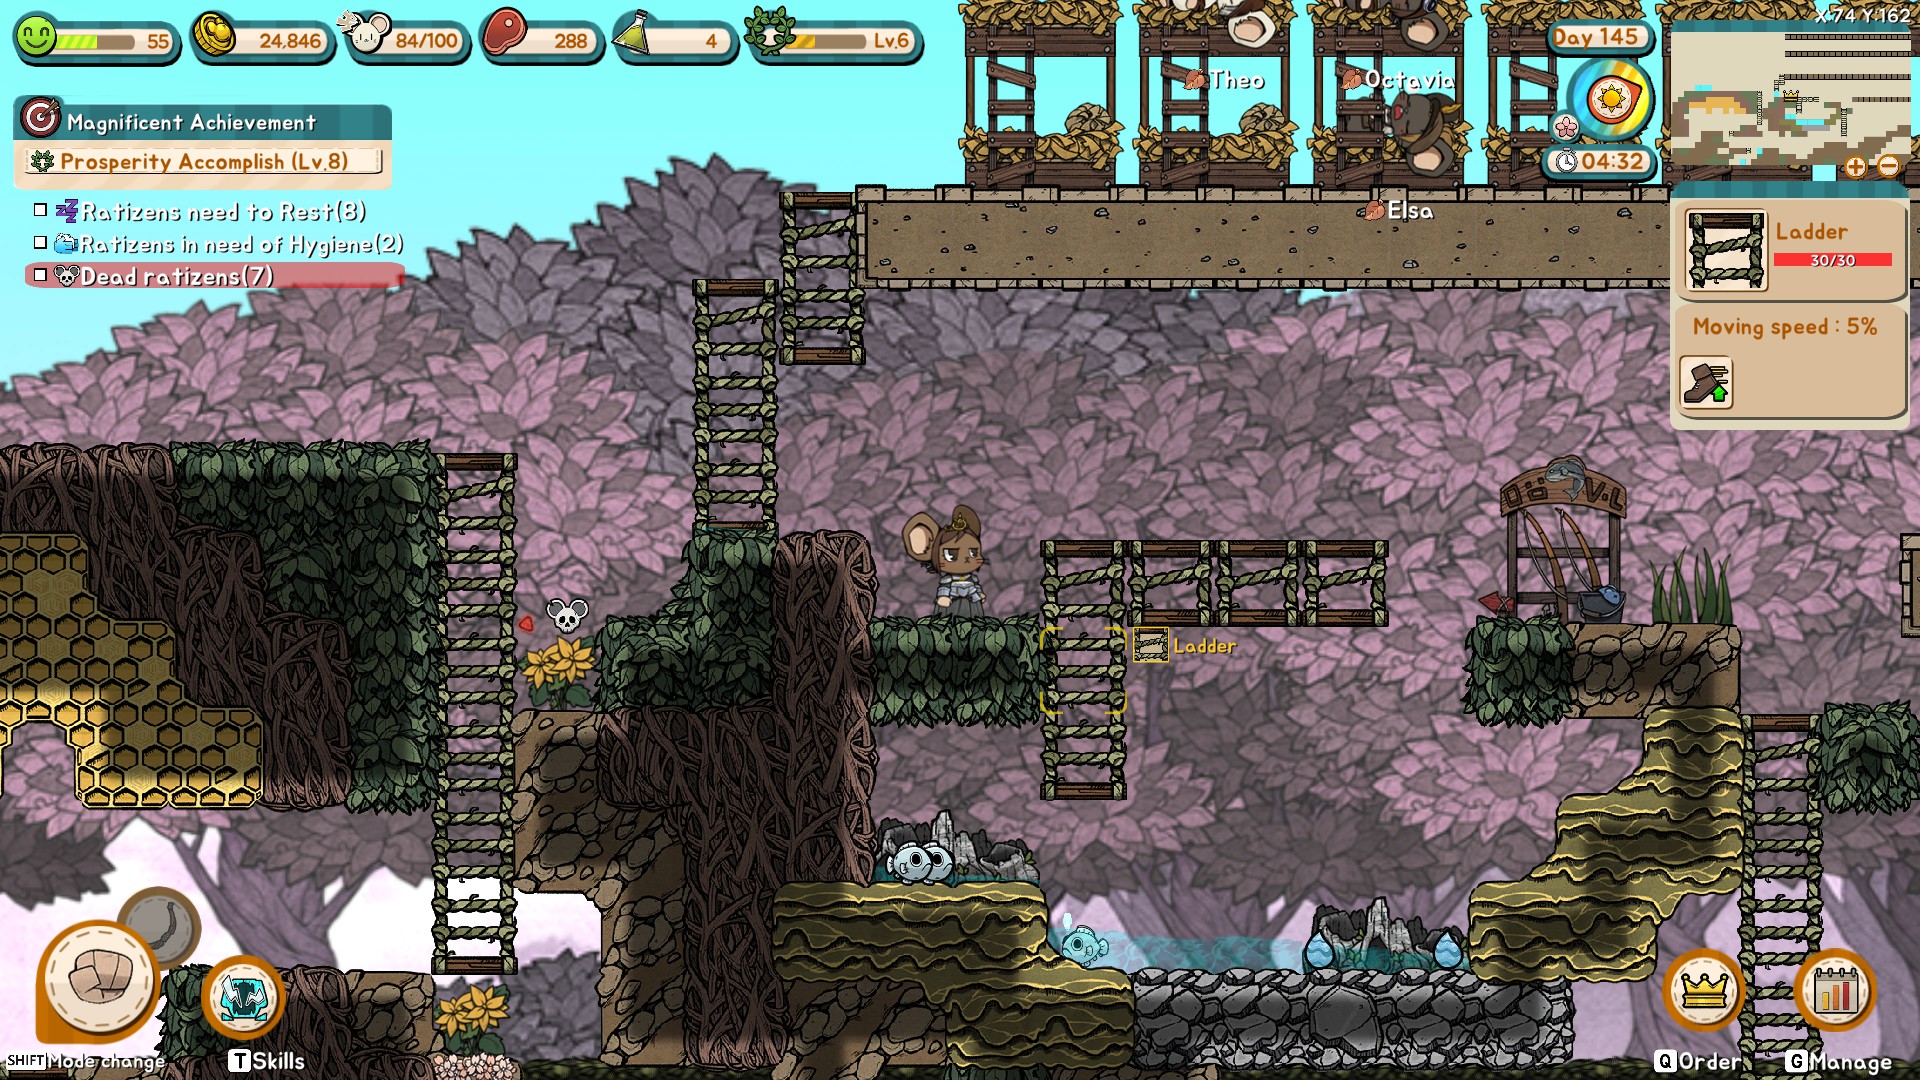
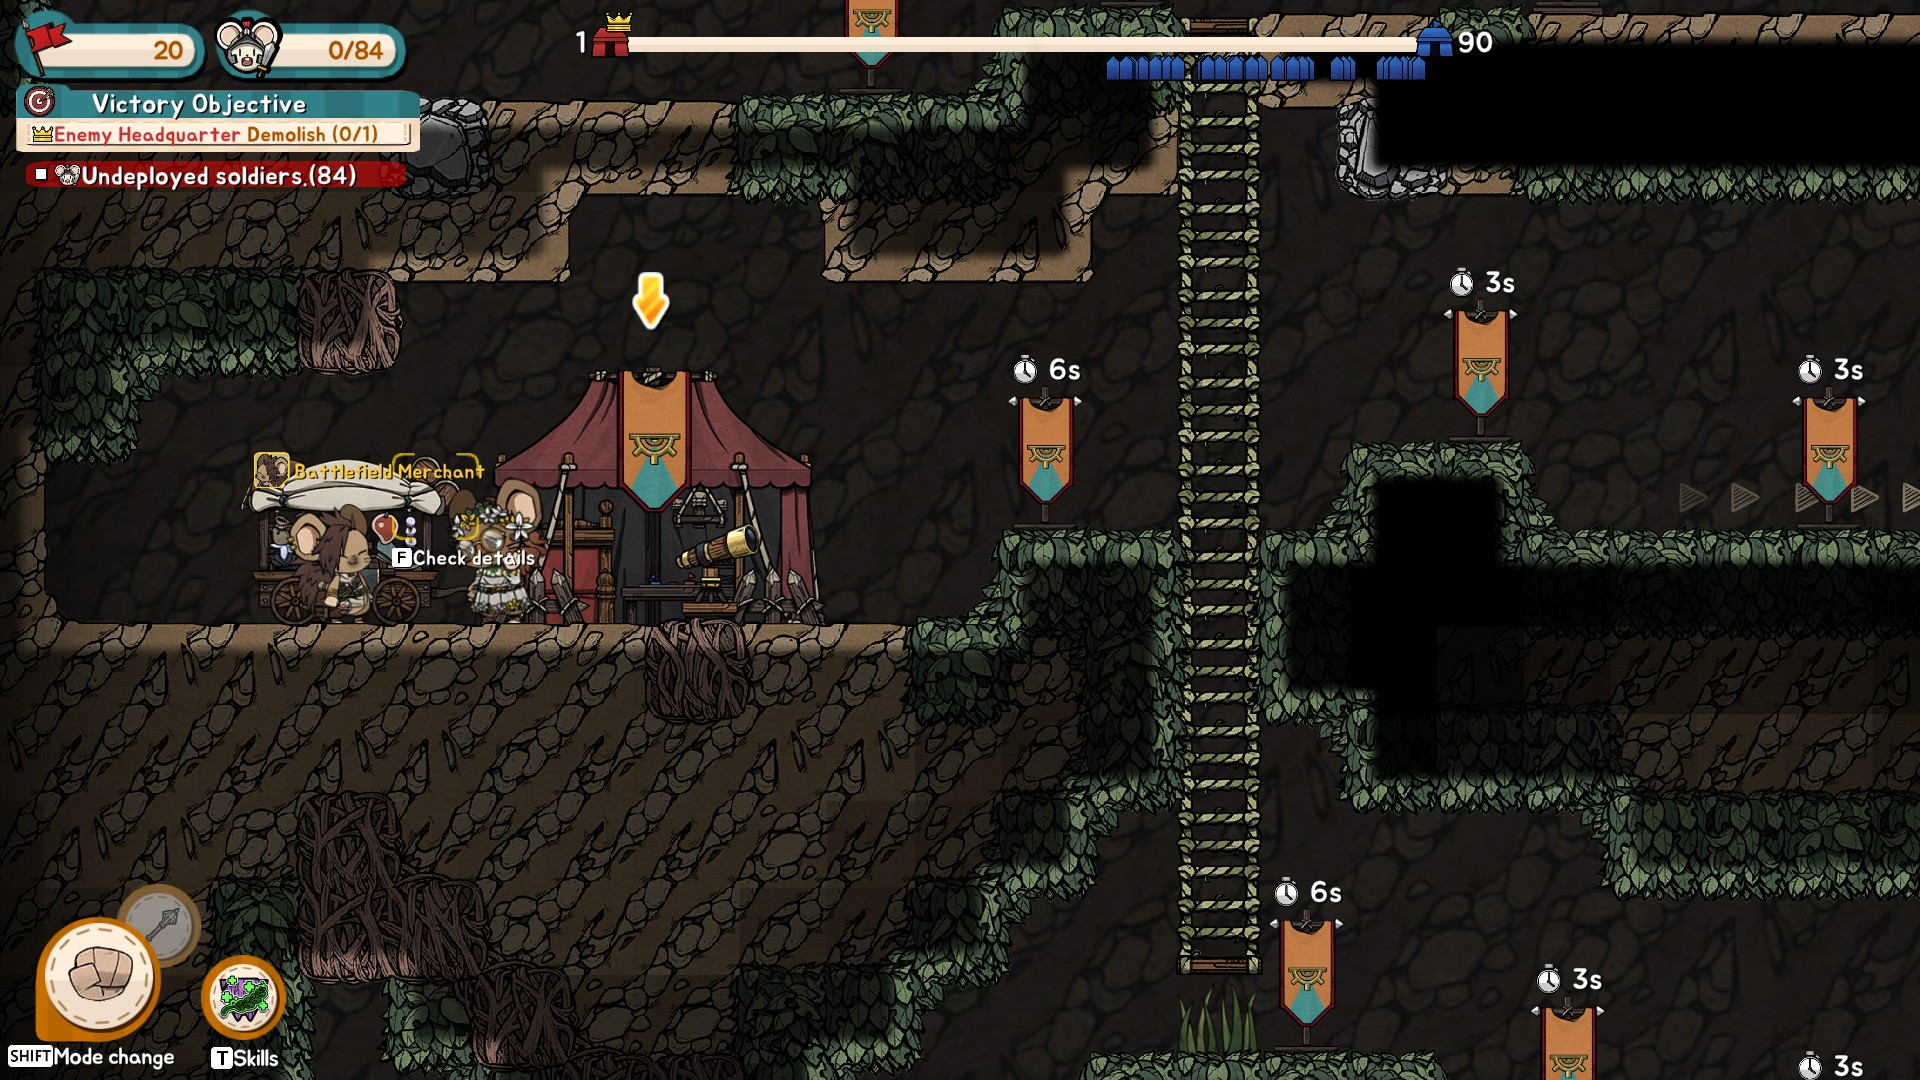
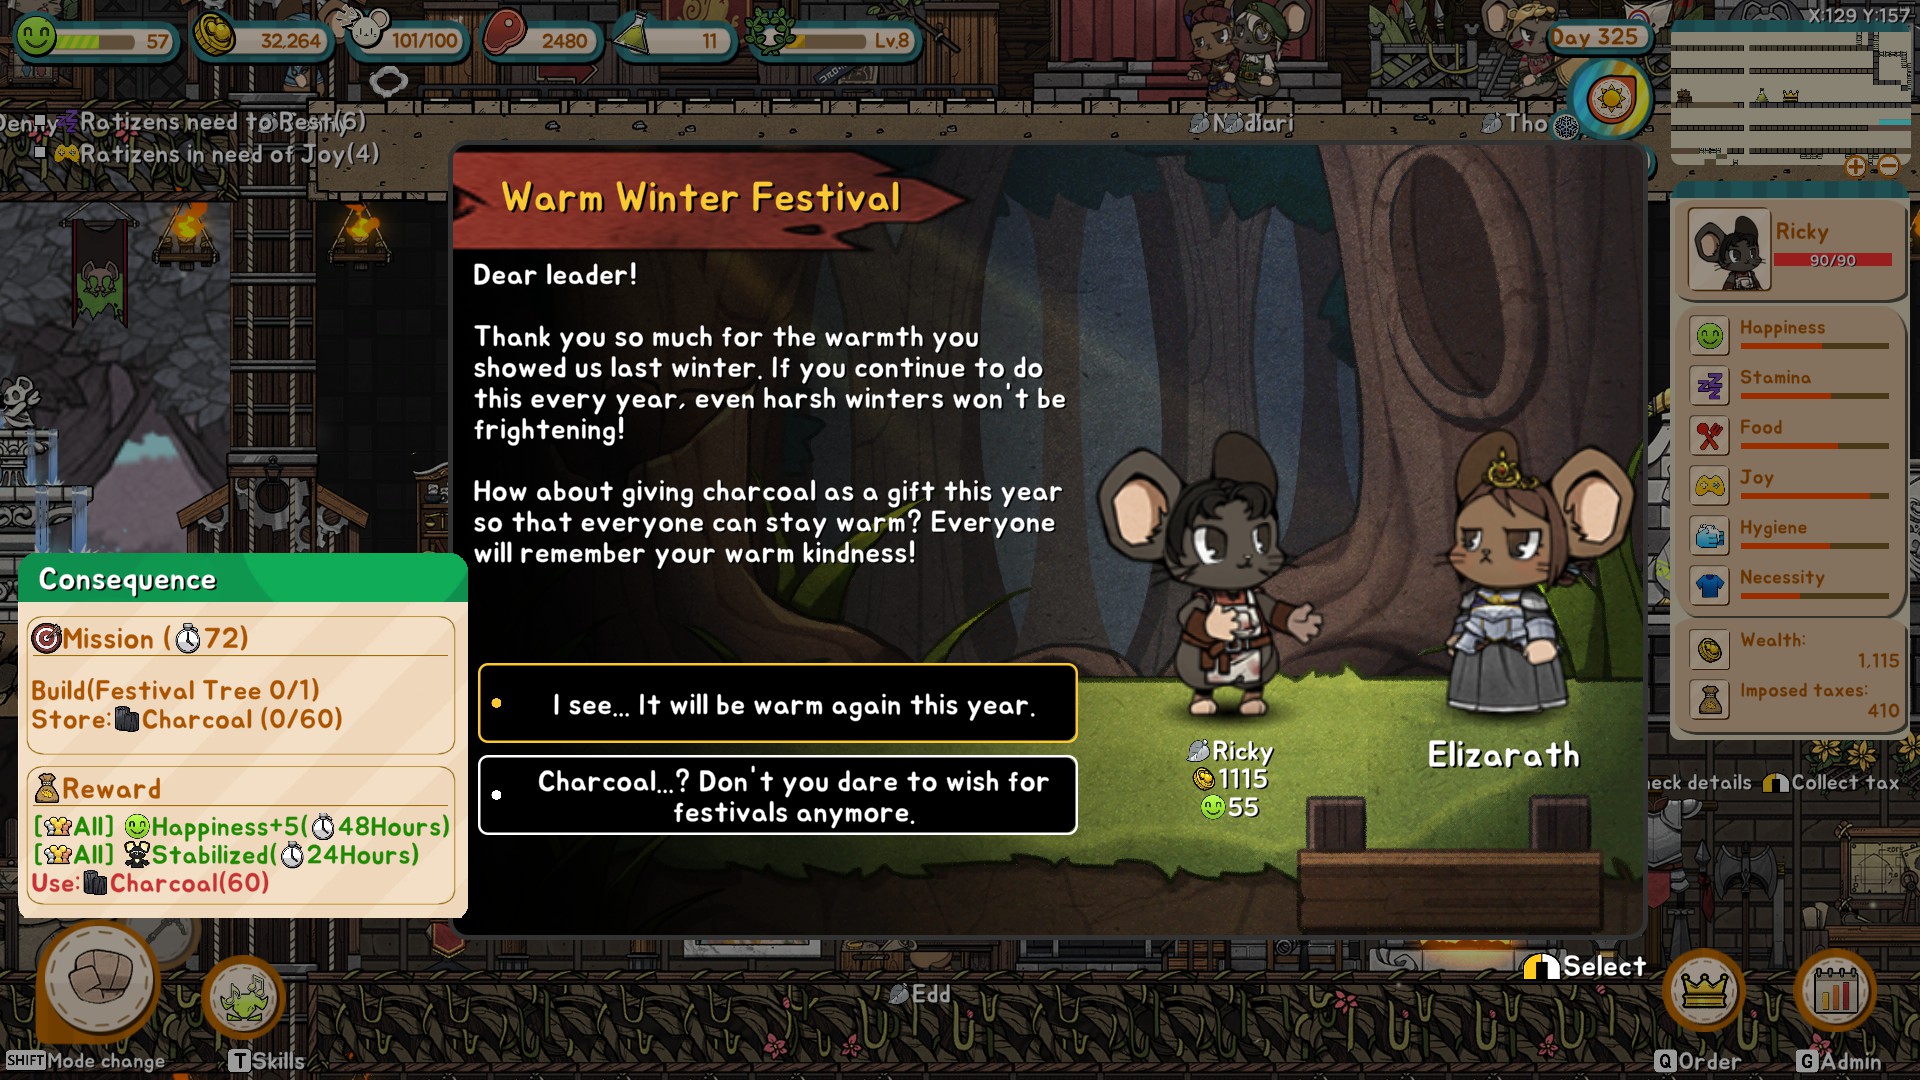
Gardens depends on your start, my most recent run I found I had easy access close by to a lot of bunnies and frogs plus good grass harvesting spots so year 1 I mostly relied on butchered meat and year 2 I expanded into a lot of bunny milk by maxing out the grasses and later searching the map for grass to break down and turn into gardened spots close to the settlement. But in other runs honey worked better since I had better access to flower petals and wound up farming grain.